A long time ago in a galaxy far, far away….


Recommendations: 549
About the Project
In this project, I will document all my miniatures and models for Star Wars Imperial Assault and other Star Wars-related games. My main focus are the many iconic characters from the movies and shows, and I'm always aiming at getting my paint jobs as close the original source material as possible.
Related Game: Star Wars: Imperial Assault
Related Company: Fantasy Flight Games
Related Genre: Science Fiction
This Project is Active
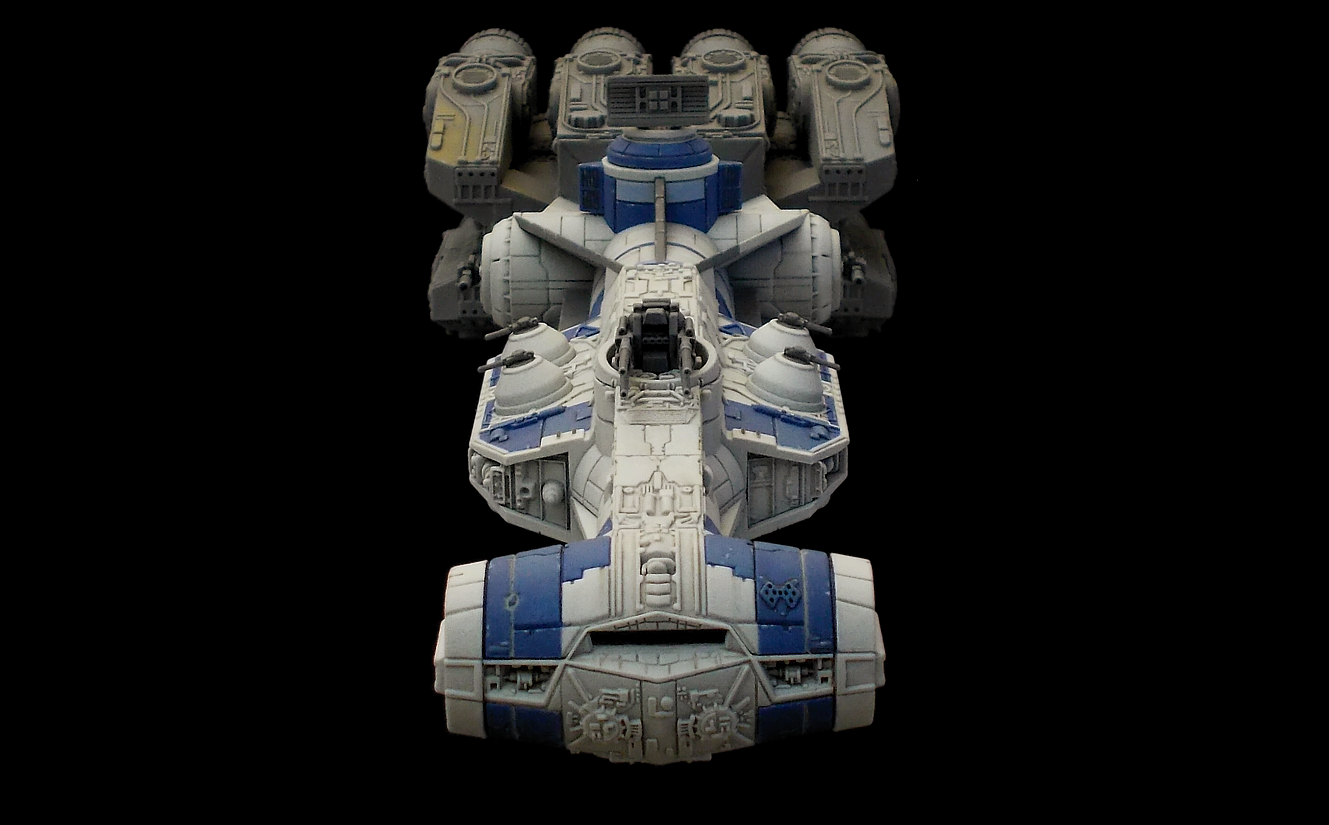
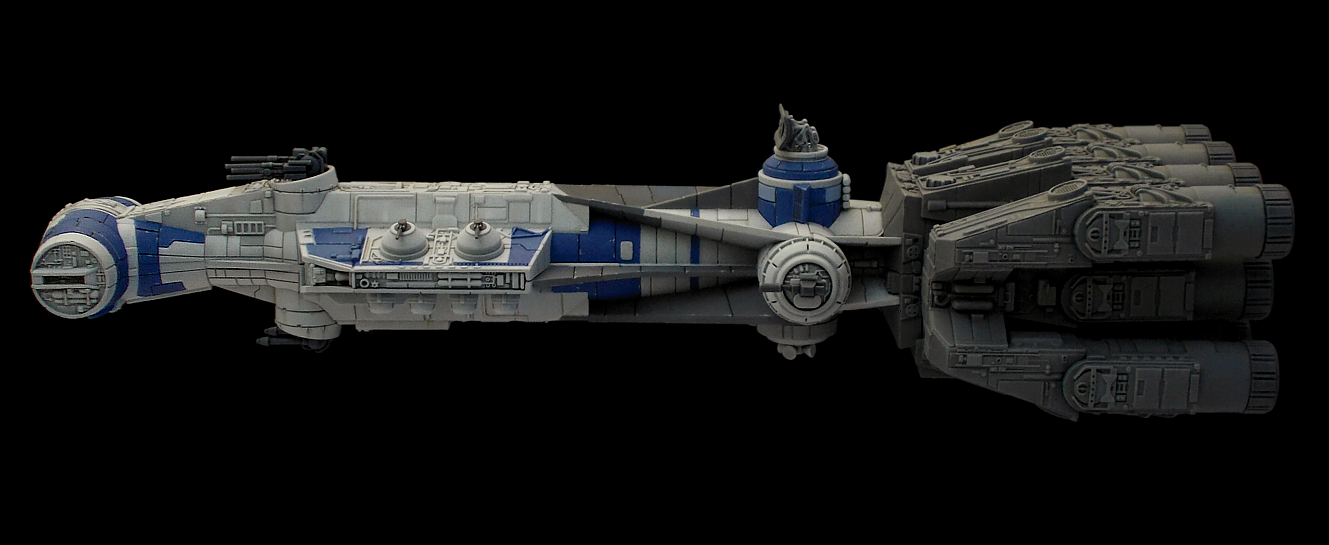
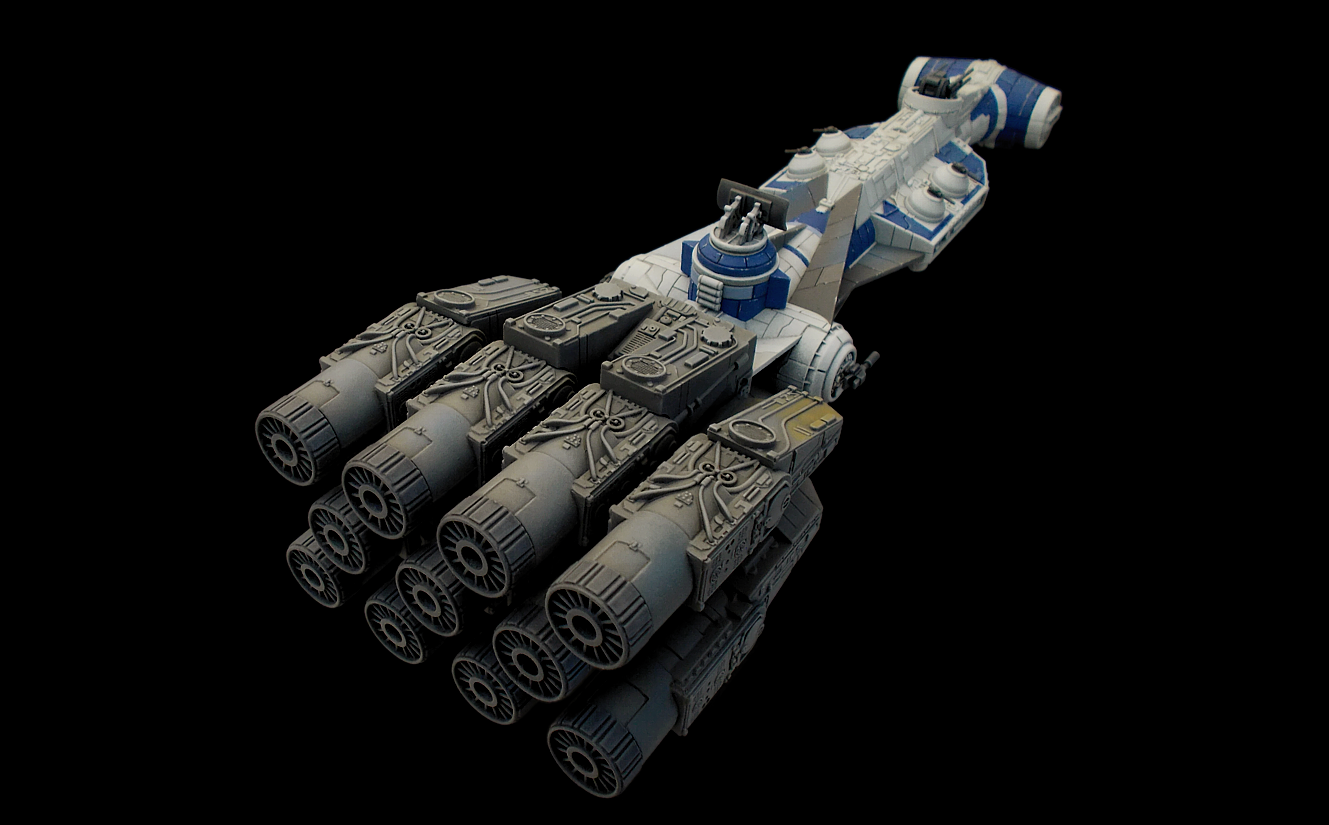
The LIBERATOR - converted and repainted CR90 Corellian Corvette for X-wing Miniatures
Here’s the finished model – the LIBERATOR in all her glory:
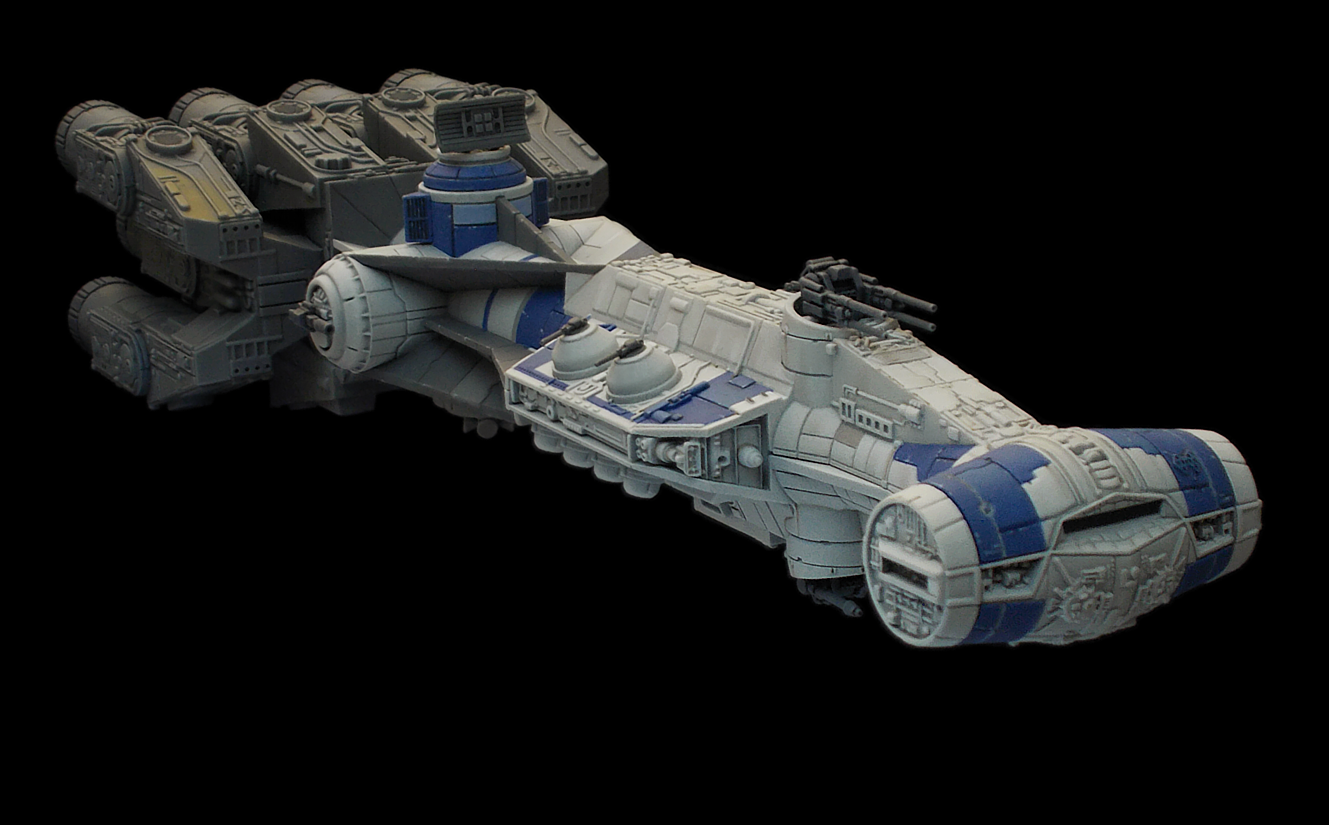

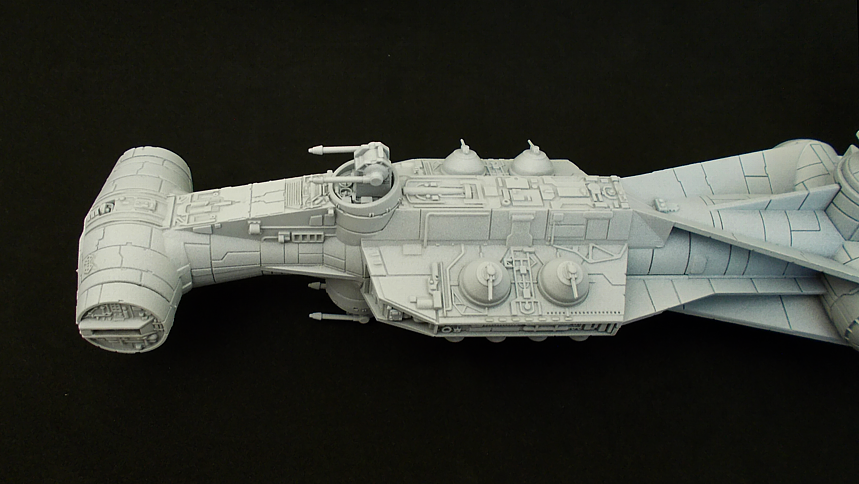
Converting FFGs Tantive IV into the LIBERATOR (X-wing Miniatures)
I got myself the CR90/Tantive IV Huge Ship Expansion for X-wing Miniatures. It’s a cool model and pretty accurate, but I wanted to make it more special and decided to convert it into another hero-ship of the Rebellion which we saw in actual combat action and which was modified to make it a dedicated warship – the LIBERATOR from Star Wars REBELS, which was also present in the battle over Scarif.
This entailed not only a repaint to give the model the paint scheme unique to the LIBERATOR, but also some conversion/scratch-building to create and add a heavier Quad-Turbolaser as well as two additional heavy canons mounted on the side docking rings.
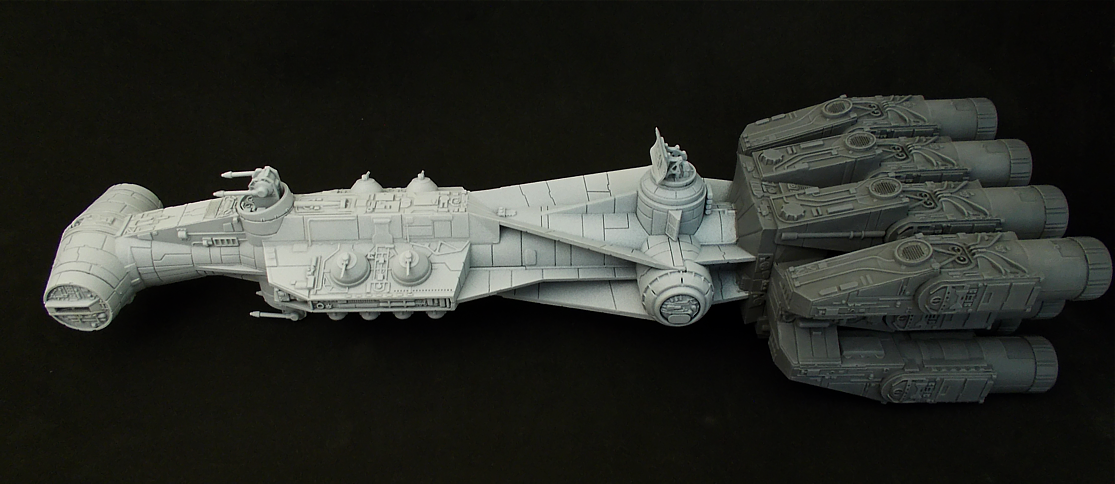
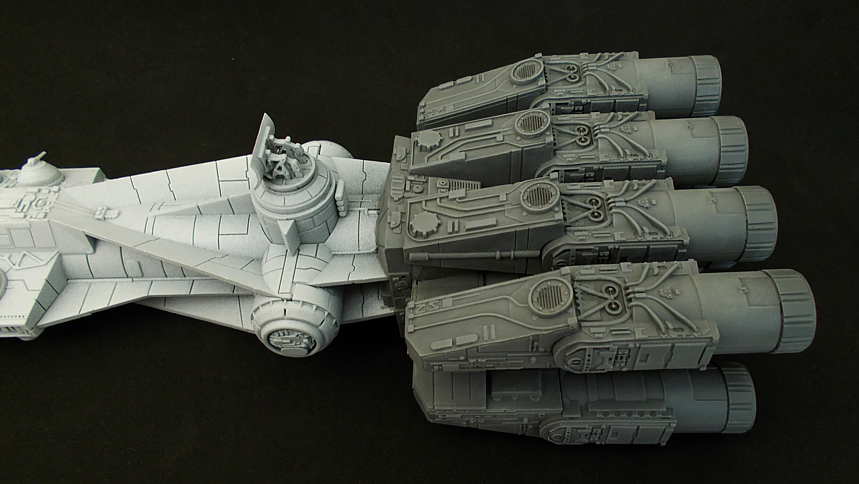
After cleaning the model from gluemarks and mold lines, I took off the crookedly attached cylindrical engines and reattached them in order to align them neatly.
Then I undercoated the engine section and the rest of the ship seperately by masking each other. The engine section got a black undercoat and was then misted with a darker mid-grey. The rest of the ship I undercoated mid-grey and misted ist with an off-white.
Next I drybrushed the off-white part of the ship with pure white to pick out raised details, and did the same on the engine section with a ligher mid-grey. I also applied pin-washes to define recessed detail like the panel lines. These steps gave me a neatly shaded and highlighted base to work on without much effort.
The next step was to add some color in the form of the characteristic blue markings and some faded coloring like the dark yellow on the front corner of the upper starboard engine. I also added light-grey scuffs and scratches to the blue markings at this stage.
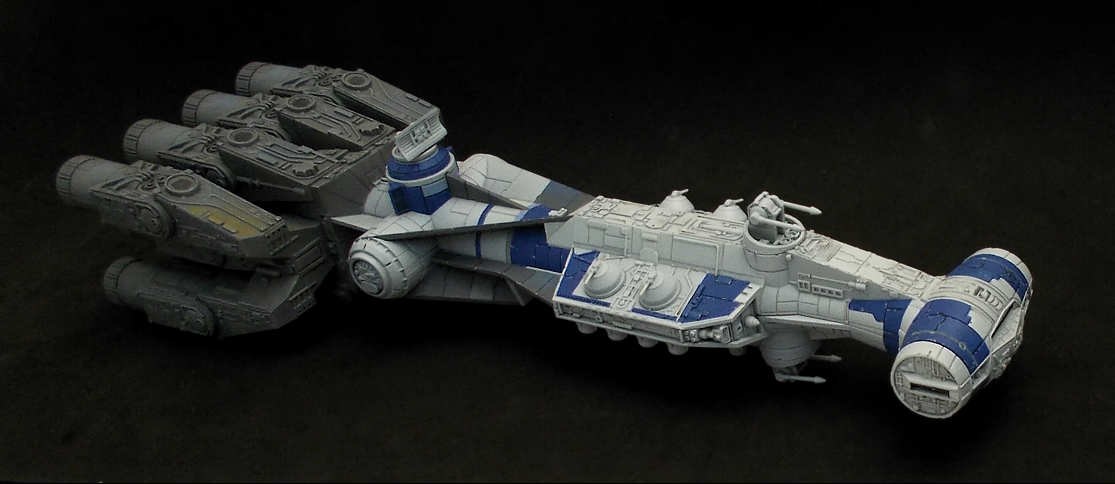
Now it was time to paint details like the laser cannons on the 4 large dorsal escape pods, and I also scratch-built the heavy Quad-Turbolaser which replaced the standard top dual Torbolaser on the LIBERATOR. I also painted subtle grime, rust spots and streaks as well as some geometrical brightness modulation on larger off-white surfaces to make them look more interesting.
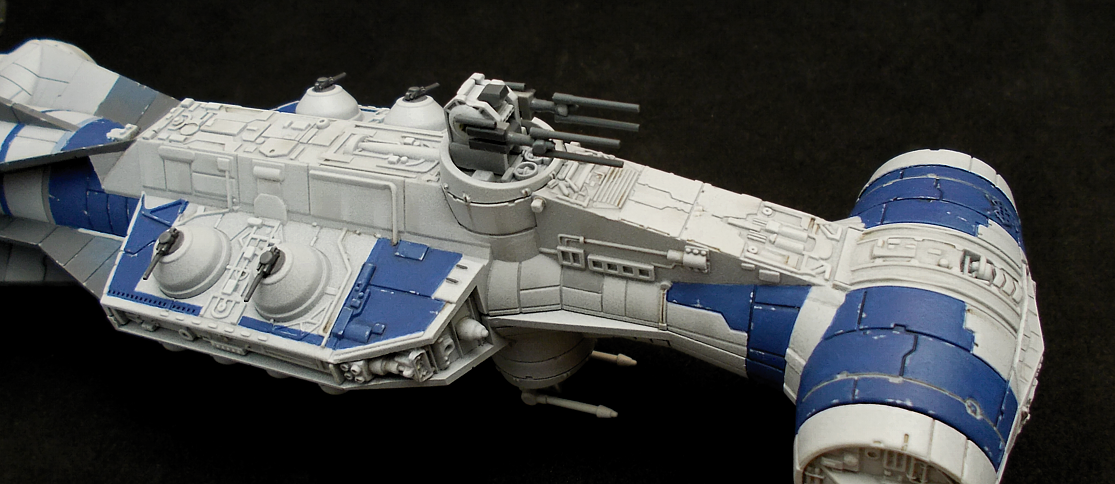
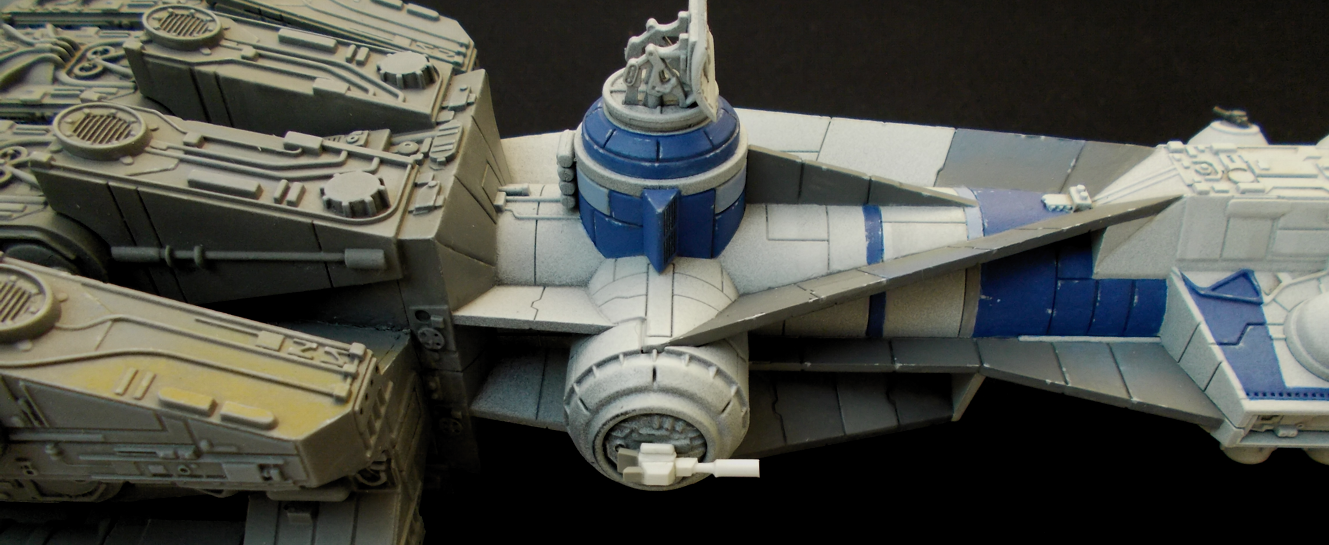
At that stage I realized that both Turbolasers stood out too high above their circular mounts on the FFG model. So, I carefully cut them off, cleaned up the remains of the cut on their mounts, cut off a few millimeters at the base of the turrets and reattached them – they look movie accurate now, neatly nestled into their circular mounts:

What remained to do now – aside from finishing painting the model – was to scratch-build the additional Turbolasers mounted an the port and starboard docking ring:
My own minis I create 3: Yoda, humbled Jedi Master
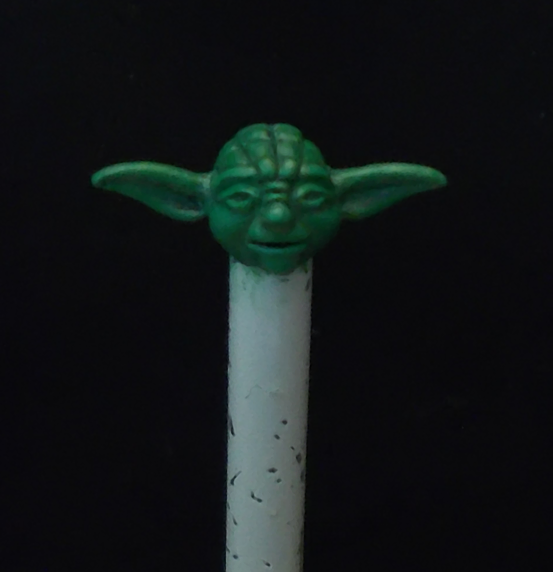
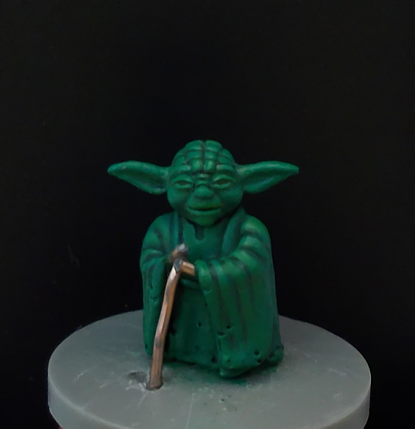
I wanted to do Yoda for a long time. He’s not my favorite character, but I like him, especially Yoda after the fall of his Jedi Order – in REBELS and Empire Strikes Back – who was humbled by his failure and learned from it to the point where he was willing to teach someone who would’ve never been even considered in the Jedi Order.
I wanted this to be present in the mini of him I set out to sculpt.
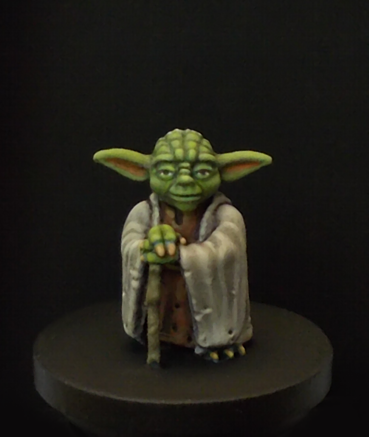
And here’s the painted mini:
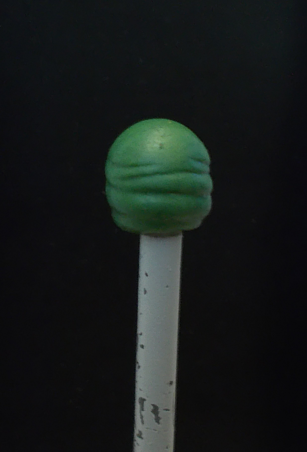
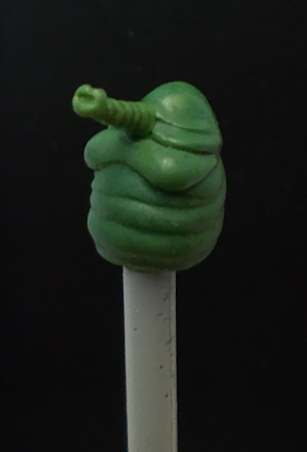
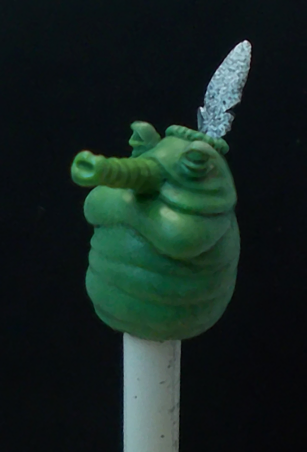
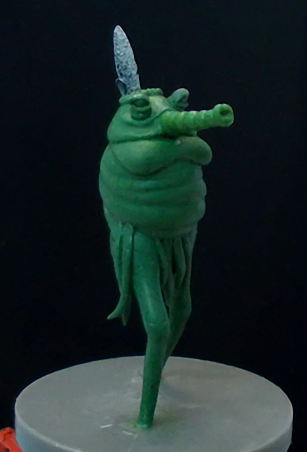
Creating my own minis 2: Sy Snootles
For a challenge revolving around the theme ‘music’, I decided to counter the knee-jerk submissions of unit musicians, noise marines and the like with something out of left field, but very, very close to the challenge’s theme:
Sy Snootles, the singer of the Max Reebo Band in Jabba’s palace, who we also see as a younger version as a back-stabbing diva in the excellent Clone Wars animated show.
I’m pretty sure there are options to simply 3D-print her and then paint her, but how boring is that? No, I wanted to create her the way even digital characters like in the show I mentioned are created to give them life and character: Sculpt them physically.
So, I saved a whole bunch of different reference images and had to decide on which version of her I wanted to go for, because there are three: The original puppet, the Special Edition cgi-character which is different in some details, and the character from the animated show. I decided to go for a combination of all three, and focus on aspects of the animated show, because in that show she had character and attitude. So, I grabbed GreenStuff, sculpting tools, wire, some plastic, and started sculpting away:

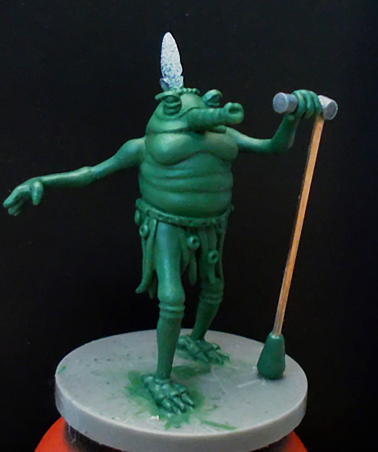
And here’s the painted mini:

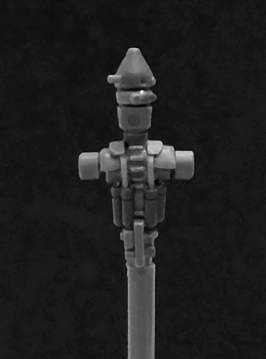
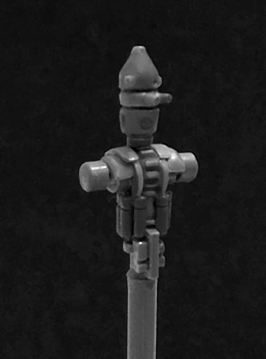
Creating my own minis 1: IG88
Since the ‘Bespin Gambit’ expansion, the minis of Imperial Assault have the design-style and quality which was also used for Legion later. Before that expansion, many IA-minis were not that good.
One of those is IG88, so I decided to build one myself. I saved loads of reference images, grabbed plastic card, plastic rods and other plastic elements of various profiles and sizes, a sharp fine hobby knife, pincers, a needle and plastic glue, and proceeded to cut, carve, bend, drill and mold over 90 tiny single plastic elements and assemble them to create my own IG88:
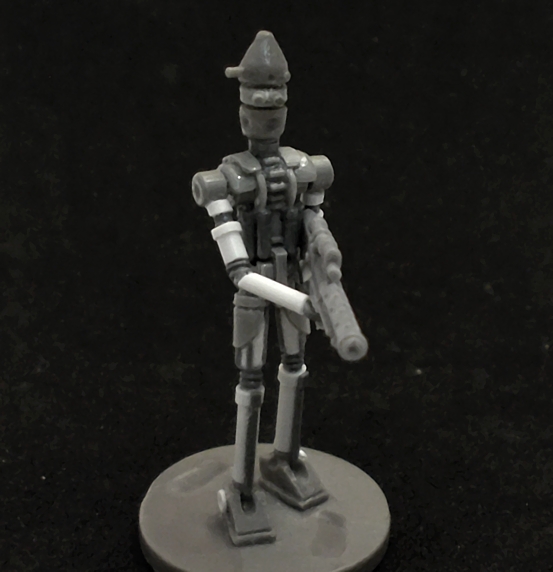
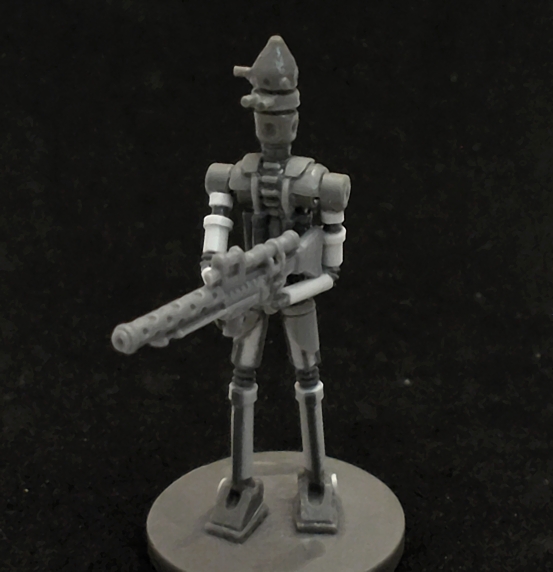
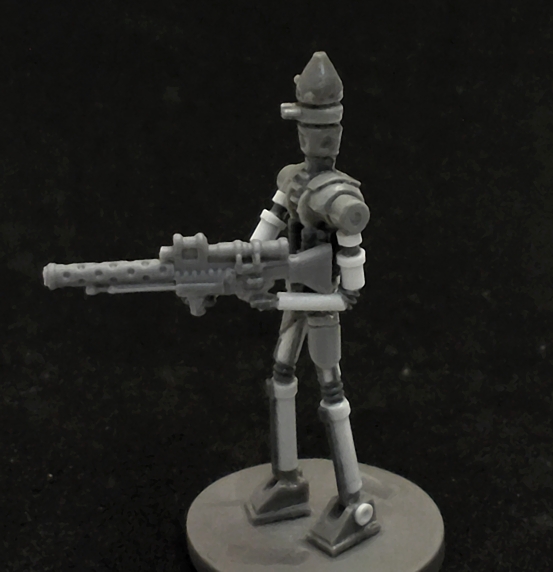
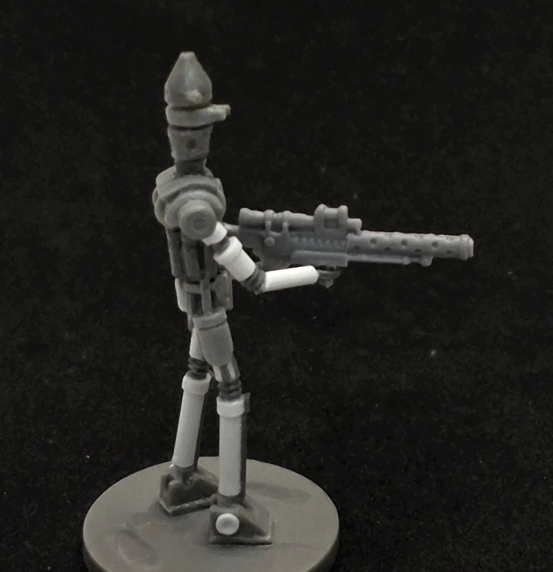
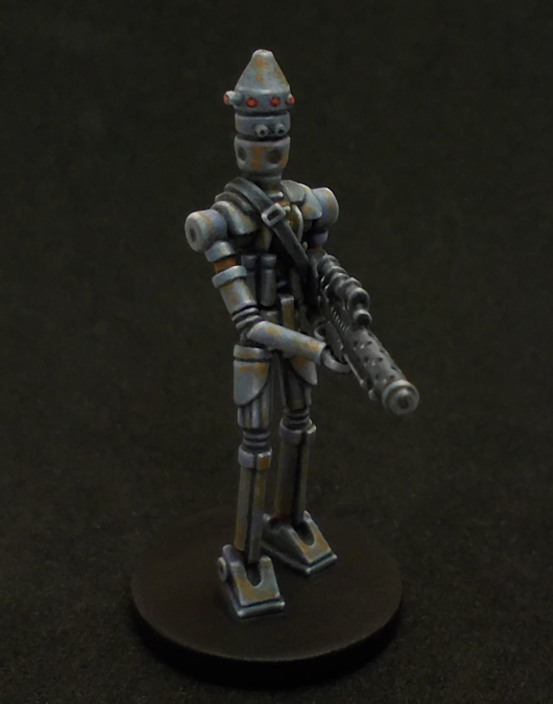
And here’s the painted mini:
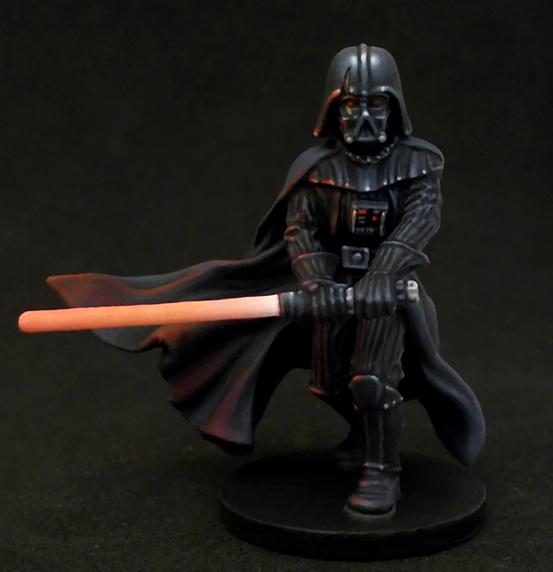
Vader re-visited
I’ve revisited my modified Darth Vader for Imperial Assault. I’ve painted this figure months ago, but I’ve made a lot of progress with how I paint gloss effects, light reflections and OSL since then, so I went back and applied what I learned to Vader.
The challenges here were 1) on an almost entirely black figure to replicate the different materials and how they interact with light – from the very reflective black mask, helmet, shoulder and leg armour over the semi-reflective suit to the almost non-reflective cape – 2) creating plausible-looking reflections of the red-tinted lightsaber blade on the figure in accordance with the reflective properties of the materials in question, and 3) to balance the intensity of the OSL with the imagined white environmental light (like that in an imperial facility or on a starship), so that the OSL does not overpower the figure.
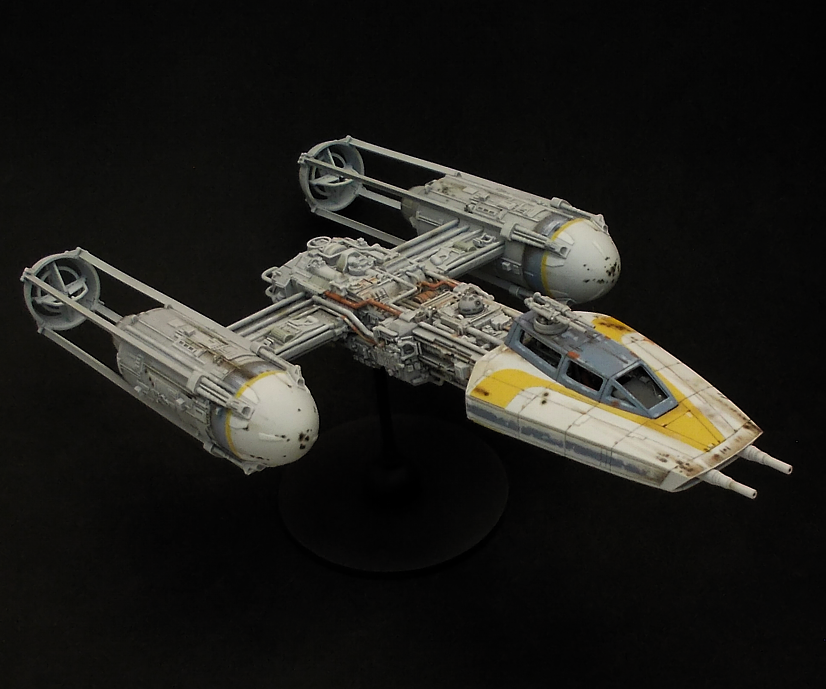
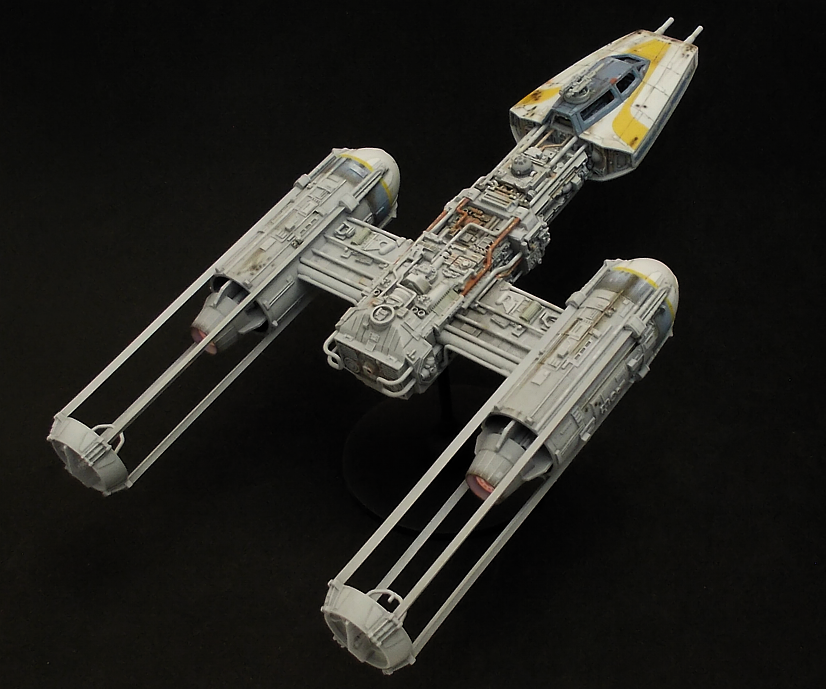
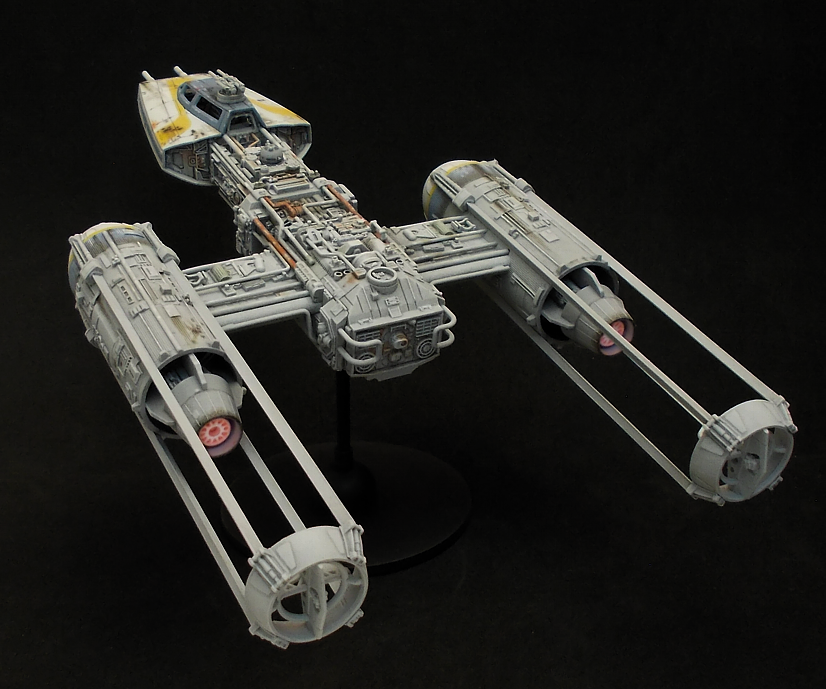
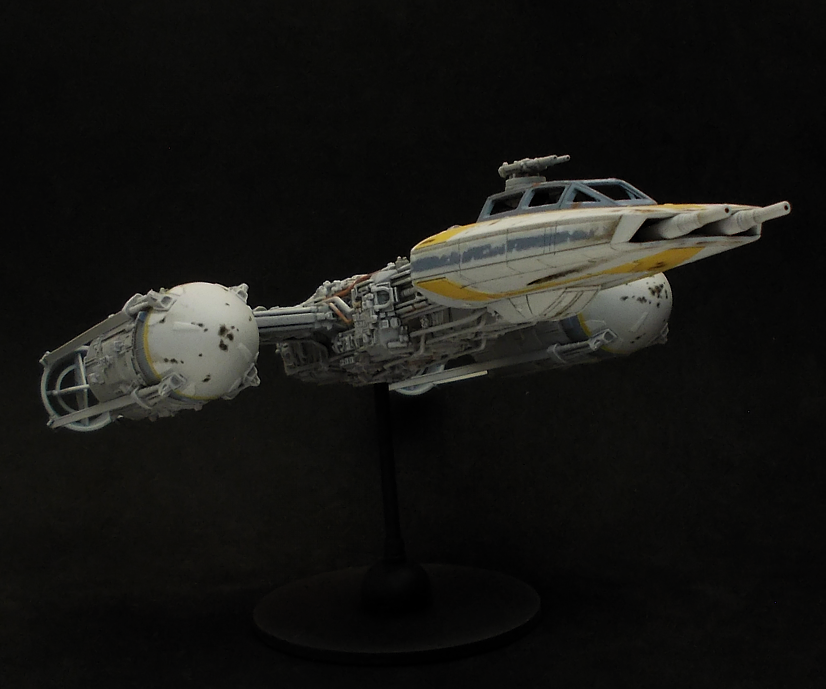
Gold Leader Y-wing model in 1/72 scale from Bandai
The second bird has now joined my Bandai 1/72-scale Star Wars collection – Gold Leader. As with Red 2 before, I painted this to replicate the original filming model as accurately as possibele given the reference images which are available to the public.


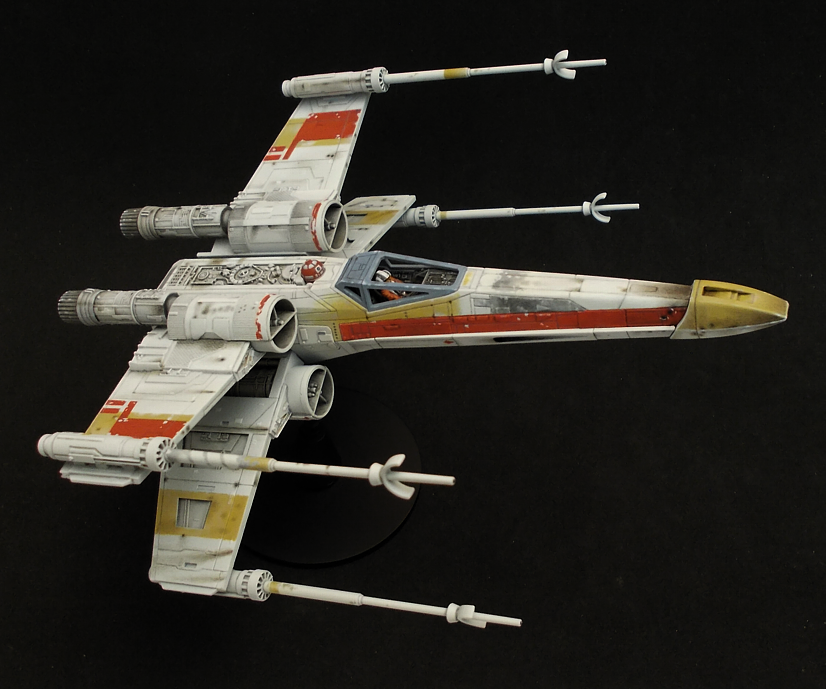
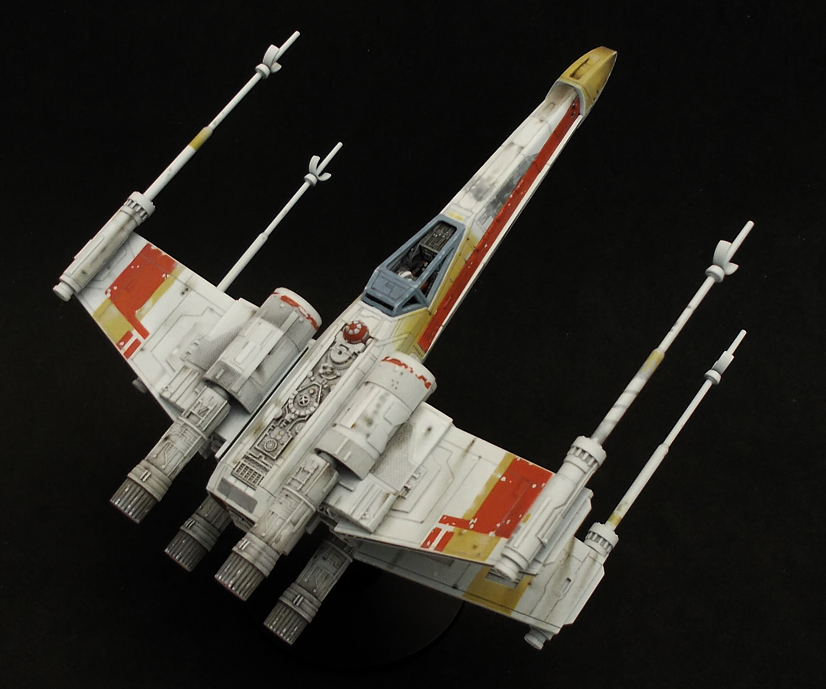
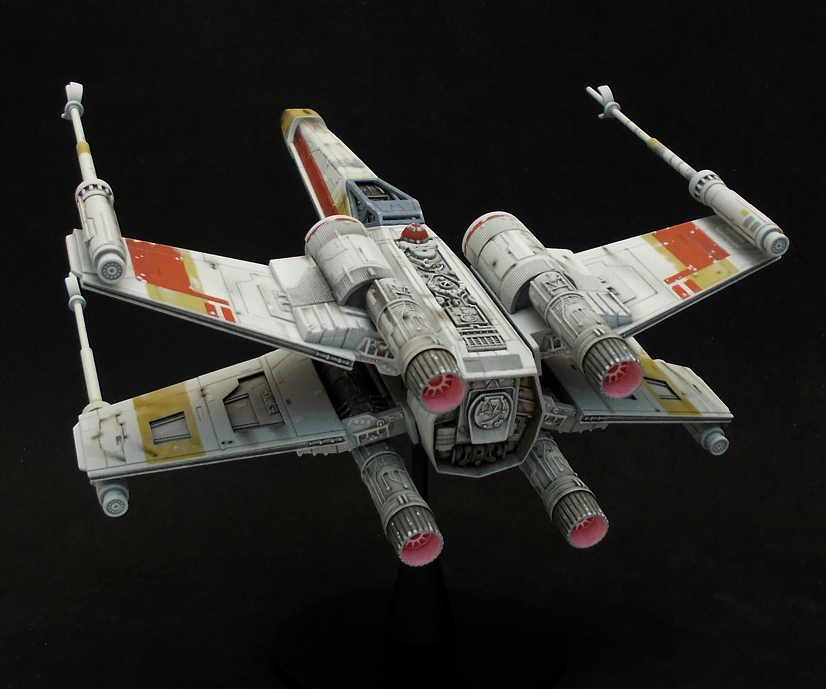
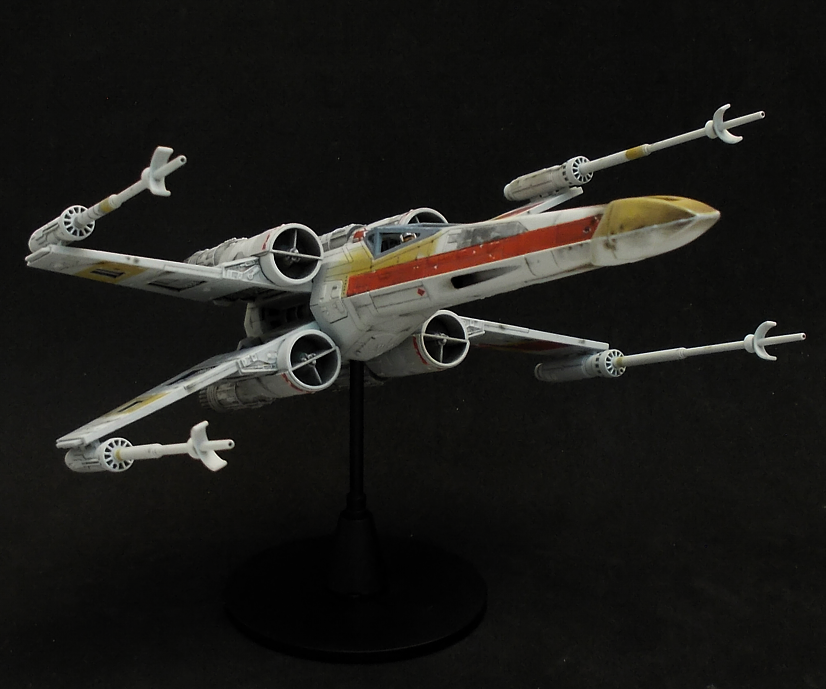
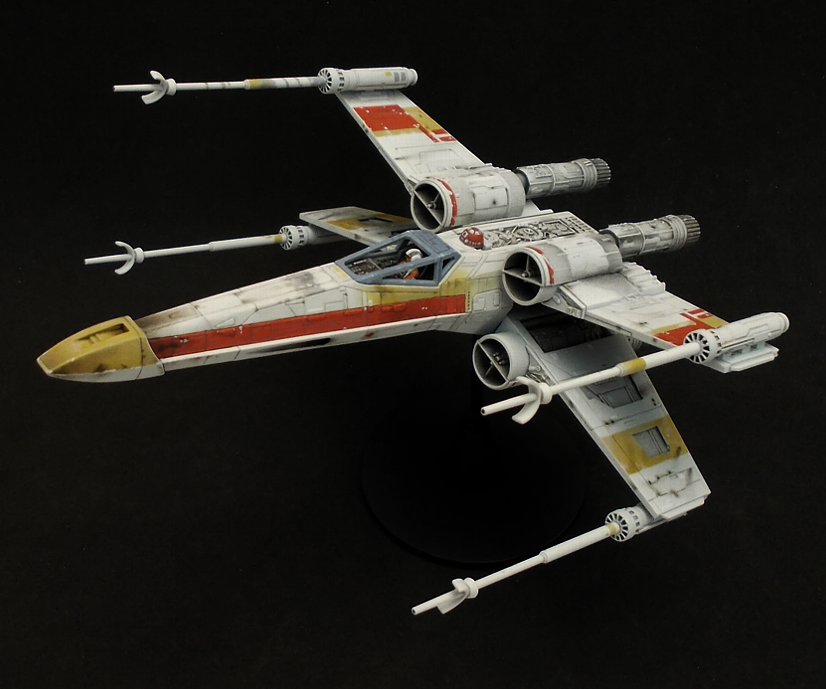
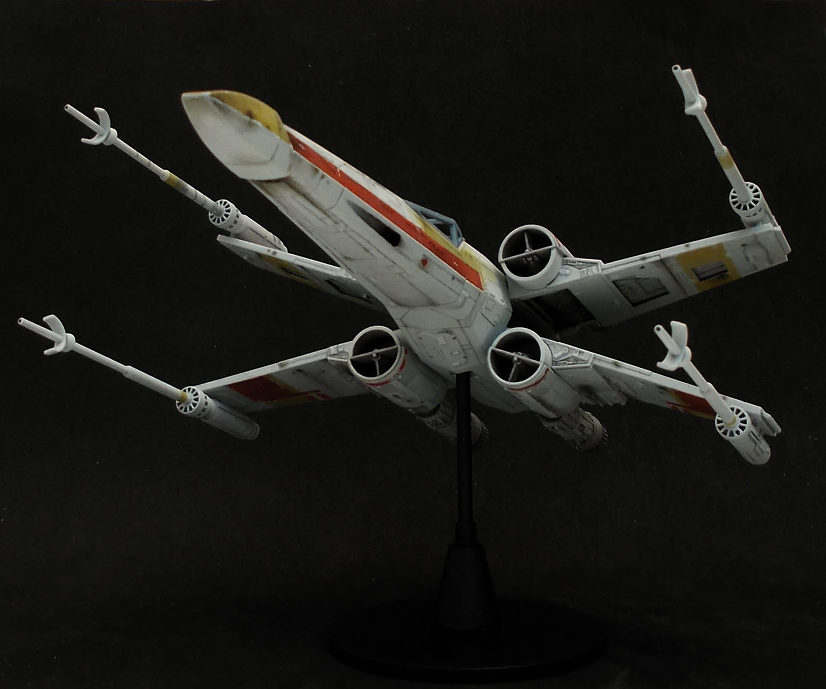
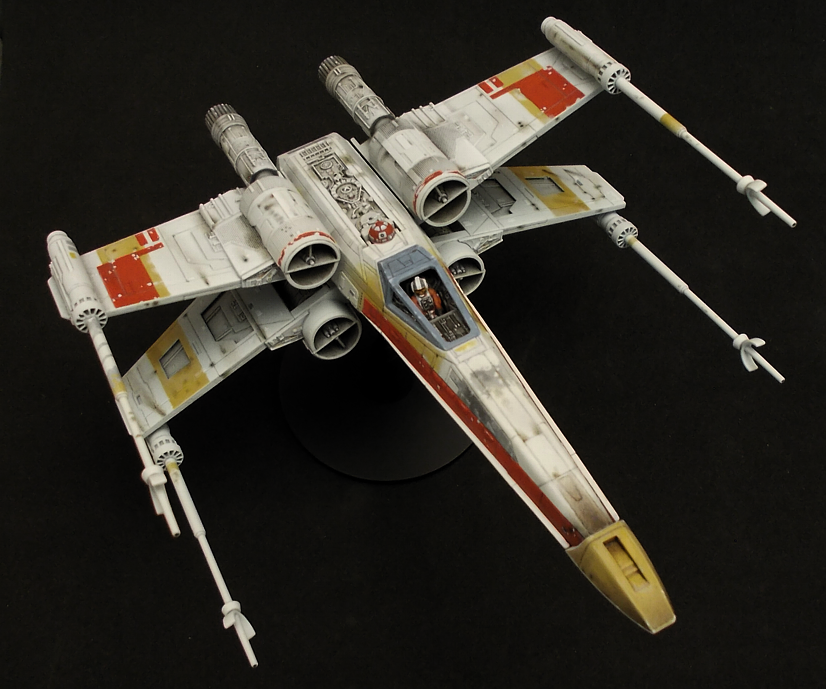
Red 2 X-wing model in 1/72 scale from Bandai - Part 3
Here’s the finished model. I took my time modifying, assembling and painting it, but the result was worth the effort and I am very happy and pleased with it: