

![Perfect Call Of Duty-Style Miniatures? Wargames Atlantic’s Operators Review [7 Days Early Access]](https://images.beastsofwar.com/2026/02/unboxing-wargames-atlantic-operators-coverimage-225-127.jpg)


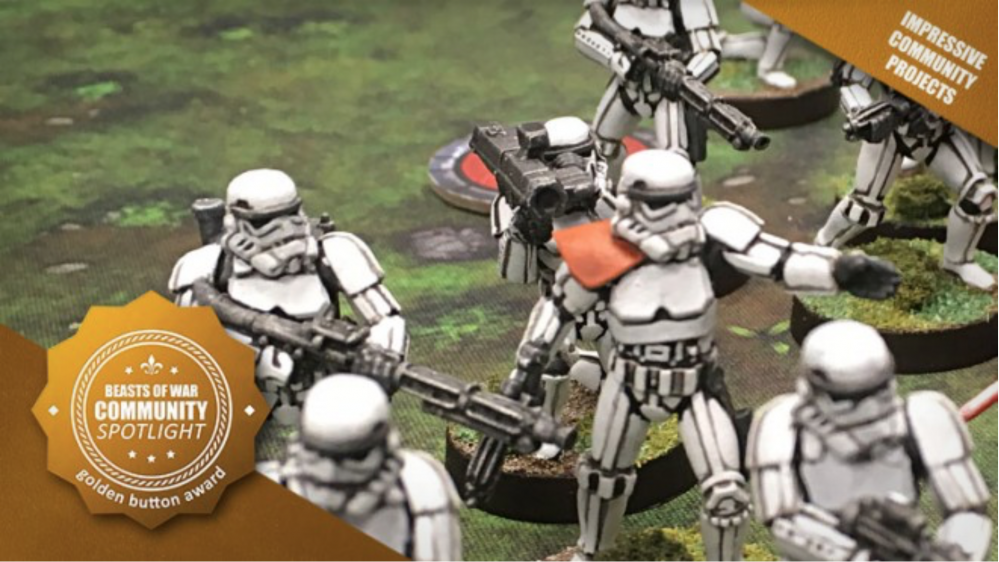
Collins Does Star Wars Legion


Recommendations: 1126
About the Project
This project is all about me documenting my journey through painting my Star Wars Legion models. I'll explain the steps I take, the paints I use, any conversions I do and also other cool stuff I've found out there that I like or am inspired by. Although some of this painting was done for my FLGS (Friendly Local Gaming Store) most of it is for me and my own enjoyment. Im not brilliant but I am certainly happy with the results I get, I just wish it didn't take so long!
Related Game: Star Wars: Legion
Related Genre: Science Fiction
This Project is Active
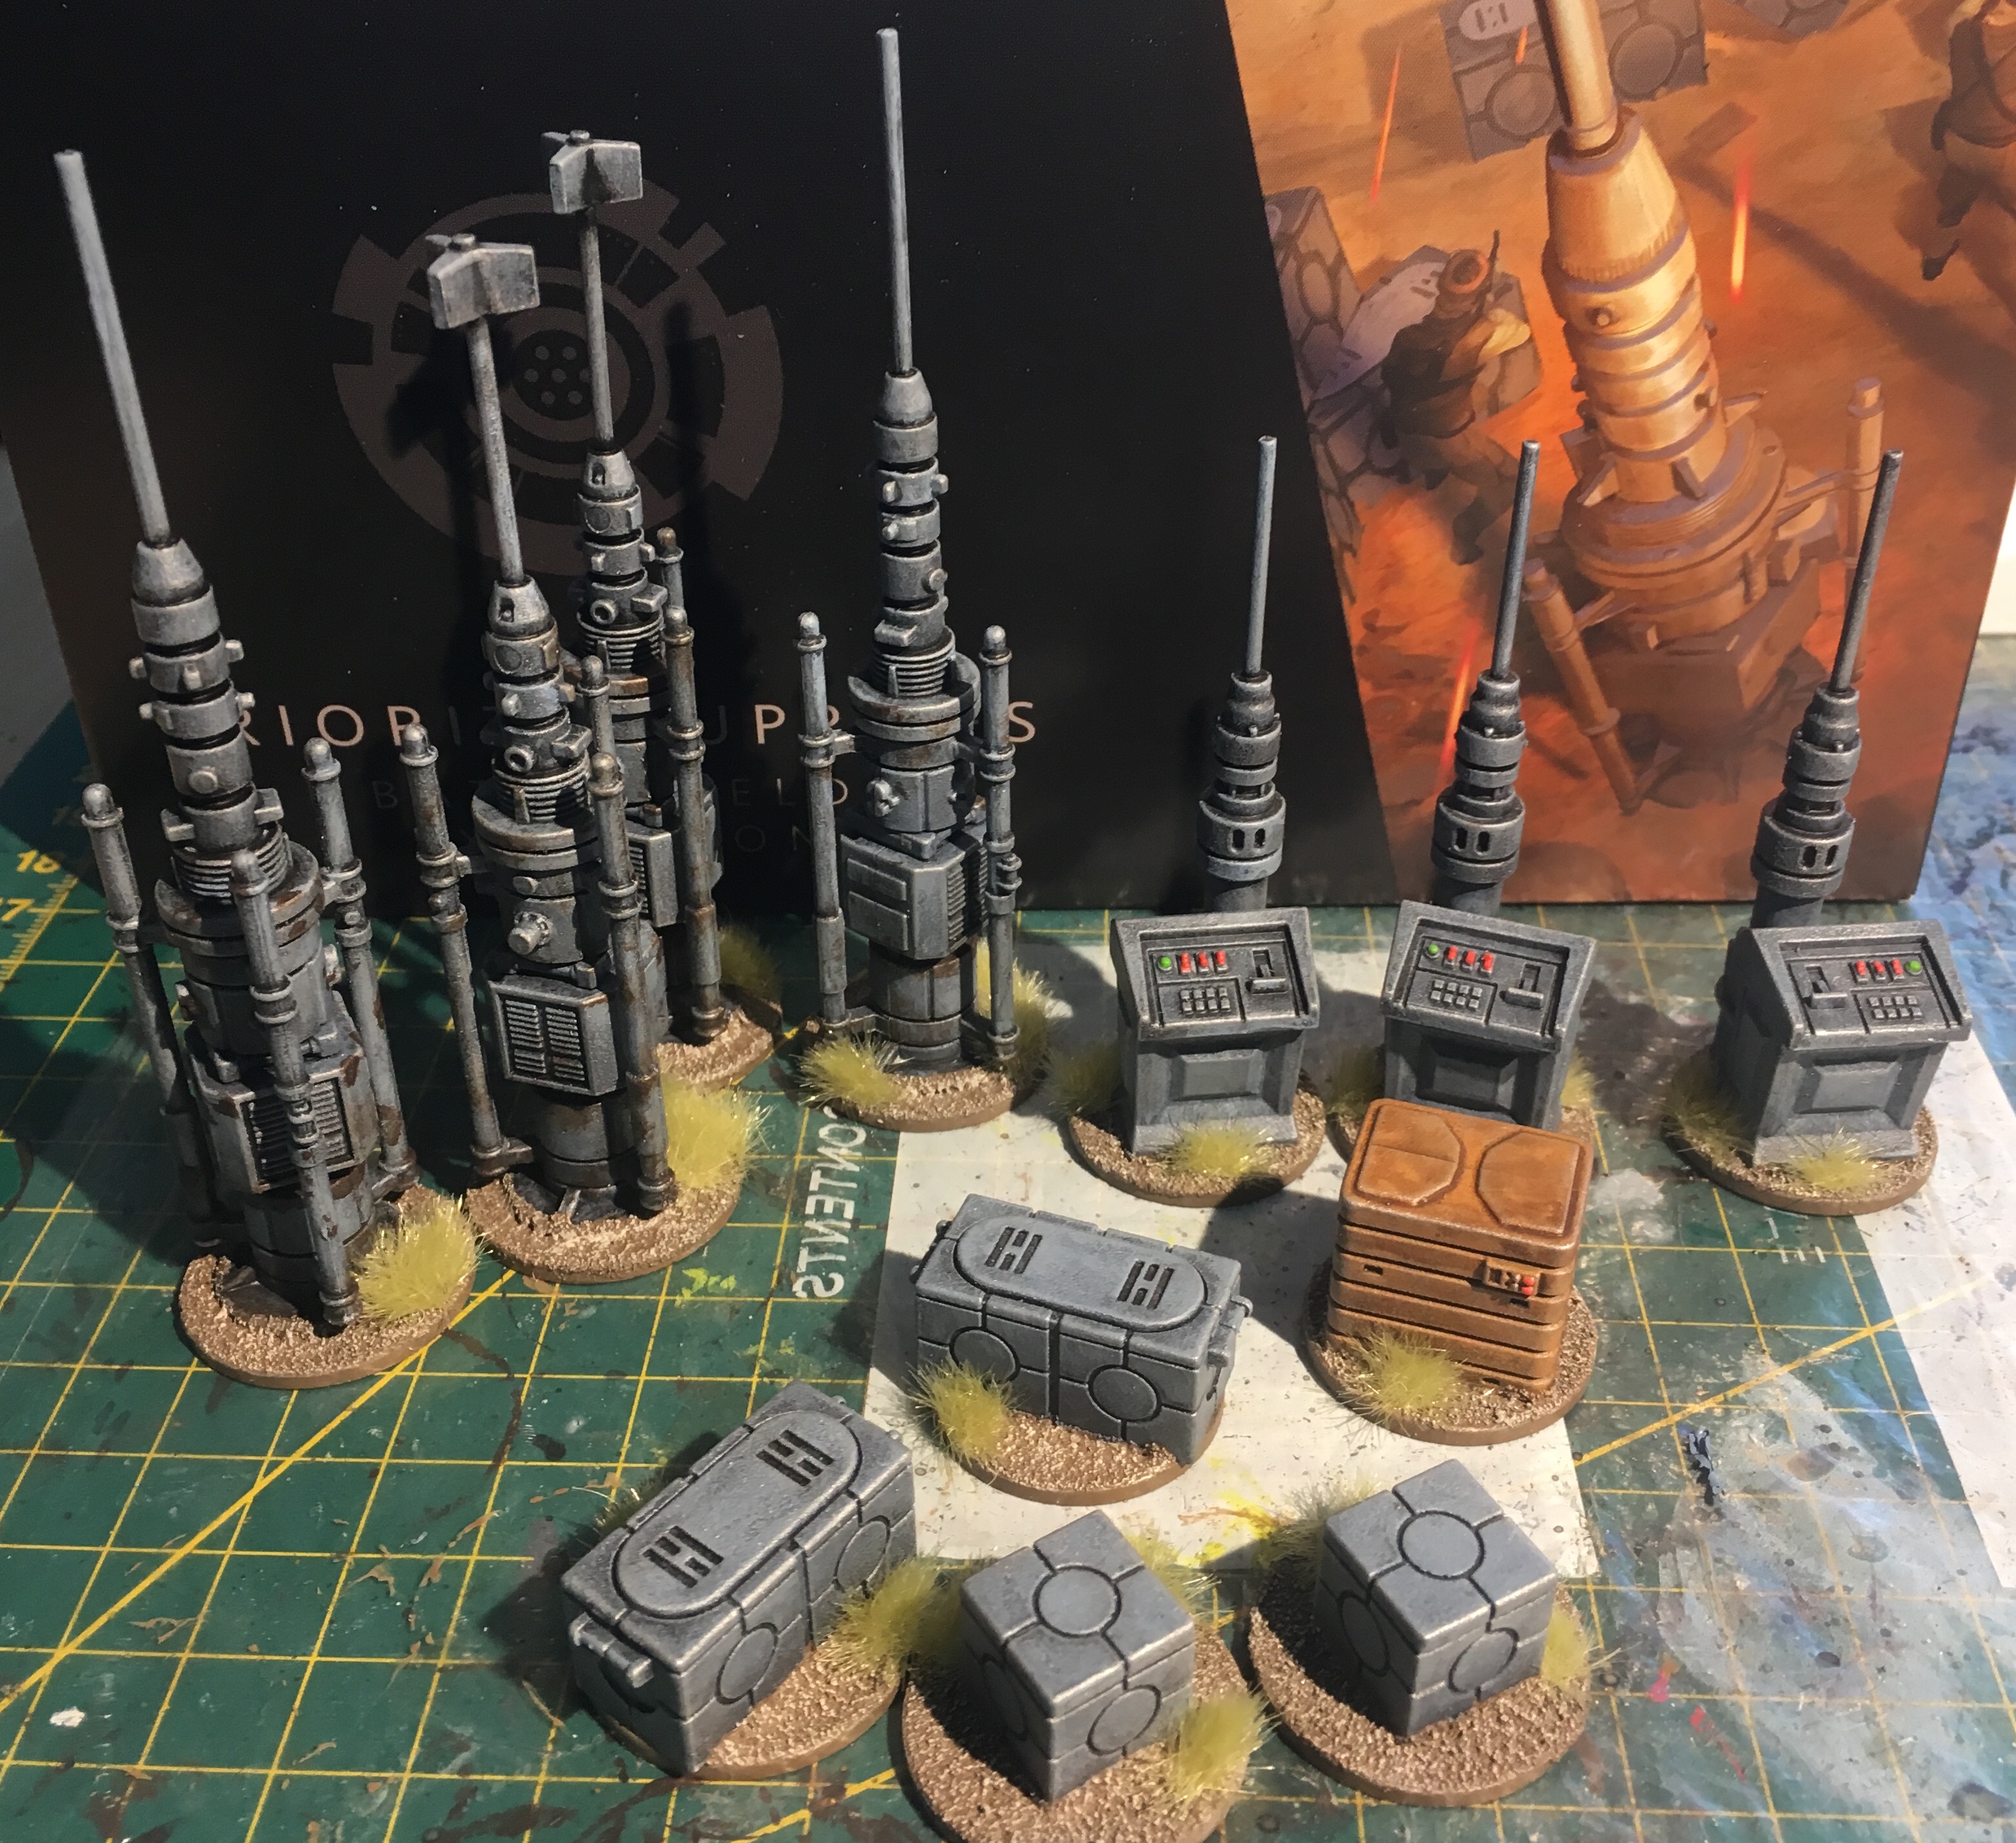
Token storage solutions
As this is an FFG game there are literally a thousand tokens to store, tidy, and organise!
there are many ways of doing this. All they from just ignoring the problem and putting it into a big baggy up to making your own solution.
I went half way between and found a ditty box at hobbycraft for a few pounds (in a sale).
i think it’s this one
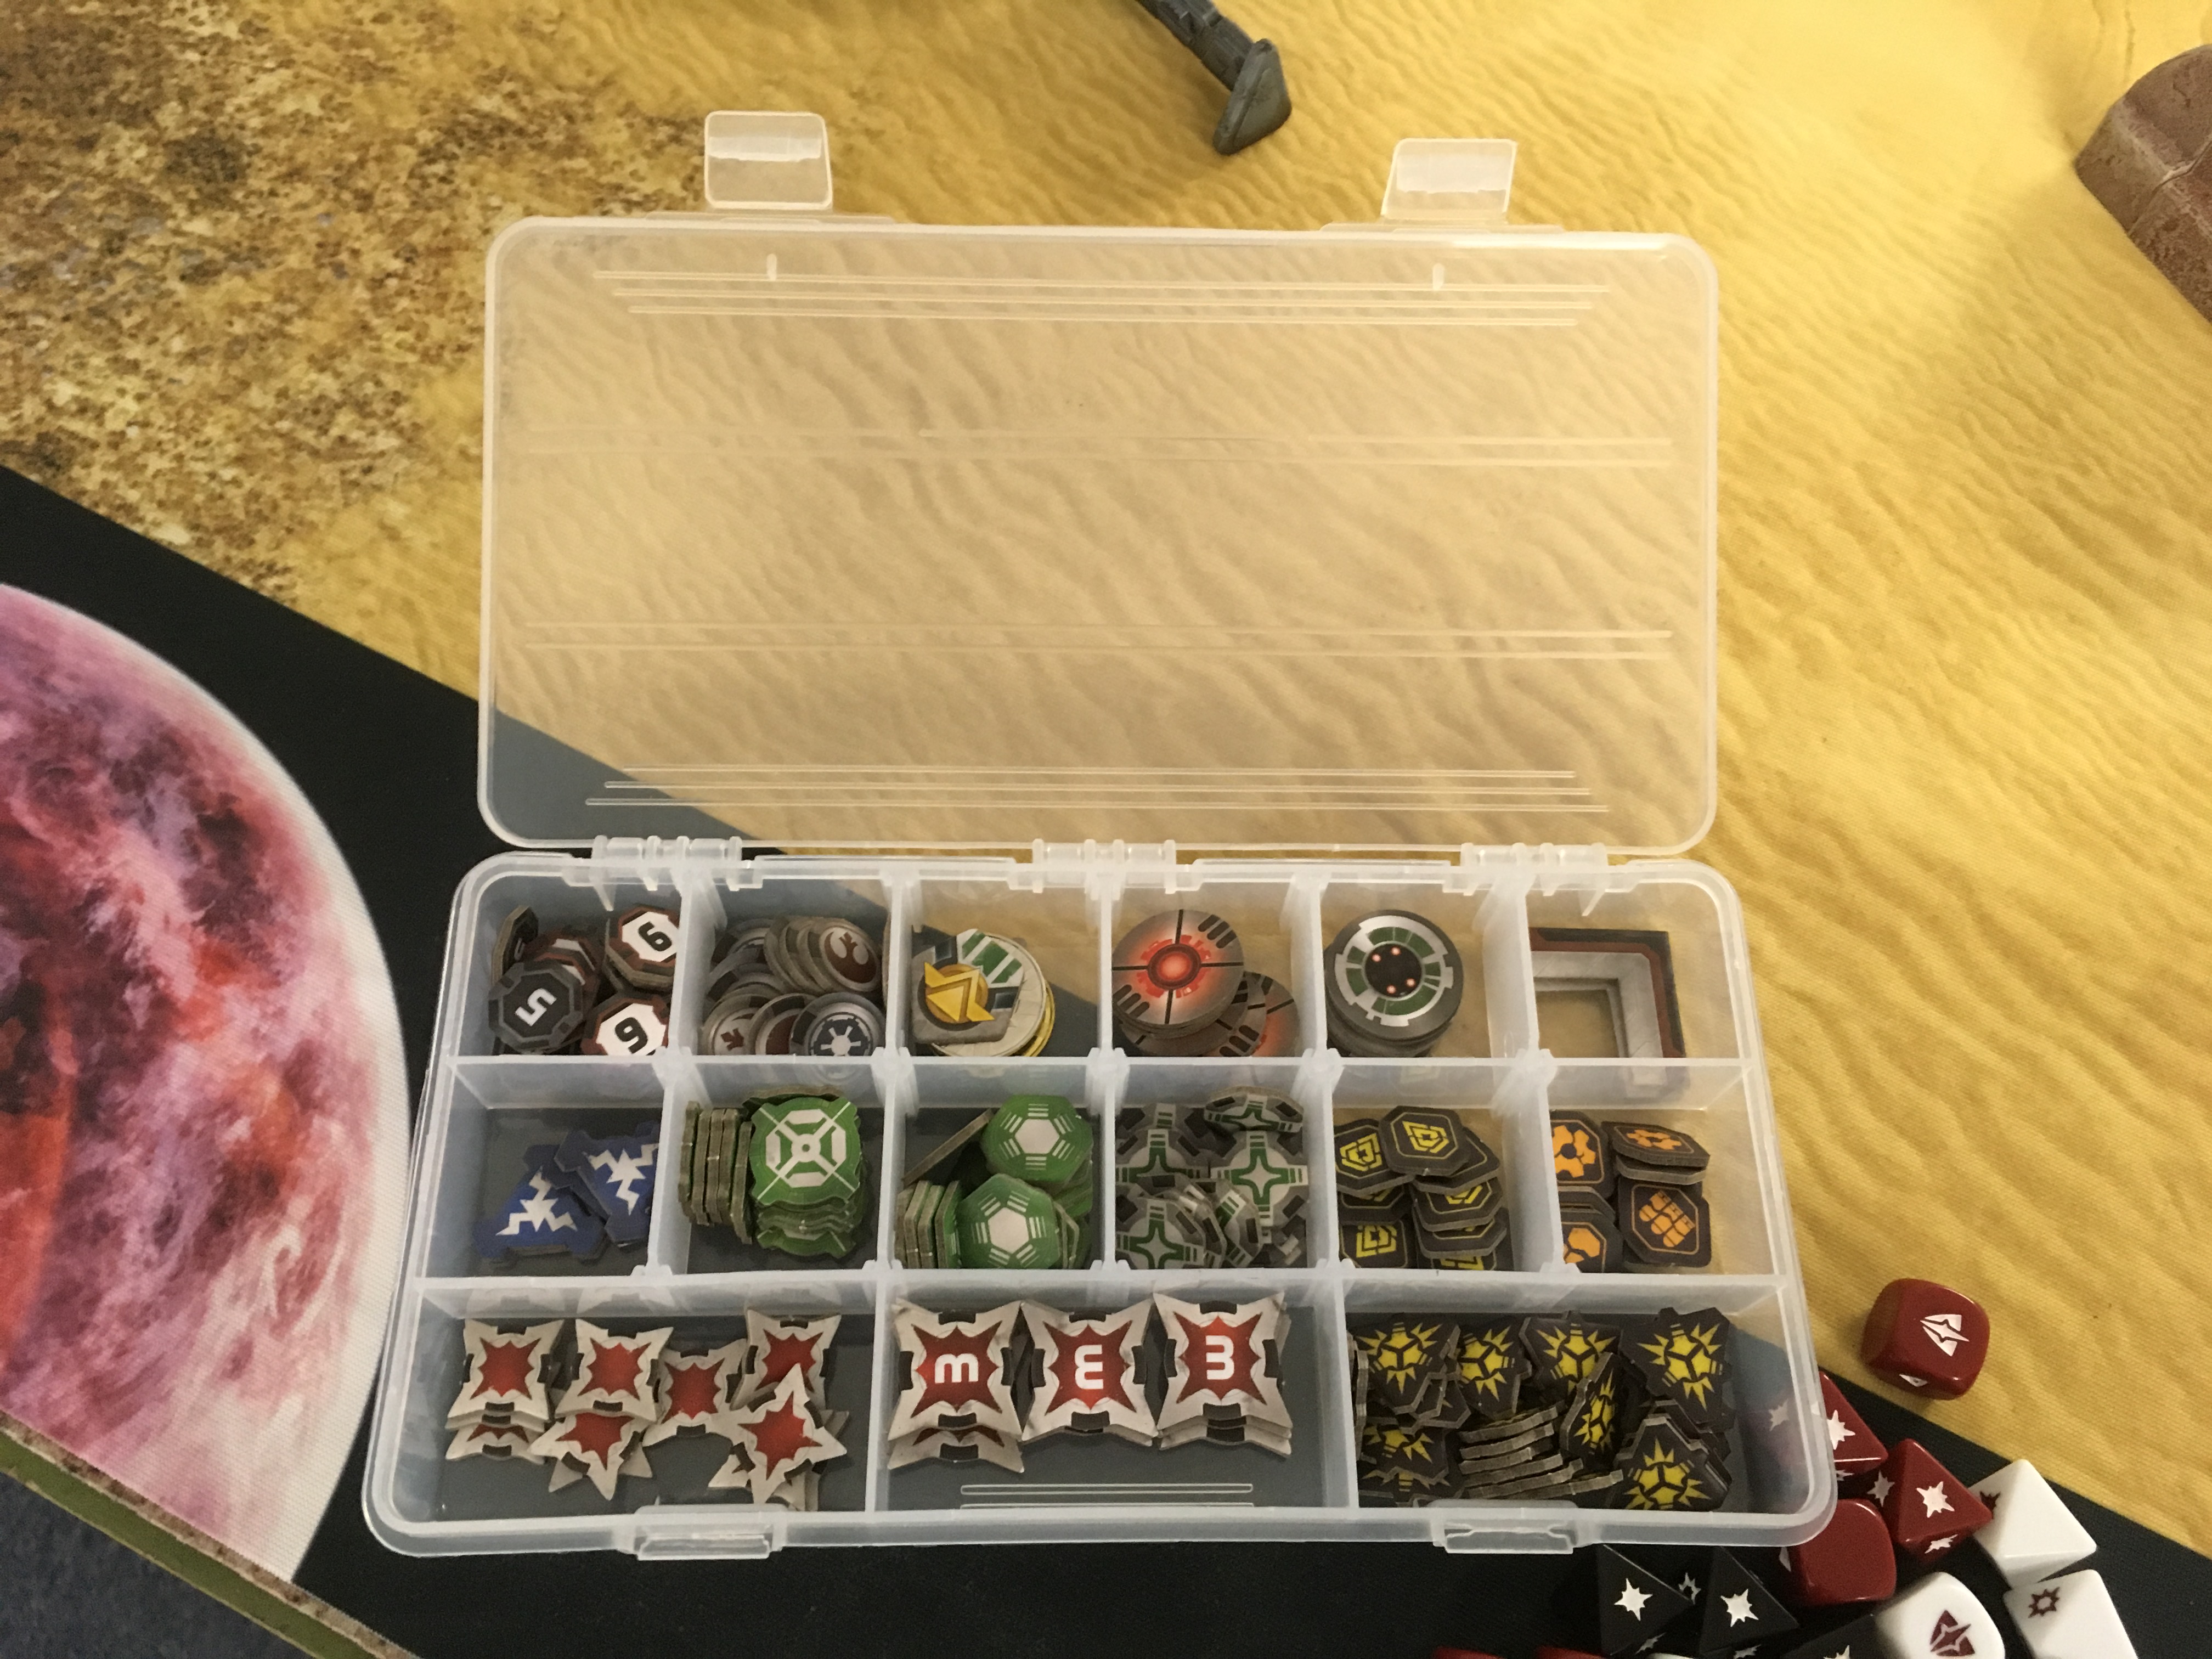 Ahhh! A nice sense of order! (Until Boba releases with new tokens)
Small Deployable Shield Generator
I saw someone (sorry, can’t find the original maker as there are so many of these now) make one of these on Facebook and he encourages other to make these too as its a great bit of scatter terrain.
We’ve all seen the battle for Hoth and how the shield generator was a big strategic target and plot device for the Empire. Well, as we found out in Star Wars Rebels (TV cartoon series) these do come in many different sizes. Well this idea works off of the idea of a smaller localised protection.
The chap who discovered these originally is a genius. He spotted that Hubba-Bubba plastic clamshell wrappers look sort of similar to the bigger shield generator on Hoth.
Anyway, go to your local supermarket and buy yourself two wrappers for 90p each. The bonus with this terrain project is that you get some bubblegum to eat while you work.
 Cut your wrappers into halves and pad out the middle sections with cutouts of toilet roll
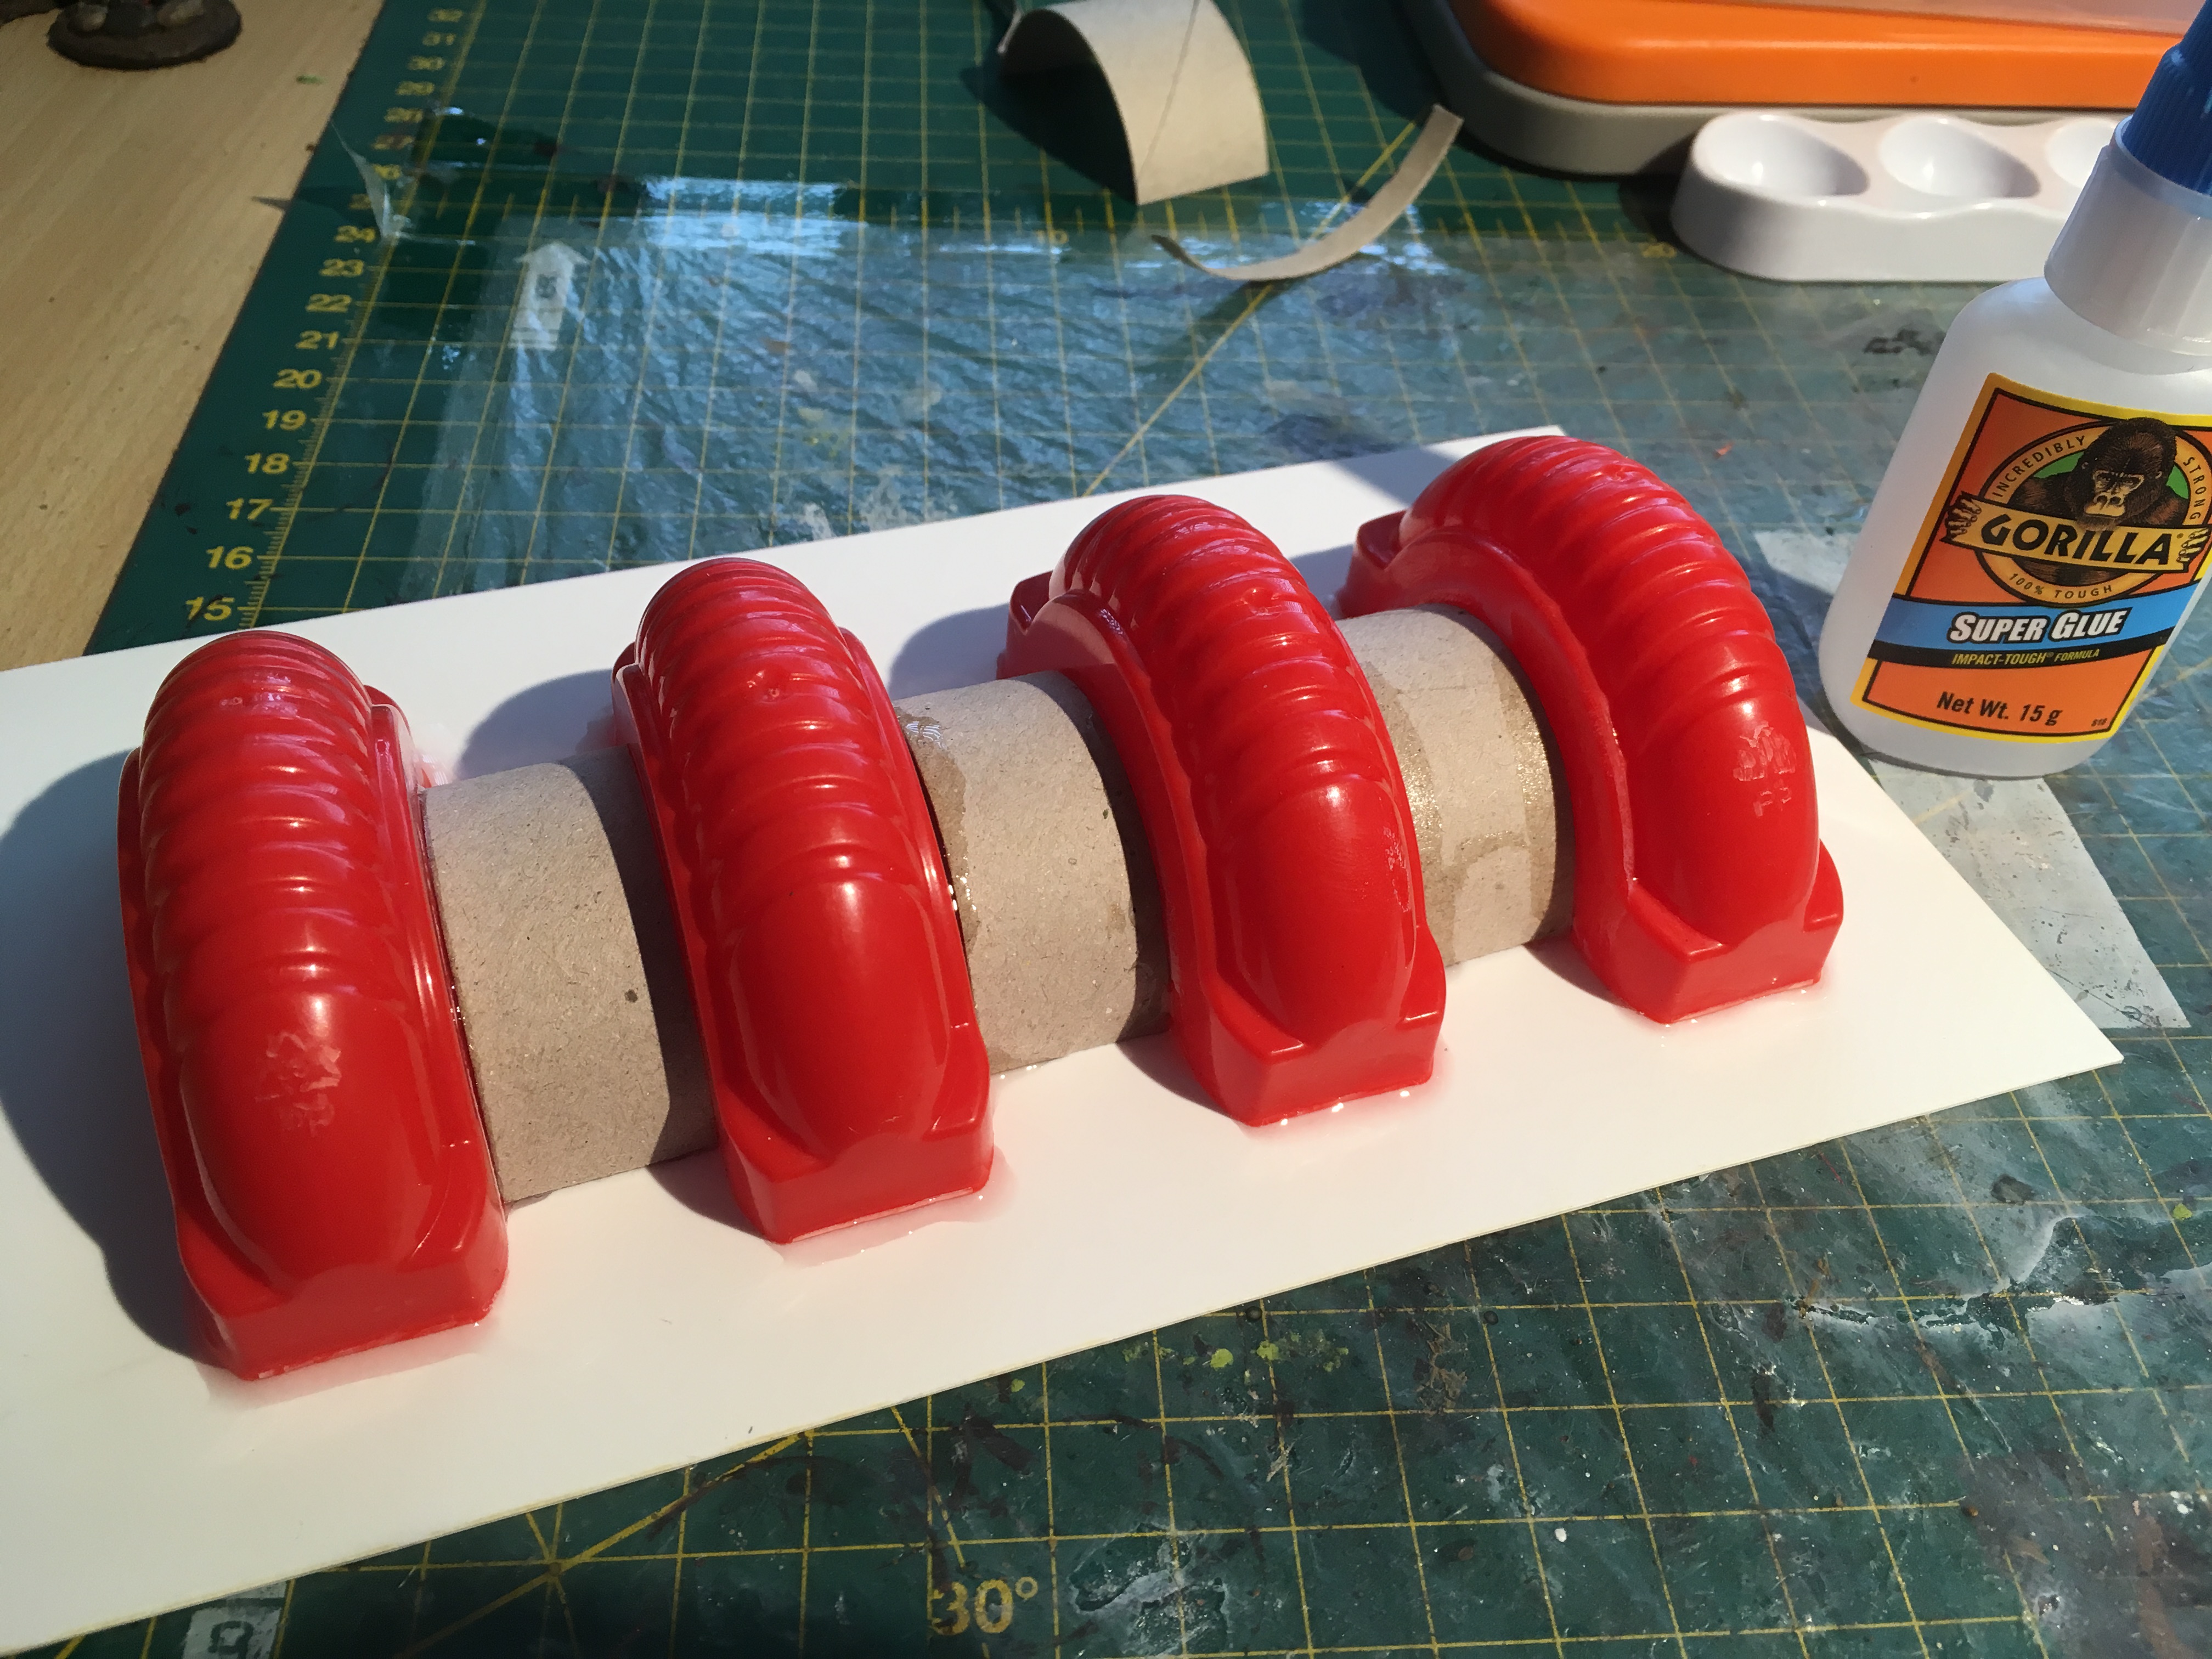 Find a suitable base (plasticard for example) and use superglue to secure it all. I used a gel type.
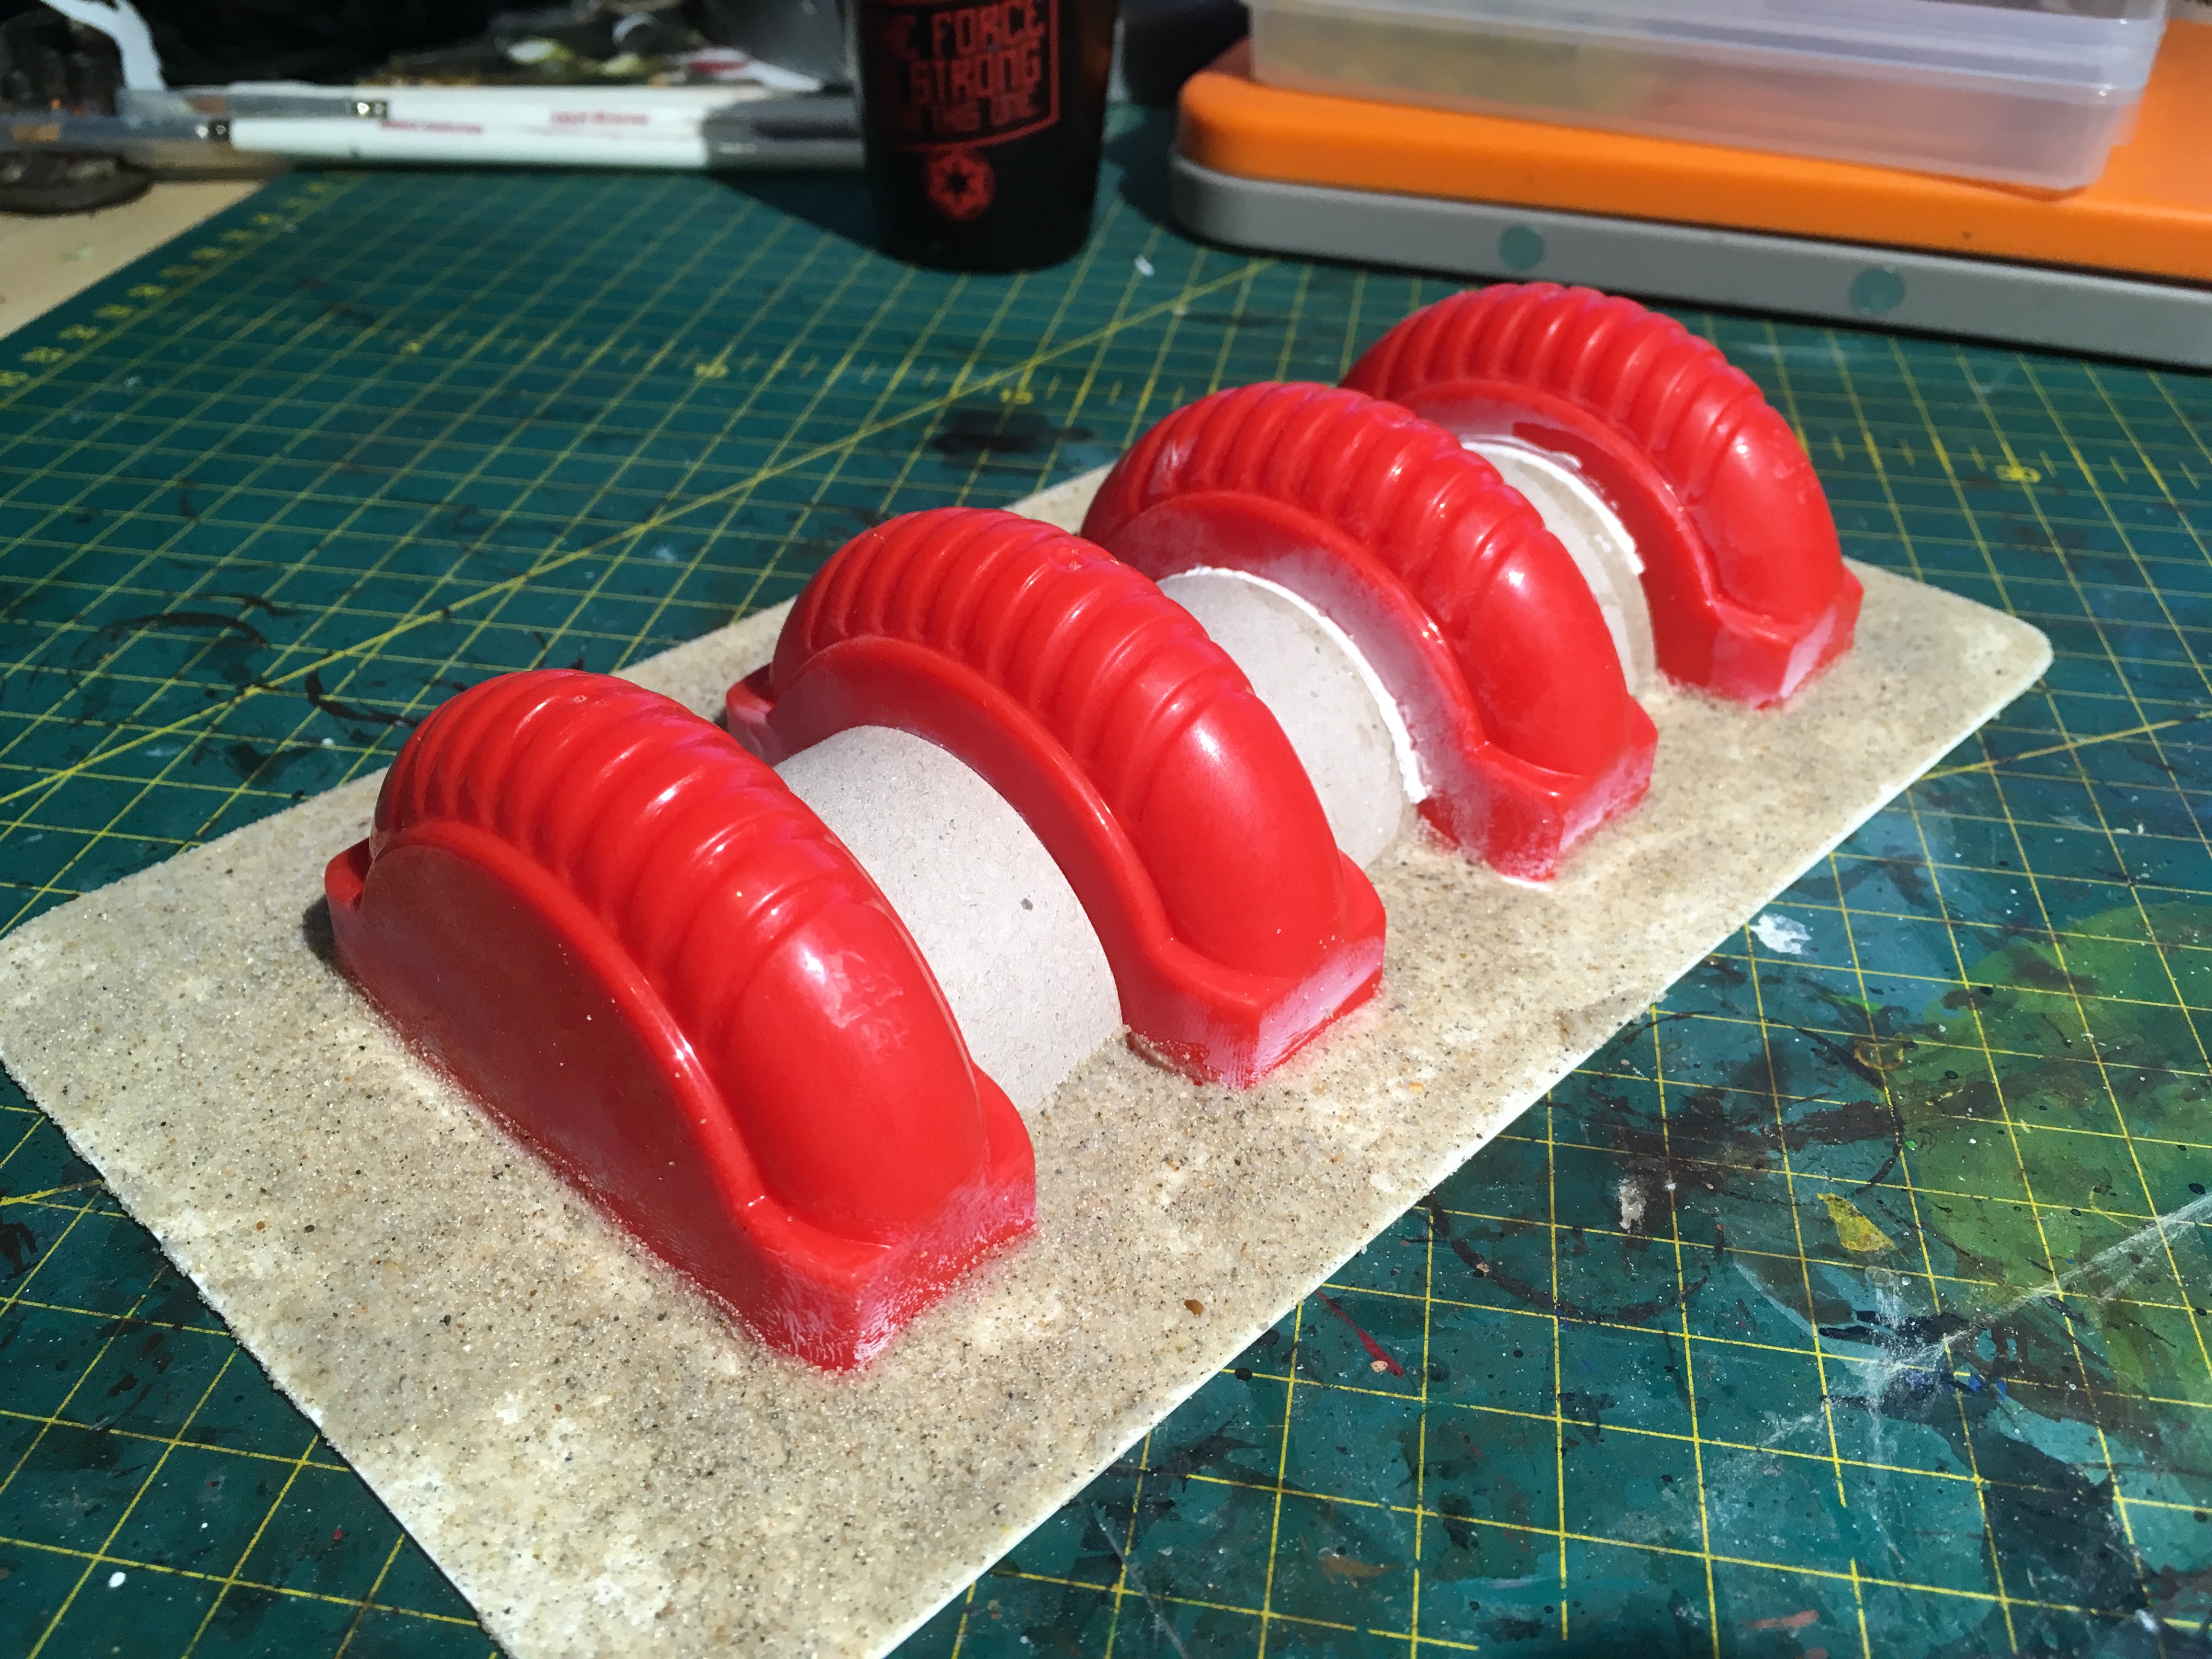 add scatter to your base. I used sand.
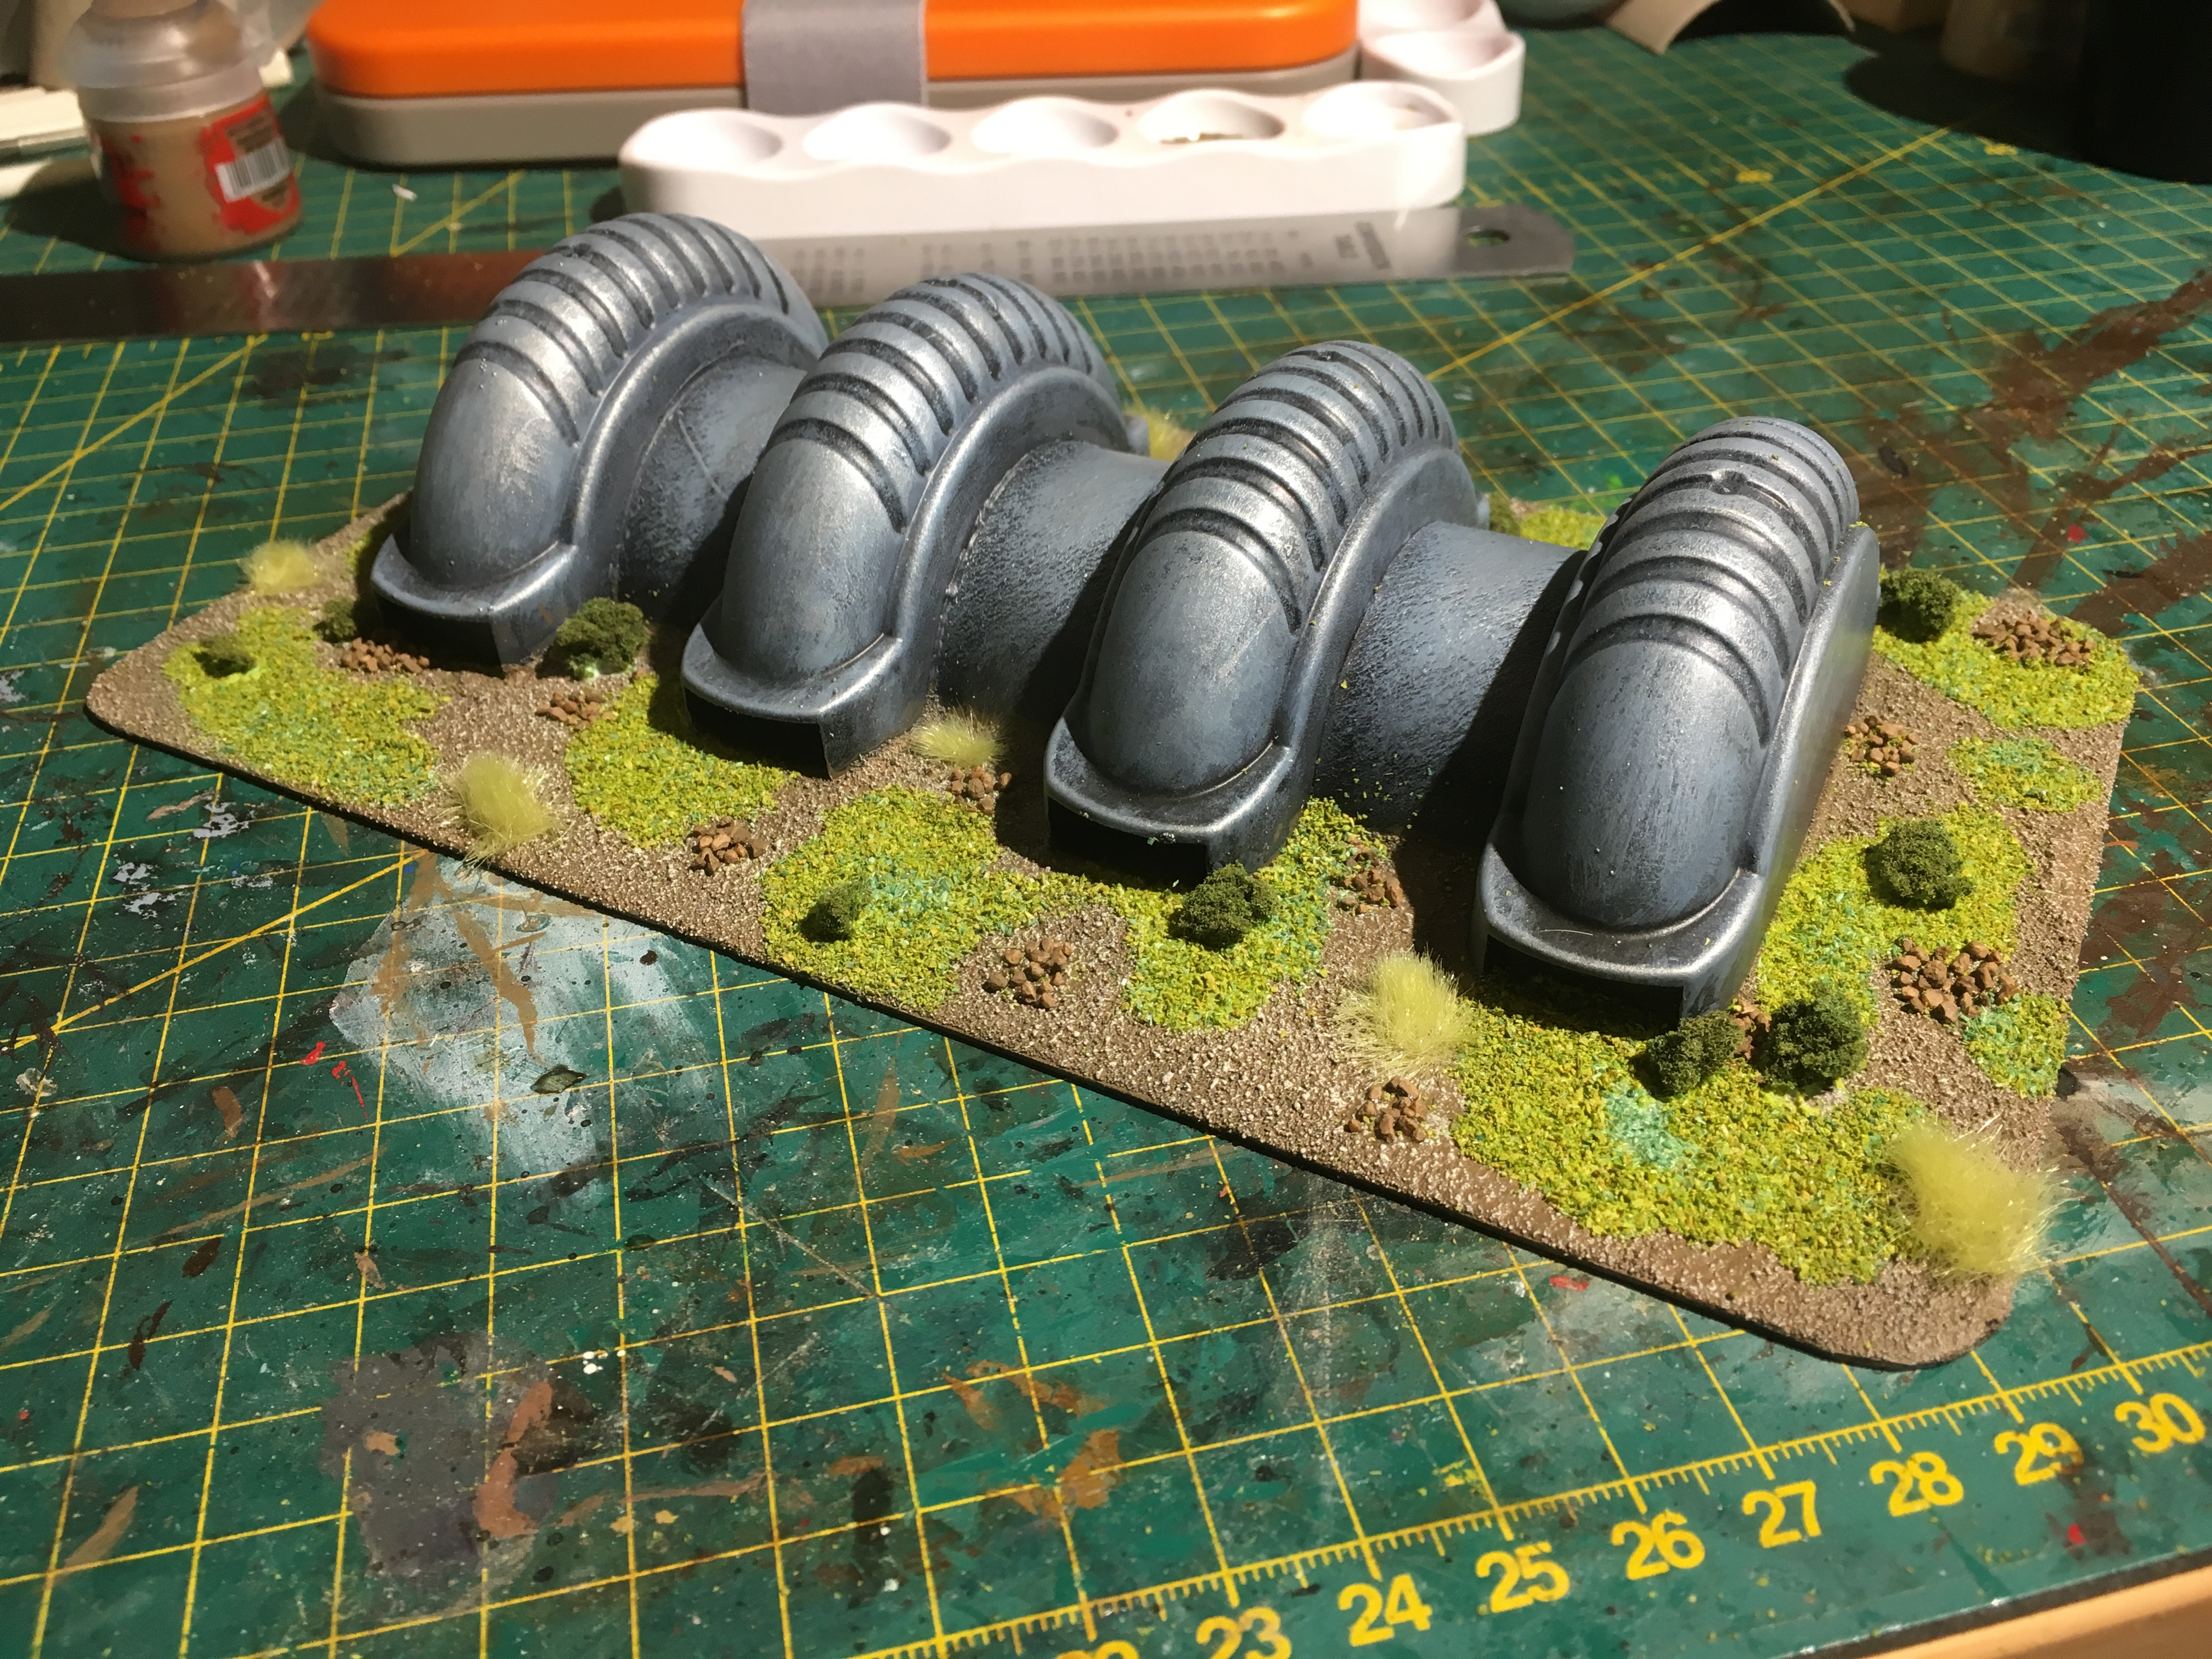 Paint and Flock
I primed in black.
Then used my standard Mechanicus Standard Grey Base, Russ and Fenrisian Grey and Necron Compound drybrushes.
Finally a Nuln Oil wash.
The sand was painted Steel Legion Drab and Terminatus Stone drybrush just like all my other models
I then sealed using matt varnish and once dry flocked using the same 5 ingredients as everything else.
Really Really simple and all thanks to a random on facebook!
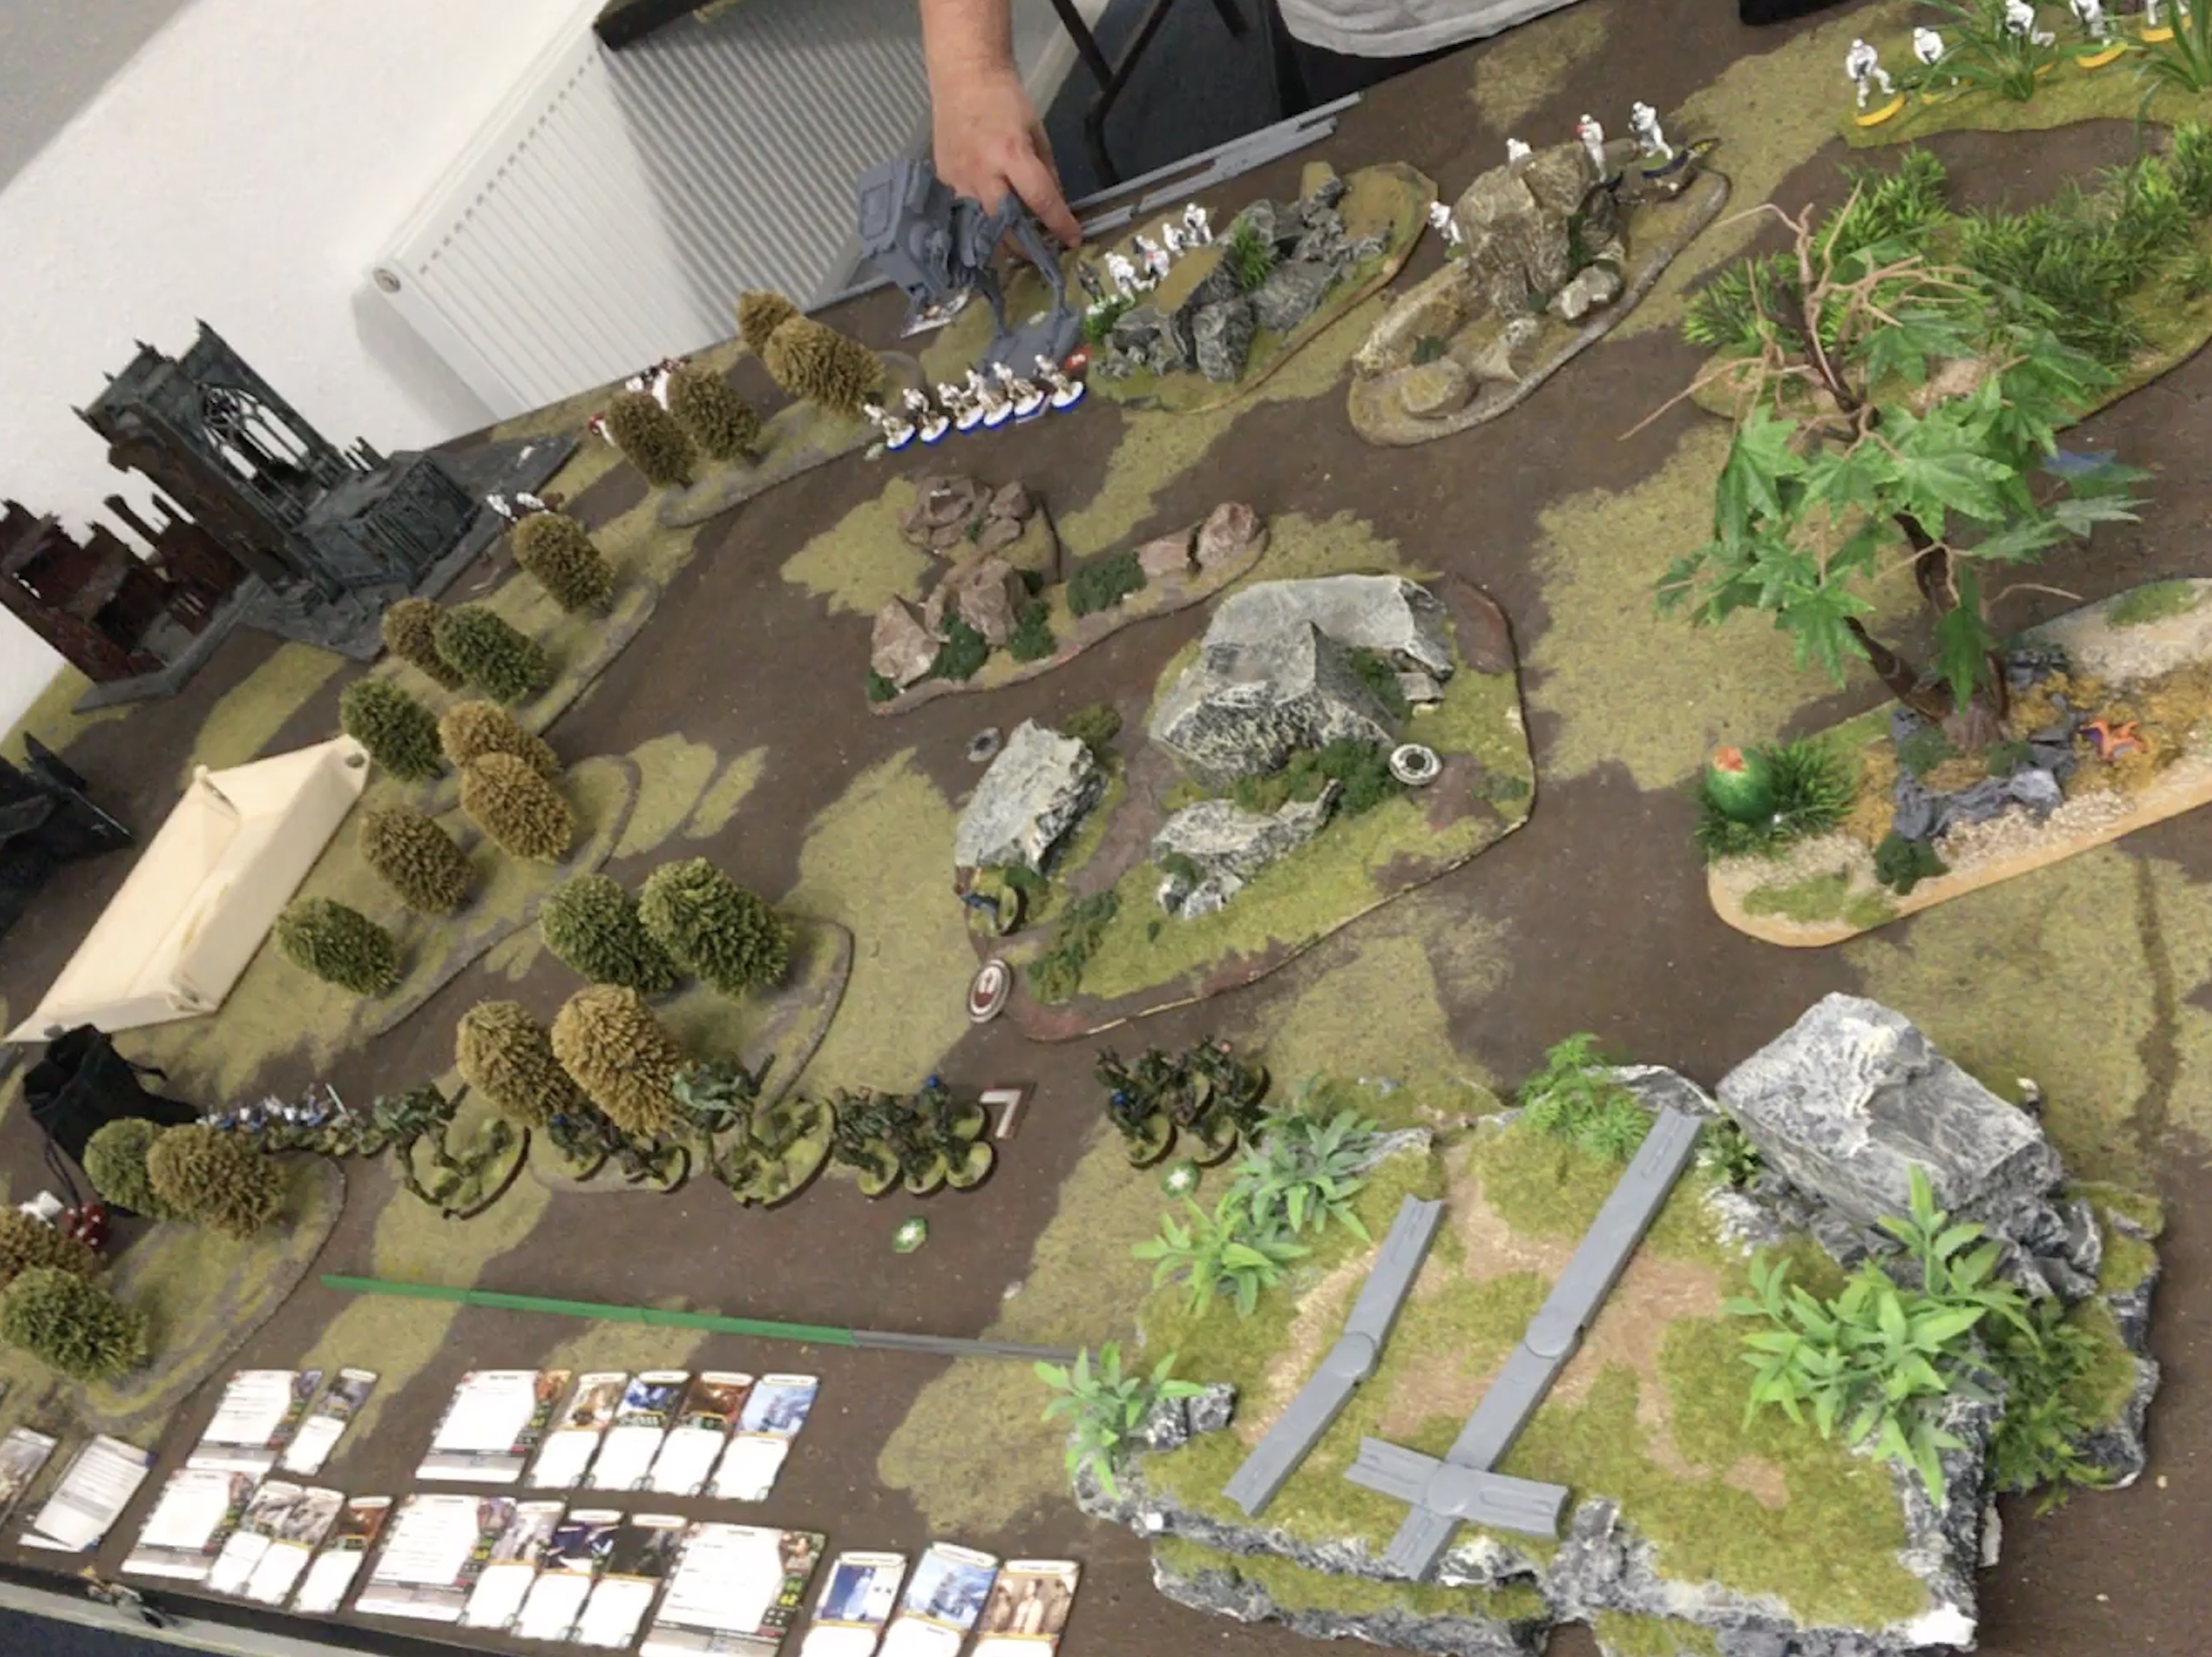
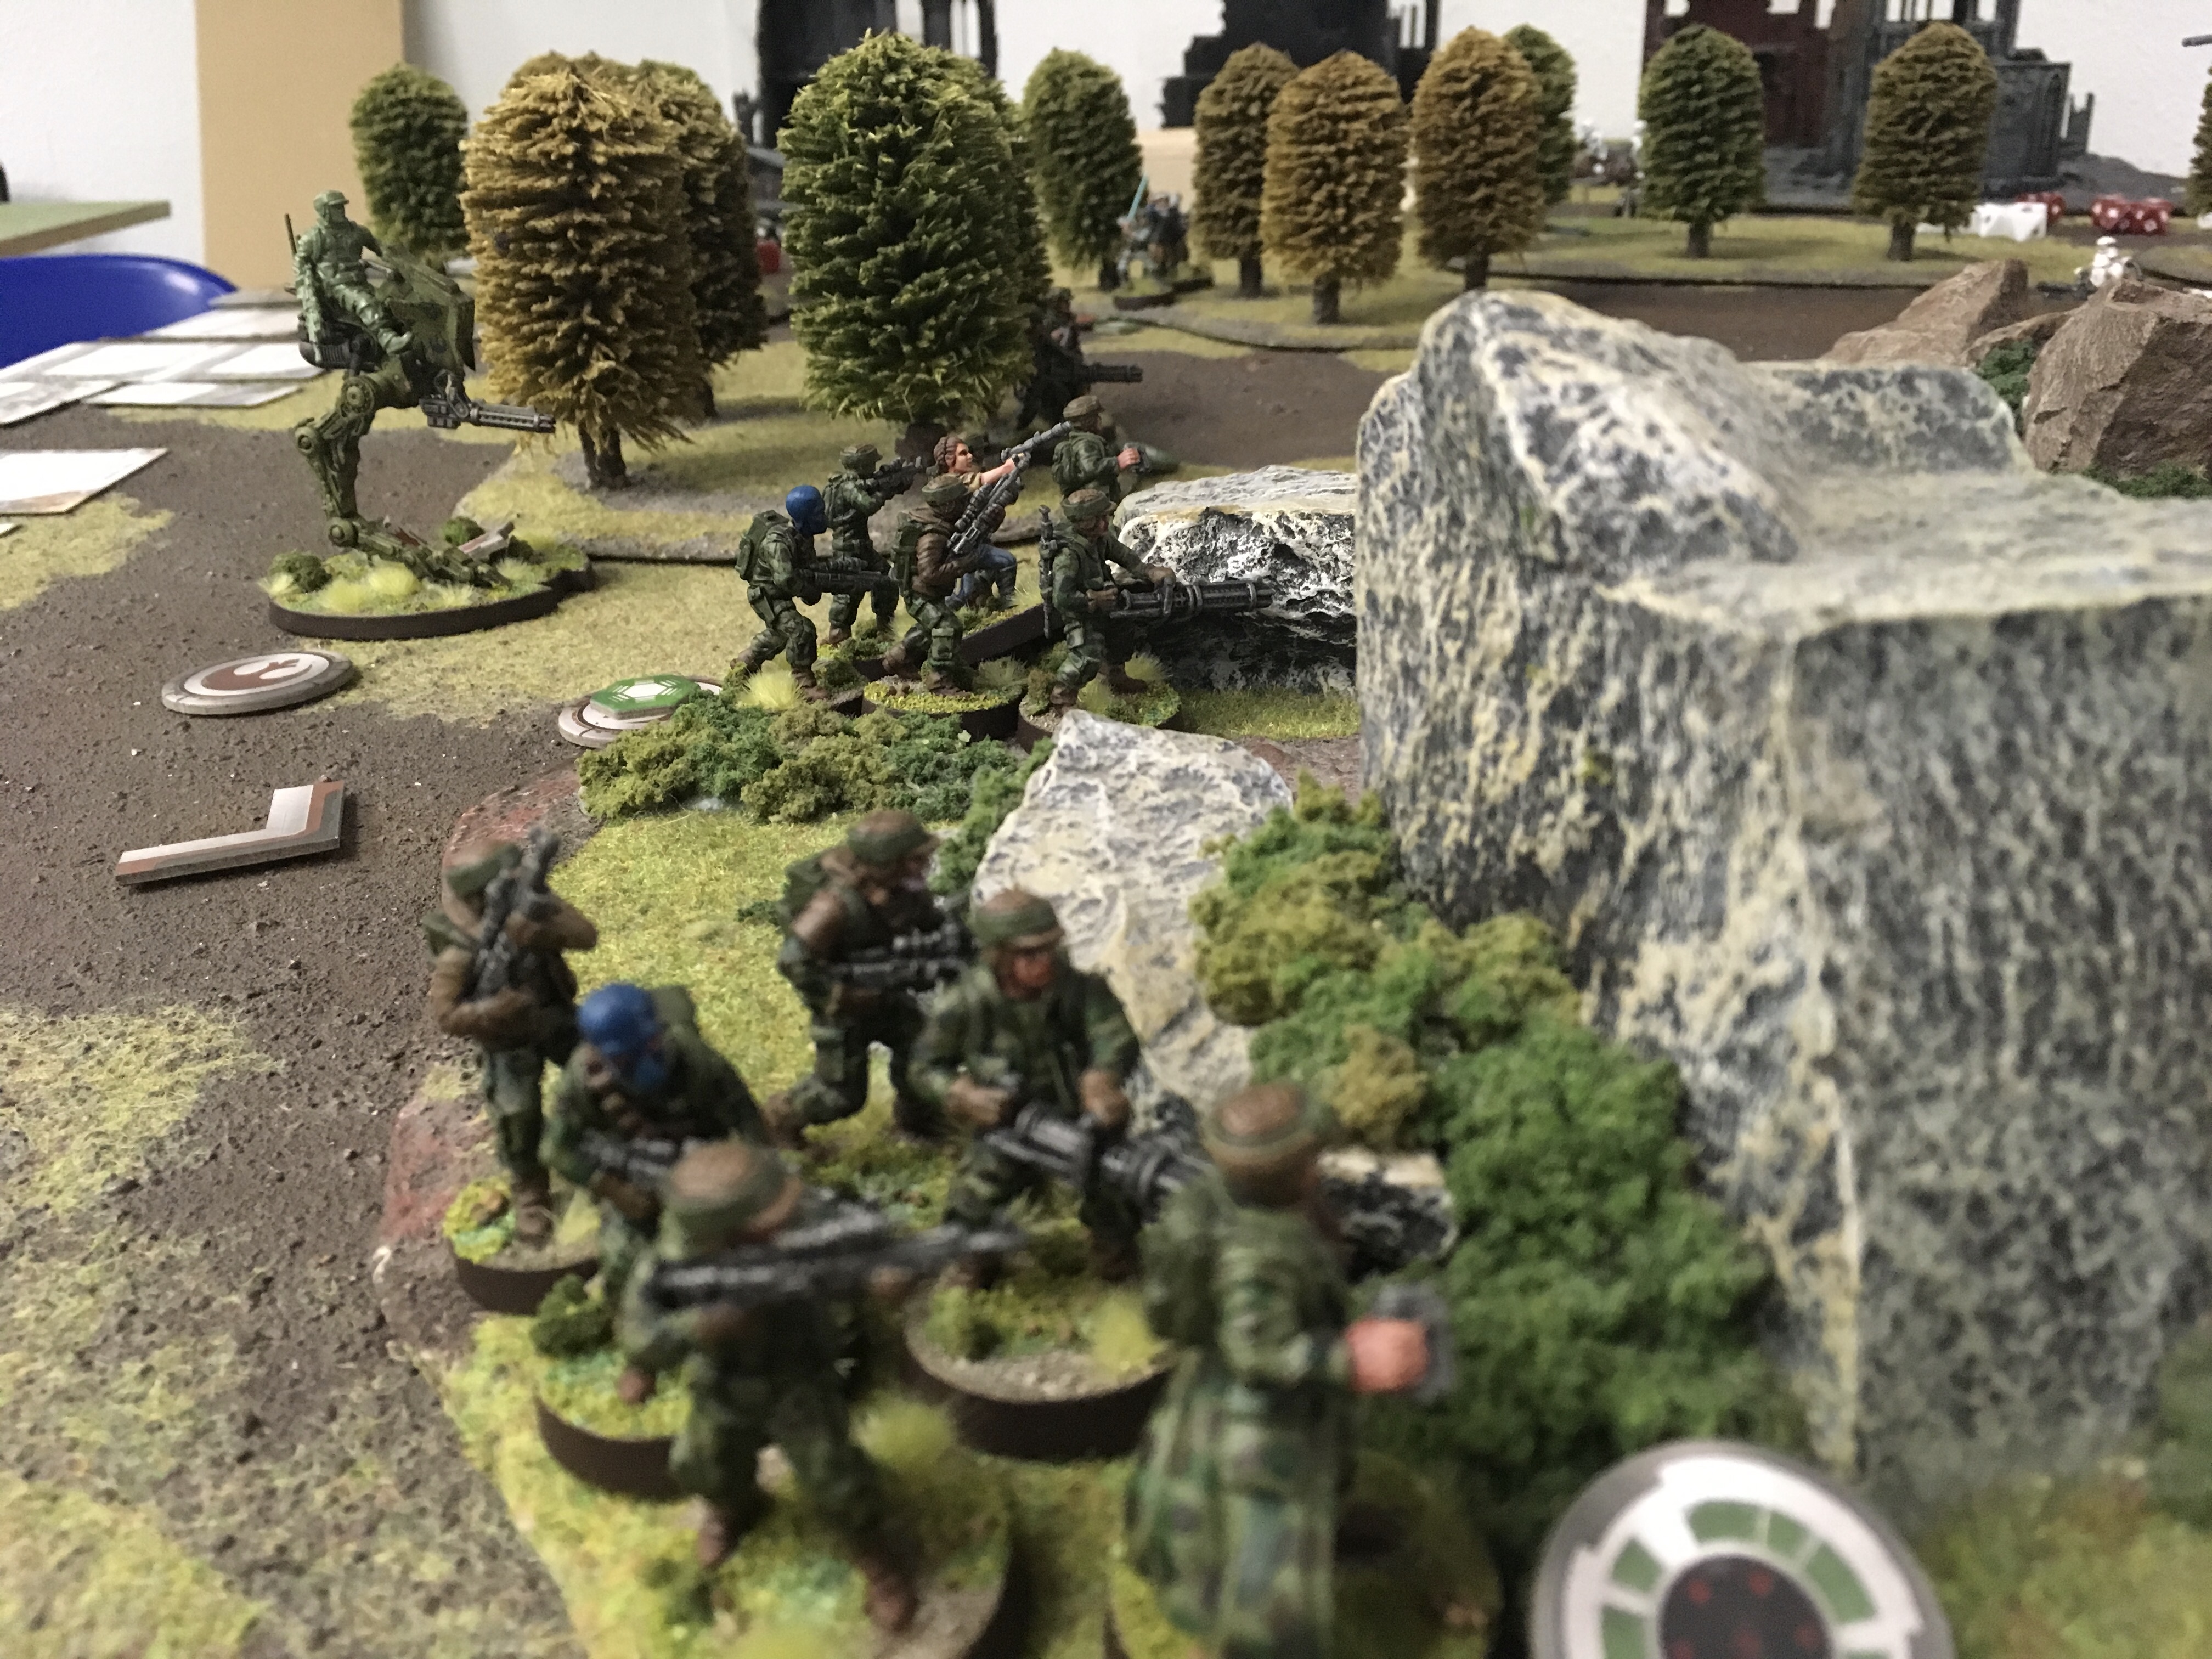
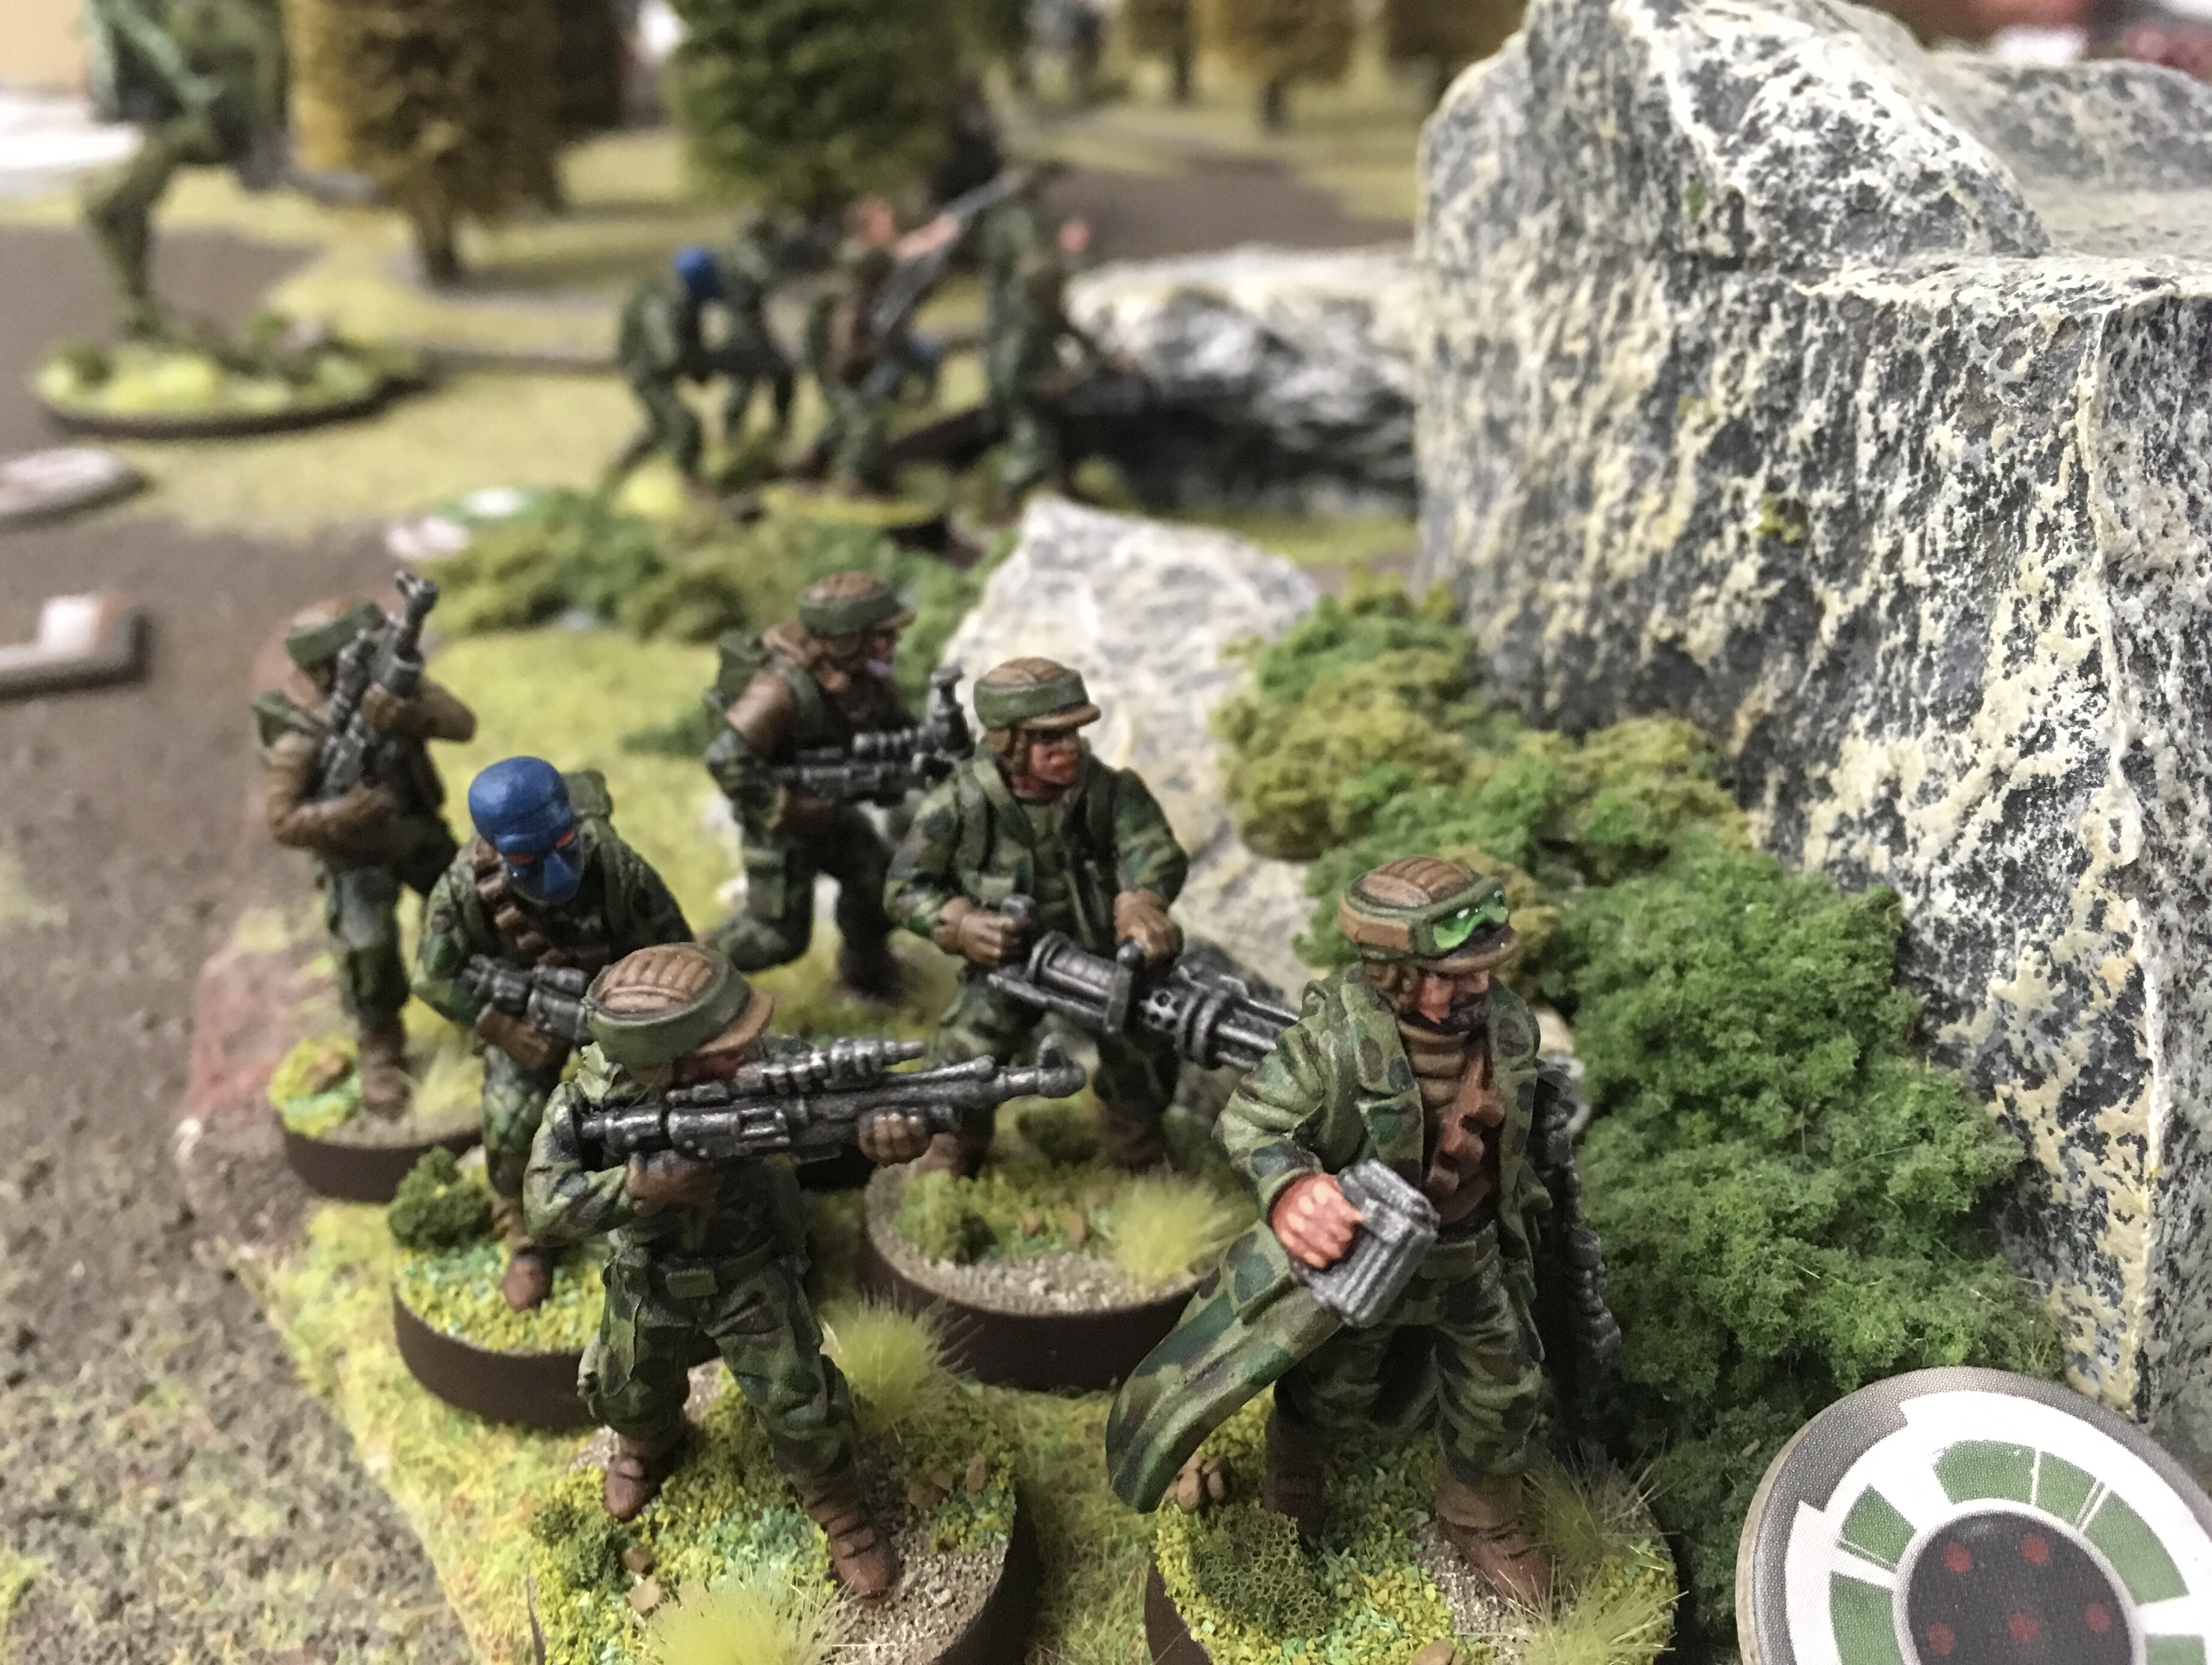
A Recent Battle
I met up with a friend and had a game of Legion on a new board and scenery. We had a great time but I feel the need to show you with photographs what happened.
Firstly the lists
Rebels List
-
Luke Skywalker (Force Reflexes, Jedi Mind Trick, Targeting Scope) 186
-
Leia Organa (Commanding Presense, Environmental Gear)
-
Fleet Troopers (Extra Man, Scatter gun, Environmental gear) 81
-
4x Rebel Trooper Squads (Z6 Gatling Gun, Environmental Gear) 4x 65
-
2x ATRT (Rotary Blaster) 2x 85
Imperial List
-
Note: I didn't record this fully, might not be wholly accurate.
-
General Veers (targeting scopes, commanding presence) 90
-
Speeder Bikes 90
-
ATST (Weiss, Twin Light Blaster, Grenade Launcher, Mortar) 250
-
Snowtroopers (extra man, flamer, grenades, targeting scopes) 91
-
3x Stormtrooper Squads (DLT-19, extra man) 3x 79
-
Stormtrooper Squad 44
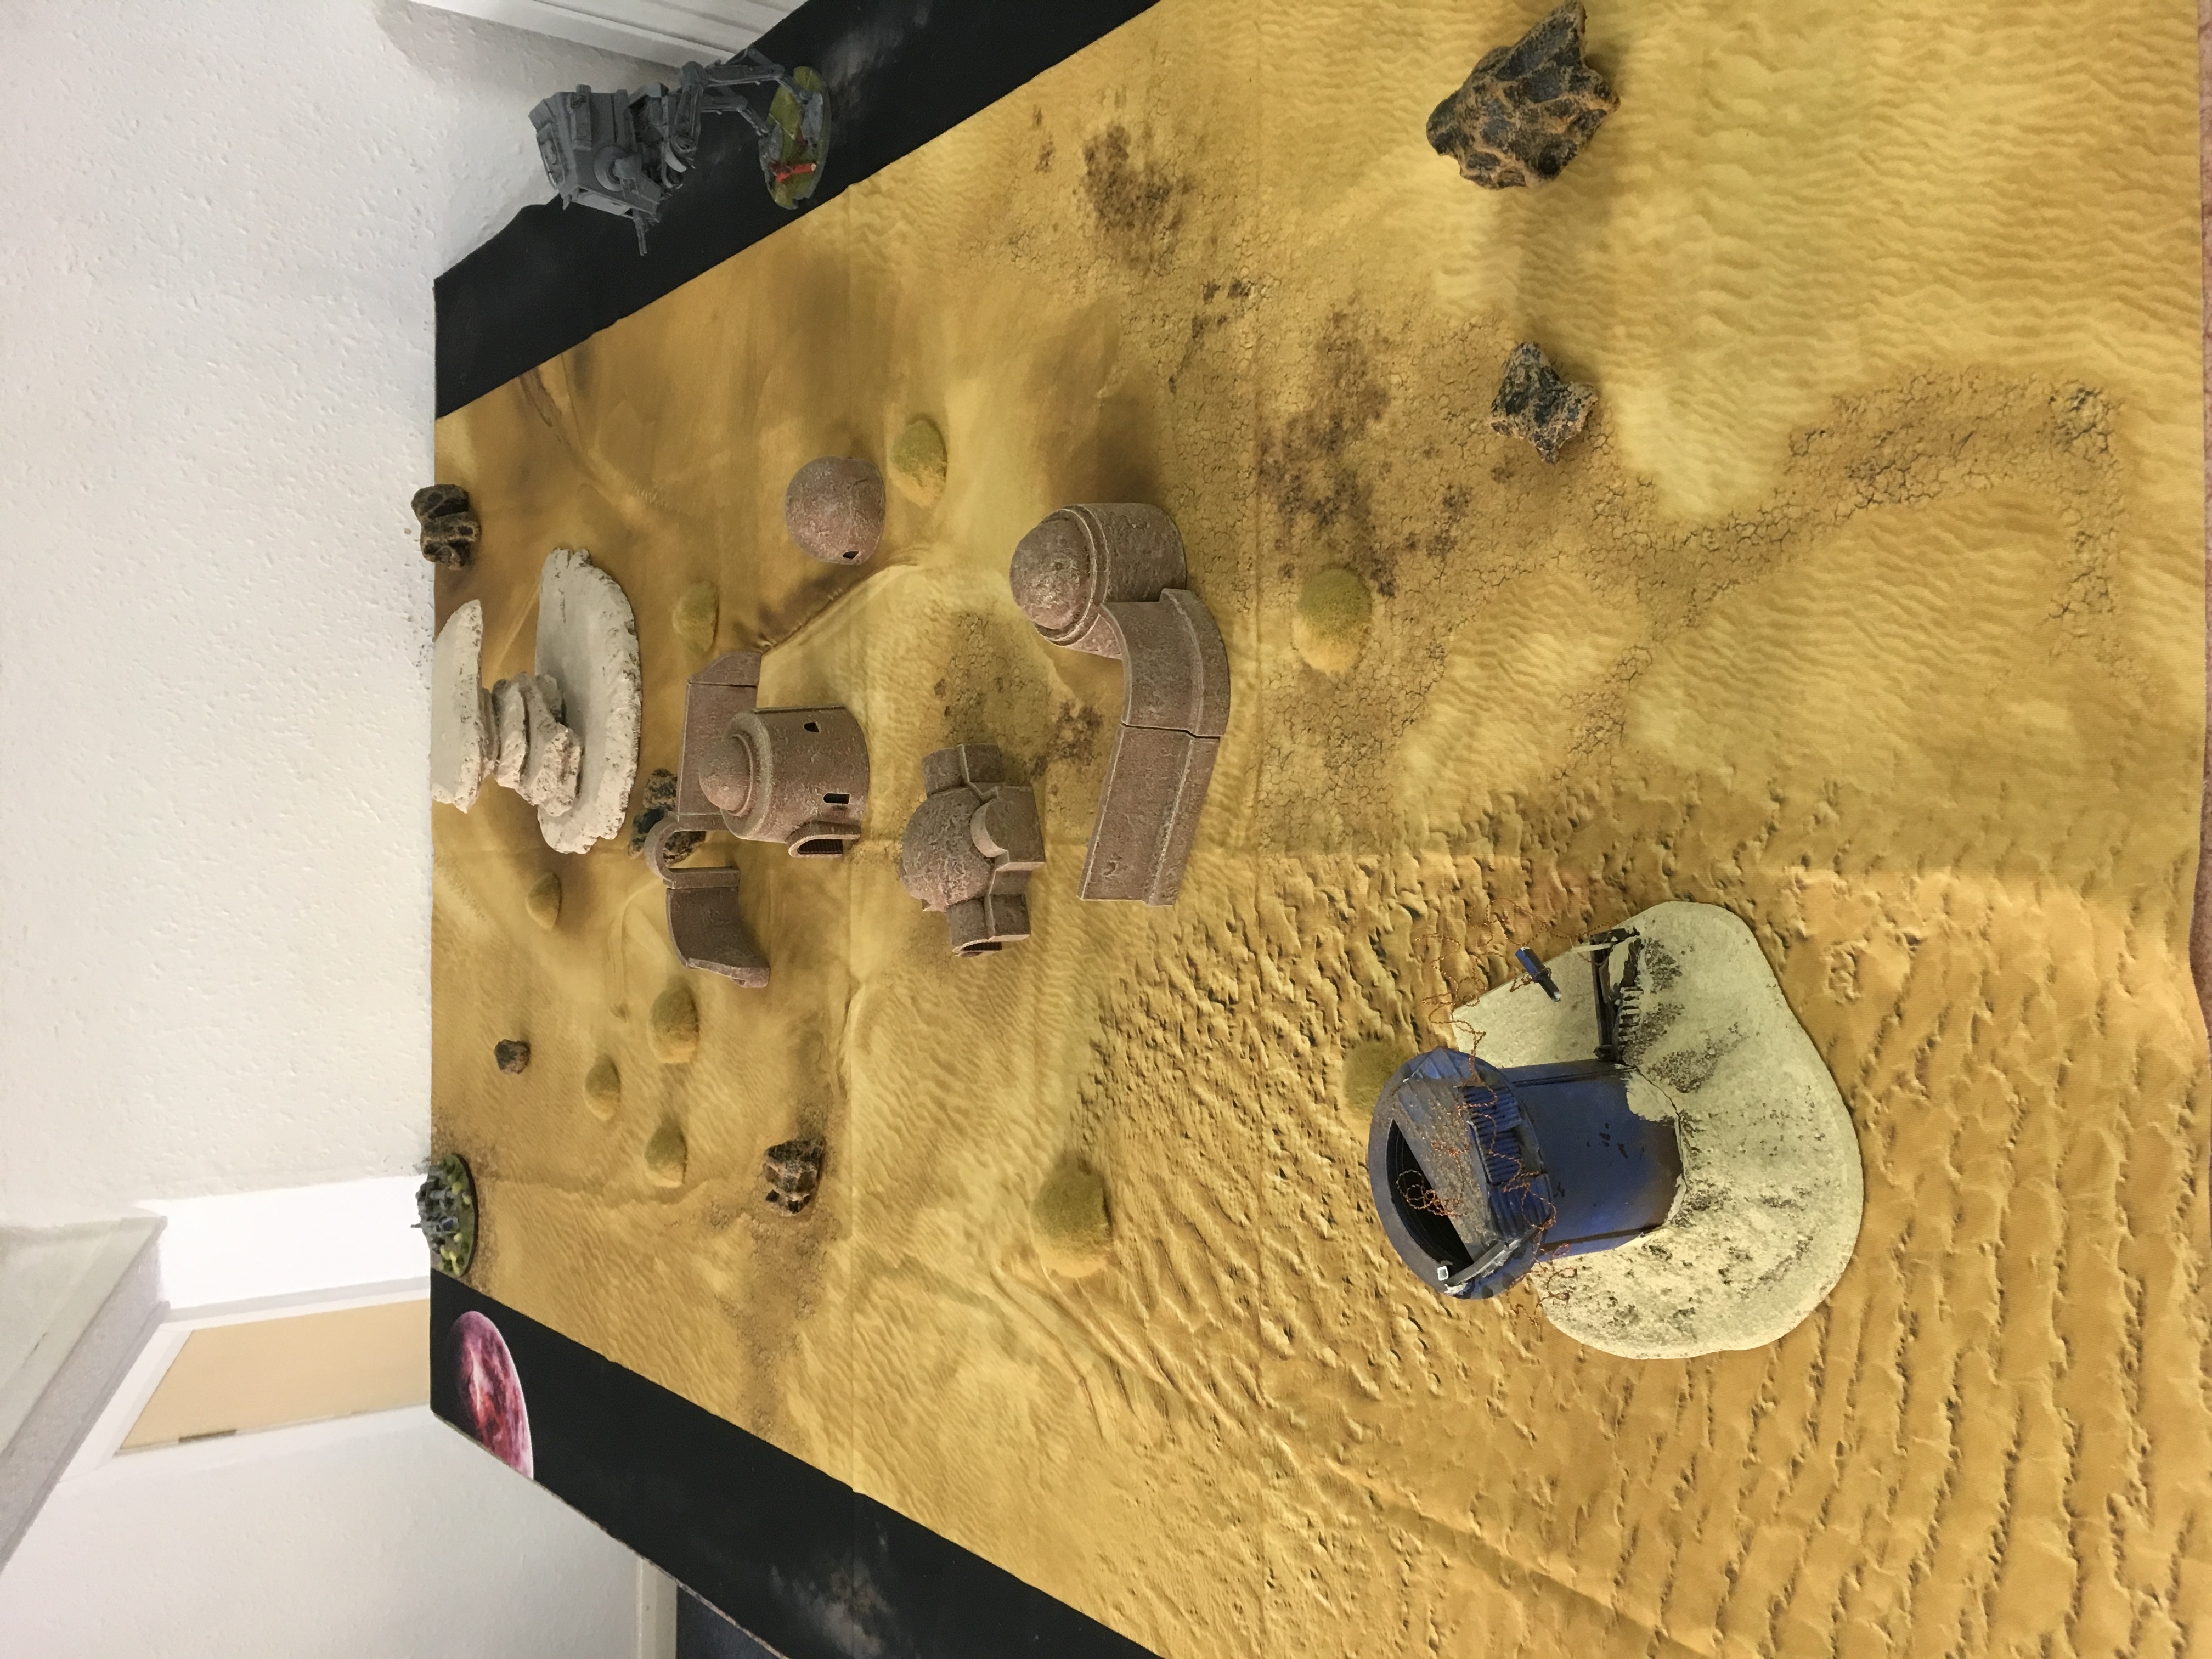 The battle site was a new desert mat and some buildings from battlefront.
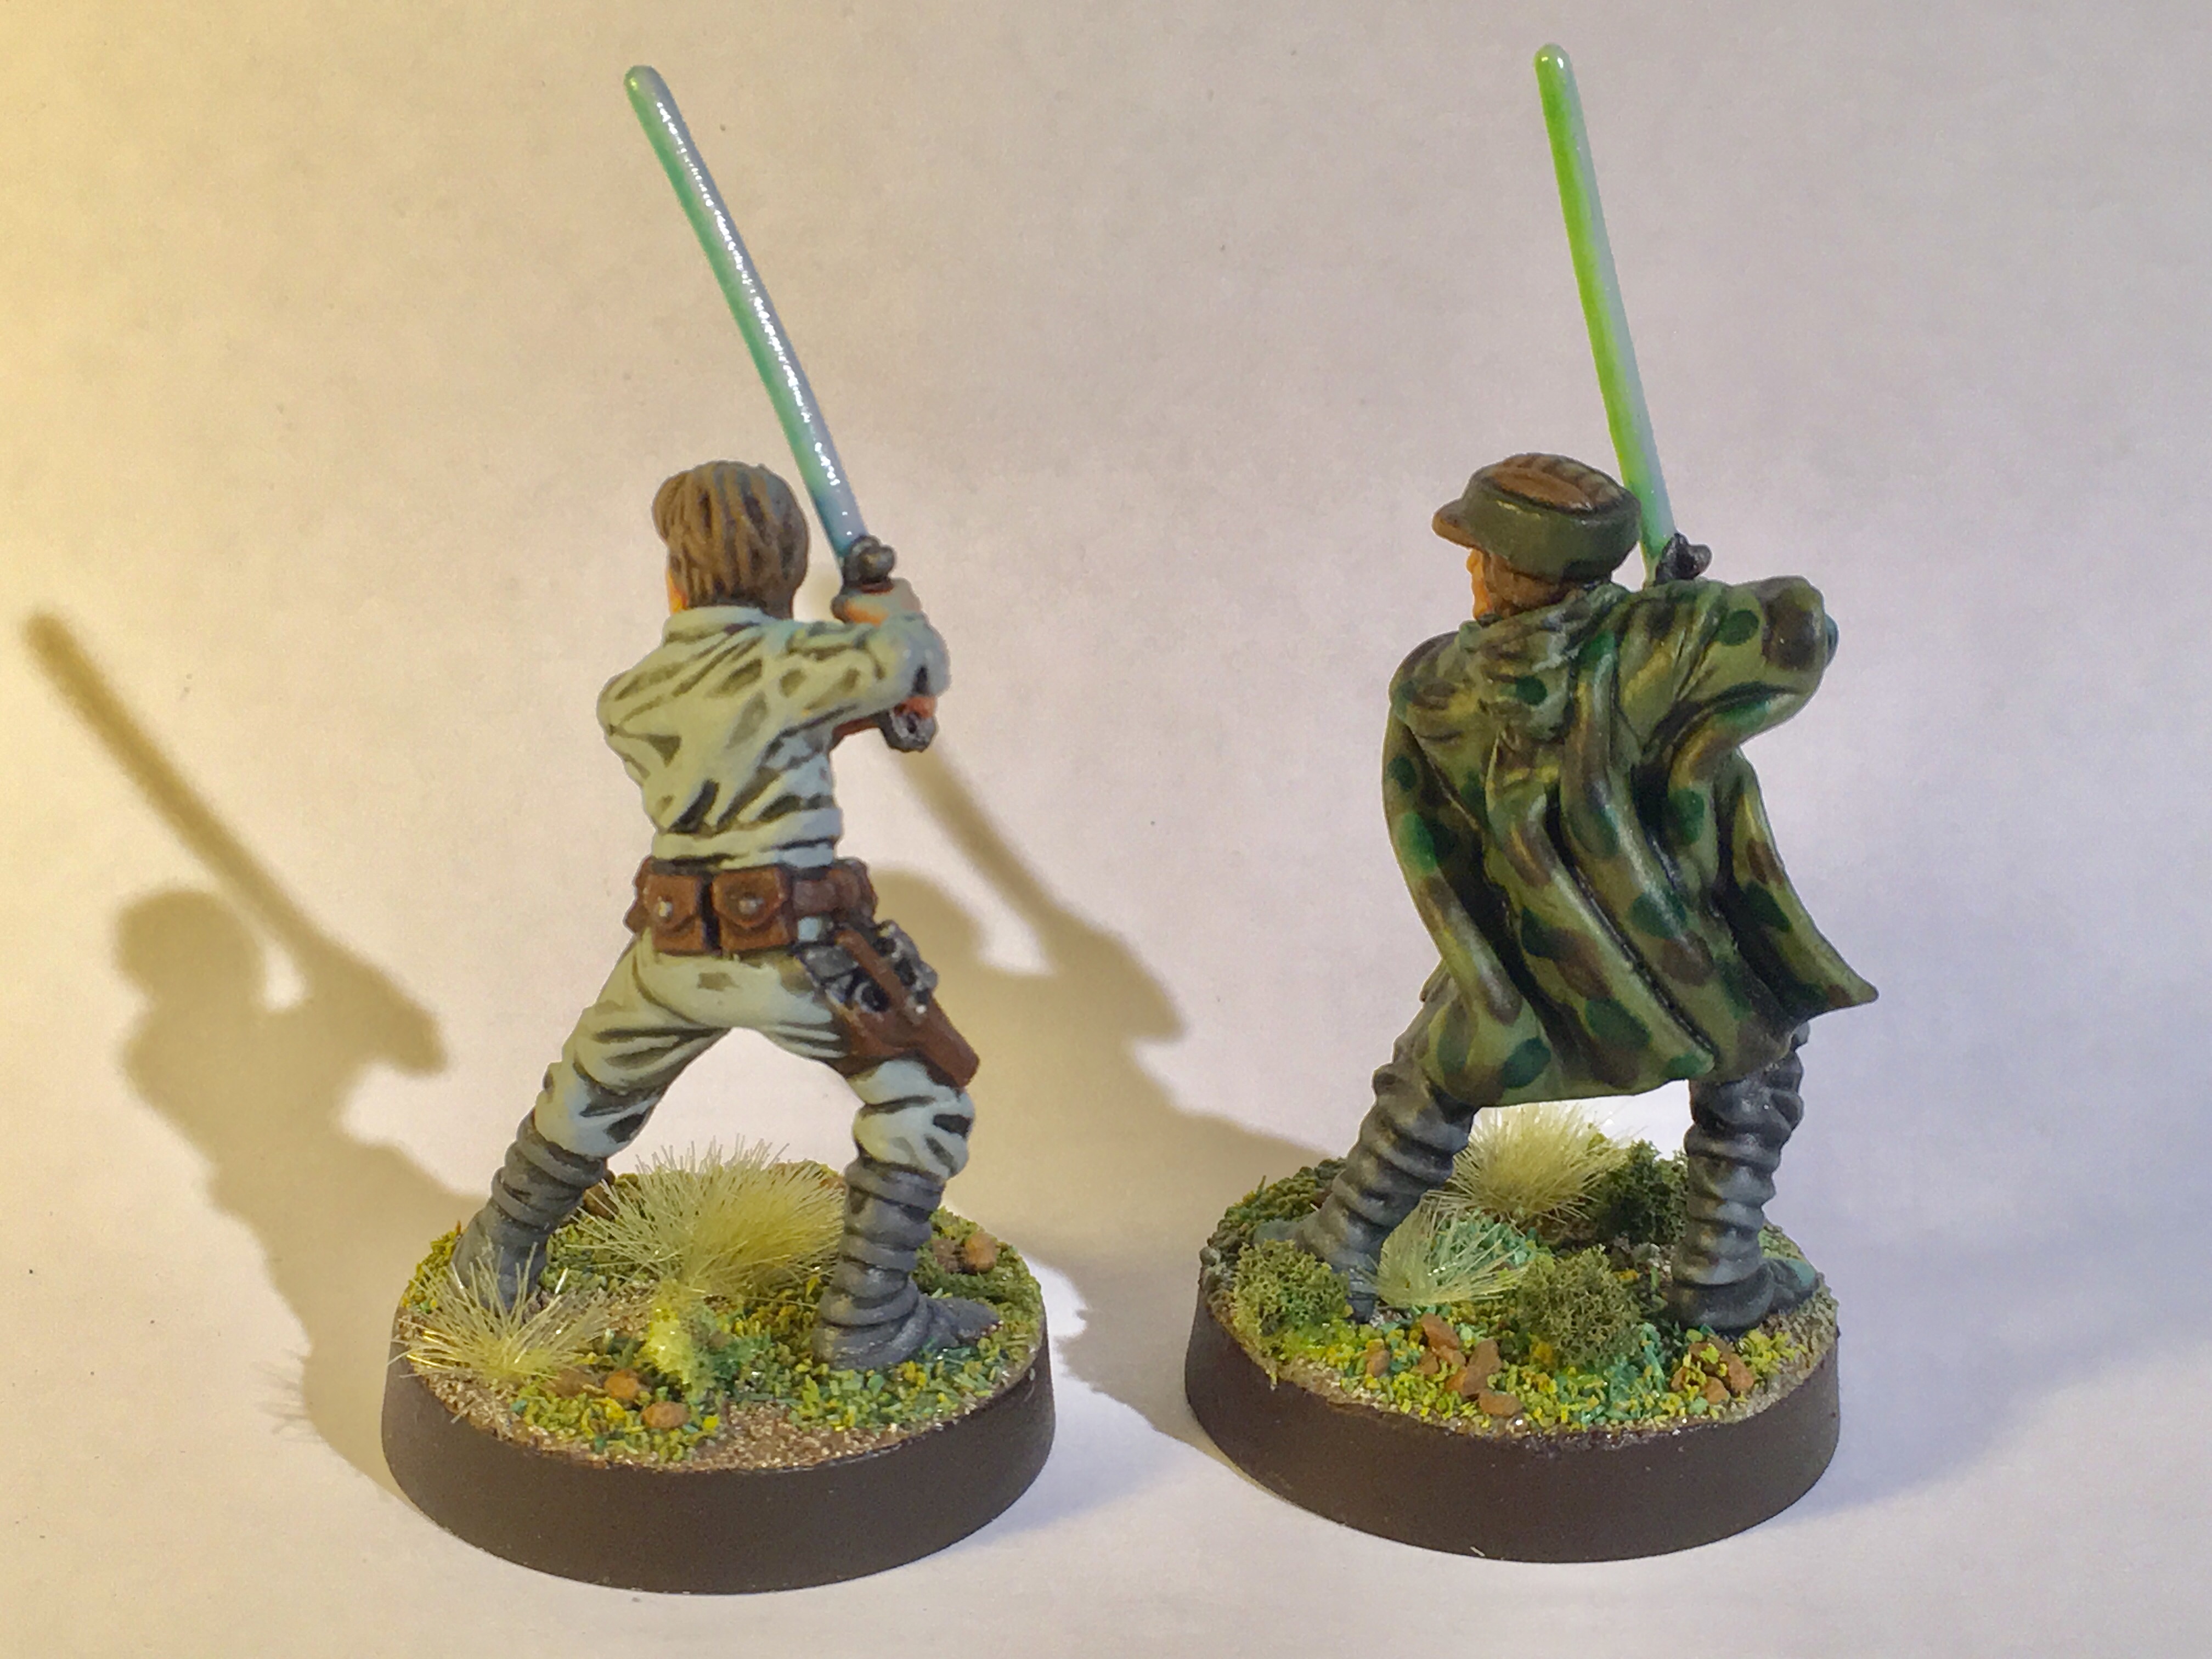
Here are a few shots of the early stages of the battle using my new Endor theme Luke.
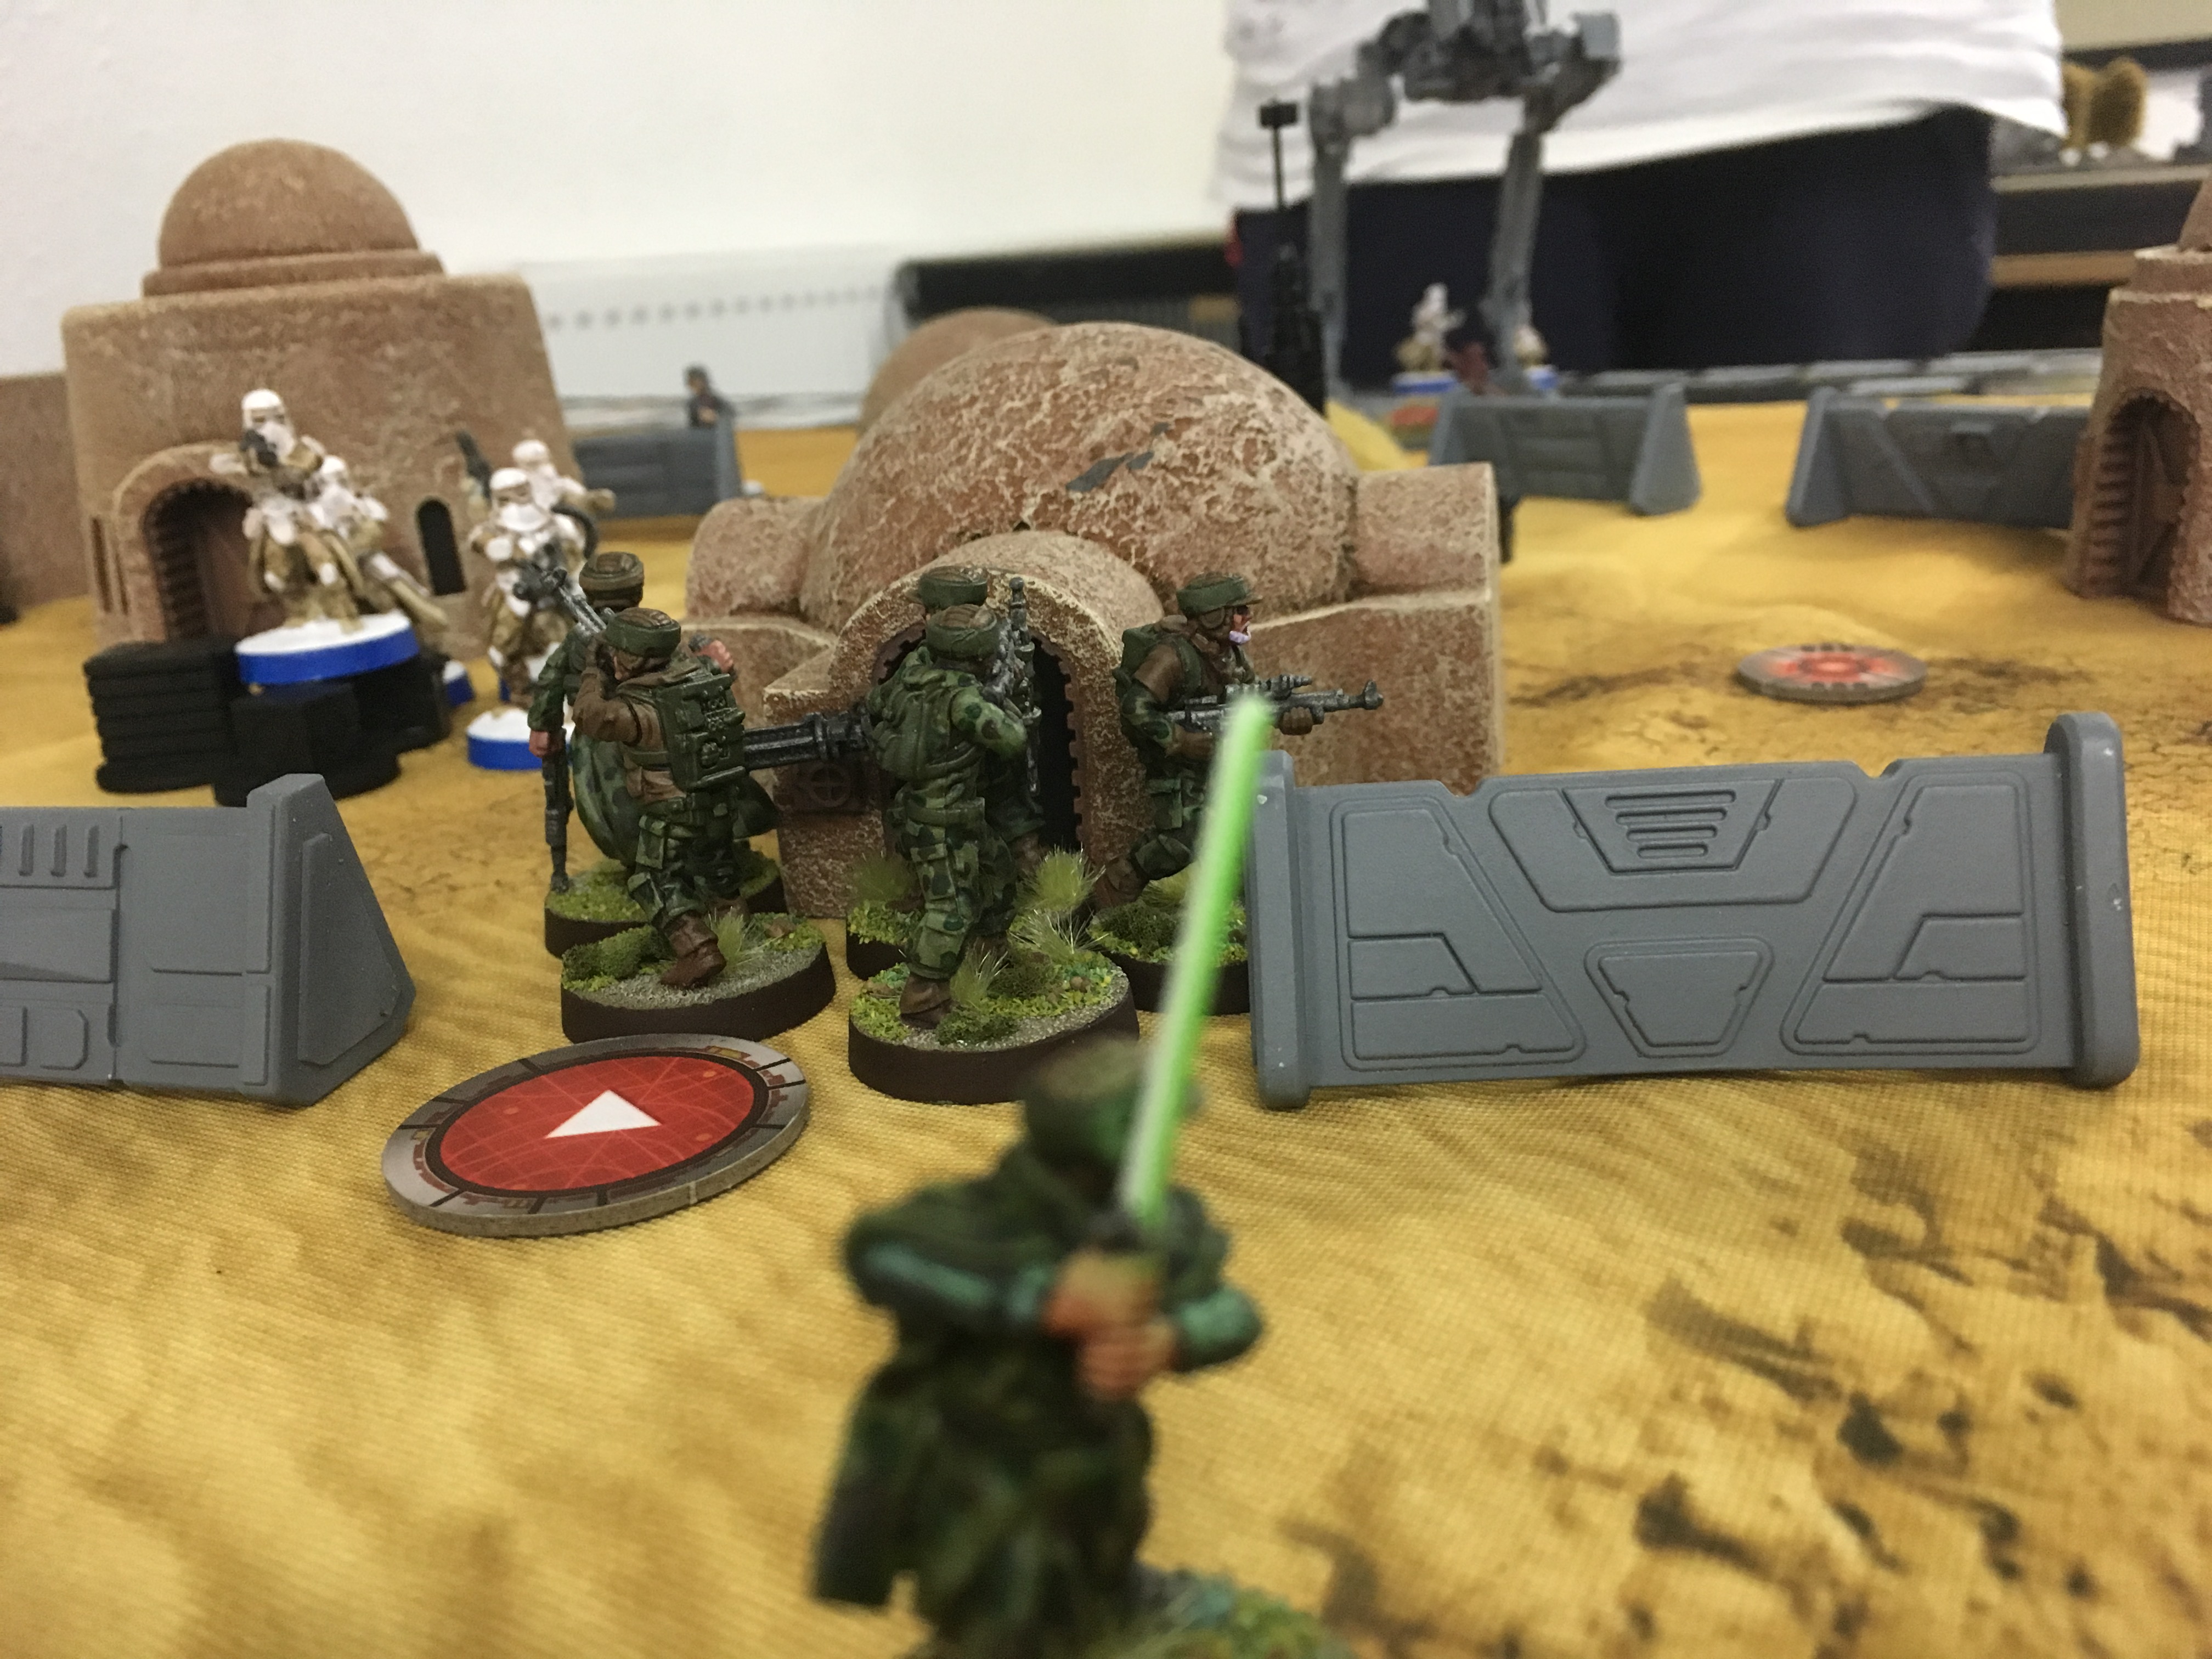
The battle was done using the brand new Priority Supplies mission objectives. Minefield, sabotage the moisture vaporators and the big L shape deployment zones.
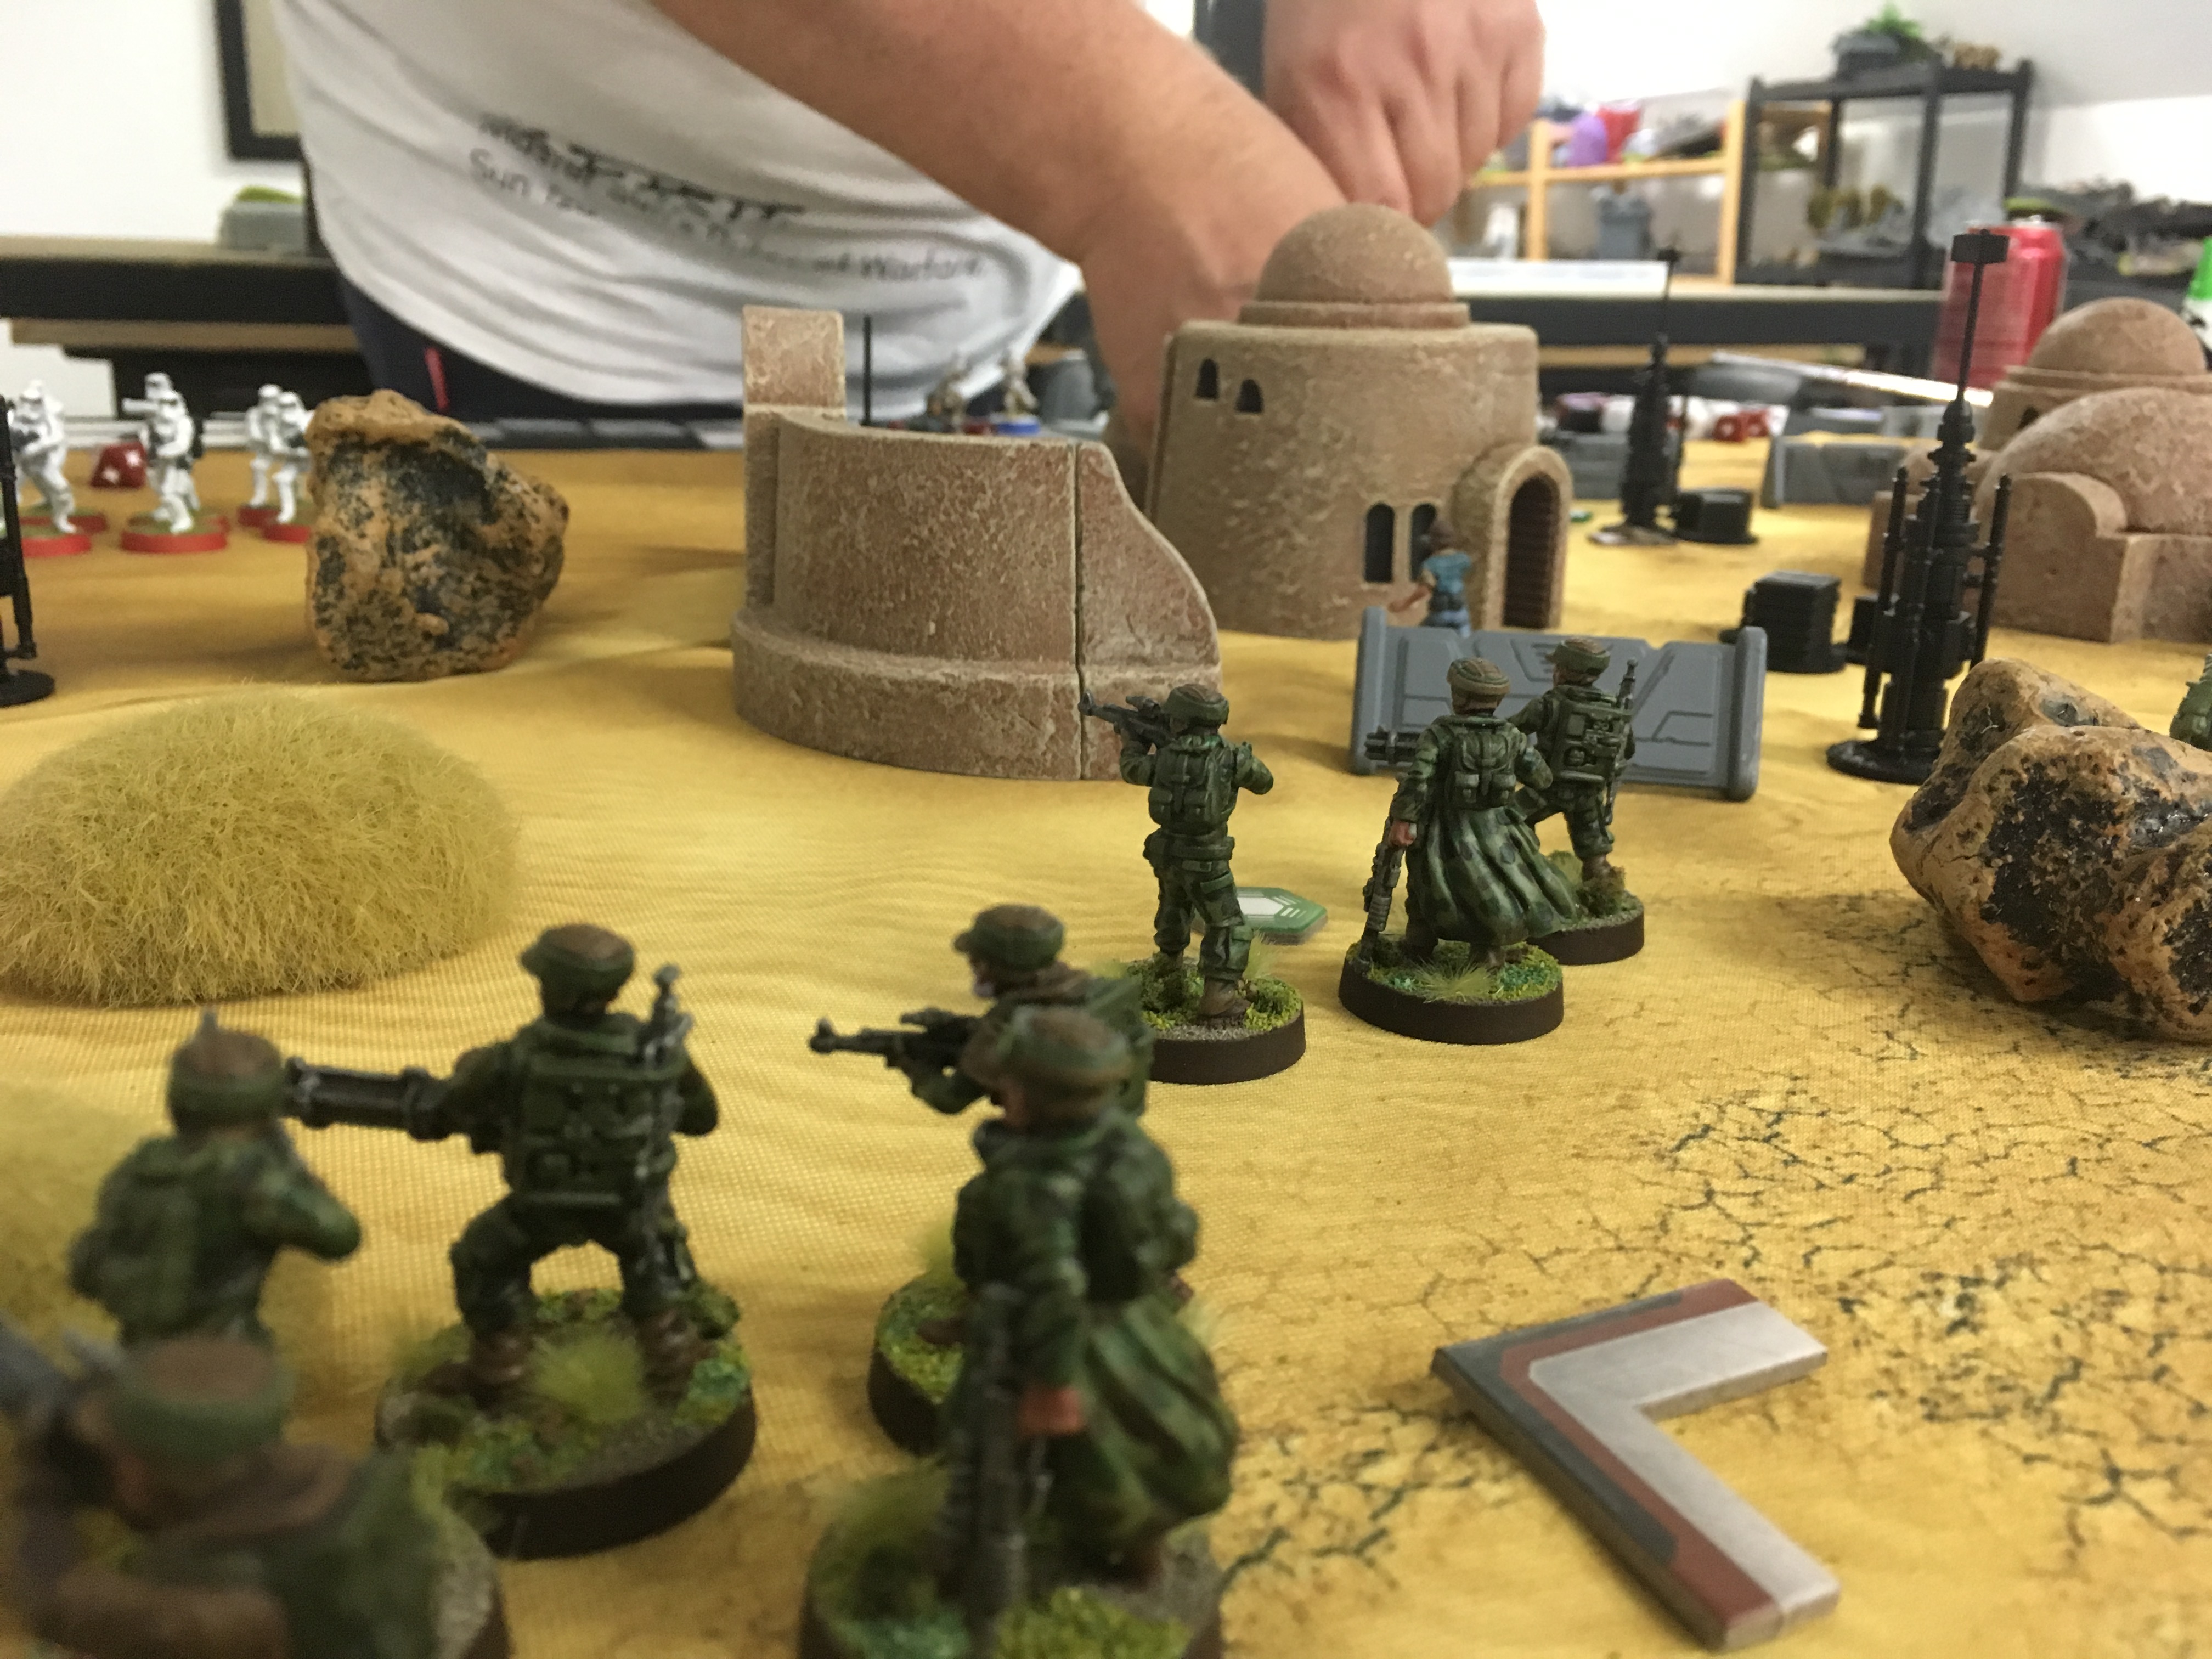
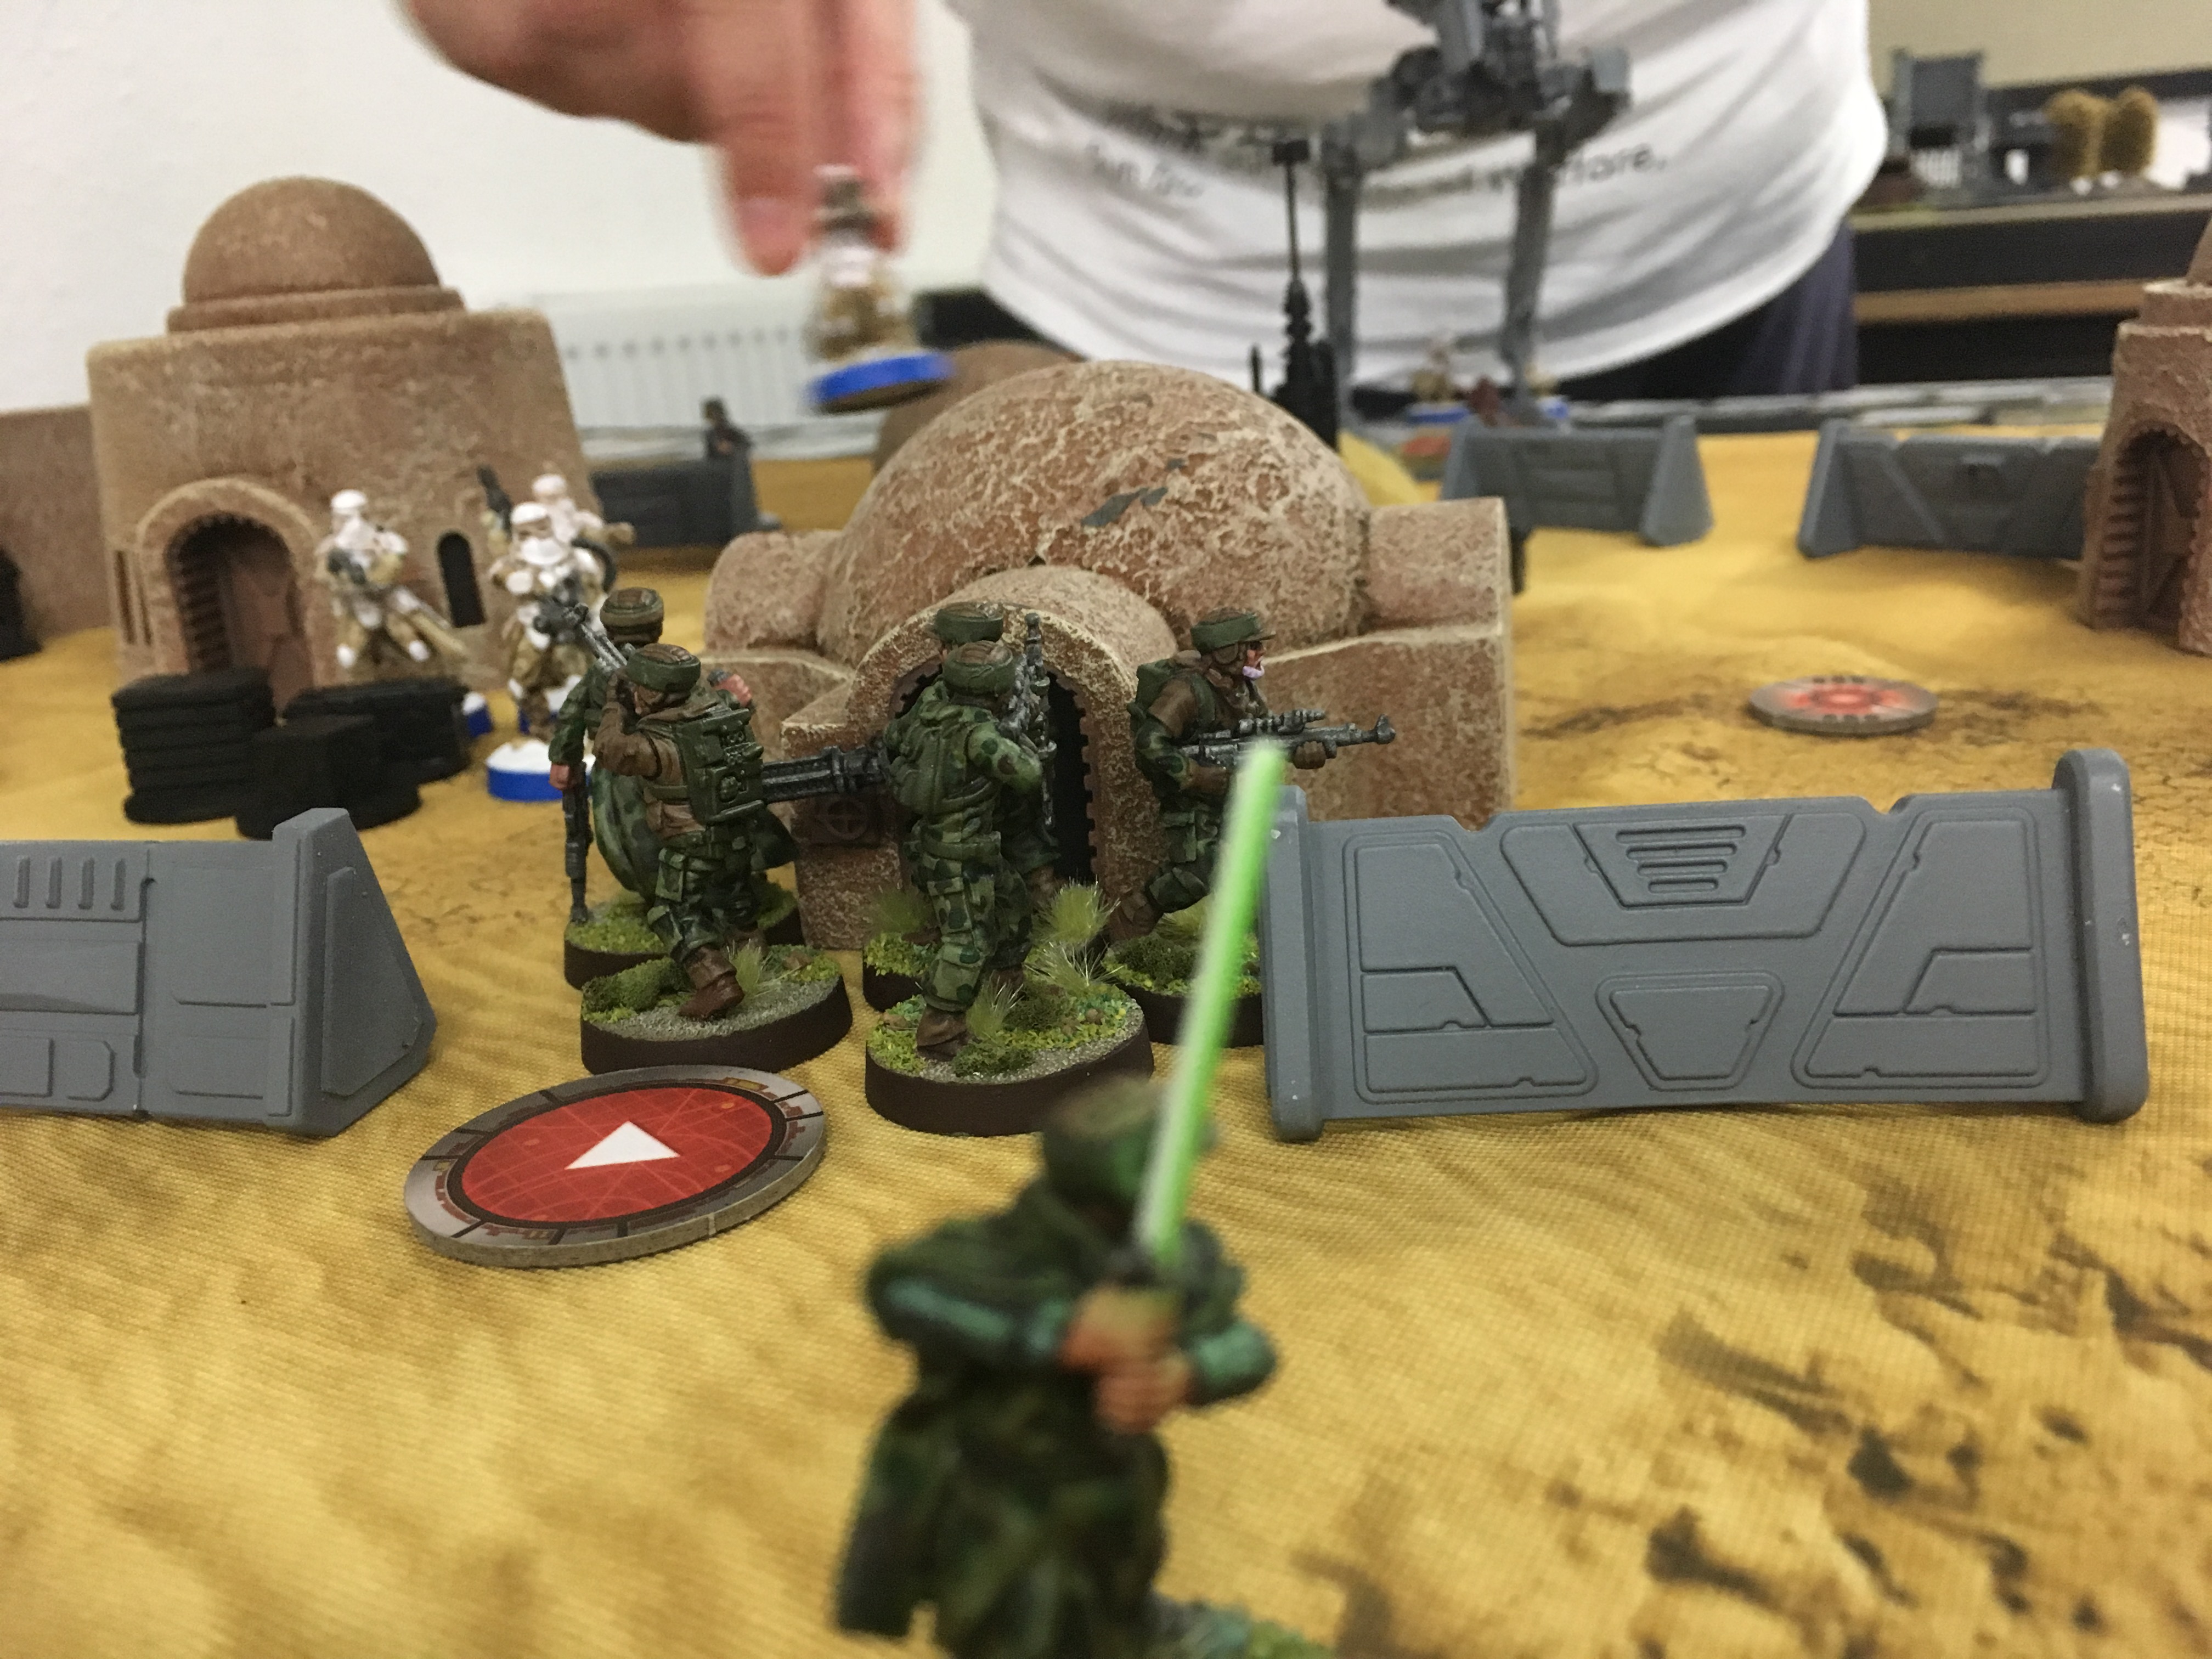
It all started well, Leia was running around doing her thing of protecting everyone from themselves (free dodges for everyone! Dodges for days!) Luke was doing his thing of running up to the closest big thing and chopping it up when close enough and the troopers did their thing of getting killed. Sadly the ATRTs had been poorly deployed (or expertly avoided by my opponent) and didn’t have any real targets.
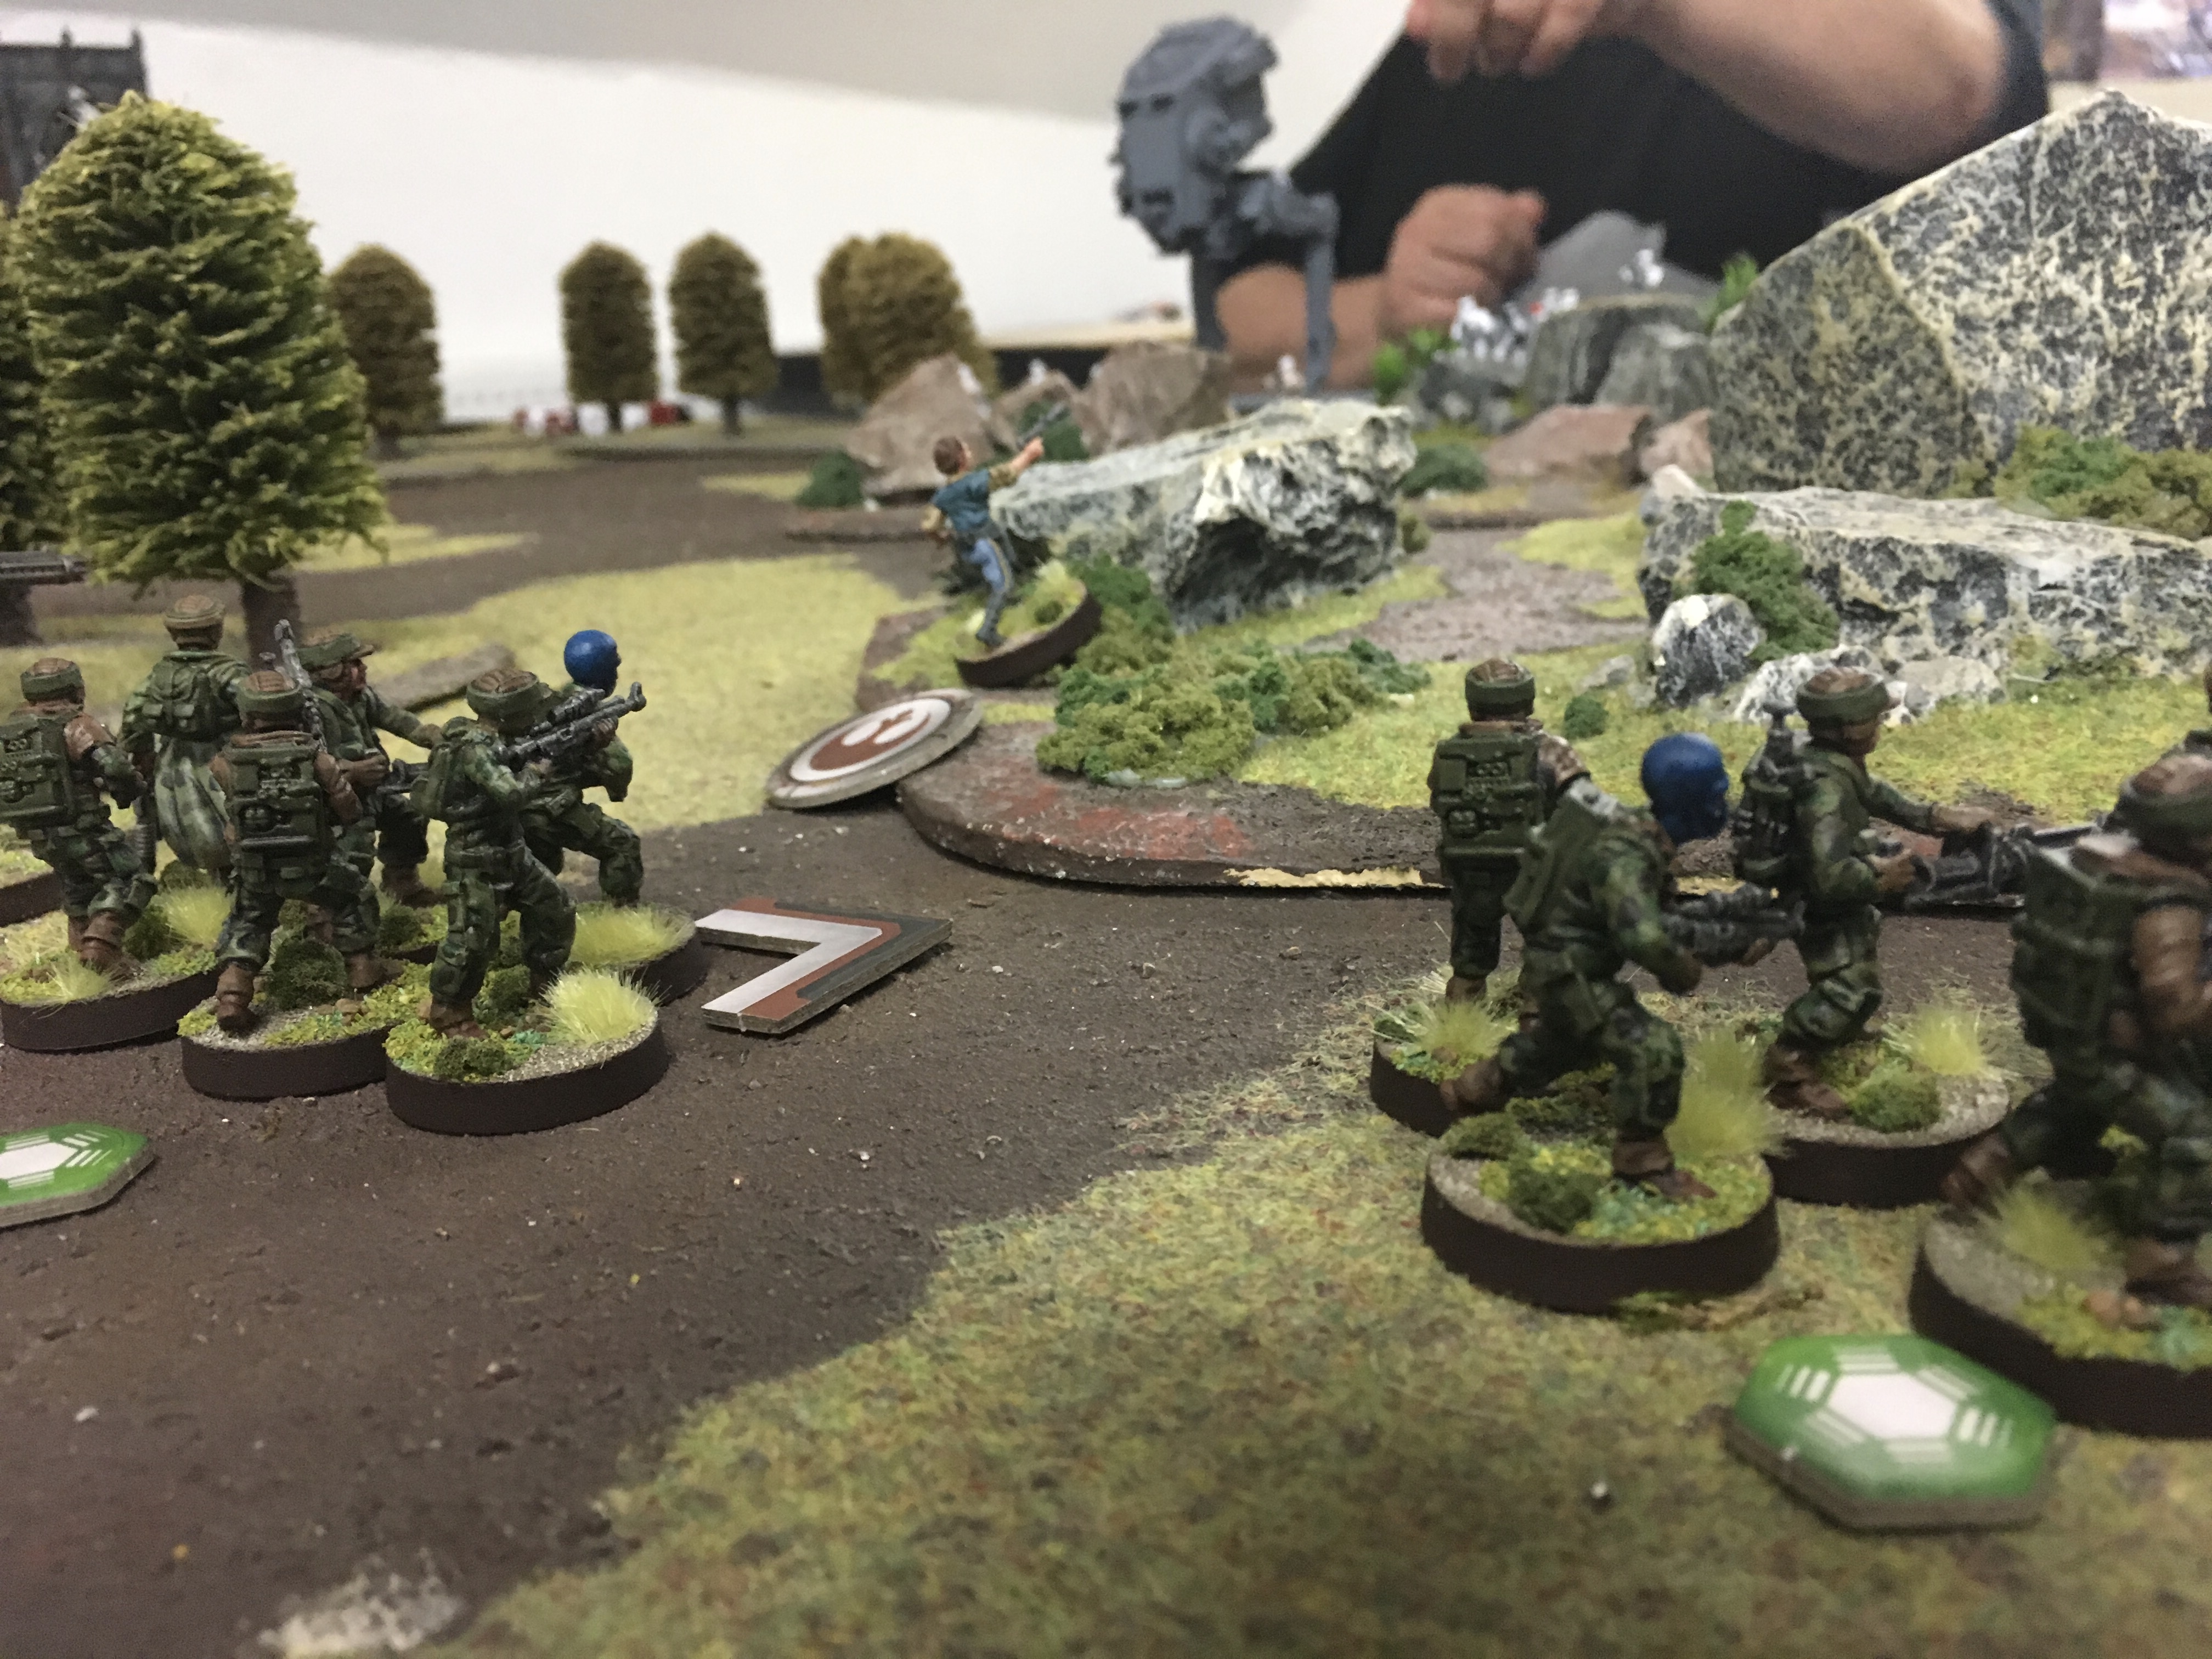
Then when the close quarters battle started it was led by the Snowtroopers (or close assault troops as they should be called in this game lol). They had suffered a few casualties early in the game through the minefields around the board. But then they got a bit too close to a forward rebel trooper squad…. oh dear! brown trouser time!
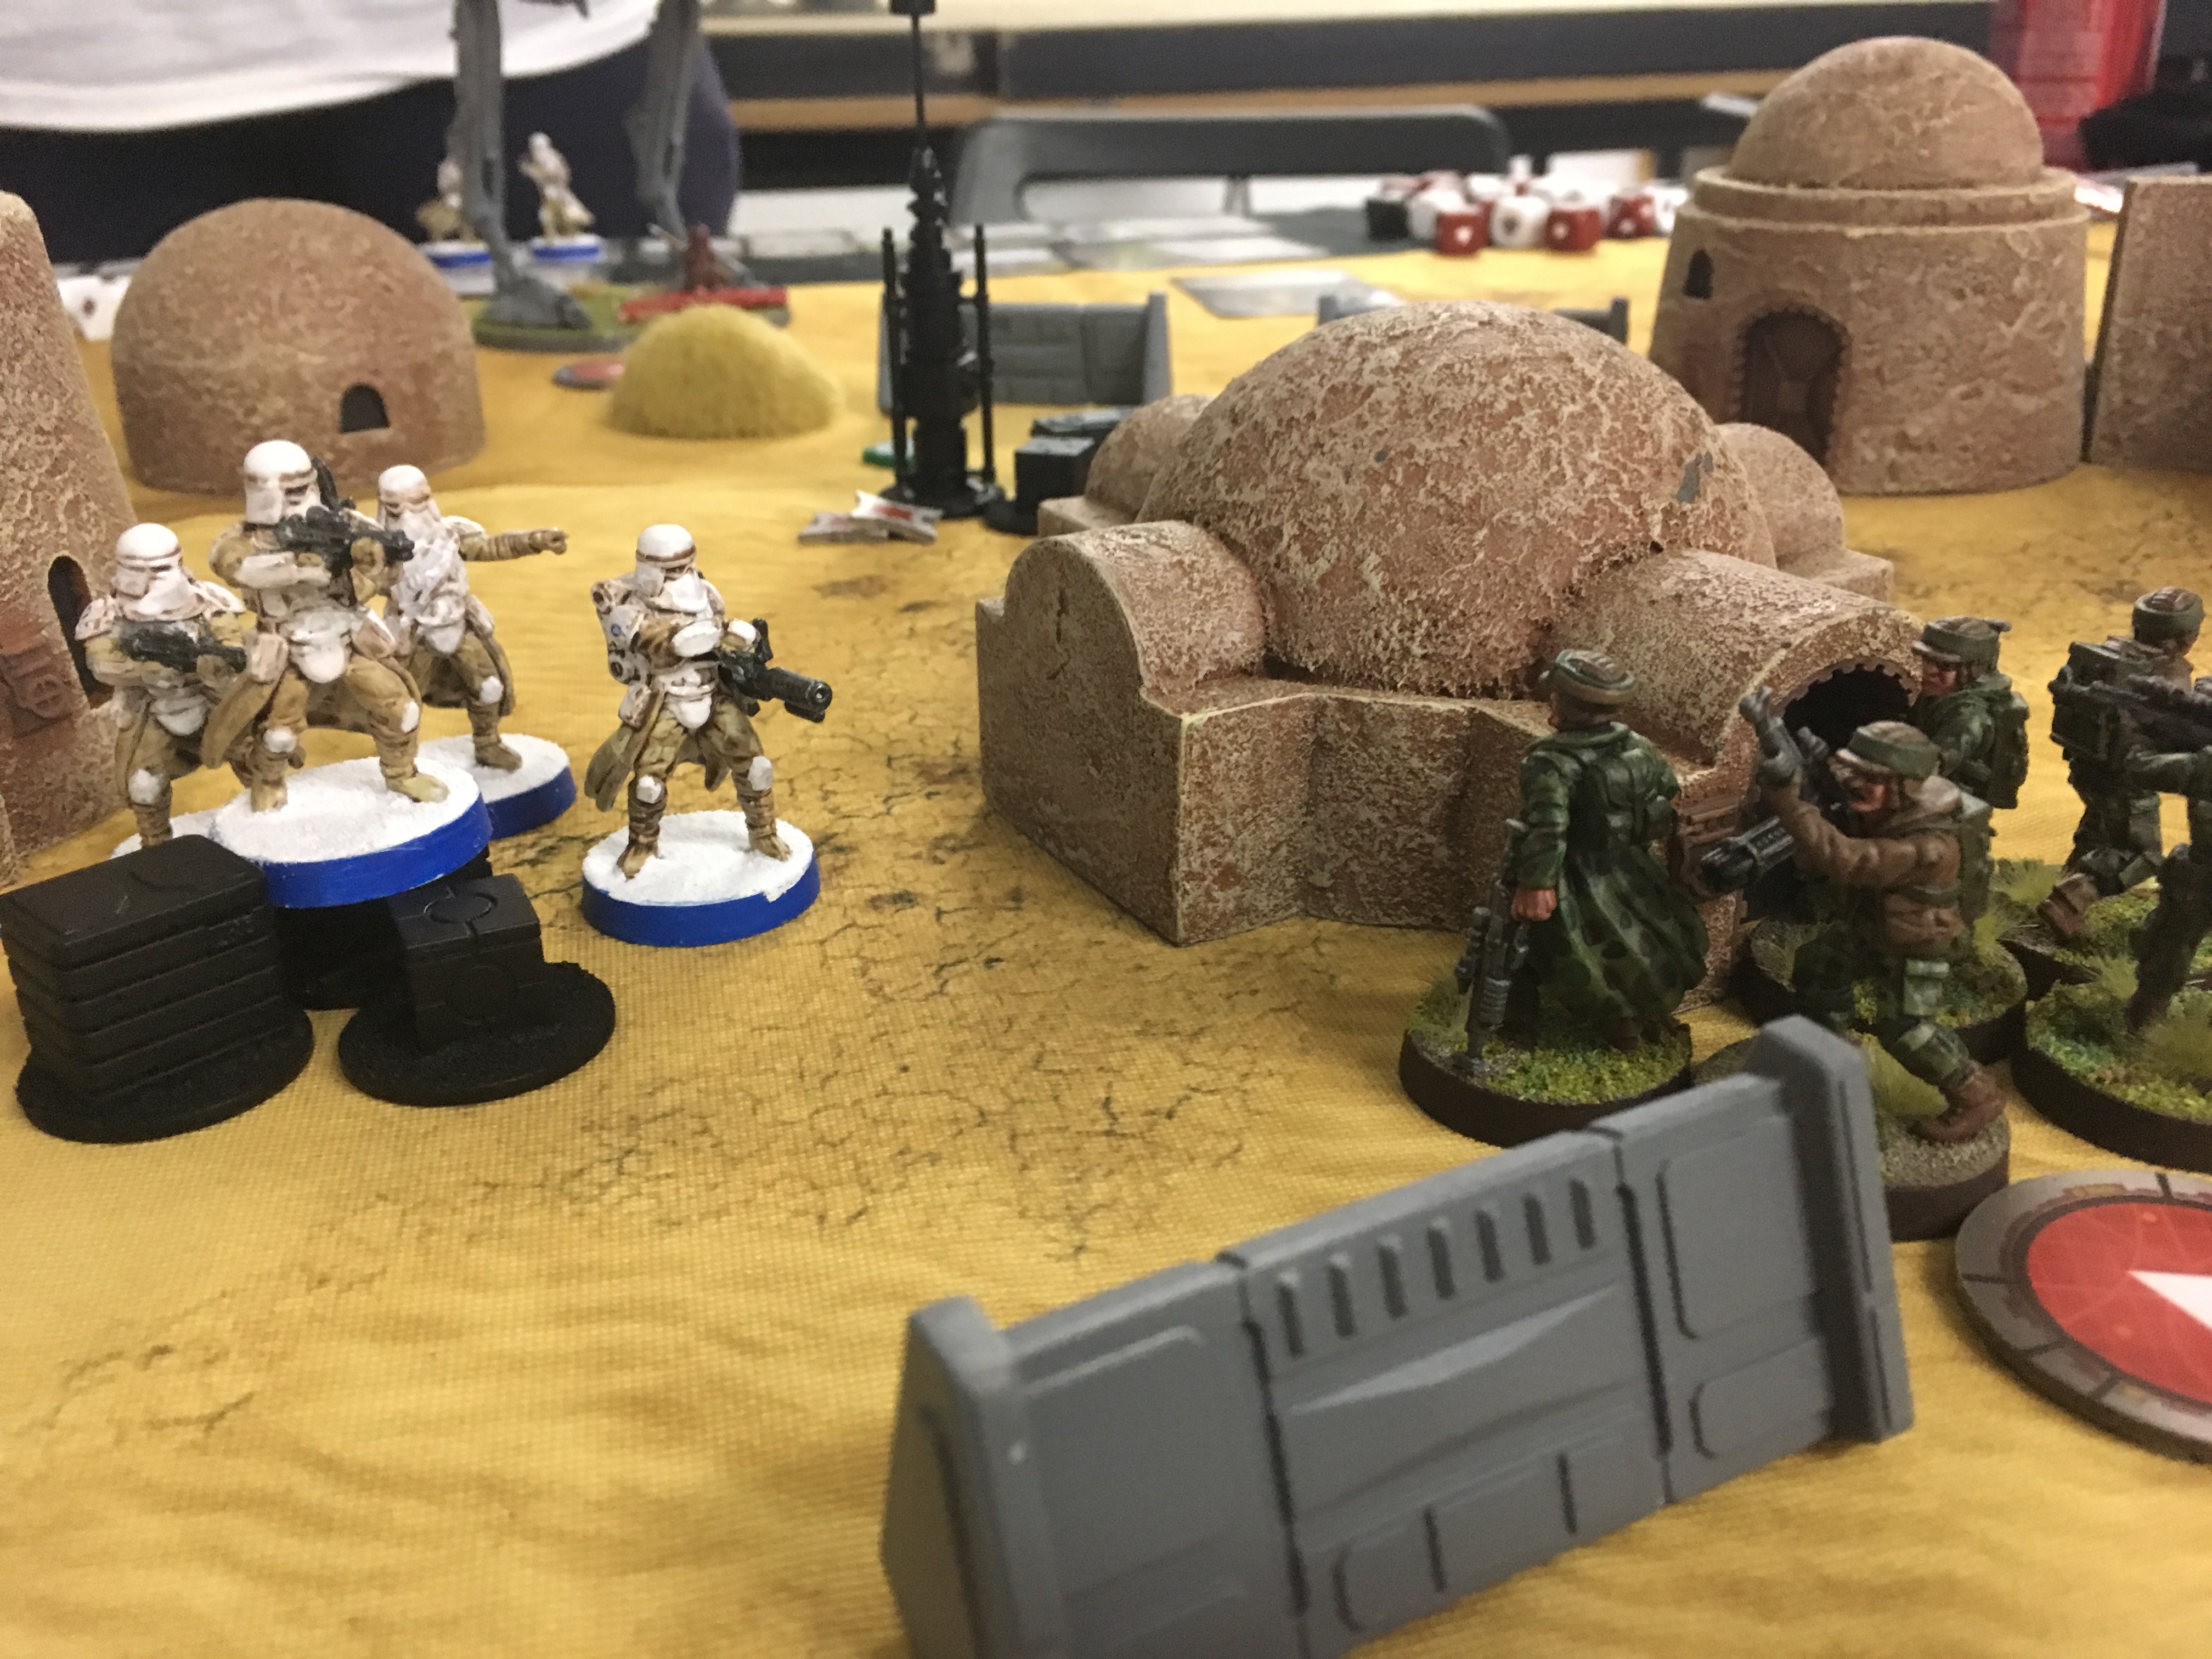 Before the attack
This attack comprised of 5 black dice (from the flamer) and 3 black dice (from grenades) and they had an aim token.
8 Black with 3 re-rolls against 1 dodge and white defence die.
Oh God, we’re dead!
 Where has my squad gone!!! somebody ordered a BBQ
 Priority Supplies
With the release of the priority supplies boxed set i sat and scratched my head as to why… I can build terrain, get a friend to 3D print it etc and it cost me nothing! Why would I pay £24 for minor terrain? Cards… damn you FFG!!! It released a number of new battlefield cards and it was at that point insuddenly realised that that my games had started to become a bit repetitive. Very similar lists (limited by the models released to date, this is soon to be rectified!) playing very similar objective games. This box helps solve that a little but also can give a warhammer table that Star Wars look.
with regards to painting these it was very simple and completed over 2 x 1 hour painting sessions. The base was black primer, then mechanicus standard grey heavily dry brushed. Then sucessivly lighter drybrushes of Russ and Fenrisian grey then necron compound. Afterwards a nuln oil wash and a bit of dirt detailing done with typhus corrosion.
a similar thing occurred for the orange box but started with Tau Light Ocre and Agrax Earthshade wash.
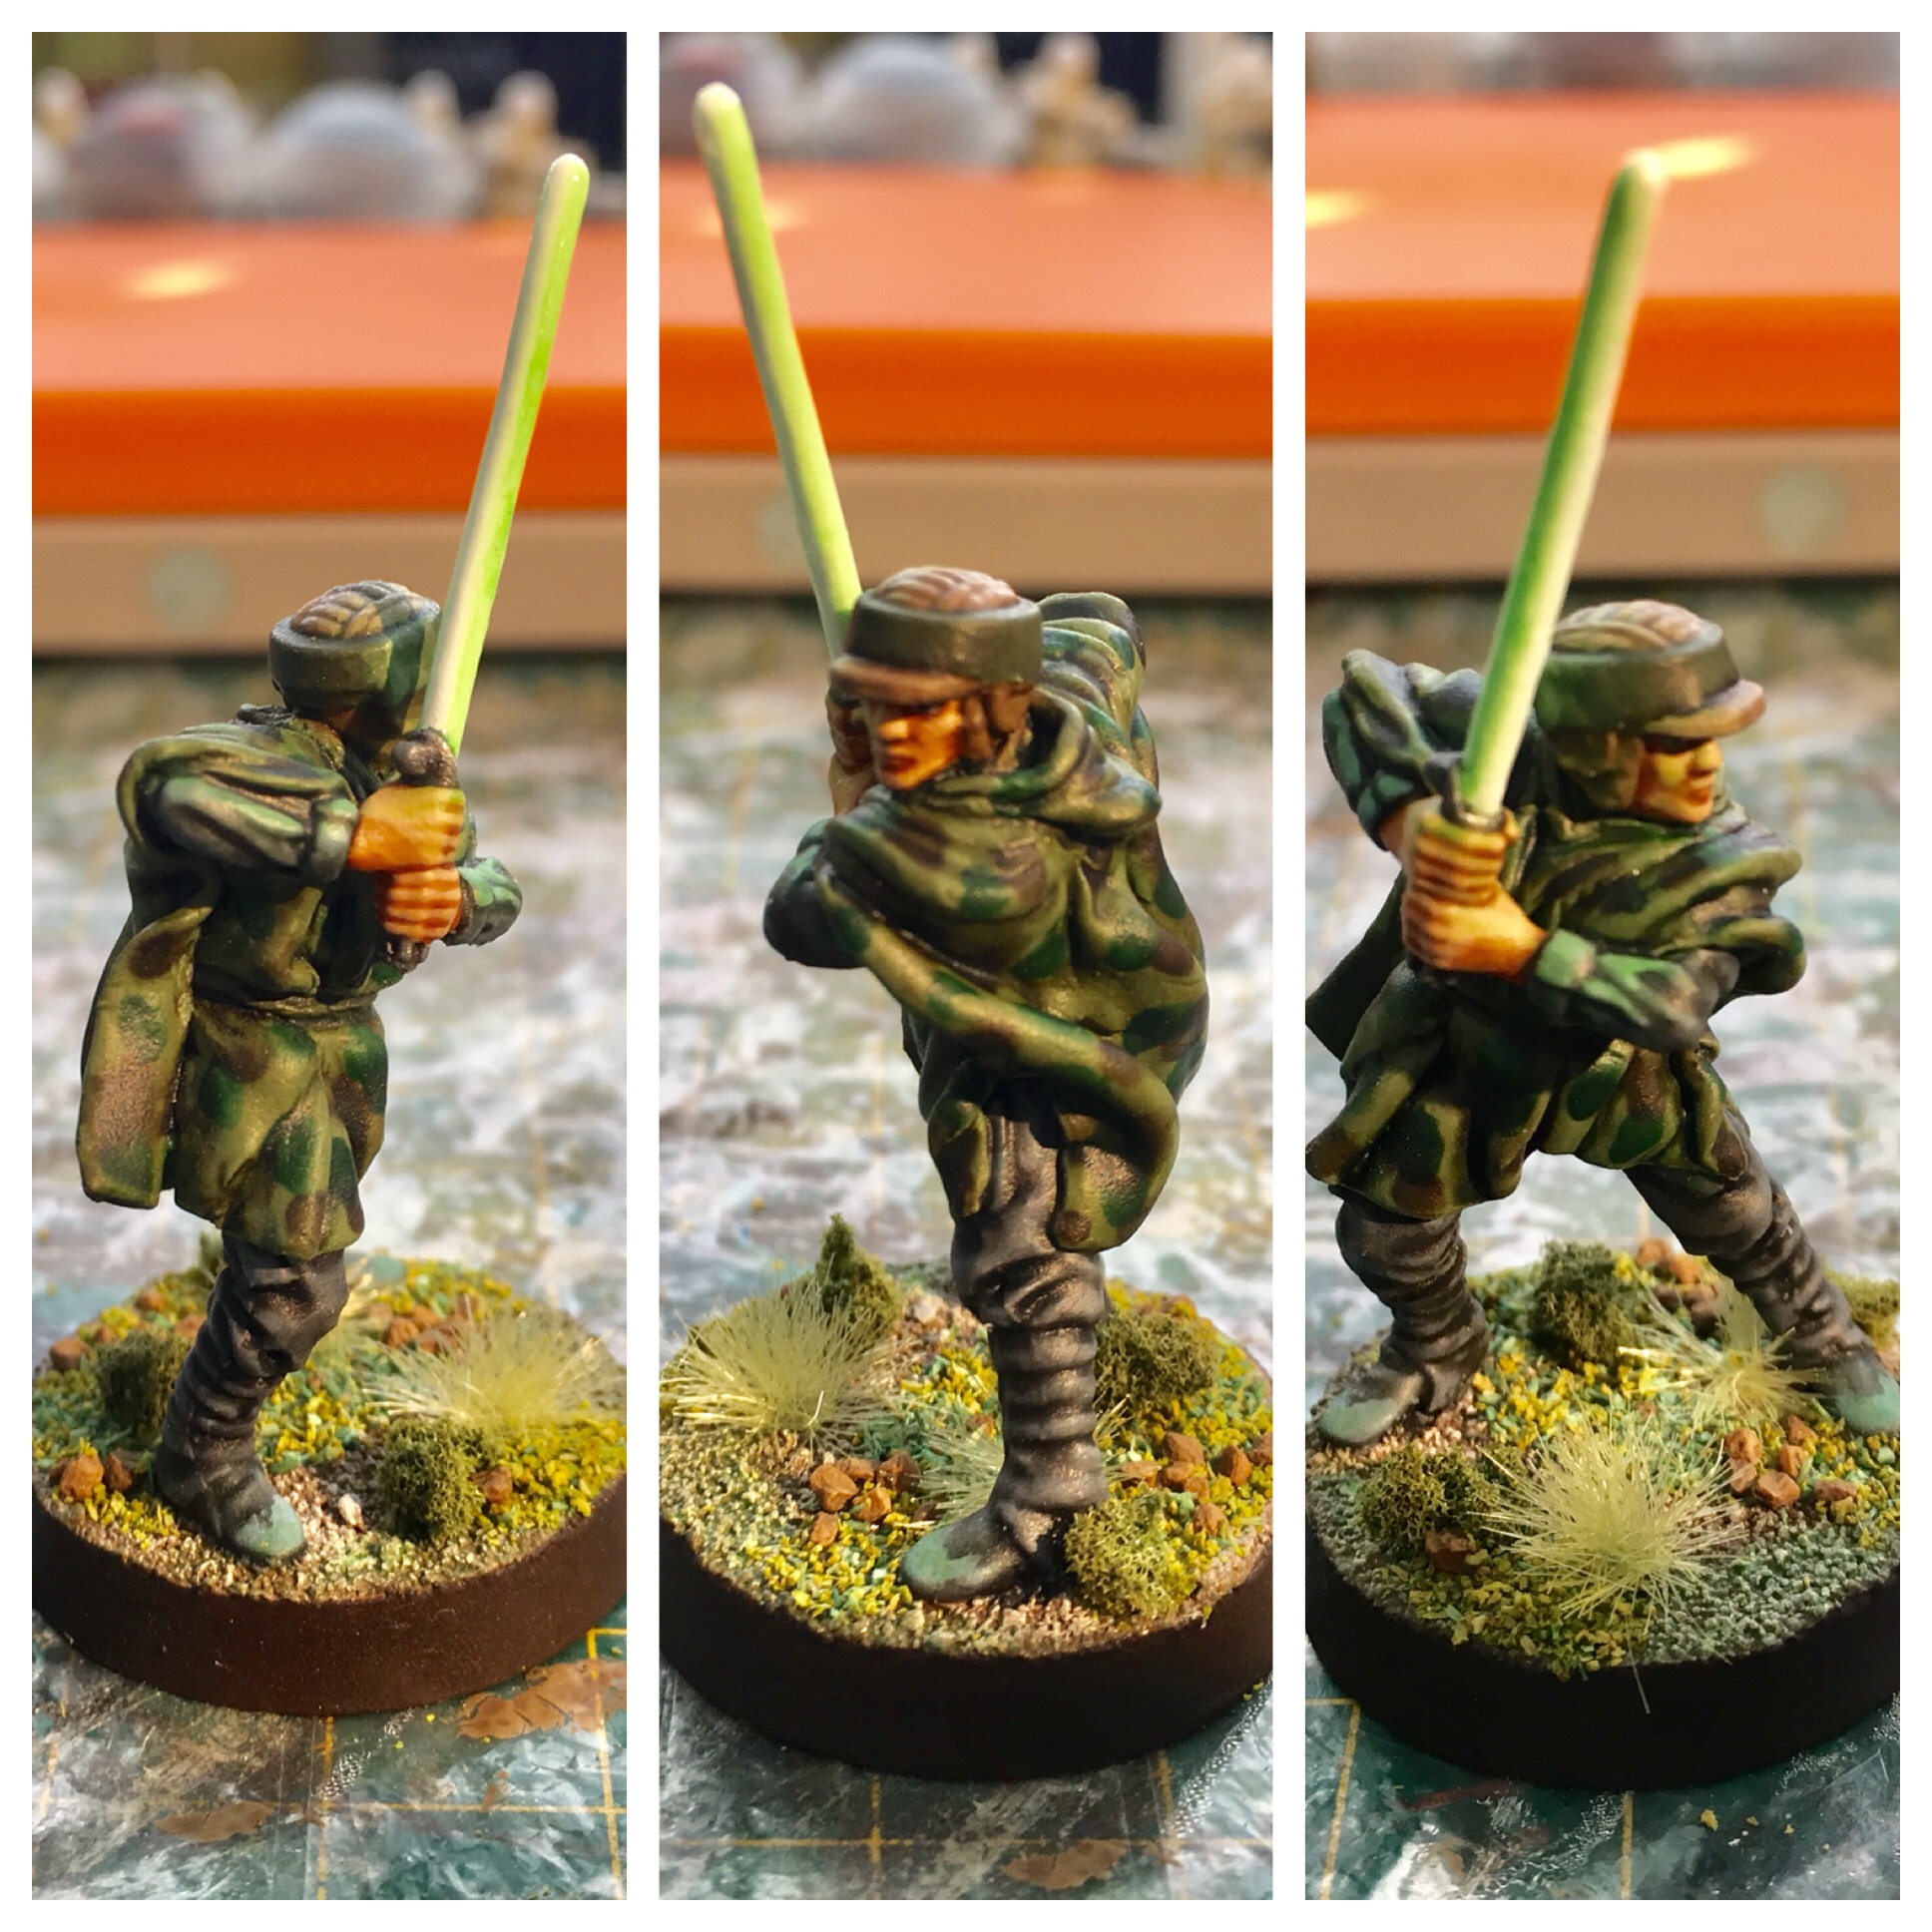
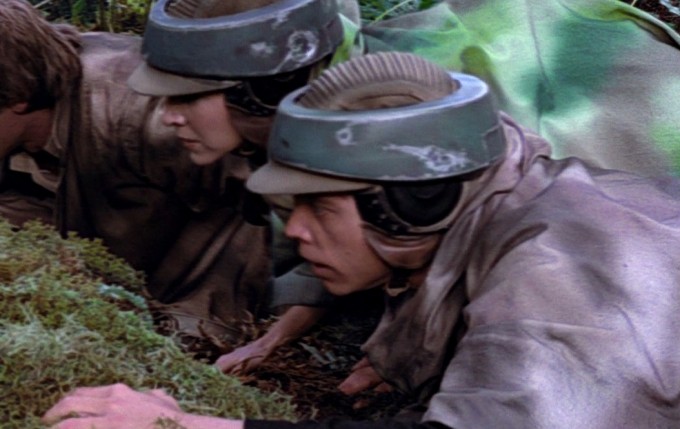
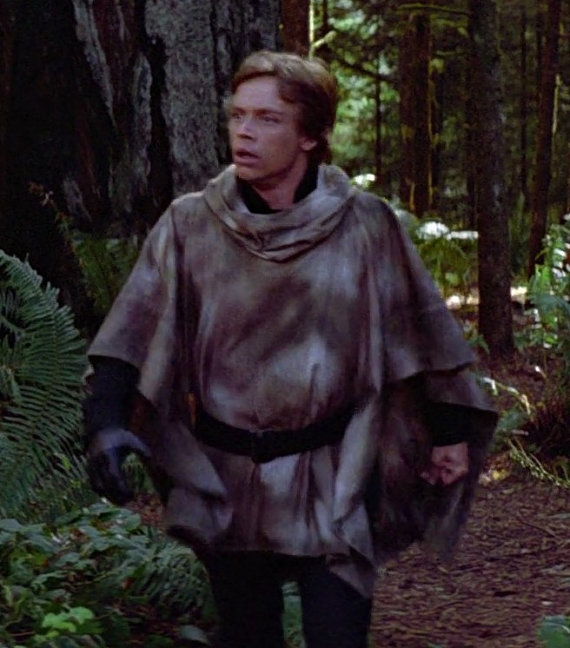
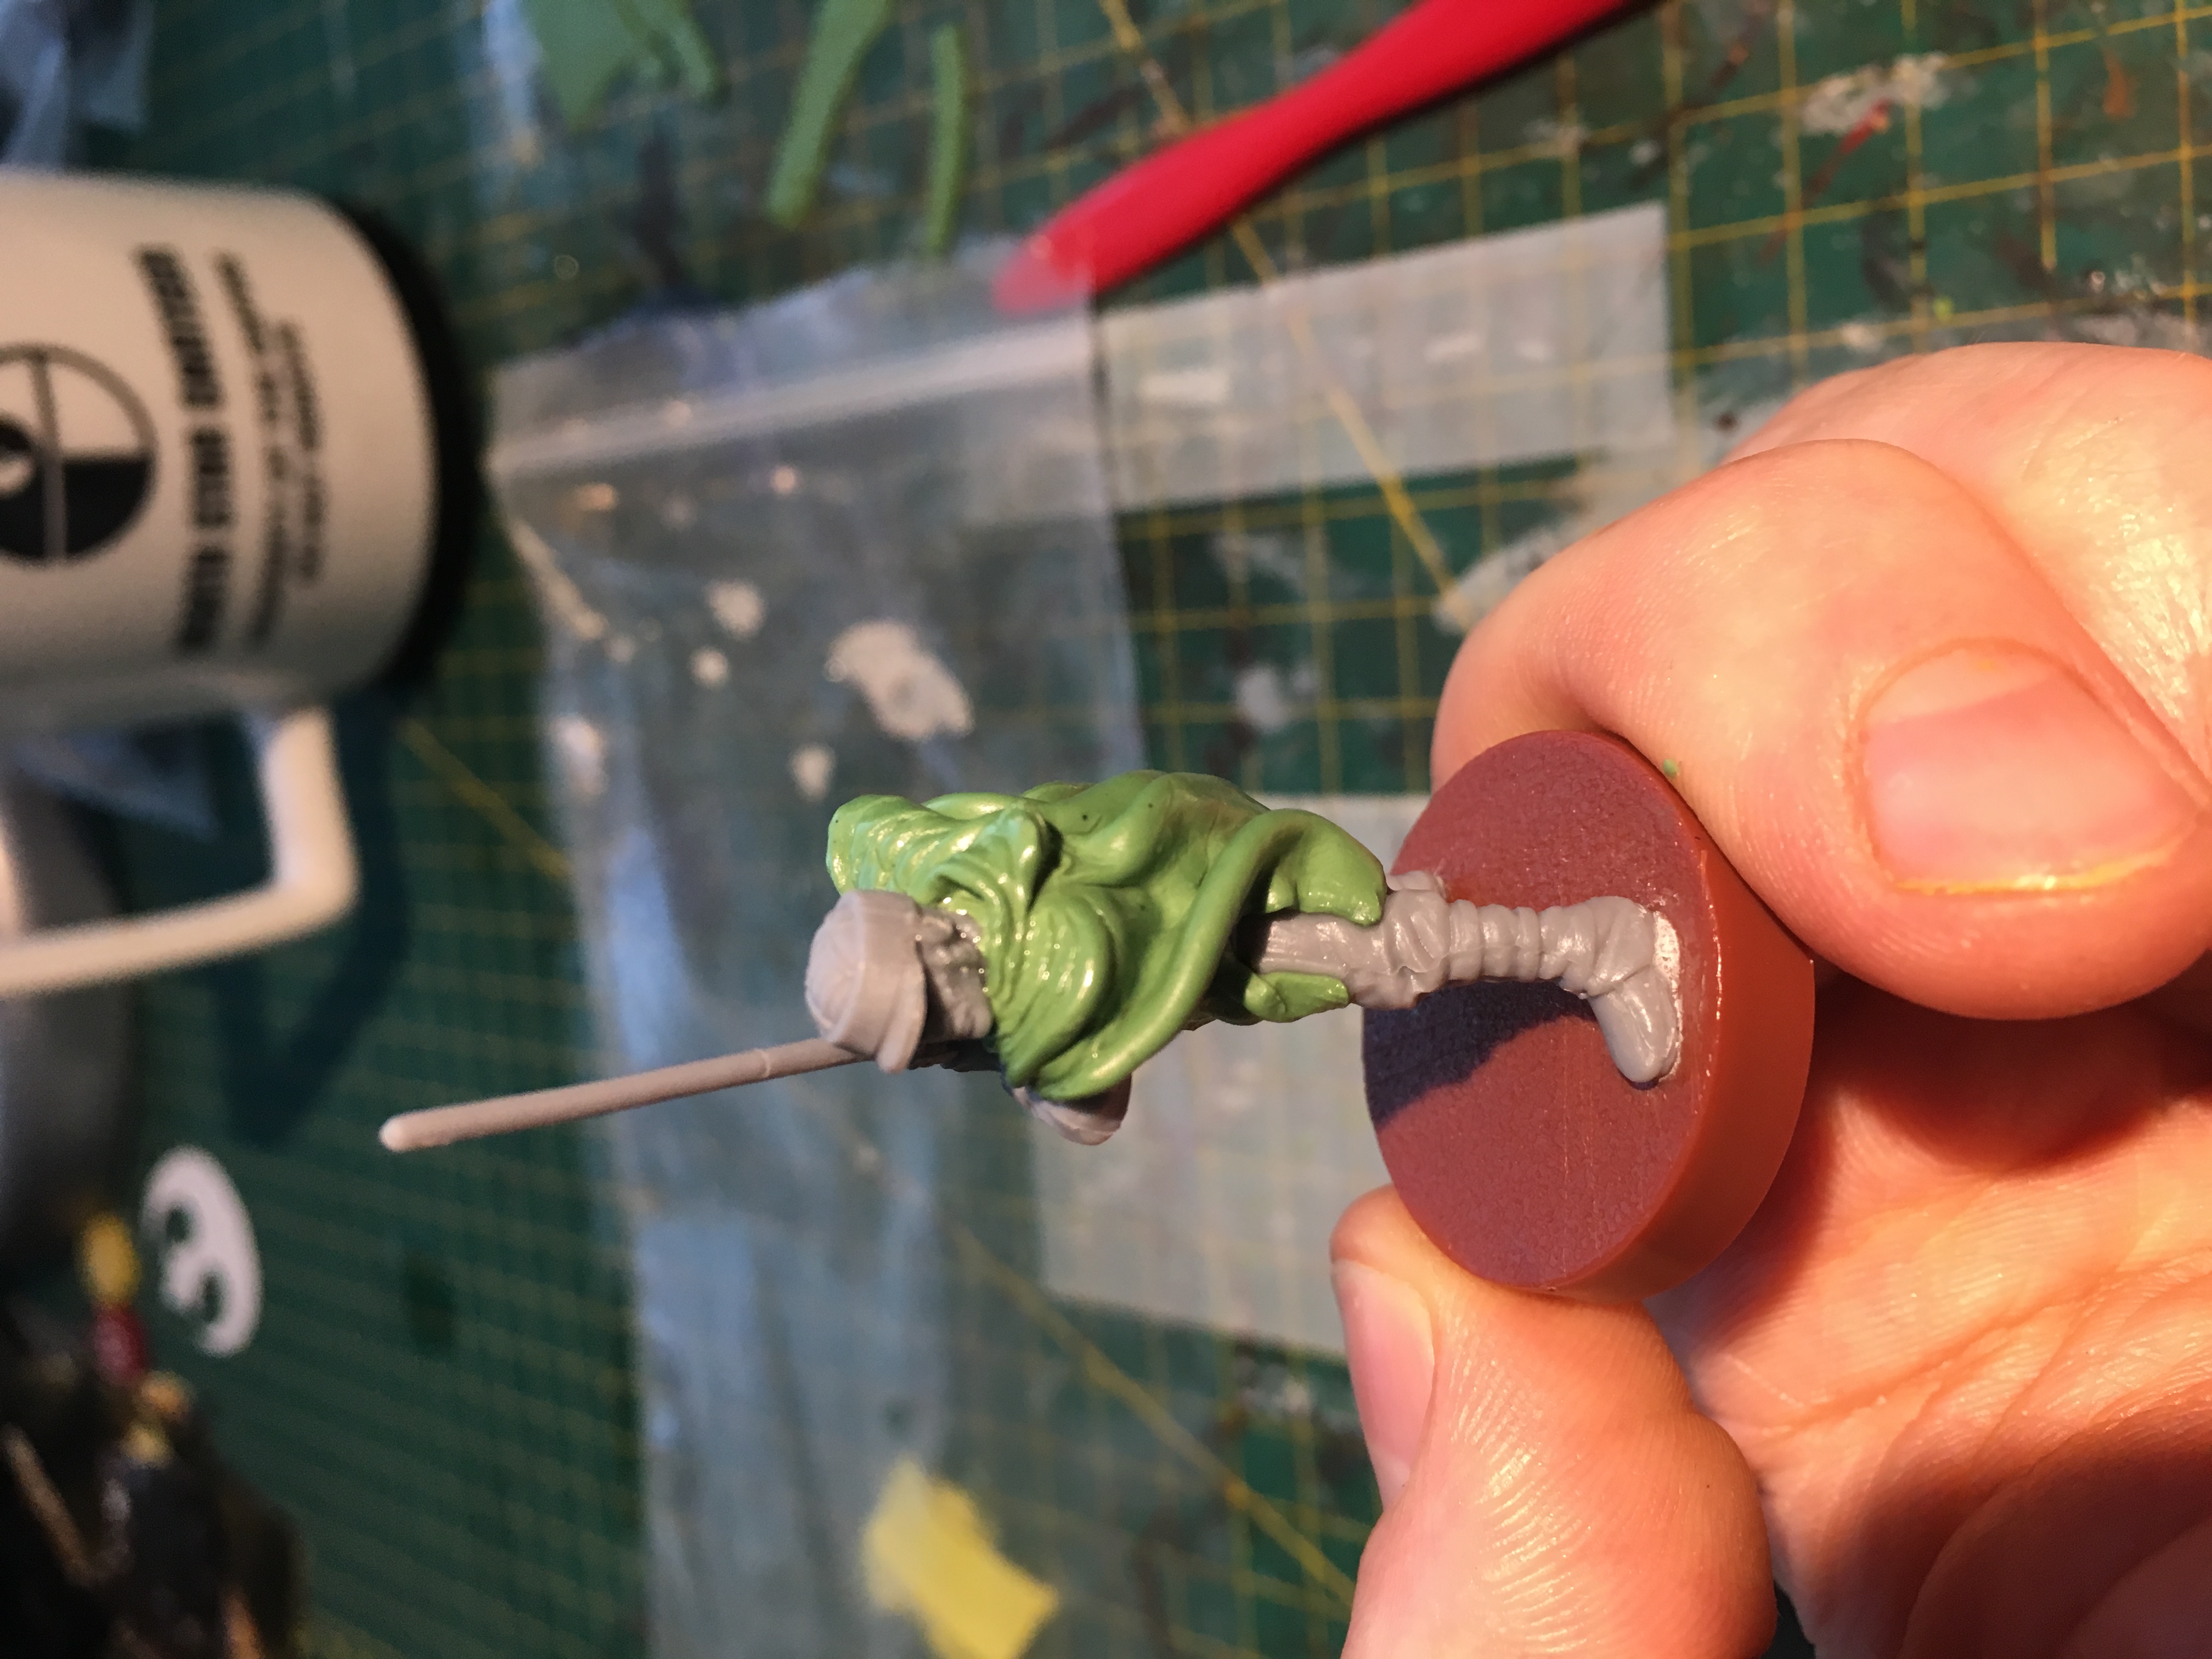
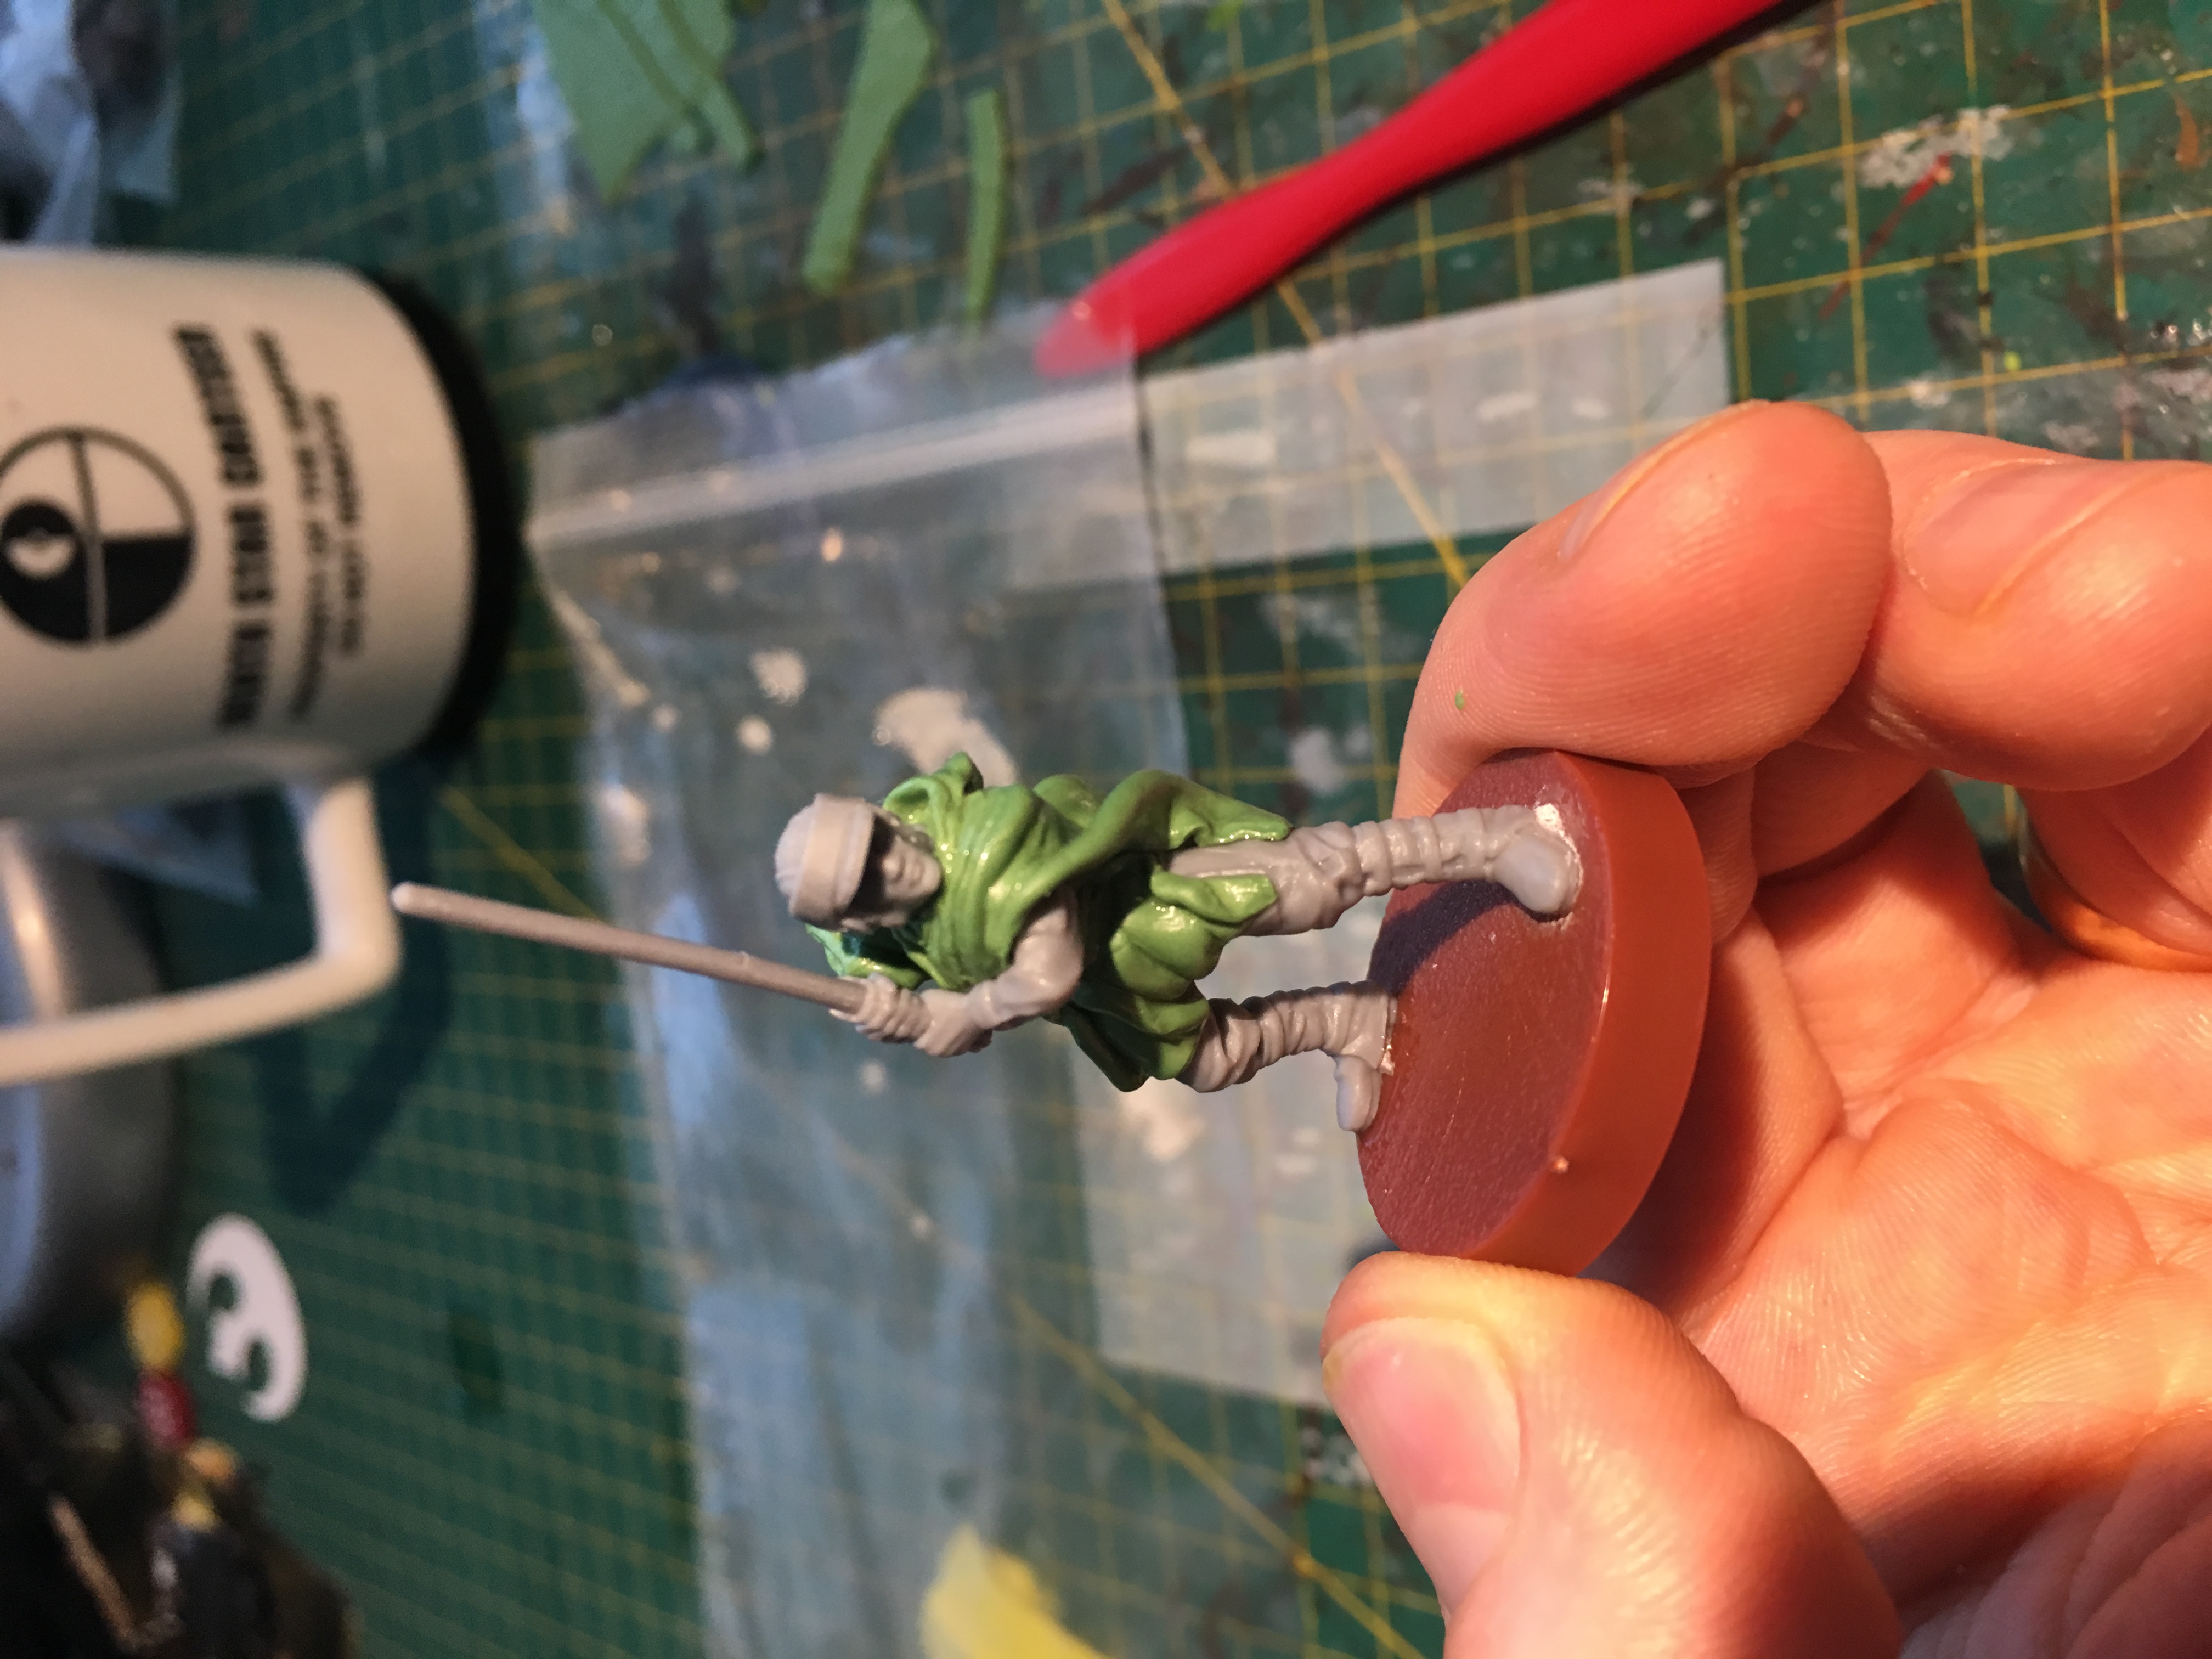
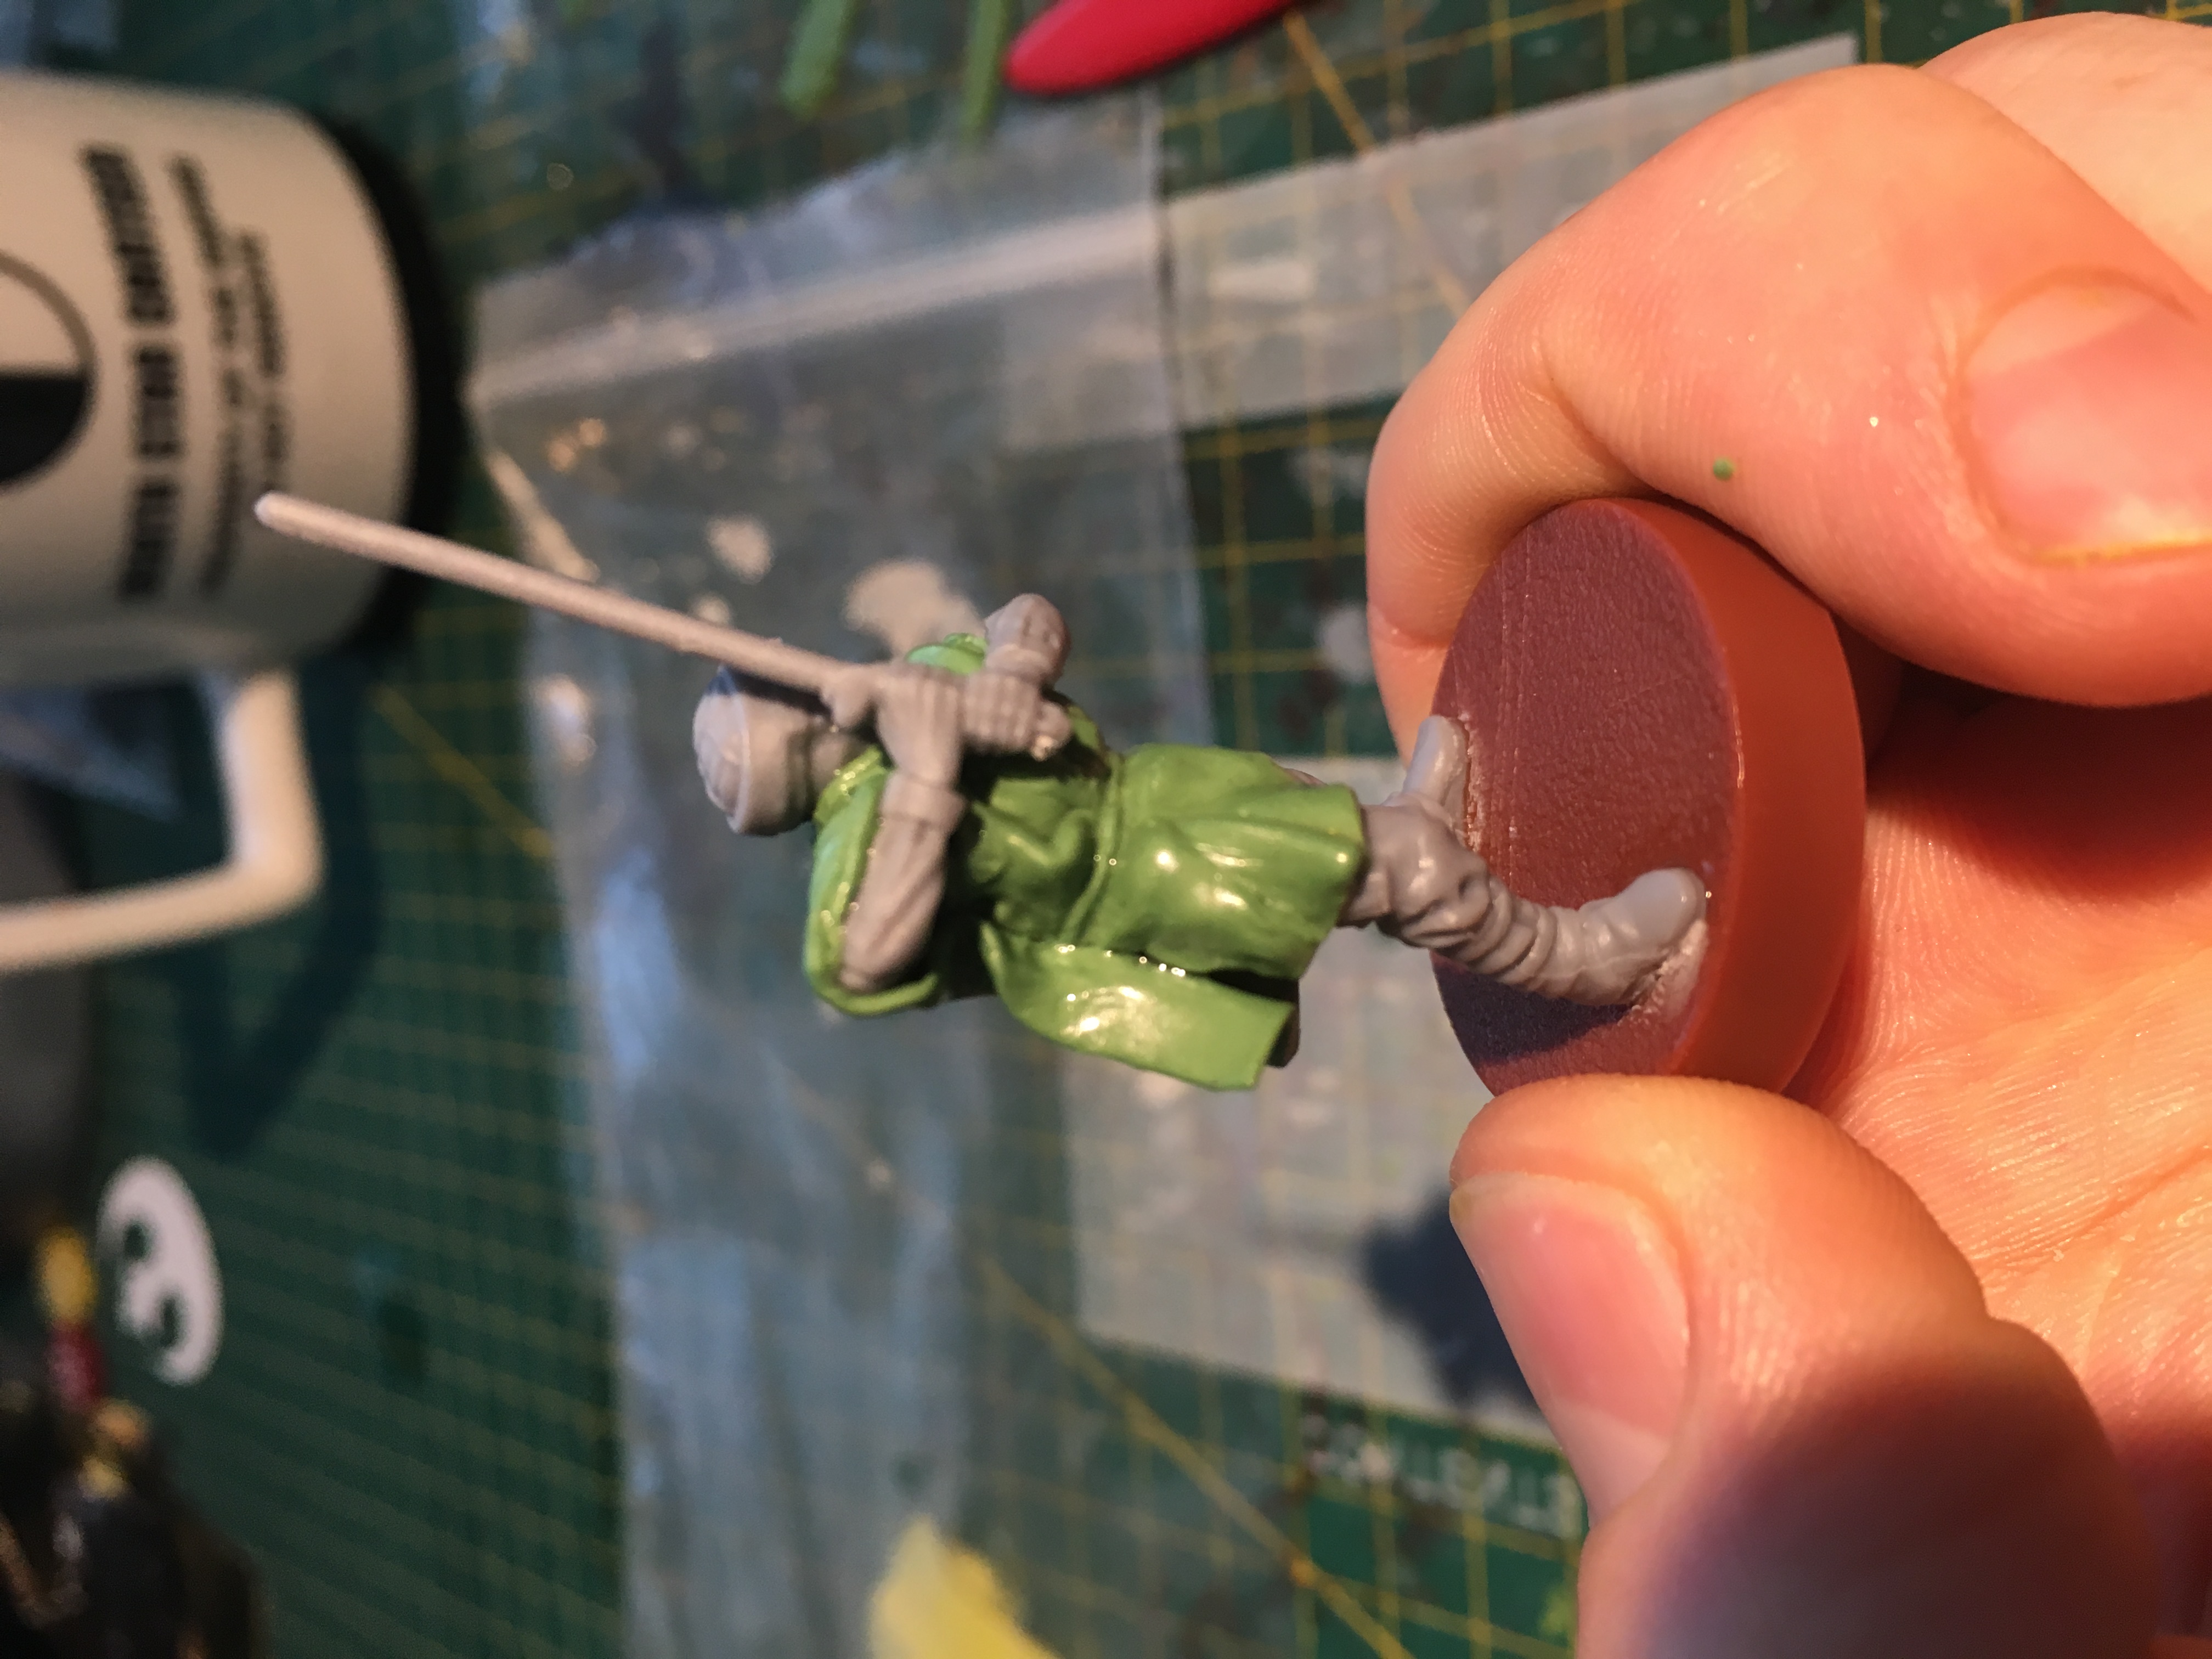
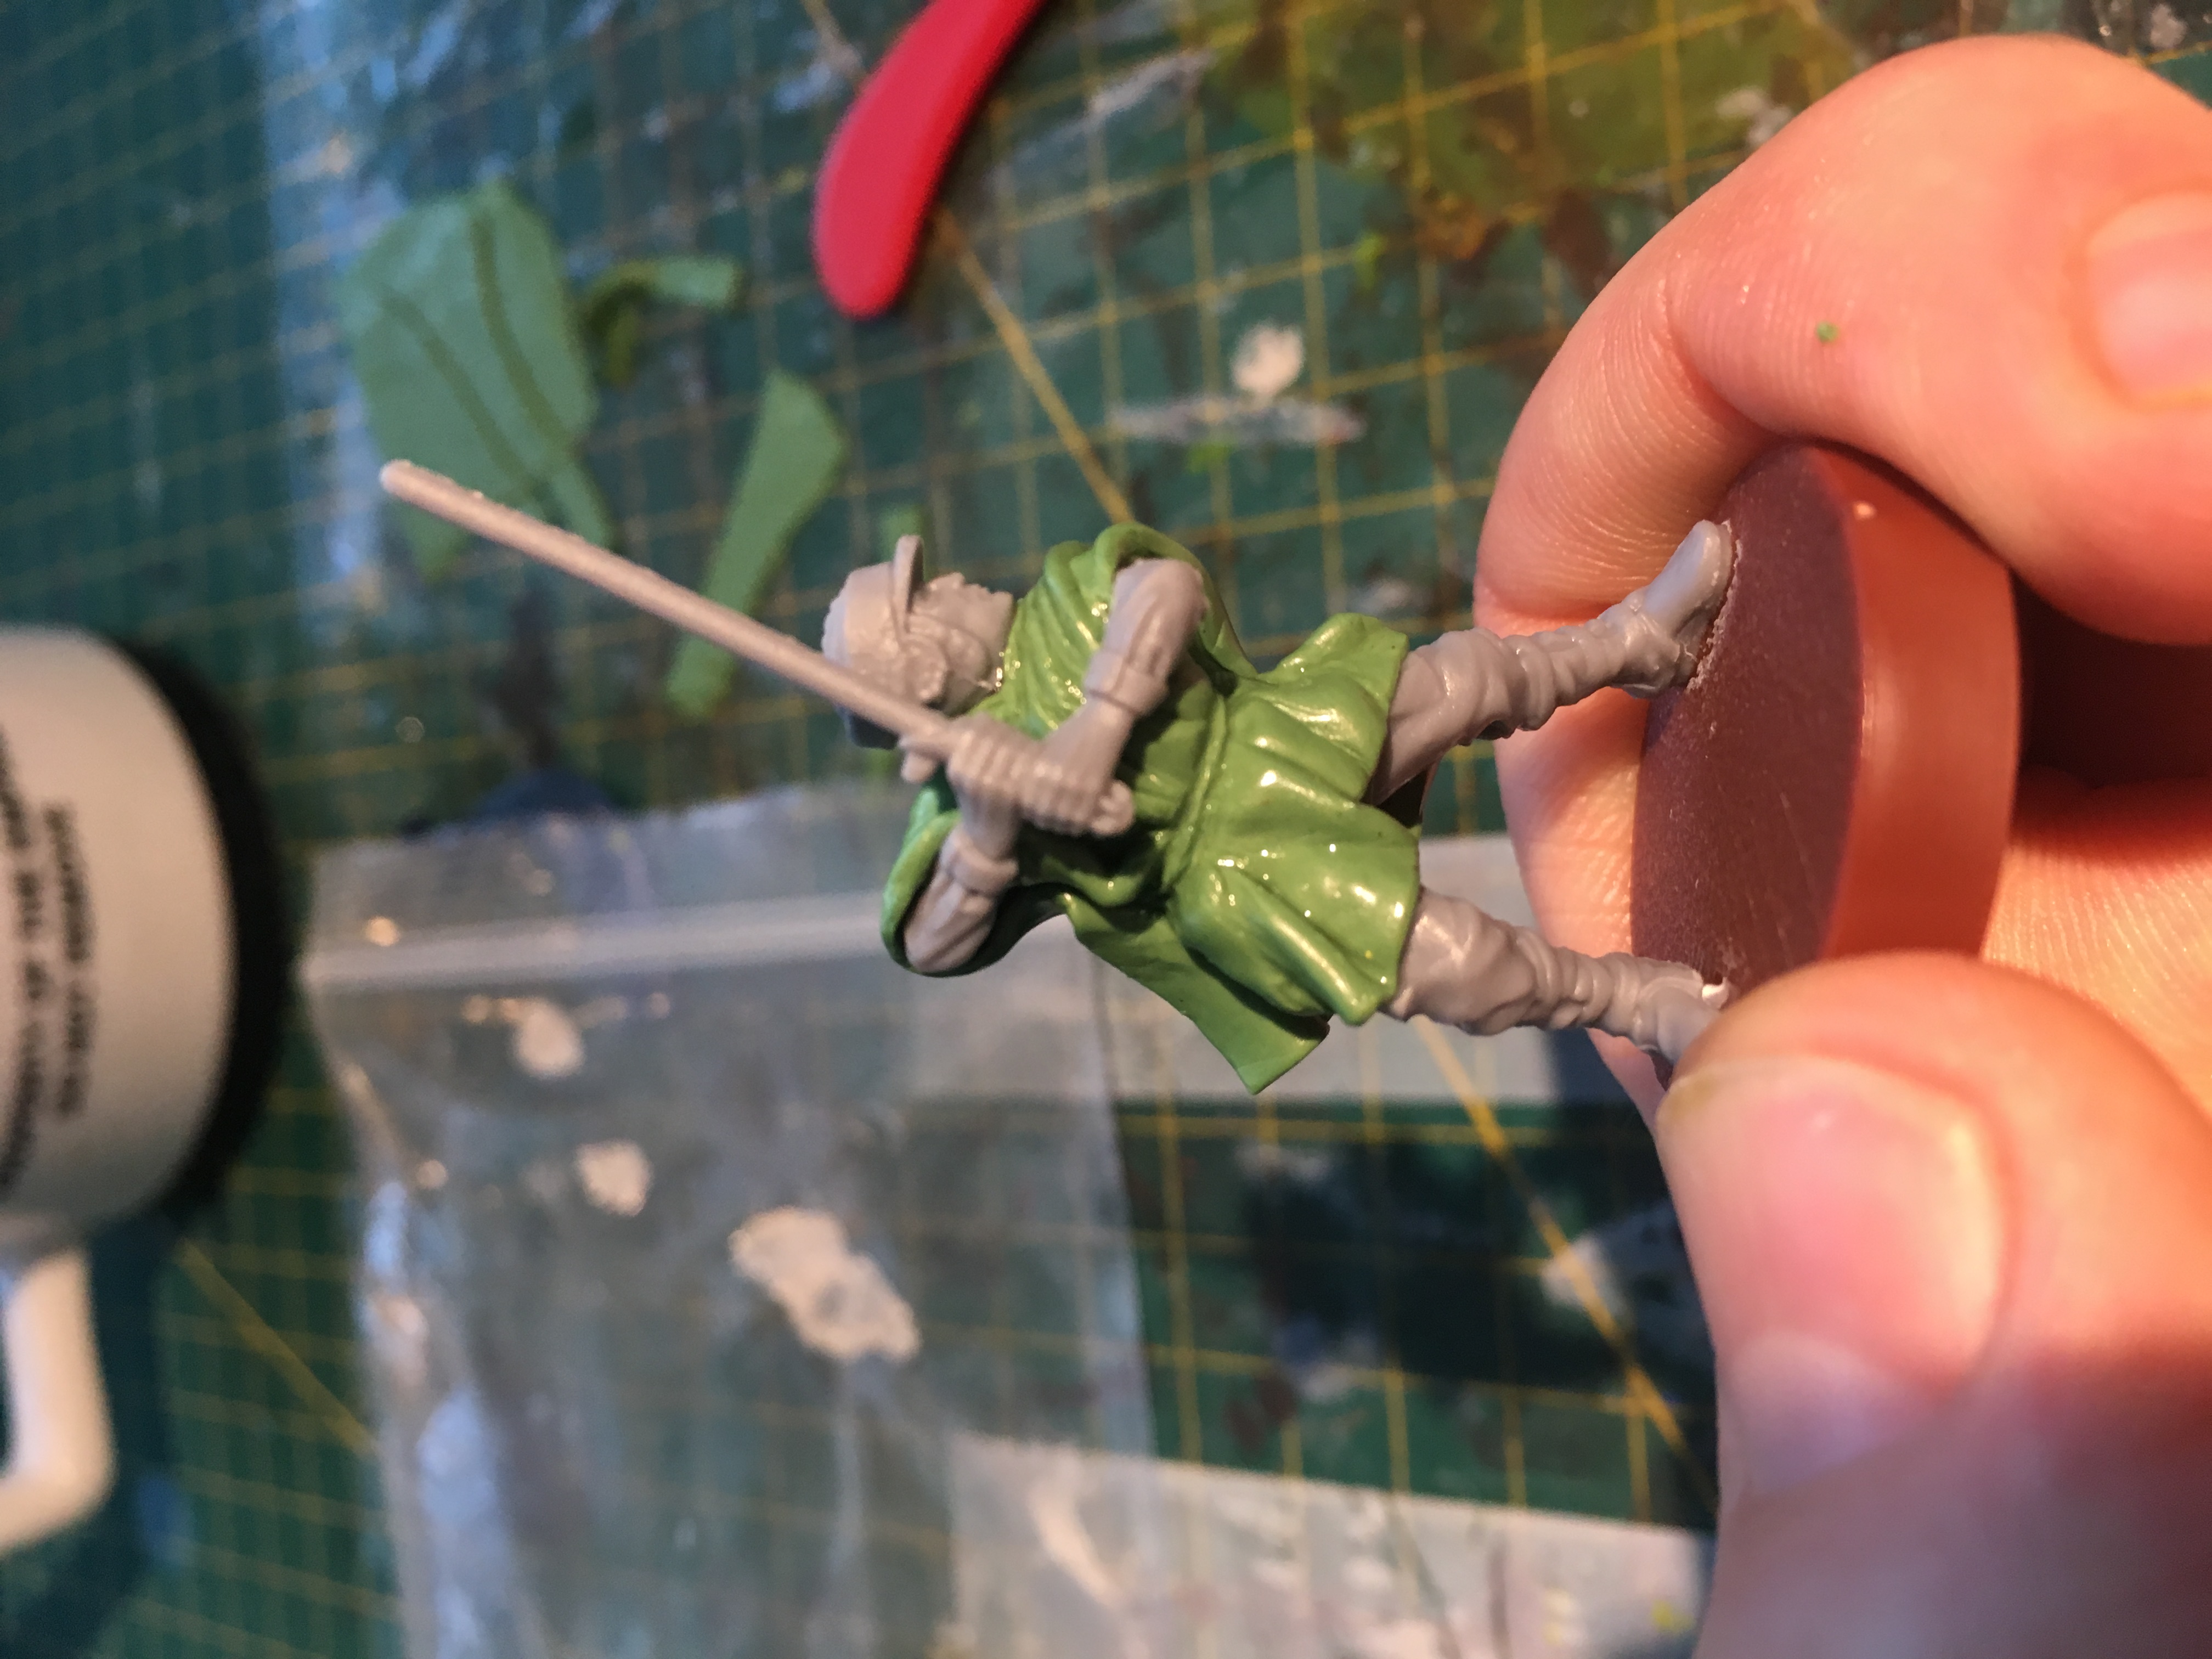
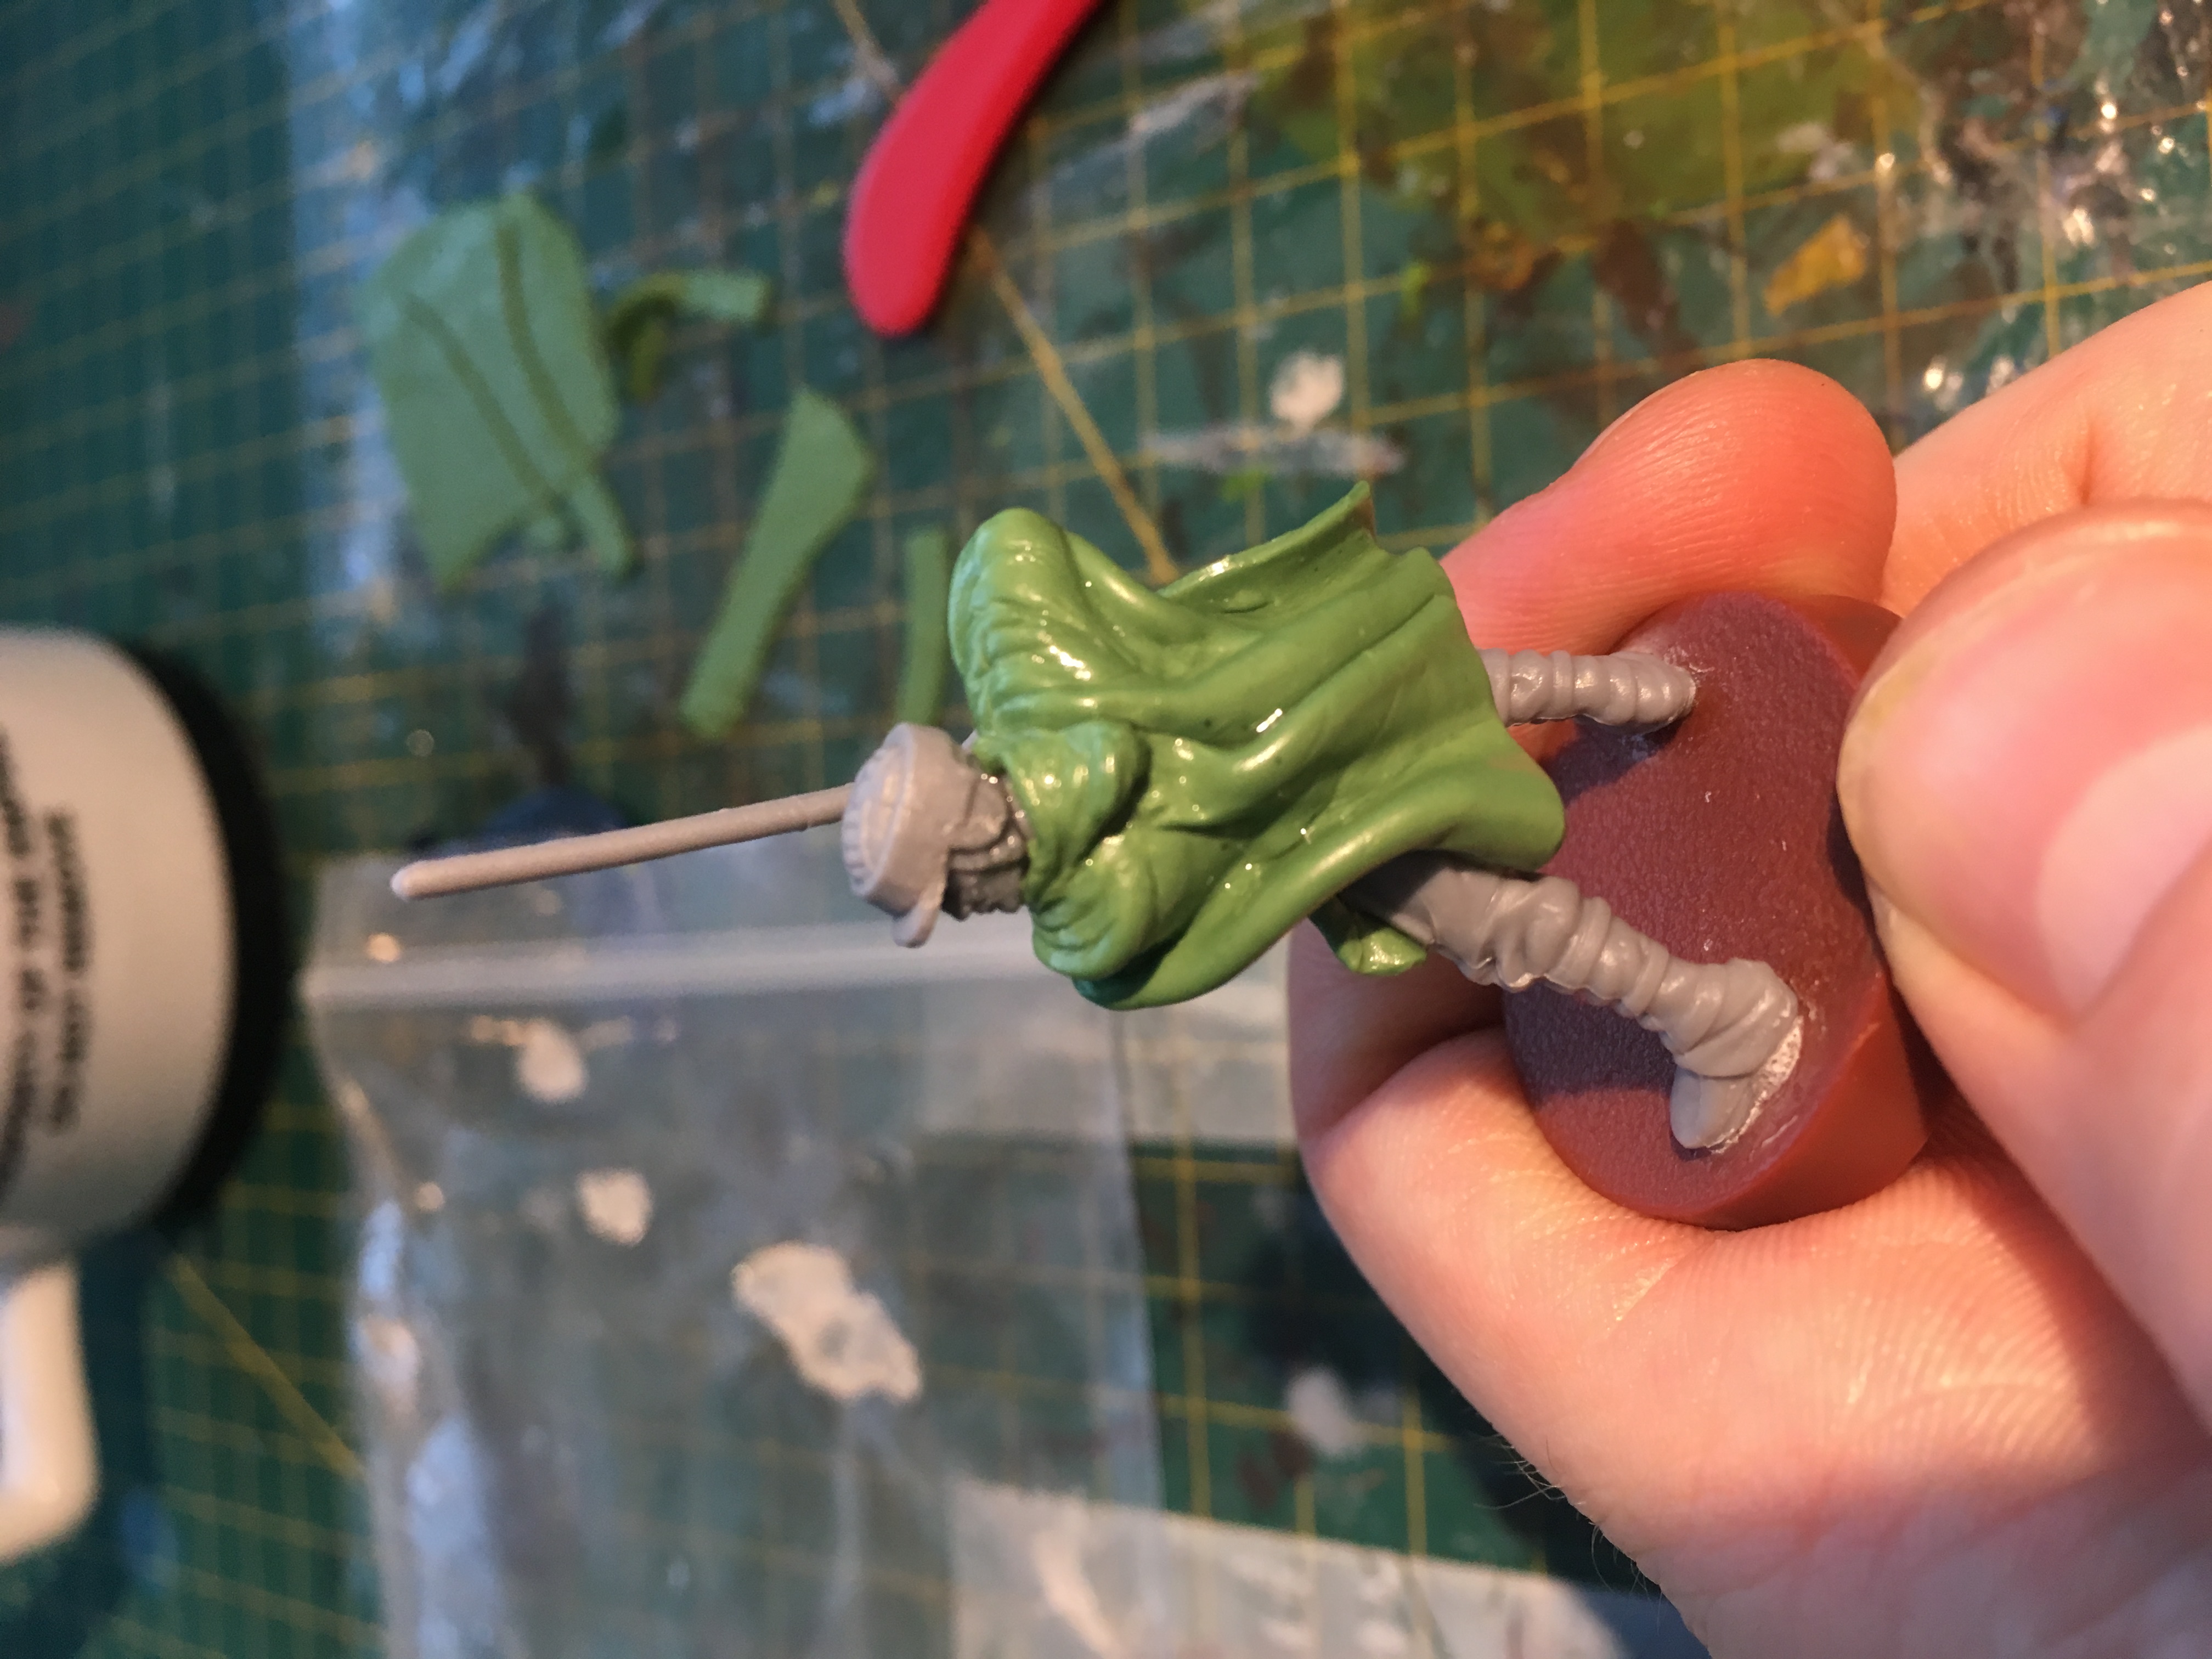
Blending in to the Forest Moon of Endor...
As a continuation of my poncho’d Skywalker project for hobby night live I have now been able to paint him.
Primed in Army Painter Army Green. His under clothes were painted in the black scheme used for Vader (Russ Grey and Fenrisian Grey highlight washed Nuln Oil) and the Poncho and helmet were painted in the same fashion as the rebel troopers (dab on Biel-Tan Green and Agrax Earthshade shades and then shade with Athonian Camoshade)
The lightsabre is done with a base of white and then successive layers of Waywatcher Green glaze. The glaze was also added to the surrounding areas of clothing, hands, helmet, face and sections of the base to try and give a bit of OSL effect. the highlights on the face and helmet were pressed really high (bright) as this glaze does darken things slightly.

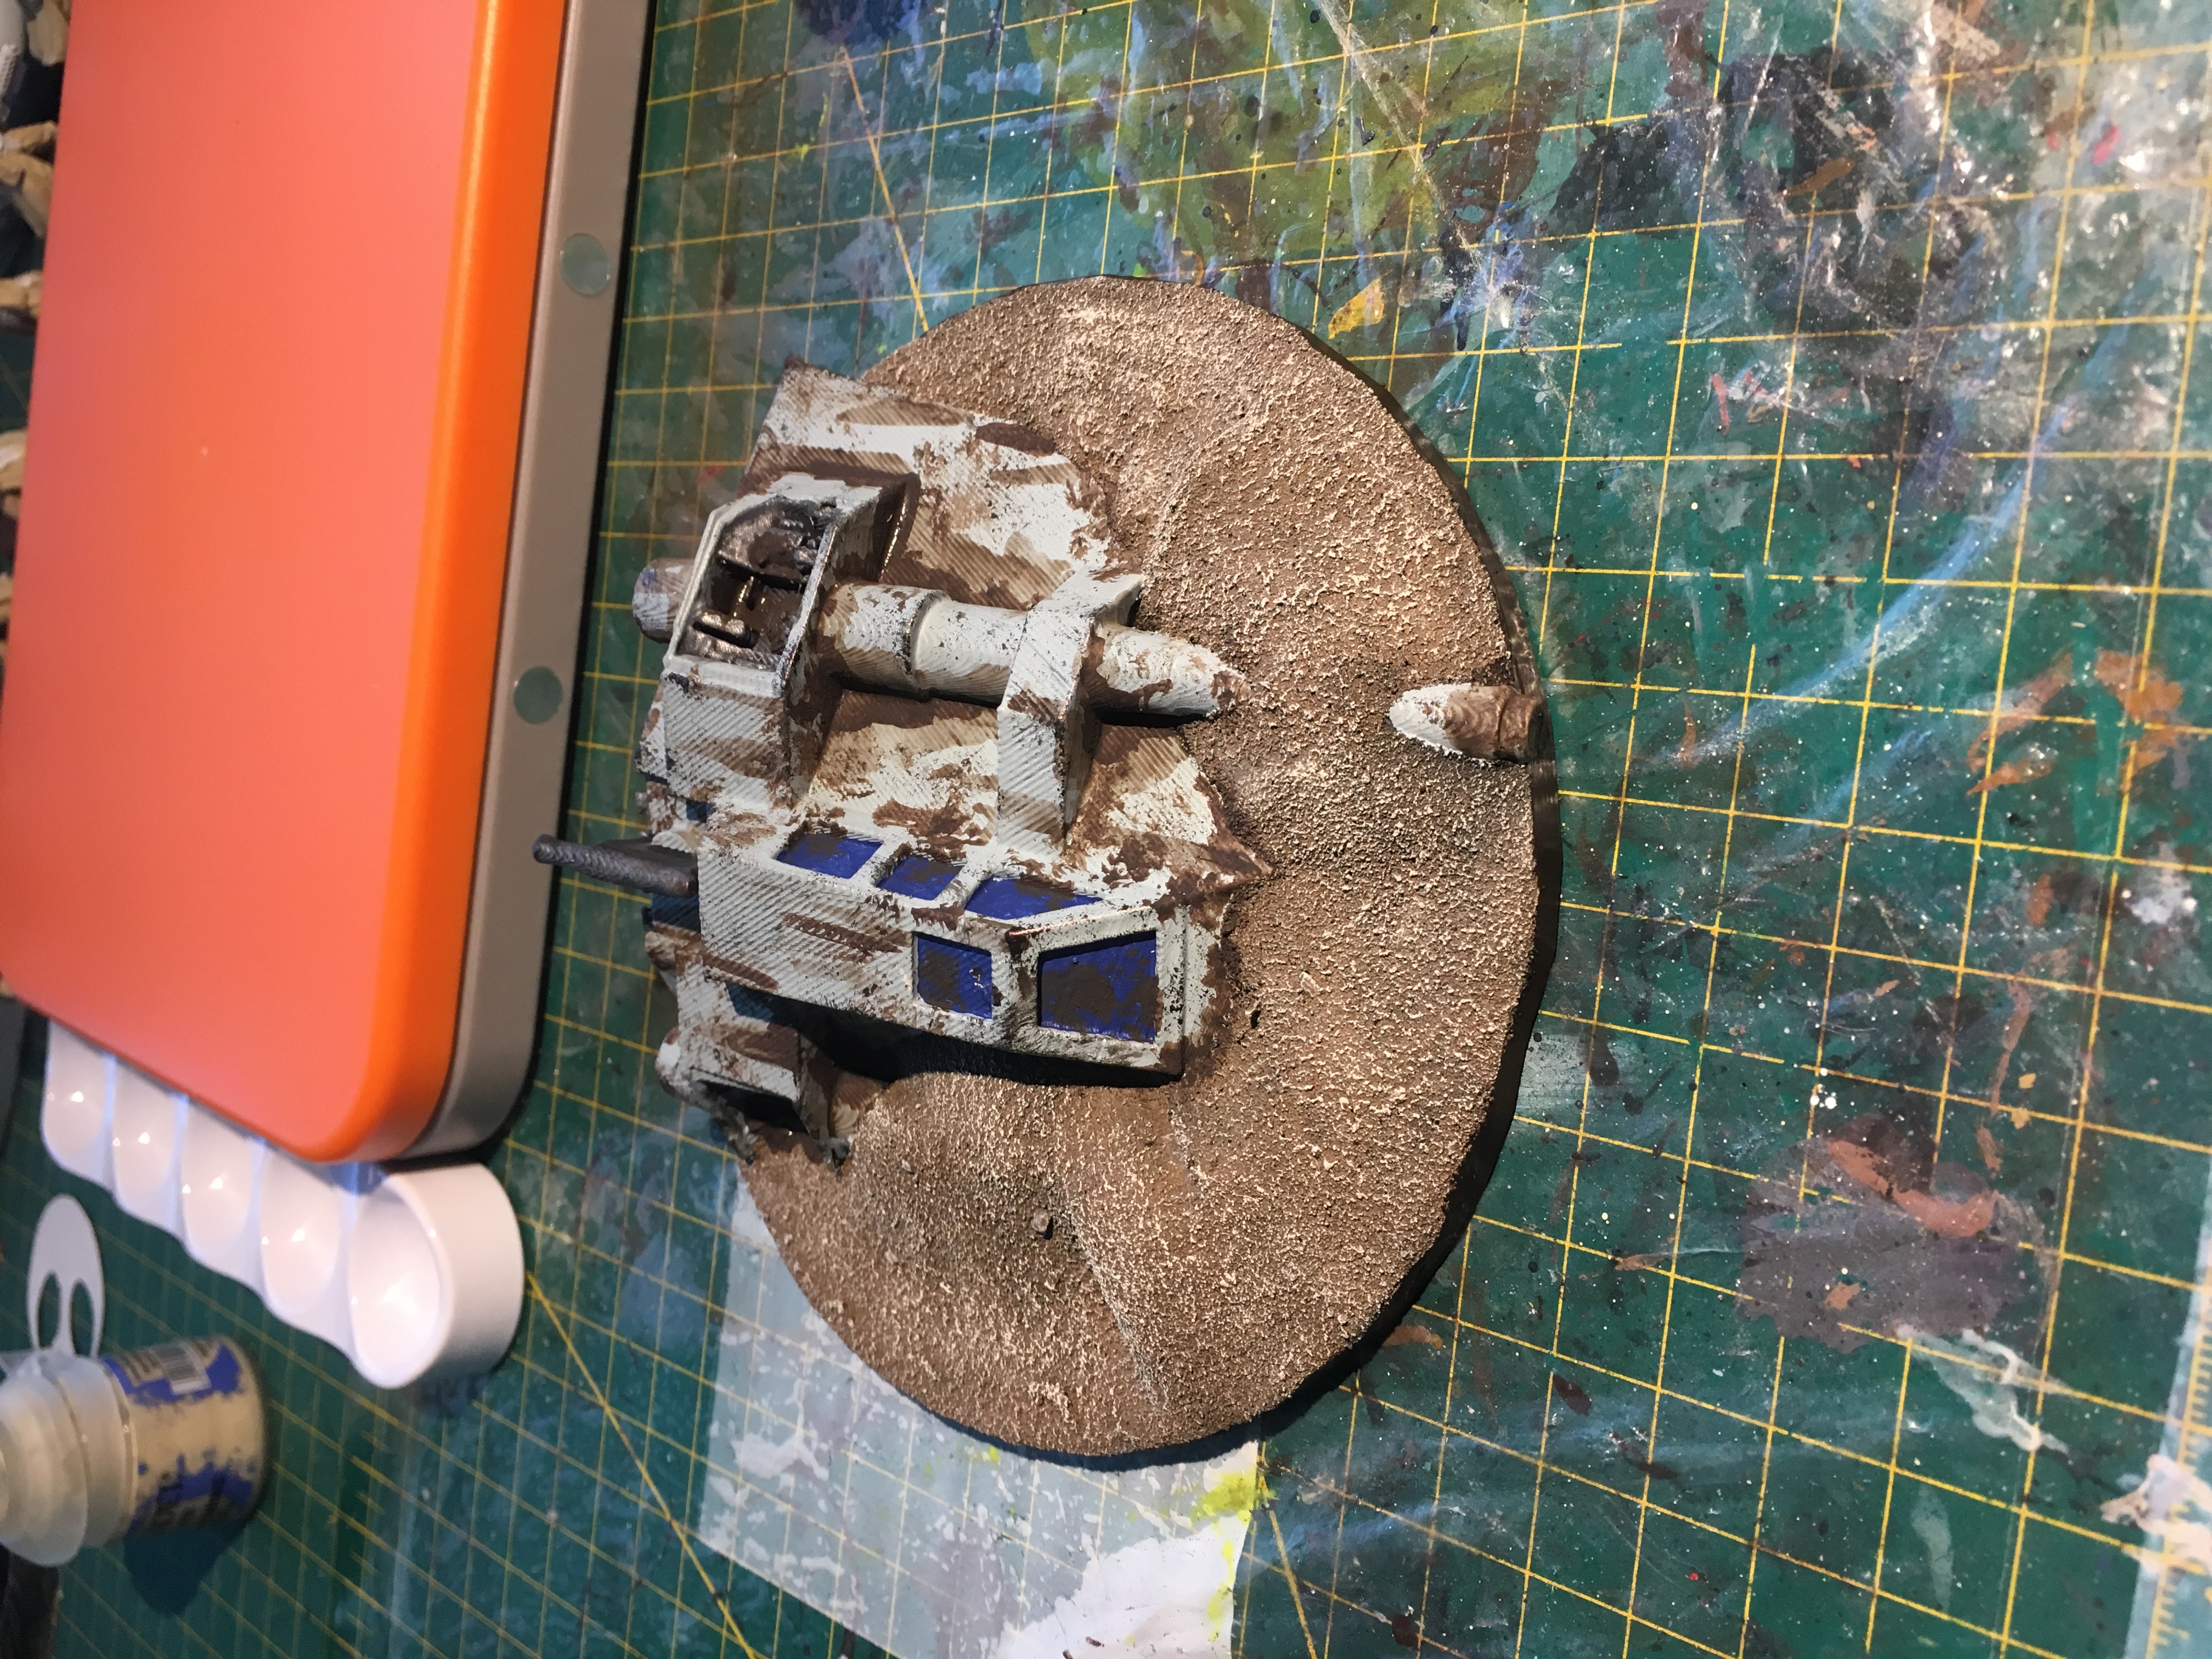
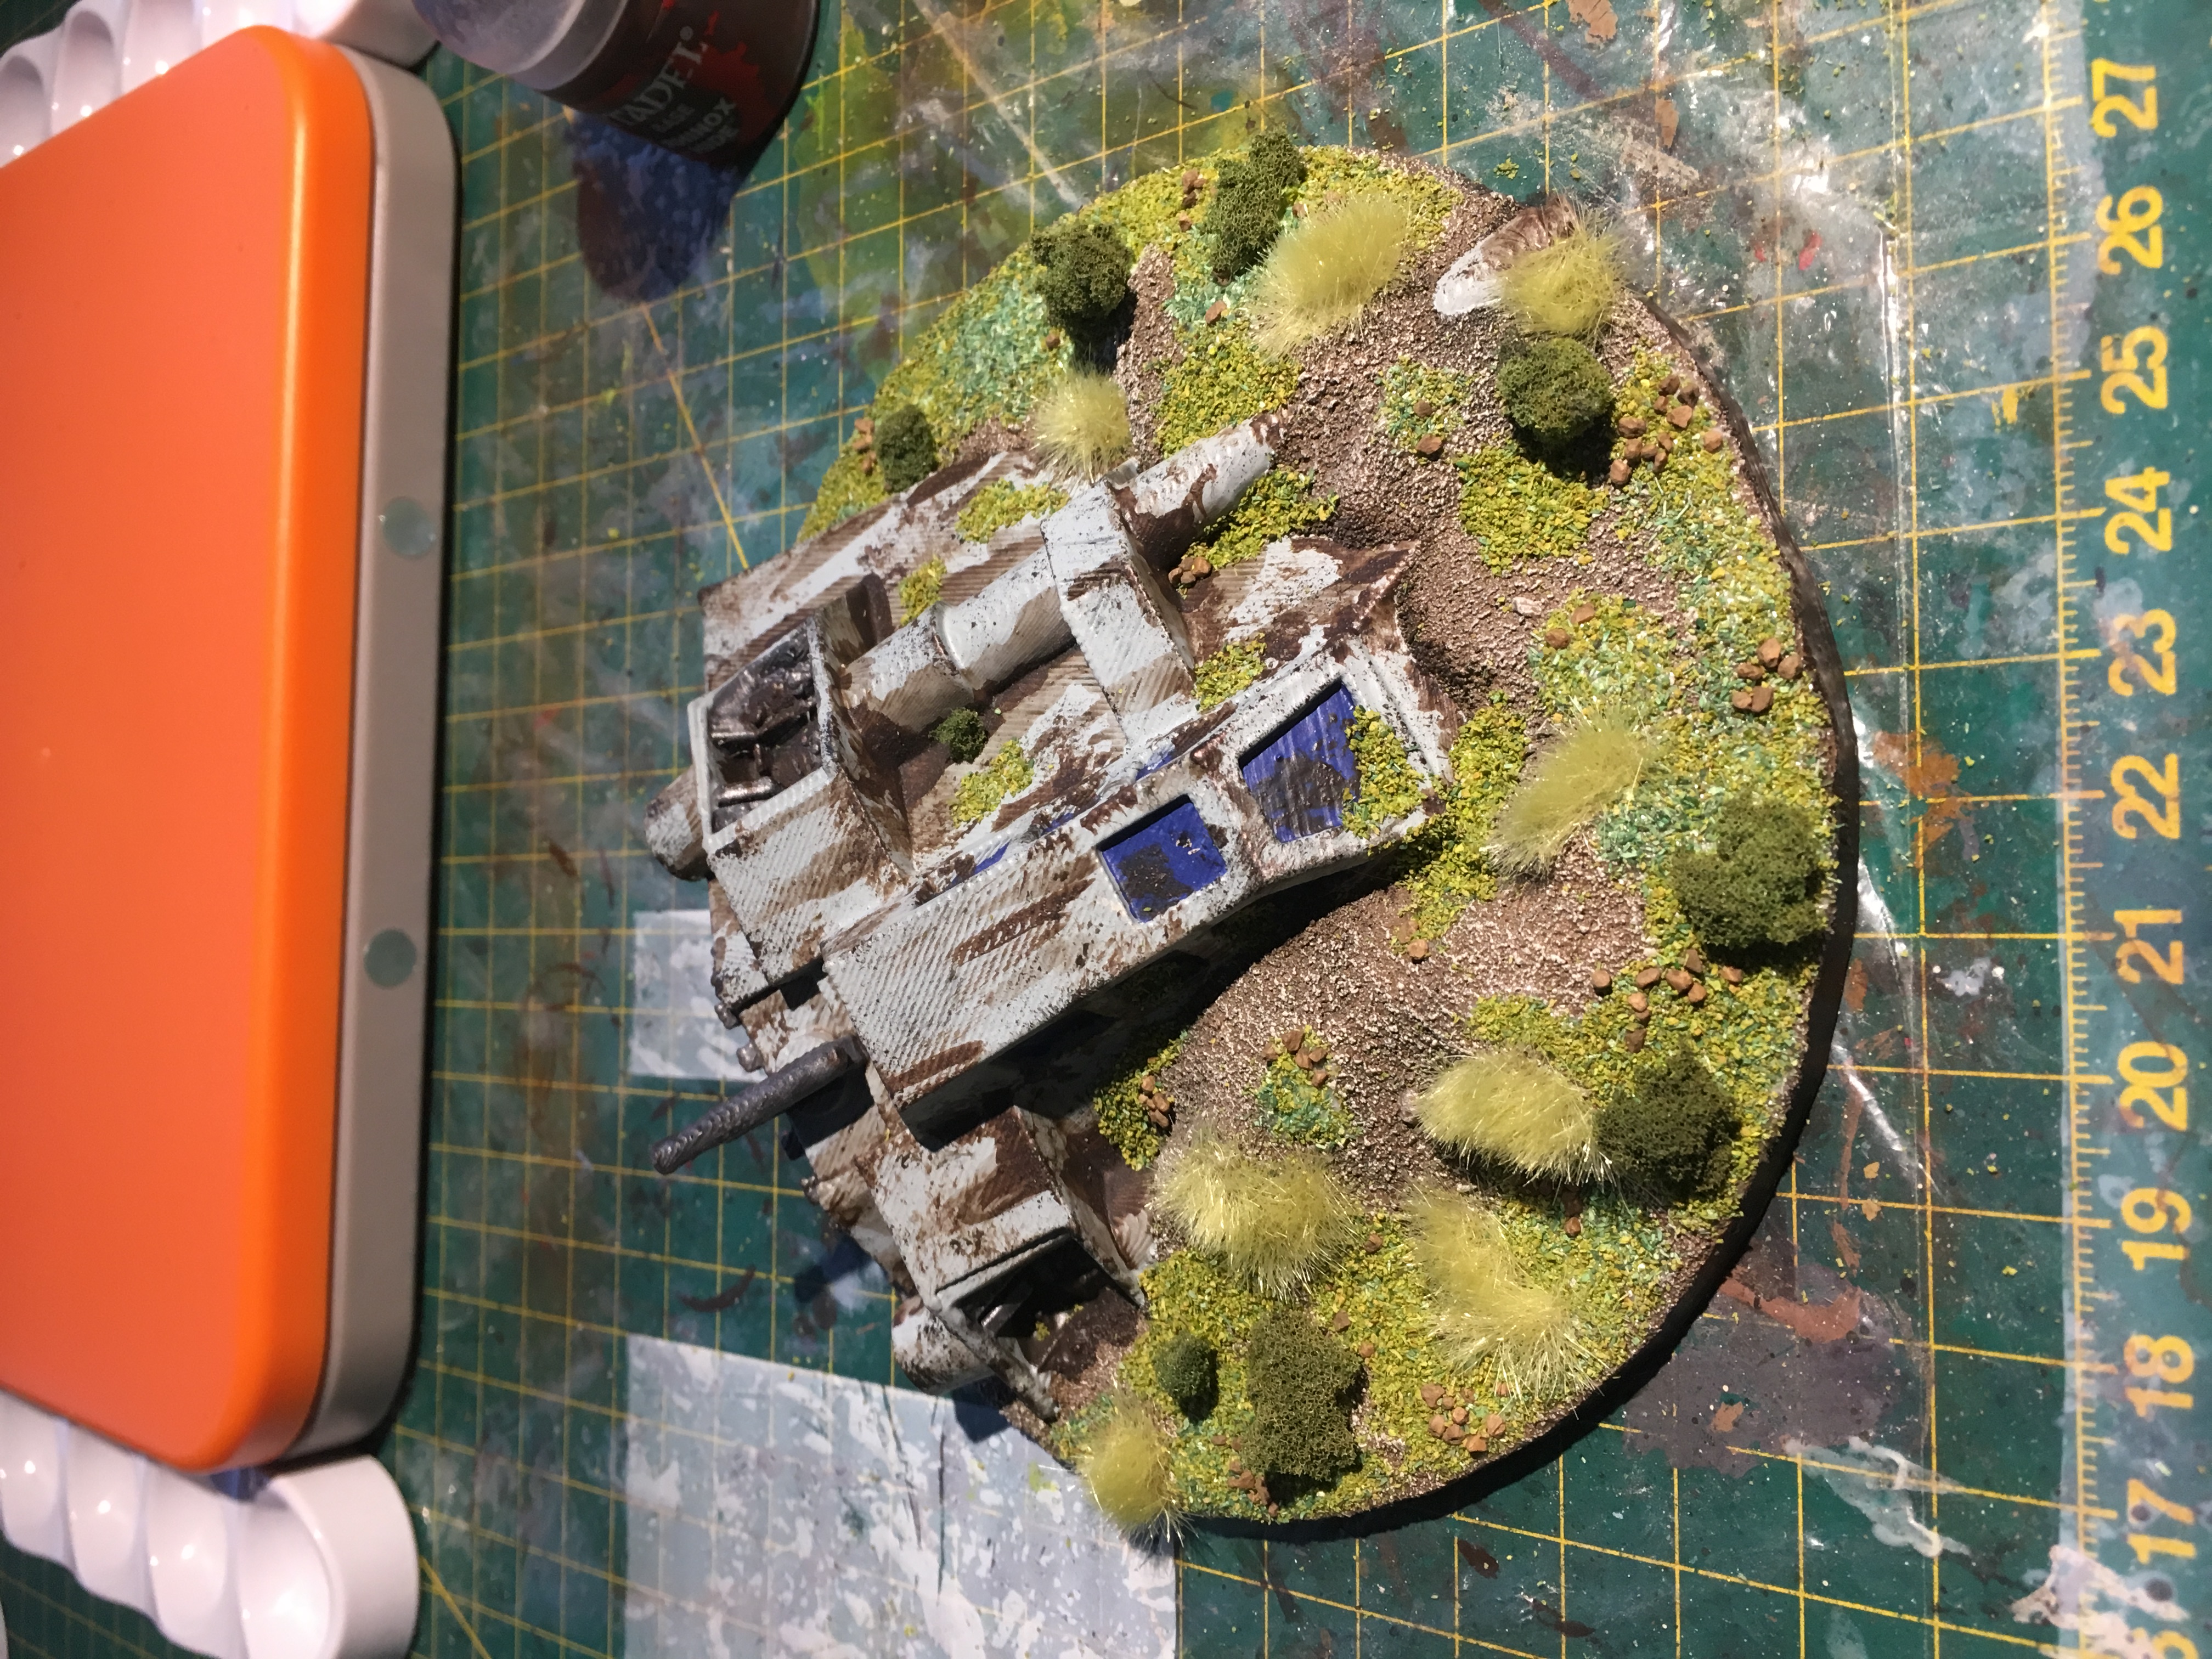
Fly Swatting!
If you remember back to BOW 1.0 you might remember that I have painted up an airspeeder (I will add that to this project when I can remember what I did). Well, a friend of mine with a 3D printer found a file on thingyverse of a downed speeder. maybe this
I PVA’d sand onto the base to help cover up the print lines and primed it in black.
I then Steel Legion Drab’d the sand, Celestra Greyed the speeder body, Mechanicus Standard Grey the engine bits and Macragge Blue the windows.
I then used two washes, black on the engine bits and Agrax Earthshade on the body for light dirt weathering. Once that had dried I sponged on Warplock Bronze to break up the rest of the big panels.
Once that was all dry I then took Typus Corrosion and added streak marks and heavy weathering inside the light weathing.
I then completed the base using my previously documented method.
from start to end this took two hours, not including drying time.


An Endor strike team needs Jedi support! Hobby Night Live July '18
I got hold of a load of models cheap from a friend who doesn’t like rebels.
I was chatting with friends and it we came up with an amazing idea for what to do with my now spare Luke Skywalker! Change his head for a helmeted rebel head and then somehow attempt to make a poncho with green stuff.
it should be mentioned that I have never used green stuff for anything other than filling gaps.
The first thing I did was search the spare models for a male head that was helmeted and looked vaguely like Luke.
turns out the only one that does is the ATRT driver. :/
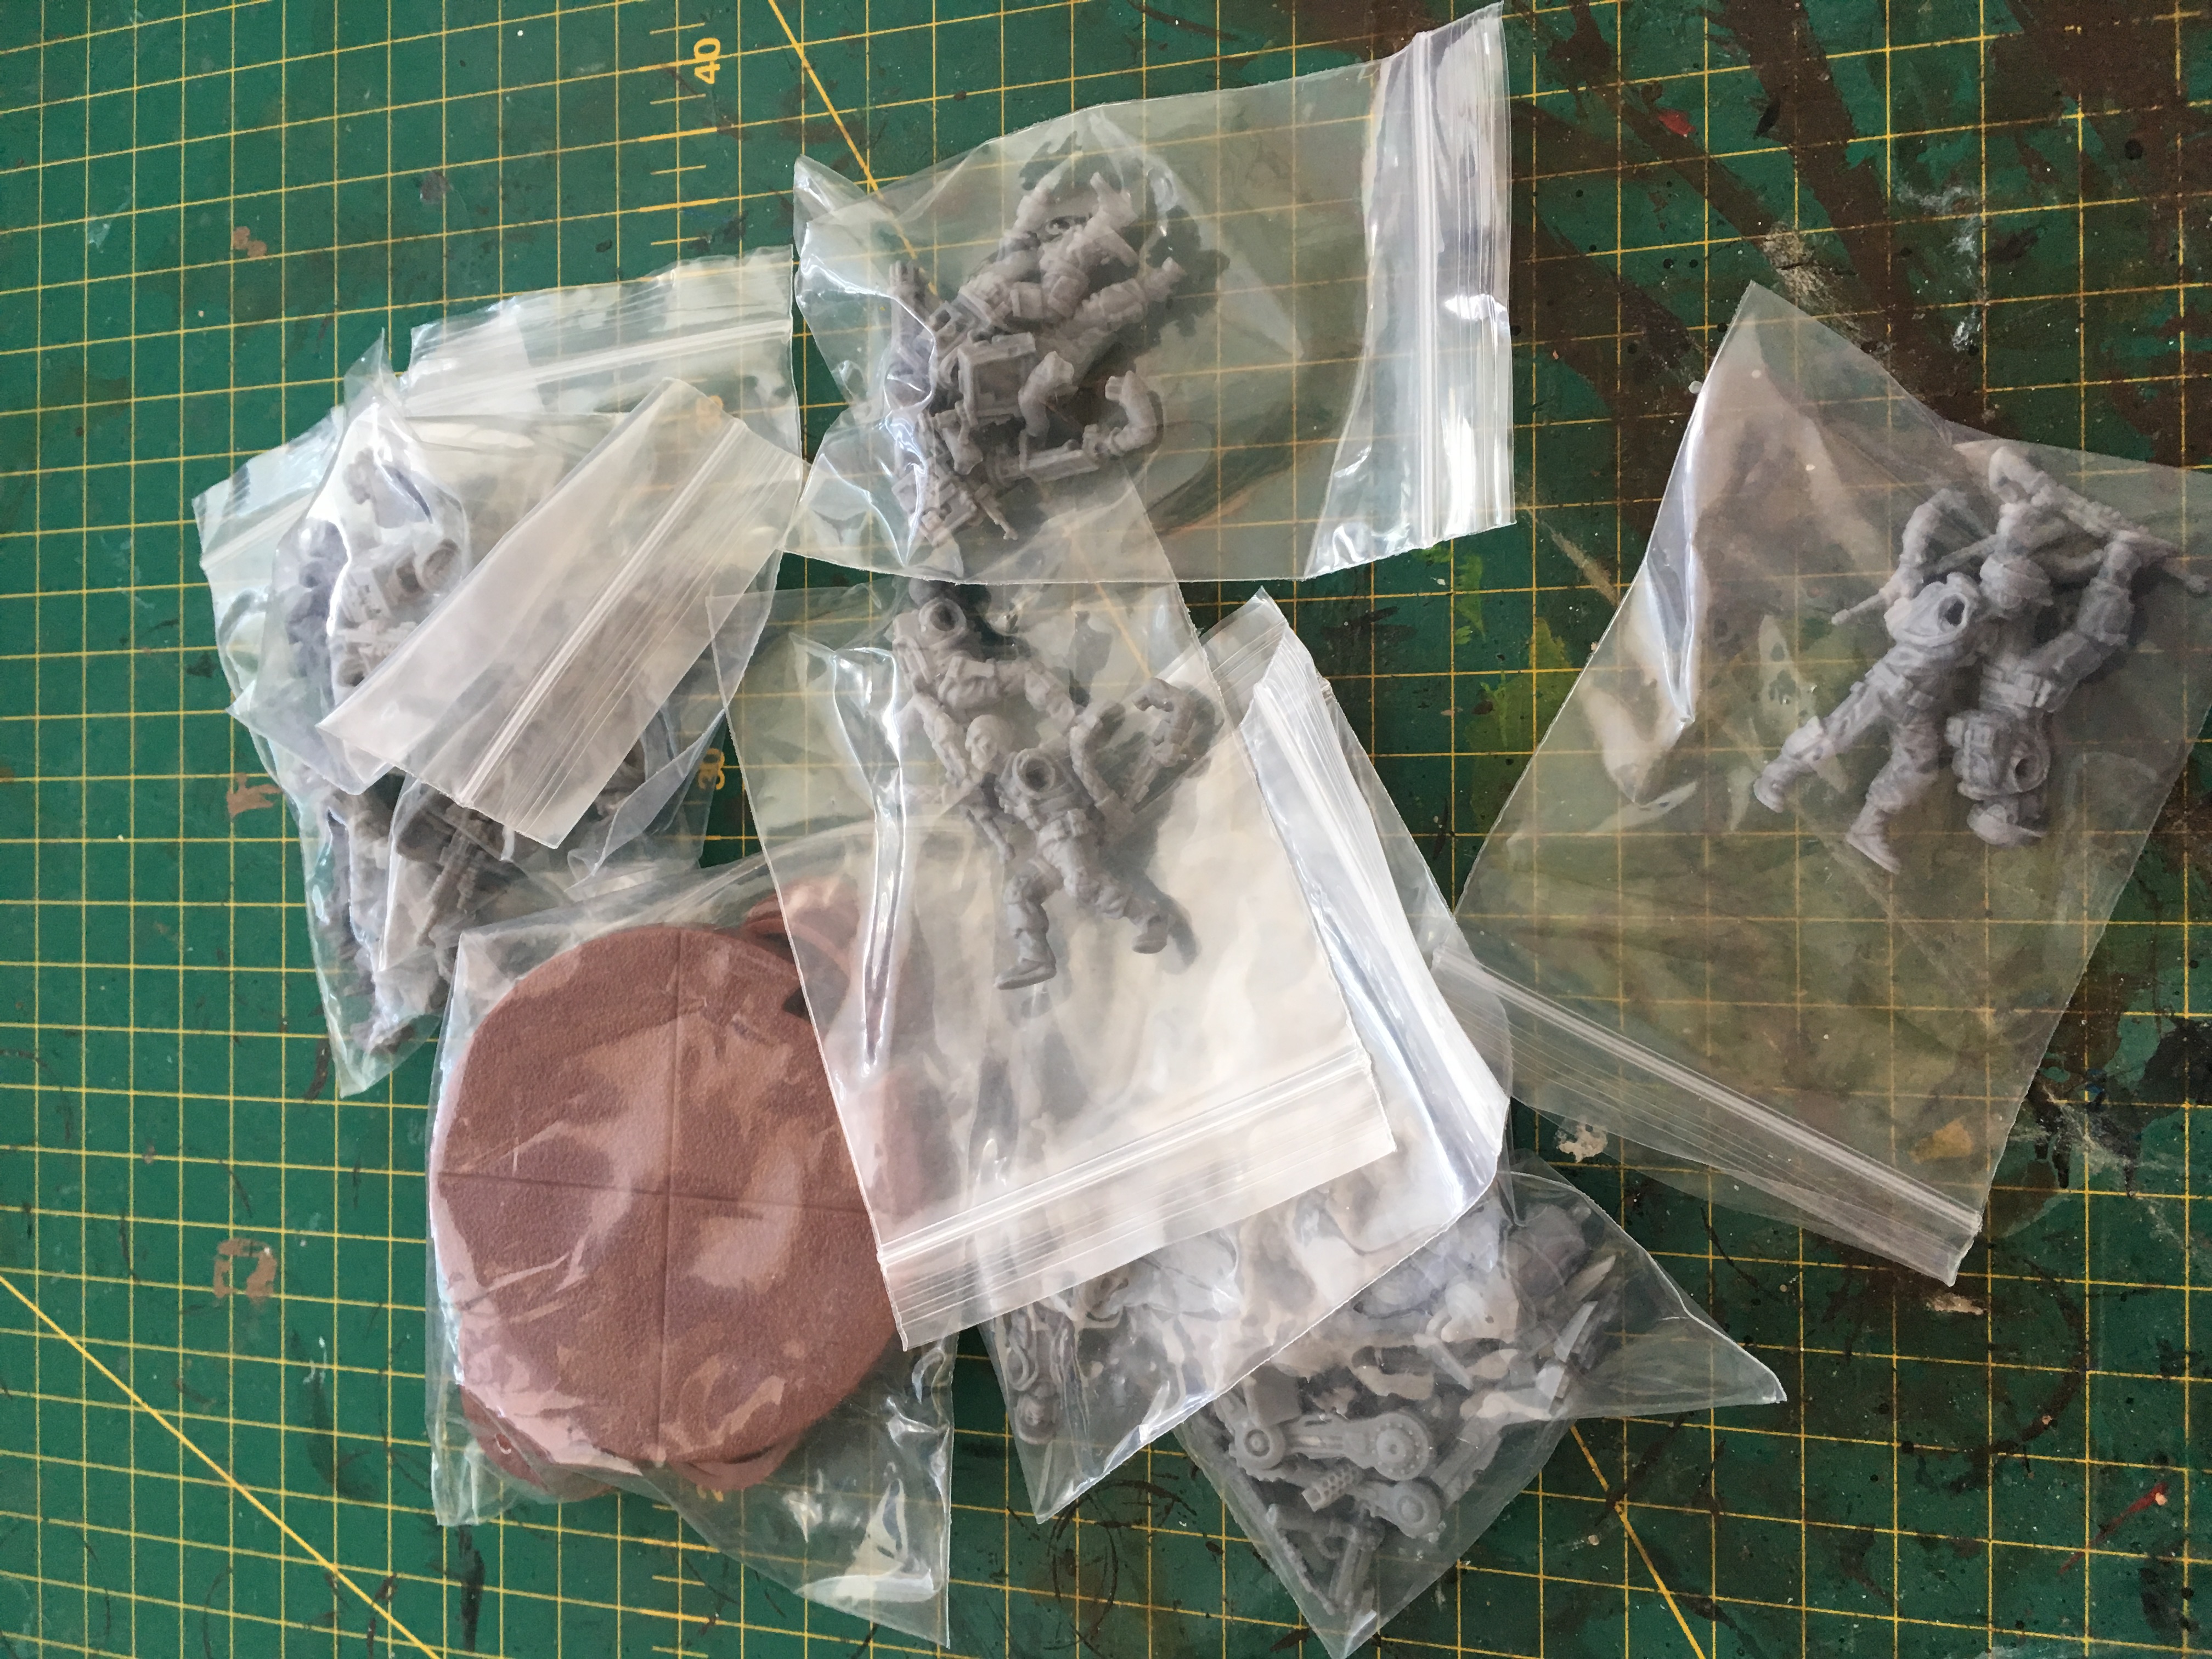
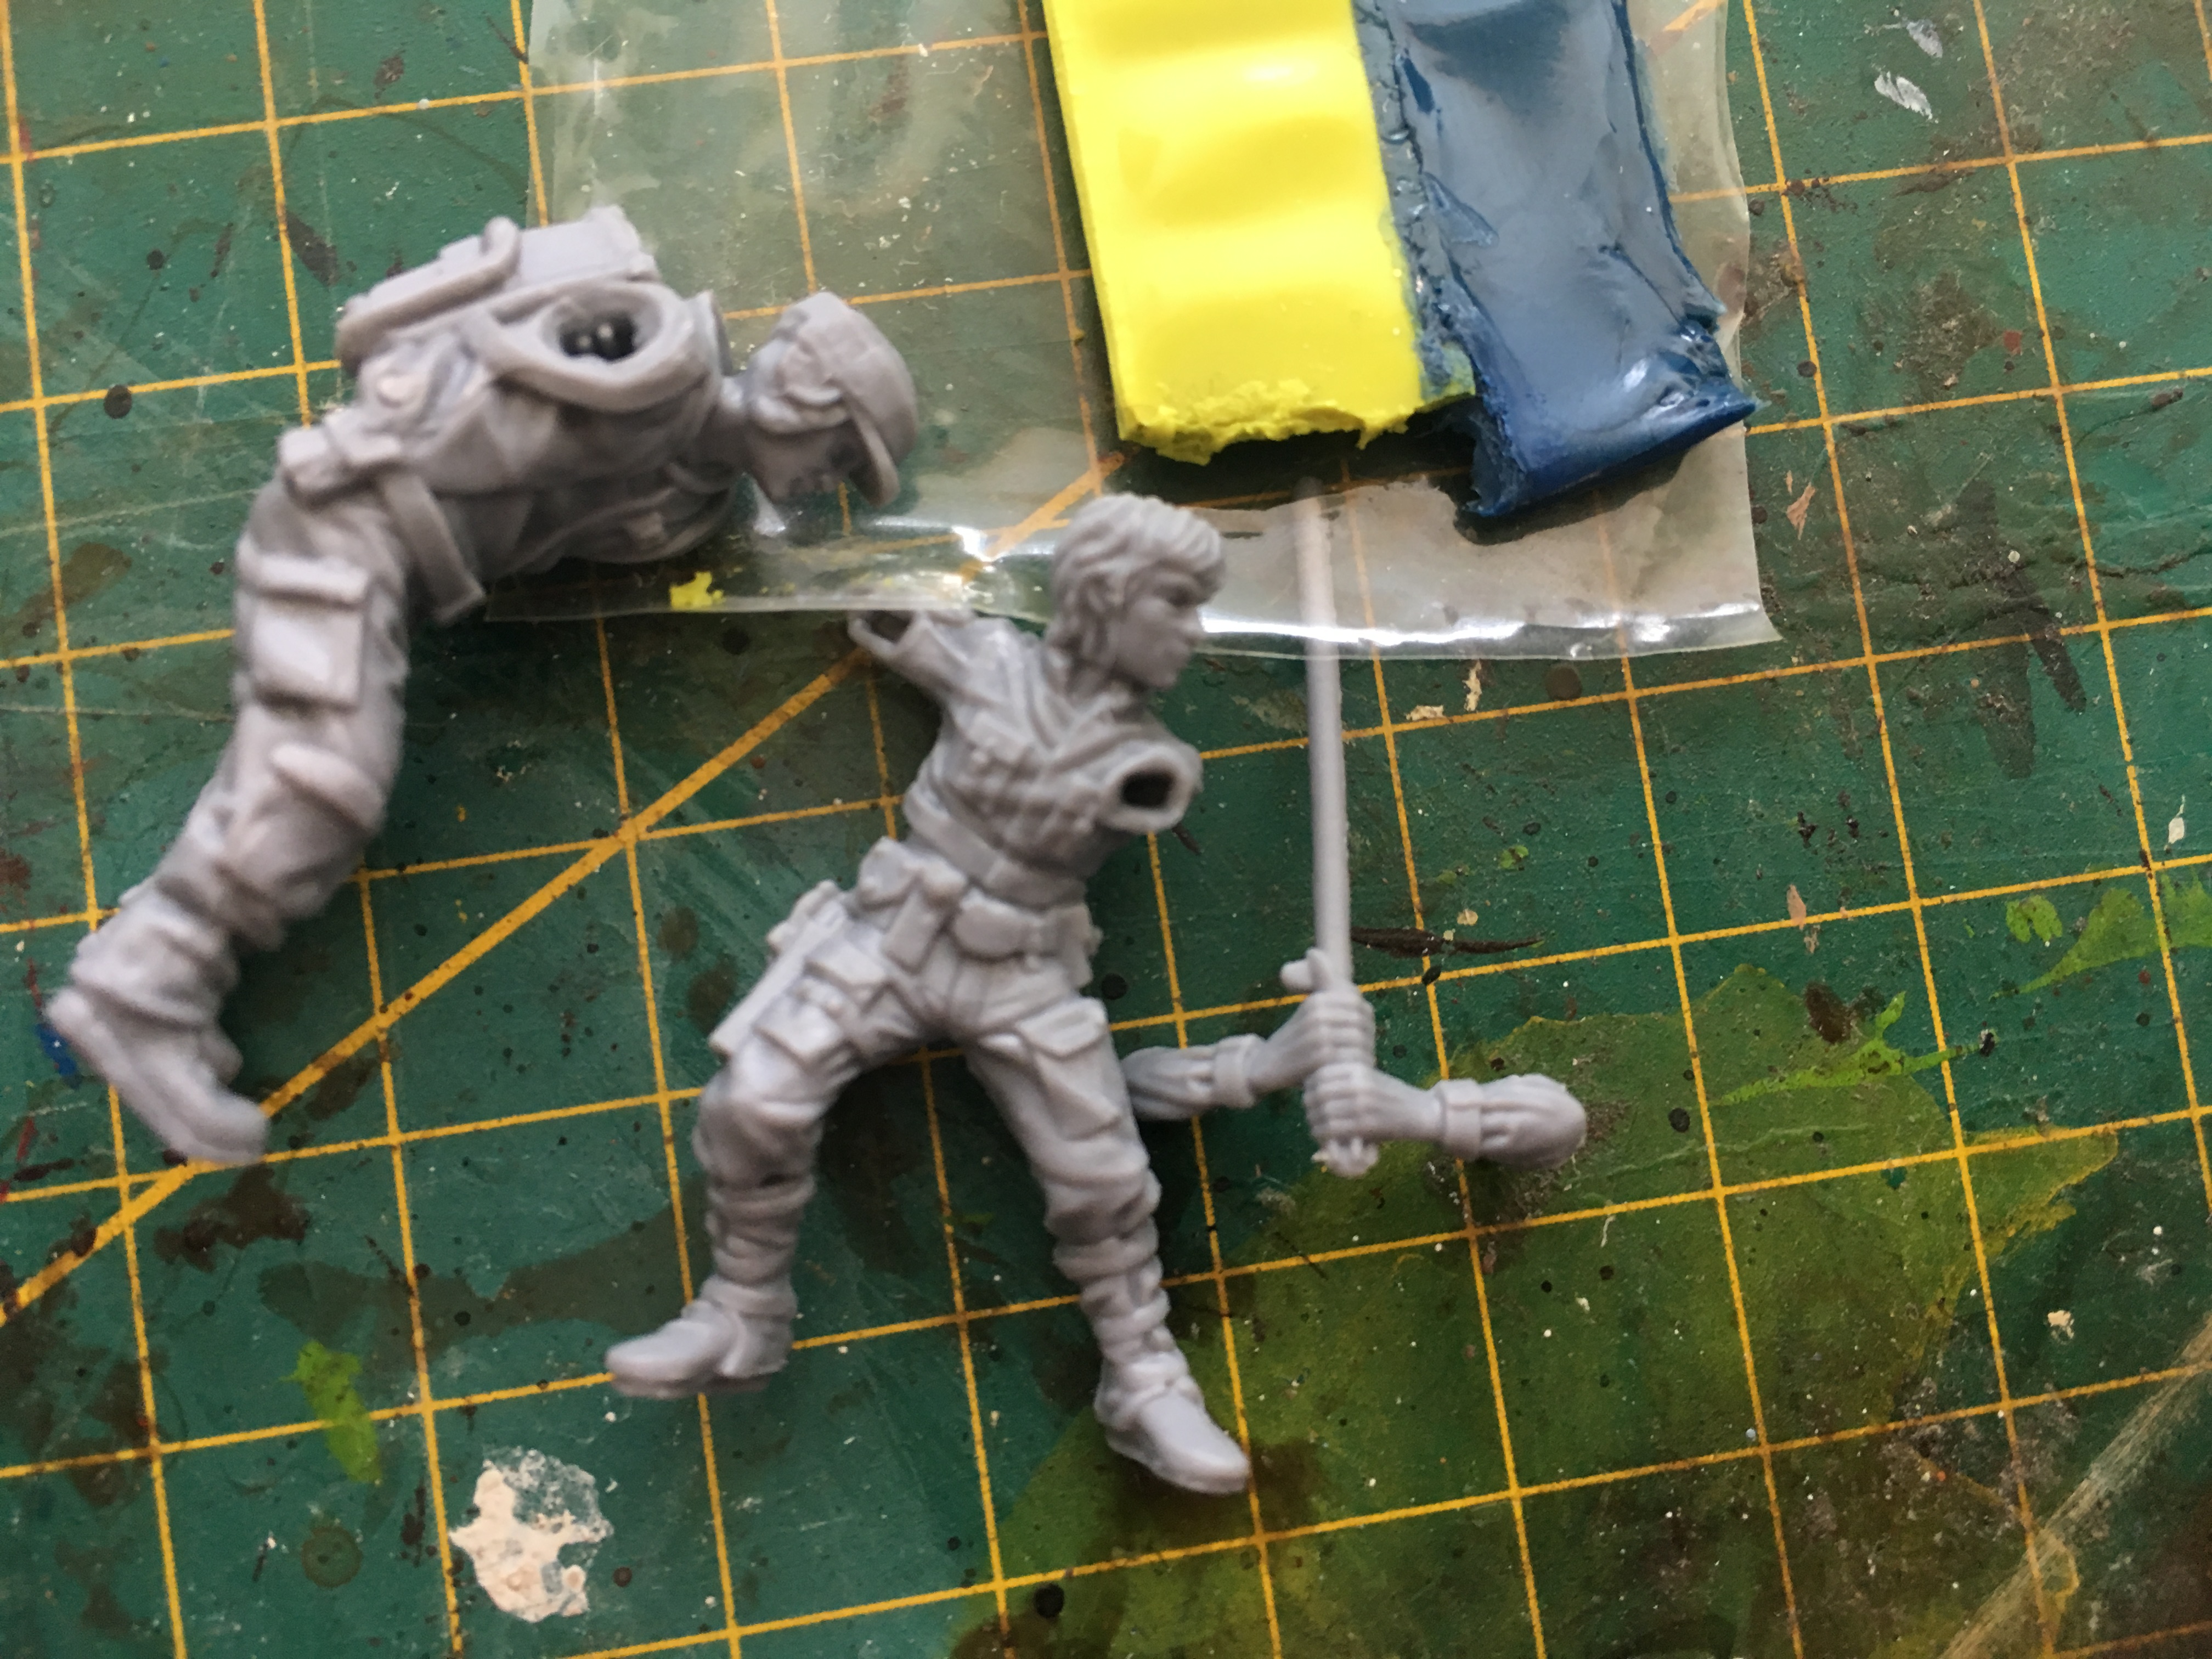
So then it was down to mr choppy the scapel to behead both volunteers and the king stick the superglue to put them back together again
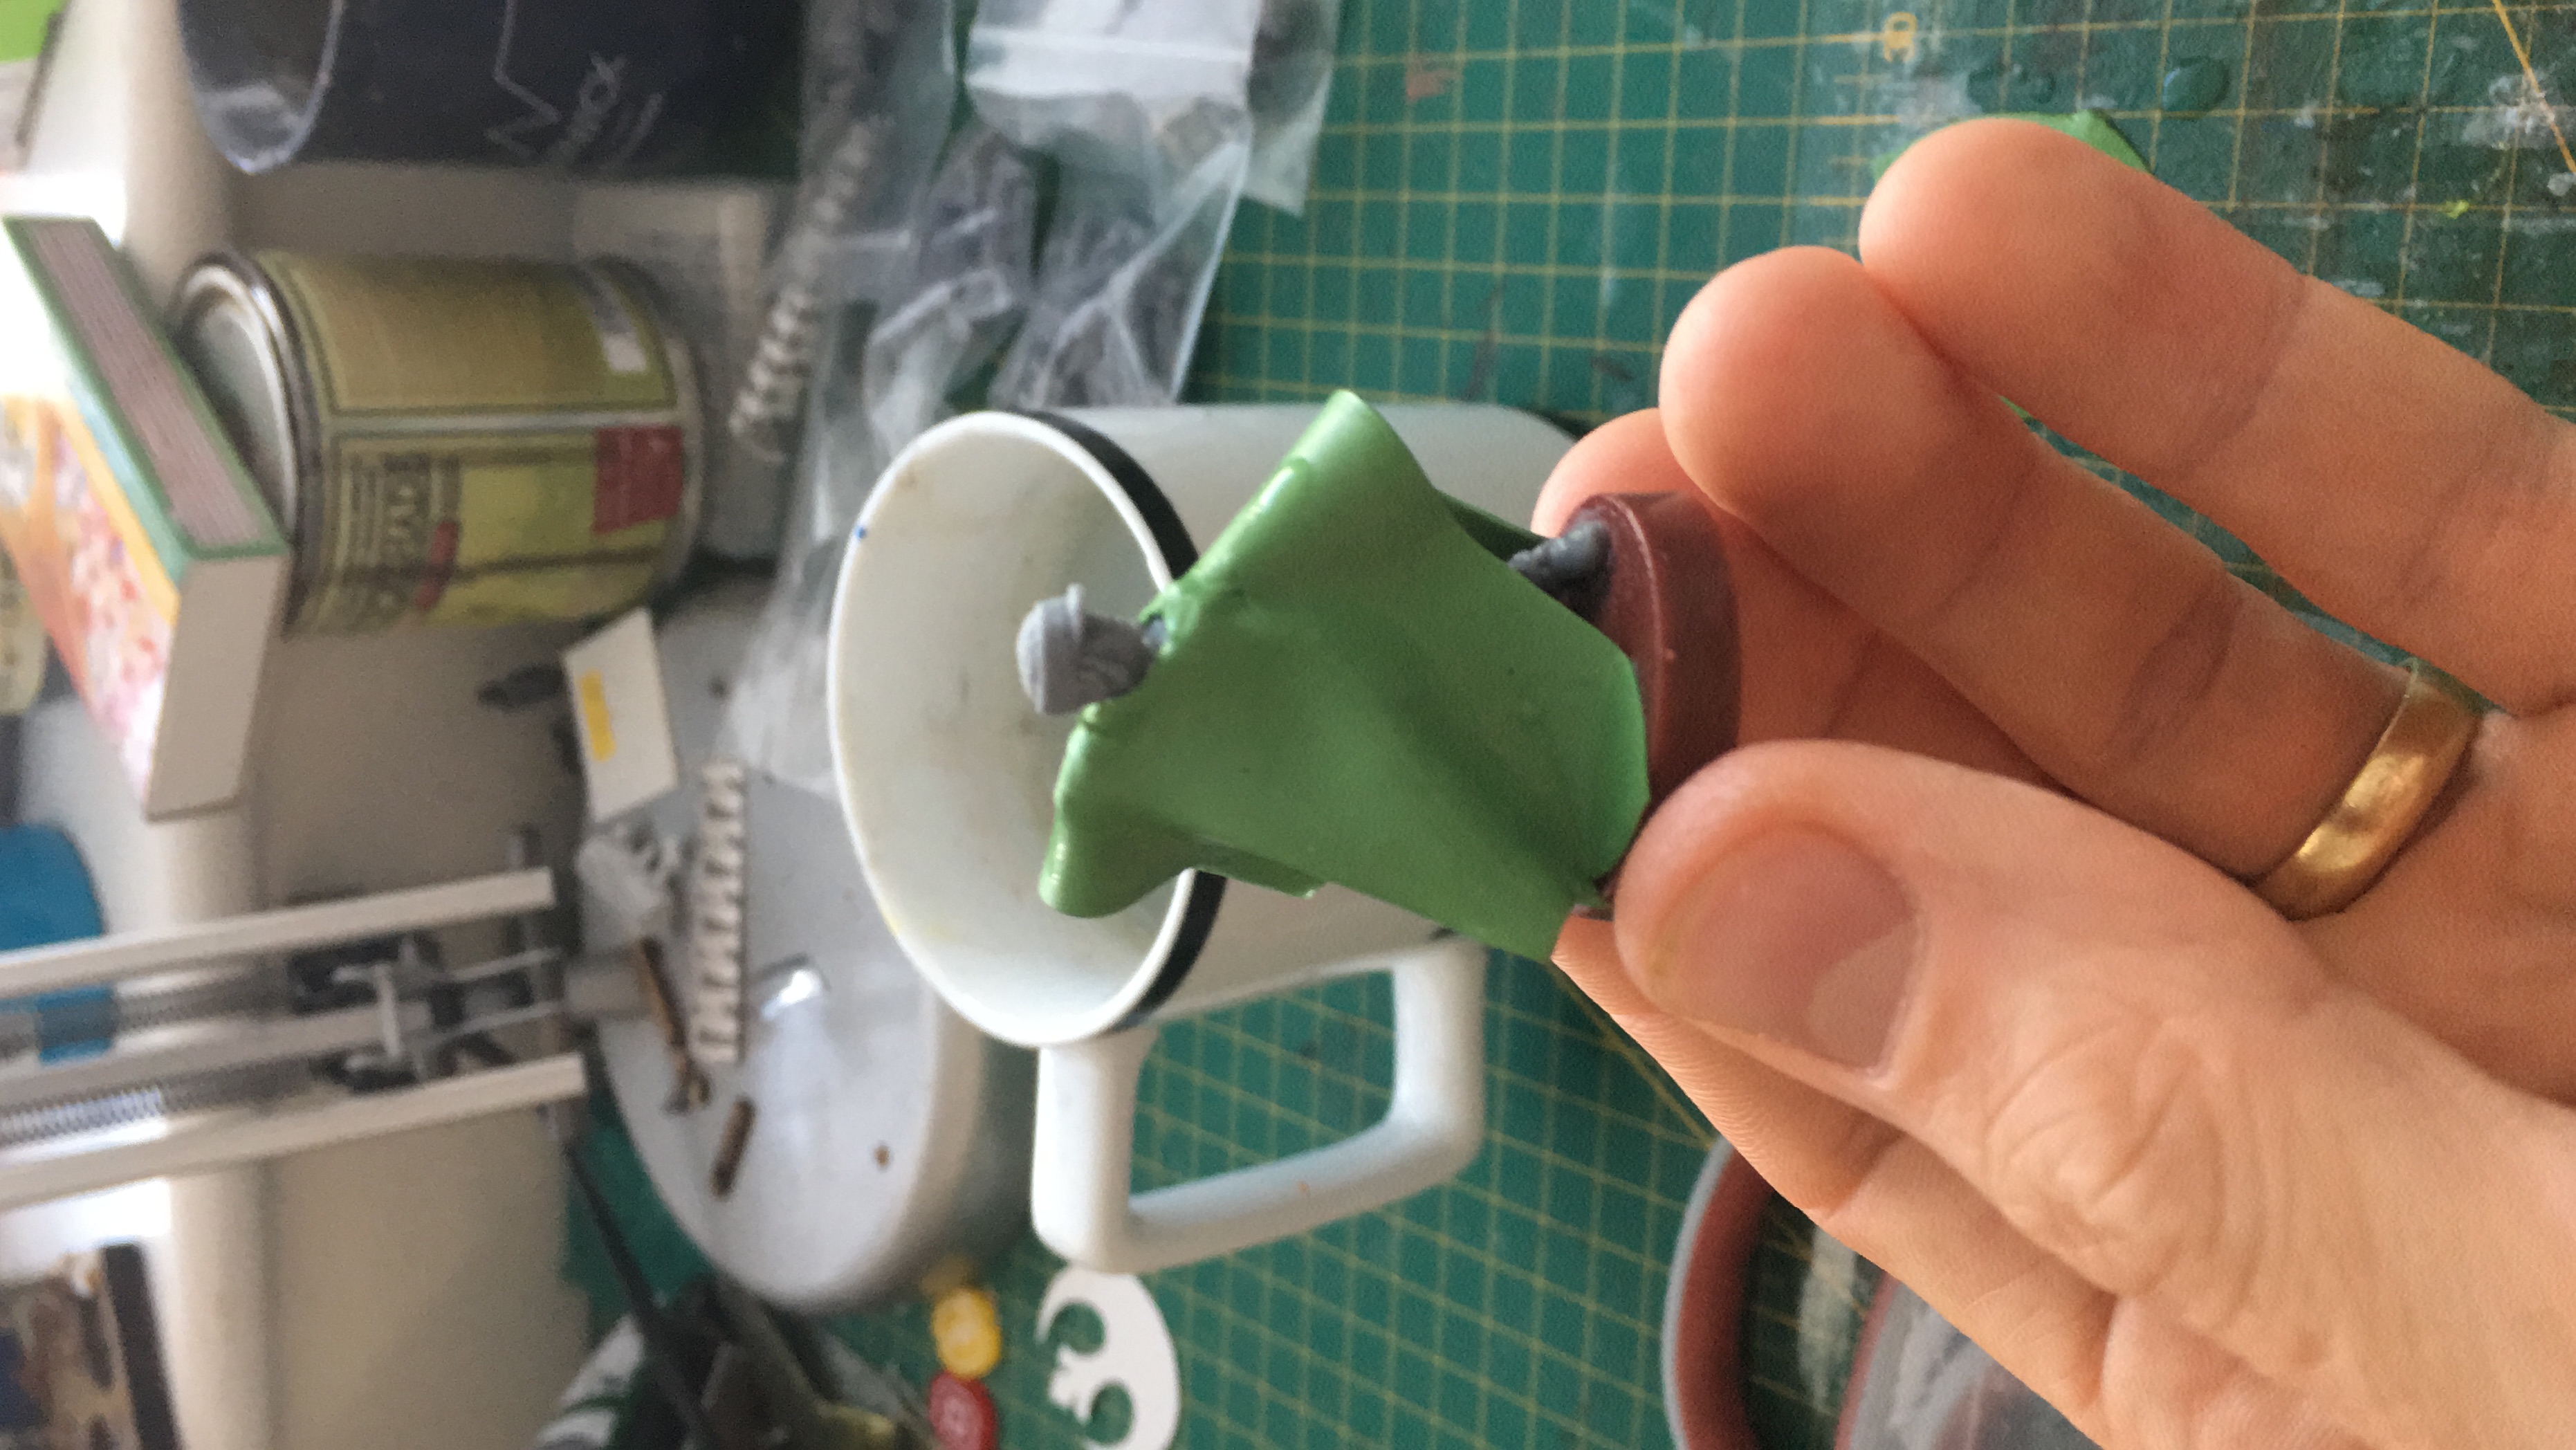
Ive laid strong plastic bag out on the table and taped it down as thats what the internet said to do… it stops sticking apparently when combined with lots of water. turns out, they were right! I rolled out the green stuff into a very thin sheet and cut it to a rectangle and made a slit in the middle for the head and then drapped it over Baby Vader (who by ROTJ was definitely close to becoming a Baby Vader)
 NAILED IT!
Ive then started to make folds and creases using super cheap plastic palette knives.
It should be noted that the arms have not been glued in at this point.
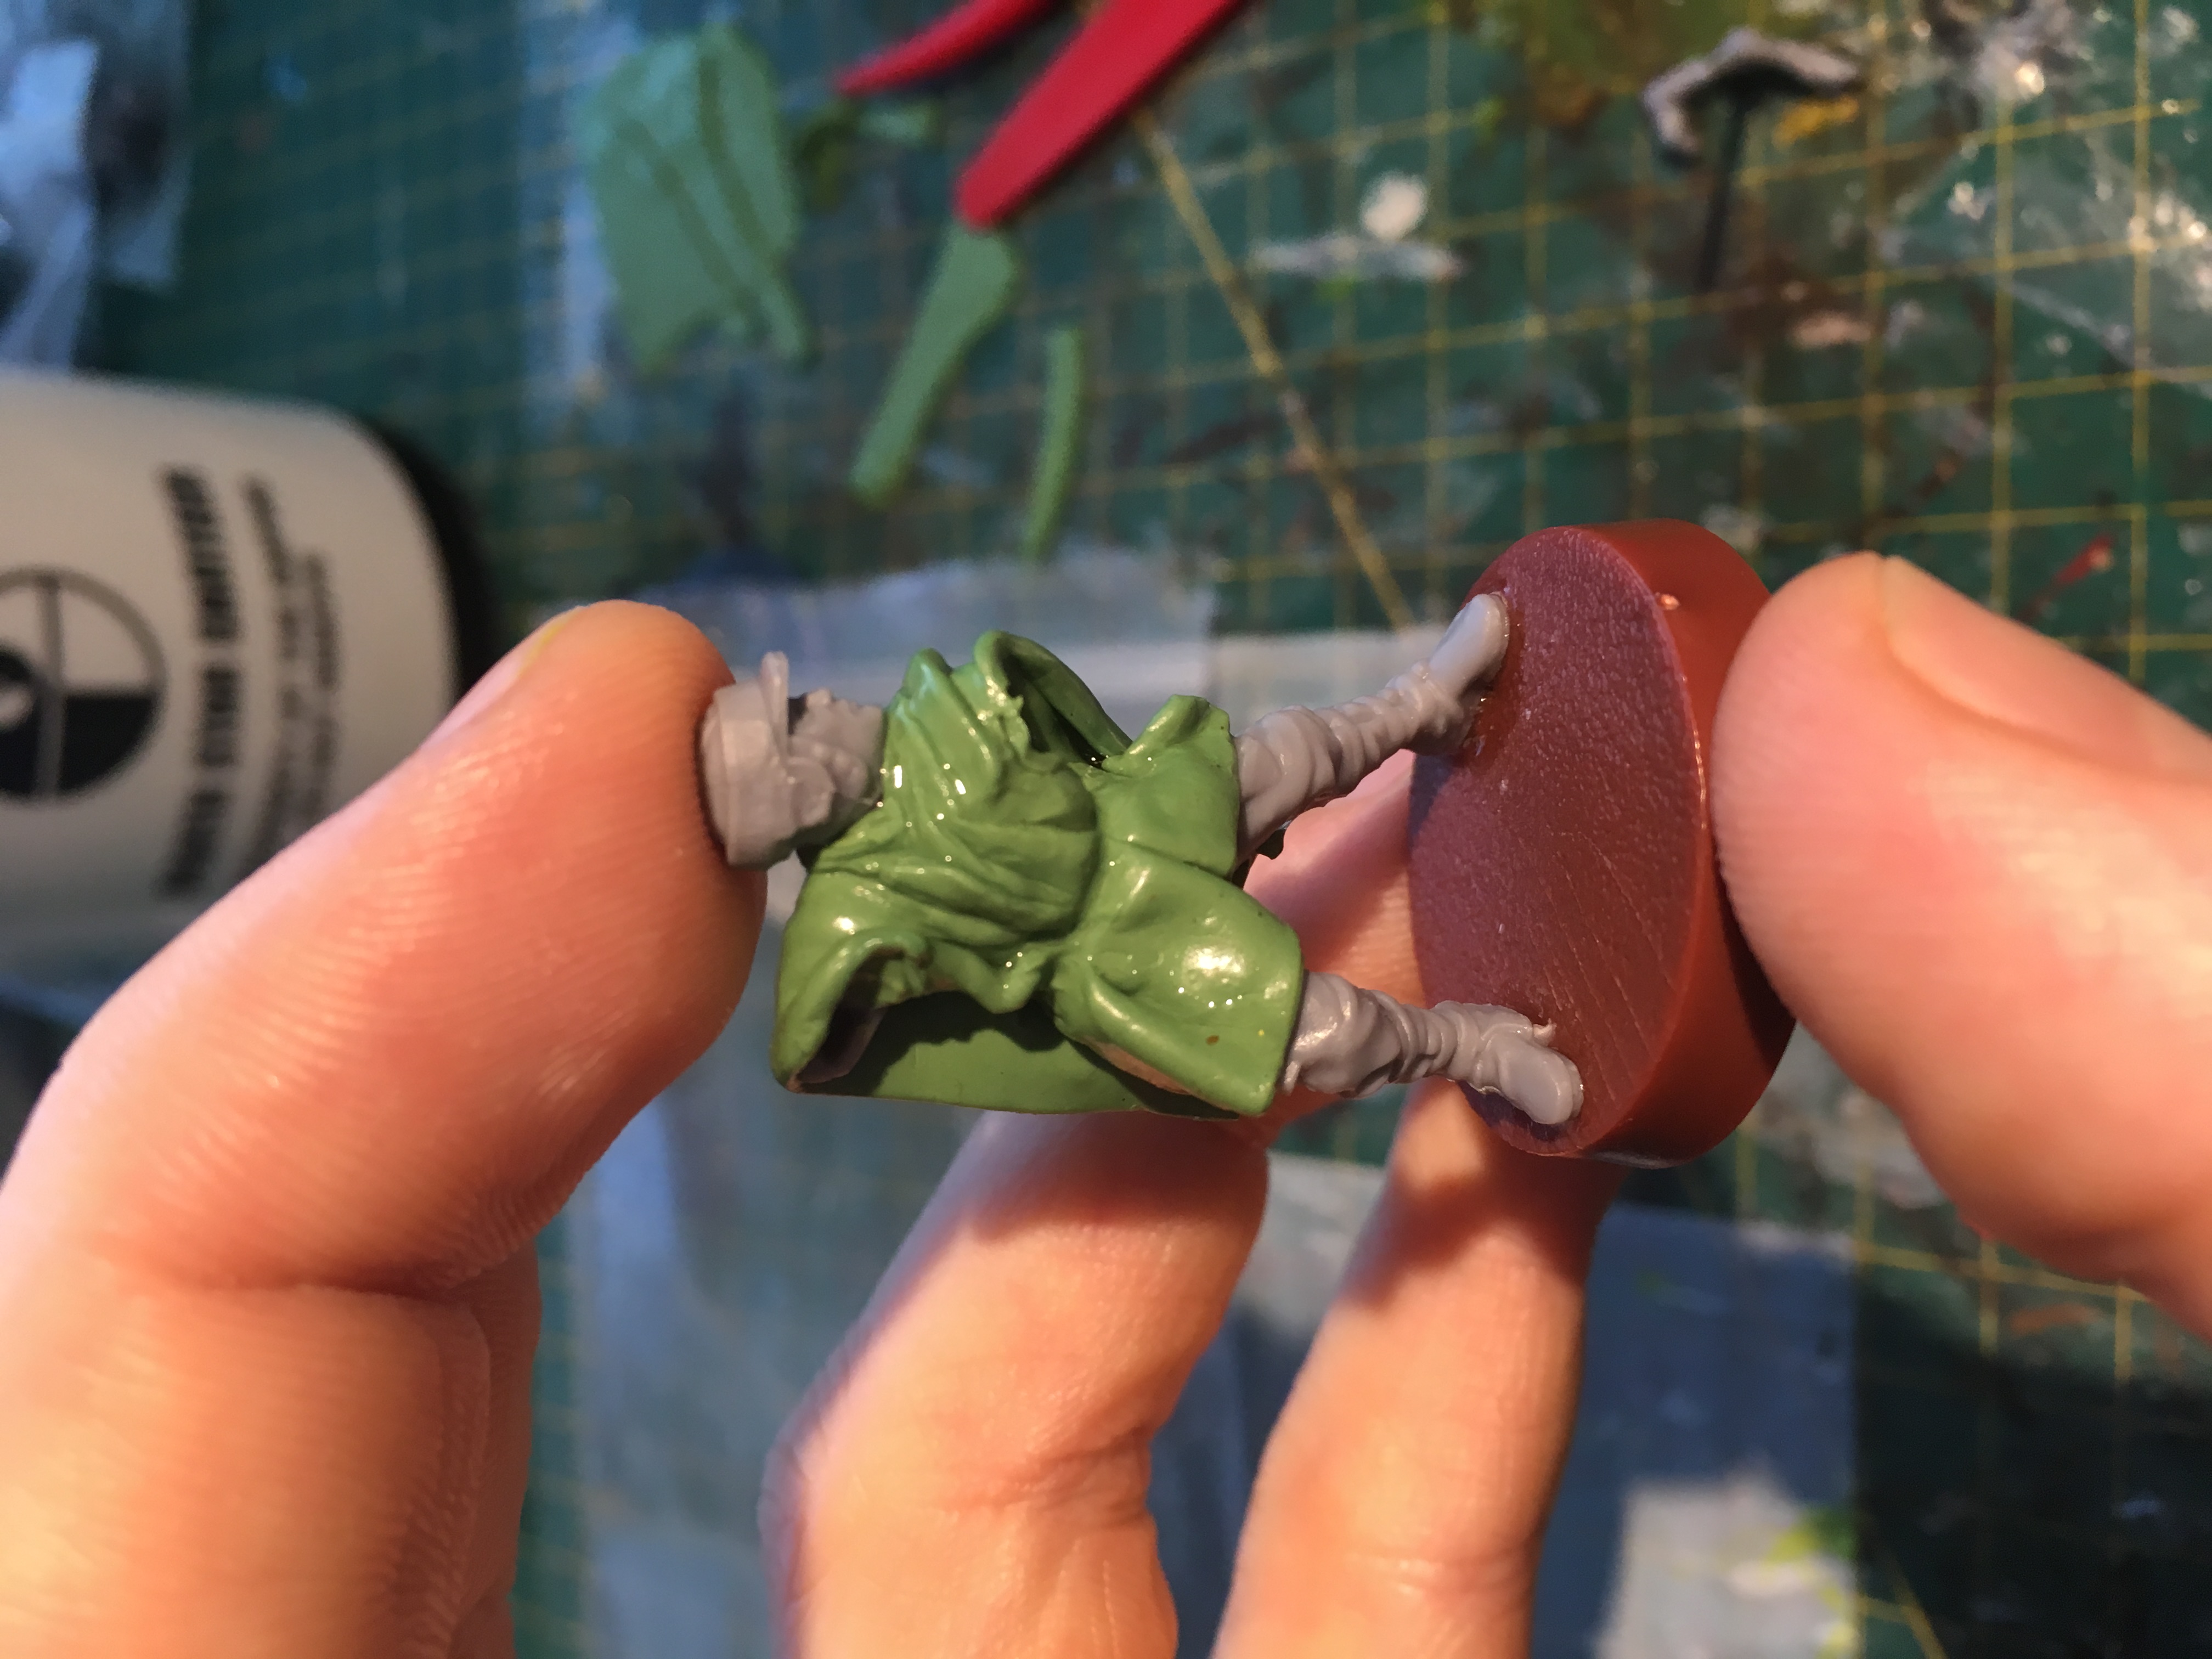

Ive then started to add more folds and finer detail. This took time and was a bit frustrating but actually quite enjoyable until I then fat fingers touched it leaving my finger prints all over it!
a bit of water and feathering and it was all back flat again.
Ive also sculpted in a hood and belt and final touches after gluing in the arms.
The sculpting is done! just got to wait for it to dry and cure now ready for painting!


Now princess, we shall discuss the location of your hidden rebel base....
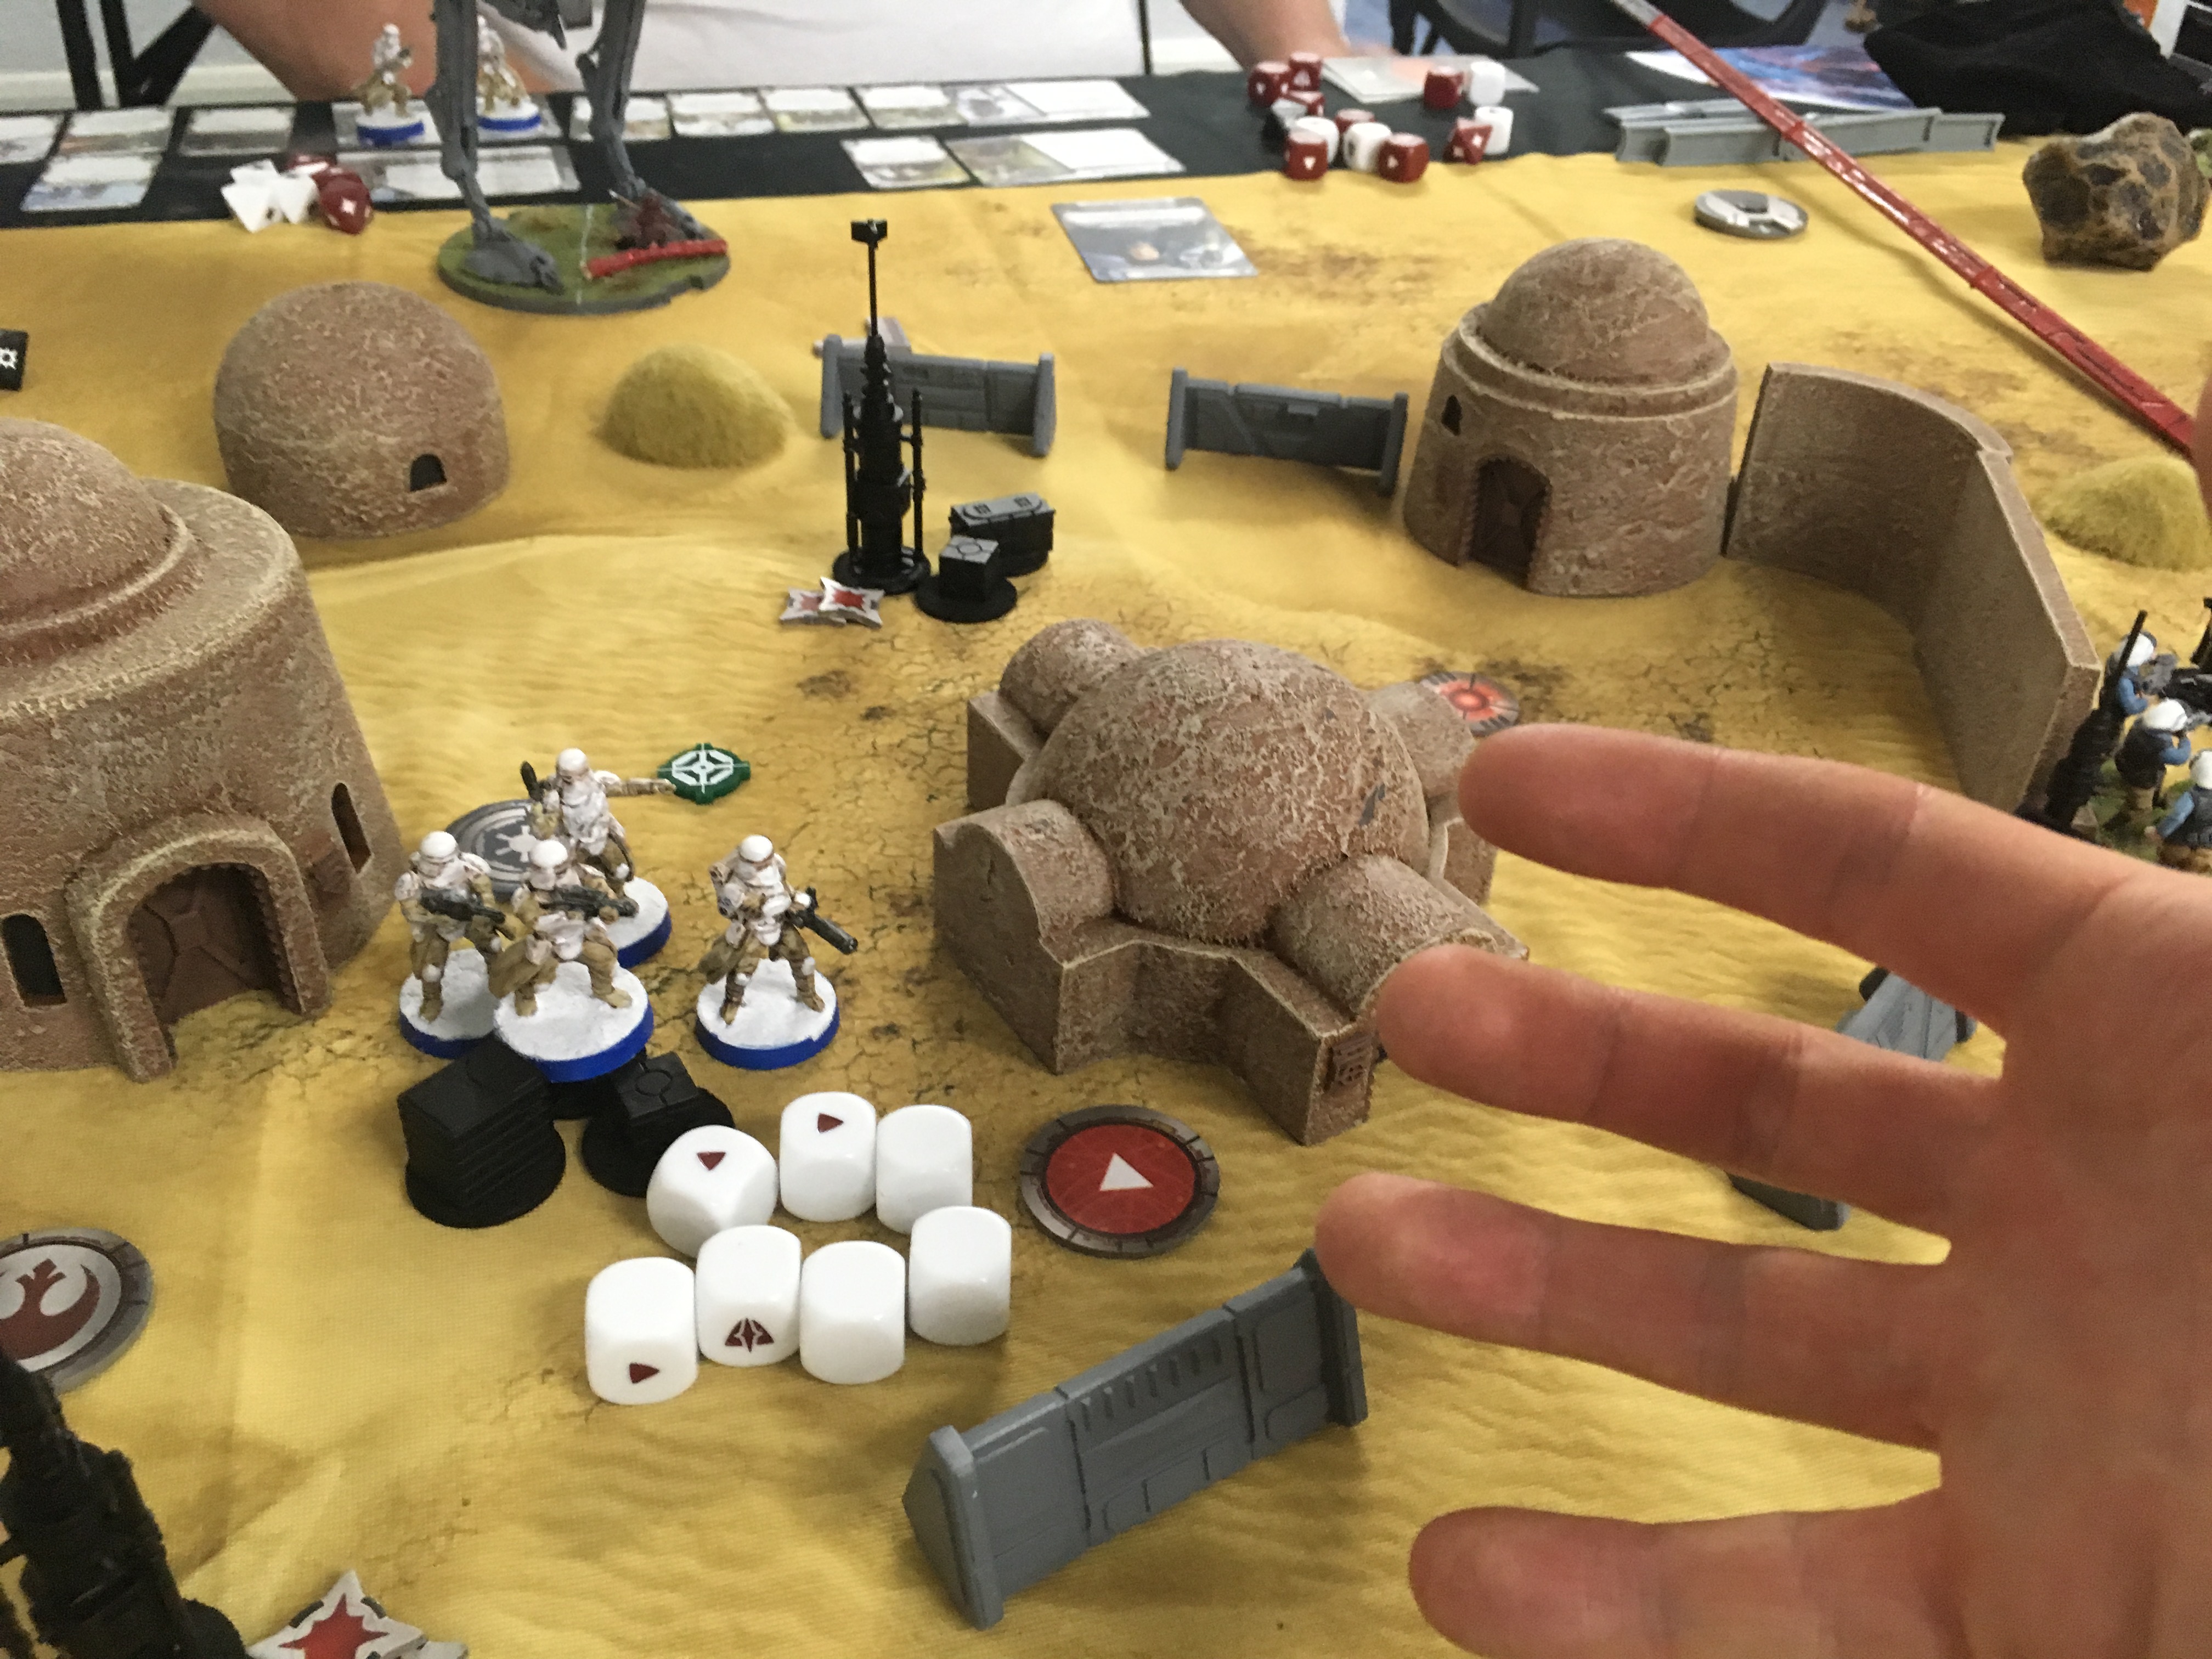
Played a game tonight which ended in a draw with an old friend.
i played as the heroic freedom fighters against the oppressive boot of laminate armoured devils
my list was
3 squads of rebel troopers with grenades, z6, extra trooper and environmental gear.
1 squad of fleet troopers with grenade, scatter gun, extra trooper and environmental gear
2 atrt with rotary blasters to see how effective they actually were
luke with Jedi mind trick, free dodge card and scope for his lightsabre
leia with guardian, range 4 command and environmental gear
it was a very swinging game and I felt I needed more men, perhaps if I reduced bulk of unit size to make 1 extra unit would have been useful. I missed not having anti tank weapons besides Luke when the atst was wrecking my infantry but the atrt were handing out a few good crits.
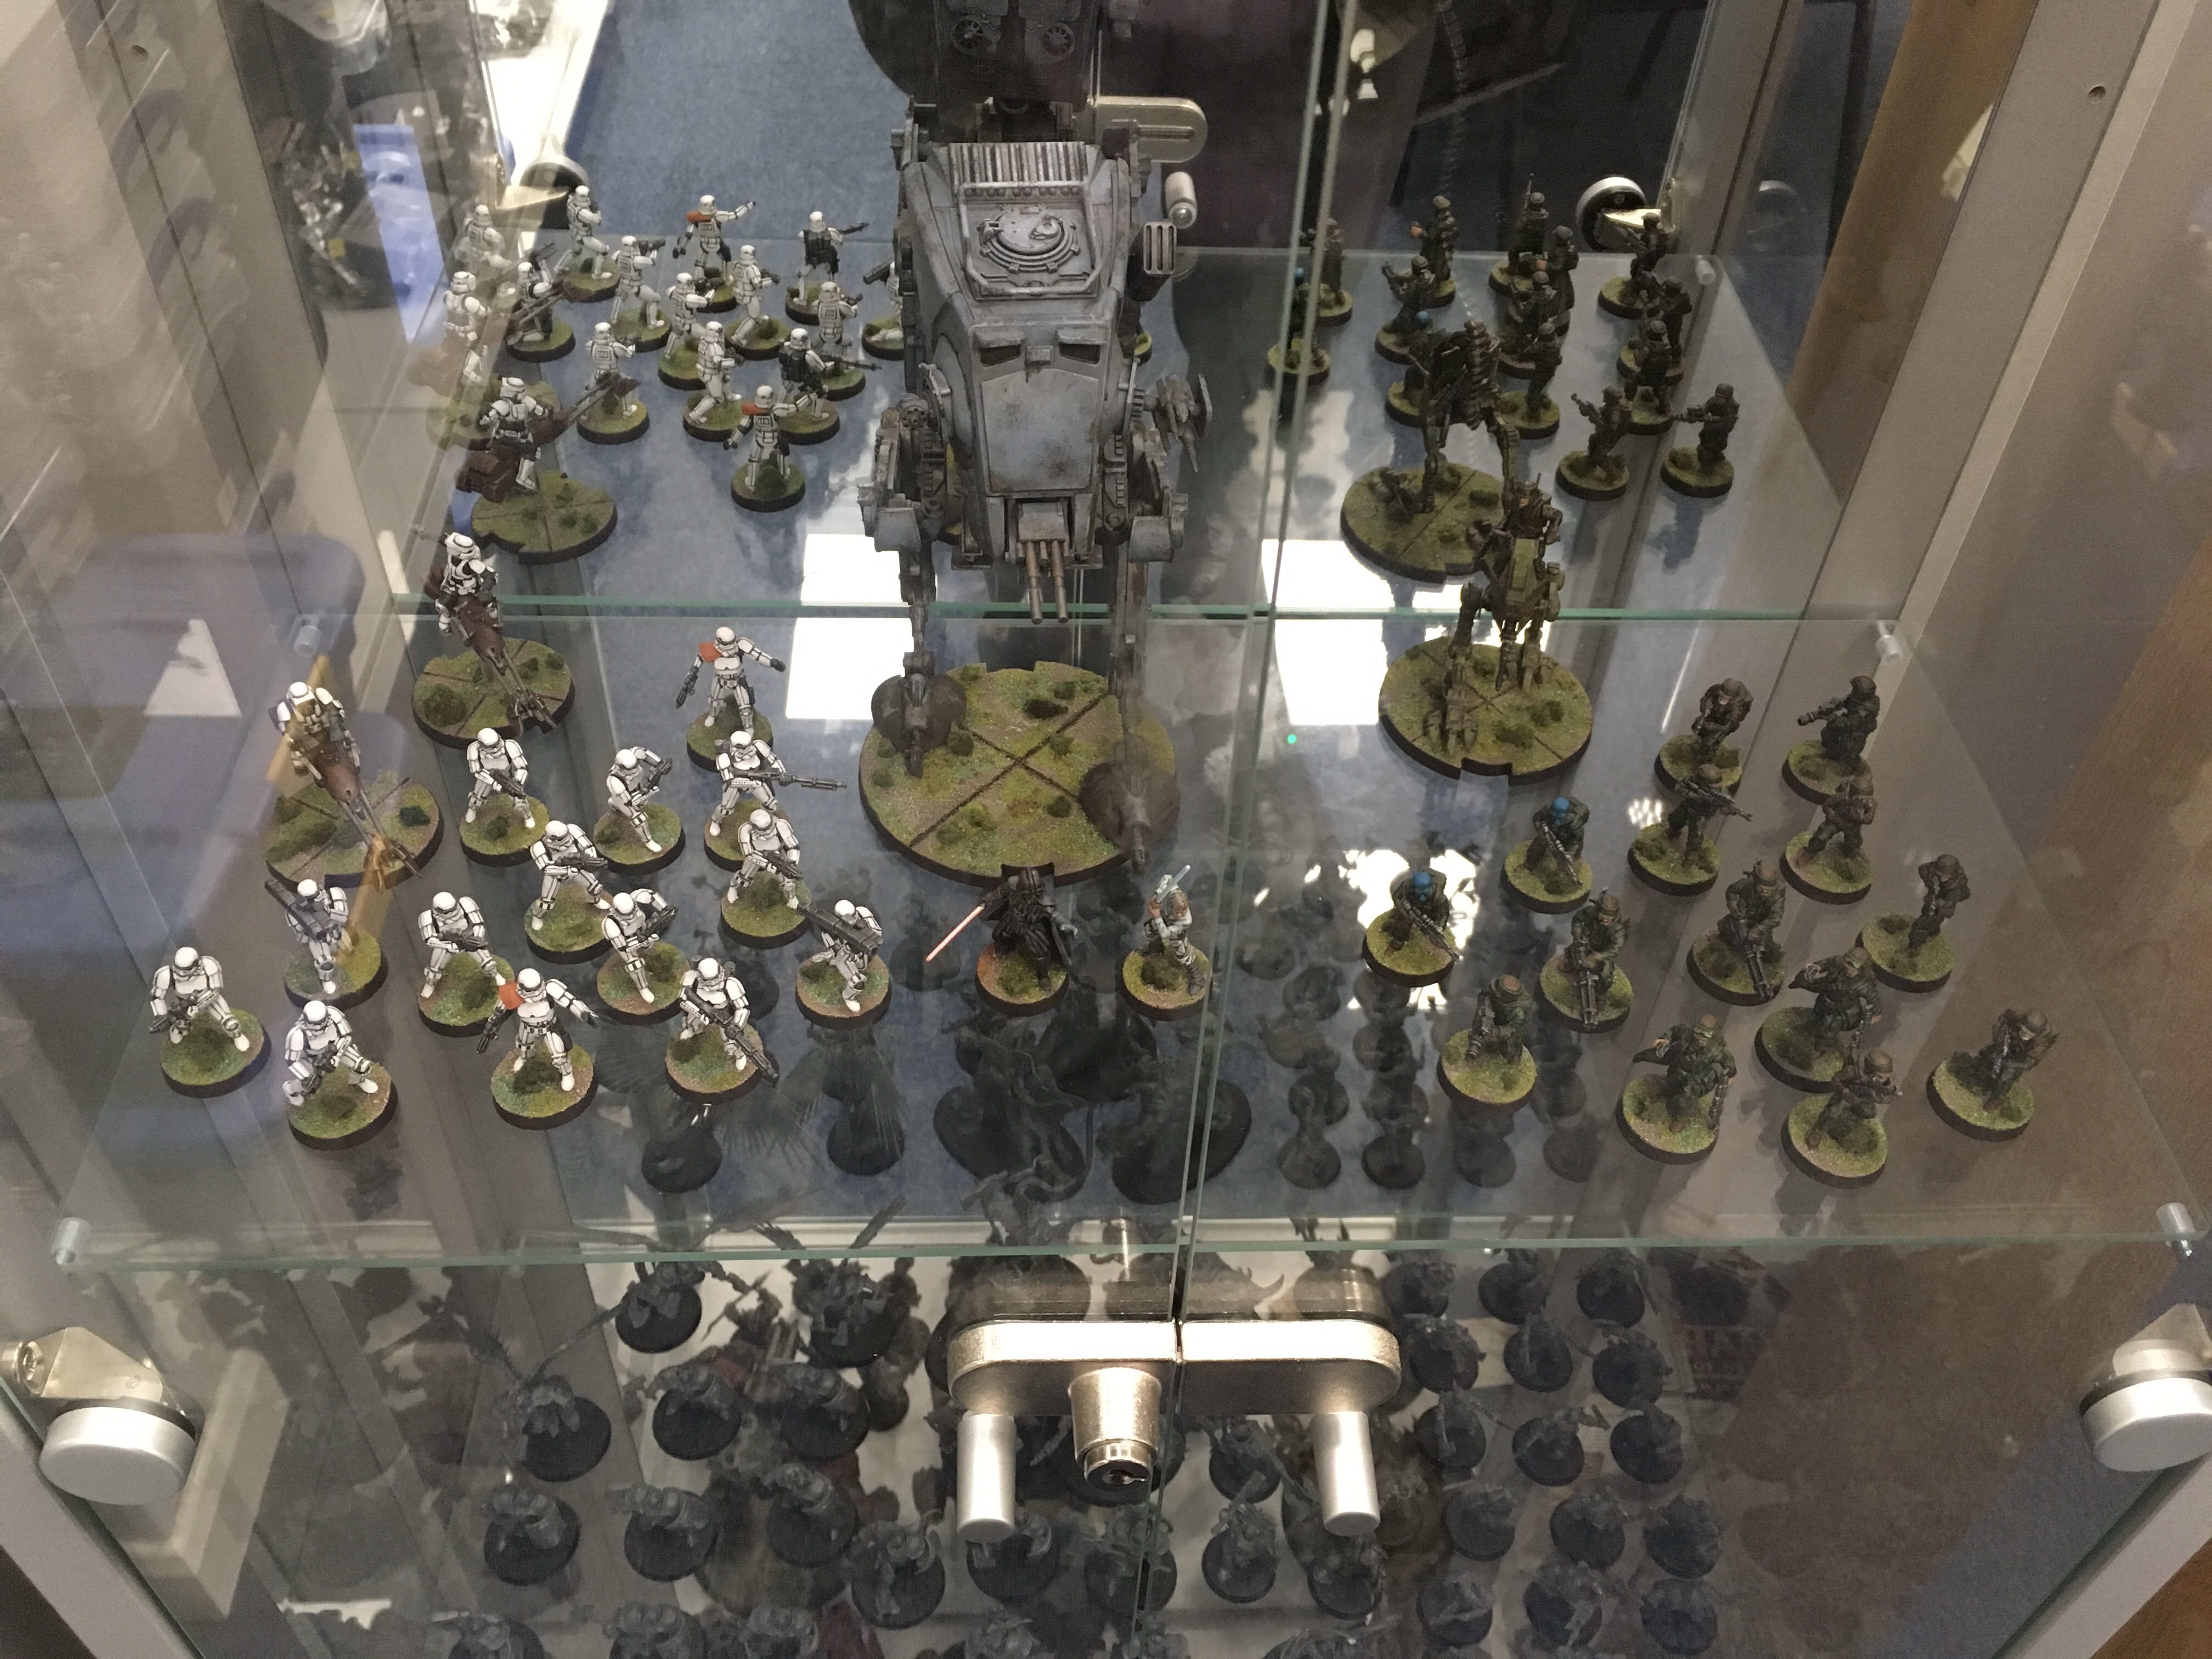 All the models I painted for the FLGS in aldershot


![Zenit Miniatures’ Samurai Warlords Now Live On Kickstarter [Updated]](https://images.beastsofwar.com/2026/02/samurai-warlords-launch-main-600-338.jpg)


