


![1918 Spring Offensive Wargame | Full Rules Overview with John & Gerry (WW1 Tabletop Game) [7 Days Early Access]](https://images.beastsofwar.com/2026/03/unboxing-warfulcrum-games-1918-spring-offensive-review-coverimage1-225-127.jpeg)


Infinity Terrain


Recommendations: 942
About the Project
designing, Building and painting Infinity terrain, plain and not so simple...
Related Game: Infinity
Related Company: Corvus Belli
Related Genre: Science Fiction
This Project is Completed
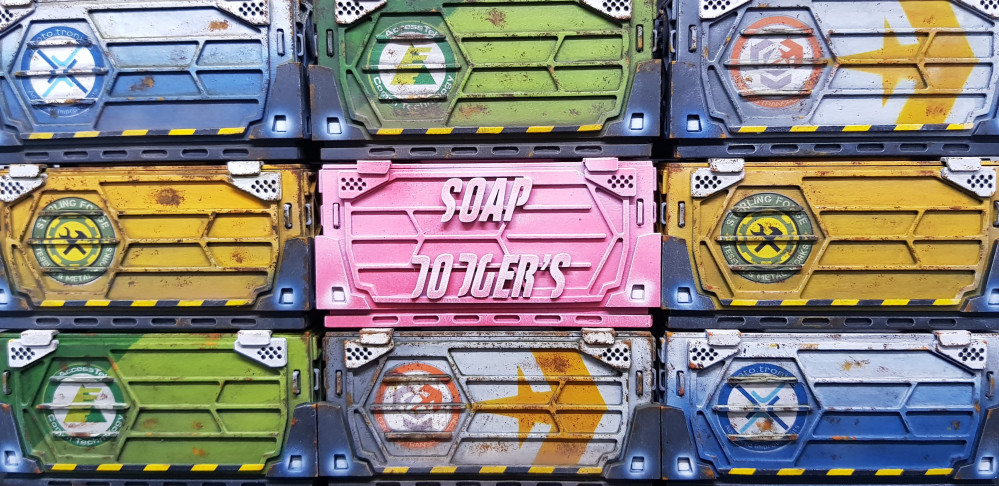
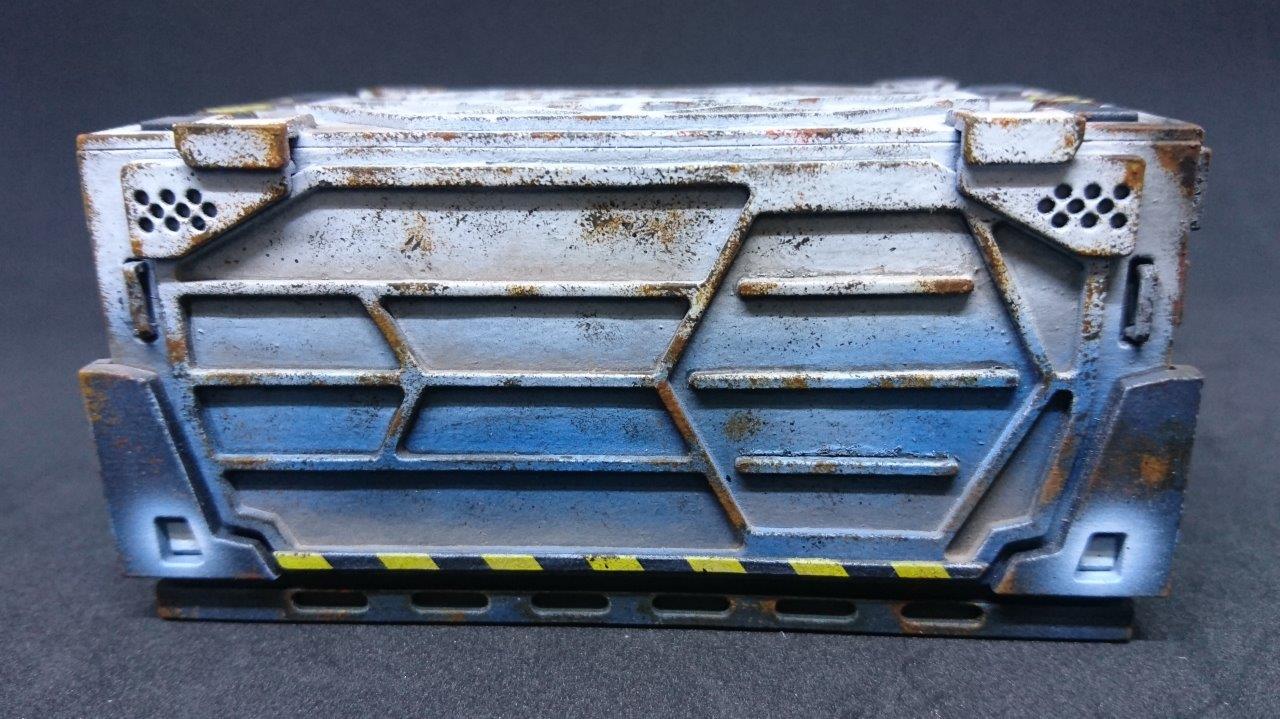
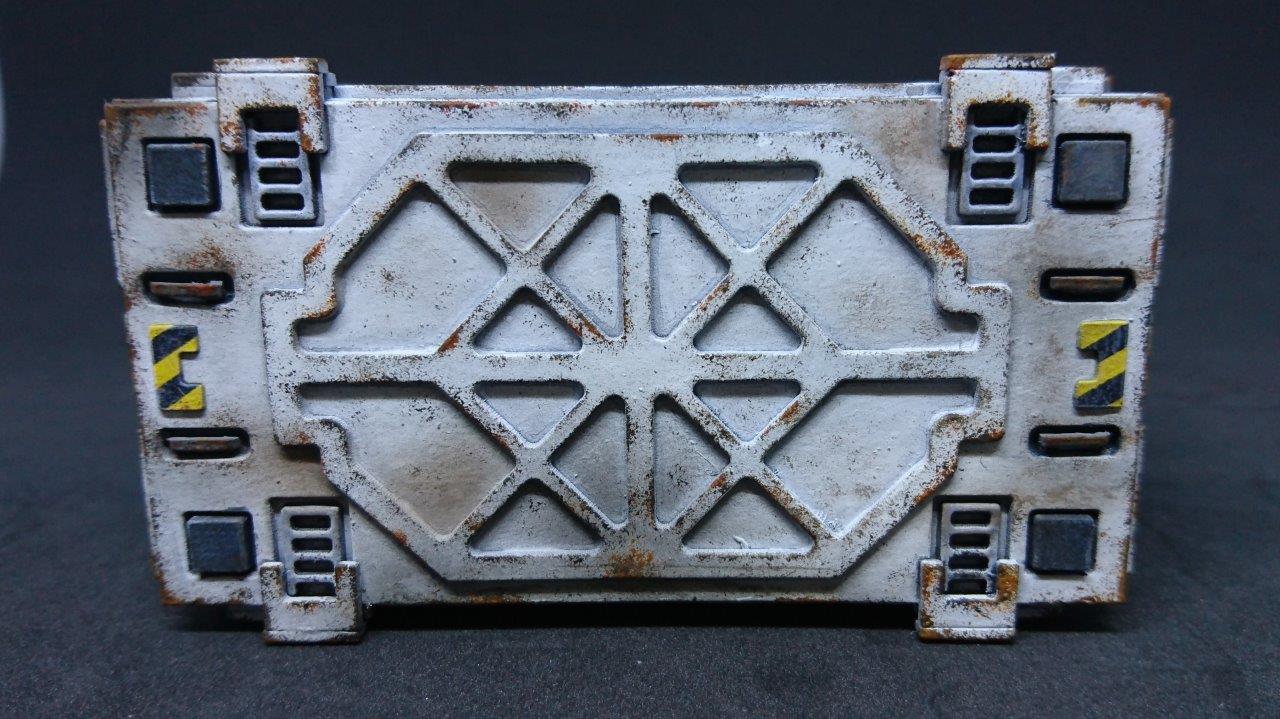
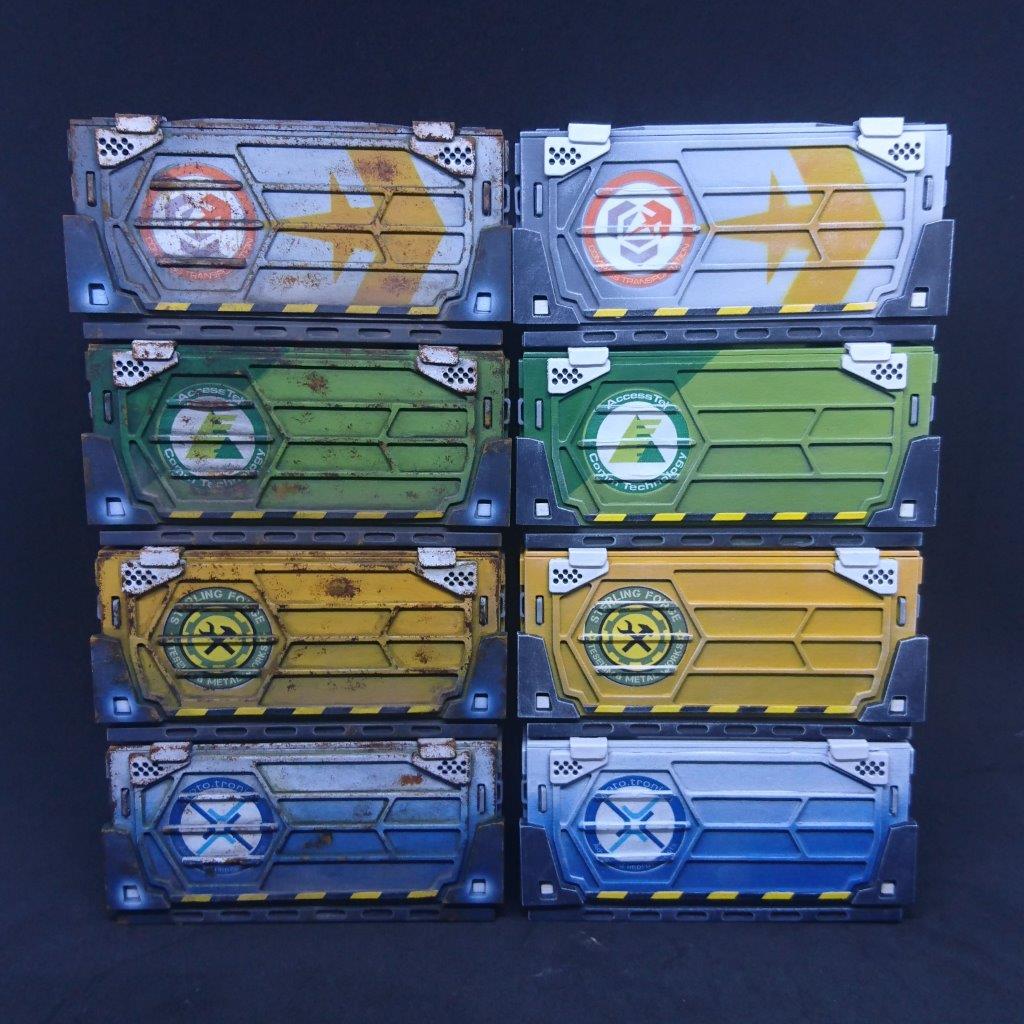
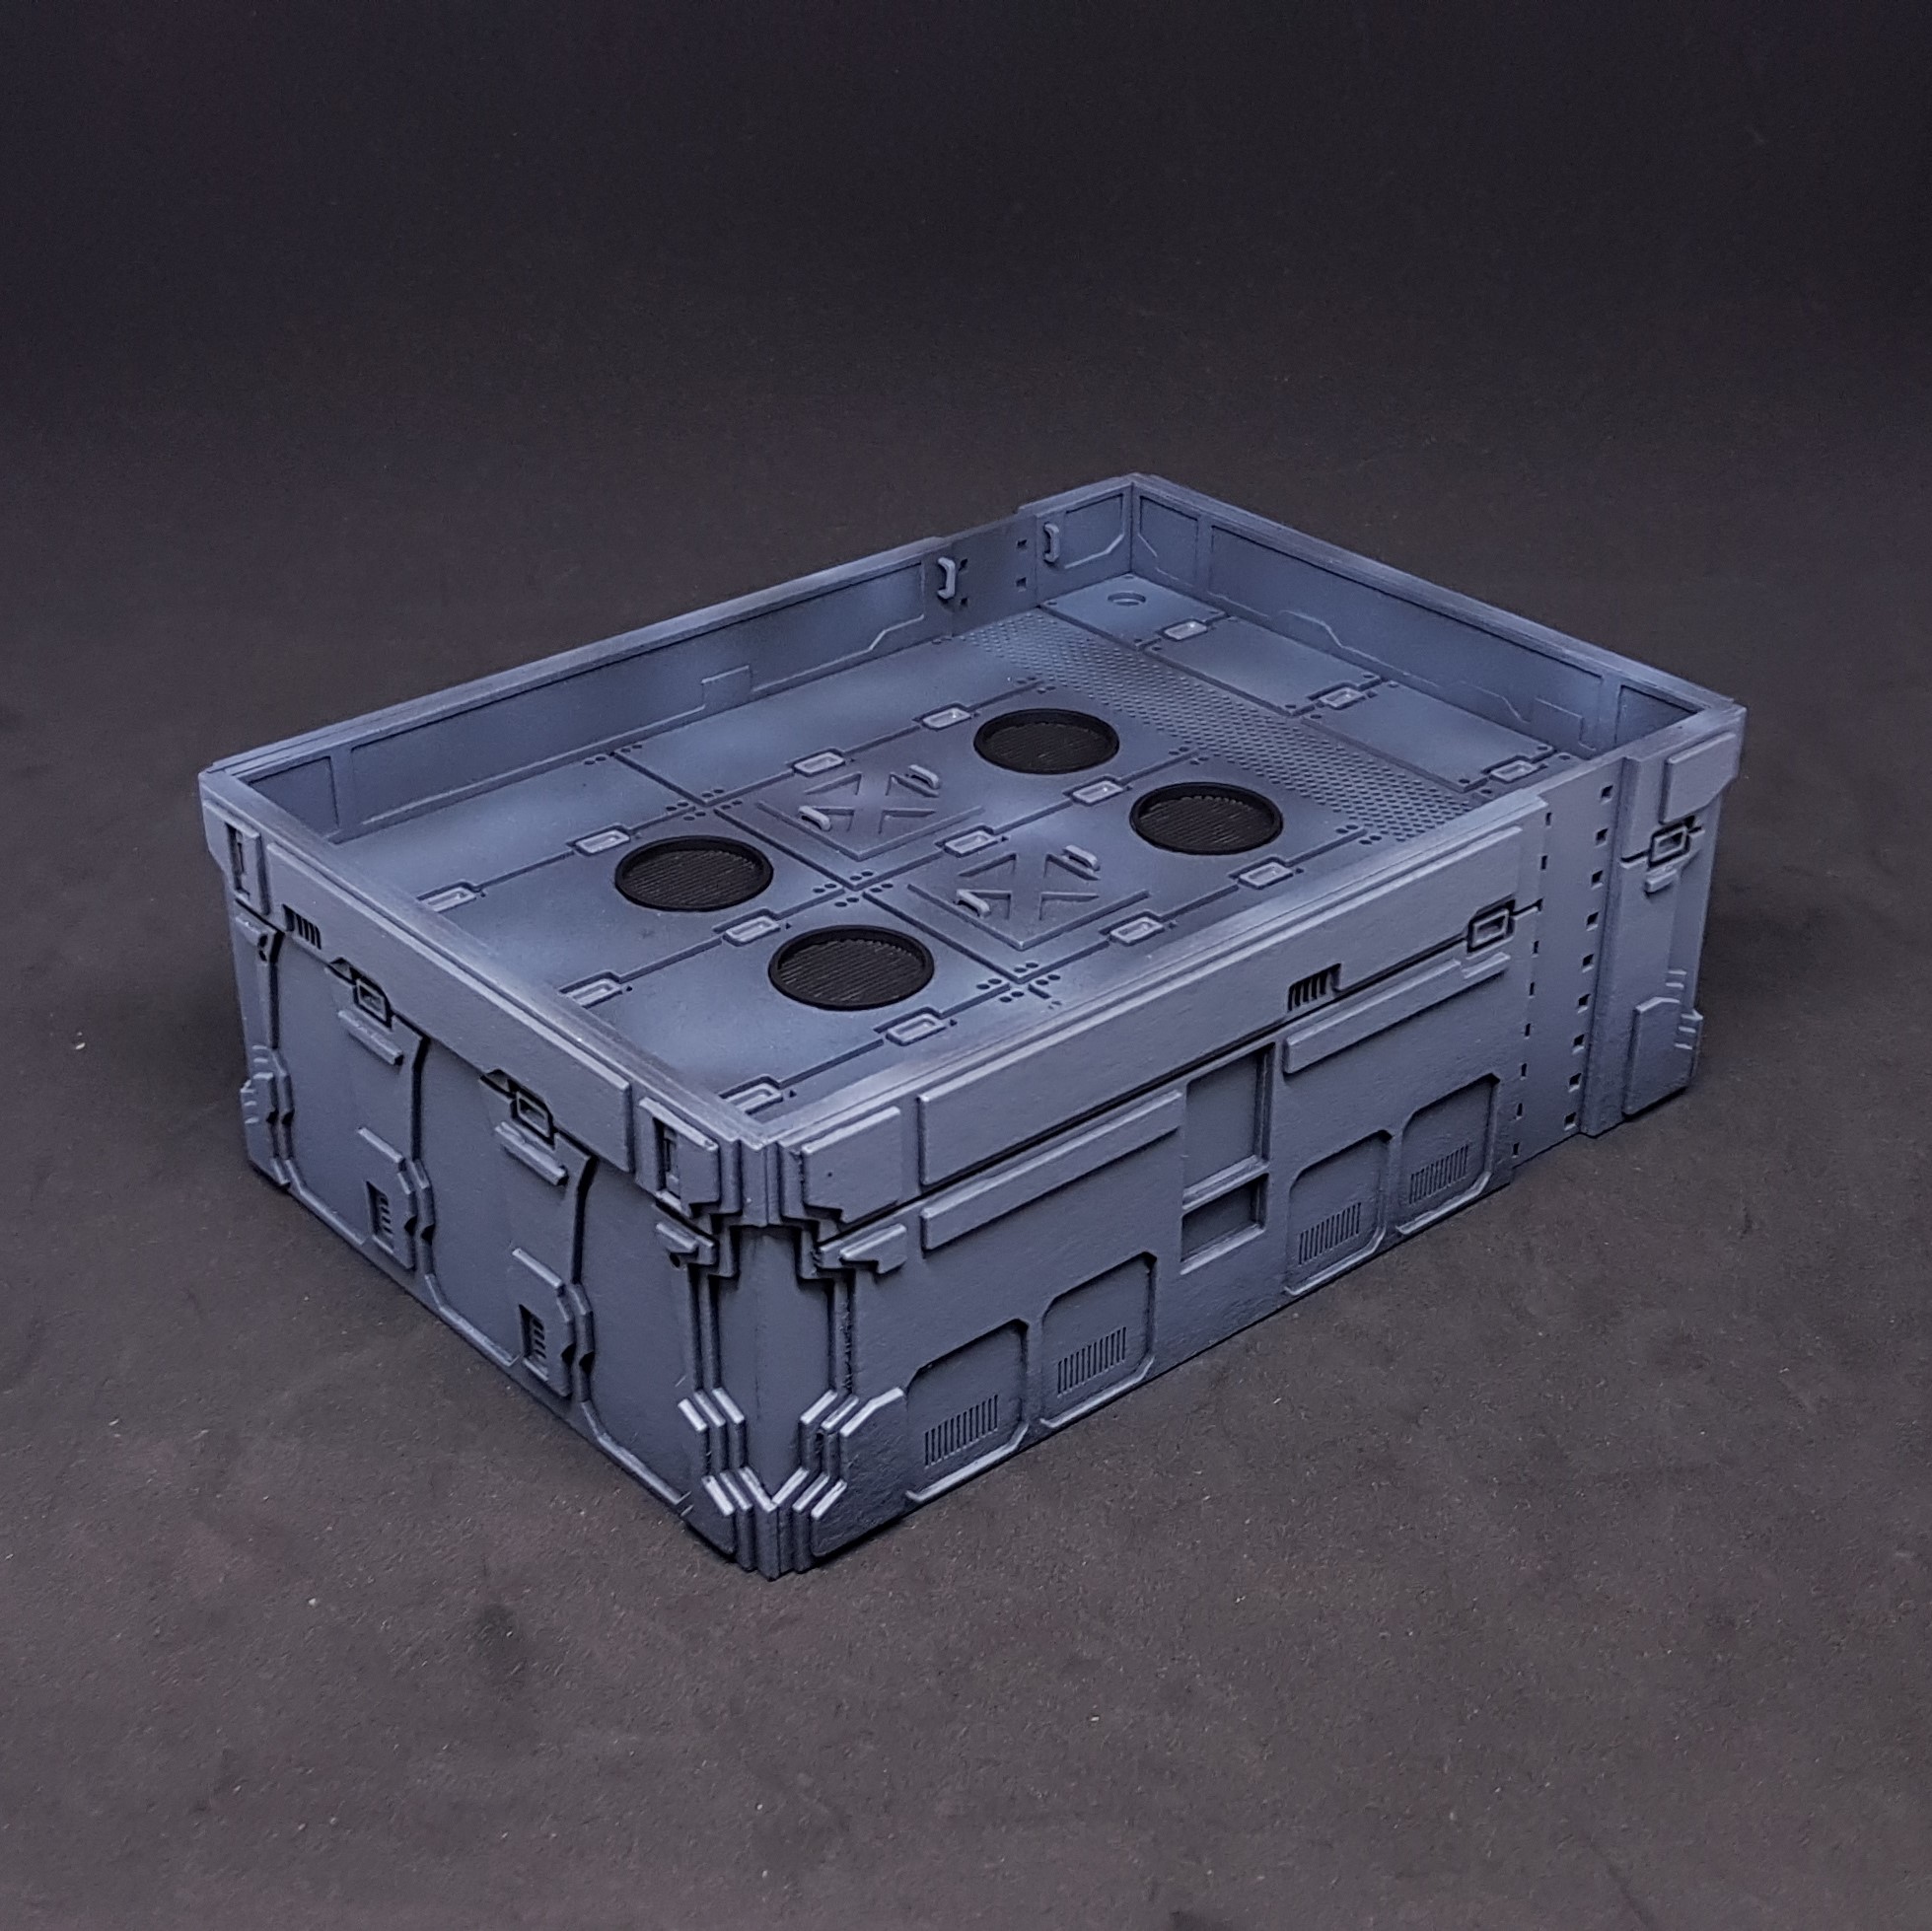
Painting the container.
I had it all zenith’d up and ready to go. Under close inspections the paint schemes of the containers are very complex. This is what makes them amazing, so it has to be done!
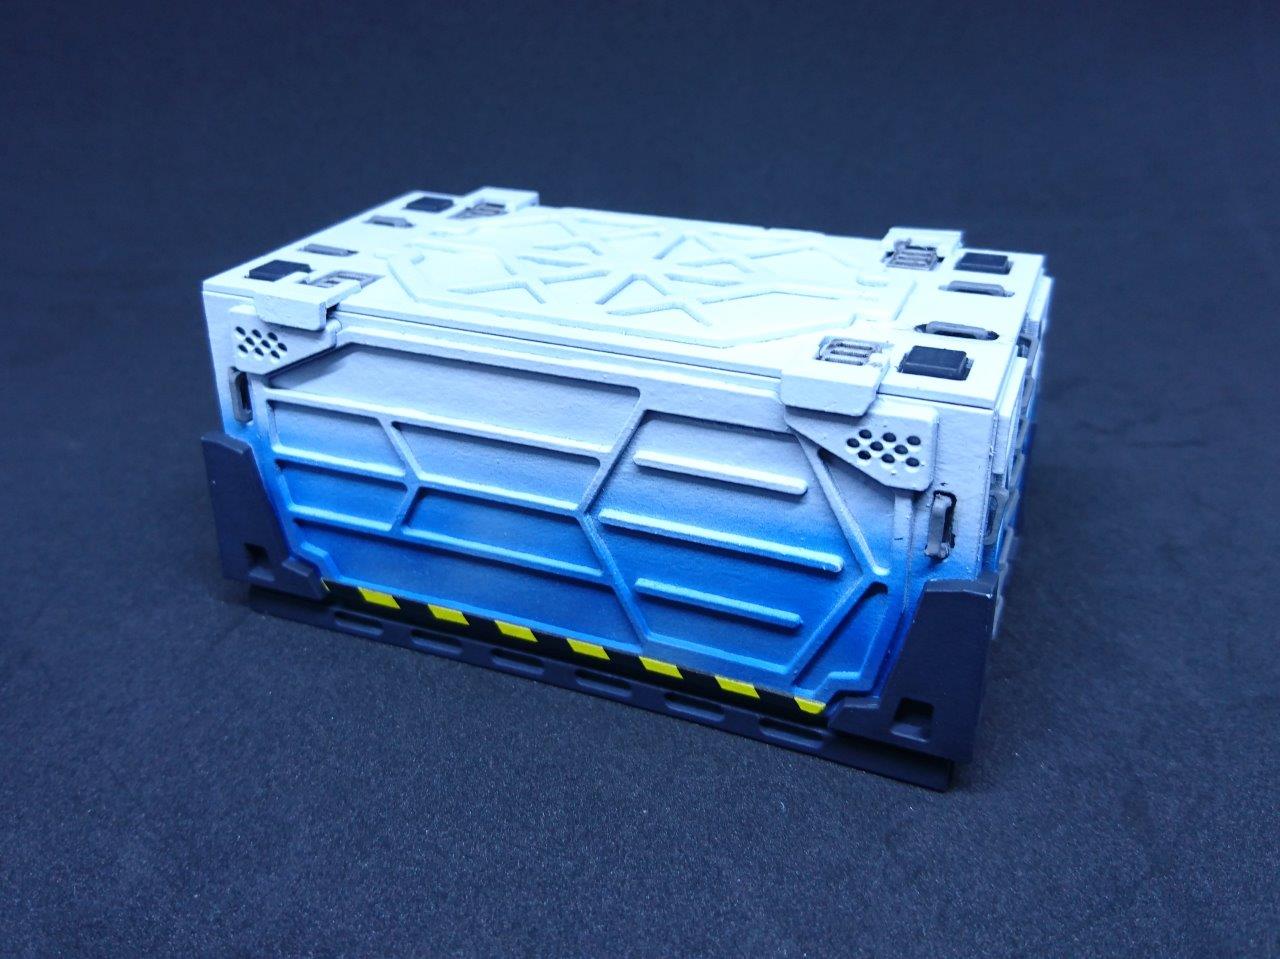
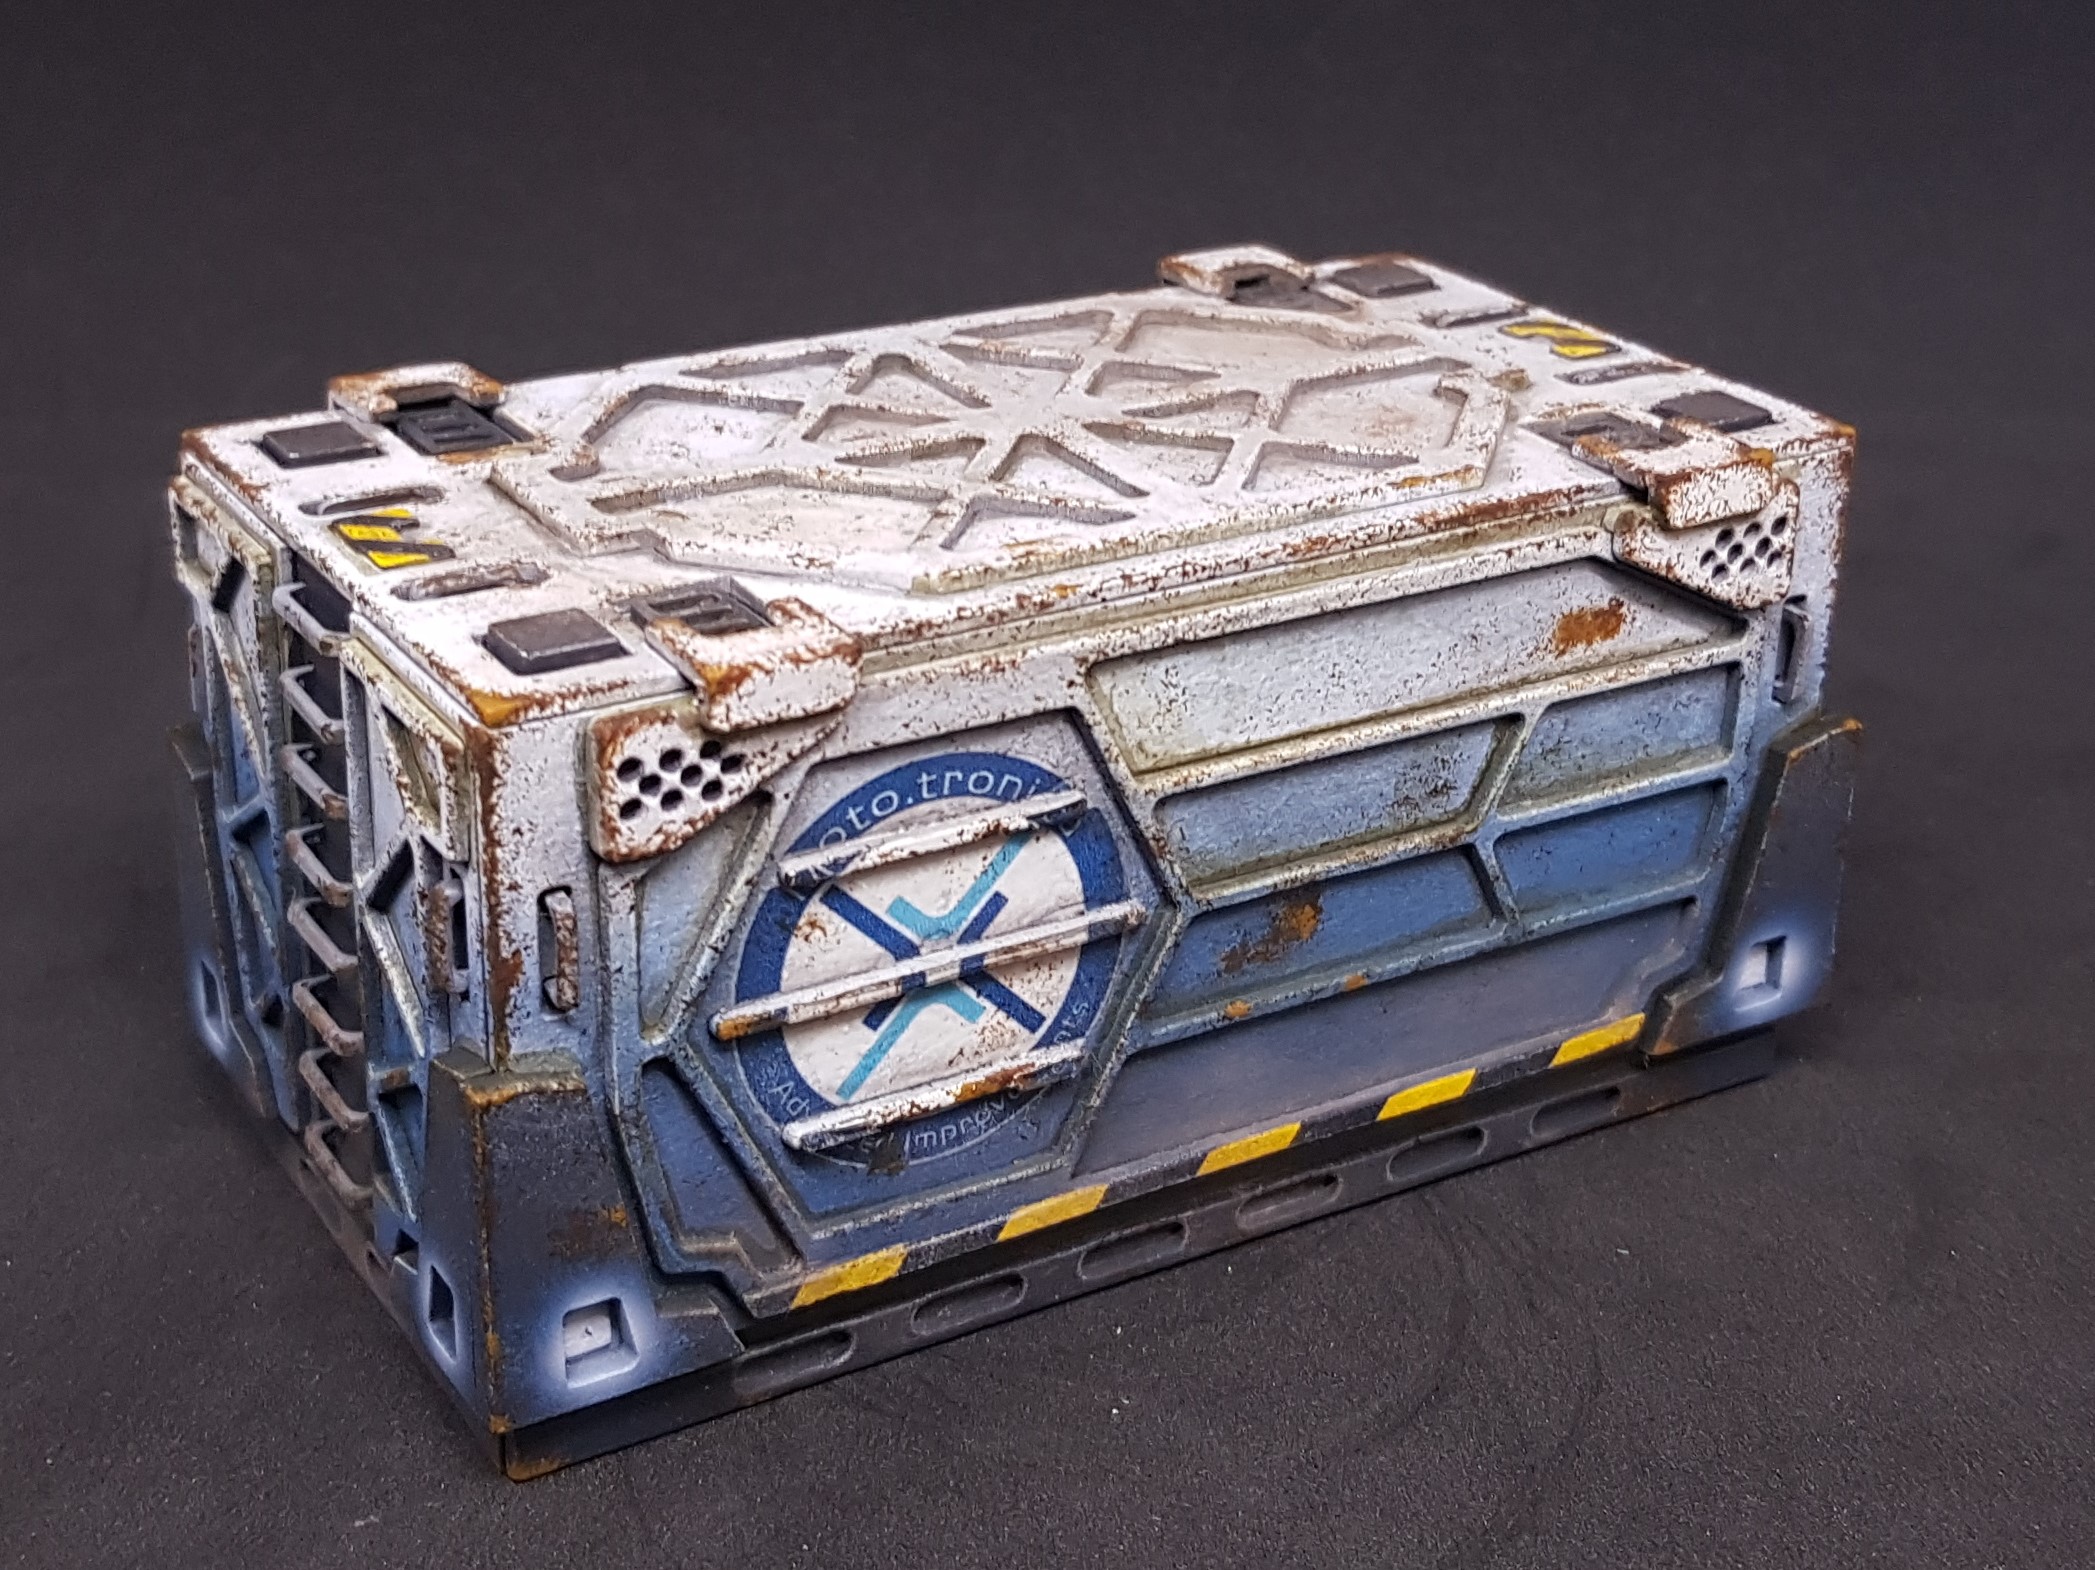
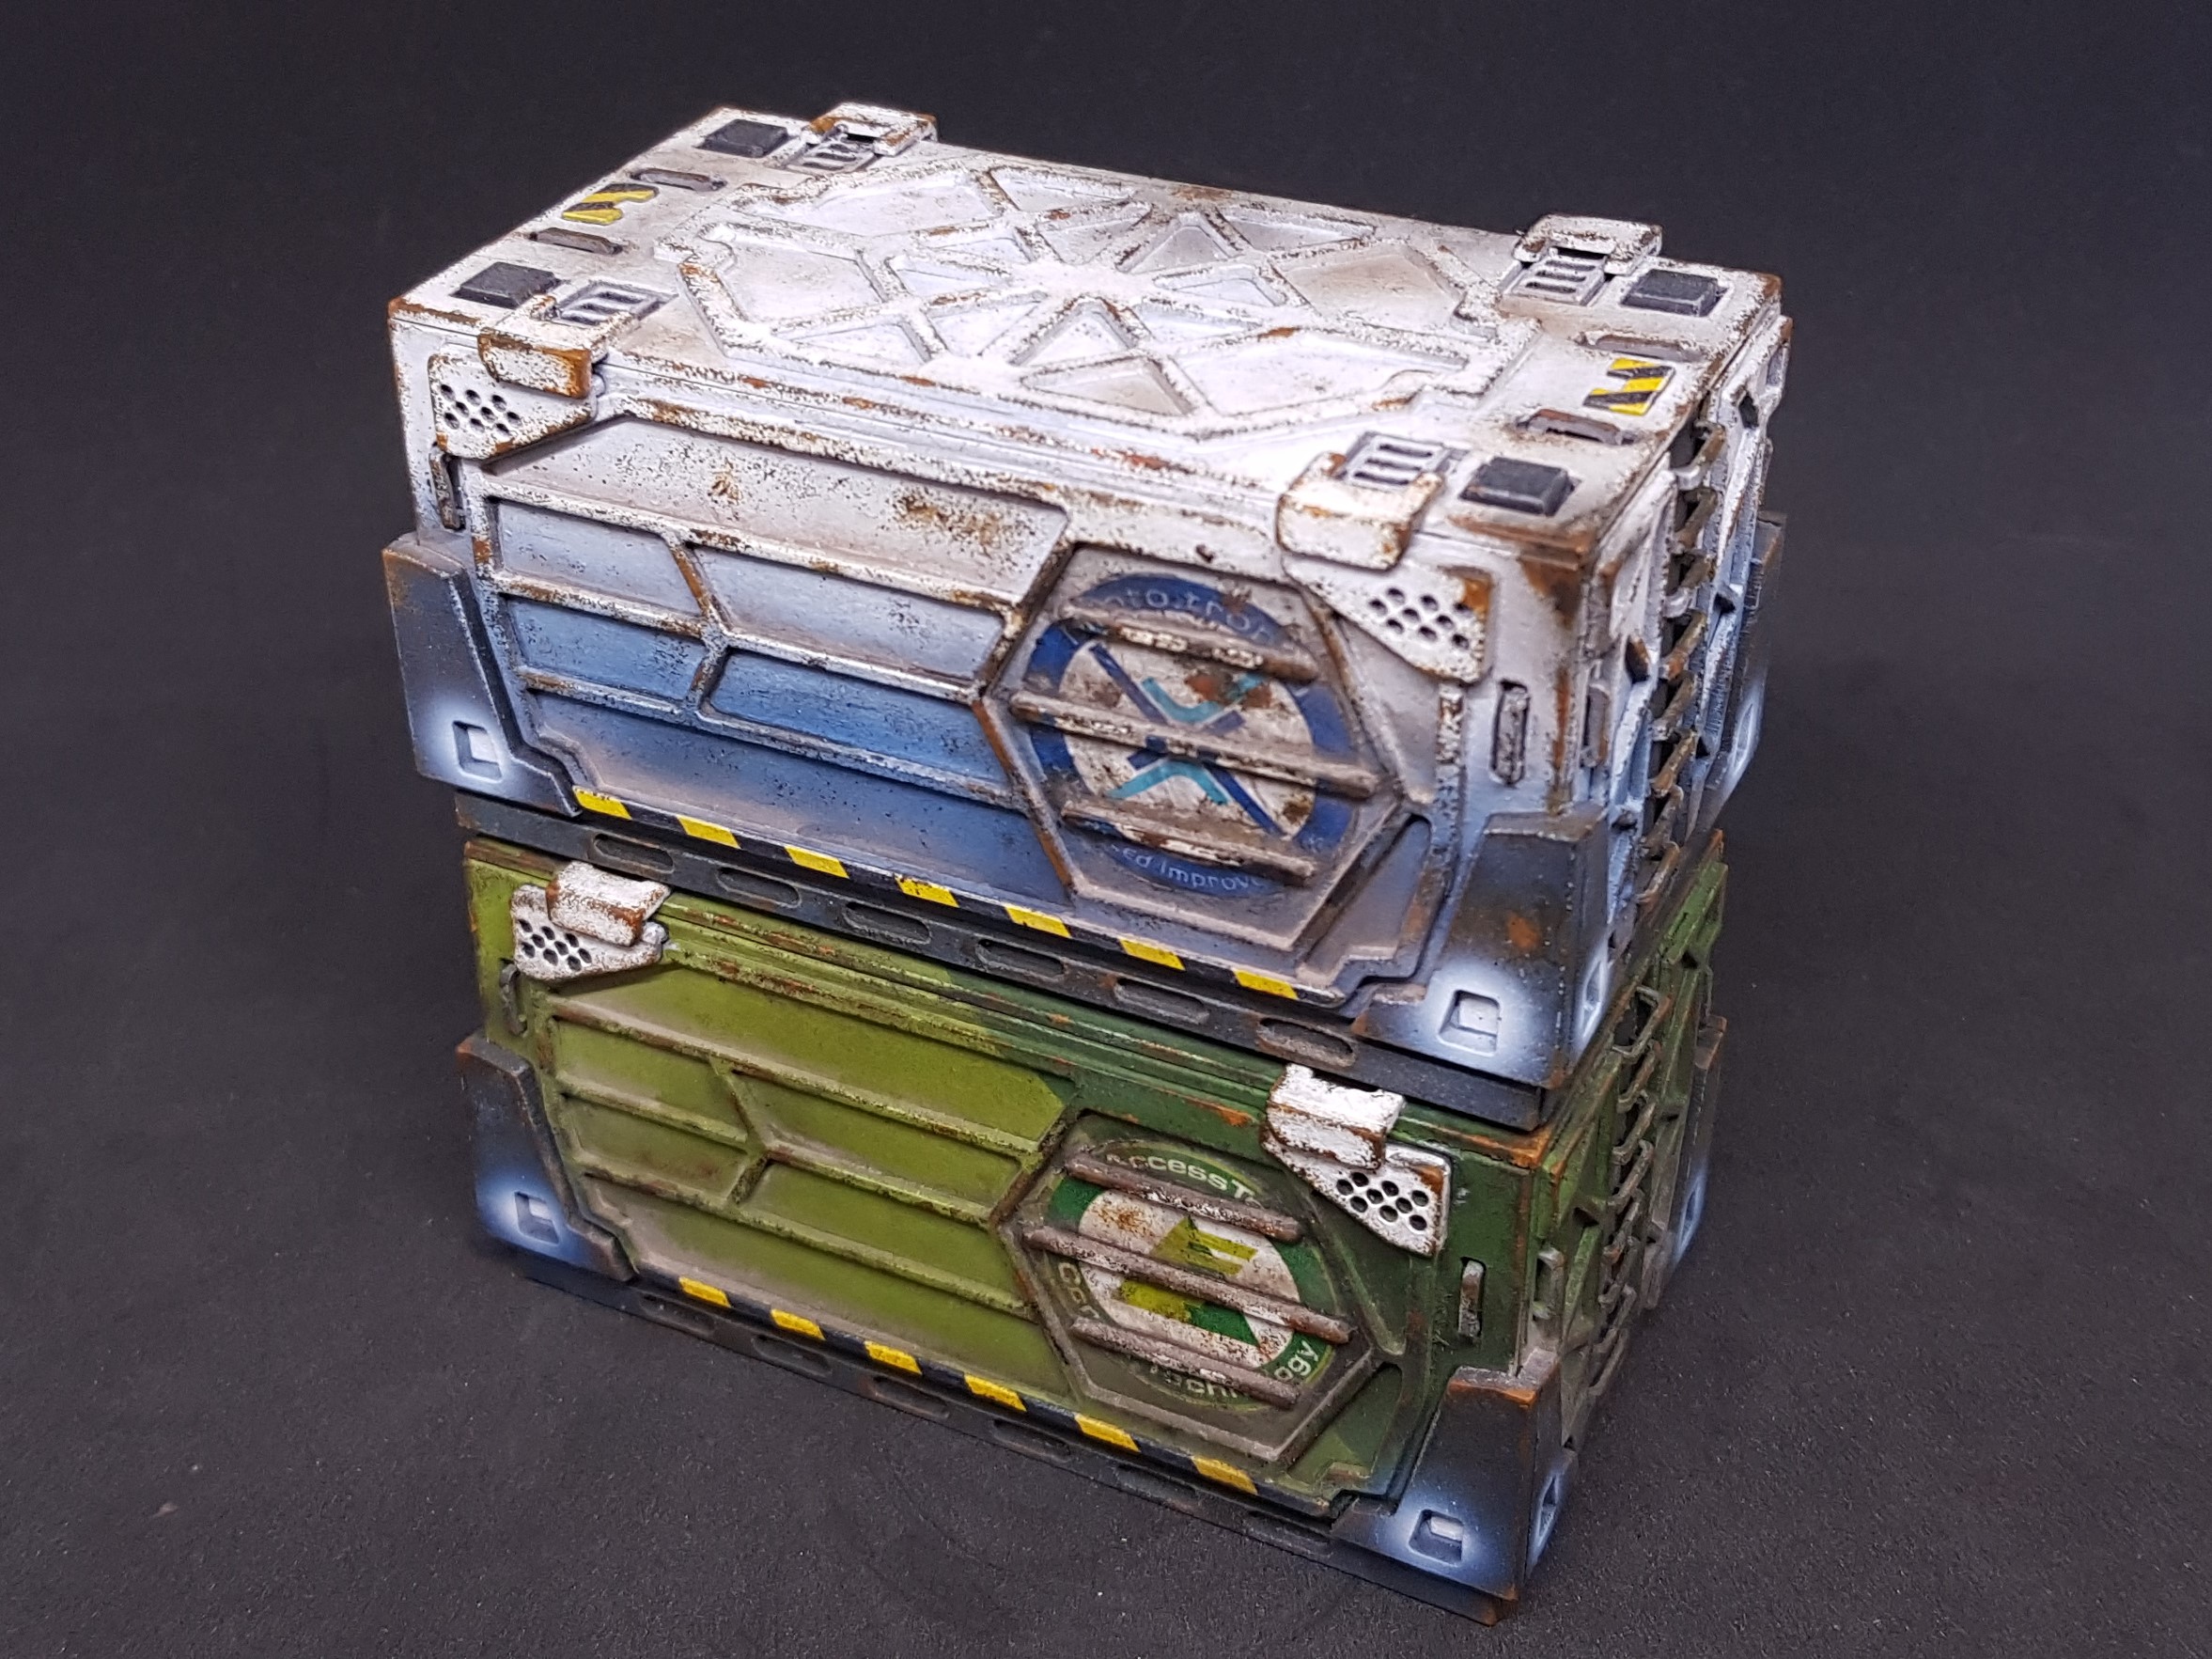
The first one I done was the Mototronica design. This was is in my eyes the easiest one and great for a prototype.
I Sprayed white and then went in with blue at the bottom then went in and picked out all the details with the final colours.
This looked great but when I was done it was missing something. After getting some feedback from WAYPN, I needed to do the logo. I had already painted the thing but I could not argue with good advice.
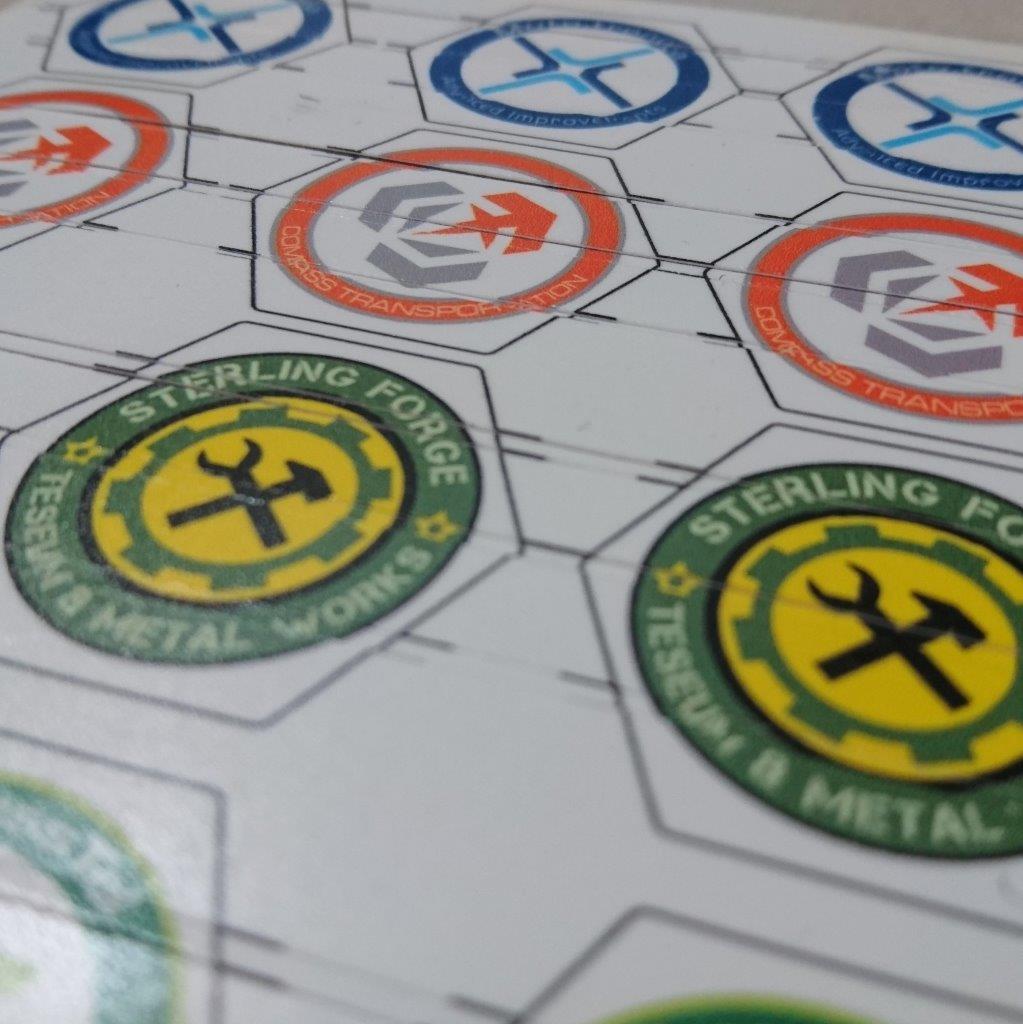
I used the laser cutter to make a template mask that could fit onto the model and allow me to spray a white circle as I knew I didn’t want to freehand this and it’s not cheap to get your own transfers made. I done this also to some of the more complex paint schemes using the waste from laser cutting. These are complex but are a time saver. This could also be done with masking tape or freehand.
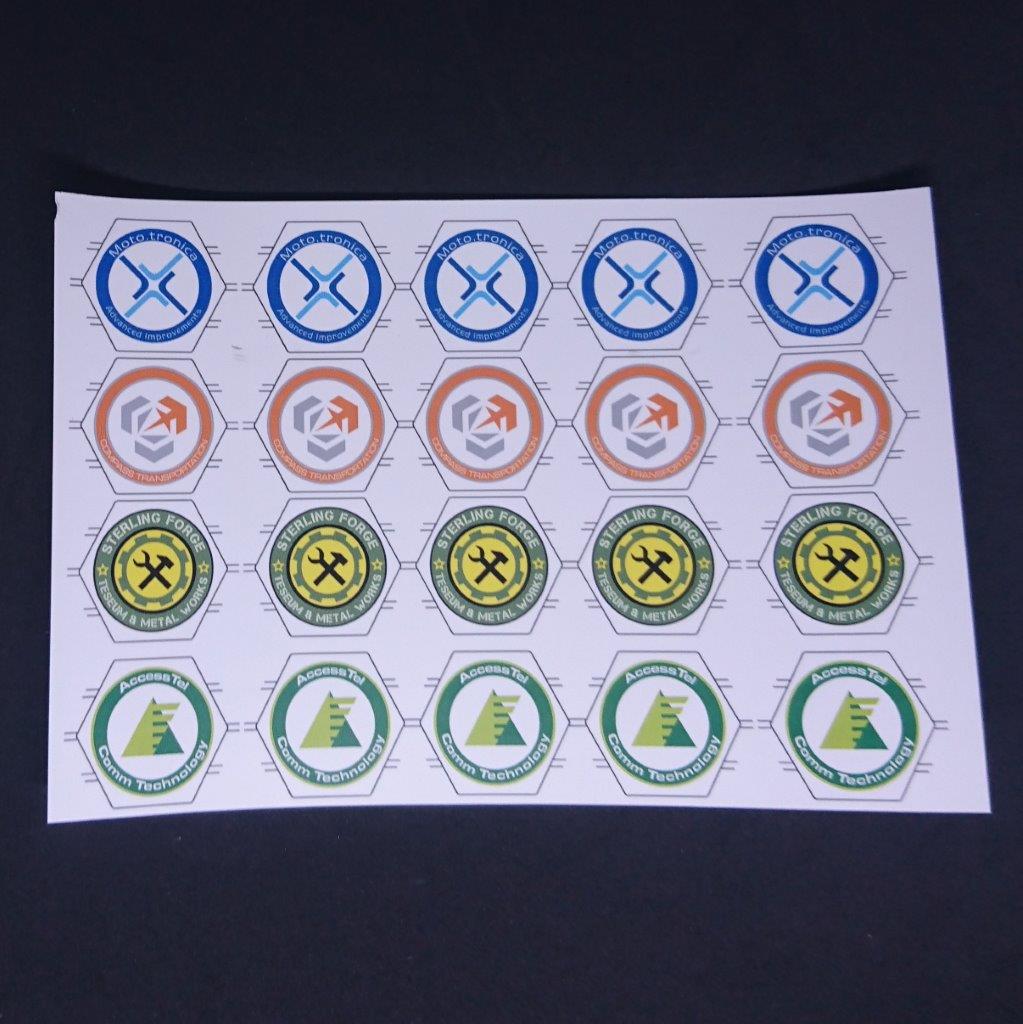
I found this amazing human being on the infinity forms who has recreated all of the logo’s from infinity. https://forum.corvusbelli.com/threads/high-res-logo-vectors.380/
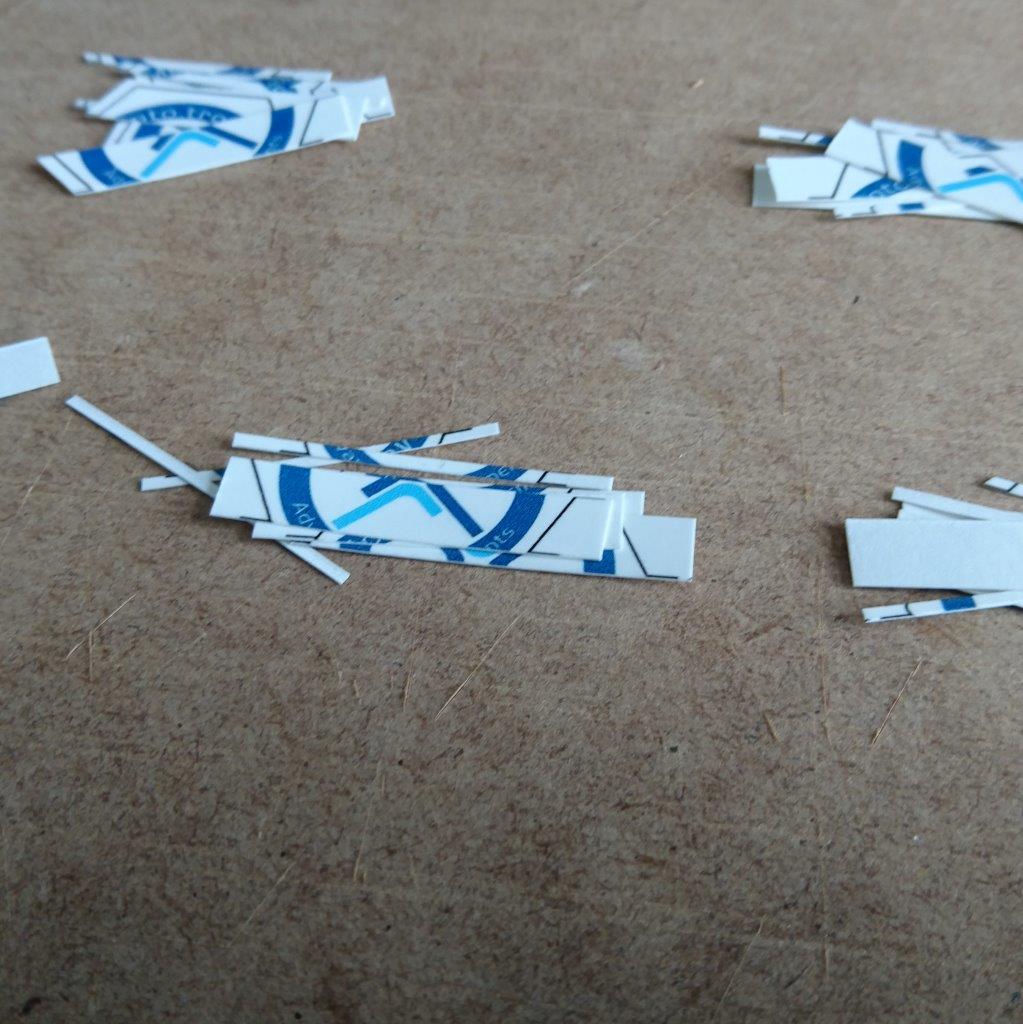
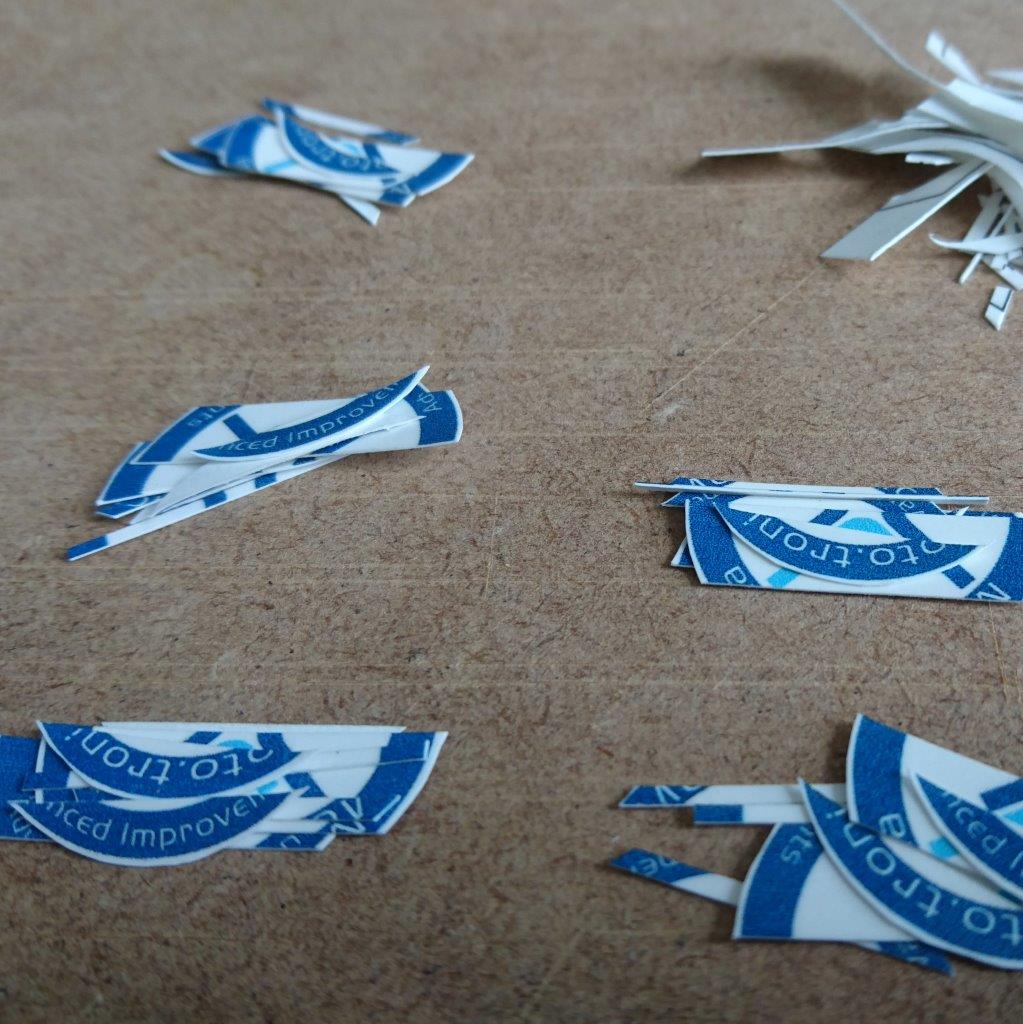
I then scaled these and printed onto transfer paper. I knew I couldn’t place these and just hope they fit so experimented with cutting them into three transfers (this later turned out to be 7).
With some fiddling I manager to get these on and then gloss then matt coated them with varnish and weathered to match the rest.
My homemade transfers are great on flat solid things but on homemade containers, not so much. I had to creatively weather them to hide this and try and turn a problem into a feature. Below should make your skin crawl if you like transfers as much as I do.
for reference if you are thinking about doing this, this is the process:
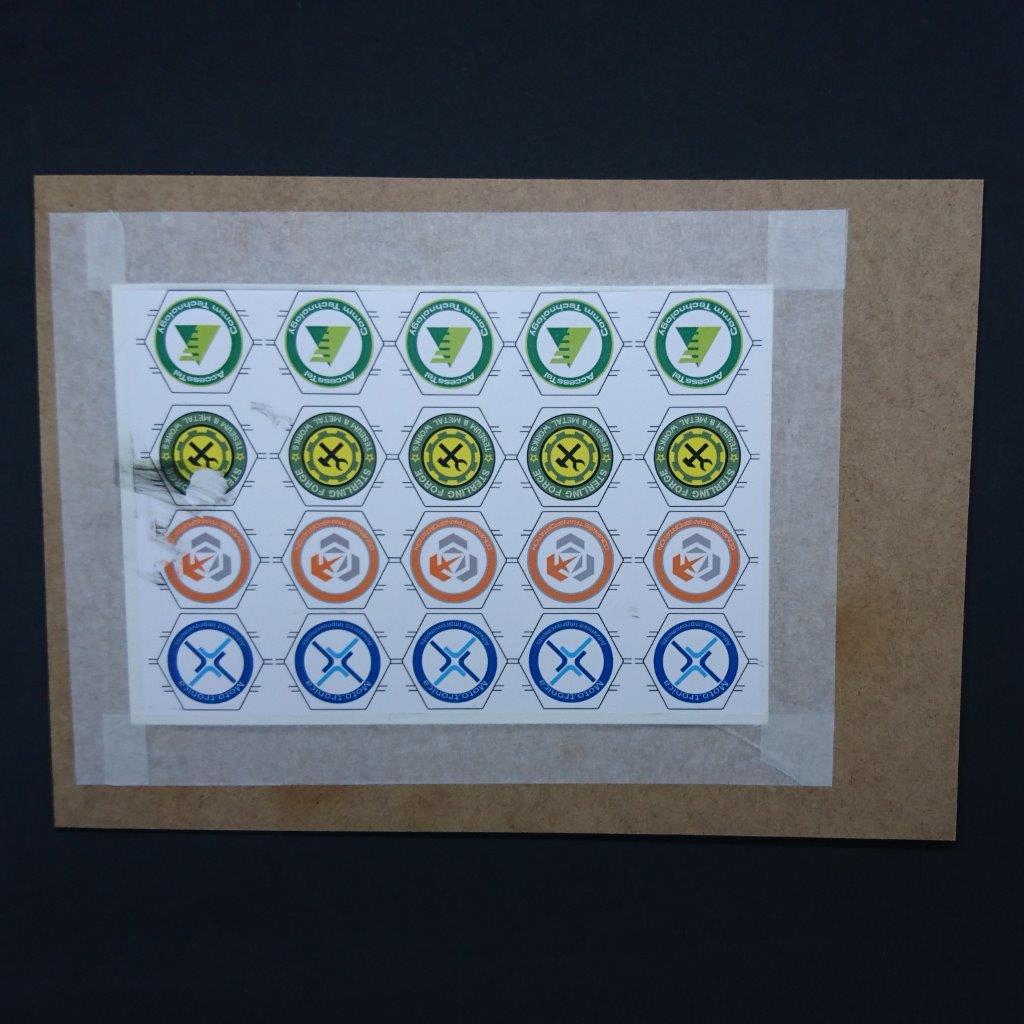
- Get transfer paper suitable for your printer, e.g. laser printer or Ink Jet printer.
- Print your design on the shiny side of the paper.
- Allow this to dry and don’t touch it or it will smudge.
- Gloss coat everything in thin layers letting this dry in-between layers. (i used an airbrush but i think an aerosol would be better.
- Cut out then trim to size.
- I used Decal fix but you could just use water. I would avoid any kind of topping that will break down the varnish or the ink will run.
The bellow also takes you on my little production run which is probably why I will make very few of these again in the future.
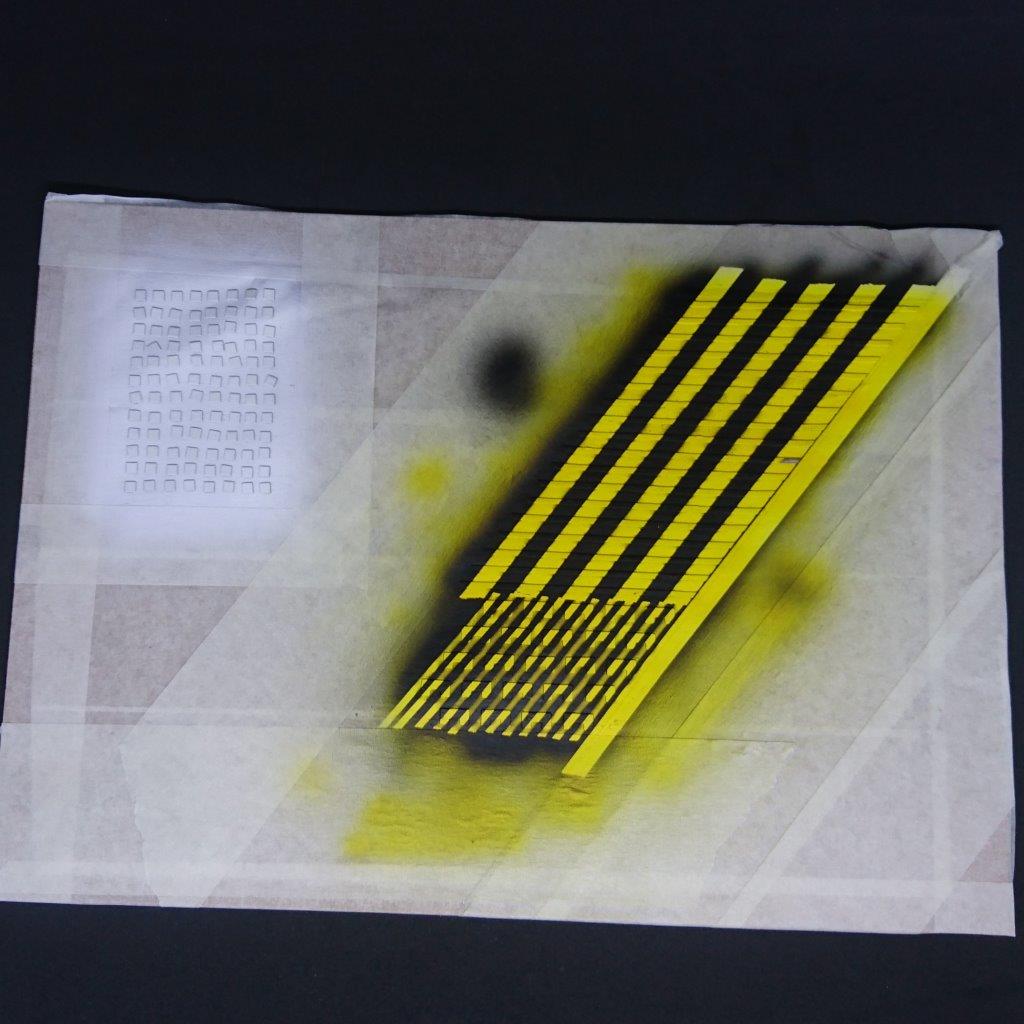
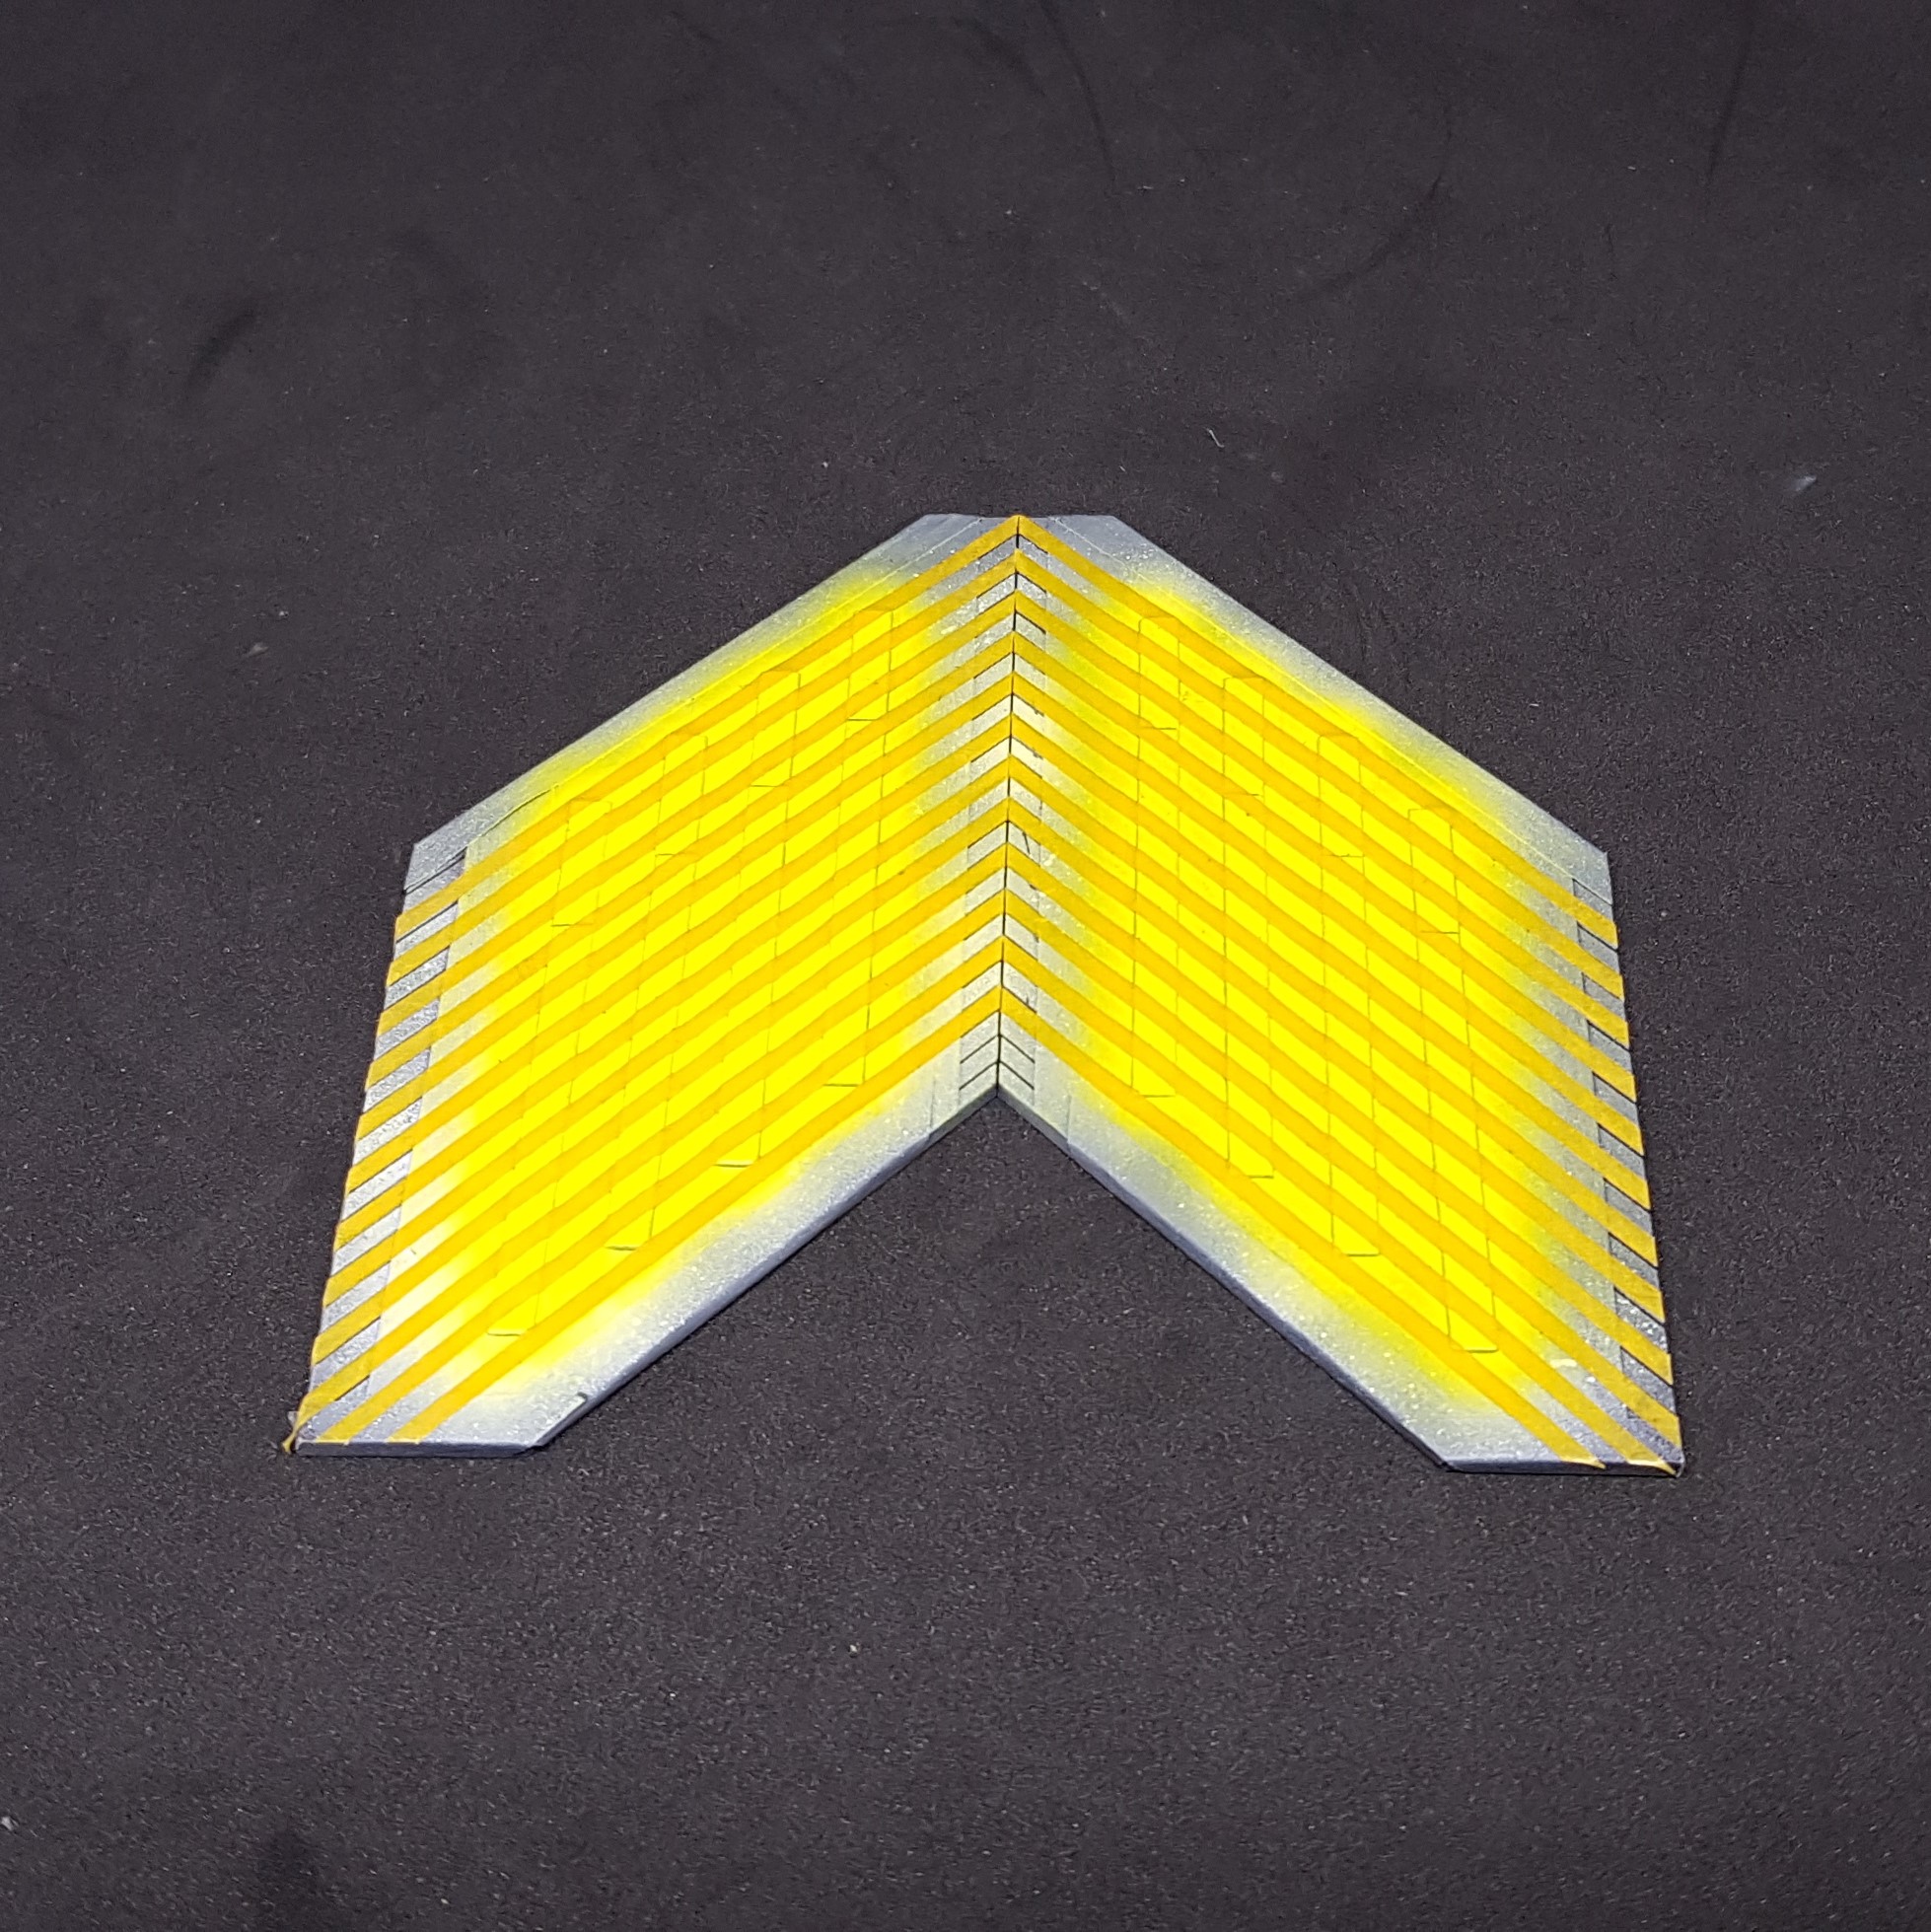
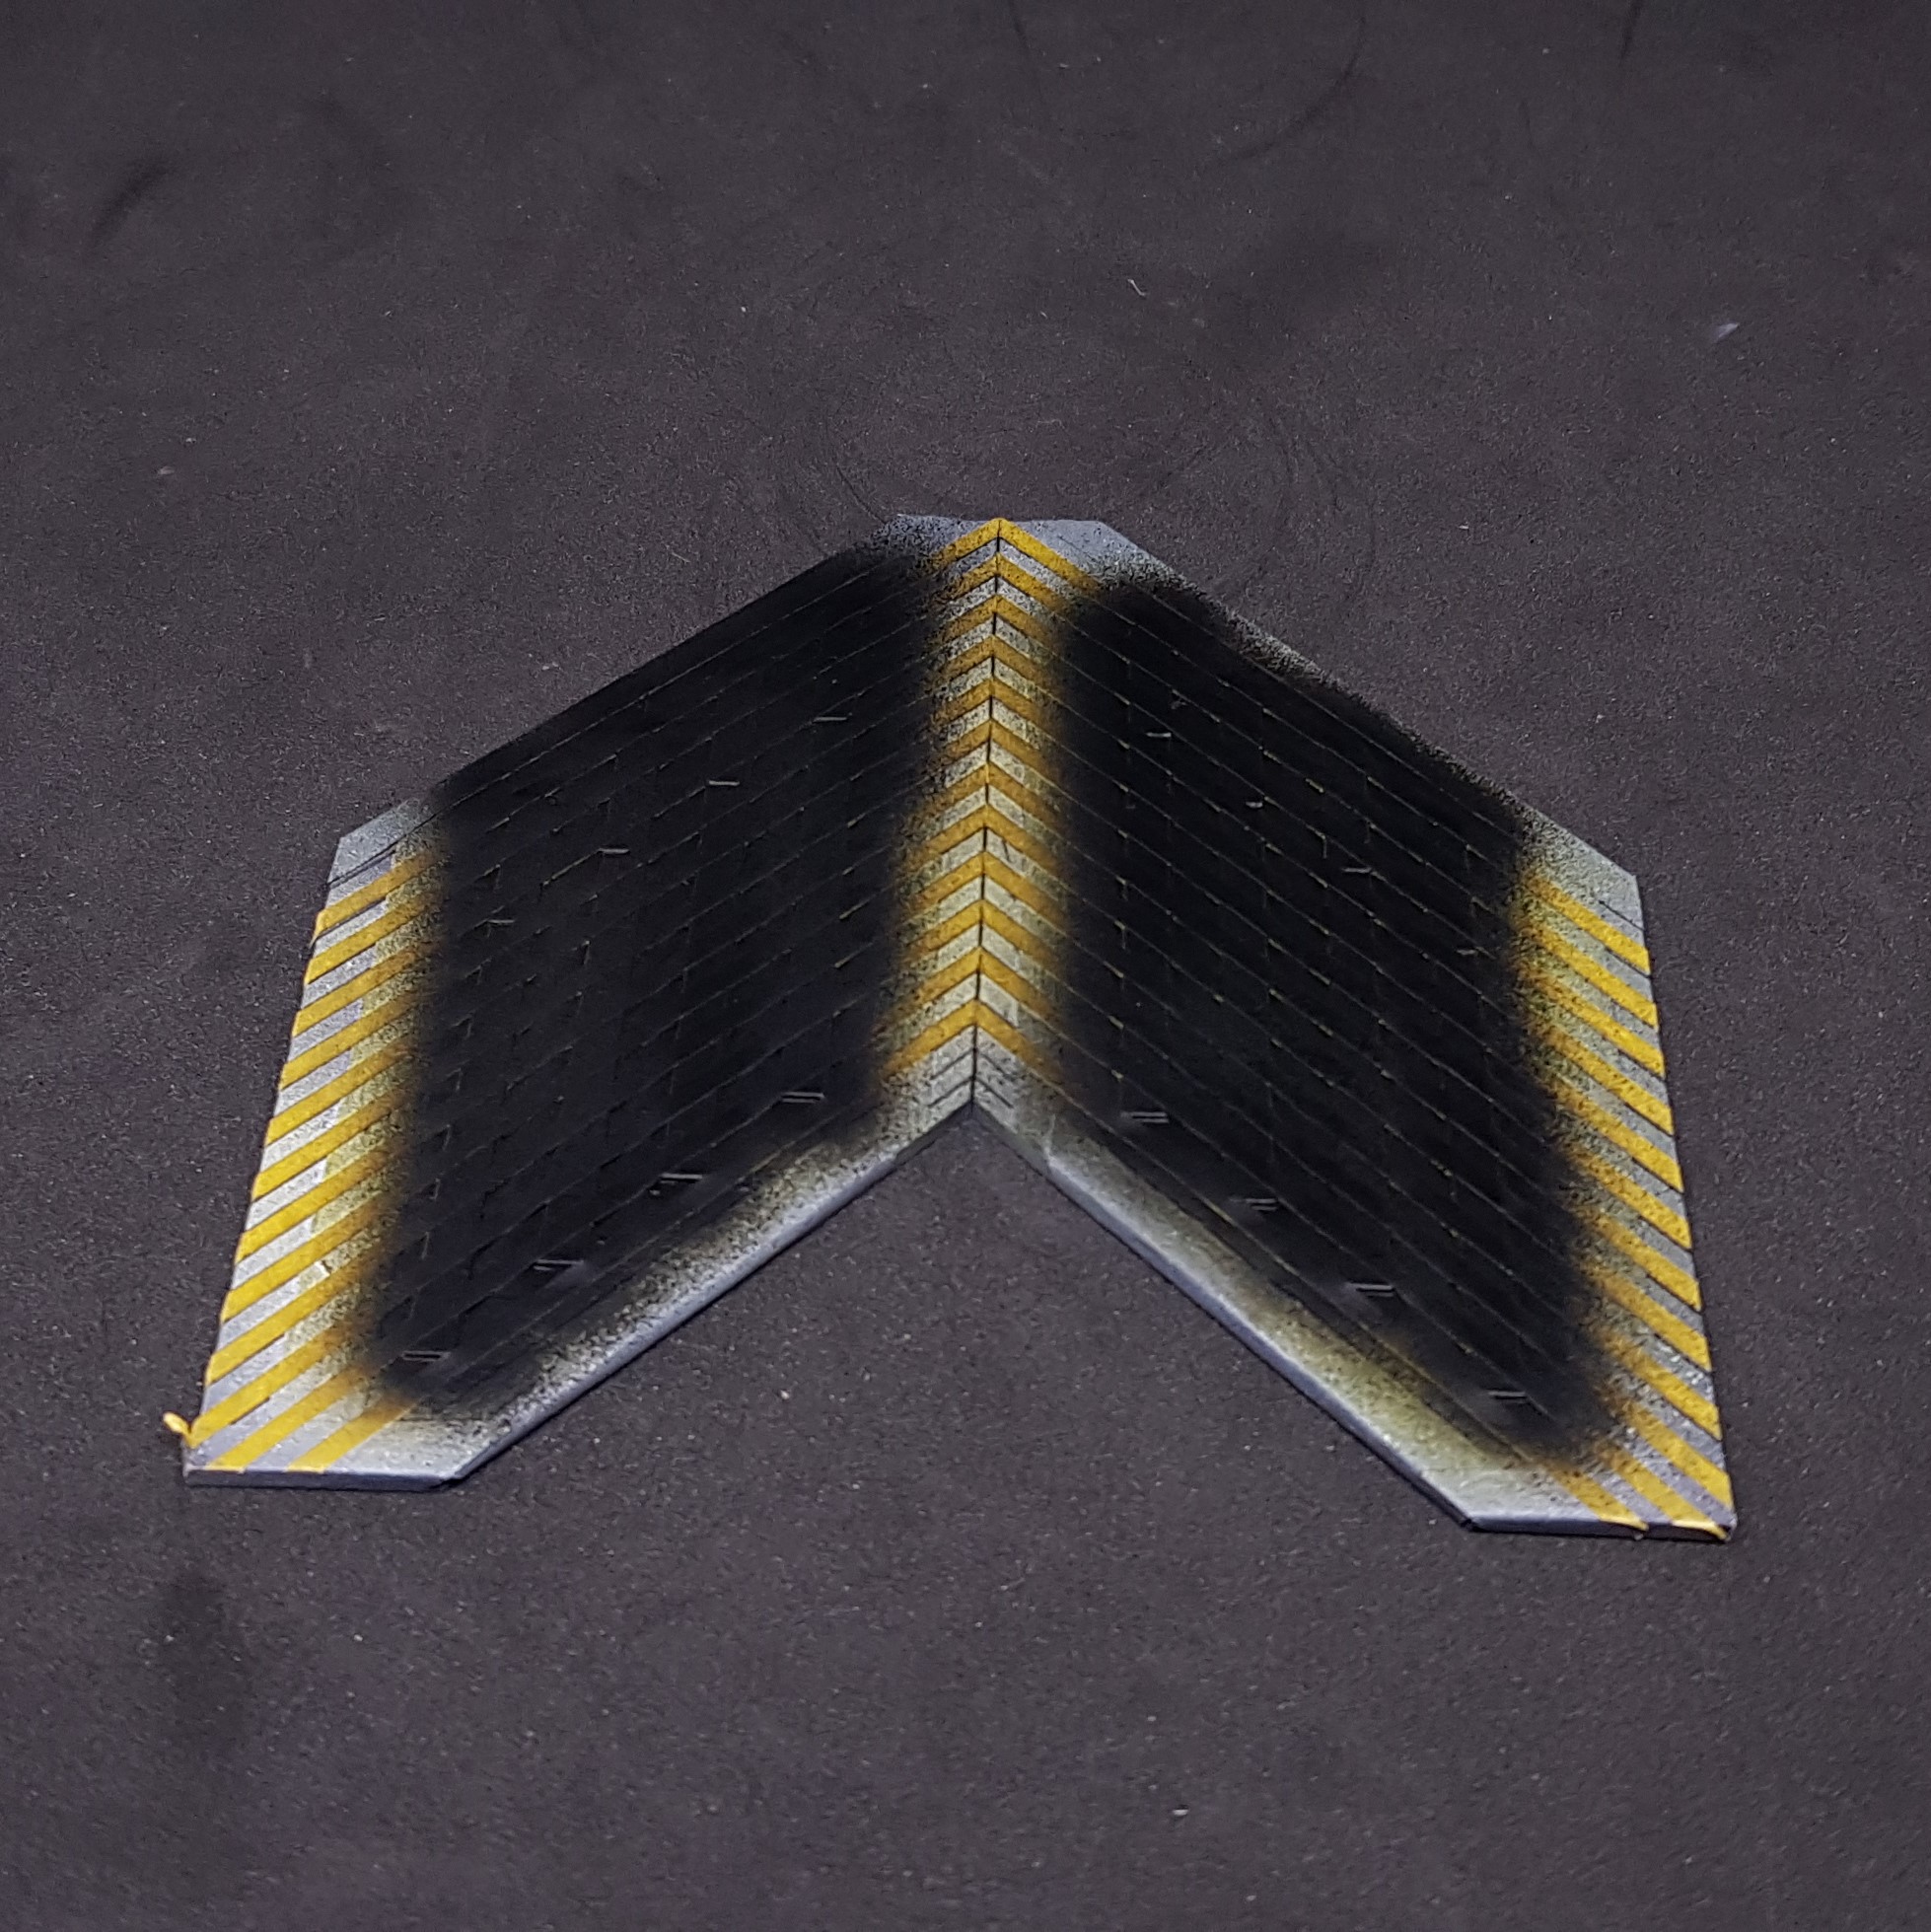
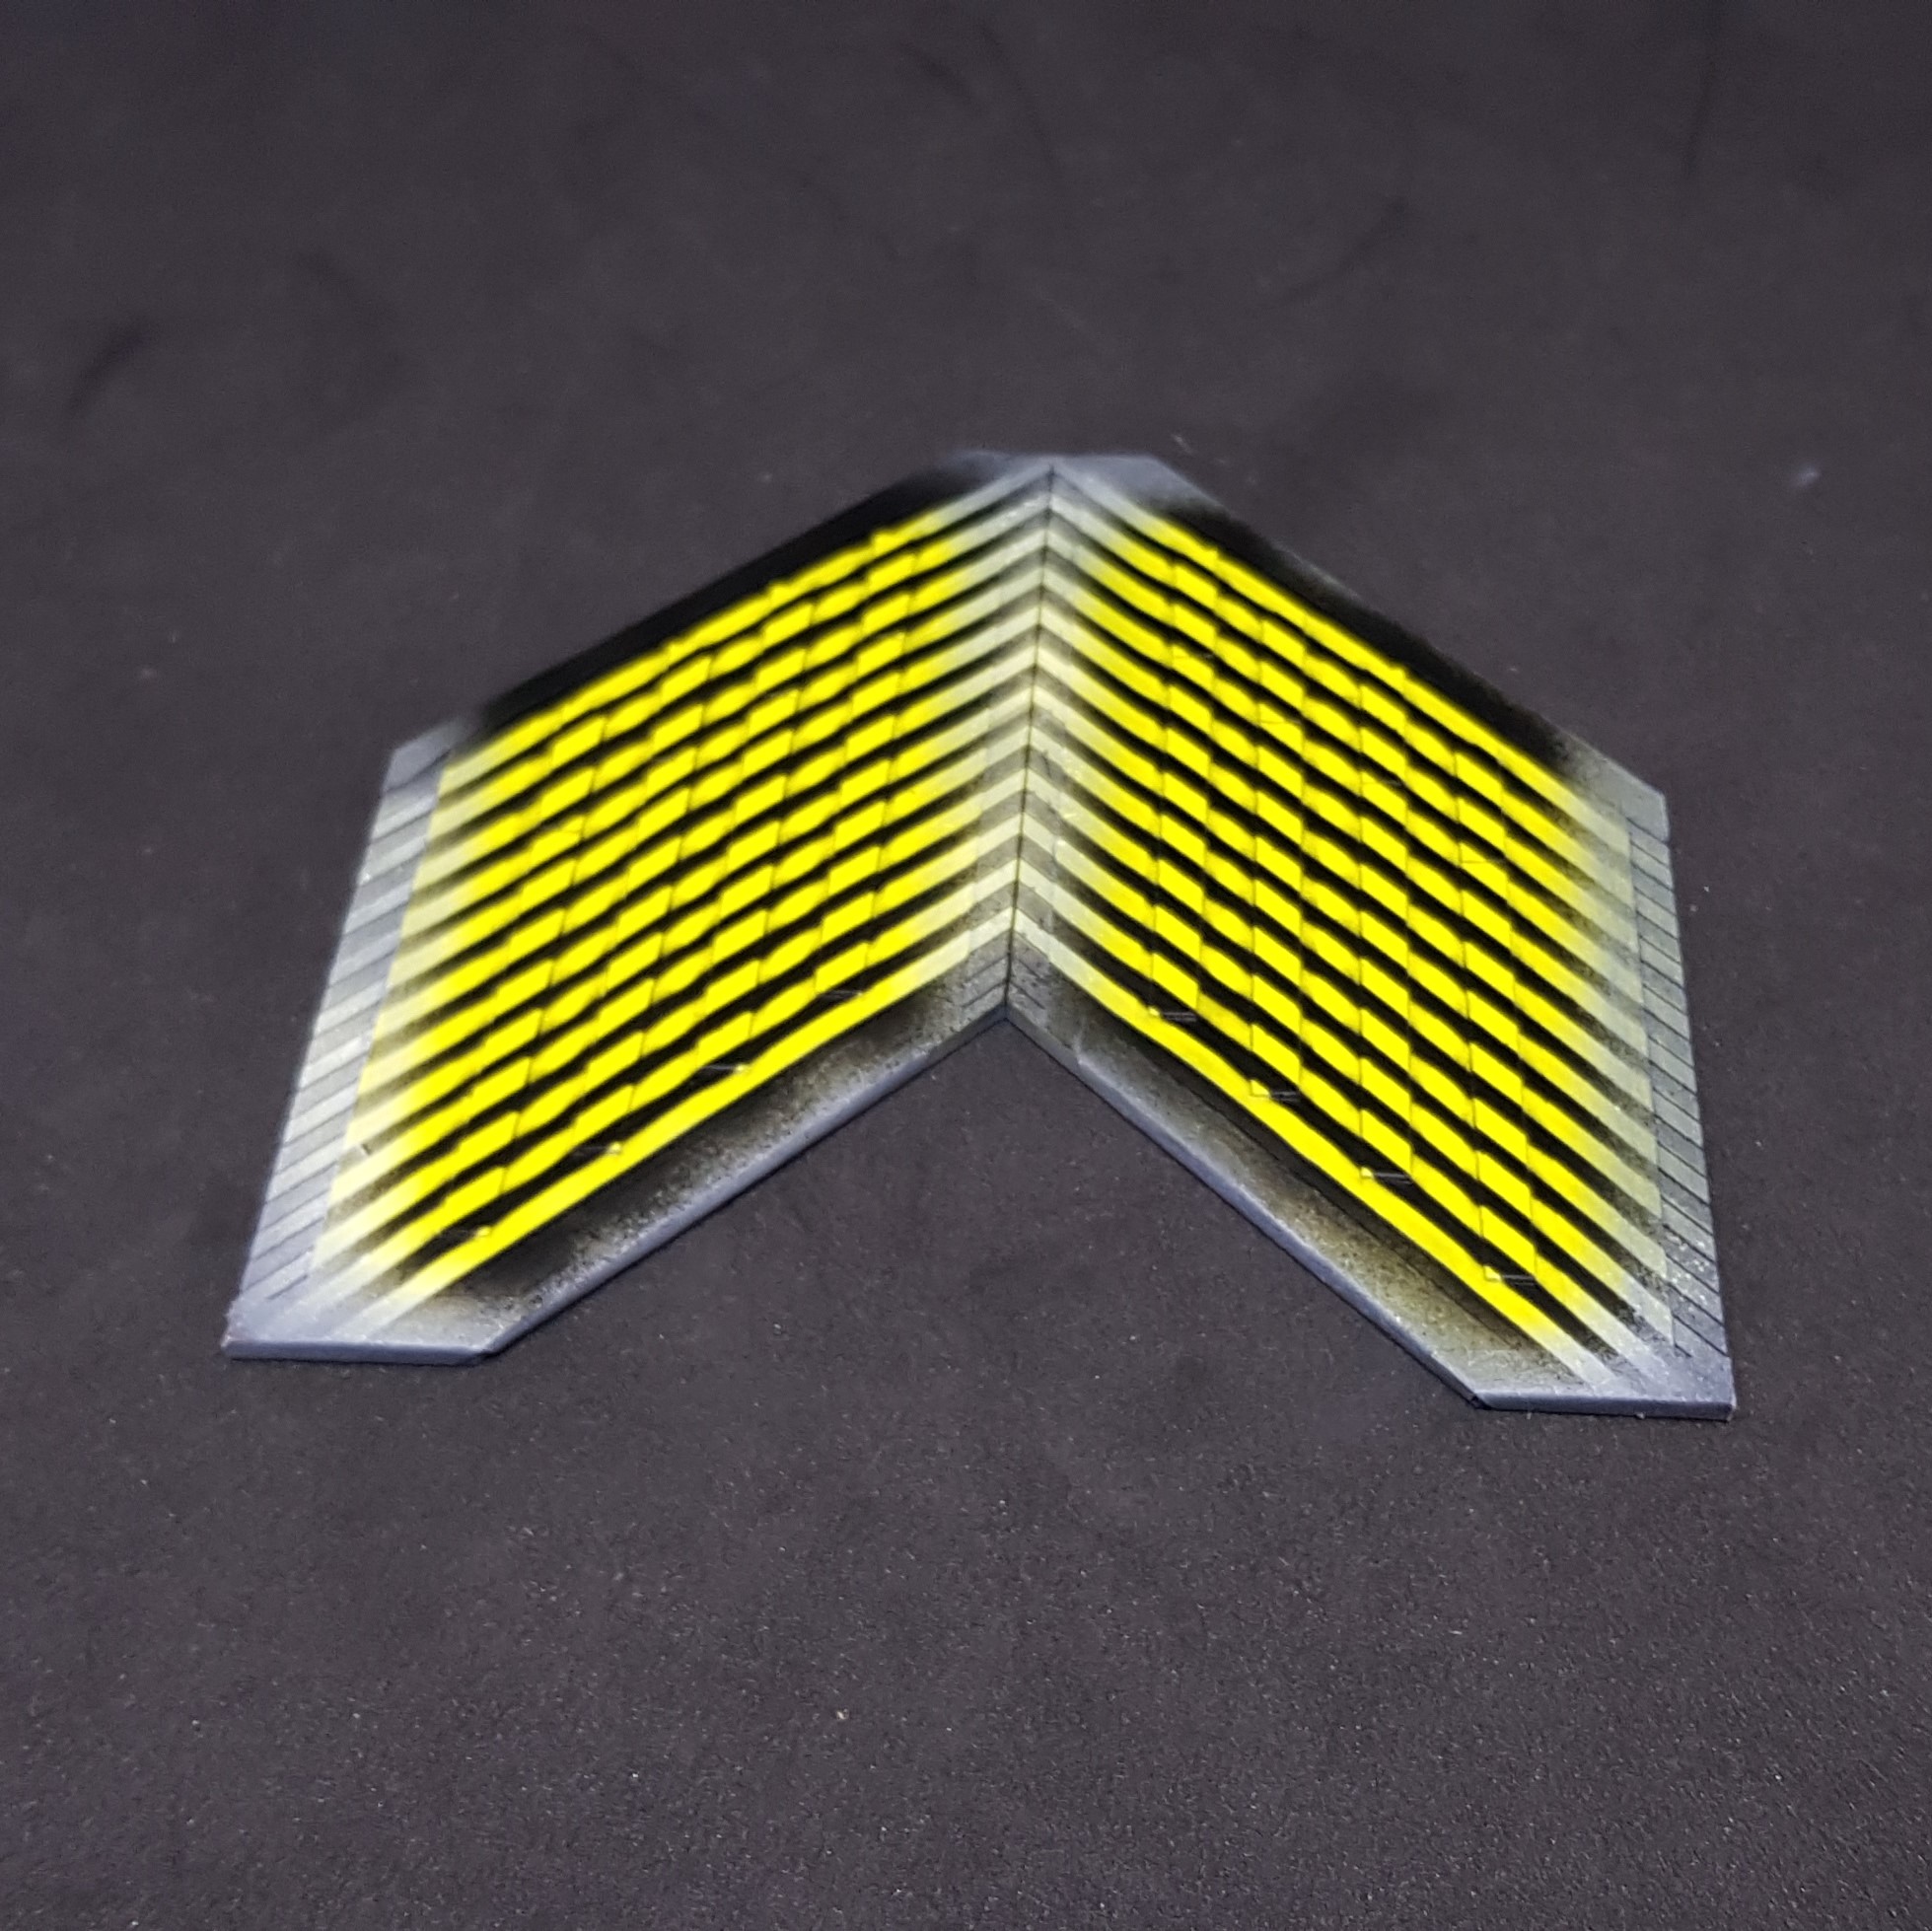
I also decided in later revisions to leave off the hazard tape marked areas and apply them after. This is a paint to do in an individual basis but is great if you do a bulk of them at once. I would advise to make spares if you are ever doing this.
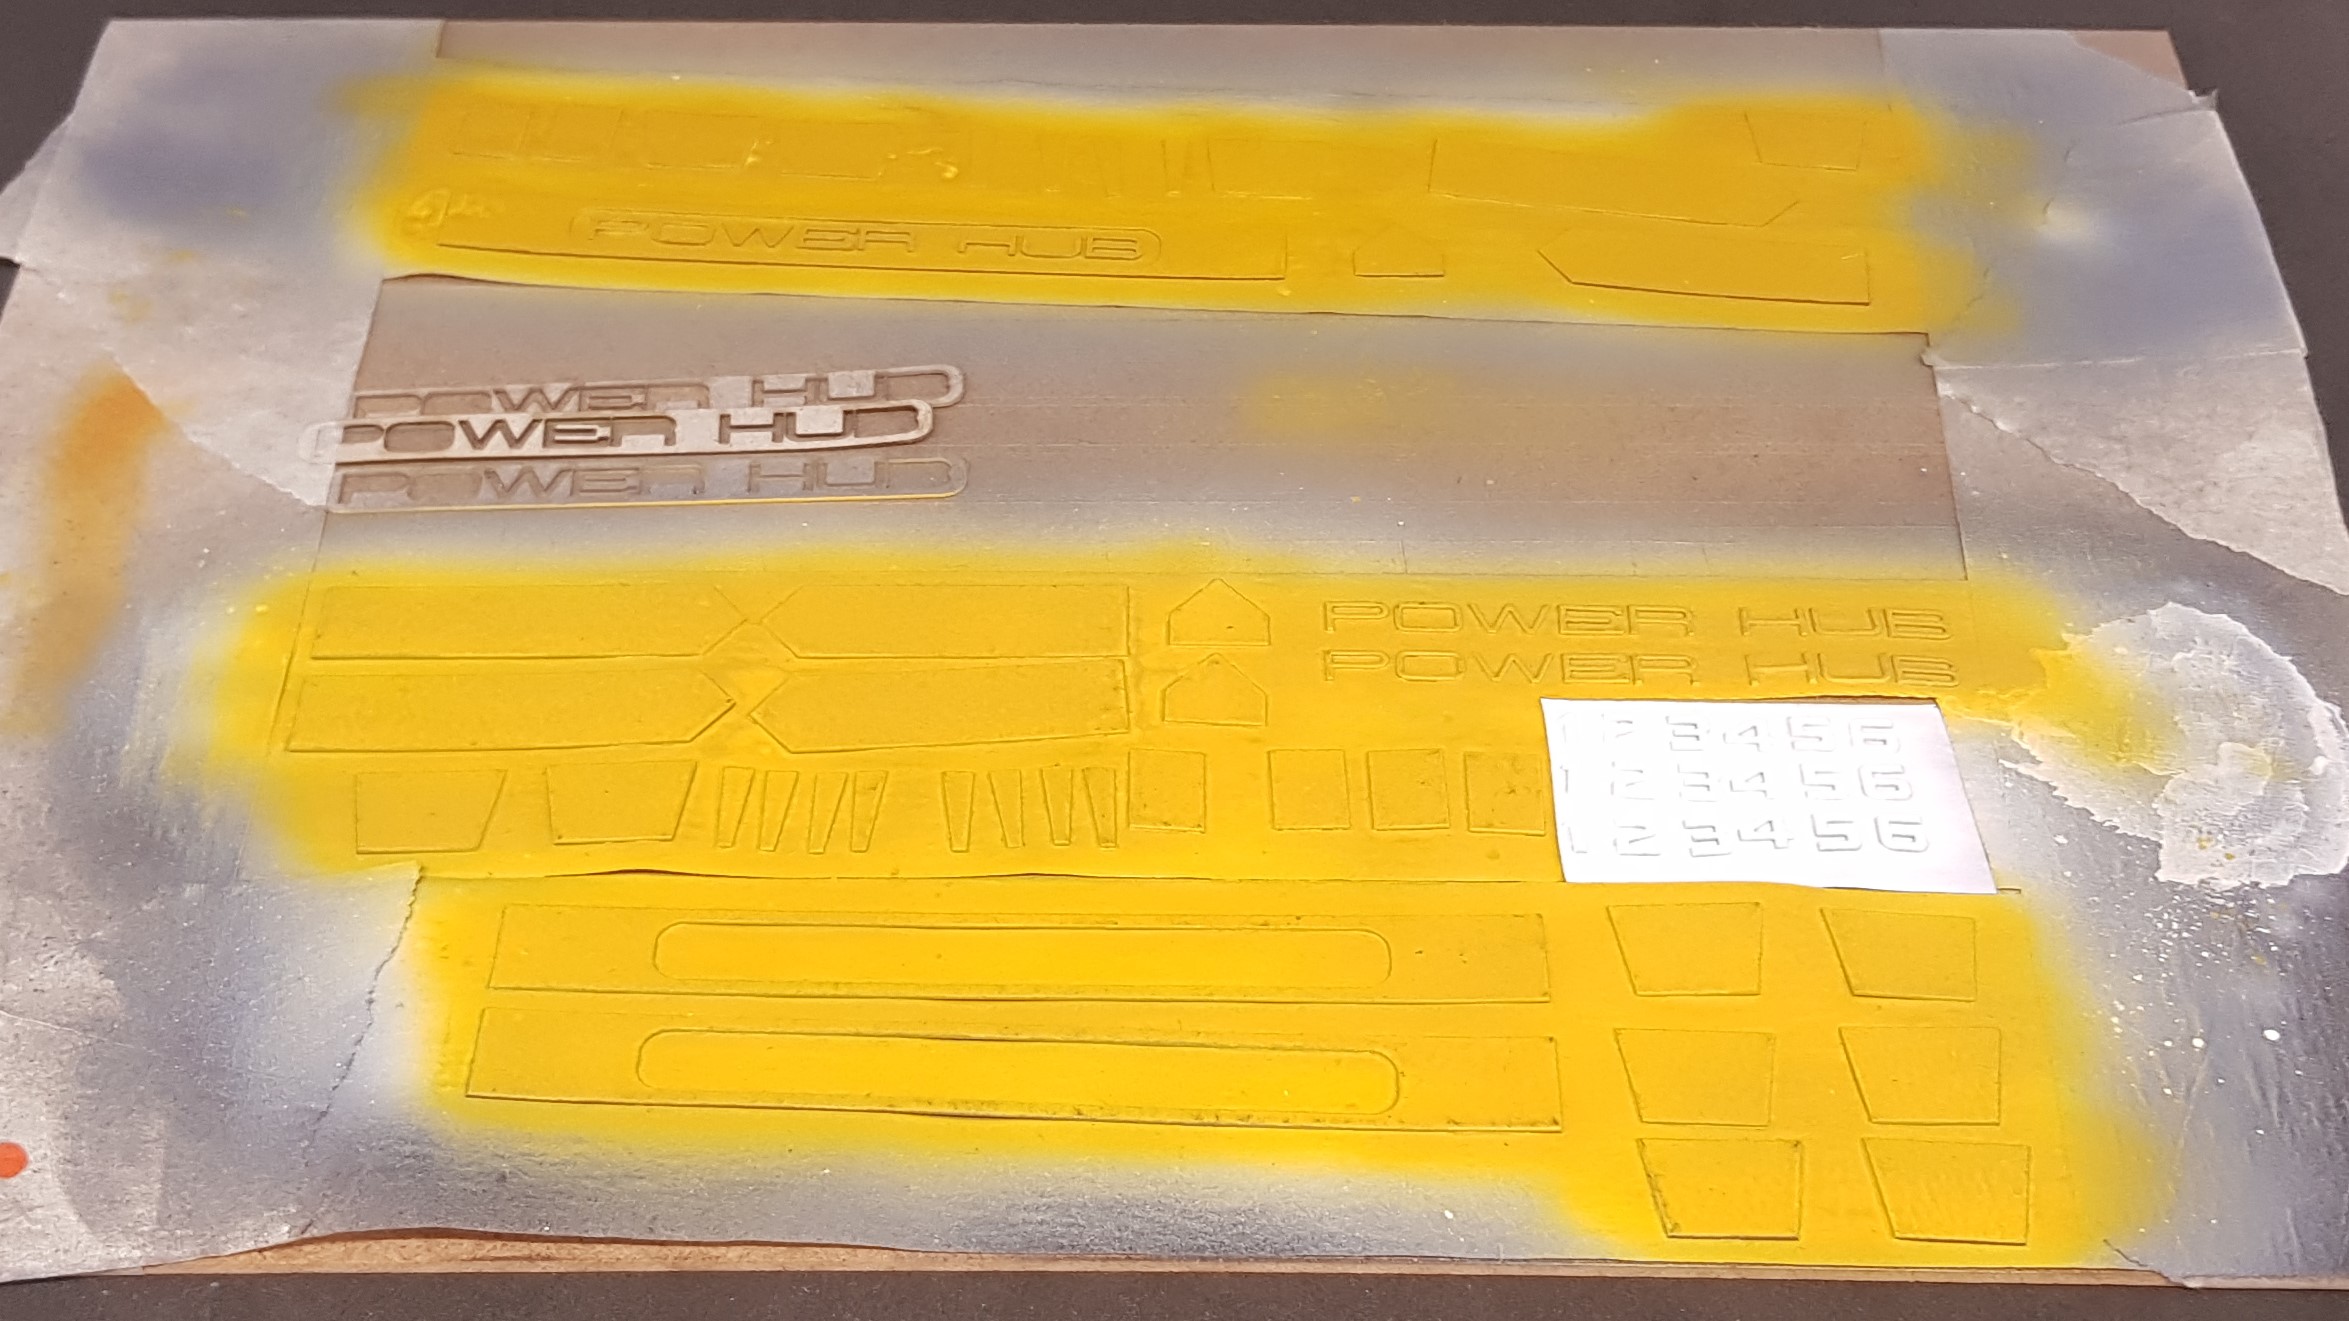
- I stuck everything down on a sheet and reversed my masking tape to be sticky side up.
- I then sprayed everything in an undercoat of white then sprayed in yellow.
- After this I masked with better quality hobby masking tape as pictured bellow
- Then sprayed black.
After this I stuck these on using superglue and was very careful not to use to much to avoid damaging the rest of the paint.

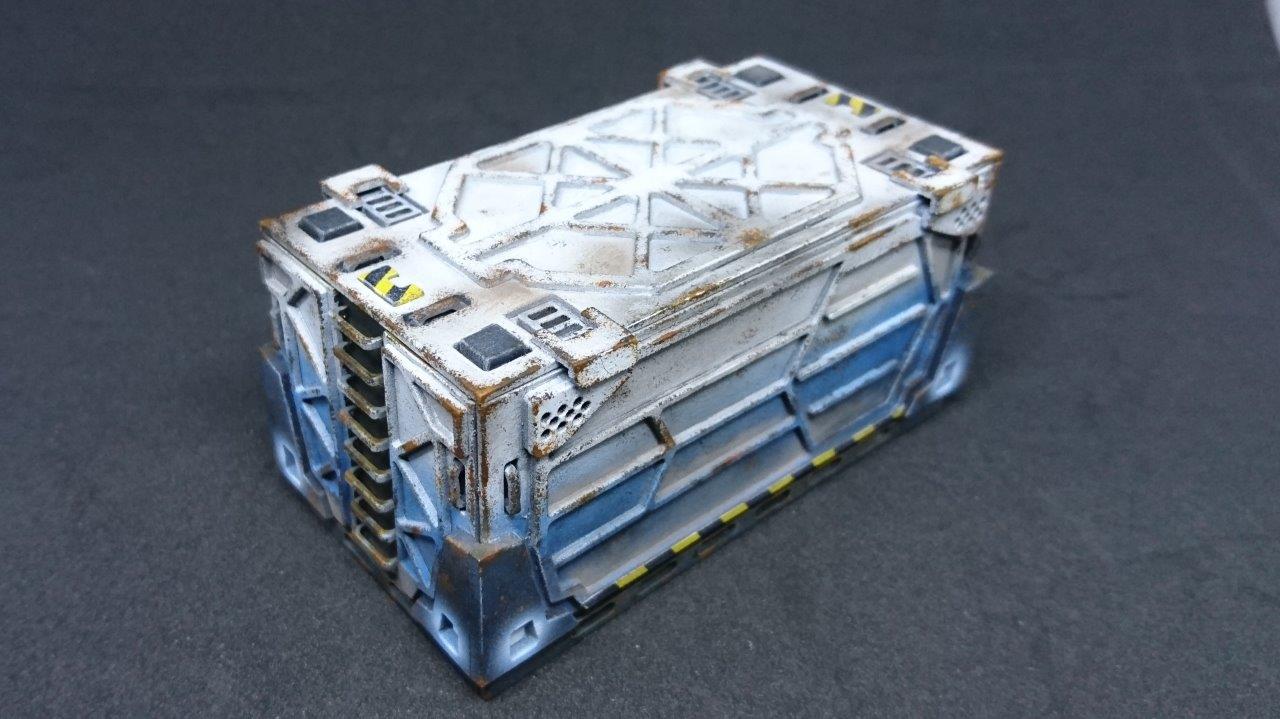
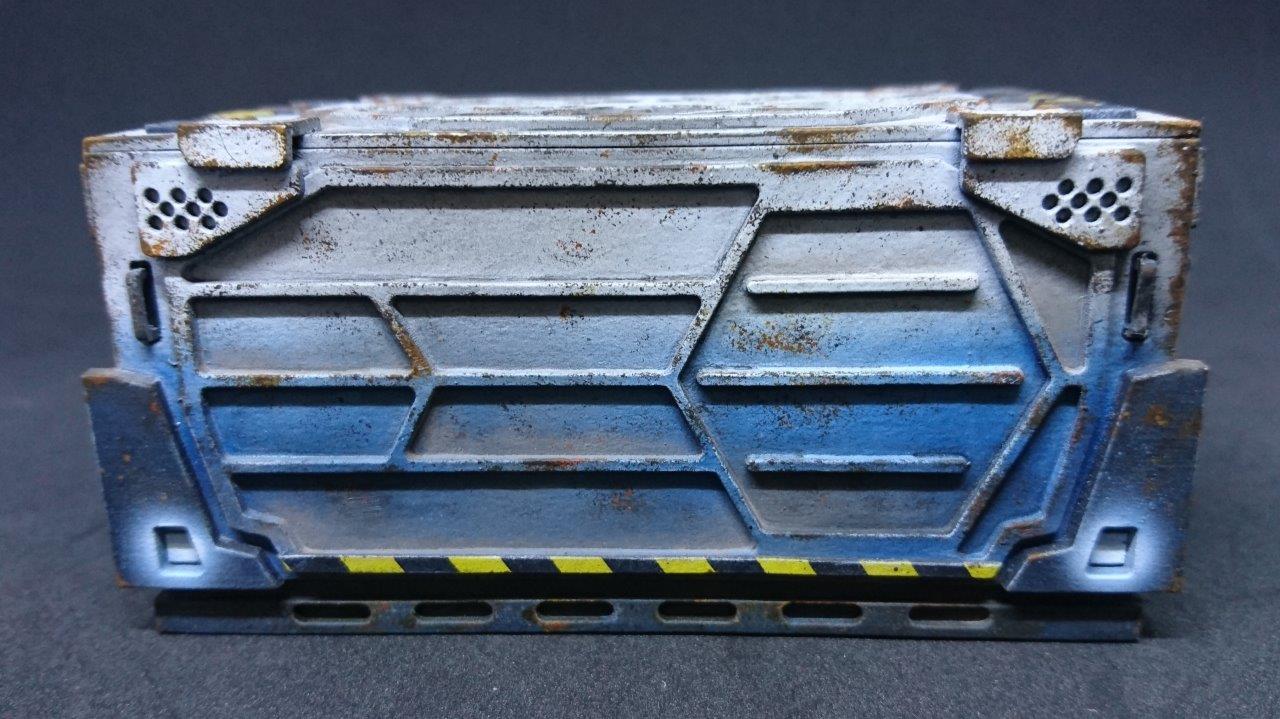
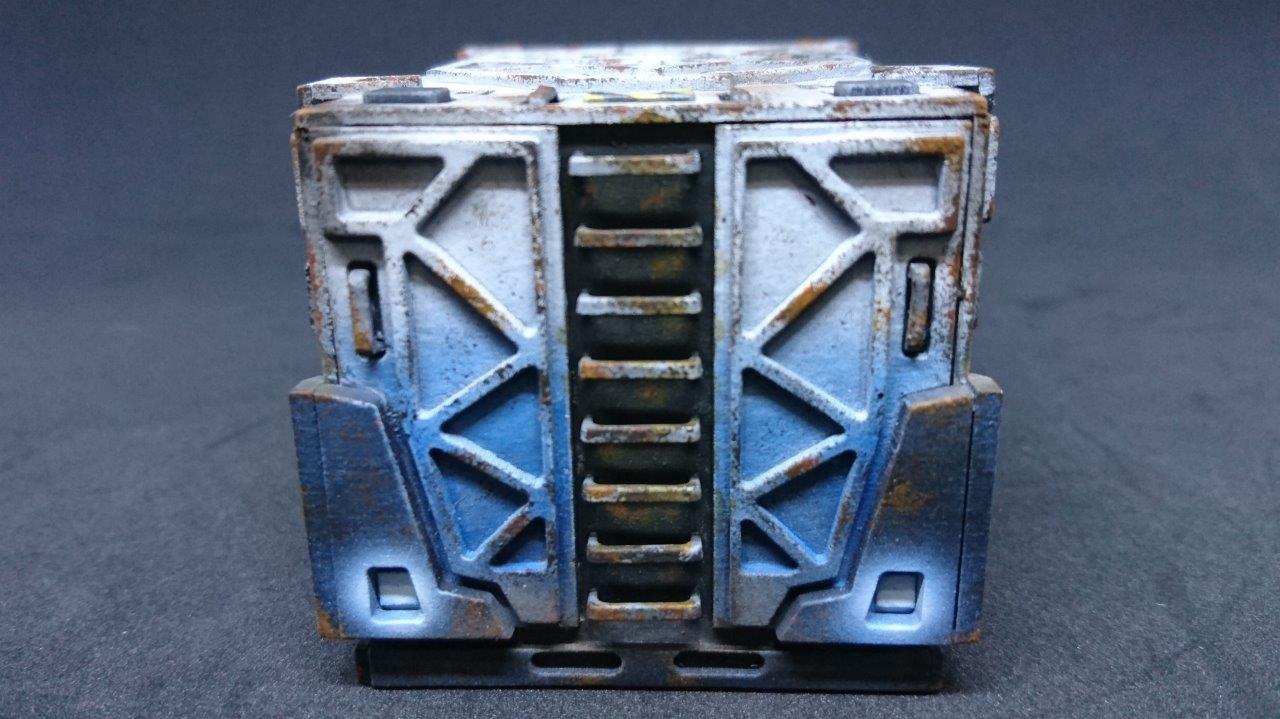
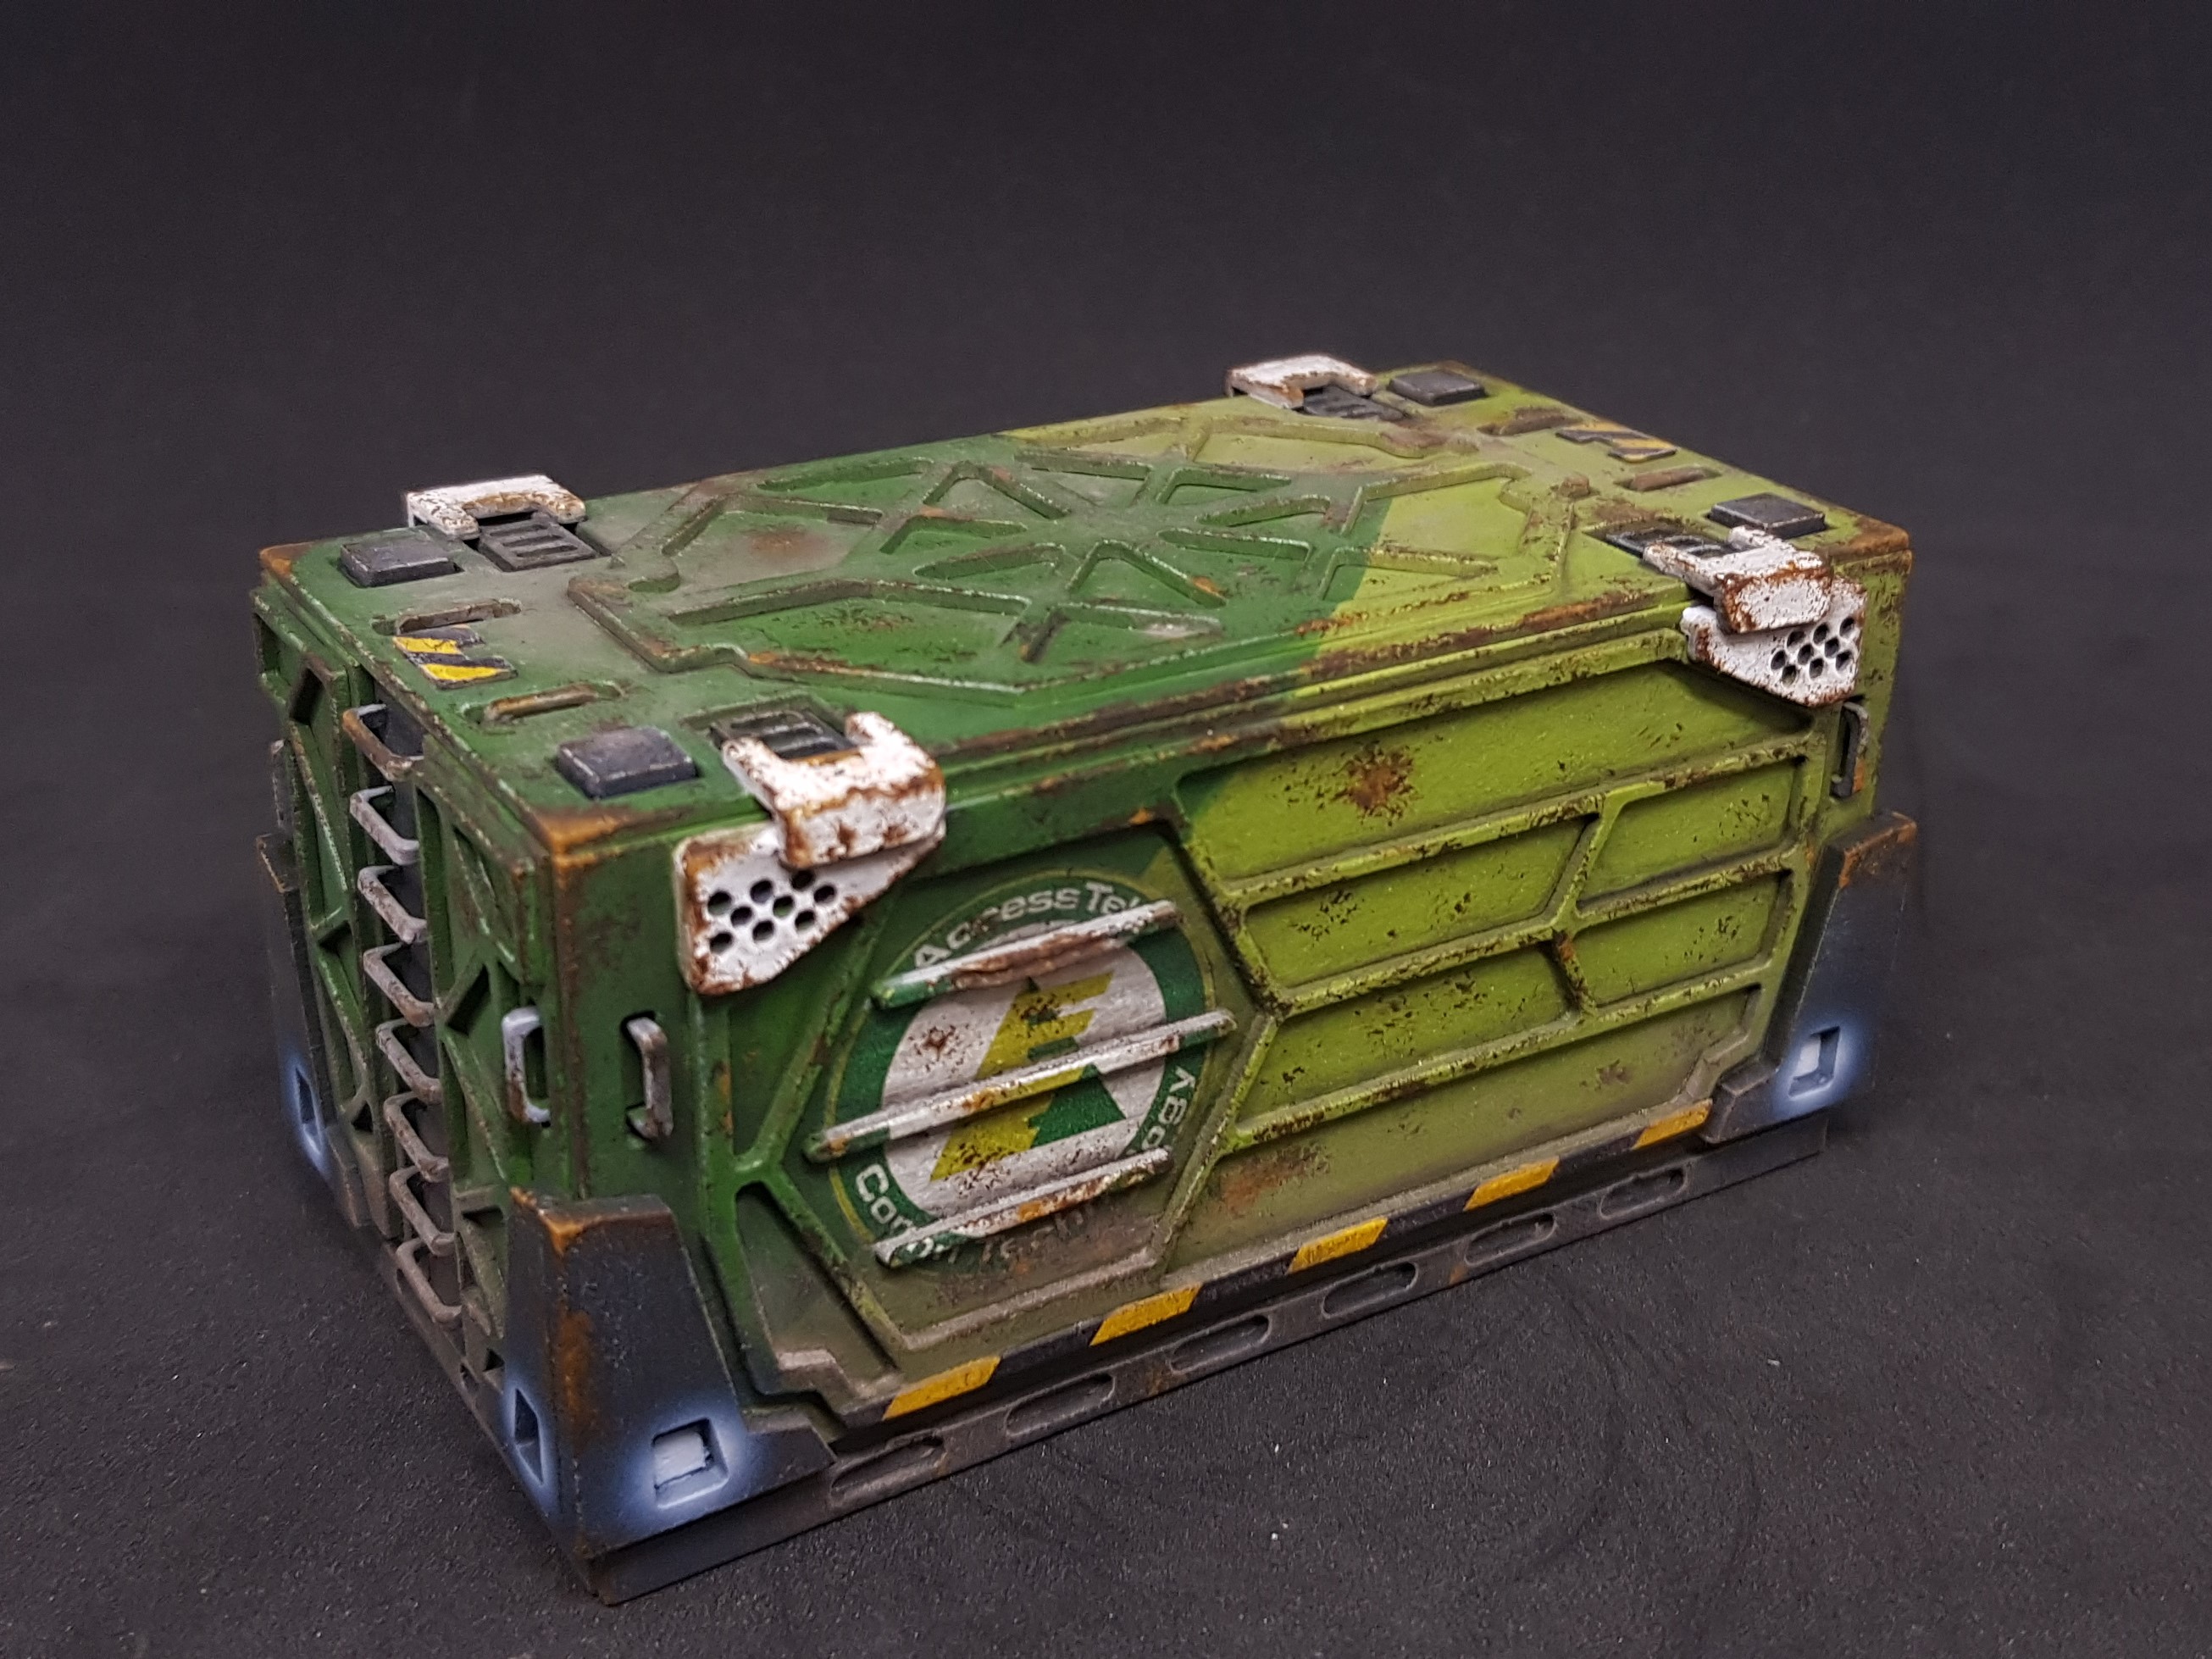
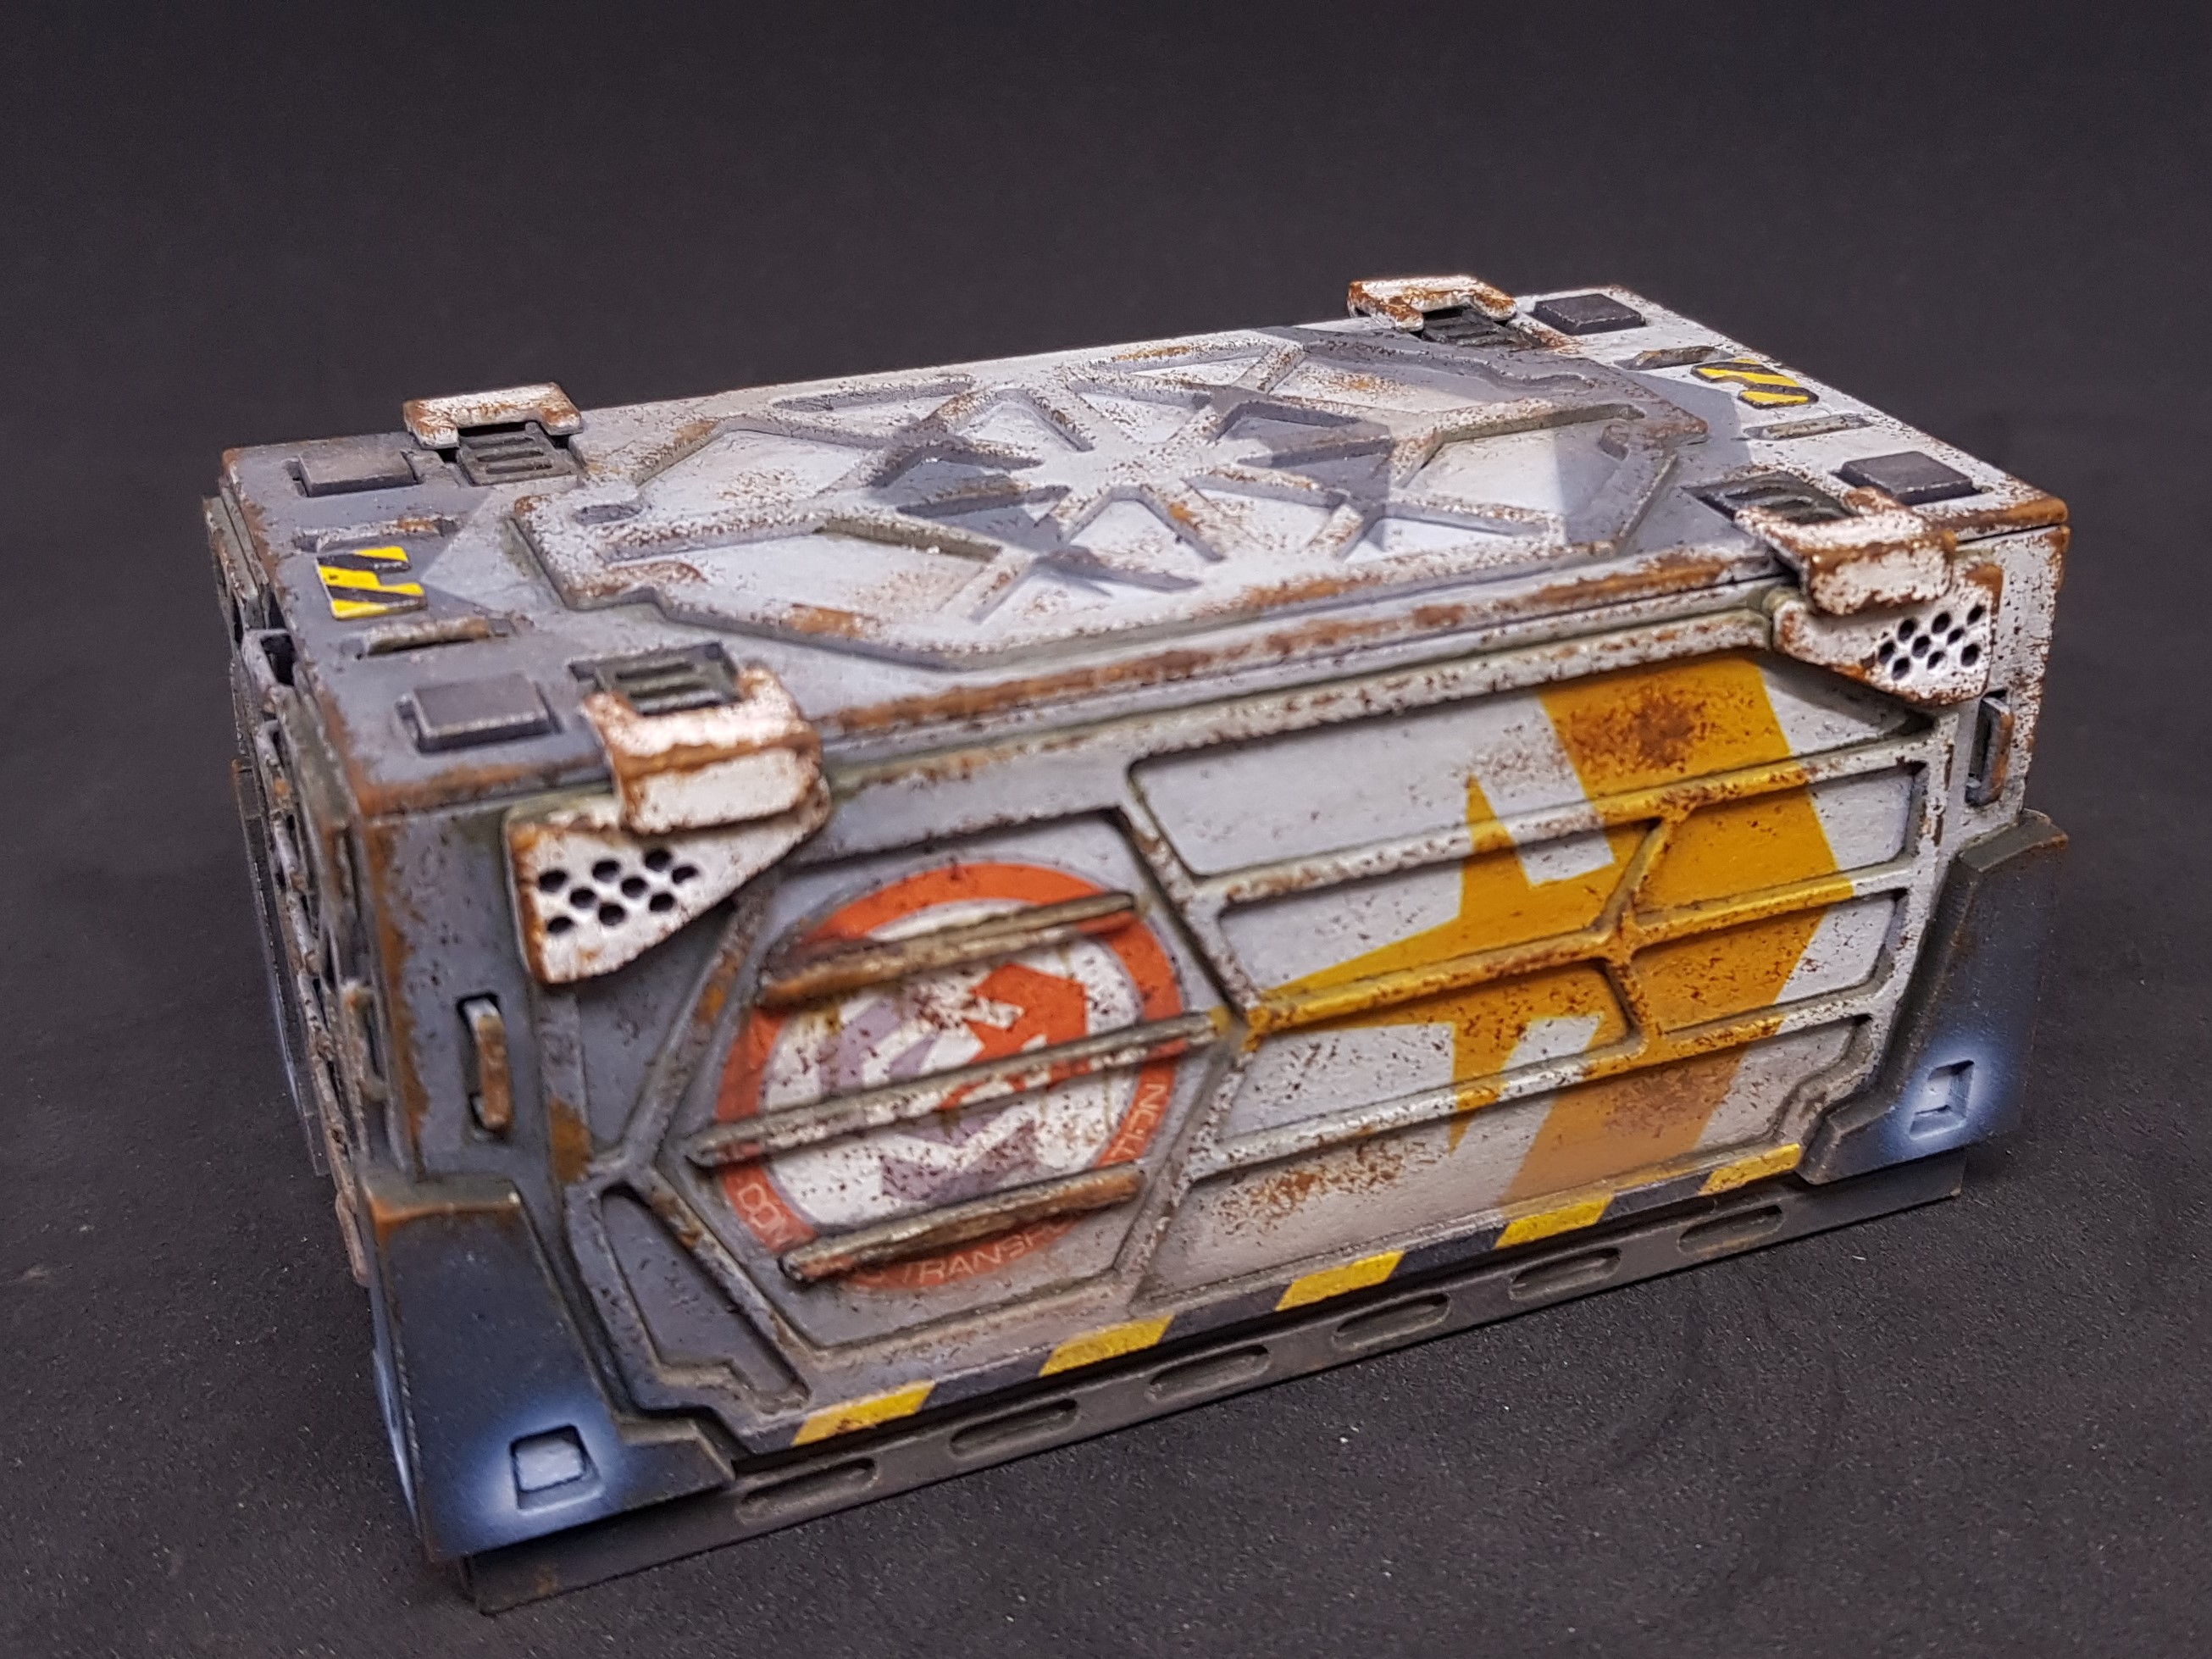
So after making and painting everything as best I could. I washed heavily wiped this off, let dry. Then weathered with orange, brown and black paint with a torn sponge for rust. Last thing was another coat of matt varnish to give everything an even finish.
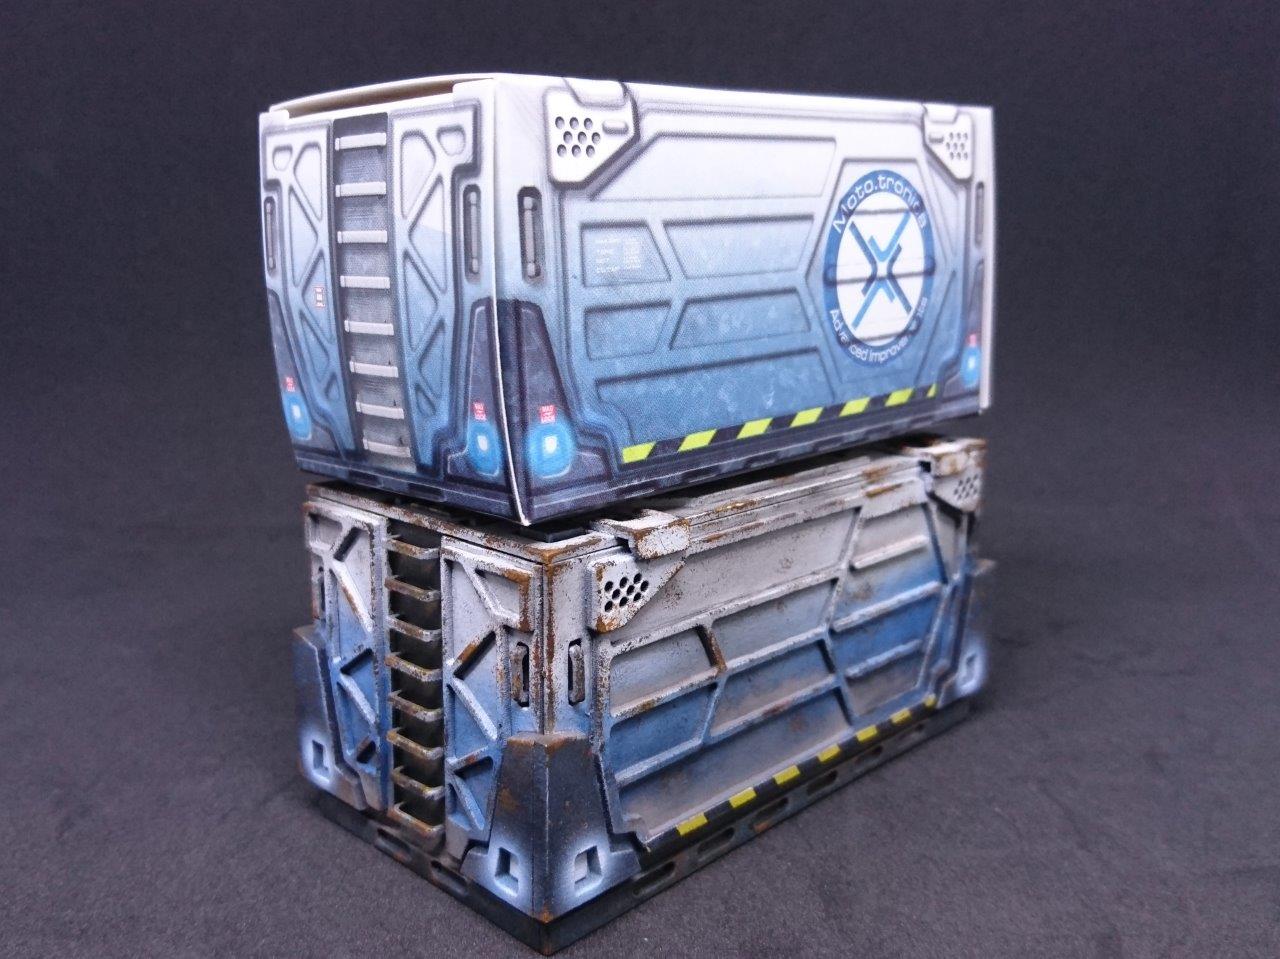
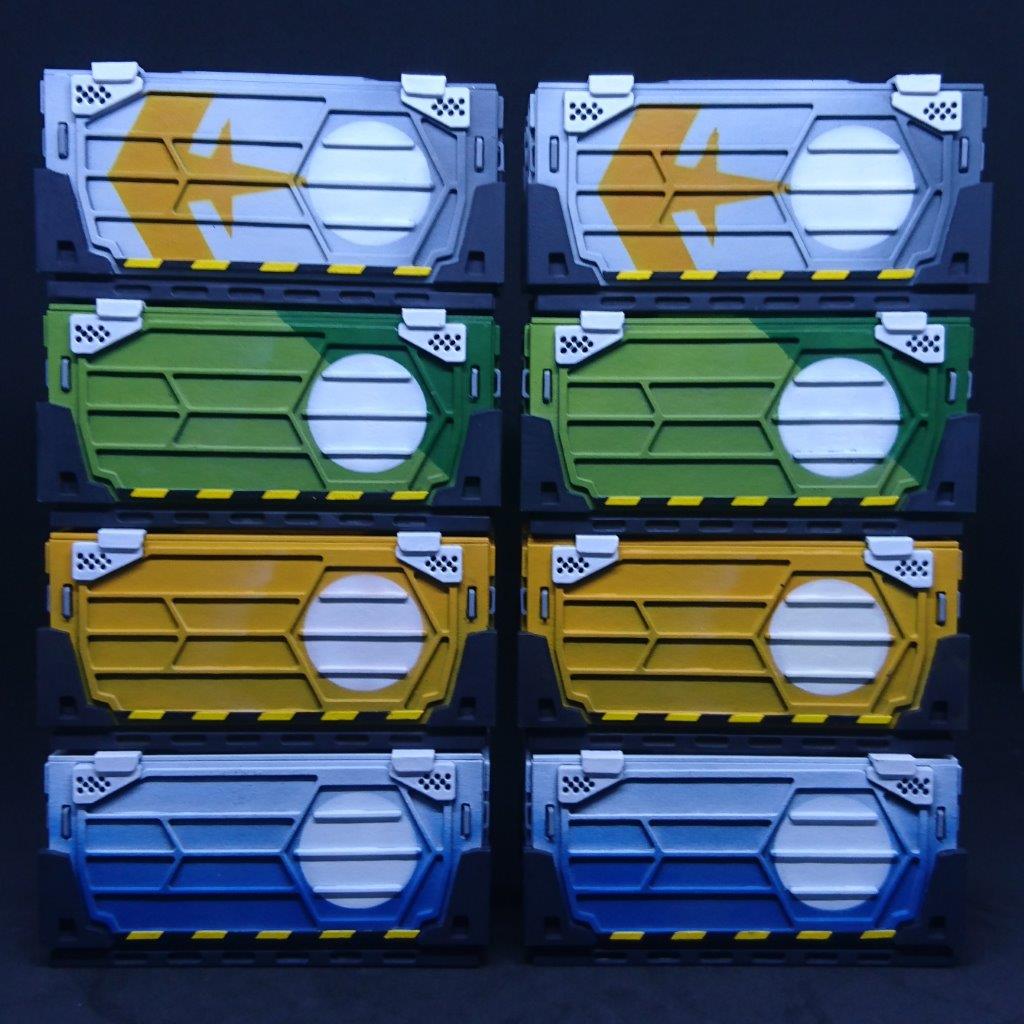
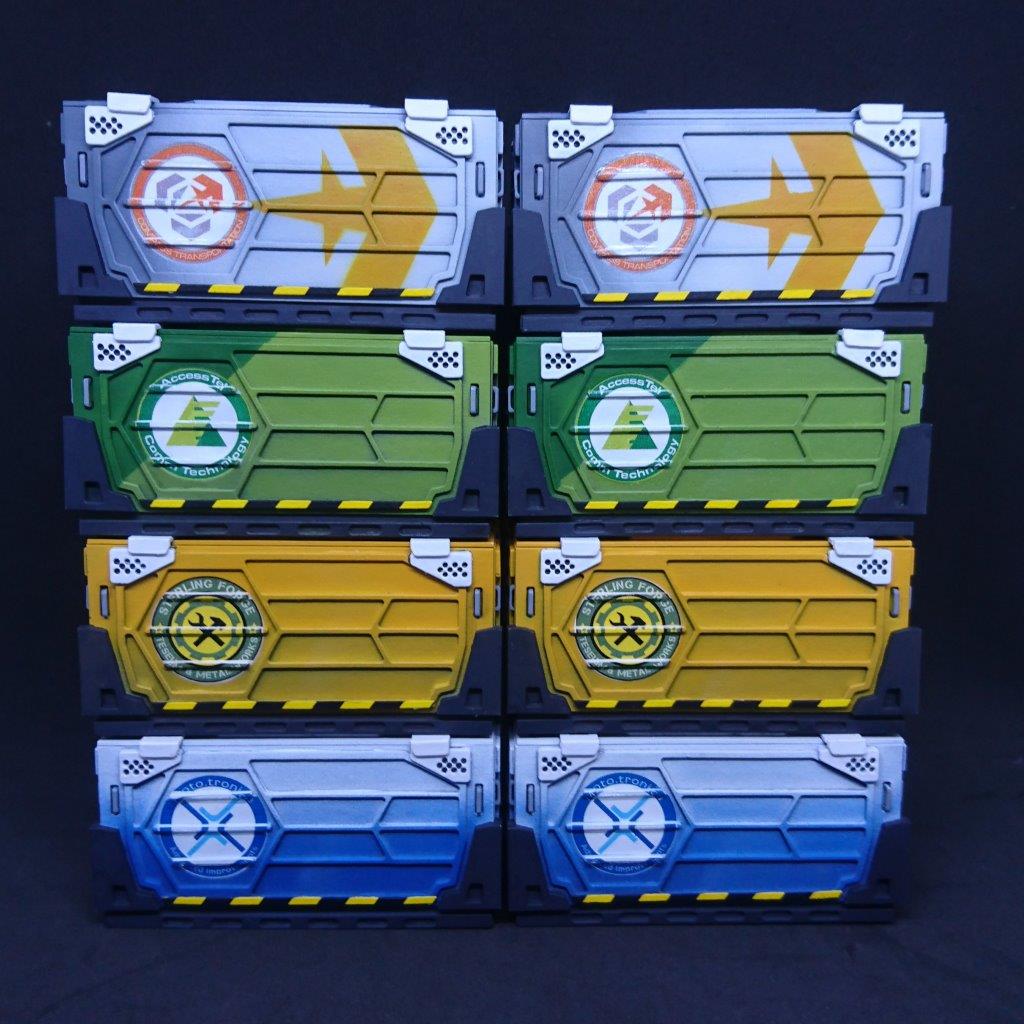
Here is one of each of the ones I have painted so far.

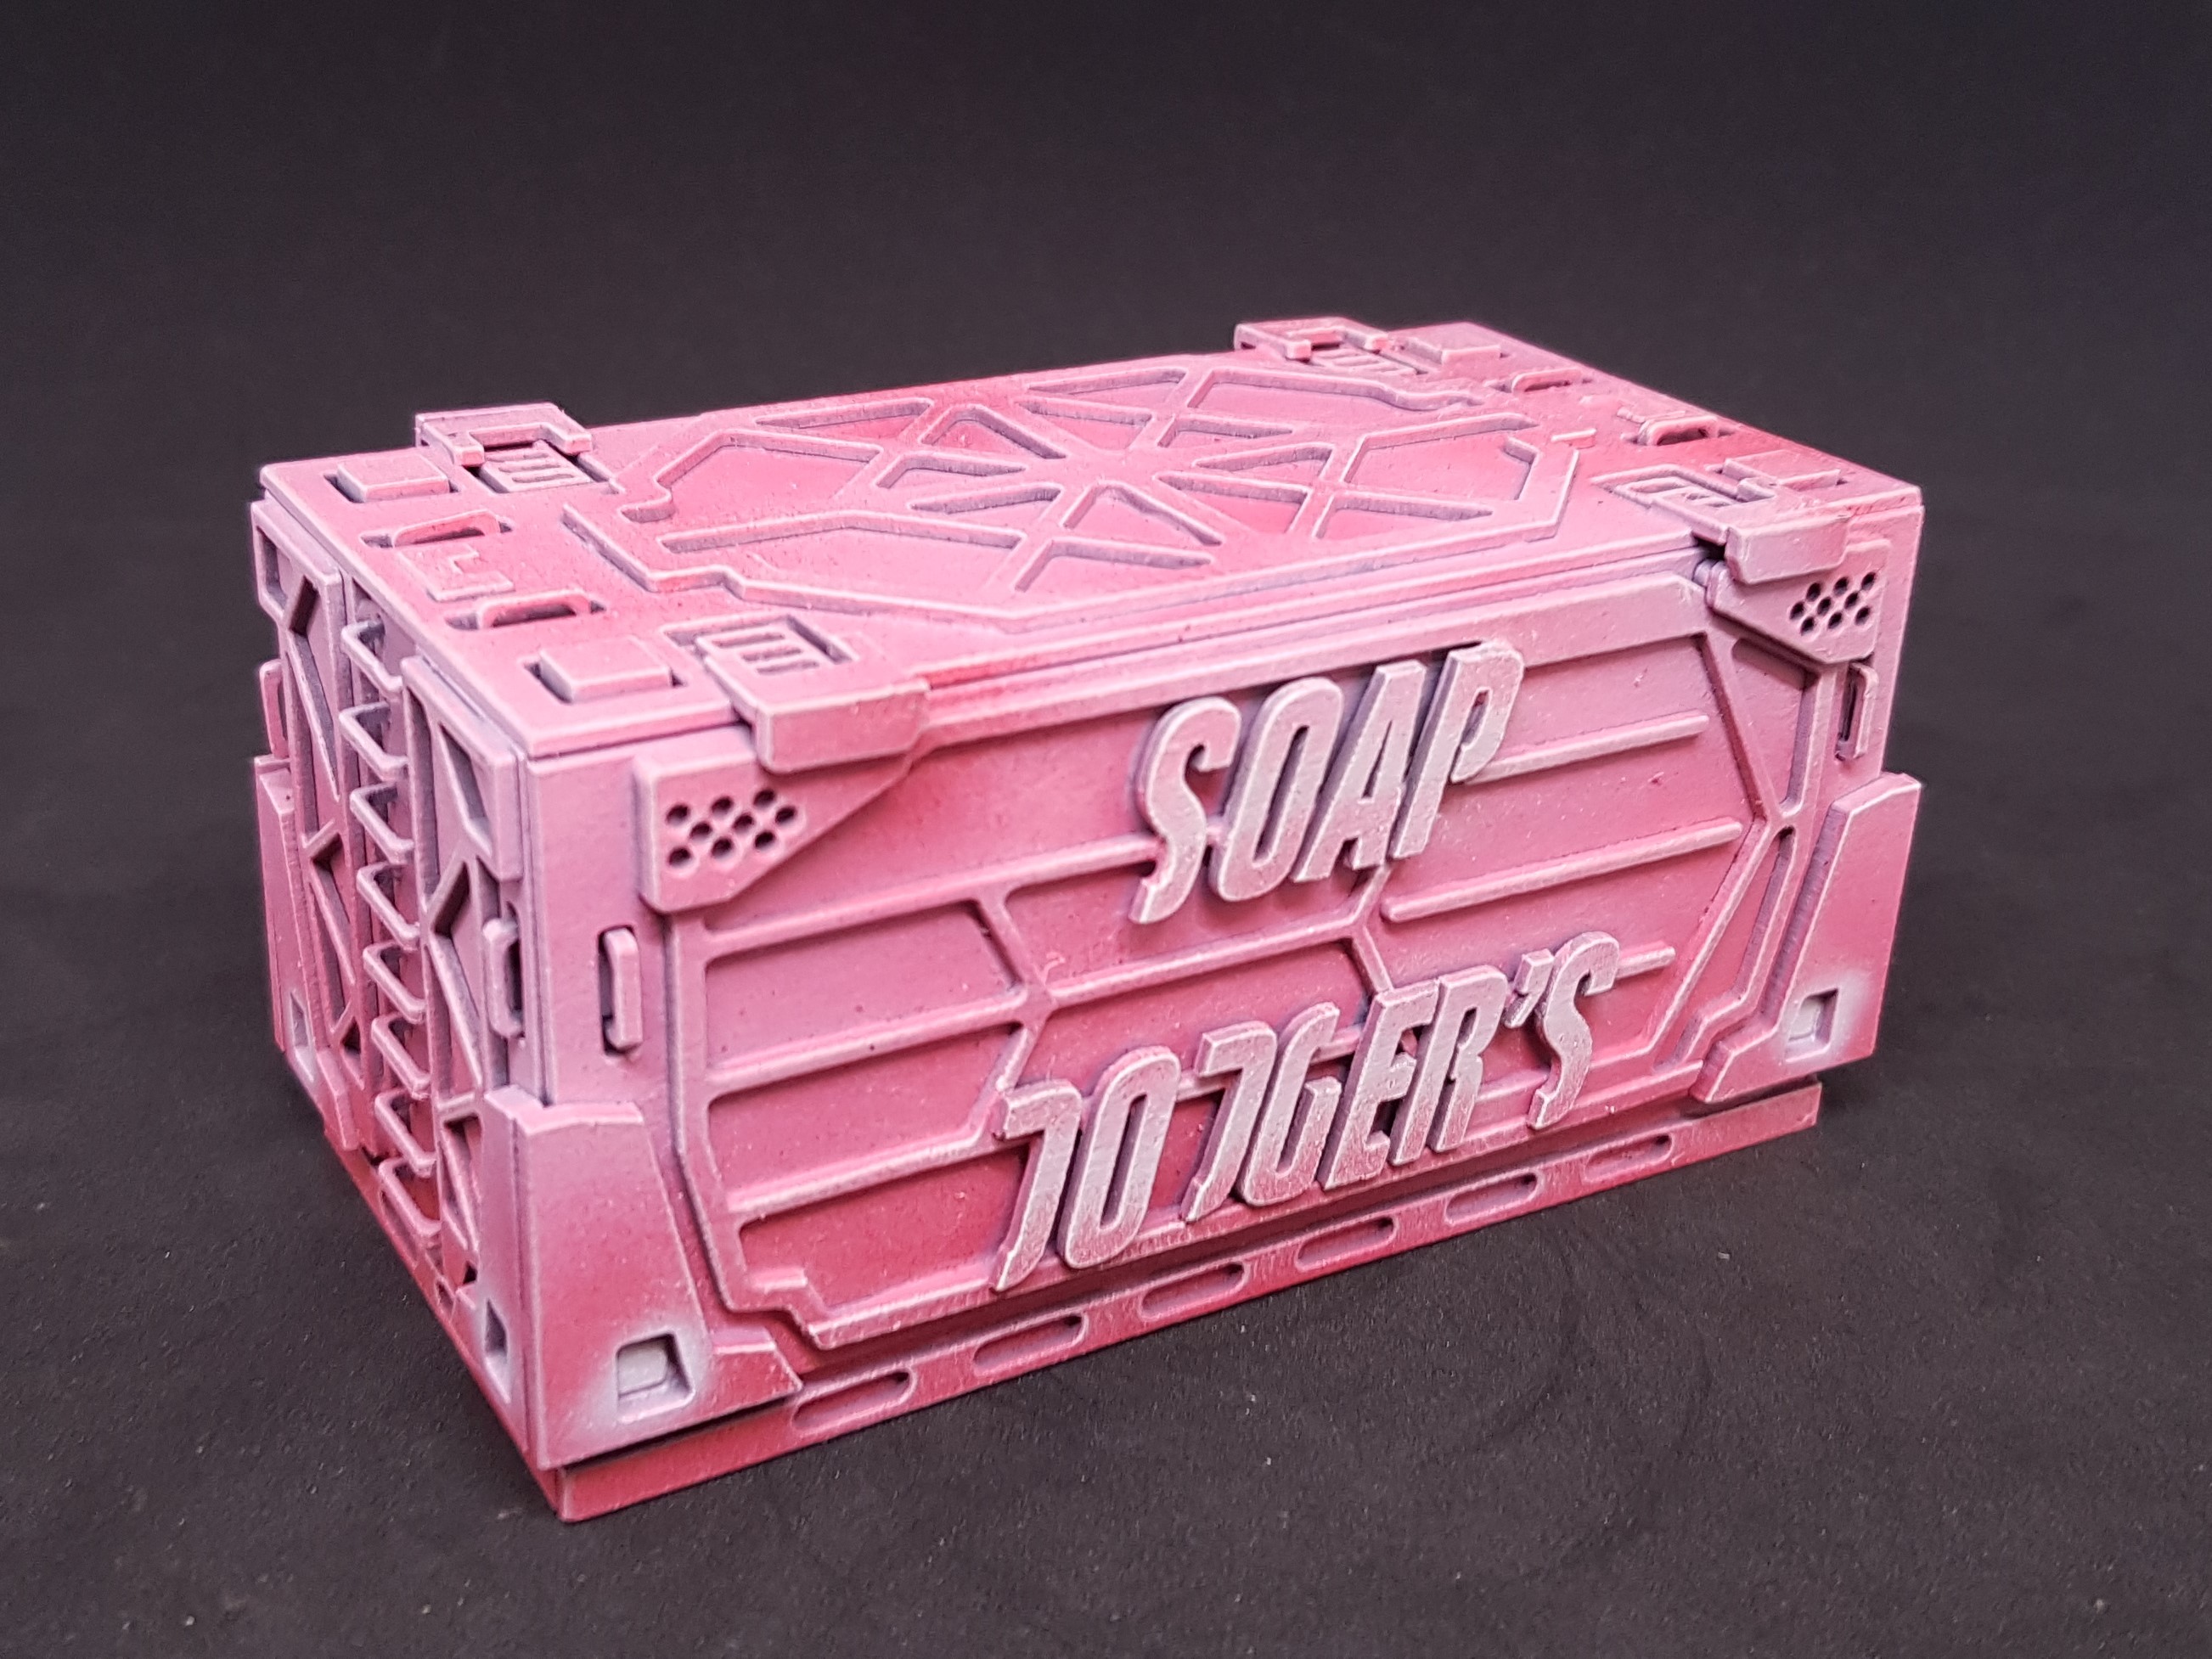
 The prototypes
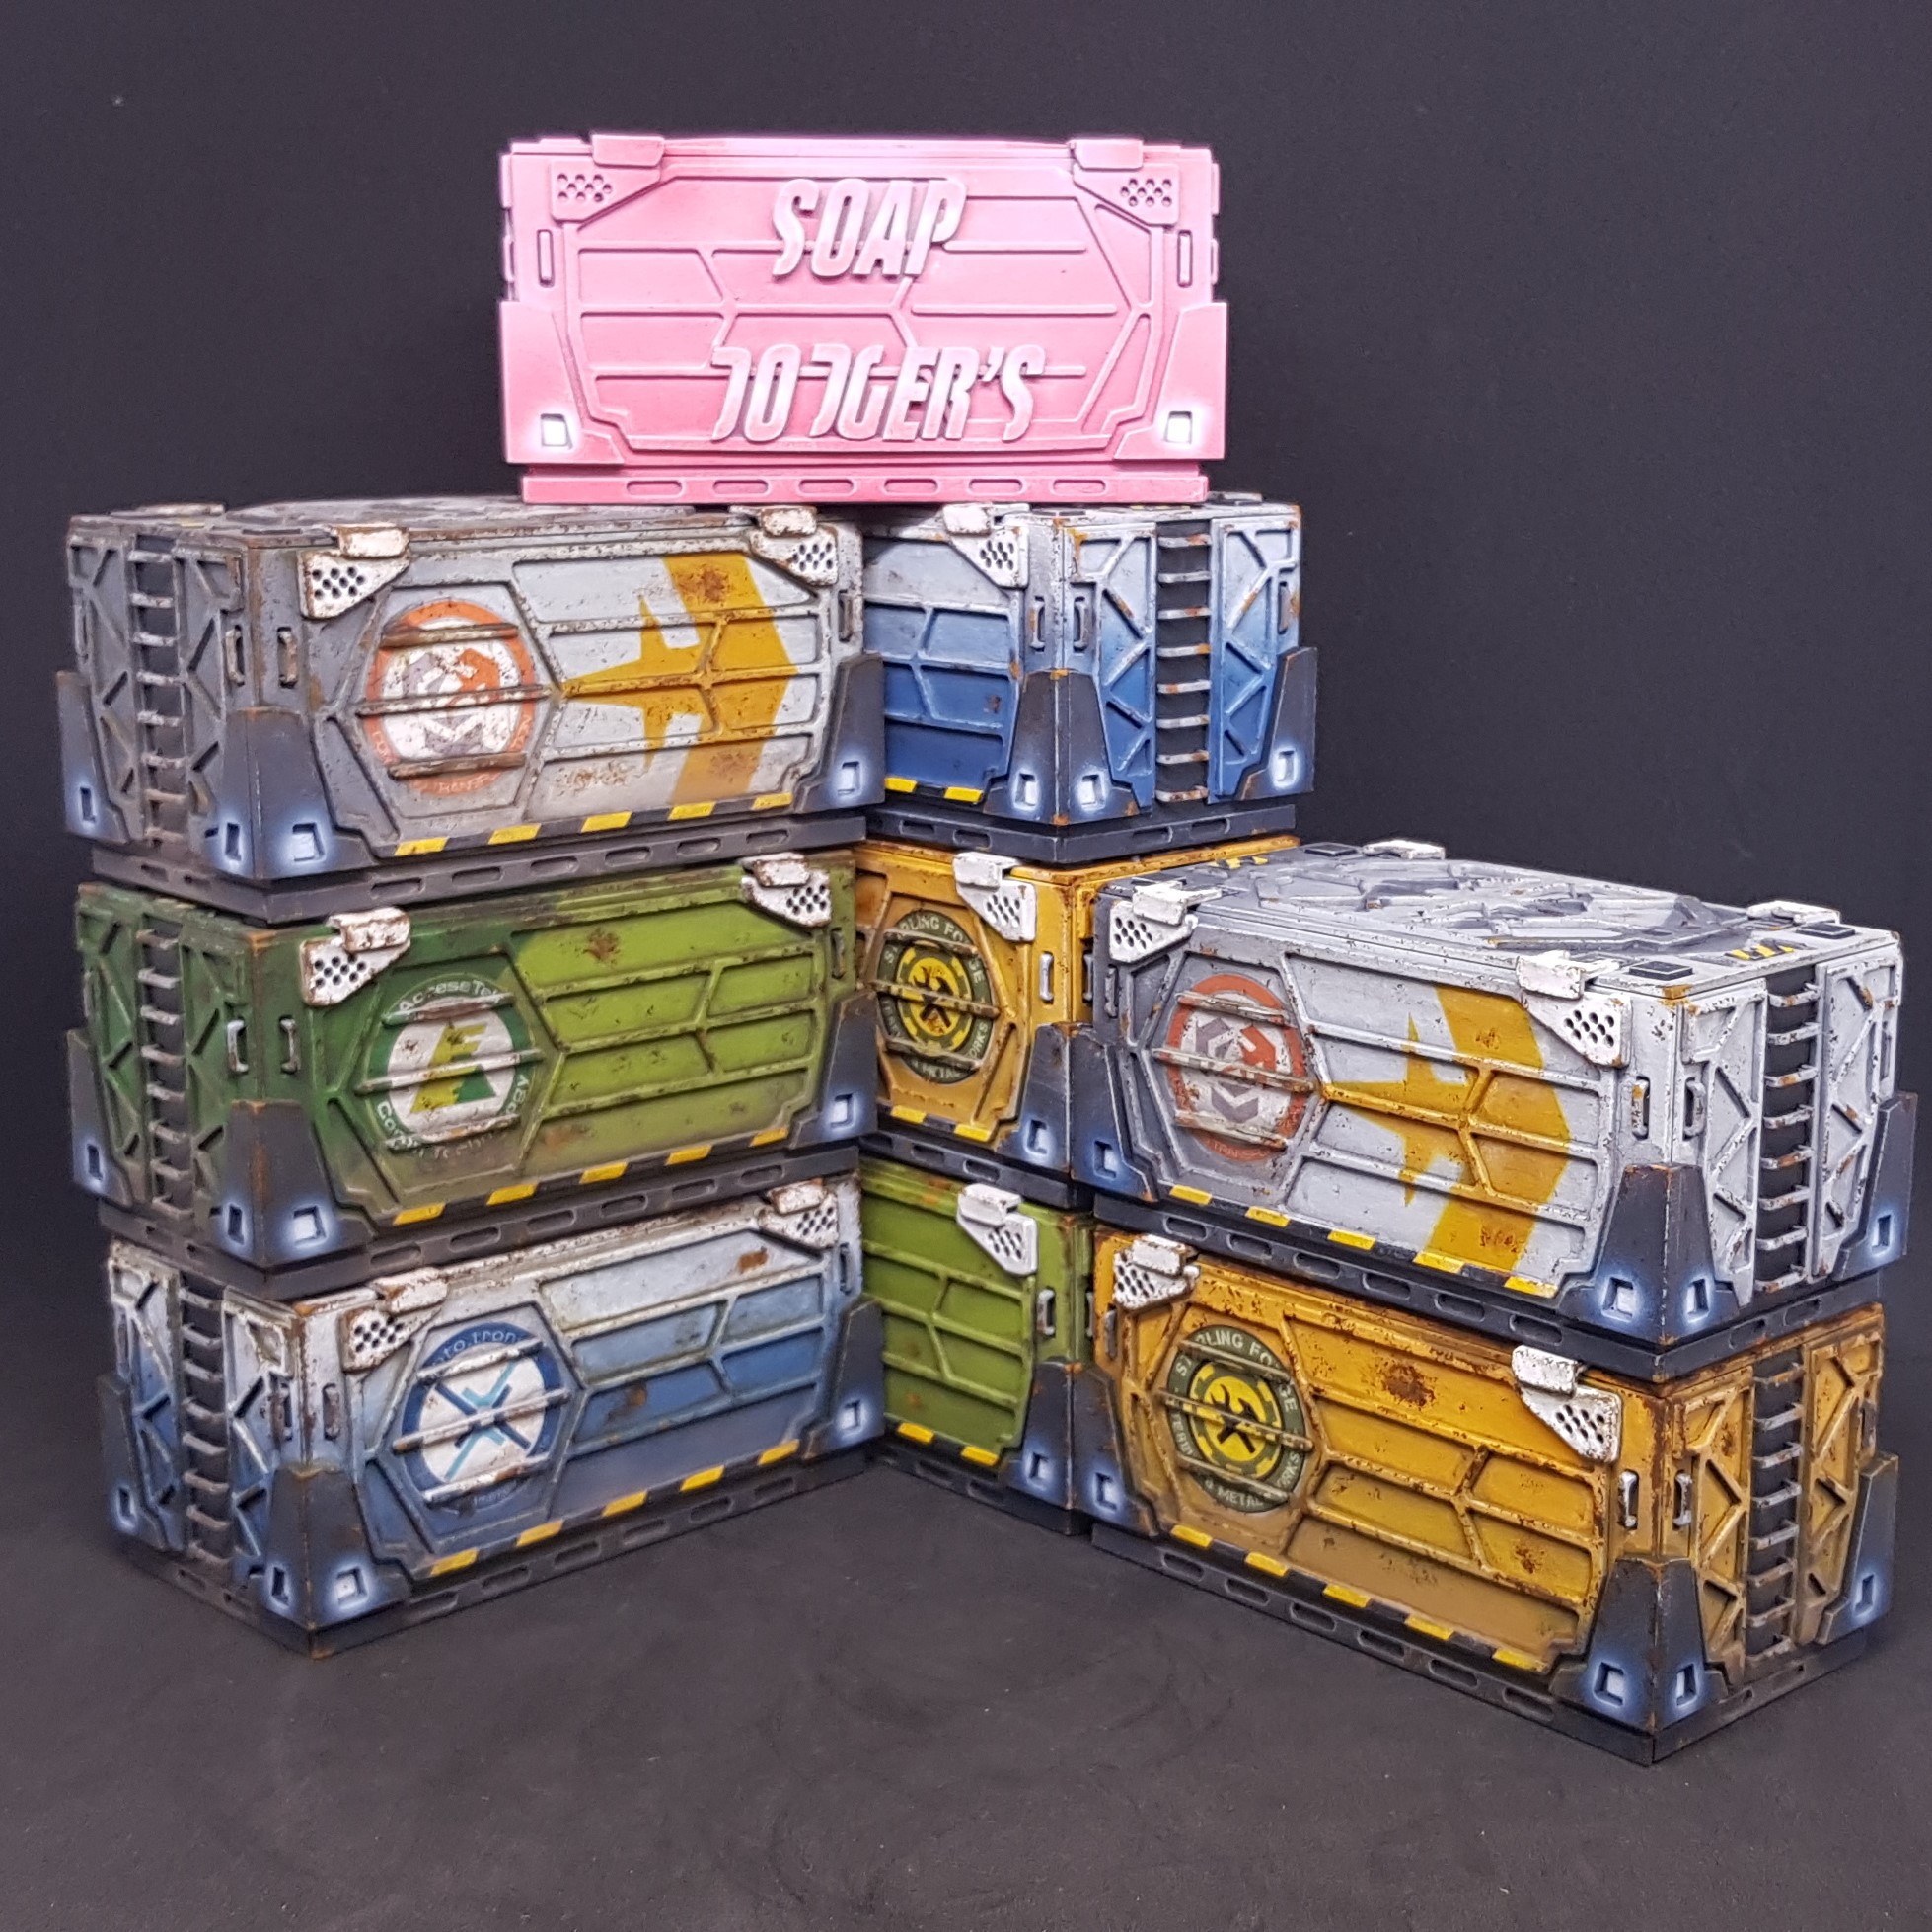 All of the ones minus the prototypes that I have made so far.
 So there you have it all done and I now have great containers to use in my games and can pass on my card ones to get people into the game!
My journey with containers is not over though. I have many more to do to match each of the sets I have. At least I know what I am in for now.
I now feel the need for some power! Powerhub is up next and is actually current!
Prepairing to paint the Power Hub
Thought I would post this has it has taken a few hours to do my prep to paint and if I jumped right into painting it may not make sense. Most of the initial painting will be done with an airbrush for speed and then go in after and put details in by hand.
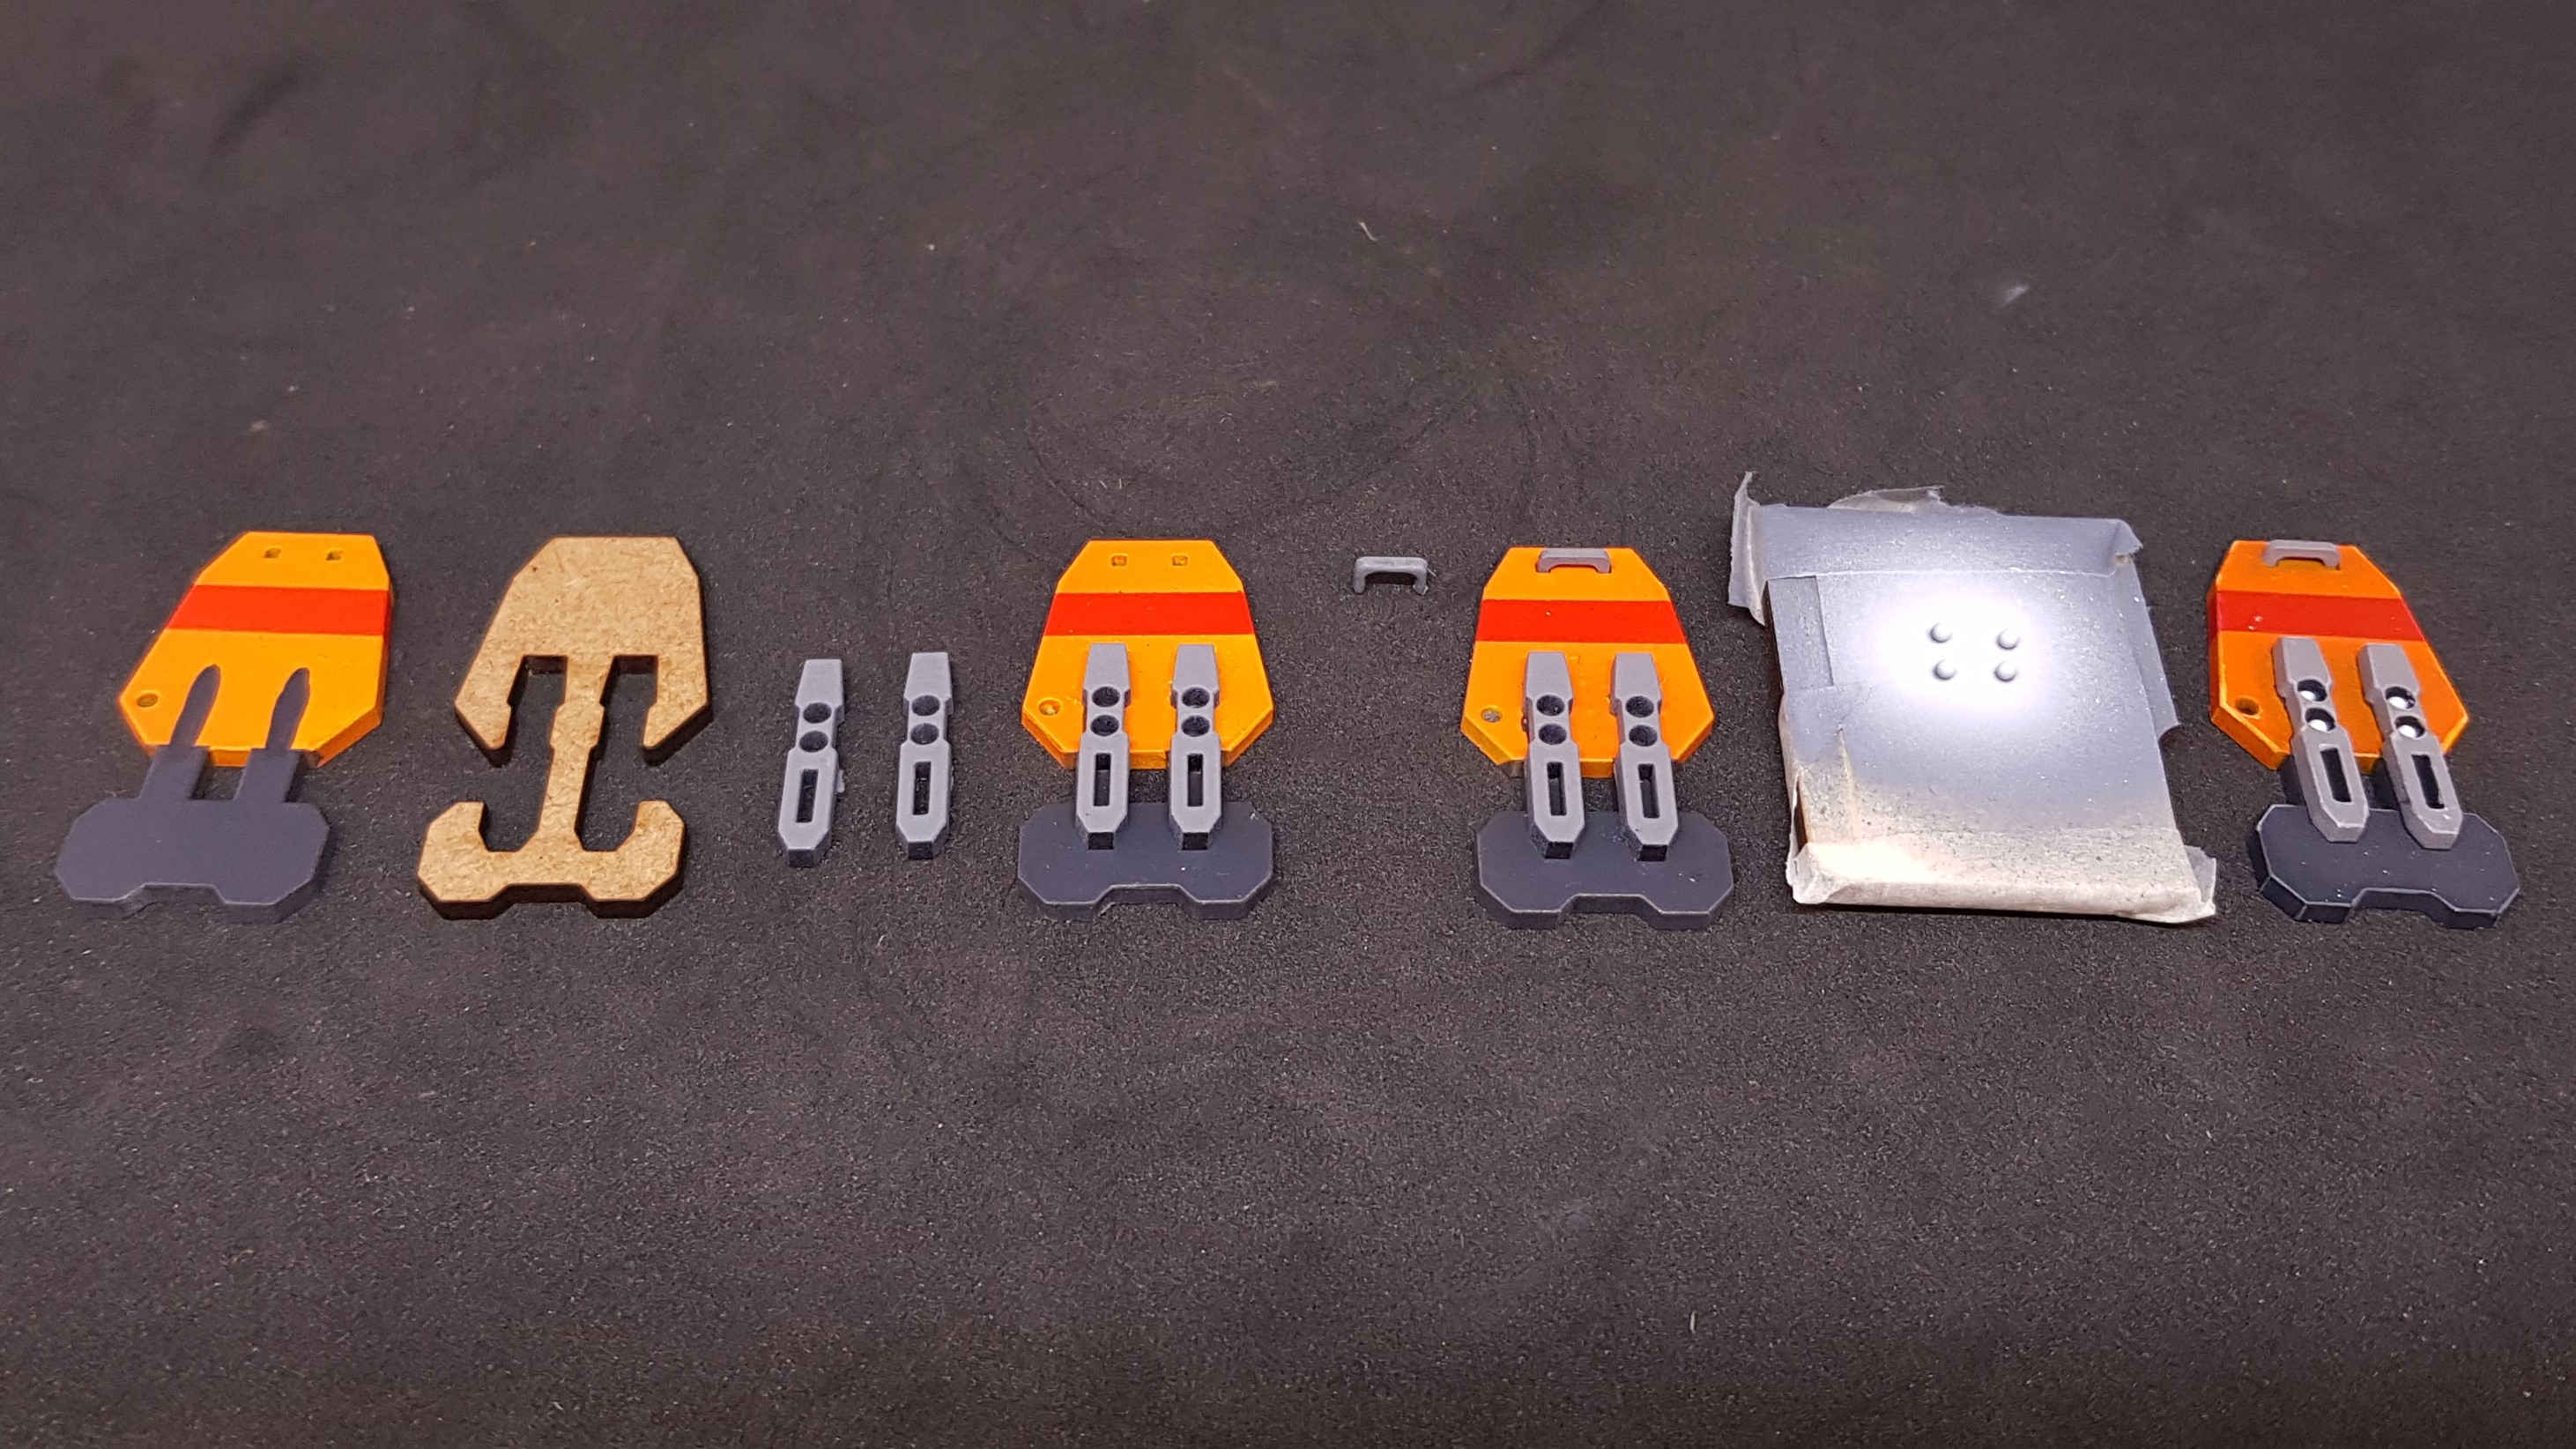
As I Advised bellow I am parting out some of the painting to make this faster and easier before the final painted assembly before washing etc.
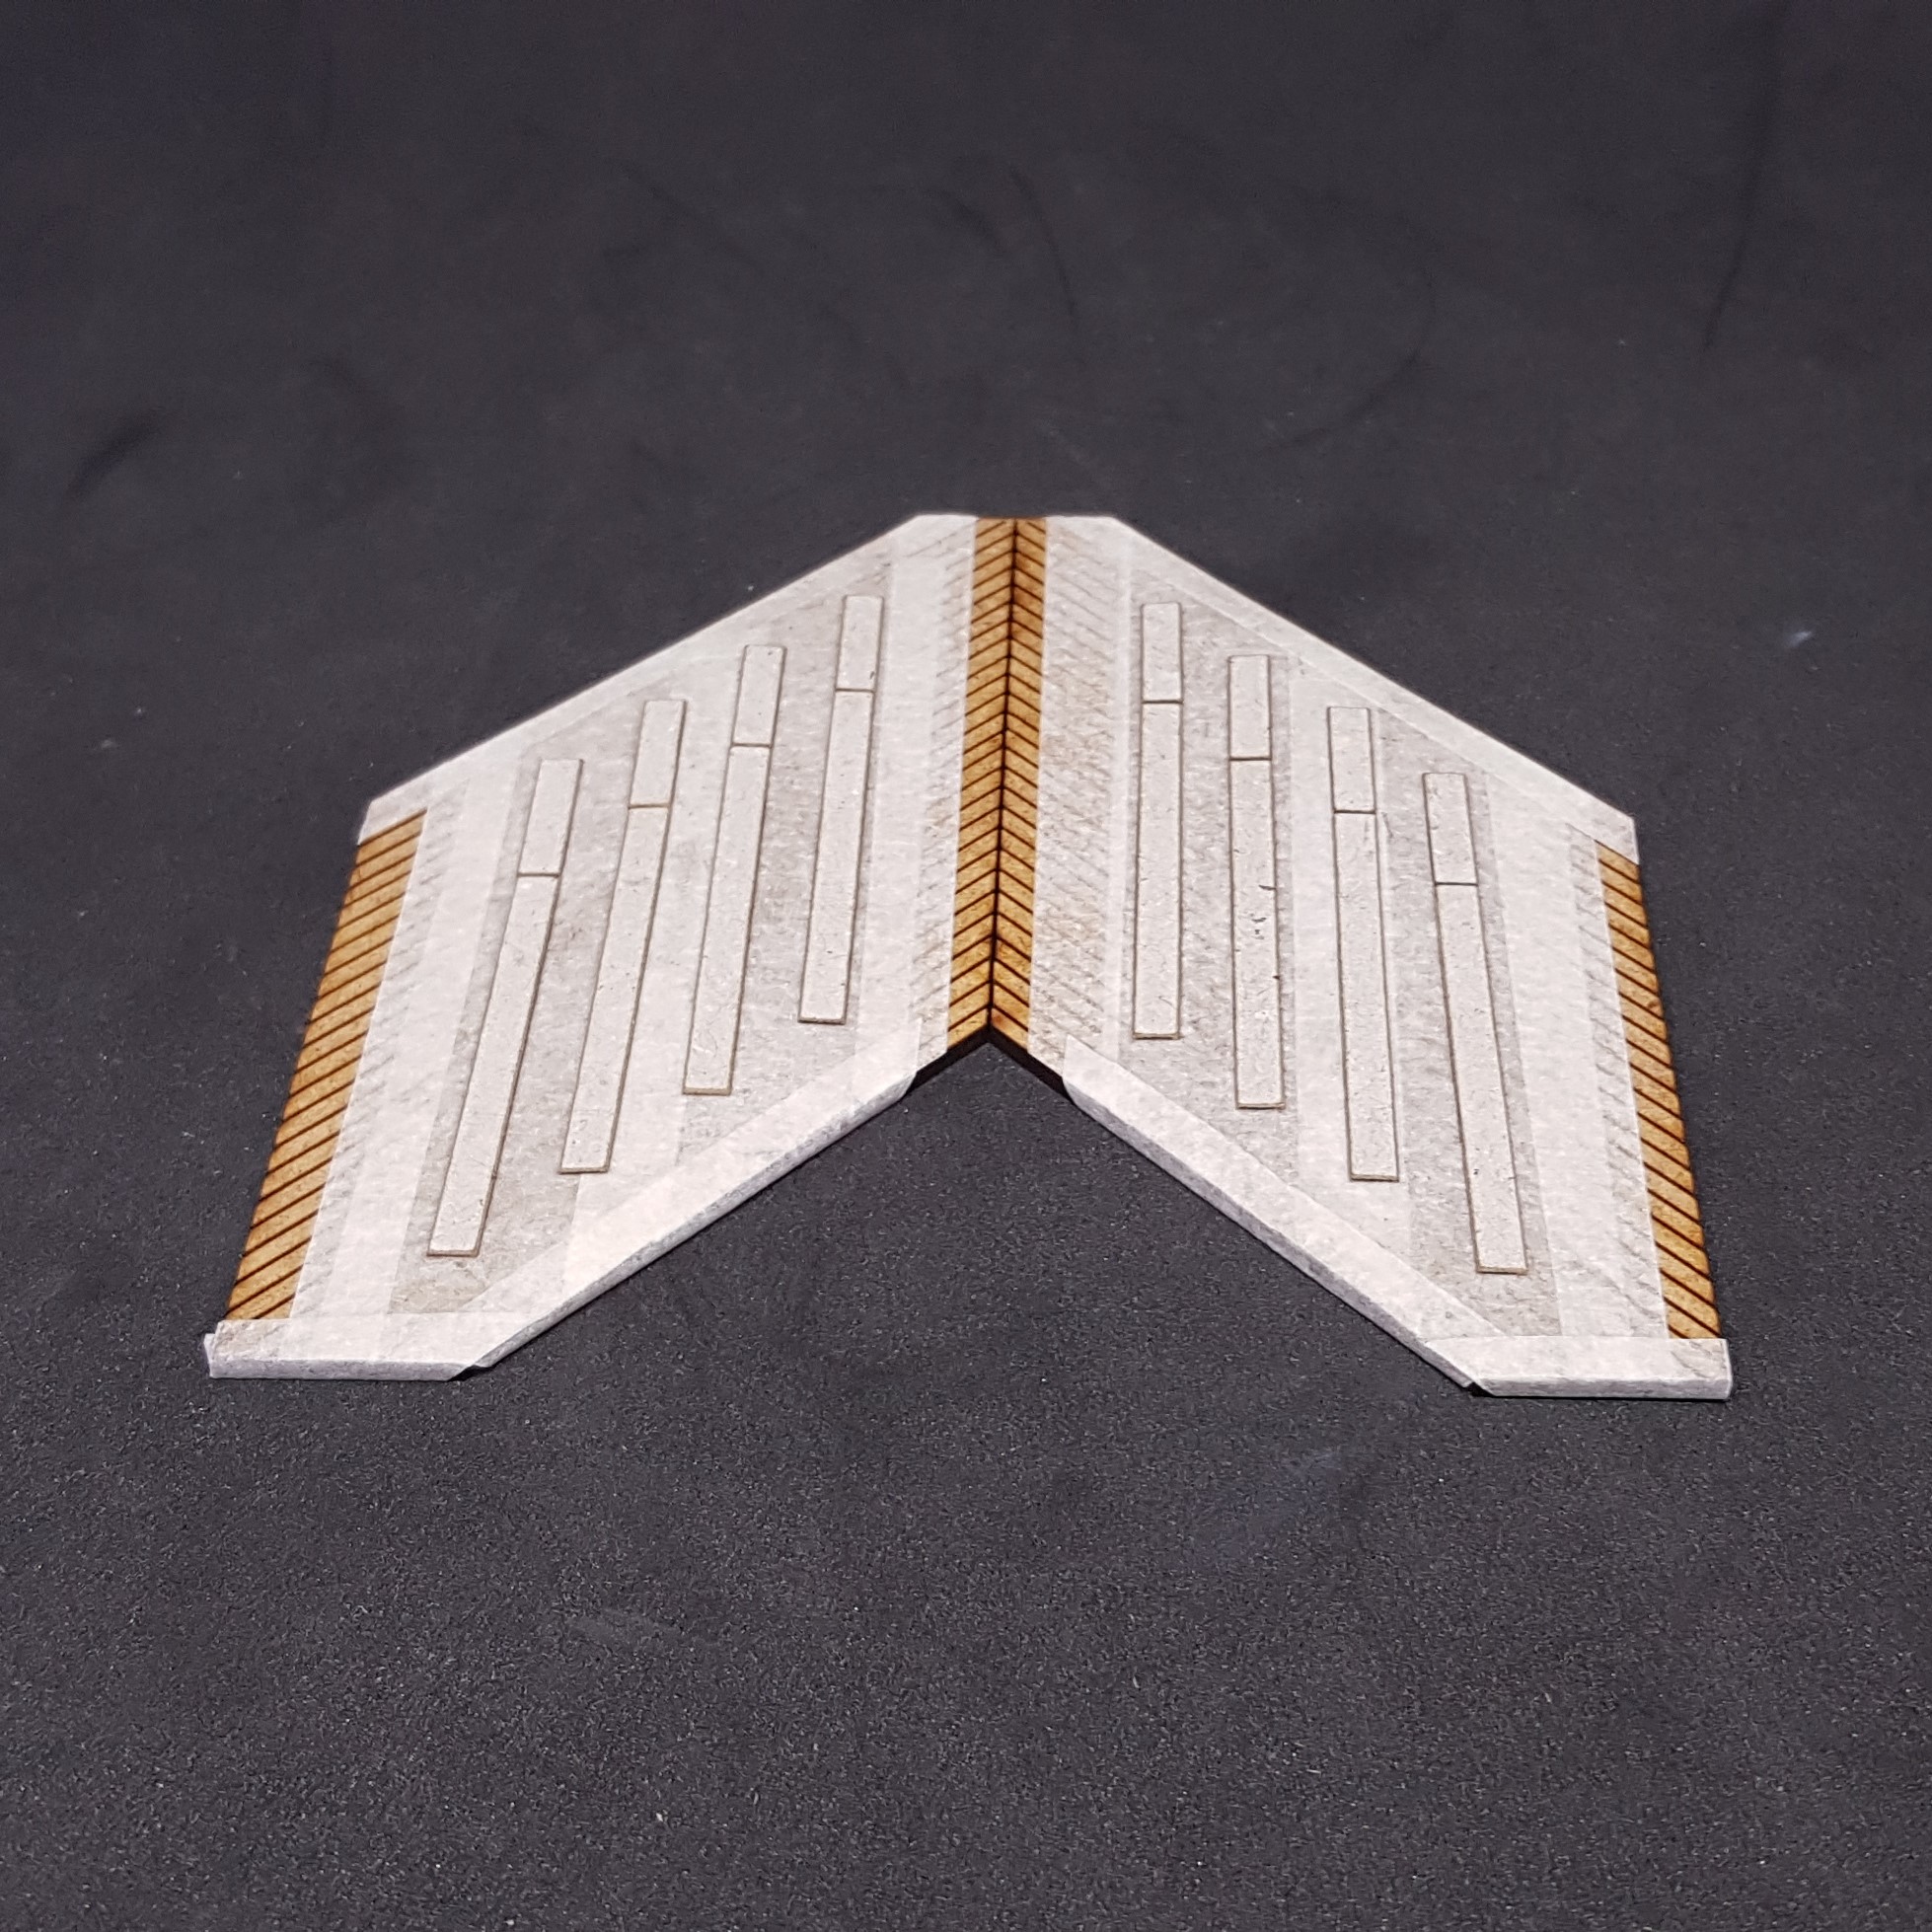
I made a laser cut template to do my hazard lines to ensure these match up properly no matter which pair I use. this should putting on the masking tape after painting yellow very easy.
I used very poor non sticking masking tape to mount all the thin card pieces I will be painting yellow.
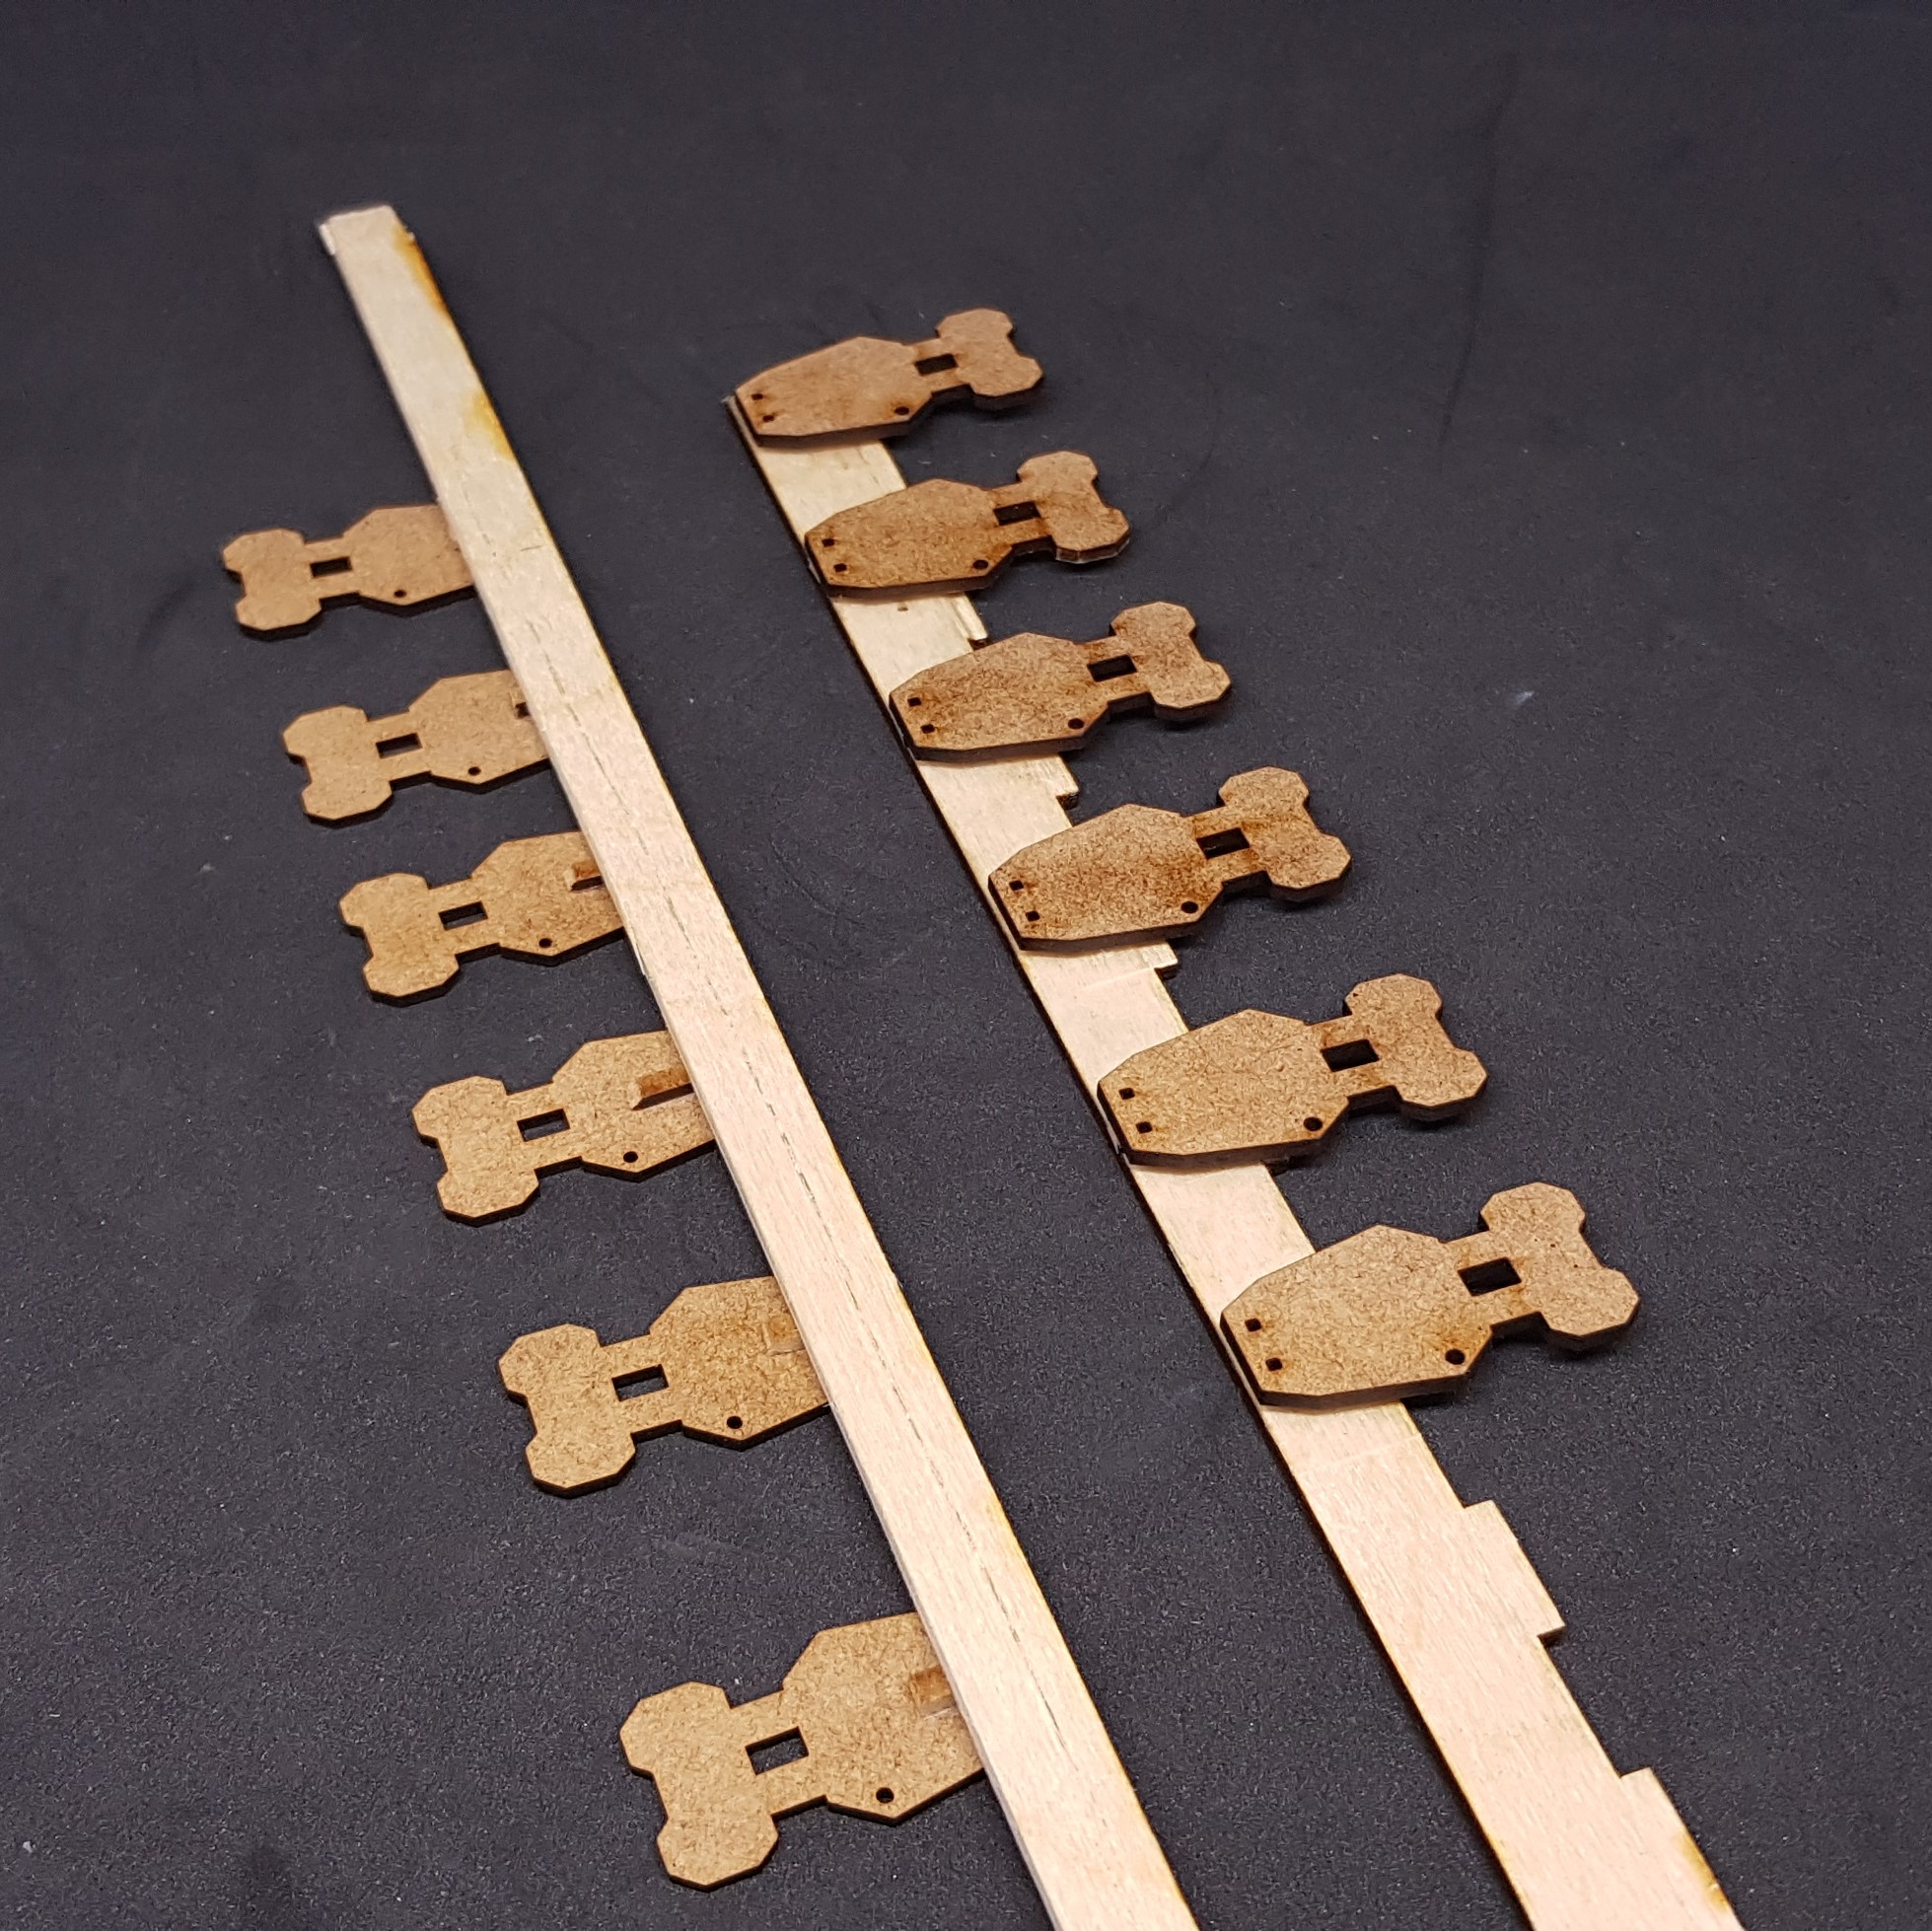
I mounted all the power bricks and aligned them all together. With the hope of being able to run strips of masking tape down to paint the red stripe on them. I don’t think this will work but I will try and if not make a painting Jig. |These include standoffs on the back side.
All the handles have been stuck down I will paint them all orange then one strip of masking under and over the top then spray grey.
The light sections for the power brick are all ready to paint then tick on and then some hand painting then the tiny balls added.
The side vents are ready to be put on again with small standoffs so that they don’t end up with a large line through them. I still need to add the hinges but that’s future Soap’s problem.


Almost ready to start to paint. I hope this will come together quickly so I can go onto a brand new building.
Still wondering if I should paint them both blue or if I should go for another colour on the second one. This may need to wait to Friday so I can give it the time it deserves.
Painting the Power Hub
It’s been a long weekend but the end is nigh. While watching the Games Expo I have been painting my behind off and making lots of errors along the way.
I started off doing some sub assembly’s and painting. Hazard stripes this time using my laser cut template to help. This sped things along and meant i didn’t need to measure anything. This worked well and I will definitely use this in the future.
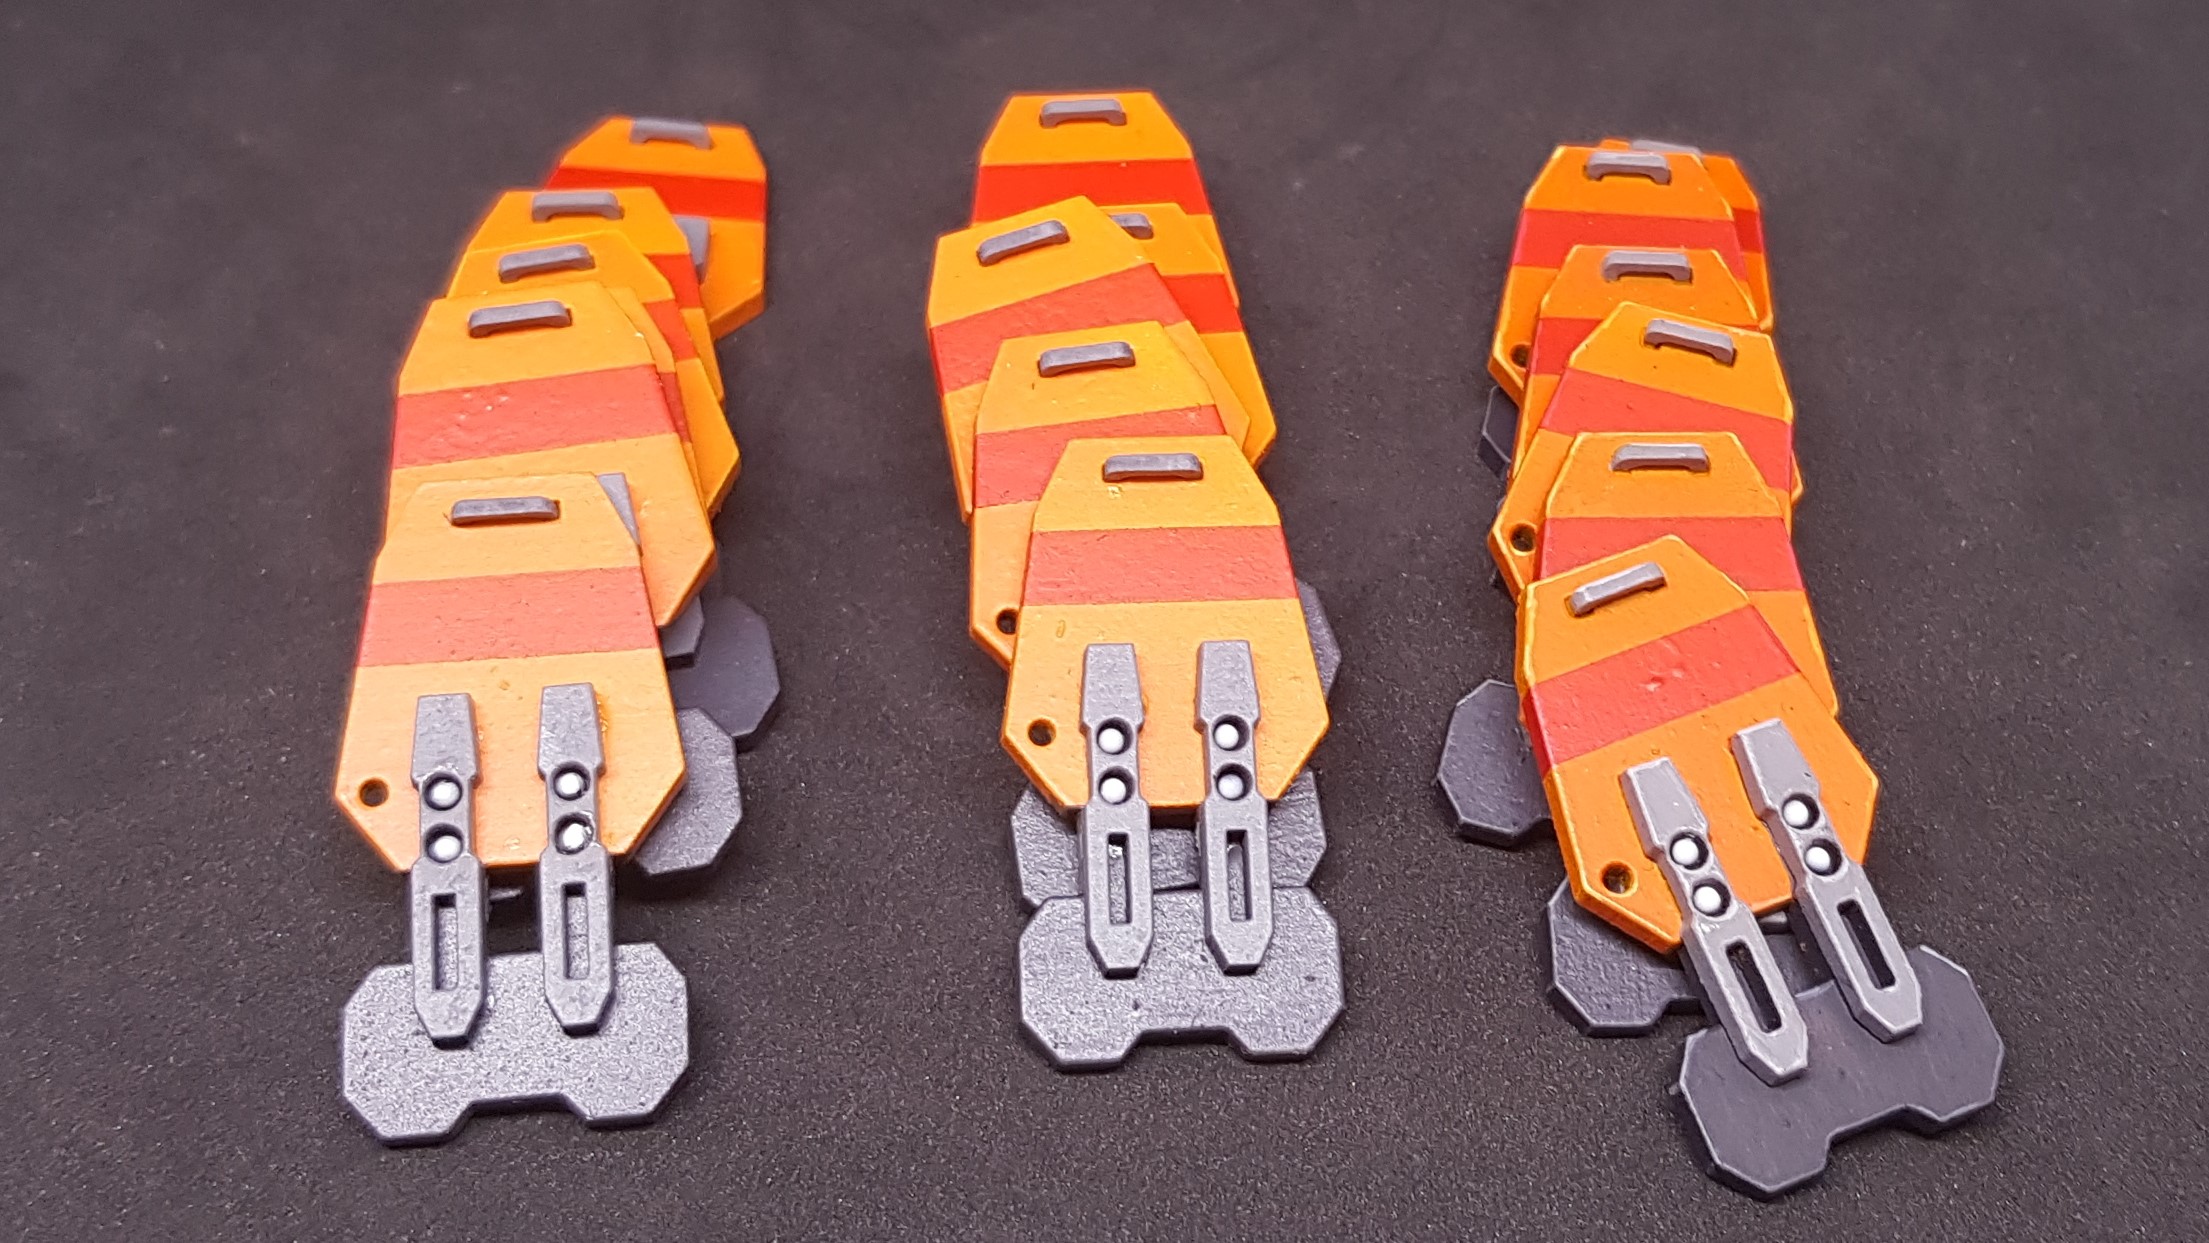
I painted the power bricks for the ends. This was done by undercoating with grey primer then spraying white then orange. After this I put them into the waste I laser cut from and masked everything but the stripe and the bottom. this allowed me to spray the red and grey with only one mask. I then hand painted a grey line for under the struts that come out so they would not have an orange background.
This was assembled stages. I made an jig to help ensure i stuck these down straight. I had painted some small balls and put these in with the paid of a scalpel with a dot of blue tack on it. Everything was mounted with superglue from a cocktail stick.
I then glued the numbers onto the power bricks using PVA this allowed me to move it on the brick to get the correct alignment. (sorry for the troll couldn’t resist)
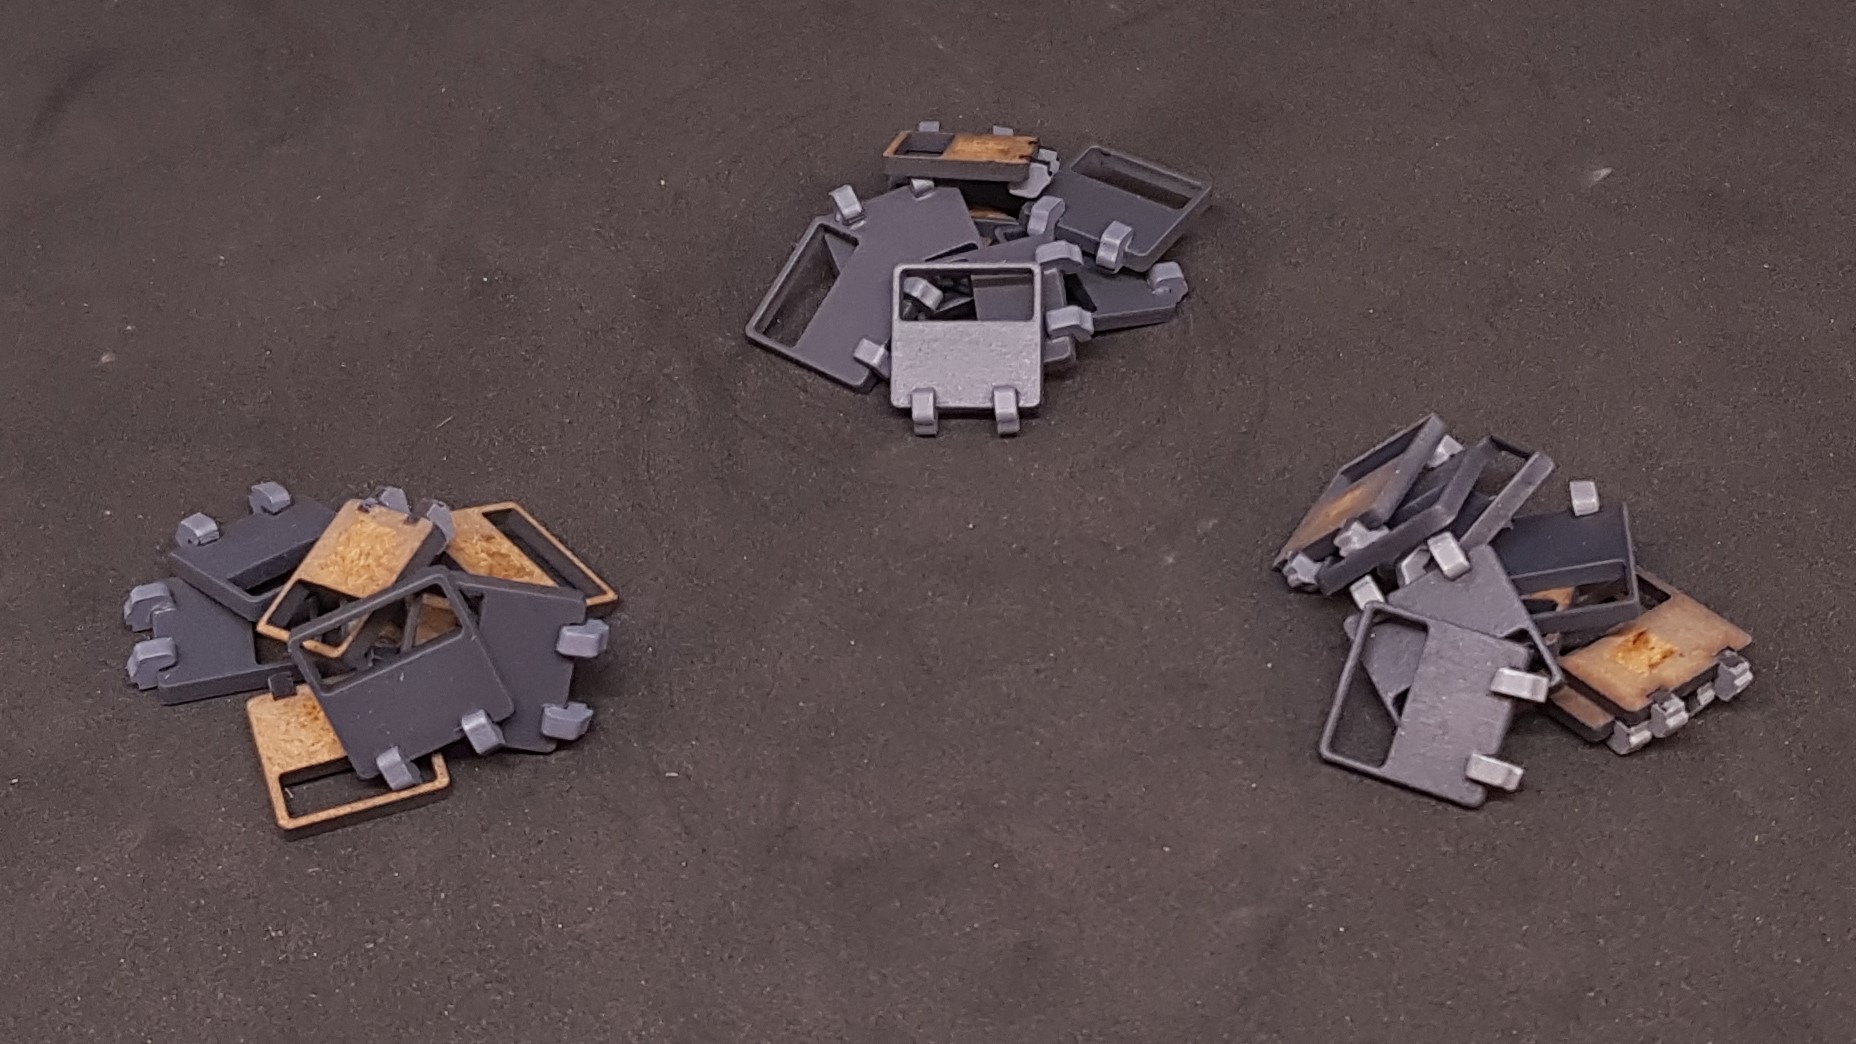
This was at the point where i decided to make 2 blue and one purple power hubs. I ripped off the side of a failed one and cut a new elevation and stuck it together. So i needed a few more parts and done these at this point.

I went ahead and painted all of the side vents. This was simple spray then hand paint the hinges.
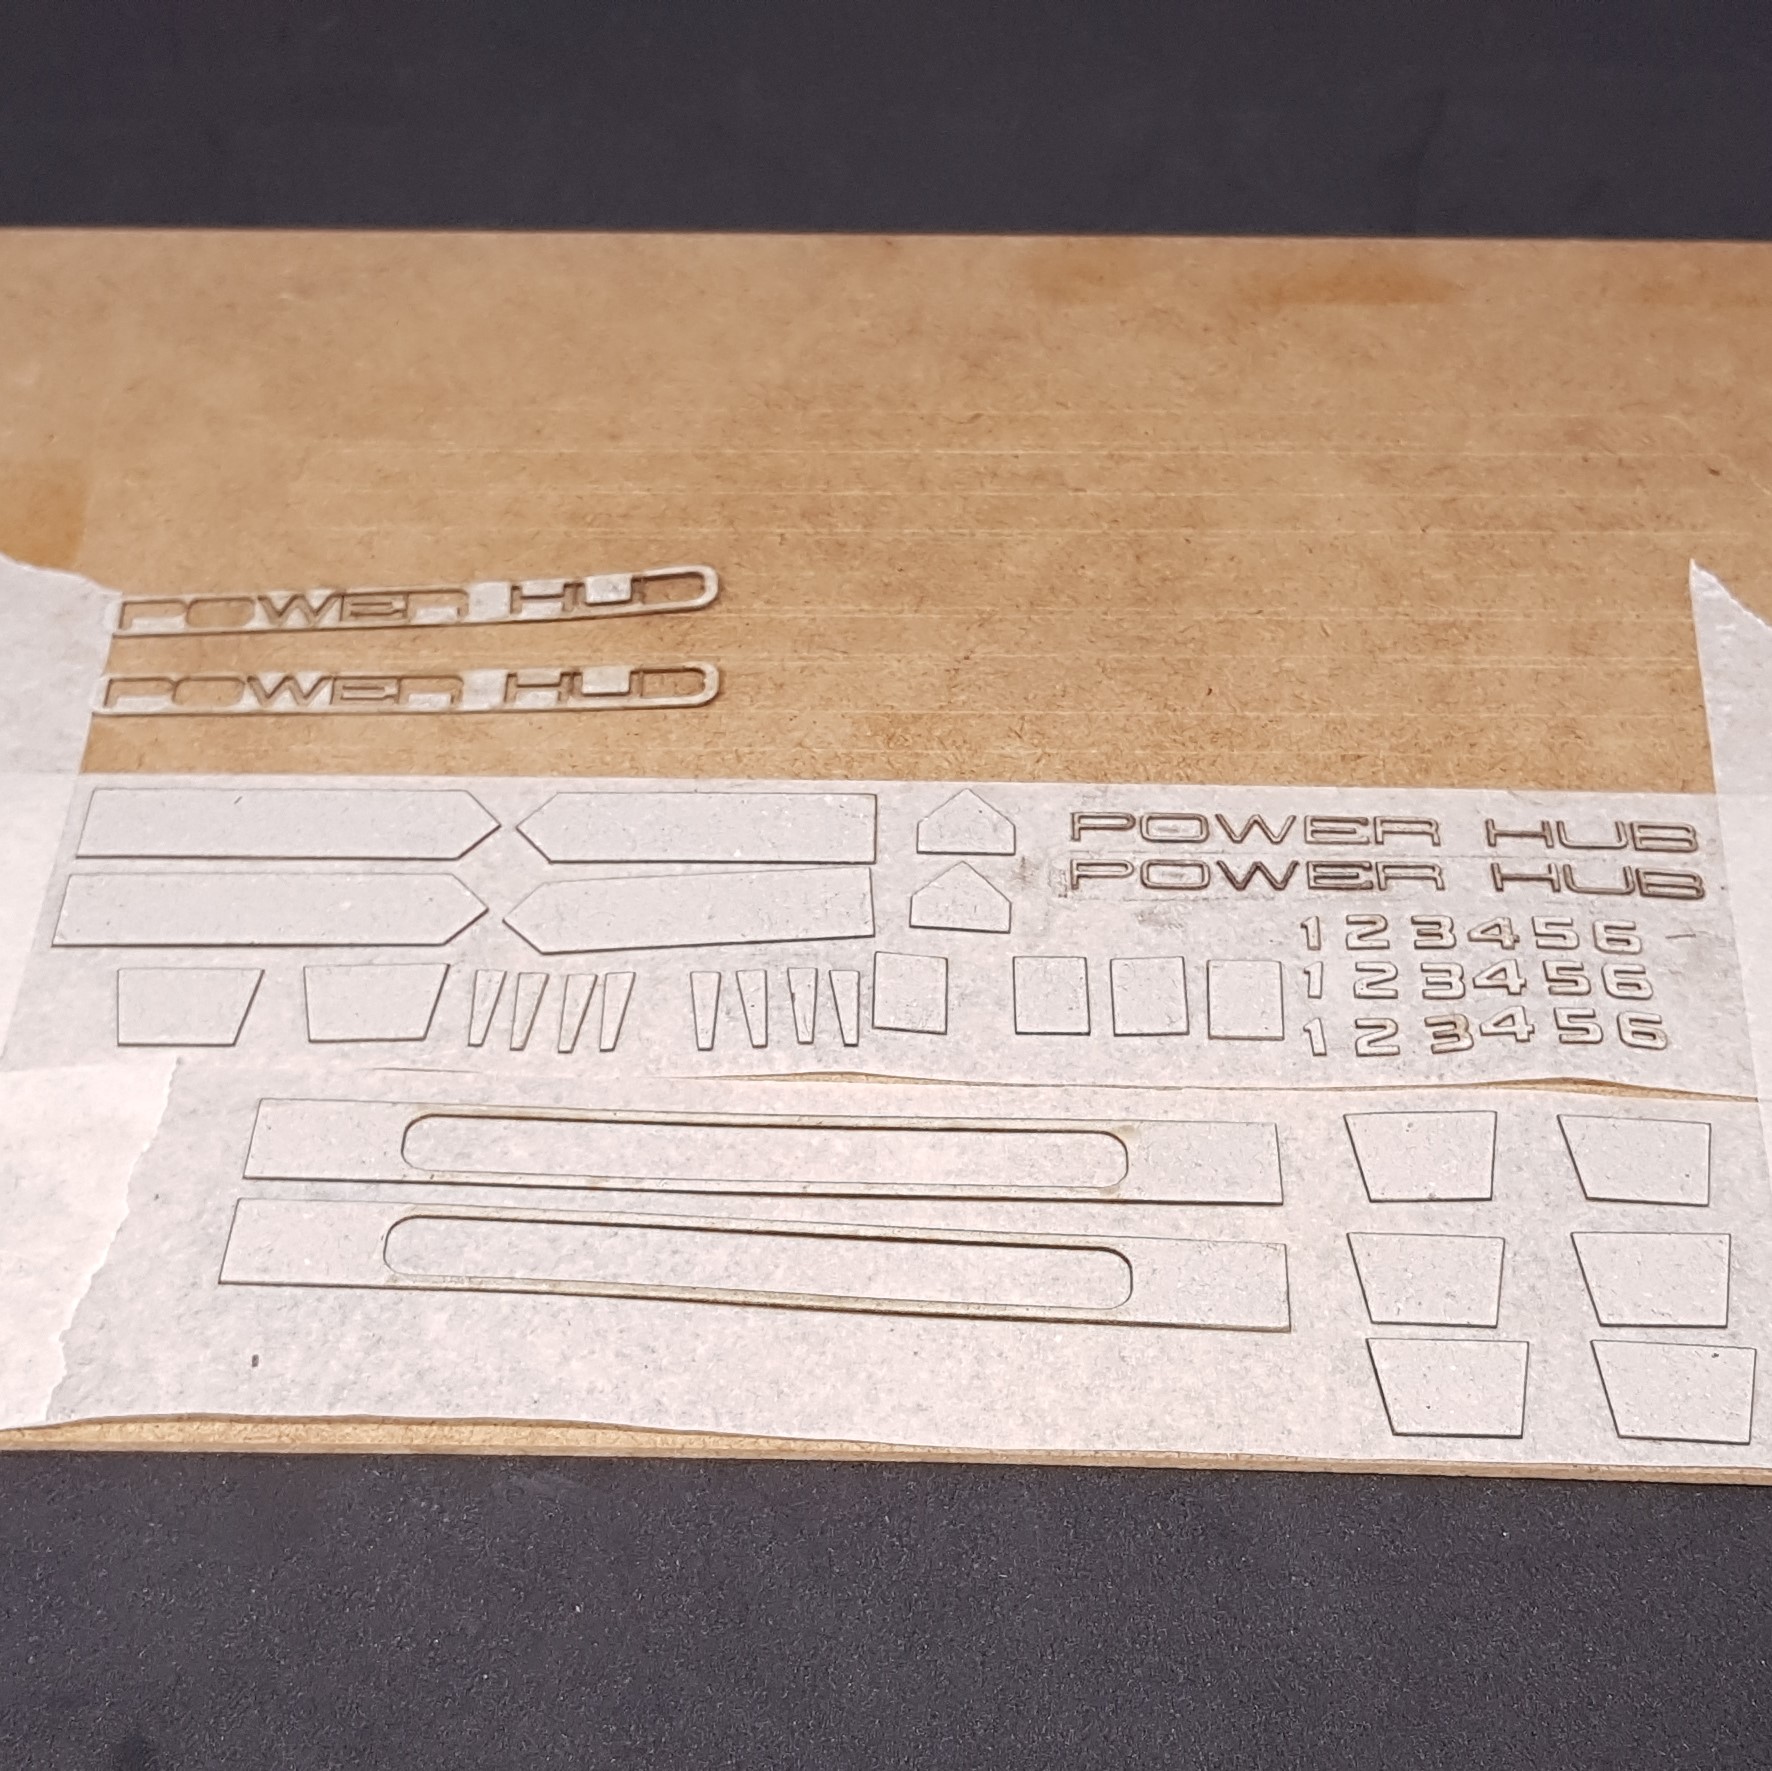
I also sprayed the 0.5mm card I had left yellow.
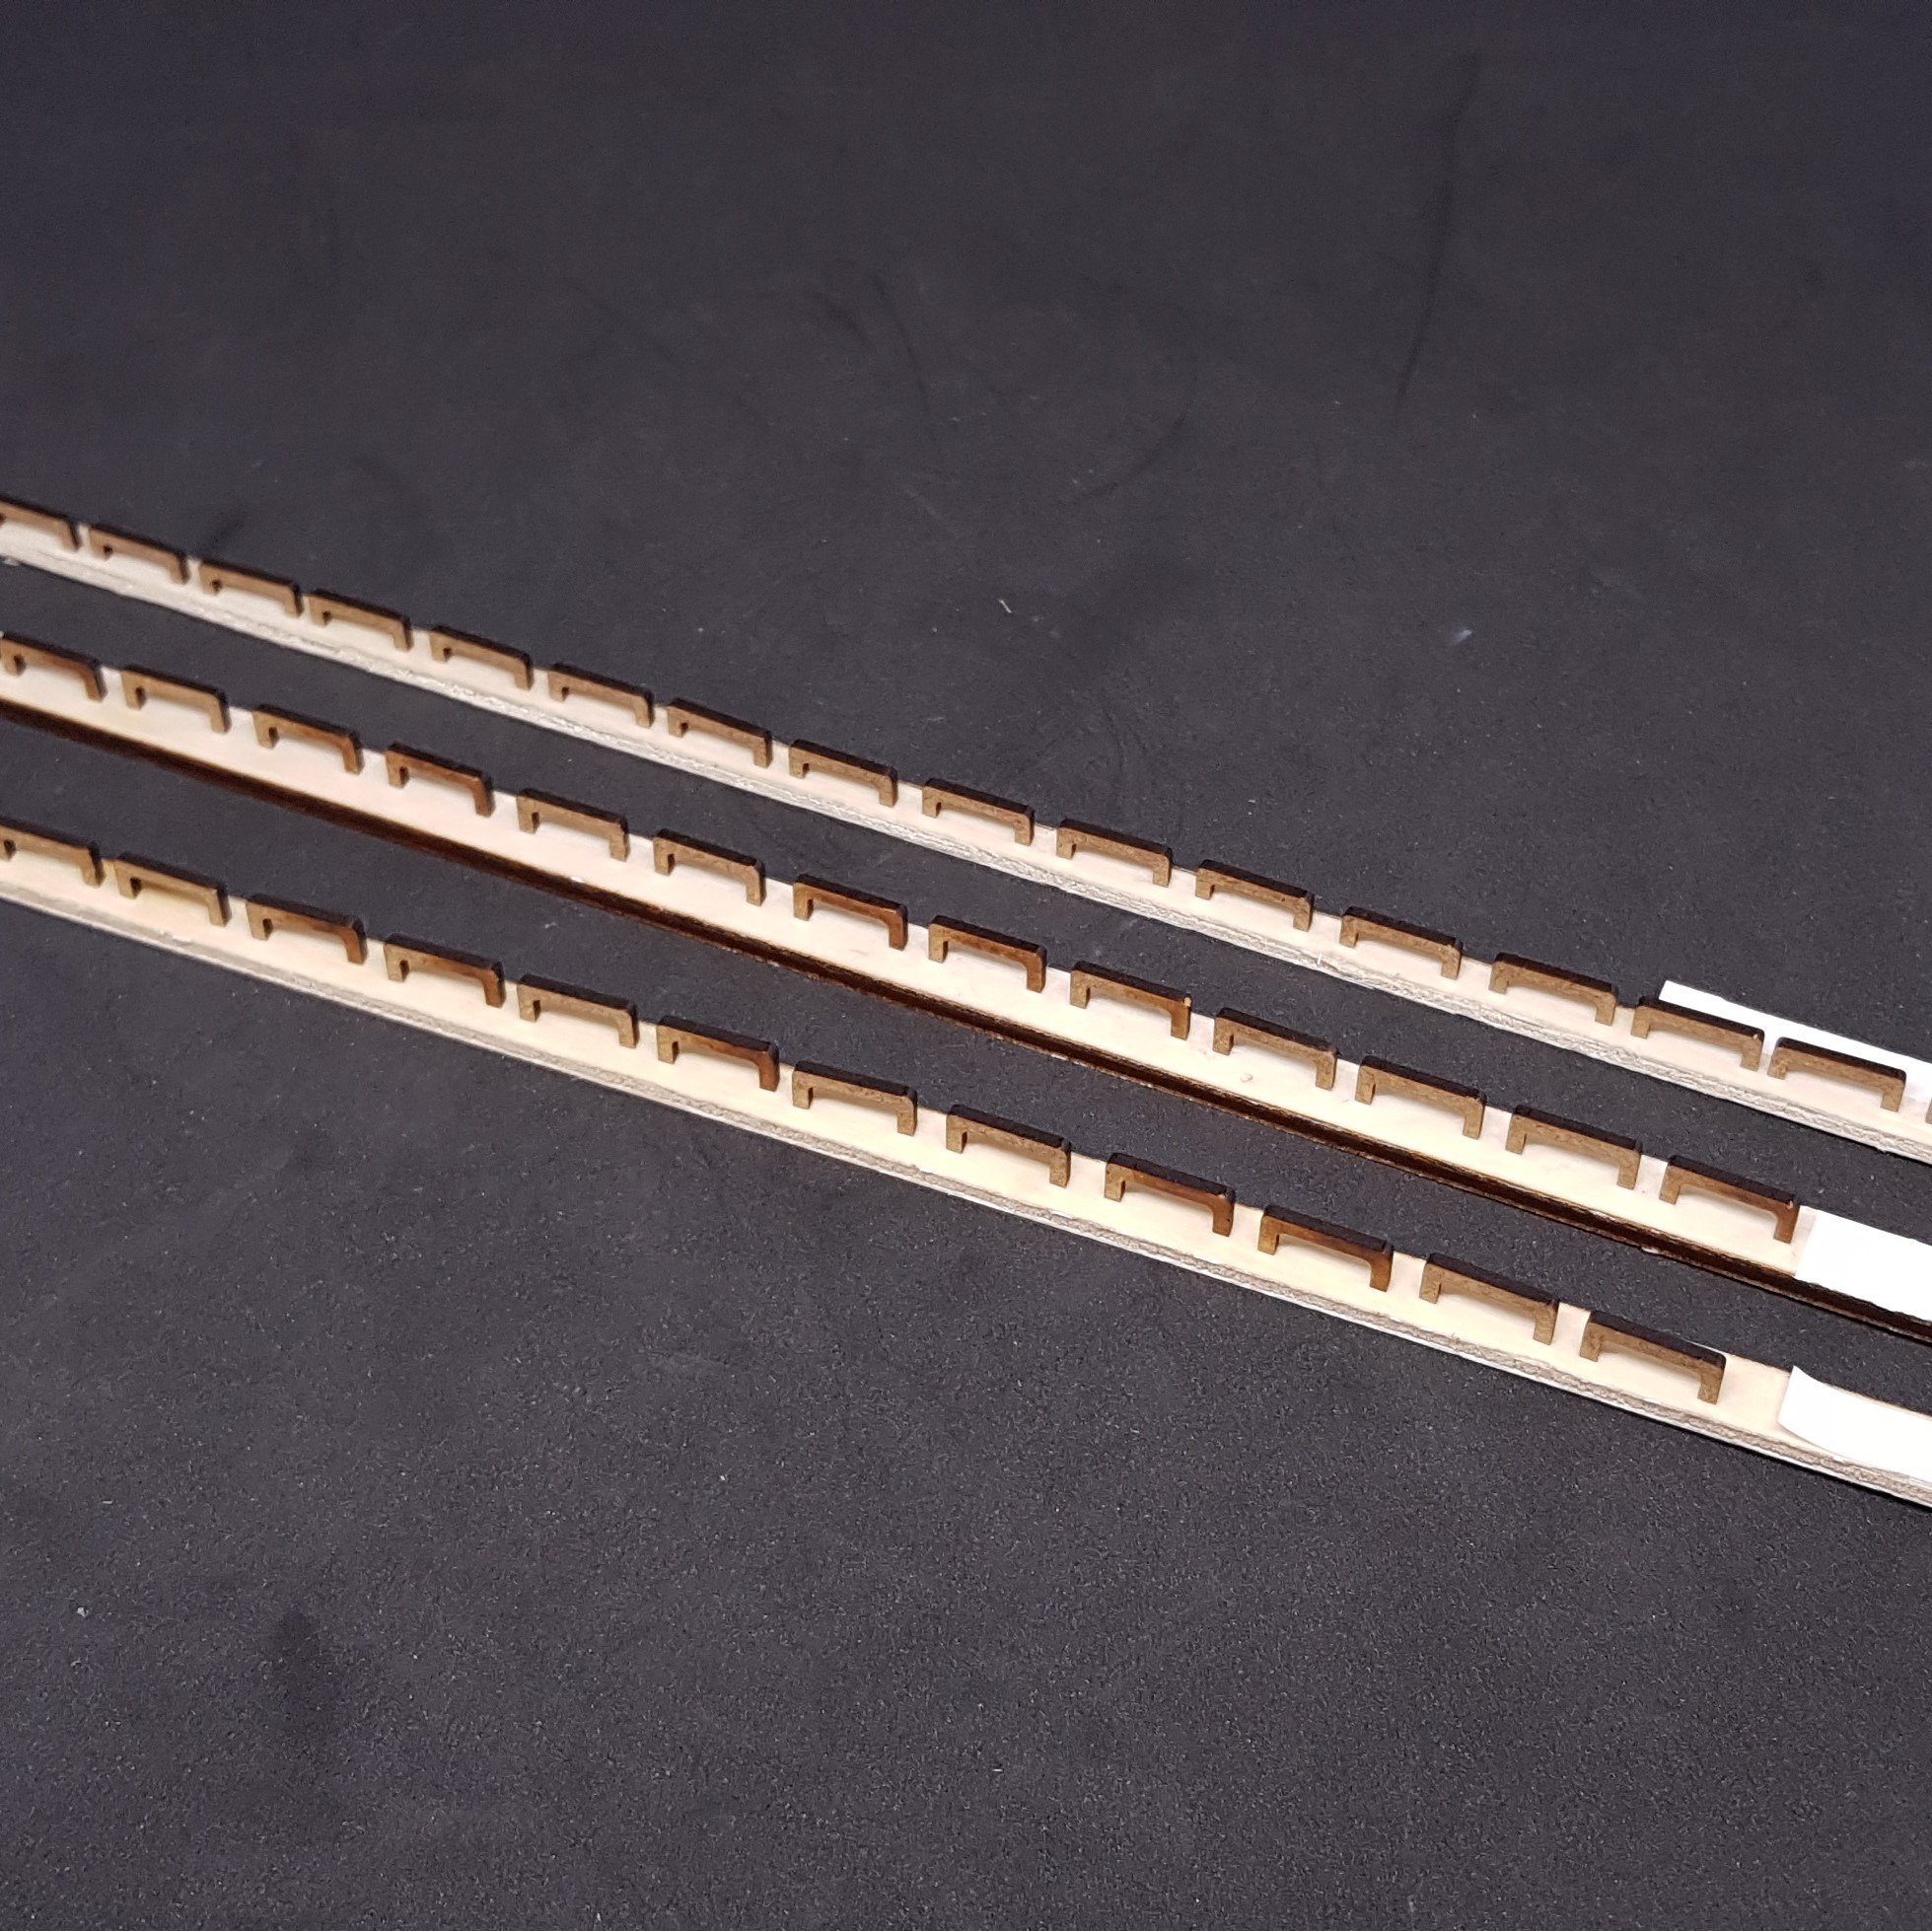
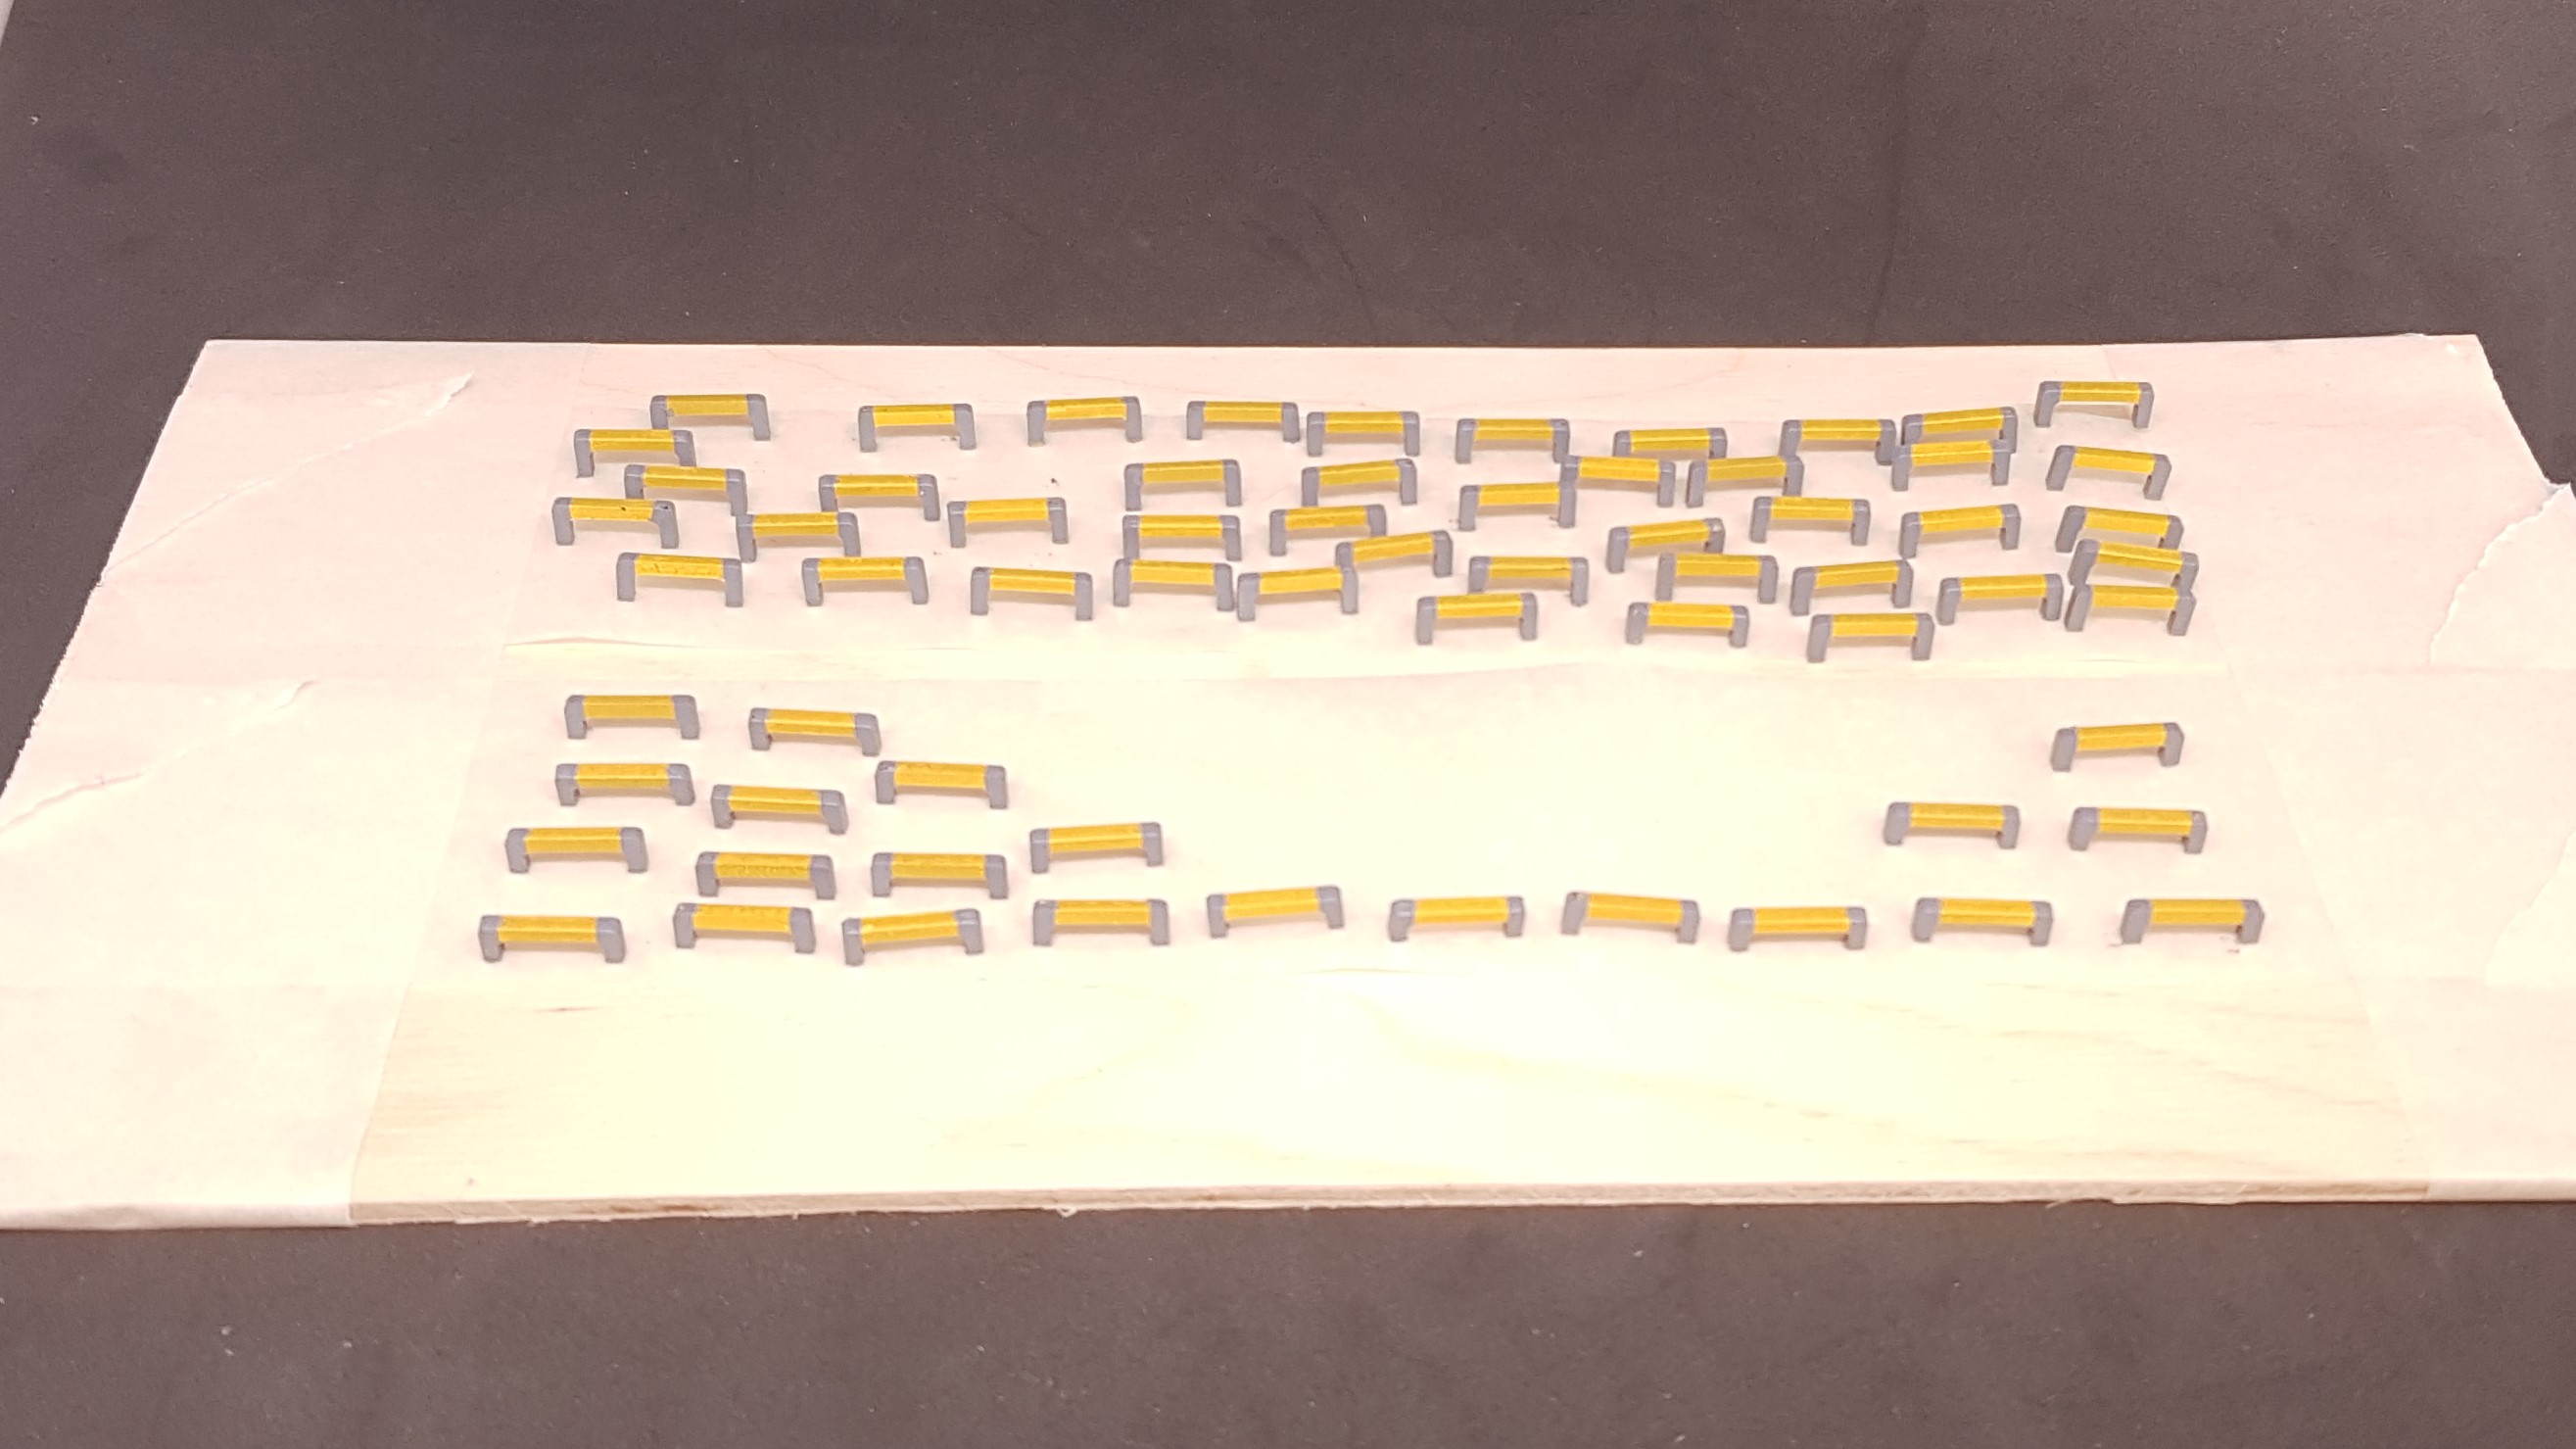
This is where I had the first of two nightmares. I painted all the rungs of the ladder. First by priming in grey then painting in white and then orange… I then masked each one of the 54 rungs and sprayed grey.
I made this mistake before, they were supposed to be yellow the same as the one I just sprayed.
Instead of just accepting this and pushing on I binned all the rungs cut new ones and done the same steps but painted yellow. I do not wish to know how much time that wasted but the second set turned out better anyway.
I pushed on with my new found drive I was ready to paint the main body of the power hubs.
I blued in the BB’s in the orders and added on the lights to the sides.
I started by painting the top section this was sprayed grey then went over in different blues and then some parts black wash.
It was at this point I seen my mistake. Not on the one pictured but one the second one i made wile i done the first below. I blued in the roof backwards so the walkway did not line up with the stairs… DOH! I had already painted this and did not want to start this from the start. So I plucked up the courage and attached it with a chisel. I managed to break it apart with only minor damage to the model and paint. I then repainted the broken sections using the same method as above.
I then picked out the handles and future rivets in a lighter grey and the vents in black.
I then masked this off so not to get any paint in there.
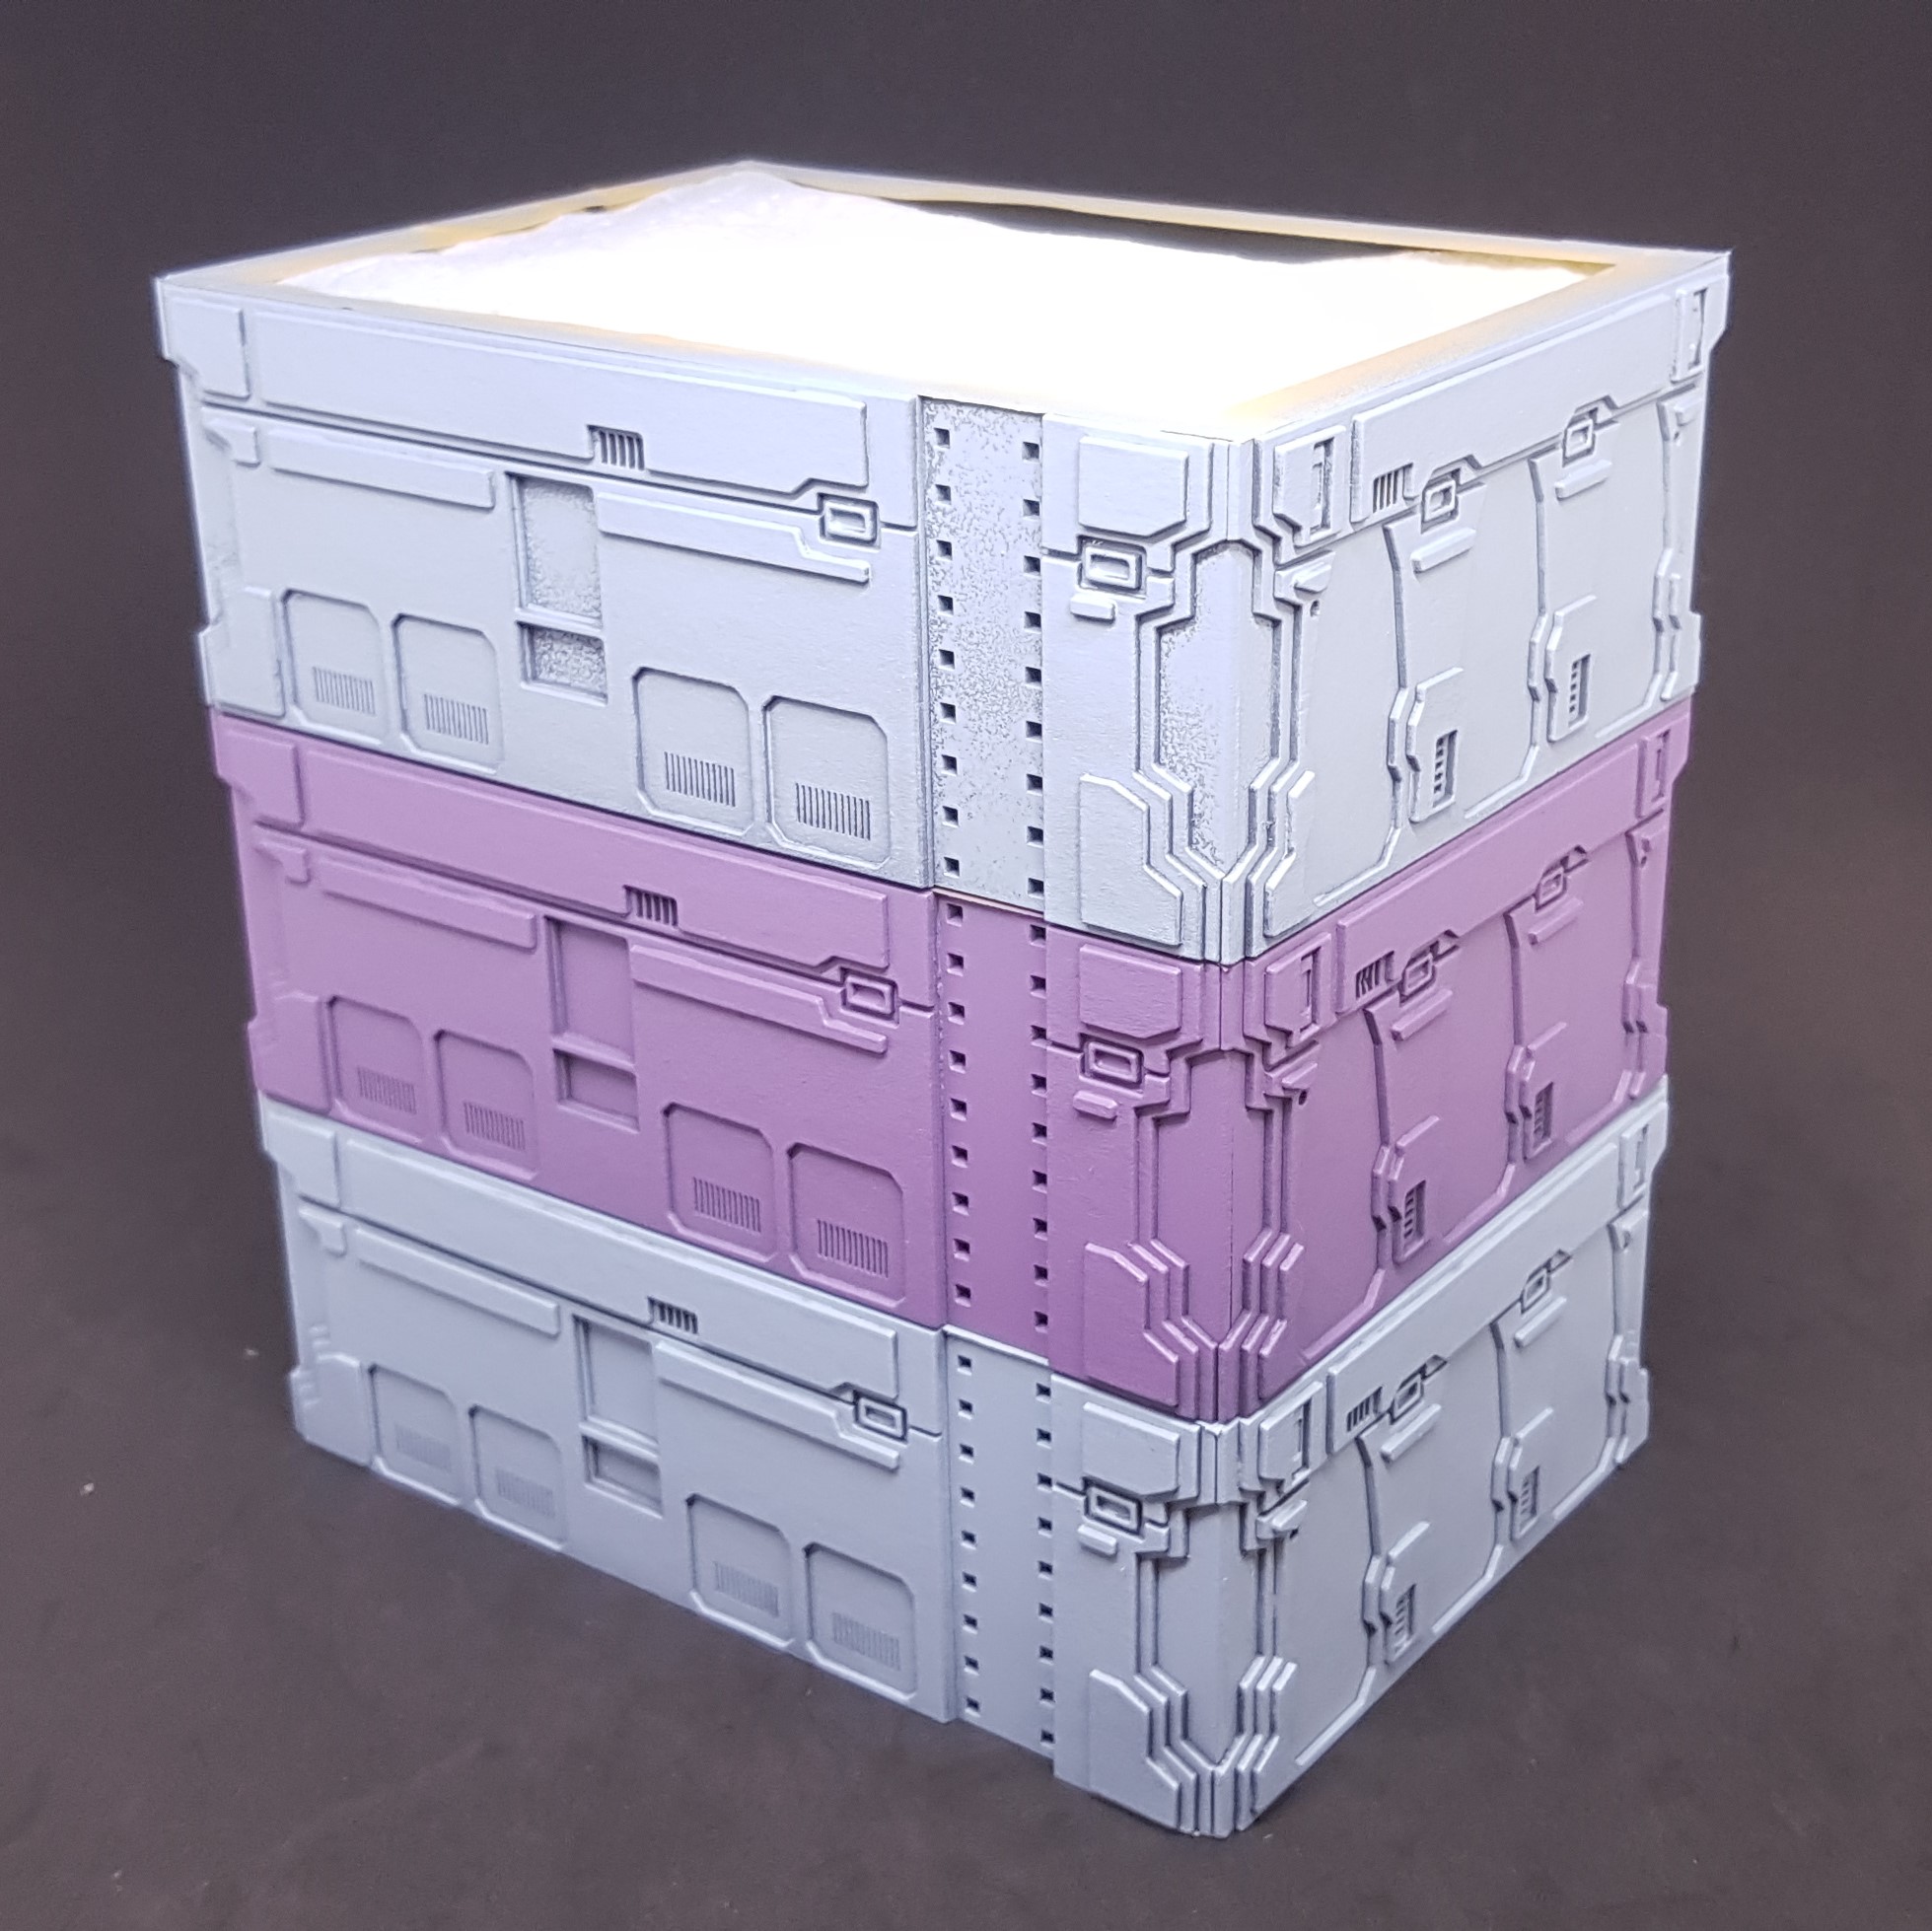
I painted the blue ones in a light blue and the purple one in a light purple. (it looks very pink but I assure you it’s purple) This sort of reminds me of an ice-cream sandwich.
After this I went on and done by gradients. This was done in three stages. I took a medium colour and added dark and light grey to do the top and bottom it and then white at the top.
Unmasked and then went in with hand brushing out all the grey. This made it pop like I wanted adding some needed high contrast to them.
After this I want back to the roof and finished off the grooves in the plates with a darker grey to make them pop out a bit more.

So that’s me up to date with this project again. I now have to assemble everything. I am tired, grumpy and hungry so best not rush ahead even though I want to. All of the components are painted sub assemblies complete and painted not bad for a weekends work.
More to come!
Assembling the Power Hub
Quick update from me, I have assembled everything together. This has been a bitter sweet moment.
I seen that my painting plans worked and assembled all the pieces. I was overjoyed until I went to take these photo’s there is one major mistake that I made that is evident in this picture. I was so careful!
So I need to get over this. It’s not something I can fix at this stage. The instructions are crap! Because there isn’t any, apart from a 3D model. 🙂 which I drew. I only have myself to blame.
The funny thing is the closest to “perfect” is the purple one which I wasn’t going to do. I also prefer this colour Funny how things turn out.
I decided to use PVA glue to stick everything down to avoid any mistakes and to also make it easier to clean up should any glue come out the sides. The rungs are the exception and i pushed these in then glued with superglue from the inside.
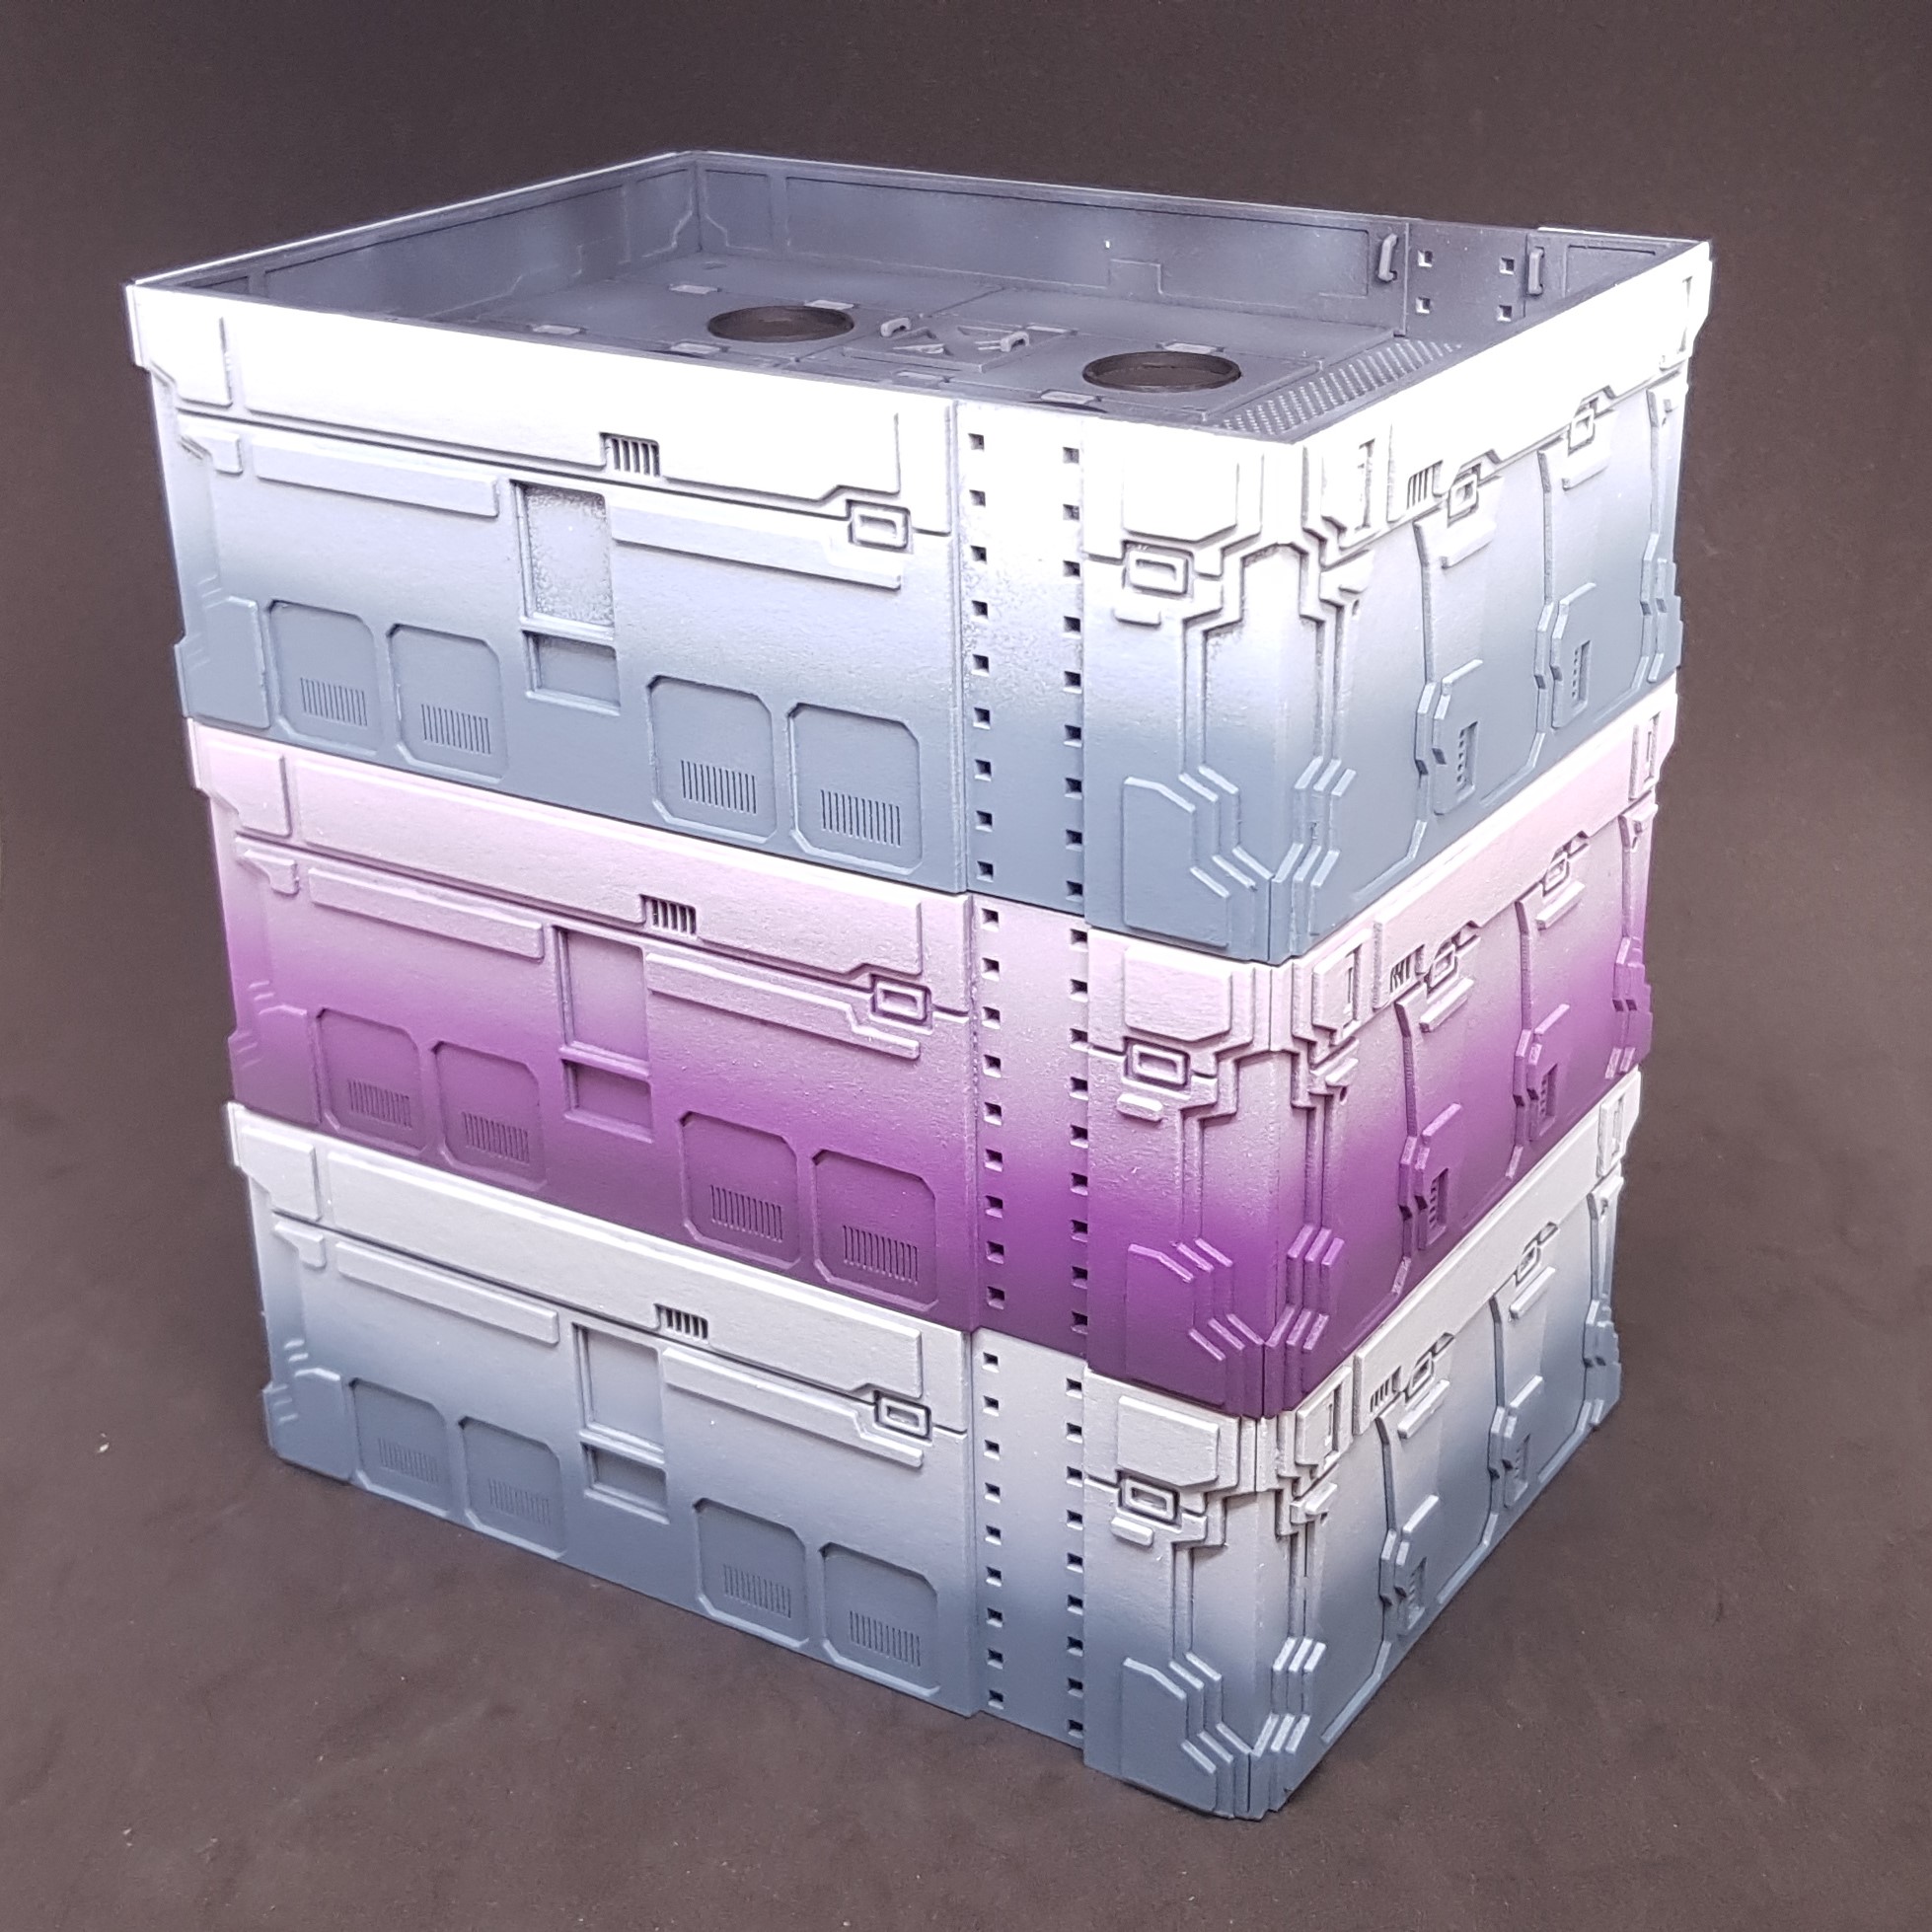
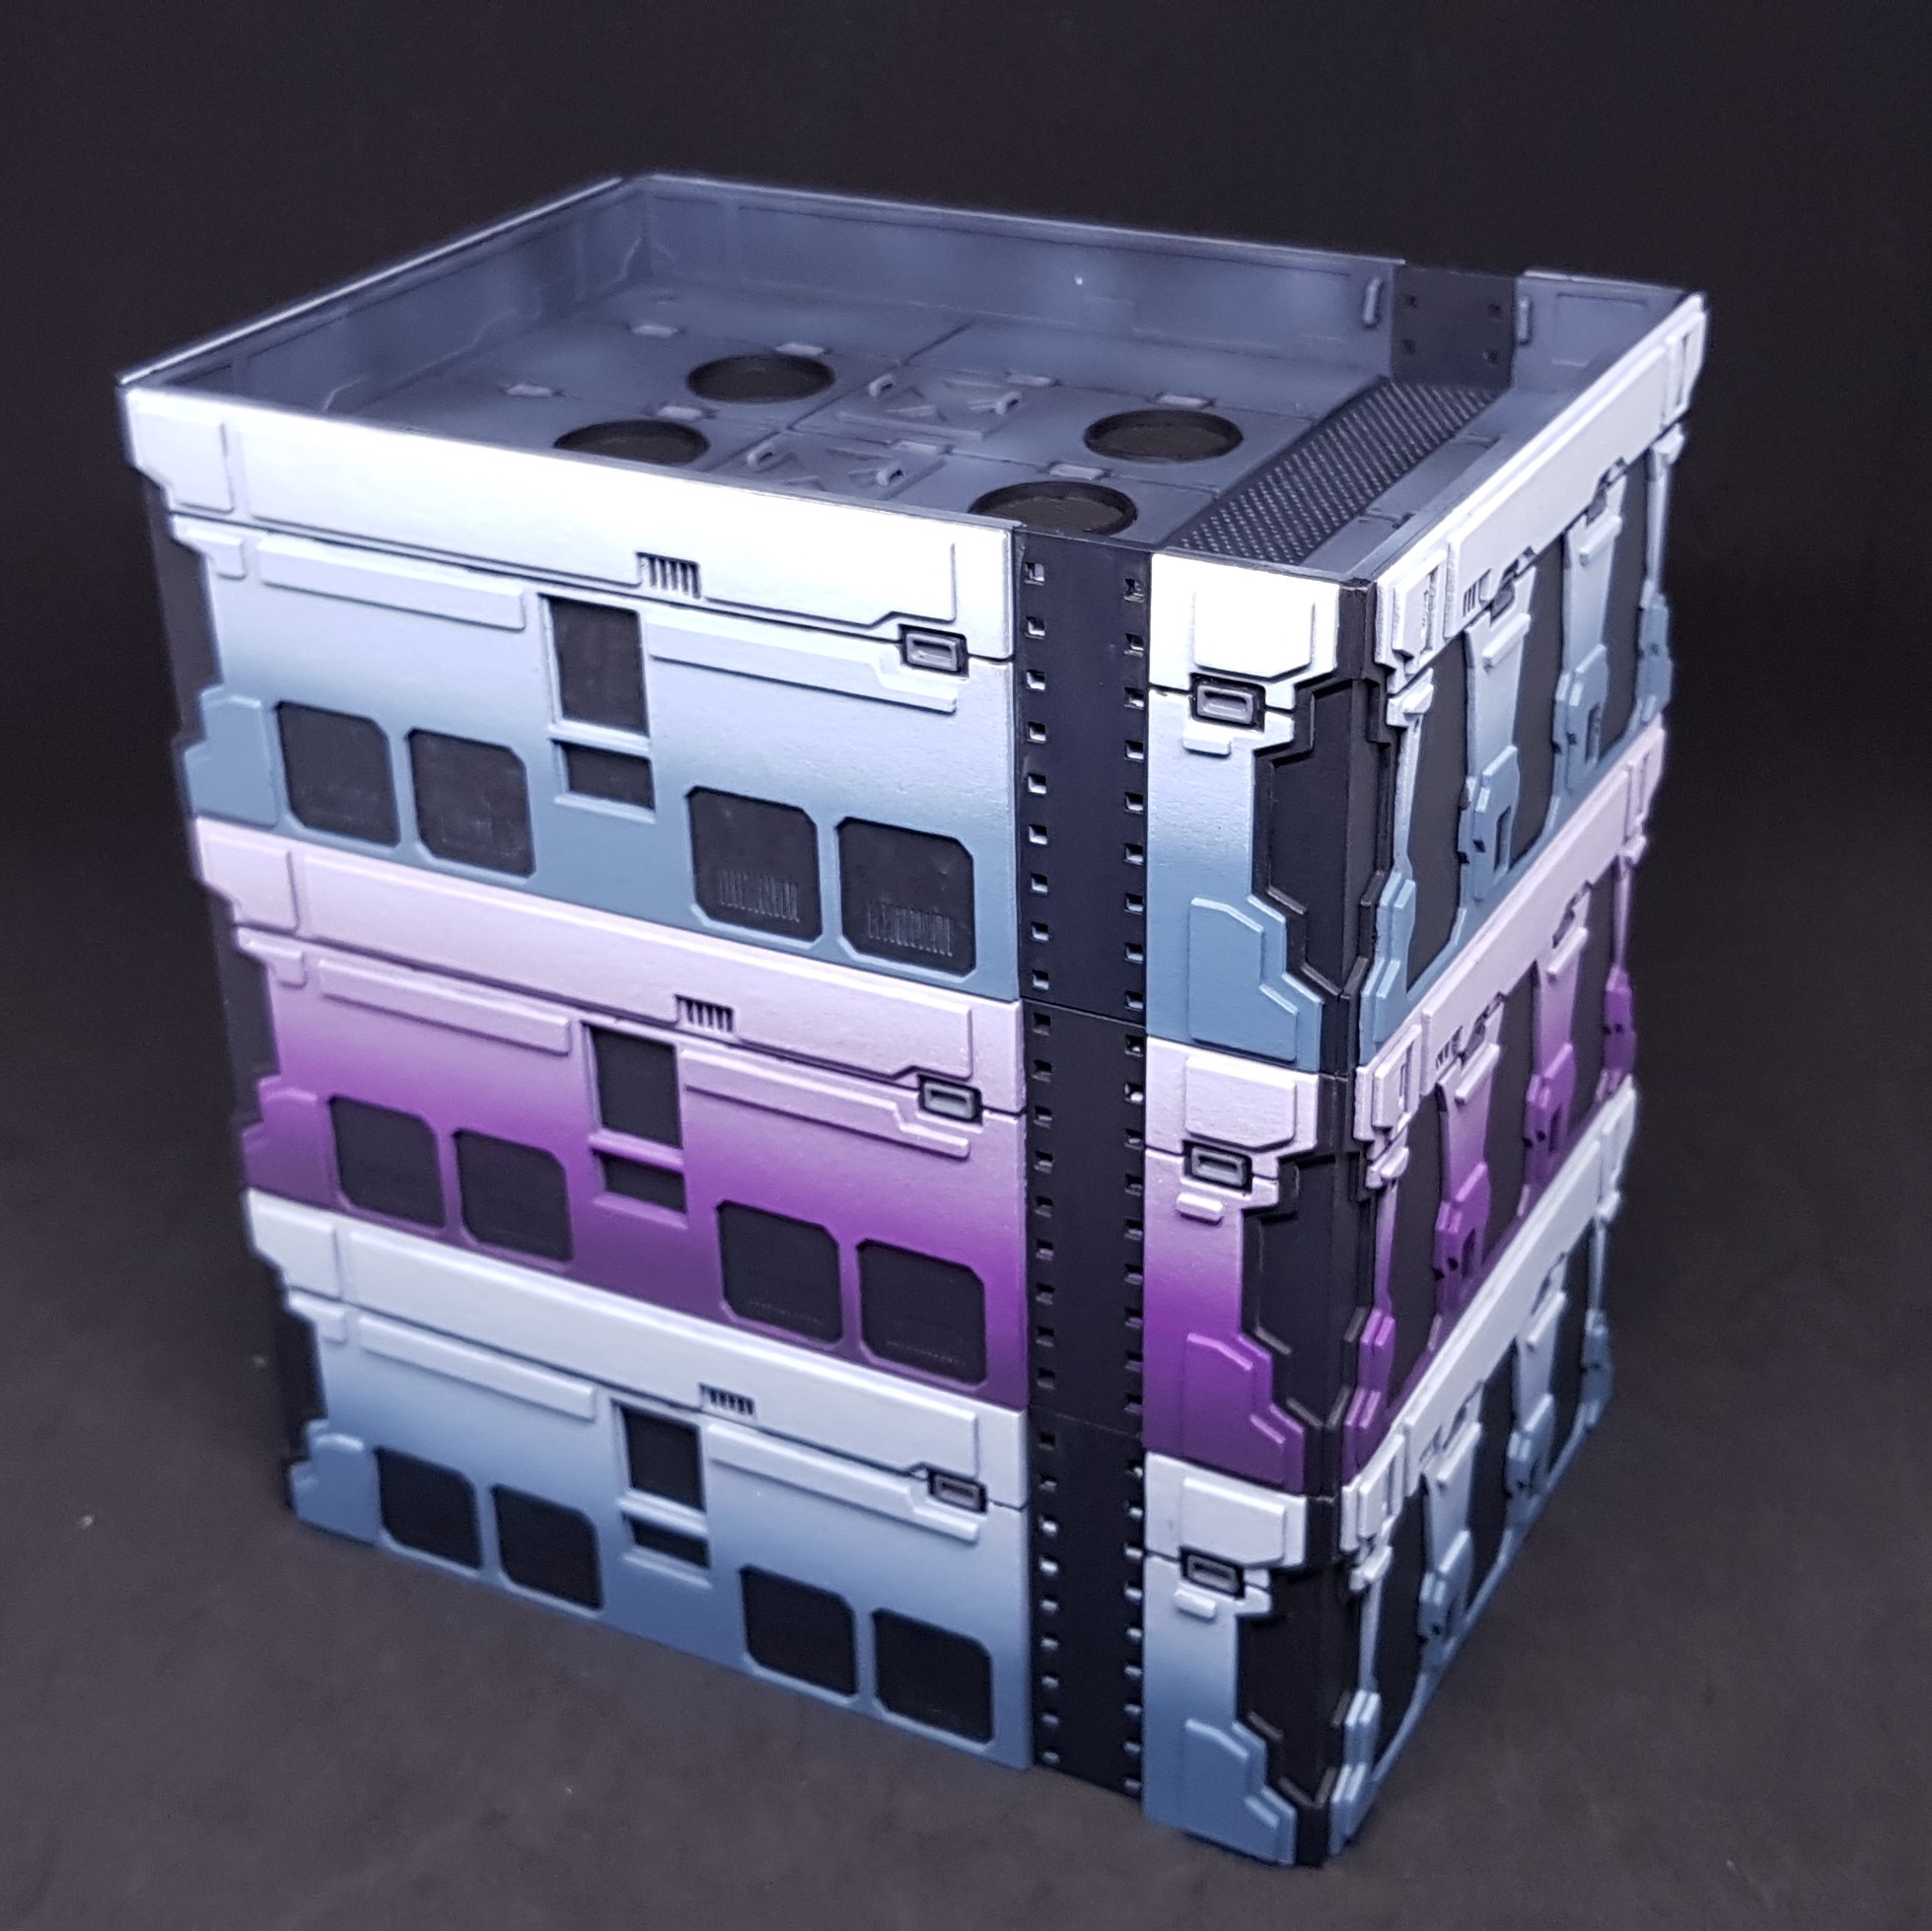
 All three Power Hubs together. Here you can see the mistake that I made!
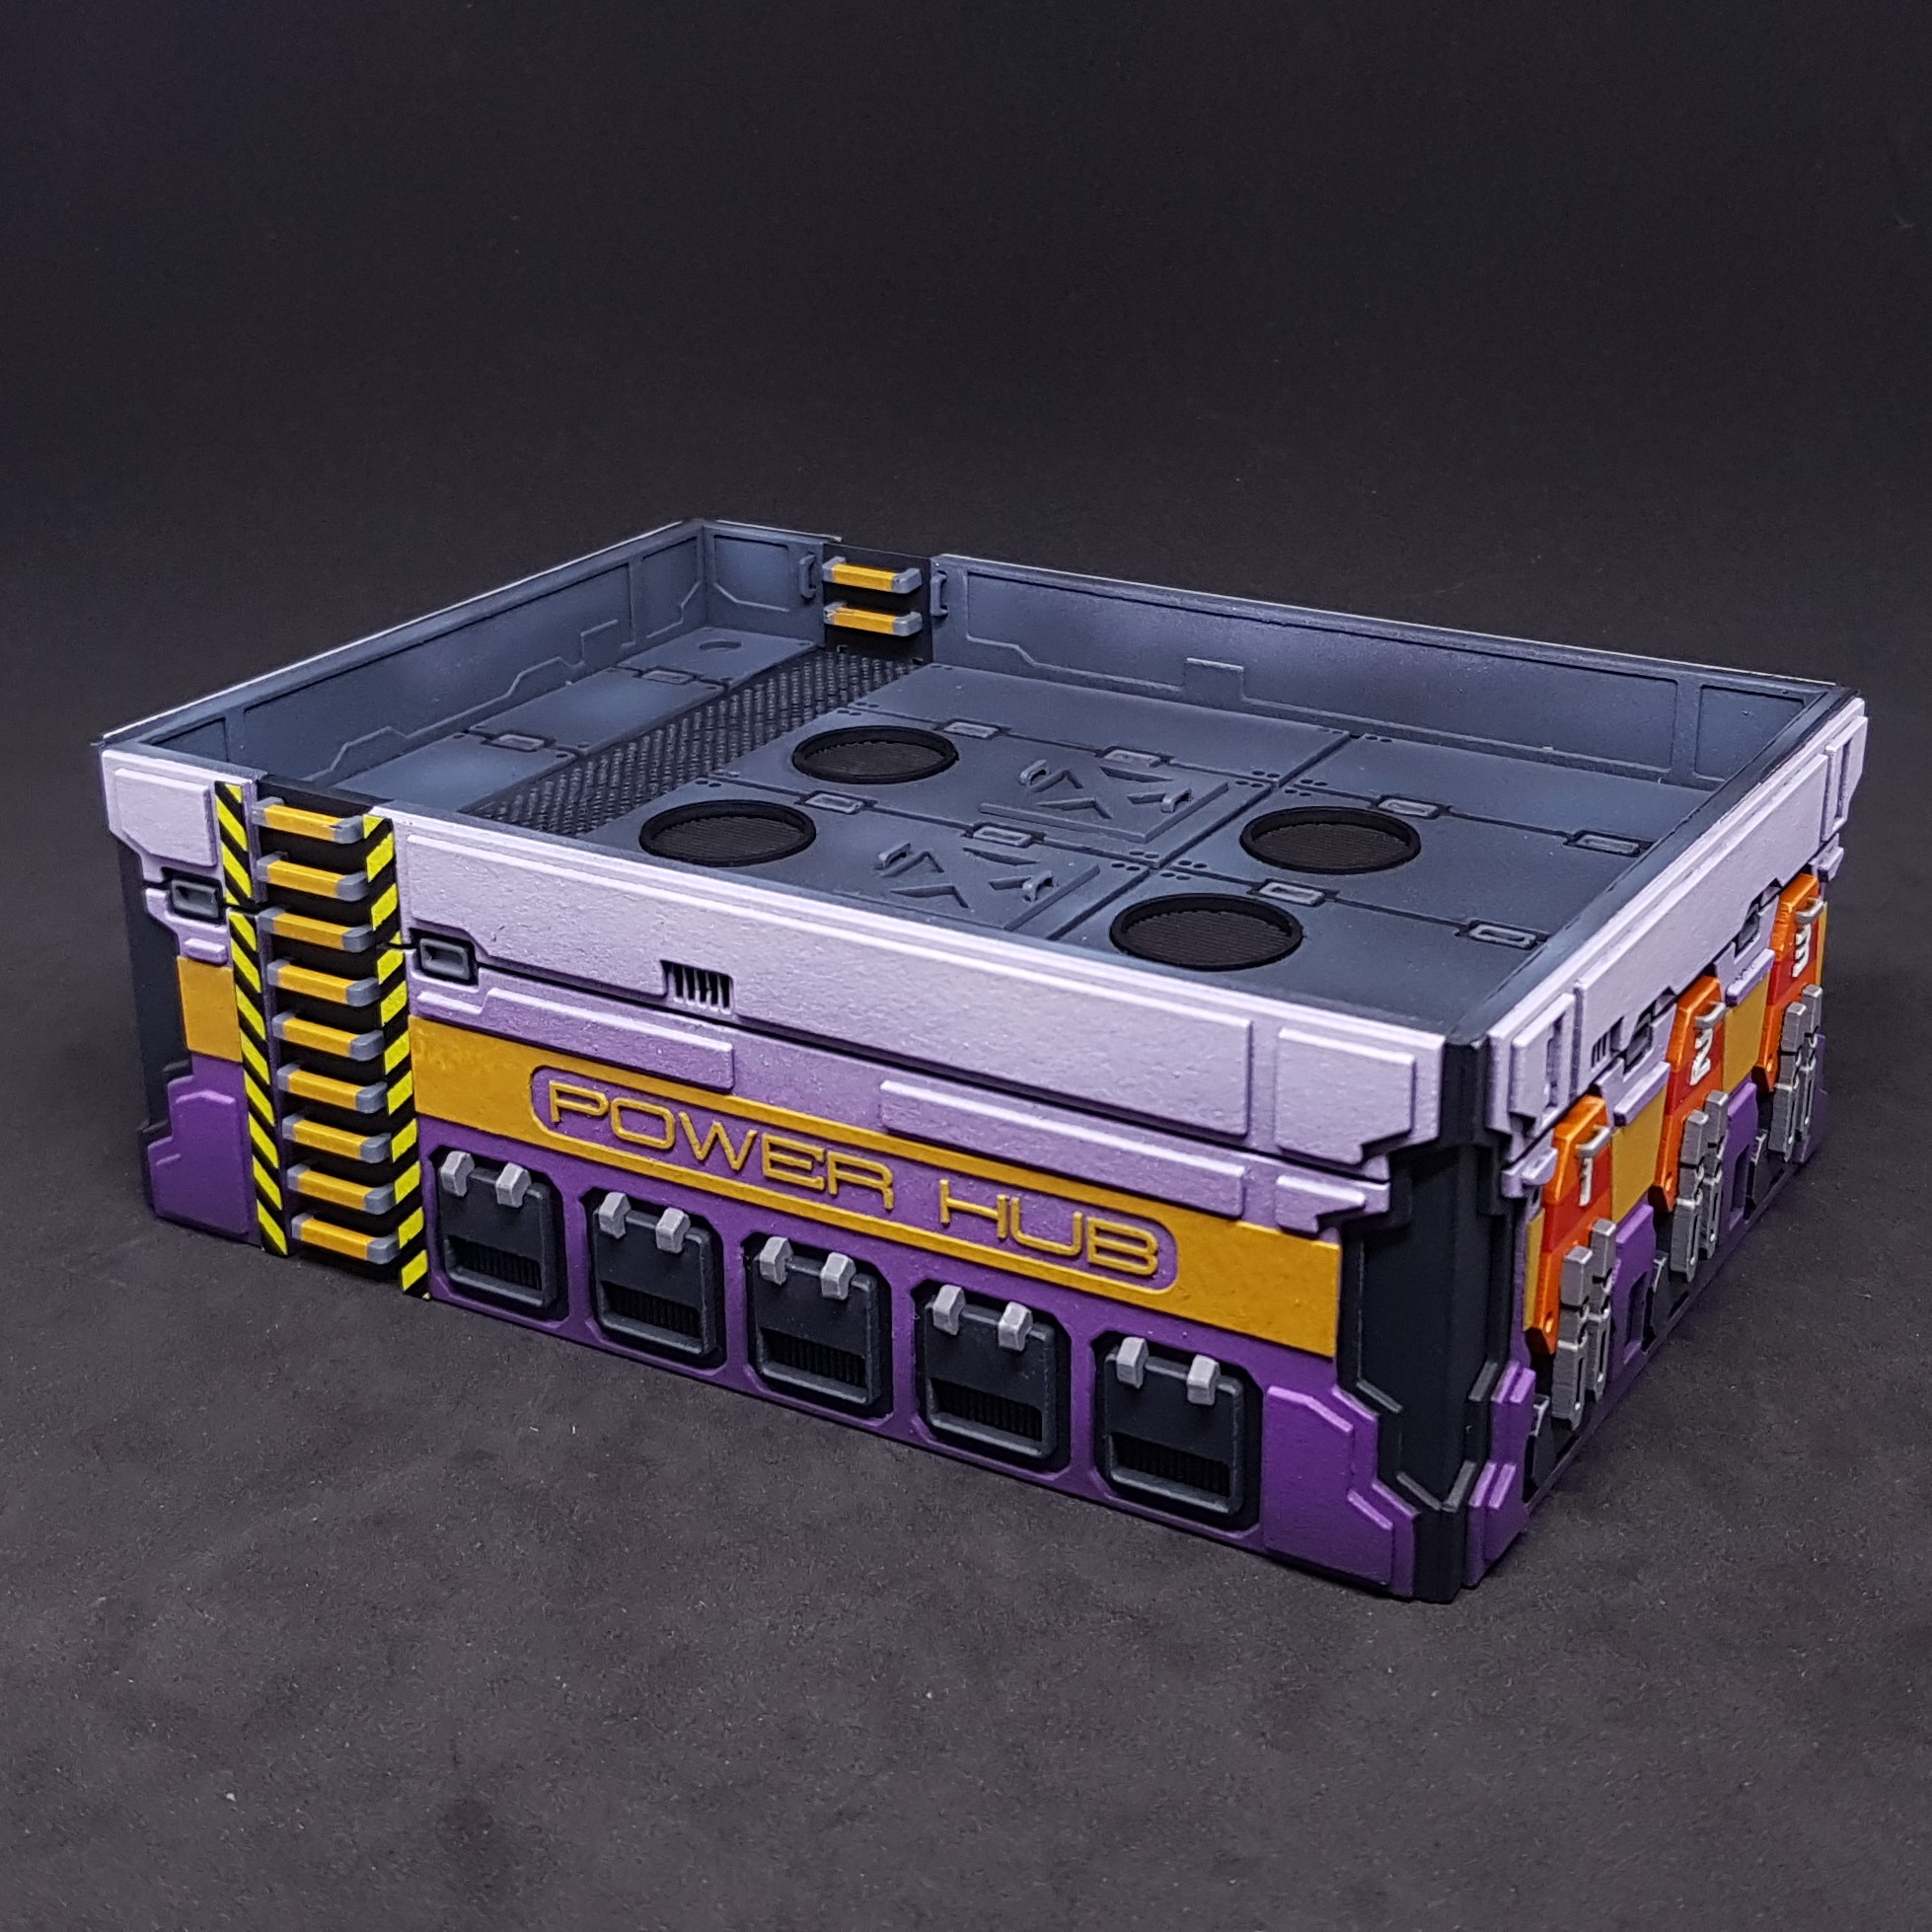 Purple Power hub. Power Hub side on. I like this the best.
 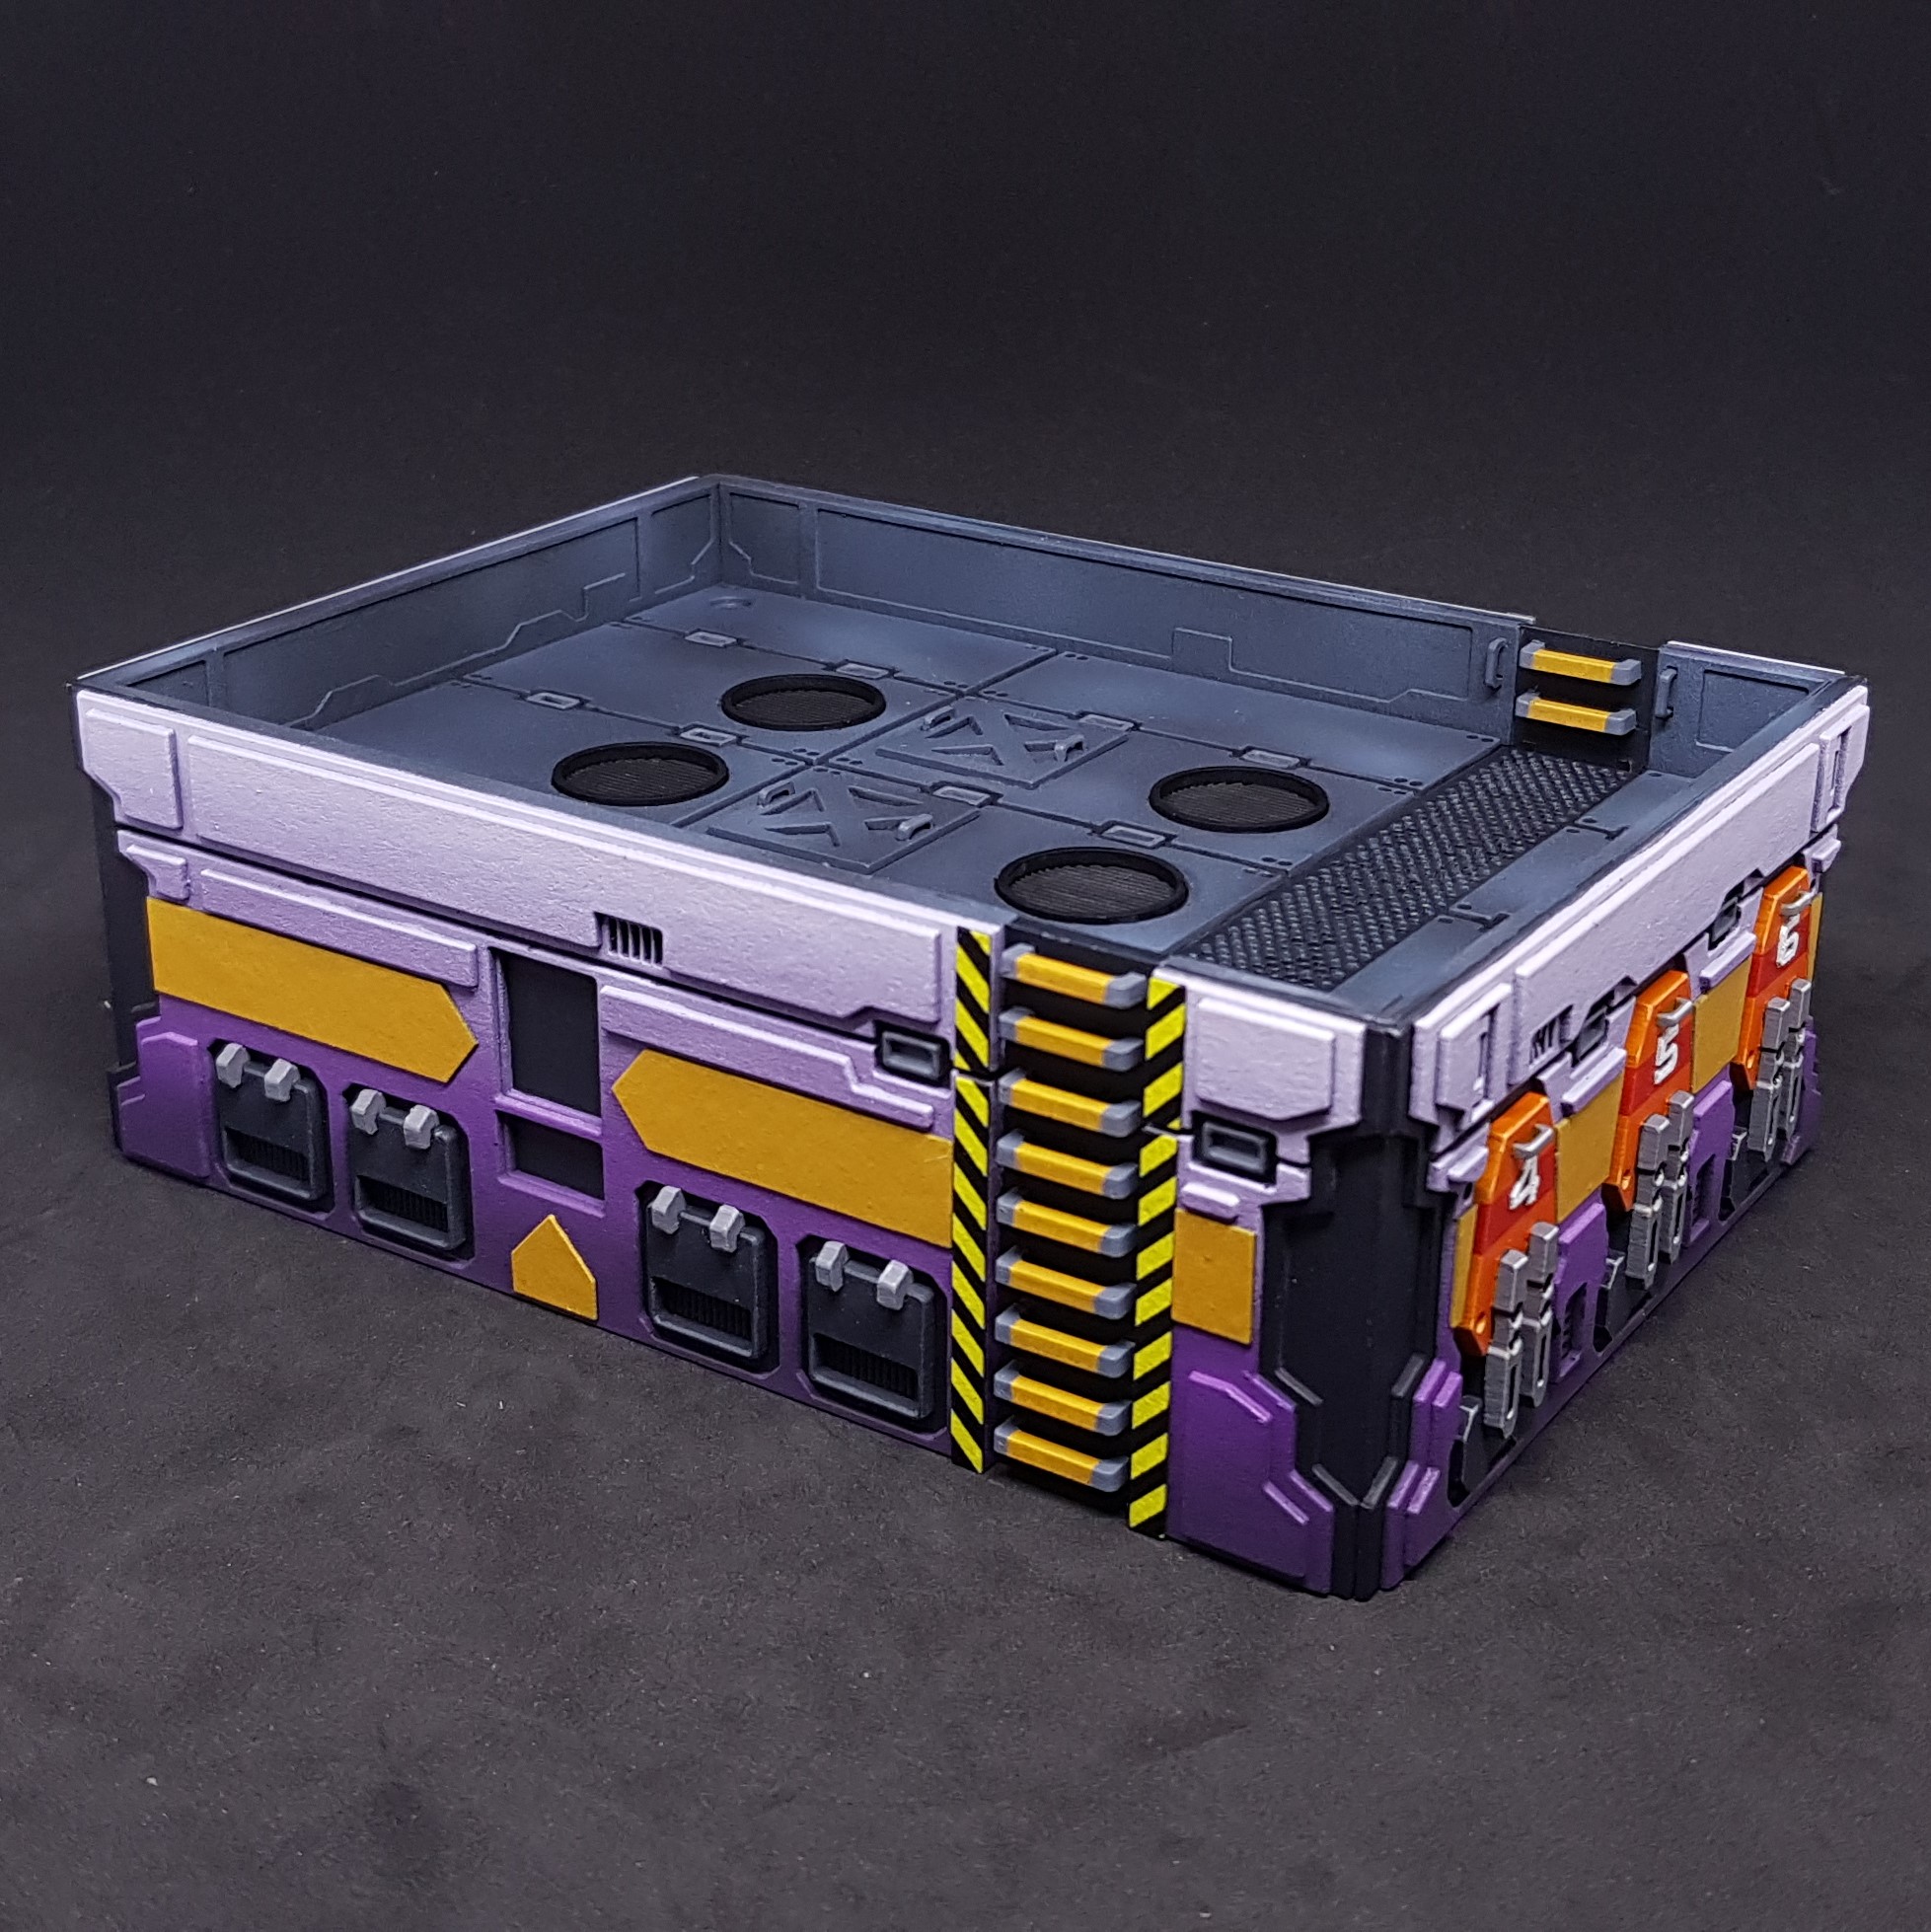 Purple Power hub. Control panel side.
 Blue Power hub. Power Hub side on.
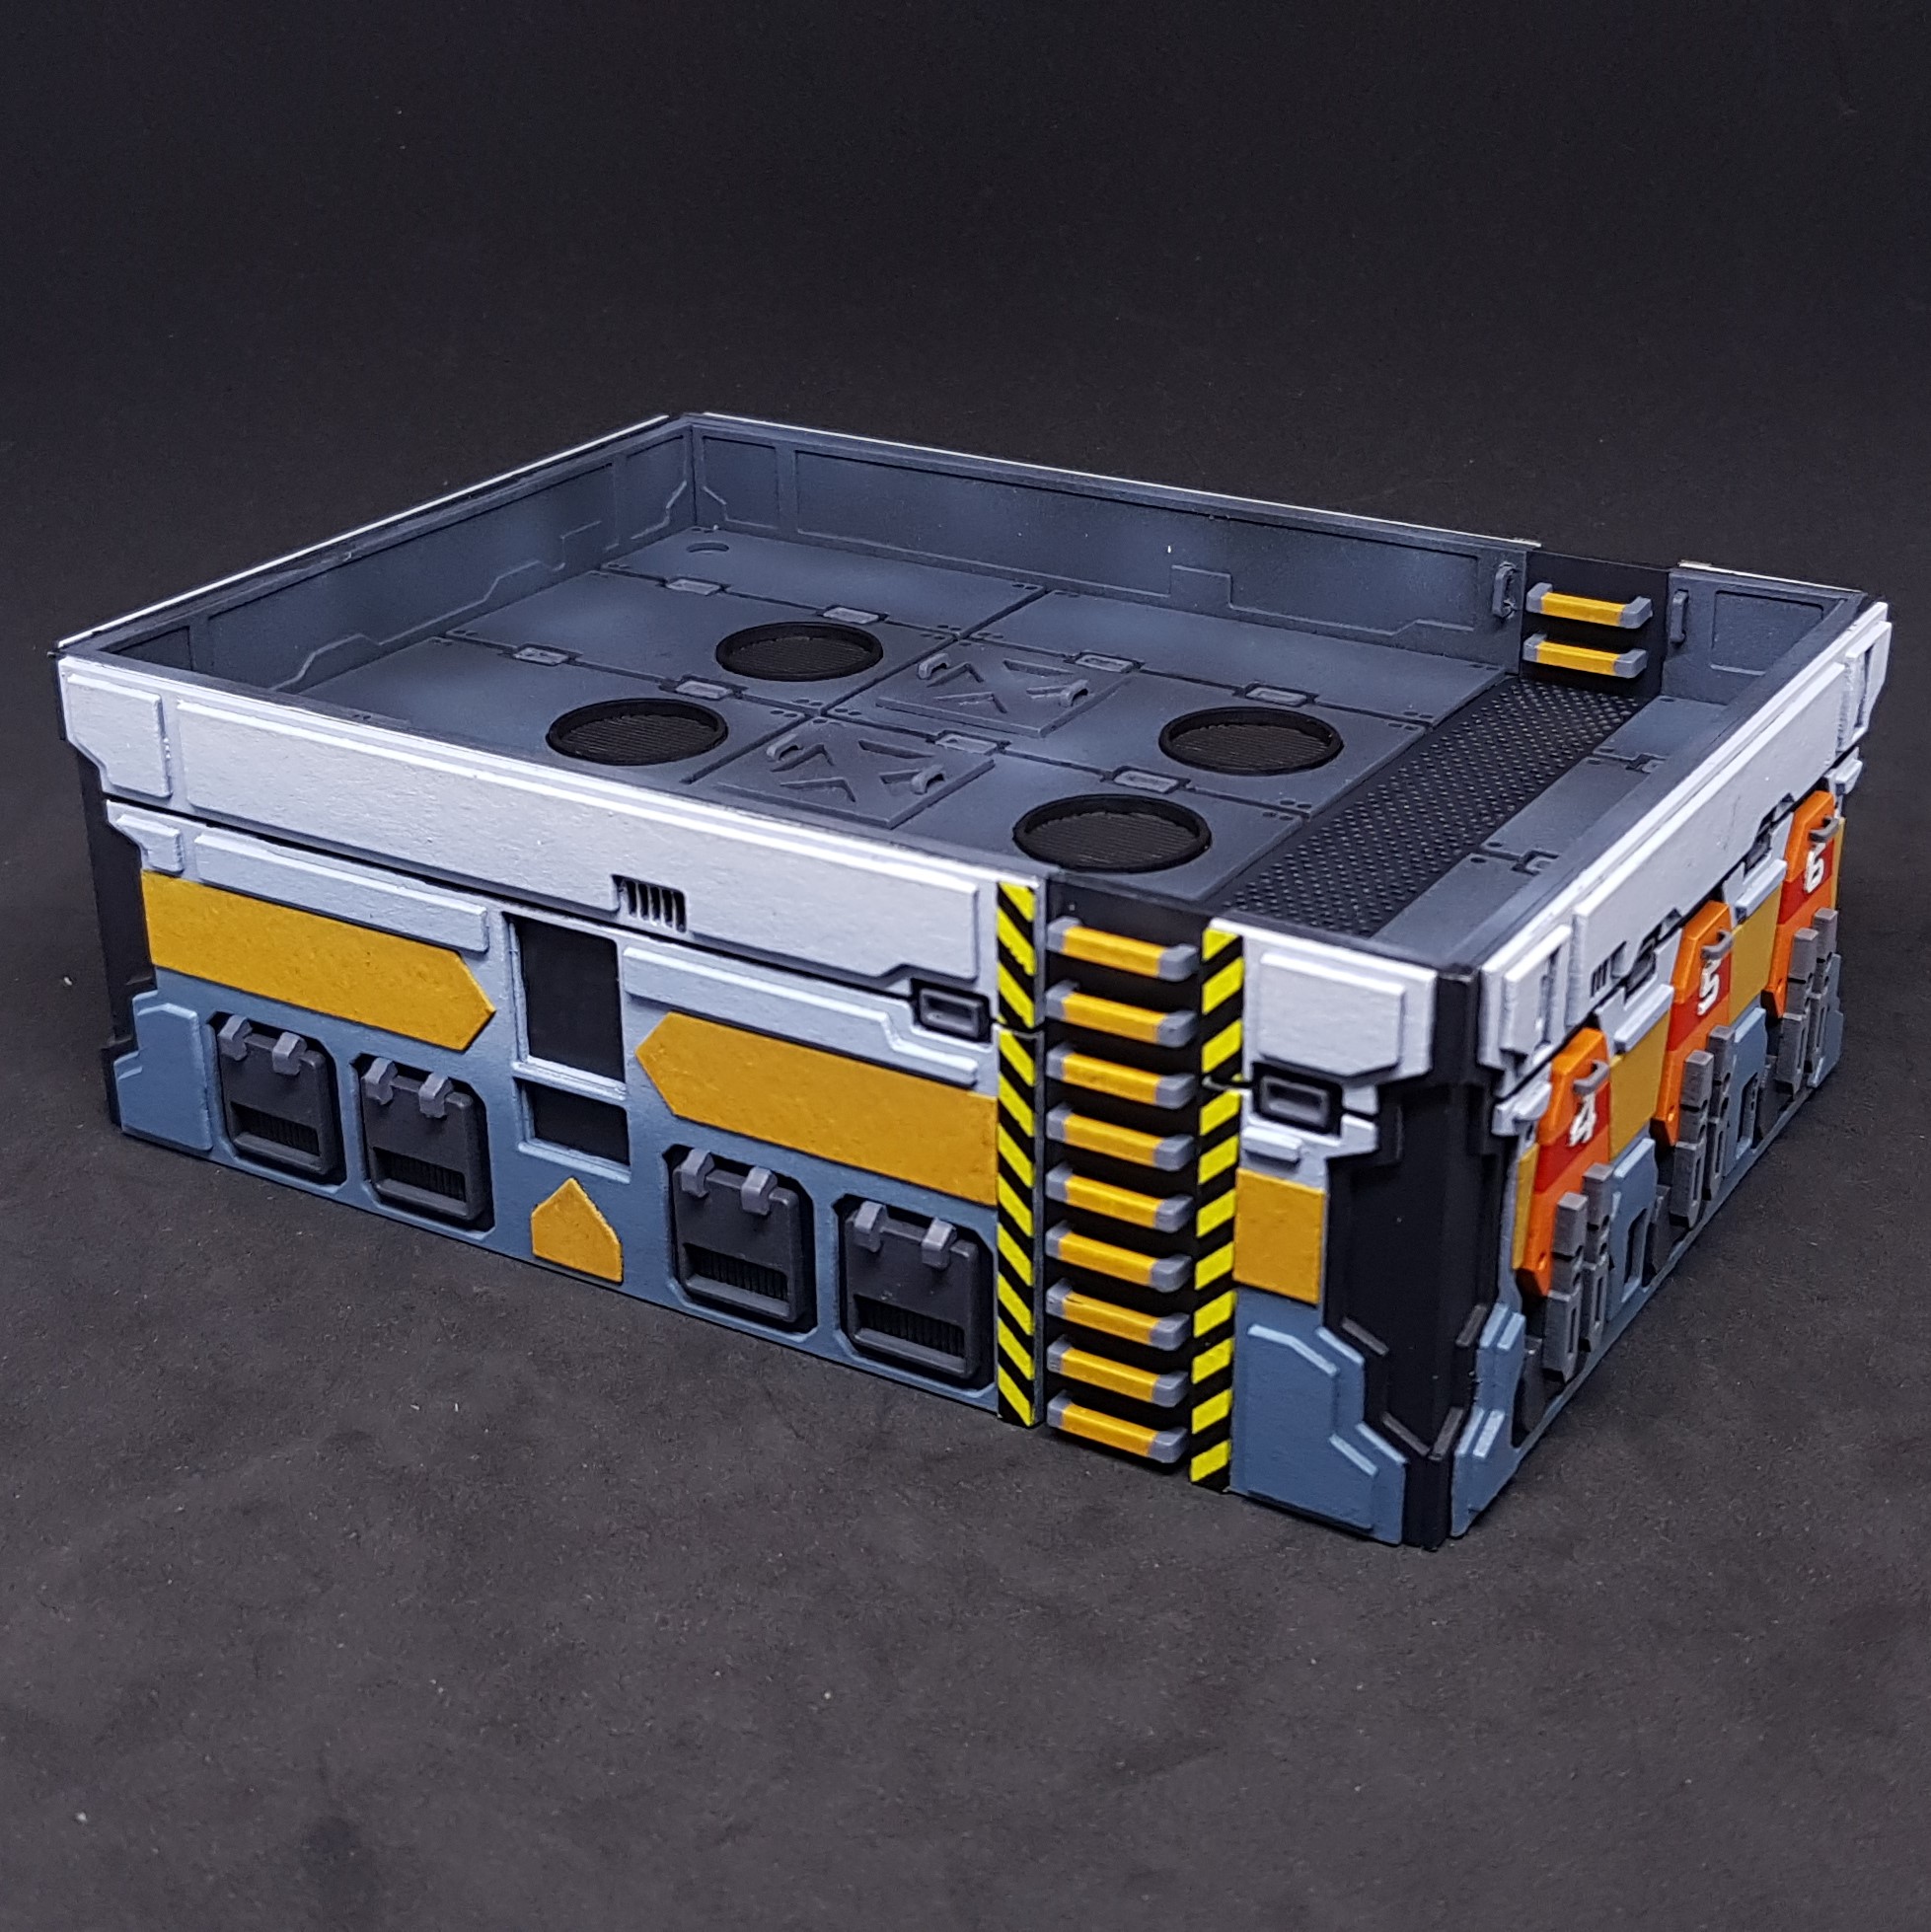 Blue Power hub. Control panel side.
That’s where I am at the moment. I have a few decisions to make.
- How to make the control panels. This did not look great before, I may need to draw something or make something?
- Should weather these the same way I done the containers and Prototype 1.0 Power Hub?
- Should I bother highlighting everything (sort of depends on 2)?
- Should I make another 2 and do them right?
I deliberately didn’t point out my major mistake/ If you find it then great. To be on such a high and come down to earth is quite brutal at this stage. There truly is too many parts to these buildings.
Feedback and suggestions are welcome at this stage. (and always)
Weathering and detailing the Power Hubs.
So it’s been a while (probably not but feels that way) but I have not been idle. I have officially finished all 3 power hubs. I still think the purple one is my favourite which is strange because I like the original artwork so much.
How did I get here from my last post? Glad you asked…
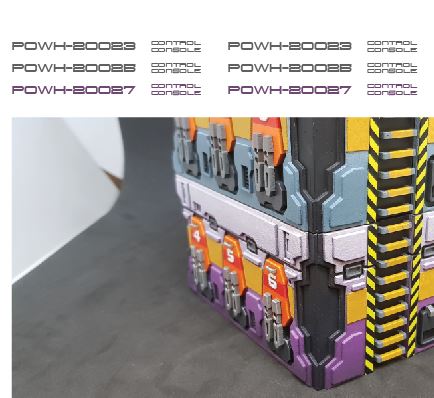
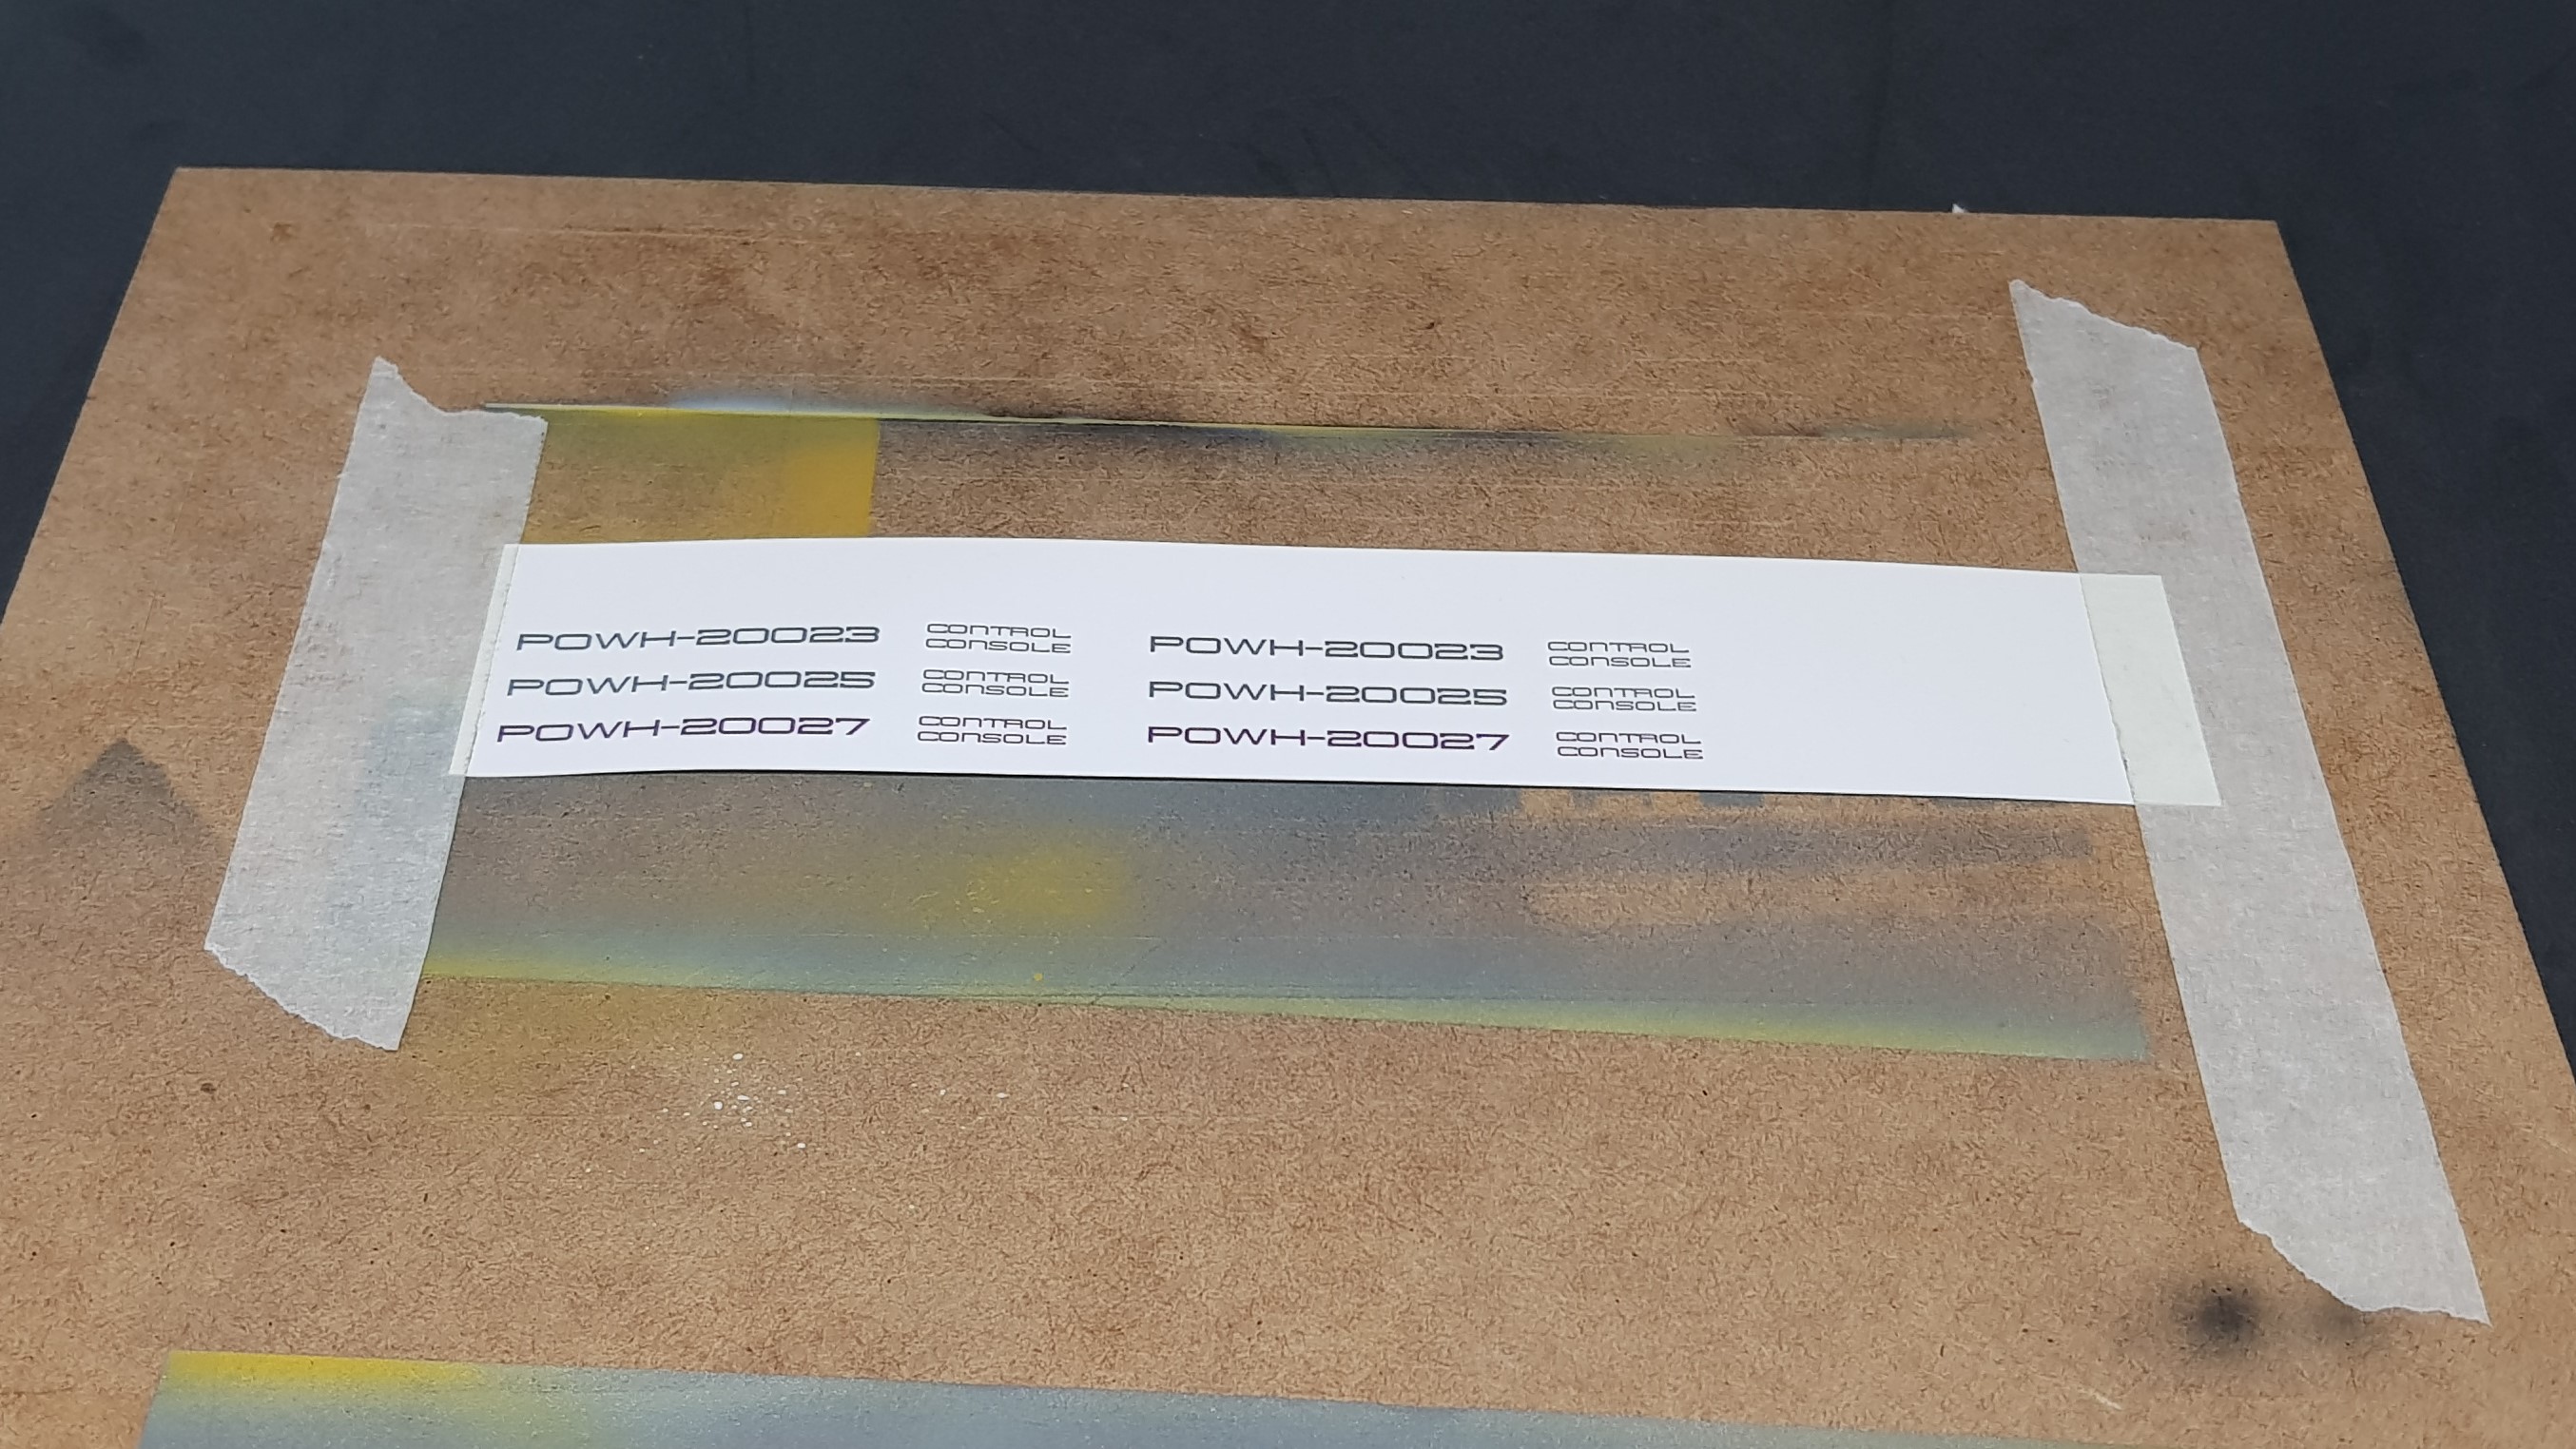
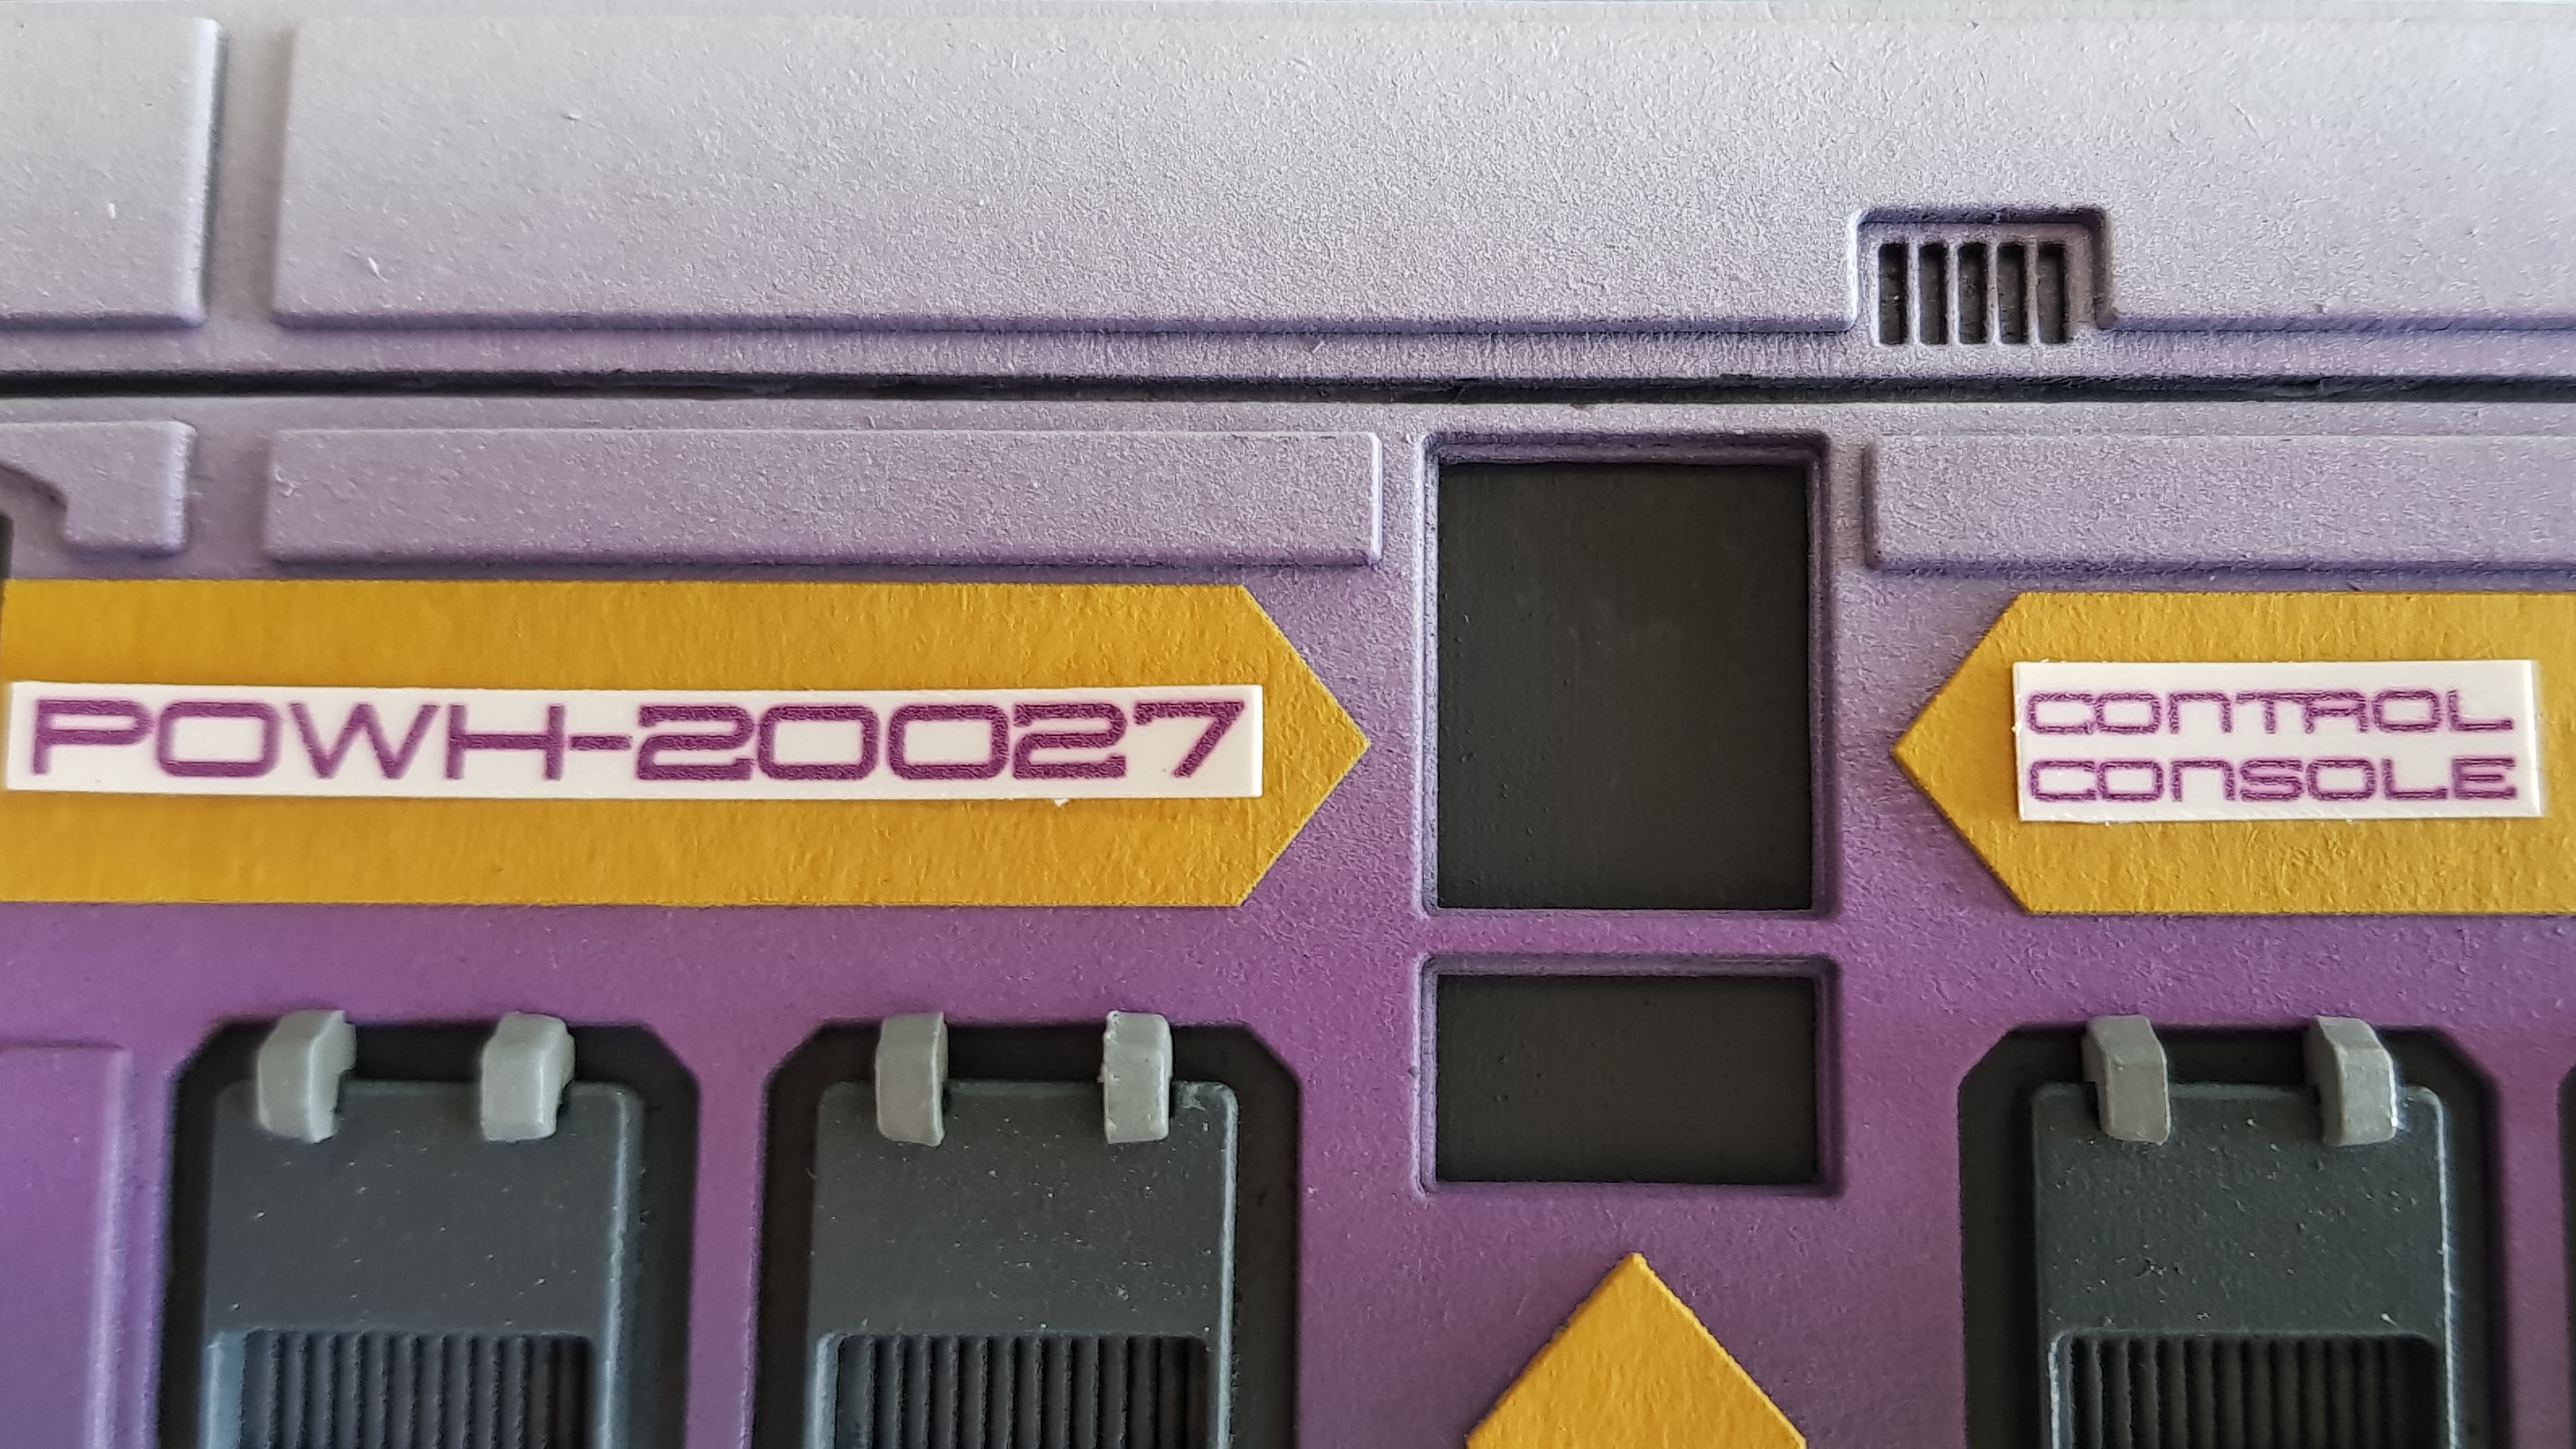
I started by getting the transfers I required down. These were simple however I did use a little trick. I typed out what I needed POWH-20023, 5 and 7. POWH-20020 is the original art POWH-200231 was my first prototype so the numbers keep counting. The font I was using didn’t look good when i done a 4 so decided to move up in odd numbers.
I tried to use the same colour as the background making the text blue and purple. I couldn’t get the correct colour. I brought this into photo editing software and used the eye dropper tool to select the correct colour for both. Handy tip if you cant find the right colour.
I could have taken this a step further and removed the yellow background colour from my selection and when i put the transparency on top it would have looked right. But I didn’t take it this far.
I then printed this off and masked it down while I gloss coated it with my airbrush. I cut these out and checked scale and then applied the waterslide transfers. After this was done I gloss coated again then matt coated the transfers and surrounding area.
Also note that I only used the top part of the printer paper that means I can feed it back through for more transfers and waste less, I also printed spares in case I messed up.
I done this now so that any weathering could go over them and not look out of place.

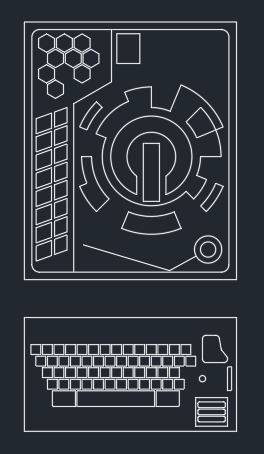
I moved onto making the control panels for the Power Hubs. I didn’t like the look I got last time from trying to photograph the original and pasting it in. The angles were not right and the quality of the print shows in the photo and not on the original buildings.
I though about transfers but I didn’t feel this would add anything plus I wanted them glossy and to pop out of the models as focal points as they may be used as objectives during the games.
I tried to draw them this didn’t work out to well as I couldn’t get this to work the way I wanted. So I done them in CAD as this made my life easier.
I then put this in my photo editing software and filled in the spaces and changed the colours I added a filter to try and break them up and make them pop a little more. I think this worked on the models the do stand out.
I then prepped these the same as the transfers but left them gloss painted the sides black and glued down with PVA at the end so not to get any weathering on them.


I edge highlighted all of the barker faces and the sides but deliberately didn’t do the elevations. I felt the blend had enough of a natural highlight to it. It just needed some details picking out.
I didn’t take any progress shots of the weathering but to explain my actions…
I knew these needed to be weathered but i didn’t want to go down the rust look of the containers. I wanted these to look used but not forgotten. I missed the rust off of these completely.
I mixed up some black ink, matt medium, flow aid and water to make a soot spray. I then used this on all the vents to make these look a little used.
I used weathering power around the bottom to ground the terrain I also used this on the steps and used paint to wear the trends before applying the powder. I liked this simple effect rather than rusting the thing to death. I think this approach is far more realistic than anything else I done. I looked out of my window to look at the roads and buildings around and they were mostly dusty at the bottom and soot stained at the top.
After this i glued in the control panels and done the lighting effects on the sides and top by spraying Prussian blue down followed by white. These looked better with a darker background but how much light do you see in the day 🙂
I was then done at last! (well this part)
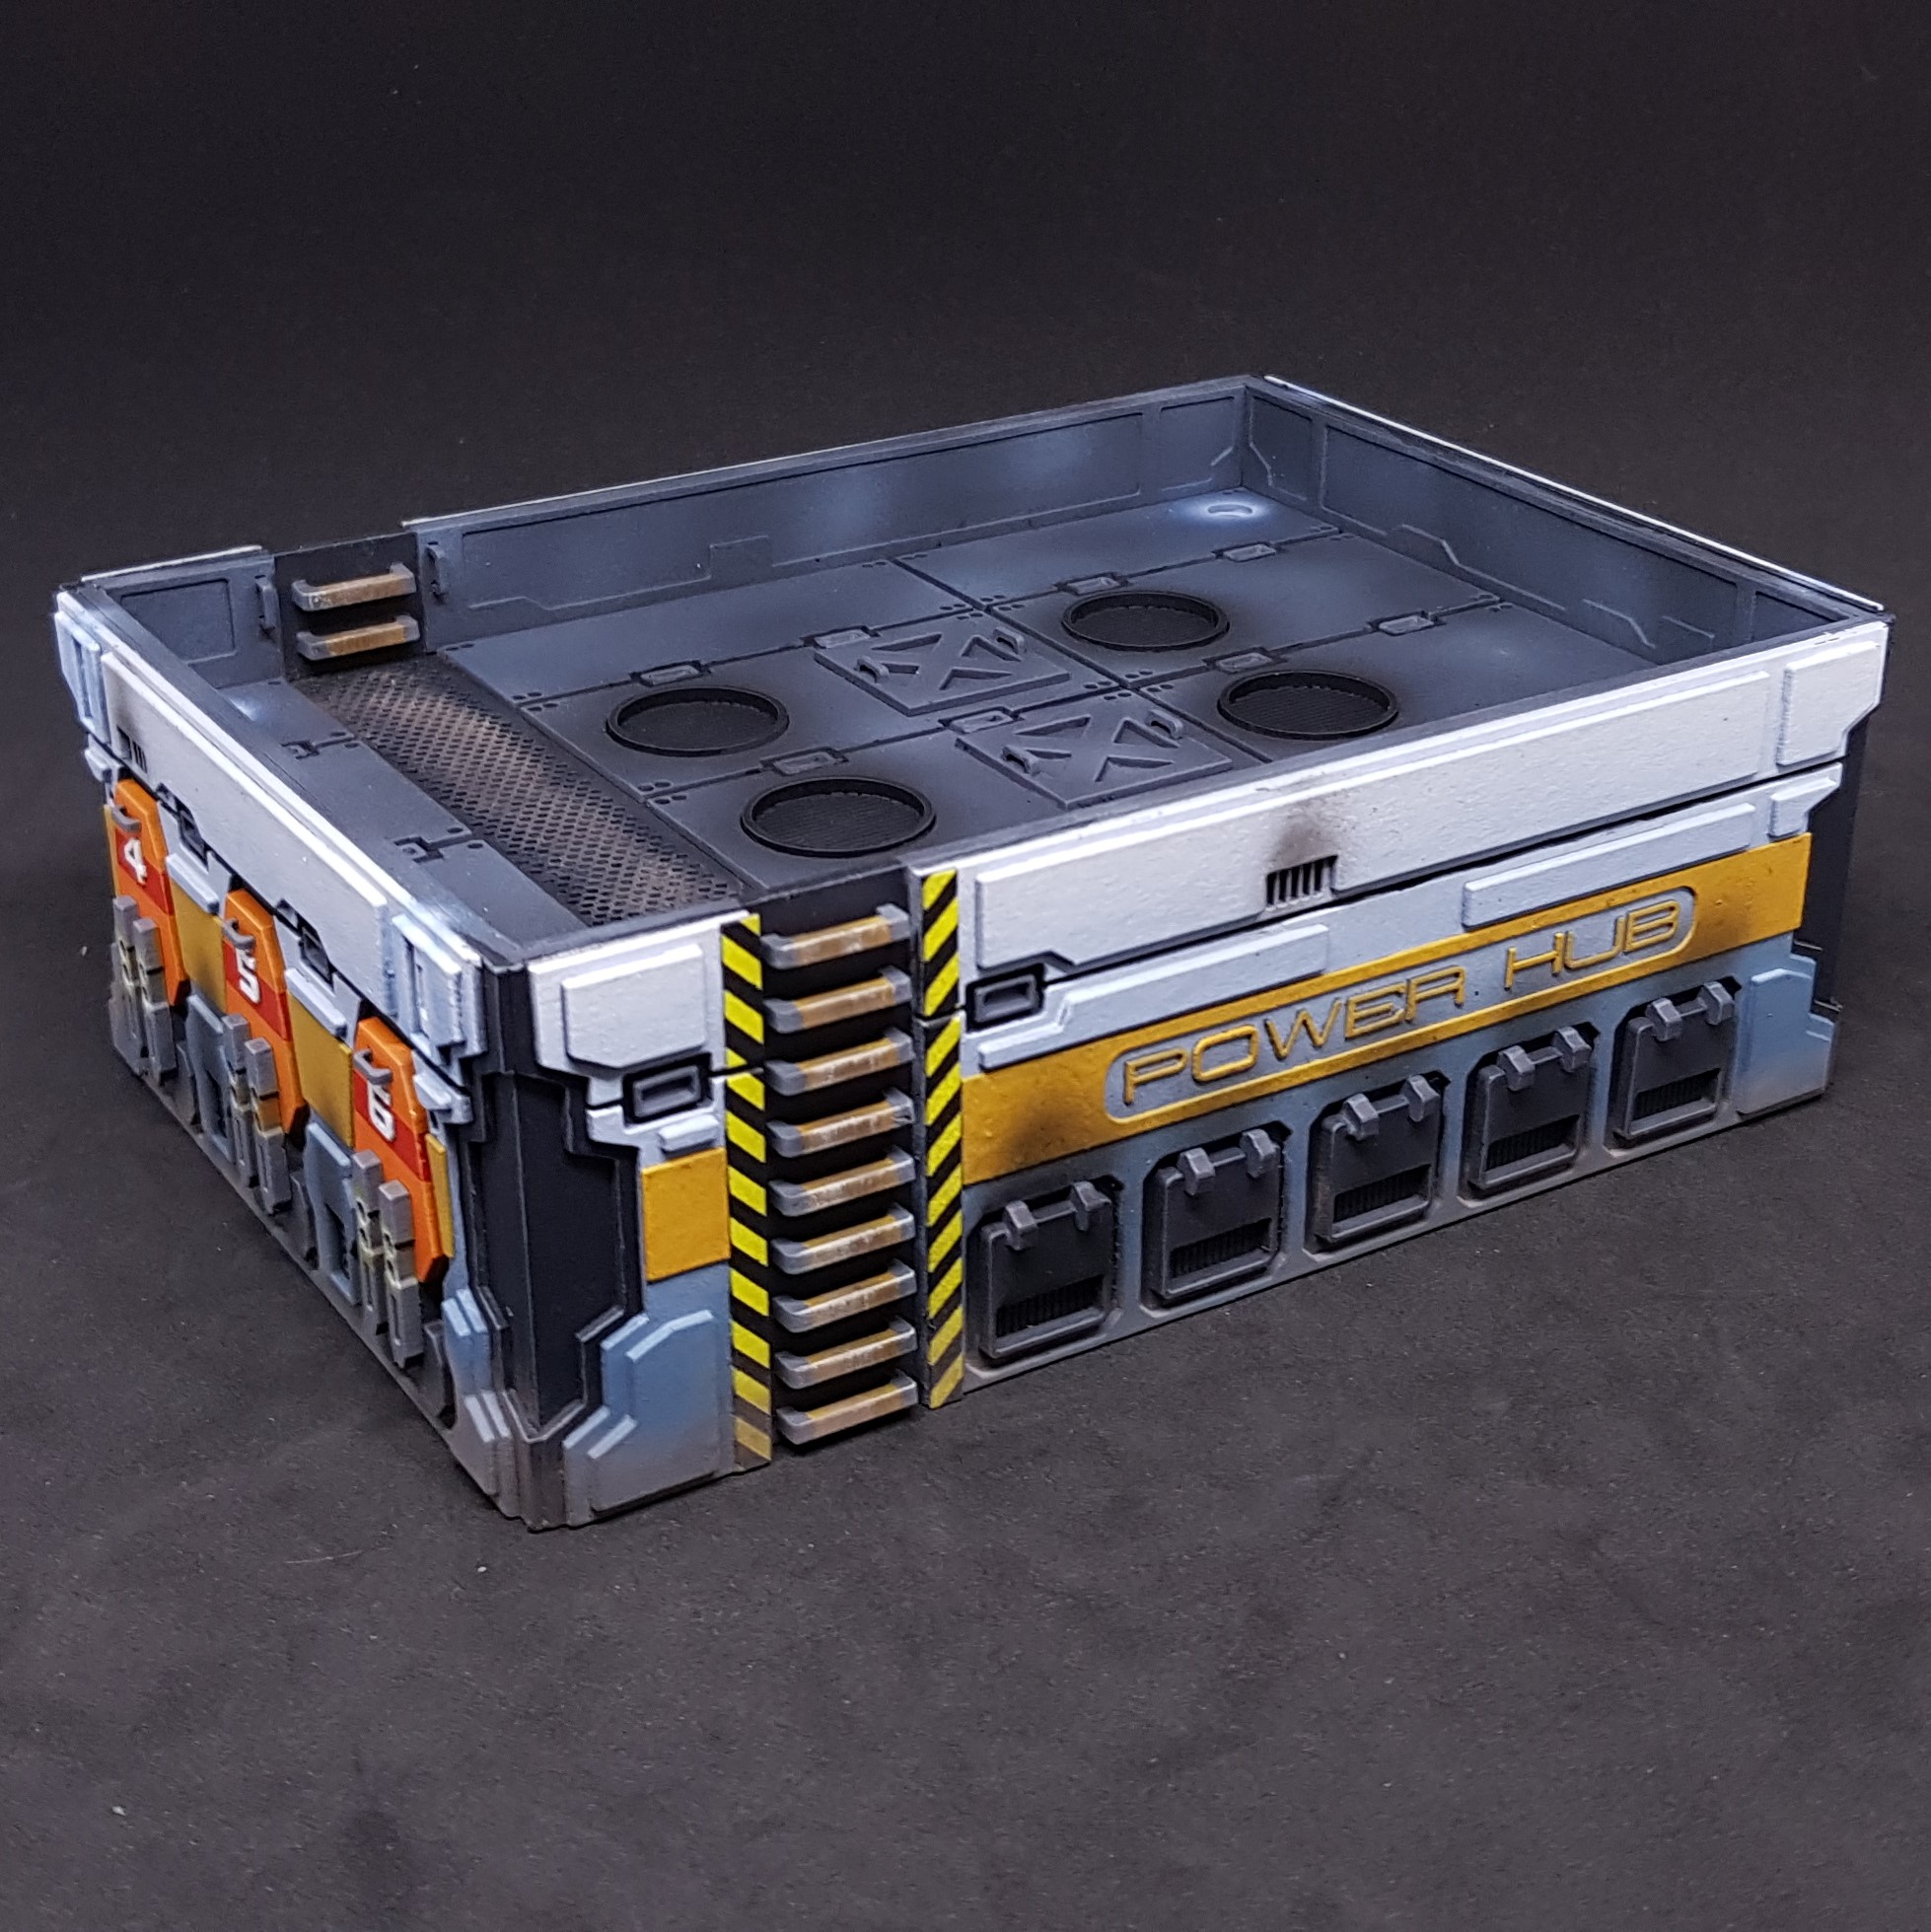 Named Side of a blue Power Hub
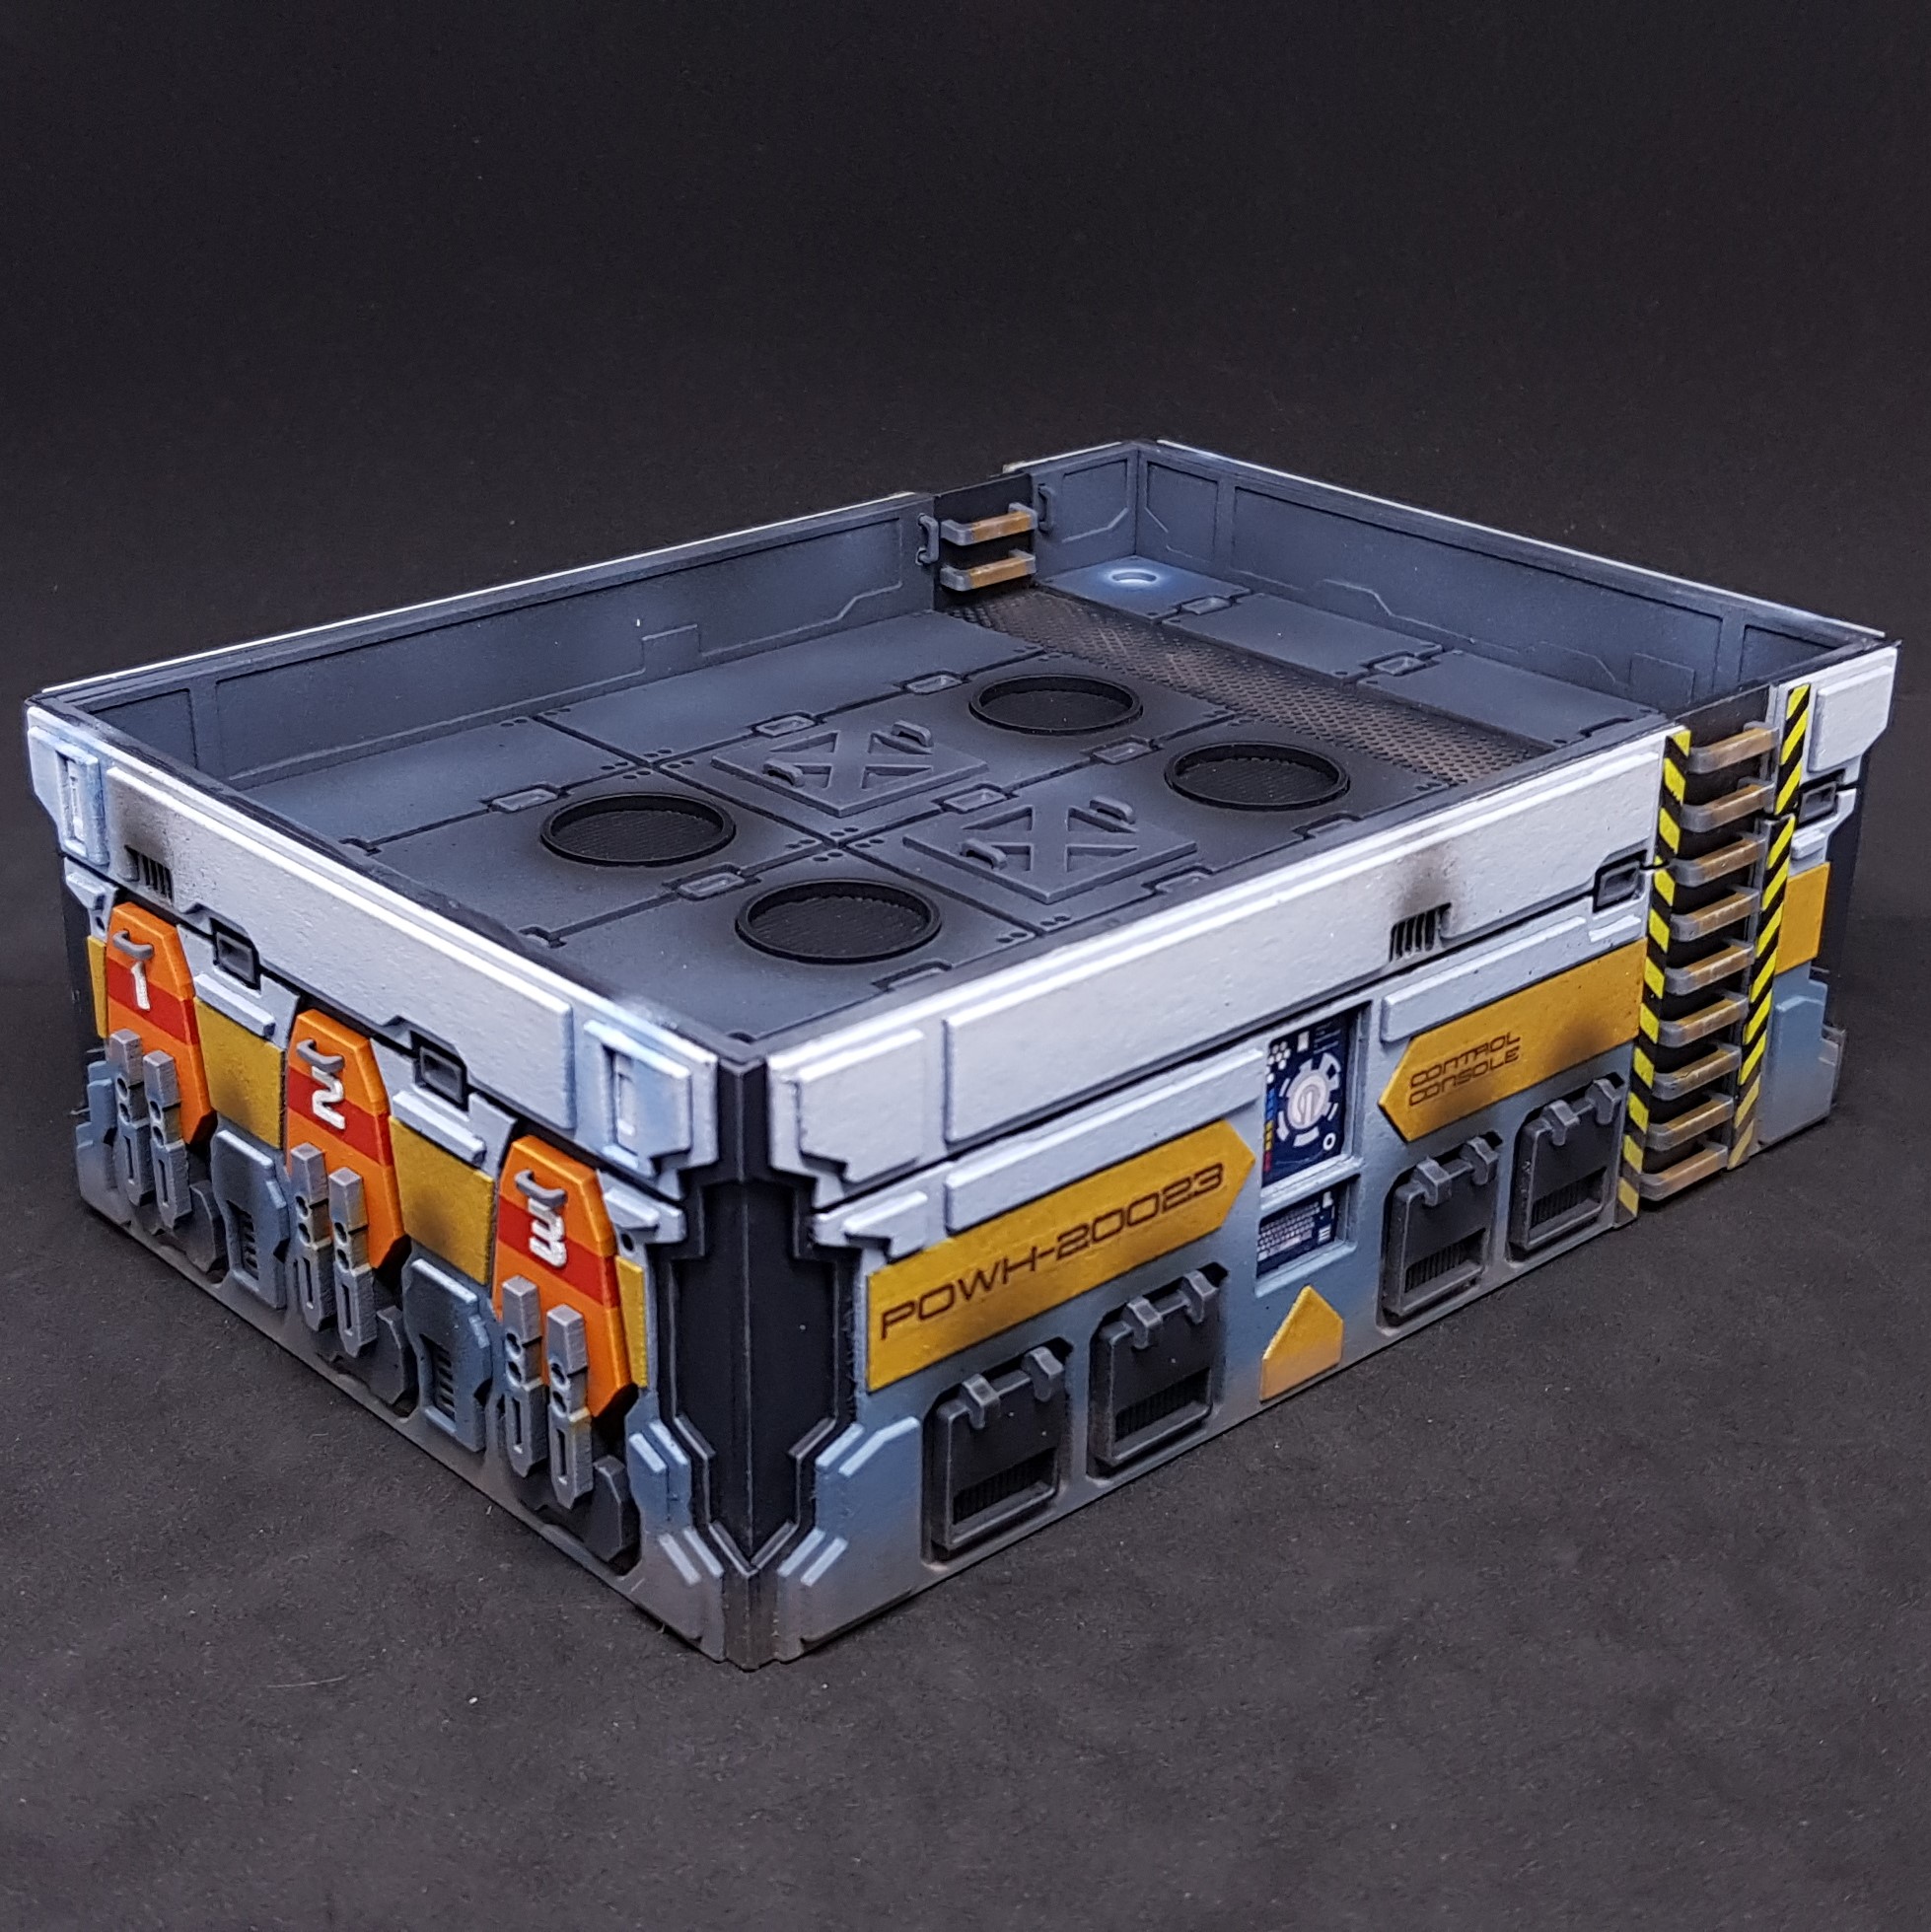 Control panel Side of a blue Power Hub
 Named Side of the purple Power Hub
 Control panel Side of the purple Power Hub
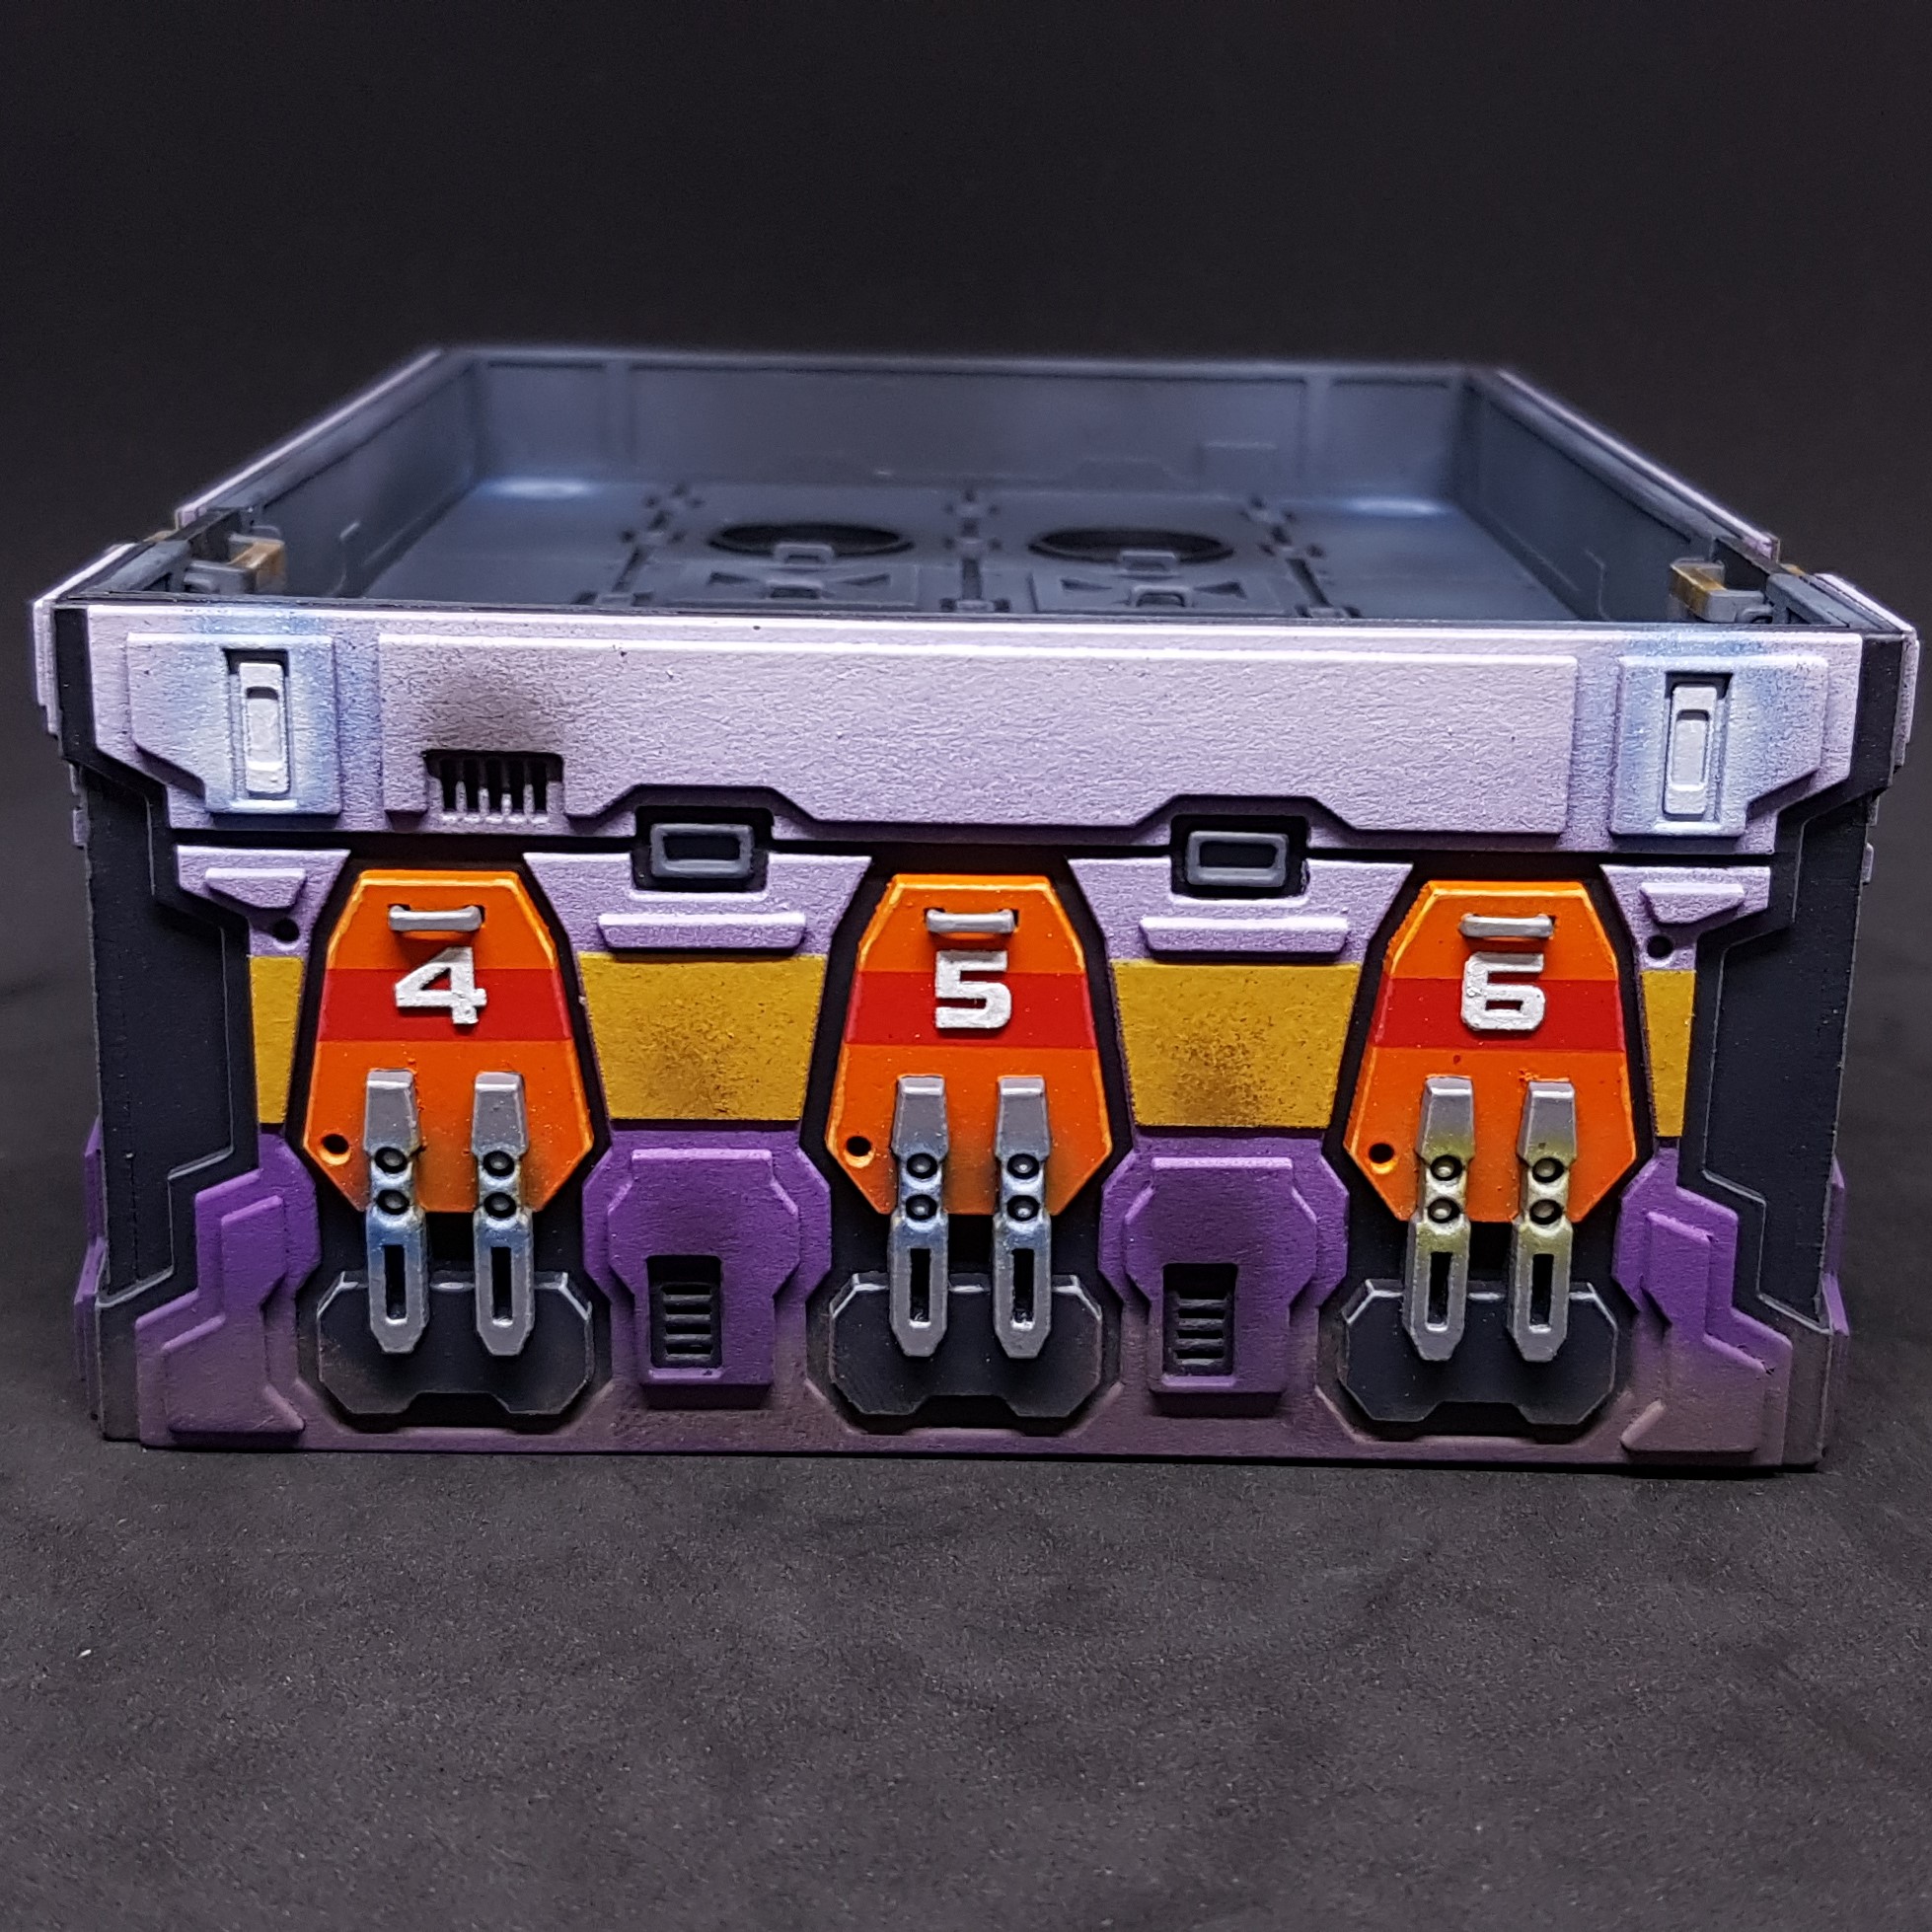 Side of the purple Power Hub showing the lighting details
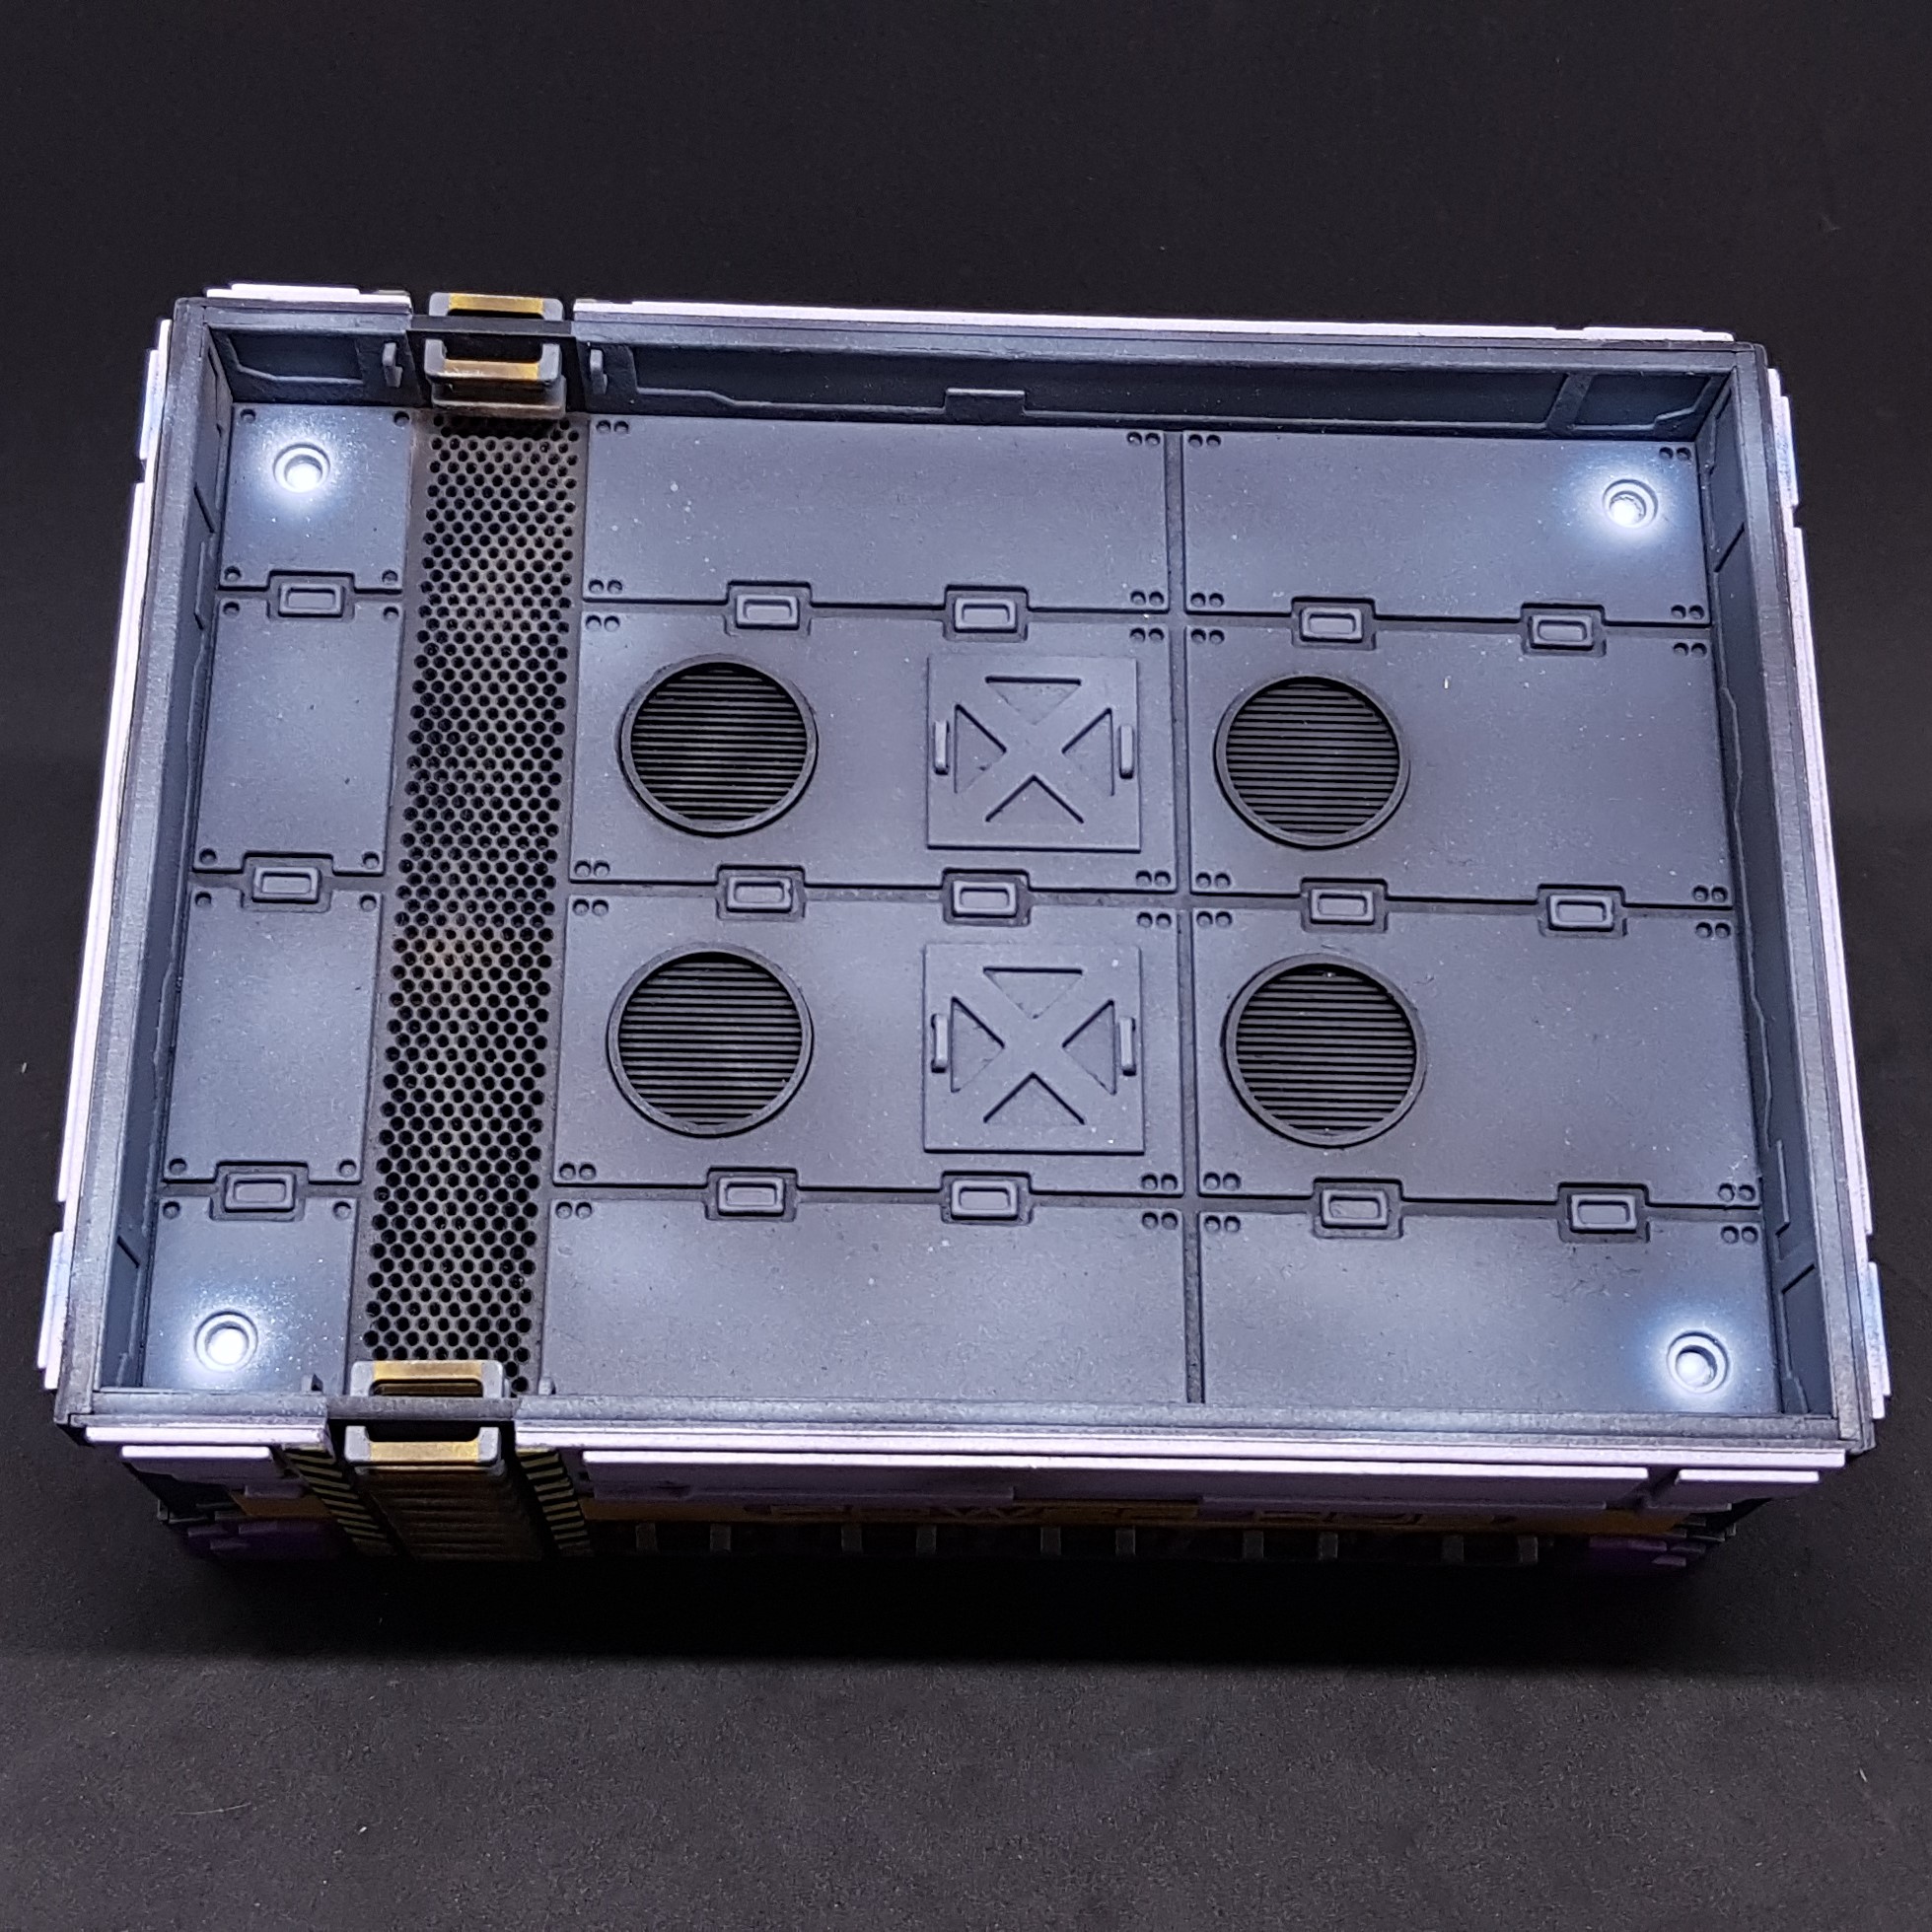 Top of the purple Power Hub showing the lighting details
So that’s that then. Overall happy with this. It has been a long time coming. Can’t help feel they look very sad sat out there on their own in the pictures…
Despite the ups and downs I am glad I done this and finished it when I gave up a while back and started painting models. This is why you may notice when I am not updating this project I am in my other project painting. It’s whatever floats my boat. If a project gets you down move away but definitely come back.
This was from 2 days ago, what have I been up too since? Glad you asked…
Photo base board
I am happy with my terrain and miniatures but it doesn’t tell a story. I am limited by my camera as good as my smartphone is so my finished pictures can only be so good. I am also not that creative when it comes to photography. Though I know what looks good.
This is a little side tangent I done in a day (i thought 3 – 4 hours). Don’t worry there will be more to come in terms of terrain but I may take another tangent before I finish up Ice Storm with the Main Management Module.
I started by looking to see what materials I had. I had a A3 3mm MDF board from another finished project. I placed this in my pop up photo booth and this was a good fit as my photo booth bulges at the sides.
I sketched out what I wanted. Namely a place for two buildings and a place for containers and a road to make my bases bake sense as I have had mixed feedback on these.
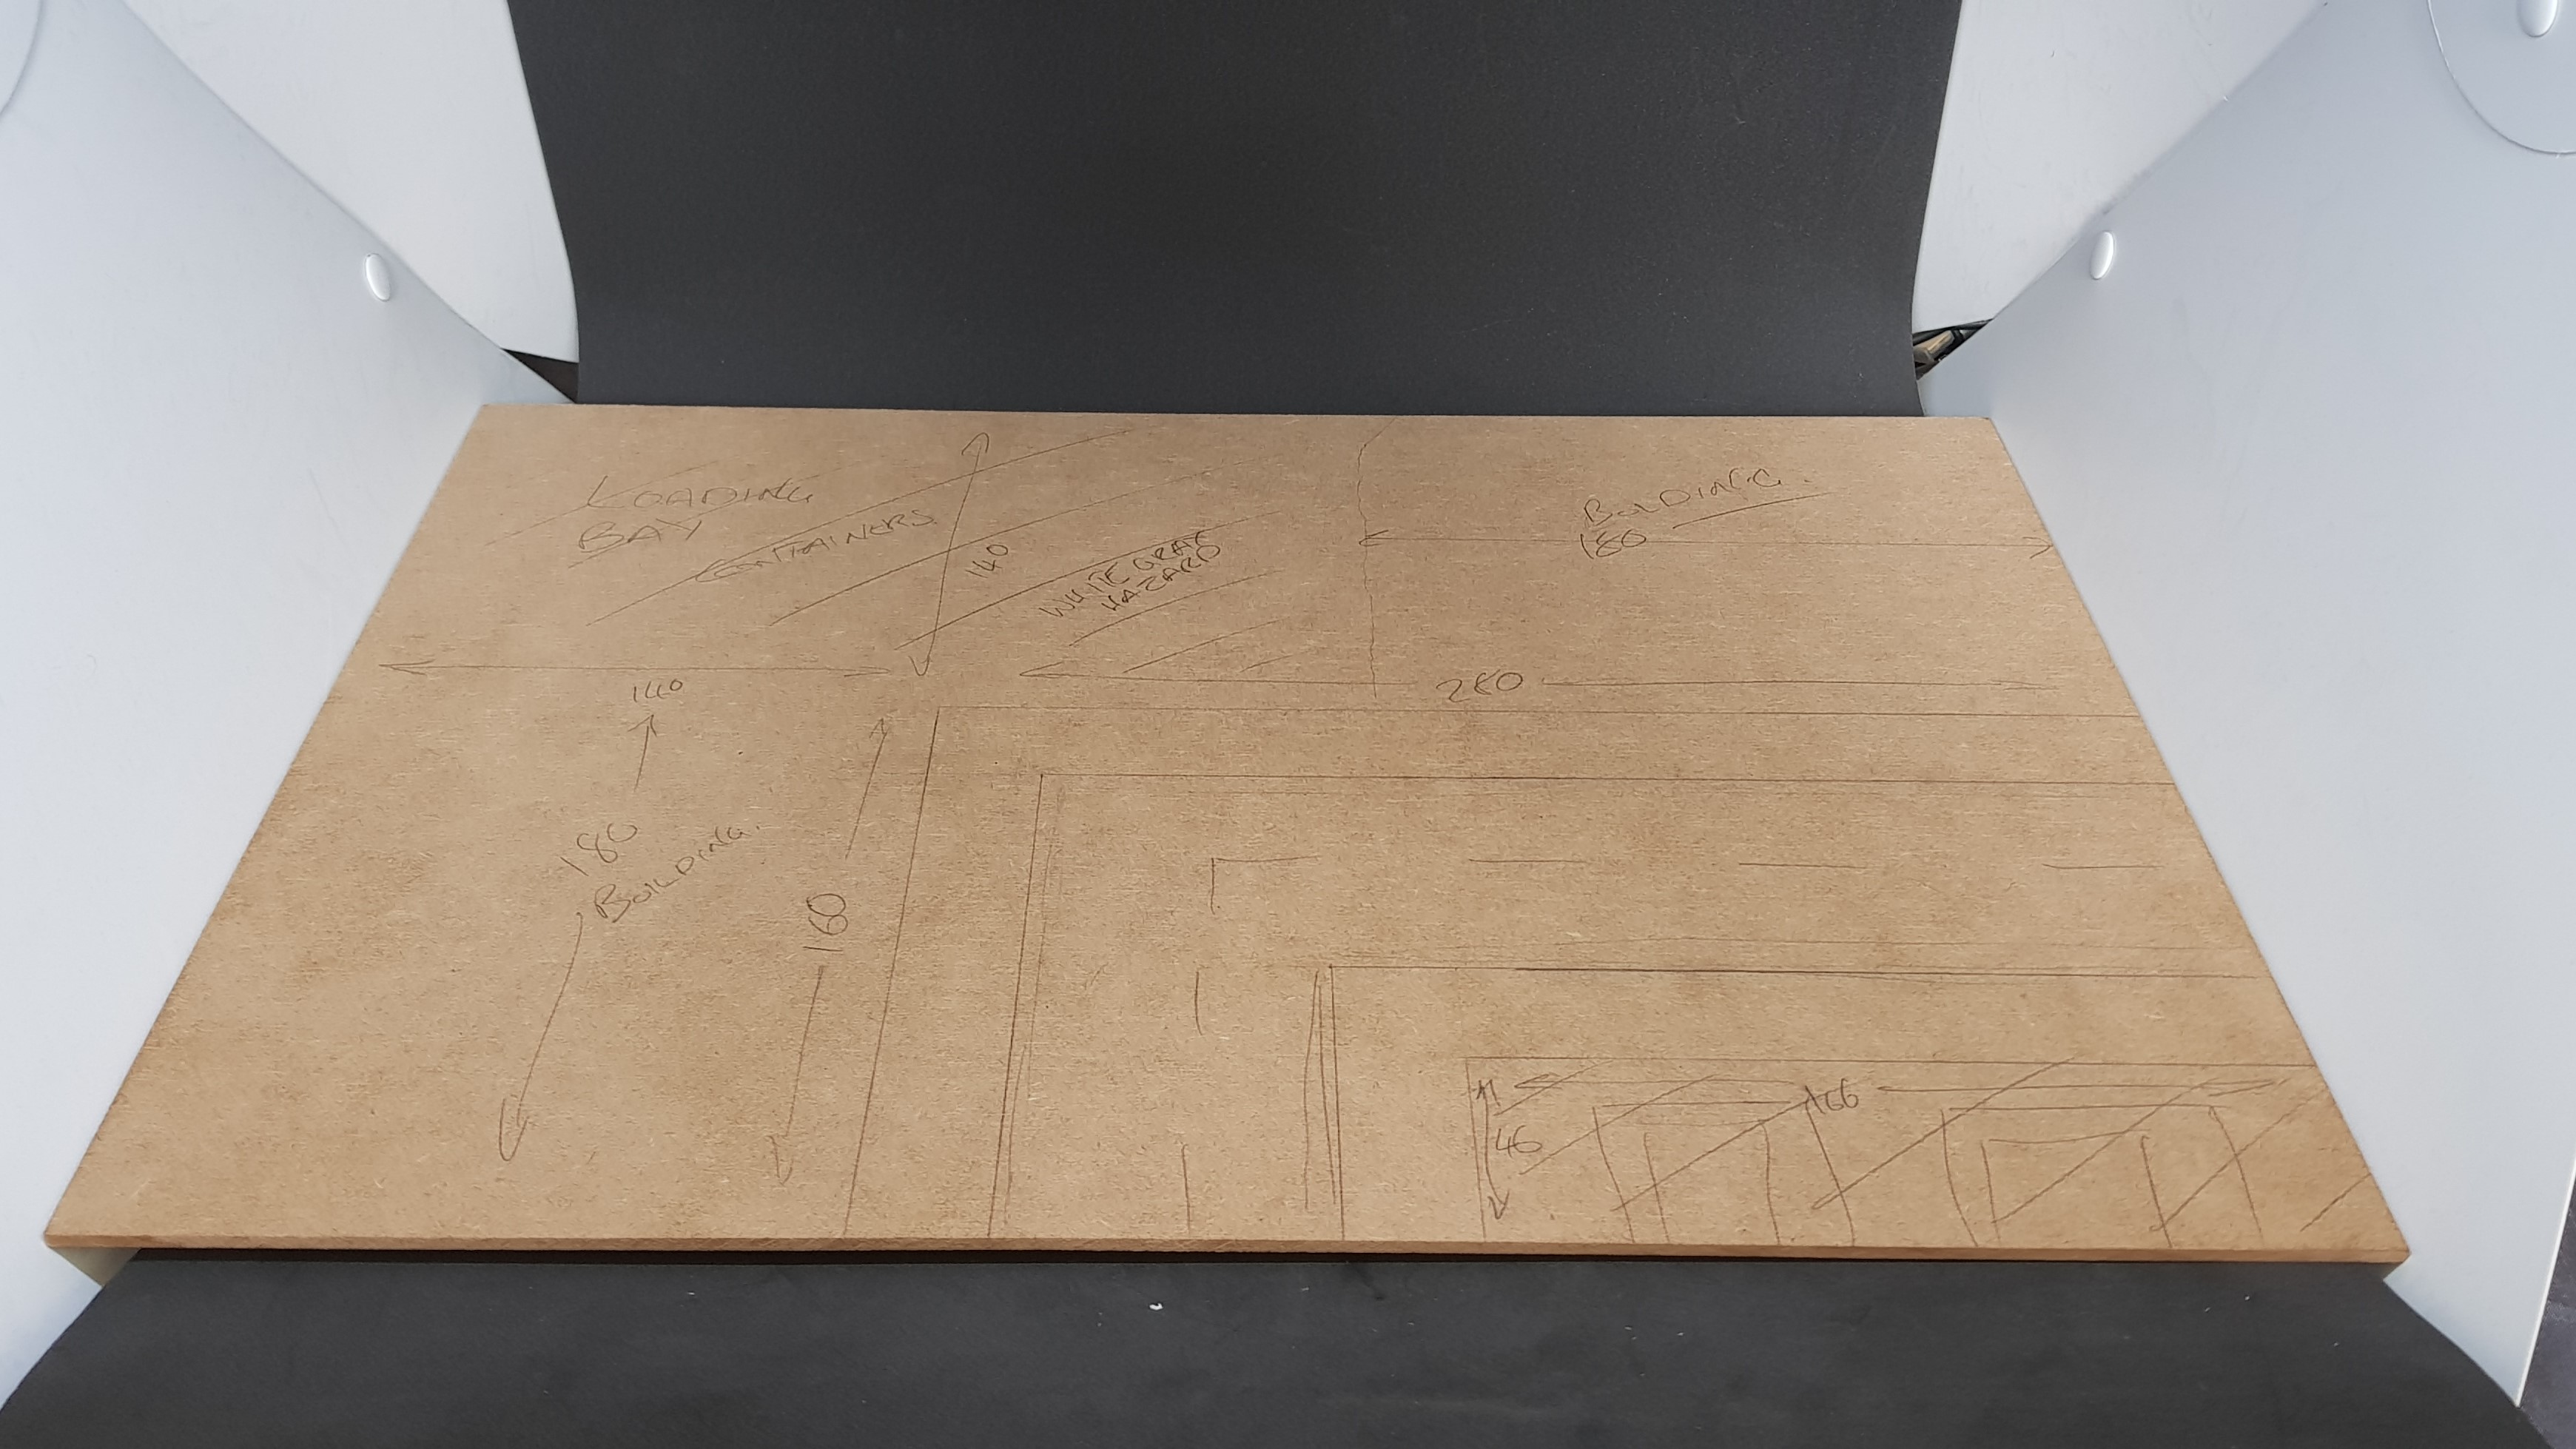 The plan and everything drawn on and in the booth.
 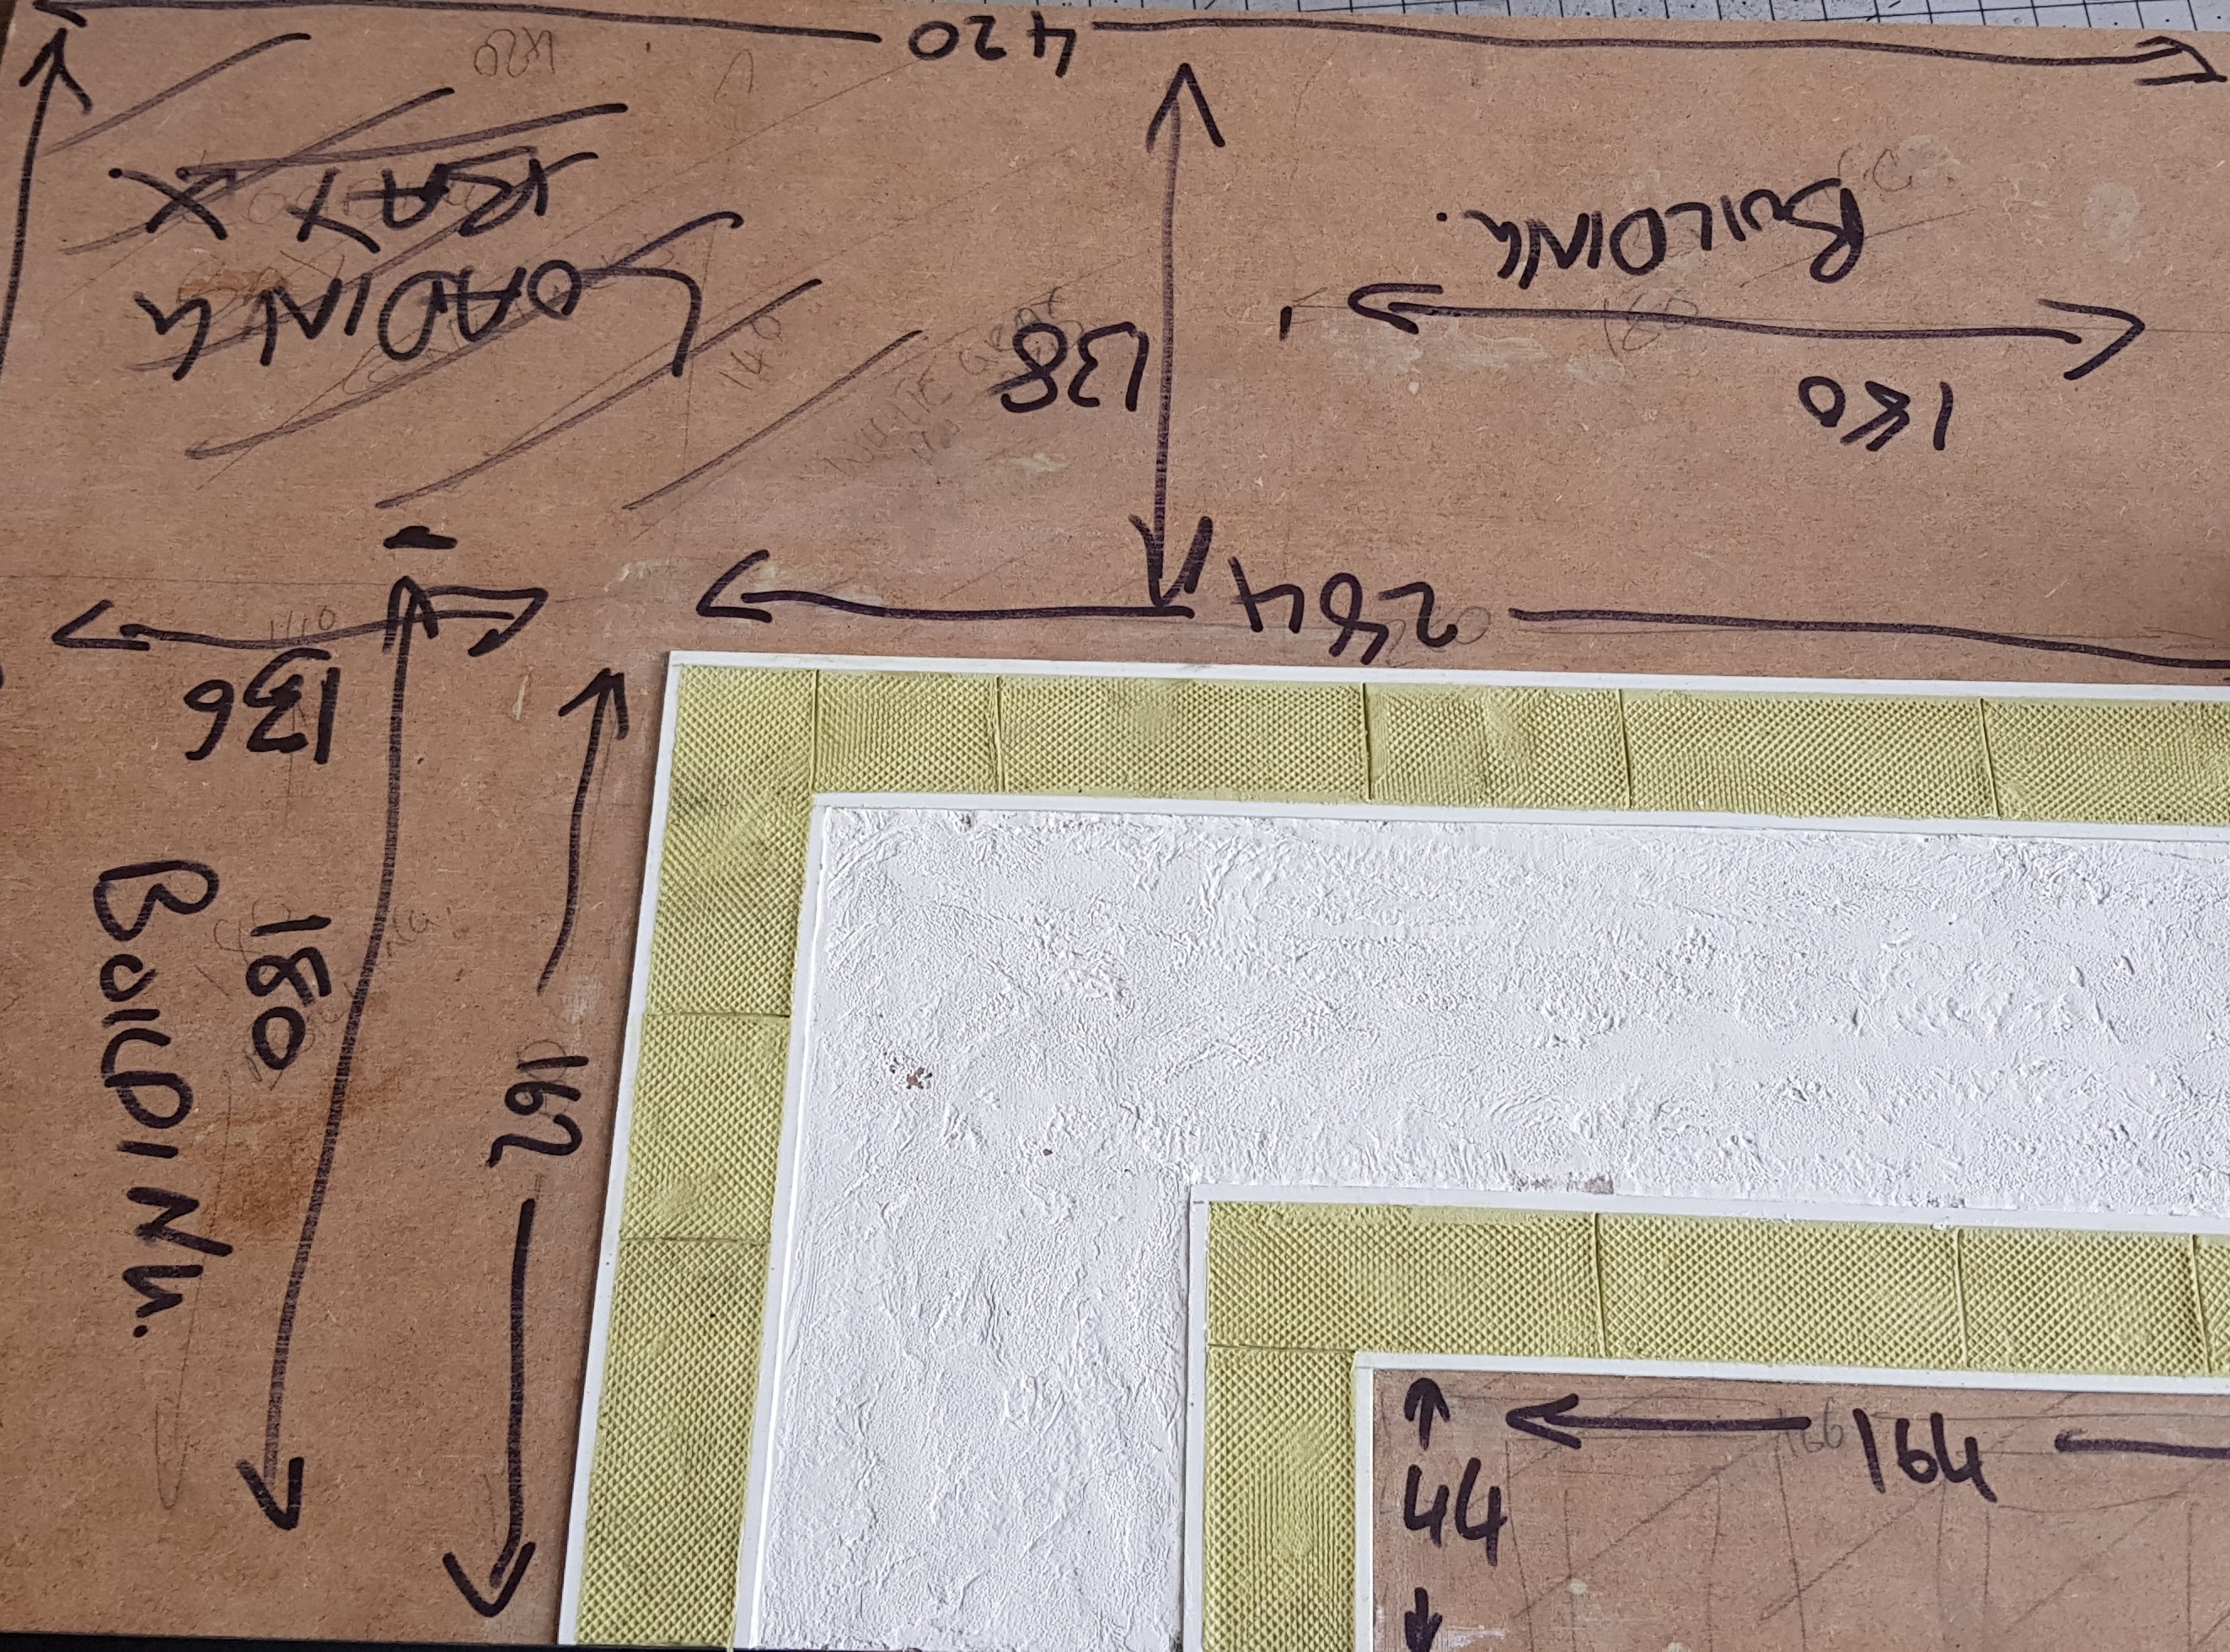 I pushed on and done the kerbs first out of strips of plastic cut. I then filled the joins. I then filled in the pavement area with Milliput let it half dry then went over with the bottom of a tool to put a texture on it and then put in pavement spacers randomly as this is how it is done outside my house. After this I put in filler into the road and texturized this with a cloth and made some parts crack.
 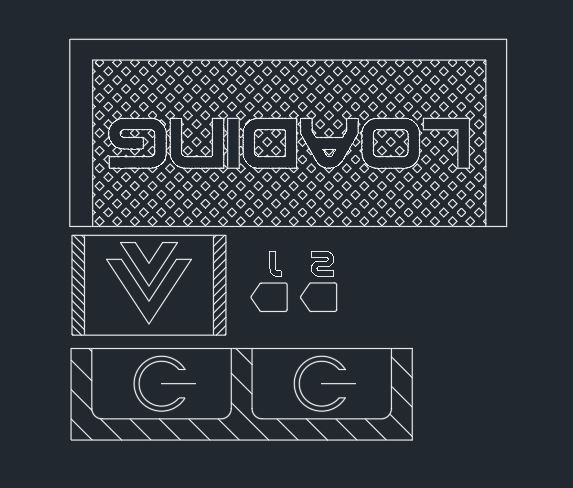 I went ahead and drew this and laser cut some card on hindsight I should have made the hatch on the back loading bay larger.
 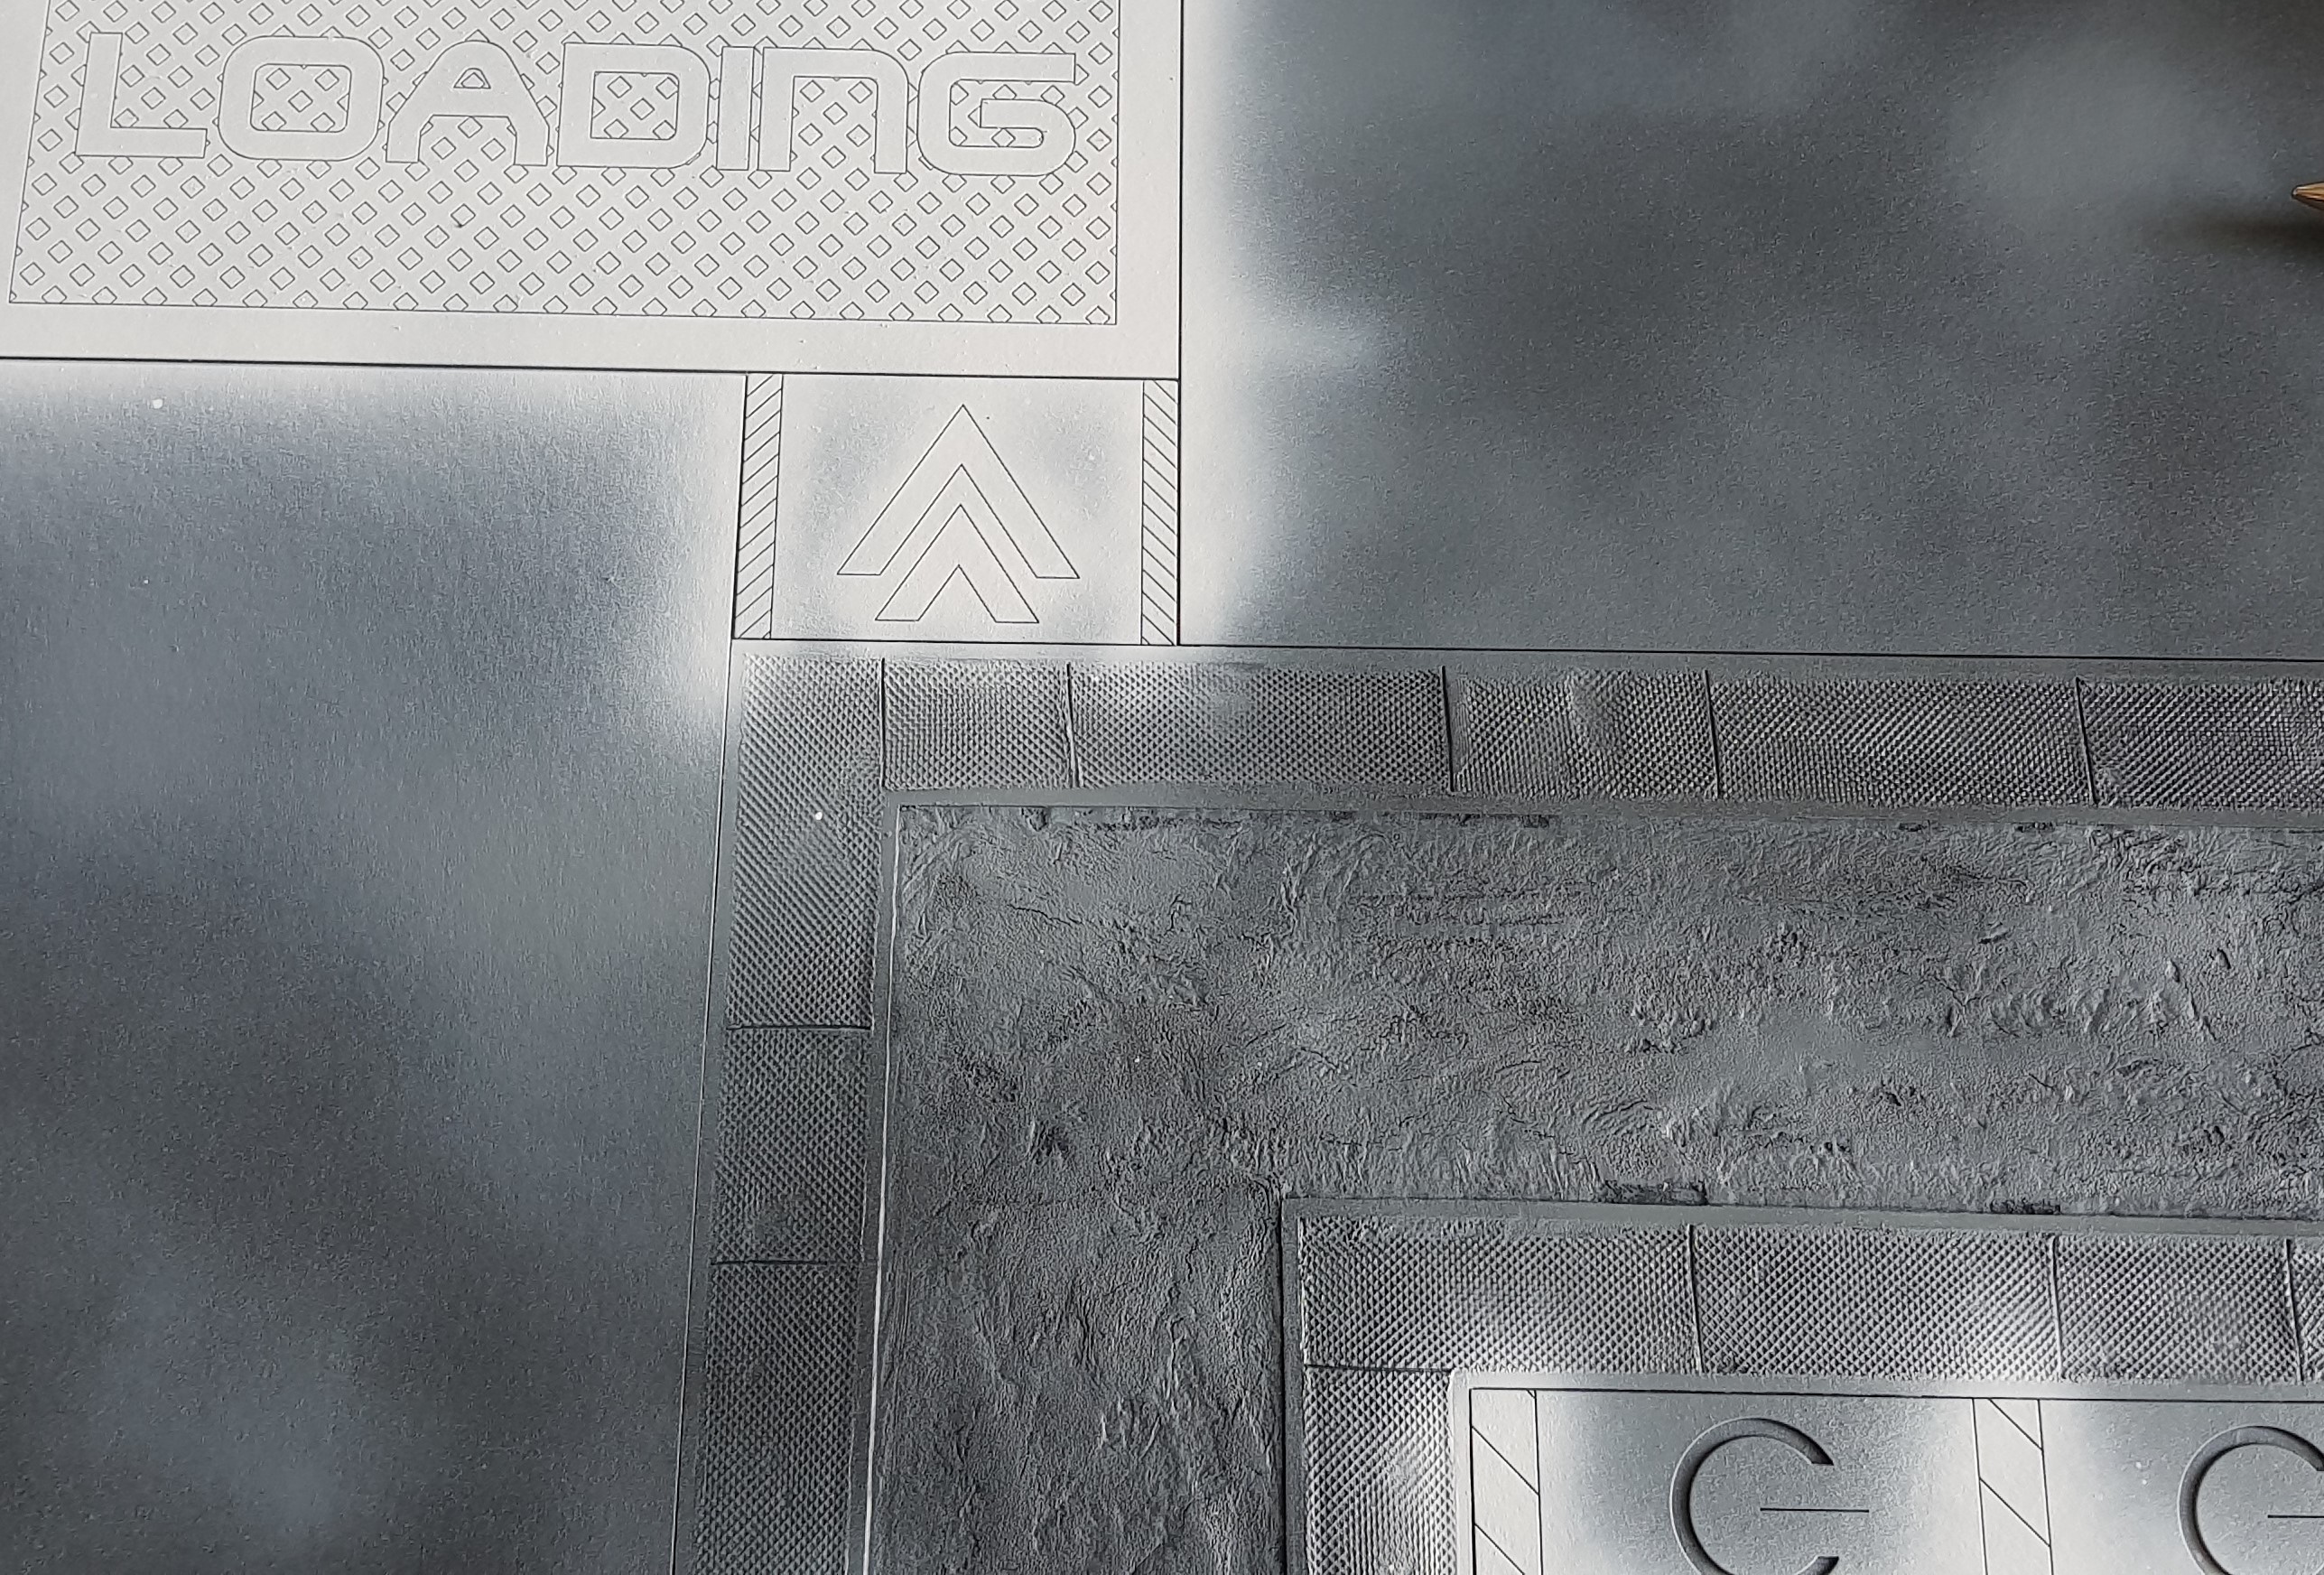 I primed everything in matt black and then went over in grey lightly. After this I used white to ill out all the sections that were to be white / light.
  After spraying a final colour I masked off a piece, then sprayed the next colour then masked this off and sprayed the next layer. This was a little more time consuming than I wished.
 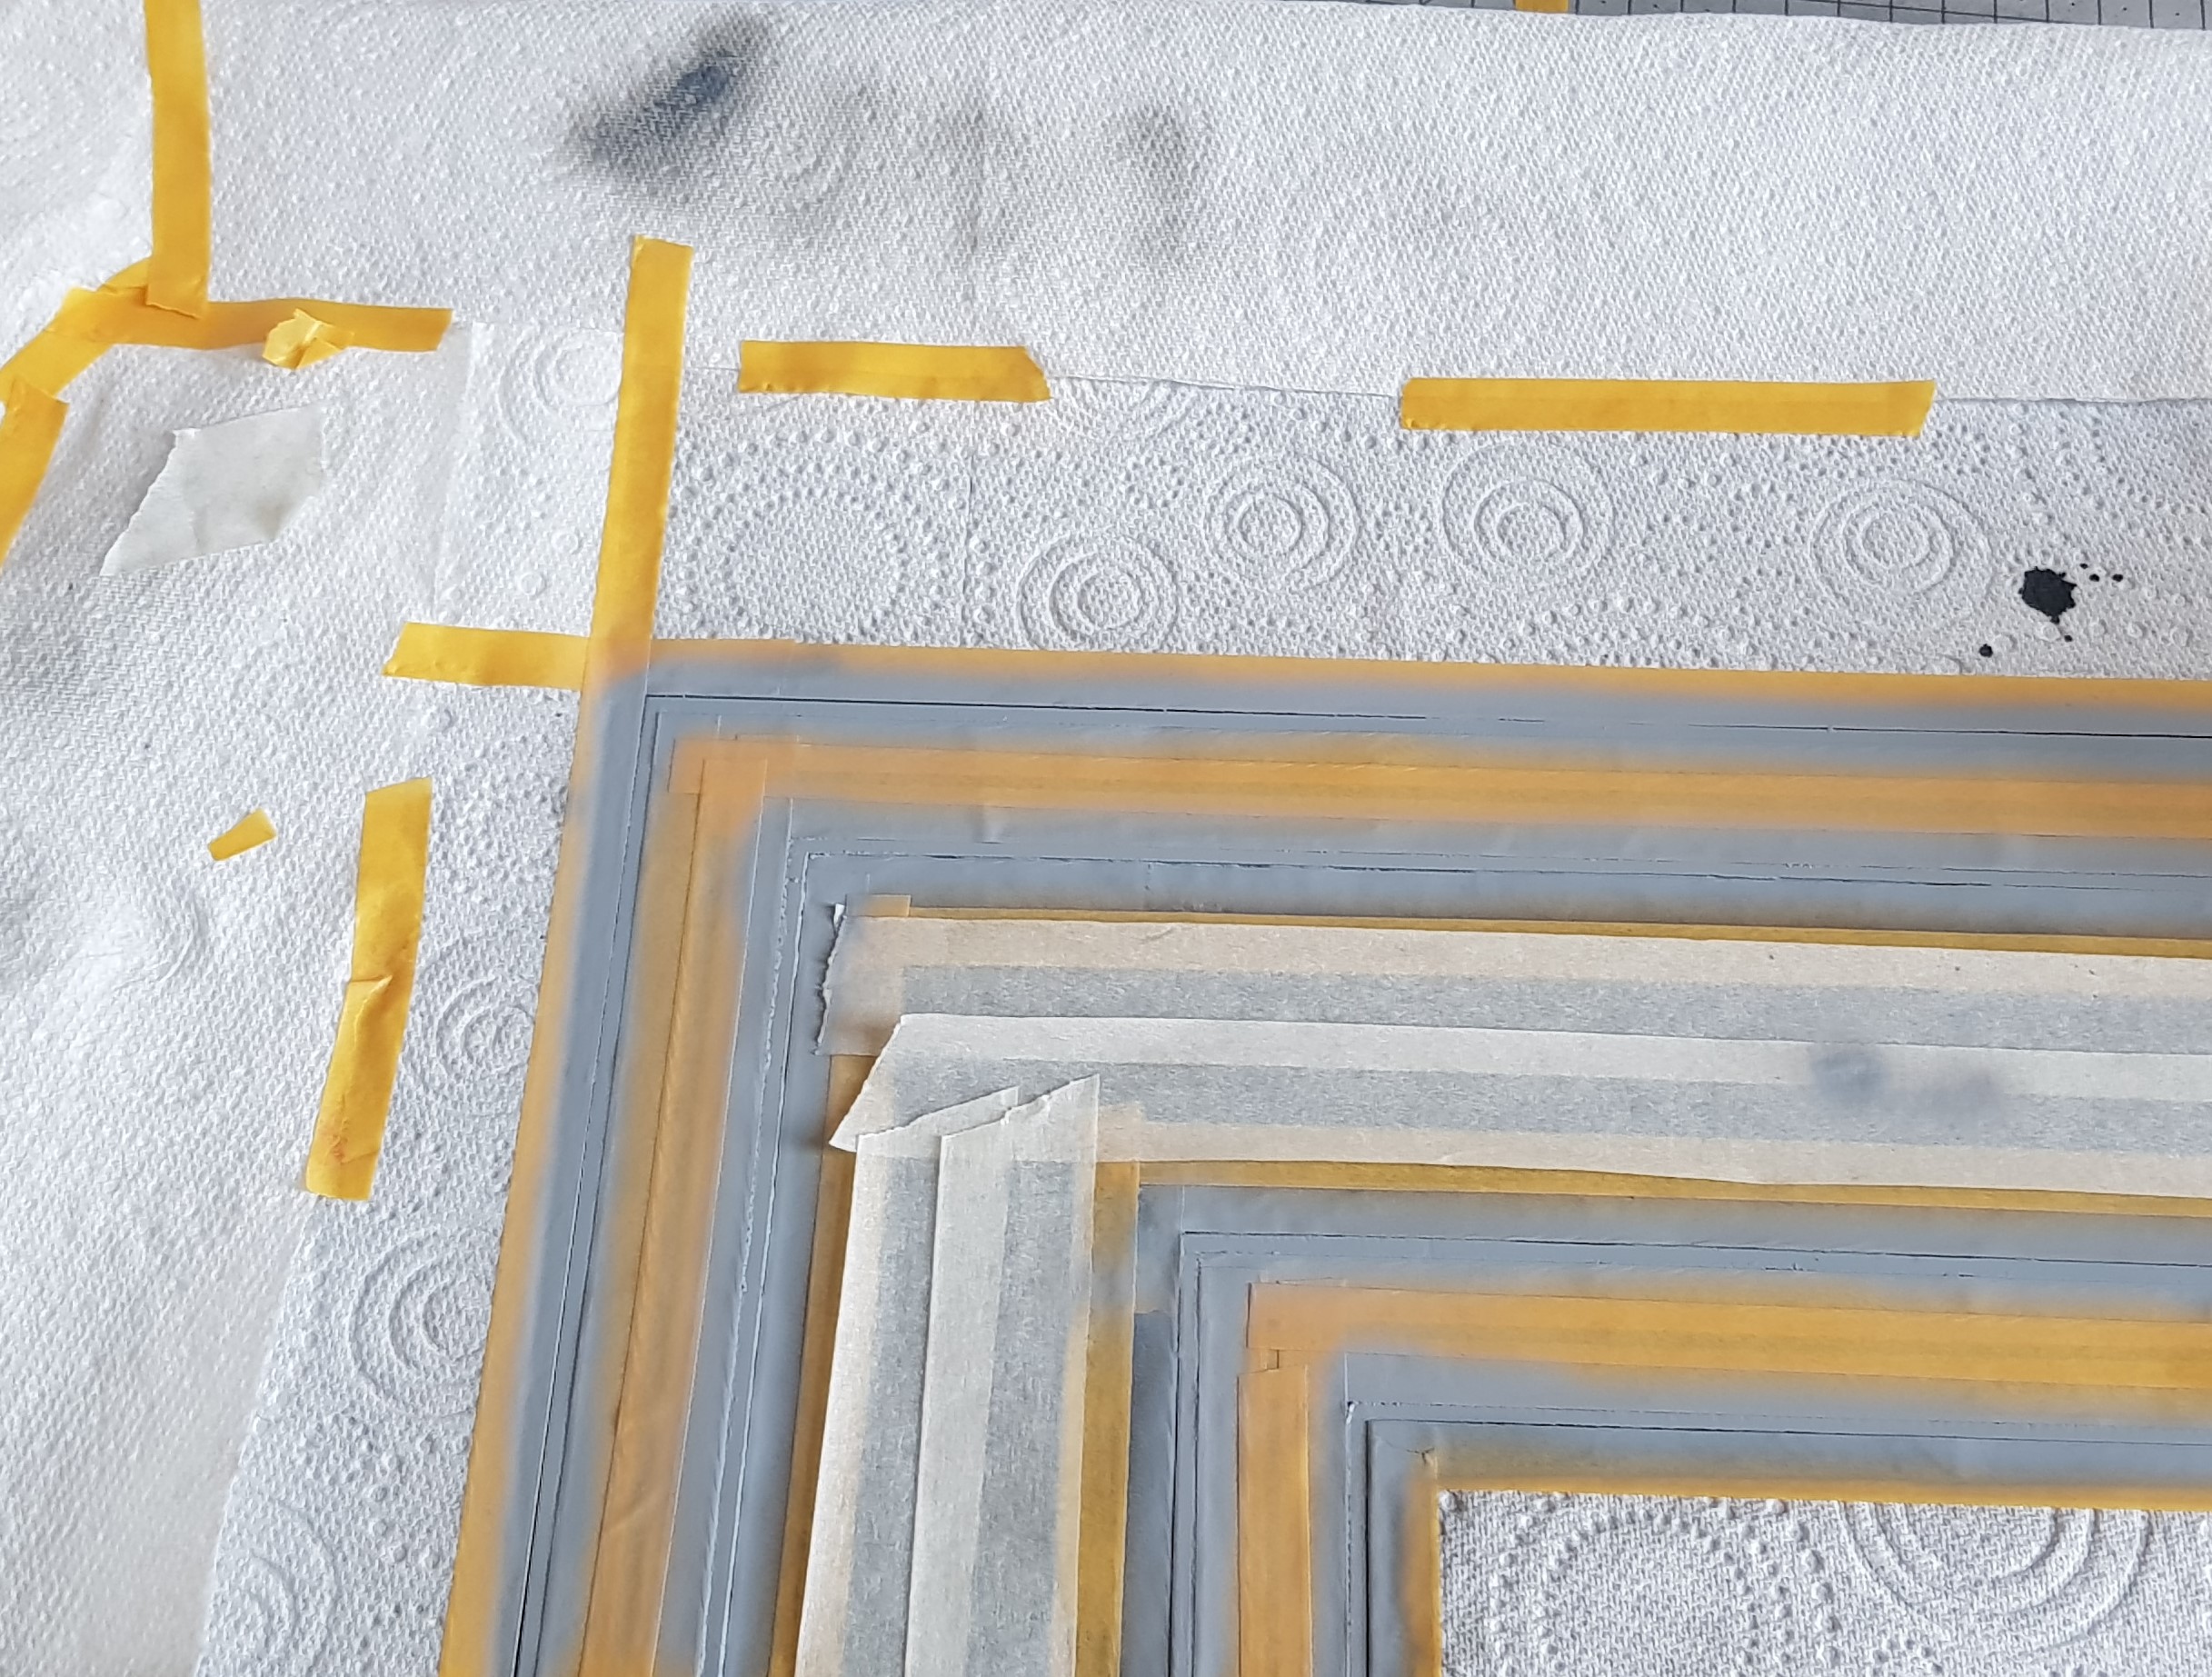 This process continued until I had a nice present waiting to be unwrapped.
 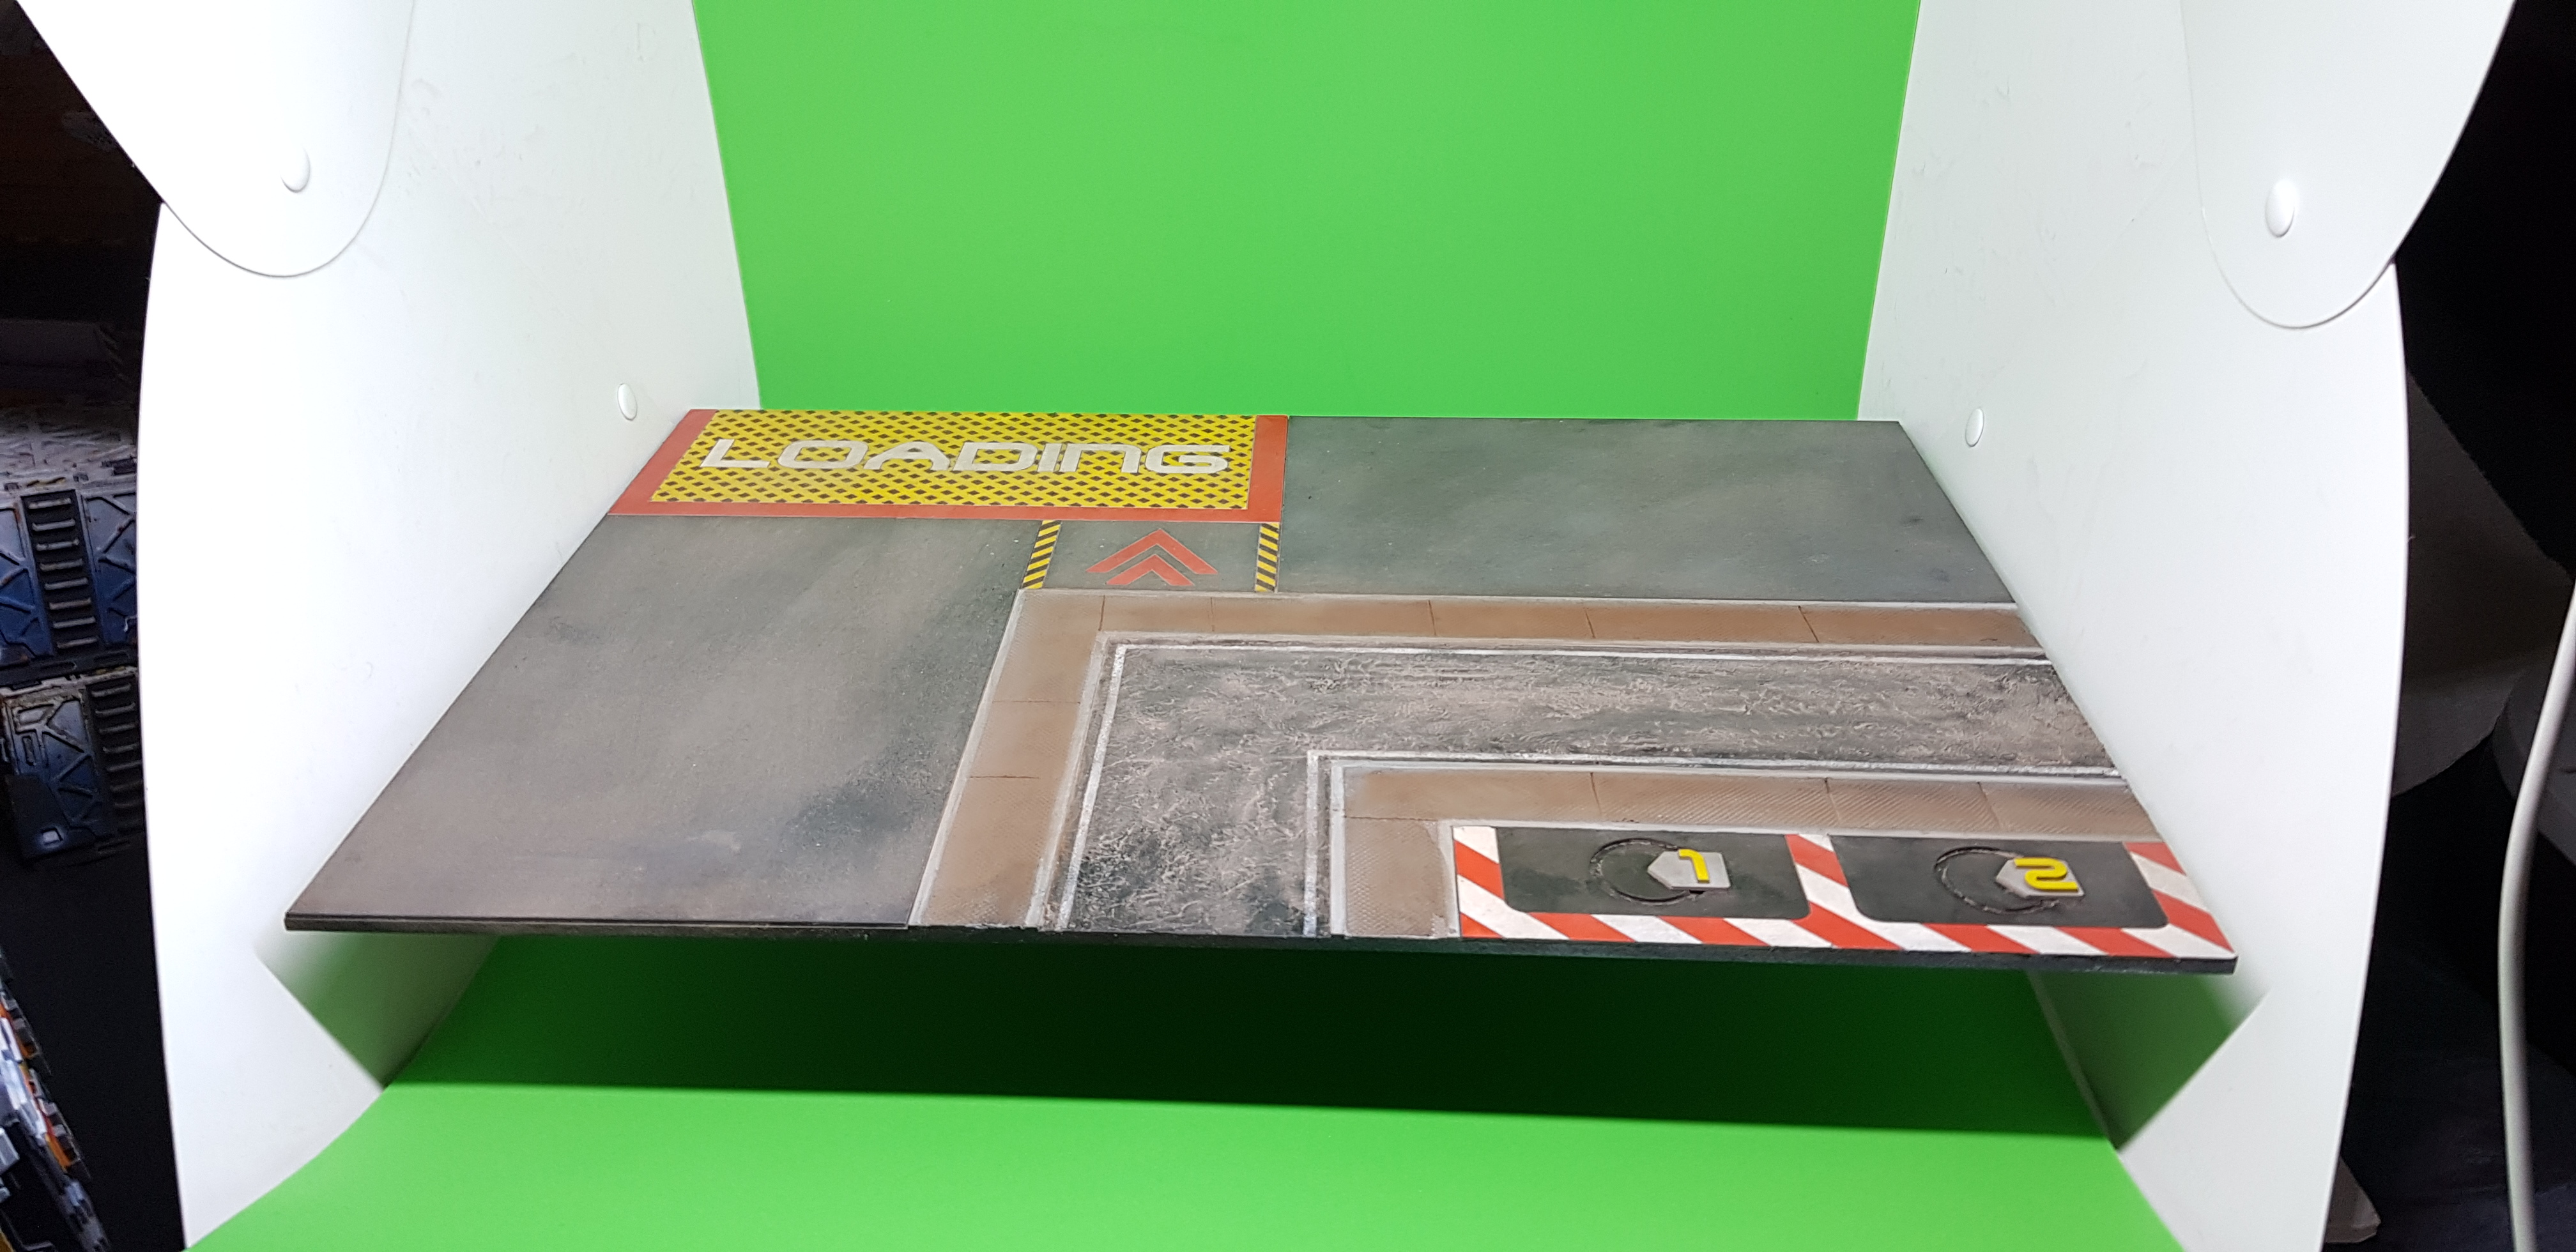 After this was unmasked I added some weathering powders to match the bases and my scenery this looks very much over the top here but in the pictures it looks ok. Also the green screen didnt work out. The green relects on the white sceanery and it looks very off in a picure when you cut out the green.
 After all that It was done. Sadly this took all day I wish it had been quicker (a case of should have, would have, could have)
I can however take photo’s that show everything the best it can be This shot is a little side but it gets this idea over.
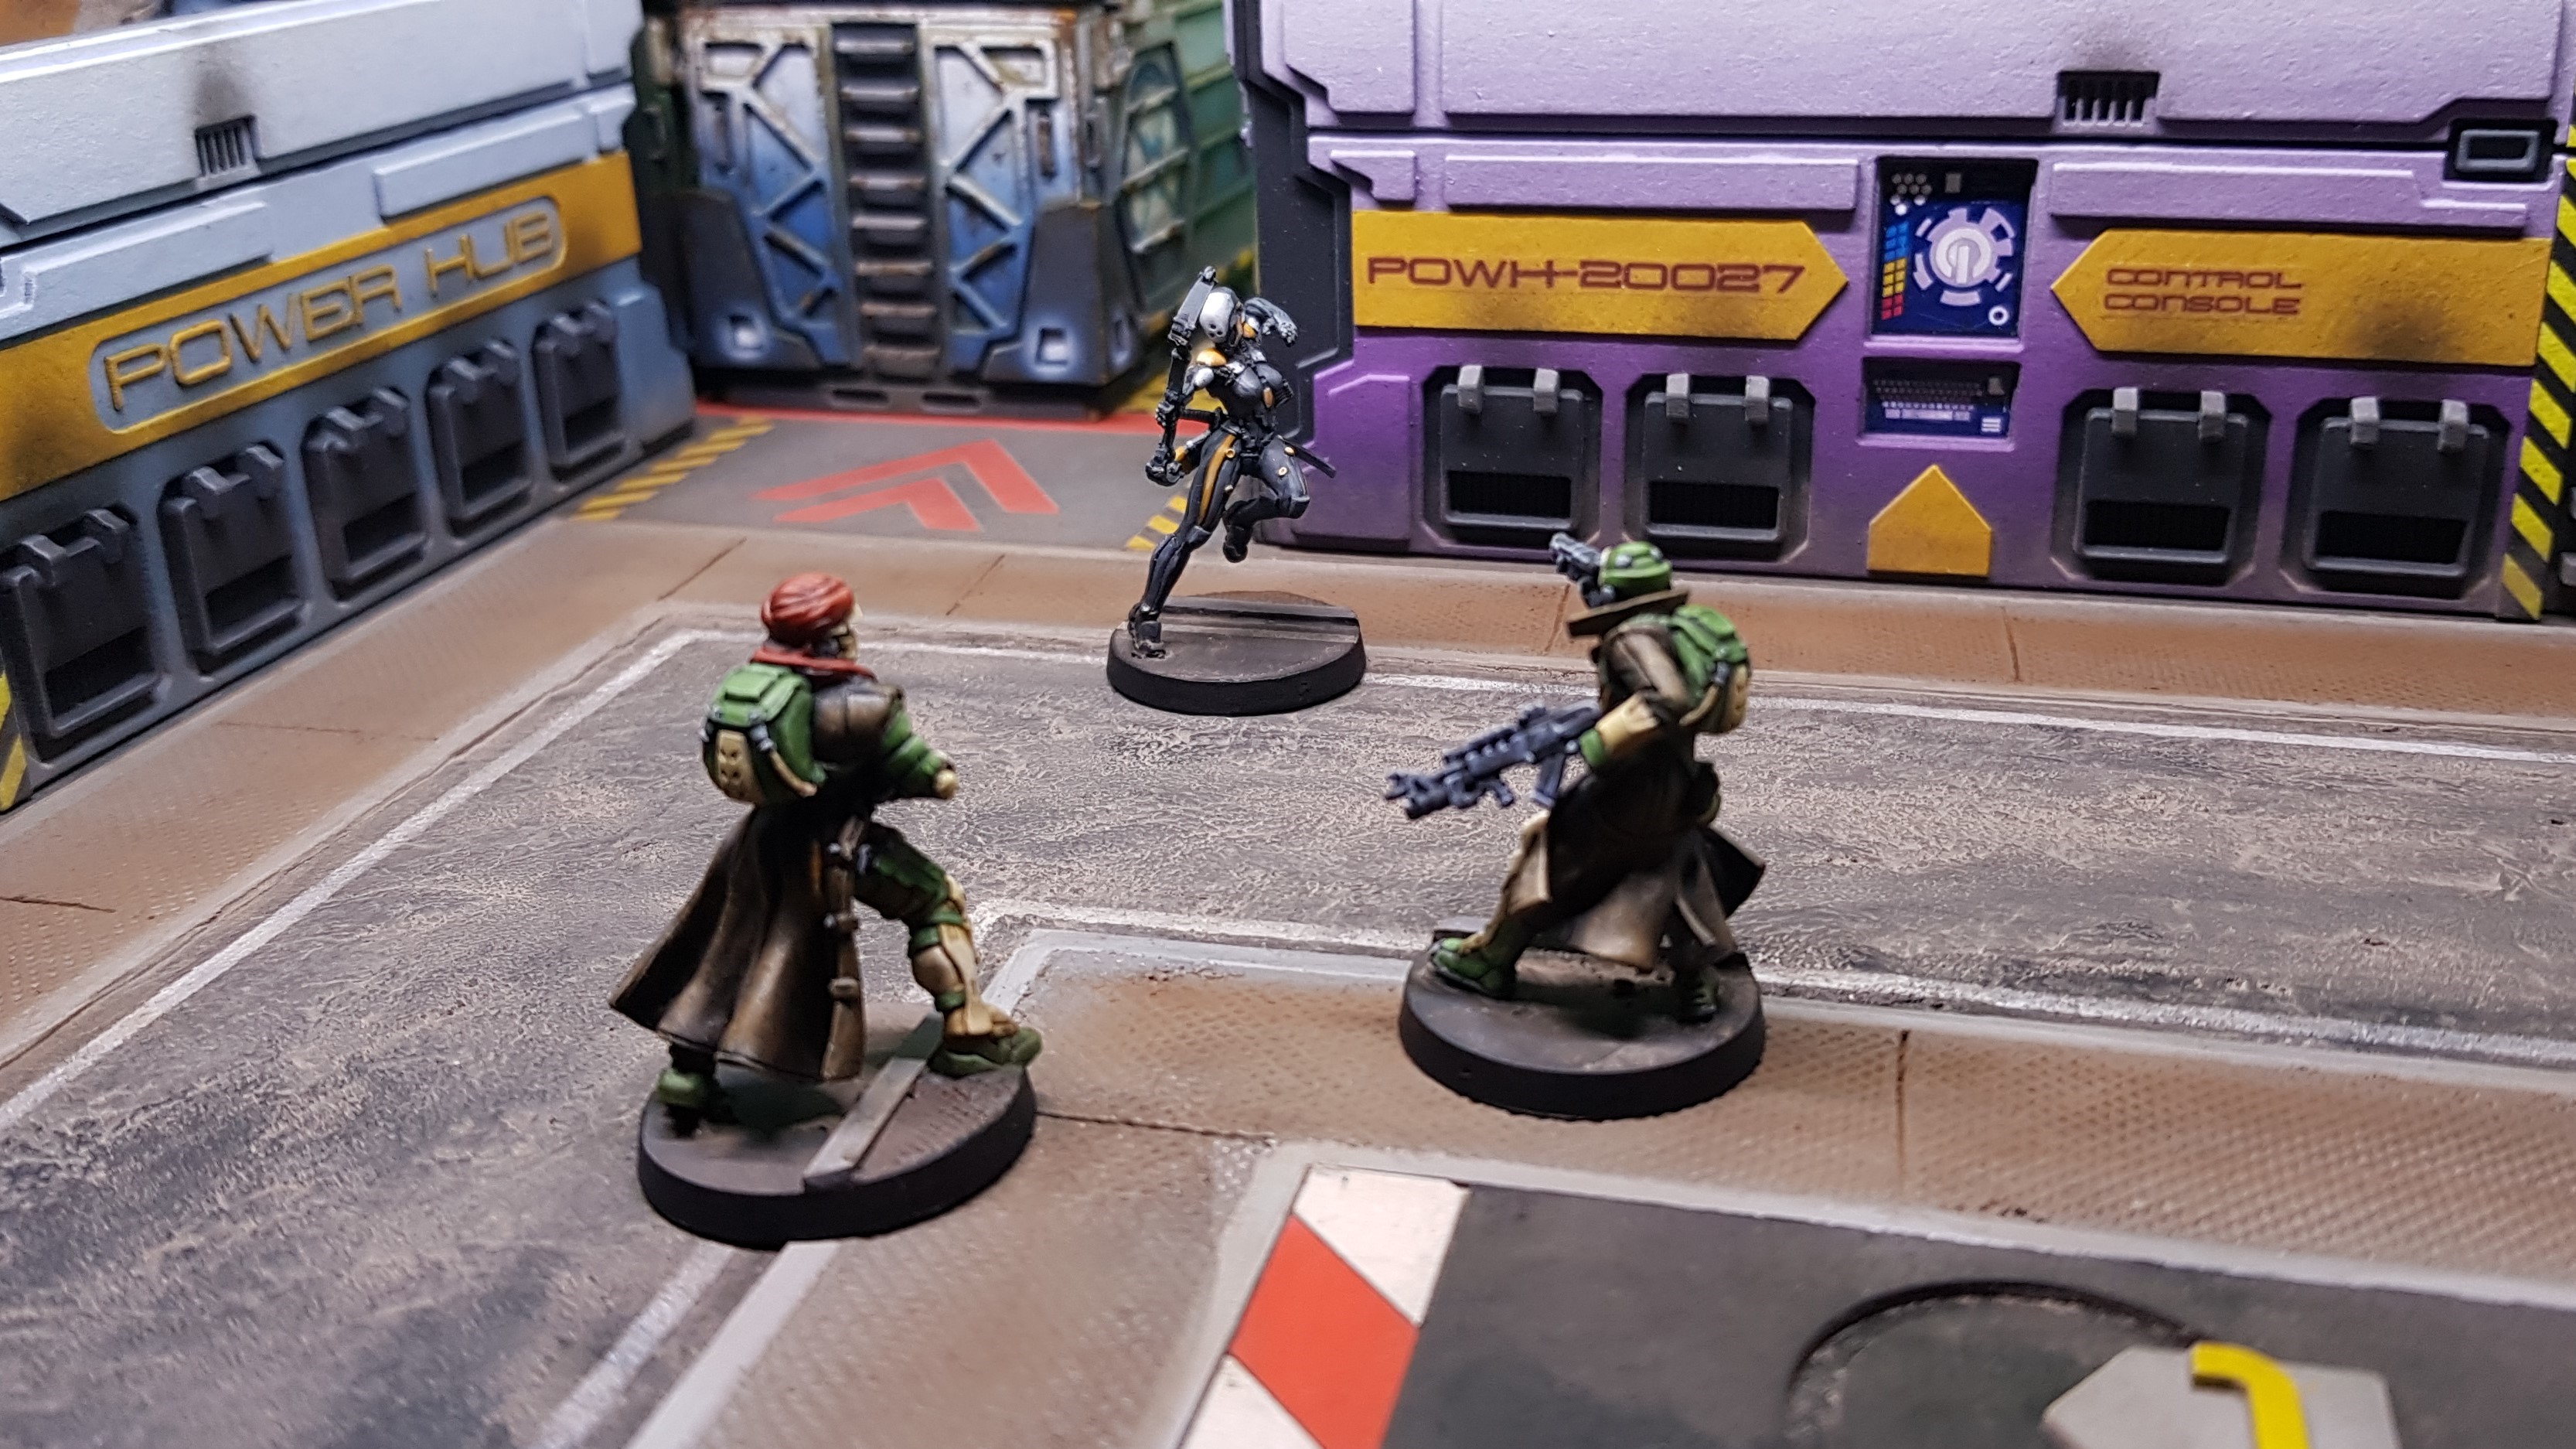 Khawarij is caught unawares by an Ninja assasin on his way to restart the power hub. Luckily his boadyguard Zhaydan is no slouch.
That’s an end to this very short part of the project. I think I may just go onto something of my own creation next before continuing with the management module. this is drawn and below there is a sneak peek. I am in the process of rediscovering how I build it and making it flat to laser cut.
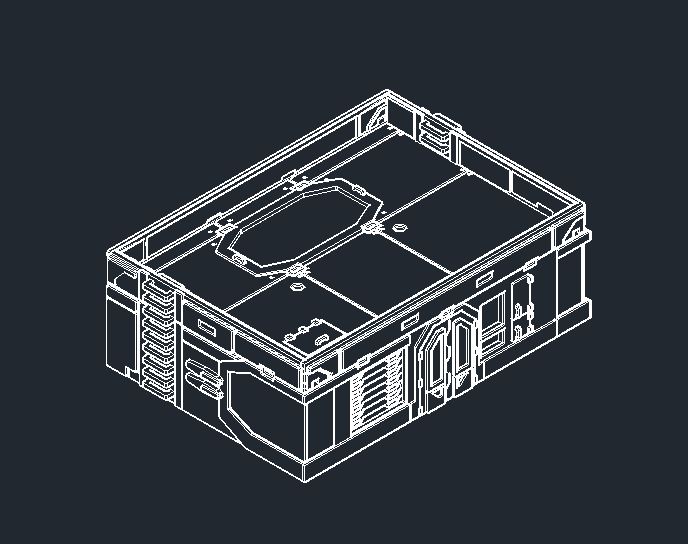 Sneak Peek of the Main Management Module
Designing and building Vending machines
What’s more Anime / Japanese than vending machines you can get anything in a vending machine in Japan.
I decided to start to try and come up with a cool design for this. I have seen some of the things available from the companies online and this is great chance to try and cut acrylic on my laser which I need to do on my next Ice Storm building (have not done this before).
I wanted this to be as simple as I could but have enough detail to have fun. In fact I wanted this to be a quick fun project to get a few more under my belt before I start something longer and more complex.
If you have read all of this so far, for one congratulations on reading, looking and watching all of this massive project log. for two this probably is not going to be so simple.
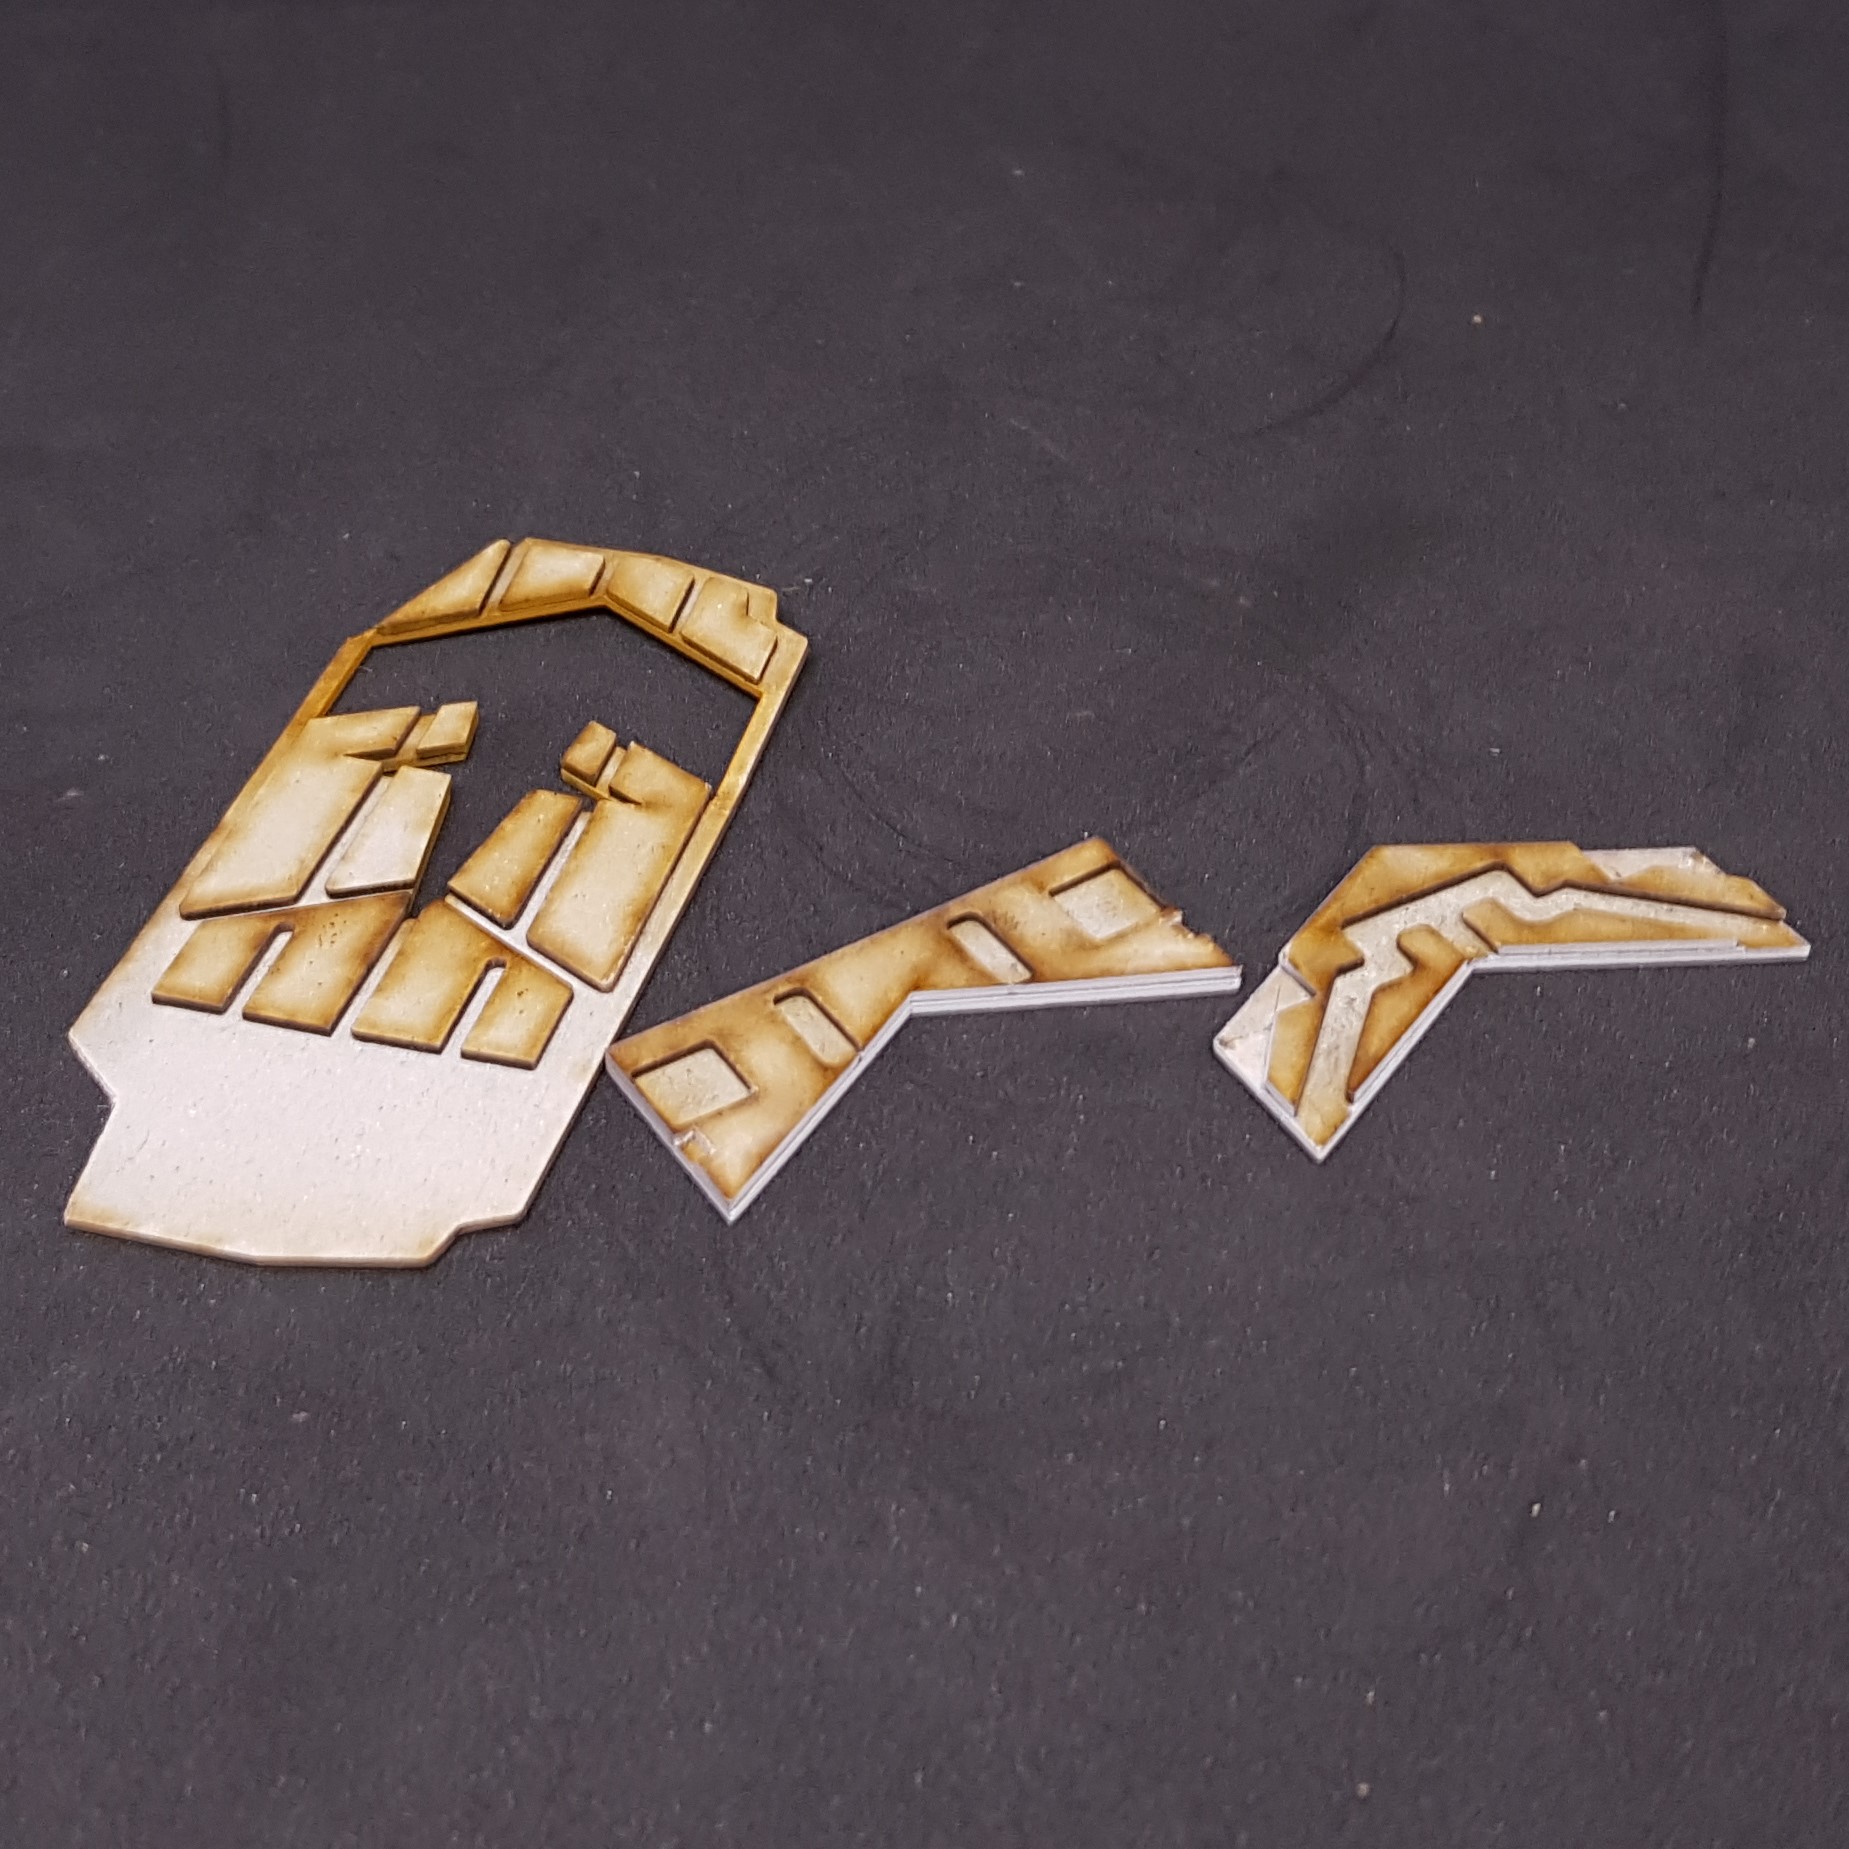
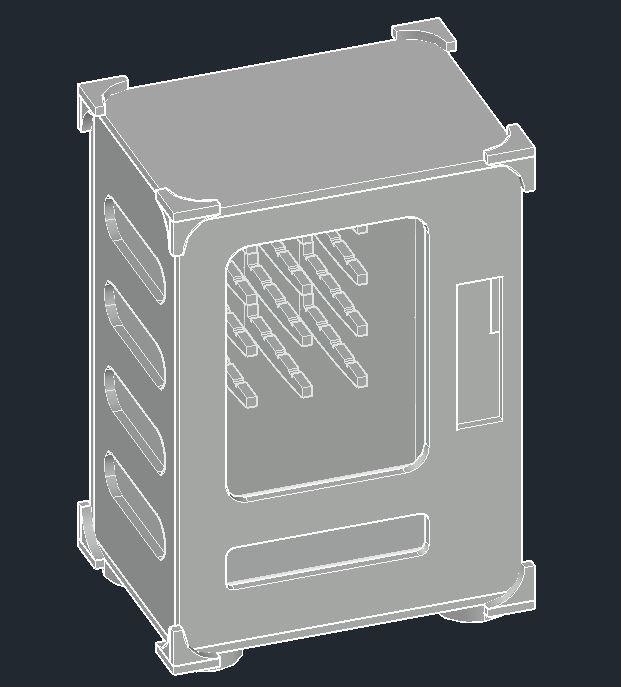 I designed this in an evening though this is the alpha i decided to remove the 3 pieces on each corner to simplify this.
 Here is the flats that I made showing all the components. I decided to make 4 due to my A4 material constraints I did make too many of the back pieces as these sometimes distort the way i cut these.
 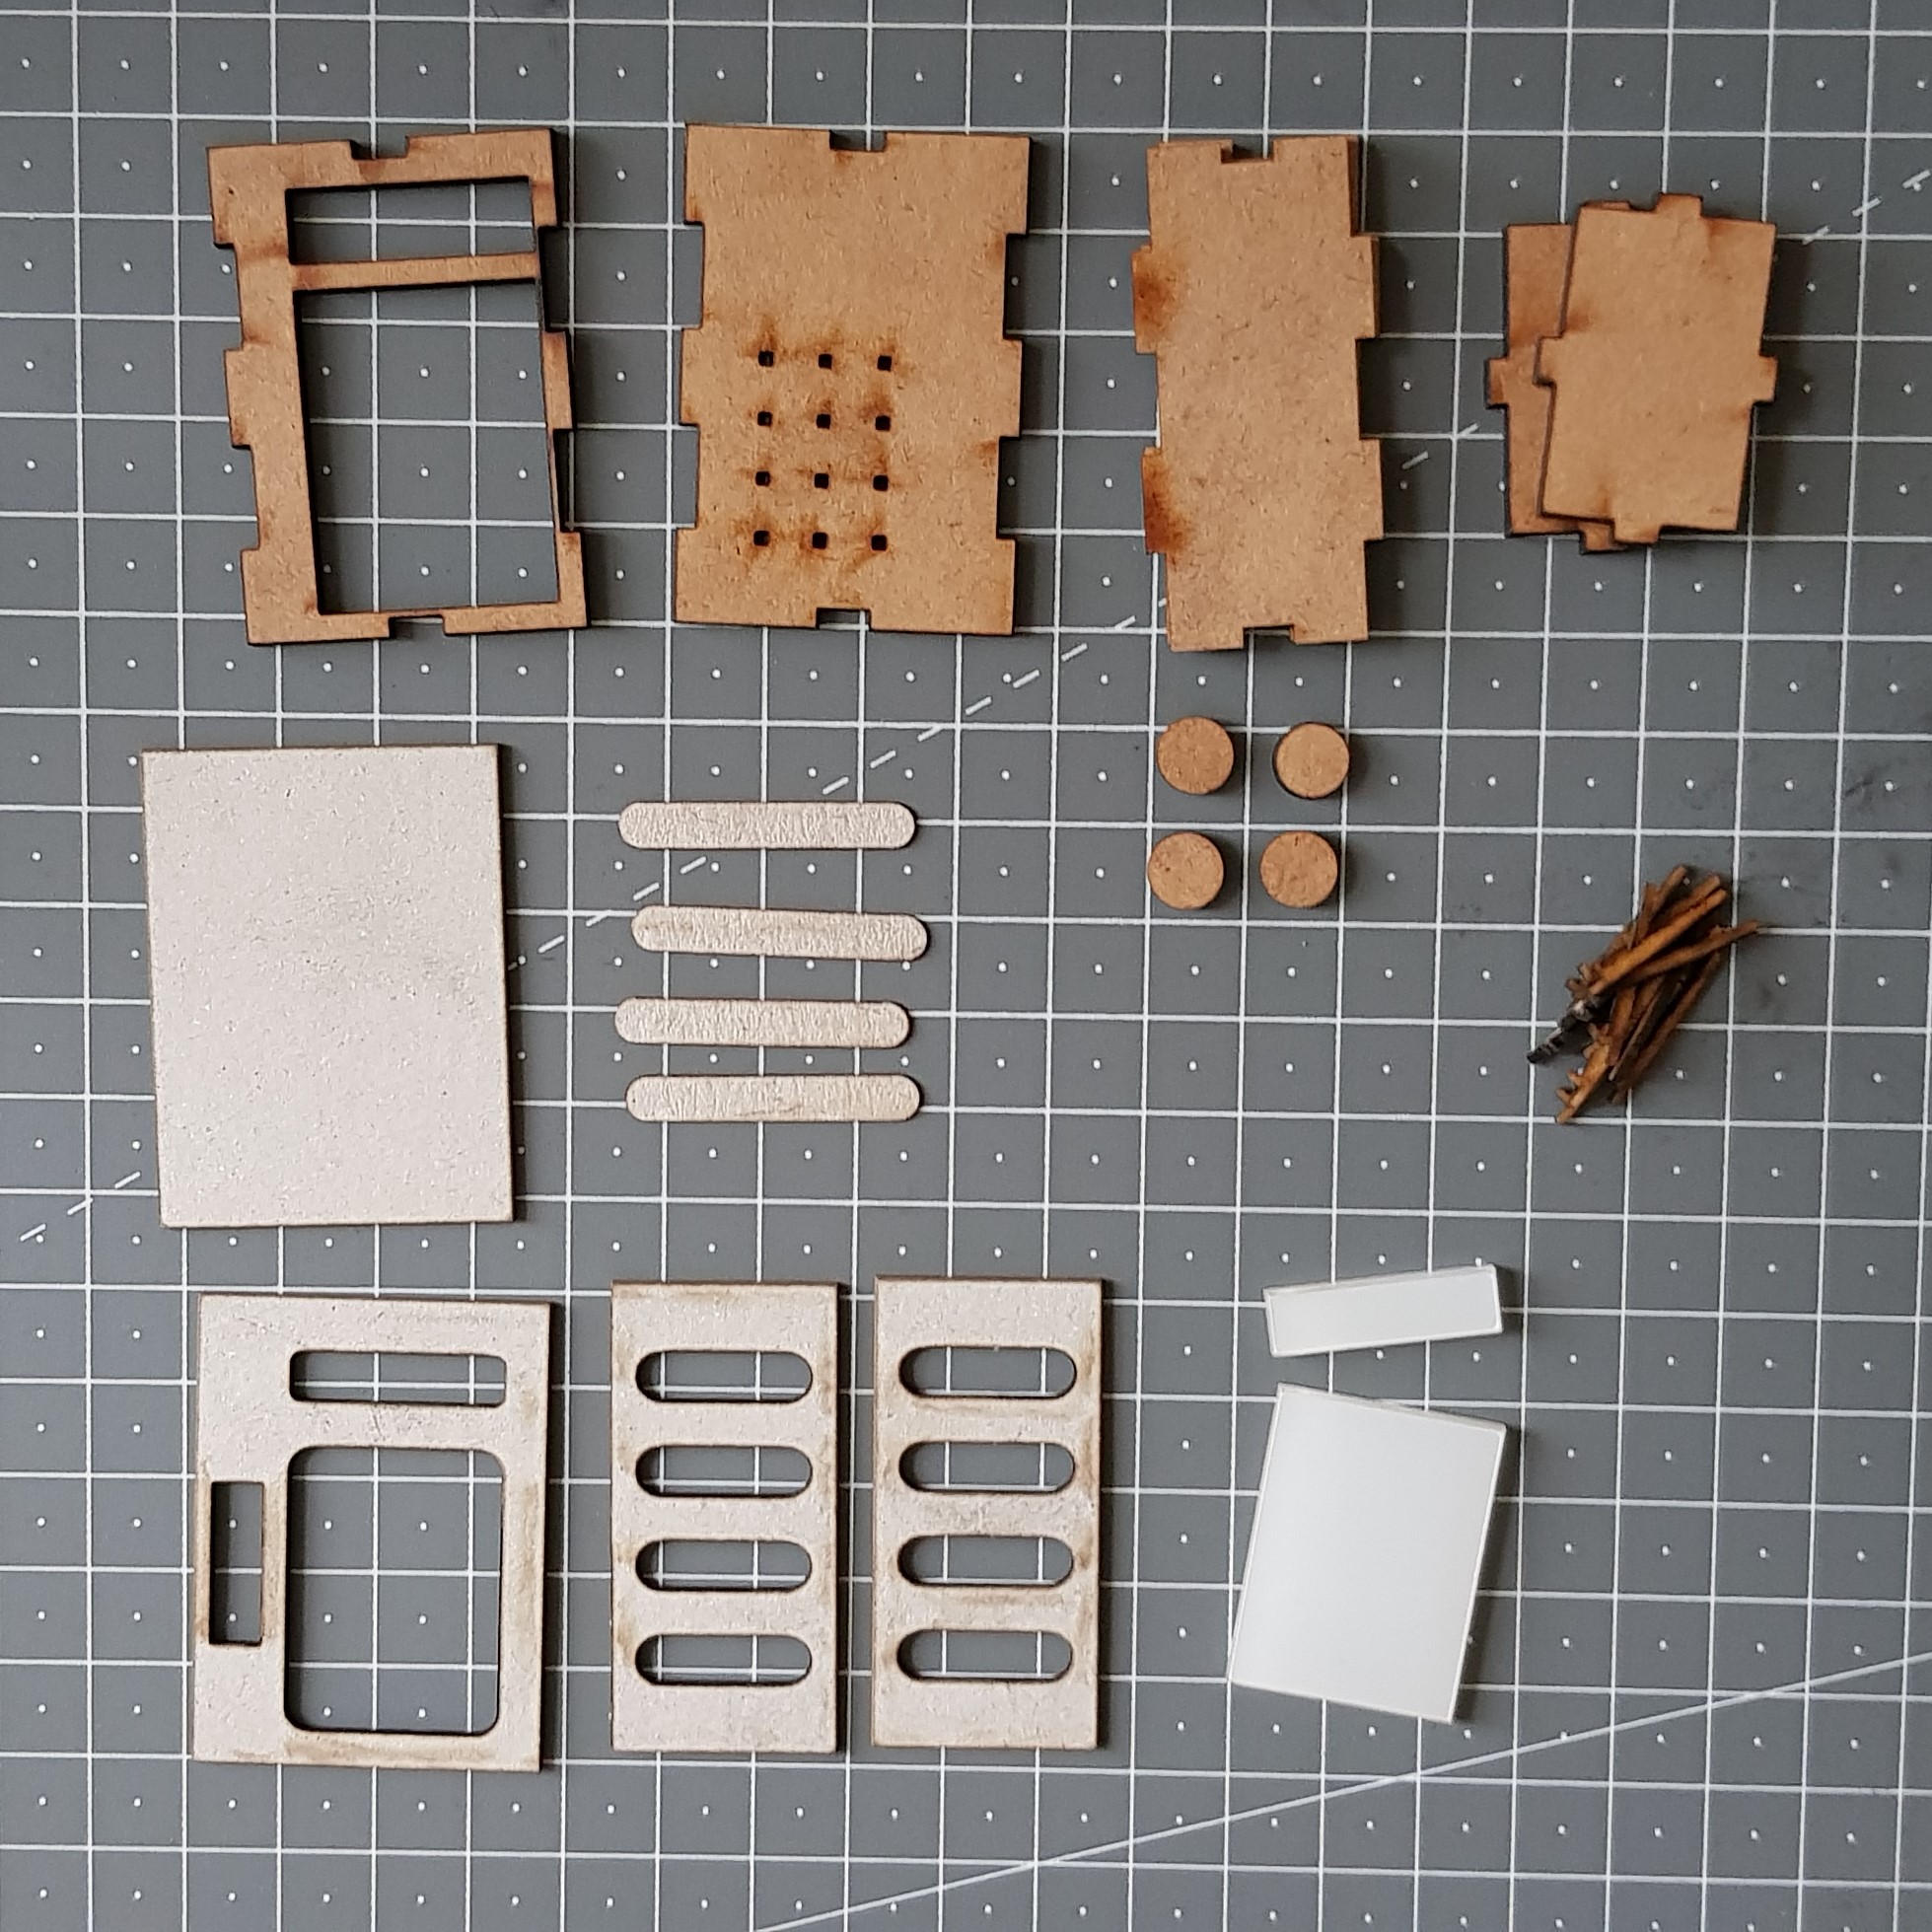 All the components cut out and ready for assembly.
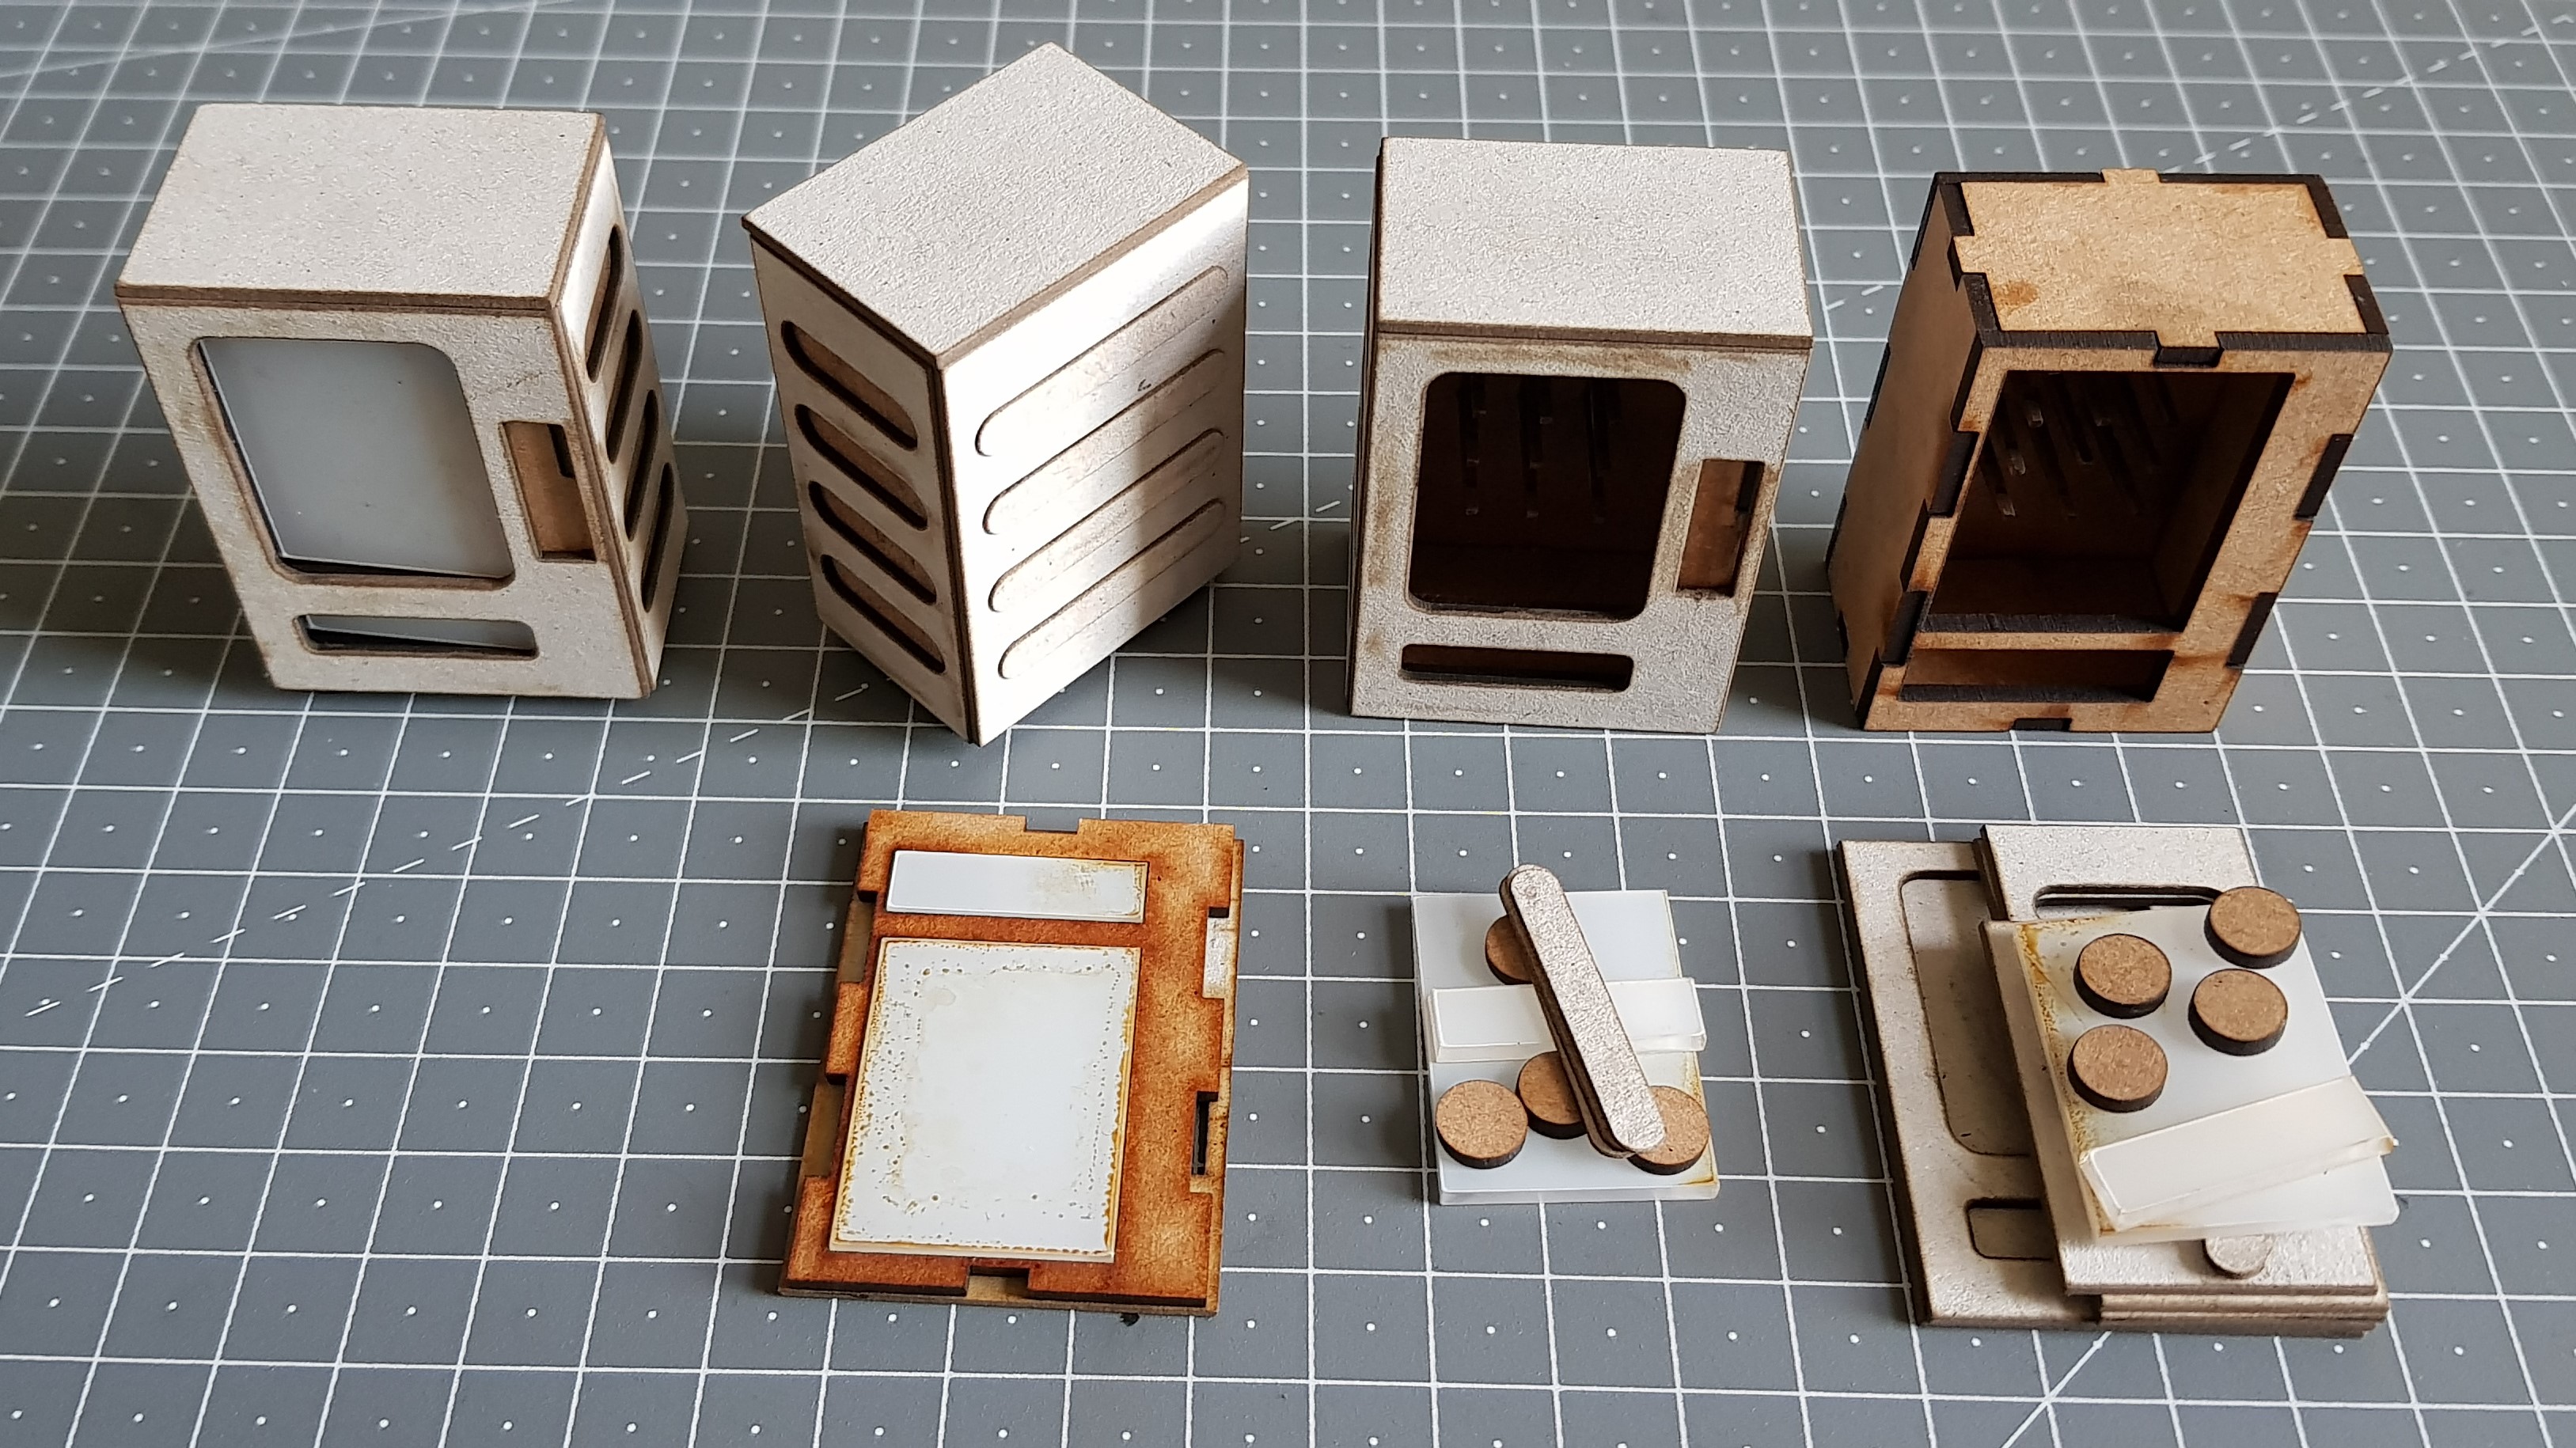 This is showing the build process. I start from making the box and putting the prduct rails in theen add the sides and then the feet. I have not glued in the clear acylic or removed the protective film. to make painting easier.
At this stage I was set but knowing me, I don’t like to have these kicking around aimlessly. I do like it and I may do this for a few others but do a bit more of a paint job on them.
I needed something more, something more fantastical and imaginative. So I took to the internet for inspiration…
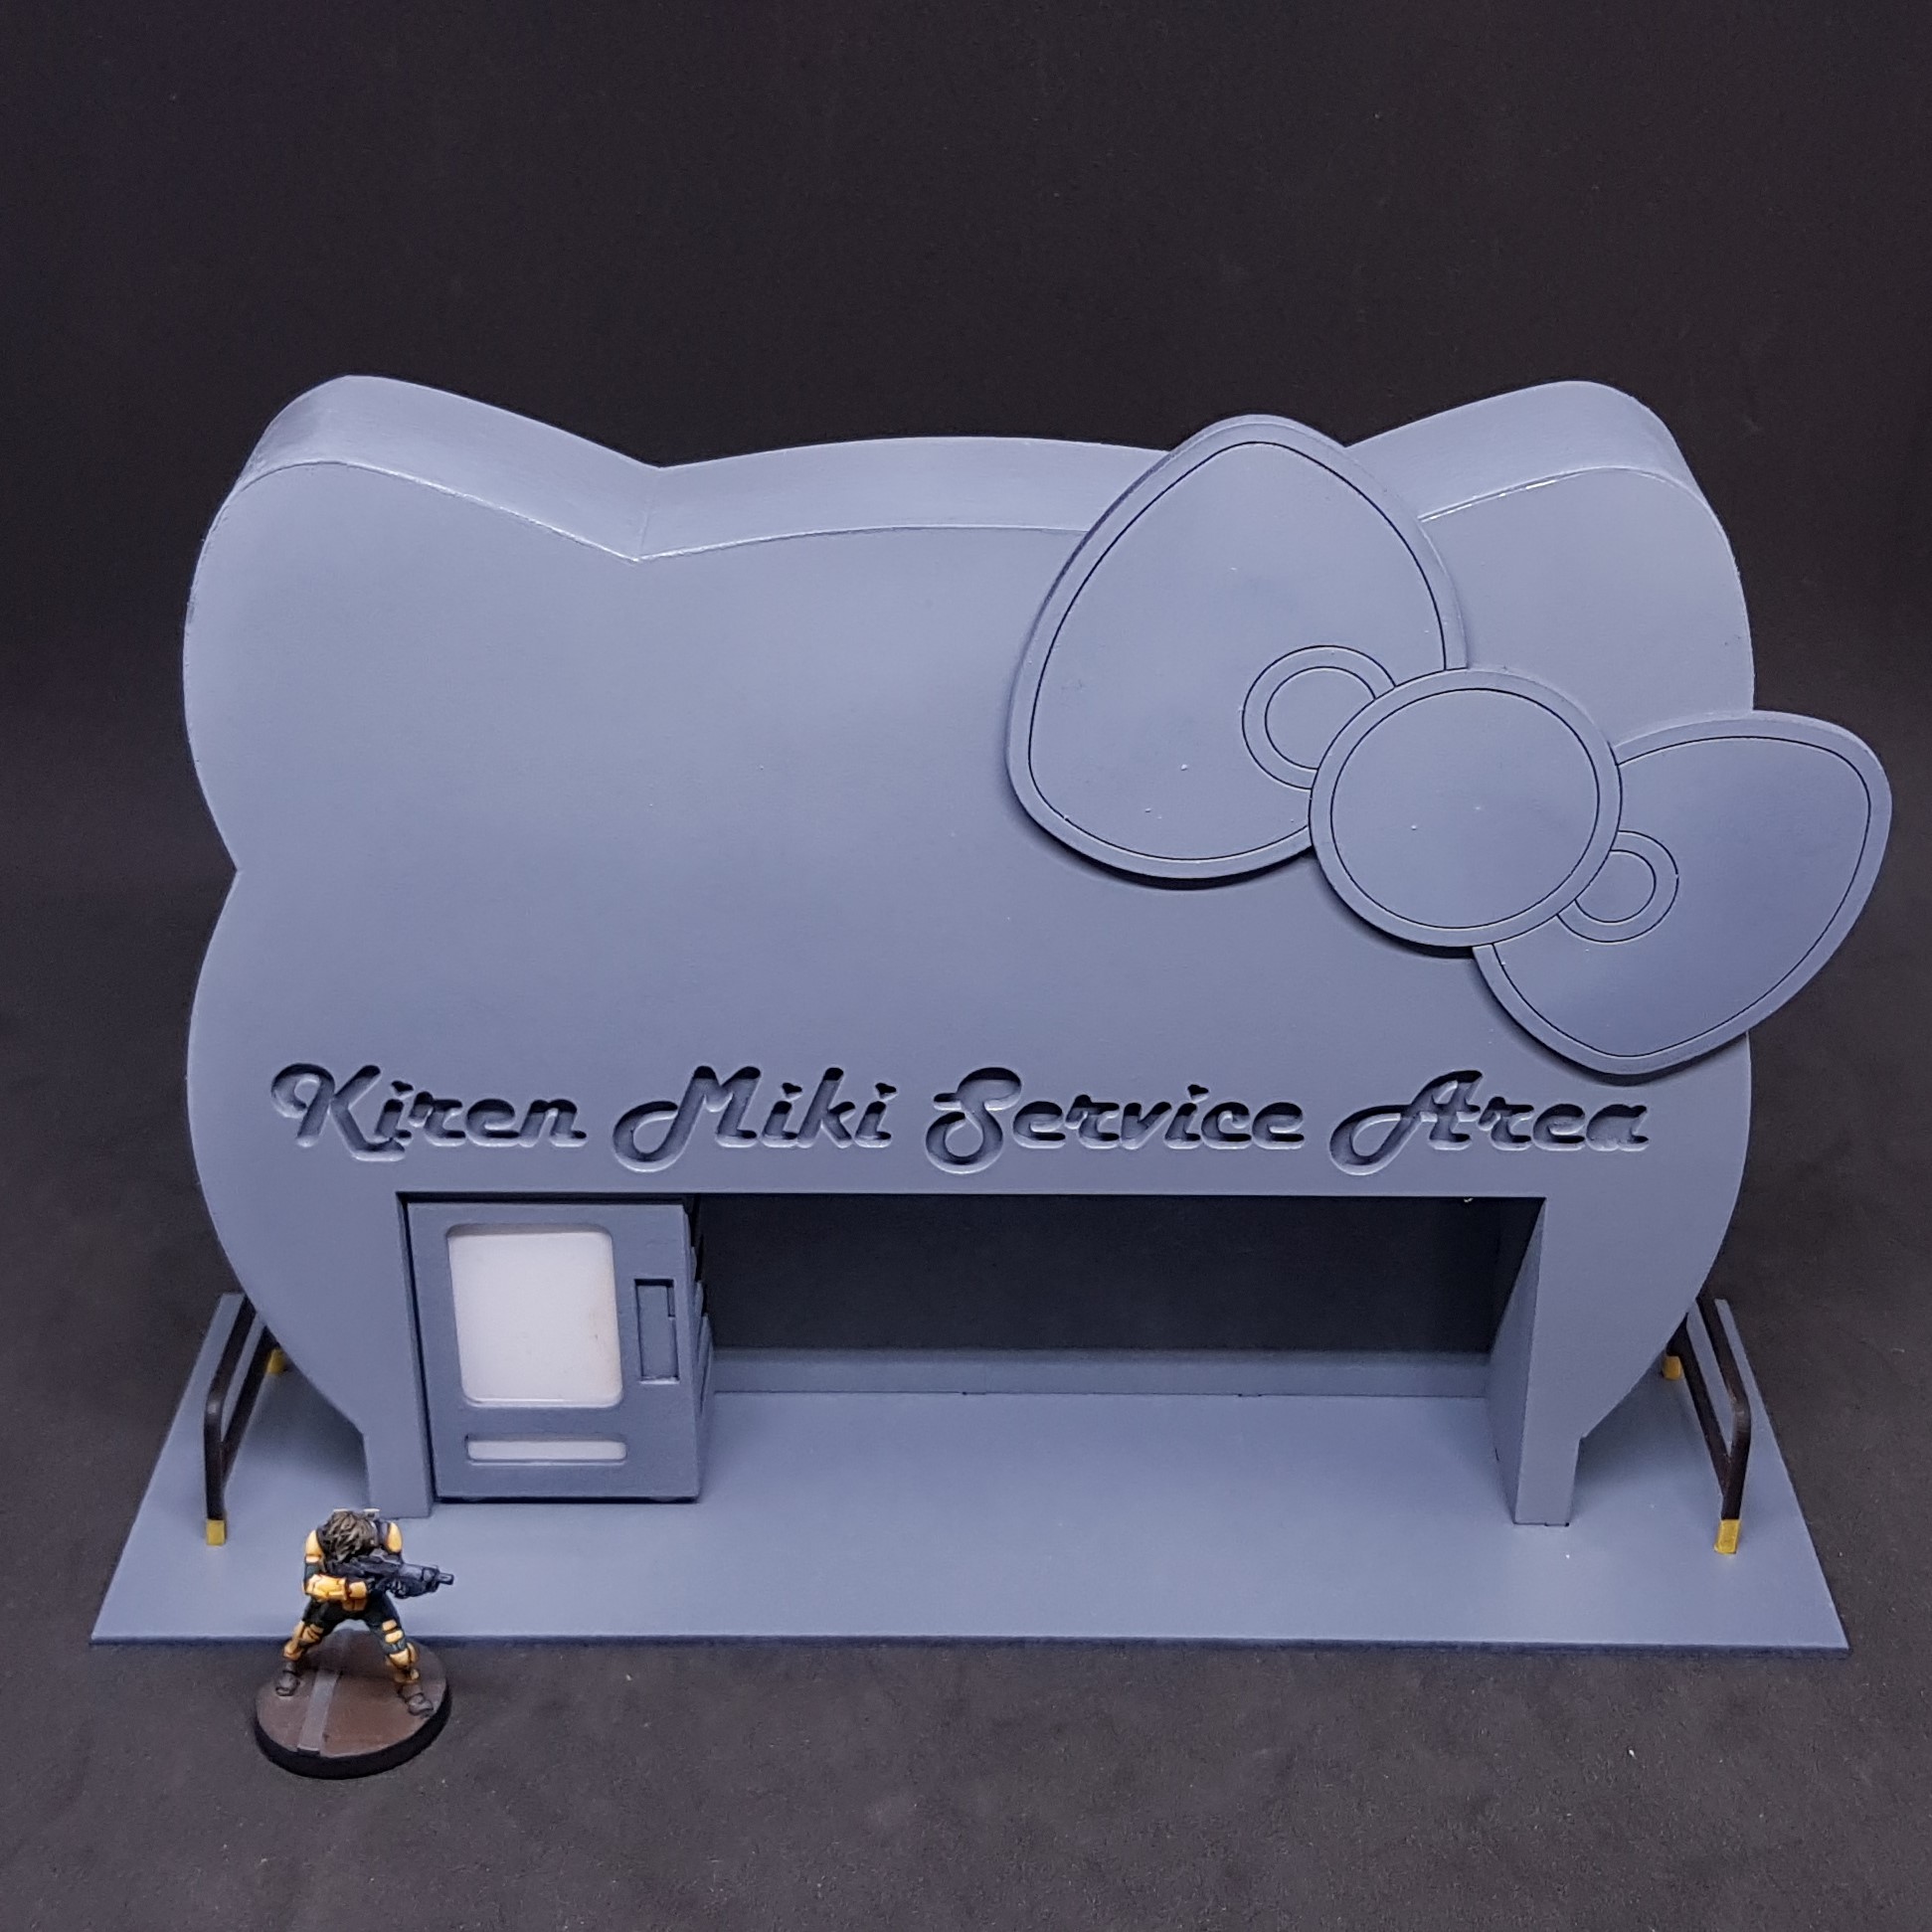
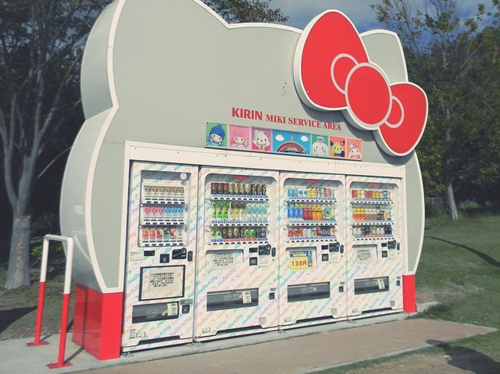 And here it is. A cat shaped vending machine enclosure!
 Drew this out. It should still be simple but there are a few things to work out. I will come to that at the end.
 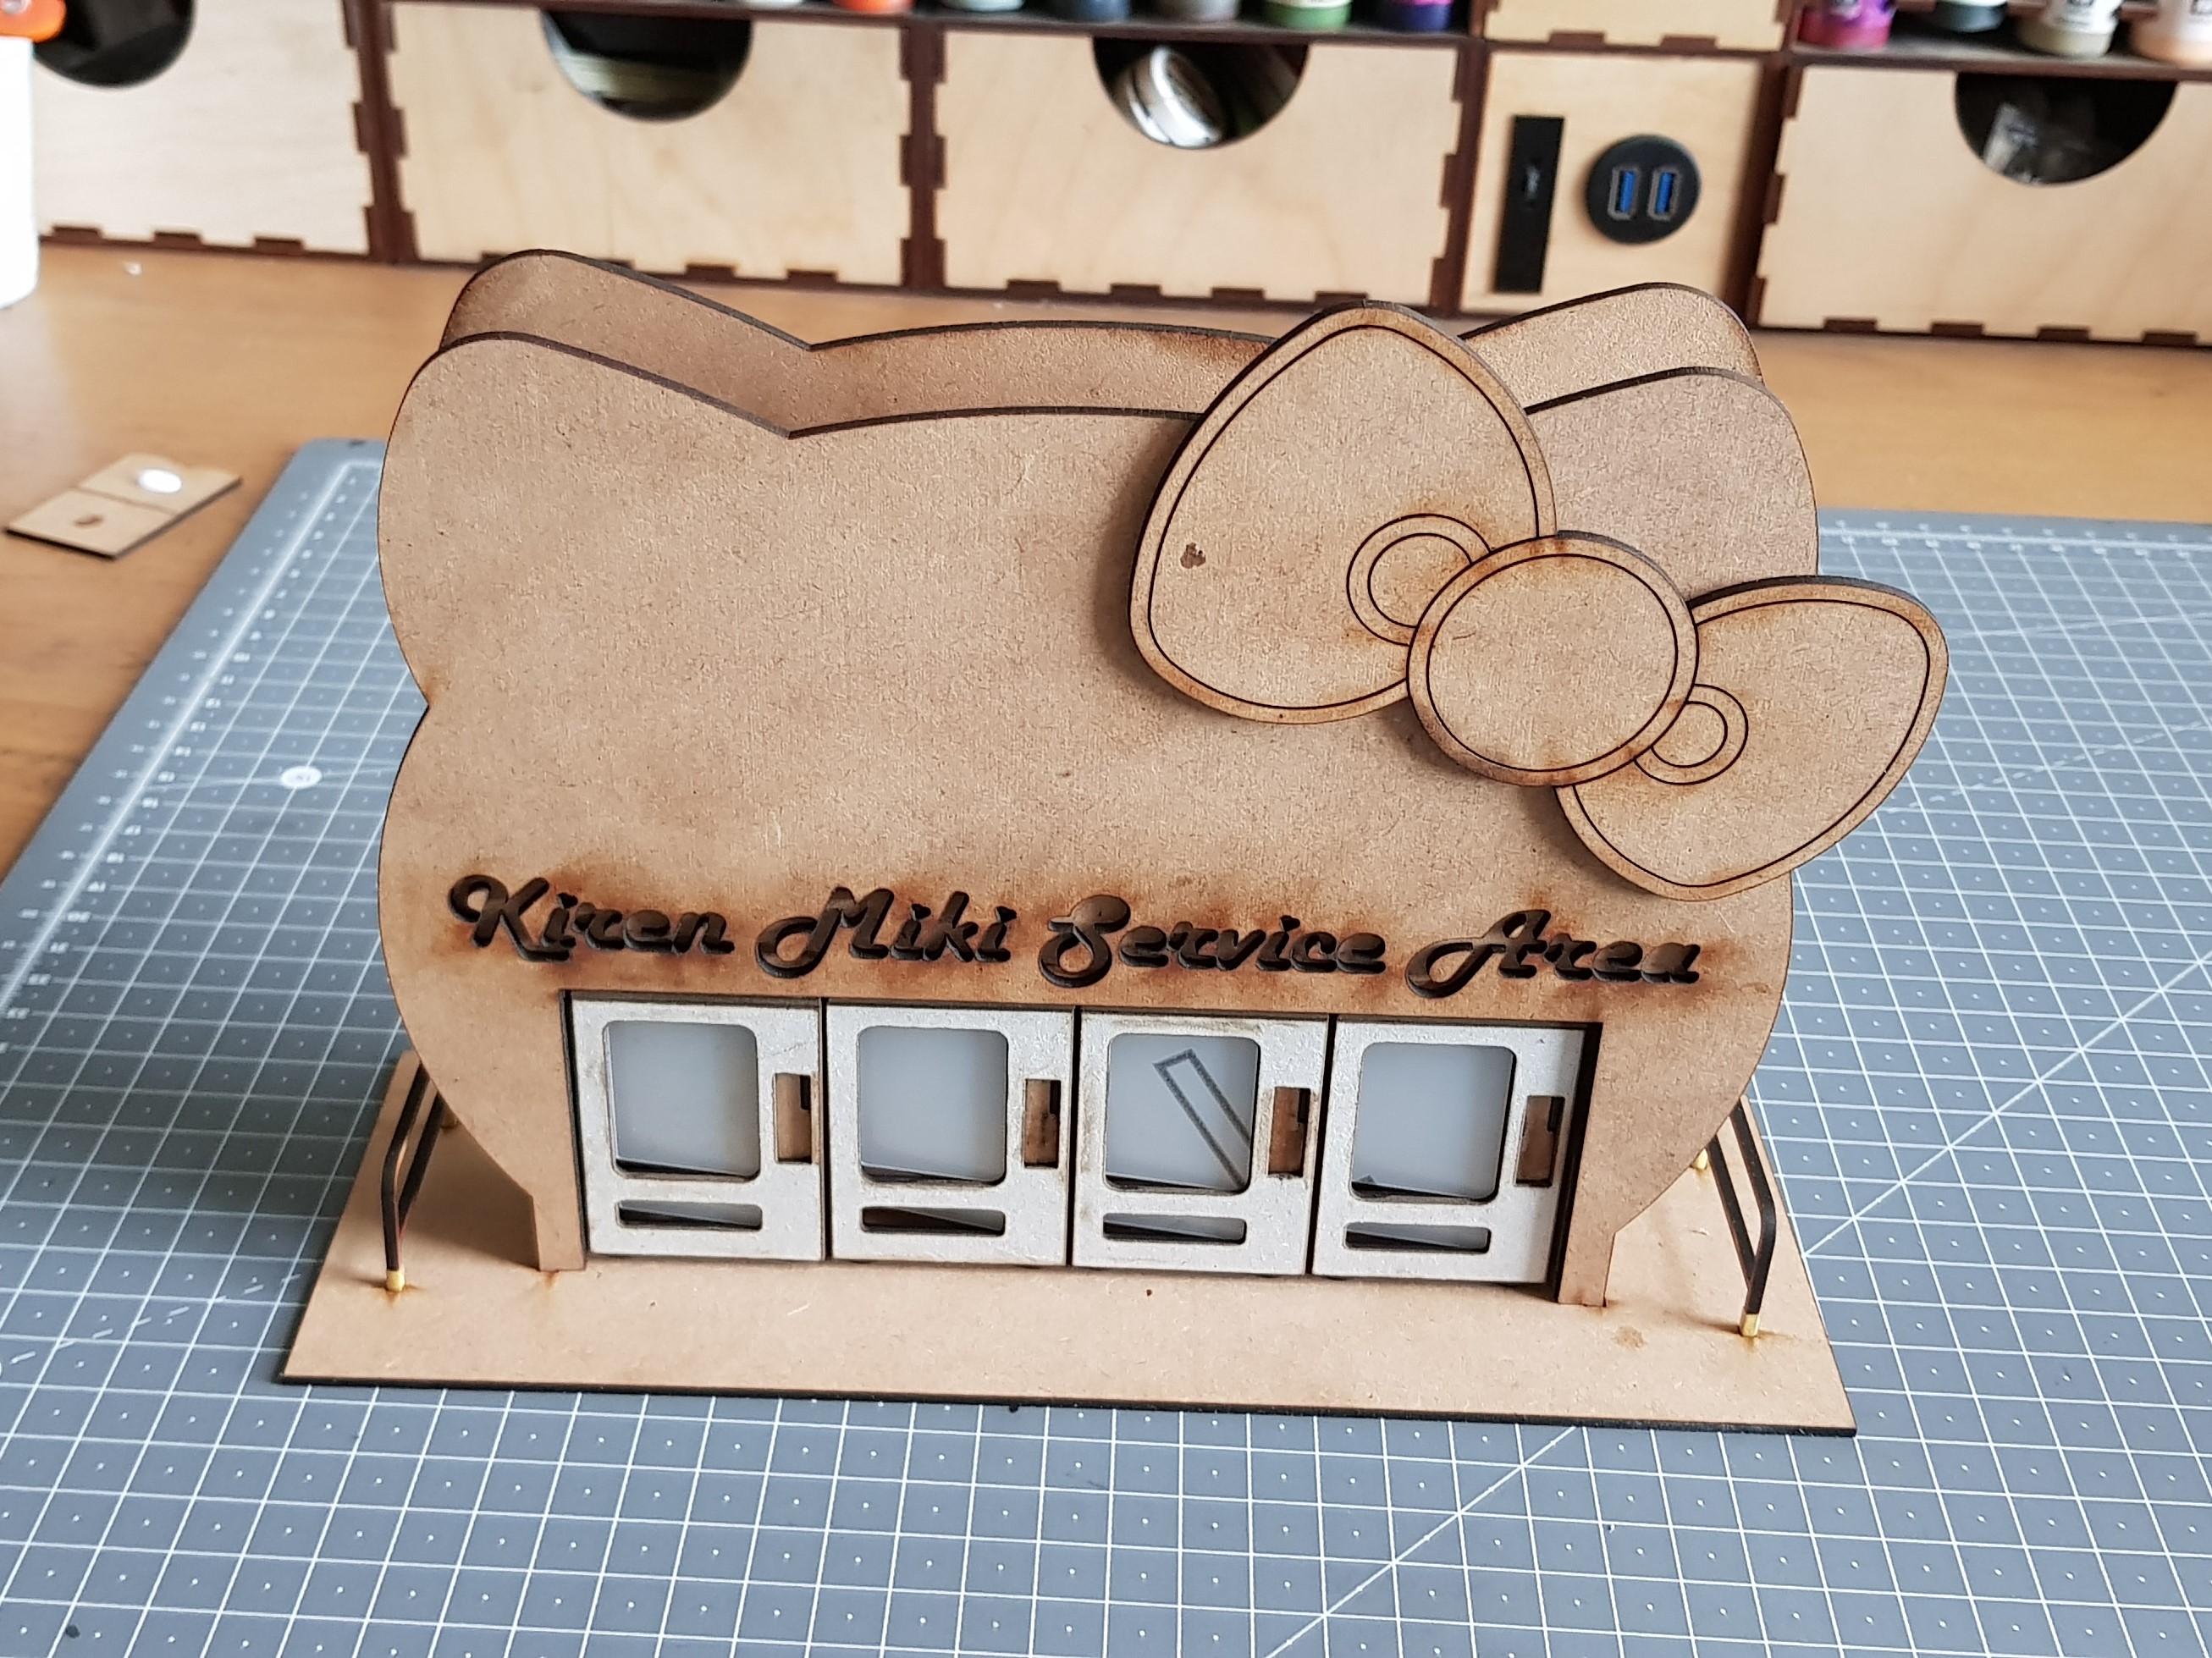 Cut out and assembled with the vending machines in situ. I am so happy with this there are a few missing pieces in the lettering they belong to the carpet god.
This provides line of sight blocking terrain on my tables and I think it’s fun.
What worked well.
- The vending machines look great and they don’t need any further work. I just cut and assemble no further work needing done on the drawings. I usually make ones to start then make changes but I think these will be finals.
- almost all the begs turned out so I did not need to mess around to much I did add two missing peg holes from the base.
- The vending machines can be removed from this. This means I can use them as scatter terrain or even tip one or two over to break up the terrain.
What I need to work on now…
- Find a way to clad the outside to fill in the massive hole on the sides. I want to be cheap. I could use plasticard but would rather use card. I have not stuck this down for this reason.
- I need to be able to cut out the text and not lose the bits. I think this is possible but will have to try and just out just the letters from scrap to get the bits.
- the back of this is very plain and requires some filling due to construction holes. I may do graffiti? Don’t know yet.
- What do I put in them. I want something quick and not have to make 48 28mm Twix and Packets of crisps.
Apart from all of the things to do this has been great fun and very fast, 3 nights work. This is the way to go on a project rather than months. Things are so much faster when you are just drawing and not caring about matching something exactly.
Let me know if you have any ideas for this or future side projects I can do!
Changing up the service area
It’s been a long week I had some work stuff to do but still found time for hobby.
I have progressed the design a bit as you will see below was not happy with the original prototype. This felt as though I didn’t put any effort in.
I have also made the files for these available for people as I don’t think it can tread on anyone’s toes. I would ask that if you know someone that’s wants this, can you direct them here and not send them the link below.
Link to One drive with the Vending Machines and service area
If you decide to make any let me know on the forums or create your own project to see what you do with it! I have made them DXF for comparability and if you wish help on them I can offer limited support via the comments section on this thread. There is also a 3D vending machine in case anyone wants to edit this and create a 3d print.
Now all that nonsense is over with, here’s what I done and why.
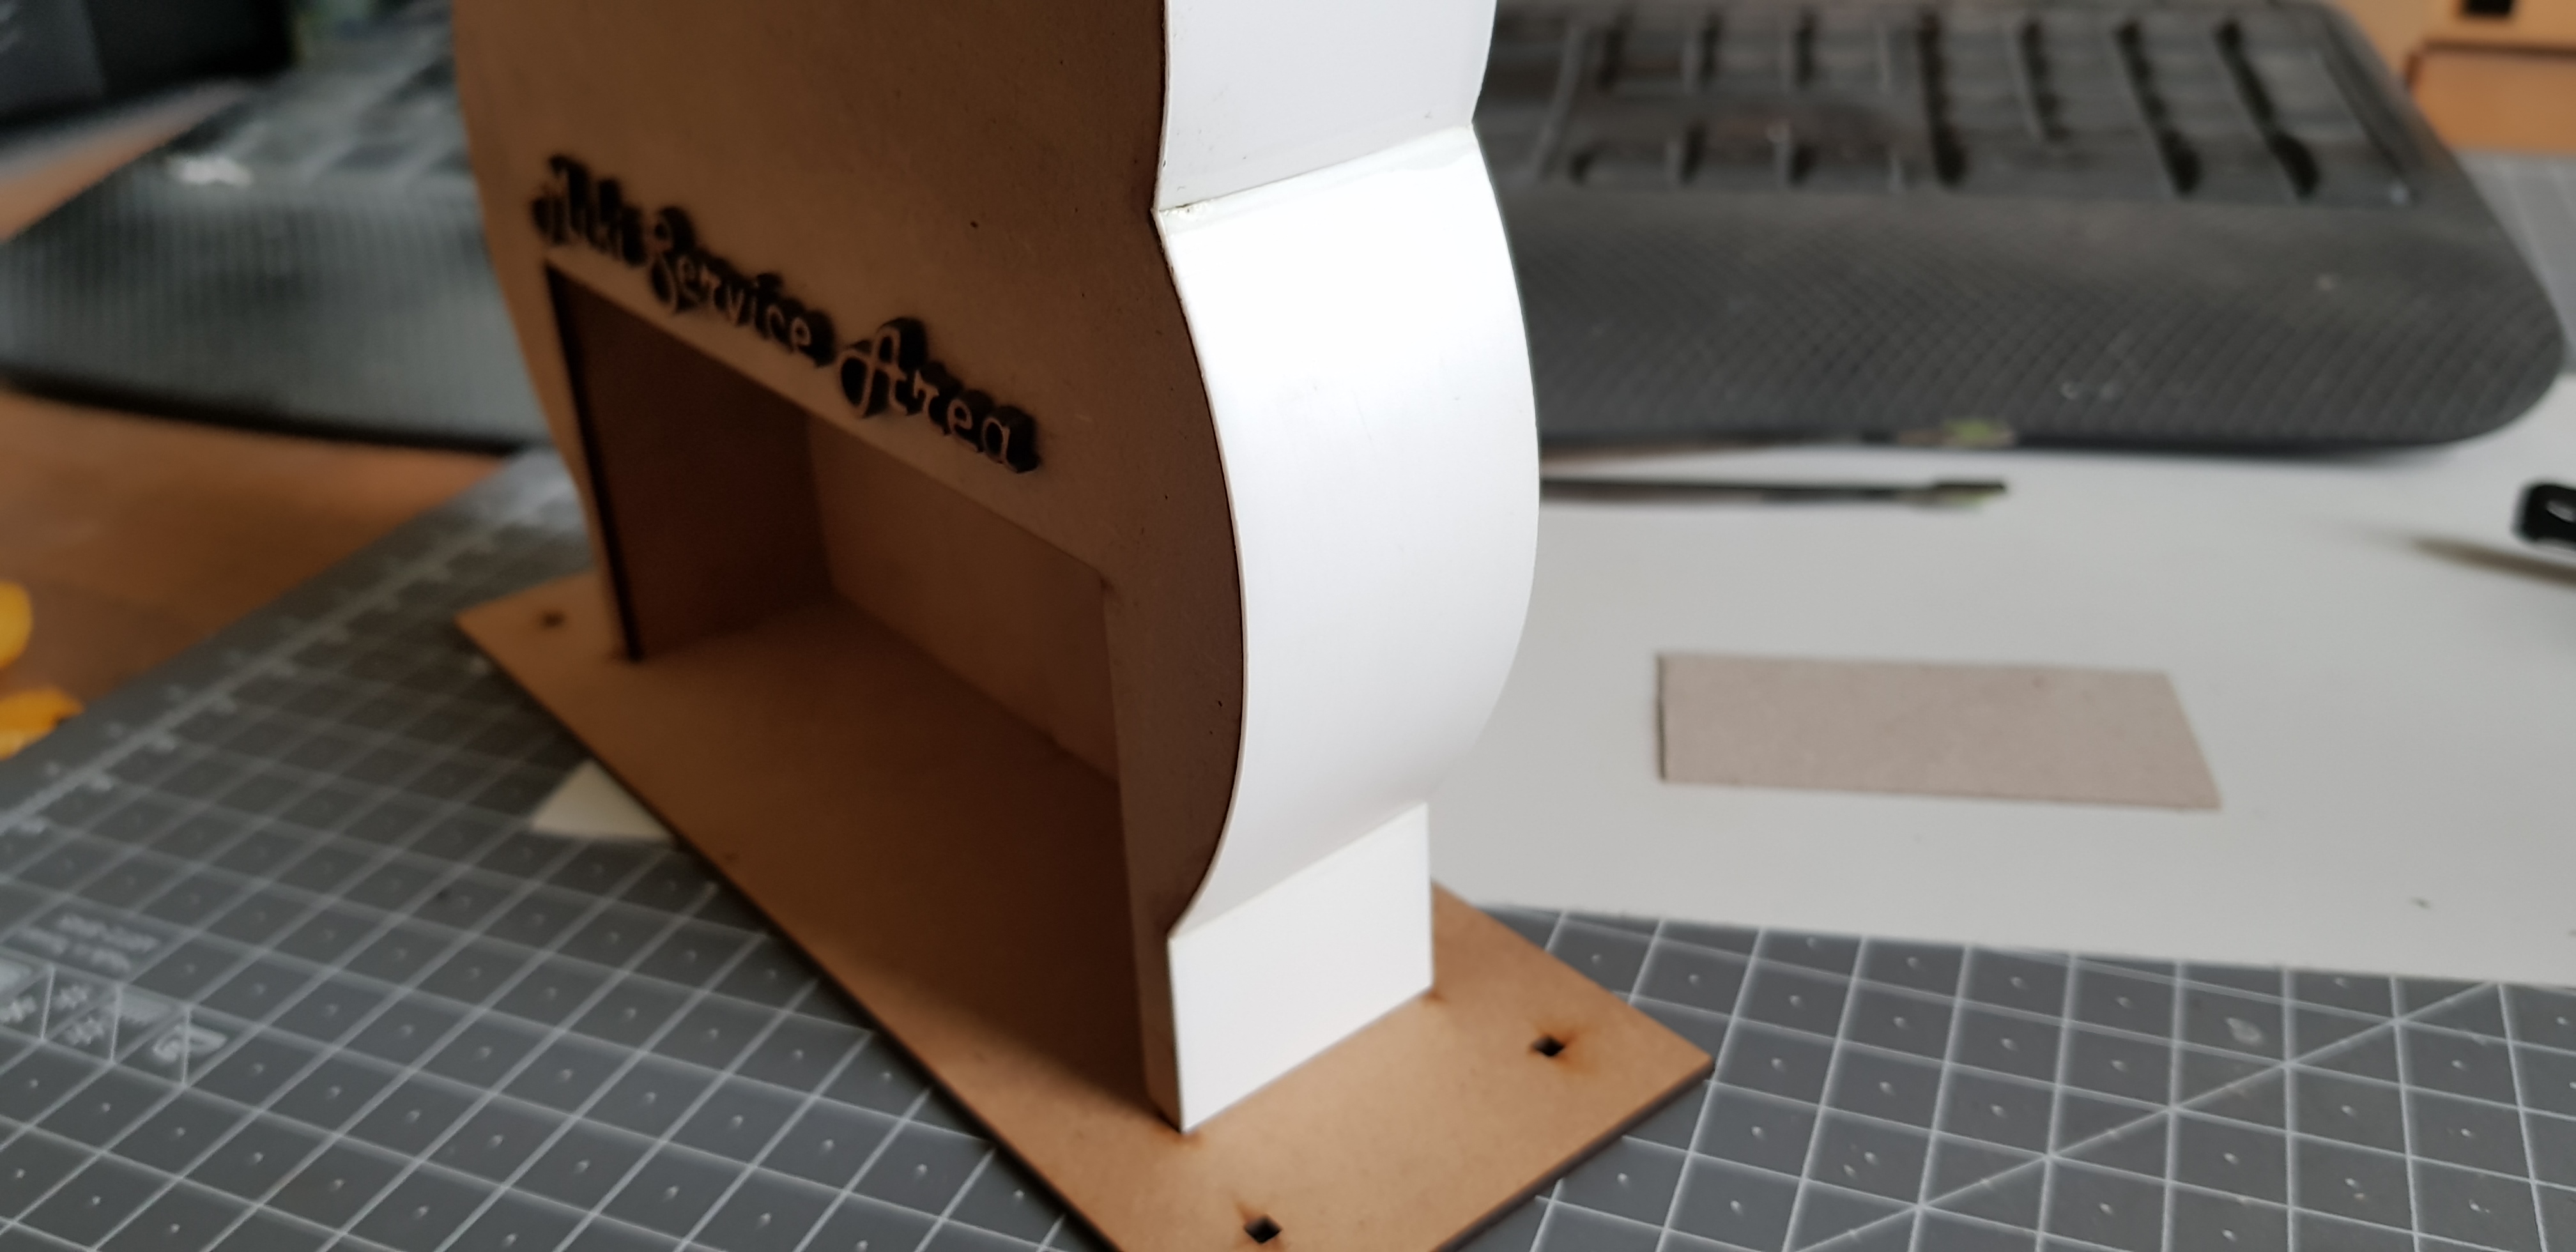
 I clad the outside of the service area in 0.5mm card like I have laid out in the drawings. This worked but it could be damaged easily. I placed it on the model marked and then cut to length. I was not happy with how robust this was and it creased on one of the parts. This also got me thinking about a comment for neon lights, I liked this but had to figure out a way to do this. I also ended up not liking the size and scale of this. it would be pretty massive.
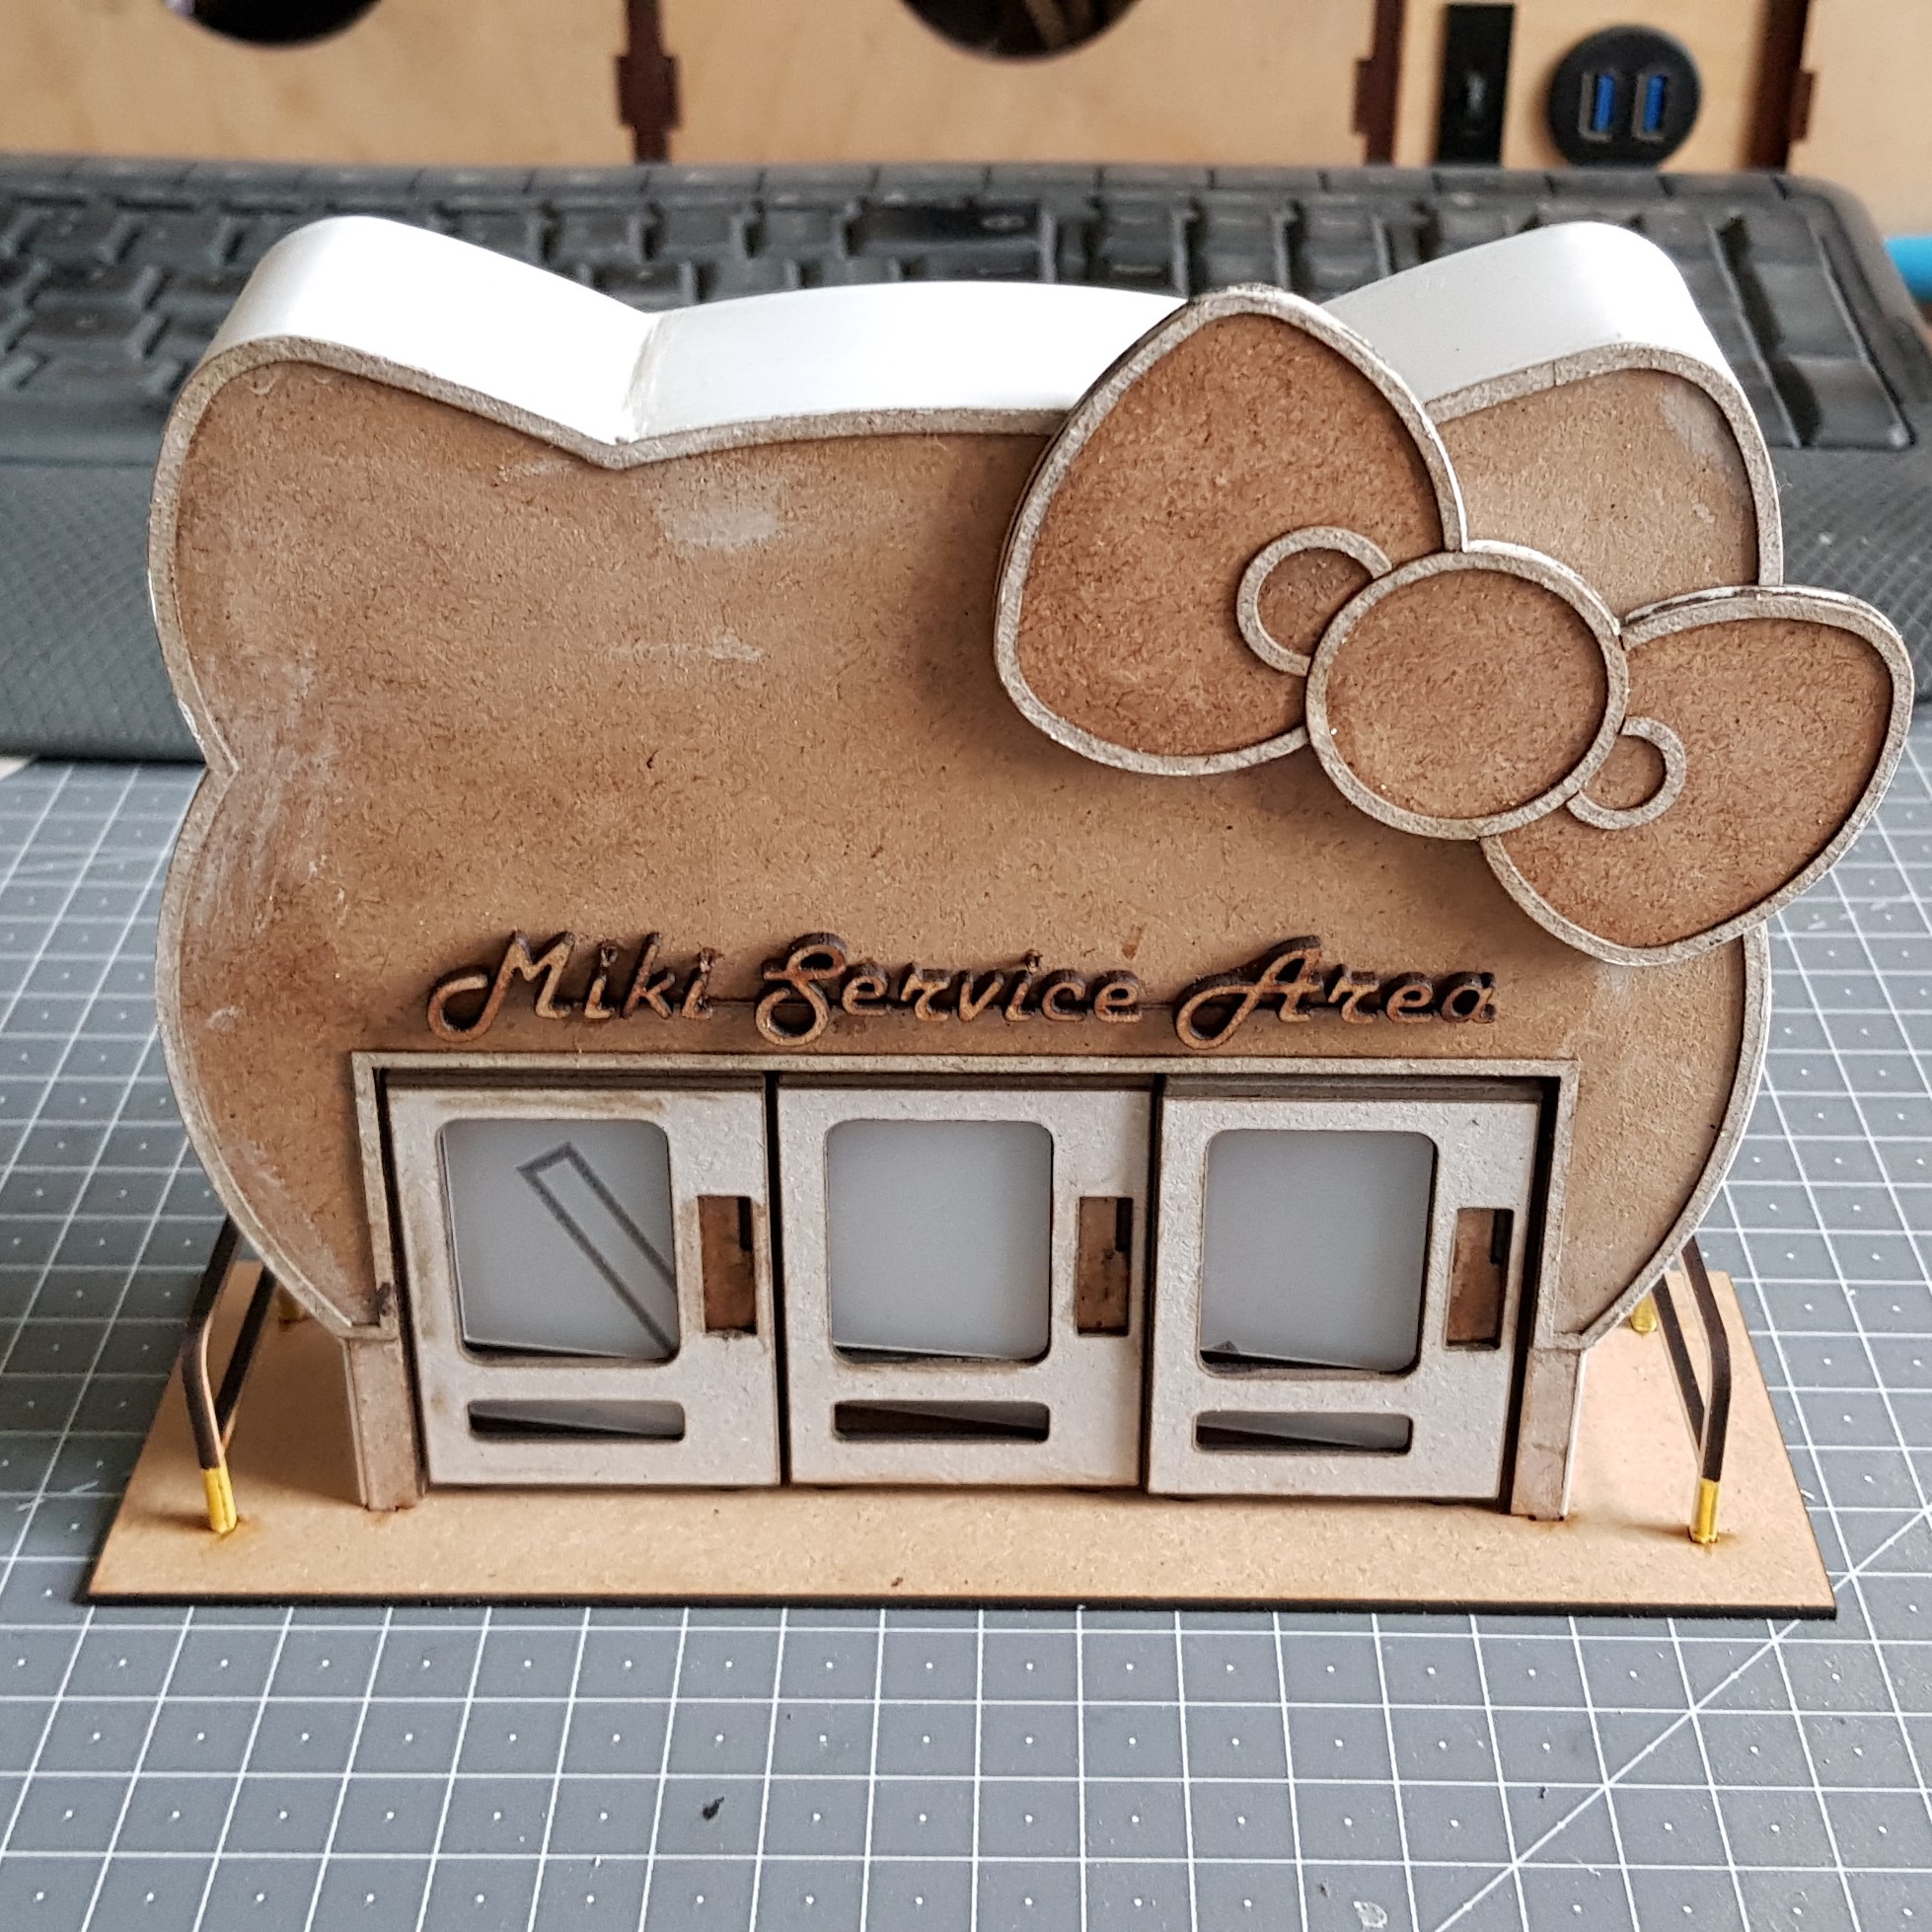
 The redesign. I made this smaller to fit 3 vending machines. I also changed the text from an innie to an outie and split this component in two for ease and detail (more on that next). I added a border to frame the building this also added detail to the back and I made the bow more 3D to add detail. It looked kind of flat. Not a lot of changes but I feel it has transformed this. I also Added a top section for support.
 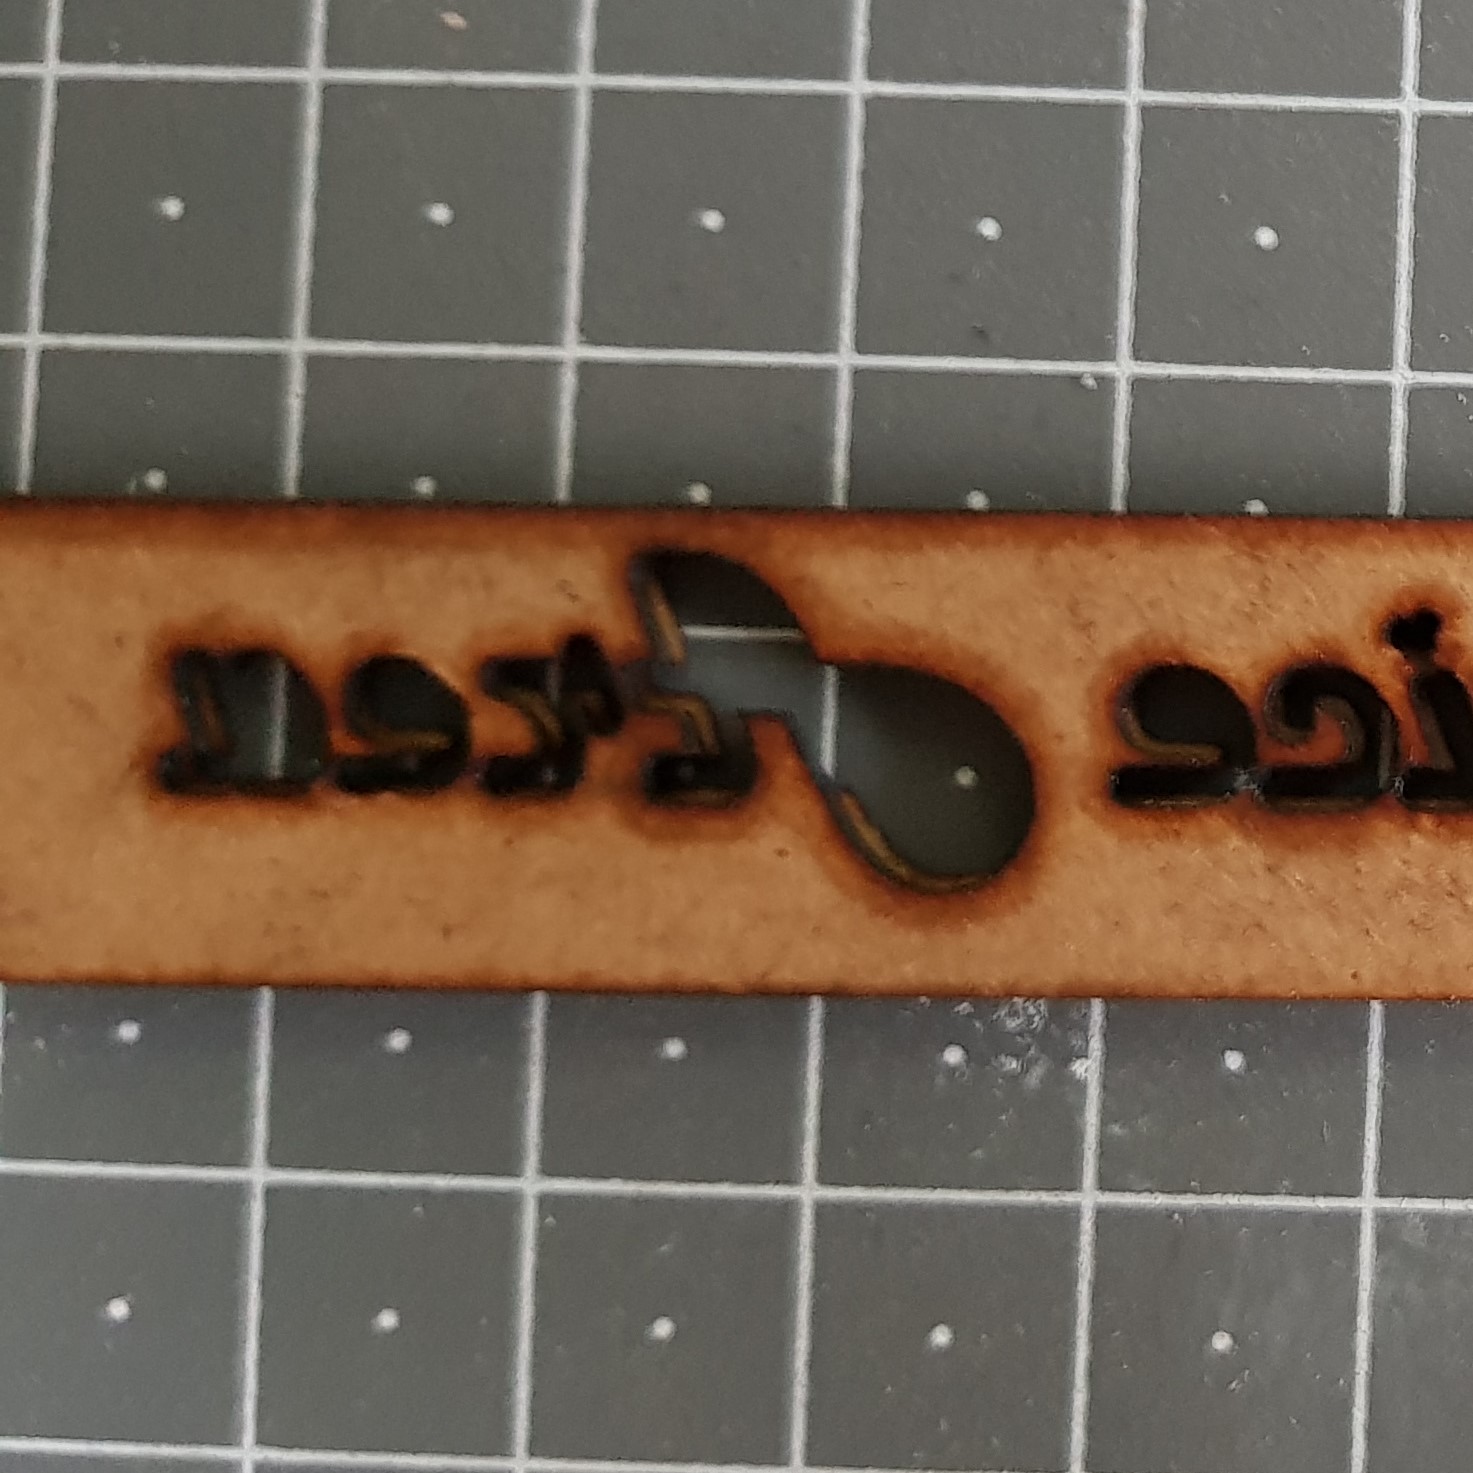 The changes to the text were a great idea. Glad I done this based on feedback. I need to explain this picture as it no doubt looks strange. I have 2mm MDF with an offset 0.5mm cut-out behind this. I couldn't photograph this any better to illustrate this. The 2mm text is cut out completely loose letters. and 0.5 is all attached via a line through it. After laser cutting i placed masking tape over all the letters. Turned this over. Glued only on the letter section leaving the line on the 0.5mm card and then stuck this down before removing the masking tape and removing the backing and the 2mm letters. This worked great and was much easier to glue. It also has the bonus of looking like everything's connected.
 I changed the way I don’t the cladding here. Not that it does not work on the card route I just wanted something more durable. A more even finish could be obtained from using he card.
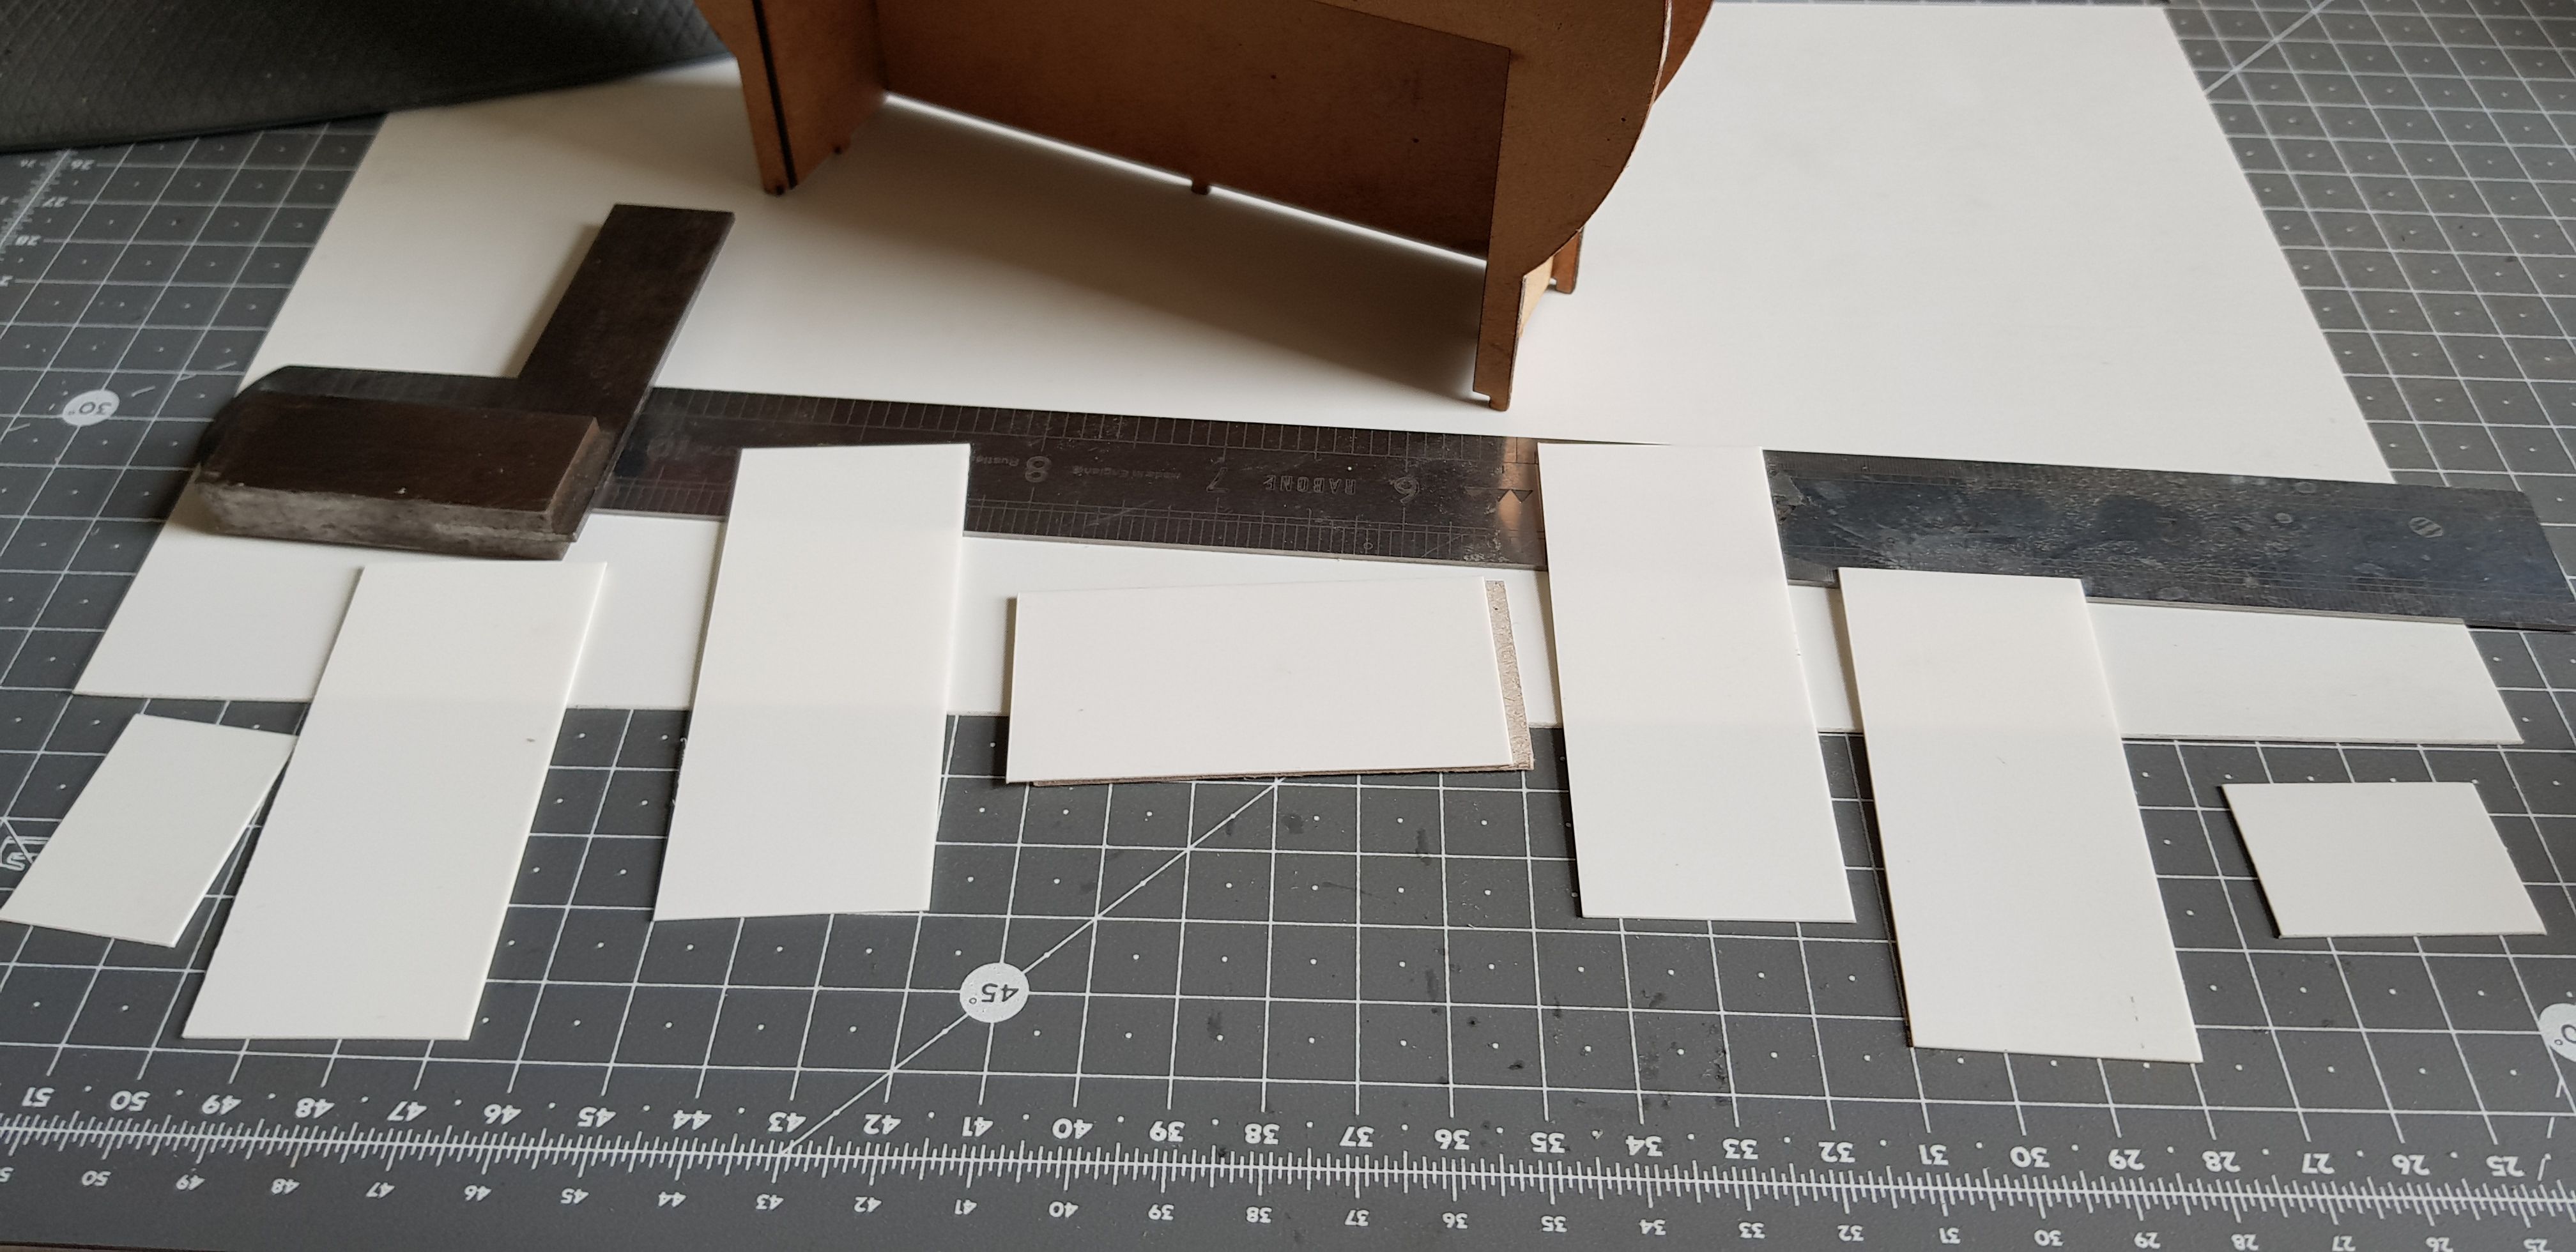
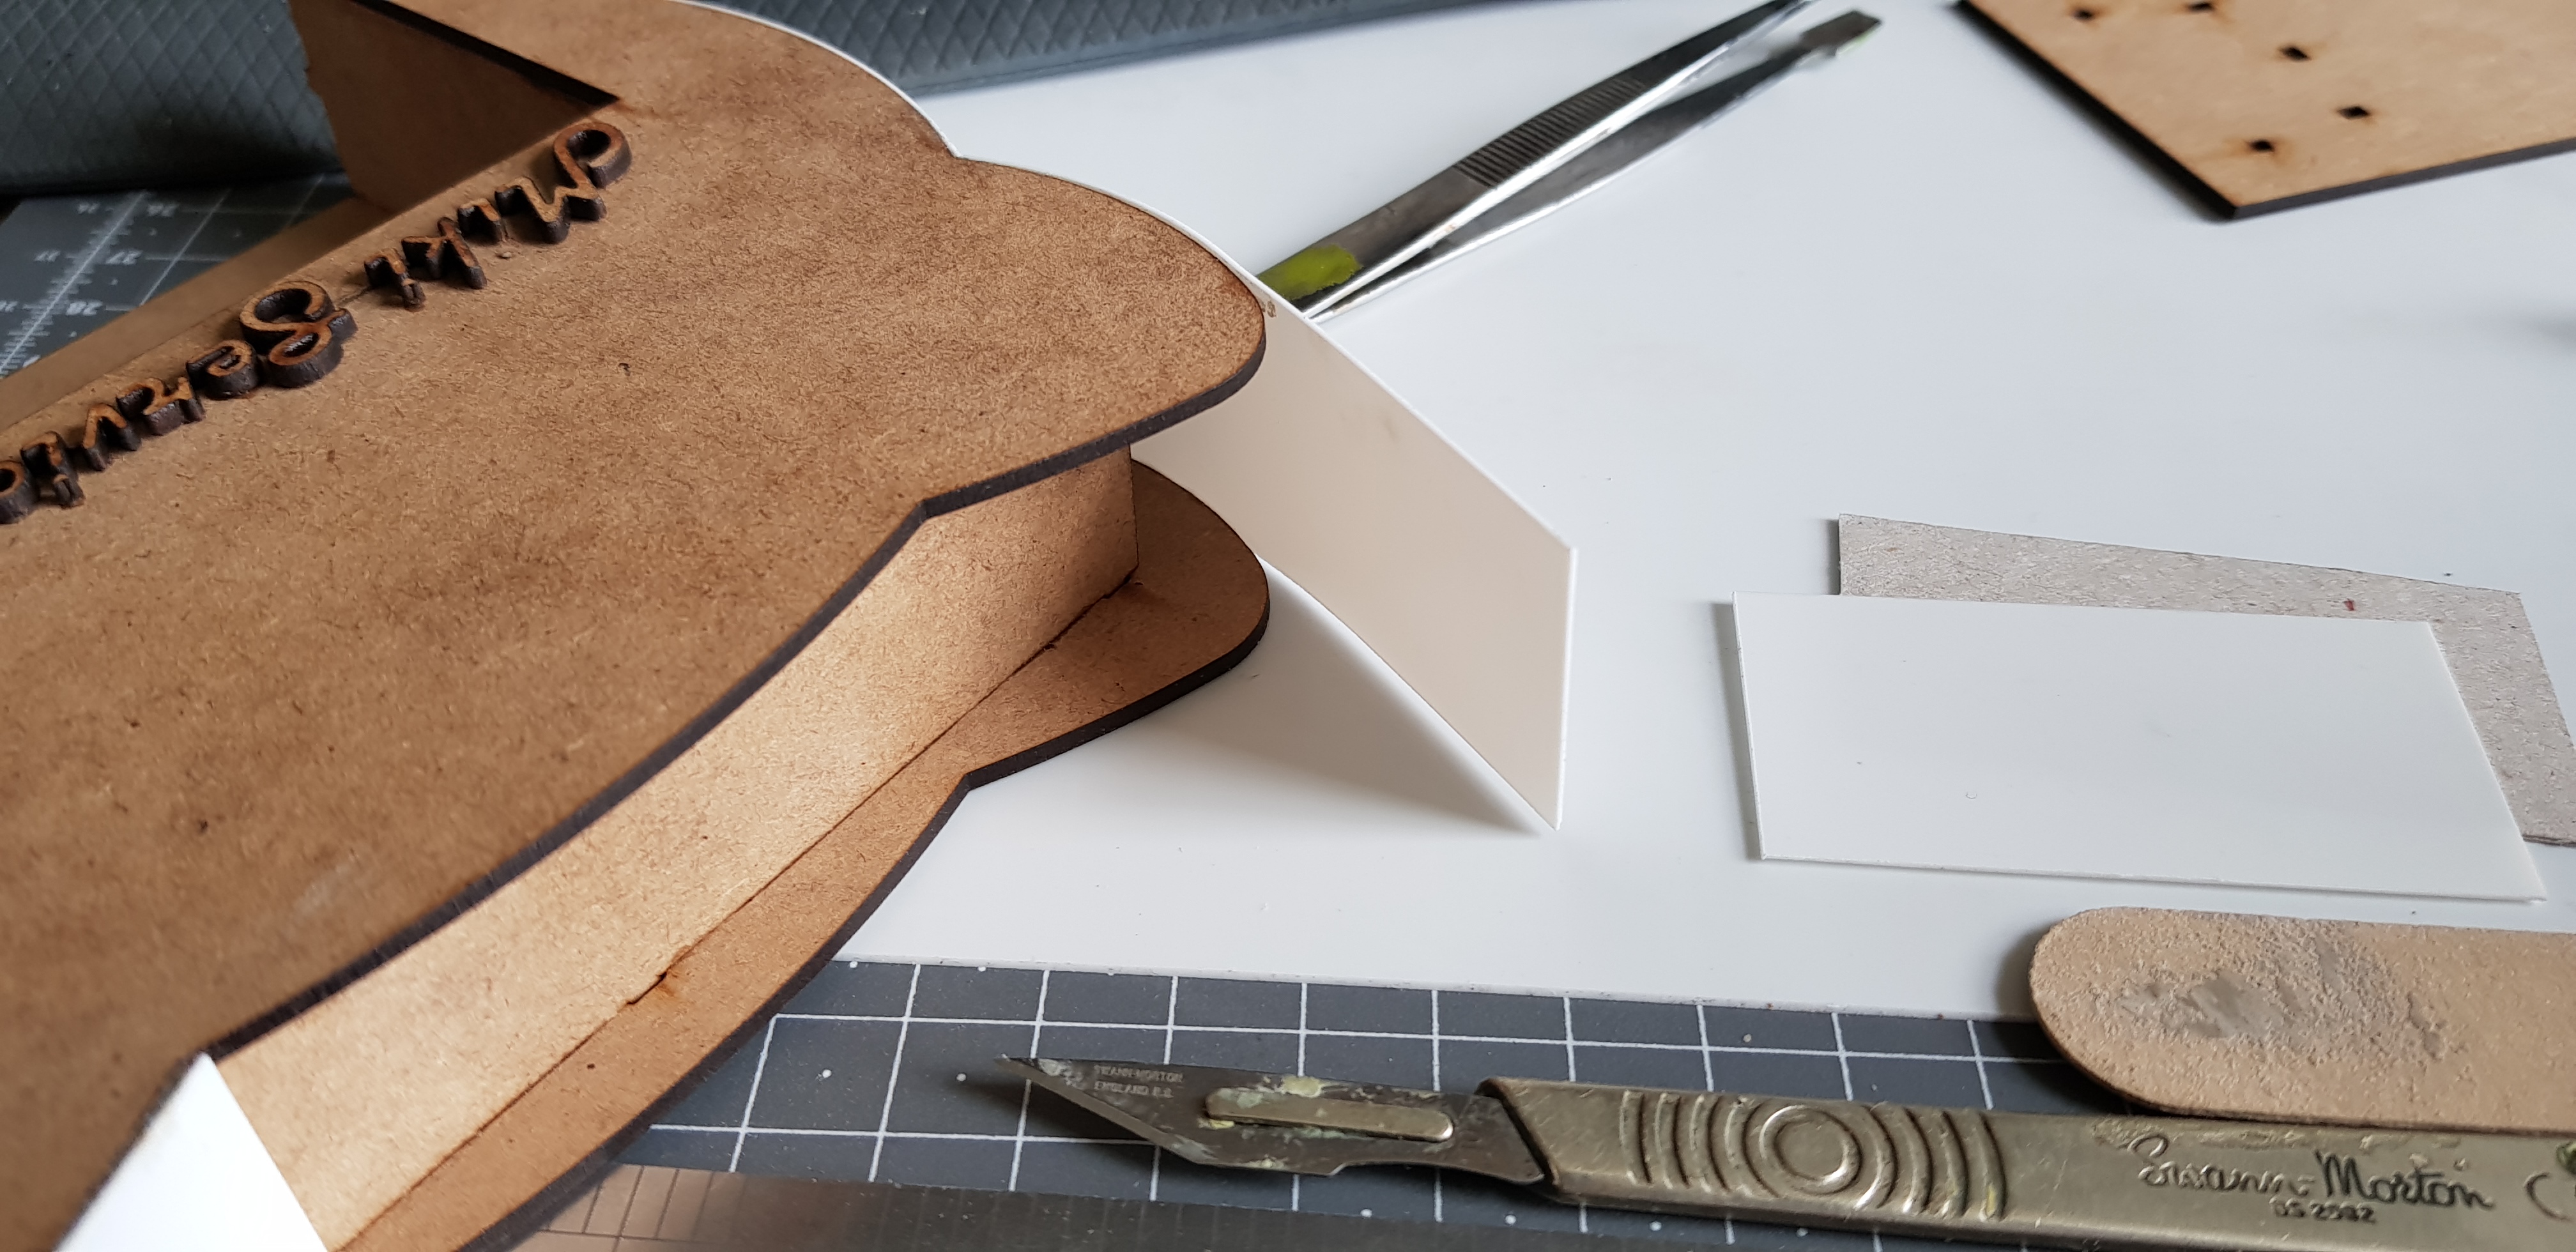
I cut out a strip of plasticard and used the card for a template to get the right size then cut to length. This was then stuck down with superglue. the tricky part was the curves and I just done these in sections.
 Here is the completed build together with the vending machines. To complete this I stuck down the front and back trim with PVA and filled the sides with Plastic Putty and sanded everything as best I could without touching the front of the card.
 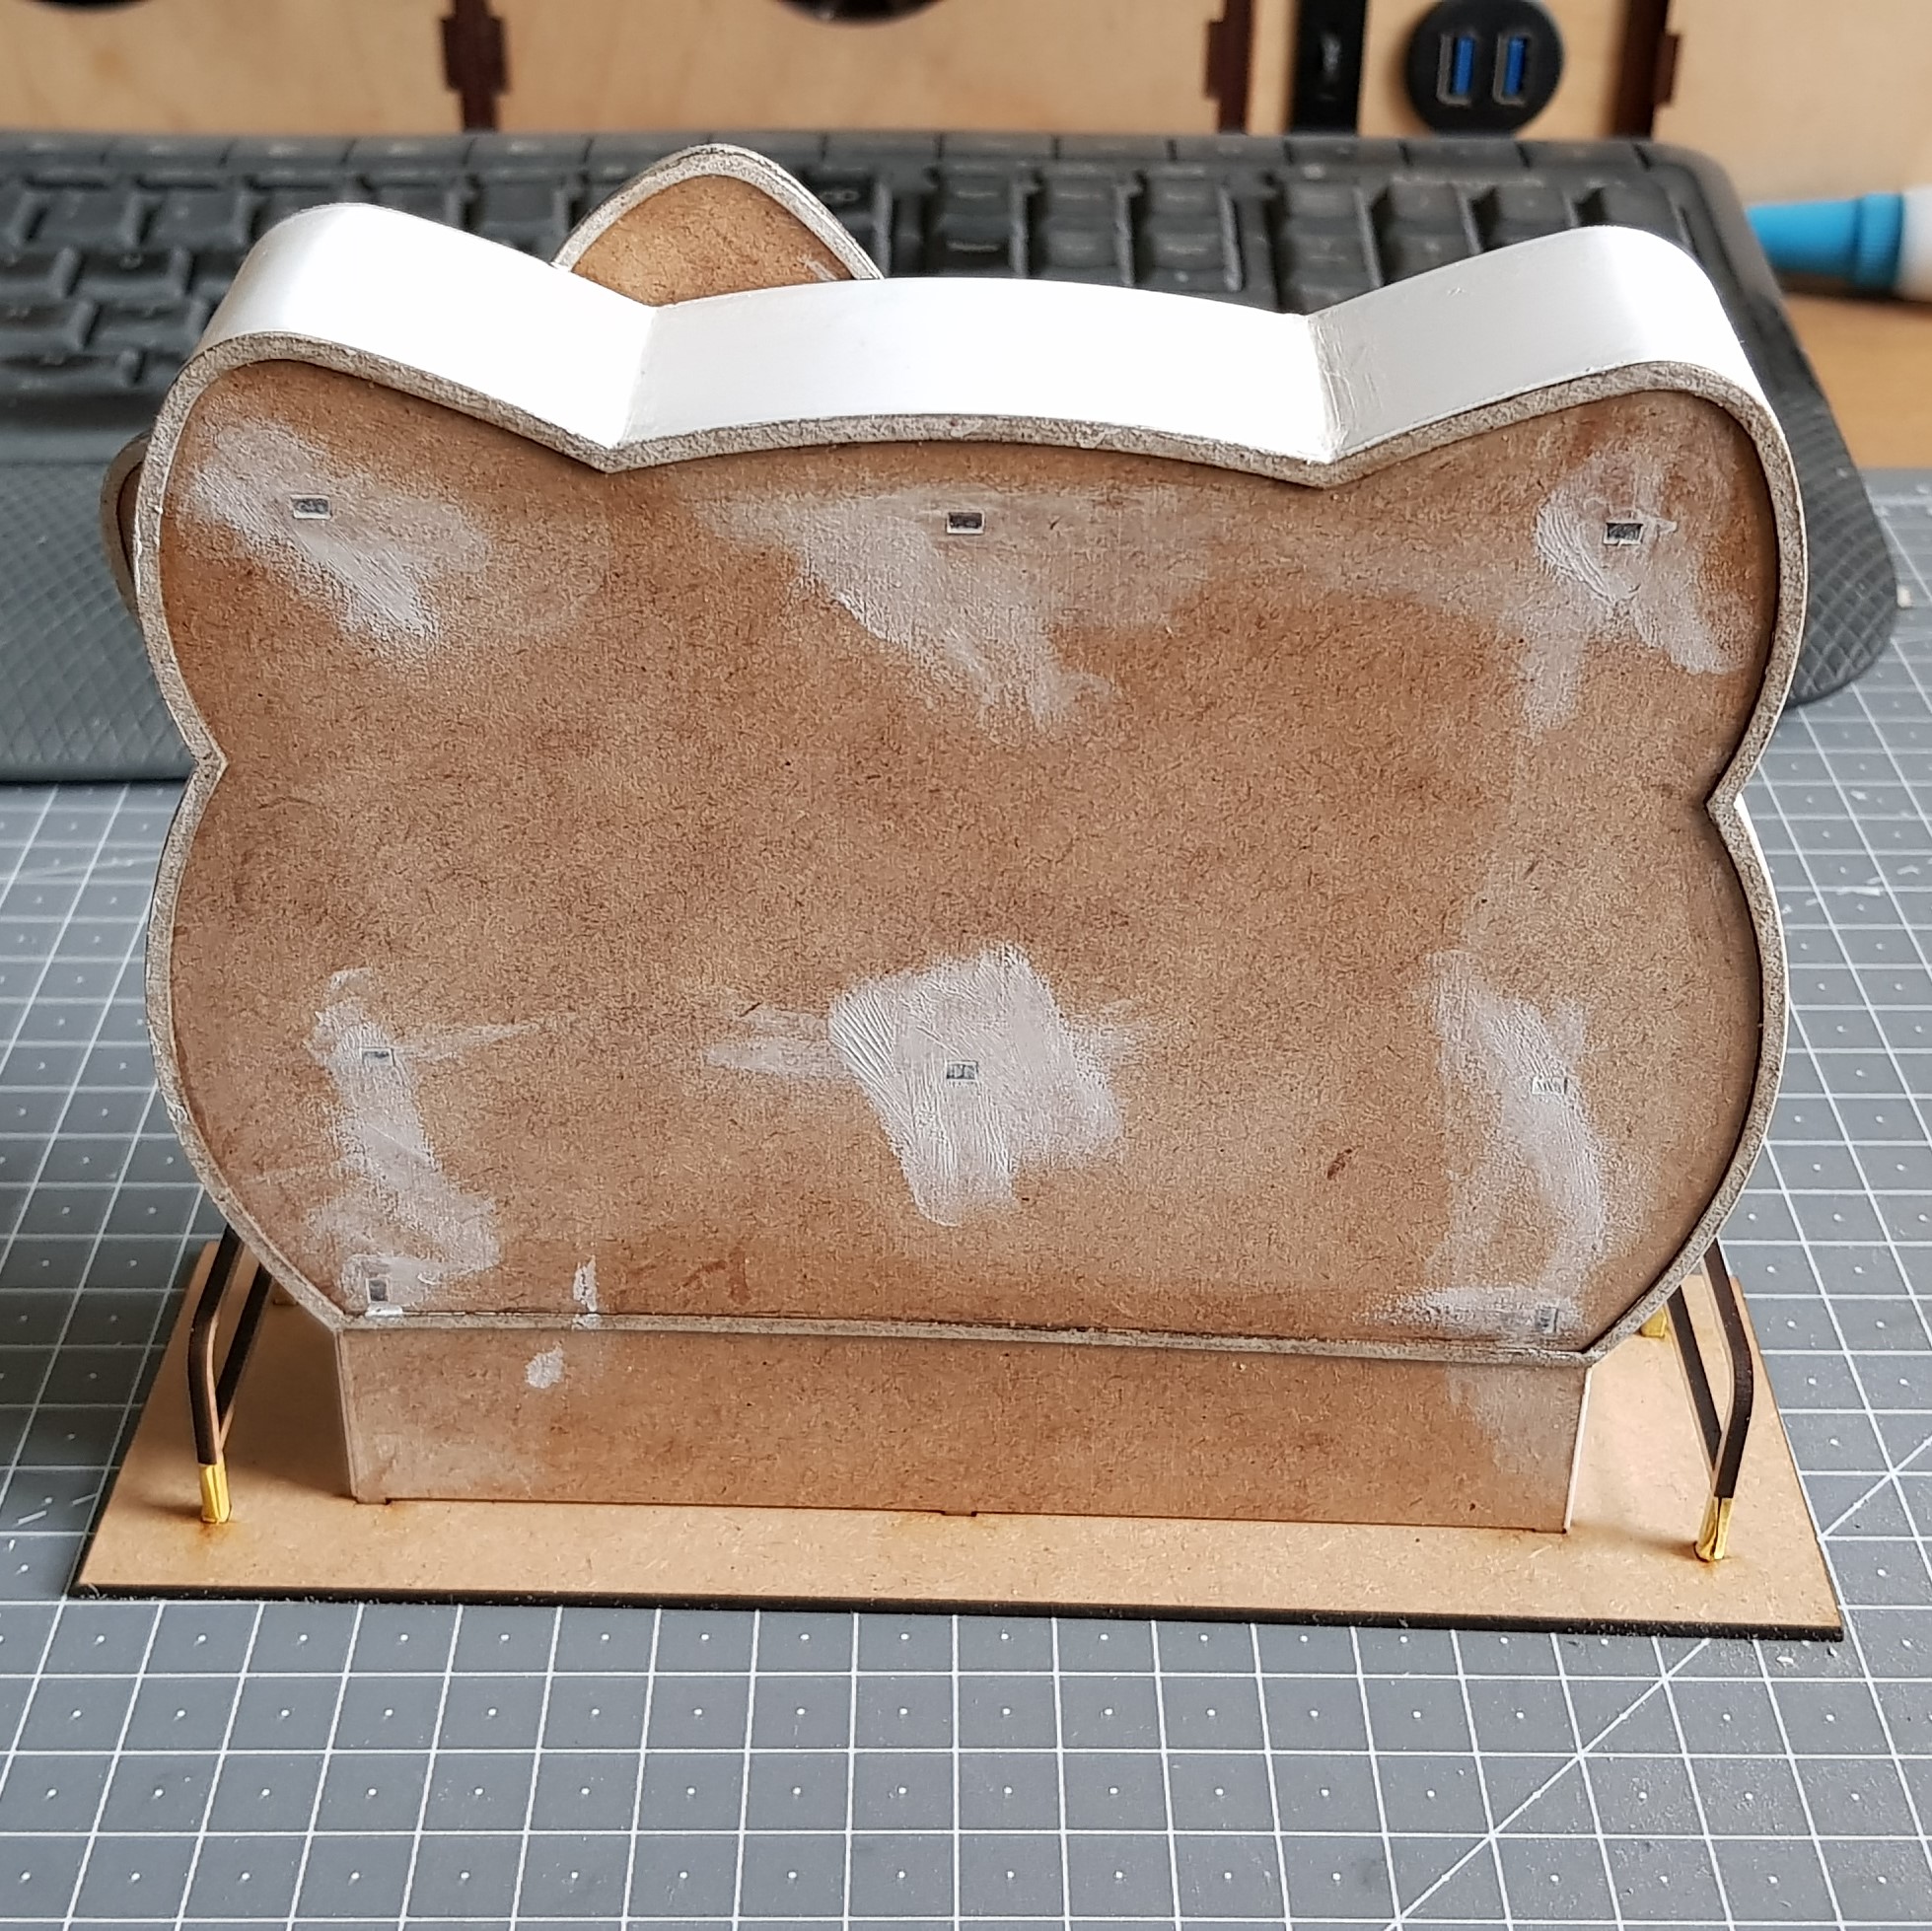 I filled in the construction holes on the back with plastic putty and again sanded this.
 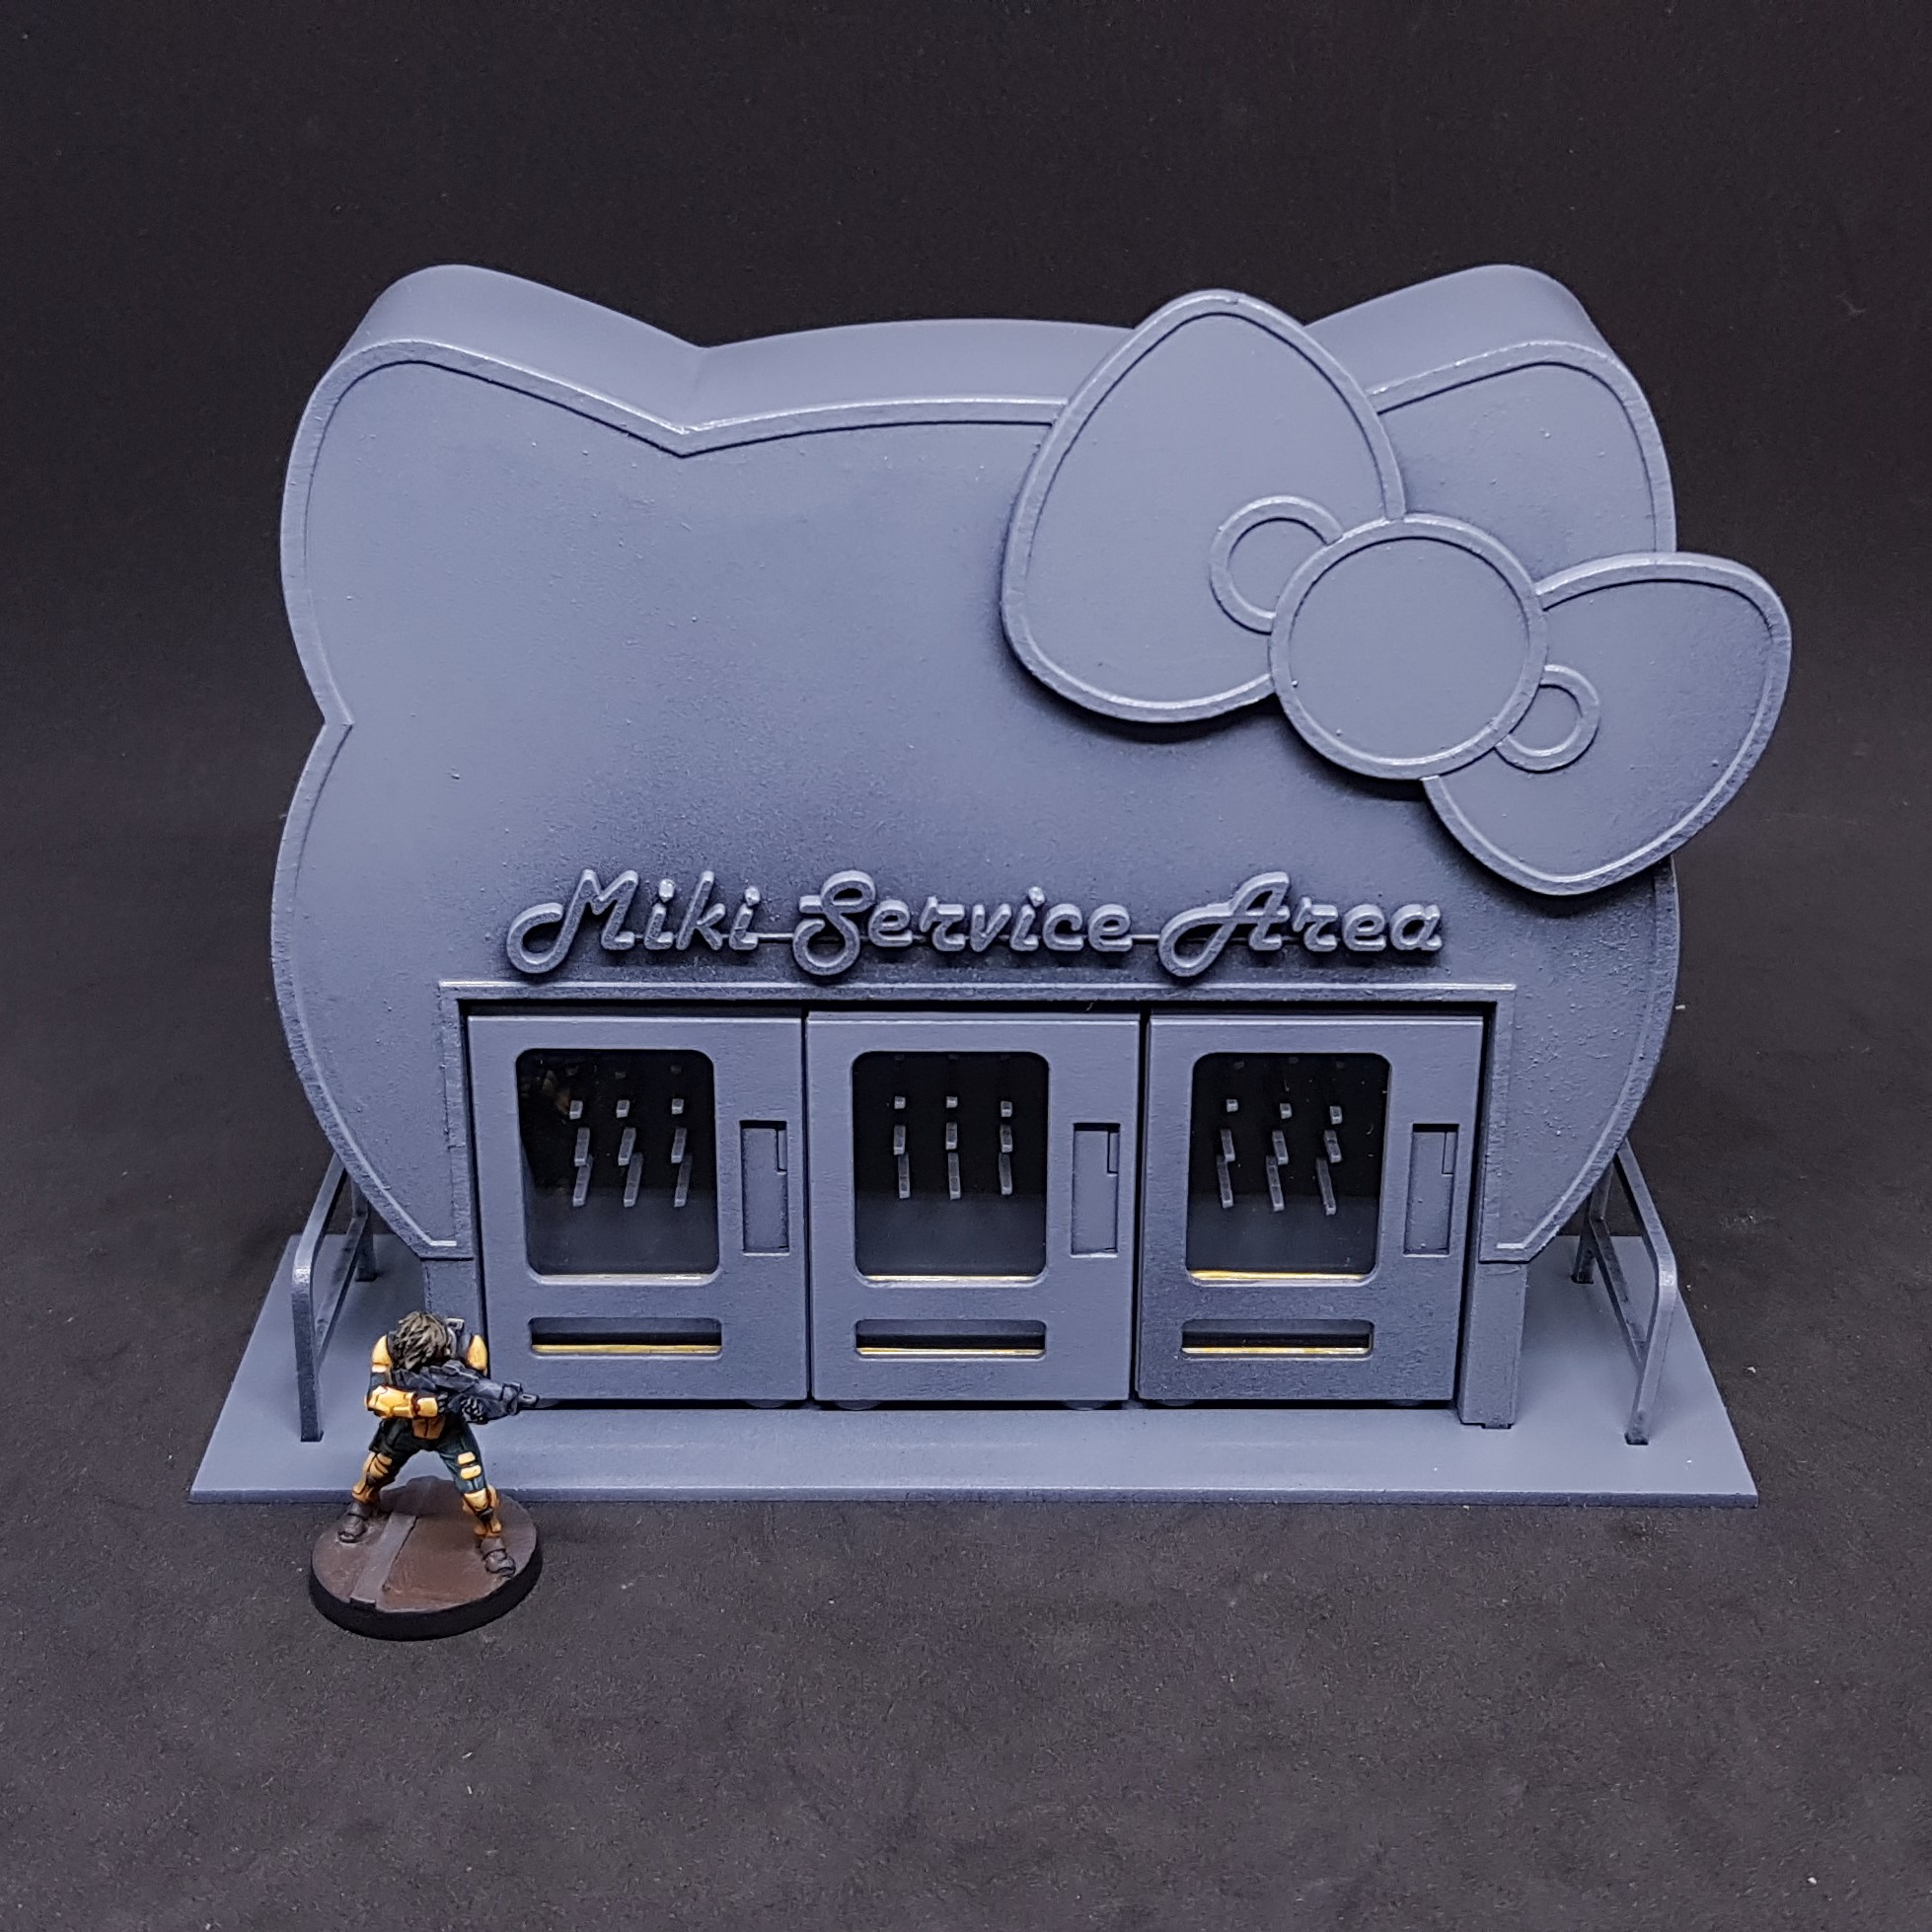 I primed this with matt black and hit it with grey from the top and 45 degrees. I couldn't help myself I unmasked the windows on the vending machines but the time when you want glare I didn't get any.
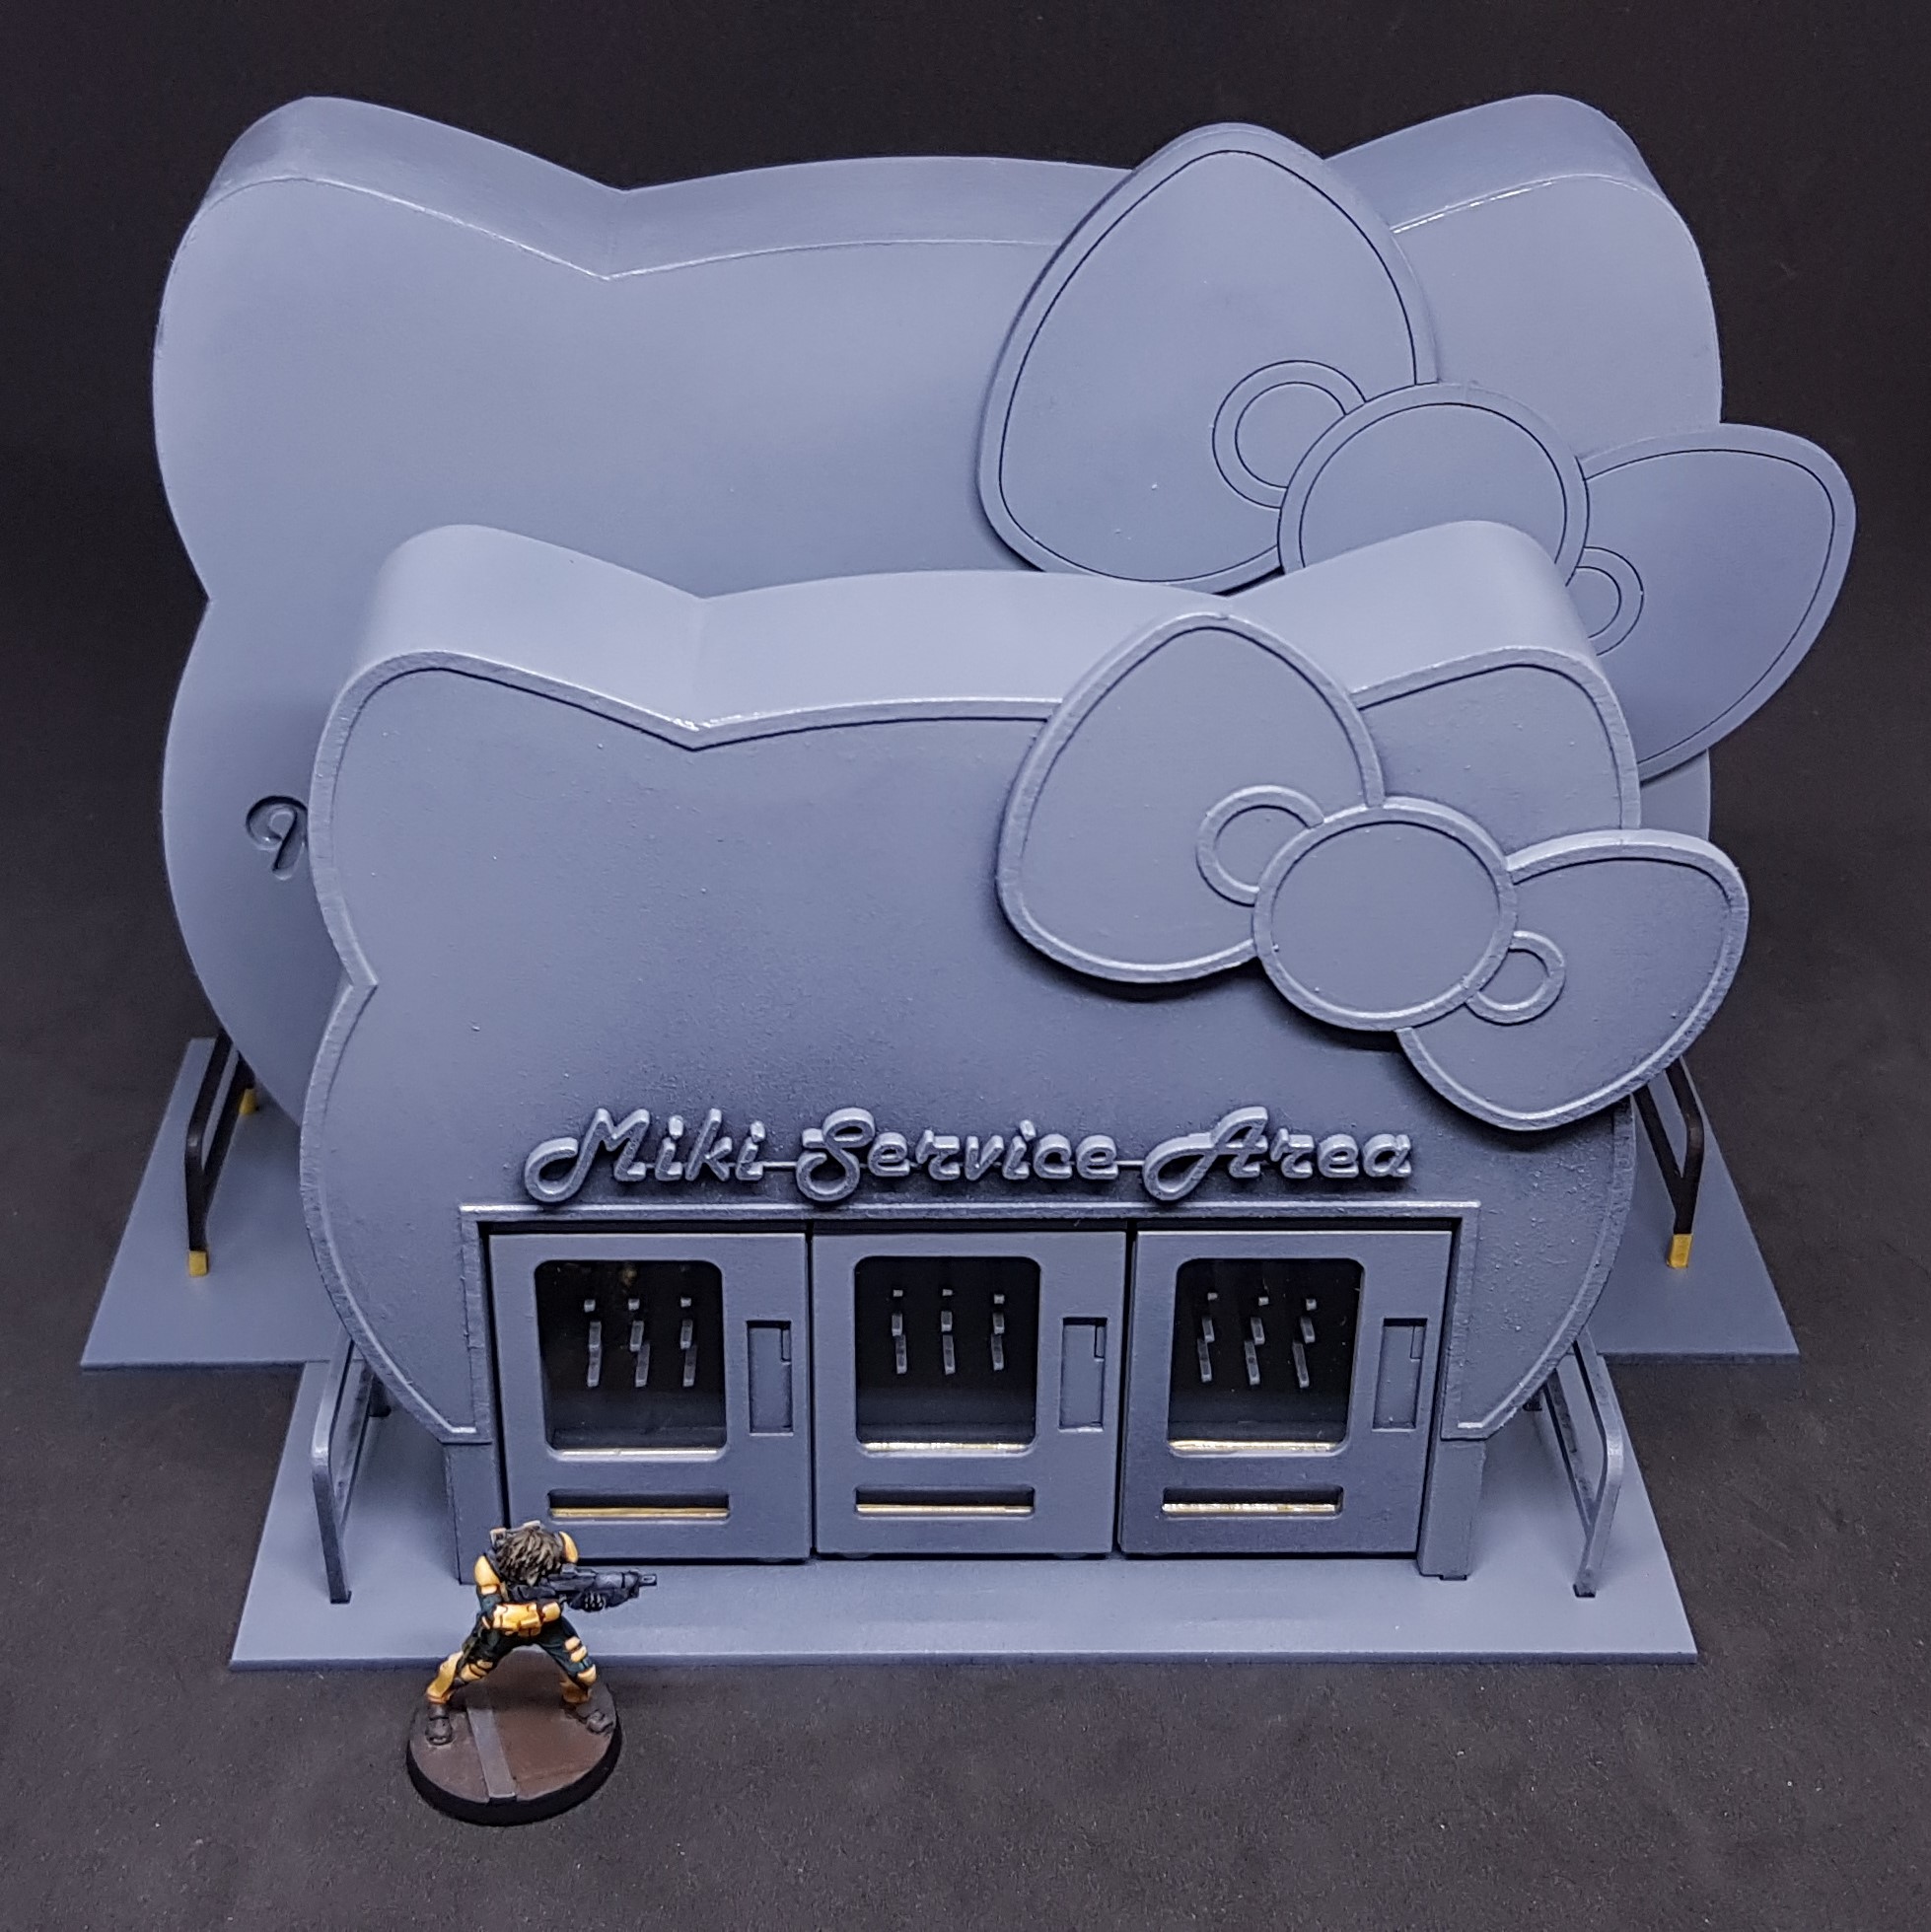 A comparison on new size vs old size., I am much happier with this design.
So, there you have it! All ready for painting. The only thing I have not done that was in the building stage was to put something in them to buy and design the display to go on the left side of the vending machines. This will come, and I will share a printable PDF that should be the correct size for this.
As always more to come… Anyone know how long a project must be to break the system?
Guess we will find out.


![StarCraft Tabletop Miniatures Game Pre-Orders Live Now [Updated]](https://images.beastsofwar.com/2026/03/starcraft-tmg-news-cover-600-338.jpg)


