


My Attempt At Painting: Fallout Wasteland Warfare – The Tabletop Hub


Recommendations: 249
About the Project
Hey everybody! Sam here, aka MrStainless, aka Sam from the Tabletop Hub. Fallout Wasteland Warfare is a game I've been super excited about for a LONG time and now that we're drawing nearer to the release in a couple of months I thought I'd put together this project to help you get inspired and motivated to paint your Fallout Miniatures! The 'My Attempt At Painting' series is a series for the amateur and beginner painter out there, I'm still a fledgling painter myself but hopefully by watching these videos and posts it'll help you progress on your journey. If I can do it, so can you!
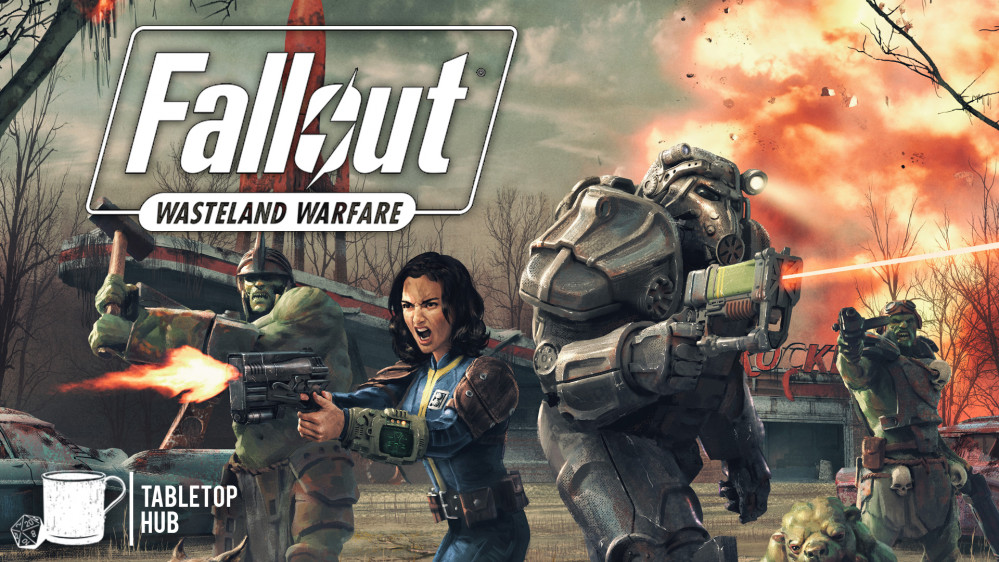
Related Game: Fallout: Wasteland Warfare
Related Company: Modiphius Entertainment
Related Genre: Post-Apocalyptic
This Project is Active
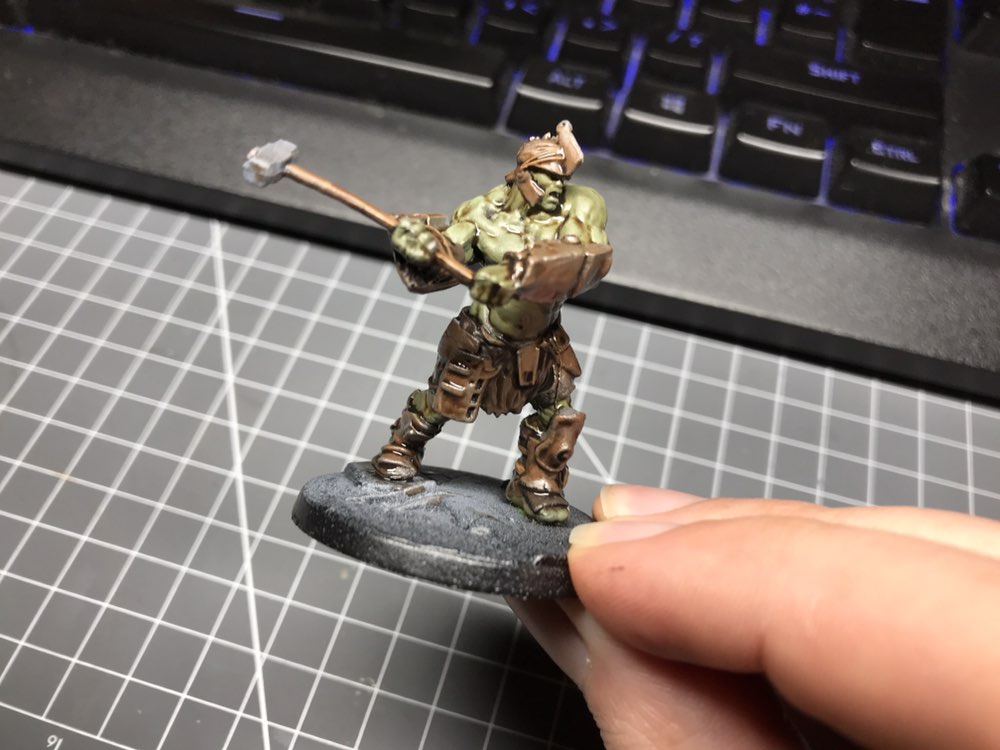
My Attempt At Painting Super Mutants - Fallout Wasteland Warfare
Today I’m going to go through my attempt at painting the Super Mutants from the Fallout Wasteland Warfare Core Set.
Now if you’re new to my projects the ‘My Attempt at Painting’ series is really for the amateur and beginner painter out there, I’m still learning how to paint miniatures well myself and my hope is that as you watch these videos and read through these guides it’ll inspire you to pick up a brush and get painting and hopefully we’ll both learn from each other along the way.
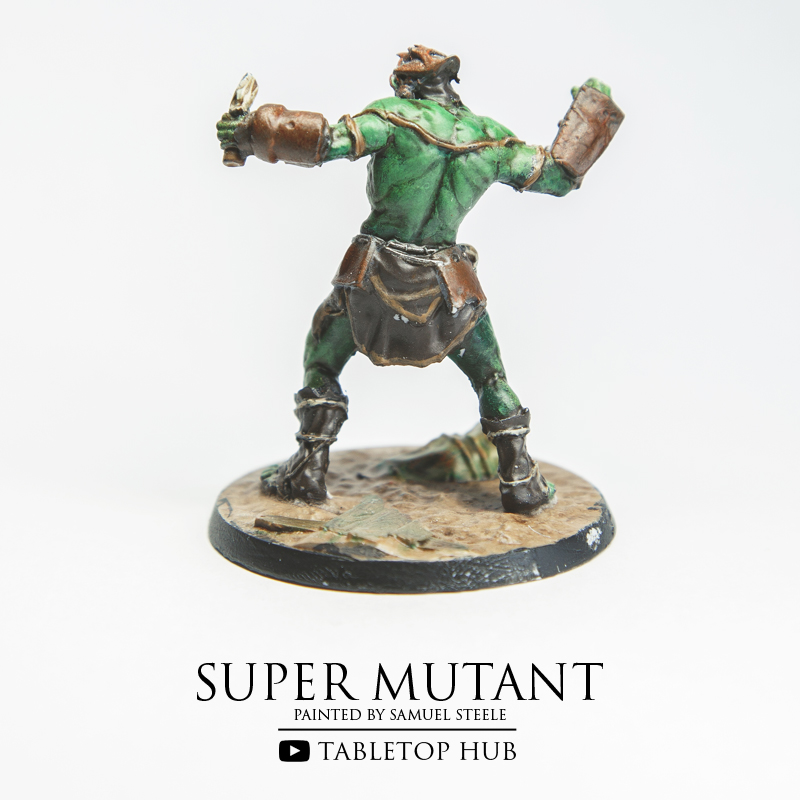
Today we’re painting the Super Mutants that you’ll find in the core set for Fallout Wasteland Warfare and while I’m not totally pleased with how the armour came out on these miniatures I am much happier with the skin tones as I feel they’re much closer to what we’d see in Fallout 4.
So first of all I took some Army Painters Ash Grey and painted some of the shoulder pieces of armour, I equally wanted to mix things up a little bit, the Super Mutants tend to scavenge their armour from whatever they can find and so there can be a bit of a mix and match look to it, so next I took some Army Painters Electric Blue and Army Green and applied that to some other random pieces of armour also.
Next I took some Army Painters Leather Brown and applied that to the wooden stock of the Super Mutants Pipe Rifle and then took some Army Painters Dry Rust Effect paint and gave the armour a dry brush, I feel I applied too much of the effect paint though because once we get to the finished look the different paints that were used on the armour are almost indistinguishable so if you’re doing this do consider applying sparsely.
Next I took Army Painters Army Green and began painting the skin of the Super Mutant.
I then took Army Painters Leather Brown and applied this to the clothing of the Super Mutants and applied some Army Painters Skeleton Bone to the skulls that you’ll see adorning some of the models.
Once this was all done I took Citadels Agrax Earthshade and gave the entire model a coating.
Once this was dried I took Army Painters Gunmetal and dry brushed the armour and the weapons to give them a brushed metal look.
As for the base it was very simple, I applied Necromancers Cloak from Army Painter to the road surfaces, Army Painters Monster Brown to the dirt, Army Painters Oak Brown to the wooden planks and finally Dungeon Grey from Army Painter to any bricks or kerbs that were on the bases.
I then applied Citadels Nuln Oil to the base to bring out some of the cracks and definition on the base itself.
And folks that was it, I think out of all three of the Mutants, the least armoured mutant is the one I’m most pleased with because we see more of his skin. I do feel the work I did on the armour of the other two really adds to much rust and brown to the mini and I think I’ll be less generous with this in the future.
If you enjoyed this tutorial or found it helpful do feel free to head over to my YouTube channel and subscribe to be kept up to date with when my next videos go live but until next time folks, have a great week and I’ll speak to you all soon.
The Super Mutants - In Progress
So I thought I’d share an in-progress photo of my Super Mutants, I don’t usually do this but I’m happy with how they’re coming along.
Usually what I do when preparing my guides or the videos is that I’ll work on one or two of the mini’s in a specific warband and figure out my style and technique for painting them, then document and film that process on the final mini.
One thing that will definitely add pressure with the rest of the range is the hero characters as I’ll only get one shot at them…fingers crossed!
In the meantime if all goes well I may even get my updated Super Mutant guide ready for next week!
Here’s hoping!
S.
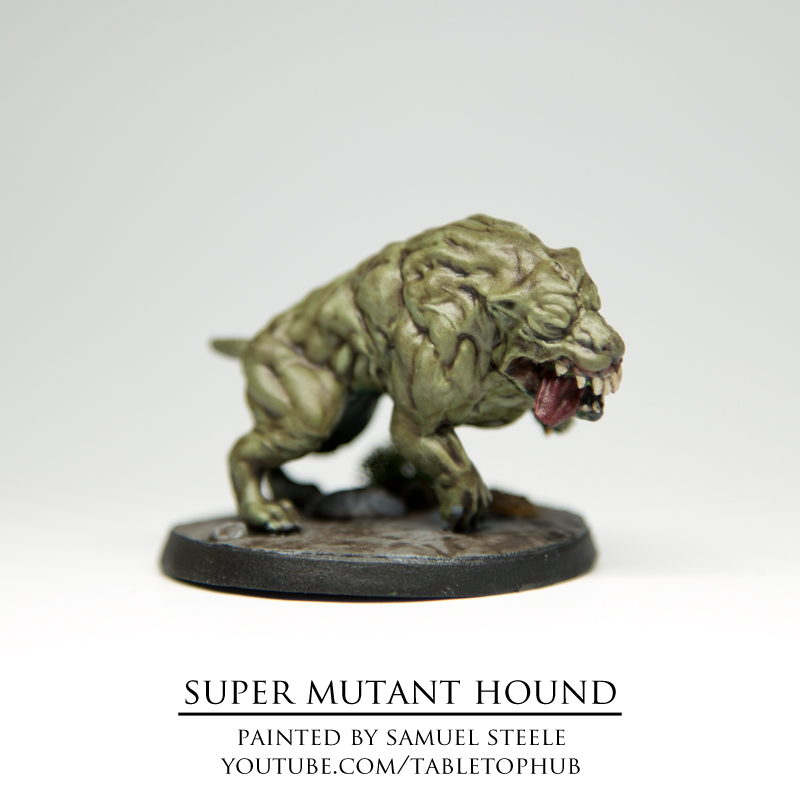
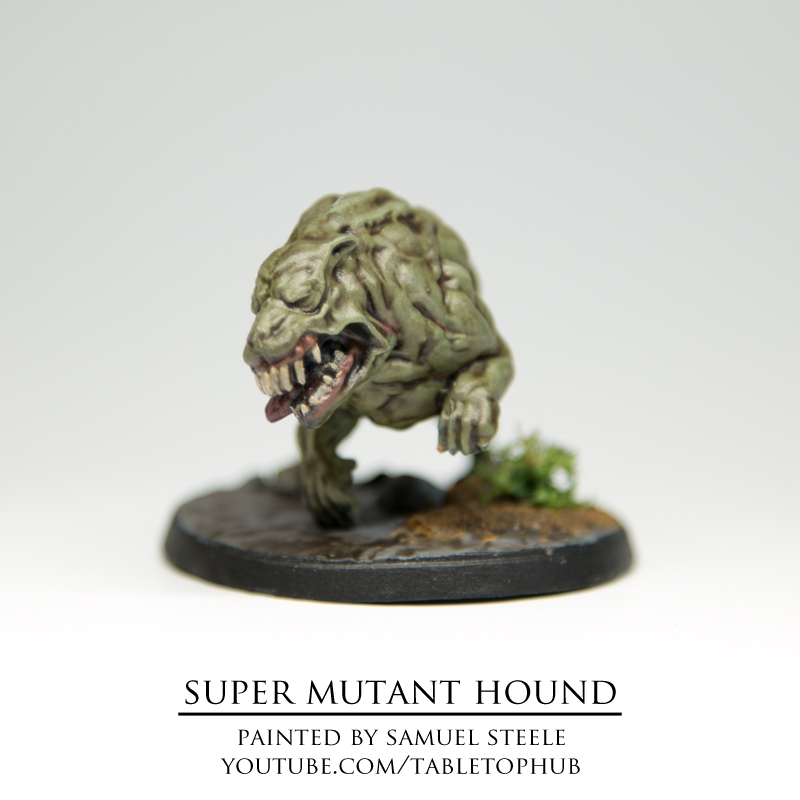
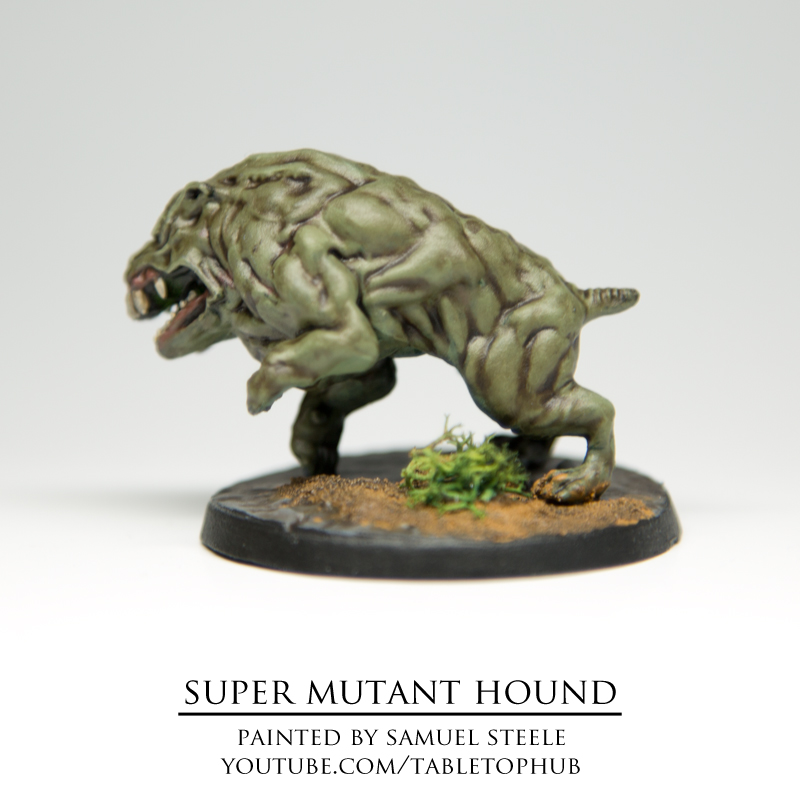
My Attempt At Painting Super Mutant Hounds - Fallout Wasteland Warfare
Hey everyone, Sam here, back for another painting guide! If you’re new to my projects, ‘My Attempt At Painting’ is a painting series for the amateur and beginner painter out there, I’m still a fledgling painter myself but hopefully by watching these videos and checking out these guides it’ll help you progress on your journey. If I can do it, so can you!
Today we’re making a start on the Fallout Wasteland Warfare two player starter set with the Super Mutant Hounds and I wanted to come up with a really simple, really easy to do, yet effective paint scheme. Today we’re only using about 5 paints and two washes and you should be able to achieve a look similar to mine in only a matter of hours. So lets get stuck in.
After priming my miniatures I used some Army Painters Army Green, added a little bit of water just to thin it down a little on my wet palette and painted the entire body of the hound. Now don’t worry if you need to give the miniature another coat or two of Army Green in order to cover it evenly, it’s always better to add a few even coats for a nice smooth finish than paint onto the miniature with paint straight out of the dropper as it can leave you’re miniature with a thick, gloopy looking finish.
Once this was done I got some Vallejo’s Bone White, but really any off-white paint here would work like Army Painter’s Skeleton Bone for example, and I painted the hounds teeth.
For the gums and the skin on the interior of the hounds mouth I mixed one drop of Army Painter’s Monster Brown with one drop of Crusted Sore which gave me the colour i was looking for, if you want to go one step further I’d recommend using this mixture to paint the veins or some deep recesses of the Hound. If you look at some imagery of the irradiated pups from the game you will notice so discolouration on the skin in the deep recesses and this colour works well for that.
Next I gave the hound a wash with Citadel’s Agrax Earthshade, this is where it really starts to come together. Now don’t worry if the skin doesn’t look dark or dirty enough after this first coating, we’ll come back to it in a second.
After the first wash layer had dried I took some Army Green, added some Matt White and added a few highlights to the hound especially around the face where I wanted the players eye to catch, I didn’t highlight extensively as honestly I didn’t think it needed much and I’m also not a massive highlighter kind of guy but some subtle highlights work well.
Next I went back and added another layer of Agrax Earthshade to the miniature and once that dried it was on to the base.
I couldn’t tell if the base was on roughed cement, gravel or dirt so I gave it a coating of Vallejo’s Stonewall Grey and accented this with Army Painters Dungeon Grey on the bit of the base that looked like broken slabs or pave stones.
I equally wanted to experiment a bit more with basing with these miniatures, I haven’t added much to the bases in any of my other painting guides aside from mud in a tub so this time around I added a little bit of Vallejo’s mud in a tub (or more accurately their Brown Earth Diorama Effect Texture Paint) and then took some Summer Undergrowth from Army Painter and tastefully added it to the mud with some superglue.
I gave the entire base a quick wash with Agrax Earthshade and finished off the miniatures with a layer of Anti-Shine from Army Painter just to seal it all in.
And folks that is it, that is how I painted the Super Mutant Hounds from Fallout Wasteland Warfare. This is a really simple way to paint your Super Mutant Hounds but hopefully you’ll agree that it looks pretty cool and pretty effectively captures the look of the characters.
I’m going to be bringing you an updated version of my Super Mutant painting guide next and I’ll be using very similar paint schemes for the flesh tones there but if you want to see more of this kind of content from me feel free to head over to my YouTube channel and subscribe there to be kept up to date!
Until next time, wanderers!
S.
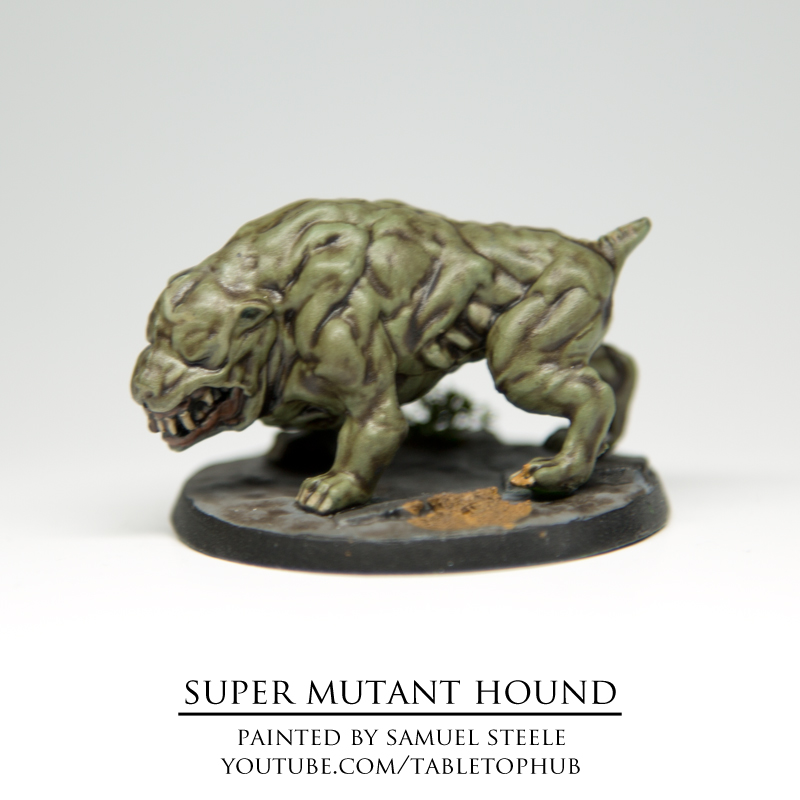
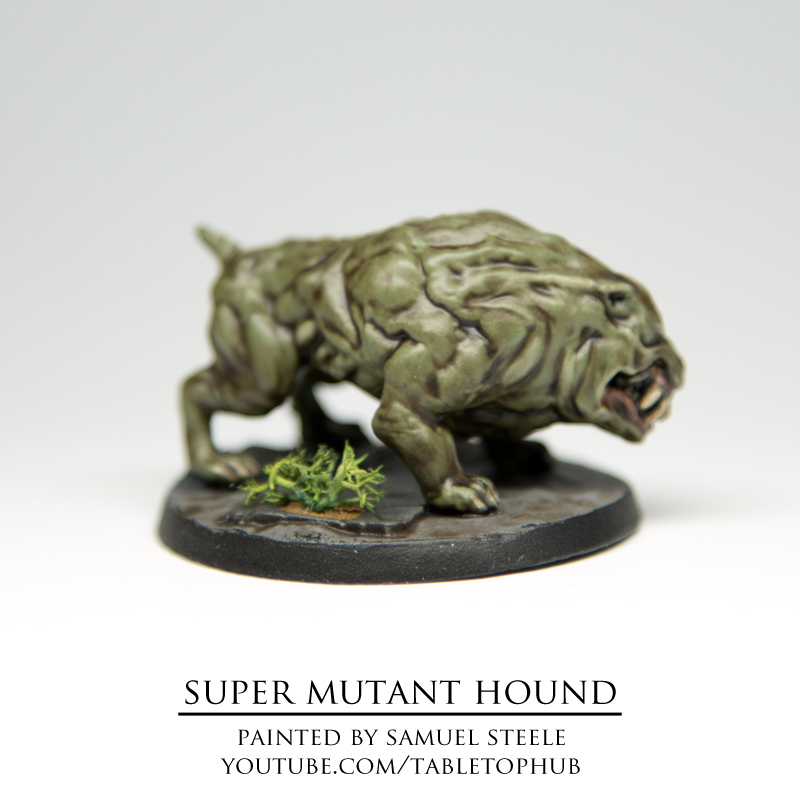
Super Mutant Hound Photo Gallery
Hey everyone! I’ve just wrapped up painting my Super Mutant Hounds from the two player starter set for Fallout Wasteland Warfare. I’ve got a full video guide on the way but basically I wanted to keep this paint scheme very very simple and easy.
In essence what you’re looking at is a total of about 5-6 paints, two different washes and some basing materials and could be done in a couple of hours.
If you’re looking for a quick and effective paint scheme keep an eye out on Monday for the video and full written guide!
Sam.

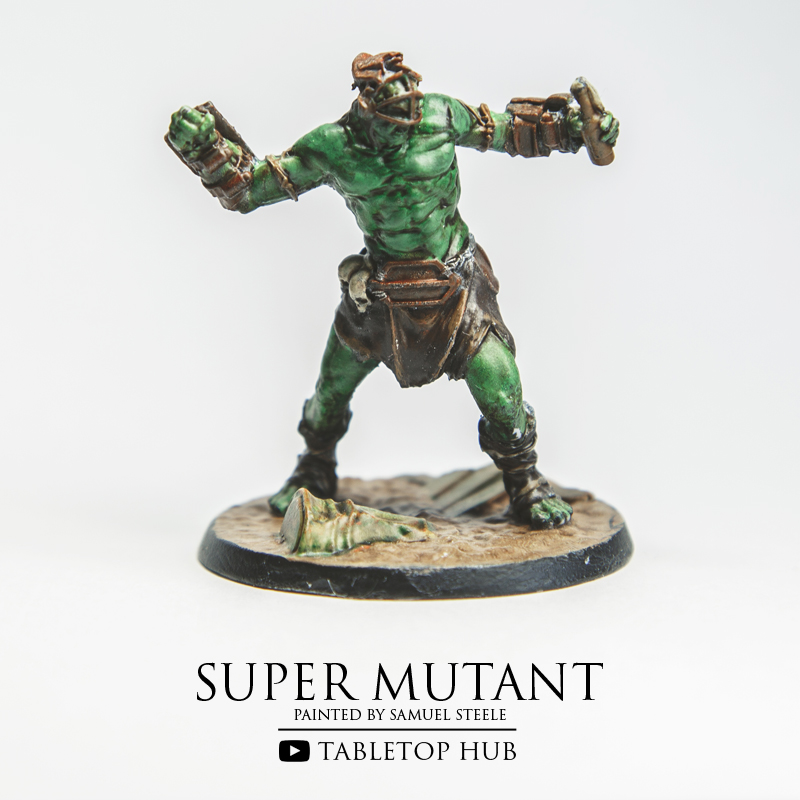
Super Mutant Photo Gallery
Hey everyone, Sam here, so as always now that the paintwork is done I thought I’d upload some images of the final product so you can see it in greater detail.
I’ll have a Brotherhood of Steel Scribe painting tutorial coming your way at some point soon but in the meantime enjoy!

My Attempt At Painting A Super Mutant
Hey everyone Sam here from the Tabletop Hub and this is My Attempt At Painting a Super Mutant from Fallout Wasteland Warfare. This is our painting guide or painting tutorial series here at the Tabletop Hub but what makes it different from other painting guides is that I include my mistakes and tell you about them. I’m not a professional painter by any means so as I learn and progress as a painter the hope is, as you watch these videos, you begin to progress and improve too.
So, to begin I applied a undercoat of zenithal highlights to help me better pick out where the highlights and shadows are on the miniature. If you haven’t done this before it can be super helpful. Once this had dried I took some of Army Painters Goblin Green and applied this to all of the shadowed areas on the miniature, now this is the first time I’ve used a wet palette and I have to say I’m already seeing a massive difference when painting my miniatures, you may need to apply a couple of layers to get an even coating but the results really speak for themselves, your work is less chalky and preserves the detail on the miniature.
Once this was done I then took Army Painters Jungle Green and began painting the highlighted areas of the miniature, at the areas where I saw the highlight meeting the darker areas I tried to blend the two colours as best I could. Now Jungle Green may look a little too bright but remember we will be adding a dark wash to this at the end which will bring that down a little. Equally the skin colour of the Super Mutants in Fallout 4 is quite bright.
For the cloth and clothing that the Super Mutant wears I actually steered clear of using any browns, instead I used Army Painters Dark Stone. It gave the clothing a nice dark and discoloured look.
Next I moved on to the pieces of metal that the Super Mutant uses as protection, now recently for any metal I’ve been painting I’ve been tending to steer clear of using actual metallic paints, I just don’t feel like it gives me the look I’m trying to achieve so in this case I used Dungeon Grey from Army Painter.
Now if you look at any images of a Super Mutant you’ll notice that the armour they wear is all rusted and weathered so I wanted to achieve a very similar look here, so what I did was I took Army Painters Dry Rust effect paint and got my Stippling Brush and applied just a little amount to the brush itself and the just dabbed the effect paint onto the metal, once it was applied I would occasionally scratch it or dab it some more but it gave the armour a really nice look and I think the weathering effect really works well.
Once this was done it was really time to just apply some finishing touches to the miniature and get those final details completed so I applied some of Valejo’s Bonewhite to the skulls around it’s waste and the cloth coming out of the Molotov Cocktail, and I equally added some Army Painter Leather Brown to the ropes that the Super Mutant has tied around it and to the Molotov it’s holding.
Once this was completed it was time to add the wash, now usually I would use Army Painter’s Quickshade to my miniatures but this time I wanted to experiment with some Citadel Inks just to see what kind of finish they would produce, so I used some Agrax Earthshade from Citadel and applied this generously to the miniature and then removed any excess or unwanted pools of the ink before leaving it to dry. It gave a similar look to what you’d achieve from the Quickshade and I think on a miniature with such intricate details having a wash or ink with a thinner consistency perhaps works well…I still love the Quickshade though.
With the miniature more or less complete I wanted to finish off by completing the base so I got some Army Painter Leather Brown and gave a quick coating to the ground. For the barrel I used some Army Painter’s Desert Yellow and applied a couple of coats there before taking some Oak Brown from Army Painter and painting any wooden planks you can see sticking out of the ground.
One stage I don’t know if I’d repeat was once this was all done I took some Agrax Earthshade and covered the ground with it, I equally took some Green Ink and added this to the barrel and to the wood to make it look like they’d gotten moss or fungus growing on them, like I say I’m not sure if I’d do this for my other Super Mutants but it was interesting to experiment with.
With this complete I gave the miniature a quick coating of Anti-Shine and we were done. In all I think the paintwork was effective in replicating the look of the Super Mutants from the Fallout series, in future though what I’ll likely do is give the bases more of a gravelled look that a dirt one because I think that would look quite nice.
In the meantime though why not let me know what you think down in the comments below. But until next time have a great week folks, and I’ll speak to you all soon.
Nora: The Sole Survivor Photo Gallery
Hey everyone, Sam here, so with the paintwork finished I thought I’d upload a couple of images for you all to see the work that was done on Nora: Sole Survivor.
I’ll have a Super Mutant painting tutorial coming your way soon followed by some Brotherhood of Steel but in the meantime enjoy!
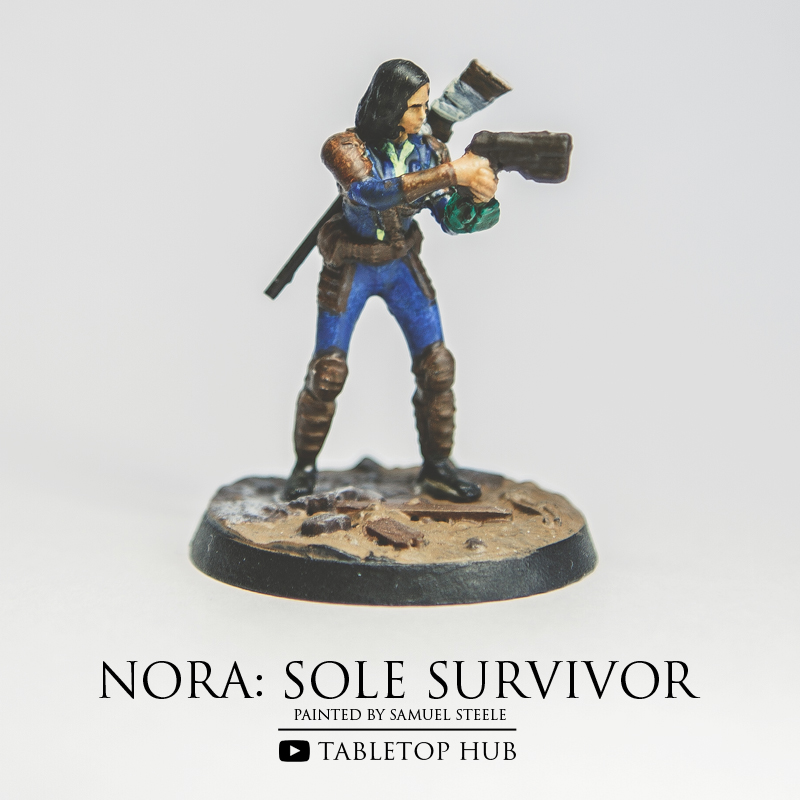
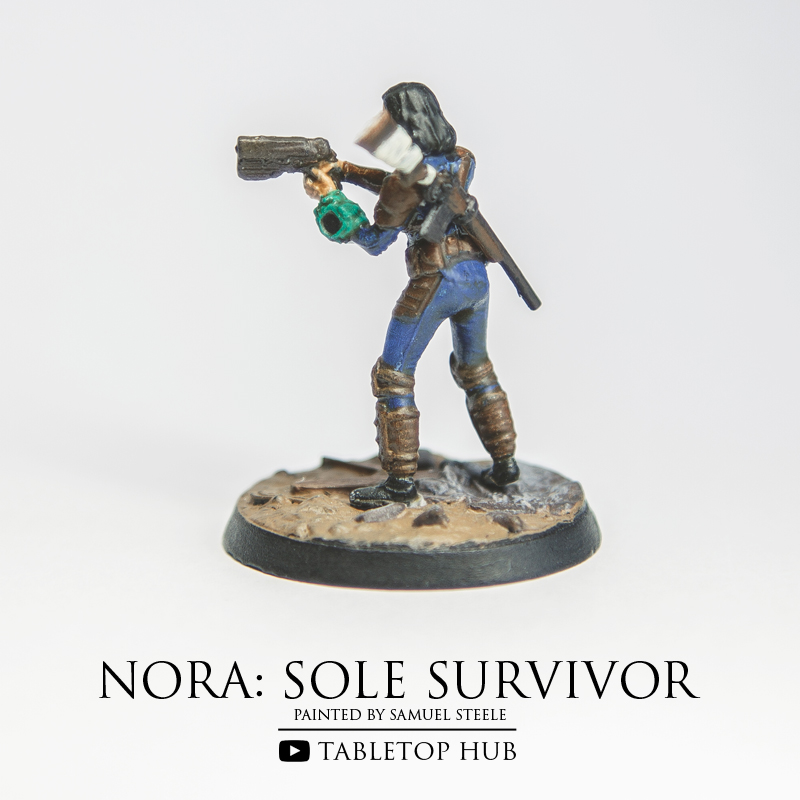
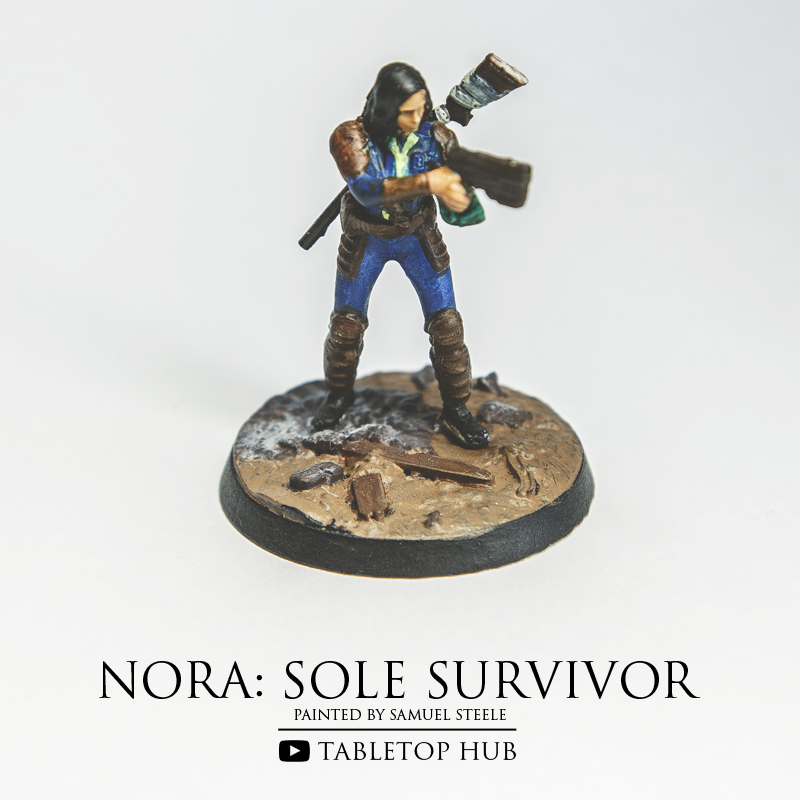
My Attempt At Painting Nora: The Sole Survivor
In our first installment in the ‘My Attempt At Painting’ Fallout Wasteland Warfare series the key lessons I’ve learned is take your time, plan ahead and know when to stop.
It can be so easy when you paint to just get frustrated and throw the brush down when you make a mistake or the project doesn’t go your way. In those moments it’s important to just remind yourself that you’re human, you’re going to make mistakes on this journey to improve your skills and you just have to take the knowledge of your mistakes into your next miniature.
Thats what I learned while painting Nora, it’s not my best work, but I definitely learned from it.
S.


