
![Pure Sci-Fi Nostalgia! War Rocket Review | Hydra Miniatures [7 Days Early Access]](https://images.beastsofwar.com/2026/02/unboxing-hydra-miniatures-war-rocket-coverimage-225-127.jpg)


Age of Sigmar Fyreslayer Lodge


Recommendations: 236
About the Project
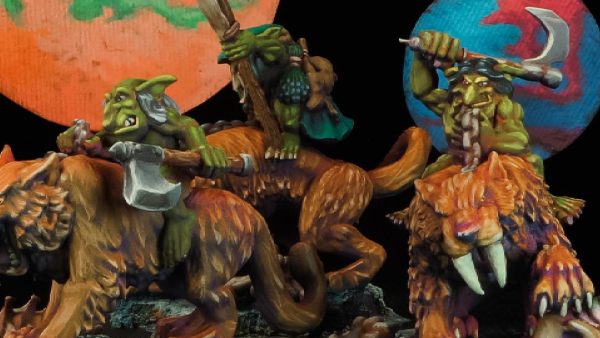
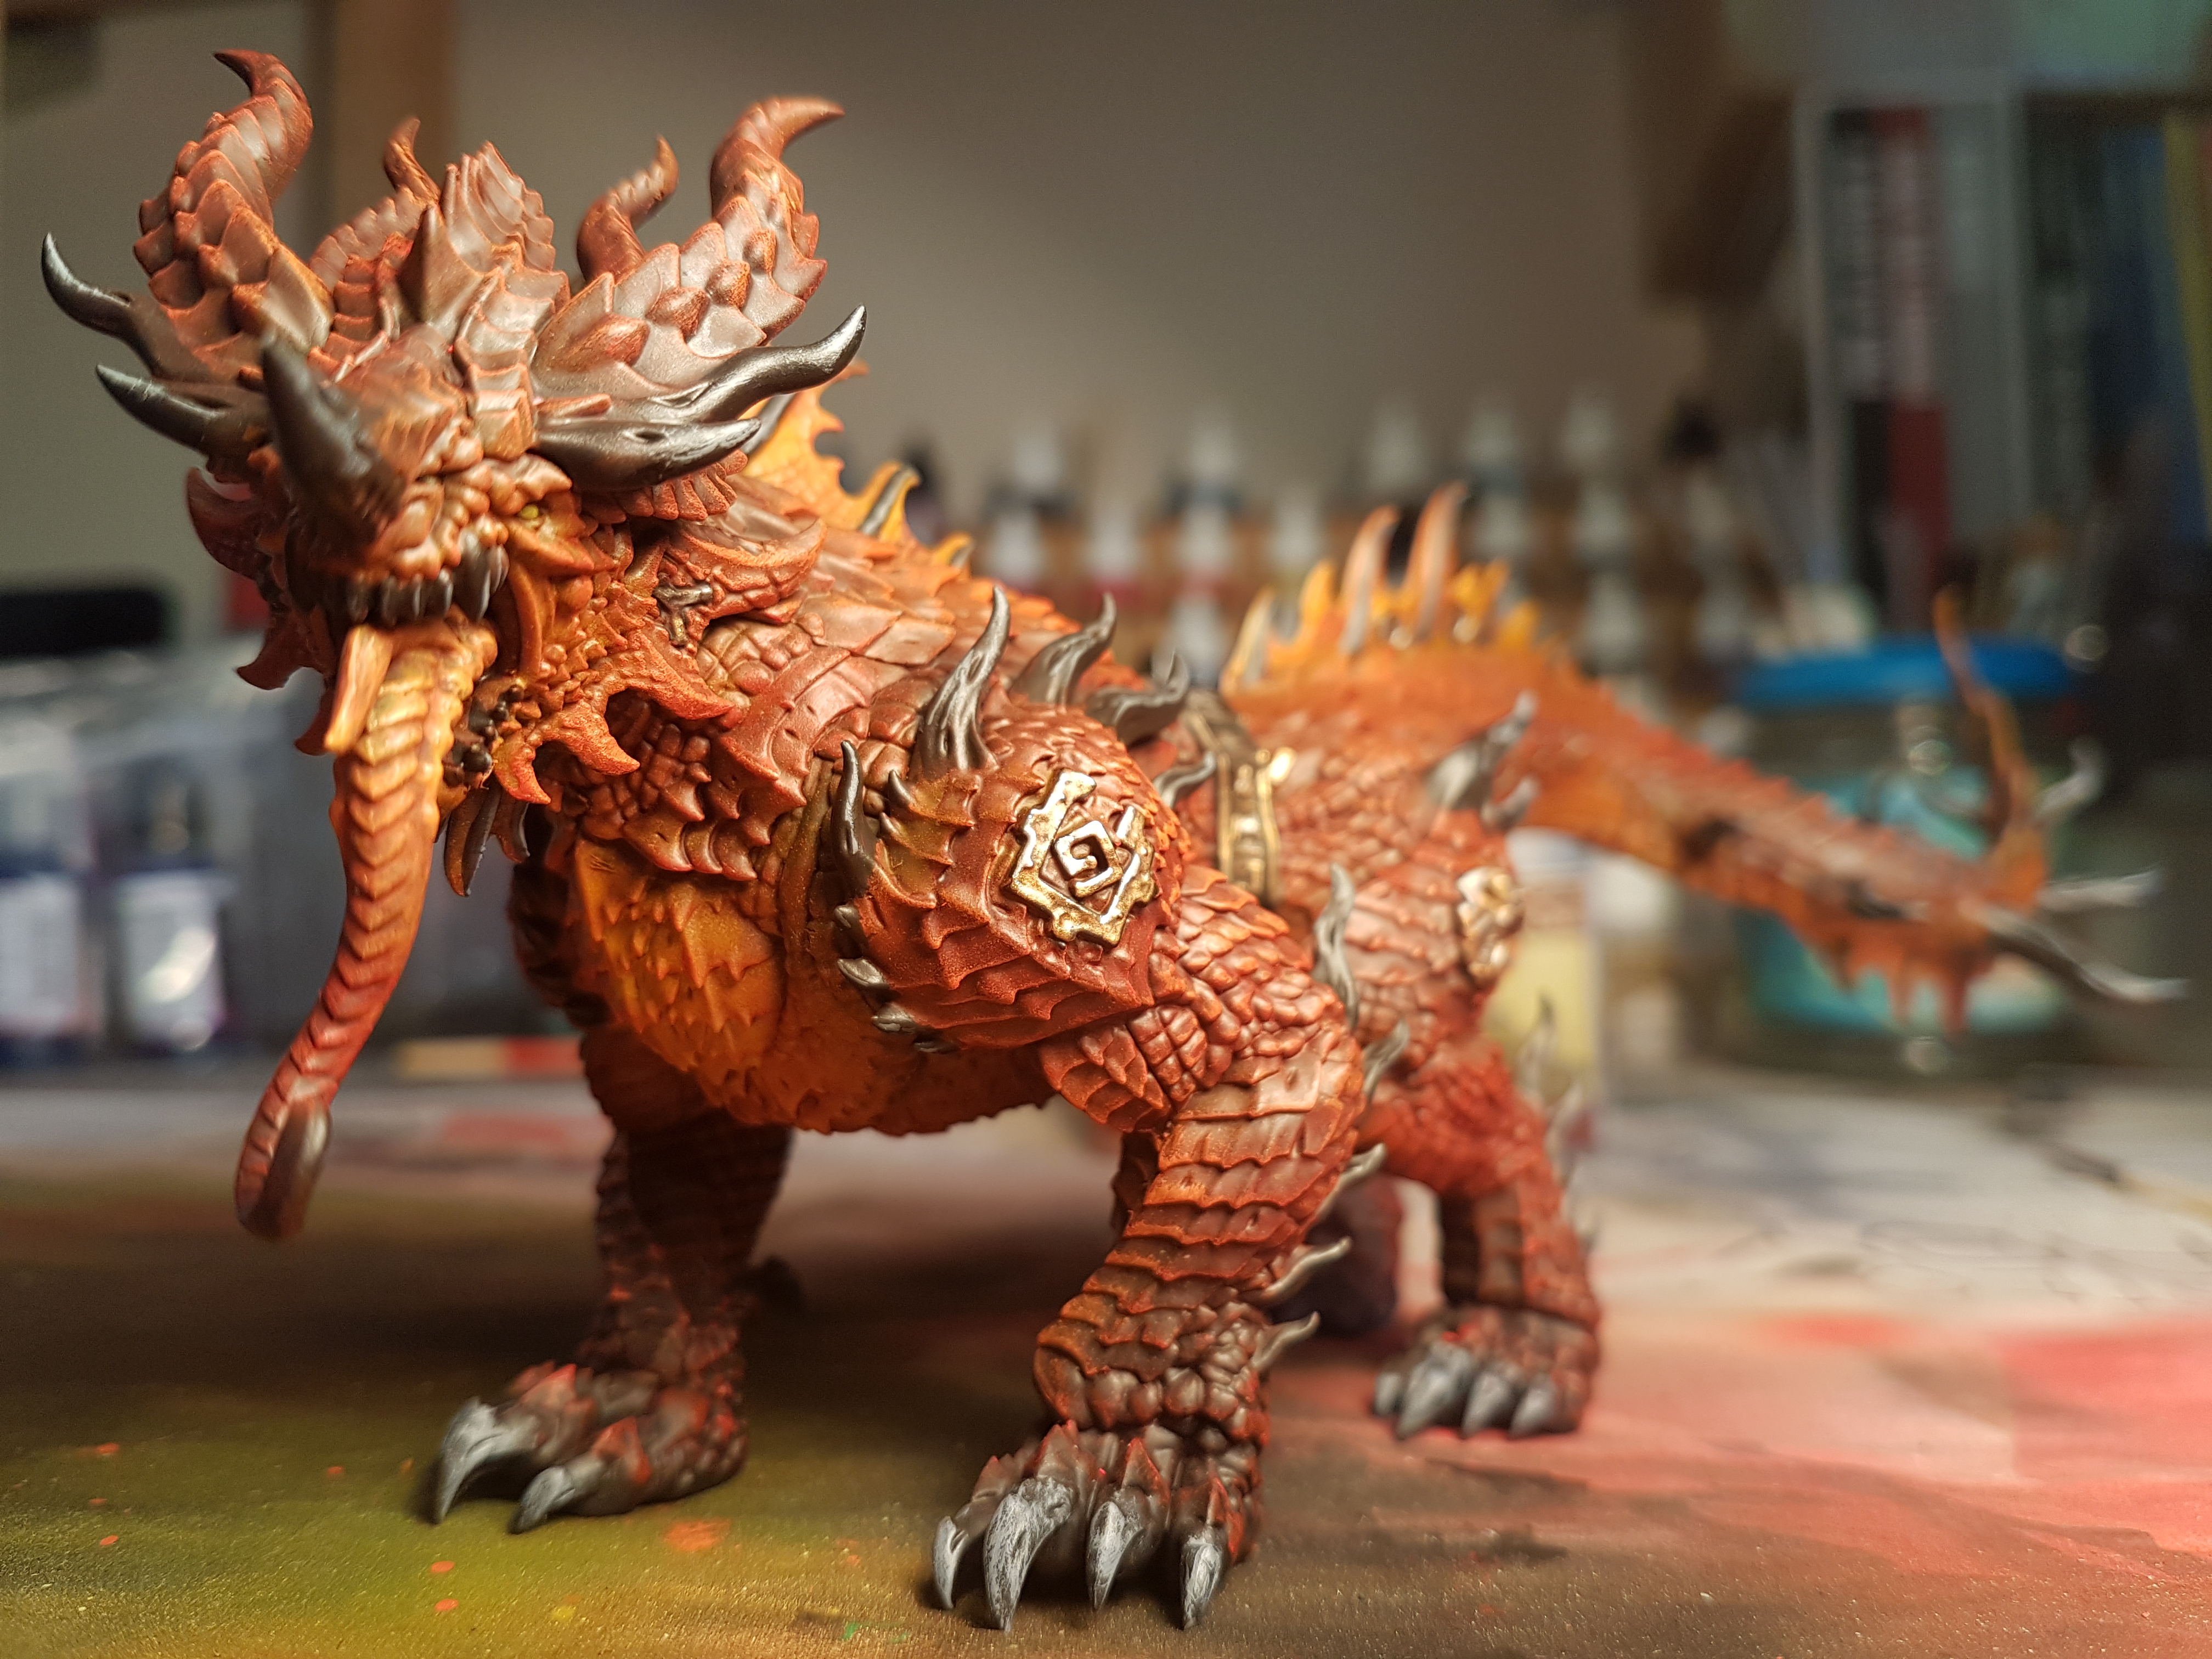
With the new edition of Age of Sigmar on the horizon I am getting on with painting up my Fyreslayer Dwarfs. Thought I'd share my progress with you all. For the Magmadroth I took inspiration from an online video by Big Mek Workshop and the GW TV pages, but have been varying it to suit my ability and style. I have learnt a lot painting the Magmadroth, and forced myself to use new techniques I normally shy away from like edge highlighting and flesh tones. Really pleased how it has turned out so far. There are some superfluous steps in there, especially on the riders hair where I went back and forth trying to get the right balance and contrast, but the lessons learnt will certainly help me formulate a speedy approach to painting up the rest of the foot troops.
Related Game: Warhammer Age of Sigmar
Related Company: Games Workshop
Related Genre: Fantasy
This Project is Active
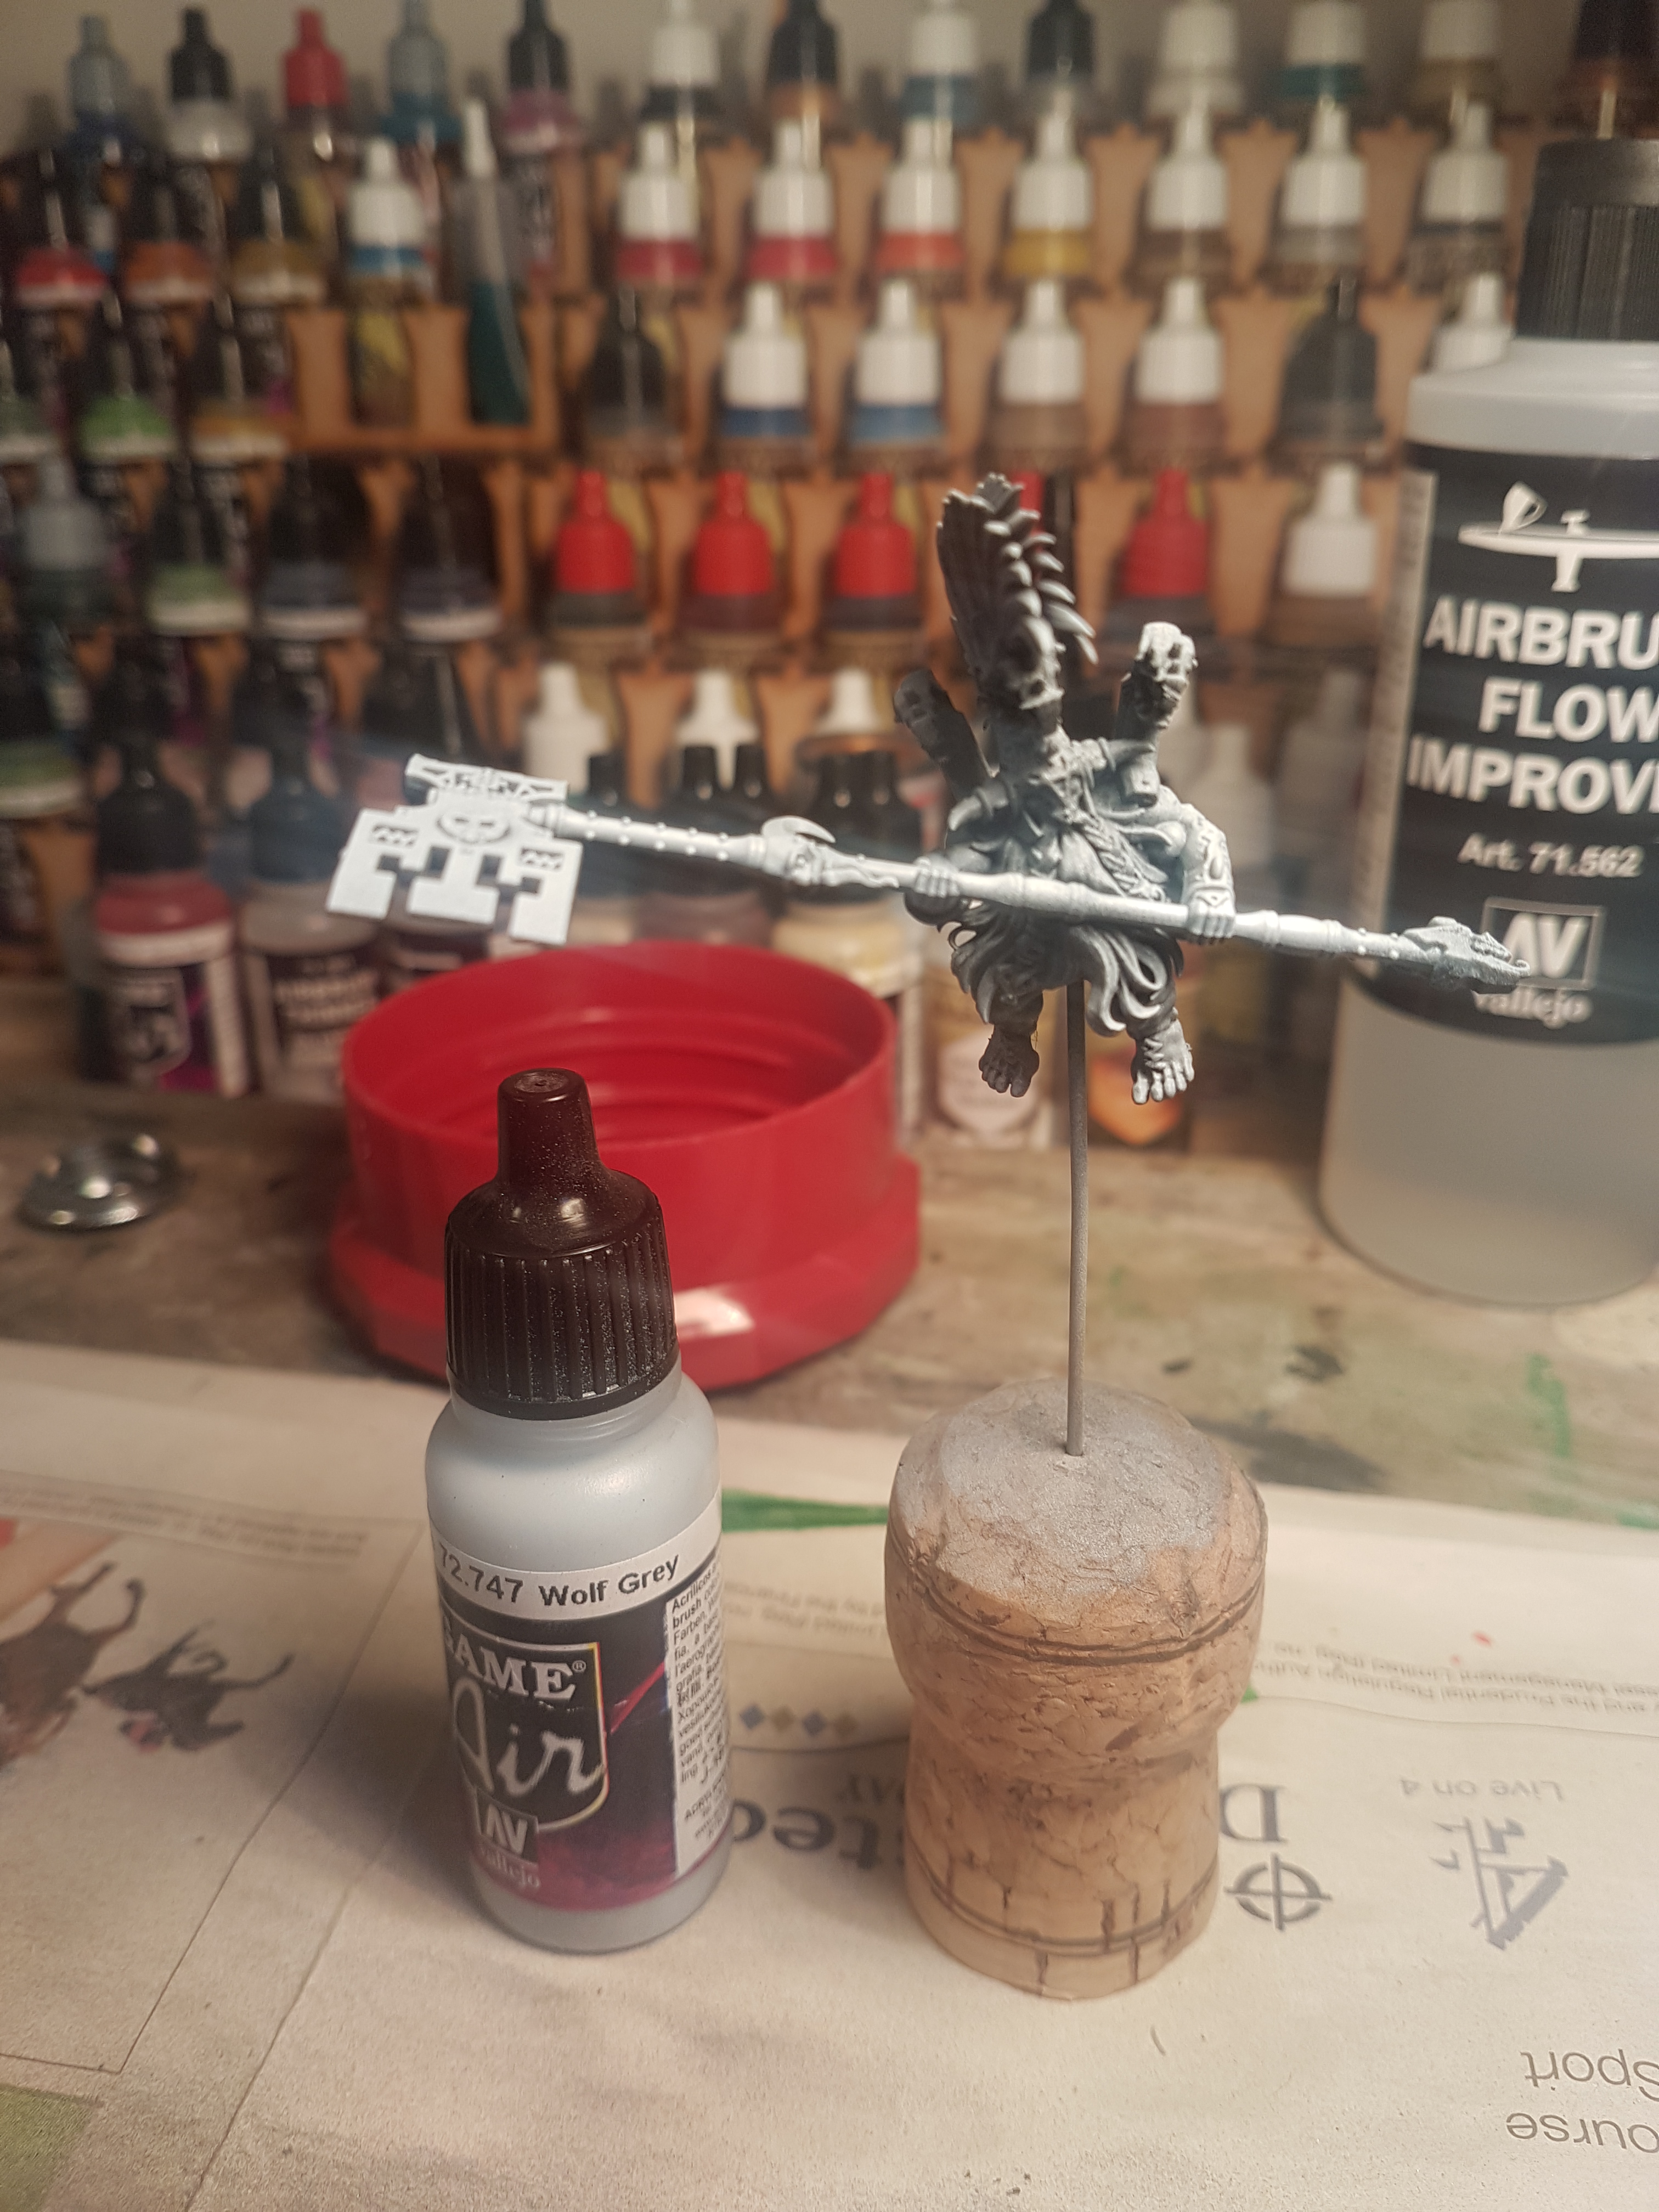
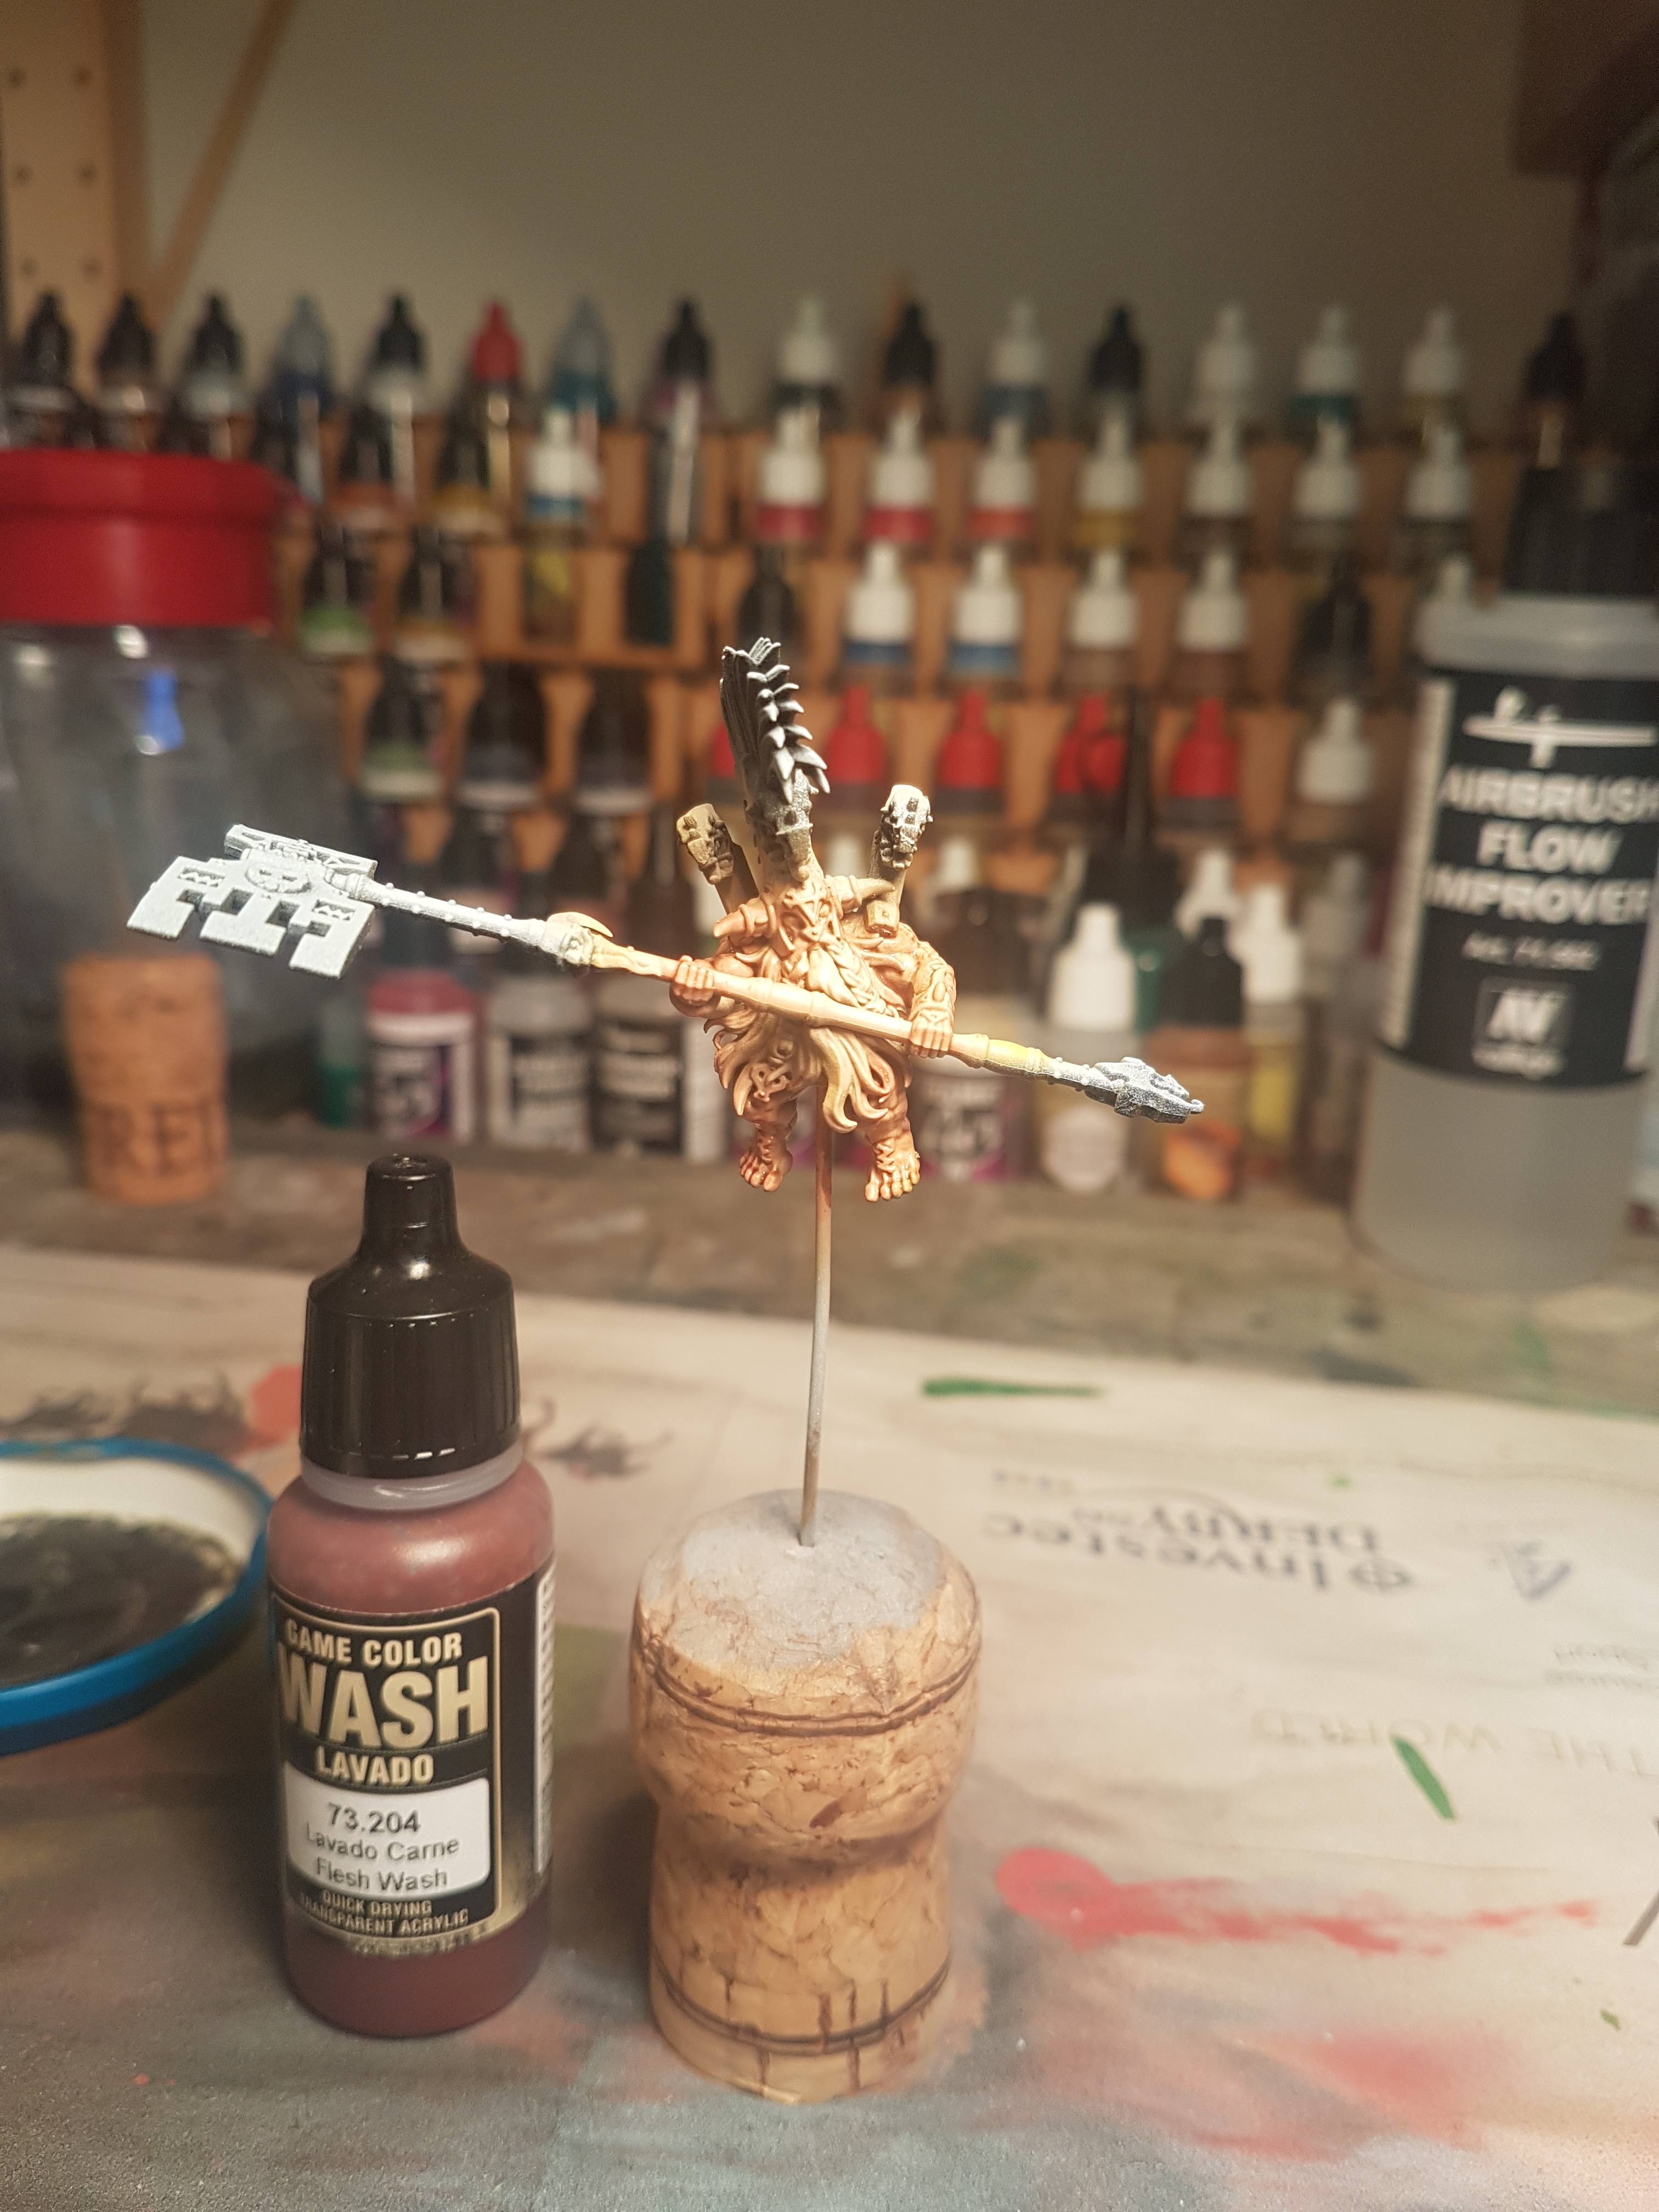
Rider - Flesh Part 1
Having base coated the rider black, I used an airbrush to apply a light coat of Vallejo Wolf Grey, directing mainly from above and at a 45degree angle to get some pre shading in.
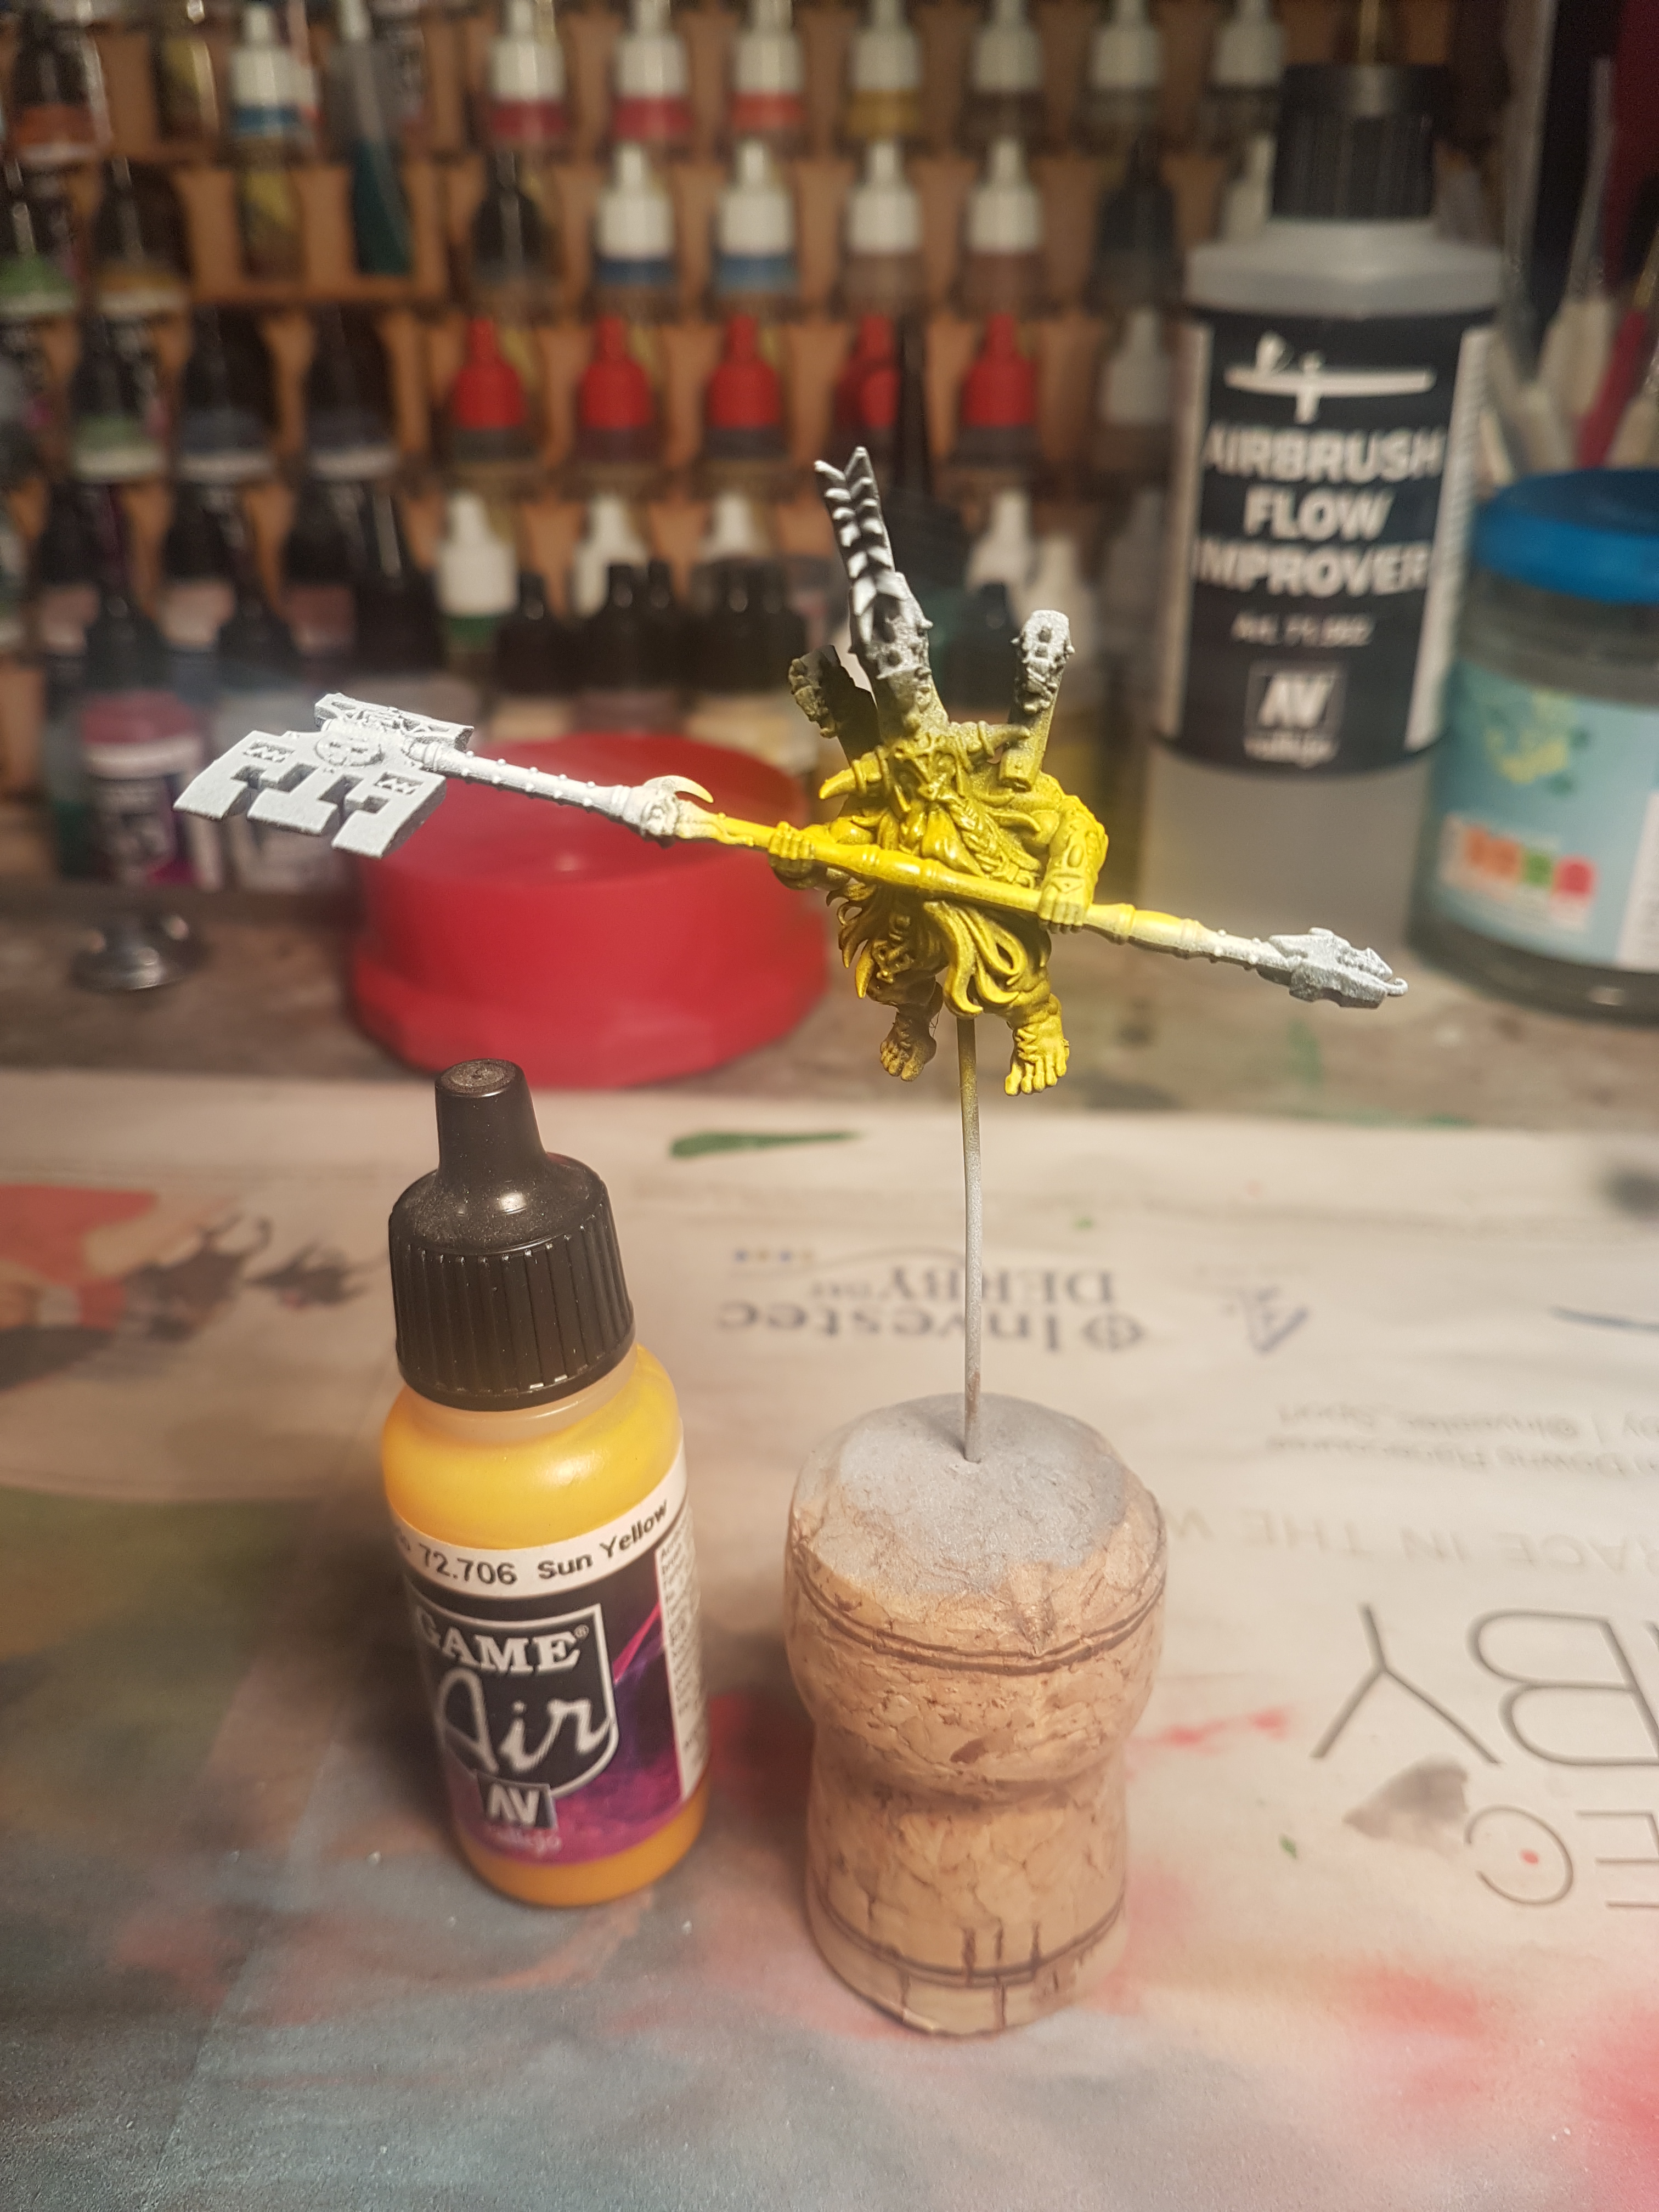
I then did the same with yellow over the skin areas.
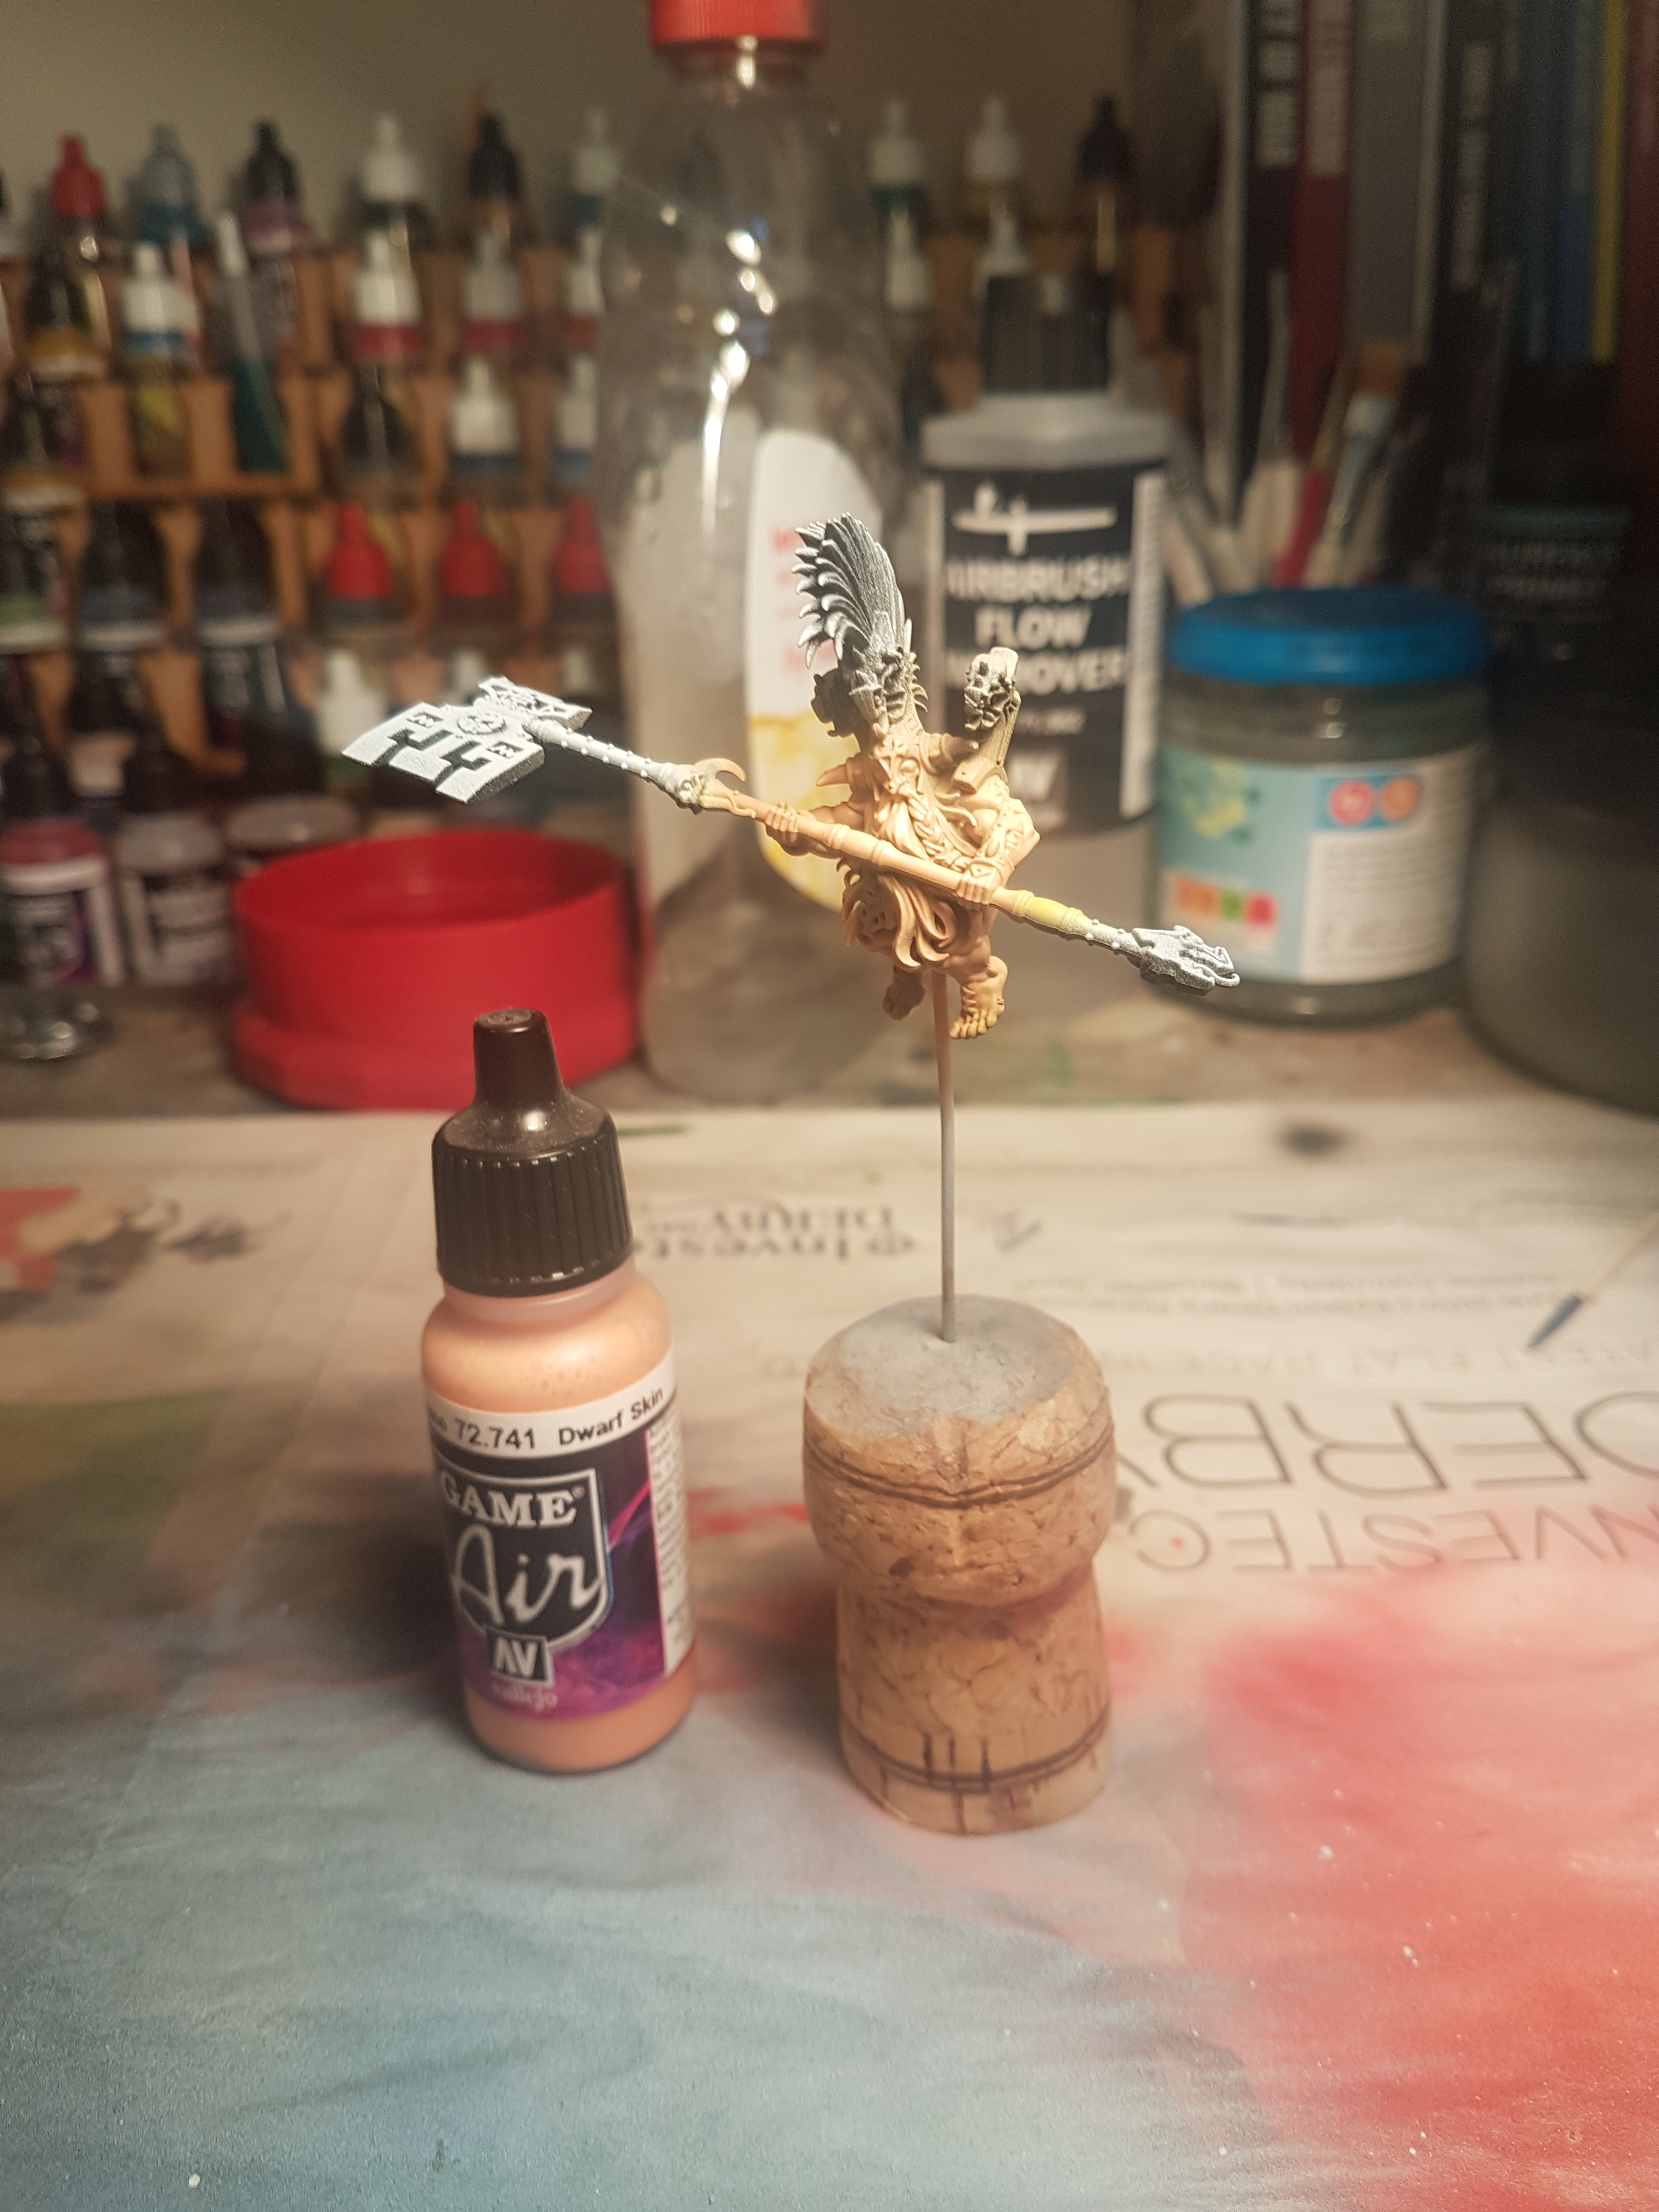
Floowing this I used the airbrush to apply Dwarf Flesh to the flesh areas, and once dry used a bursh to apply Vallejo Flesh wash, being careful to make sure it did not clump on the raised muscle parts.
It was then time for dinner 🙂
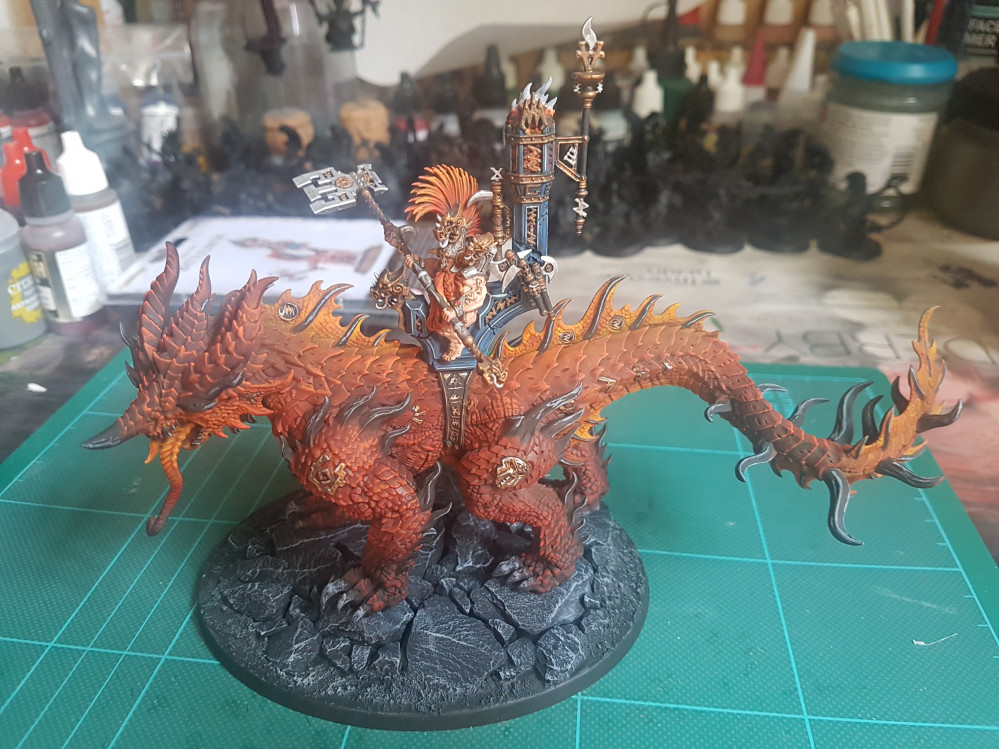
Magmadroth and Throne Combined
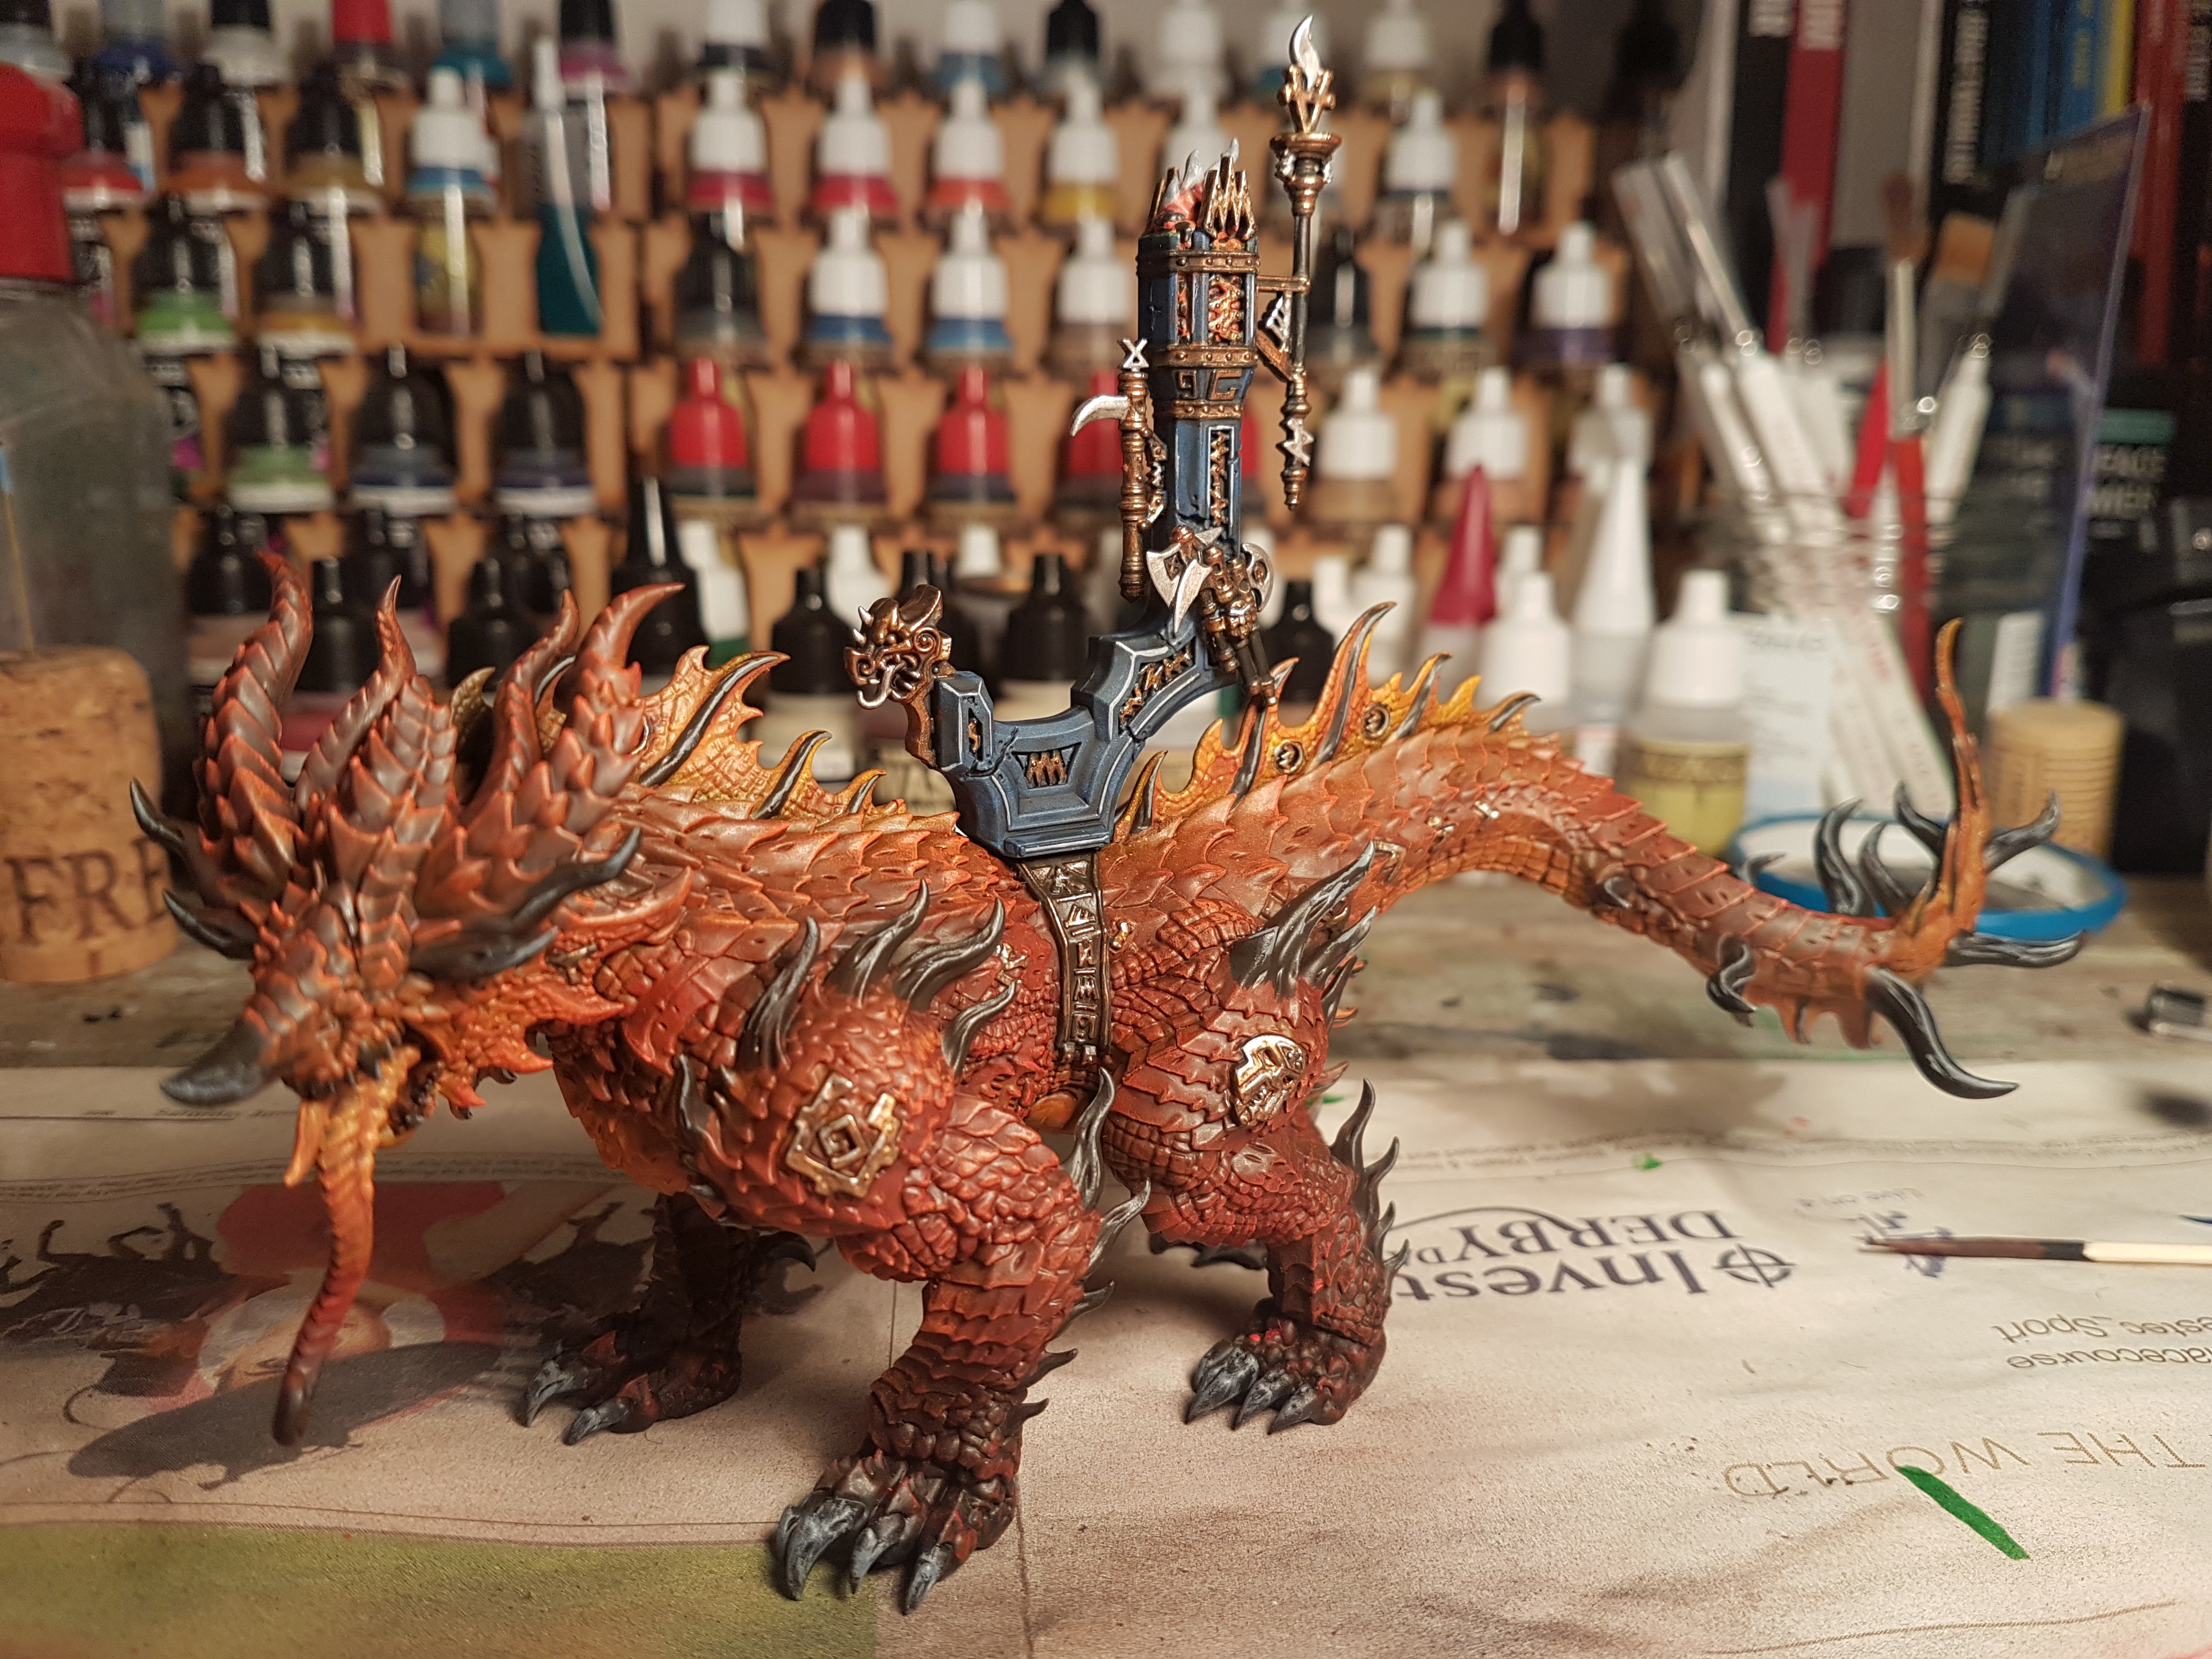 Having added the throne onto the Magmadroth, I am quite pleased how this has turned out so far. Onto the rider and then the base.
Throne Part 4
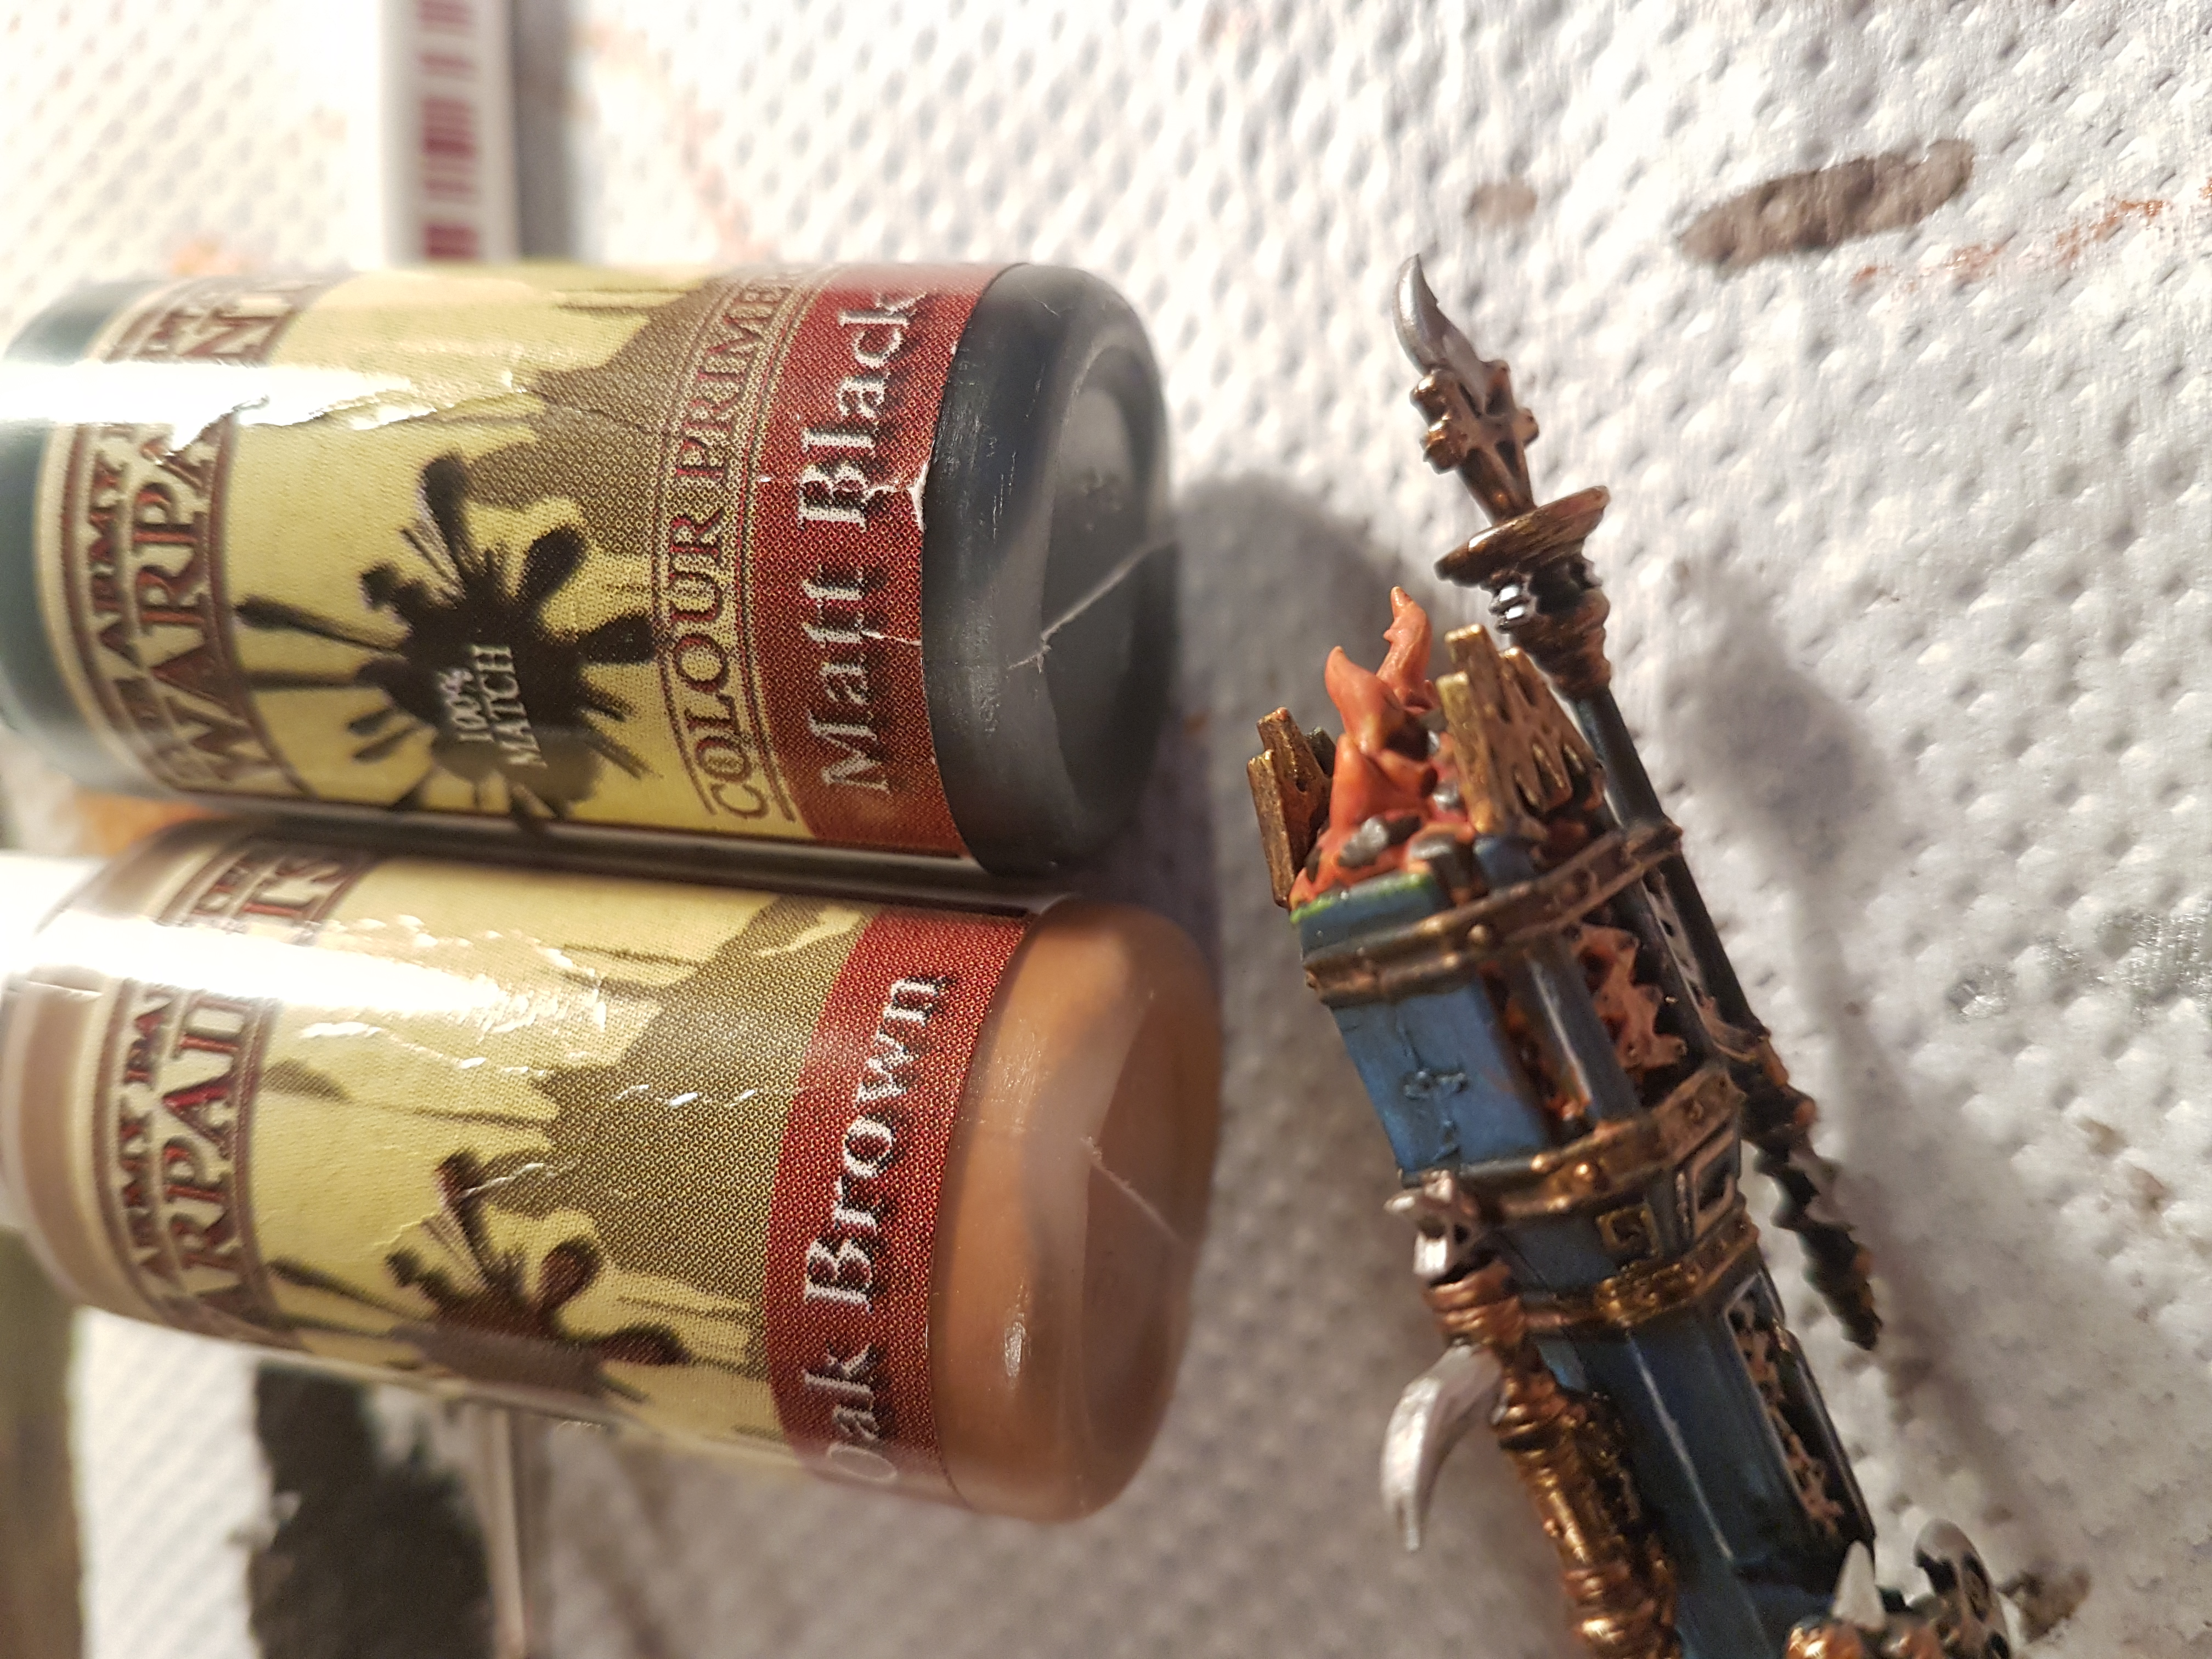
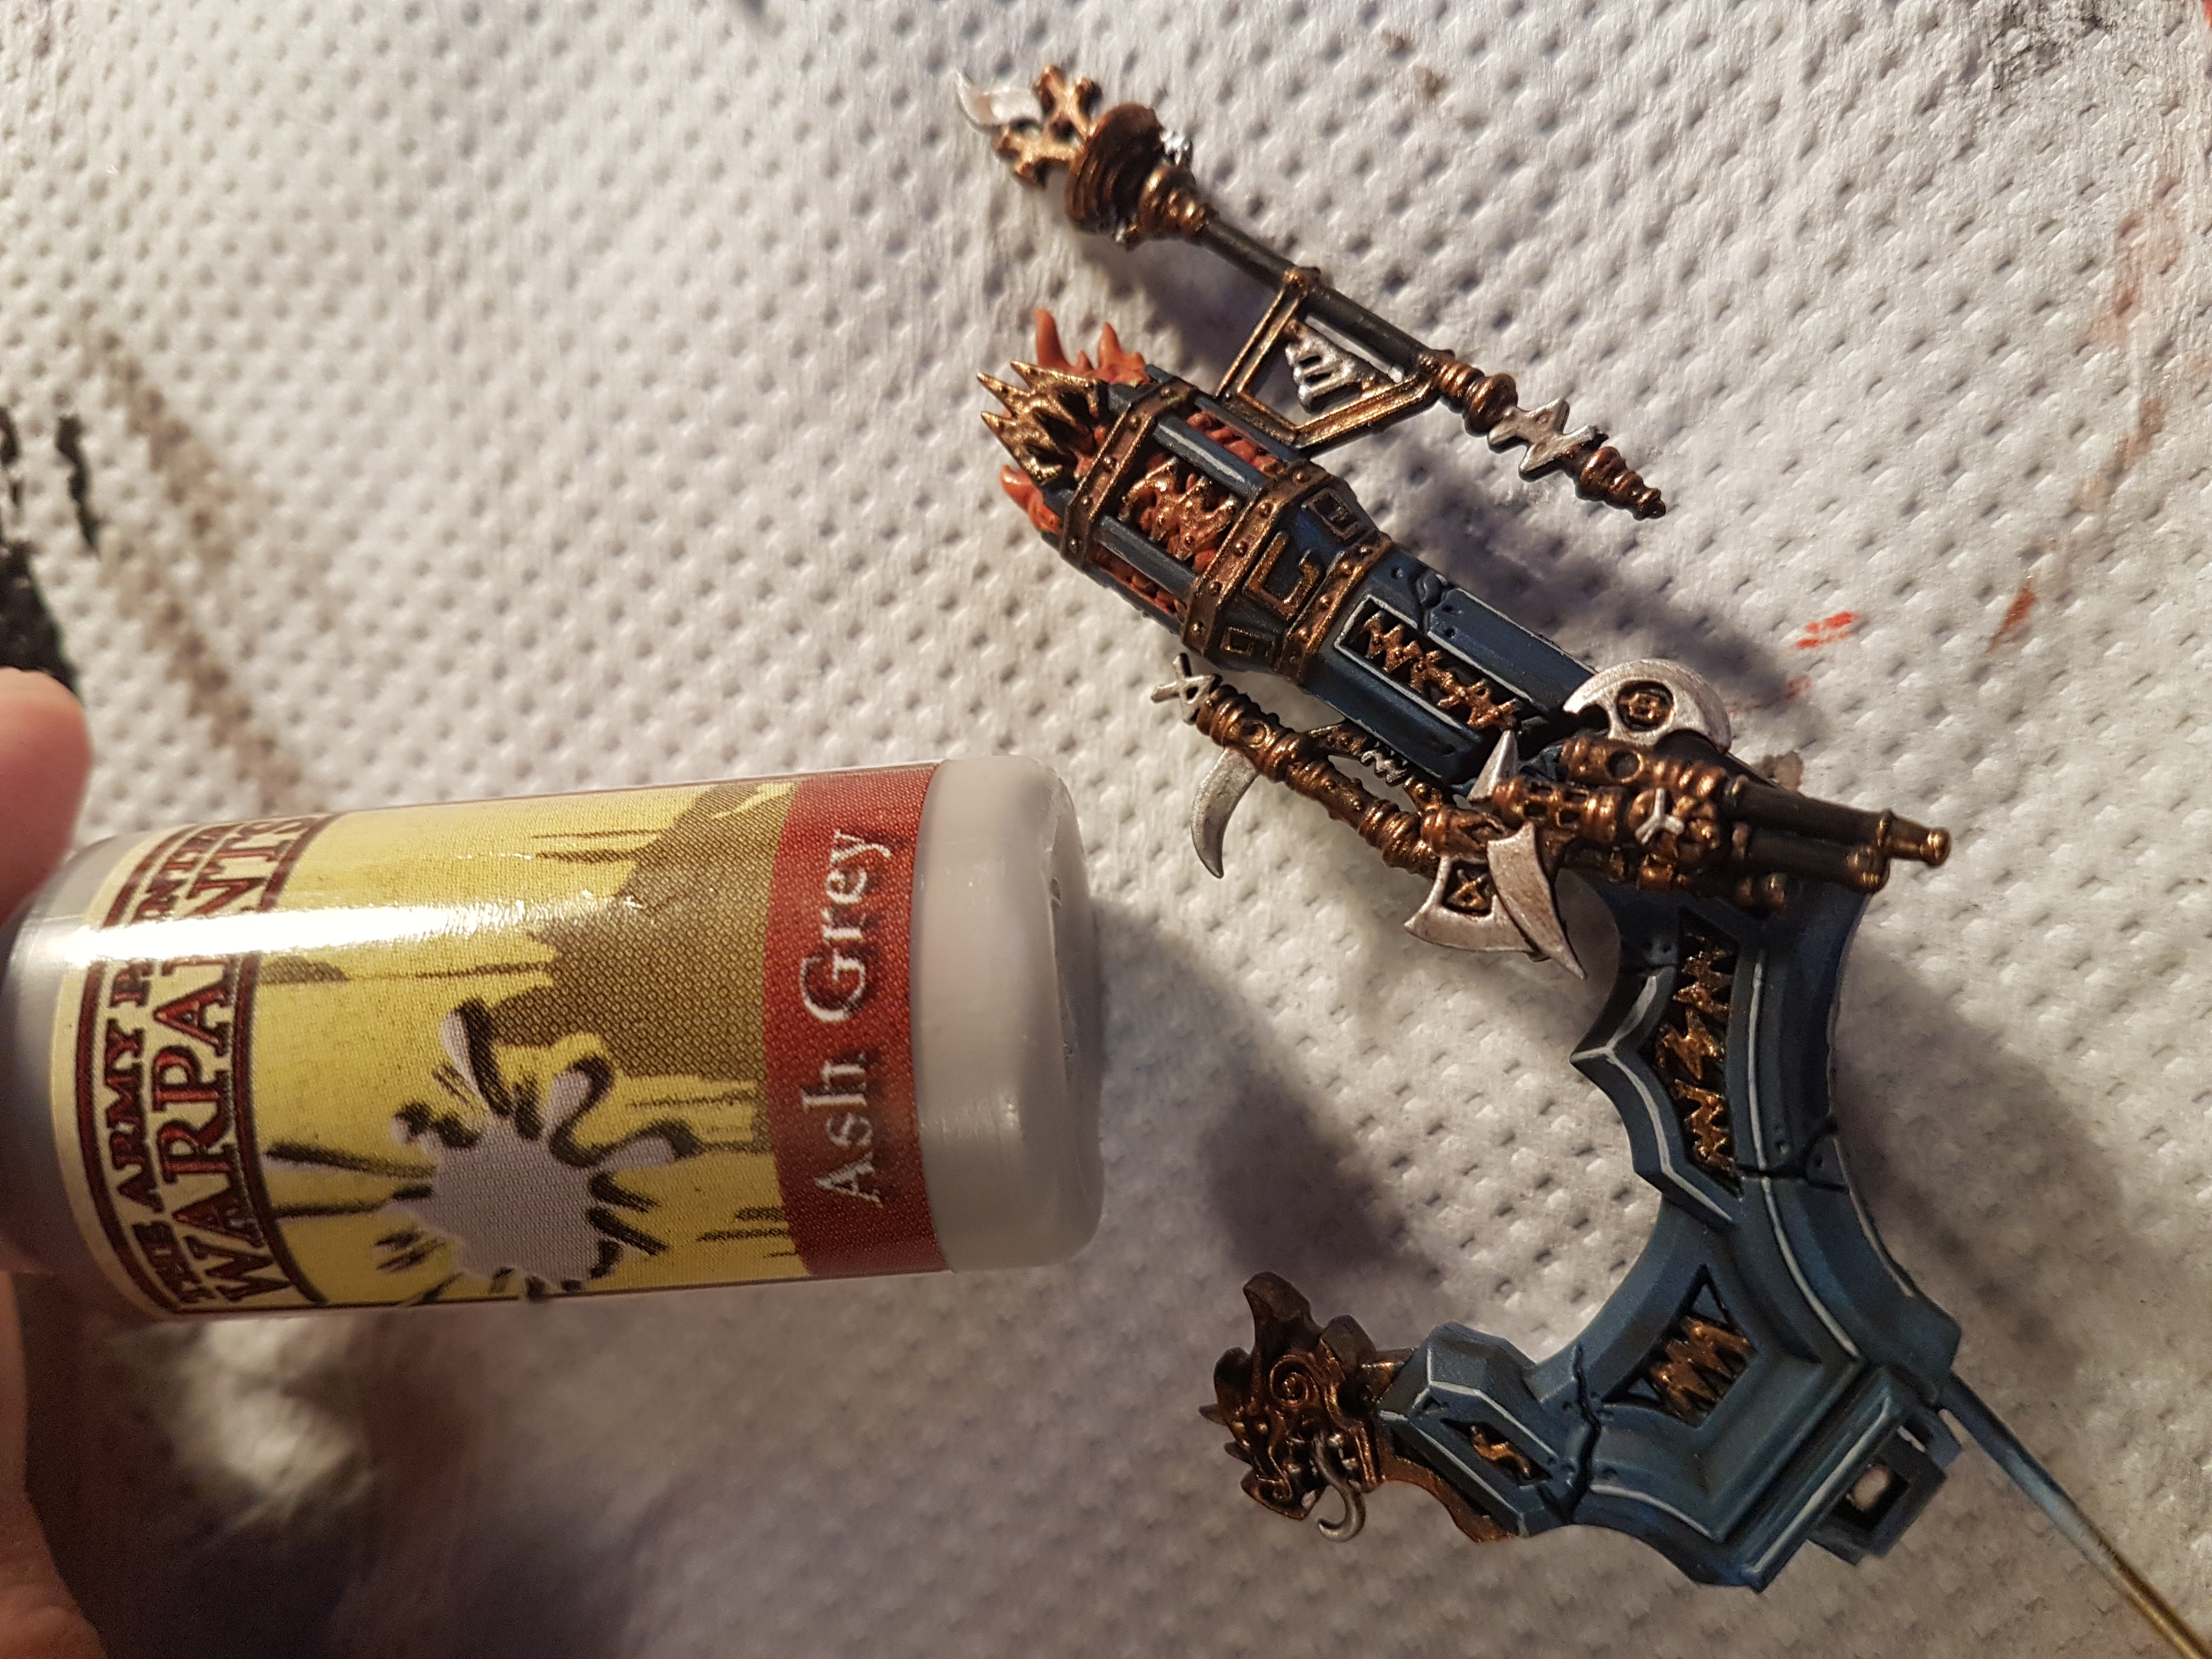
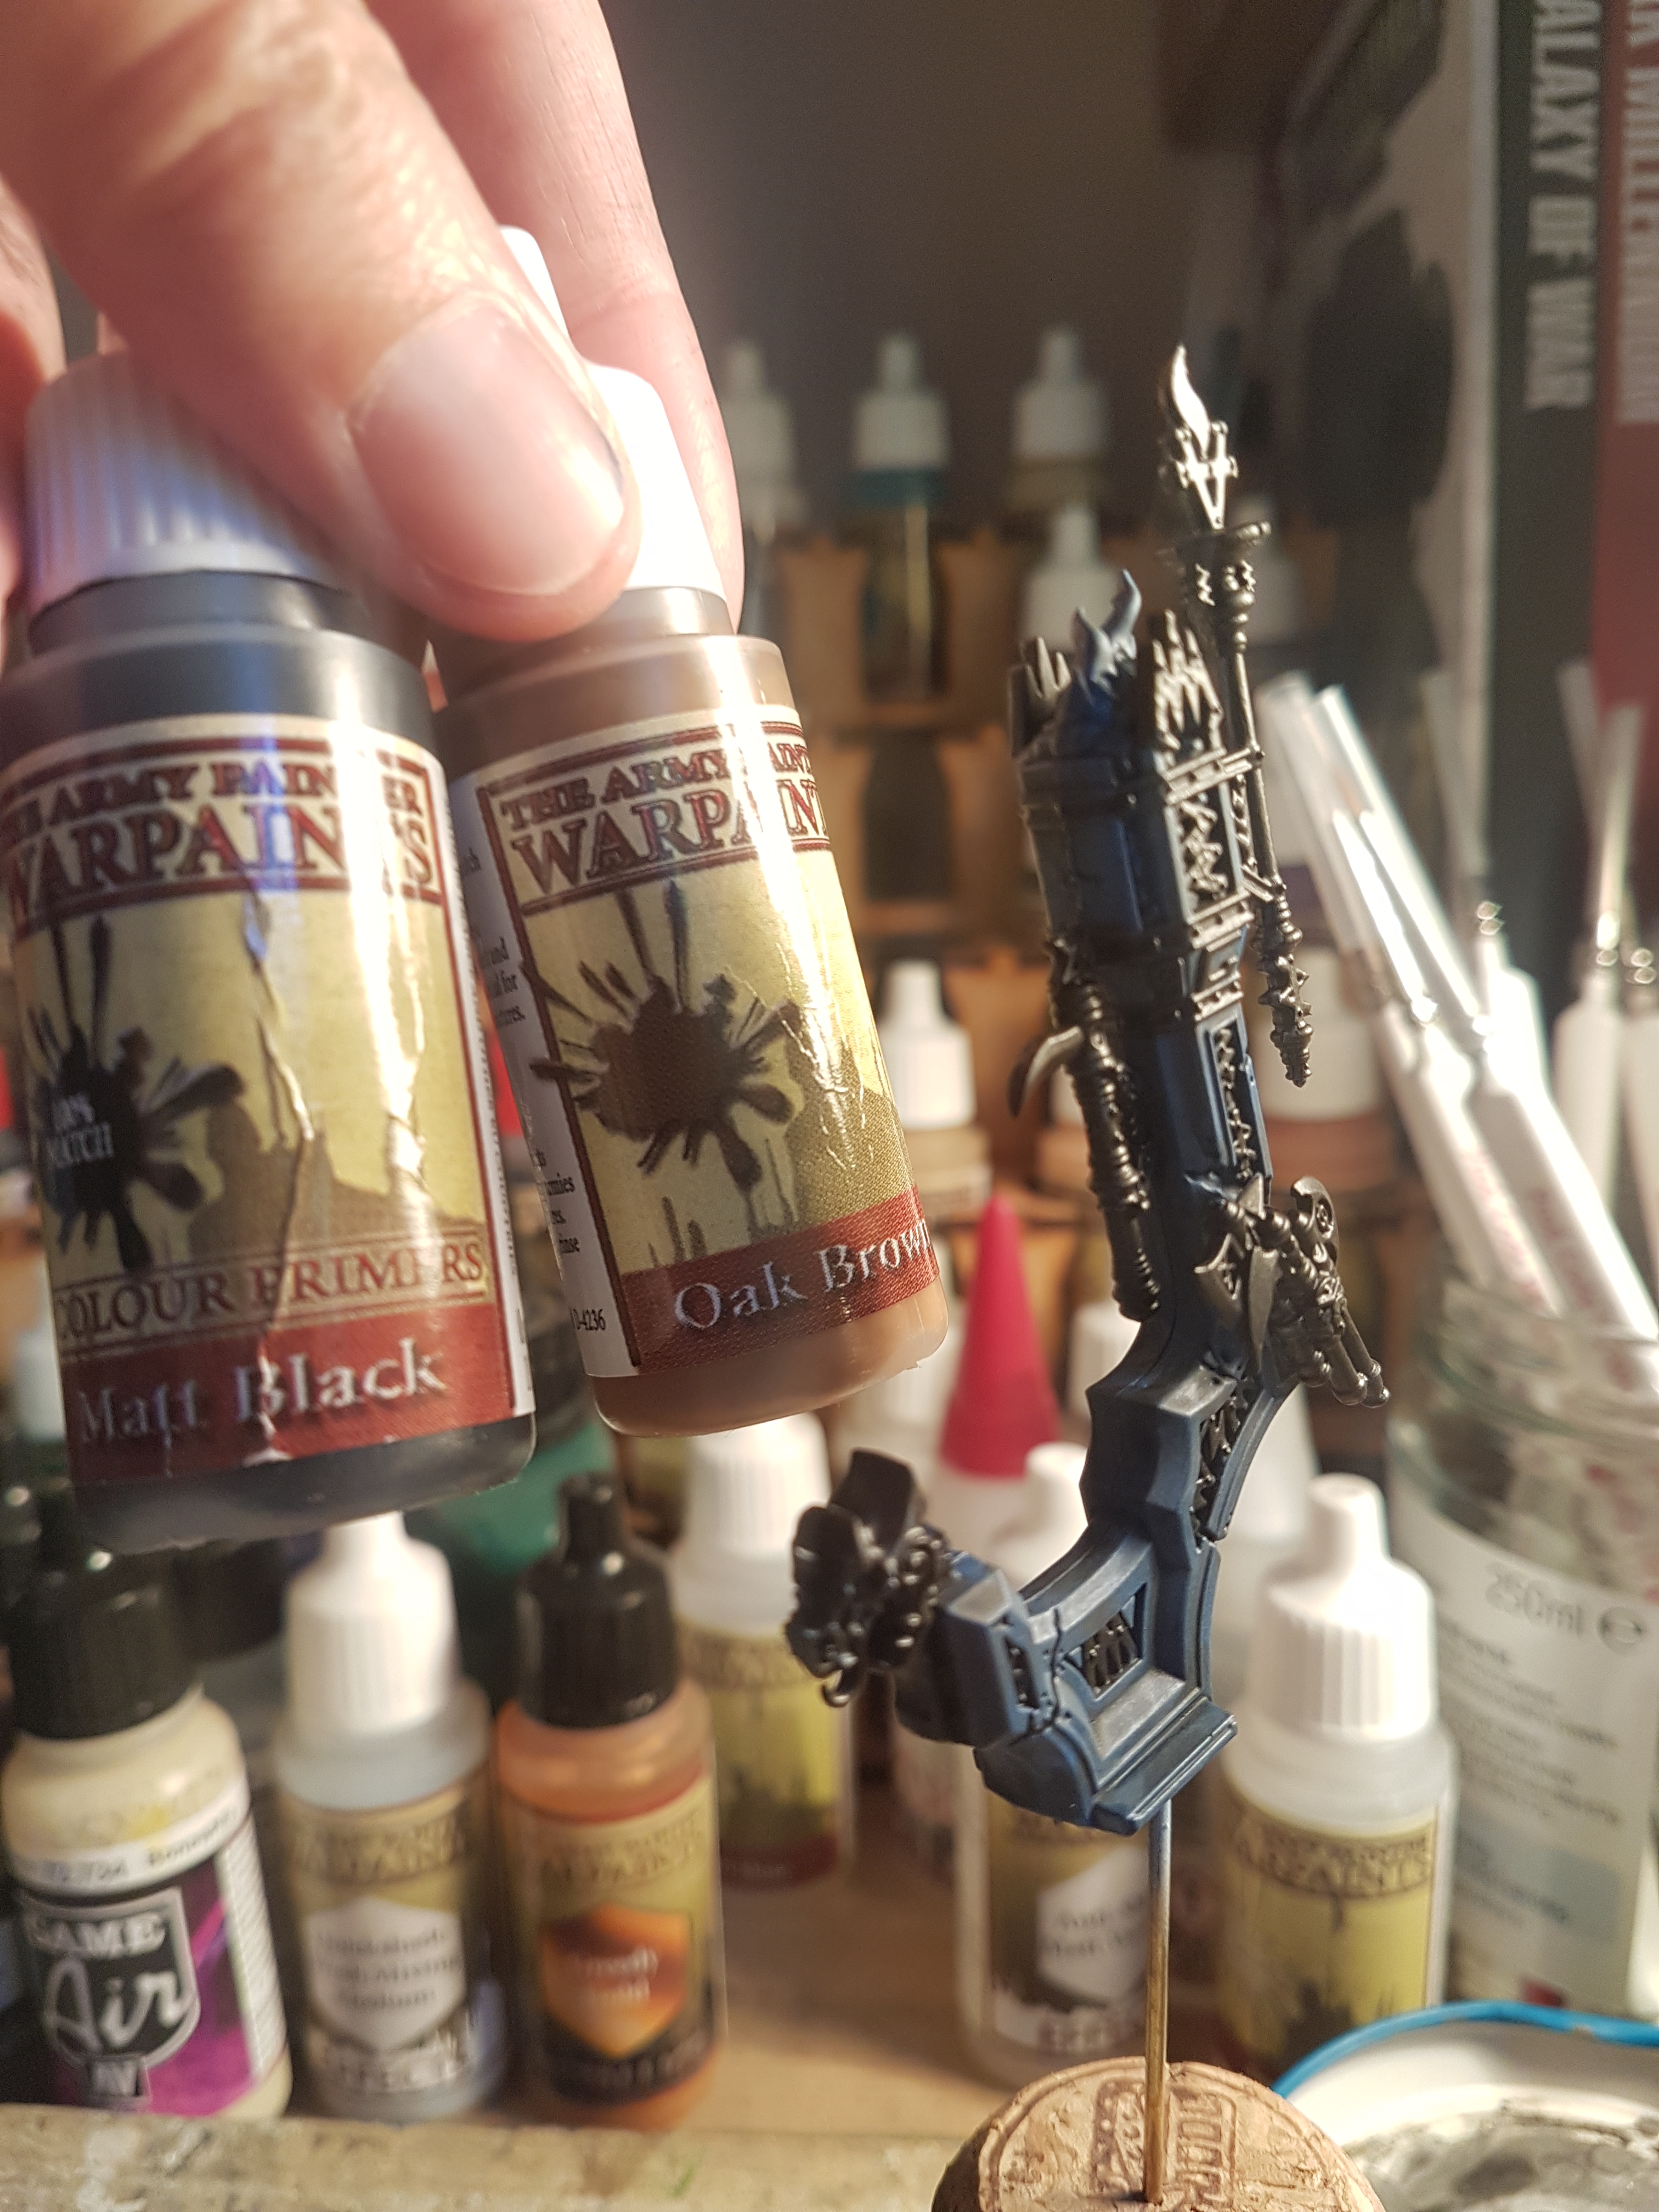
Using my warm black mix (2 part oak brown, 1 part matt black), I picked out all the embers, leaving the orange fire glow around the edges.
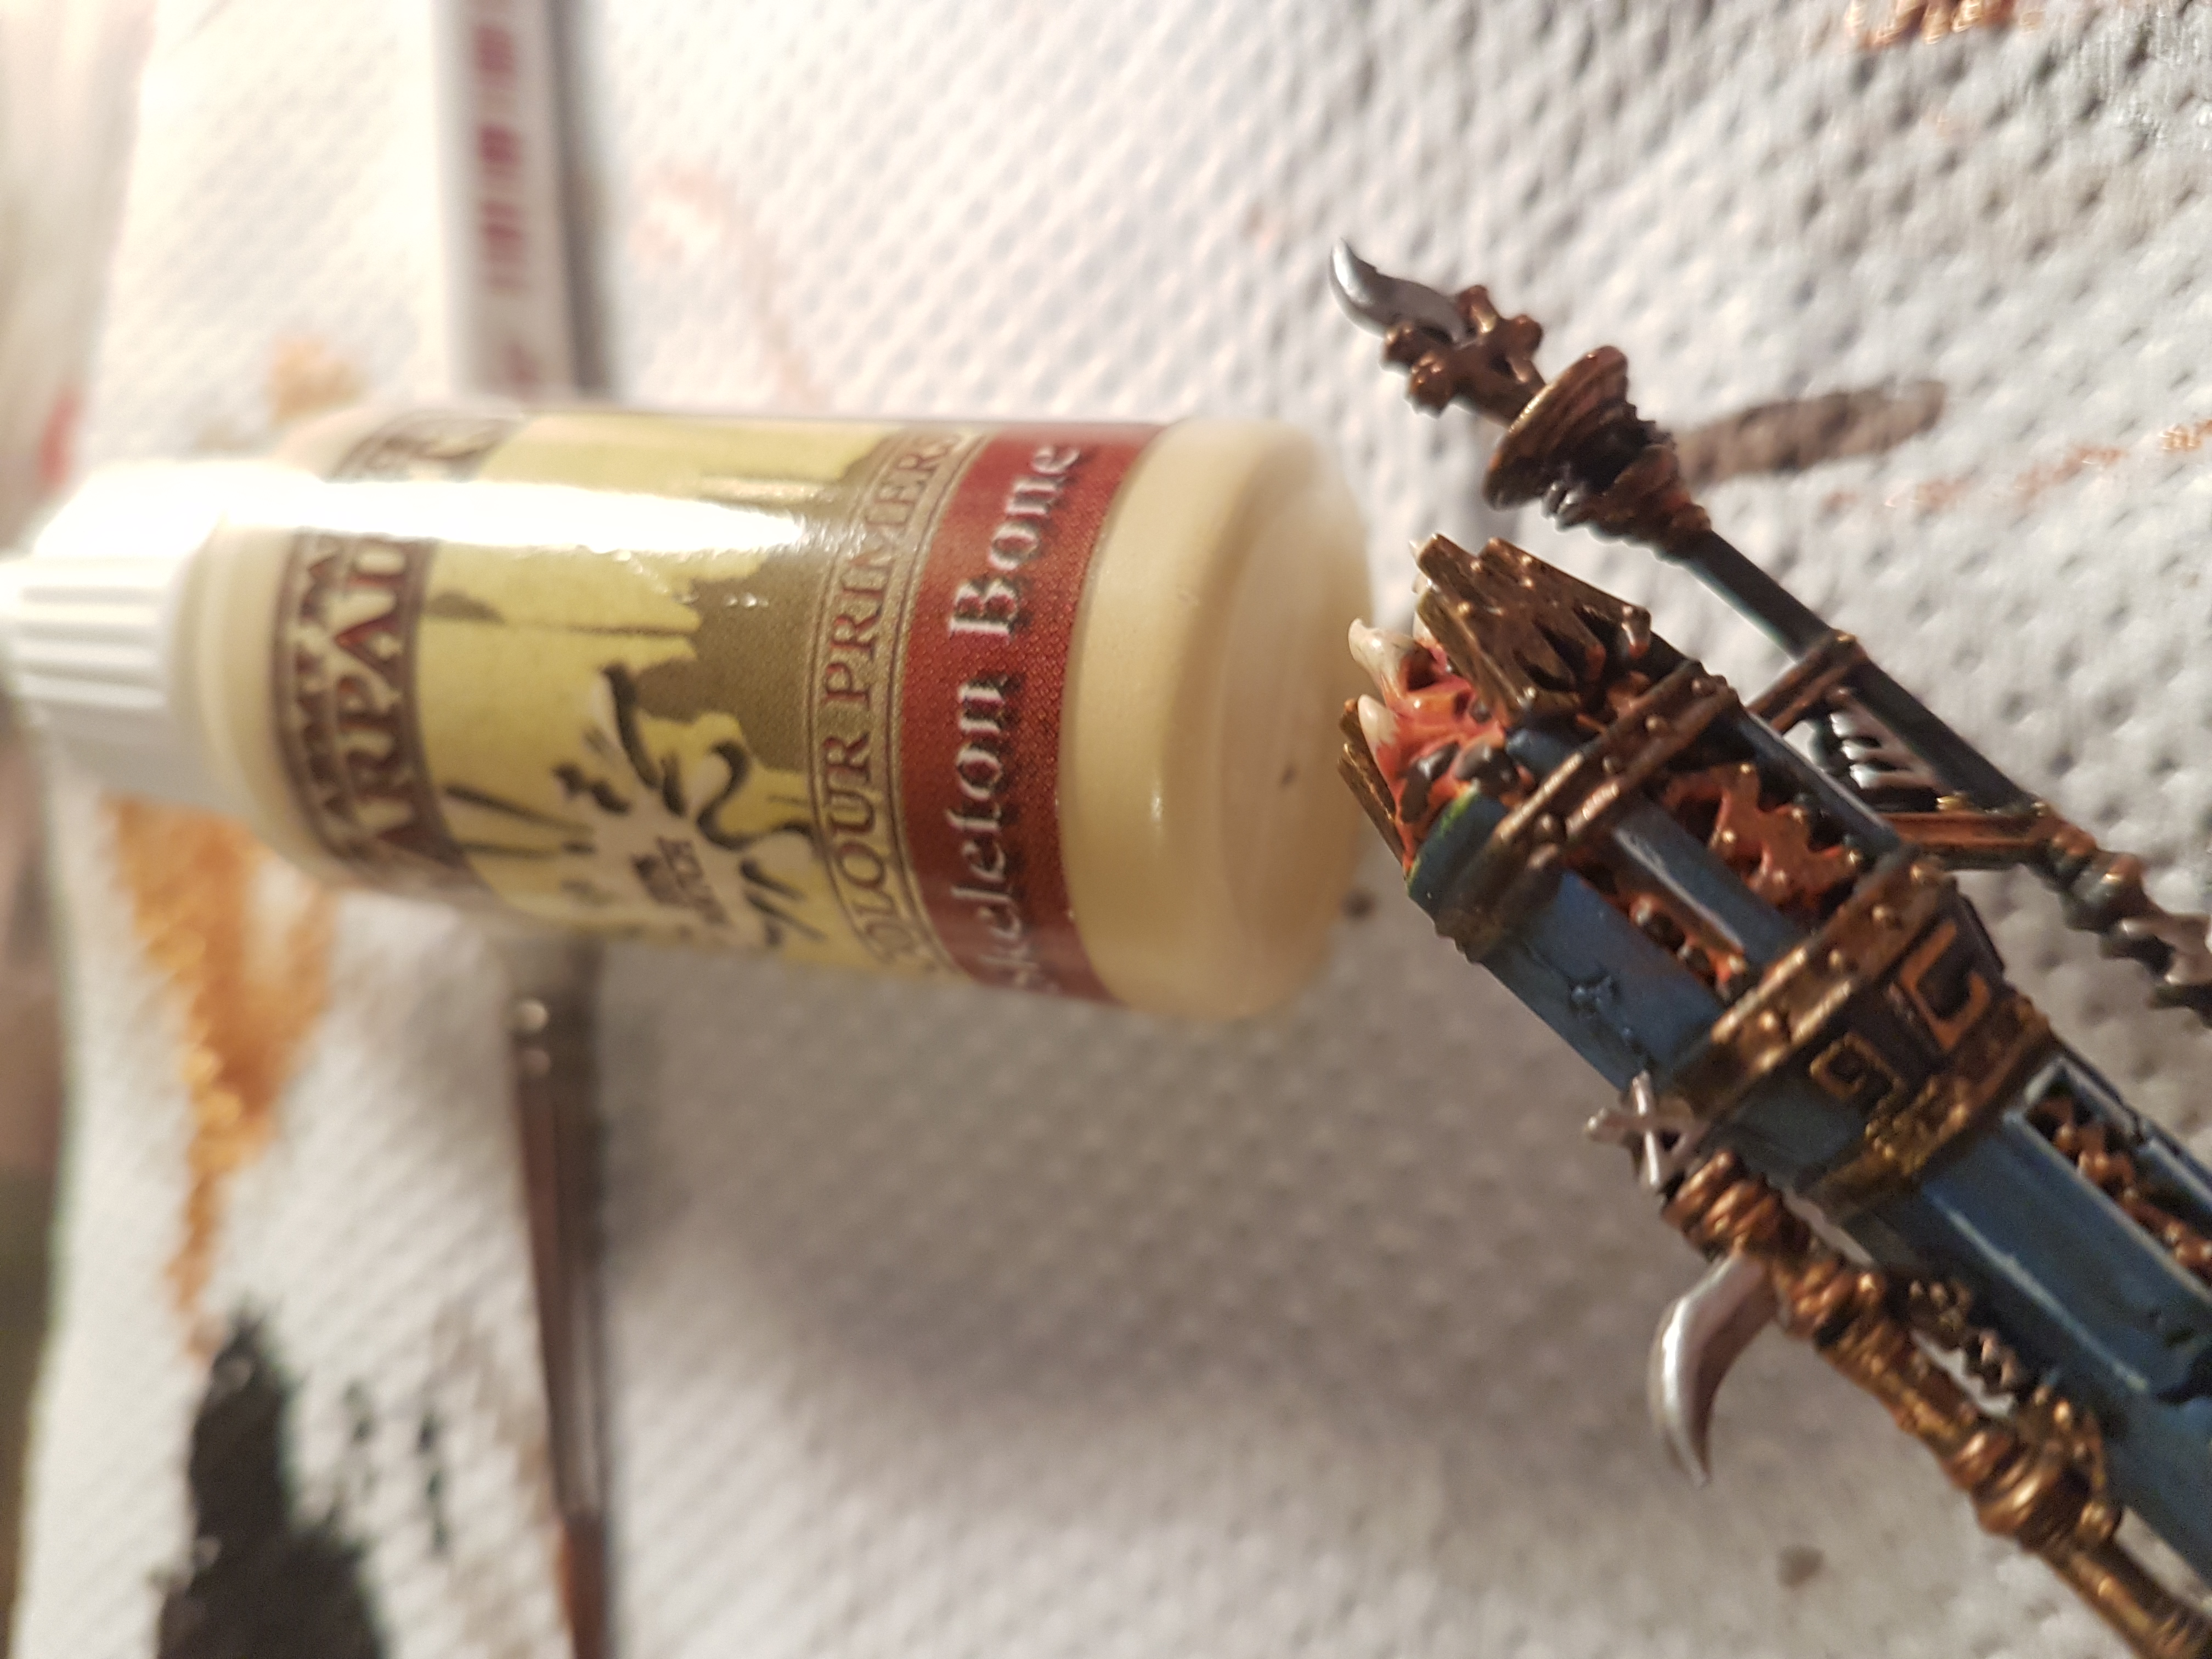
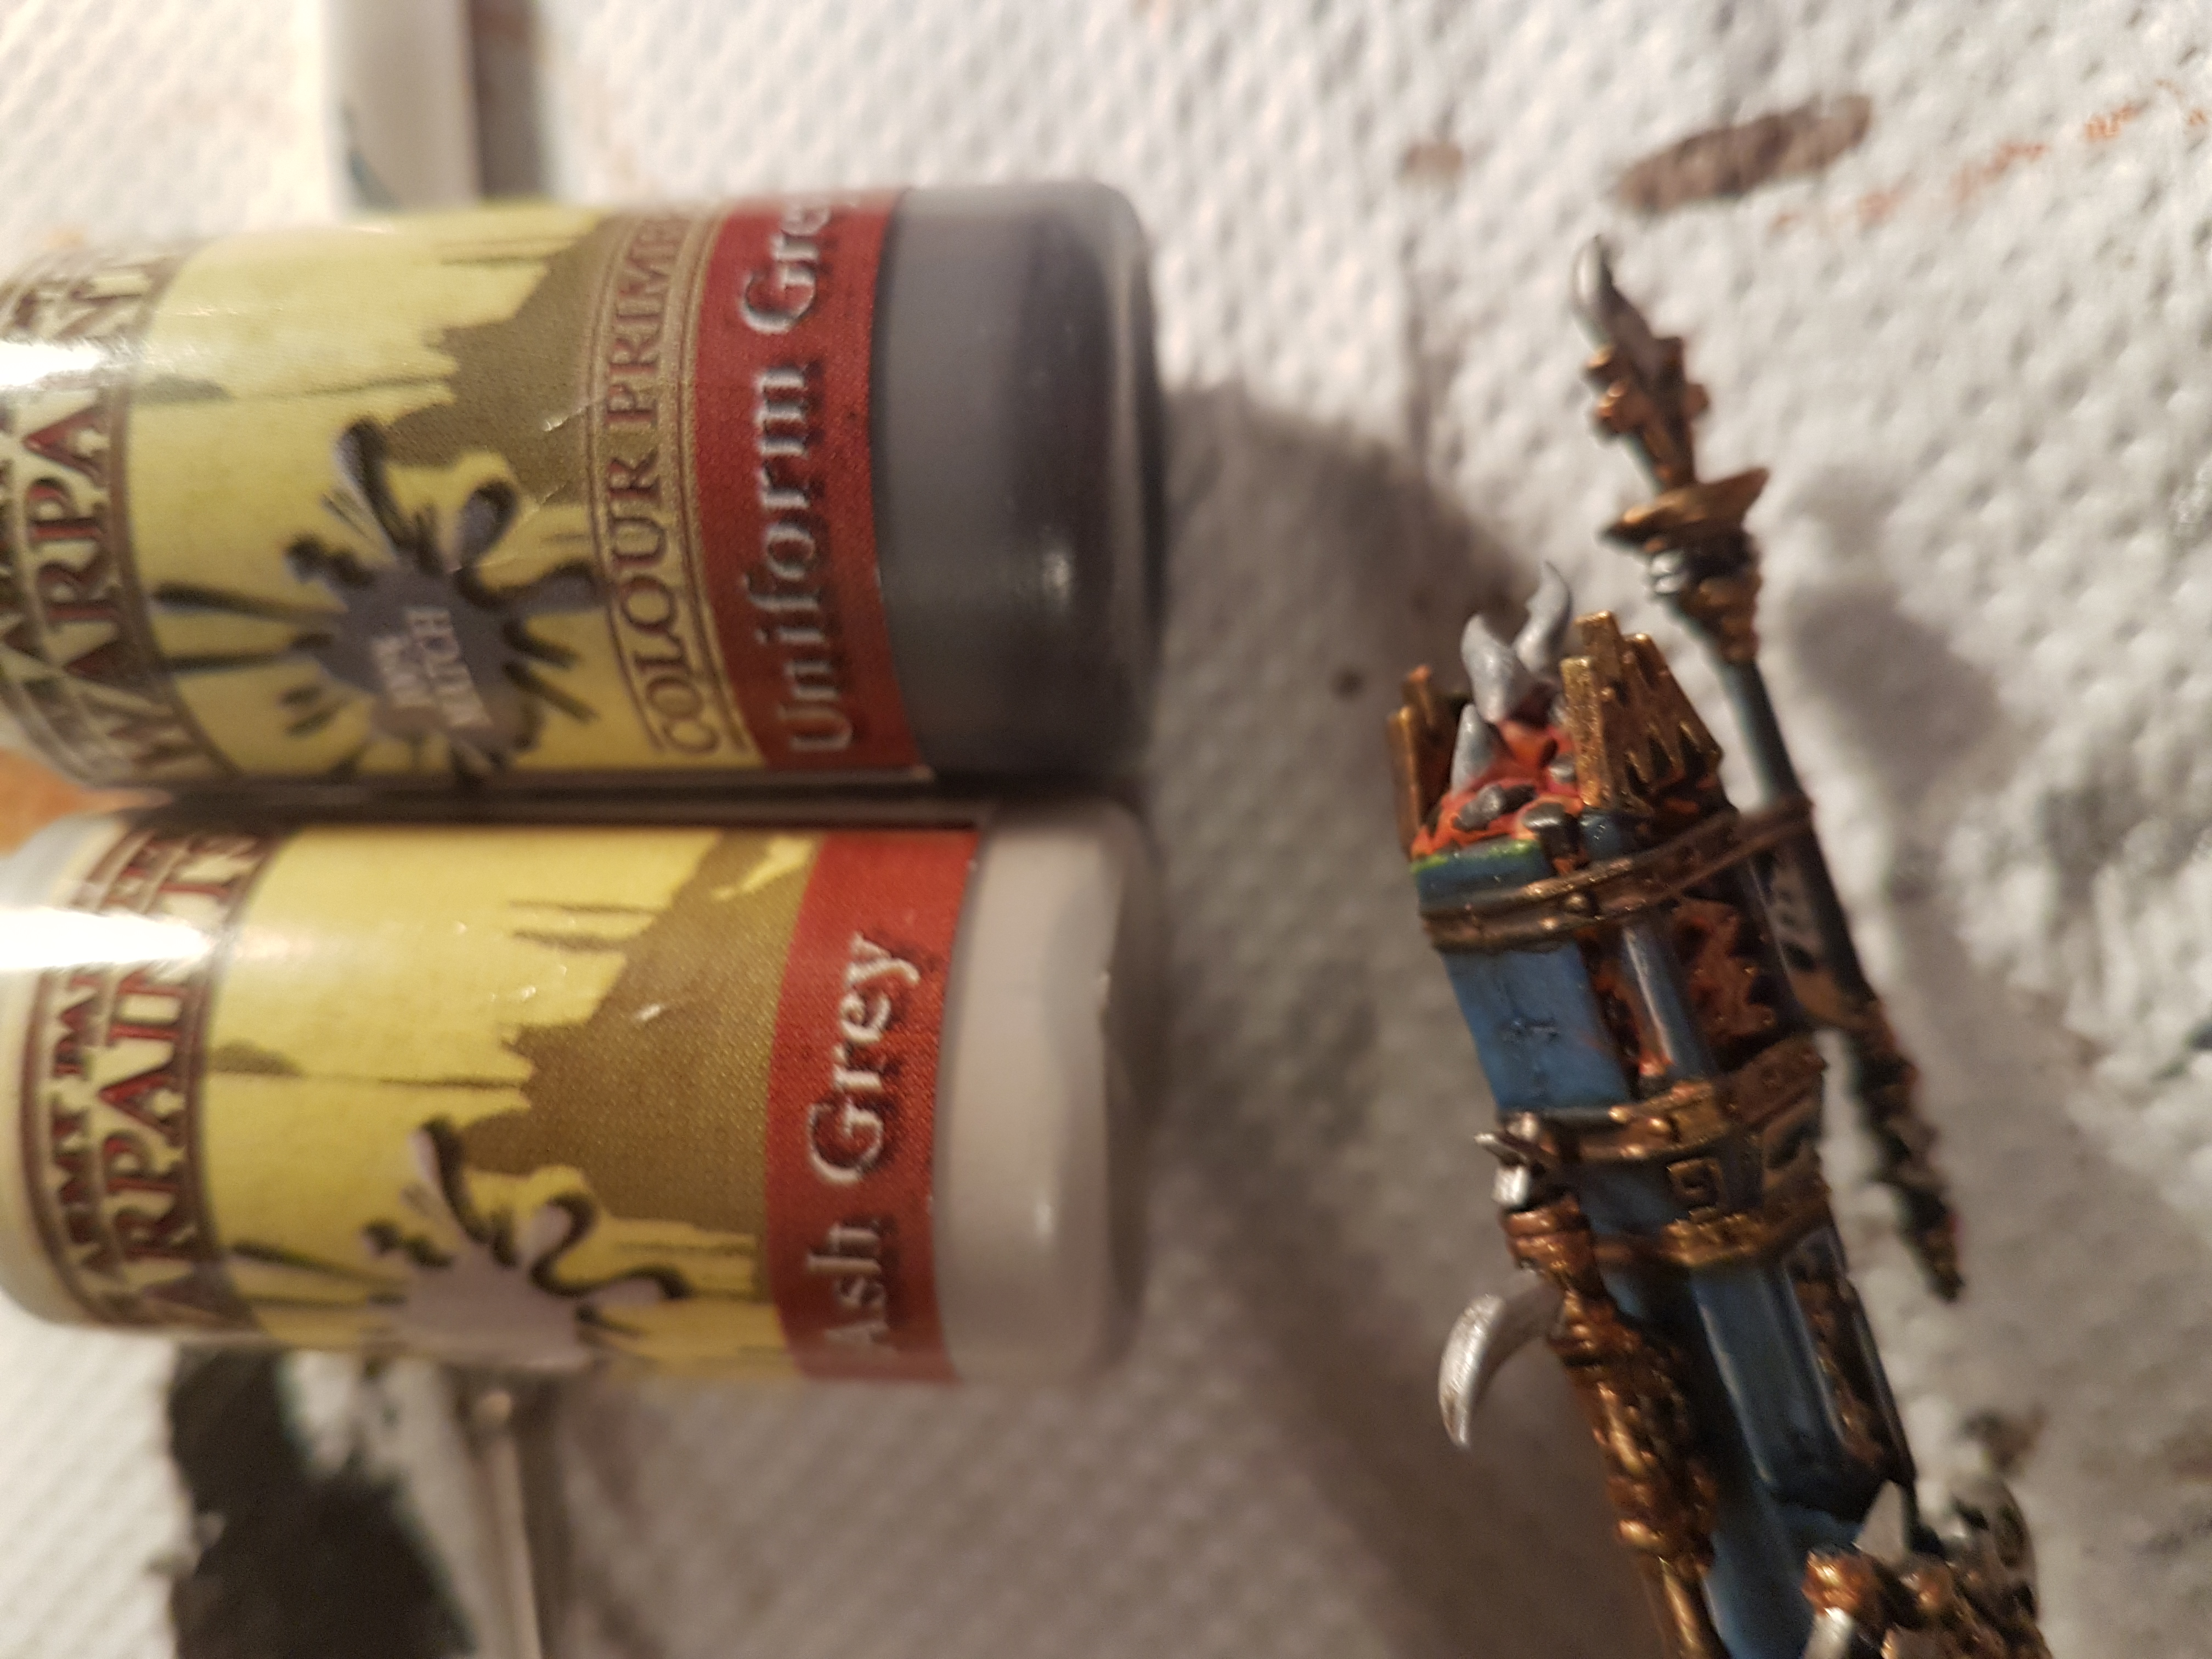
I then picked out the smoke plumes using AP Skeleton bone. I have been finding this works as a nice base to lighter colours rather than a stark white.
Finally I used AP Ash Grey at the bottom of the smoke dragging it into AP uniform Grey at the top. I then stippled a little of both Ash and Uniform grey to try and break up the solid model effect. I think this step needs more practice.
This then finished the throne, ready to be mounted on the Magmadroth.
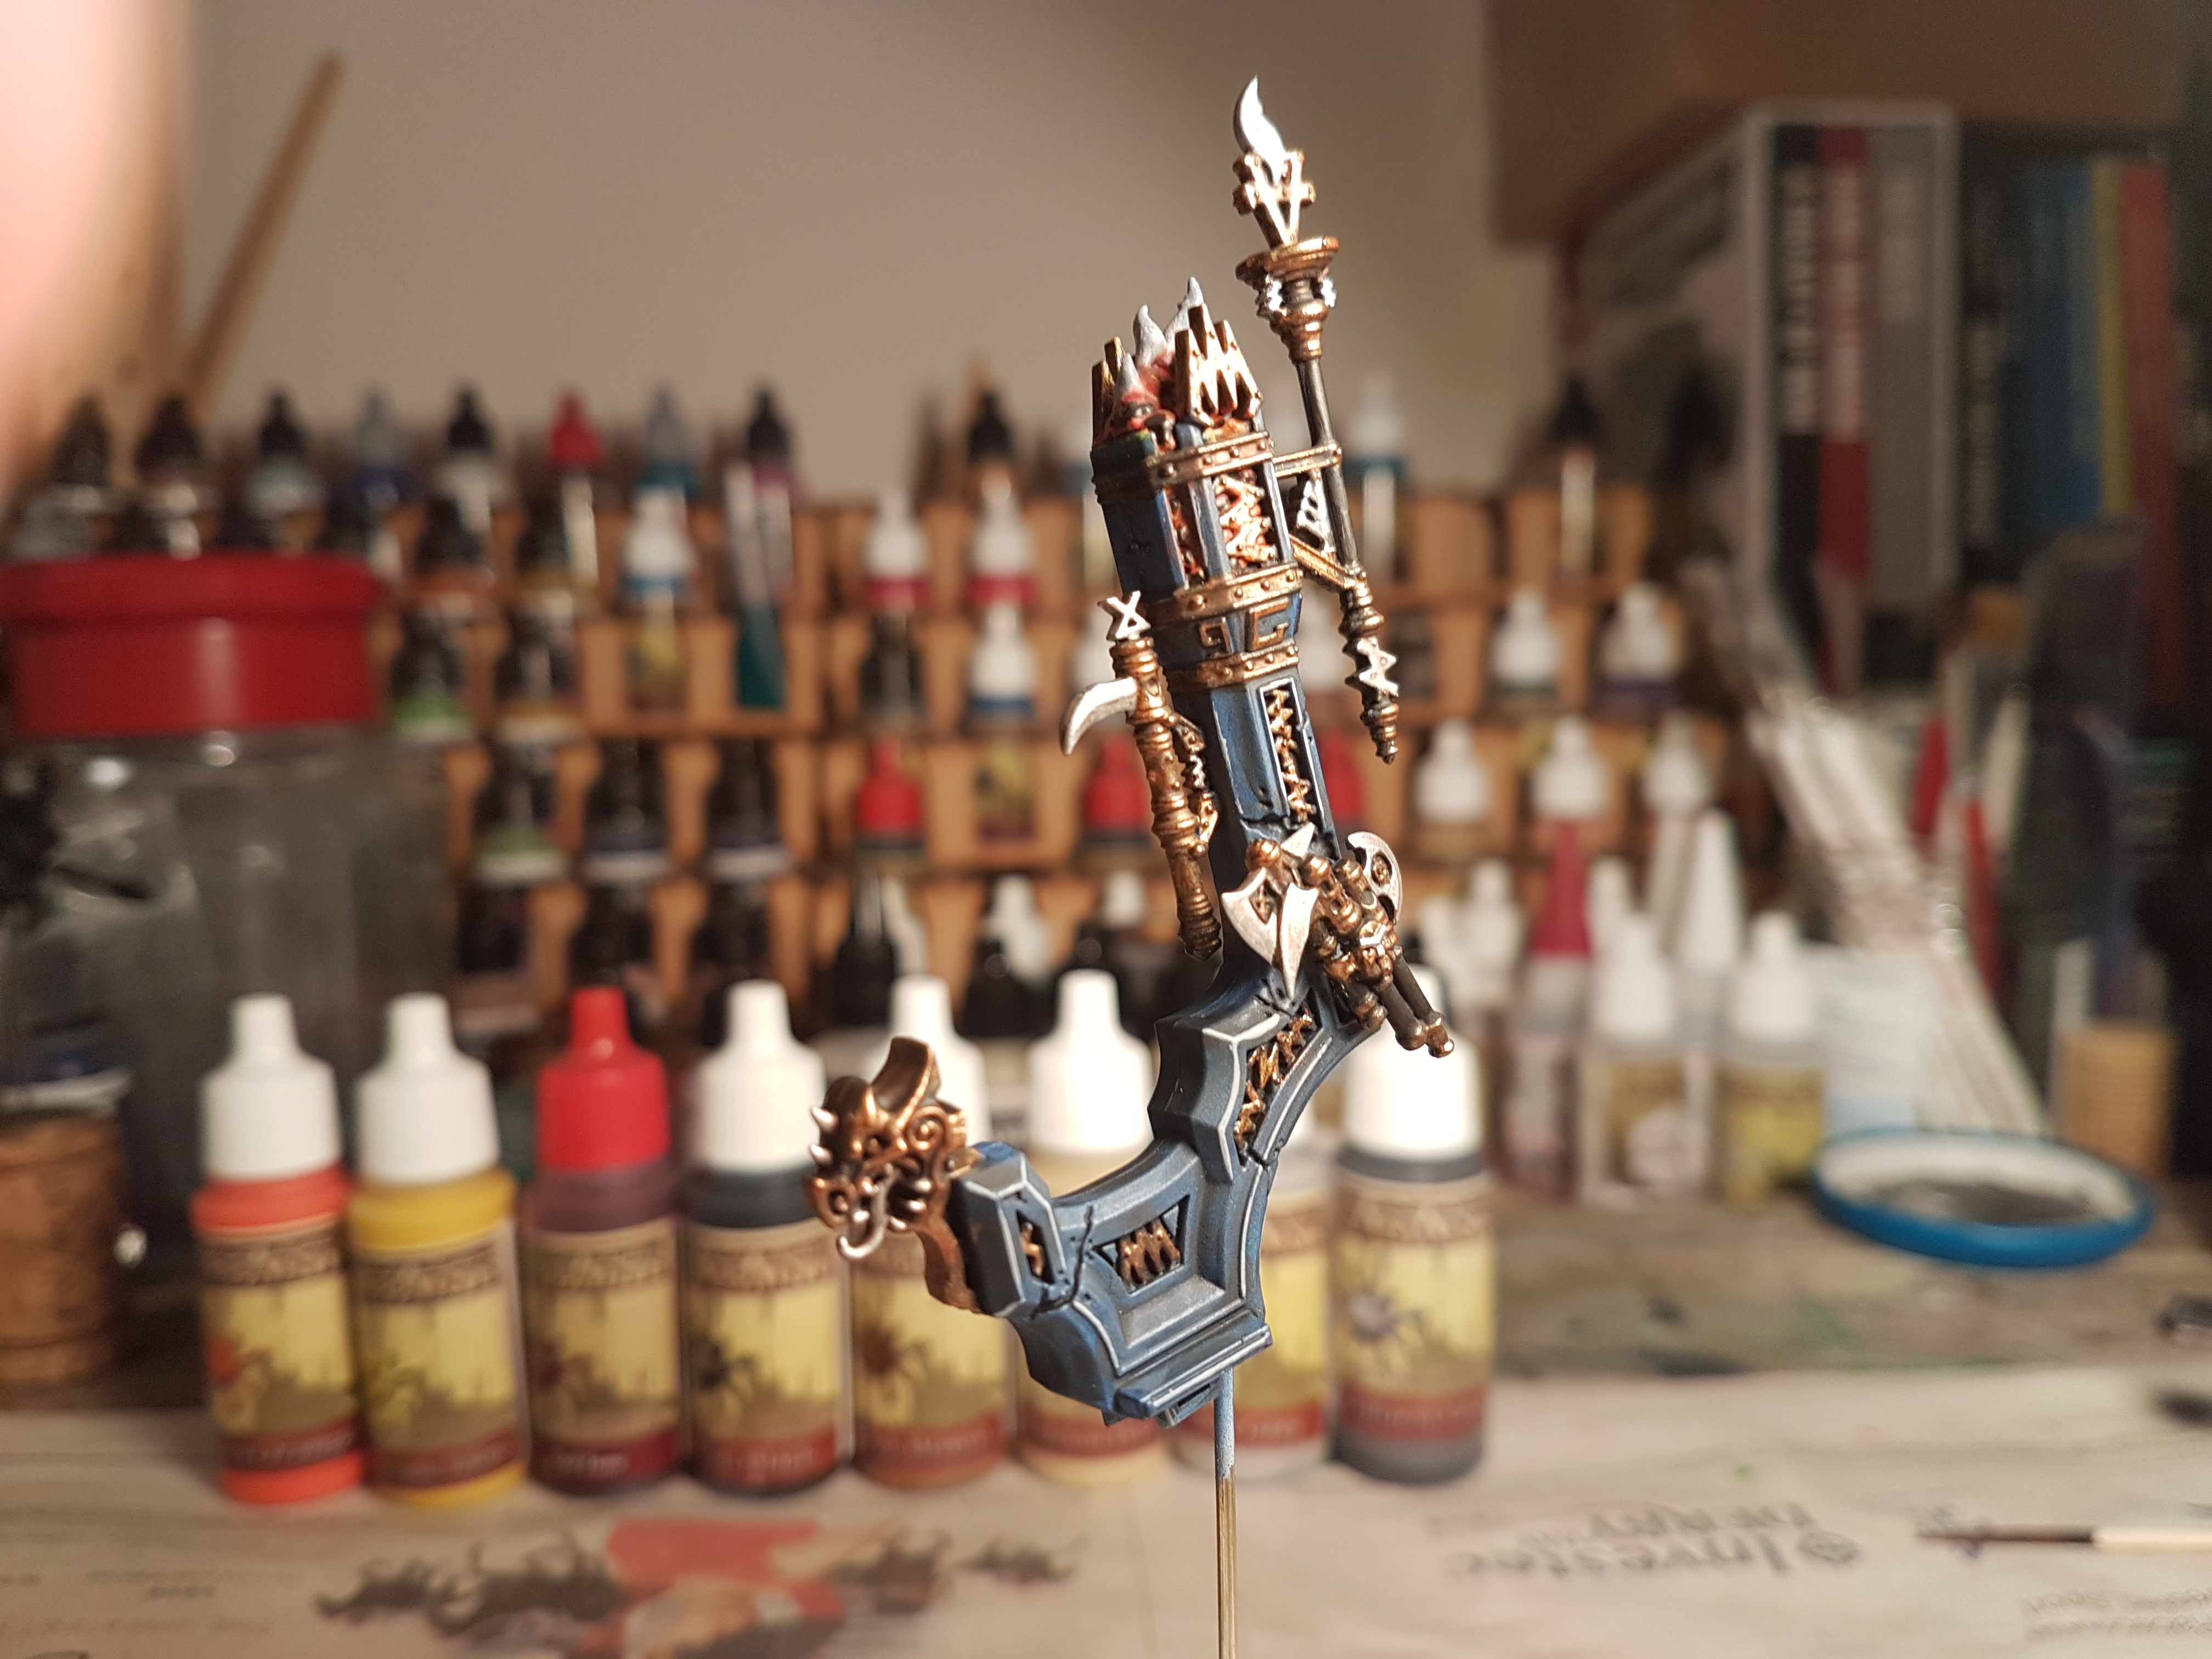
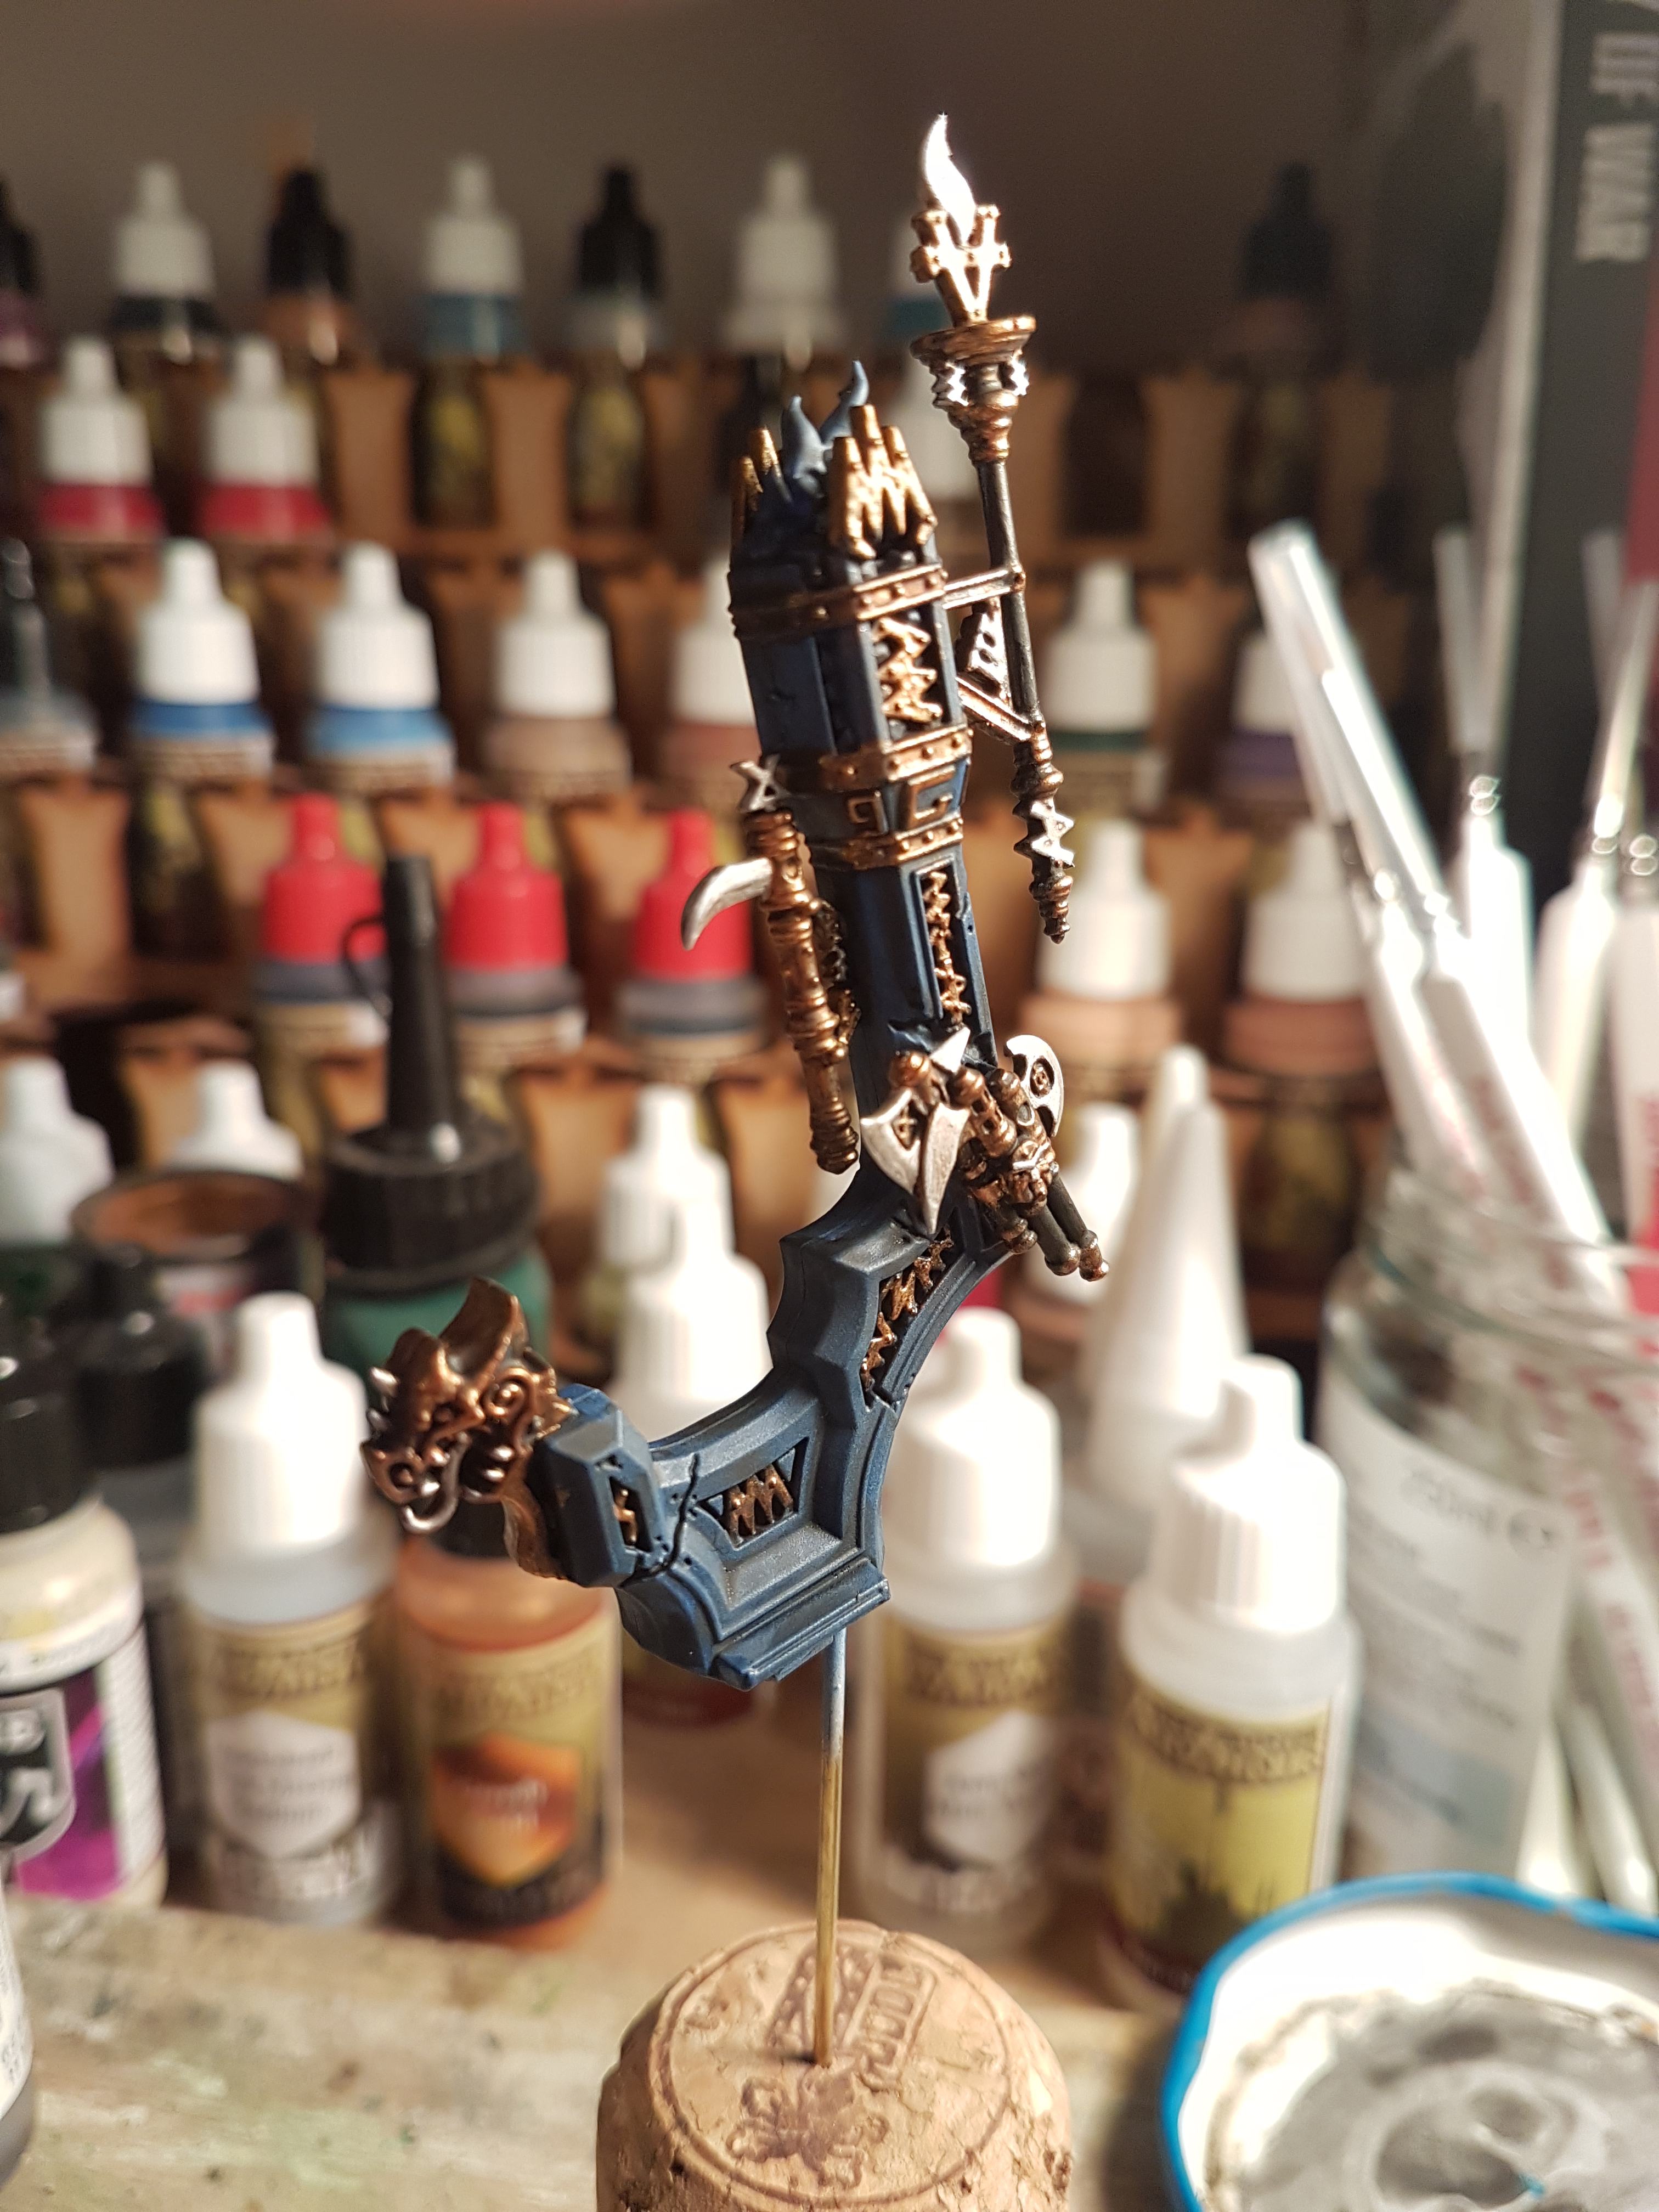
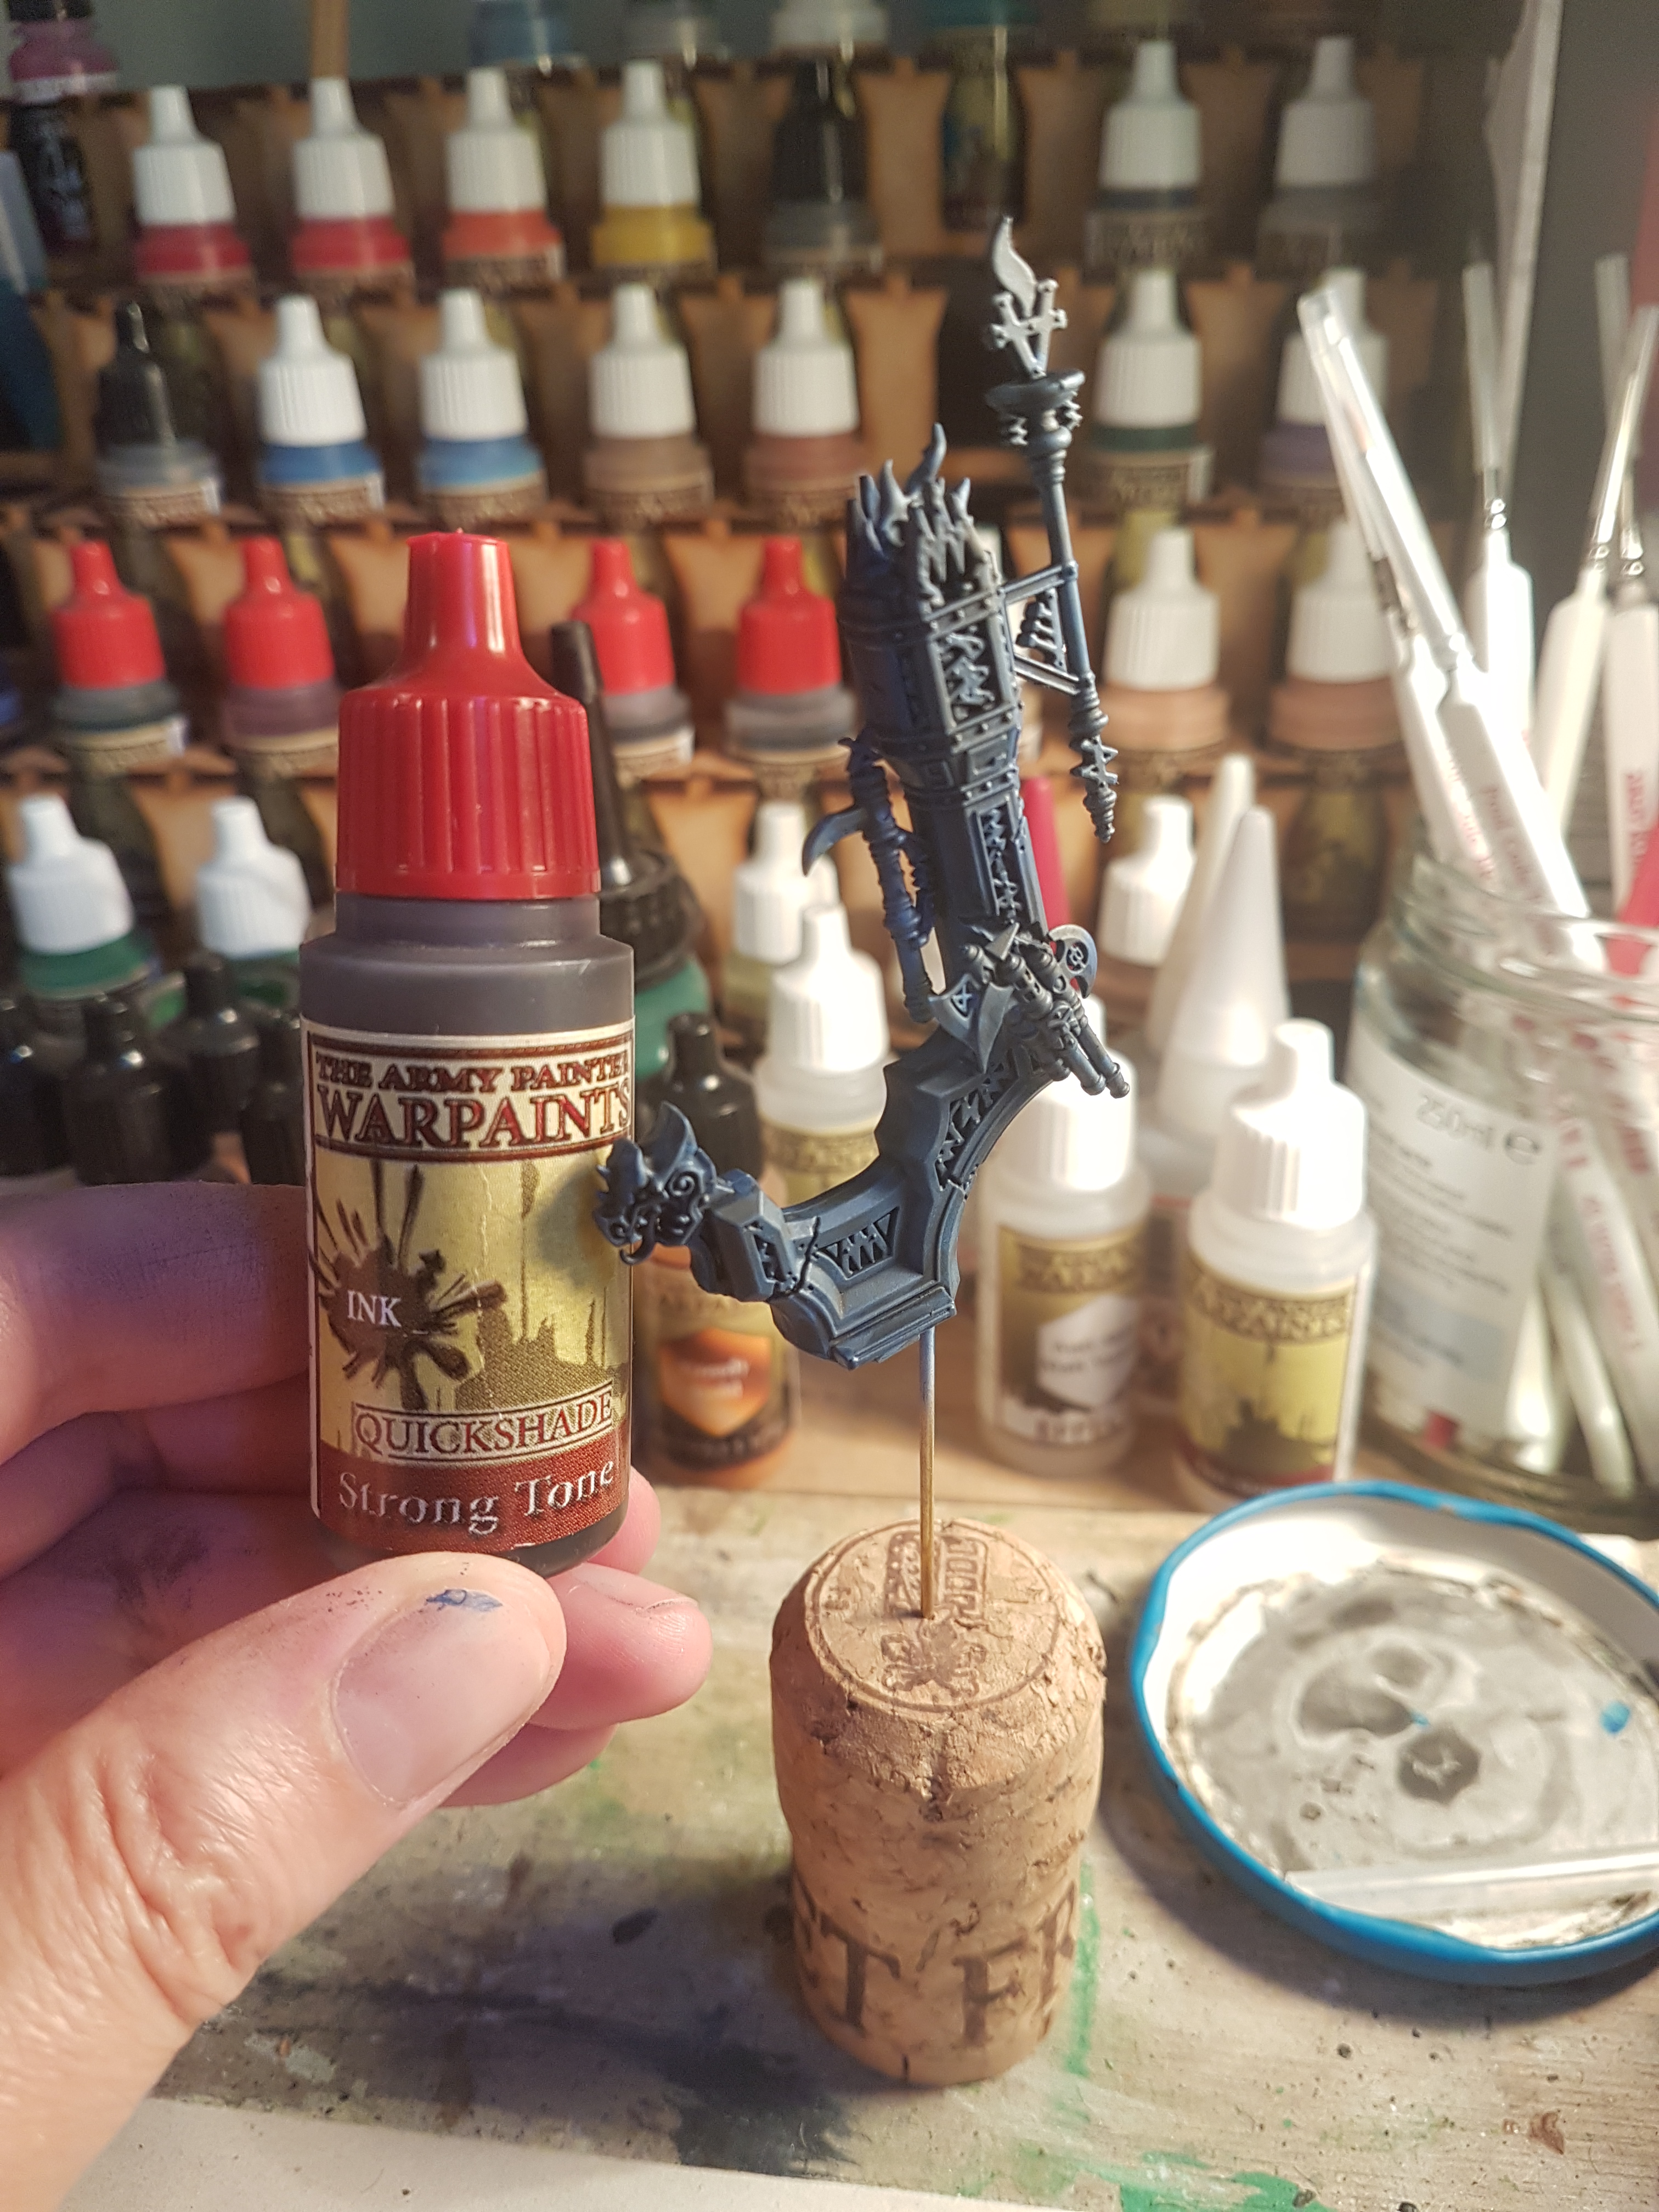
Throne Part 3
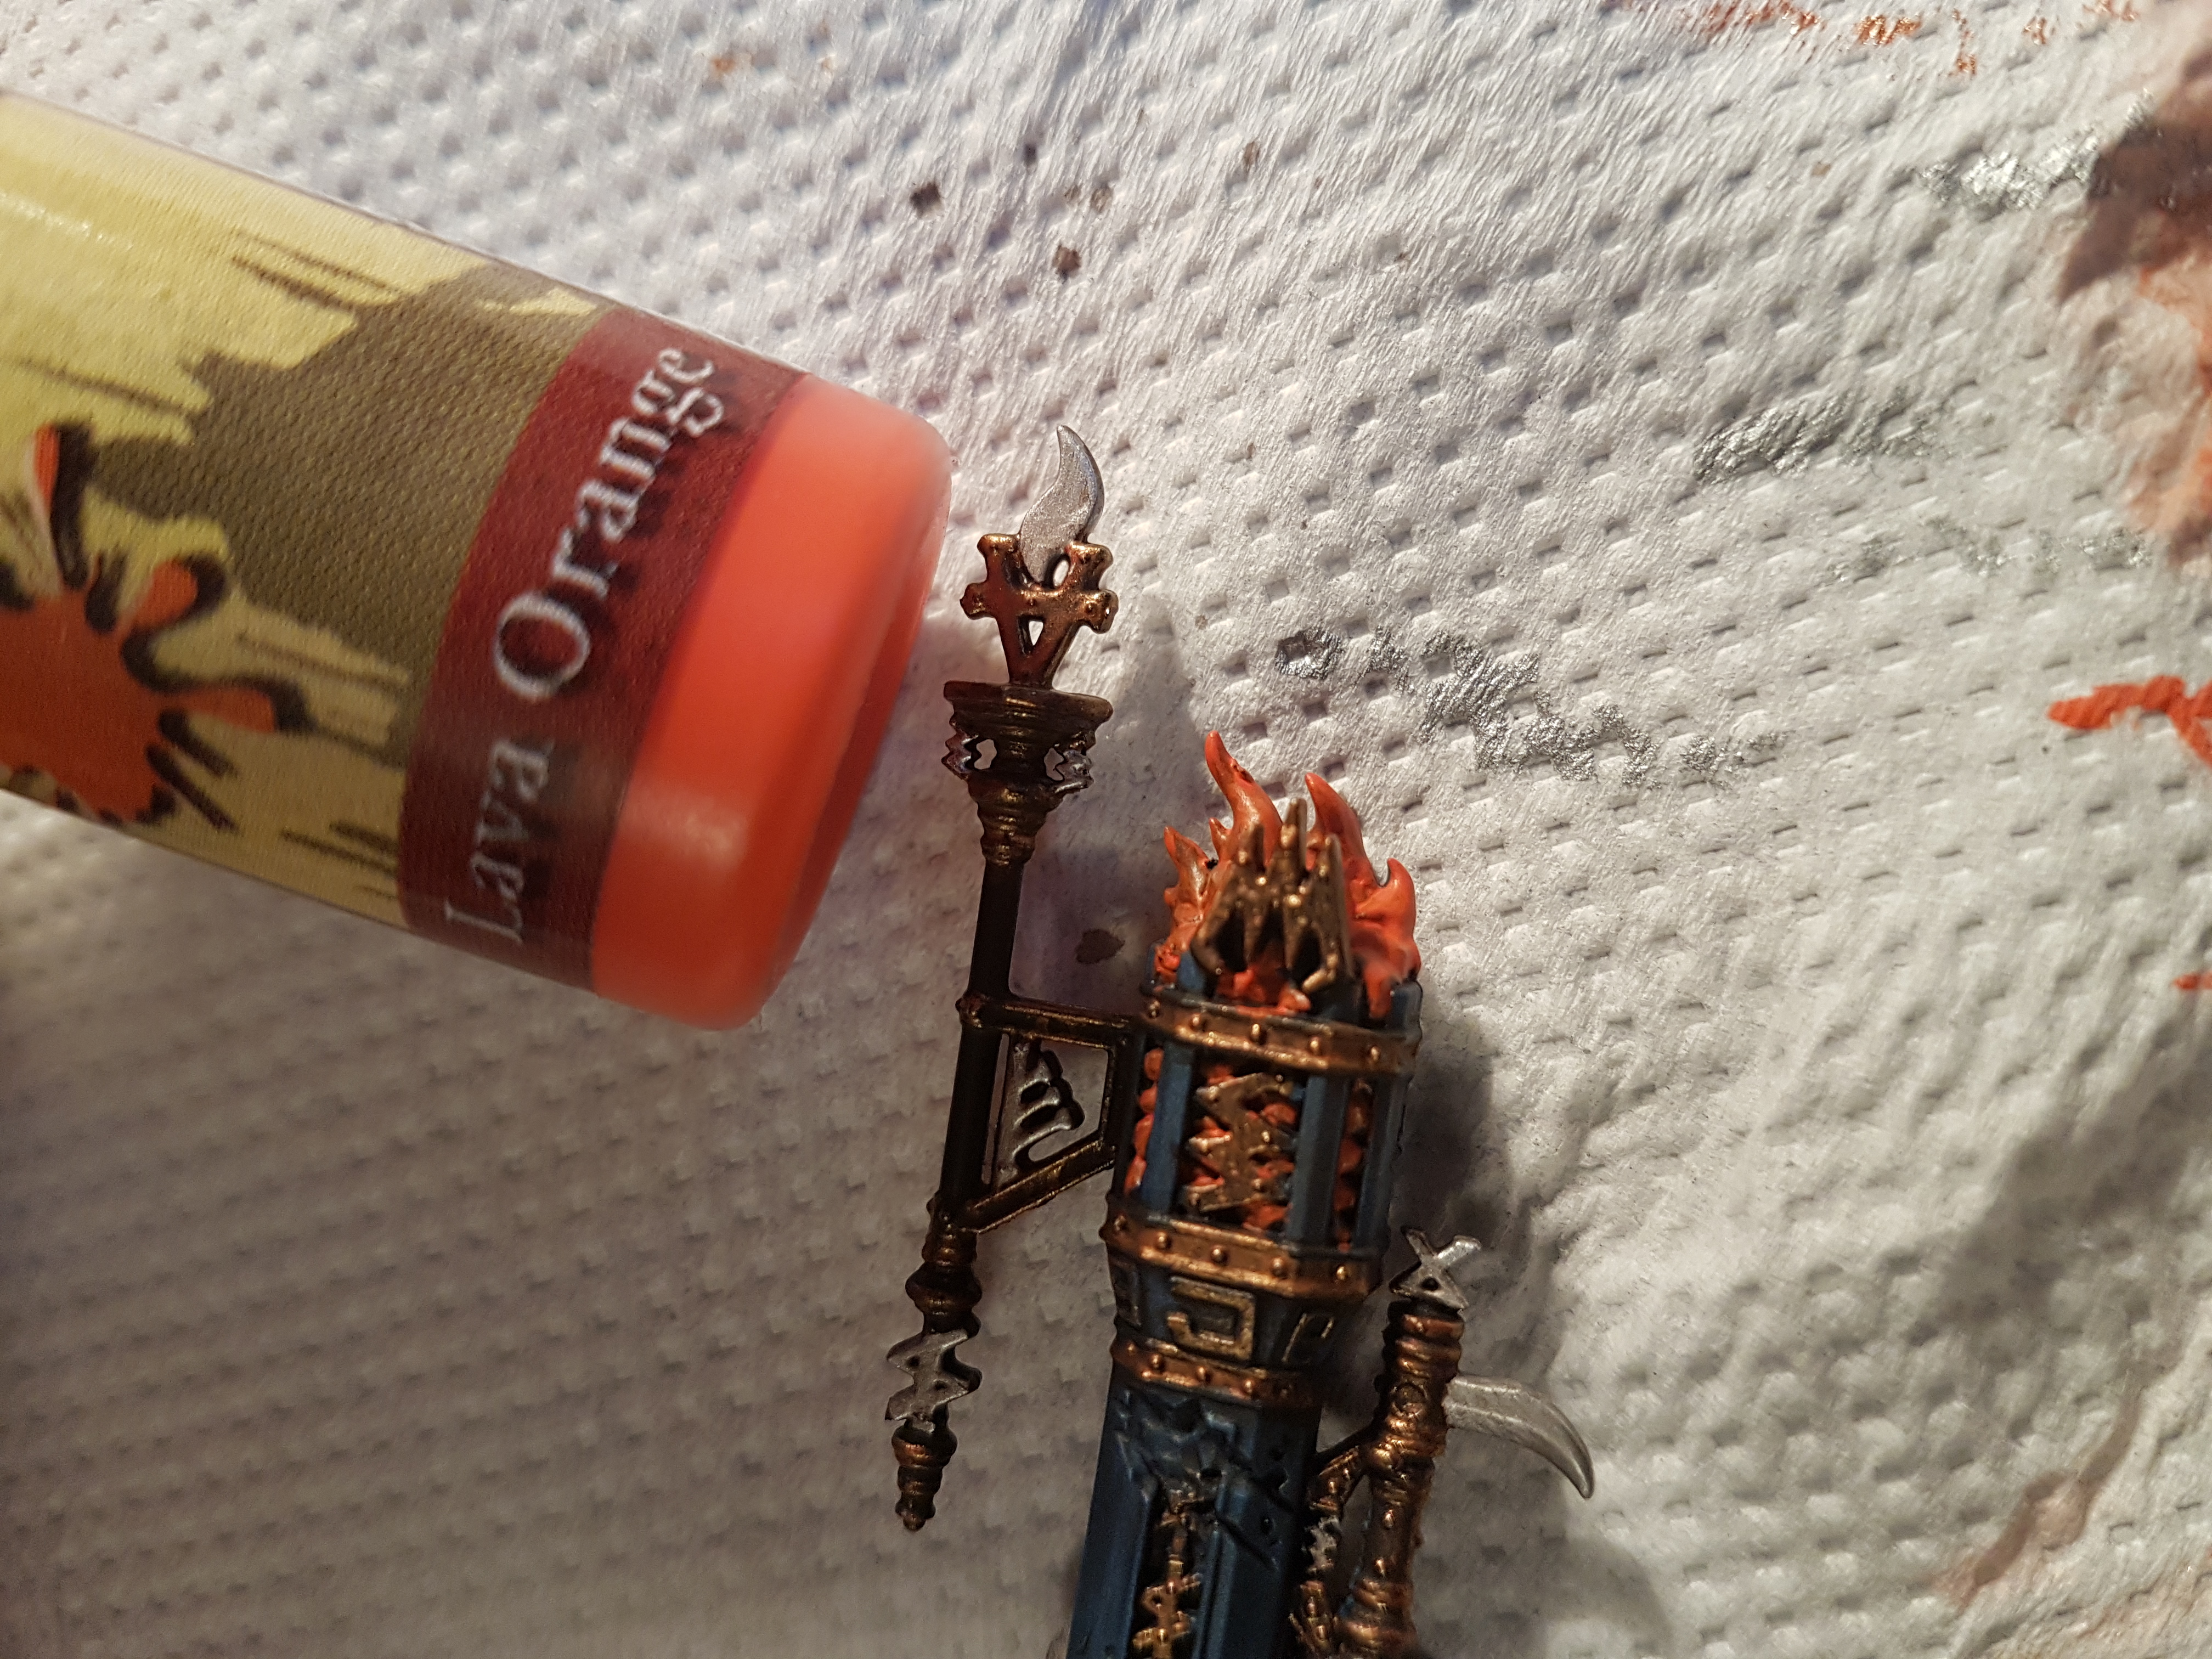
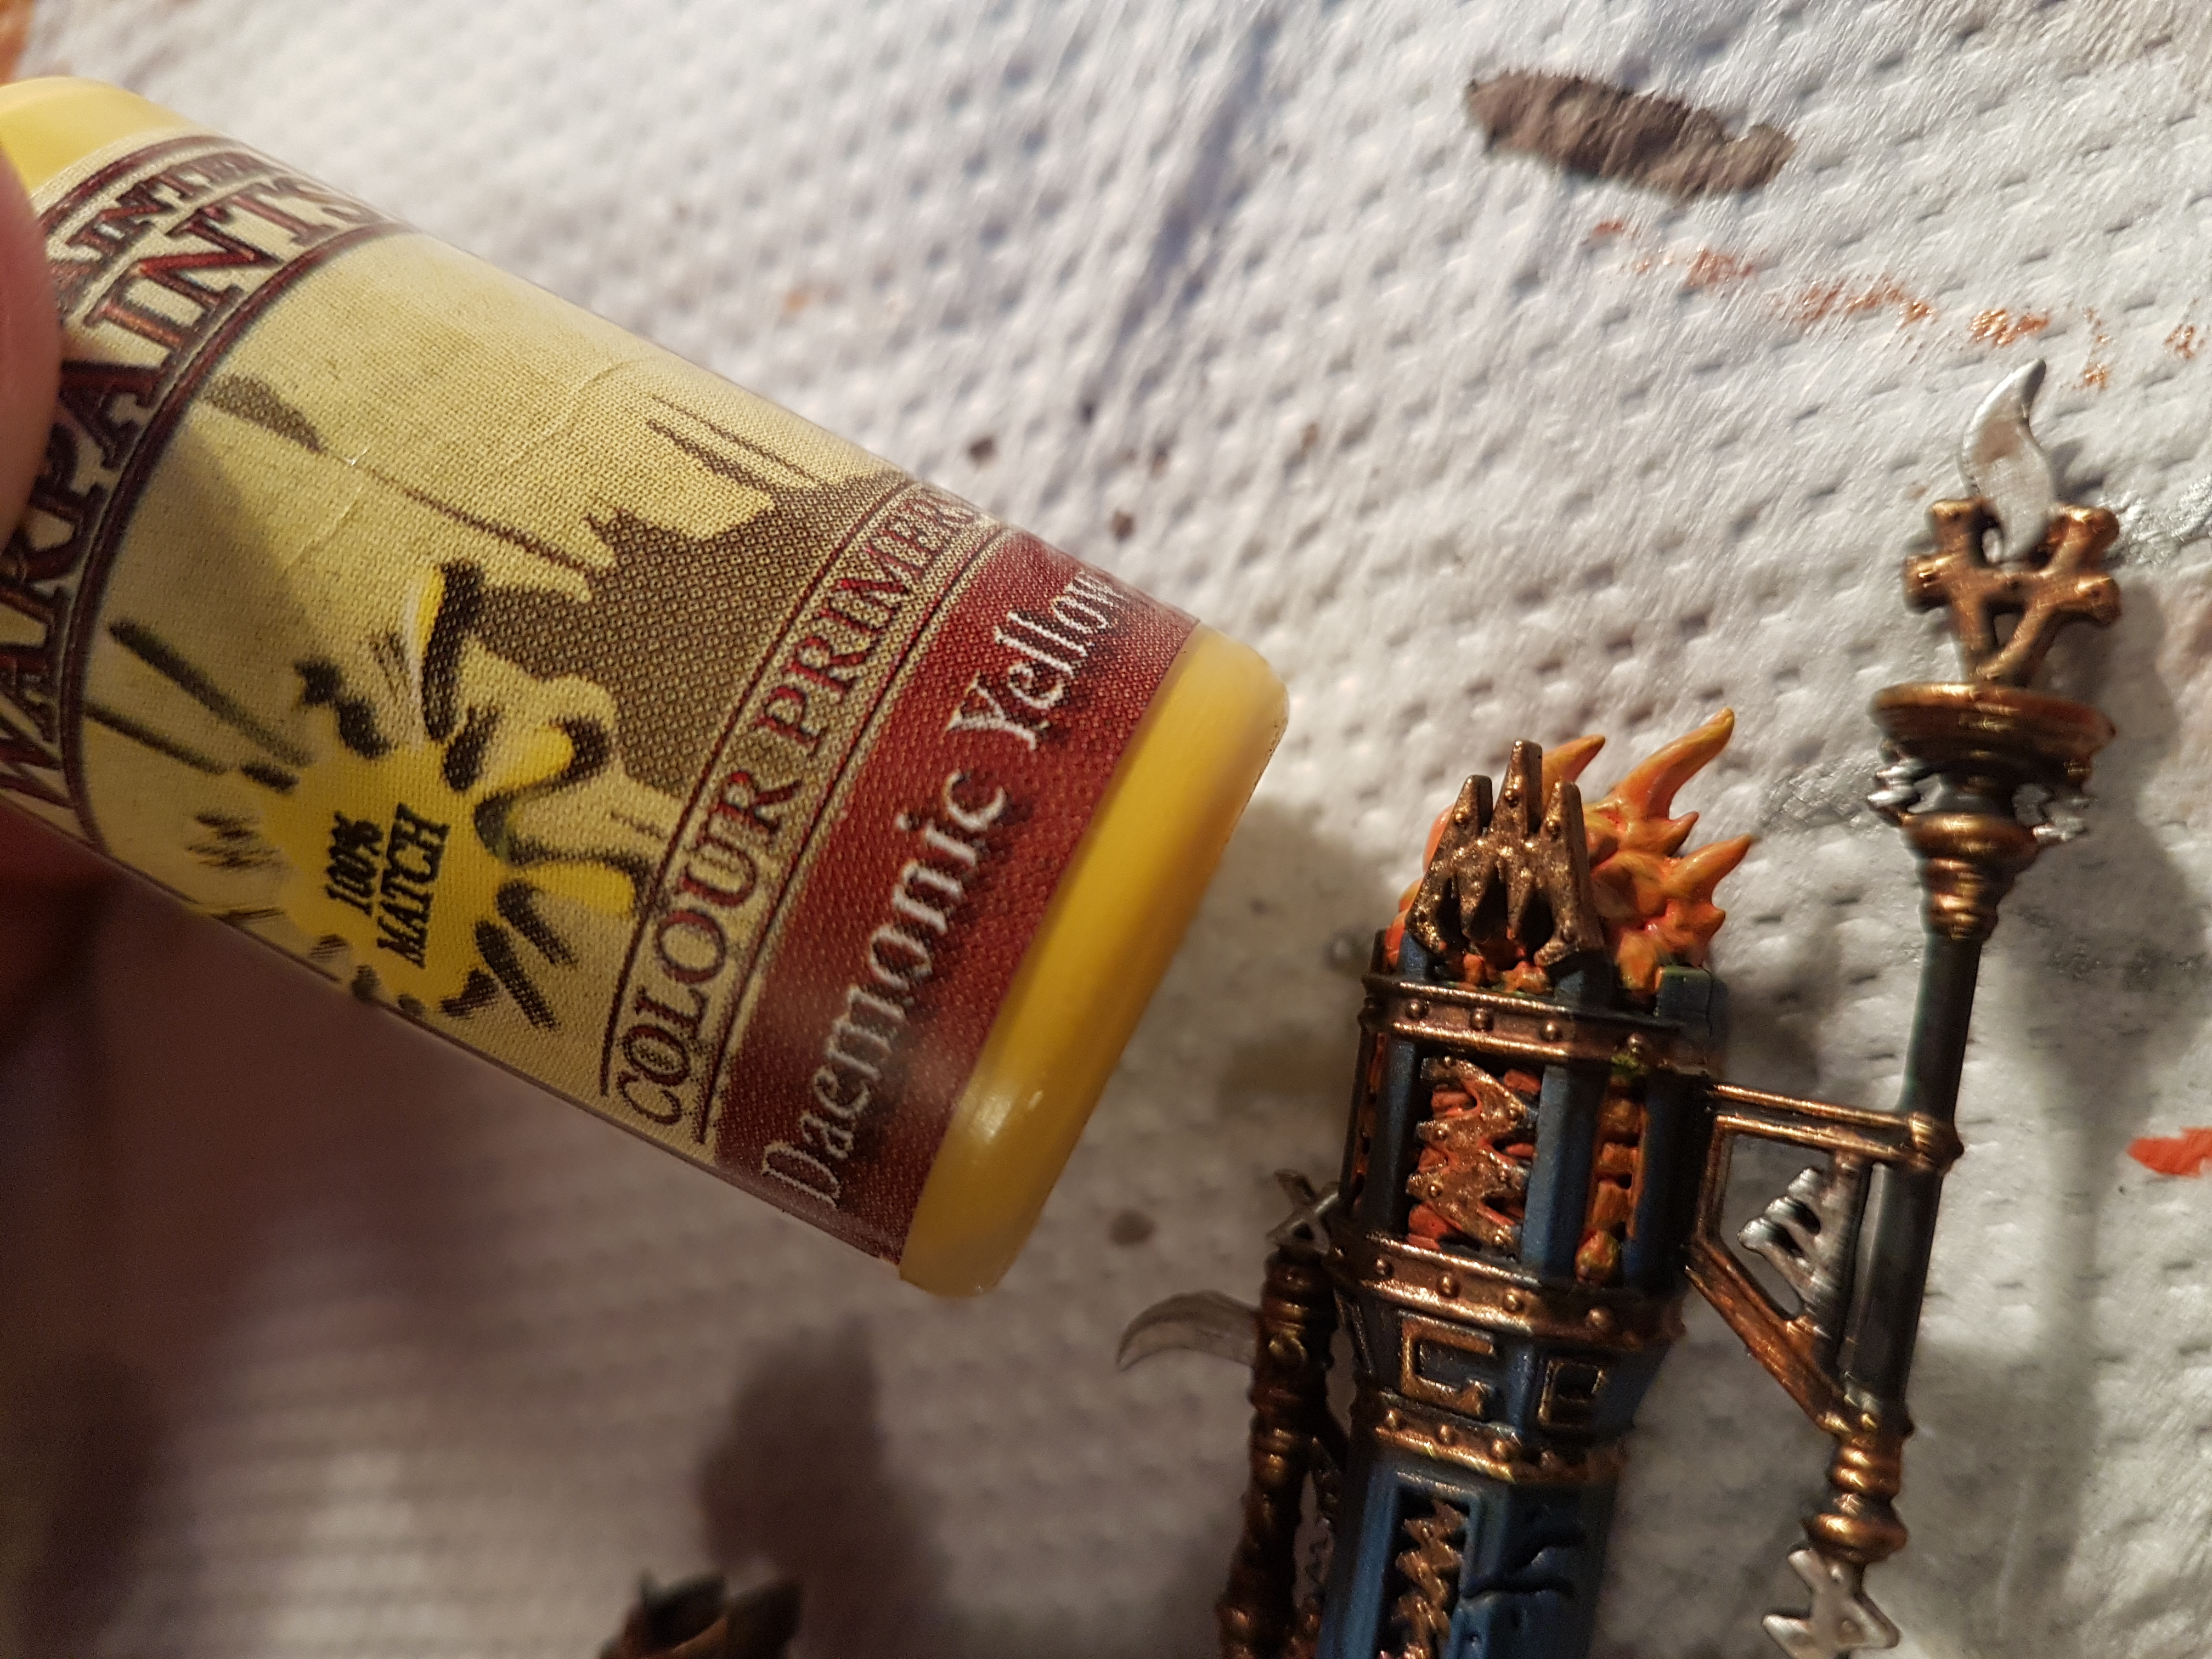
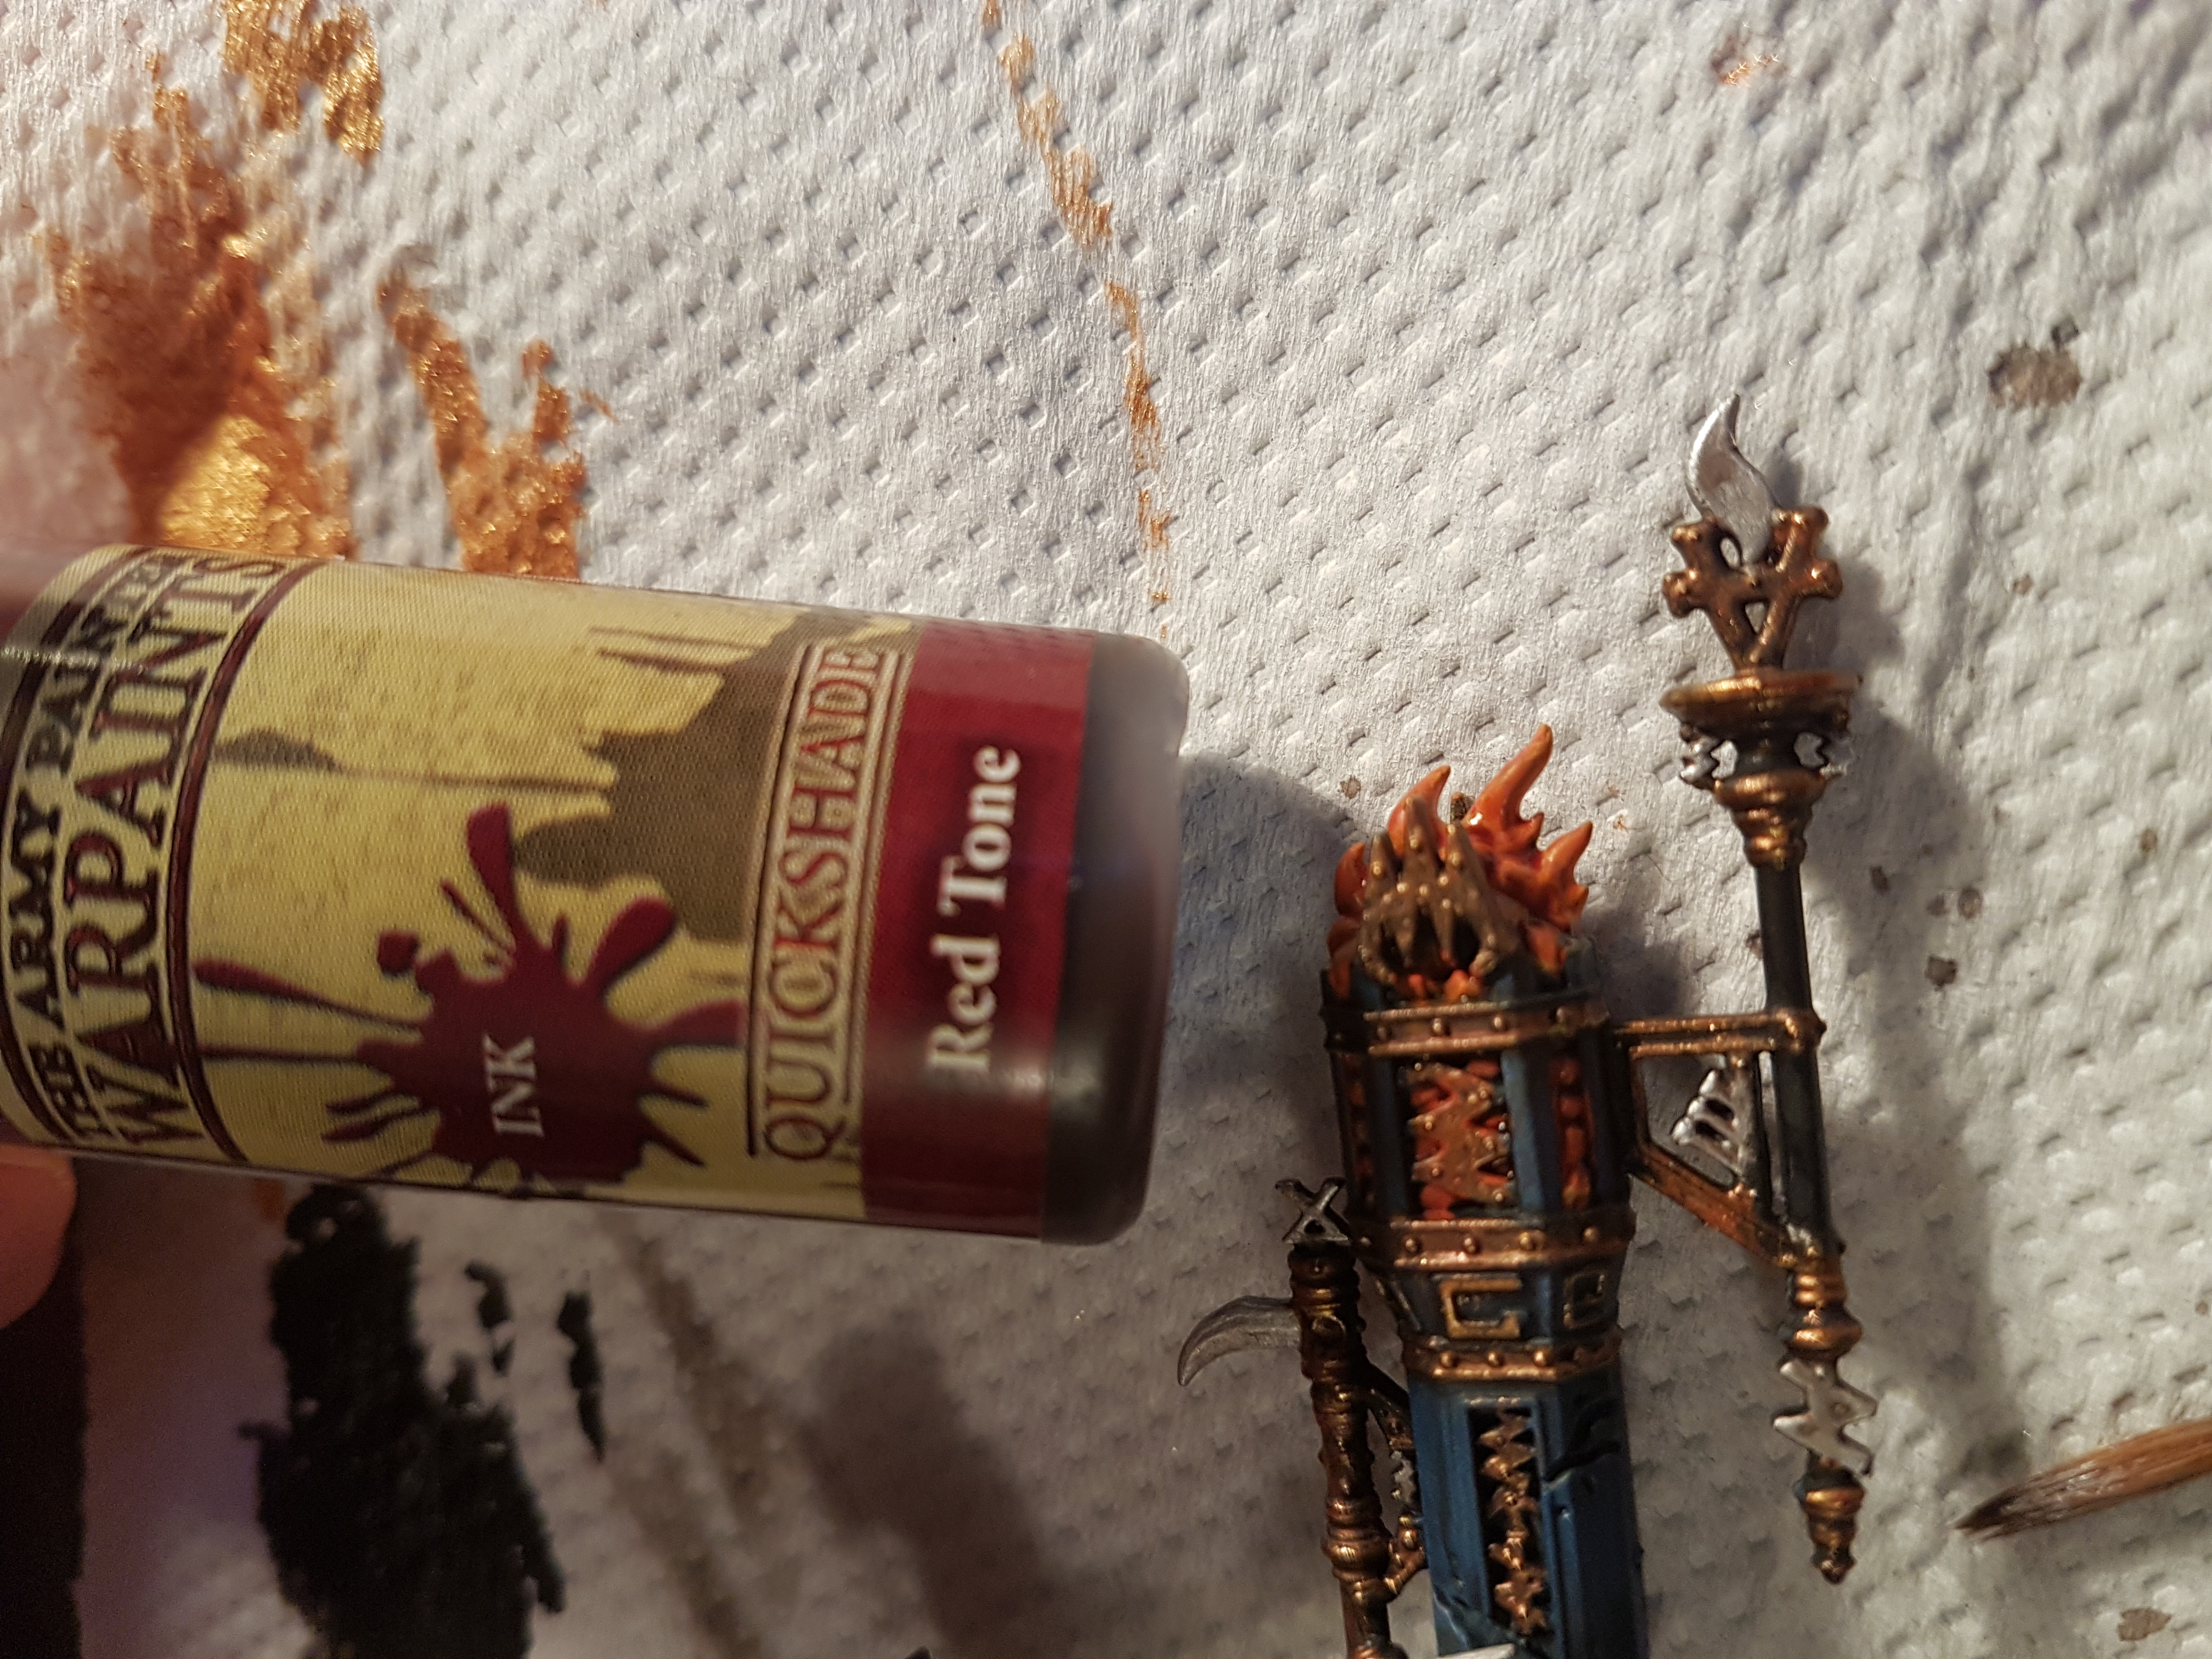
Next was the brazier.
I started off with a few thin coats of AP Lava Orange to give a warmth to the flame. I then went over this with a AP Daemonic Yellow drybrush. The yellow is quite thin so this needed quite a few passes. Following on I used the red ink to wash over all the areas of fire and embers to give a warm glow.
Whilst this was drying I used AP Ash Grey to edge highlight the throne (I have really been practicing my edge highlighting on this model and improving my technique, thankfully the areas where I did not do as well as I would have liked will be obscured by the rider once he is sat on the throne).
Throne Part 2
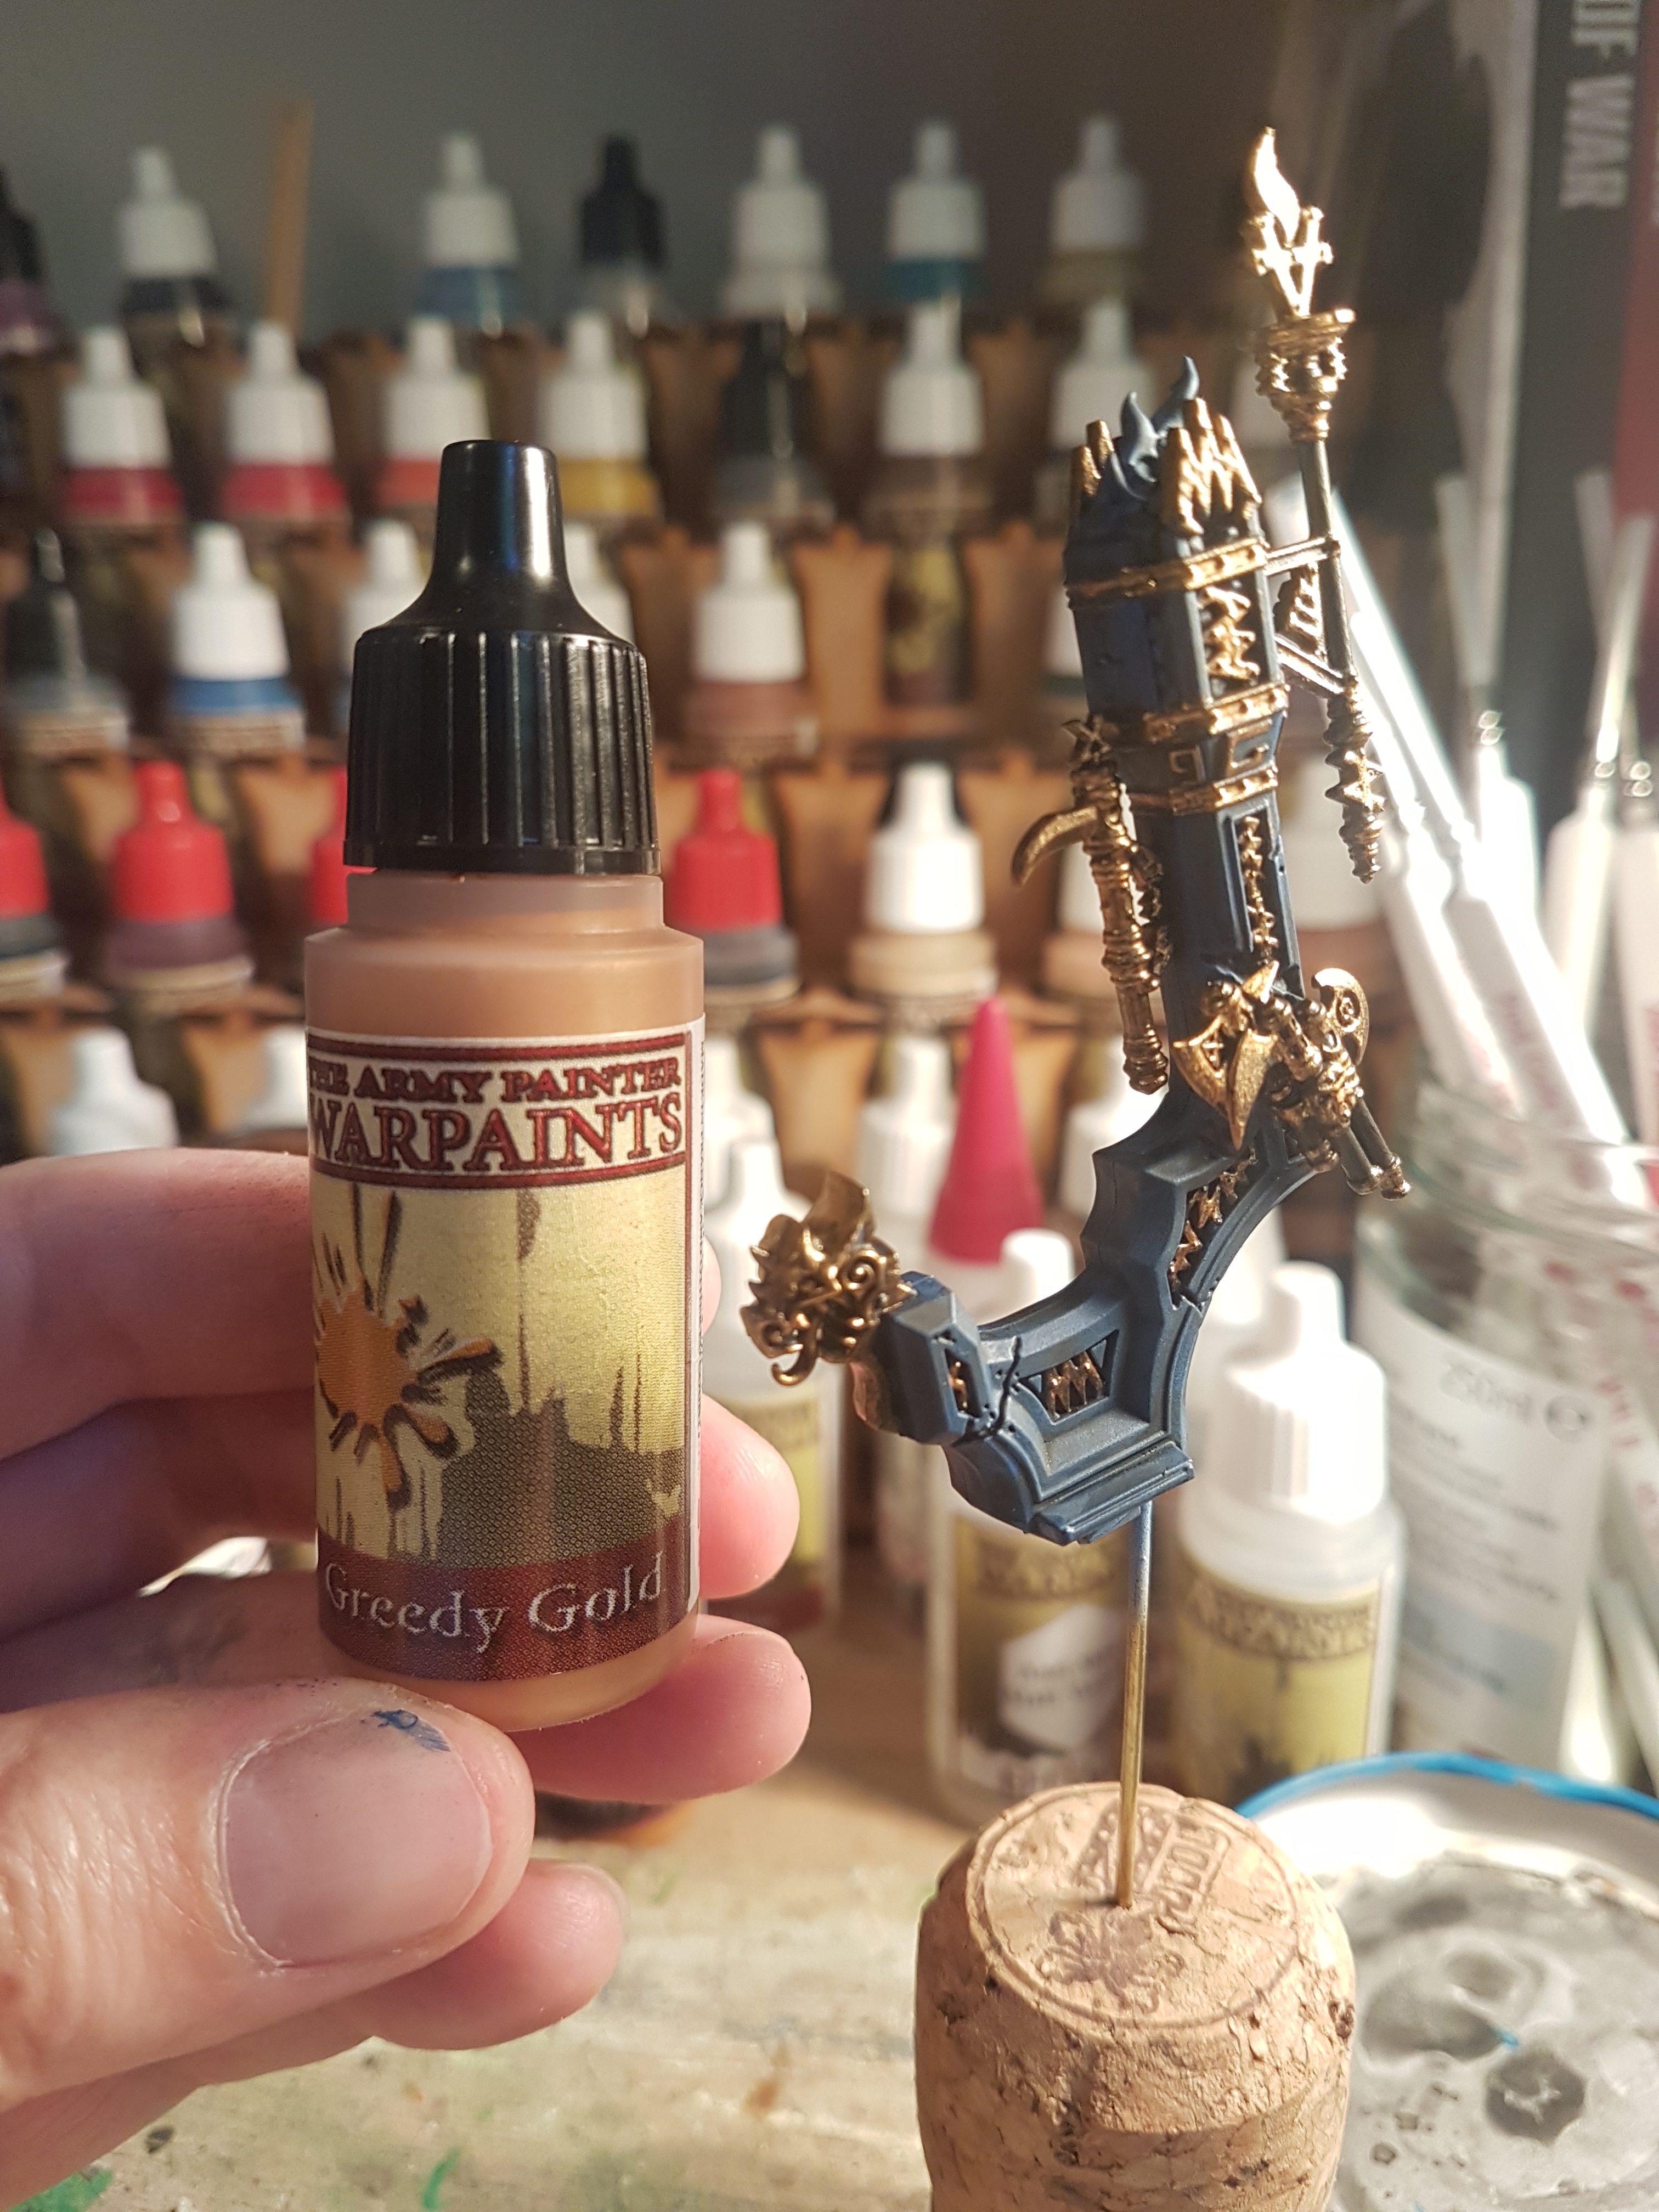
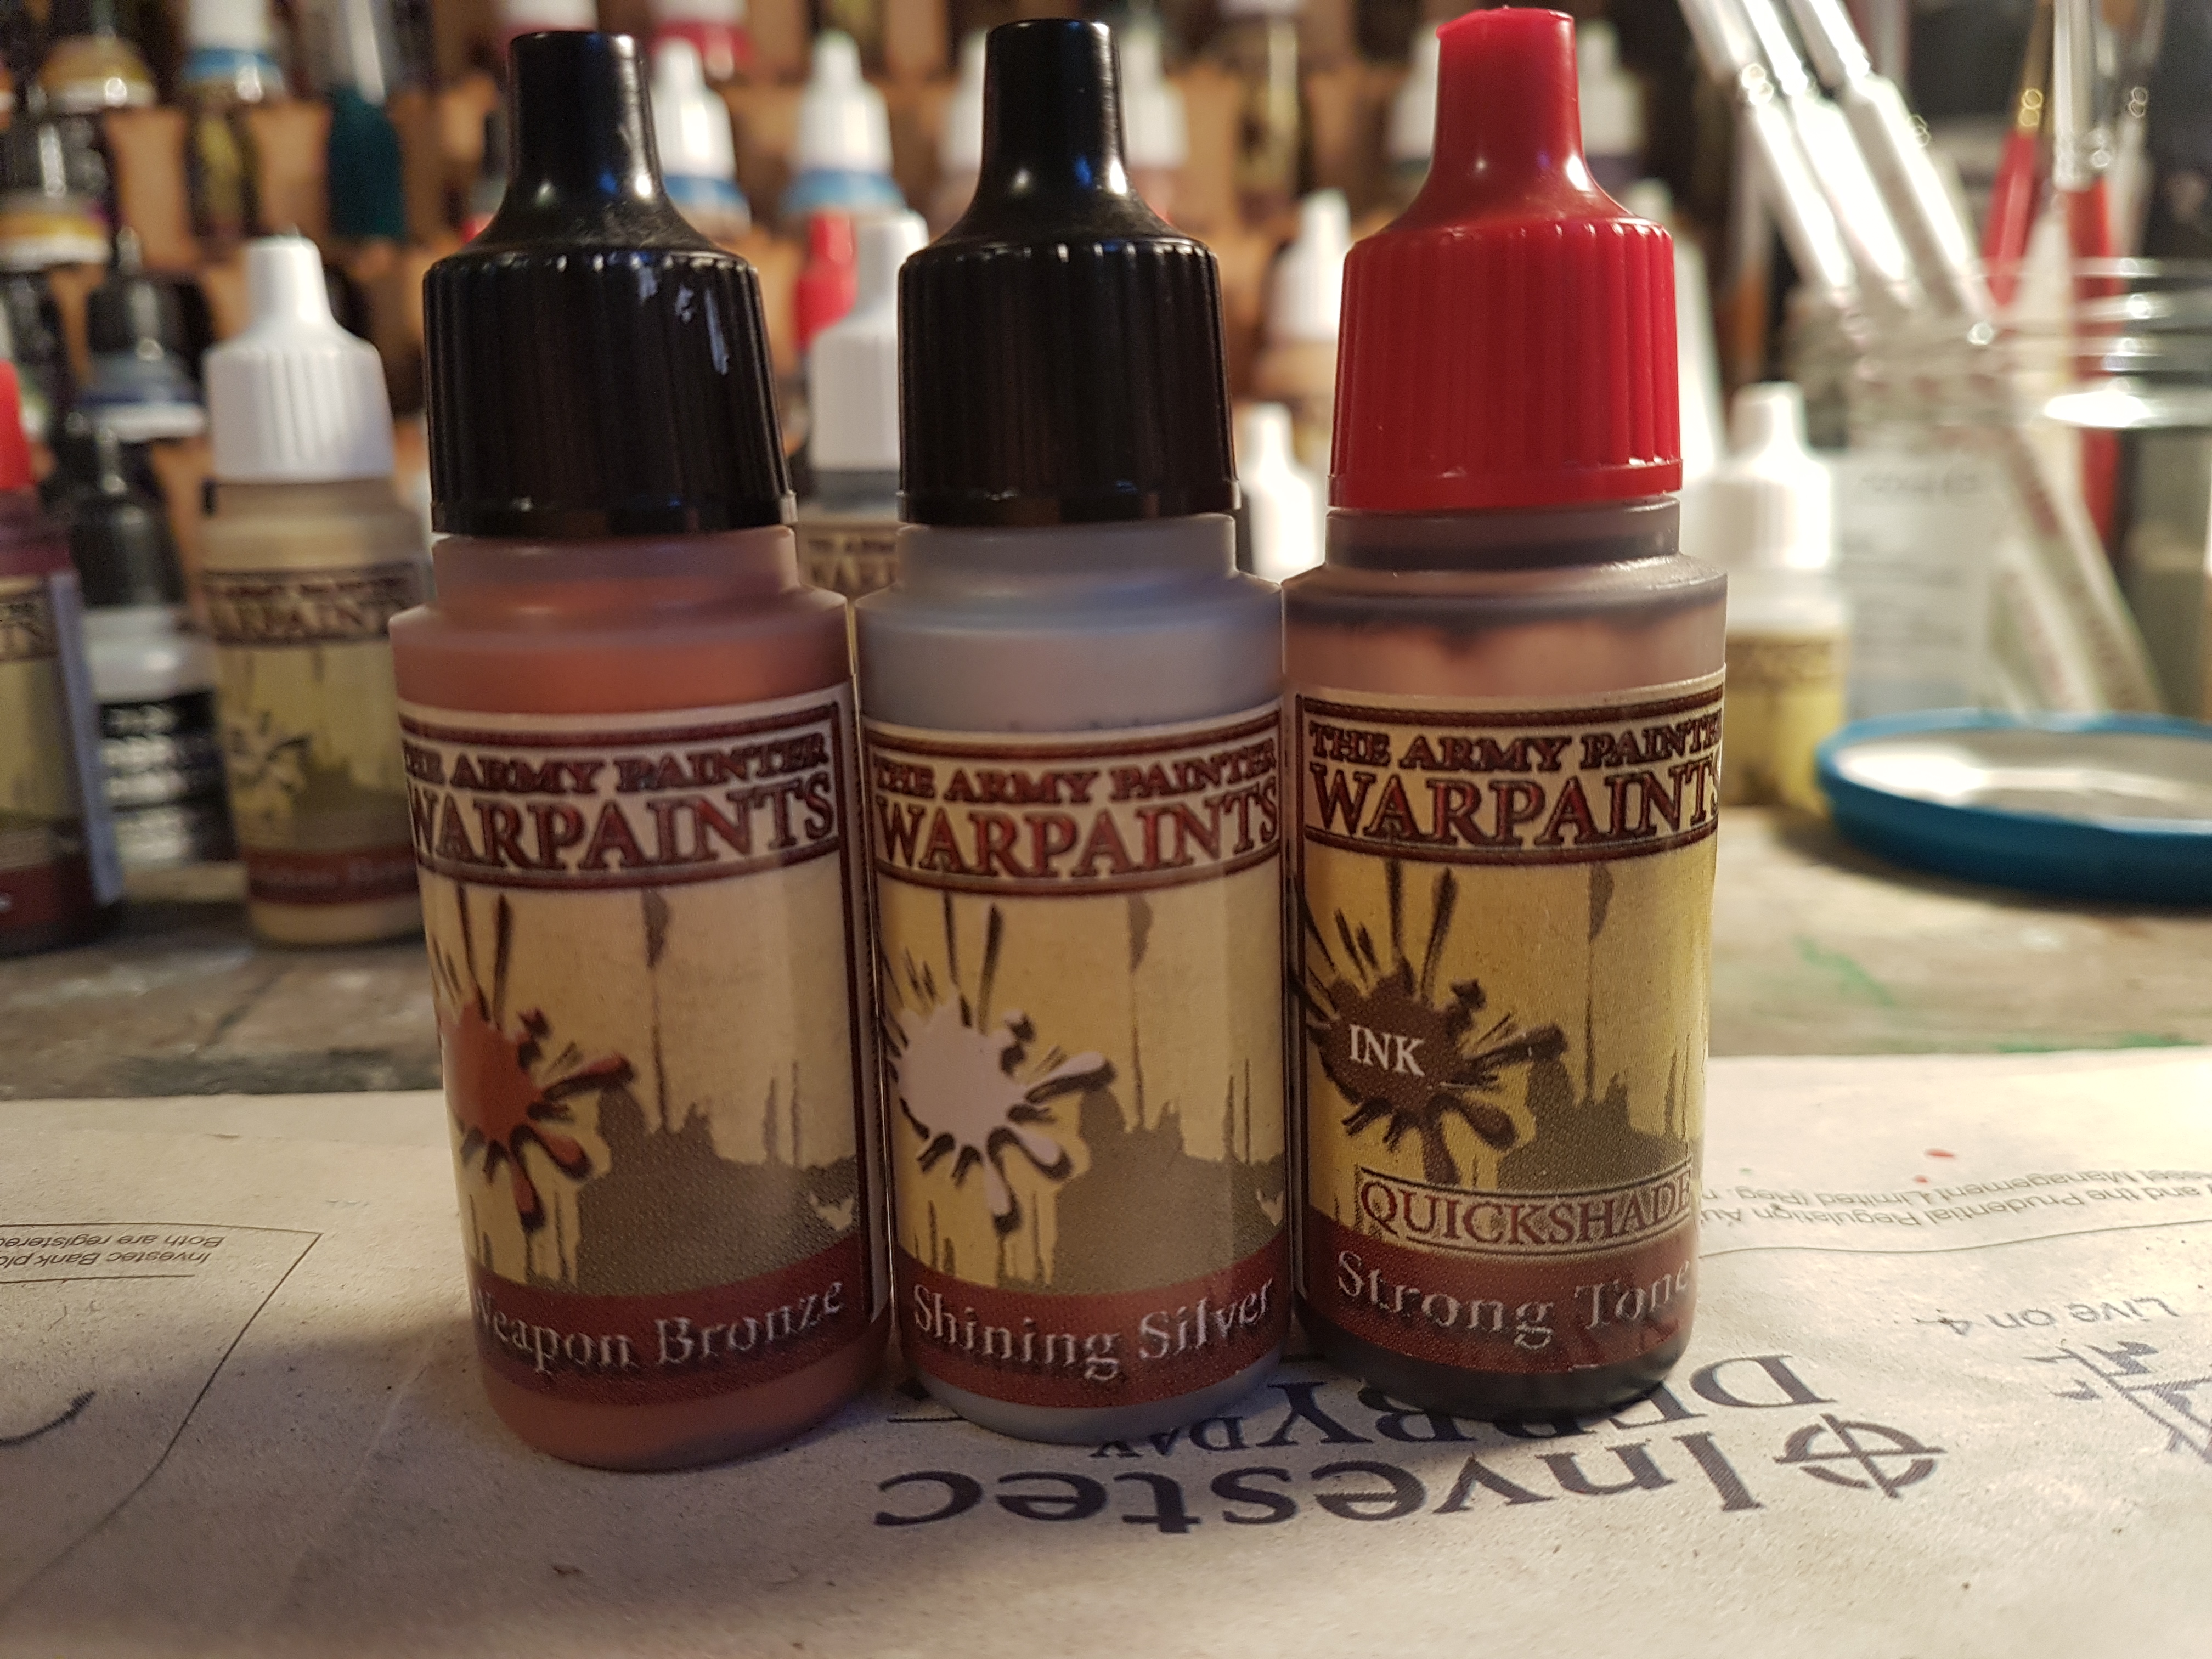
The next step on the throne was to to do all the metalics.
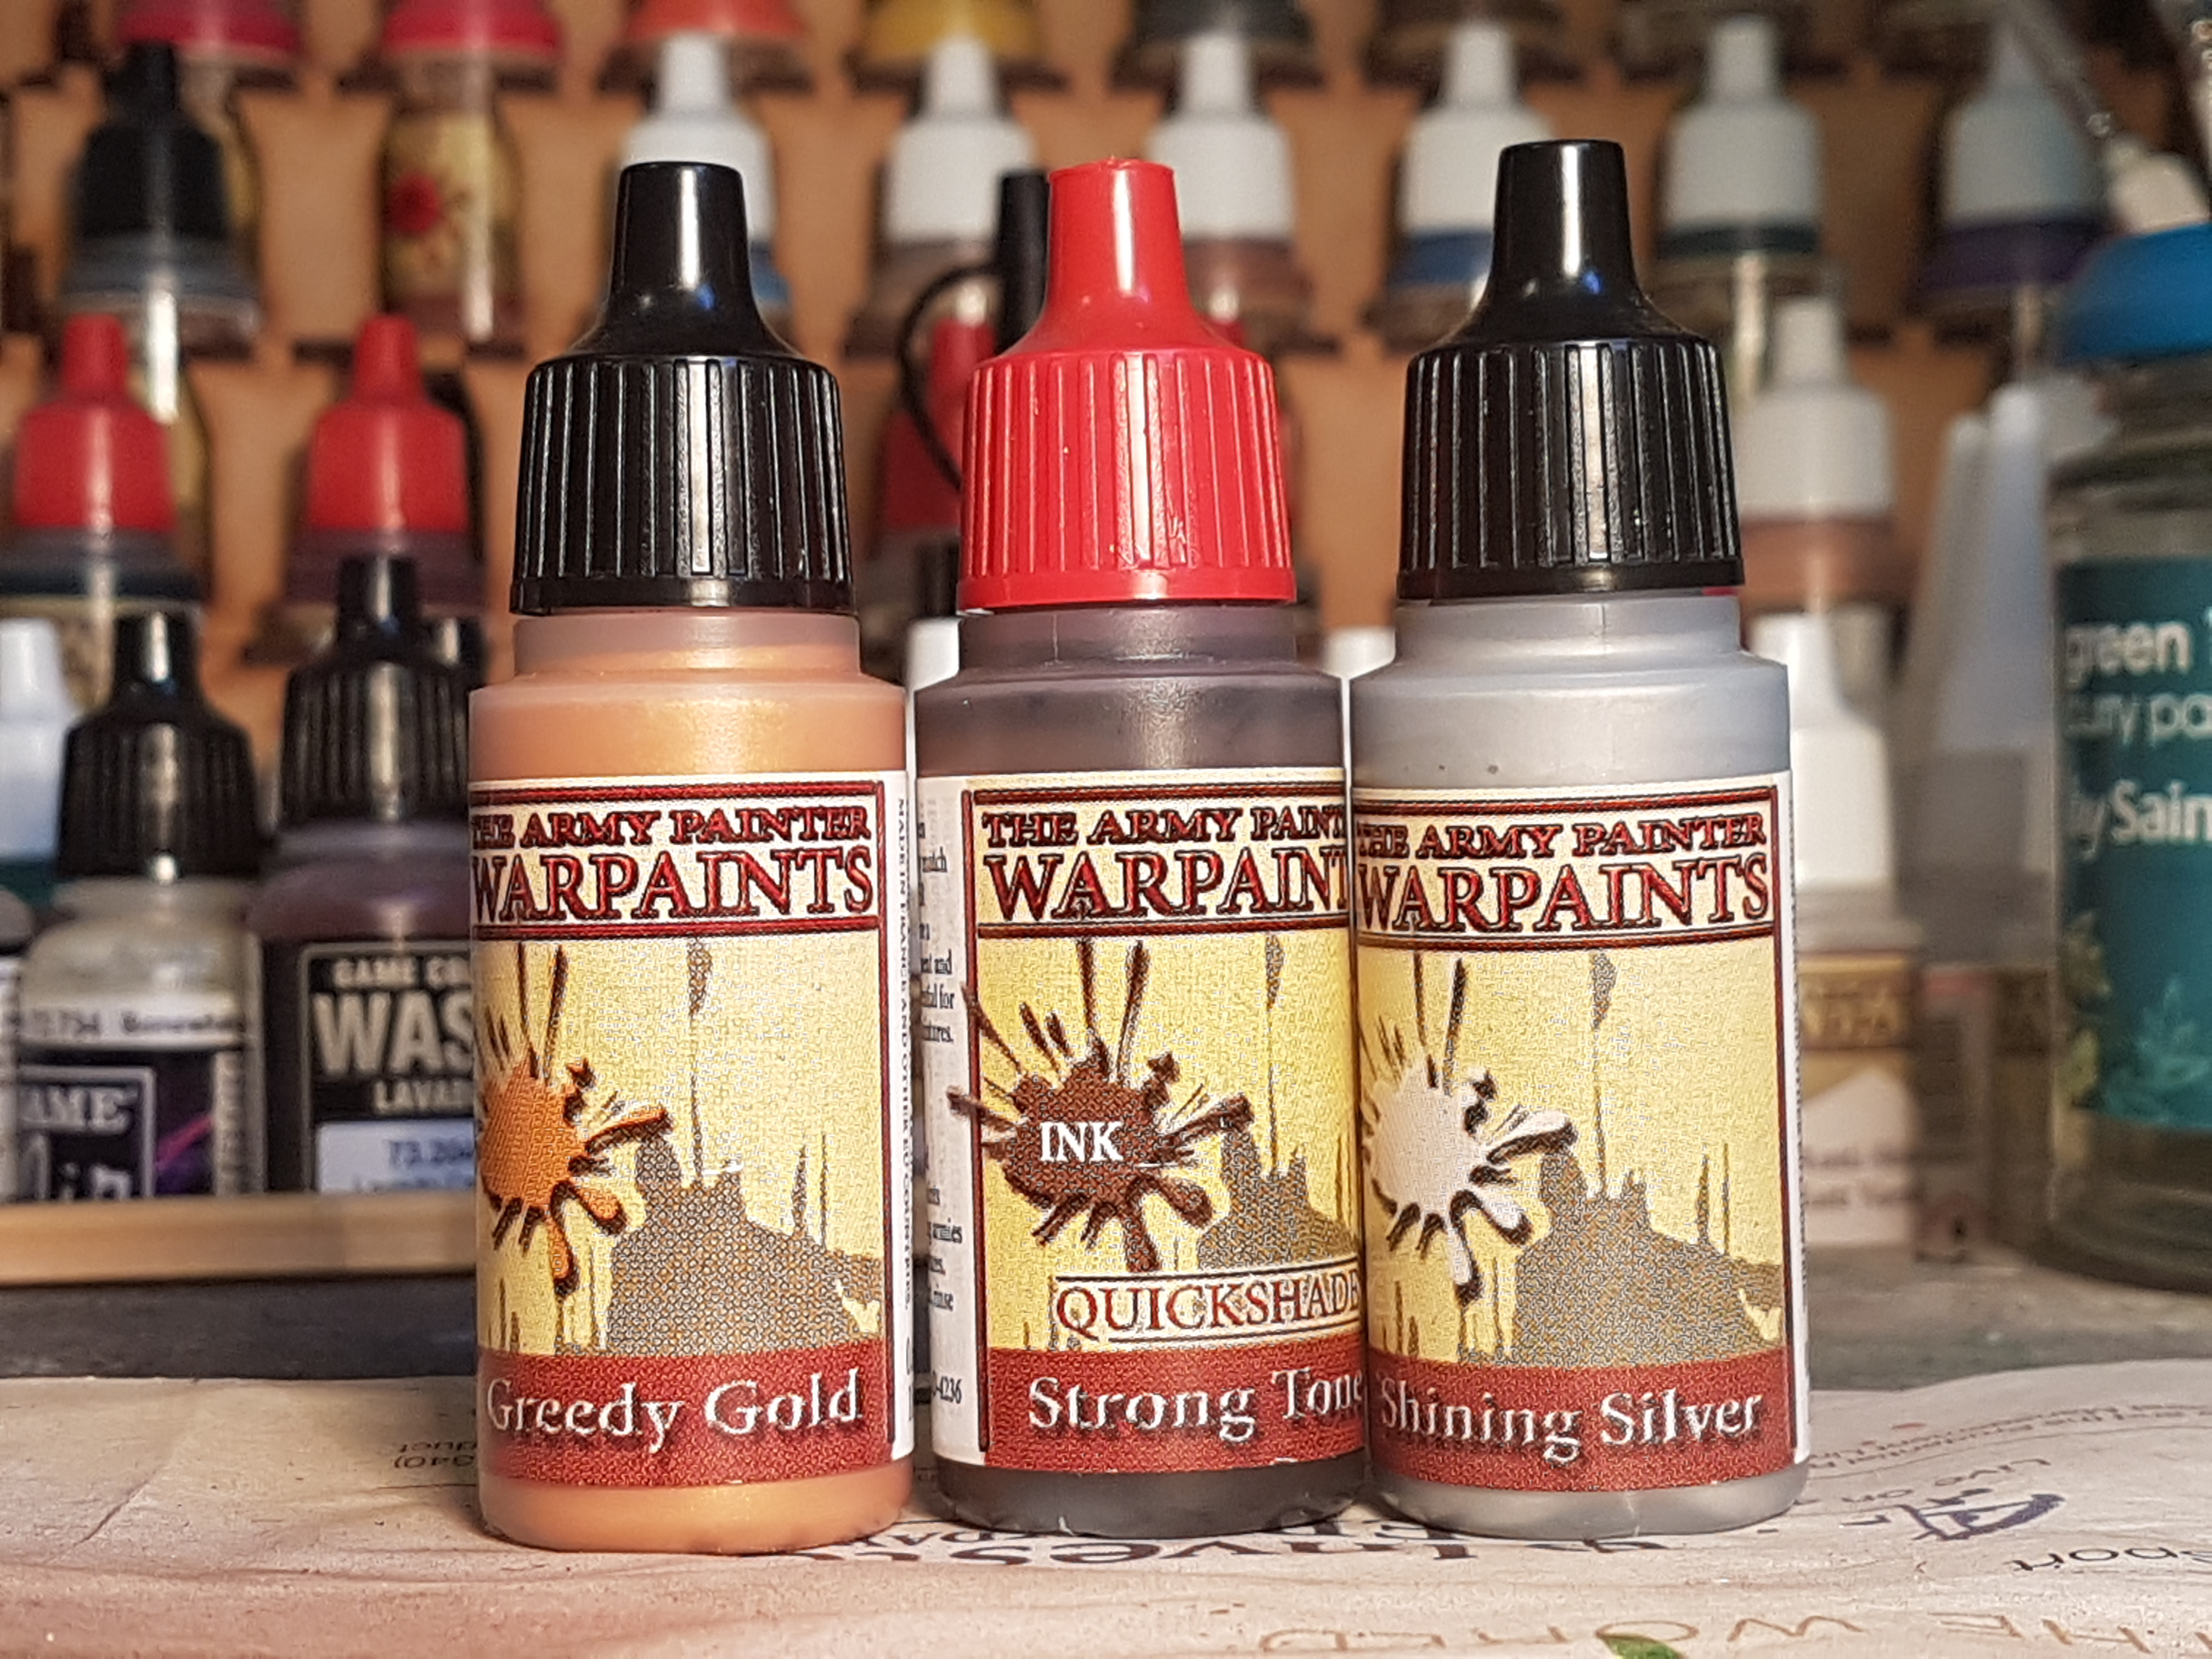
I started with a base of AP Greedy Gold, on all metalic areas (runes, weapons, pommel/statue, etc)
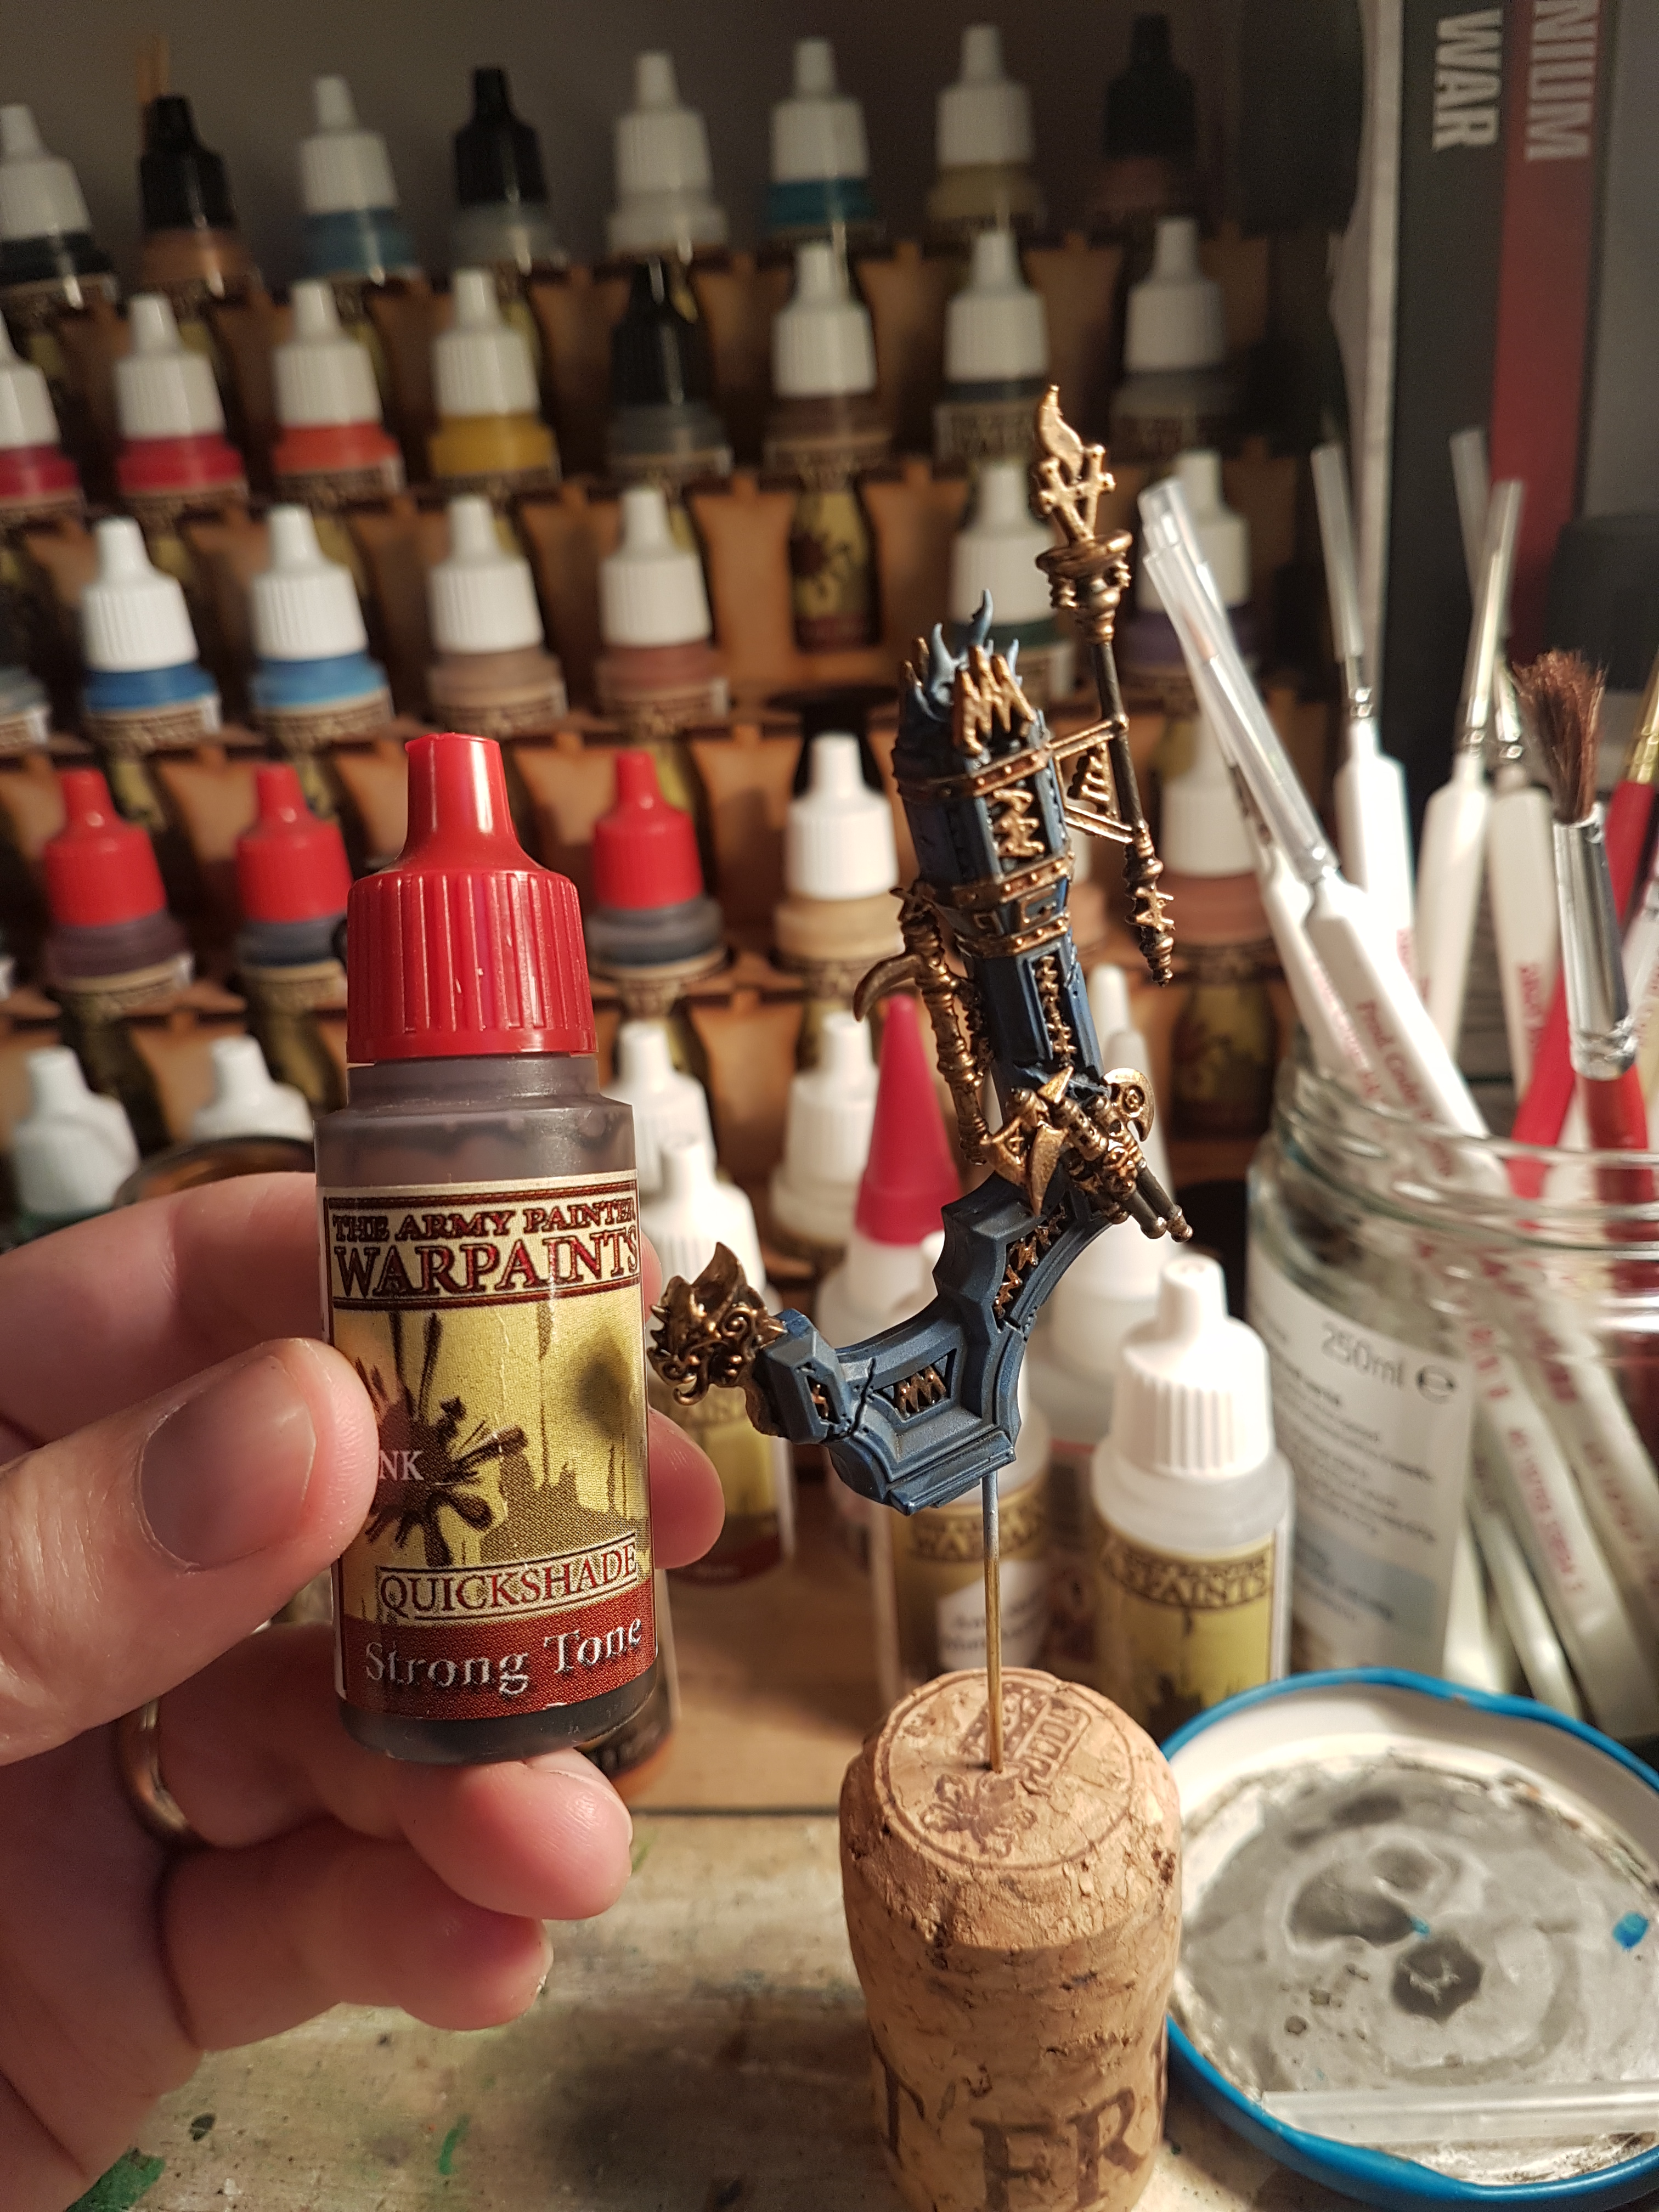
These were then washed with AP strong tone ink.
Having learnt from before… I then picked out some of the details / drybrushed using Weapon Bronze. This gave a bit more life to the gold areas, without being too bright. Giving a nice burnished gold effect.
I then picked out the items I wanted to have silver finish (axe blades, select runes and details on the dragon pommel). These silver areas were also washed with AP strong tone ink, and then some edge highlights added using the AP shining silver again.
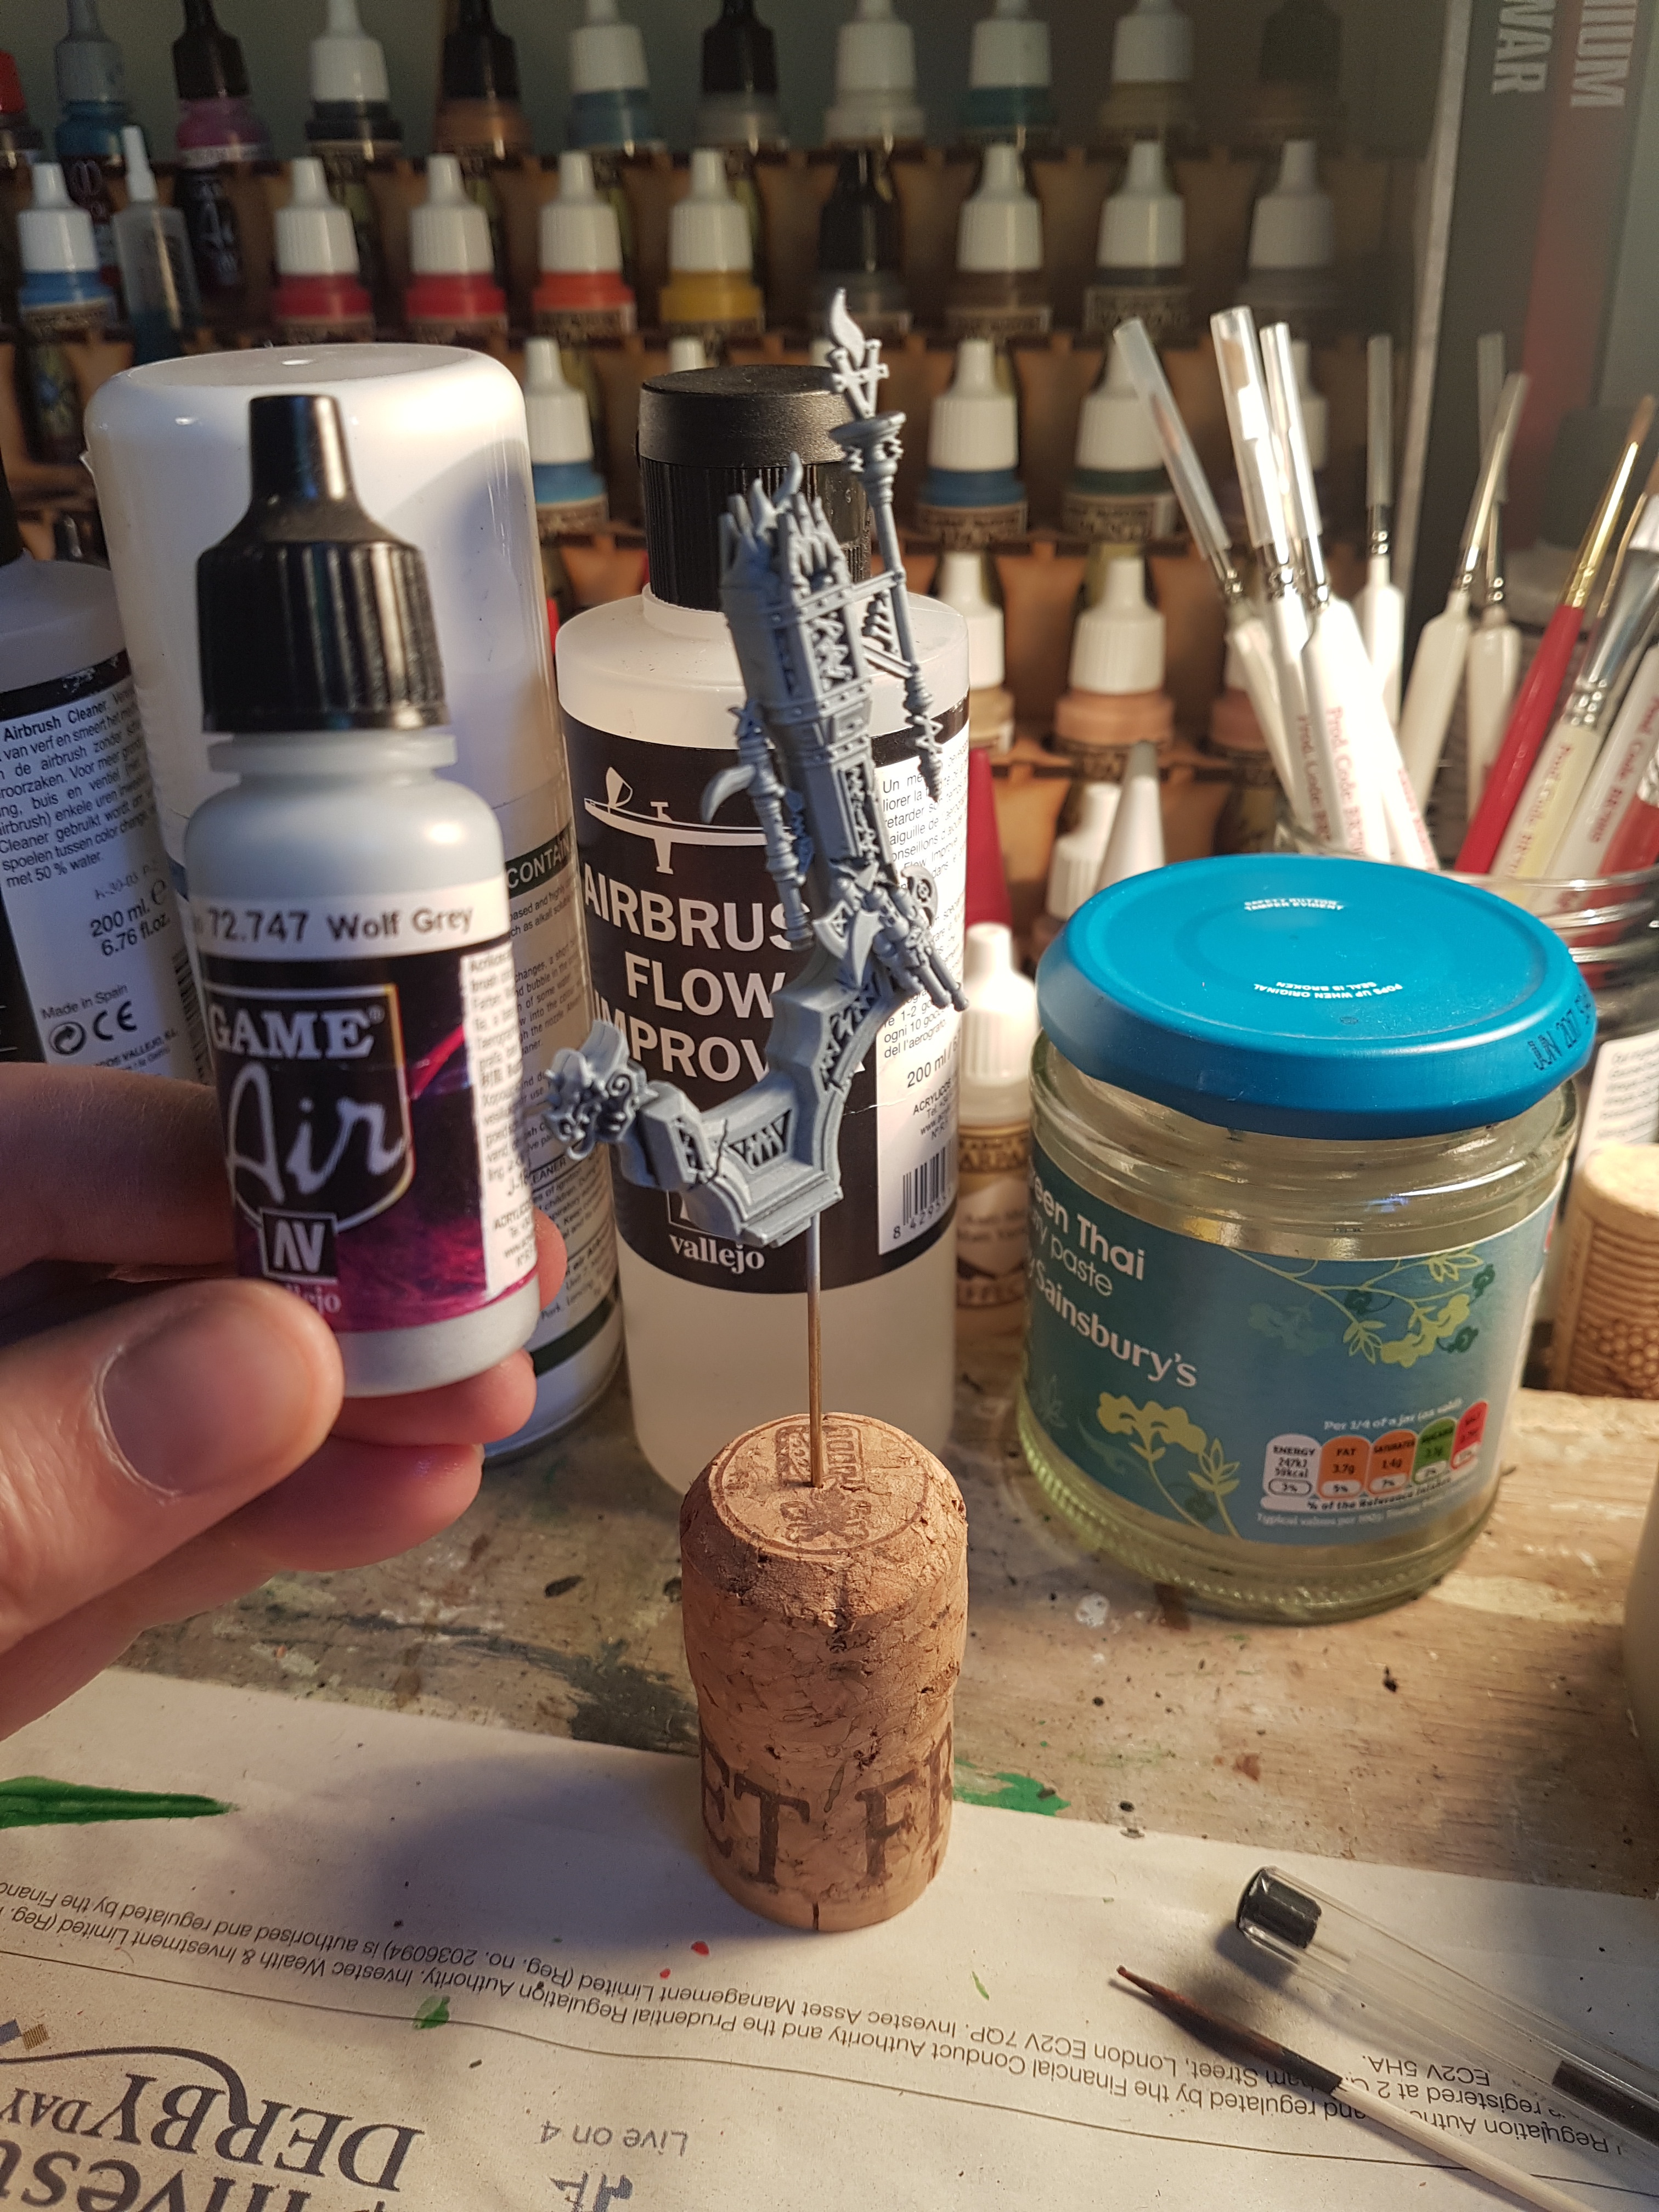
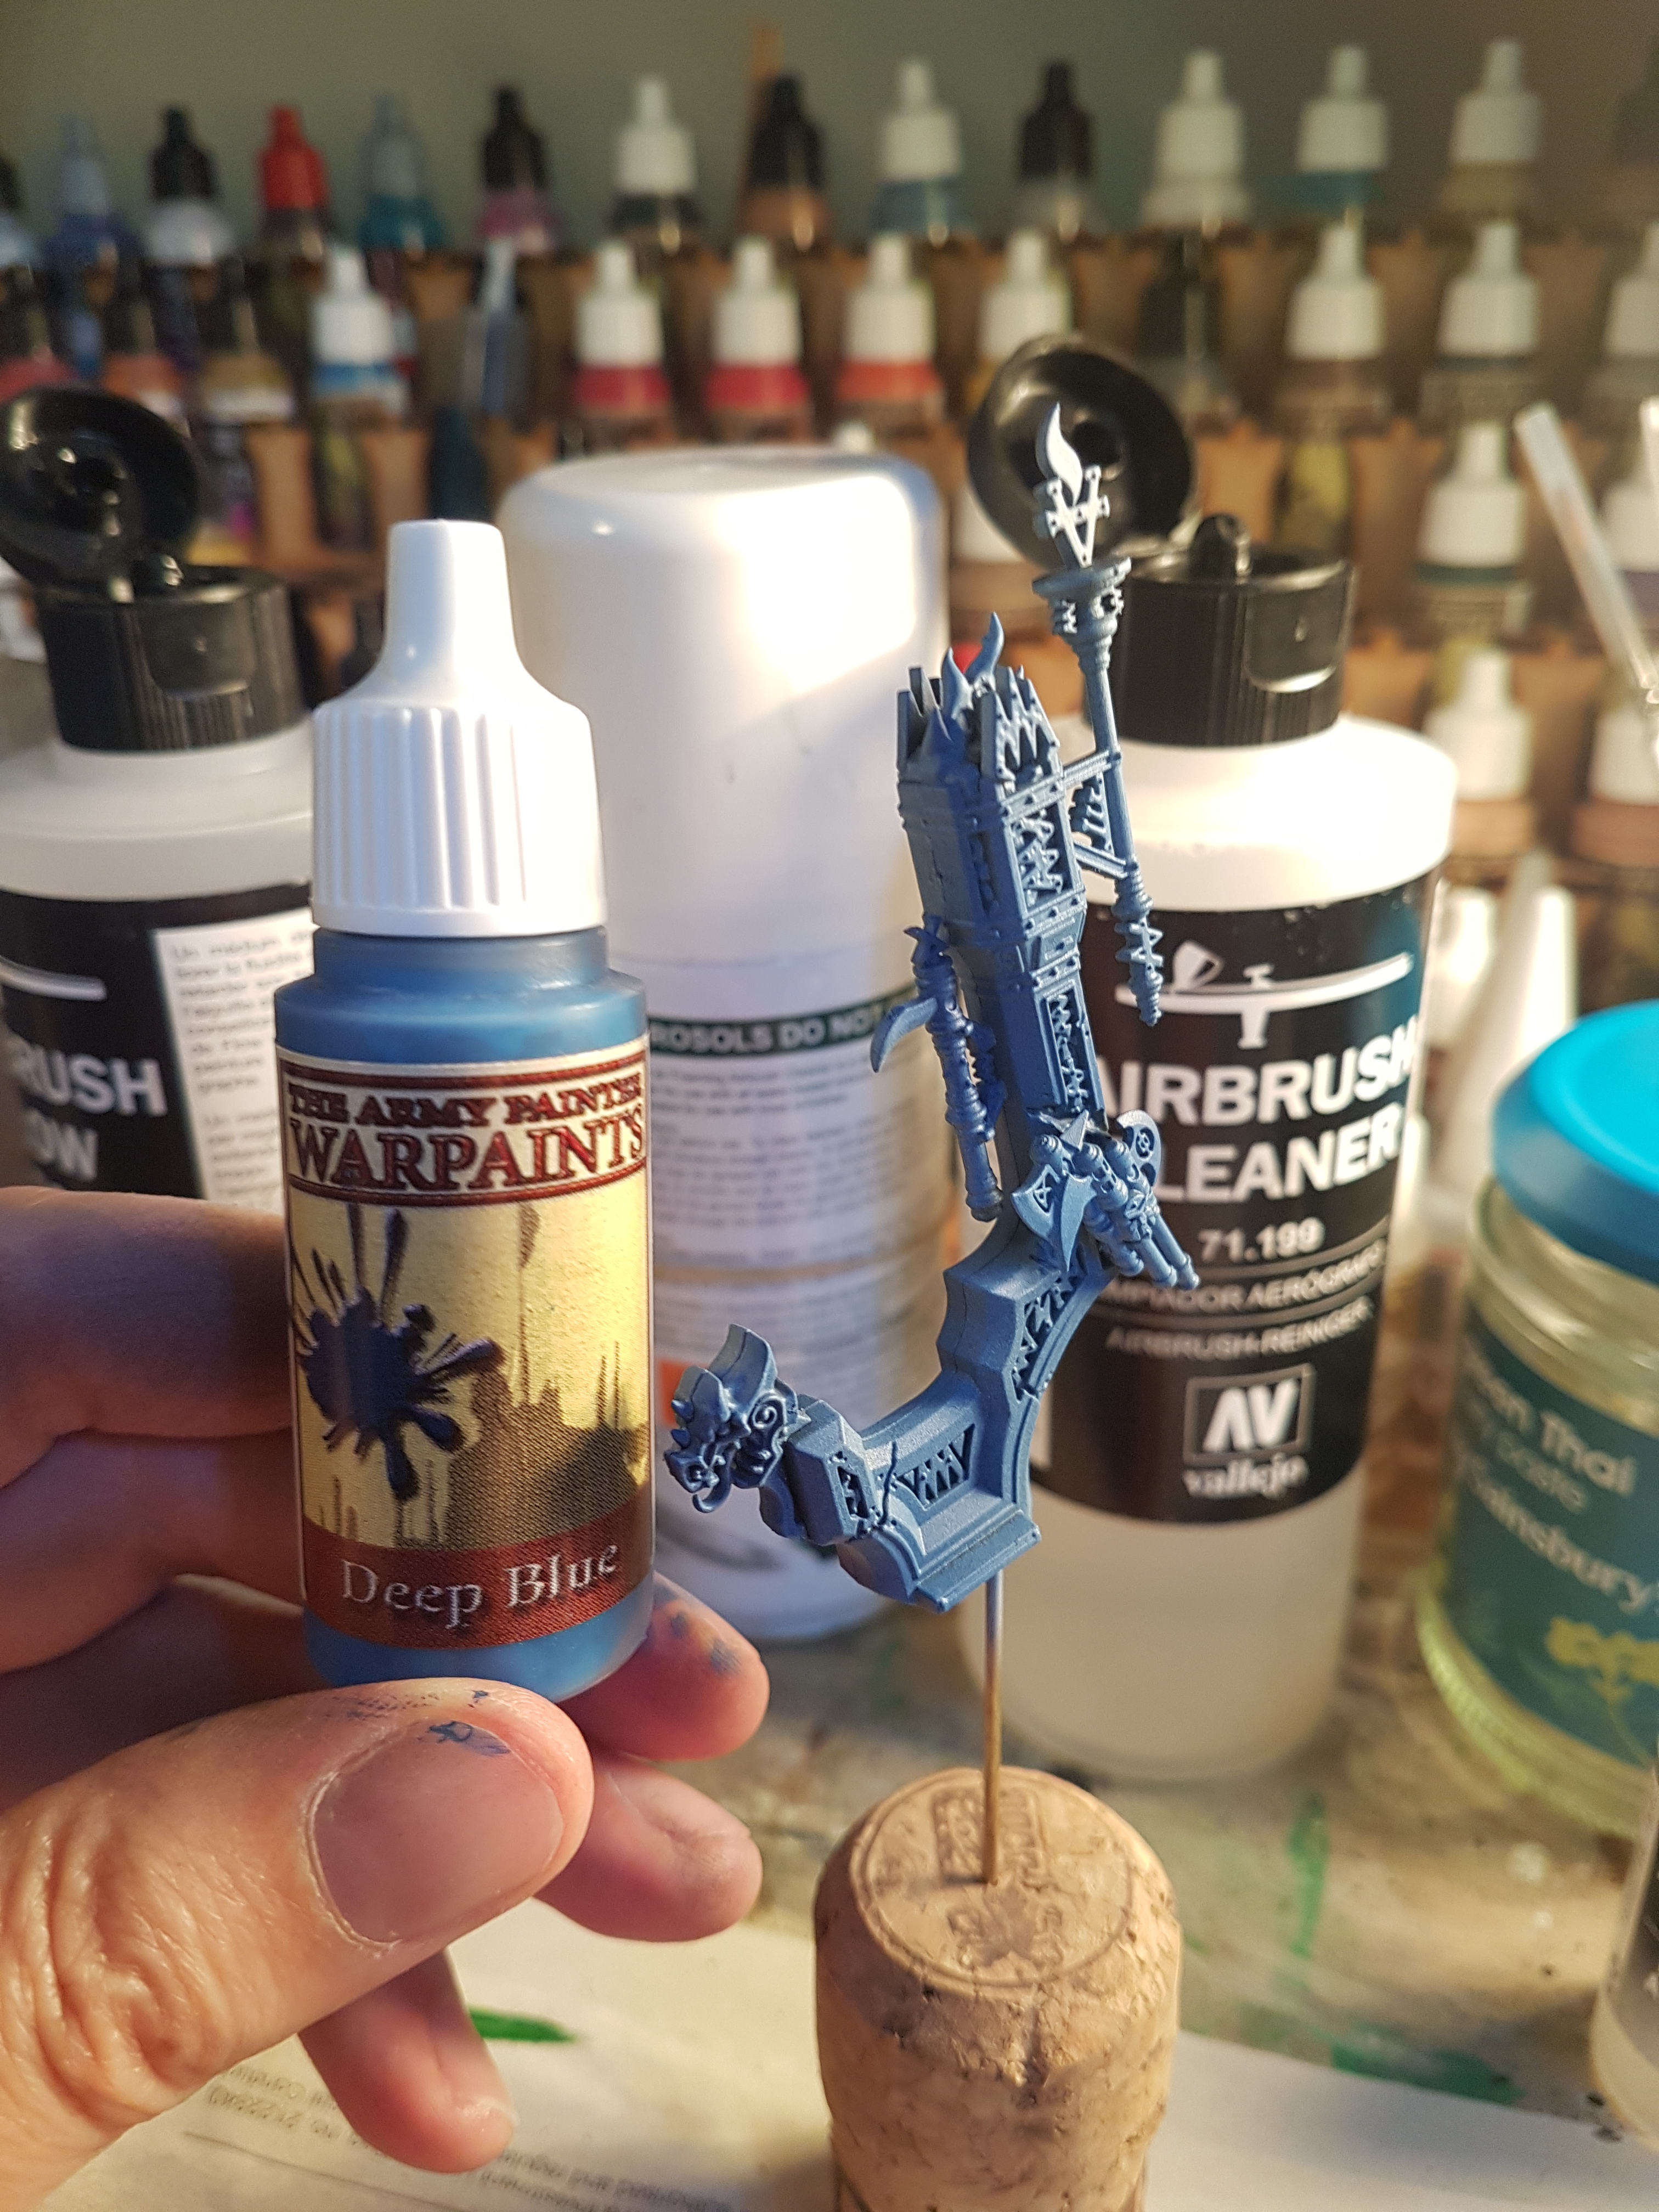
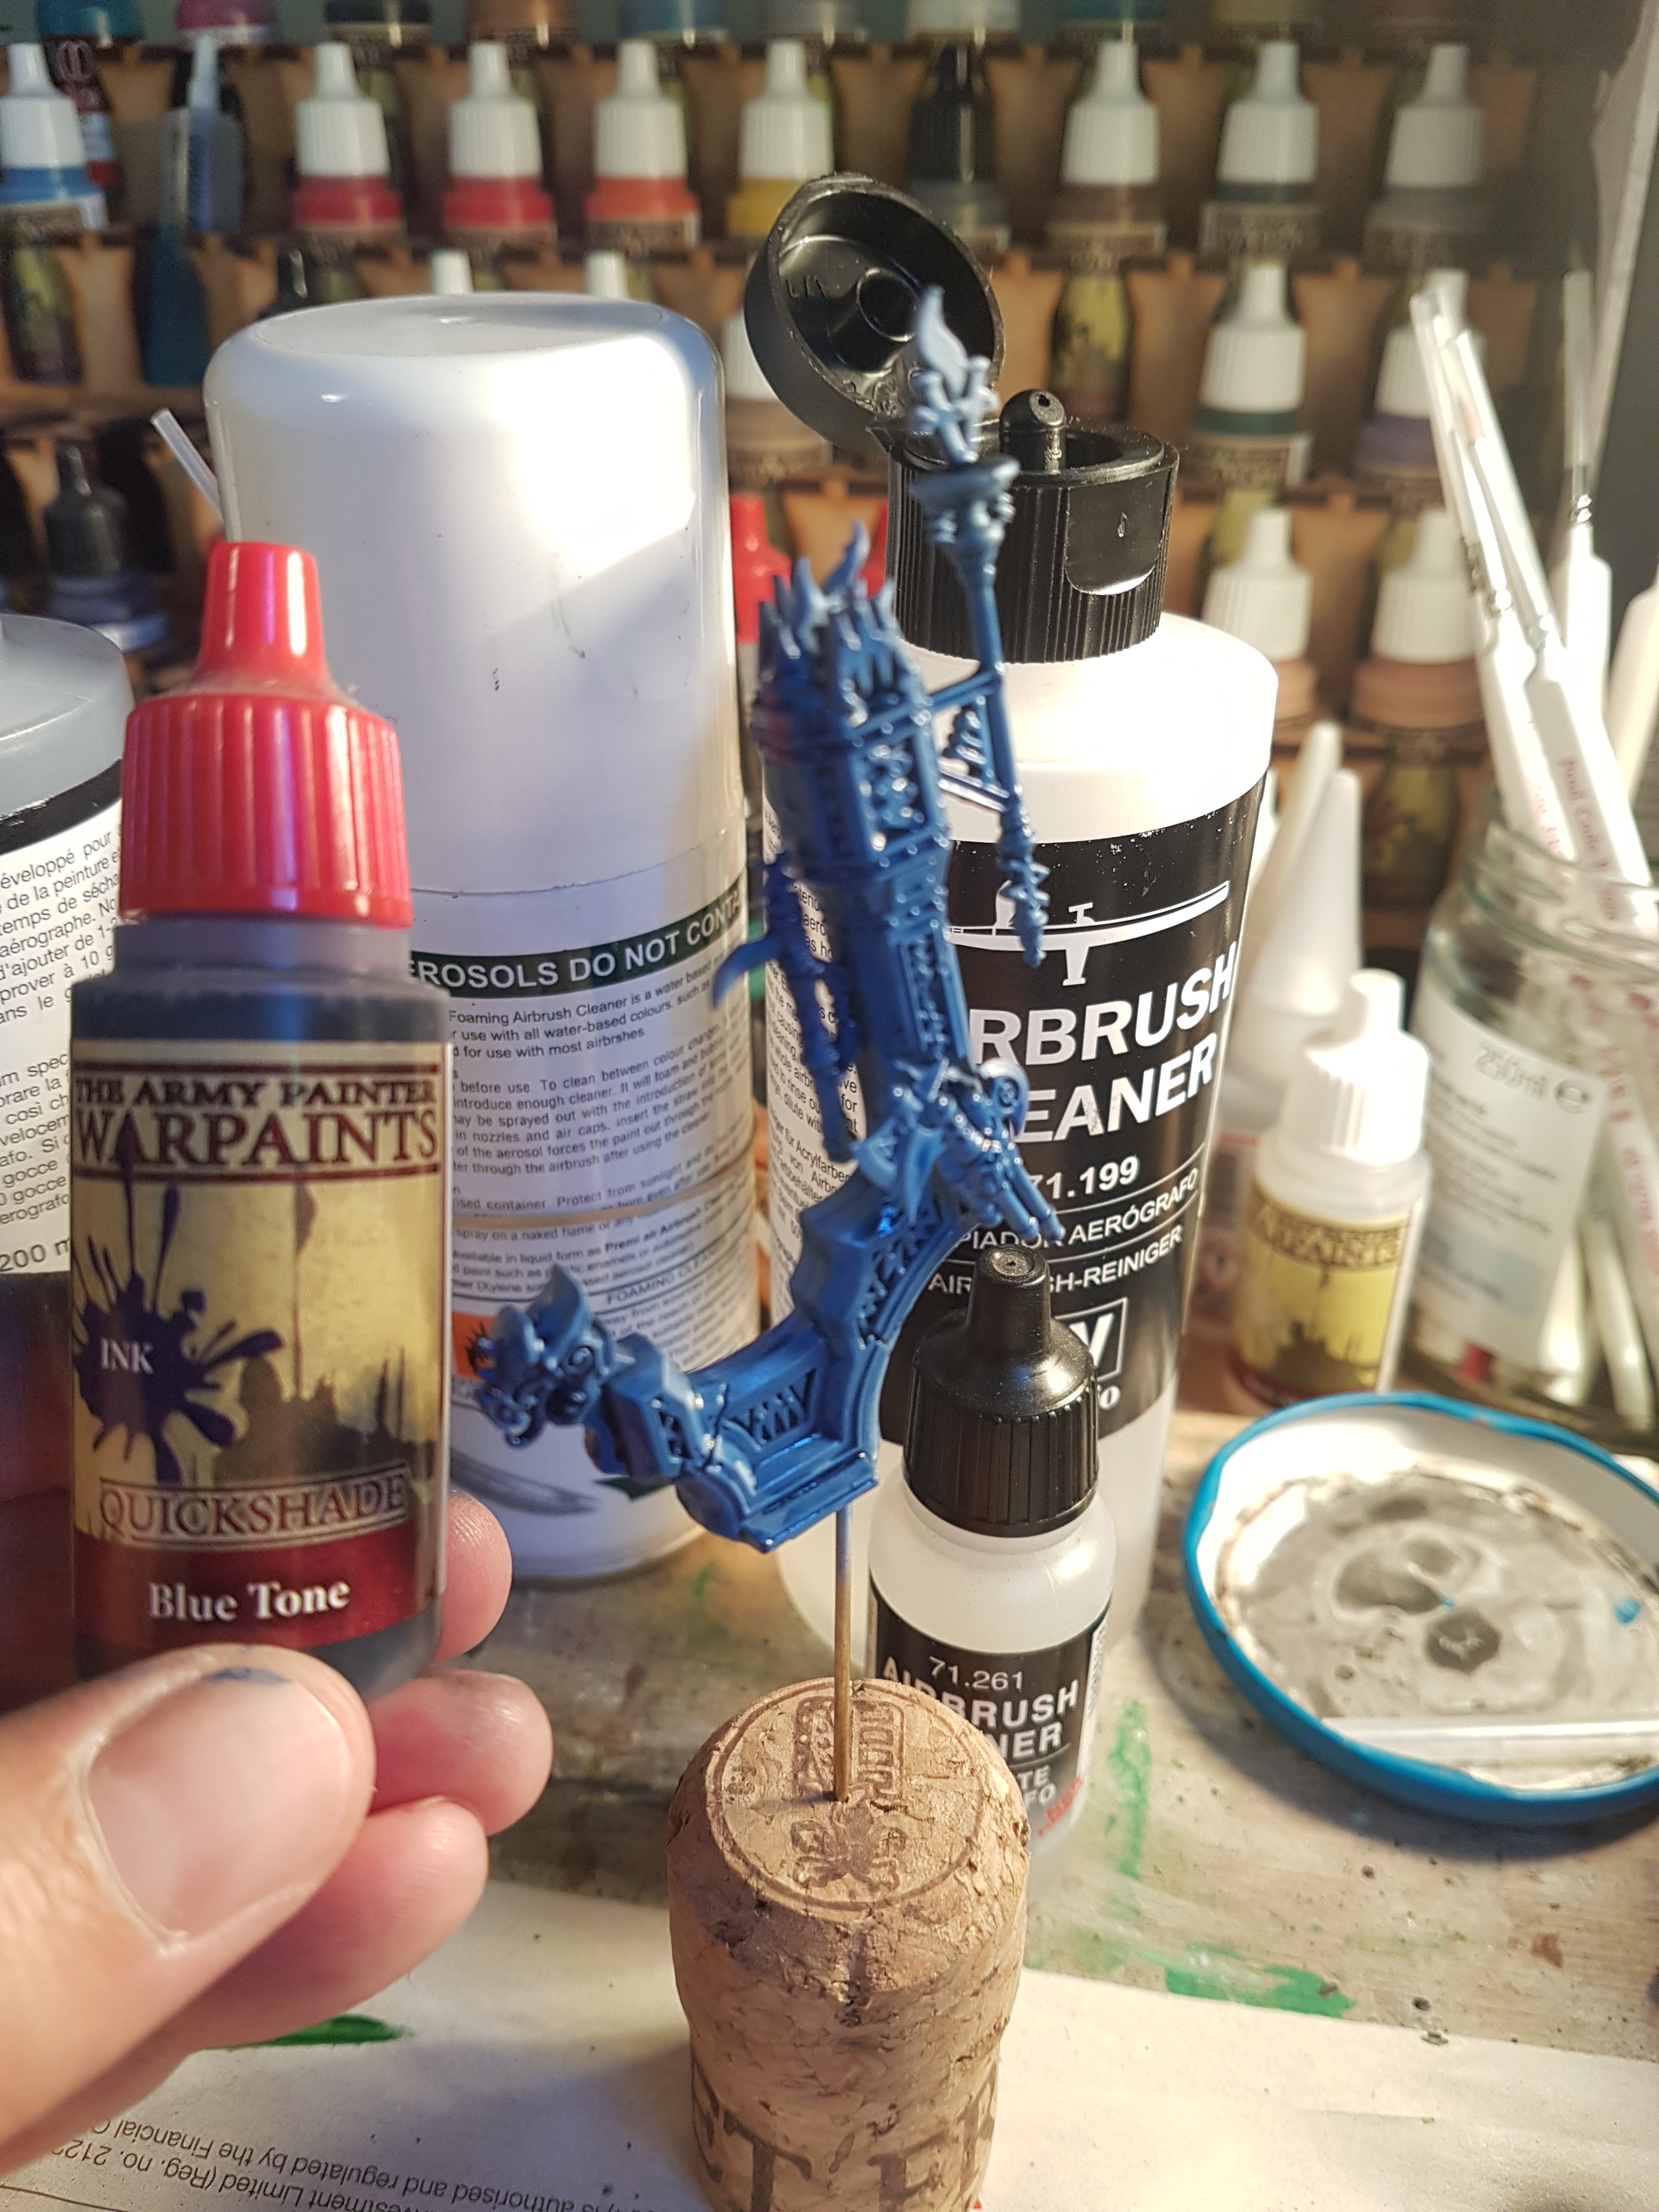
Using an airbrush I primed the model black, then I used Vallejo Wolf Grey all over, being careful to ensure not to go into the black recesses. Following this I did a light coat all over of Army Painter (AP) Deep Blue, watering this down using a thinner.
I then washed the entire throne with AP Deep Blue Ink, followed by AP Strong Tone Ink.
Once dry, I picked out all the areas I would be using metalics, or plenning to leave dark (eg axe handles) with a 2 part Oak Brown to 1 Part Matt Black mix. I find this gives a warm black finish (similar to GW Rhinox hide), and does not feel so stark on areas left deliberately black.
 Final steps on the Magmadroth were to pick out all the runes with Greedy Gold, followed by a wash with strong tone ink and then added some highlights with shining silver. The silver was a bit bright so I used the wrong time ink again to knock the brightness back. I then picked out the beady eyes with multiple thin layers of yellow.
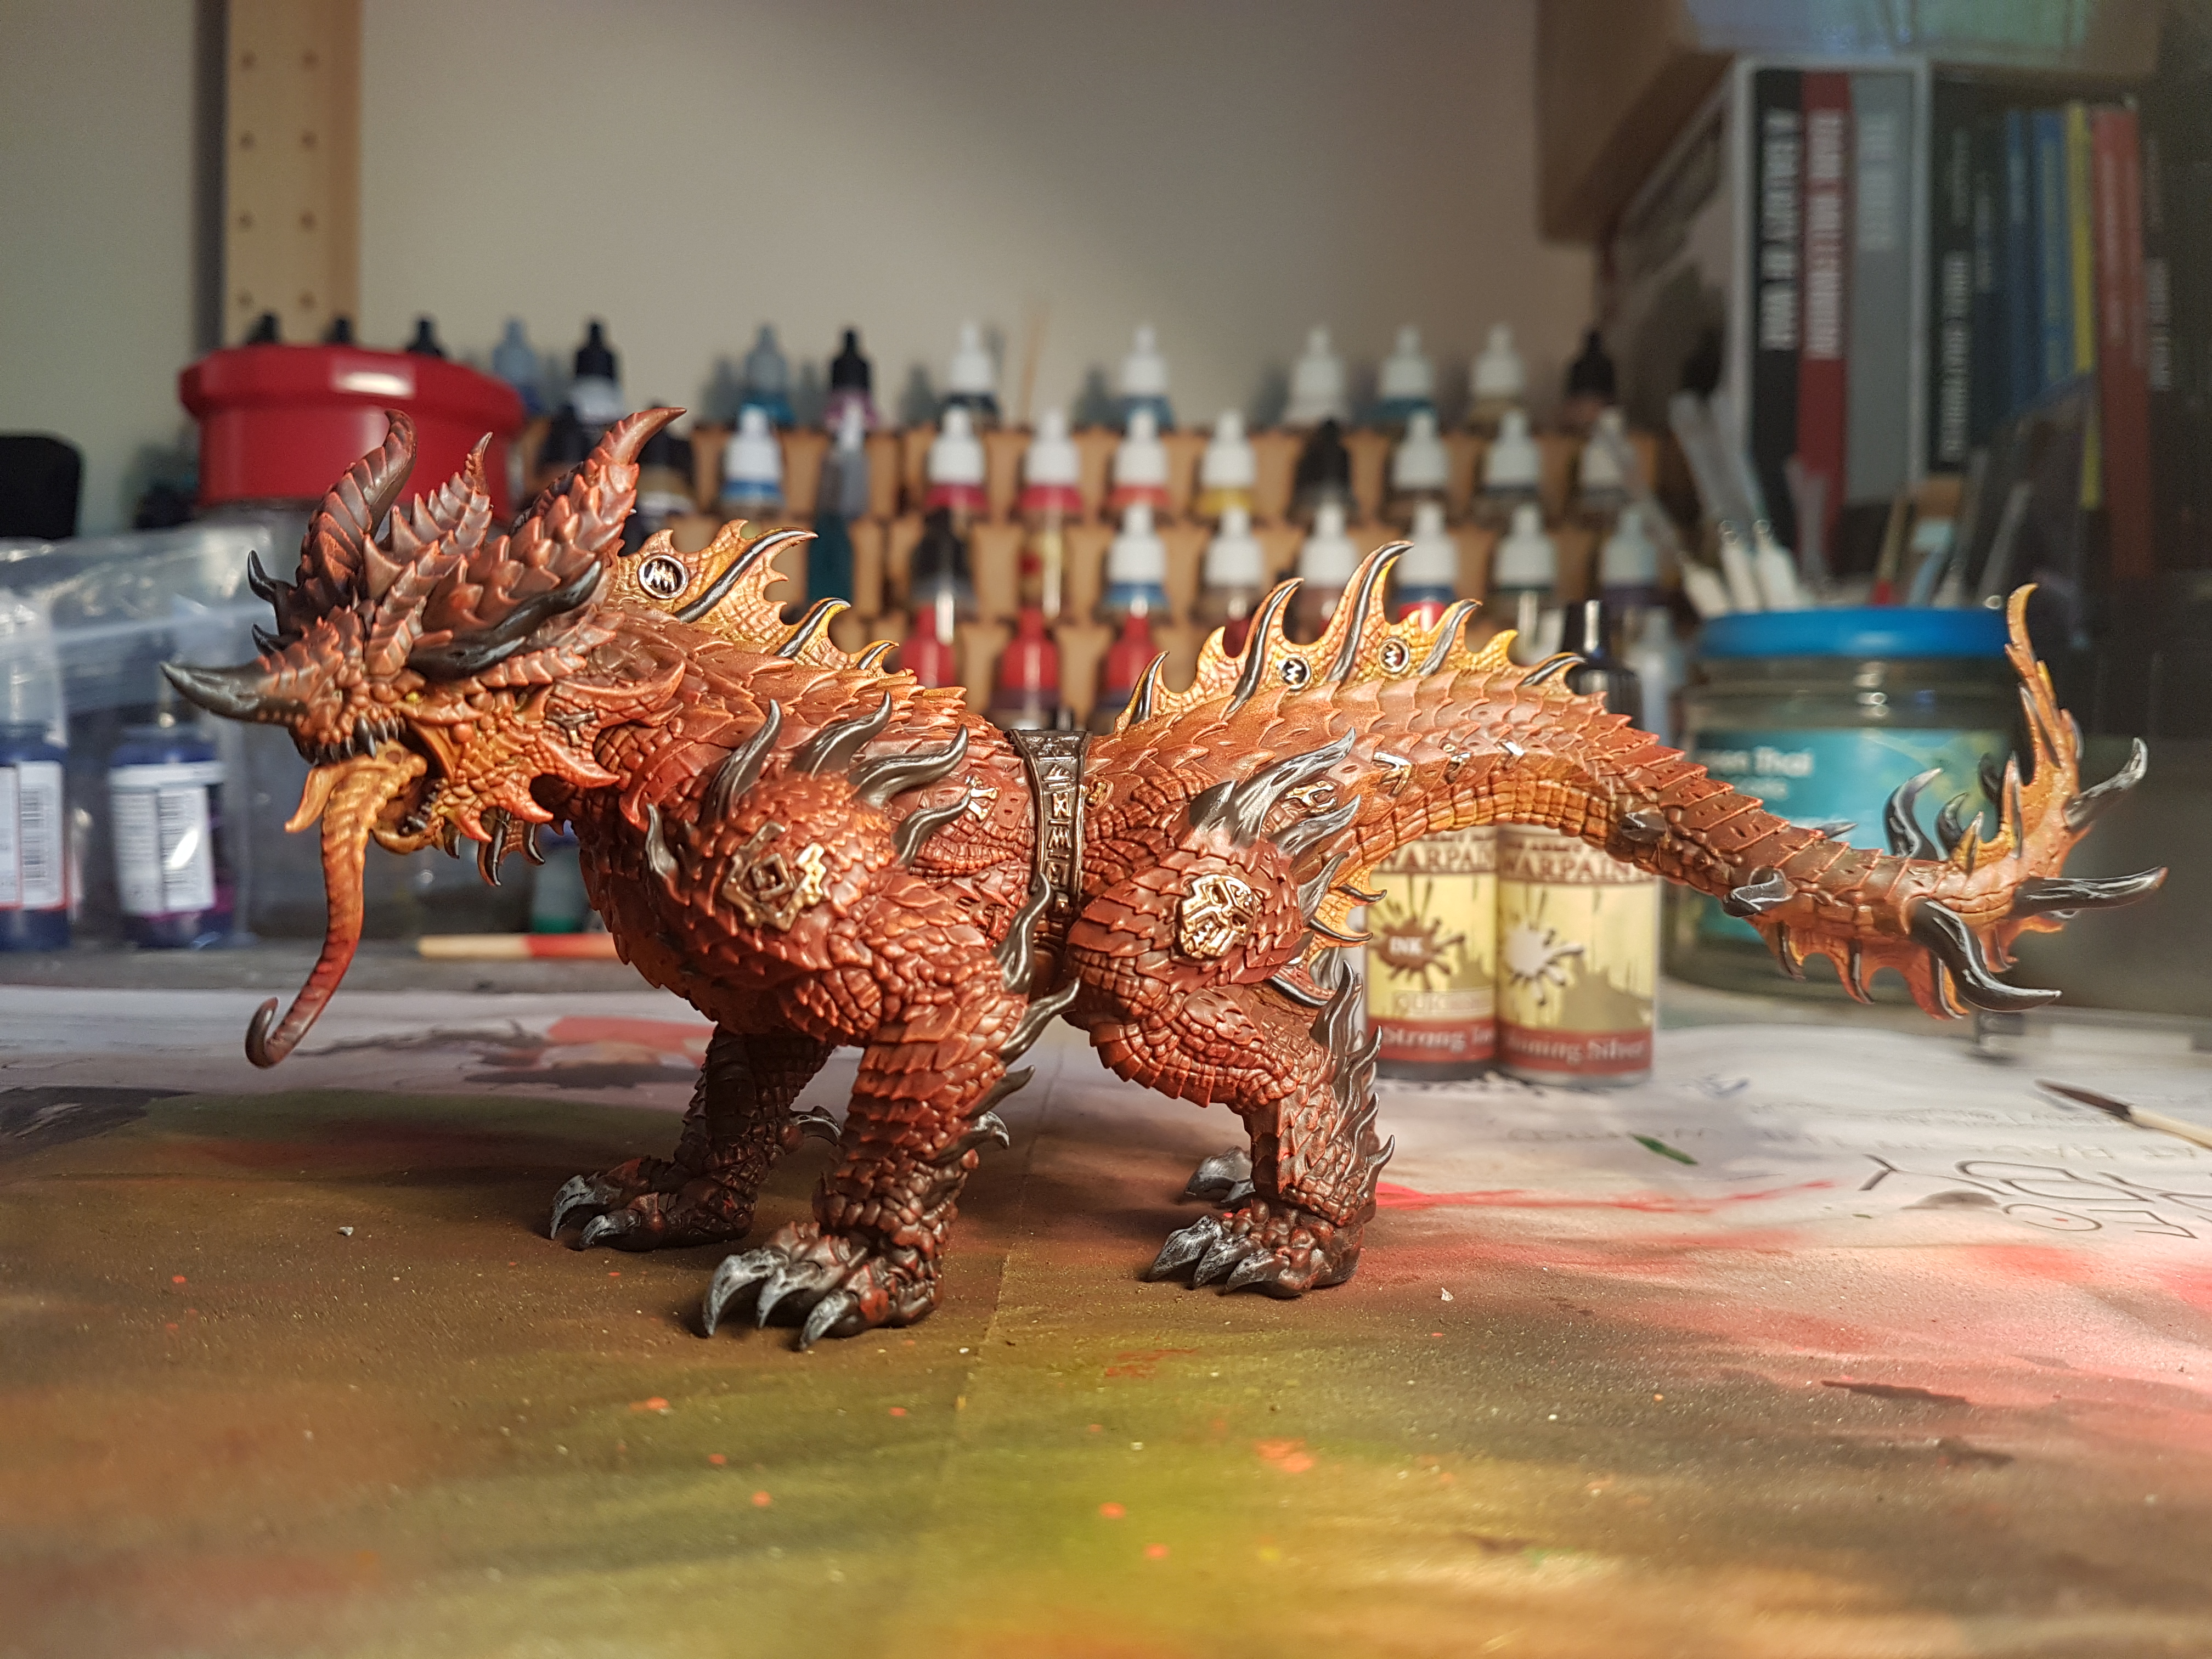


![Zenit Miniatures’ Samurai Warlords Now Live On Kickstarter [Updated]](https://images.beastsofwar.com/2026/02/samurai-warlords-launch-main-600-338.jpg)