Levarius’ Army of the Dead – Middle Earth Strategy Battle Game


Recommendations: 193
About the Project
I run through how i'm painting my Army of the Dead for the Middle Earth Strategy Game. In anticipation of the new rules and edition I picked up 40+ Army of the Dead on a Facebook trading group to add the 20 coming in the new box set. The saviours of Minas Tirith here we come. The project includes my experiments but i'm very happy with them so far!
Related Game: Middle-Earth Strategy Battle Game
Related Company: Games Workshop
Related Genre: Fantasy
This Project is Active
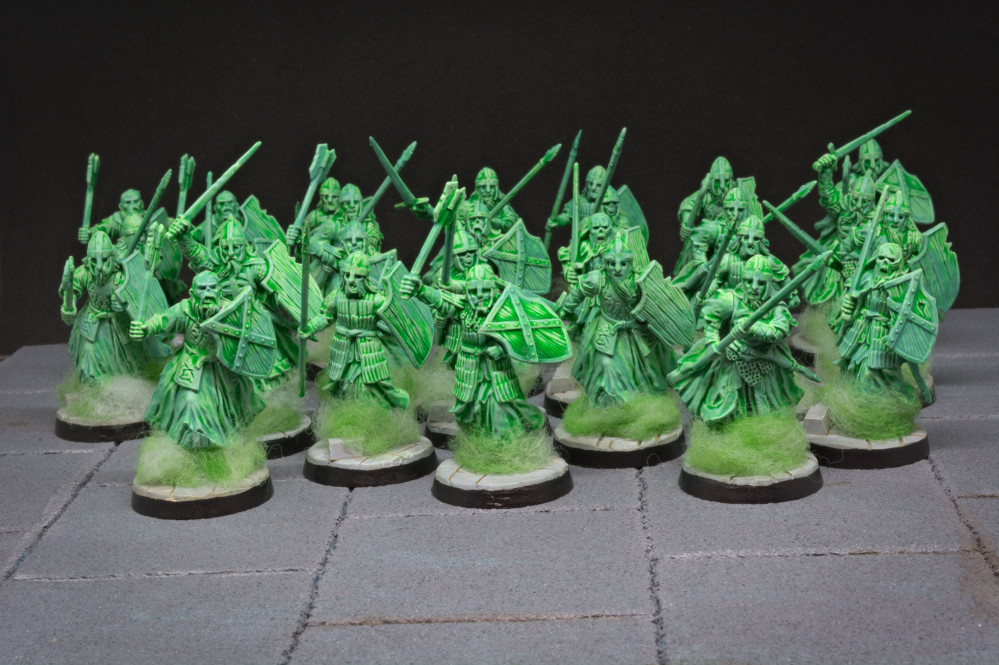
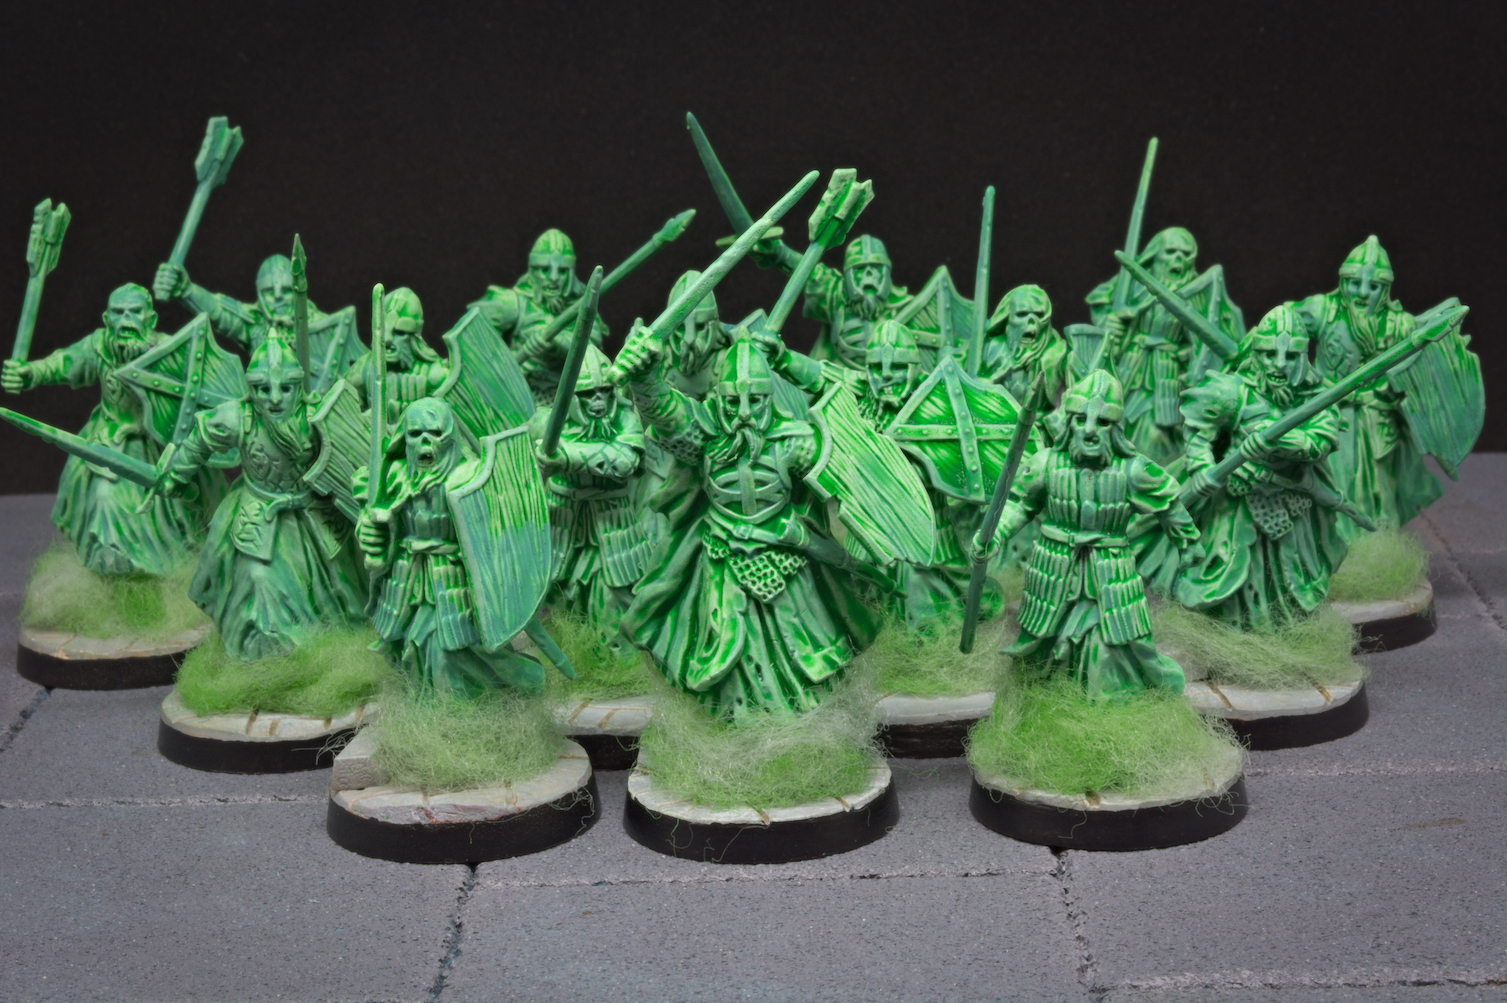
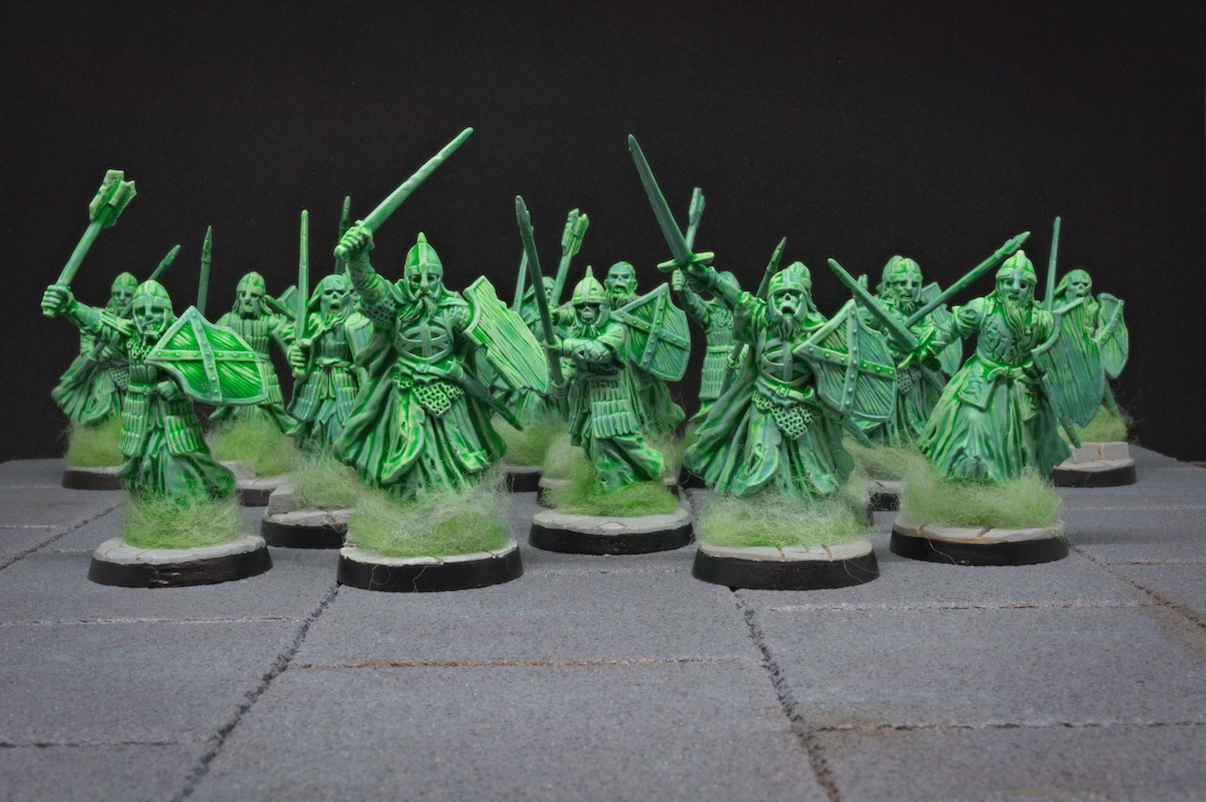
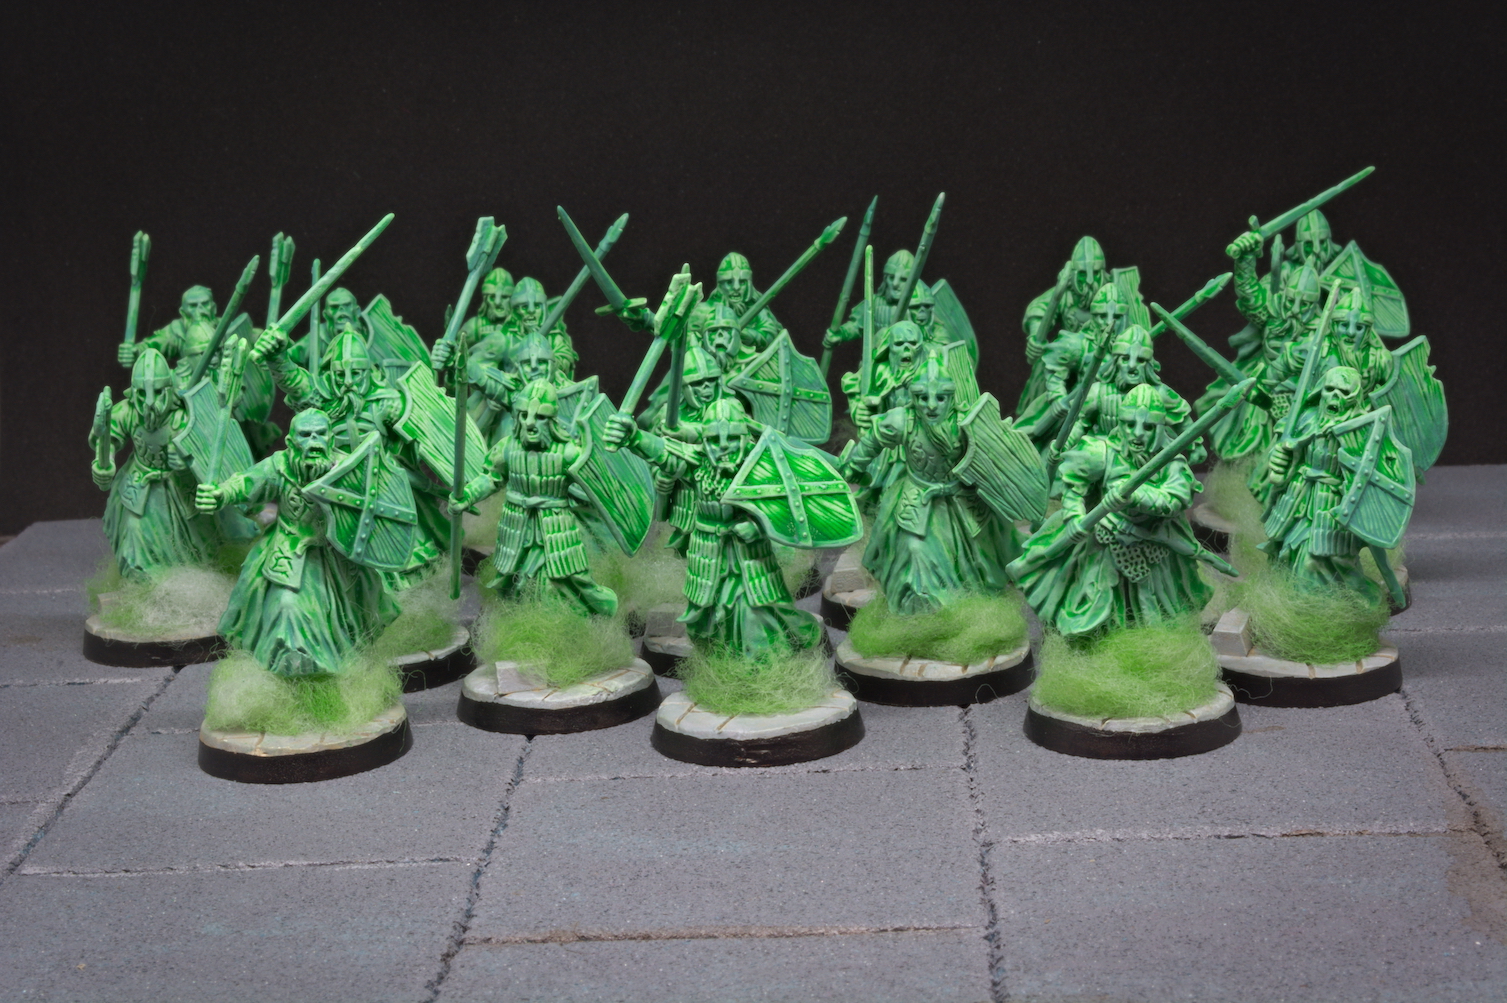
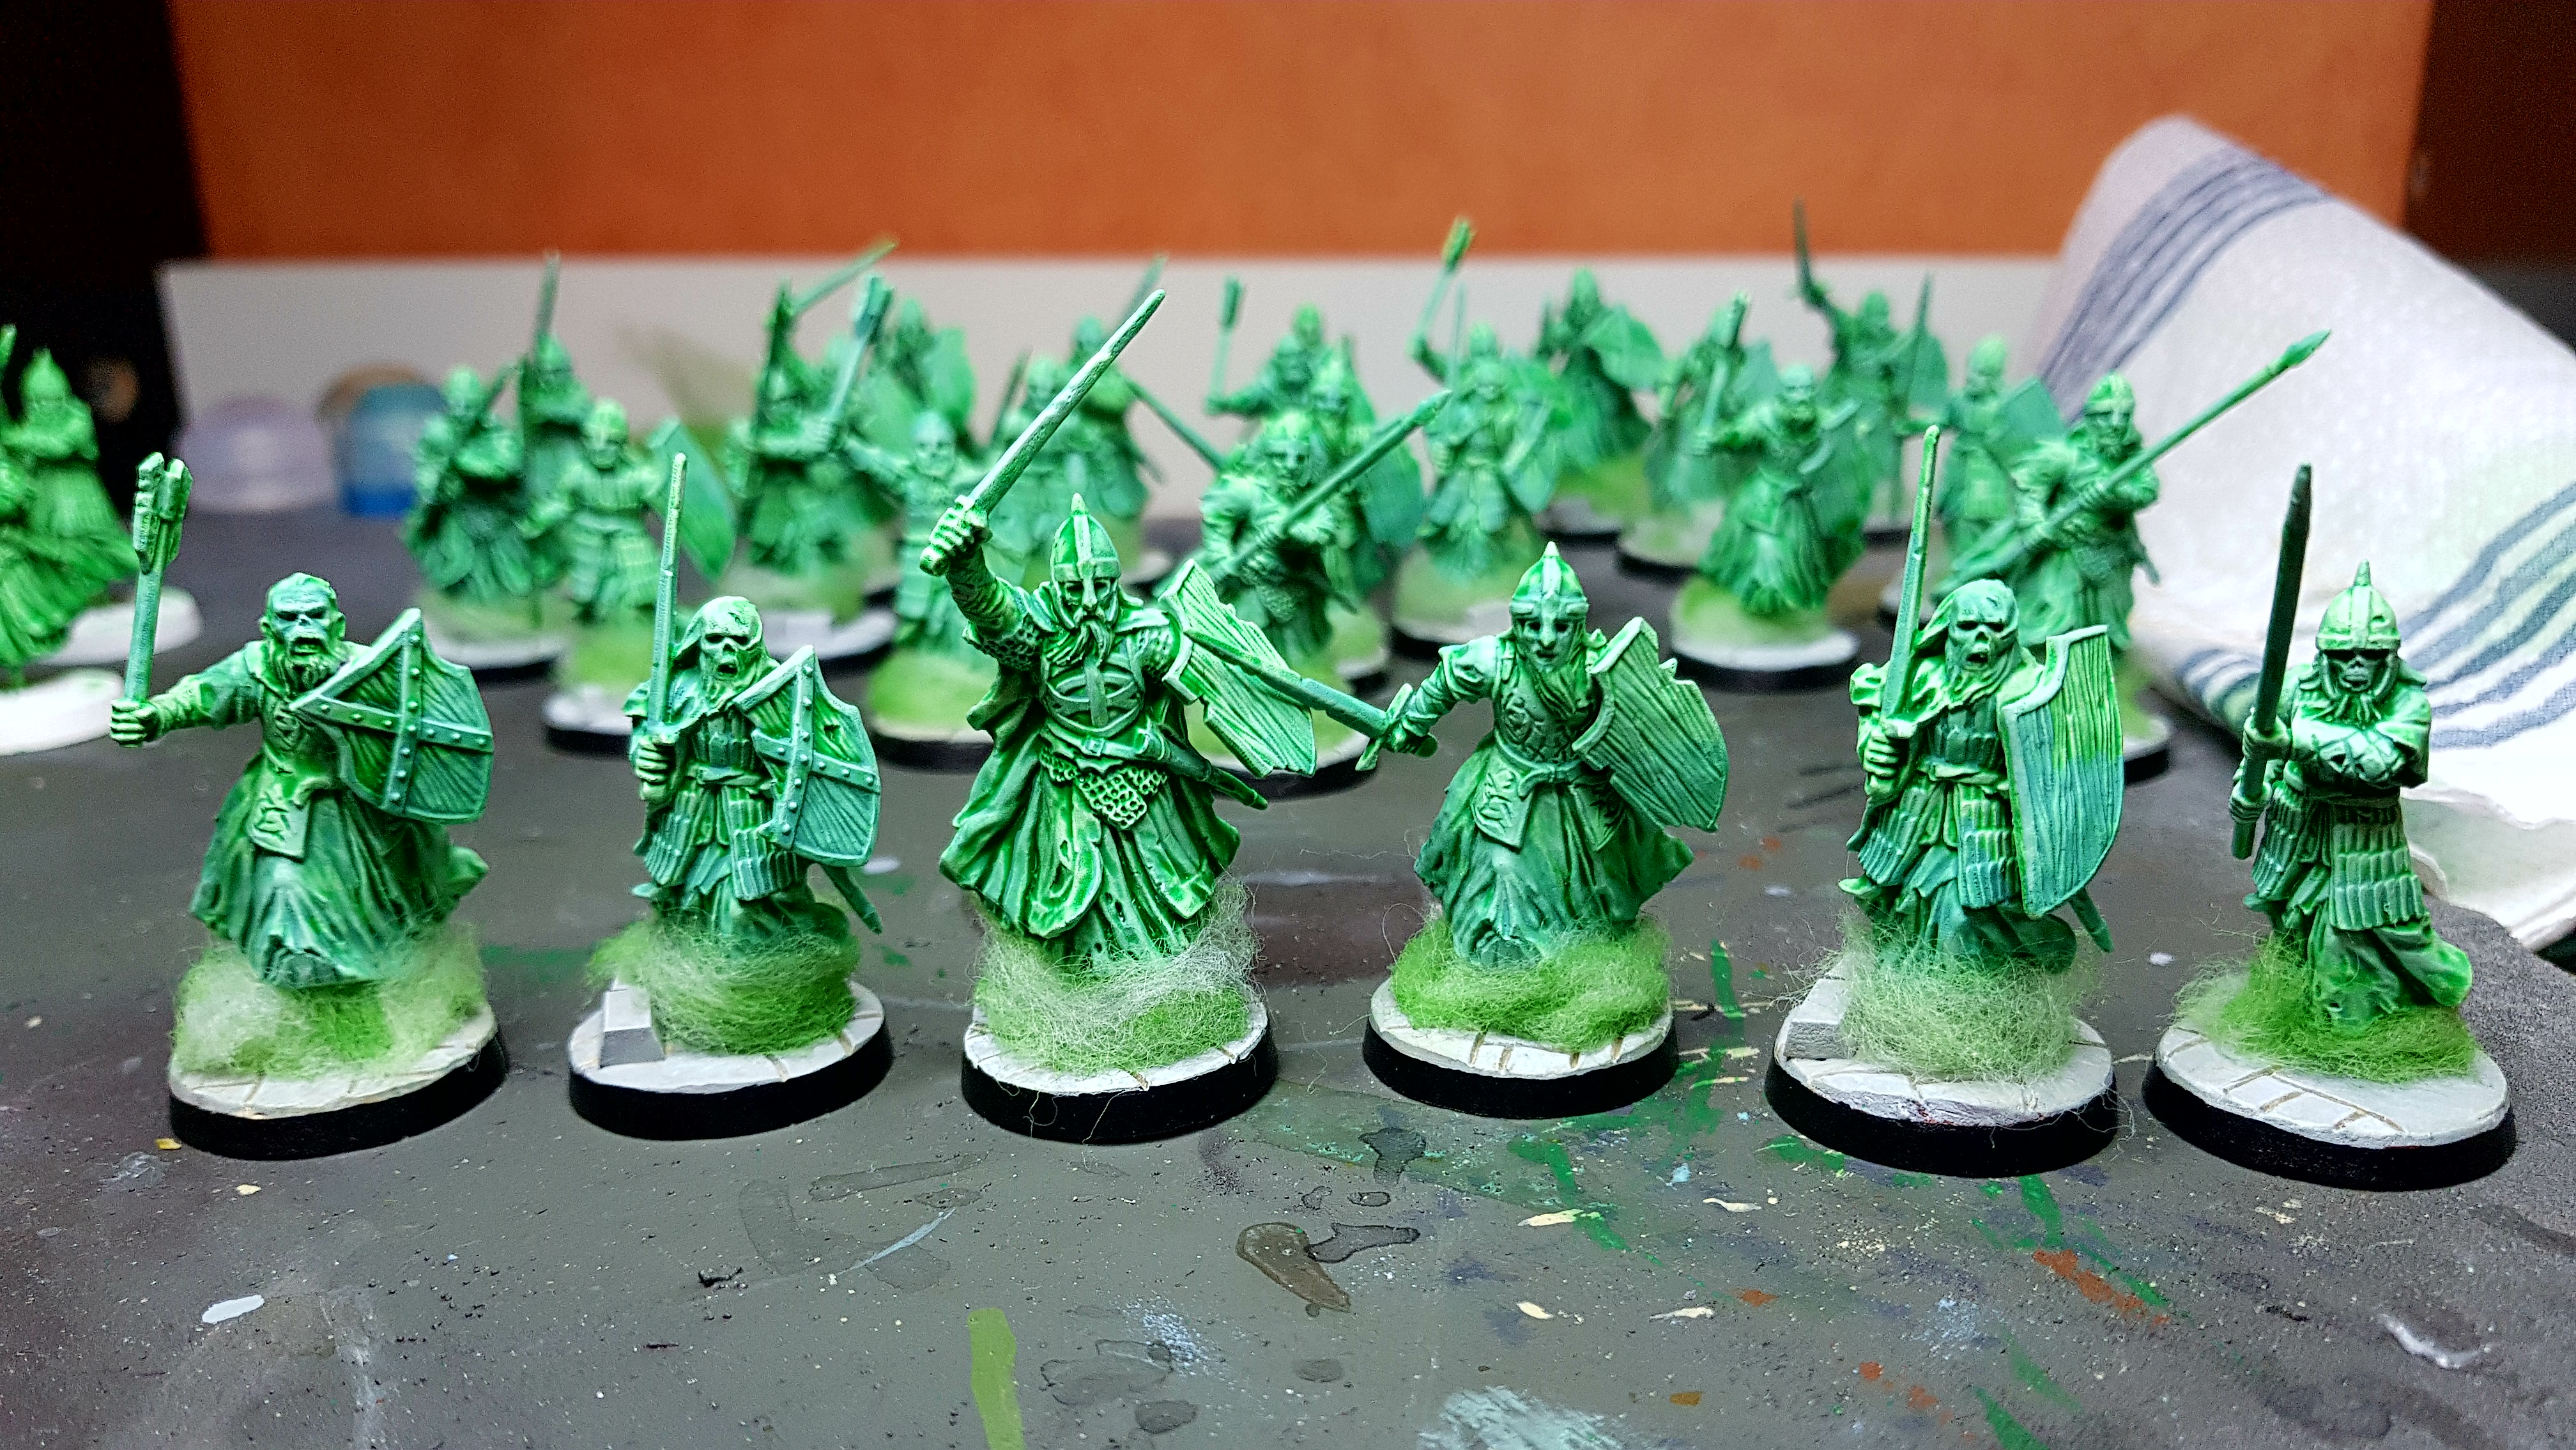
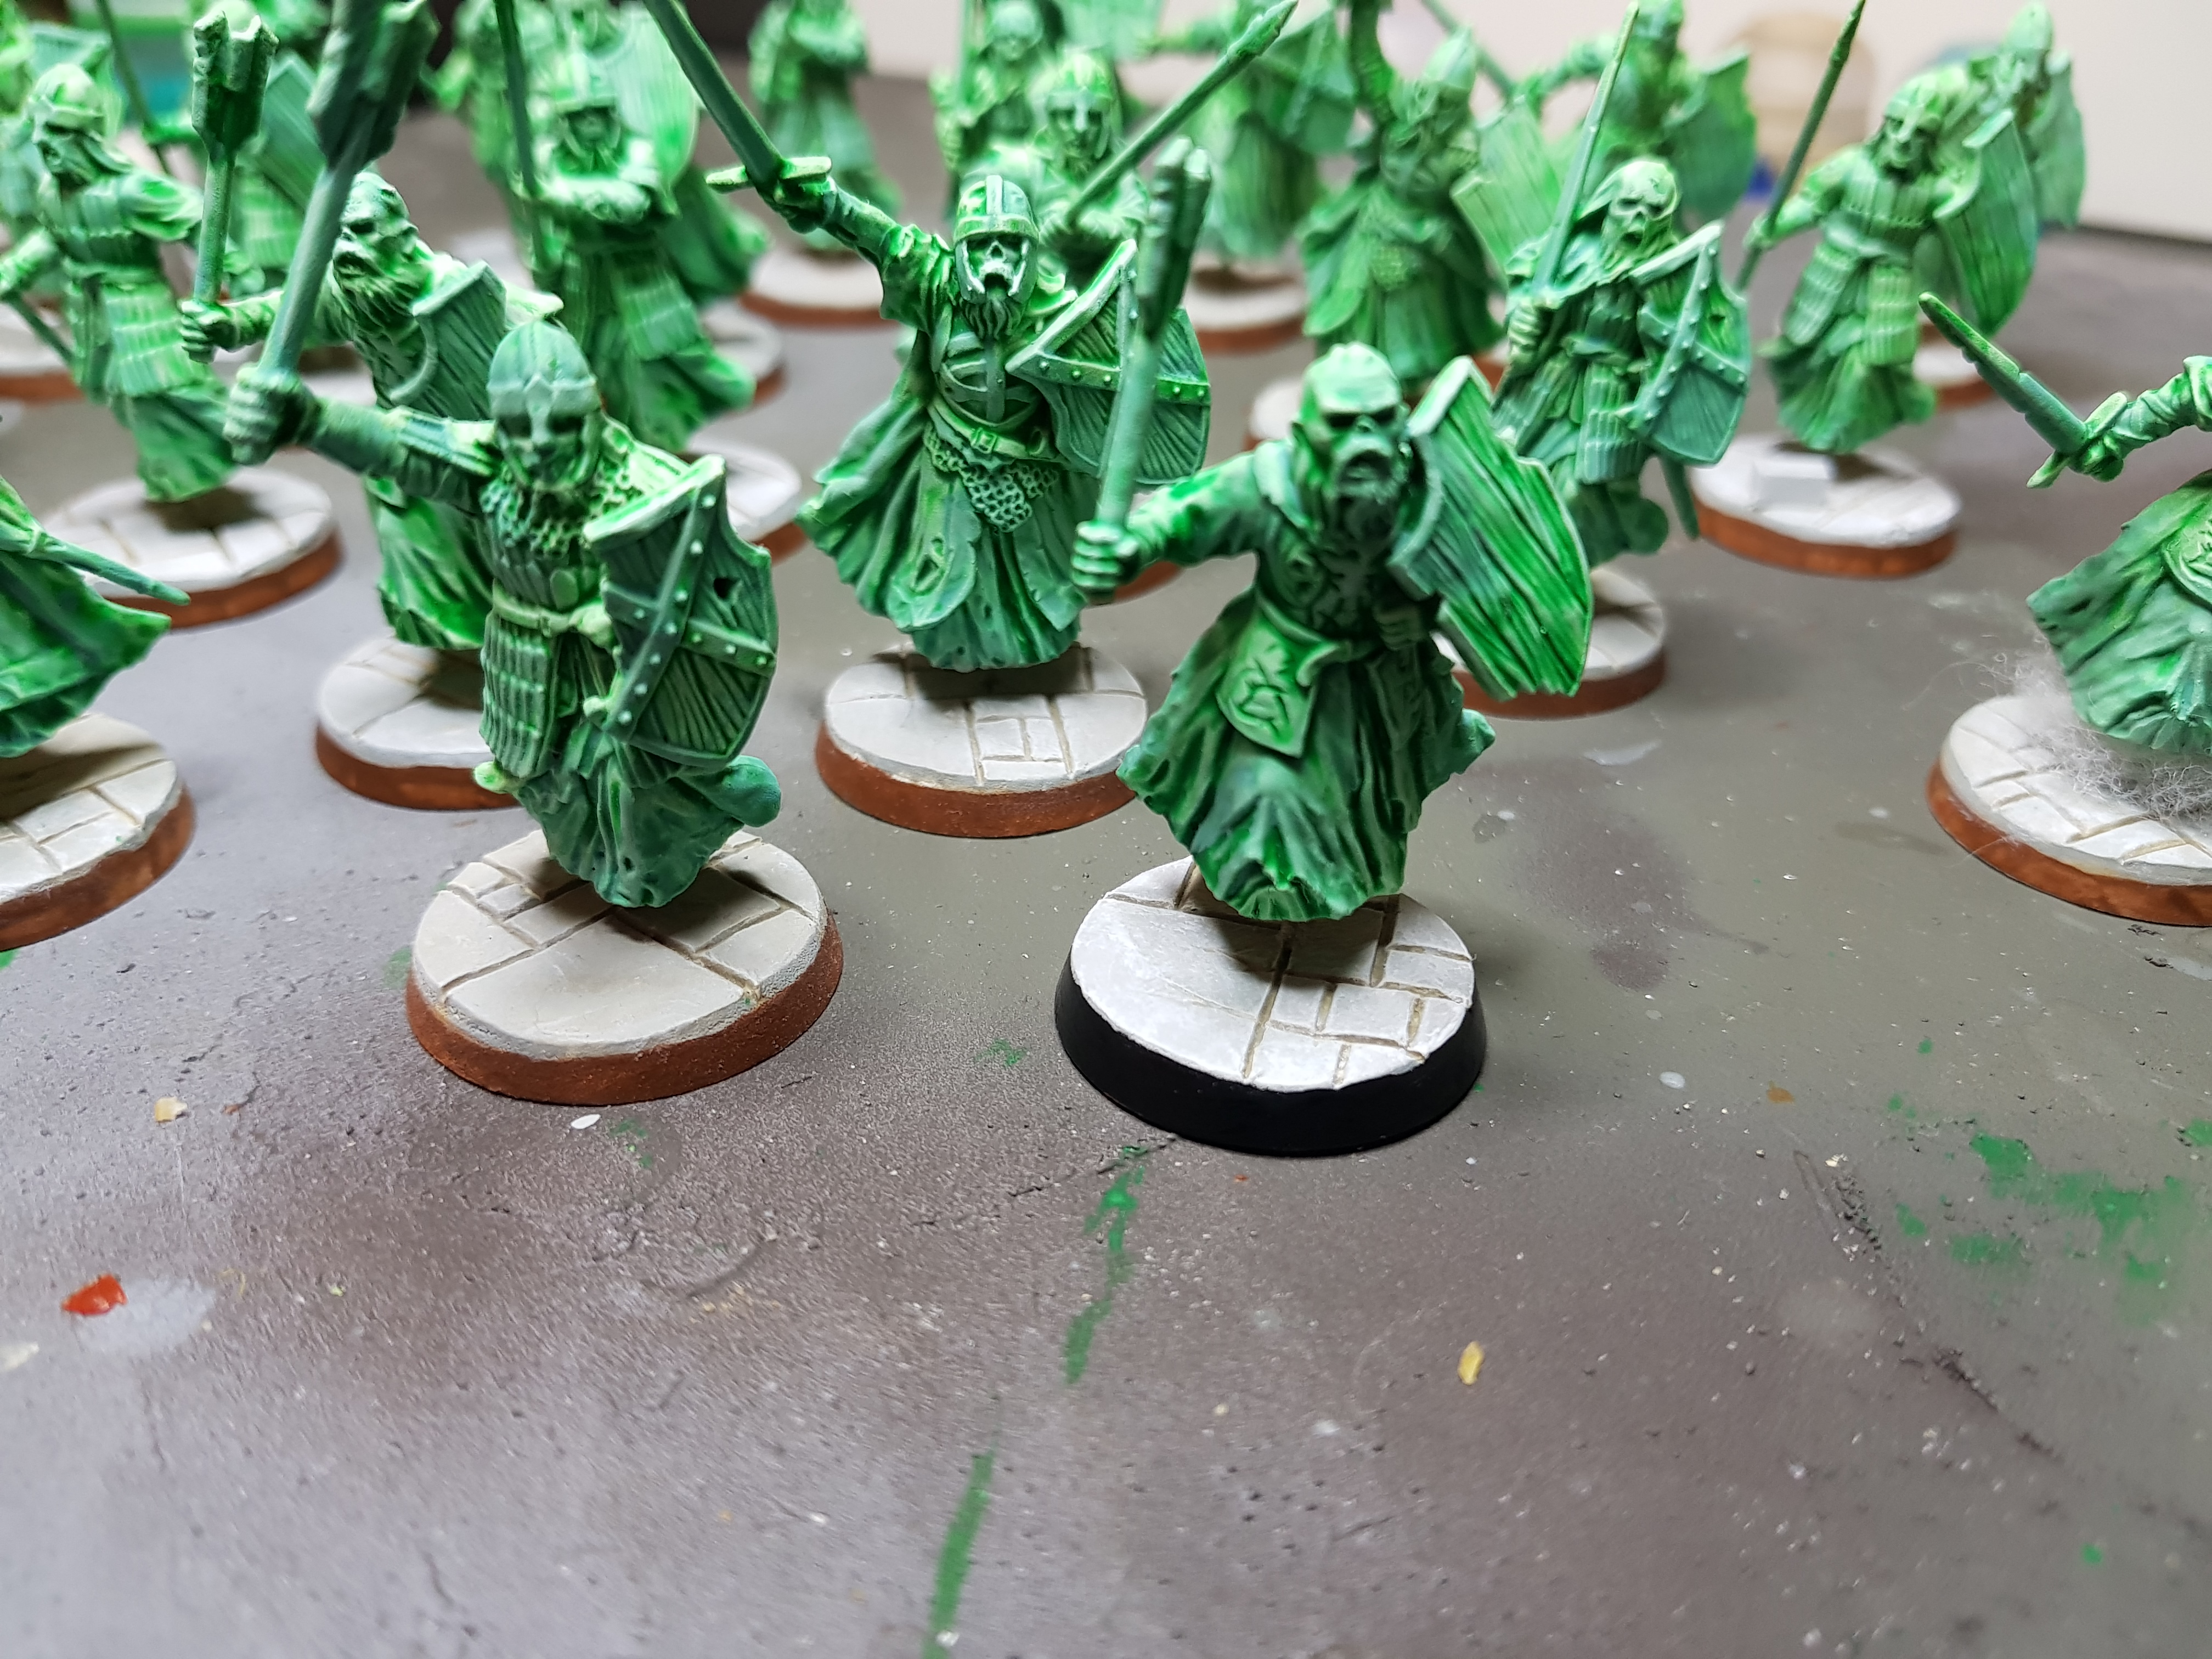
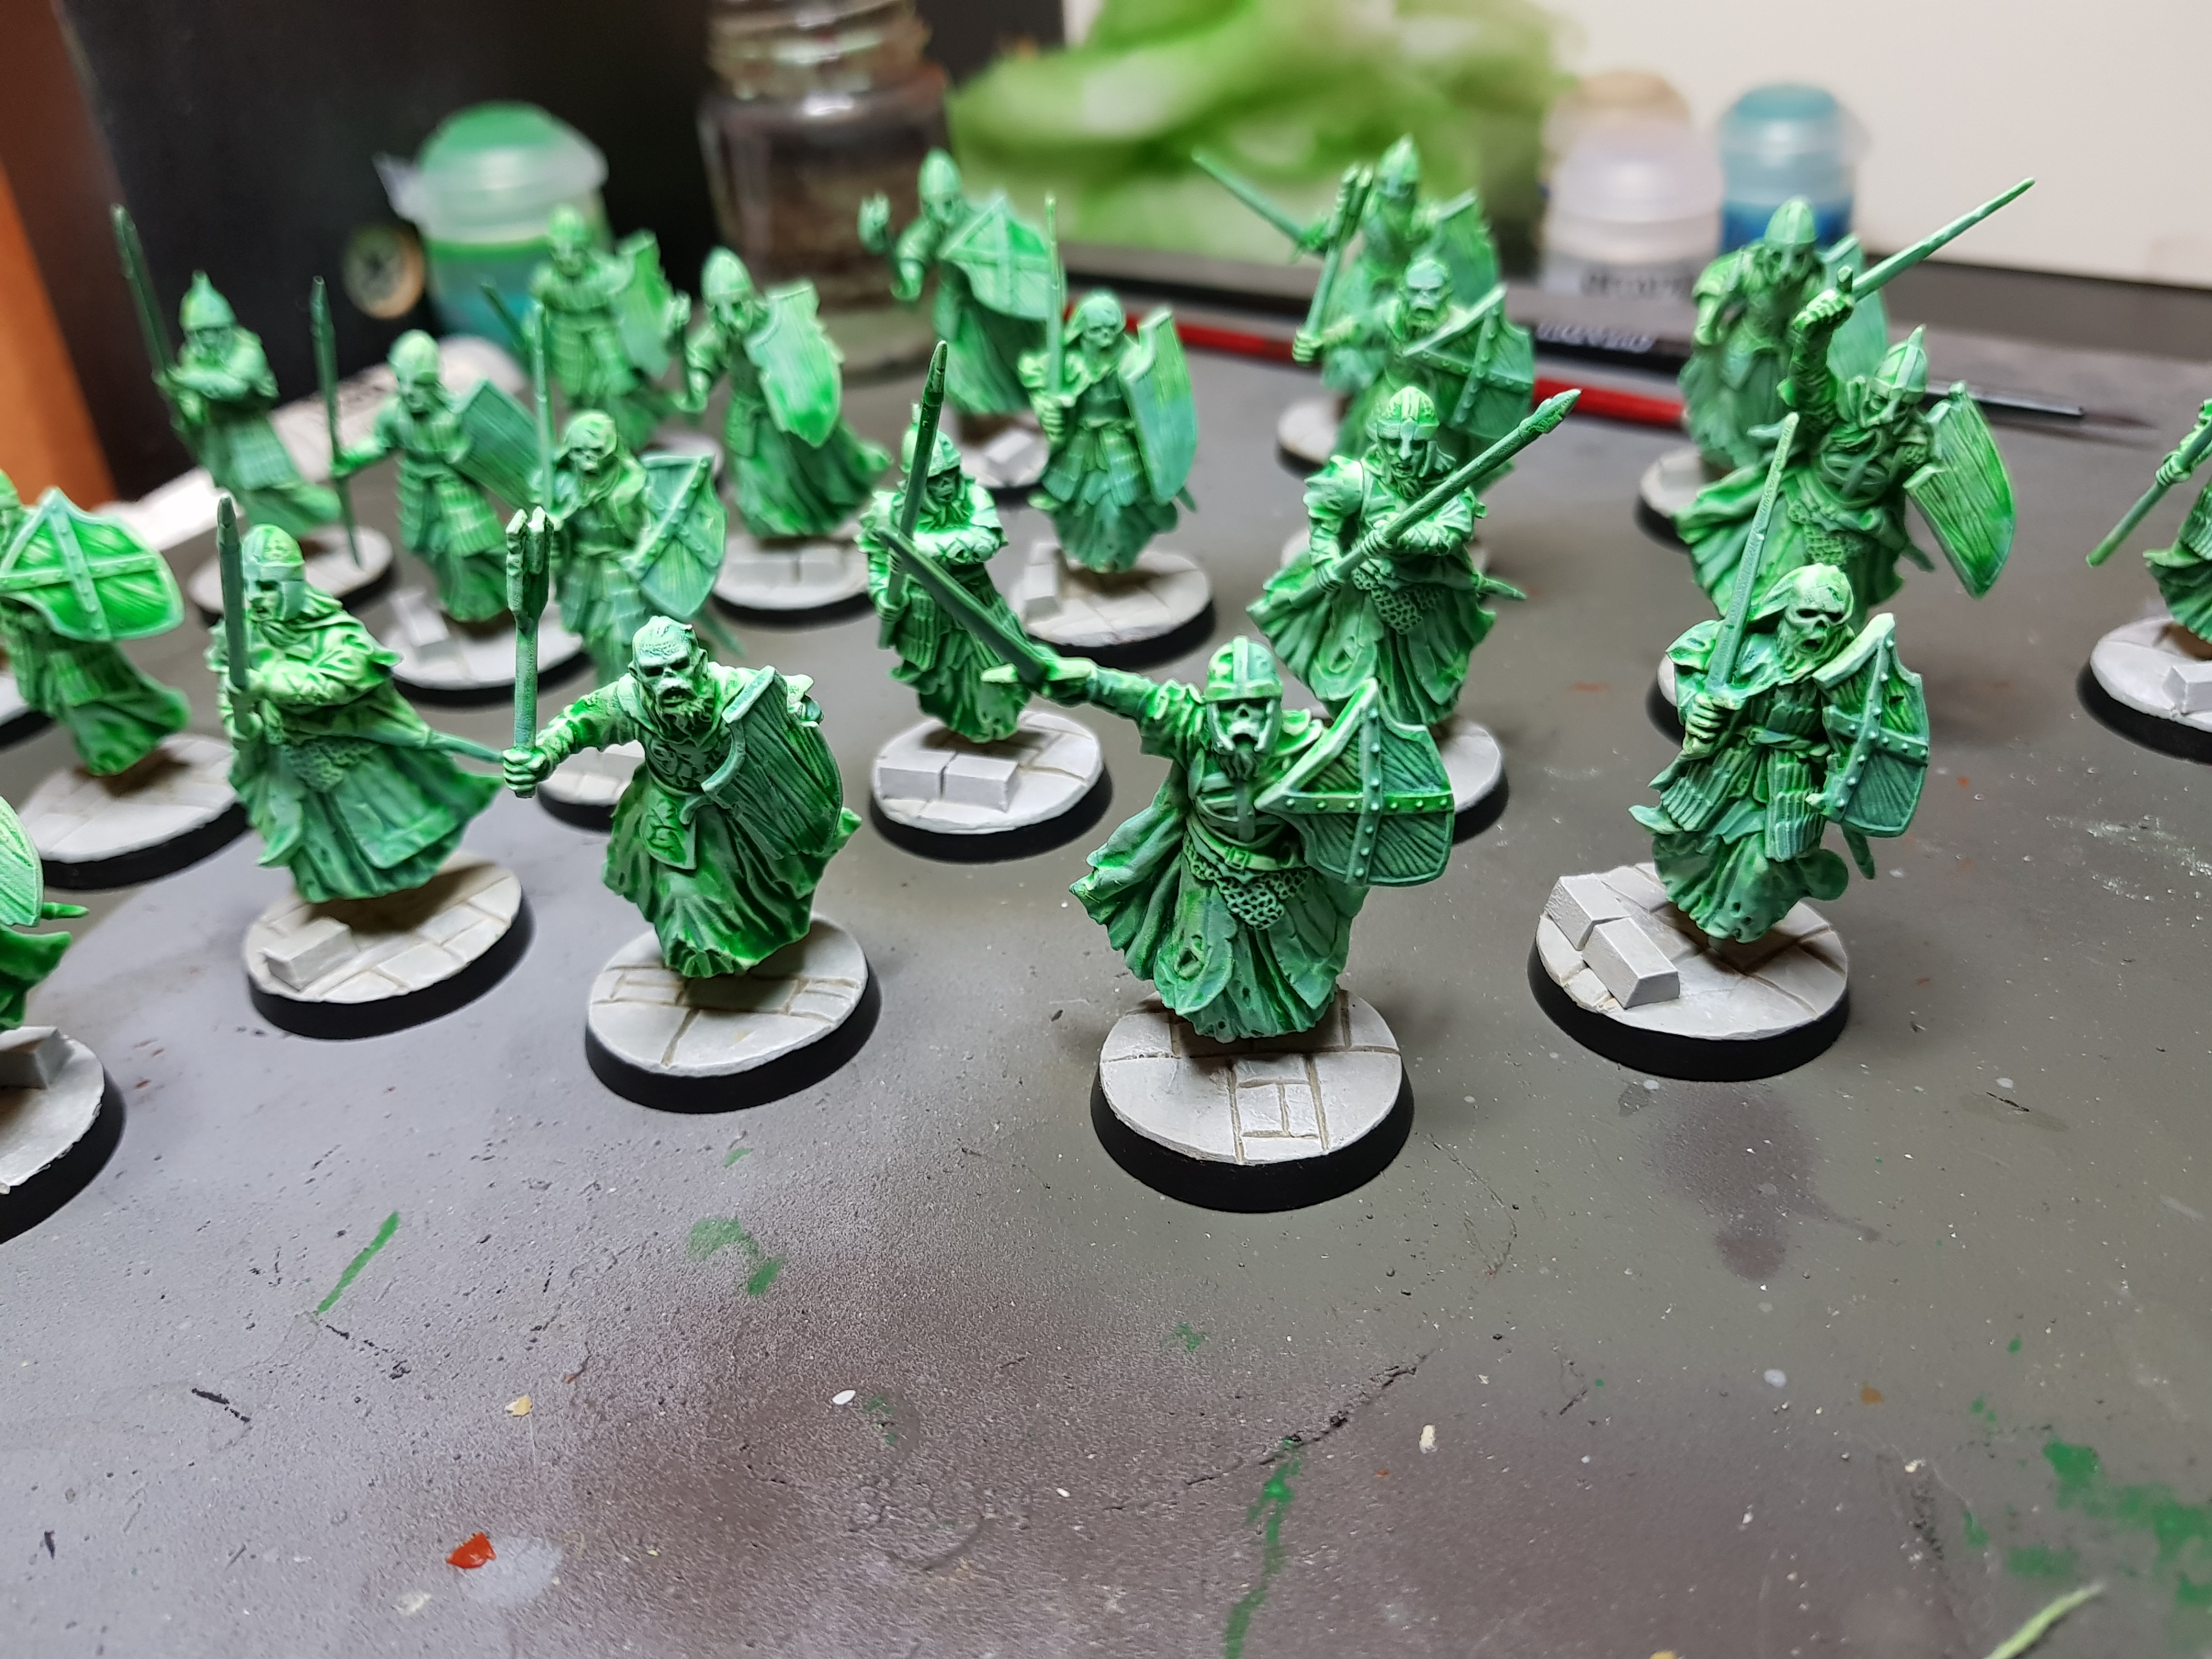
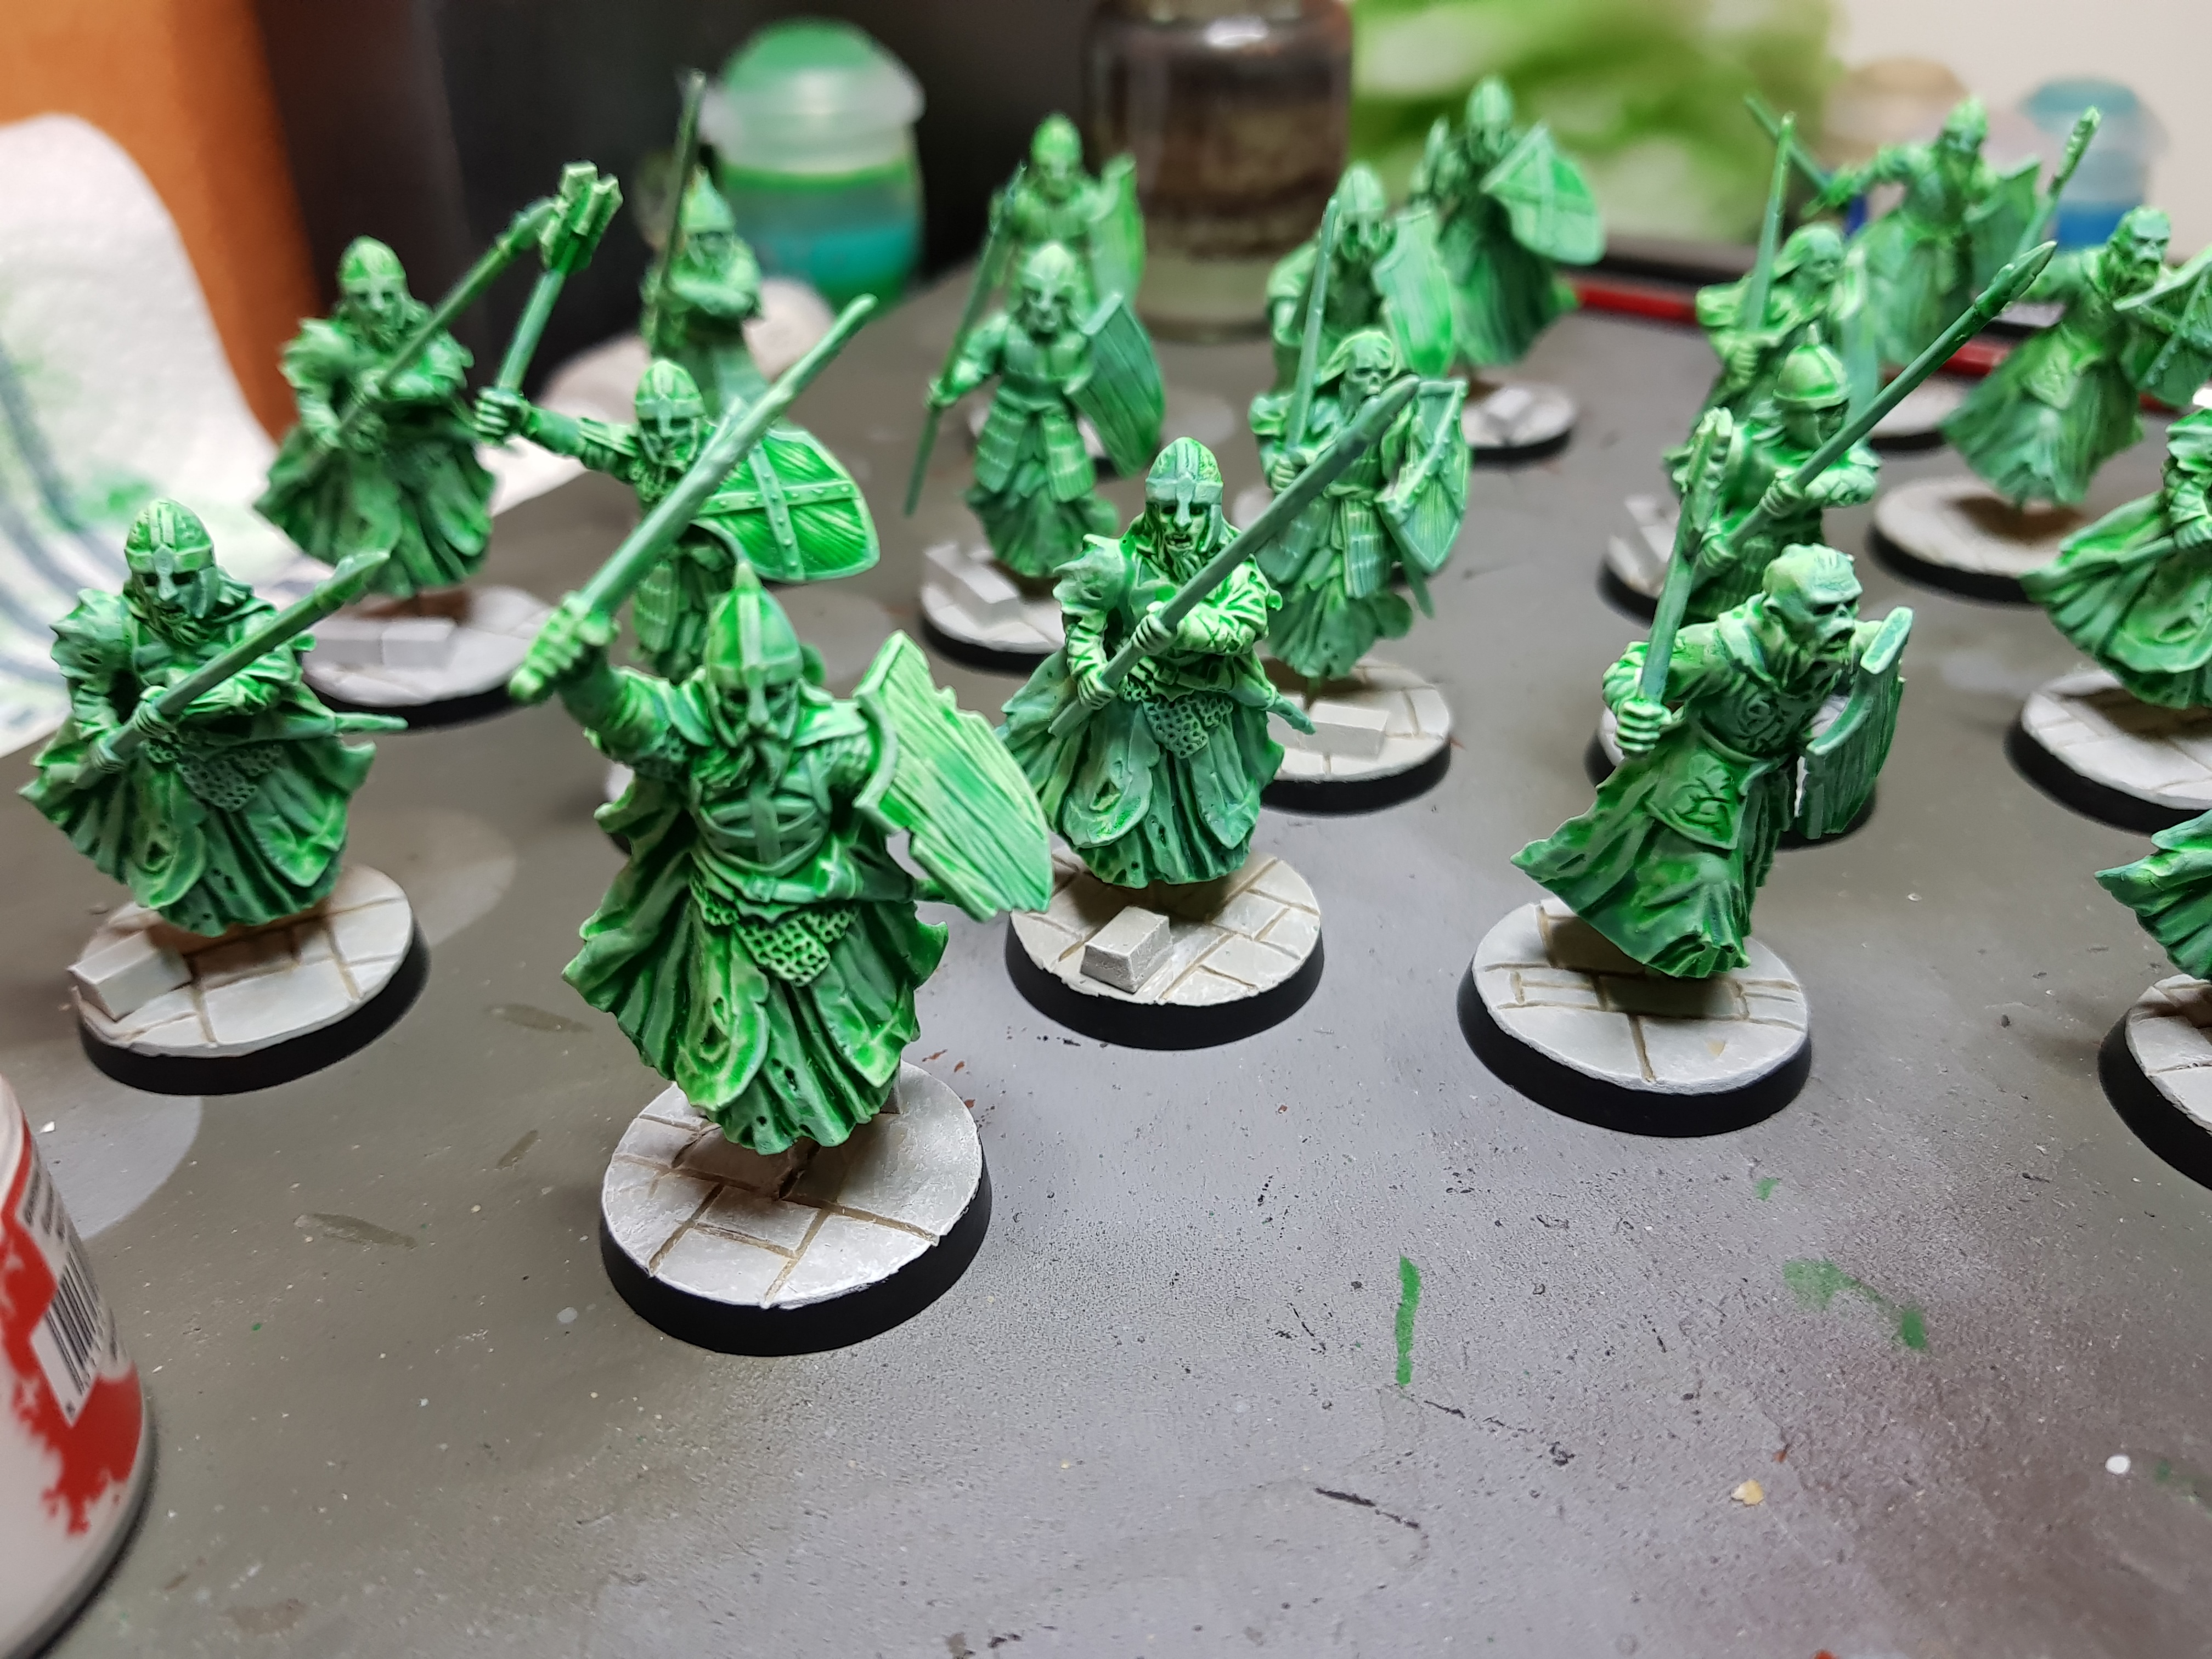
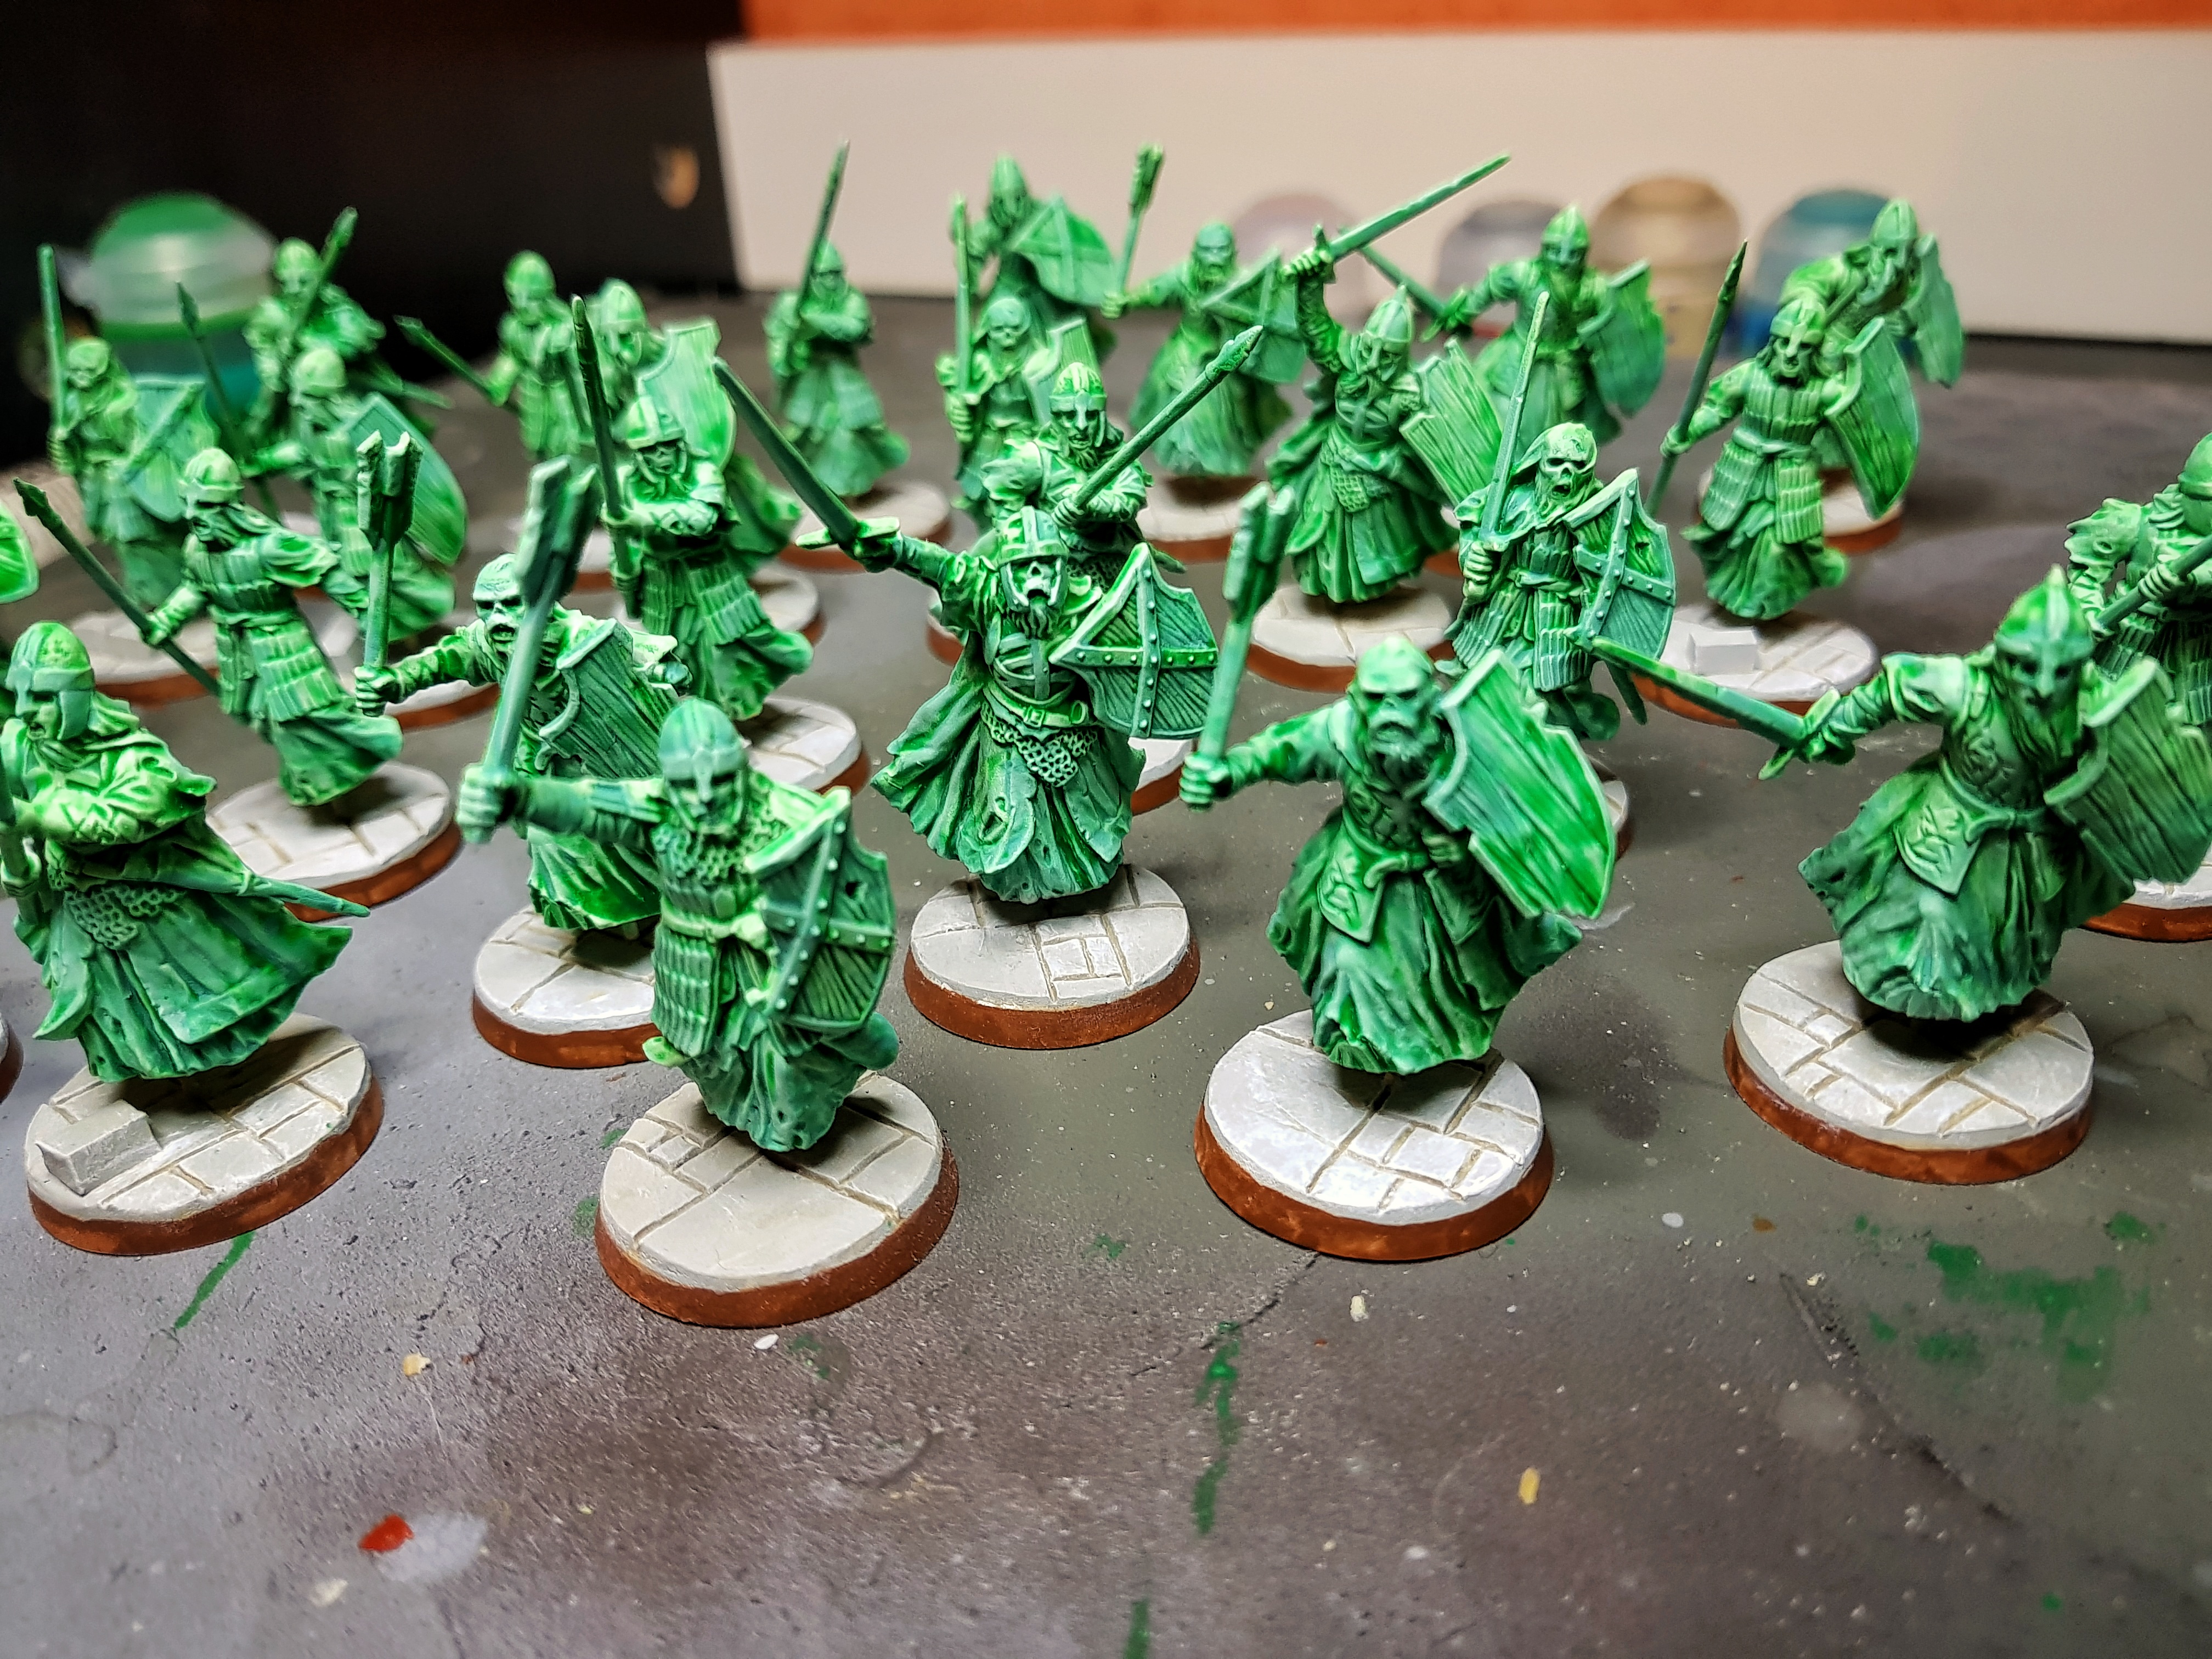
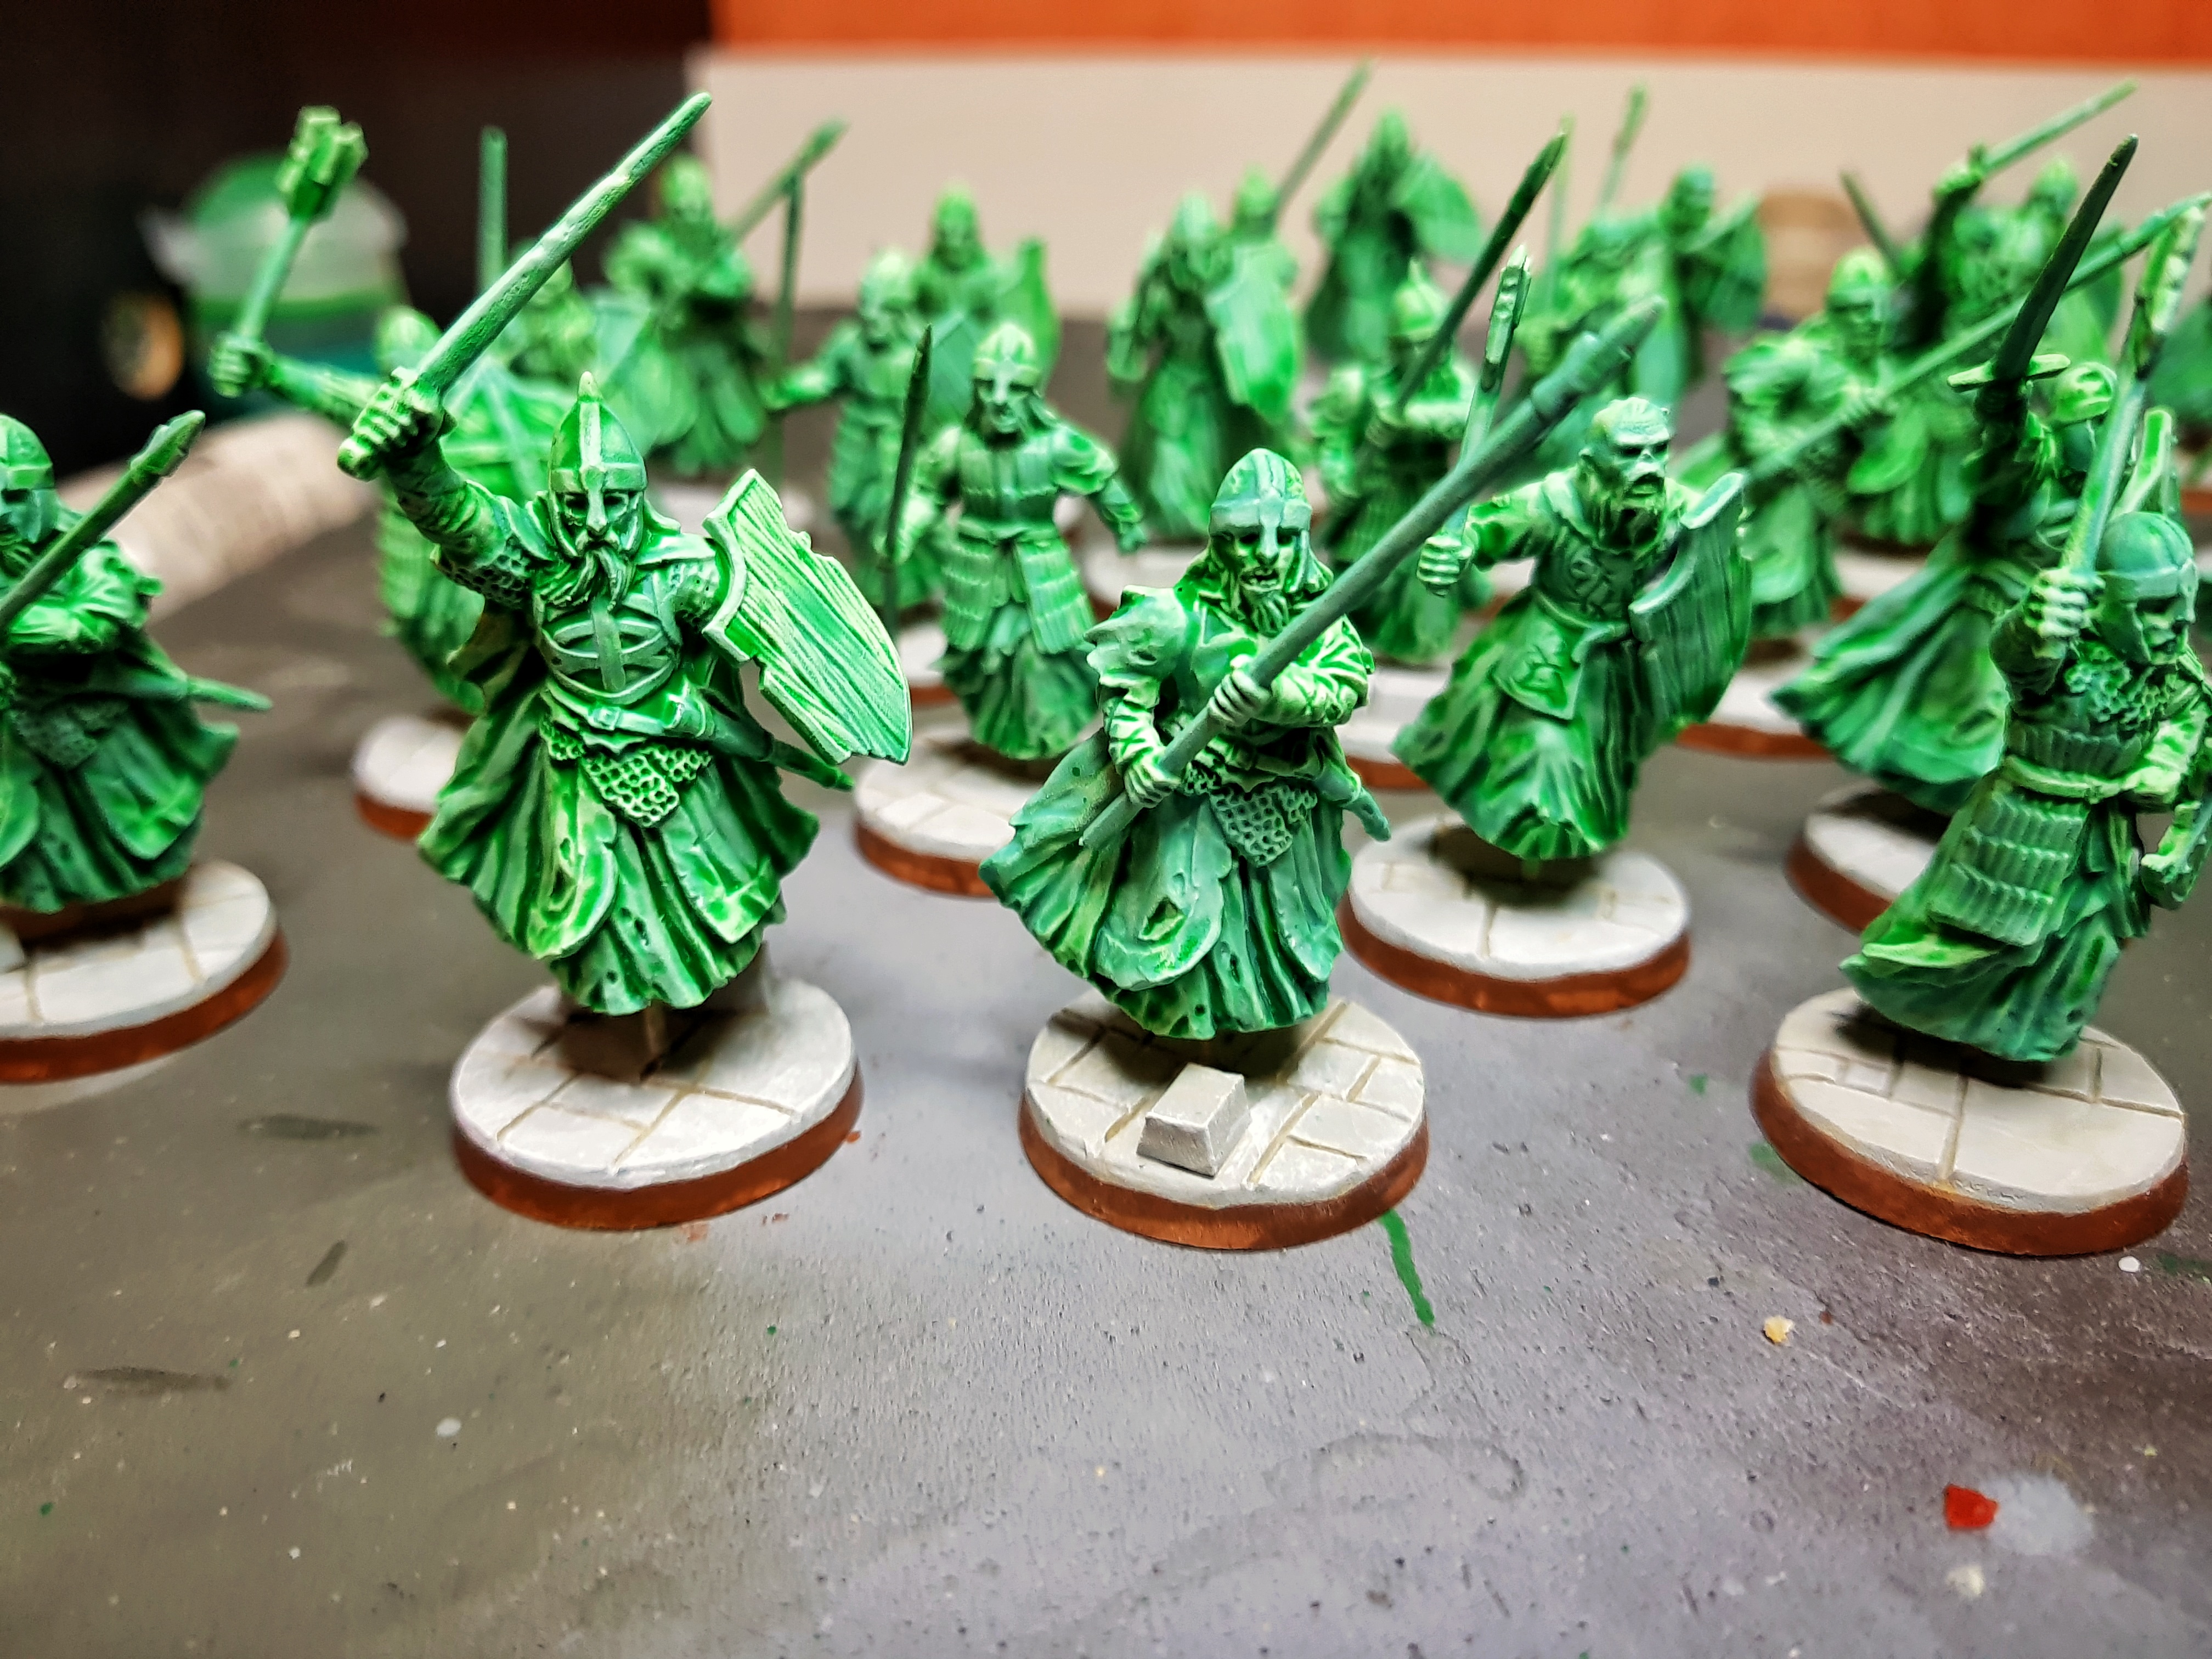
Photoshoot Time - Model Group 1
Here are some DSLR quality photos of the first finished group. After this I will go back to stage 1 and try to recreate the bases for the next bunch myself! Enjoy for now…

Ghostly Smoke Part 2
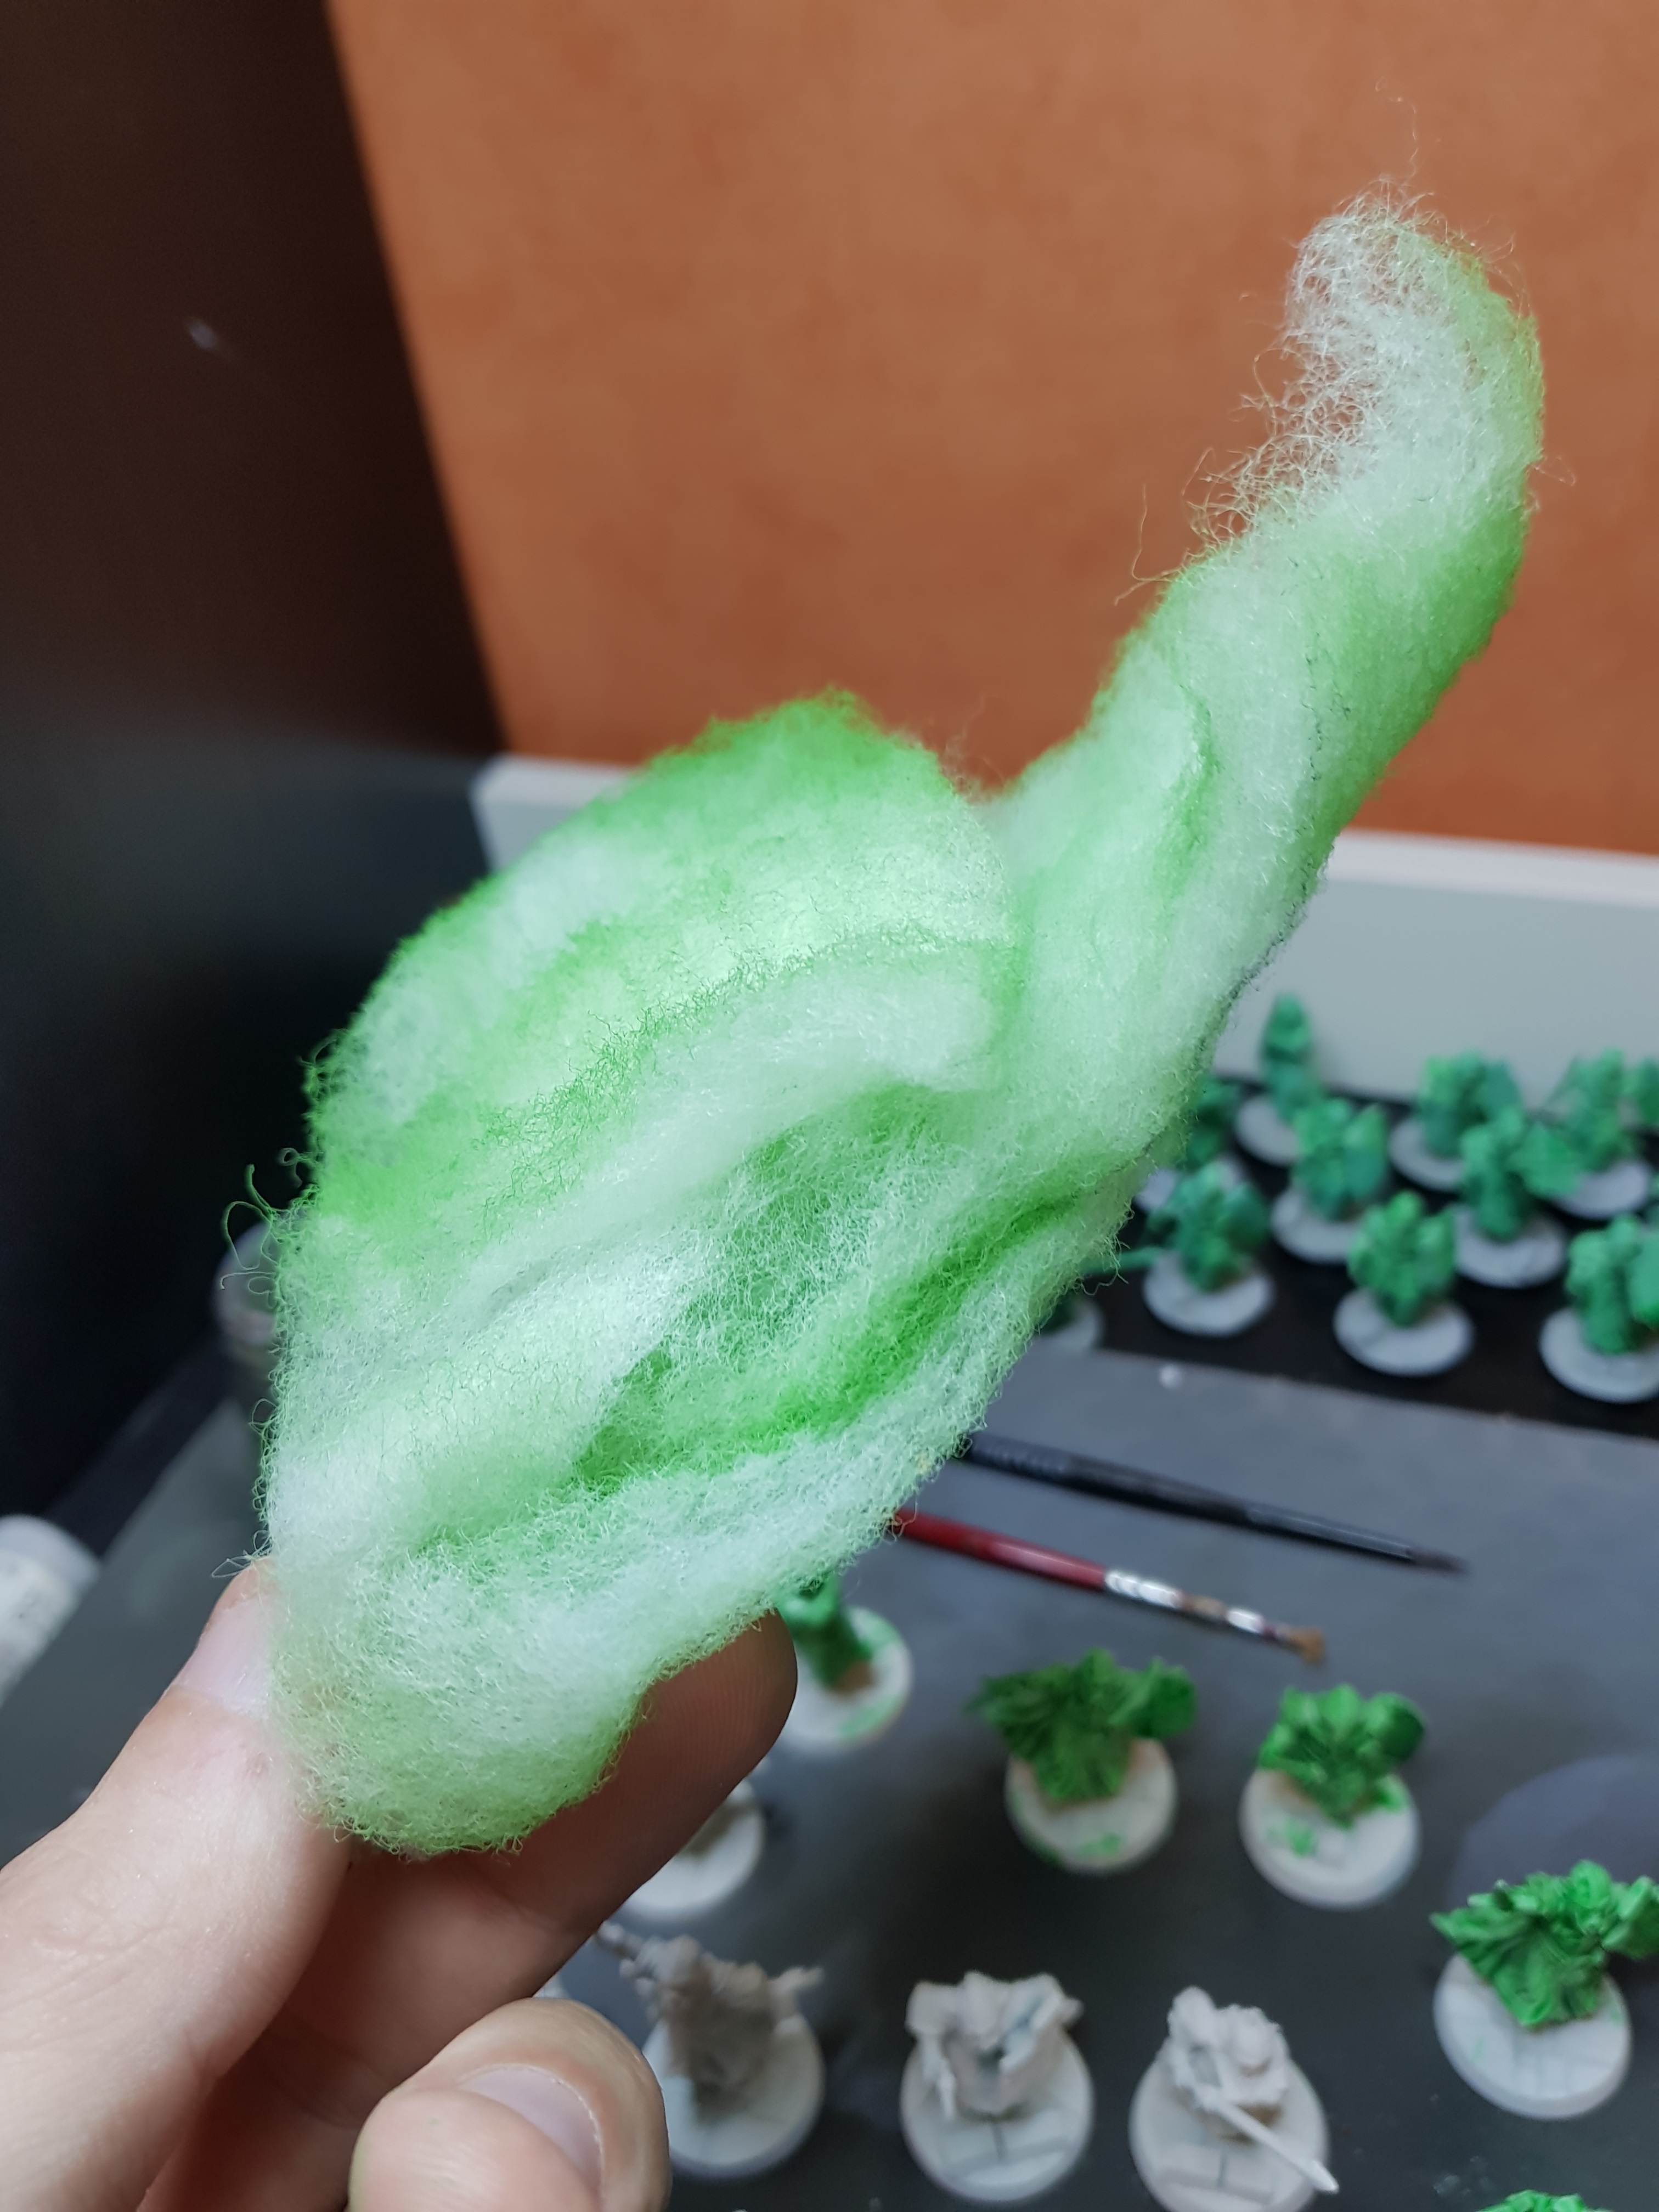
Again after feedback from my fellow SBG players in the Great British Hobbit League, I continued with the experiments on the ghostly smoke effect. In the end, I settled on going for a thicker amount of smoke directly underneath the minis, without too much whispy bits sticking out. Below shows a photo of roughly how much was used on each model.
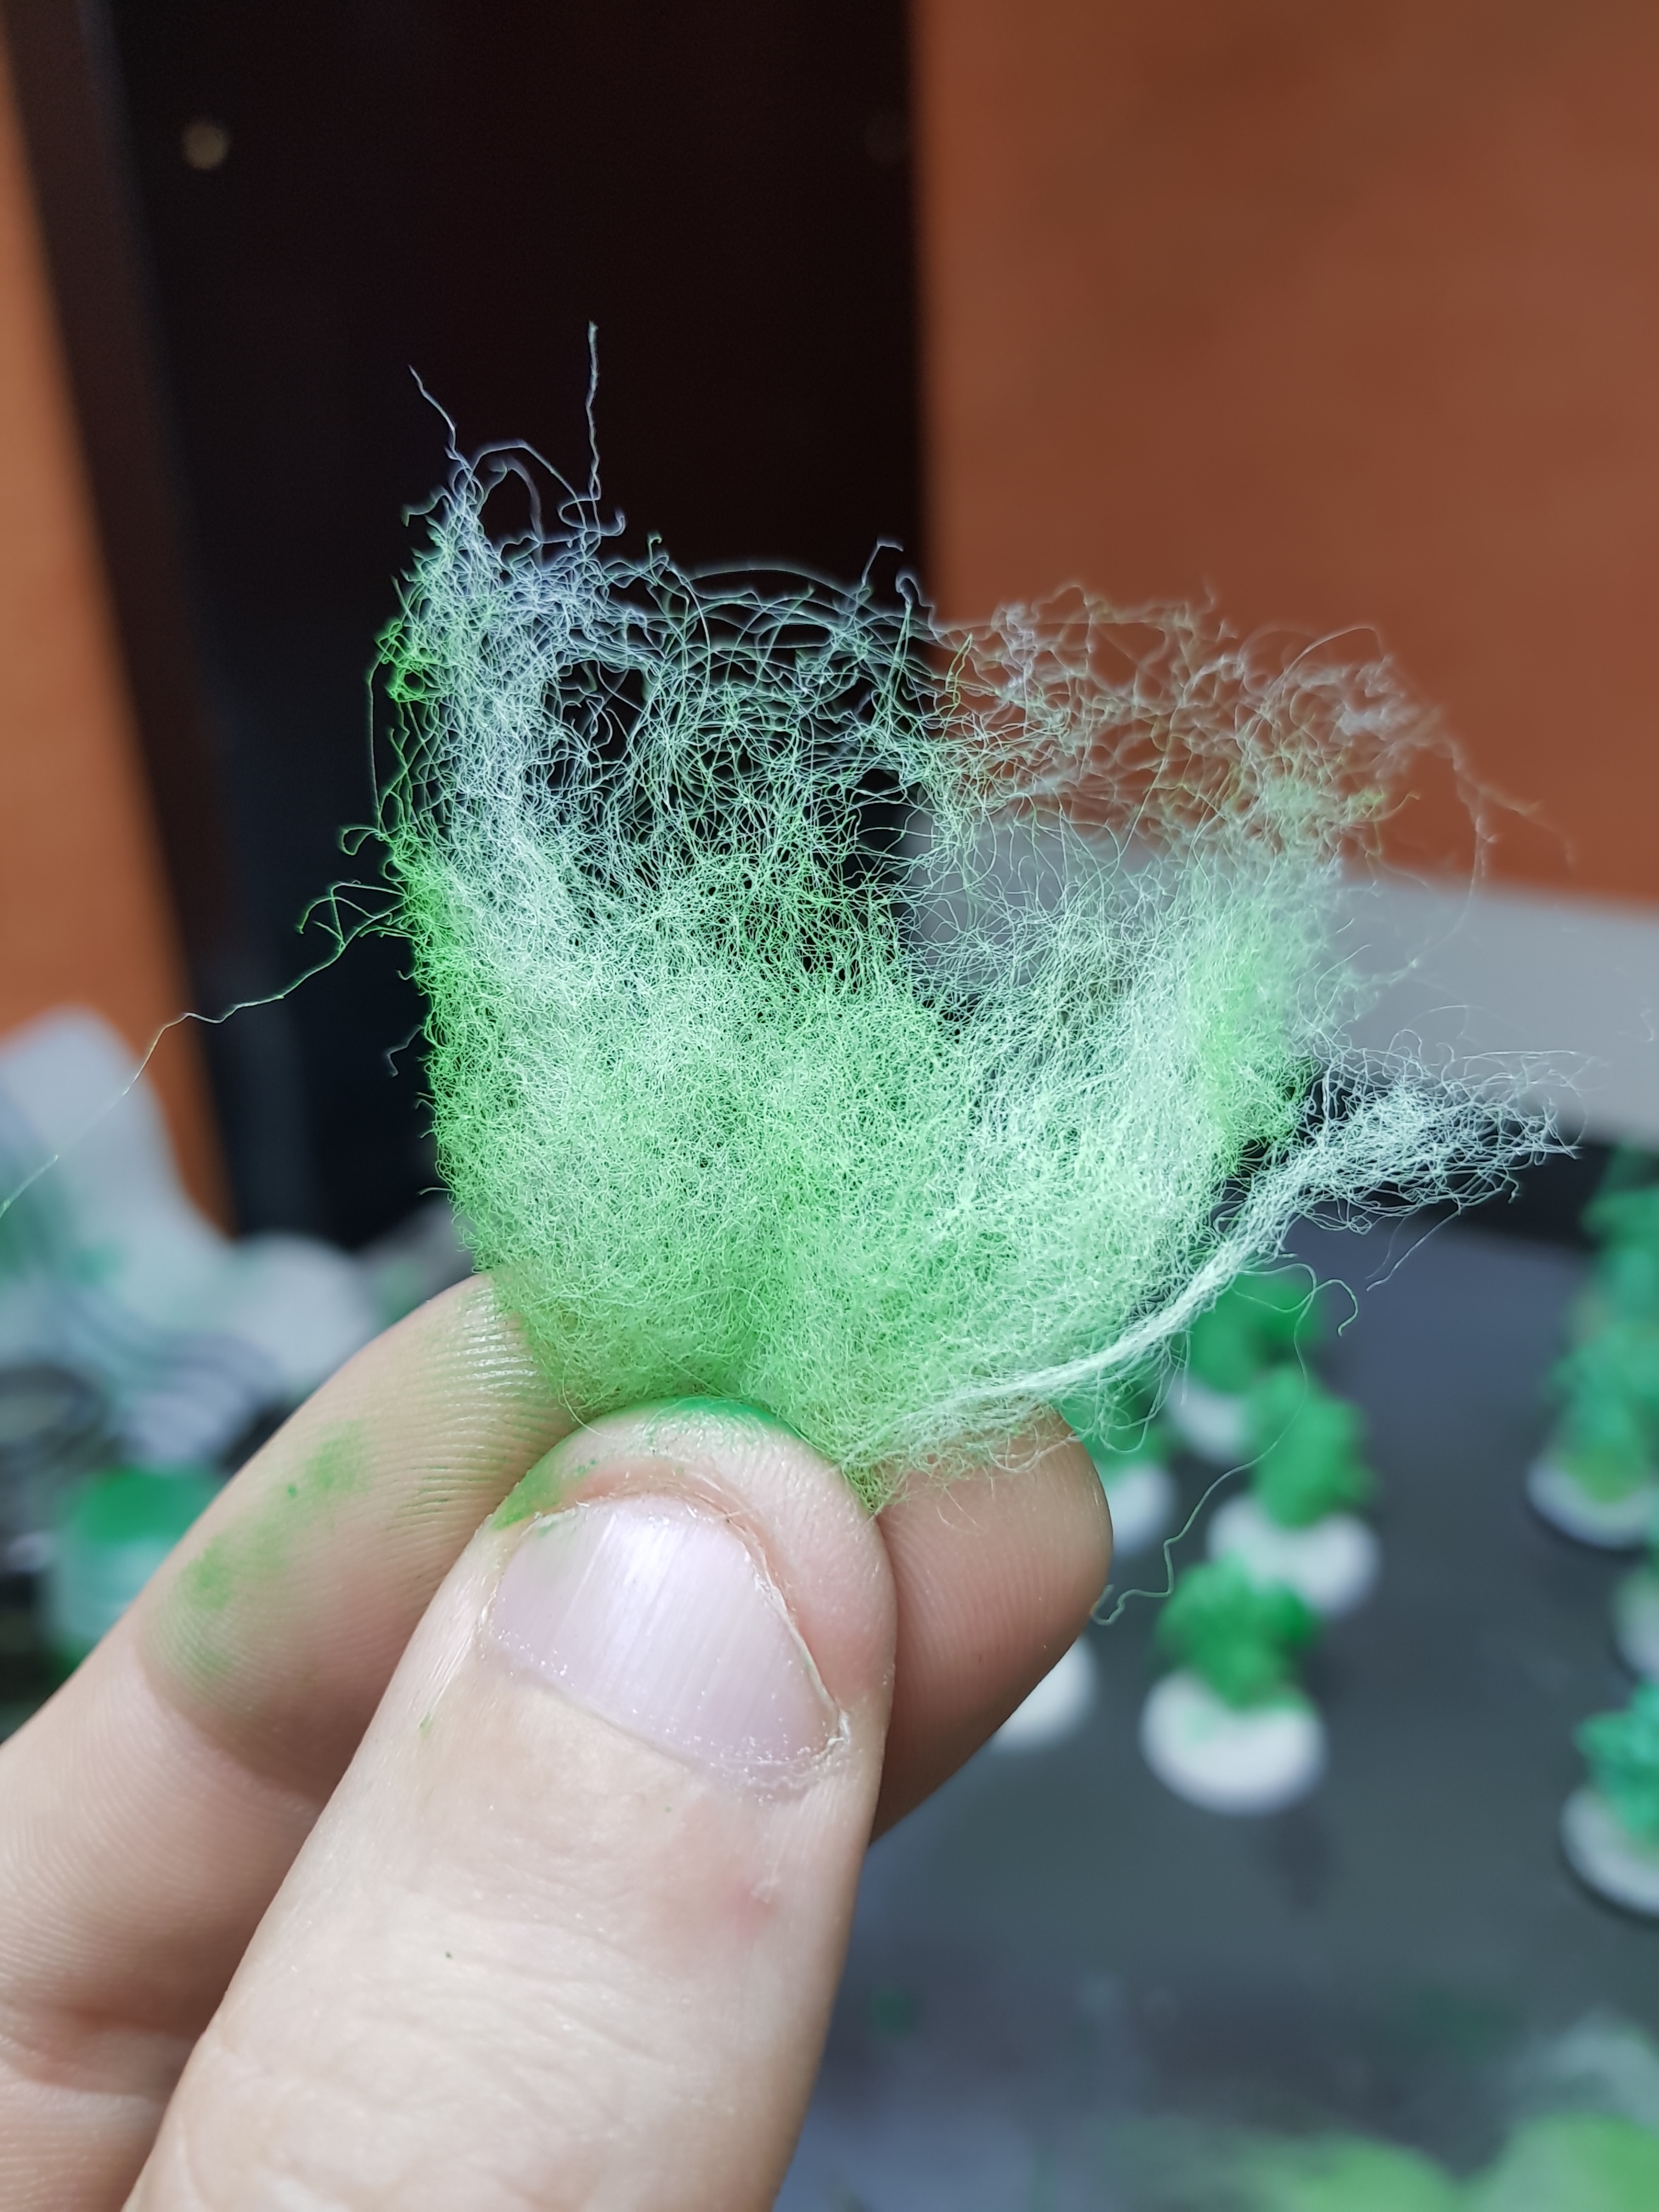 This is roughly the amount of stuffing I went for under each model.
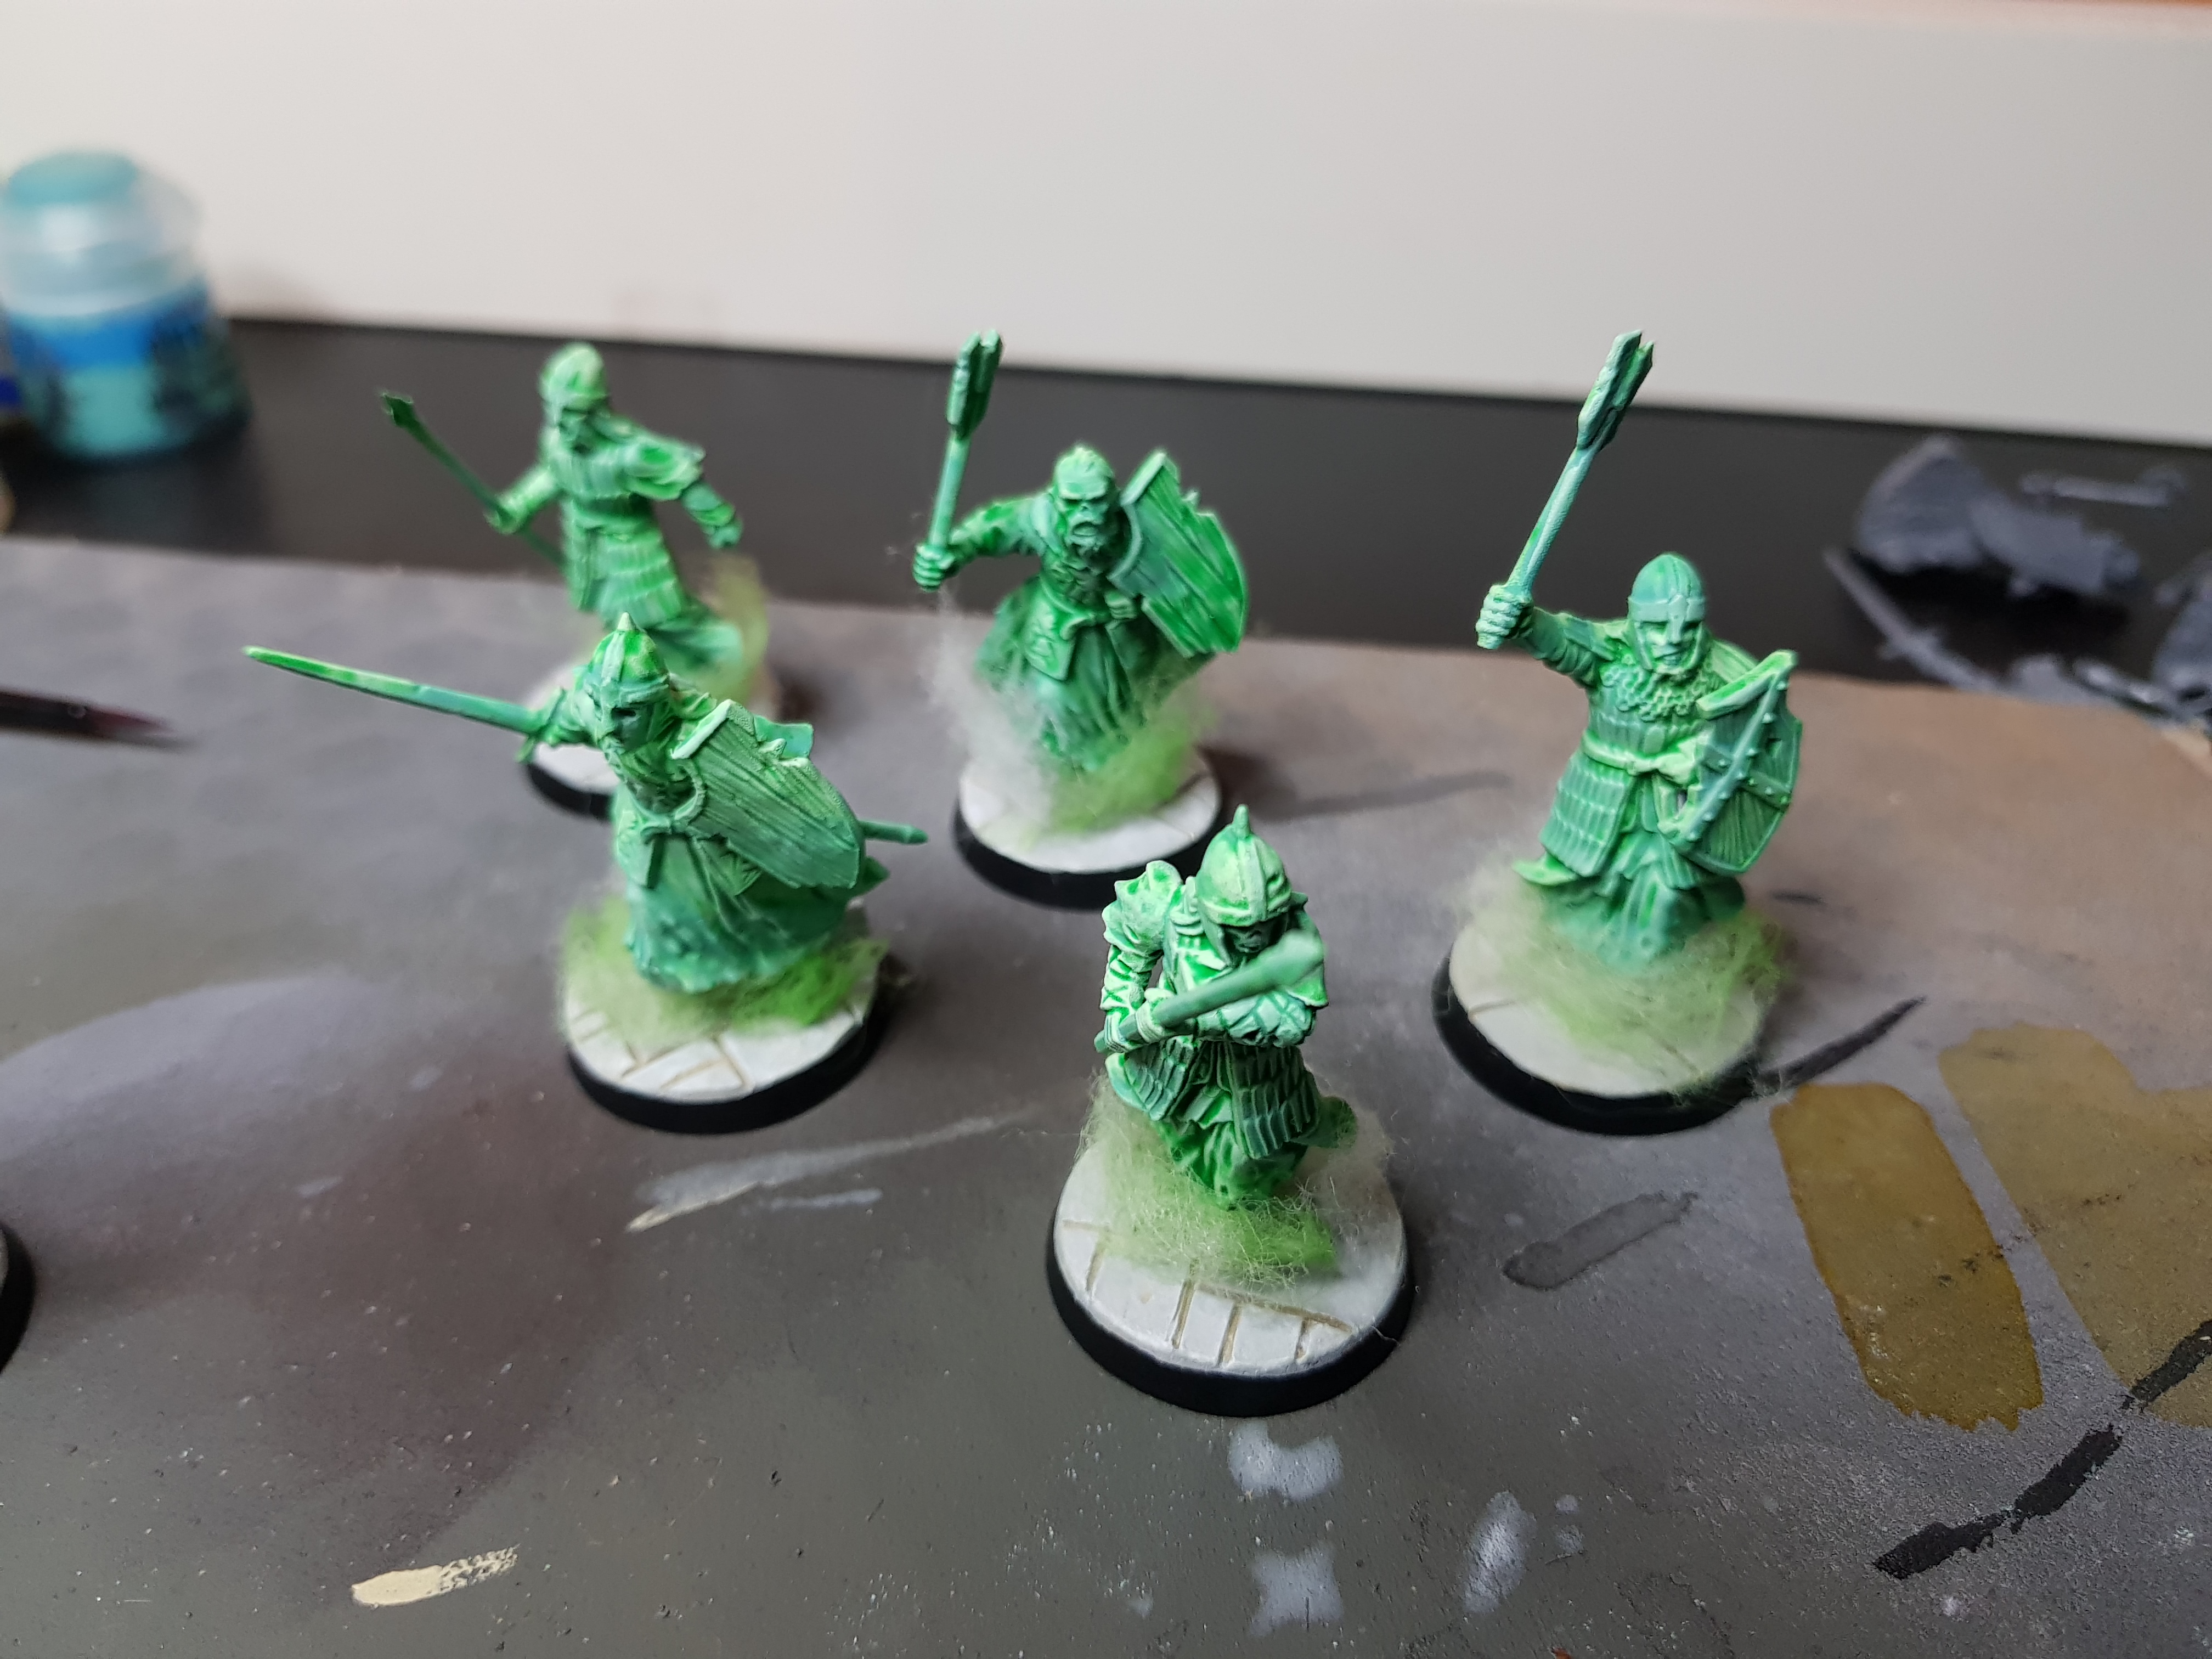
Below are some photos of the models done with the new amount of smoke
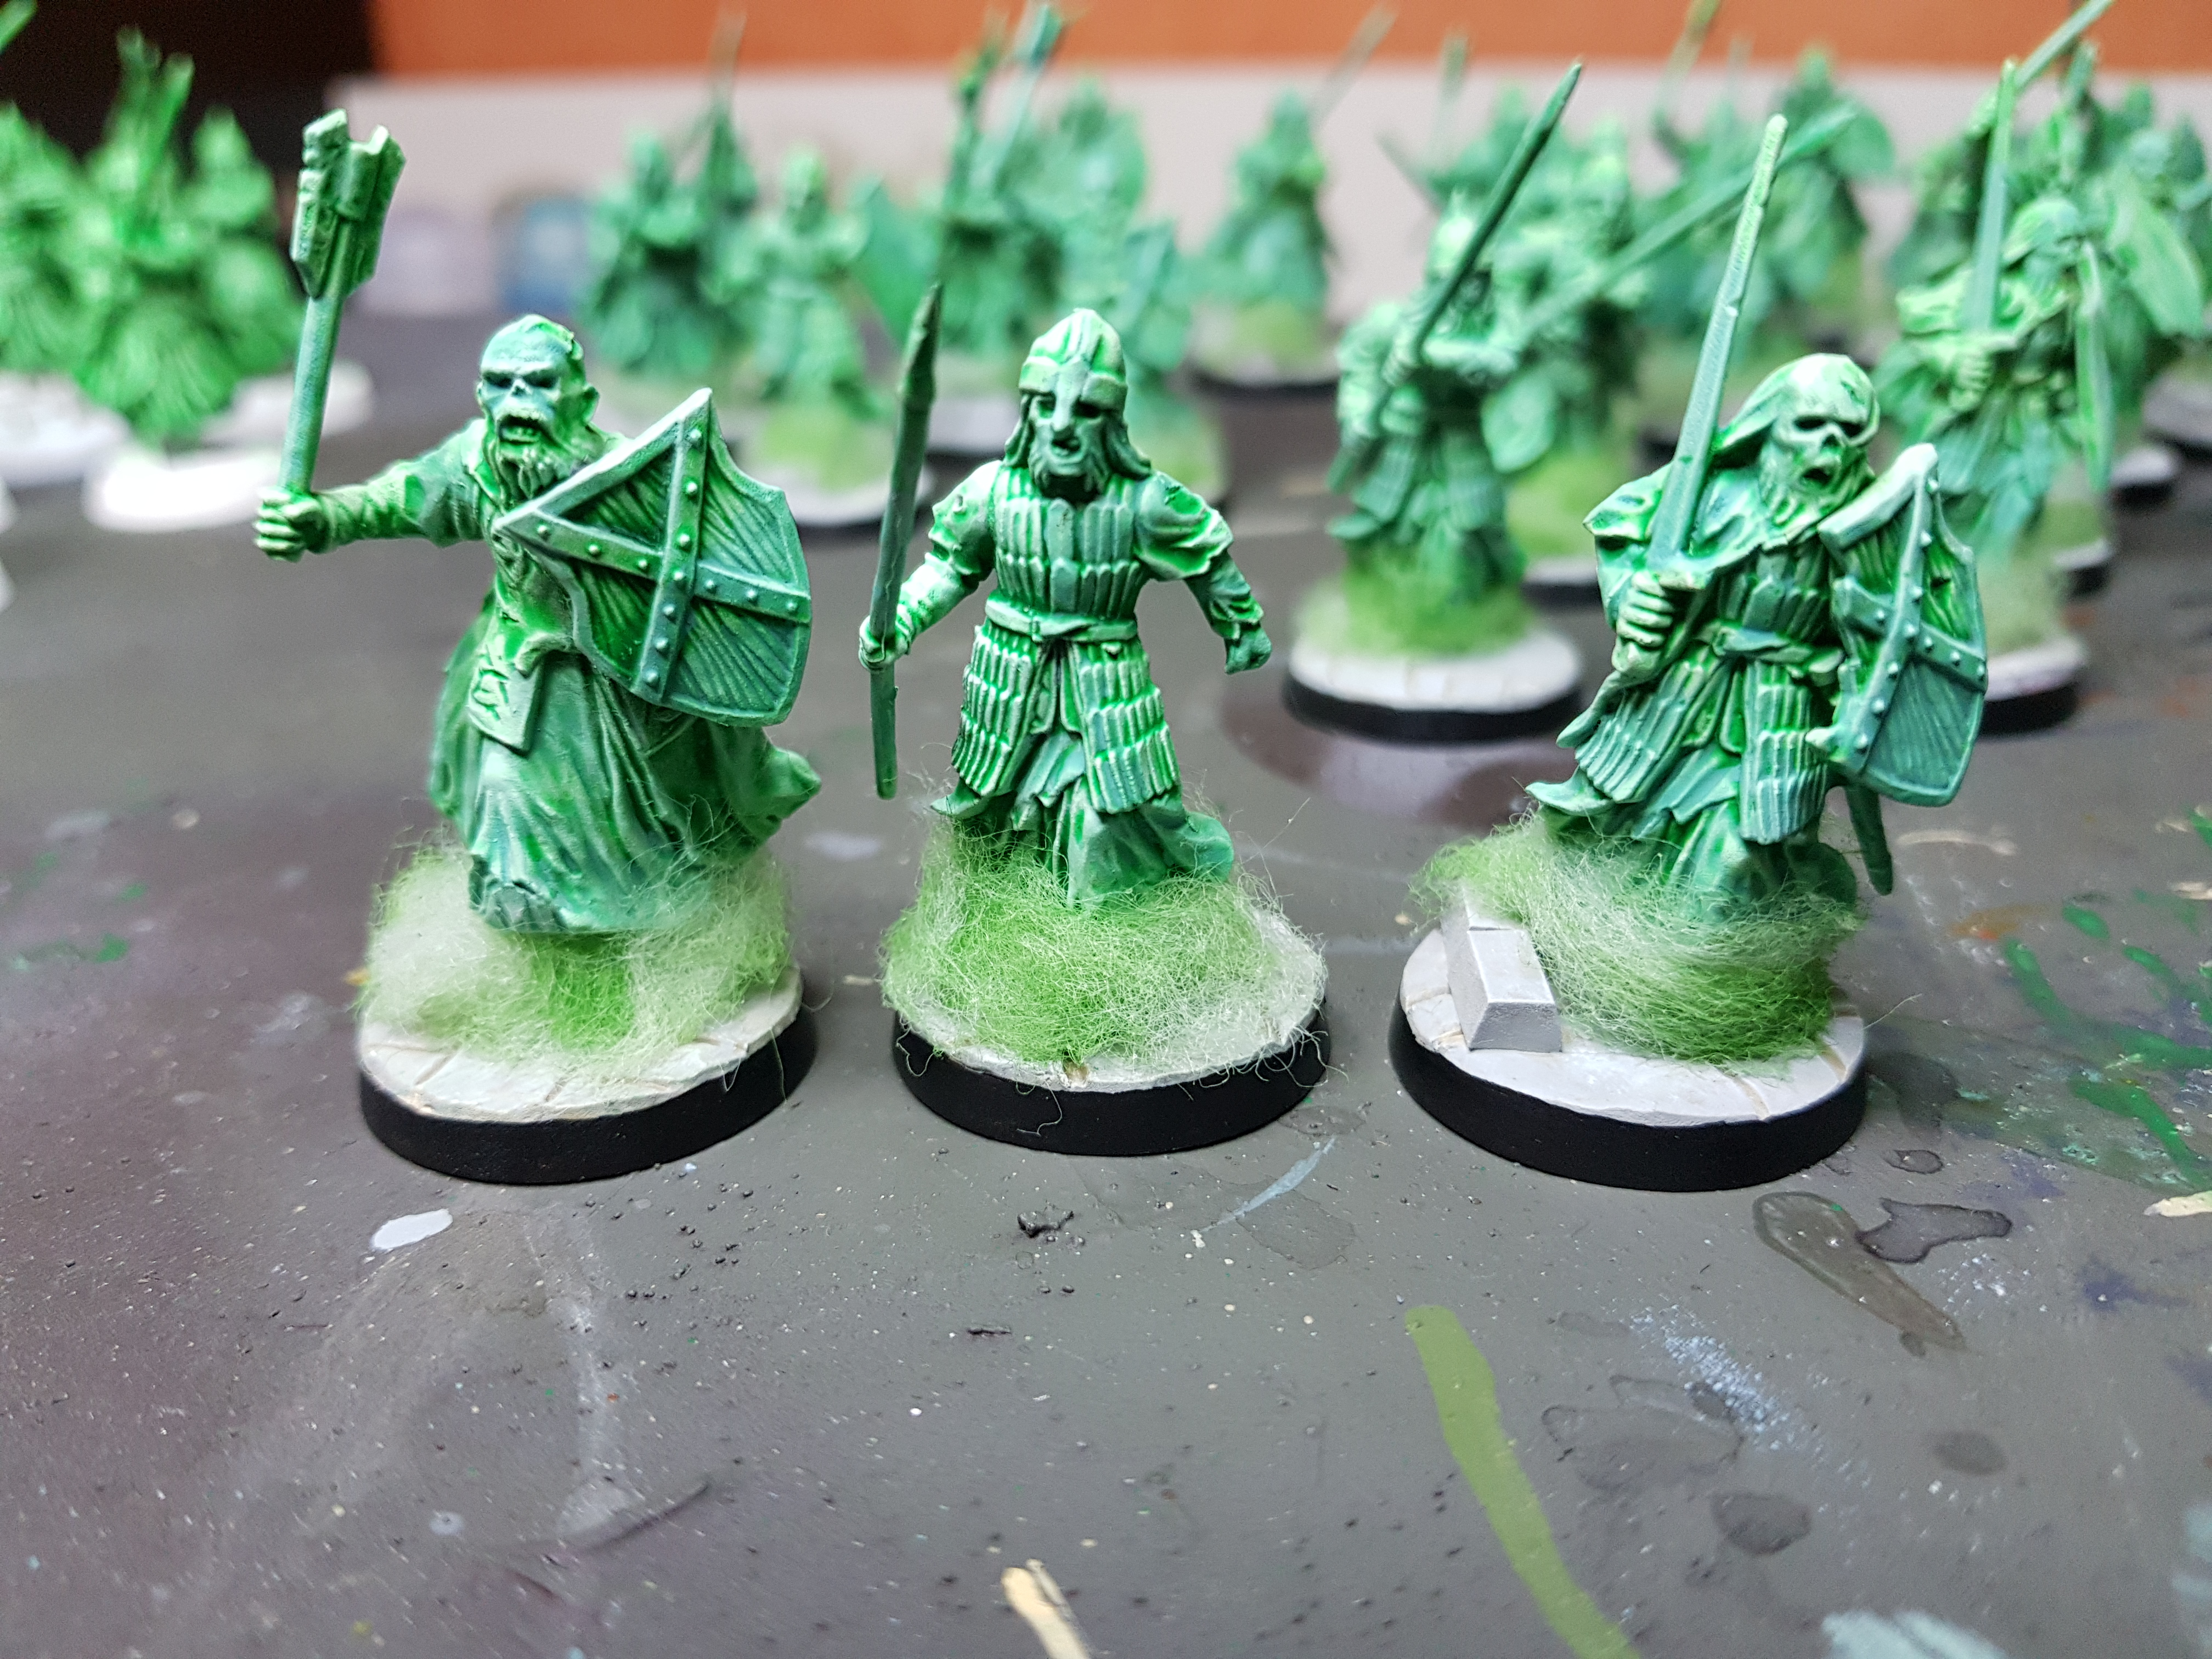
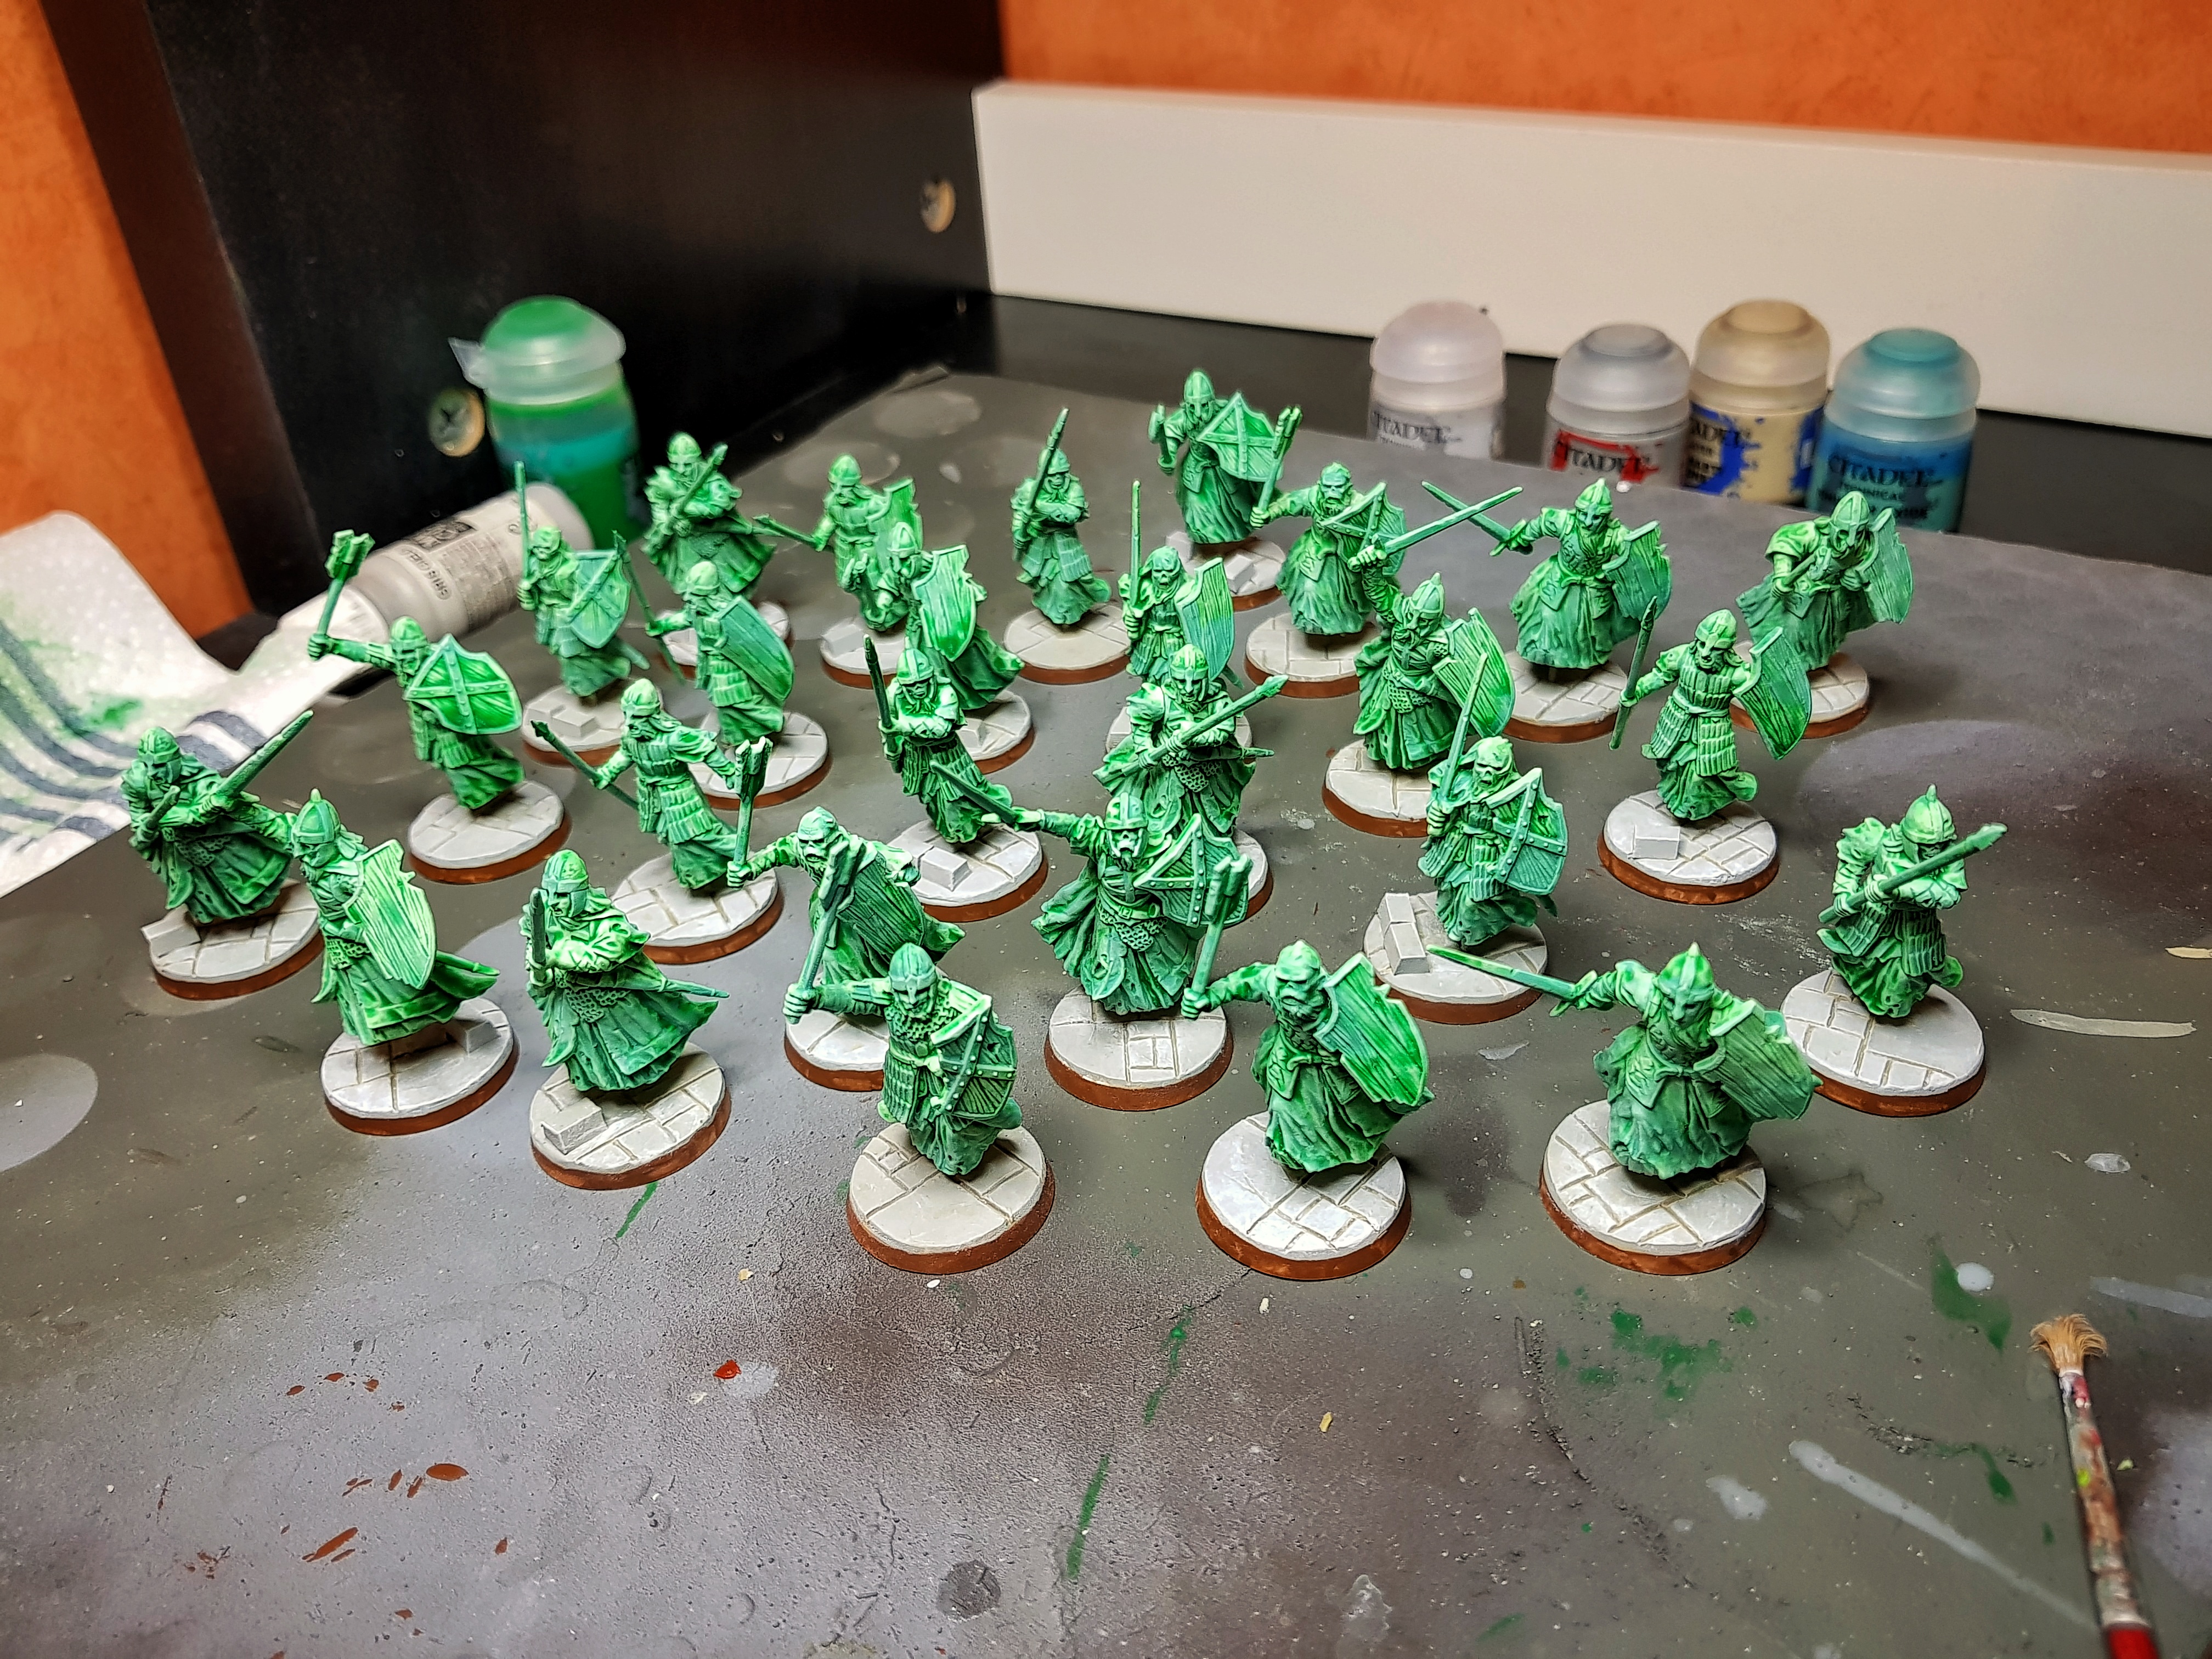
Some proper final DLSR photos are up next!
Ghostly Smoke - Part 1
In order to finish the models off, I wanted to add a ghostly like smoke effect underneath them, especially as they are raised up off the bases.
Inspiration comes direct from the CGI in the films where you can see a green blur below the characters
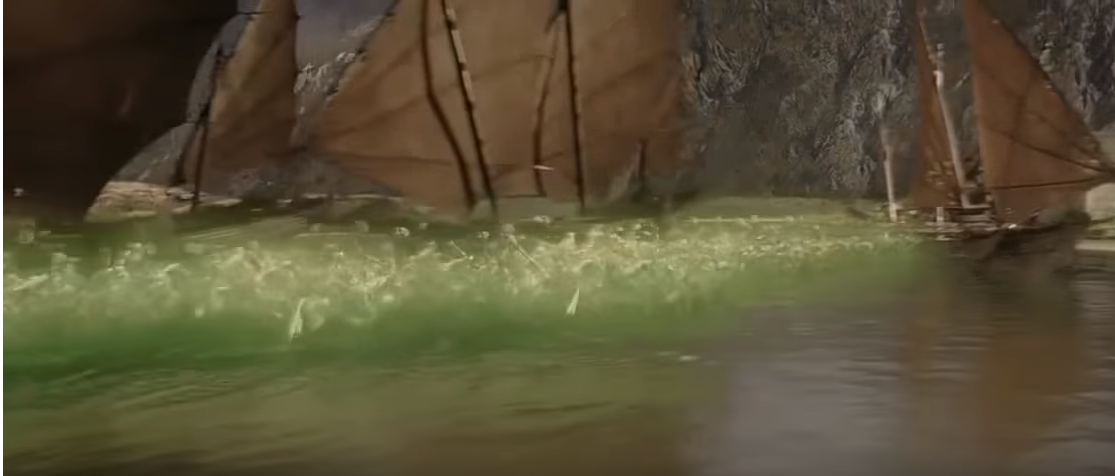 Scene at the Pelennor Fields, the dark green blur below the Dead can be seen quite clearly.
To make the smoke, I grabbed some teddy bear stuffing that i’ve got lying around the house (I use it for packing boxes during house moves at Uni). I then took a cheap can of bright green spray paint, bought from B&Q (a UK hardware store), and sprayed the stuffing in a patchy nature.
I then ripped off a small amount and stuffed it (pun intended) under the models to see what effect it had. Initially I wasn’t happy with the results and had a few experiments with colour amounts and thickness. I’ll add the final results in a part 2 update…

Base Rim Colour Change
Upon posting some photos up online, I received the comment that the bases would look better with black rims. Now whilst I always base SBG minis with Brown rims, I have done some others with grey base tops with black rims and they turned out well. So I decided to experiment with a few of them to see what the change would look like.

I had to admit, yep the black was better. A repaint was in order!
Bases Part 2
Back to the bases after the drybrushing experiment!
The bases are mostly finished off with 2 thin coats of Celestra Grey (I had to find a use for it after now I no longer wanted to drybrush hah). This provides the main colour of the stonework. Again, when applying this, stay out of the recesses in order to leave the sandy base colours still present.
Then, give the whole base a light drybrush of Ceramite White to pick out the very edges of the slabs, cracks and other detailing in the stone.
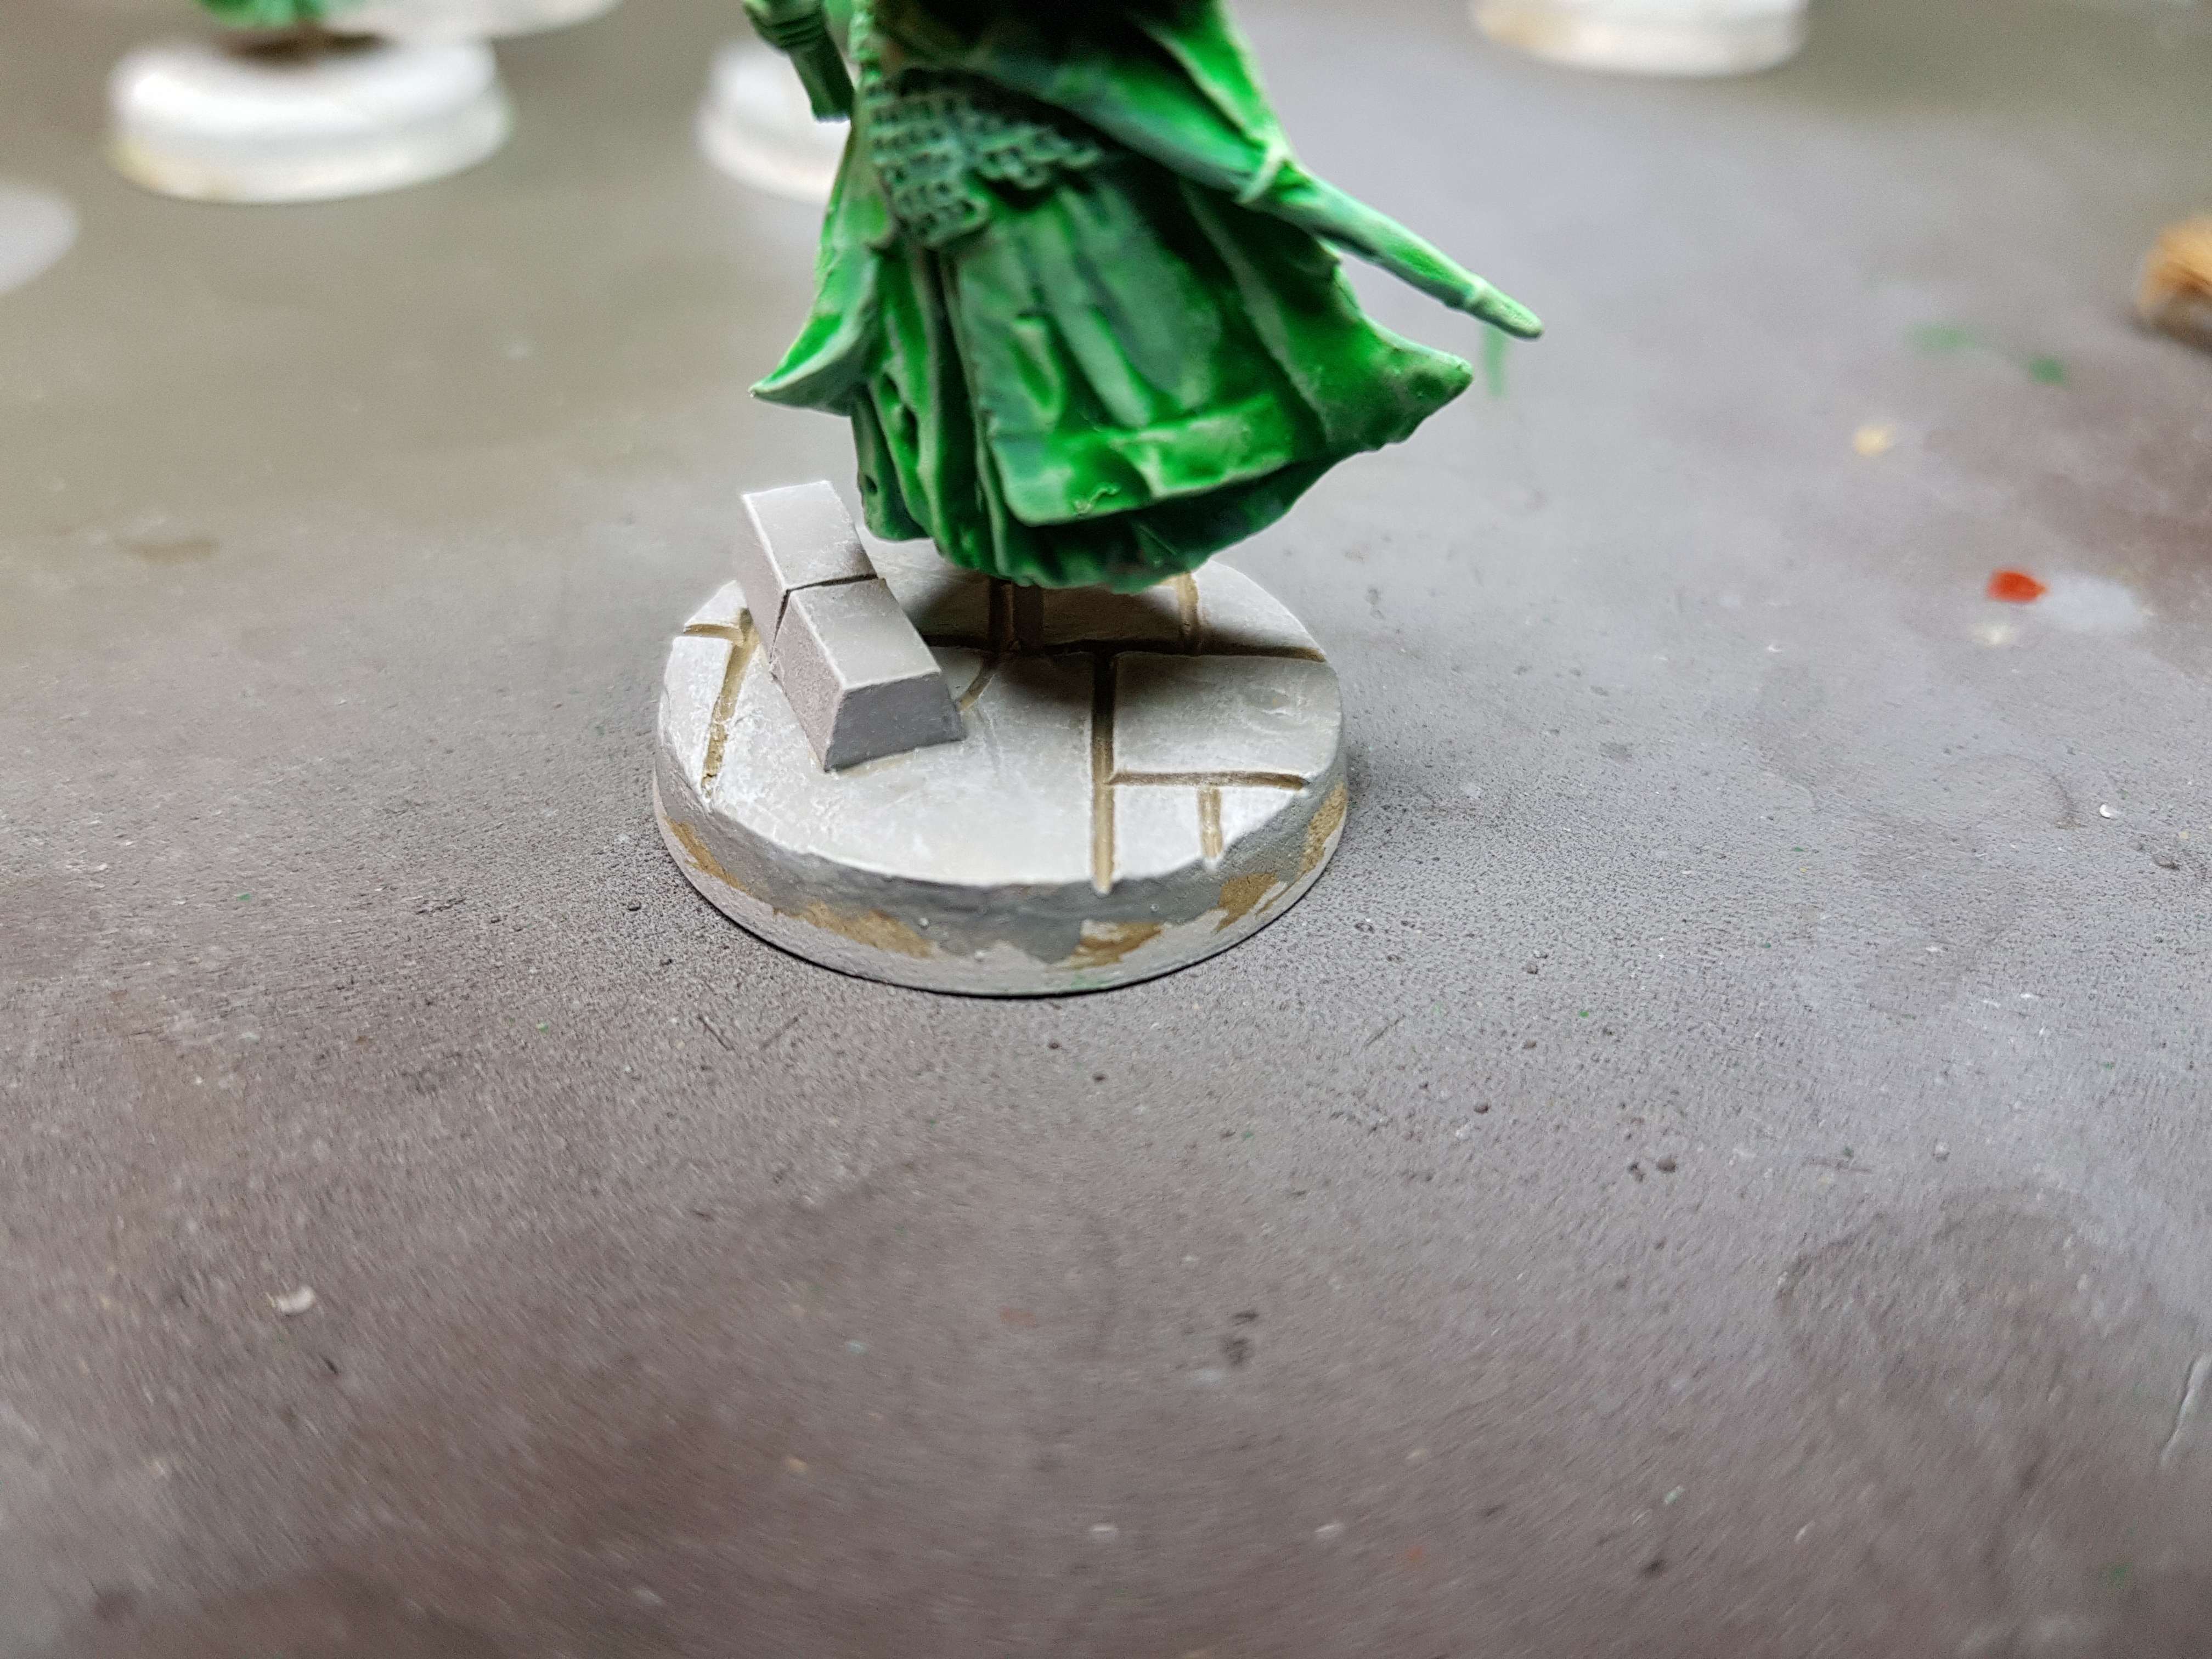
Finally, well I say finally, I gave the rim a couple of coats of Mournfang Brown, my standard colour for SBG minis. I didn’t go all the way to the tops of the slabs in order to leave some height definition to the stonework.
Drybrush Experiment Failed
Half way through painting the bases, I felt like the models might need another highlight. So I decided to try a 2nd highlight by drybrushing Celestra Grey. I’d seen a post on the Great British Hobbit League Facebook Group where someone said they had done a drybrush of Celestra Grey on their Army of the Dead, so thought i’d try it to (I’d bought the paint just for this!)
So I gave 3 models a heavy drybrush as a tester…
Now at first, they looked ok in normal sunlight. However, when I switched to using my daylight lamp later on in the evening and compared them to the other models i’d left alone I could clearly see the drybrushed ones were looking powdery. What was most obvious was that it was harder to see the details of the models that had been drybrushed and they had less depth in colour.
So I decided I wouldn’t do any further drybushing and these 3 would be coincided to the repaint pile and join the over 30+ i’d still got to do! No matter, was worth a try.
Beginning the Bases
In this entry, I begin basecoating the bases that were sculpted by the previous owner of these models. Don’t worry I will show my own attempts at replicating these later at some point!
The first step I took was to use Vallejo Model Colour German Camo Beige. The main reason for this was that i’m going for a white washed stone look, to represent the streets of Minas Tirith, and I wanted the flag stones to still have an earthy base colour rather than just straight grey/white.
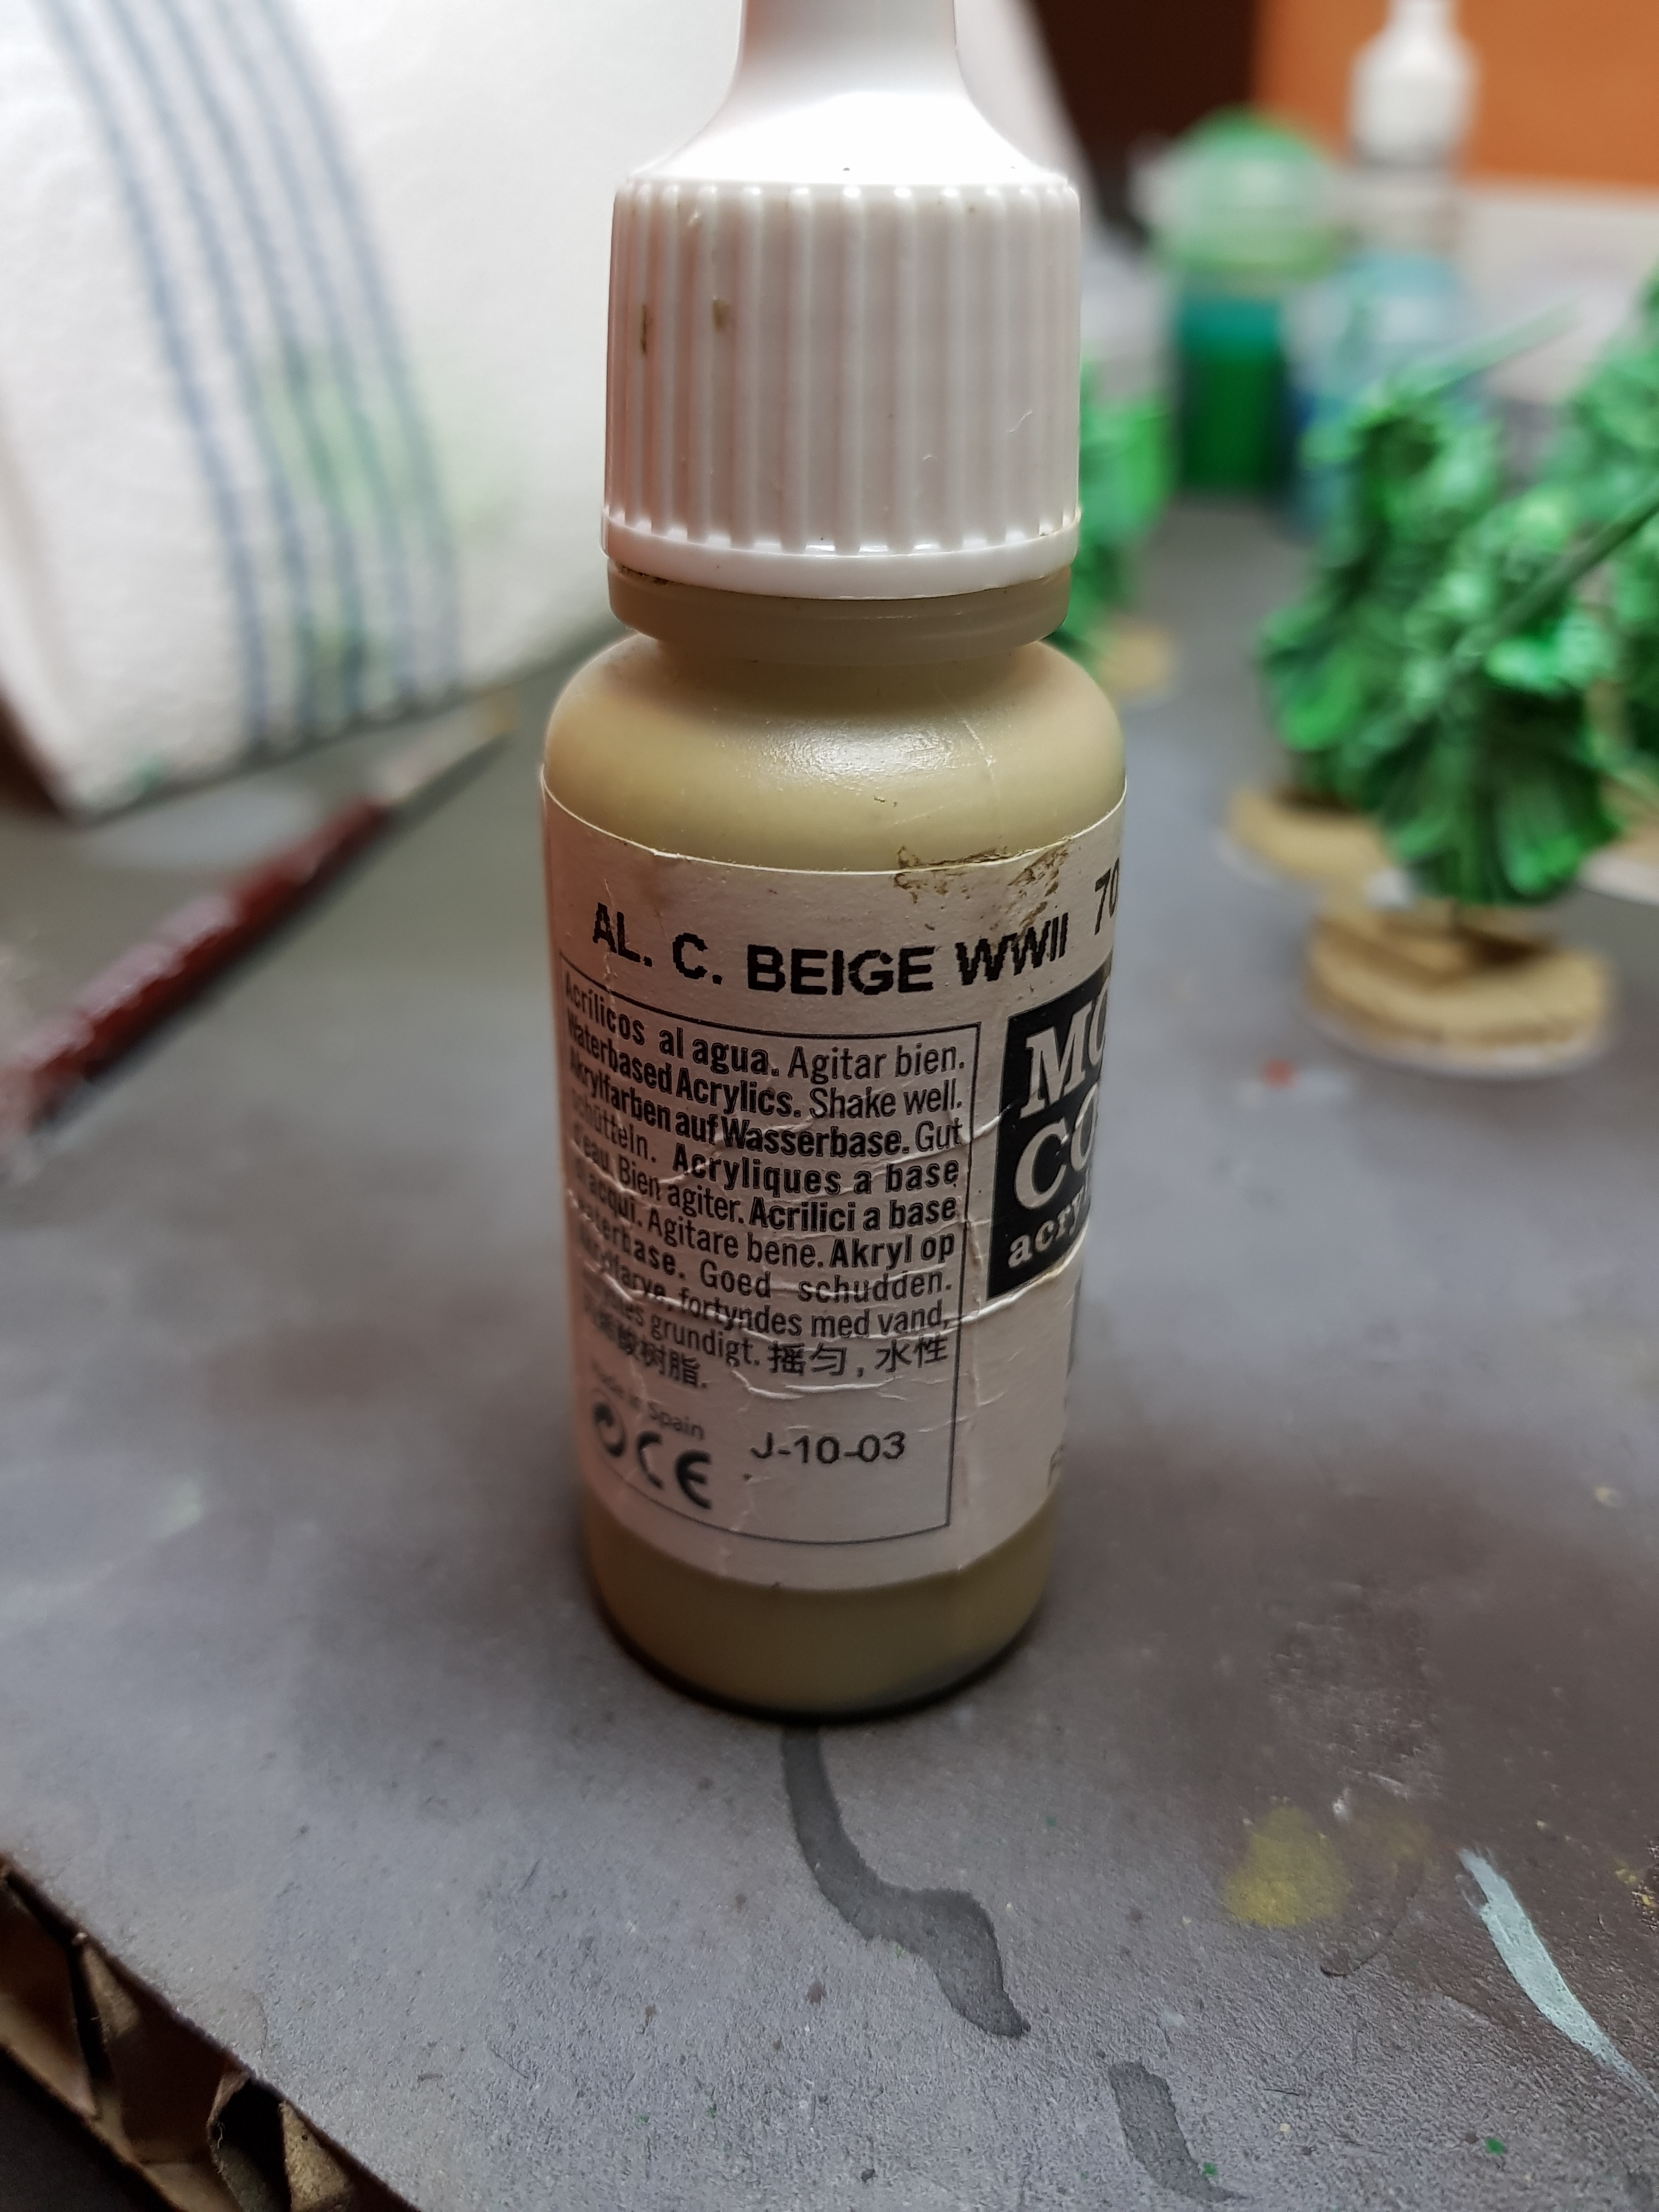 First basecoat - Vallejo Model Colour German Camo Beige
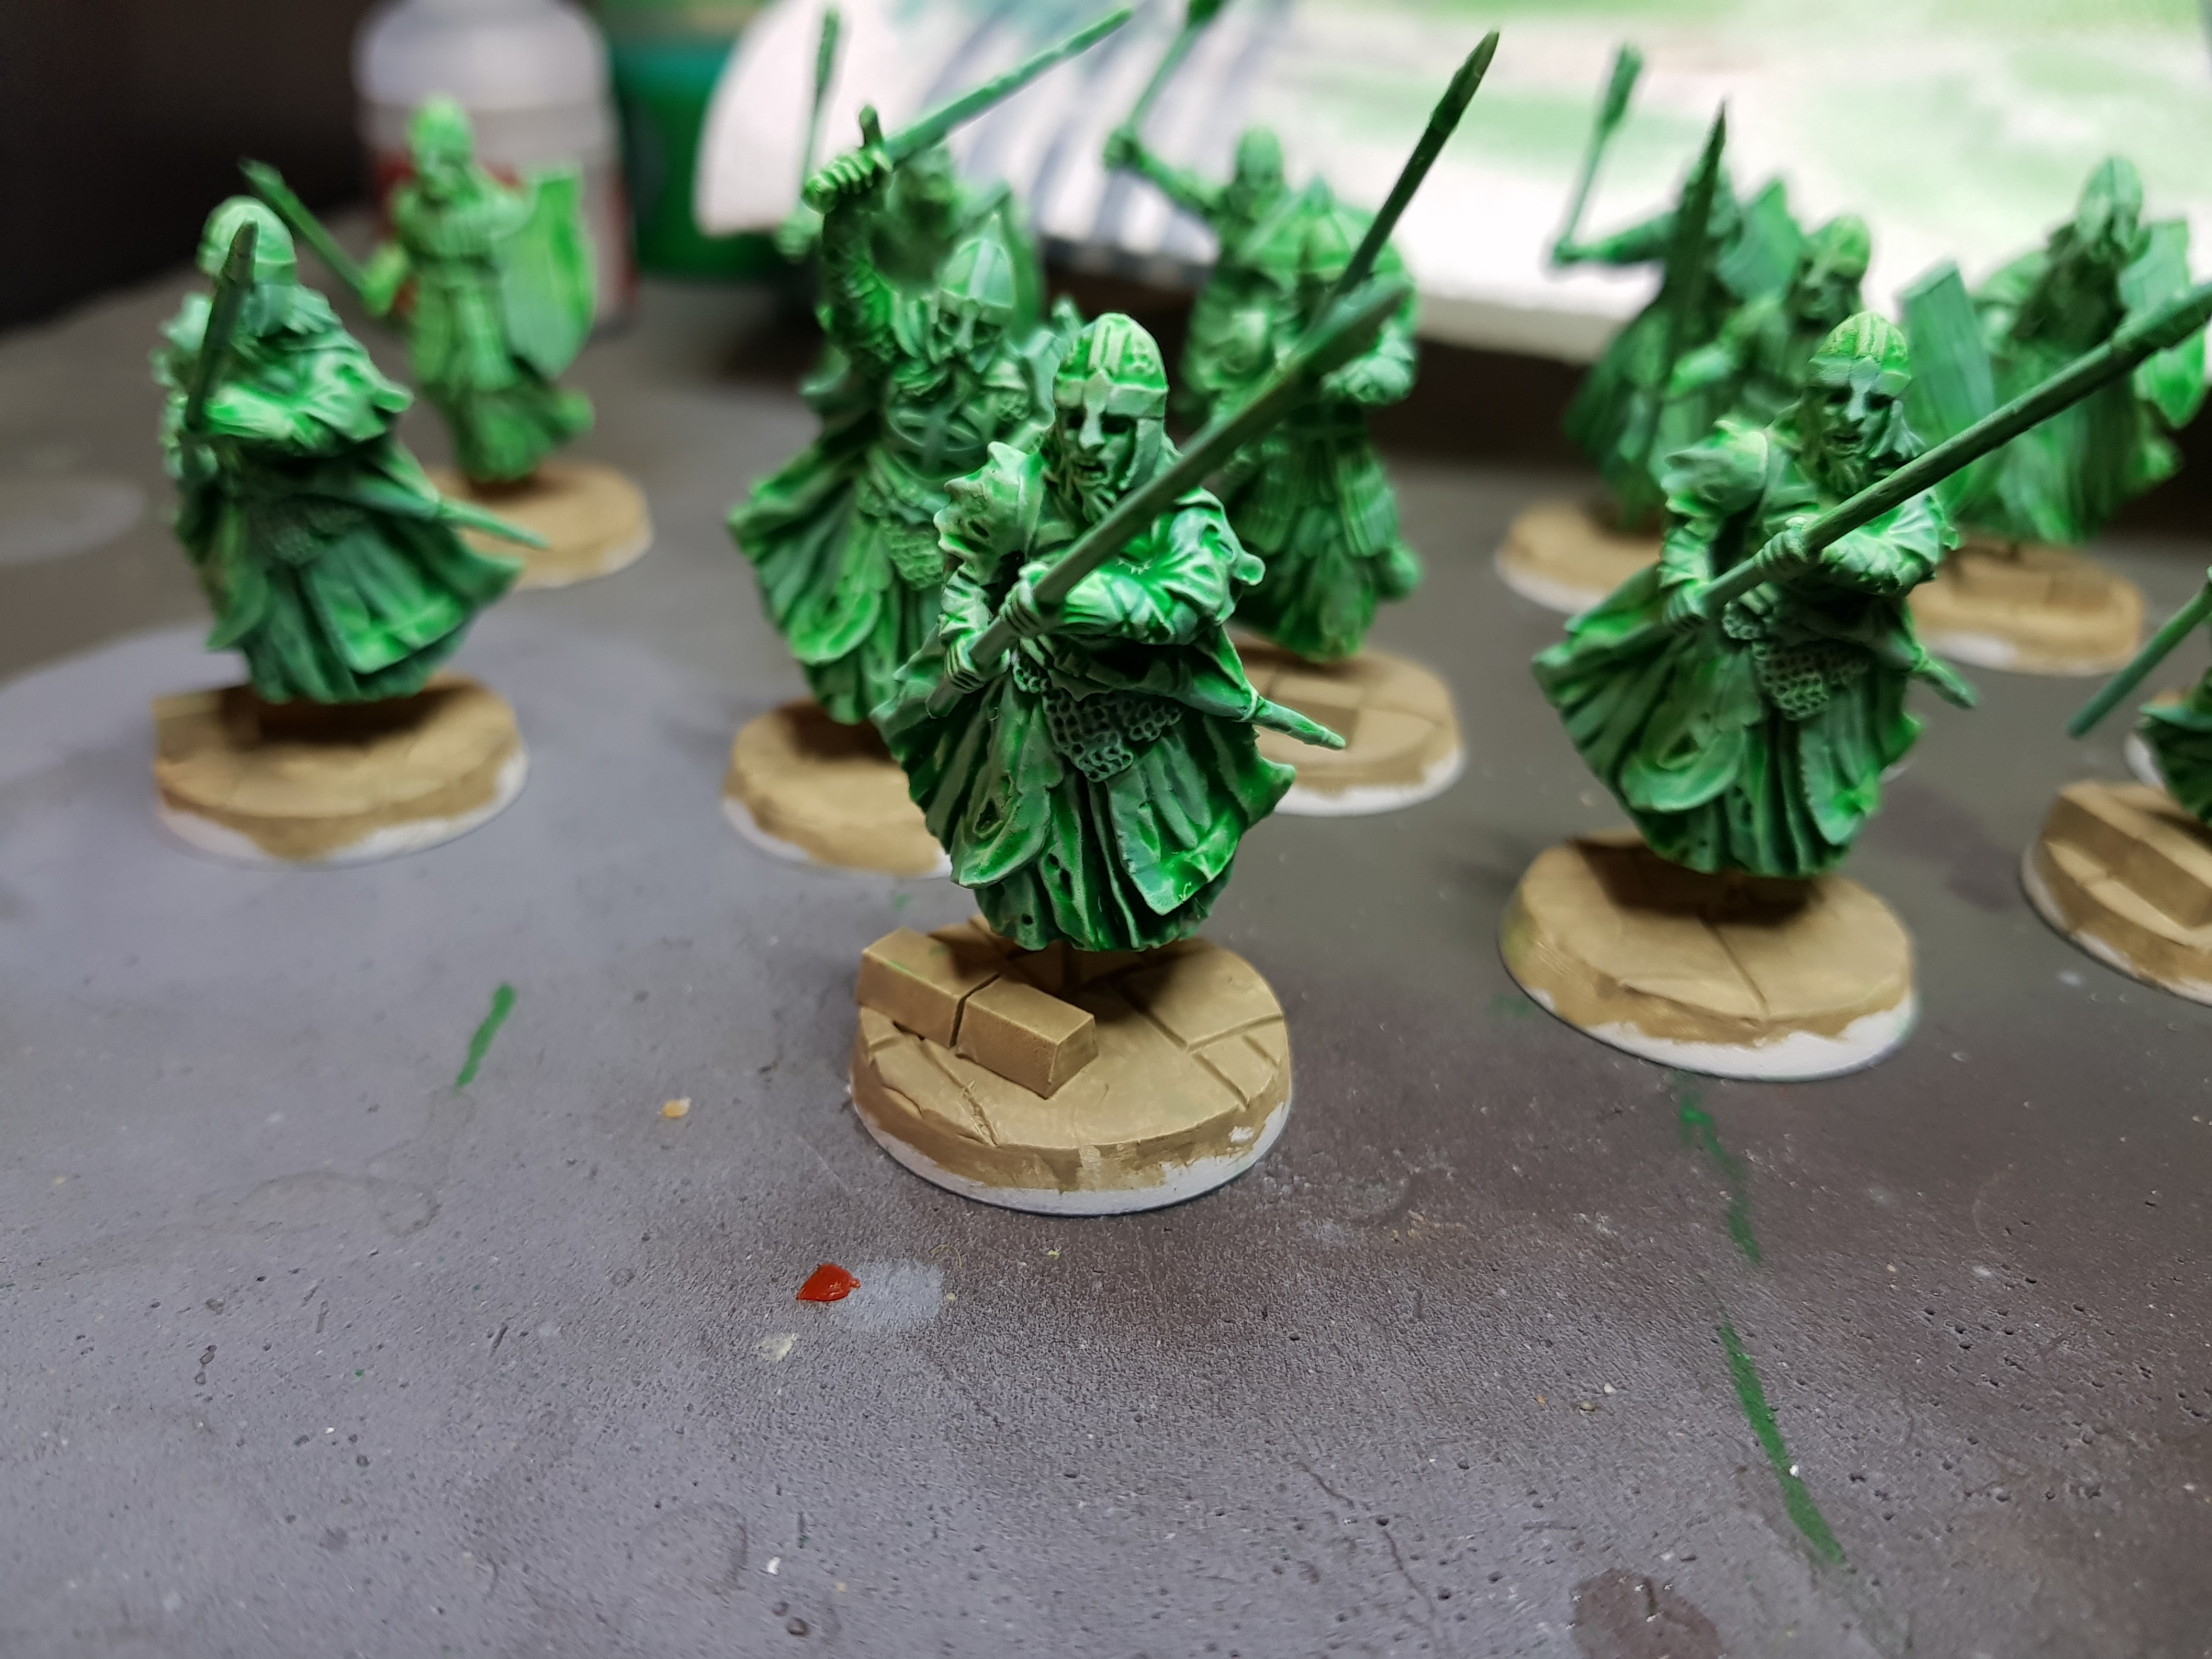
Next up was a thin watered down coat of Citadel Ushabti Bone. This coat was applied in 2 layers and begins to build the dark beige basecoat up to the grey for later.
Care was taken to avoid painting the new layers into the recesses or gaps between the flagstones. I want to keep the darker earthy colour there to more the slabs feel more ‘real’. The beige can also resemble building sand underneath the slabs.
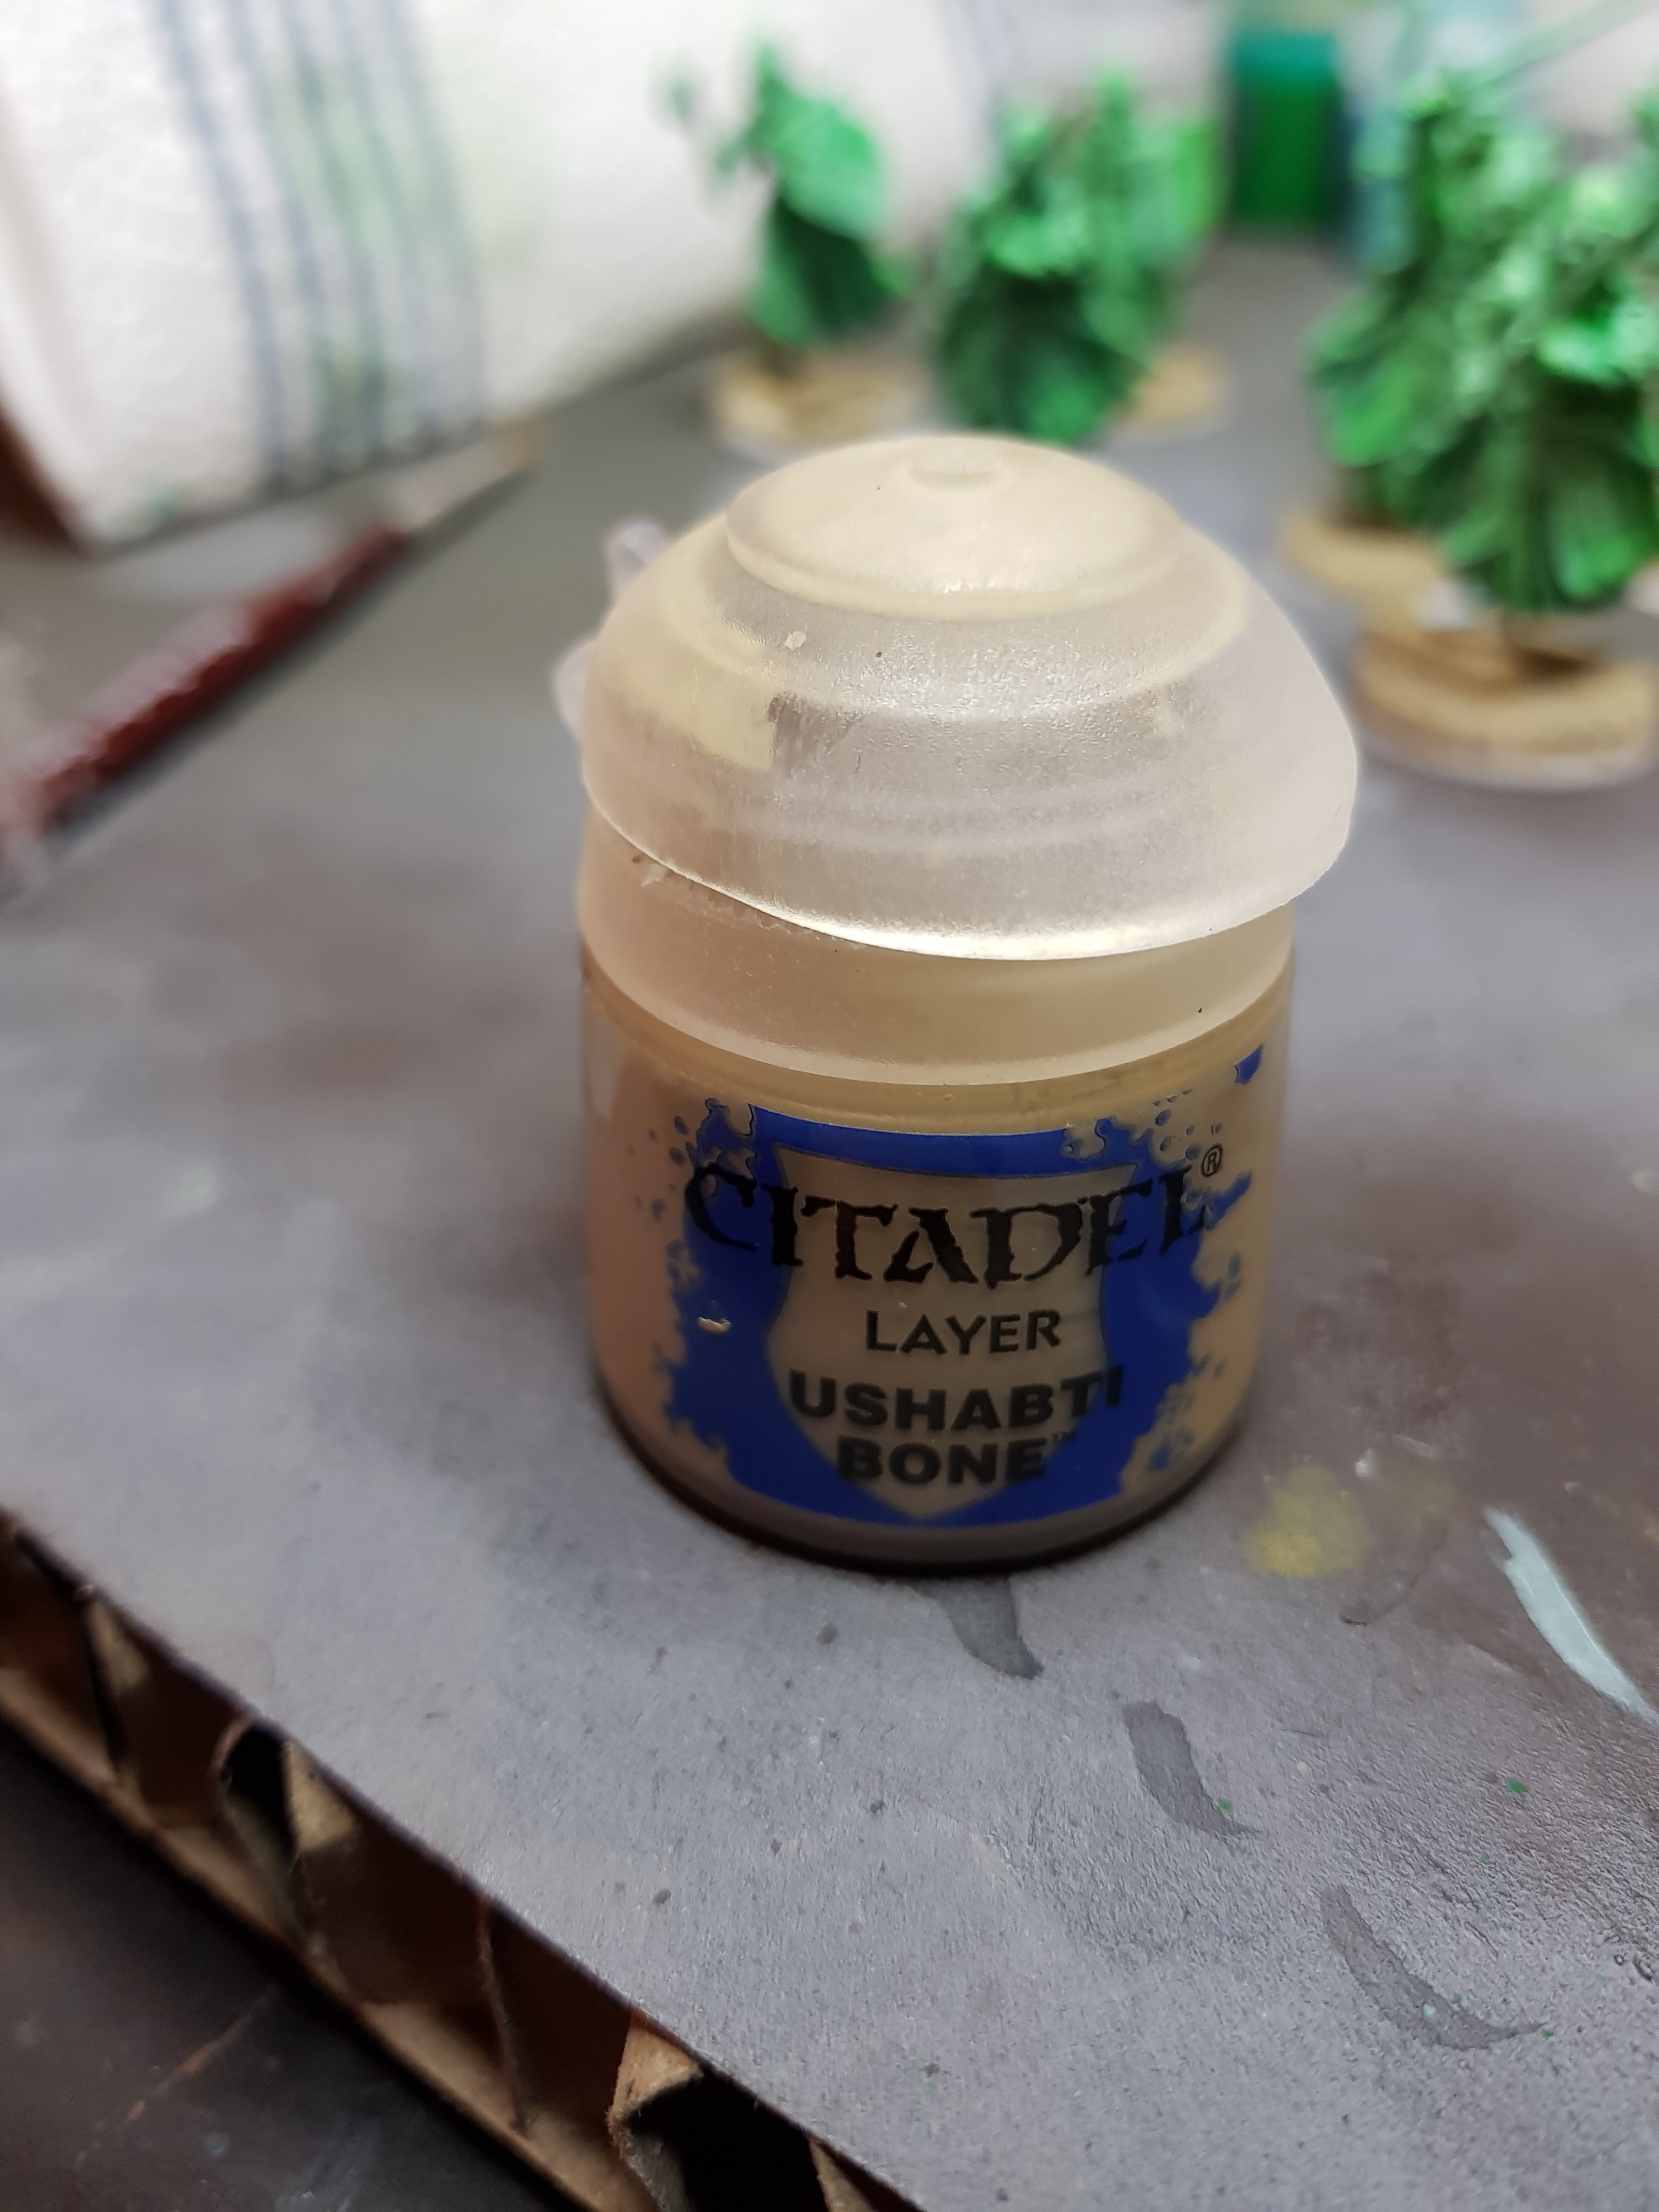 Layers 2 & 3 (Thin coats) - Citadel Ushabti Bone
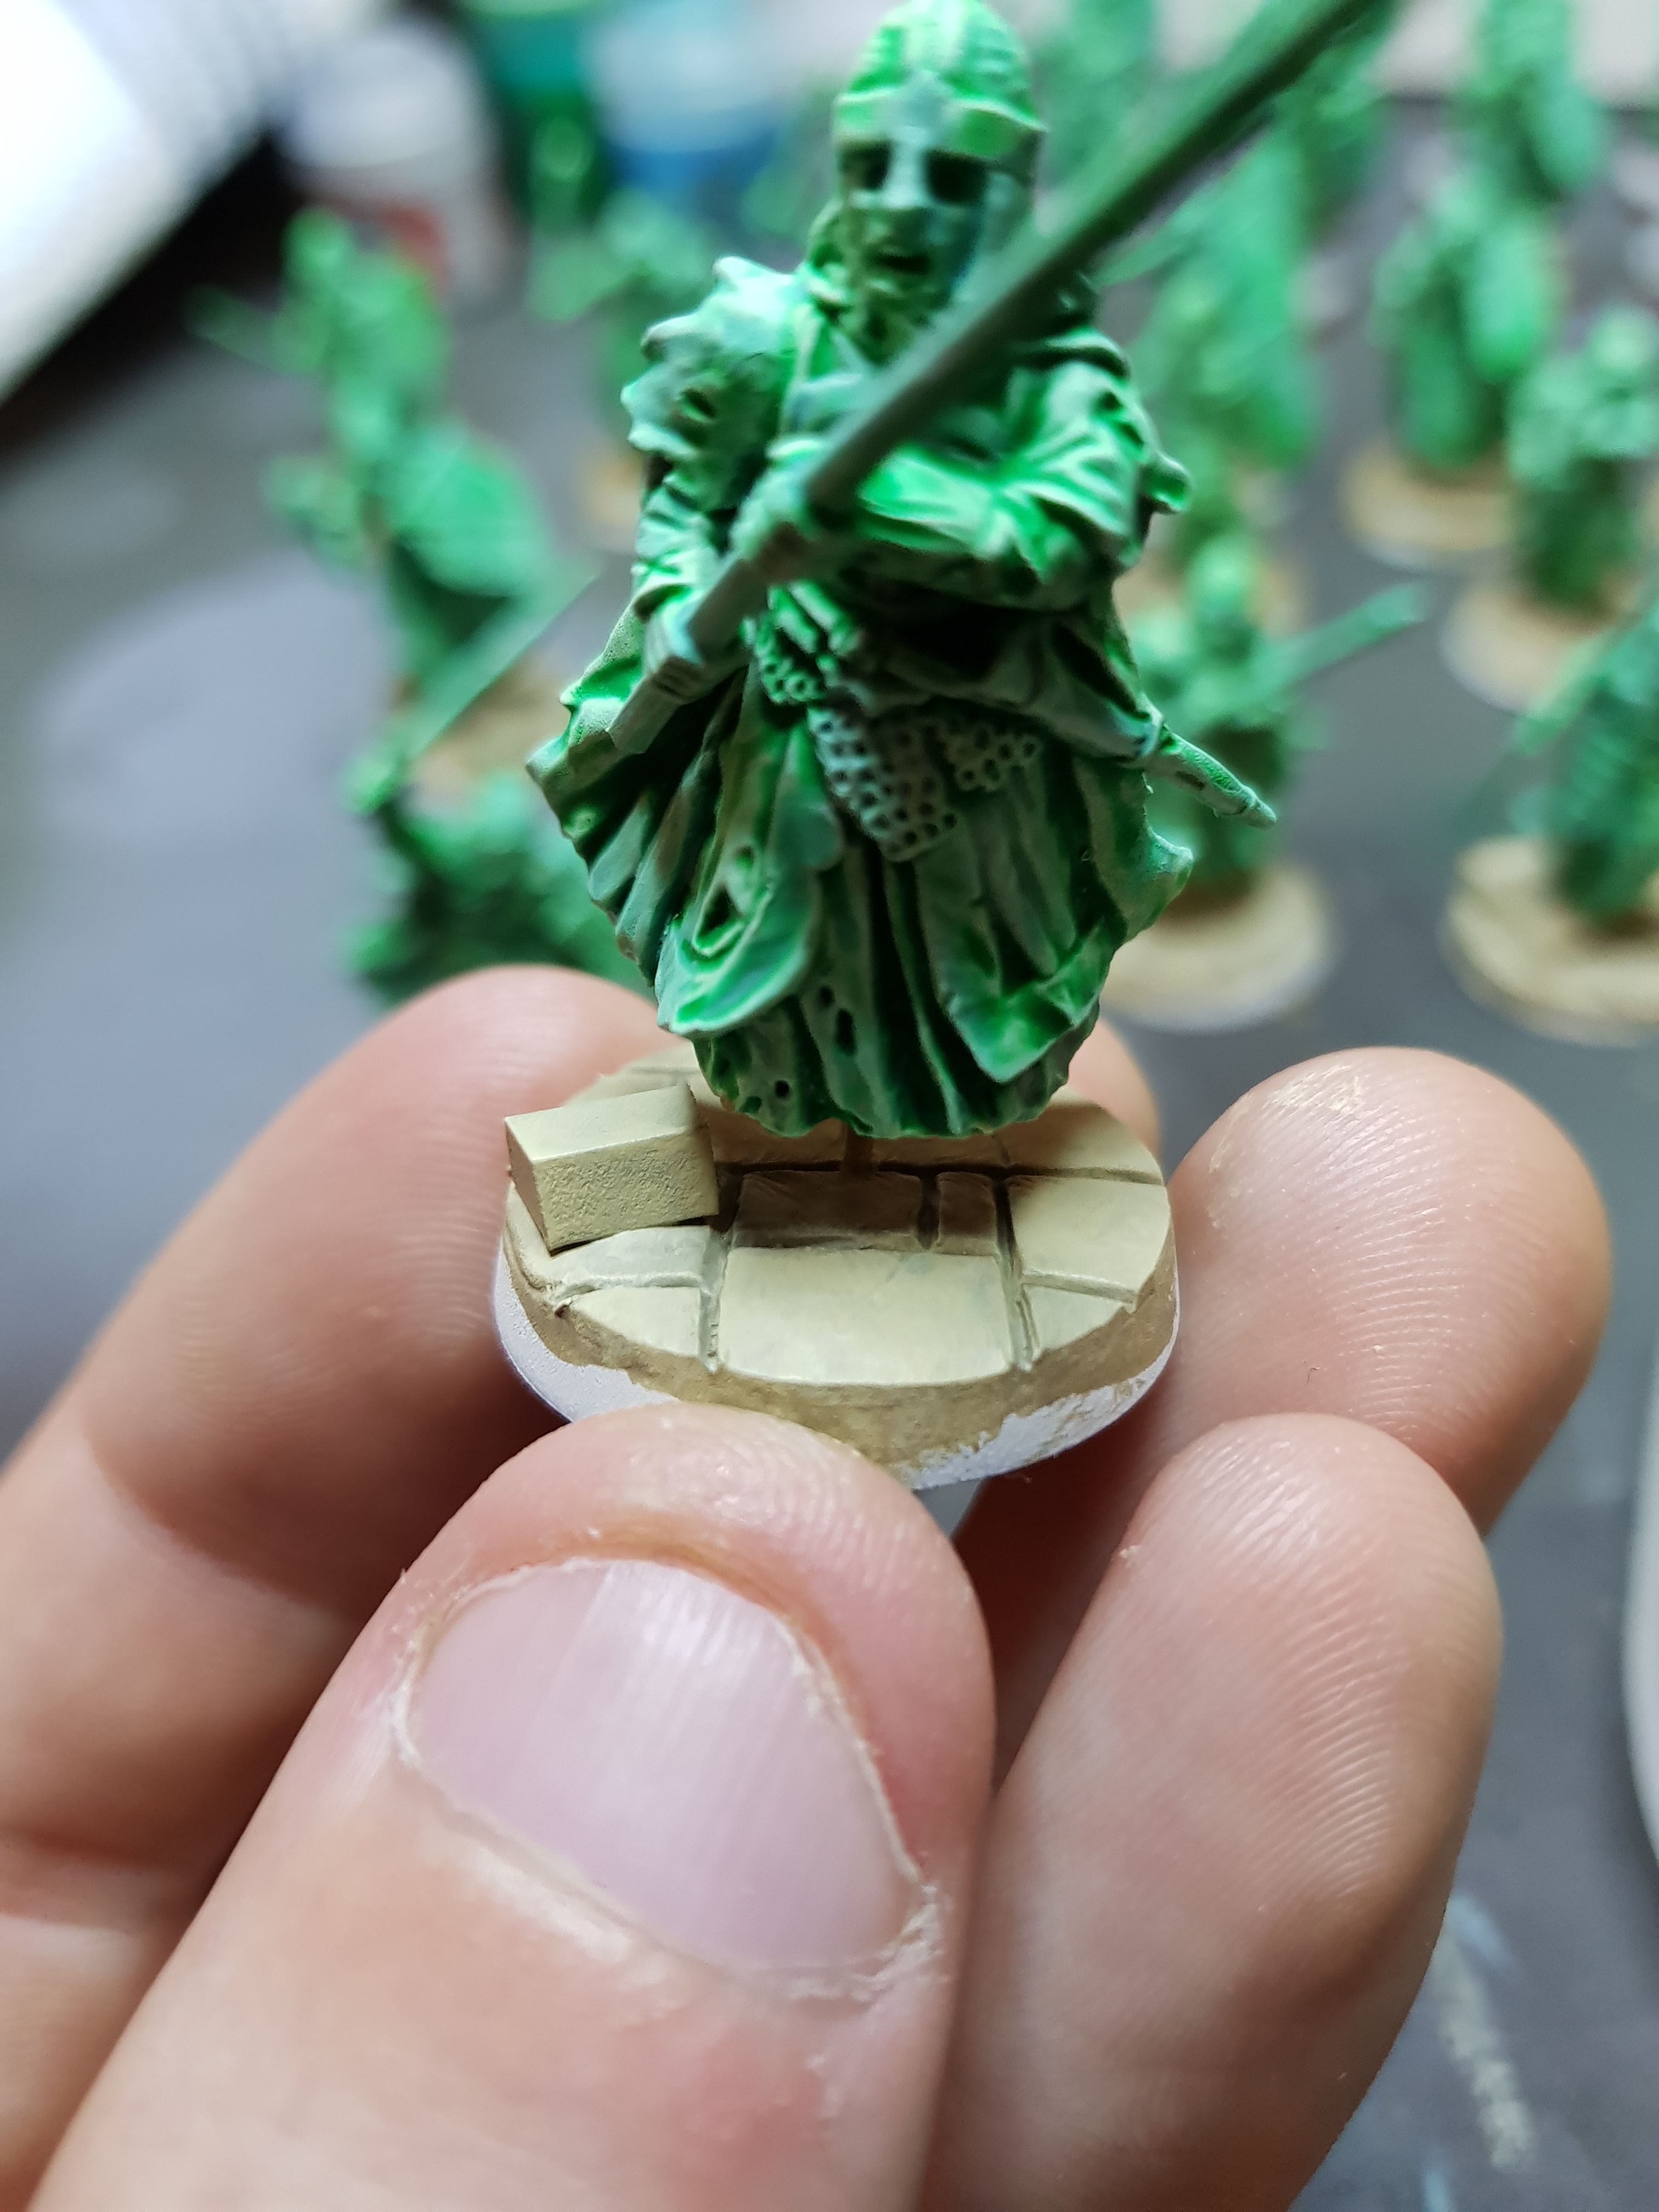
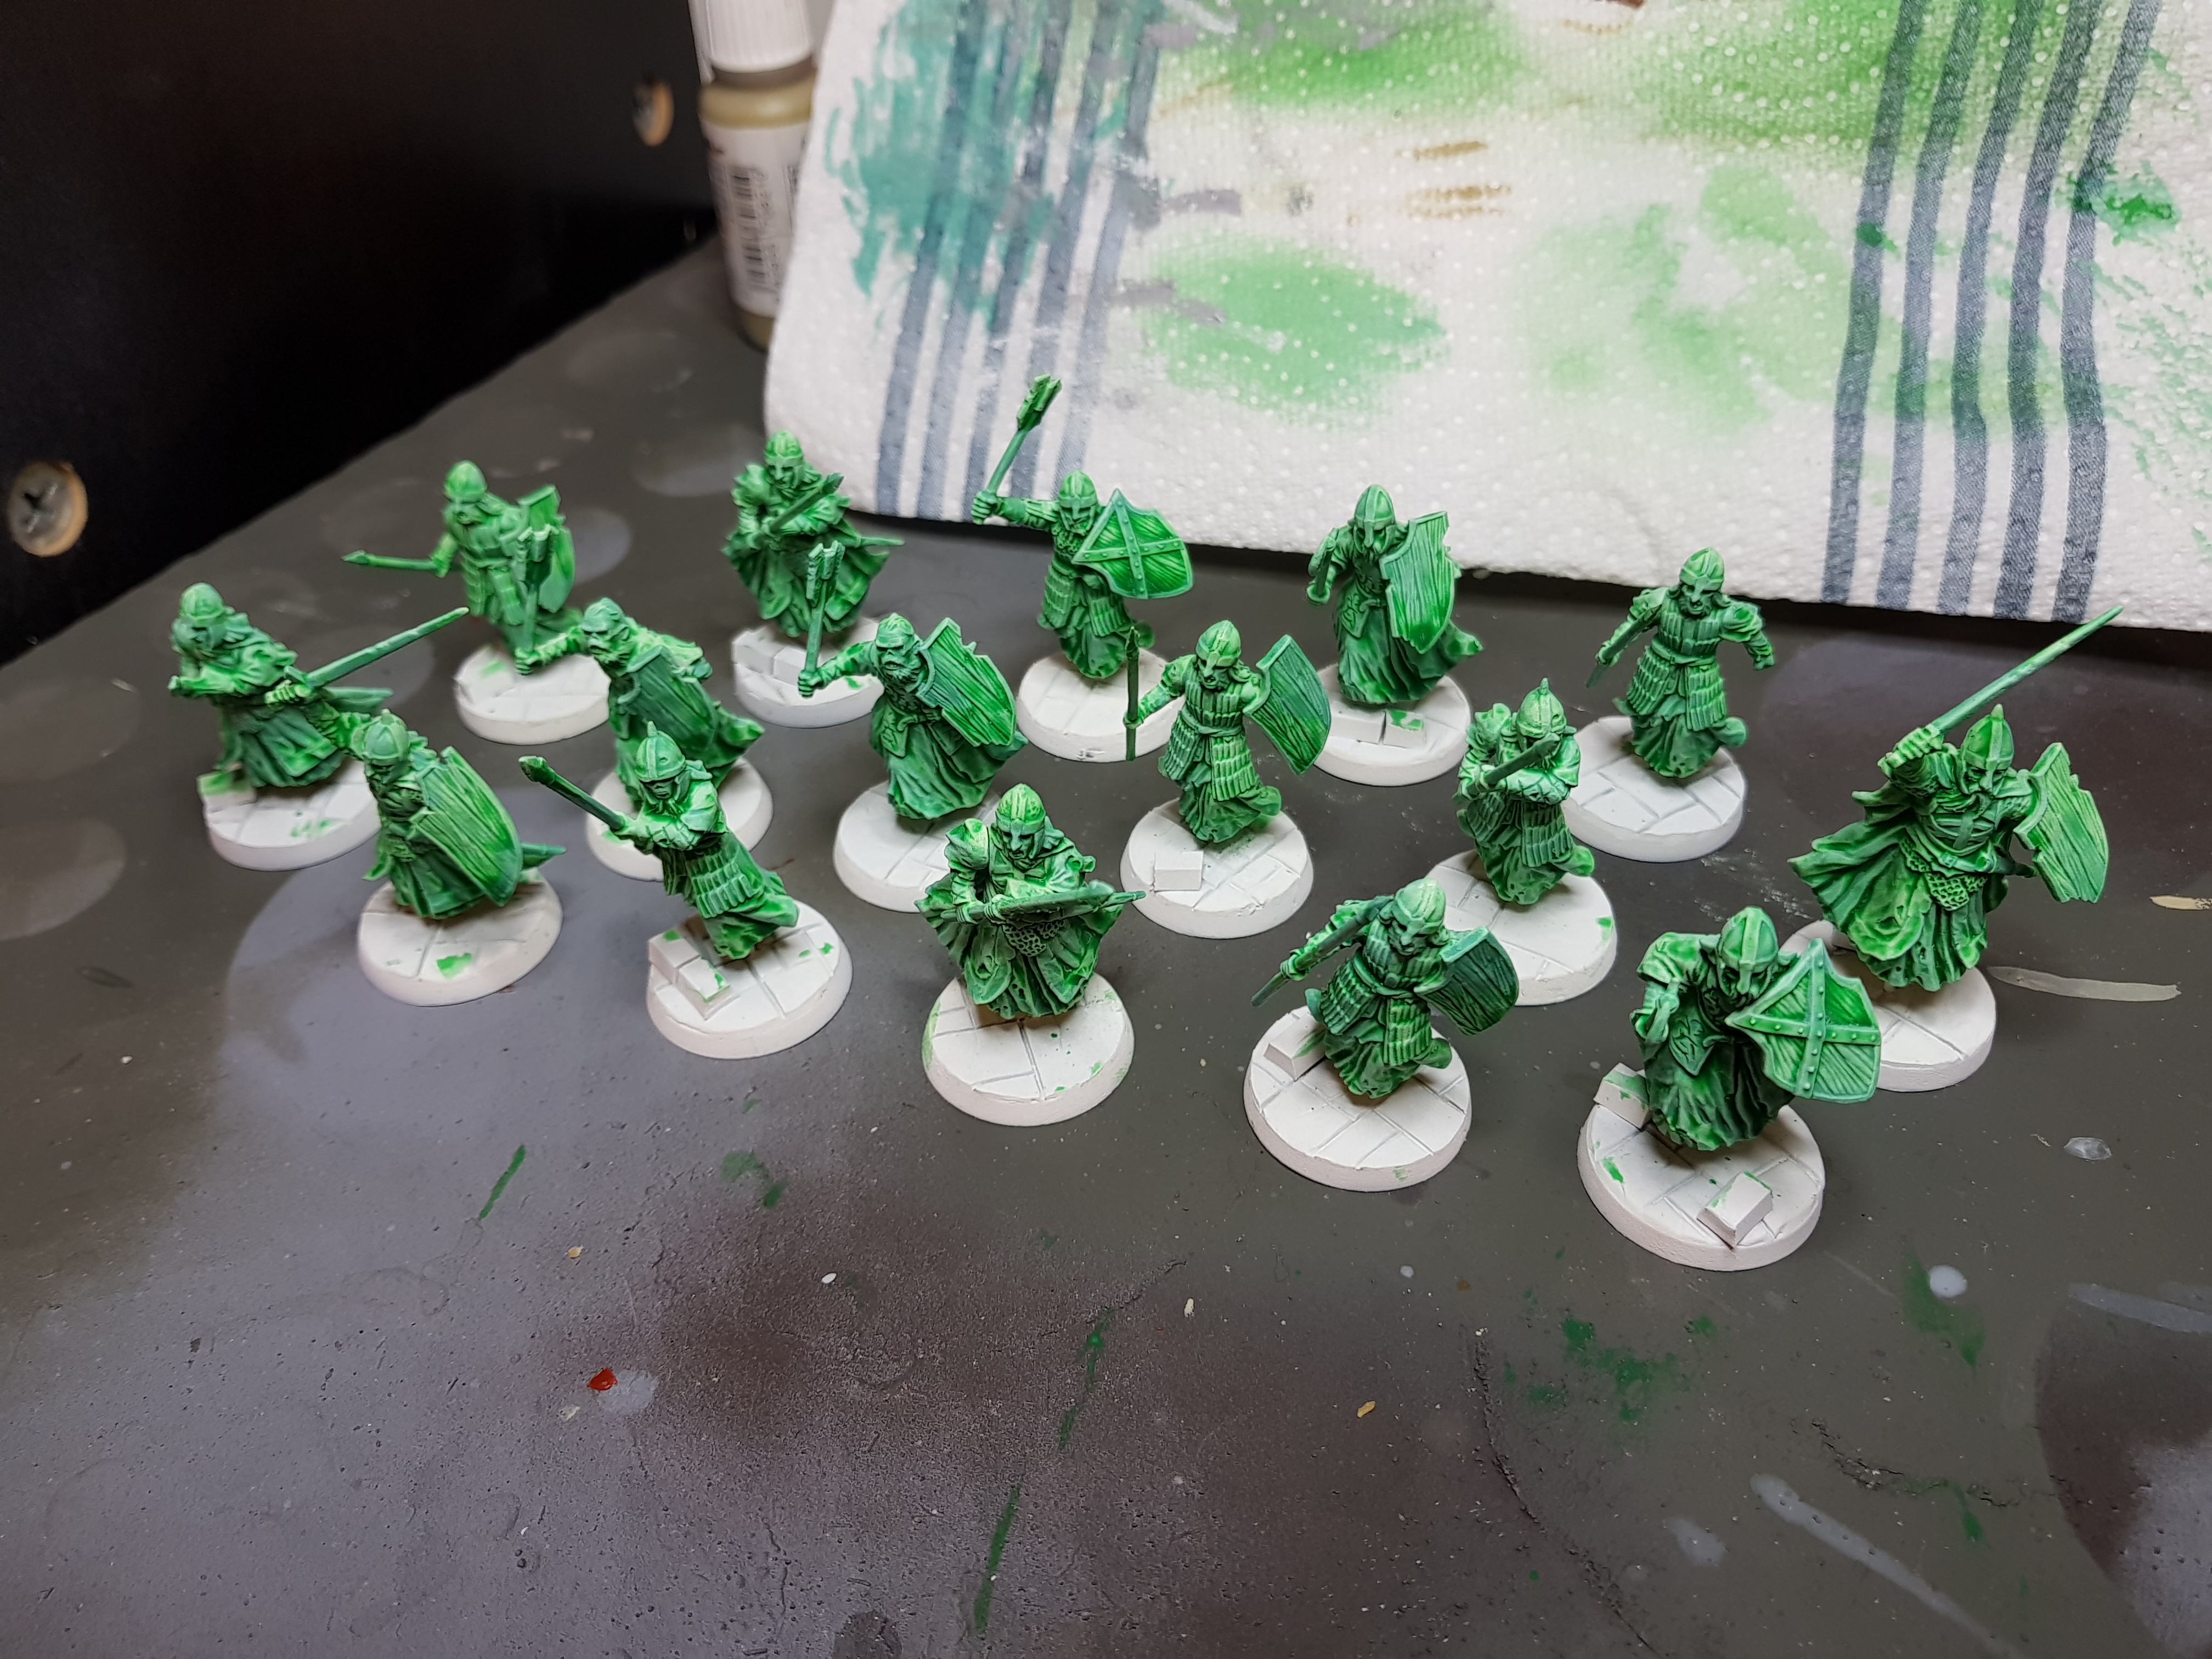
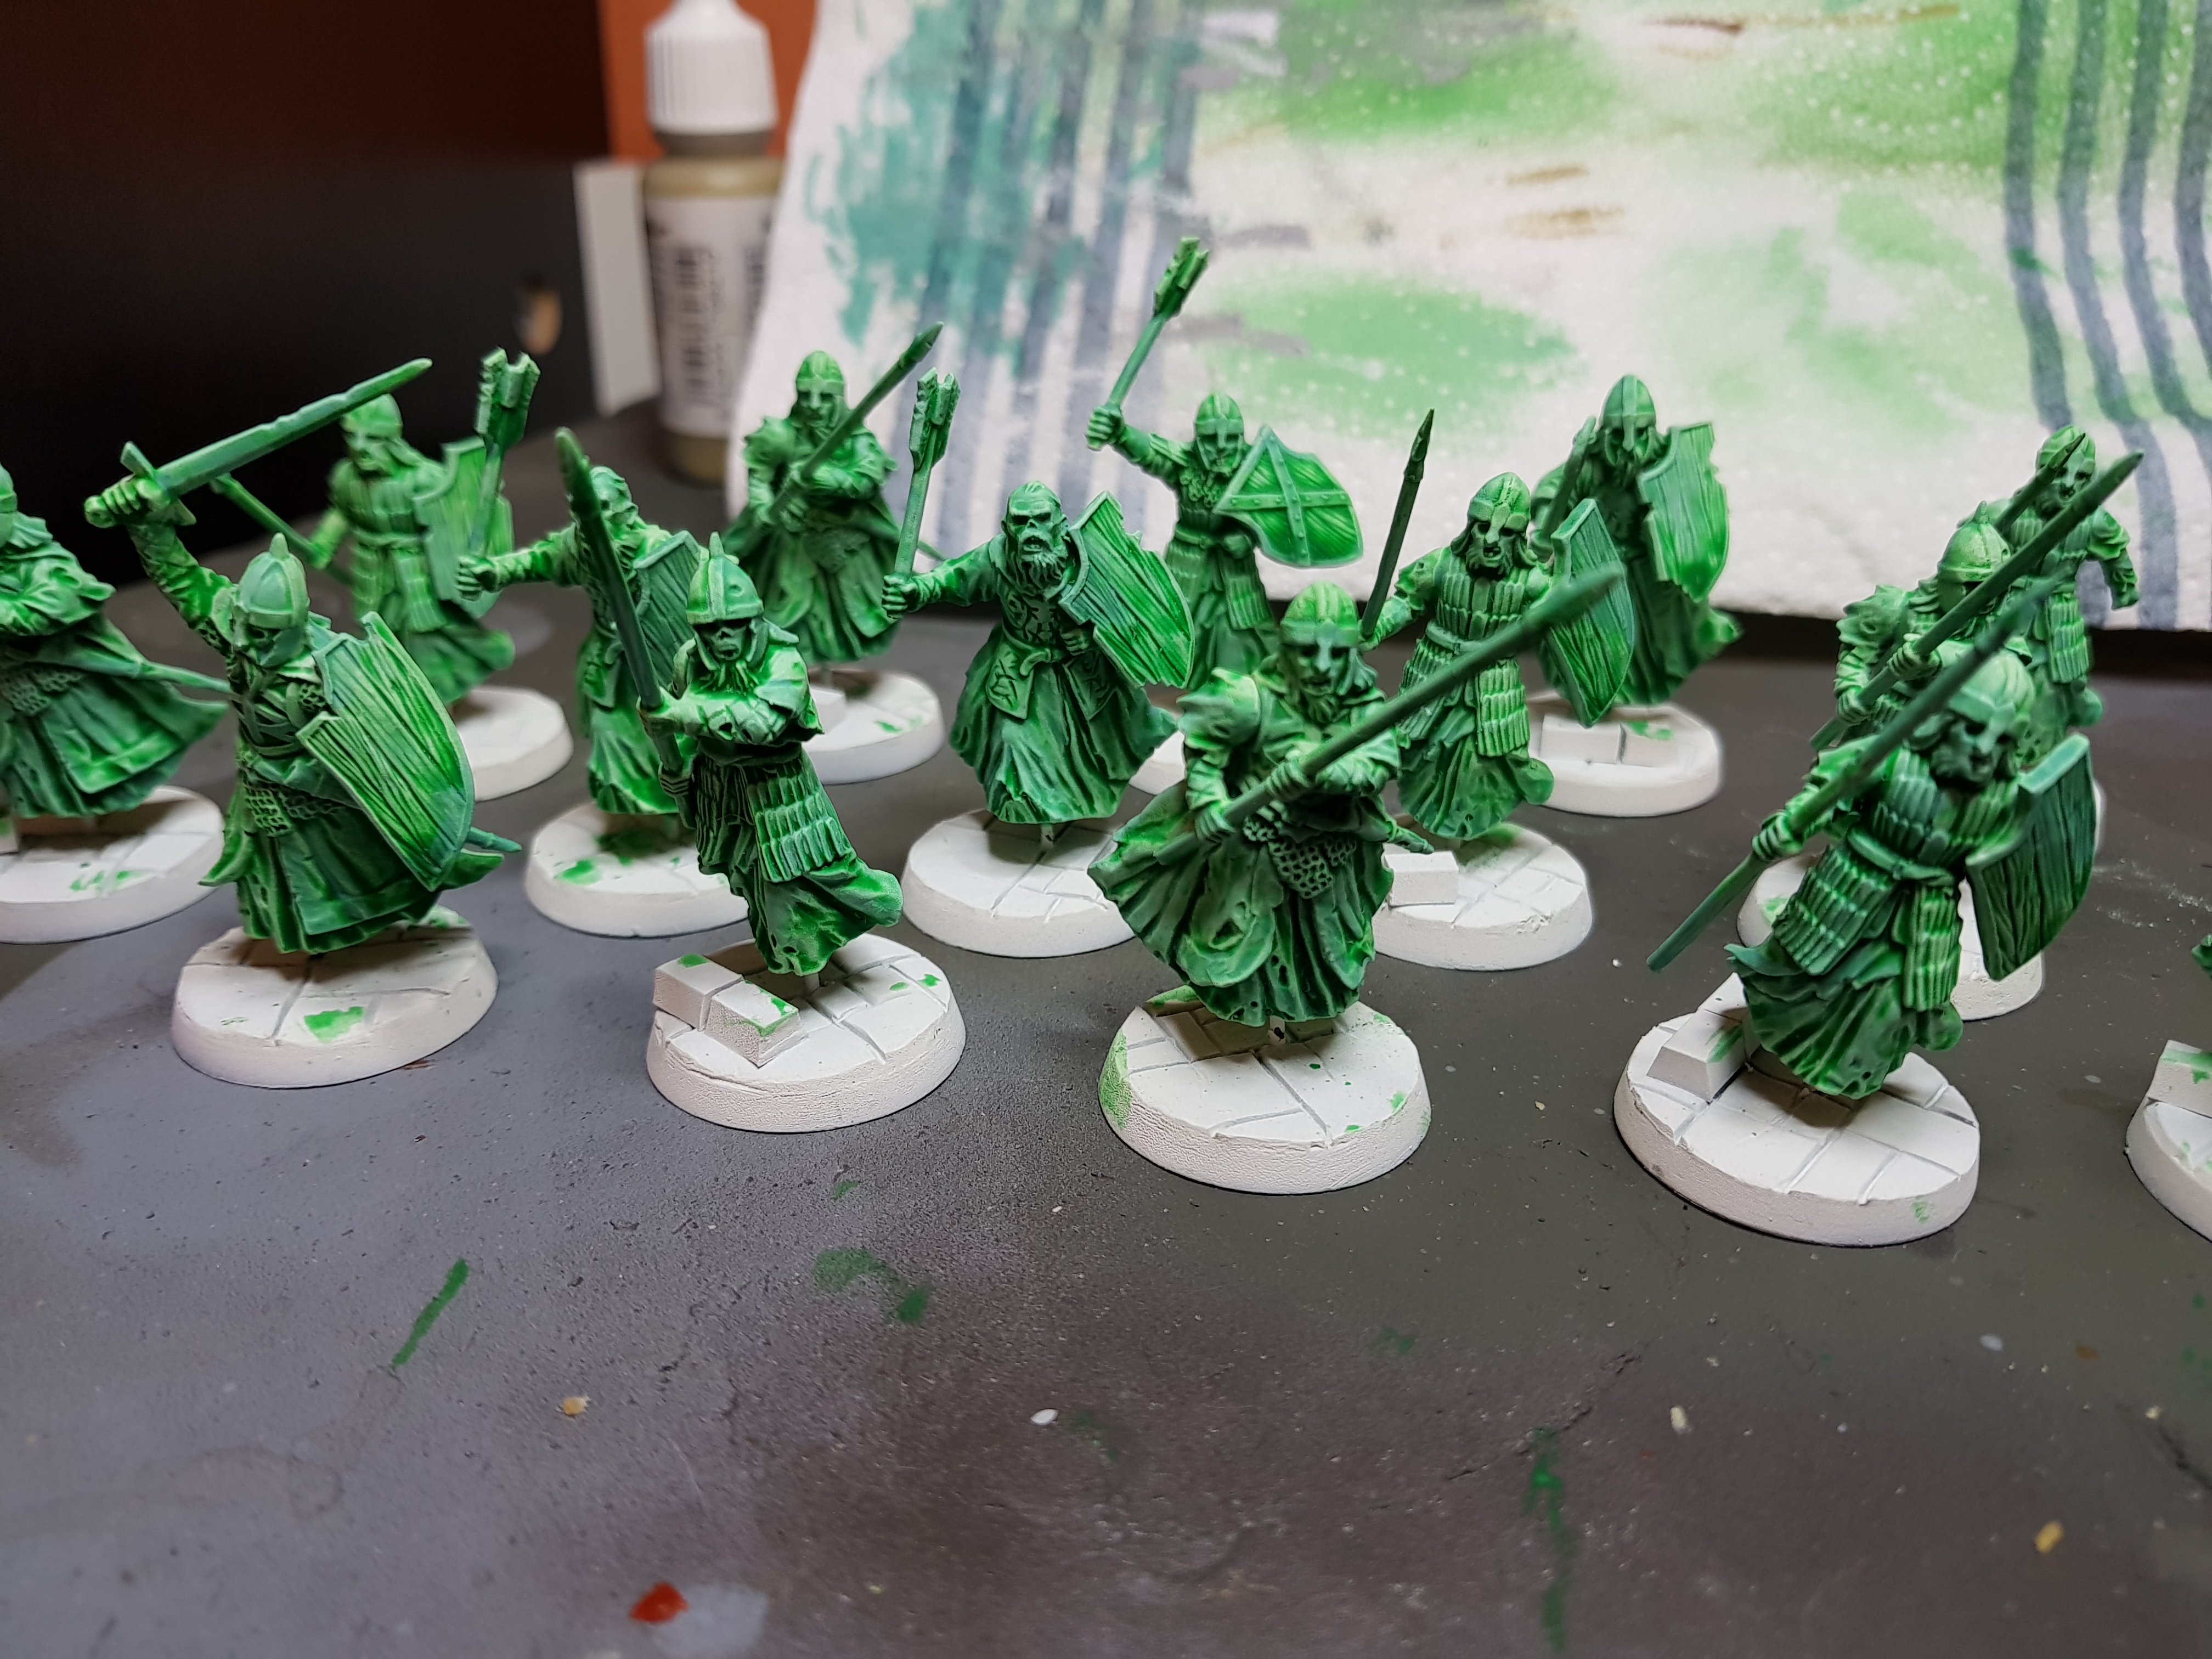
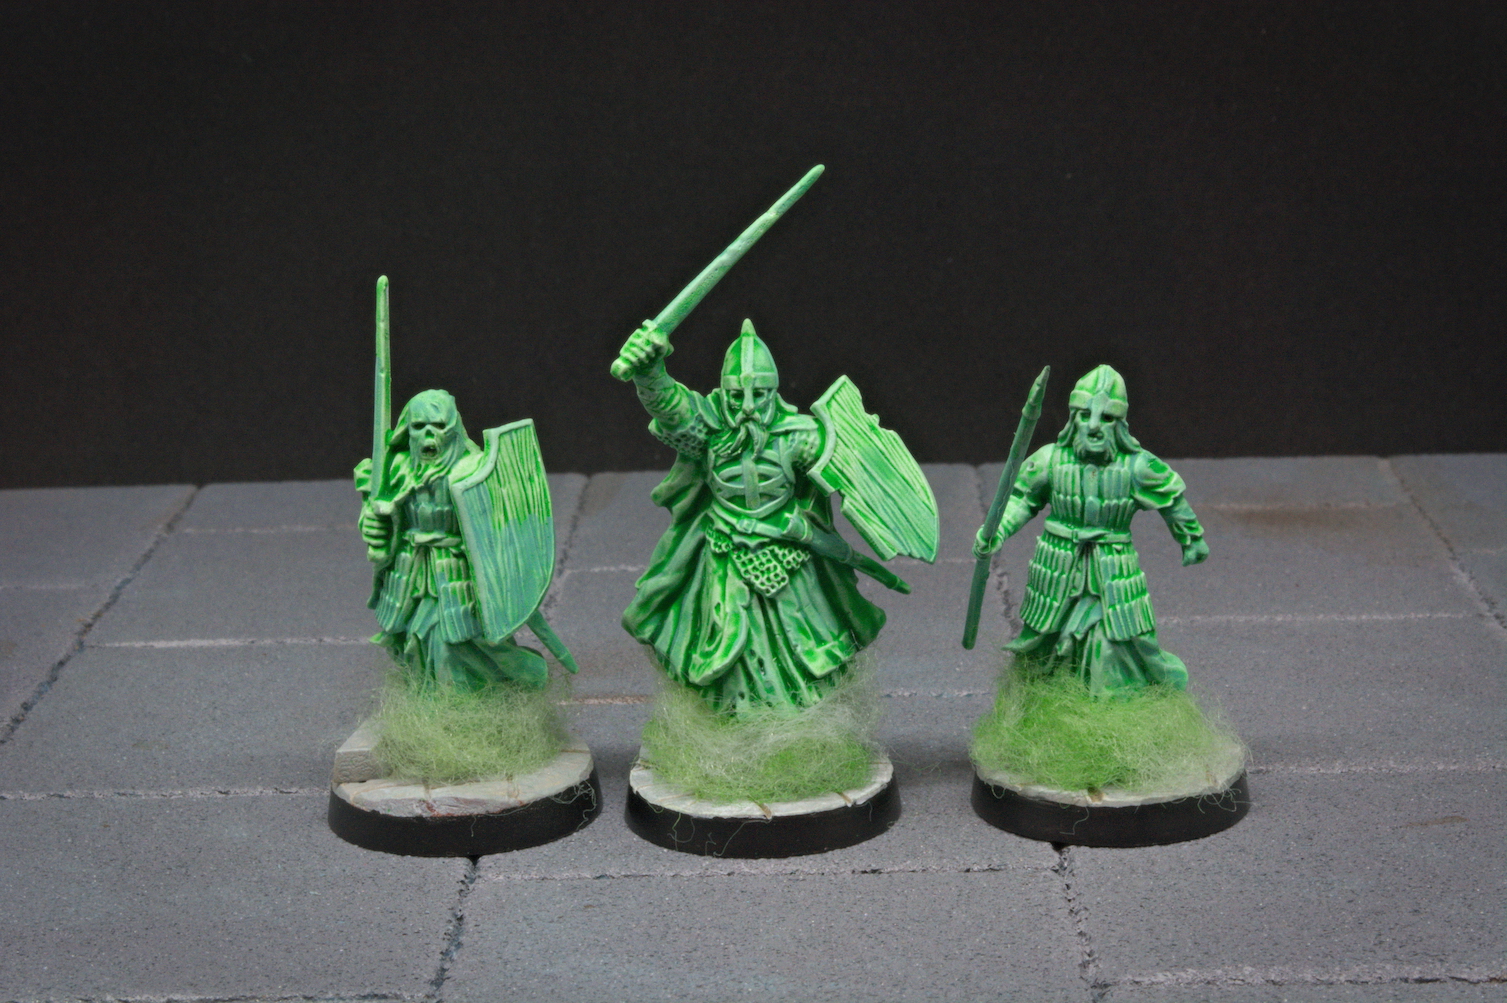
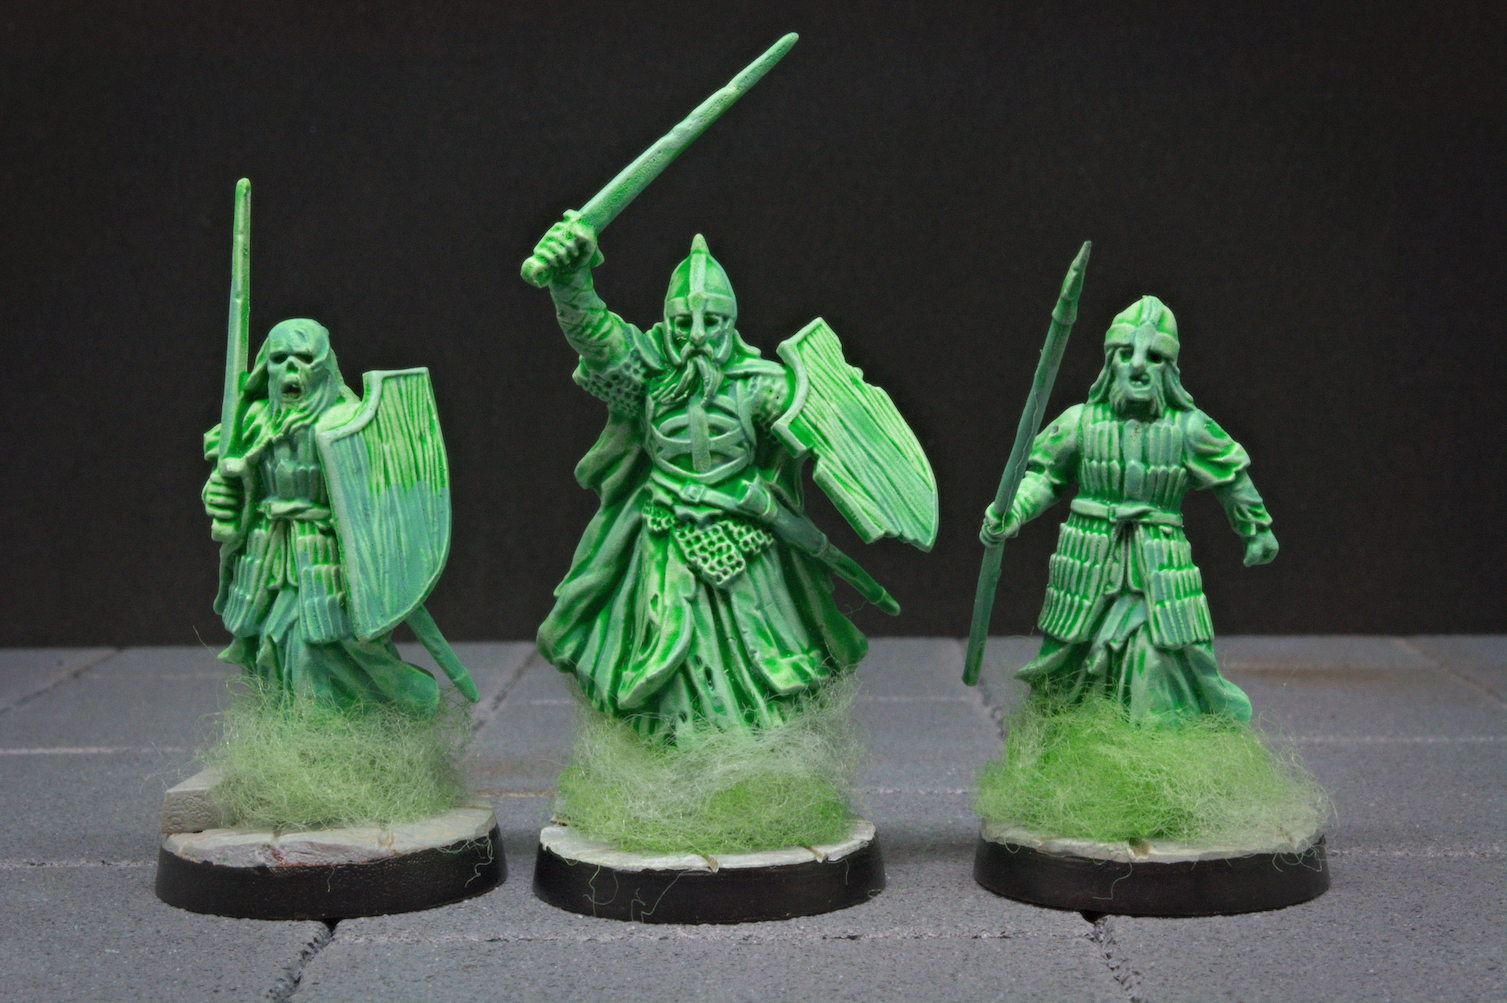
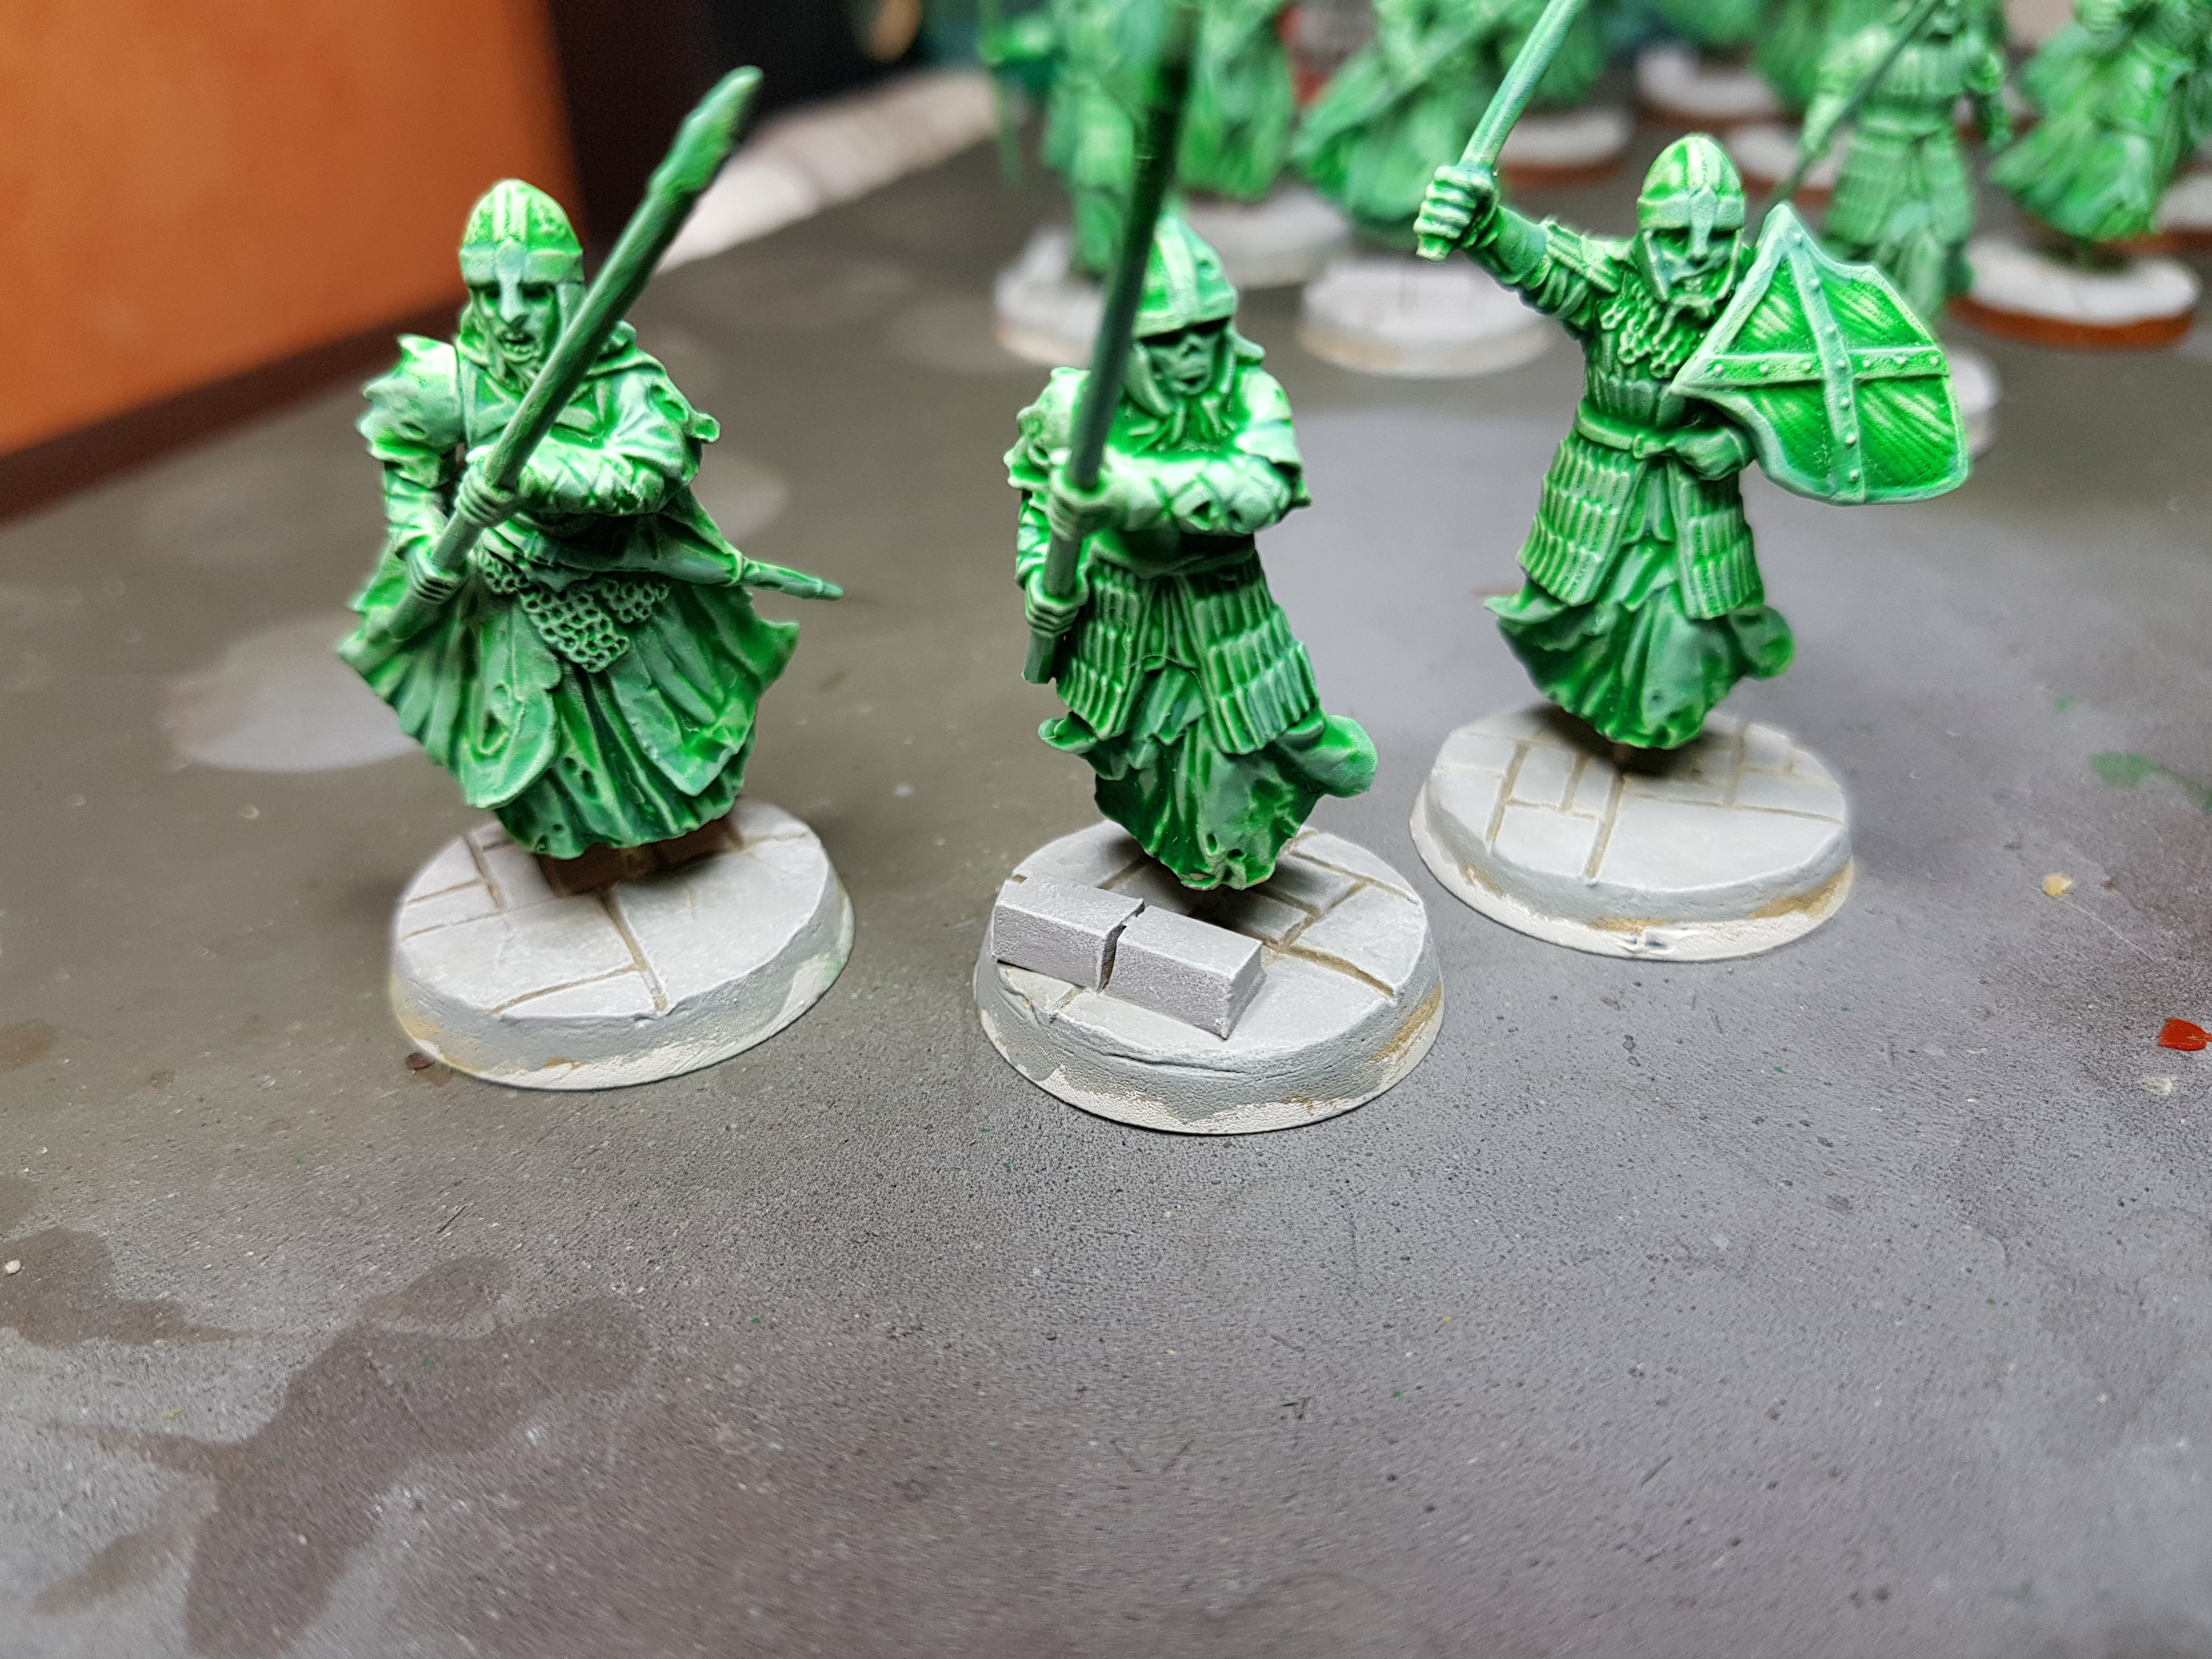
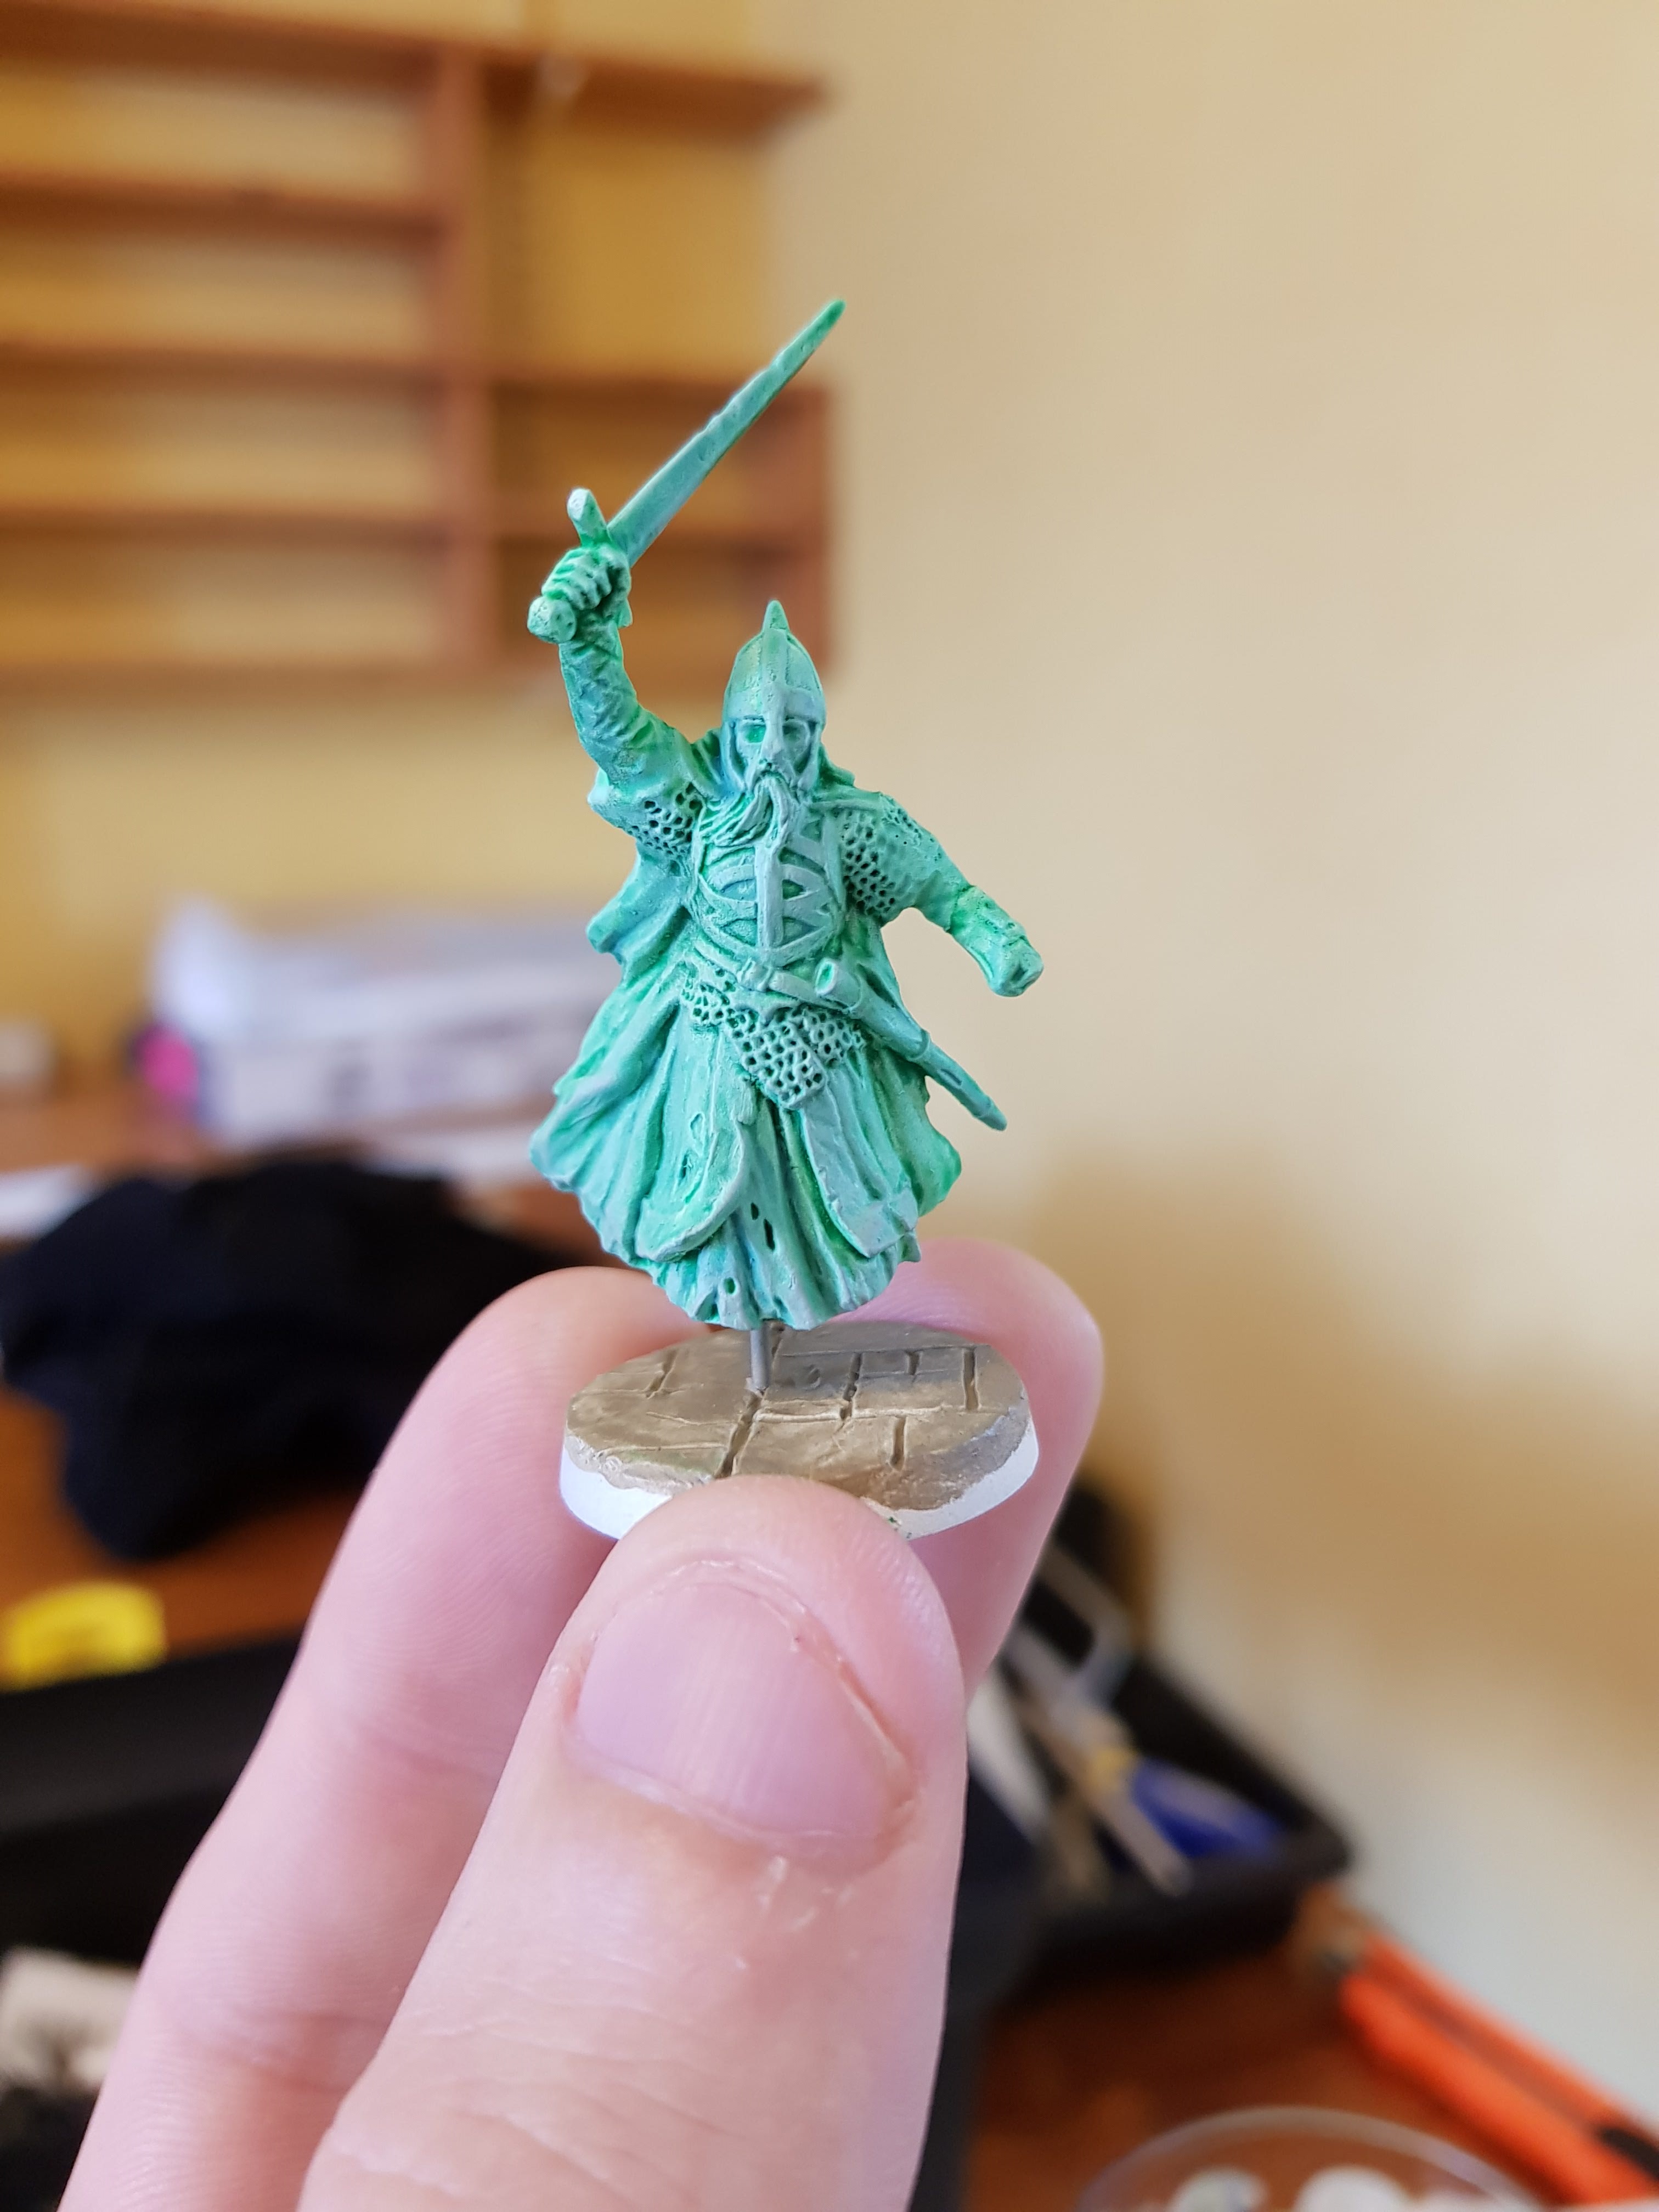
Highlighting
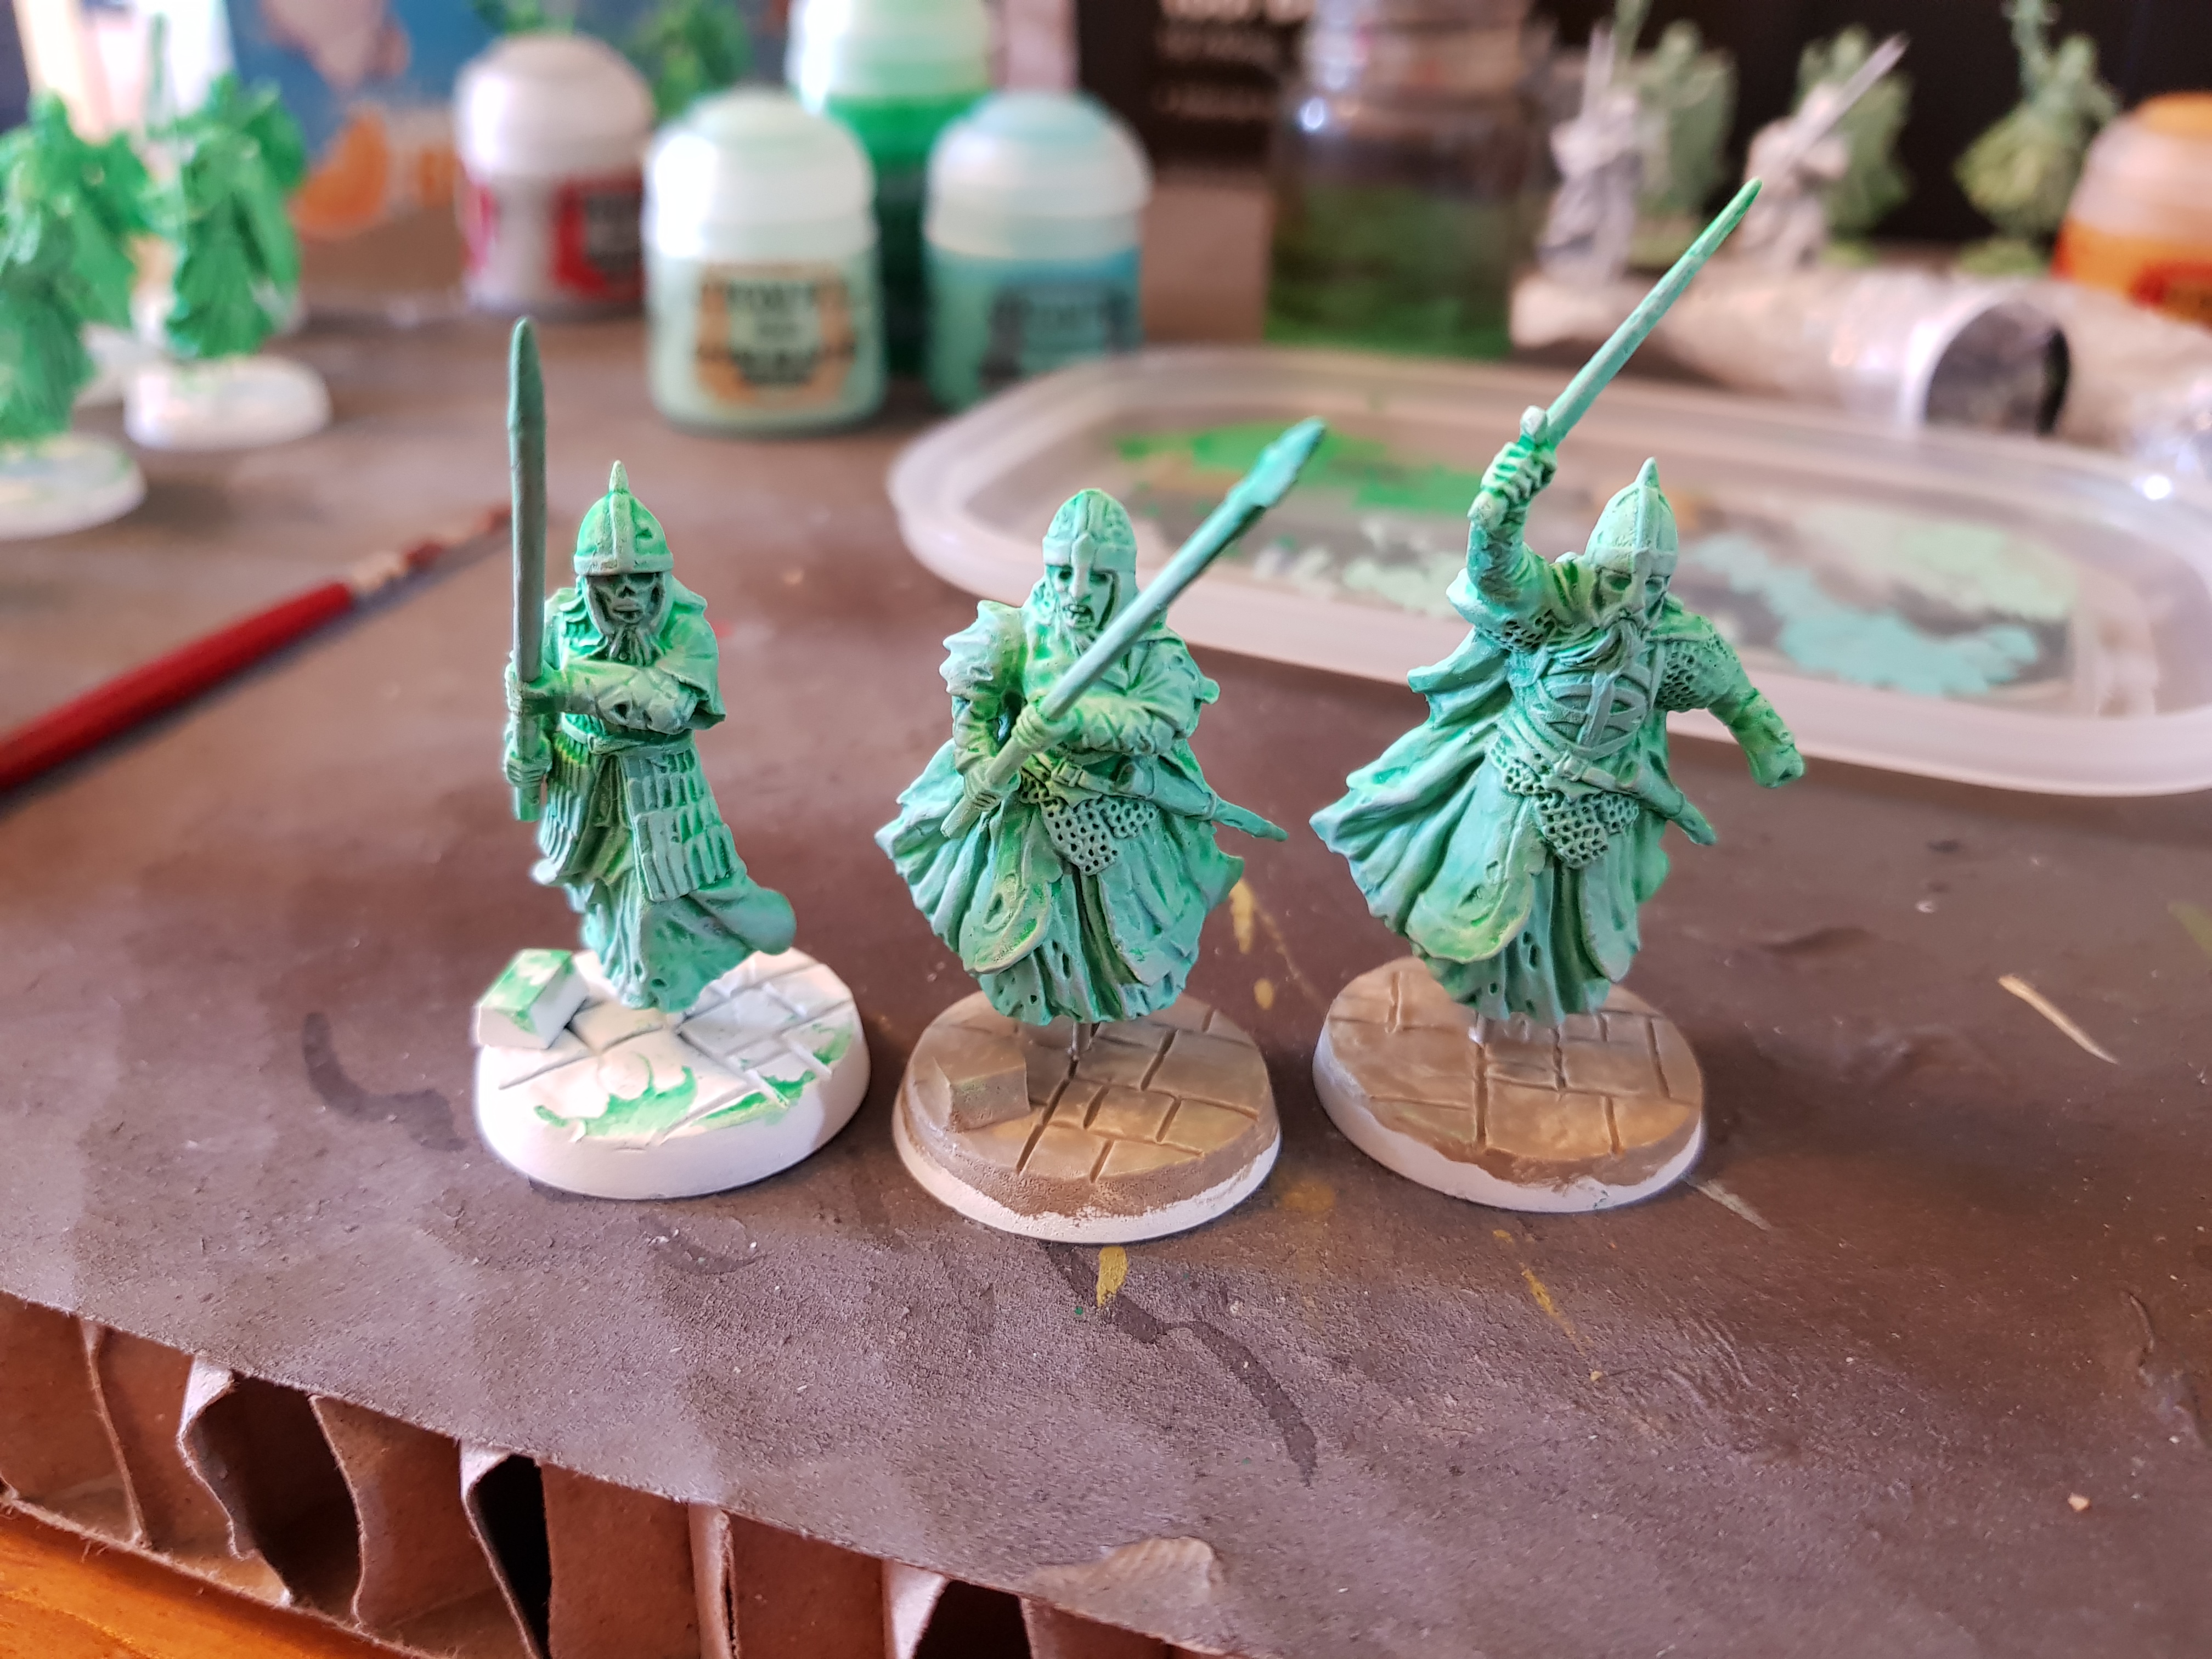
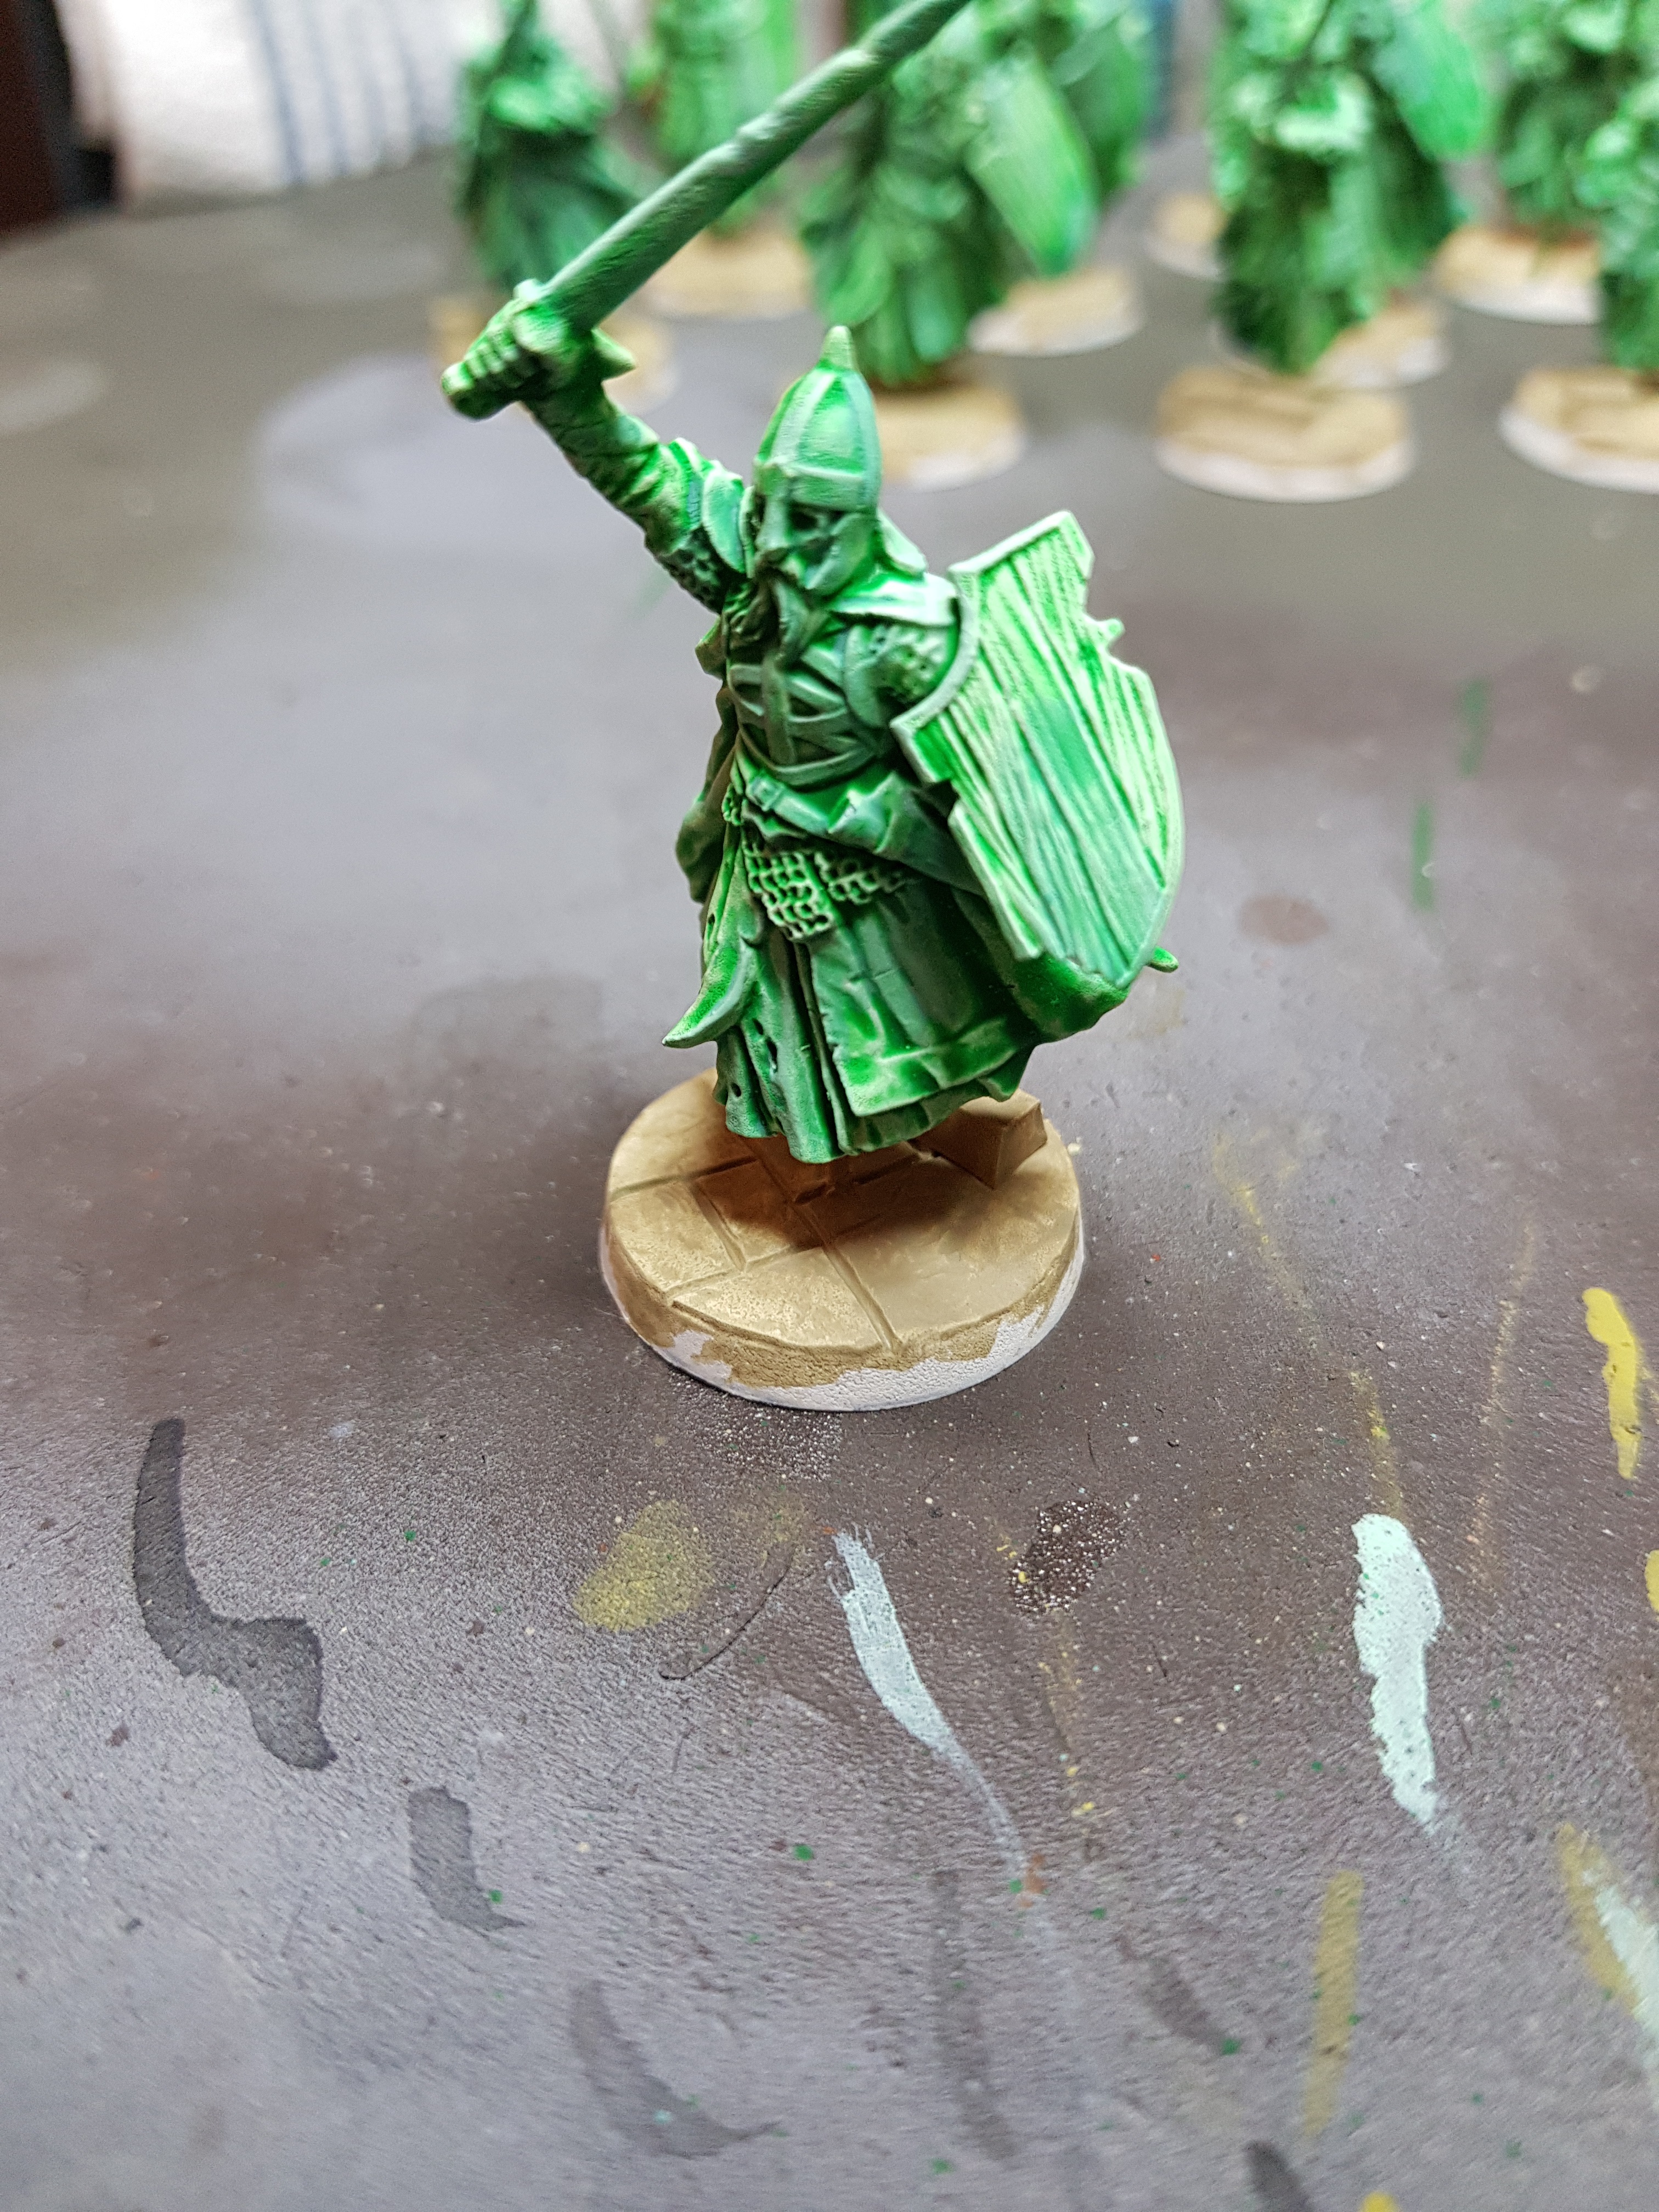
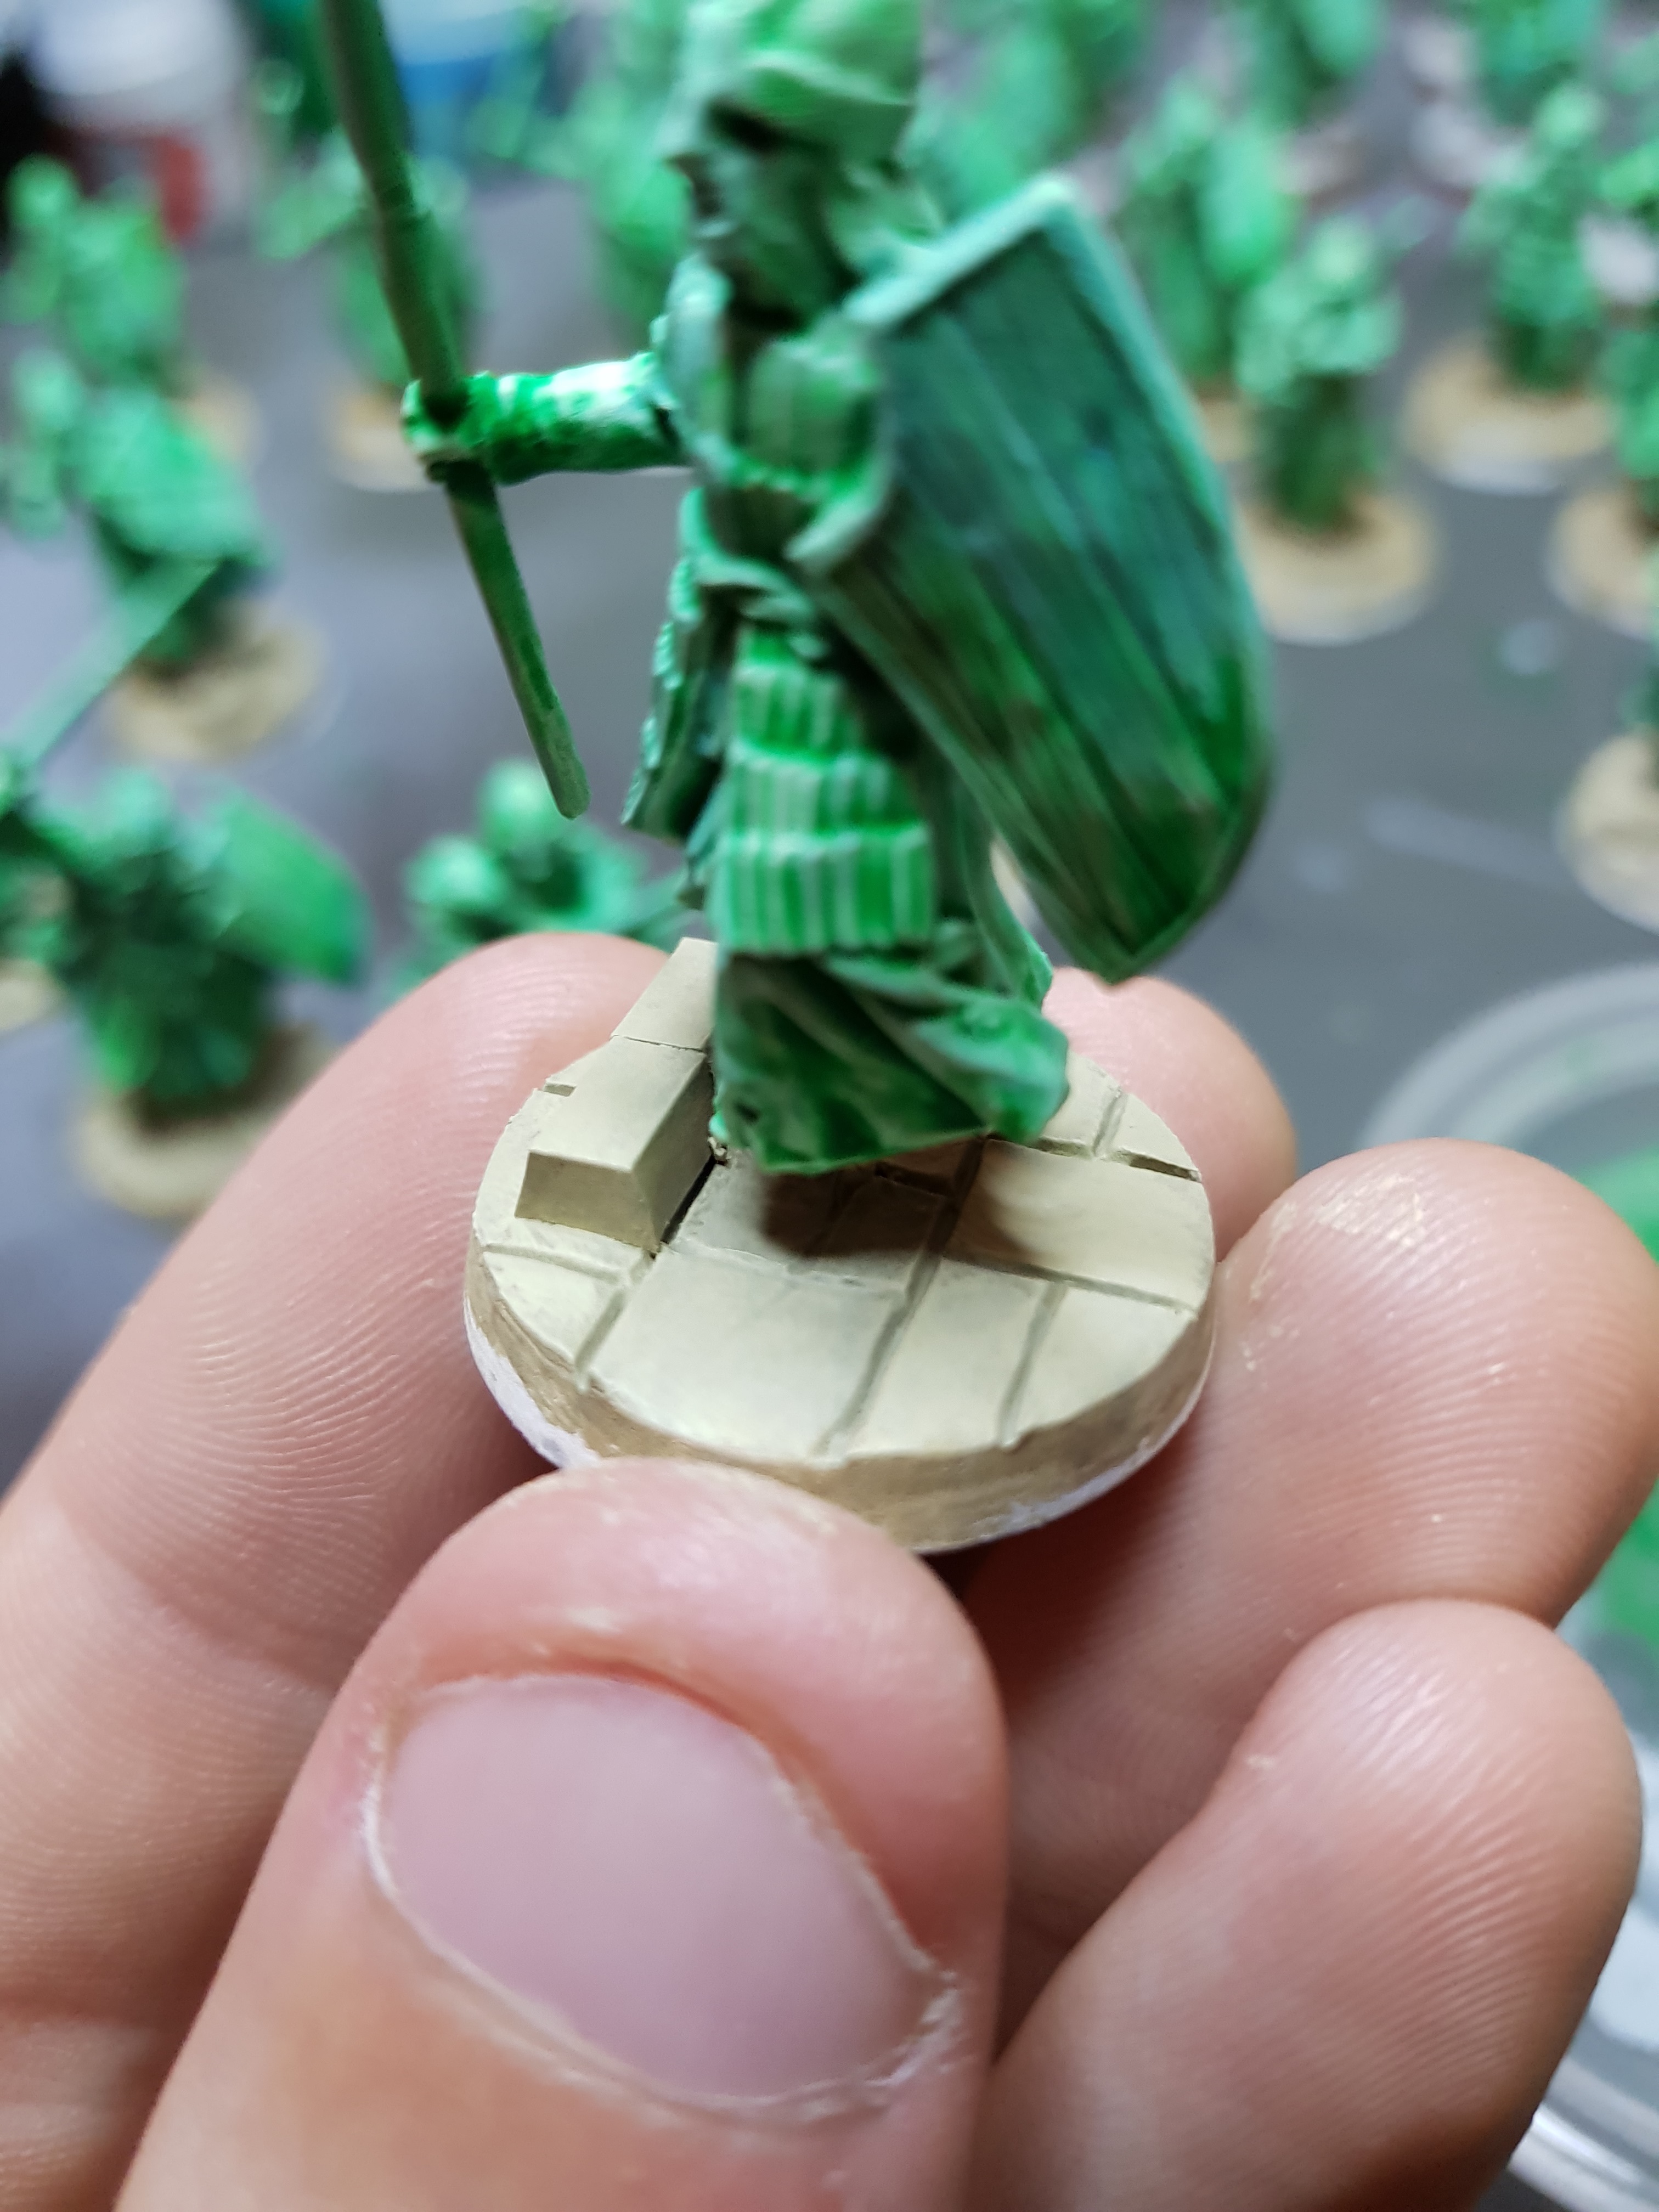
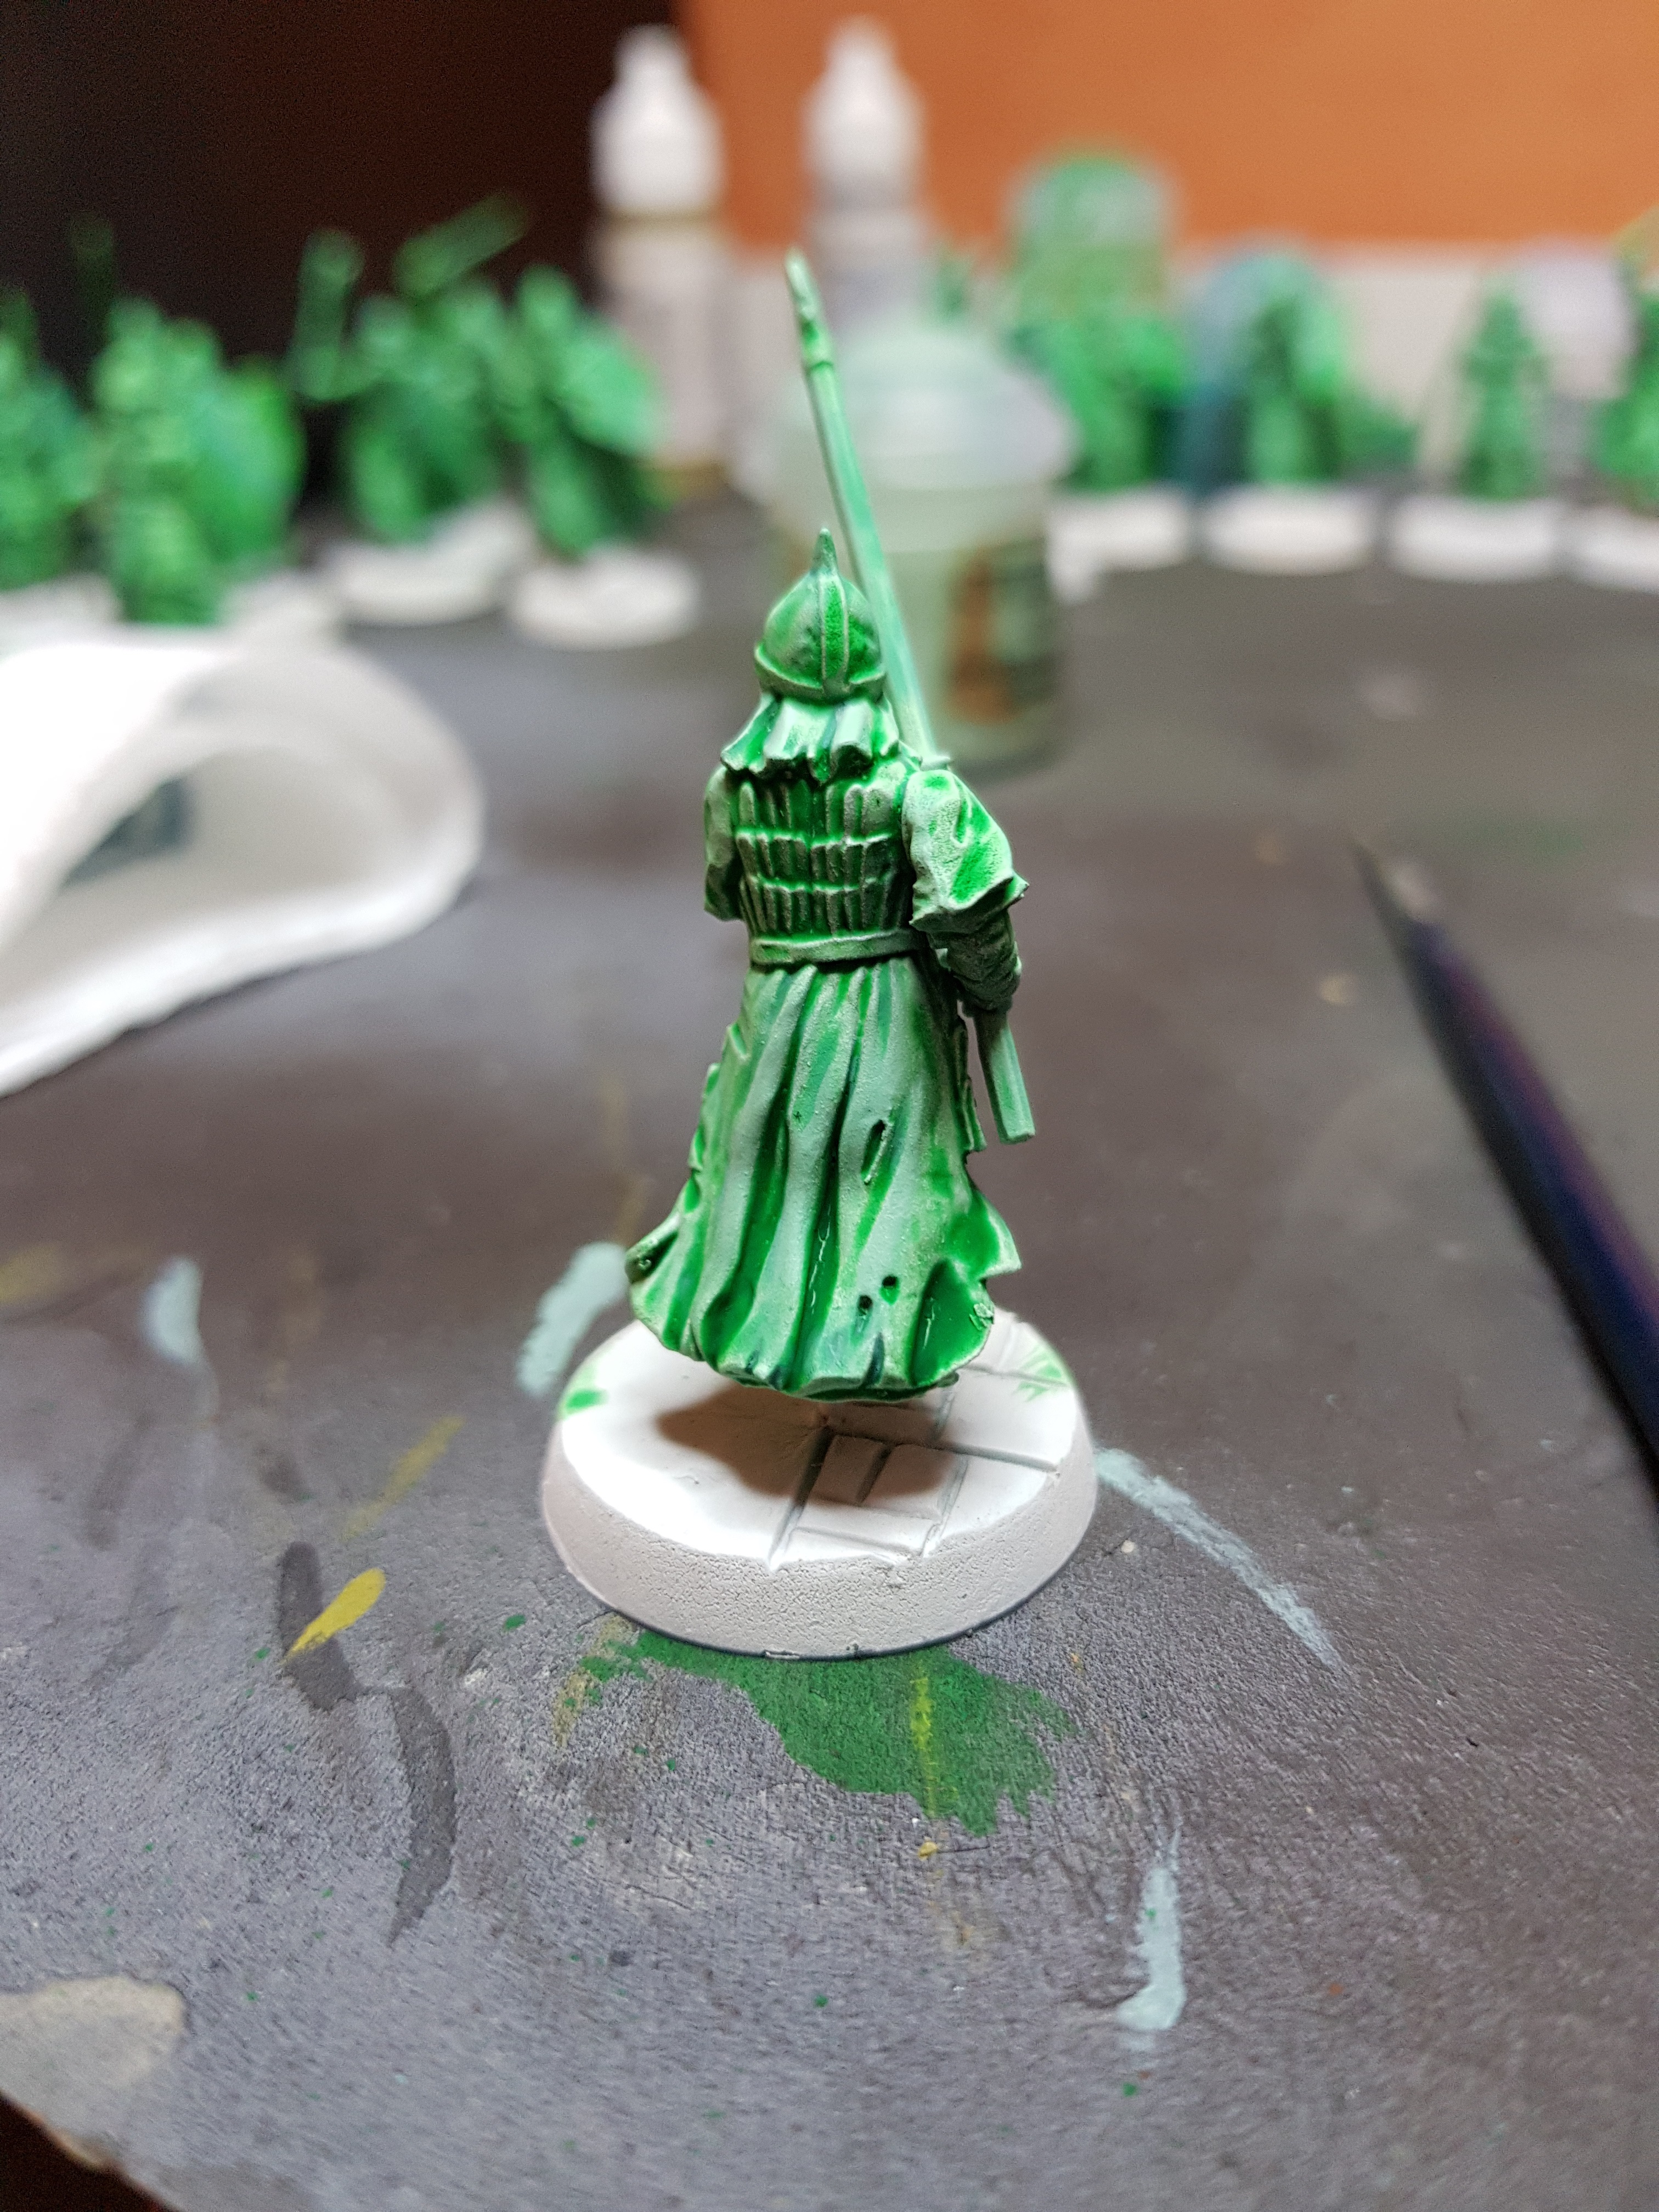
The next step was to put an edge highlight on all of the models. Whilst I don’t normally like to use citadel paints, whilst I was picking up the previous paints, I got the edge paint Gauss Blaster Green for this task.
Edge highlighting, for those that don’t know, is a technique that requires you to use the side of your brush to run along the edges of a model to pick up the sharpest highlights. Now i’m fairly new to this technique so may paint application probably wasn’t as neat as it could be, but I figured that being as i’m going for an ethereal, flowing colour idea, that didn’t matter much.
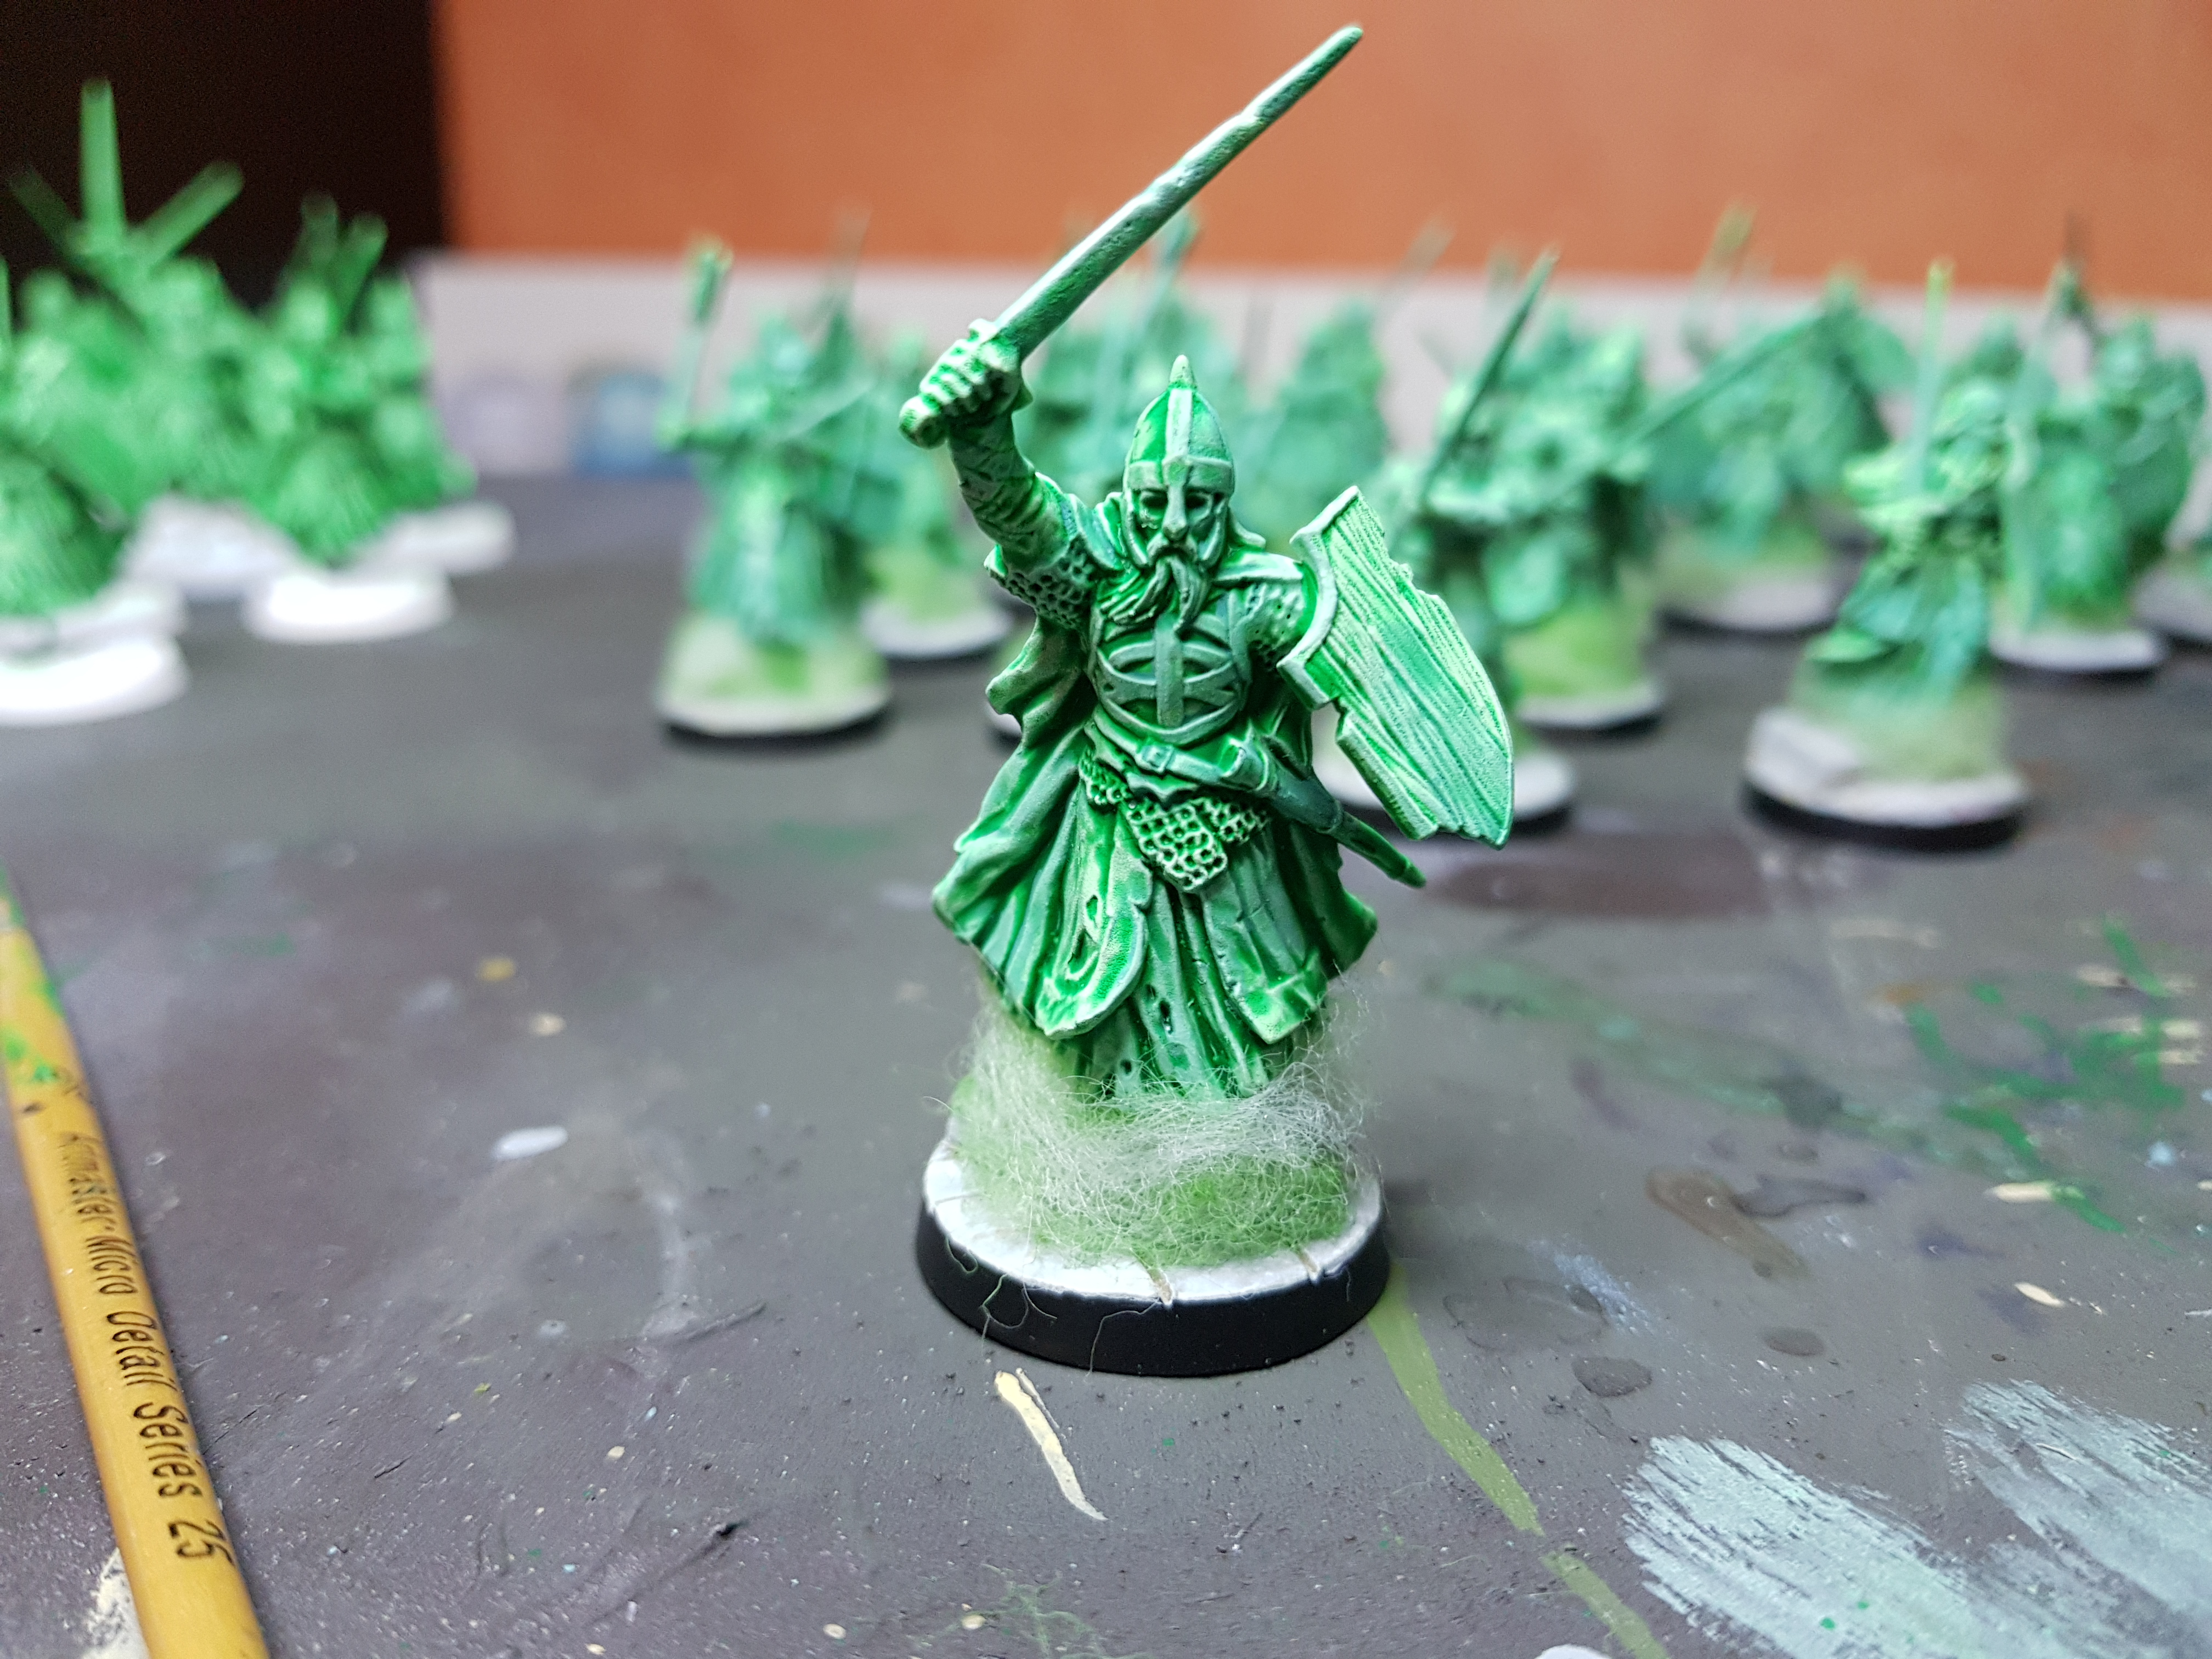
 Citadel Edge Paint Gauss Blaster Green
 My biggest tip here, to quote Duncan from Warhammer TV, is to use thin watered down coats. Watering down the paint allows it to flow better along the edges of the robes, and stops it getting pulled off the brush in blobs too quickly. The paint doesn’t need too much water, but ensure you use some.
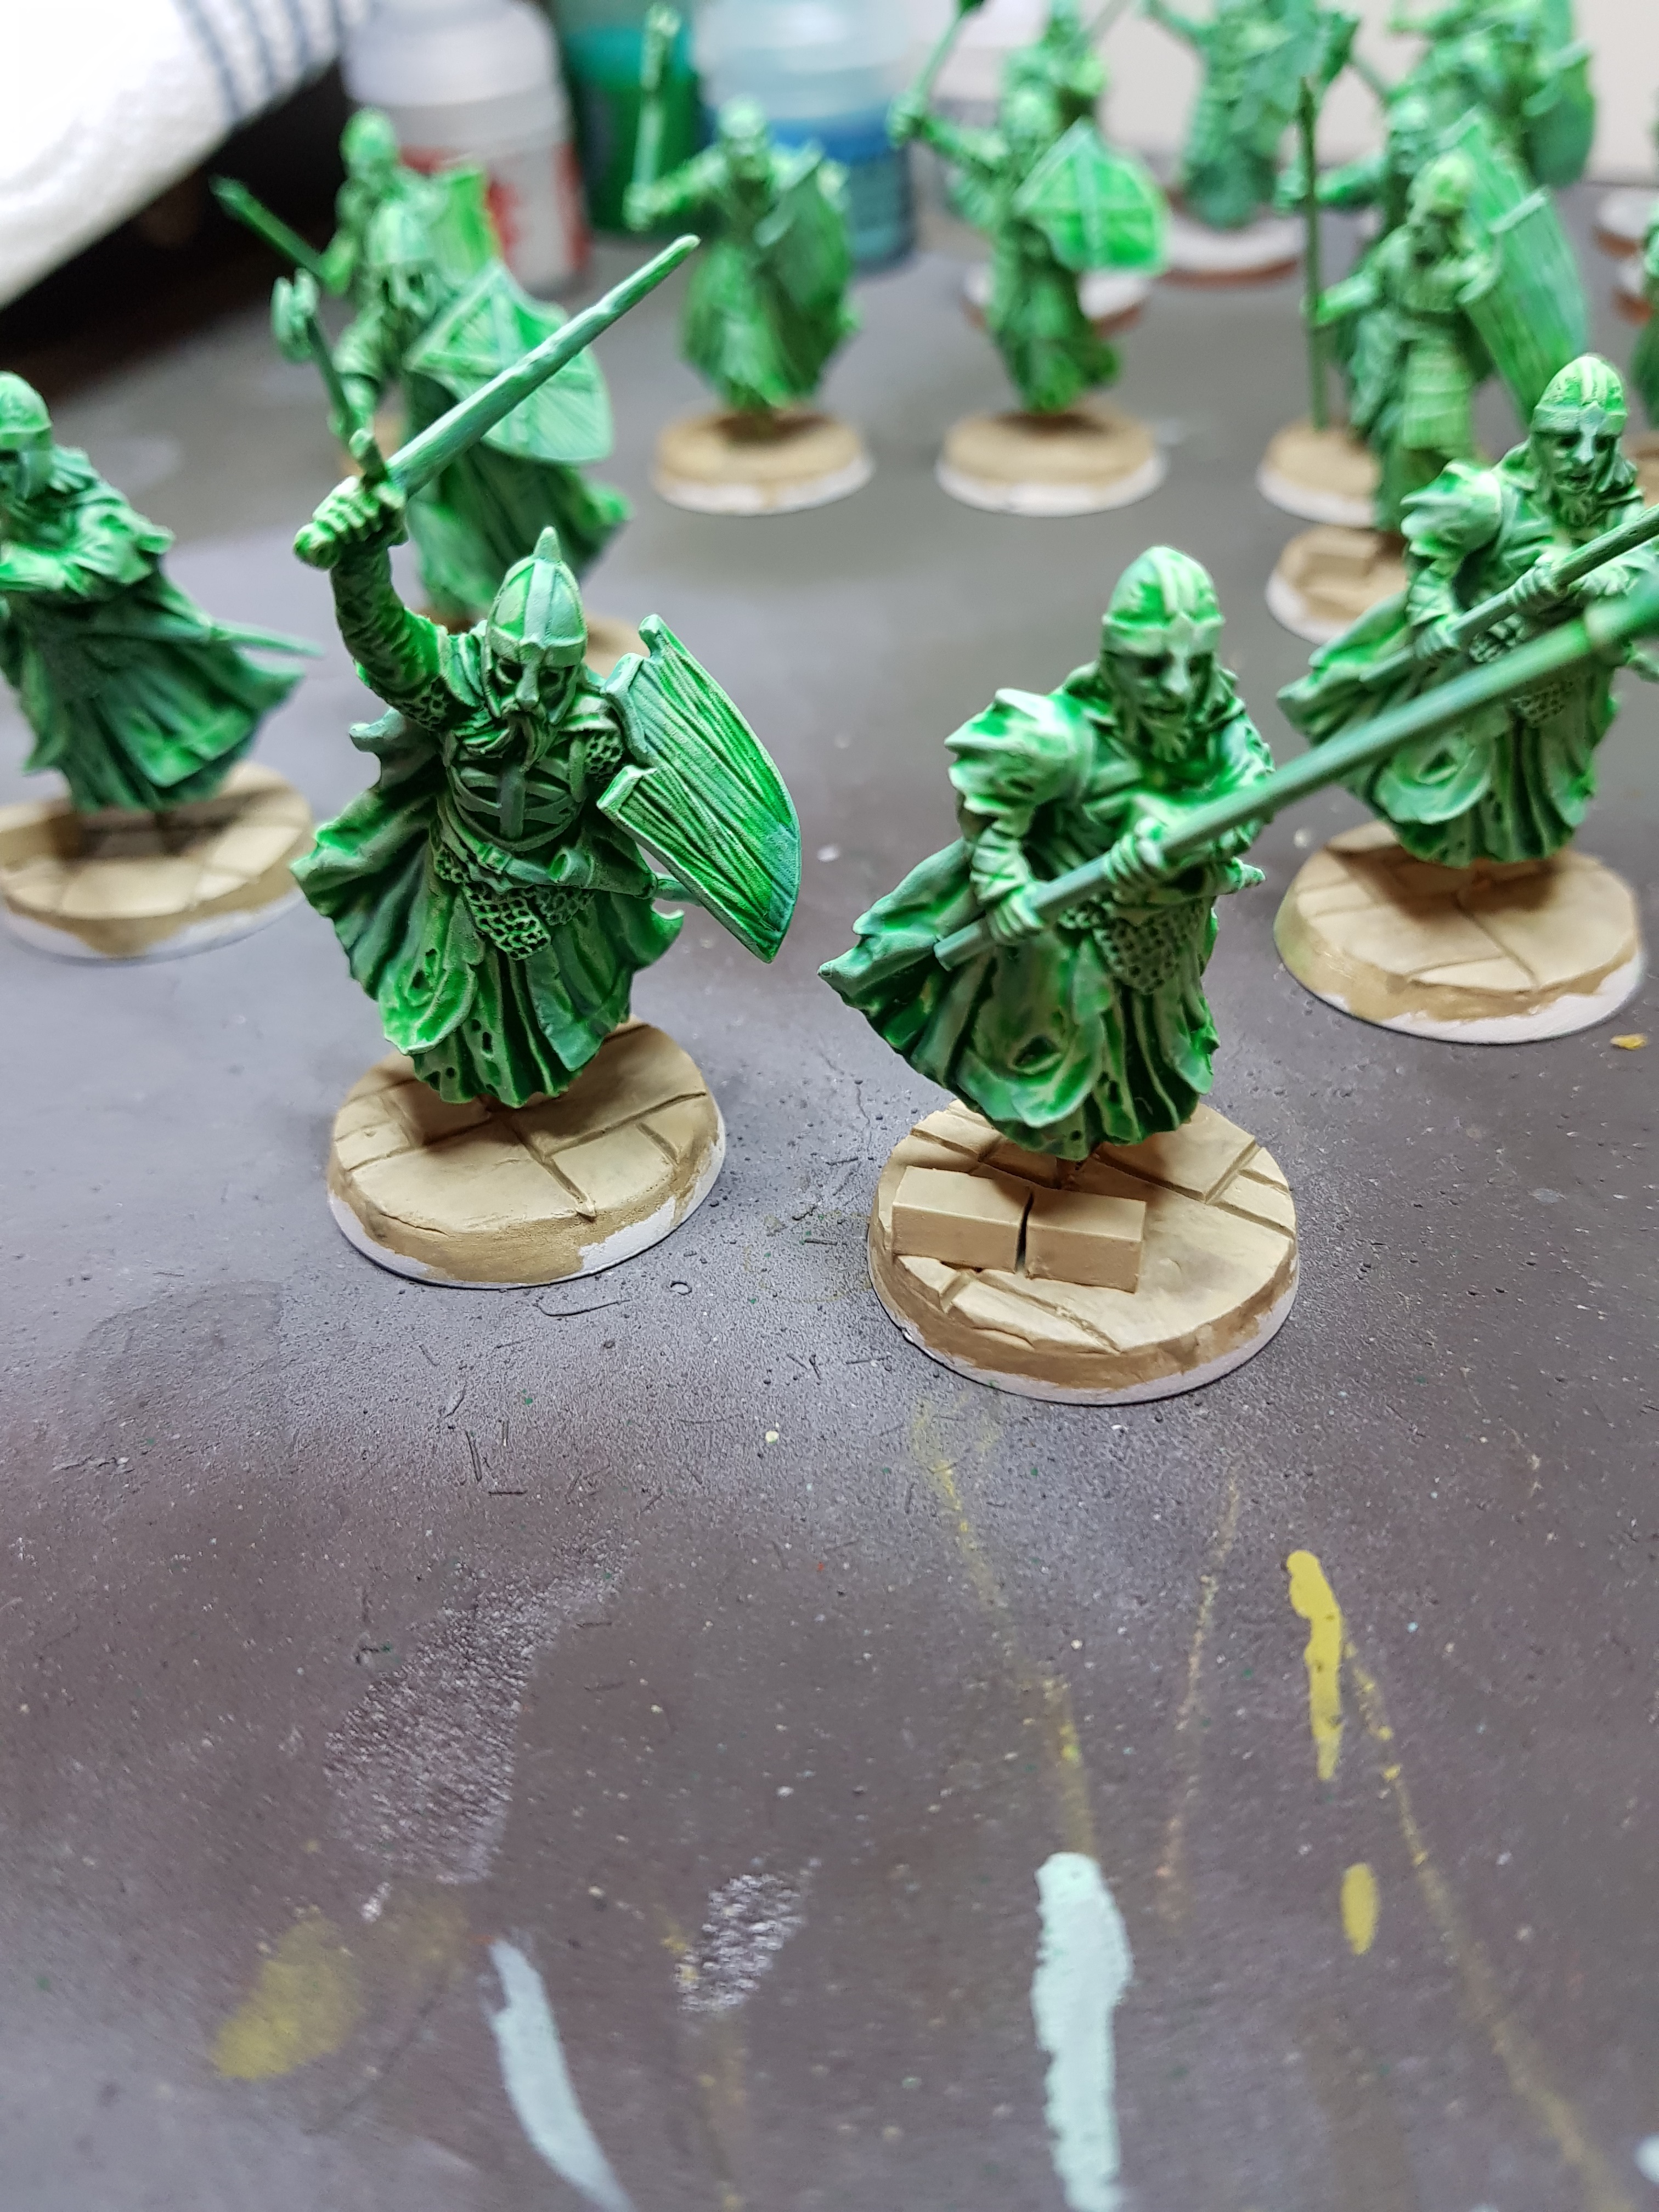
Below are some photos showing the highlighting along the robes. Now to the experienced painters, this will look more like a standard highlight, not an ‘edge highlight’, but the technique is the same. The colour of Gauss Blaster Green is a perfect suit and helps blend the previous green and blue layers together.

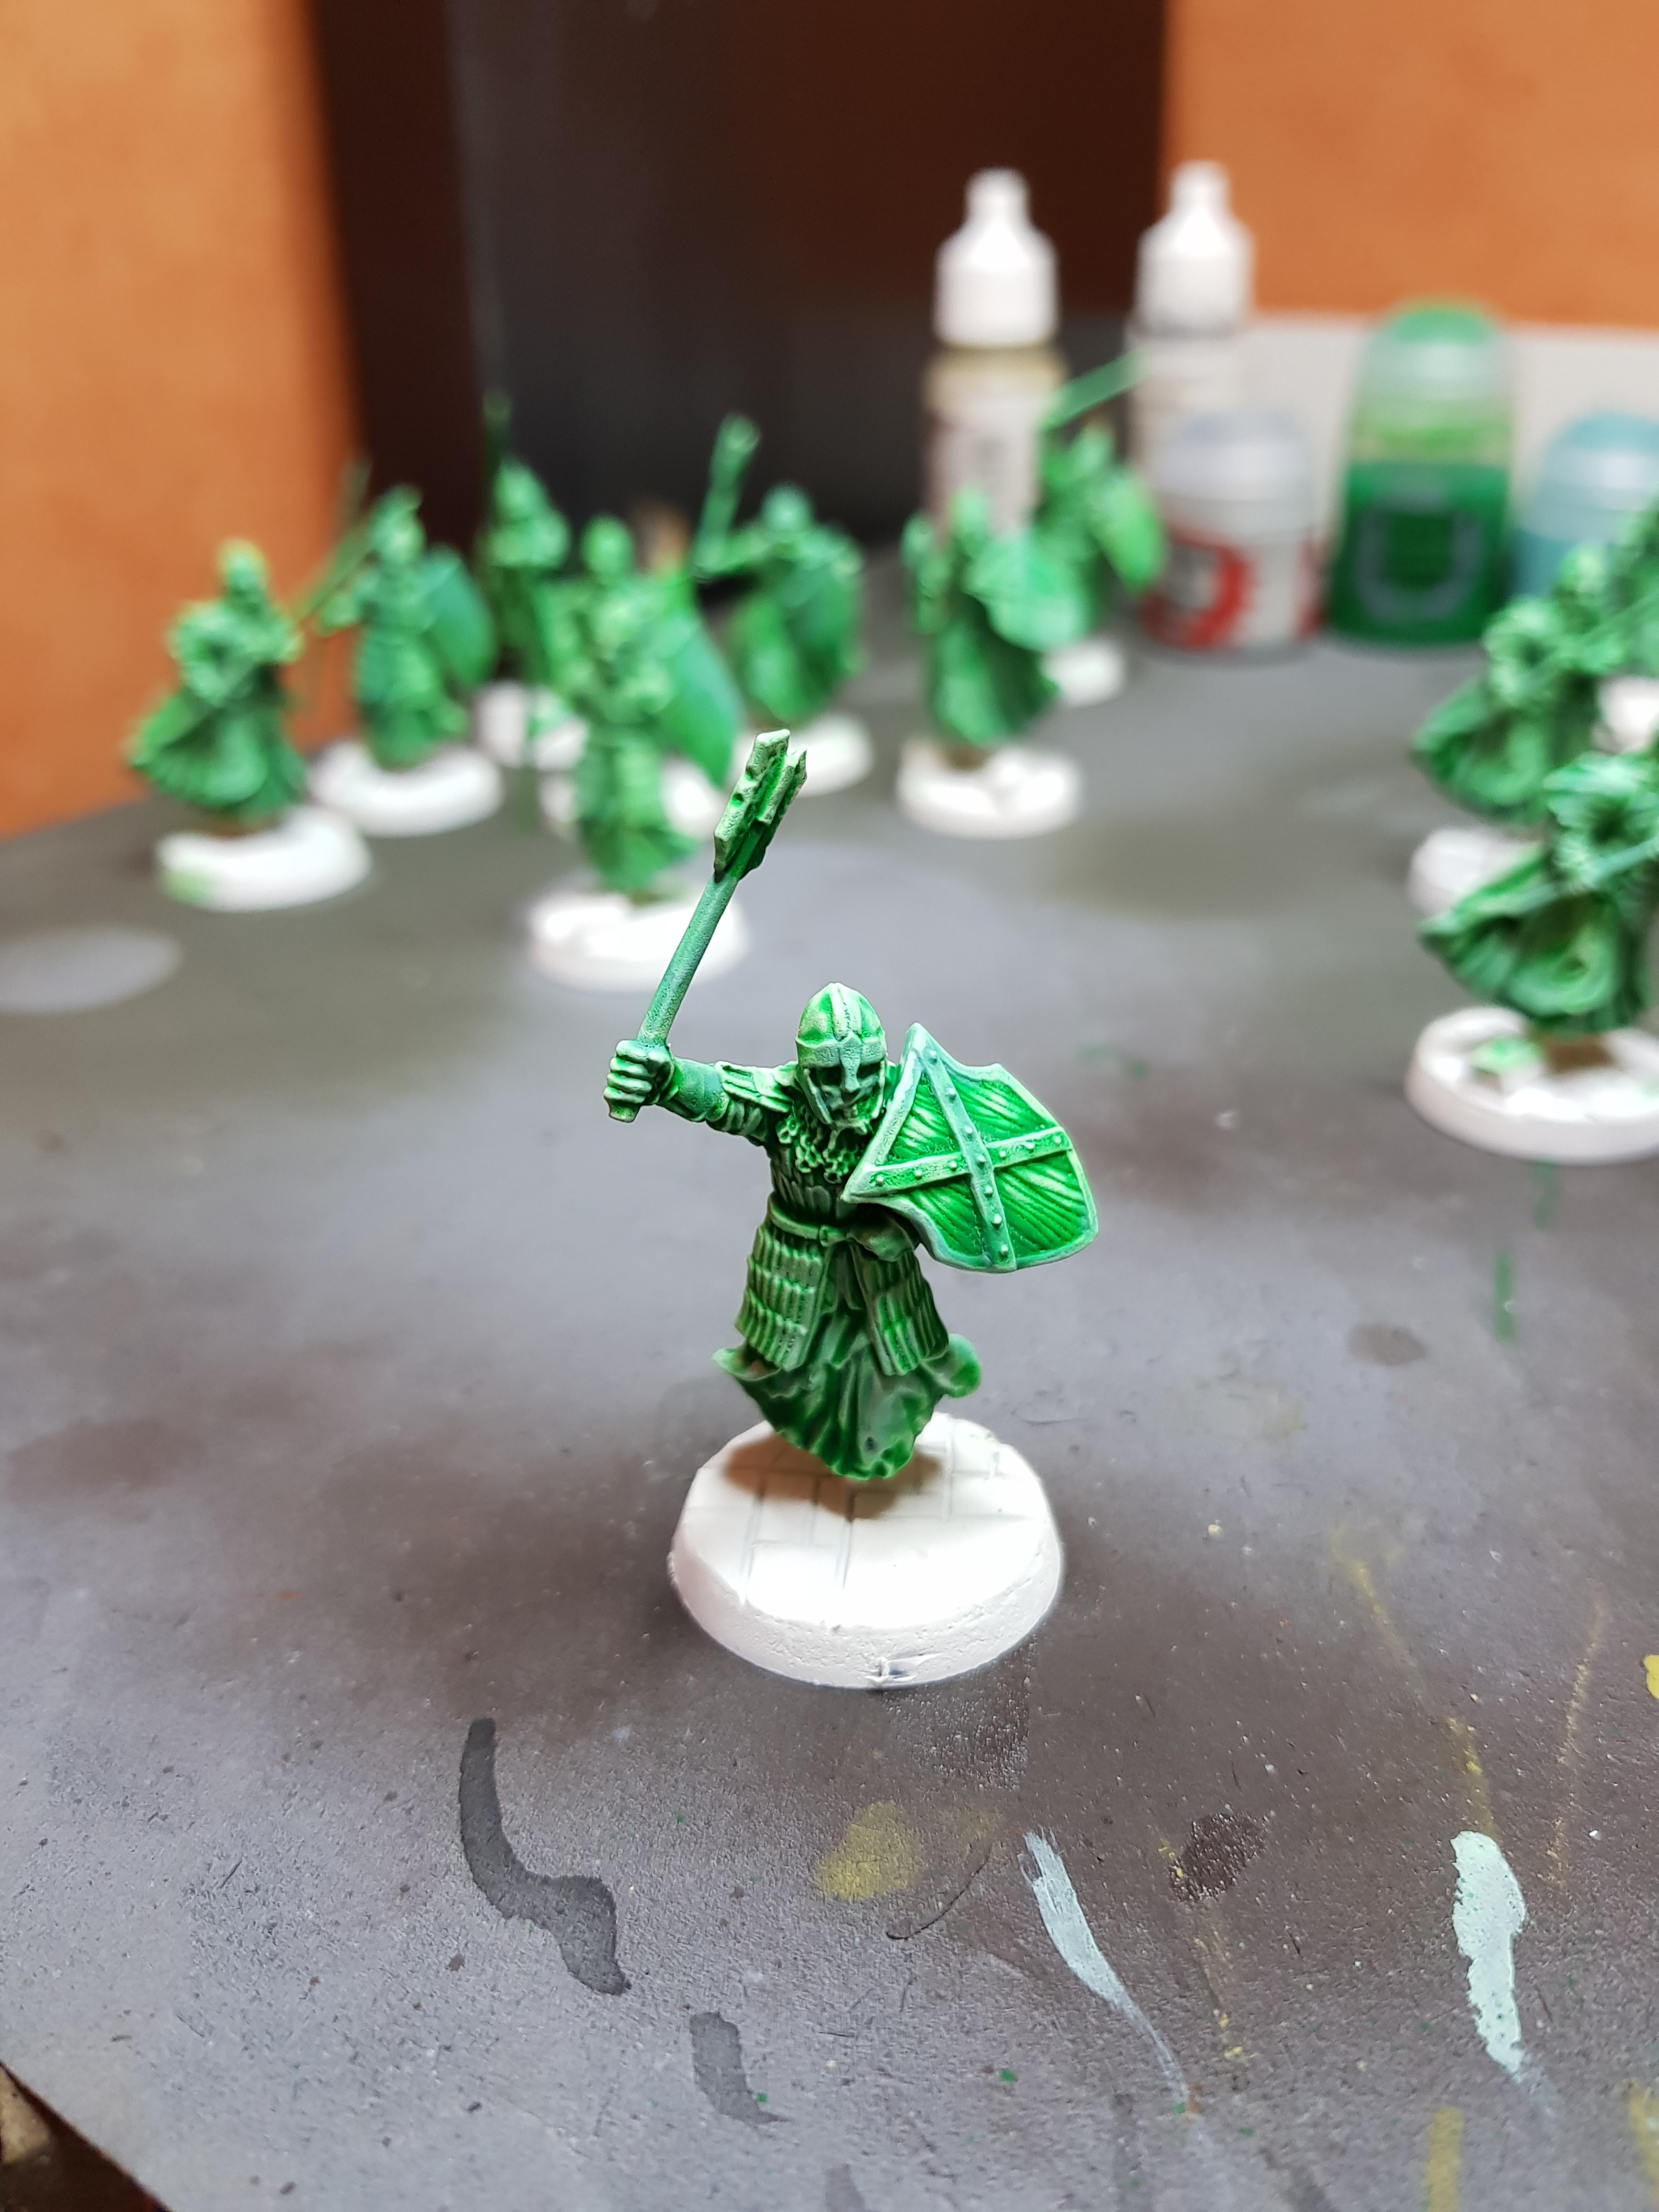
Finally, as before, here are some group shots.