


Battlestar Galactica The Thin Red Line


Recommendations: 188
About the Project
This project was originally going to be a game I was designing. However; since Ares's Games beat me to it. Now I am just going to cross over what I was working on into their existing game System. So most of what you will see here are the 3D models I created. Now being printed out for use with BSG starship battles.
Related Game: Battlestar Galactica Starship Battles
Related Company: Ares Games
Related Genre: Science Fiction
This Project is Active
Painting & Basing the Adamant
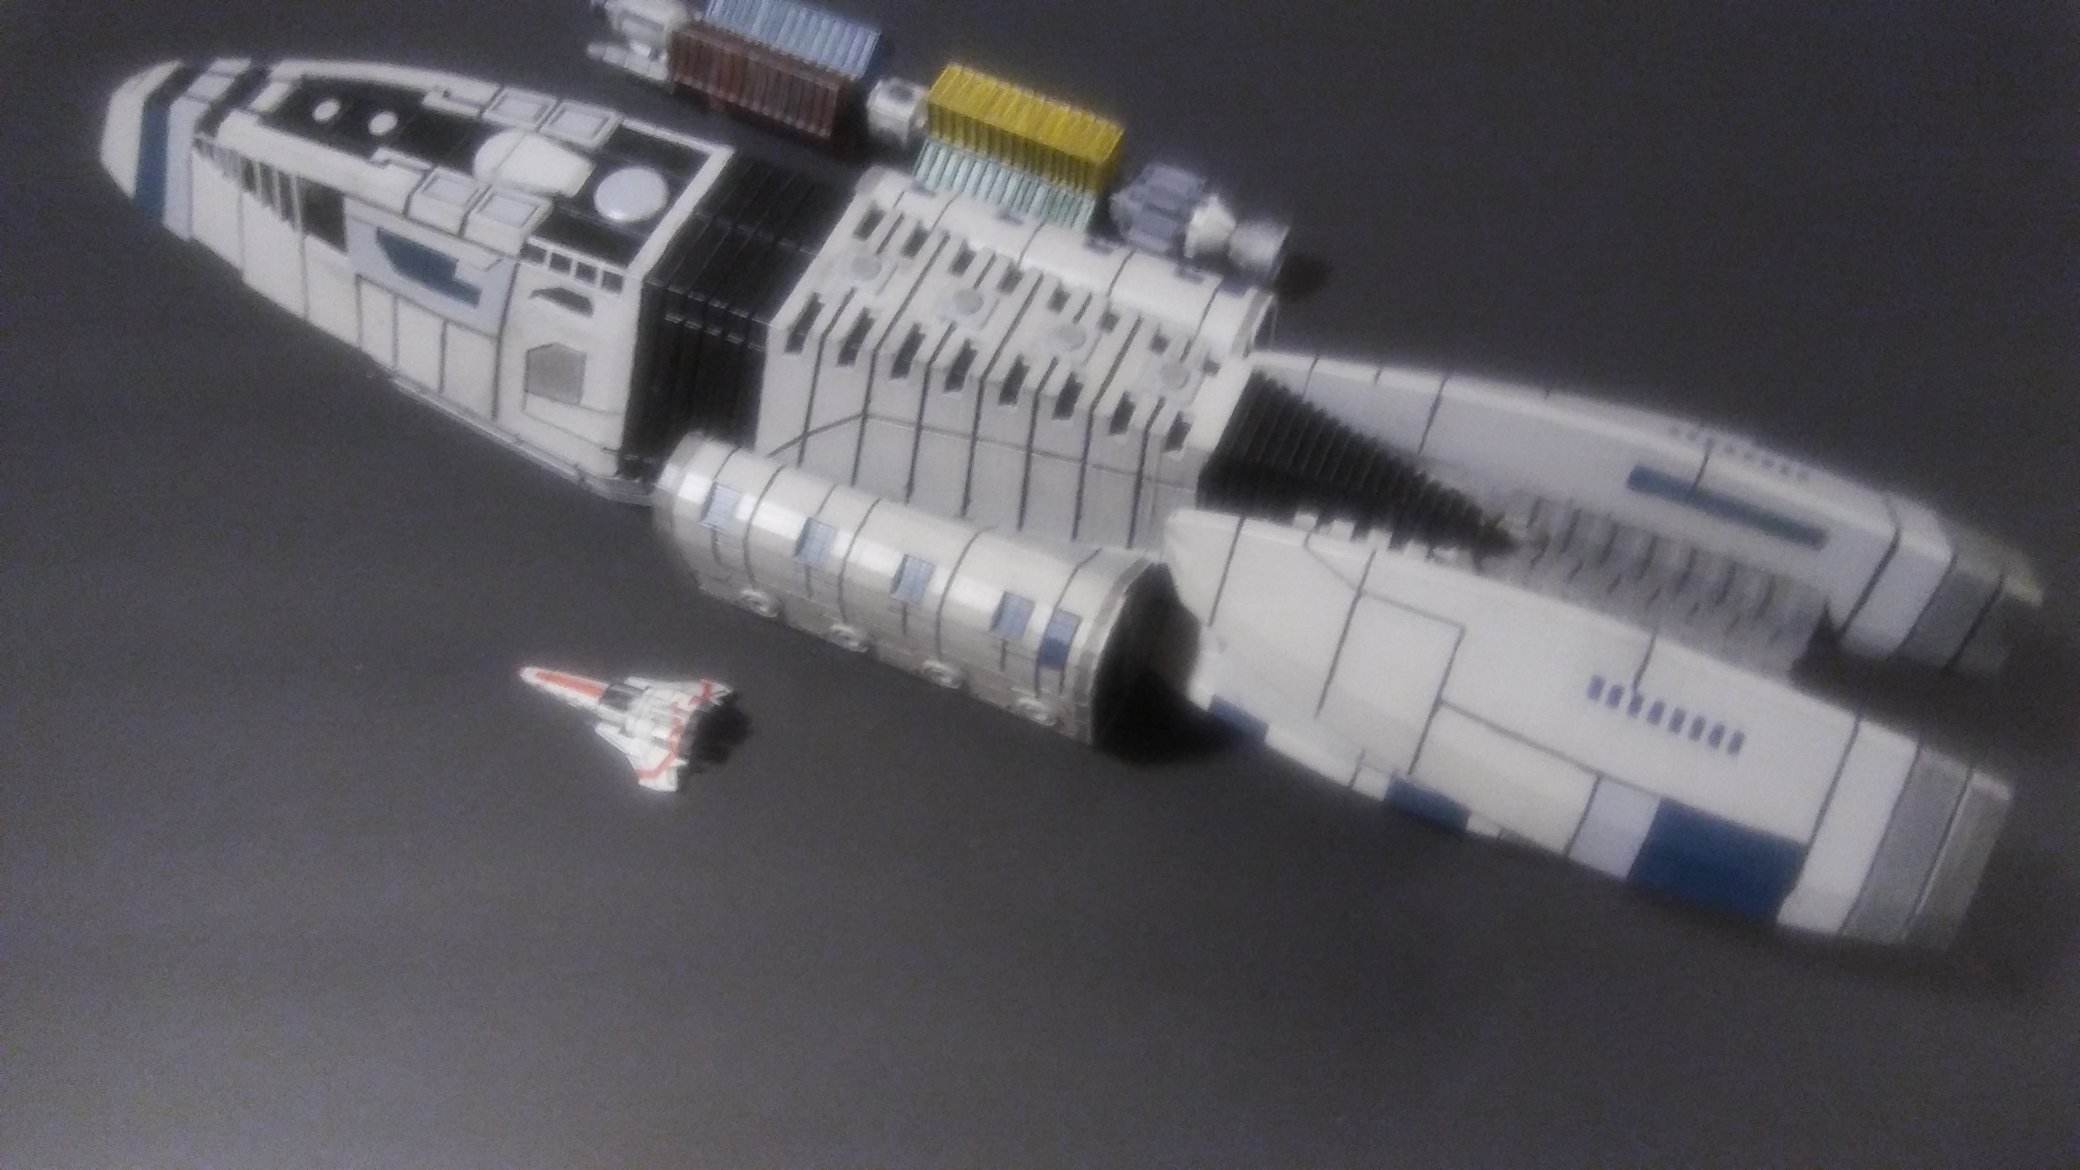
Finally my base game arrived and I was able to put the correct scaled Viper Mk2 in this picture. This picture give you a better sense of the scale of all three ships together.
After the Adamant was primed. I used a rattle can “Stone Gray” for the entire base coat. The majority of the ship will be this color with highlights of a Steal Gray and a Light Gray on some of the panels. The engine cowling is Lead Belcher with the panel before it a Steal Gray. A few panels I used GW’s Caledor Sky.
Once I was happy with this base paint. I sealed it with a semi-gloss clear coat to make my next step easier on my self.
Next I painted in all of the black panel lines. Because of this clear coat, if I get black on anything I don’t want it to be on. I can use a clean wet brush and remove this mistake with out much work. Also most 3D printed surfaces are fairly rough and or absorbent. So this clear coat also allows the paint to flow better on the models surface.
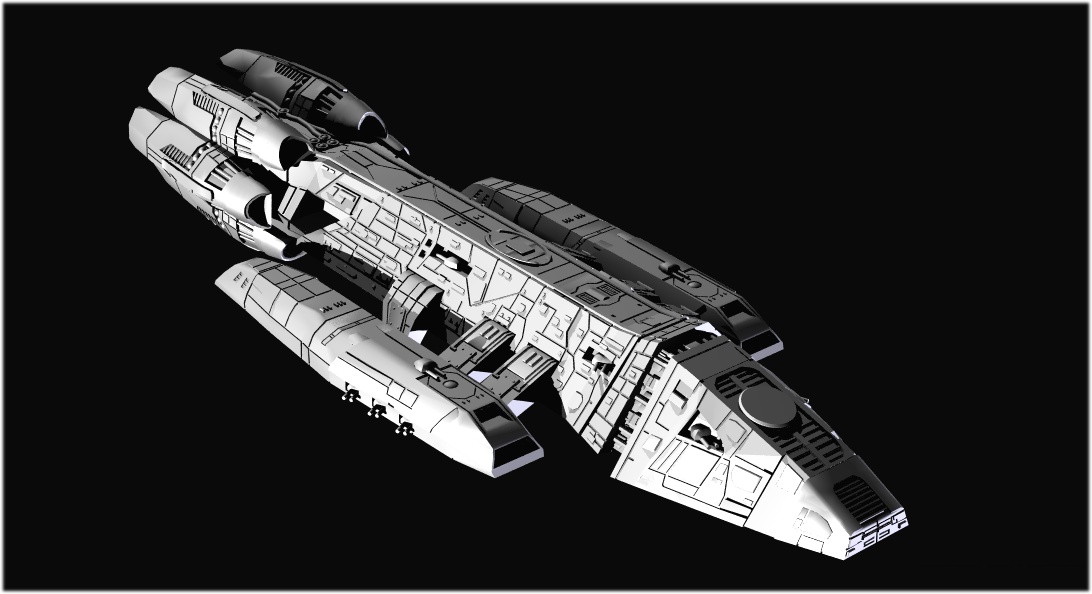
"Hero" Valkyrie
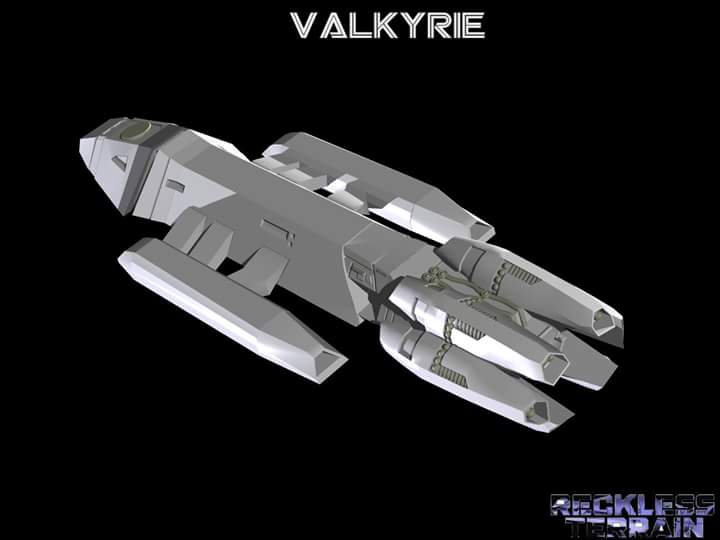
This is this the Battlestar Valkyrie which was Commanded by Adama and his trusty XO Tigh. This ship was only seen in the Episode Hero, you will eventually see a more modern twist on this hull design later.
I did a very low poly version of this as I was exiting the Home World: BSG mod Fleet Commander. So yesterday I started to take a closer look if I could salvage this model and increase its detail. Yet be able to break it down into printable parts. My biggest concern was the engines. If I couldn’t smooth them out and cut in some details it just might be easier to start from scratch.
Obviously since I’ve posted this, I have found away to do it. This picture marks about 8ish hours of work. I will be tinkering with this model for the next month.
Adamant Painted
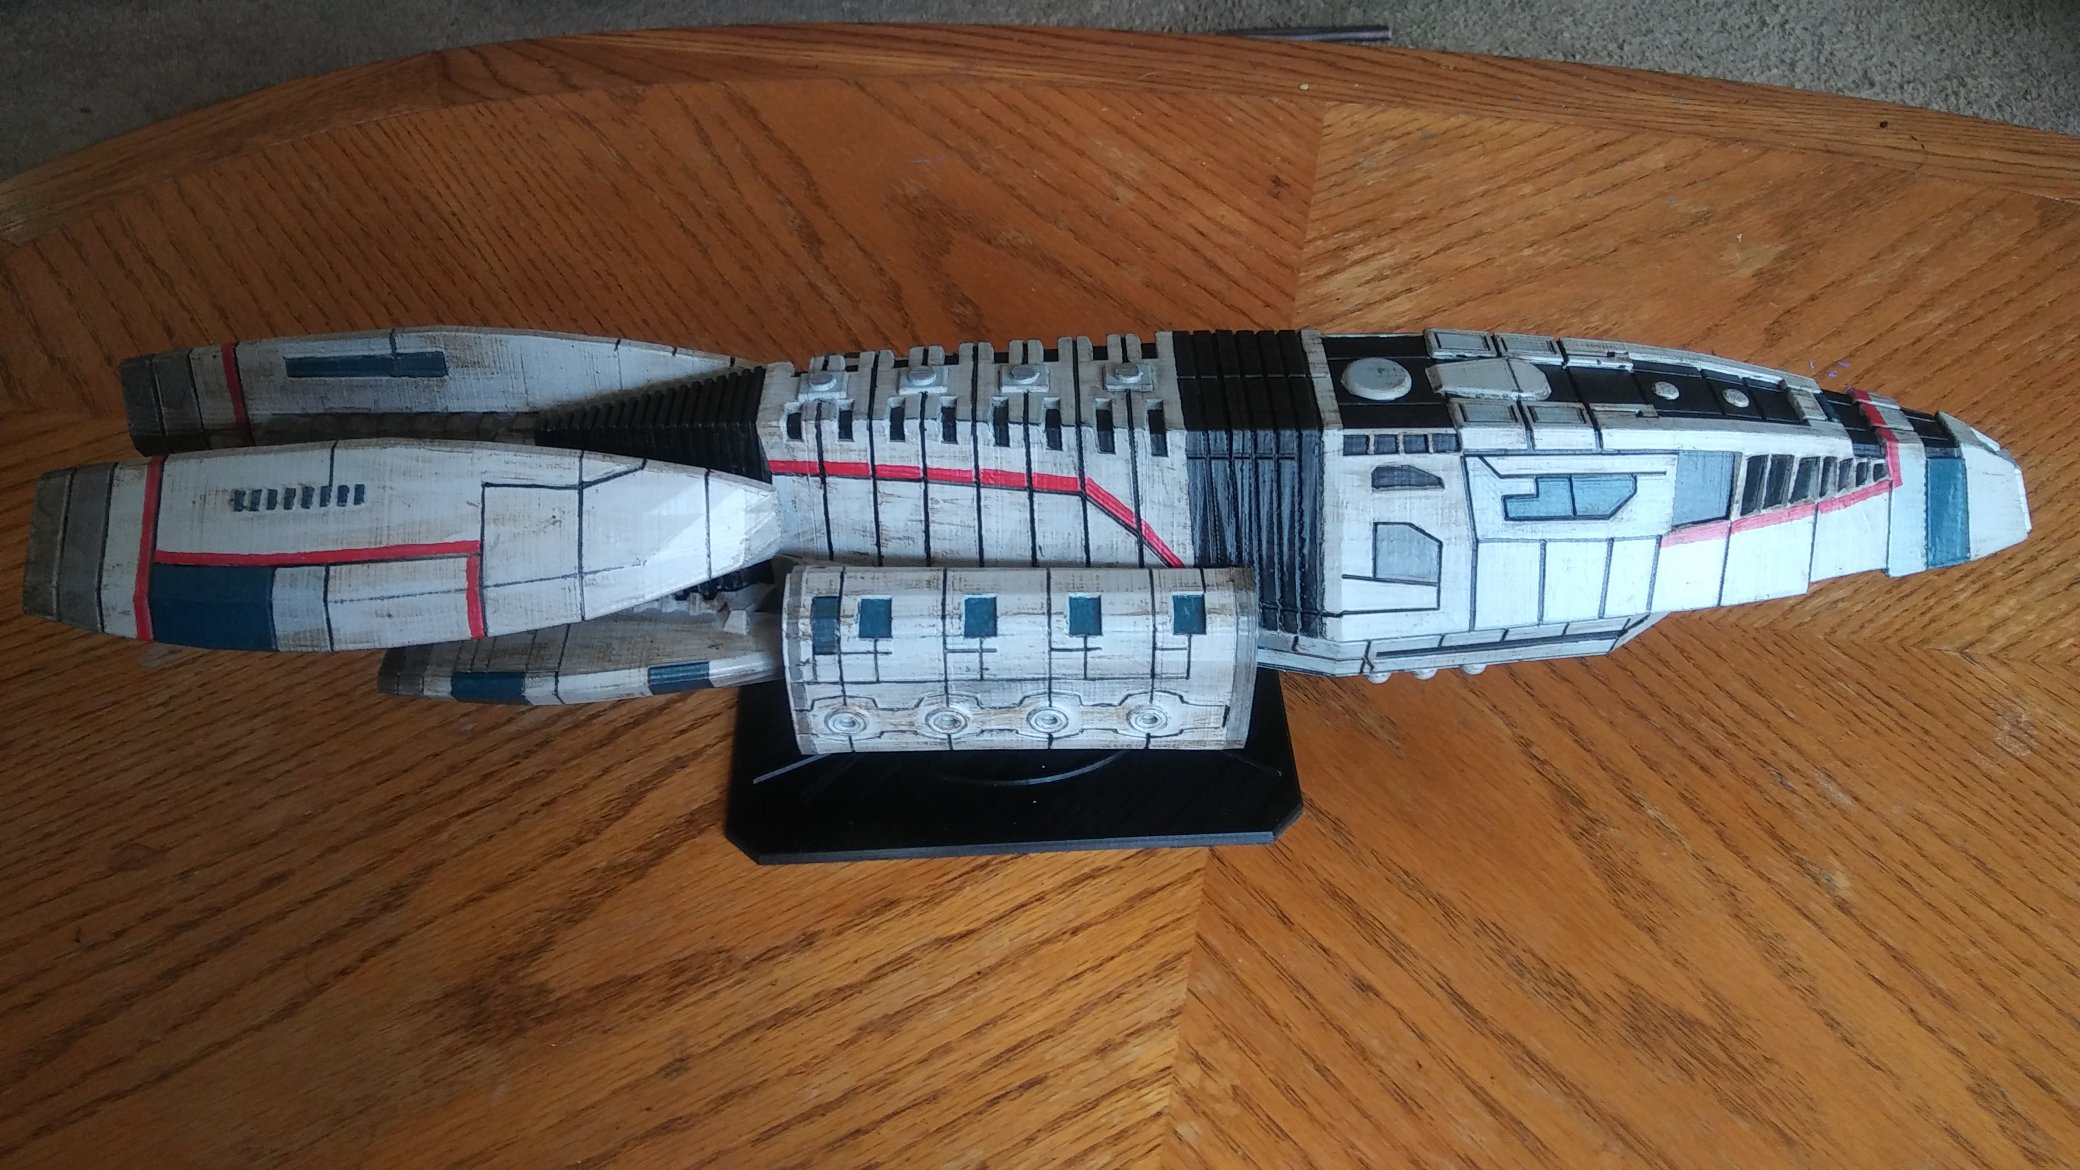
In a prior post I forgot to mention making the base for the Adamant.
Keeping with BSG tradition of not cutting corners in this production standards. I went in and cut the corners off the base. It may be hard to see from this picture, but the base has firing arcs laid out on it. The peg for the base is designed into the base it has a 5mm diameter and is roughly 4 inches high.
So to get this base to work as intended you have to find the center mass for balancing and take a 6mm drill bit and make a center line hole. Once that is done and the hole is cleaned up a bit. A 3D printed insert is glued in place which will allow the 5mm peg to slid up into it.
The 1st Base I printed worked great for the Colonial Mover. However for the Adamant I cracked the peg on its first use. The issue was with 3D printing you tell a Slicer program how solid you want the model. Most people hover around a 10%-20% infill for their prints. If you wanted a model completely solid this infill would be set at 100%. Now the problem is the greater the infill the more print time and materials that are being used. For those that haven’t had much time around 3D printing, this infill will be printed out in a honey comb like pattern narrower or wider depending on your infill settings. Most 3d printed objects are basically a 1-3mm thick shell of the object with this honey combed infill pattern inside it.
To counter the weight of the Adamant I bumped my infill setting to 50%. To give it more than enough structure to hold the weight of it. This also meant this base print would take 14hours to do. Needless to say it did the trick.
Painting the base was a very simple process. Automotive black primer , then sealed with a semi-gloss clear coat.
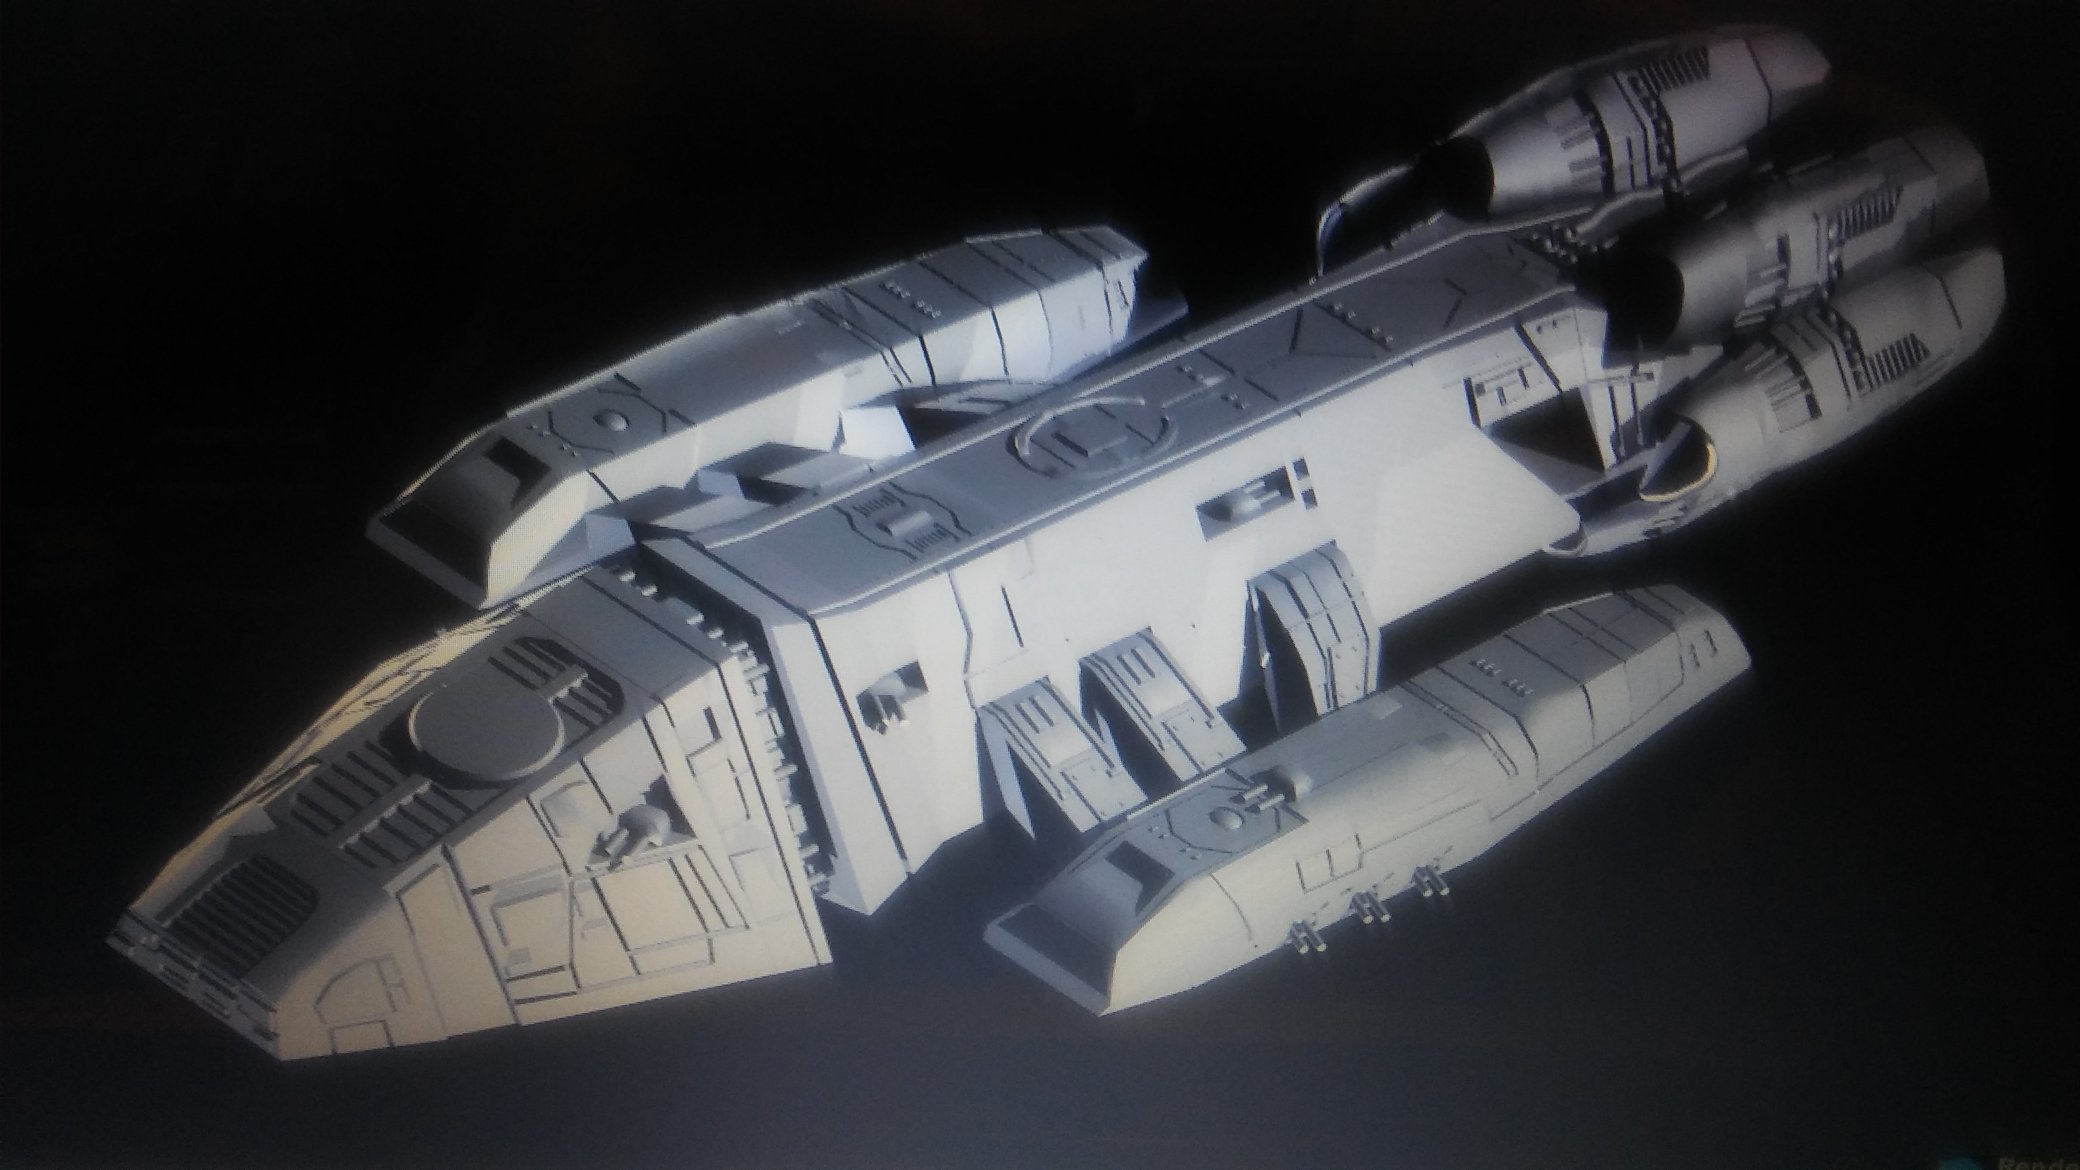
Valkyrie
Remember when I said most artists are already thinking of their next project before the one they are currently working on is done?
This thought started with what would be the biggest ship I would do on the table top and two ships came to mind. The Loki which was seen in Blood and Chrome or the Valkyrie which was only seen in the “Hero” episode. Since the Loki was already modeled and Valkyrie was a Battlestar. I thought I should take a closer look at what I could do with the Valkyrie.
Again going back to previous posts 28 inches is about the hard limit to the biggest ship I would want on the table. Keeping with in the scale of the Adamant Frigate the Valkyrie and the Loki both should be close to 28 inches long. Upon reexamining this scale, the Colonial Mover would be closer to 10-14 inches long. I may go back and fix that issue latter.
Picking up where I left off
Nothing can be more eye catching than seeing a large scale Battlestar on the table. I really want to develop a player base in my area and this may be a thing to help lure them in.
So I will be spending the next few days adding in the details to the Valkyrie.
Six Days Later
 3D render
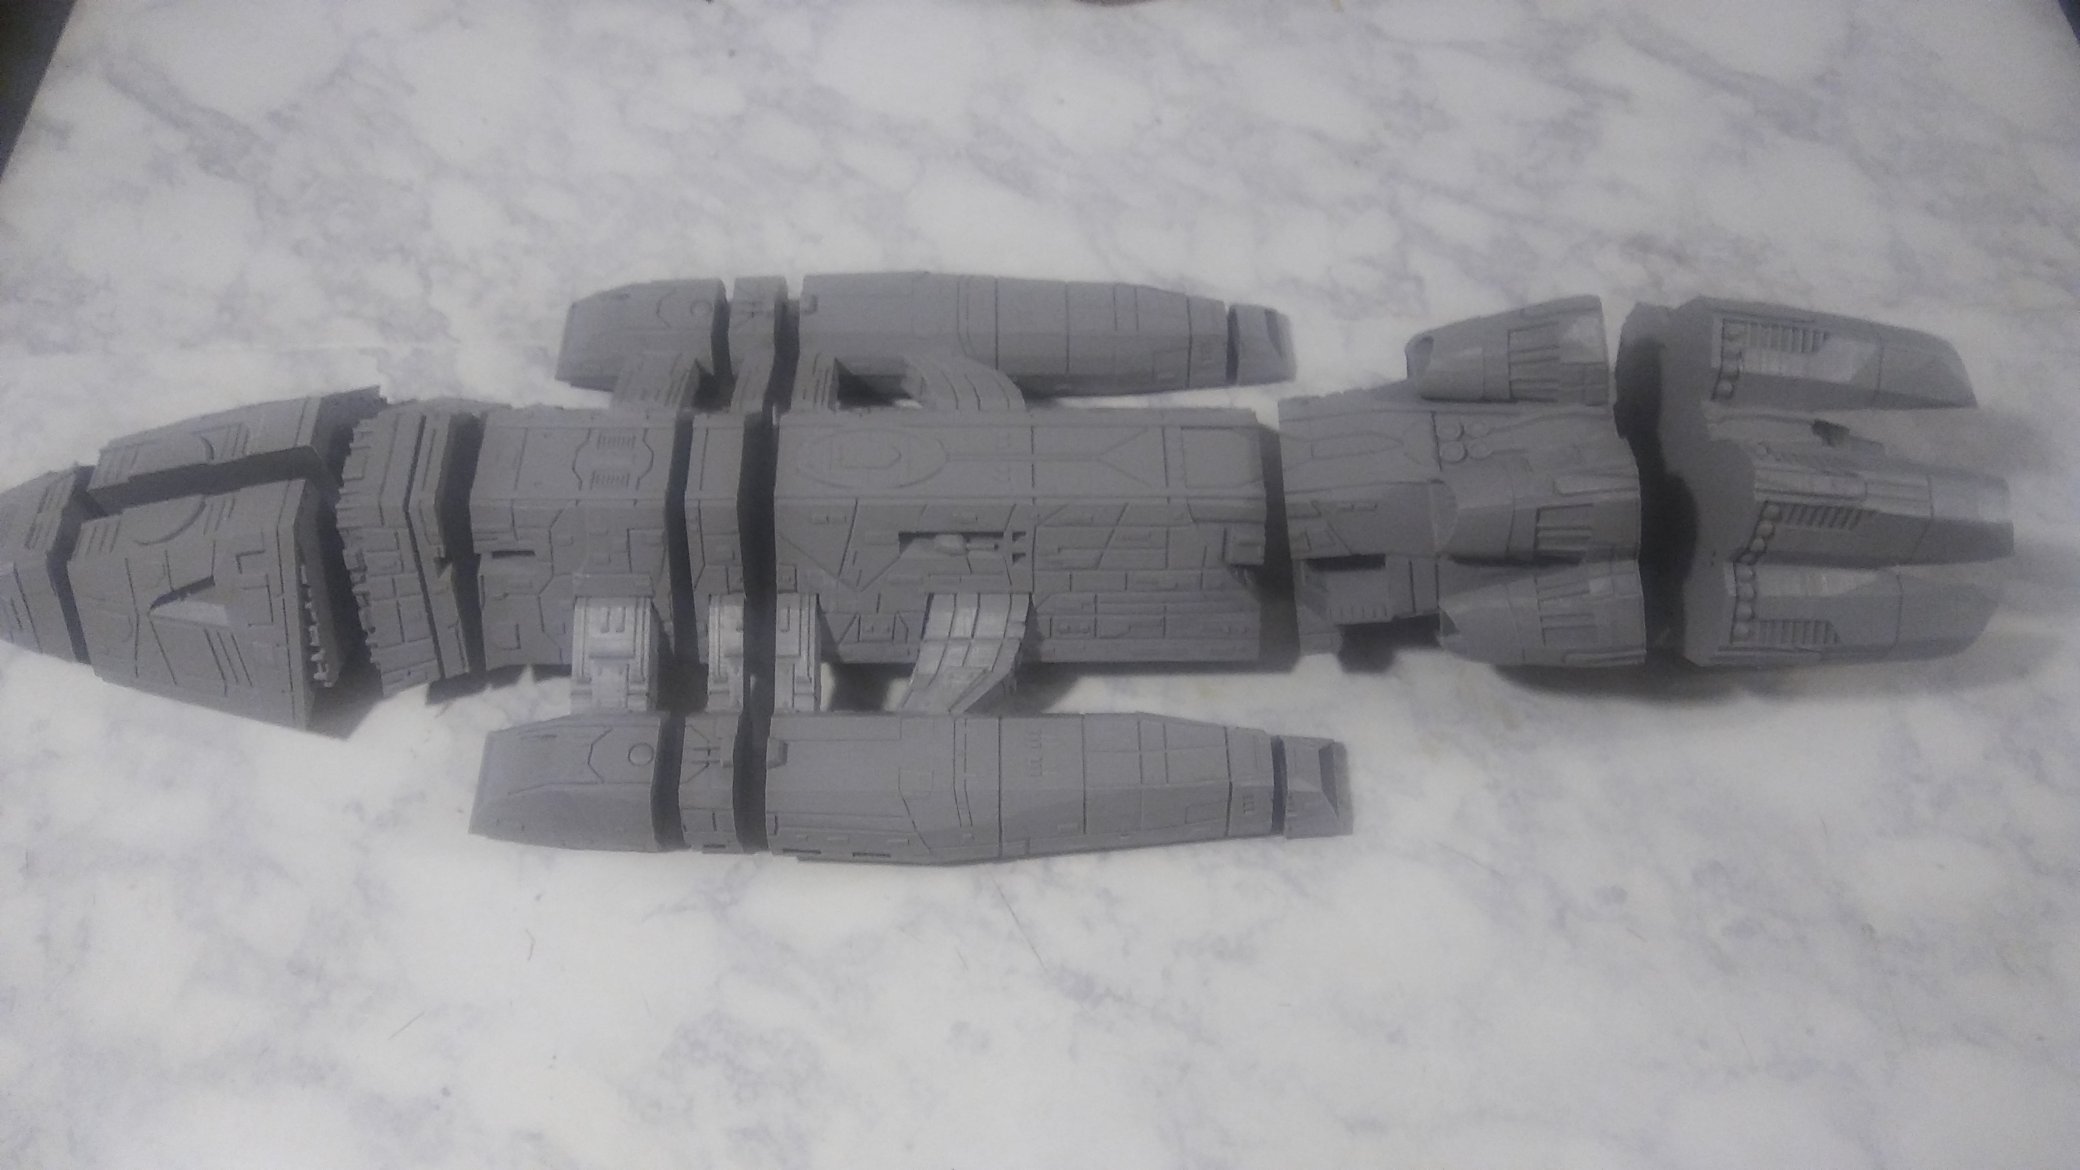
Here is the end result of working on the Valkyrie for the past six days.
I designed all of the turrets that are rotated outwards to be printed separately. These will get magnetized to make storage and transporting easier on everyone. No one wants to print a part for a day only to break off turrets the 1st time it leaves the house. A new base will have to be designed due to its size.
Blood & Chrome : Loki
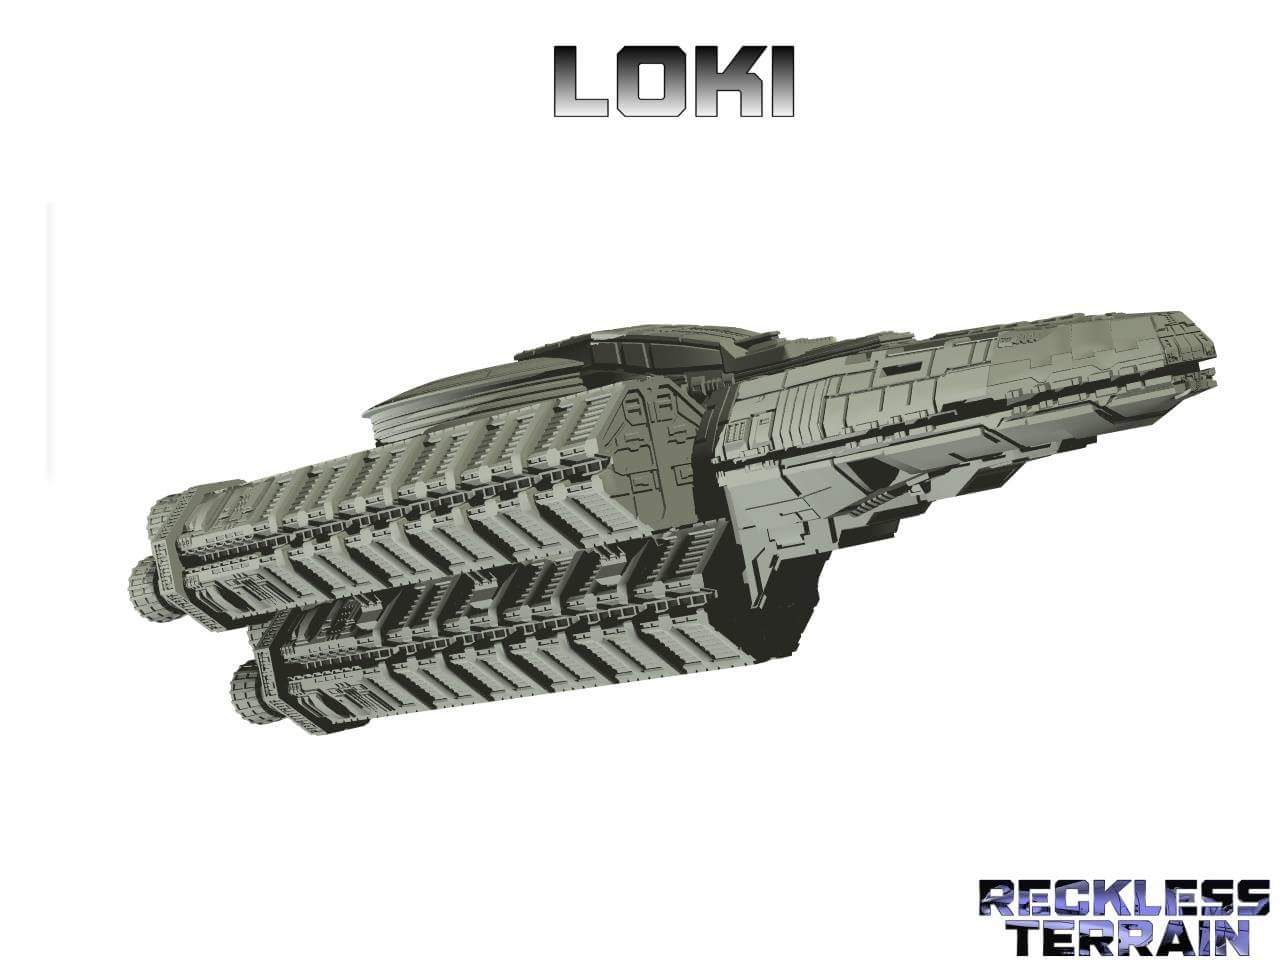
Like I have stated before, I get the game so far along. Then I see something that needs to be represented in the game. The Loki support ship was one of a few in BSG: Blood and Chrome I needed to do!
This 3D model/Mesh took me roughly over 100 hours to complete. I designed it to so it is broken up in peices to make printing it easier on me. In the 3D world you will often hear how many Poly’s a model is. This is referring to how many polygons where needed to create the model. In this case the Loki sits in the mid 300K poly range. To put this into perspective those old gamers that played Gears of War two. Your player models ranged from 10-15K range. The Galactica in the new series (pilot) was just over 1 Million poly.
I got into 3D modeling in the mid 90’s because if a PC game called Star Fleet Command. I learned how to modify the program and import new models into it with different stats. Those models needed to be under 5K and that was pushing the game engine at that time. Game models use texturing on those models to make them more complex than they really are. It wasn’t until 2010 when I finally started to push my poly weights in my models to surpass the 100K mark.
When I say I started 3D modeling in the 90’s. What I am trying to say, I am a self taught 3D modeler. I played with the programming until I got the result I wanted and that is how I learned.
Sum of all its parts
Well after two weeks of printing, I have all the parts needed to start assembling the Valkyrie.


