
![Perfect Historical Wargame Objectives! Victrix Treasures & More Reviewed [7 Days Early Access]](https://images.beastsofwar.com/2026/02/unboxing-victrix-treasures_-chests-_-market-stalls-coverimage-225-127.jpg)


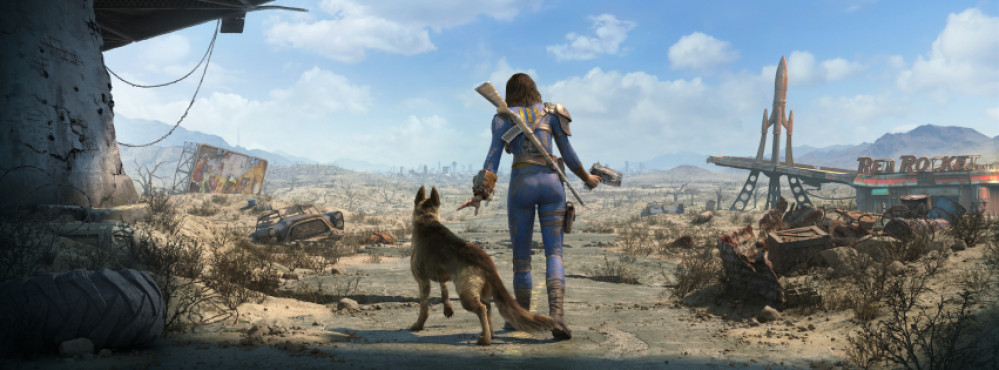
Crawl out through the Fallout…


Recommendations: 807
About the Project
This will be my ongoing project log as I build up and gradually paint my Fallout Wasteland Warfare collection. I hope you enjoy!
Related Game: Fallout: Wasteland Warfare
Related Company: Modiphius Entertainment
Related Genre: Post-Apocalyptic
This Project is Active
Toxic pool test
I decided to do a bit of scratch building and test out an idea I had to make some toxic swampy pools for my table. Because when you have all those rusty radioactive barrels, stuff leaks!
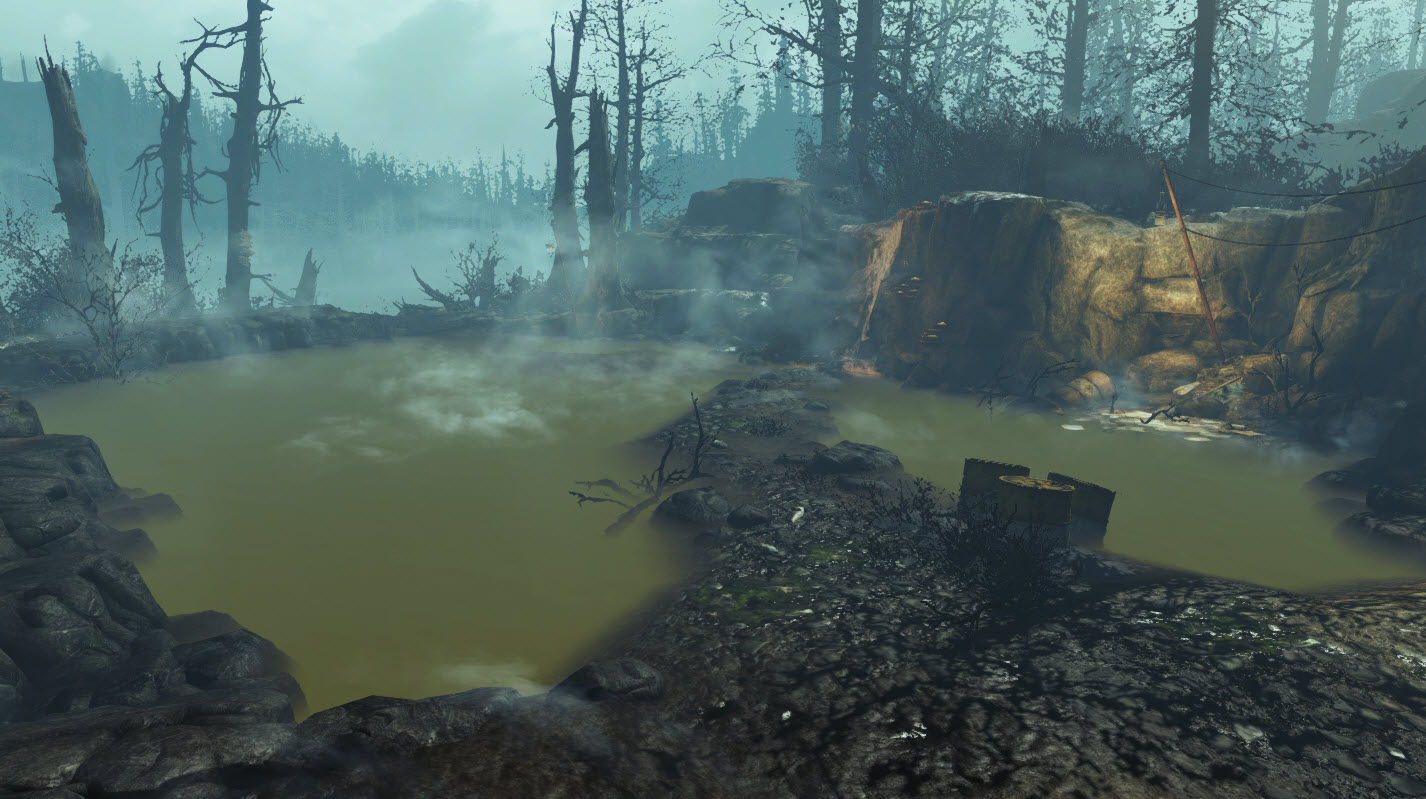 This is the Atom Spring from Fallout 4's Far Harbour DLC. Hopefully the final product looks vaguely like this.
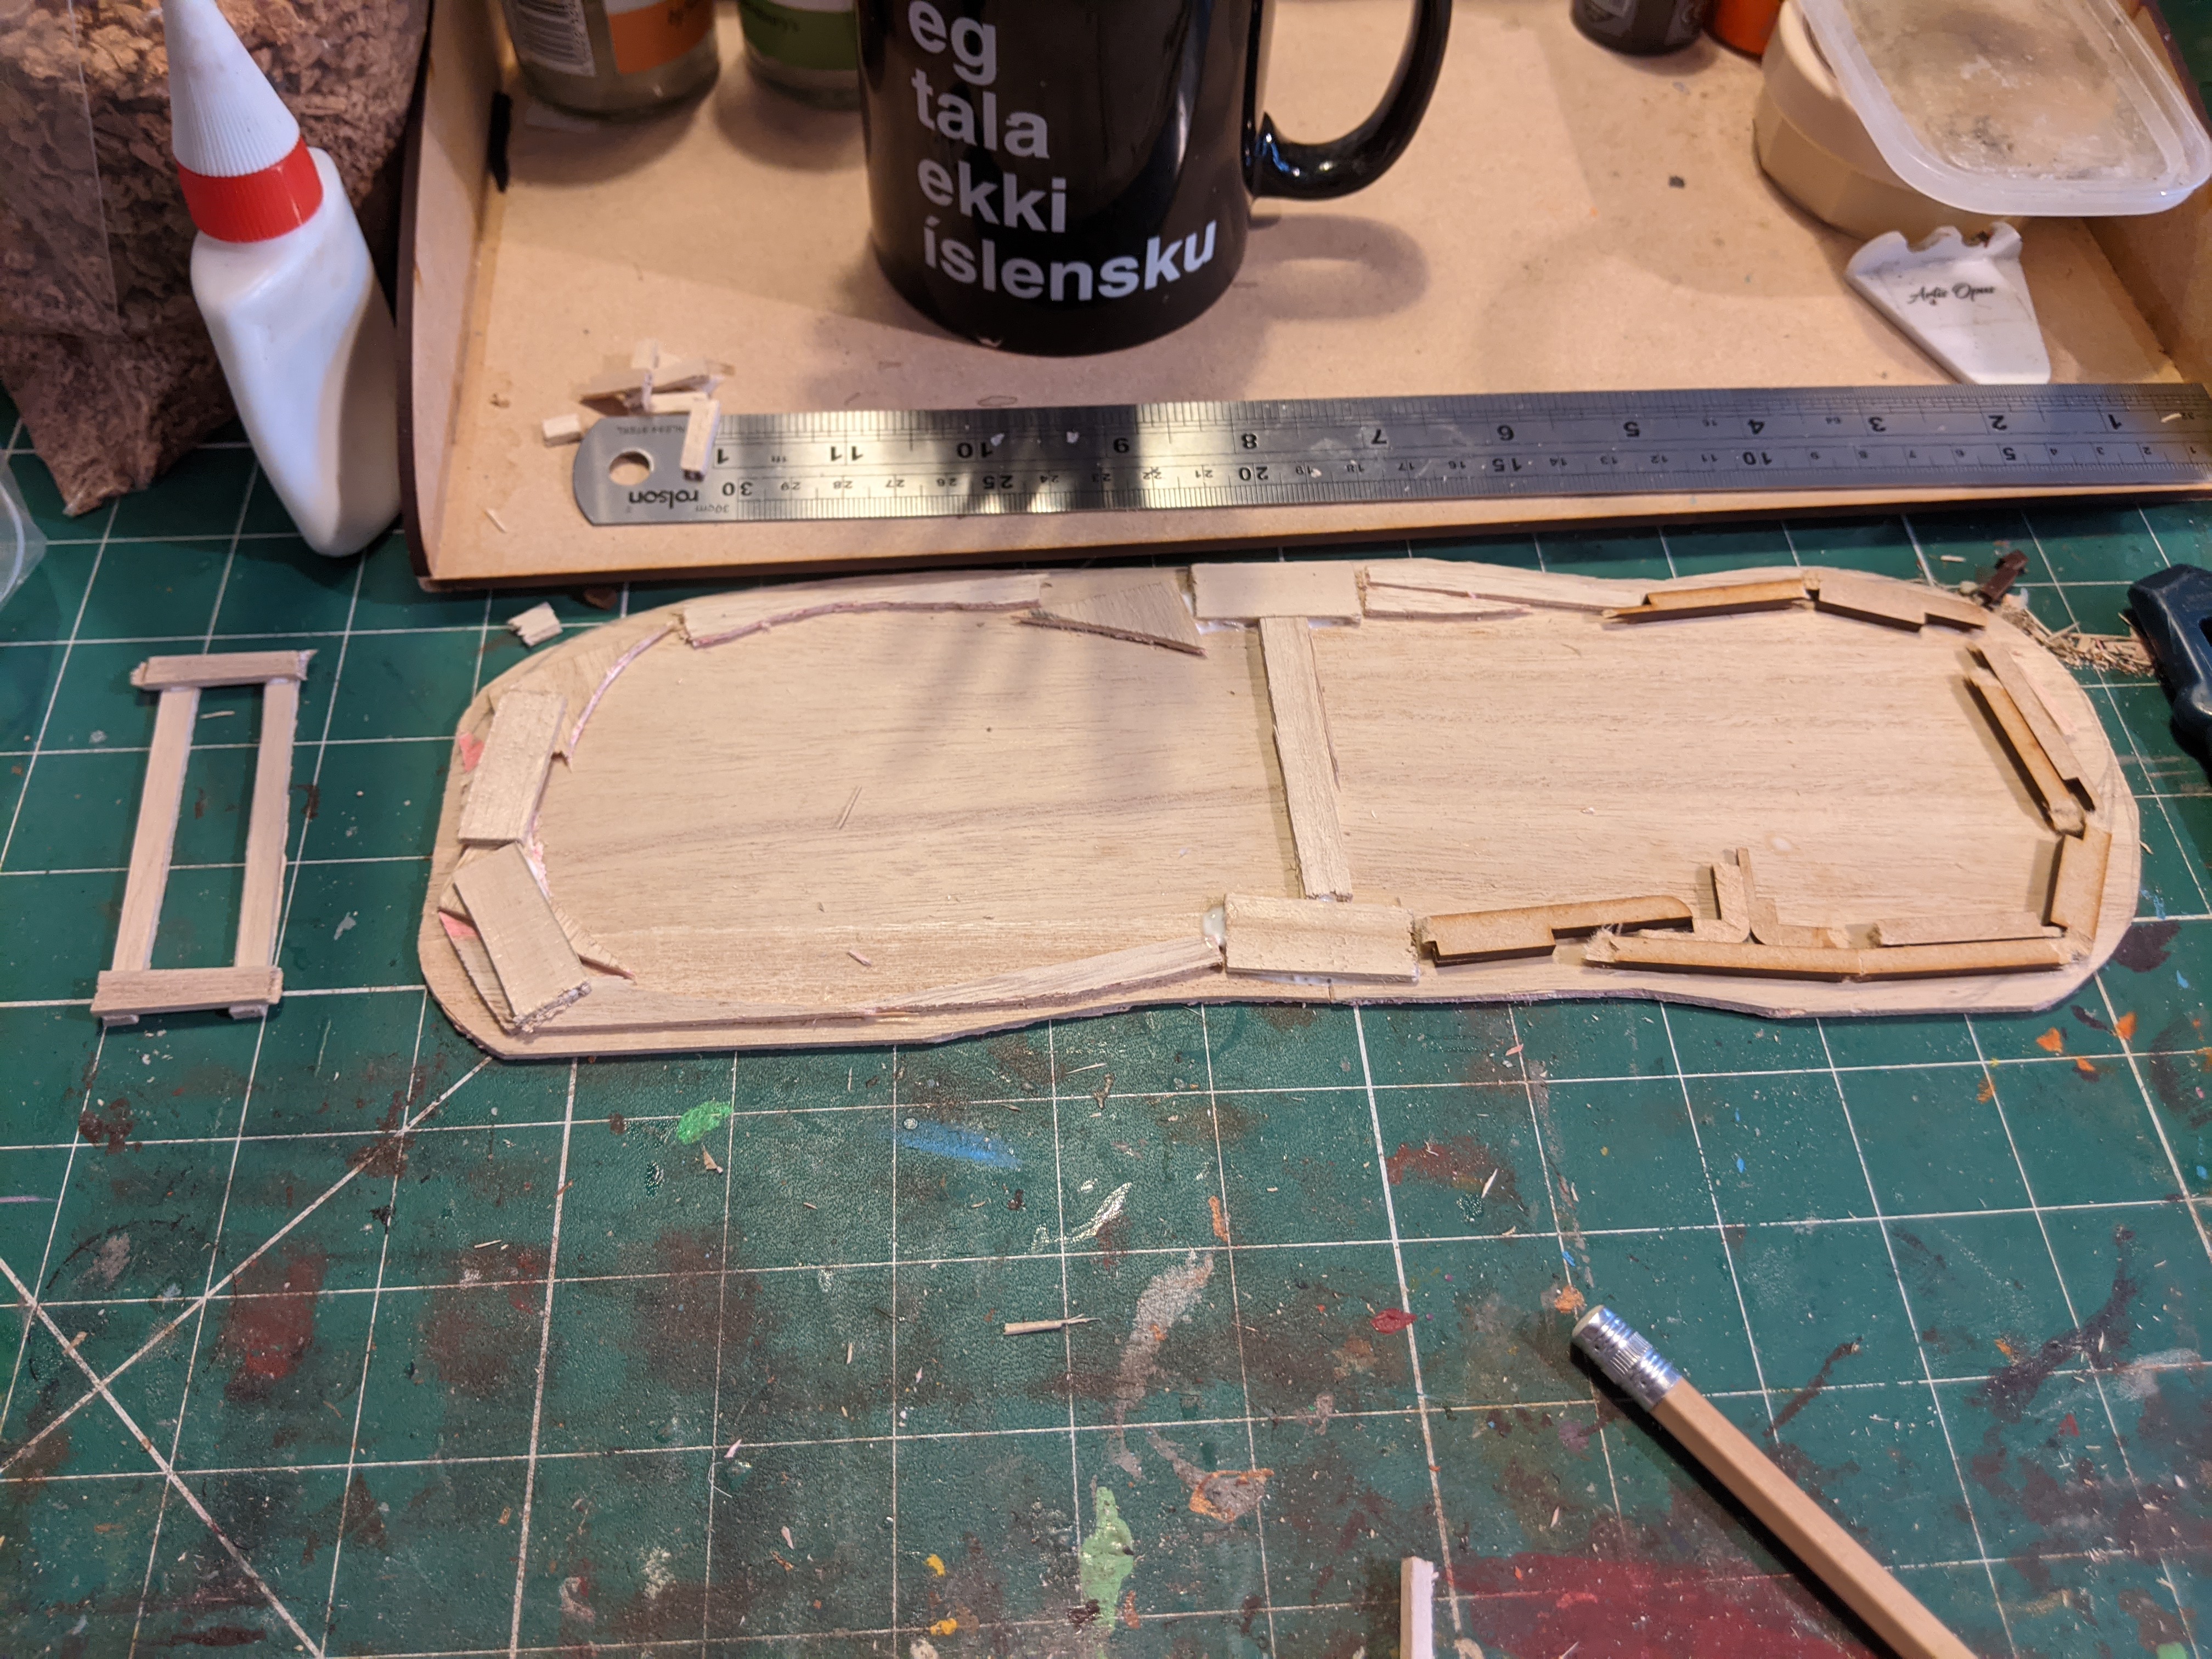 I started with these balsa wood pieces I bought off eBay. They are roughly 6"x4" but I wanted to try a larger piece so glued two together and will build a ramshackle bridge over the join. The banks are being built up with offcuts, covered with air drying das clay and textured with trusty cork bits.
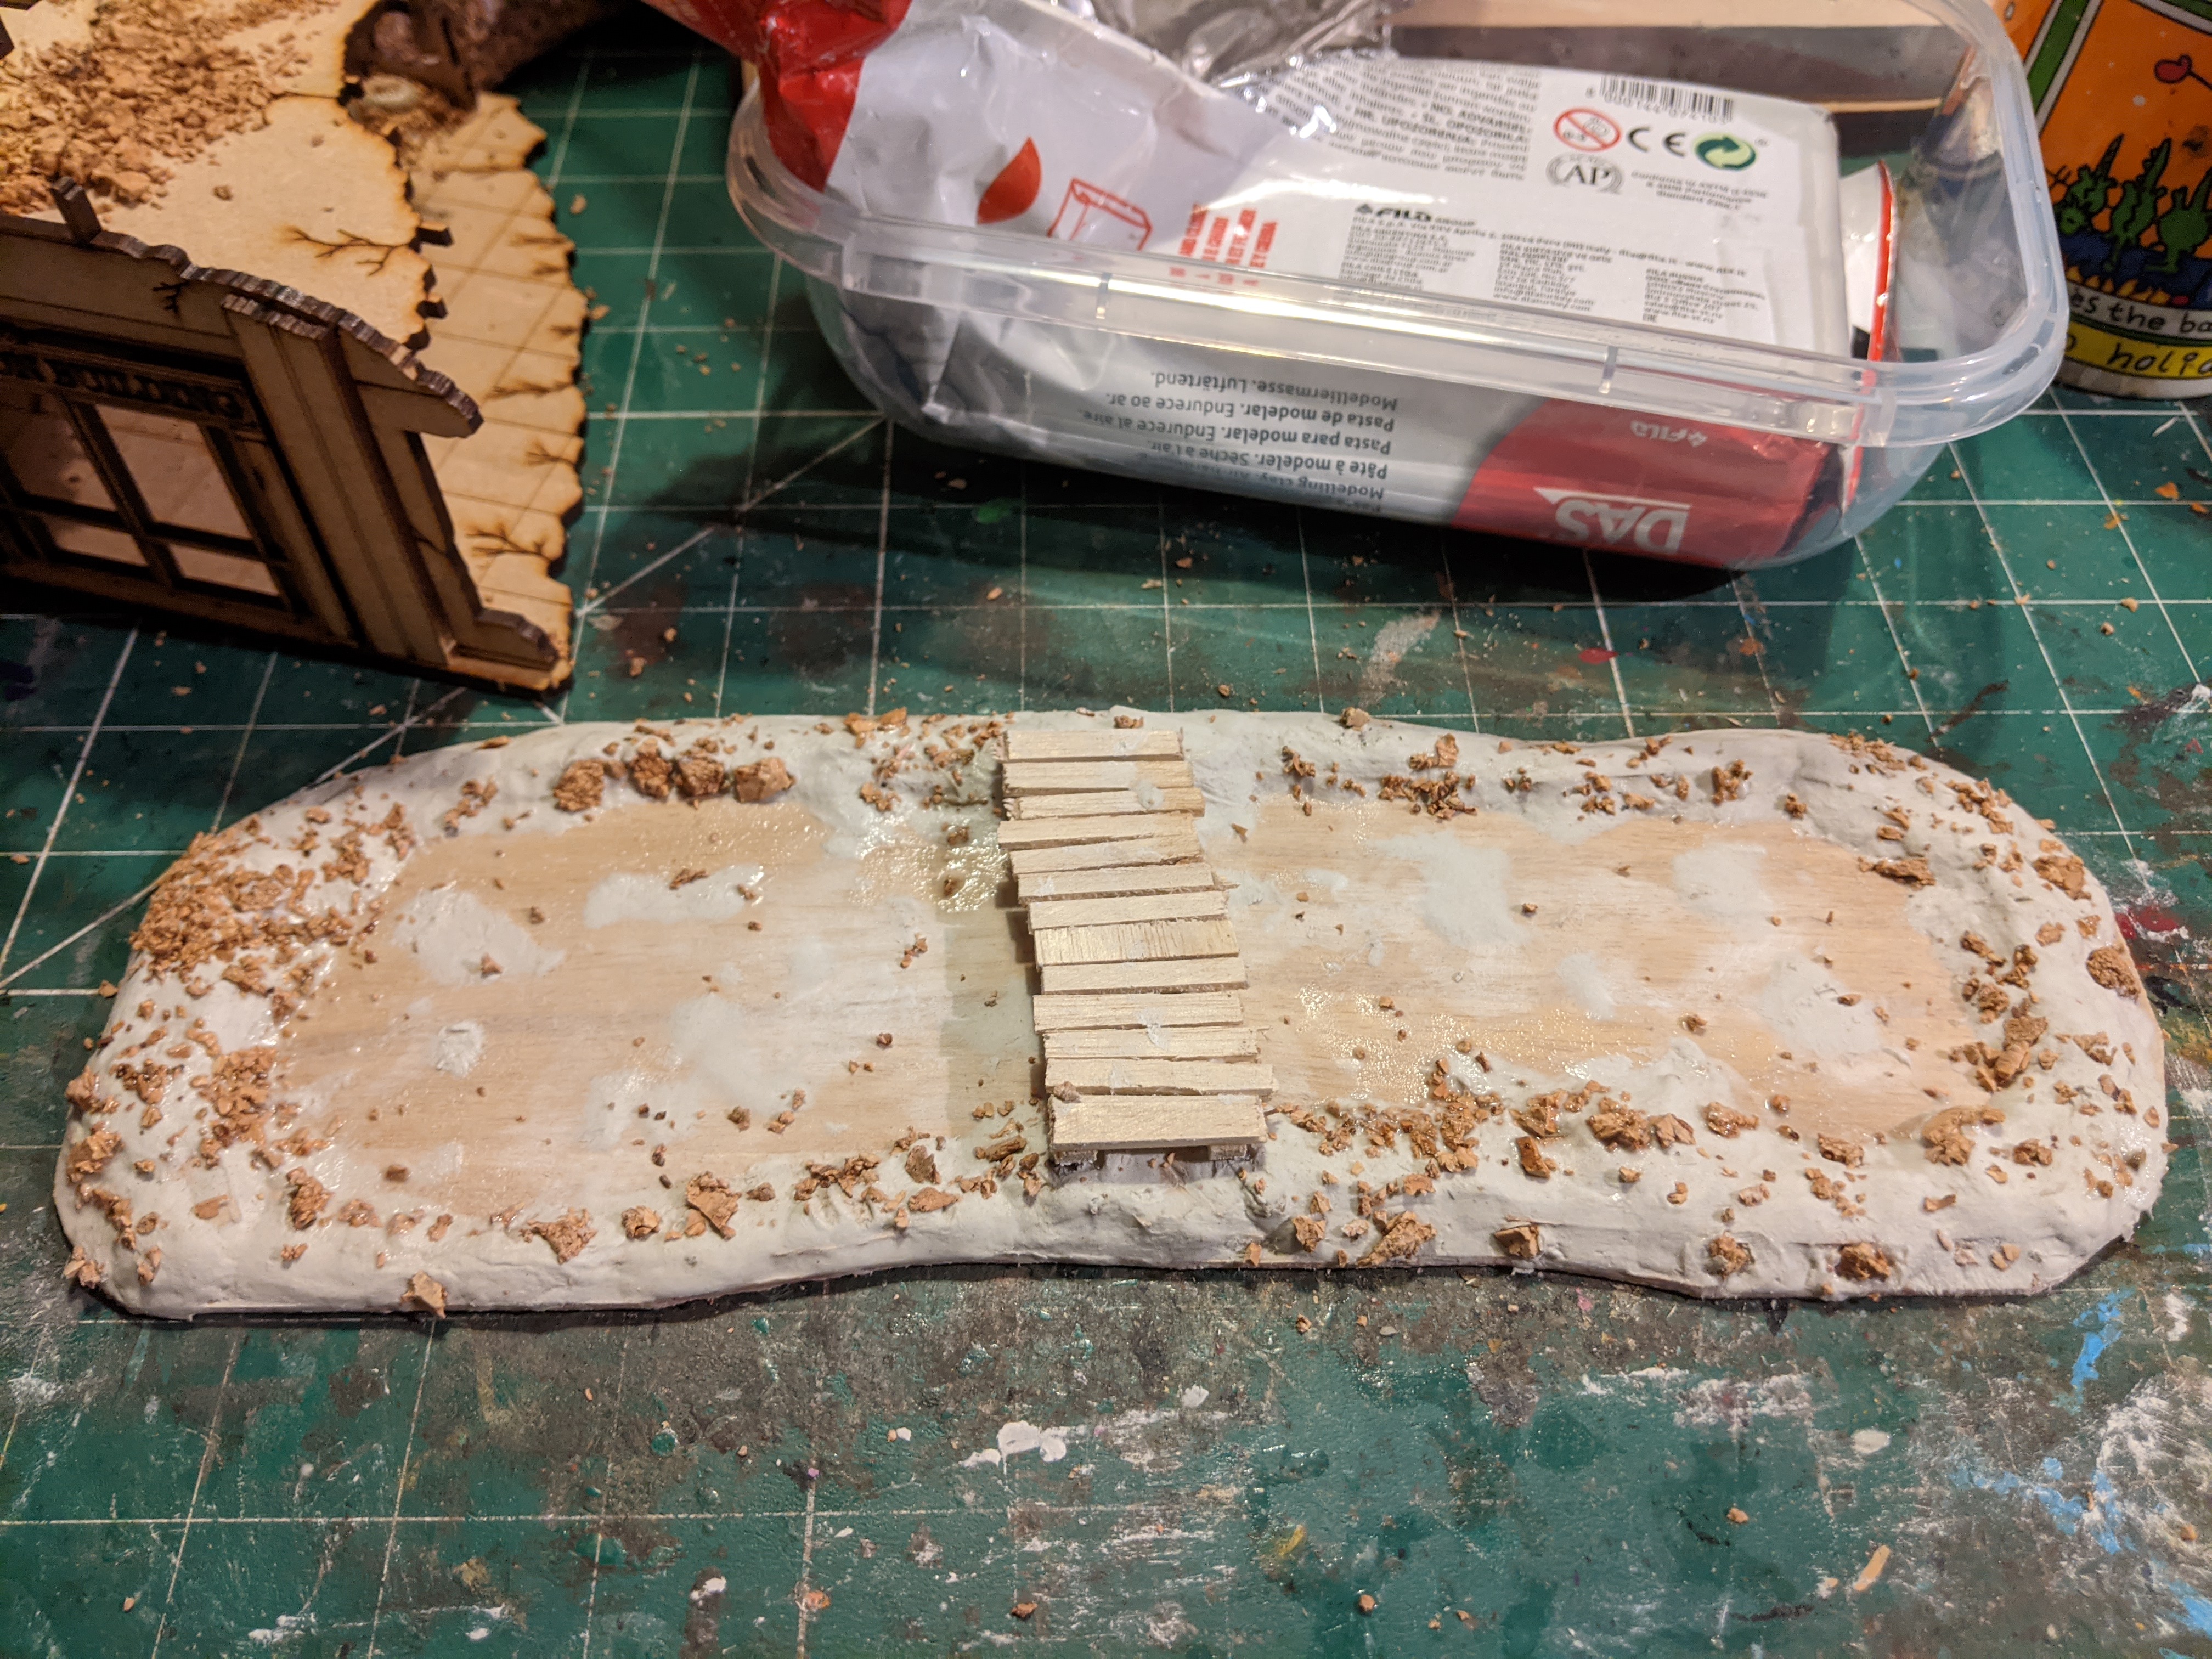 A bridge! Made with more balsa offcuts.
 I remembered to glue one of the alien fungus plants onto the side then psinted. I used strong green colours for the water but this will be knocked back a lot by the swamp effect water I'm going to add.
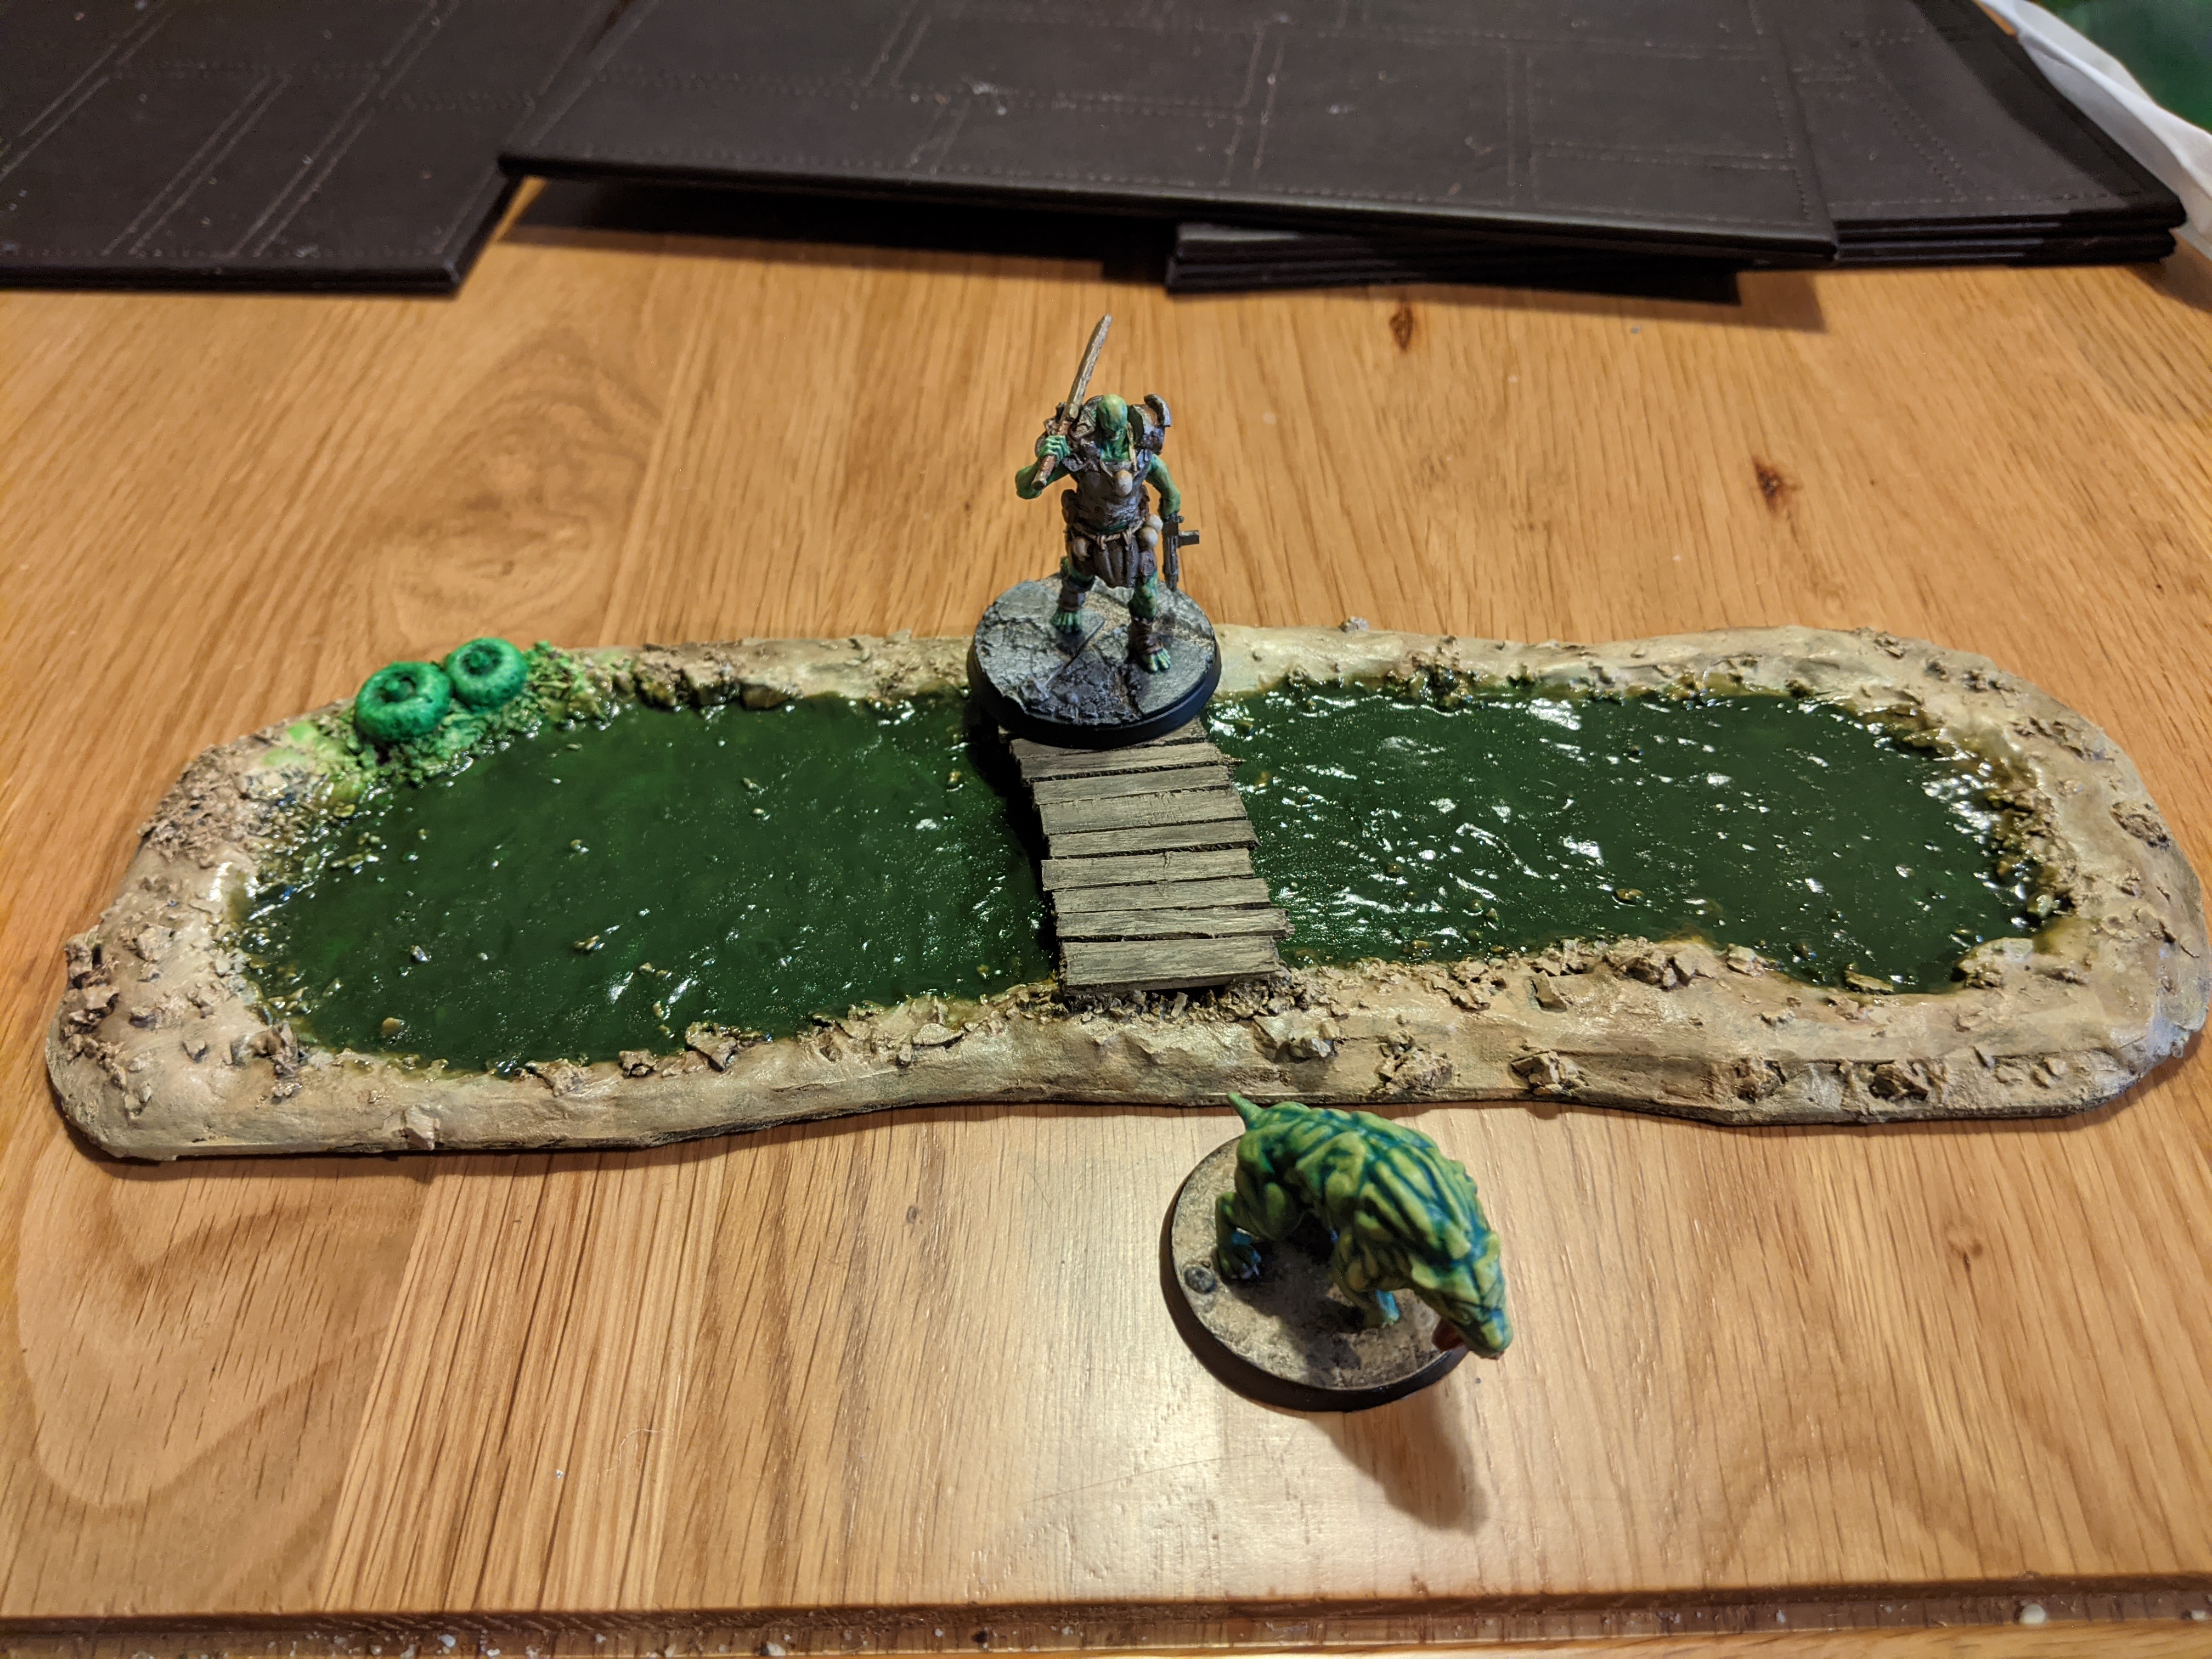 This is with two fairly thin layers of AK Swamp effect water over it. I'm fairly happy with the look although my glowing fungus look has been lost in the opaque water effect. I had tried to lighten the underlying base colour but it hasn't come through. No matter still looks like it will do the job!
Lexington Building
Today we have something a little larger for the table, the Lexington Building by TTCombat. This is another thing that has sat in the backlog far longer than intended!
I have added some extra details using cork chippings for rubble and some resin ‘alien plants’ again from The Square. I thought these resembled the mutated flora you will find throughout the world of Fallout growing in decaying ruins everywhere.
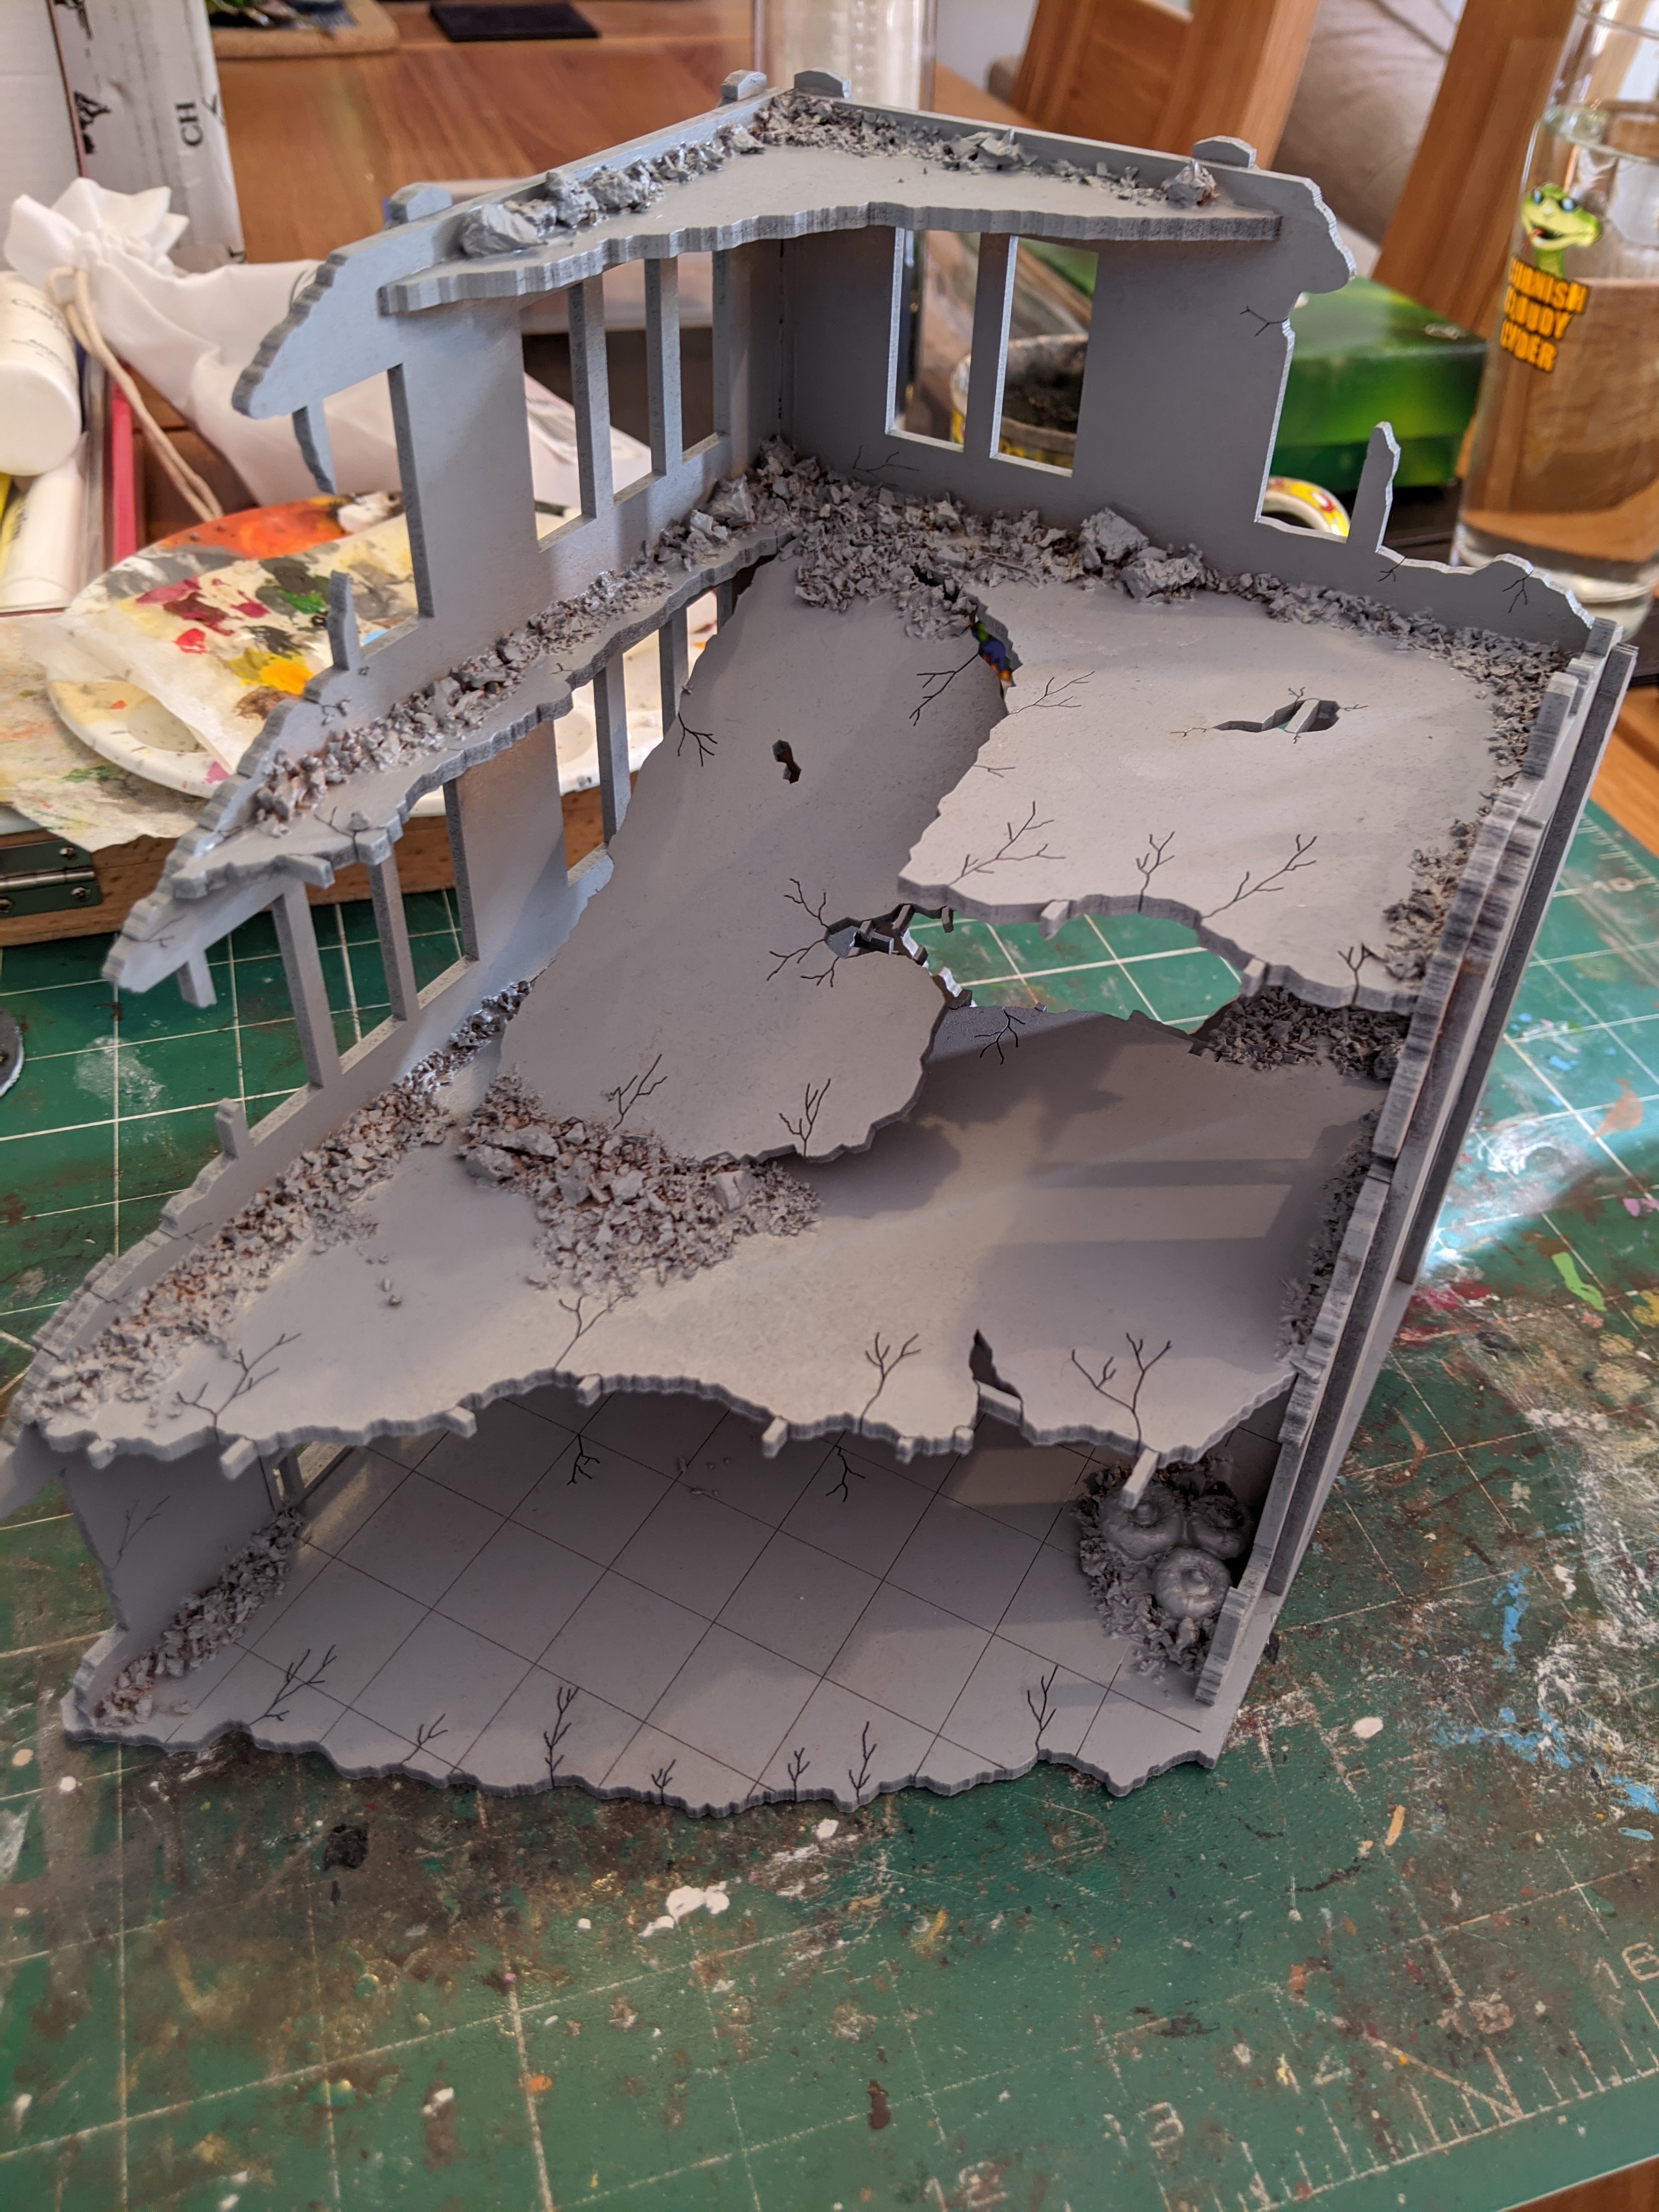 Sealed and primed grey. Loads of PVA glue used - that cork had better stay on!
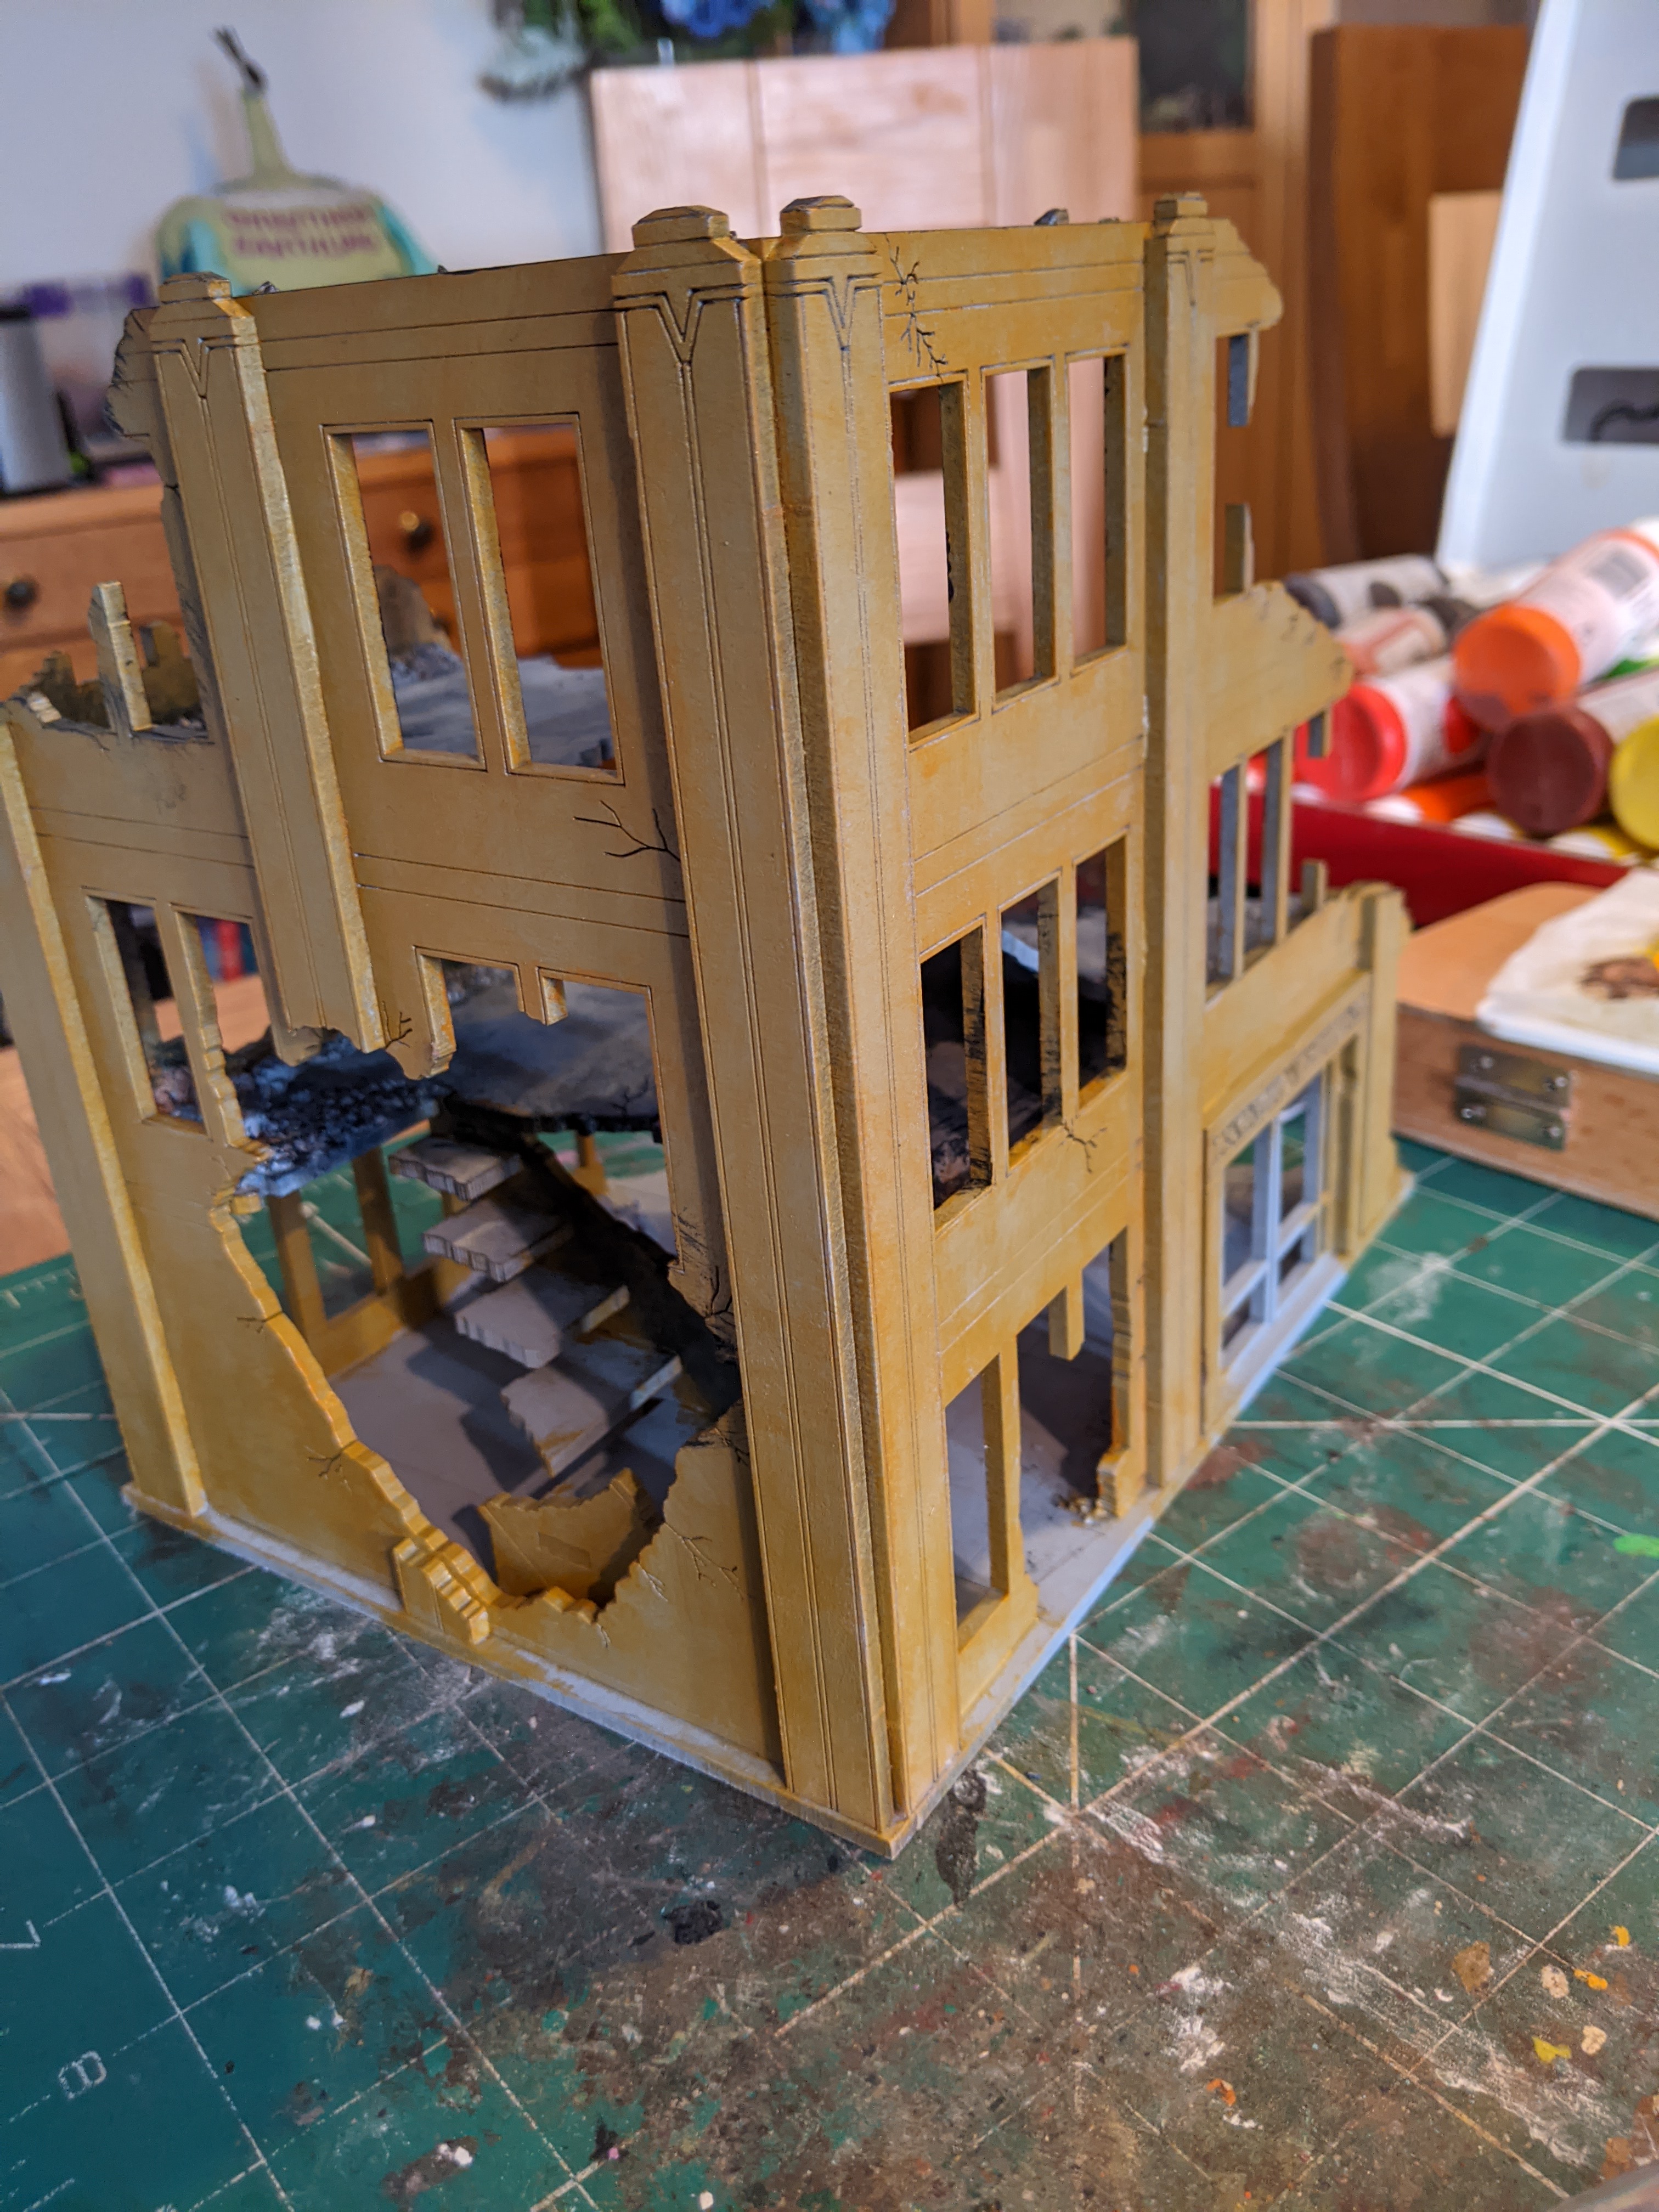 A light base coat all over. Not worrying about coverage here, because this is getting layers.
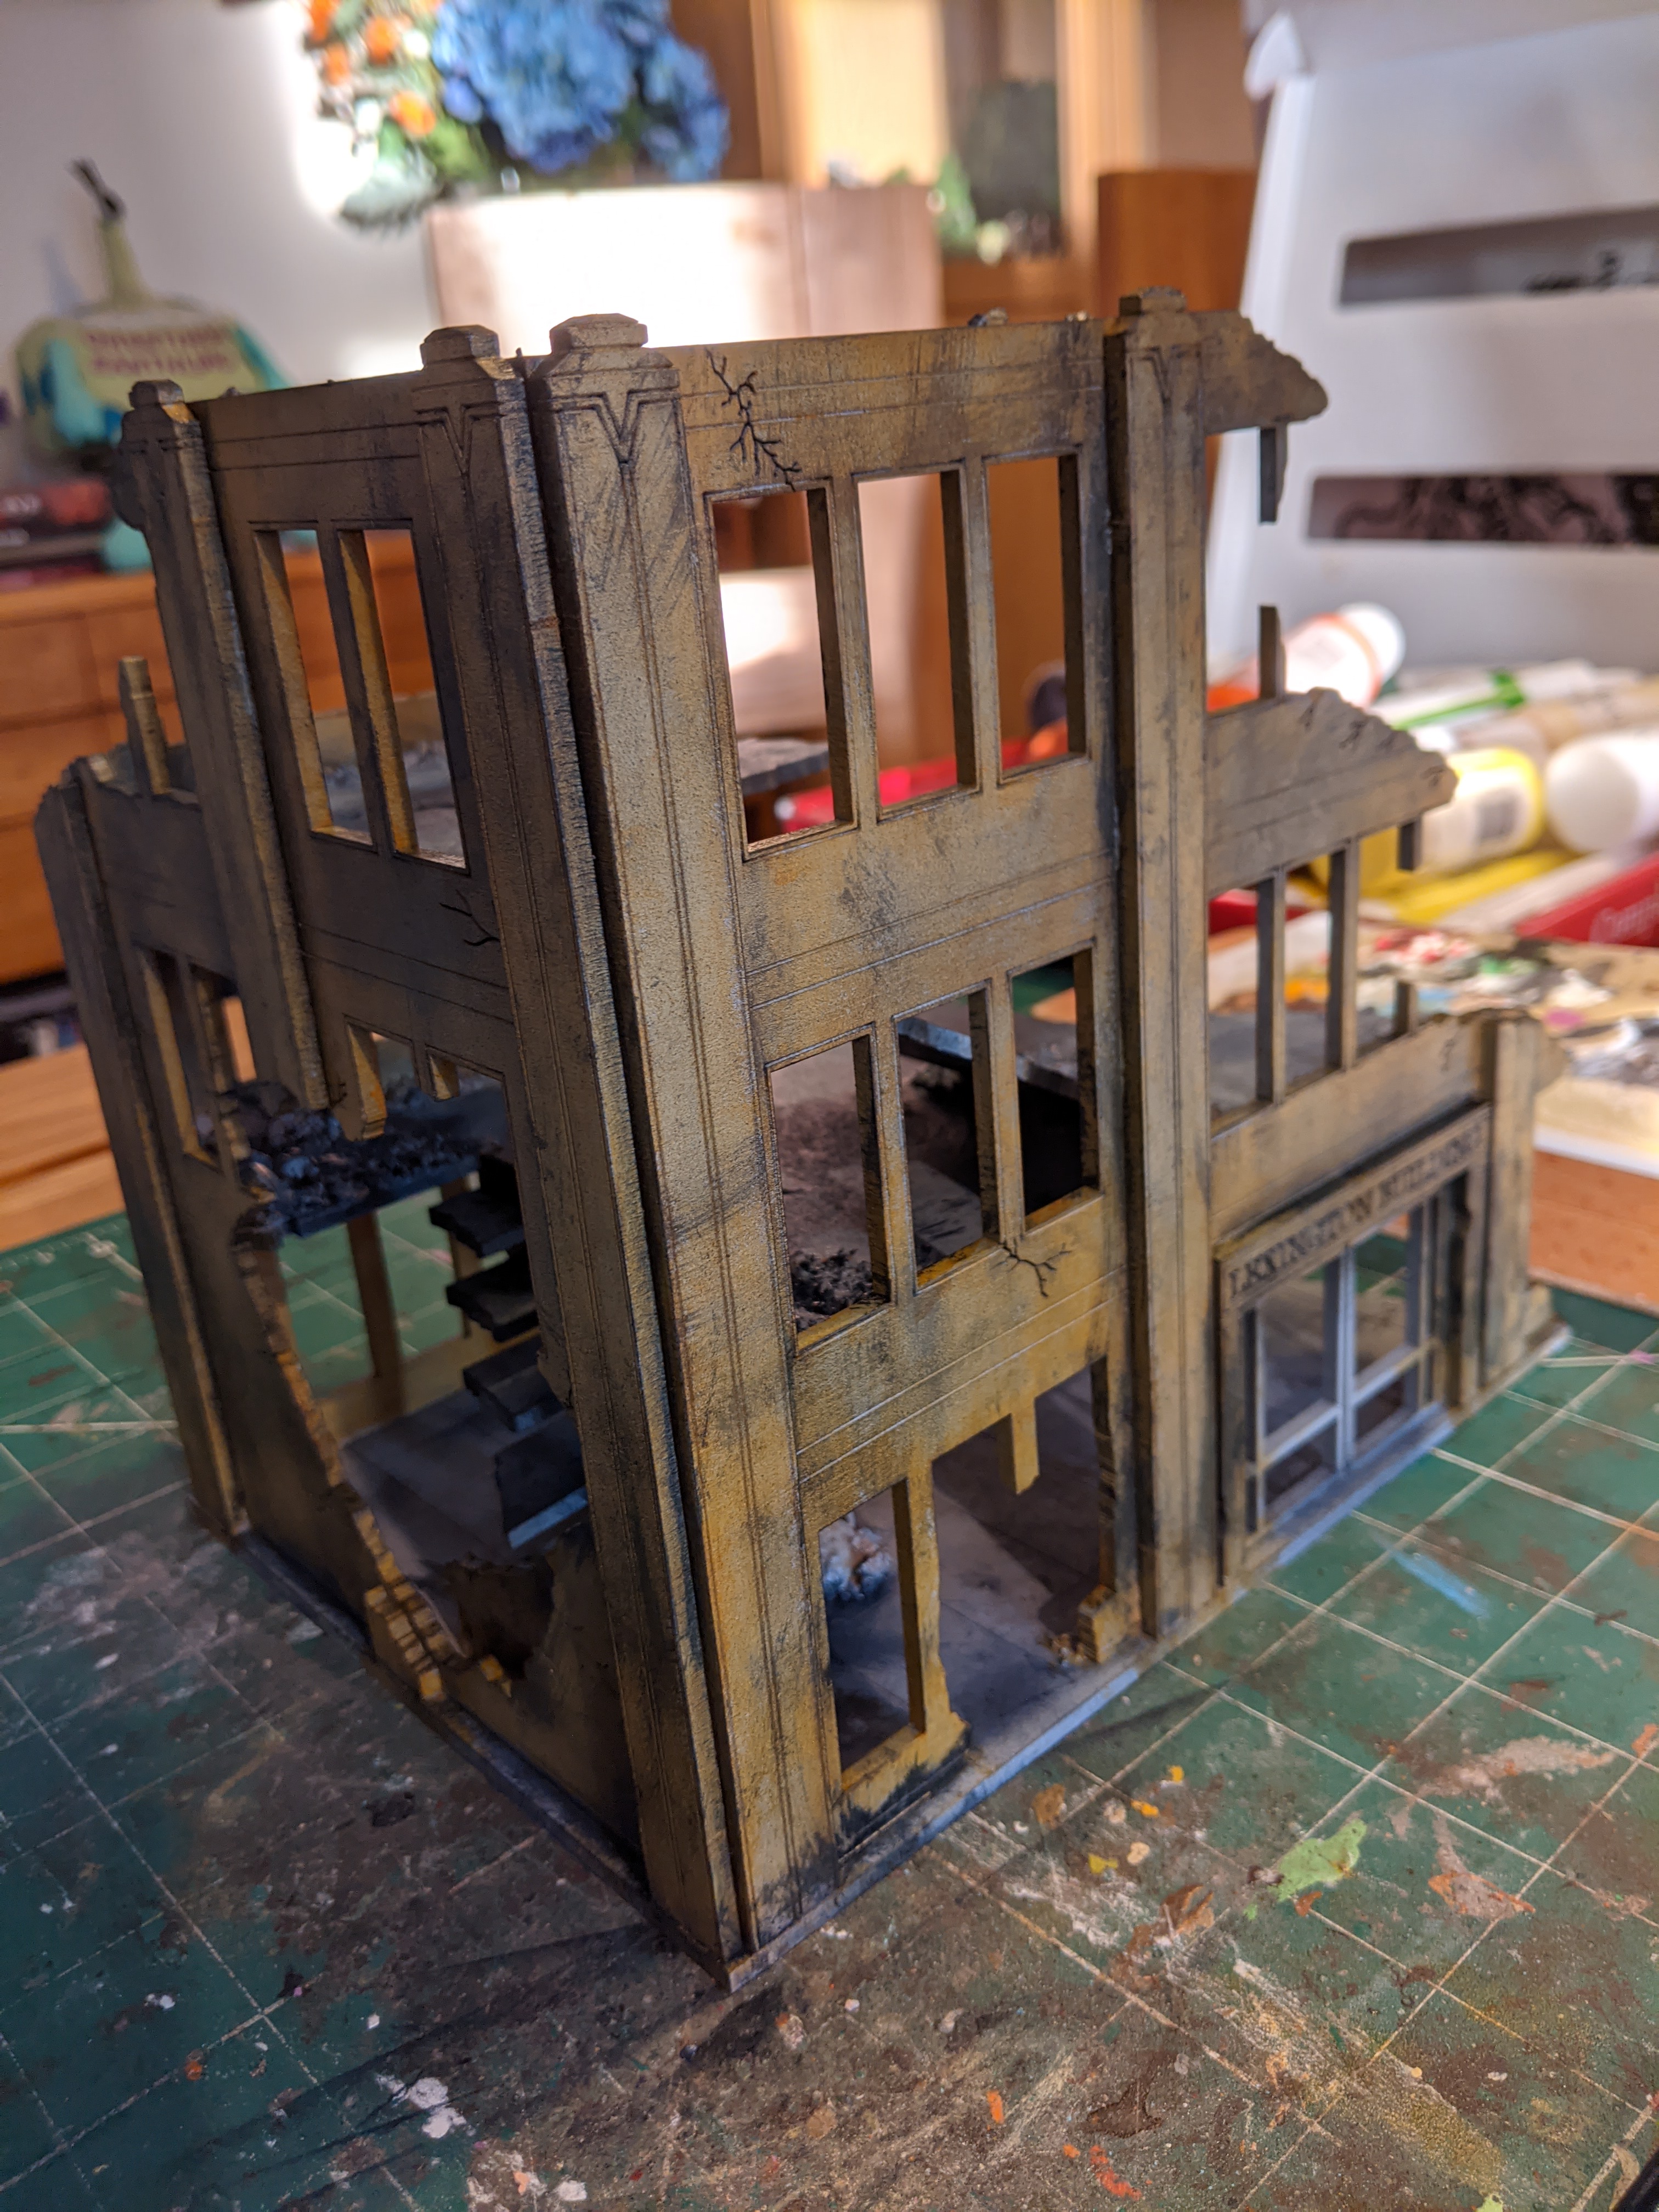 Dirtied up with black dry brushed a bit randomly but with attention to recesses.
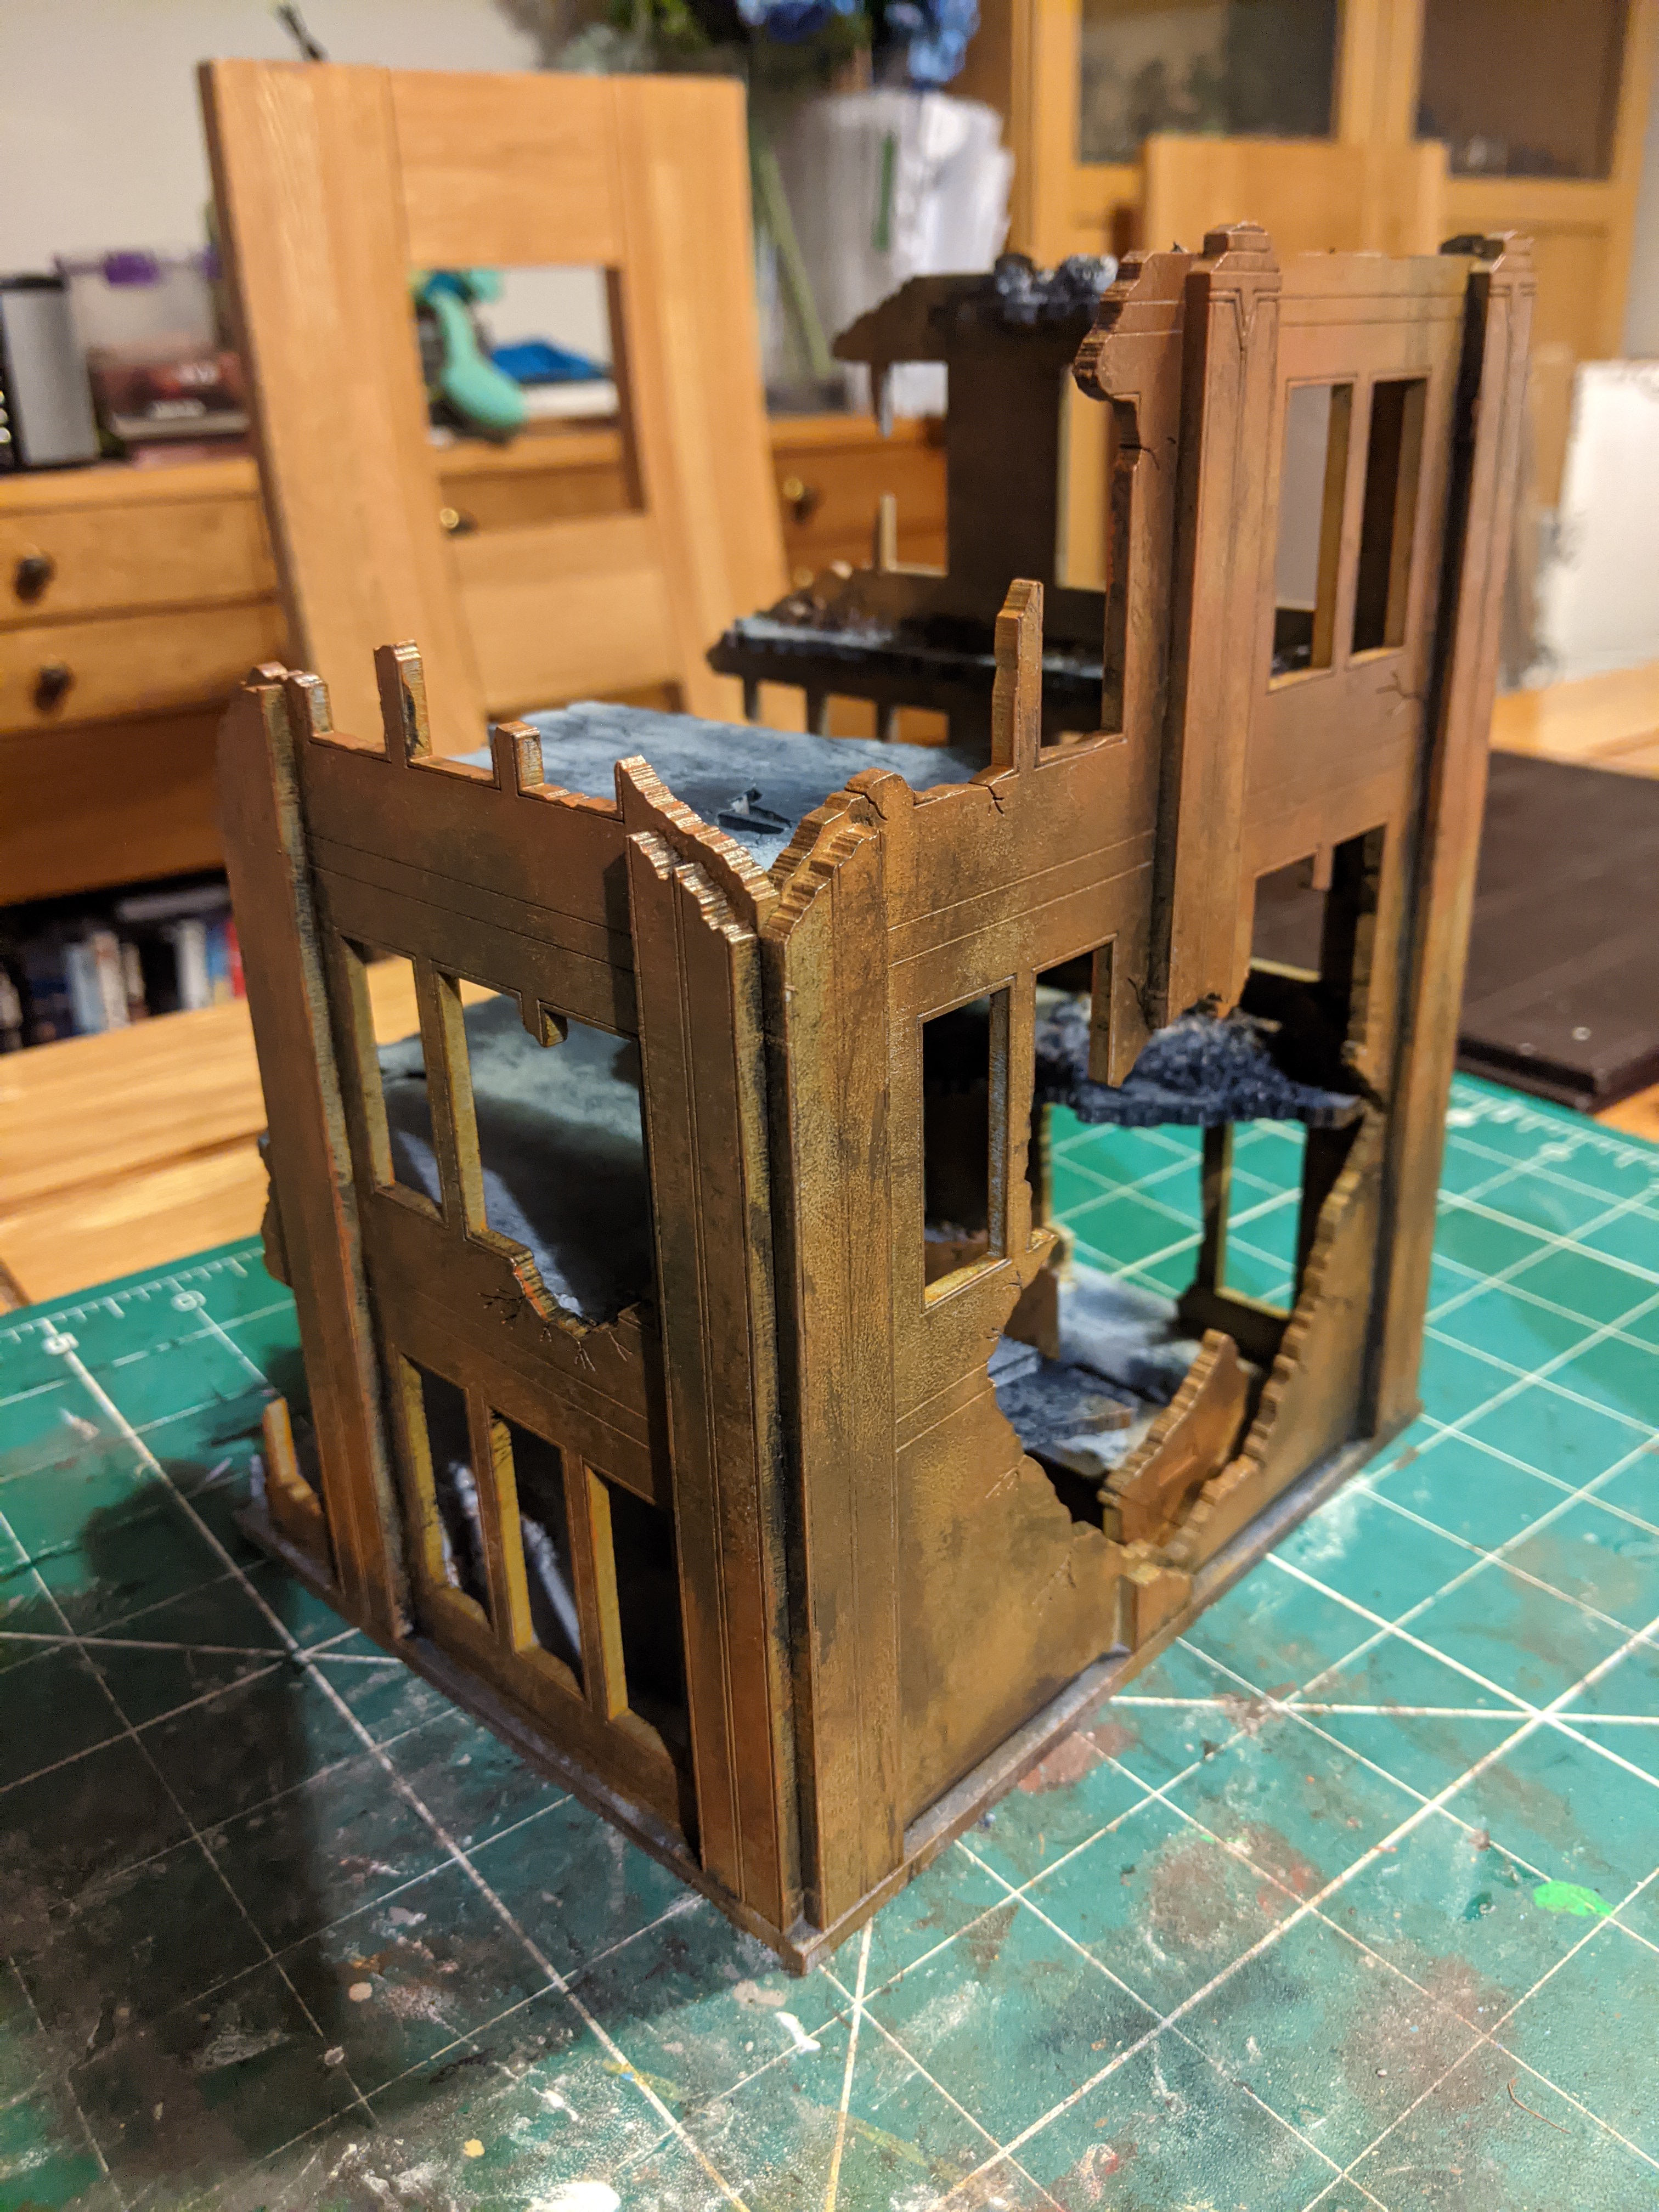 I through an orange into the mix next to imply a bit of variation in the brick/stone.
 Here I went too light. I wanted a grubby off white but in person the white covered too well and washed it out.
 So I brought the sandy base colour out again and knocked it back.
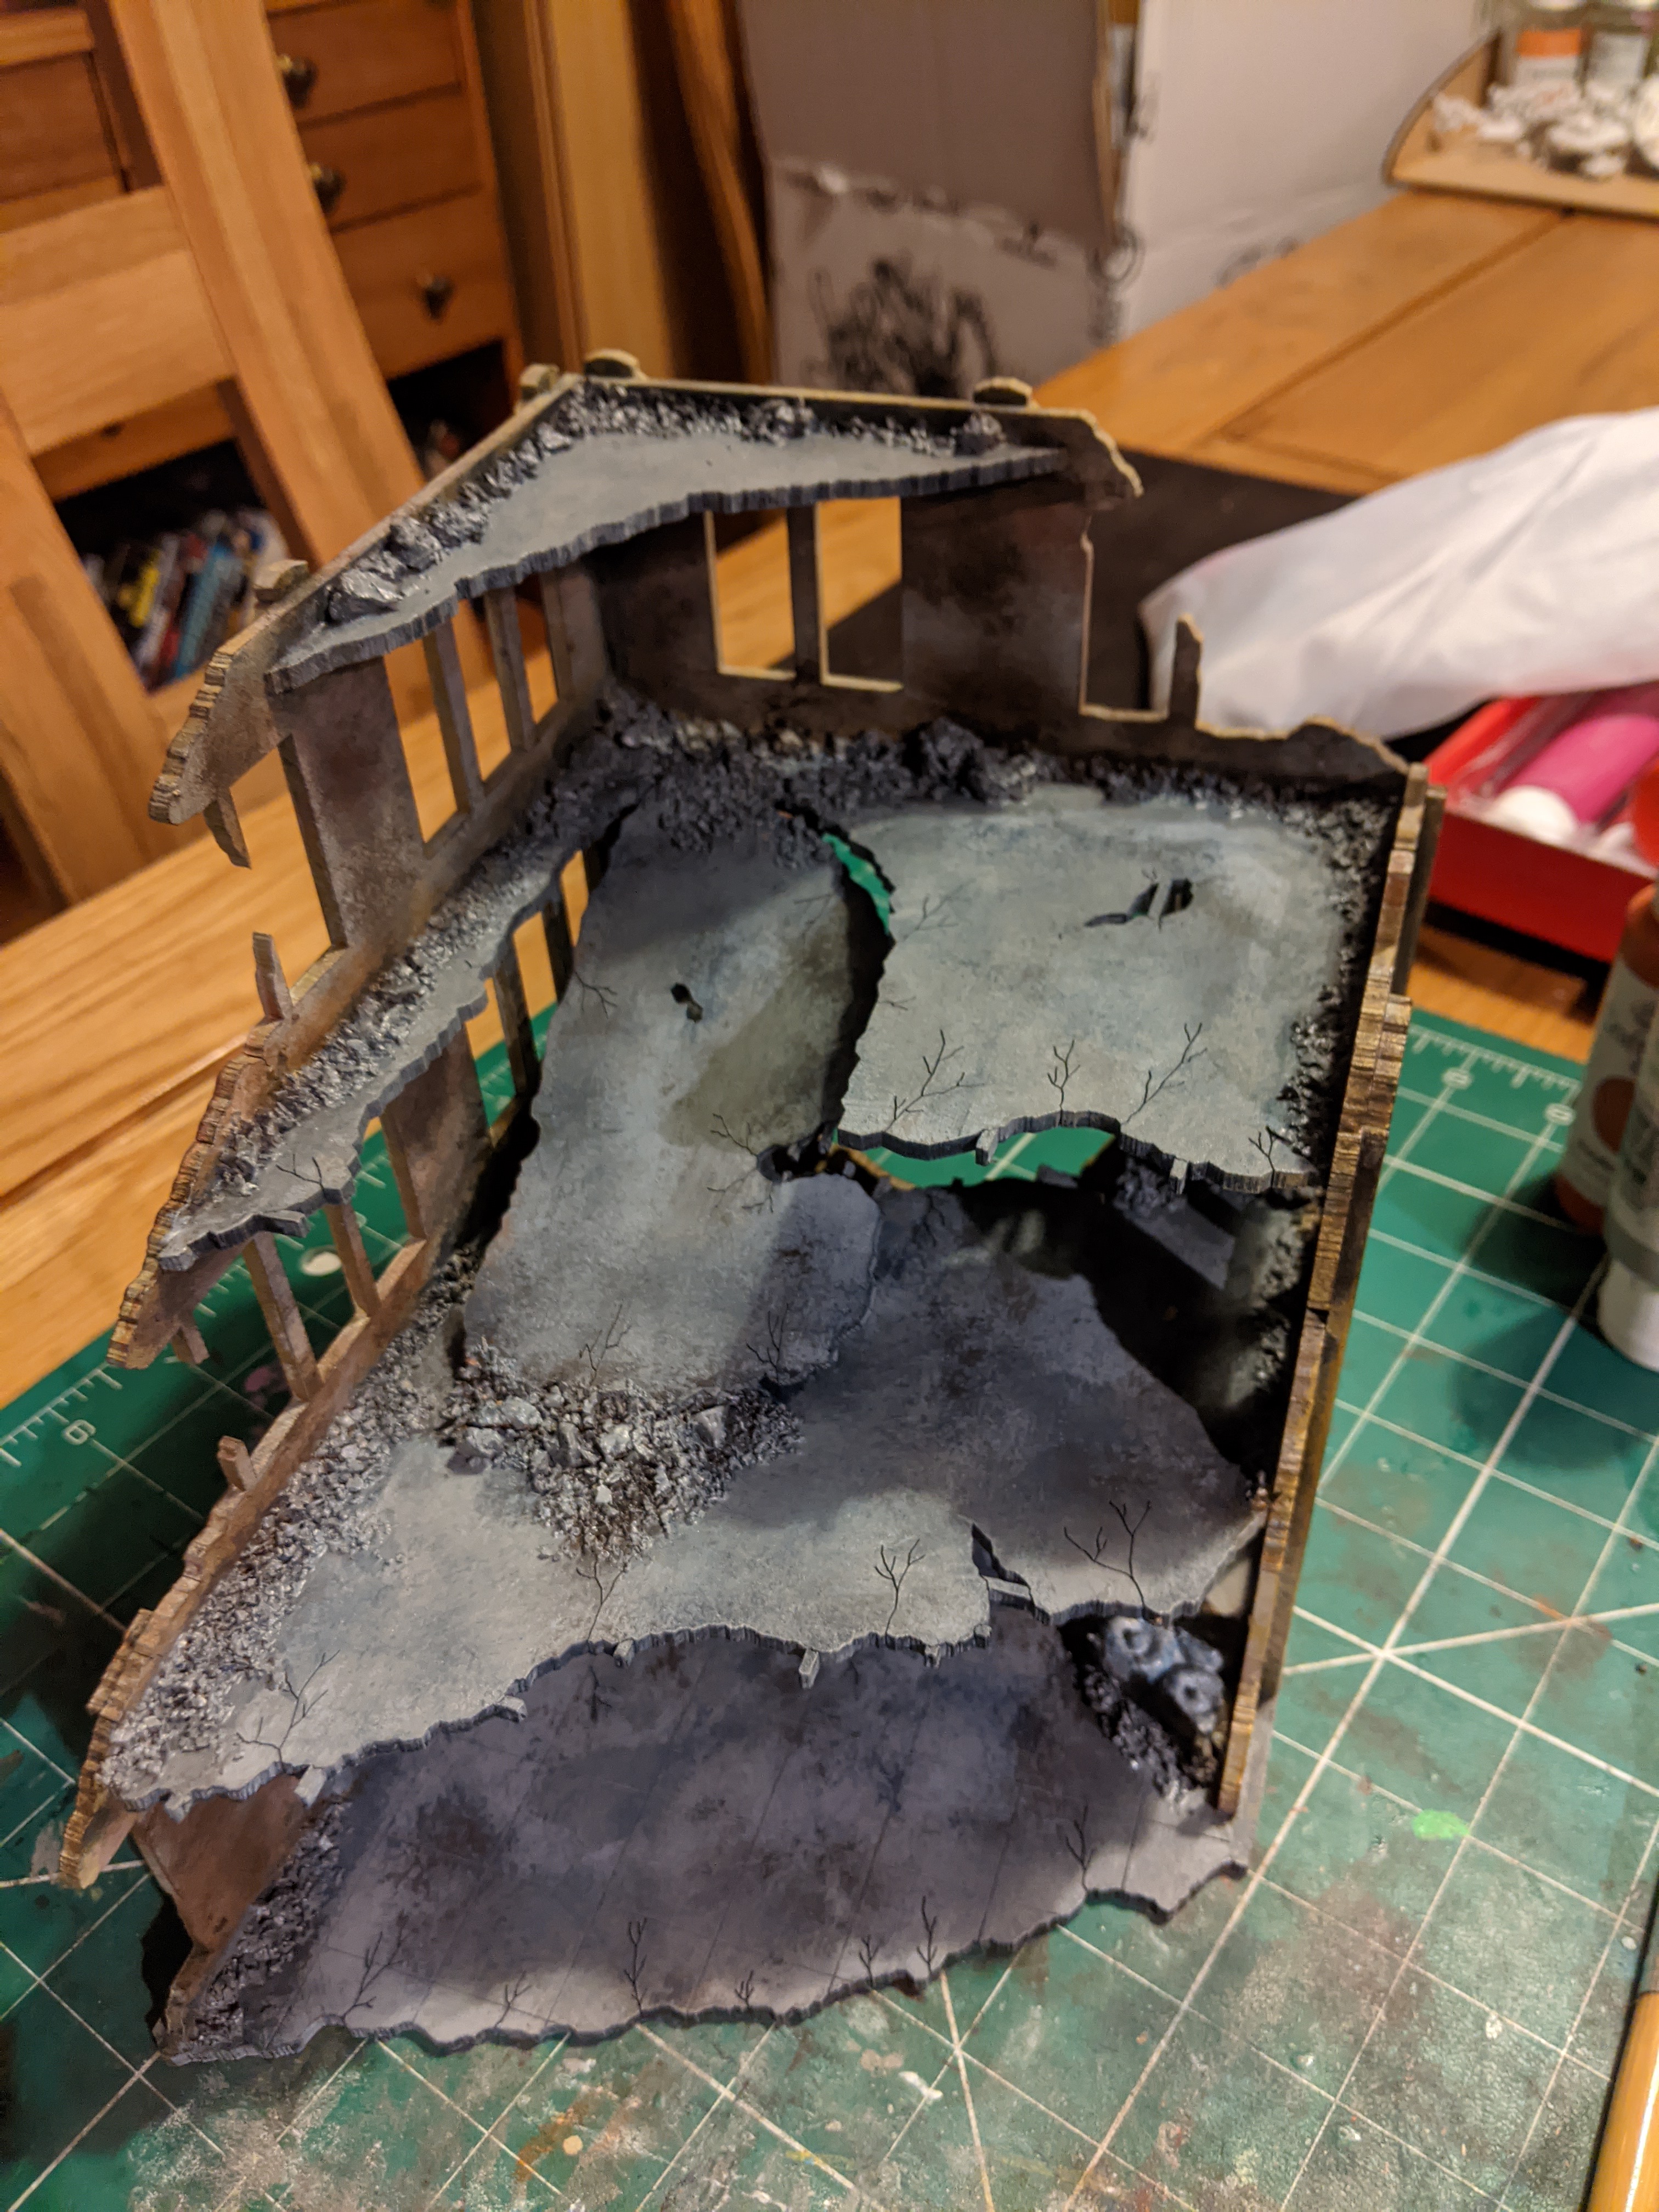 Black, grey and a bit of brown dry brushed together for the floors..
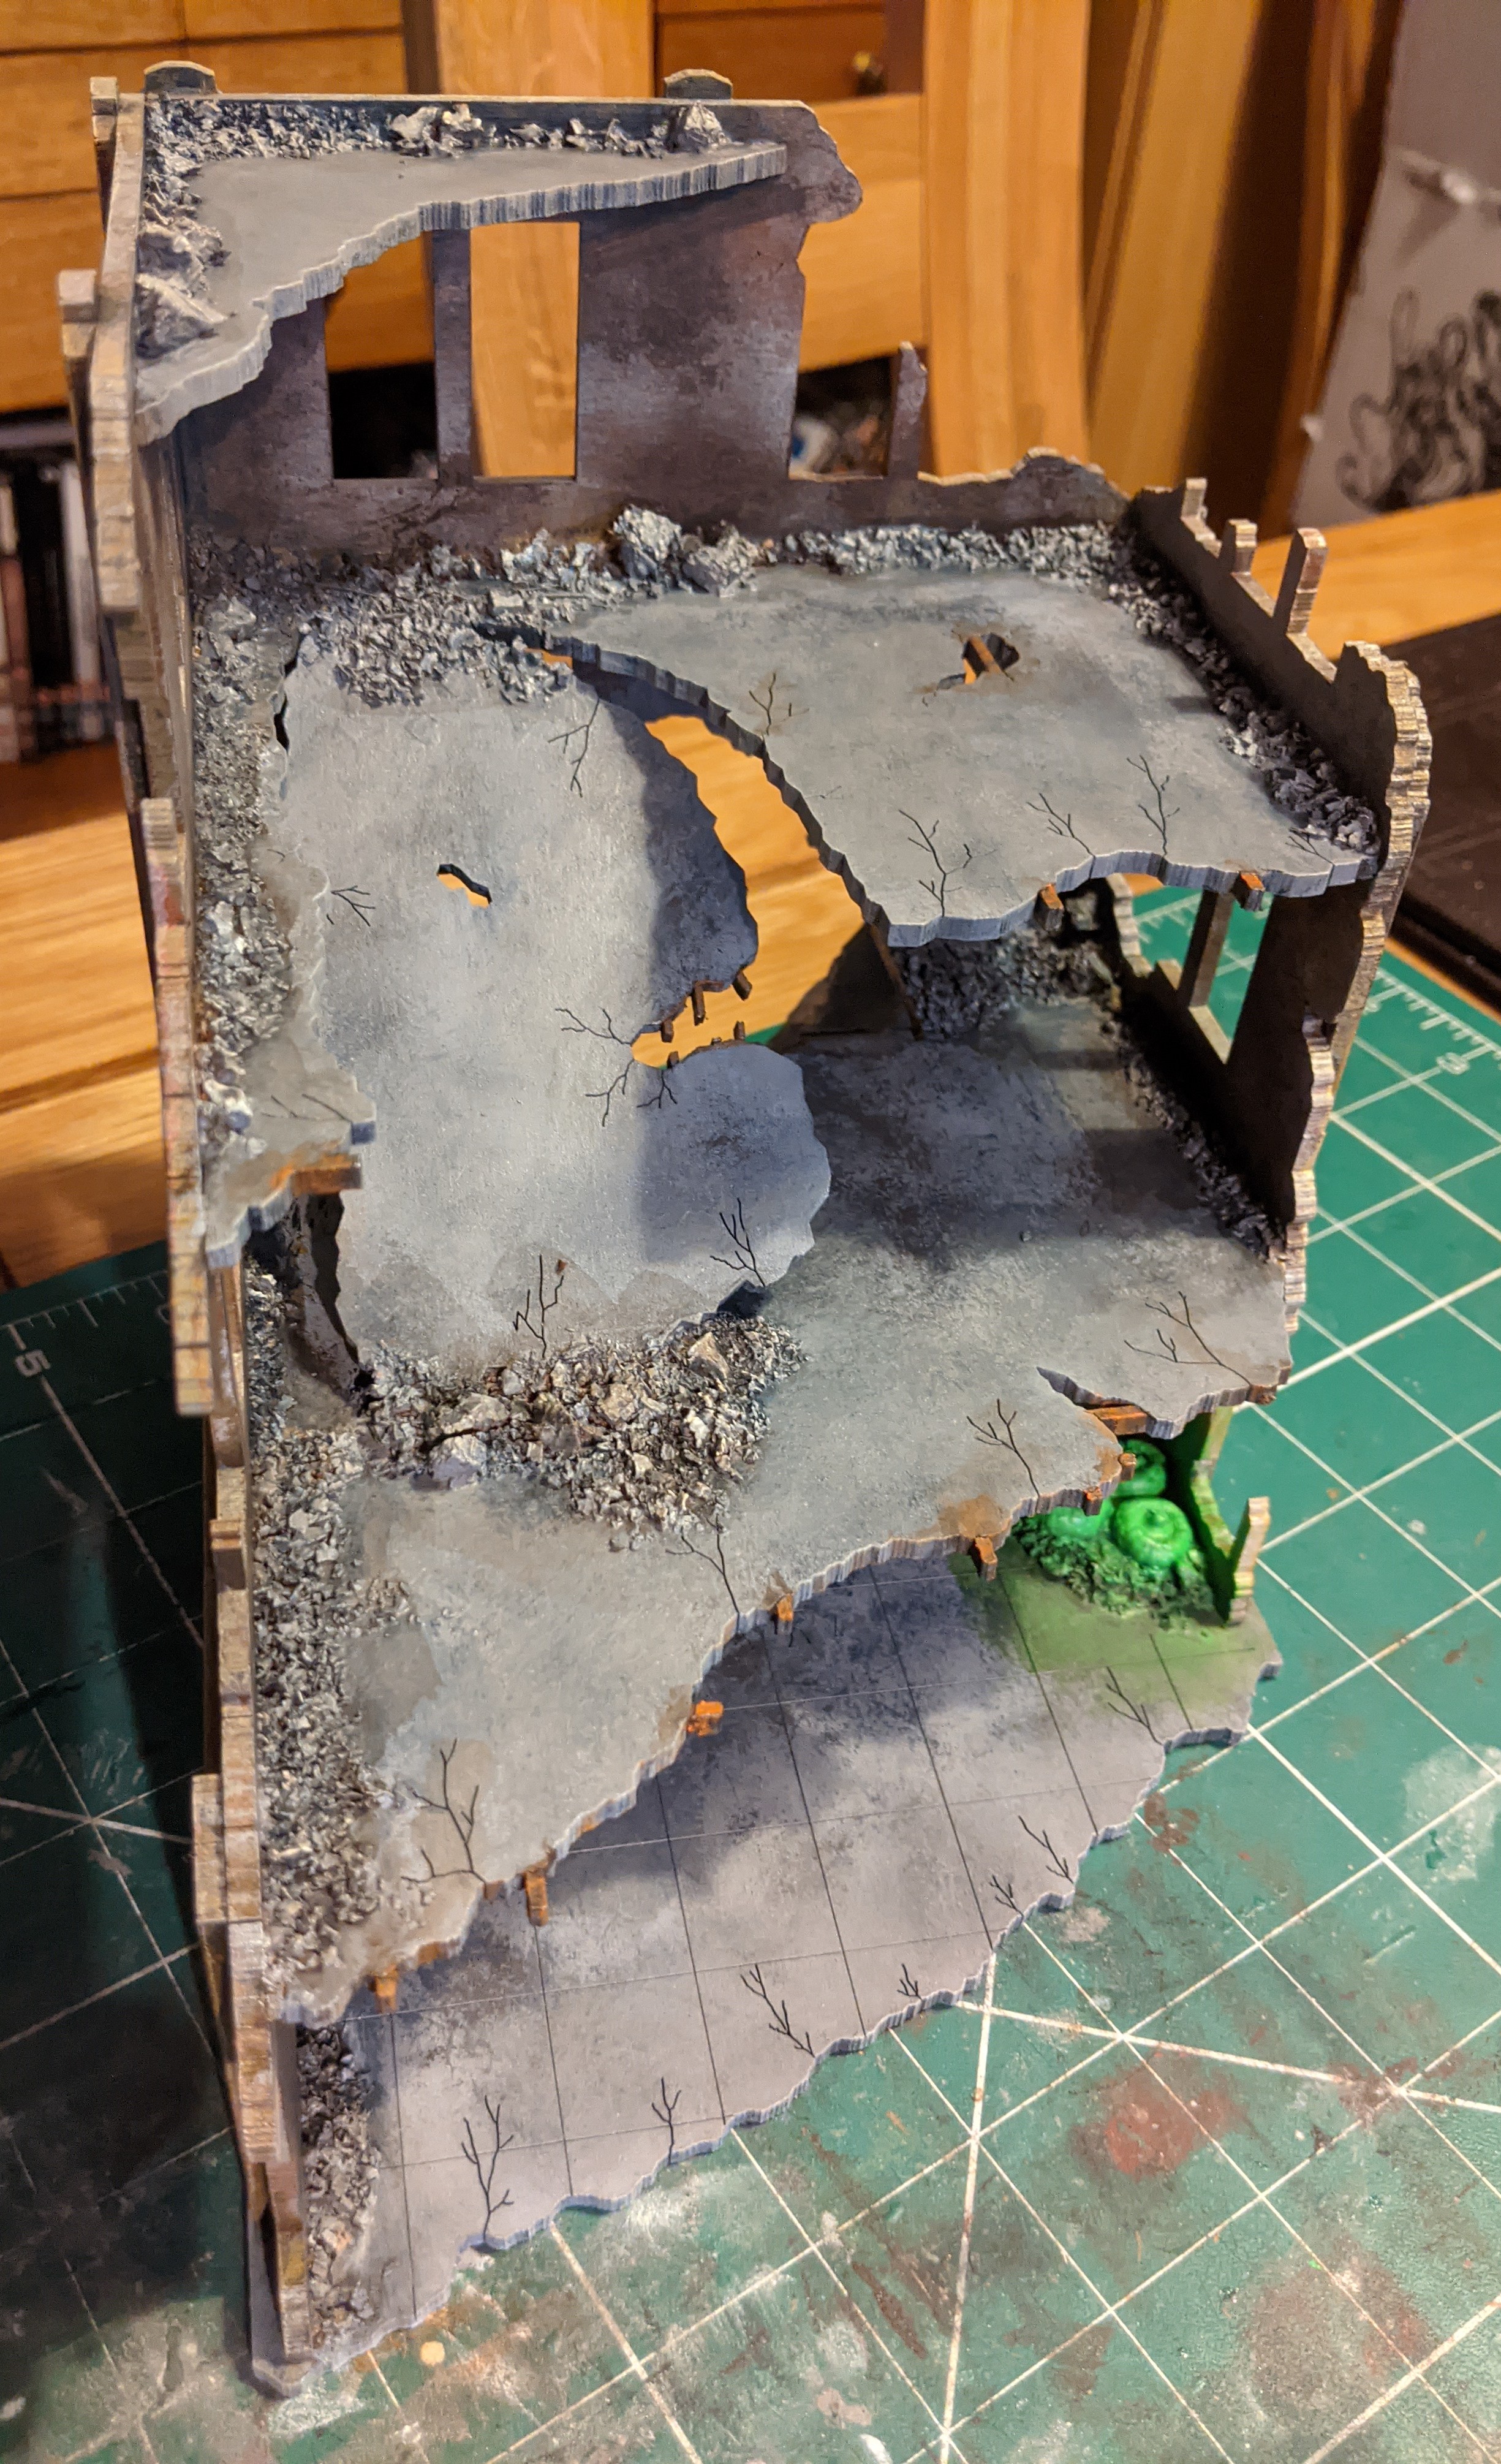 Picking out rebar, the glowing mutant fungi and I put some agrax earthshade over the rubble.e
 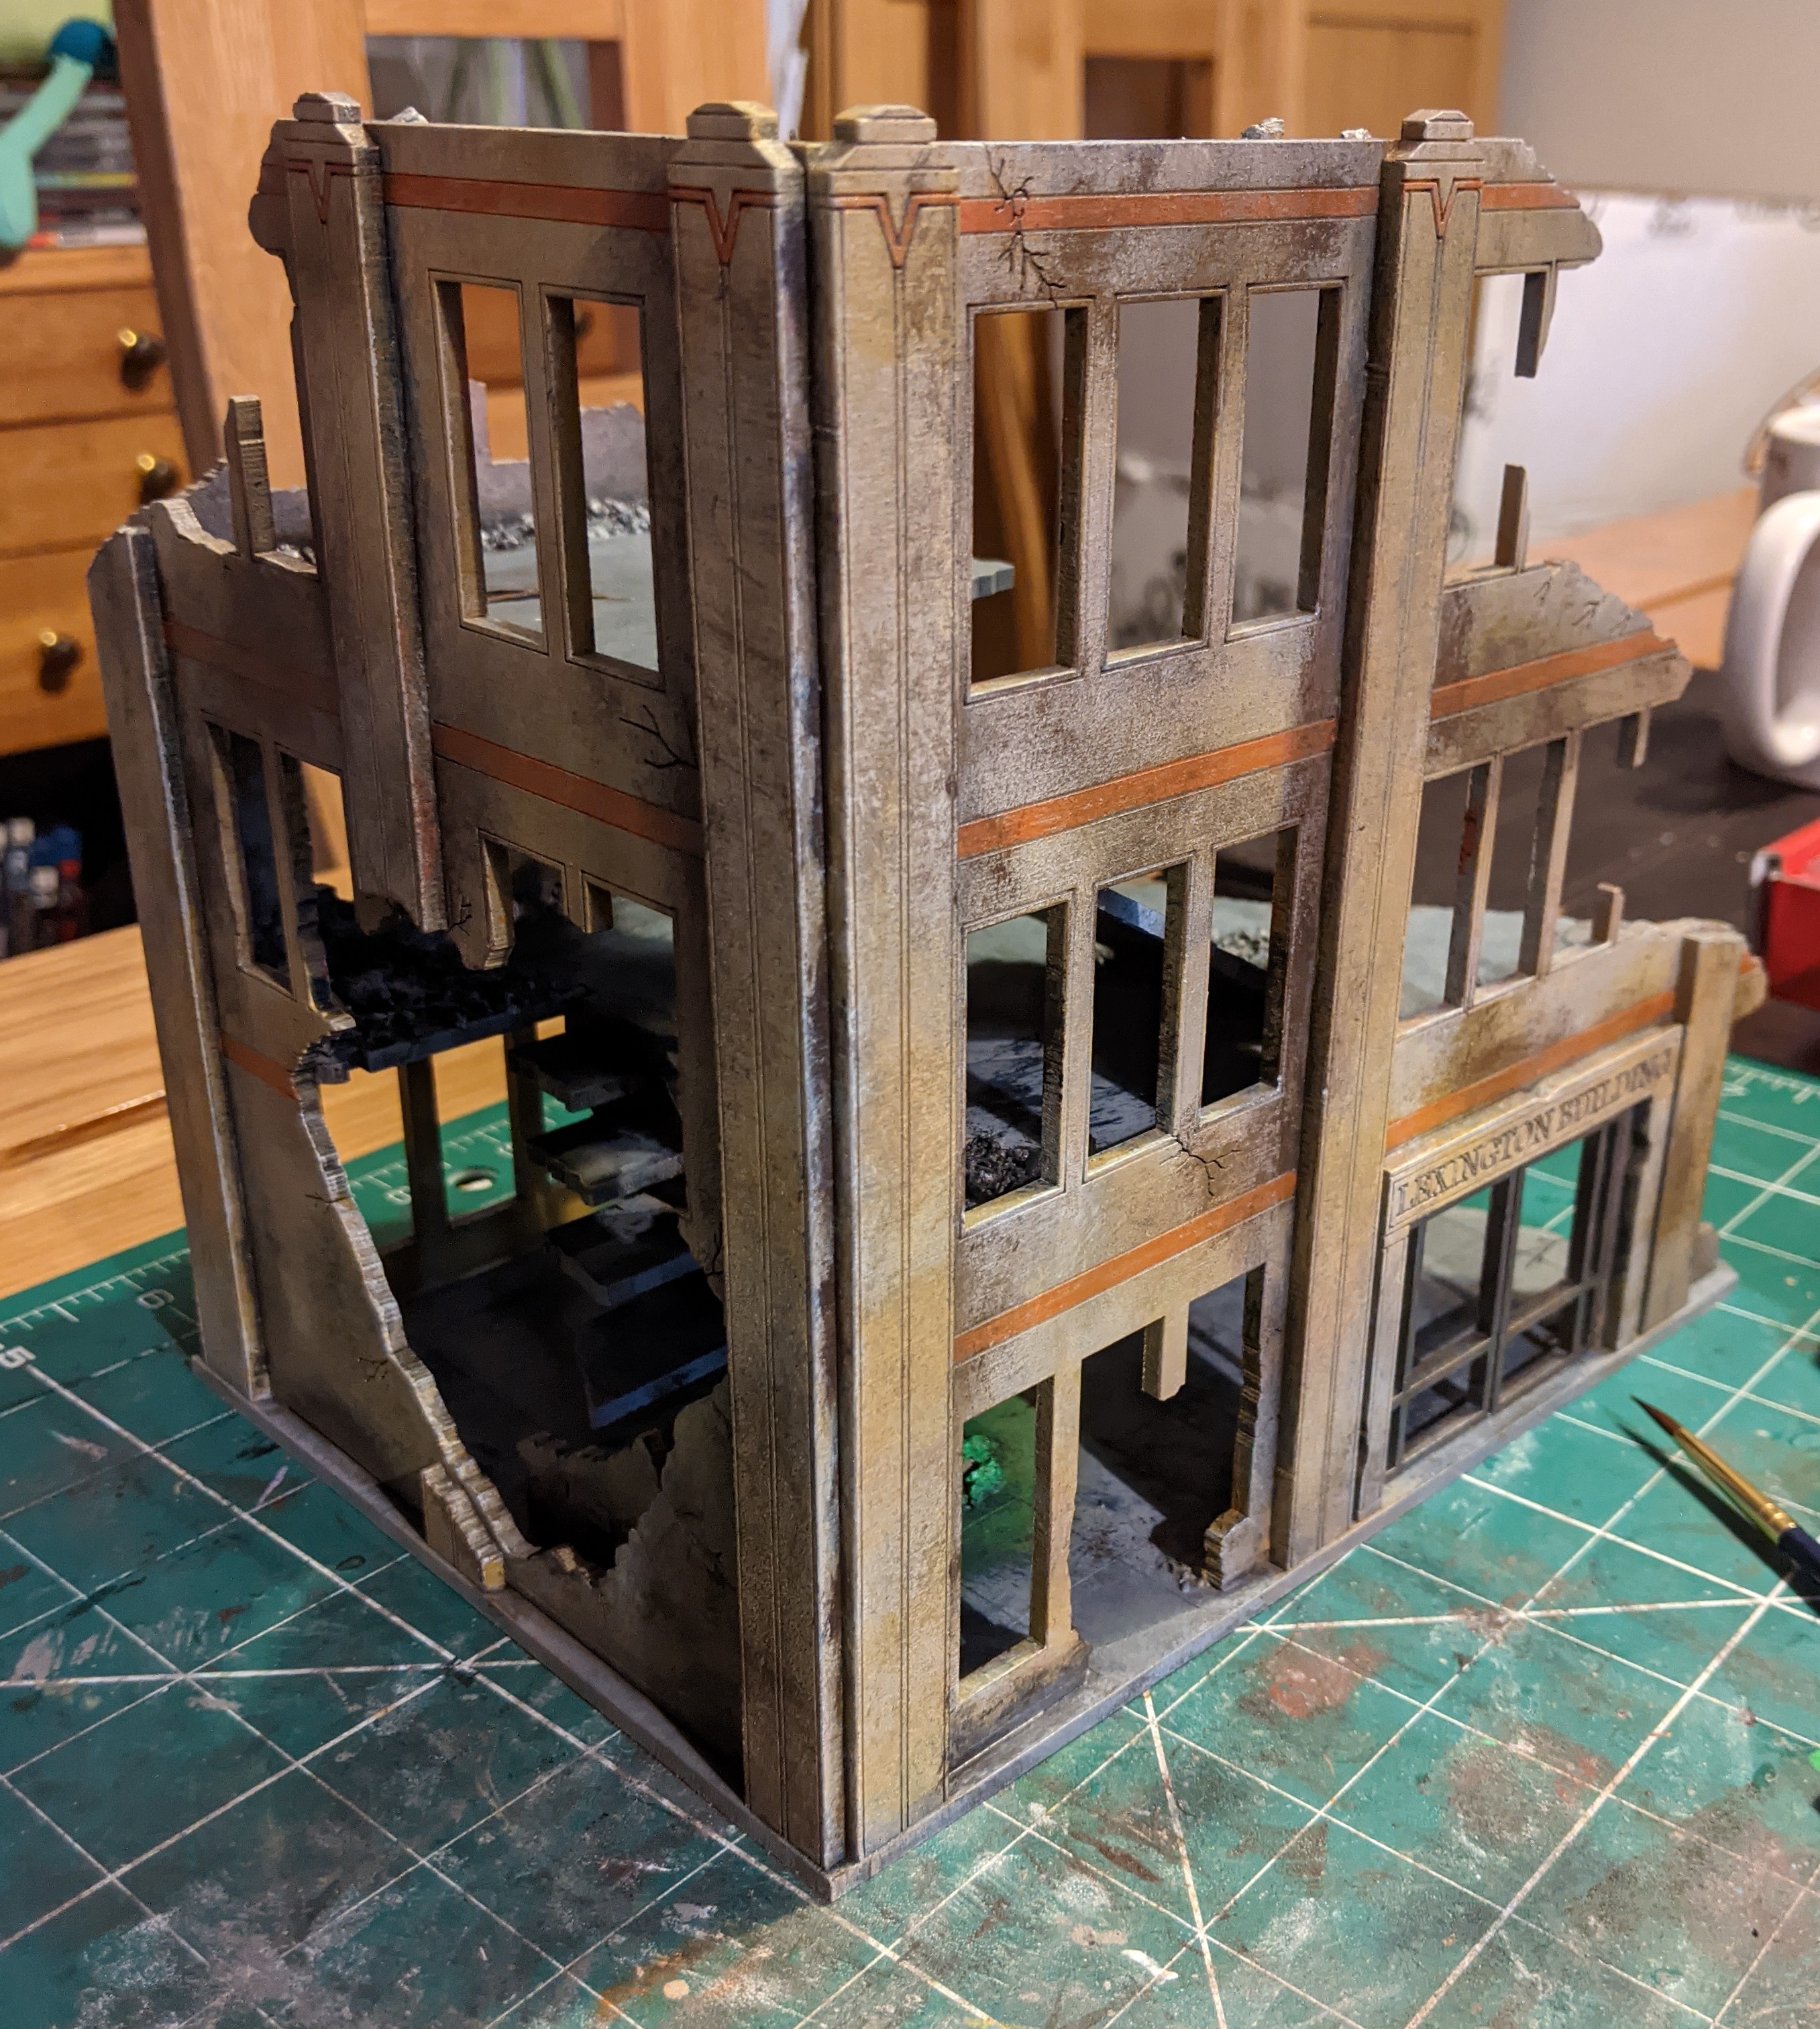 Finally I picked out the orange stripe with a thin coat to leave the grime showing through and dry brushed a little white along the top edges of the walls and window frames.
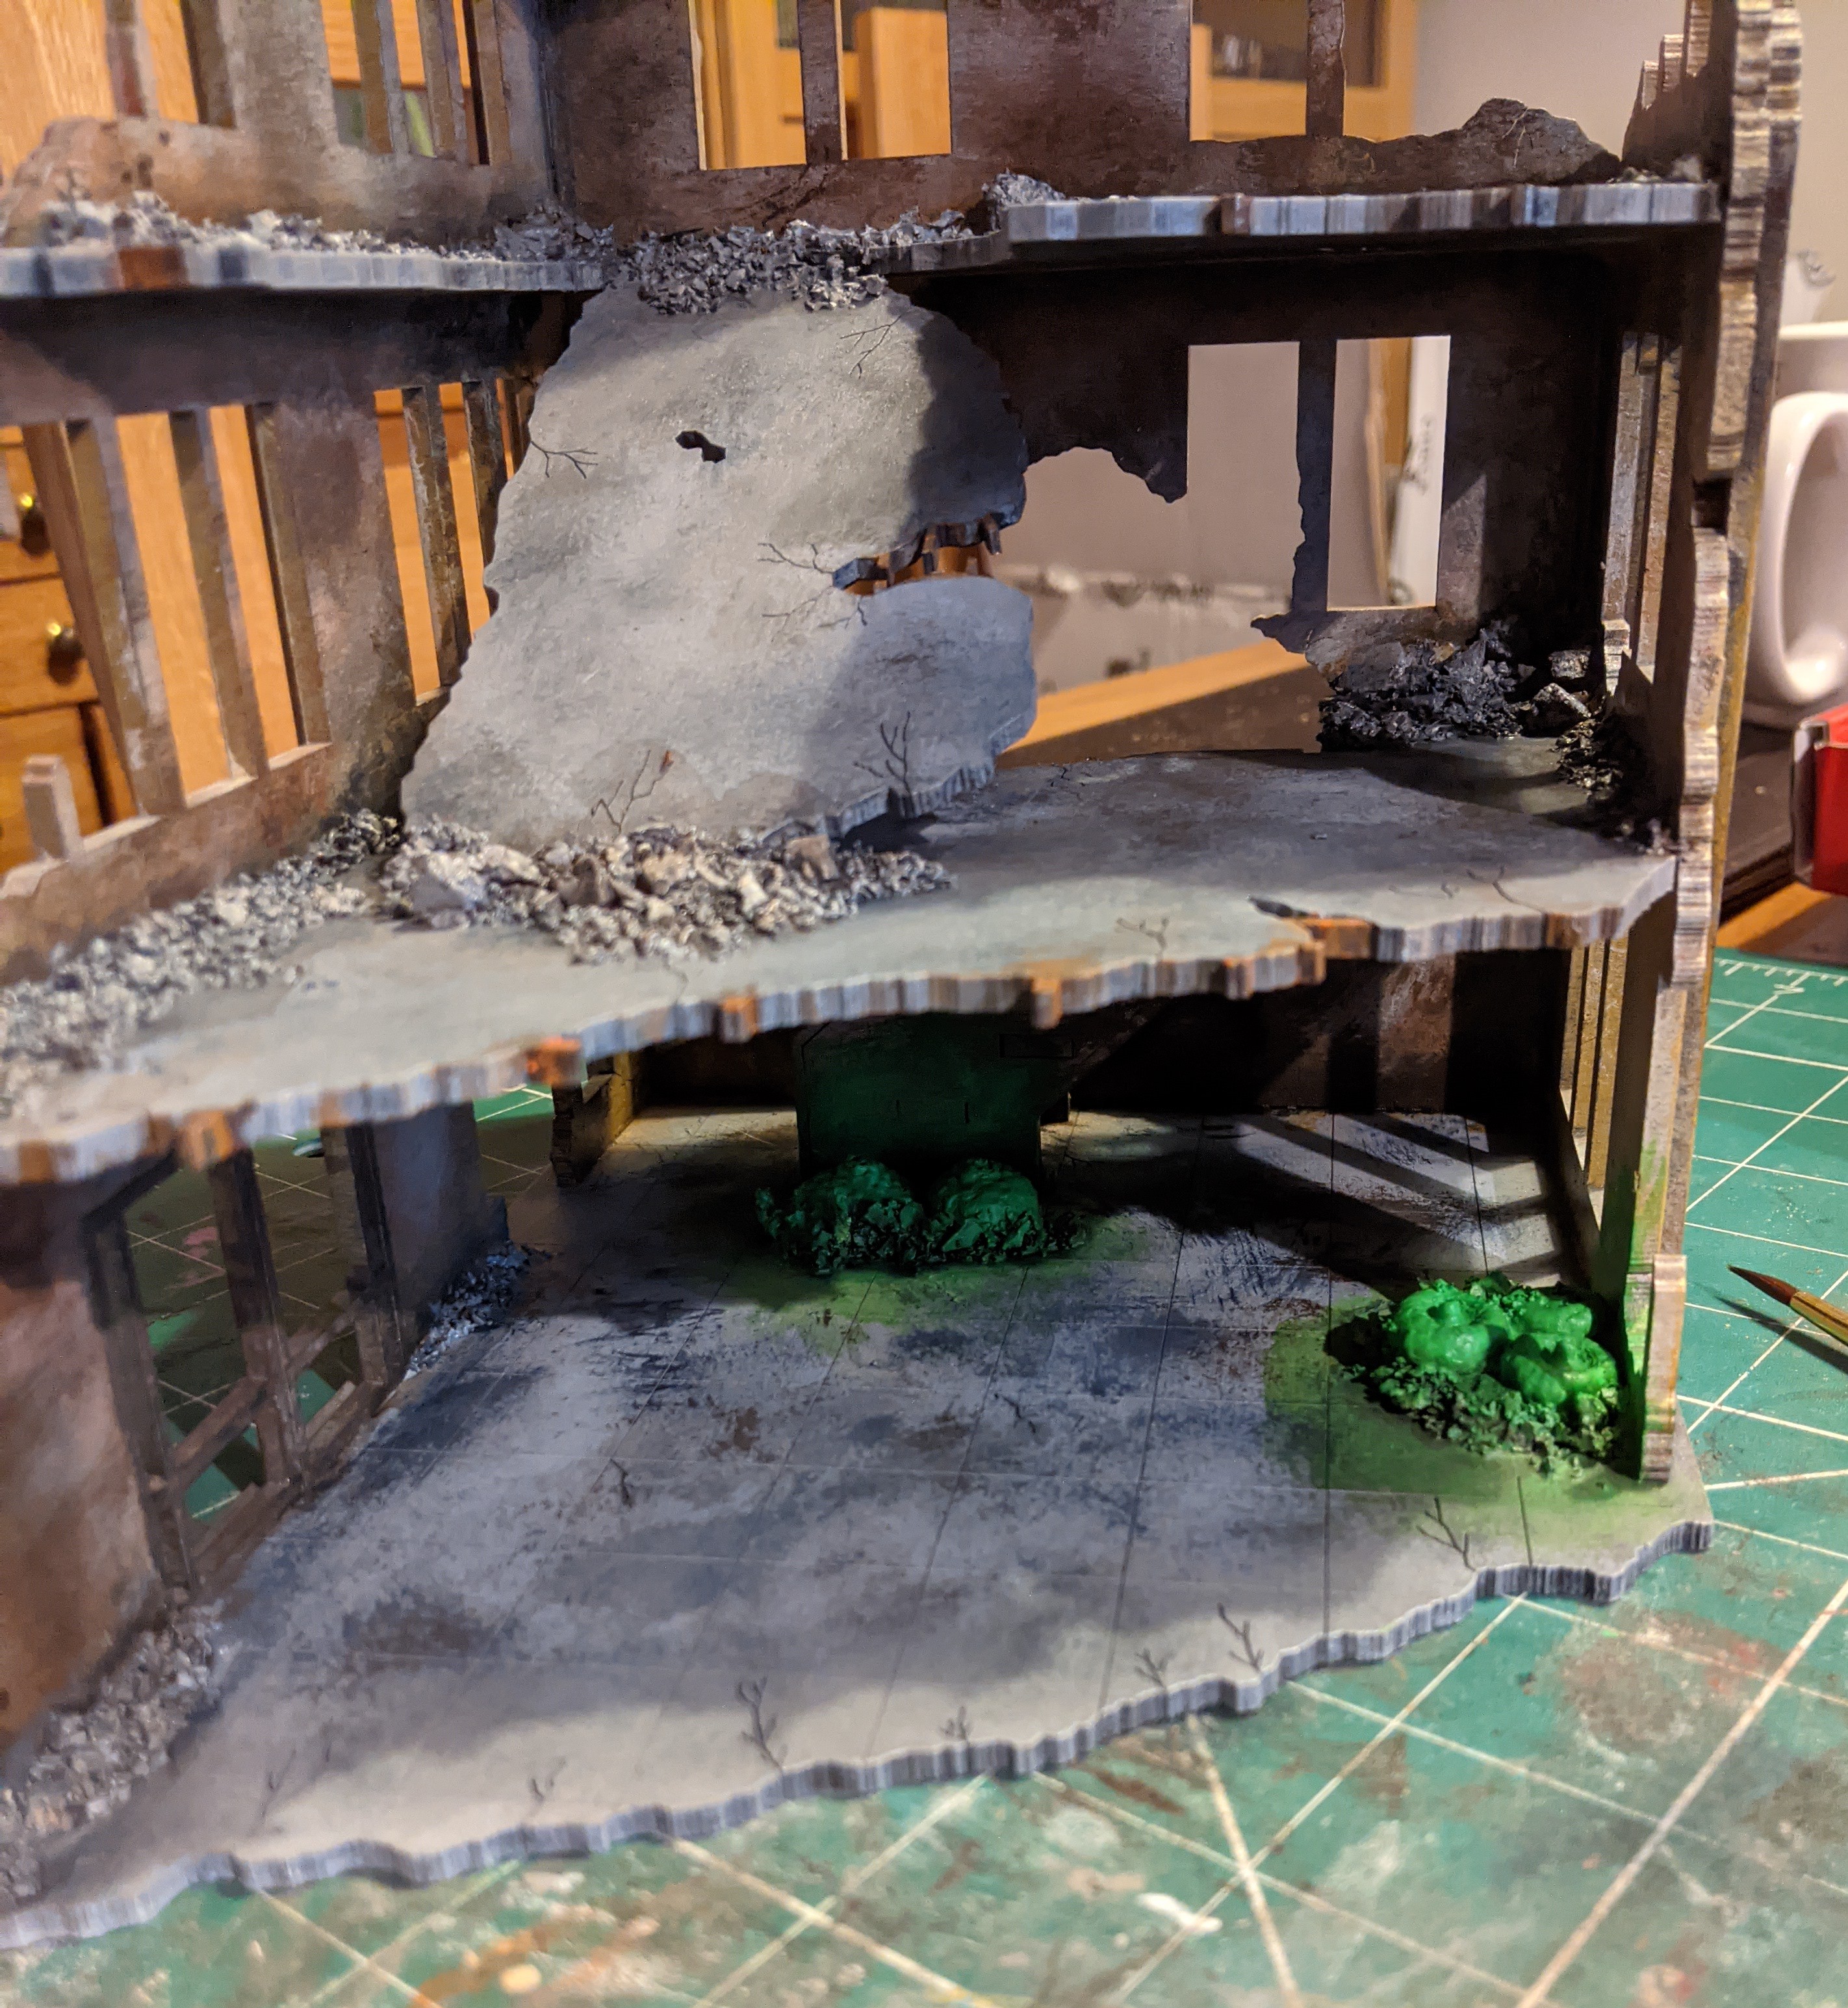 Mmm. Radioactive....
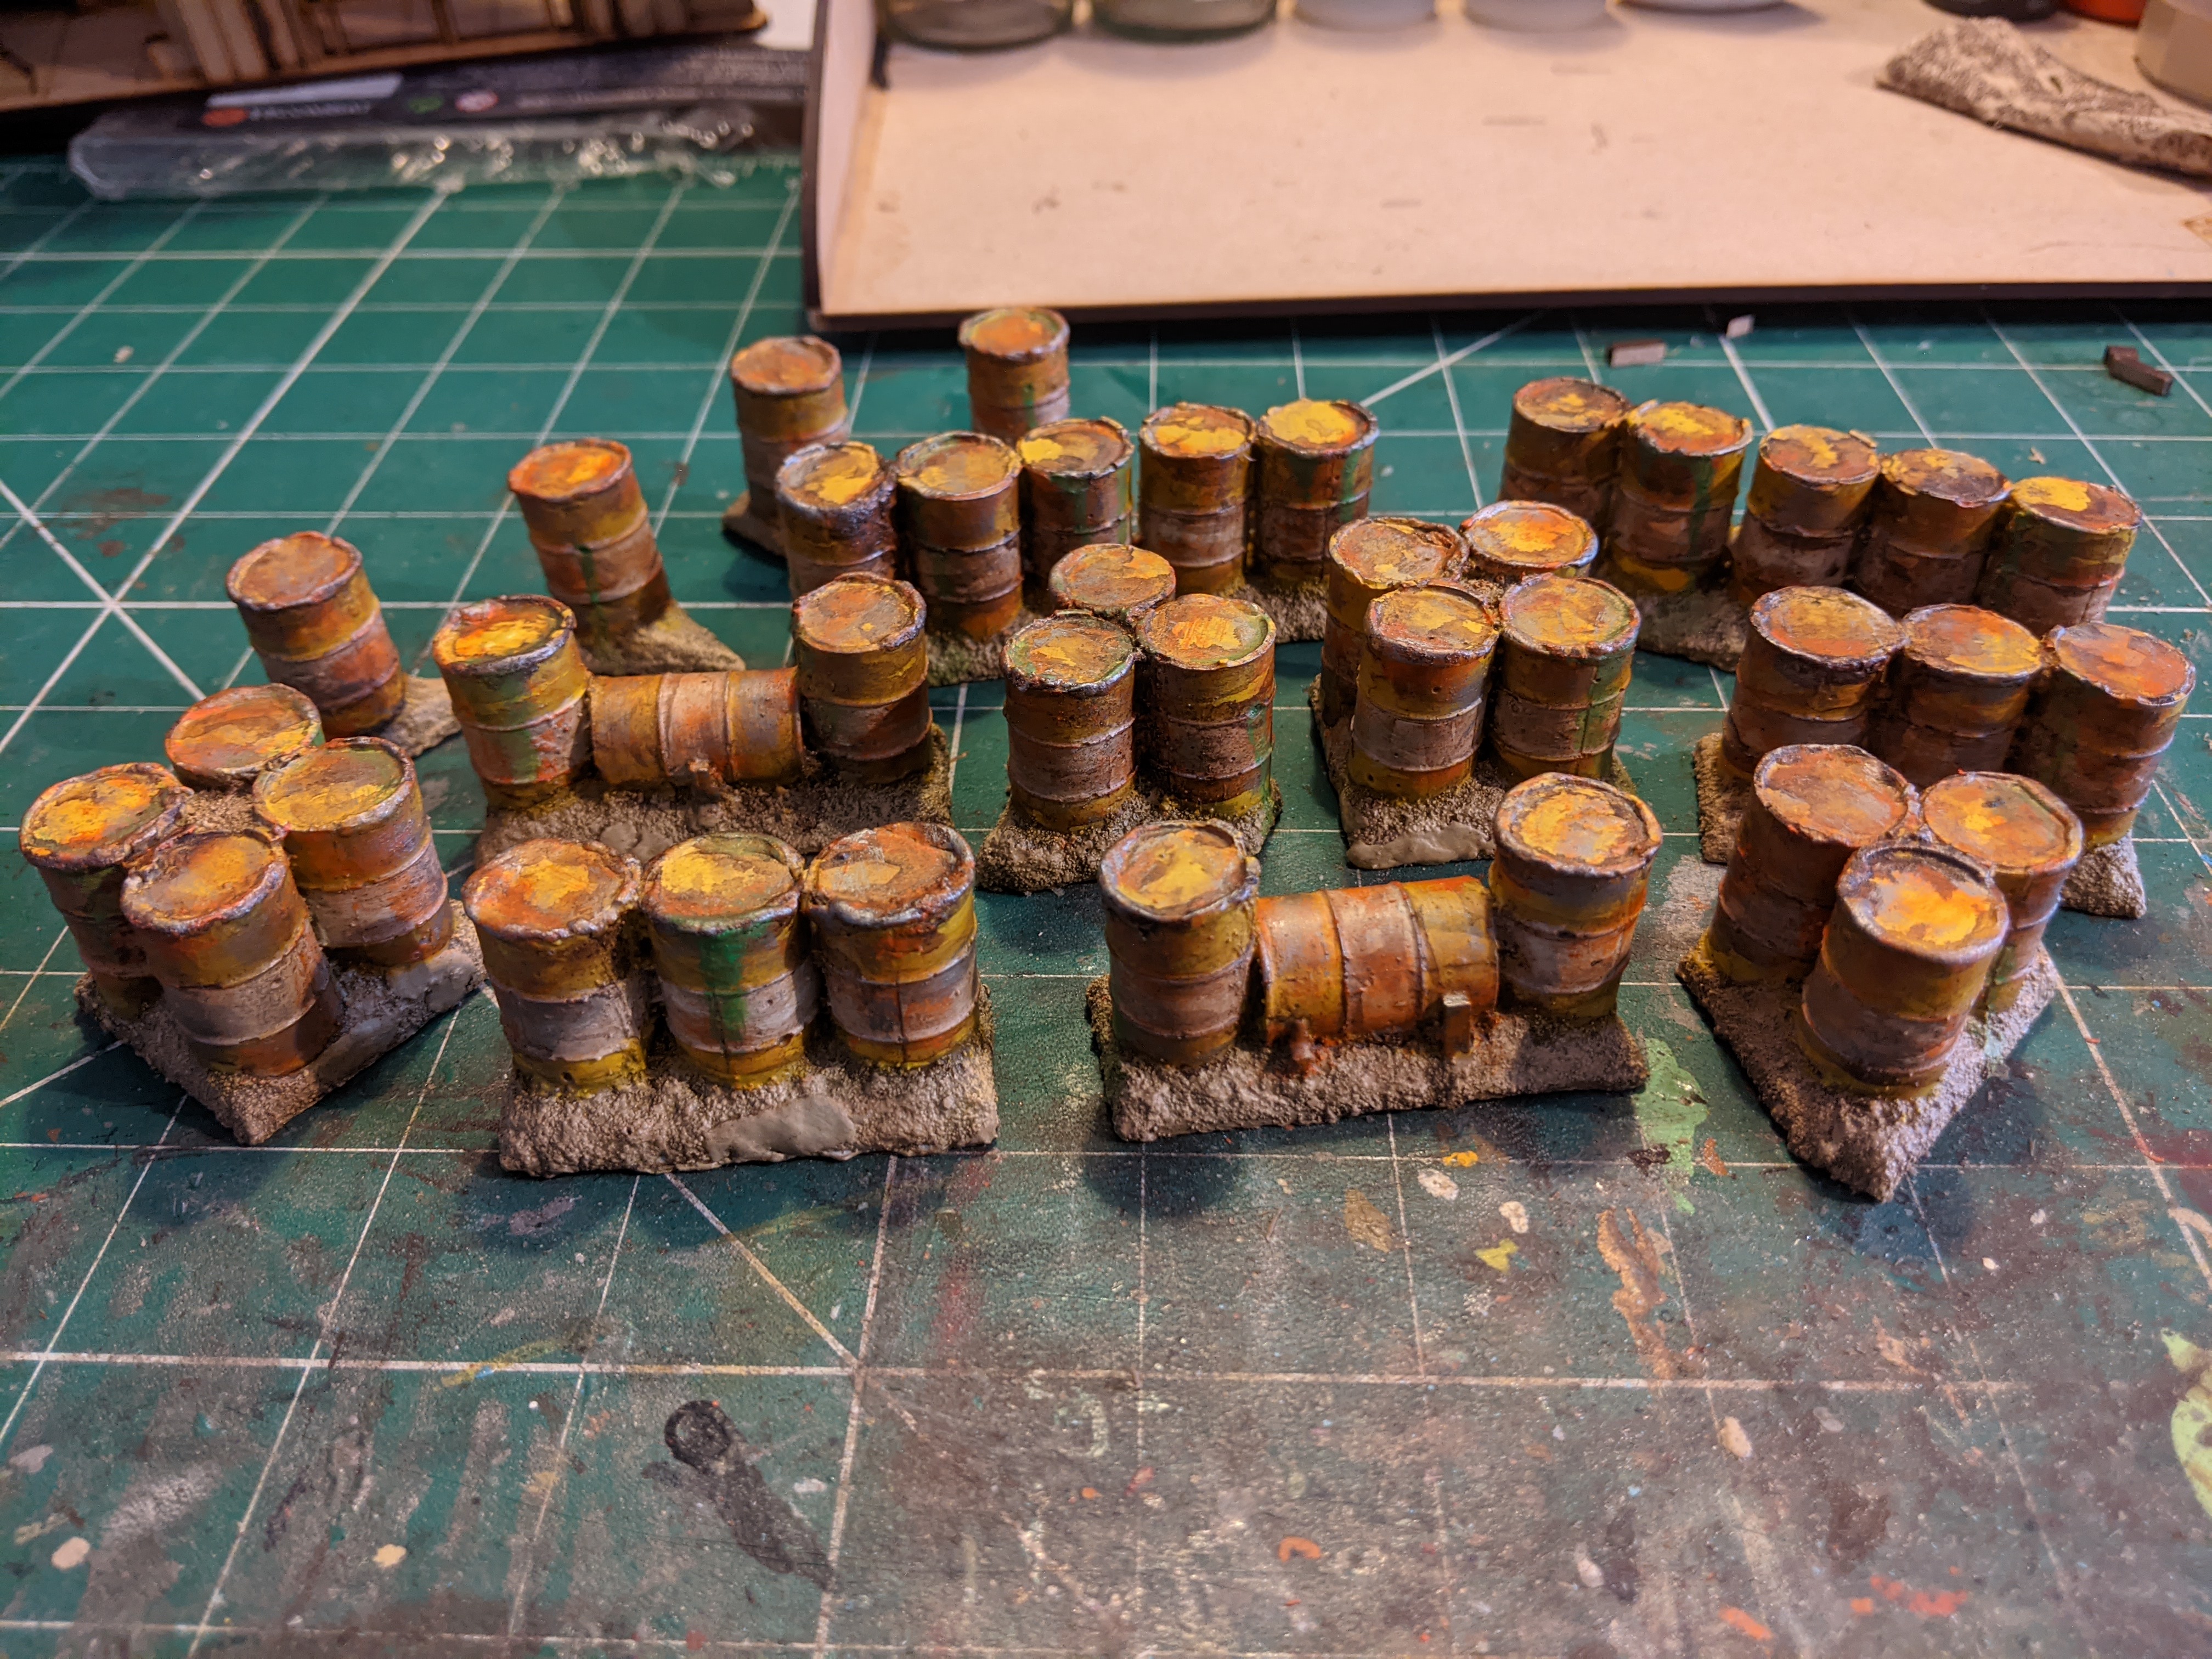
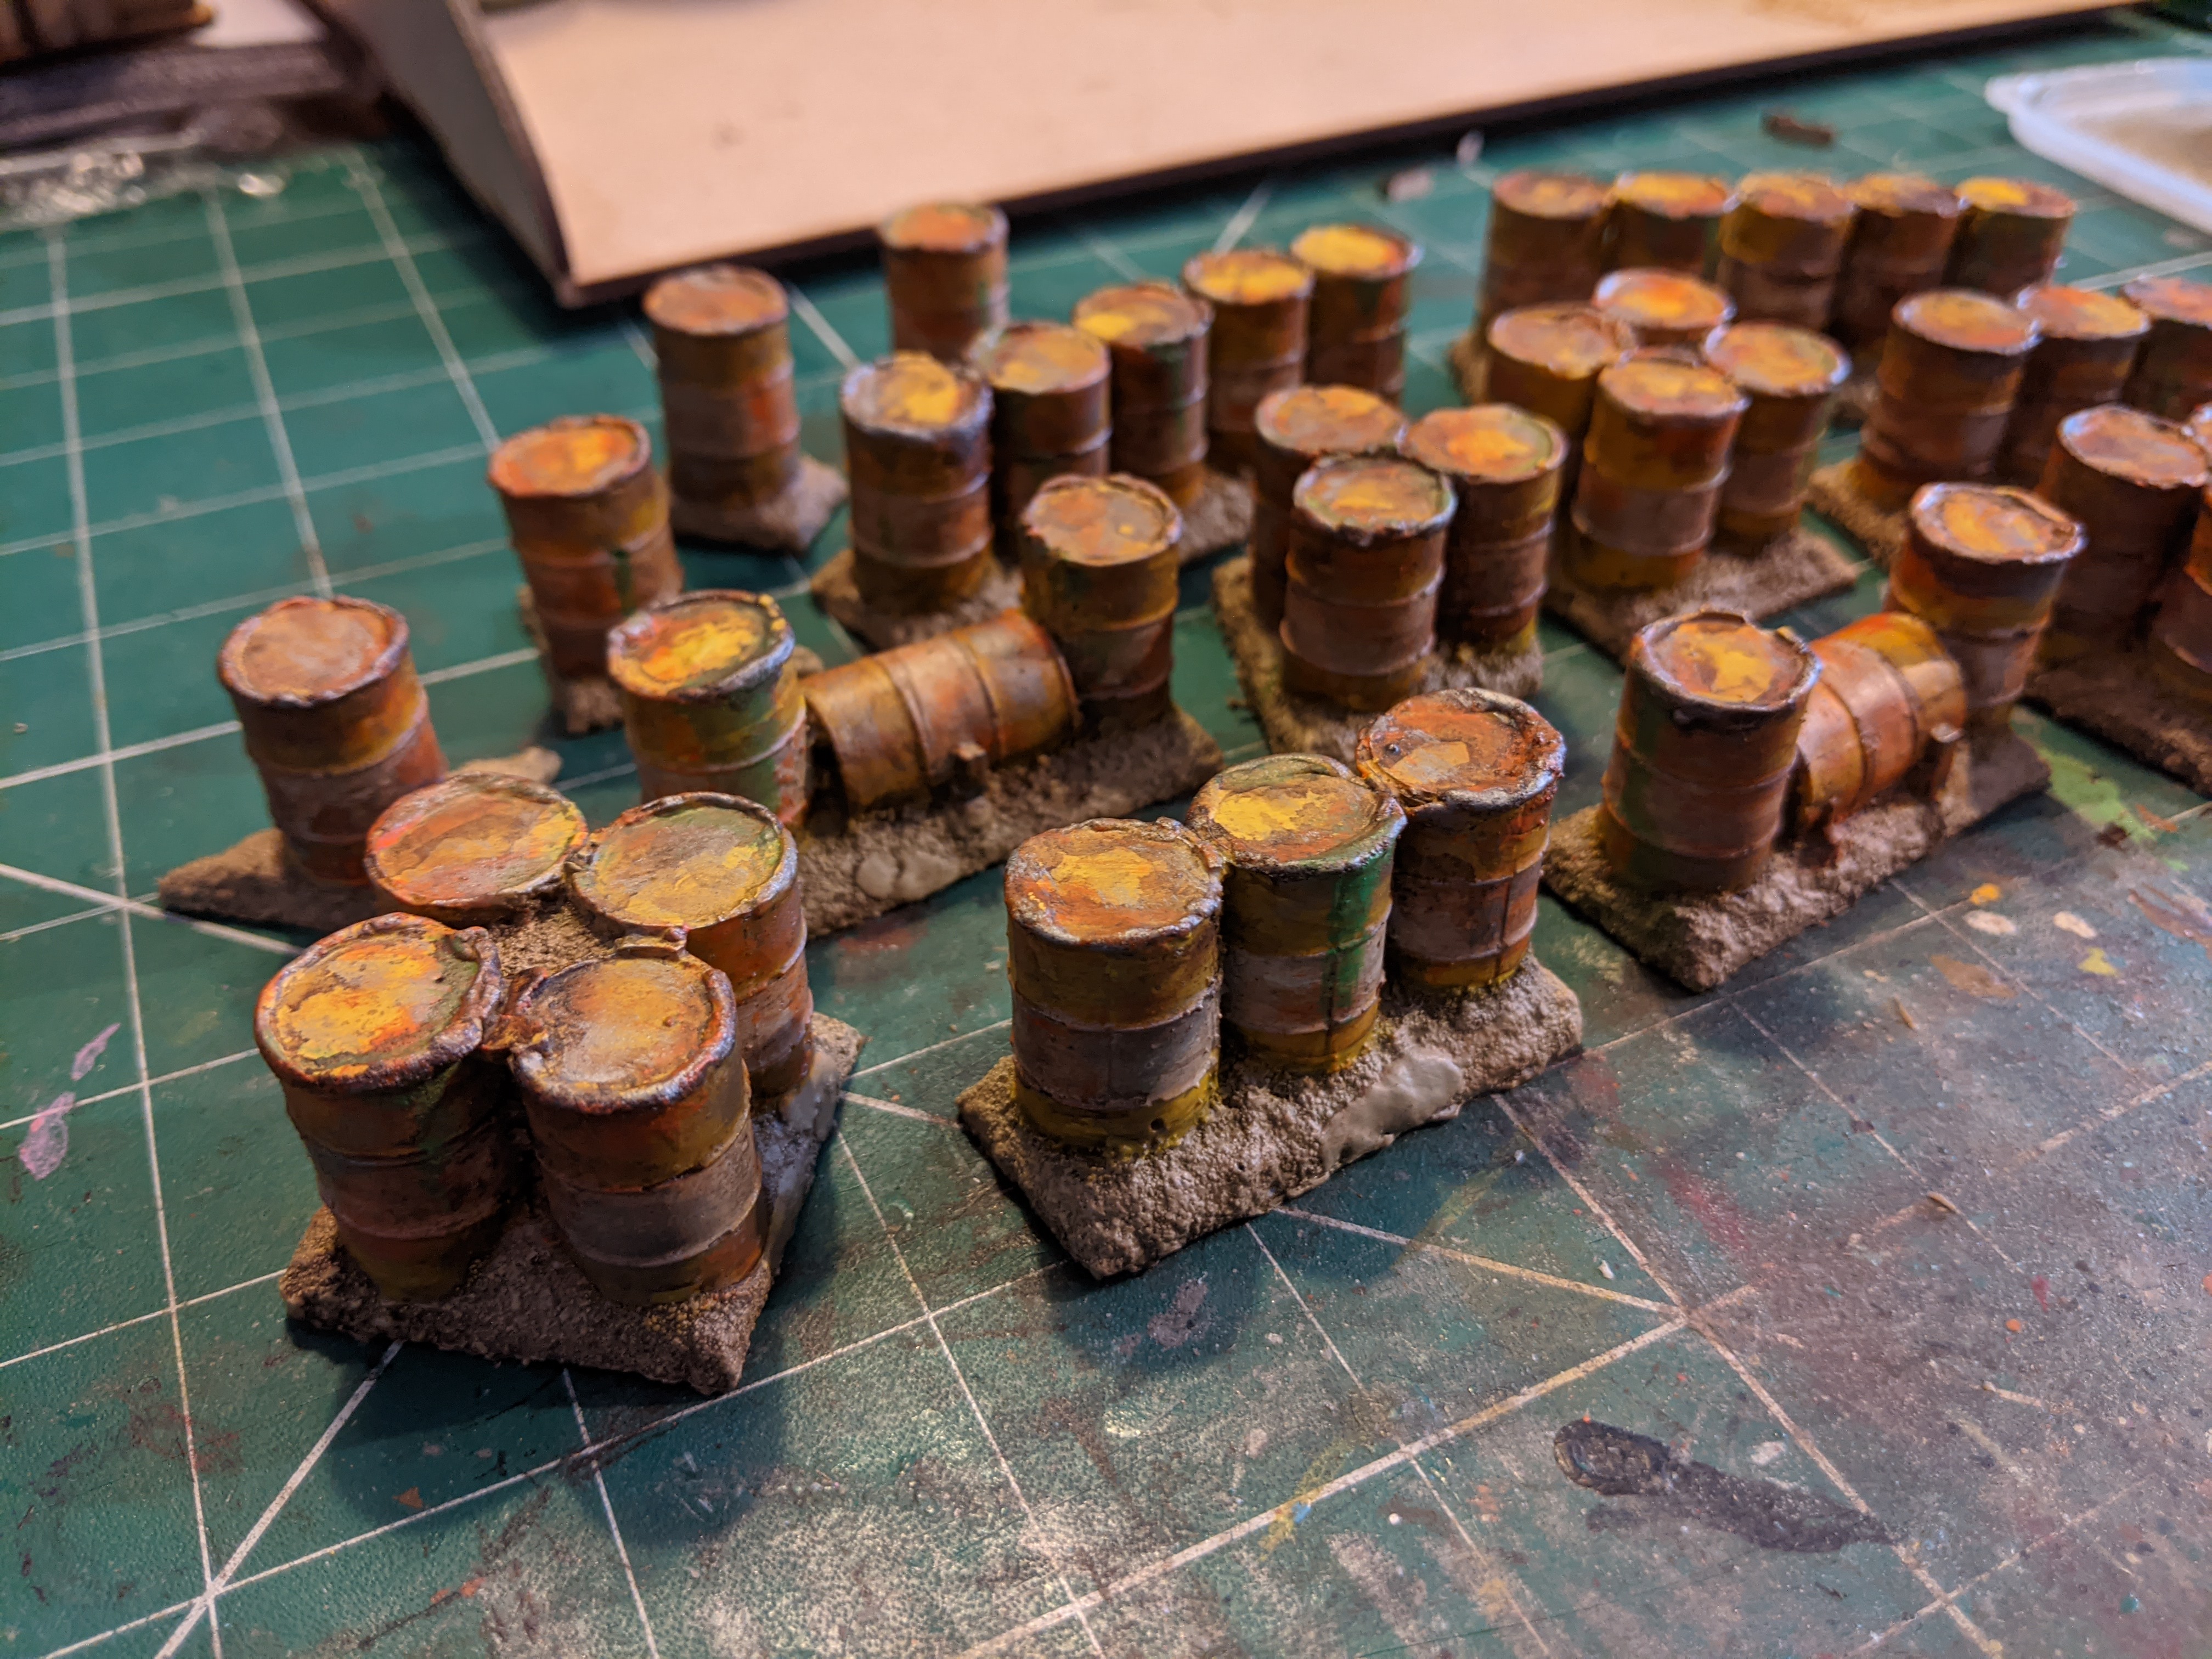
Barrels! So many rusty yellow barrels...
If you have played a Bethesda Fallout game you will probably recall that there is something of an obsession with yellow barrels.
They are everywhere, leaking radioactive toxic waste all over the environment. So I found a pack to litter my gaming tables with!
Like the missile silo, I bought these at the Colours show from a little company called The Square. Honestly they were pretty rough resin casts but they were also cheap so can’t complain too much I guess. I did do a bit of rough greenstuff work on some air pockets and barrel rims, I didn’t worry about the finish as I was going to weather the hell out of them anyway.
These were spray primed with Army Painter Demonic Yellow. Next I painted the earth in an earthy brown and dry brushed up using Bacchus basing kit paints to my Wasteland desert look.
I added the stripe with Vallejo Ivory (again not worrying about being neat) then weathered.
These were slathered with a liberal but watered down covering of Citadel Typhus Corrosion followed by Ryza Rust. I the dry brushed a little bit of Army Painter Plate Metal Silver over them.
As a final touch I painted on a few dribbles of leaking green ooze using Vallejo Scorpion green. It’s the shame colour I use on the Super Mutants to get that vibrant toxic look Gerry found so shocking. 😉
As some of the casting had left the odd crack or air bubble I had a half assed go at addressing, I turned some of those defects into splits and leaks in the barrels.

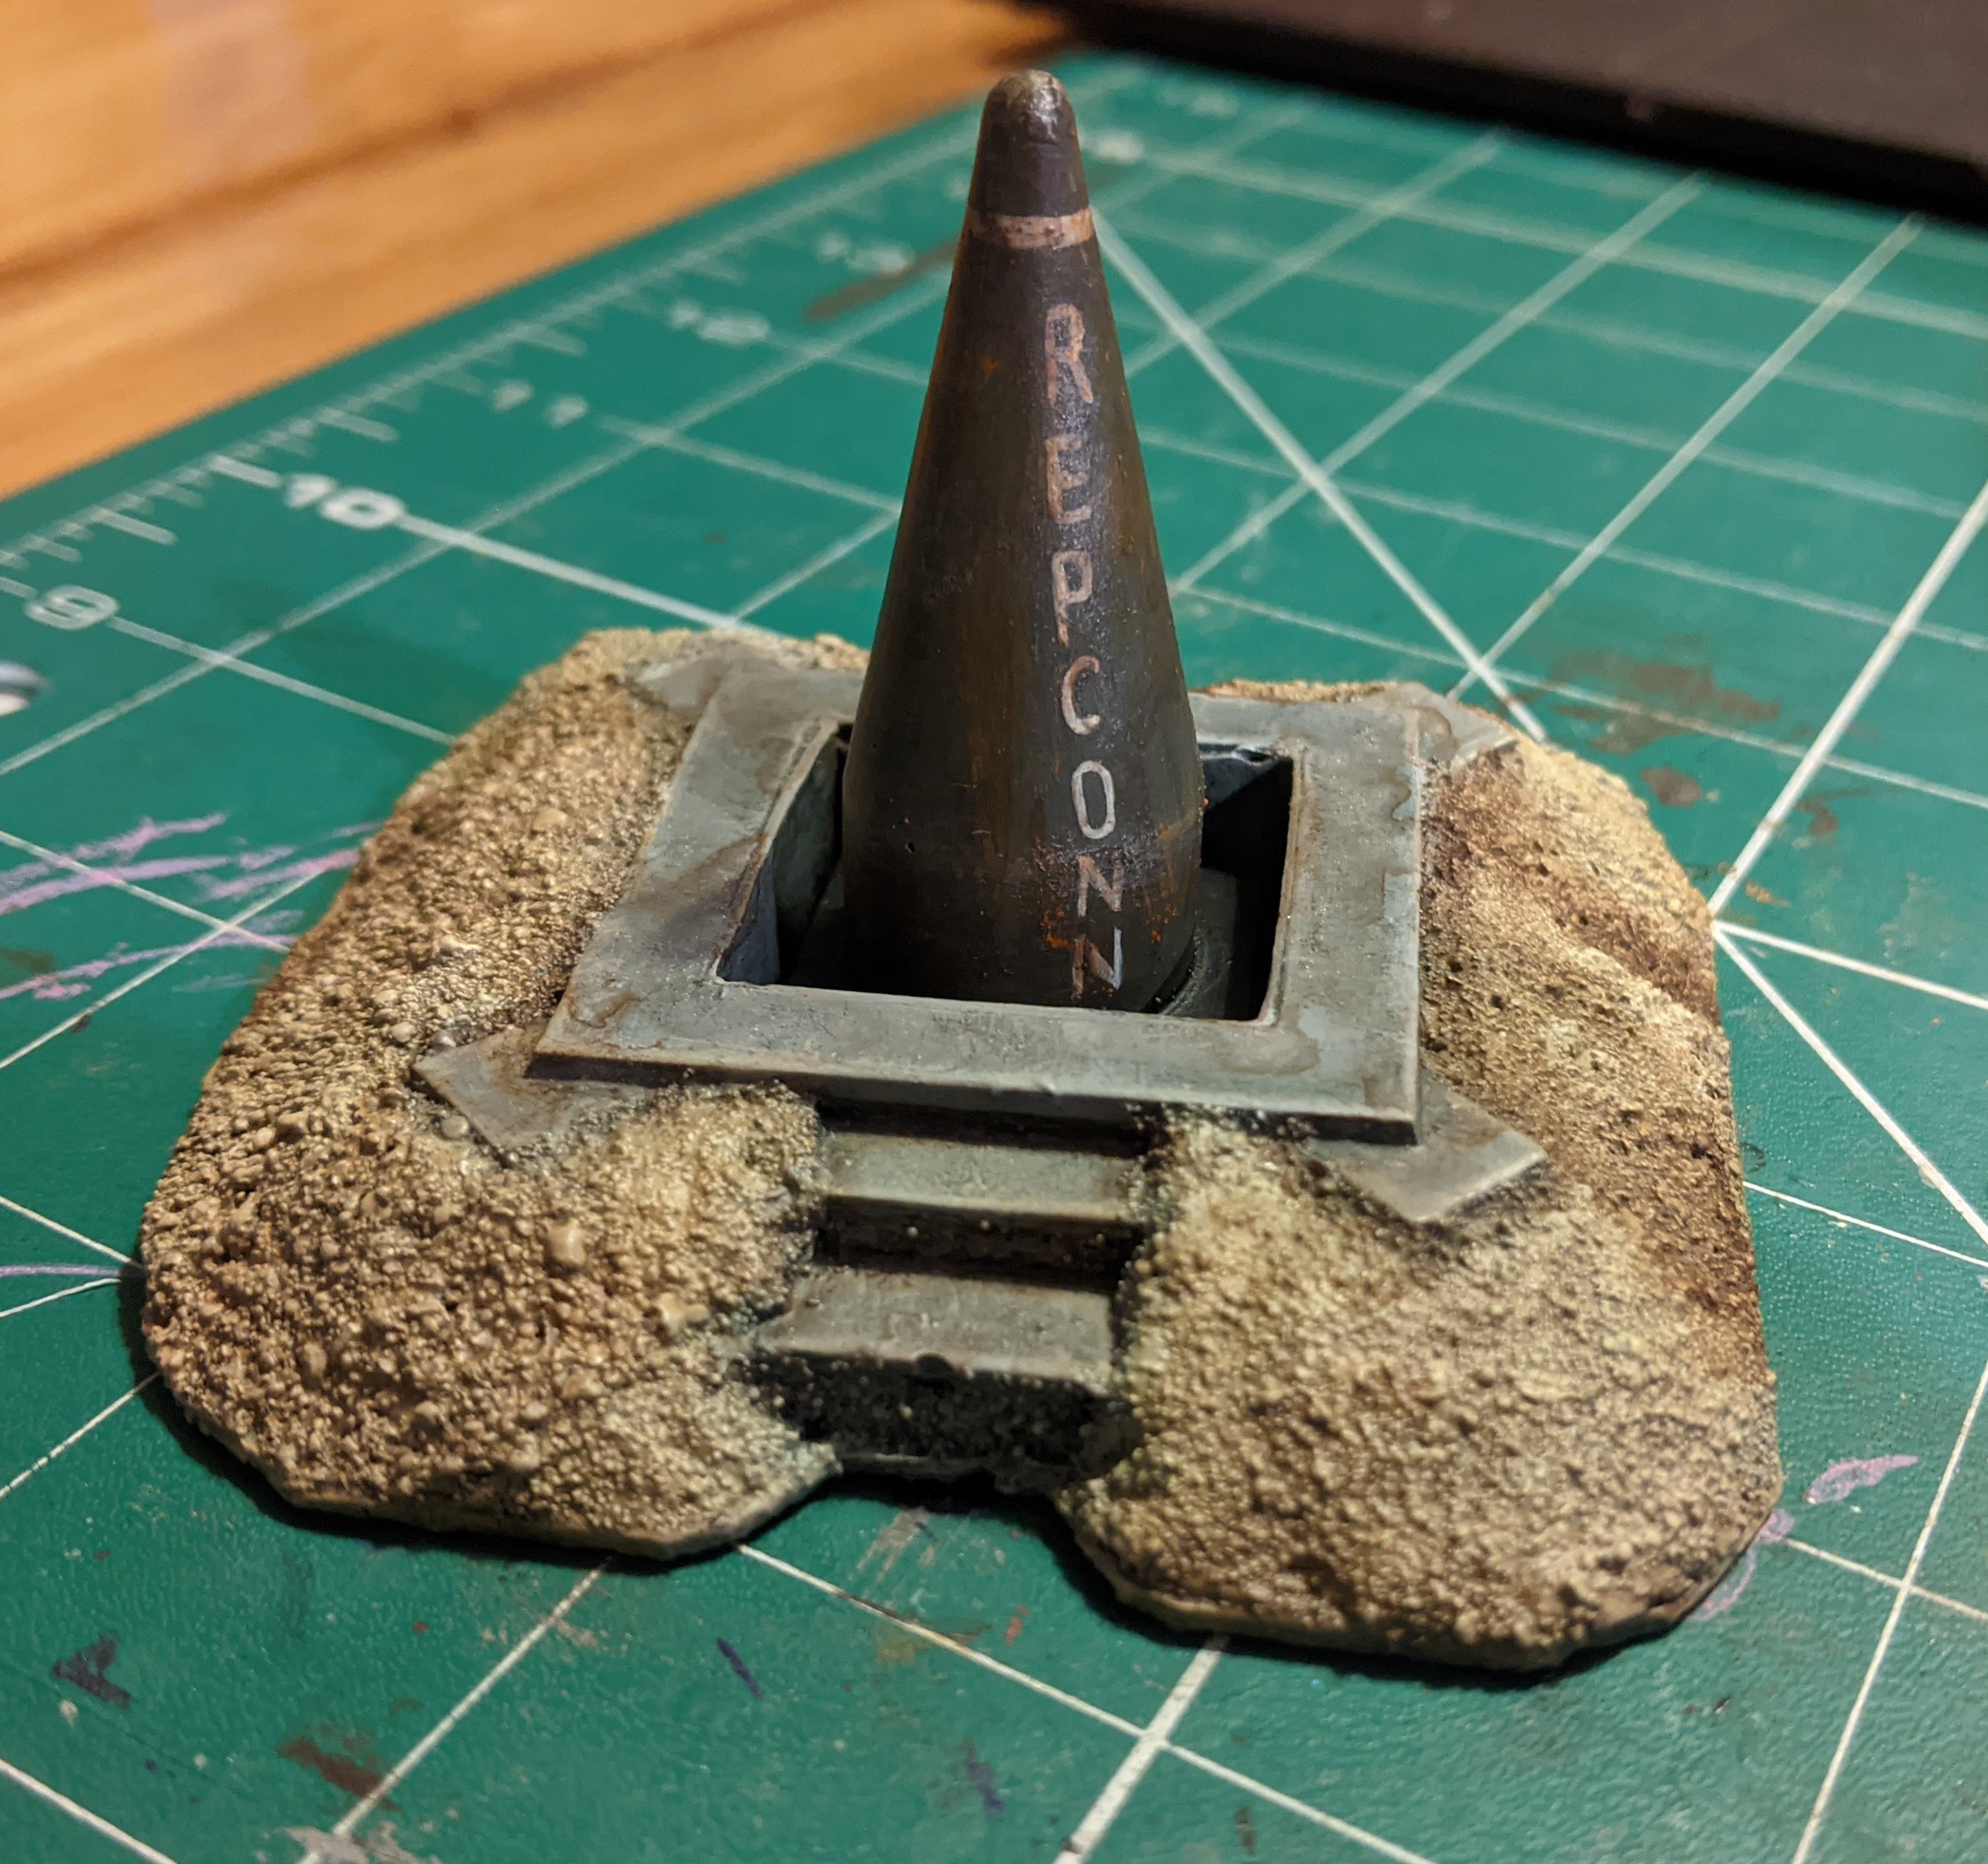
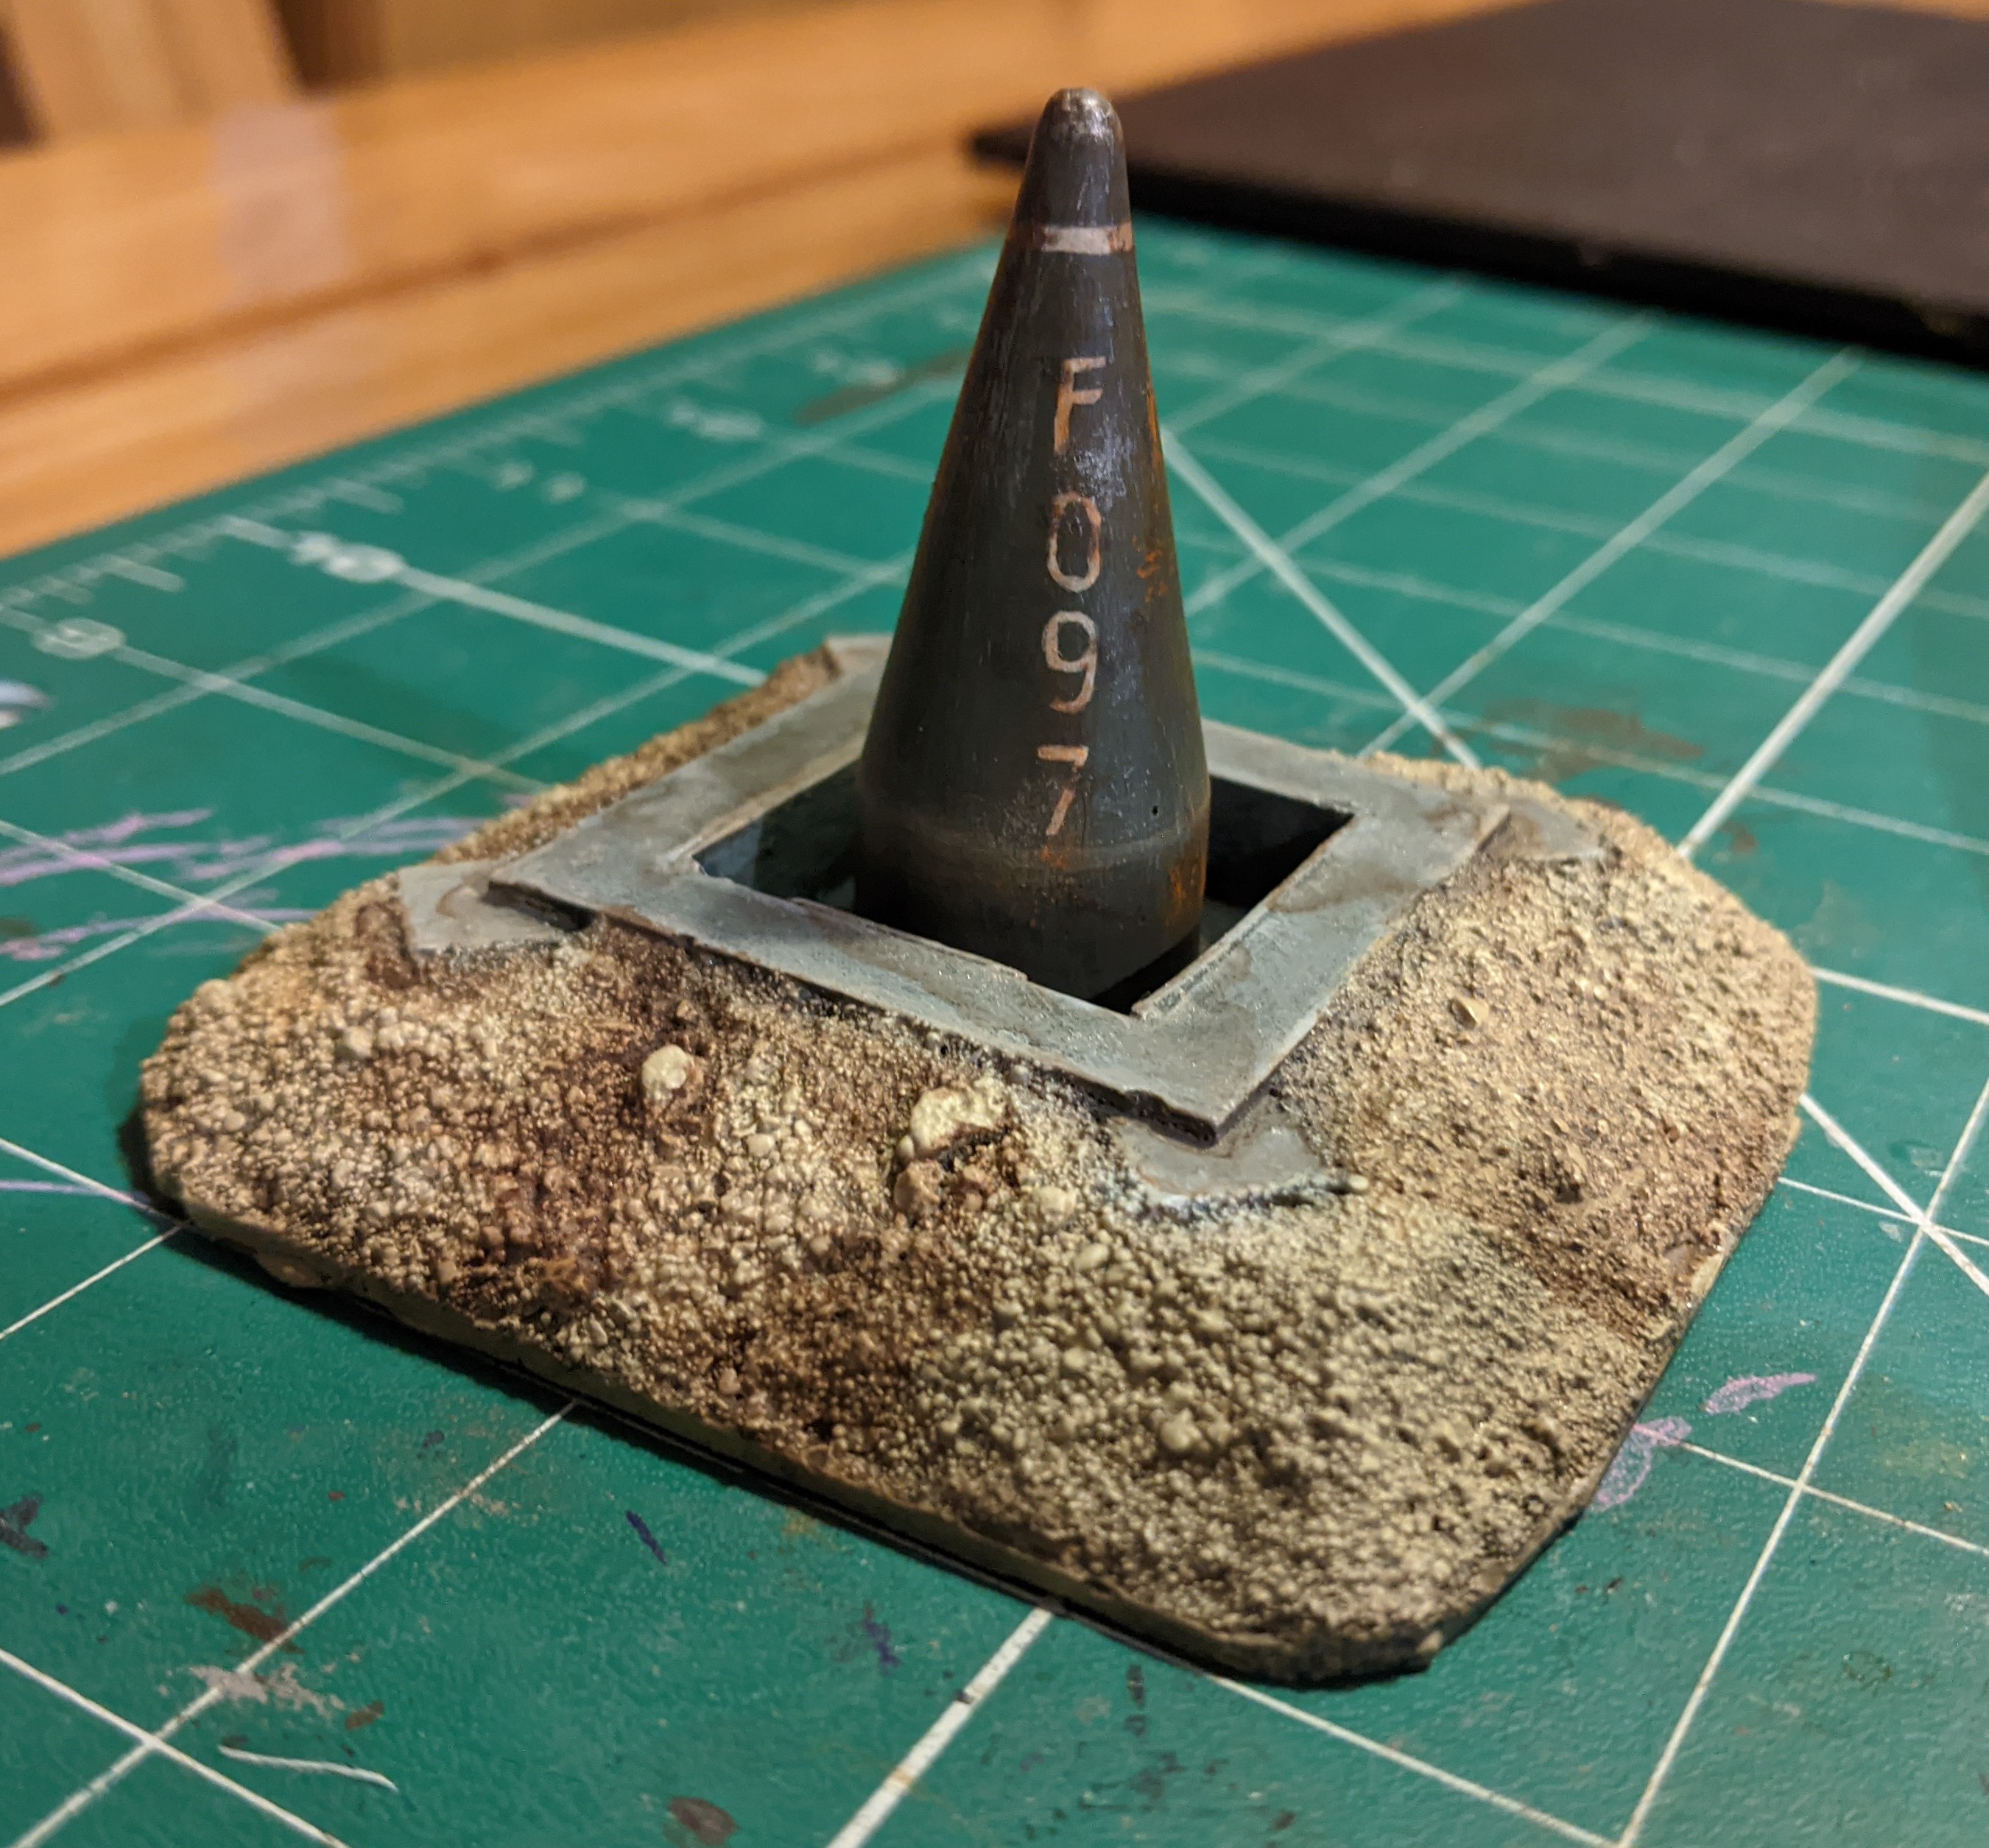
Mini Silo!
A quick little addition to the table this time, a small resin missile silo/bunker entrance I picked up at the Colours show last year. It is made by a company called The Square and was cheap and cheerful.
The warhead text references REPCONN, which was a rocket testing facility in Fallout New Vegas. For the back I felt some sort of serial number was in order so went with FO97 in reference to the year the original game was released.
The warhead is obviously interchangeable with the hatch so I can use this as a couple of different thematic objective pieces.

Scrapyard table anyone?
I have now finished up painting all of the junk walls and scrap piles in my collection and had a look at it all on the mat – it is coming together!
The mat is a 3×3 and there is a fair bit of coverage already. Next up is a bunch of barrels, because barrels are everywhere in Fallout, and I think I have plenty of scatter!
I need to get some wooden shacks into this I think, or a Red Rocket type garage…

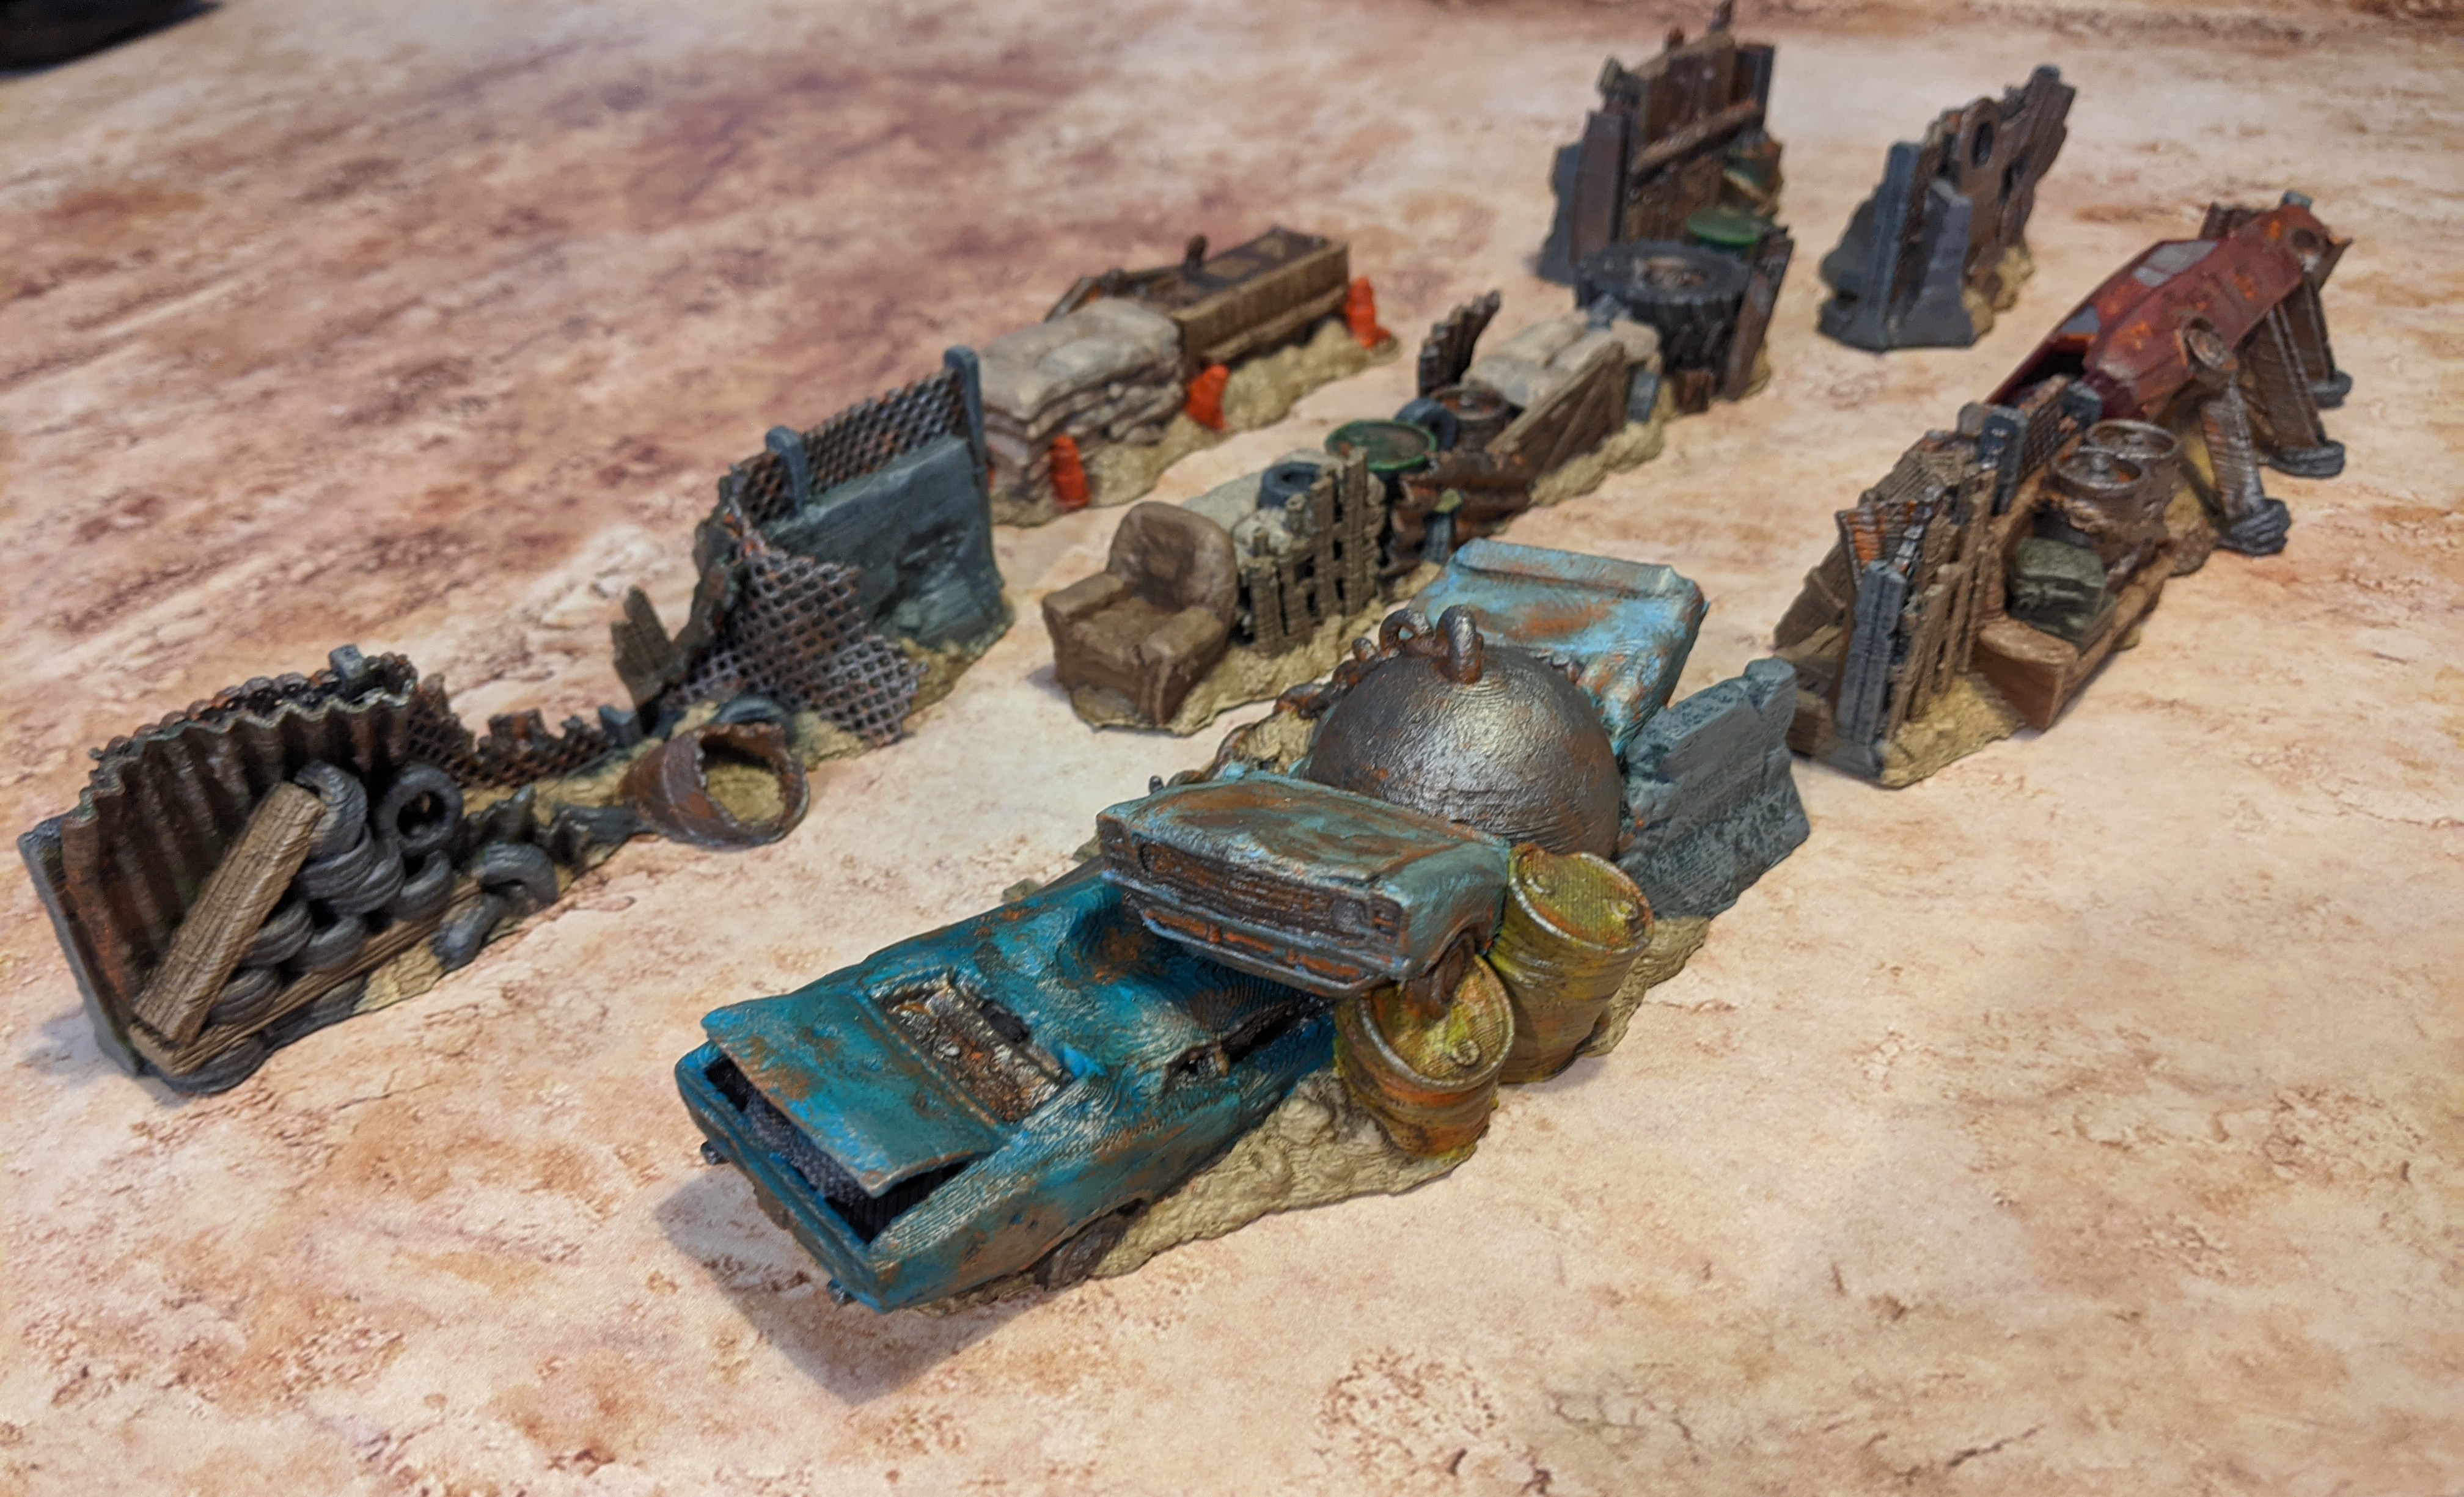
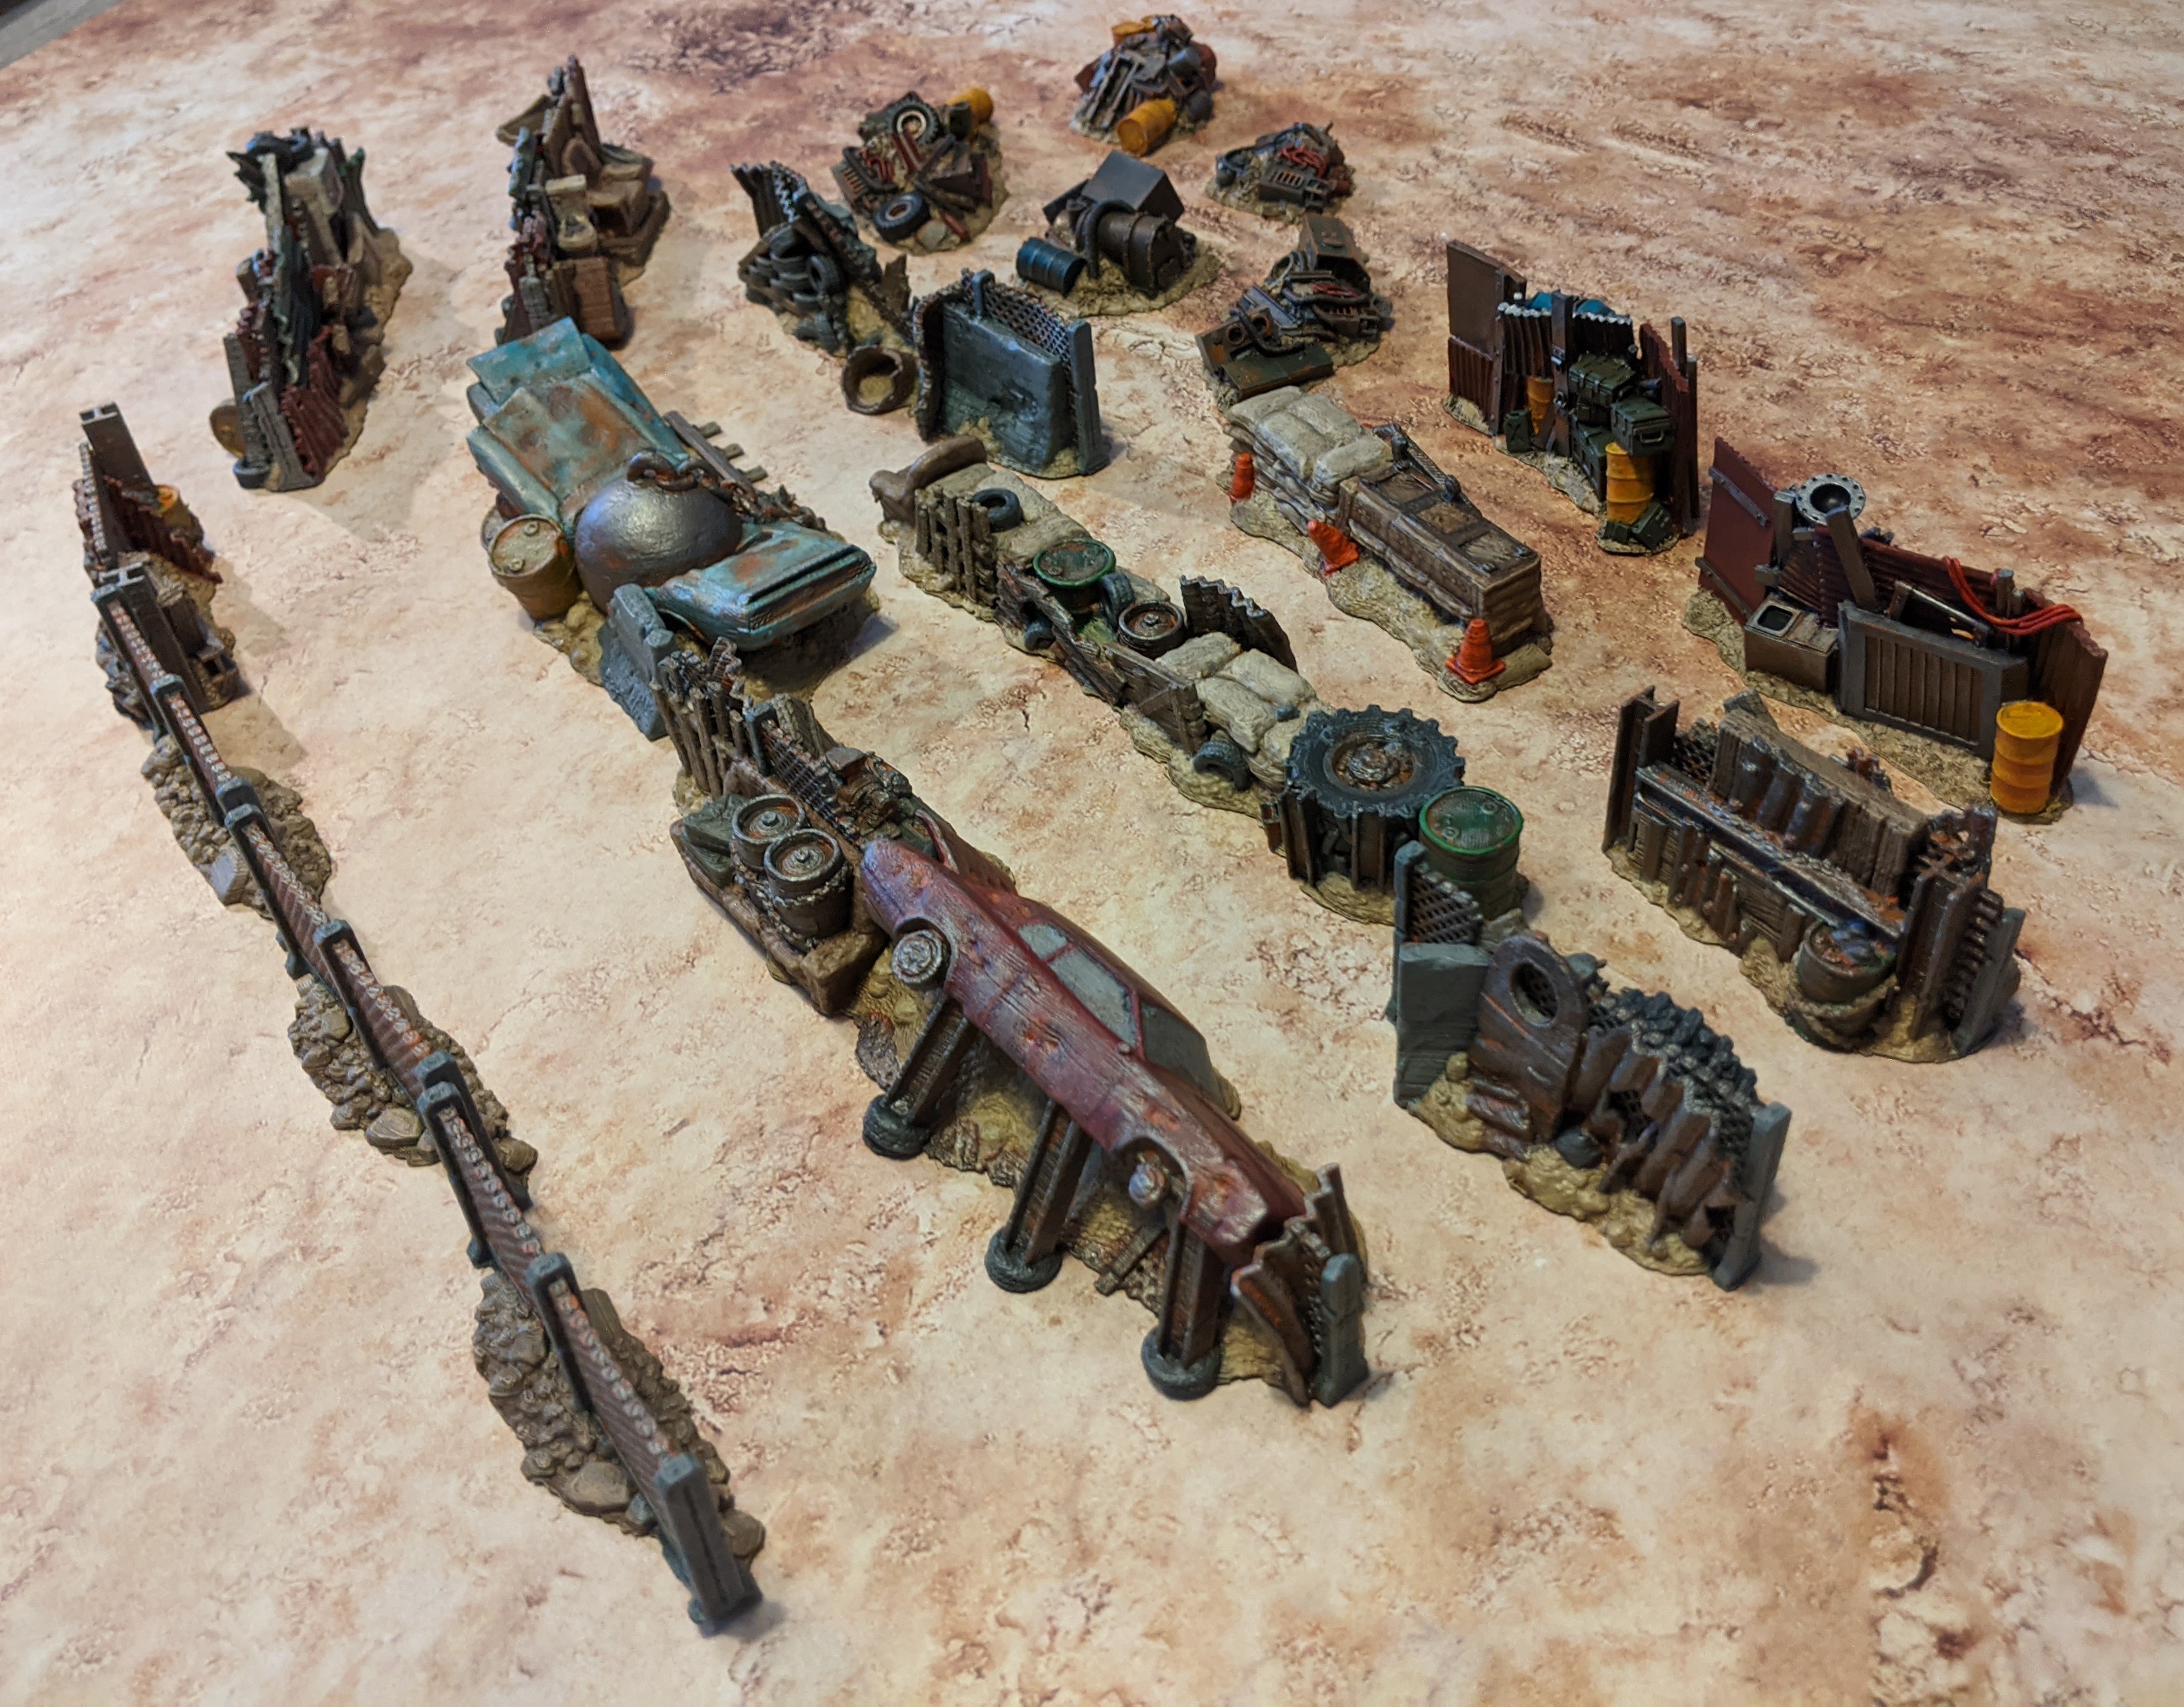
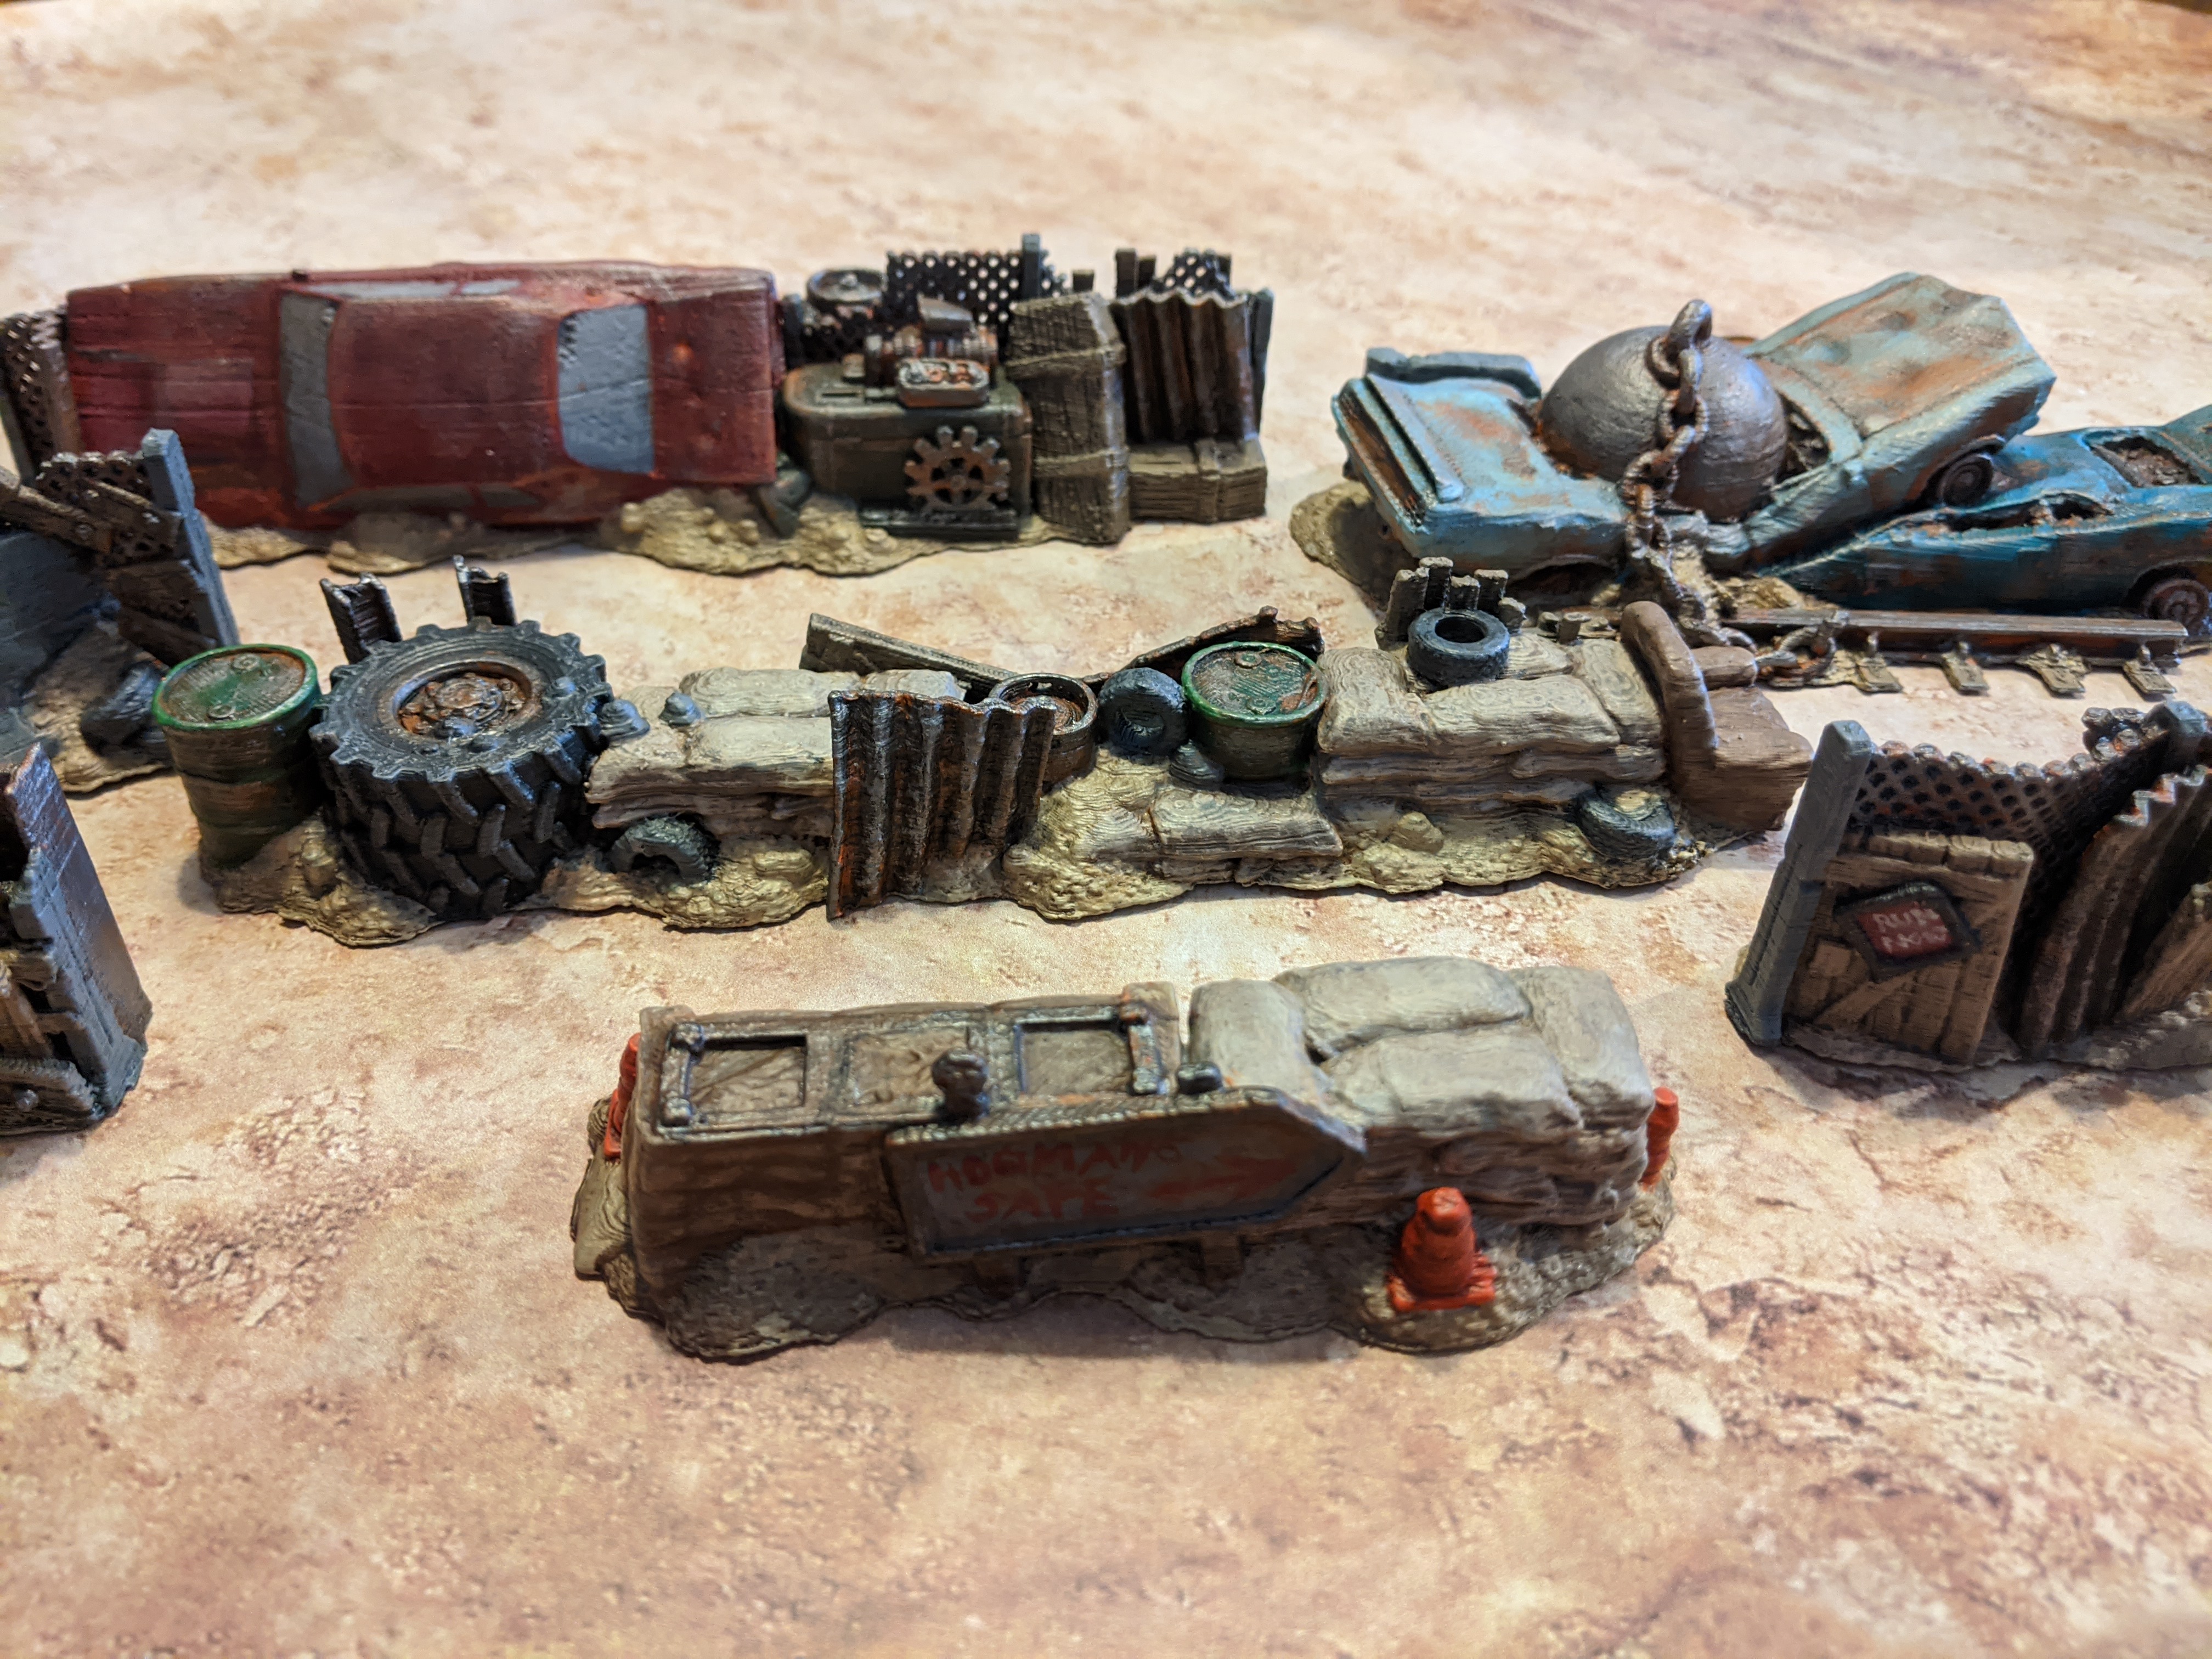
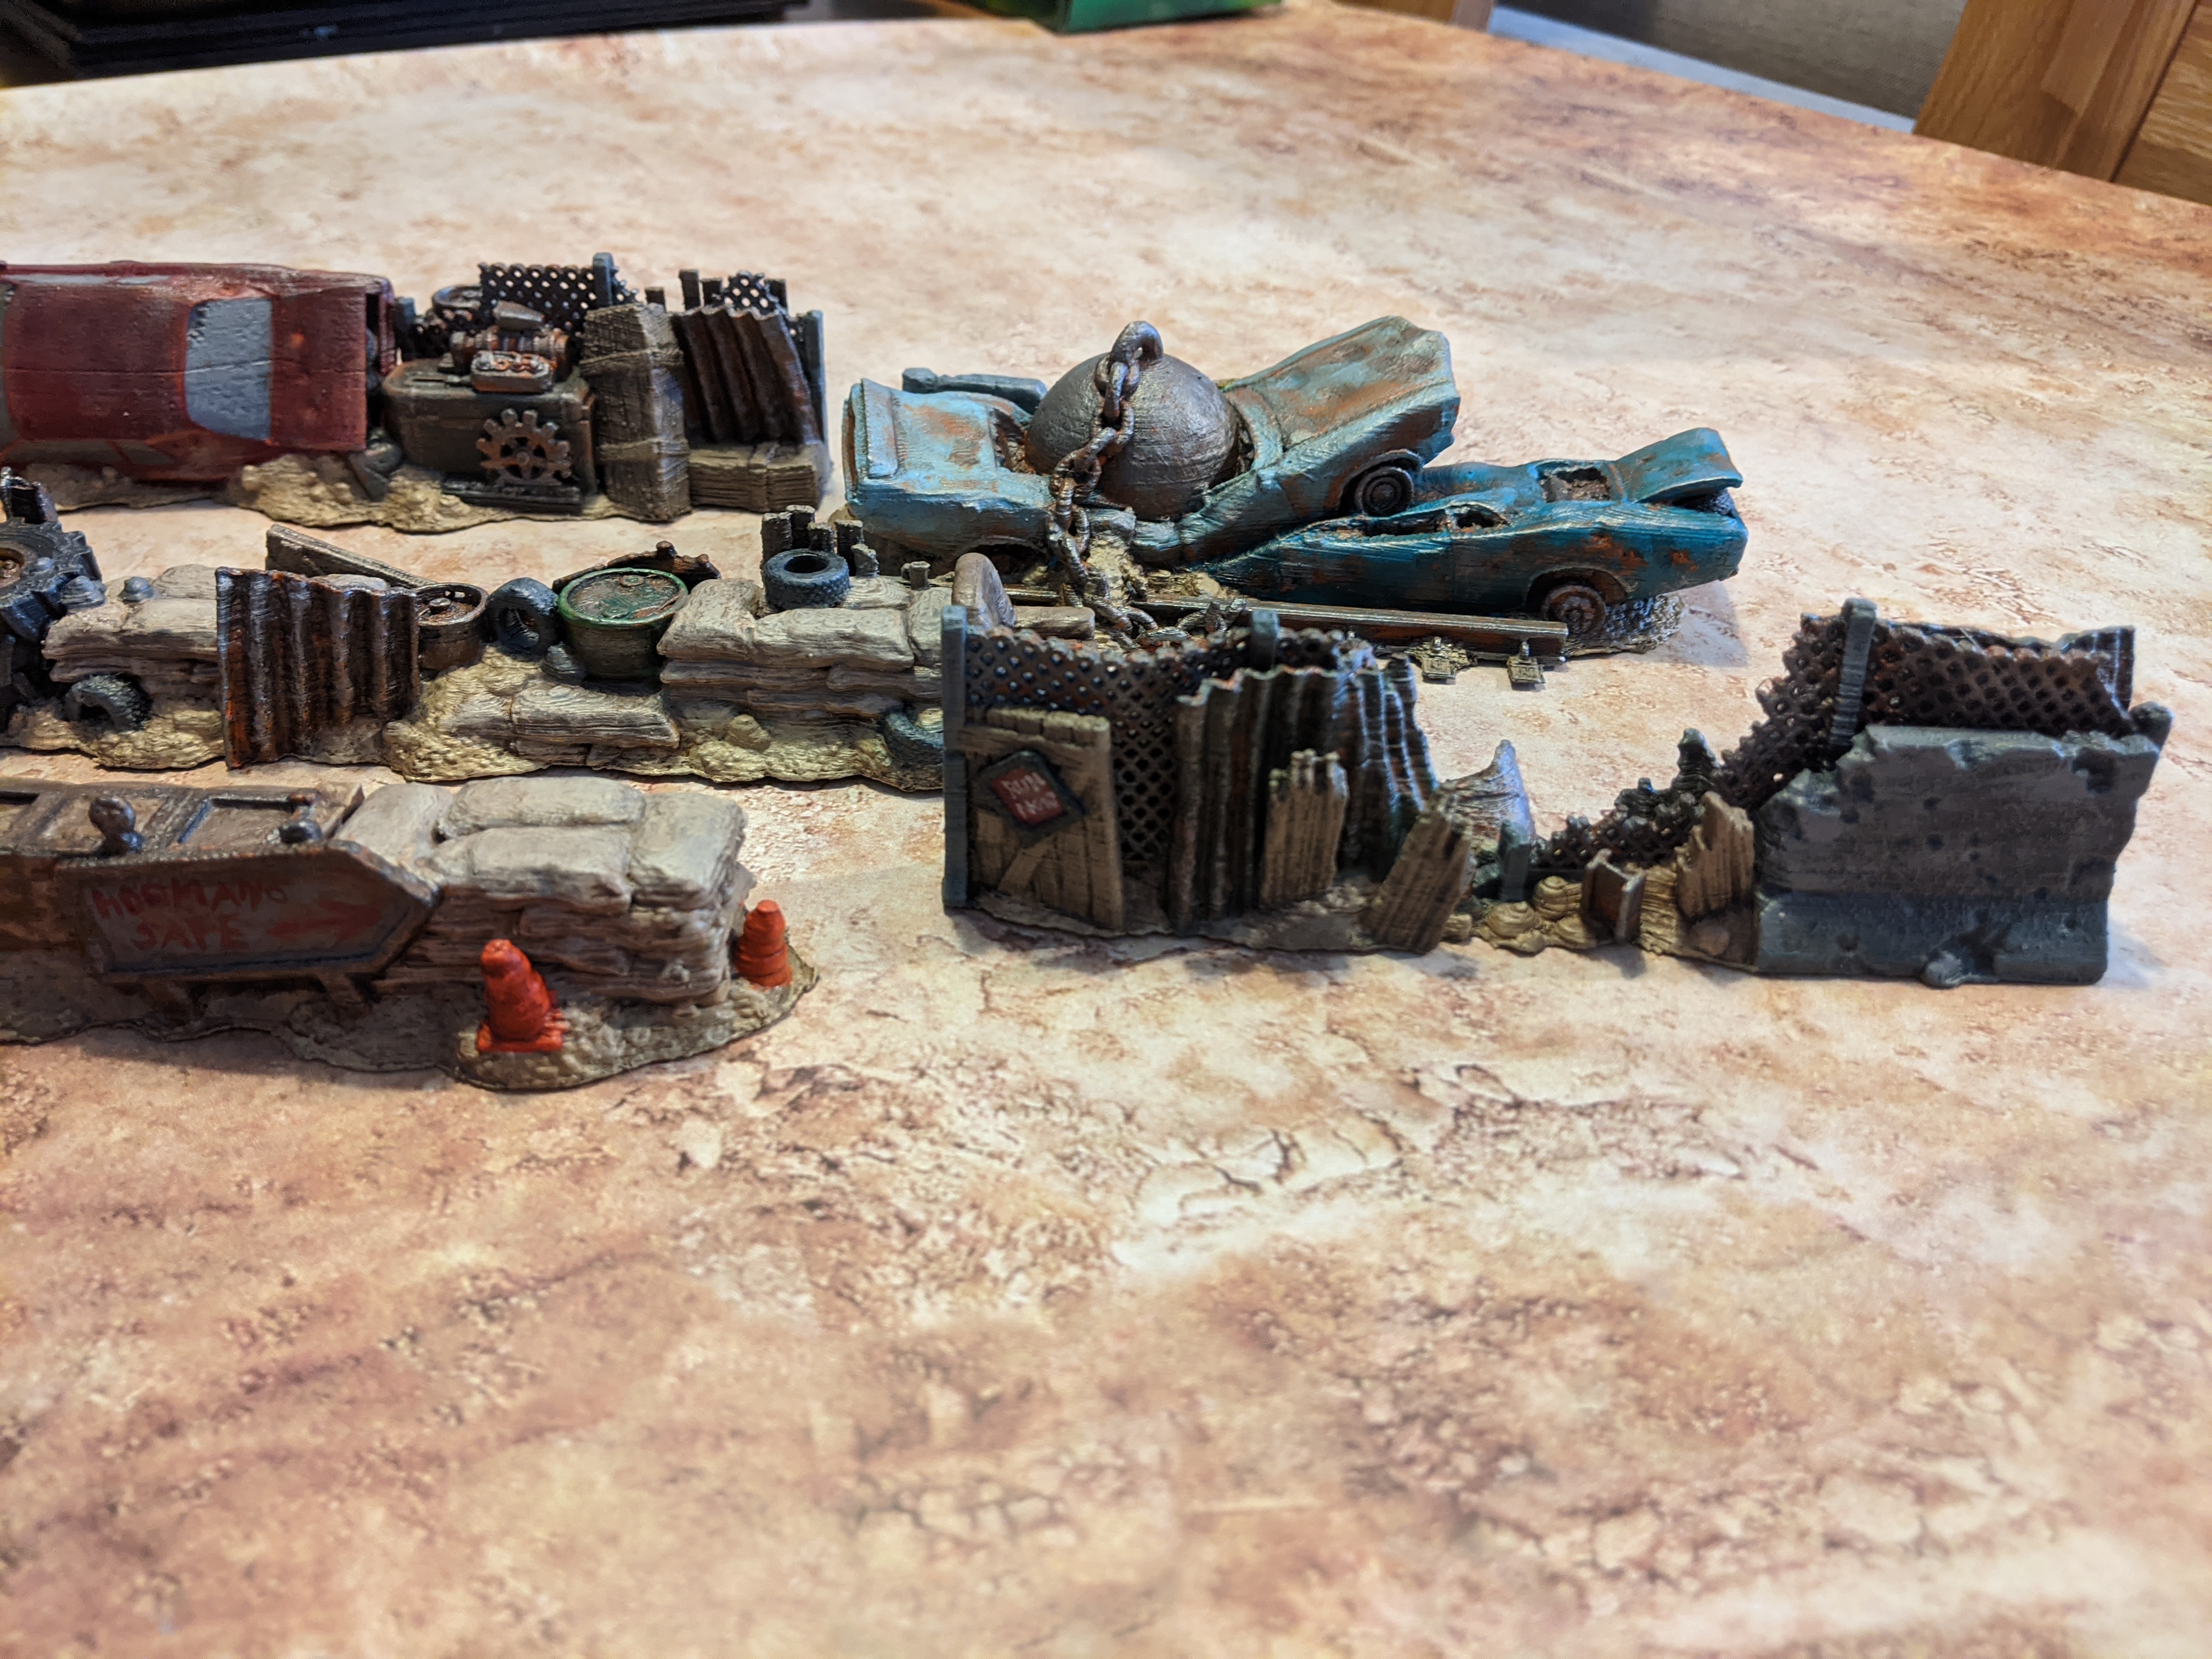
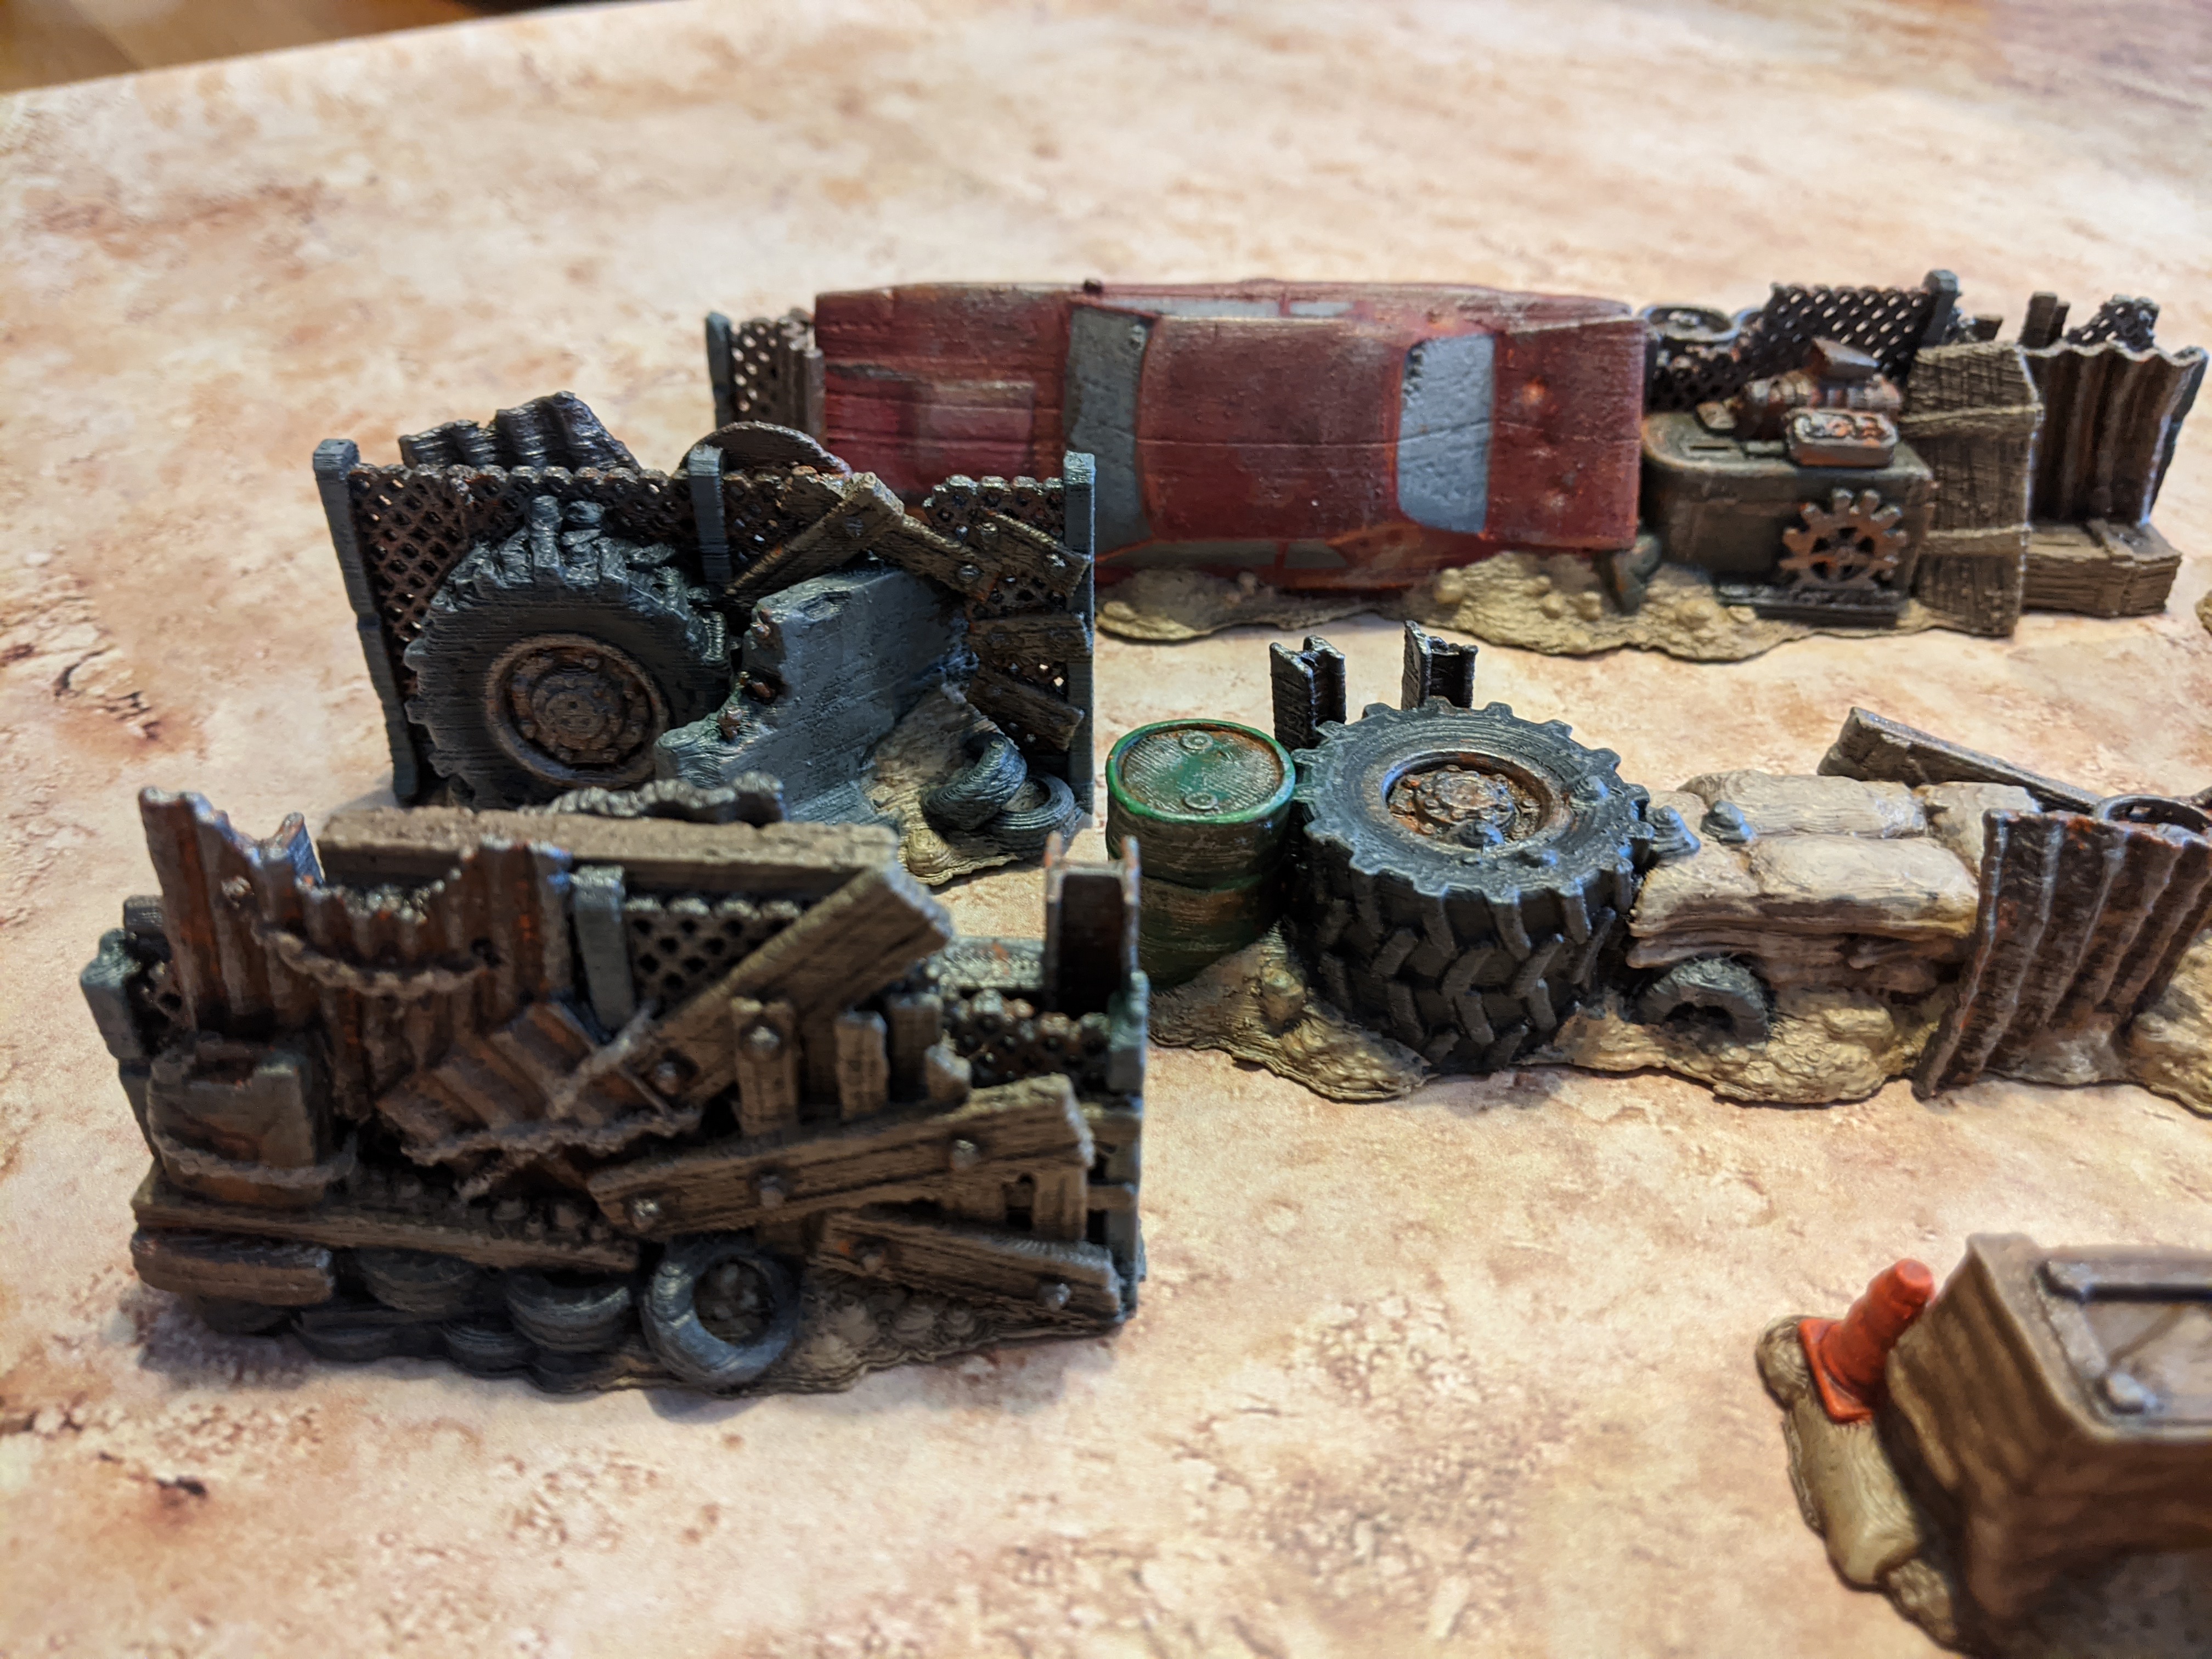
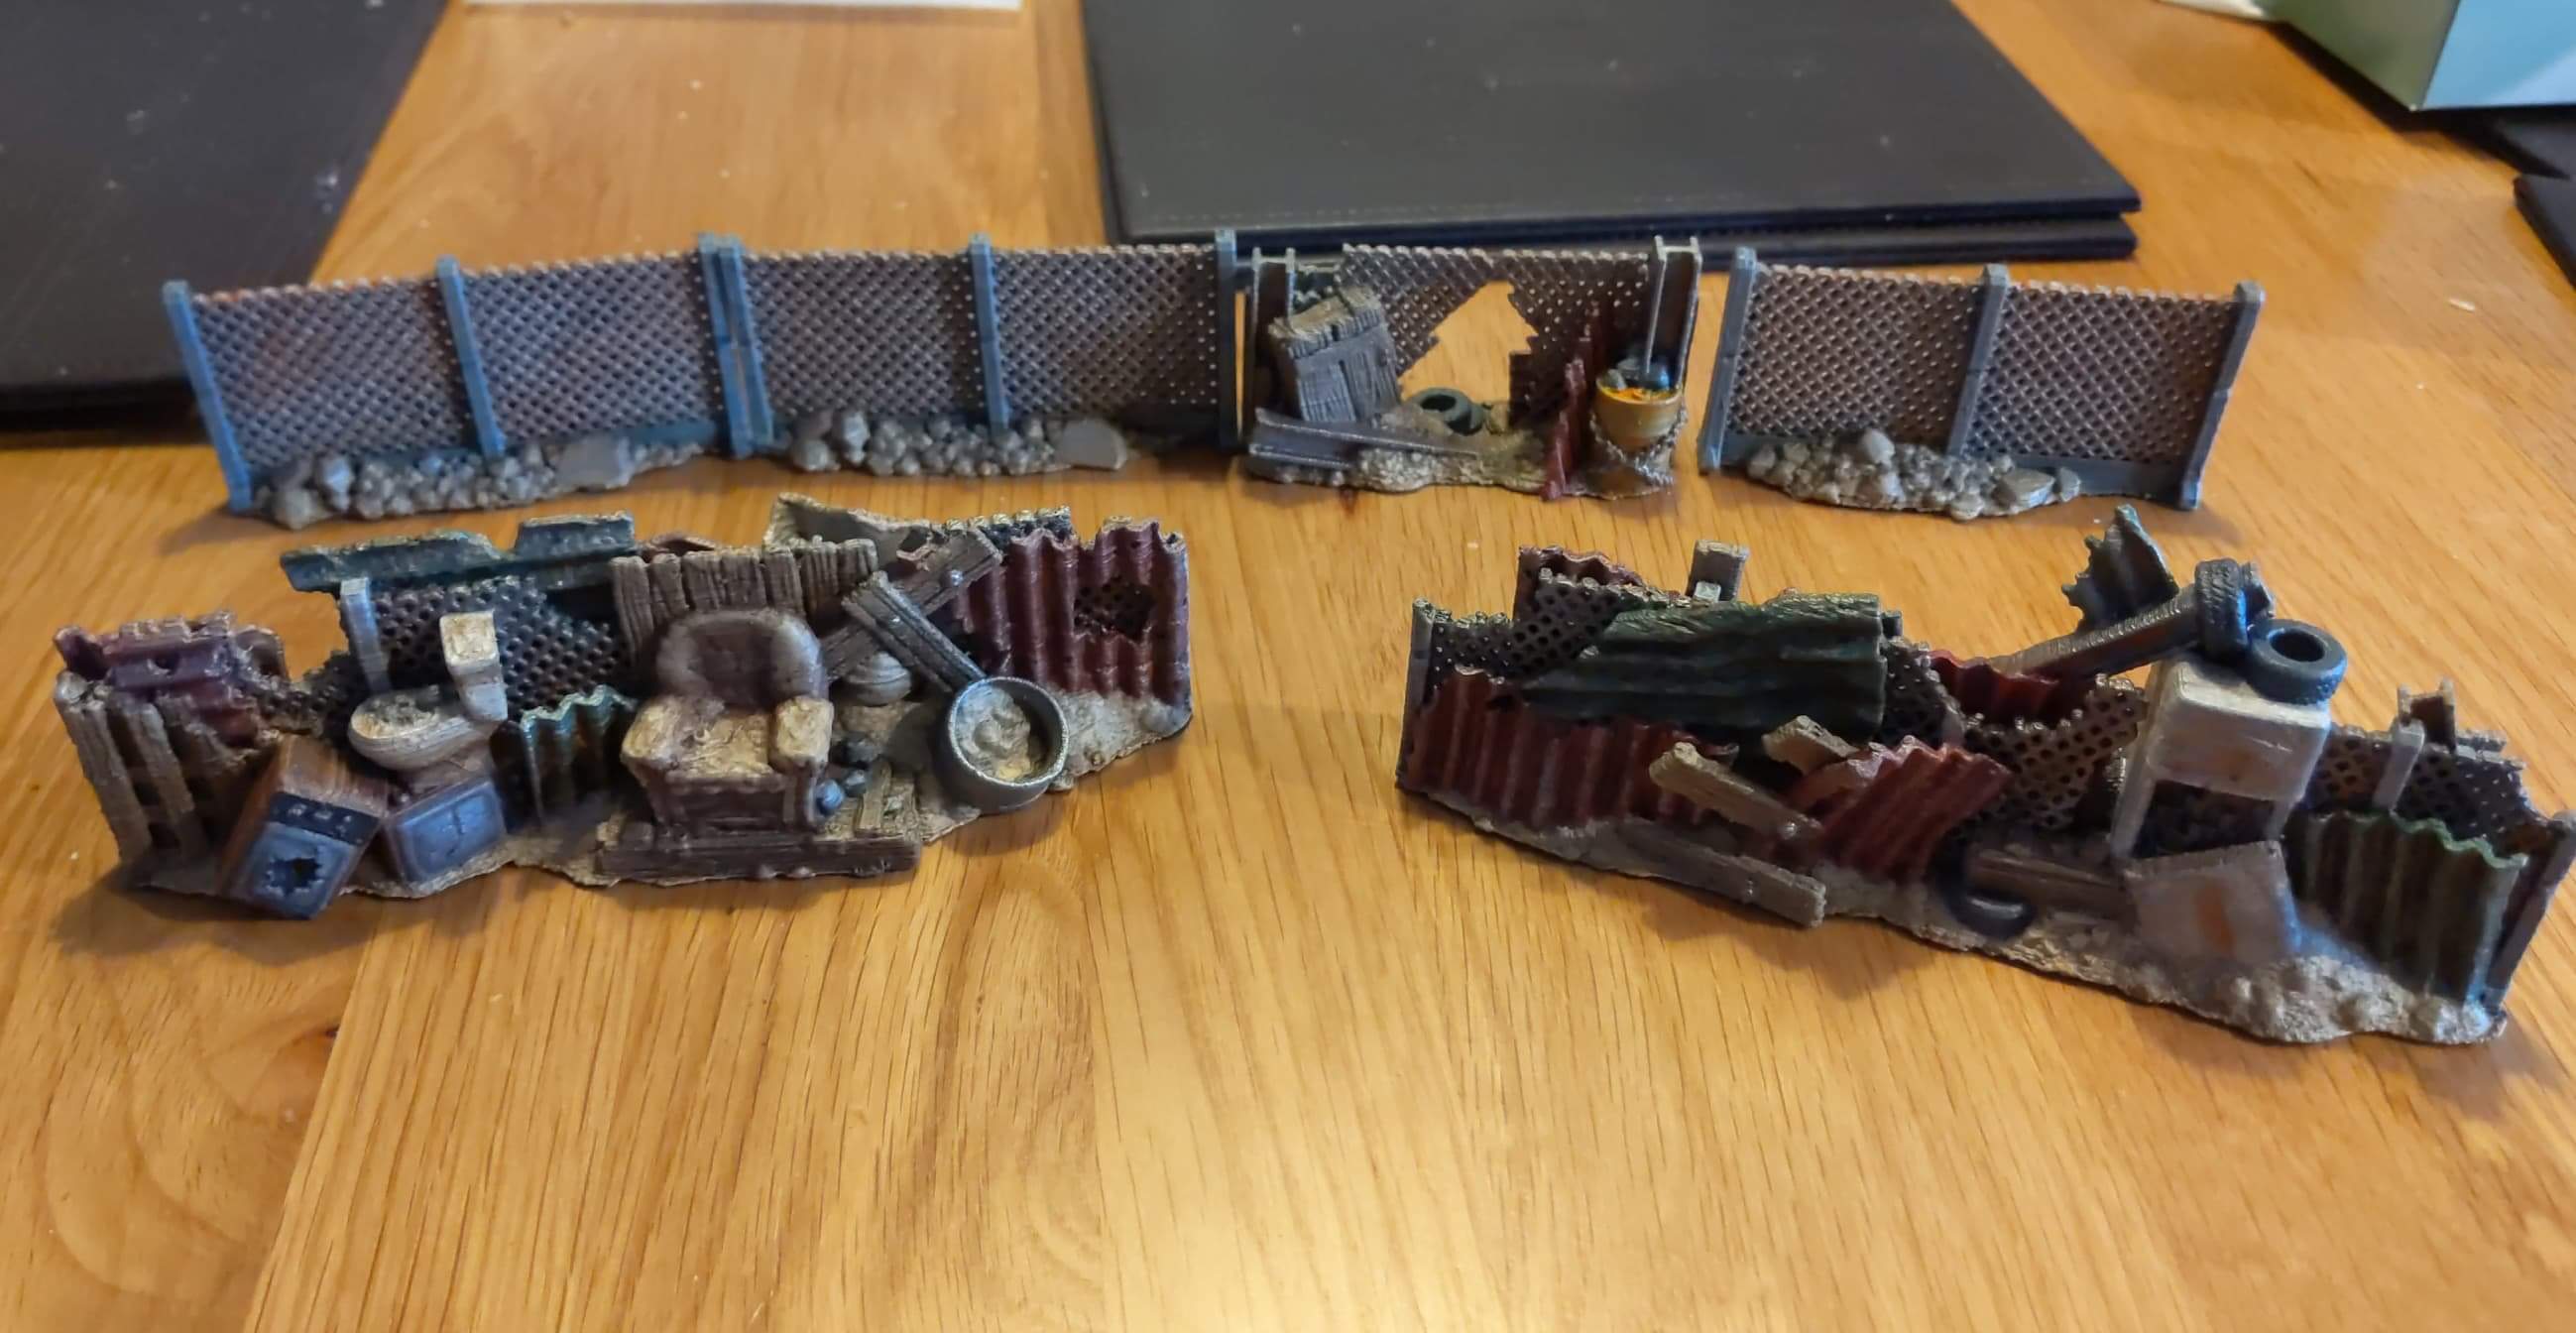
Junk Walls
Sooo…this project won a golden button last week! Was not expecting that. Fortunately I have a big more progress to share really!
I have turned my eye back towards terrain and am working up to a junkyard/waste dump table. I have picked up a few Fallout-ish bits and it is high time to apply paint and bring some stuff together.
These are 3d prints on my brother’s filament printer, and the STL files come from Printable Scenery. This is the first batch, with a bunch more to come.
Super Mutant Starter set
I largely followed the steps detailed earlier in the project log on layering up the skin tones, but diverged a bit on the Super Mutant Hounds using more Ice Yellow highlights and charred brown shading to differentiate them from the pair I already have. There is an alternative profile for ‘fiends’ so thought that might be useful.
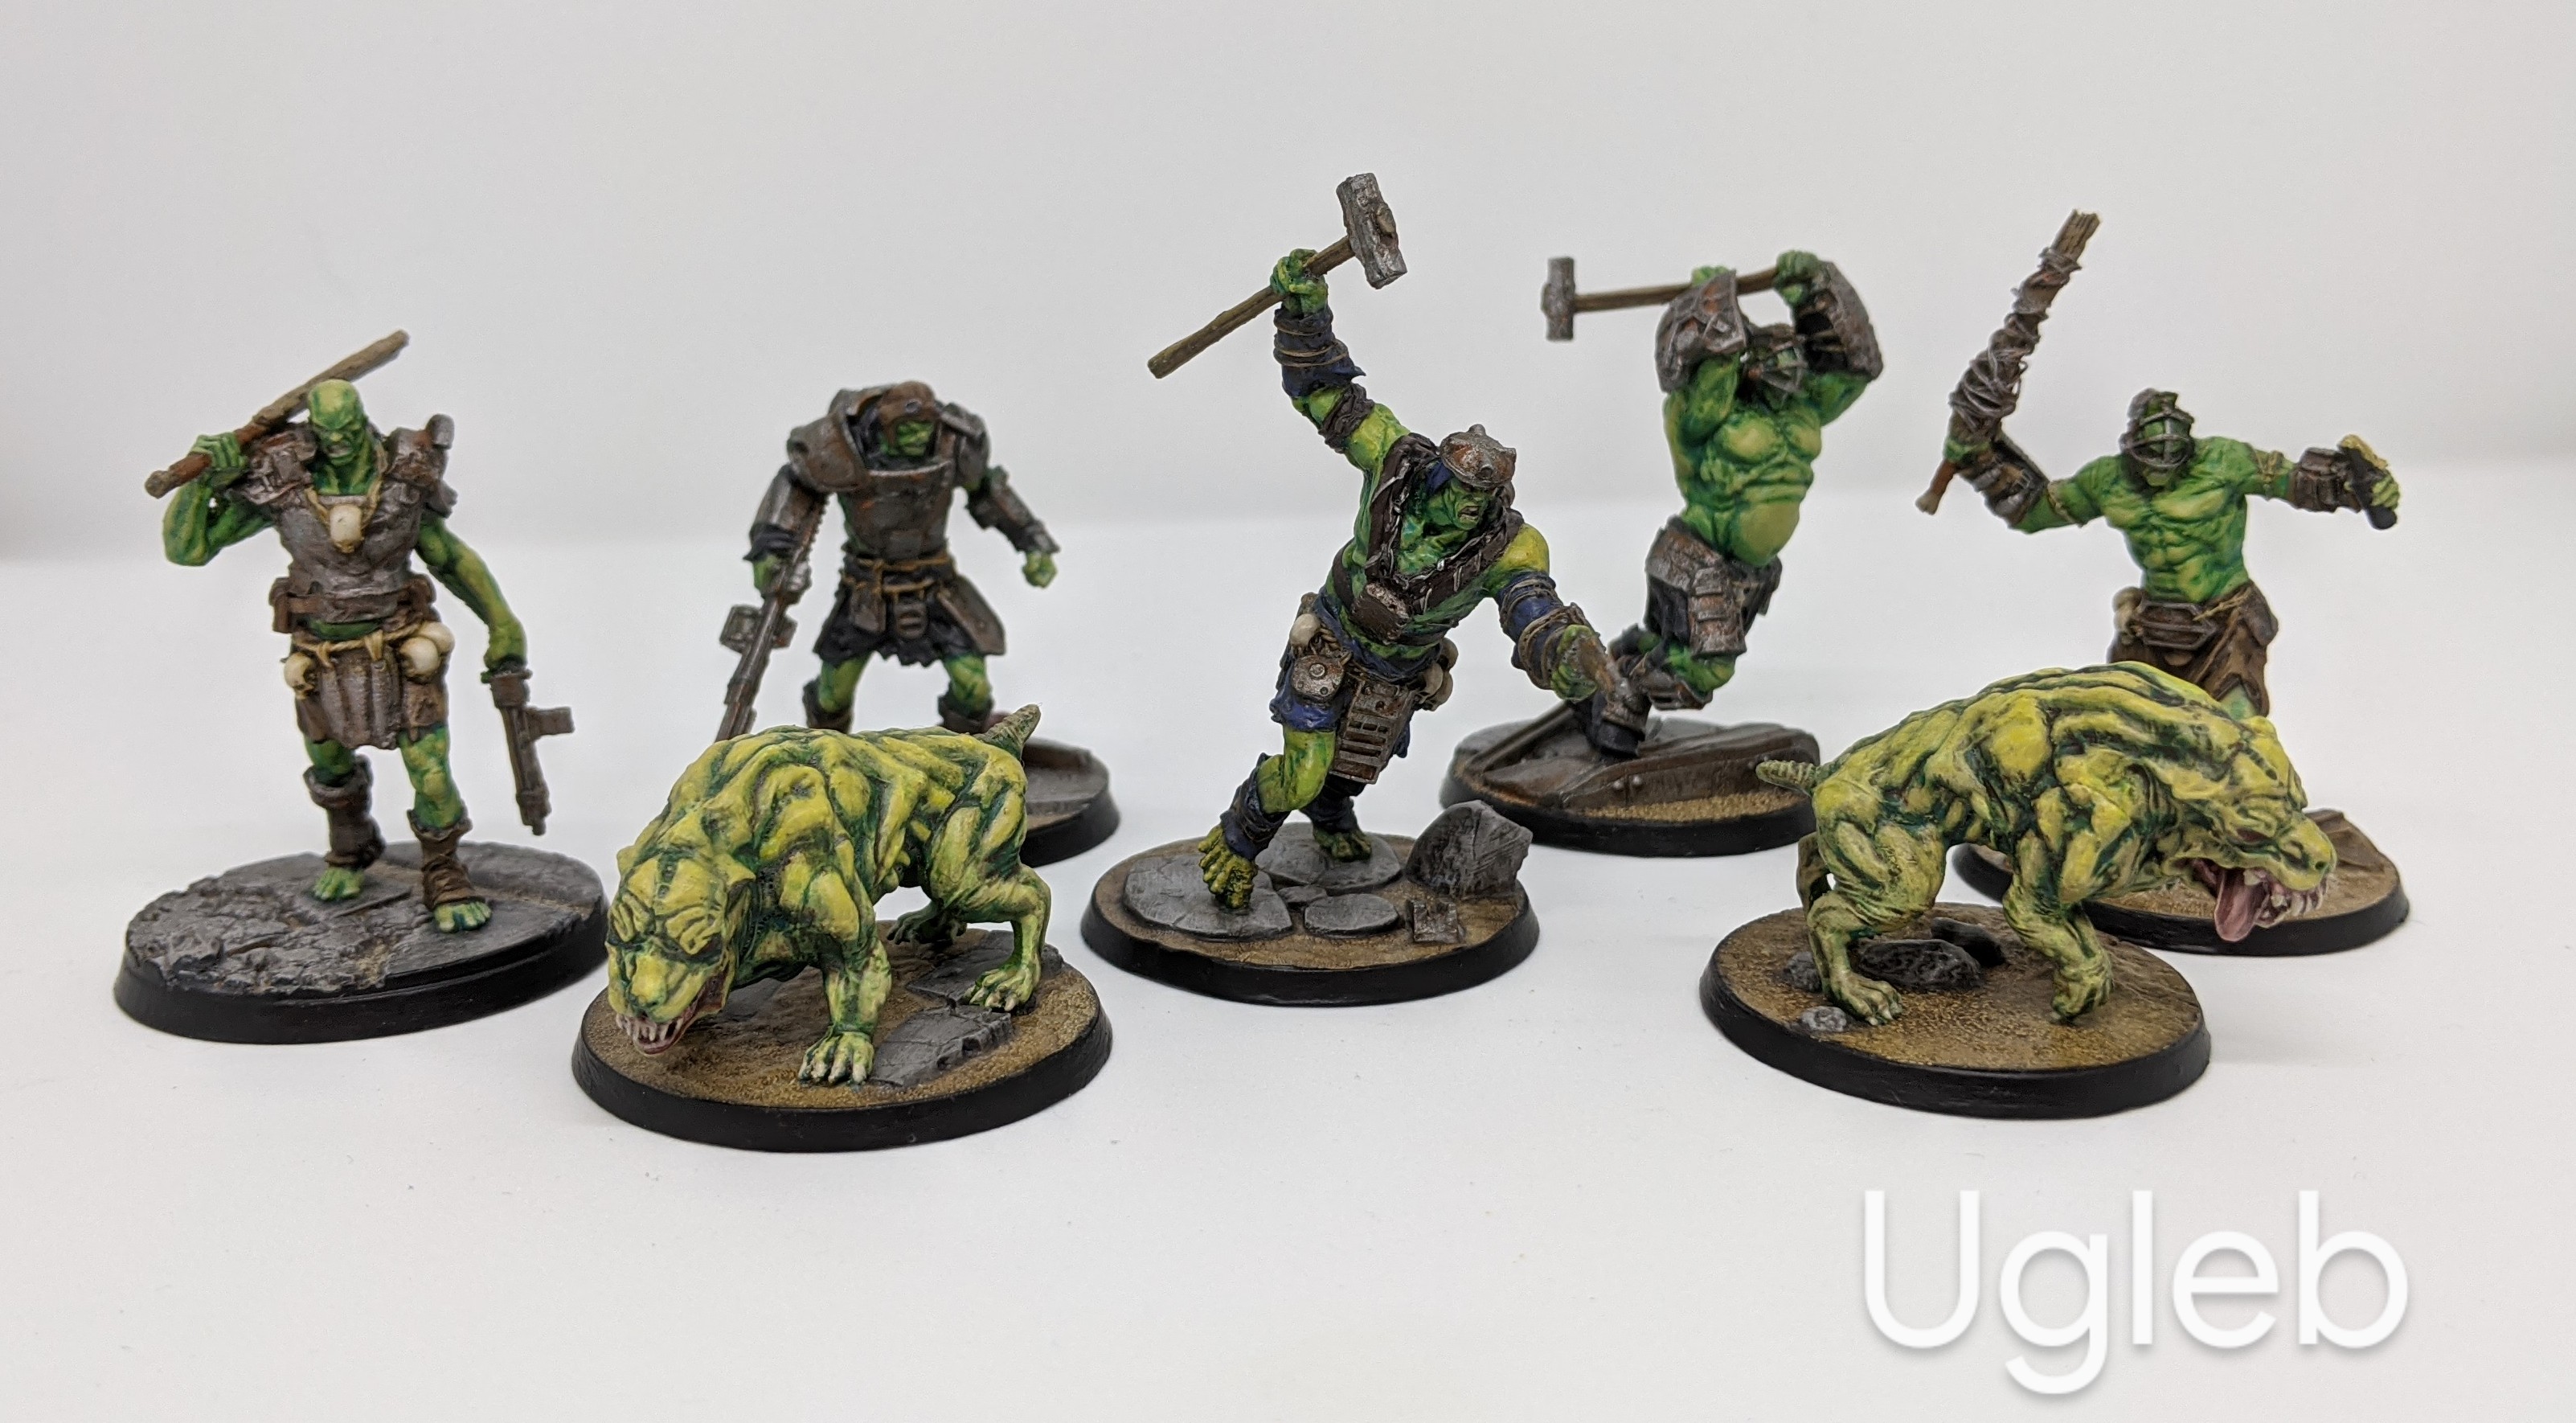 The complete starter set.
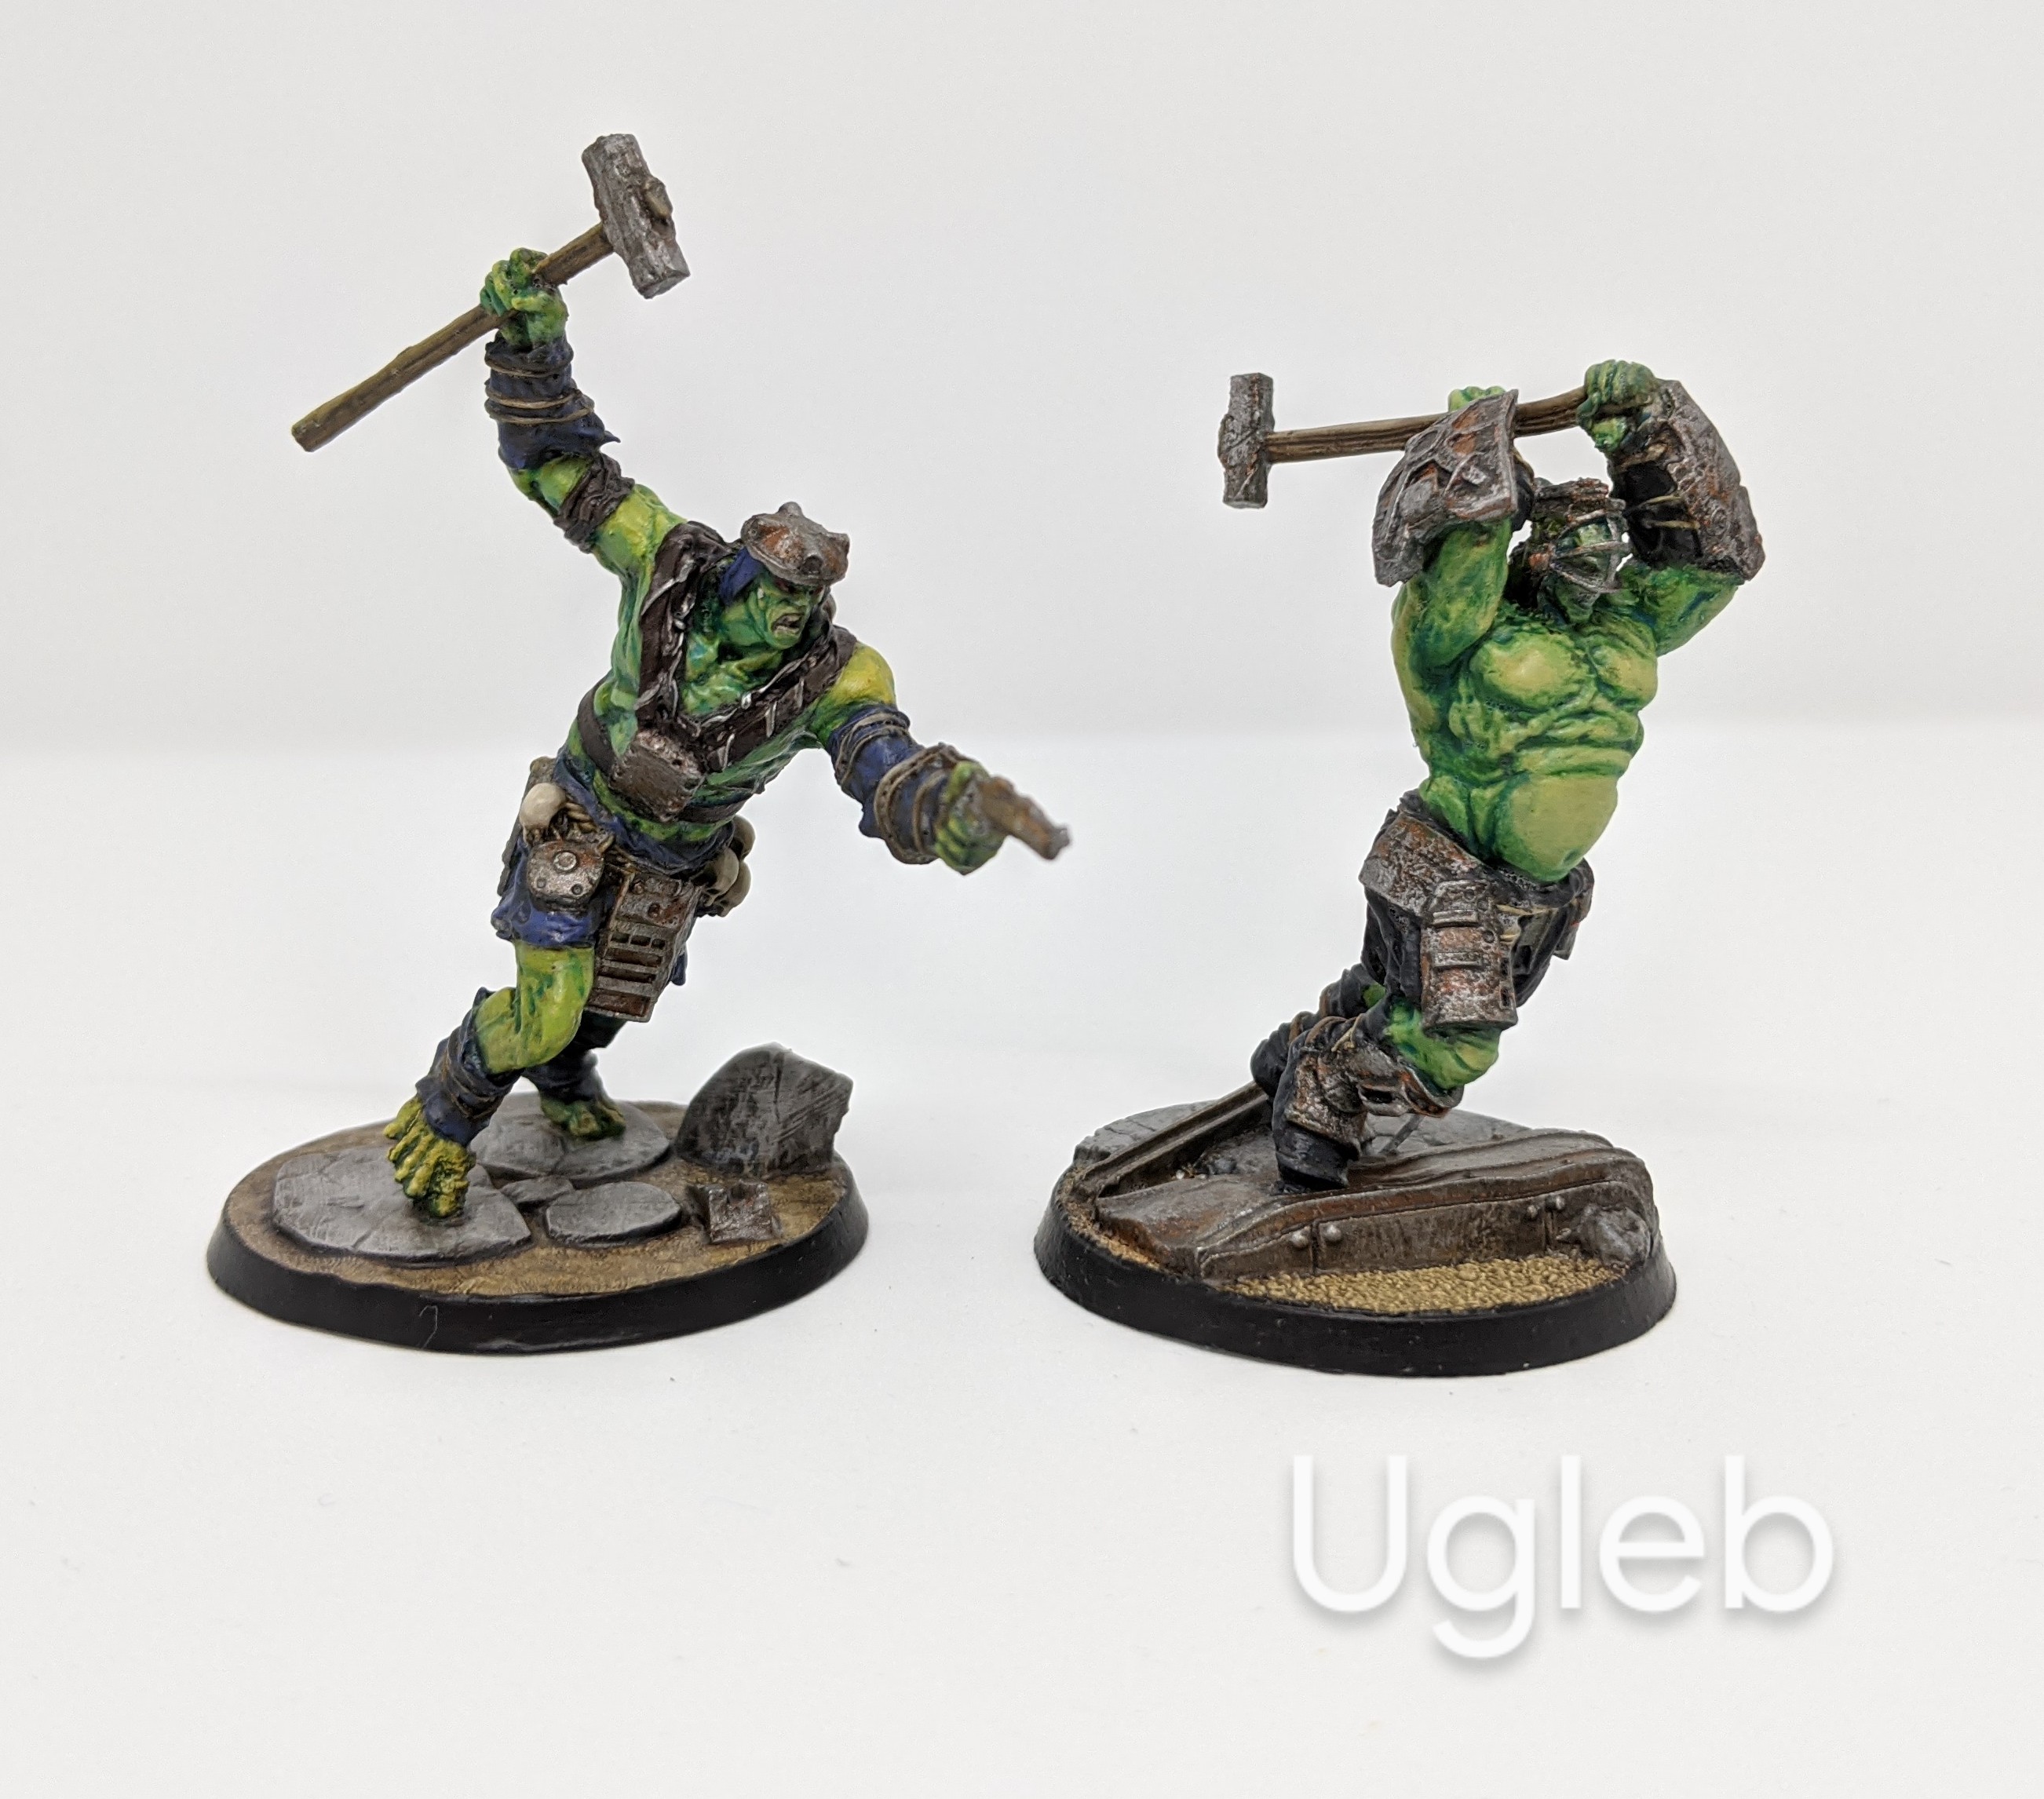 Super Mutant Master & Brute.
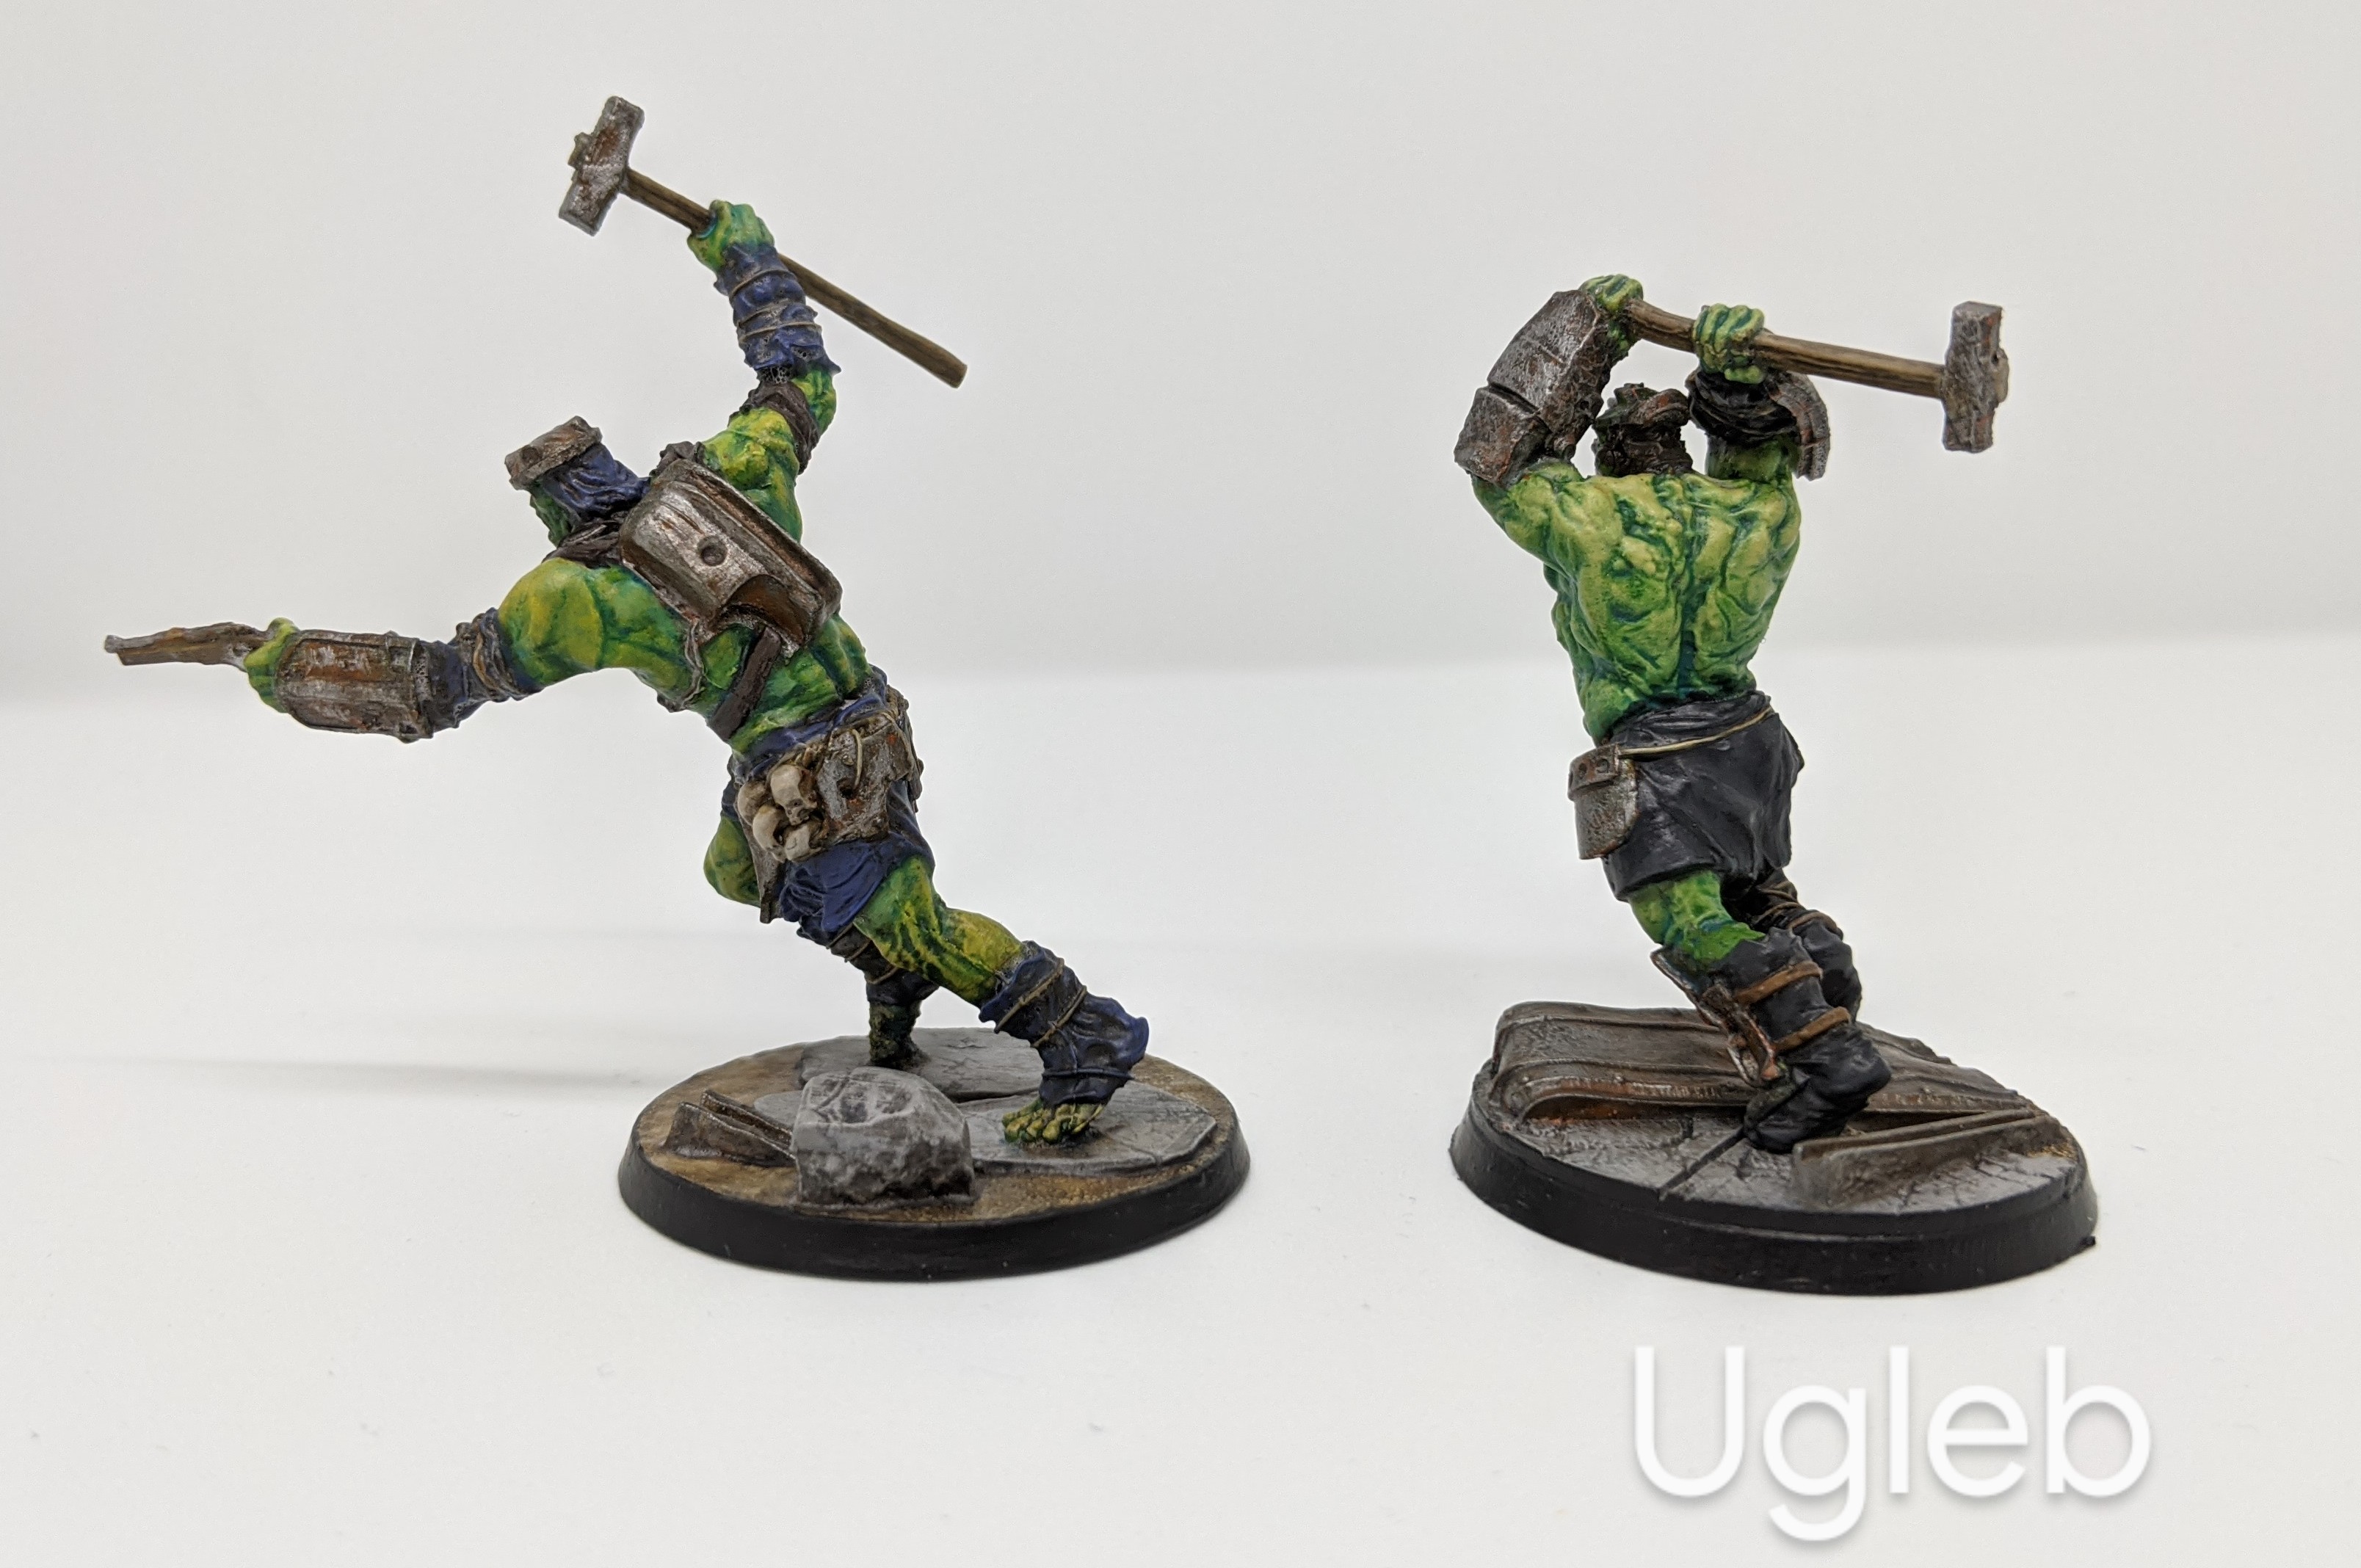
 A trio of Super Mutants.
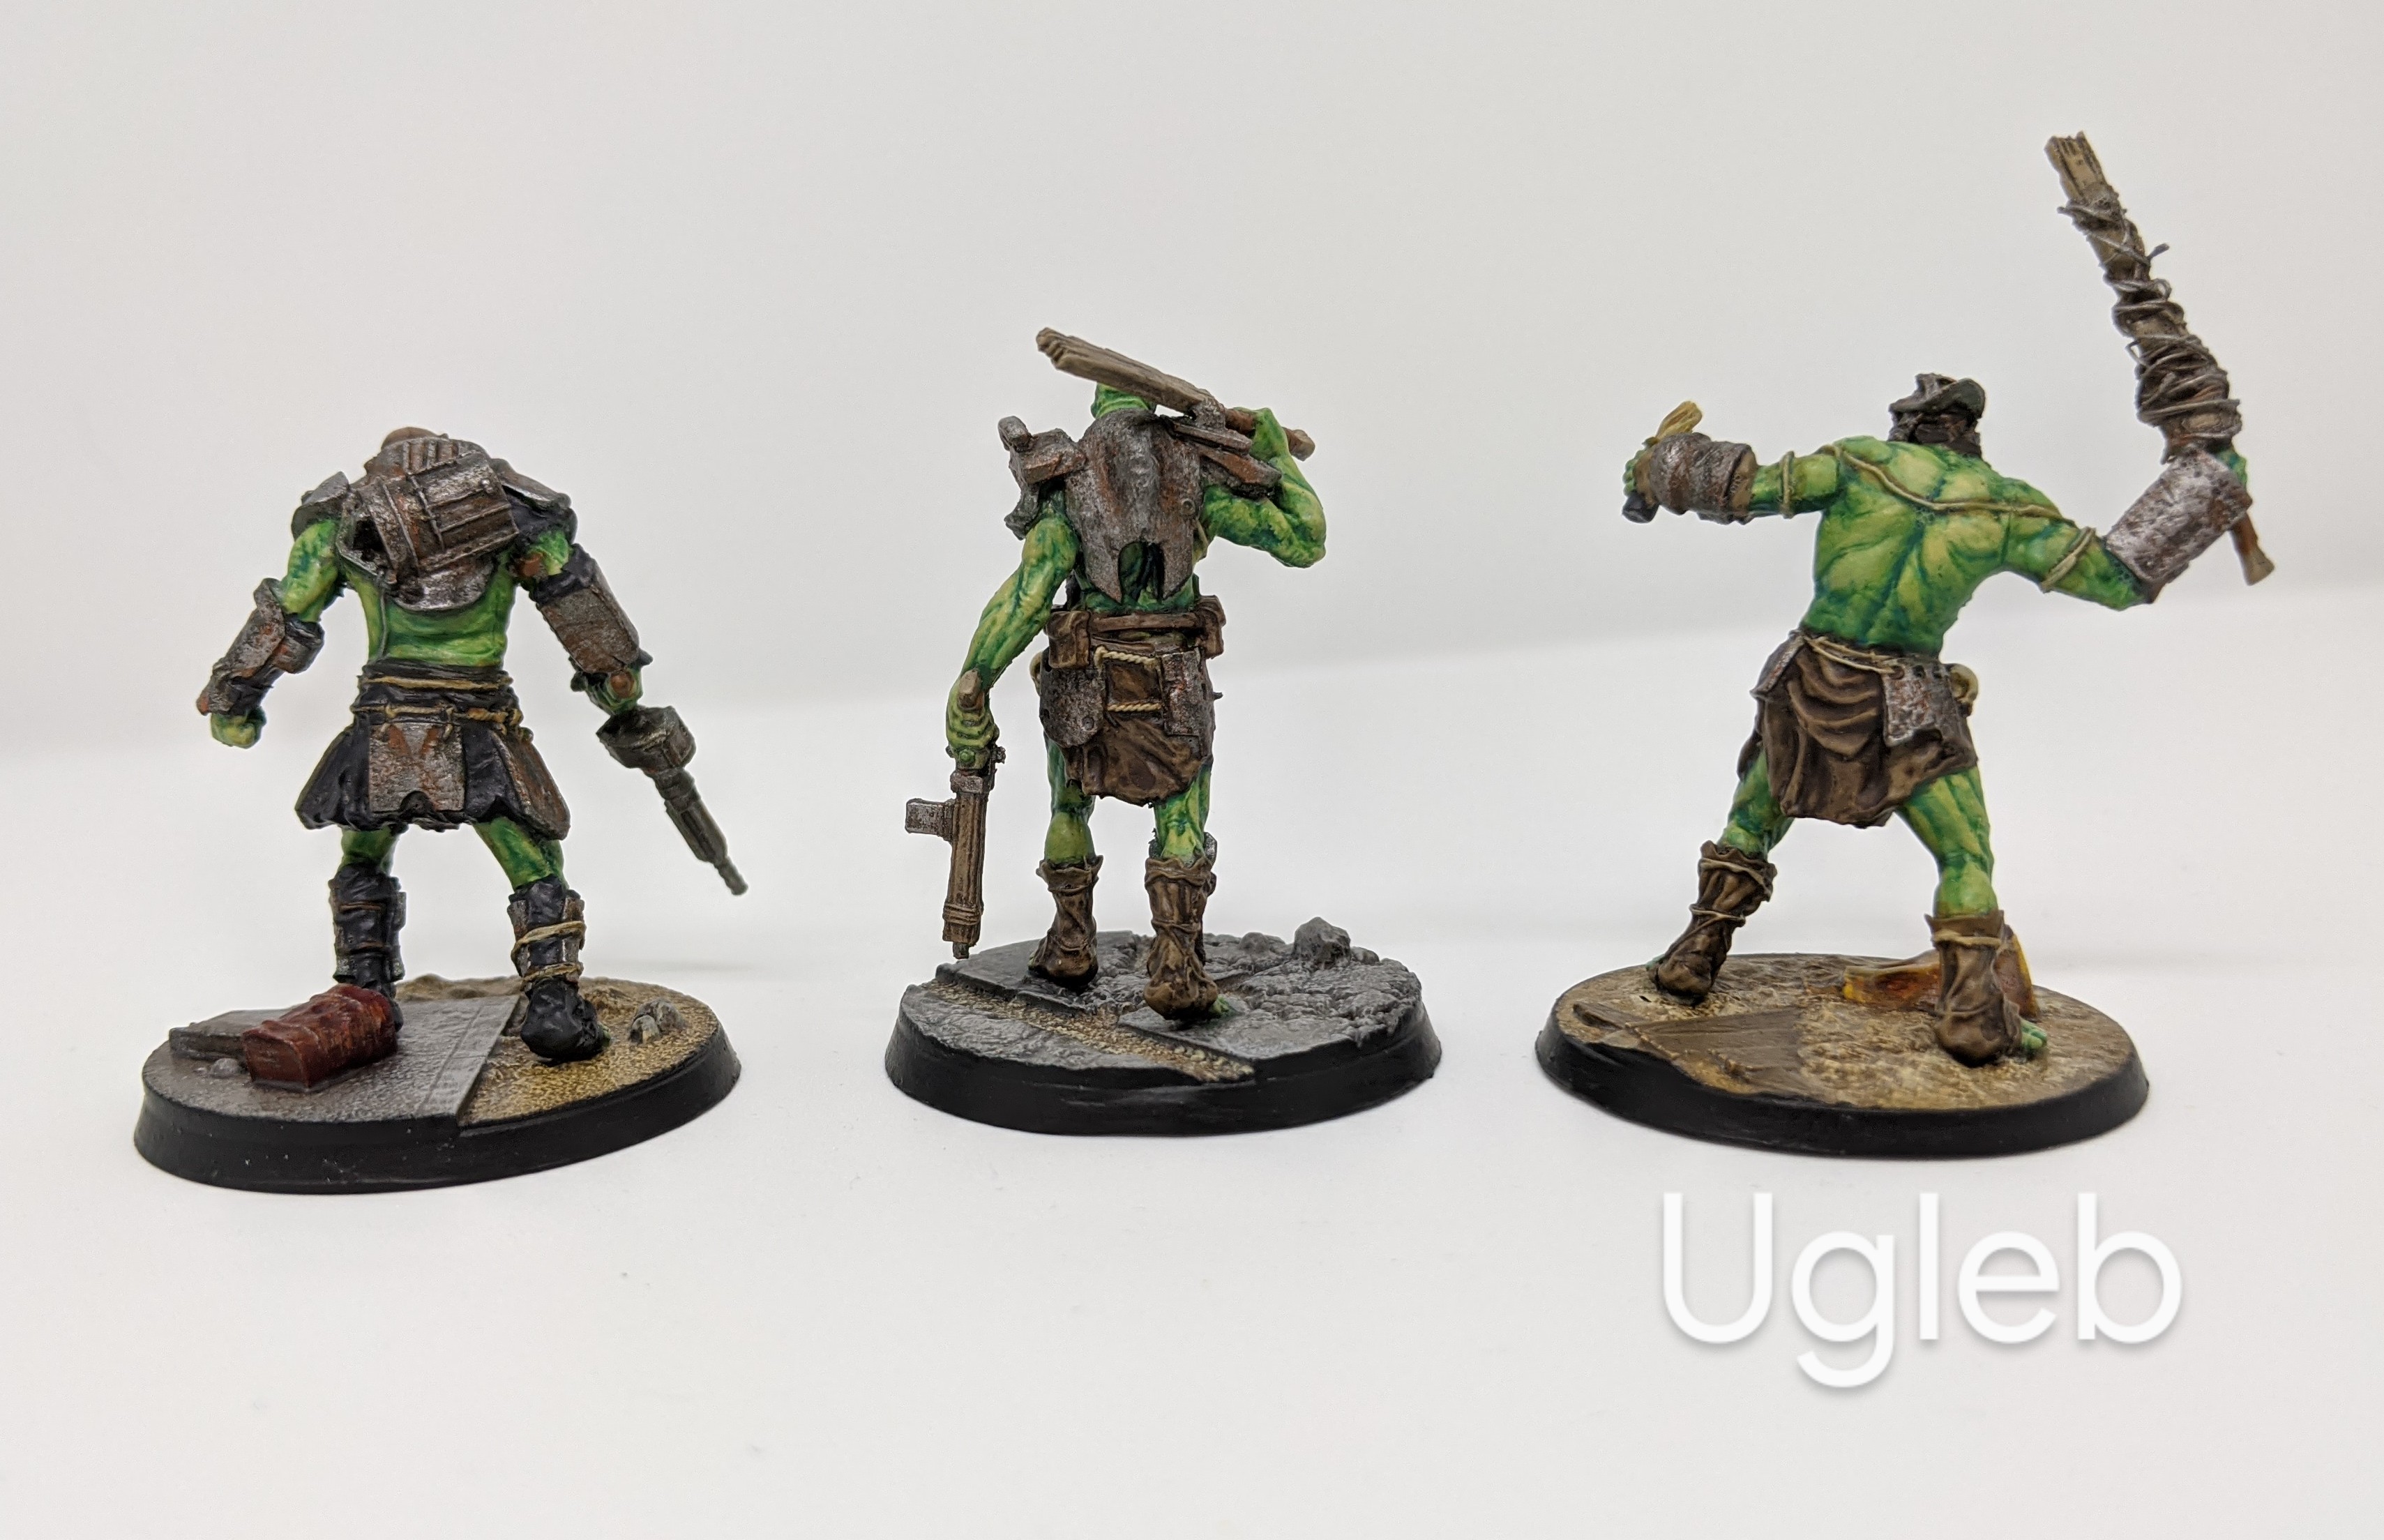
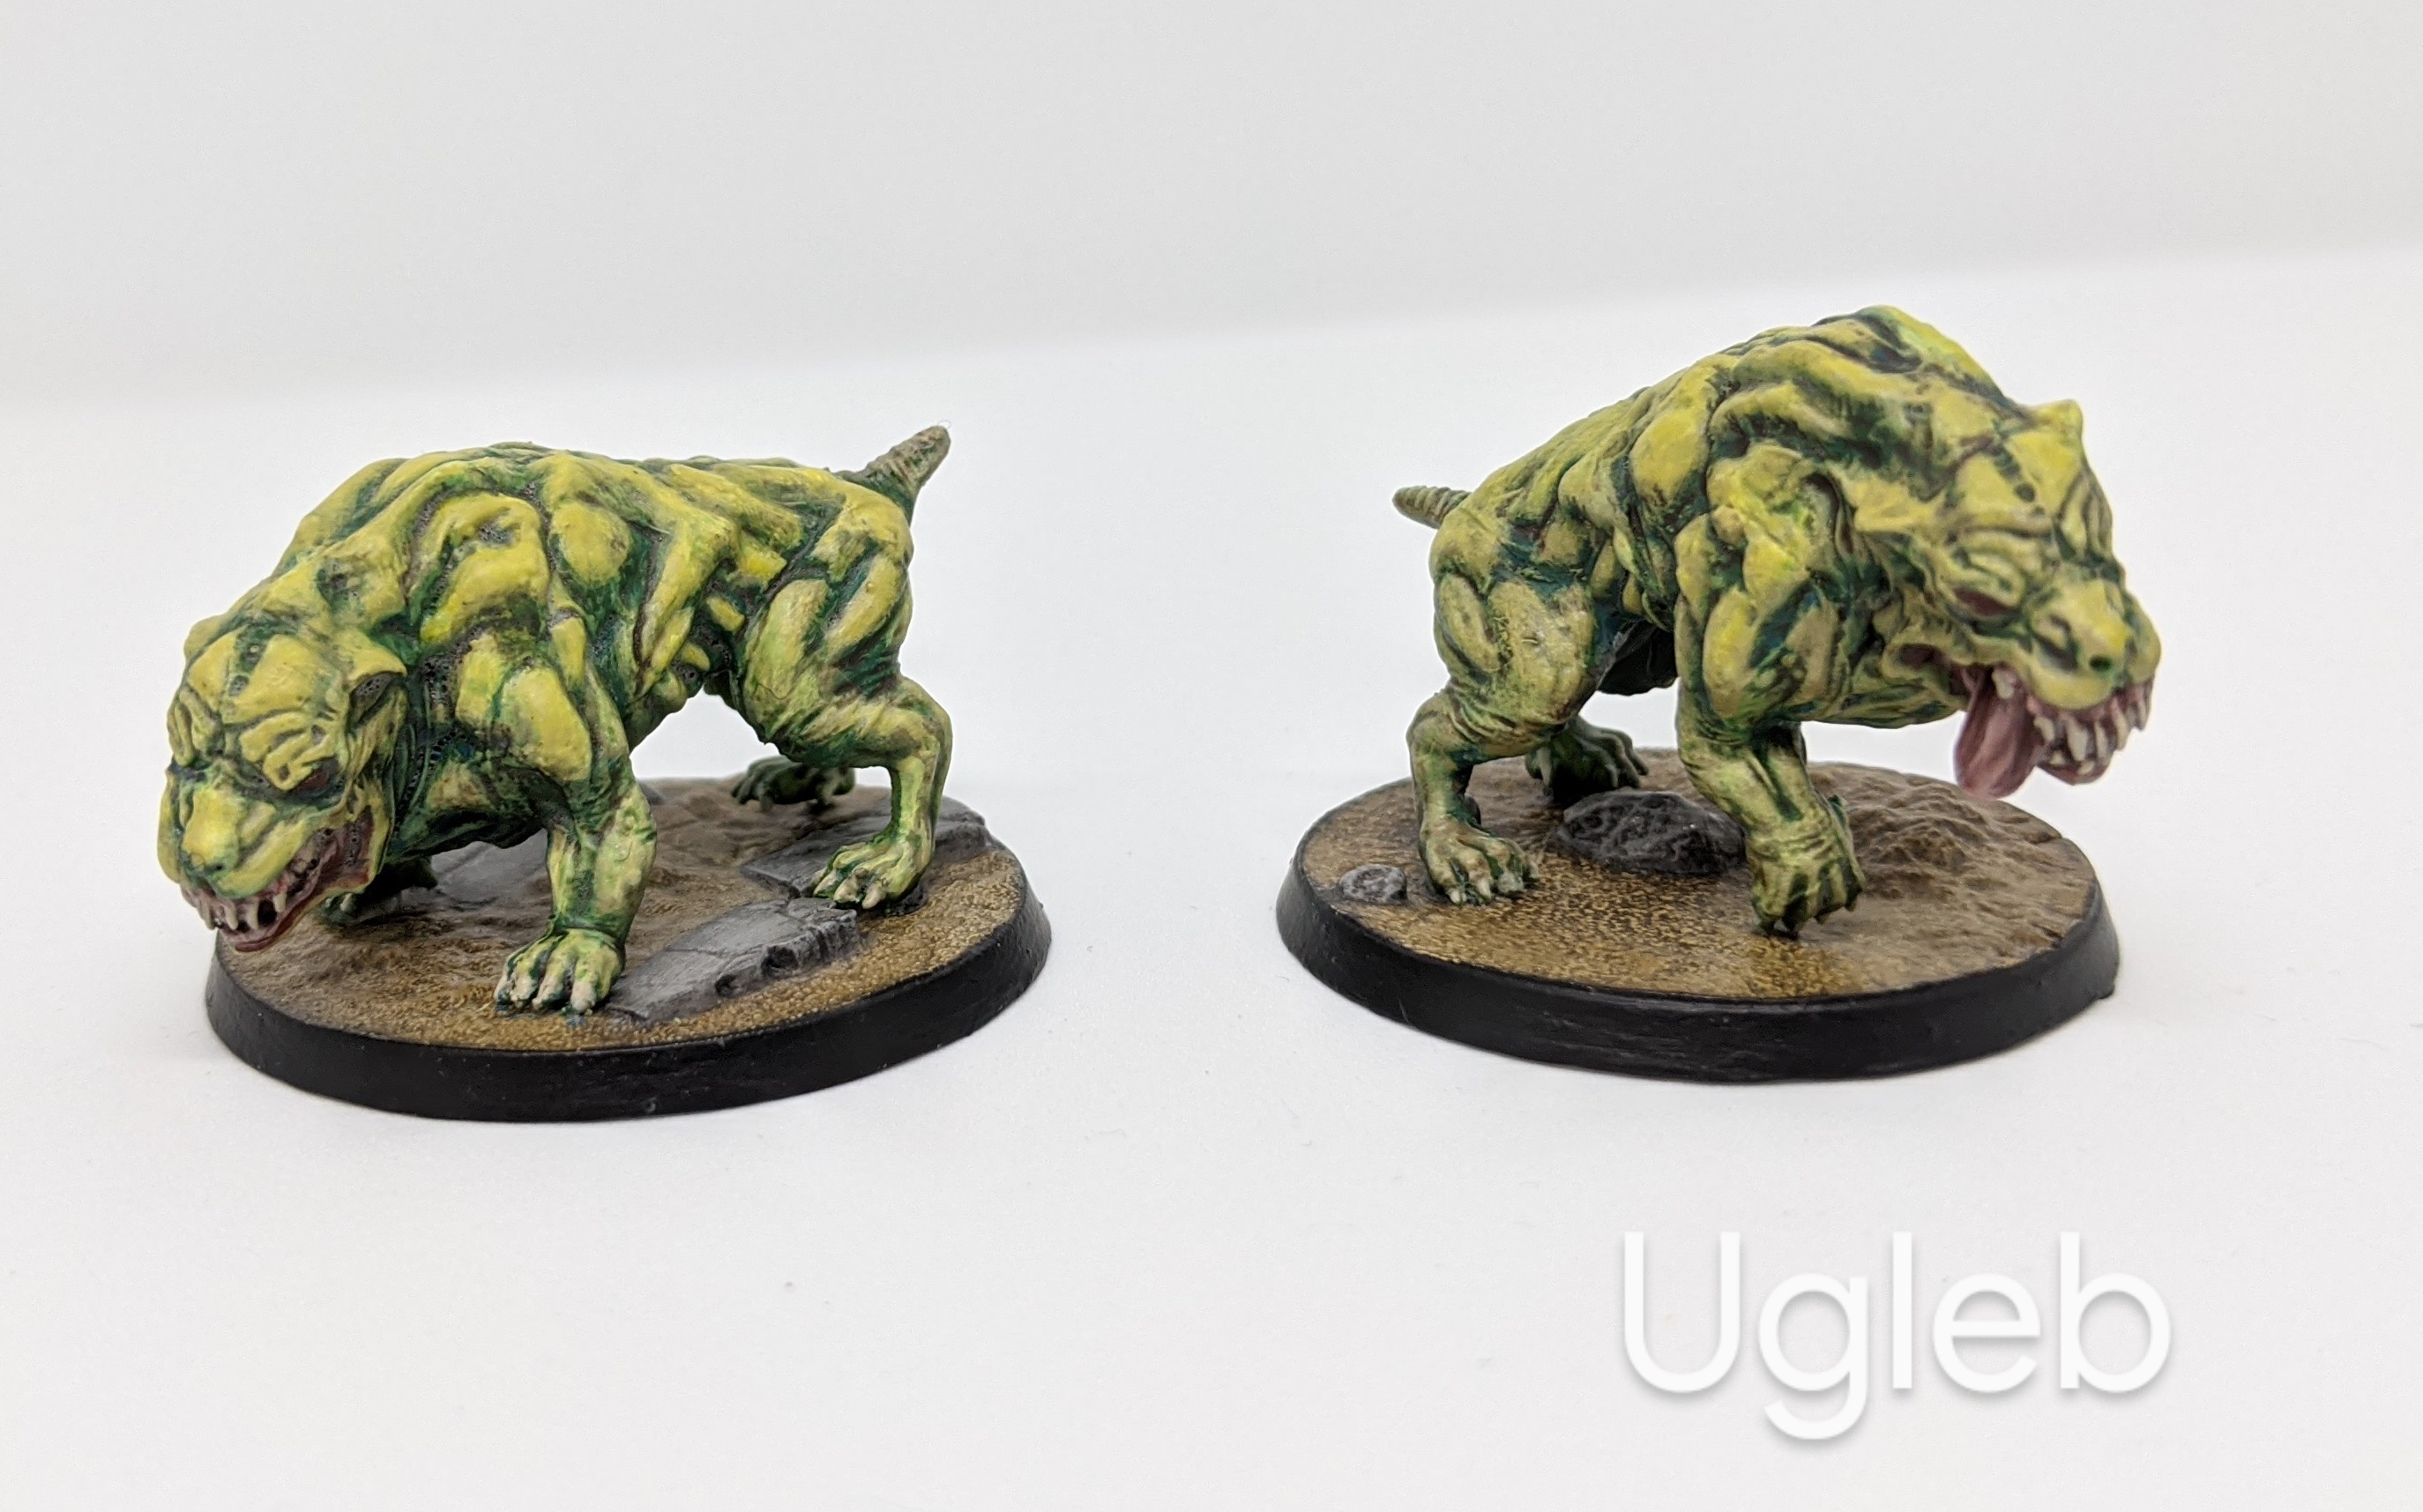 The Hounds.
Brotherhood of Steel Starter set
After a much, much, much longer gap than I expected or intended, I have done some more Fallout stuff! Inspired by the prospect of getting a game in with another human being in the same room, I have pulled some stuff out of the pile of shame and got cracking again.
This project ground to a halt mostly because Modiphius’ launch of Fallout Wasteland Warfare was crippled by production woes not being able to match an unexpectedly high demand – so you just couldn’t buy anything reliably for about a year, by then I was distracted by other things. Still, better late than never I am finally moving forwards on getting some minis painted and sorting out some more terrain.
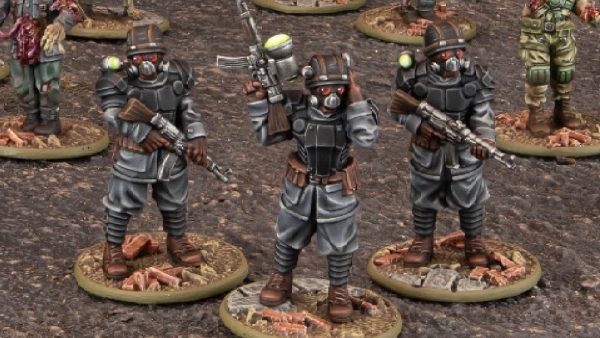
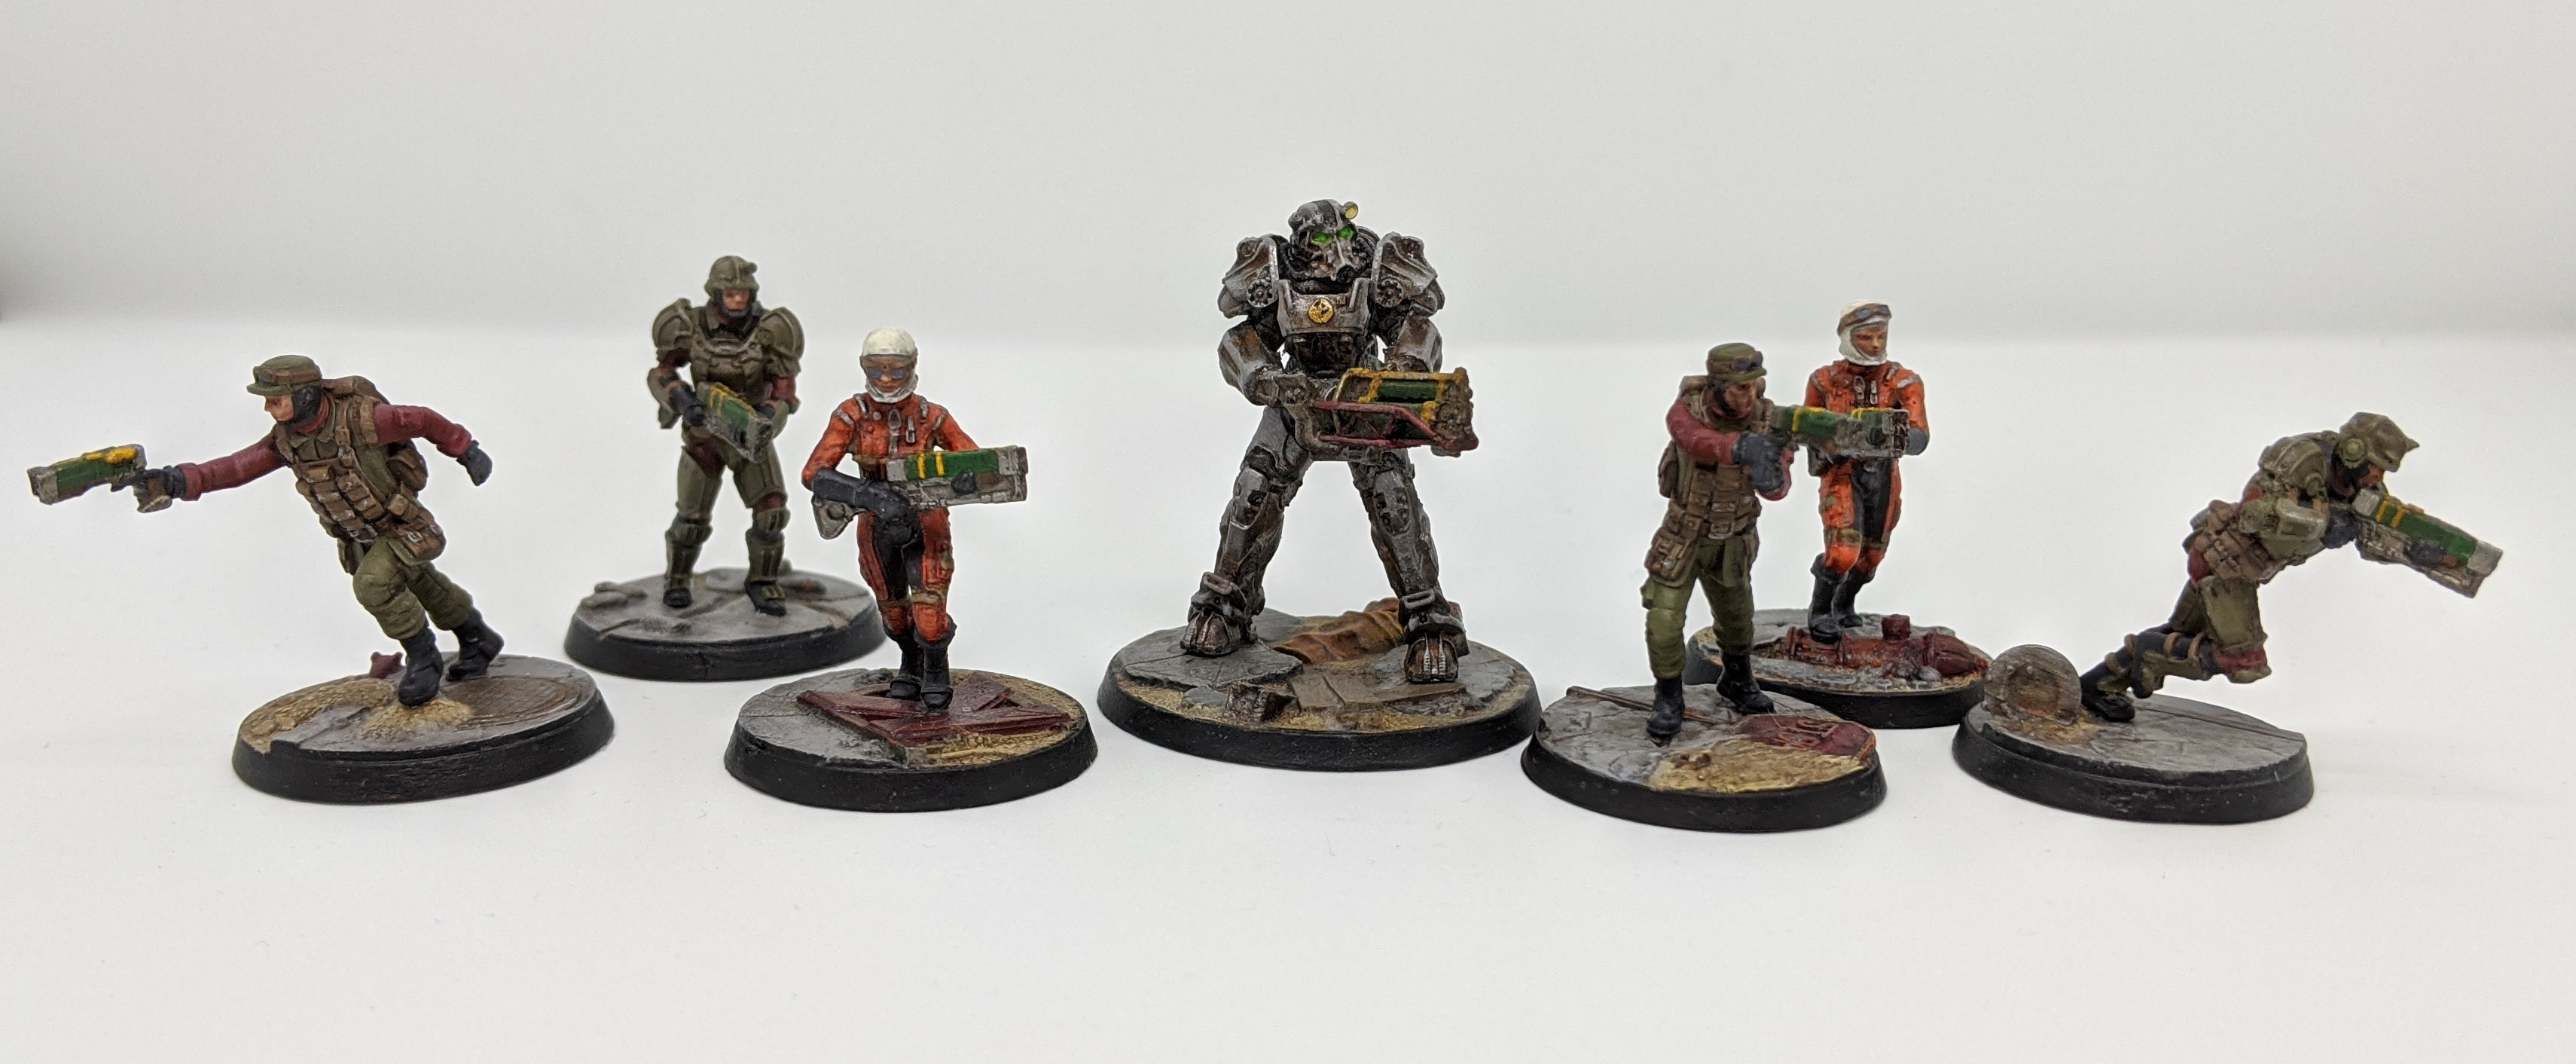 The Brotherhood of Steel Faction starter set.
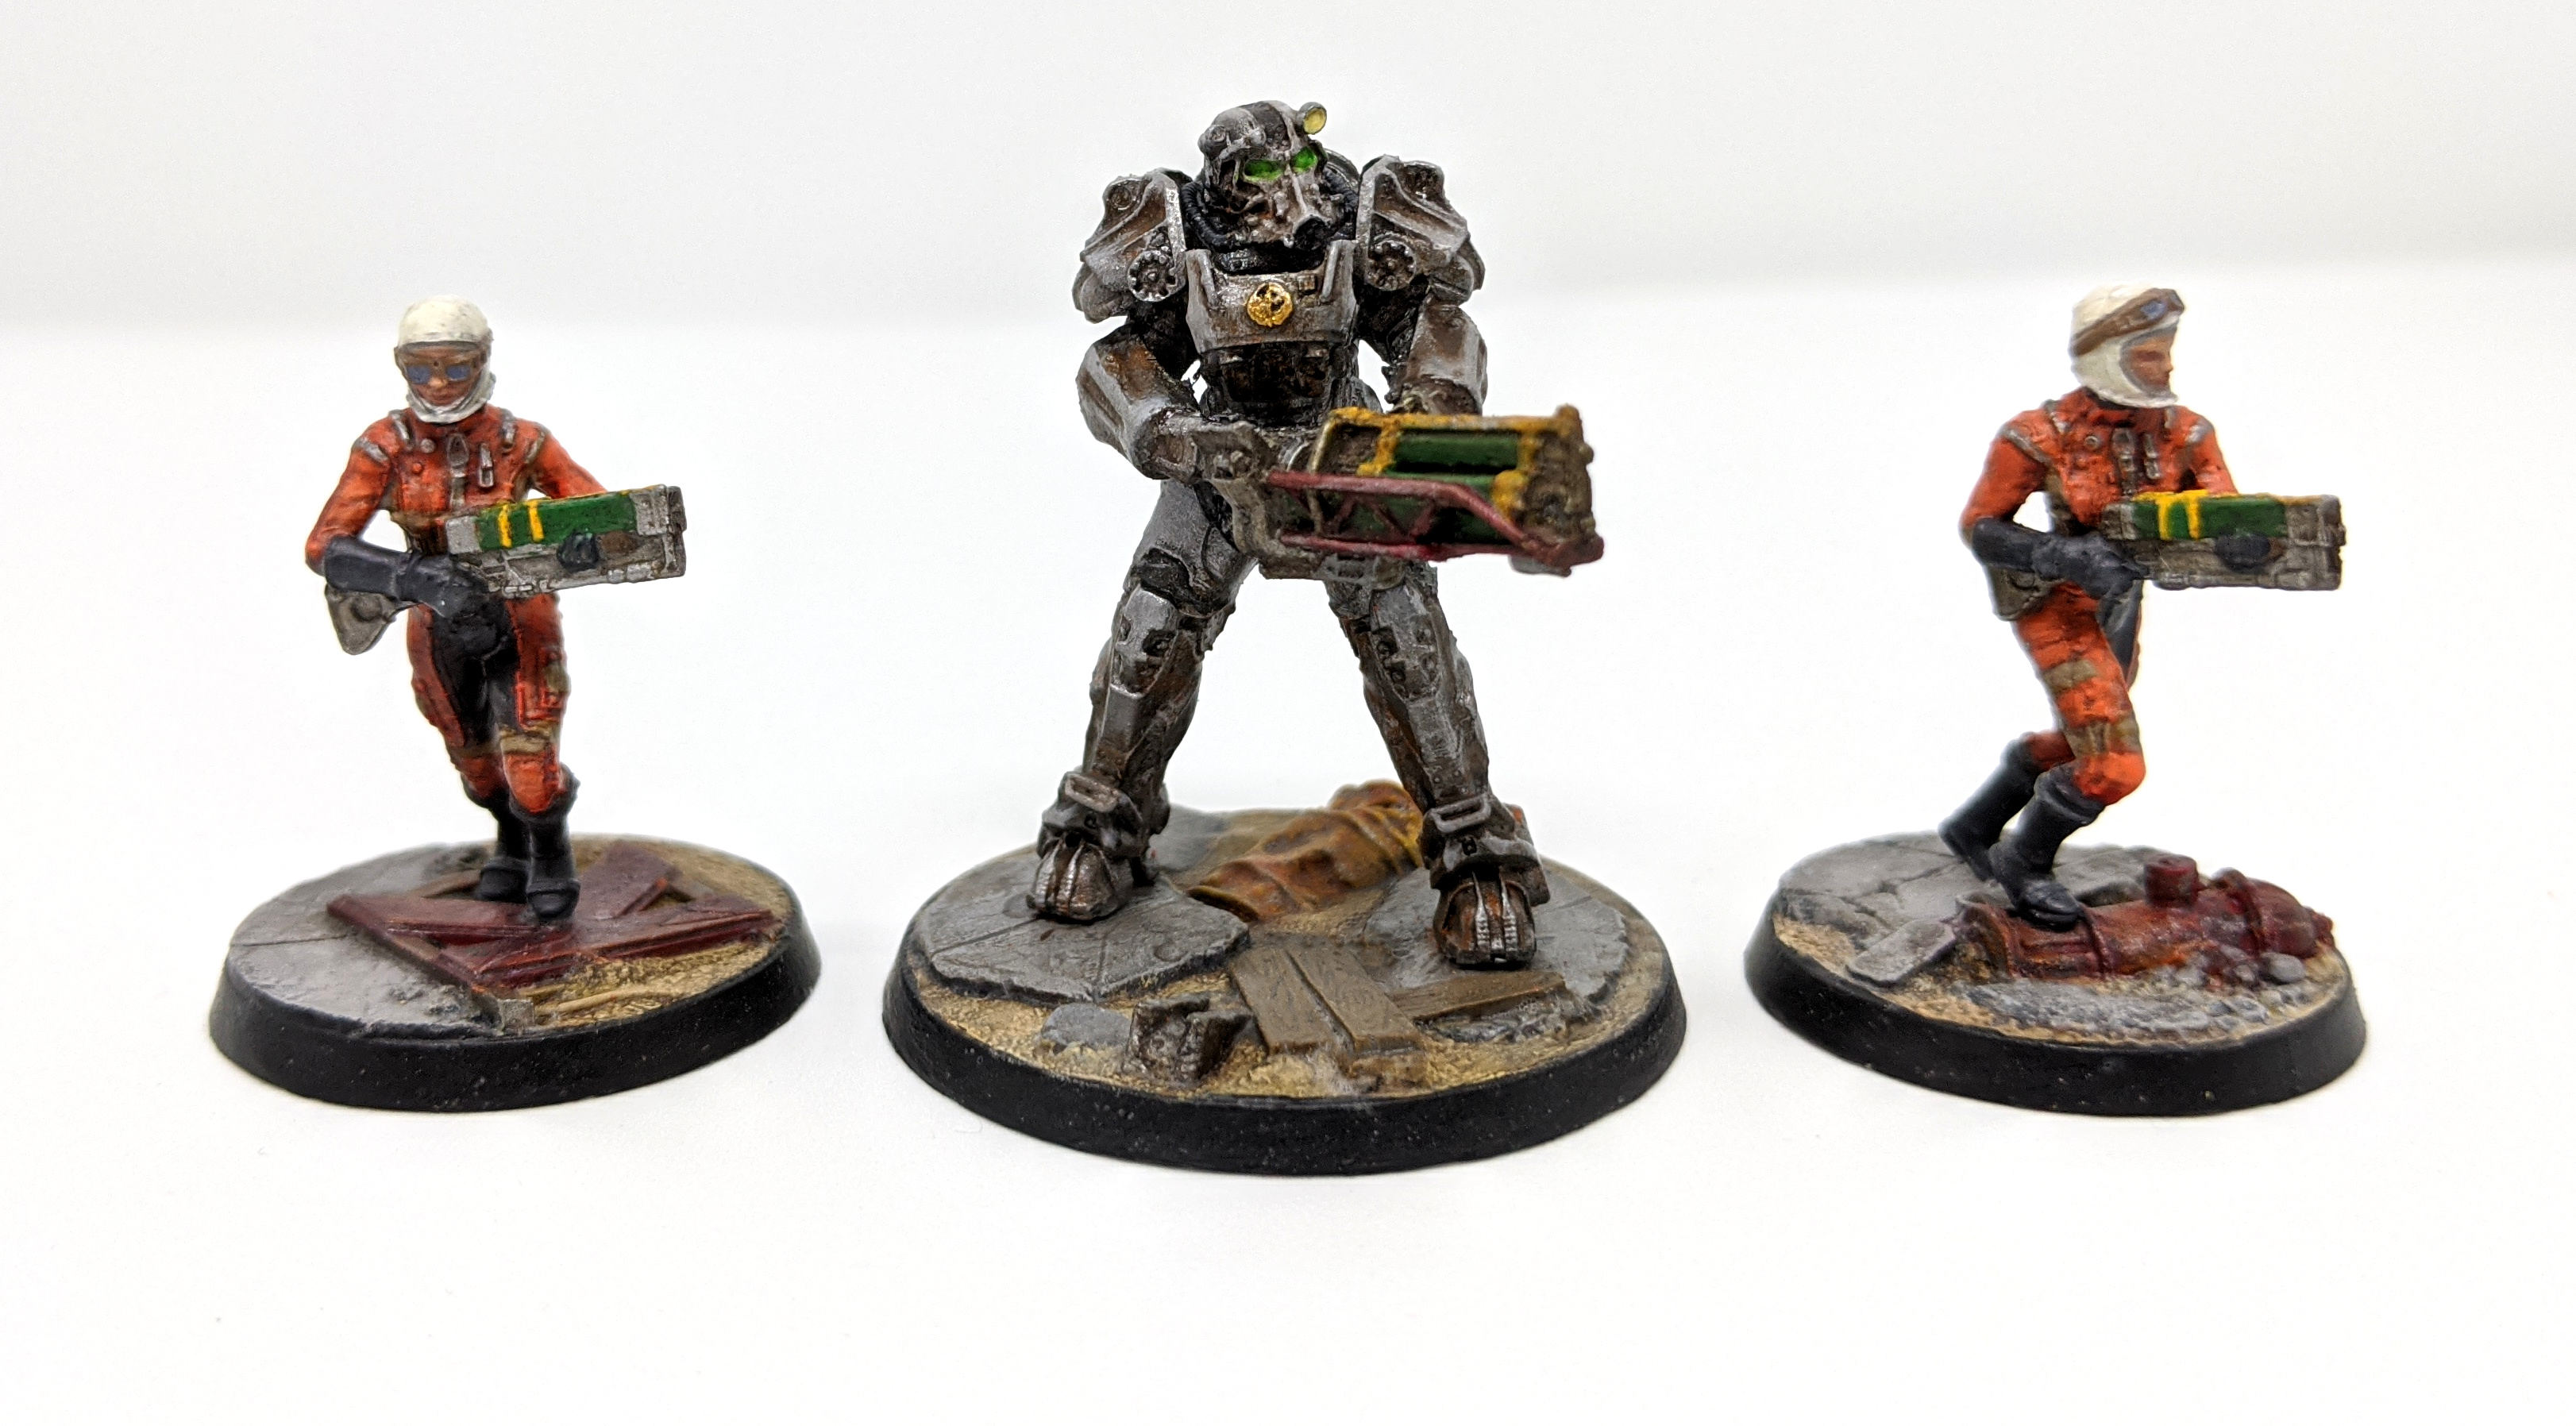 Paladin with Gatling Laser & Lancers.
 The Lloyd shot.
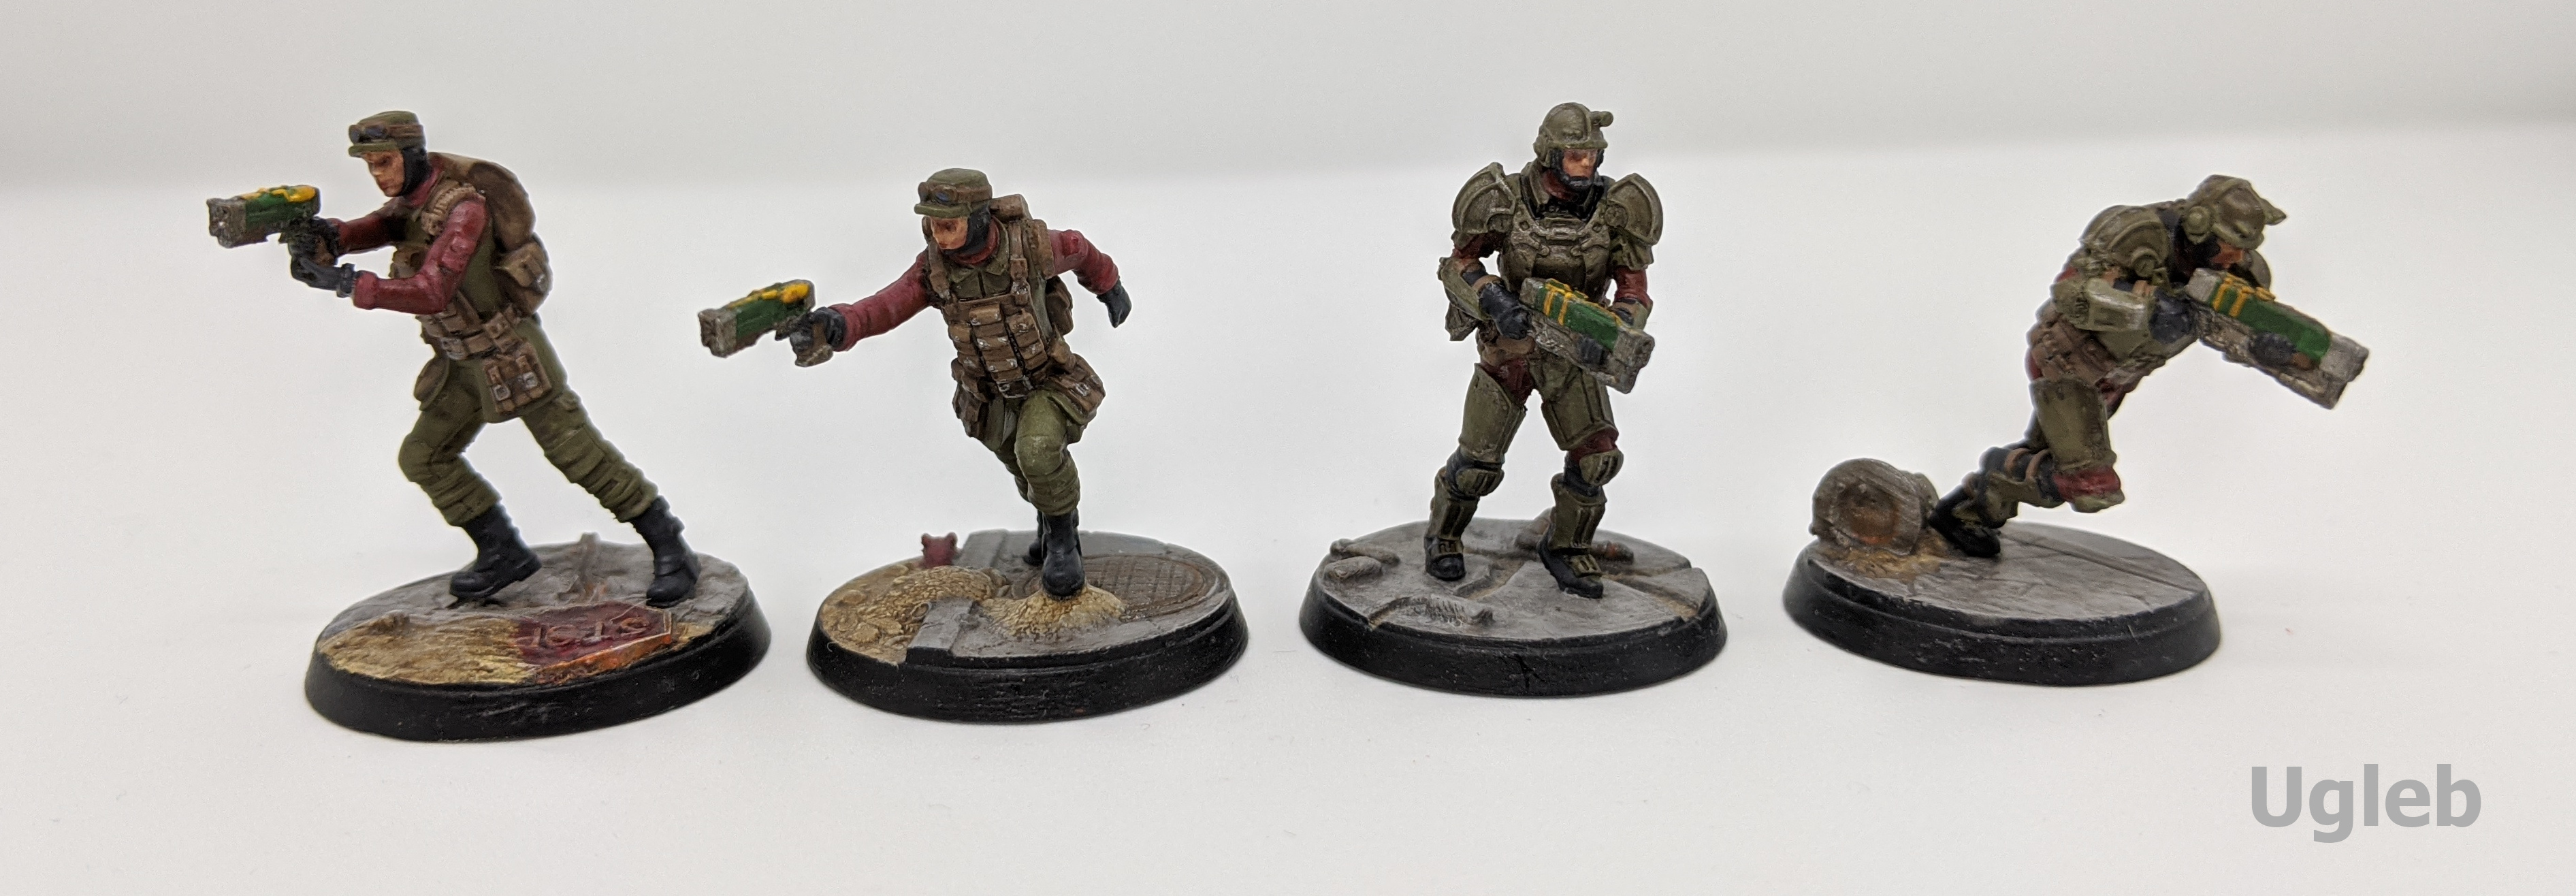 Field Scibes & Knights in Combat Armour.
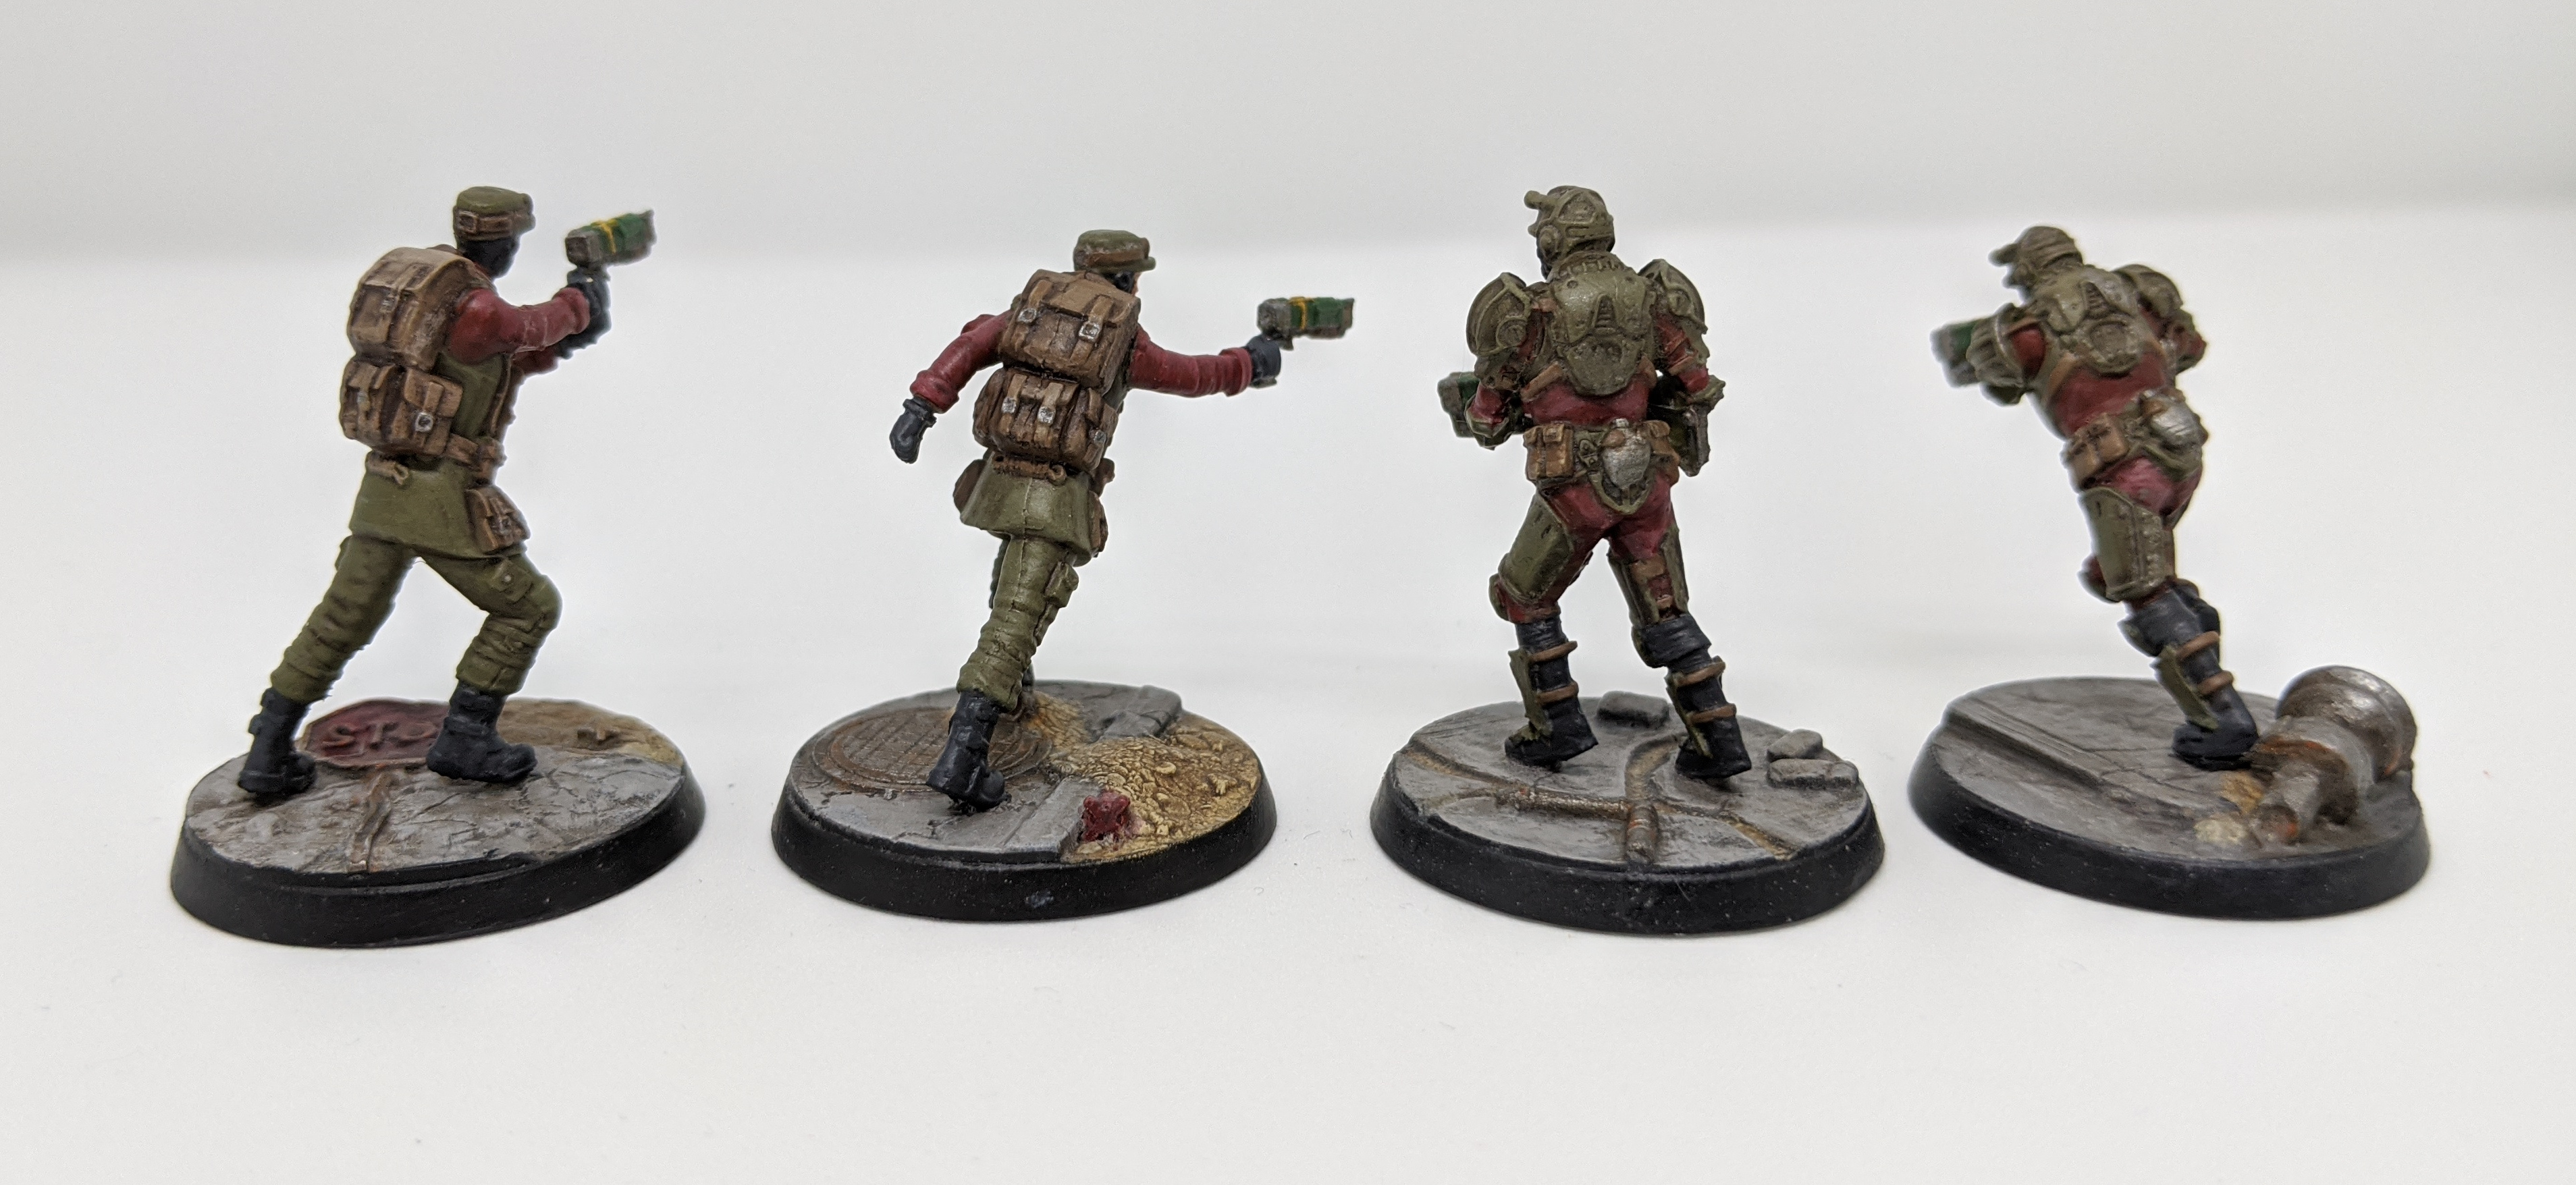 The other Llyod Shot
 Colours used.
Combat Armour & Field Scribe uniforms were base coats of Russian Uniform Green (I actually primed with it) highlighted with a bit of white mixed in.
Red fabrics were a Heavy Red basecoat with highlights mixed with white and shaded with a bit of Terracotta.
Lancer Jumpsuits are Hot Orange with white. Vallejo Game Colour Khaki brown was used in the suit panels.
Leather work is Leather Brown highlighted with a mix of Ice Yellow.
Guns are Greenskin Green with Golden yellow markings.
Everything is knocked back with washes of Agrax Earth or glazed with Charred Brown. The guns have all been washed with watered down Typhus Corrosion.
The Paladin was sprayed Gun Metal, washed with Nuln Oil, highlighted with Mithril Silver and I experimented with added some white to the metallics on the highlights. It has been weathered with Typhus Corrosion, Ryza Rust and brown washes.