

![10mm Medieval Miniatures! Azincourt English Army Review | Wargames Atlantic [7 Days Early Access]](https://images.beastsofwar.com/2026/03/unboxing-wargames-atlantic-azincourt-english-army-coverimage-225-127.jpg)


Dr. Tortenkopf is making Terminators great again


Recommendations: 570
About the Project
I decided that the Space Hulk Tactics Hobby Challenge would be a great excuse to get away from edge highlighting my Death Guard and get to build something again. So here come some Terminators I have been meaning to work on for several years now. I will true-scale them. I will mod them to not be Death Wing anymore. And I will hopefully get started painting them as Howling Griffons.
Related Game: Space Hulk
Related Company: Games Workshop
Related Genre: Science Fiction
This Project is Active
Painting: Day One
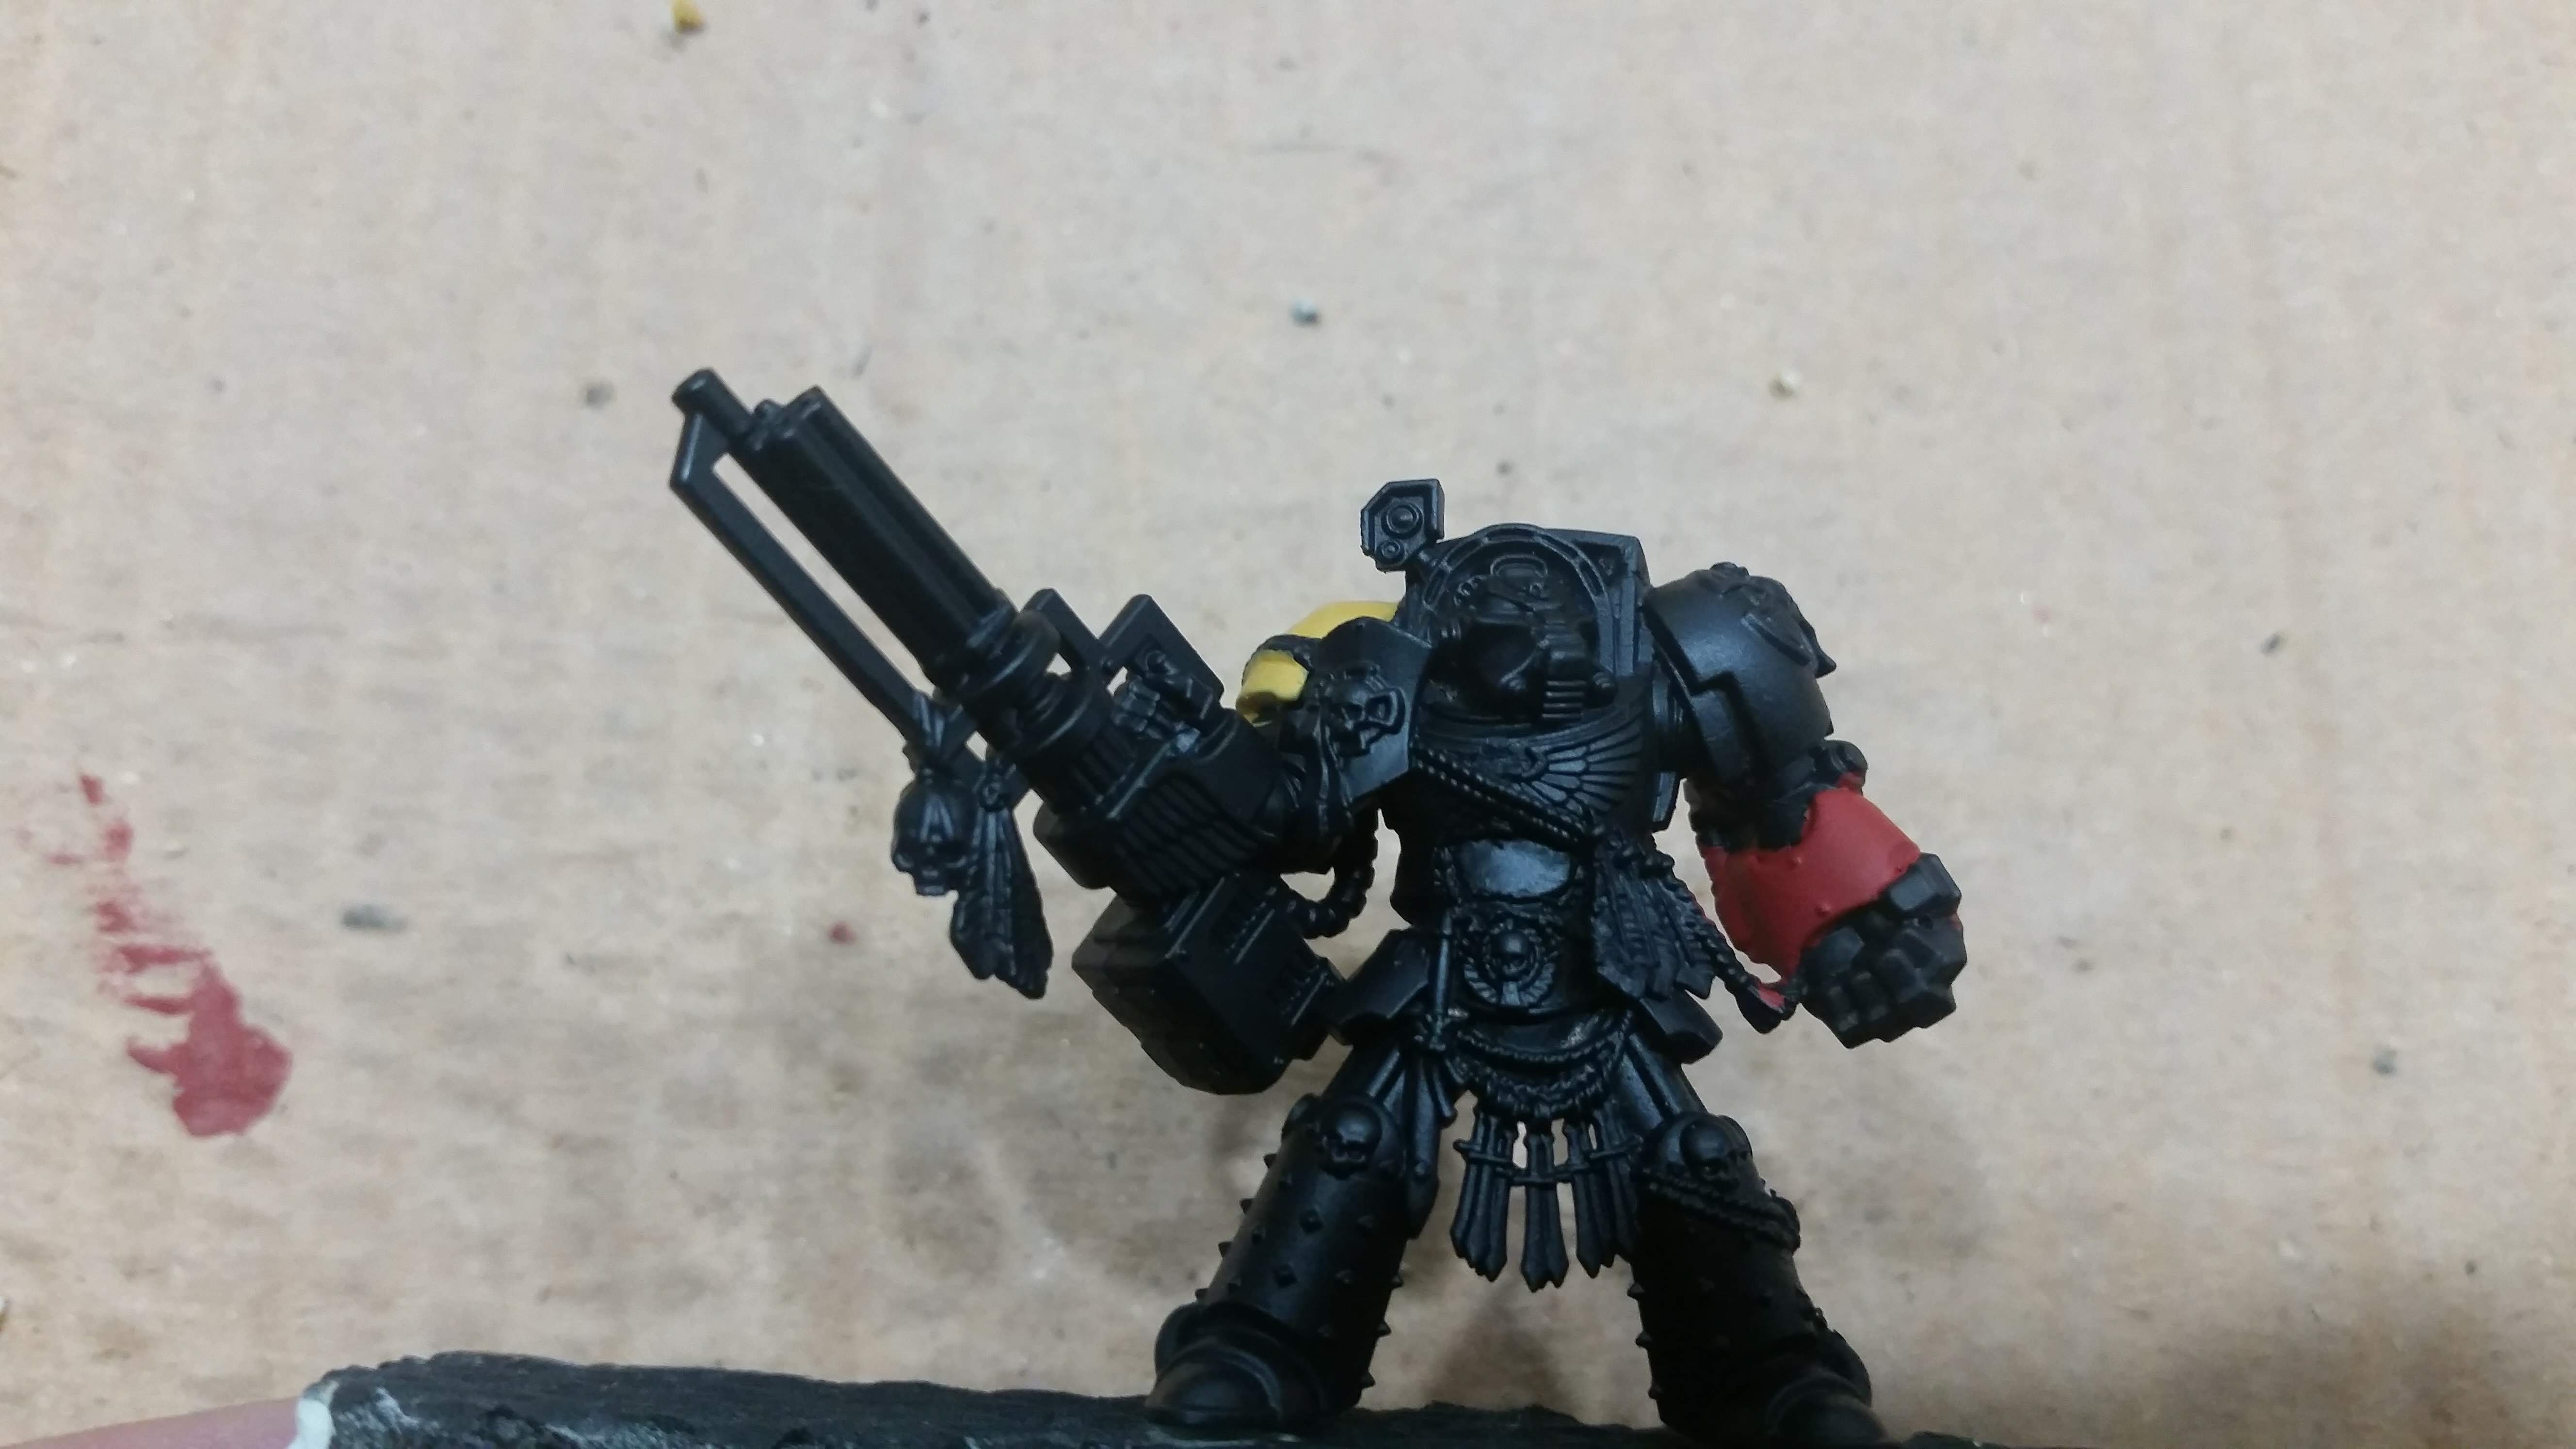
 I have added the red side of the base coat over the primer and painted the right glove and the left shoulder on the two night world Terminators.
I will try to cover my painting of the Terminators on roughly a daily basis. That wont always work, but it should make me keep a decent pace with the project.
Most of the work on the colour scheme is covered in my Howling Griffons Project, so I wont go into too much detail on the painting steps this time and rather try an focus on the building side of the project.
In that regard I am still unsure of how I will be doing the bases. But its a long time until the 24th of November. I am sure I will come up with something…
Prime Time
Today was probably the last day for the month that had outside temperatures that would allow for easy priming. I am happy to report, that I was able to make use of this and prime the Terminators.
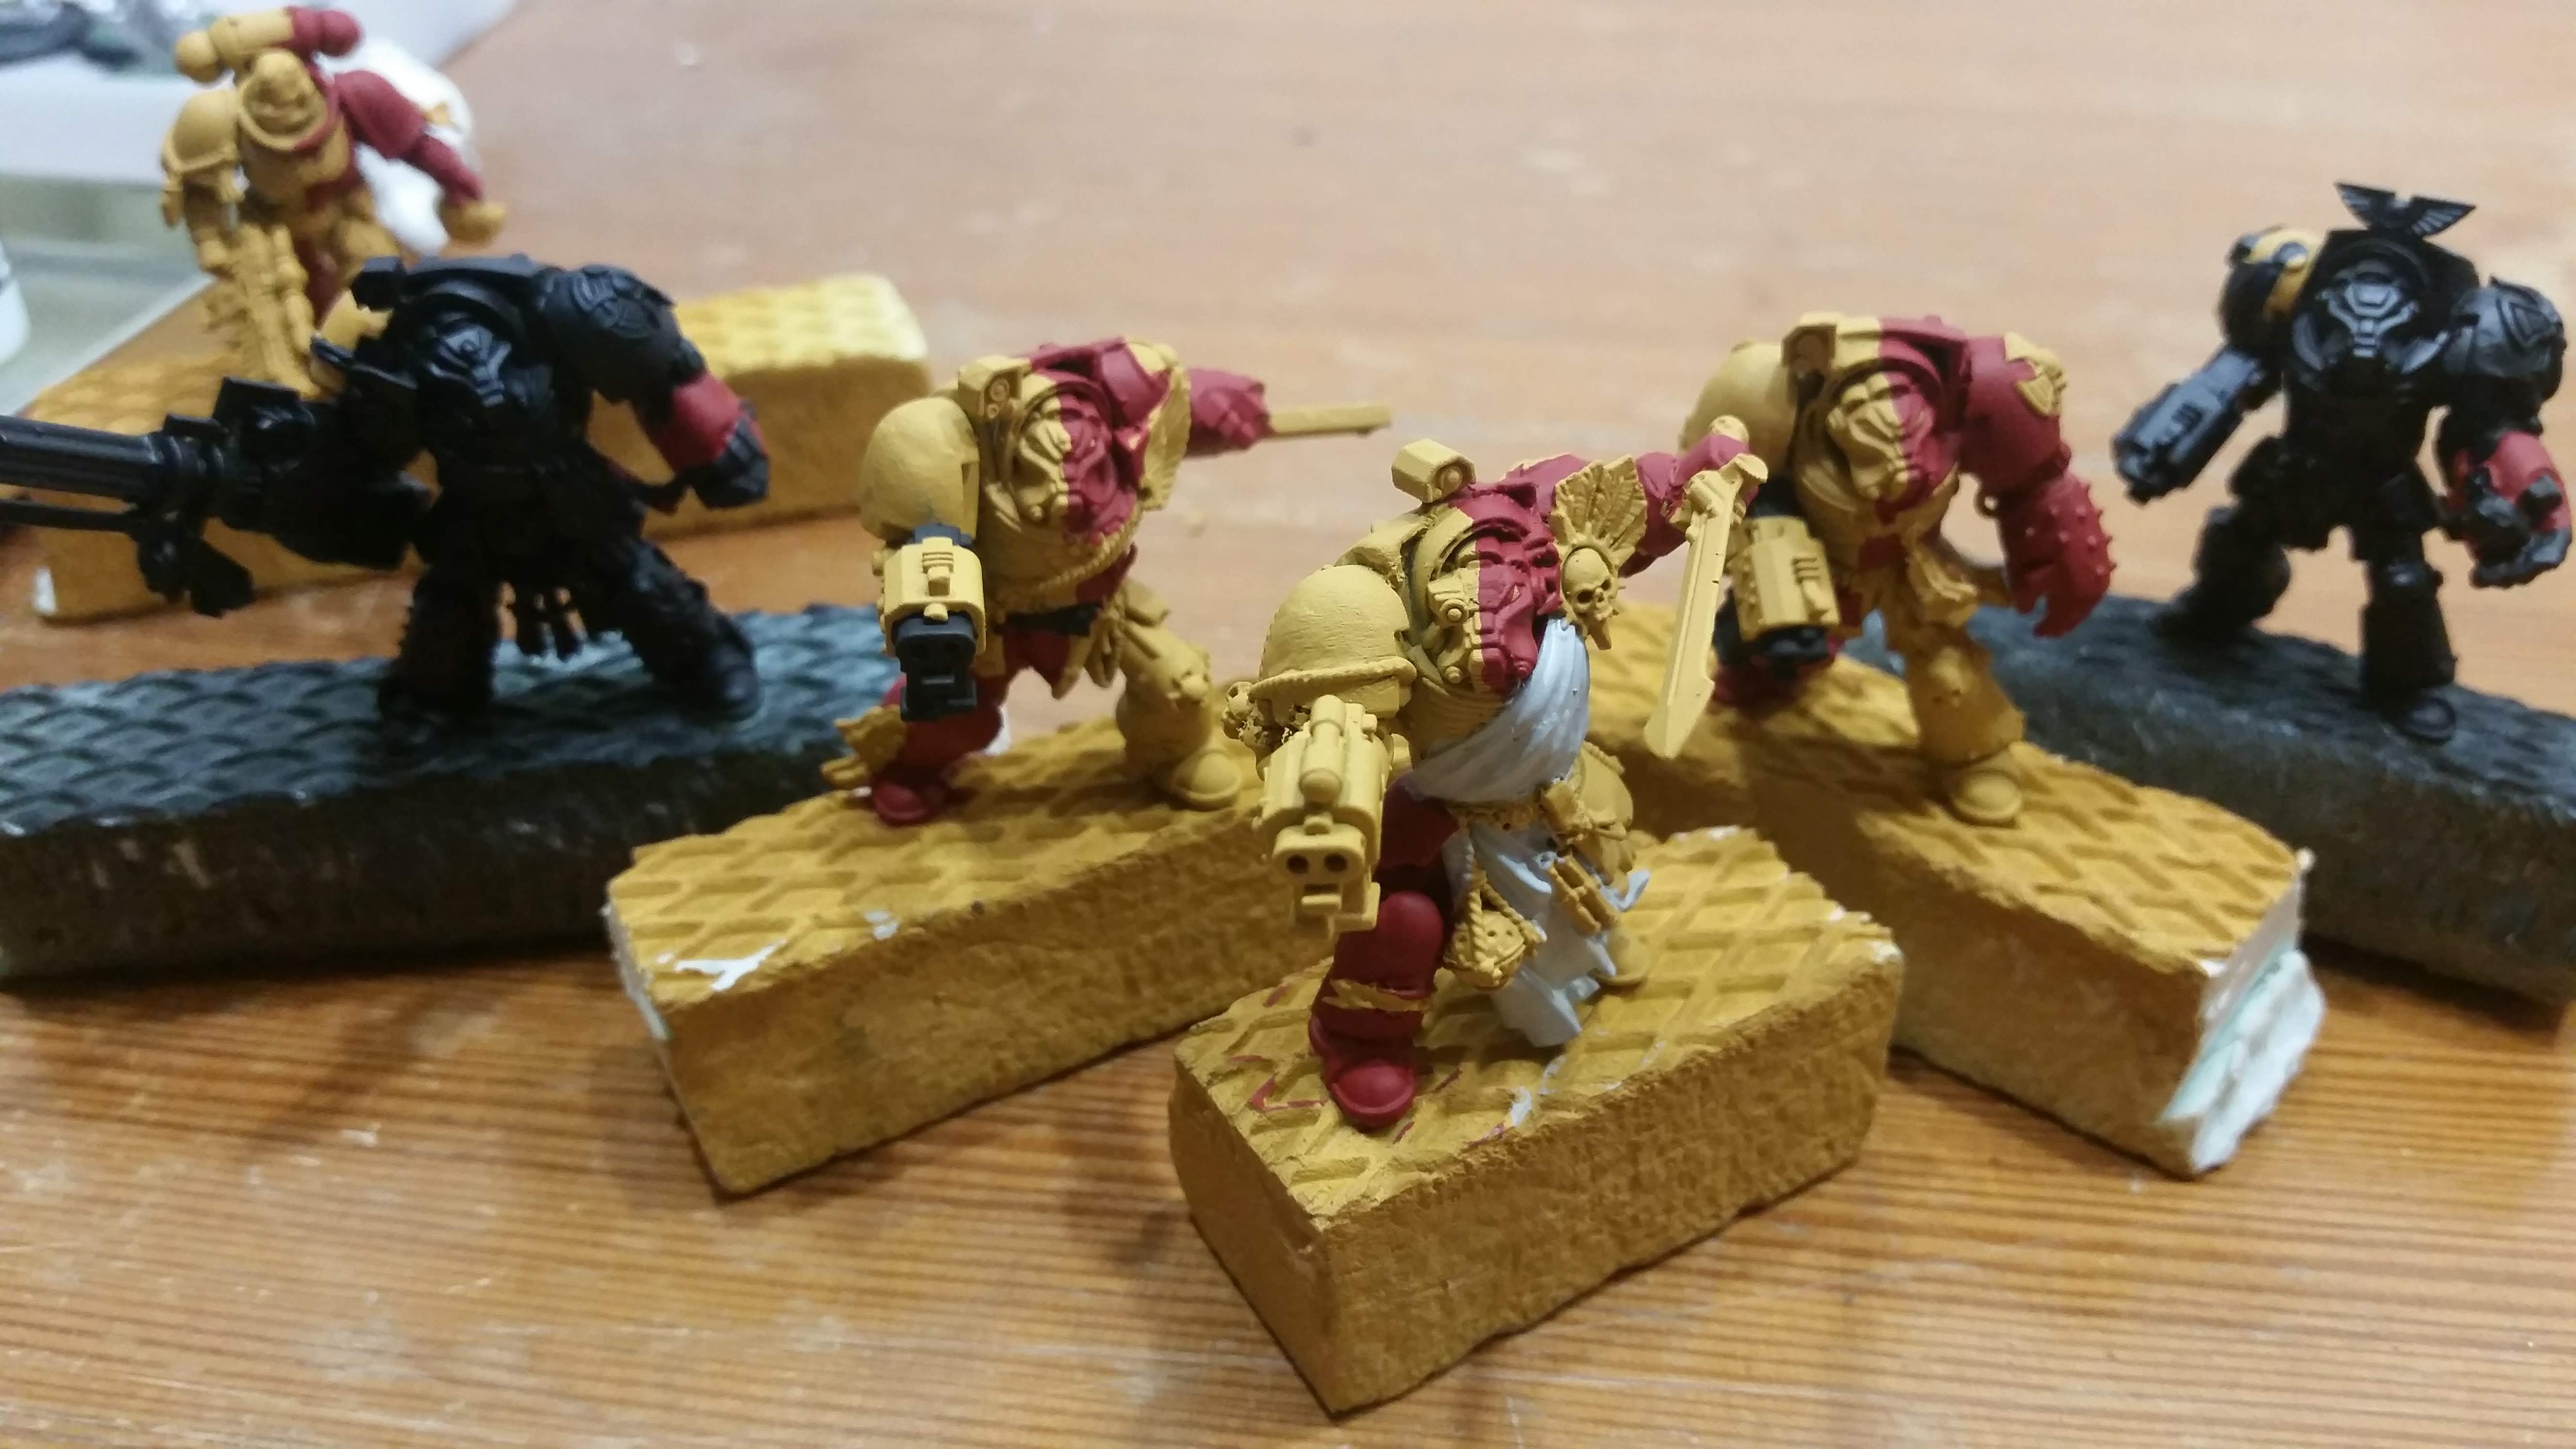
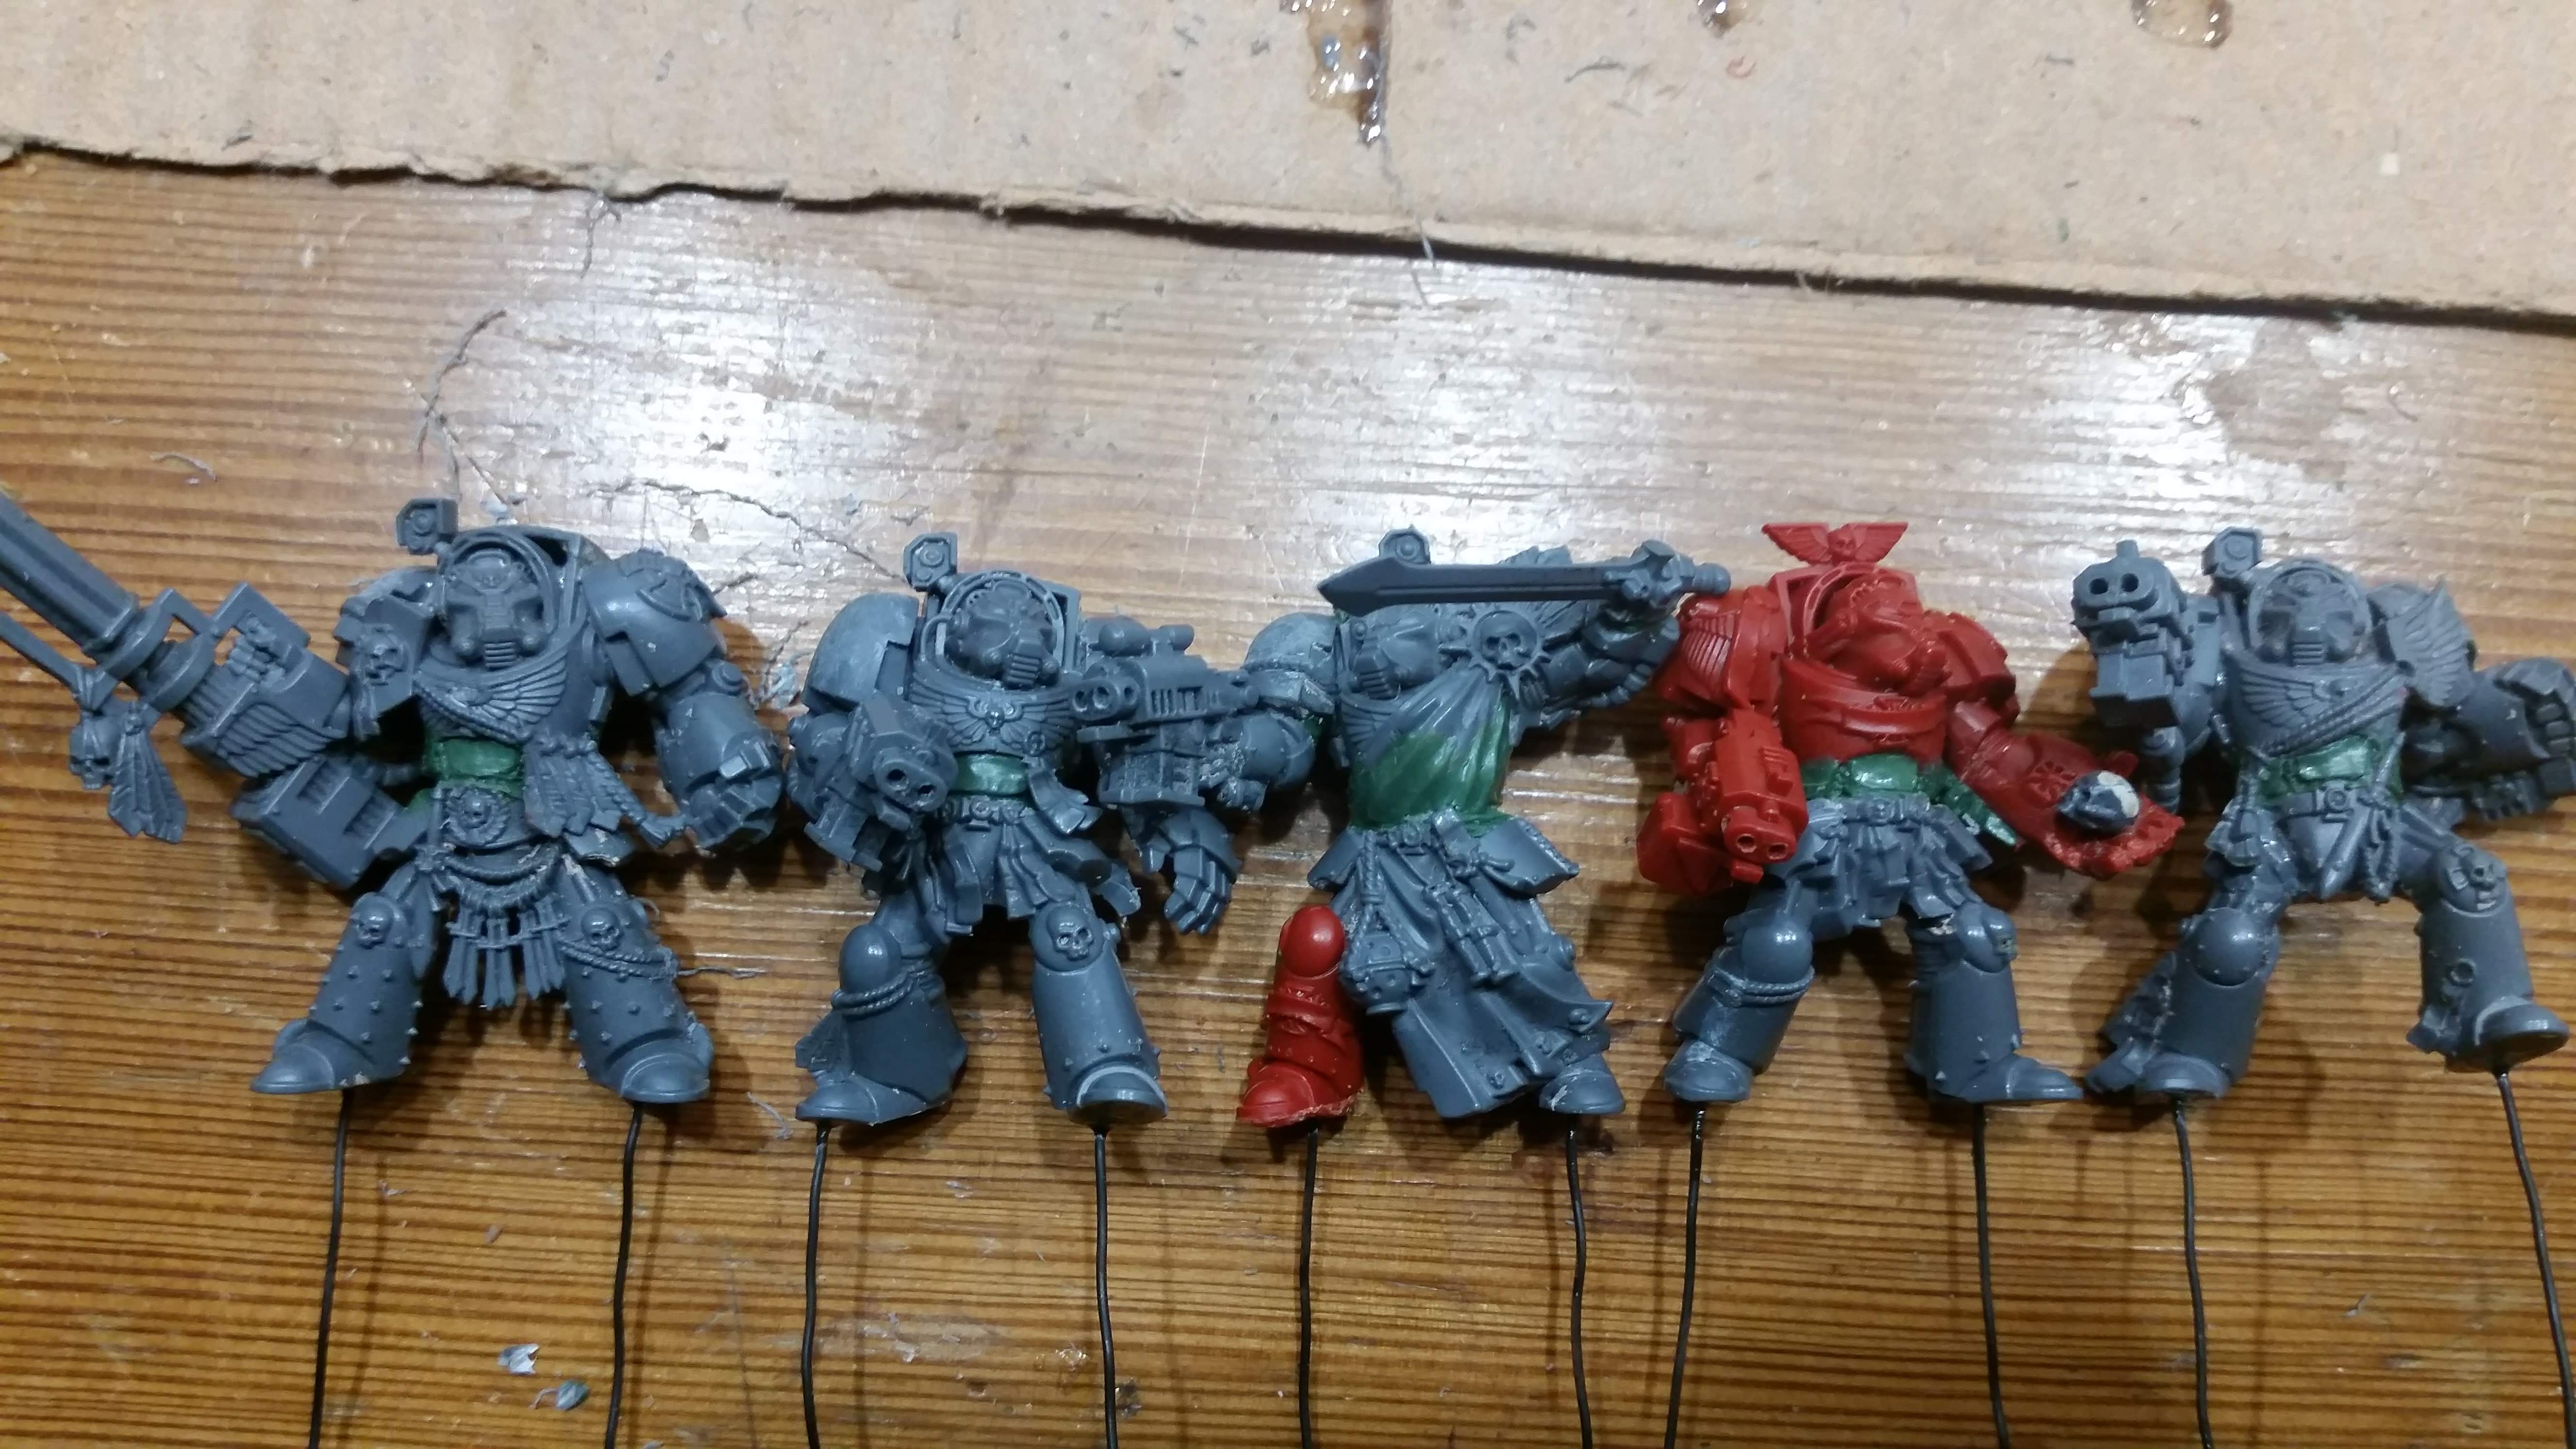 The entire squad ready to be put onto their painting stick. I did not do a very good job of documenting the scultping of the details around their waists and this is the only shot that shows it for all of them.
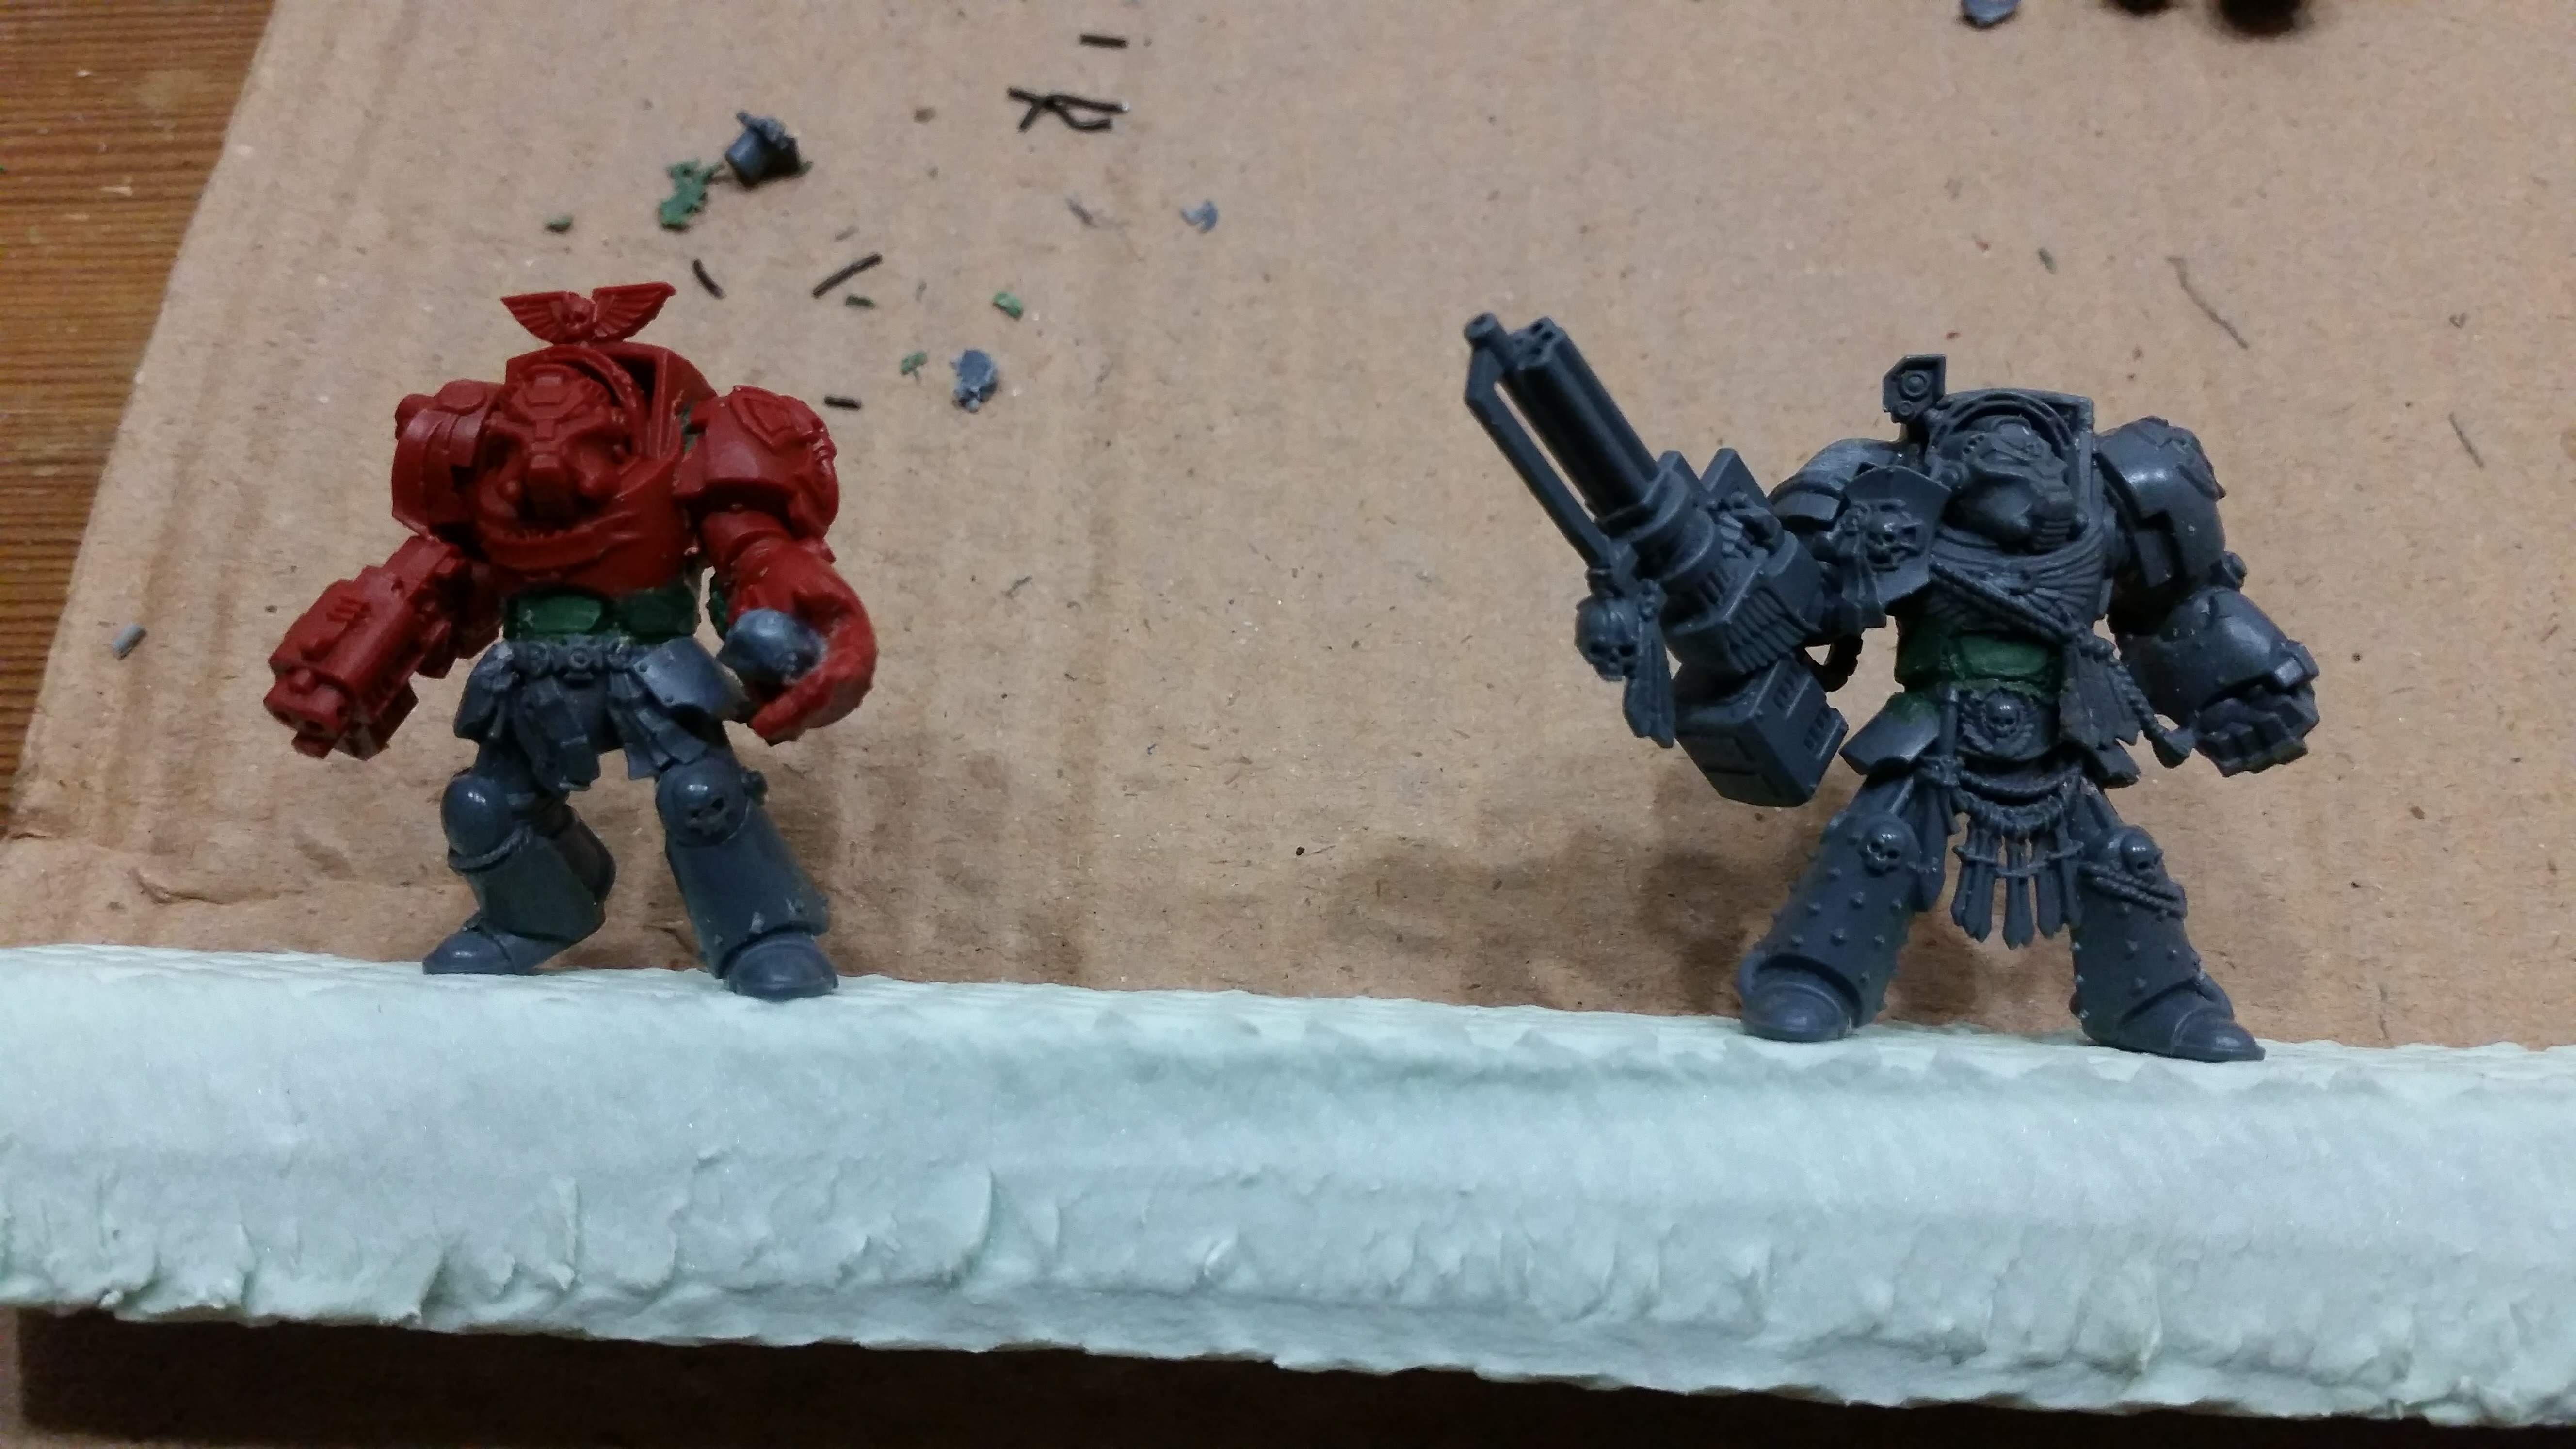 These two are getting their own painting stick.
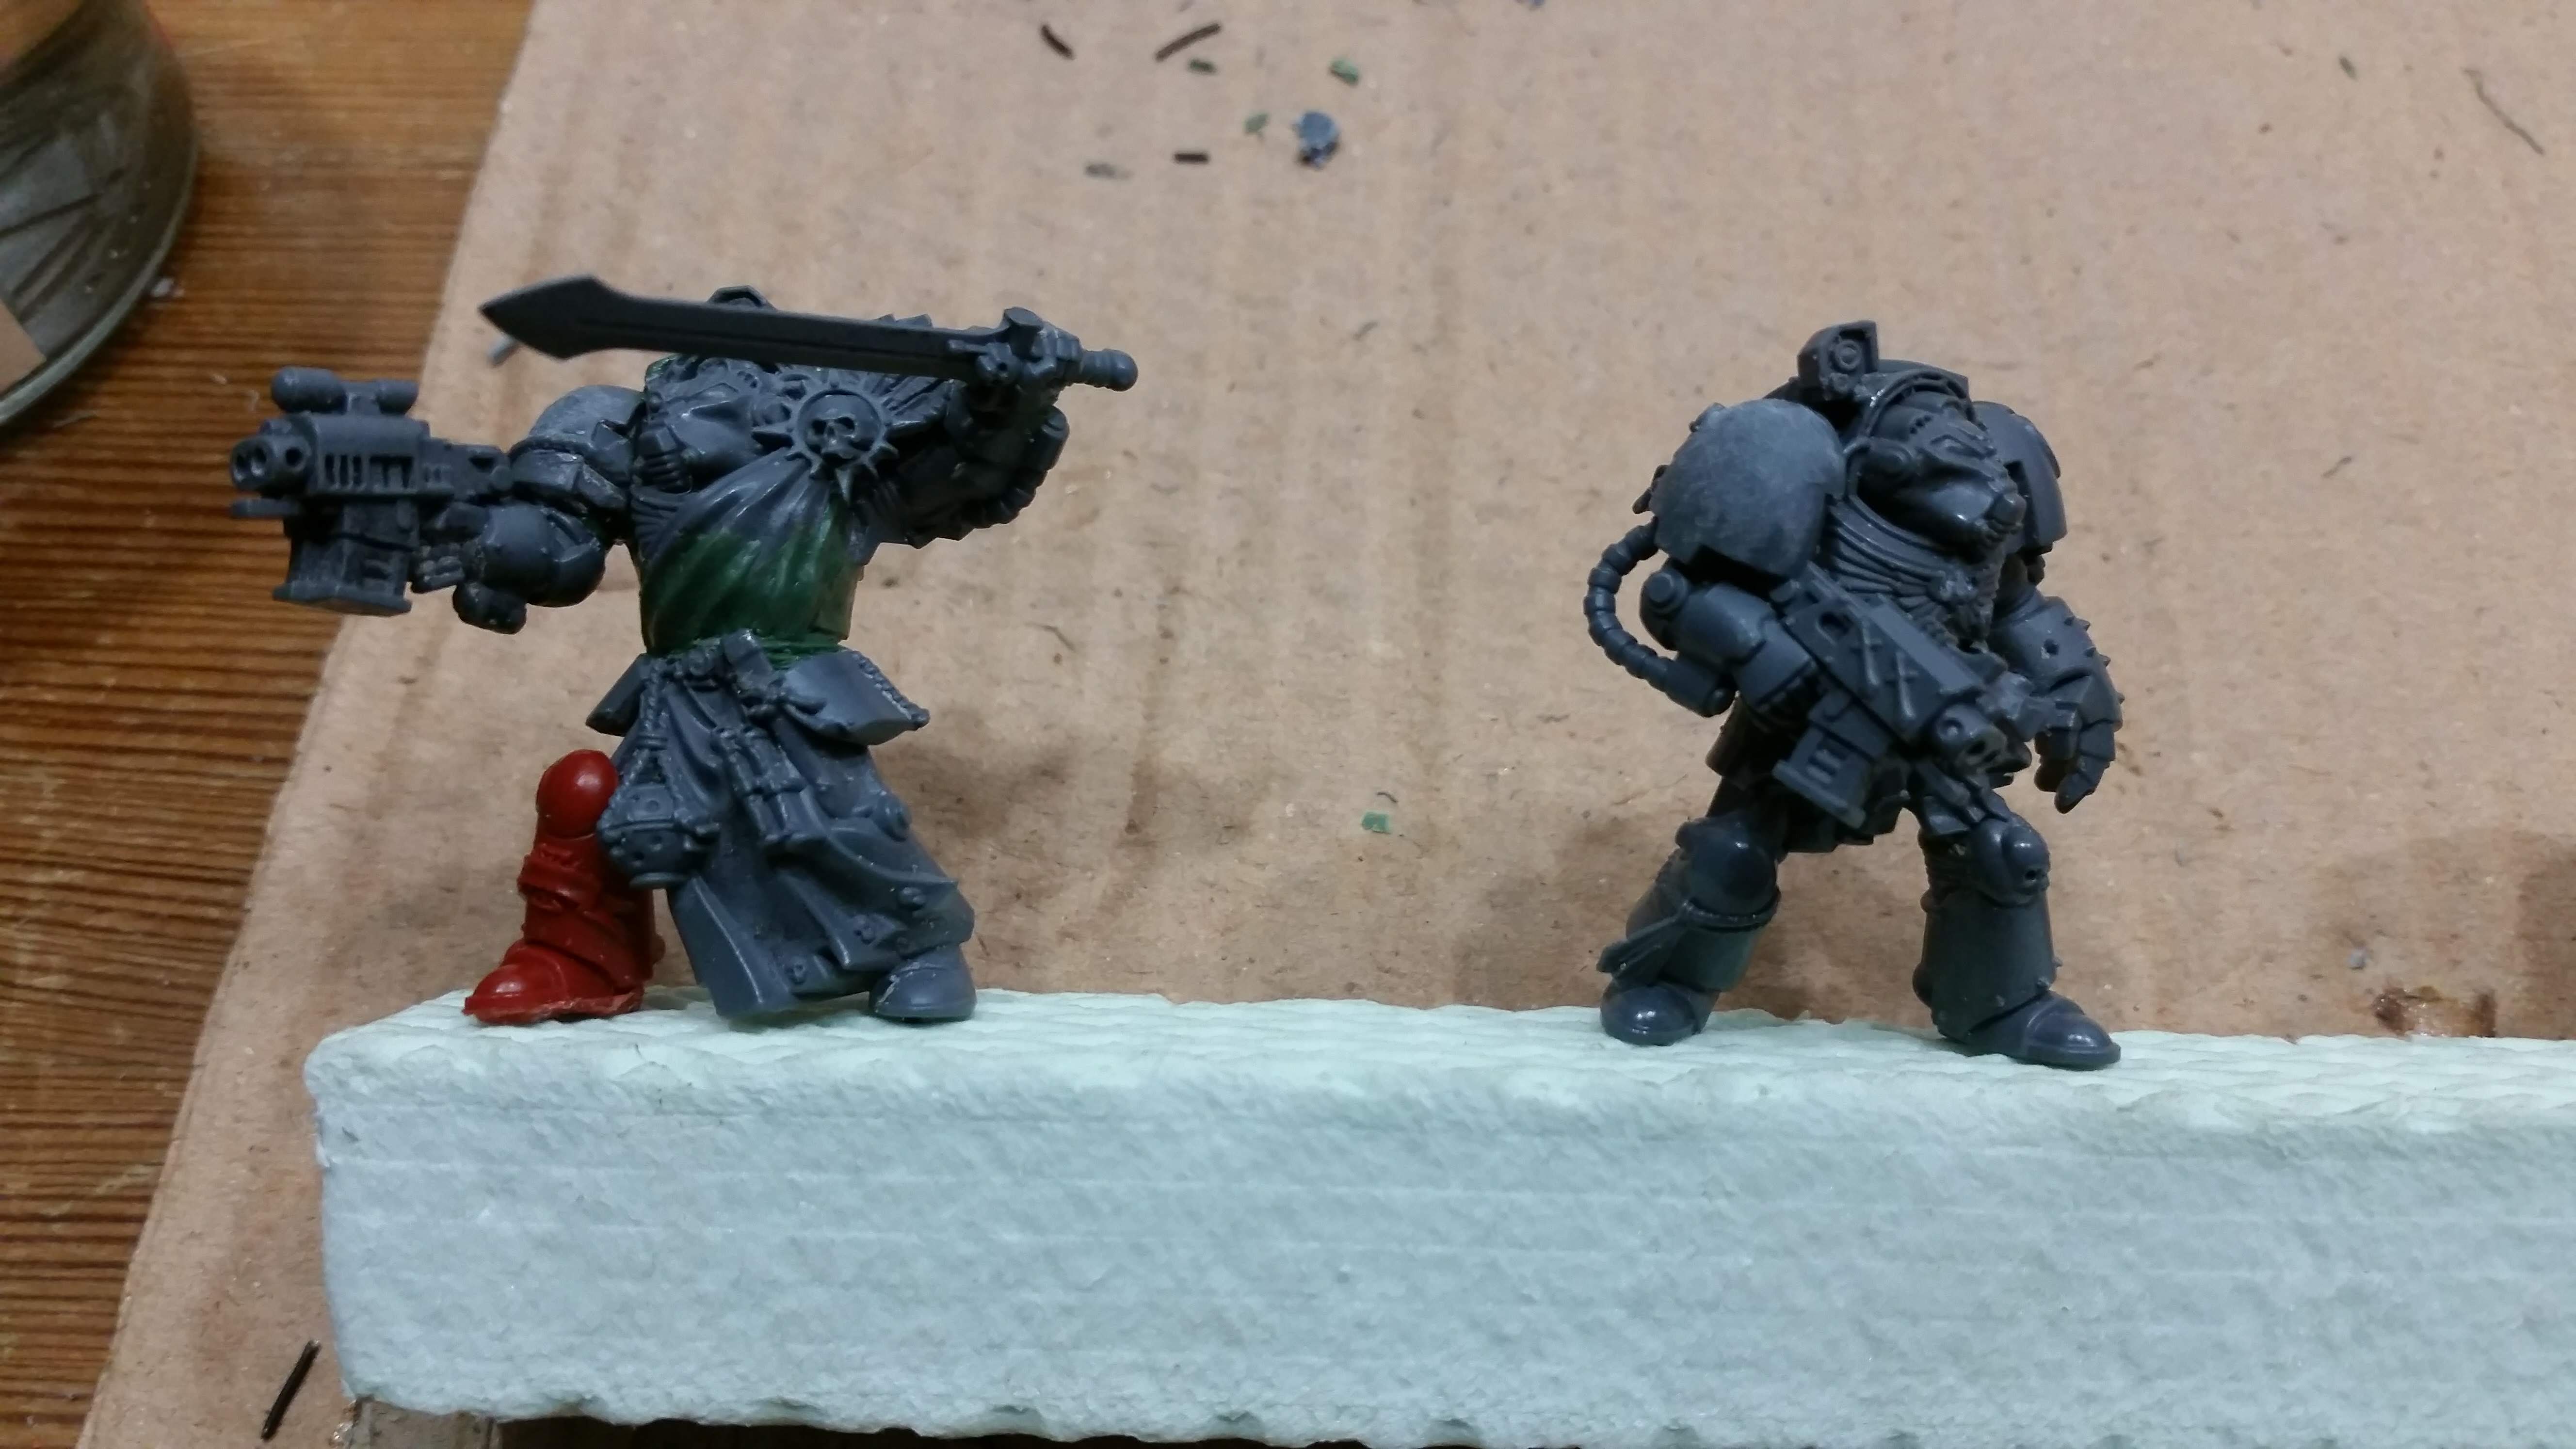 The sergeant, the two other Terminators...
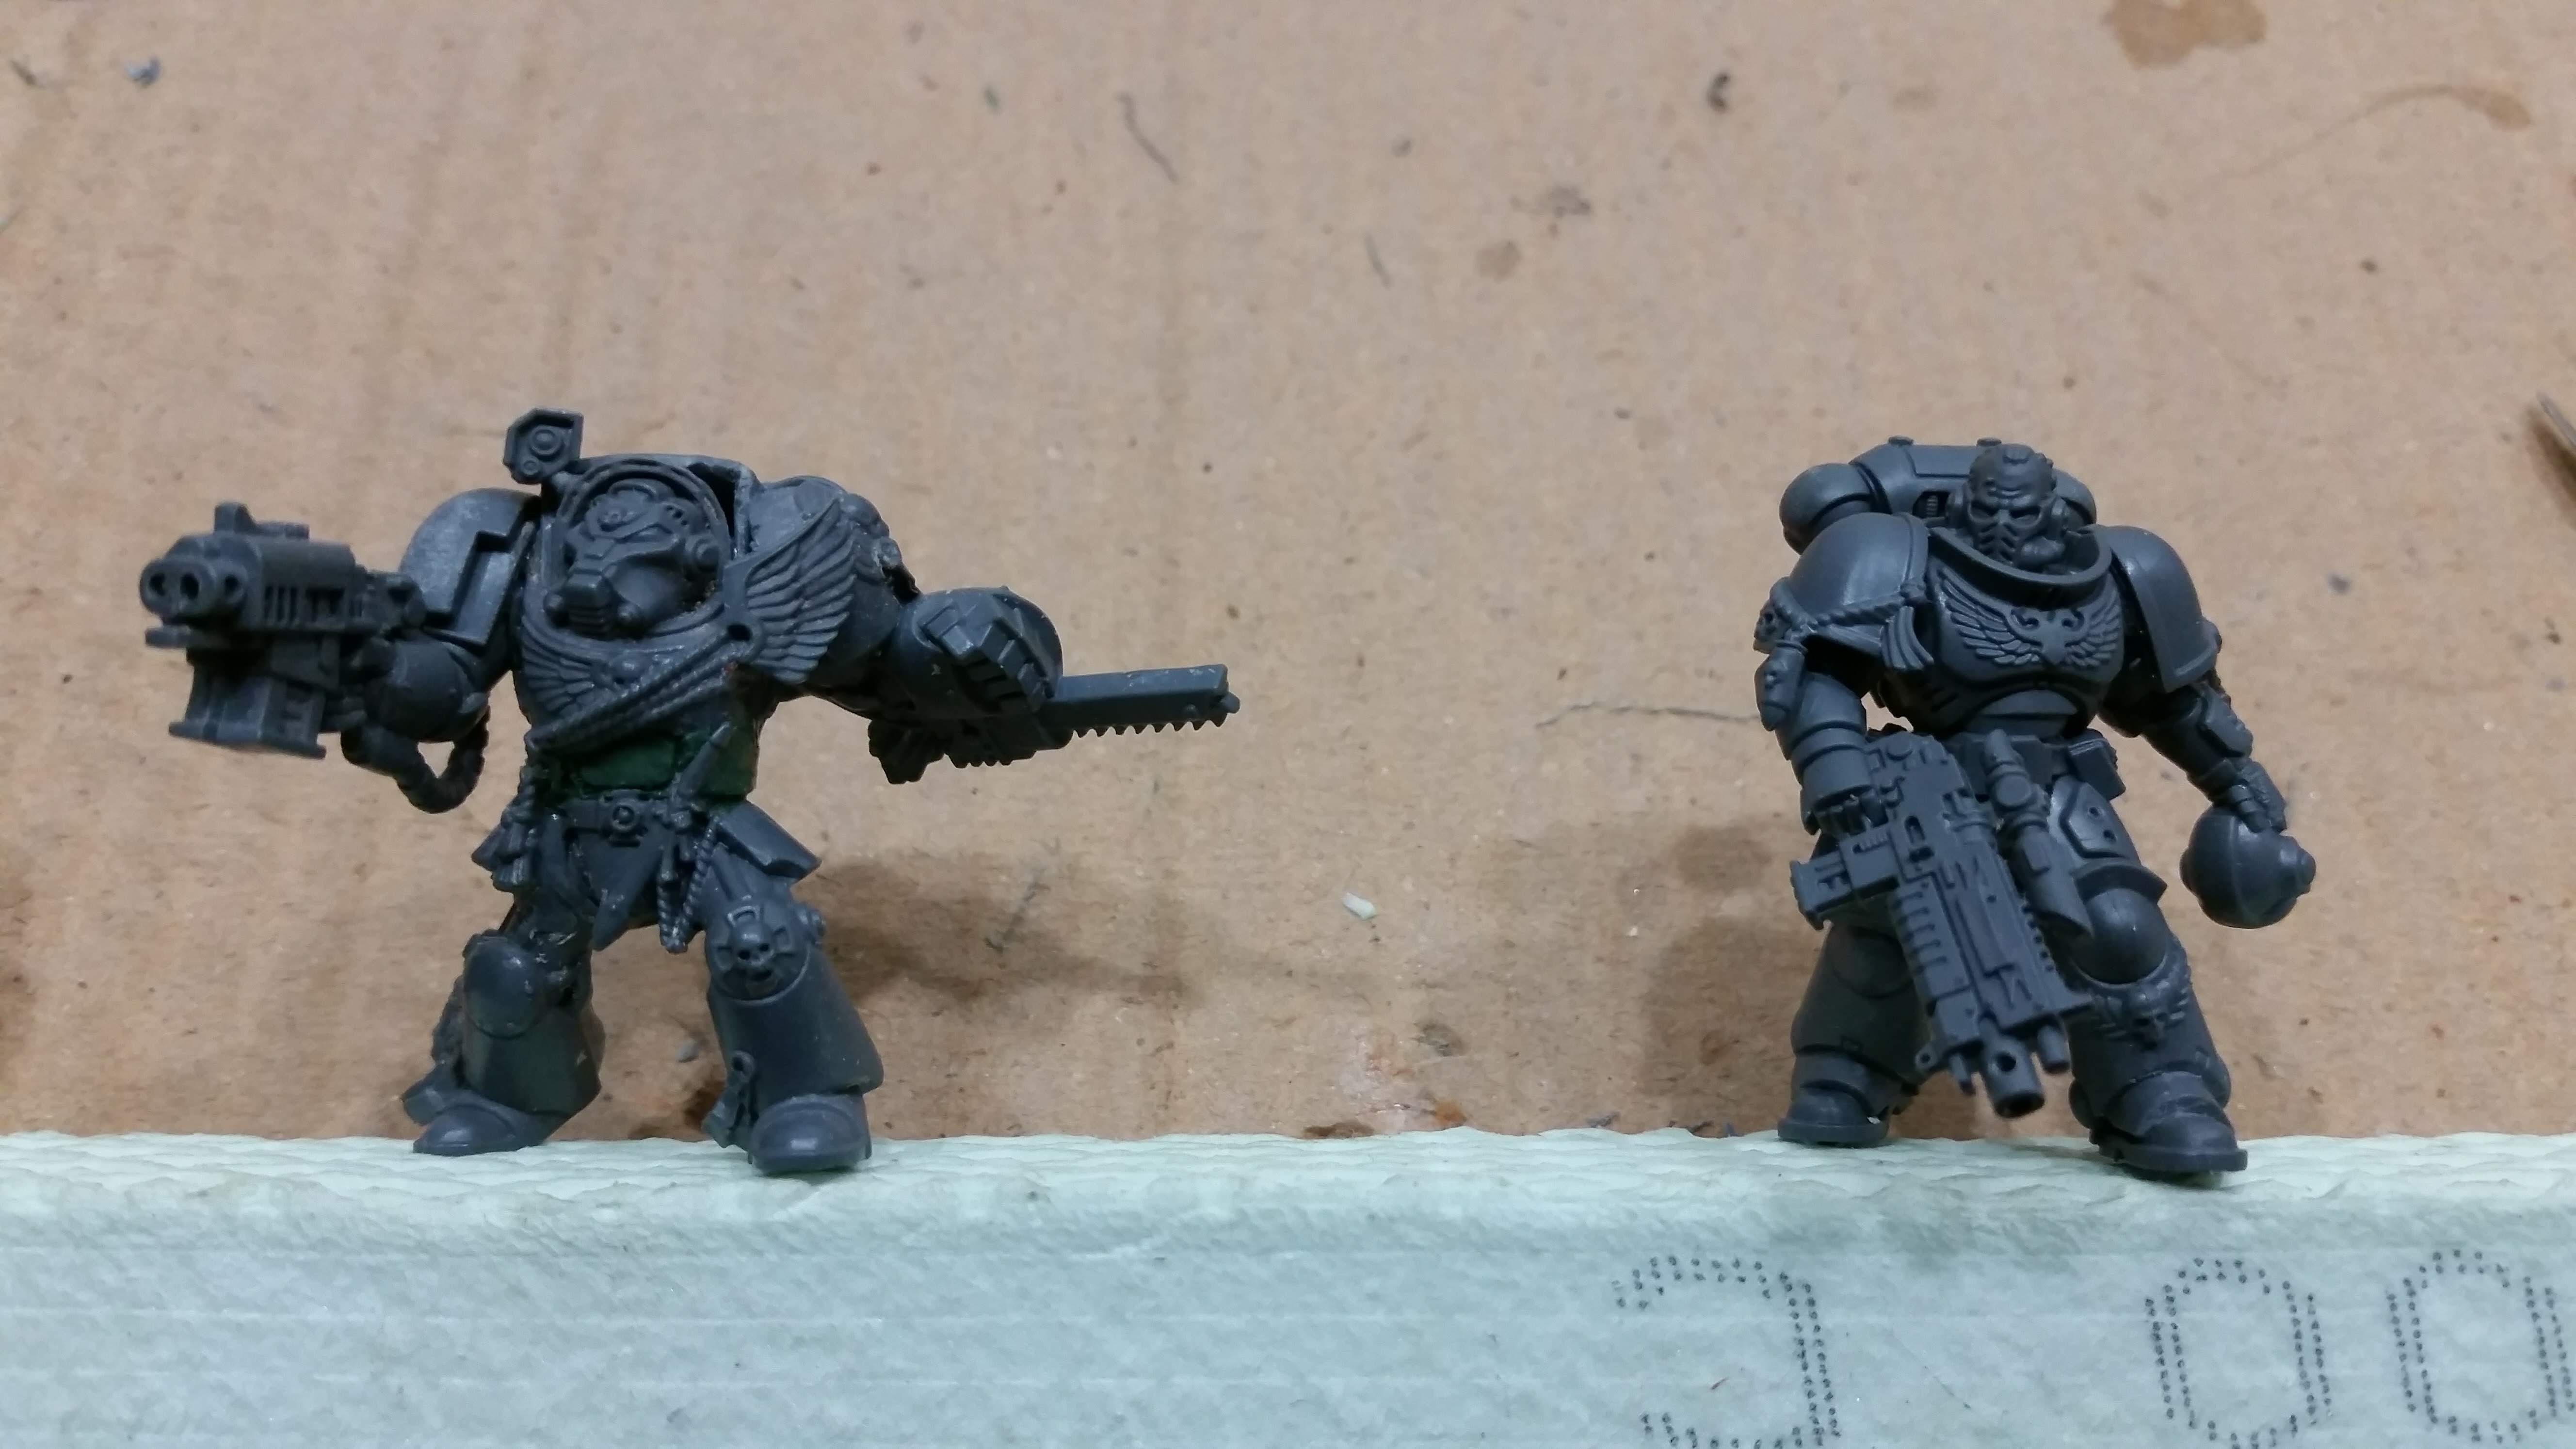 ... and the 500th store celebration marine are sharing the other painting stick.
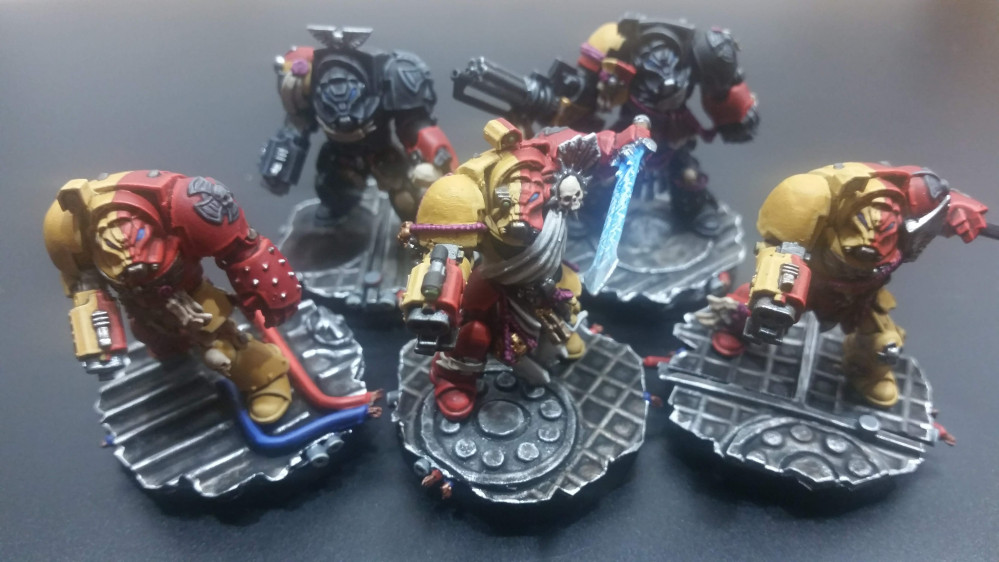
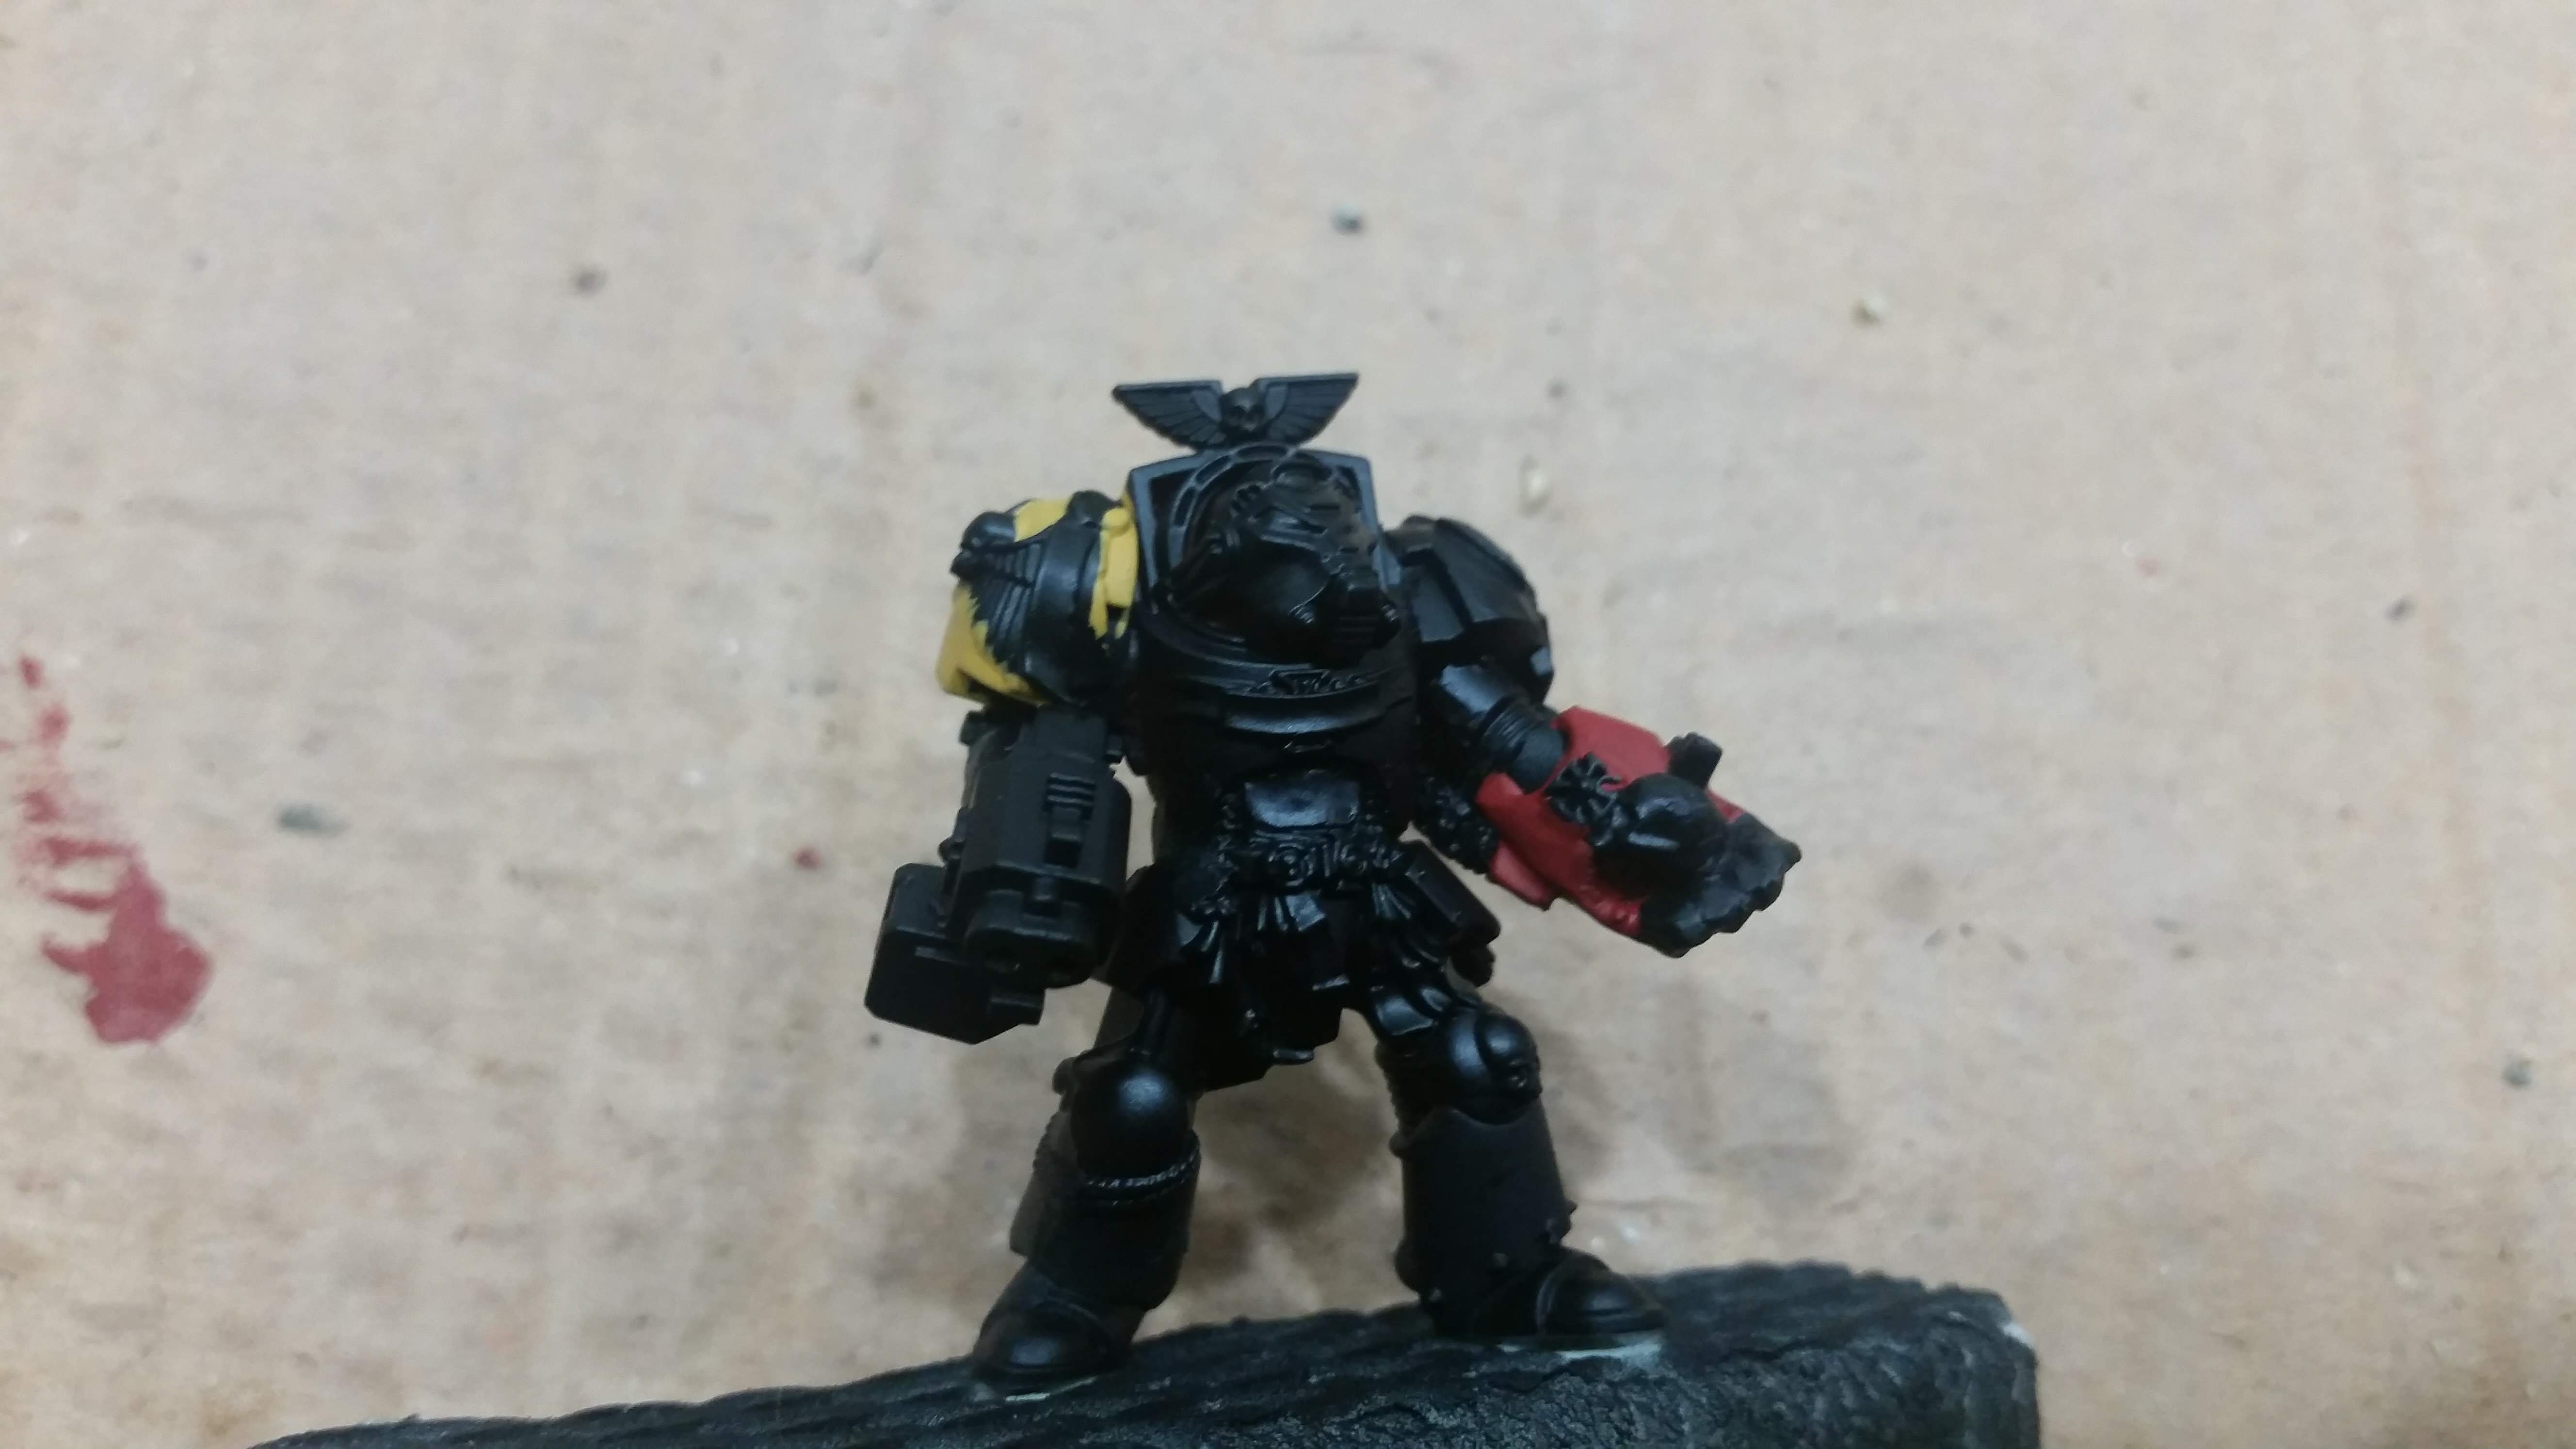
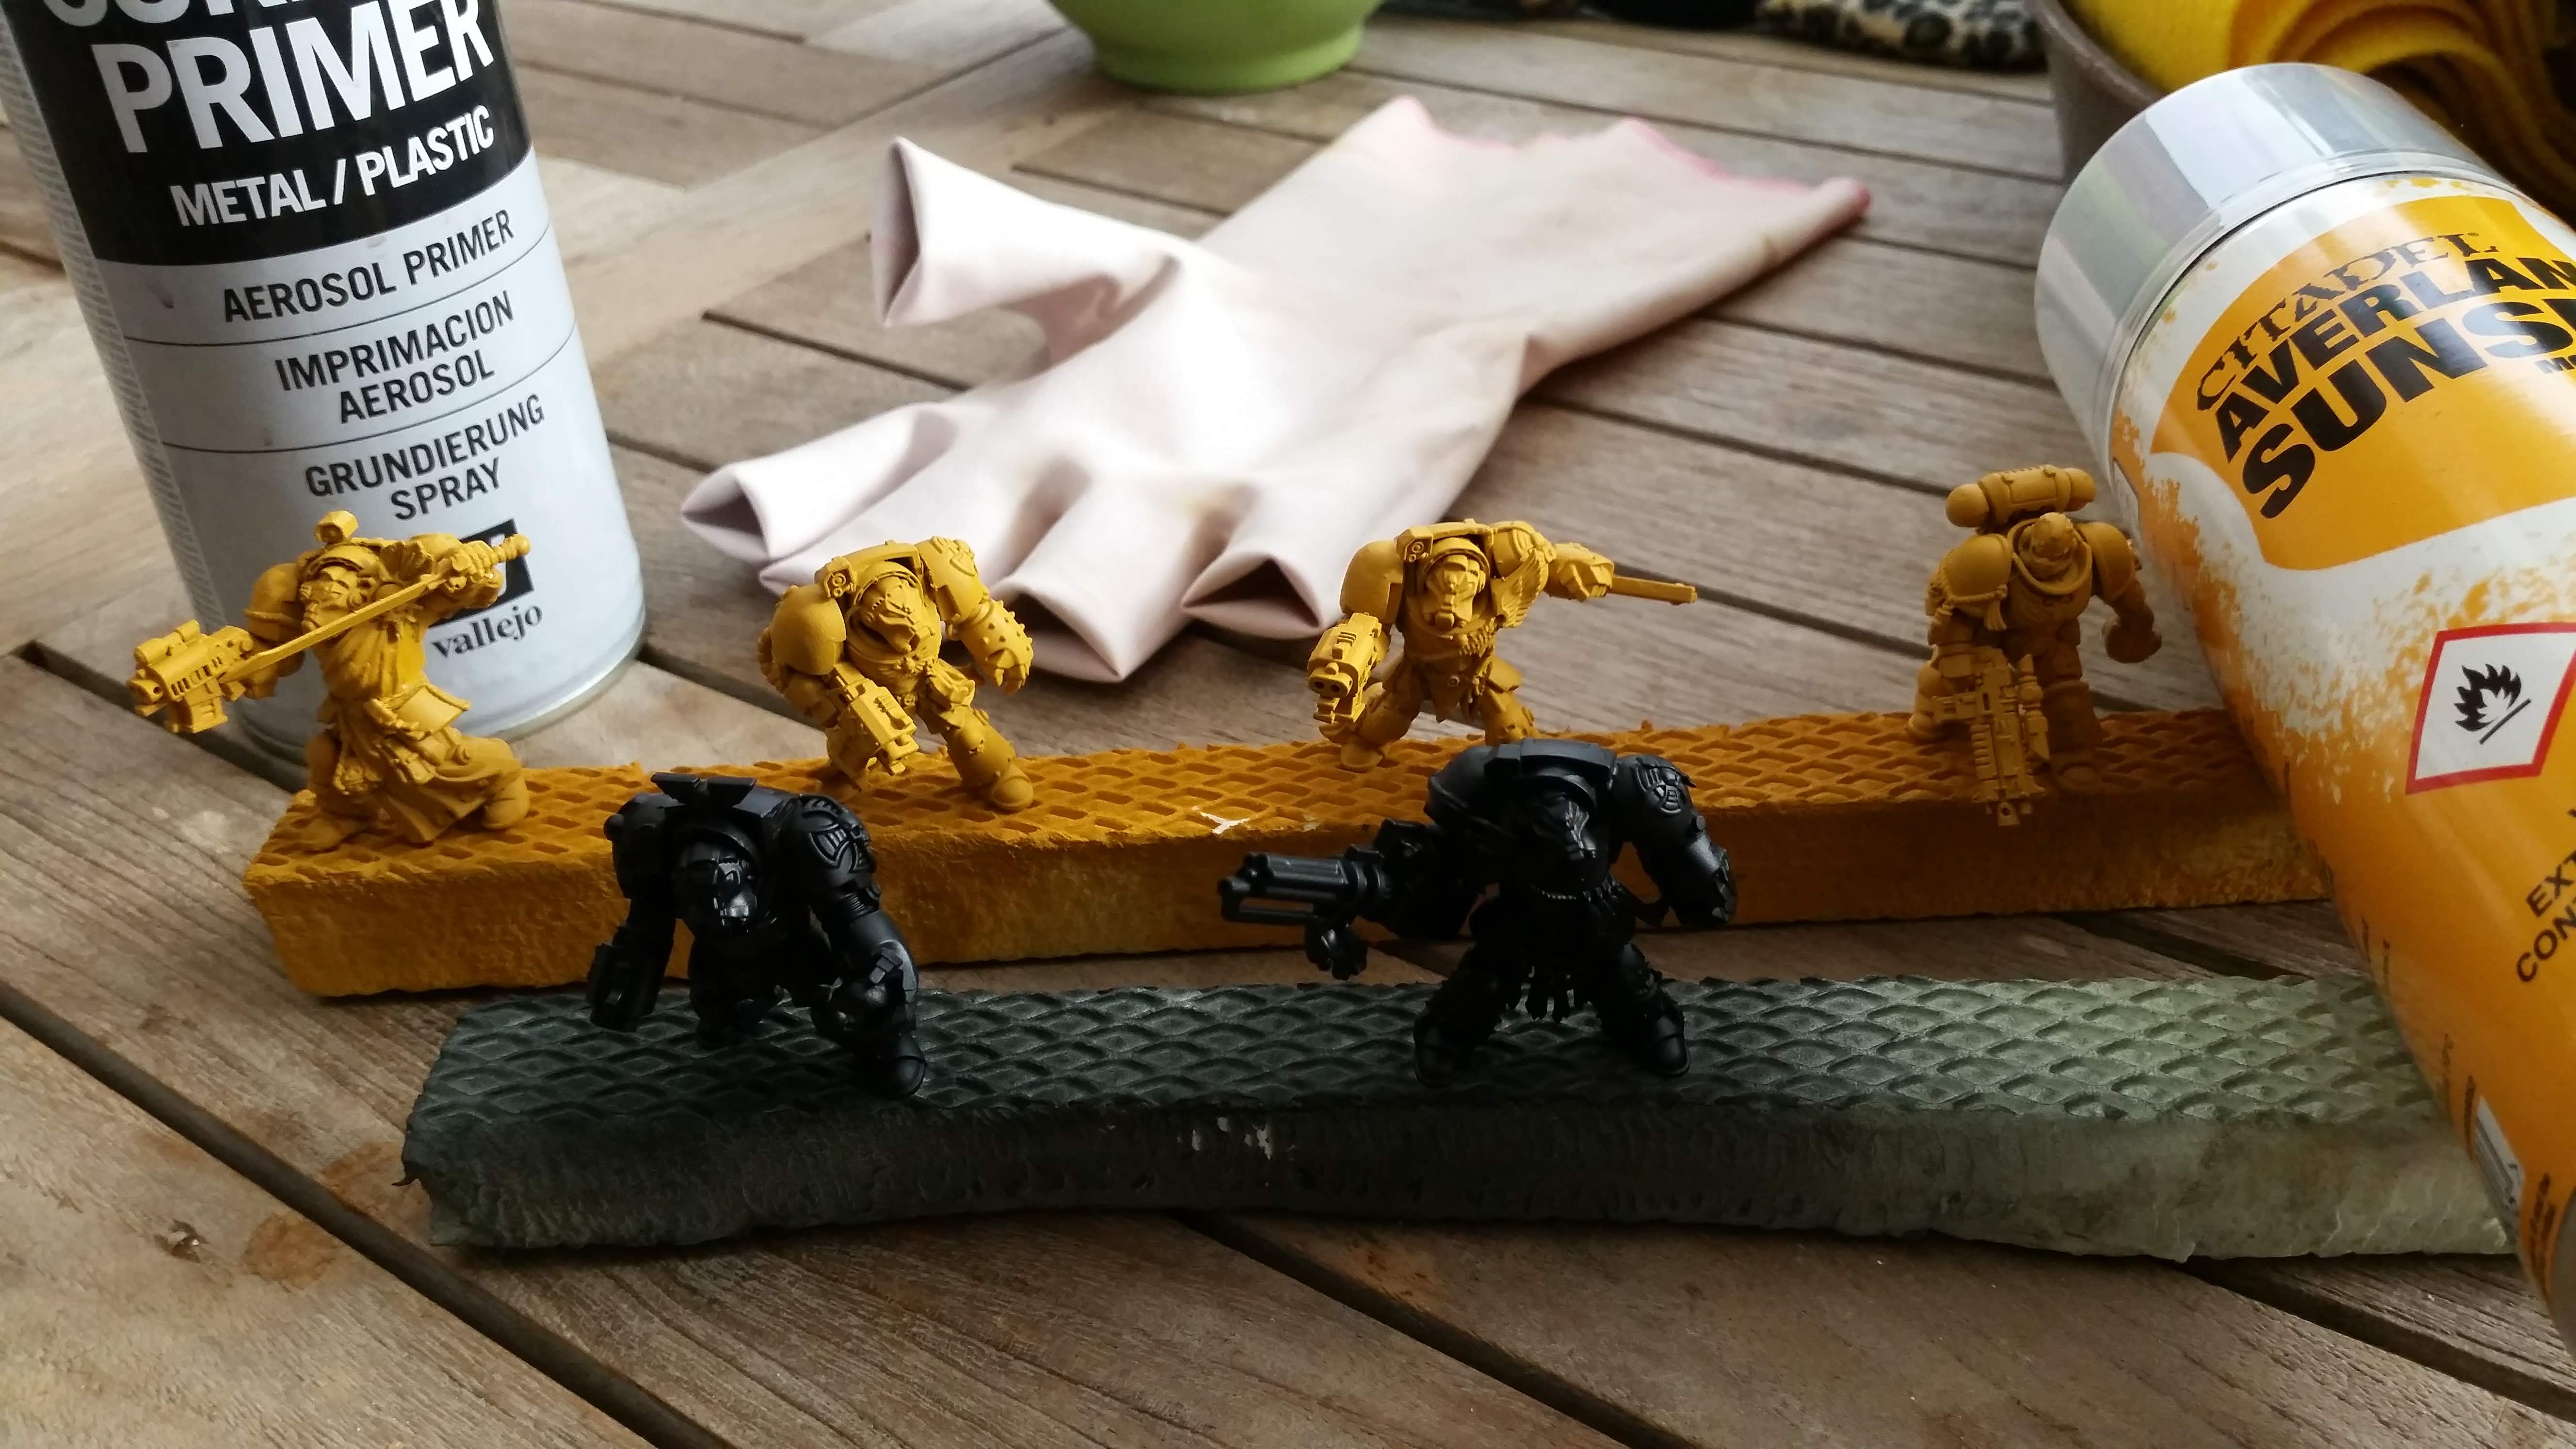 And here they are primed black and yellow. Two of them are primed in black, as they will be painted in the Howling Griffons alternate, night world colour scheme that was used during of the Badab War. My assumption is, that suits of armor from that campaign might not get repainted to honour the valor of armors machine spirit during a particular engagement, even if the armor has since been passed on to another battle brother. But I also assume, that the night world scheme is still in active use by the chapter and am using it for the Primaris Reavers and Interceptors as well.
Another problem with the sergeant
The sergeant is in a pose, that made him easy to cast, but does not make him as dynamic as I would like.
In particular he originally is holding his bolter in from of his wais and is waving his sword around somewhere over his head, while being in a leg stance, that actually suggests some more aggression.
He is clearly in a stepping motion and is holding his sword arm behind him. The only time the sword arm should ever bee behind the fighters body is while either executing a very lumbering swing, that would leave the fighter completely uncovered, or while preparing for an overhead attack. The second and for a seasoned fencer more probable case is called an Ochs (Ox) Guard and has the sword pointing towards the enemy.


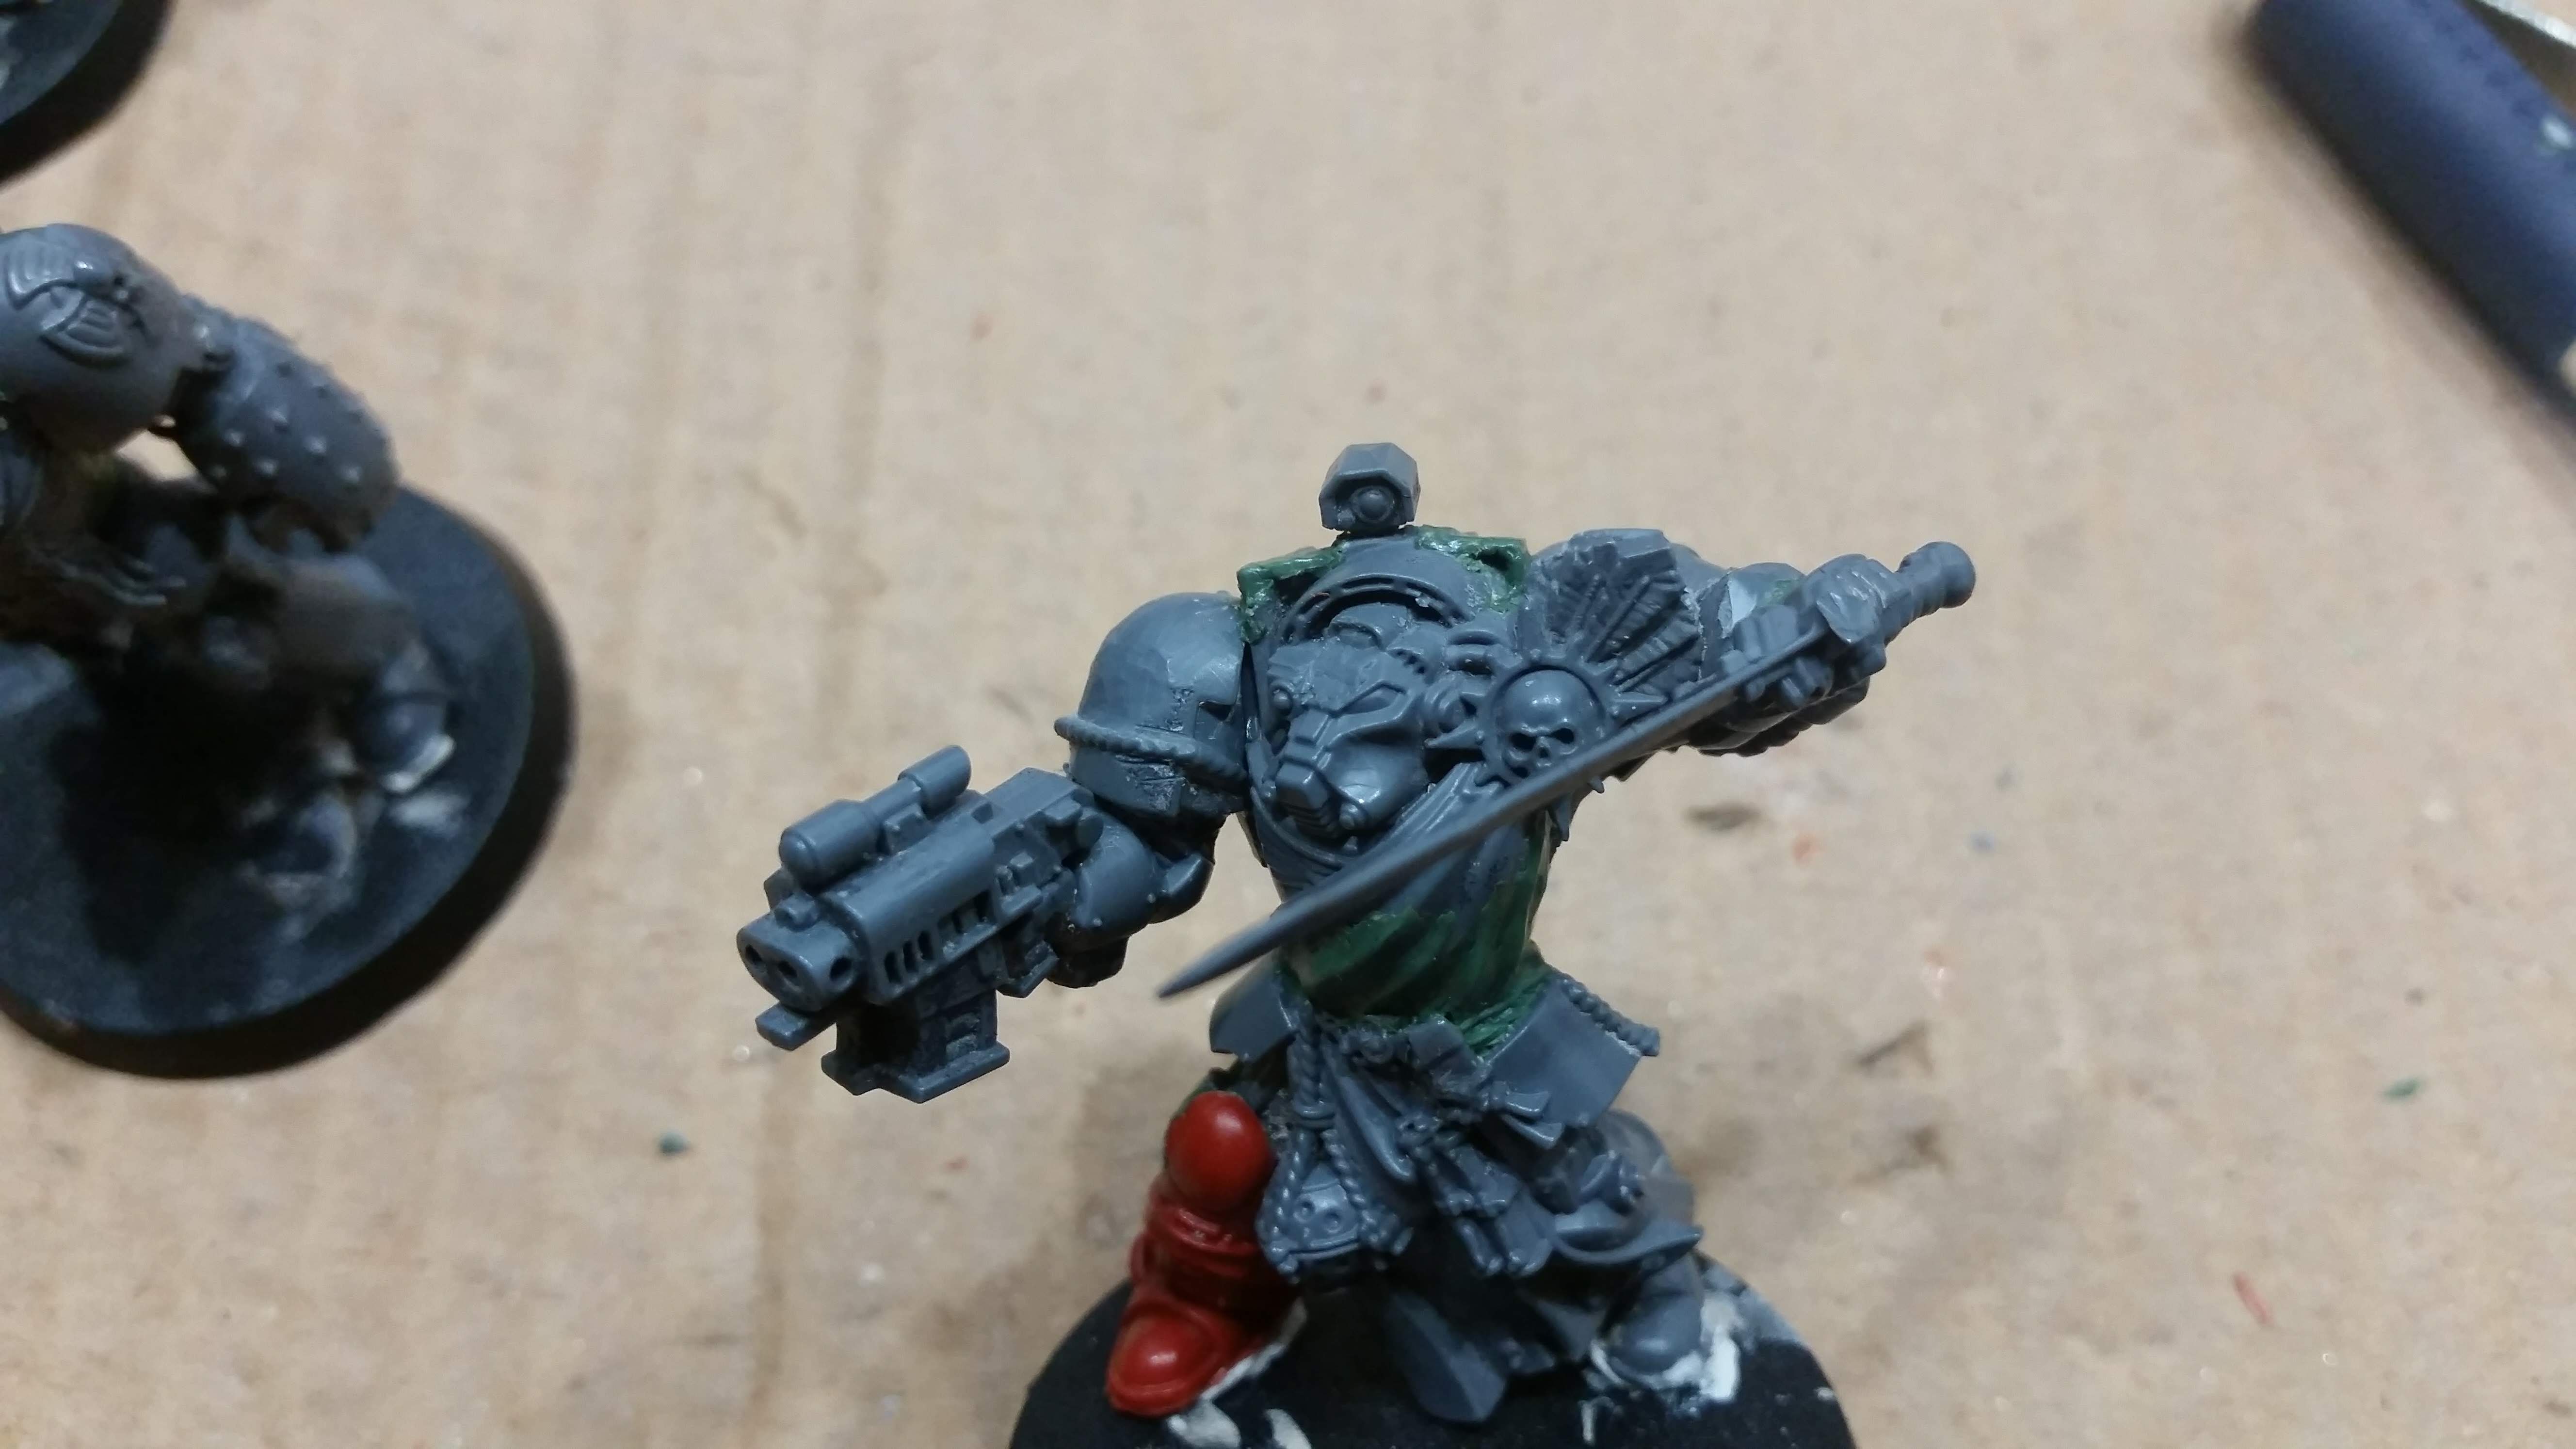
I reposed his bolter and his sword to both be pointing in the direction he is looking and stepping in. My idea for the sergeant is, that he has just been advancing and firing at an enemy and is now getting ready to take one last step towards him and execute an overhead stab with his blade.
While fighting gene stealers this would seem like a viable tactic to me, as the Ochs Guard will be useful in defending against their claws while allowing him to make maximum use of the bolter before stepping into melee range.
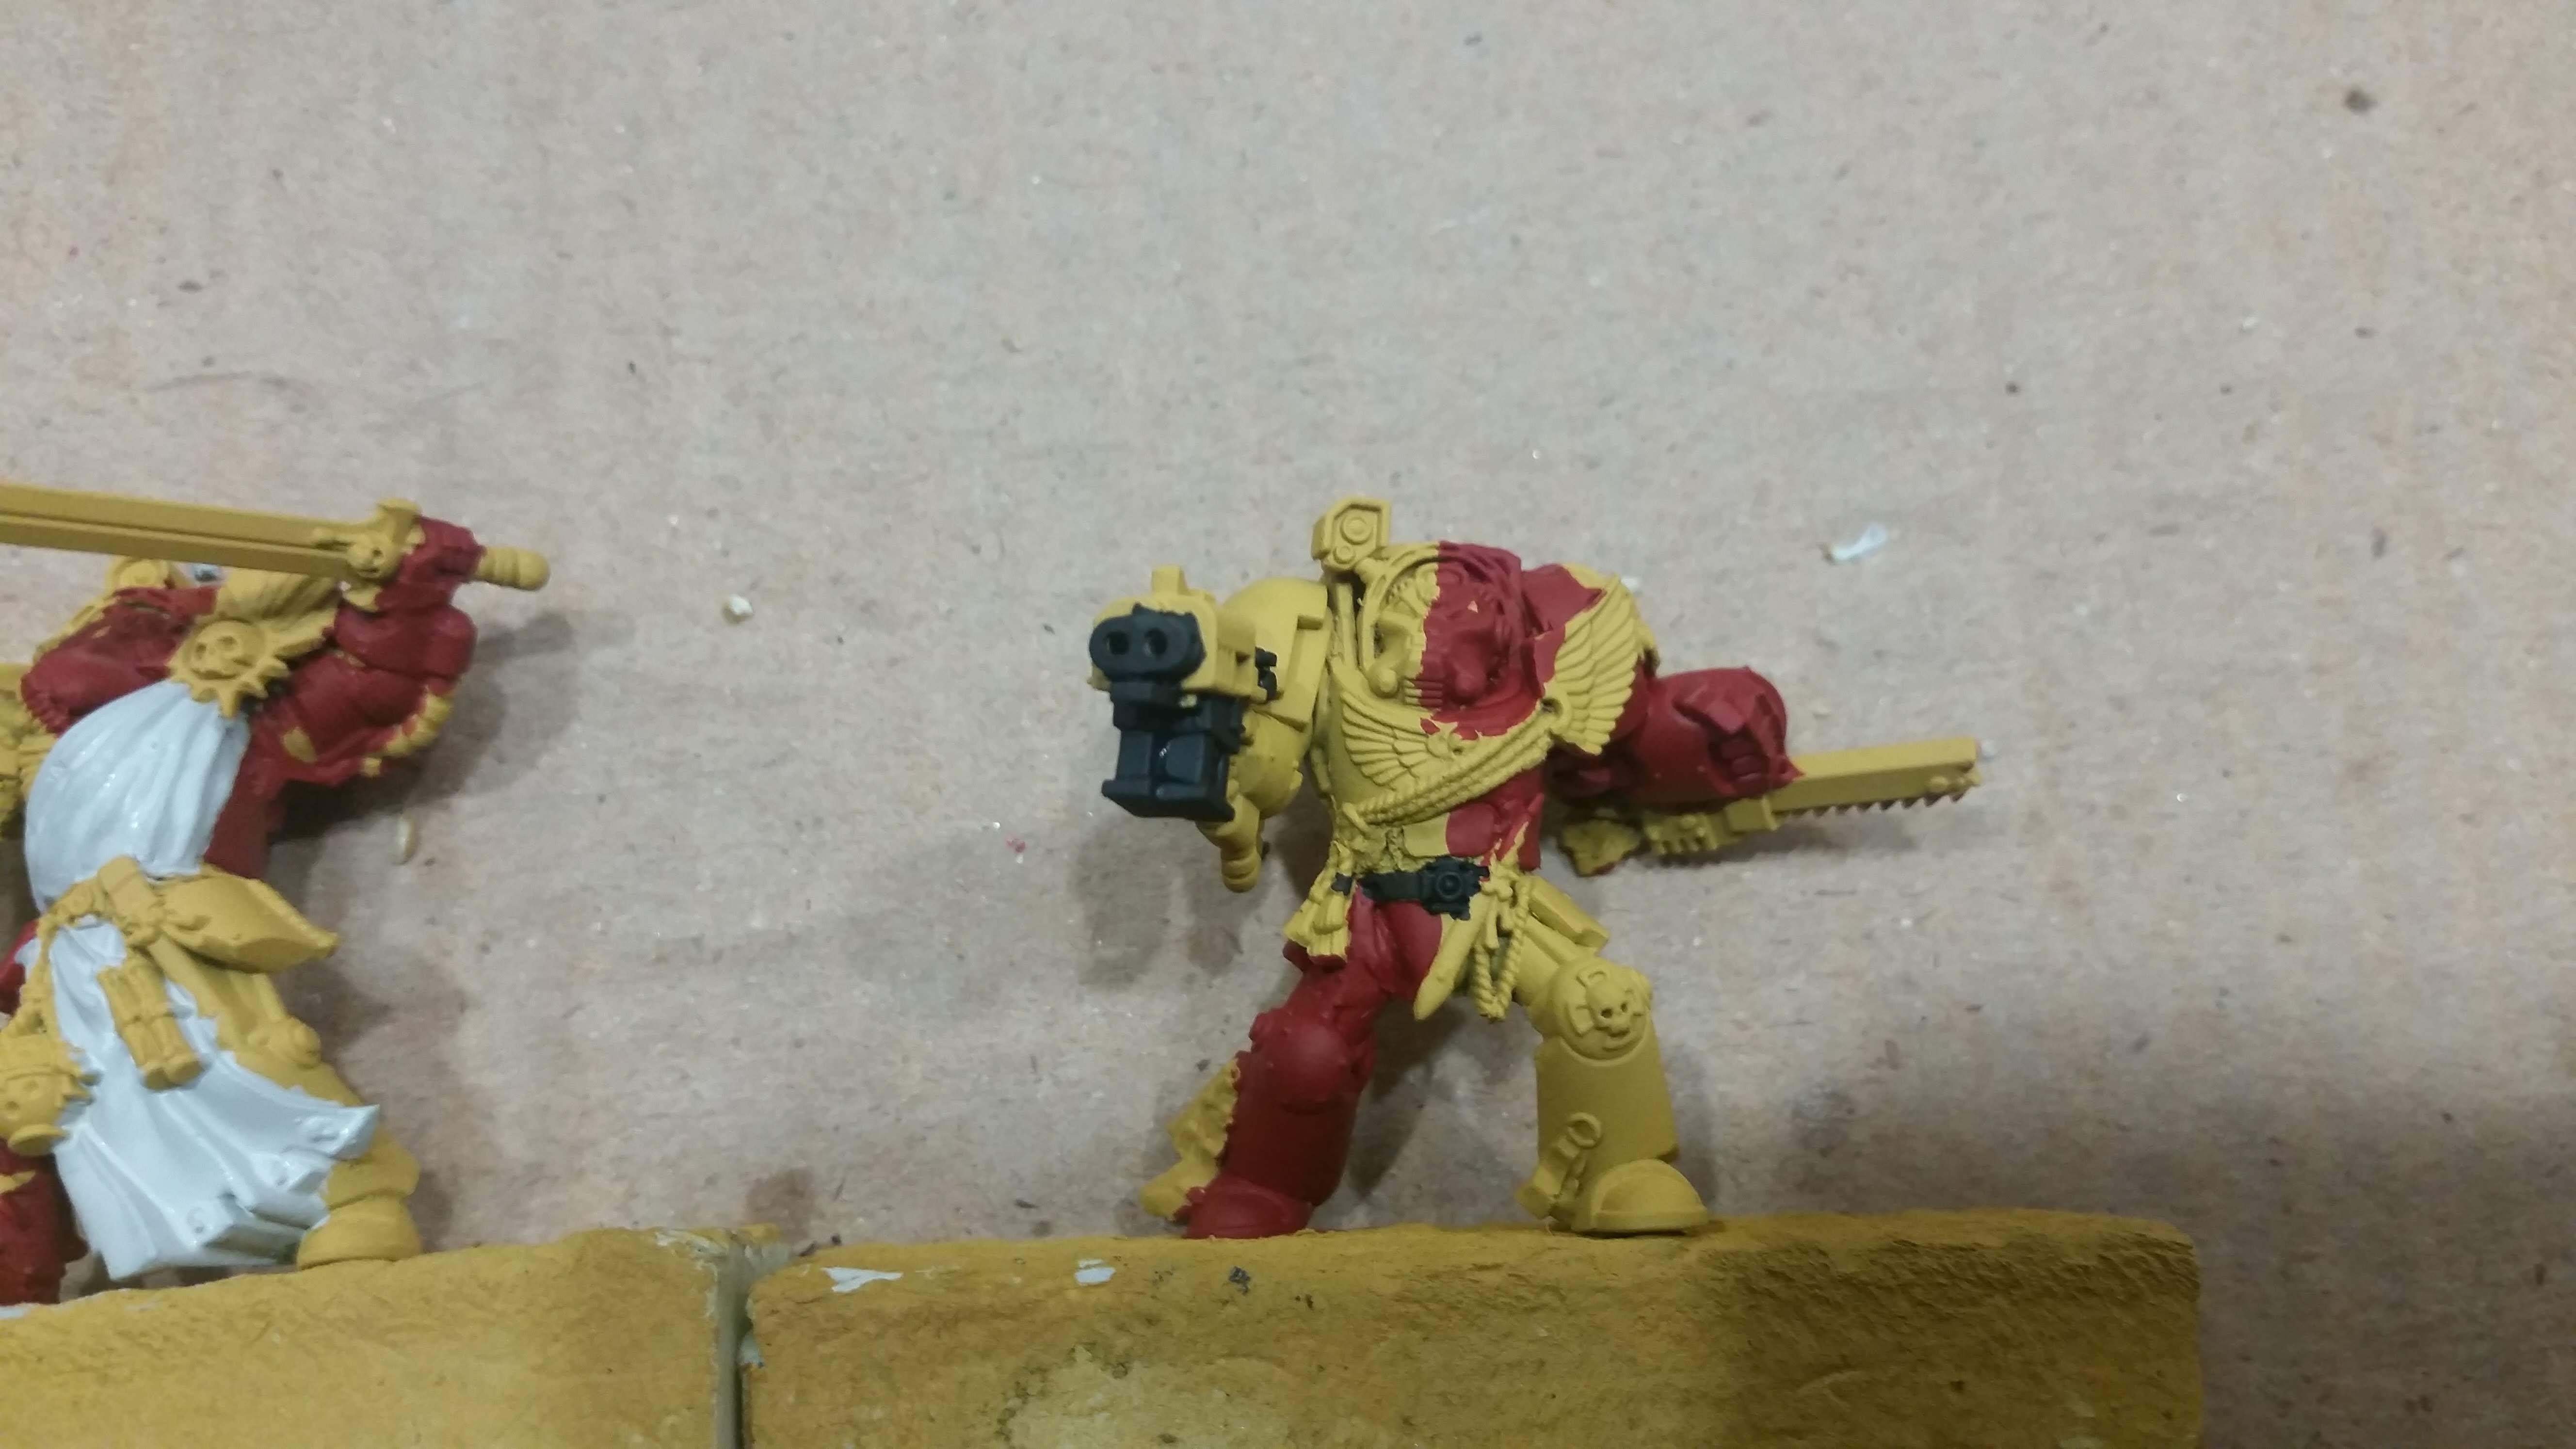
About that Angel on the shin guard
Remember the angel on the sergeants shin guard I mentioned earlier. That still needs to go, as it just looks too much like the Death Wing.
 II had another boot left over from the Picnic Terminator. Here I am cutting that of its base plate.
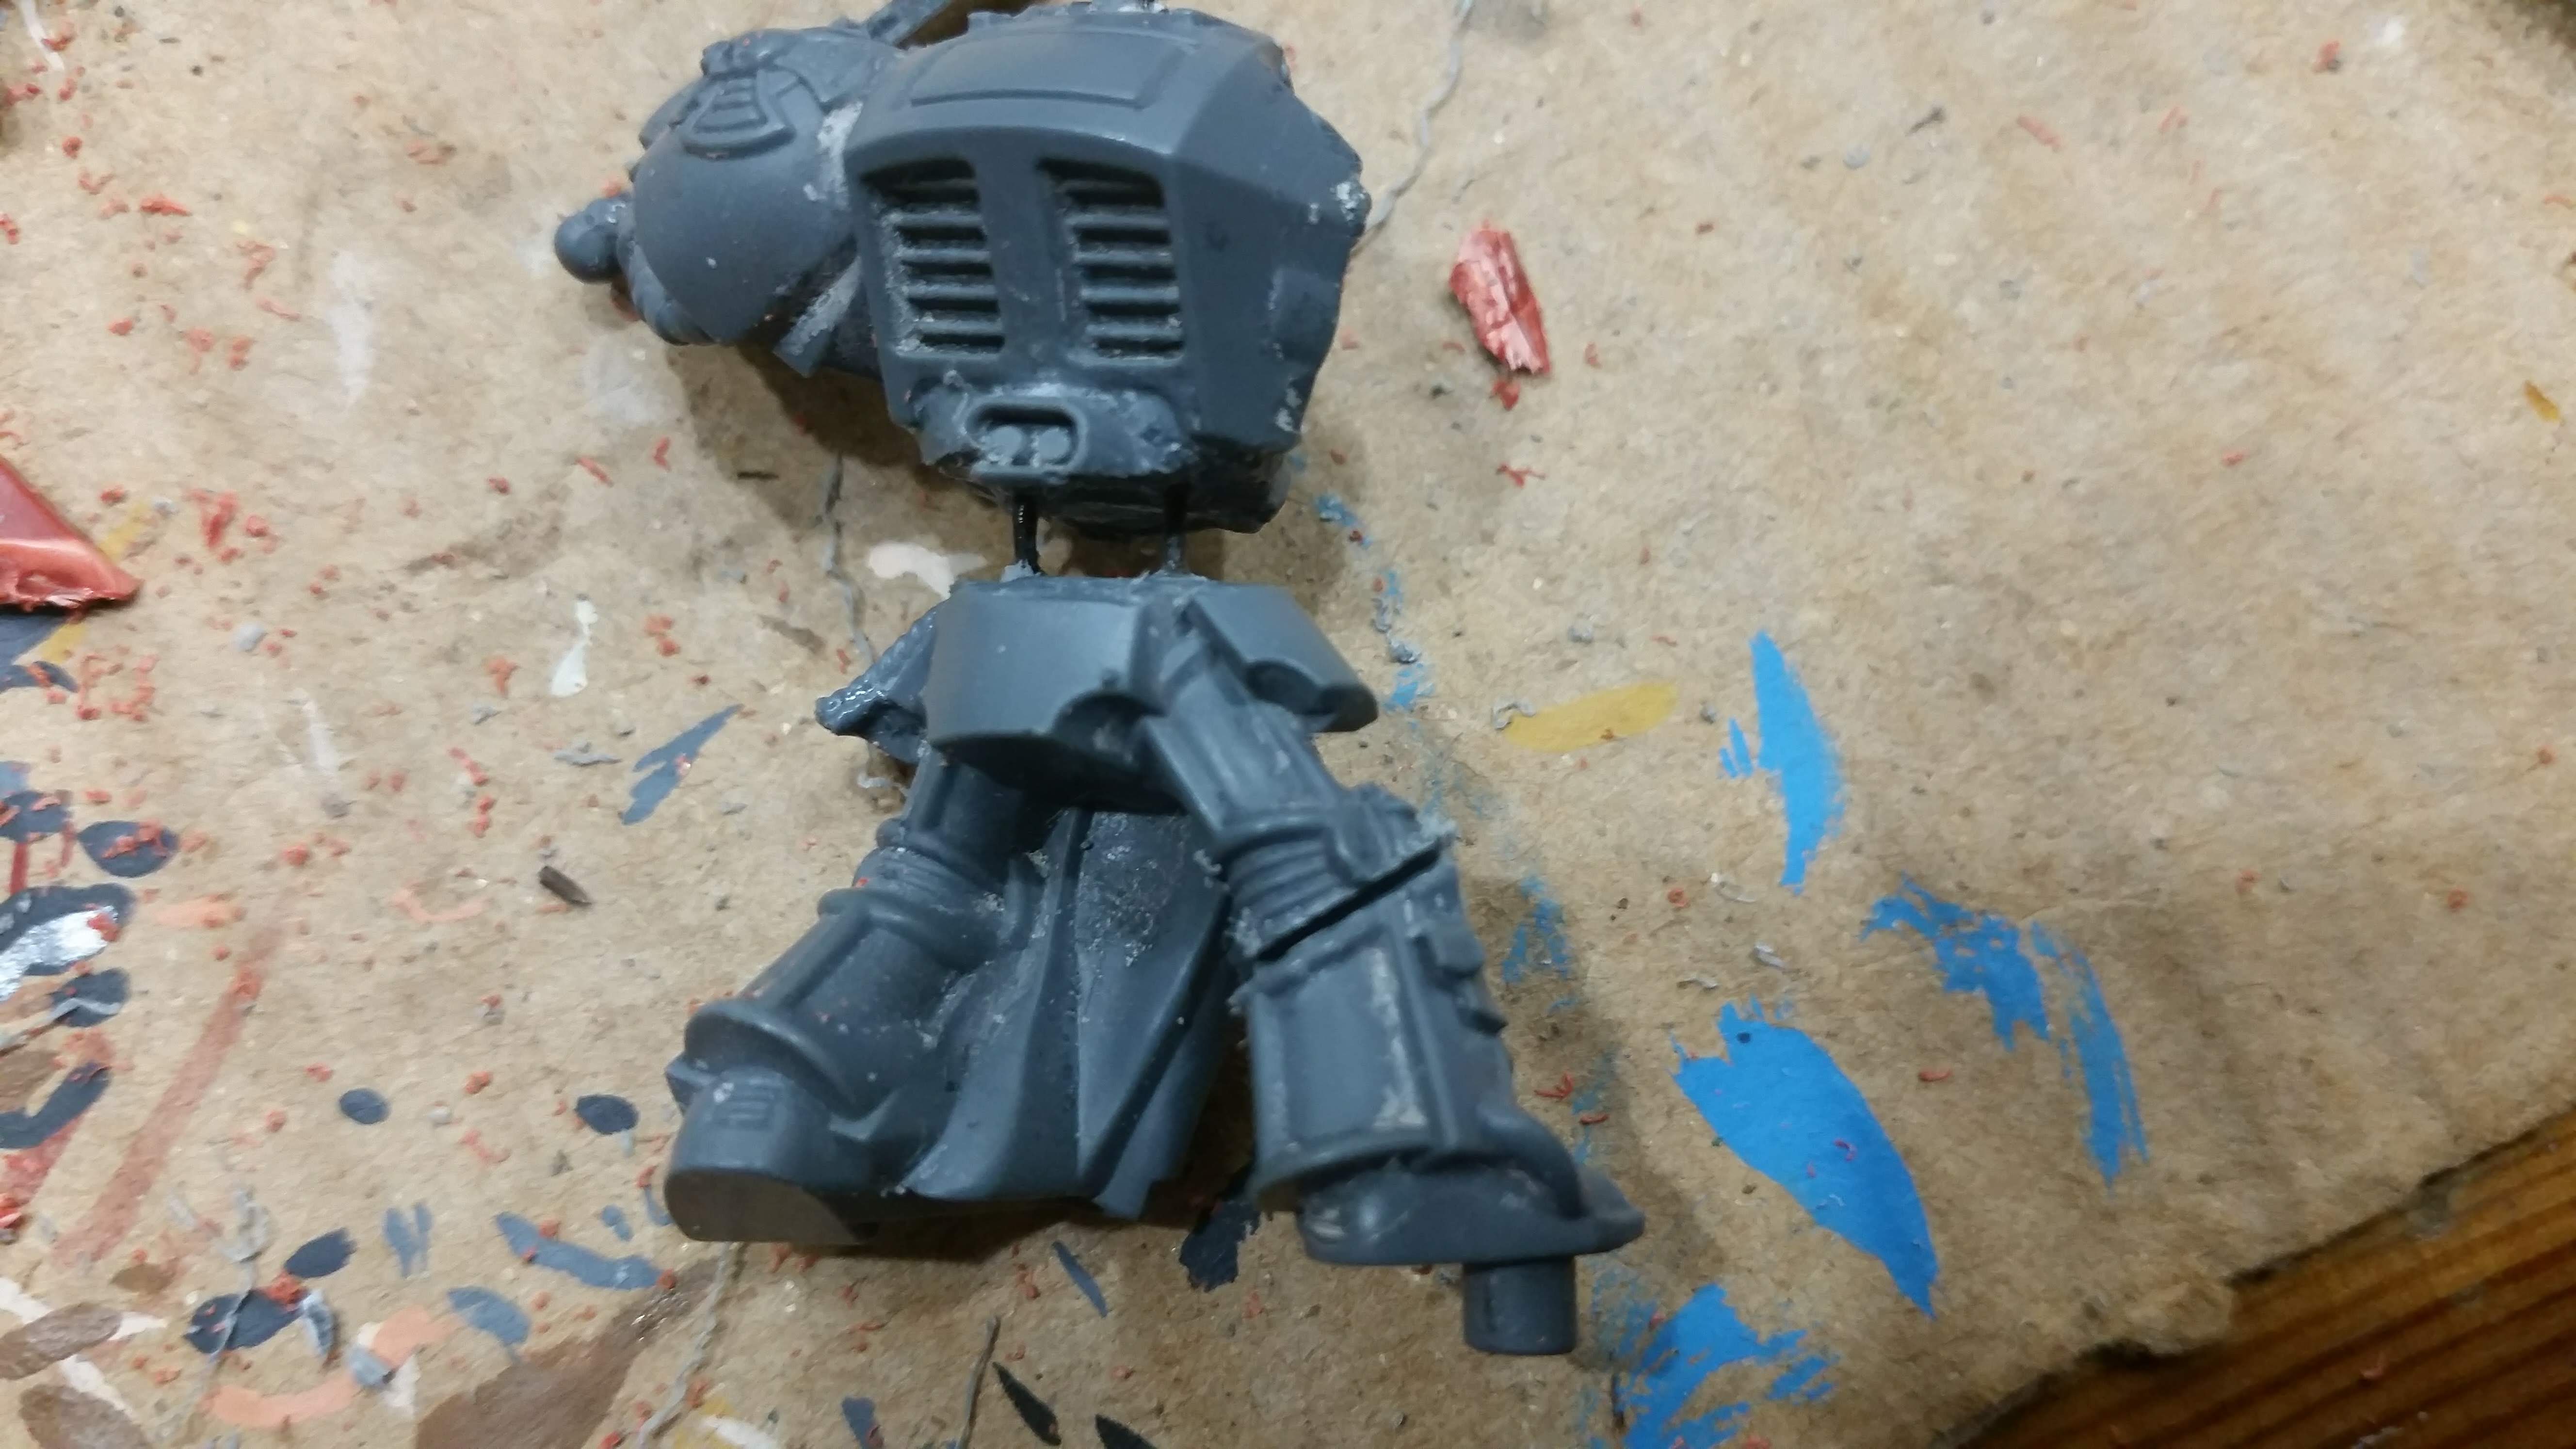 The first cut made in order to remove the sergeants angel embossed footwear.
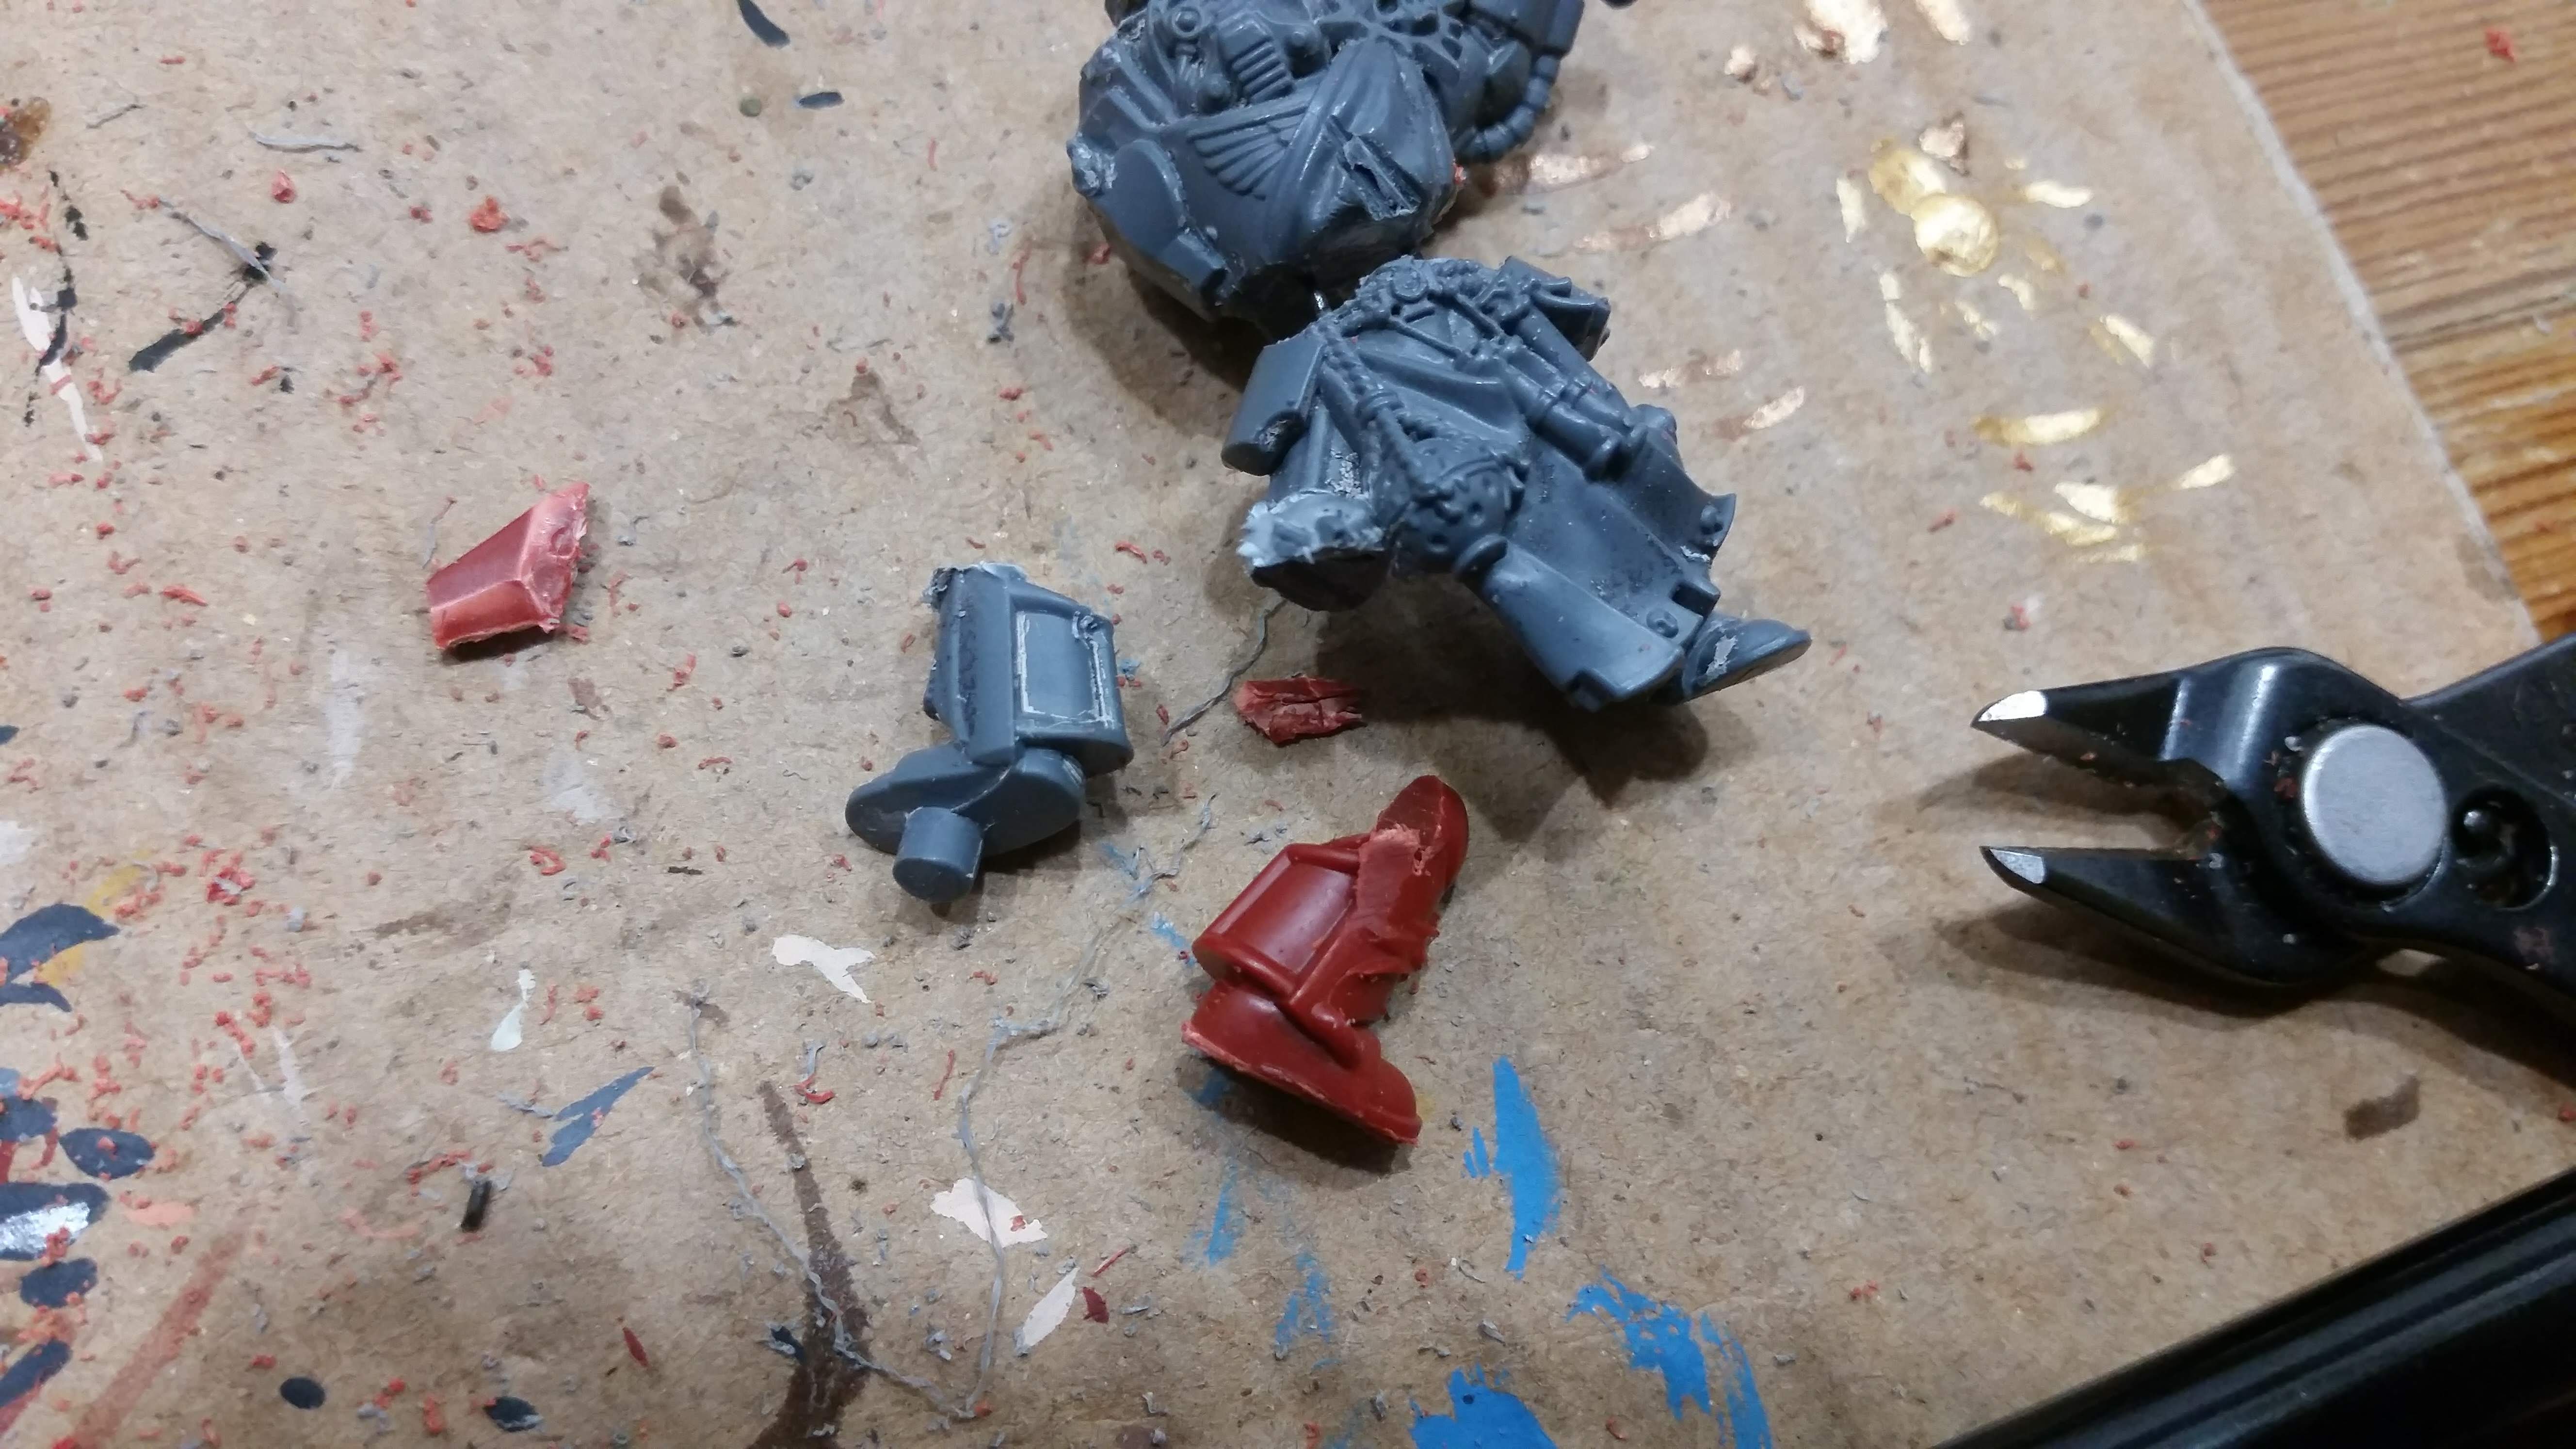 A second cut behind the knee cap made the boot come free rather easily.
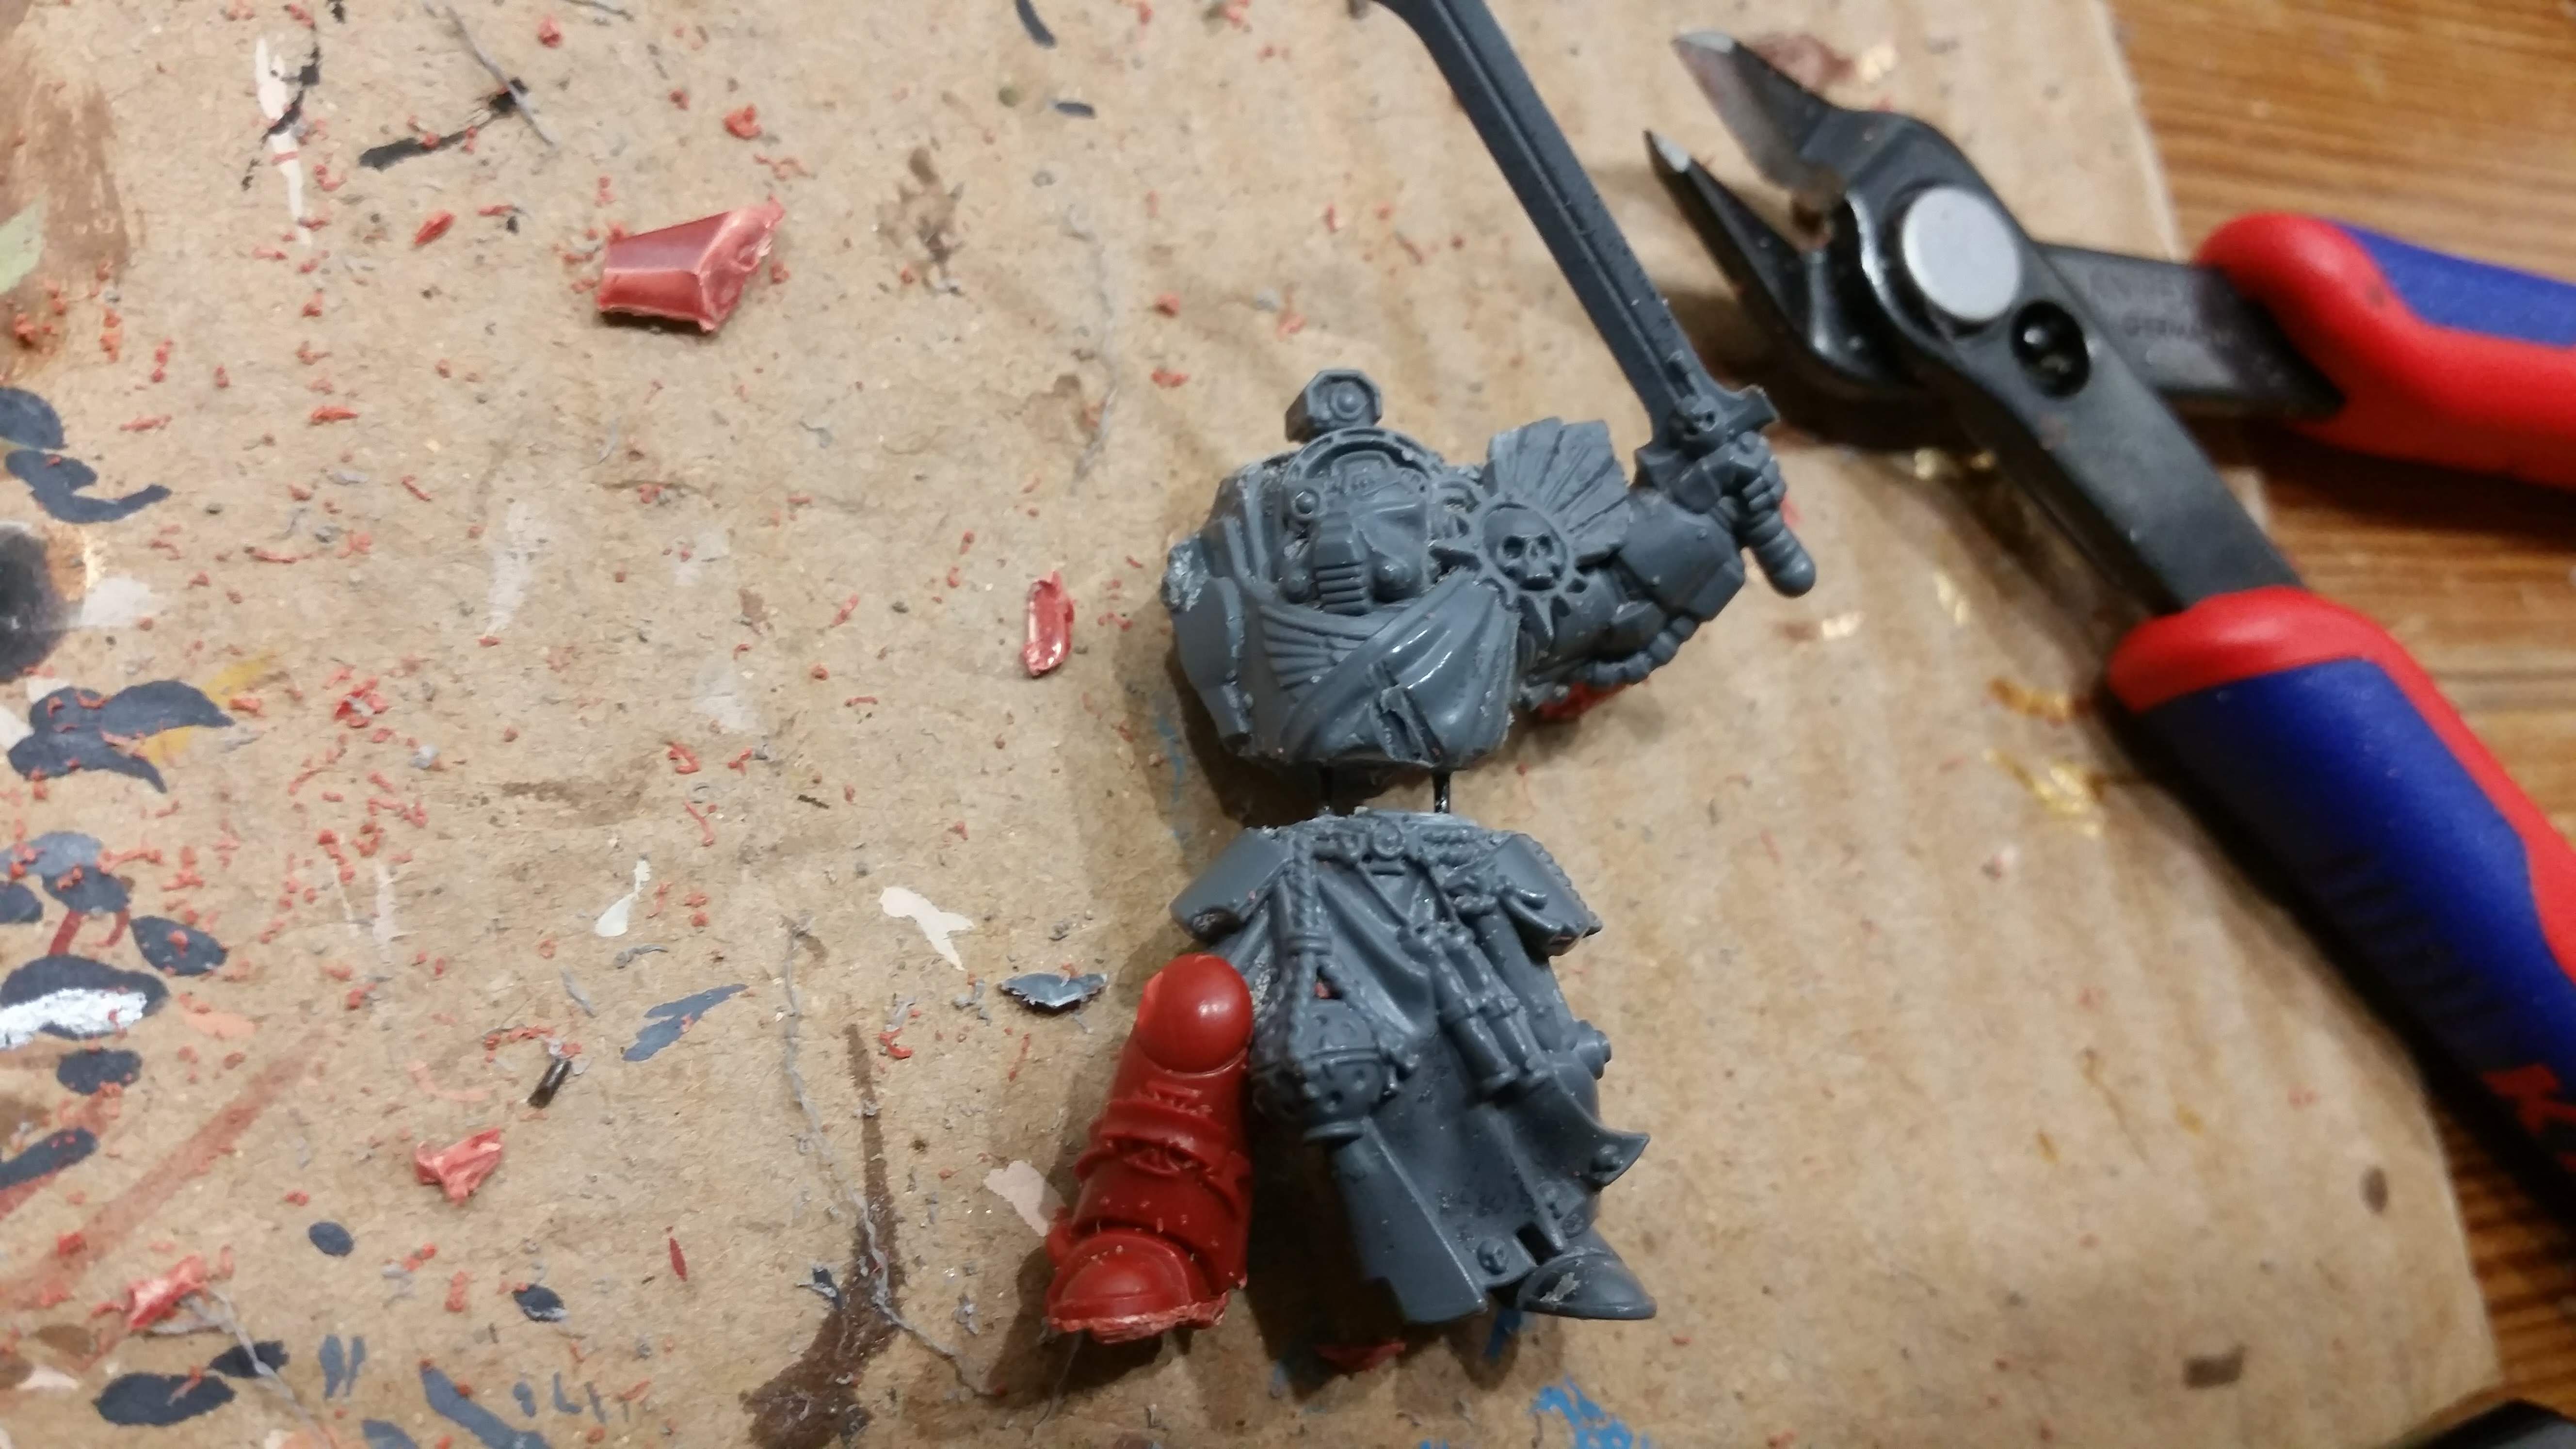 The Picnic Terminators leg is being fitted into place on the sergeant.
 After welding the leg into place with modedling glue I sculpted over the seam with green stuff to rebuild some of the lost detail.
A Picnic on a Space Hulk
 Adaptus Astartes in Tactical Dreadnough Armor spreading a picnic blanket.
A while ago I bought some of the Space Hulk Terminators of ebay and I have always been wondering what the above model was supposed to be doing. It just looked more like he was spreading a blanket, than tearing up the floor plating to me.
And why would he be tearing up the plating anyway? Isn’t he supposed to shoot the jeans stealers. Maybe he dropped his keys and they slid into a grate or something….
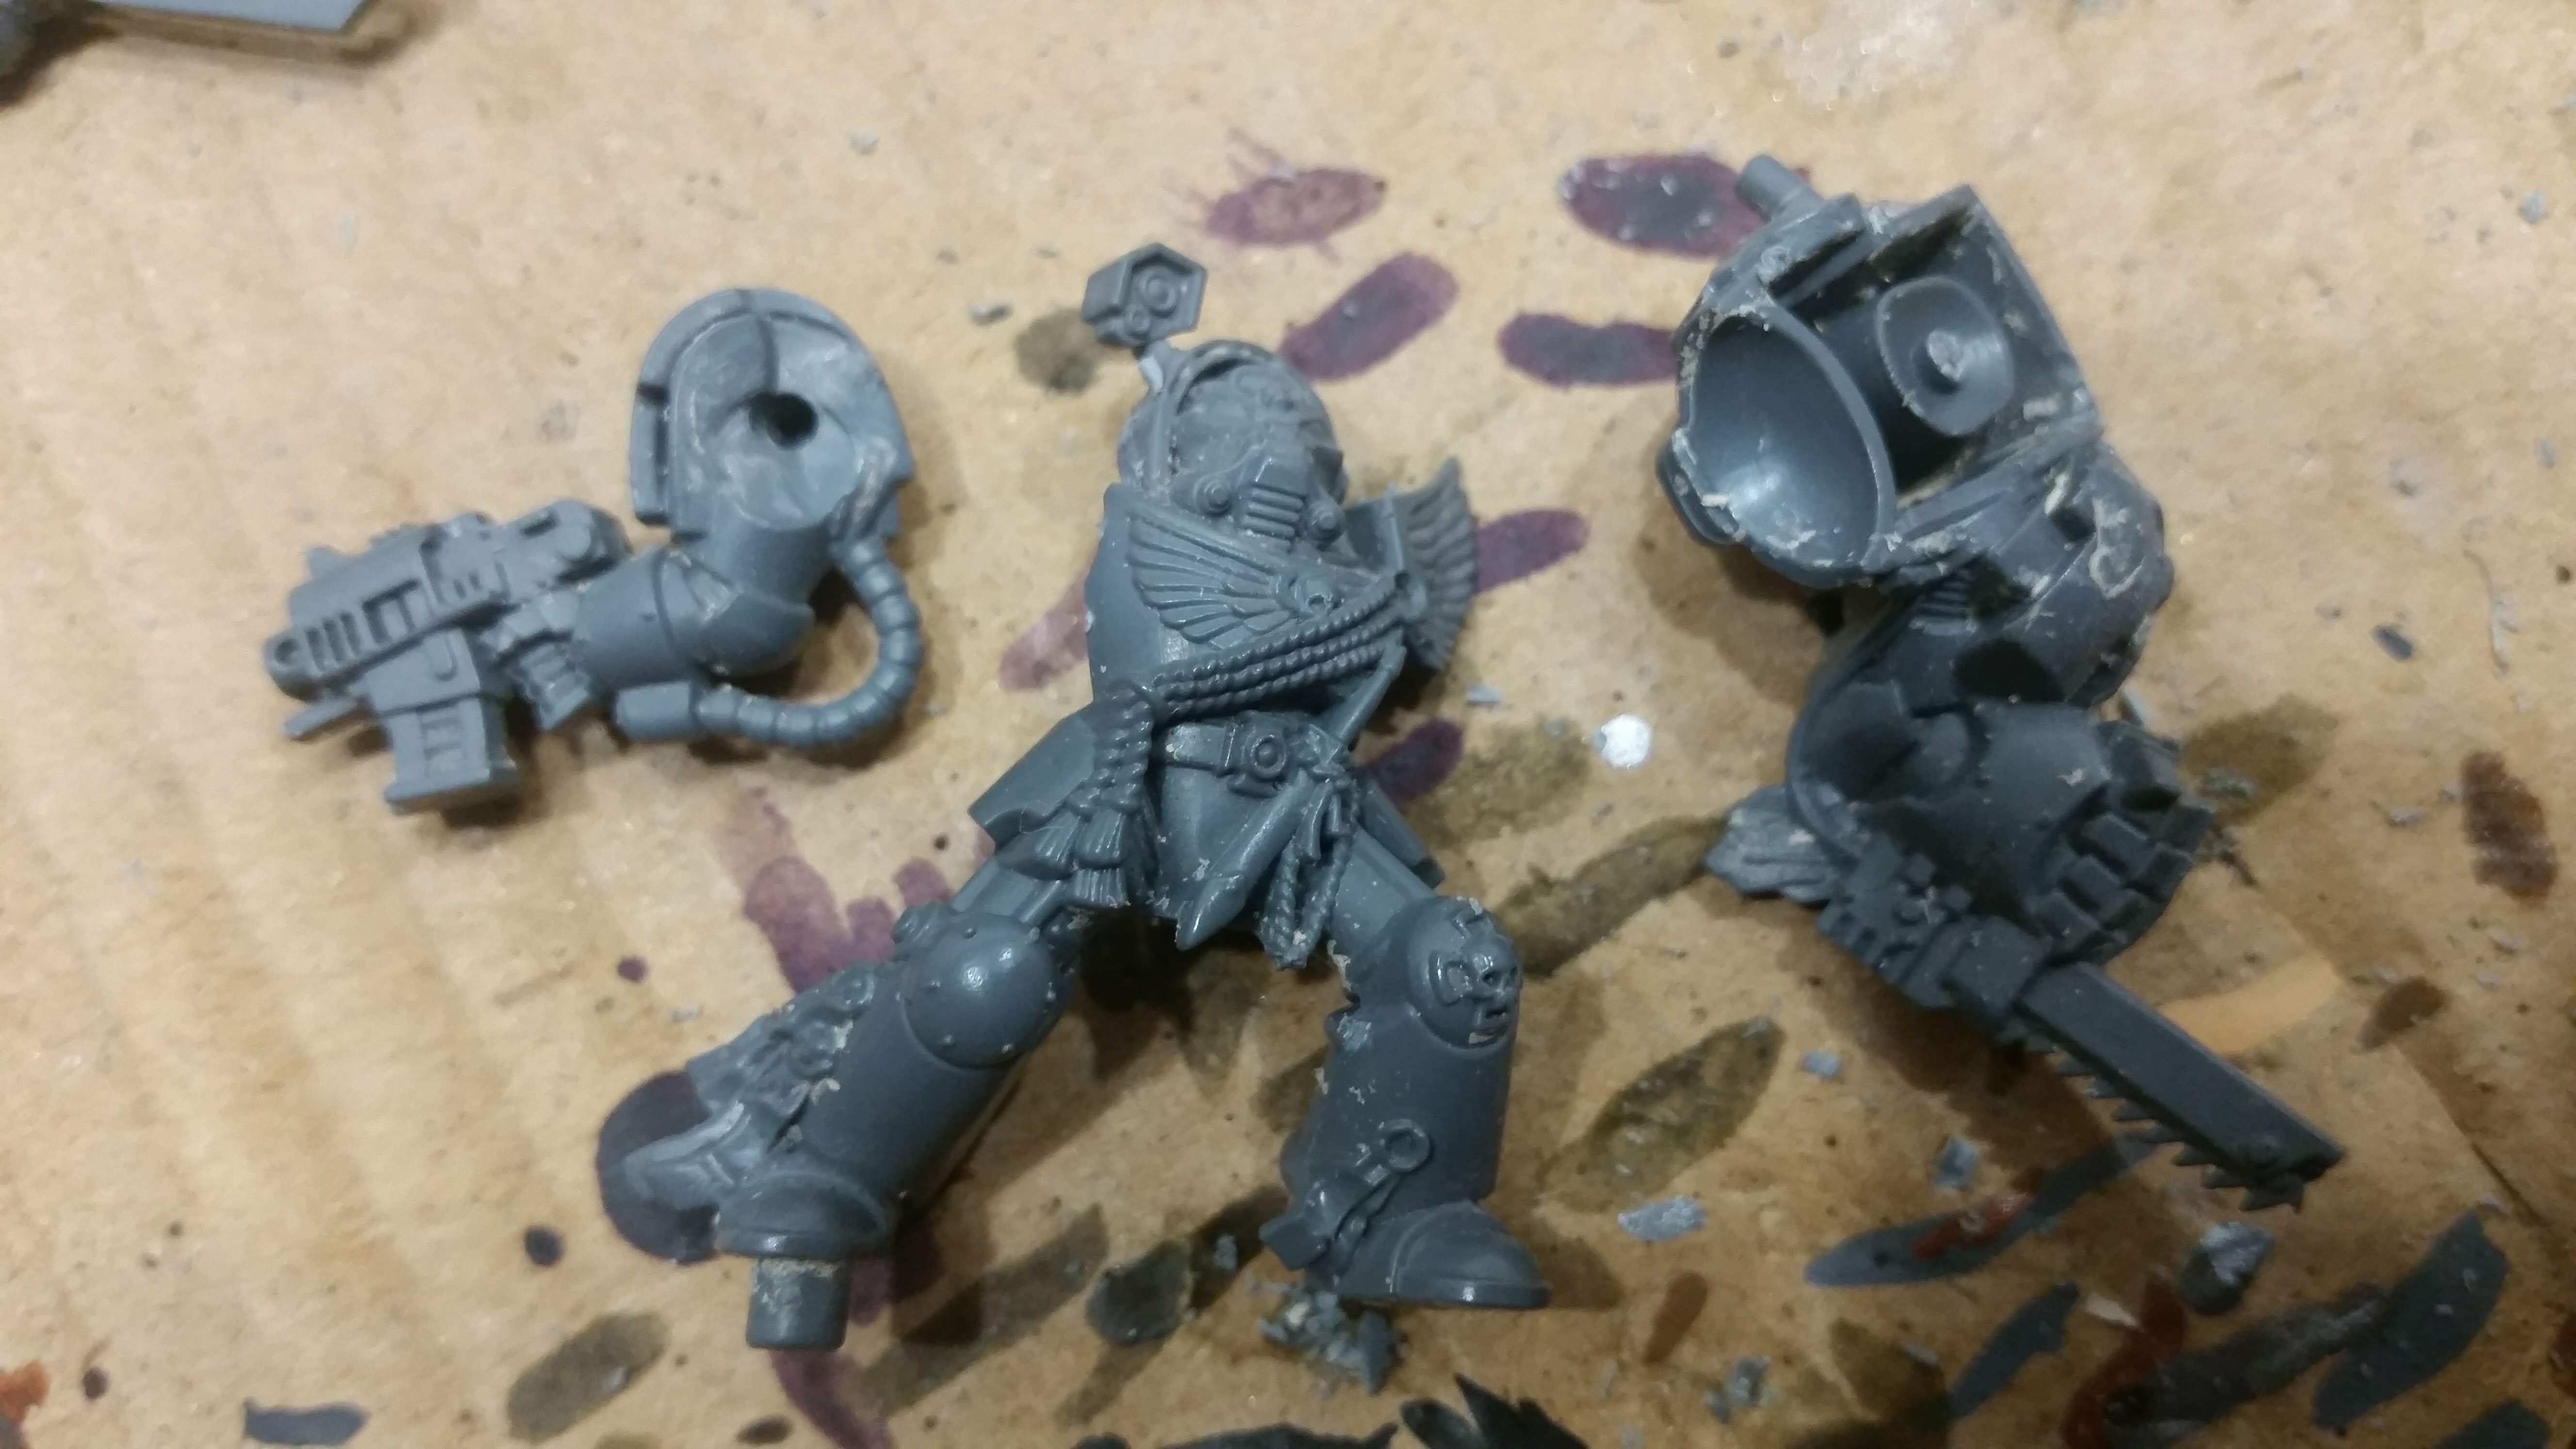
Well, he might not be in a dynamic combat pose, but I had another use for him in mind.
 The model comes in separate parts. A series of cuts is being made to separate its torso from the kneeling leg...
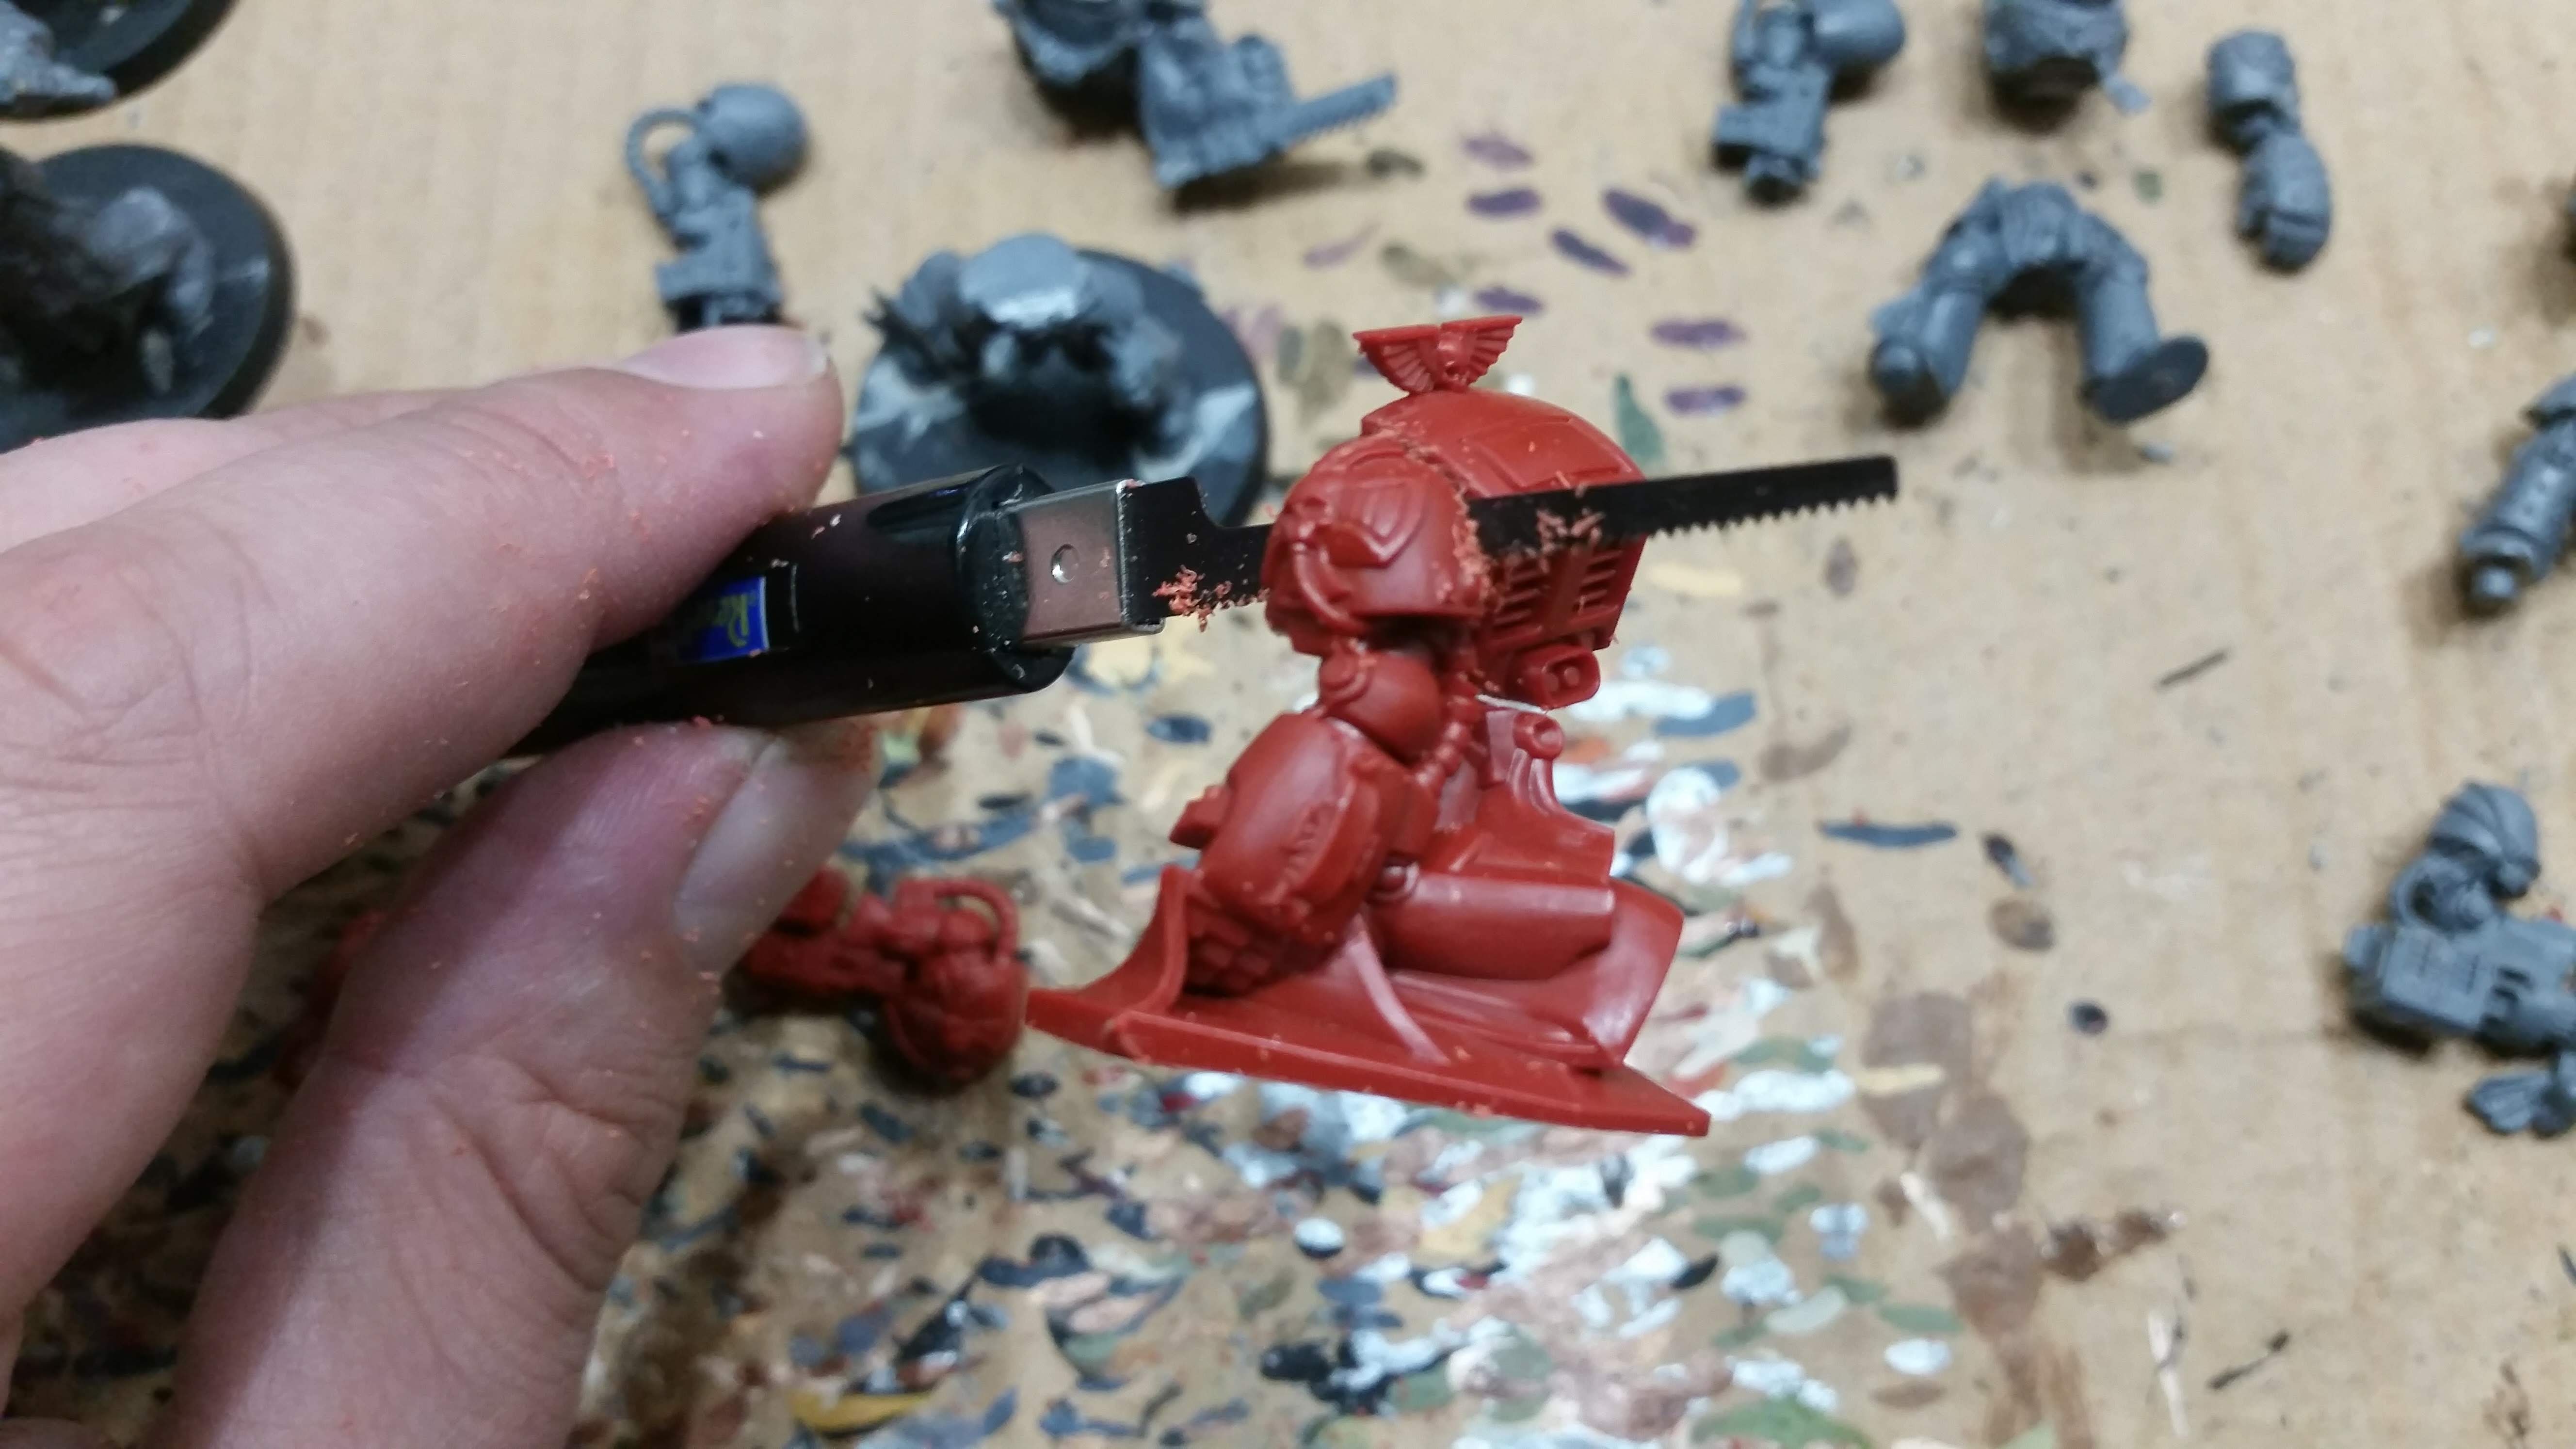 ...and the arm.
 I used pliers and the crafting knife ot remove the picnic blanket from the arm. Here it is on its own.
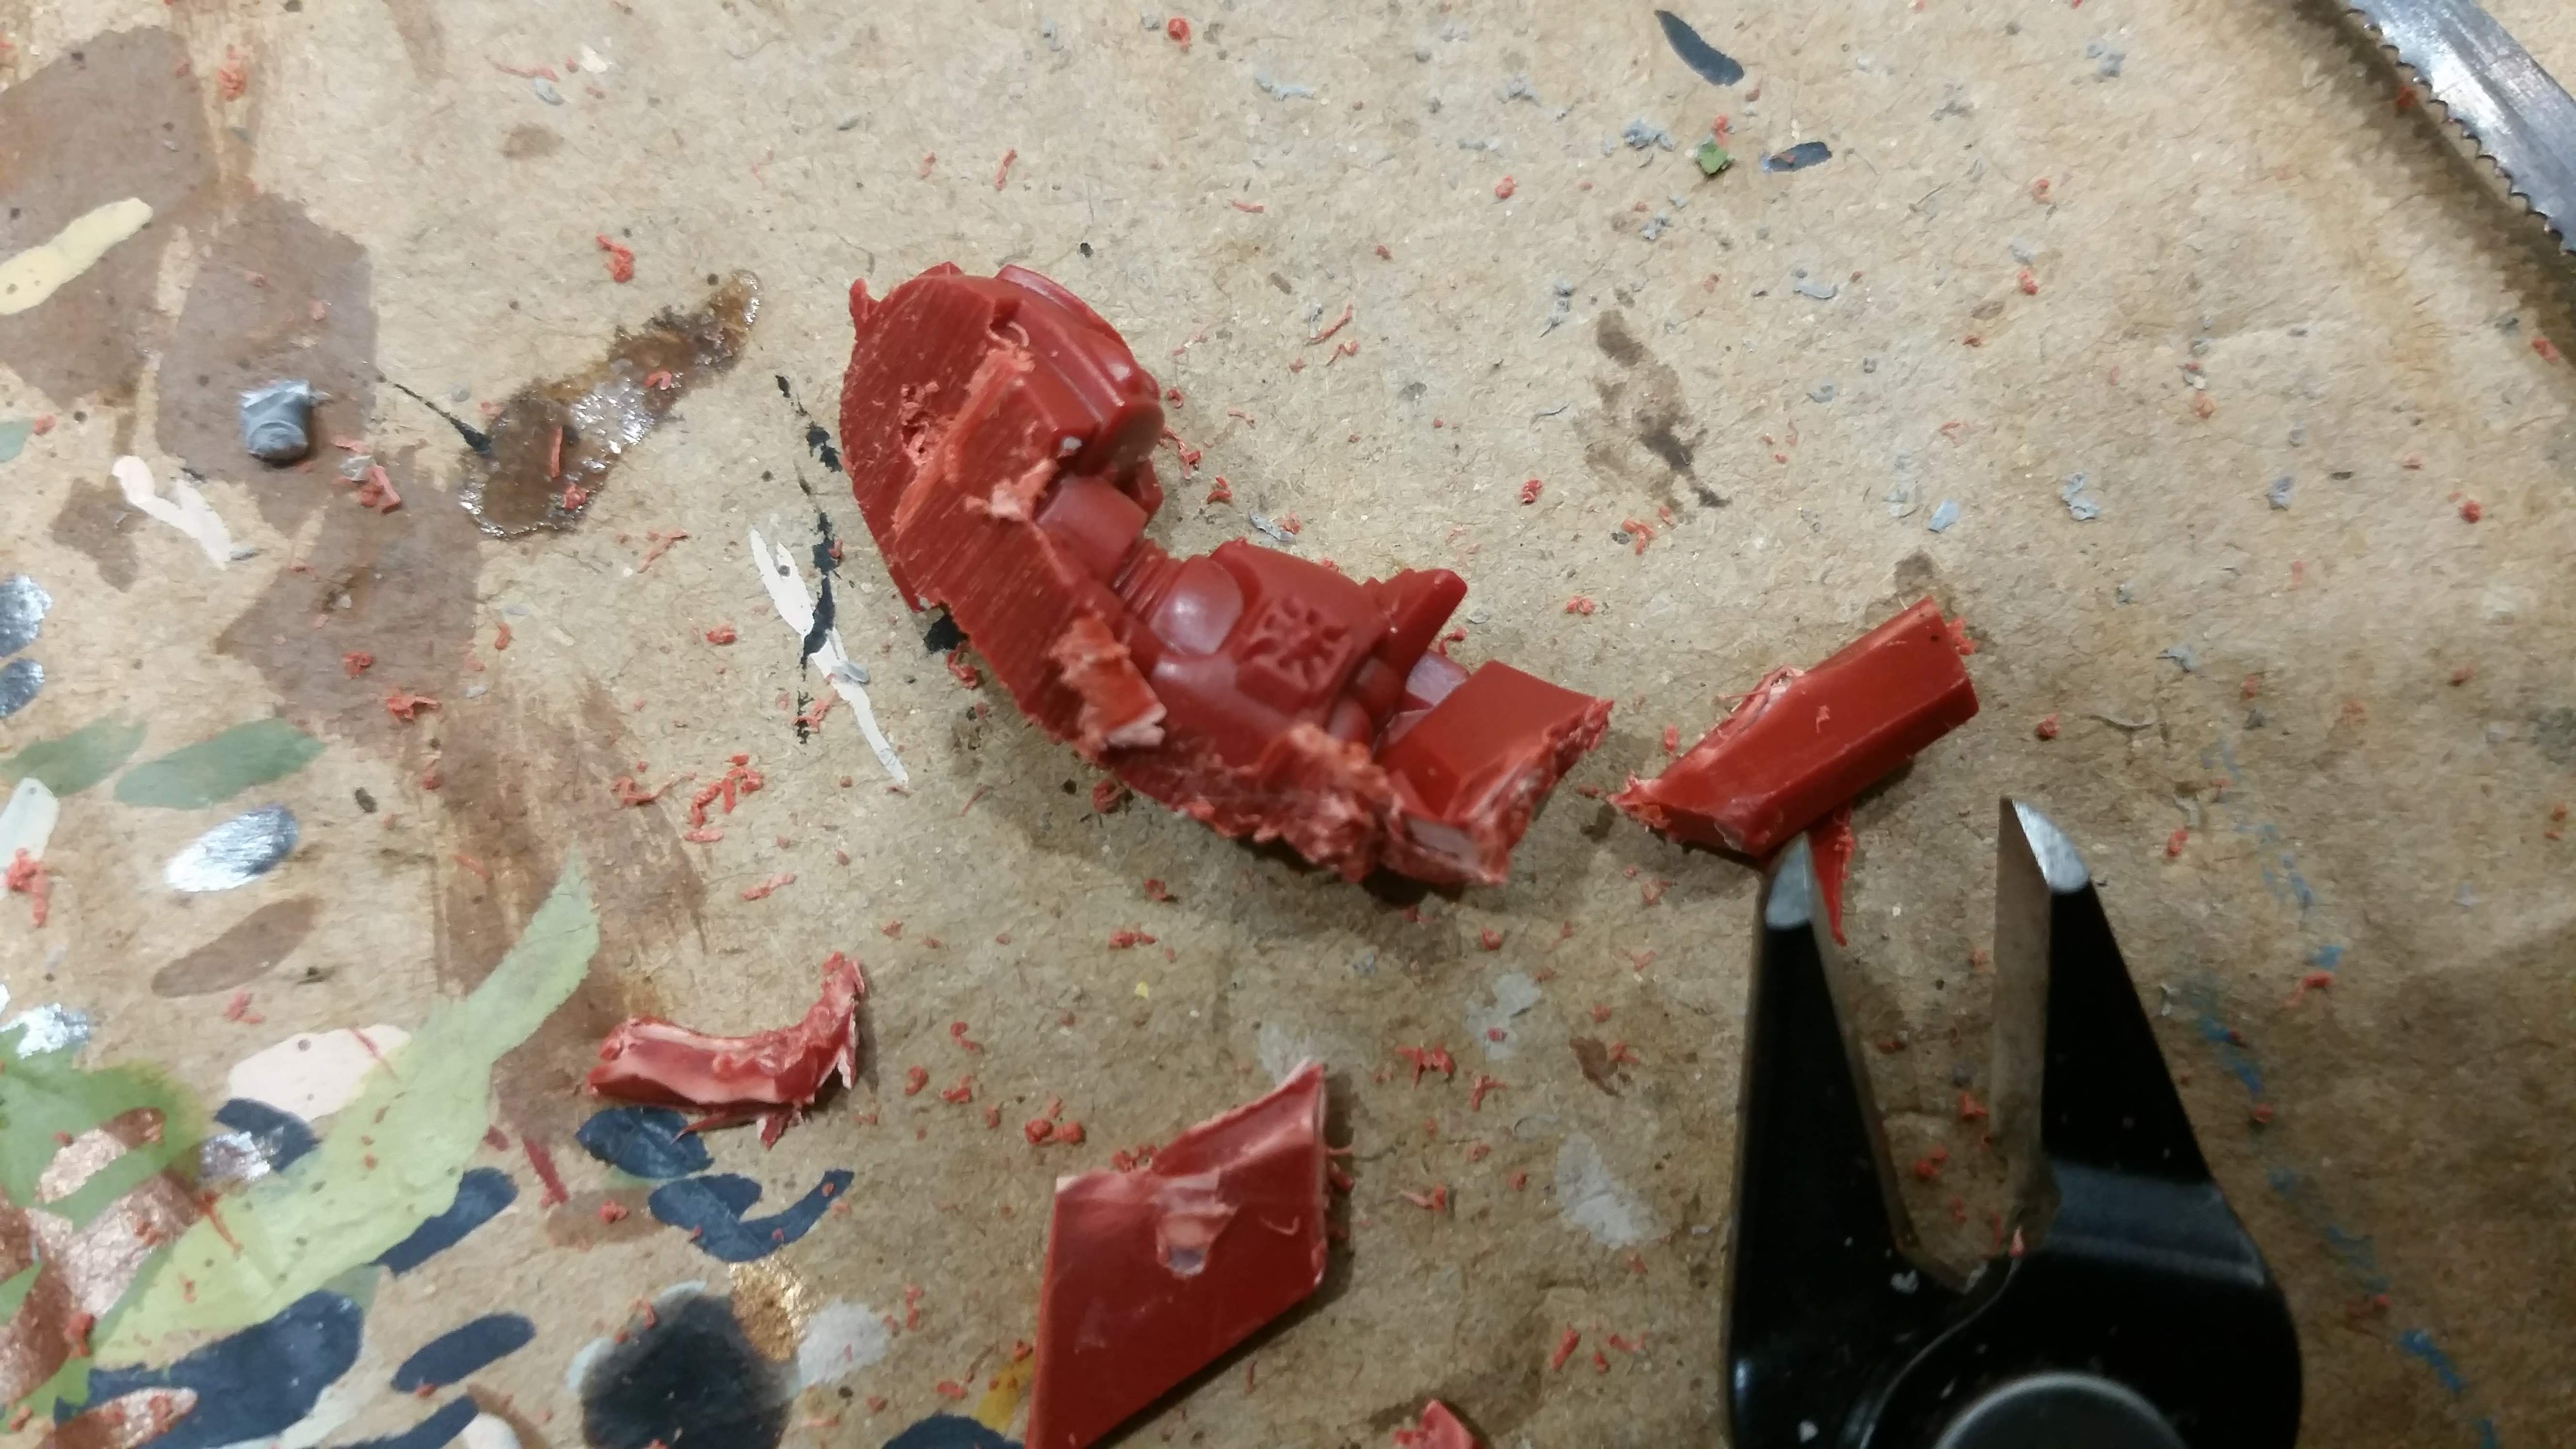 The inner side of the arm looked pretty mangled though.
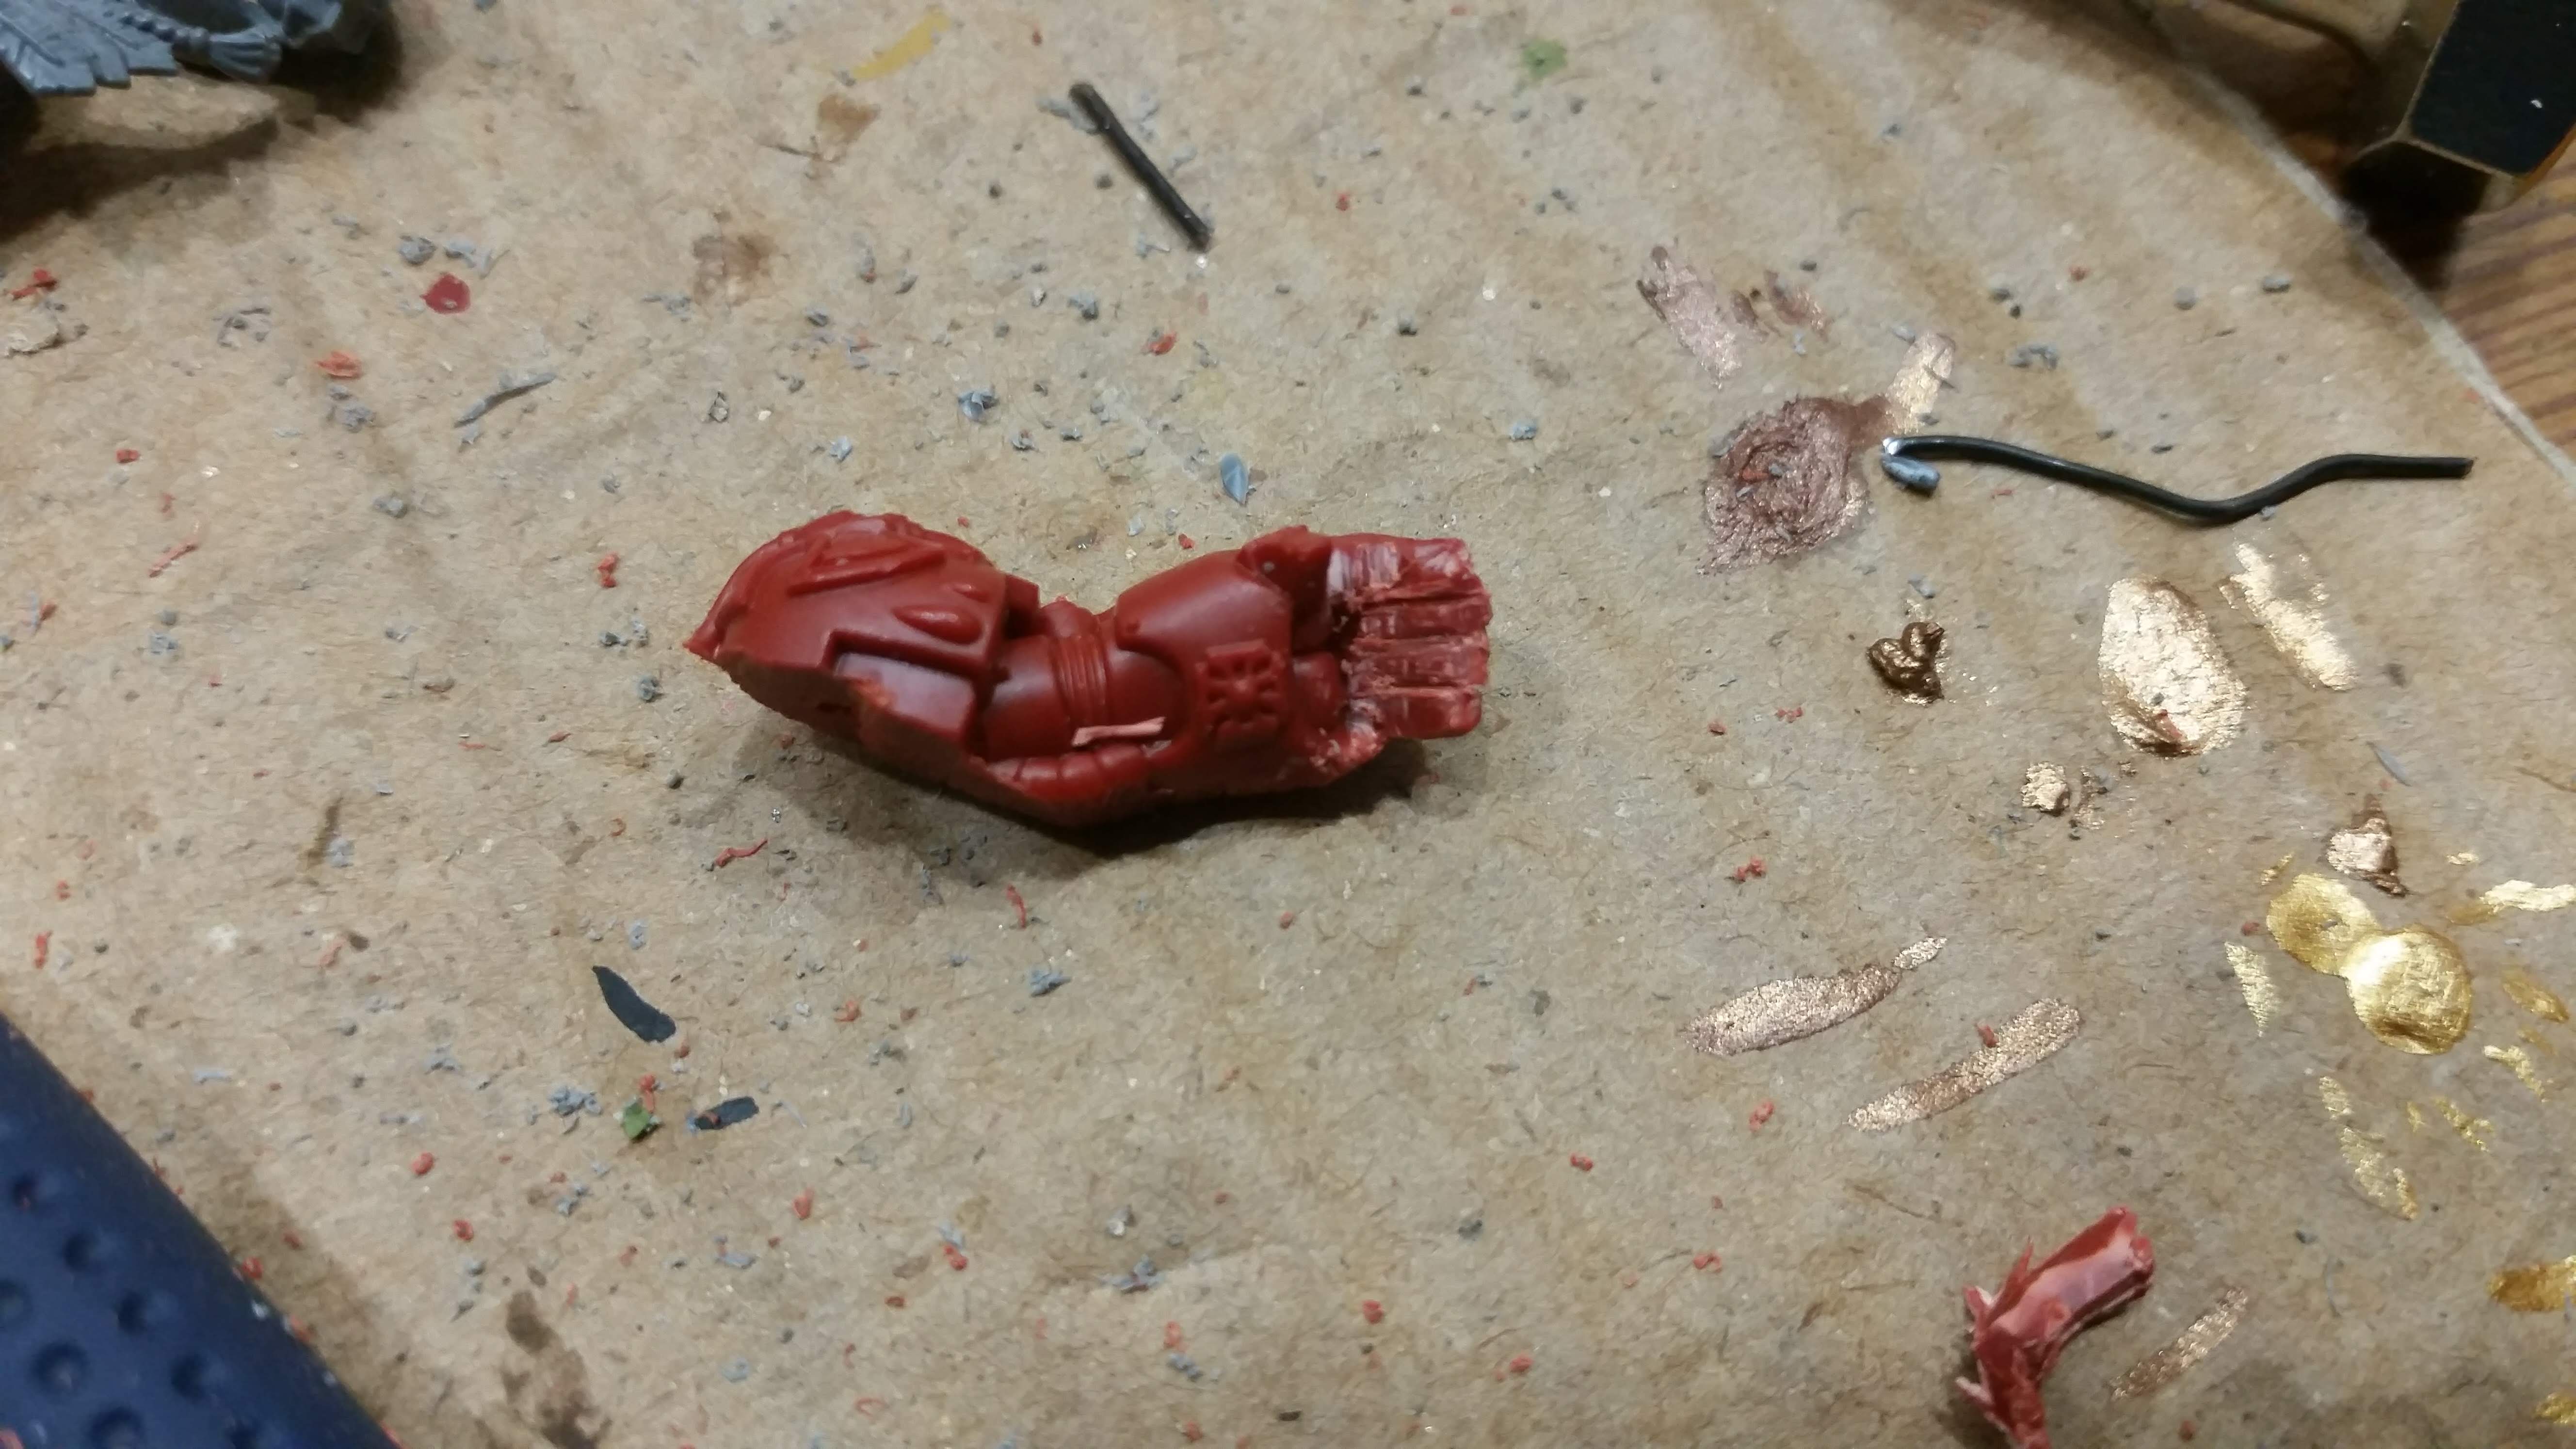 The arm was cleaned of with a carfting knife, and missing detail on the inside of the hand was carved, also using the crafting knife.
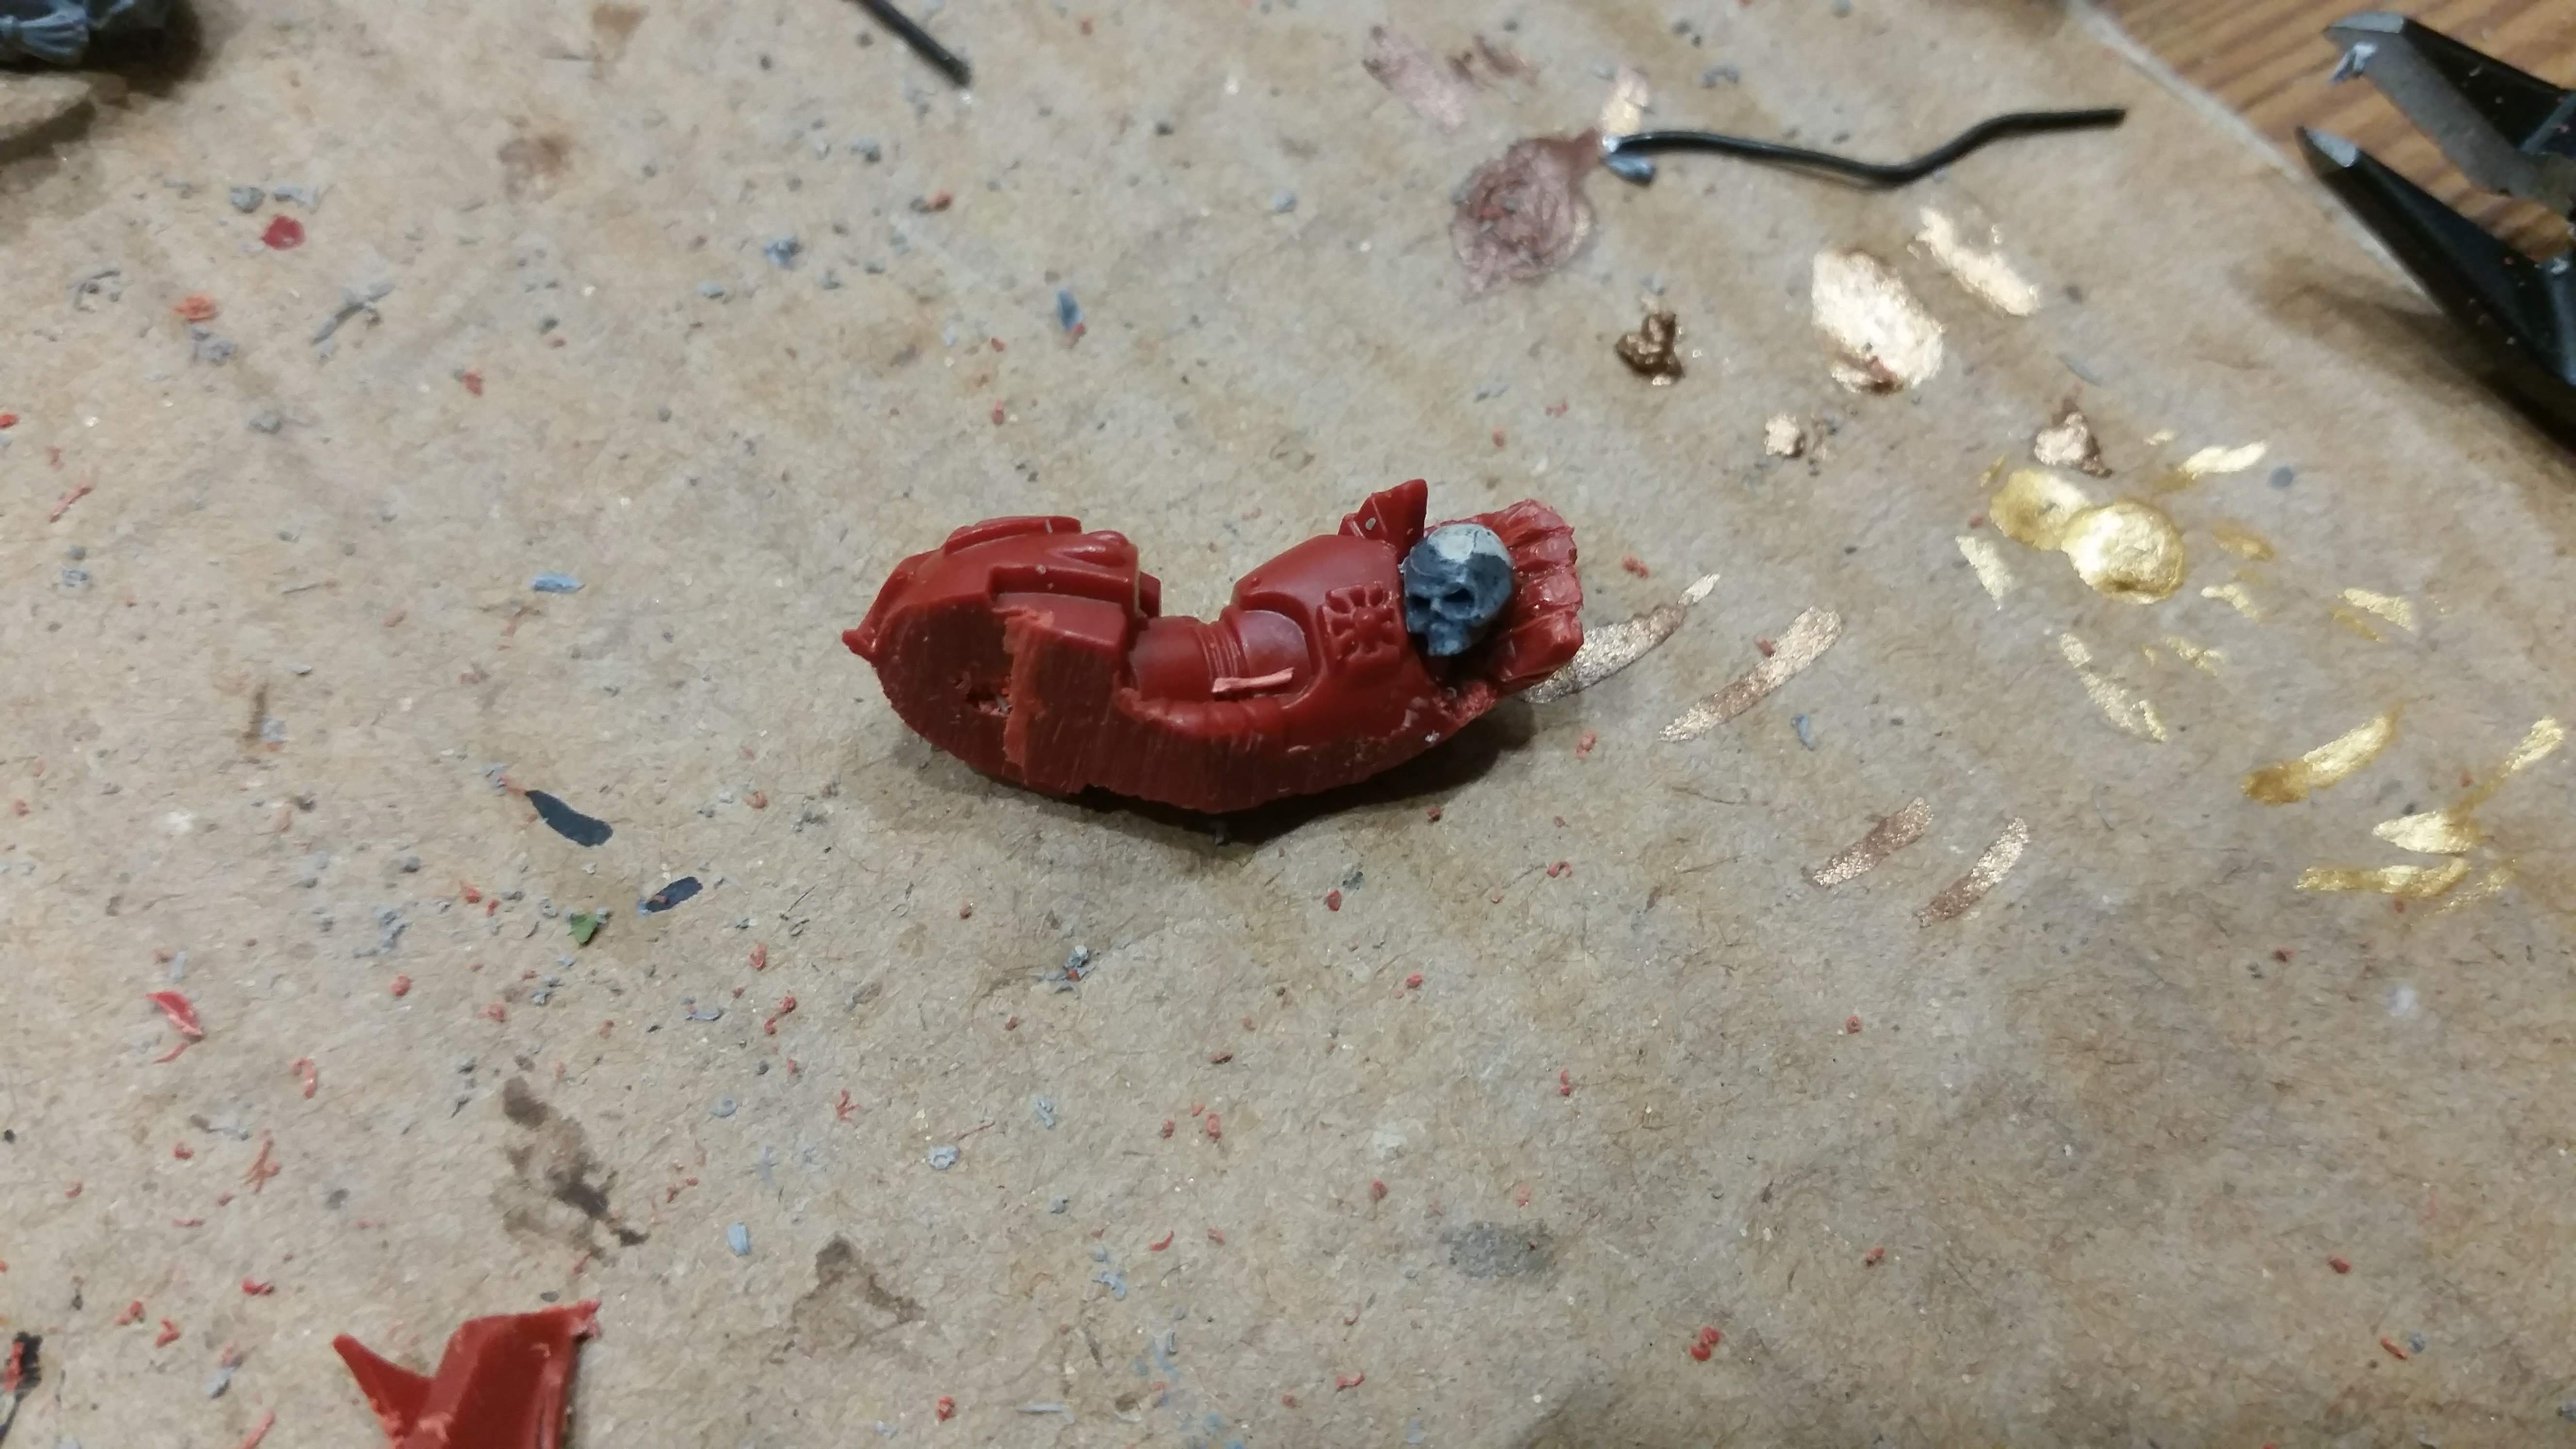 I glued a skull into the hand in order to both cover some of the damage and to distract from the carved areas.
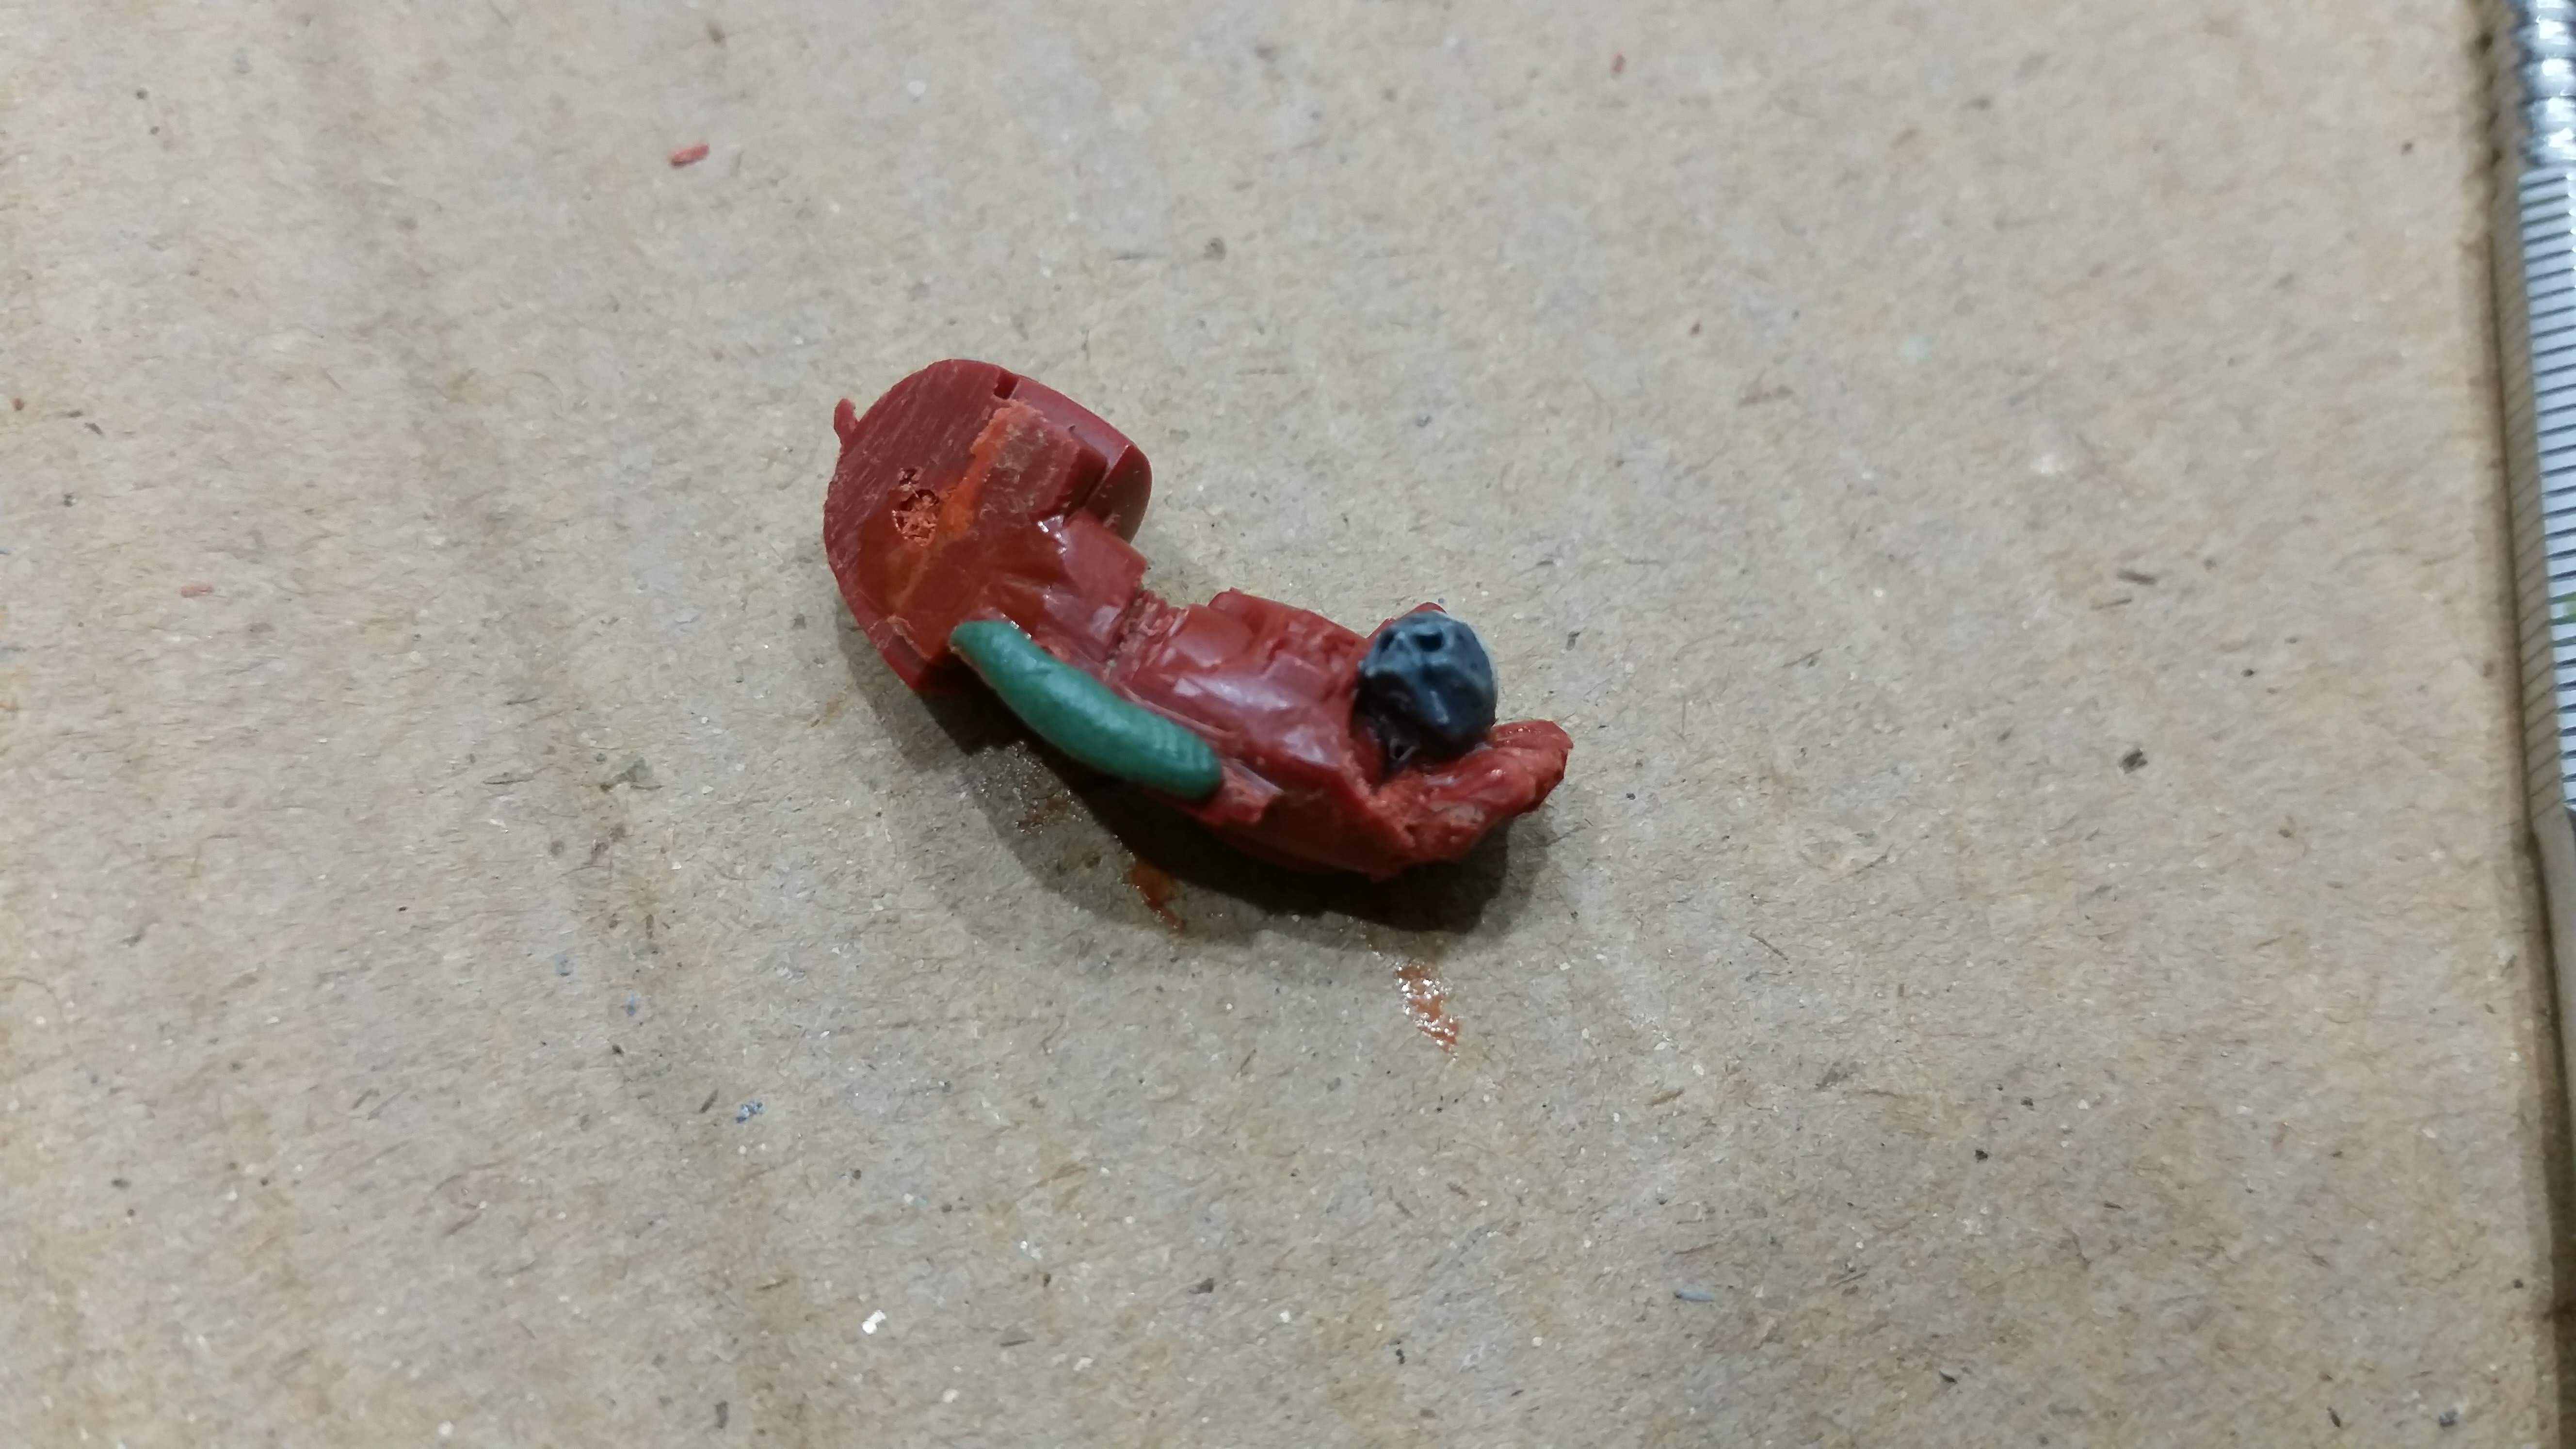 I used a little bit of green stuff to rebuild the cable on the inside of the arm...
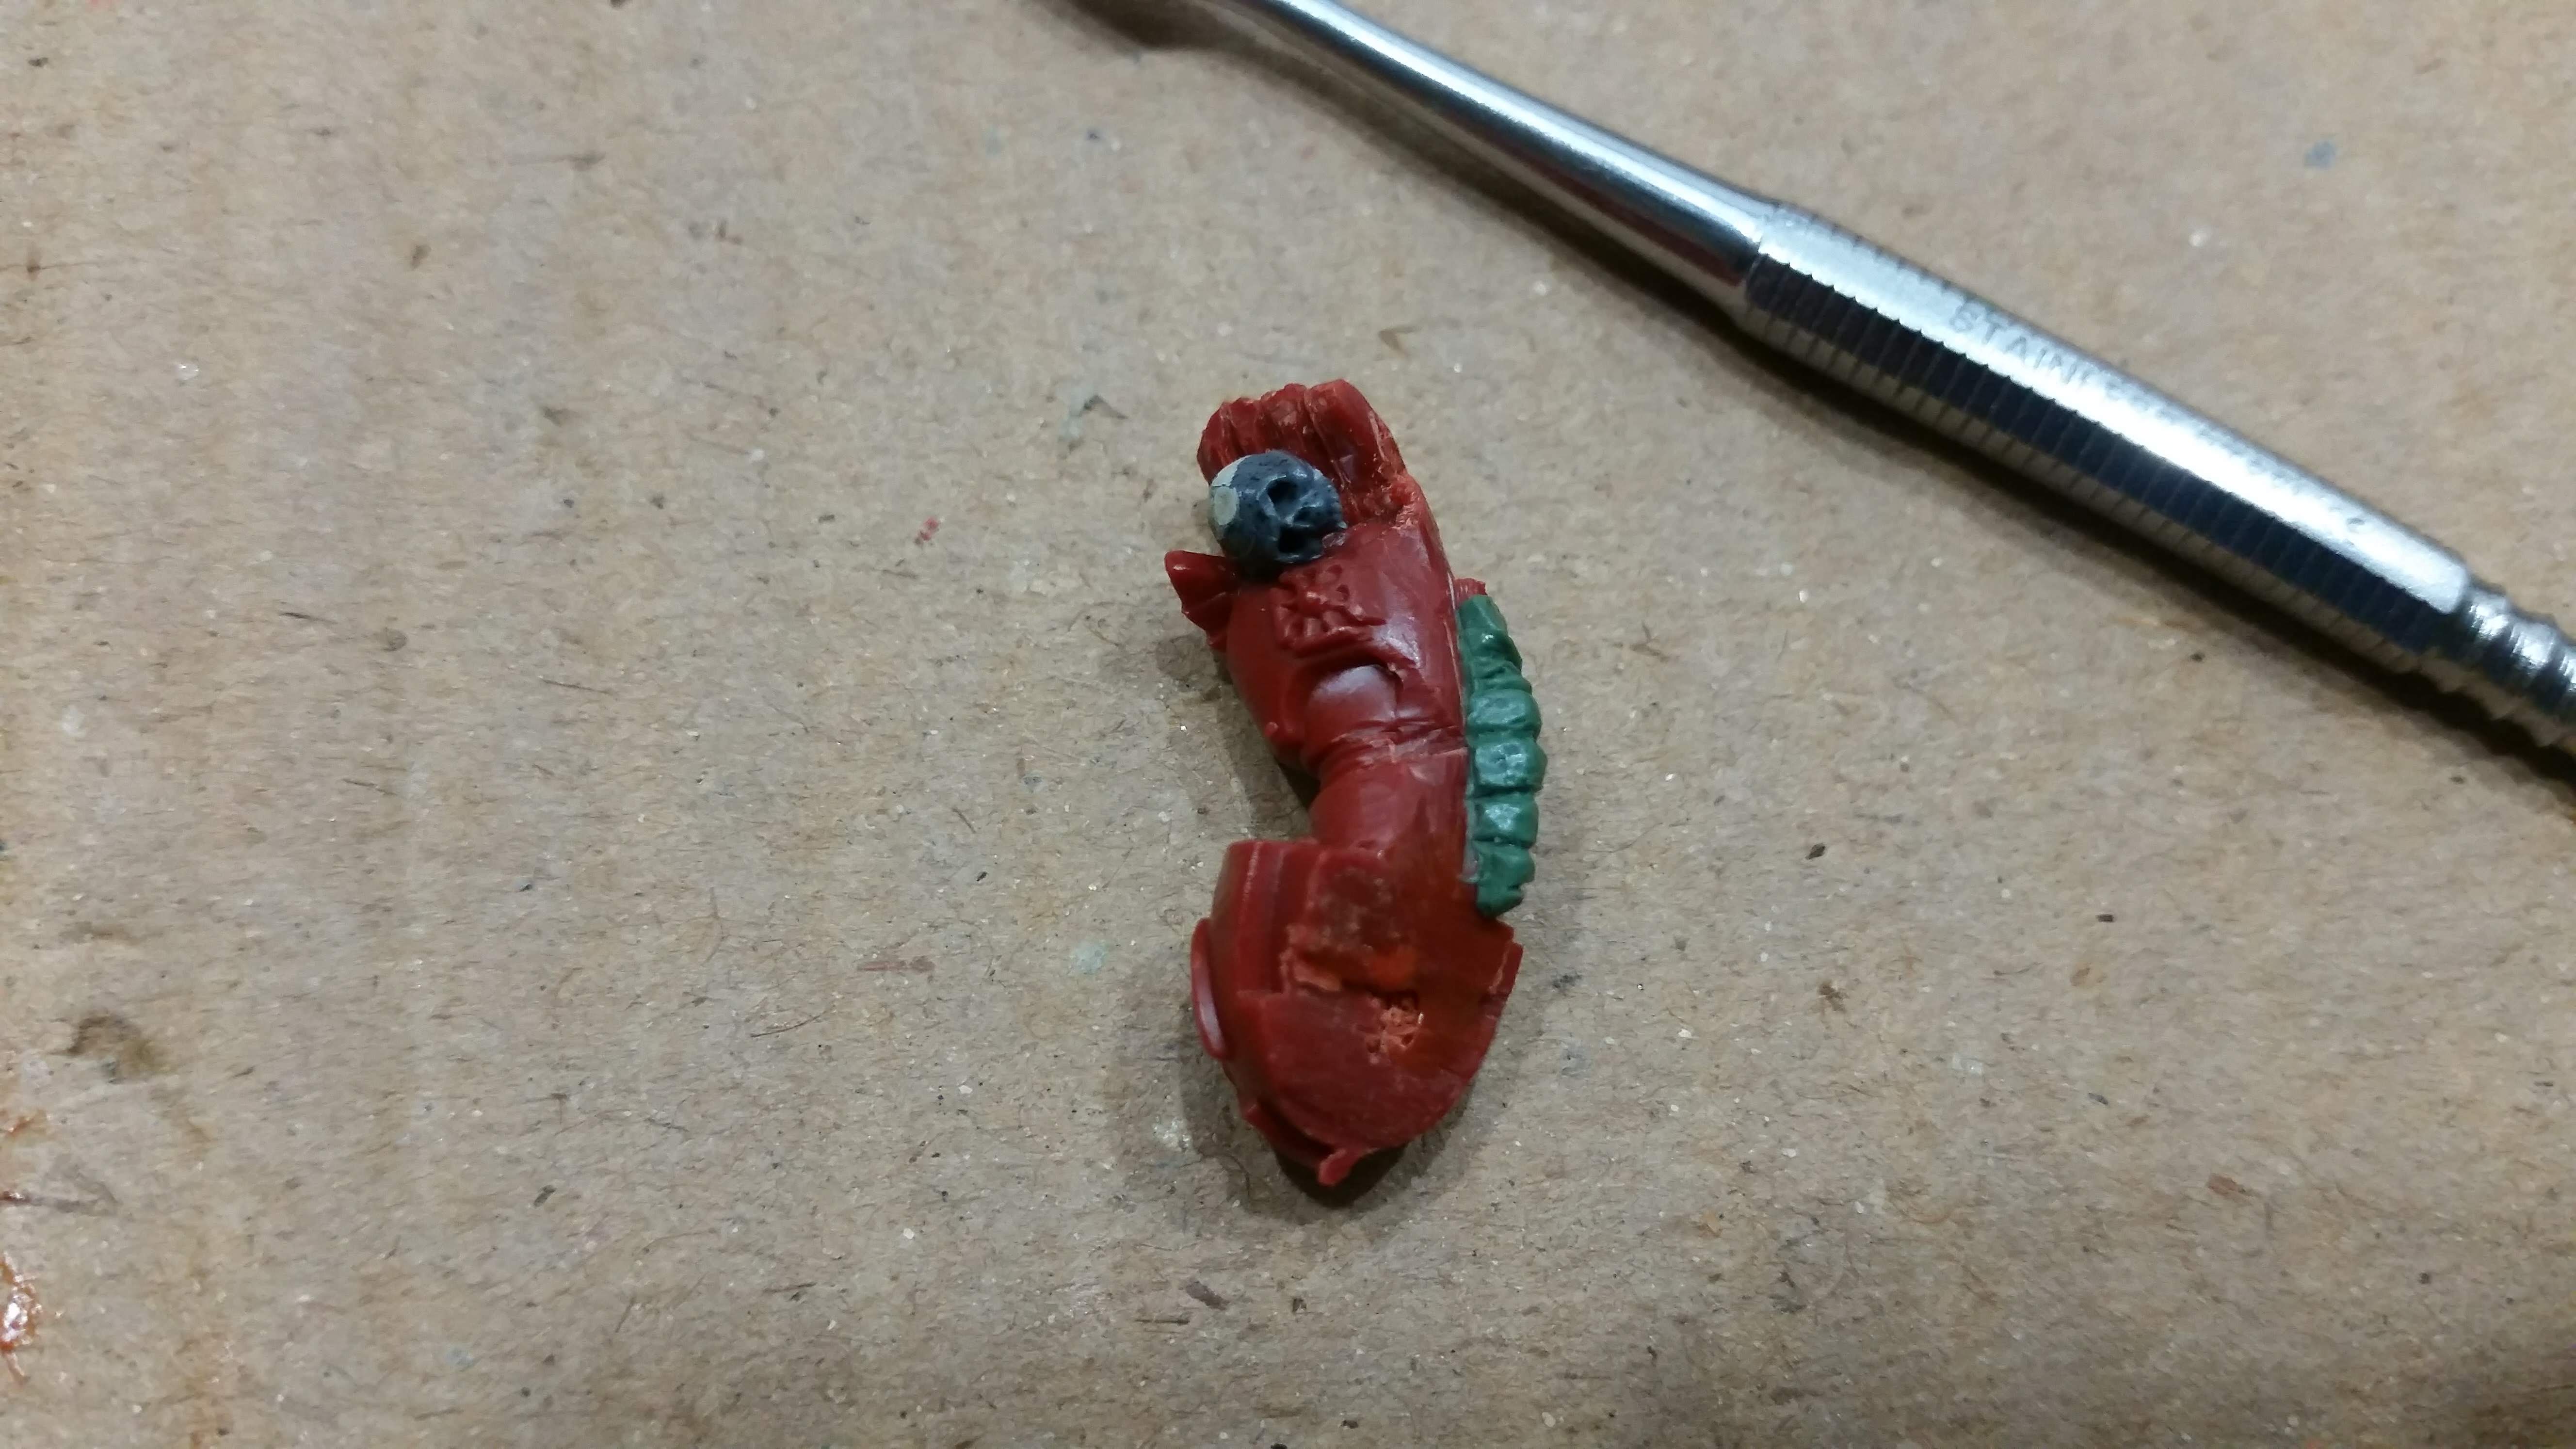 ...and sculpted some ridges into it. This will be on the inside of the arm and won't be very visible.
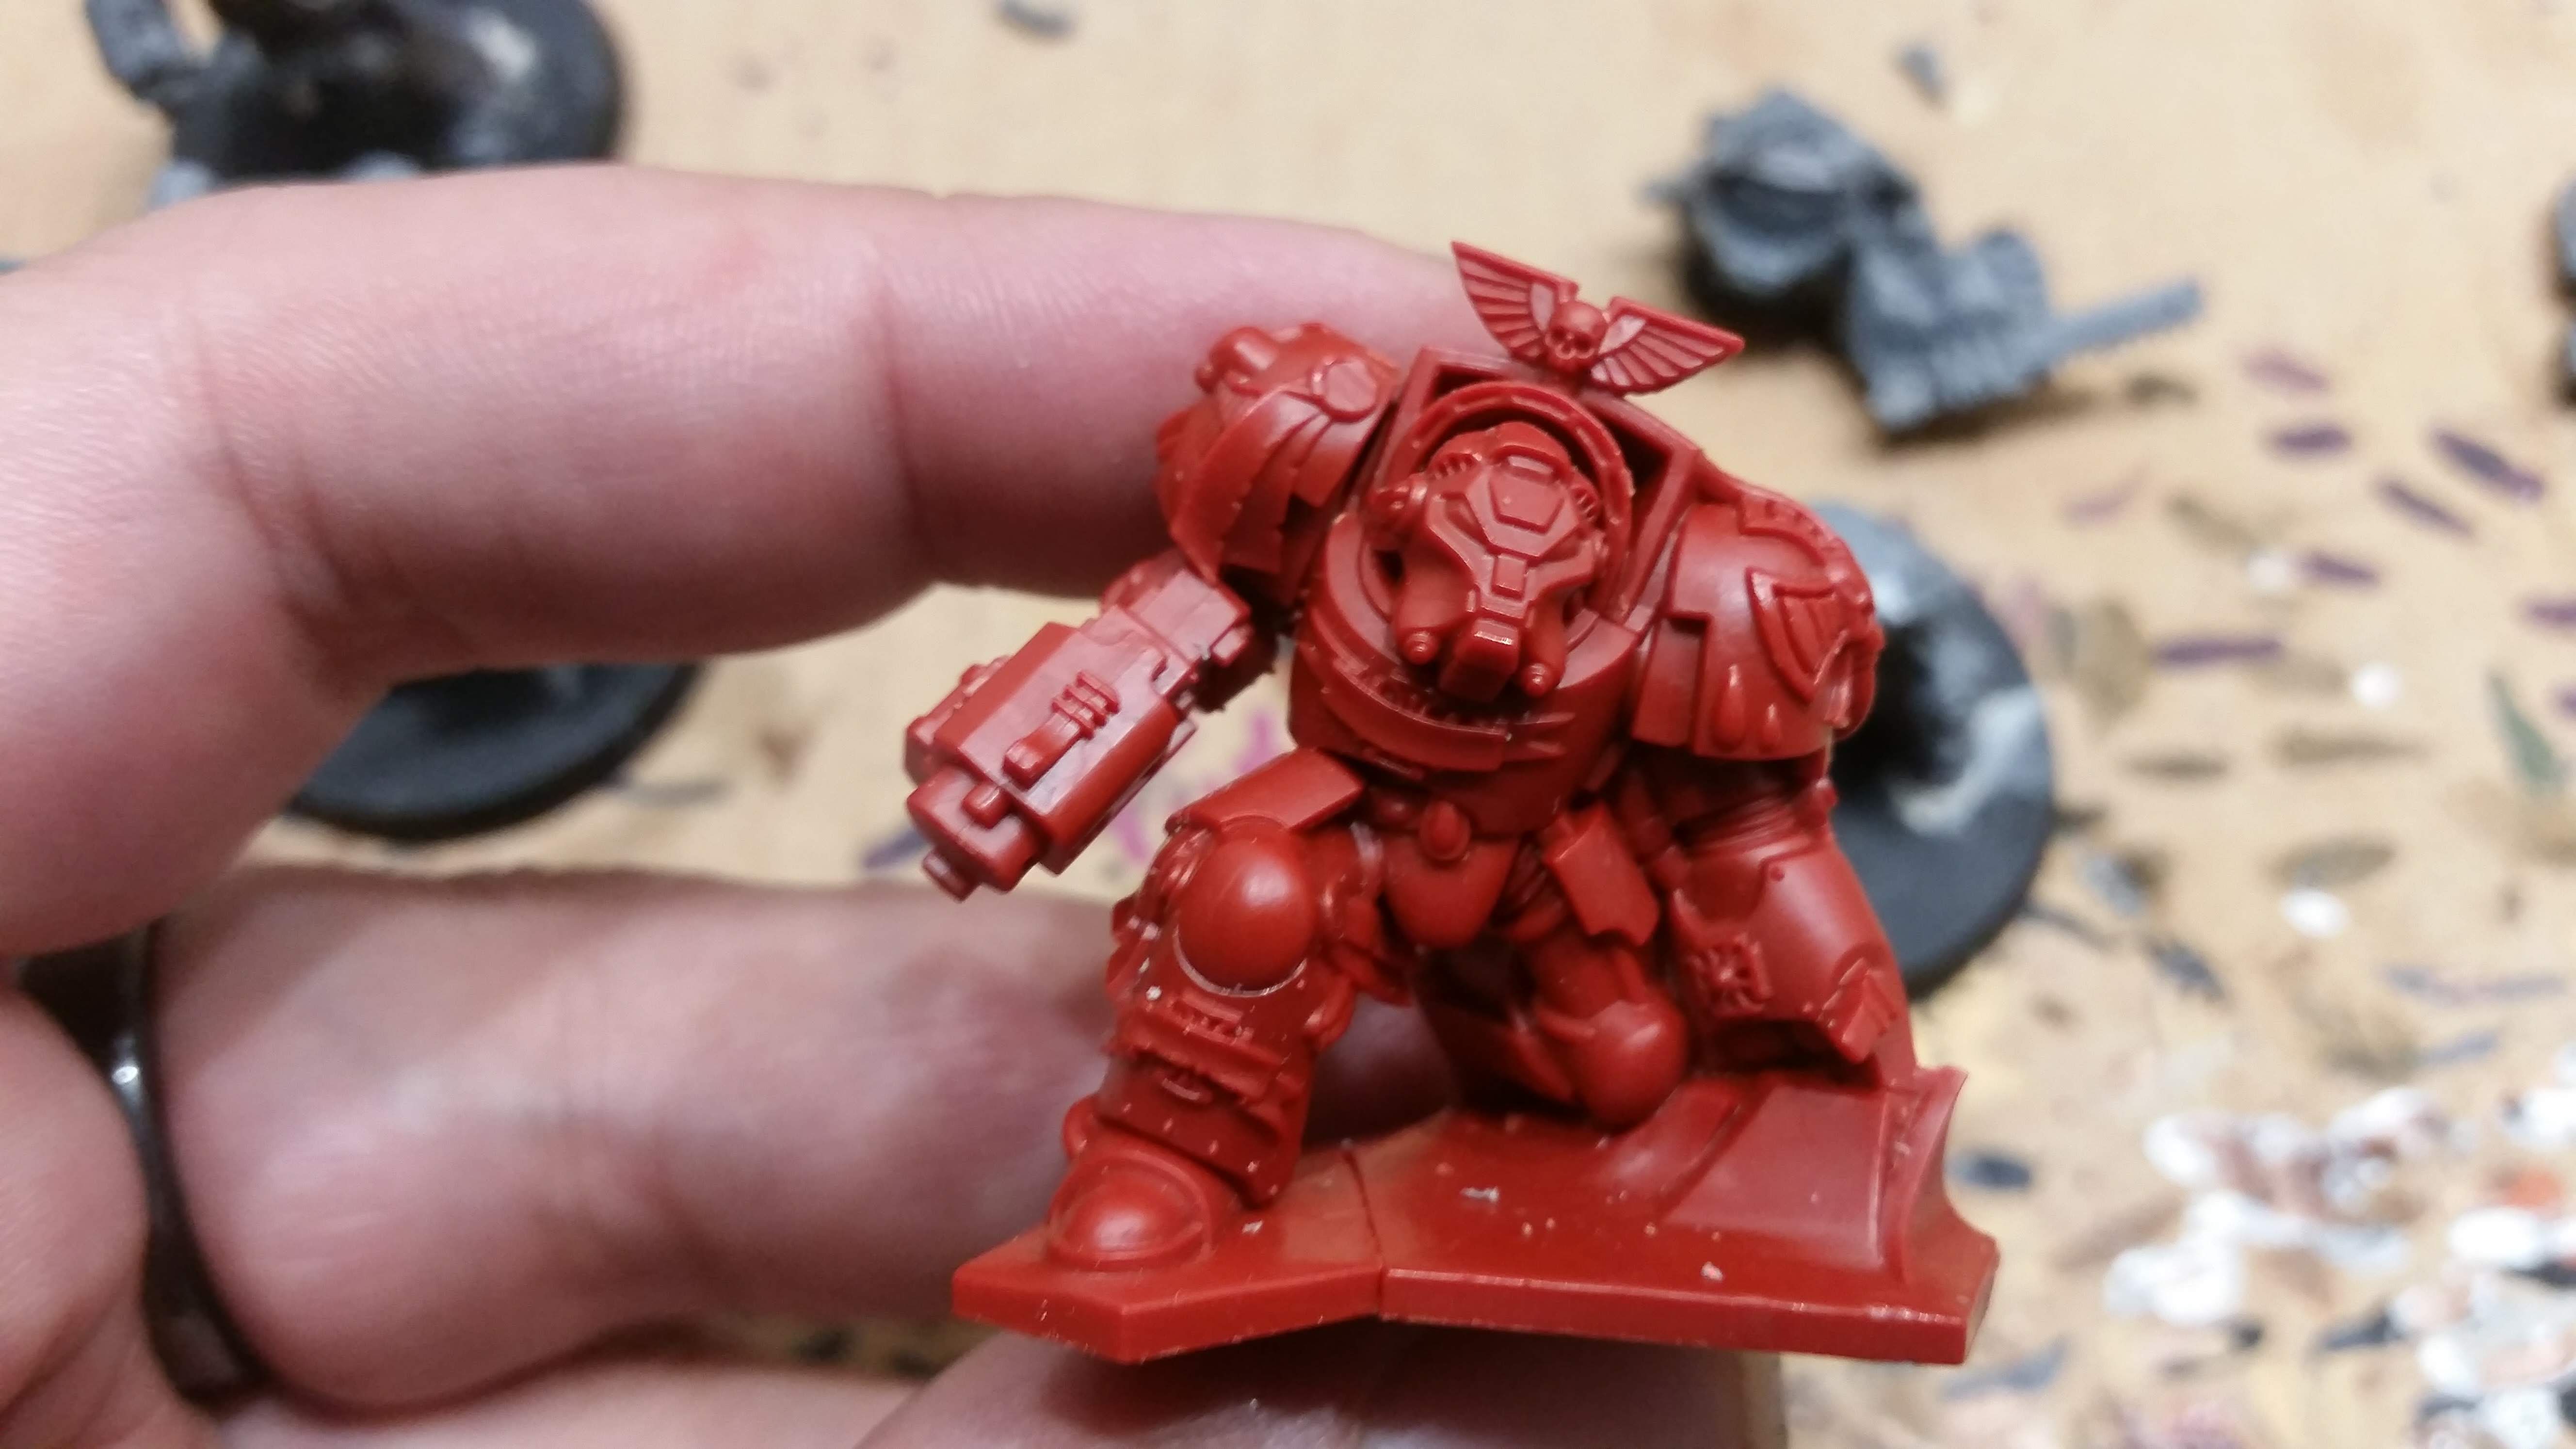
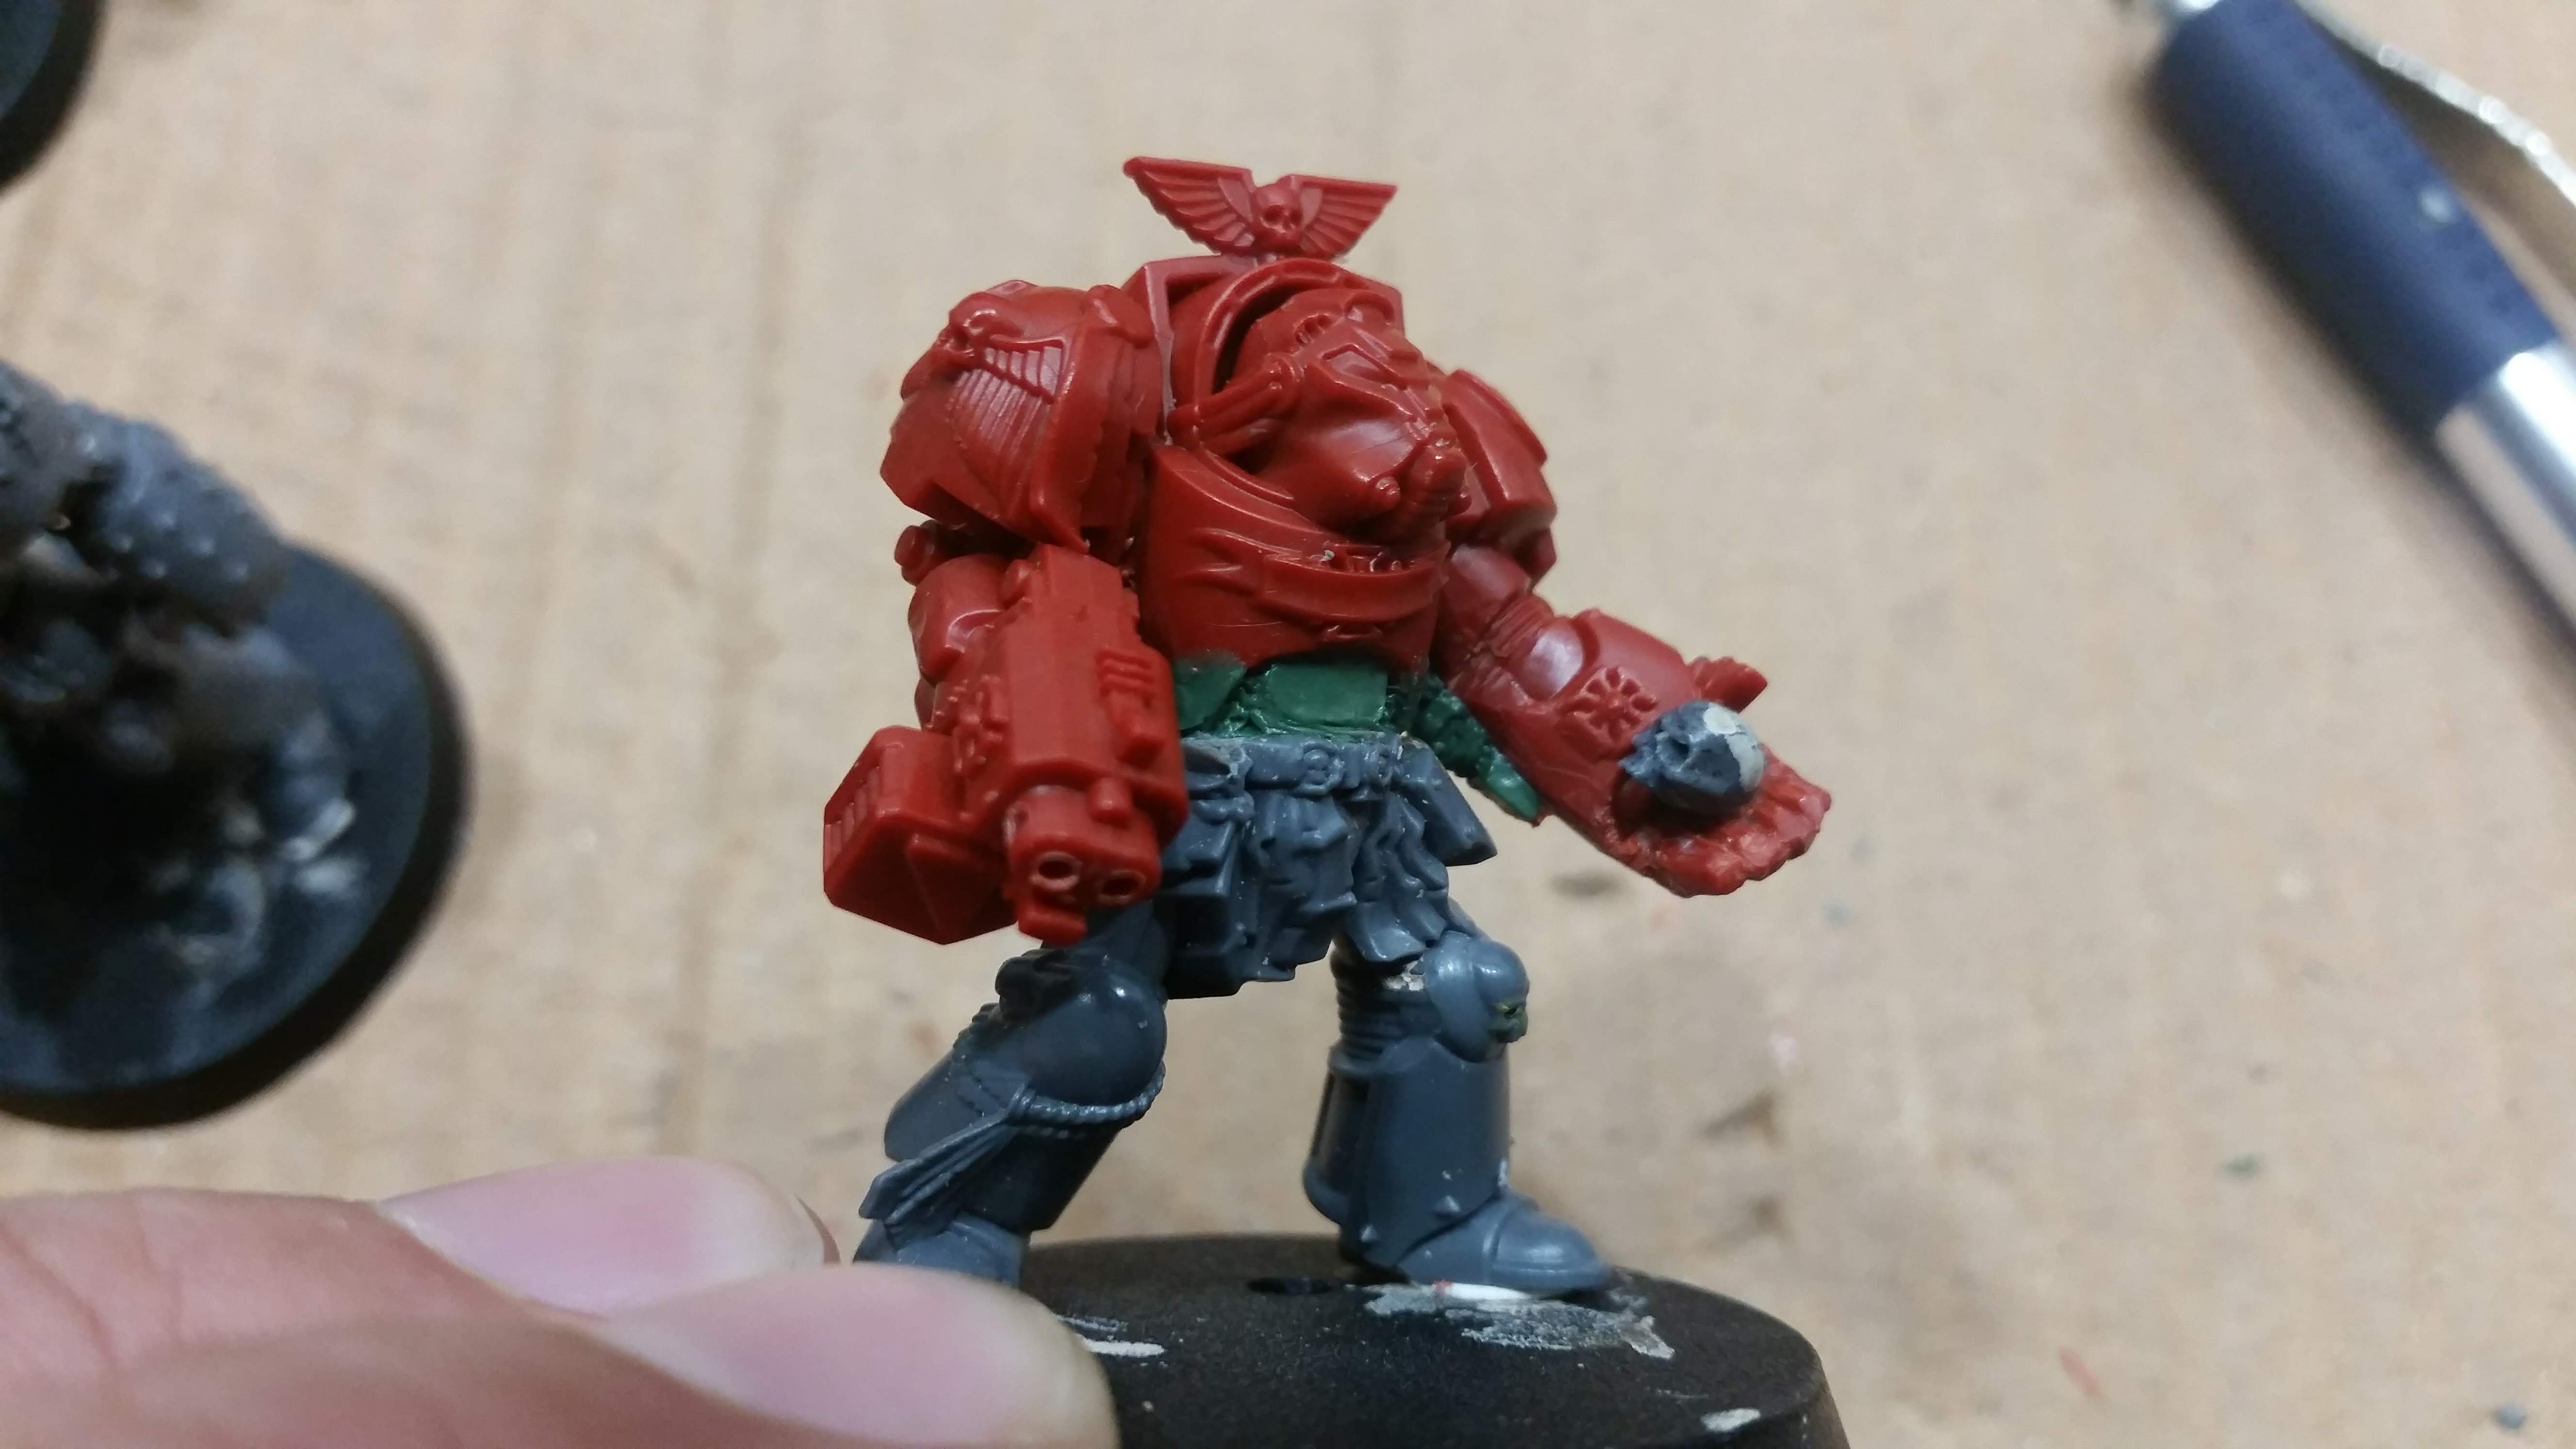
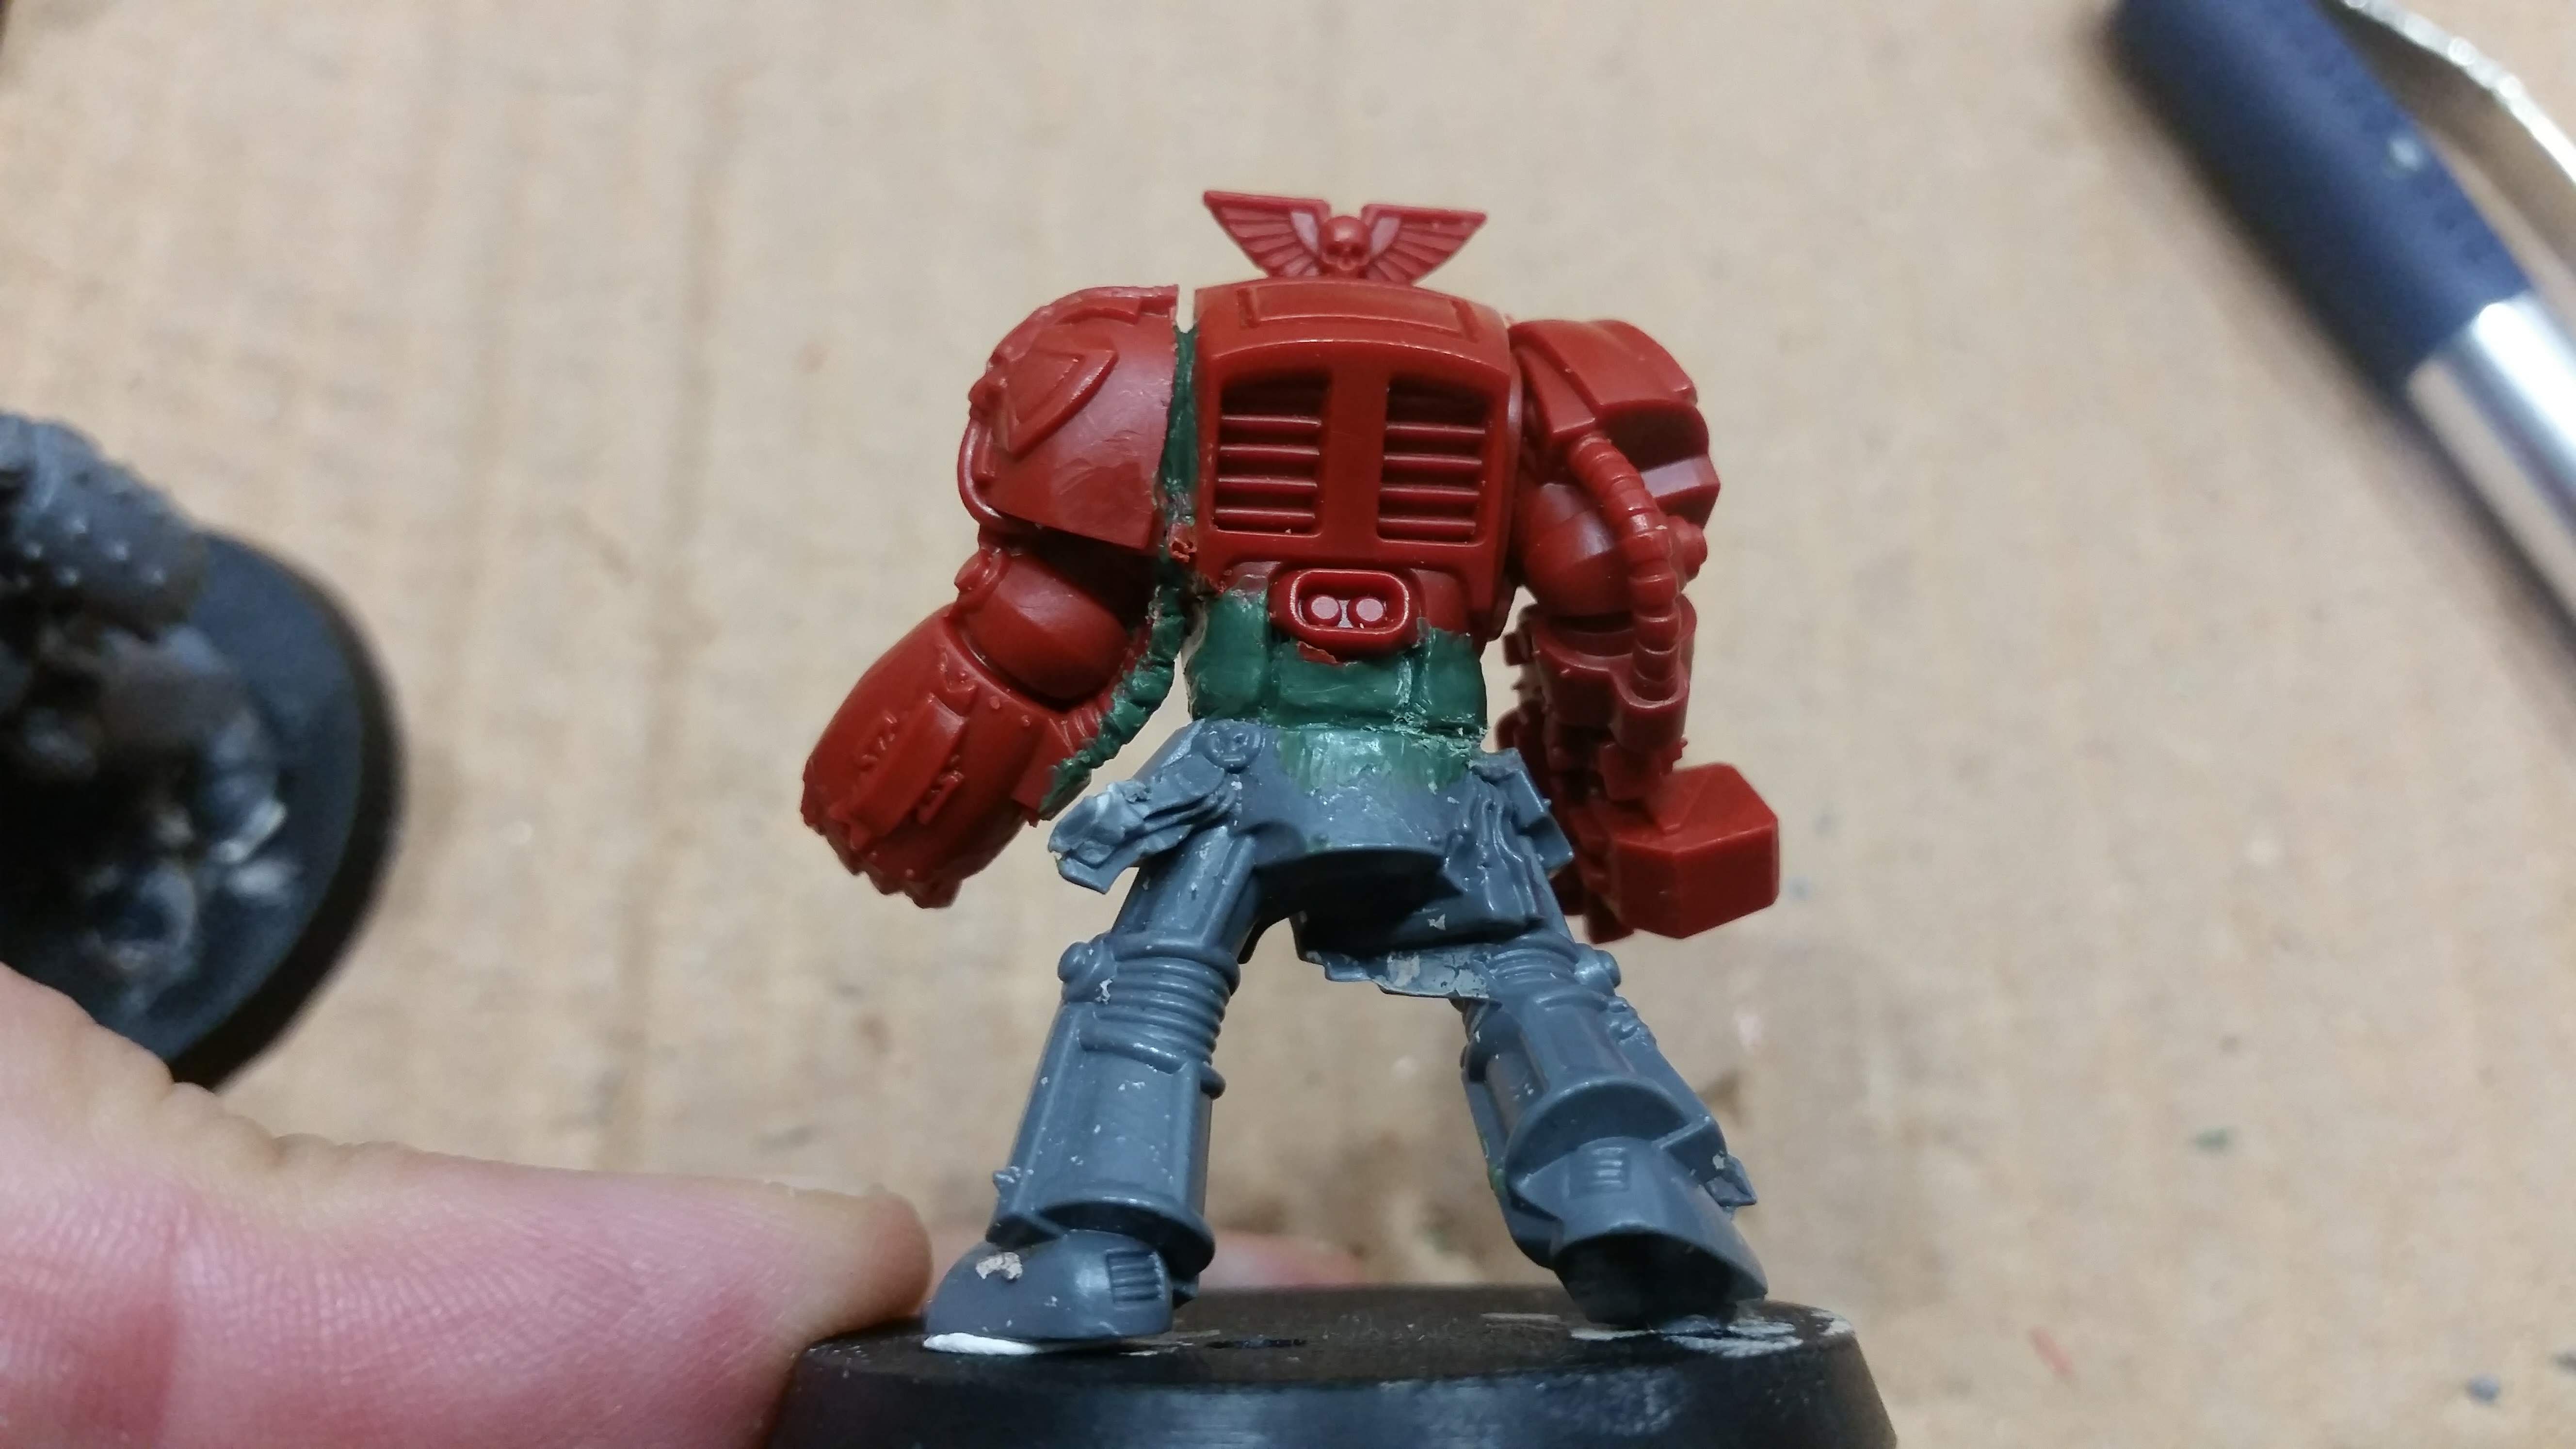
The reason I did all of this is, that two of the Terminators from the Dark Vengeance kit are duplicate sculpts. I wanted to use the duplicate Terminators legs to allow the picnic Terminator from the Space Hulk set to stand up and take part in the fighting.
This is how he ended up looking:

Some more complicated cutting
Sawing the models apart at the waist was not as straight forward for some models as it was for the test figure. Some of them have details that extend across the waist line, for which some extra care needed to be taken.
 This model has a decorative cord and presumably ceremonial dagger, that extend across its waist line.
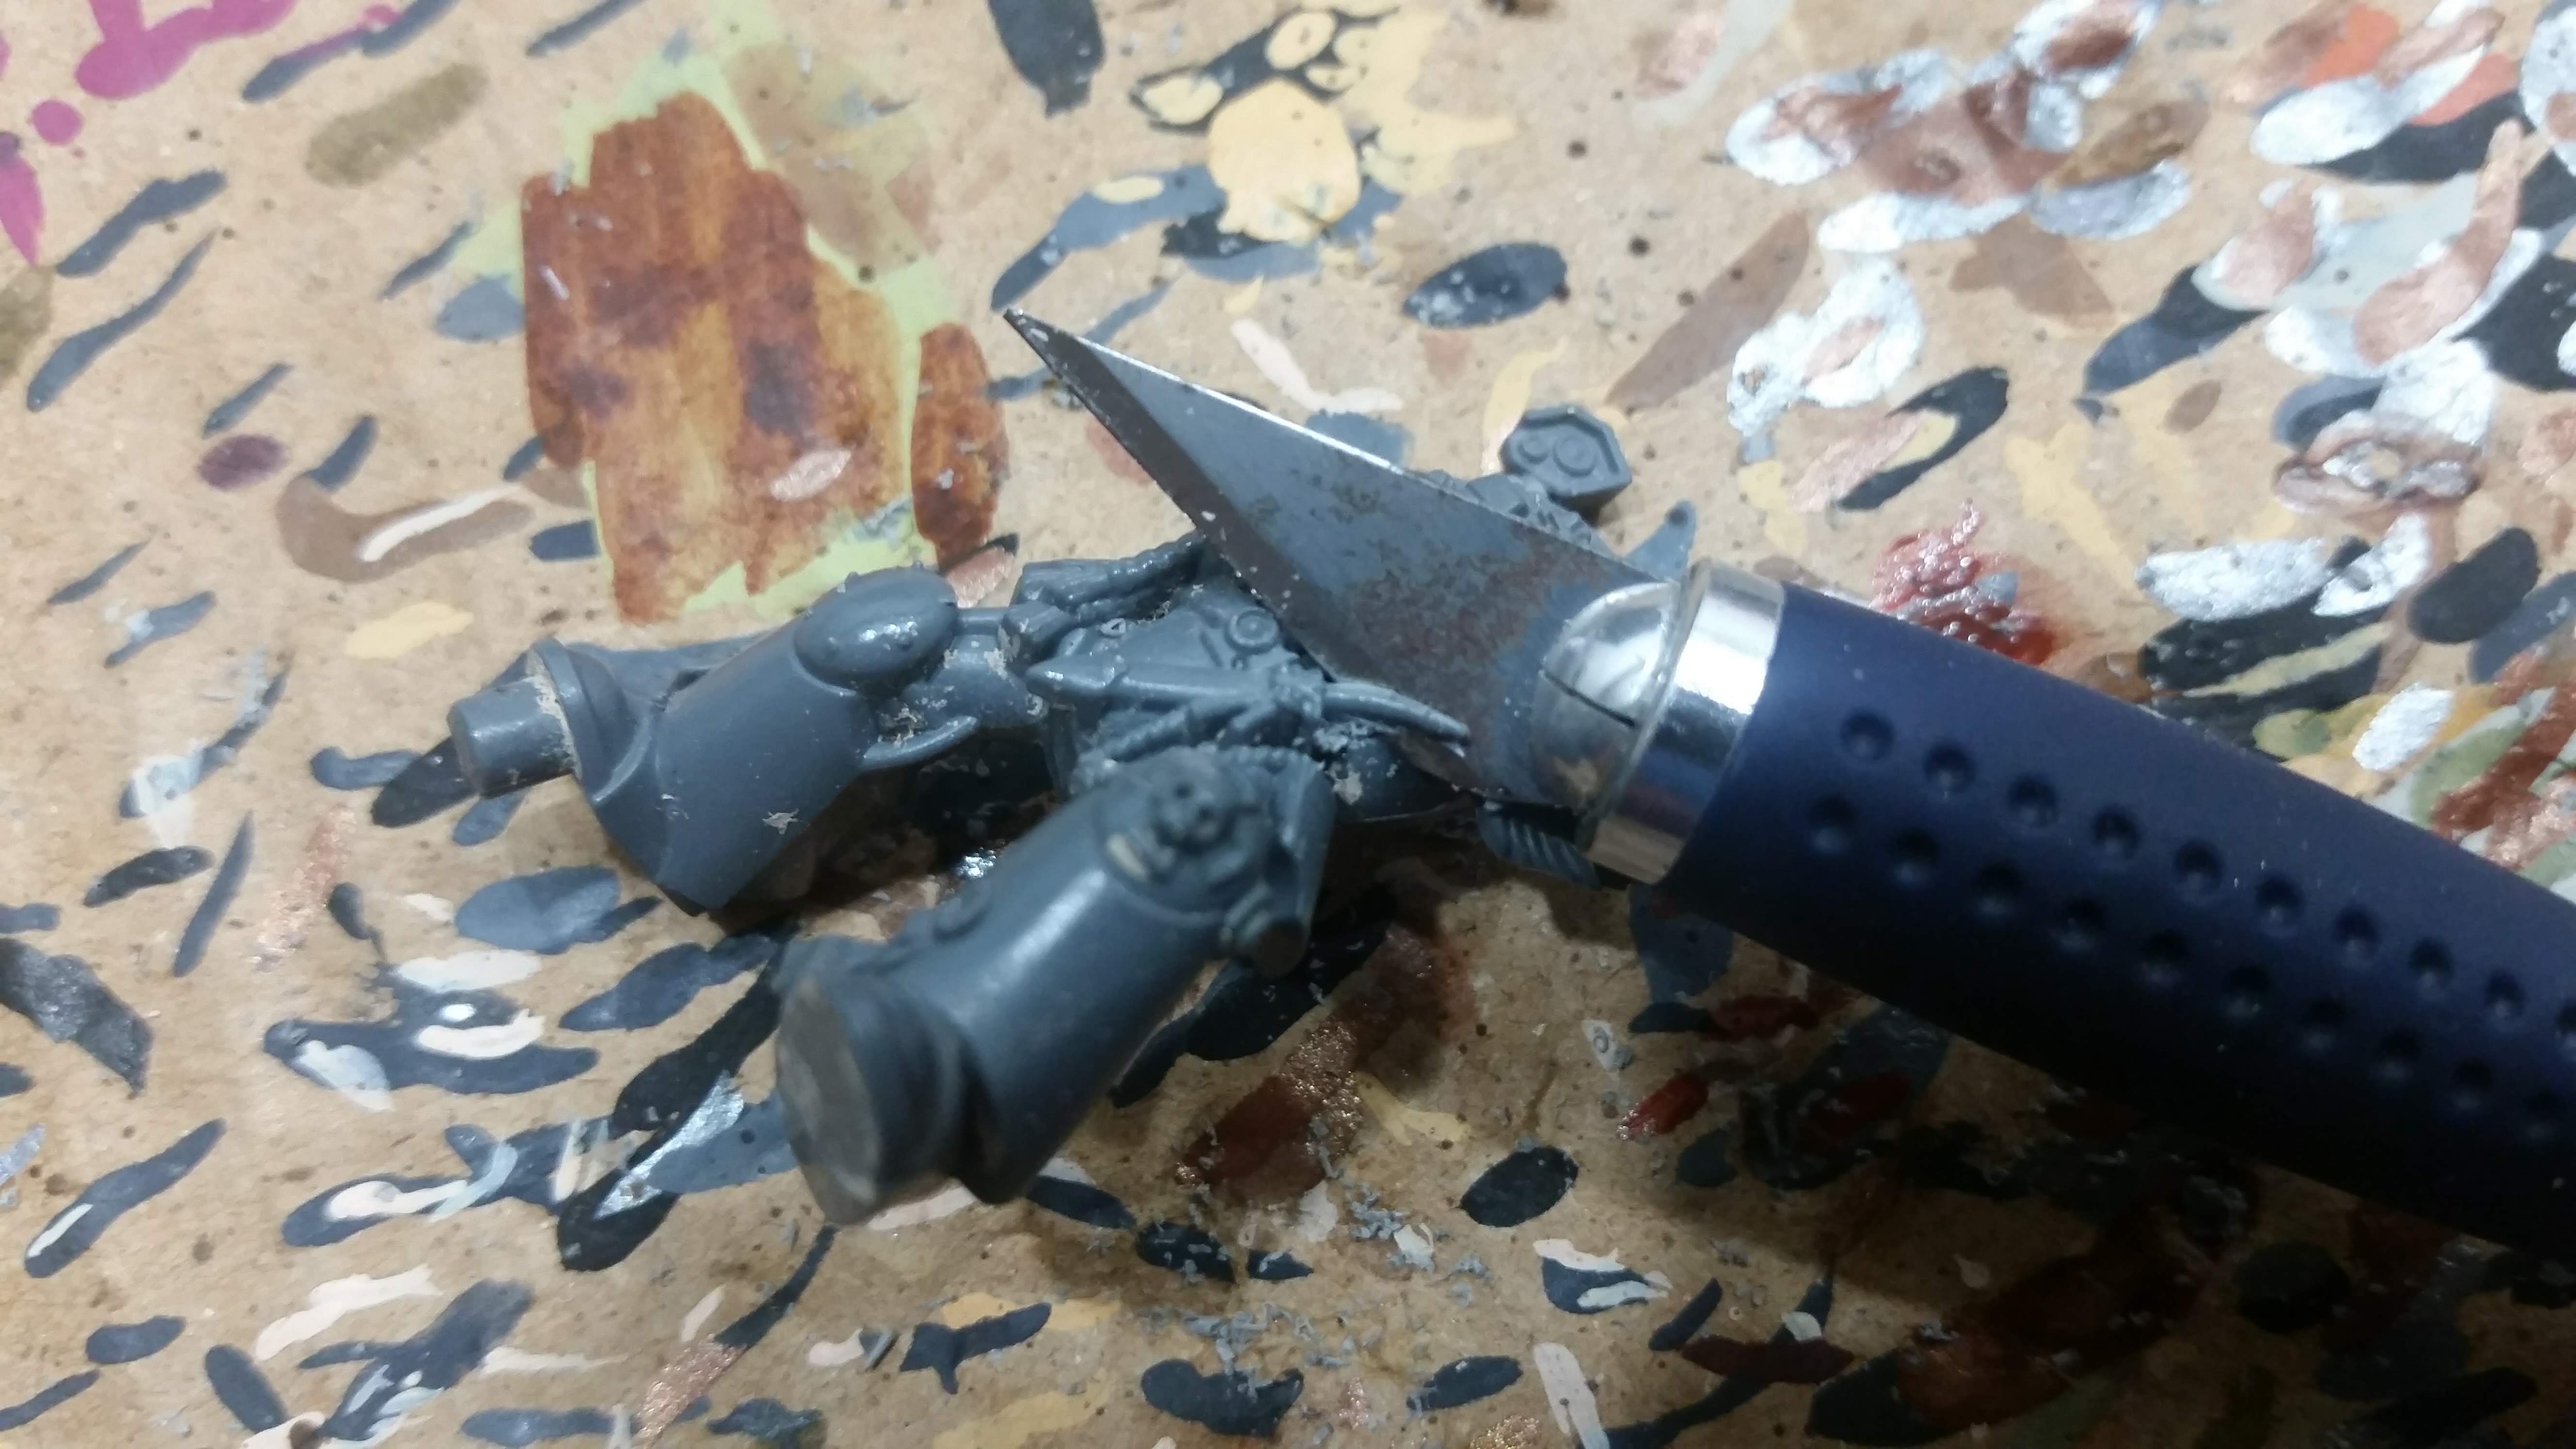 A careful cut is used to separate the daggers hilt from the model, while leaving it attached to the dagger.
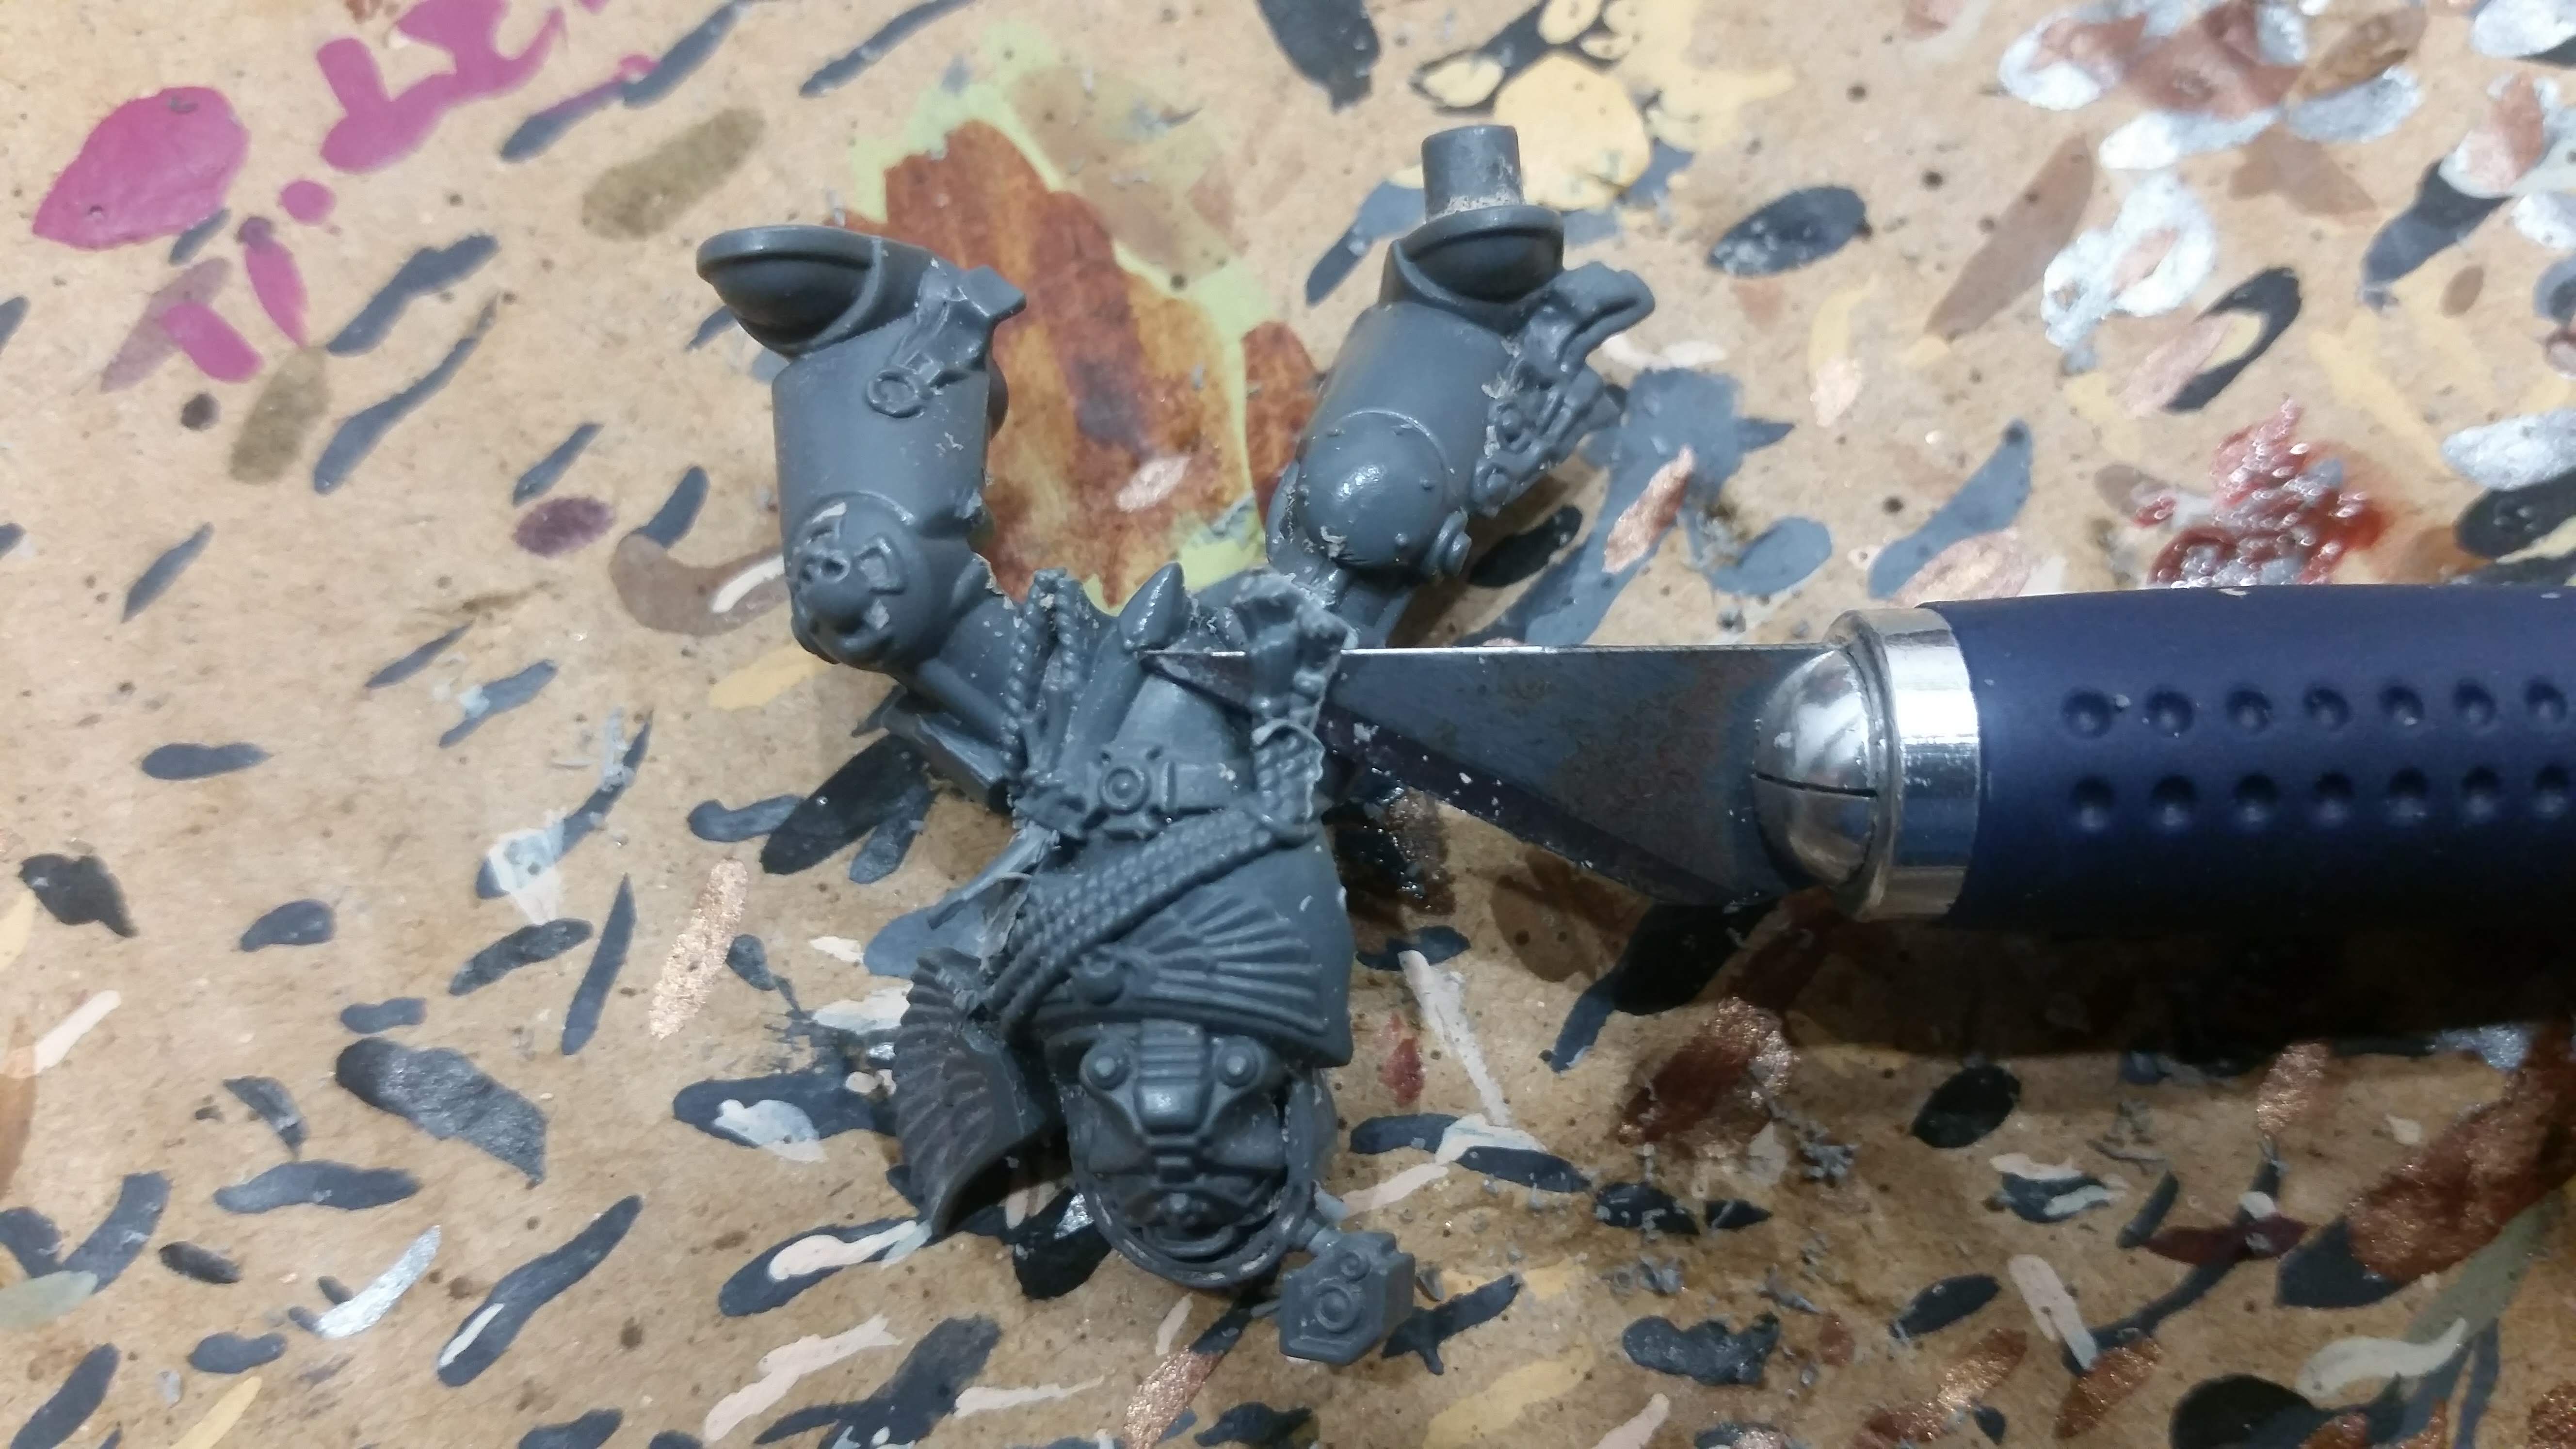 The same is being done for the cord.
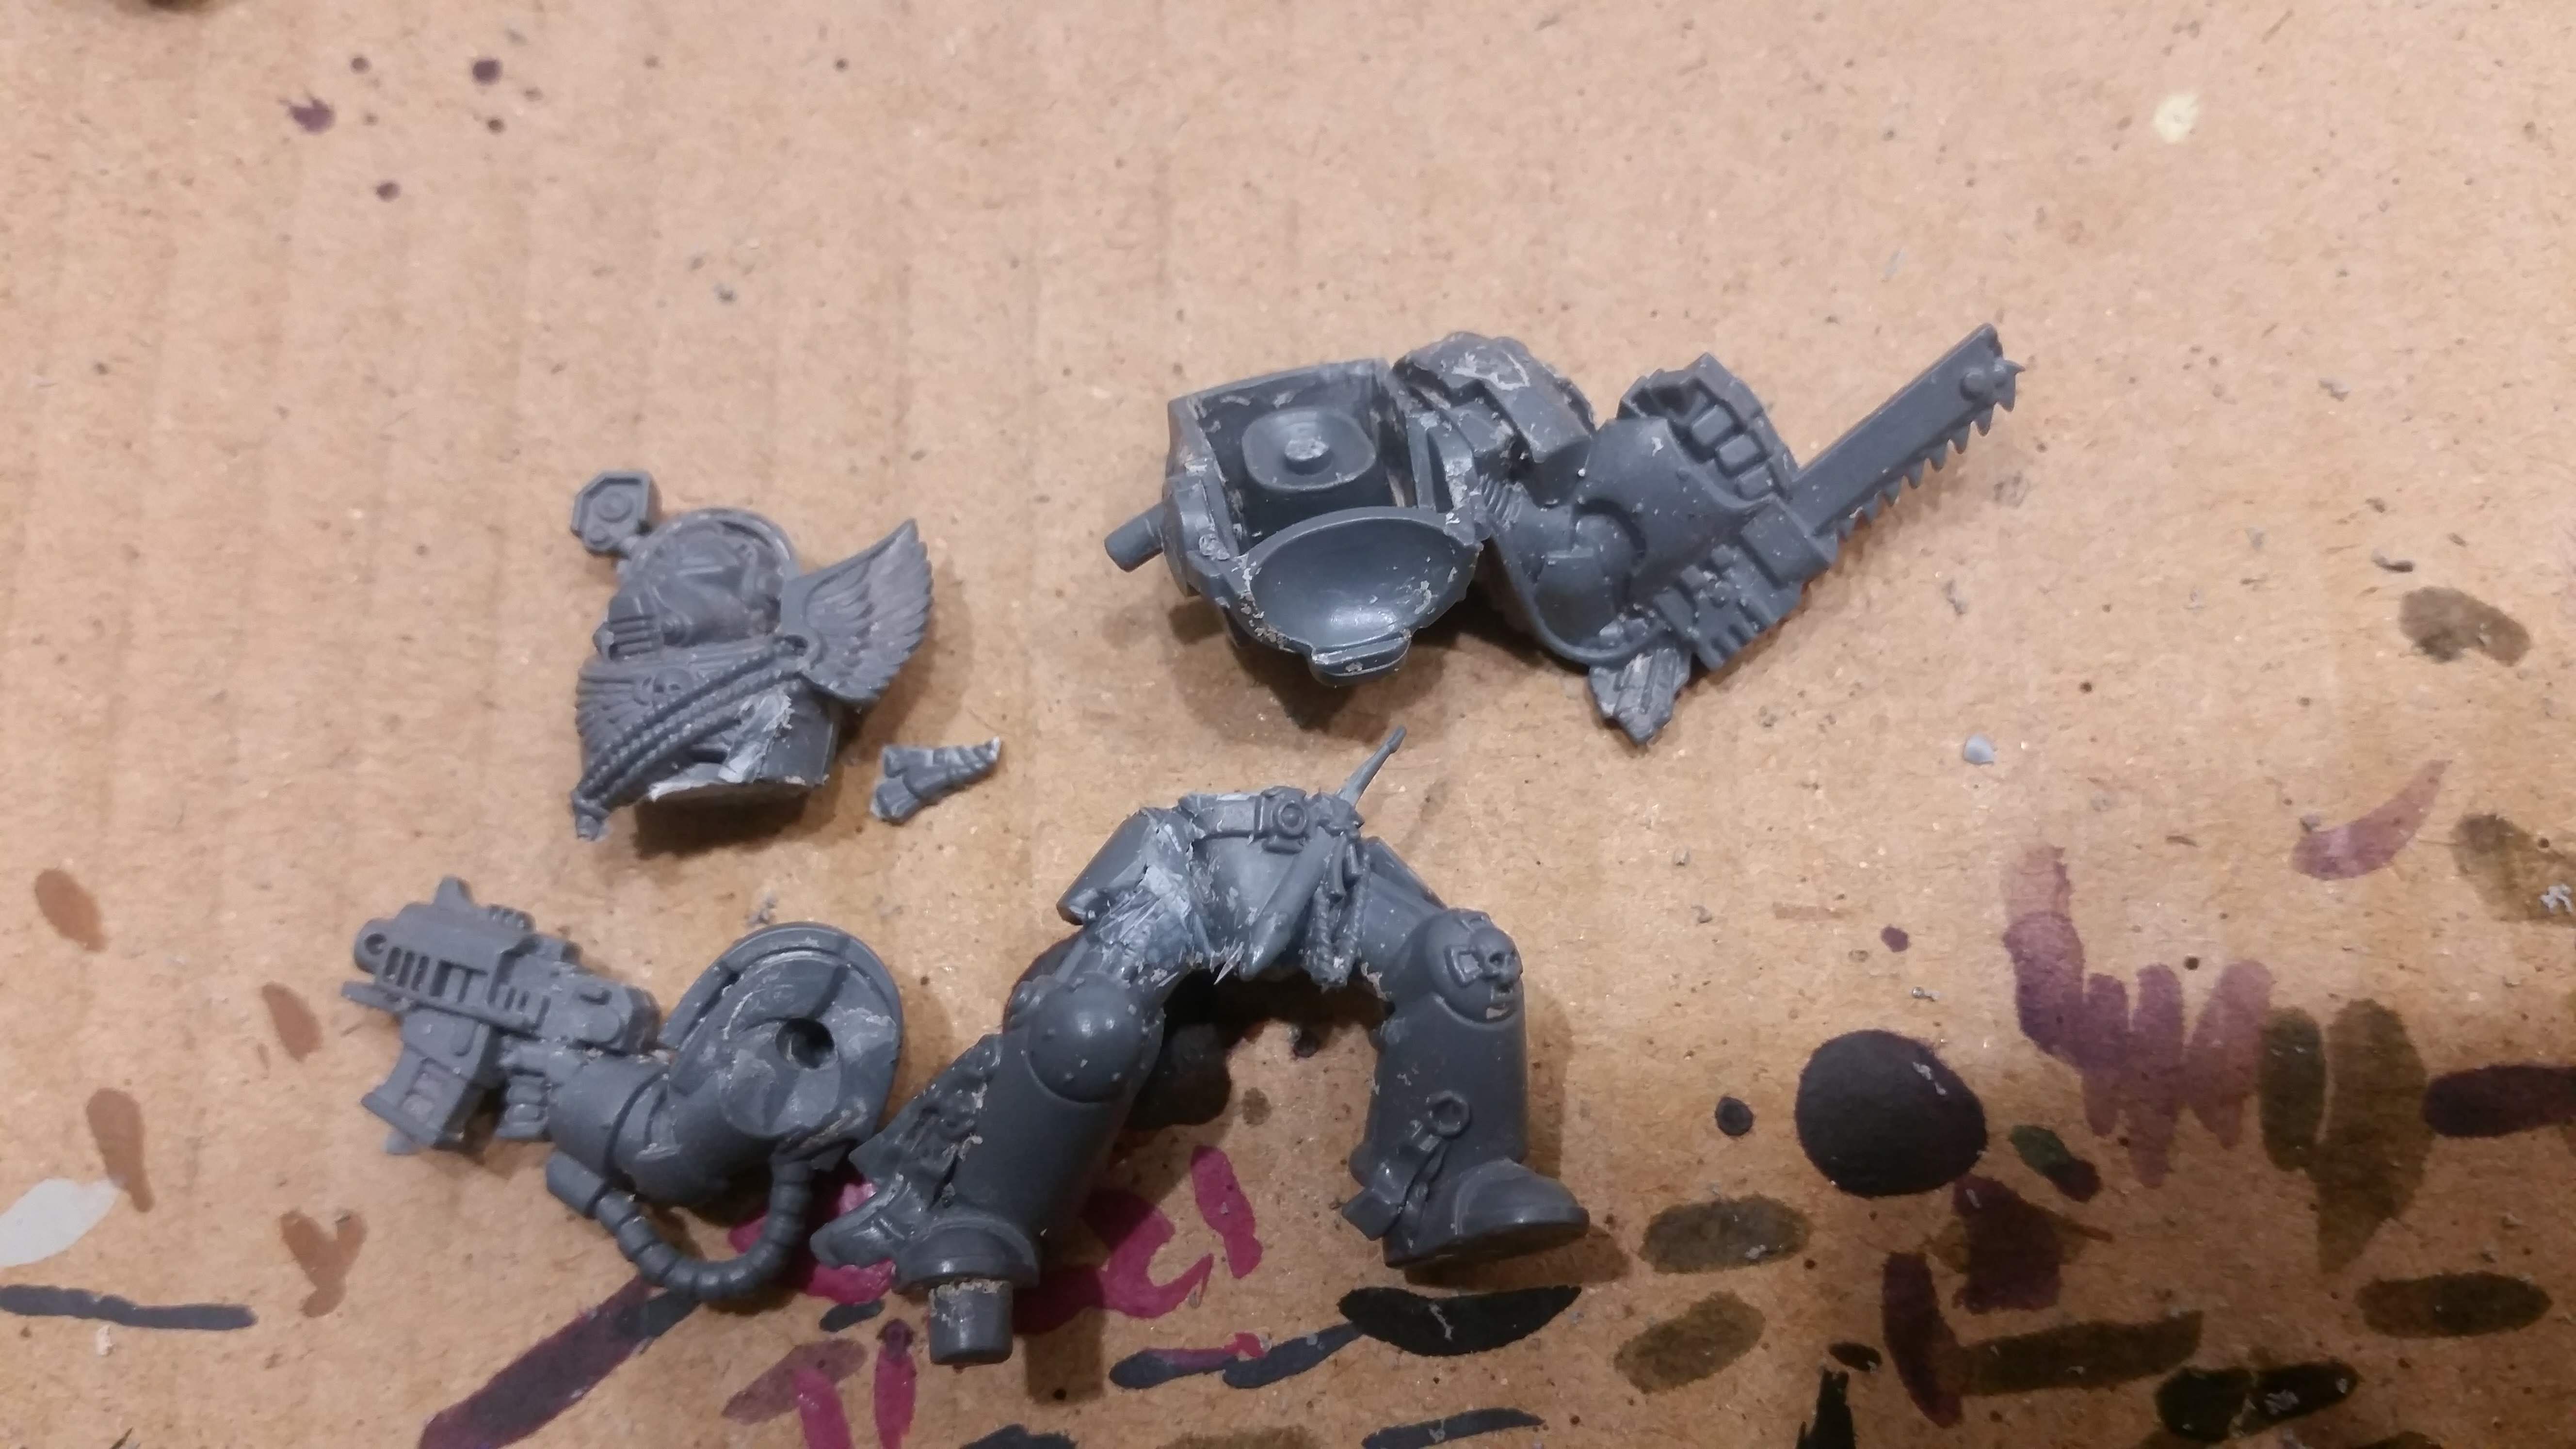 After these two cuts had been made, the model could be sawn apart from the back. Once the saw meets the first two knife cuts, the model comes apart leaving the details attached. Which did not quite work out for the cord though.
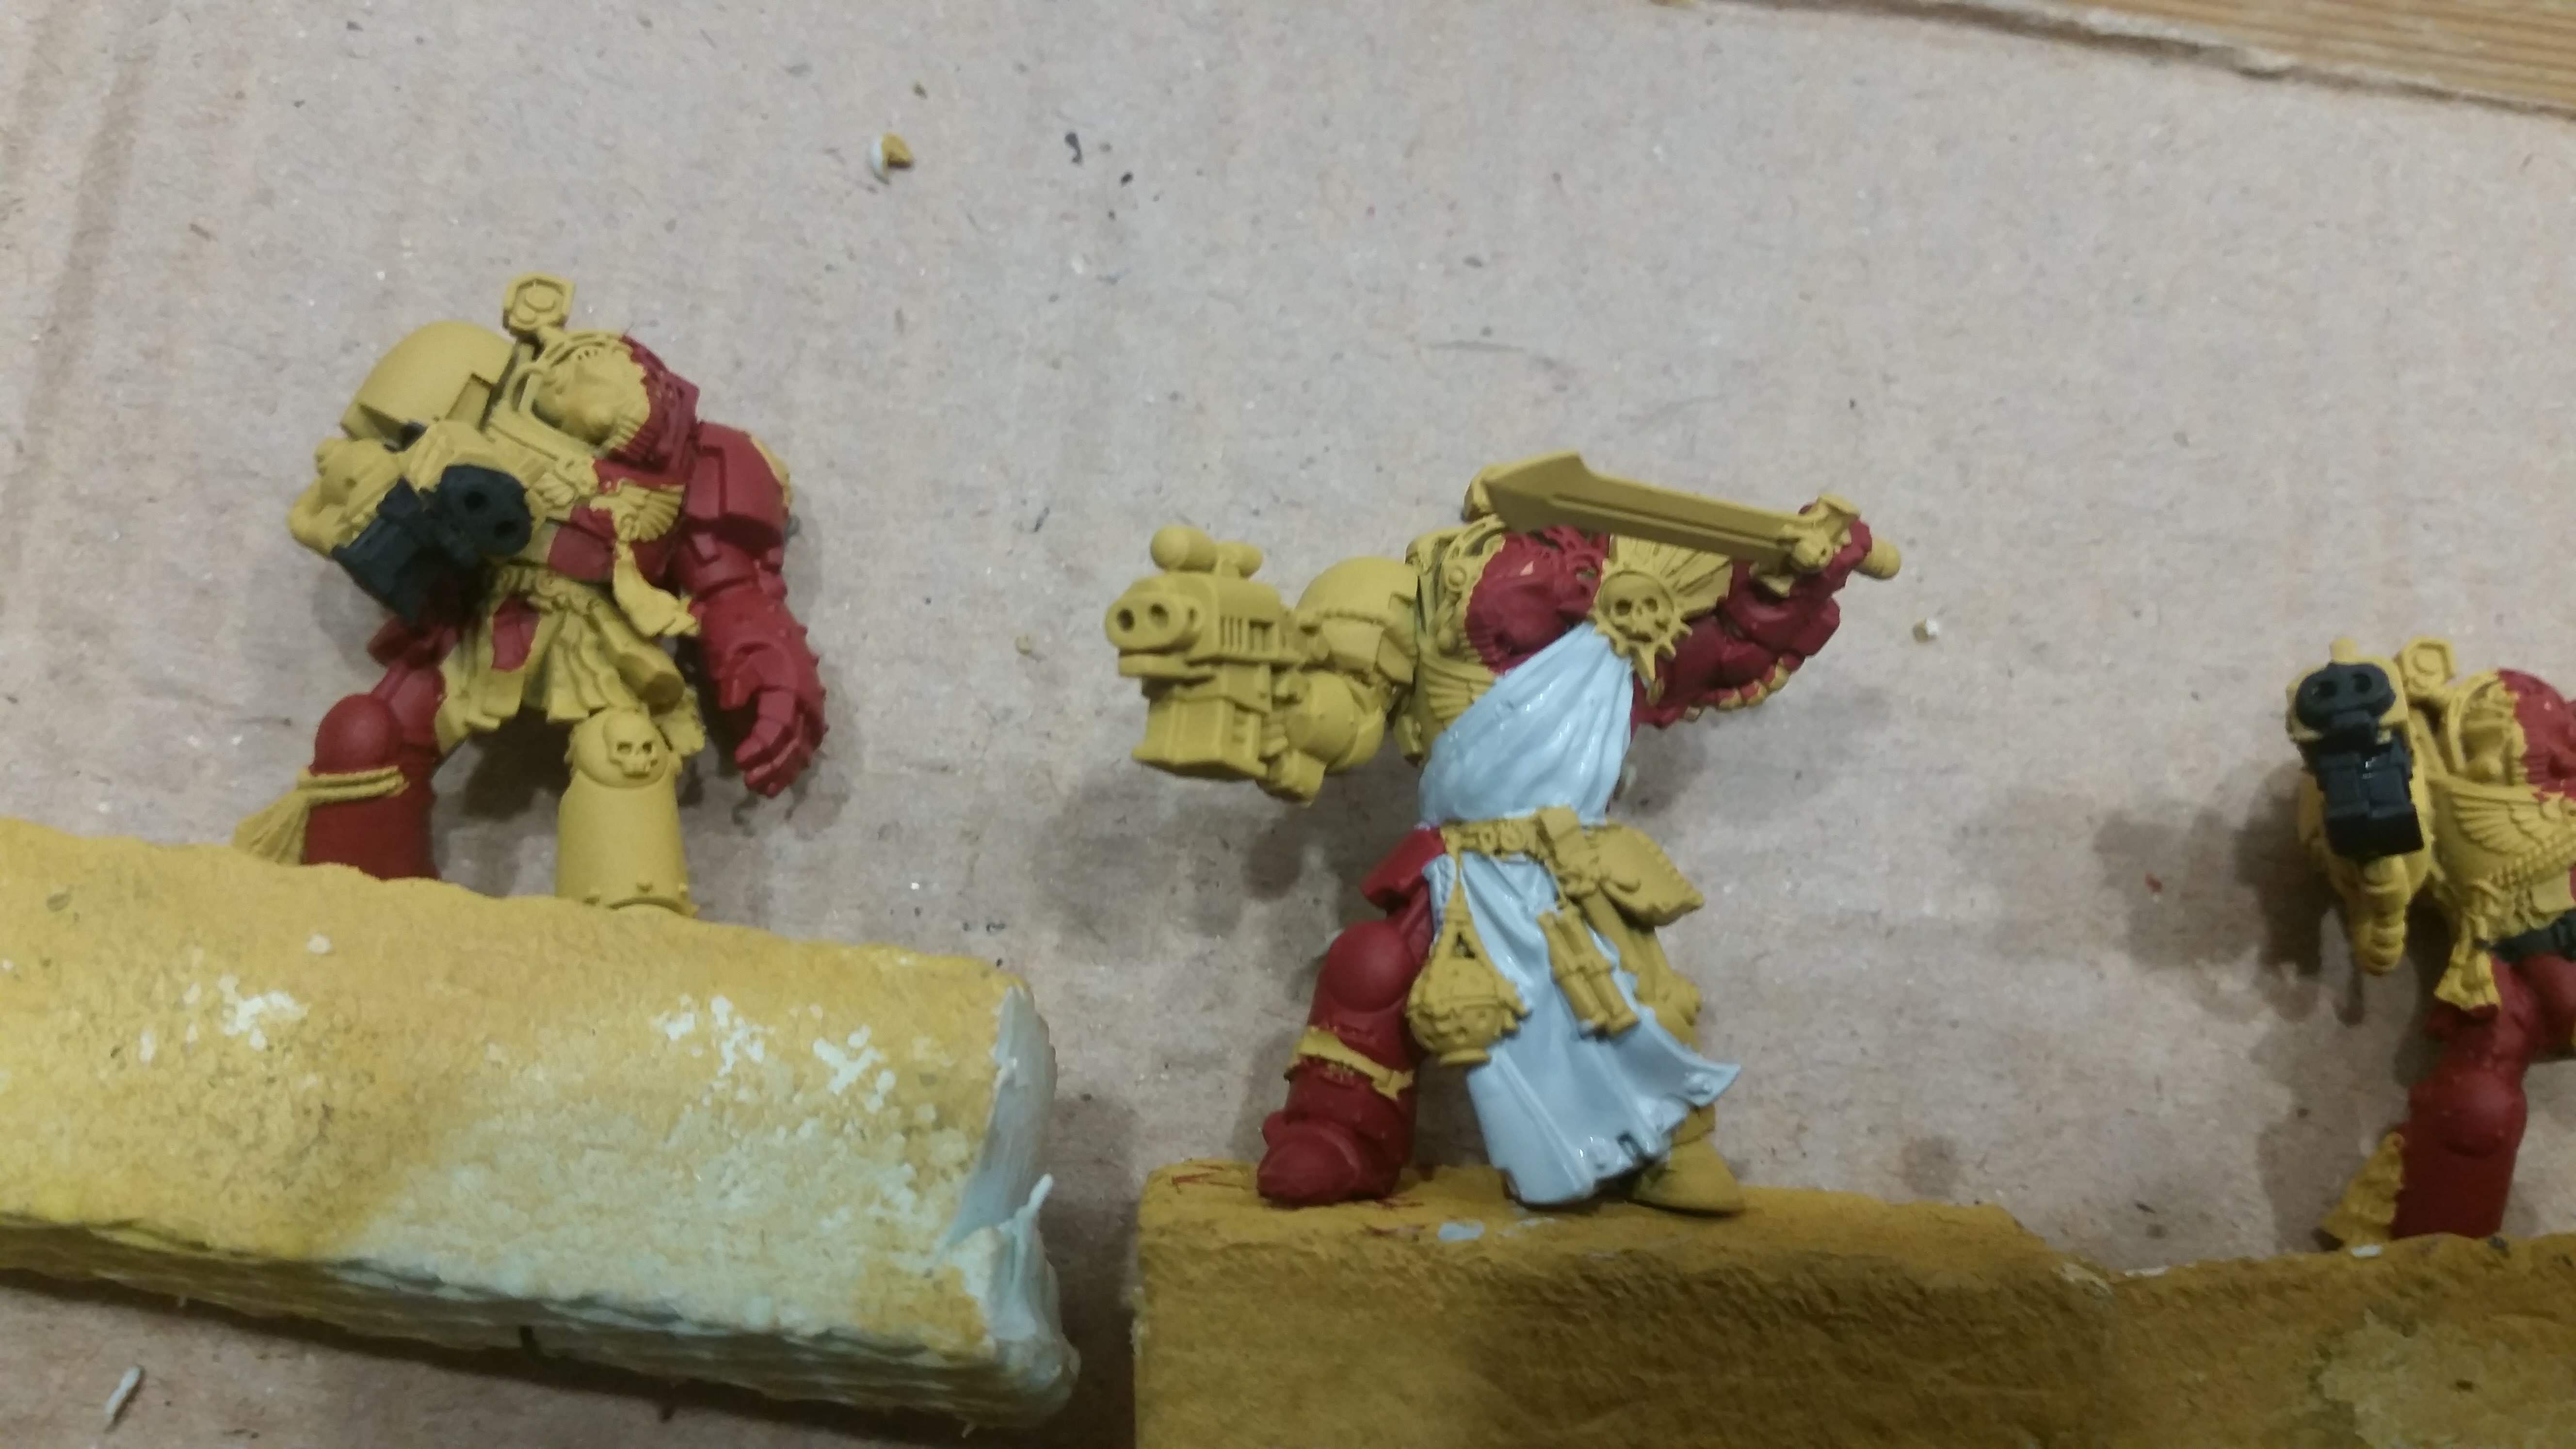
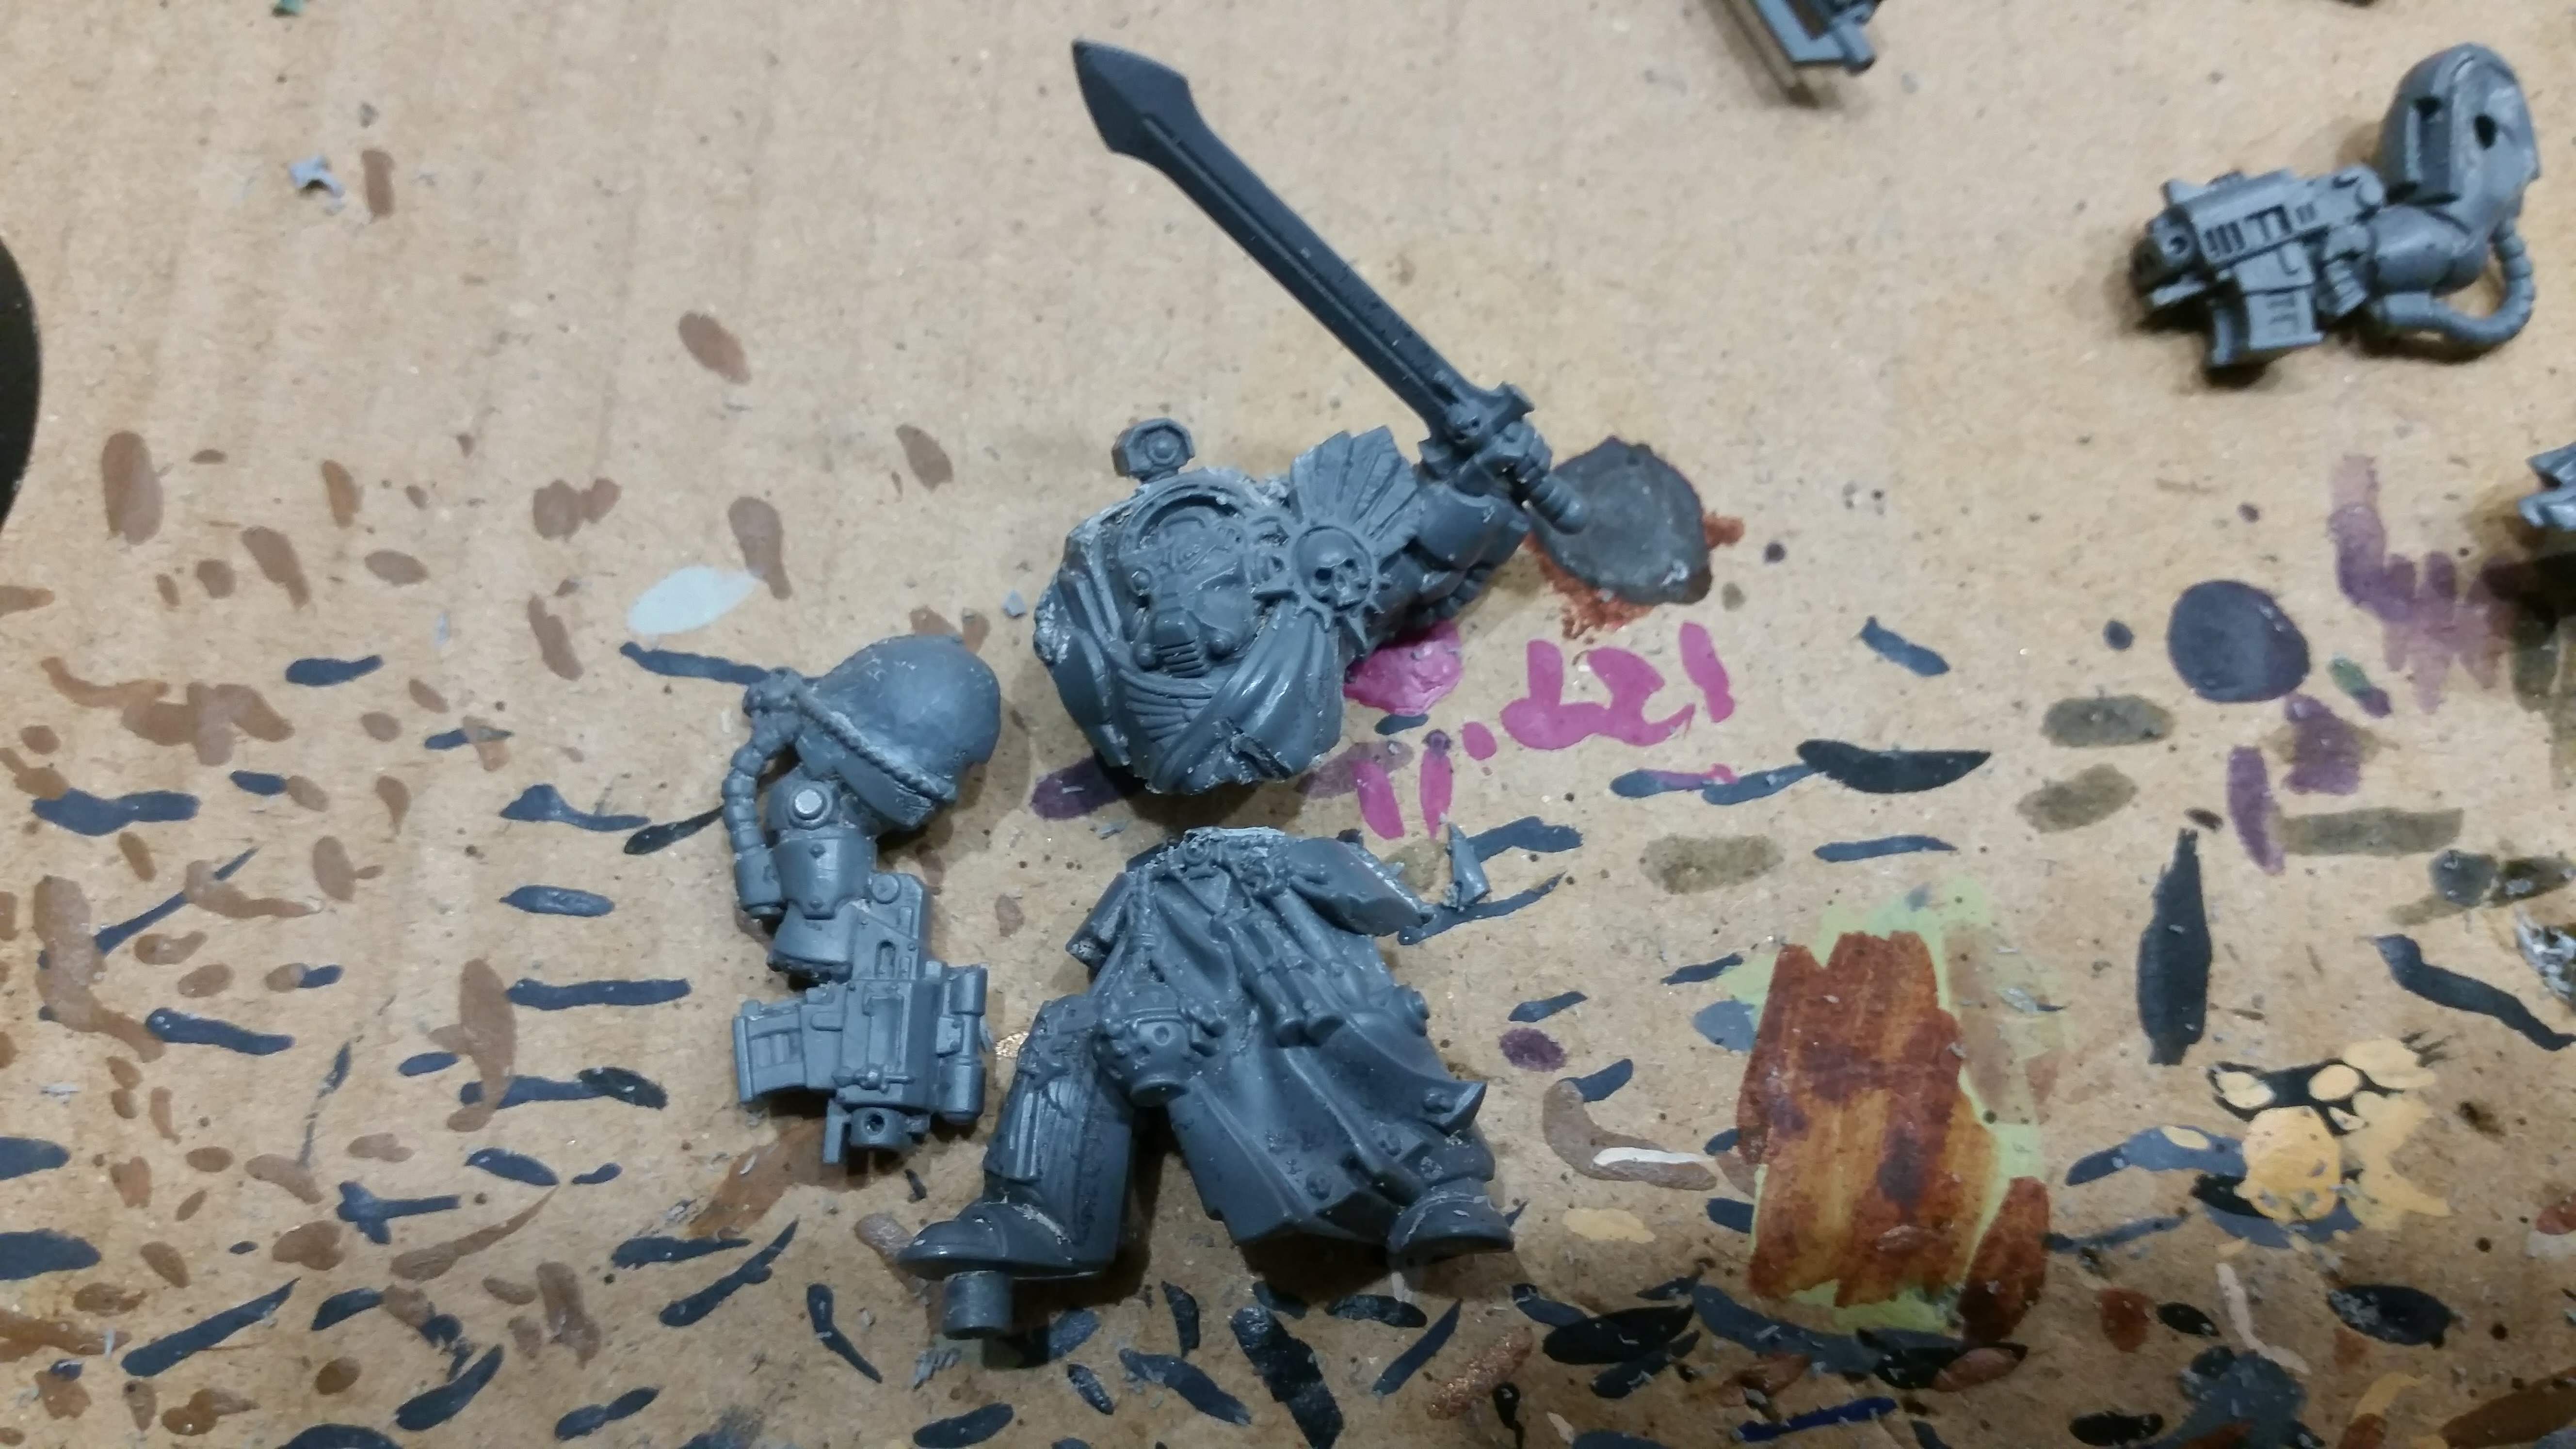 The sergeant has similar blade and he is wearing a tabard. I used the same process to first remove the blade handle and then make the cut at the wais.
Removing the chapter markings
The Terminators I am using are from the 7th Edition Dark Vengeance starter box. And they are Dark Angels Death Wing Terminators.
So in order to turn them into another chapter I will have to at least remove all the obvious Dark Angel chapter markings. Since they will be turned into Howling Griffons, a chapter with a strong knightly, heraldic background rich in both avian and leonine imagery, I figured that all manner of swords wings and feathers are probably ok as decorations.
But the large stylized wings on the sergeants back and the angel relief on his right boot had to go. And of course the actual chapter symbols on the shoulders.
 The chapter markings on the shoulderpads are being carefully shaved of with a crafting knife.
 The finished right arms without the chapter markings.
 This file was used to smooth out the shoulder pad after shaving of the markings.
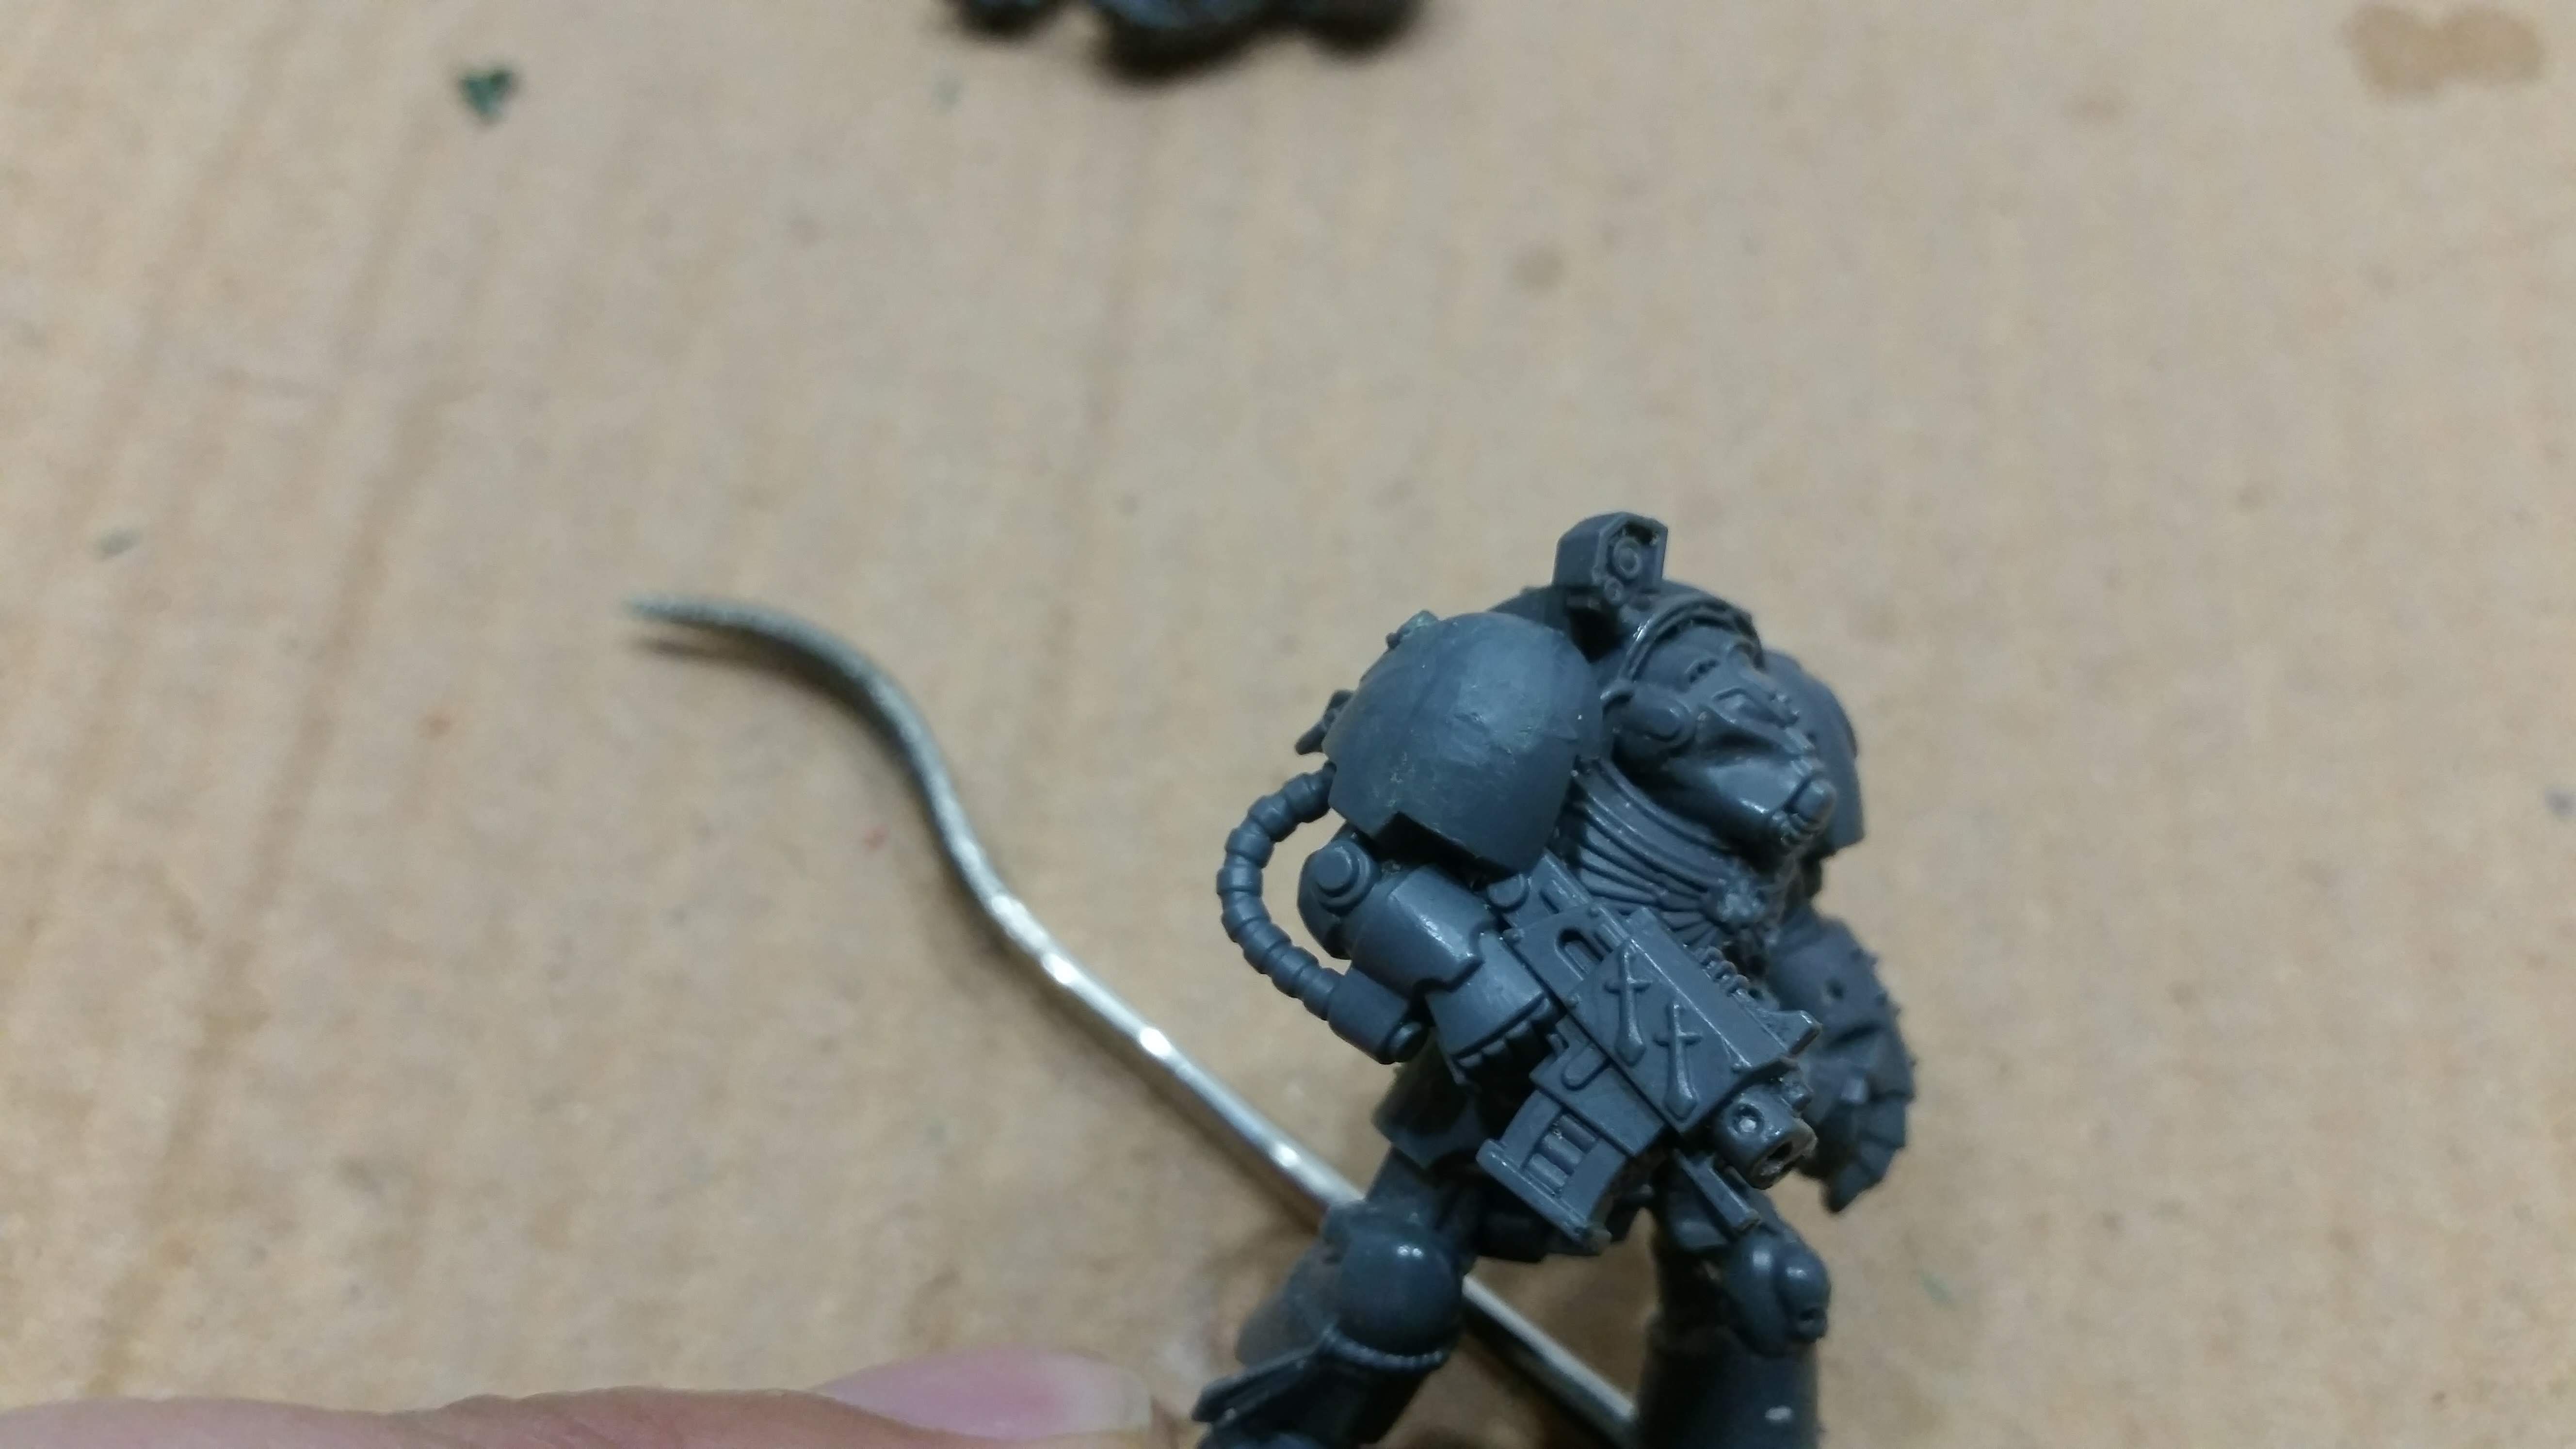 A finished and cleaned of shoulderpad.
Embiggification of the Terminators
Here is how I am currently embiggening the Terminators. I am at the time of writing not quite done with all of them. You will notice the the progress pictures have been taken with different miniatures for some of the steps. That is simply due, to me working on all of them at once, not having taken pictures for all of them, as well as a little secret I will reveal at a later point in the project.
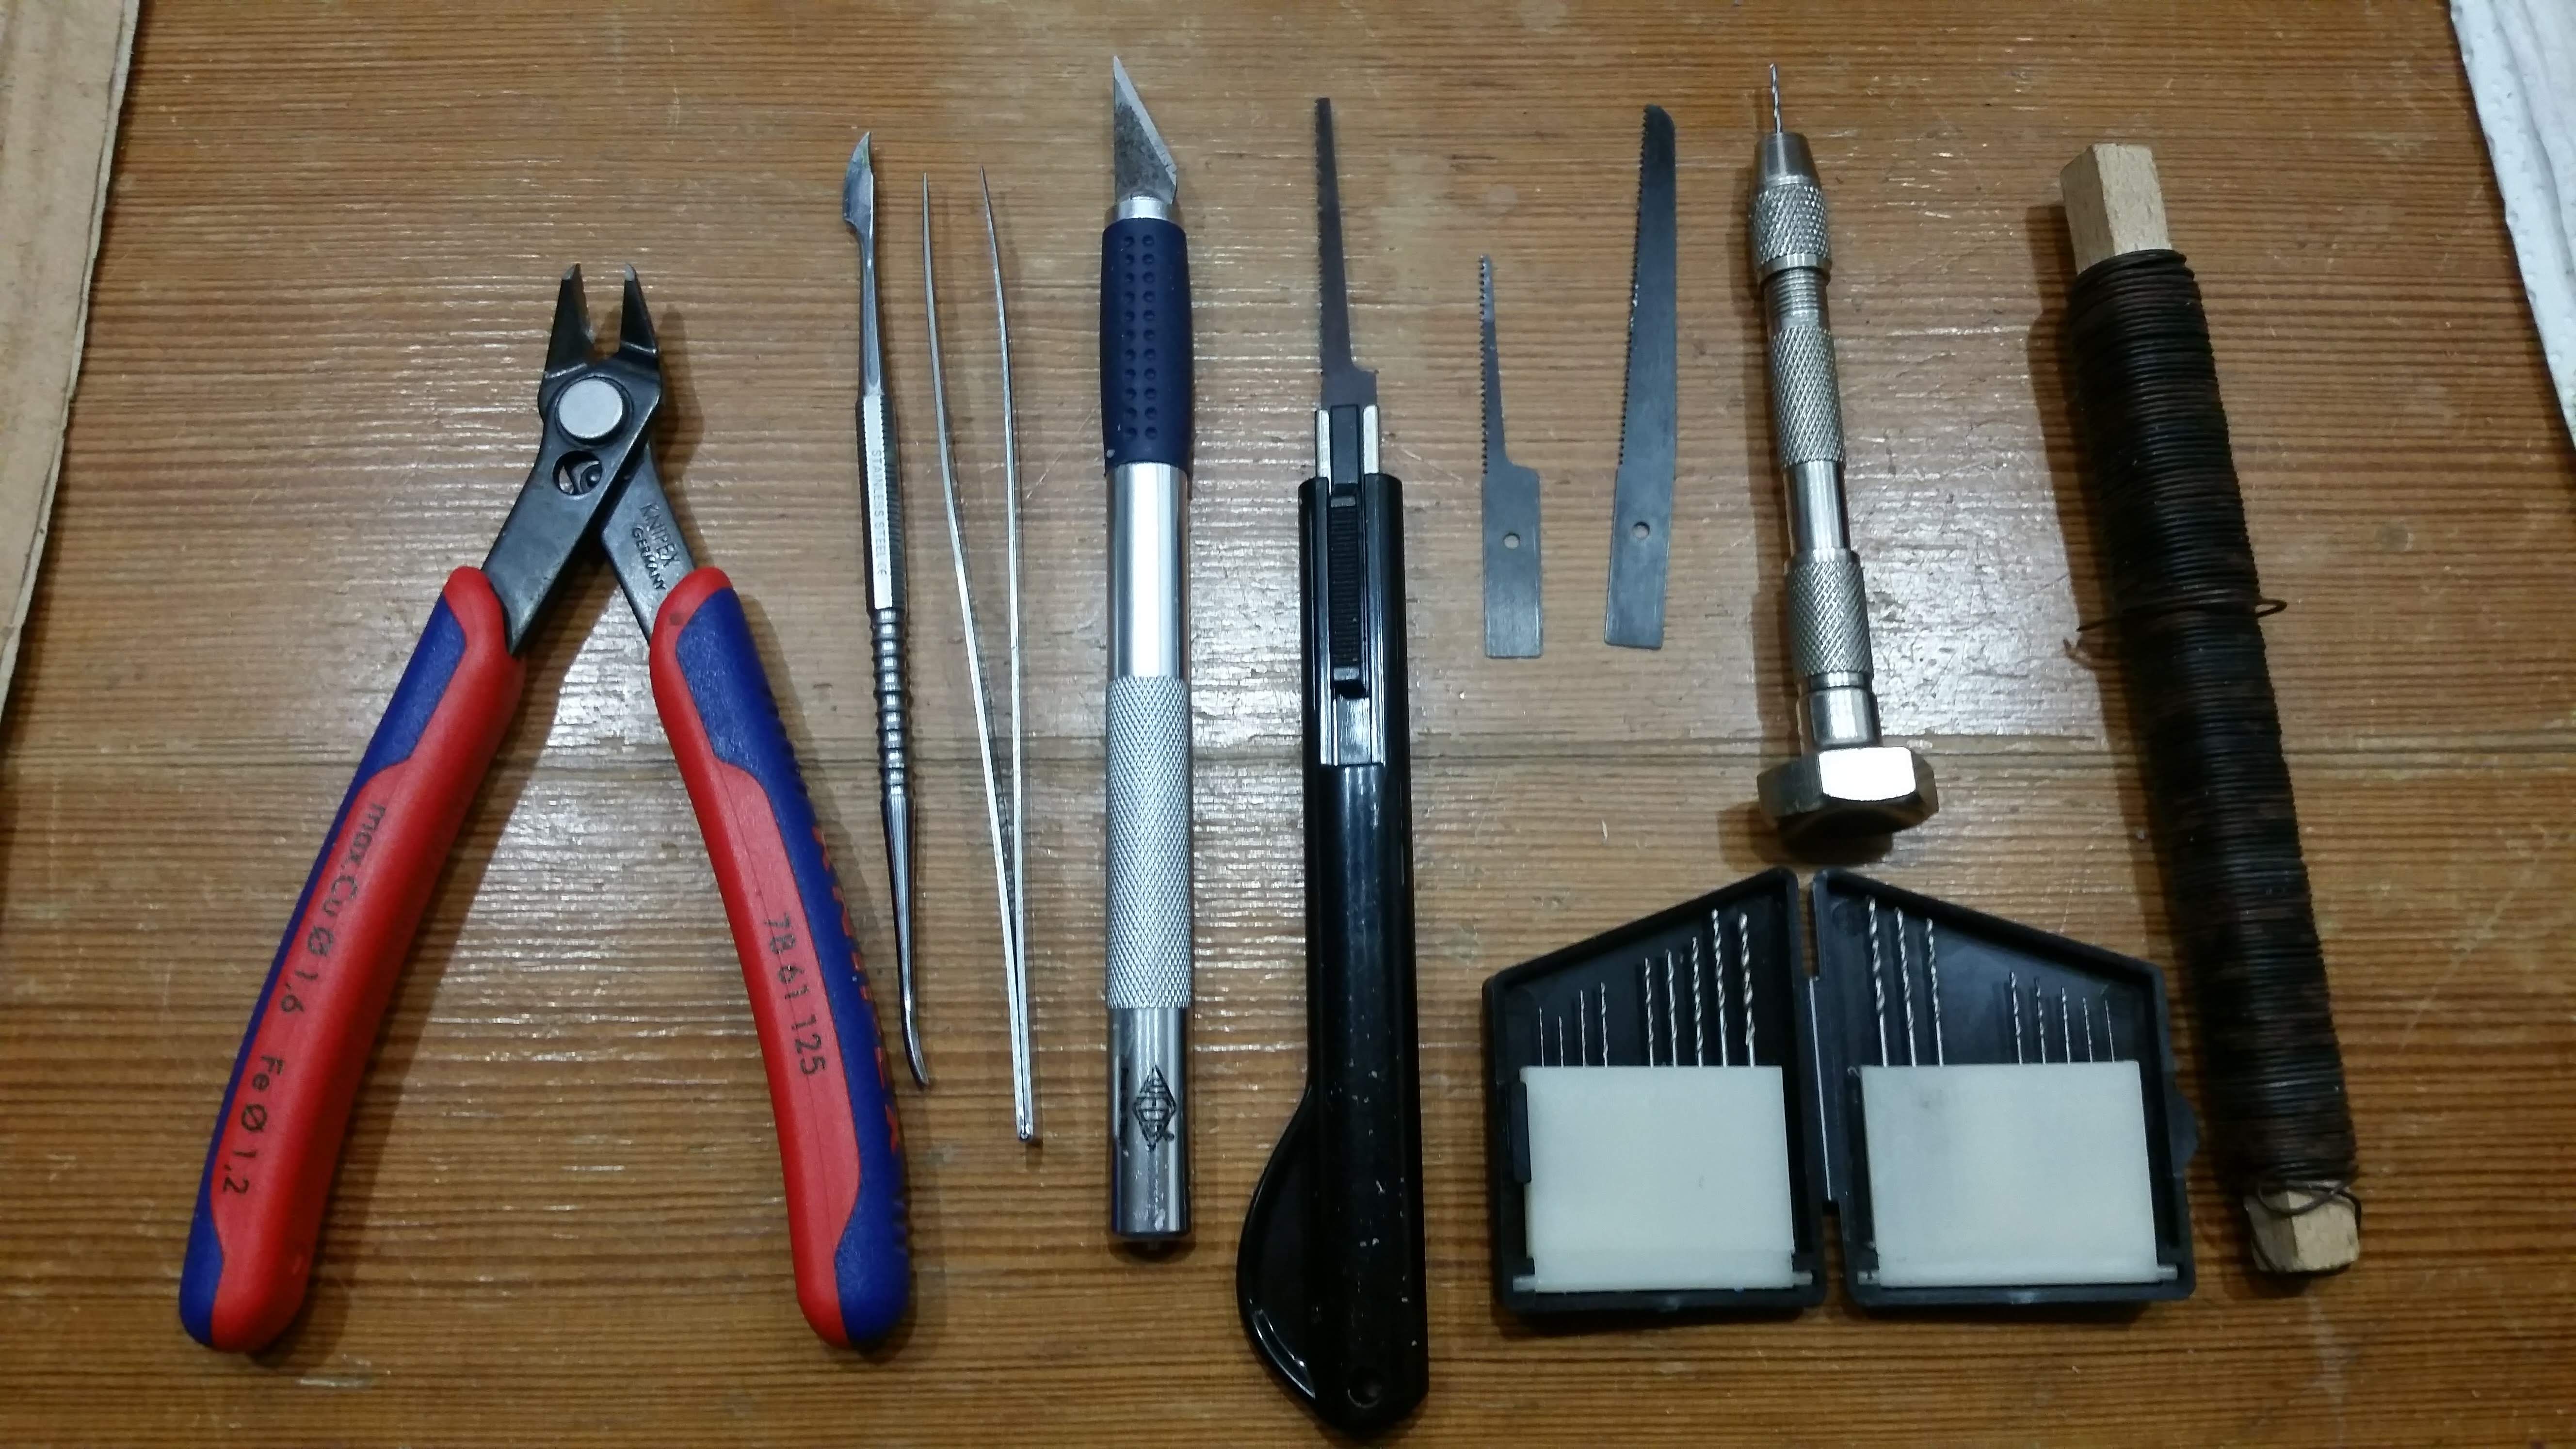 The tools I use: Clippers, Sculpting Tool, Pincers, Paper Knife, Modeling Saw, Hand Drill, Garden Wire
 I remove any molded on arms from the model with the modeling saw.
 I cut the models torso from the legs, again using the saw. I found out that it works best to cut below the oval detail on the back. Also the front part of the model came loose during this step.
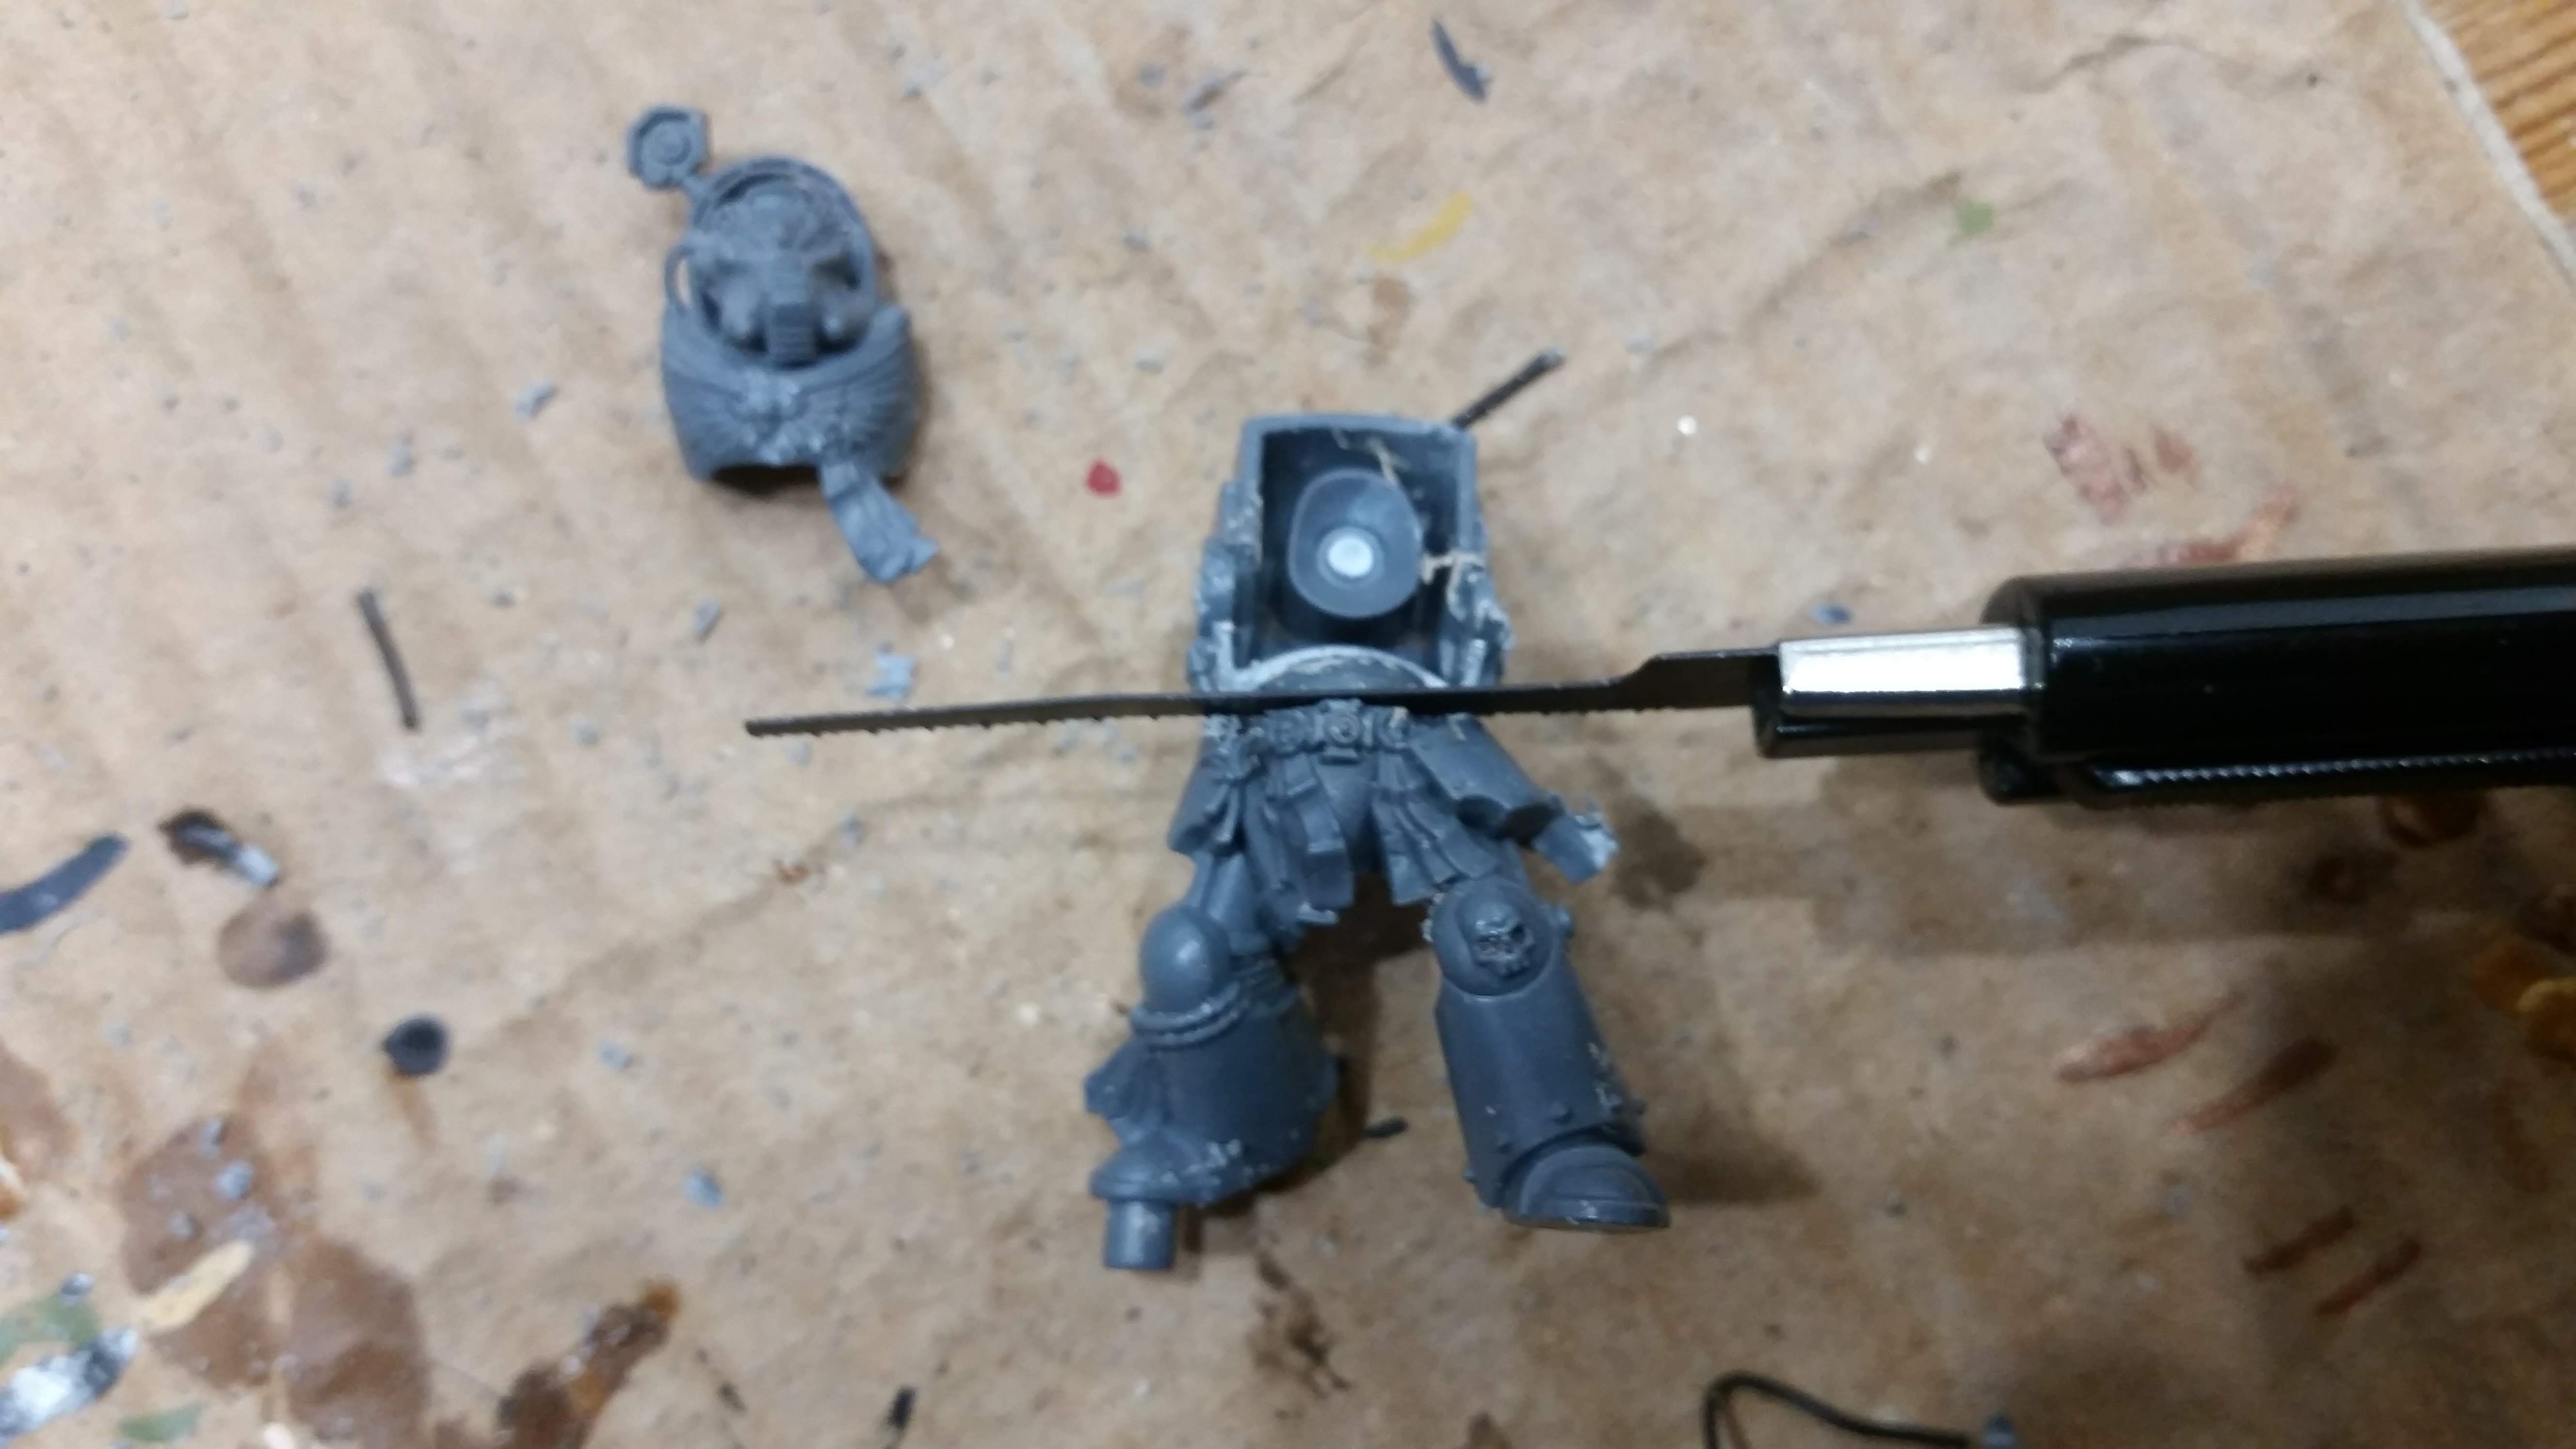 I make a second cut from the front of the torso, being careful not to damage the details on the models belt.
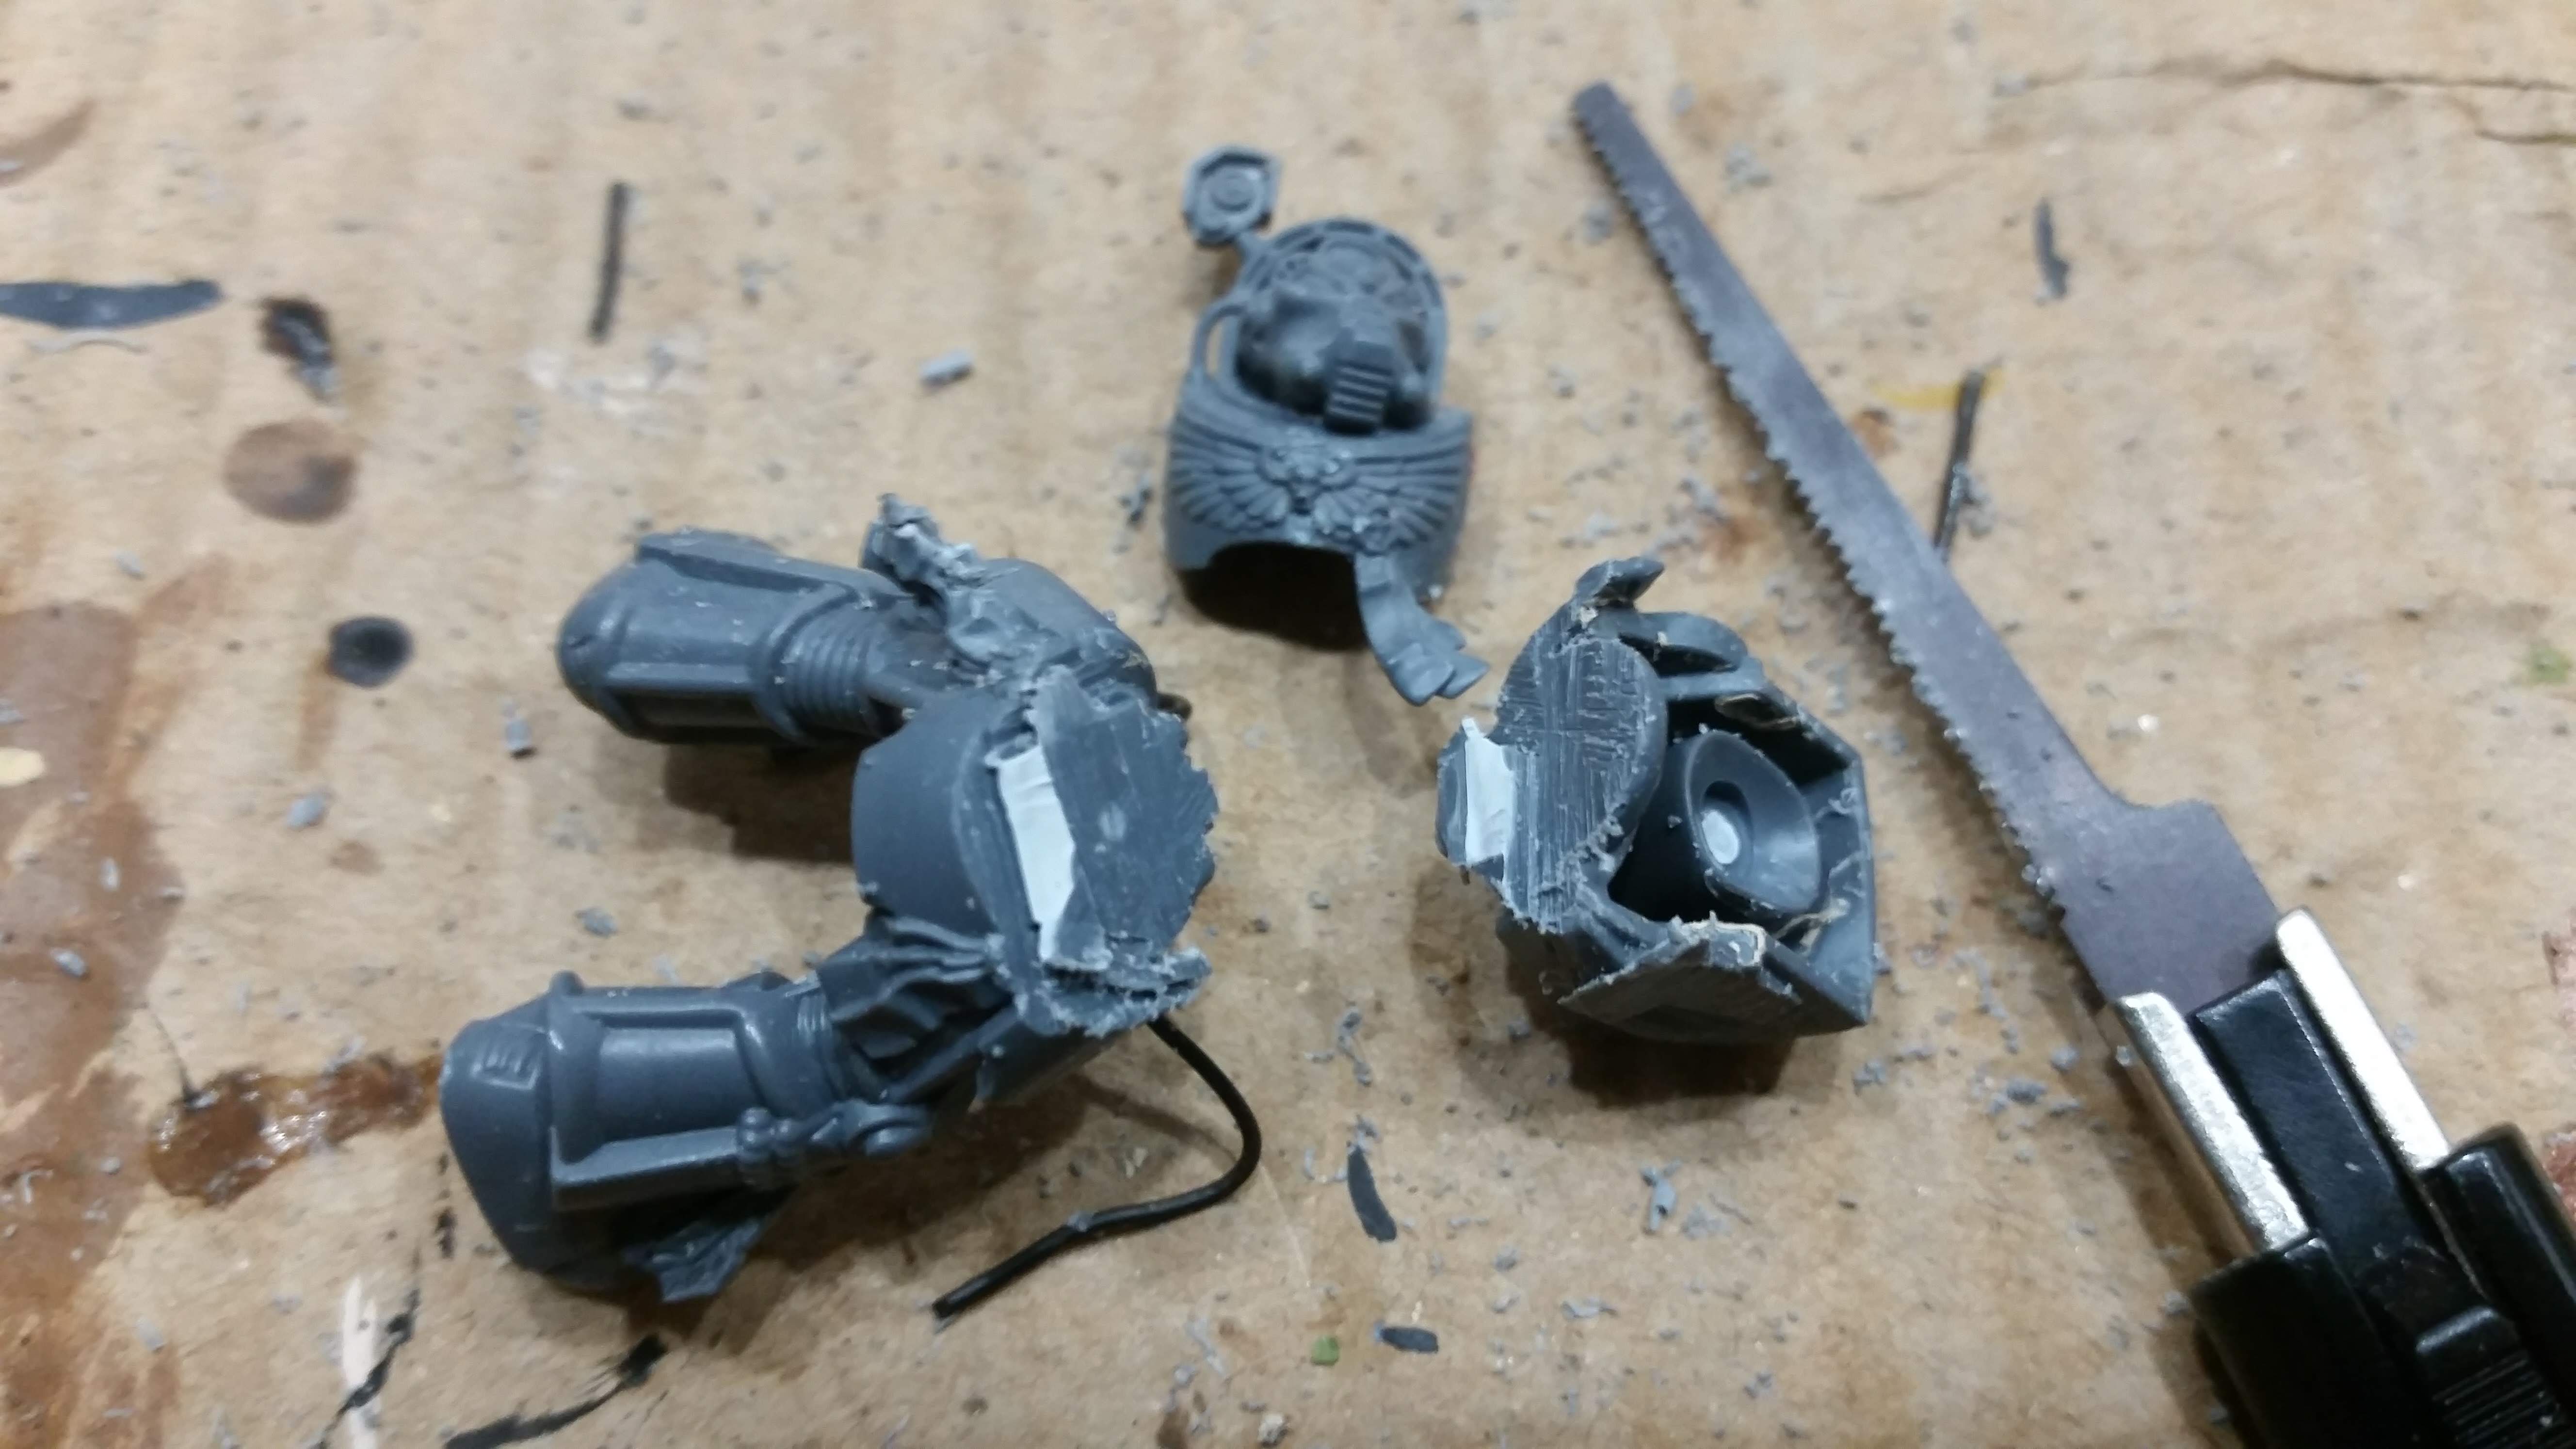 Once the two cuts join up the torso can be removed from the models legs.
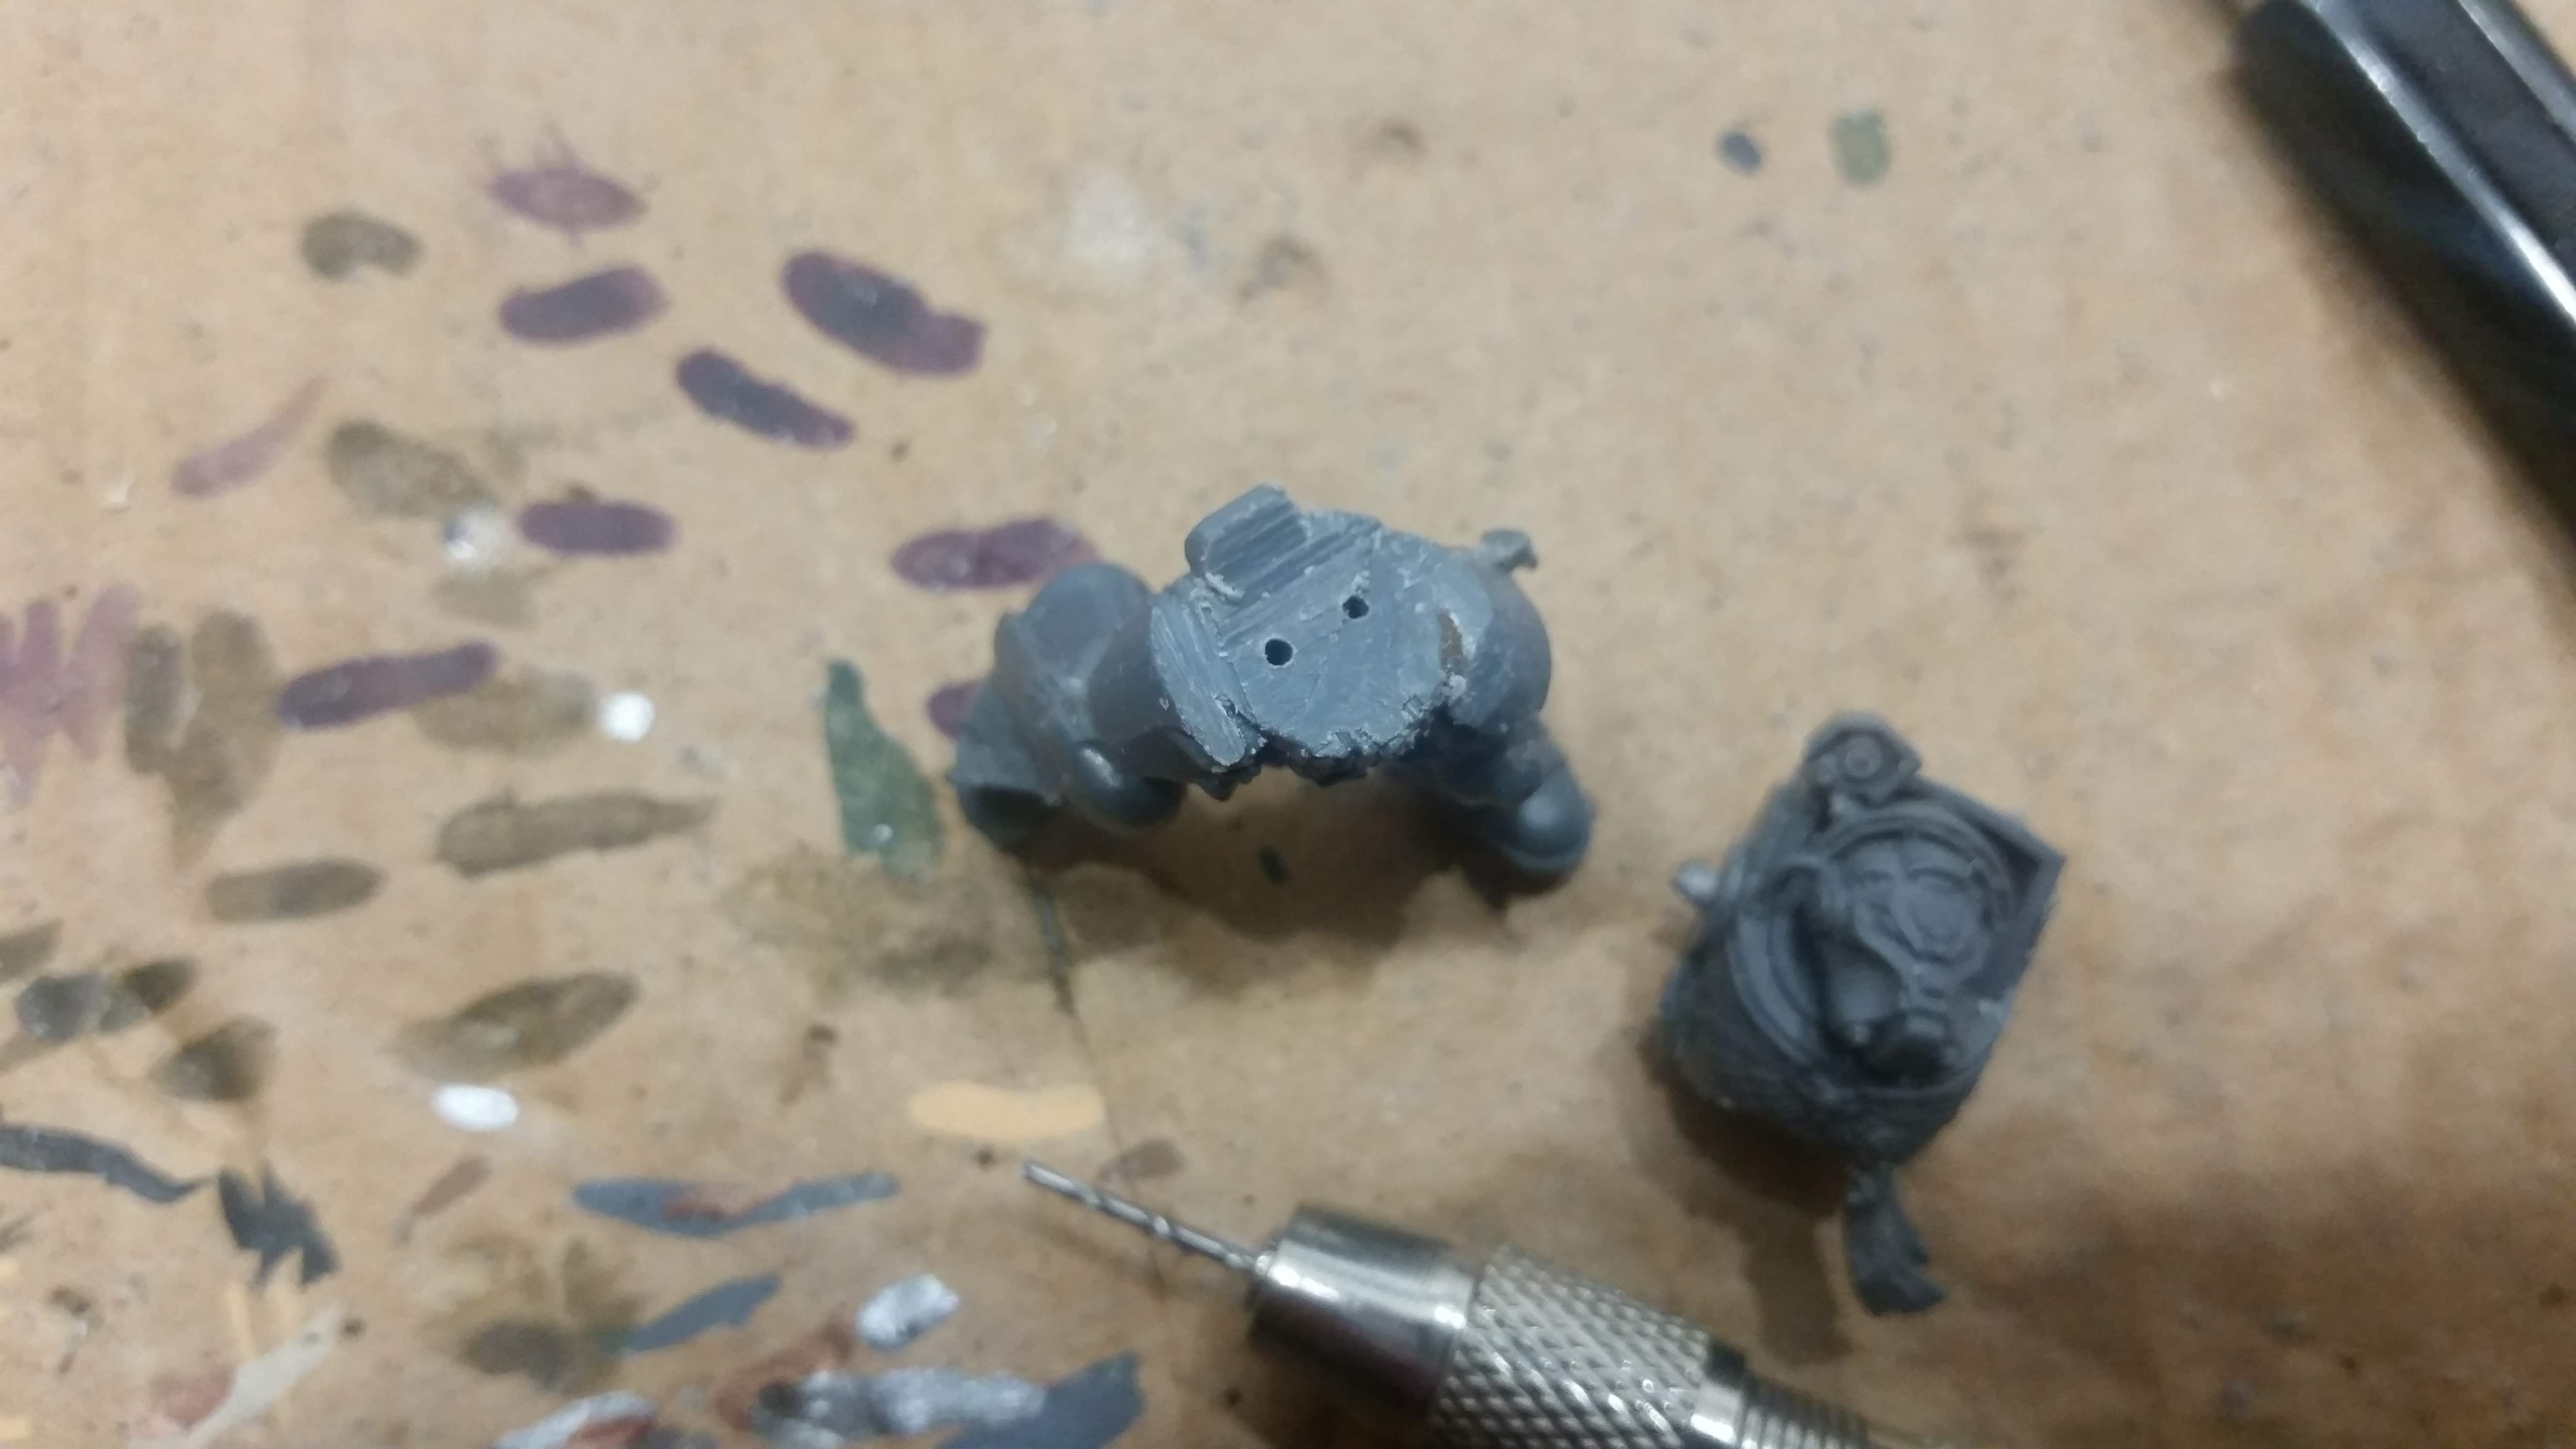 I use a hand drill to drill two holes into the leg part. Matching holes are being drilled into the bottom of the torso, after its two parts have been welded together. I must have used regular super glue when putting them together the first time, which has caused them to come apart under stress.
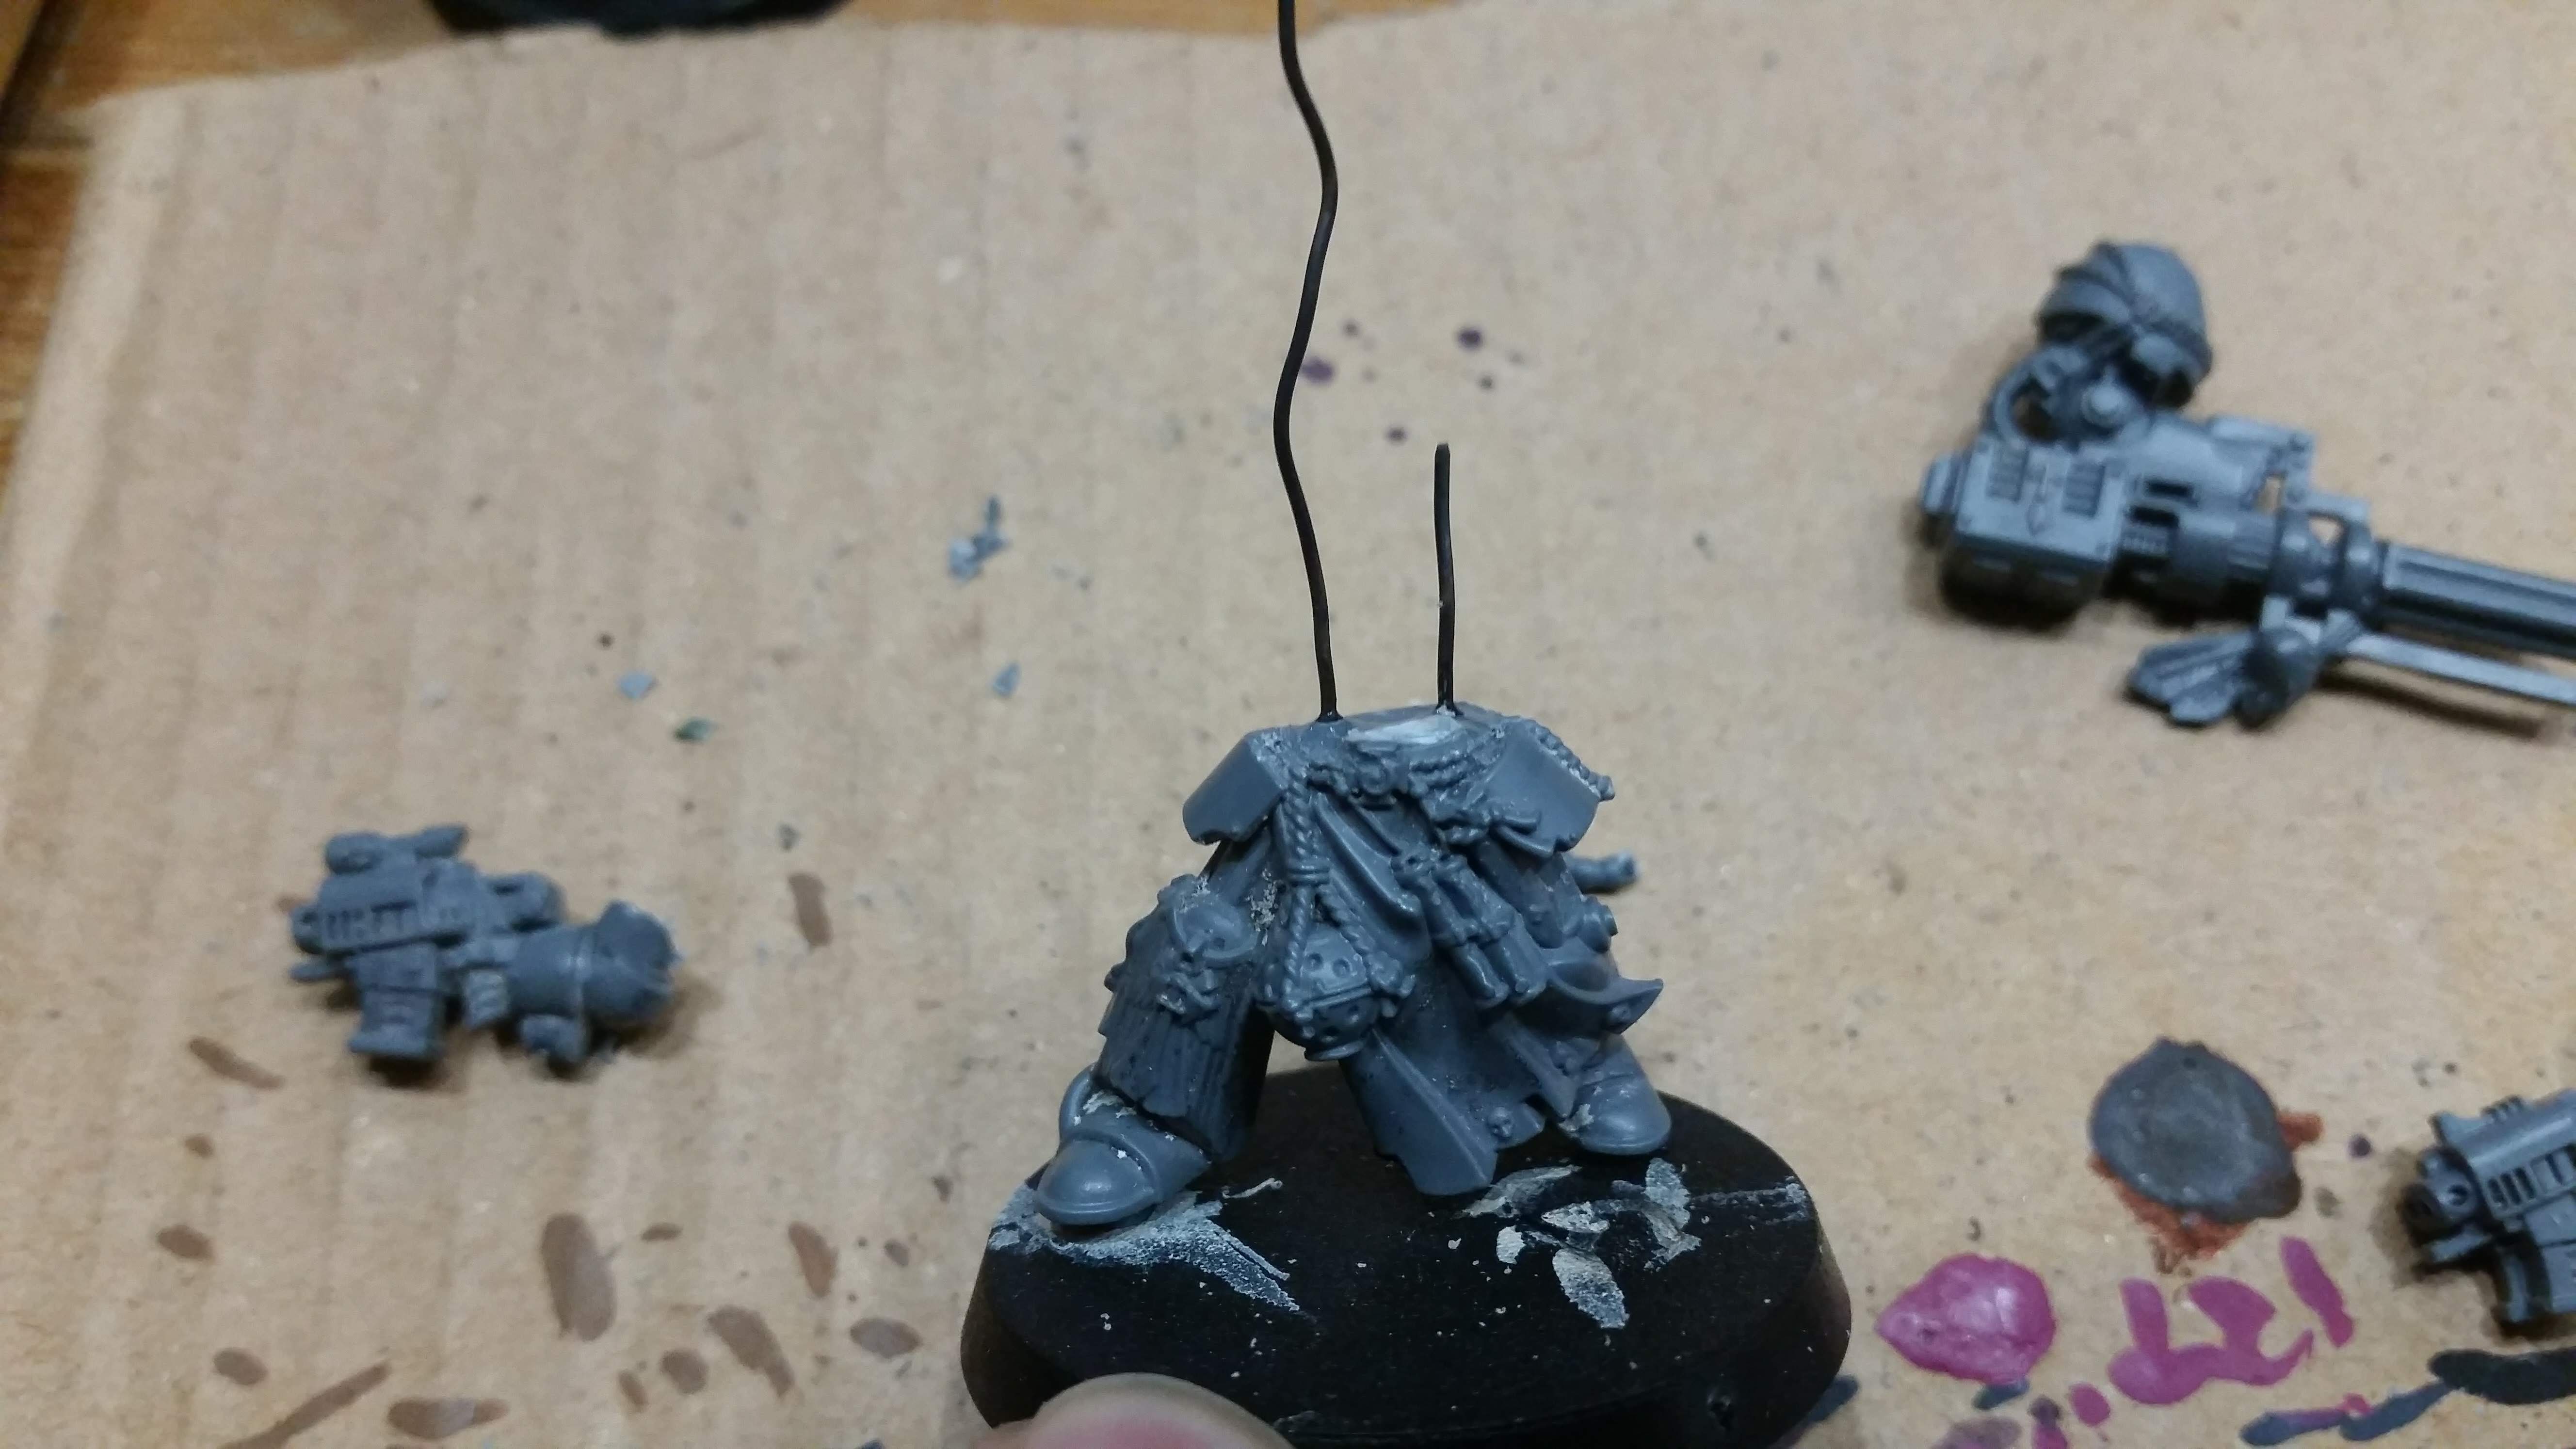 Two pieces of garden wire are being inserted into the holes of the leg part and fixed in place using super glue.
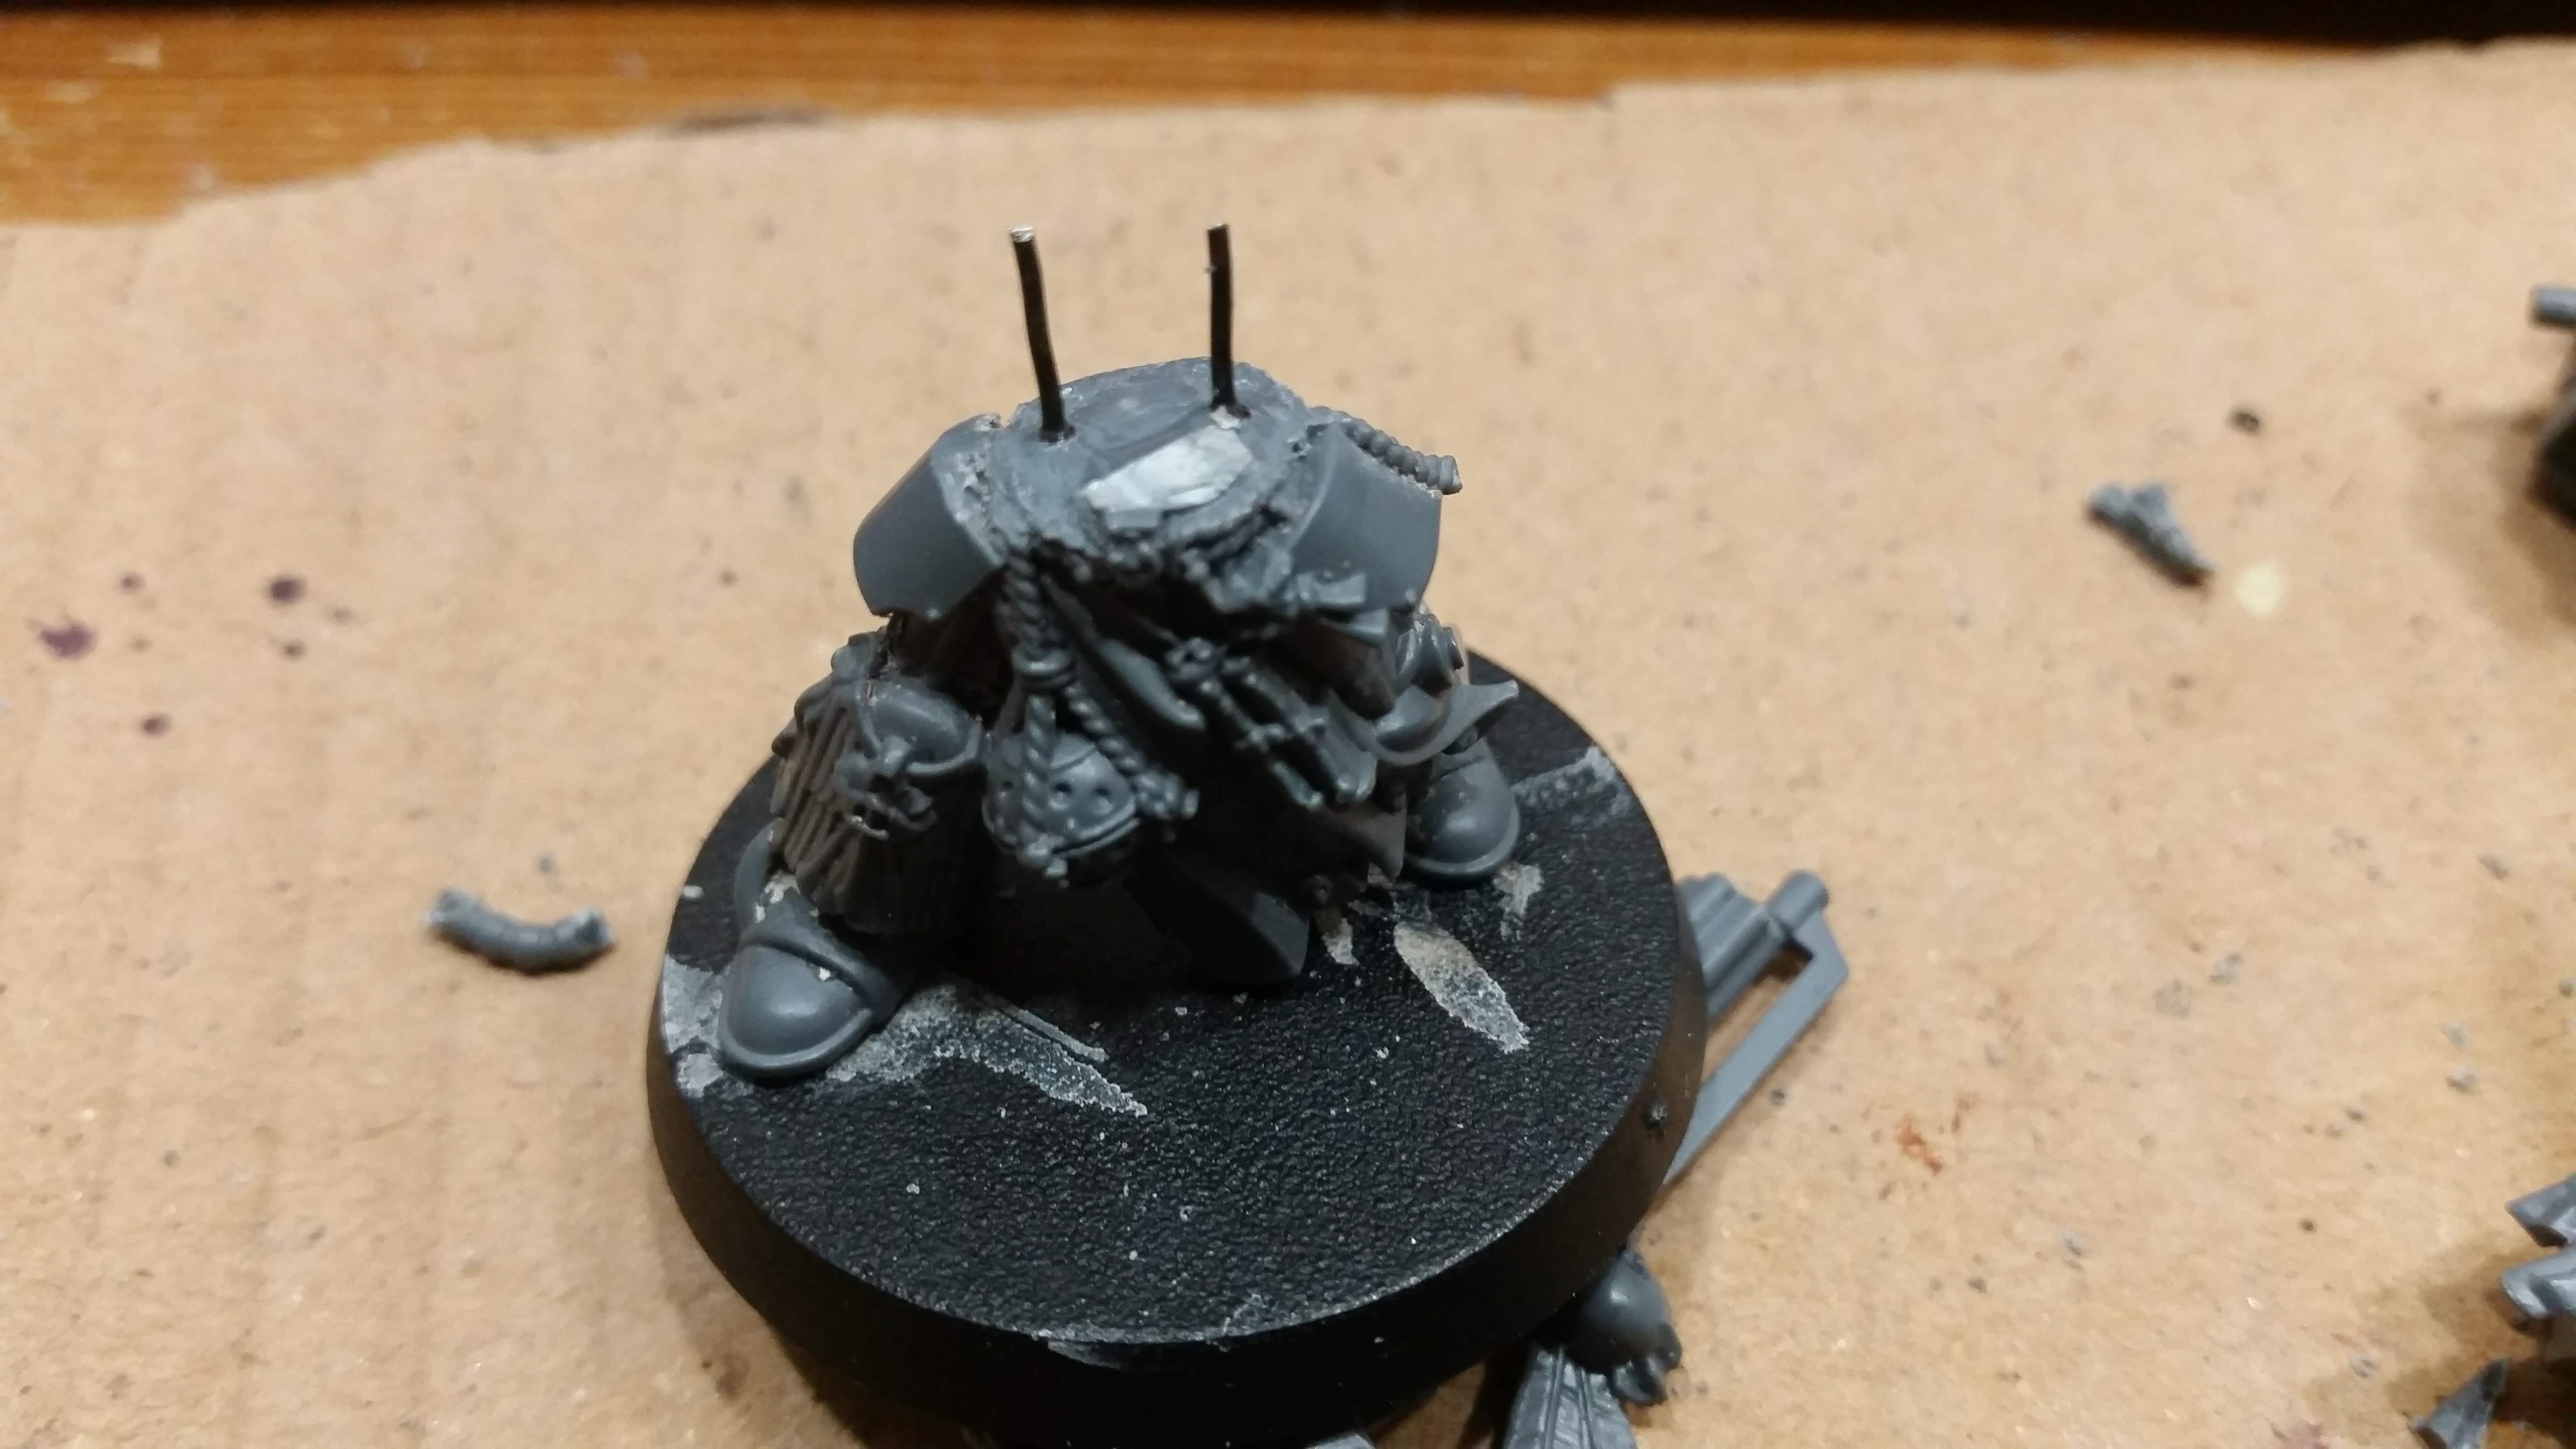 I cut the wires down to about 5 or 6 mm in length.
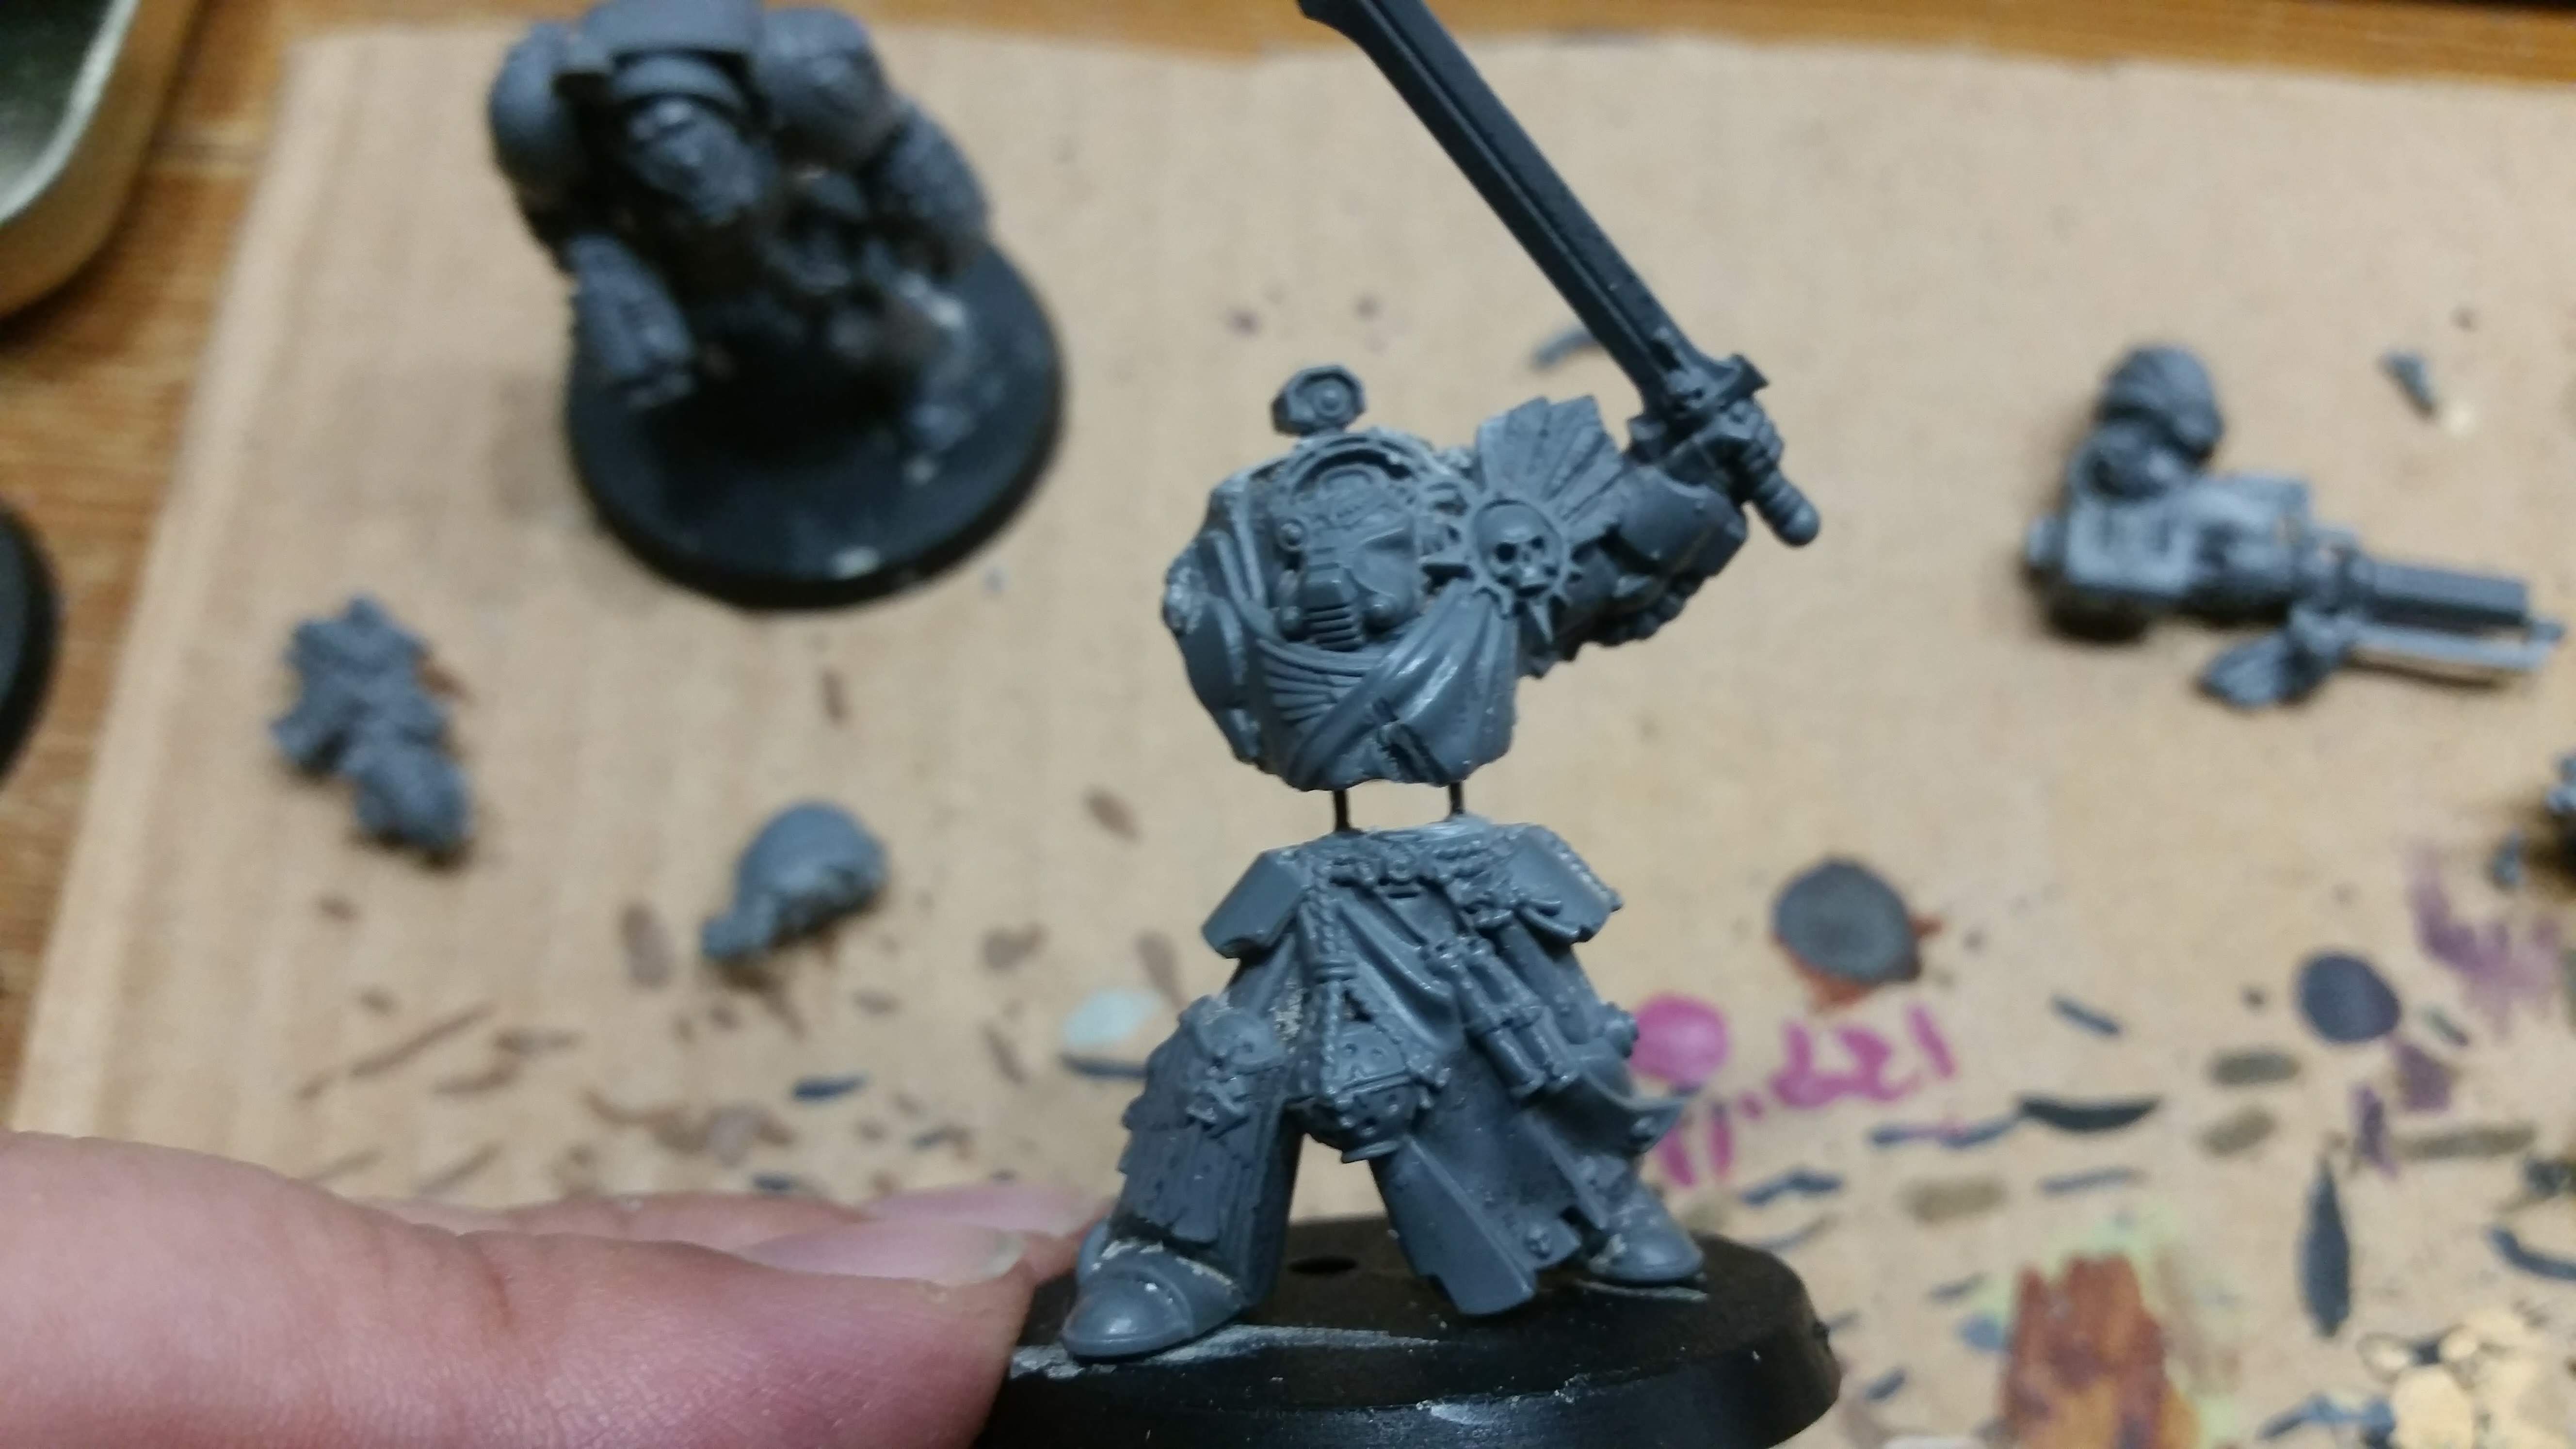 I then attach the torso to the top of the wires using the matching holes in its underside. Again the parts are bonded using super glue. Care has to be taken not to make the gap too large or two small, as this is hard to fix later on. I usually aimed for making the model either eye level with the Primaris Marine or the same torso length as the test miniature.
 The gap at the figures waist is now filled with a small amount of kneadatite (green stuff).
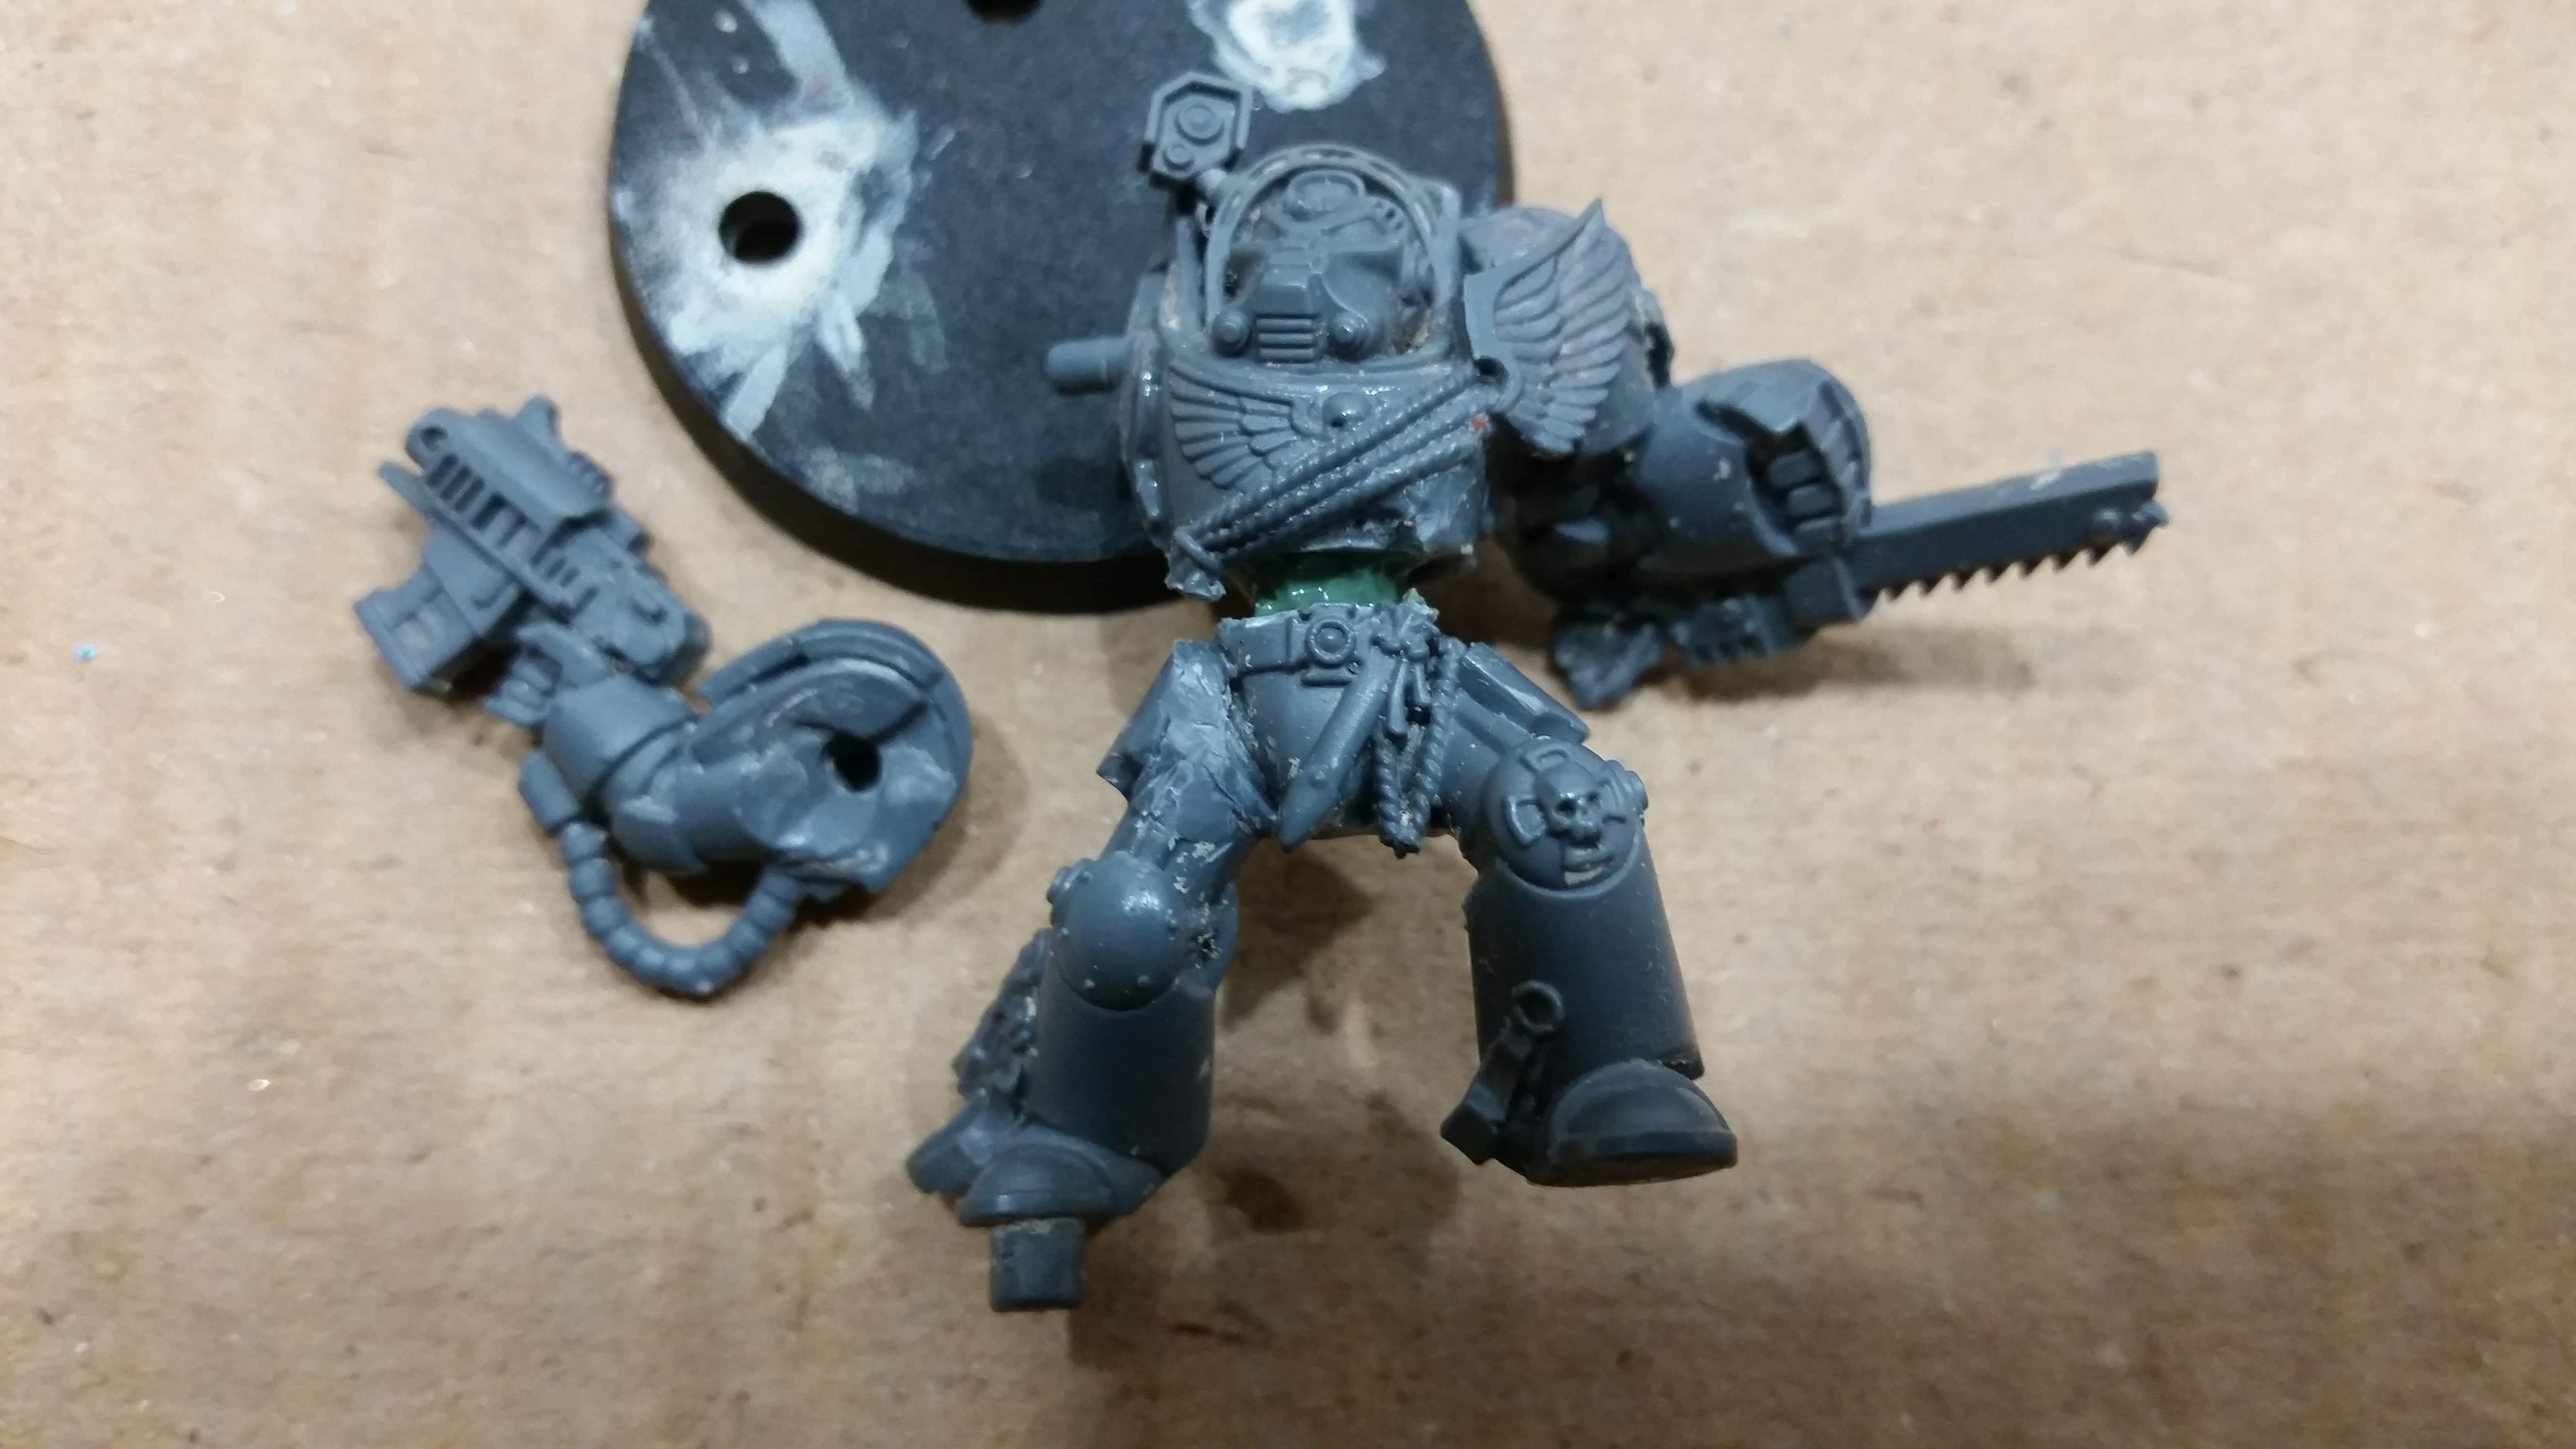 Only a small amount of kneadatite is being used at first. Just enough to stabilize the joint and keep the wires from bending. No detail is being modelled on at this stage.


![Play WW2 Commando Operations With Butcher & Bolt [Updated]](https://images.beastsofwar.com/2026/03/relaunch-600-338.jpg)


