


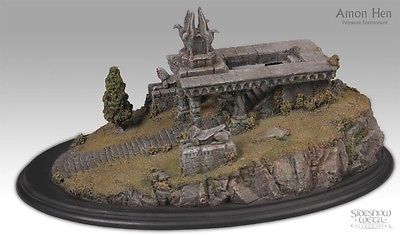
Amon Hen: Middle Earth SBG Terrain.


Recommendations: 110
About the Project
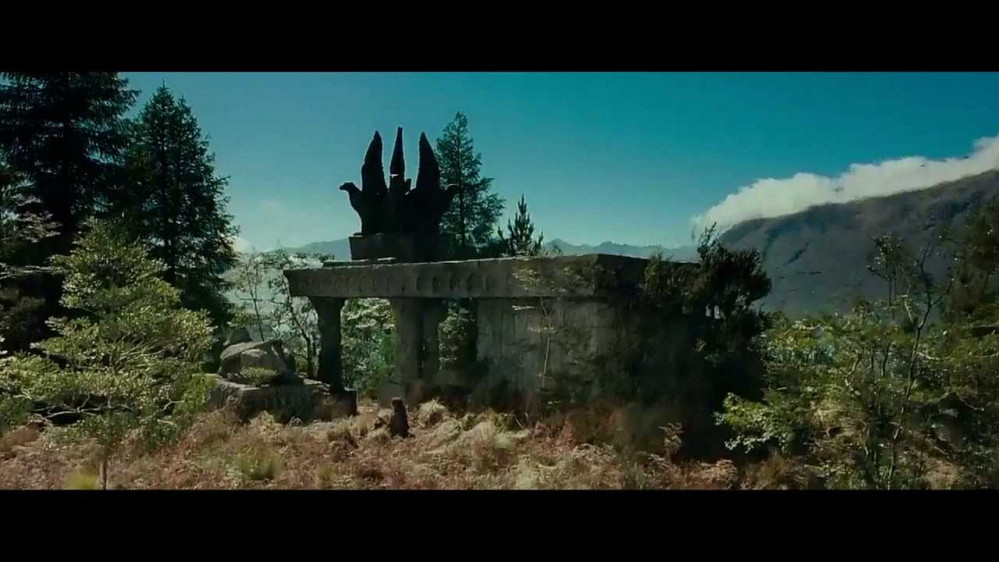
Since both Sam and Ben have brought me back to my favorite fantasy setting of Middle Earth. I just can't simply have a generic game table. This game is now so thematic, I need to bring the visualizations of the movies and the world to the table top. Most memorable one of these is Amon Hen the old watch of Arnor's southern border.
Related Game: The Lord of the Rings Strategy Battle Game
Related Company: Games Workshop
Related Genre: Fantasy
This Project is Active
Ruin of Arnor
Since its been a solid week of printing out Amon Hen. I switched things up and Scuplted a Ruin of Arnor.
You roughly see this in the extended addition for a few seconds. All the orcs and trolls throughout the land destroyed these old statues.
This one will be about 4 inches long and maybe 2 inches high. It will take a good 10 hours to print.
I will have an up-date on the Amon Hen tomorrow. The last peice is just about done printing. 80 hours to print up all the parts.
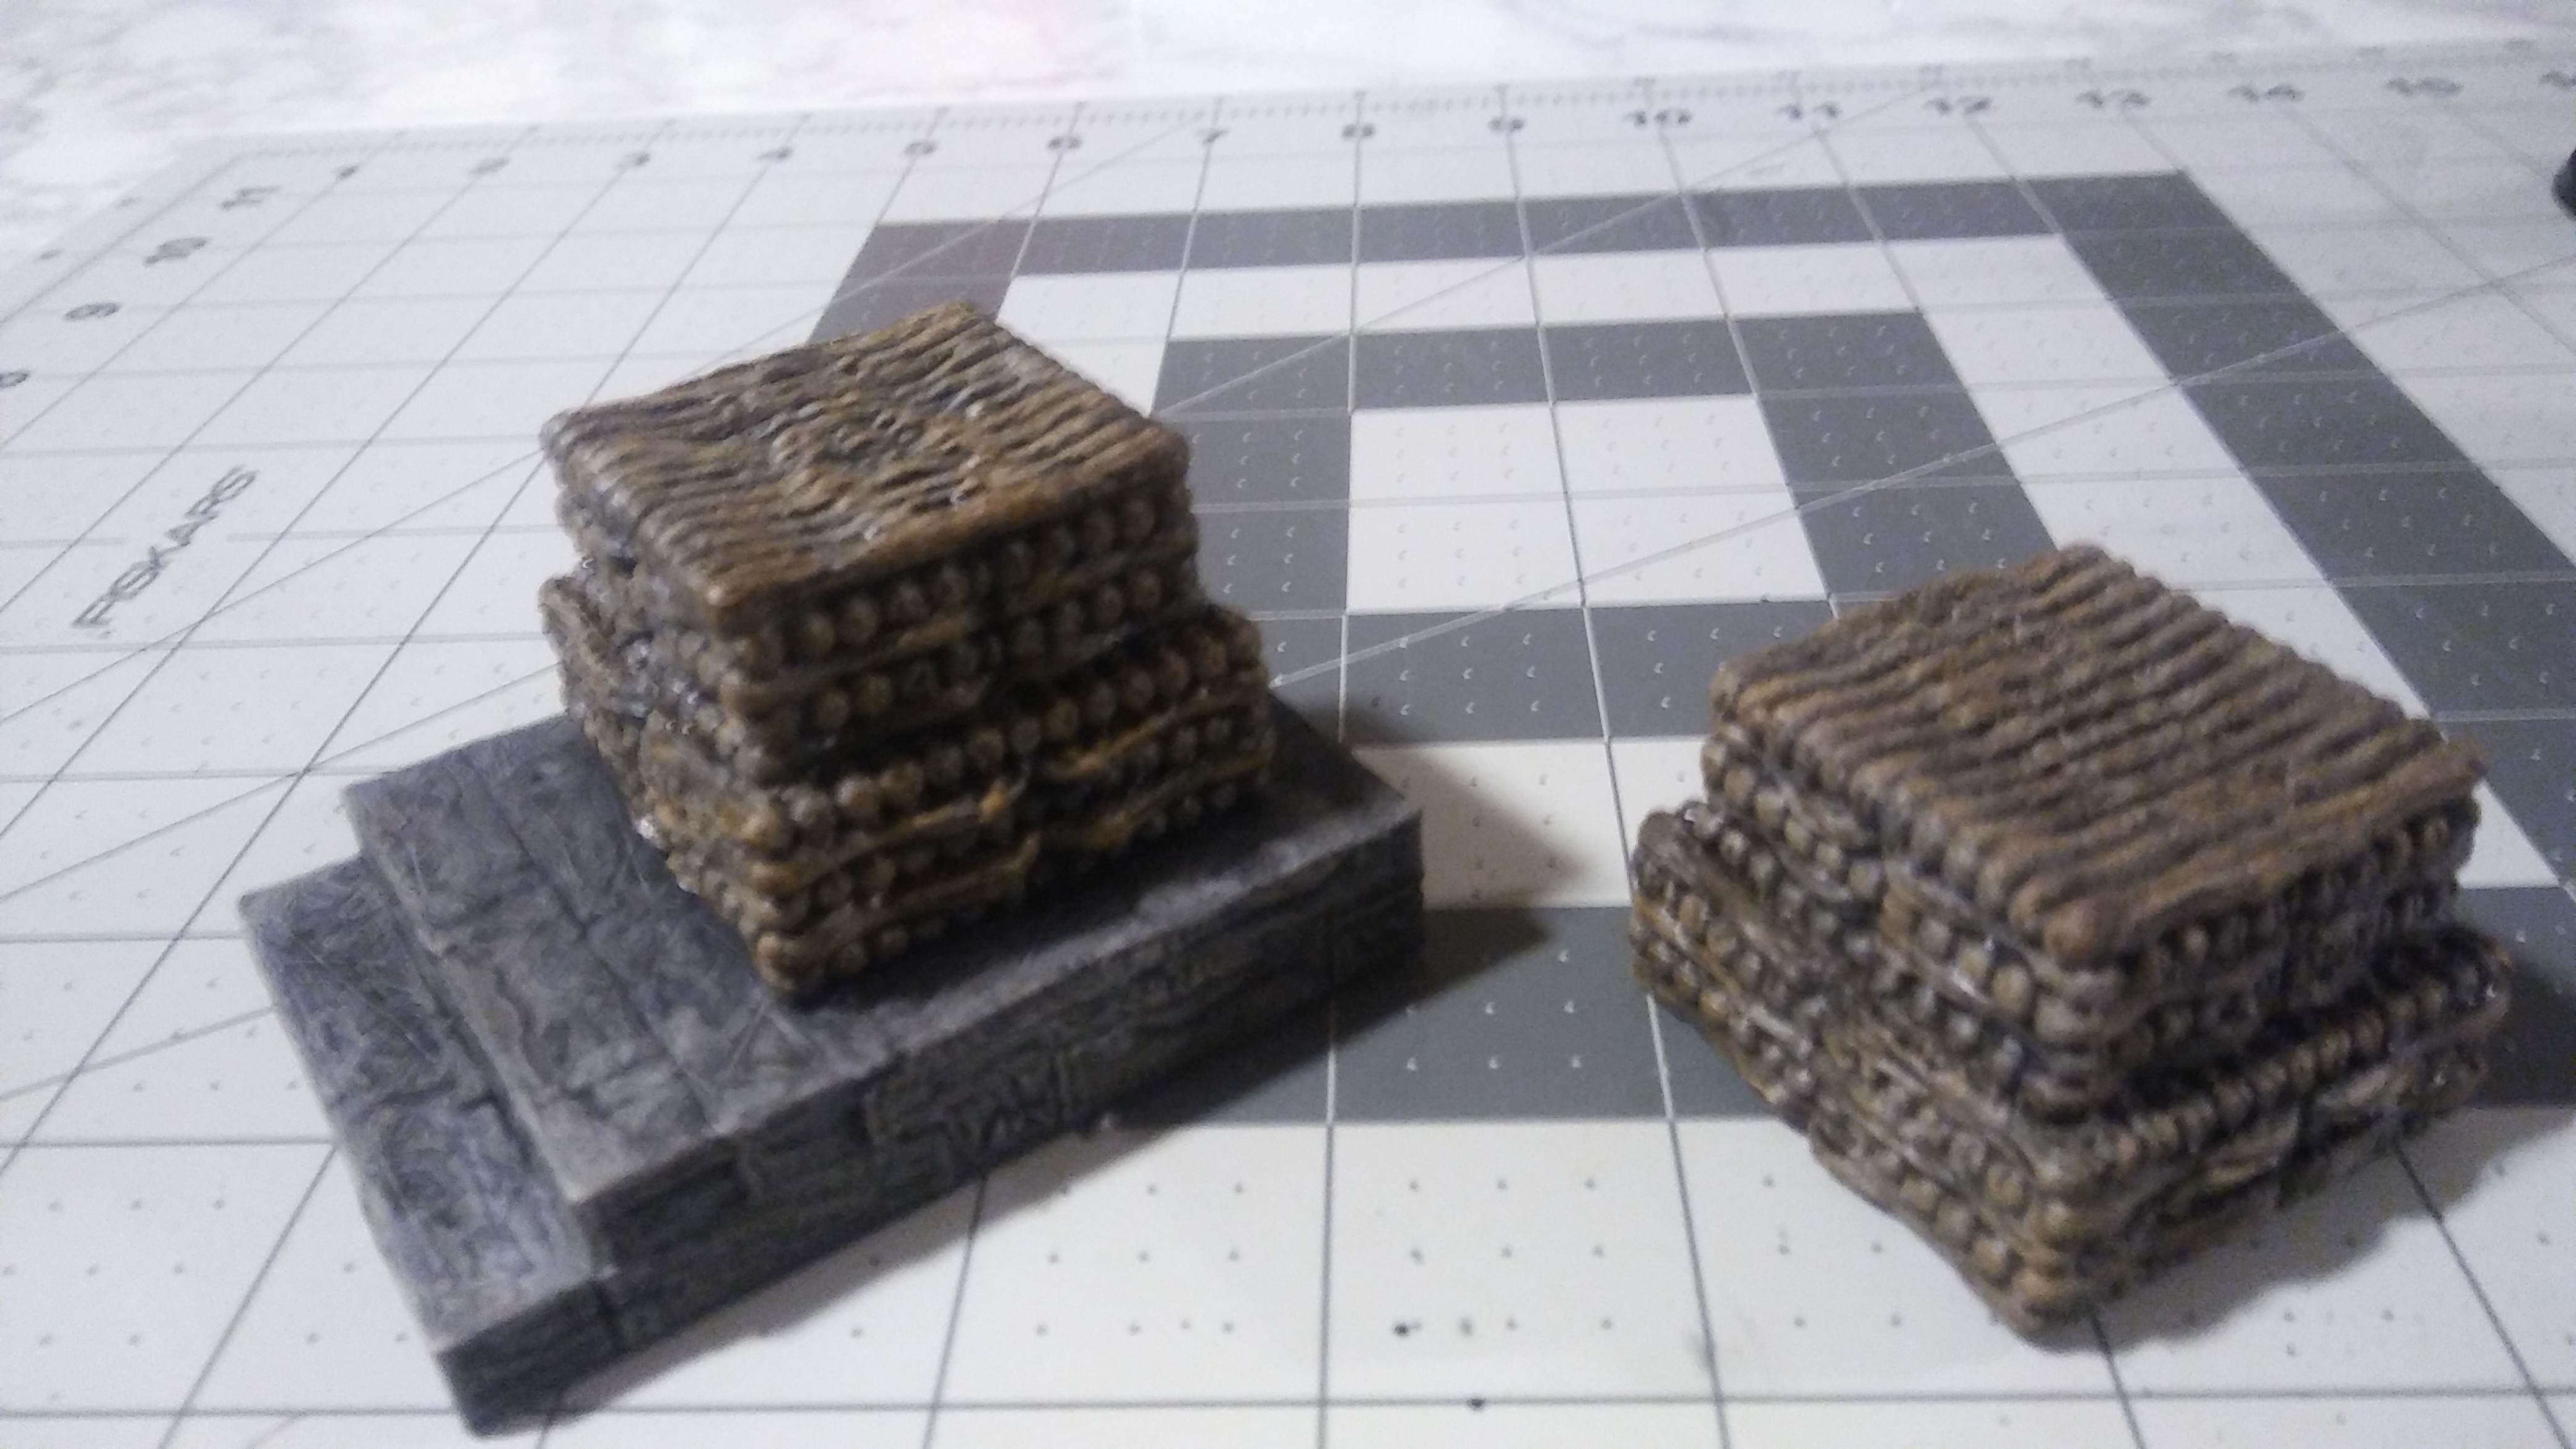
Got wood?
Noticed that I am running out of catchy Lotr title postings?
Well here is the painted Wooden Pyres.
I base coated both with a black paint. Then dry brushed a light gray over most of it at about a 45 degree angle. Then dry brushed few areas with an cream color.
Once those where dry, I did a thin layer of burnt number over it all. So the lighter colors underneath would sort of shine through.
After that dried I used a Army Painter Monster Brown and did a quick dry brush again. My next step was to use GW Agrax Earthshade to give it a real old and possibly oil soak wood look.
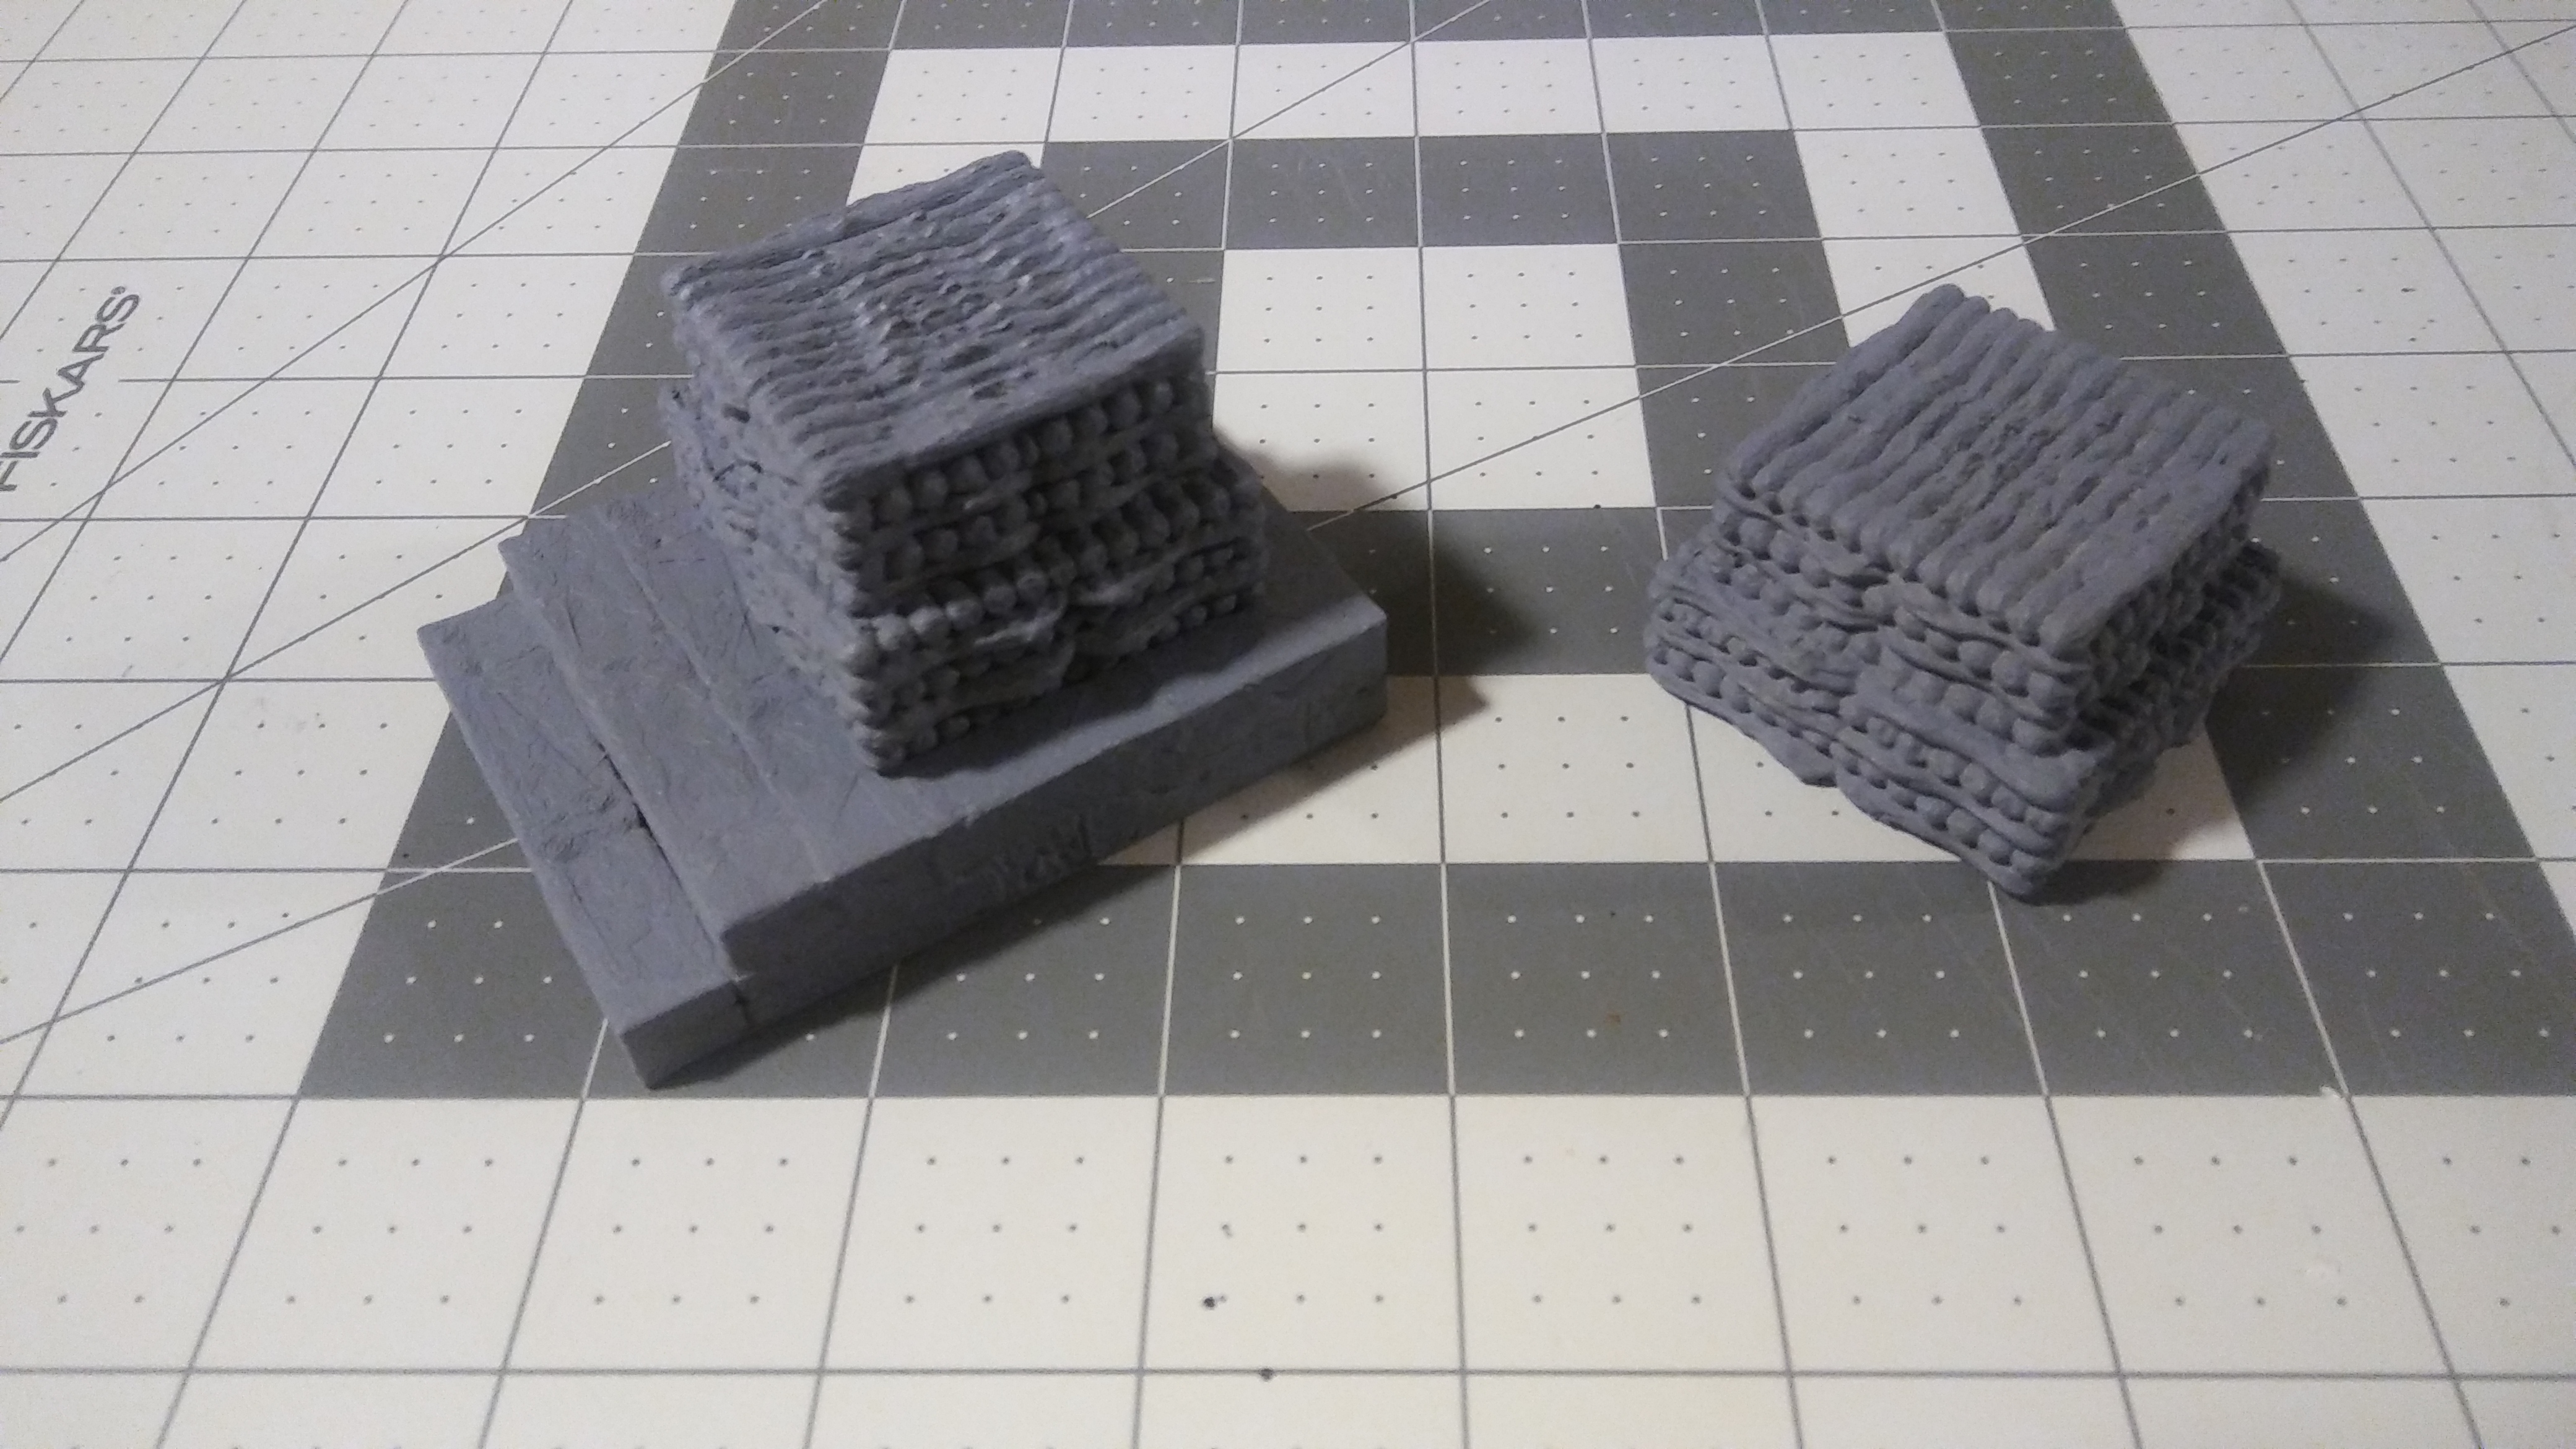
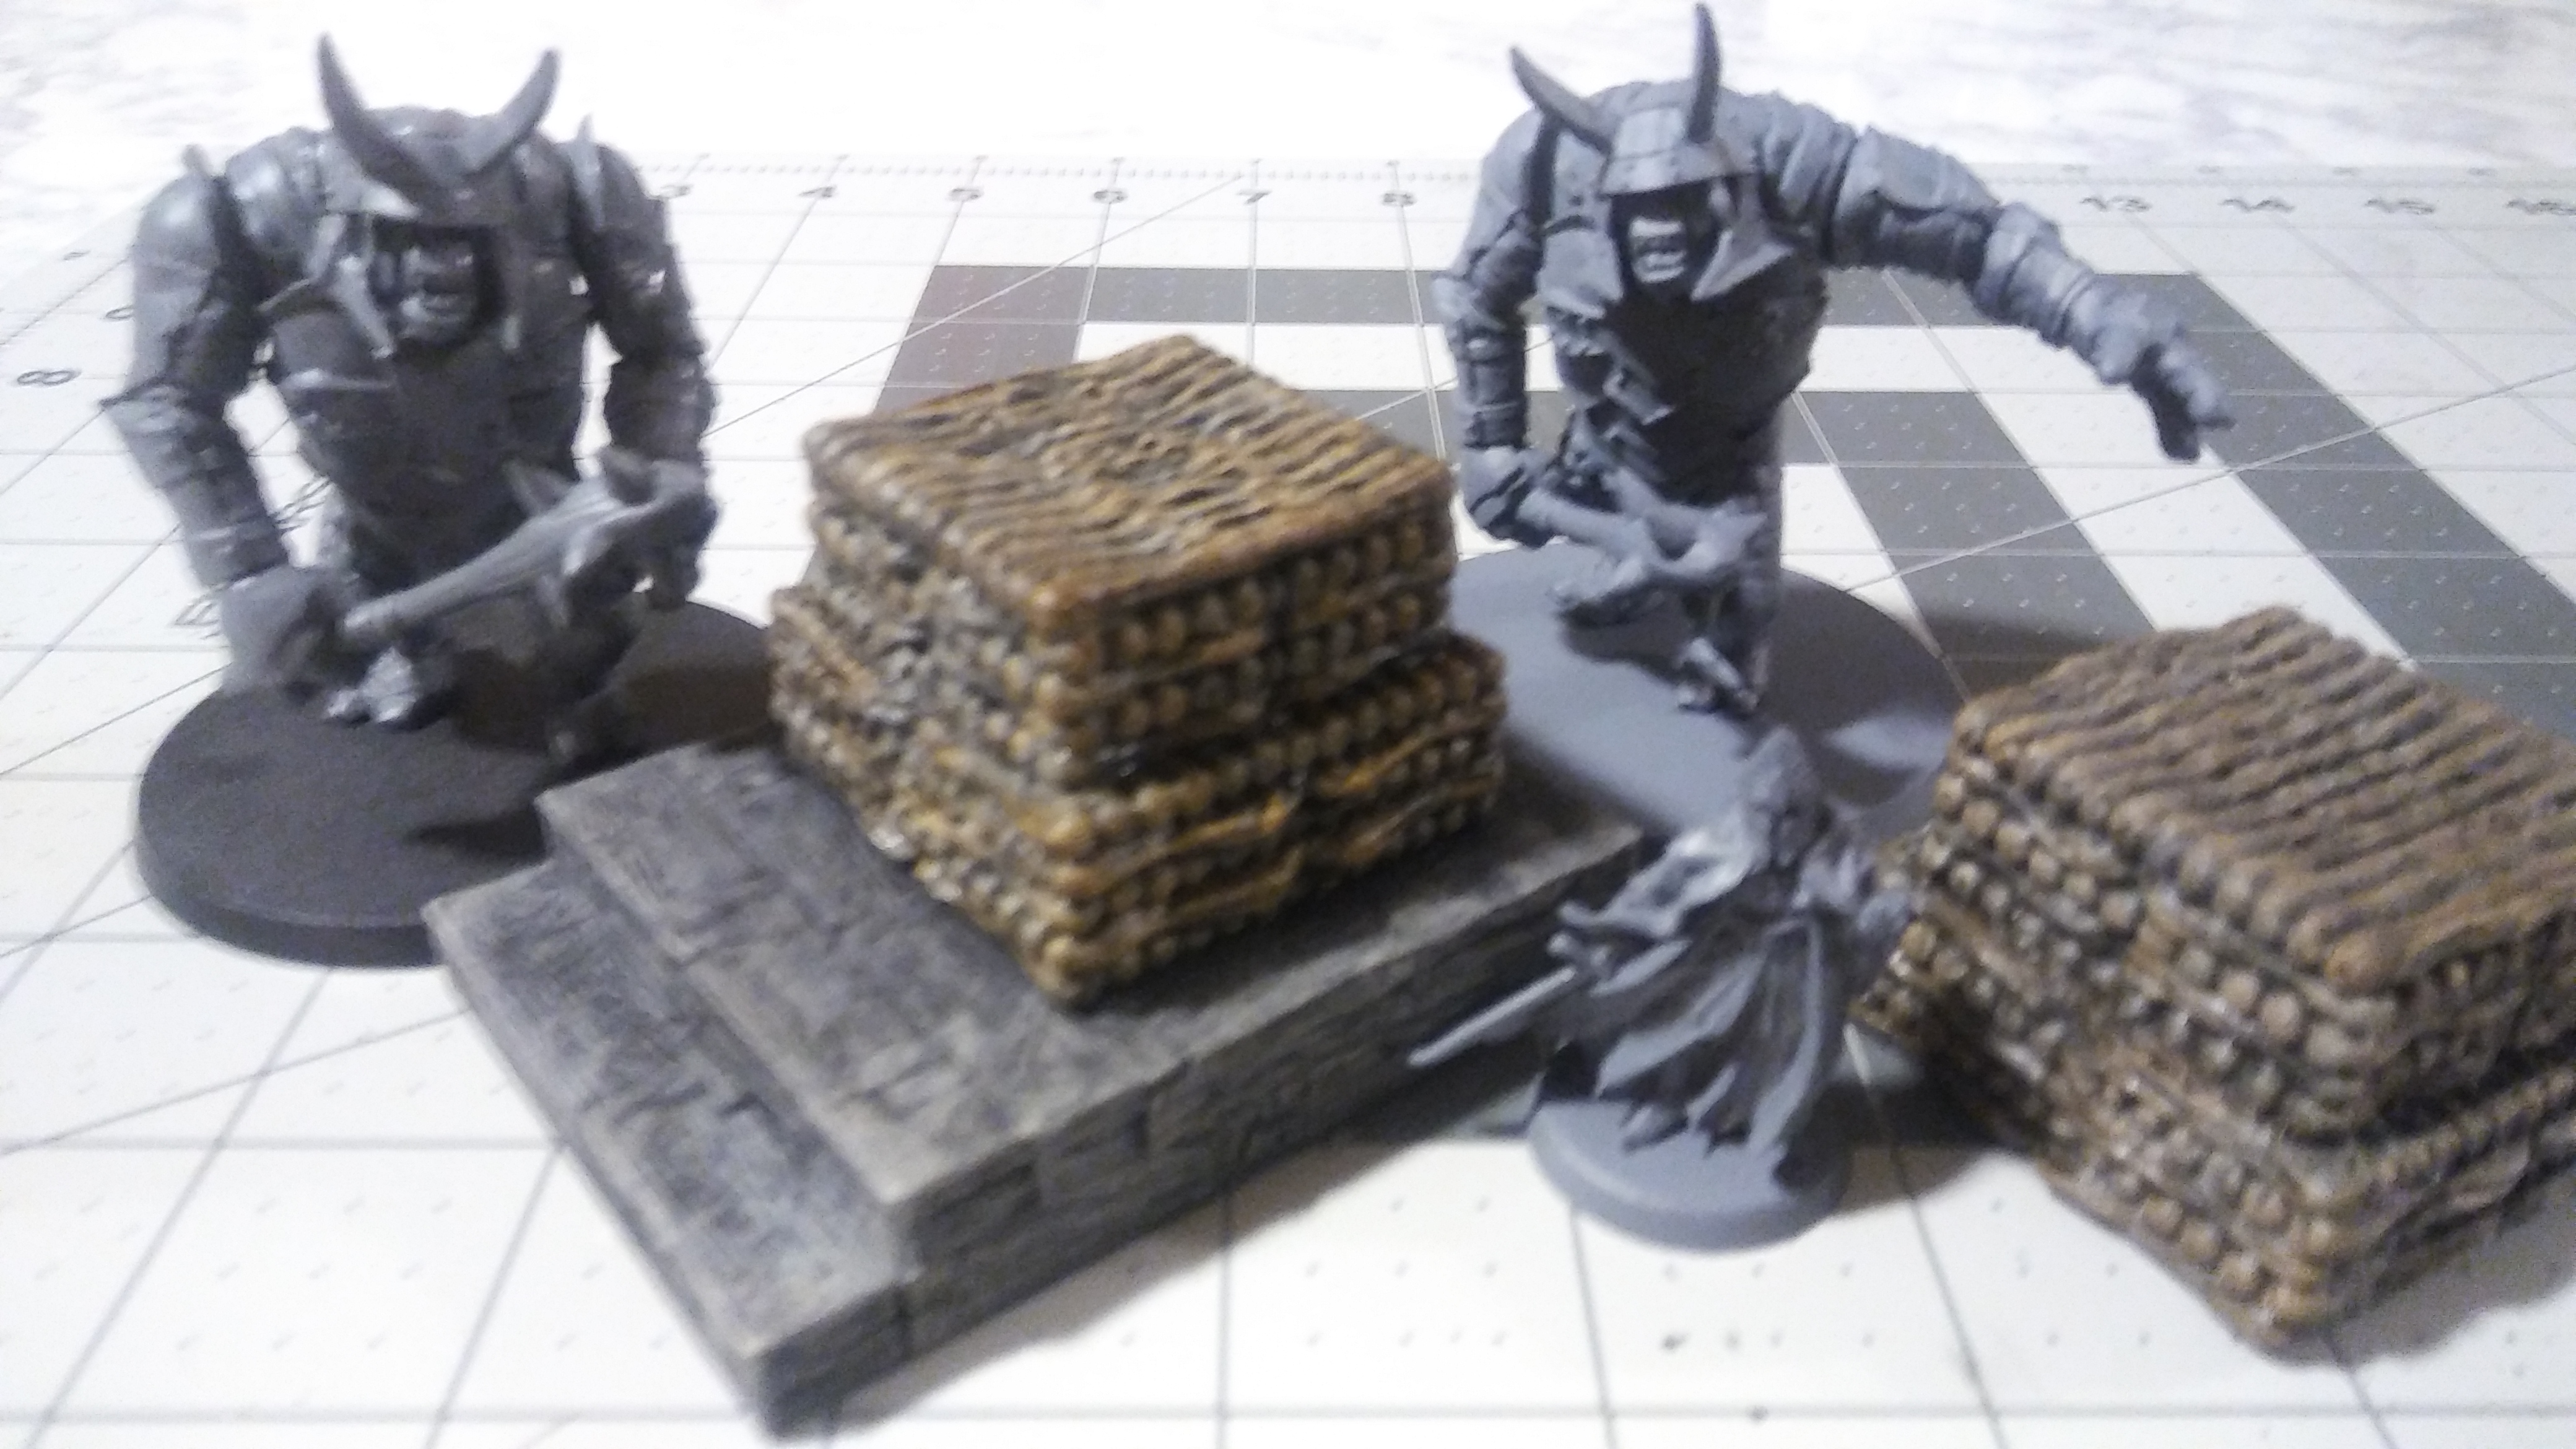
As you can see in these pictures the scale of them. The top step is just large enough to keep a figure in place. Unless its weight is not centered very well.
I was delayed...
I was hoping to show some pictures of the painted Wooden Pyres. But my base coat is taking way to long to dry.
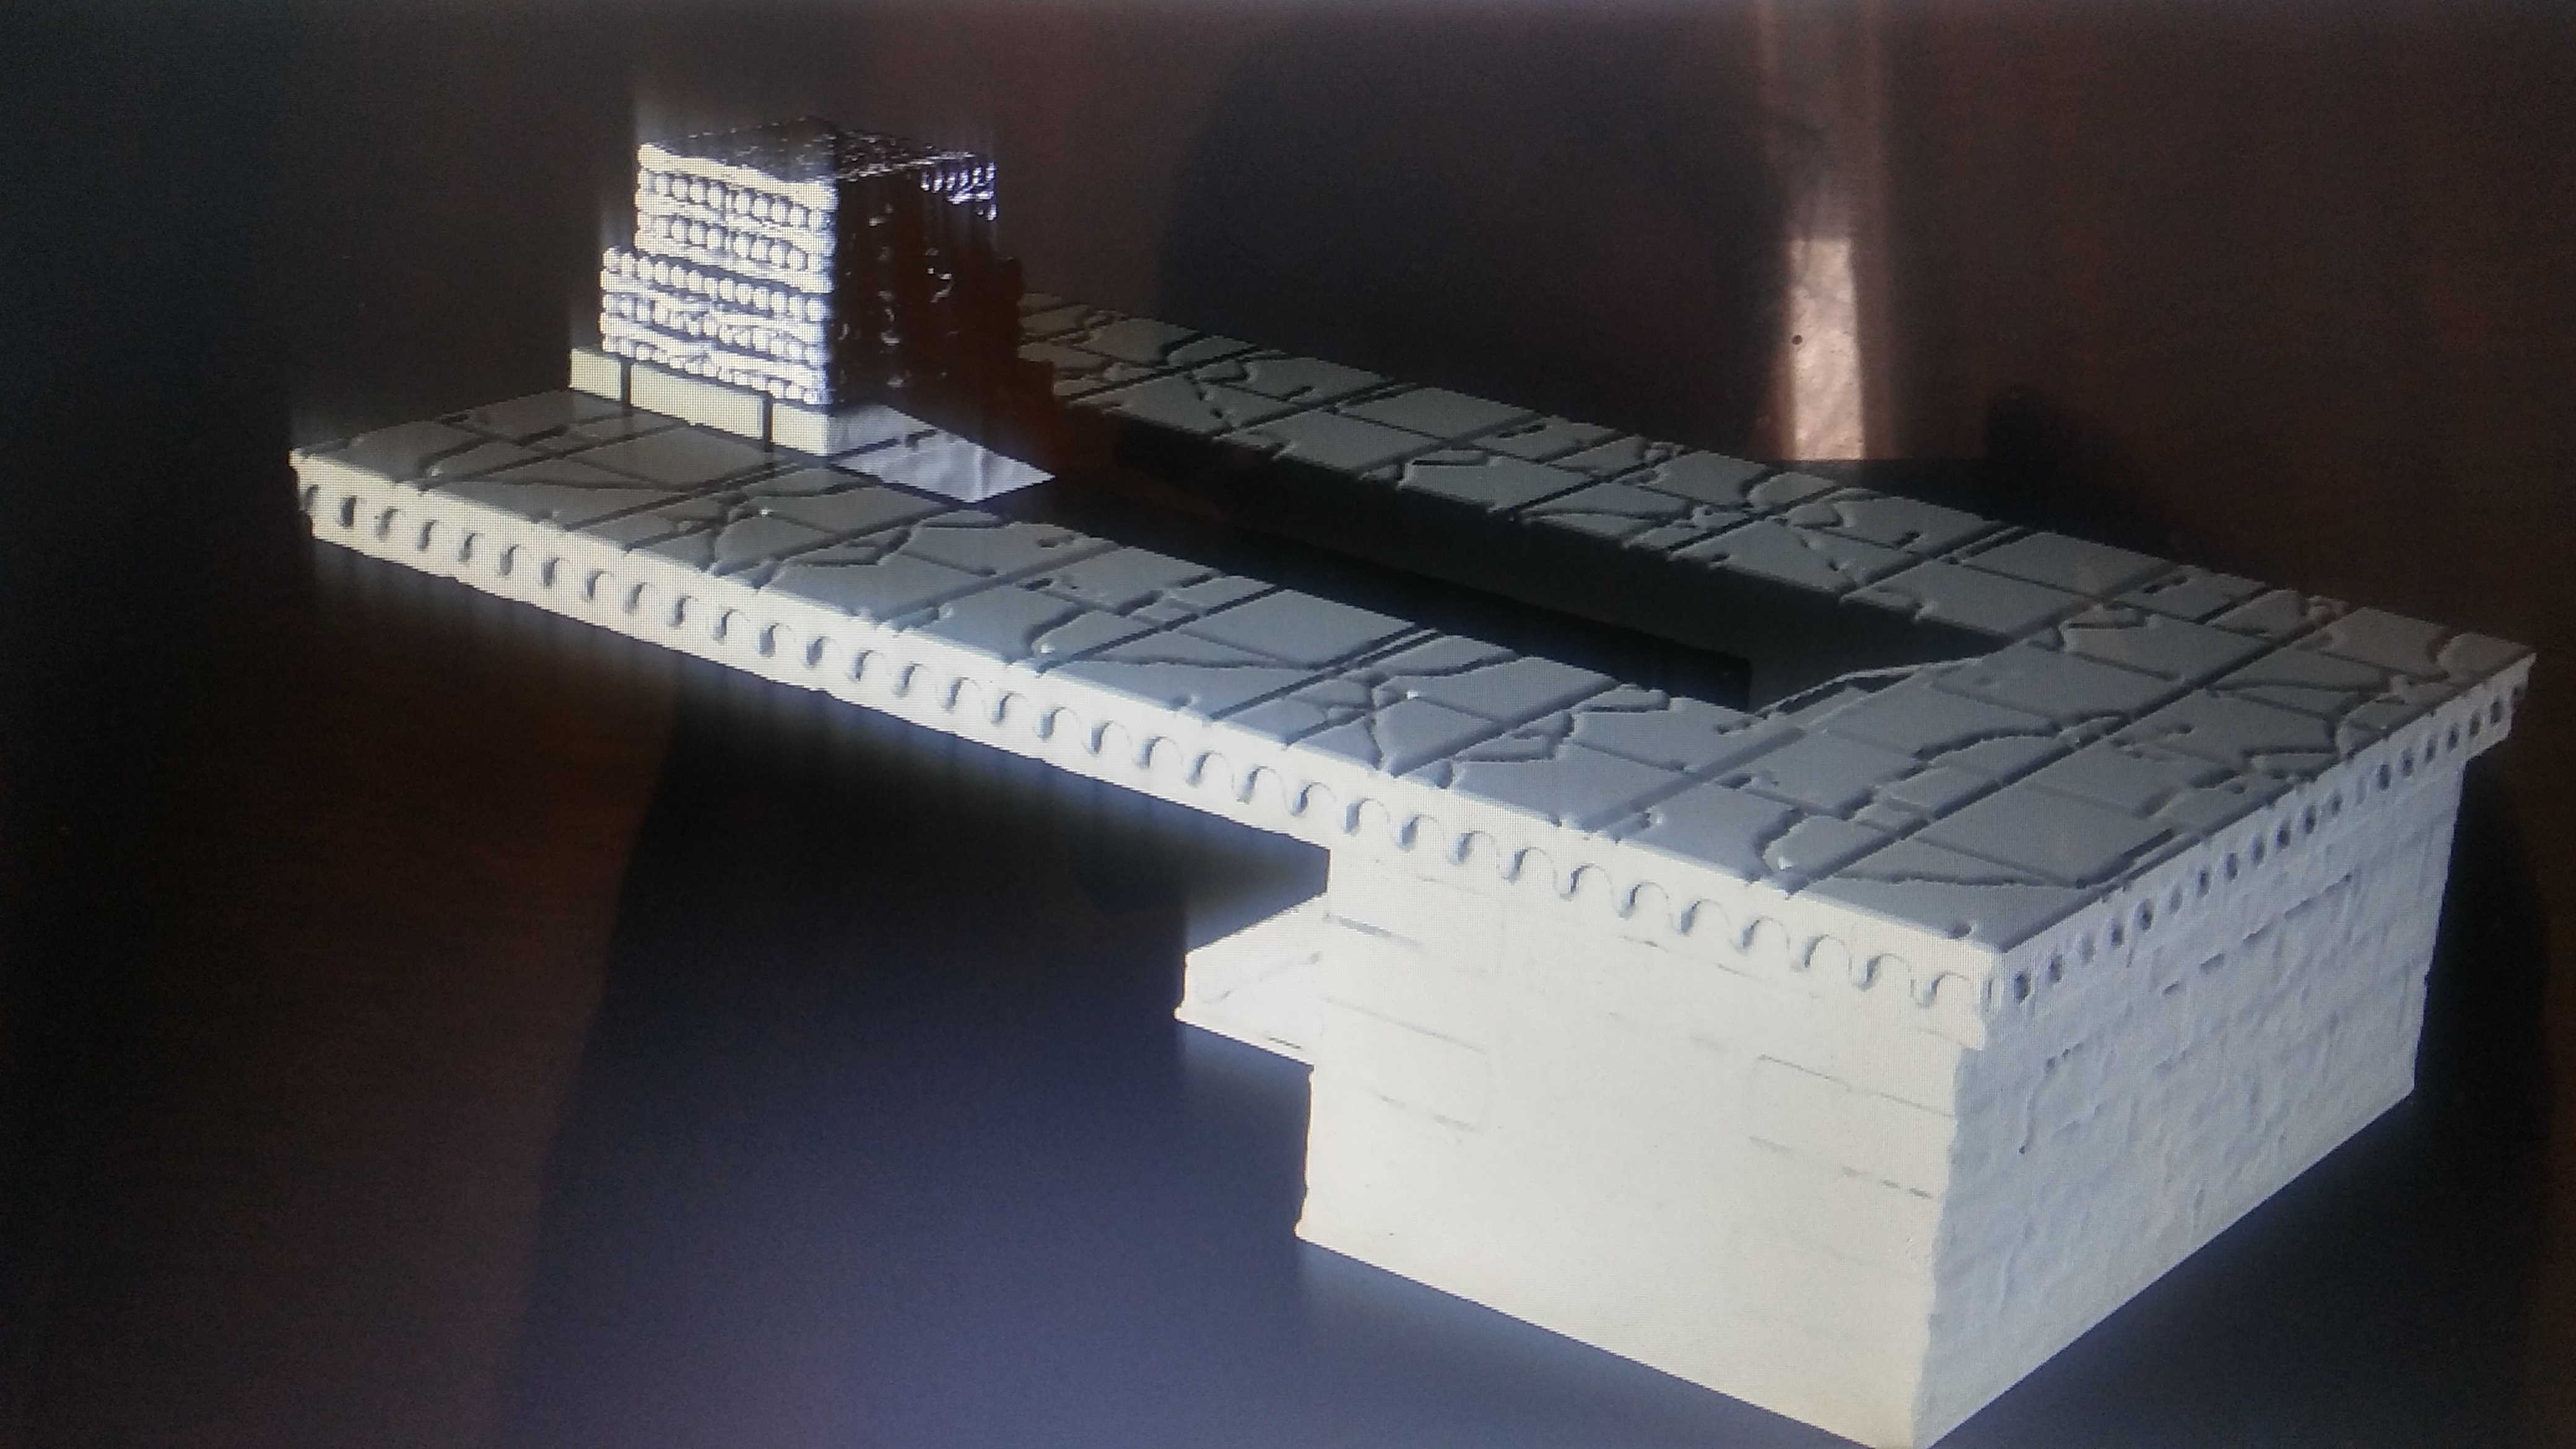
Since we are all dealing with that. I cut up Amon Hen into the 6 parts like I mentioned in the post earlier for 3D printing. If you haven’t guessed it, this also means the 3D model is finished.
Cutting up 3D models is something relatively new for me. It was a lot of trail and error until I figured it out. With the help Meshmixer (free program) and Angus from Makers Muse (YouTube channel). He made the process easier to understand.

Here was the progress shots of meshing out Amon Hen.
I did put small pegs on the pillars and the base. So these pegs will connect with the holes I put in the platform.
Side note: I have not forgotten the two statues to the left and right of Amon Hen. I will start working on those later in the week.
Conjuring of cheap tricks
So I have been trying to keep this build with in the spirit of Middle Earth. By trying to keep the visualizations in par to what we have seen in the movies. (With a little artistic leeway thrown in).
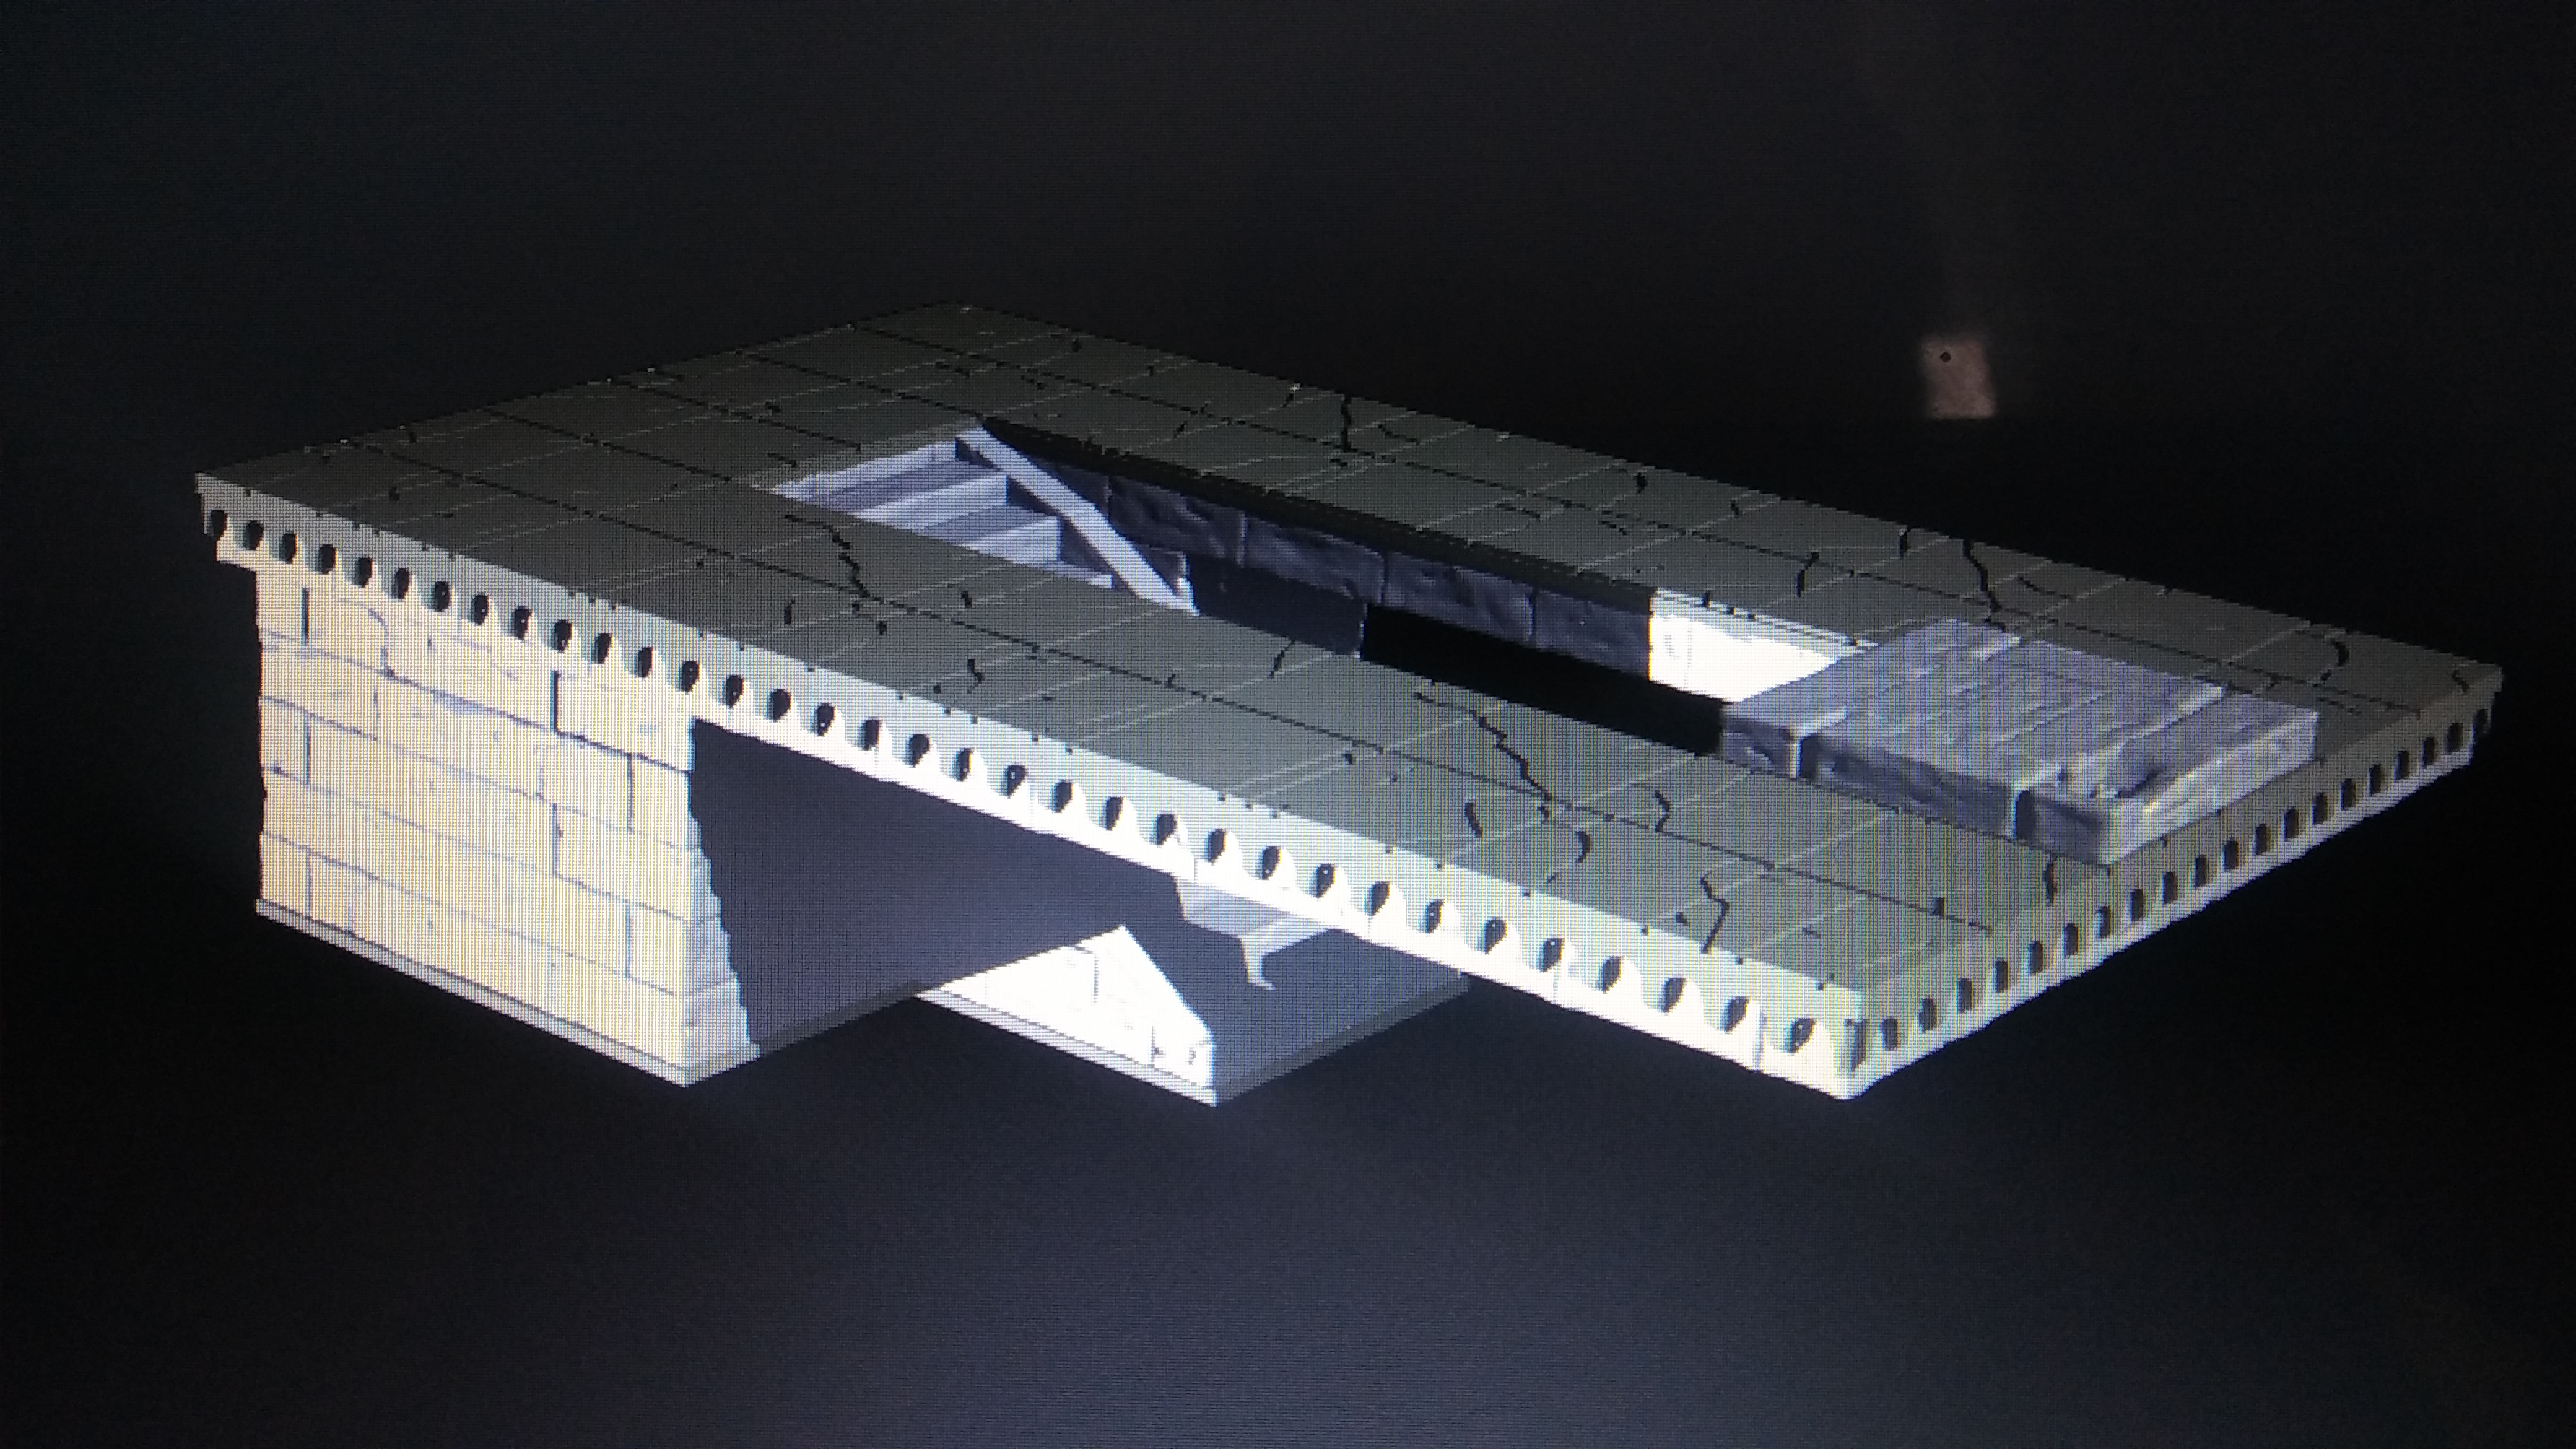
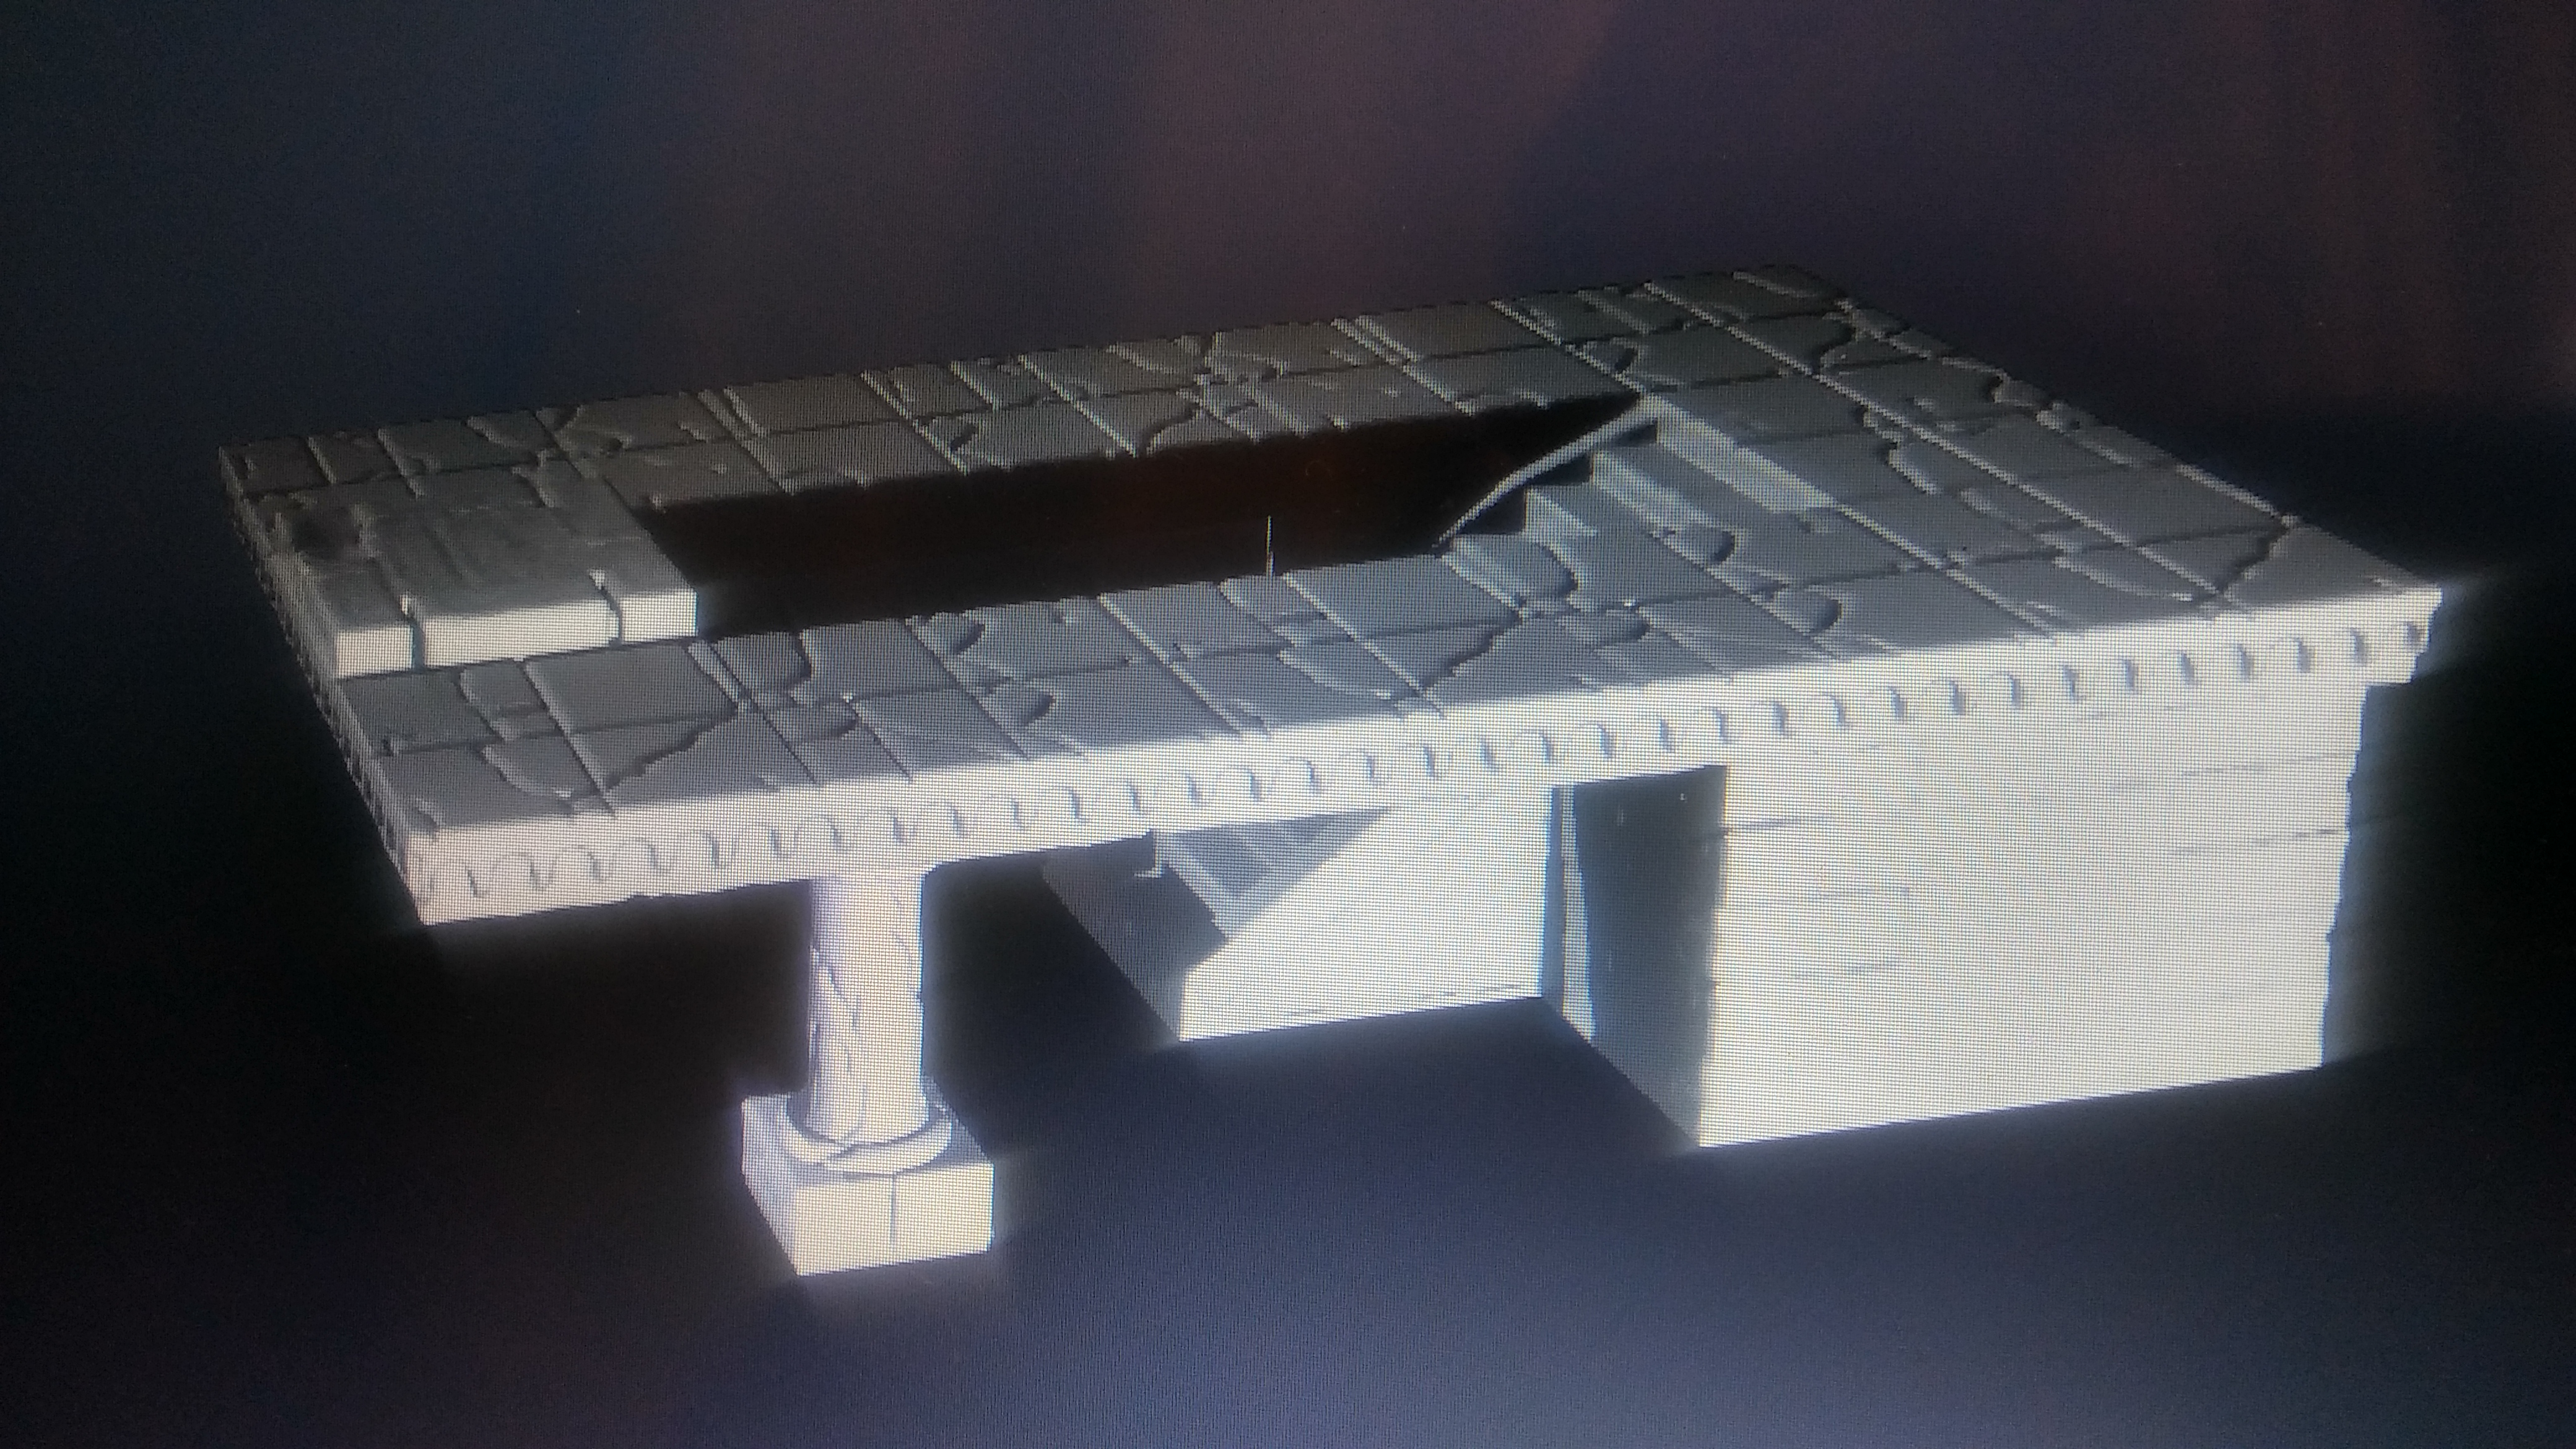
3D printing Amon Hen is going to be tough. Since of the large over hangs with little to no support. How the people of Arnor did it with actual stone would be amazing to see. Anyways, the point I am trying to touch on while I sit here on my lunch break at work is. Limiting the number of cuts/peices needed to 3D print.
And here is why, each time you cut a model in two parts. It will fit together just fine. But it creates a notice seam line. Some times you can hide those in between grout lines in tile and Some times you just can not.
Now I could cut this up into multiple parts and it would print just fine with next to no artifacts from 3d printed supports. Or cut it into 3 parts with supports and artifacts (huge mess to clean up).
My 3rd option is to break some of the visualizations/emersion and cut/seperate the whole upper platform. From the base with stairs and the pillars. Leaving the underside of the platform completely flat and not stone textured like it currently is.
Yeah I think I am going to do this 3rd option. I will figure away to make interlocking parts so assembling it together will not be a chore to do.
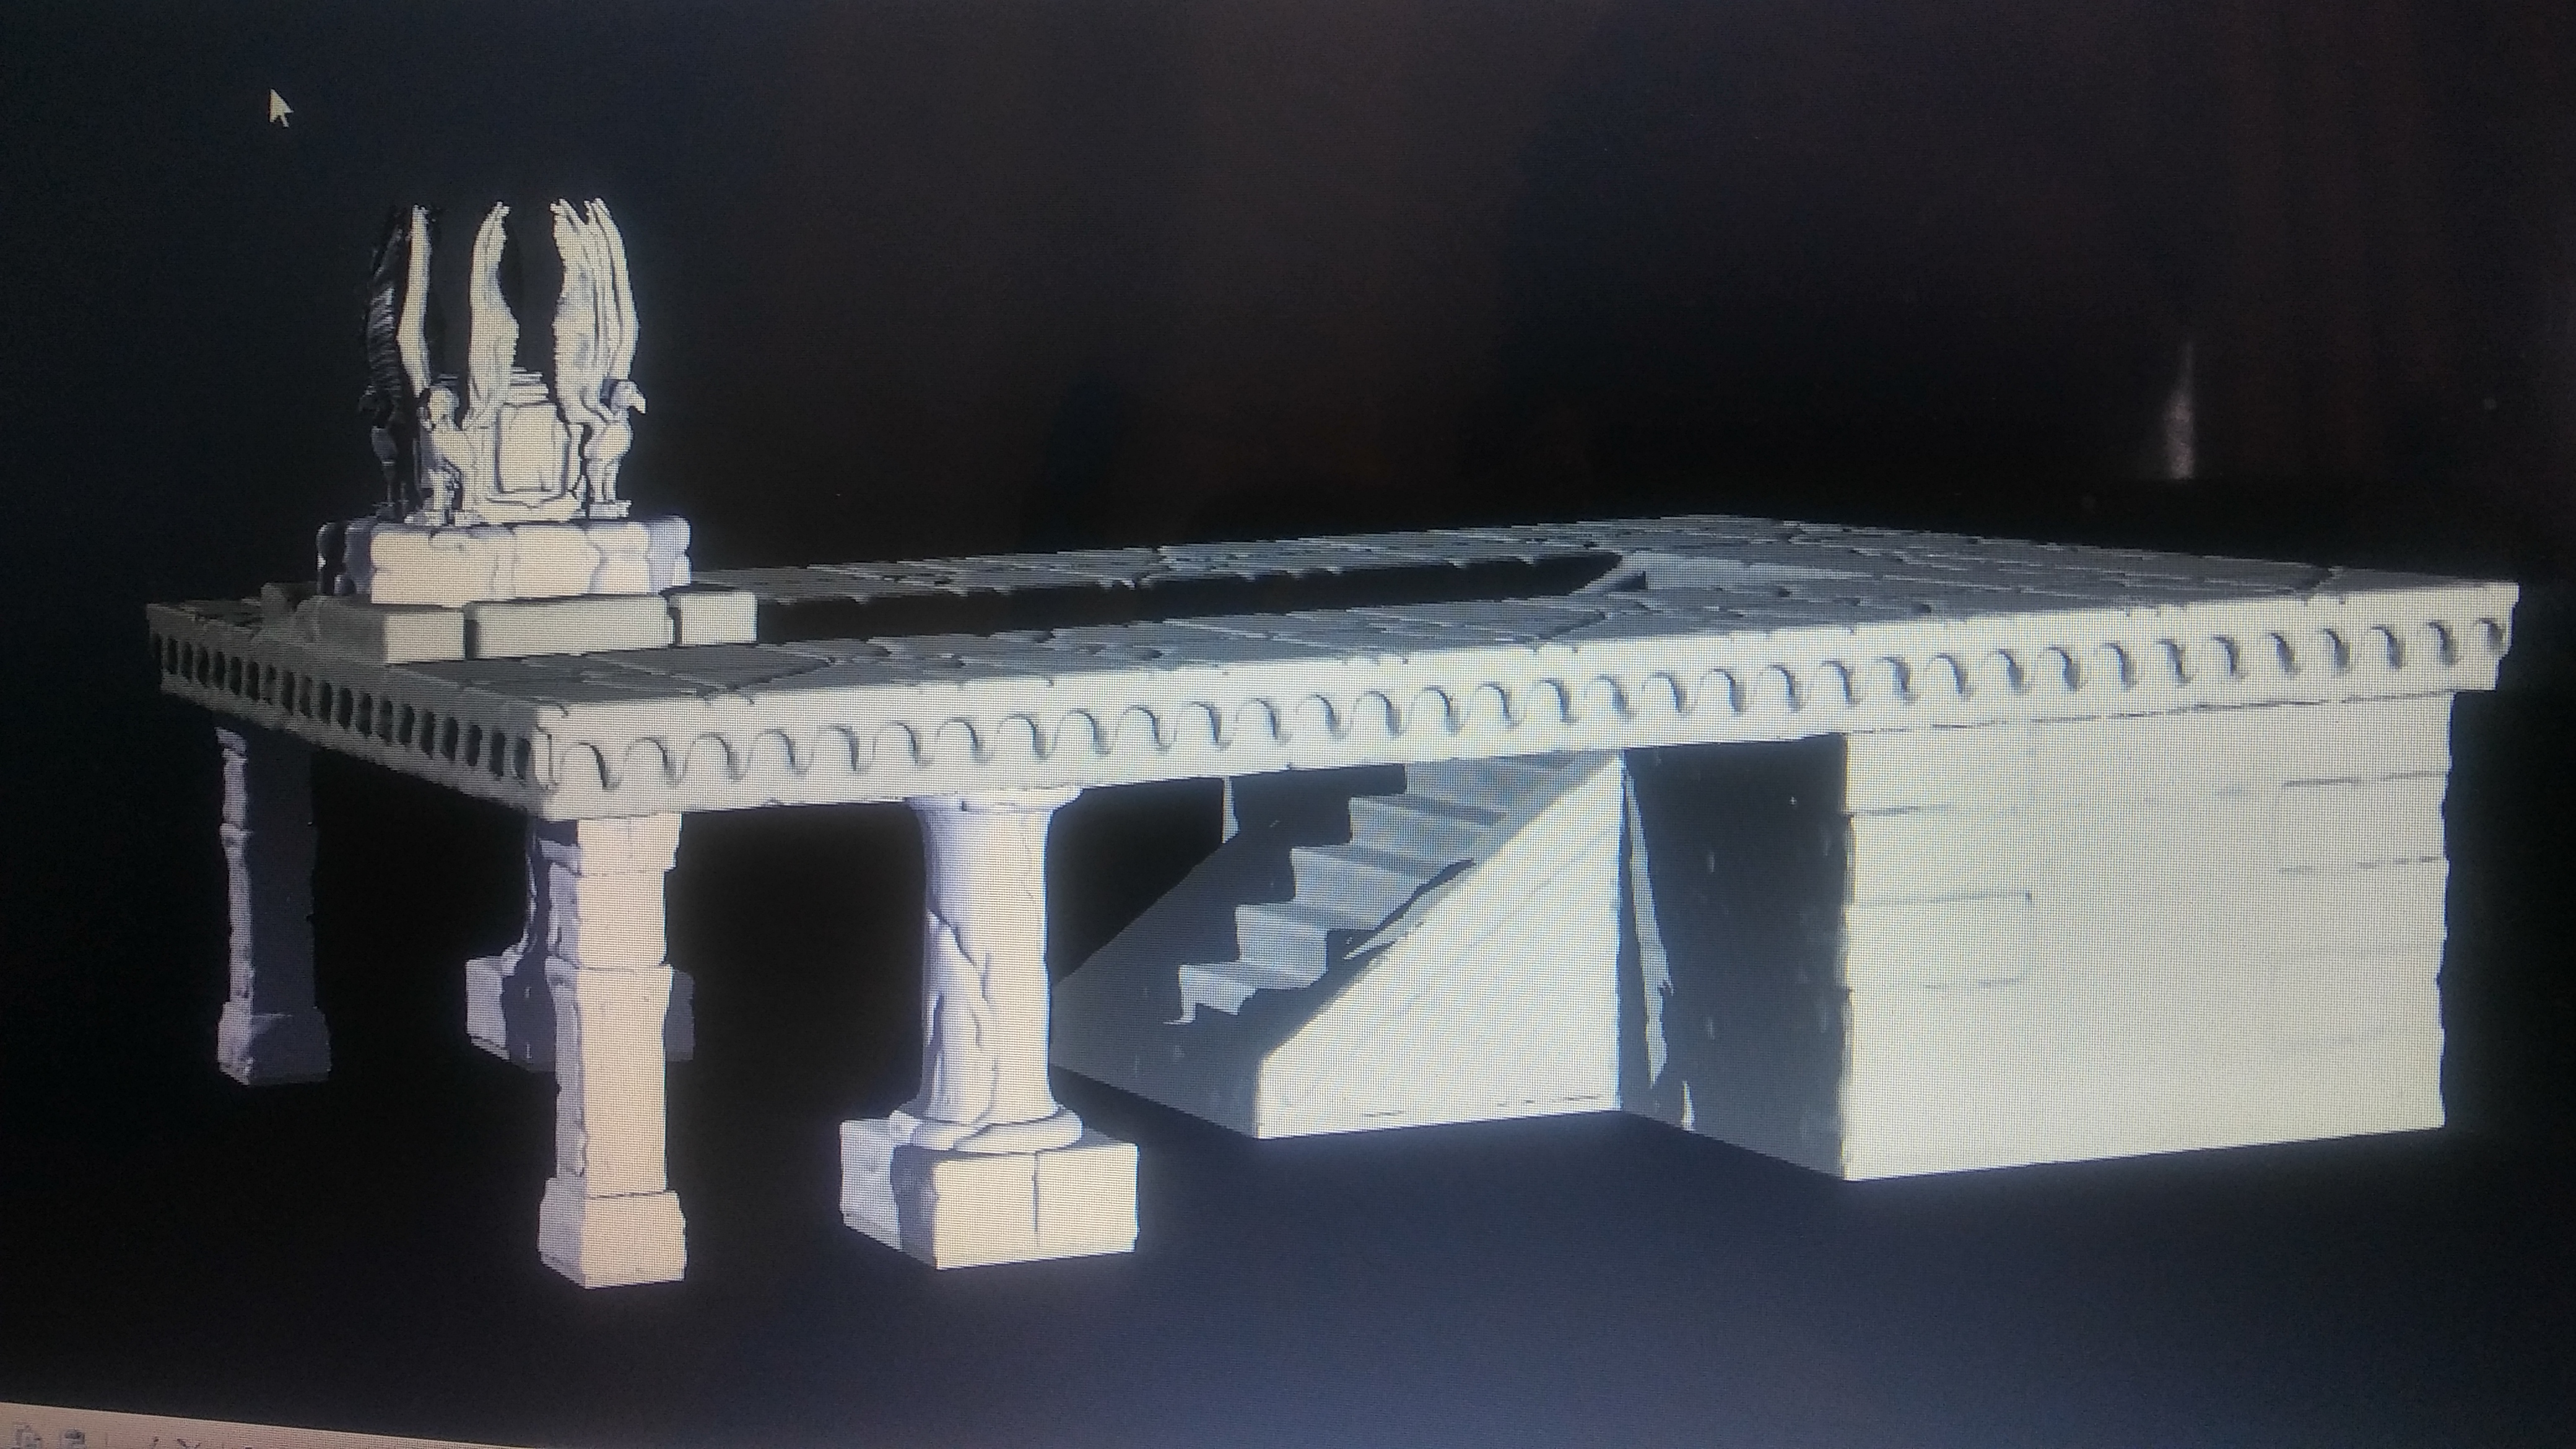
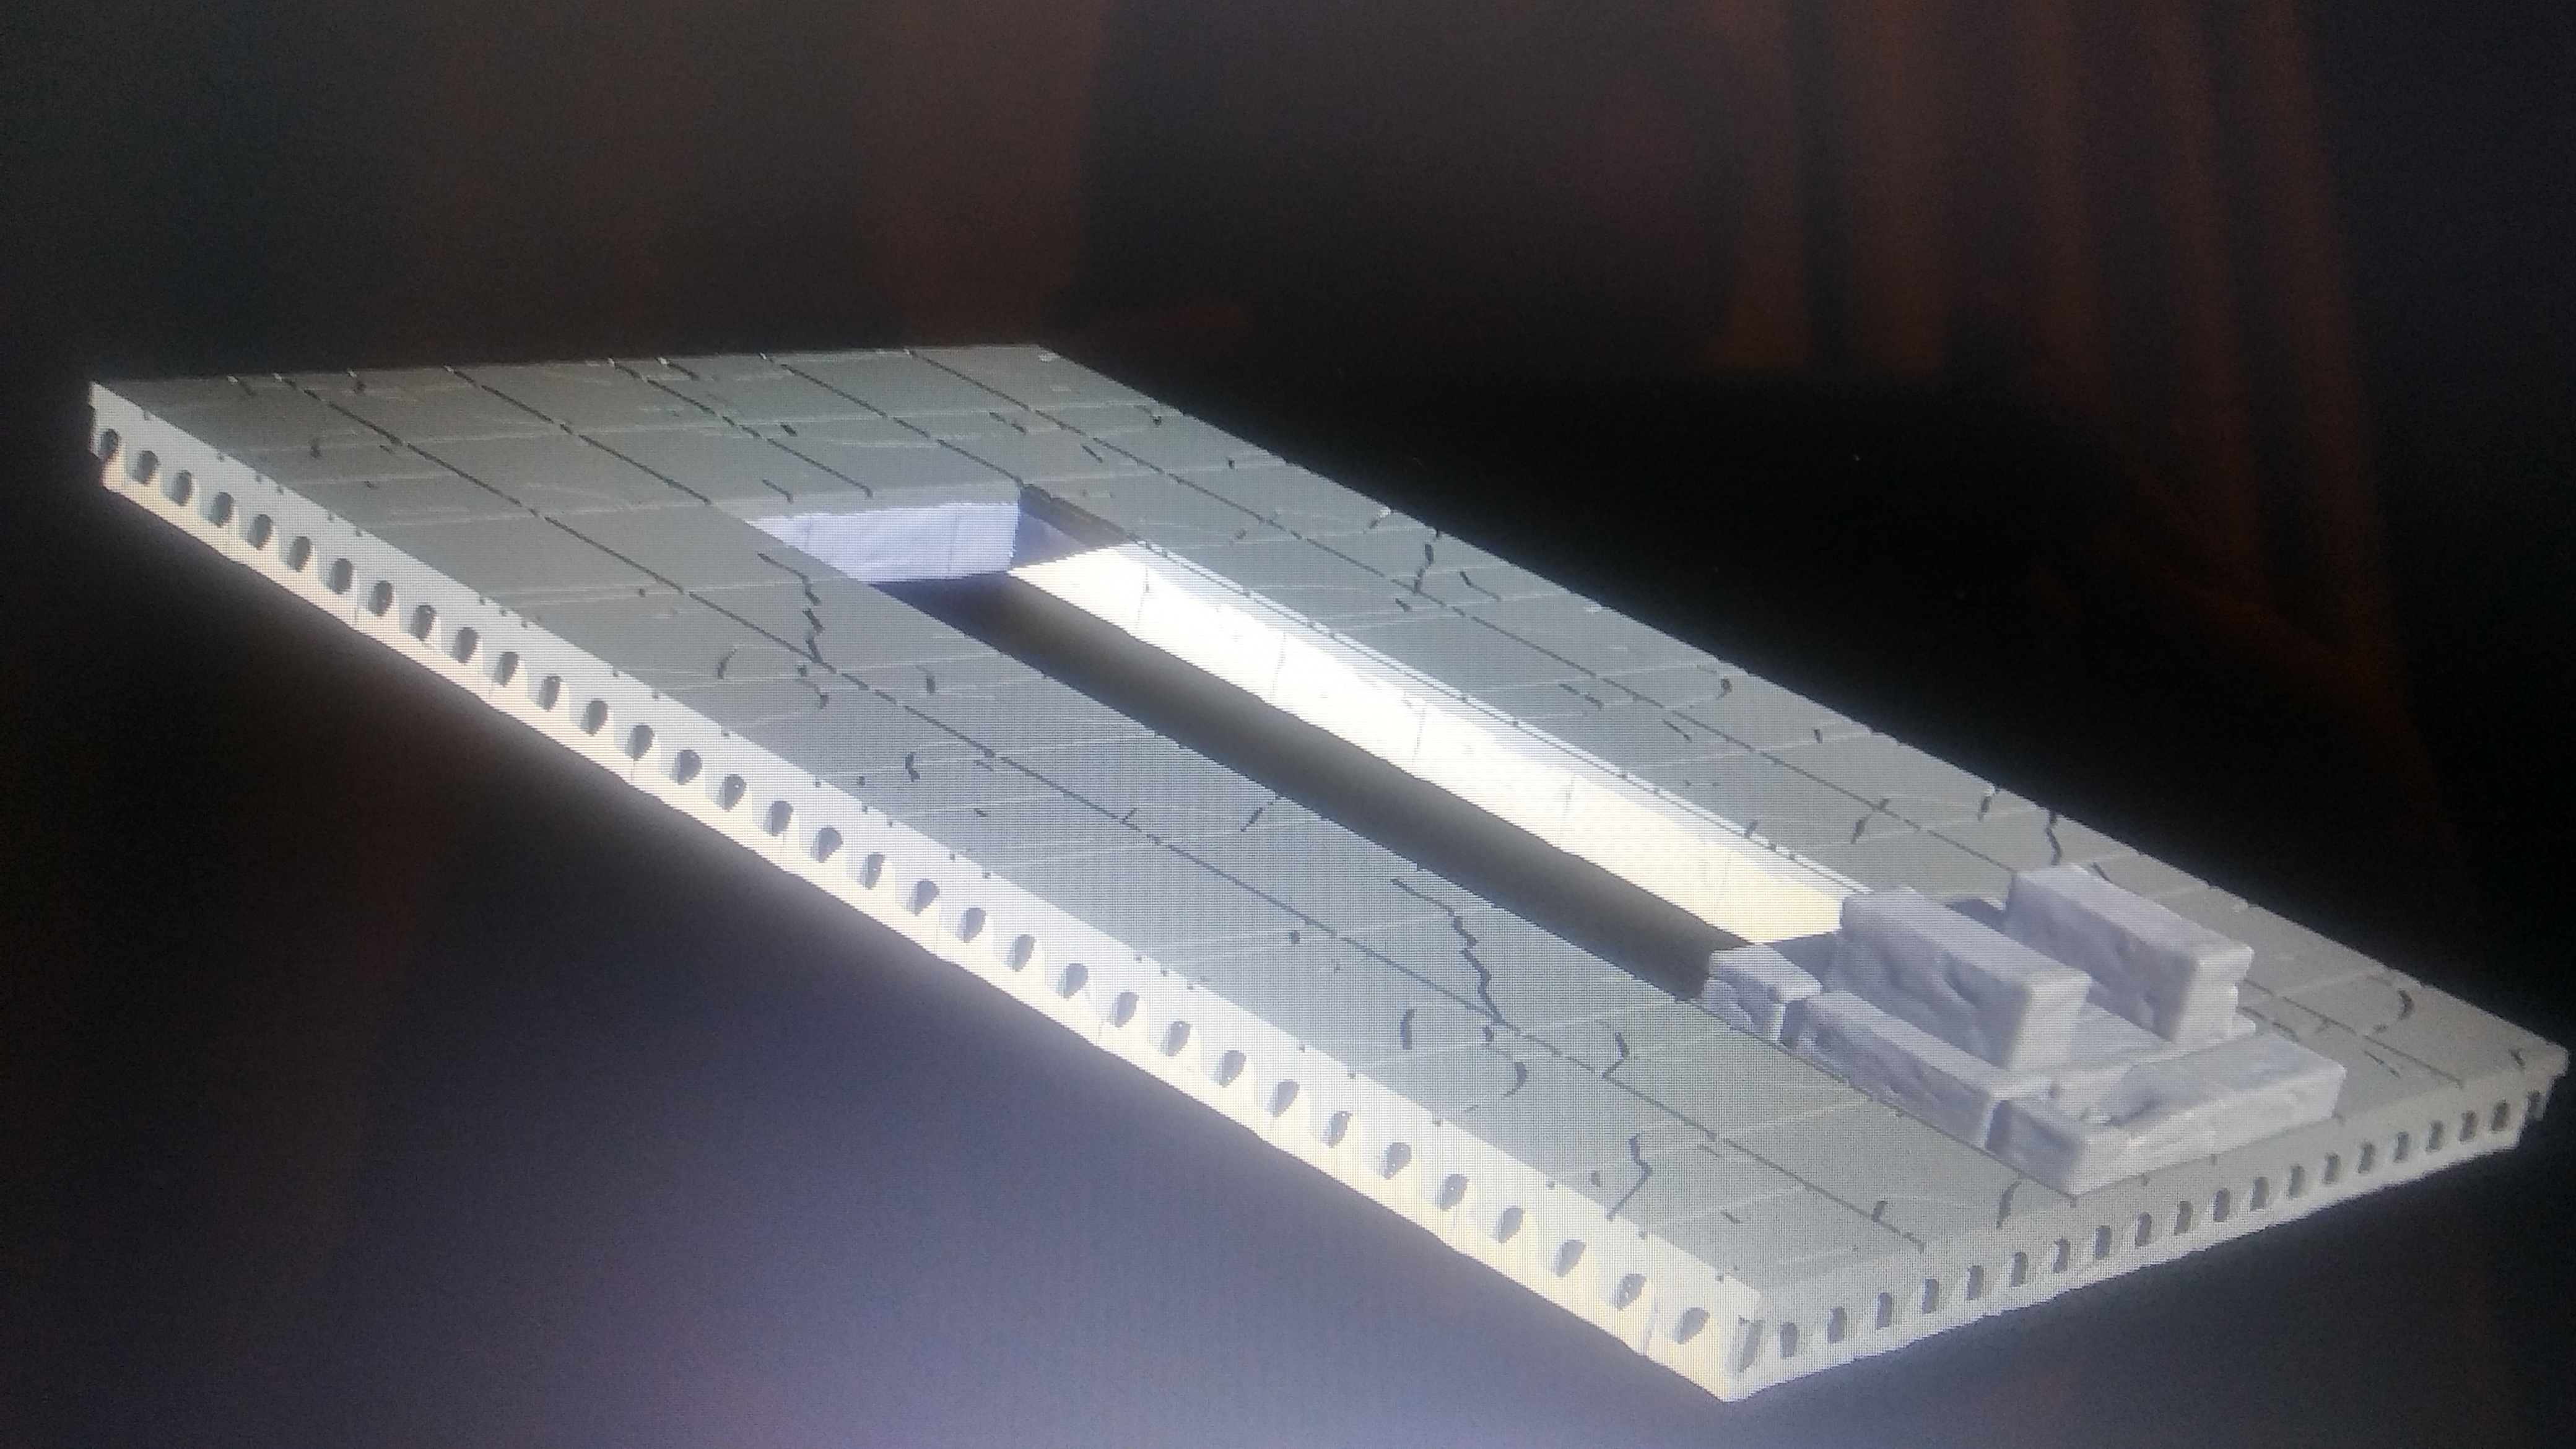
Here is what I am thinking on parts. The platform will be cut from the base and then broken into two parts. The base with the stairs will be its own part. The four pillars will be grouped into right and left sections. So two more parts there. Then we have the eagle statue. So roughly 6 parts to print to make Amon Hen.
The....the Eagles are Coming!
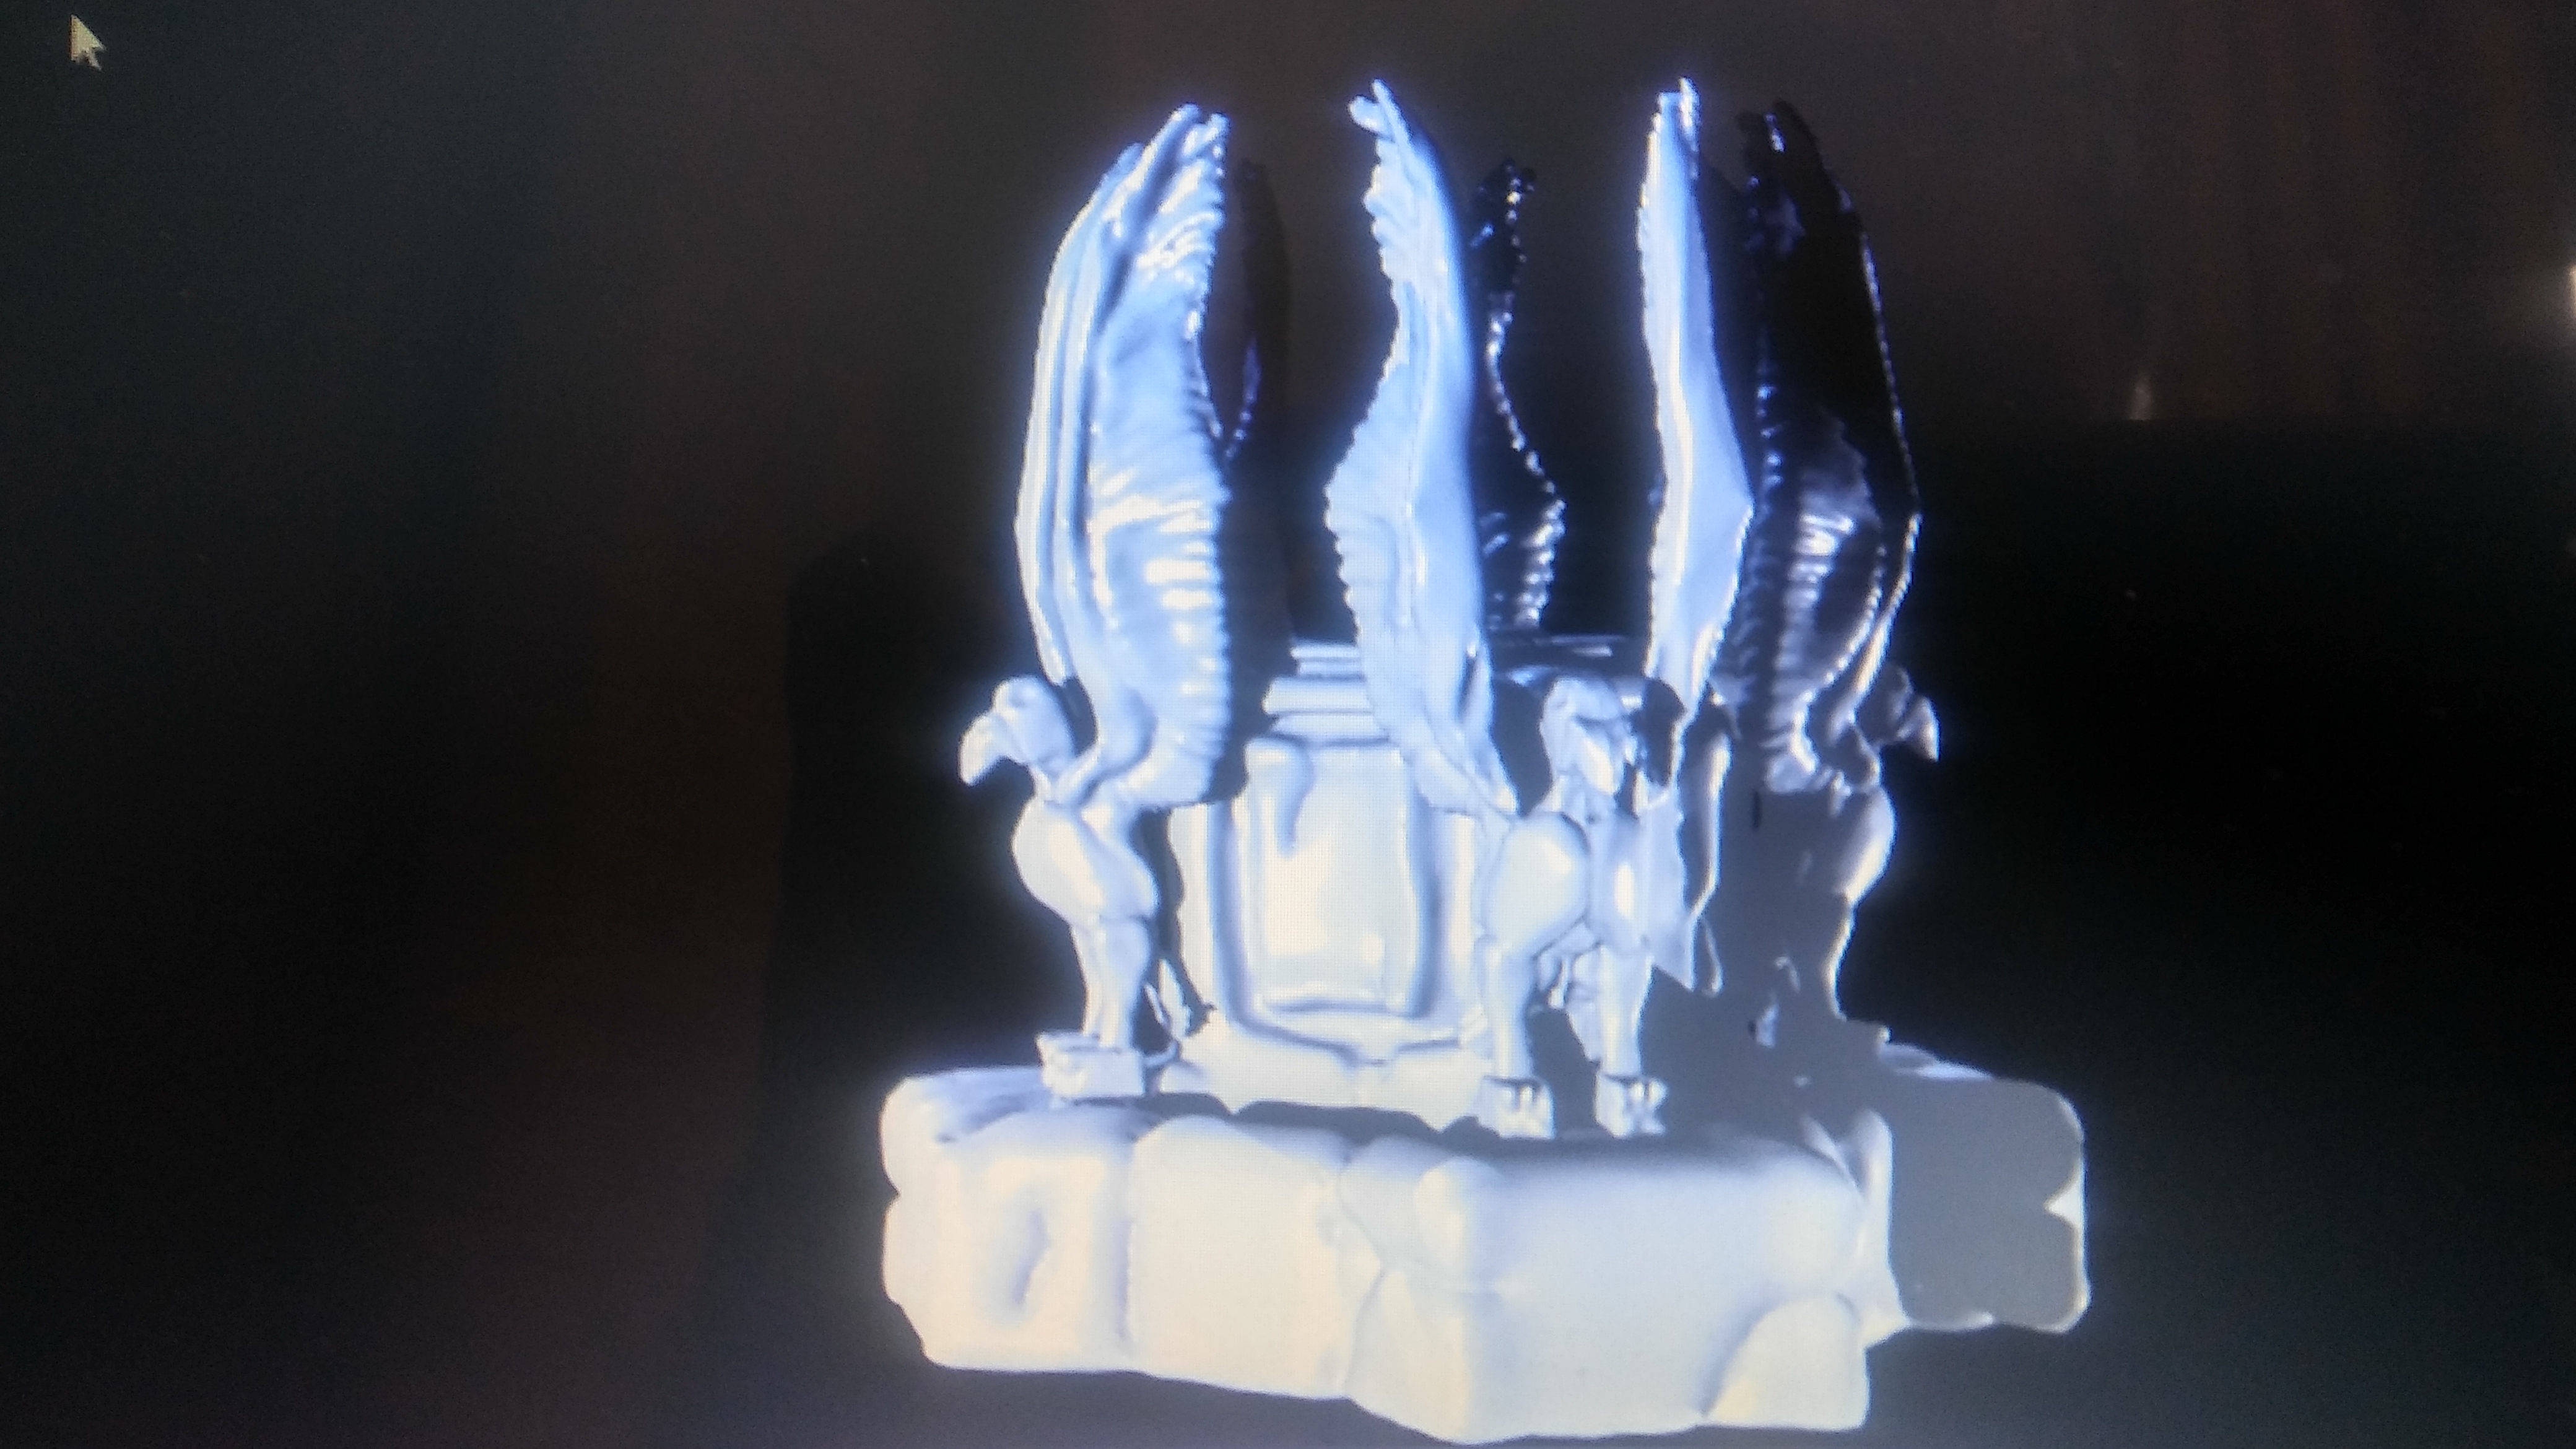
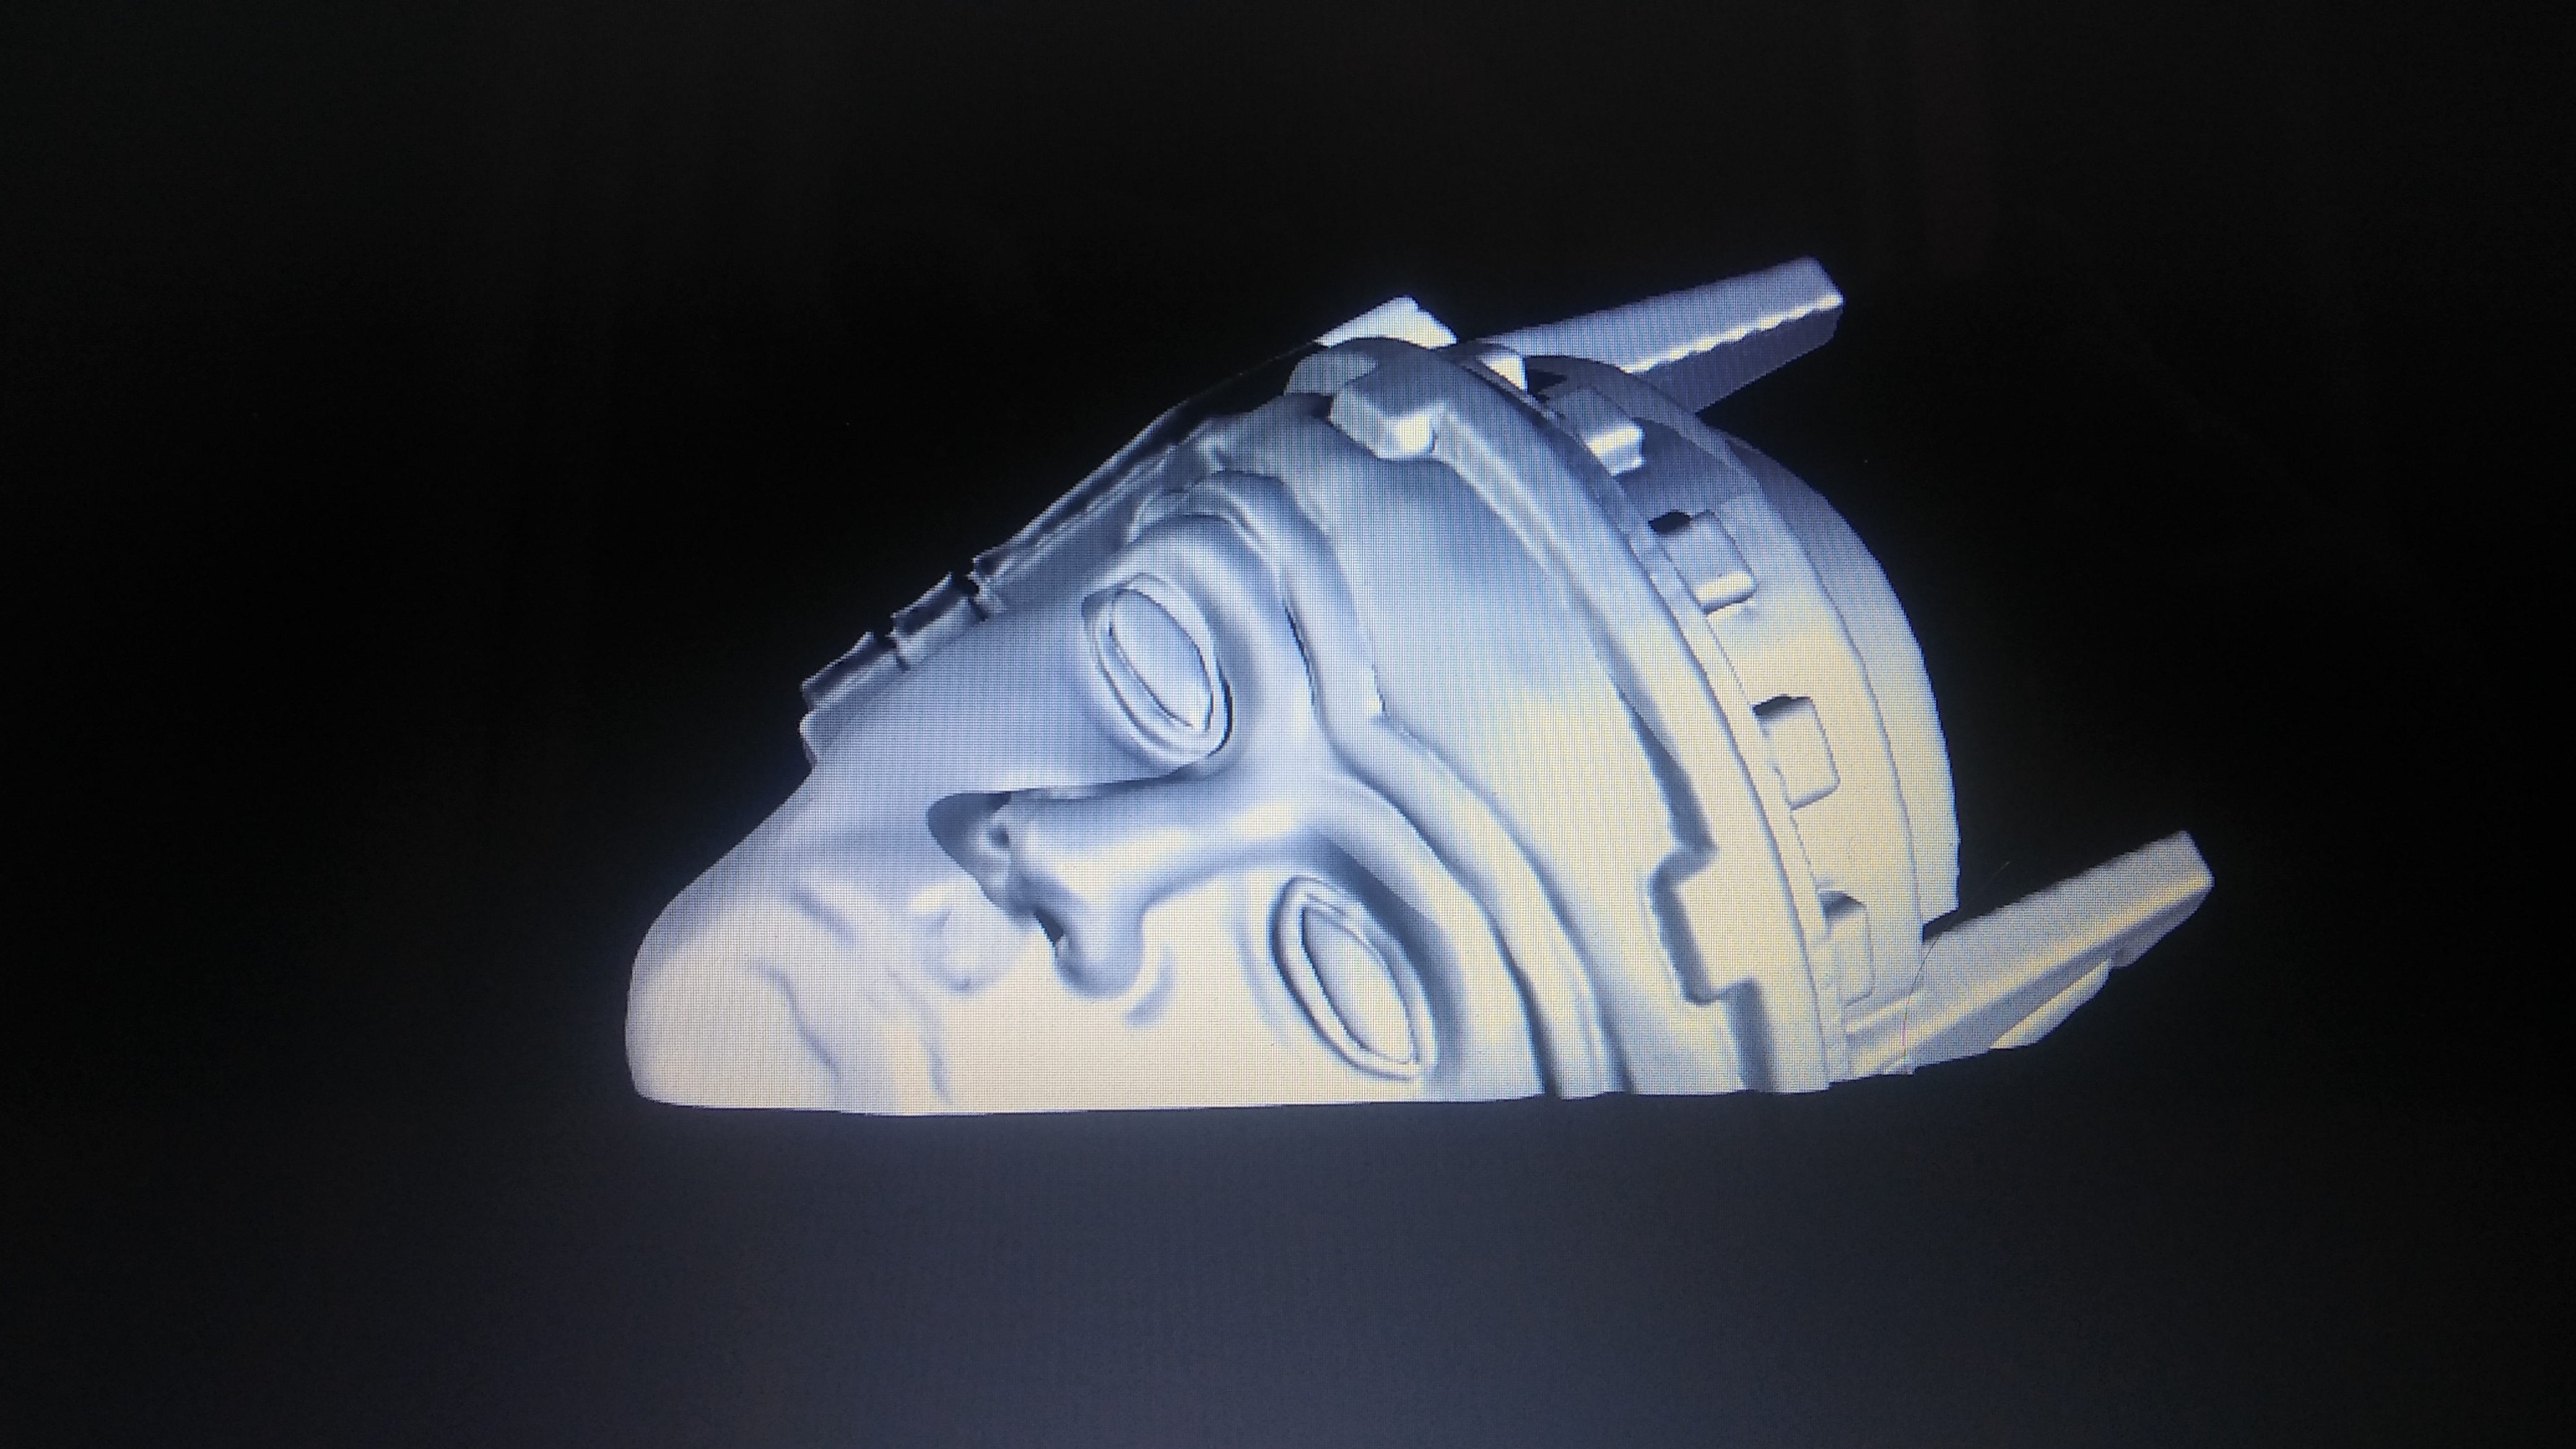
Since I am still waiting for my test print to be finished. I spent some more time working on Amon Hen. This time the focus was on getting the eagles that safe guarded a possible Palantir finished.
The pedestal between the eagles has a bowl like indentation. So you could place an object like a Palantir (glass Marble) there.
I am going to print this peice seperate. So I can switch it out with the wooden pyre. A little bit of poster putty should help keep it from moving to much.
Sculpting the Eagles was a bit of a task. I’ll share what I did to make them in a later post.
Stupid...Fat....hoBbit's!

Yup…ran out of filament during the print.
The good news! The stone work looks good. Very subtle and the very few layer lines that you can see plays in well with Stone brick.
Oh I should of mentioned this. Most people tend to print at .1 mm layer heights with terrain. It speeds up the print process but the trade off is more noticeable layer lines.
I normally print at .08 mm layer heights. It may add a few hours to a project. But if you are already printing something for 6 hours at .1 mm what’s an extra hour at .08 mm. My CR-10 and Monoprice Mini can both hand layer heights down to .04 mm with out an issue. So .08 mm isn’t over tasking them.
Well 3D printer has been reload with filament and currently redoing the test print. It should be done close to 8pm (7am currently as I write this). It may go over in time, those slicer programs always under estimate the print times.
Gondor calls for Aid!
So I had this random thought. I like my terrain peices to have multiple uses. Just building Amon Hen is a great undertaking. Now giving it more options to be used on the table is always an excellent idea.
So I originally was going to make a Gondorian Beacon. Before I tackled a place like Amon Hen. Then I heard Ben talk during the Hobby Hangout. “Someone should build Amon Hen…” Well Ben, I heard you loud and clear!
I am just going merge these two projects into one.
As you can see I skipped showing off building the base of Amon Hen and the stairs. So I can show off the modular side of this project.
The wood pyre and the statue that most like housed a Palantir will be interchangeable. Giving you at least two different uses for this terrain.
Due to this wooden pyre is when I learned how many polys my system could handle. The 1st wooden pyre was 1.1 Million polys which I imported into the Amon Hen build which was floating around 350K polys. After many crashes and the computer processing this for 20 minutes with no results. I had to go back and reduce the pyre poly count down to the 50K range. During this time my original saved file never truly saved due to the poly count. Thankfully I had a reduced poly count back up to work with.
Once the pillars and other objects around its base are done. I will have to throw this model back into sculptris to increase its detail.
So I did a quick test print of the wooden pyre.
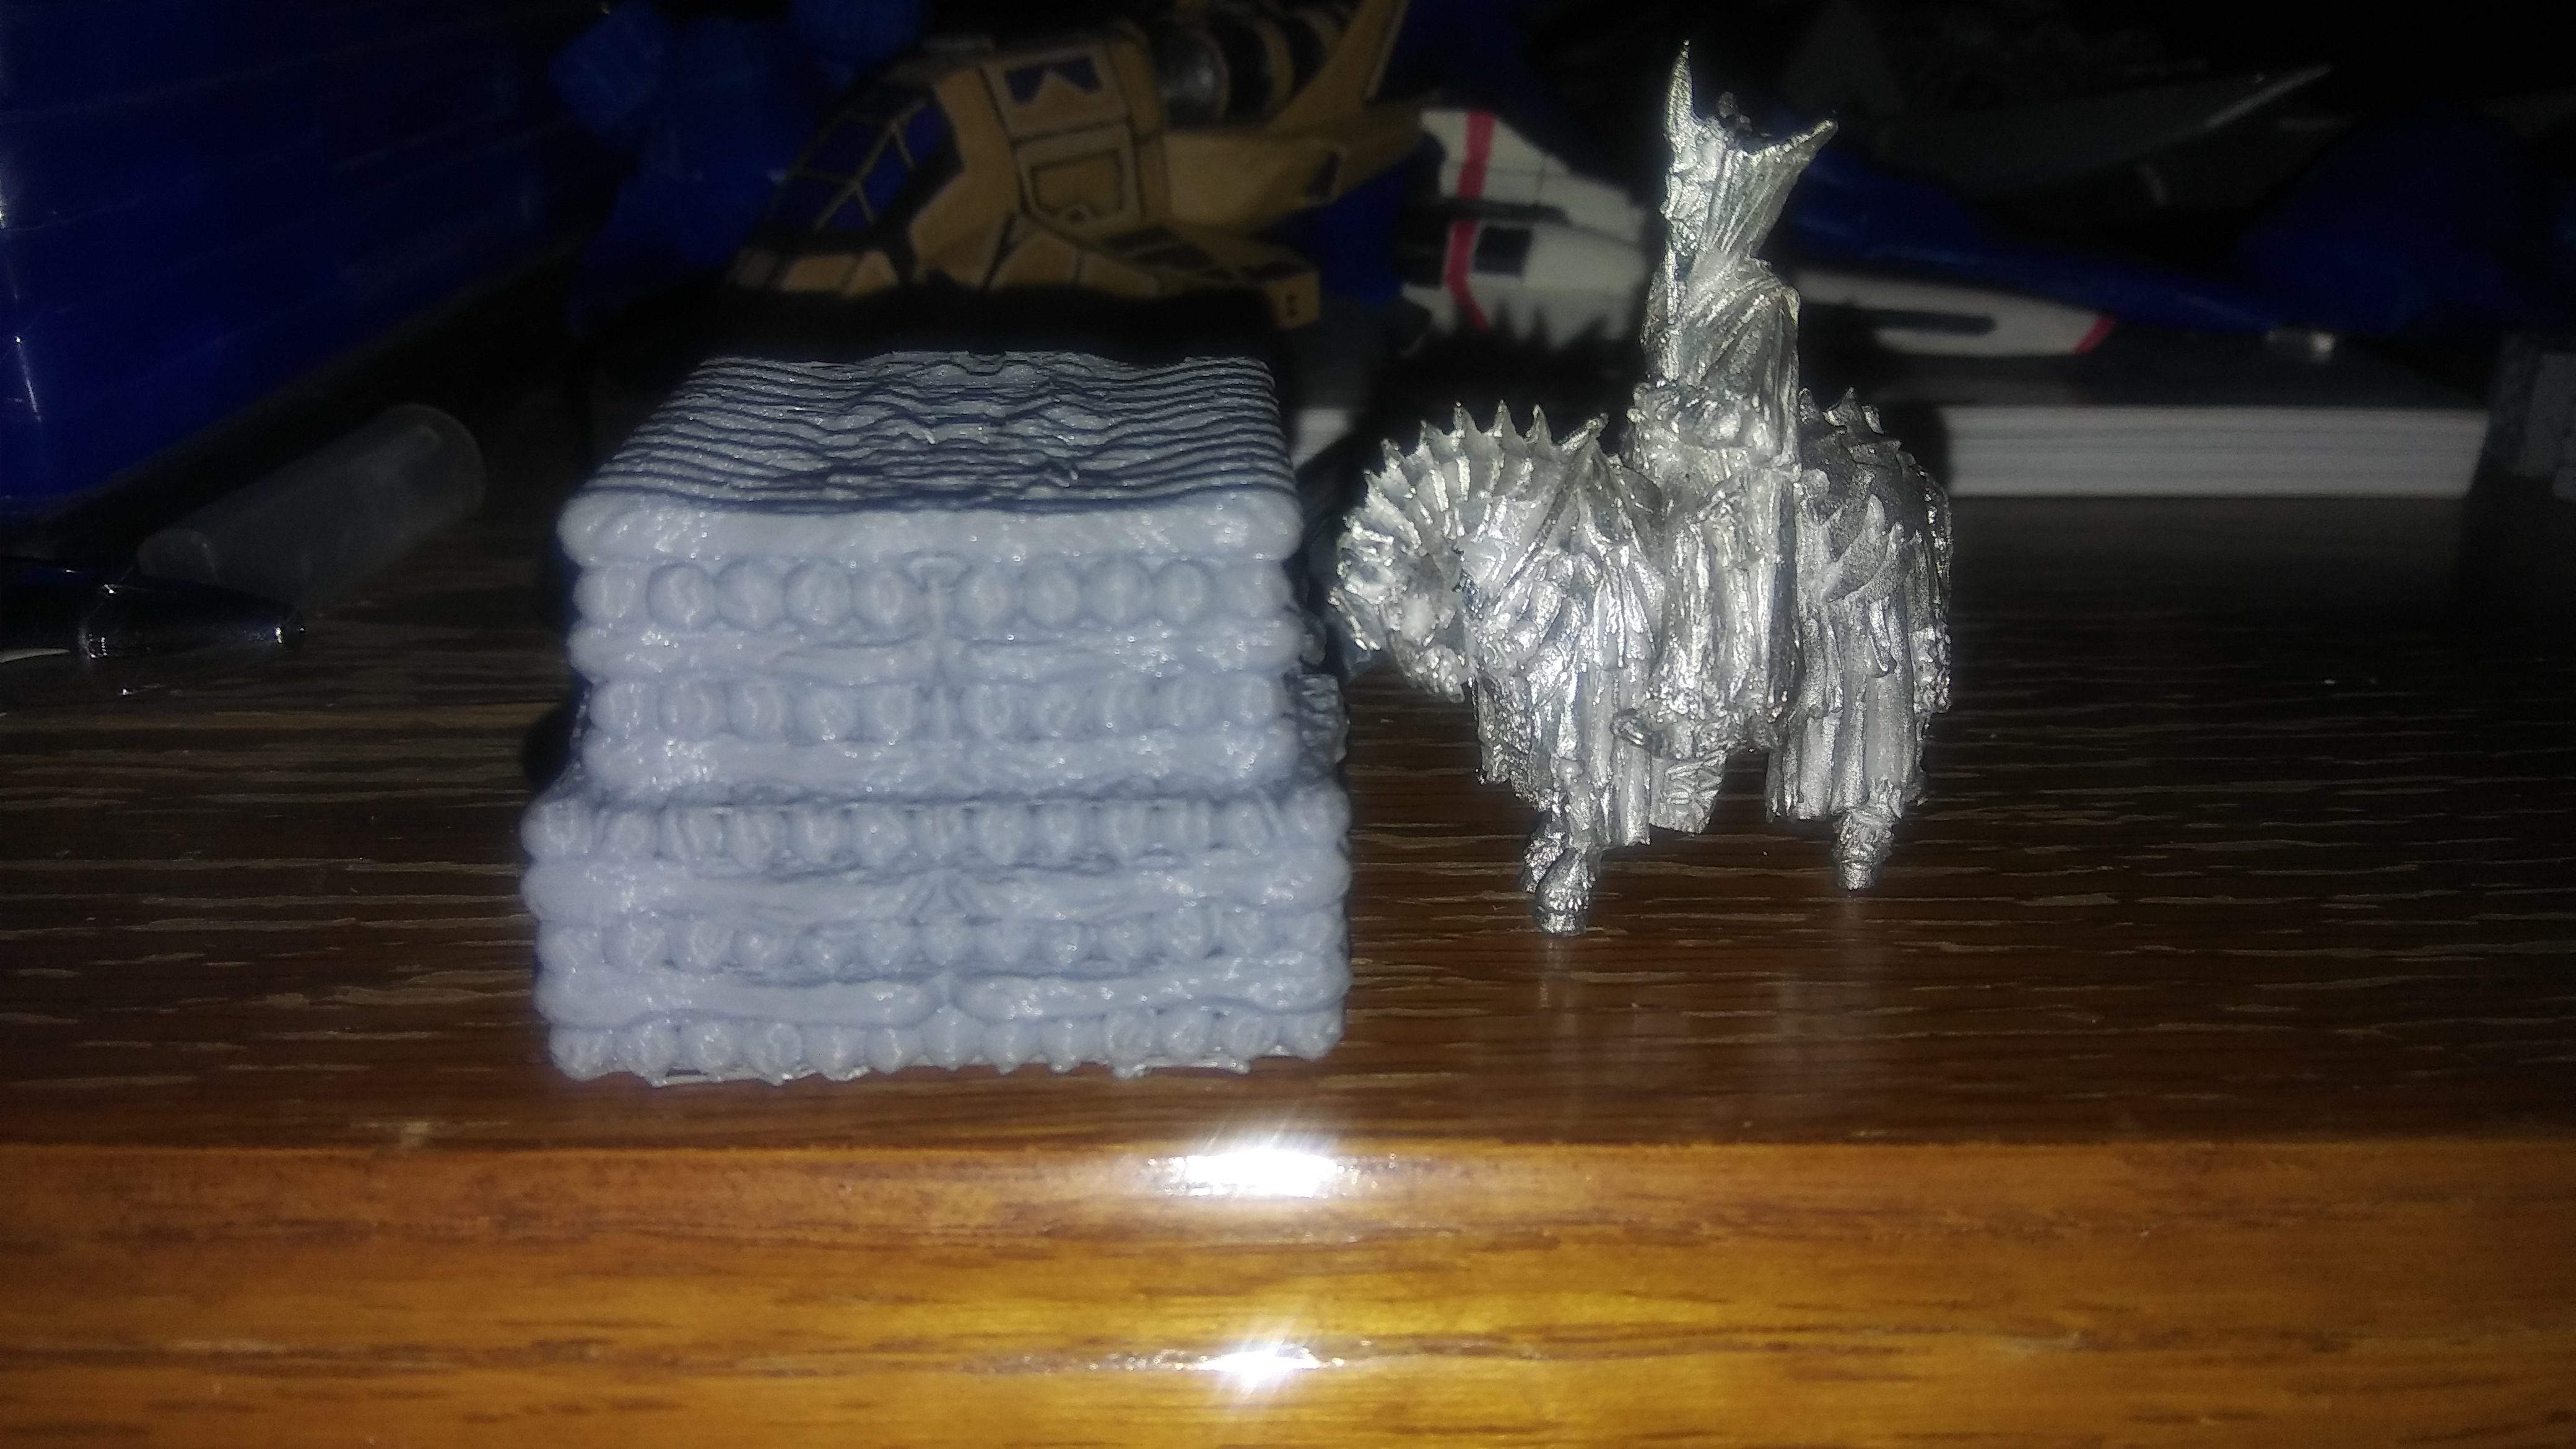
Not the best picture but it just came off printer 20 minutes ago.
I will paint this up tomorrow and see if those tiny details will show up.
Mean while, who wants just one beacon? You need many to signal Rohan.

This was the result, a simple two stepped platform to the Beacon. The top step is roughly 20mm deep so models should be able to come into contact with it. And not worry about falling over all the time.
This one gets printed tomorrow (Sunday). I will paint this one up and post pictures hopefully by Monday.
2nd Breakfast
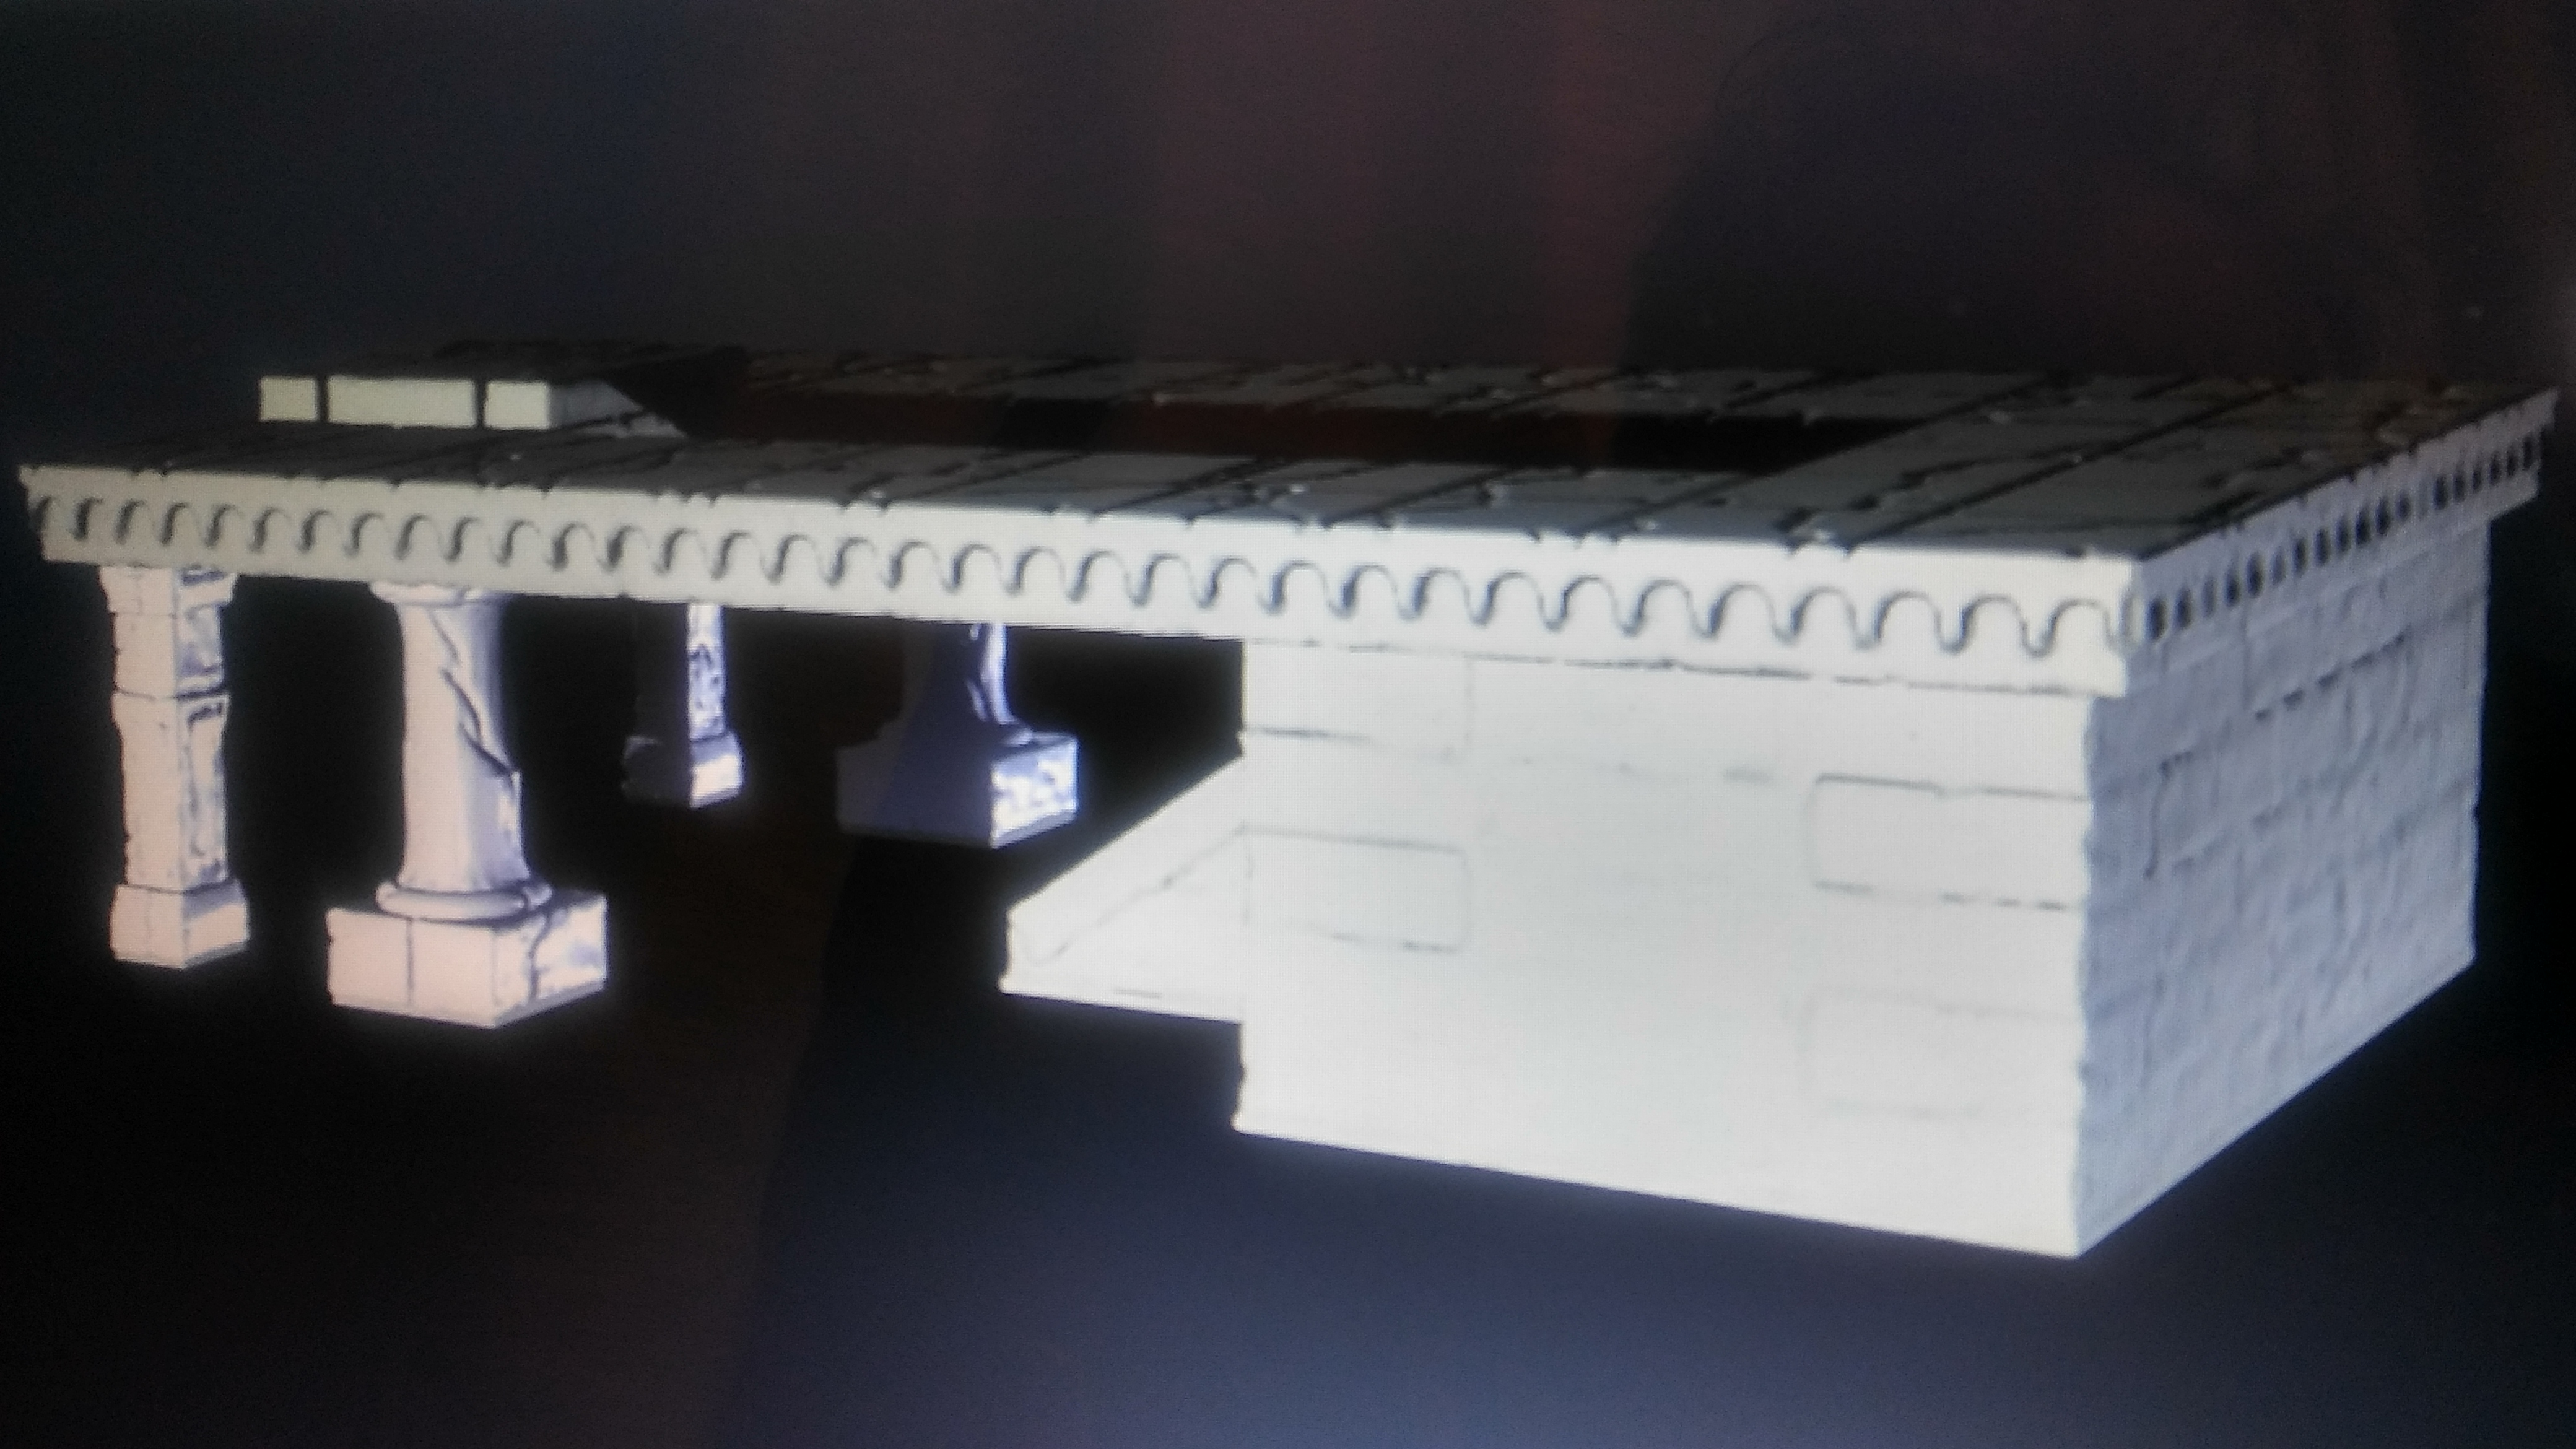
First step for Amon Hen was getting the size about right for Middle Earth SBG.
So lets start with the top of the structure.
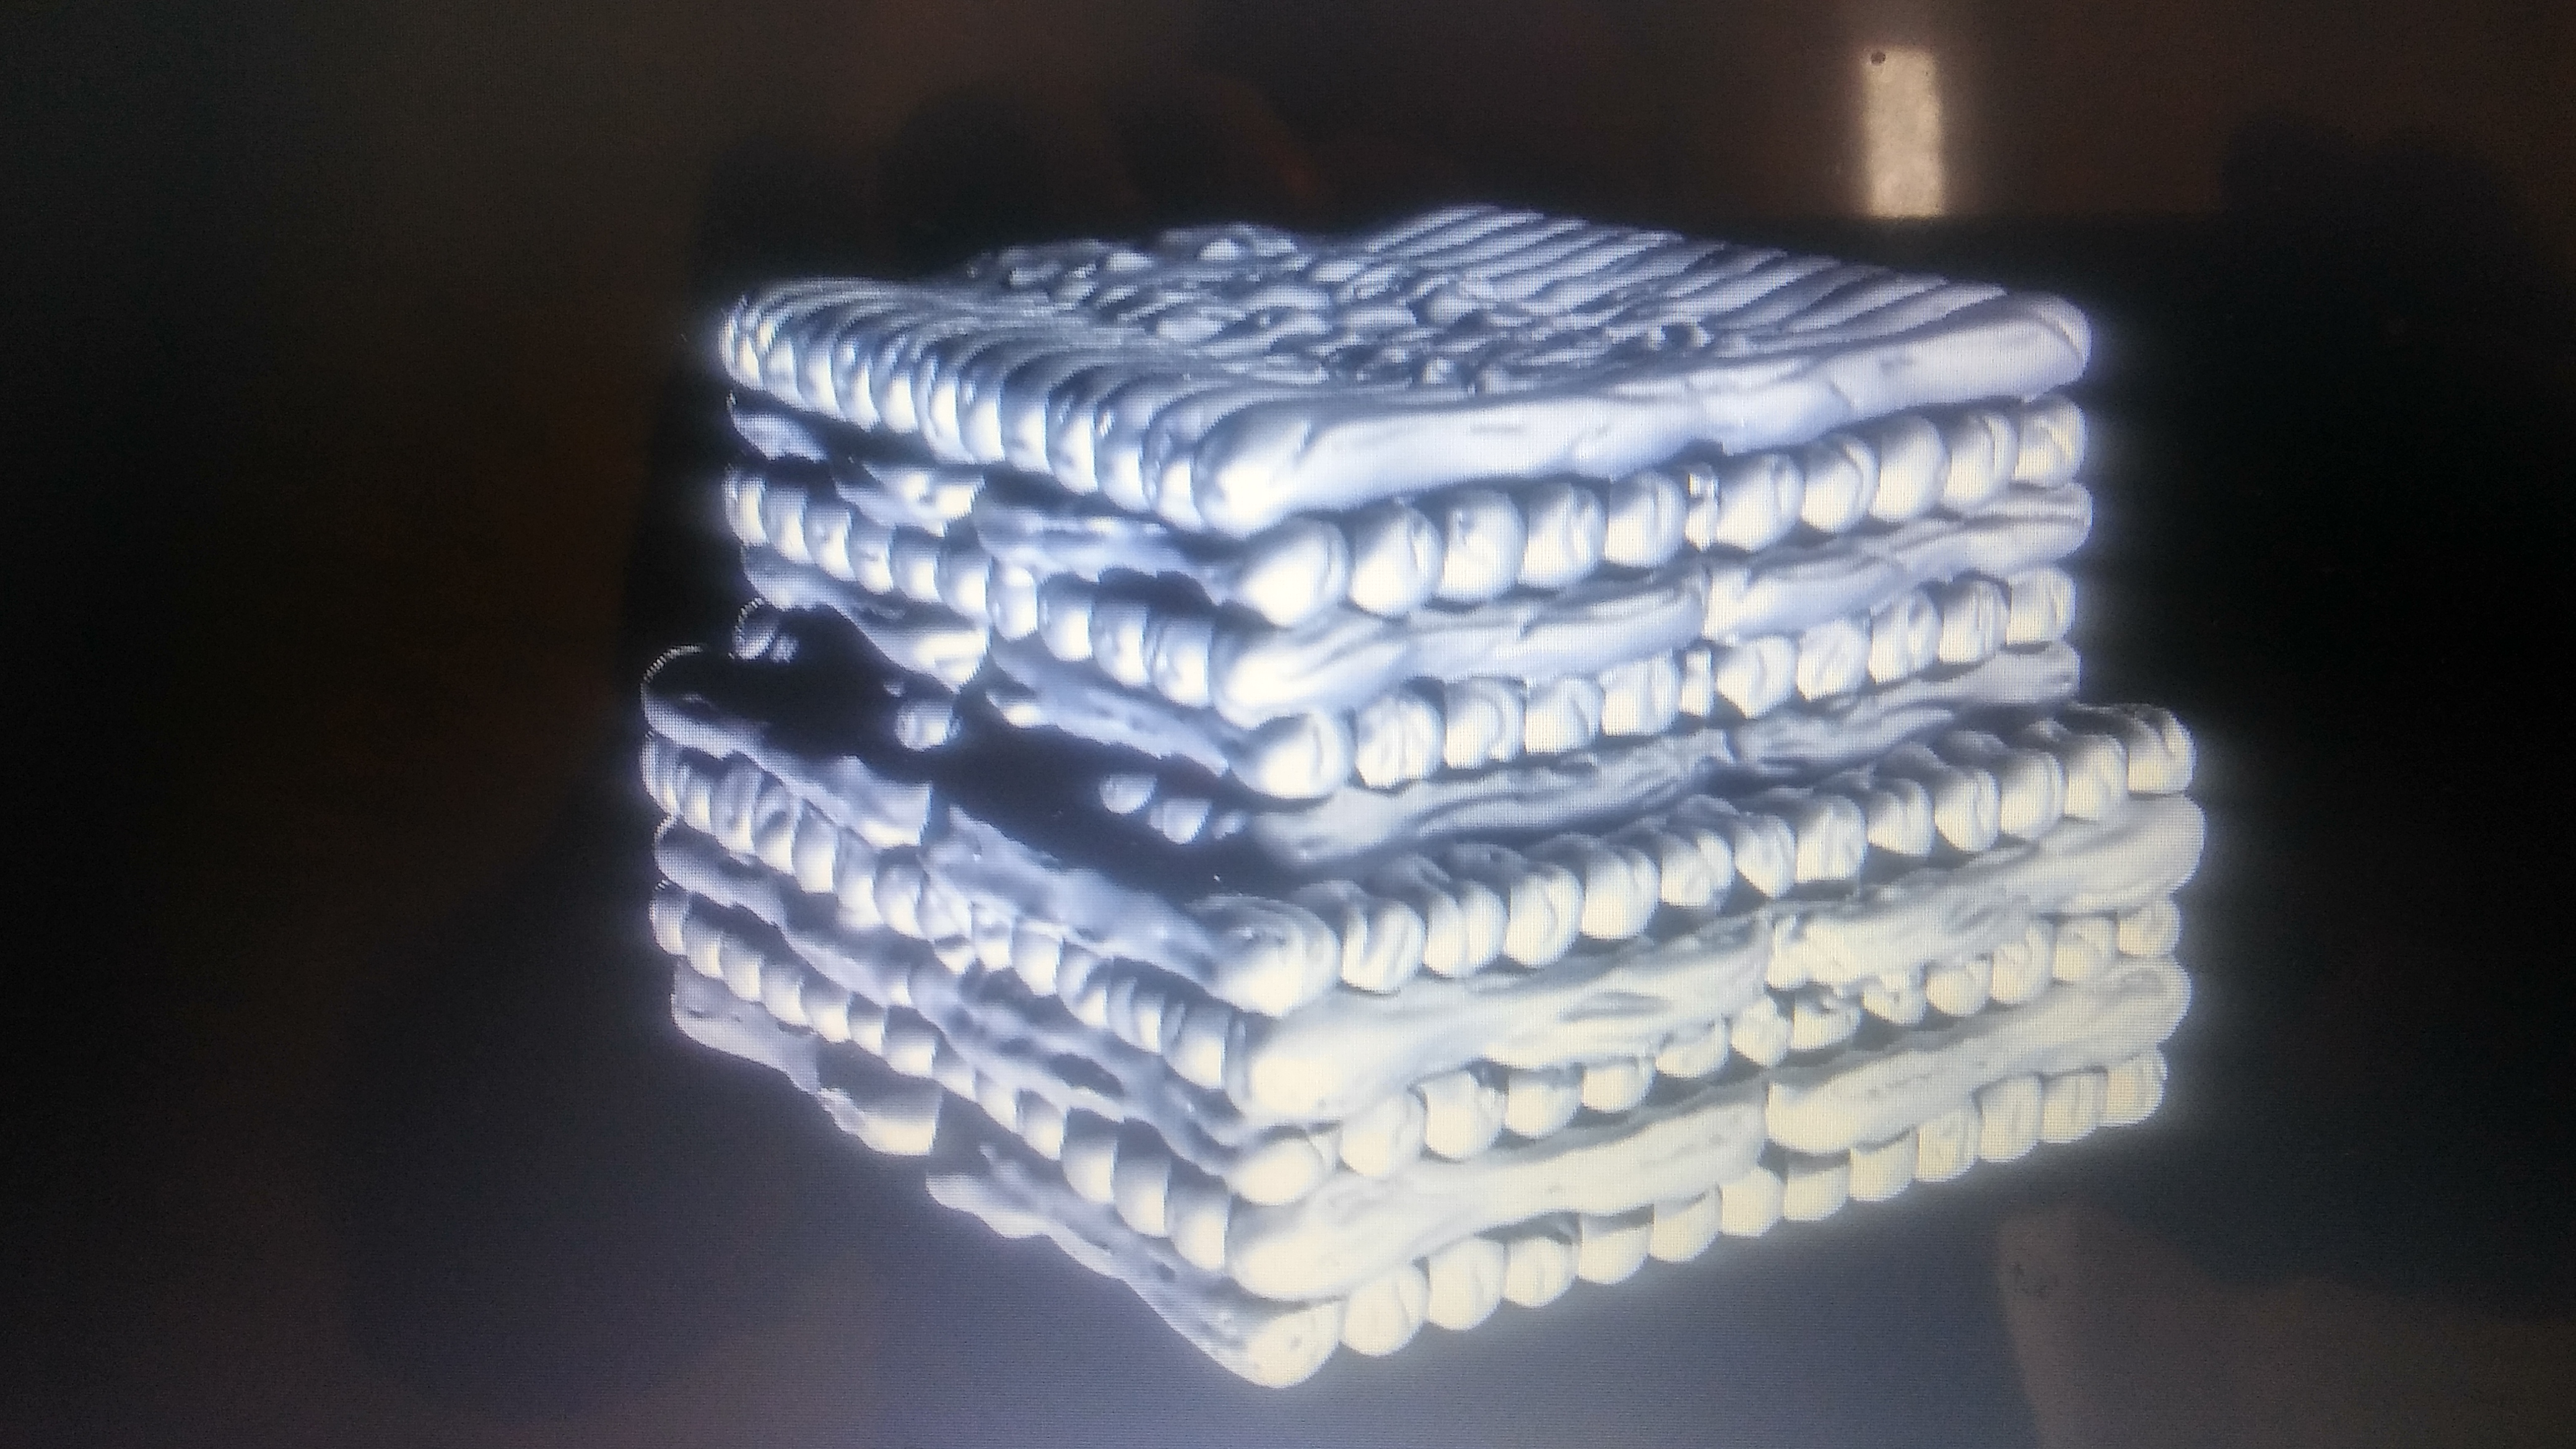
So I spent the majority of my Friday night. Just adding those bricks I created to some tiles I worked on earlier this week. Each one of those broken tiles are 25mm which is the same base size for a standard unit. The bricks are also 25mm long so they line up with the tiles. It is hard to see the details in the brick work with this picture. Plus the crown work at the top covers most of it.
Keep in mind I spent from 4pm till 9:30pm just getting this basic shape in place. It is a very slow process in which I used 7 different bricks. I did my best to remove repetitive patterns in the brick lay out. A simple fix was to just simply flip a brick to its other side. This then gives me 14 different bricks to use.
That crown peice I would sculpt out later. To conserve polys until most of the shape was laid out.


![Play WW2 Commando Operations With Butcher & Bolt [Updated]](https://images.beastsofwar.com/2026/03/relaunch-600-338.jpg)


