


Battle Boards and Scatter Terrain


Recommendations: 241
About the Project
Last fall my LGS convinced me to build battle boards and terrain for their new store. It was a project that went from ‘a few boards’ as we ordered our first pints, to a monster undertaking where I somehow agreed to produce two 4’ by 6’ tabletops and accompanying scatter terrain.
Related Genre: Fantasy
This Project is Active
Battle Boards and Scatter Terrain
I changed things up a bit when constructing the second river board, as I had problems with the glycerin infused lichen reacting with the Realistic Water. I still applied the flock before pouring the acrylic, but waited till the river had cured before adding the rest of the ‘garnish’.
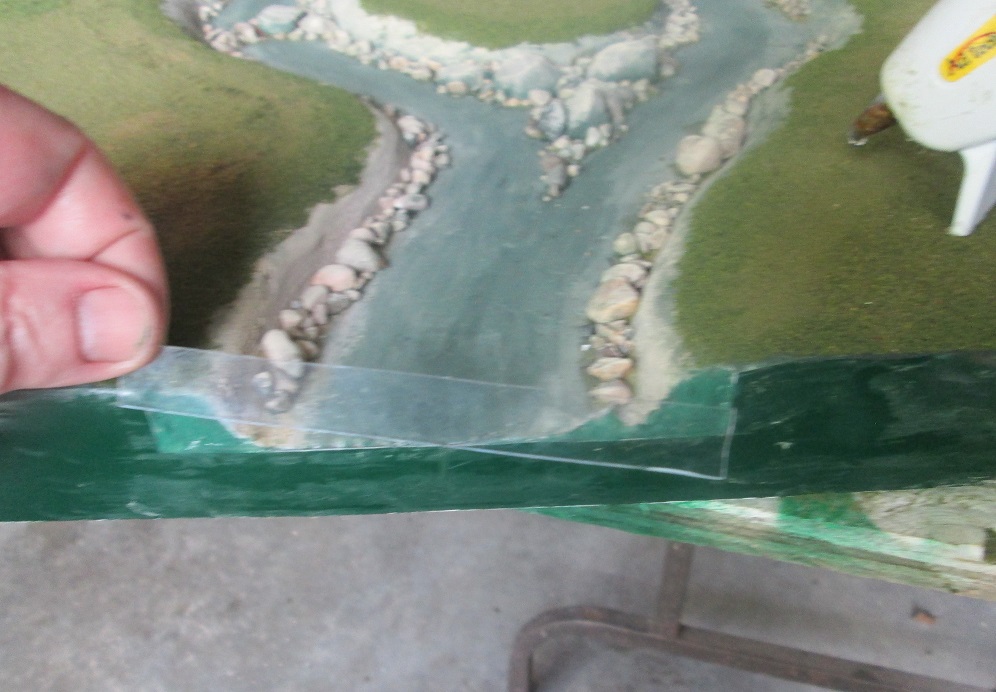 I got a few more pictures of the process this go around. Here’s one of the bits of blister pack plastic I used to dam up the ends of the river. I sealed it up with the glue gun and a transparent glue stick. The glue all but disappears when you pour acrylic around it.
 I stuck the plastic on by gluing it on the outside, and then sealing it on the inside.
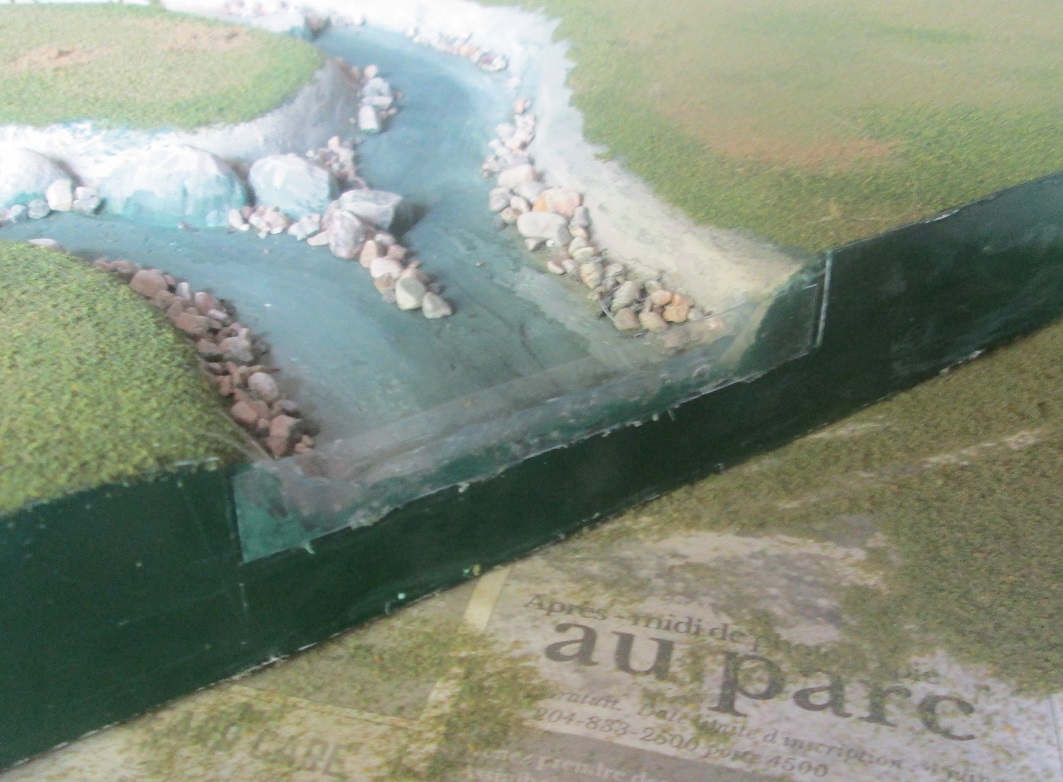 Outside view
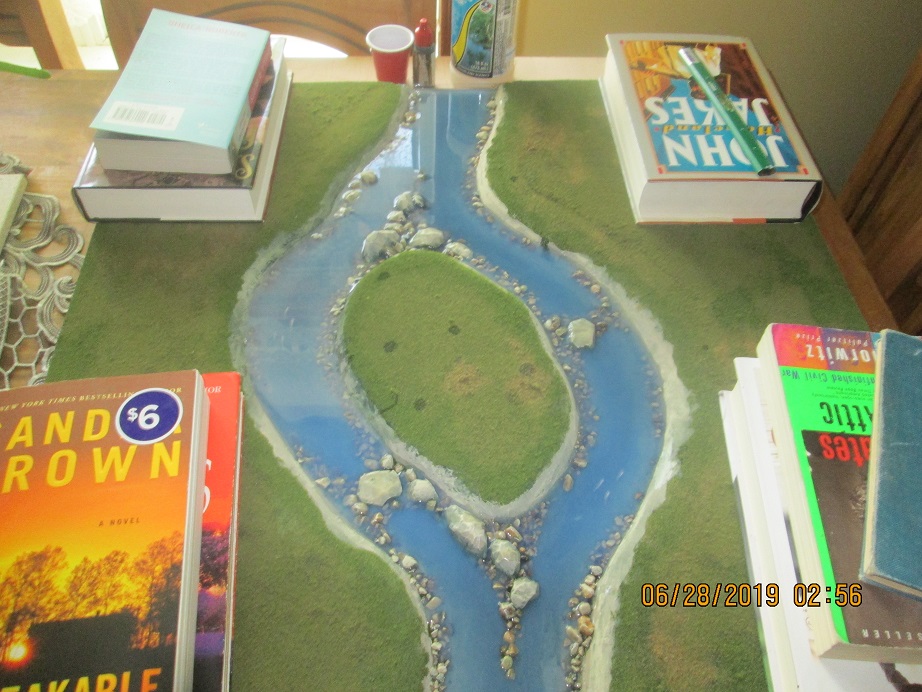 The board after four pours of Realistic Water. I had to crack a third bottle of the stuff. I saw some clear school glue the other day that was cheap as chips (the same stuff I used to eat as a kid), and apparently it dries clear as well. It's on my list of alternative water options to try. I painted fish on the second layer once again, using gun metal and a pearlescent highlight. They look better than my previous efforts on the other board.
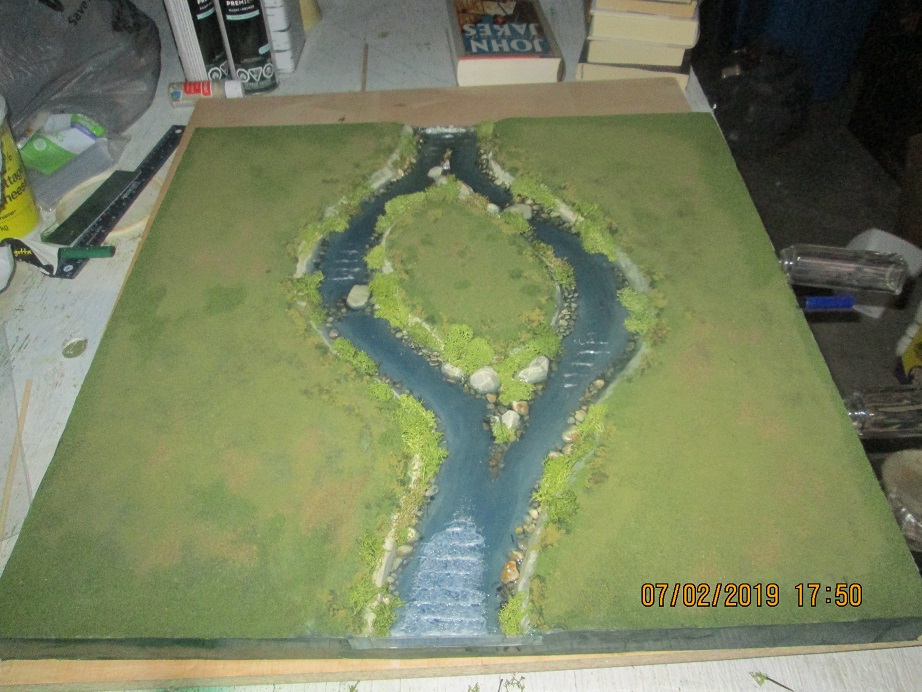 Garnish and Water Effects added. It's in the process of clearing... finicky stuff. If I was better with a glue gun I would try making waves with it next time. Also, I would submerge untreated lichen into the bank. Some drops of acrylic hit the island, but I covered them with flock.
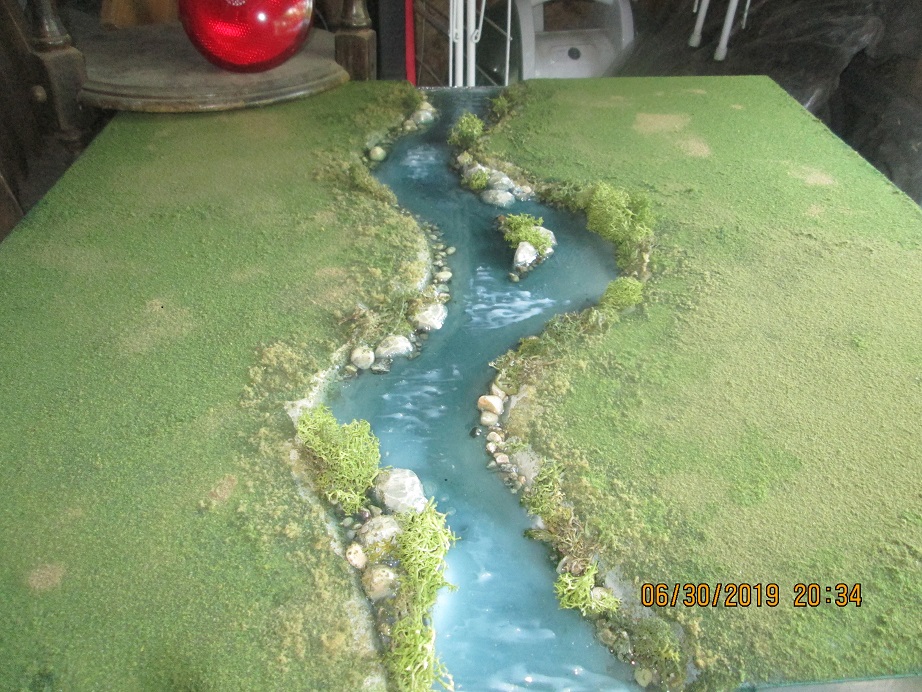 Update on the first board: the Water Effects has almost cleared entirely, and the customer is very happy with how the board turned out... even the murky bits from the glycerin. I've never had a mistake called "mysterious" before, but I'll take that save.
I learned a lot from these boards: use Water Effects sparingly, and do multiple layers to build it up, just as you would with Realistic Water. Make sure to use clean lichen if you’re going to submerge it in the water.
These boards warped ever so slightly when the acrylic cured, despite having been weighted down on all four corners. Not sure what the solution is. In the past I’ve straightened things out by painting the bottom of the board afterward. Then, as the paint dries it pulls the board flat again. I may give it a try.
I’m on to the flat boards next. They should go fairly quickly. I may sculpt remnants of a walk, or building foundations into the foam, but I’ll keep the features small enough so they can be covered with a hill.
Battle Boards and Scatter Terrain
It’s been a while since I’ve been able to post on this project. Funny how life gets in the way. As mentioned previously, I’ve moved on to the battle boards themselves, and of course started with the most difficult ones: the two river boards. Needless to say, things didn’t go quite as planned… but I keep telling myself this is all a learning experience and will aid me in building the next set — bullsh*t.
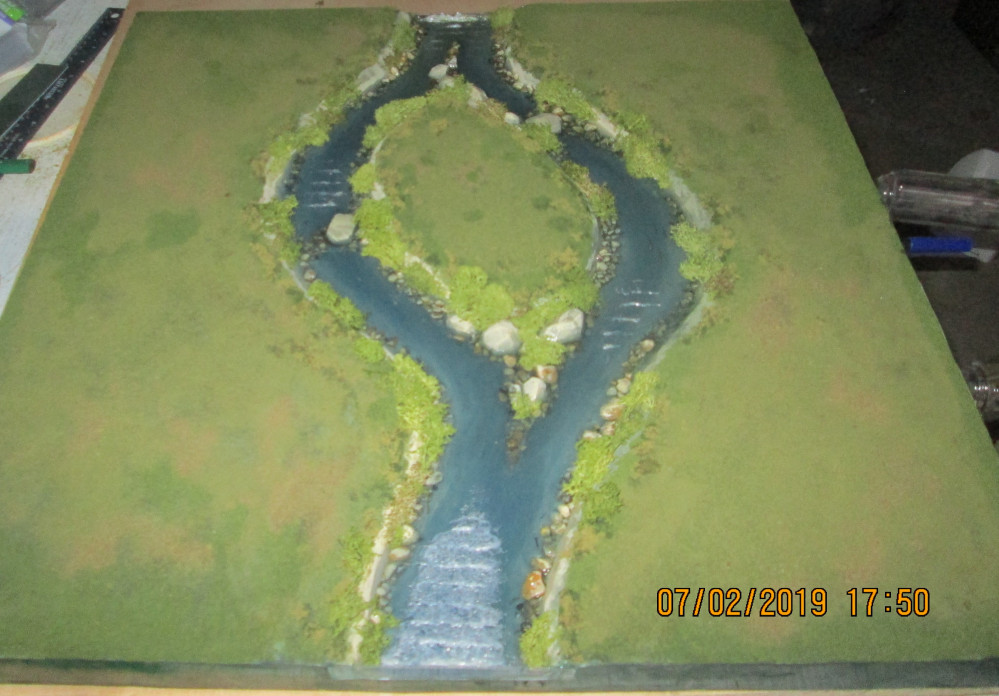
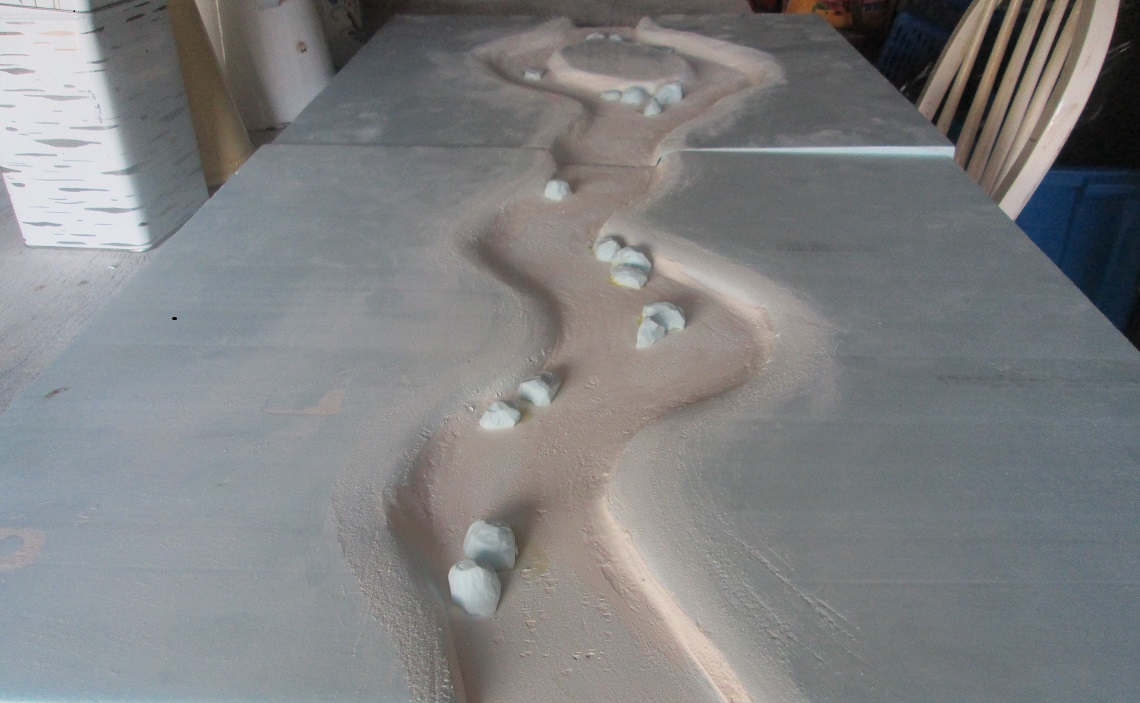 Two river boards, one with an island. After carving out the channel I lined it with wall filler, both to protect the foam in case the Woodland Scenics stuff ate it, and also to texture the bottom (I didn't like the texture and ended up sanding it smooth). I also used polystyrene to make some larger rocks for the banks and river bed. The foam has warped on the island board, but I'll weigh it all down on a flat level surface when I do the first pour of Realistic Water.
 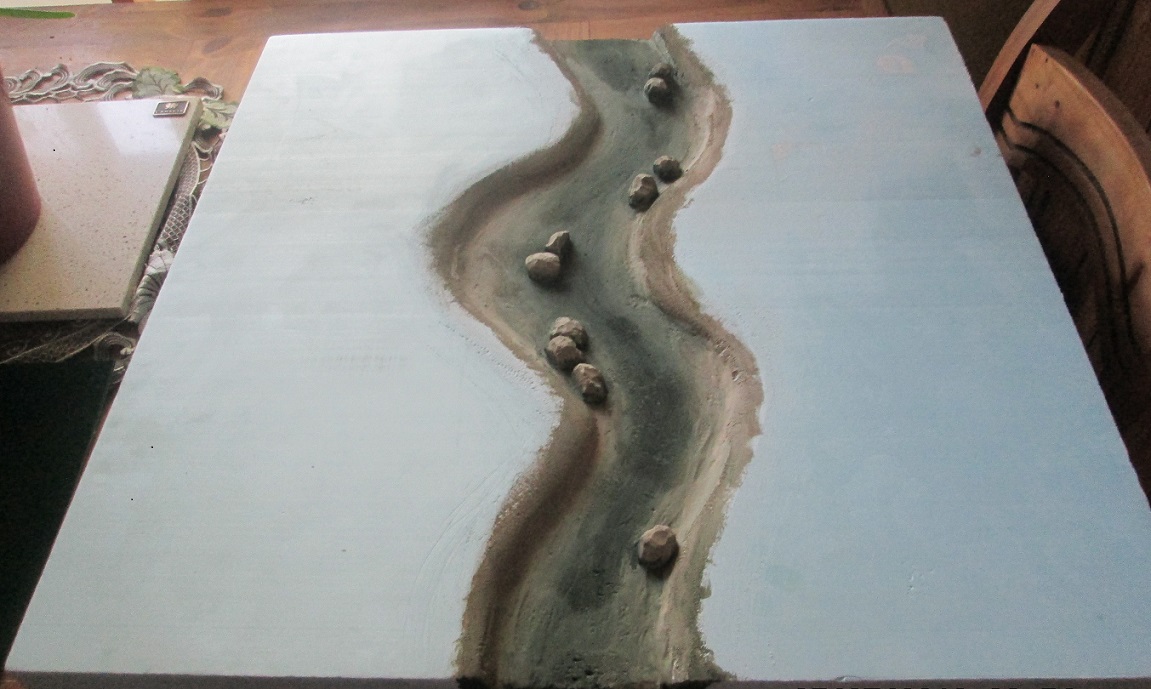 Paint: I tried to force perspective, or in this case, depth by painting the middle of the channel a darker green.
 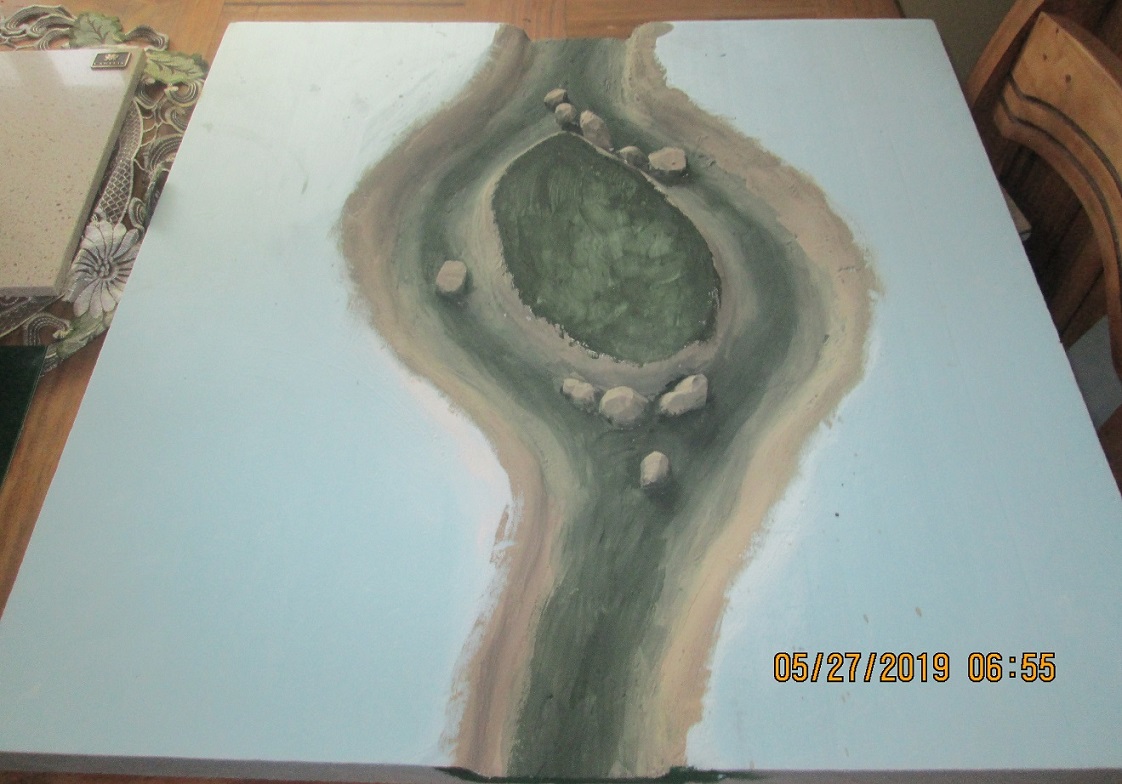 The island board. Note to self: make the @#$%! island big enough next time so that a copse will fit on it.
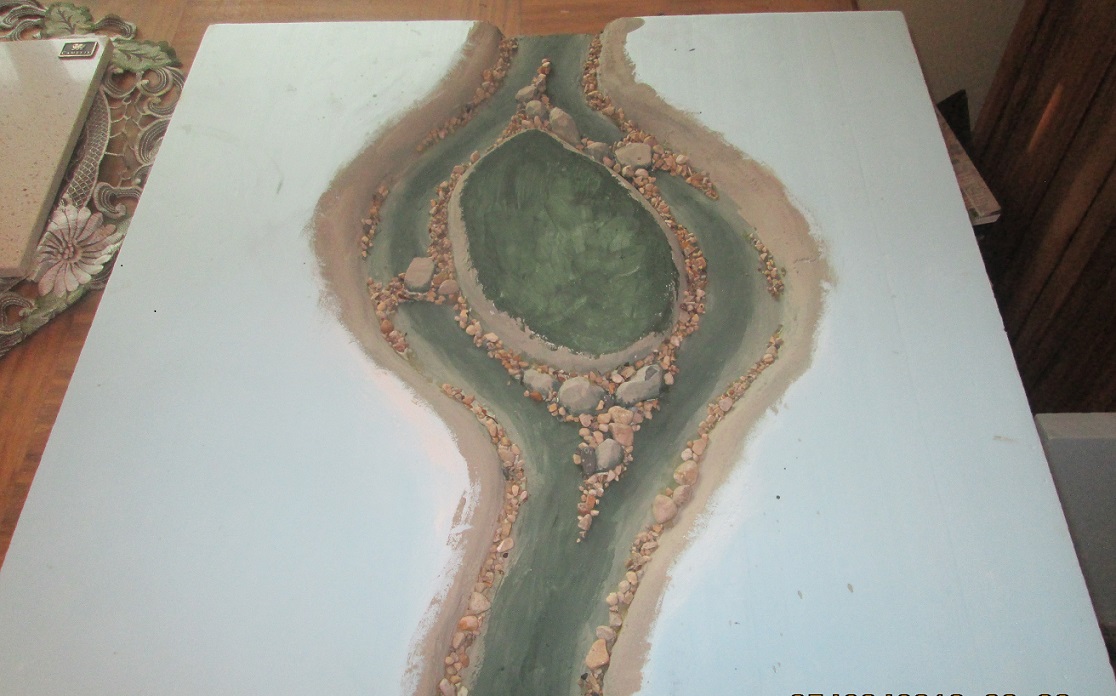 Gravel added.
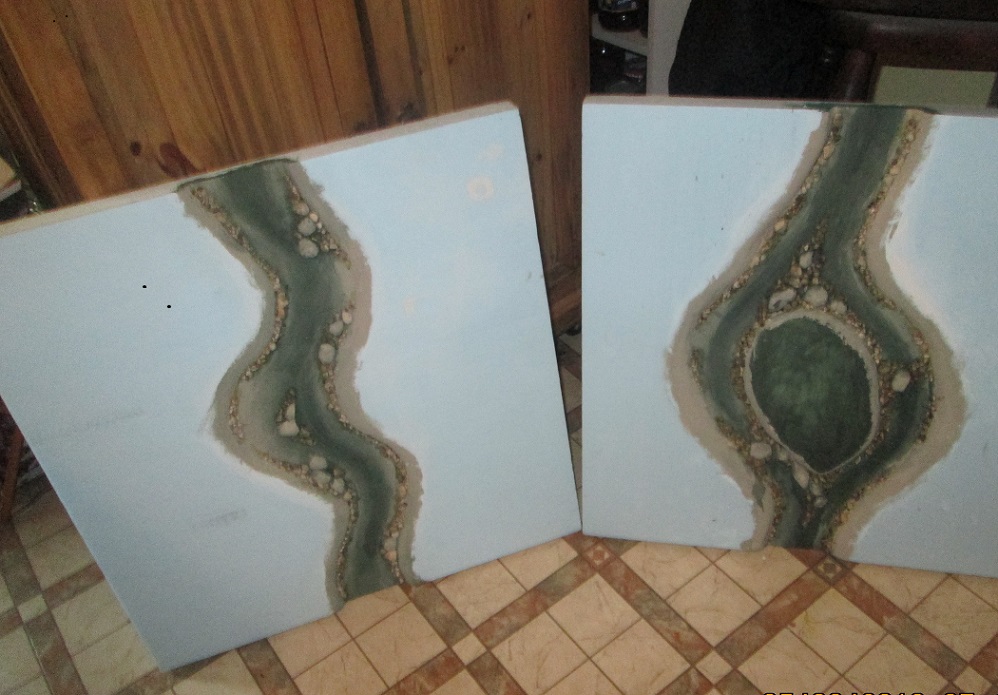 Both boards were drybrushed with a lighter tan so all the stones would look similar, but there's still enough variation in the underlying natural colours to add interest. I put in two flat stones to either side of the island to act as a possible ford. They'll still be covered with water, but will be visible, so it will be up to the players to decide whether or not the fords are in play.
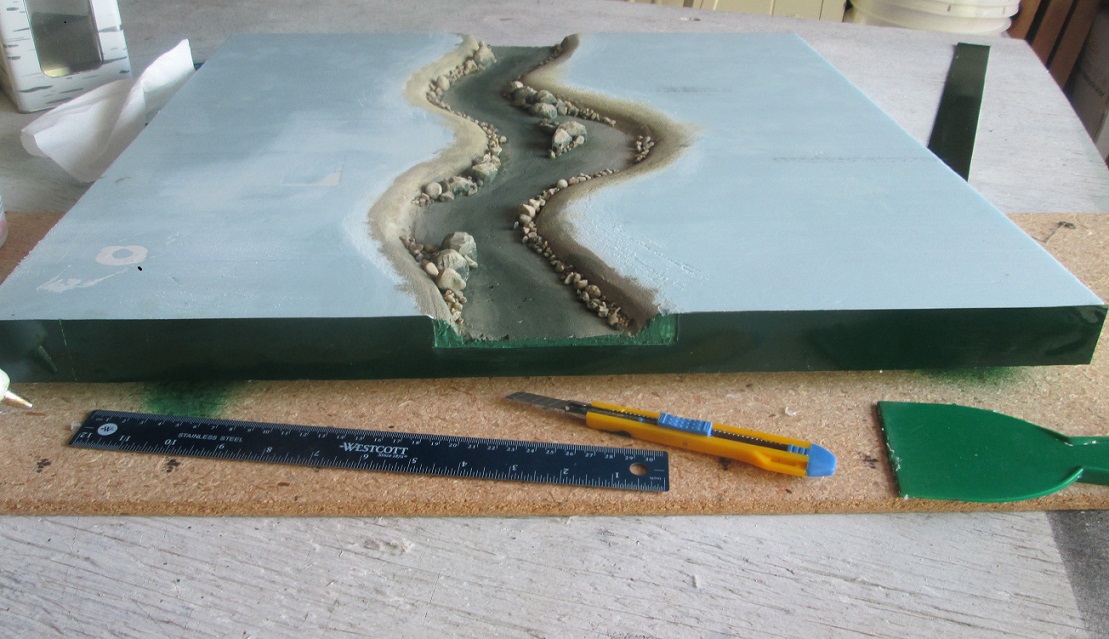 I managed to score eight plasticard signs from a local gas station that were used for a promotion. I got them before they went into the bin, so I didn't even have to go dumpster diving, though I would have (saved $25). I cut out a section of the plasticard where the river ends, and will use clear blister pack plastic to dam it up. Note the plastic putty knife, used it to flatten out the hot glue beneath the plasticard.The top edge got a healthy dose of wood glue and wall filler to seal up the gap, as with the previous small edge pieces.
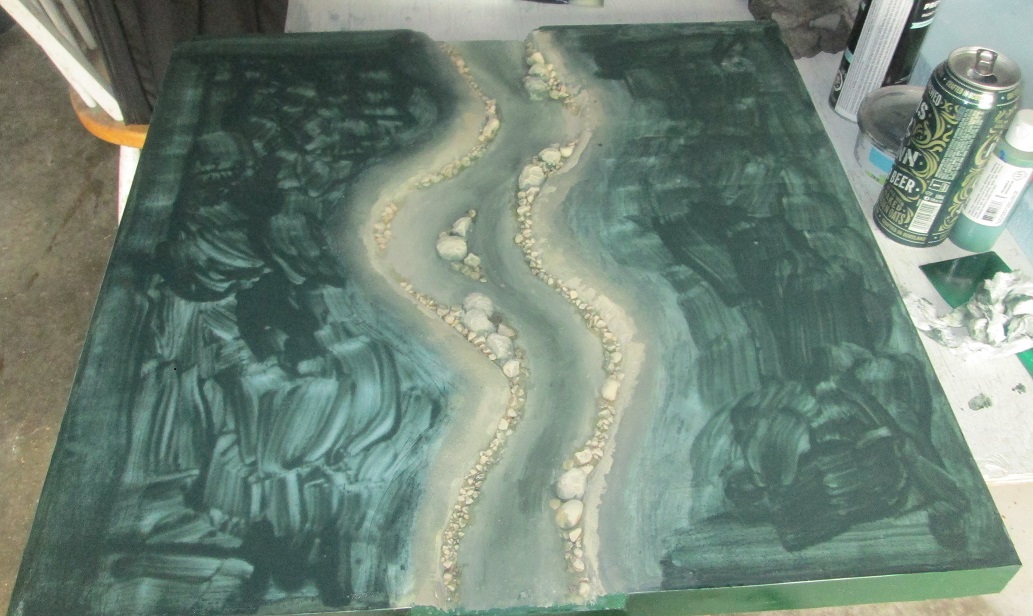 The two boards got a dark green shadow where flock will be glued down. I've watered down the craft paint considerably because A: it covers easier, and B, I'm a cheap bastard and want to stretch my paint as far as I can. In my experience it hasn't really mattered if the coverage isn't perfect. I might add that Innis and Gunn Lager is ideally suited to building river boards
 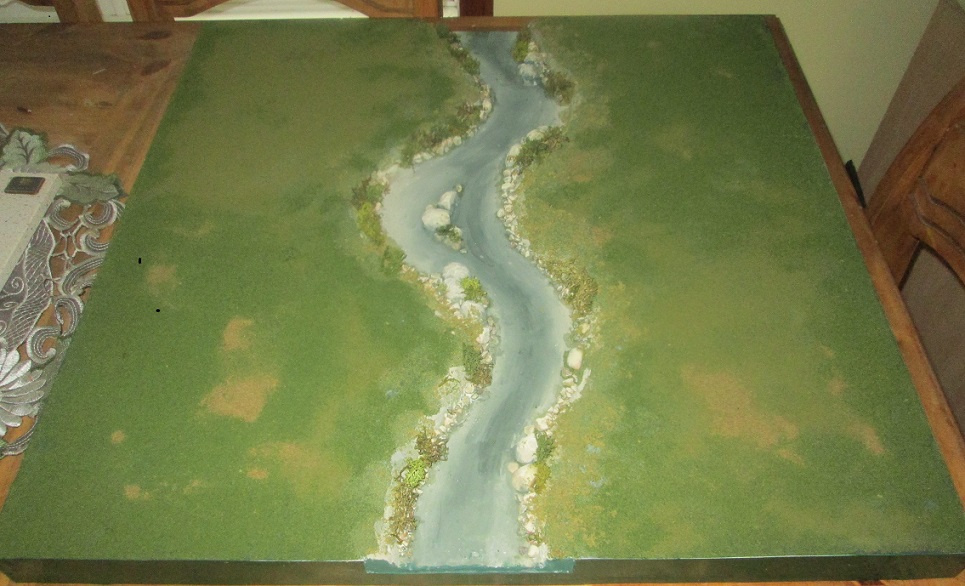 Flock added. I had some smaller bits of lichen left that had already been treated with glycerin, so lined the bank with it. Little did I know that the acrylic water would react with it and turn white. #$%^&! Also, there are some glaring gaps in my flock coverage. It reminds me of the haircuts my dad used to give me to save money. I'll patch it up when everything has cured.
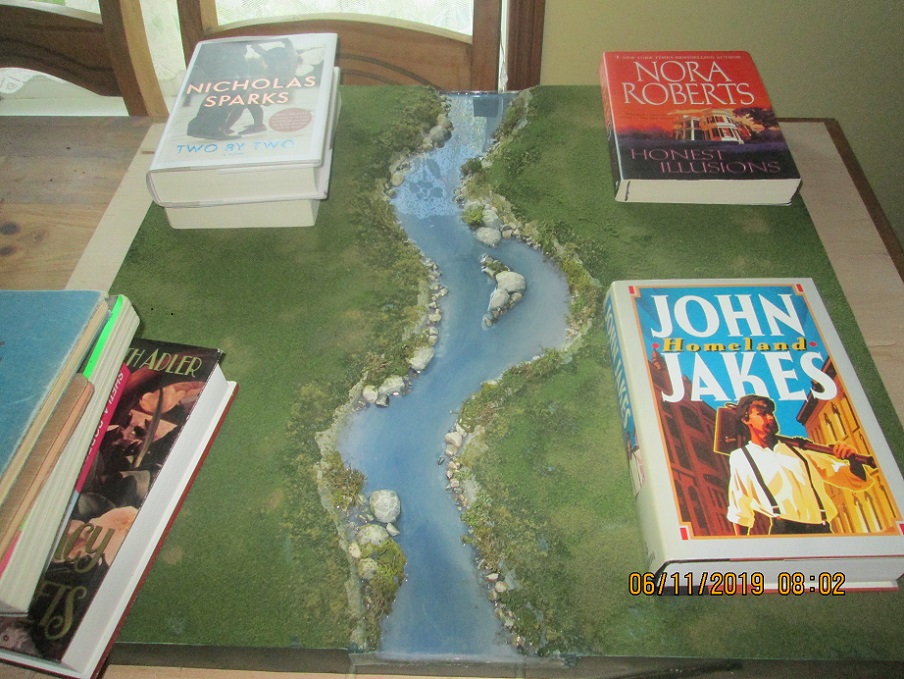 First pour. Note the clear blister plastic at both ends of the river. I tinted the water with a drop of blue tone per 2 oz. of acrylic. It looks much greener in real life. I've weighed down the four edges so they don't lift when the acrylic cures. I used an entire bottle of Realistic Water on this board, even though I tried to keep the river's dimensions modest. You could always muddy the water so you can't see the bottom (by using a drop of paint instead of wash) and thereby make it much shallower and wider. I should apologize here for the book titles; they're from my spouse's shelf.
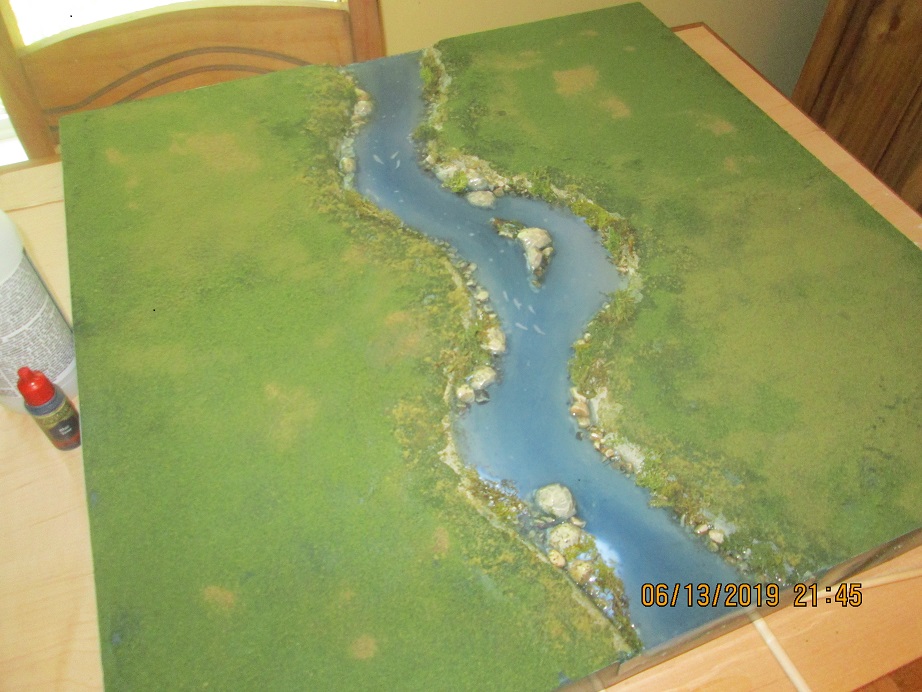 I painted fish on the first layer when it cured, using silver and a pearlescent highlight then did two more pours. Looks good now but everything went pear shaped when I added the Water Effects paste.
 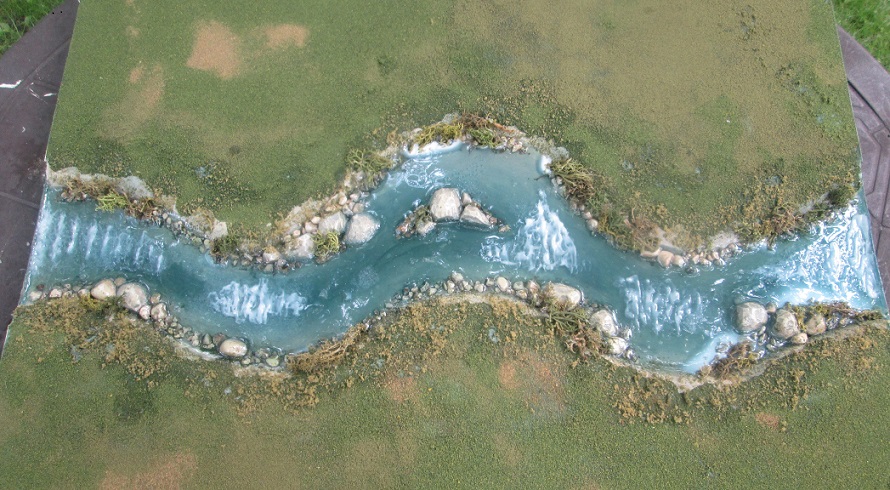 I put in a small section of waves using Water Effects. It dried clear, as advertised, but looked a bit messy, and the waves weren't tall enough, so I added more, and thought it would be a good plan to add a final layer of Realistic Water to clean it all up. I sculpted higher waves all along the river, but after several days the goop hadn't cleared completely. I got impatient with the mess surrounding the sculpted waves, so did the final pour. All the Water Effects paste turned white again! I'm told it will all eventually clear up, and it has somewhat after a few days in the sun, but confidence is low. The whole thing came very close to going into the bin! Note the white where the glycerin reacted with the Realistic Water. I'll either cover it with more lichen (using wood glue to stick it down this time) or put some bright green flock over the area as pond scum. The plan was to make the river non-directional, as the two boards will fit together in several different configurations. It just wouldn't look right to have the river flowing in two directions! Next: I'll post pics of the island board when I finish it.
Battle Boards and Scatter Terrain
A short entry this week. I’ve moved on to the boards themselves, but in the spirit of potentially f-cking things up royally, I’ve started with the small edge pieces before moving on to the more costly ‘2 by 2’ boards.
The plan, at the moment of conception, was to put duct tape along the edges to protect them from bumps and bangs. I applied it to a scrap to see how it looked and the first word that came to mind was ‘tacky’.
I then moved on to plasticard. I sprayed it with a Hunter Green primer, which ended up being shiny, but everything will be sprayed with a matt sealer eventually, so no big deal.
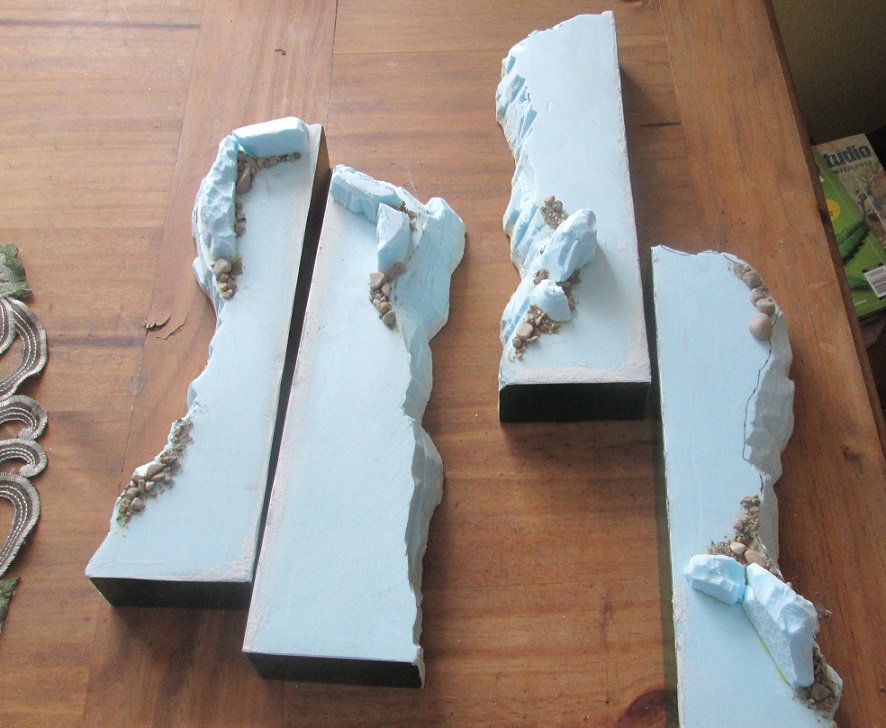 I sprayed the plasticard with Hunter Green primer then cut it into 1 1/2" wide strips. I applied hot glue to a corner, and made sure the edges of the plasticard lined up top and bottom all the way along the edge. You've only got a few seconds to do this before your hot glue sets. Then I worked my way along, gluing small segments at a stretch. Note: a credit card or spatula is ideal for pushing the glue along and squeezing it flat beneath the plasticard, ensuring a snug, flat fit. The corners were trimmed and sanded, and I used glue and wall goop to fill in tiny crevices between the polystyrene and plastic.
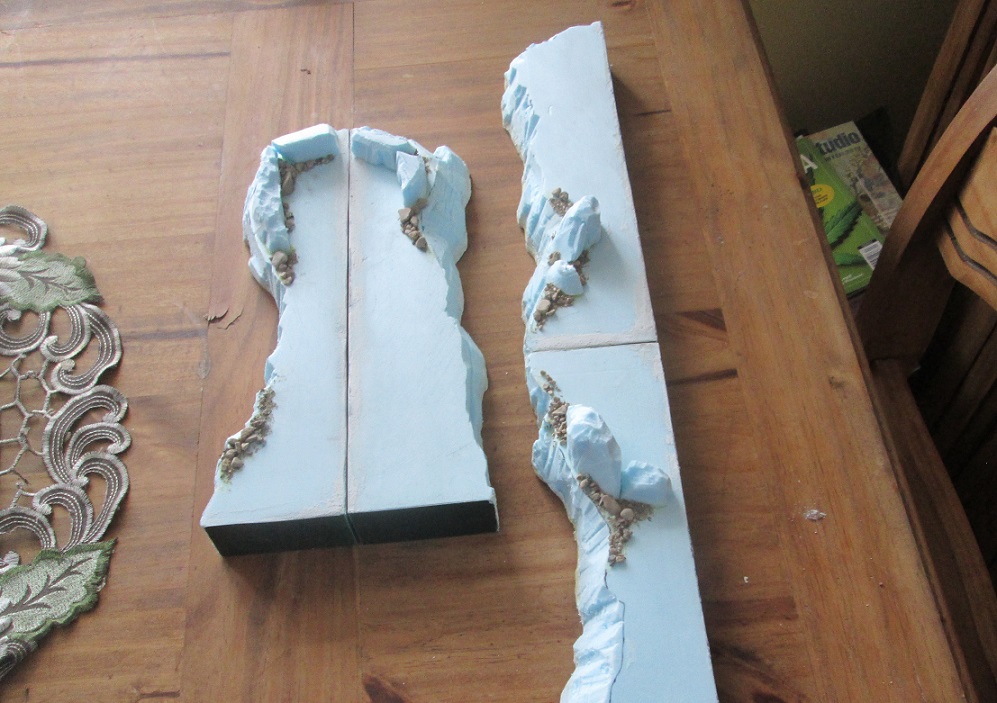 I could tell, even at this stage, that the pieces were going to be quite versatile, both for their original purpose, which was to flank a slope board sandwiched between two flat boards, and also for putting together unique terrain features. They can be used as a ridge on a board edge, or put together as a finger of land jutting in from a side.
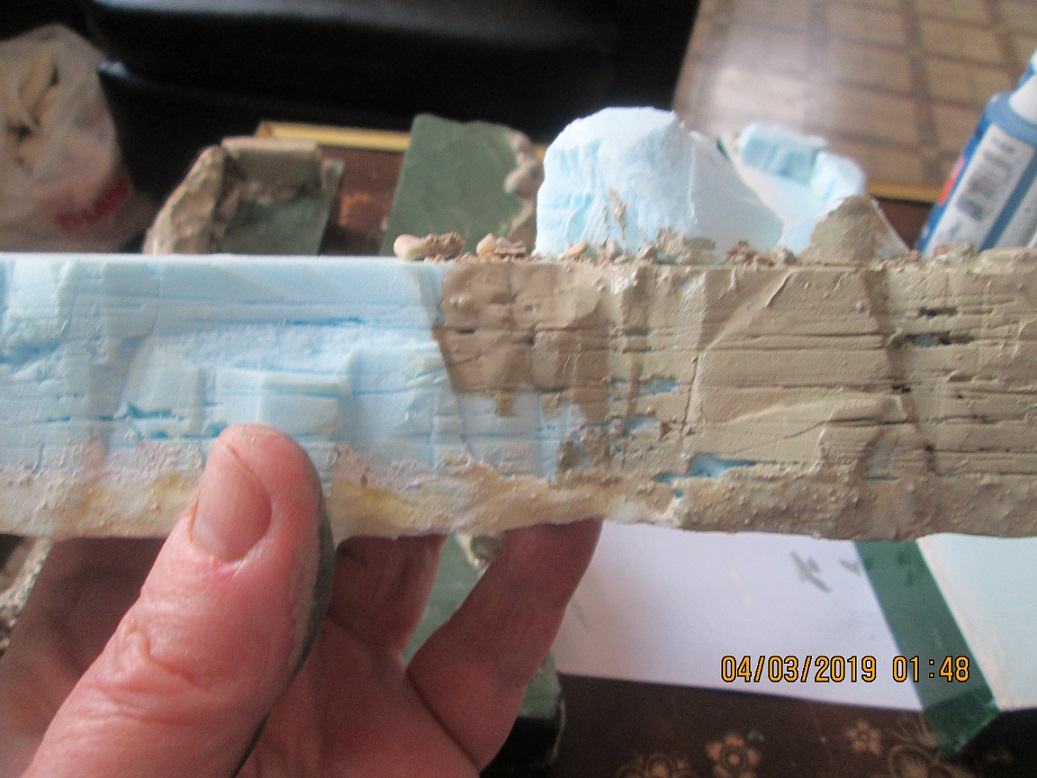 I painted on a tan base coat, as per previous models. Note the beefed up glue/wall filler base, which will hopefully toughen it up a bit.
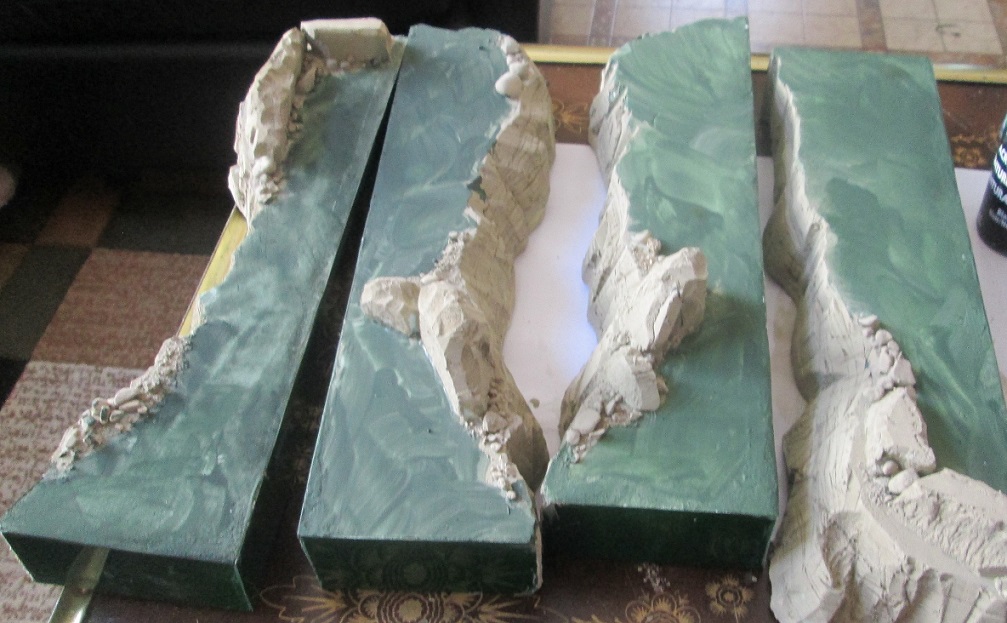 Green base colour painted on to areas that will be covered in flock or lichen. I slopped a dark brown wash on tan areas and added yellow to the orginal tan as a highlight.
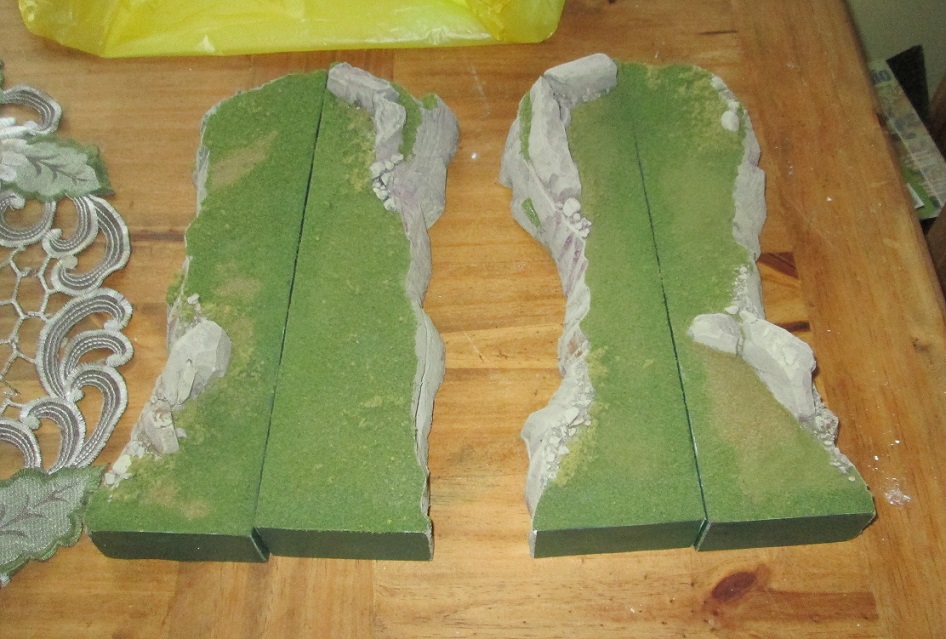 I added flock and foliage to the pieces, and was quite happy with the result, particularly along the edges where the flock further covers the seam between the foam and protective plastic.
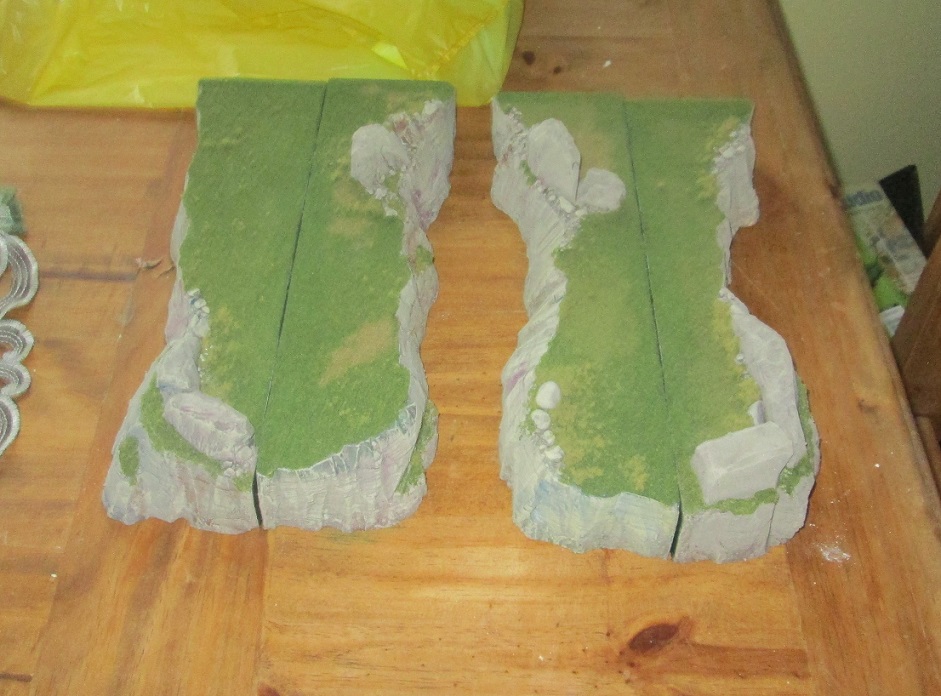 I'm quite happy with how these pieces butt together. I can only hope the rest of the boards fit together as well.
Lessons learned: Plasticard is definitely the way to go when edging boards. It’s cheap and will protect the board edge quite well. I find that gluing it on straight along an edge is a challenge, but I think applying it in shorter segments might help. You can always trim it up afterward, and you can also sand plasticard, as I found out during this test run.
I went with a complimentary green colour for the edge. I would likely go with a red/brown on a desert board, or a dark purple or navy blue on some sort of greyscale lunar landscape… anything that says “This is not part of the playable area.” It should also be darker than the predominant colour on the boards, otherwise it will draw attention from your meticulously crafted terrain!
Next installment: river boards. Mediocrity is within my grasp.
Battle Boards and Scatter Terrain
 I finished up the other three hills but things didn't go quite as planned. As mentioned previously, I wanted the copses to stack on top of the hills, but I got a bit overzealous in carving the hills, and now the copses are a squeeze on two of the hills, and won't fit on the third. $%^&*#!
 I wanted this hill to be a good defensive position, and so stacked rocks on one edge. I carved a rocky slope/stairs on the back side of the hill so troops could move into position quickly. Unfortunately, none of the copses will fit on it. It will, however, hold a few individual trees... almost like I planned it.
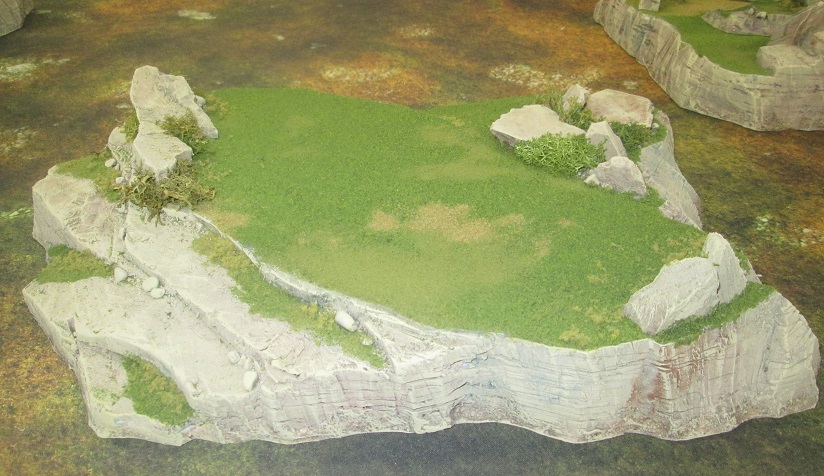 The next hill had a rocky access on one side, and a gentle slope on the other. I used a few different kinds of flock, and will likely forego sand altogether as ground cover on the rest of the project. The Woodland Scenics Earth Blend contrasts well with the other flocks I'm using..
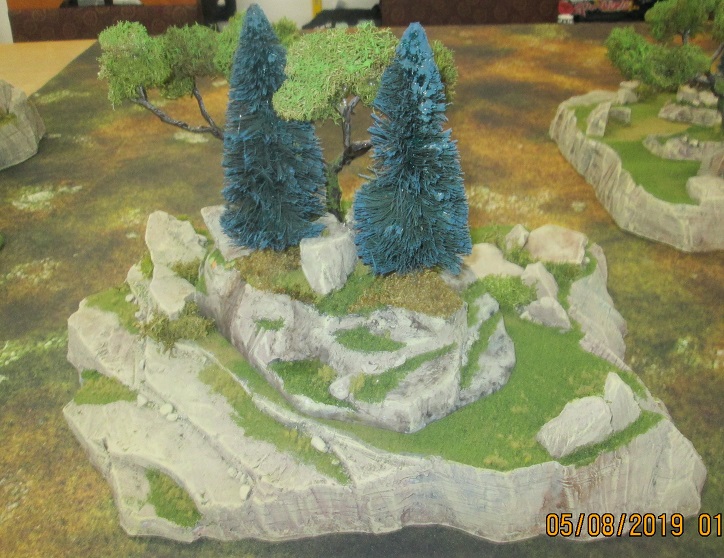 I managed to squeeze one of the copses on top of the hill, but it's tight.
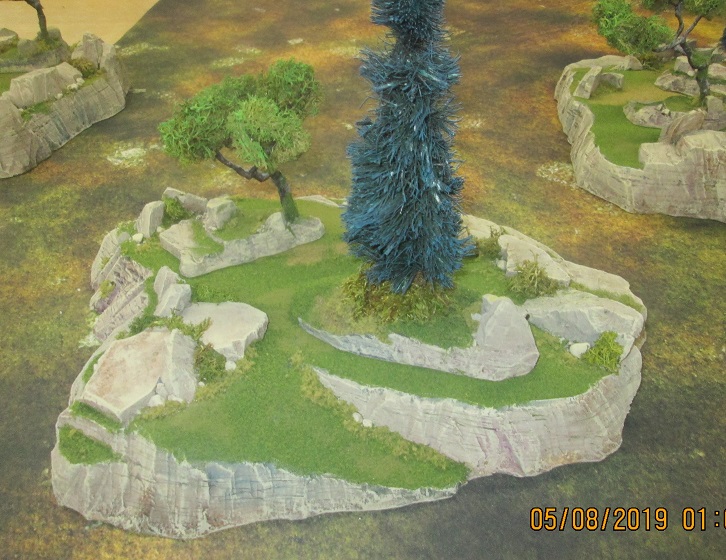 The other side of the same hill showing the slope. Note: individual trees are a better fit... like I planned it. @#$%^&!
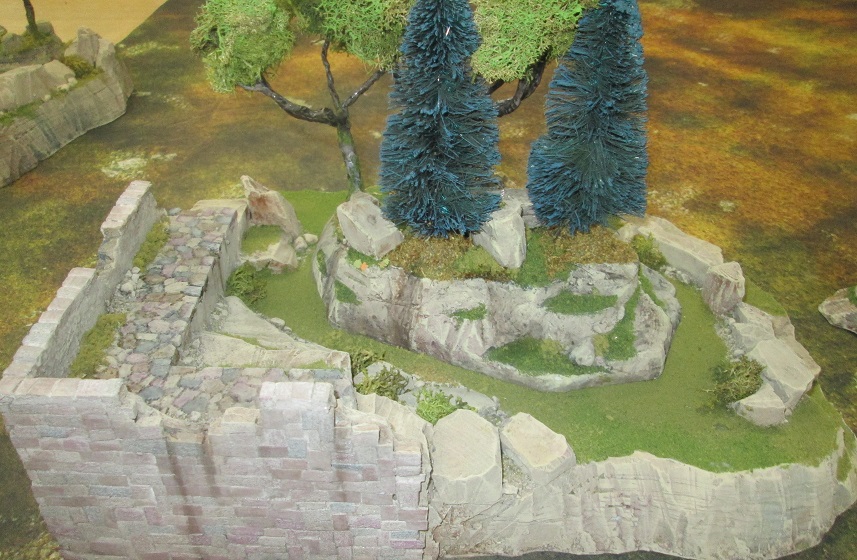 The last hill had more real estate on the top, thanks to my last experiment with building a wall section. A copse fits nicely on top.
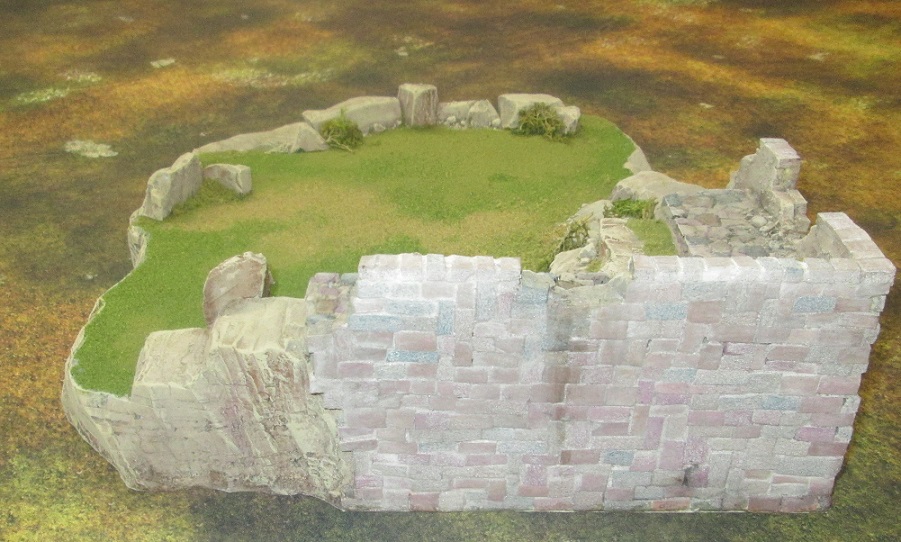 I fiddled with brick size again on this wall, but am on the fence about whether I will use this method to build an entire castle. If I do, I will use more larger bricks where possible. This will get another wash at the finishing stage to darken it somewhat.
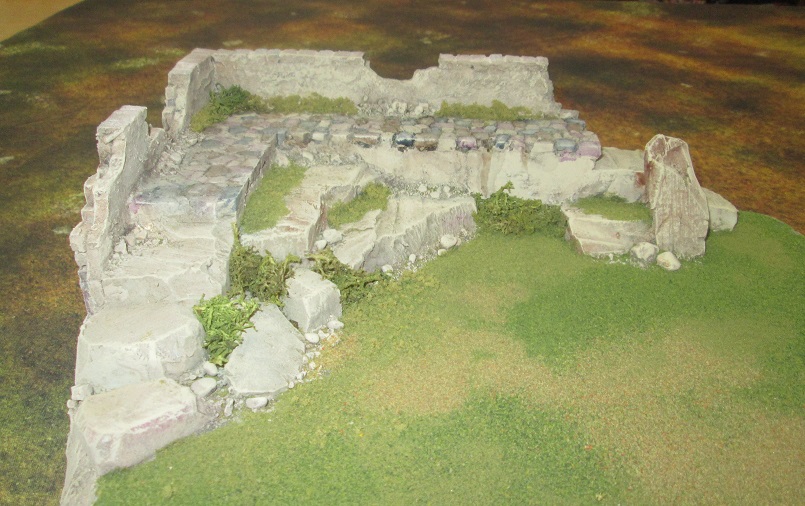 I like how this side of the wall turned out, combining natural and ruined architectural elements. This would make a great overwatch position, with room for half a dozen models. It could use more foliage, and some paint touch-ups, as the bricks are too saturated in places.
Overall I was a bit disappointed with these pieces. If I got a ‘do over’ I would have been more cognizant of copse and hill size. On the next set (I have an order for another one) I will likely match each copse to a hill, but still make them versatile enough to be switched up a bit. Next week I’ll post pics of my edge pieces, and my first kick at covering the sides of the boards in plasticard,

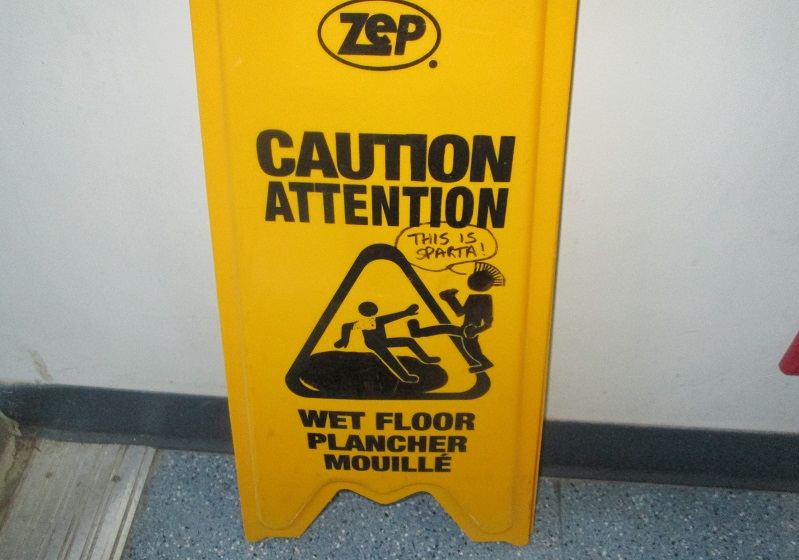
Unrelated, but I think I found a kindred spirit at work. Love this doctored ‘Wet Floor’ sign!
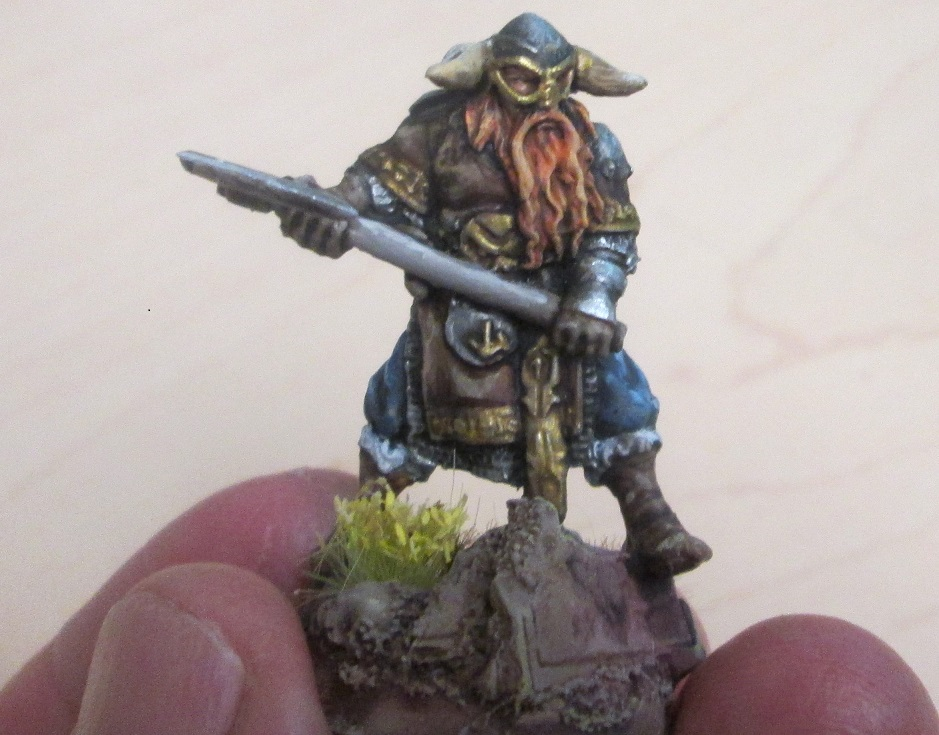 Another character for the christening mash-up on the battle boards.
Battle Boards and Scatter Terrain
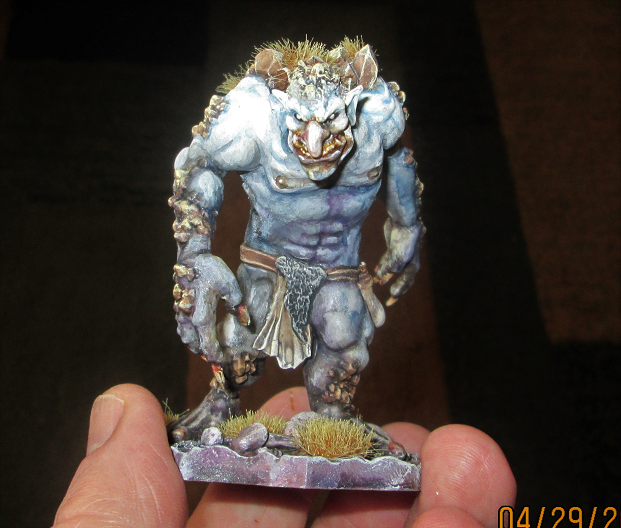 Thought I'd share this. While building the battle boards I've been concurrently working on a few units for a brigade-sized Battlesystem scrum to baptize the terrain. This rock troll will be a bad guy PC. He was the Reaper free mini with $10 purchase for the month of March. I cammed him to look like a snow-covered rock.
Battle Boards and Scatter Terrain
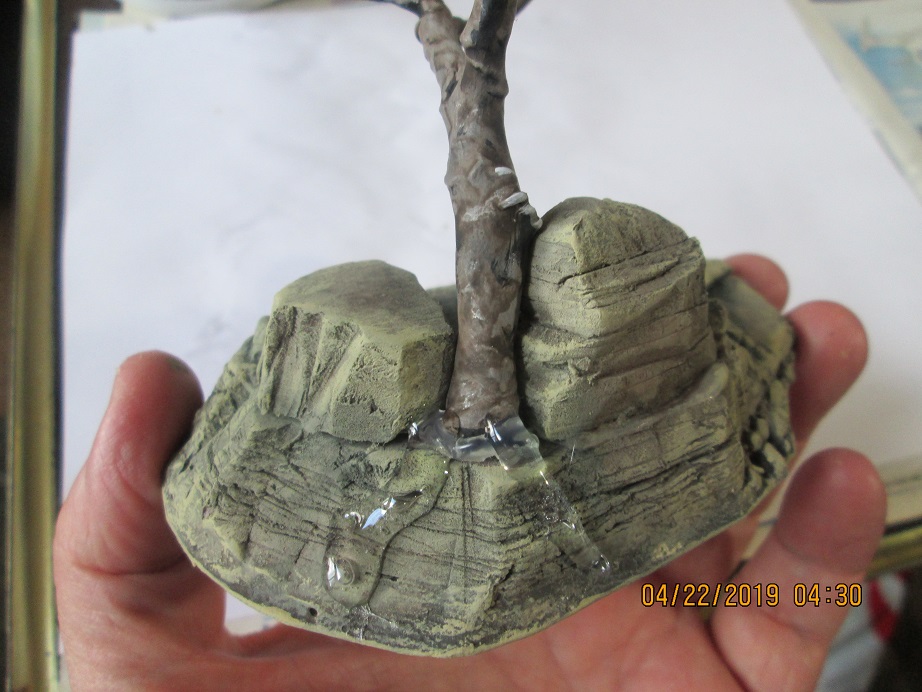 I stuck the tree into the base with a glue gun and added some glue as 'roots,' to help keep it in place. It doesn't look much like roots at this stage, but I'll hide this ham fisted effort with paint and weeds.
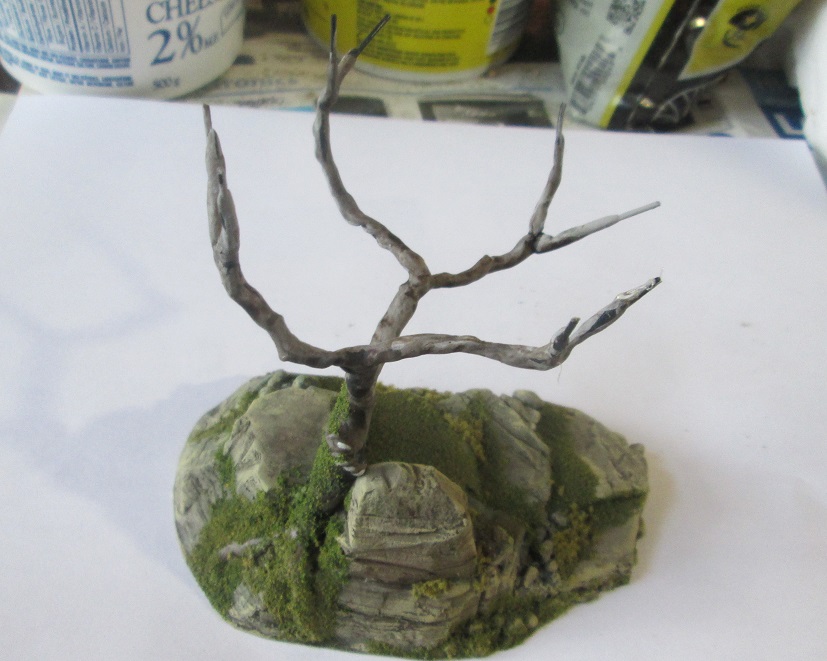 I painted the roots then added foliage to the base, again a few different Woodland Scenics products. If you're skinnt you need look no further than your spice cupboard for small amounts of ground cover. Thyme, parsley, and oregano are all great choices for adding variety and texture. I once had a player whose favourite colour was 'paprika,' so upon request, the base of her miniature was covered in the stuff... artists *Shakes head.*
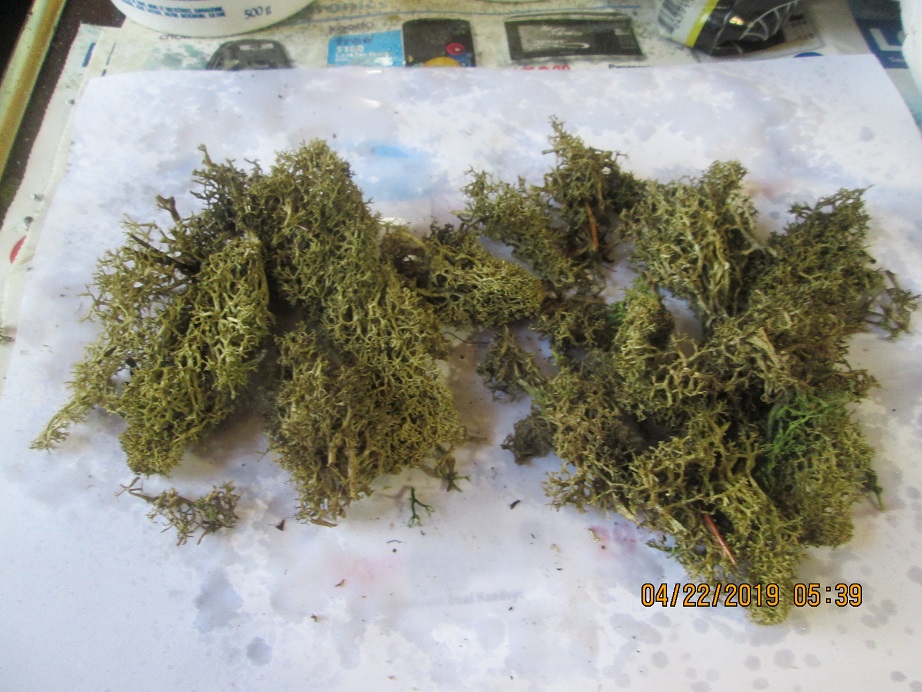 Time to add lichen. I sprayed it down with glycerin, mixed roughly 1:1 with water. Otherwise it flows like urine around a grapefruit sized prostrate.
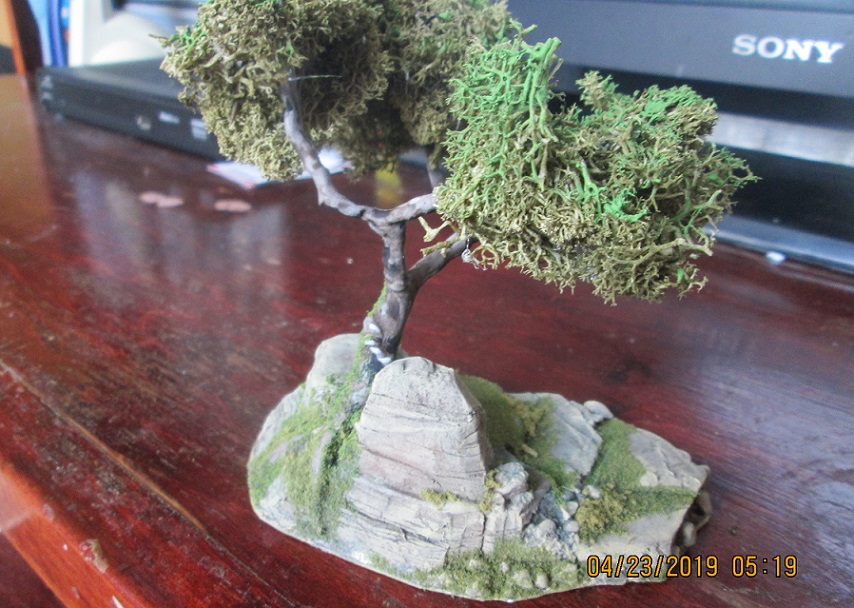 The final step was to apply the foliage with a glue gun, and drybrush a leaf green on it where it had faded to brown in the bag (actually, that's two steps). It's not quite the colour I wanted, but at the finishing stage, all the deciduous trees will get a slightly yellower highlight.
That’s all for this week. I hope this fills in any gaps in the process. Next week I’ll move on to the remaining hills, and illustrate the dreaded three ‘P’s of terrain building: piss poor planning.
Battle Boards and Scatter Terrain
This week I thought I would go step by step in creating an individual tree and base. I’ve described the process with other pieces, but I haven’t actually illustrated it. The steps are pretty much the same for larger hills and such, so hopefully this will fill in the blanks.
As stated previously, I didn’t think I had planned for enough terrain to stock two 4′ by 6′ tables, so I created half a dozen individual trees to keep the client smiling.
There weren’t many parameters for these bits; I wanted them to still provide cover for at least one model, and maybe have enough room on the base for a second model.
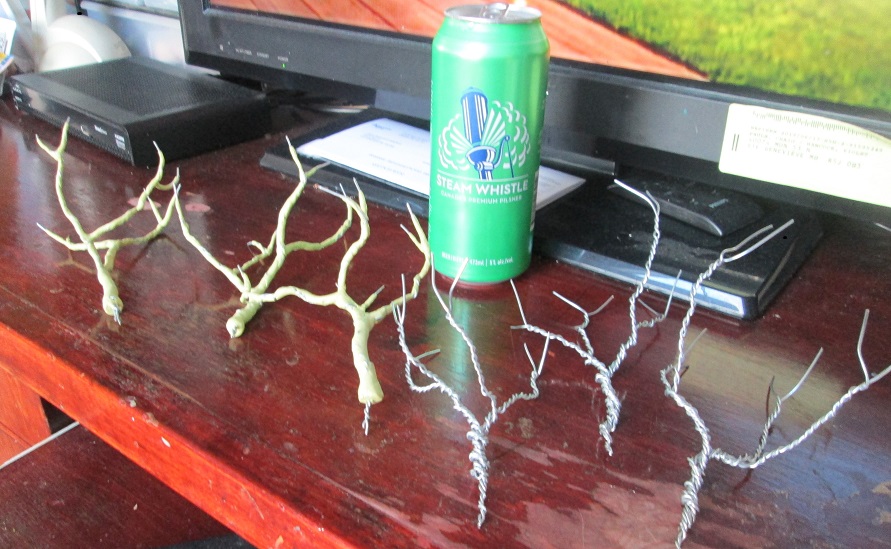
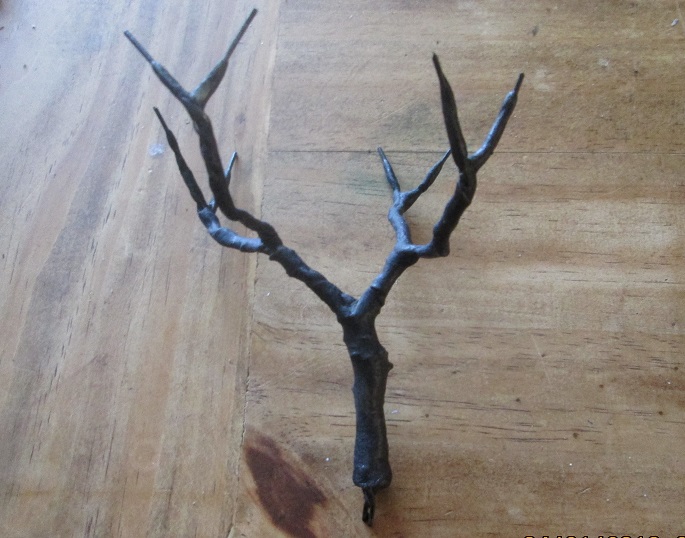 I've already described the process of building trees out of wire, so we'll start there. This piece was primed with 'rattle can black.' I use whatever primer I have on hand for projects like this, usually Krylon. Sometimes they dry with a satin or even a gloss finish, which leads me to wonder what tall forehead thought to label it 'primer,' when nothing else will stick to it. In this case I sprayed my glossy tree with a matt fixative.
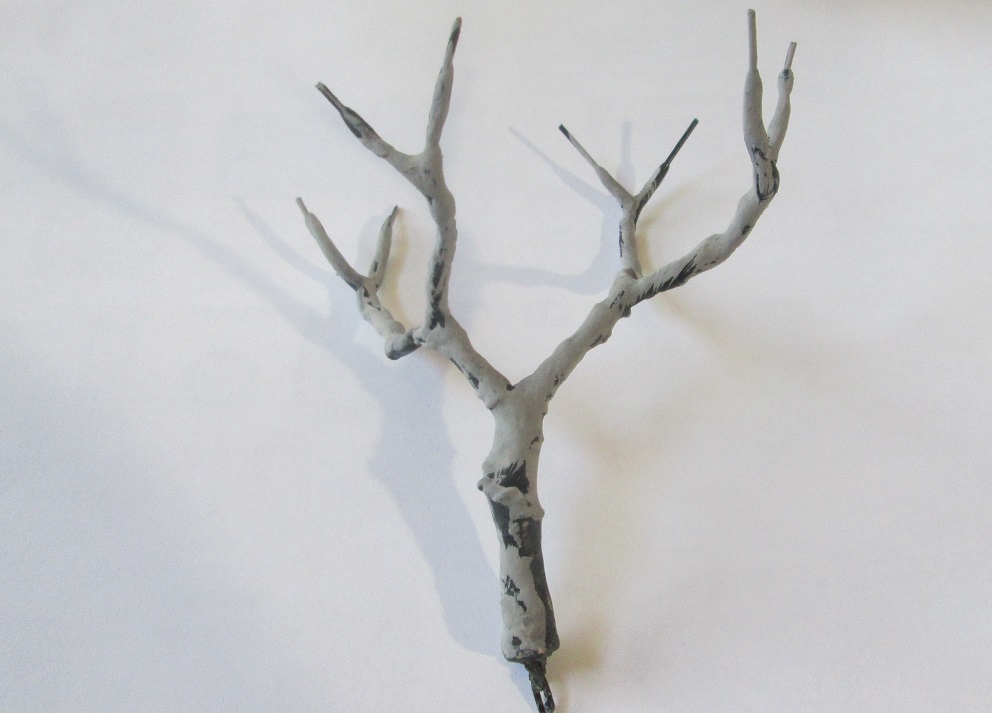 Base colour is a light grey/brown craft paint. Note that I didn't cover it entirely, so there are random dark patches, which could represent running sap, black knot fungus (whick looks like a turd on a stick) or just variations in the bark itself. For birch and poplar I would have gone with white at this stage.
 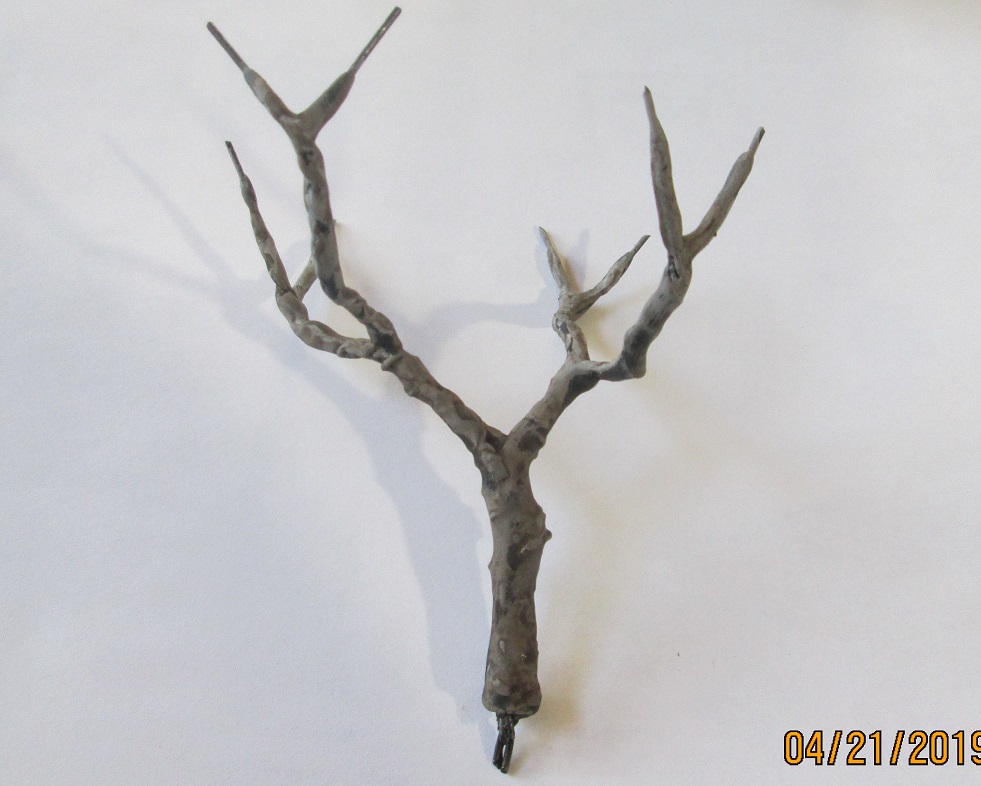 I added a dark brown wash, but again I didn't cover it entirely, allowing for different shades on the bark. This was either Agrax or Army Painter strong tone; I can't remember which. You won't go broke using a commercial wash on trees. Rather than drybrush the tree, I saved a step and just wiped away some of the wash with my thumb to create a highlight.
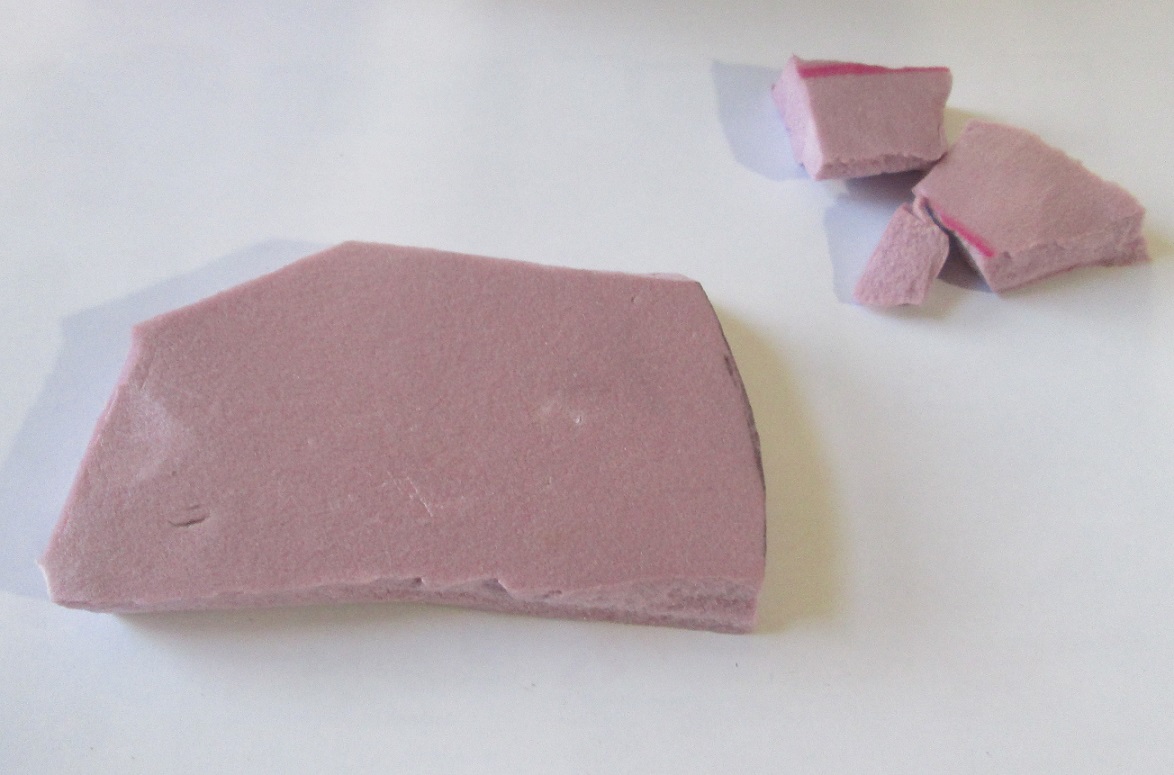 Time to set the tree aside to dry, and get to work on the base. I started with some scrap 1/2" polystyrene
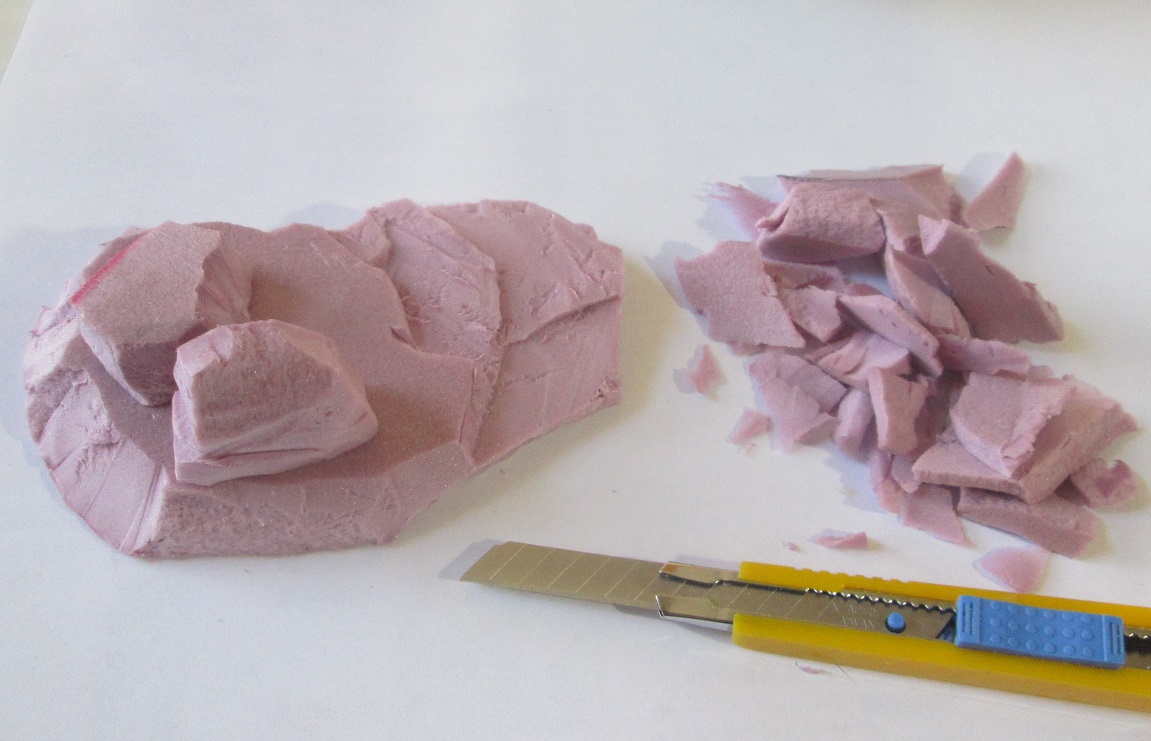 Base sculpted with a utility knife. An Exacto isn't long enough for this type of work.
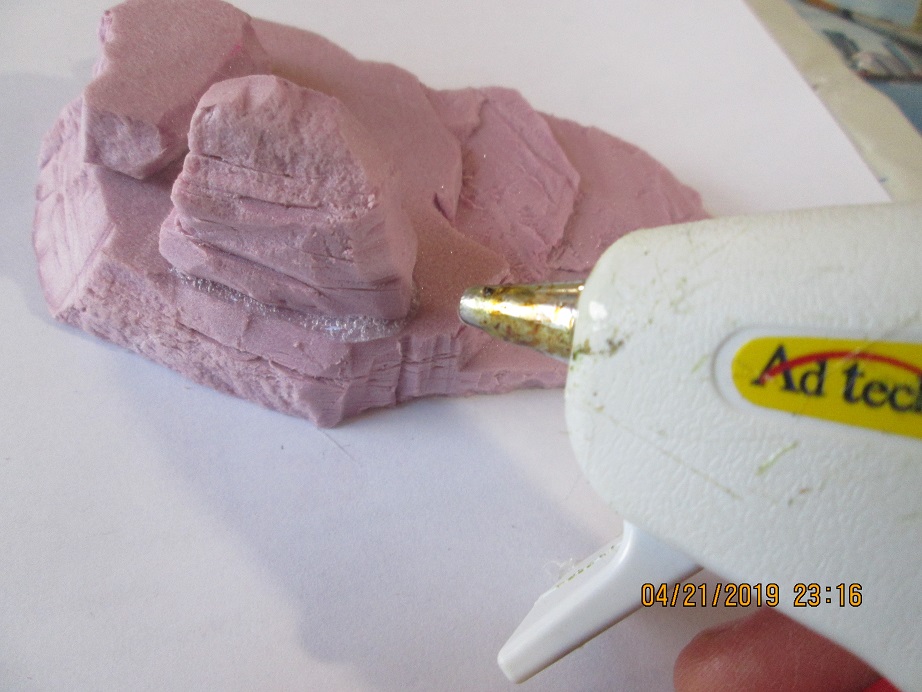 I glued the rocks to the base with a glue gun, but you can use PVA glue as well. Just allow plenty of time for the glue to set. I've cracked open pieces I've had for years, out of curiosity, and still found wet glue inside!
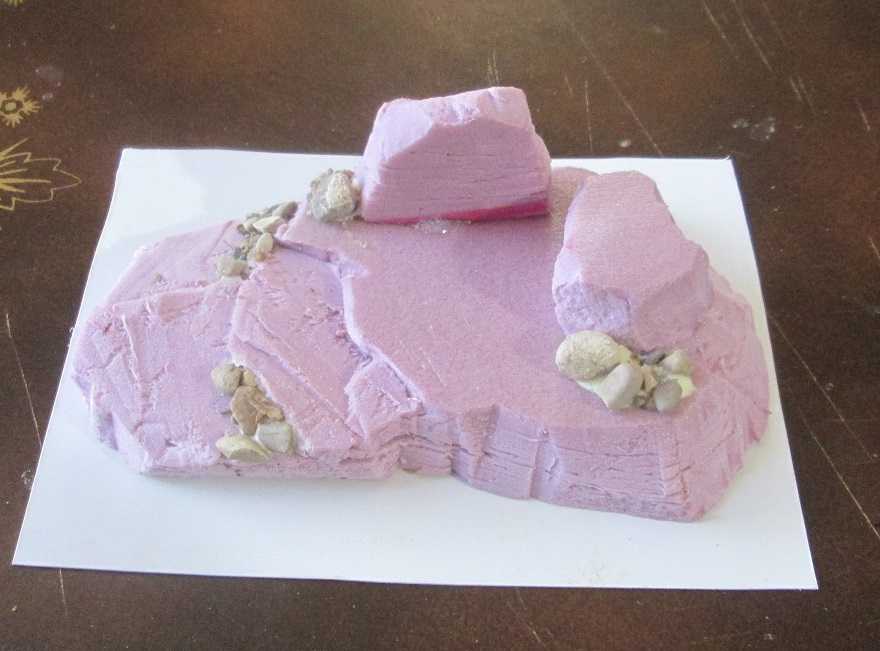 I added a plasticard base with the glue gun and put down some gravel with PVA glue.
 I trimmed up the plastiicard, but decided to extend it beyond 1/16" in places so I could place gravel at ground level around the piece. The base won't withstand re-entry, but it should be a bit more game proof. Note the wall filler on the base, with a layer of PVA glue applied over top... another attempt to toughen up my terrain.
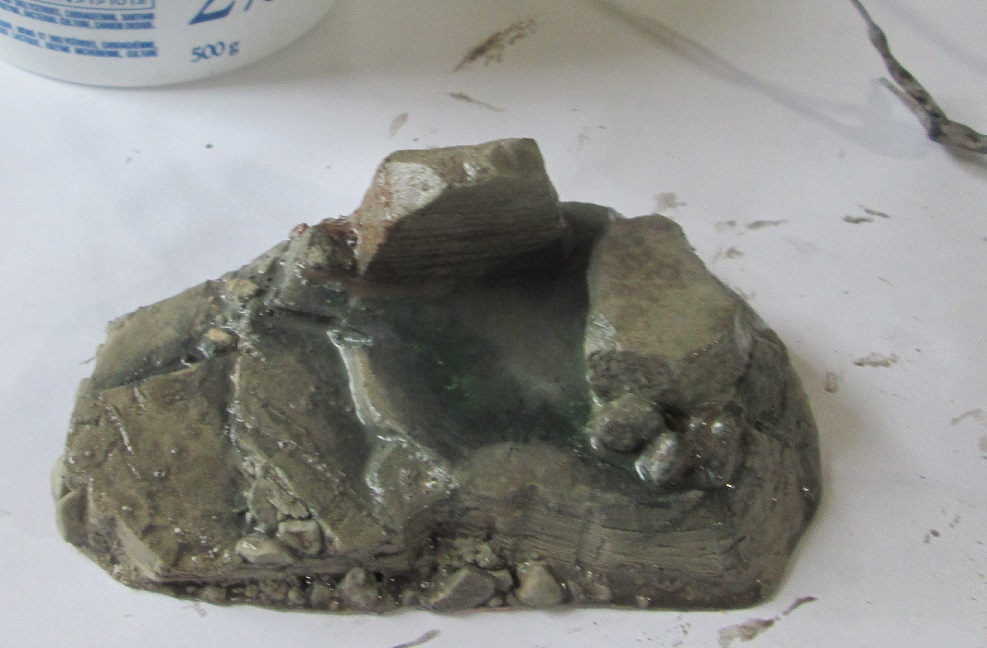 Tan base colour applied to rocky areas, while any areas to be covered with foliage had a dark green shadow colour applied. It was given a brown wash, in this case a homegrown glop of water, craft paint, and dish soap, and set aside to dry.
 A few finishing touches for the tree. I painted up some exposed twists of wire as mushrooms.
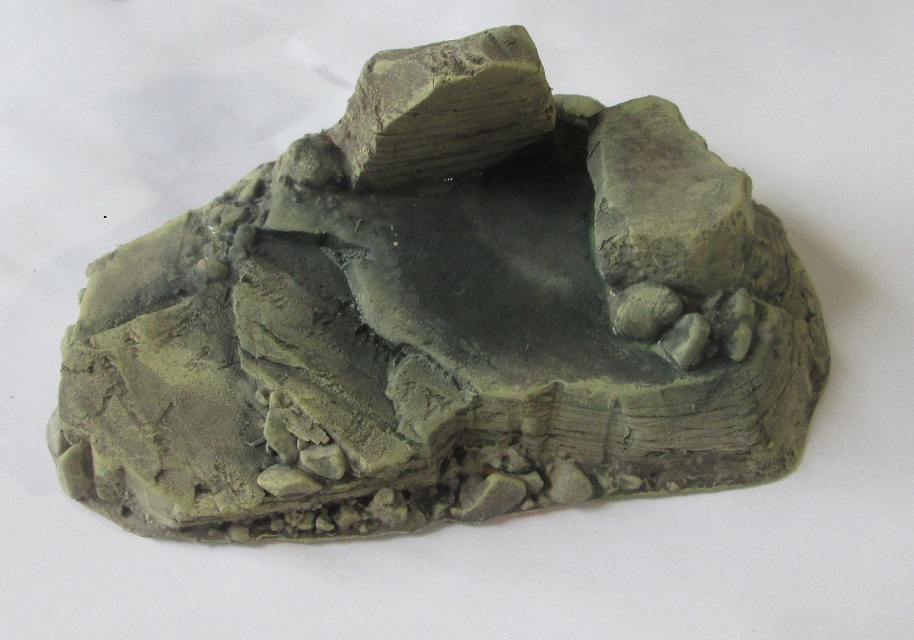 The base, now dry, was given a drybrush of the original tan paint, tinted with yellow. Sorry I can't get more specific about colours; I just fiddle with it till it looks right. We'll call it 'striped ass baboon tan' if it helps.
Battle Boards and Scatter Terrain
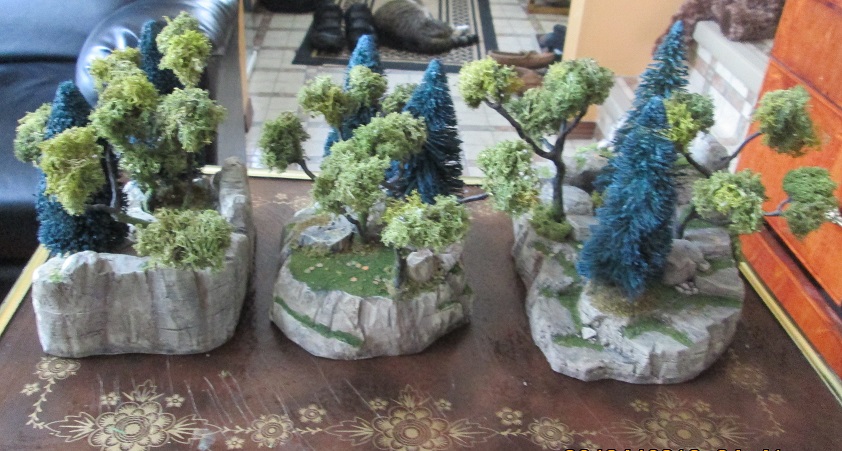
 This phase of the project started with a tree building marathon, a process that has already been described. Note the one item that didn't make it on to my initial supply list: a microbrewery.
The remaining three copses were constructed with a few factors in mind: first, space for interaction between models; second, I wanted them to have enough cover to be defensible; third, I wanted them to be tall enough be an LOS obstacle (unlike the individual trees I built later); and fourth, I wanted each to have unique characteristics.
 The three remaining copses had unique characteristics. Again, I experimented with a ruined wall section.
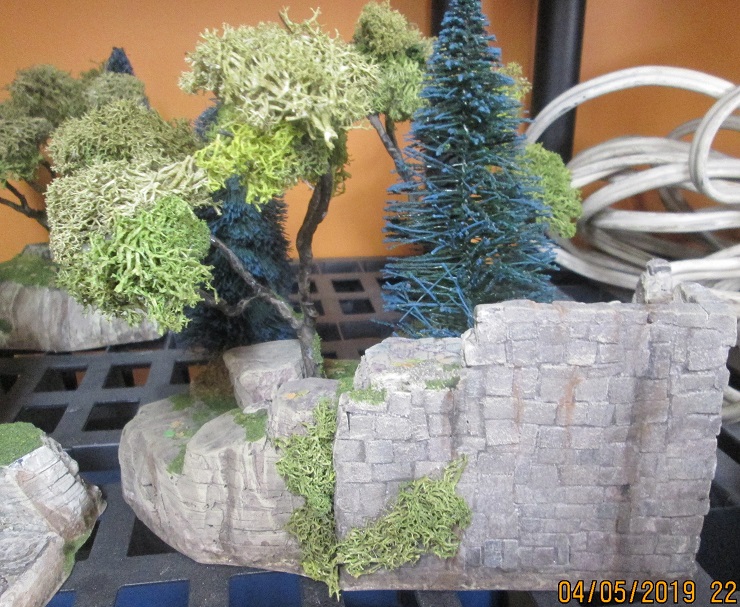 On this section of wall I tried a variation on the bricks. I tried to make them less uniform. It was a bit more of a challenge fitting them together, and I got the wash a bit too heavy, and lost a lot of the underlying colours.
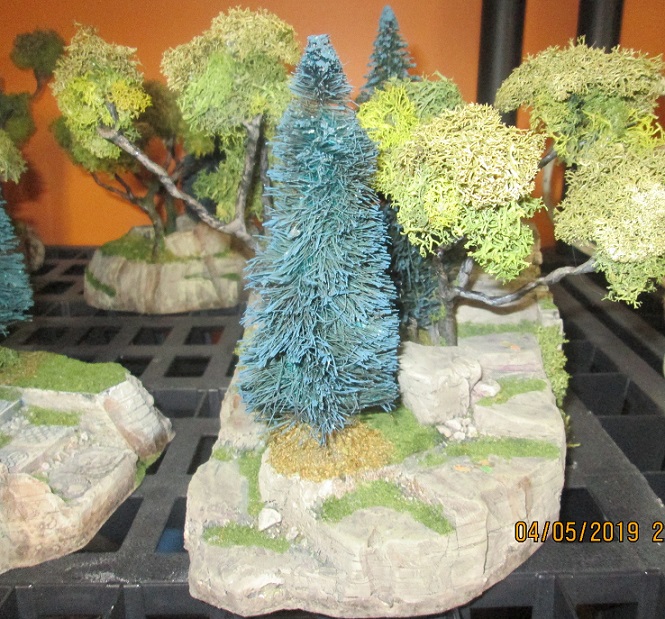 Opposite view, showing the natural rock shelf access. Note that some of the foliage has lost its colour. It will get a green drybrush at the end.
On the next hill I glued polystyrene scraps to the edge of the piece before sculpting it. I was hoping to create a more dramatic rock face. As with the previous brick ruin copse, this piece offers good cover for several models, and would be a good anchor for a flank, or a good overwatch position.
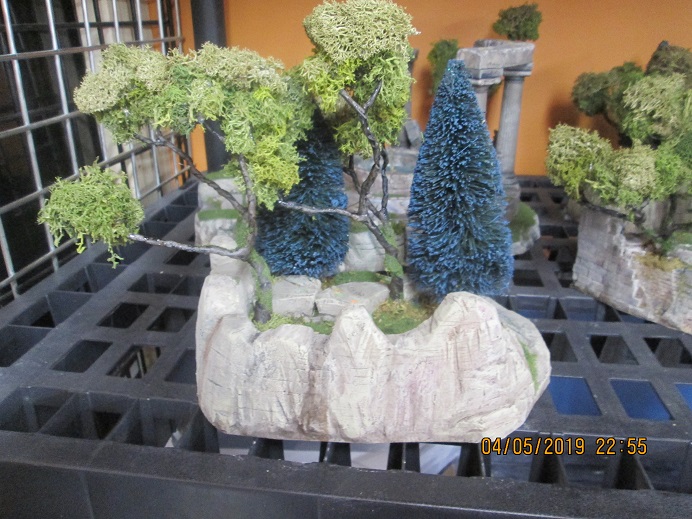 Scrap and base sculpted to create a higher feature. Not entirely happy with it. Next time I will make it less smooth, and possibly more complex. Also, the base will need more angles; I can still see the 'square' shape of the orginal block of polystyrene. Not many straight lines in nature. Like a good book, good terrain should suspend disbelief.
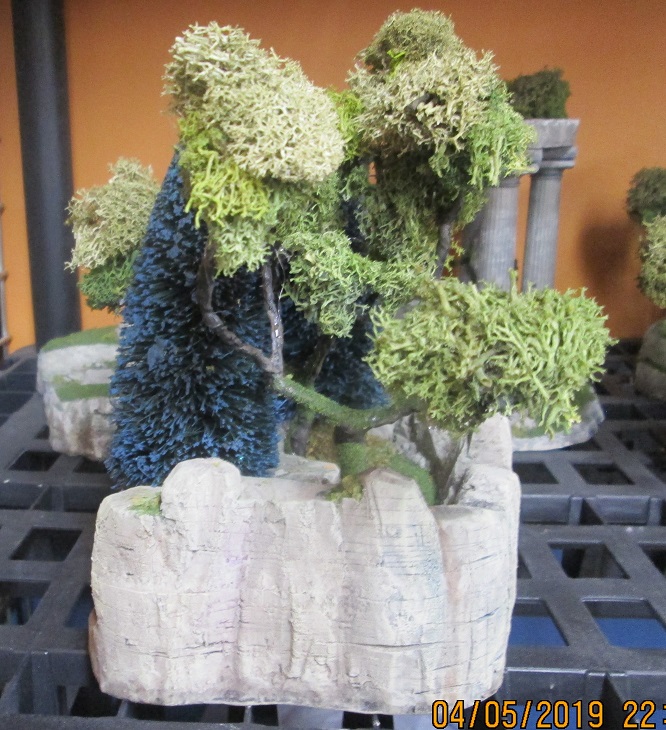 Another view of the same copse.
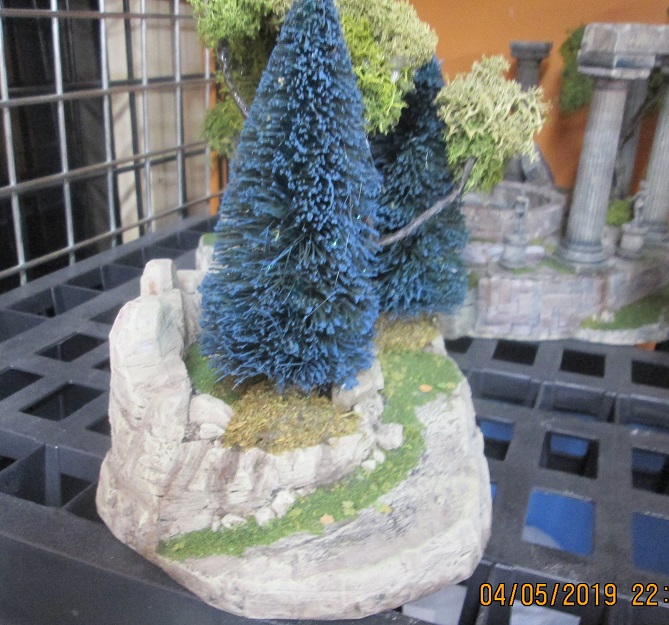 This copse was accessed by a ramp that curved around the outer edge. The angle on the slope was shallow enough for the average model, but the tippy ones, not so much.
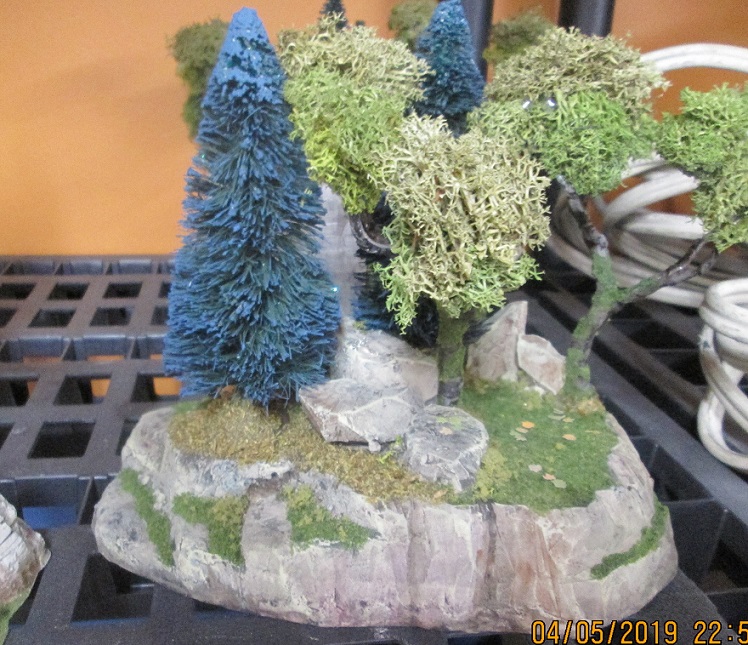 The last copse had a more open top, and was also accessed by rock shelf steps. I put a few rocks on it for cover, and scattered leaves on the ground, as with all the other copses.
One thing I failed to mention with regards to the coniferous trees: I’ve encountered two kinds of bases, one with a wooden disc, and the other with a sloped plastic base. I prefer the plastic base — it can be left on and covered with Spanish moss, as the area under the tree is wasted space anyway. The wooden disc is harder to camouflage, so I remove them and sculpt a trunk out of Milliput.
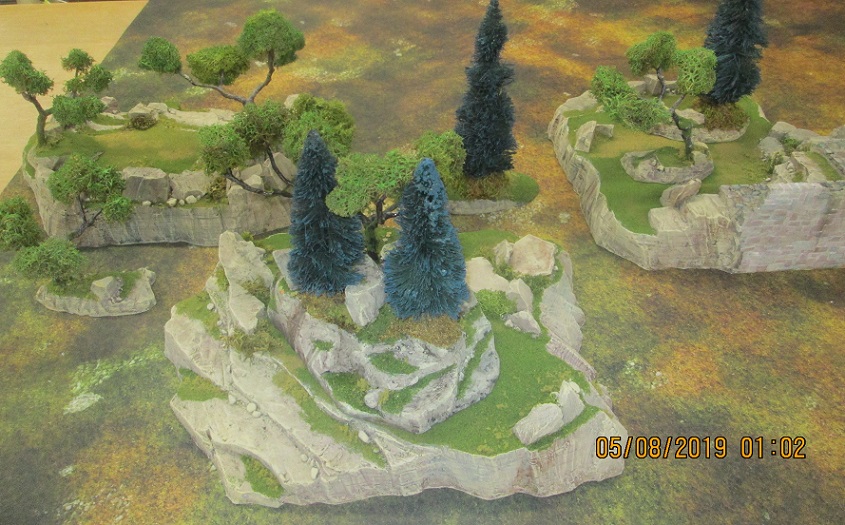
Overall I was happy with how these pieces turned out, and learned a few lessons about carving polystyrene, and how to design these smaller pieces so that they are interesting and more than just an LOS block.
Next week I’ll post pics of the individual trees I built for this project.


