


![Atomic Tank – The Robot Wars Review | Fast-Paced 10mm Sci-Fi Wargame [7 Days Early Access]](https://images.beastsofwar.com/2026/01/unboxing-hydra-miniatures-atomic-tank-the-robot-wars-coverimage-225-127.jpg)

![246 Dwarves in One Box?! | Wargames Atlantic Dwarven Host Unboxing & Review [7 Days Early Access]](https://images.beastsofwar.com/2026/01/unboxing-wargames-atlantic-epic-fantasy-battles-dwarven-host-coverimage-225-127.jpeg)


JOA Hovels & Houses – Unfinished Business


Recommendations: 58
About the Project
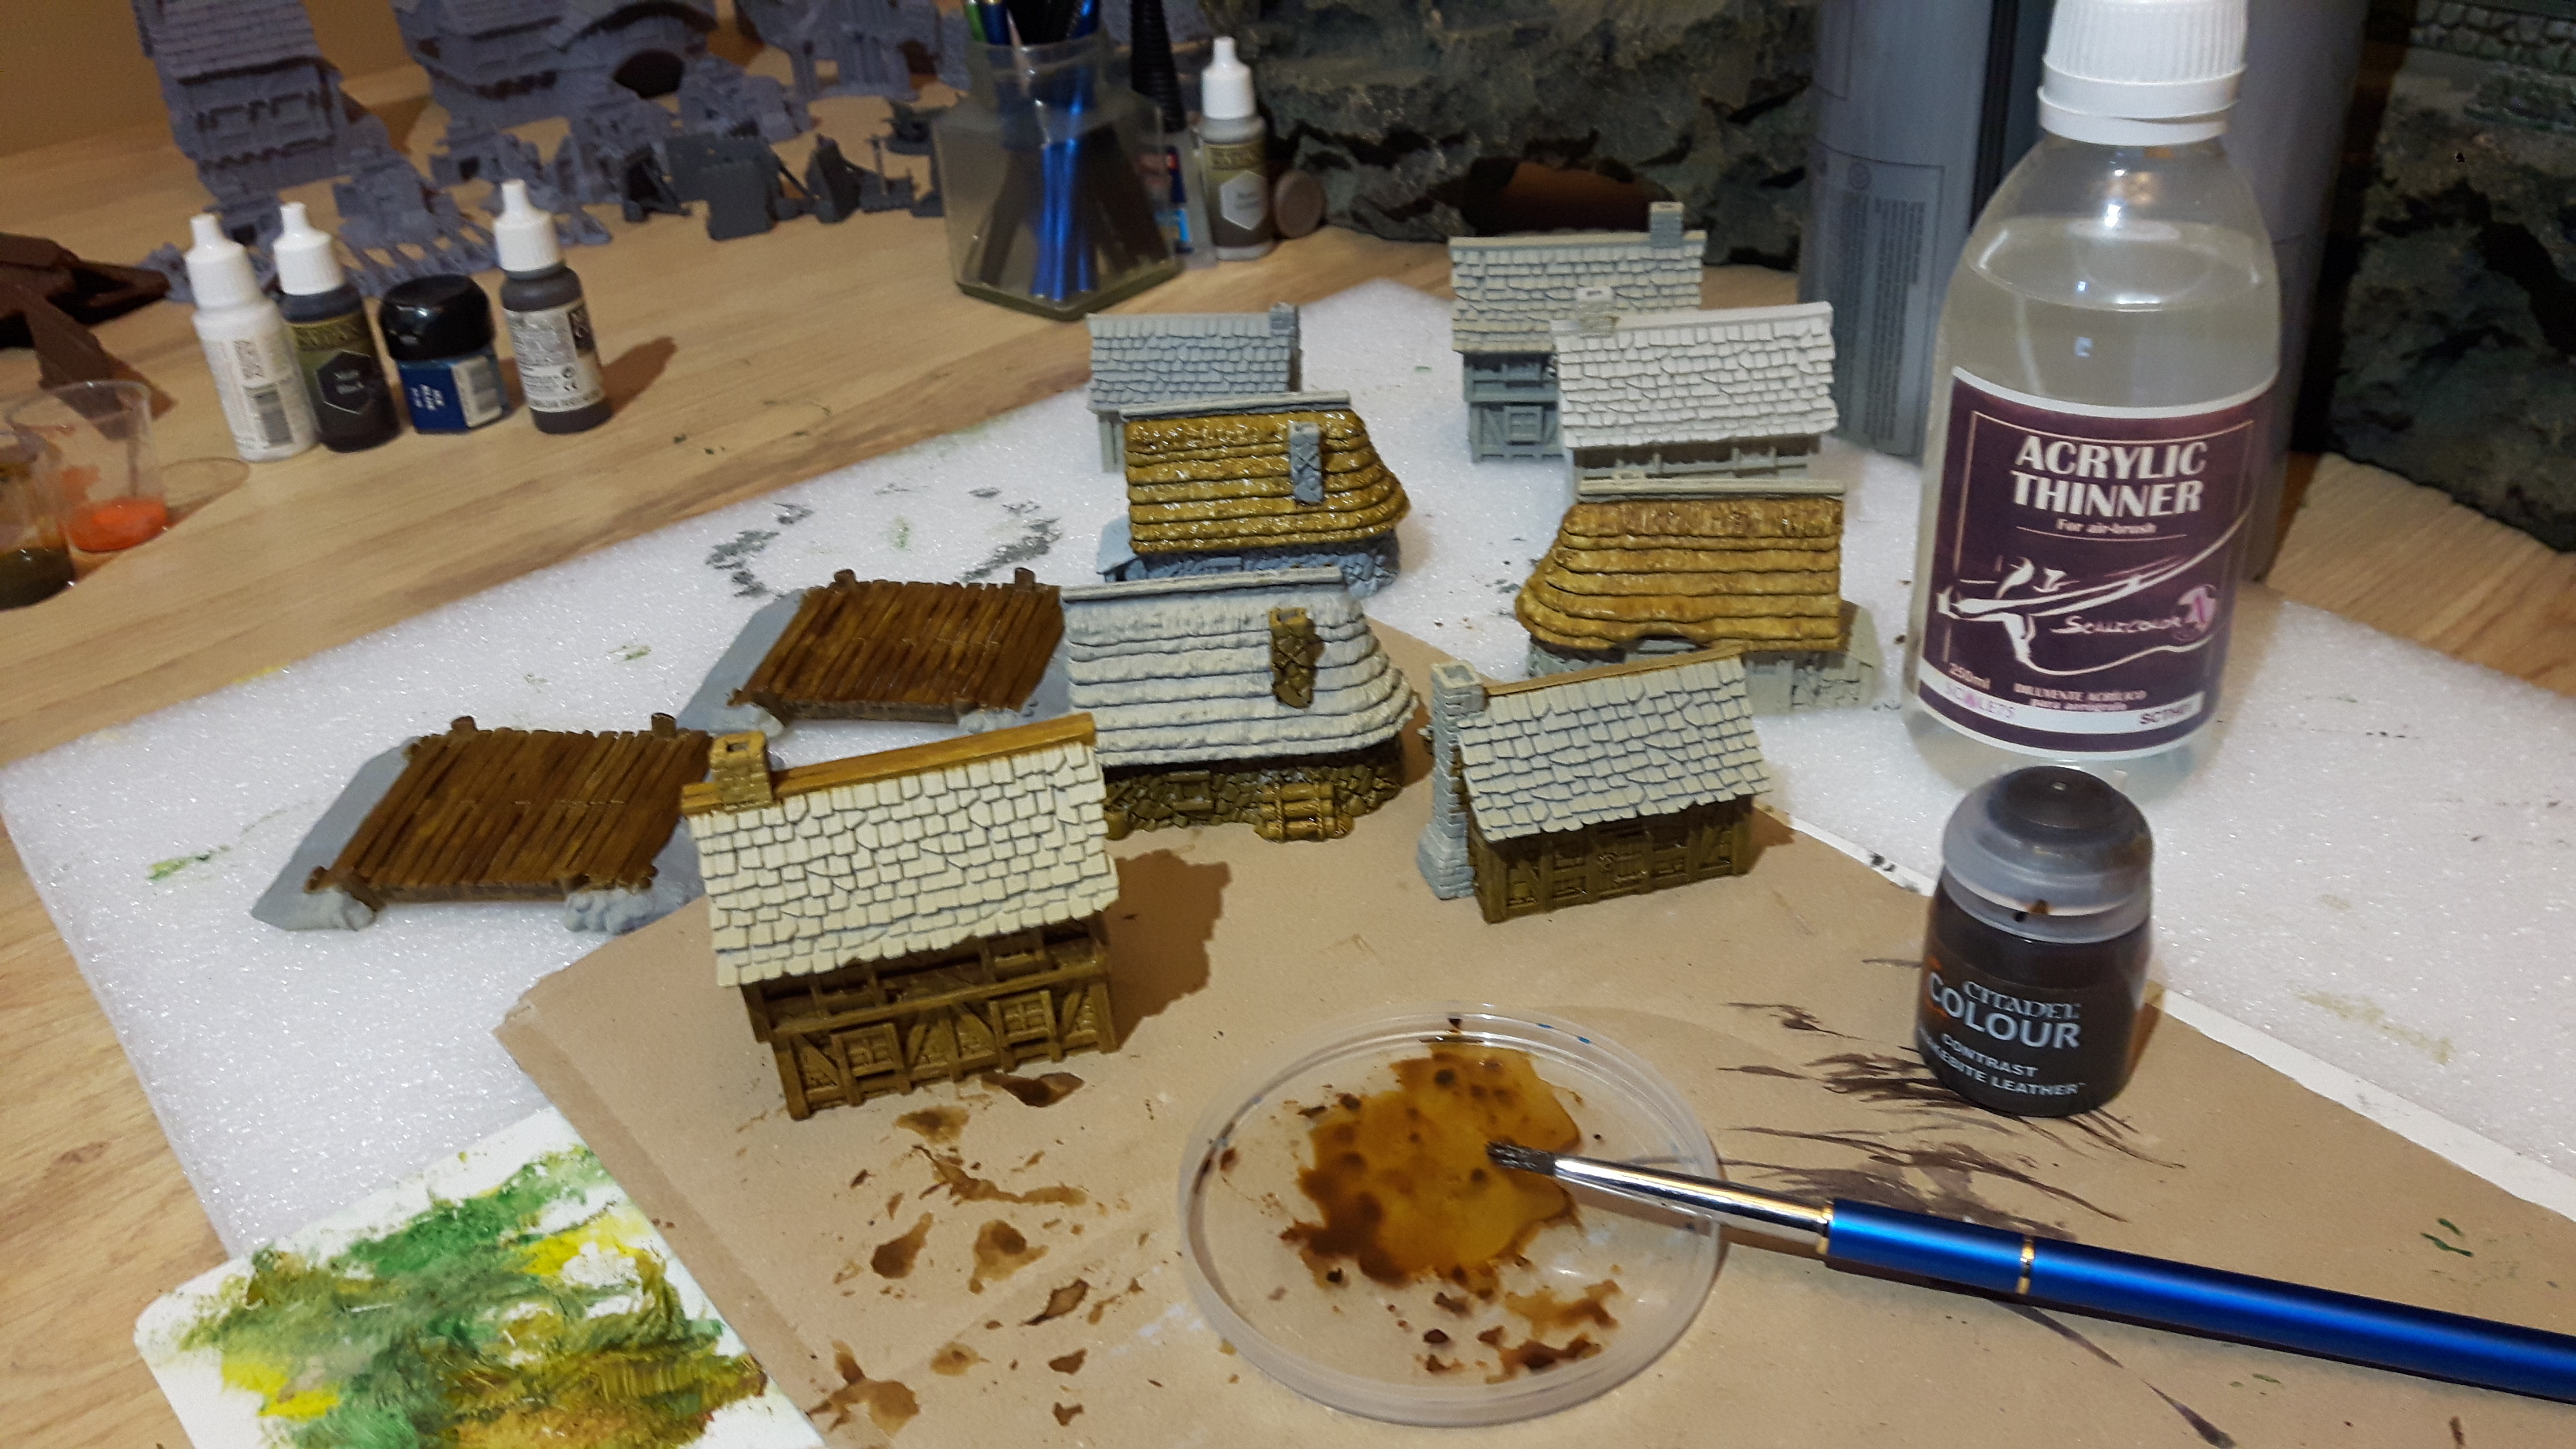
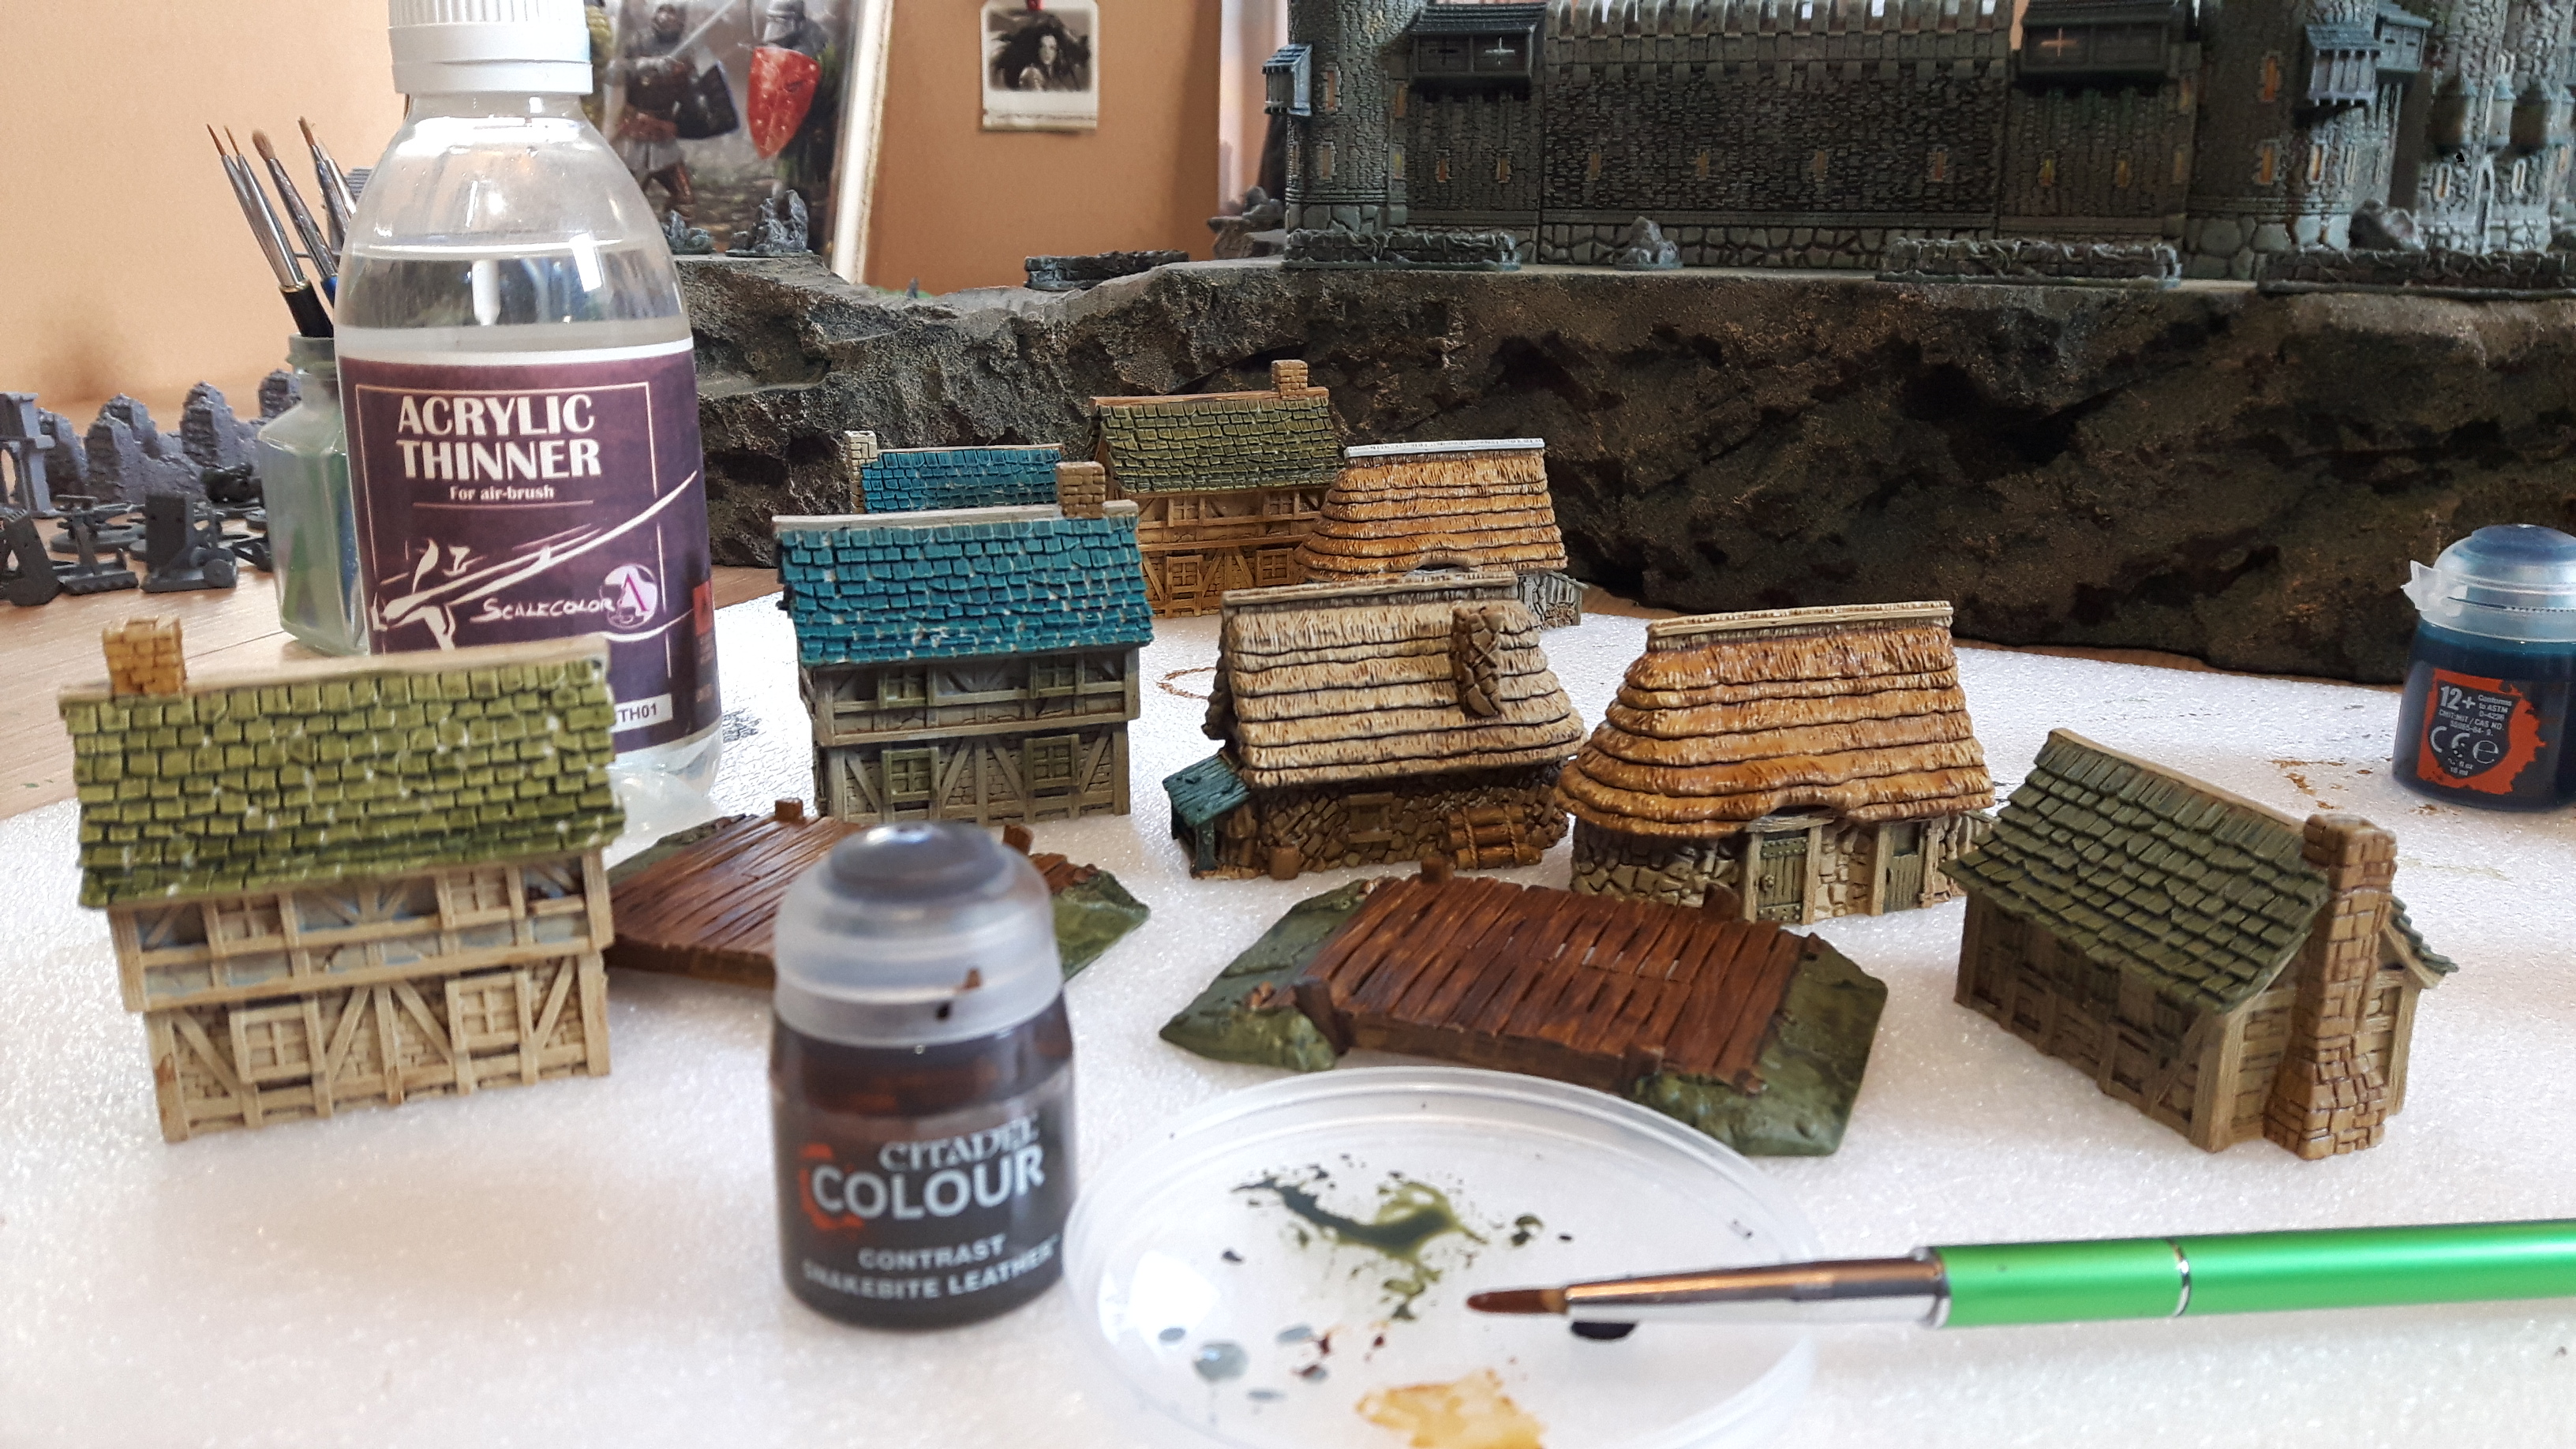
Now that the JOA Castle is 'done' I wanted to start getting the some of the other buildings painted. For this project I am going to use mainly Contrast Paints to see if I can get quick but decent effect but still keep the old ground in look of the castle. I am going to try using the paints neat out of the bottles but also using the same paints watered down 50:50 with ScaleColor's Acrylic Thinners to see colour differences. Other paints and washes will get used for detailing and tying the buildings together.
Related Game: Time of Legends: Joan of Arc
Related Company: Mythic Games
Related Genre: Historical
Related Contest: Spring Clean Hobby Challenge (Old)
This Project is Completed
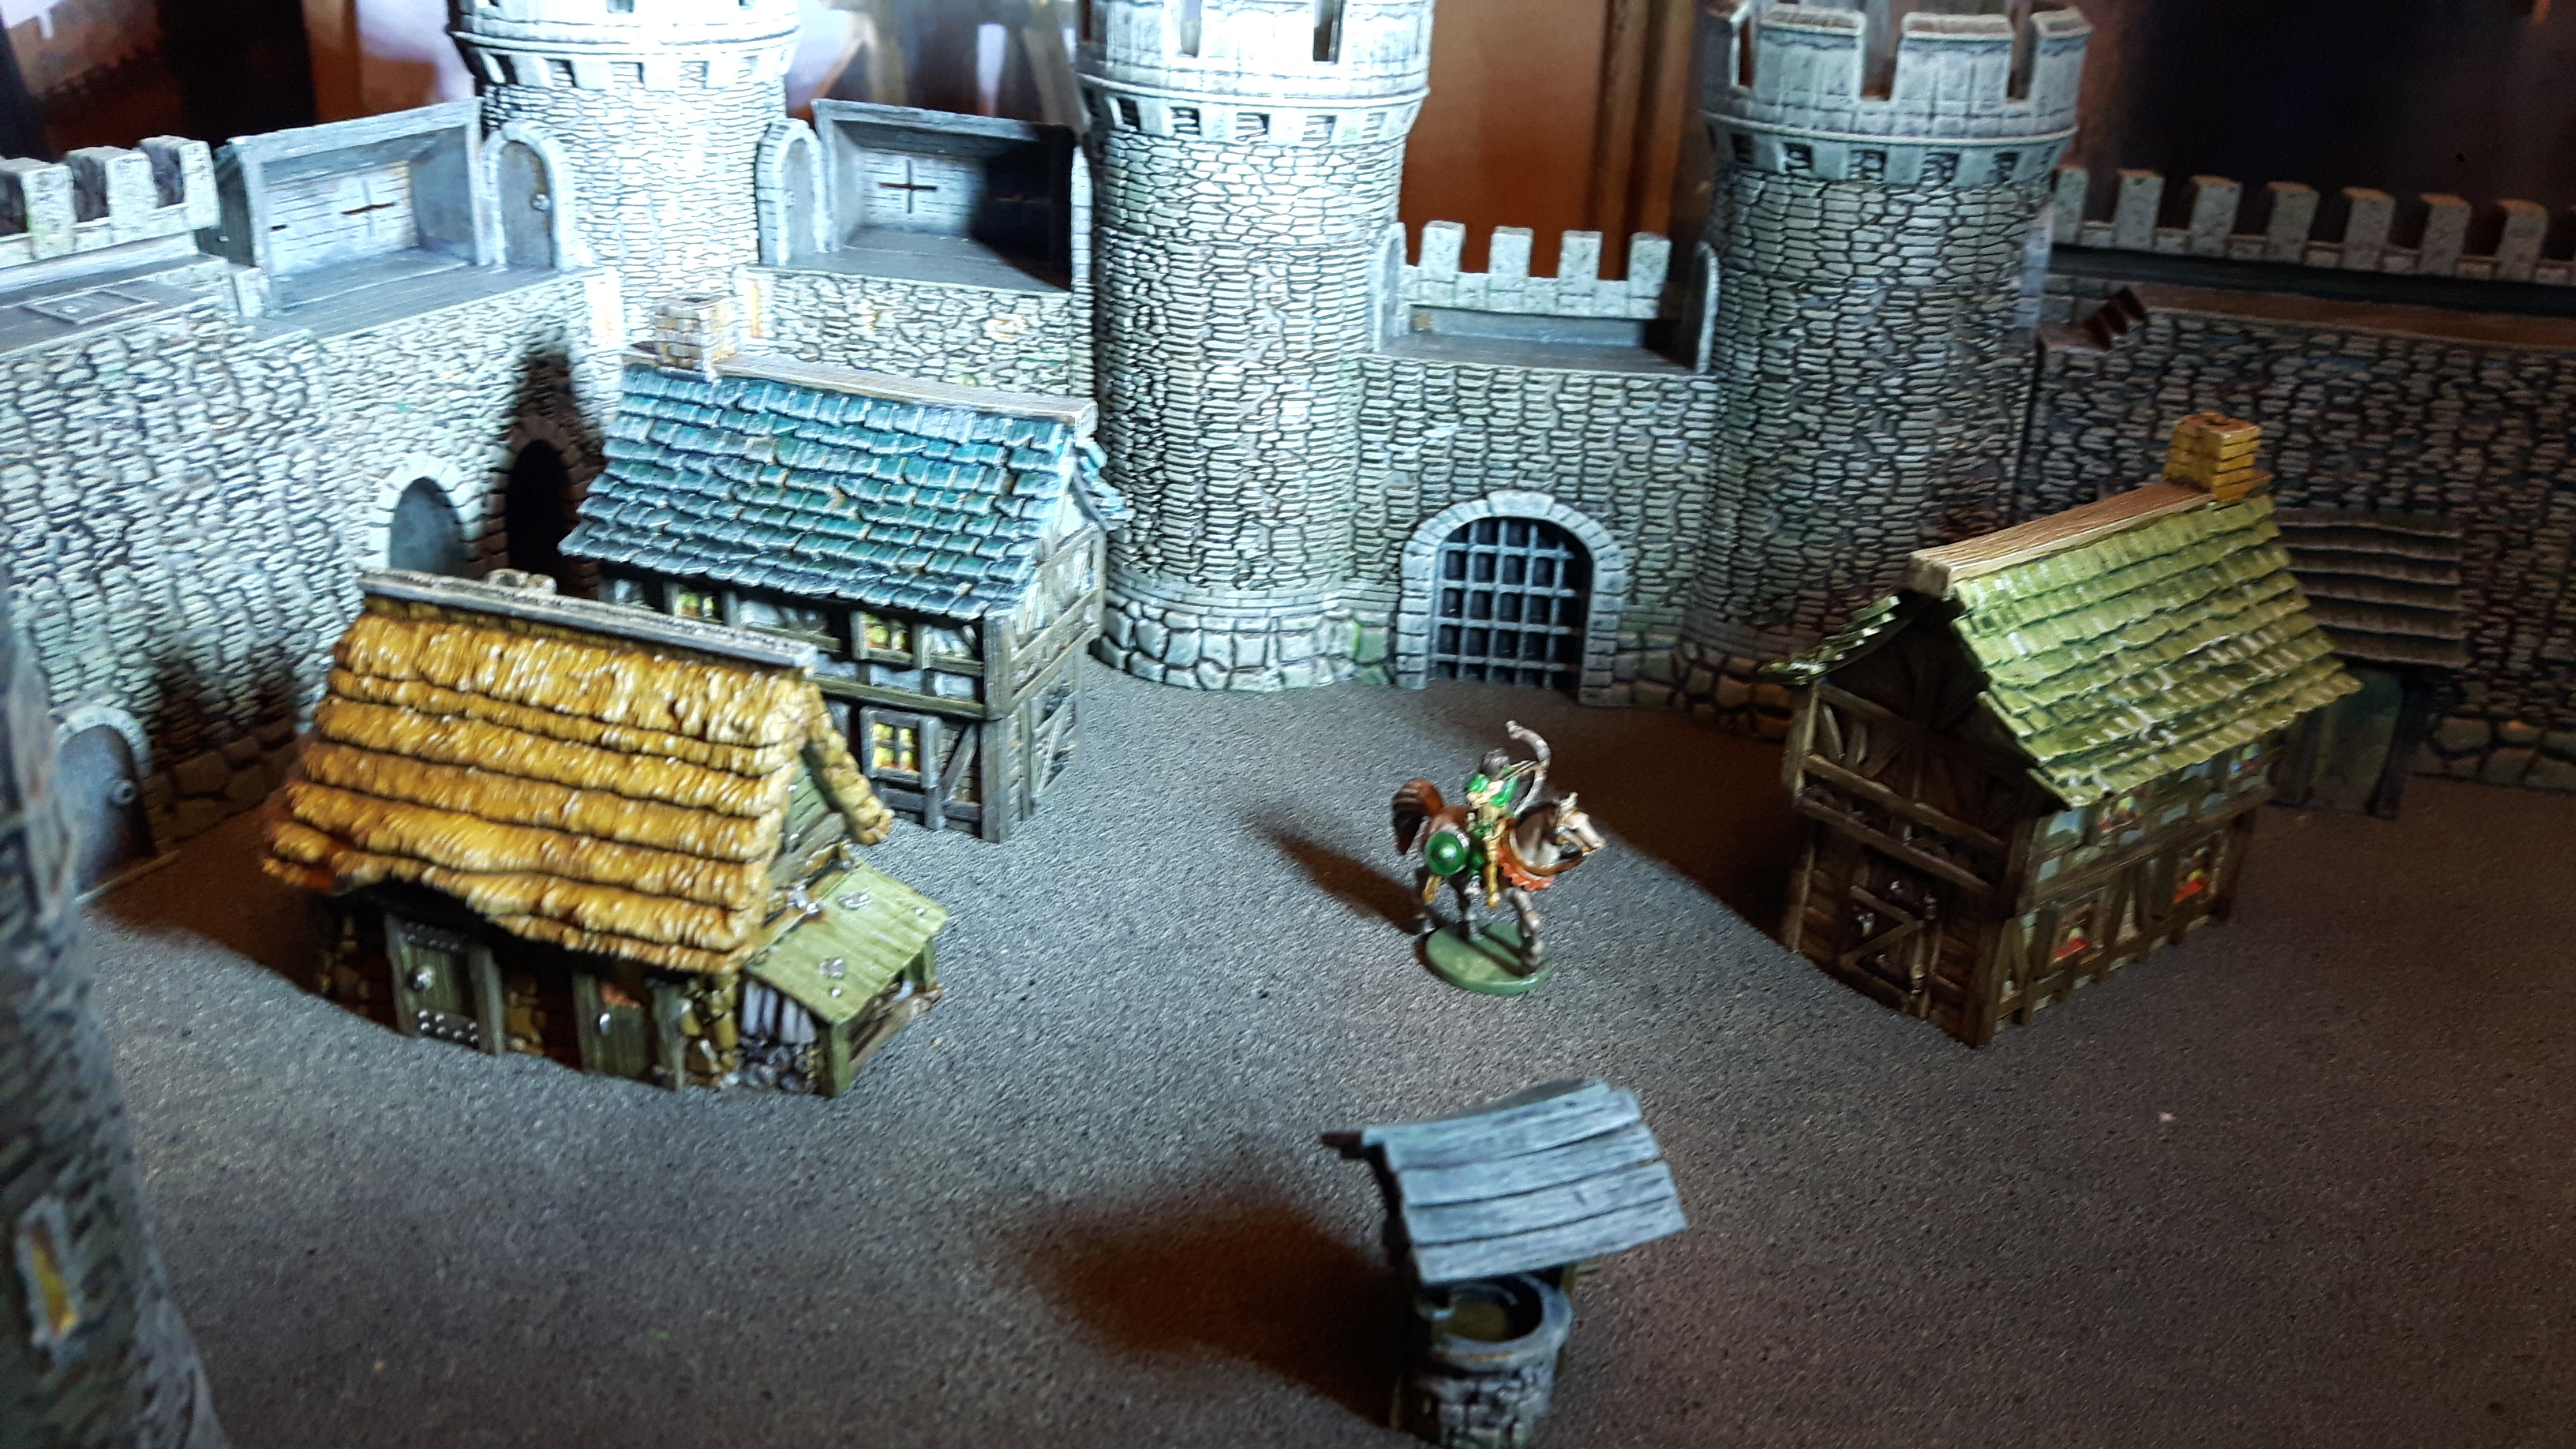
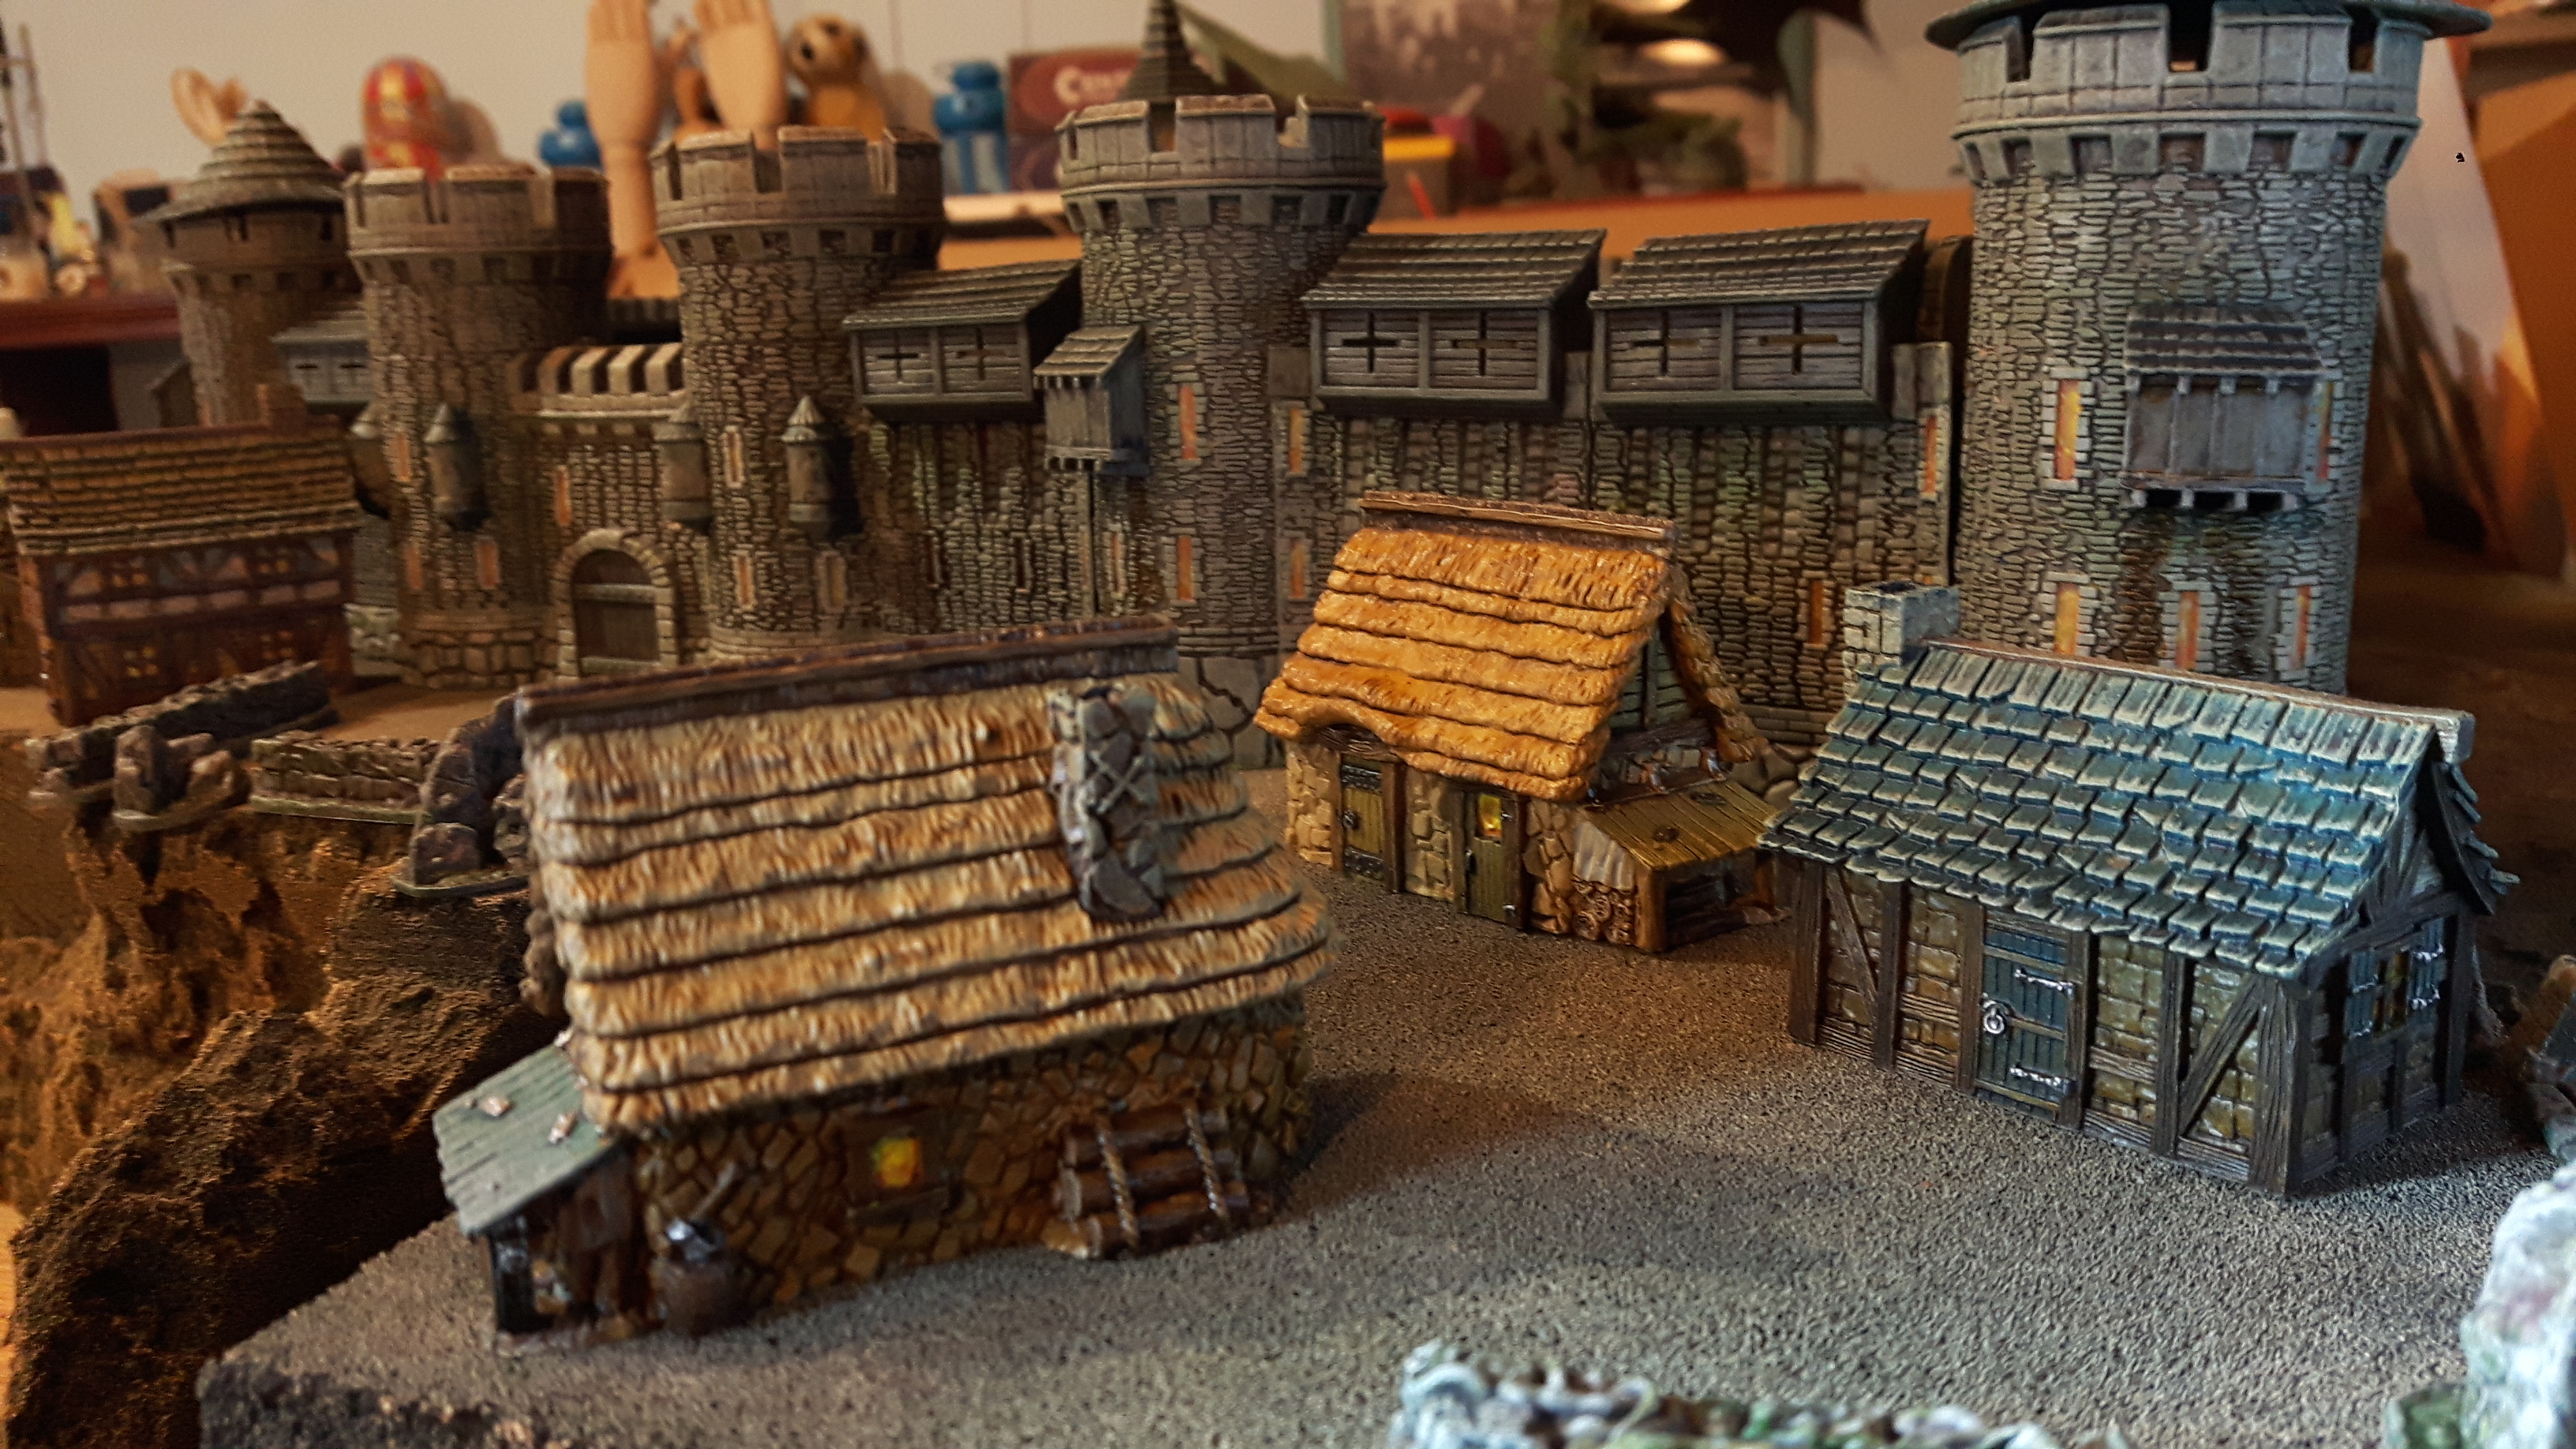
Getting Started
The buildings and bridges in this project were gathered together, from various expansions and the core box from the Joan of Arc Kickstarter, so that I could work on all the terrain types as batches.
As there are multiples of the buildings, I primed them using different combinations of three colours – some with zenithal highlighting. The primers I used were: Halford’s Grey Primer, Halford’s White Primer and Army Painter’s Skeleton Bone. I didn’t use the GW Contrast Primers as I didn’t mind if I had a grainy or patchy contrast’s paint job as this would even help towards the finish I was aiming for.
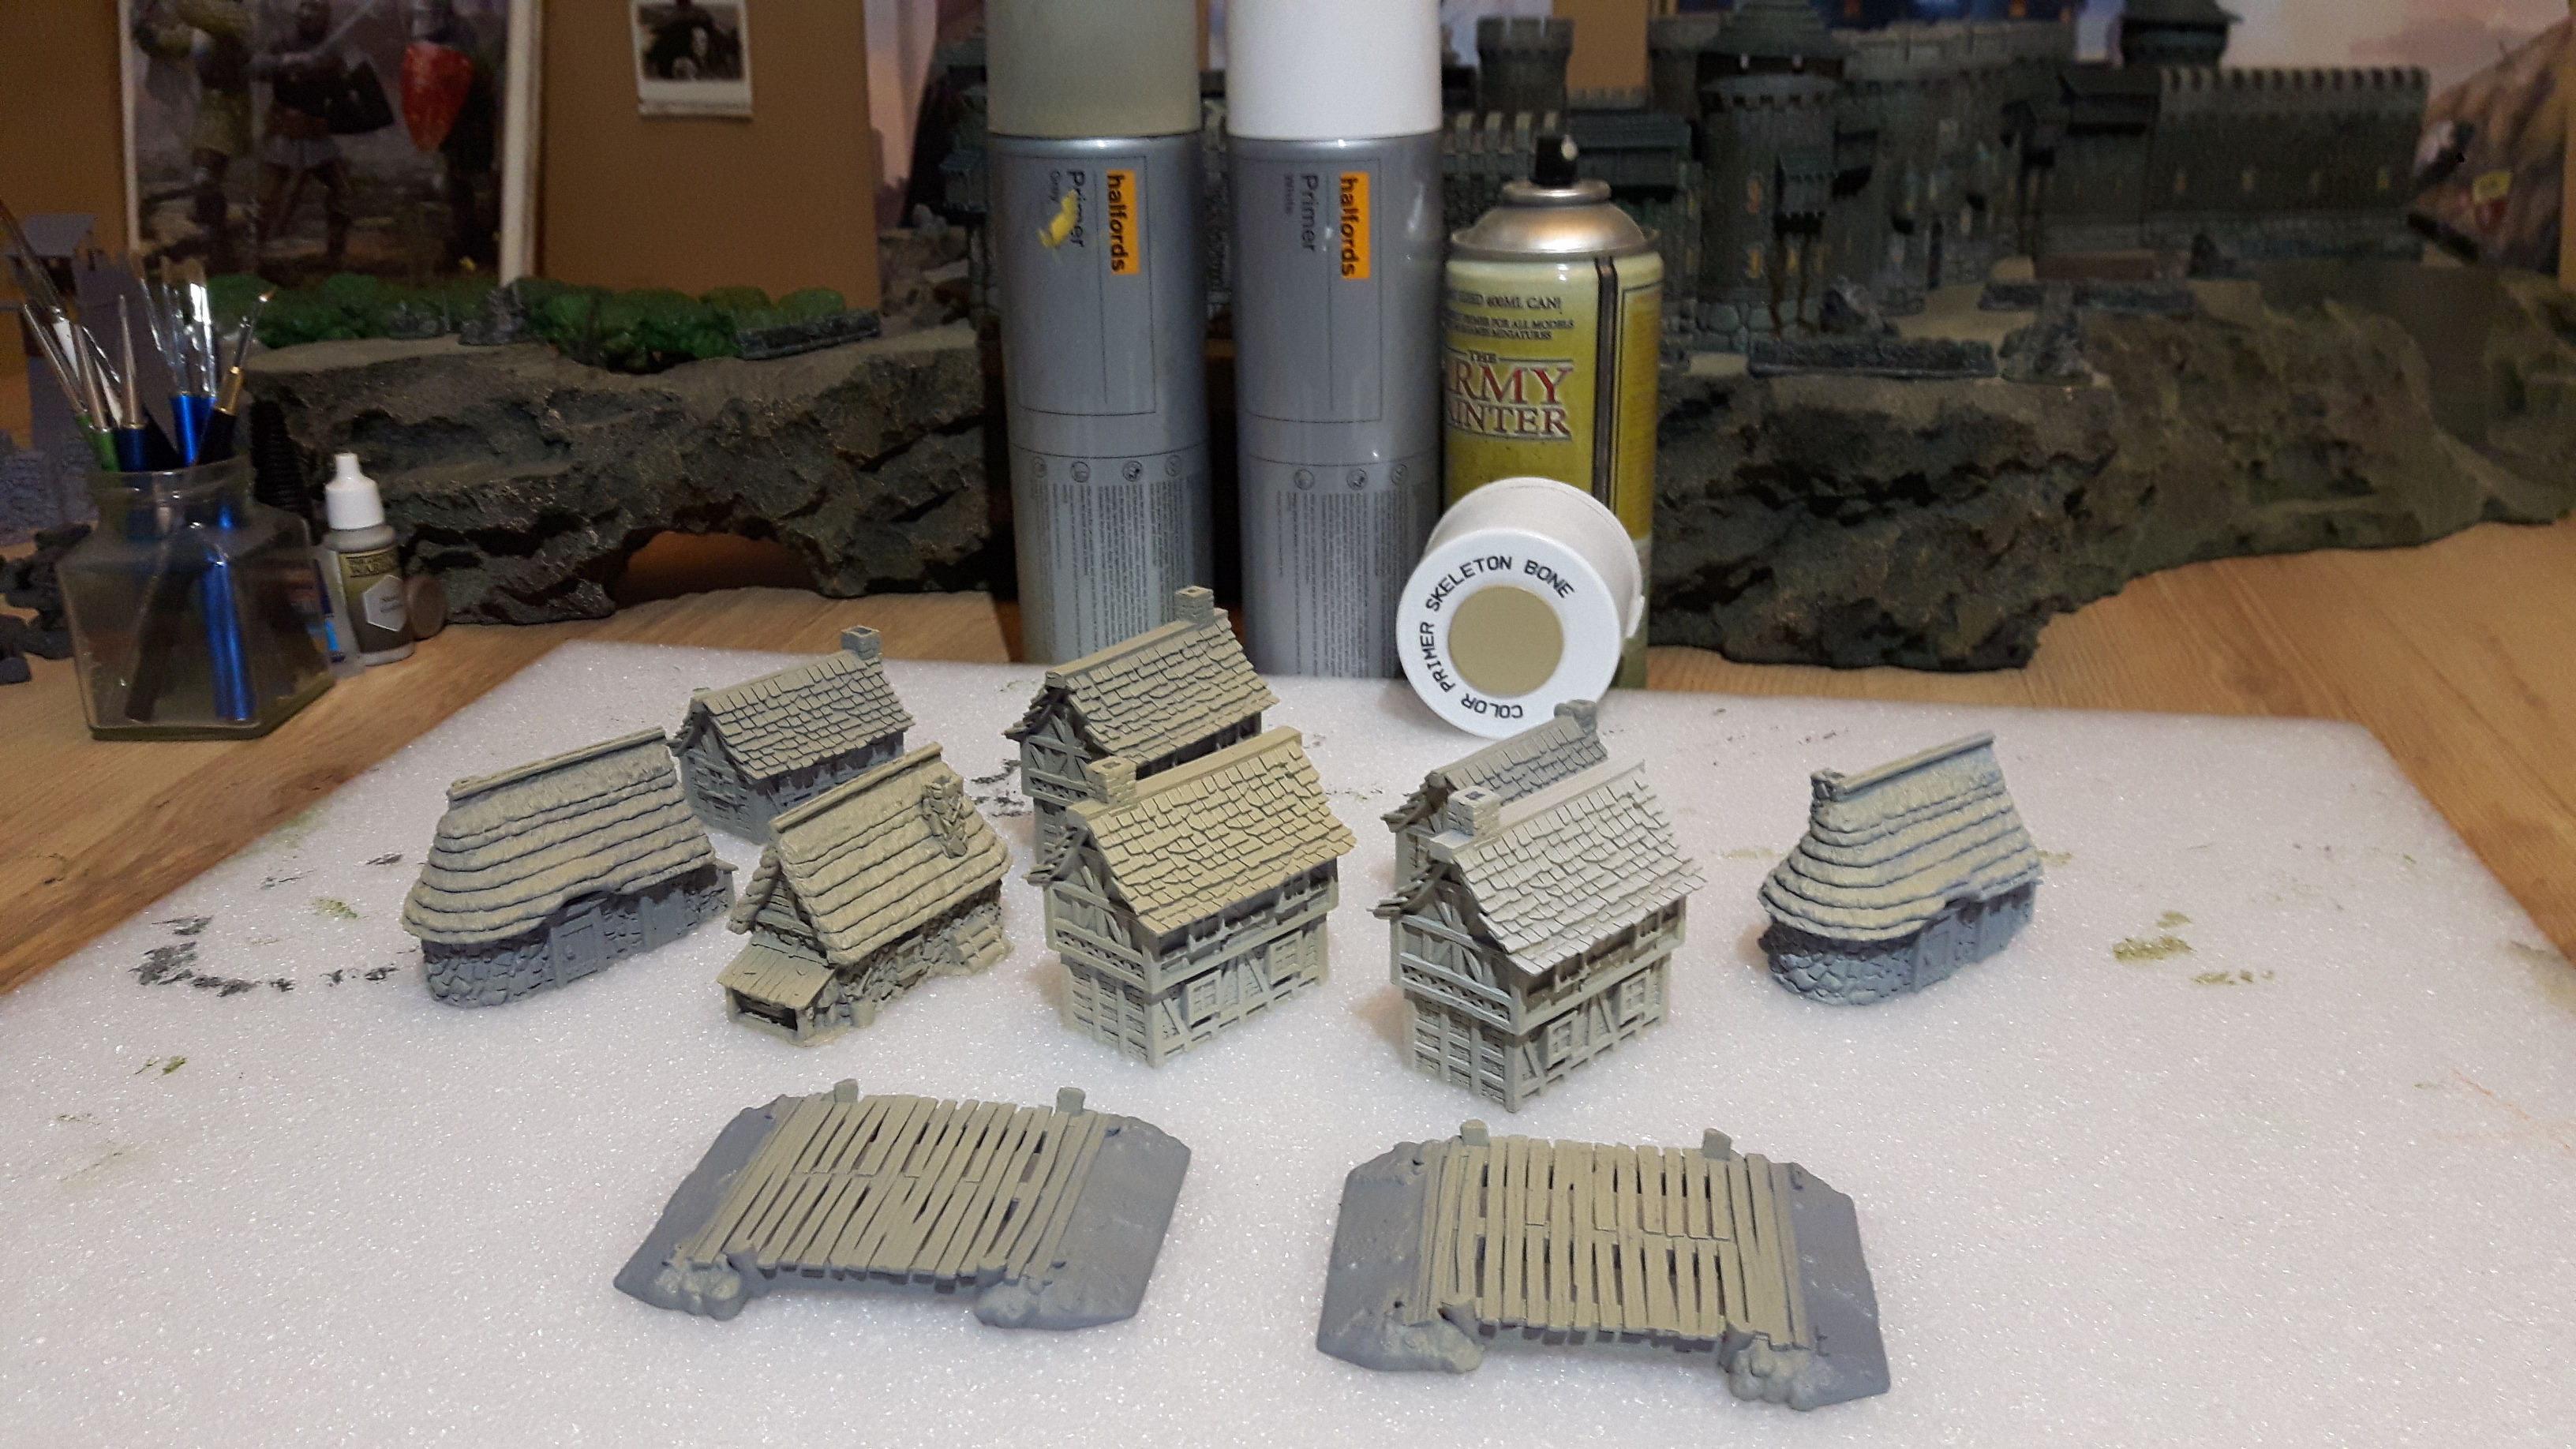
Contrast Paints
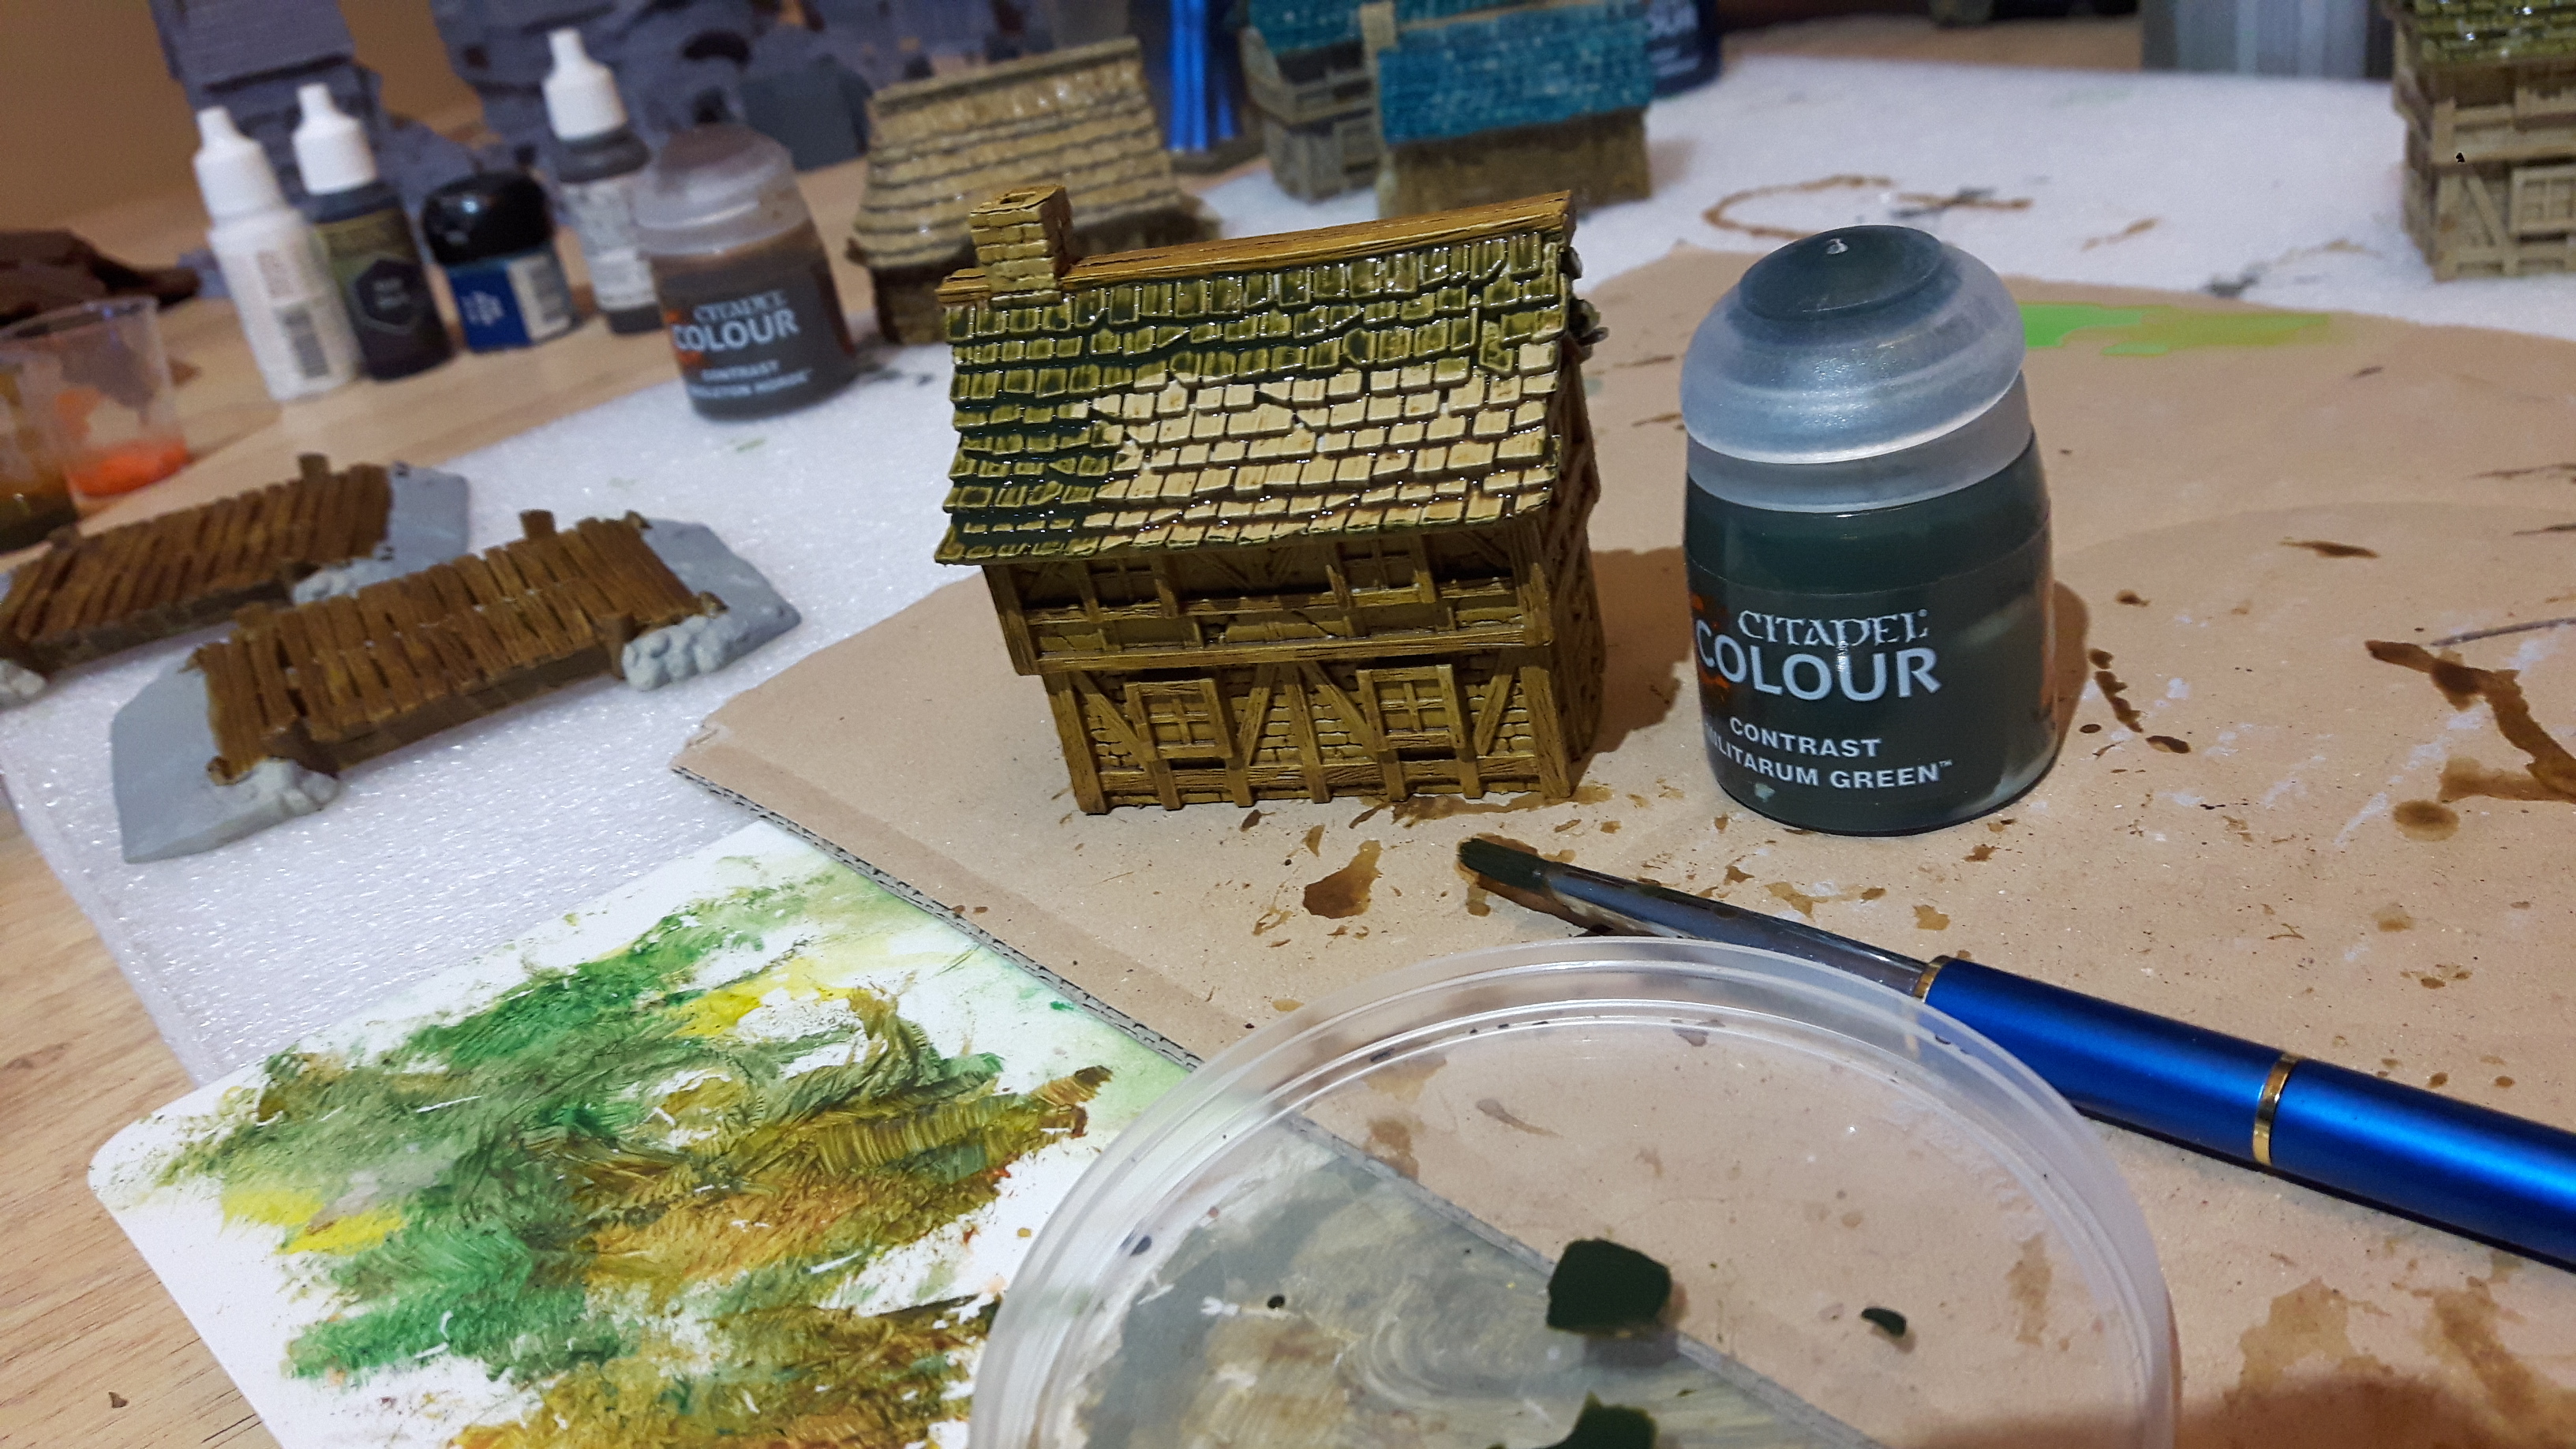
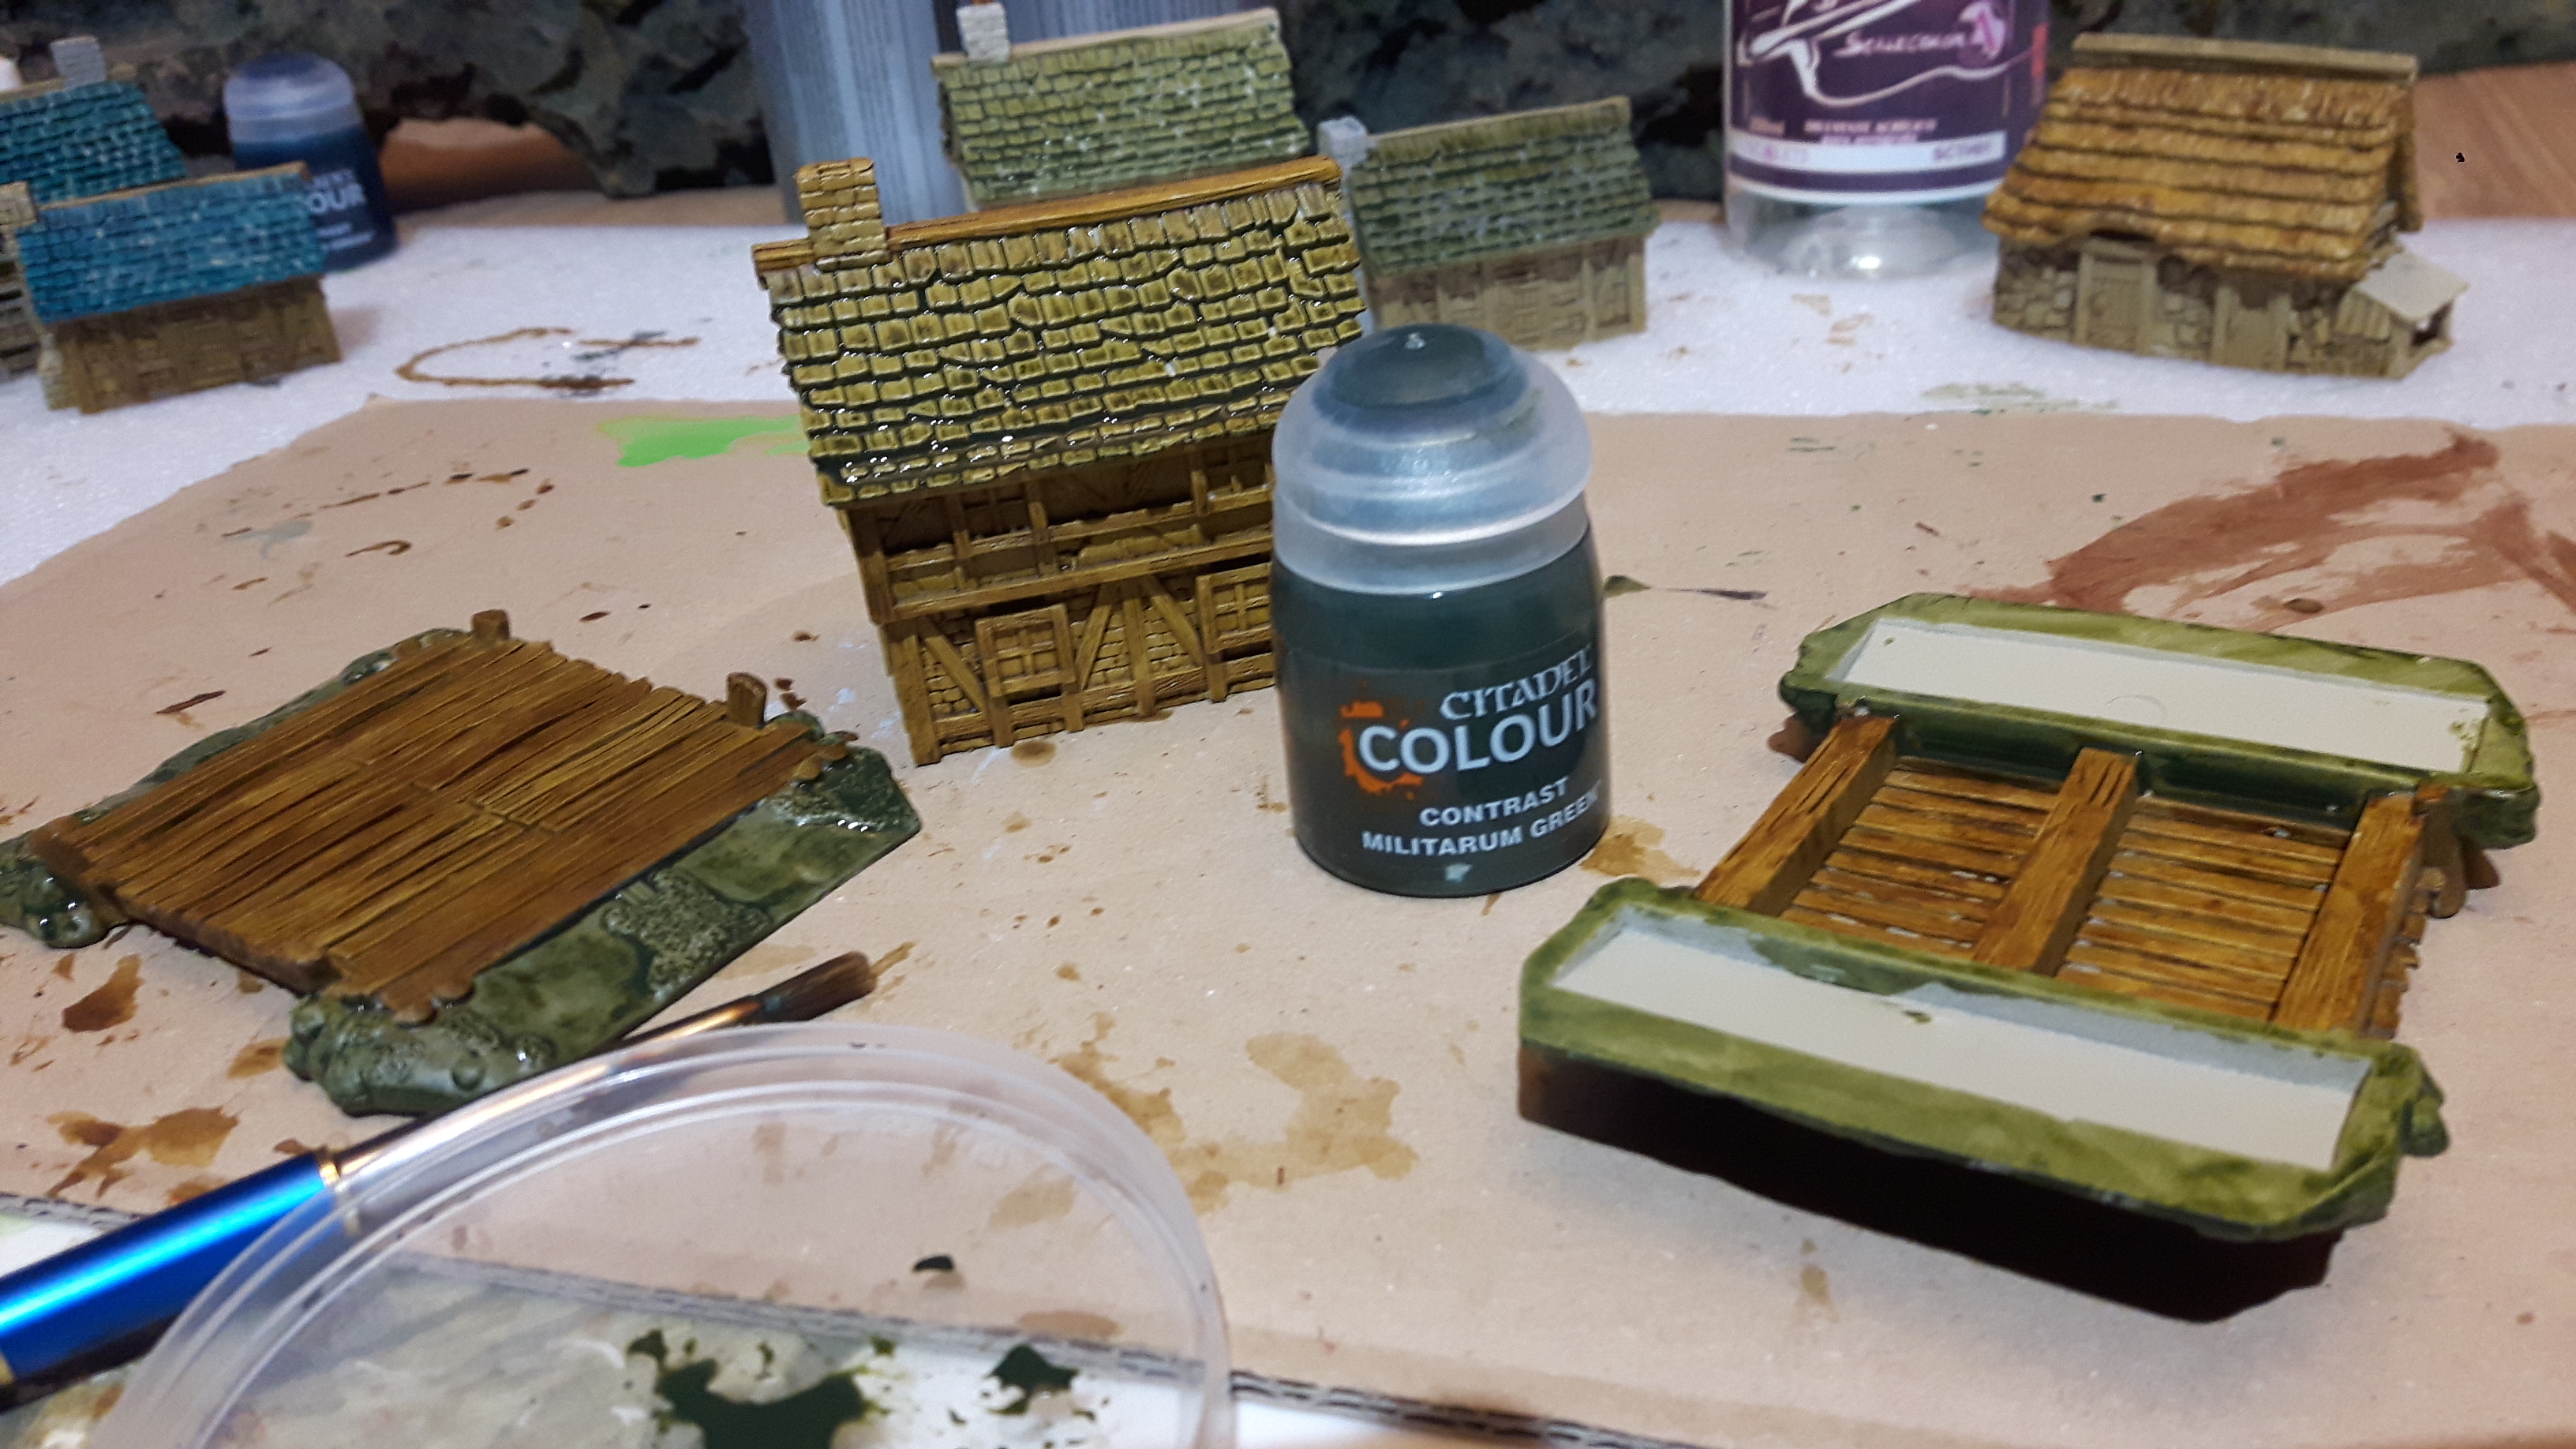
The Contrast Paints I have used so far are: Snakebite Leather, Skeleton Horde, Akhelian Green and Militarum Green.
I will be using other paints and washes later for detailing and pulling all the pieces together and to the castle.
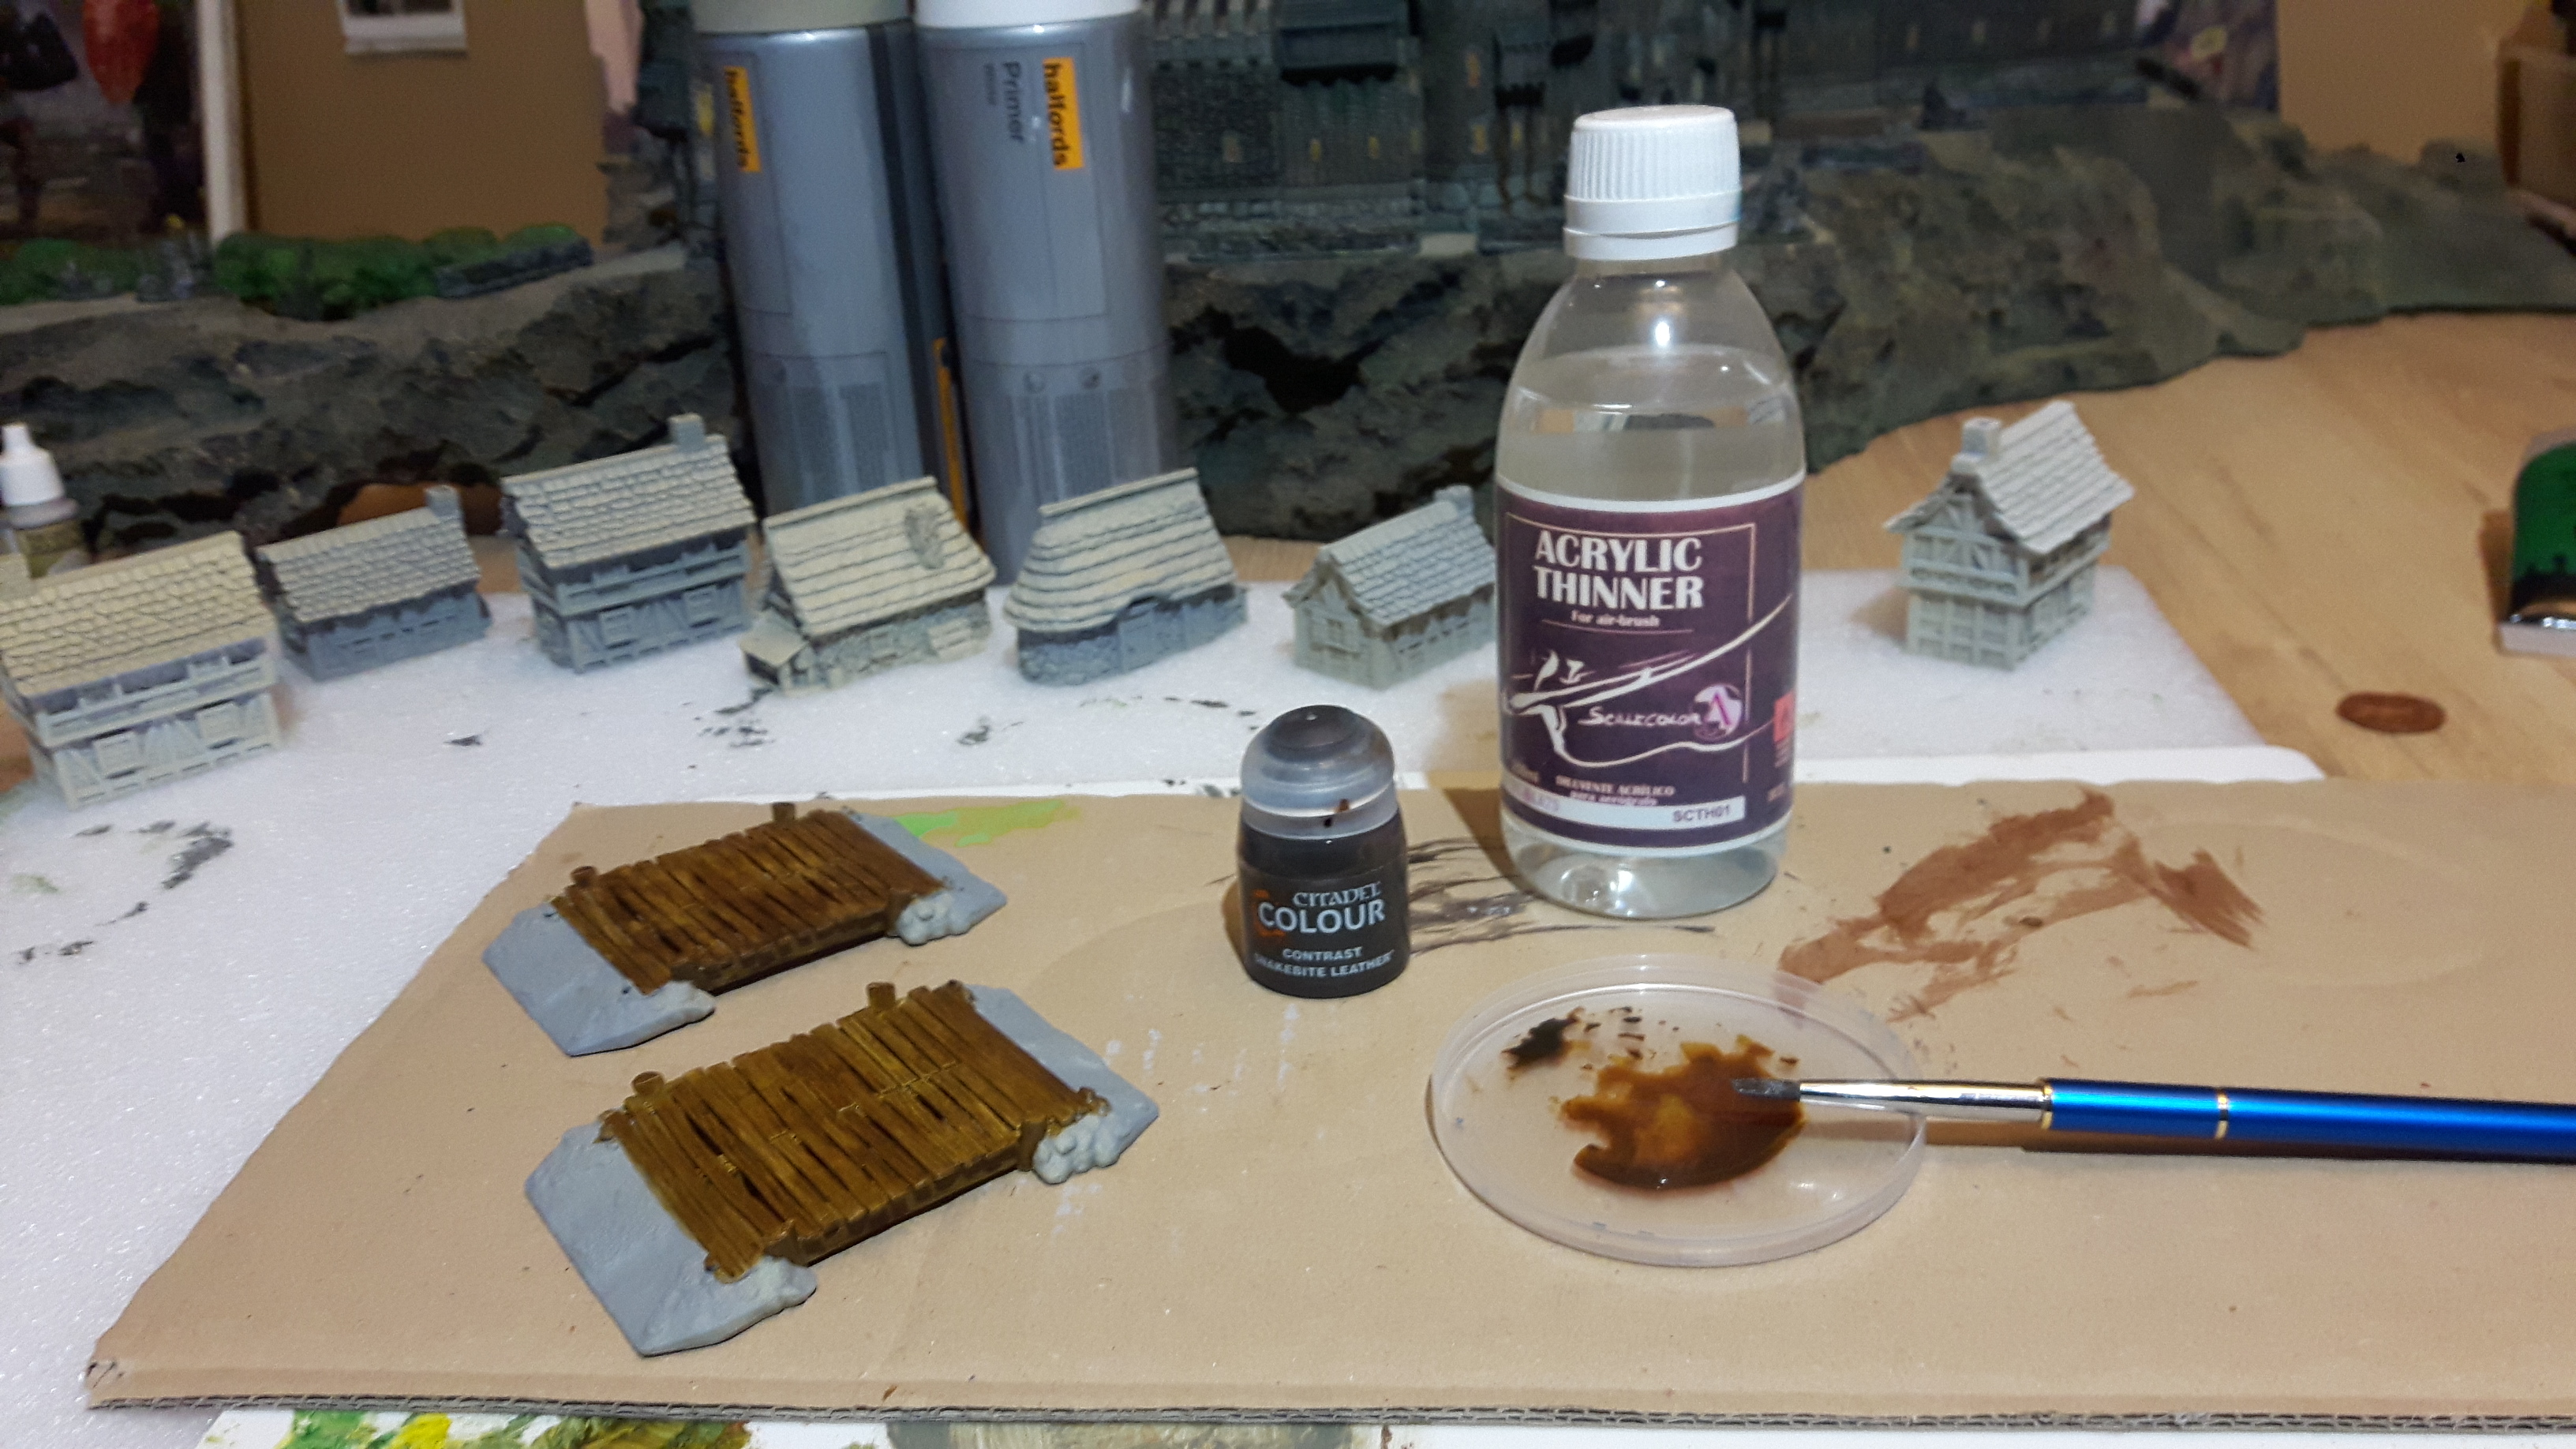
Where I have used the Contrast Paint neat only the paint pot is shown in the picture.
Where I have diluted the Contrast Paint 50:50 with Acrylic Thinners the thinner’s bottle is in the picture as well.
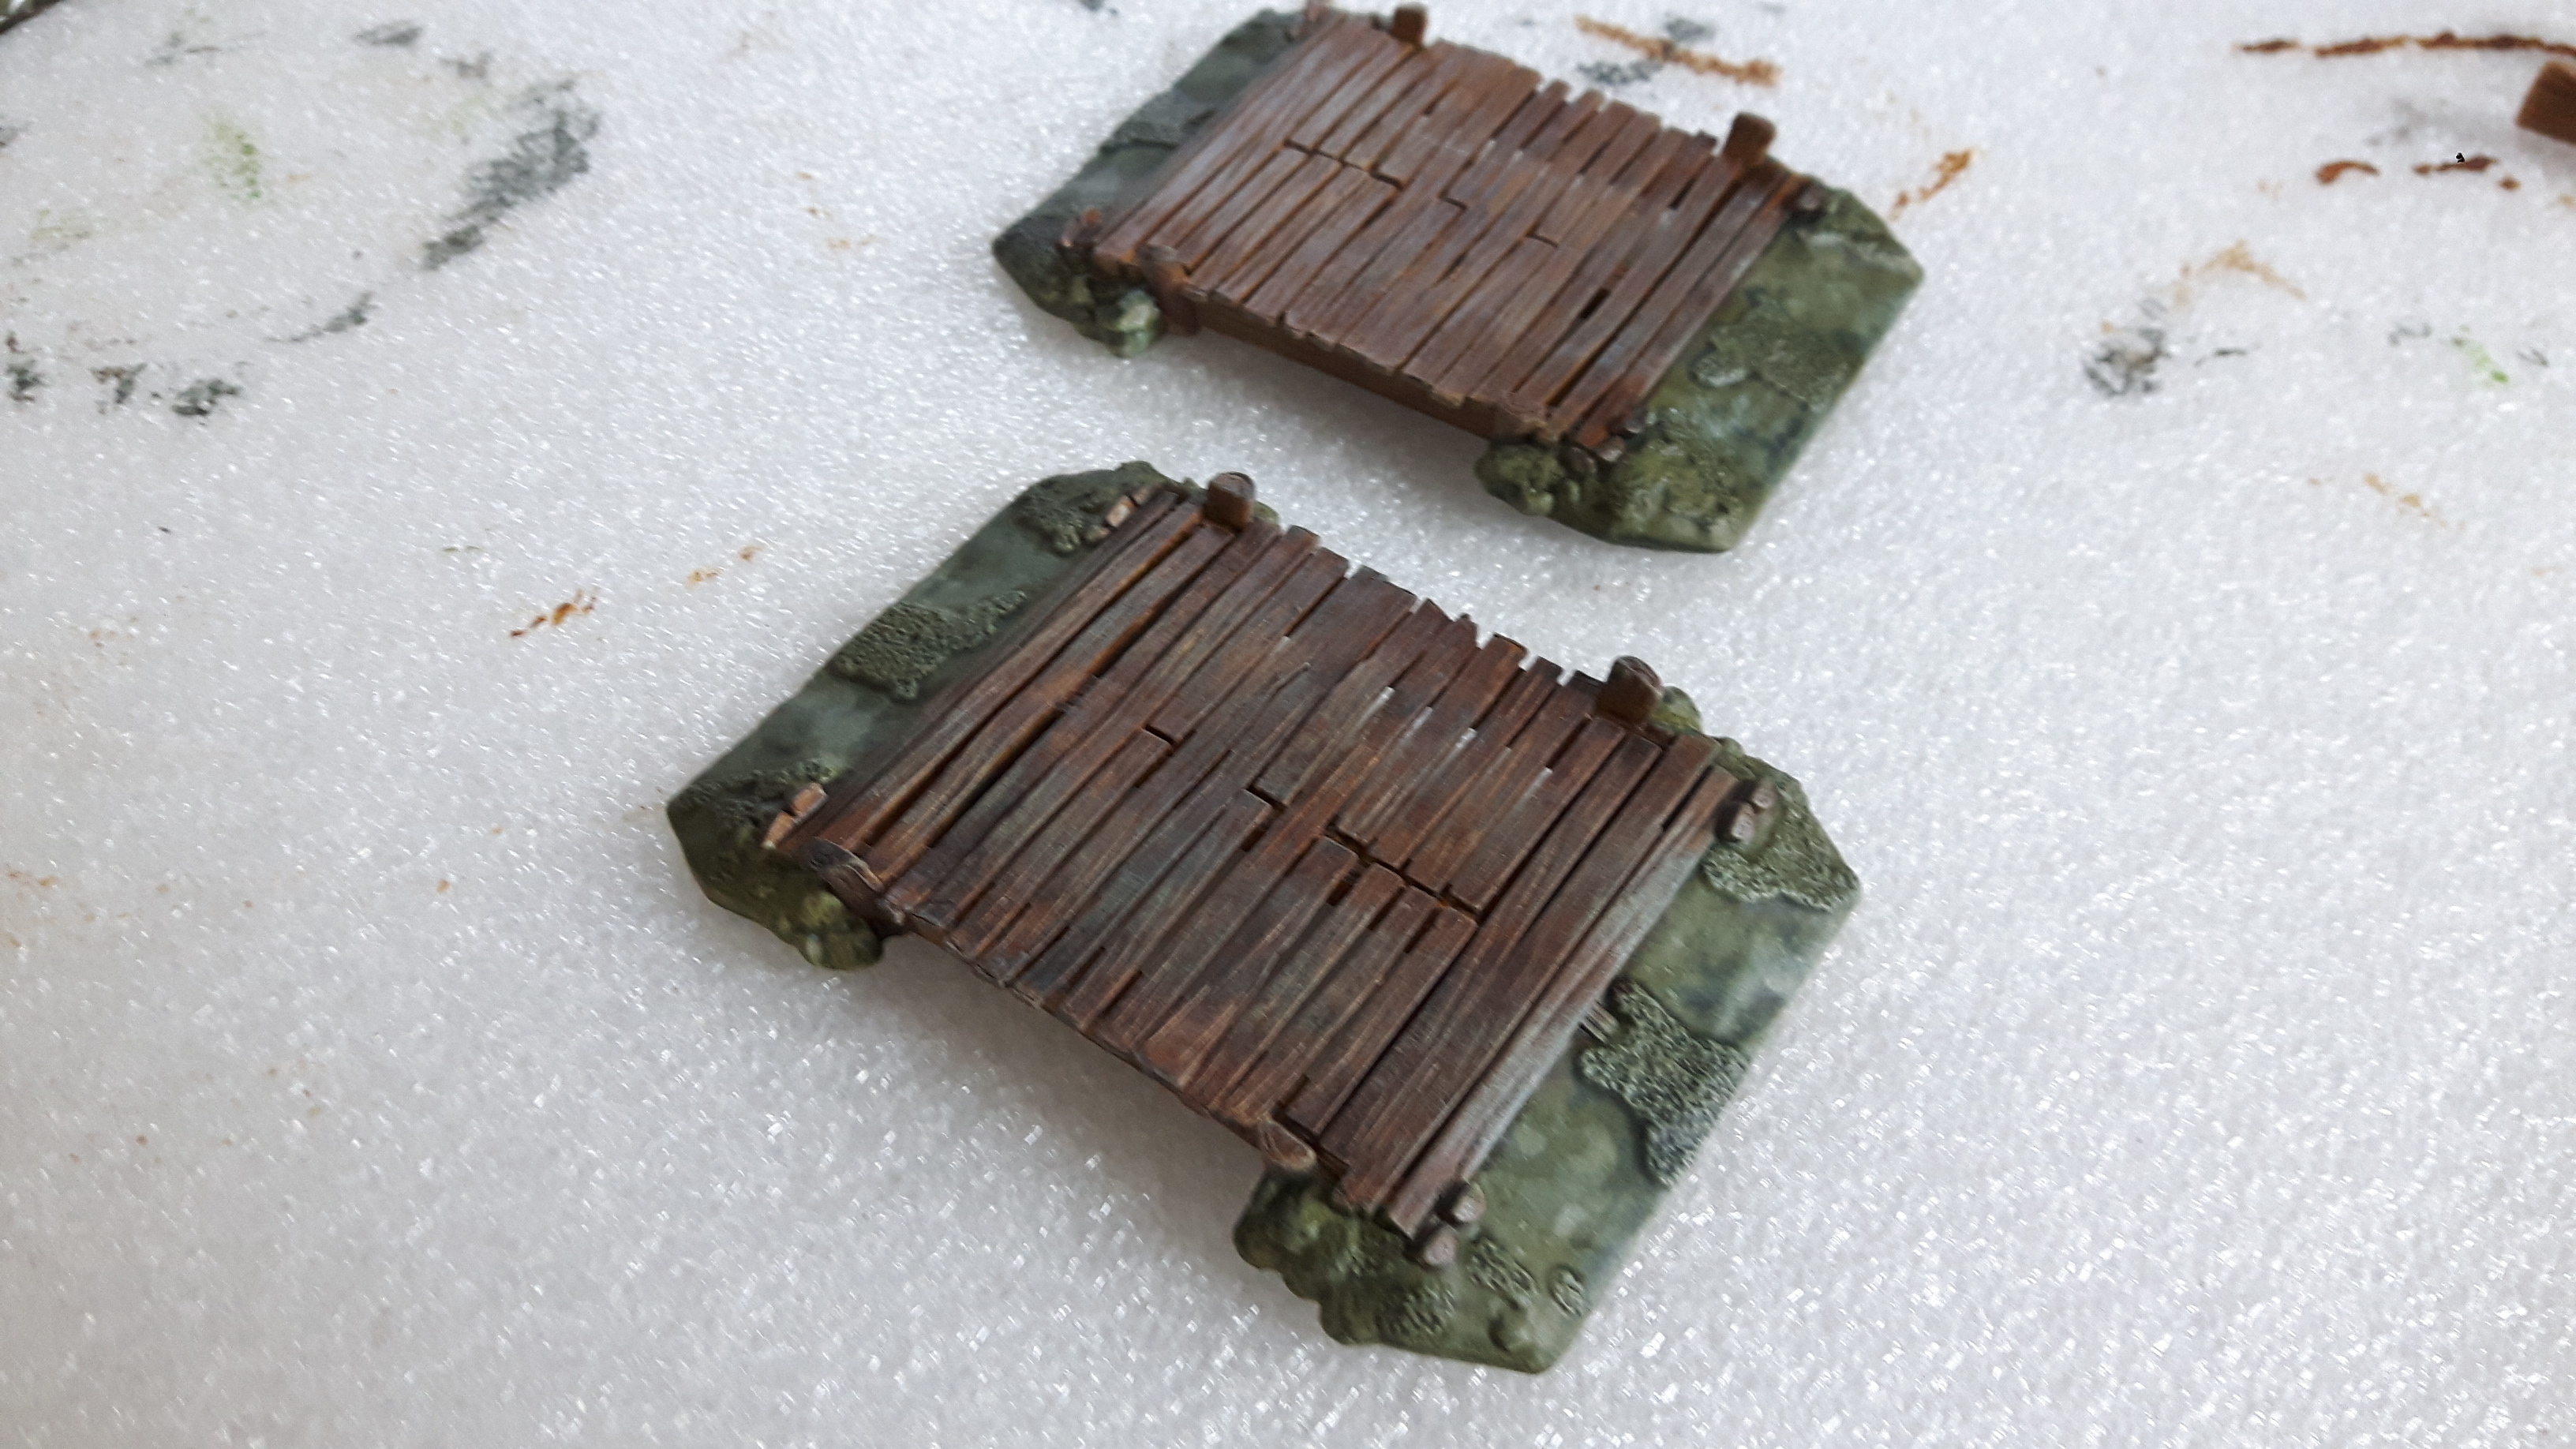
The only exception to this is with the bridges. I started painting one with Snakebite Leather straight from the pot, but found it really time consuming to get it into all the cracks between the planks successfully. I gave up and finished both with the diluted paint which was much easier to work with here.
That's it for today.
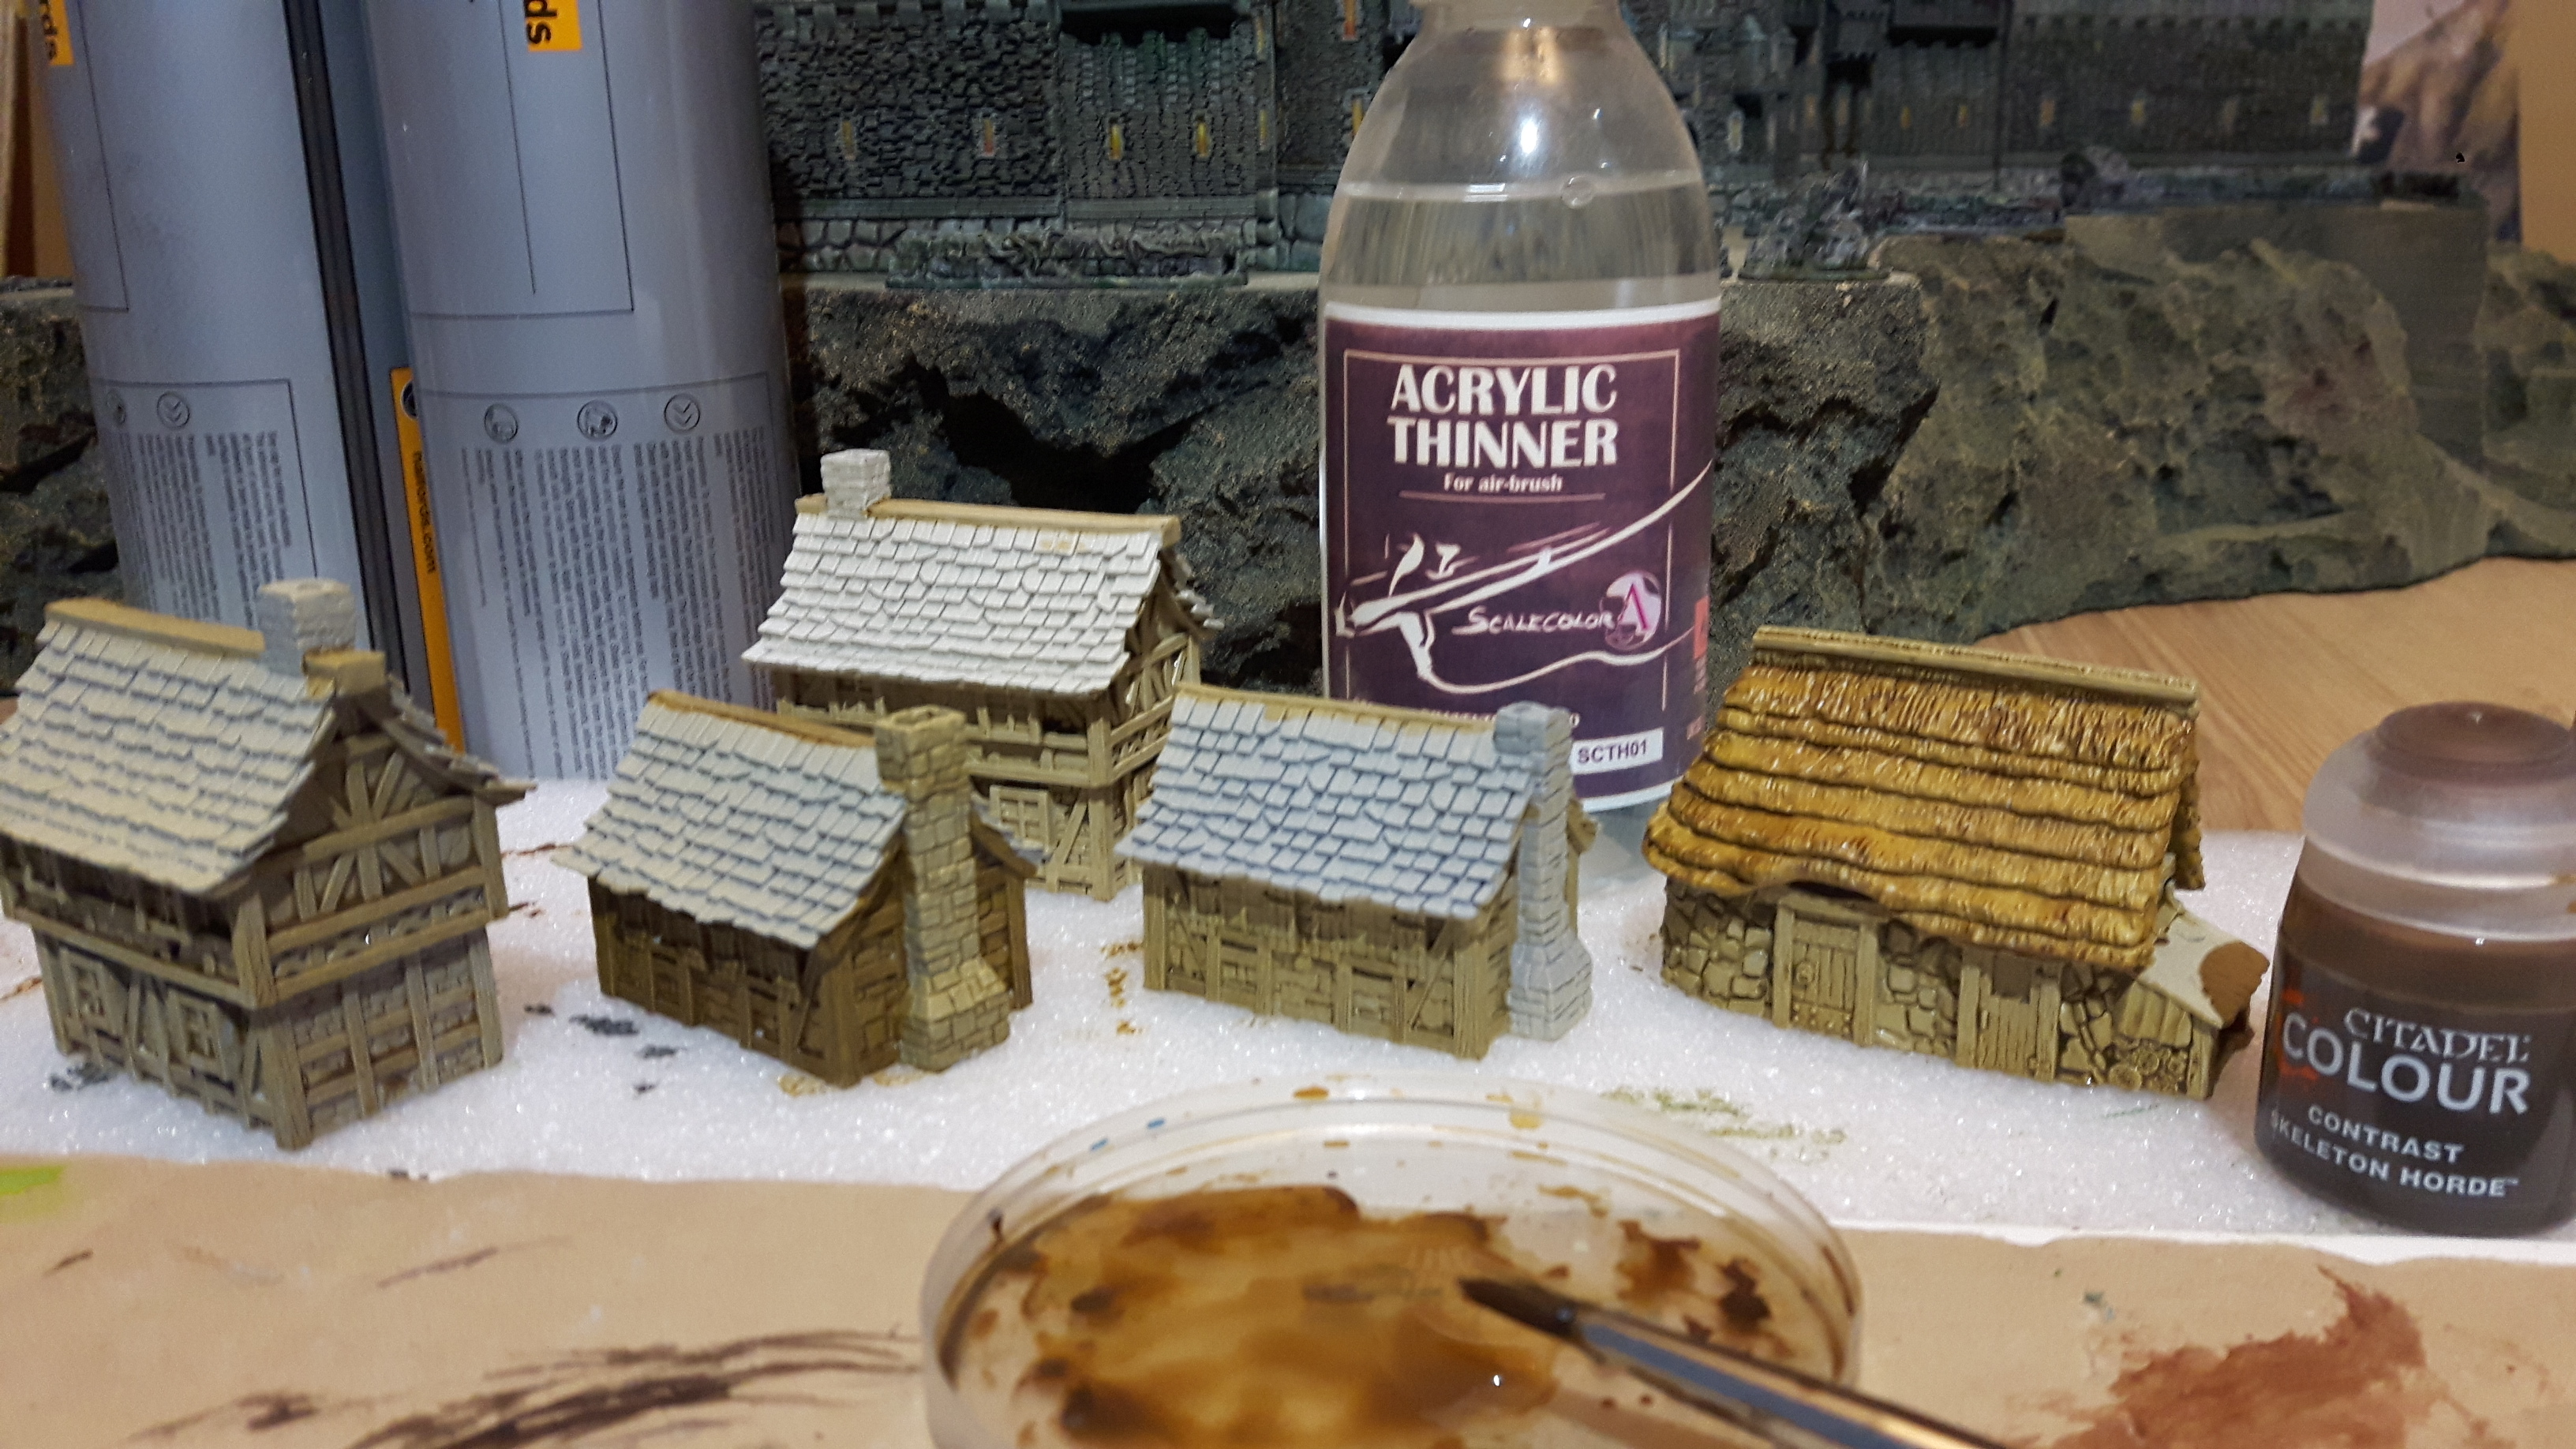
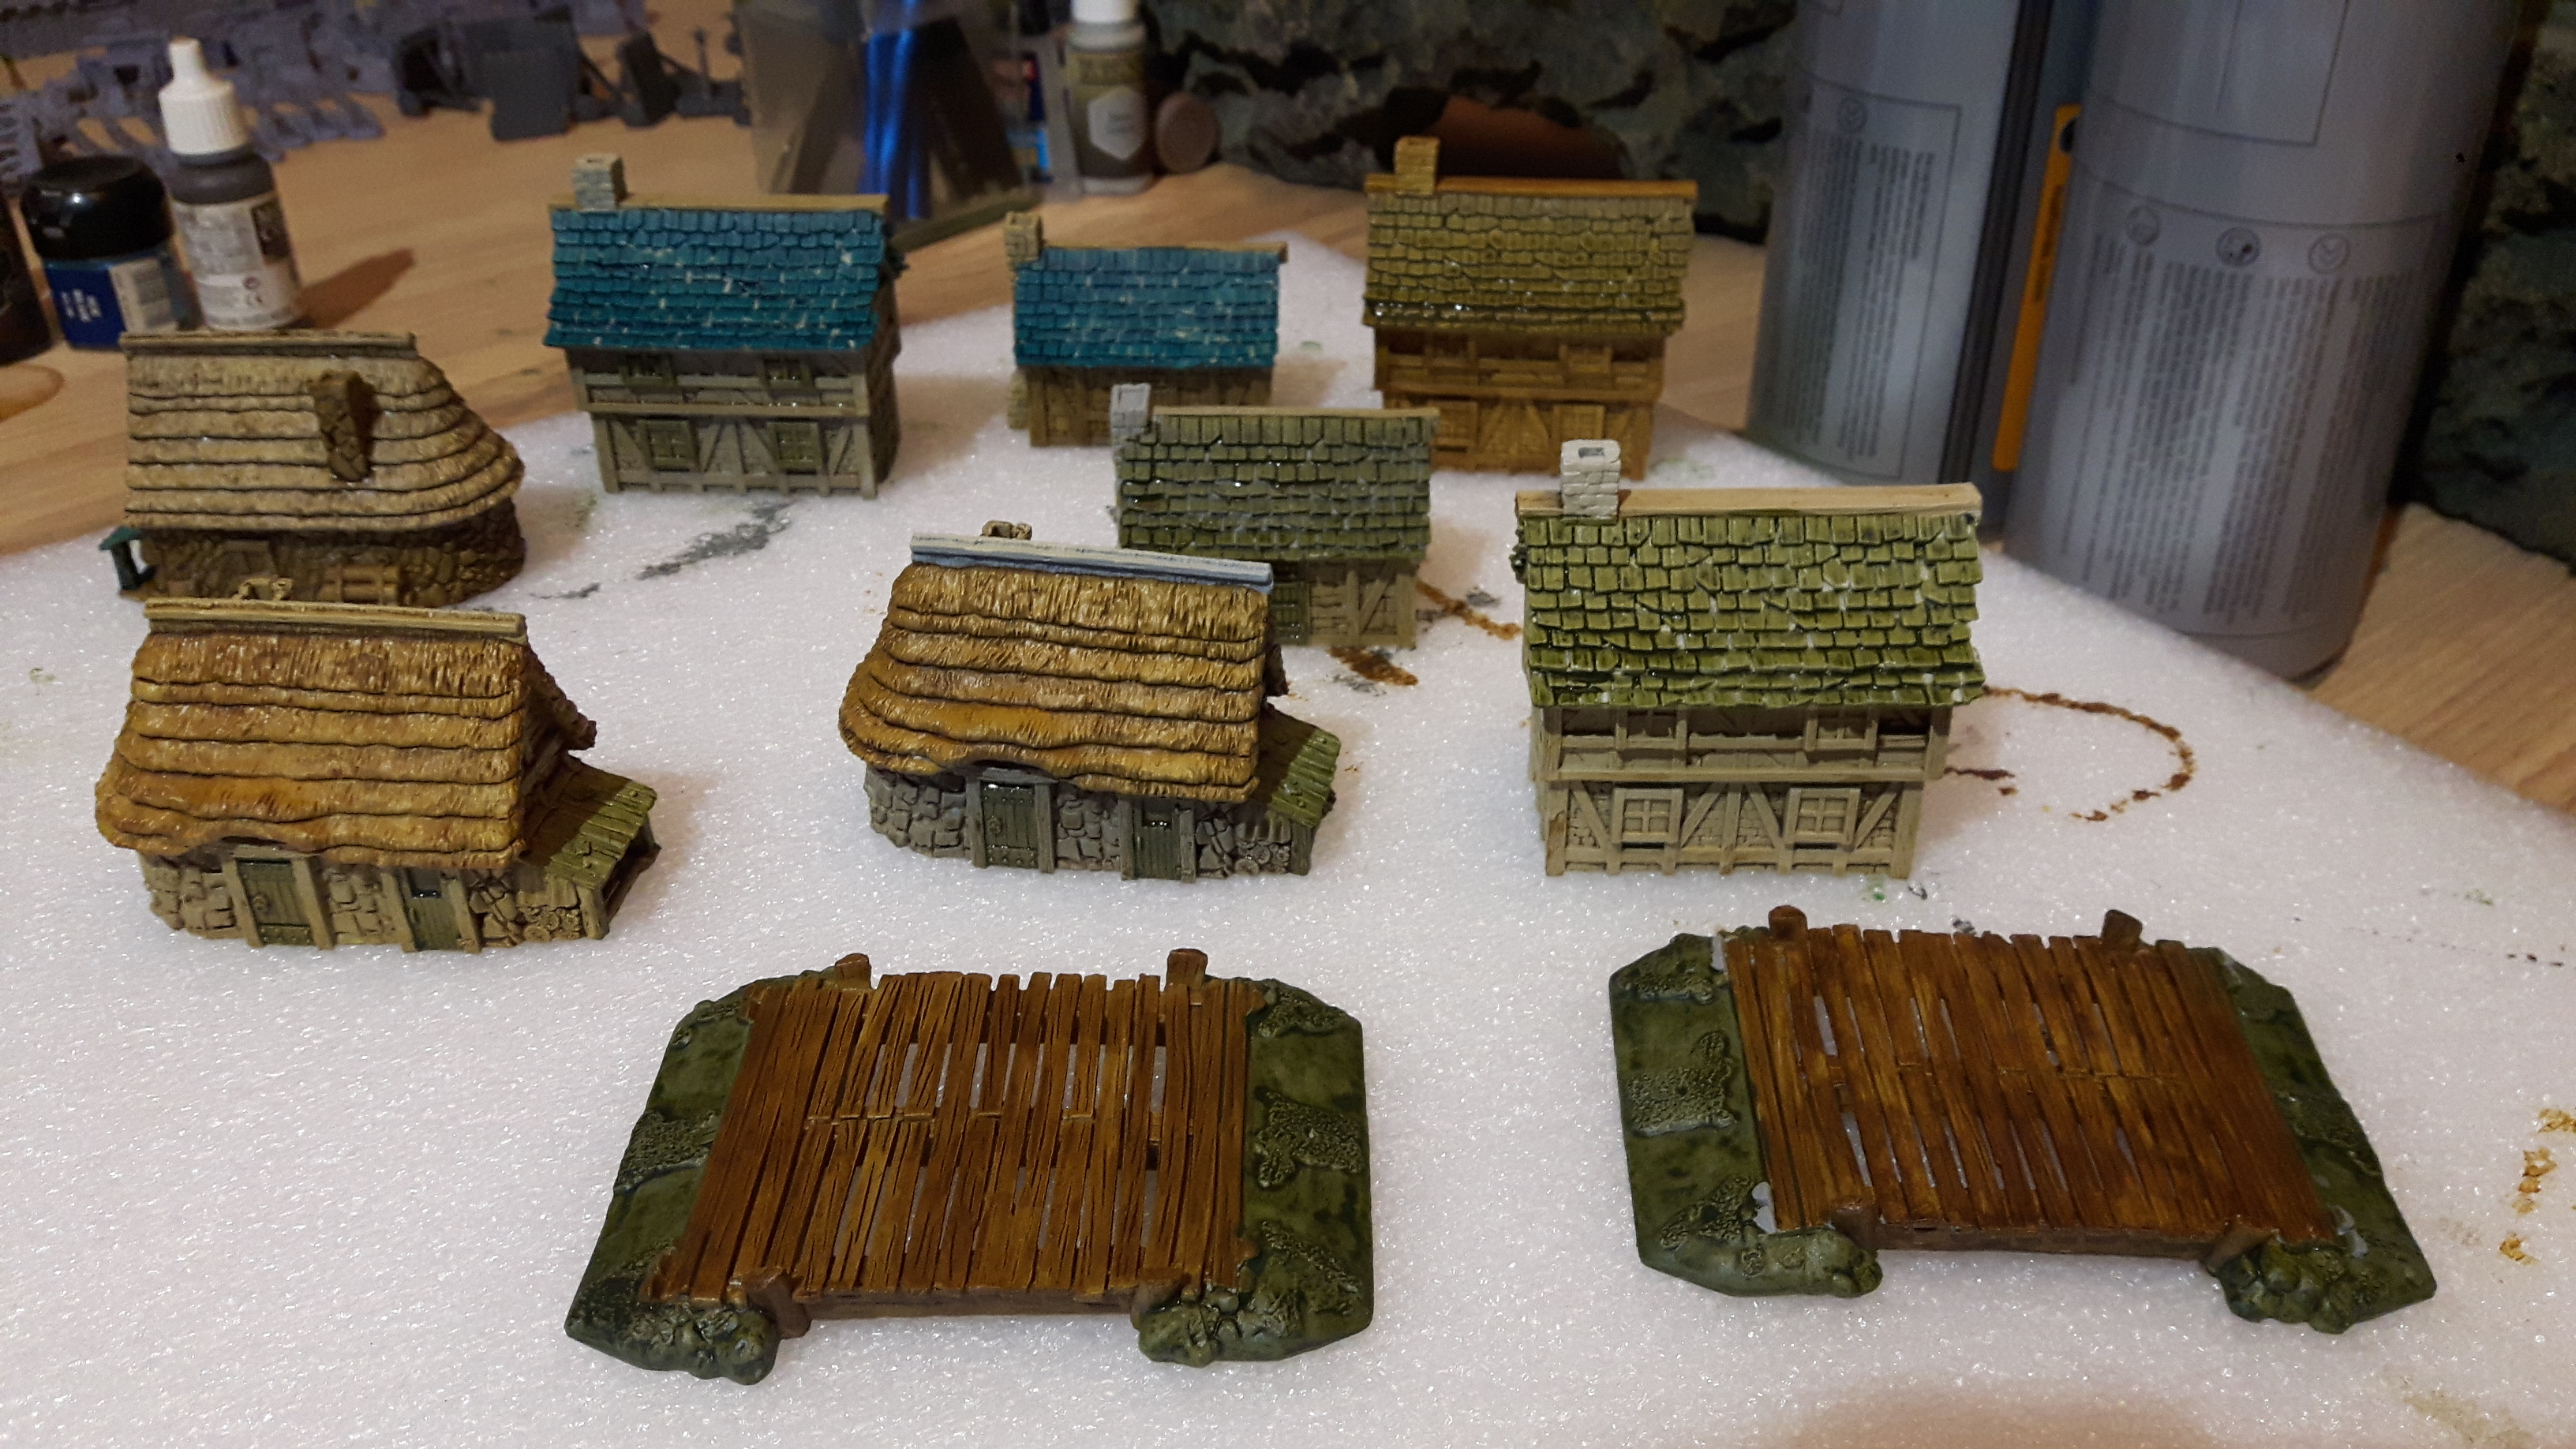
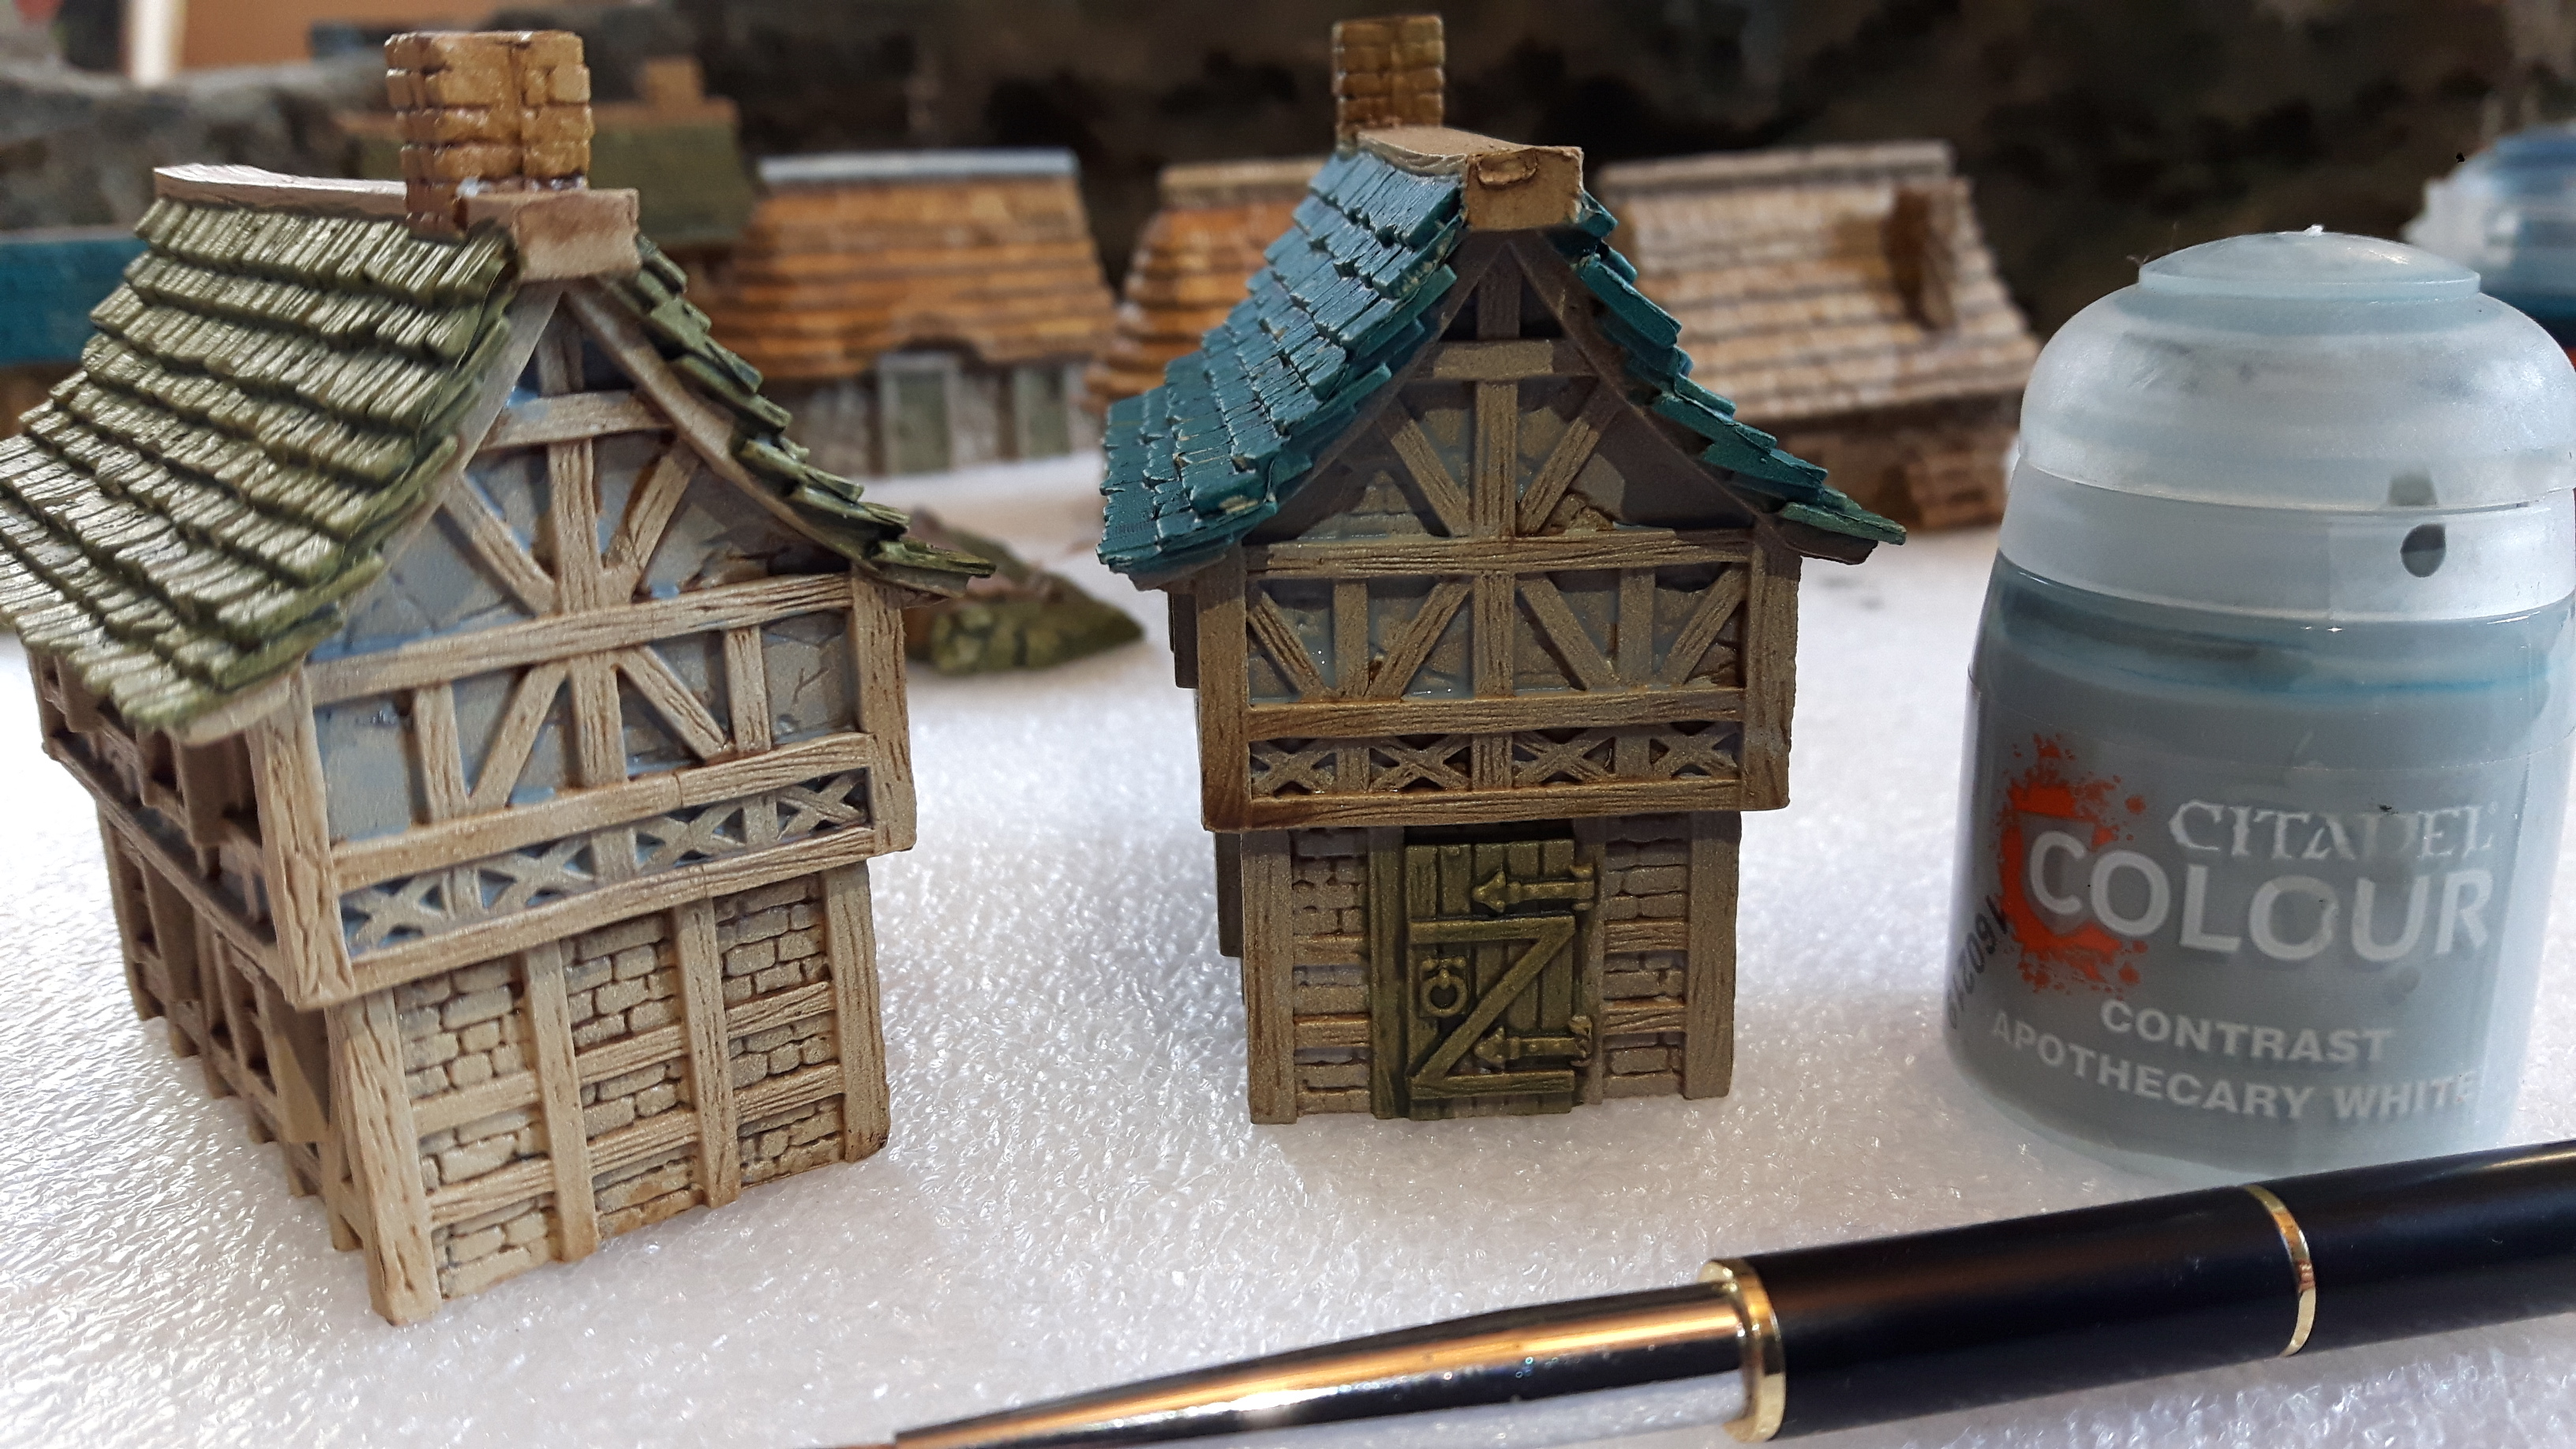
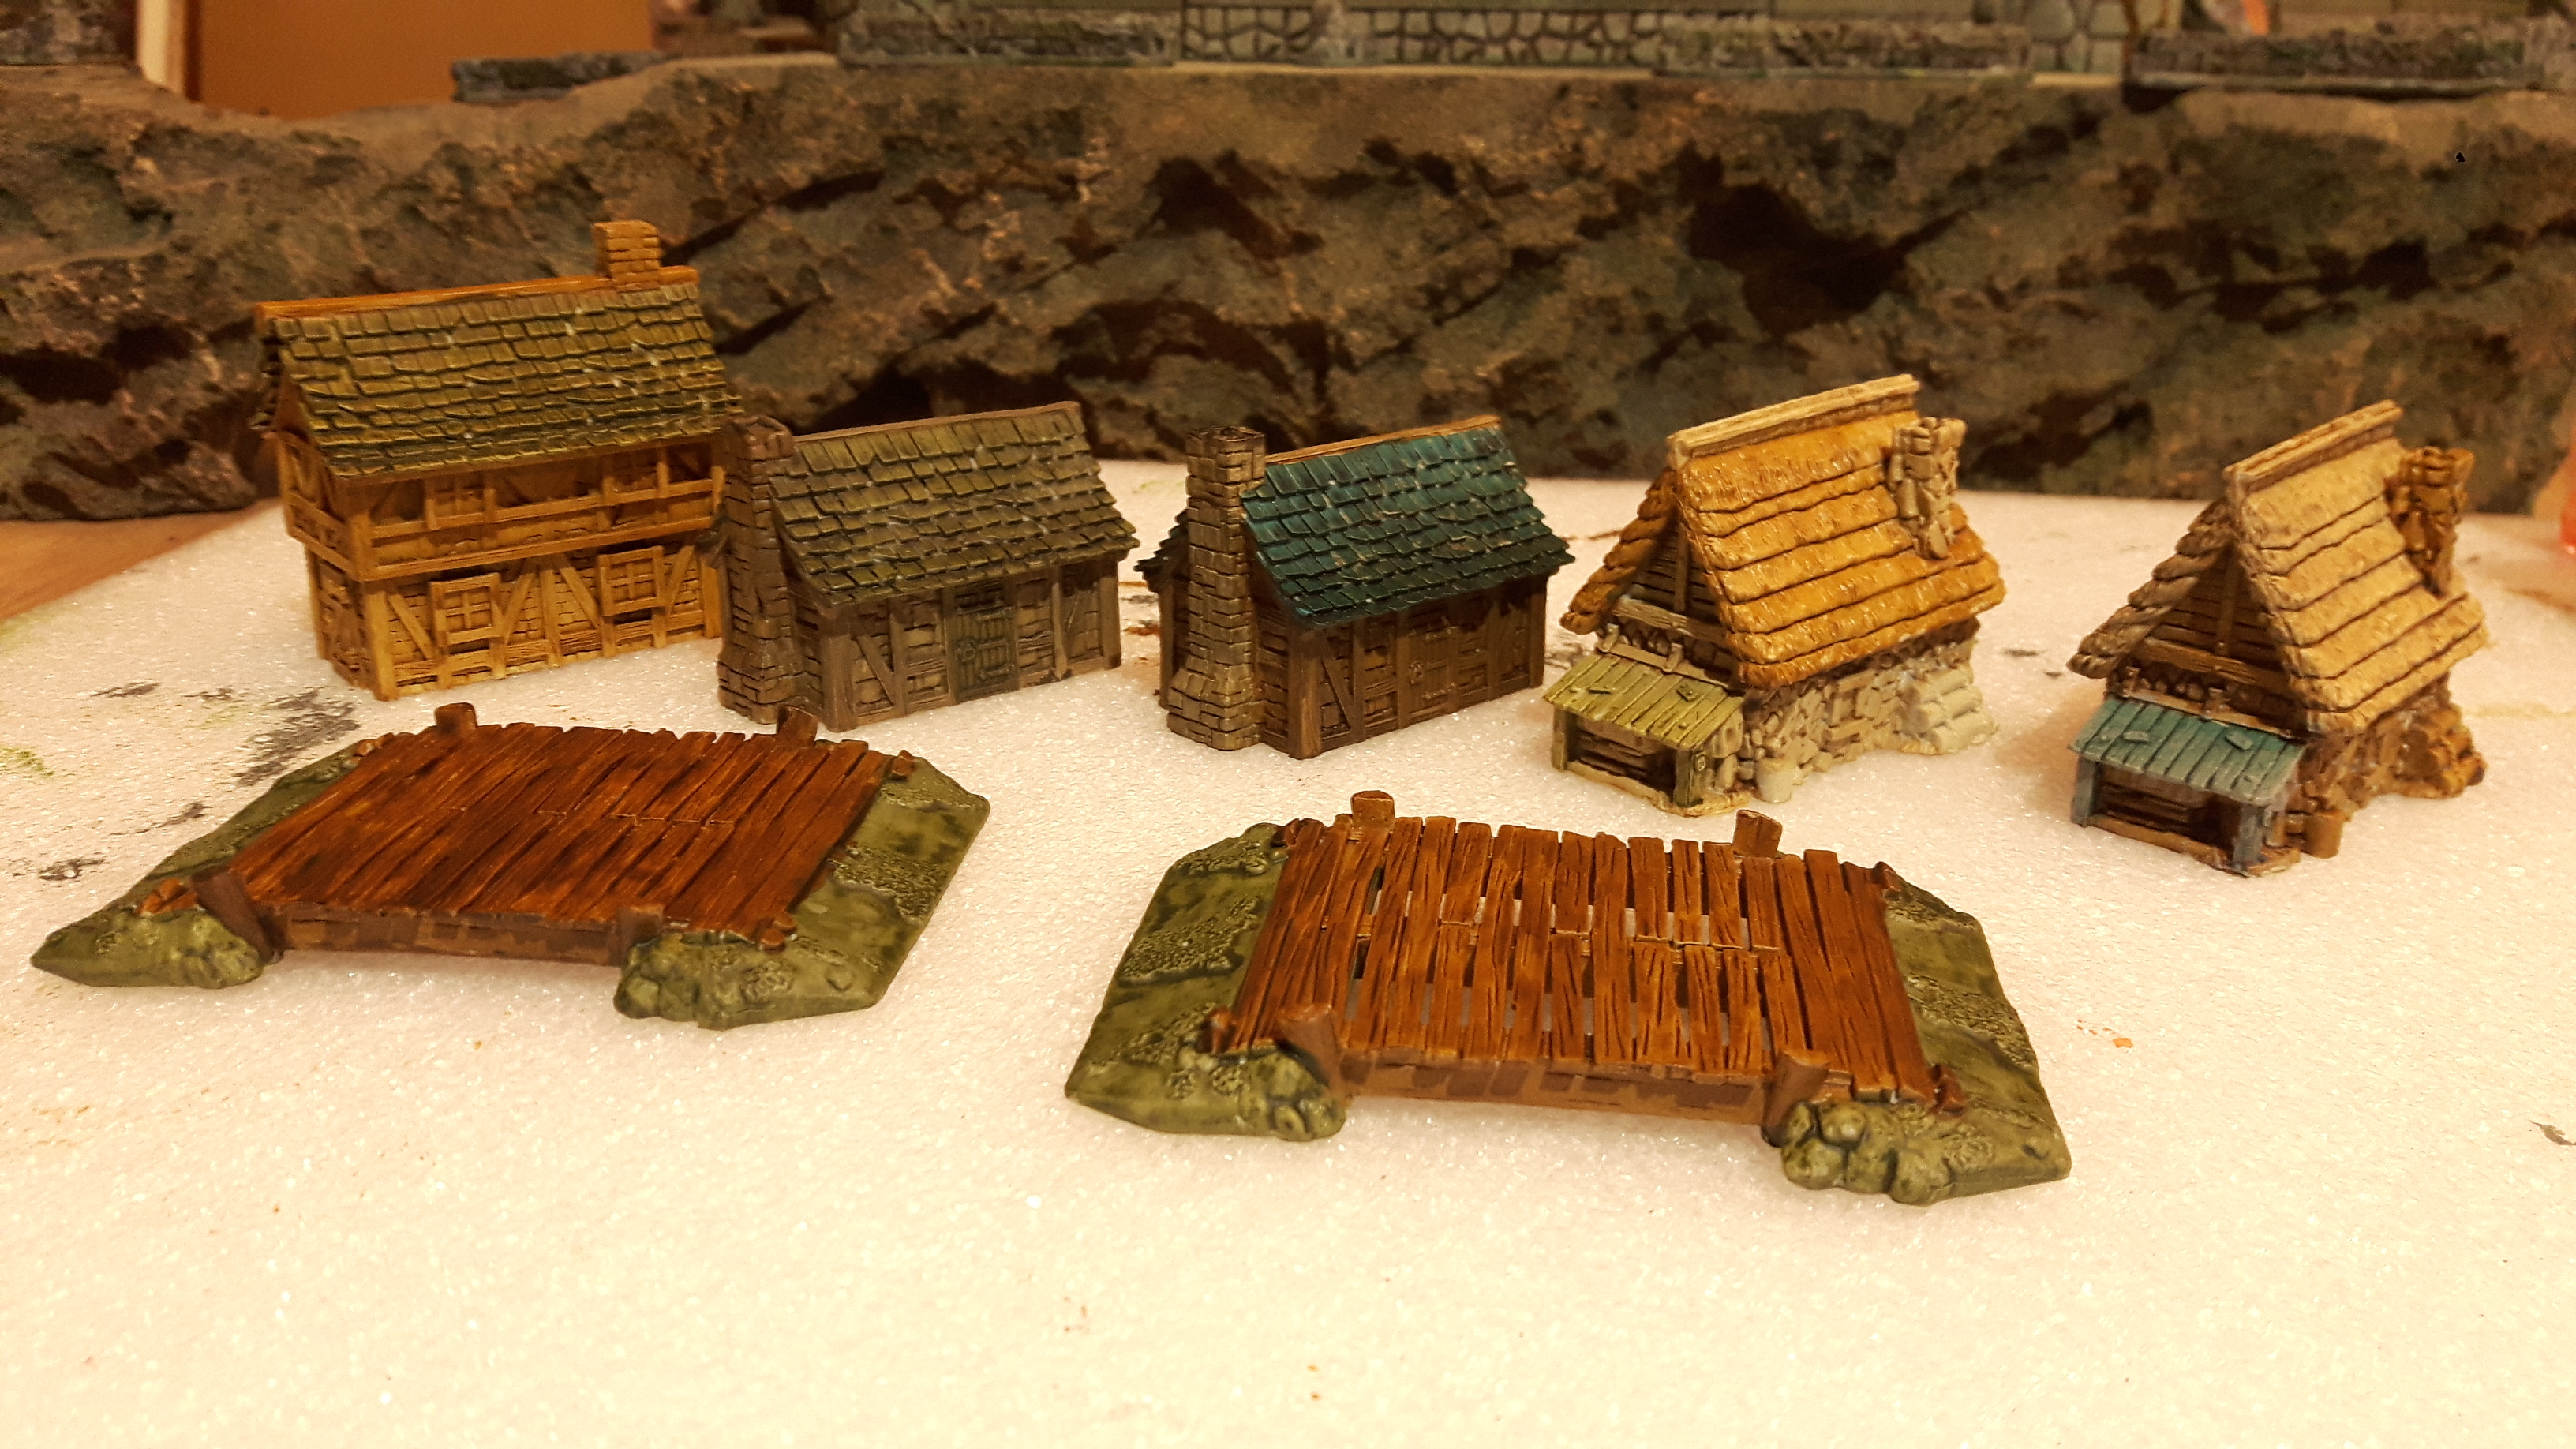
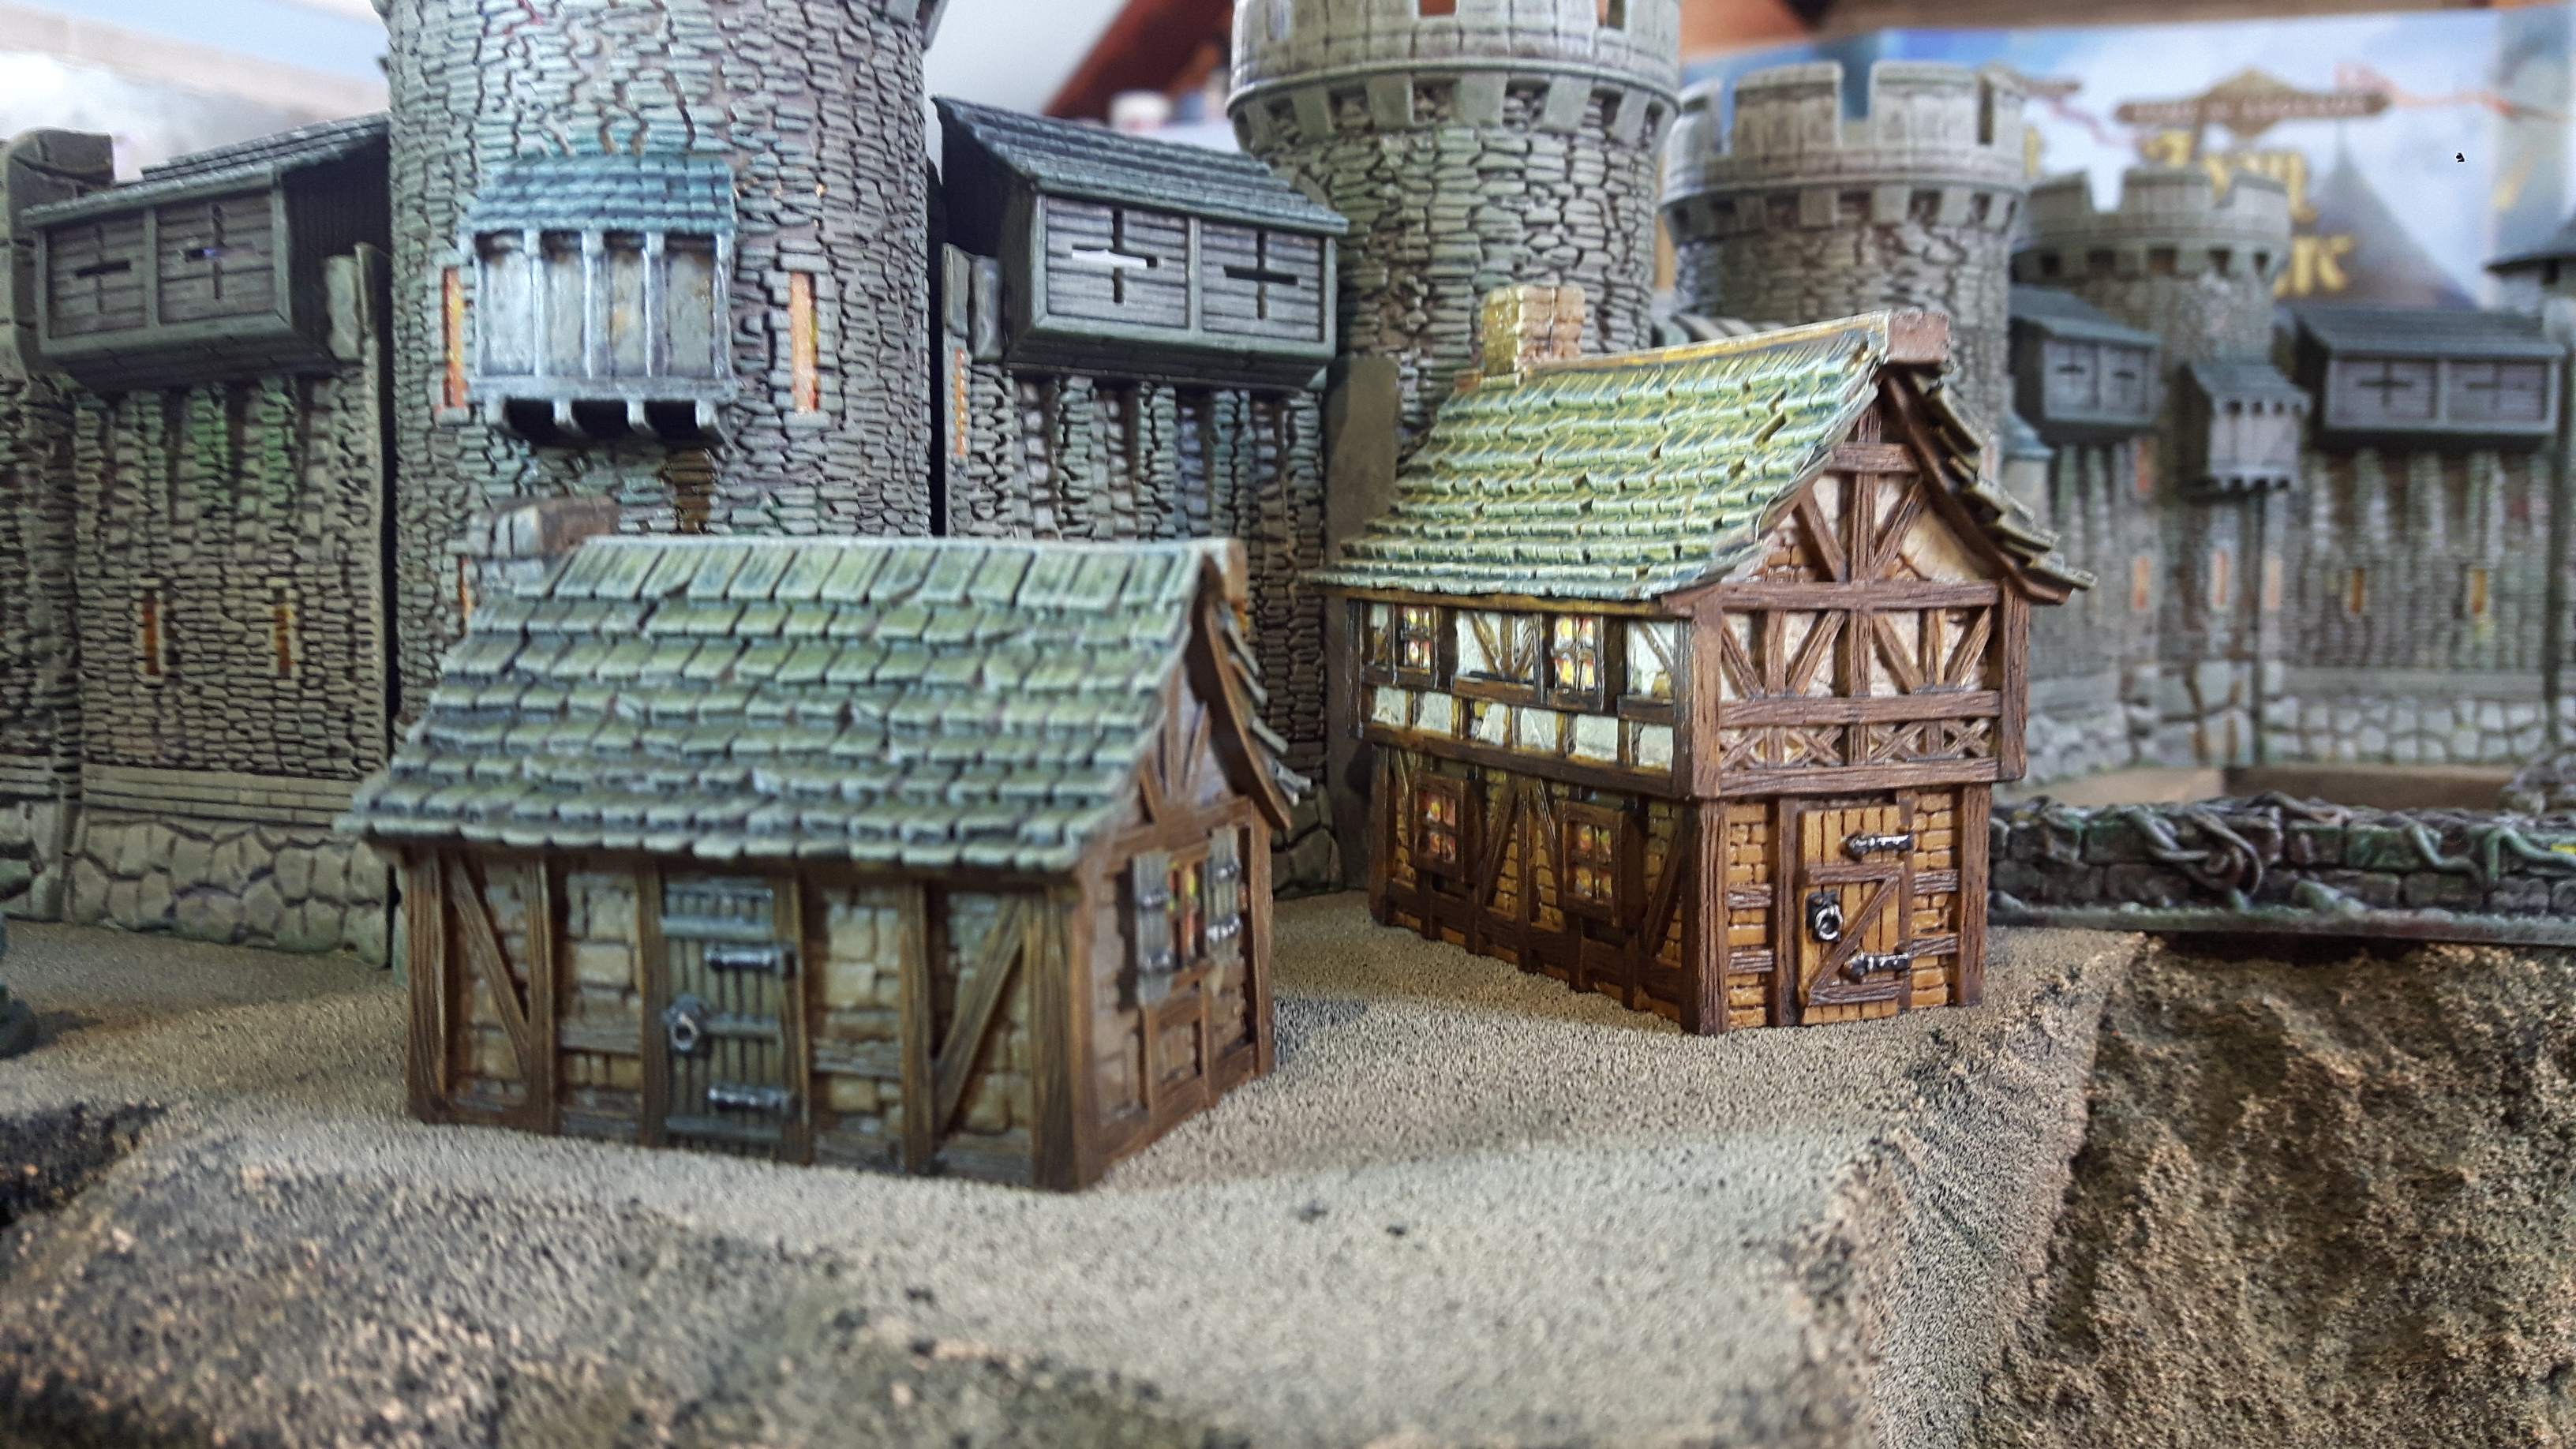
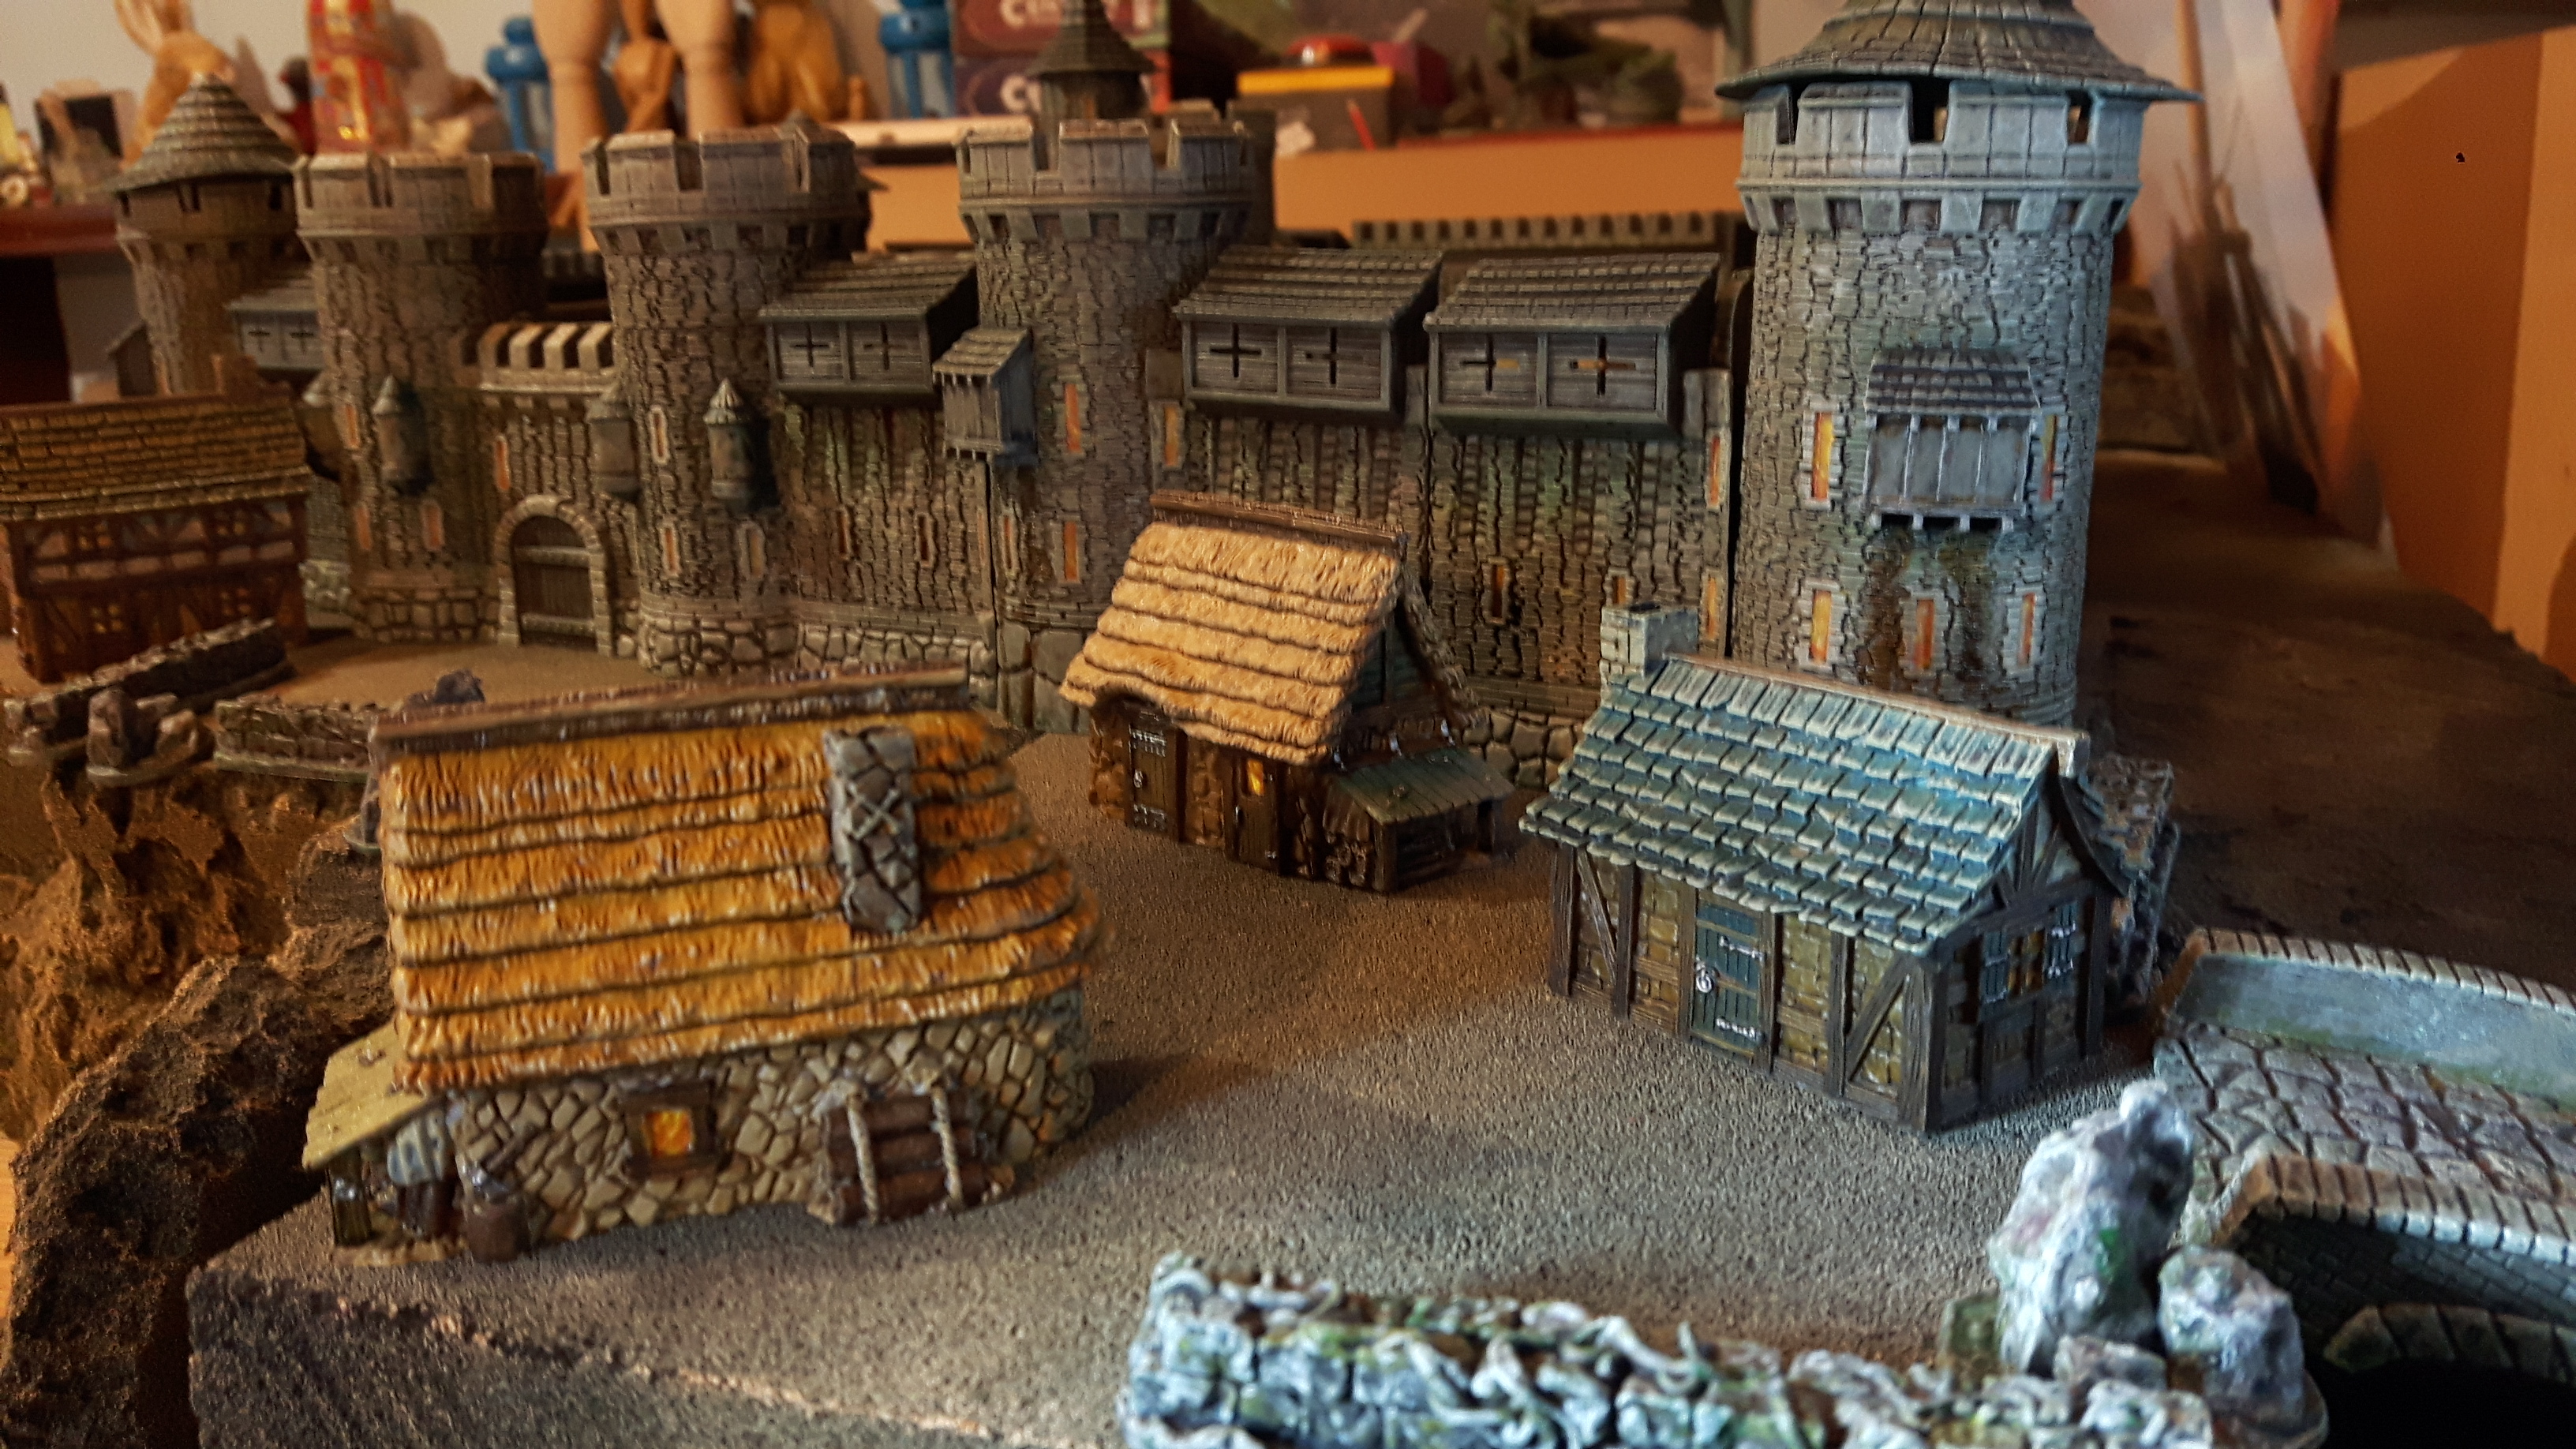
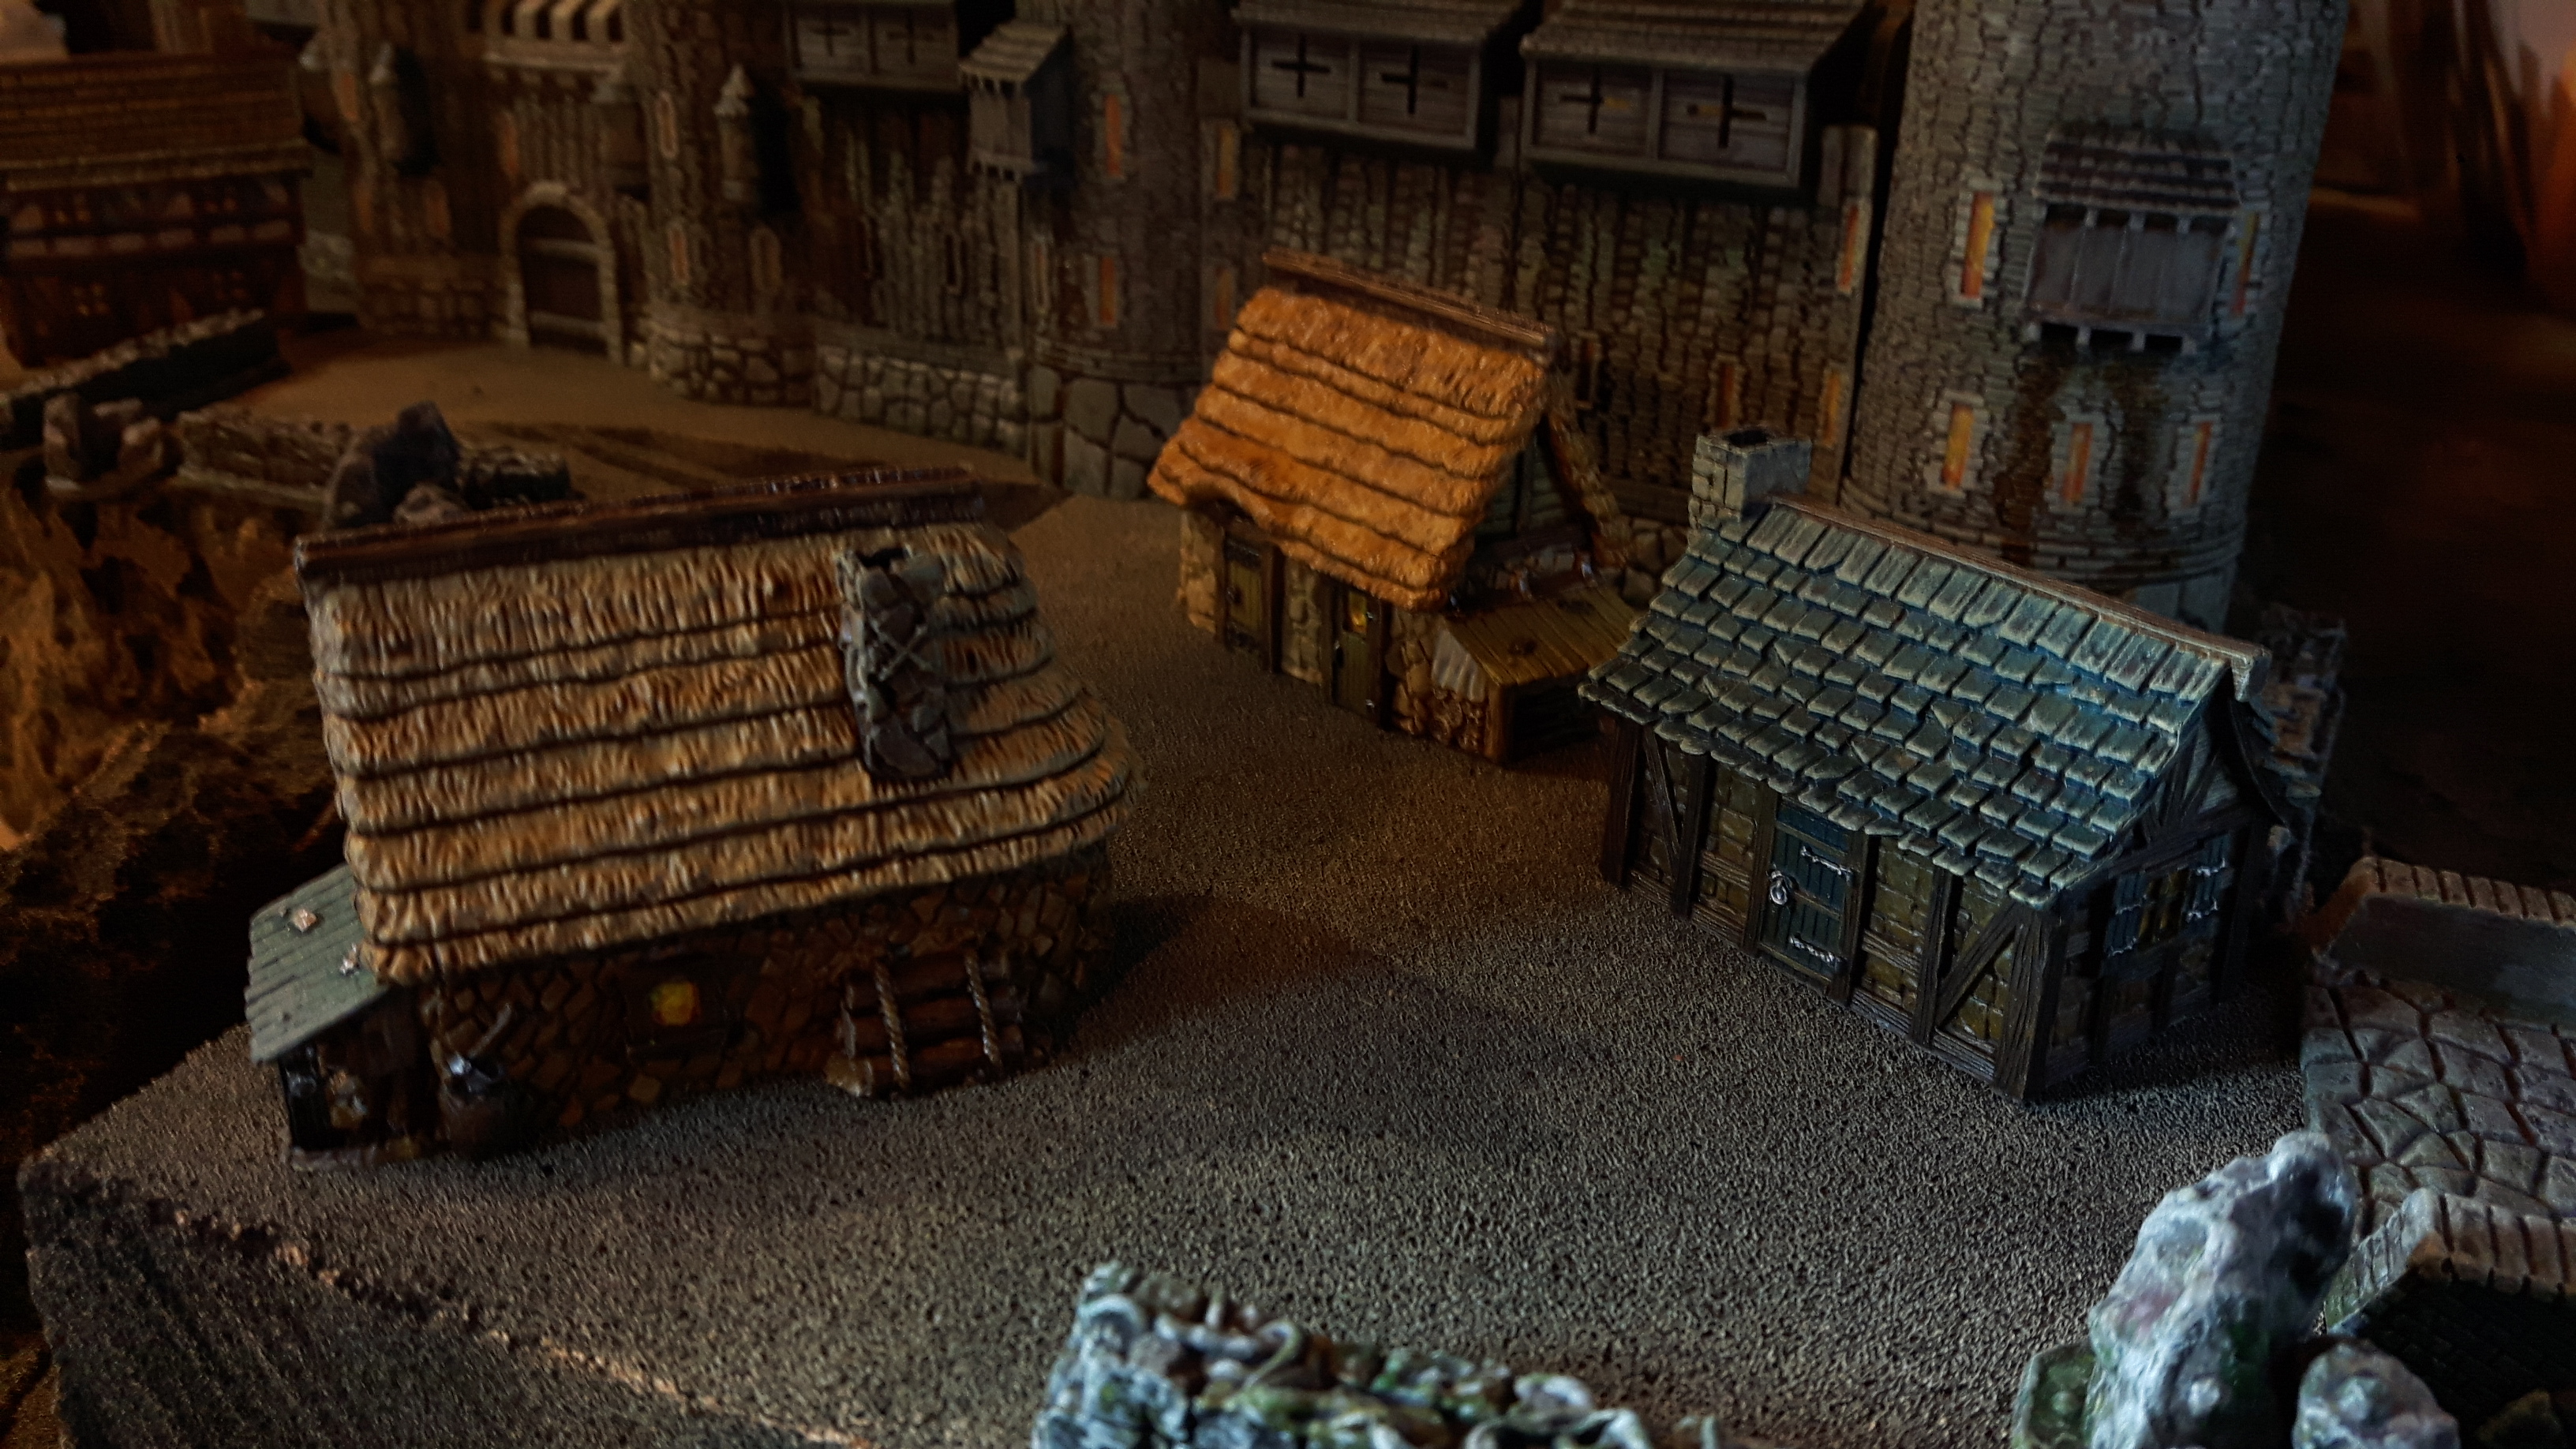
And that is the progress so far.
I particularly liked the way the thatched roofs came out and the different effects of diluting and having various primer colours.
There were some places, like under the eaves, where I had failed to get sufficient primer on and the contrast paints just did not want to stick. This won’t be a problem though as I can touch up later.
More tomorrow…
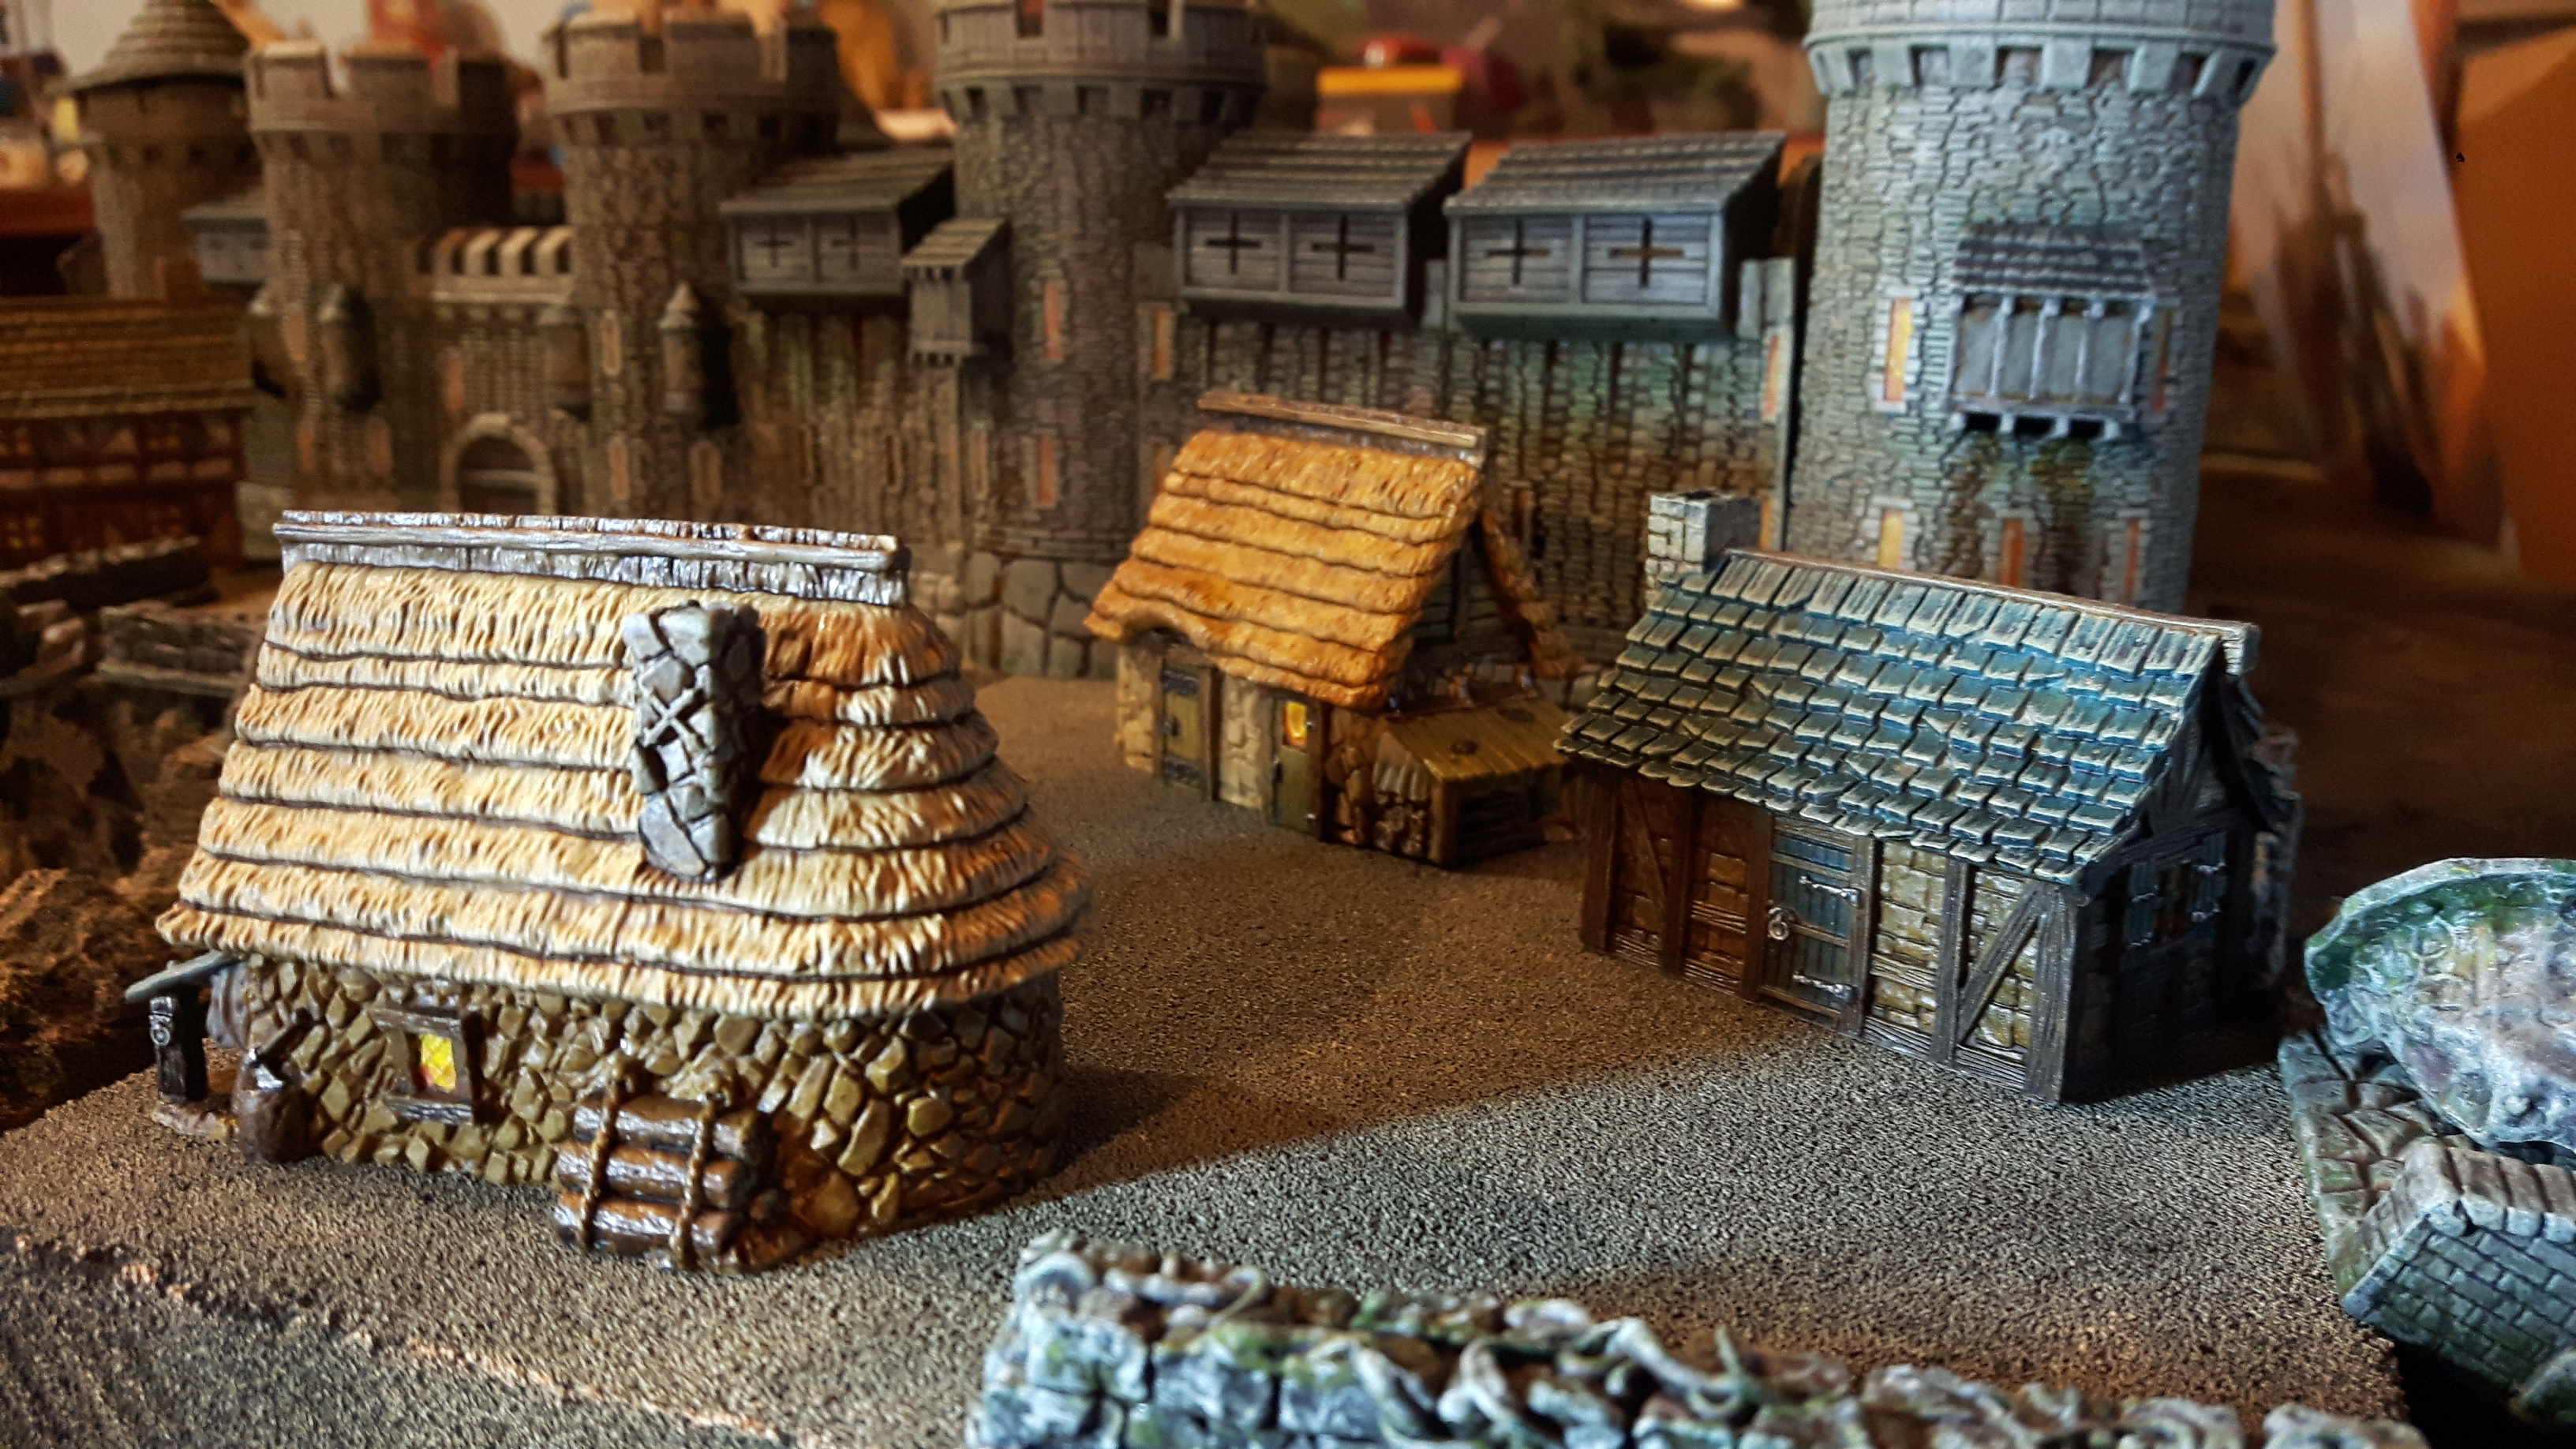
More housework - and three pieces finished.
Some days are more productive than others. Today I just kept falling asleep. I have lots of lights set up but working at 15mm gives me eyestrain. The body’s getting old even if I am still young at heart. Anyway, back to the project…
Today I was just playing with contrasts and other paints &washes to see different effects at 15mm.
I did some batch painting to begin with and then started tackling buildings individually to get some finished.
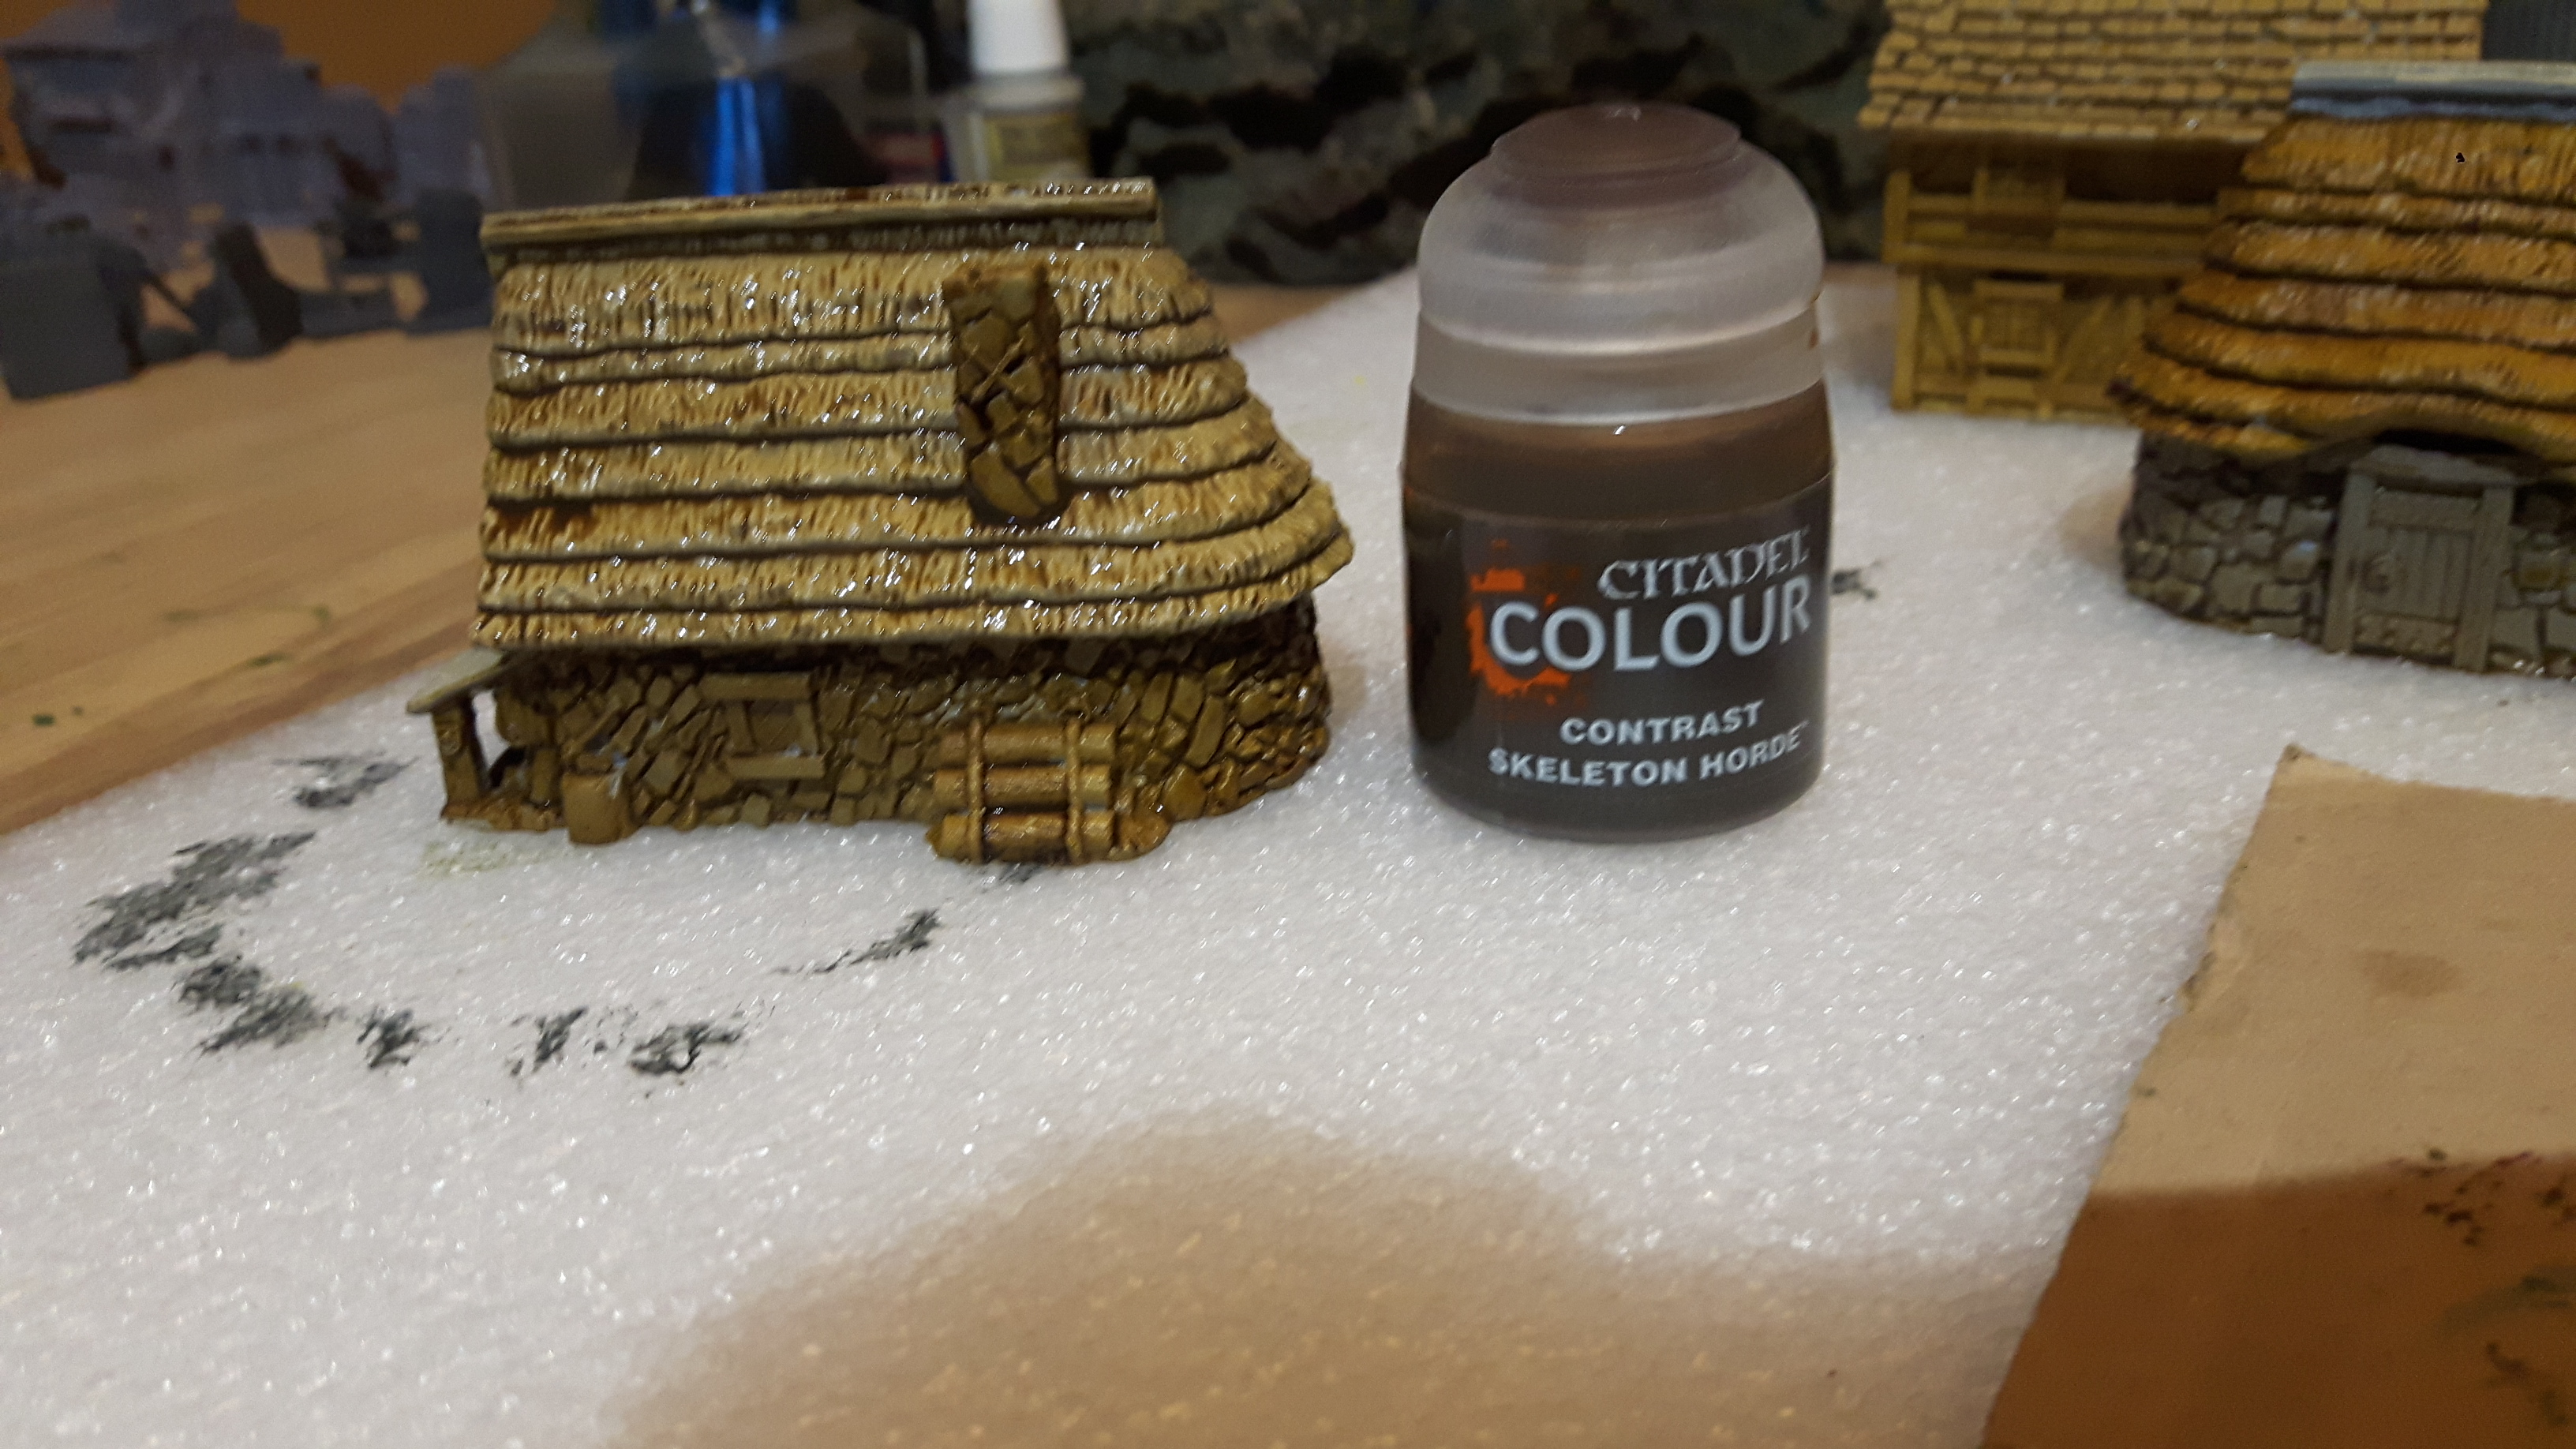
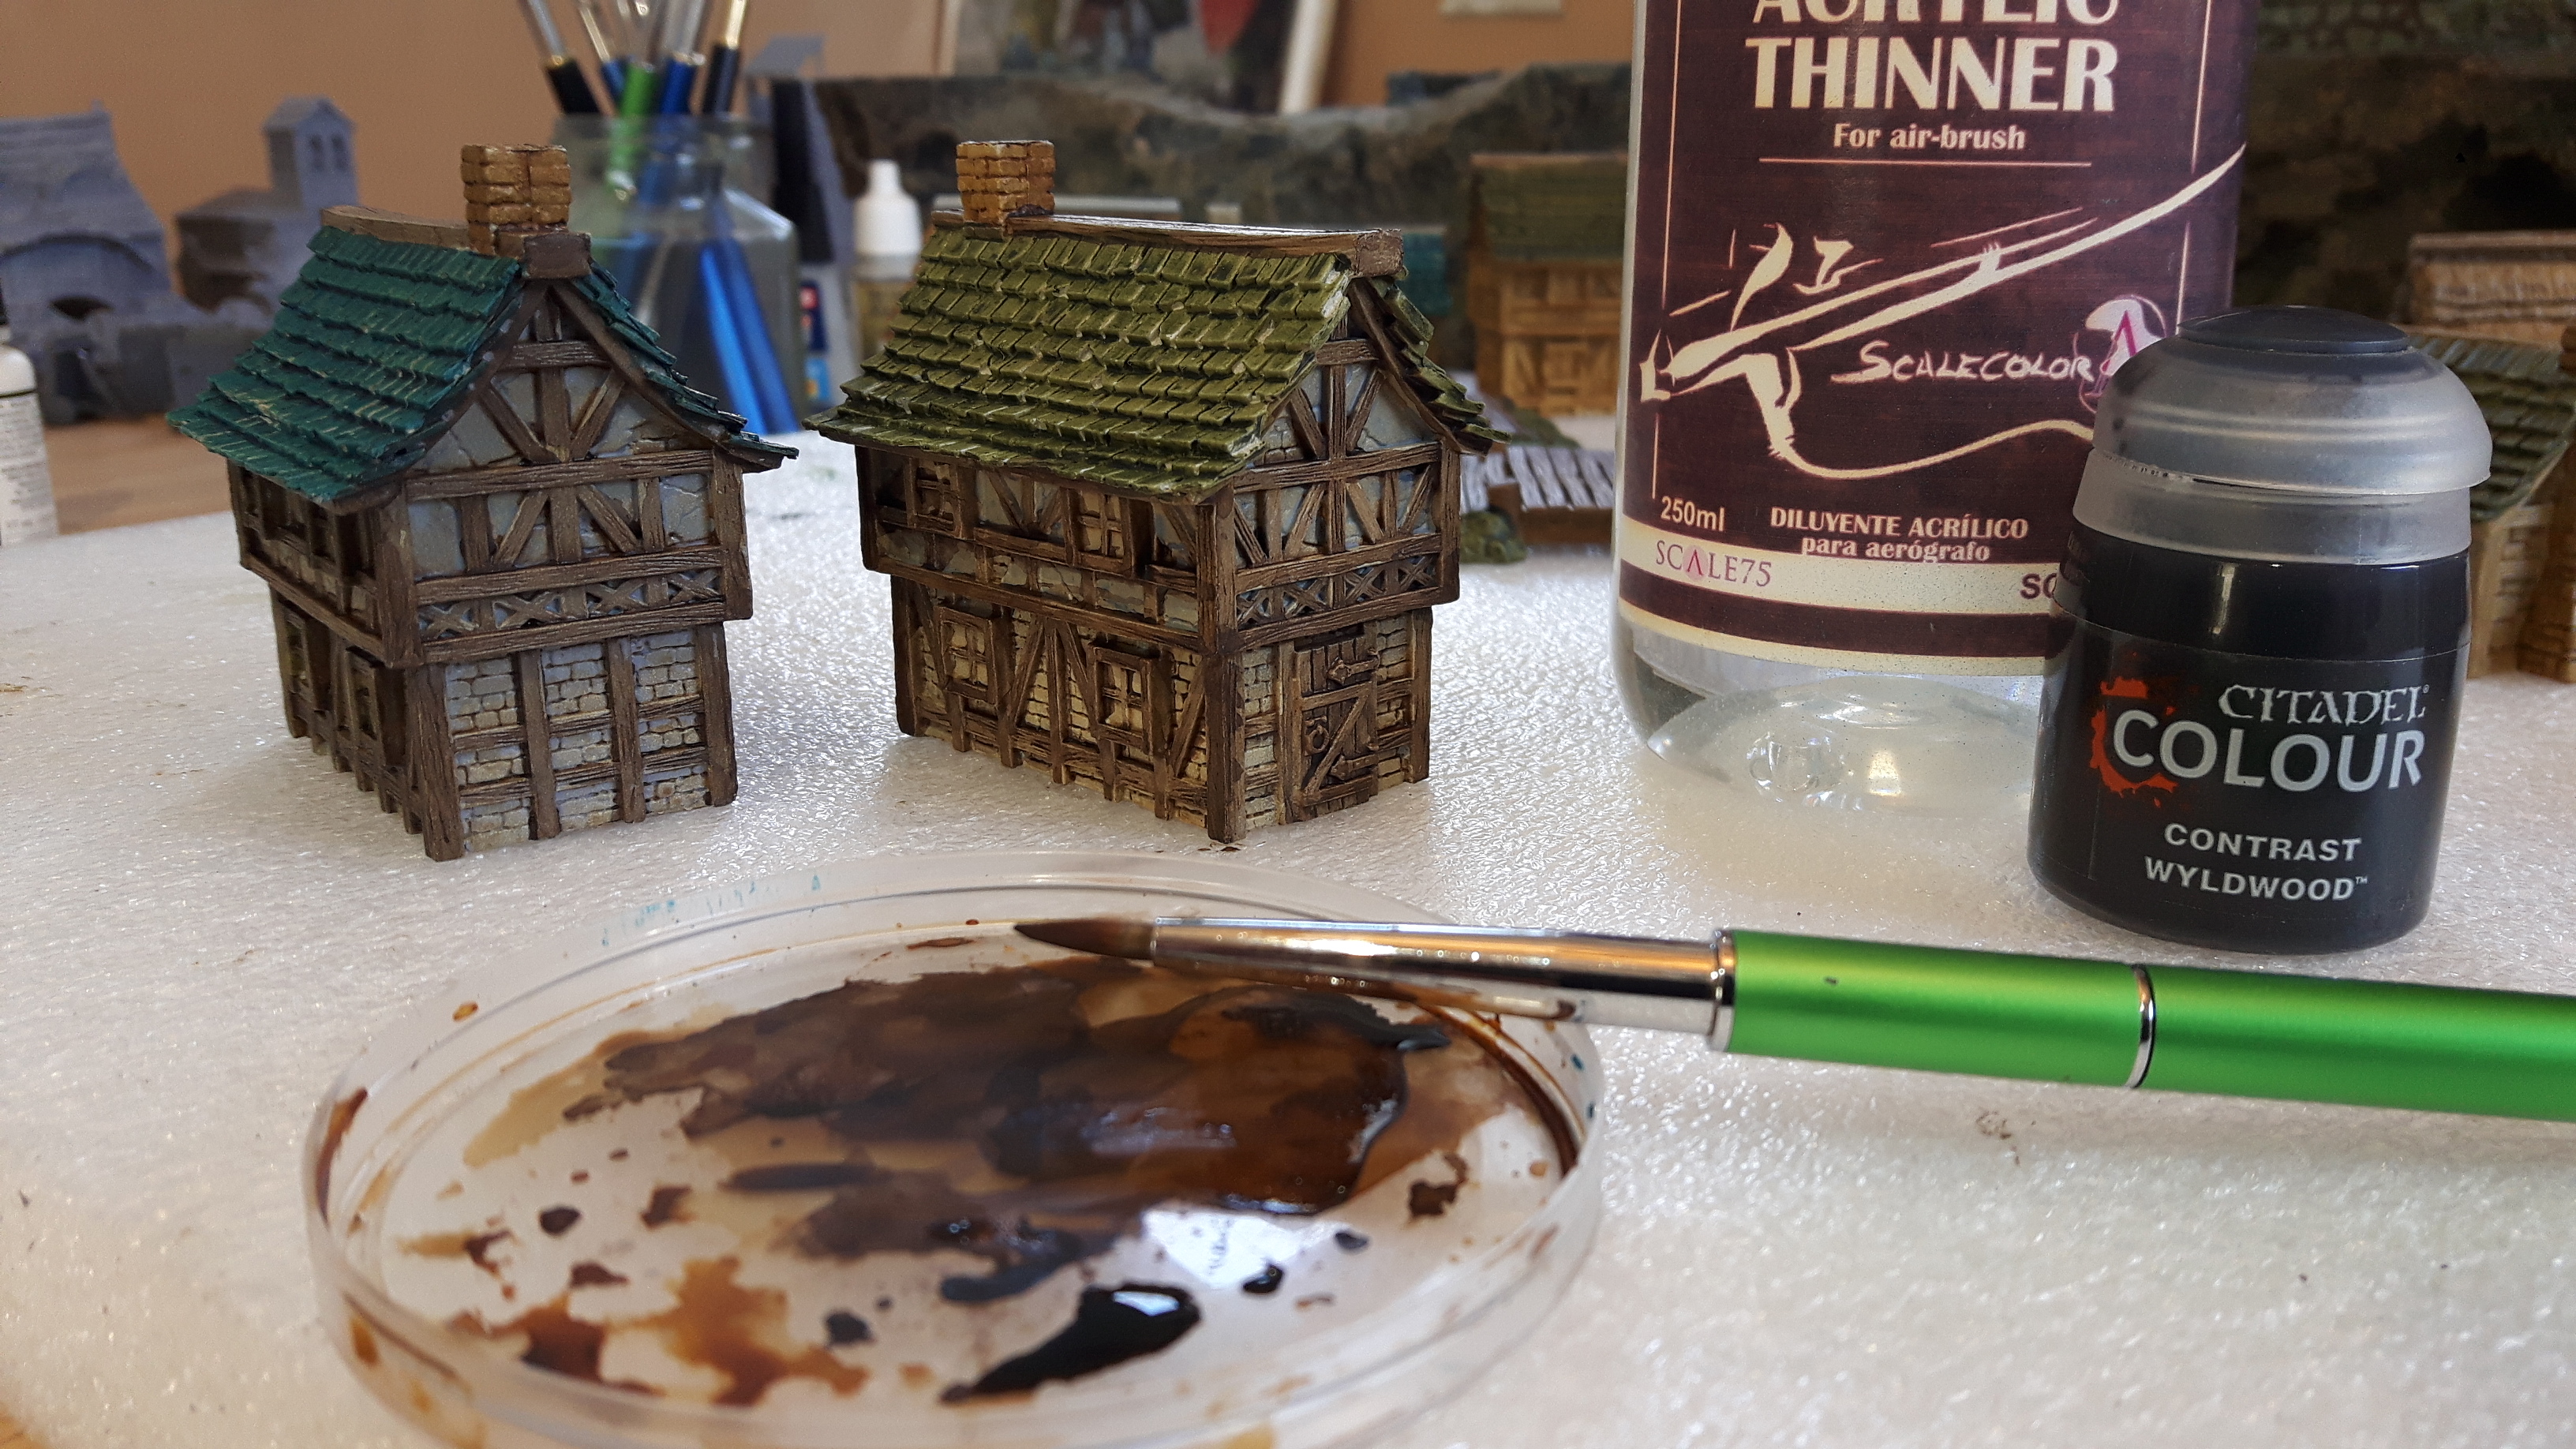
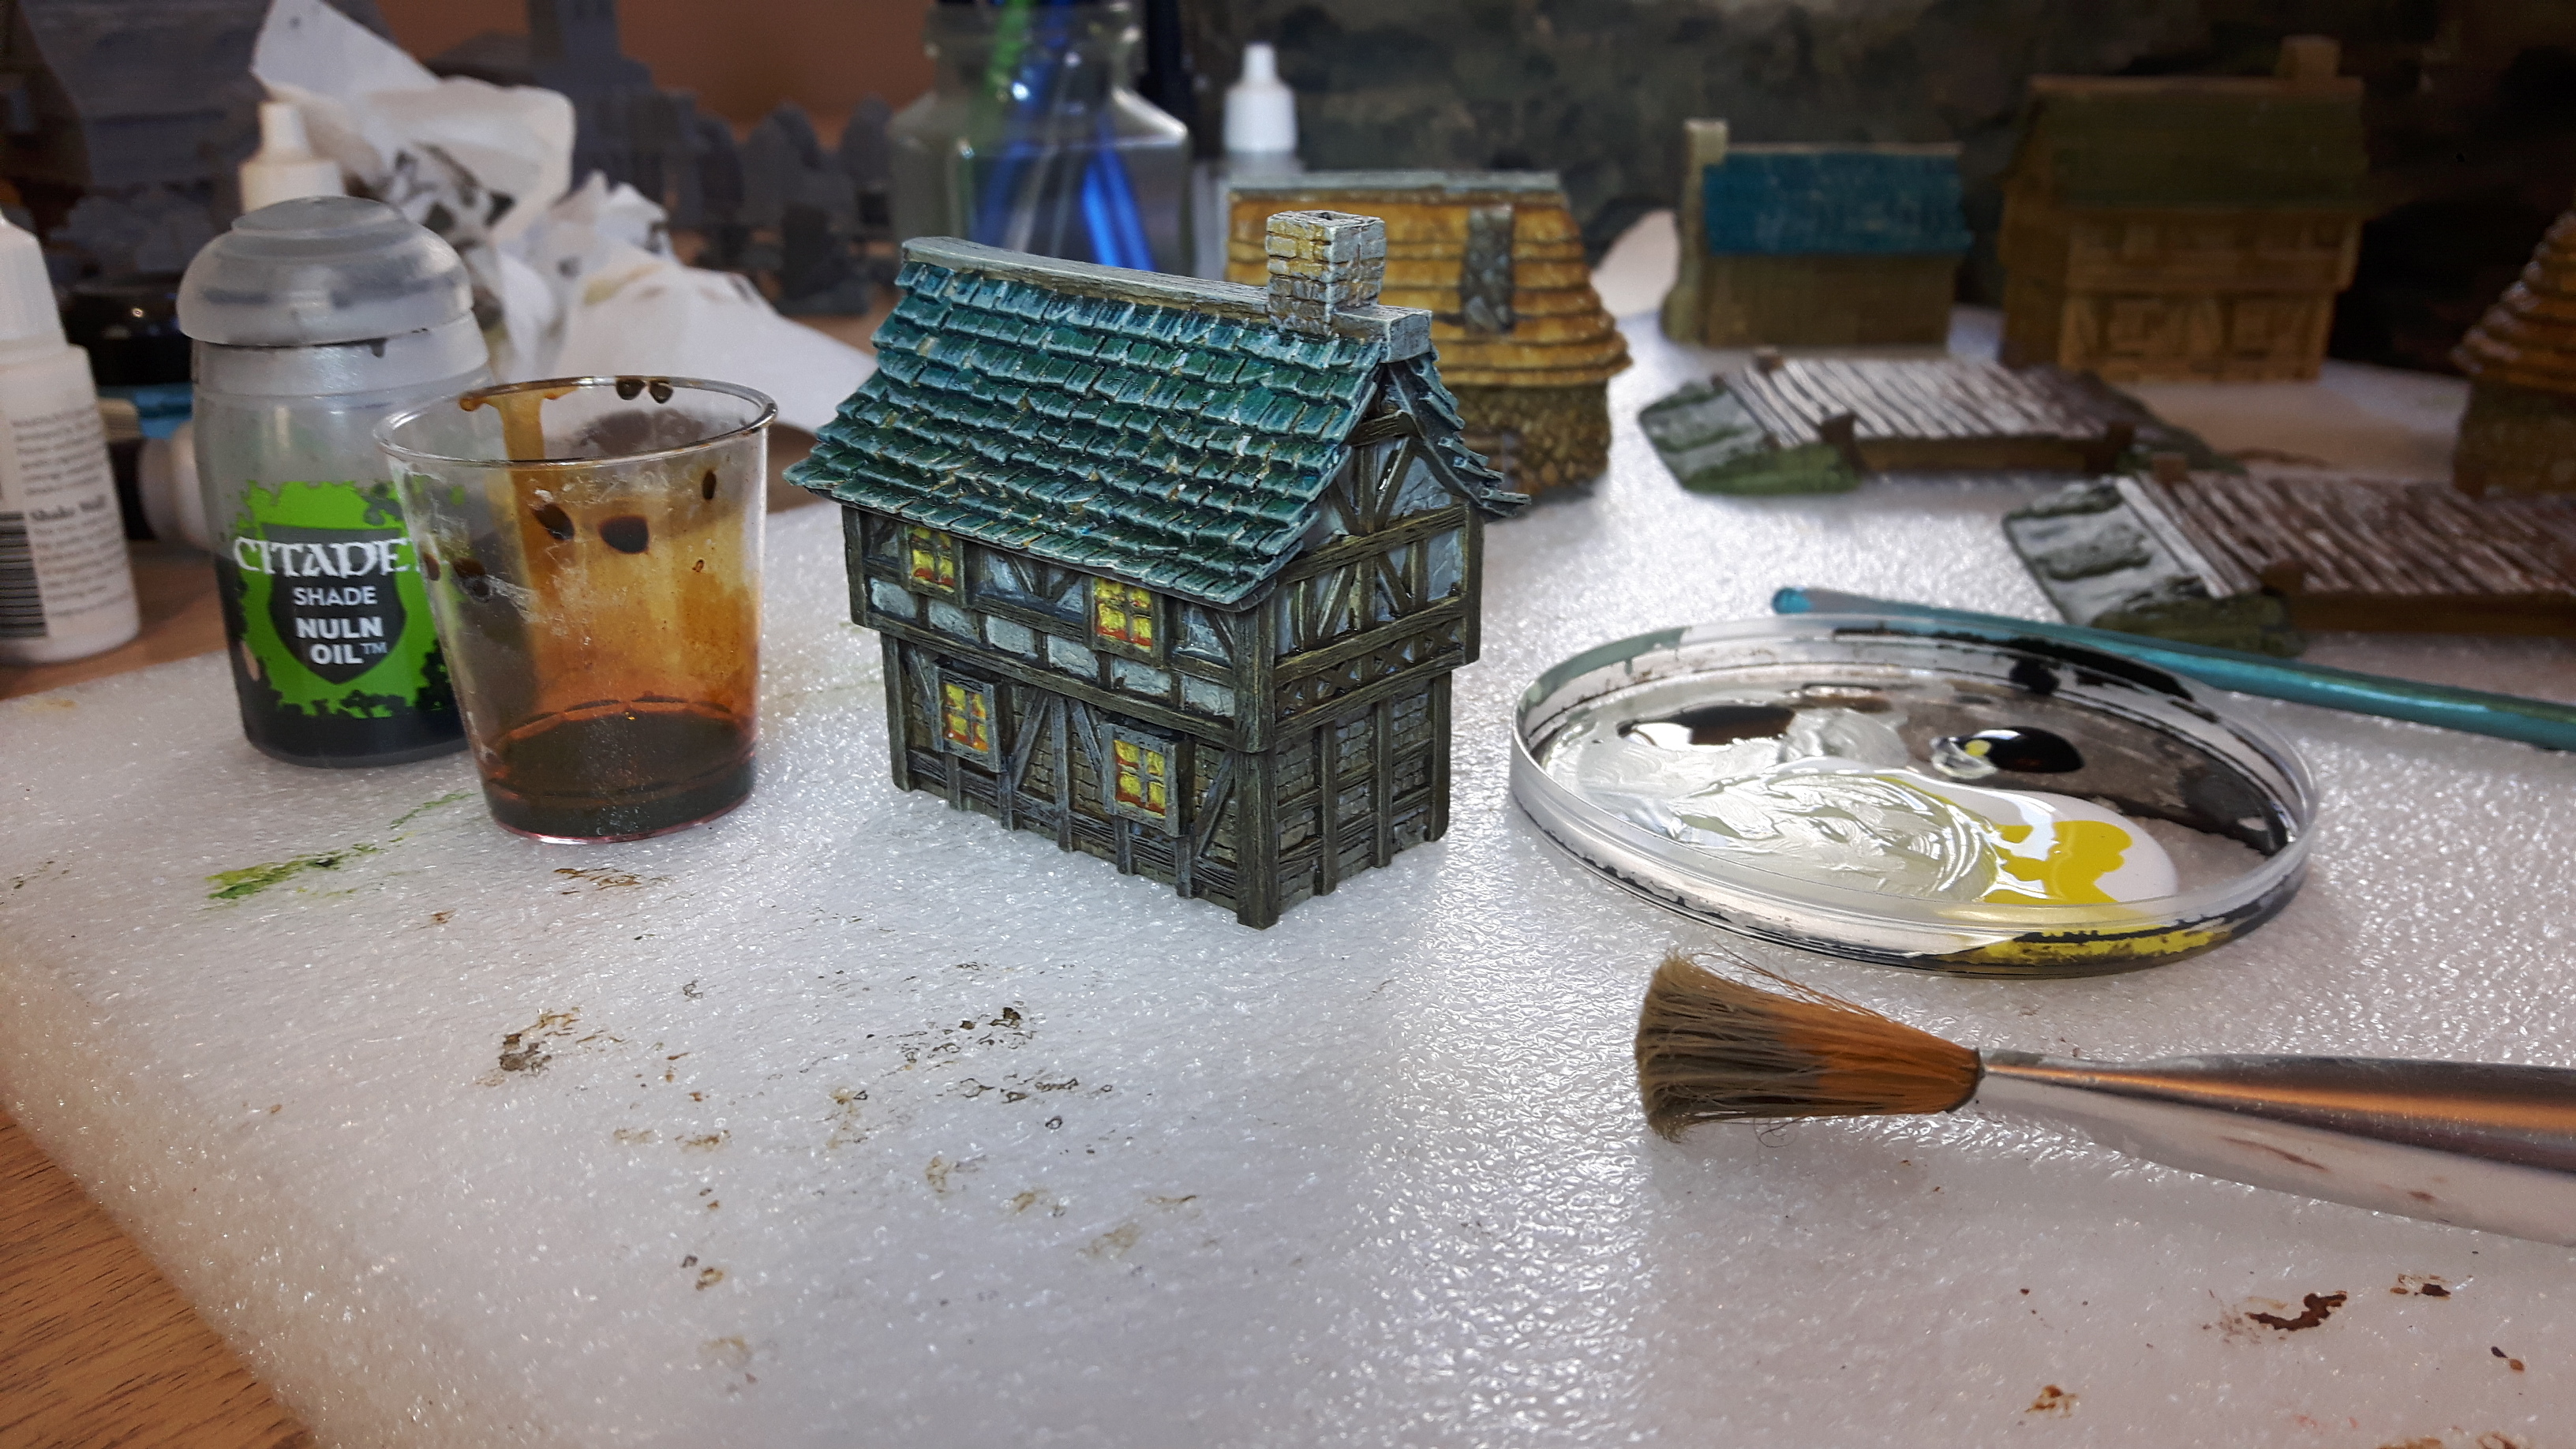
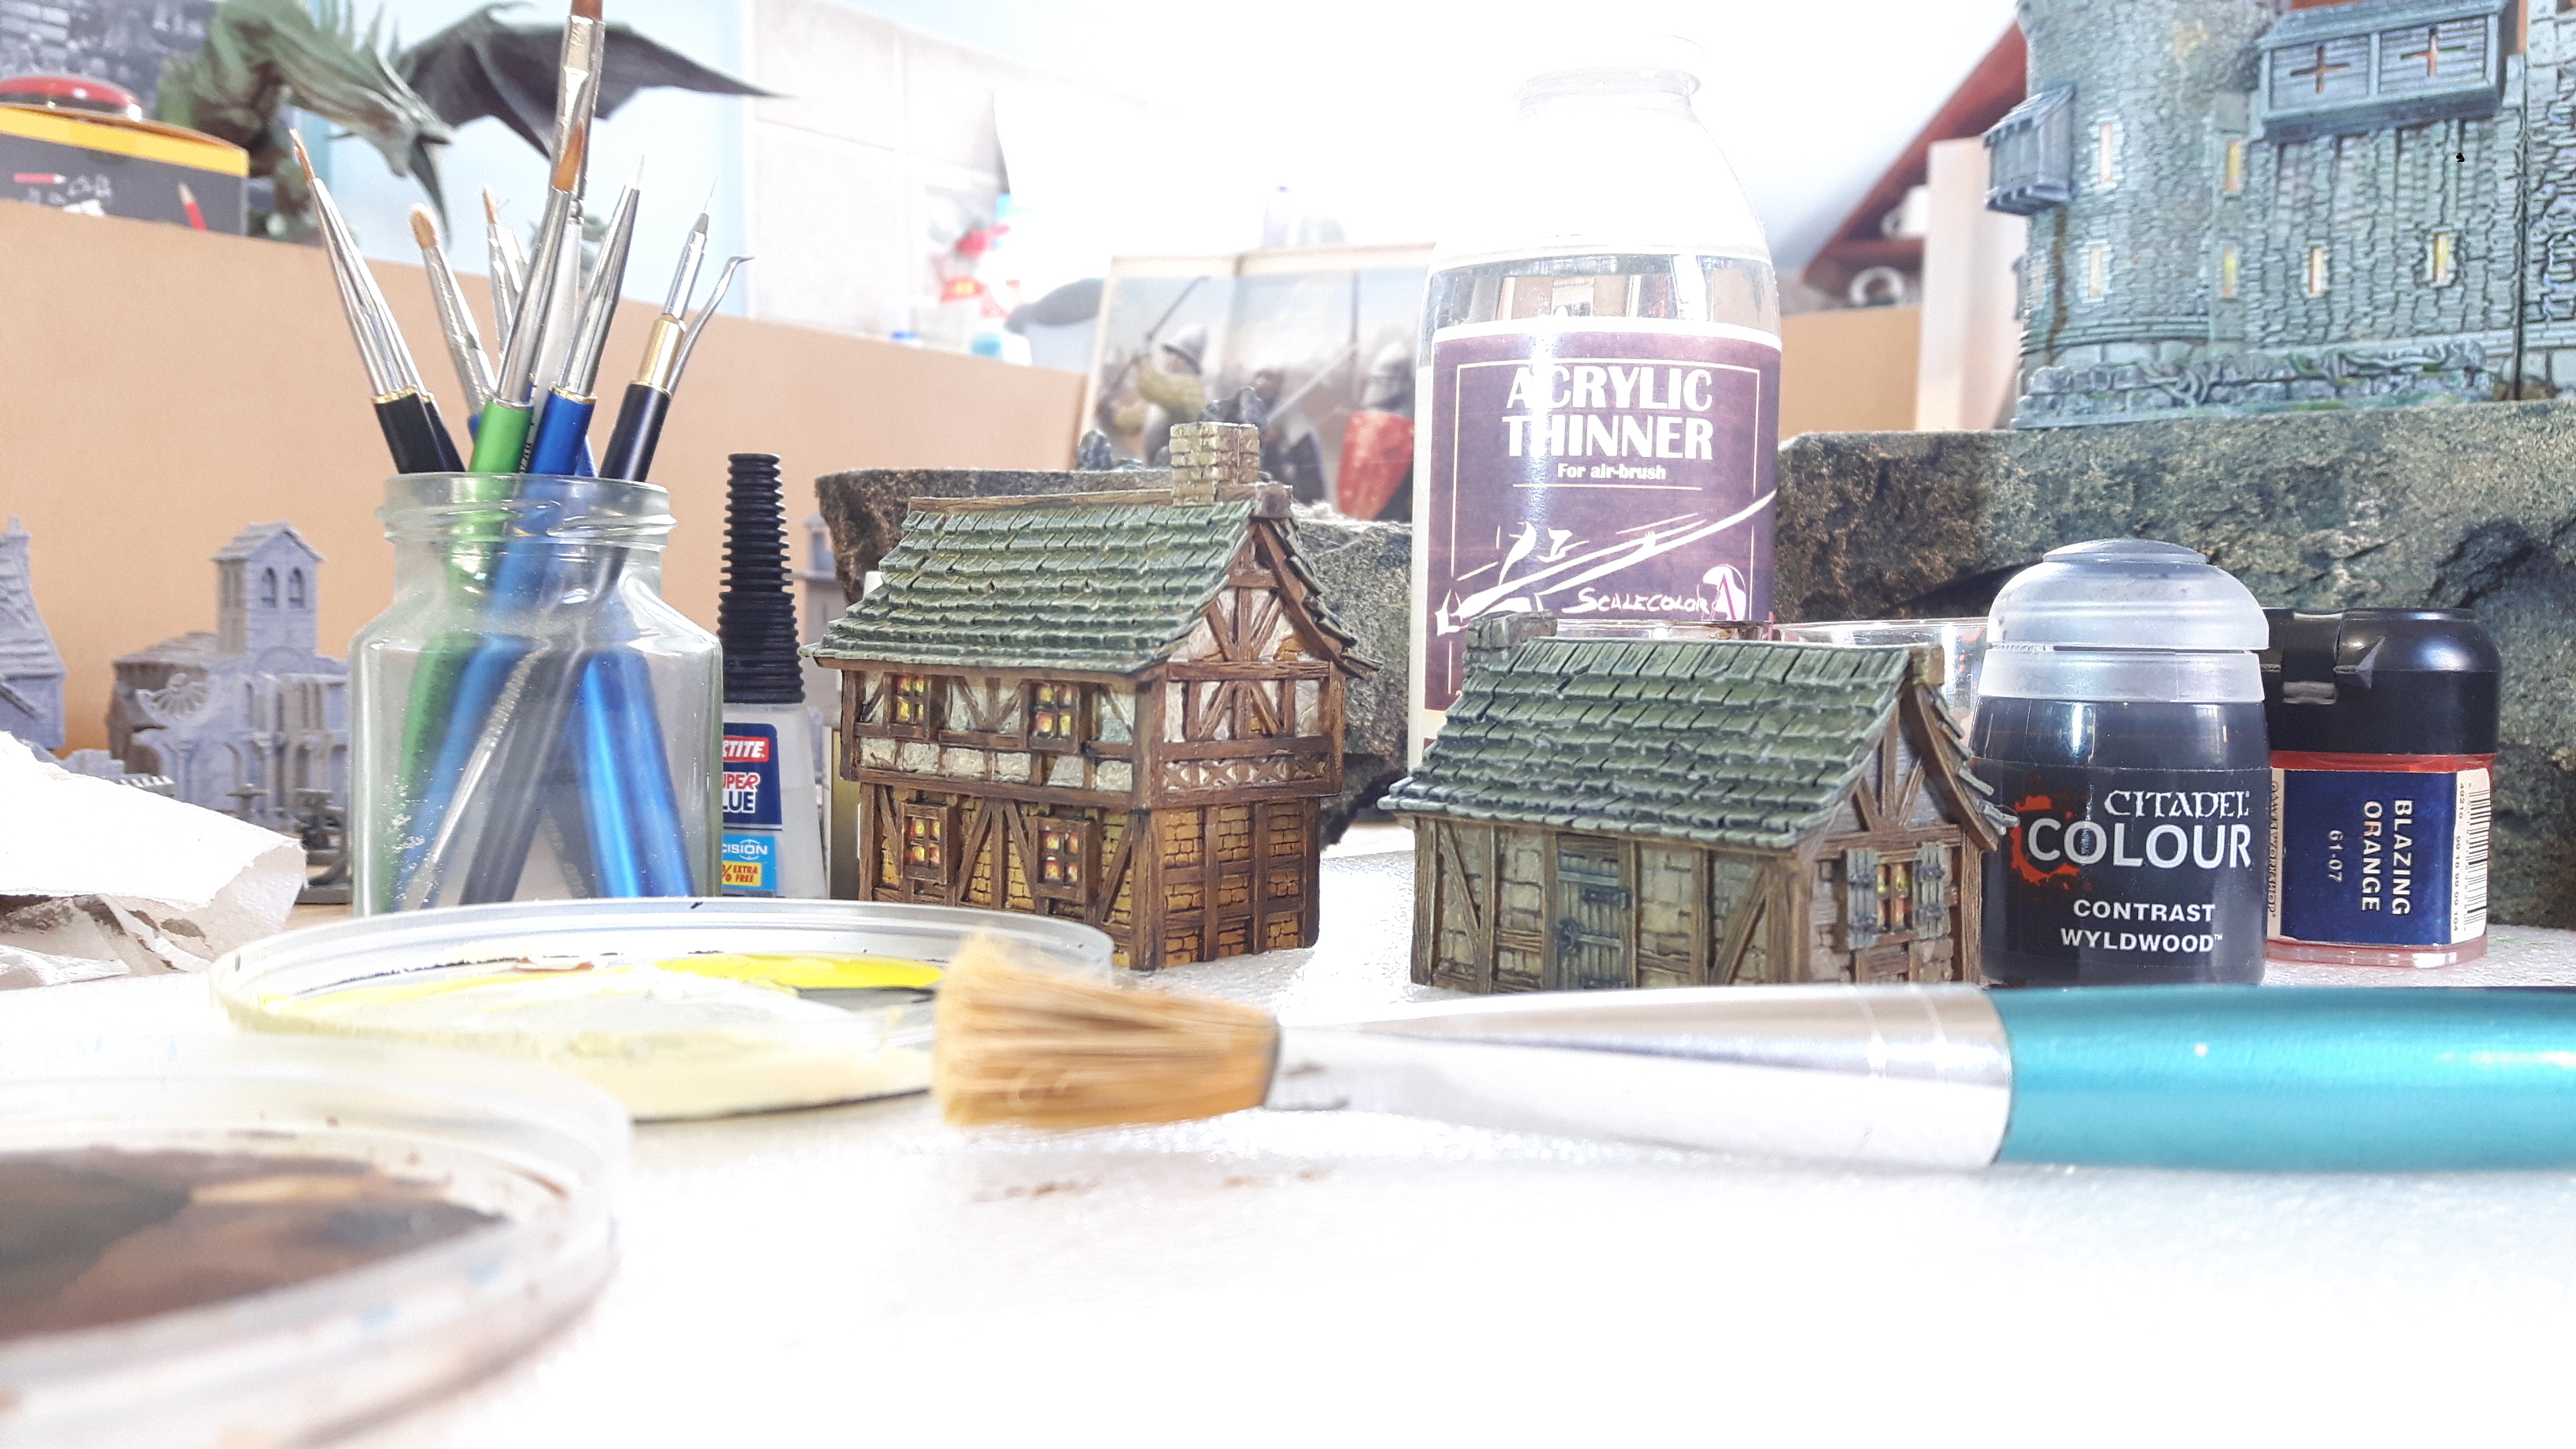
I started off with picking out bits of timber work and chinmey stonework with a diluted mix of GW Contrast Snakebite Leather. This is a good medium brown on the project and like all the contrast paints it looks different over each primer colour.
I don’t have the full range of Contrast Paints and a lot that I do have I haven’t tried yet. I liked the test board the Lloyd did on XLBS last weekend so I think I will have a go at doing my own reference board for future projects.
I started off with out of the bottle GW Contrast Apothecary White for a darker dirtier daub on the walls. It was difficult to get it into the very small areas and it pooled a lot. I syphoned the excess continuously using the tip of a dry brush, and did a several layers. The results weren’t great and I ended up later going other it with an art acrylic mix of yellow, white and a hint of black.
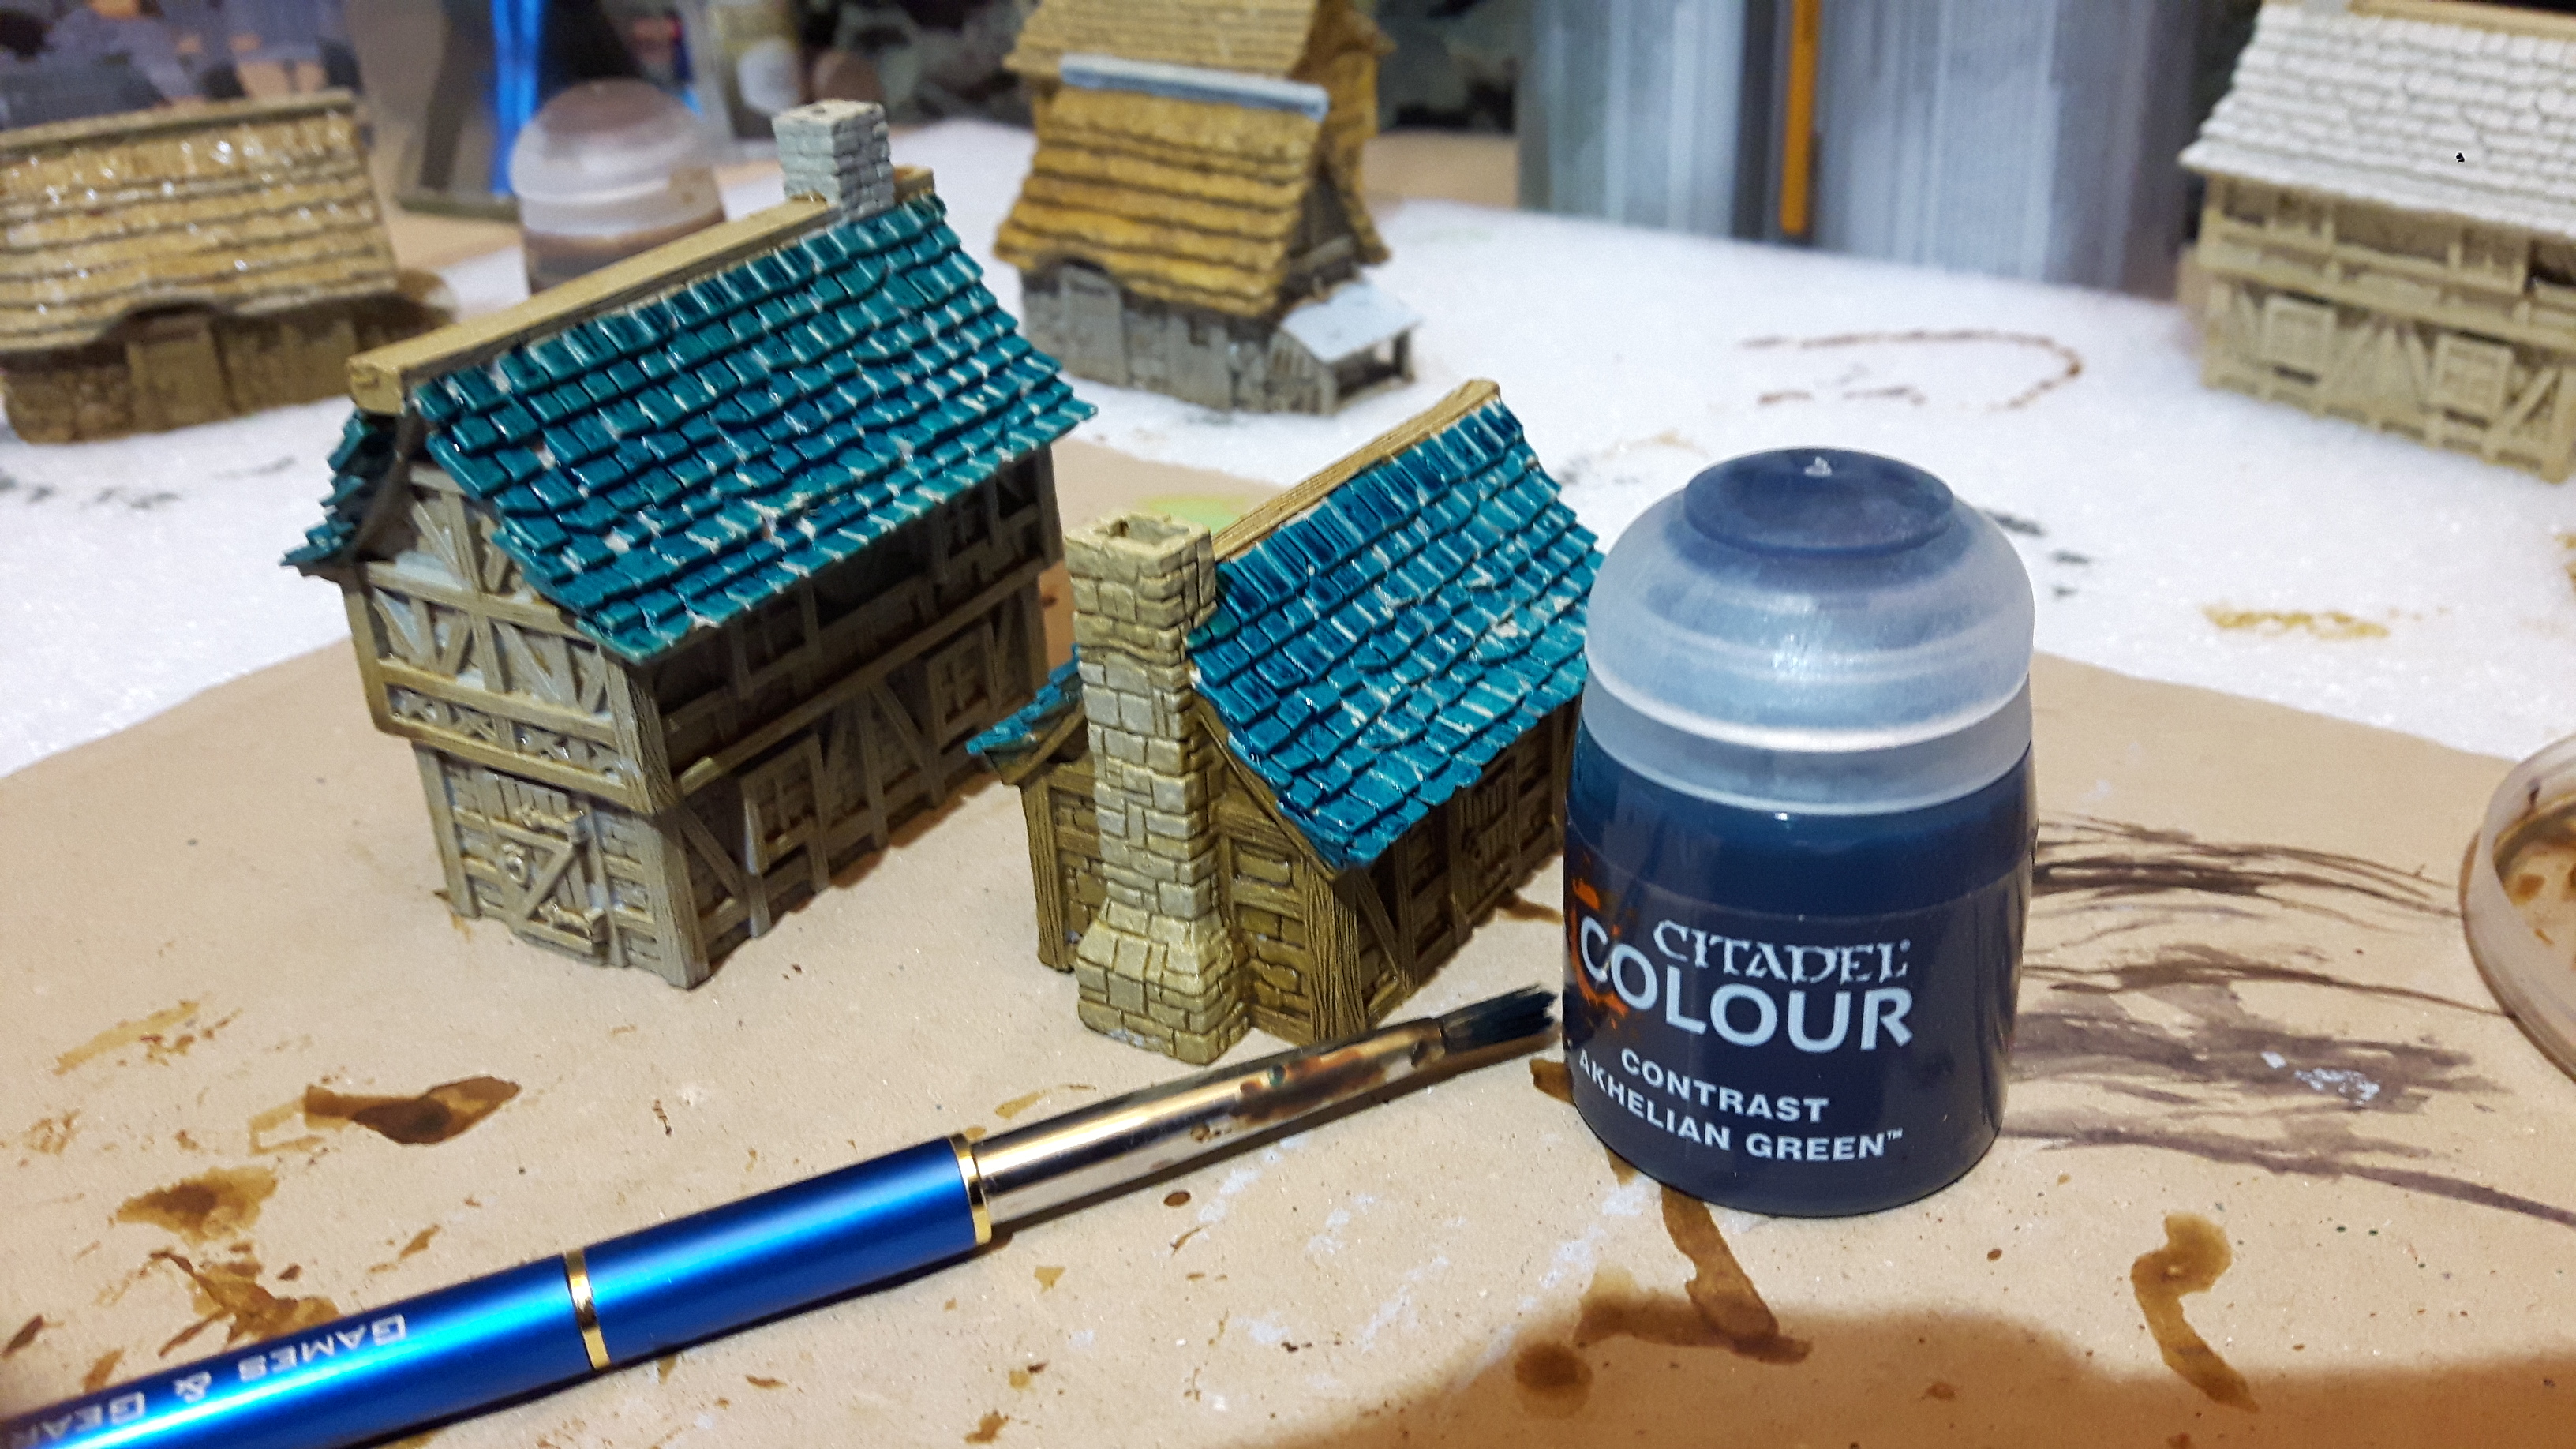
To vary the wood shades I tried a diluted GW Contrast Wyldwood. This is much darker and has good coverage.
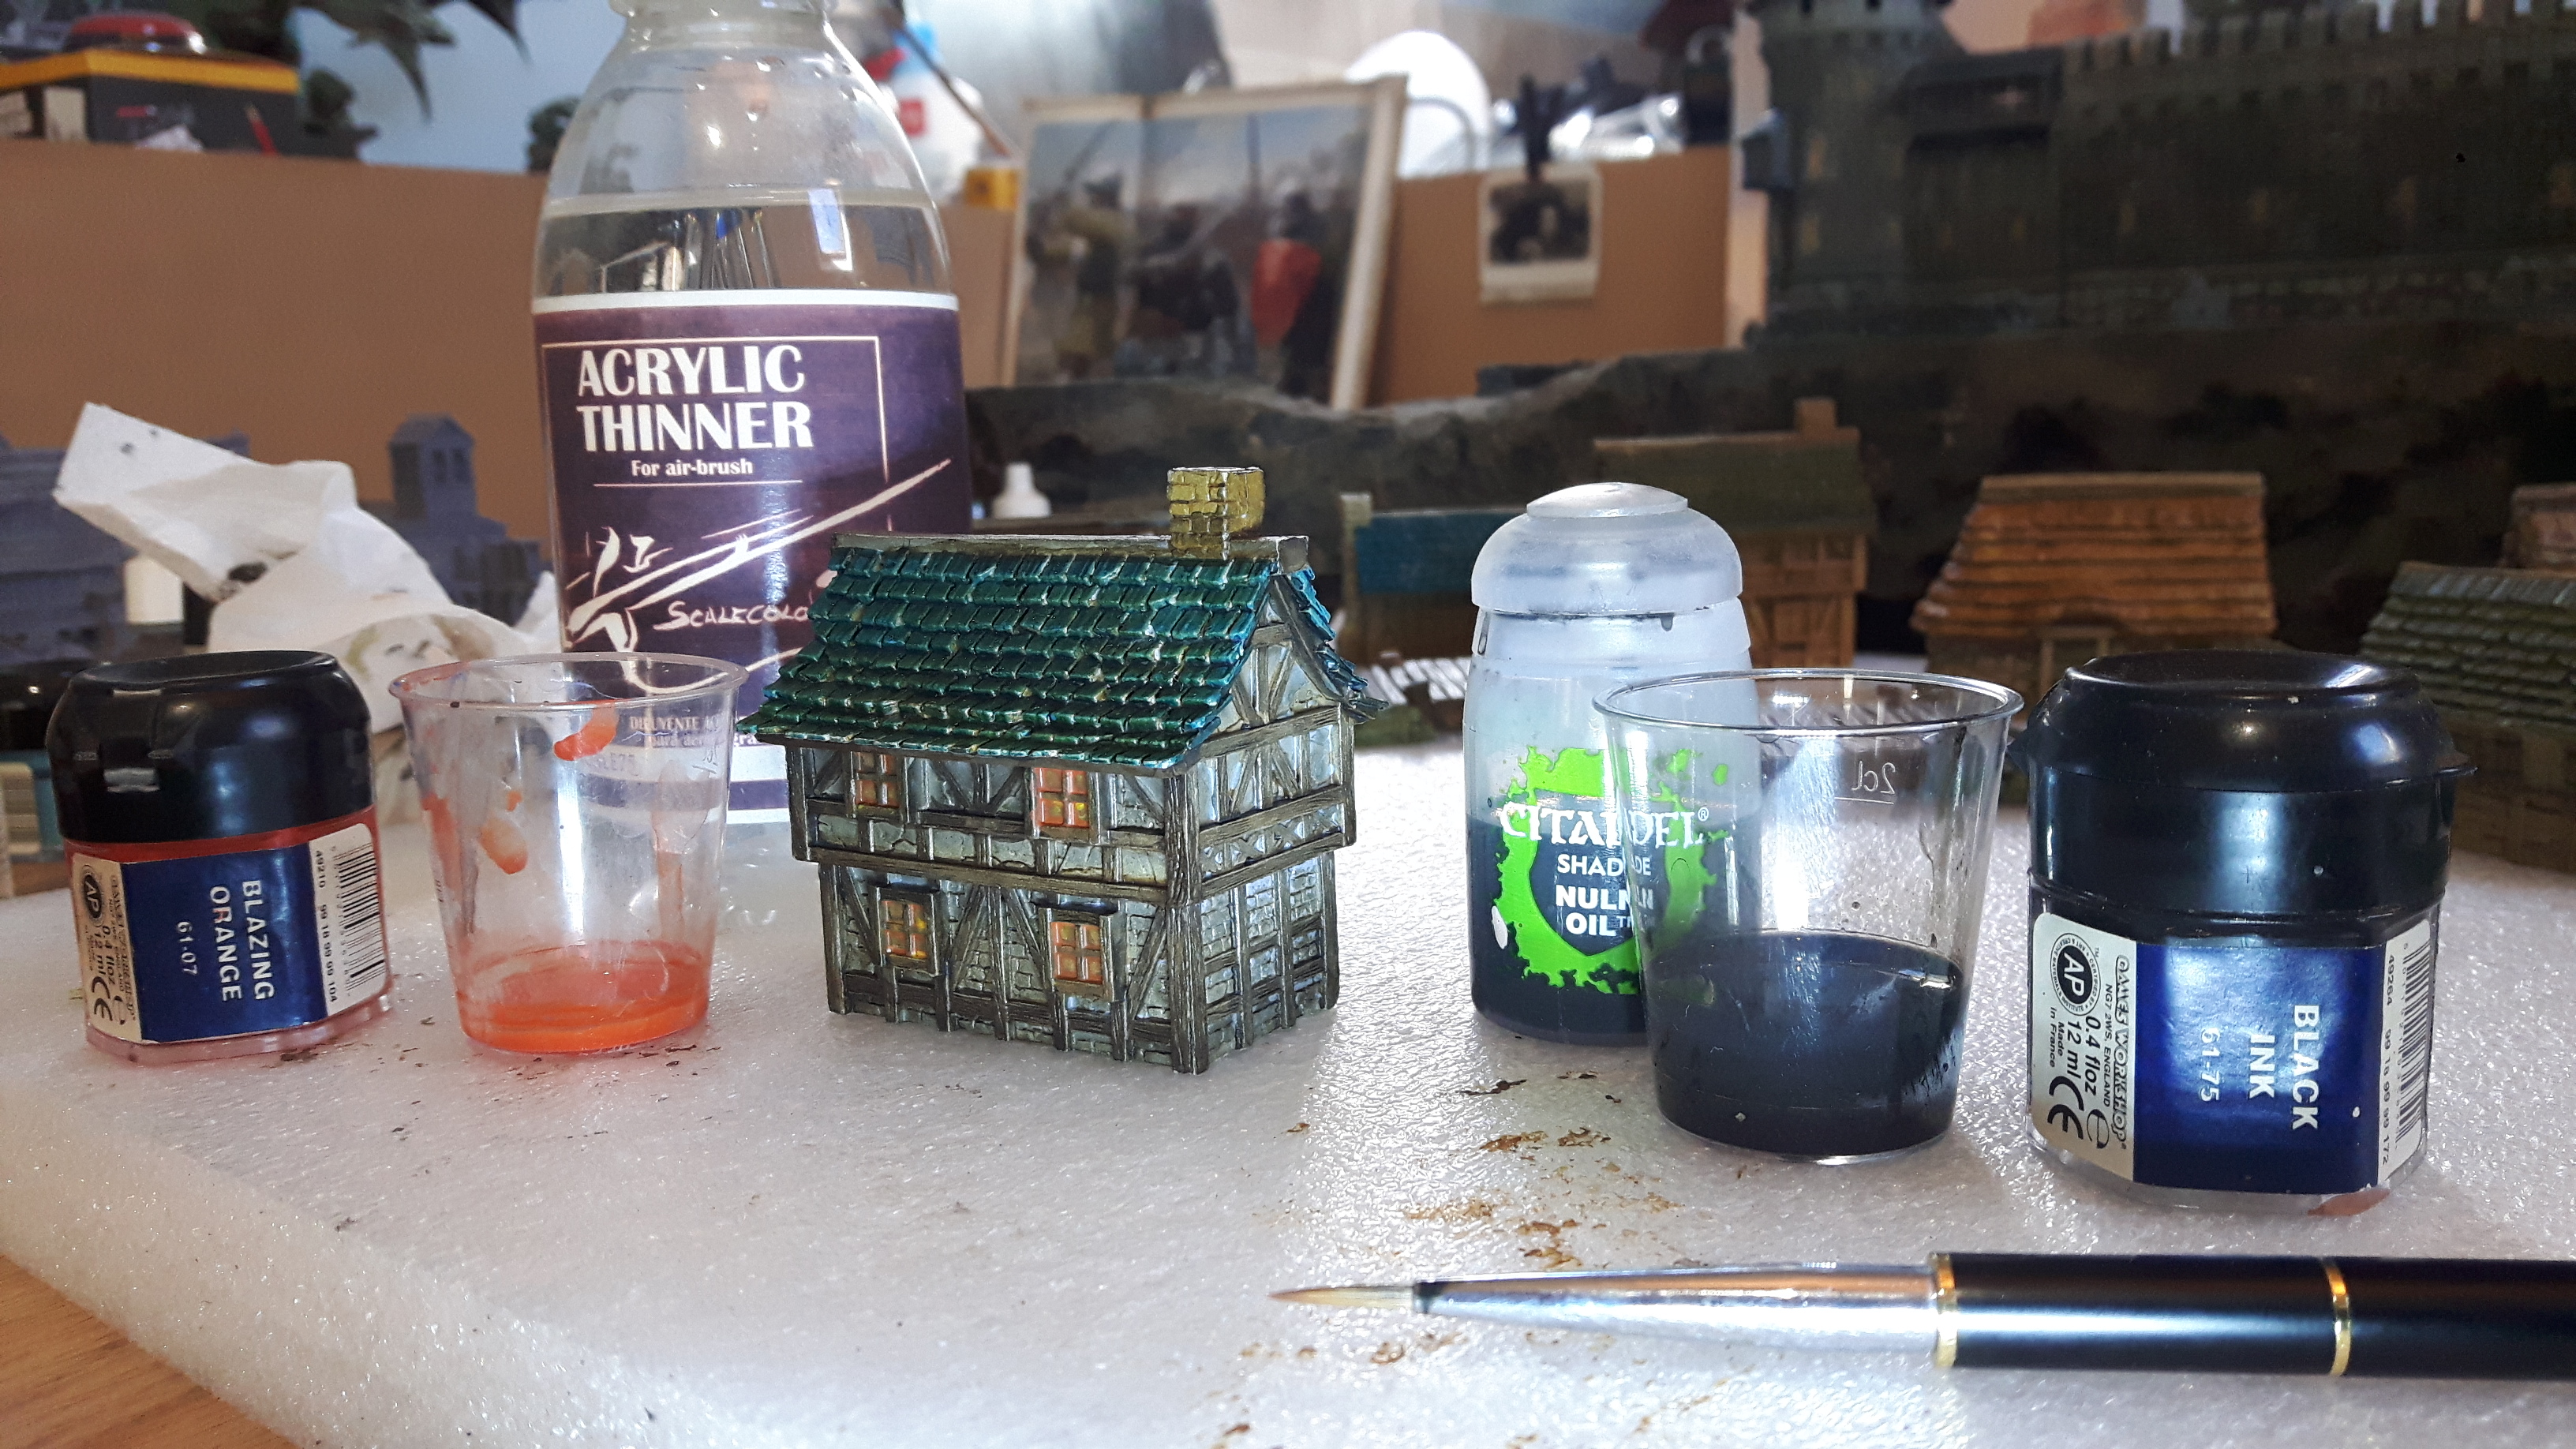
I did the lit windows the same way as for the castle, but used art acrylics yellow and white instead of the Citadel Averland Sunset basecoat first nd last.
I also went round with an extremely diluted wash of GW Black Ink / Citadel Nuln Oil and Acrylic Thinners (so there was very little pigment) and dirtied up some roofs and walls.
Some buildings were dirtied with just diluted Citedel Nuln Oil to vary the colour range.
And then finally for today, just a bit more window work and some detailing.
Quick Update
Today is Boardgames Day on Board Games arena. Just finished a cracking two player game of Stone Age with my son who is in the UK and have a 4 player game of Clans of Caledonia scheduled at 2pm.
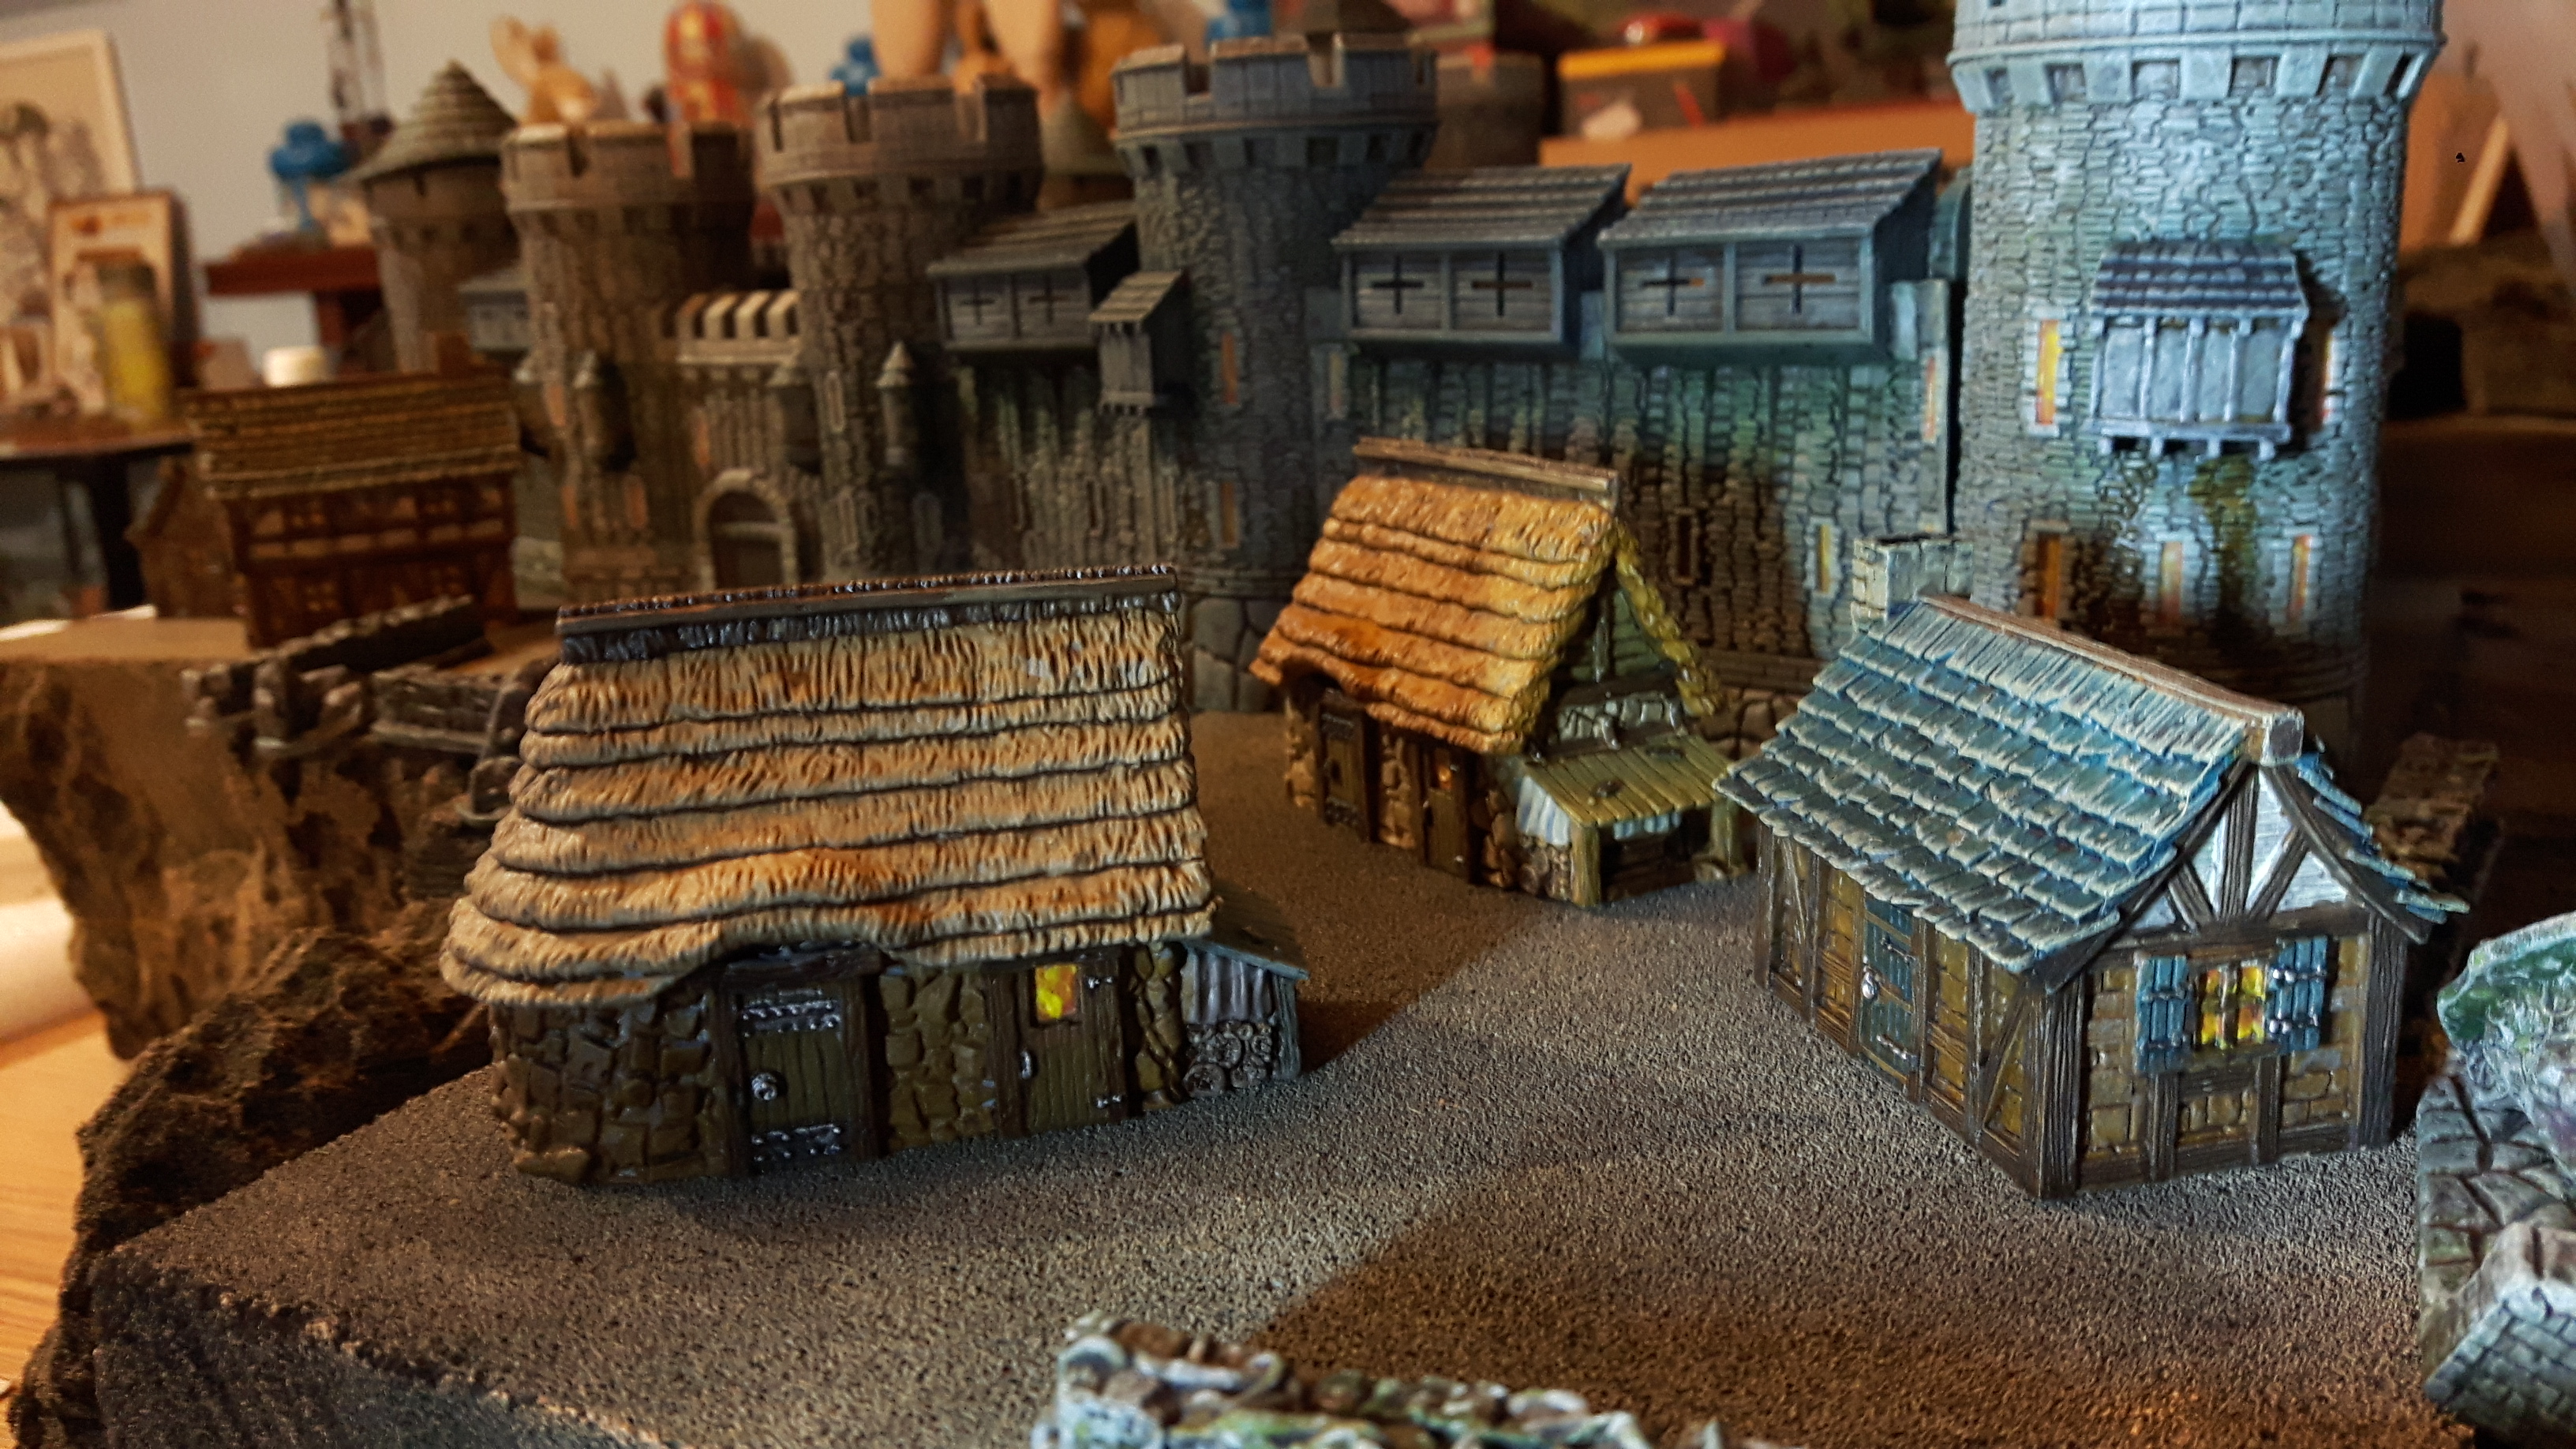
I have made made a bit of progress though. Another two hoses finished!
This was the state early this morning…
I spent the time on just two houses.
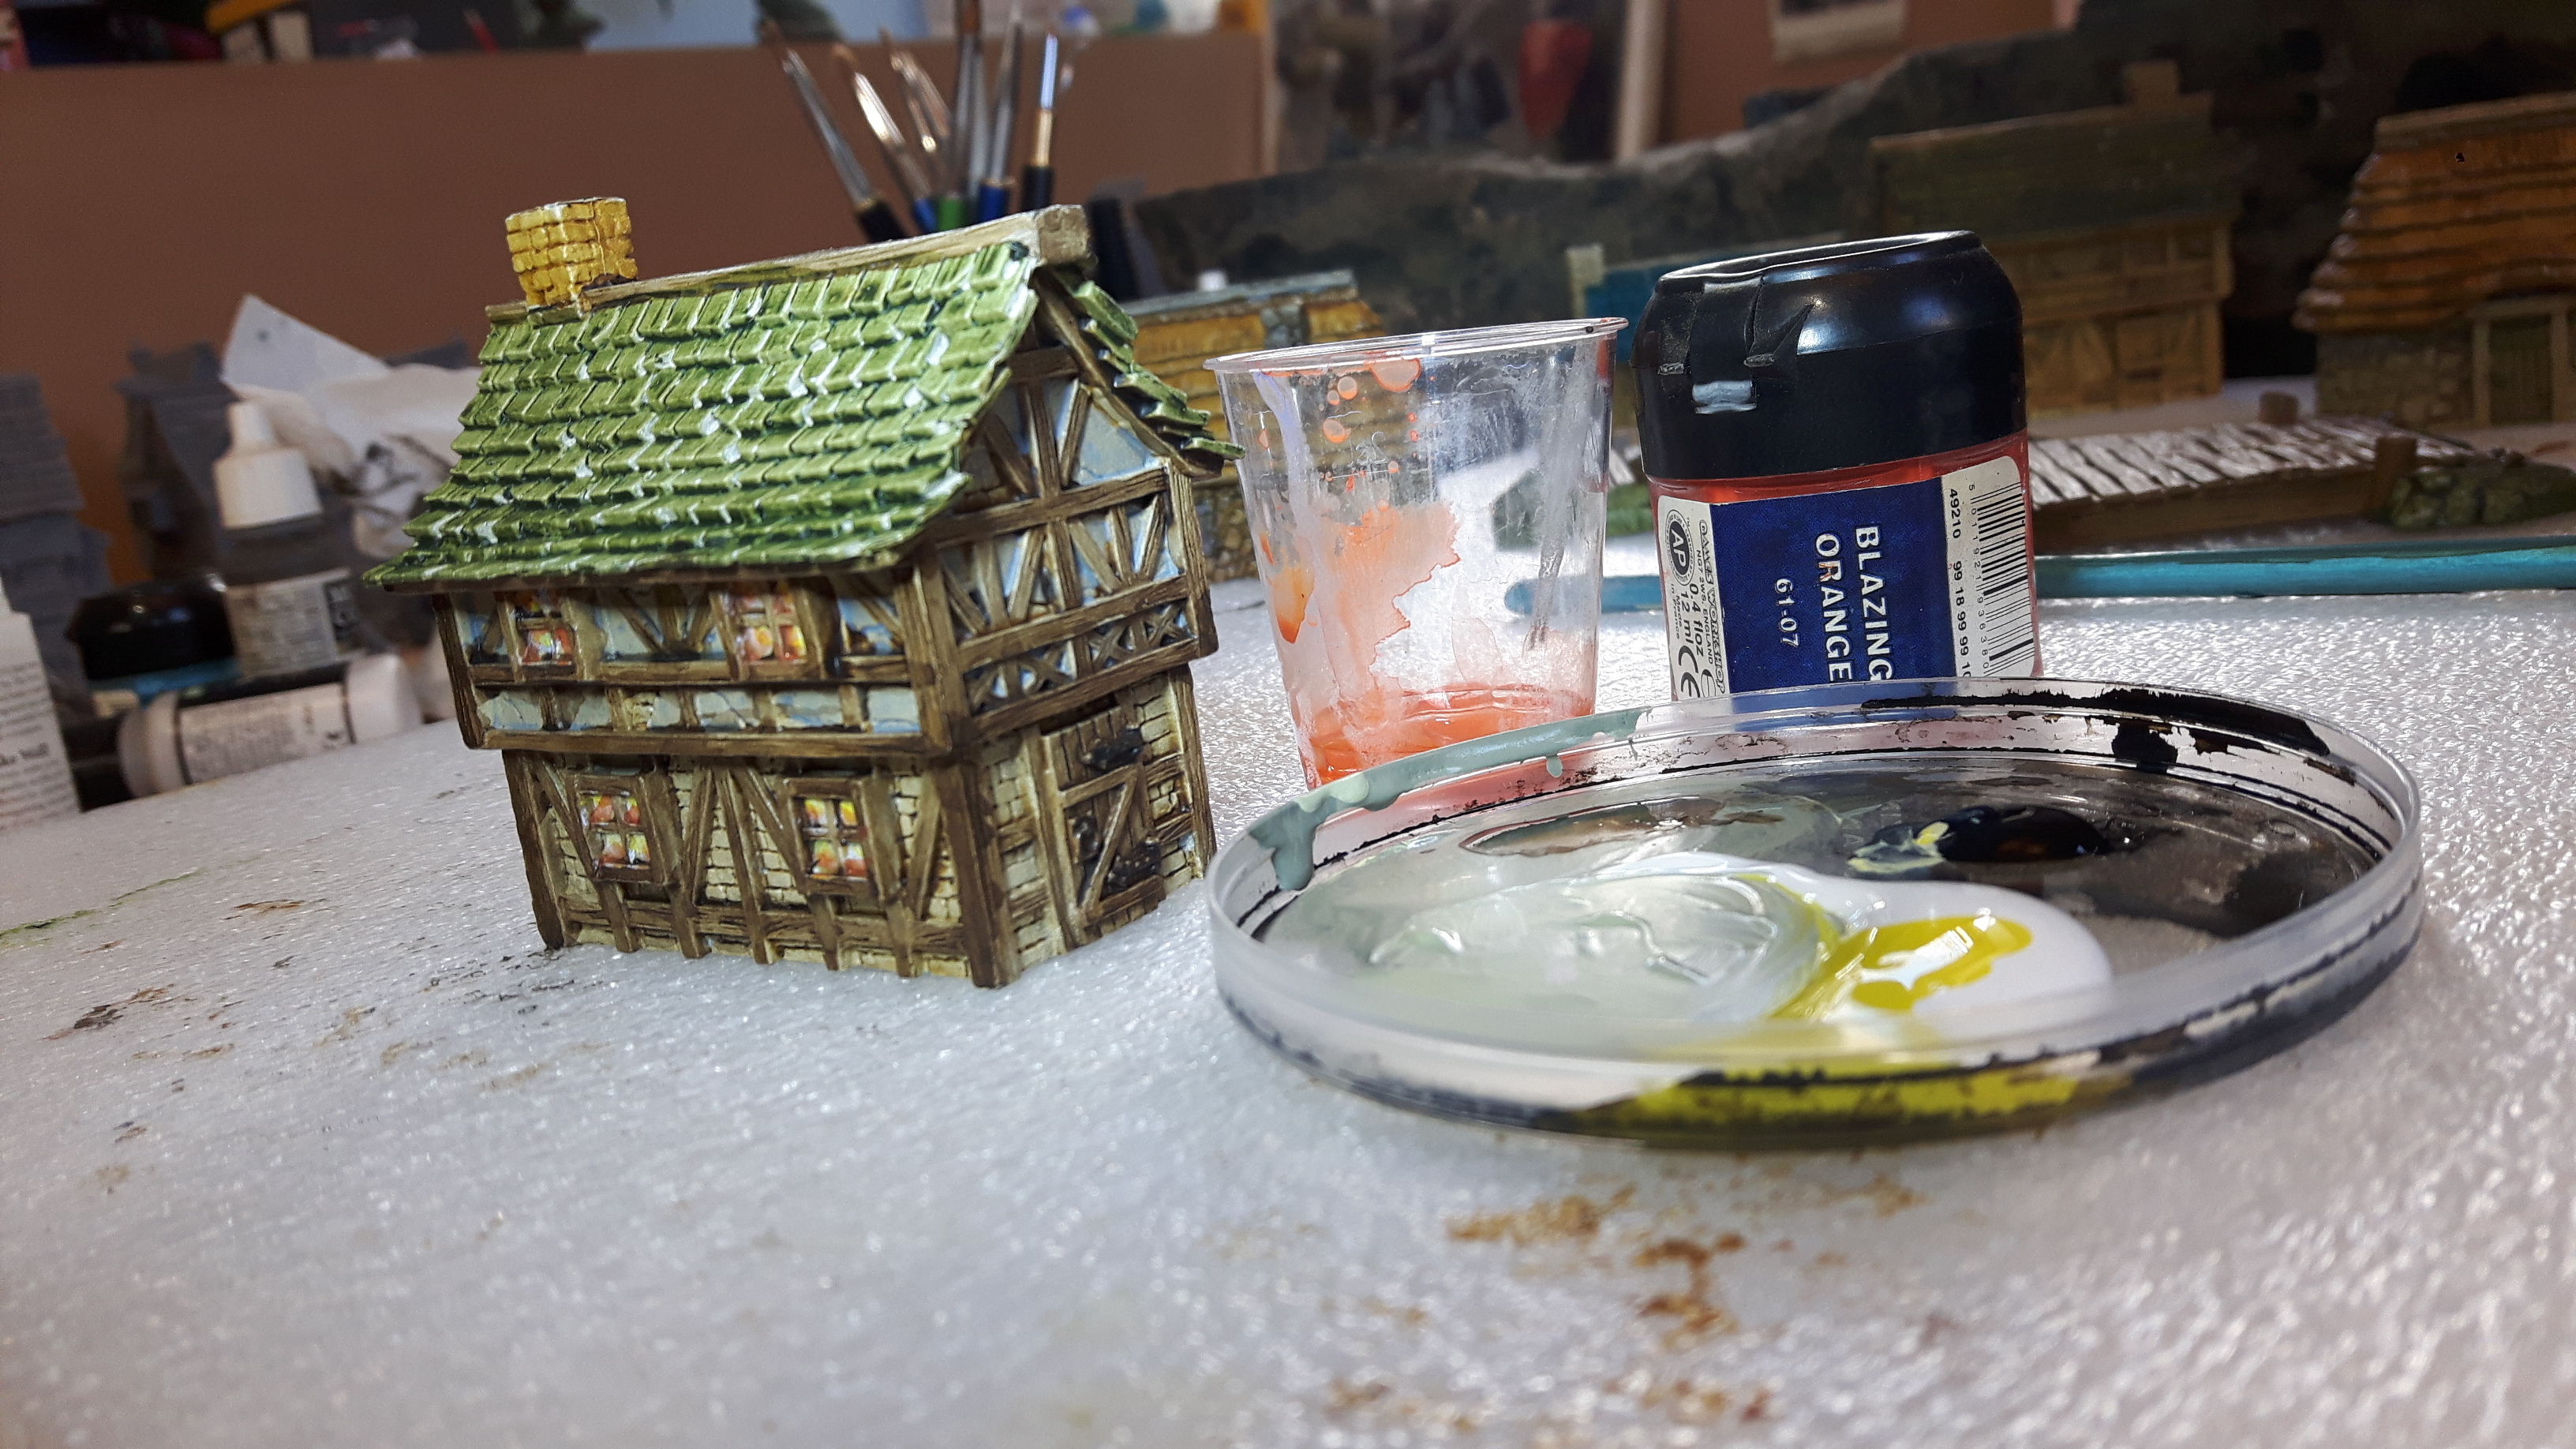
First was a diluted wash of Contrast Wyldwood on the timber frame works.
Next, an art acrylic white & yellow in all the windows.
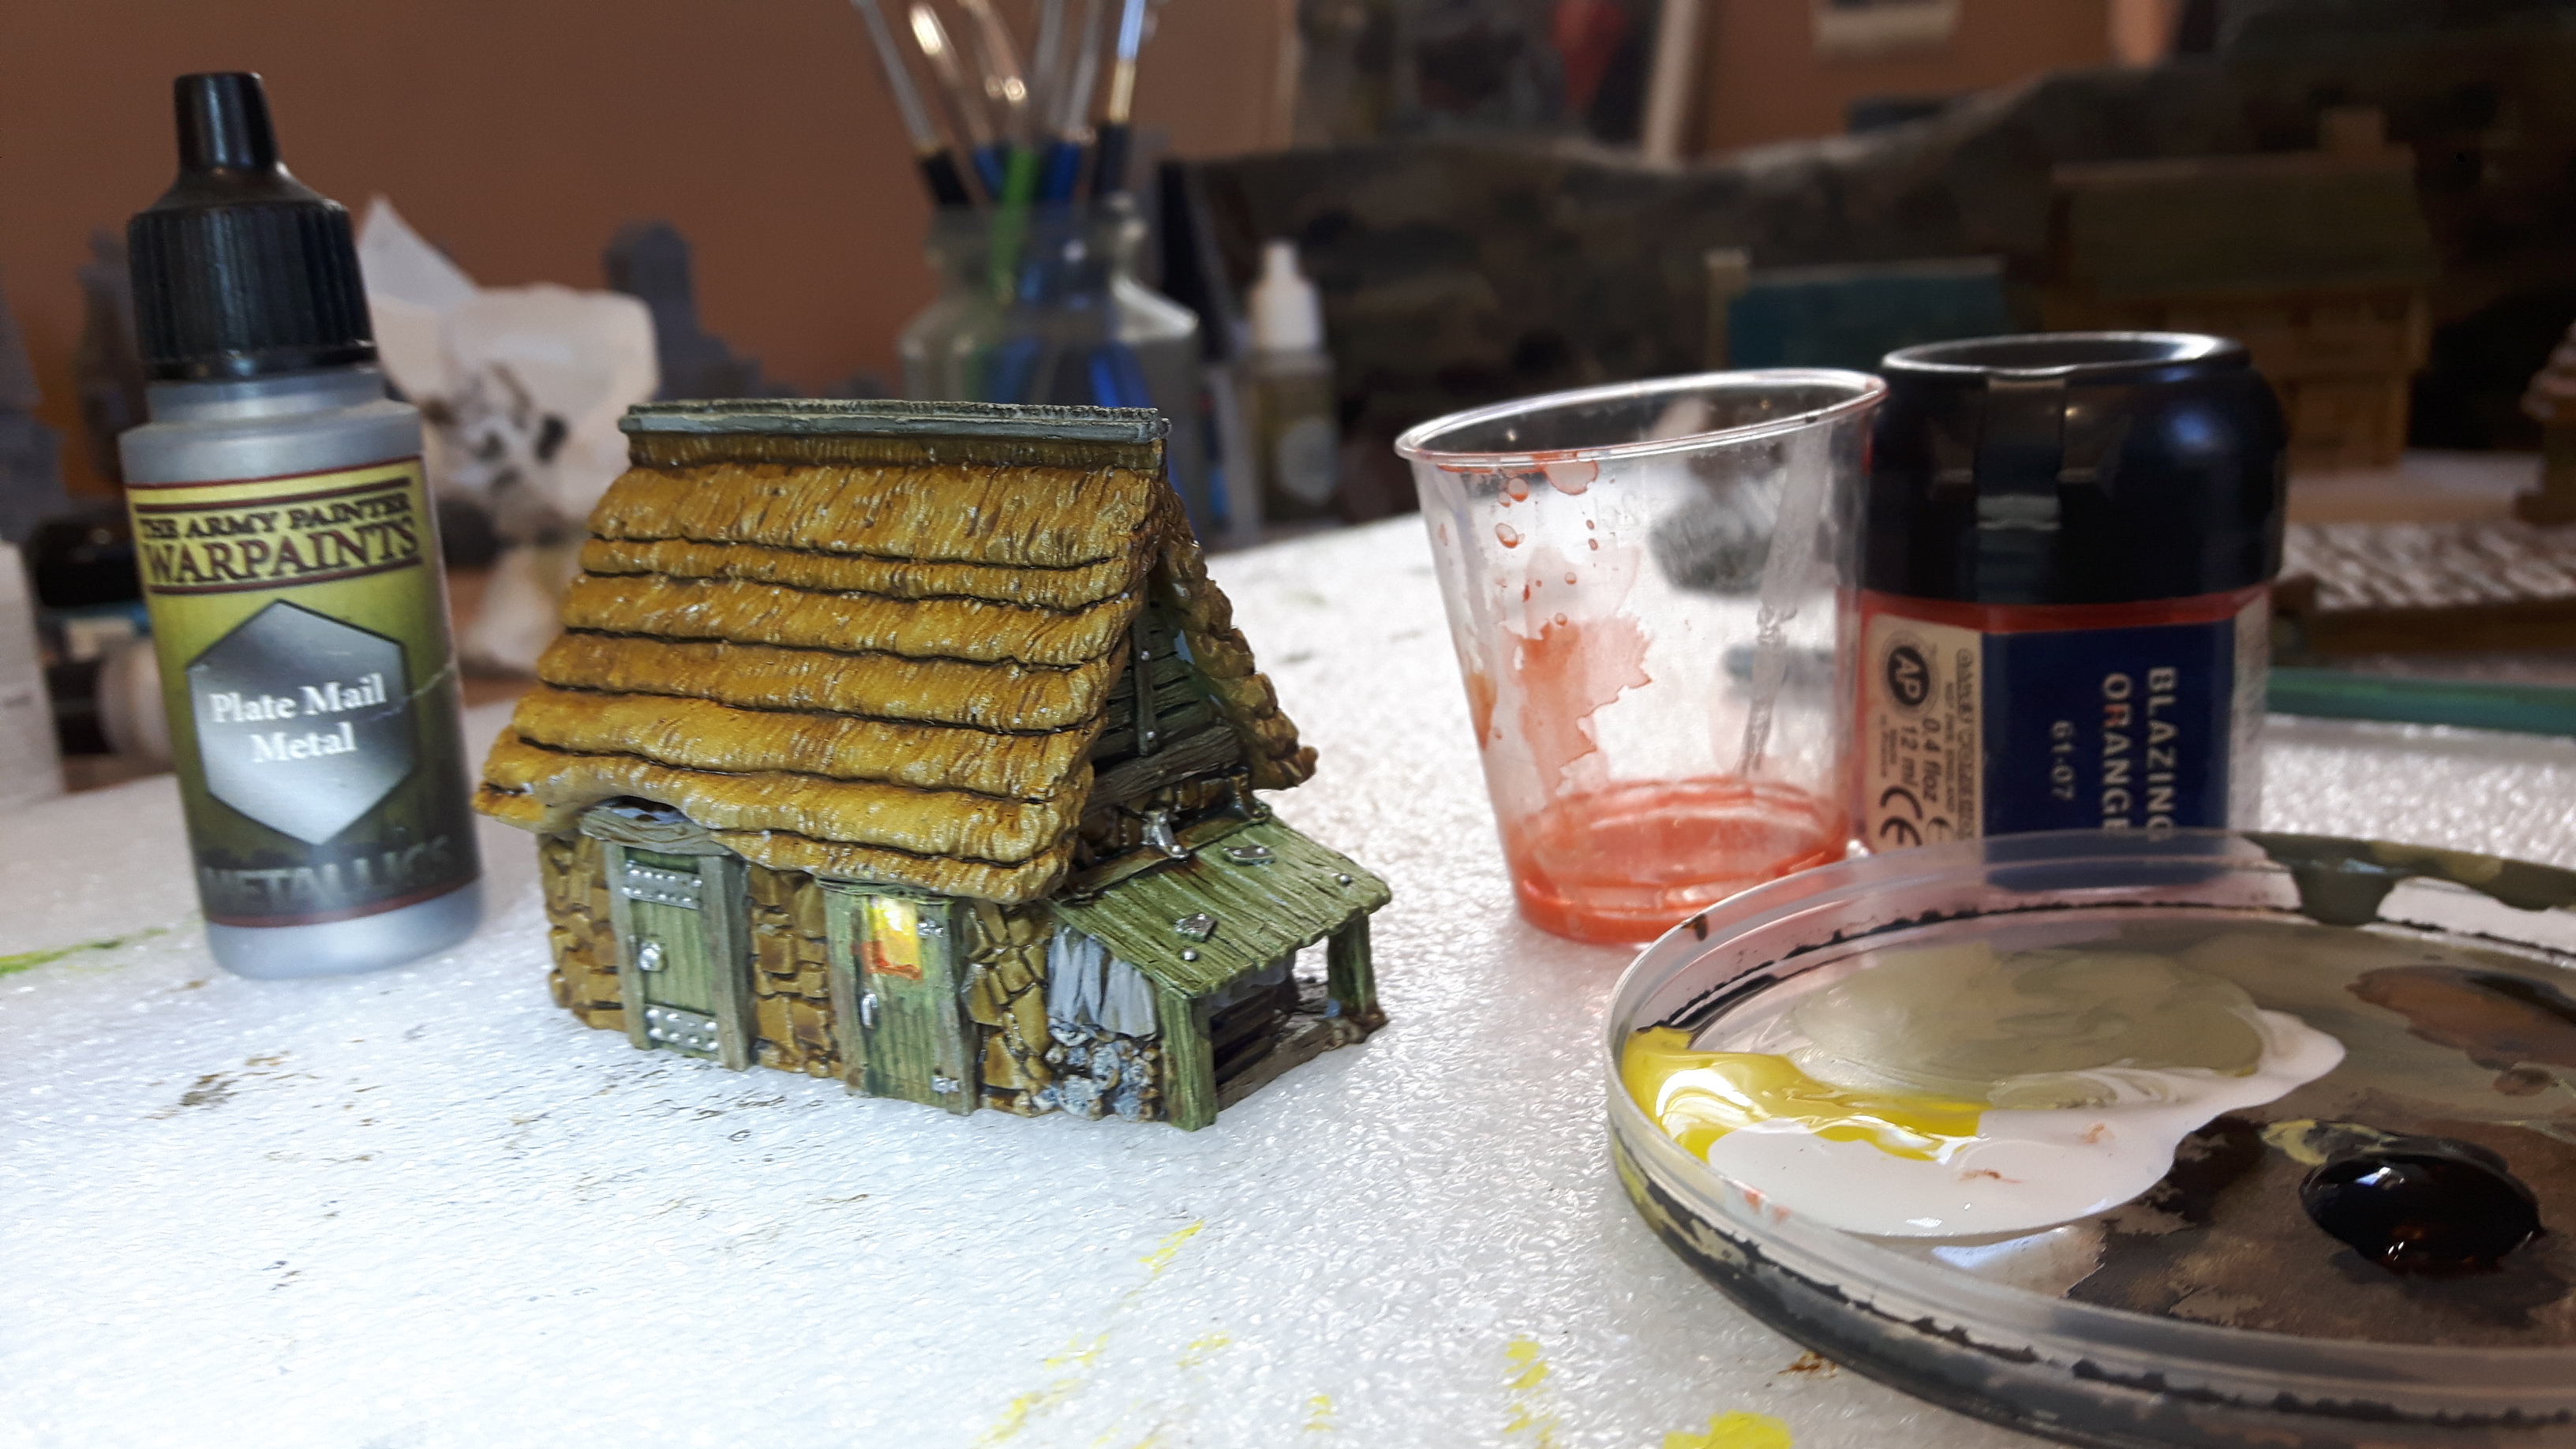
Then a light grey (arts acrylic mix of yellow, white and a hint of black) drybrush – several coats – on the roofs to highlight the shingles.
Windows were washed with diluted GW Blazing Orange and when dried a dab of art acrylic yellow was added to each one. The timberwork around the windows was touched up with the diluted Wyldwood.
The door and shutter hinges and knockers were done in a diluted art Acrylic Black and when dry gived a very light hint of Army Painter Plate Mail Metal.
Chimneys were washed with a very diluted Nuln Oil / Black Ink wash and the tops painted with black art acrylic.
And that’s it for now…
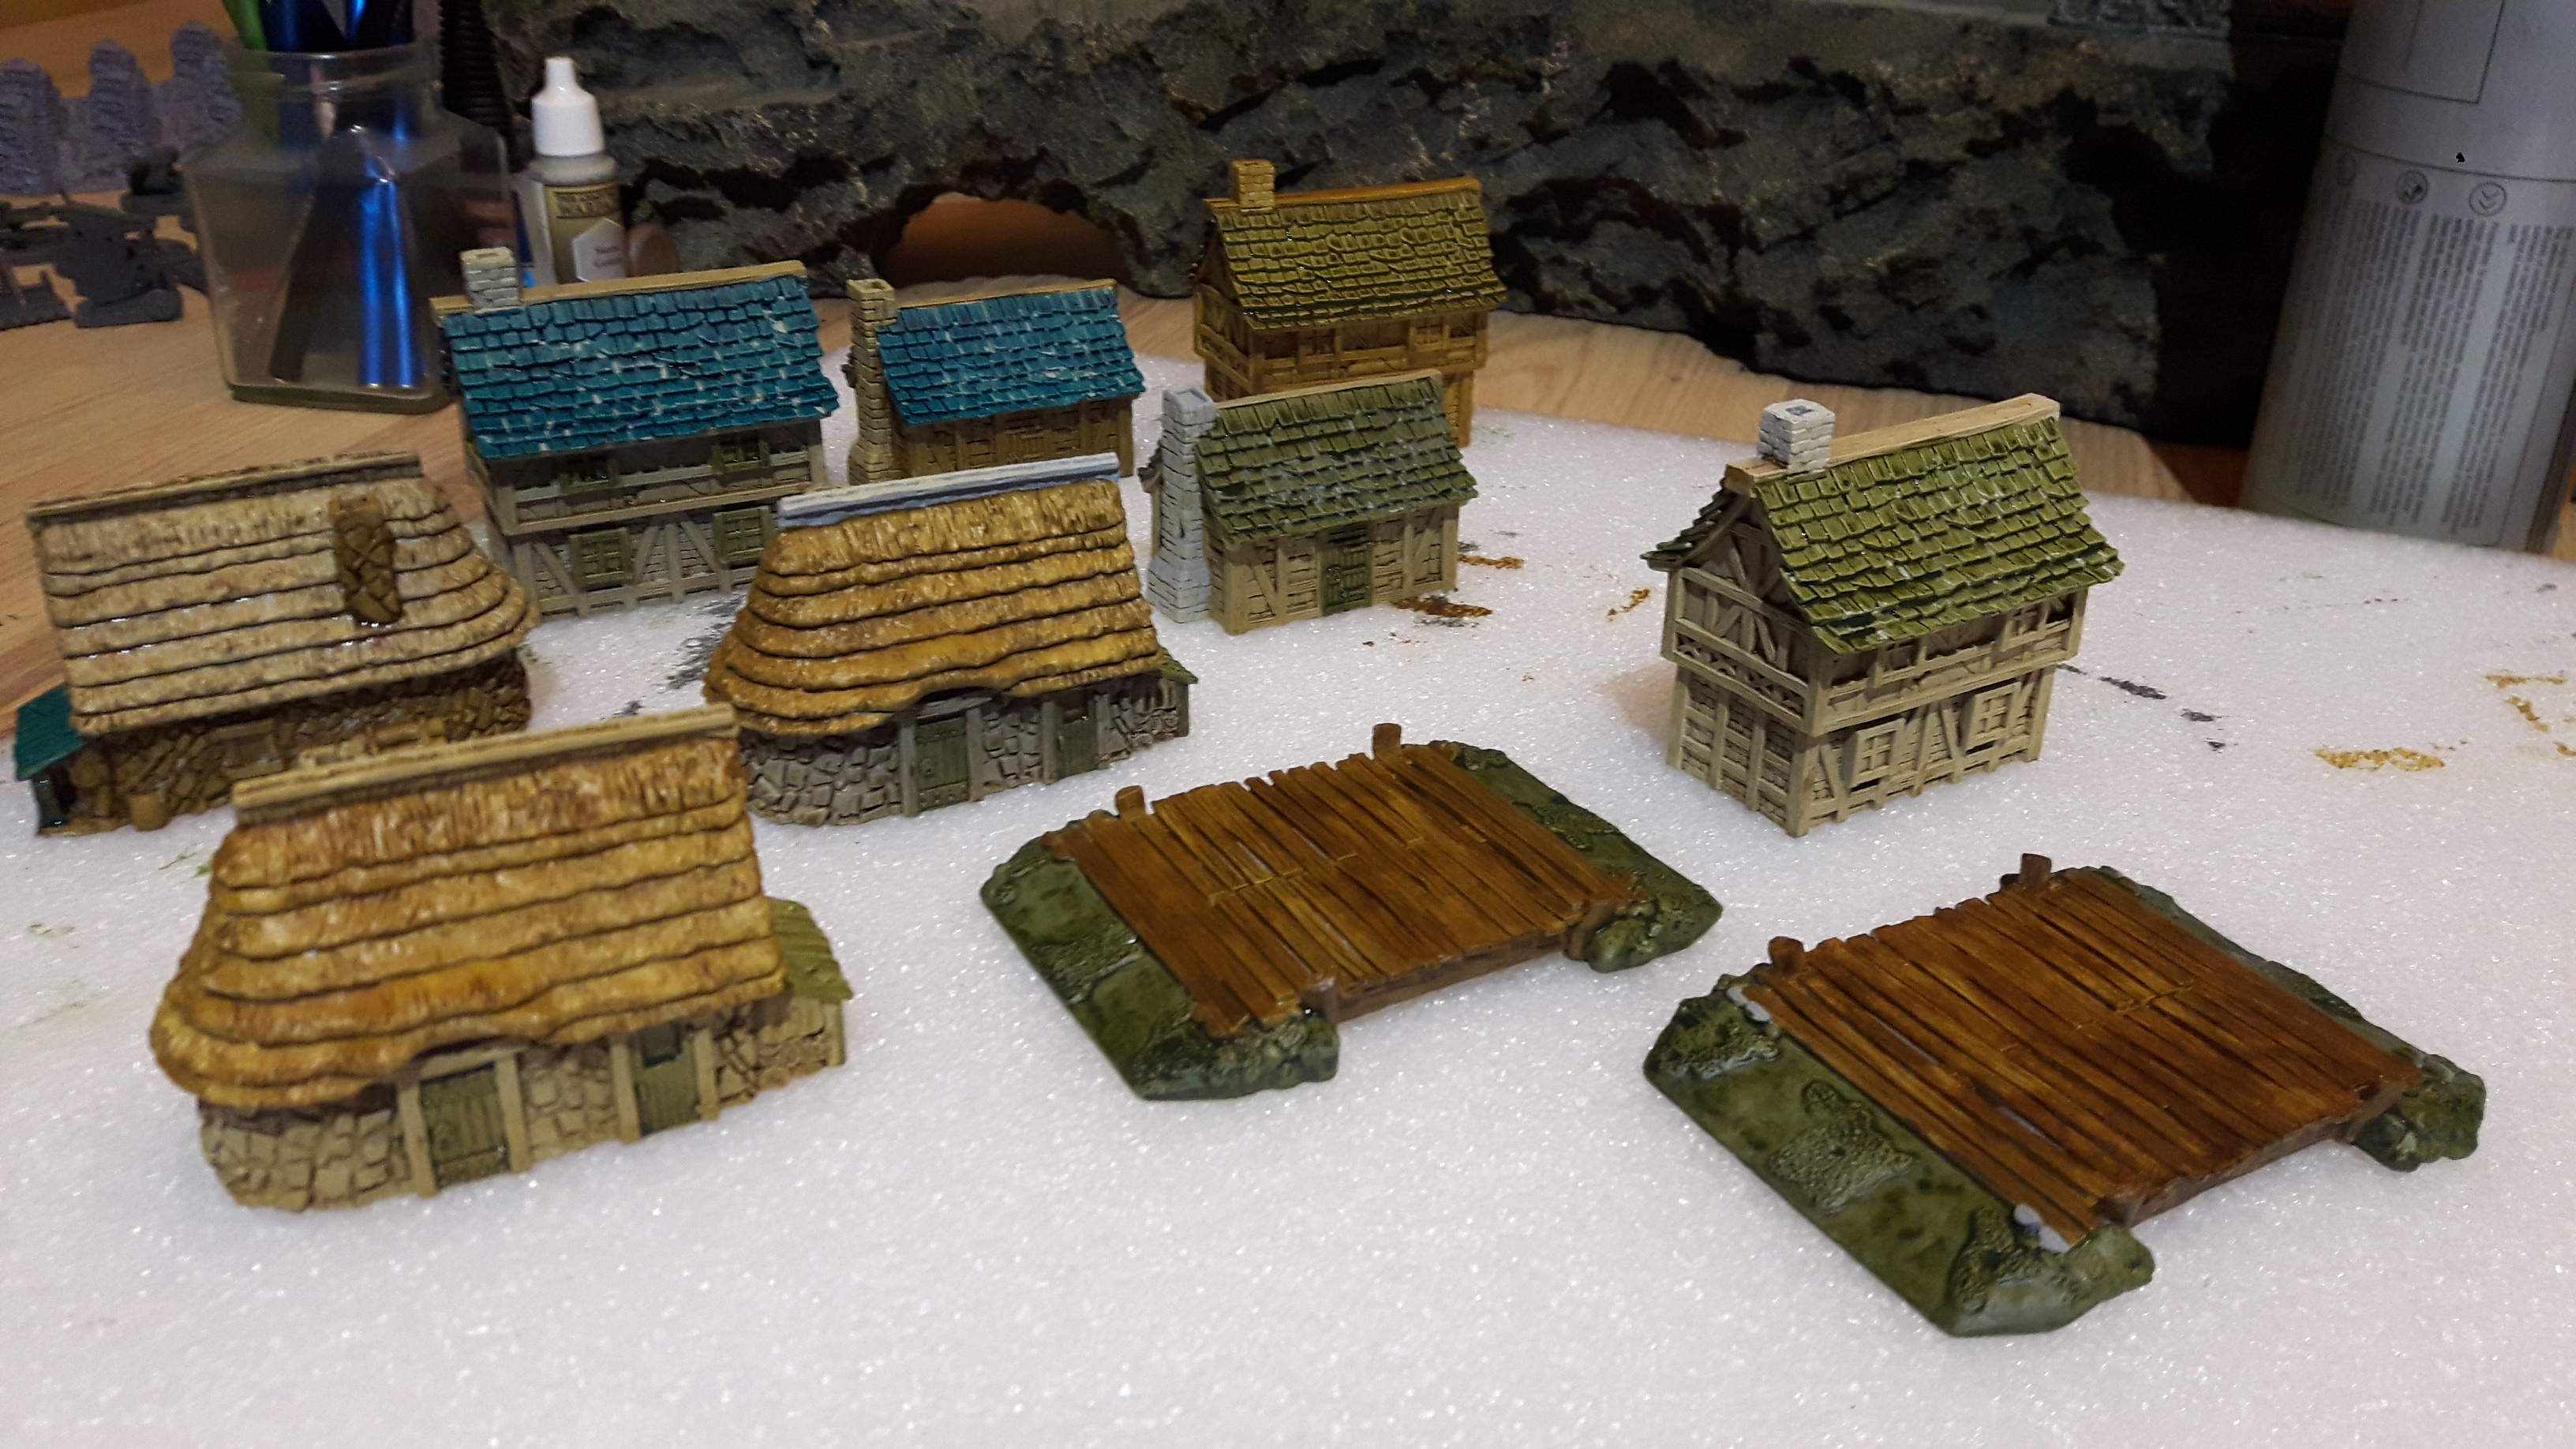
Houses Finished
Managed to finish the last three houses this evening.
I used the same paints, washes and mixes that I had used to finish off the other this morning.
So here are a few pictures…
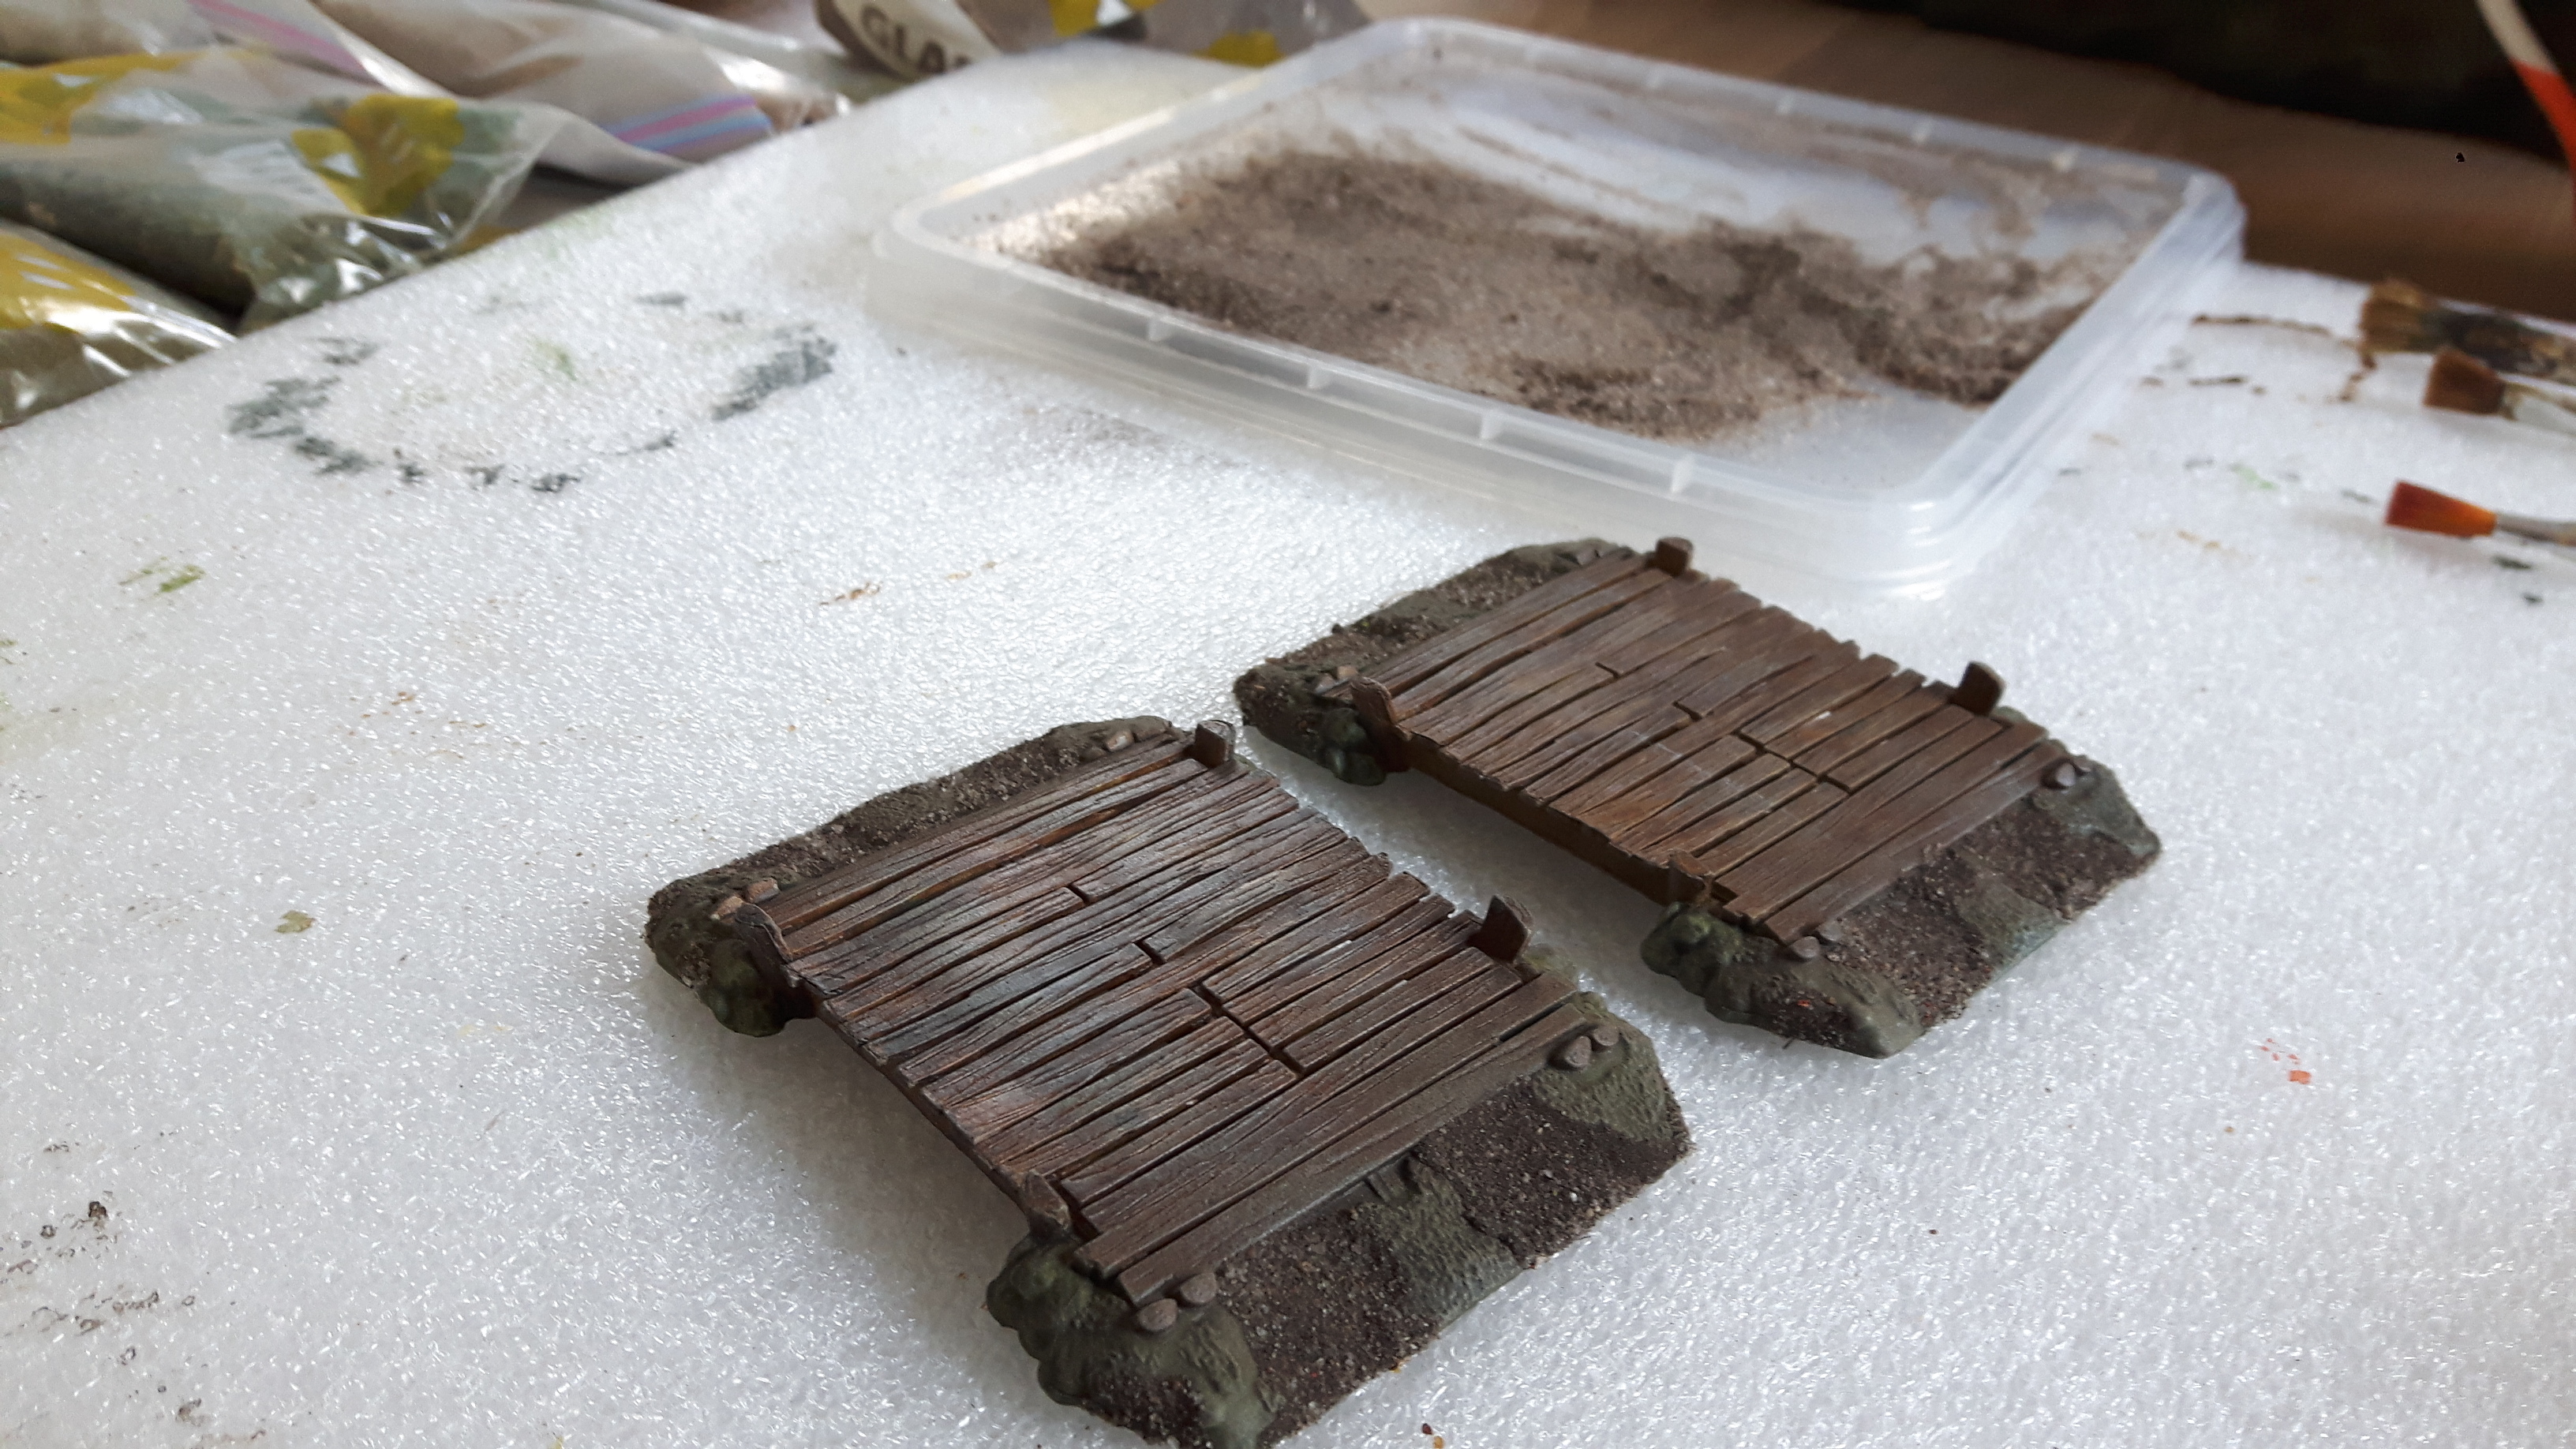
Just the bridges to do now…
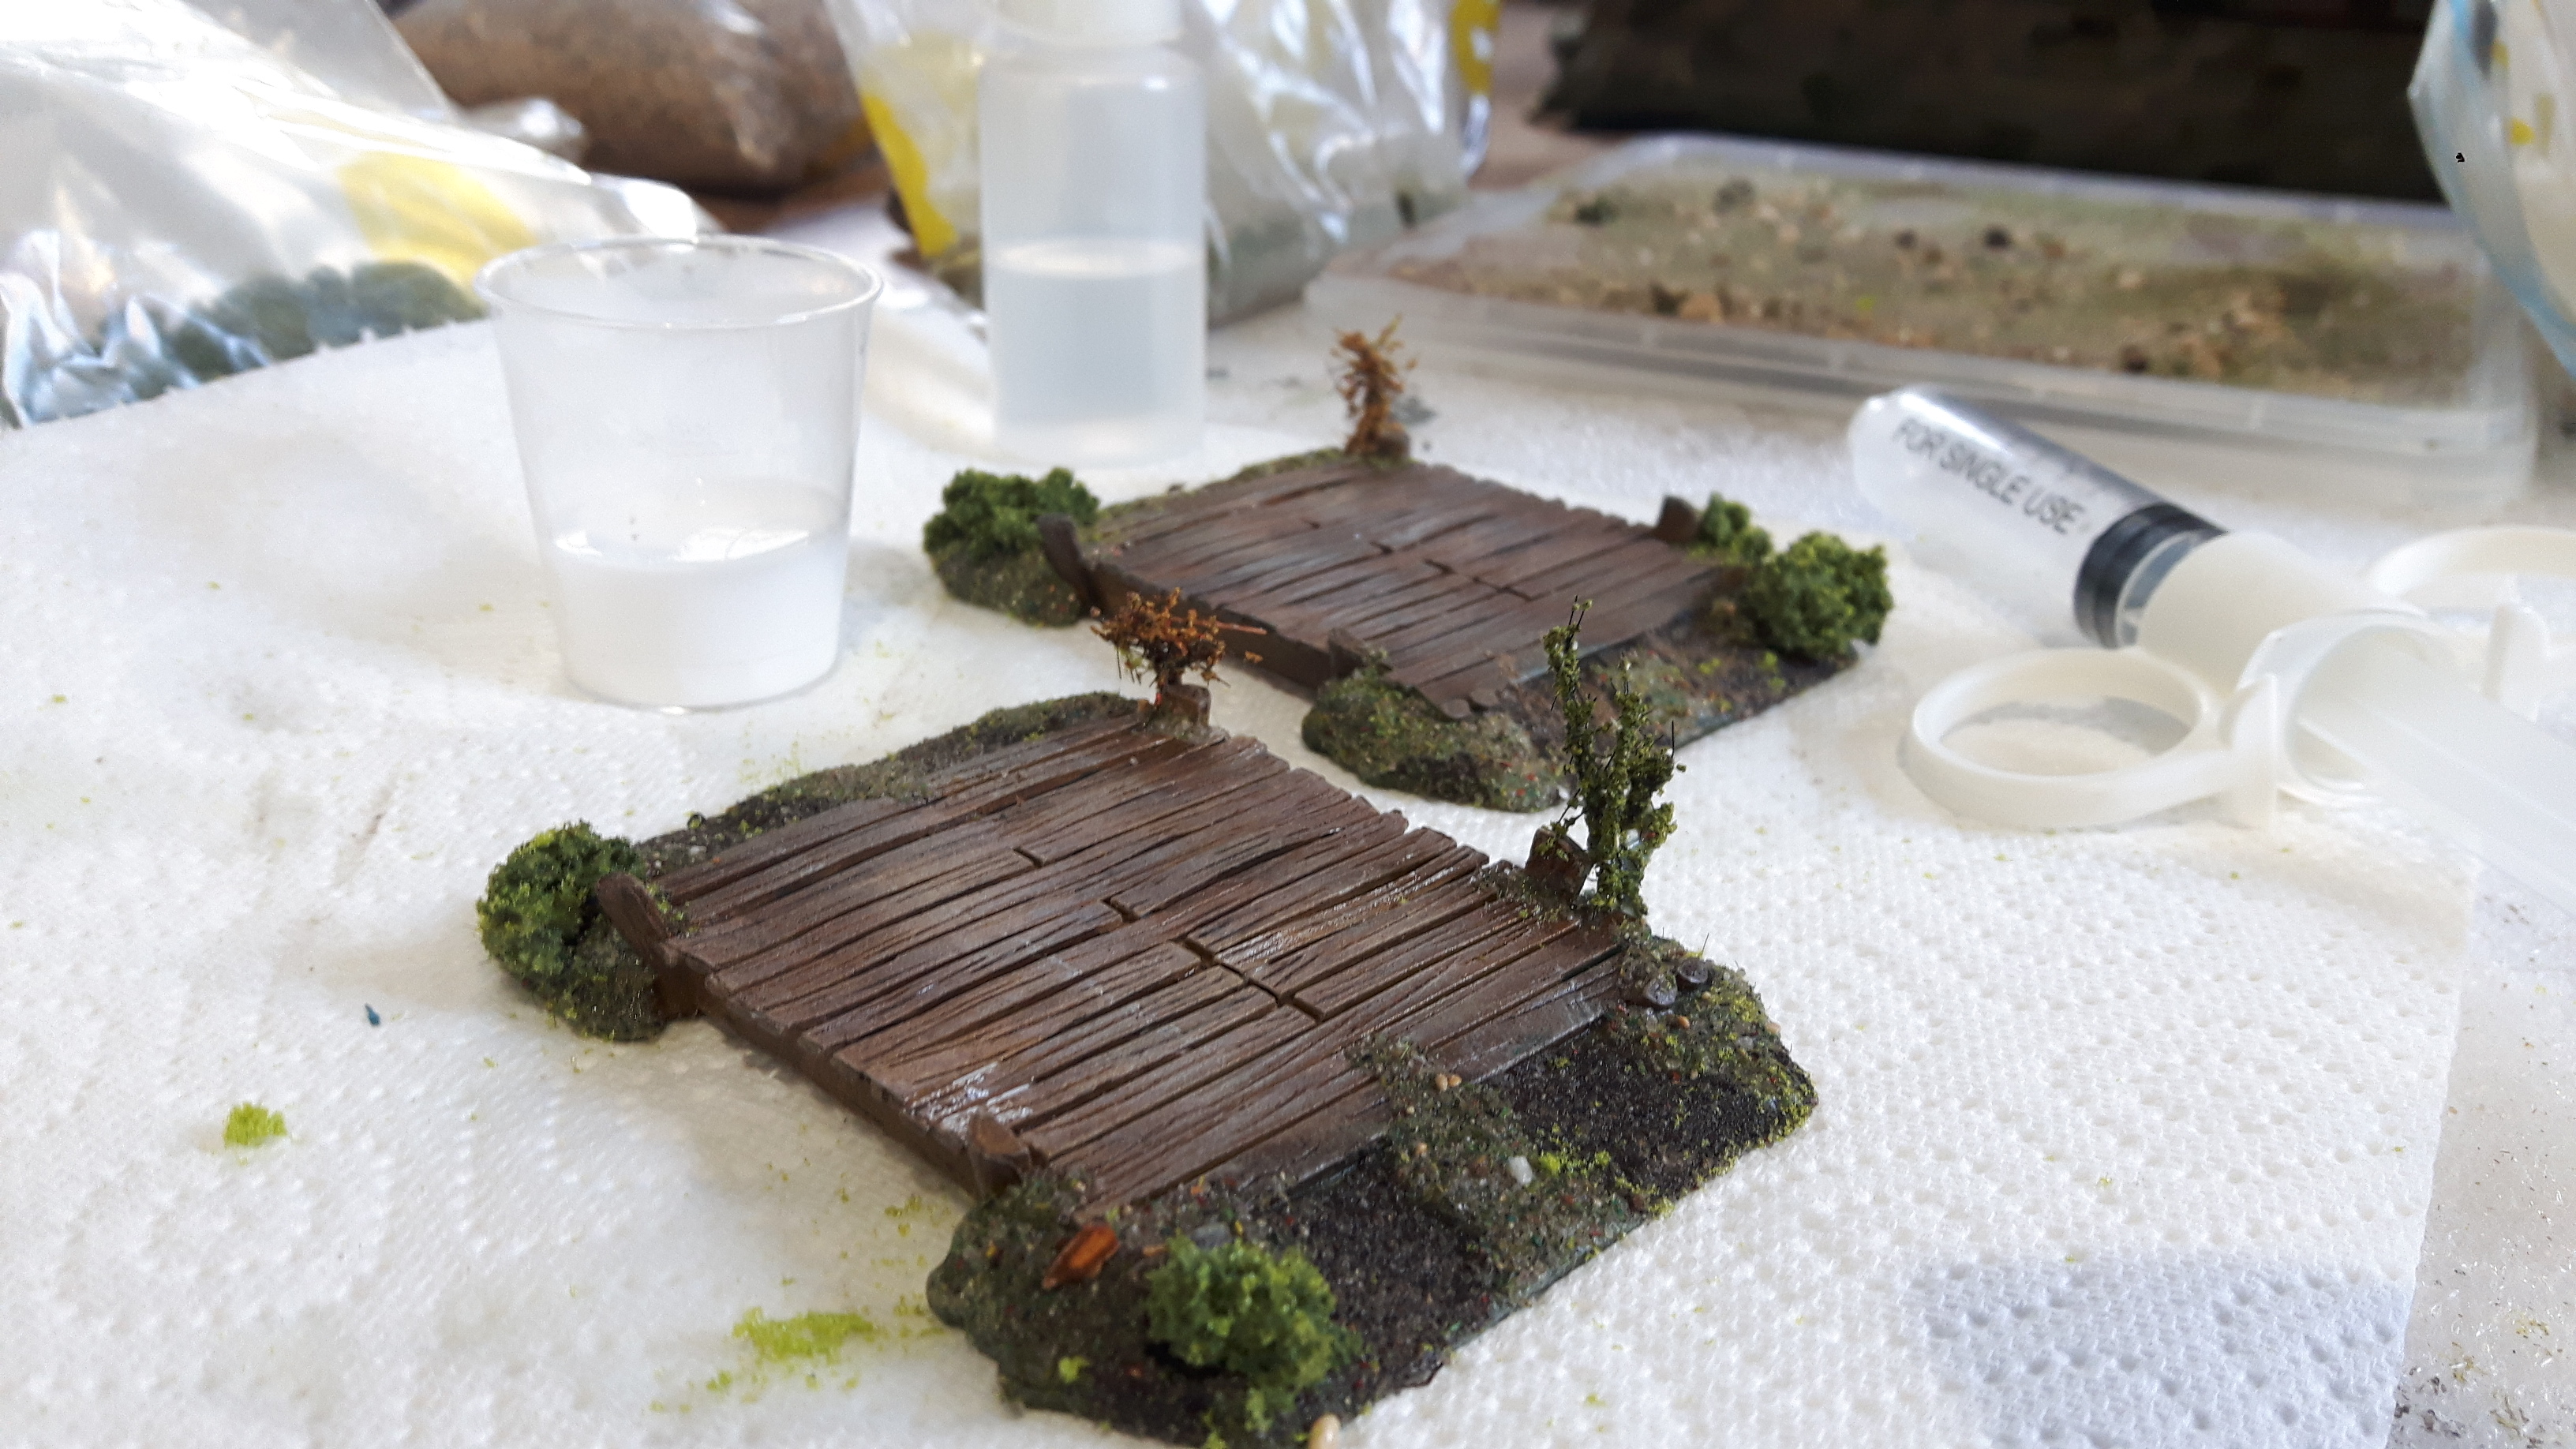
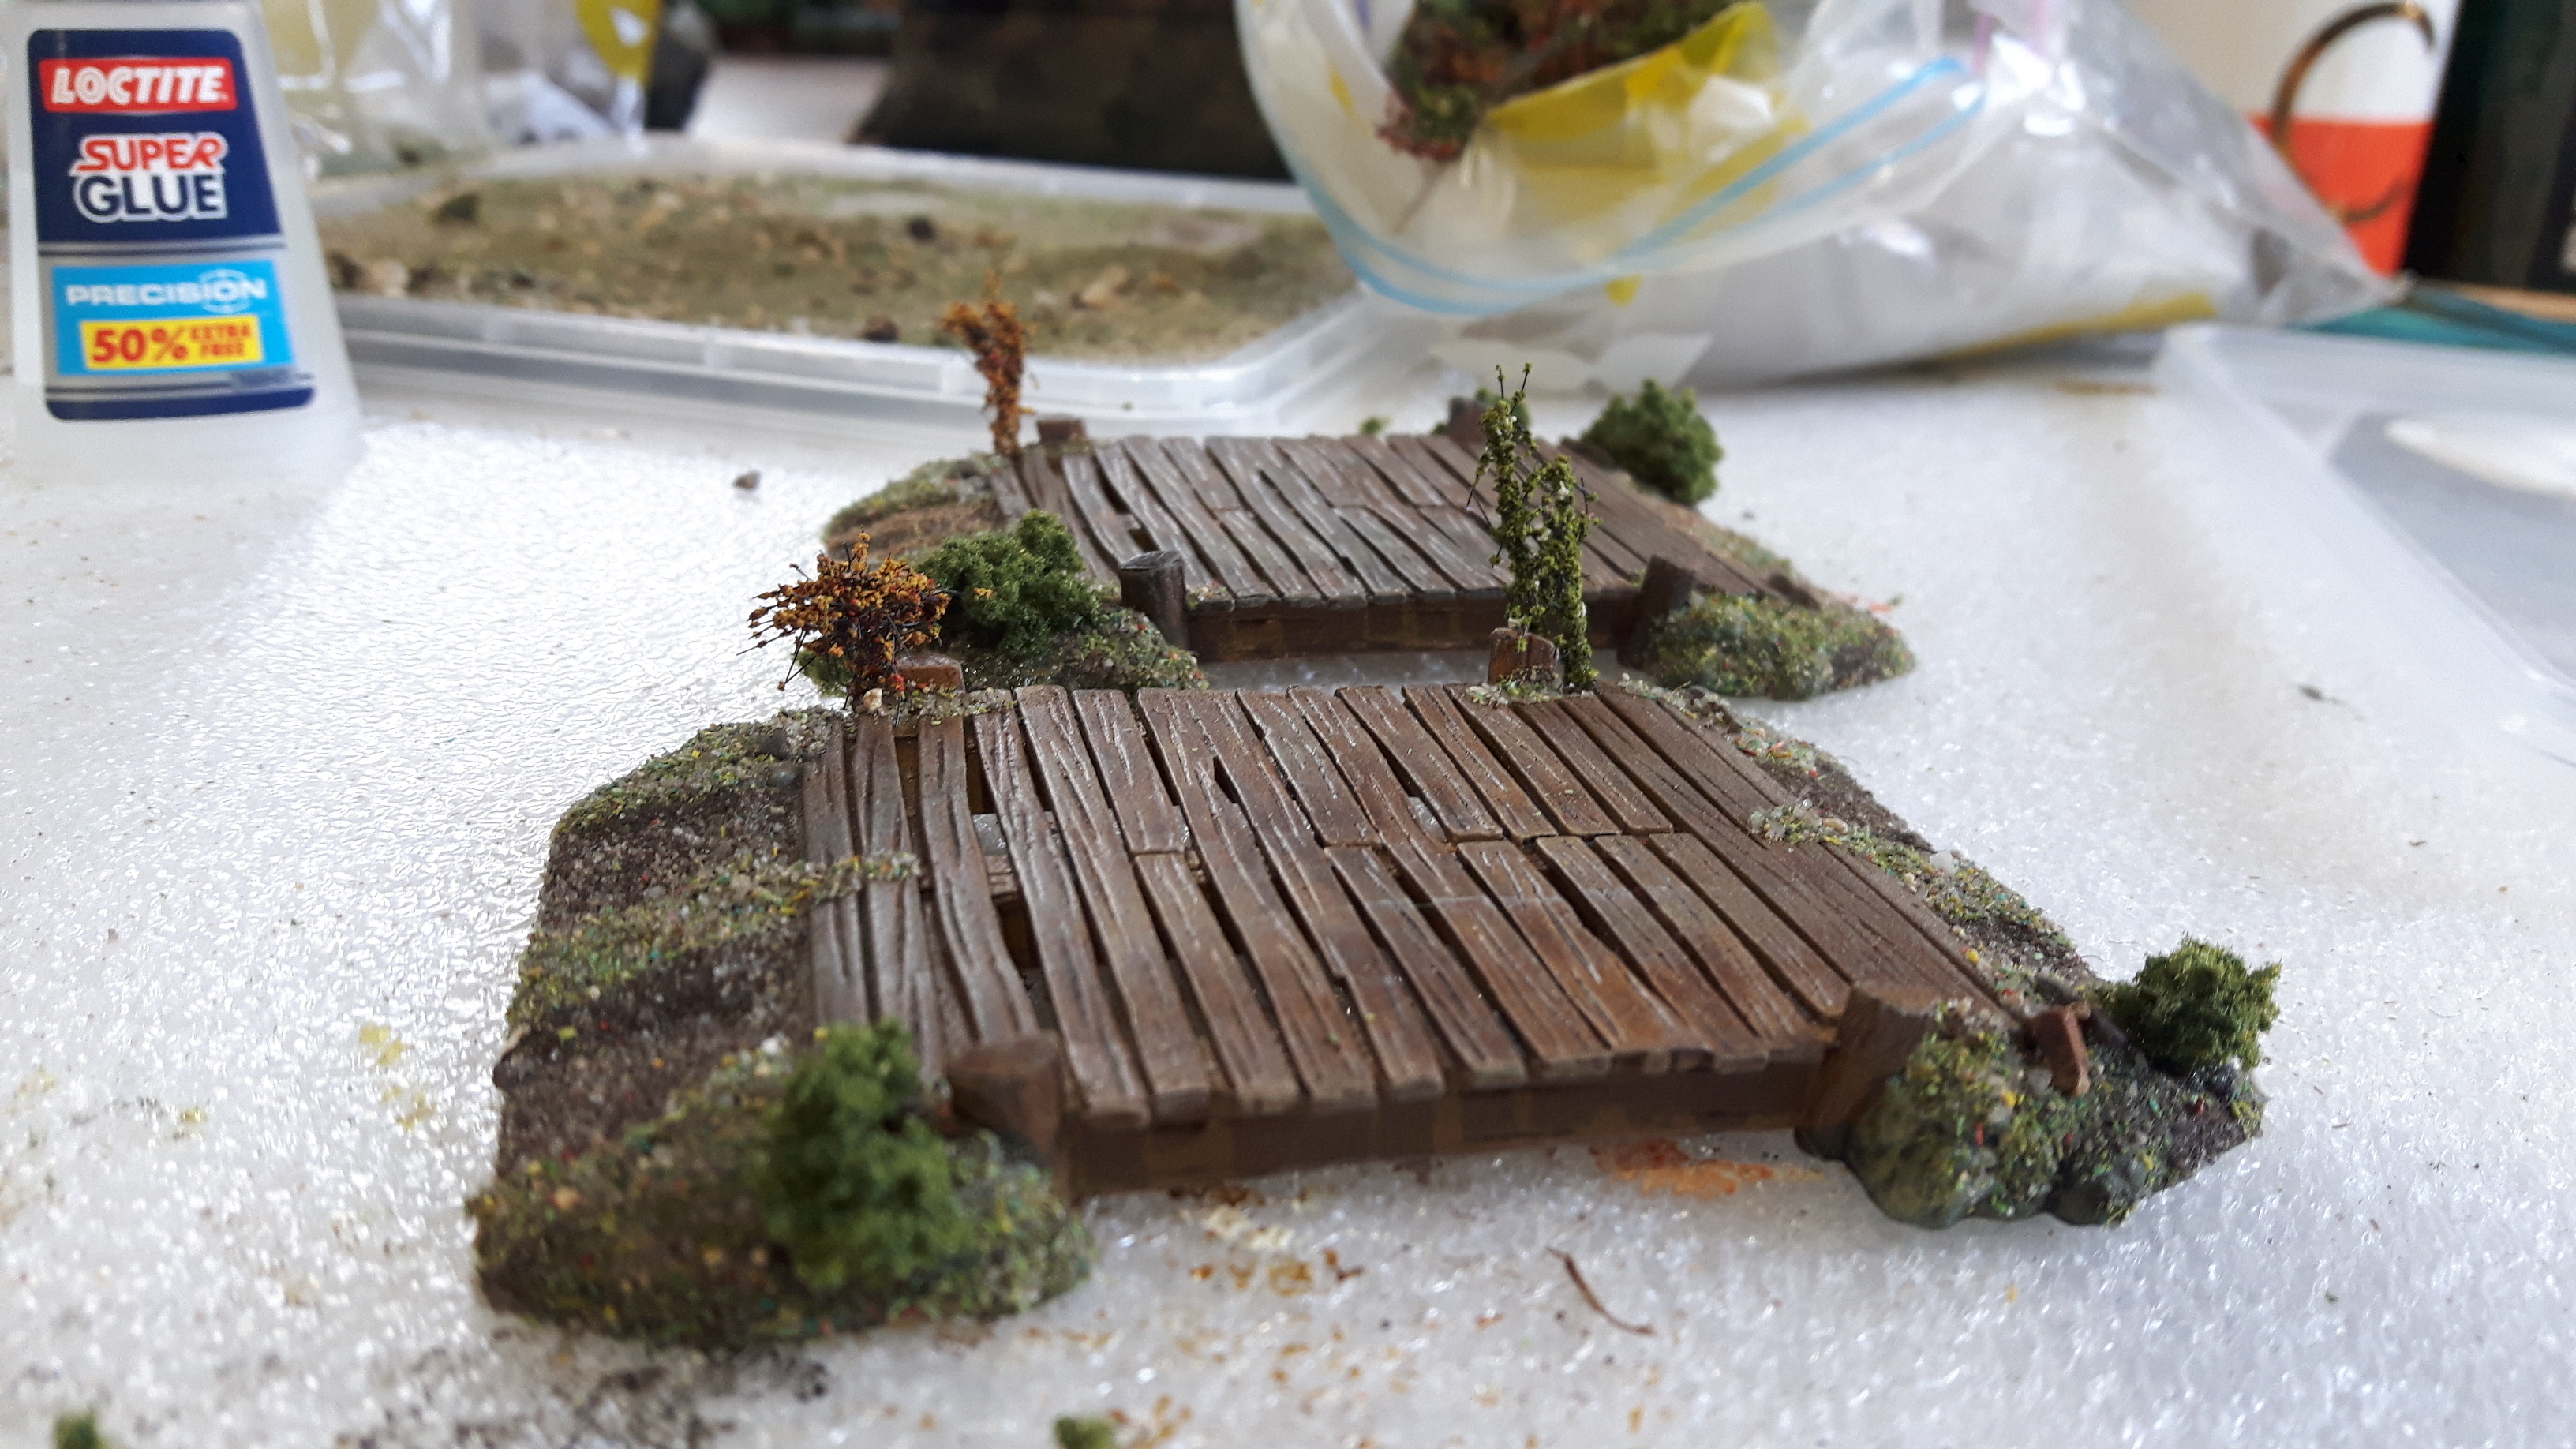
And the Bridges...
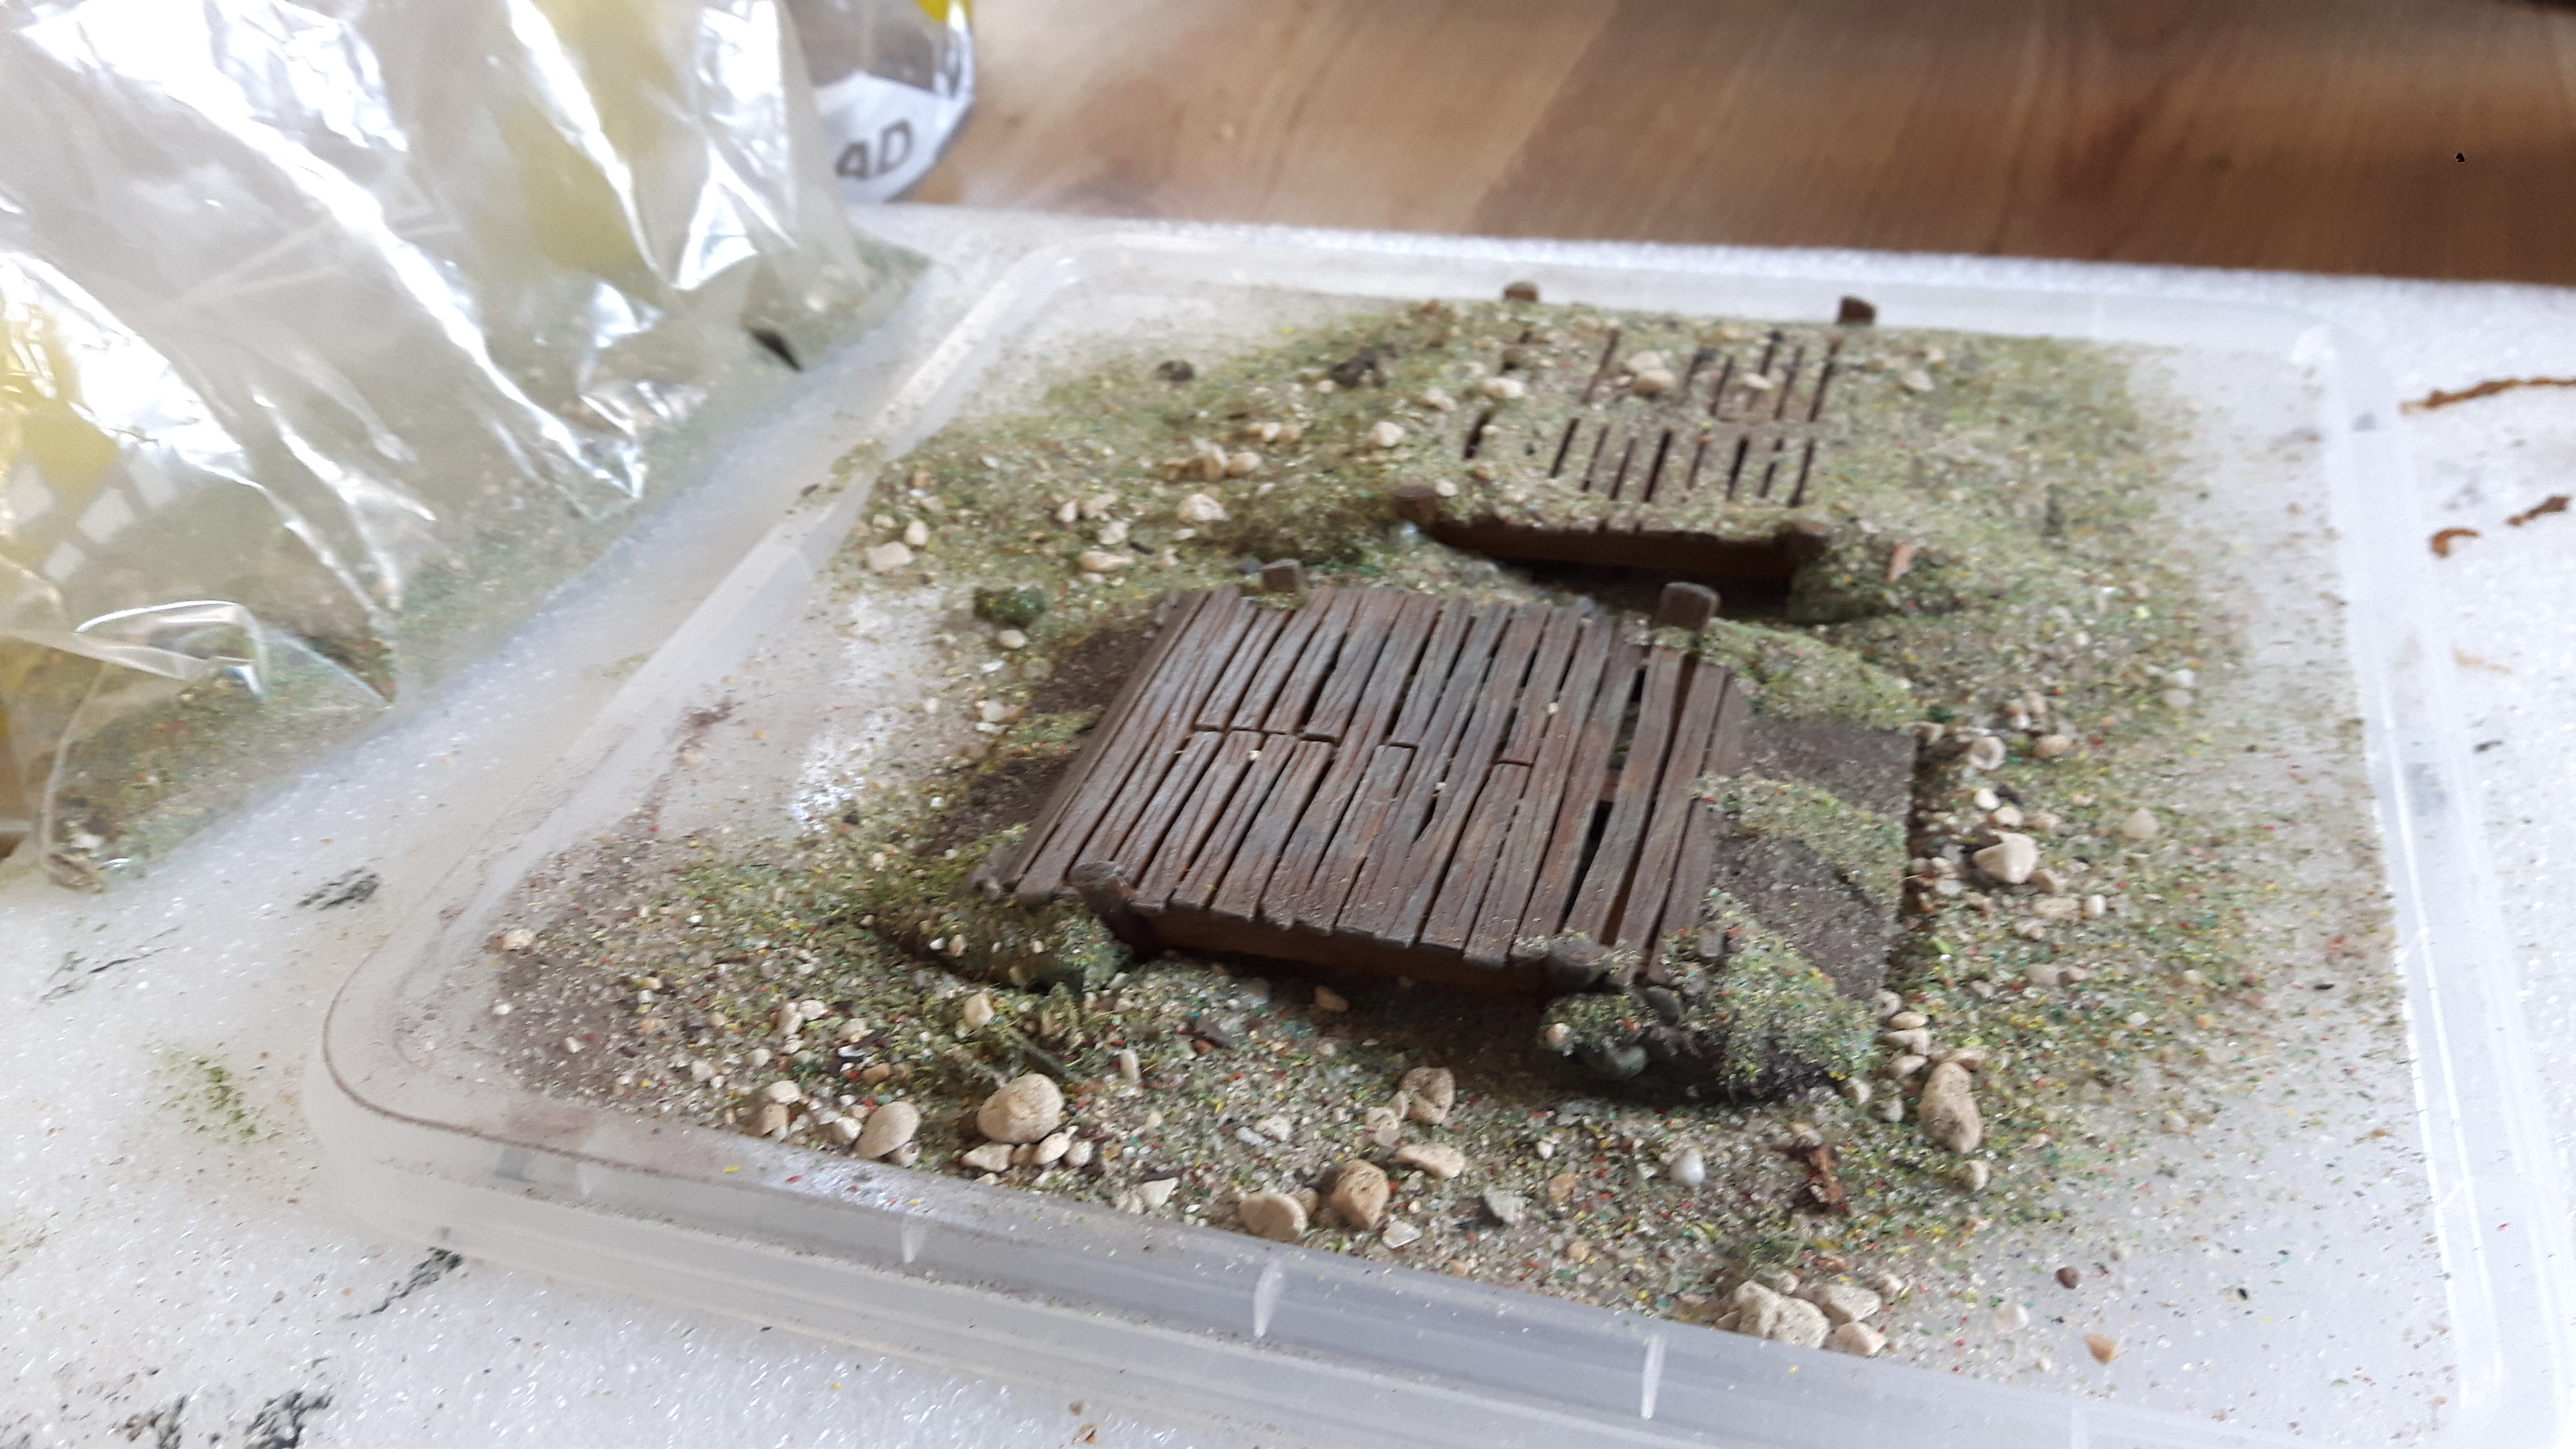
This is the stage the bridges were at this morning:
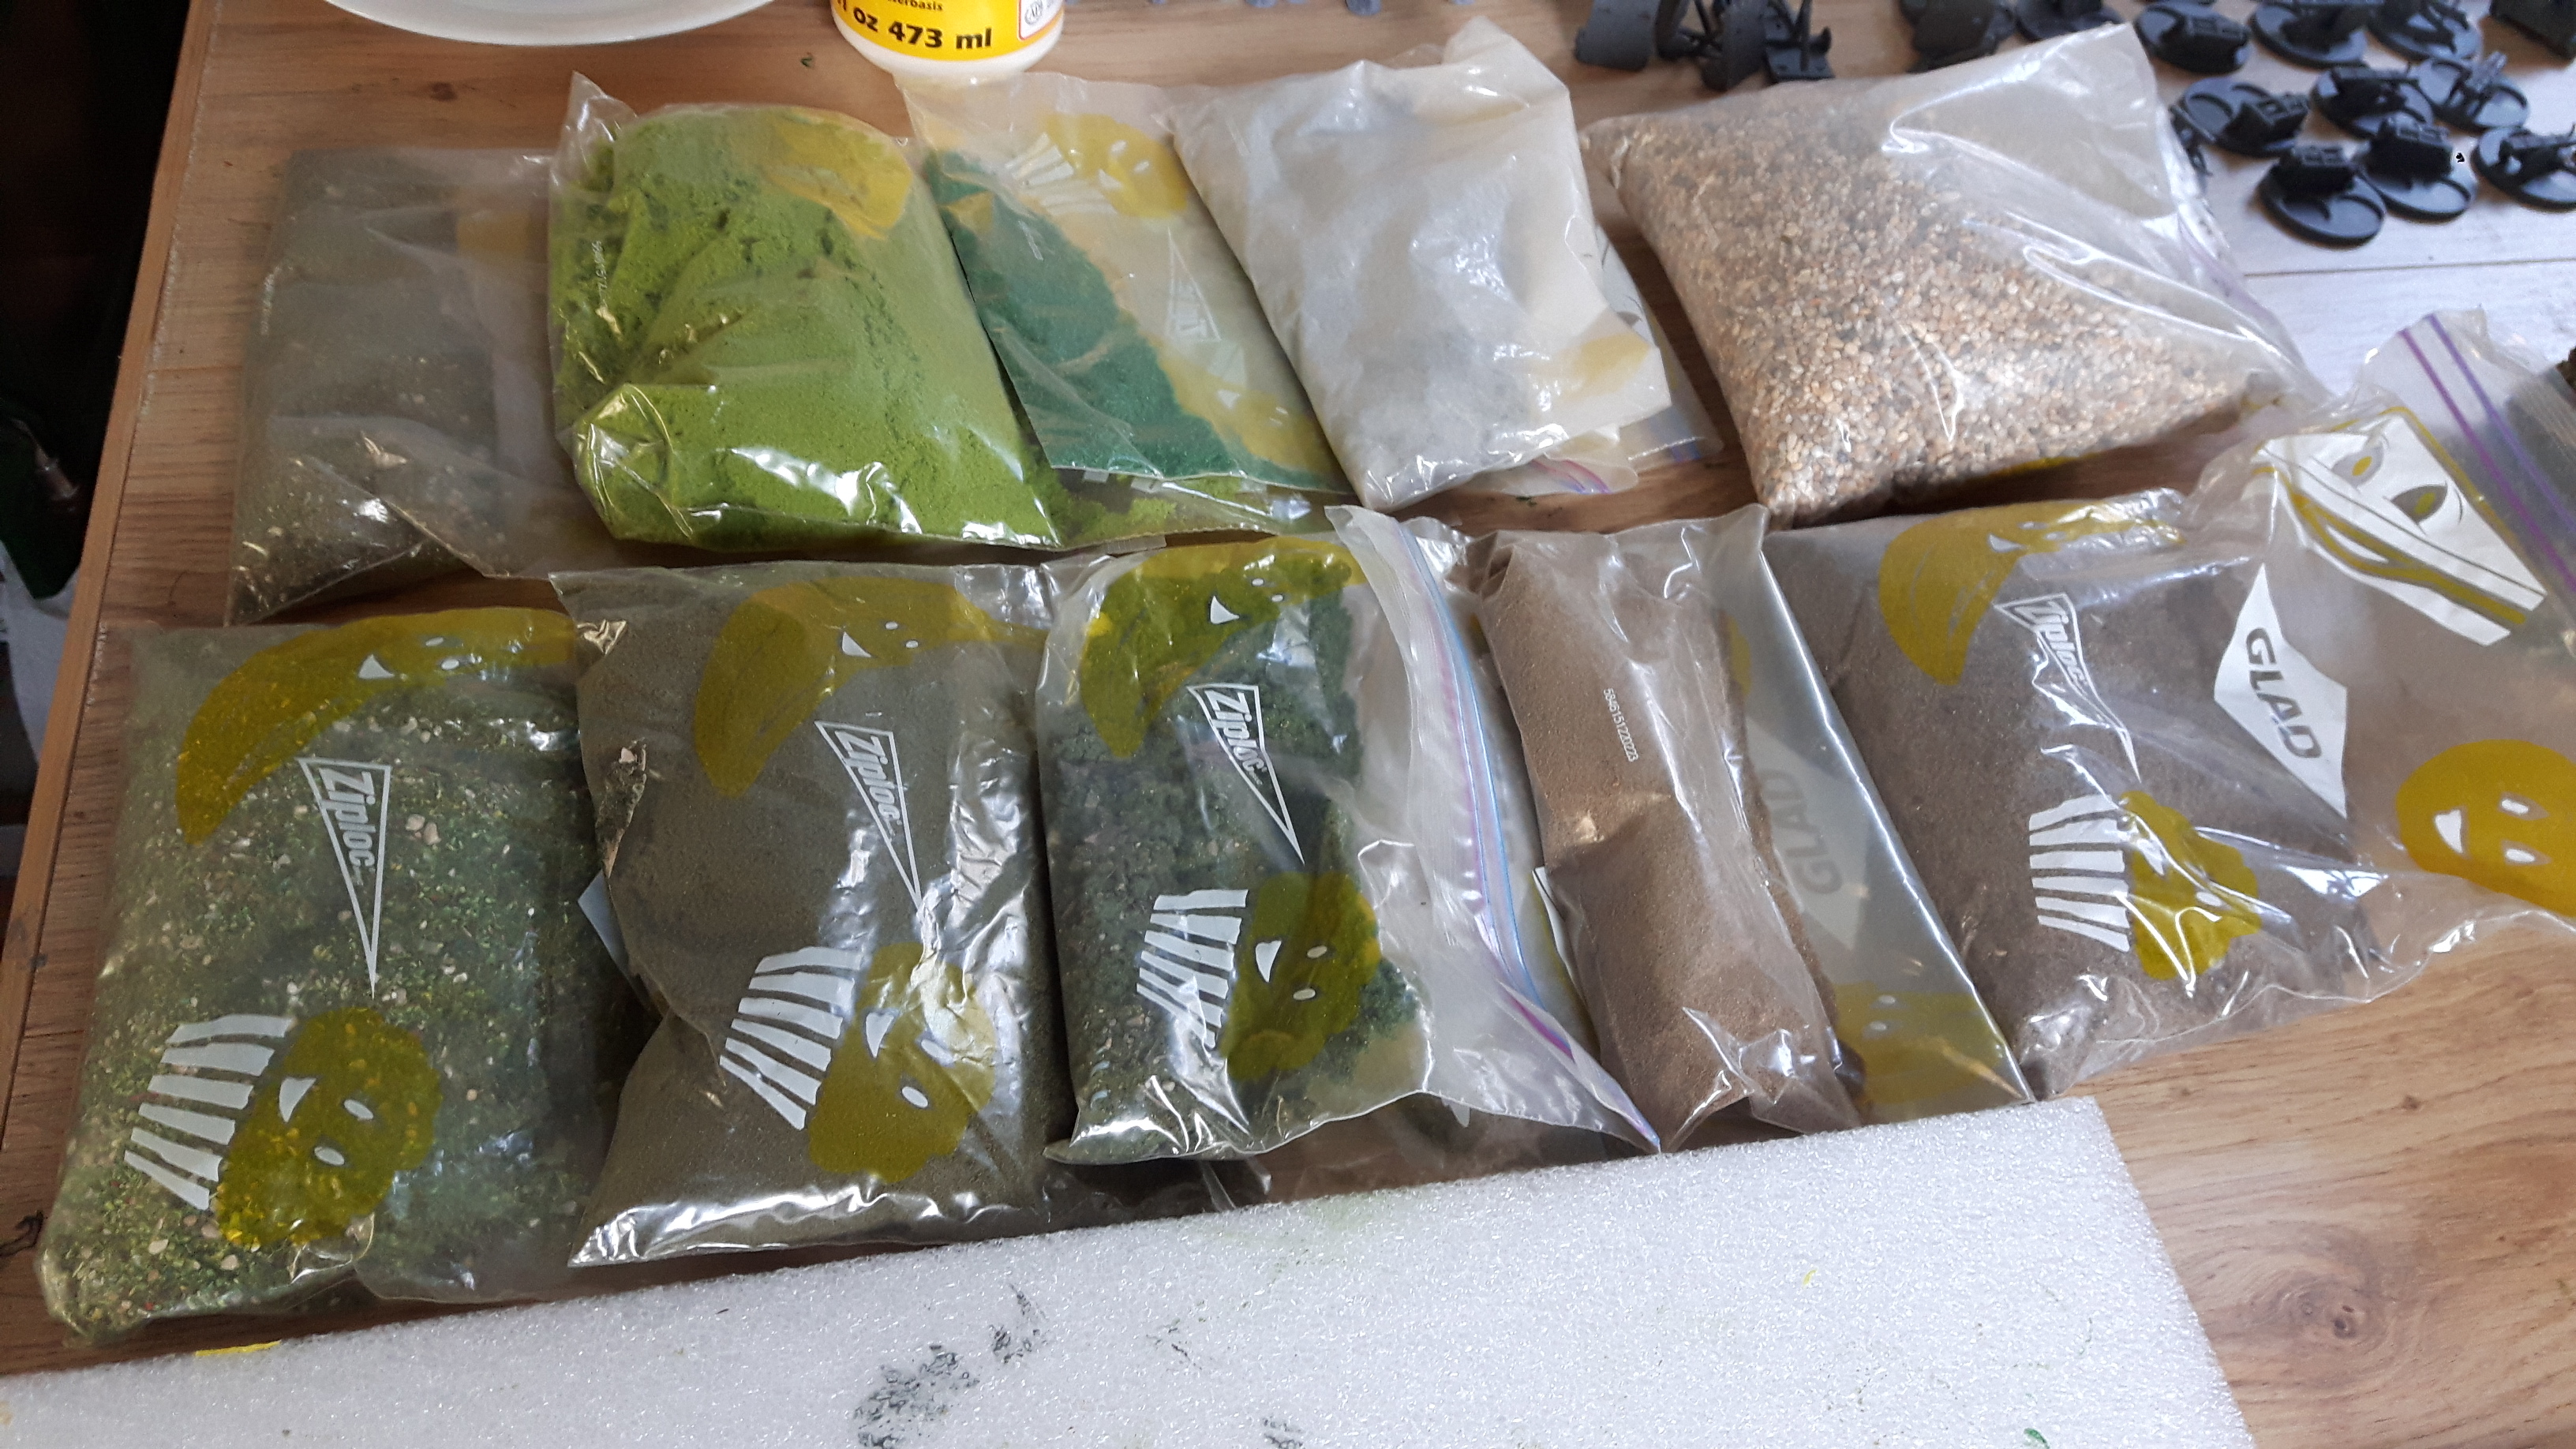
A quick clean up and re-organisation of the painting desk and then gathered up some basing materials and foliage.
I wanted to give a bit more ‘life’ to the bridges instead of just painting the plastic.
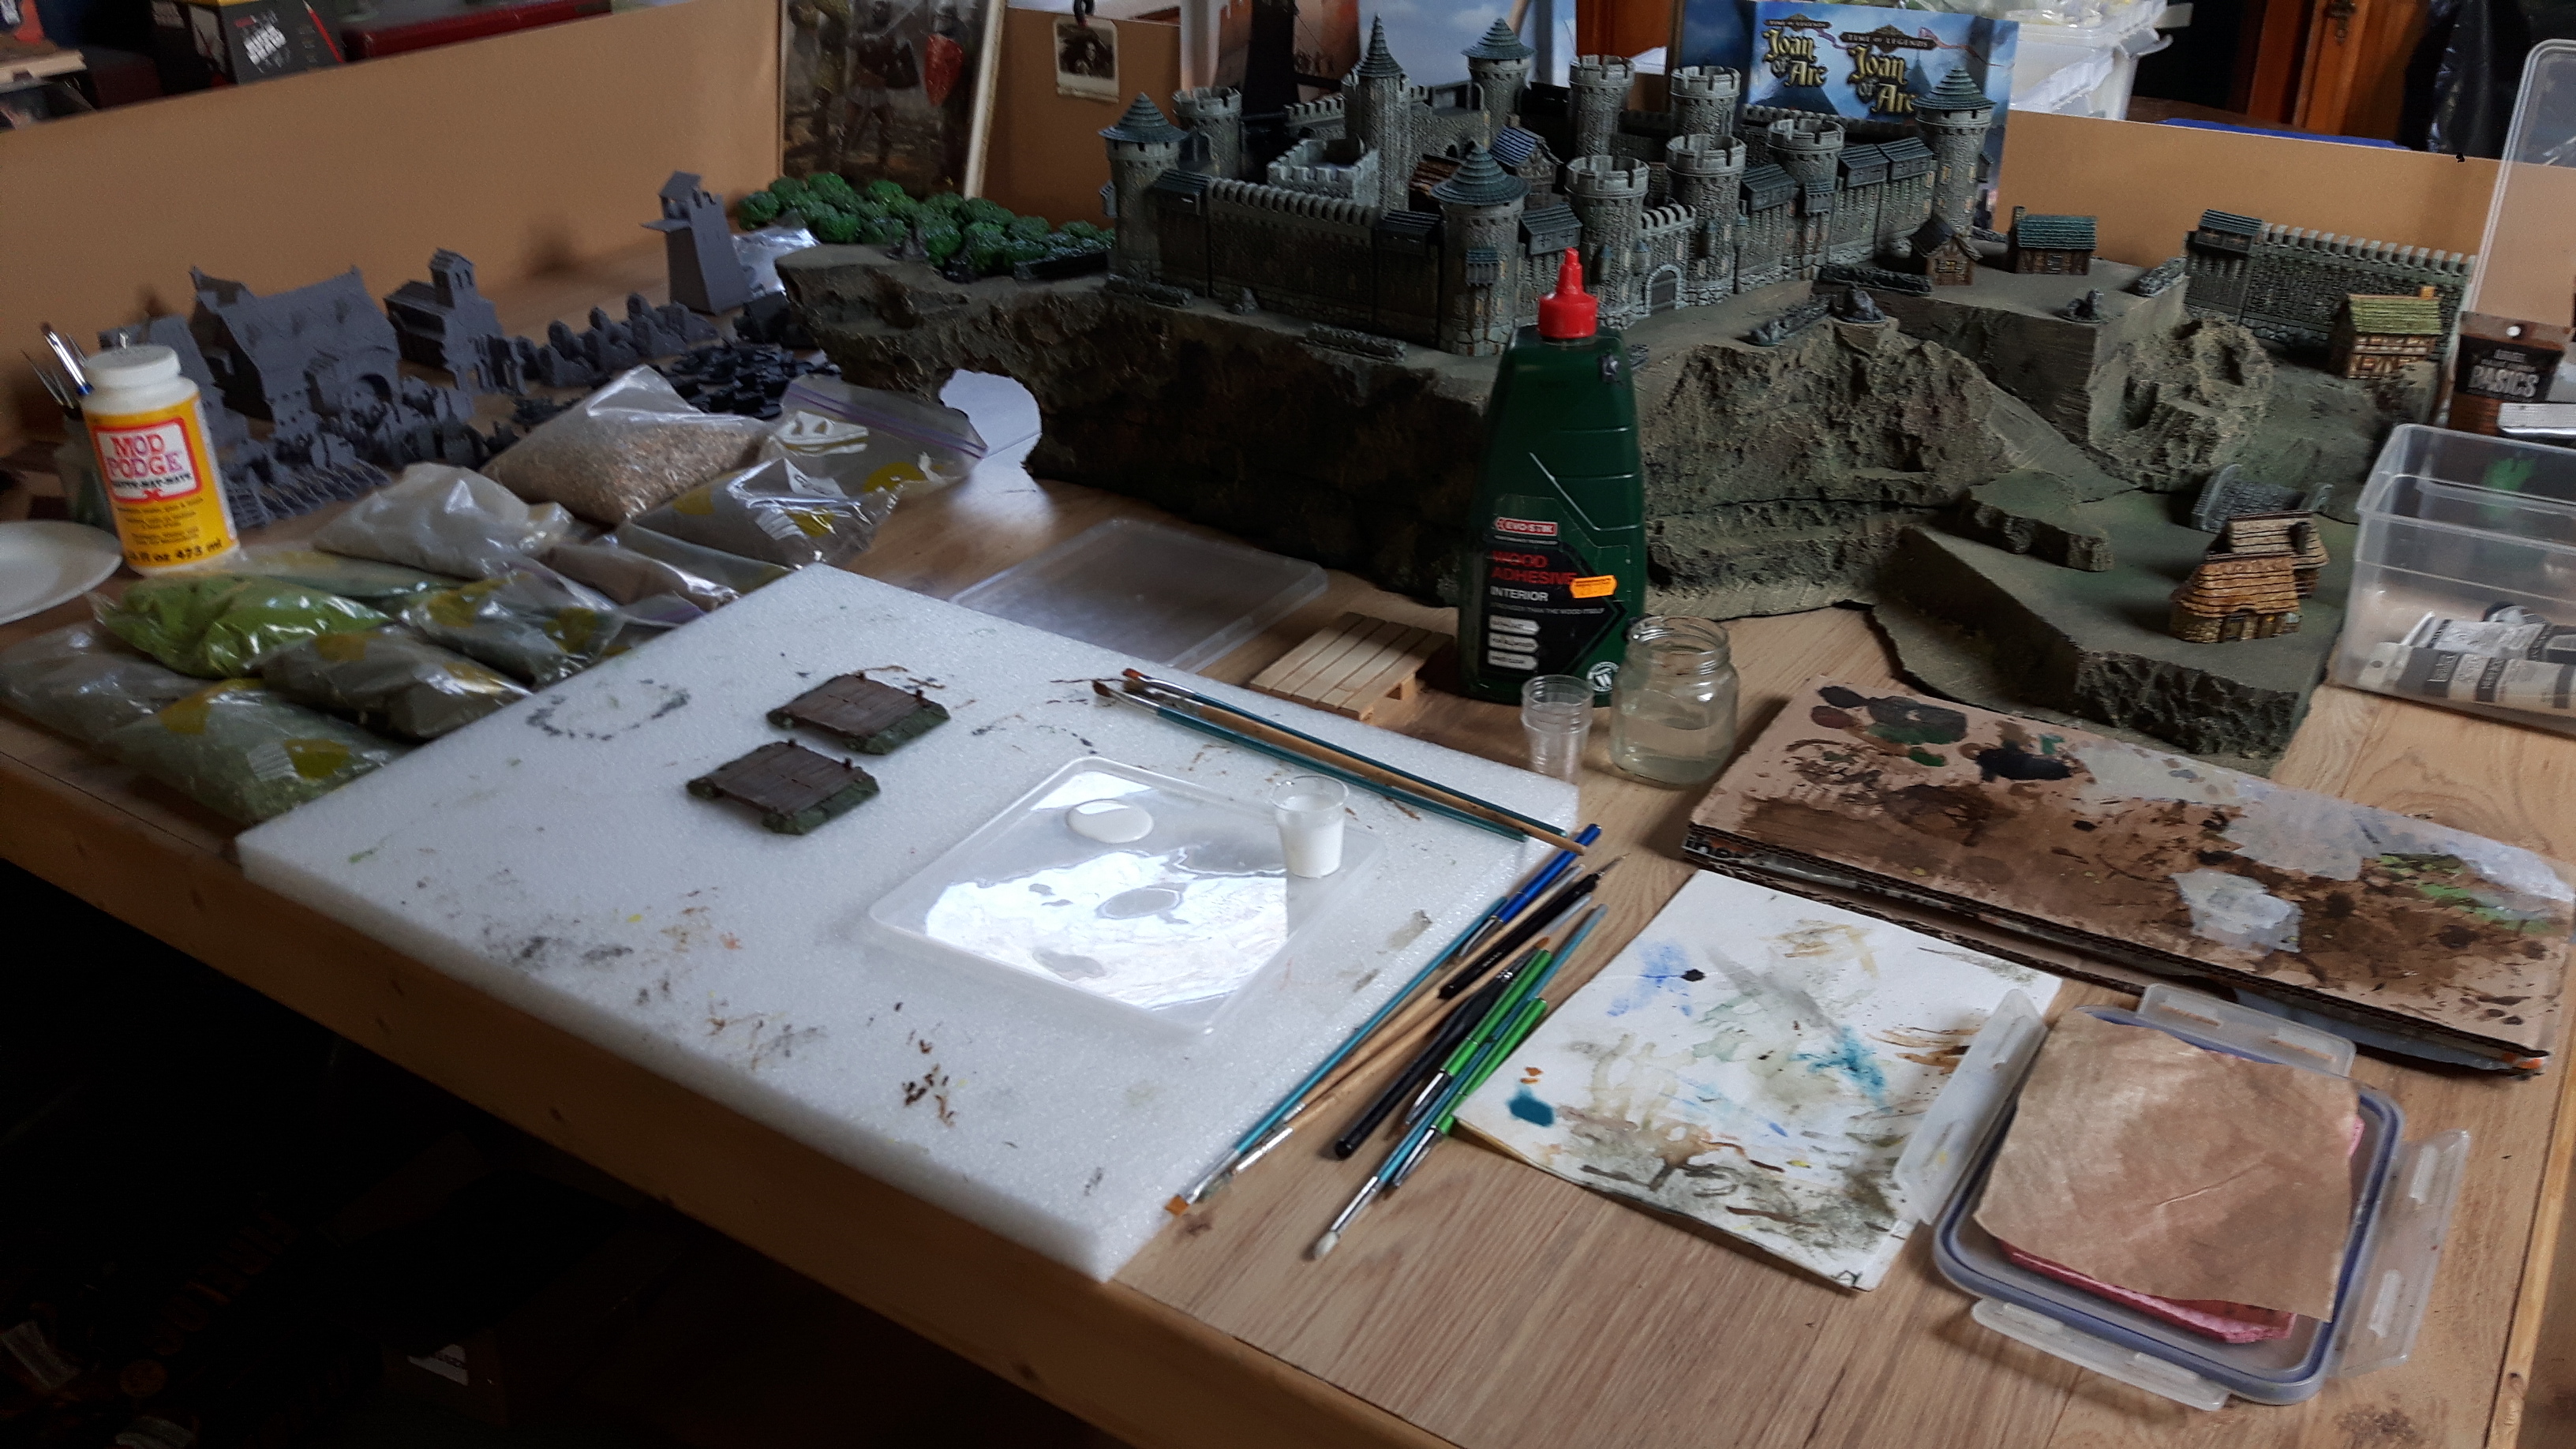
I started off by applying some wood glue (PVA) in the tracks areas and pouring on some darkish fine dirt.
Then PVA’d the grass areas and smothered it with a mix I had made up.
I then superglued on some clump foliage & some bushes and using some watered down PVA made some cart tracks with a lighter dirt.
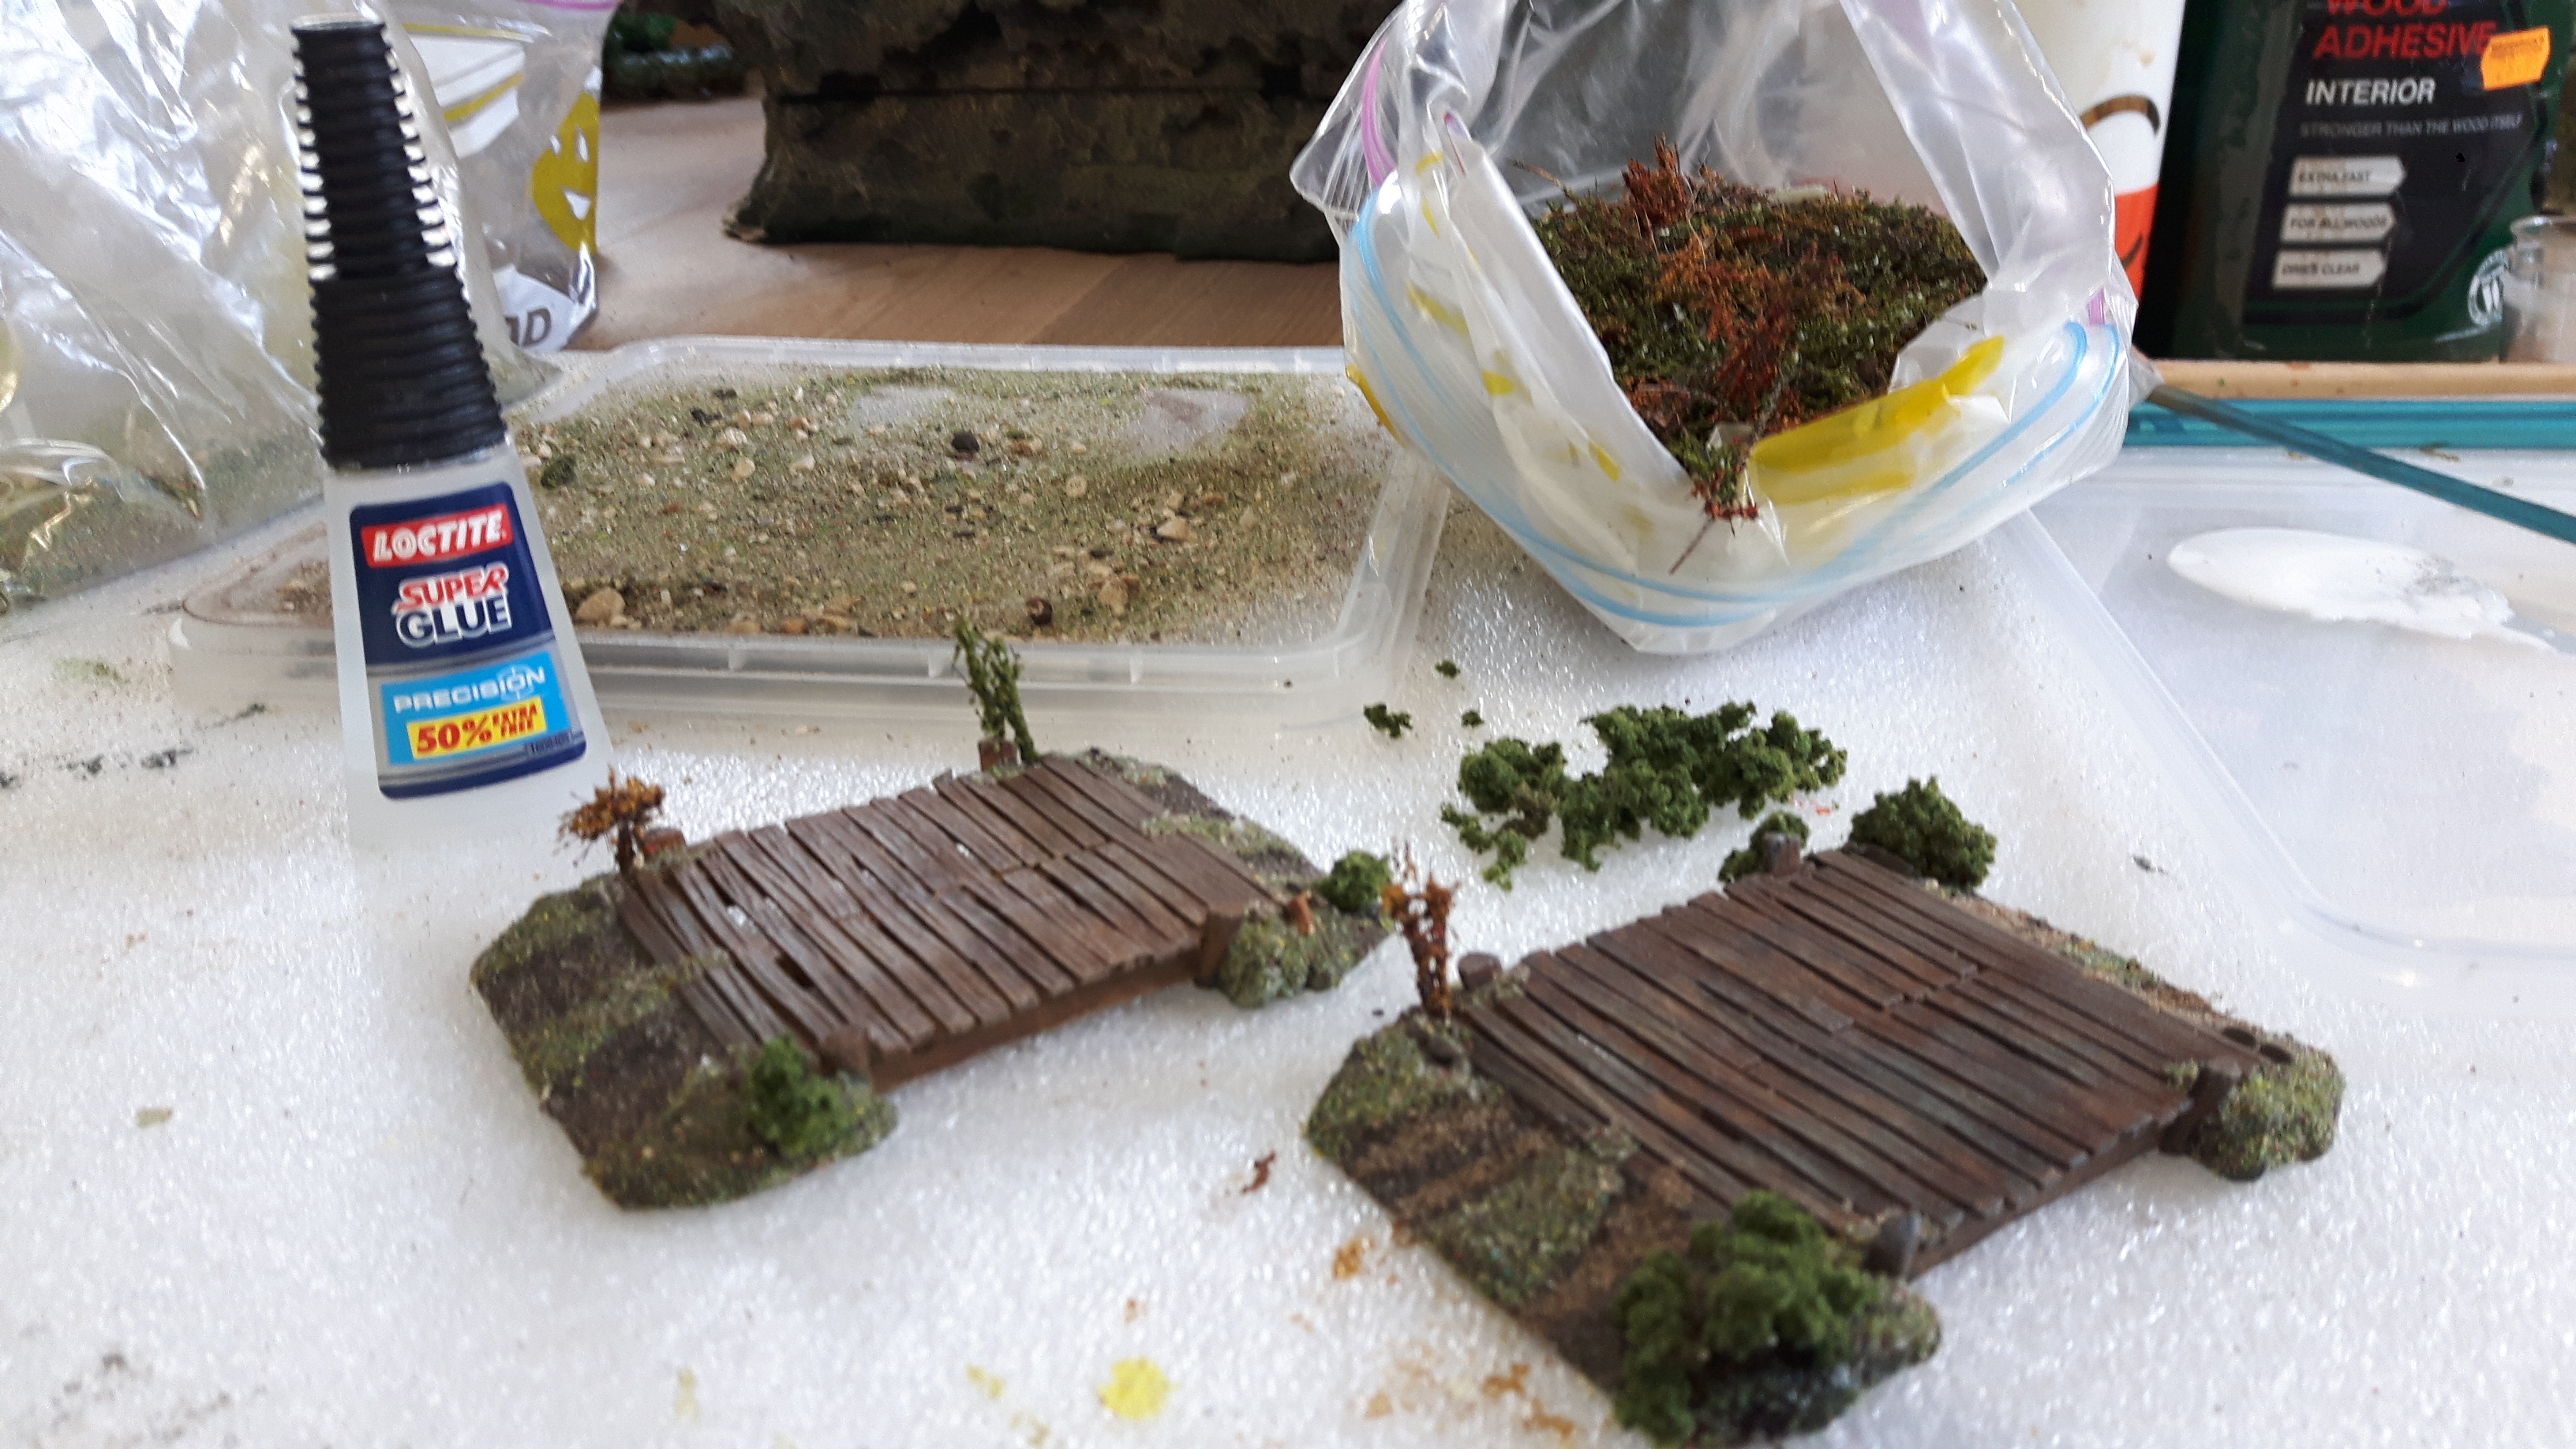
Everything was then given a drizzle of Isoproponol and a soak of watered down PVA to seal it all. Job done. Next project…