


The Thin Beige Line


Recommendations: 1077
About the Project
With a hoard of droids to paint, I need a process that is quick, repeatable and relatively painless!
Related Game: Star Wars: Legion
Related Company: Fantasy Flight Games
Related Genre: Science Fiction
This Project is Completed
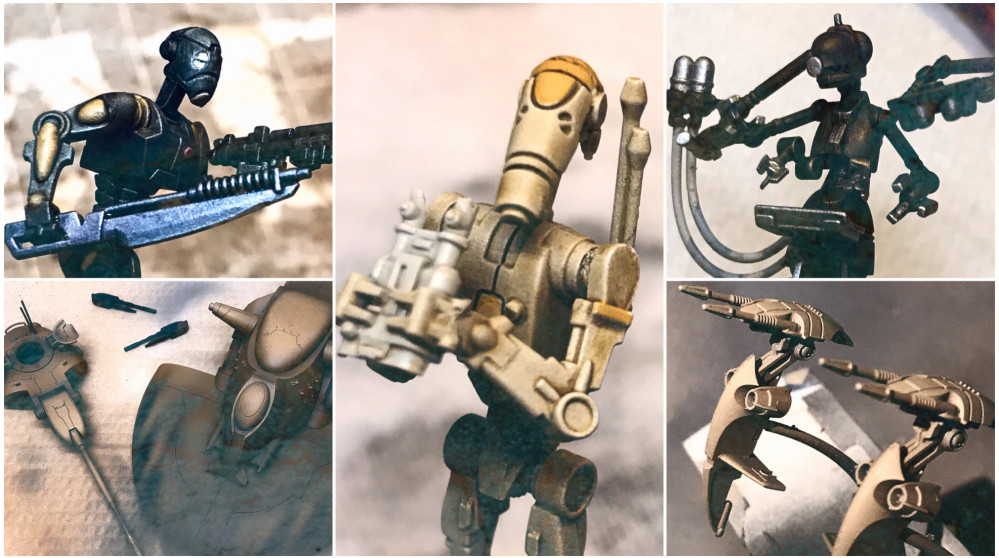
Painting the Commandos
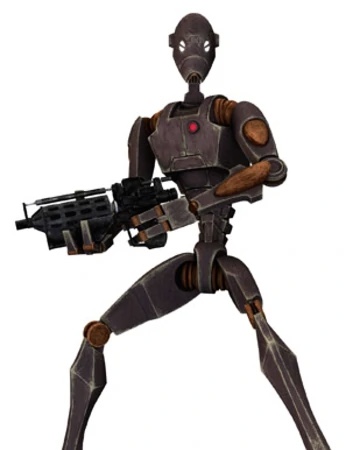
After a little research and my previous paint tests, I had my colour scheme figured out.

My first step was applying Skeleton Hoard to the joints and inset areas of armour. The vibroswords were painted with Iron breaker and the small light on the droids chests were painted with Contrast Blood Angels Red.
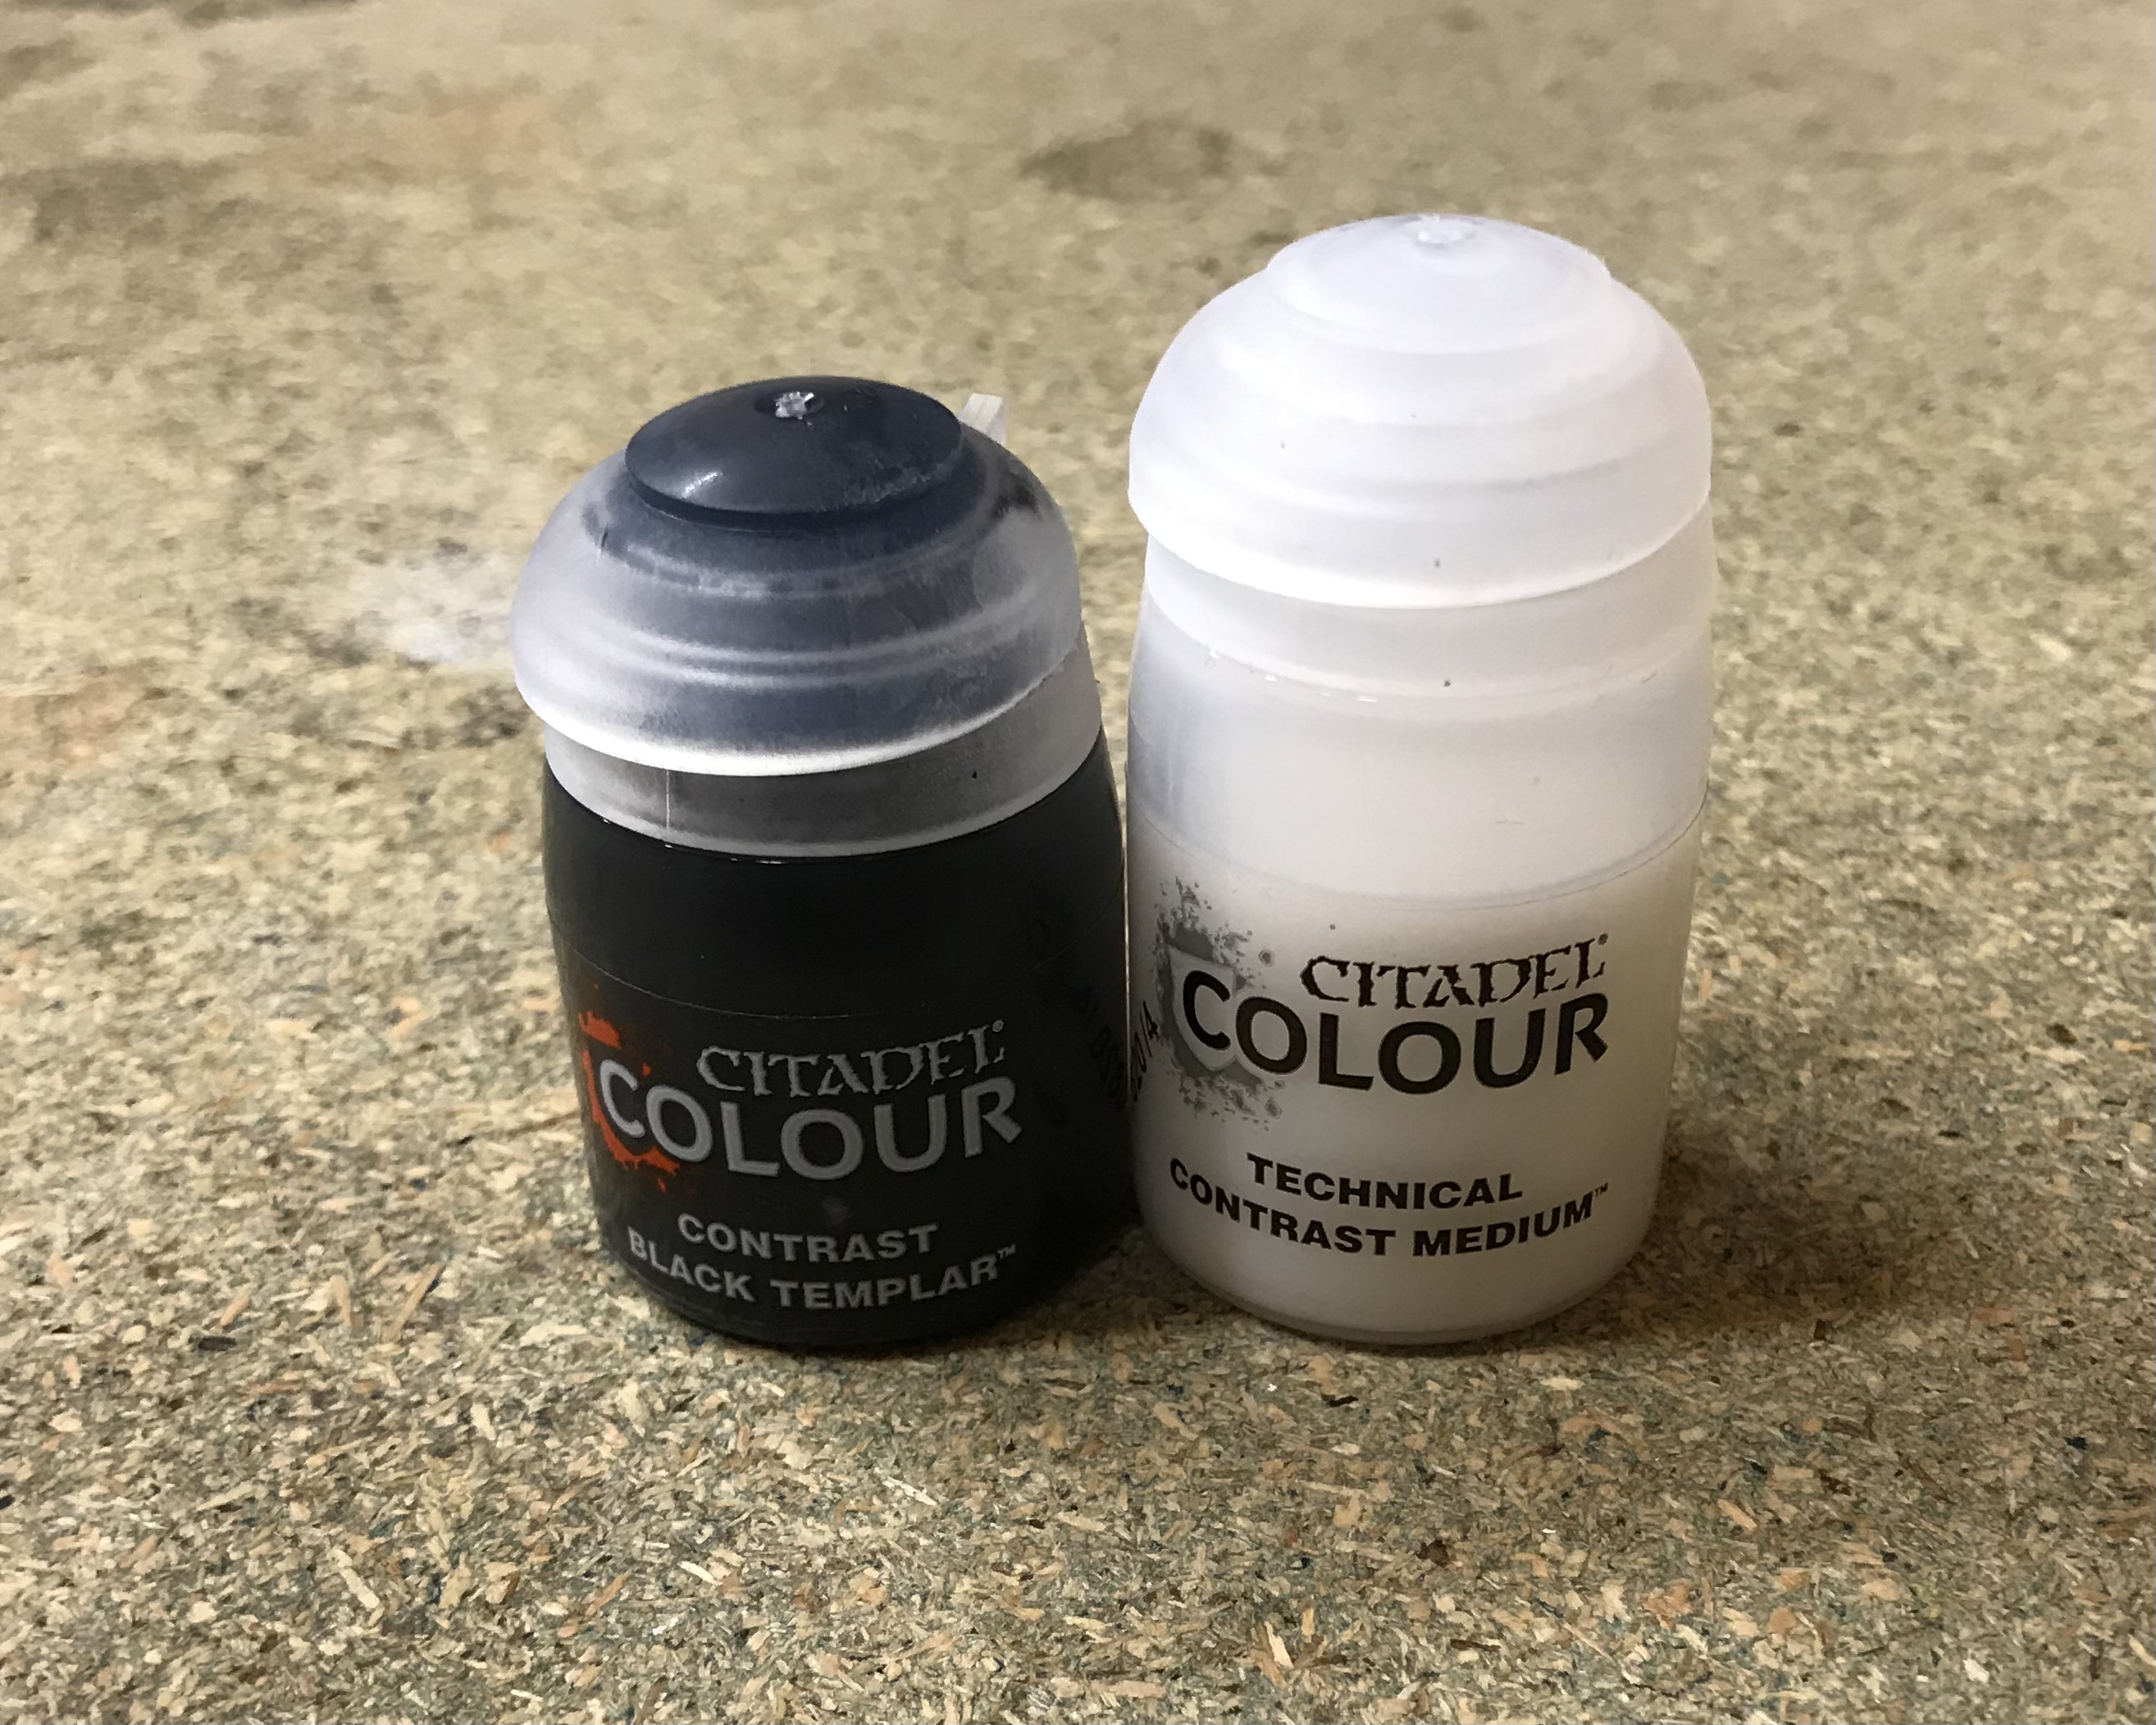
Once this was dry I used 2-1 mix of Black Templar and Contrast Medium for the droids chassis, being careful to leave the eyes in the original Wraithbone. Neat Black Templar was used for the guns.
My initial feeling about this stage was not good. Although contrasts are great on detailed areas they don’t sit so well on the flat areas, particularly the head in this instance.

Despite my initial trepidation I persevered and decided to give the chassis a second, thin coat of Templar and medium. This helped to even out the surface as well as take it a little darker. I then gave the black areas a wash of Drakenhorf Nightshade. I was careful to avoid the blaster and the brown sections, the latter of which were instead washed with Agrax Earthshade. The Vibrosword was given a purple wash made by mixing a spot of Blood Angels Contrast with a few drops of Darkenhorf Nightshade.
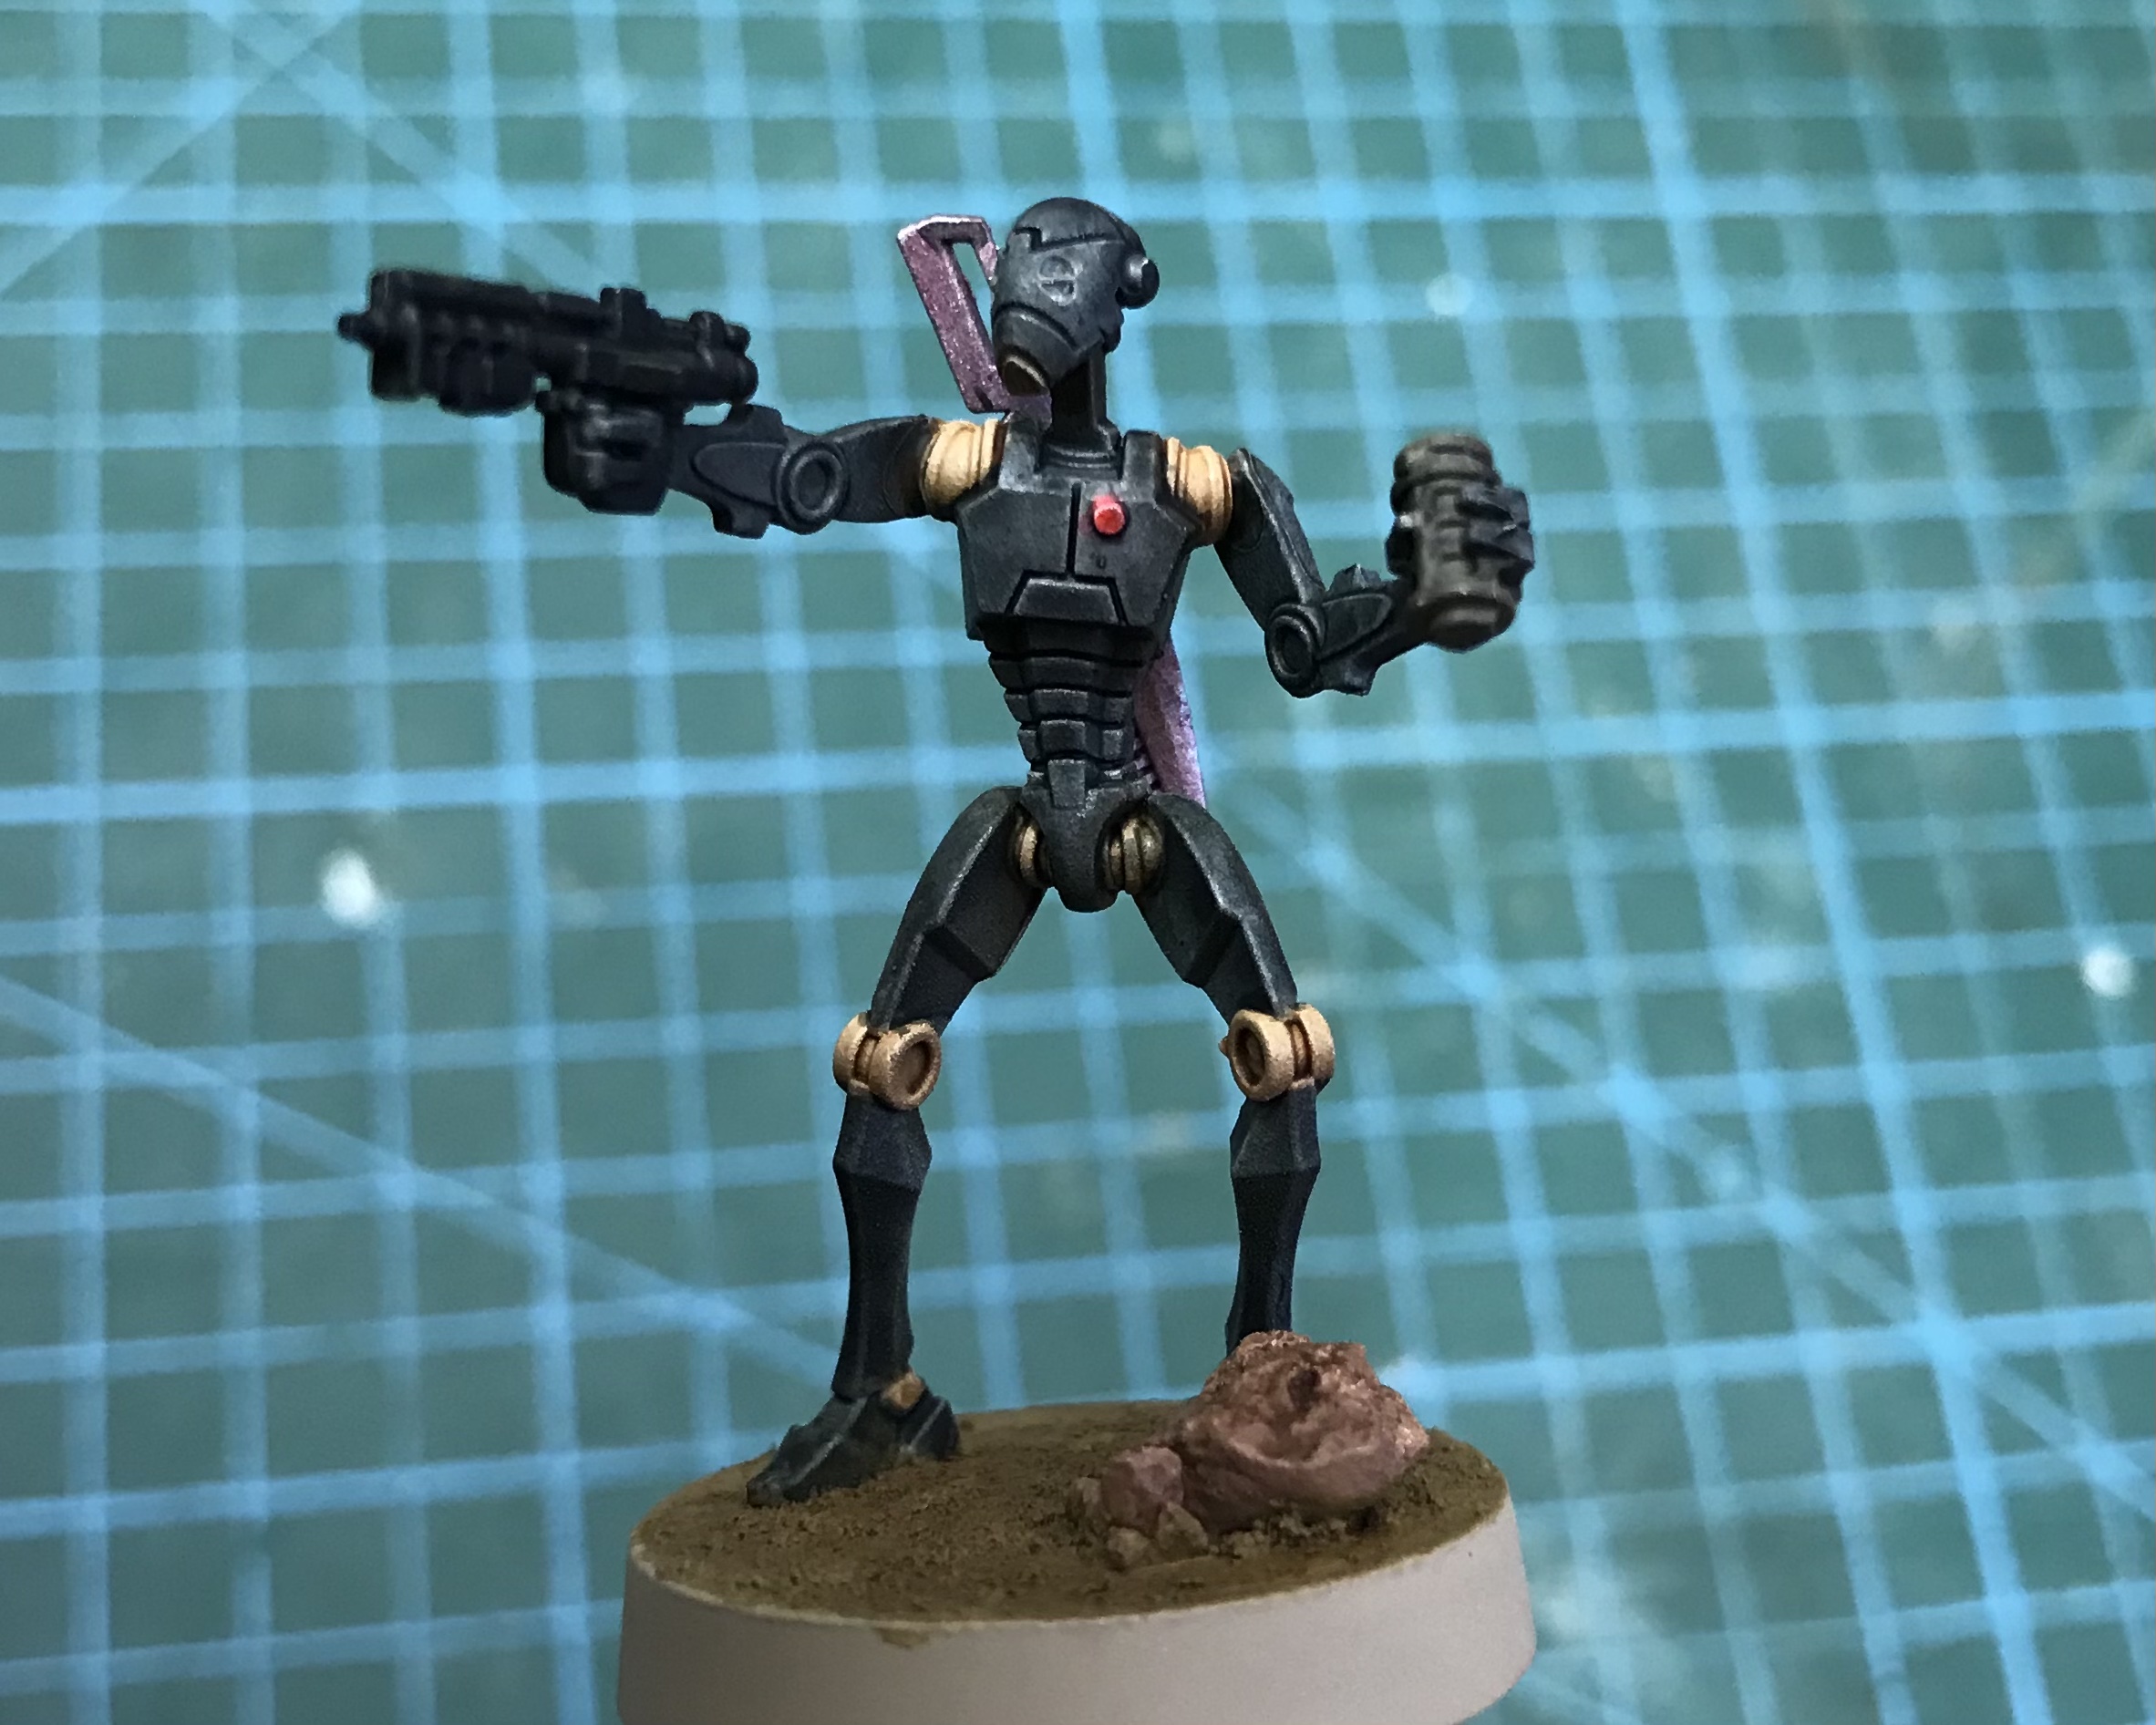
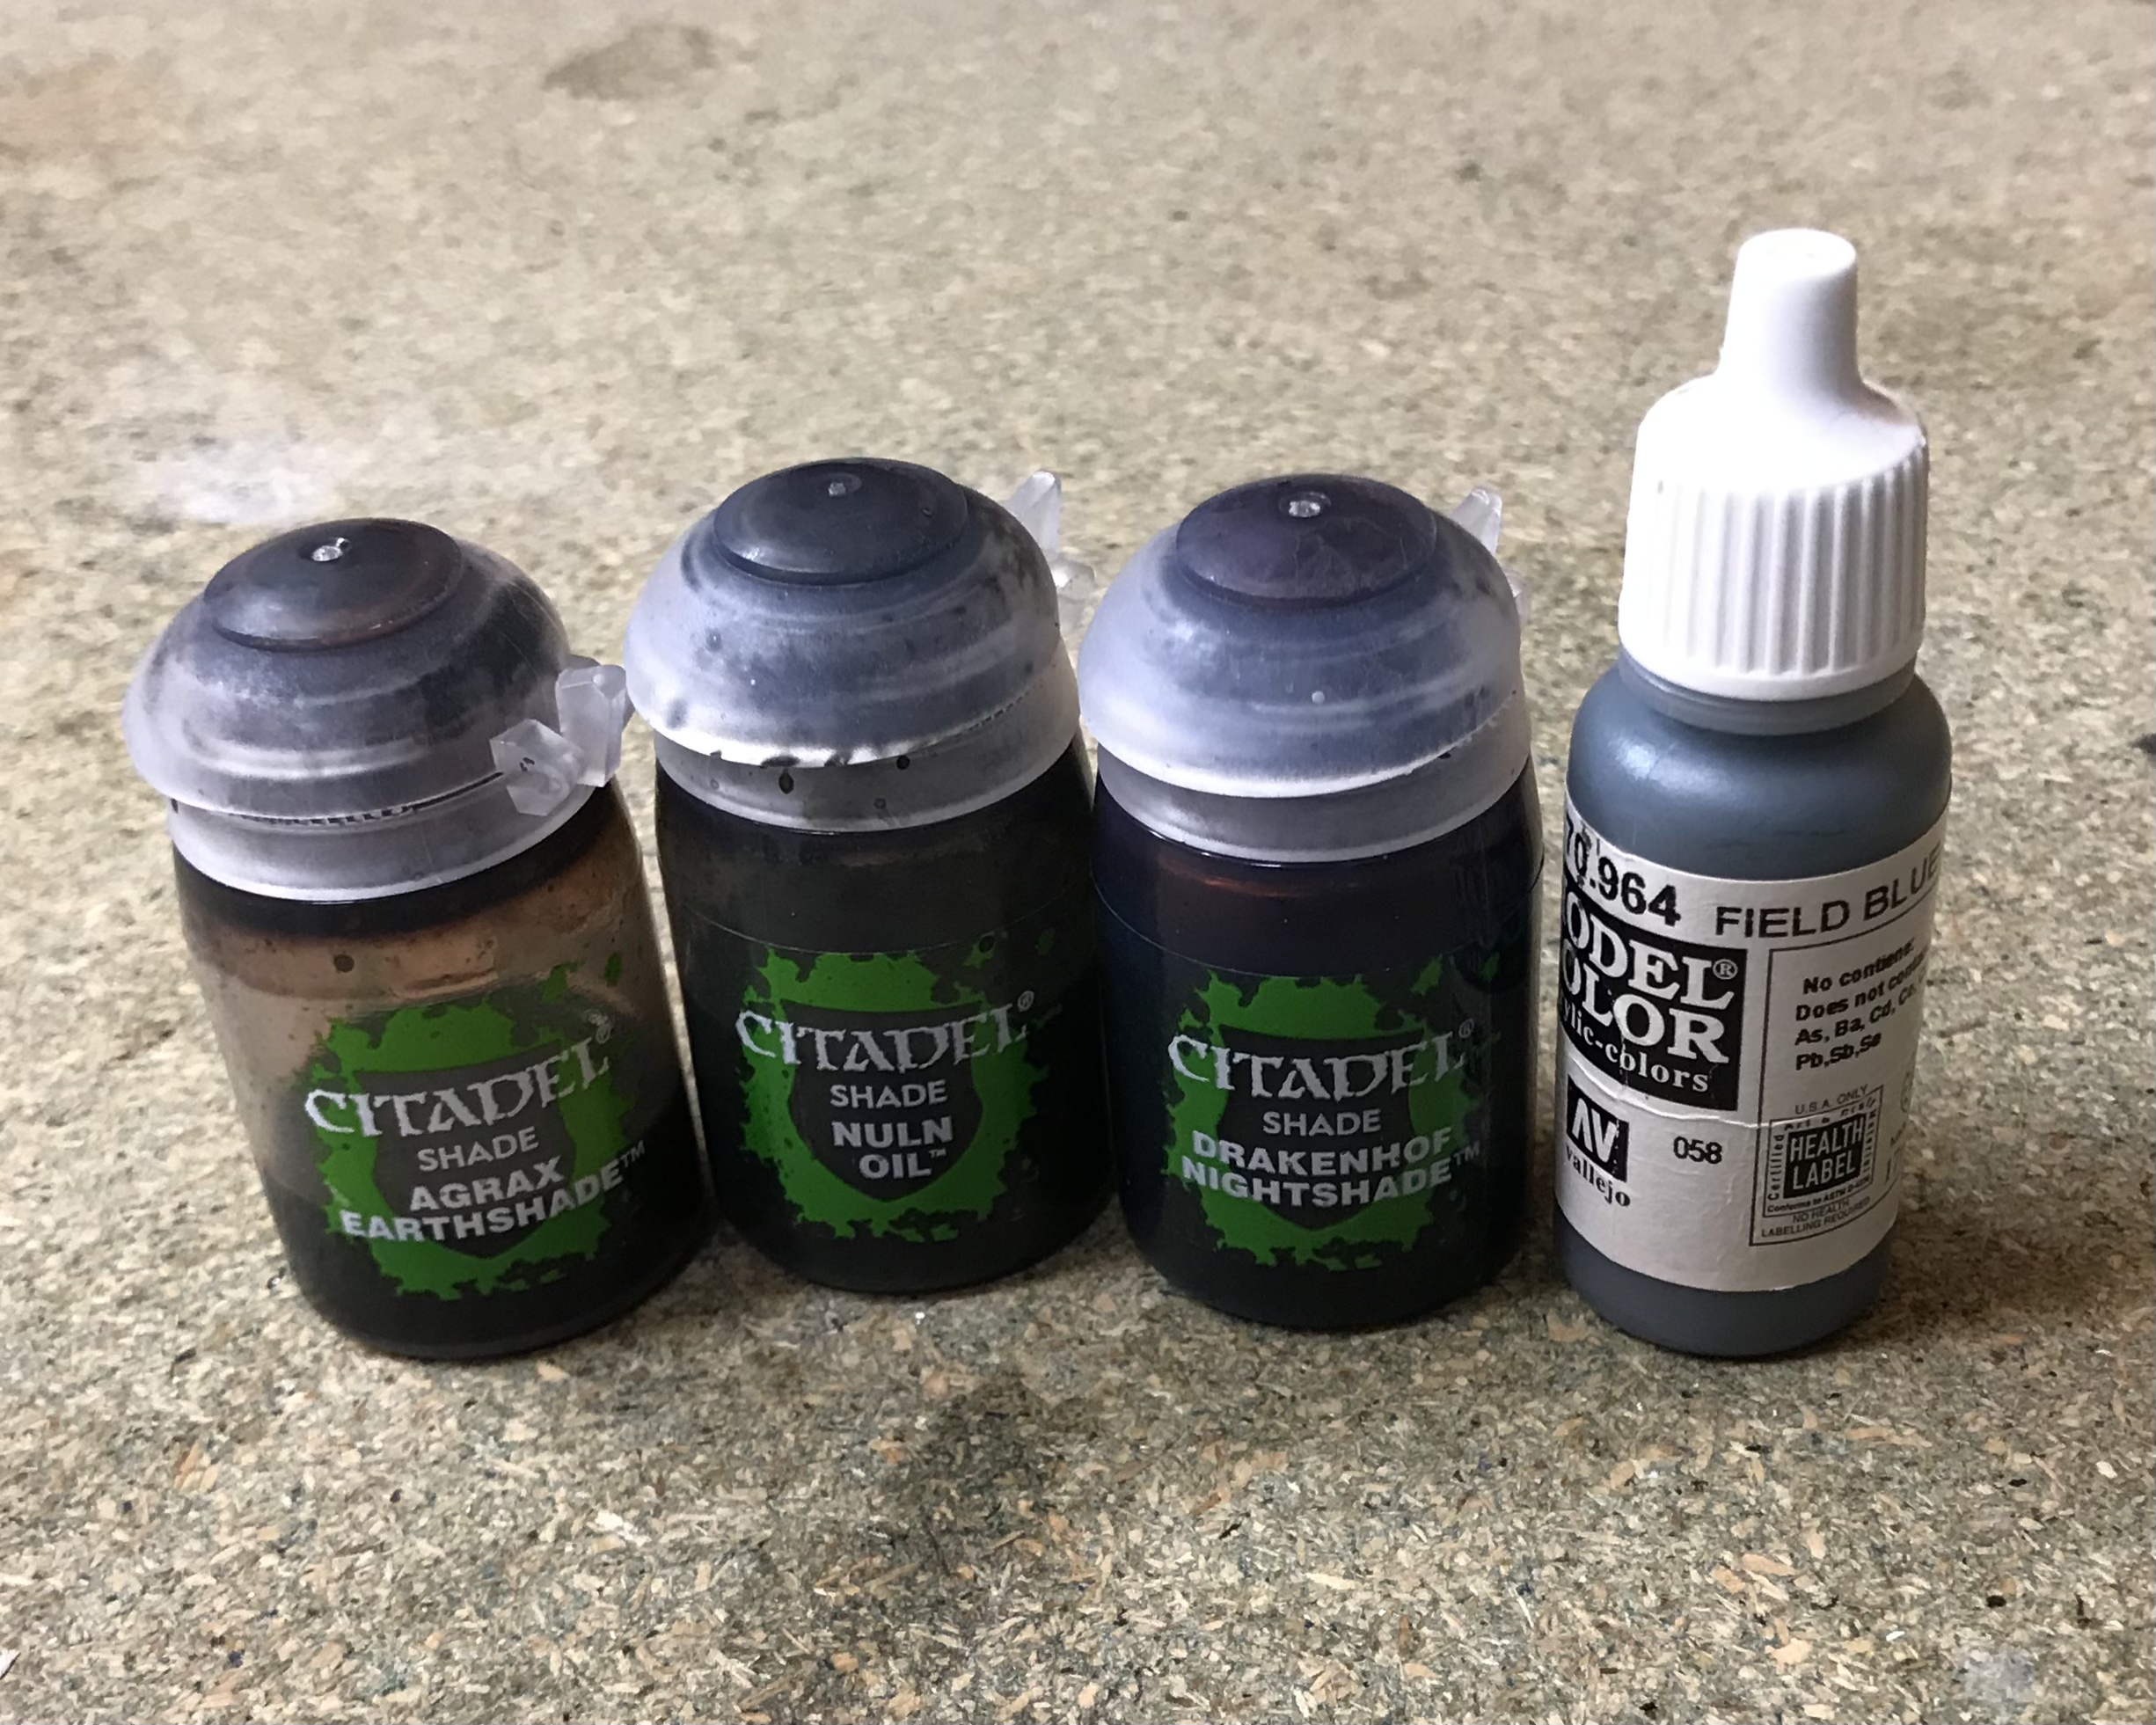
With the washes dried, I still wasn’t happy with the black areas of the droid. I decided to try a dry brush of Vallejo German Field Blue, to highlight the edges and bring the black towards the charcoal grey of the reference. The guns and Vibroswords were also dry brushed over with Iron Breaker at this stage, before all of the above were given a thin wash of Nuln Oil.
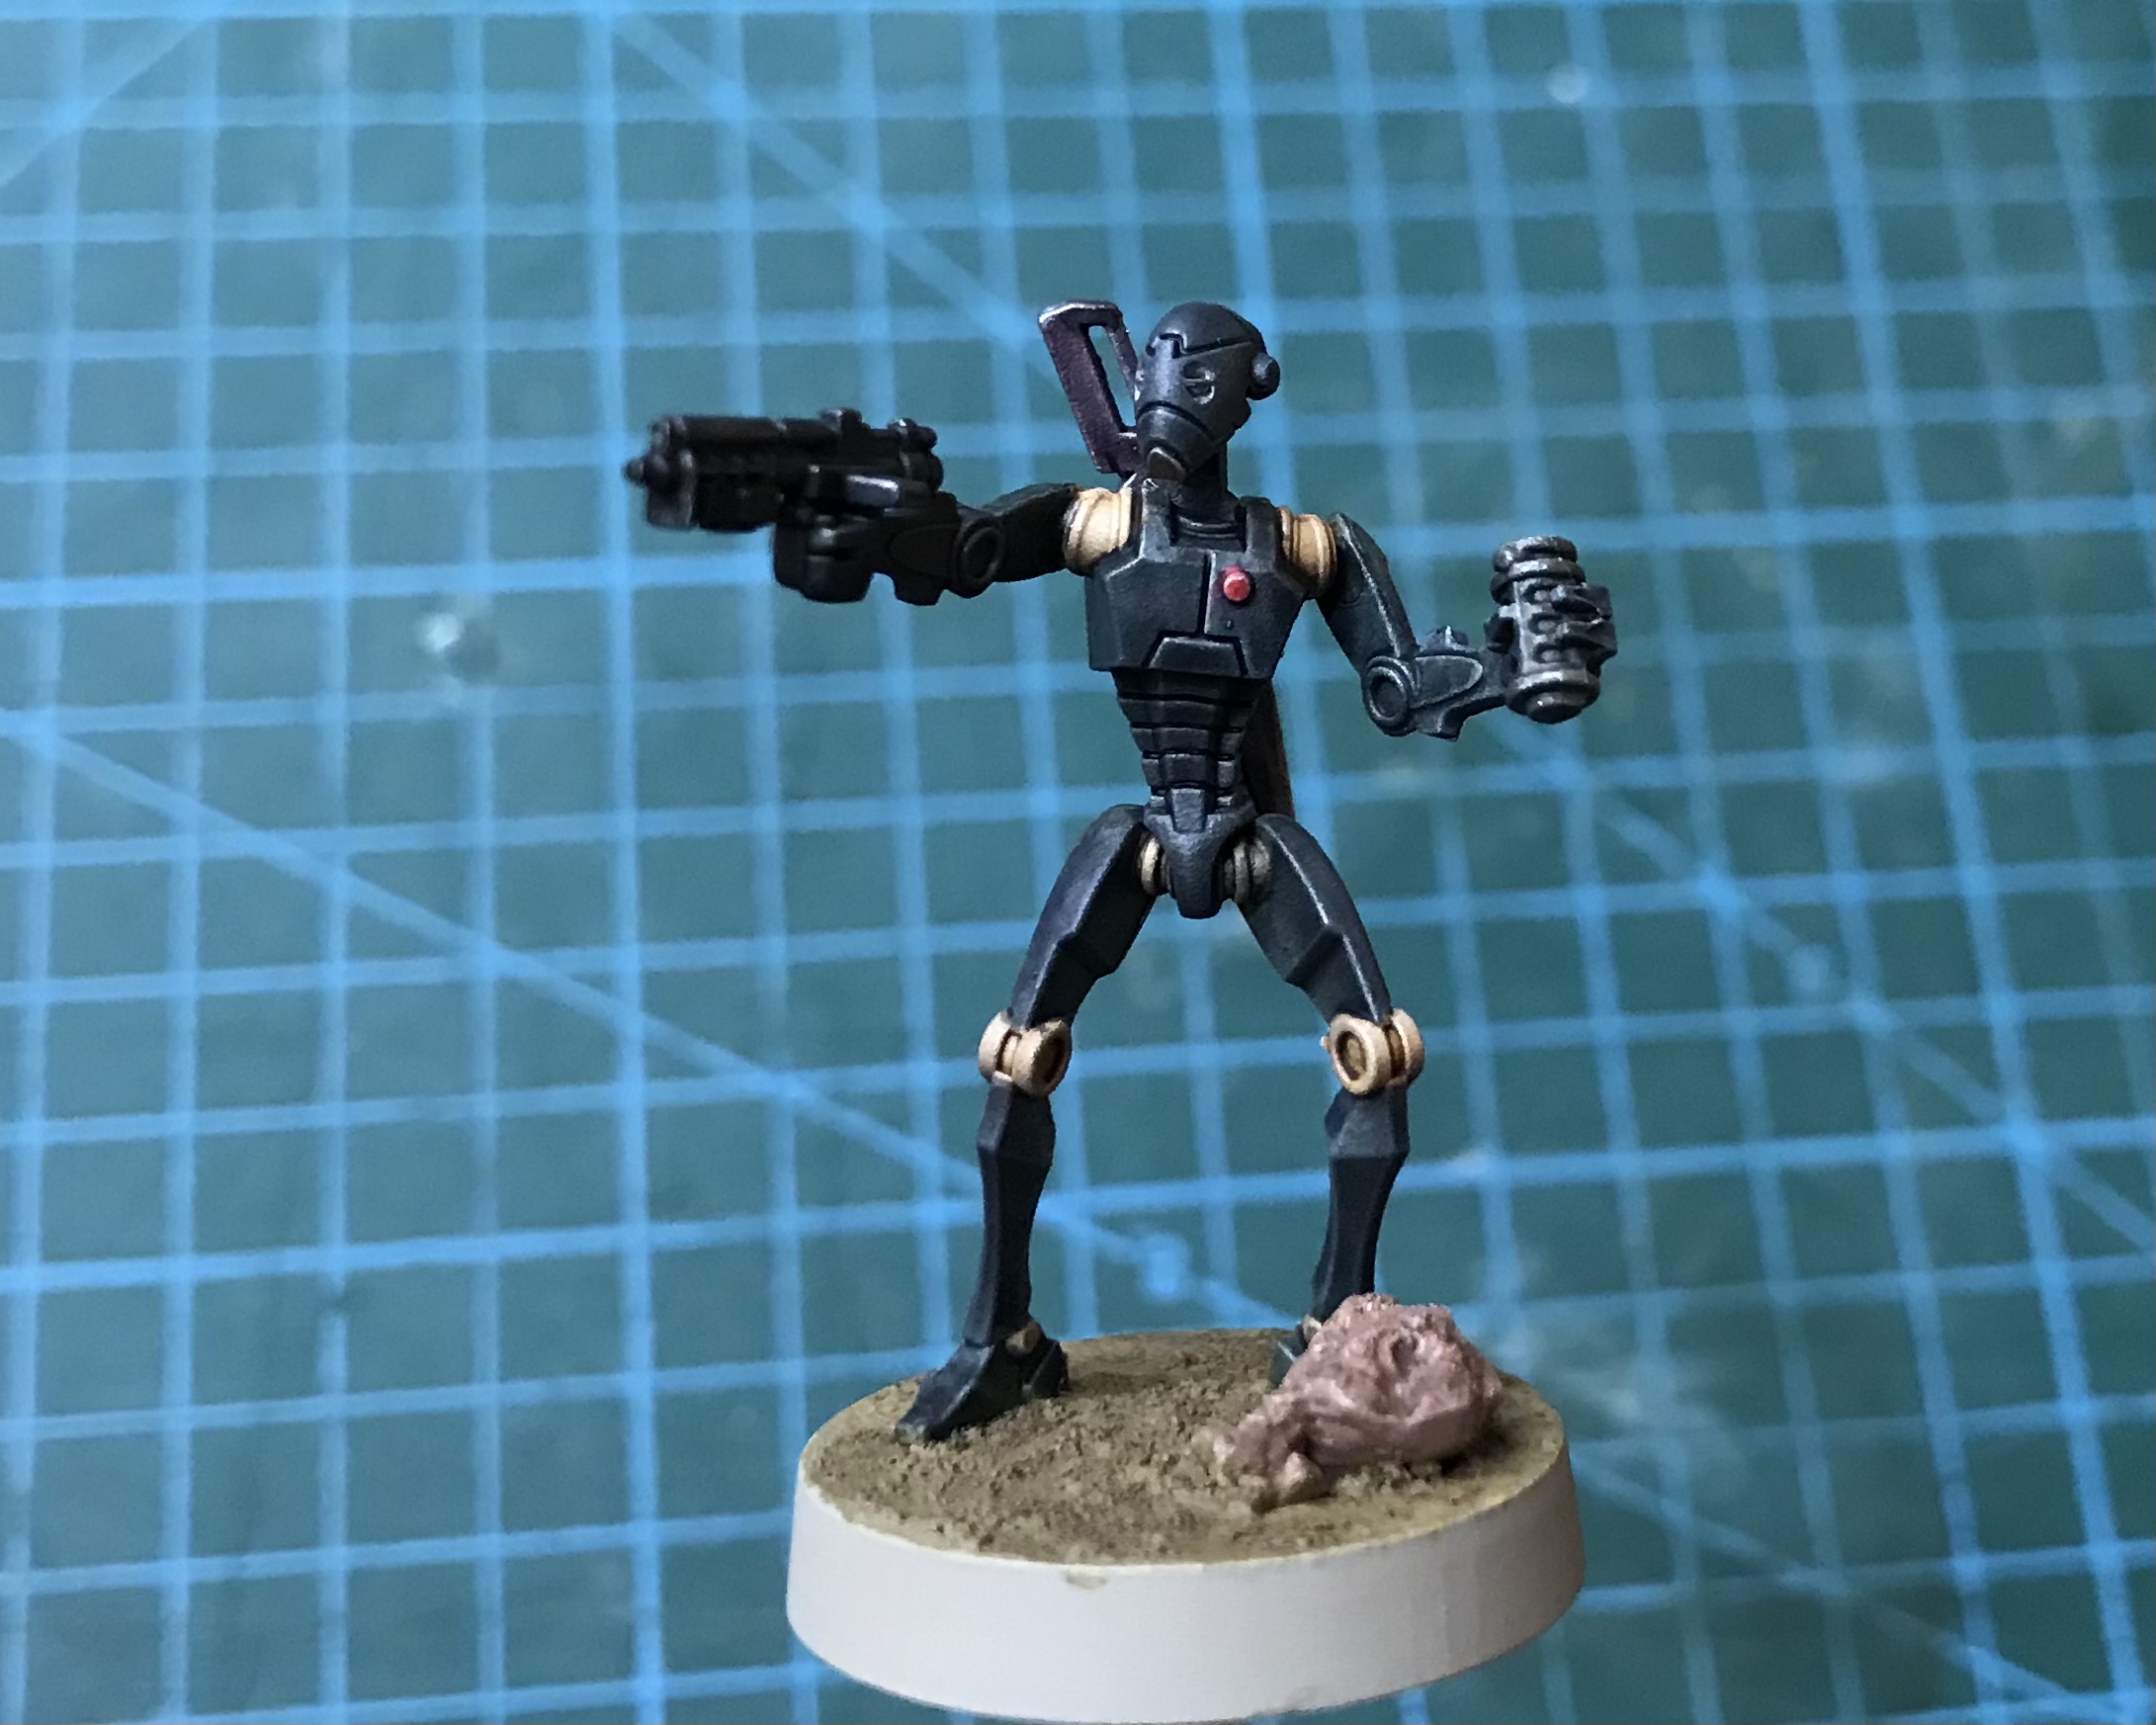
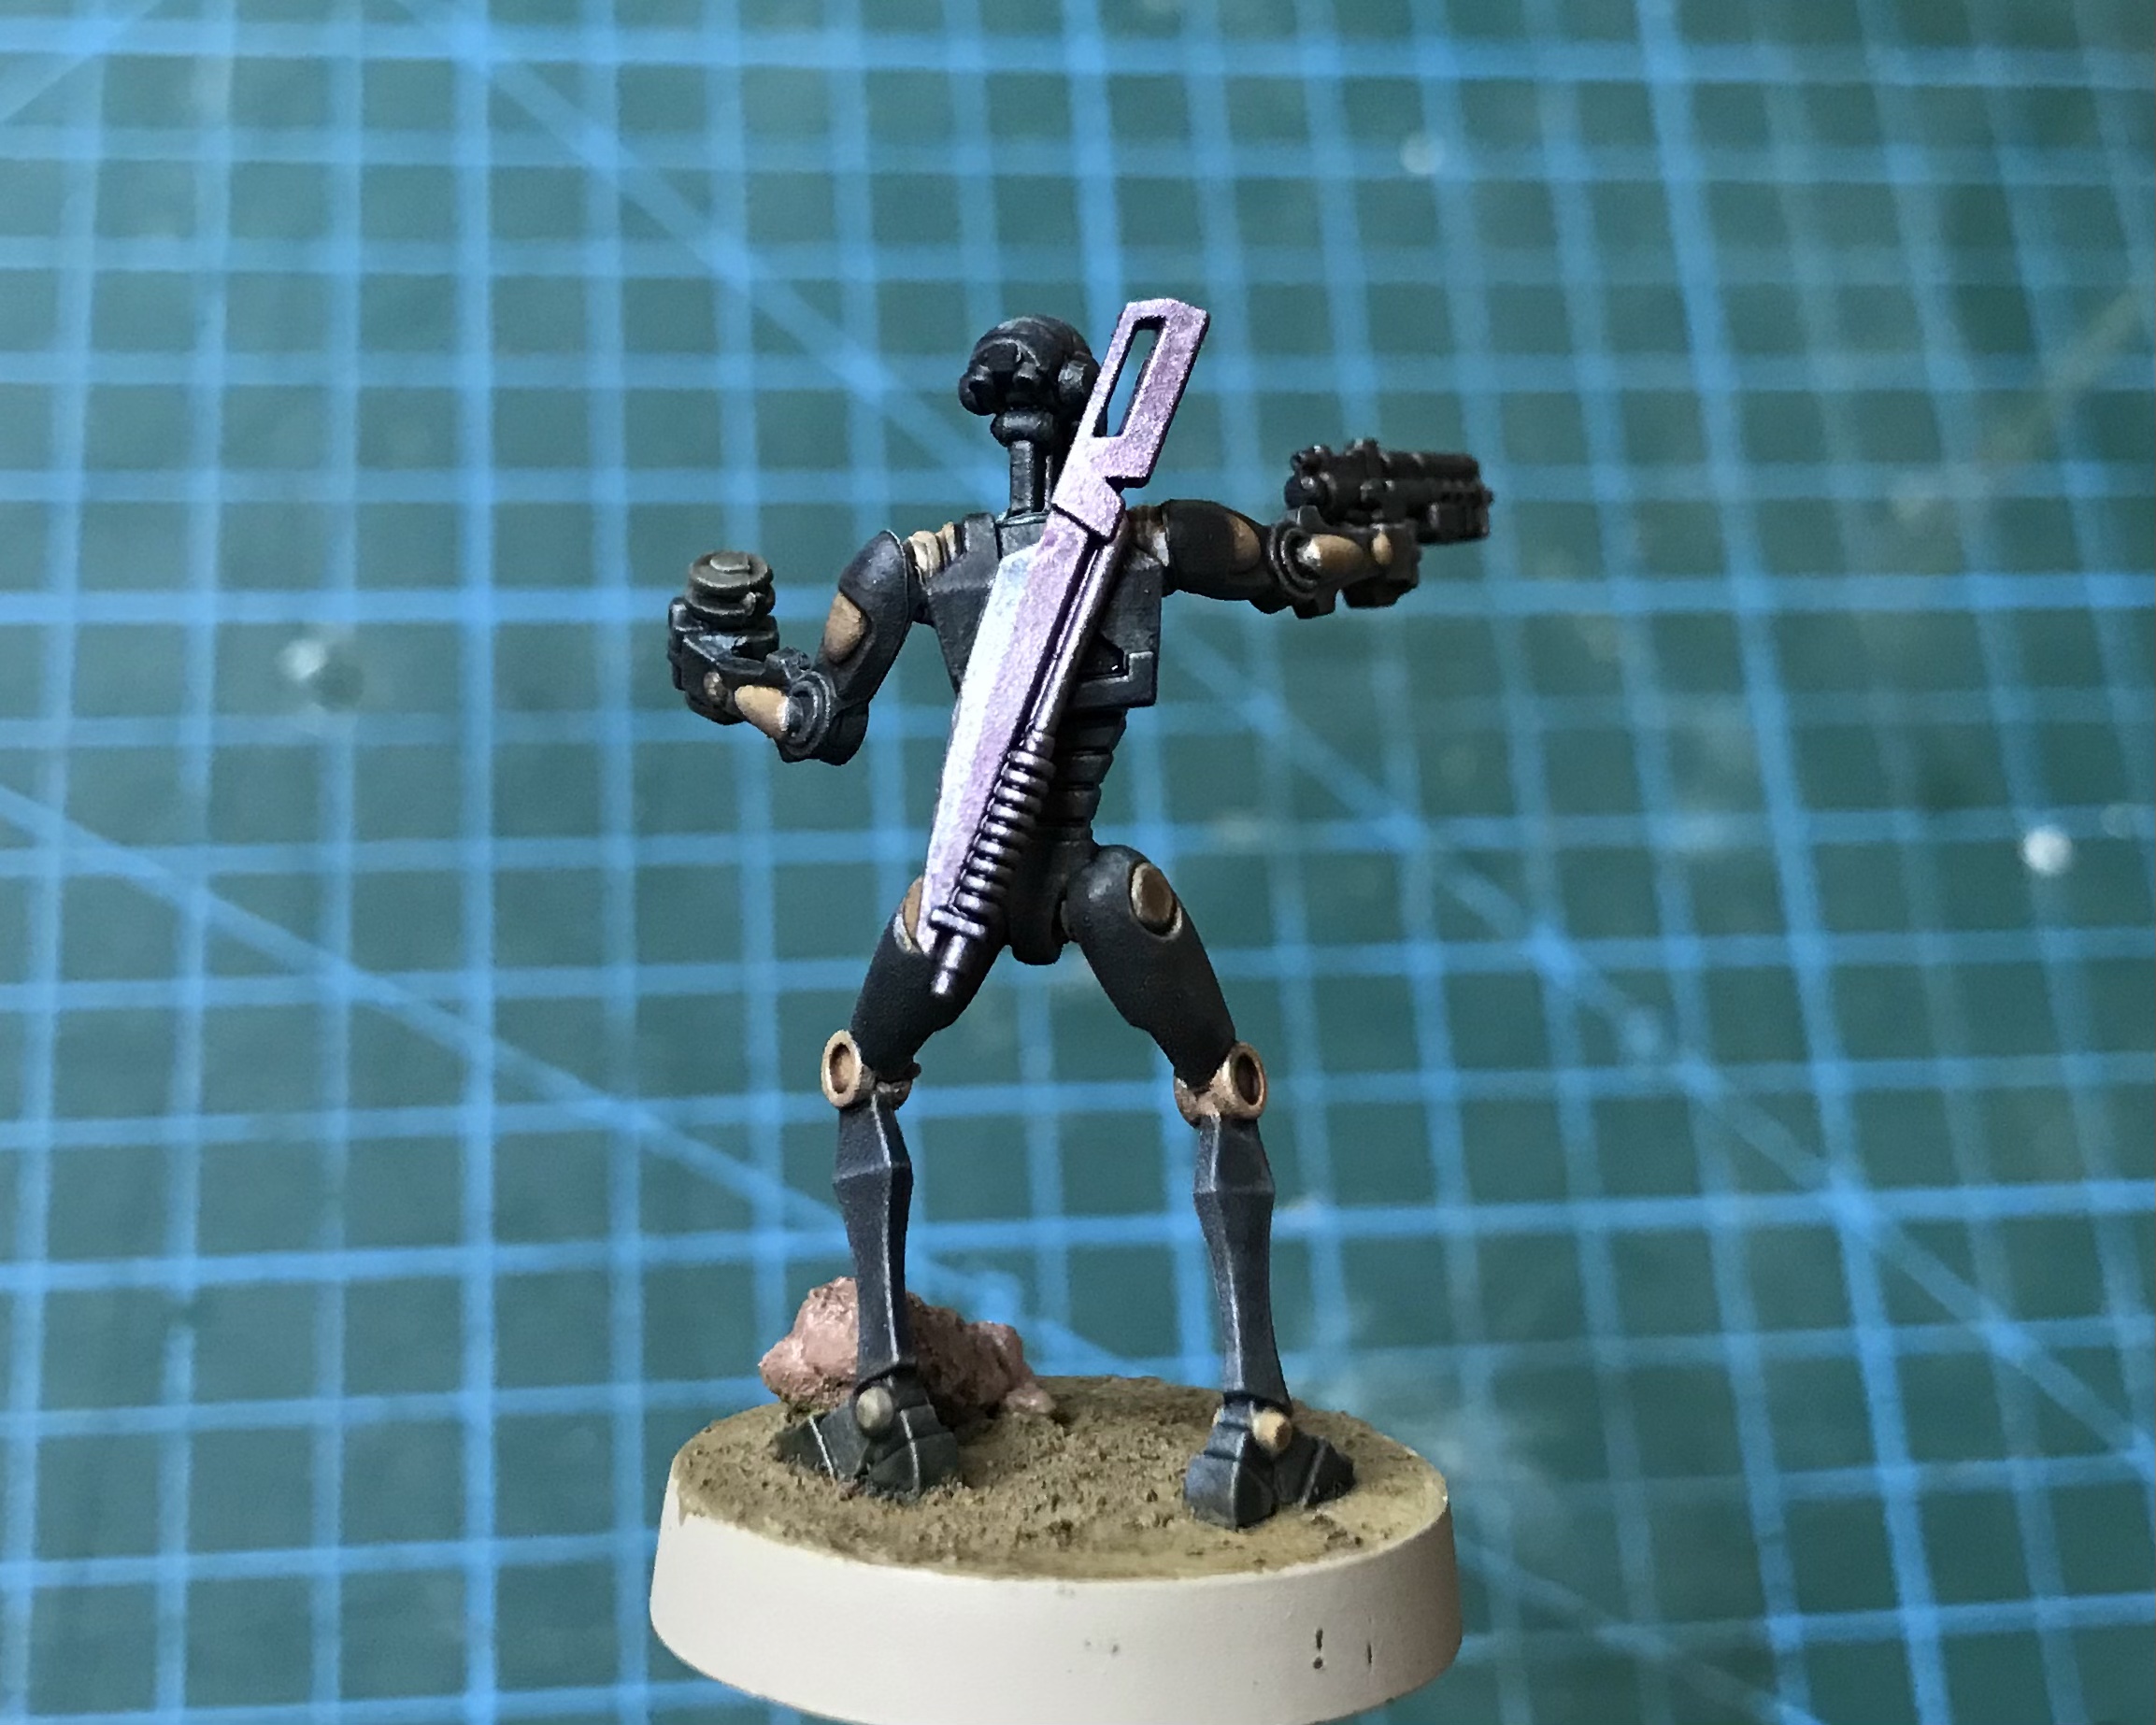
Often the simplest techniques are the best and the dry brush really lifted the detail and lightened the model. I was much happier with the overall look.
Finishing the Commandos
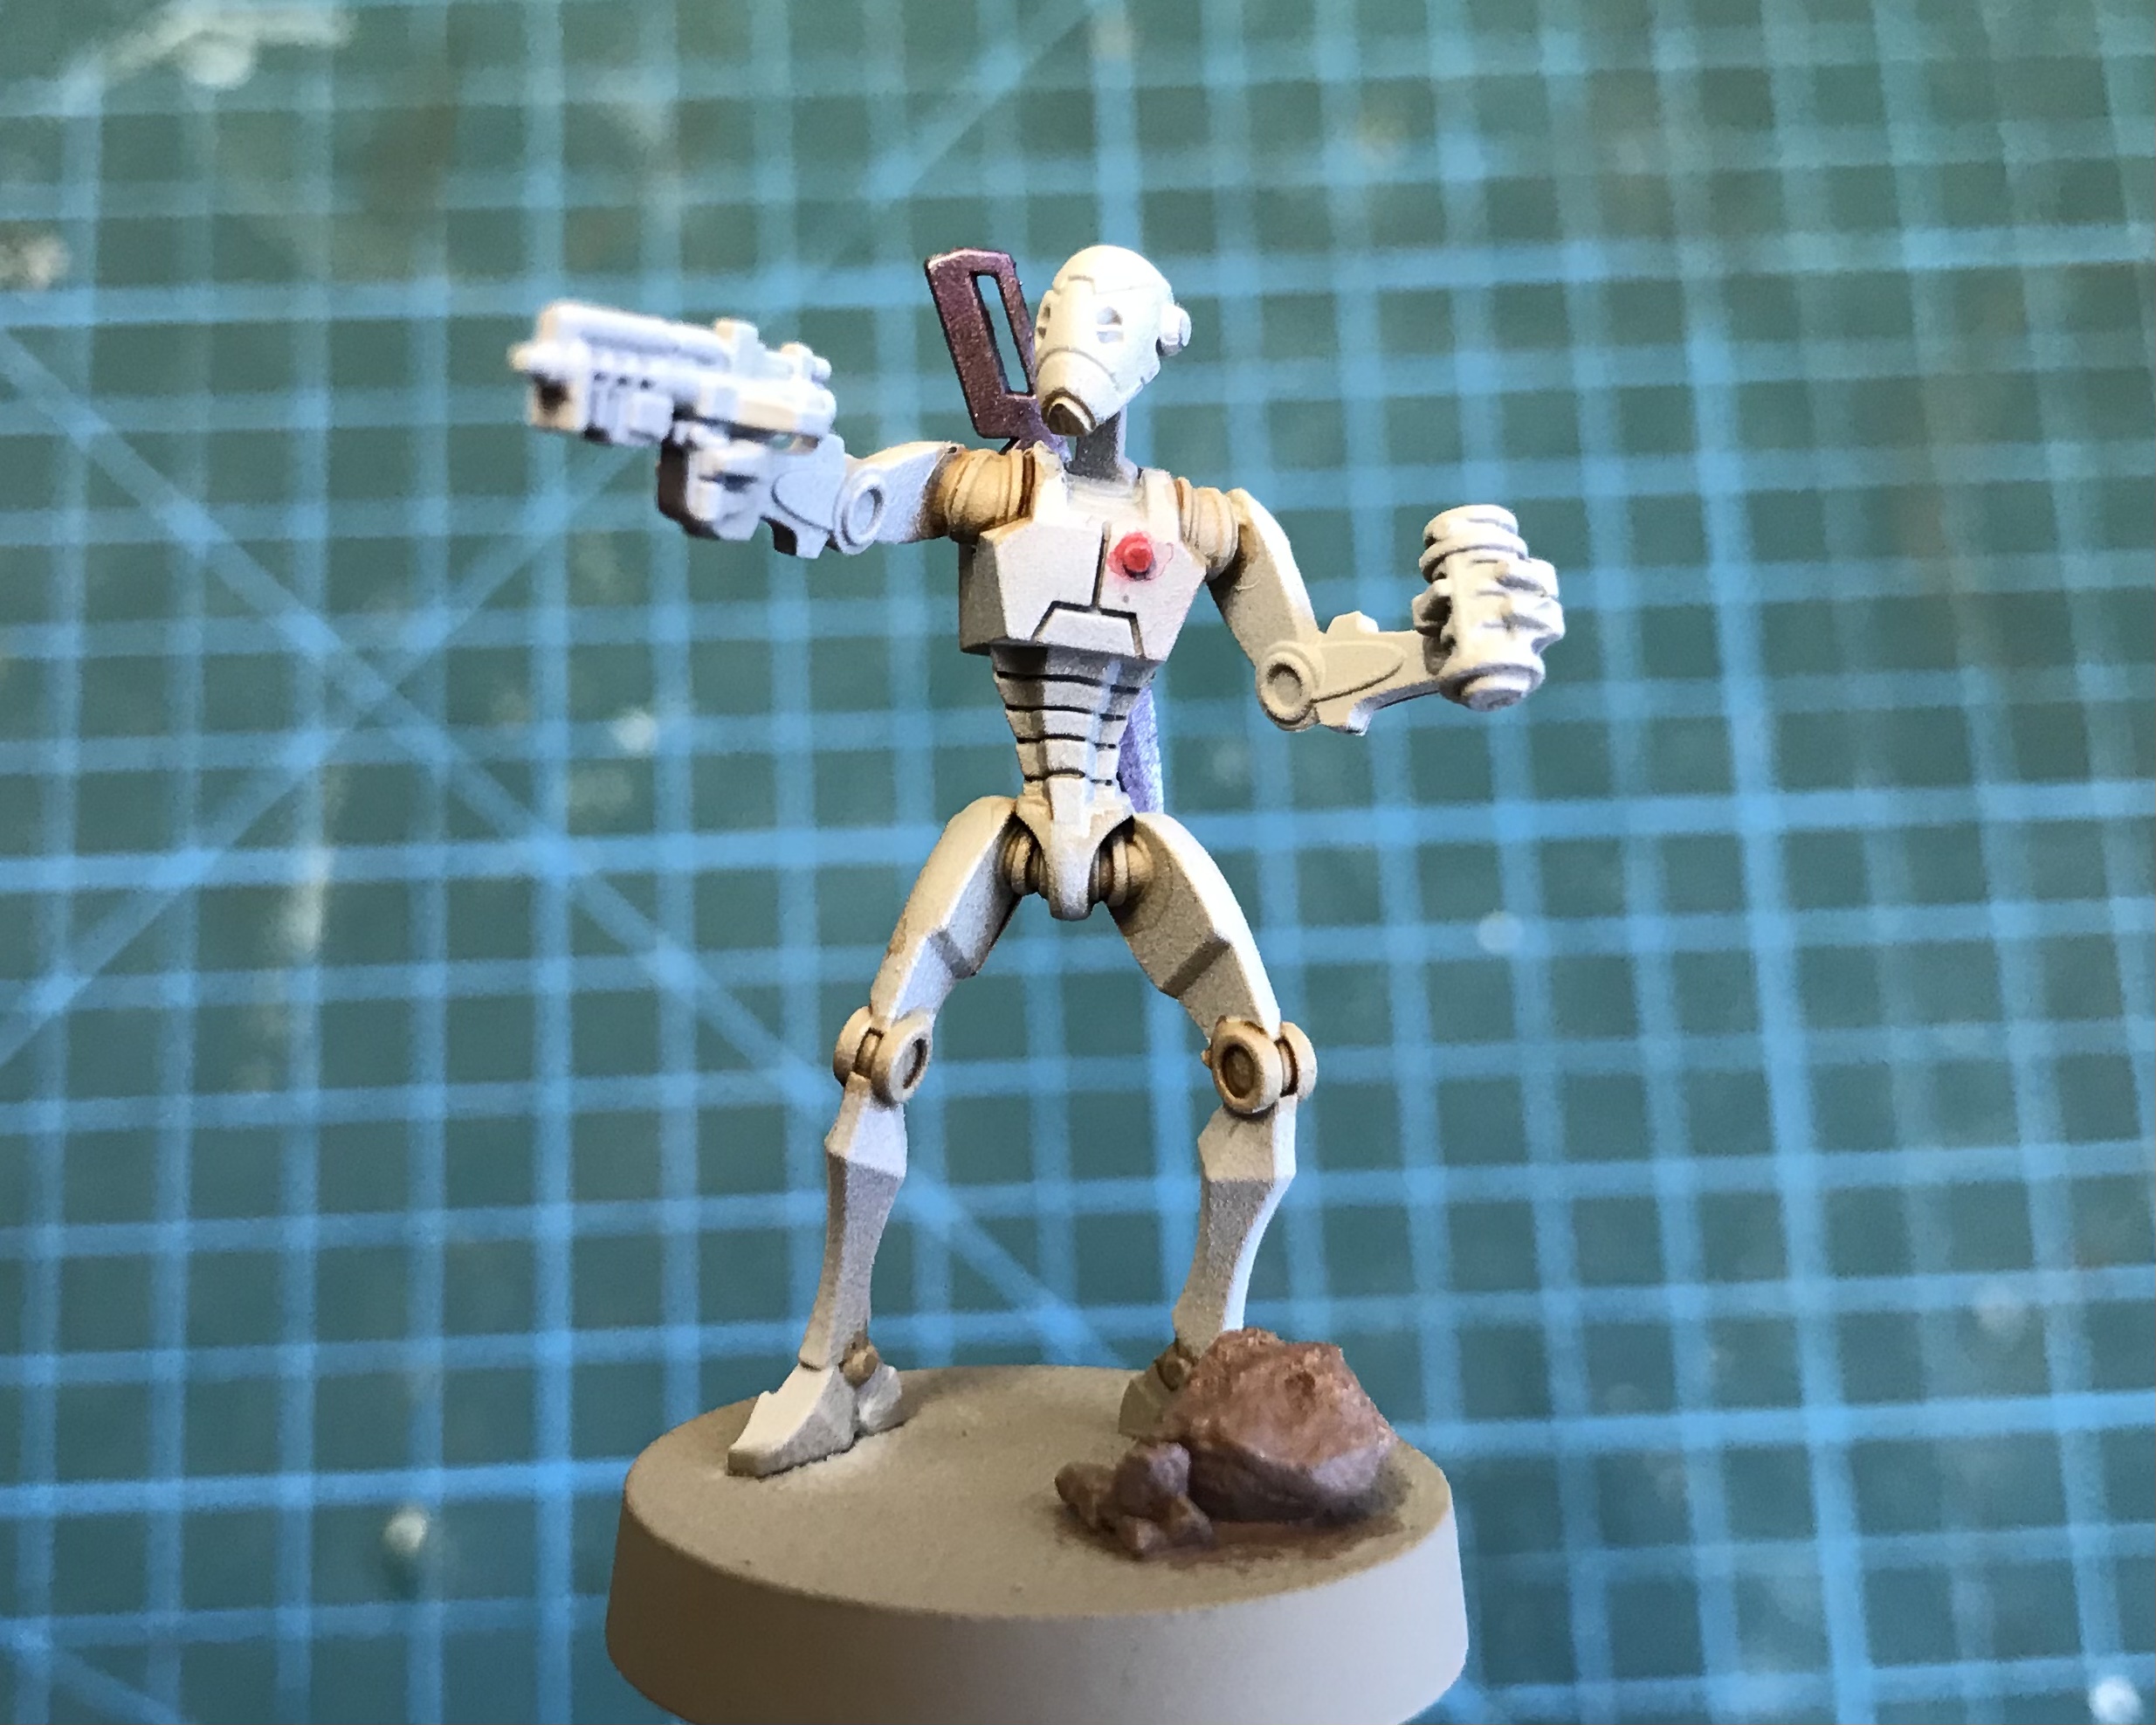
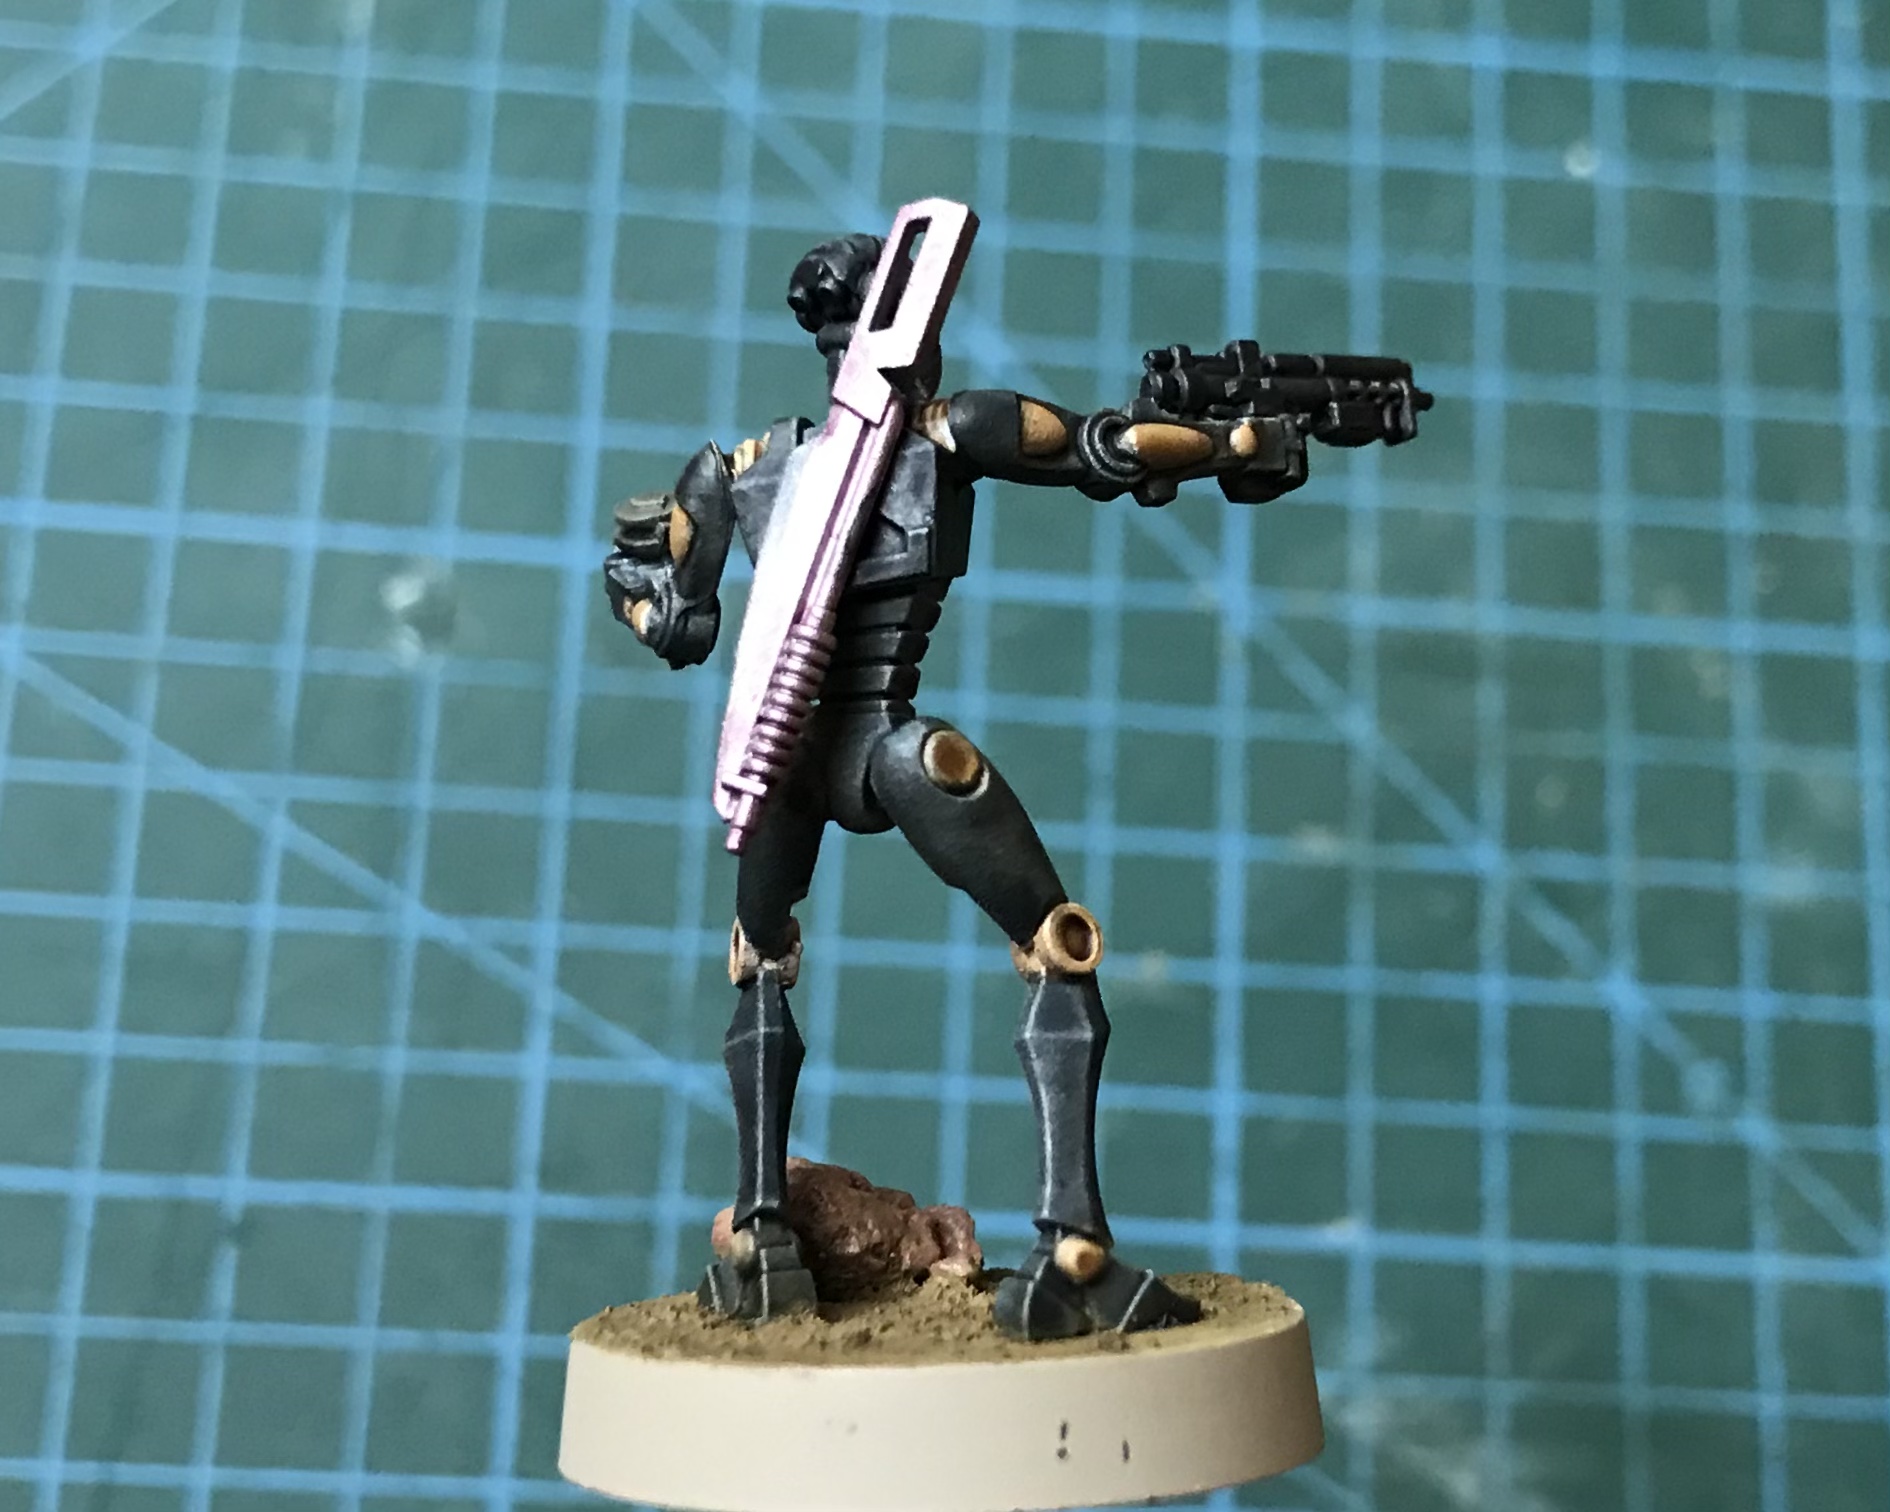
The BX Command Droid’s required a little more work than the B1’s. I touched their eyes back in with Wraithbone to make sure they stood out and added a second, light dry brush of German Field Blue over the black chassis. The bases were then completed as per my previous units.


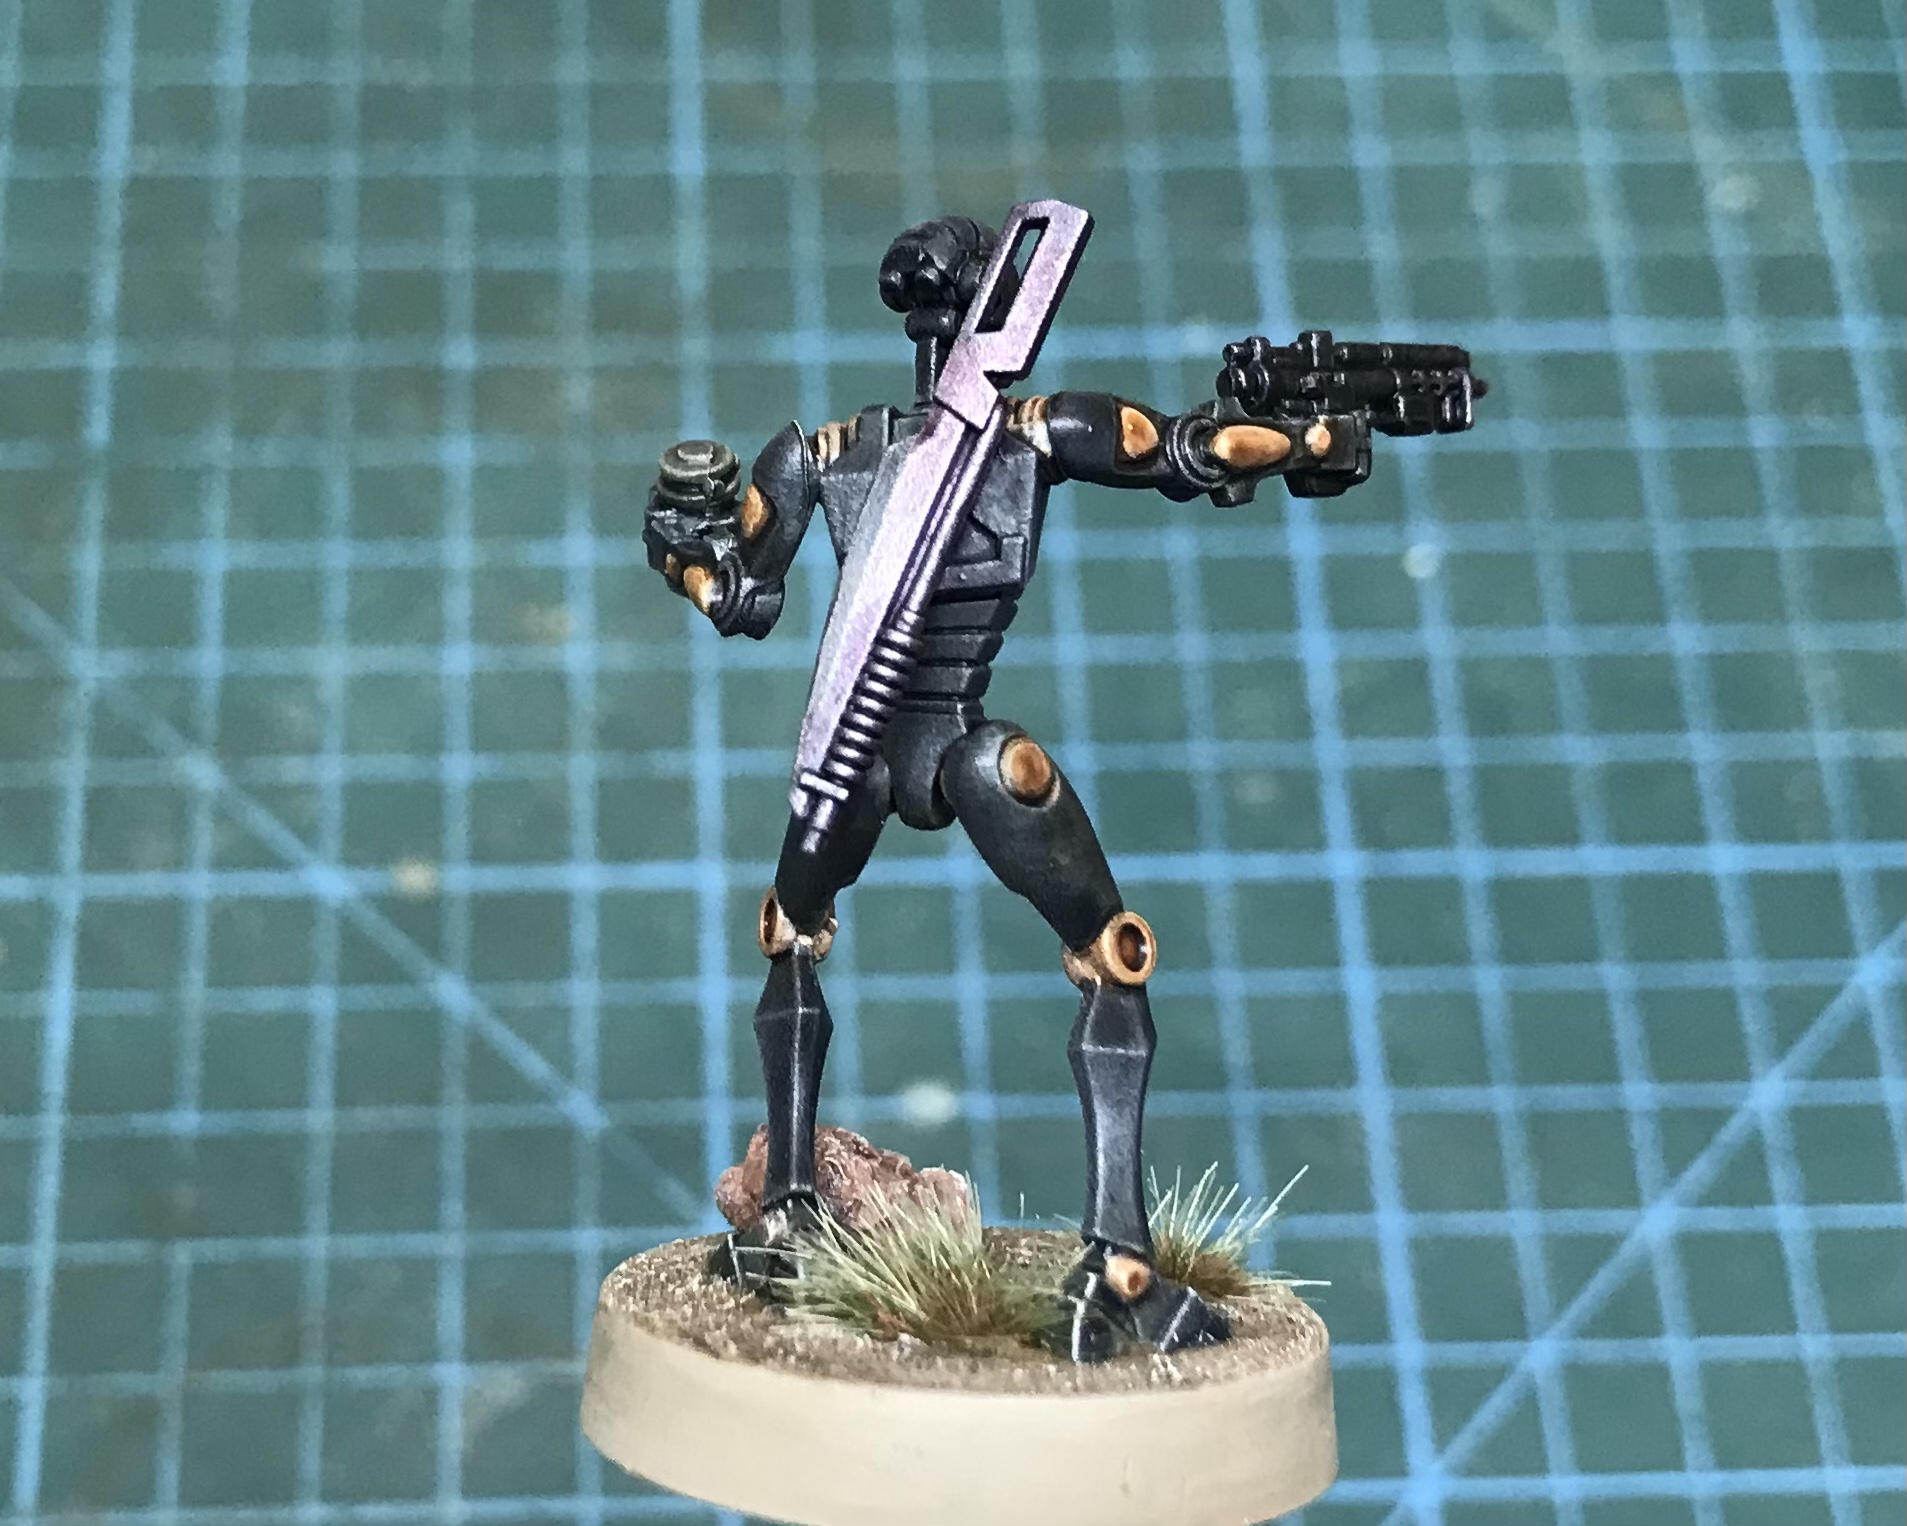
Checking back over my reference I noticed that the Vibrosword blades could benefit from another layer of Iron Breaker. I left the hilt and spine showing more purple, as depicted in the image.
Due to lock down restrictions the Commandos were yet to see the table top but my intention is to run them as follows;
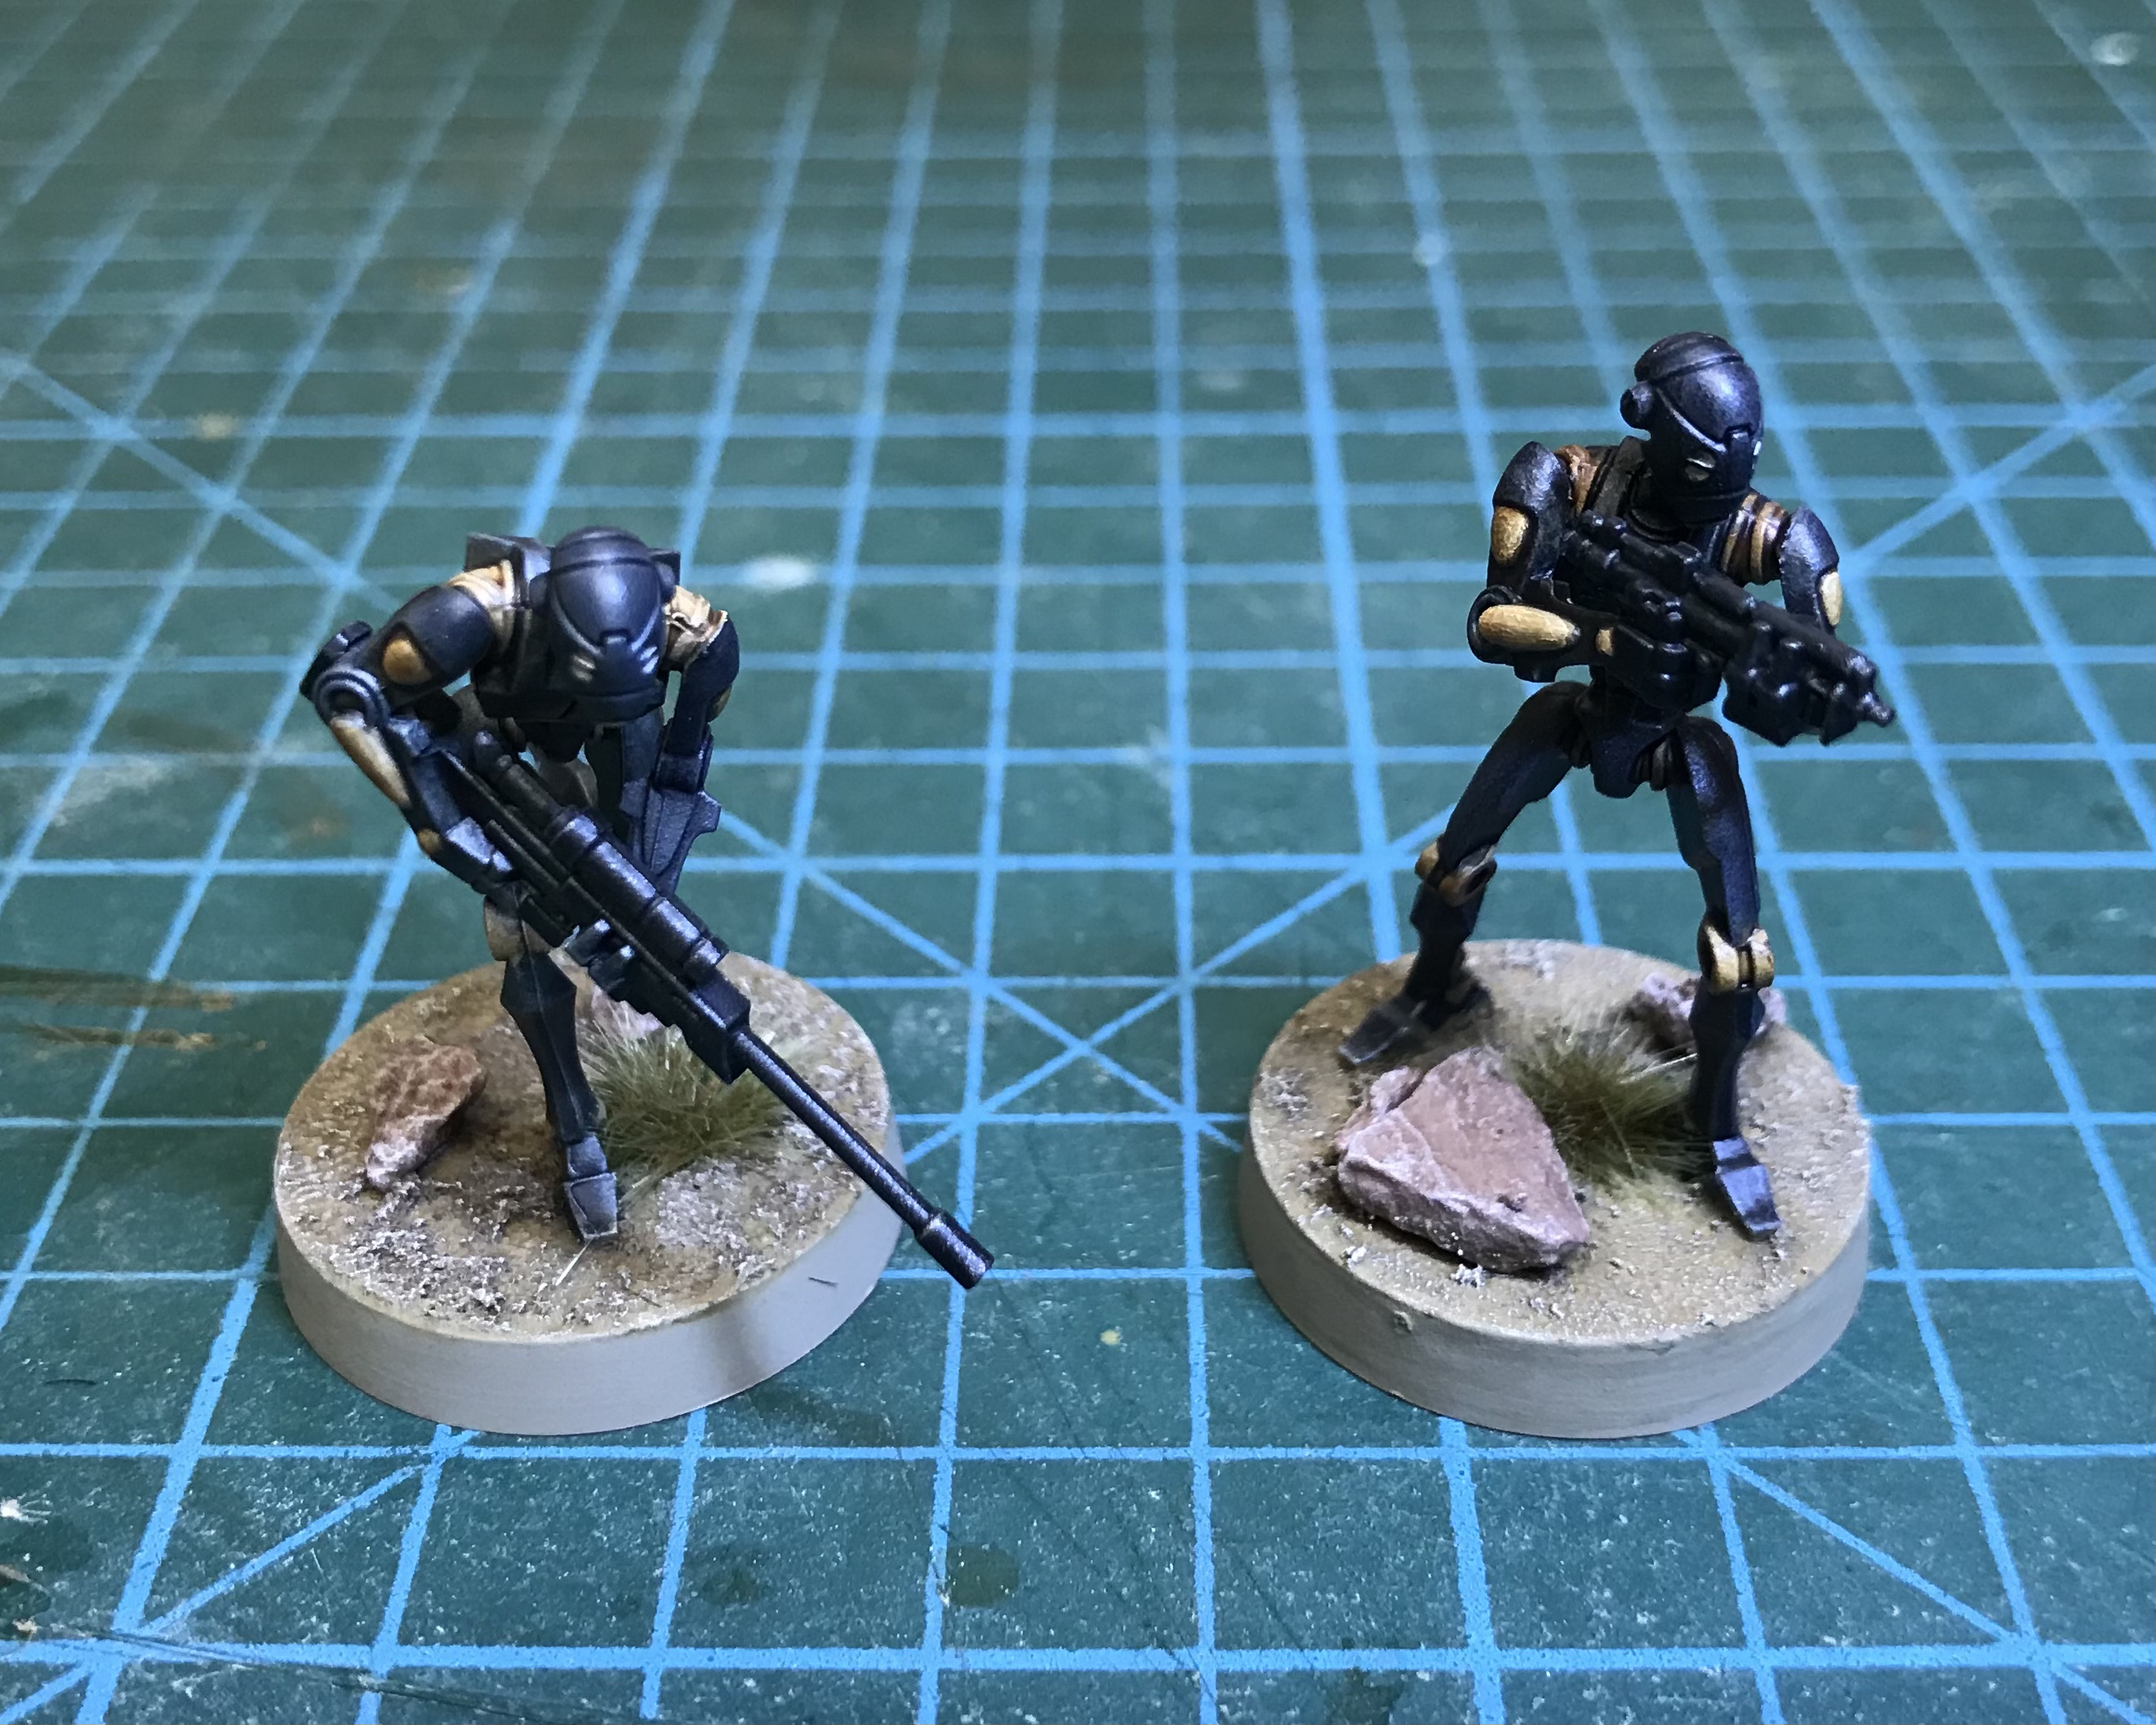
Firstly this two man sniper team who will be perfect for grabbing back field objectives and harassing critical enemy units from range. The commands have the most powerful sniper rifle to date, boasting two red dice and the Lethal key word. Combined with the Commandos Sharp Shooter ability this unit is all but guaranteed to cause at least one wound each time it fires.

The rest of the droids will form a unit equipped with Vibroswords and include the Dioxis Mine Saboteur. This unit will play a much more aggressive role, making the most of the scout and charge abilities in order to engage the enemy head on.

The Commanding Officers currently available to the Separatists are both close ranged fighters, so this 2nd BX squad is a welcome addition to my force. They are a highly mobile unit, ideal to keep pace with my commander and support an assault.
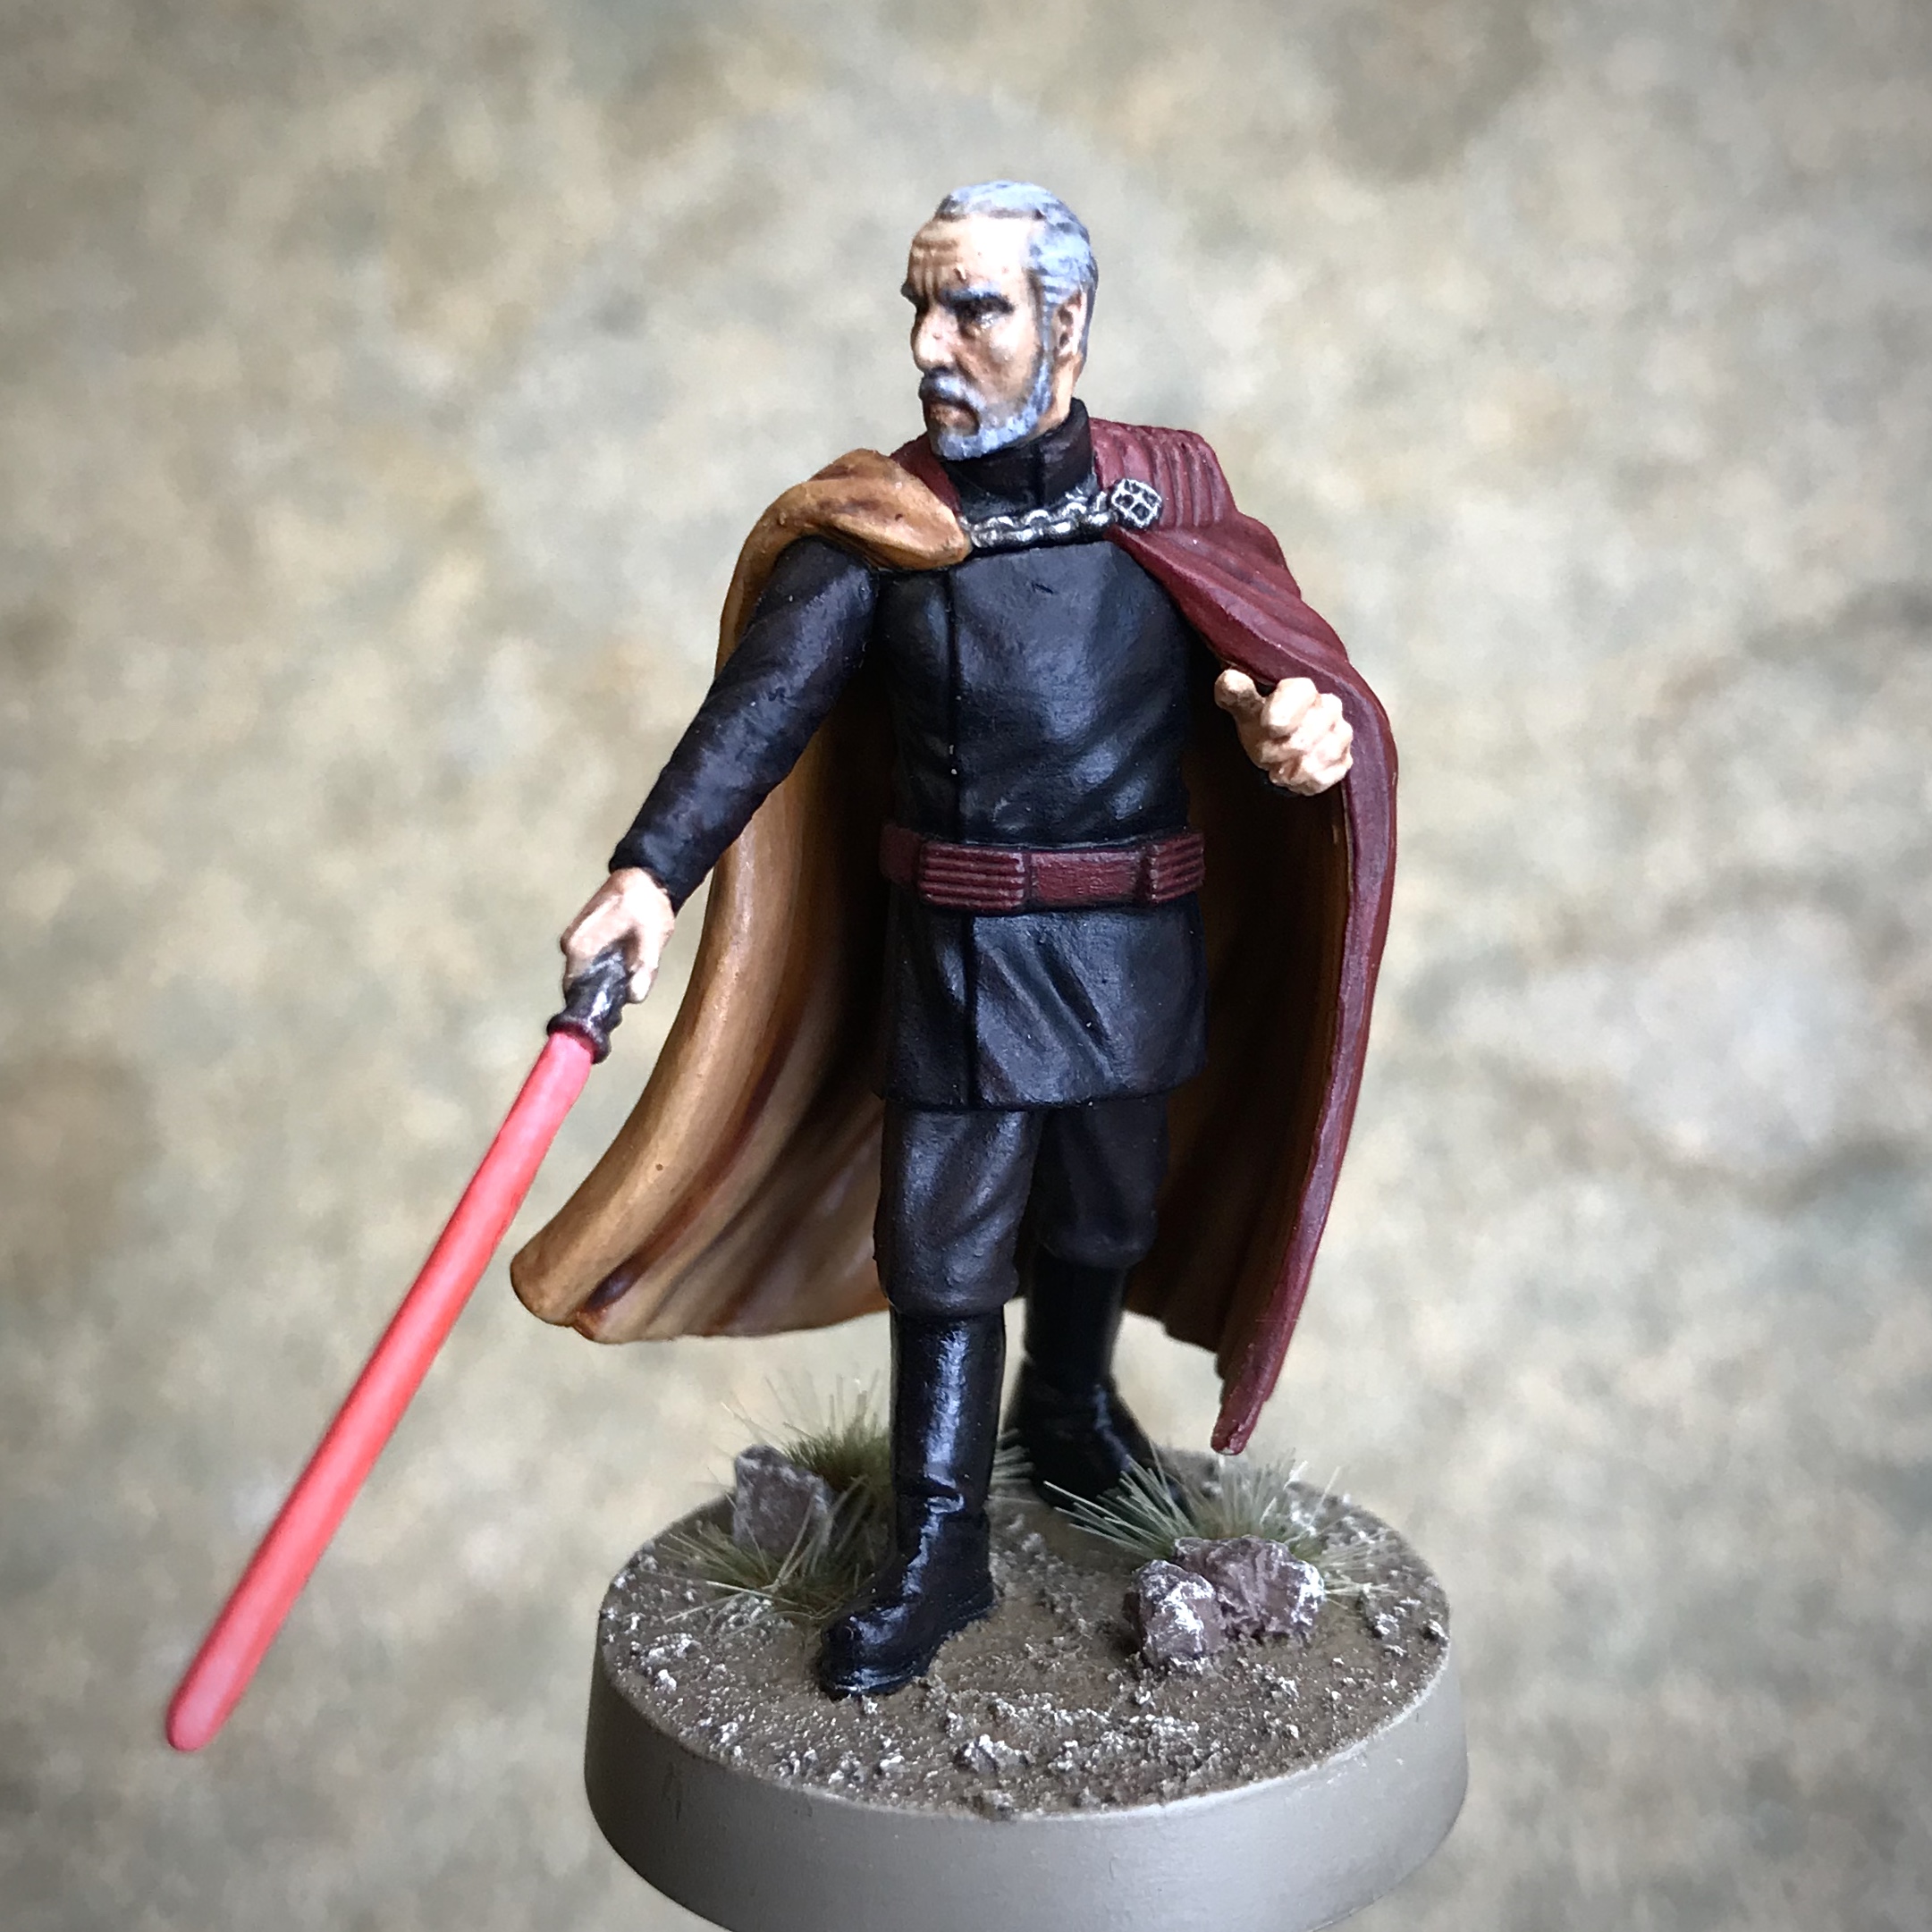
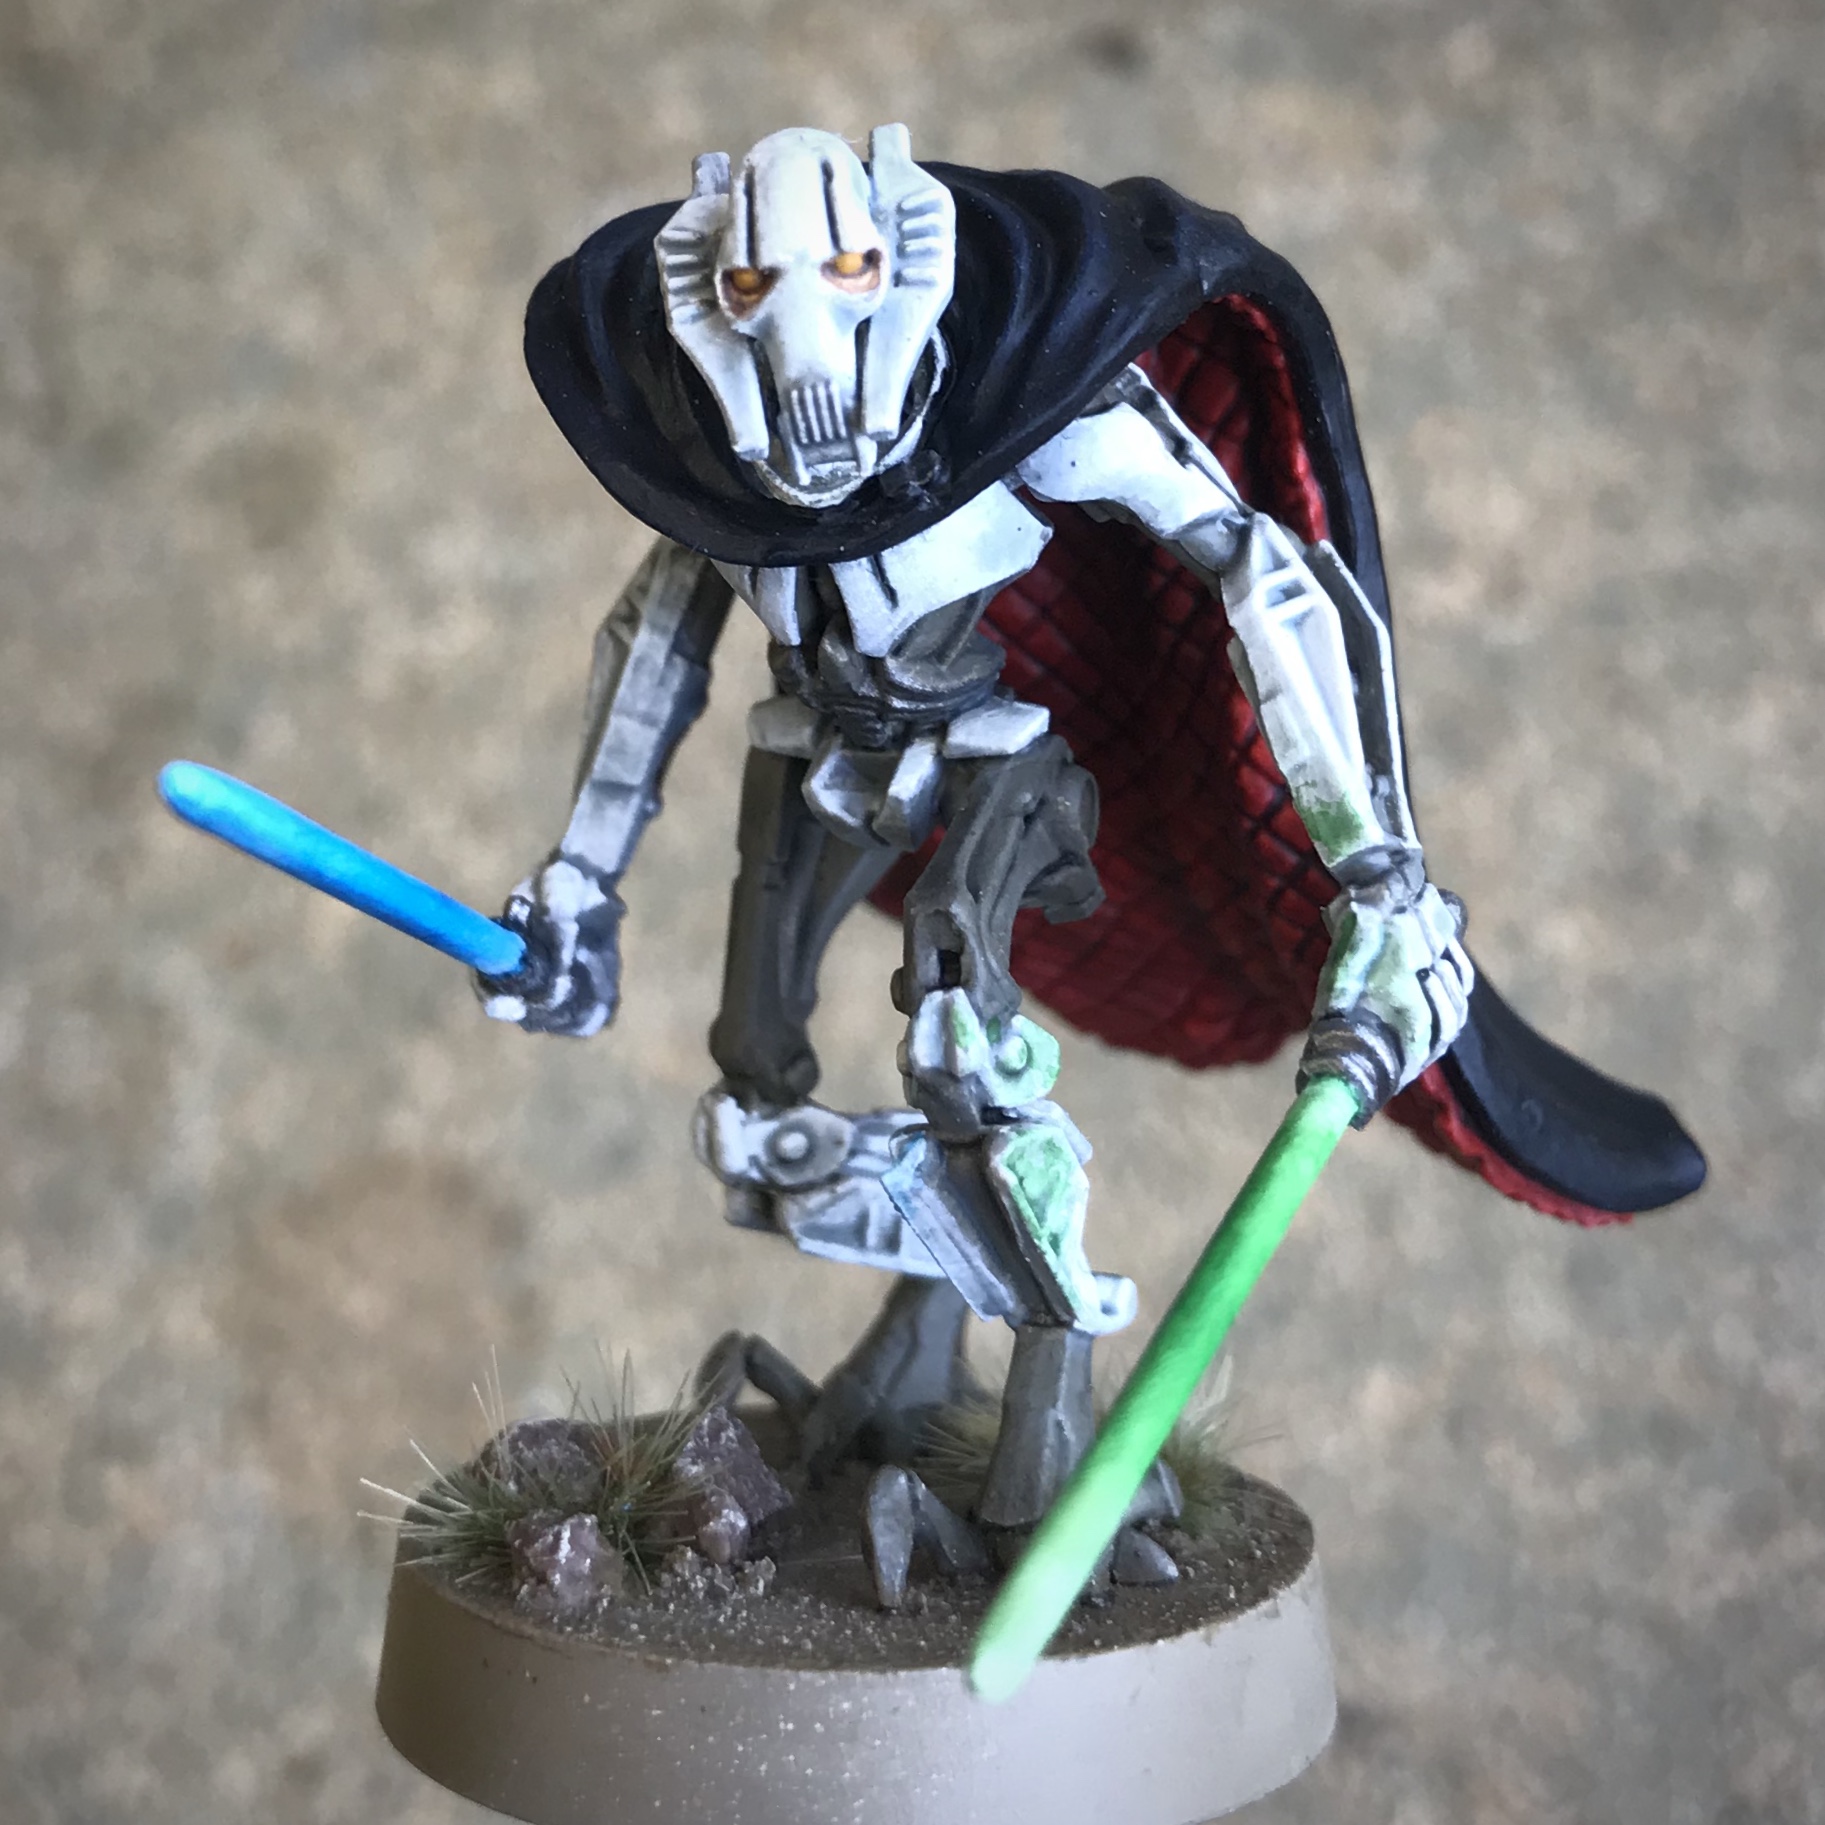
I have already tackled both Count Dooku and General Grievous in smaller projects which can be found here:
Dark Lords of the Sith – OnTableTop – Home of Beasts of War
Quick and Simple General Grievous – OnTableTop – Home of Beasts of War
Maul and Sith Probe Droid Expansion
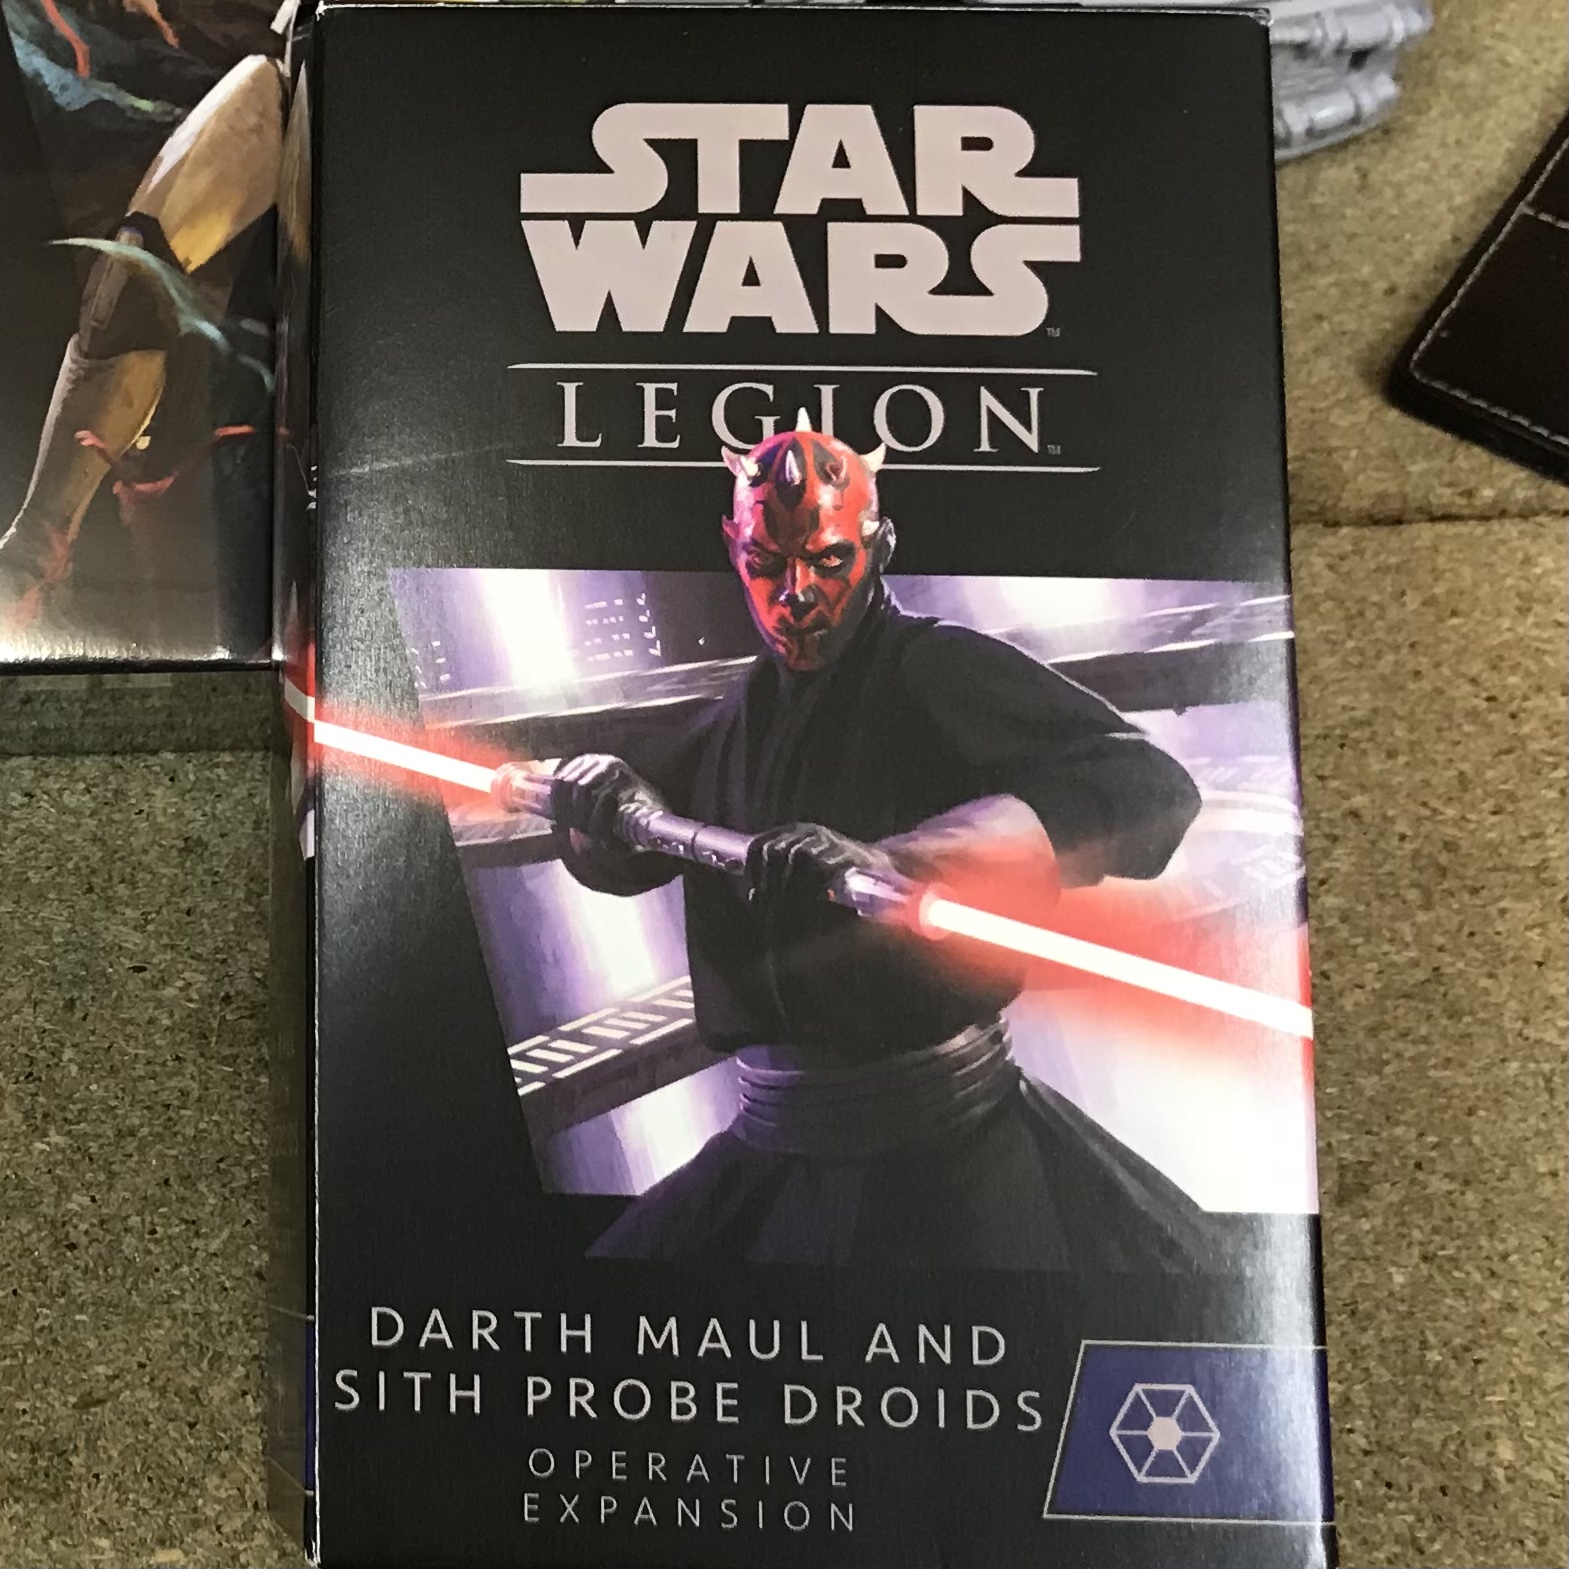
With the arrival of this latest Operative Expansion I have two new units for my Separatist forces. As they’re going to be pretty quick to get table ready, I decided to start by tackling the Probe Droids.
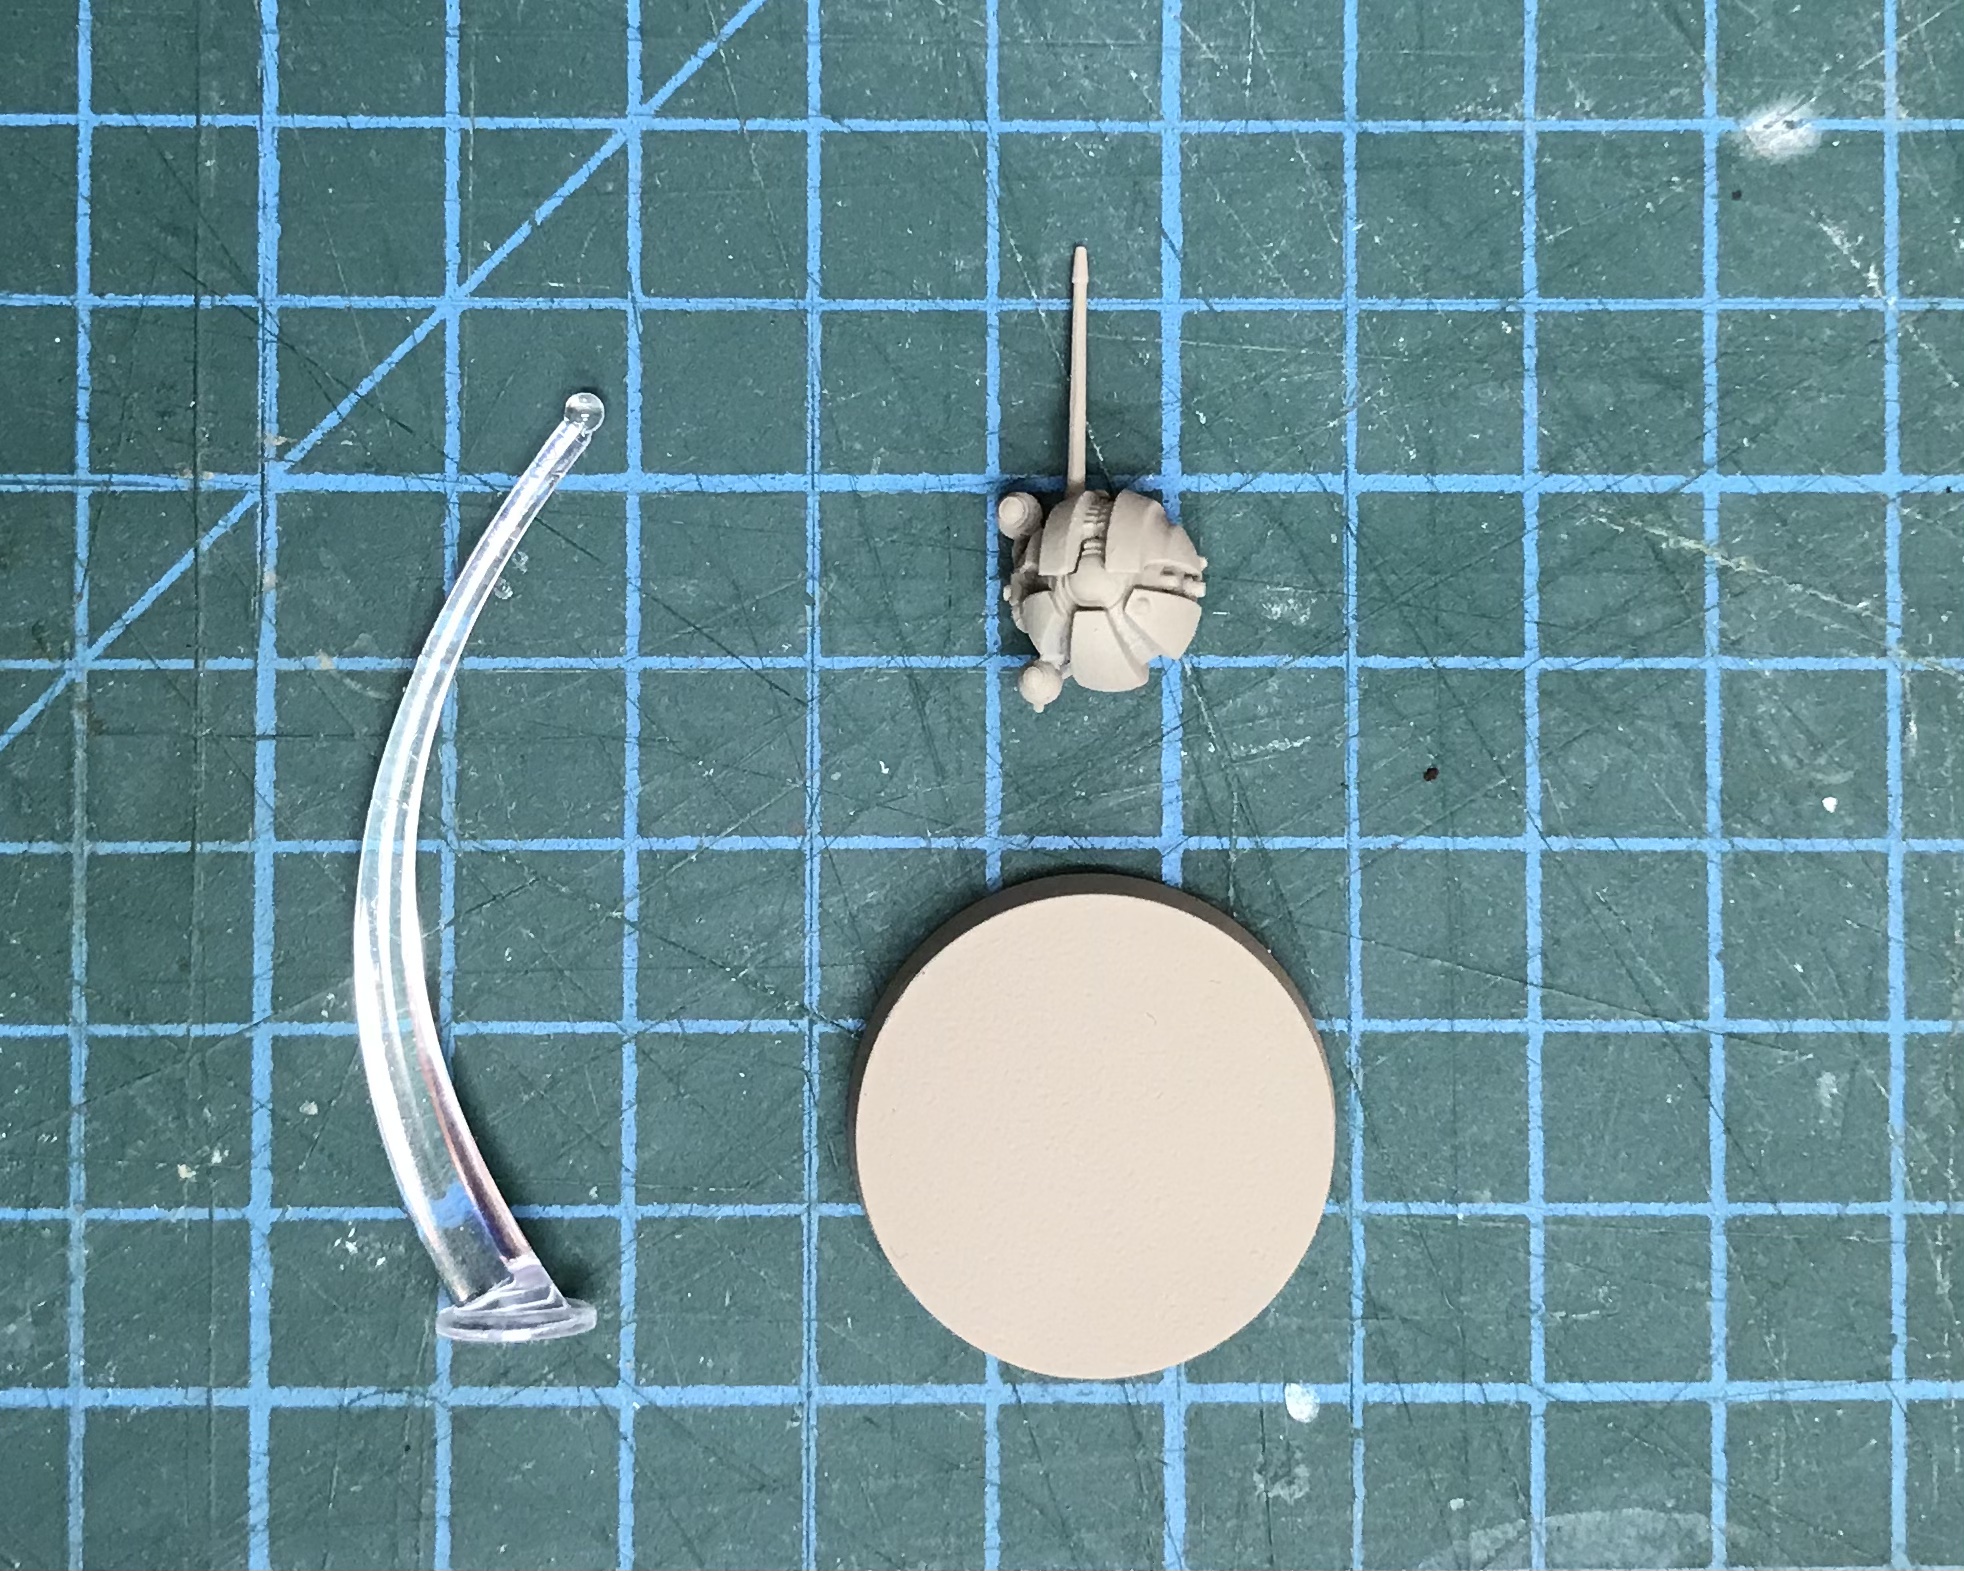
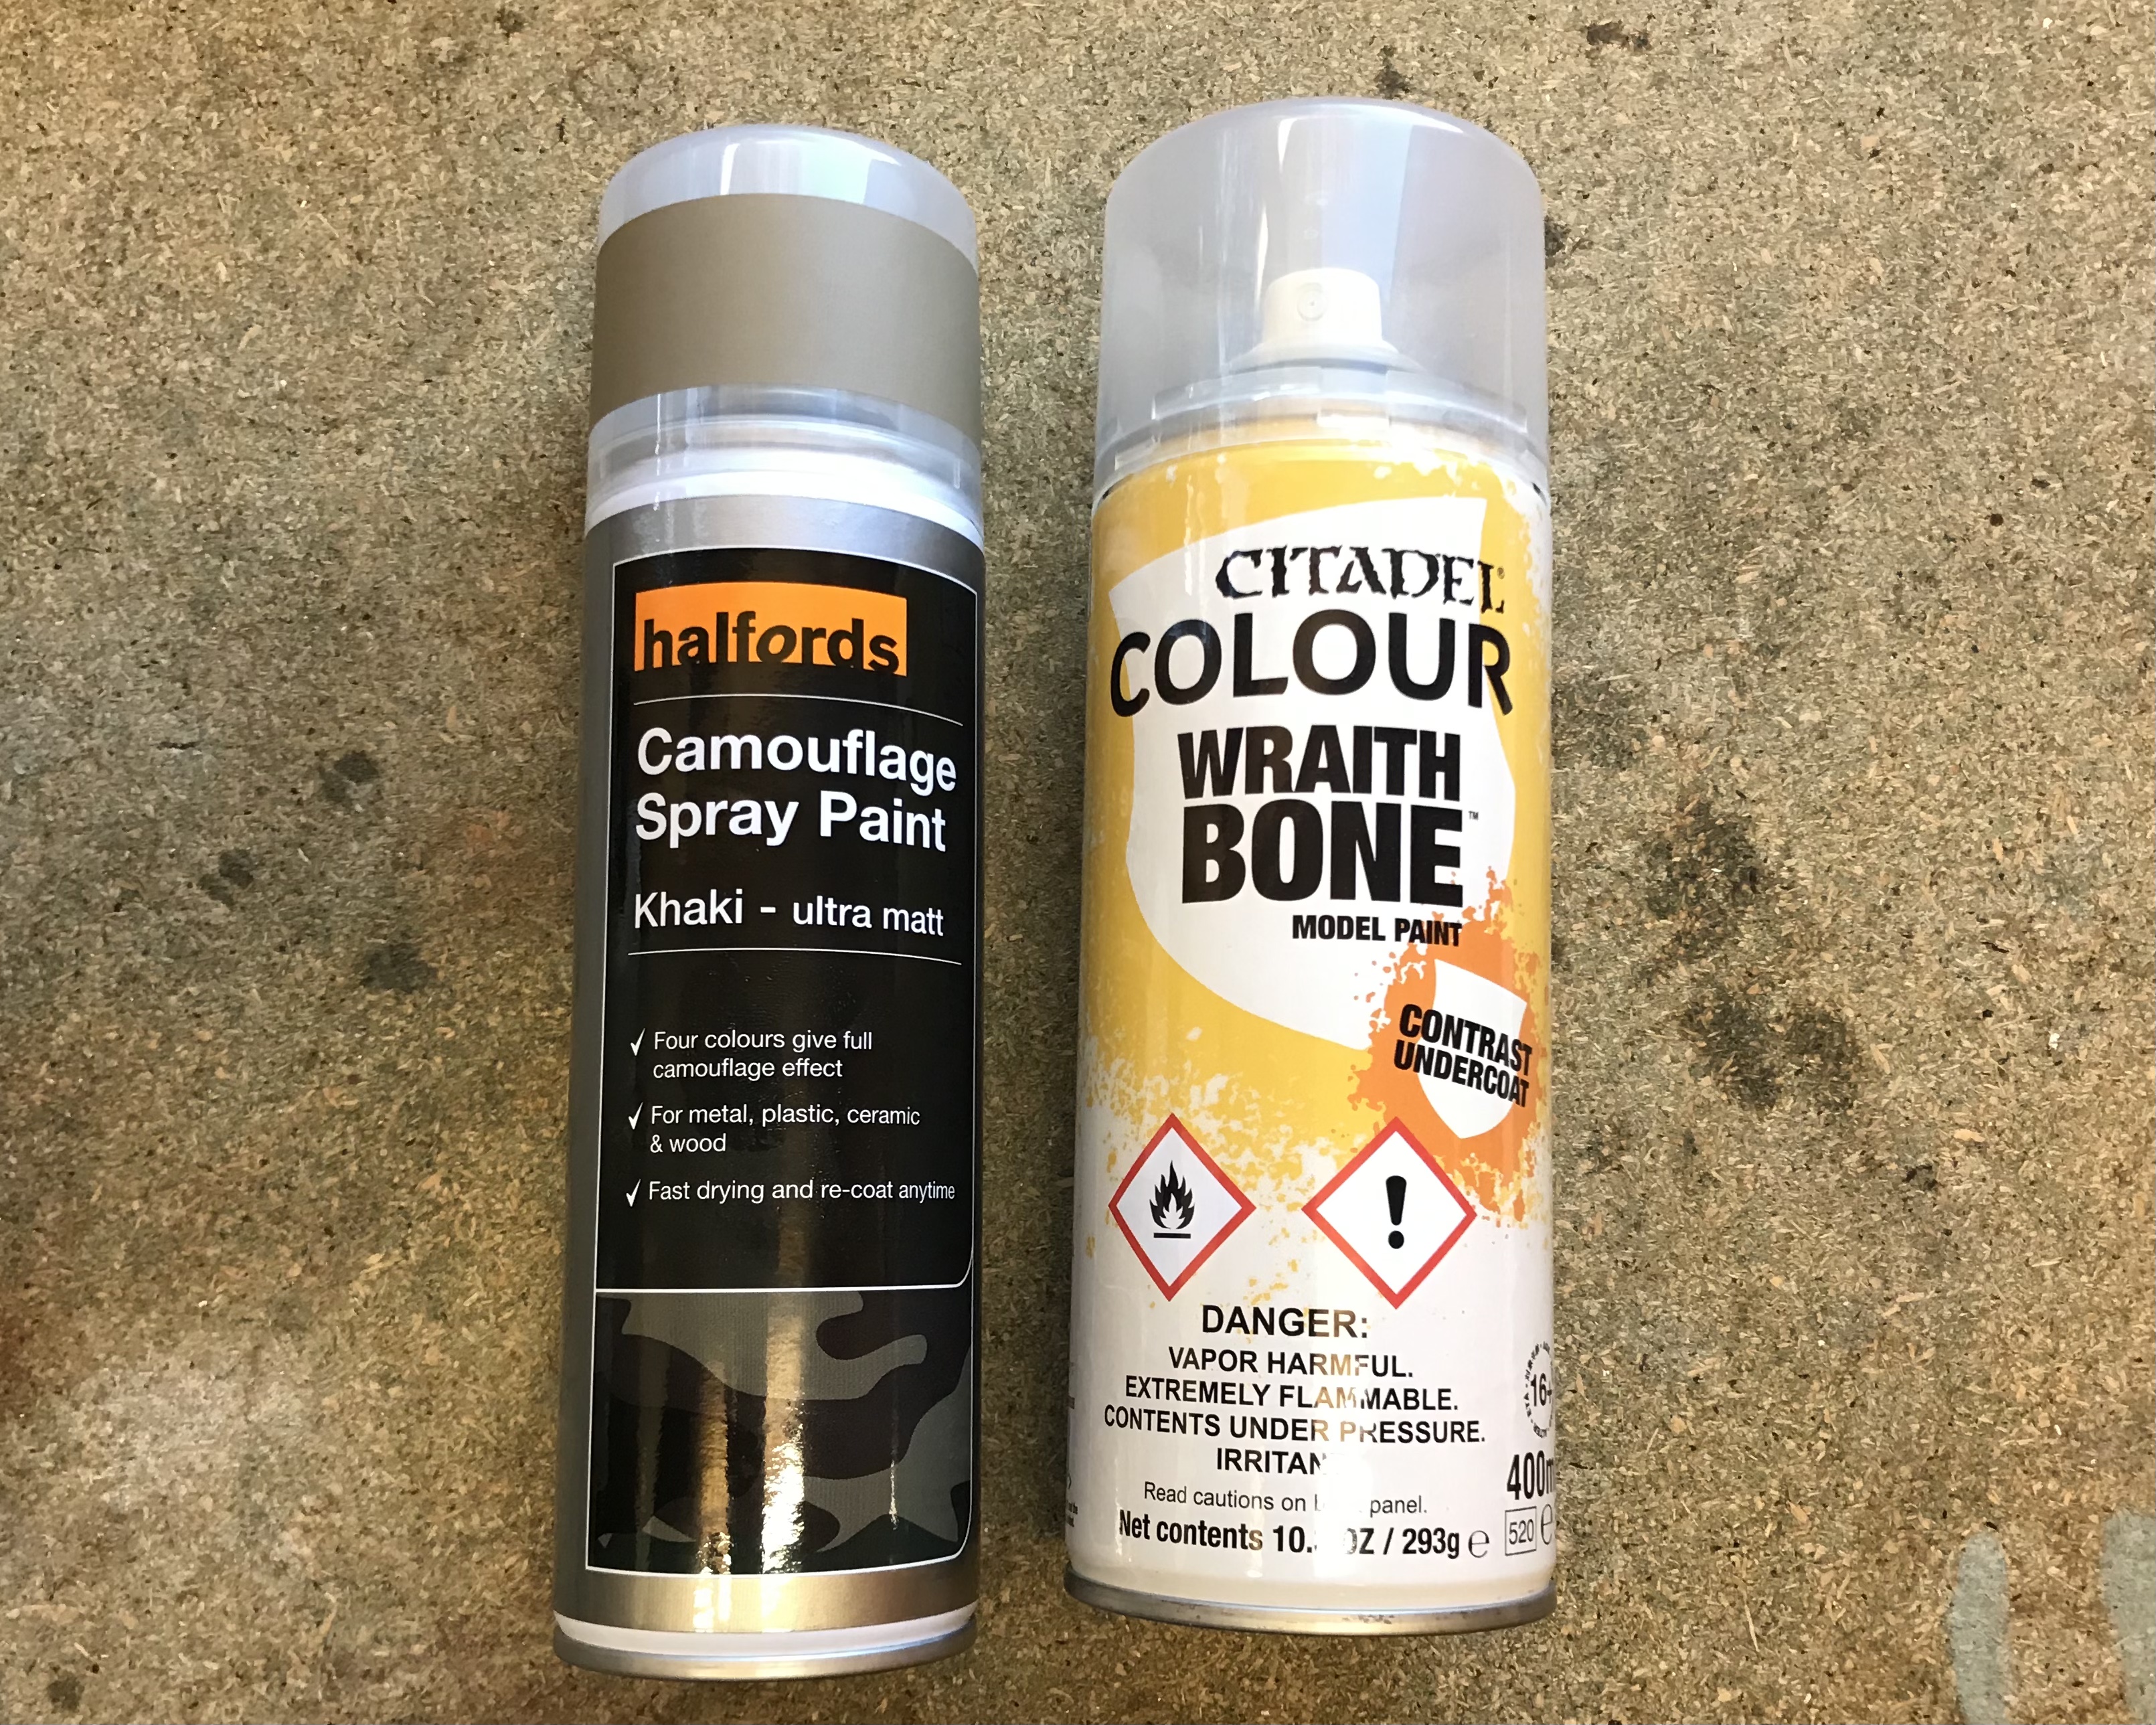
Learning from my previous mistakes I kept the models, flight stands and bases unassembled this time. For convenience I primed the droids the same colour as the bases (the Khaki primer I have used throughout).
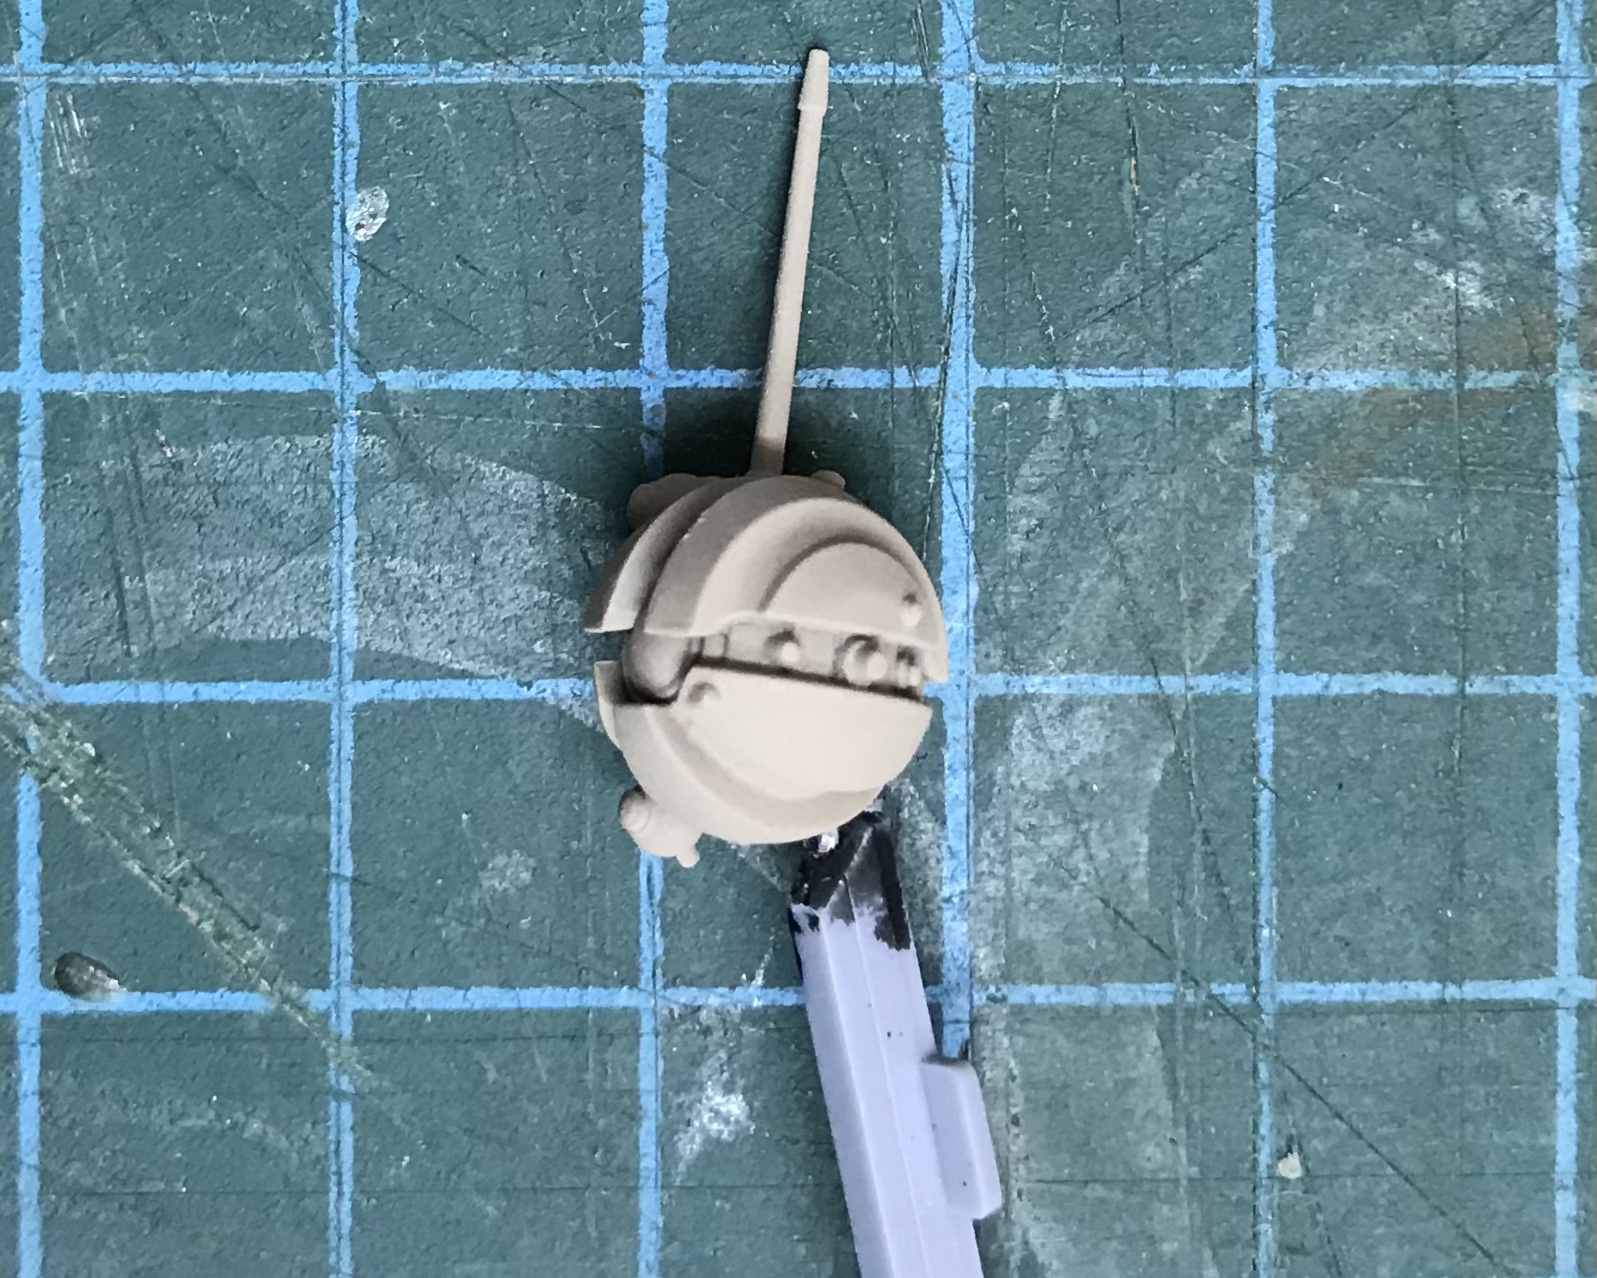
I fixed the probe droids to a piece of sprue for ease of handling. I used a tiny spot of superglue hoping they would pull off without too much paint lifting. This extra process seemed preferable to risking getting paint in the transparent flight stands.

The droid chassis was painted in Vallejo Luftwaffe Uniform Blue and the optic lens and aerial tip were painted with GW Ironbreaker.

The next step was to give the entire chassis a coat of Contrast Black Templar. I thinned it roughly 2:1 with Contrast Medium to help the flow and reduce the pigment.

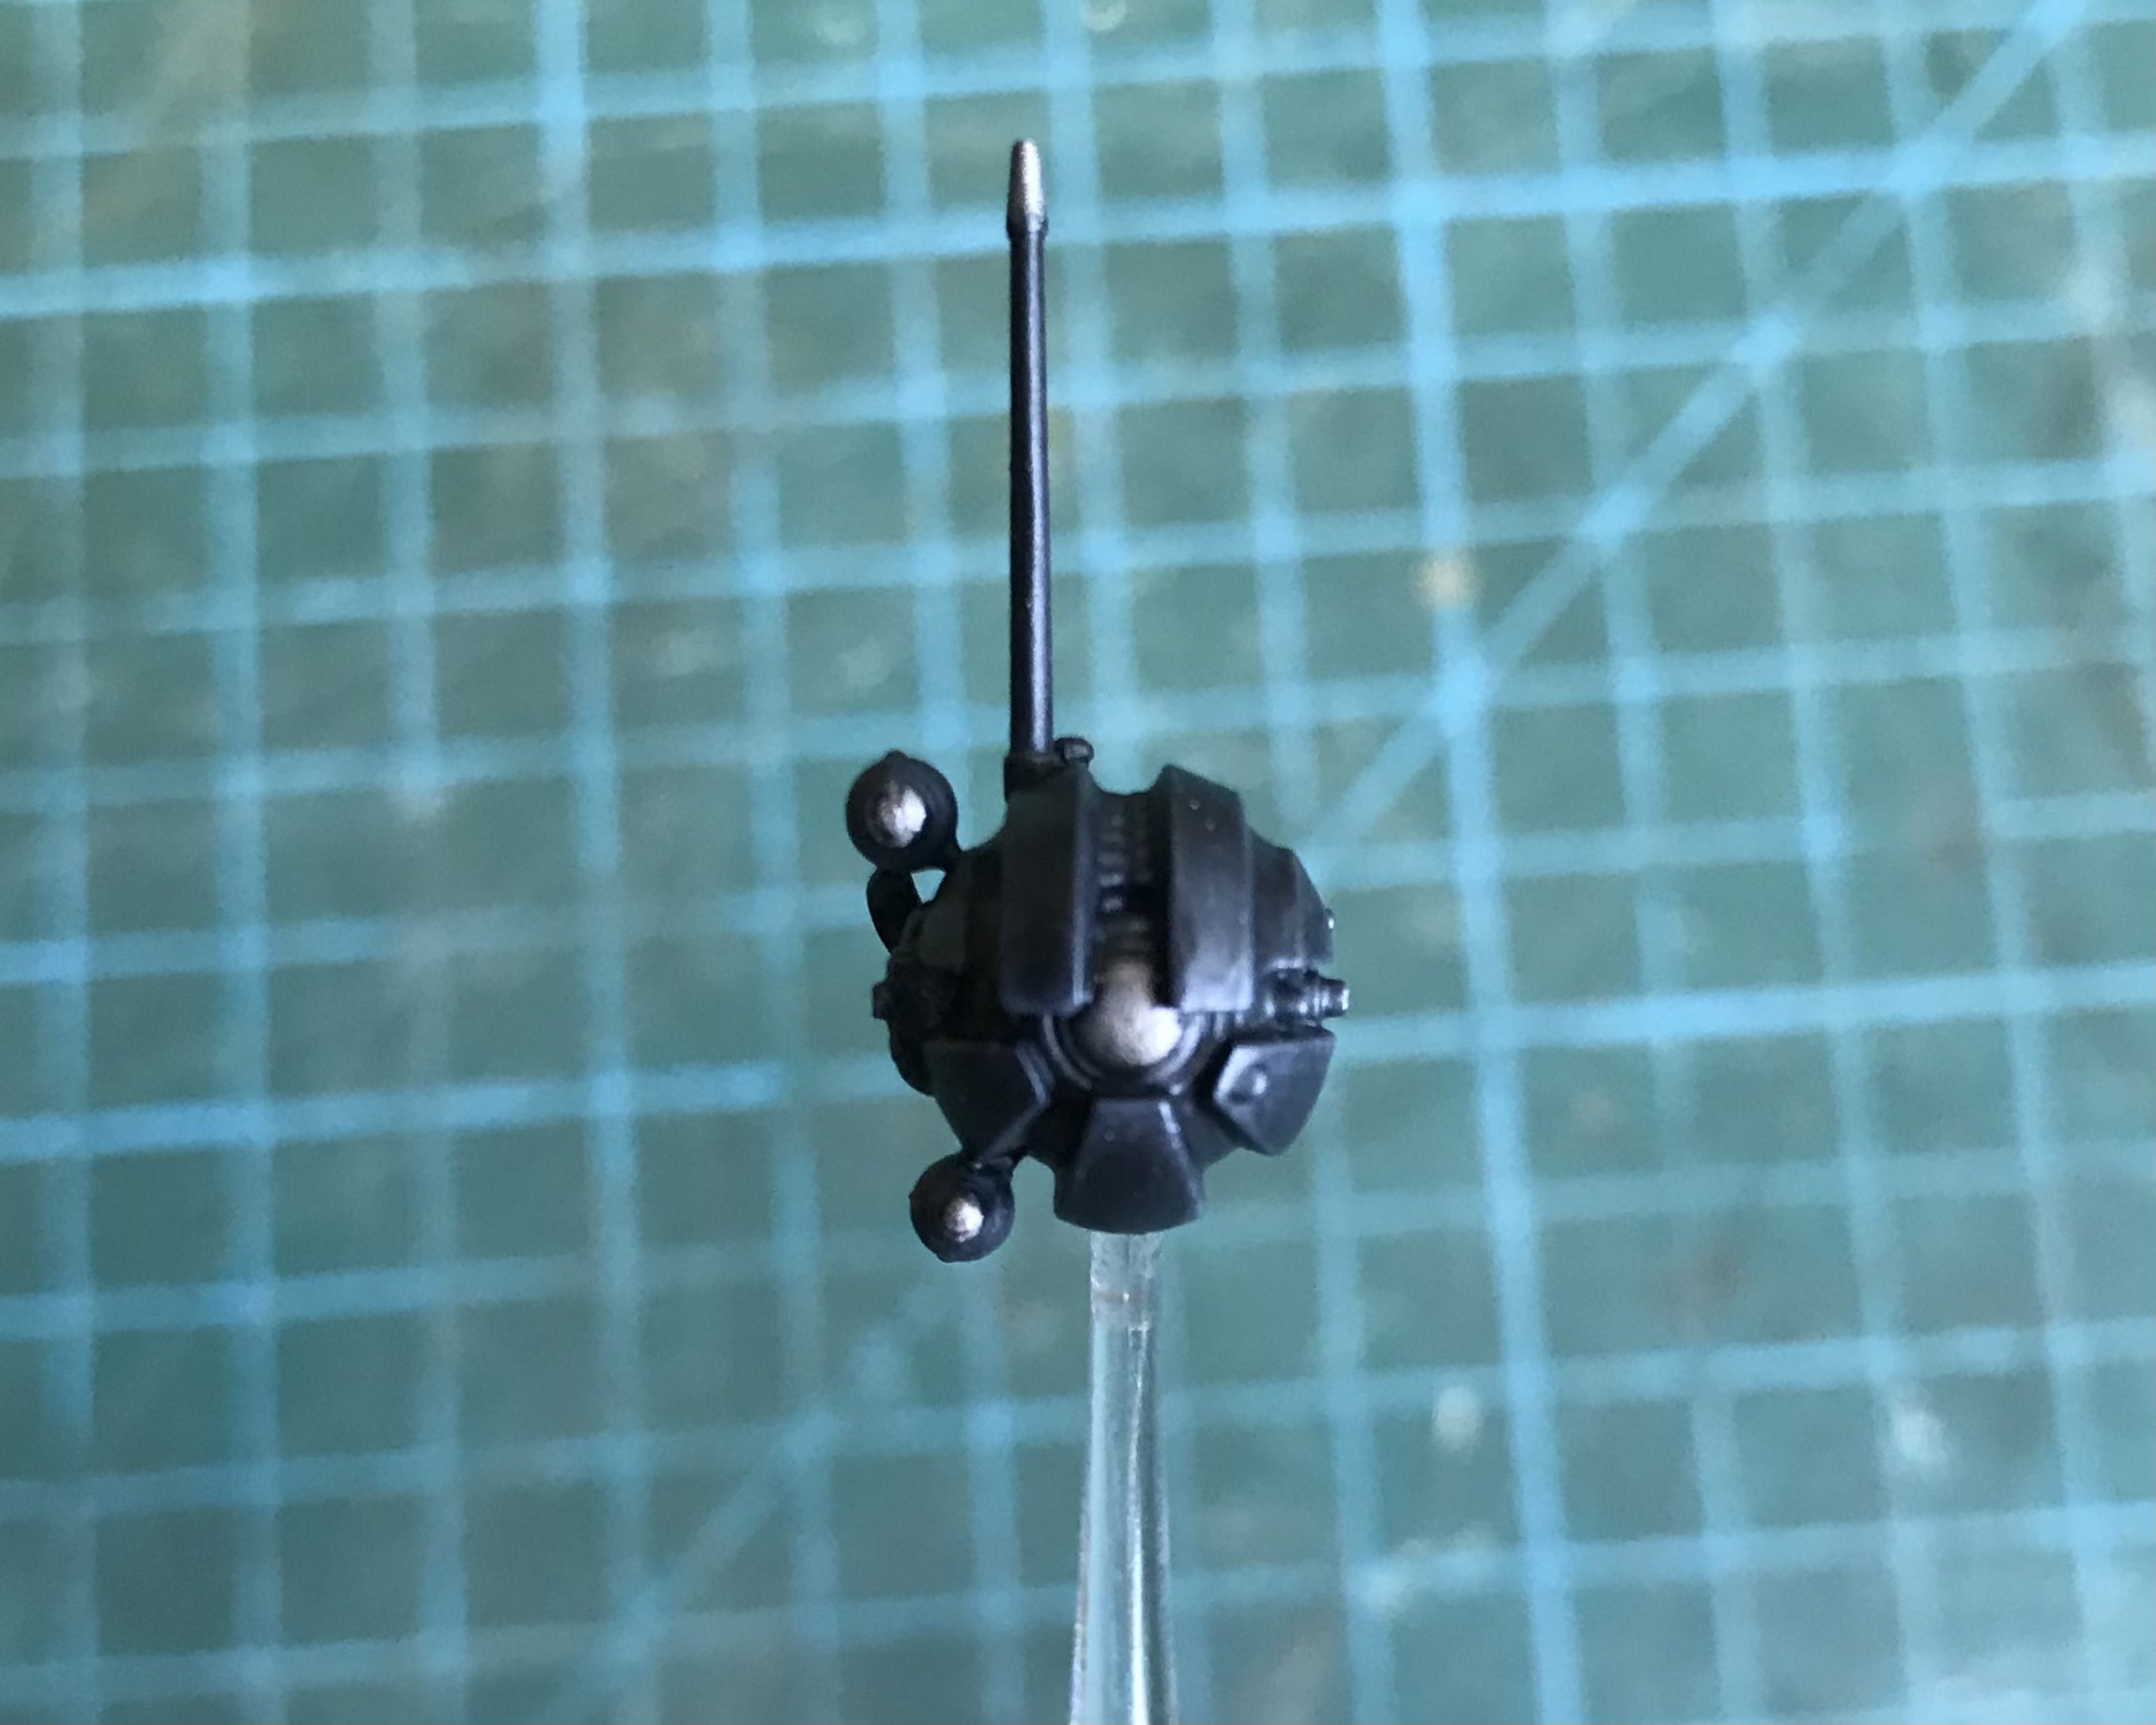
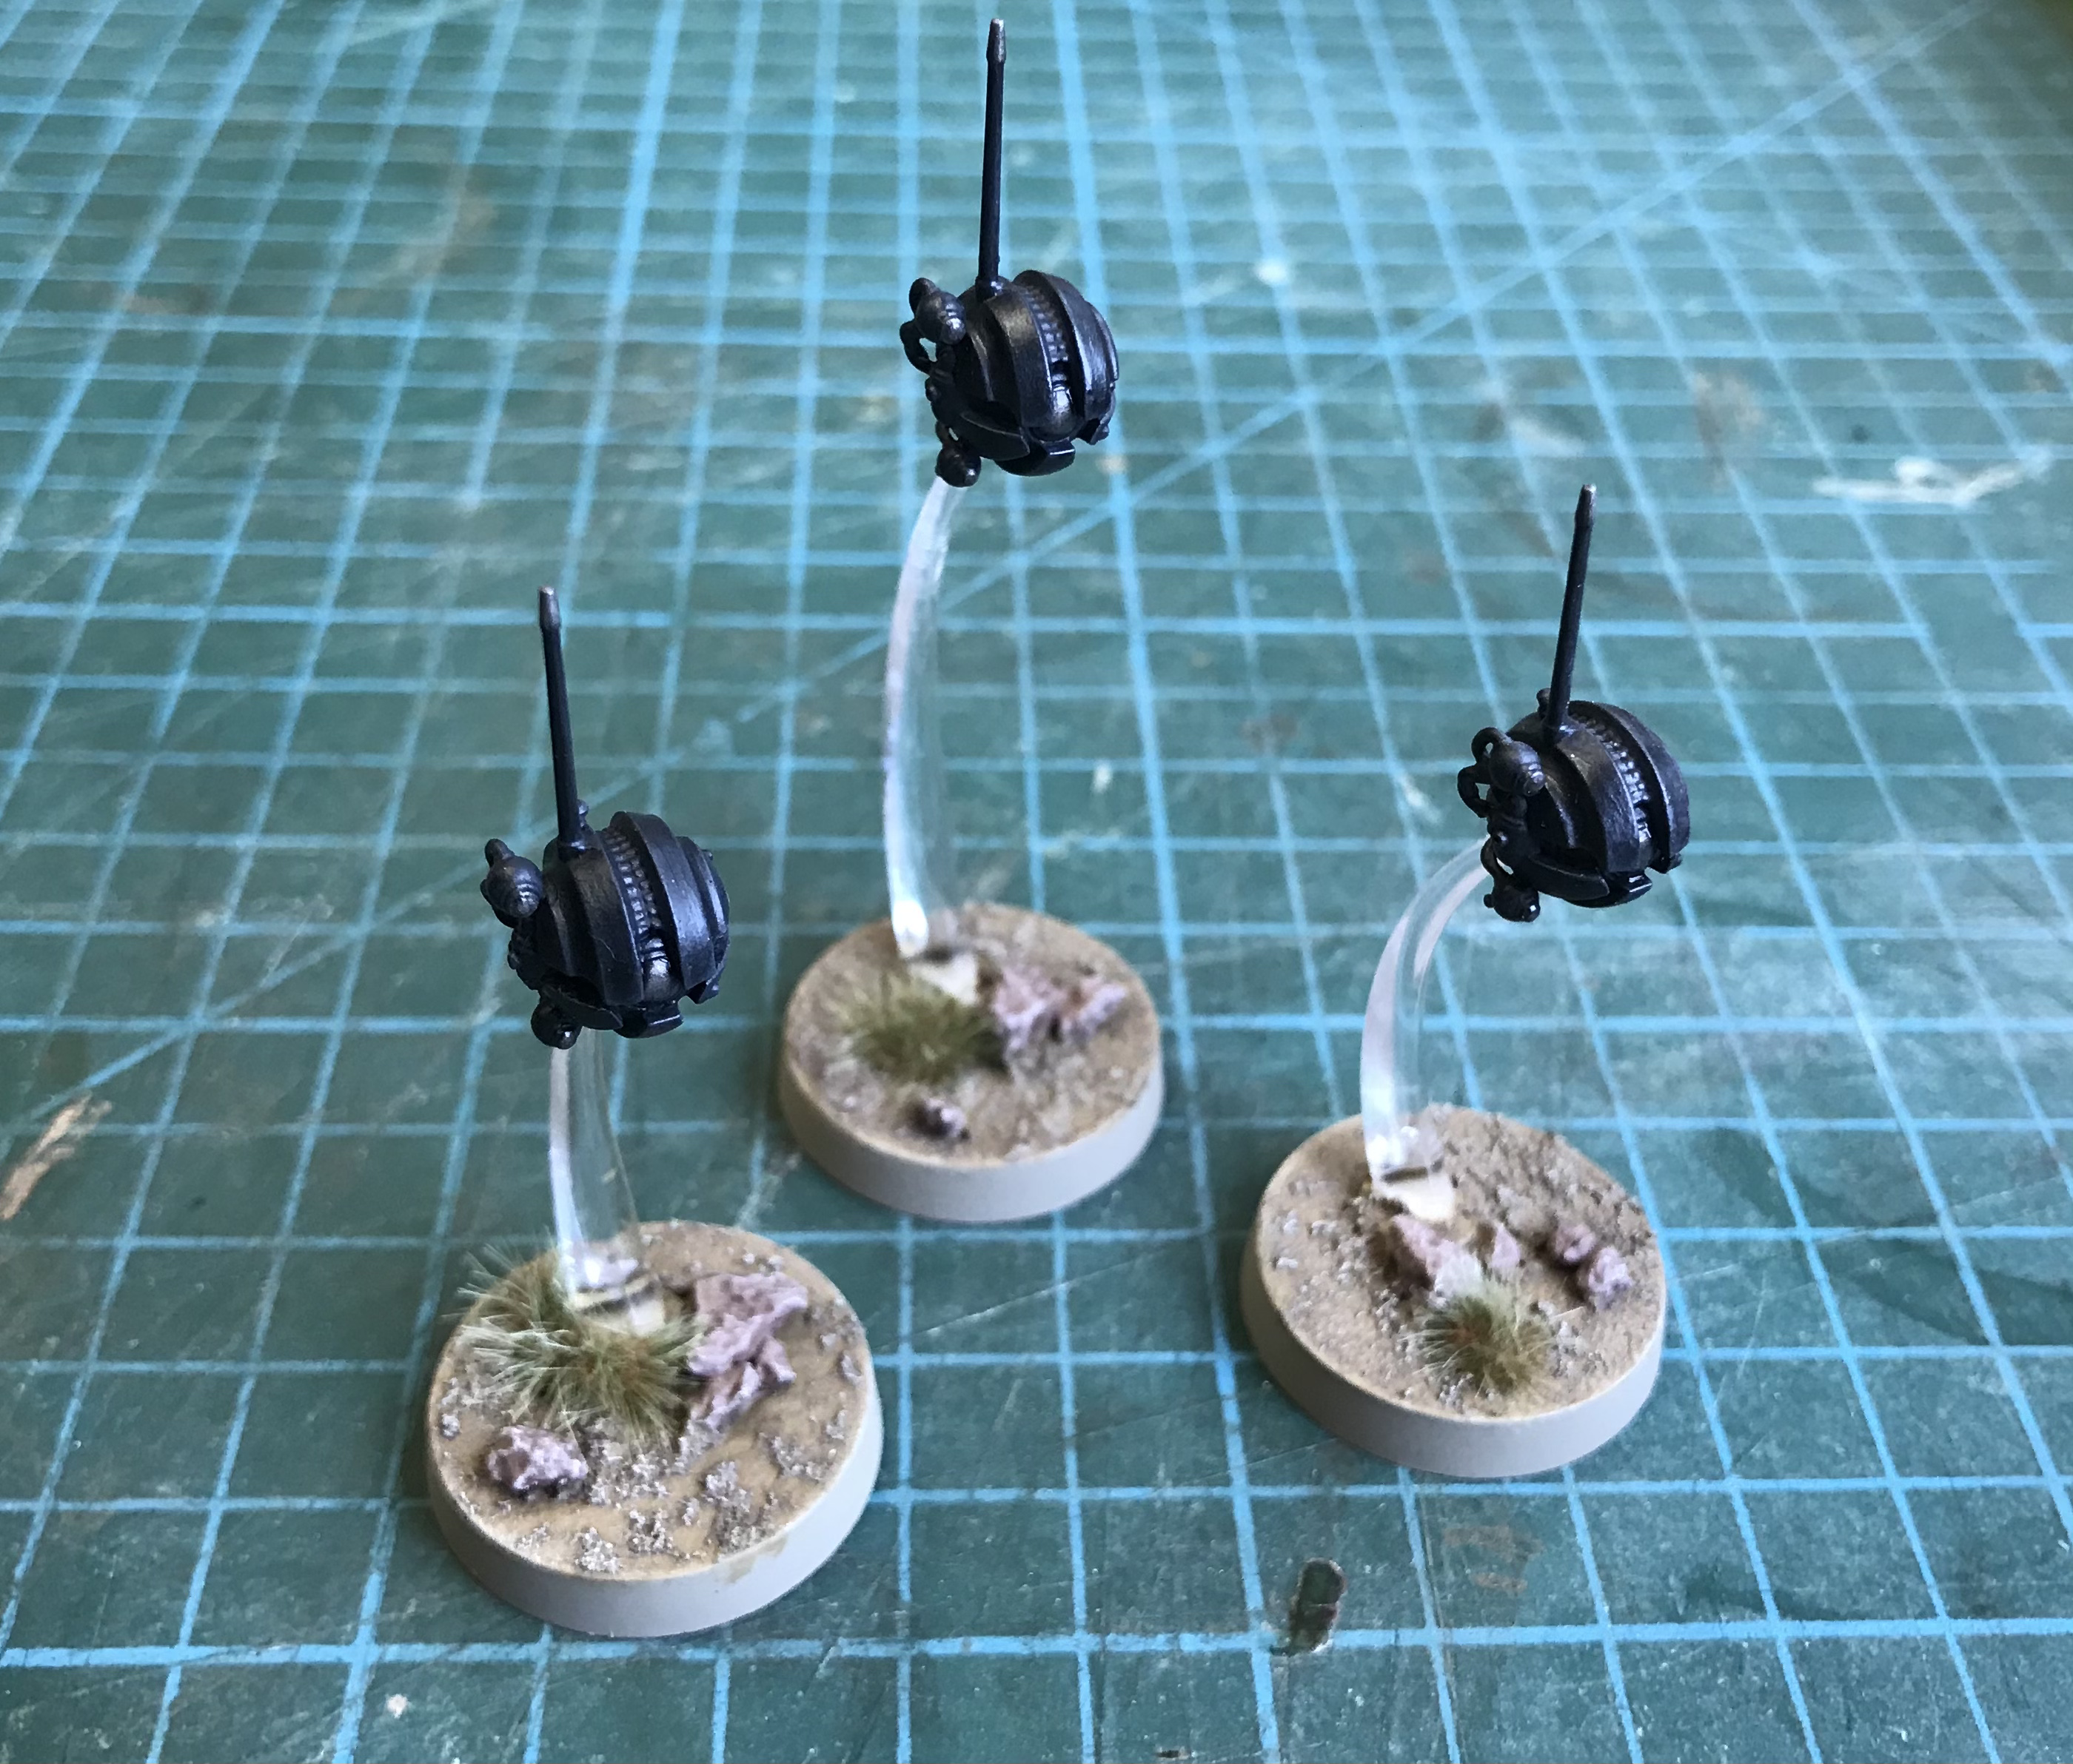
Sith Probe Droids Completed
Once the Contrast Black Templar had fully dried, I gave the droids a light dry brush with the Luftwaffe Uniform Blue that had served as the base. I then went back over the lenses and tip of the areal with the Iron Breaker.

The bases were completed as per my previous entries…
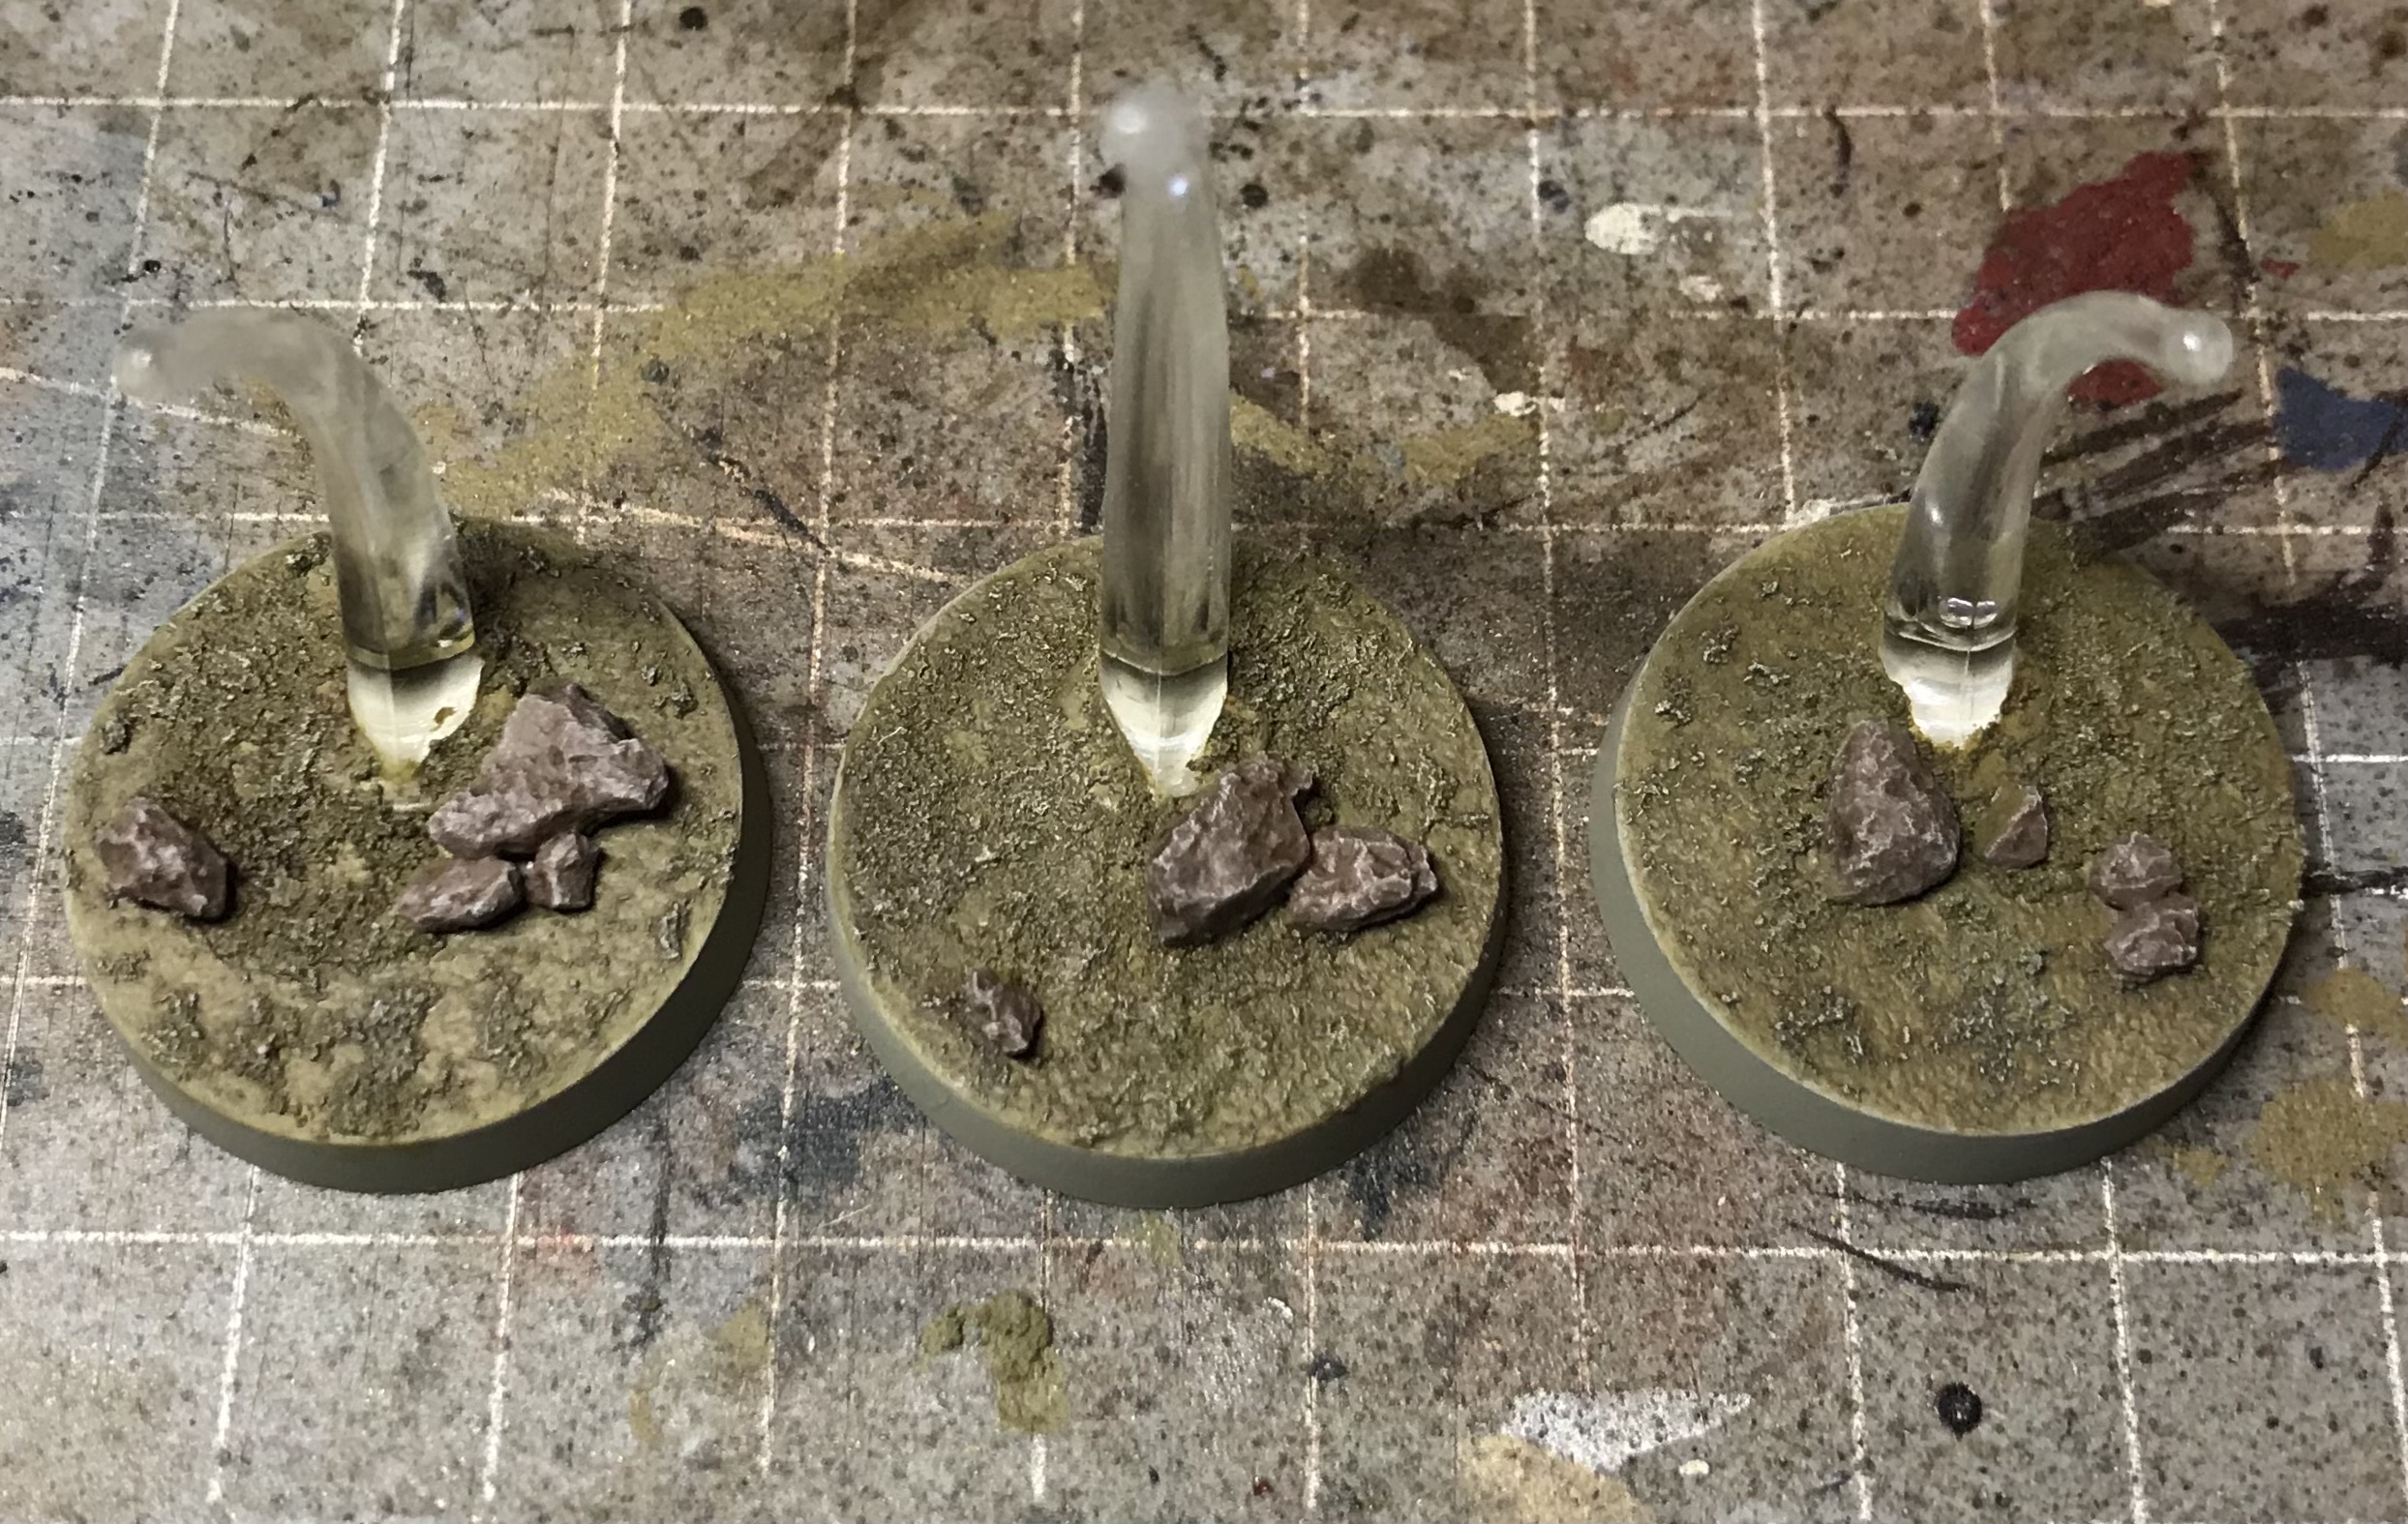
… before the seeker droids were attached with superglue. As a final touch I added a Nuln Oil Gloss wash to the lenses.
Maul
Next up we have the Sith Apprentice – Darth Maul.
As I have no chance of getting him on the table any time soon, I thought I’d make things easier for myself and leave him semi assembled for painting.
I began by spraying white over the lightsaber, in order to give the blades a bright base colour. I then masked the blades with tape before spraying the rest of the model with my standard Khaki primer. (I would’ve preferred to use grey for Maul but as I’d not been able to get to the shops for a while, I was running out of spray cans).
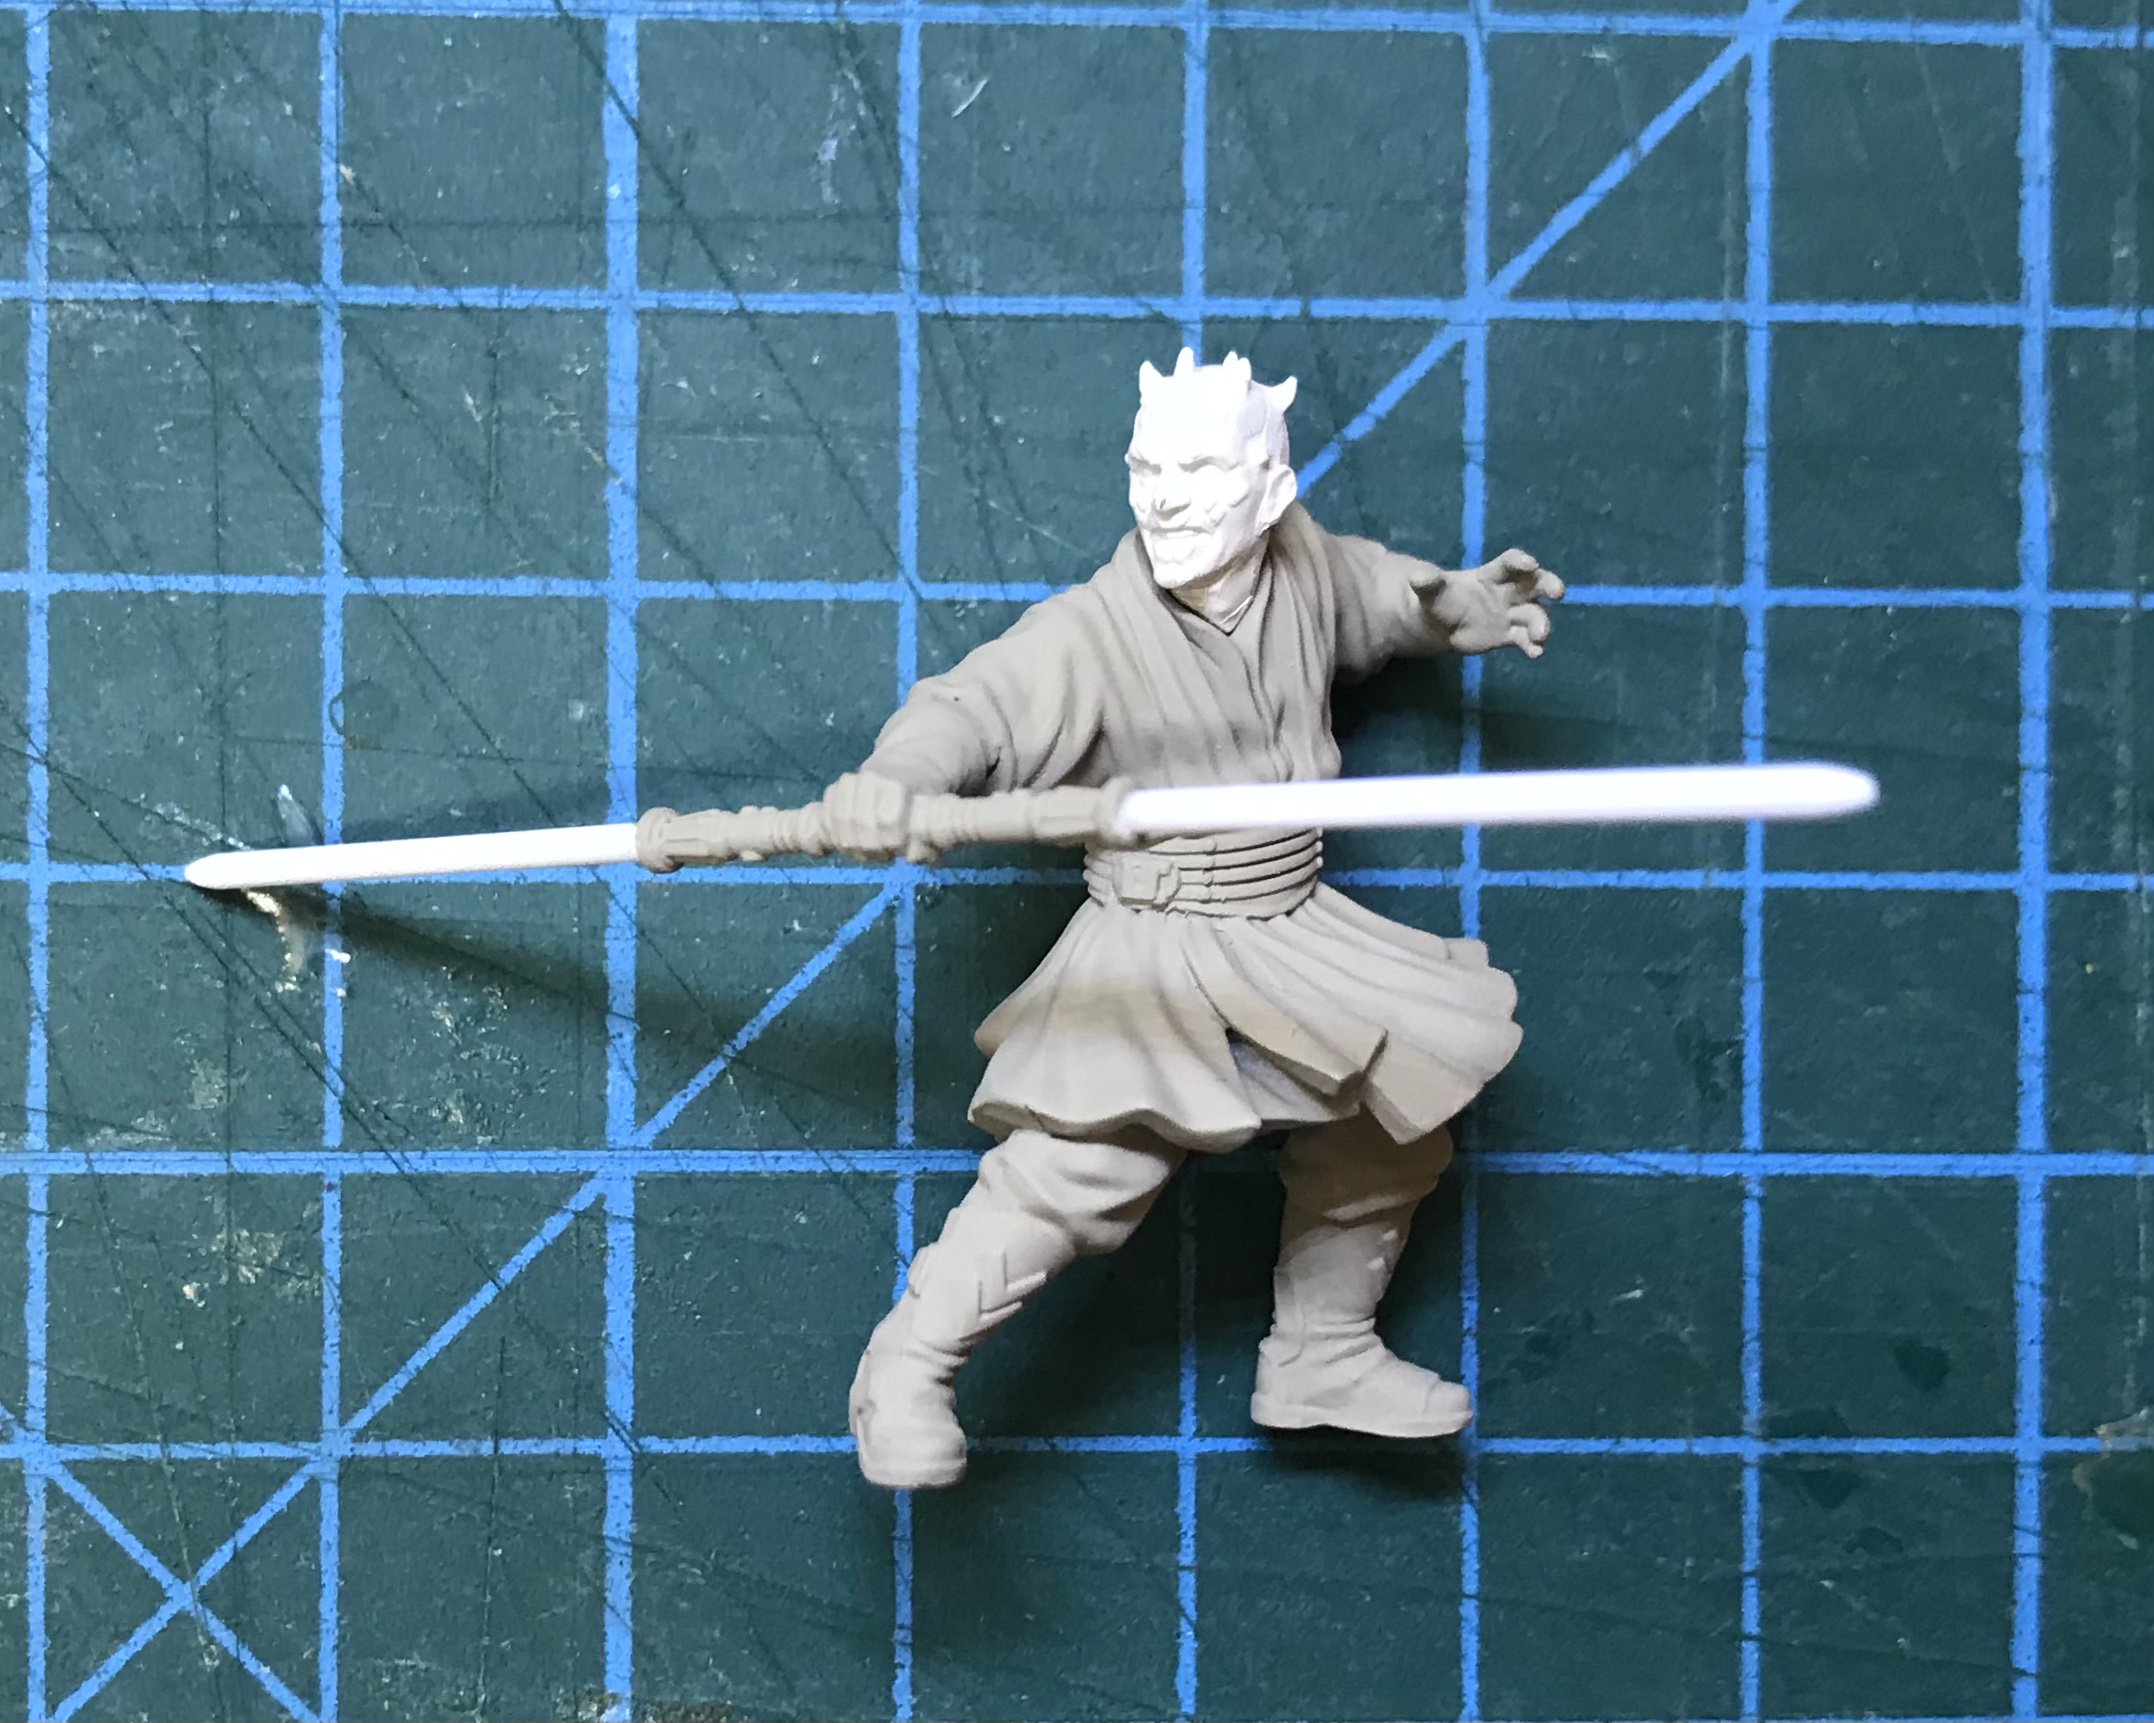
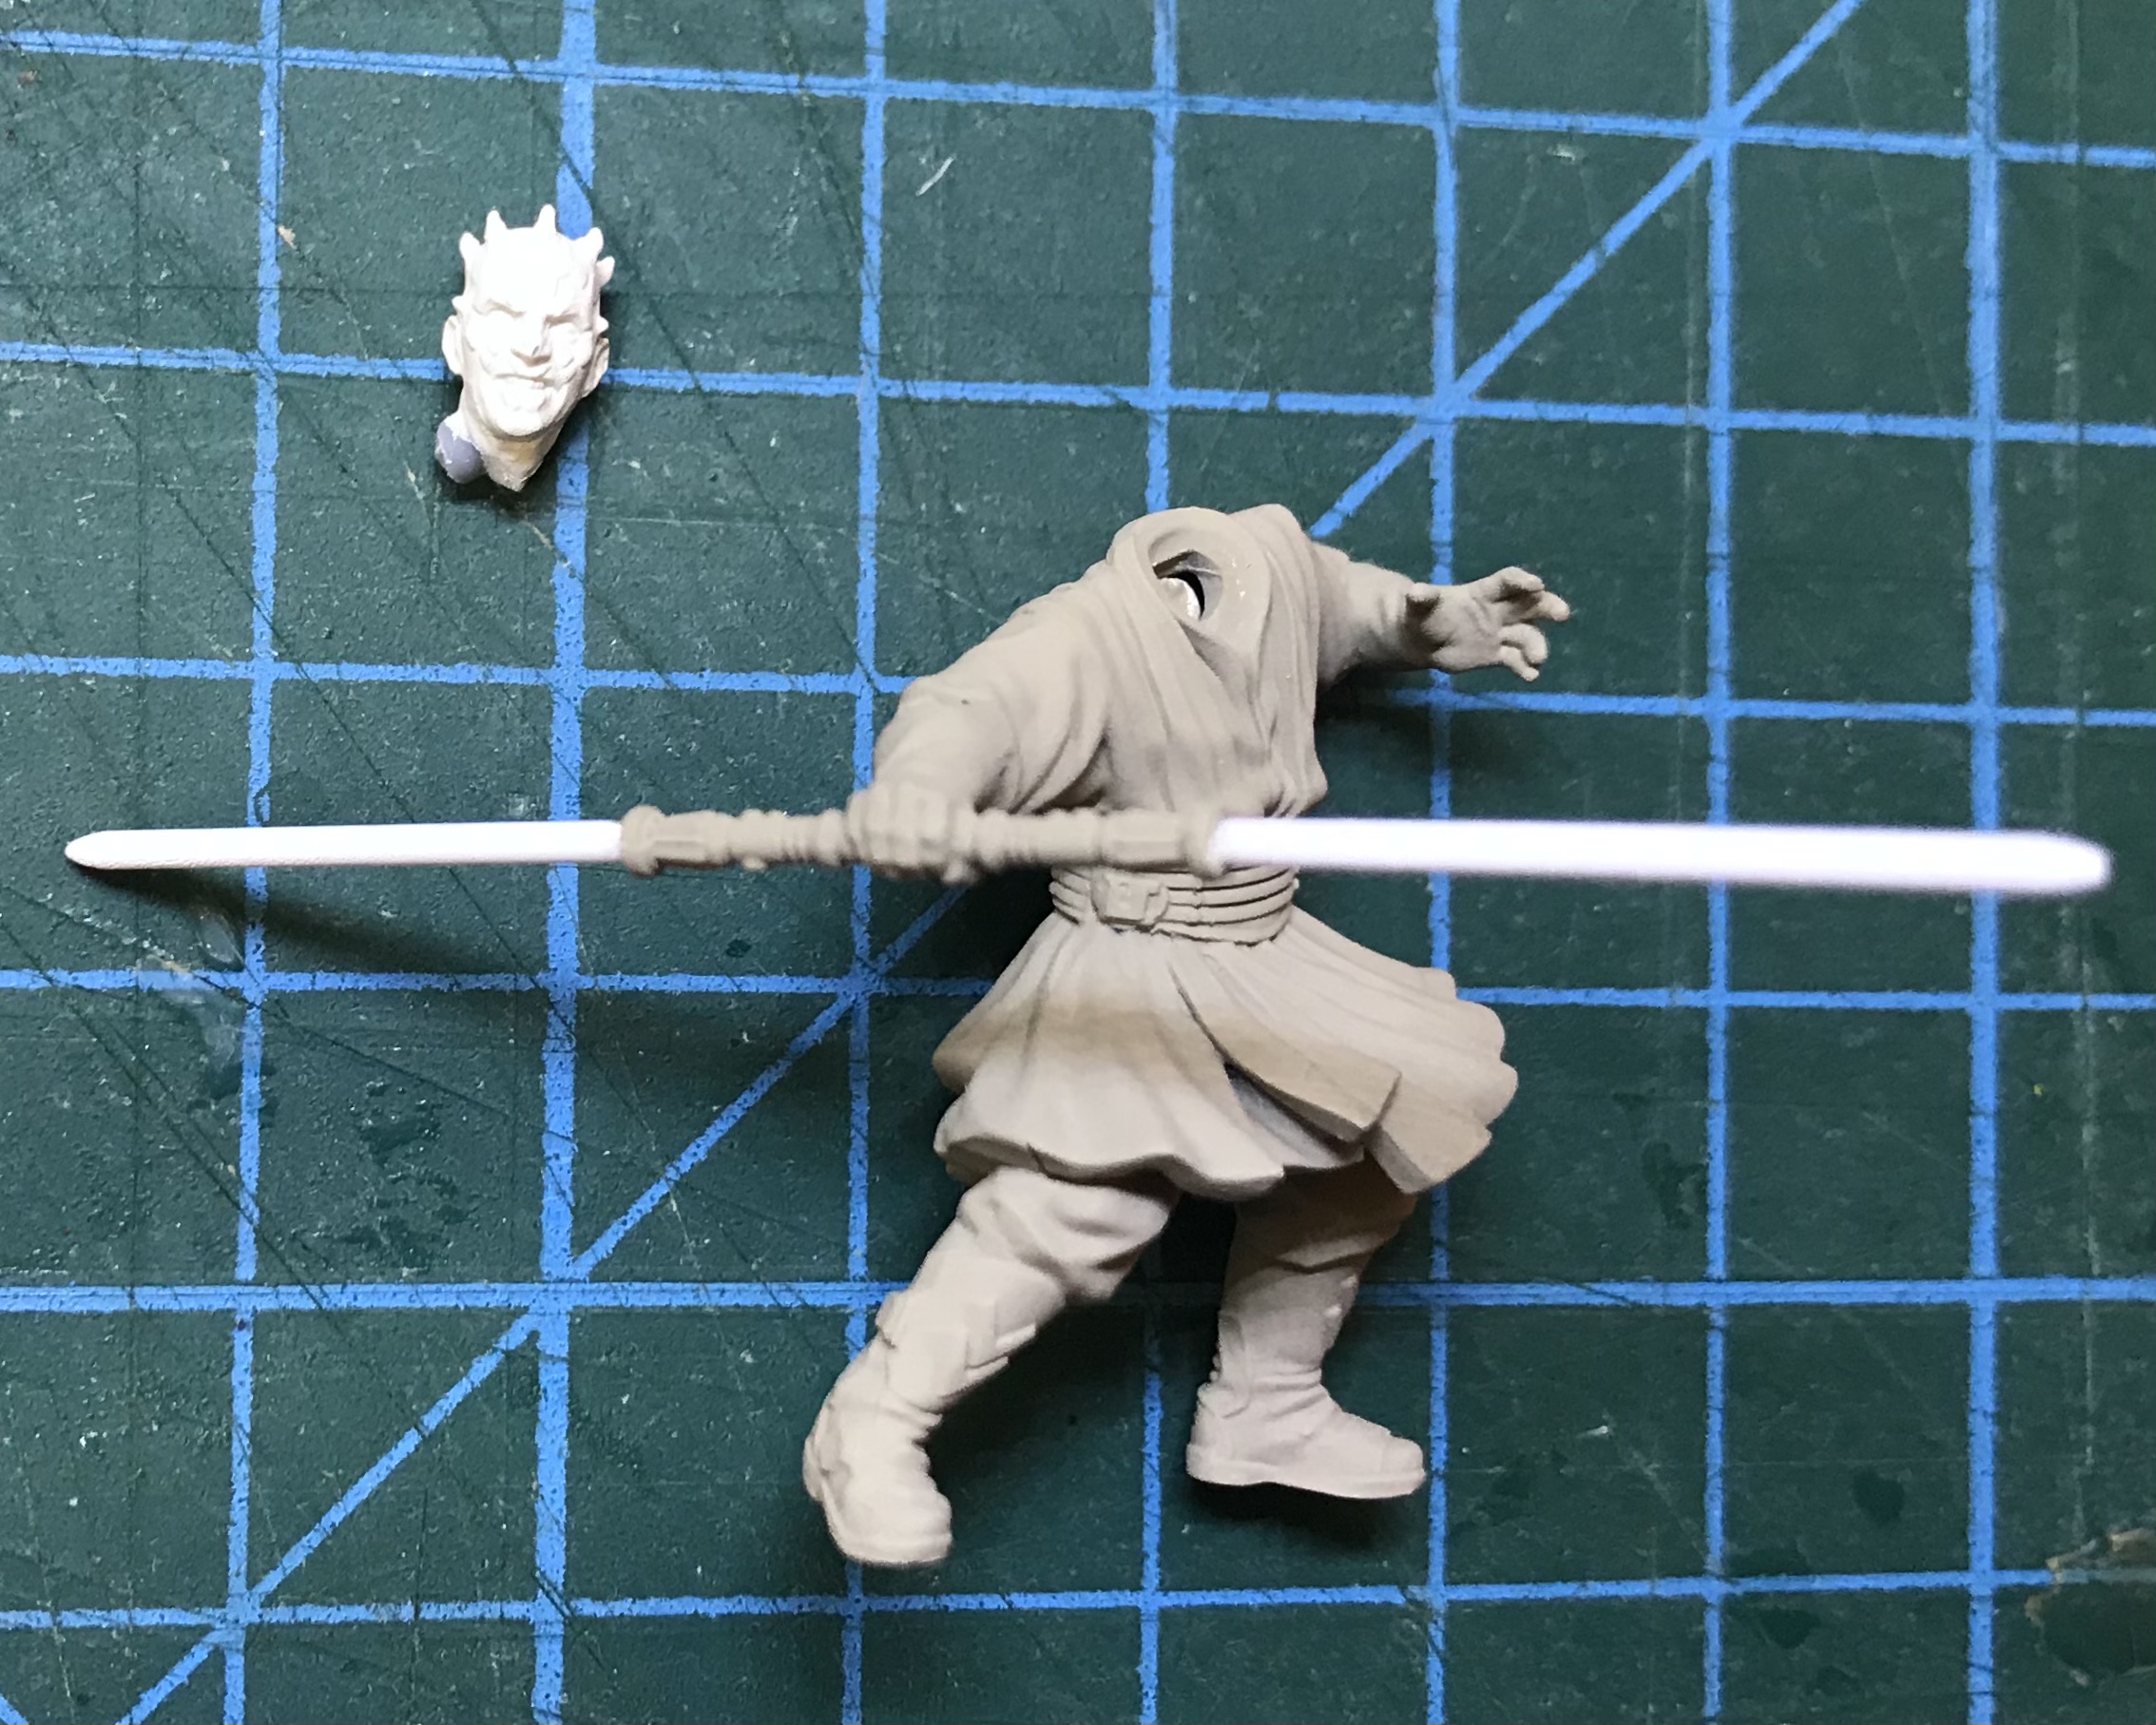
As the head fitted neatly into the collar, I found it convenient to keep it separate at this stage. This made it a simple matter to prime it with Wraithbone and put it aside while I worked on the body.
It has been my intention to keep the paint jobs for my Legion miniatures quick and simple and for Maul I’m going to try something different. Black is a difficult colour to work with but instead of highlighting up from black (which I would usually do in blue), I’m going to use blue as a base colour for the Contrast paint – Black Templar.
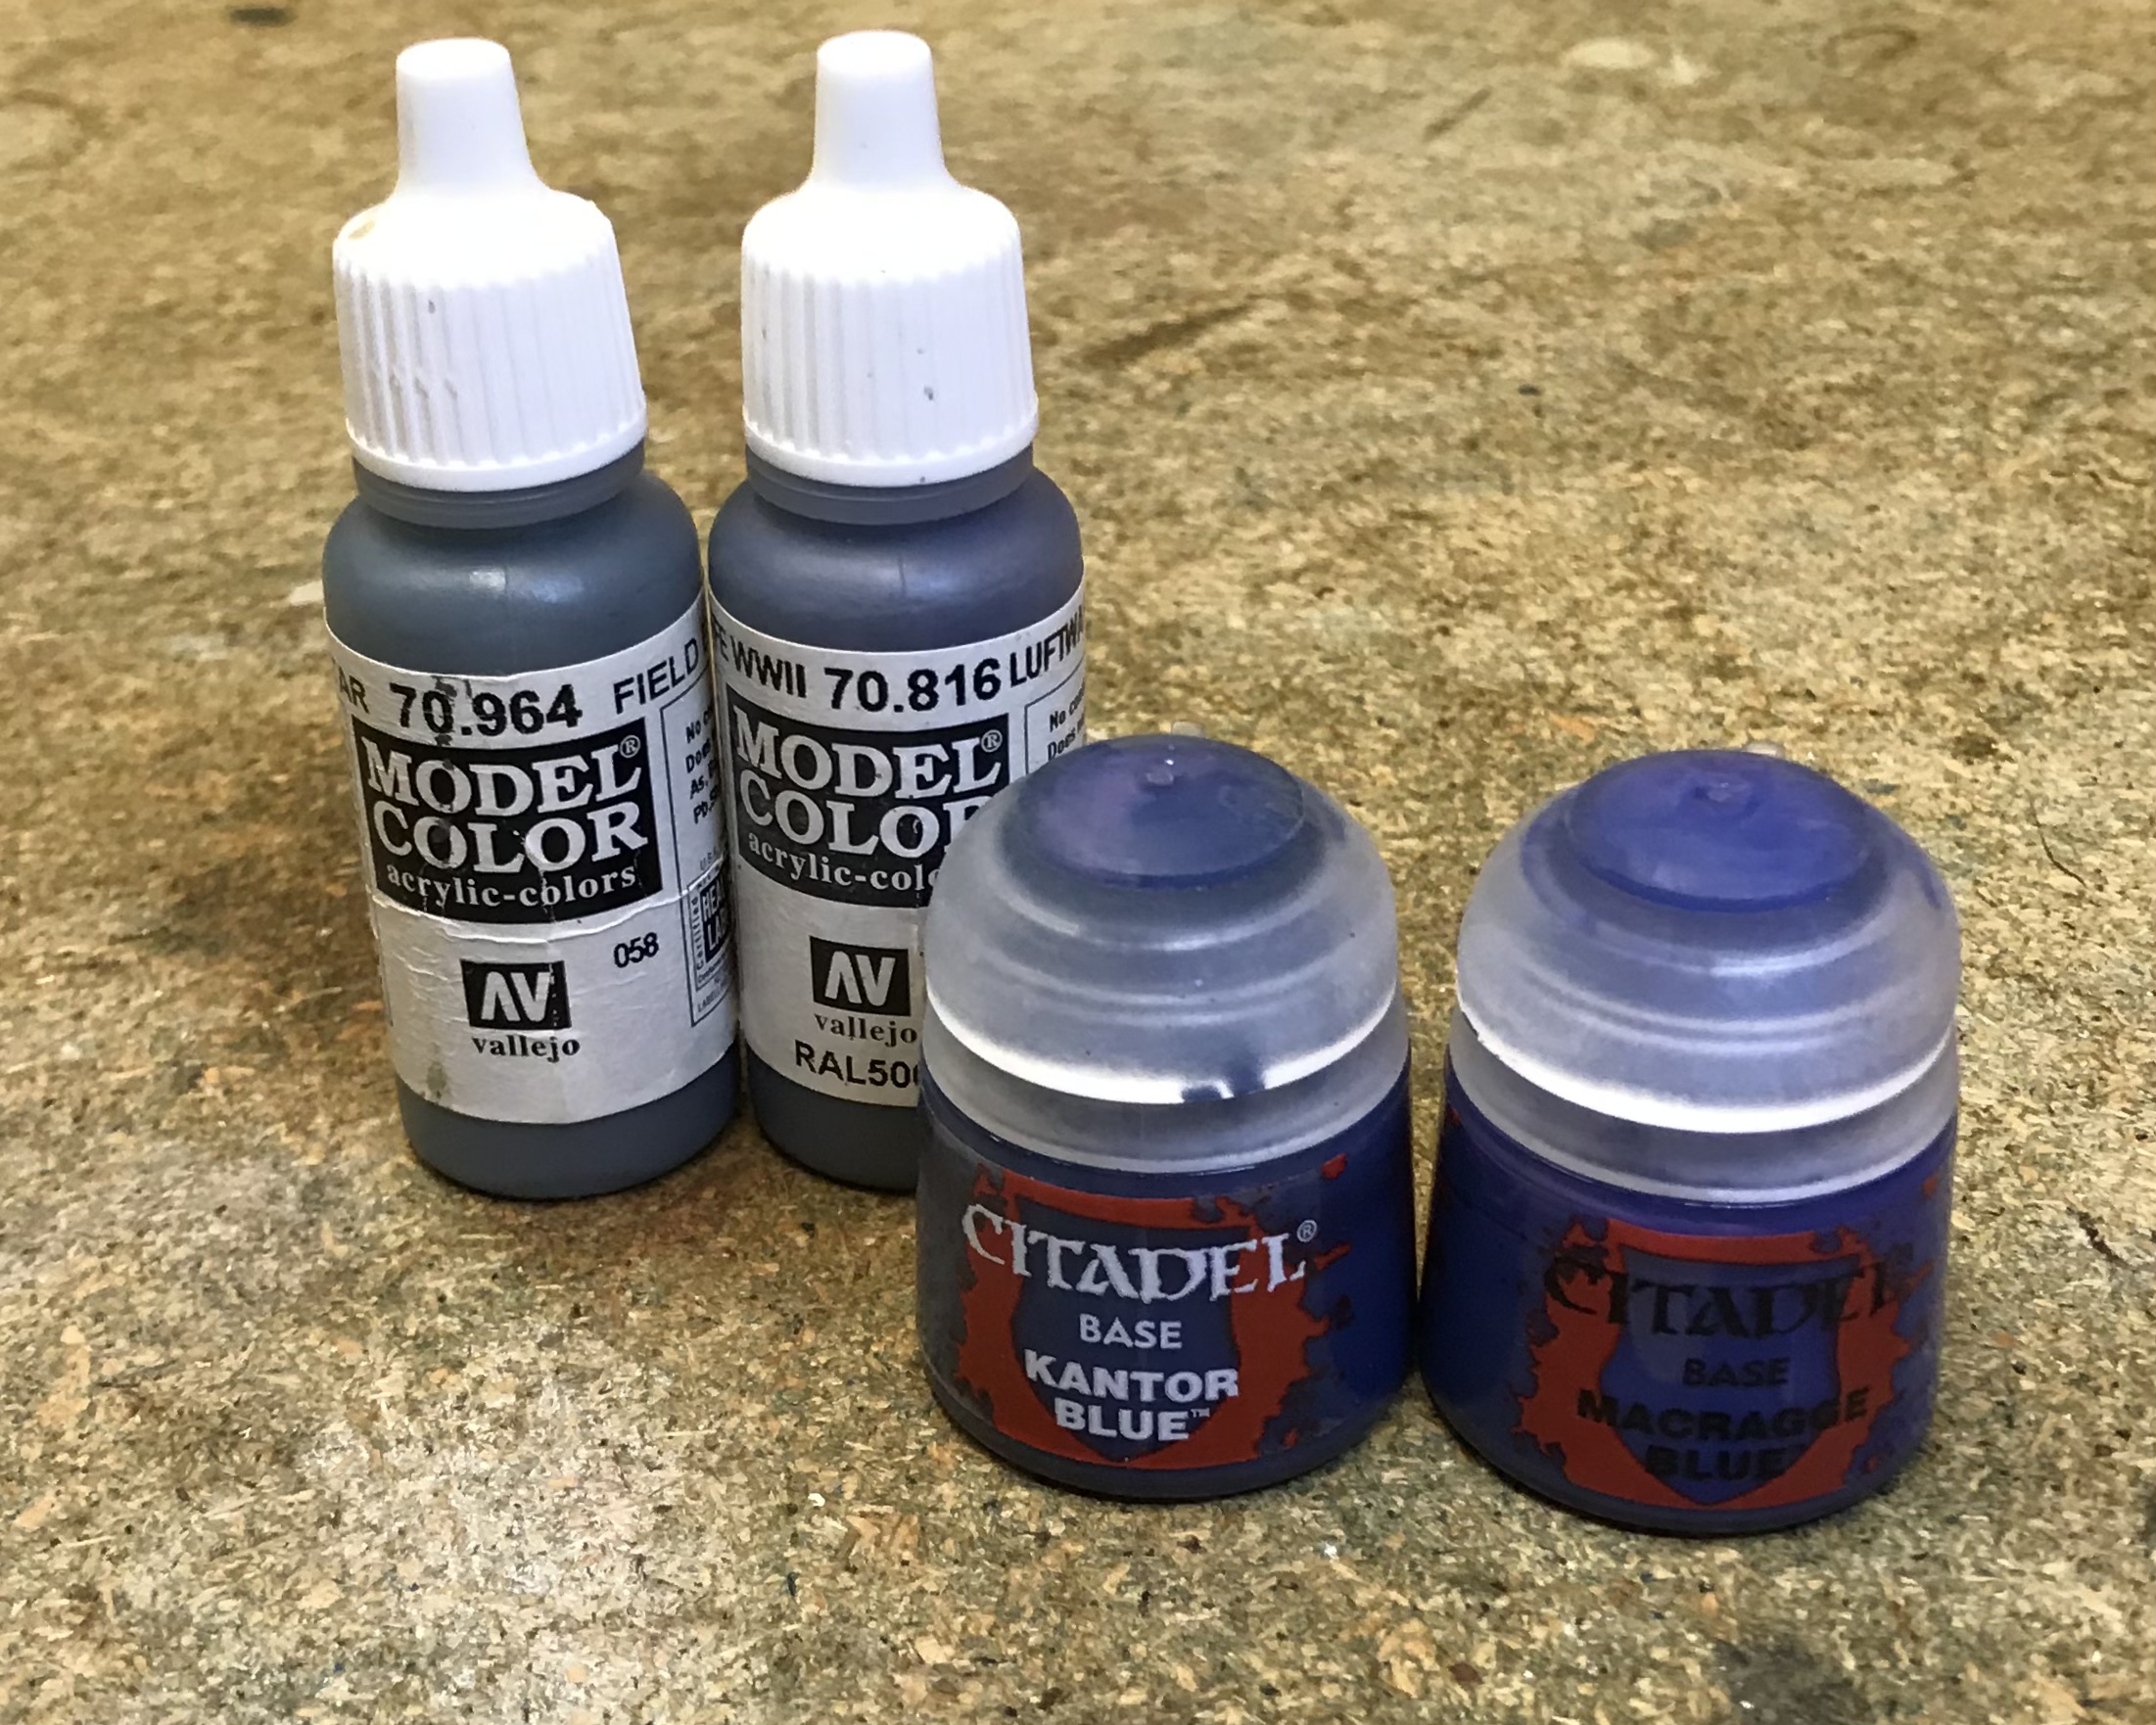
As Maul’s costume is entirely black, I have used several different blues to try and differentiate various costume elements. For the leather boots, gloves and belt I used GW Kantor Blue. The bulk of the robes were painted with Vallejo Luftwaffe Blue while the inner tunic was painted with GW Macragge Blue. I used the lighter German Field Blue to add a simple dry brush hight to the fabric areas.
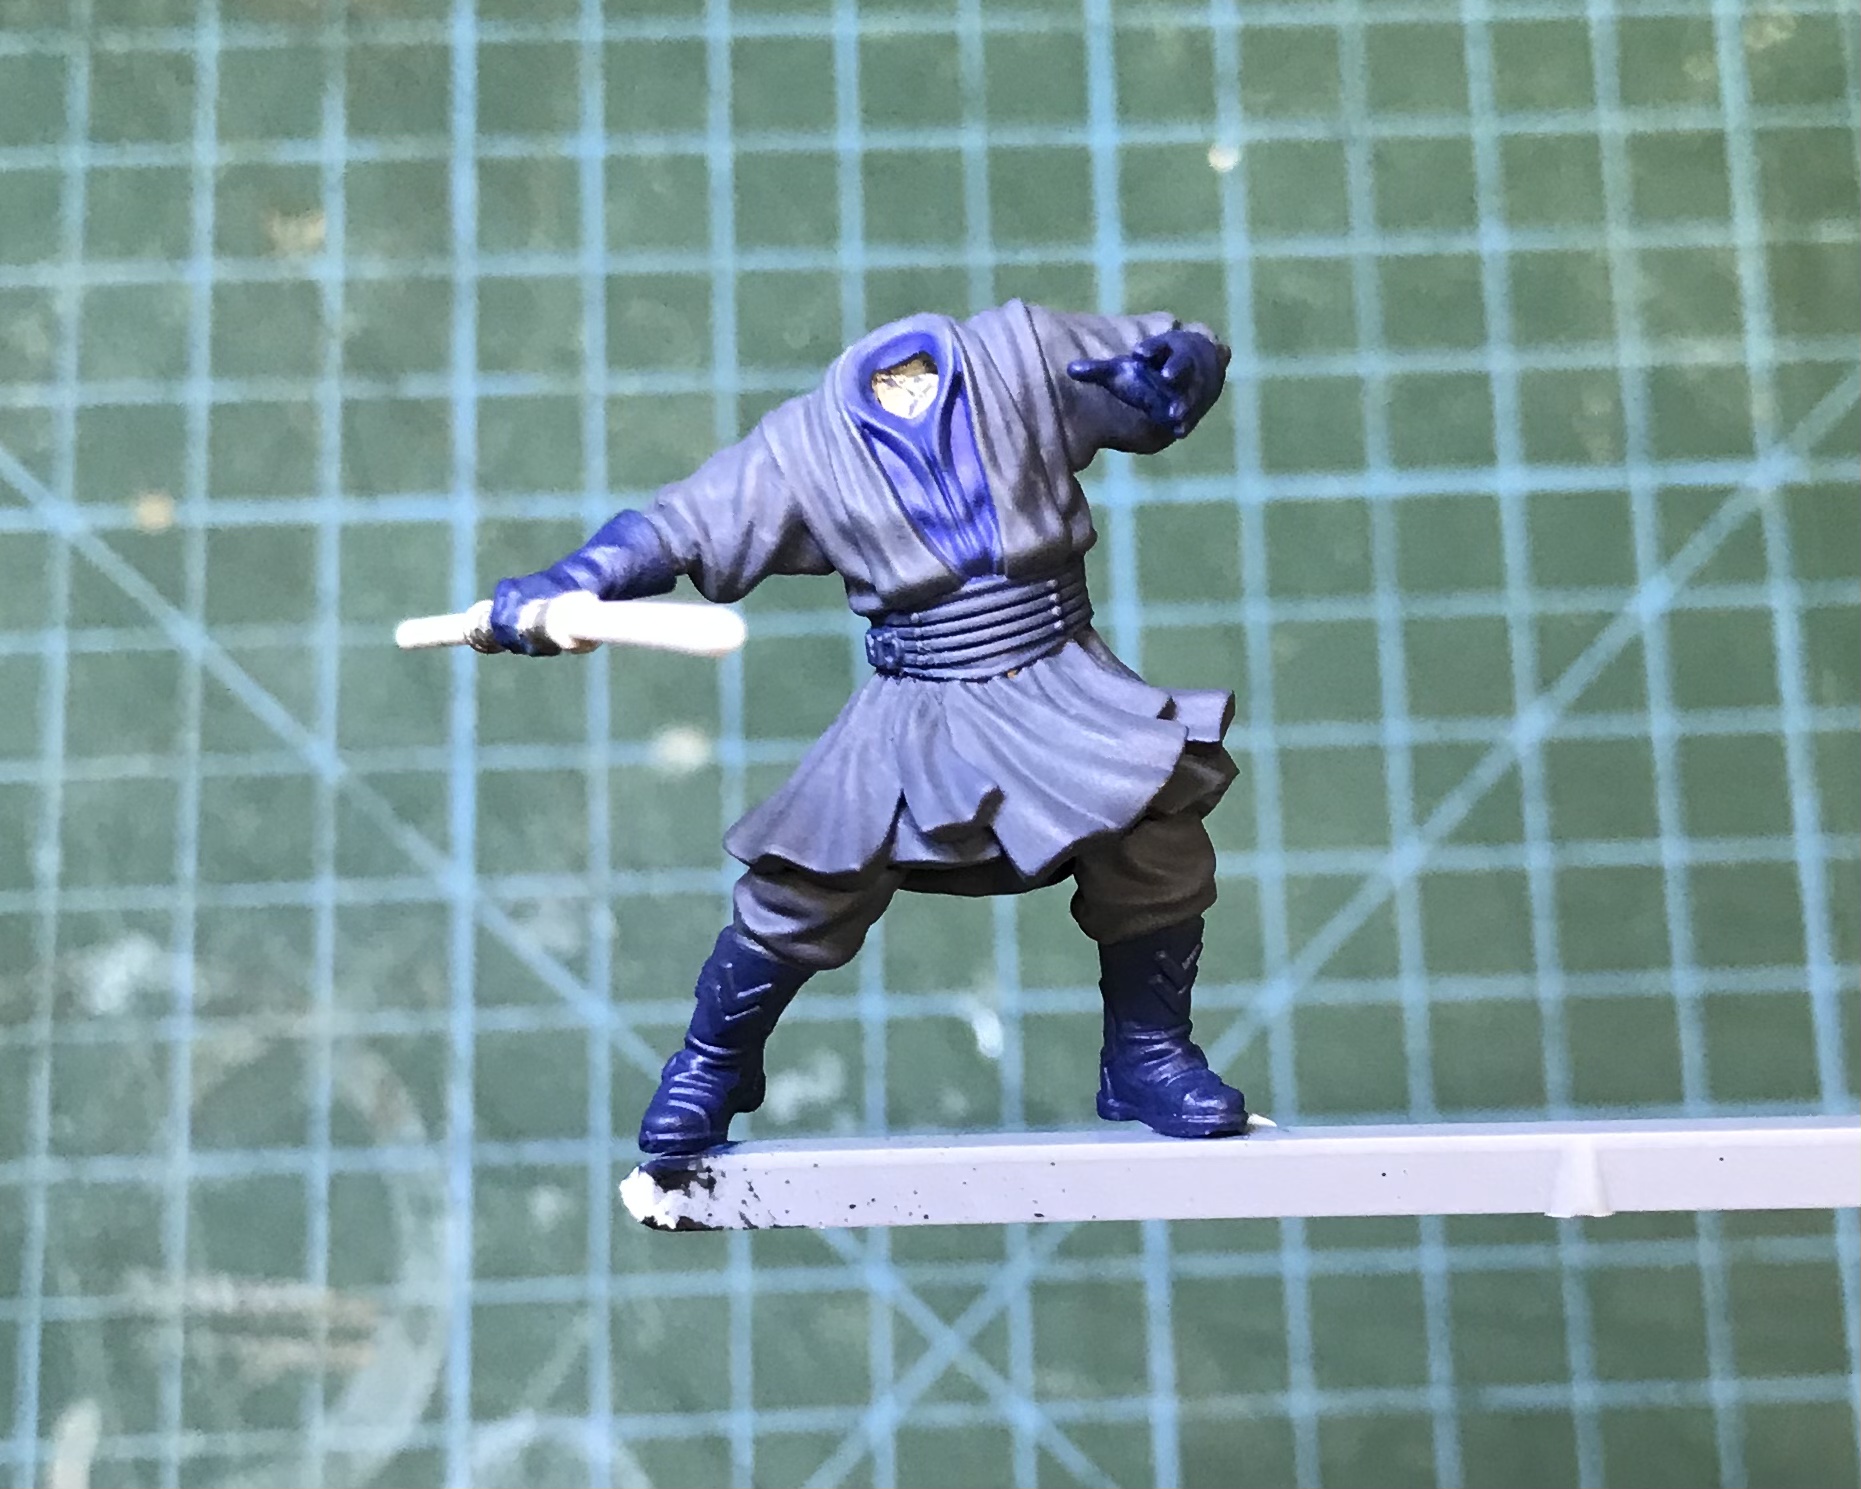
I left this to fully dry before working over the entire costume with a 1-1 mix of Black Templar and Contrast Medium. The Medium really prolongs the working time, which allowed me to cover the whole model before any one part began to dry. In the image below, you can see the paint is still wet!
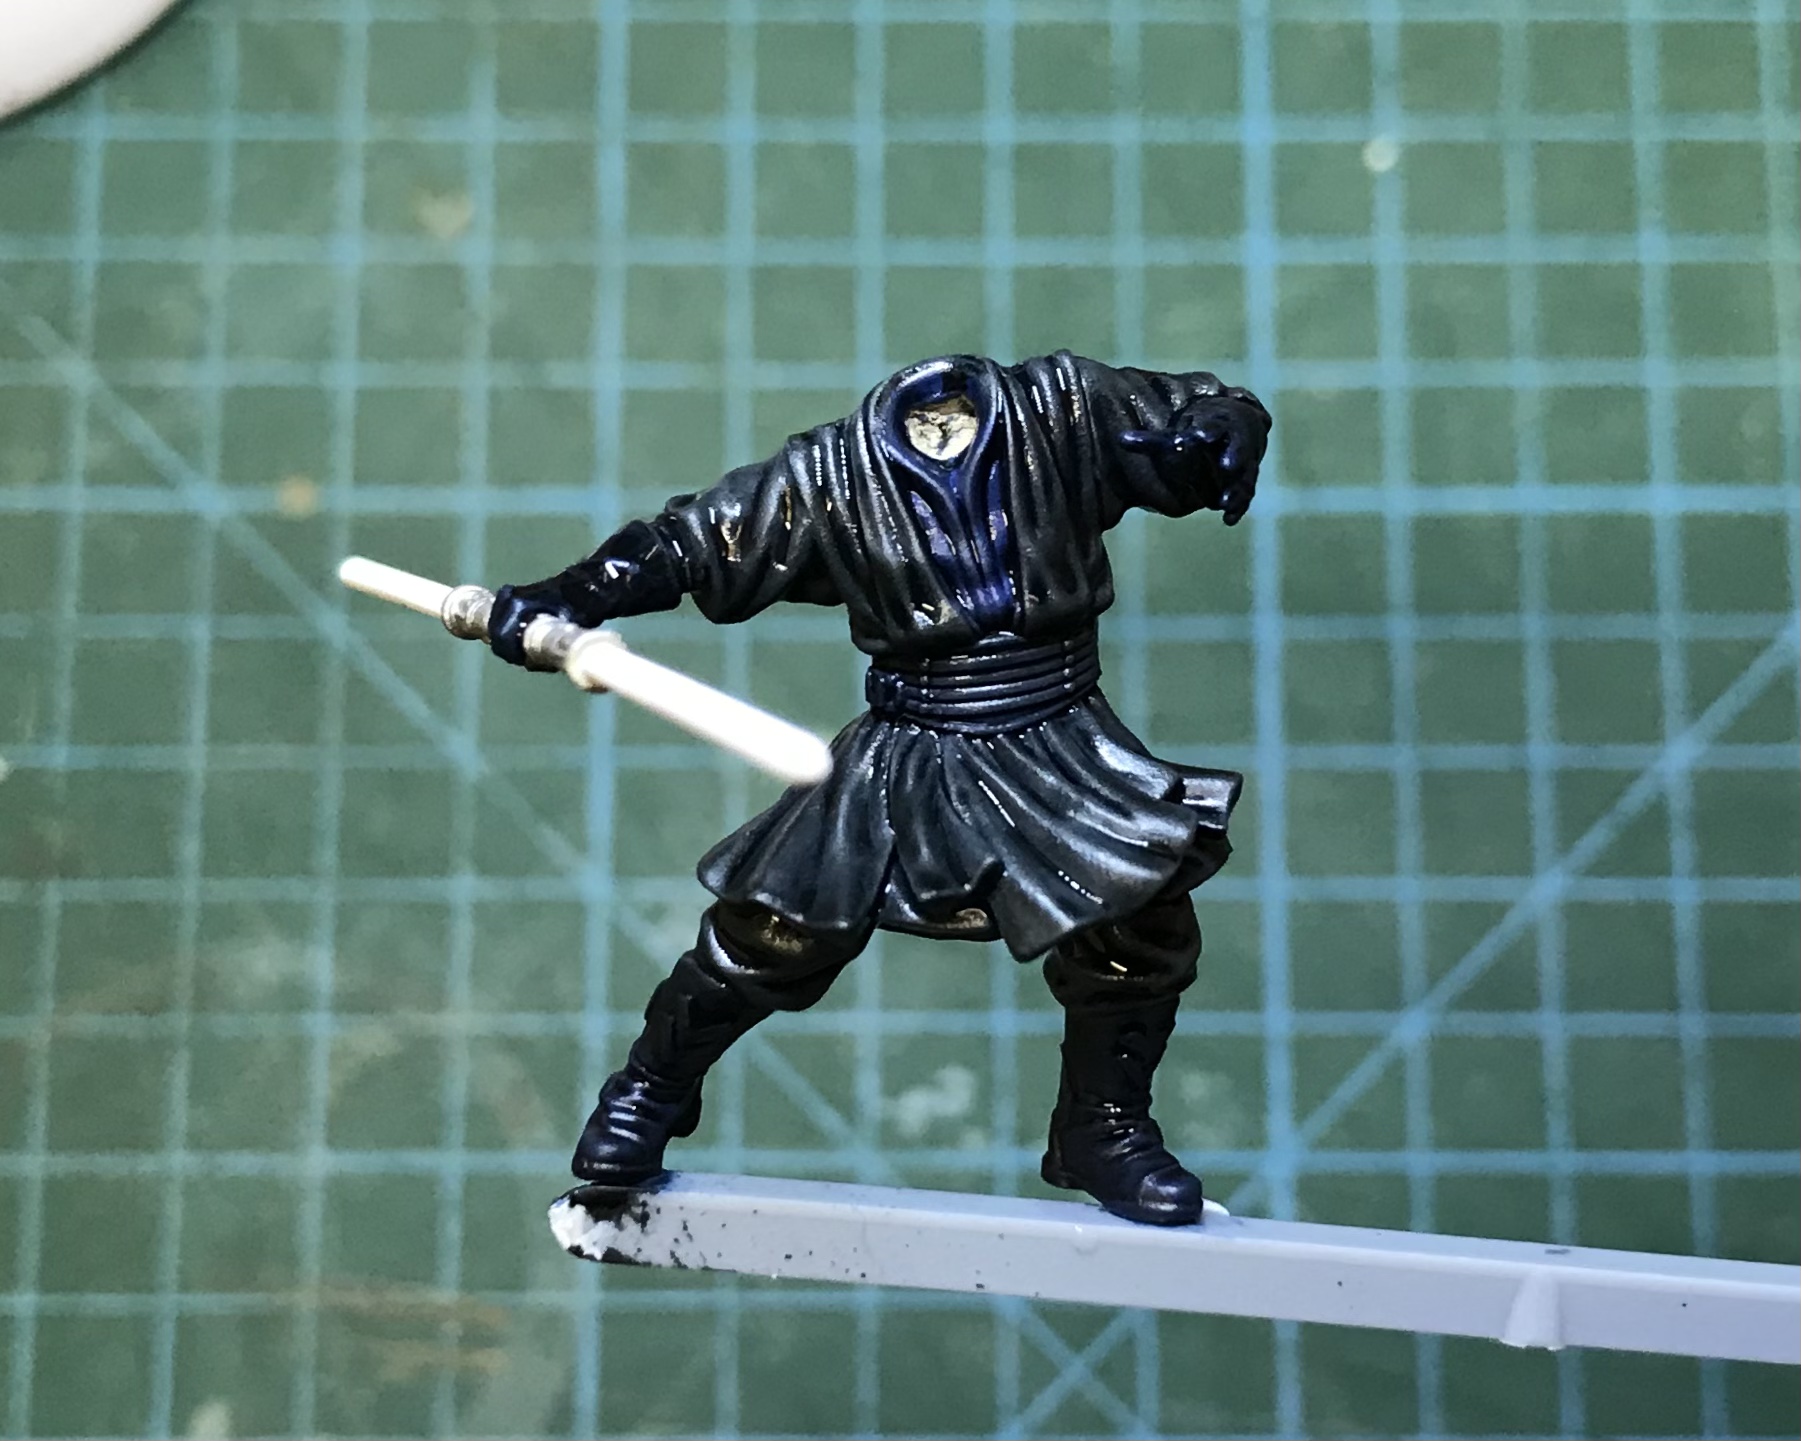
Using the medium would also reduced the pigment. This meant I would have the option of stopping at one coat or going in with a second if I wanted to go darker. As the Contrast layer began to dry, the effects of the various blues became clearer.

War Paint
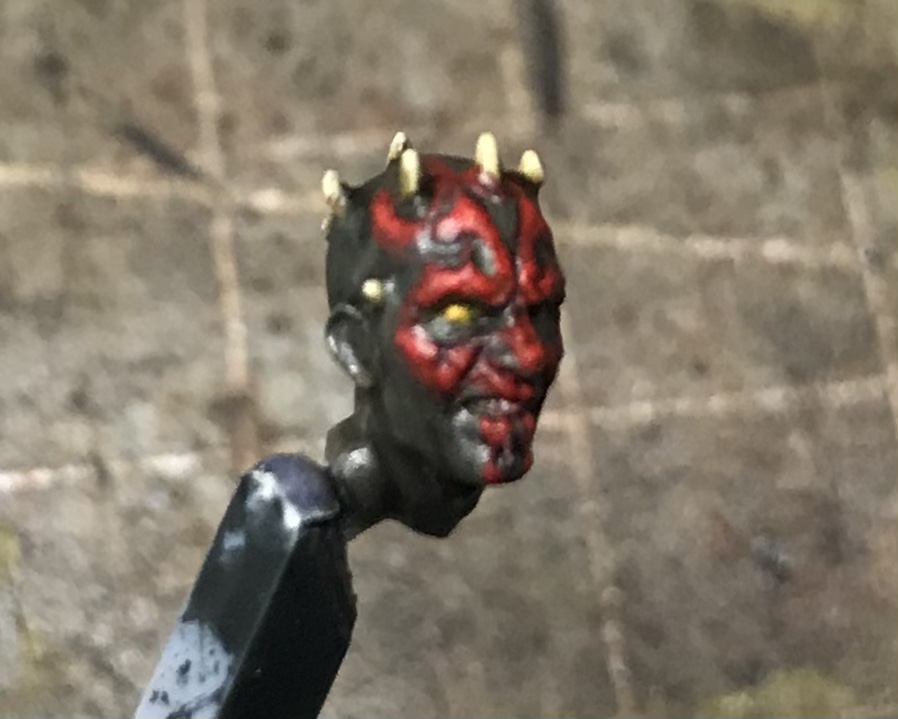
Between layers of black on Mauls body, I made a start on his head. I really struggled to make out the sculpted details at first but with each colour applied things became clearer.
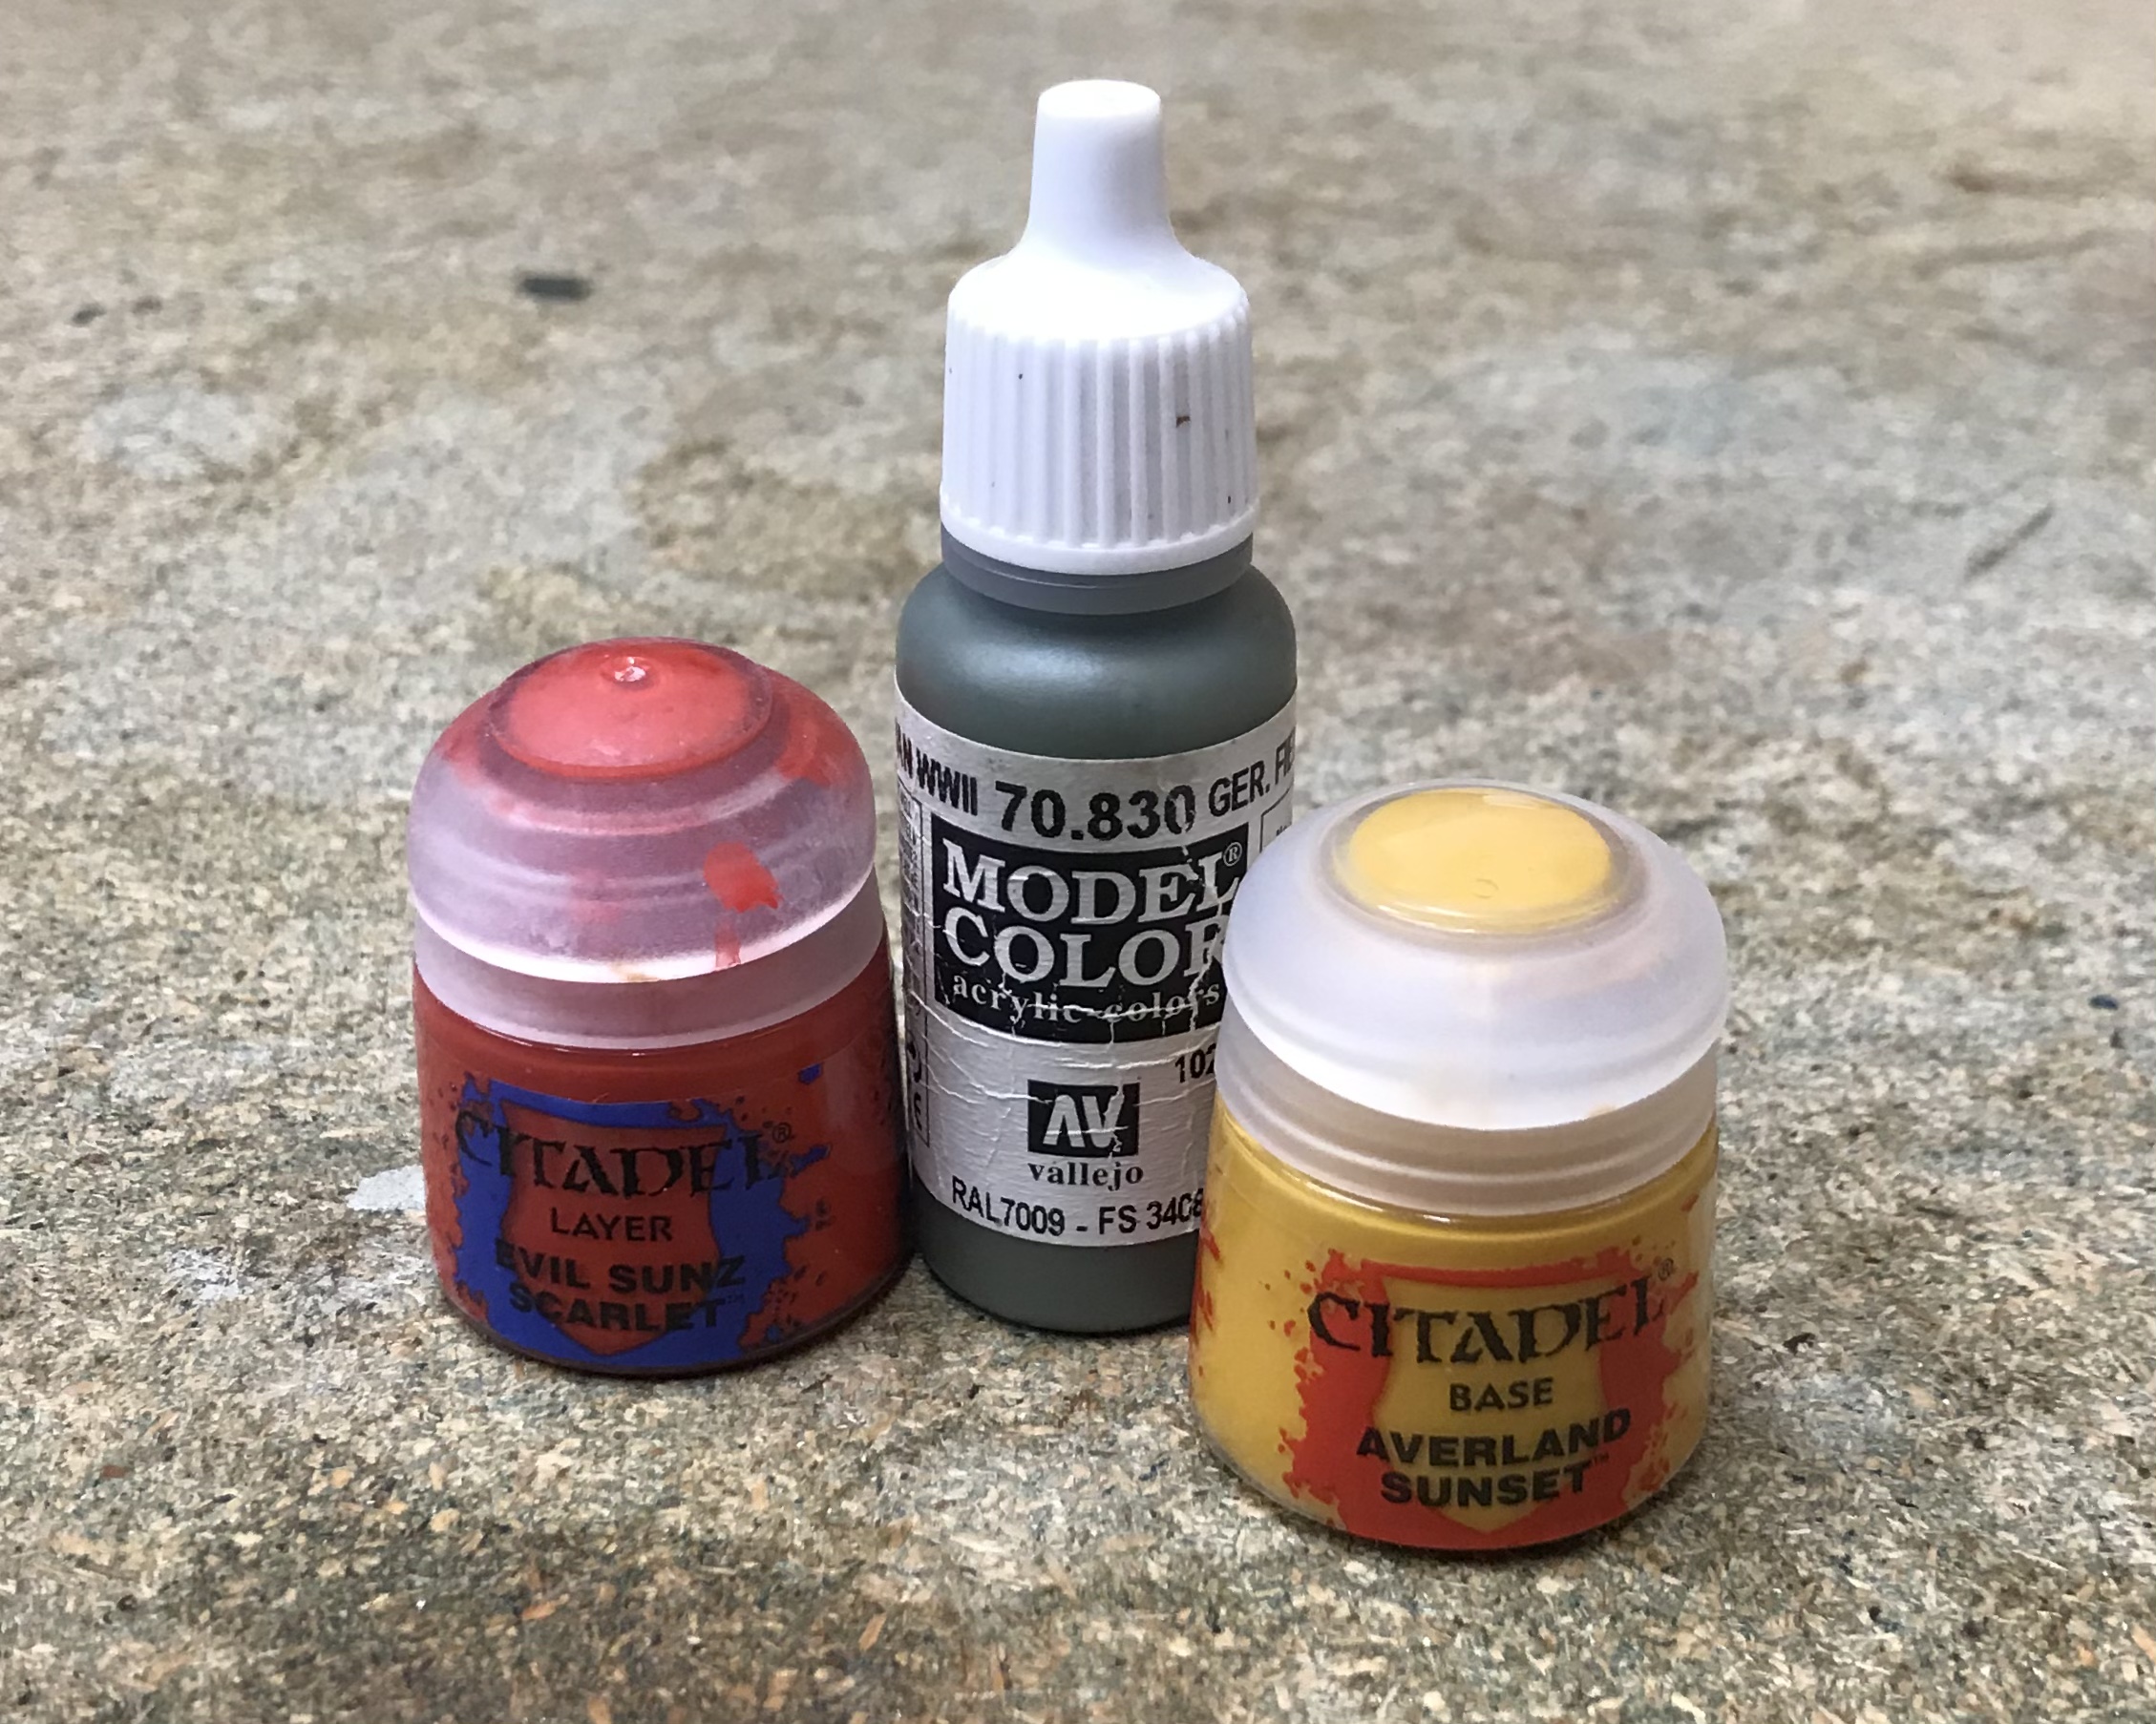
I began by roughly colouring the eyes with Averland Sunset. I then picked out the red tattooed areas with Evil Sunz Scarlet. The black parts of the tattoo were filled in with German Field Grey. I did my best to avoid the teeth and horns.
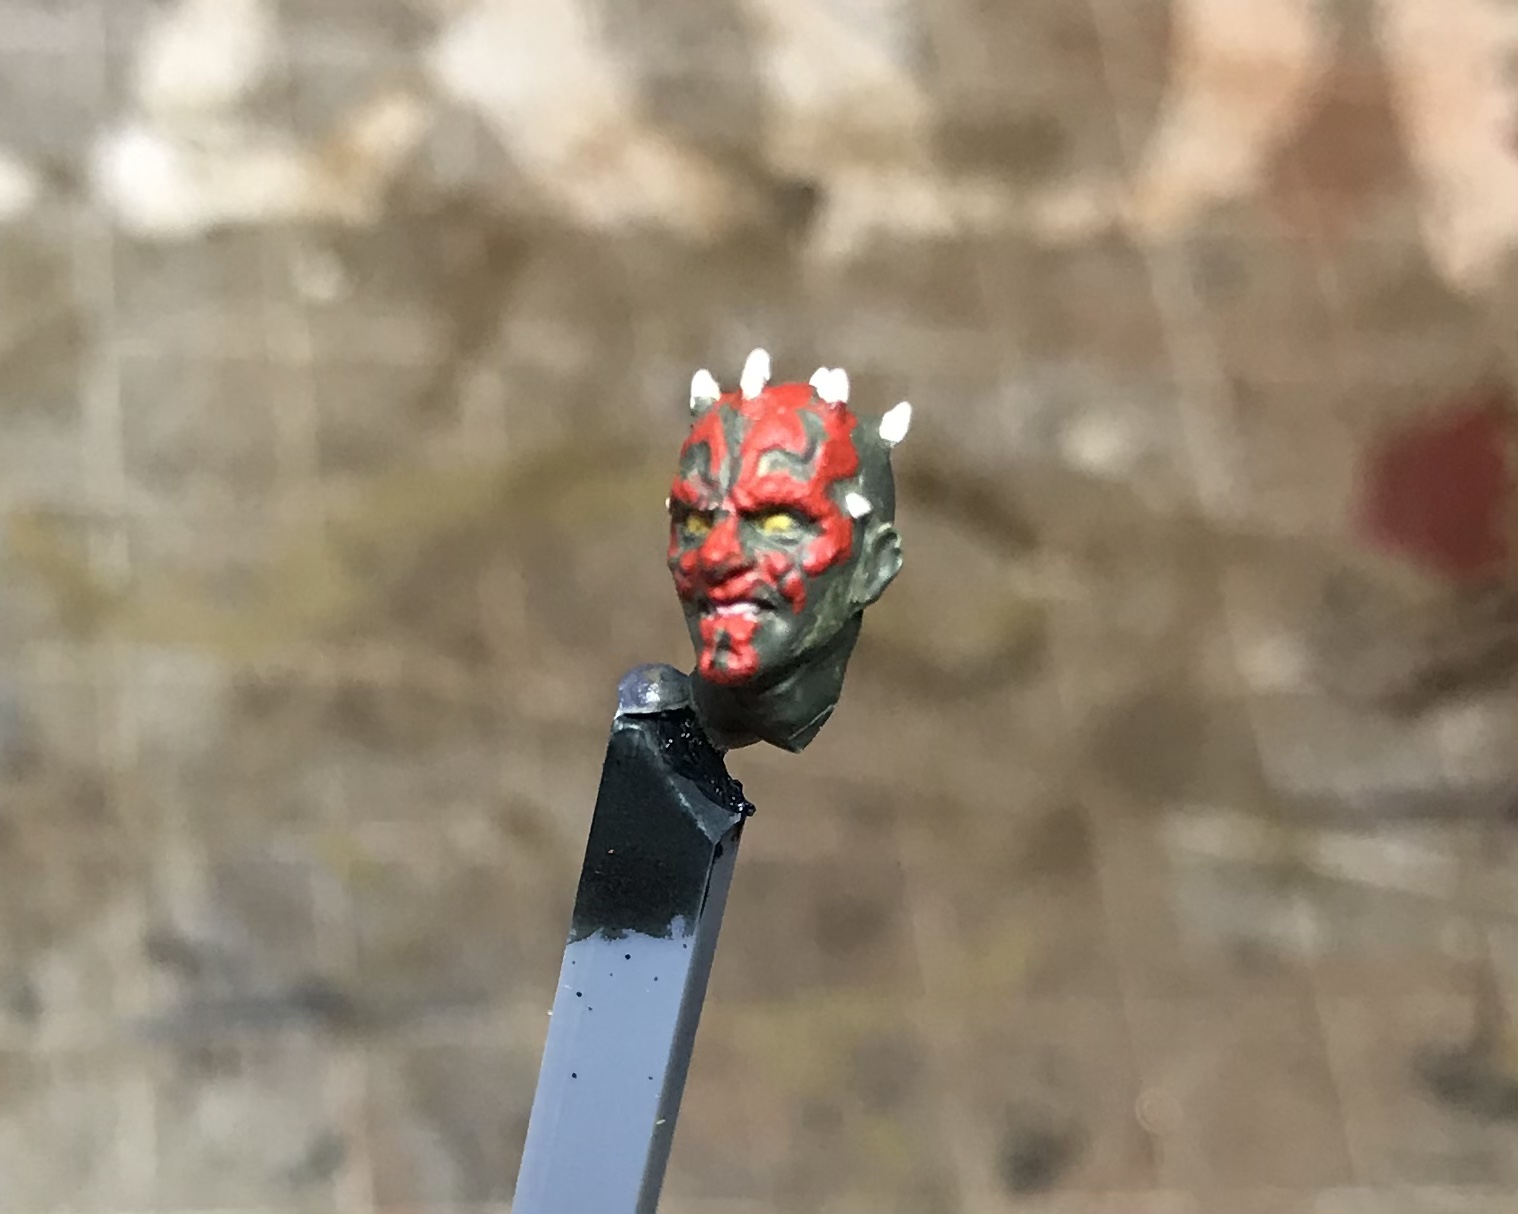
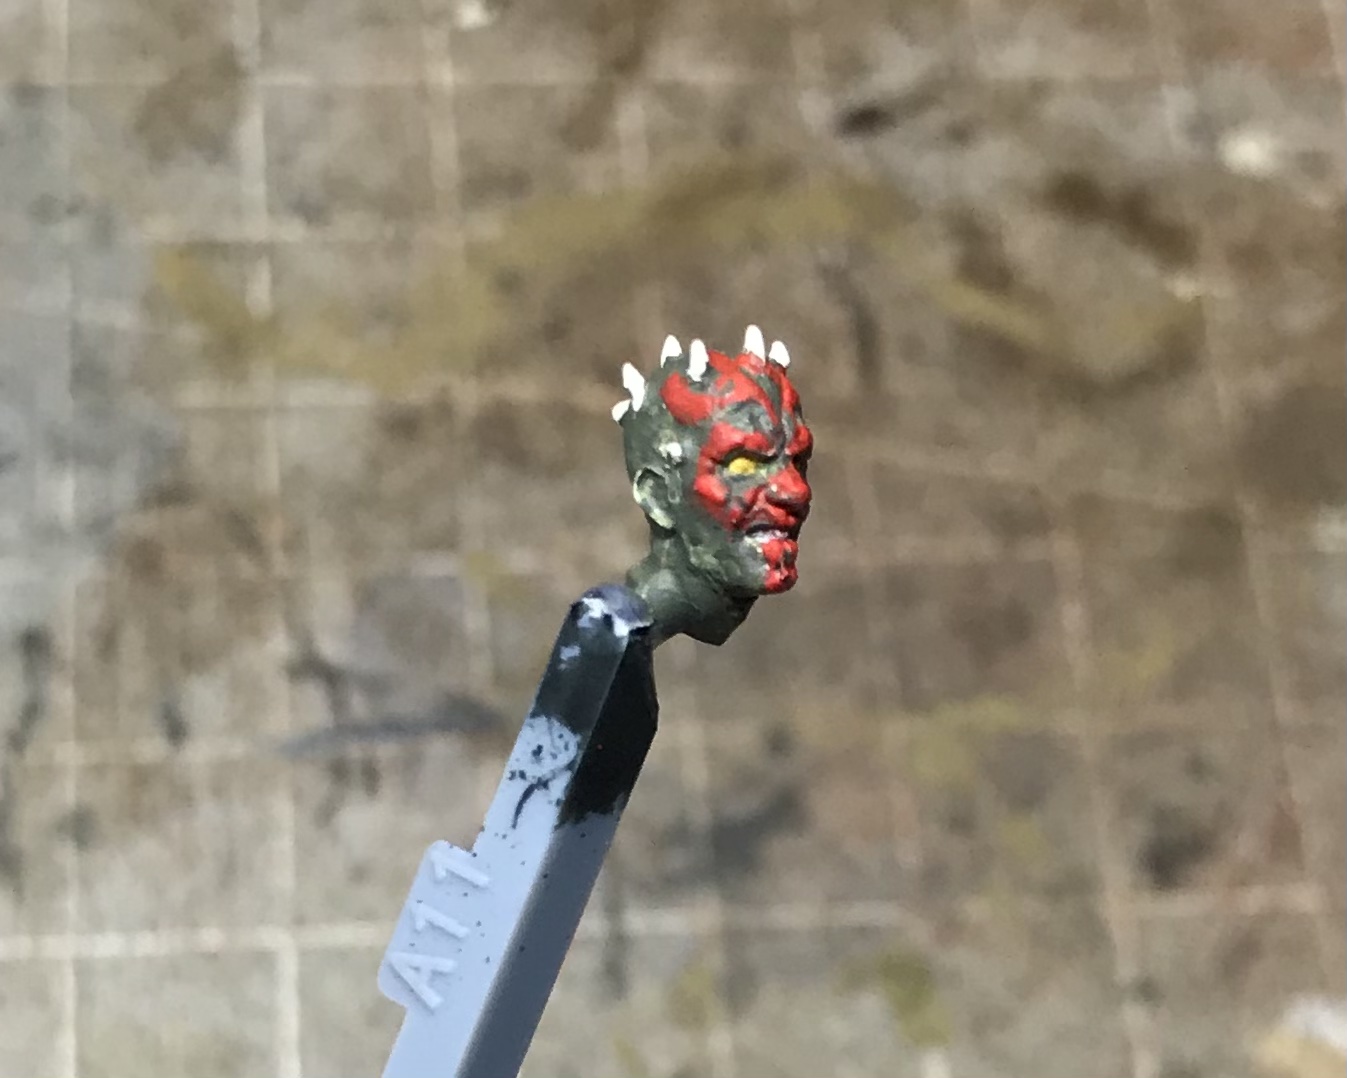
A wash of Nuln Oil was applied to the tattooed areas to bring out the definition and tone them down.
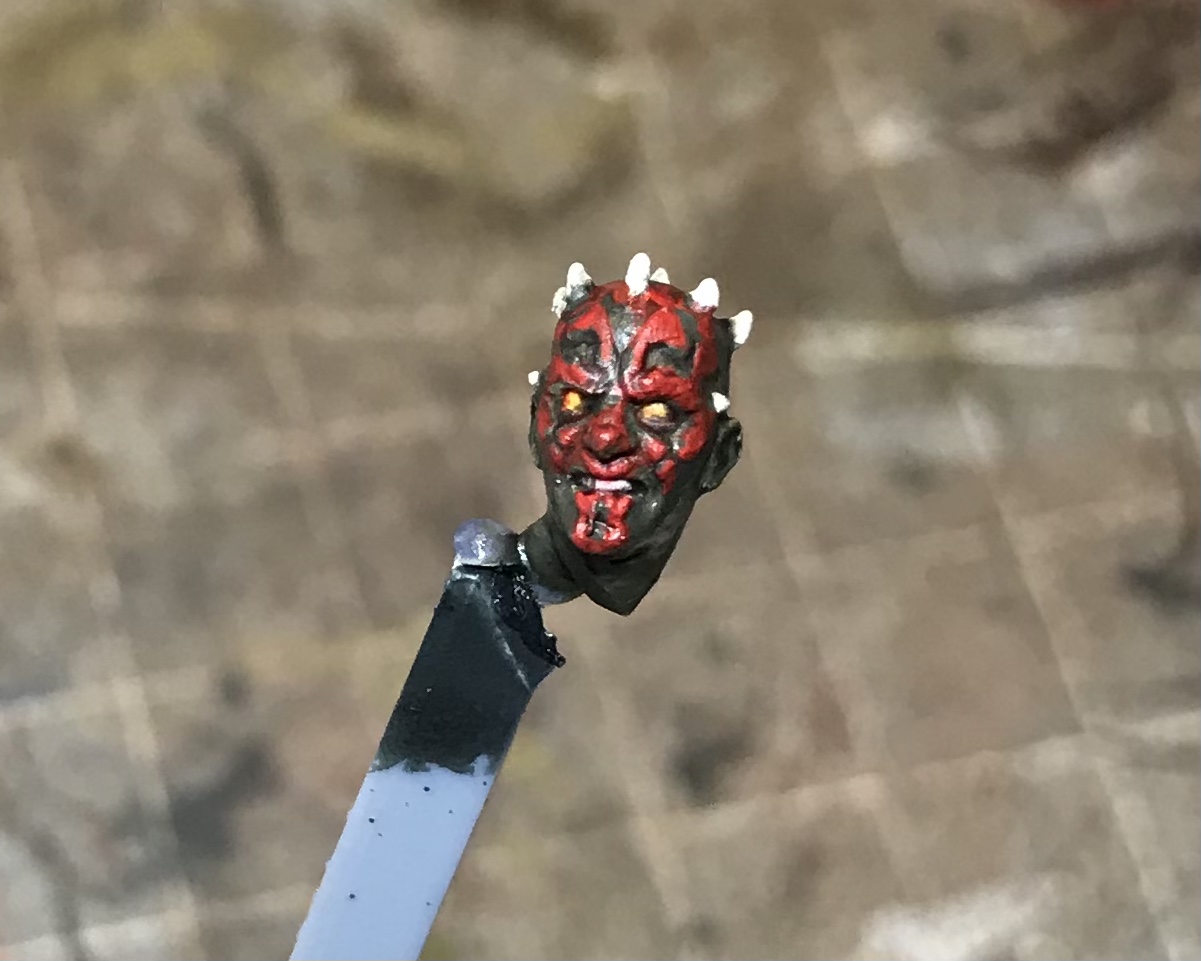
I worked back over all areas with the original colours, tidying up and adding highlights after the black wash.
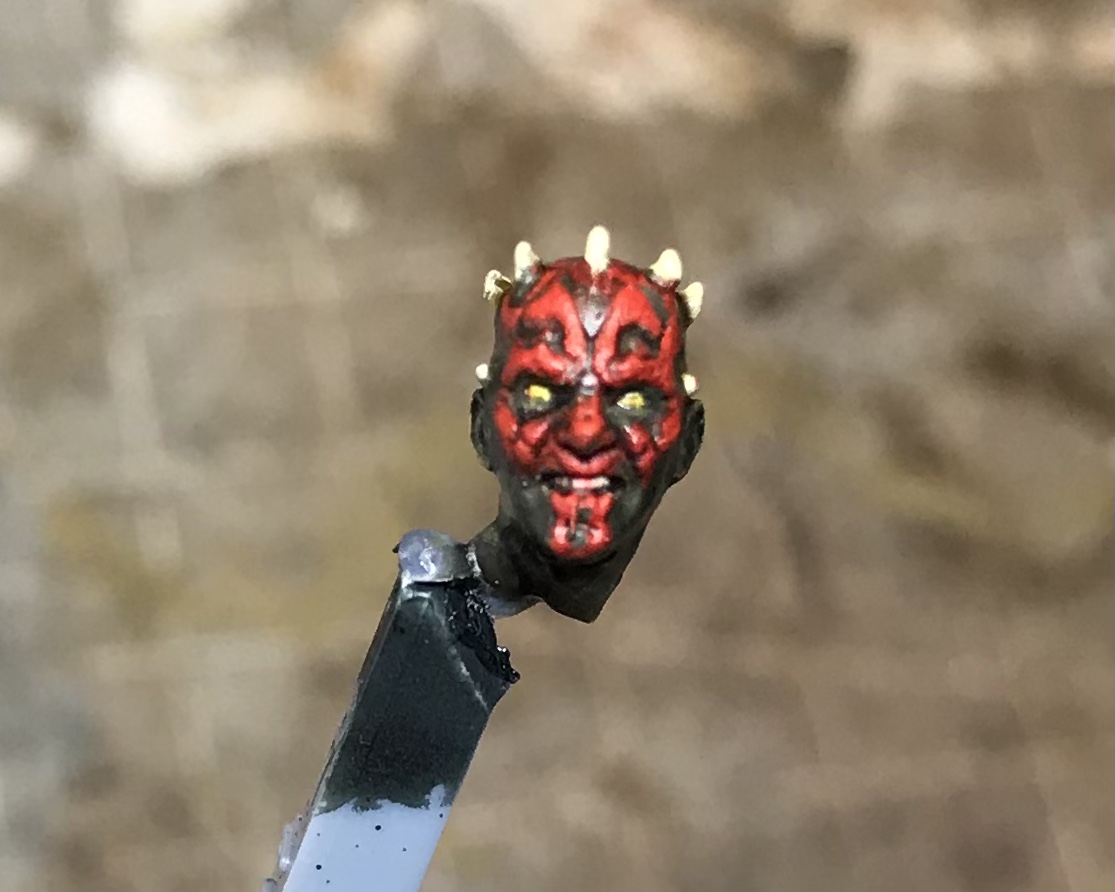
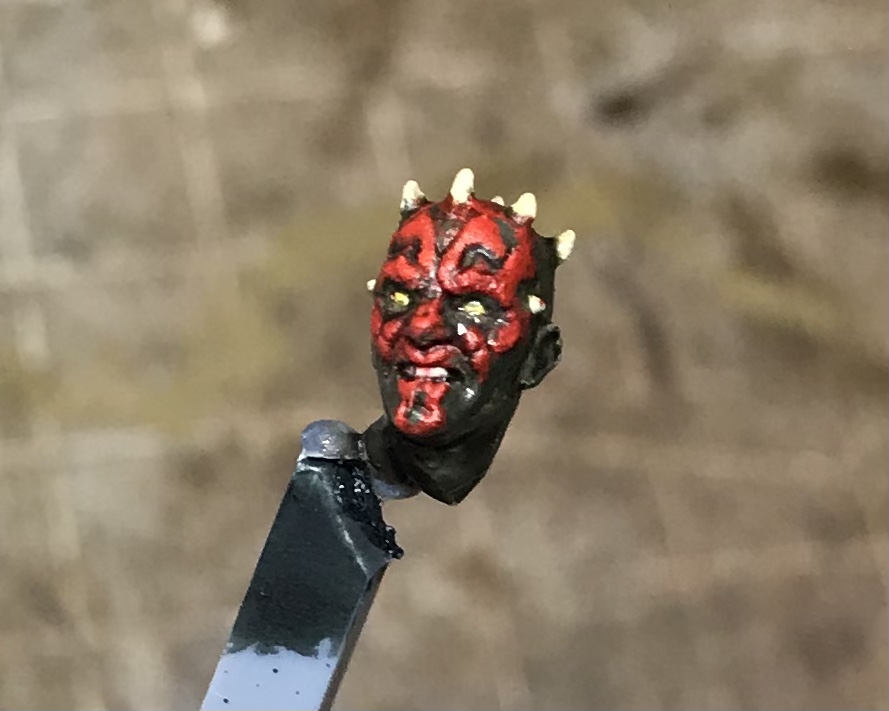
A further, selective wash of Nuln Oil, followed by more tidying up and a wash of Soft Tone to the teeth and horns…

… then I went to rest my eyes!
The Phoggy Menace!
I’ve been working on a technique for lightsabers though it isn’t quite there yet. The idea is to build up consecutive thin layers of pigment, over a white primer. I’ve been using contrast Blood Angels Red, heavily thinner with contrast medium.

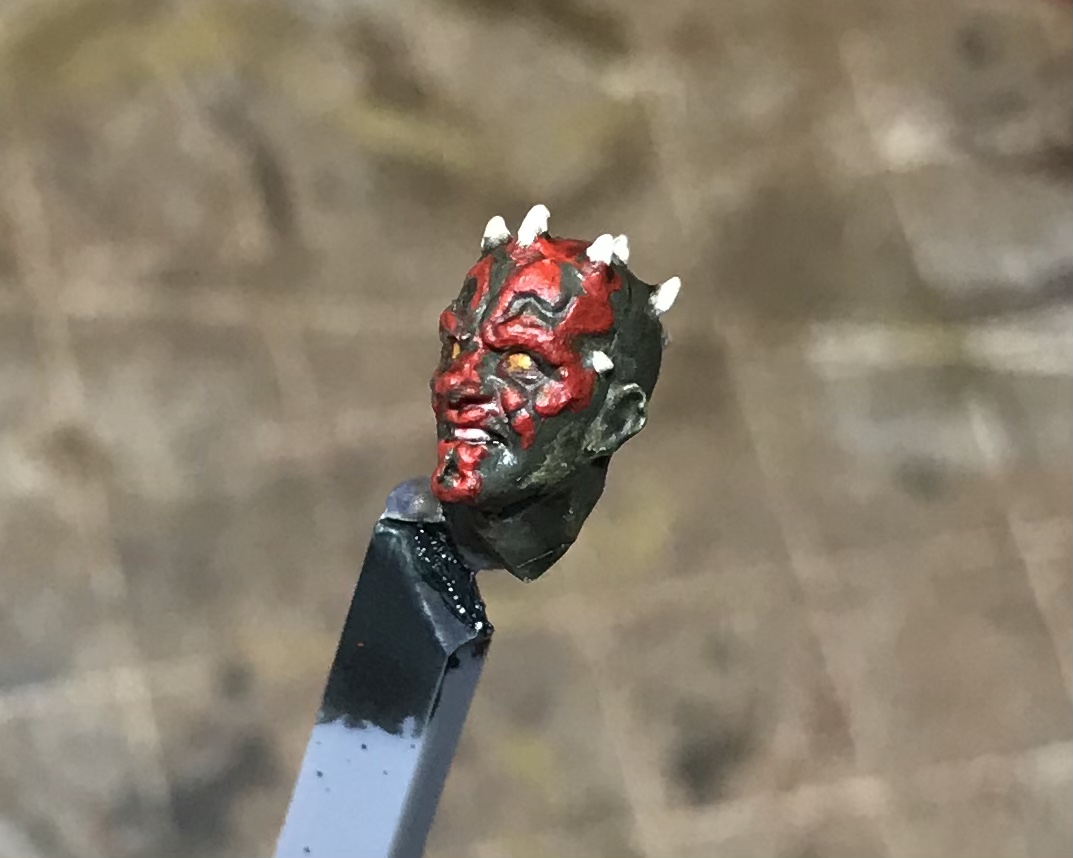
The effect isn’t bad but I think I’ll try with glazes next time. In addition to painting the lightsaber, I also gave Maul’s costume a light dry brush of the Luftwaffe Blue that I had used as the base coat. This was followed by a couple of washes of Nuln oil, applied with a little medium.

Once the head was reunited with the body, the model was based in the usual fashion. It was then that disaster struck!…


After applying my usual Vallejo Mat Varnish I was horrified to find it had dried to a cloudy finish. I’m not sure what caused this but a level head and a few careful washes of Nuln oil thinned with medium, removed the worst of the damage.
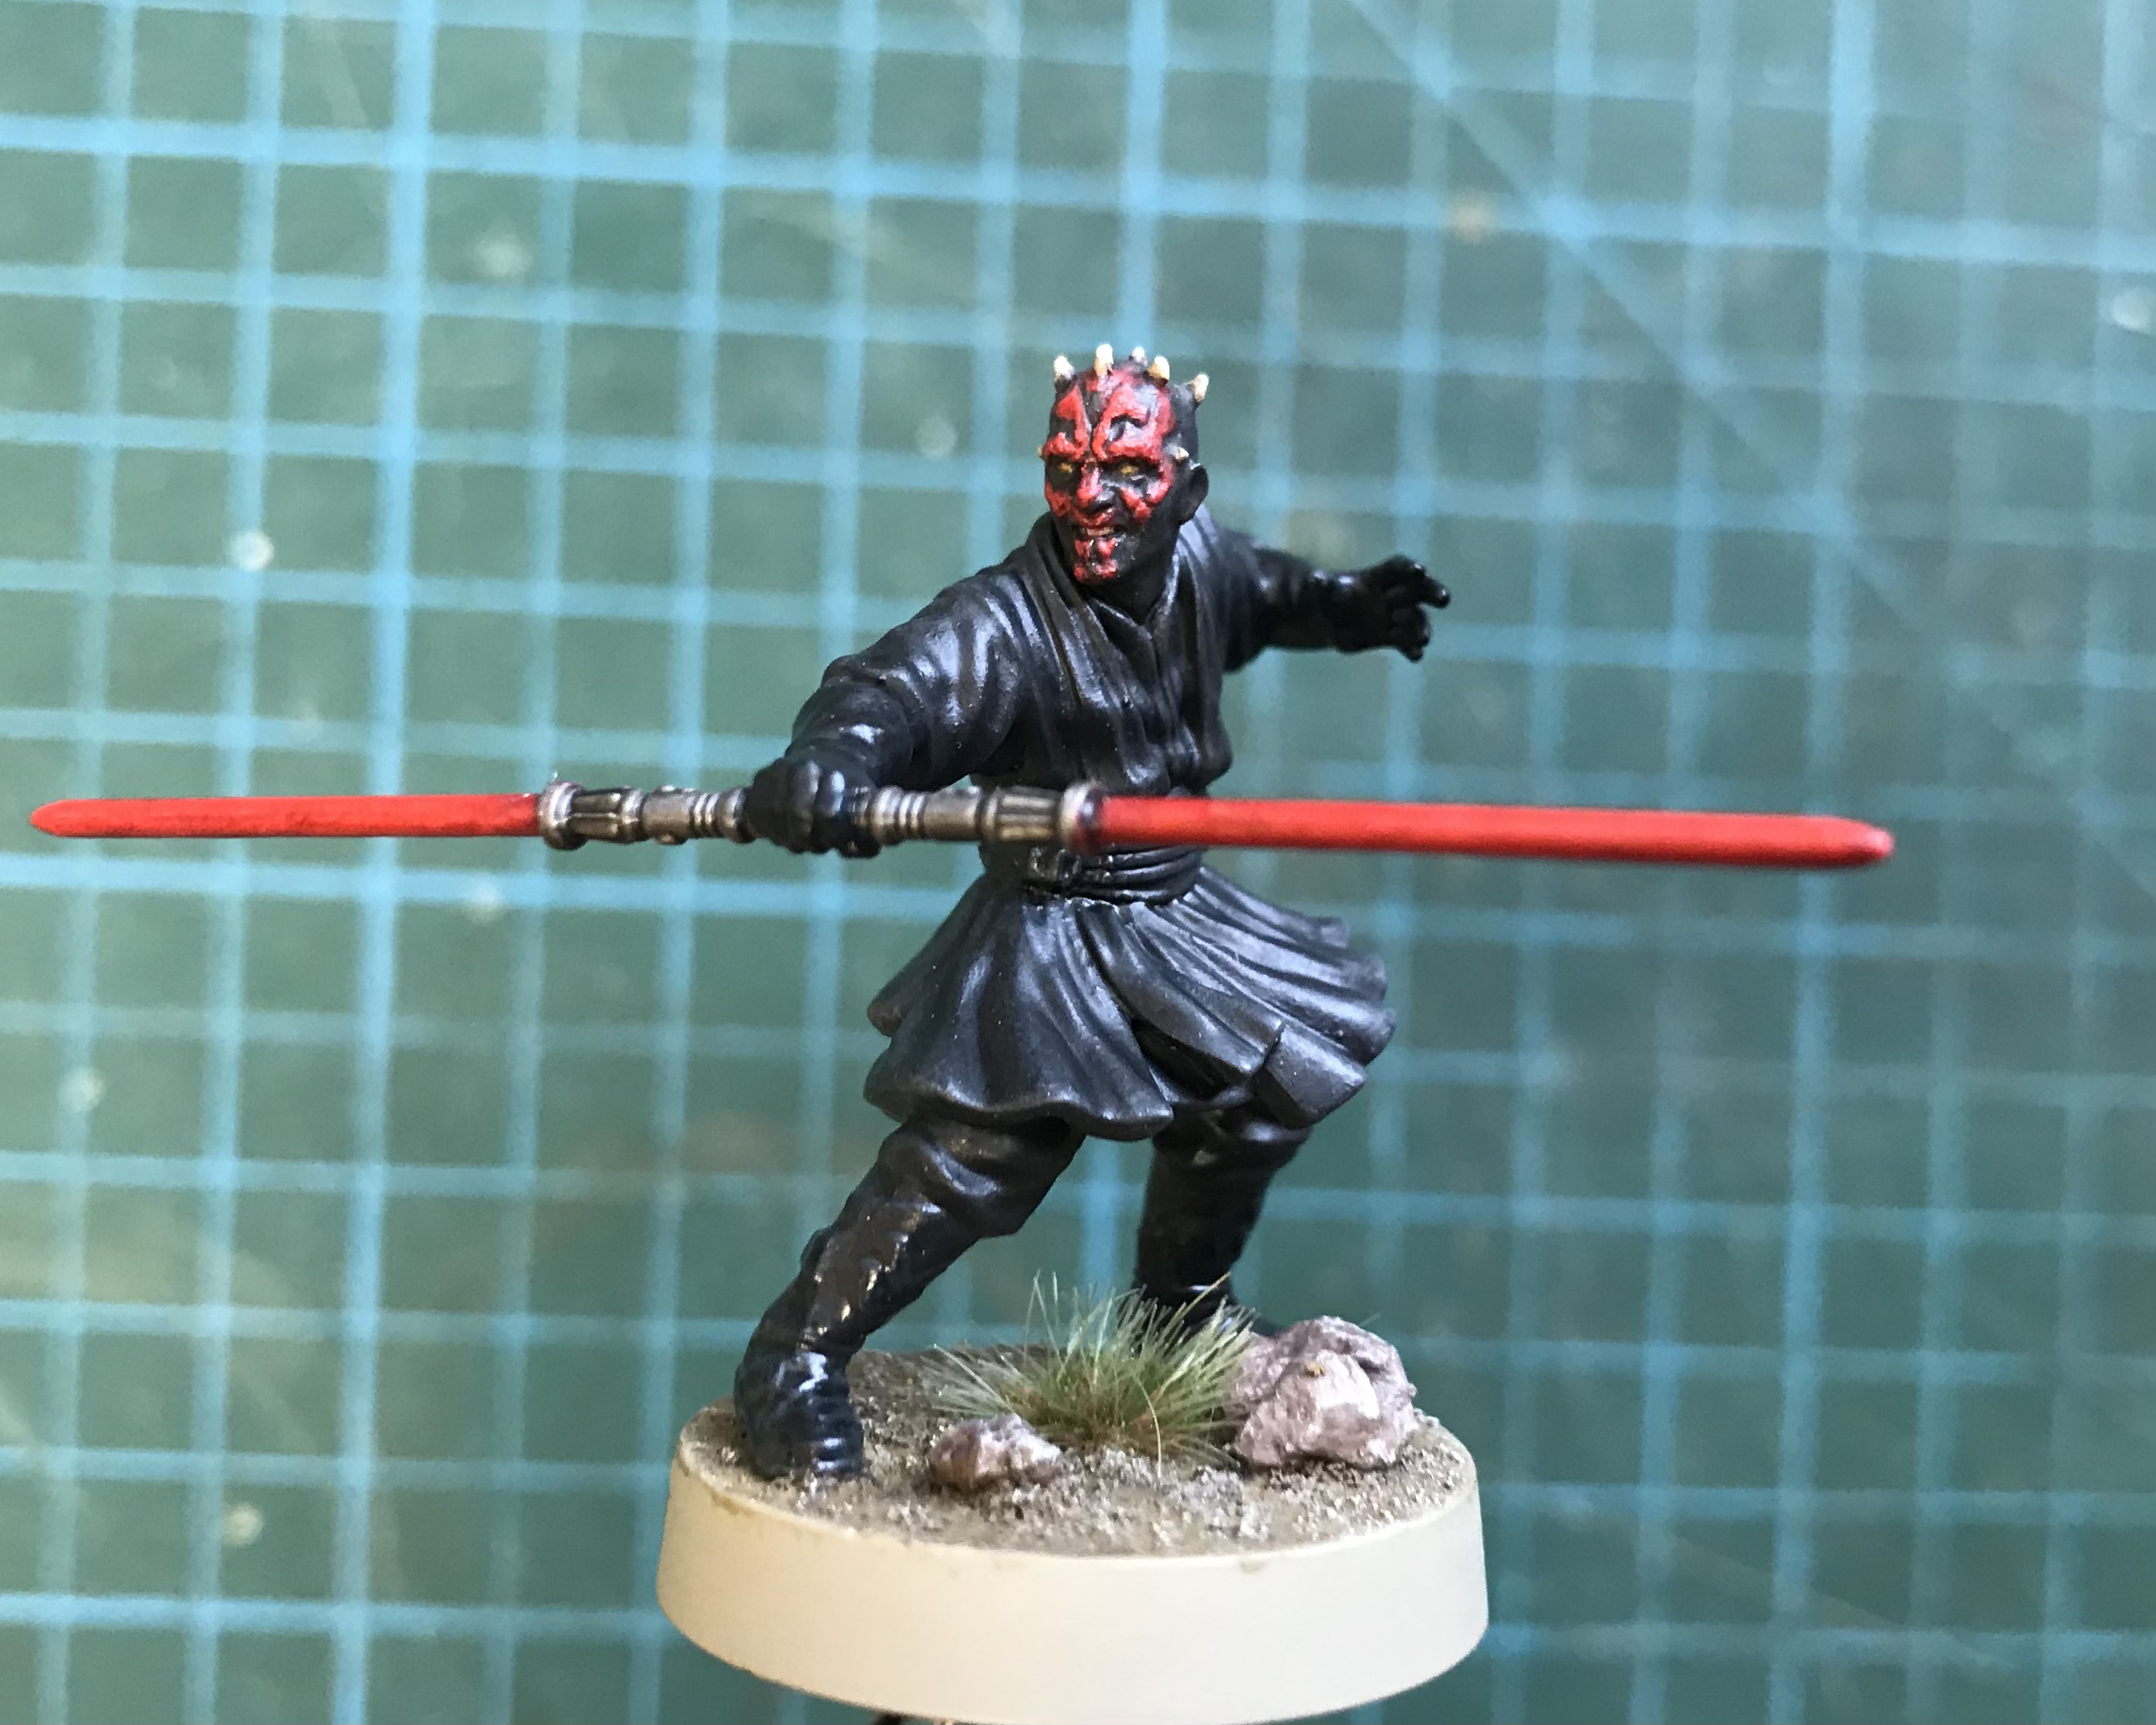

Unfortunately the above images don’t really show what is, admittedly a subtle blue highlight to the costume. A wash of Nuln Oil Gloss to the boots, gloves and belt, really helped represent the leathery elements of the costume and break up the form of the figure.
Specialist Personnel Expansion

By the time I had finished Maul the next expansion had arrived in the post. These specialists droids add some interesting options to the army such as repair and heal actions.
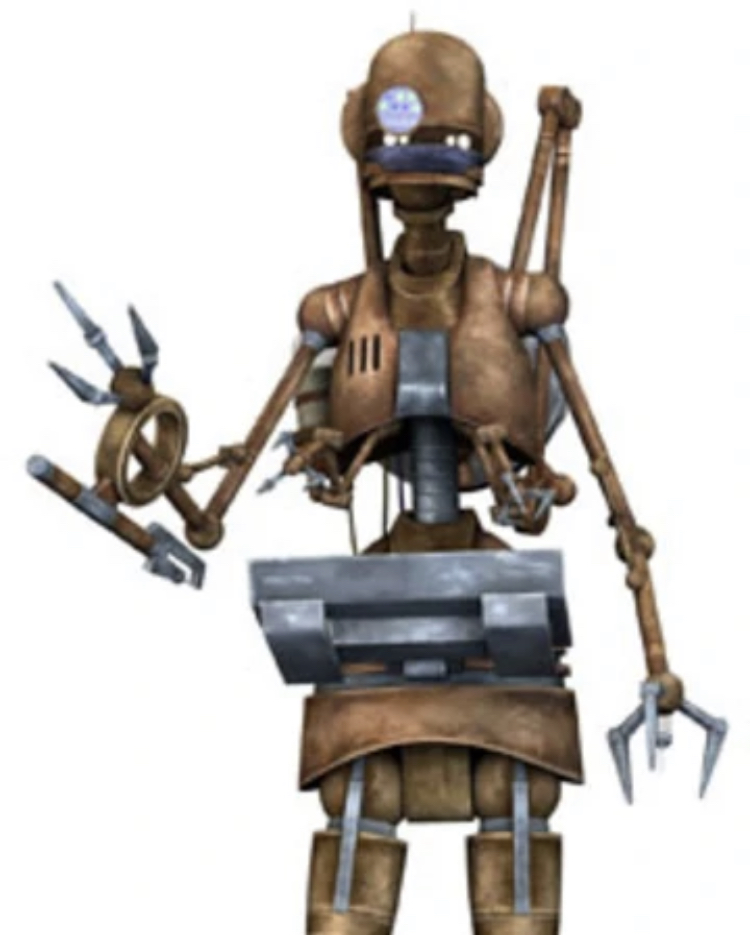
Perhaps most notable is the T-series Tactical Droid, who is able to command your forces. This is a significant change of pace from the current general options of Dooku and Grievous.
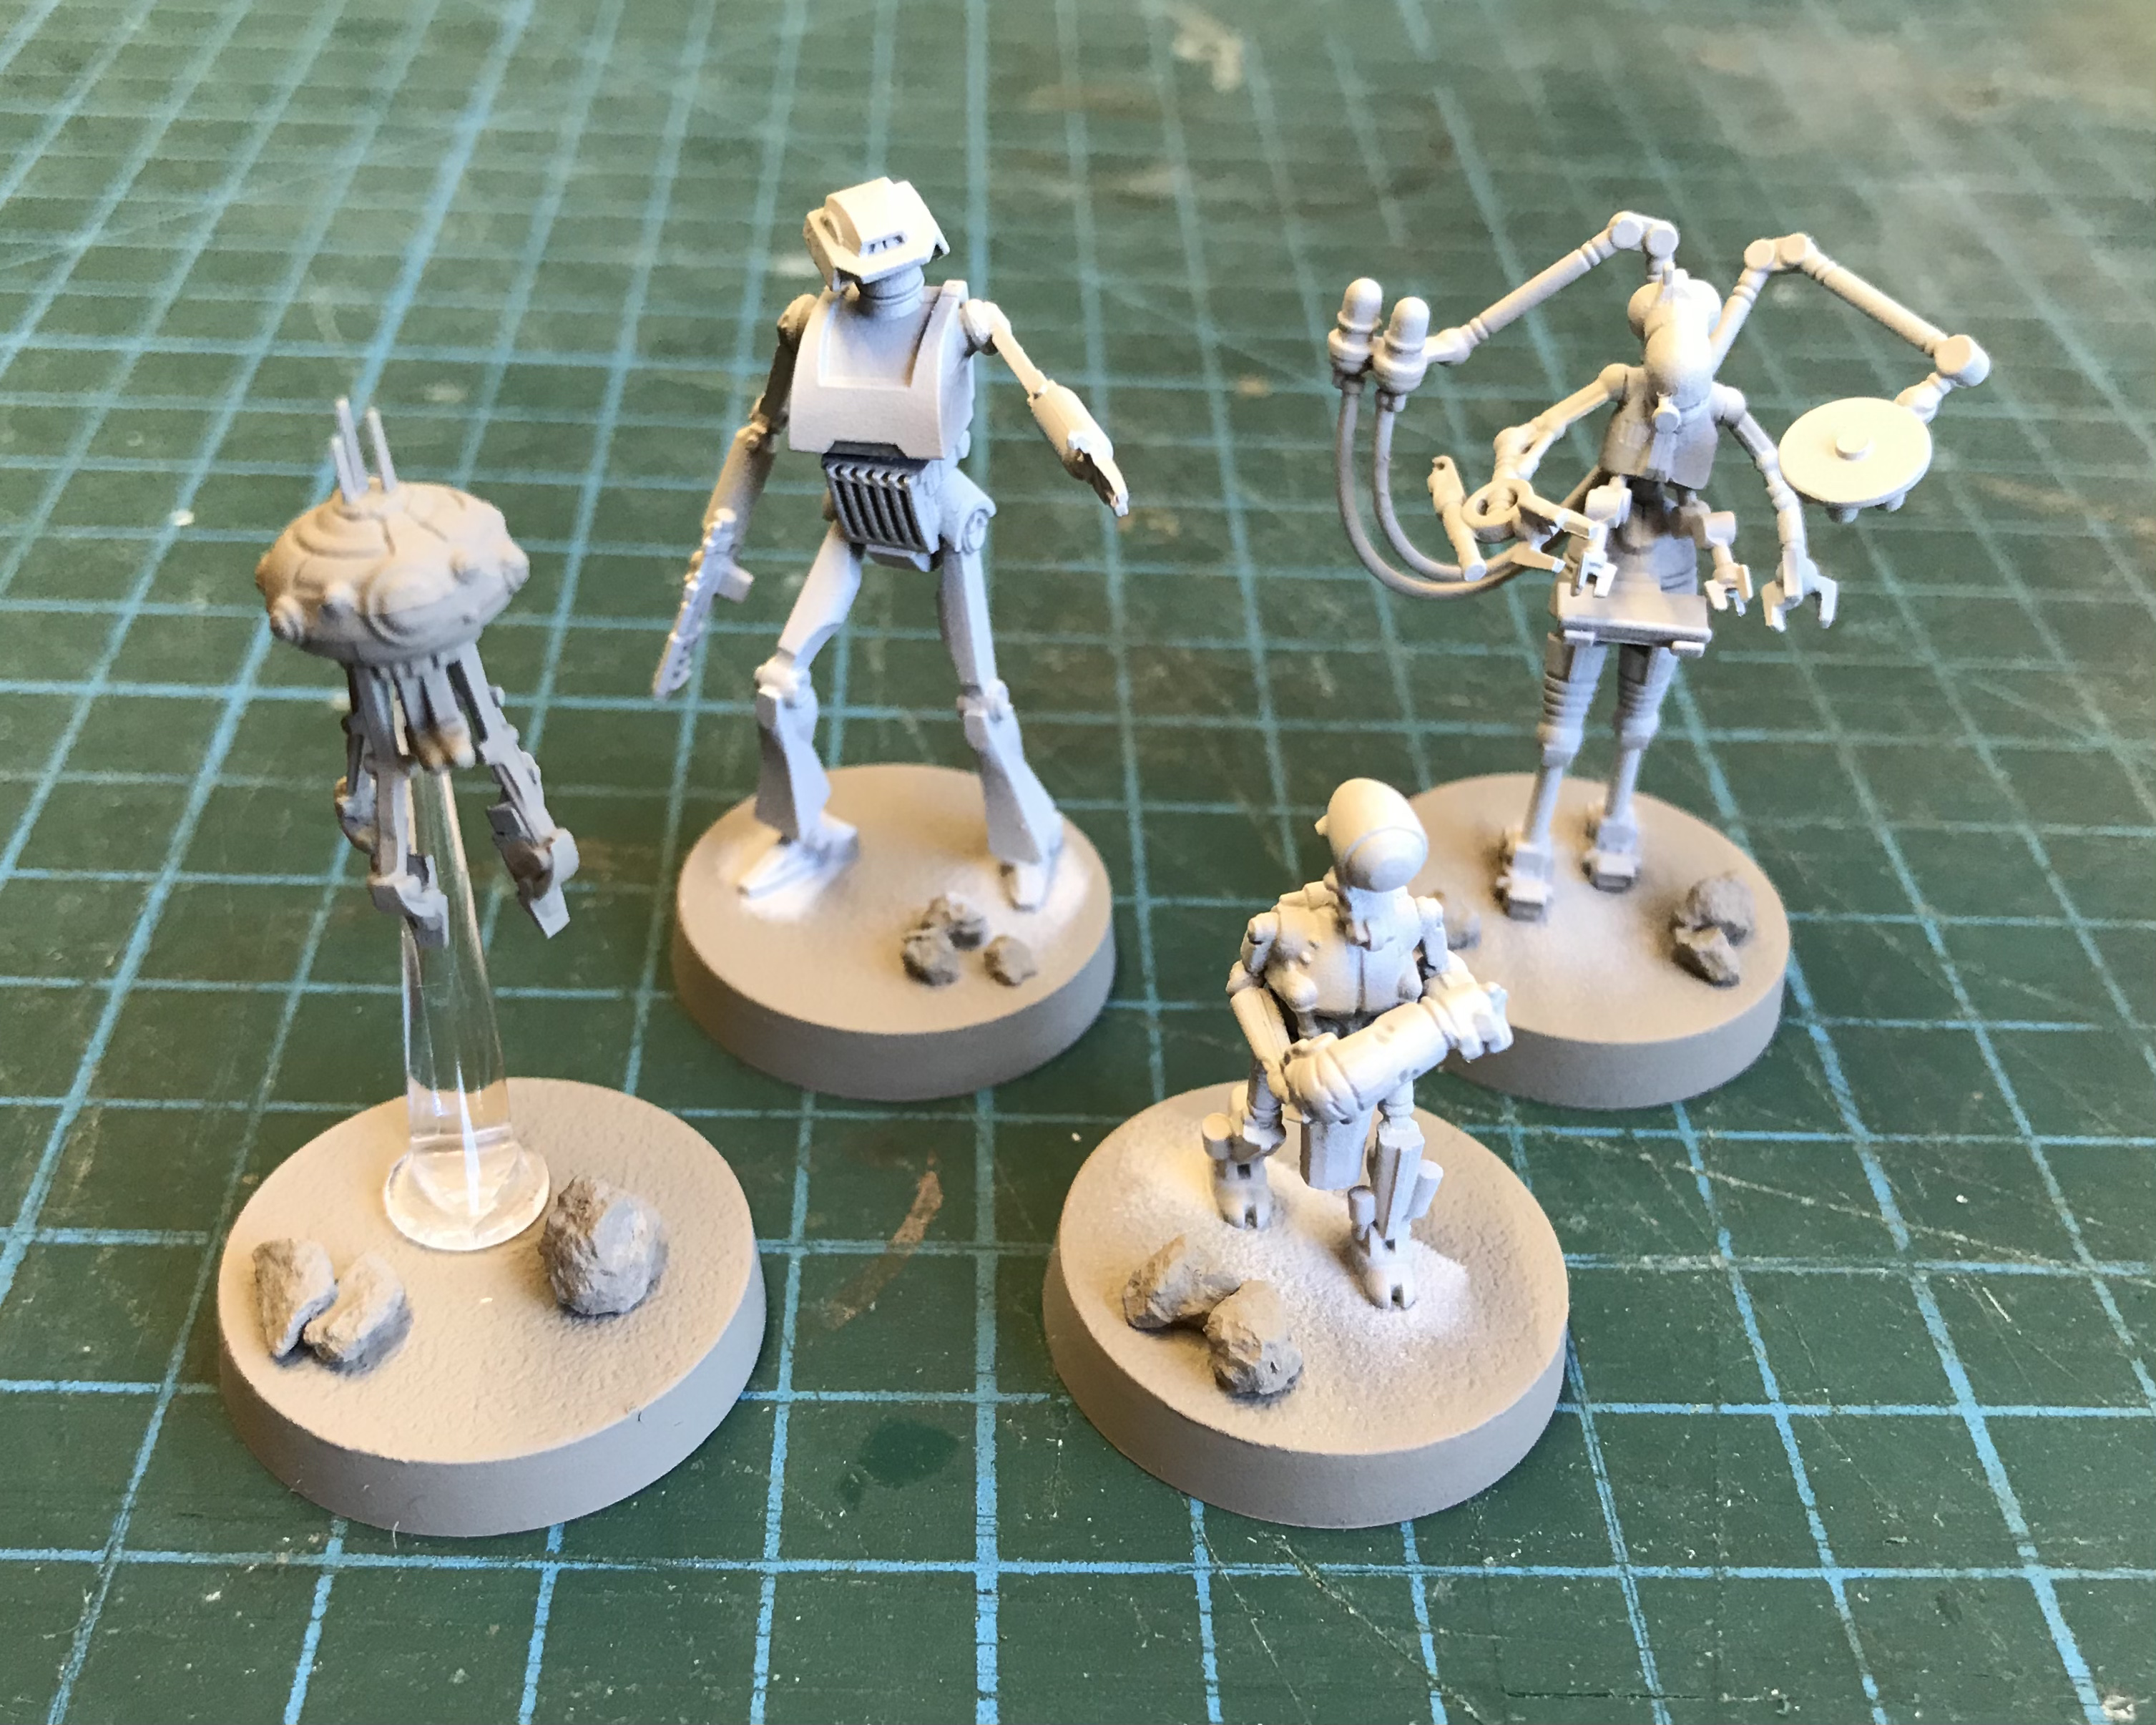
With only four models to work through I wasted no time assembling the new droids and priming them in my usual fashion.
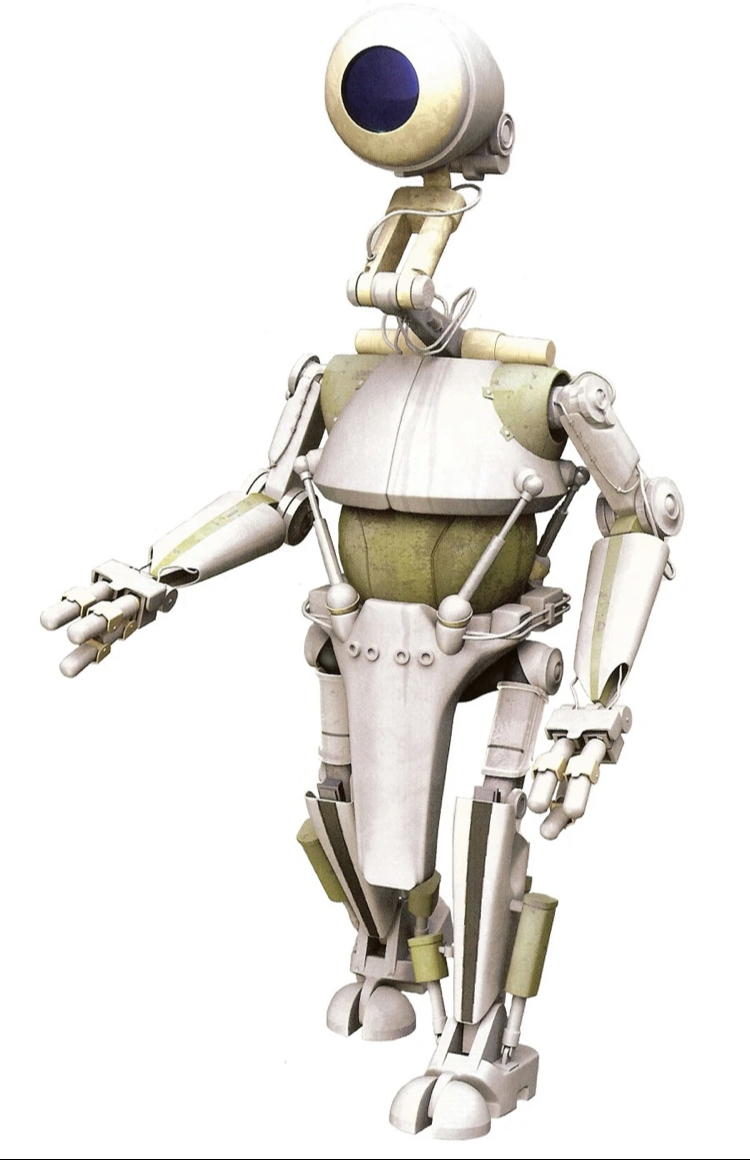
I was familiar with these droid types from watching the Clone Wars with my kids, but I wasn’t sure of their colour schemes. One of the great things about building an army from a universe as well established as Star Wars, is the wealth of reference you can draw on.
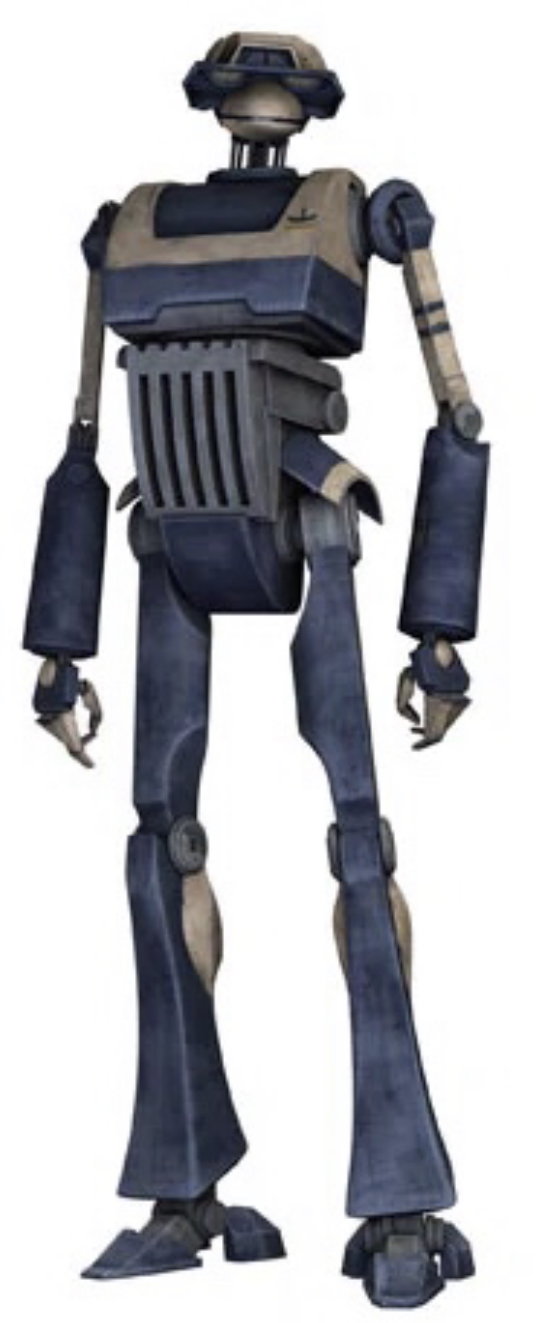
After a brief internet search I had some colour schemes that I felt would work with rest of my army.
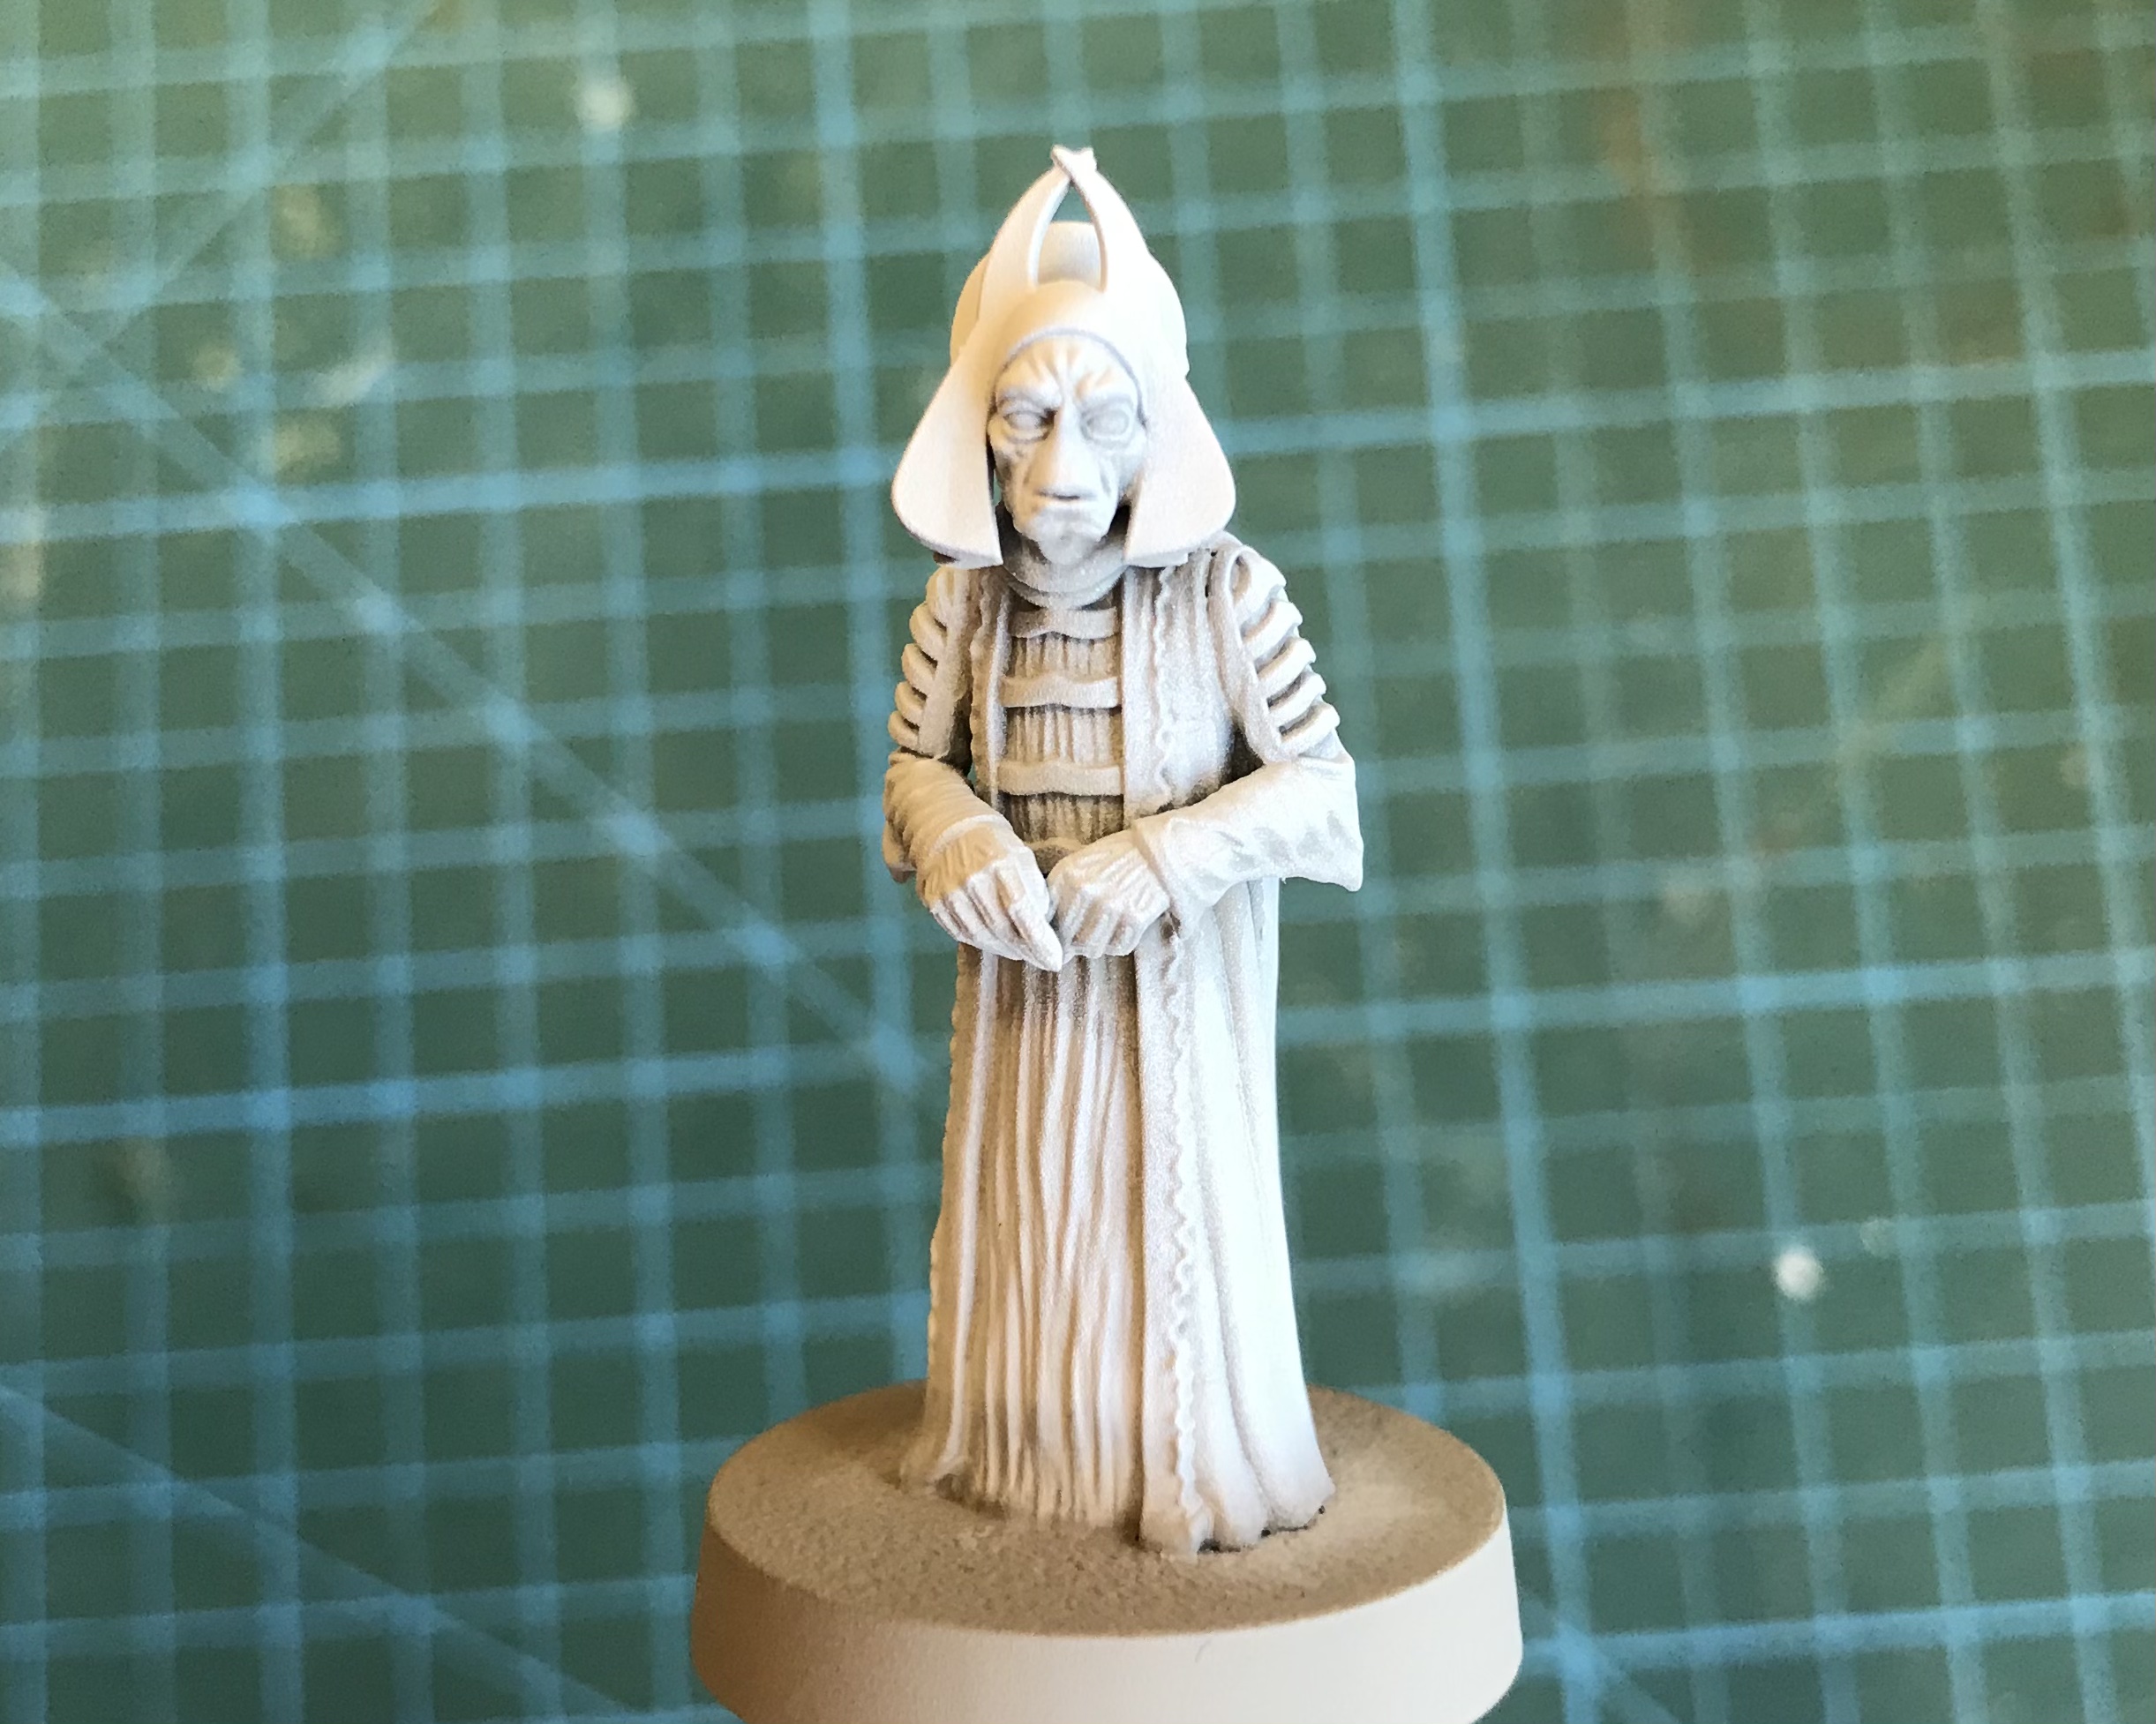
In the meantime I spotted the Separatist Hostage from the Vital Assets Battlefield expansion. I had primed him a while back but never got around to painting him. Now seemed like a good time to add him to my painting tray.


![Play WW2 Commando Operations With Butcher & Bolt [Updated]](https://images.beastsofwar.com/2026/03/relaunch-600-338.jpg)


