![Perfect Call Of Duty-Style Miniatures? Wargames Atlantic’s Operators Review [7 Days Early Access]](https://images.beastsofwar.com/2026/02/unboxing-wargames-atlantic-operators-coverimage-225-127.jpg)


Romano-British for Dux Britanniarum


Recommendations: 1546
About the Project
This was a project started during lockdown to build a Romano-British war band for Dux Britanniarum by Too Fat Lardies. It's stalled of late, so my hope is that by documenting progress on this project I'll be incentivised to finish it.
Related Company: Too Fat Lardies
Related Genre: Historical
This Project is Active
Watchtower Stuffed!
 Hopefully painting will be quicker
So the green stuffing of my watchtower is finally complete. The last cornerstones and lines of brick were smoothed into place on the top platform and it still fits snugly. You can see the line where the two levels meet, but I think that once the model is under coated in black and painted, this should be less obvious.
I also found that my fears about the green stuff hardening in lumps and spoiling the fit of the platform were unfounded. I remembered watching a Gerry Can where it was pointed out that you can cut green stuff very easily with a modelling knife and lo and behold this is true (I should not have doubted the great man). It trims very easily and so I was able to slice it off bits where they were interfering with the fit. I also went around and trimmed off areas where I thought the stonework looked a bit off to give it a more angular look.
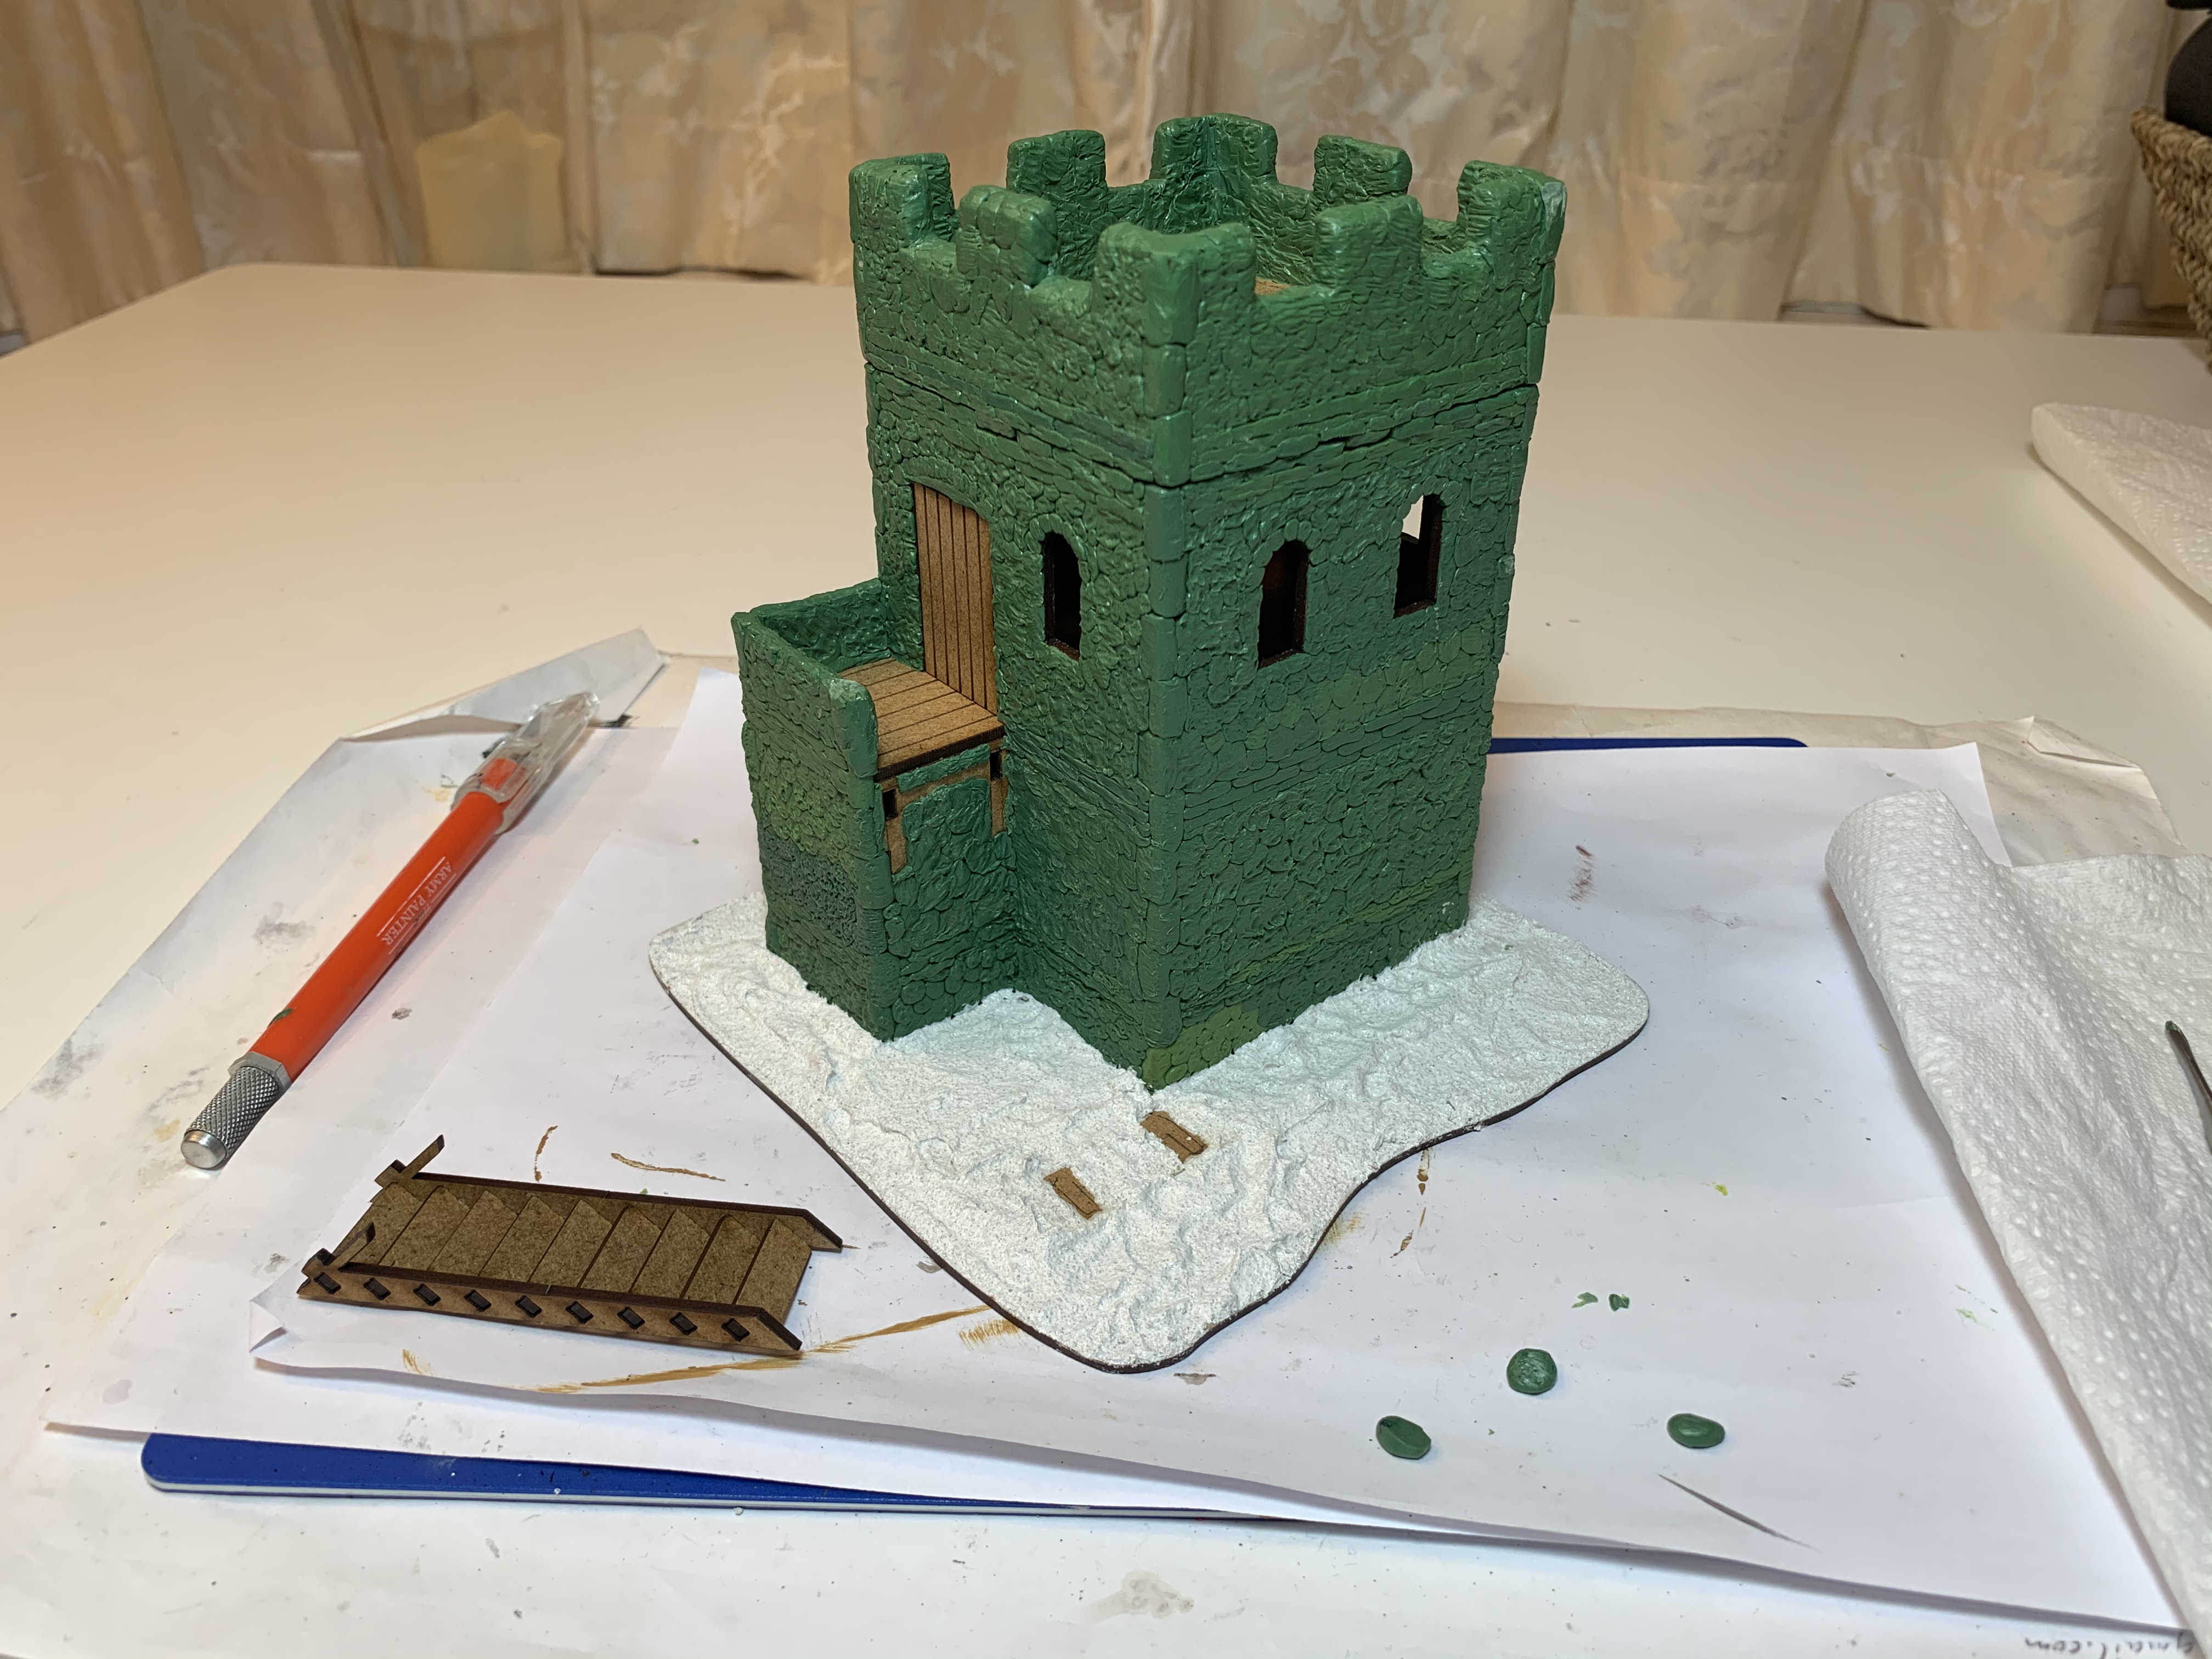 In the foreground you can see three rocks which are a good use of leftover green stuff and can incorporated into terrain
I’ve glued to tower onto a 15cm x 15cm terrain base from Warbases so it occupies a similar footprint to my other buildings. A lot of people tend to elevate this sort of building, but it is taller than the other buildings I have and I think keeping it this way gives flexibility. If I want it on a hill I shall just have to make sure it is a large one so the model can sit comfortably.
Vallejo ground texture has been added to obscure the step down between the base and the terrain base. I should note that I’ve not glued the wooden stairs in place yet. This has enabled me to build up the green stuff around where they will be placed (note where I have left bare MDF showing around the contact points) and will also allow me to get in to paint this area.
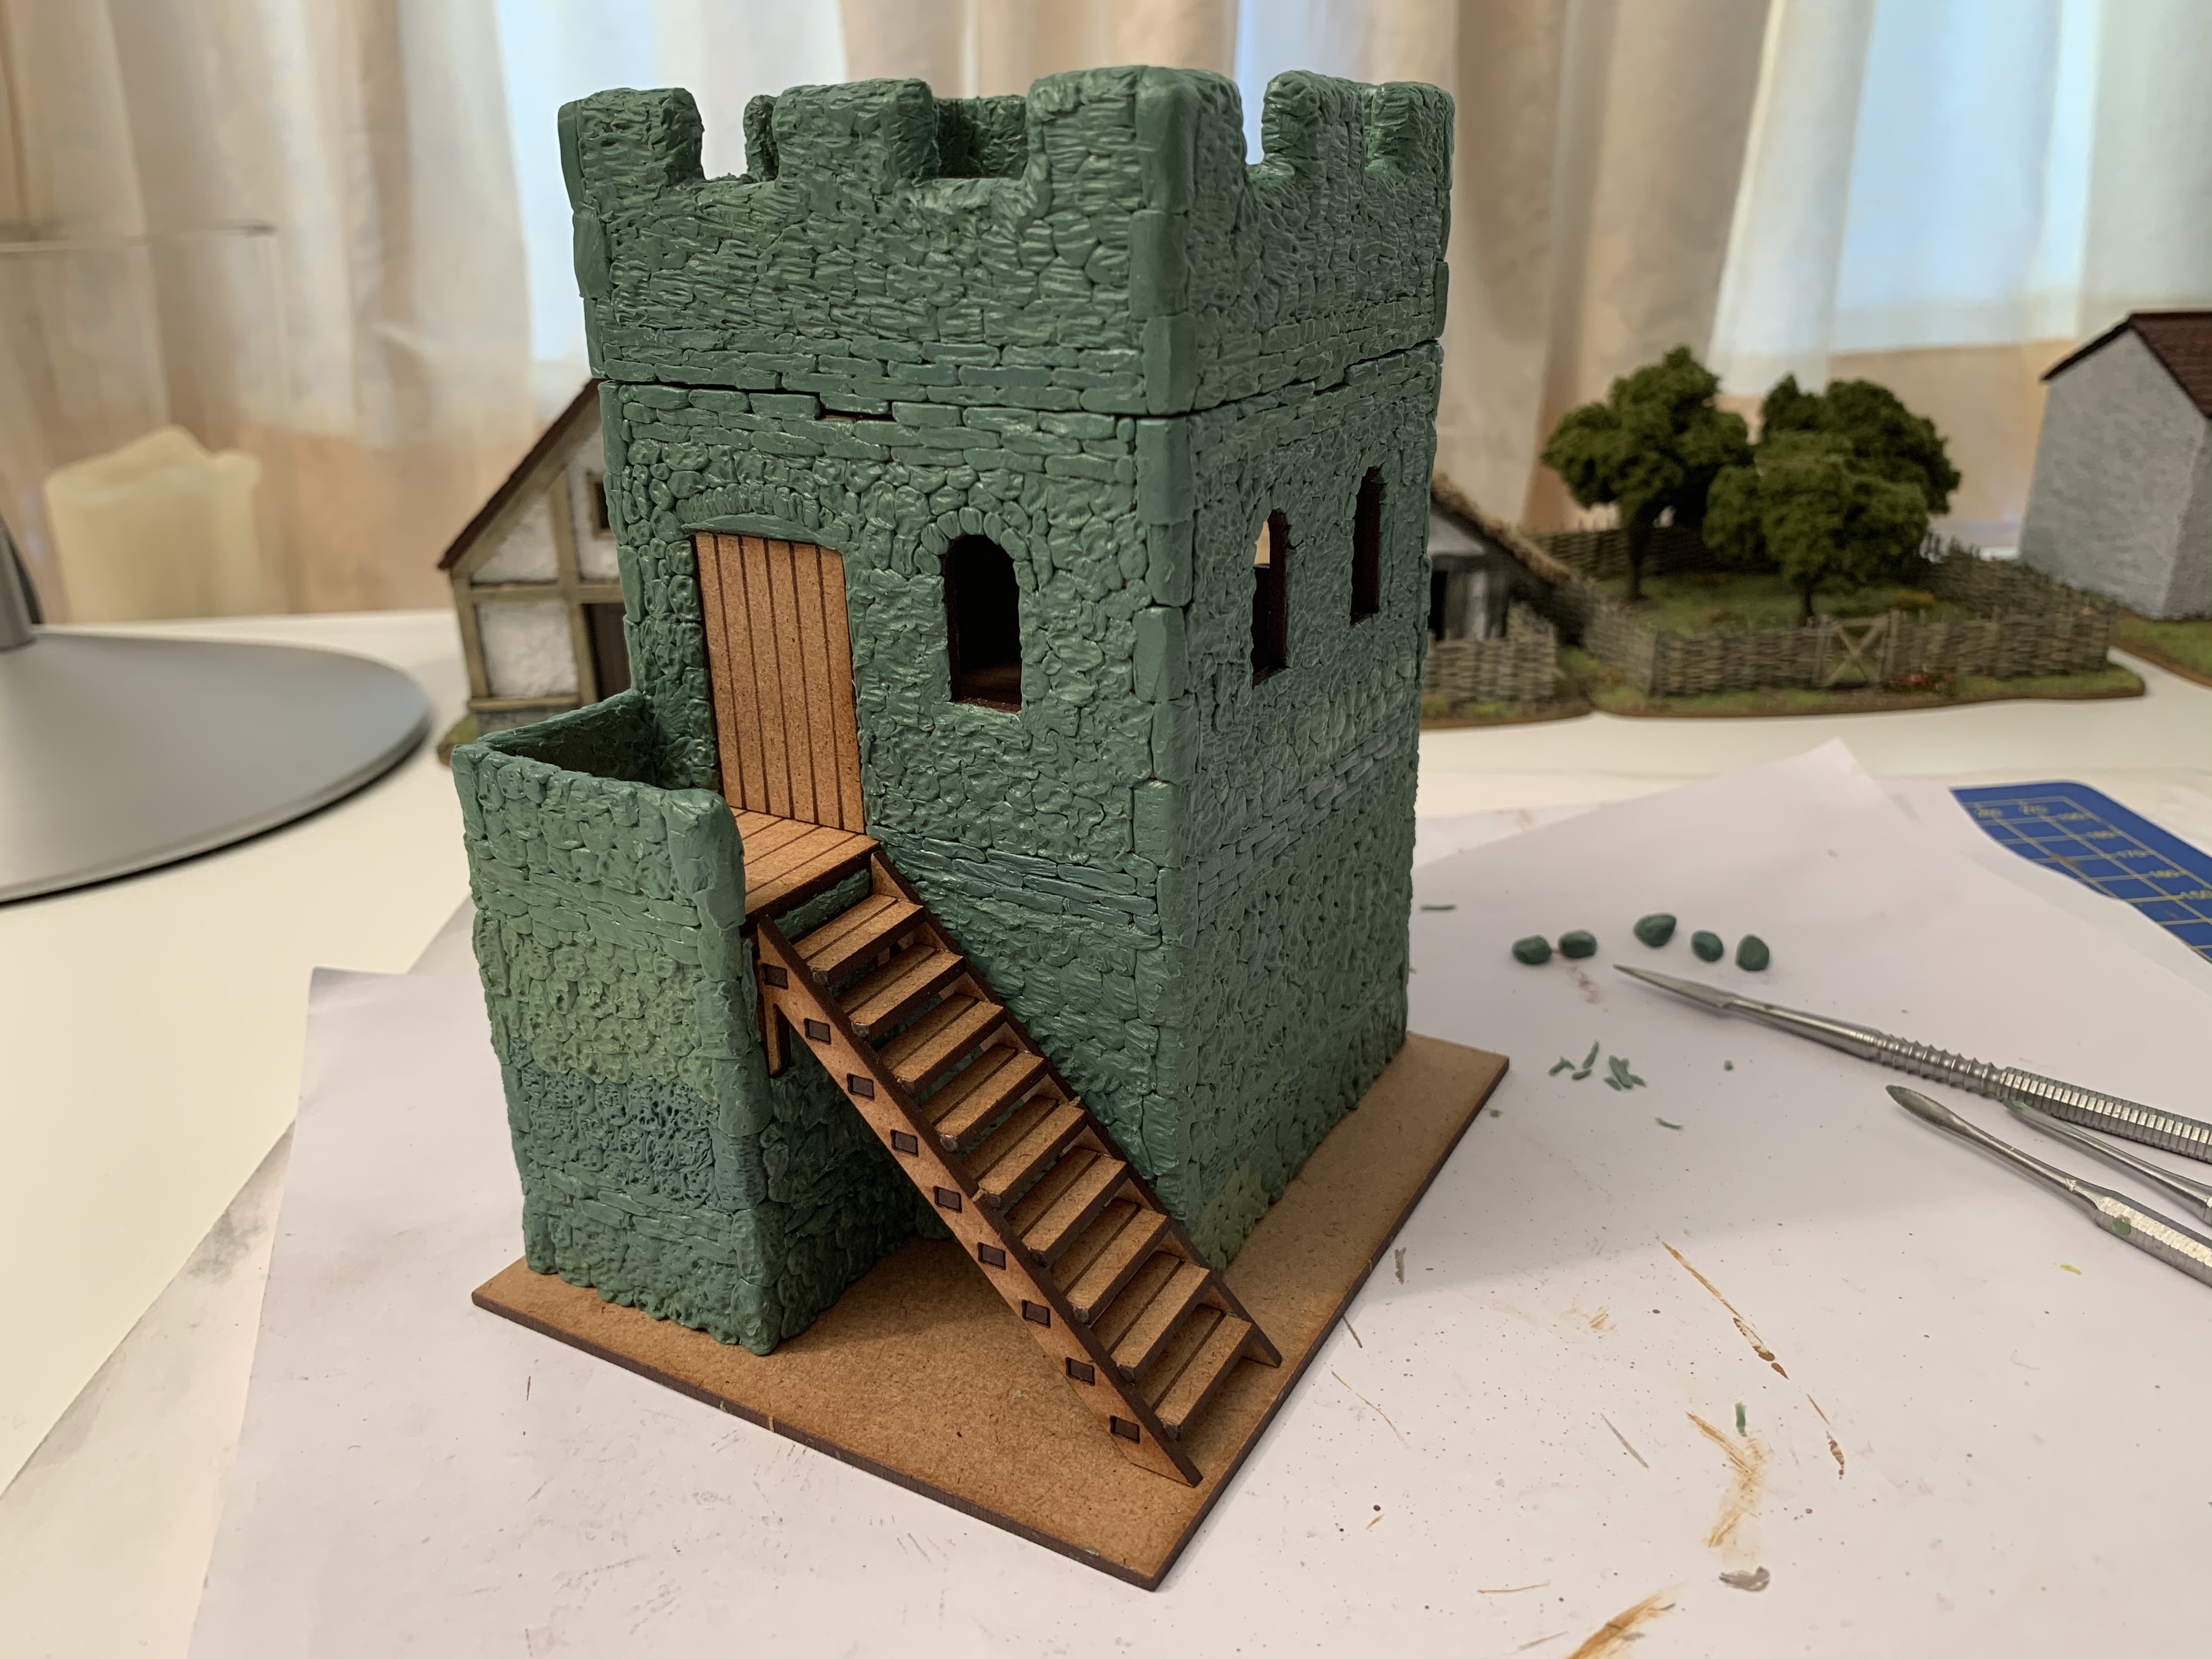
The Watchtower build continues
Hmmm, what exciting paint schemes will I try out over the long weekend? Oh, hang on, I can’t do any painting because I still have to keep green stuffing this wretched Watchtower!
 Still, we are finally getting close to the finish
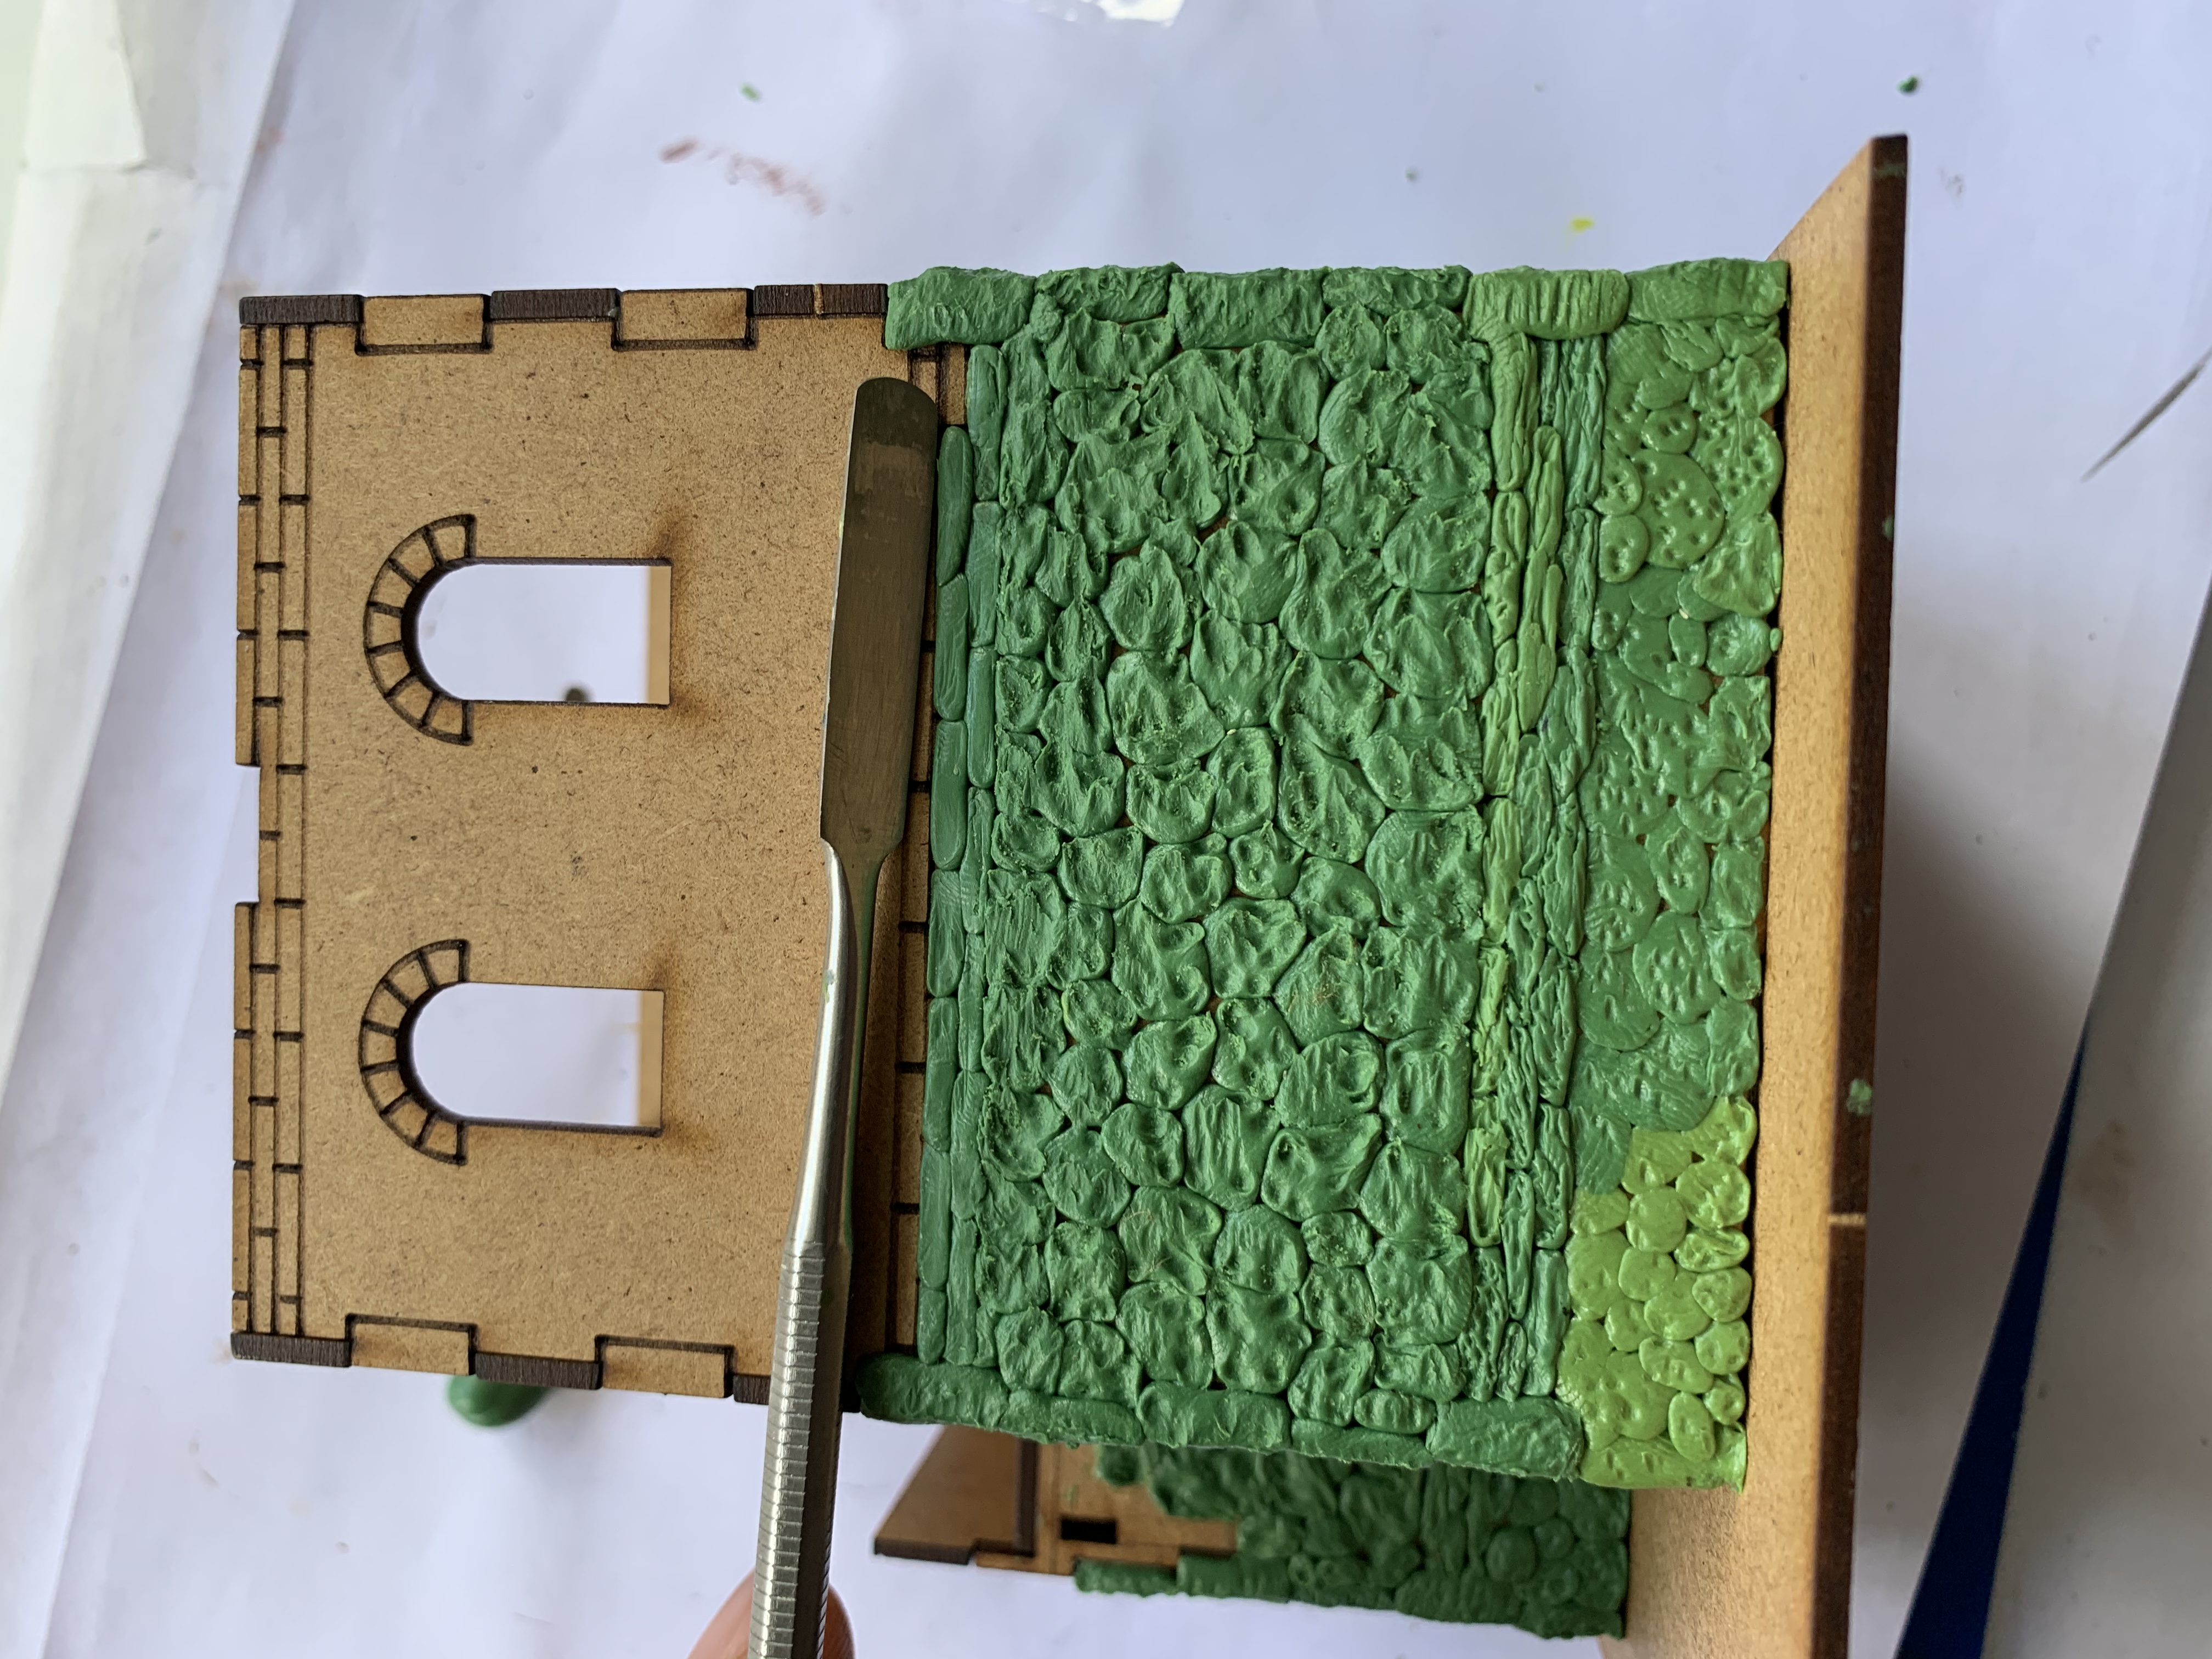
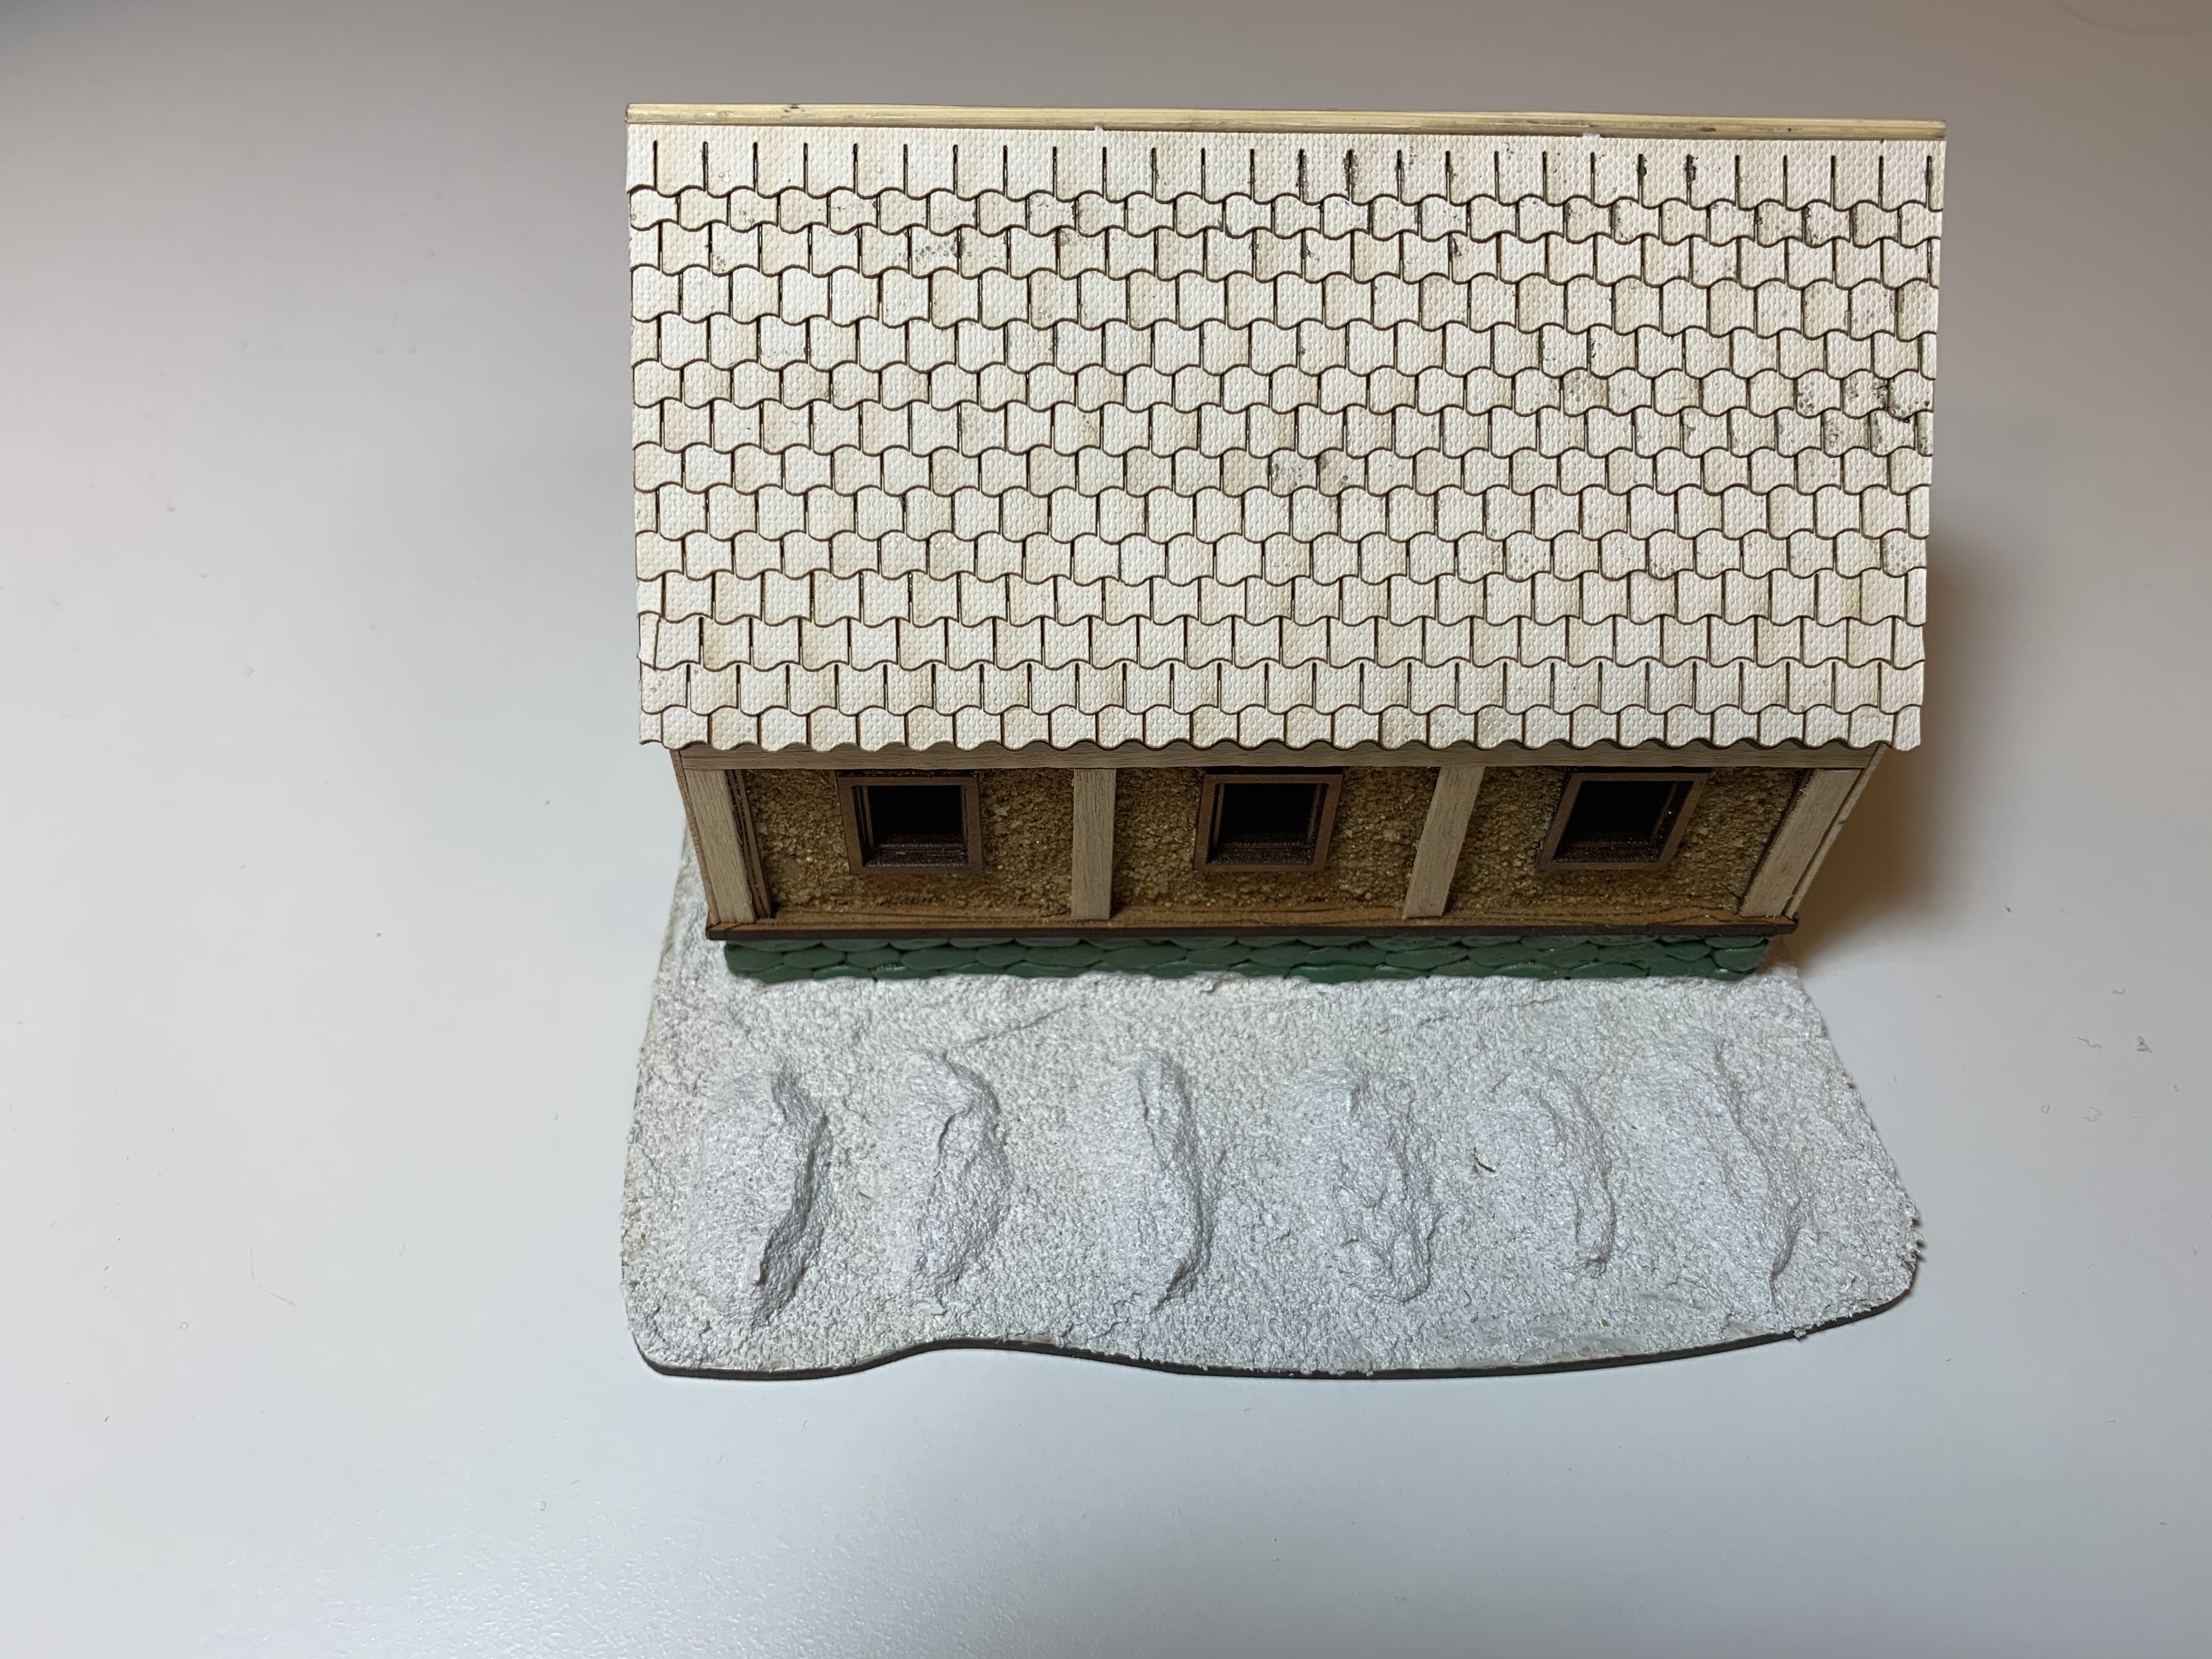
 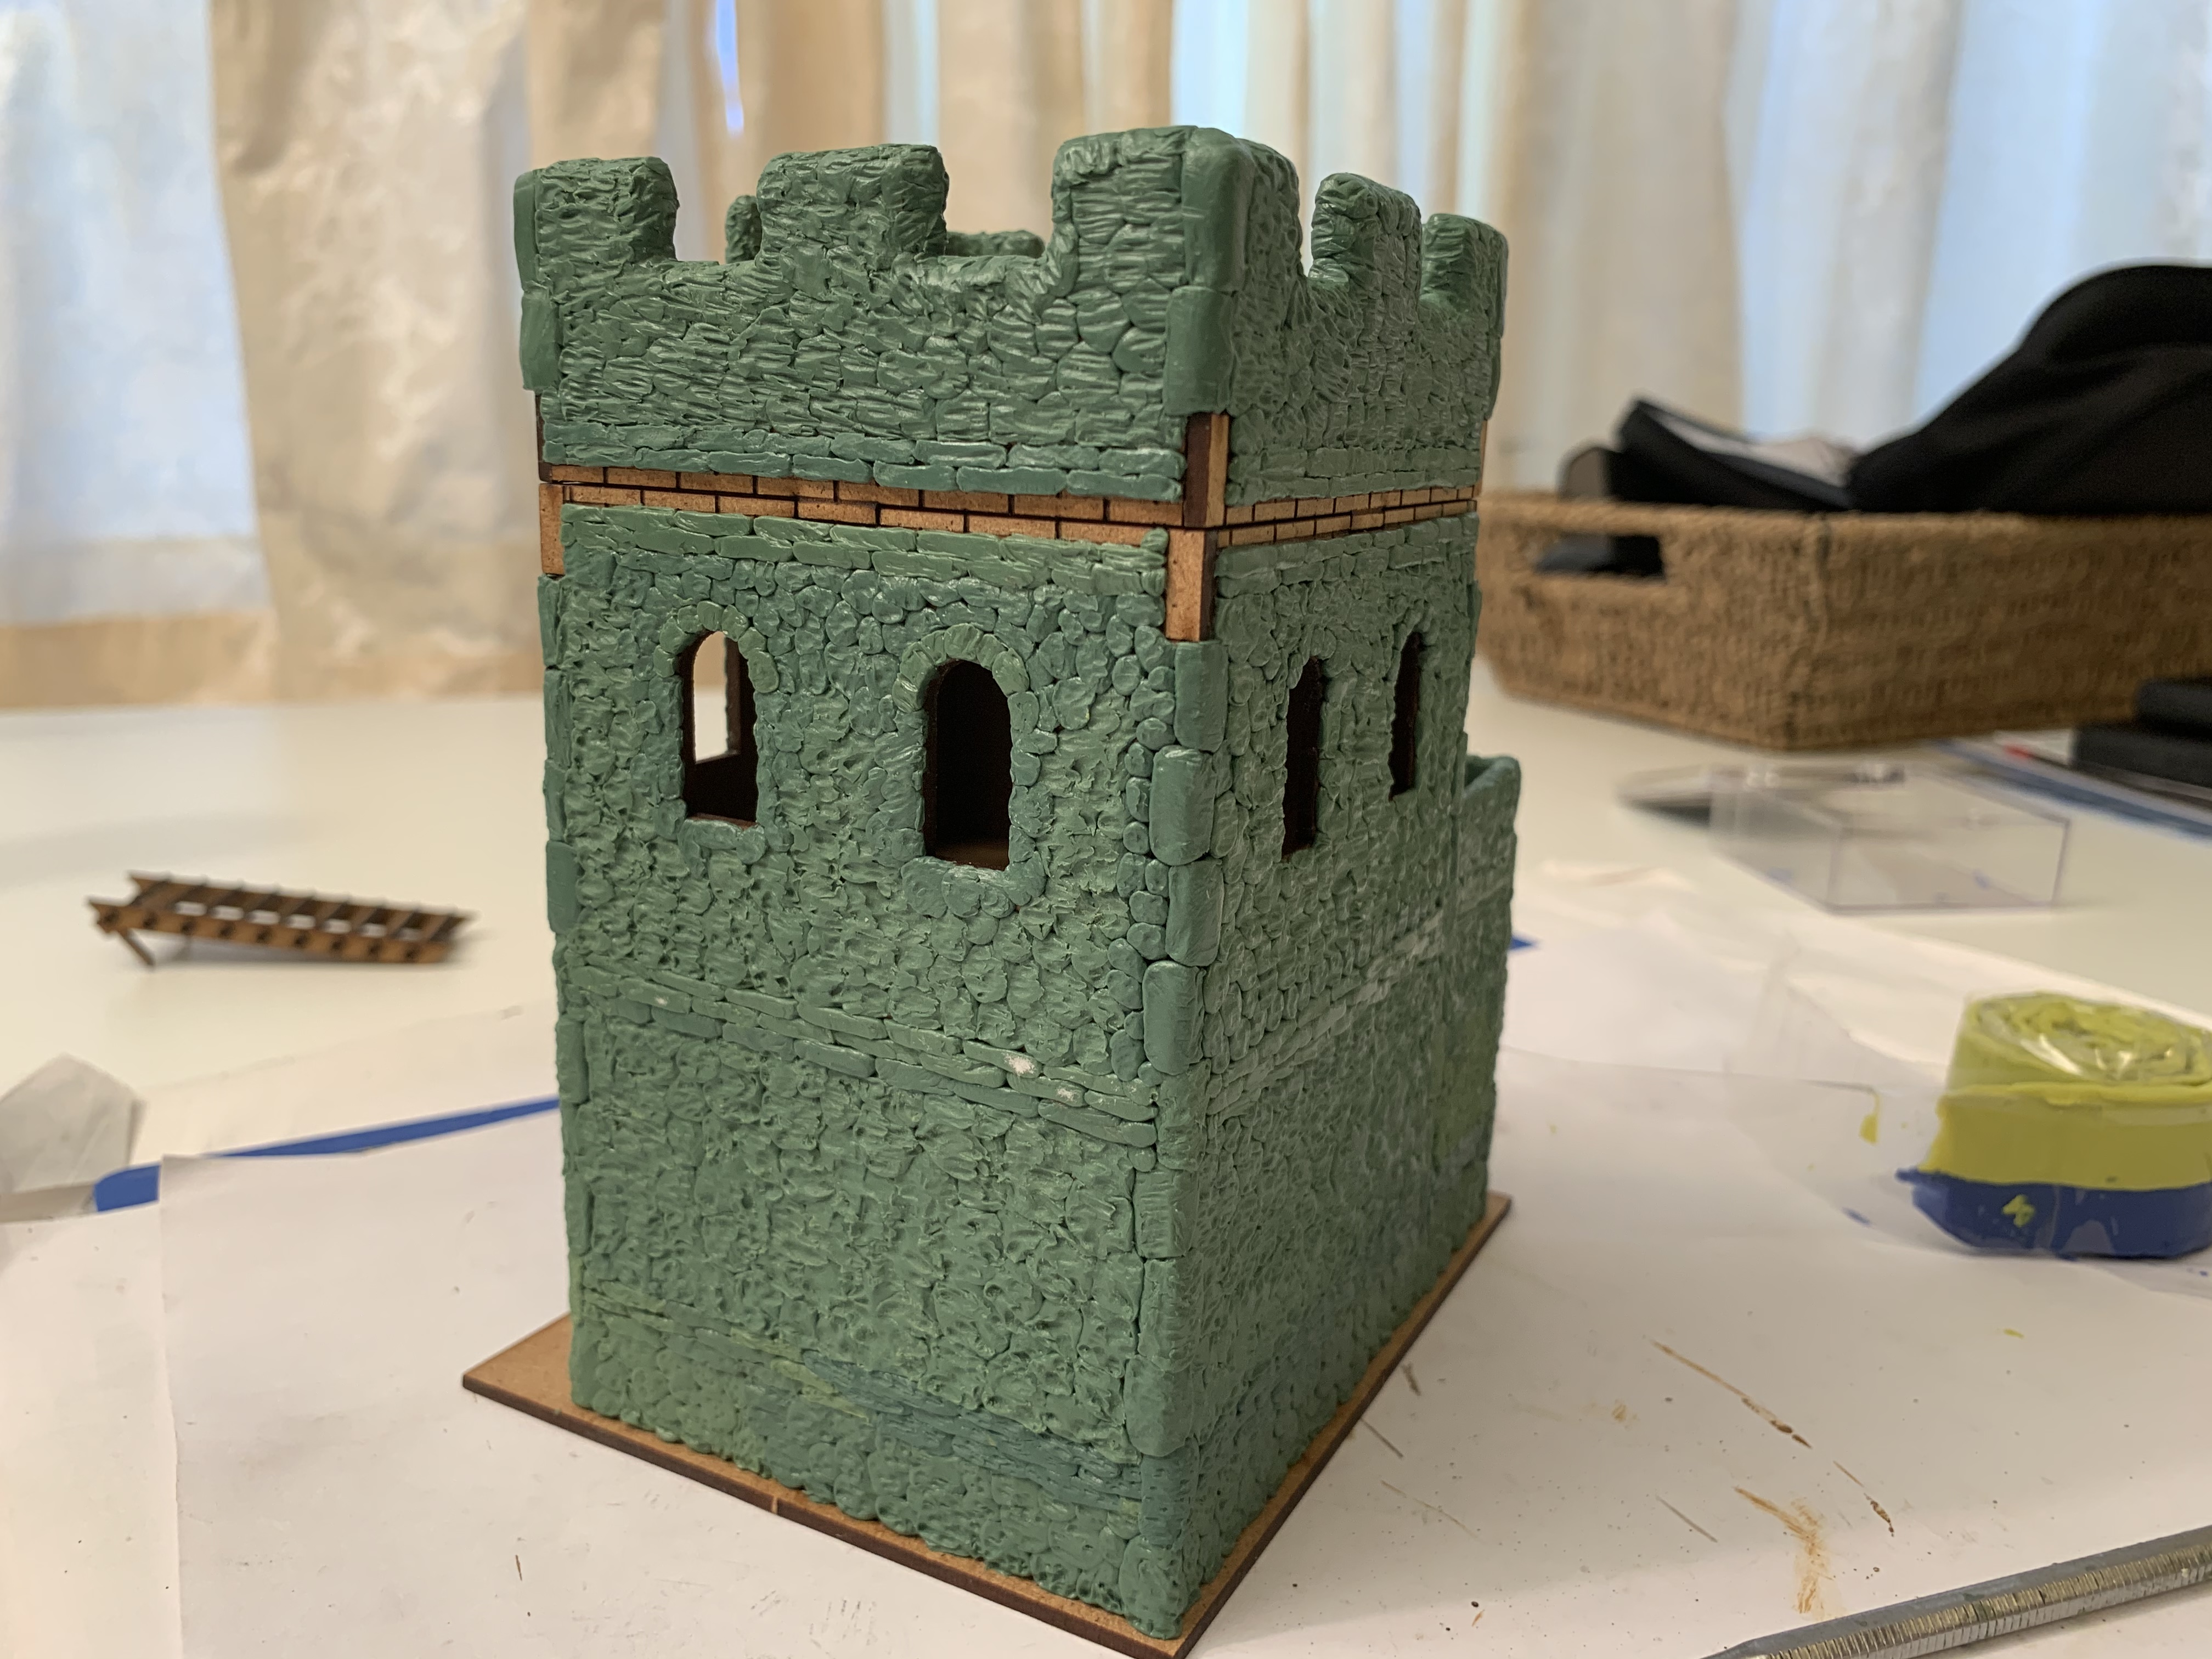 Window arches have been added
I left the row of bricks and corner stones where the top platform meets the body of the tower till last. This is because I want to ensure a smooth join between the two pieces. I want to avoid any bits of green stuff hardening into lumps that then lift off the top platform and prevent it fitting properly, whilst at the same time I don’t want to have too obvious a gap between the connecting rows of bricks and stones.
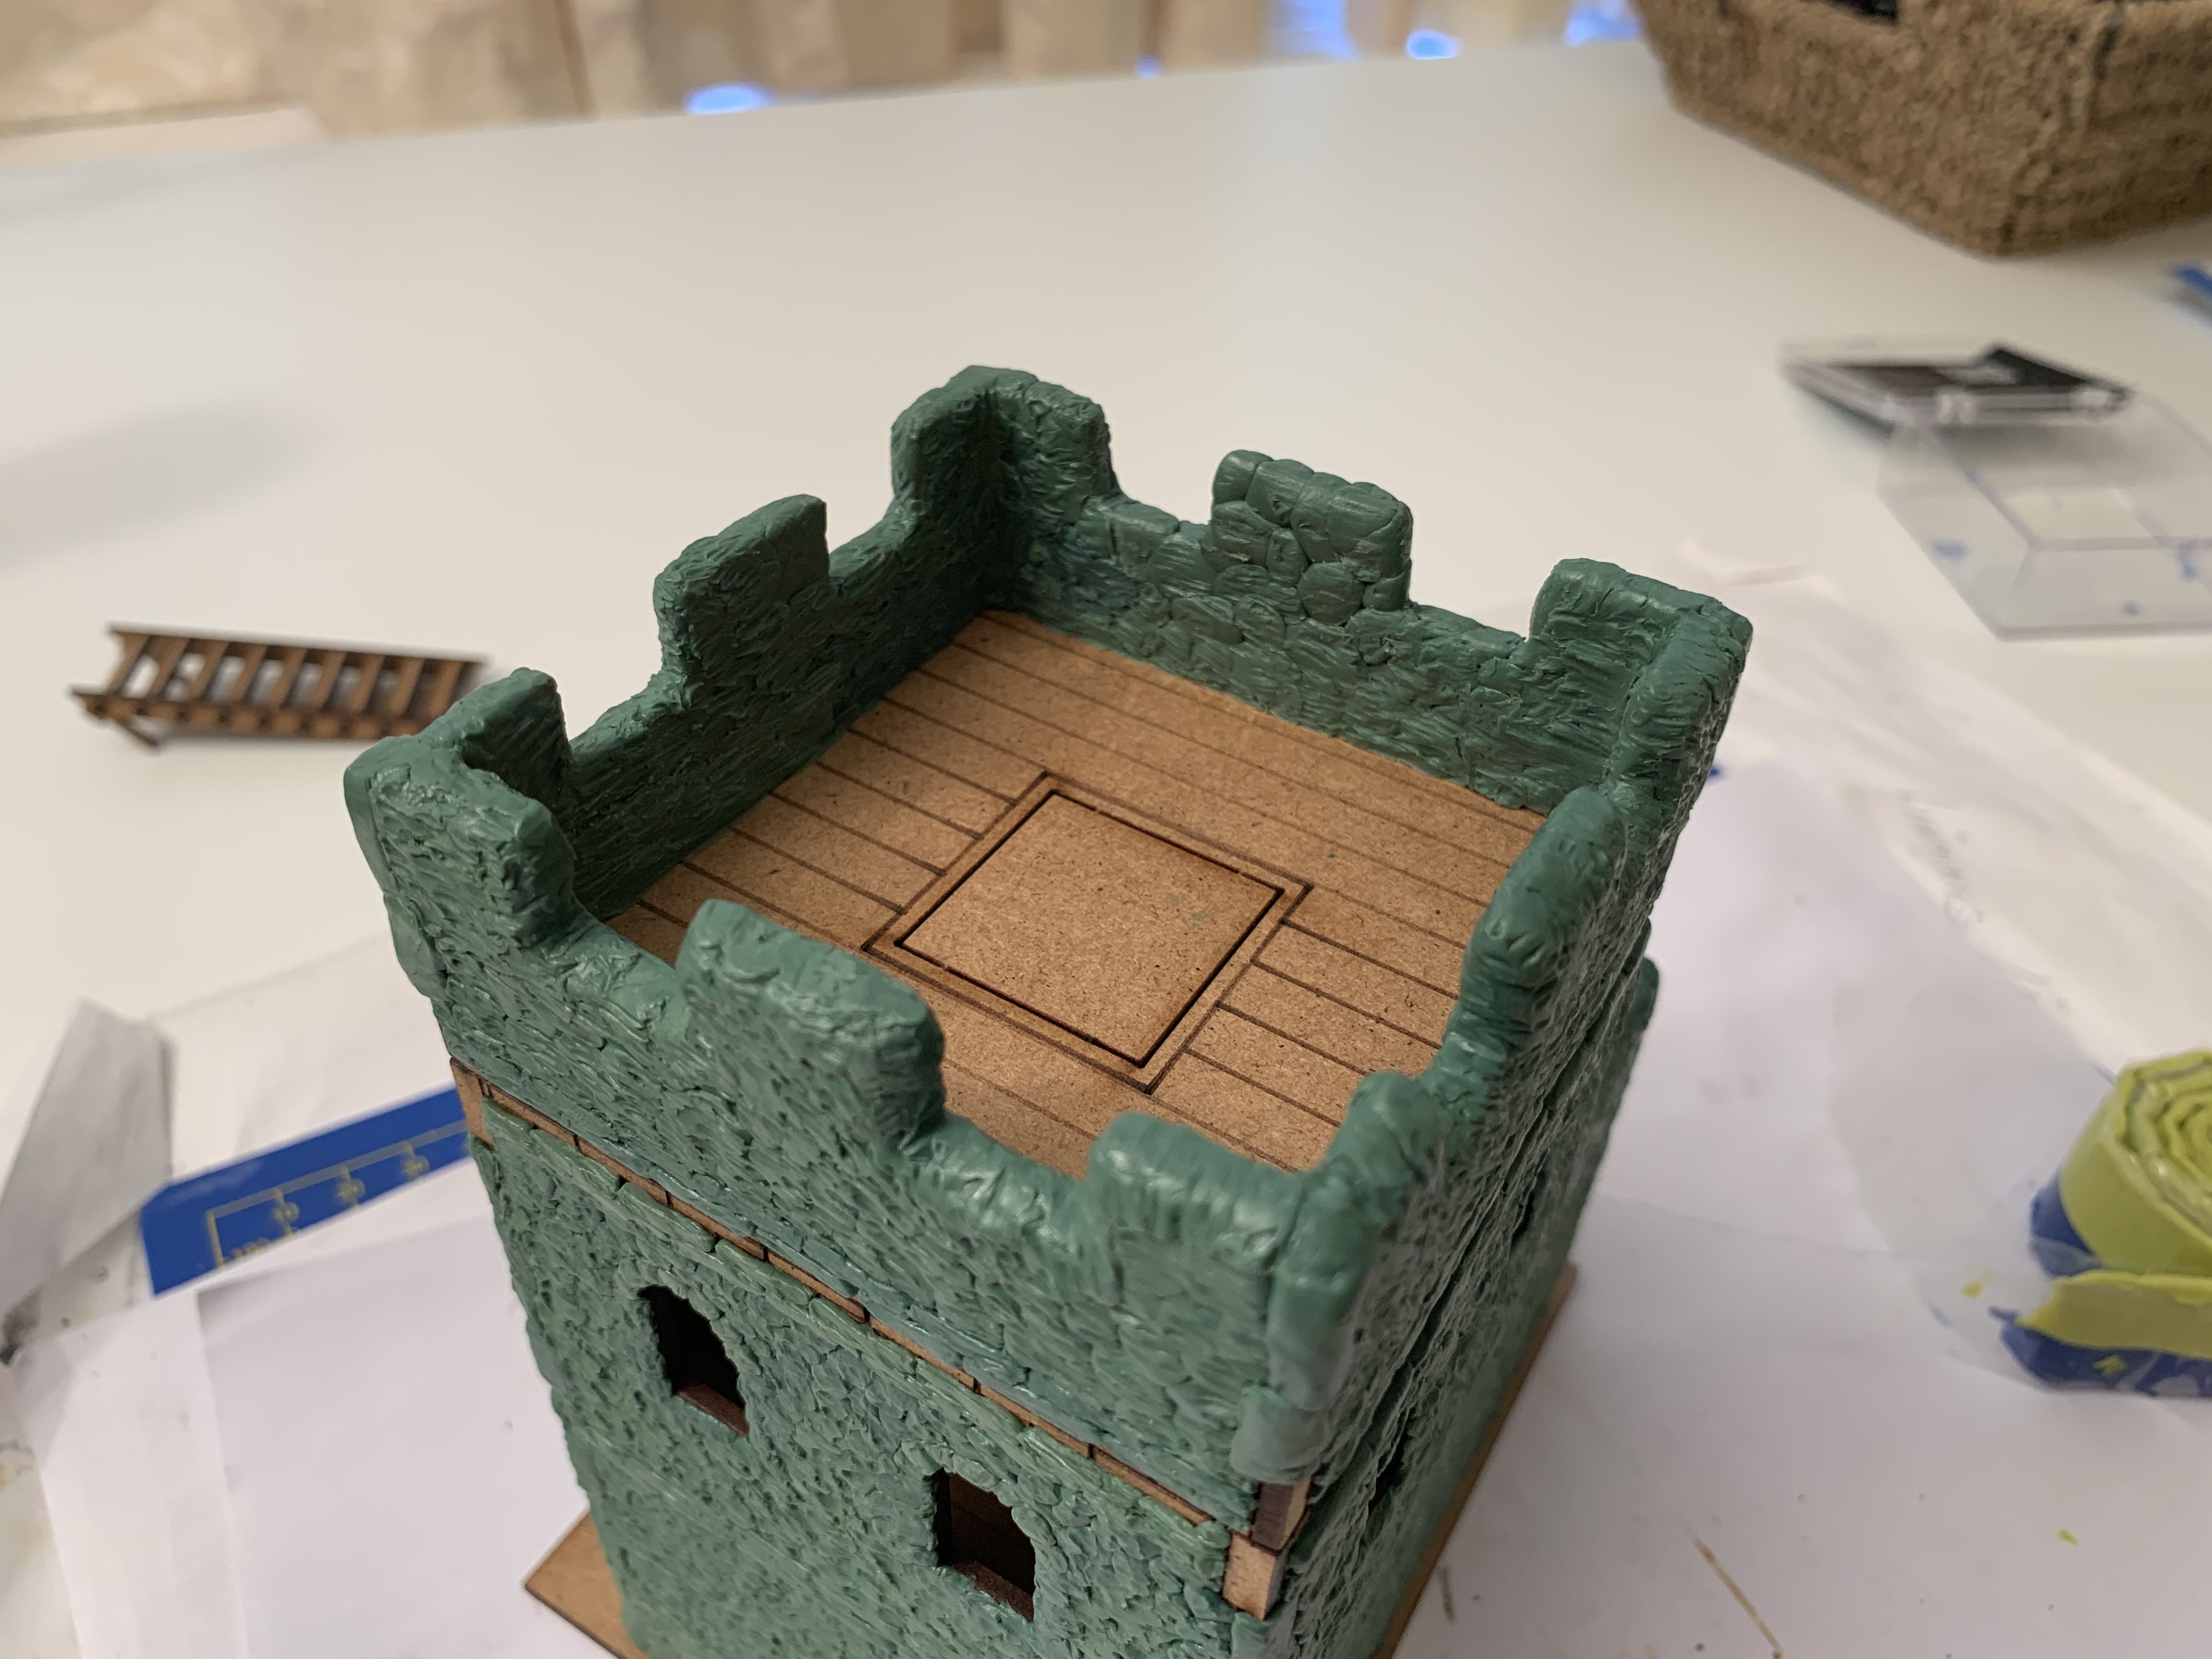 Interior of the ramparts
I also made sure to add green stuff to the interior walls of the ramparts so that all external stone surfaces were covered.
Once I’ve done the last rows of bricks and corner stones, this should be ready for basing and painting.
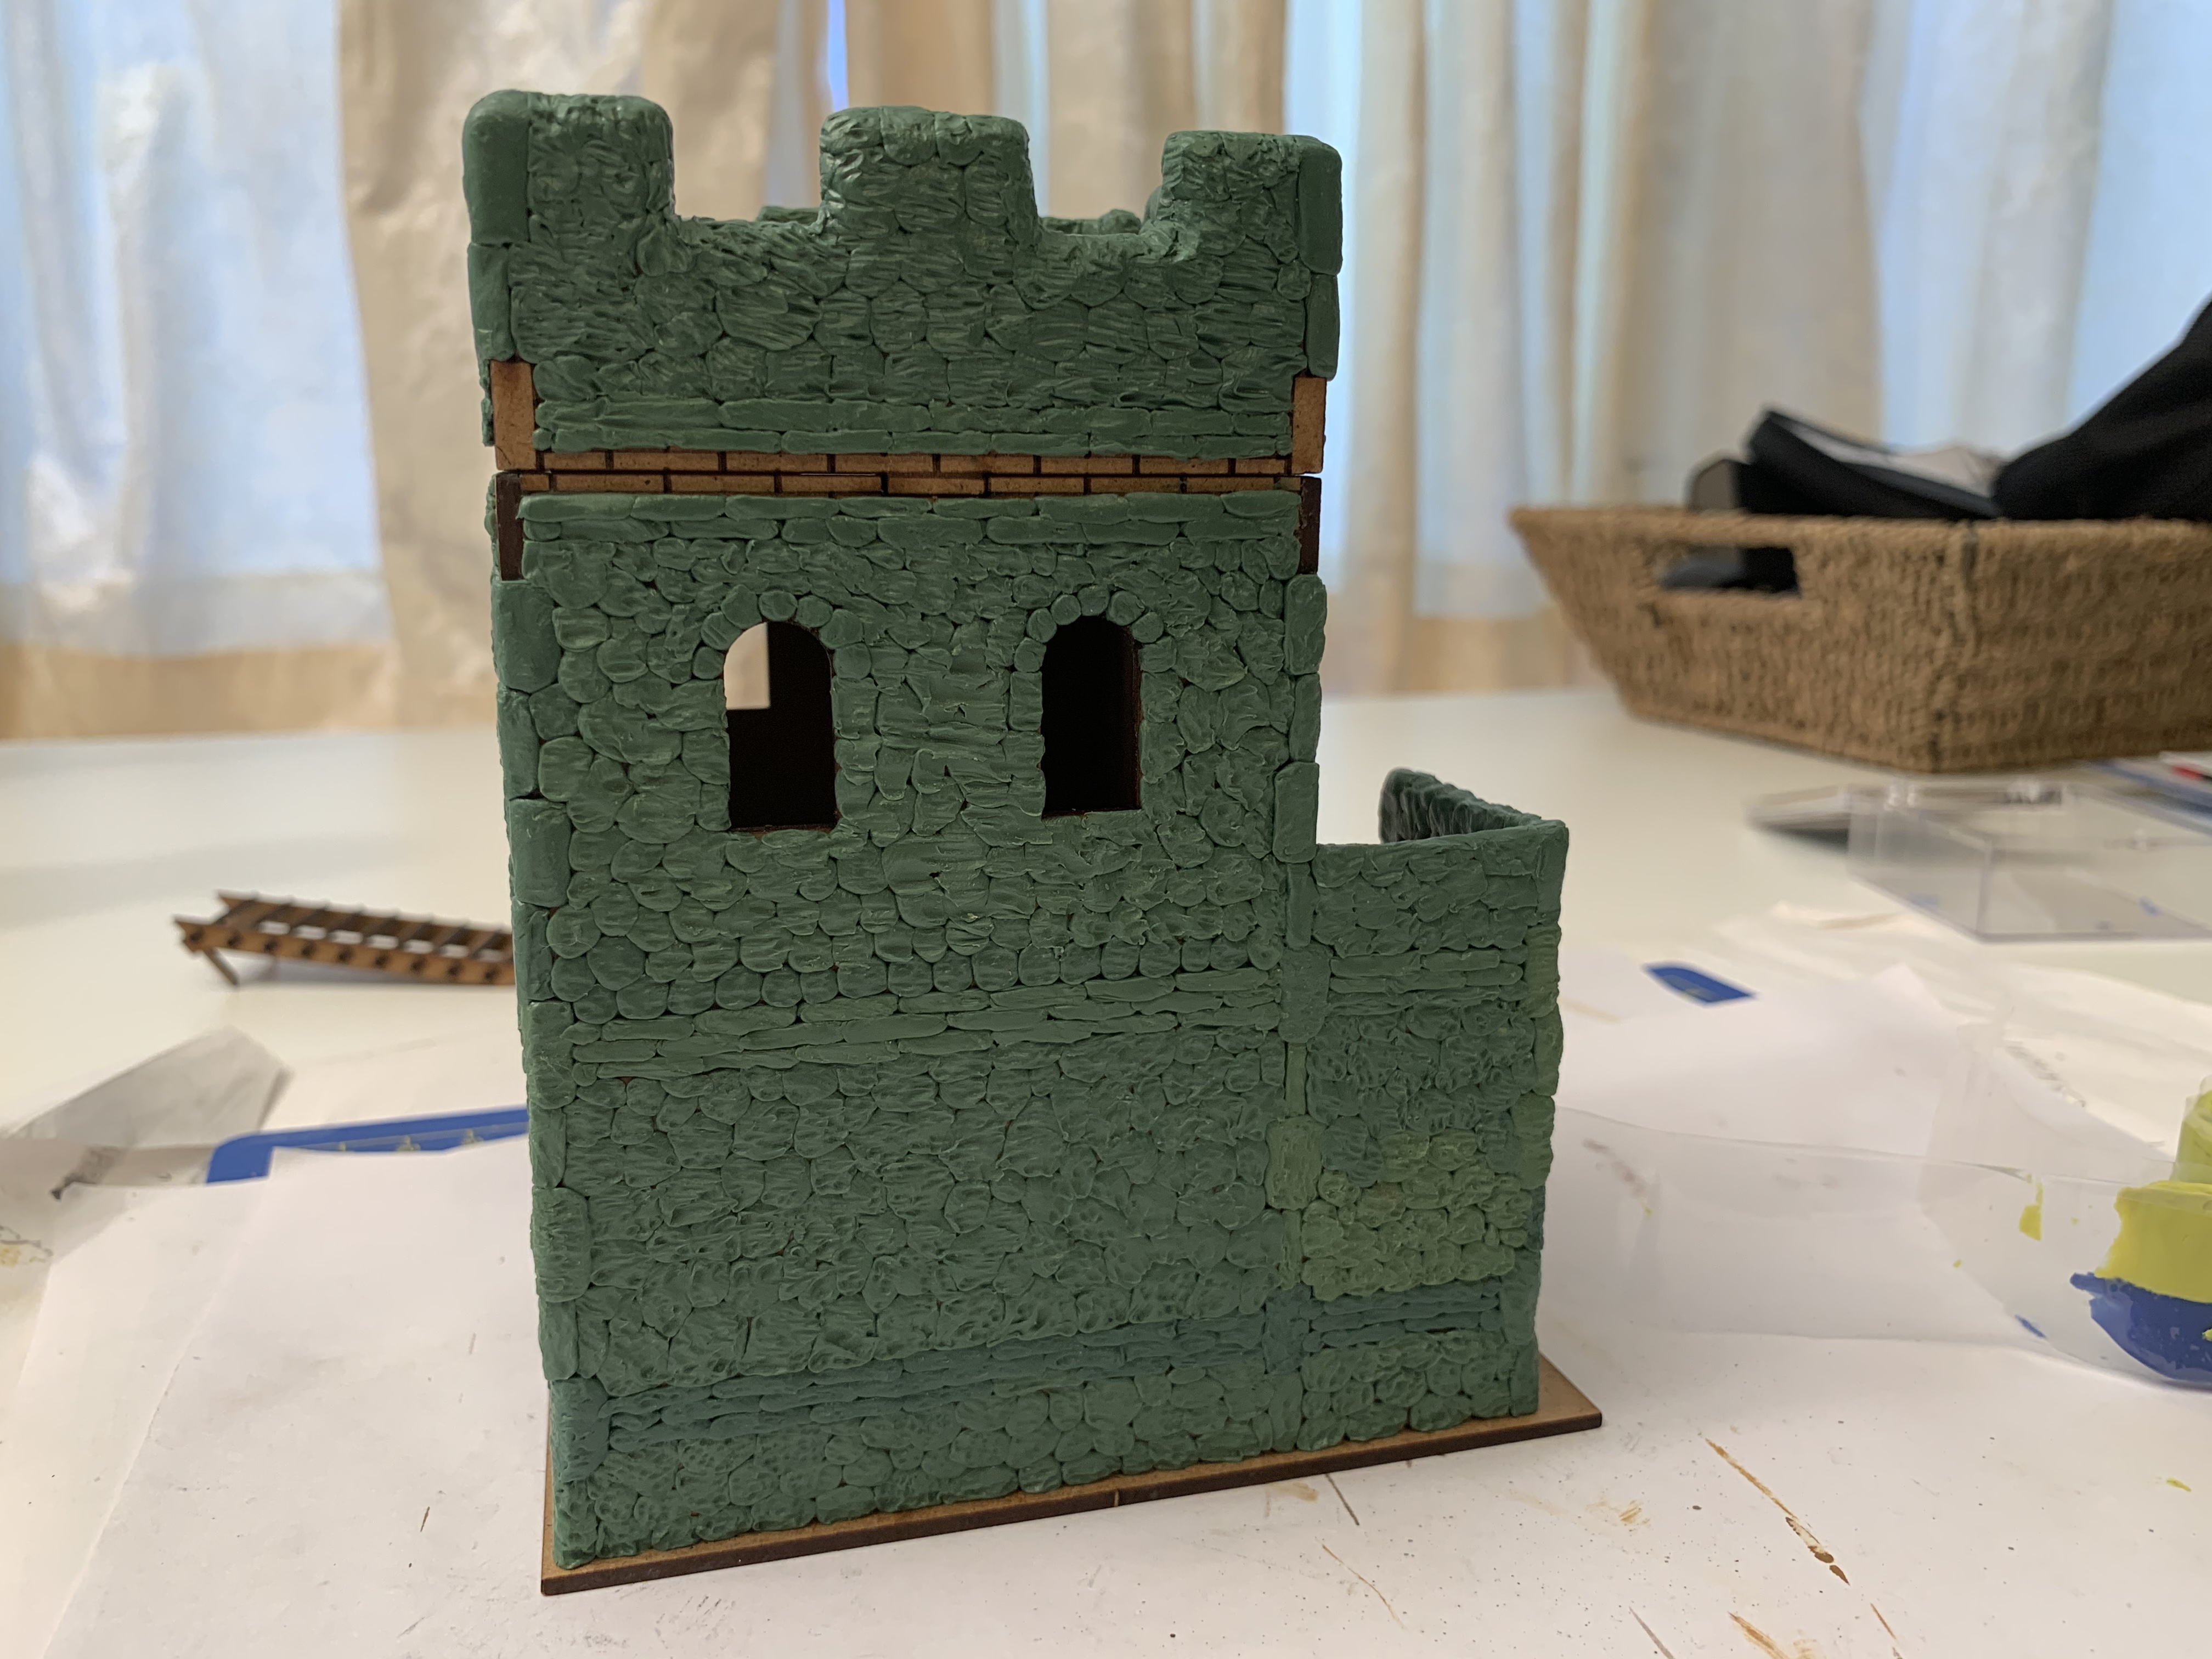
How not to enhance a watchtower
 I don’t recommend this
My brother kindly gave me this Roman watchtower from Sarissa Precision for Christmas. It was easy to build, but I felt it was too Mediterranean in style with its clean lines. I felt that a watchtower in Britain would be more obviously made of stone, rather than have a plastered facade.
So I added some green stuff to the bottom layer, without stopping to wonder why I’d never seen this done before.
I soon had my answer. Once you start, there is no obvious place to stop. I realised I would have to green stuff the entire thing!
The whole process has taken ages but I am now three quarters of the way through. Think of this post as a warning rather than a recommendation!
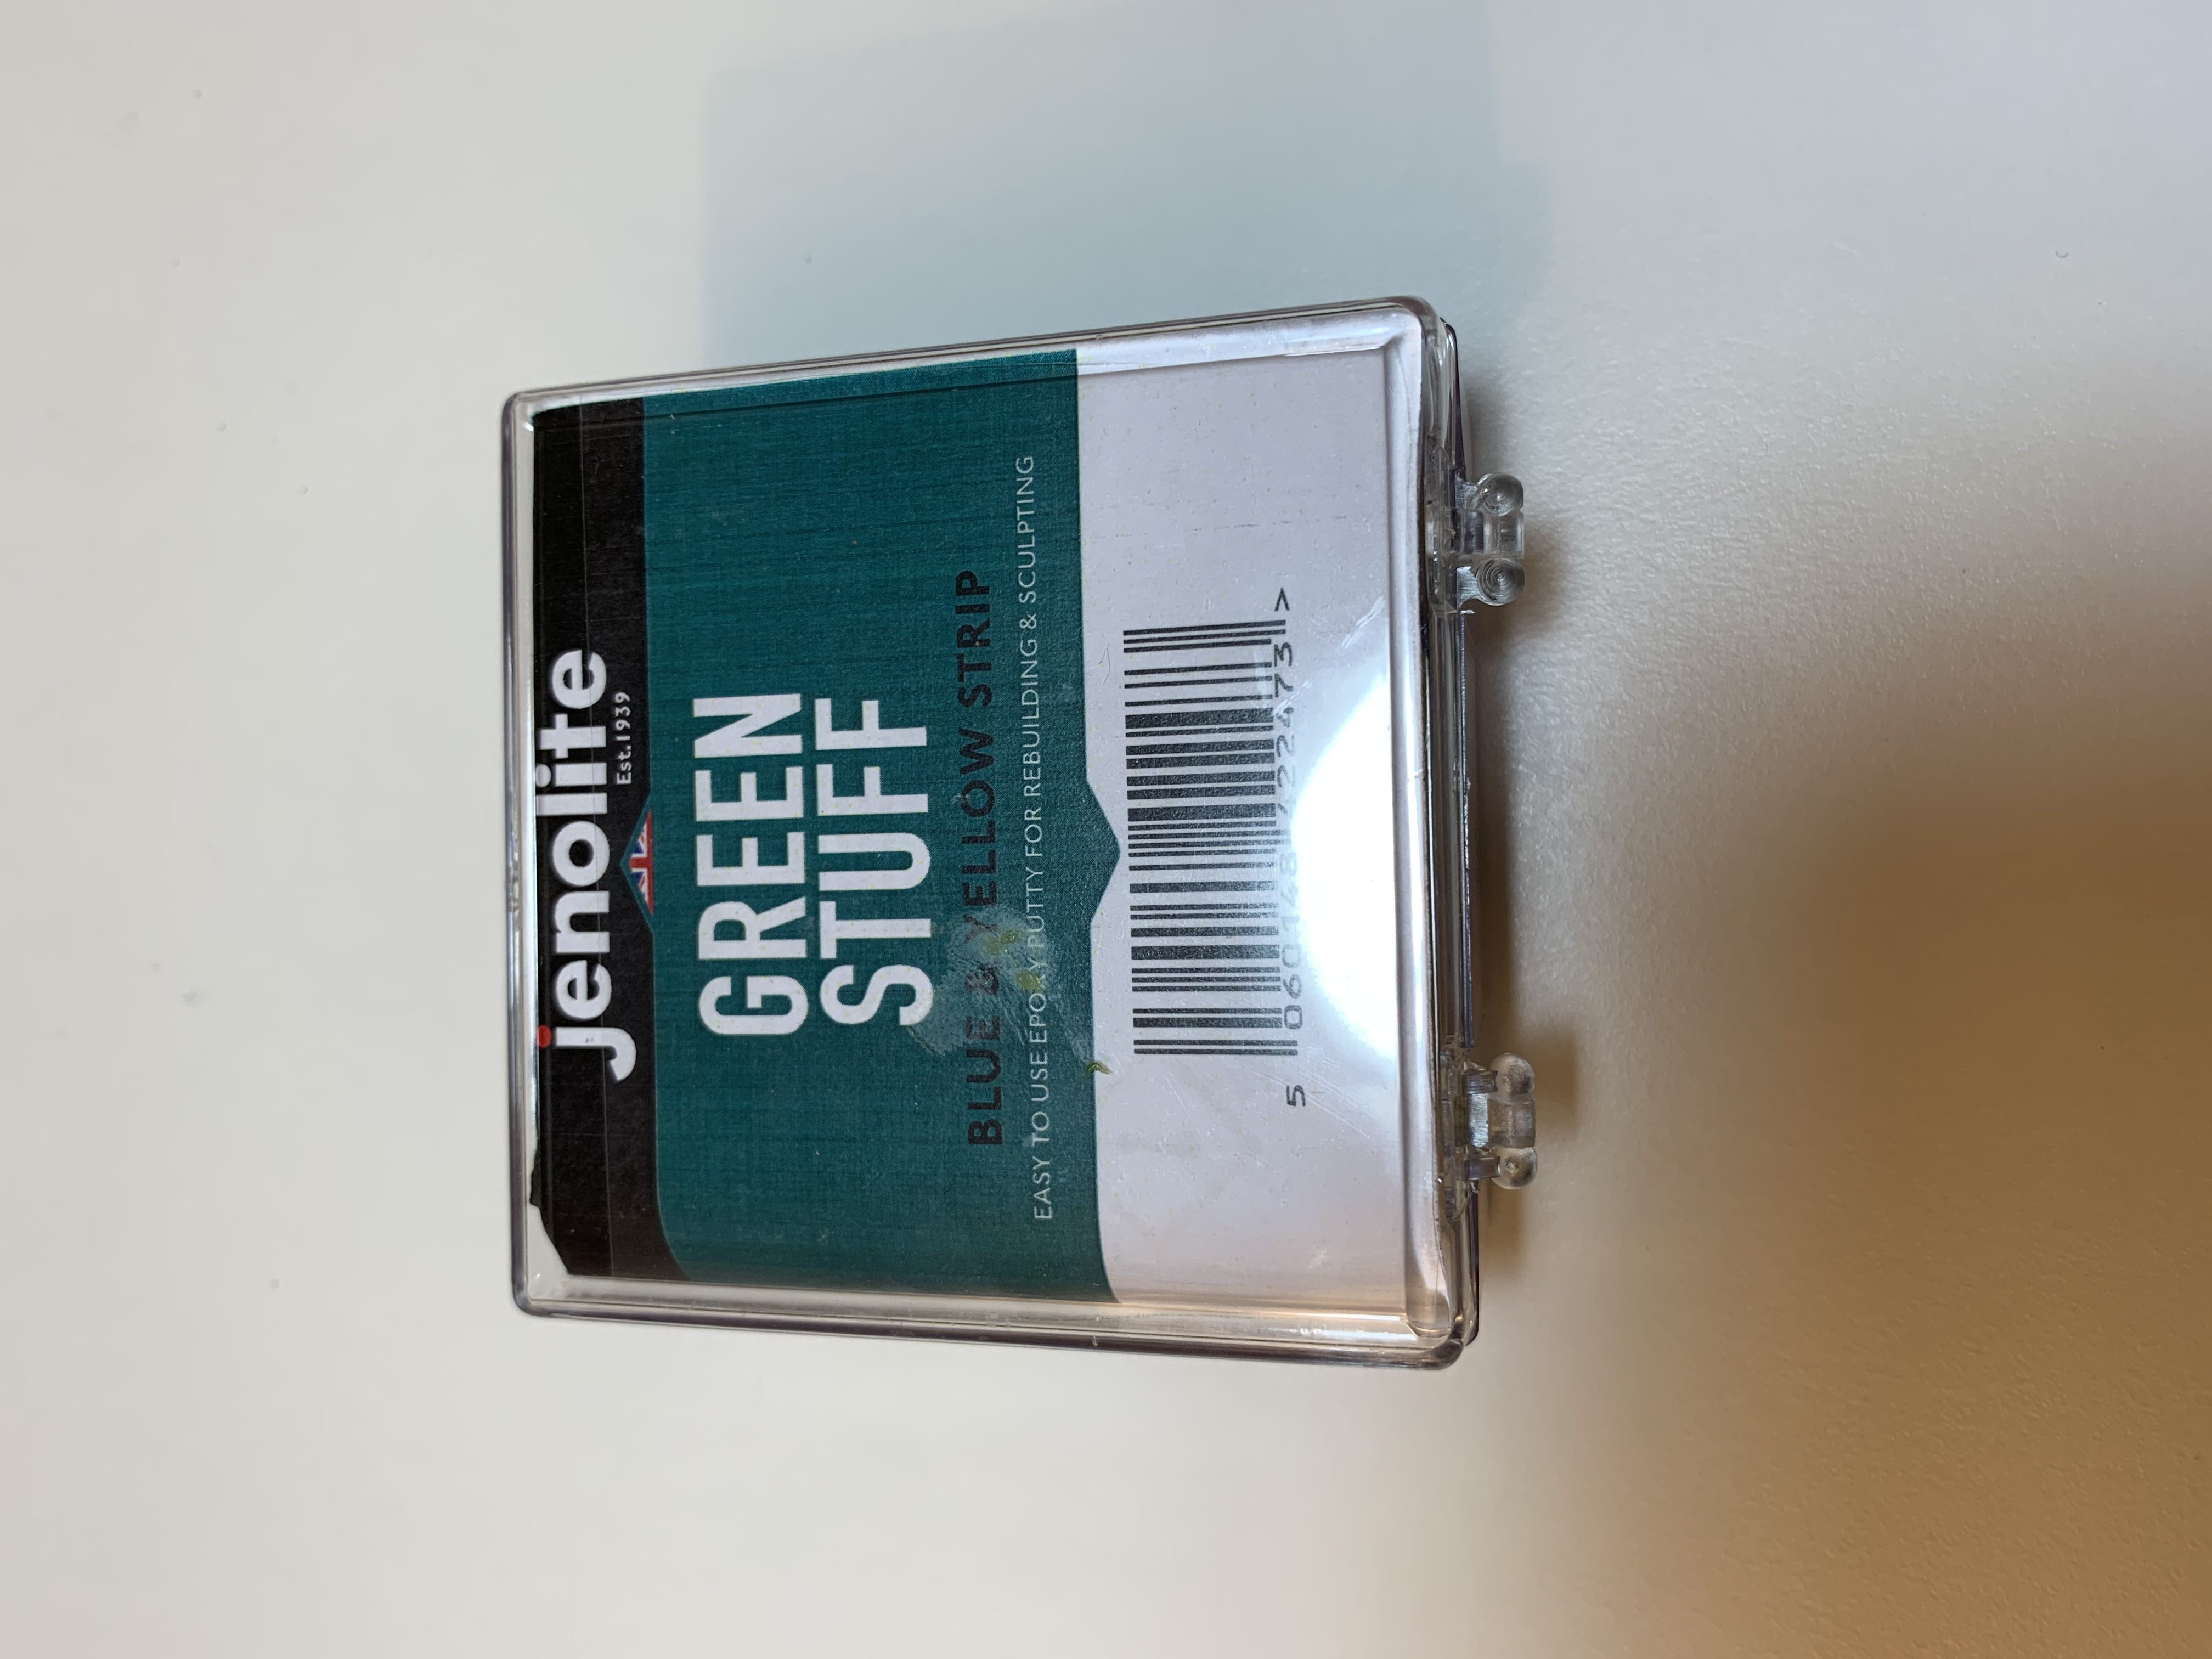
If you choose to do this, I suggest keeping the brick layers level and flat to distinguish them from the stone layers. Also, you’ll need a lot of green stuff. This is a 90cm roll!
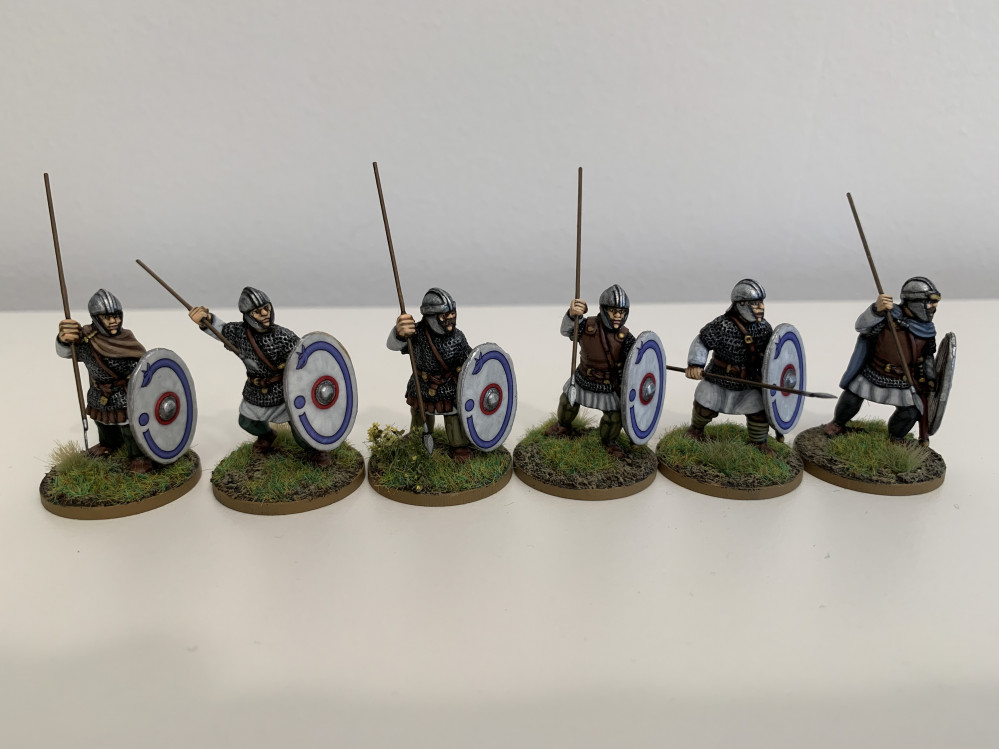
Saxons!

Having completed the Romano-British force I decided that I would continue this project and build the opposing Saxons. The Saxon starting force in Dux Britanniarum consists of:
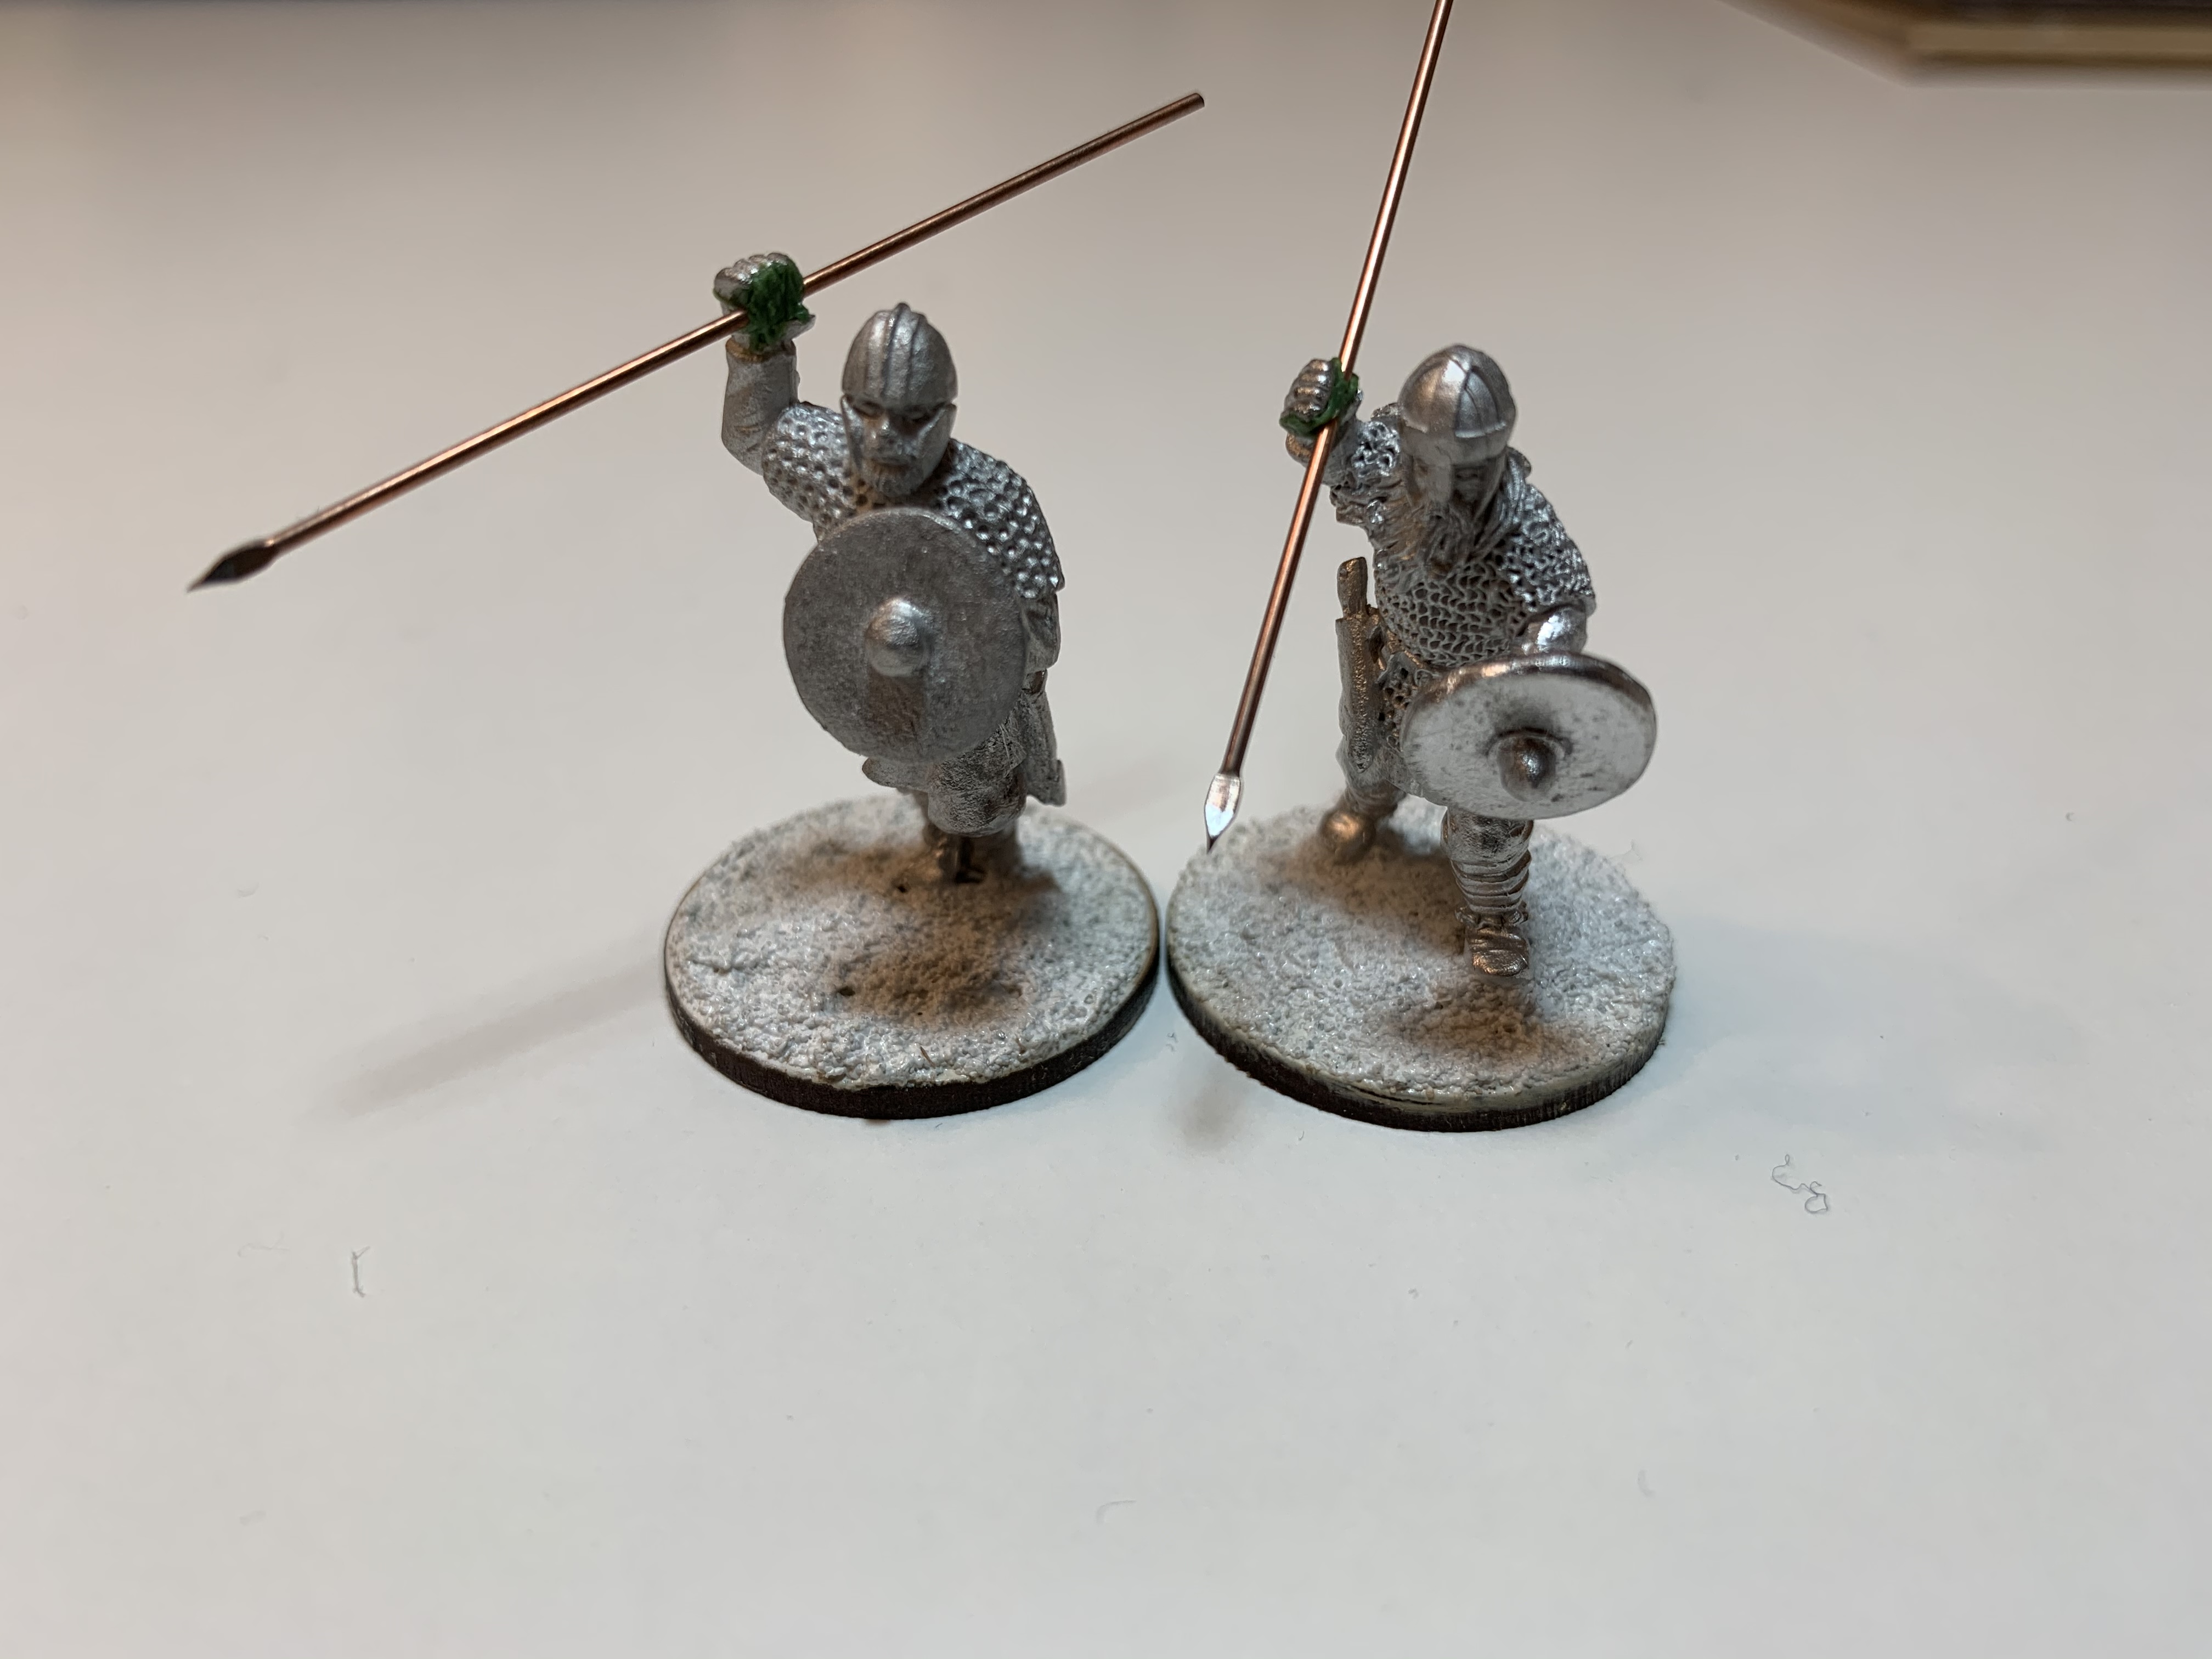
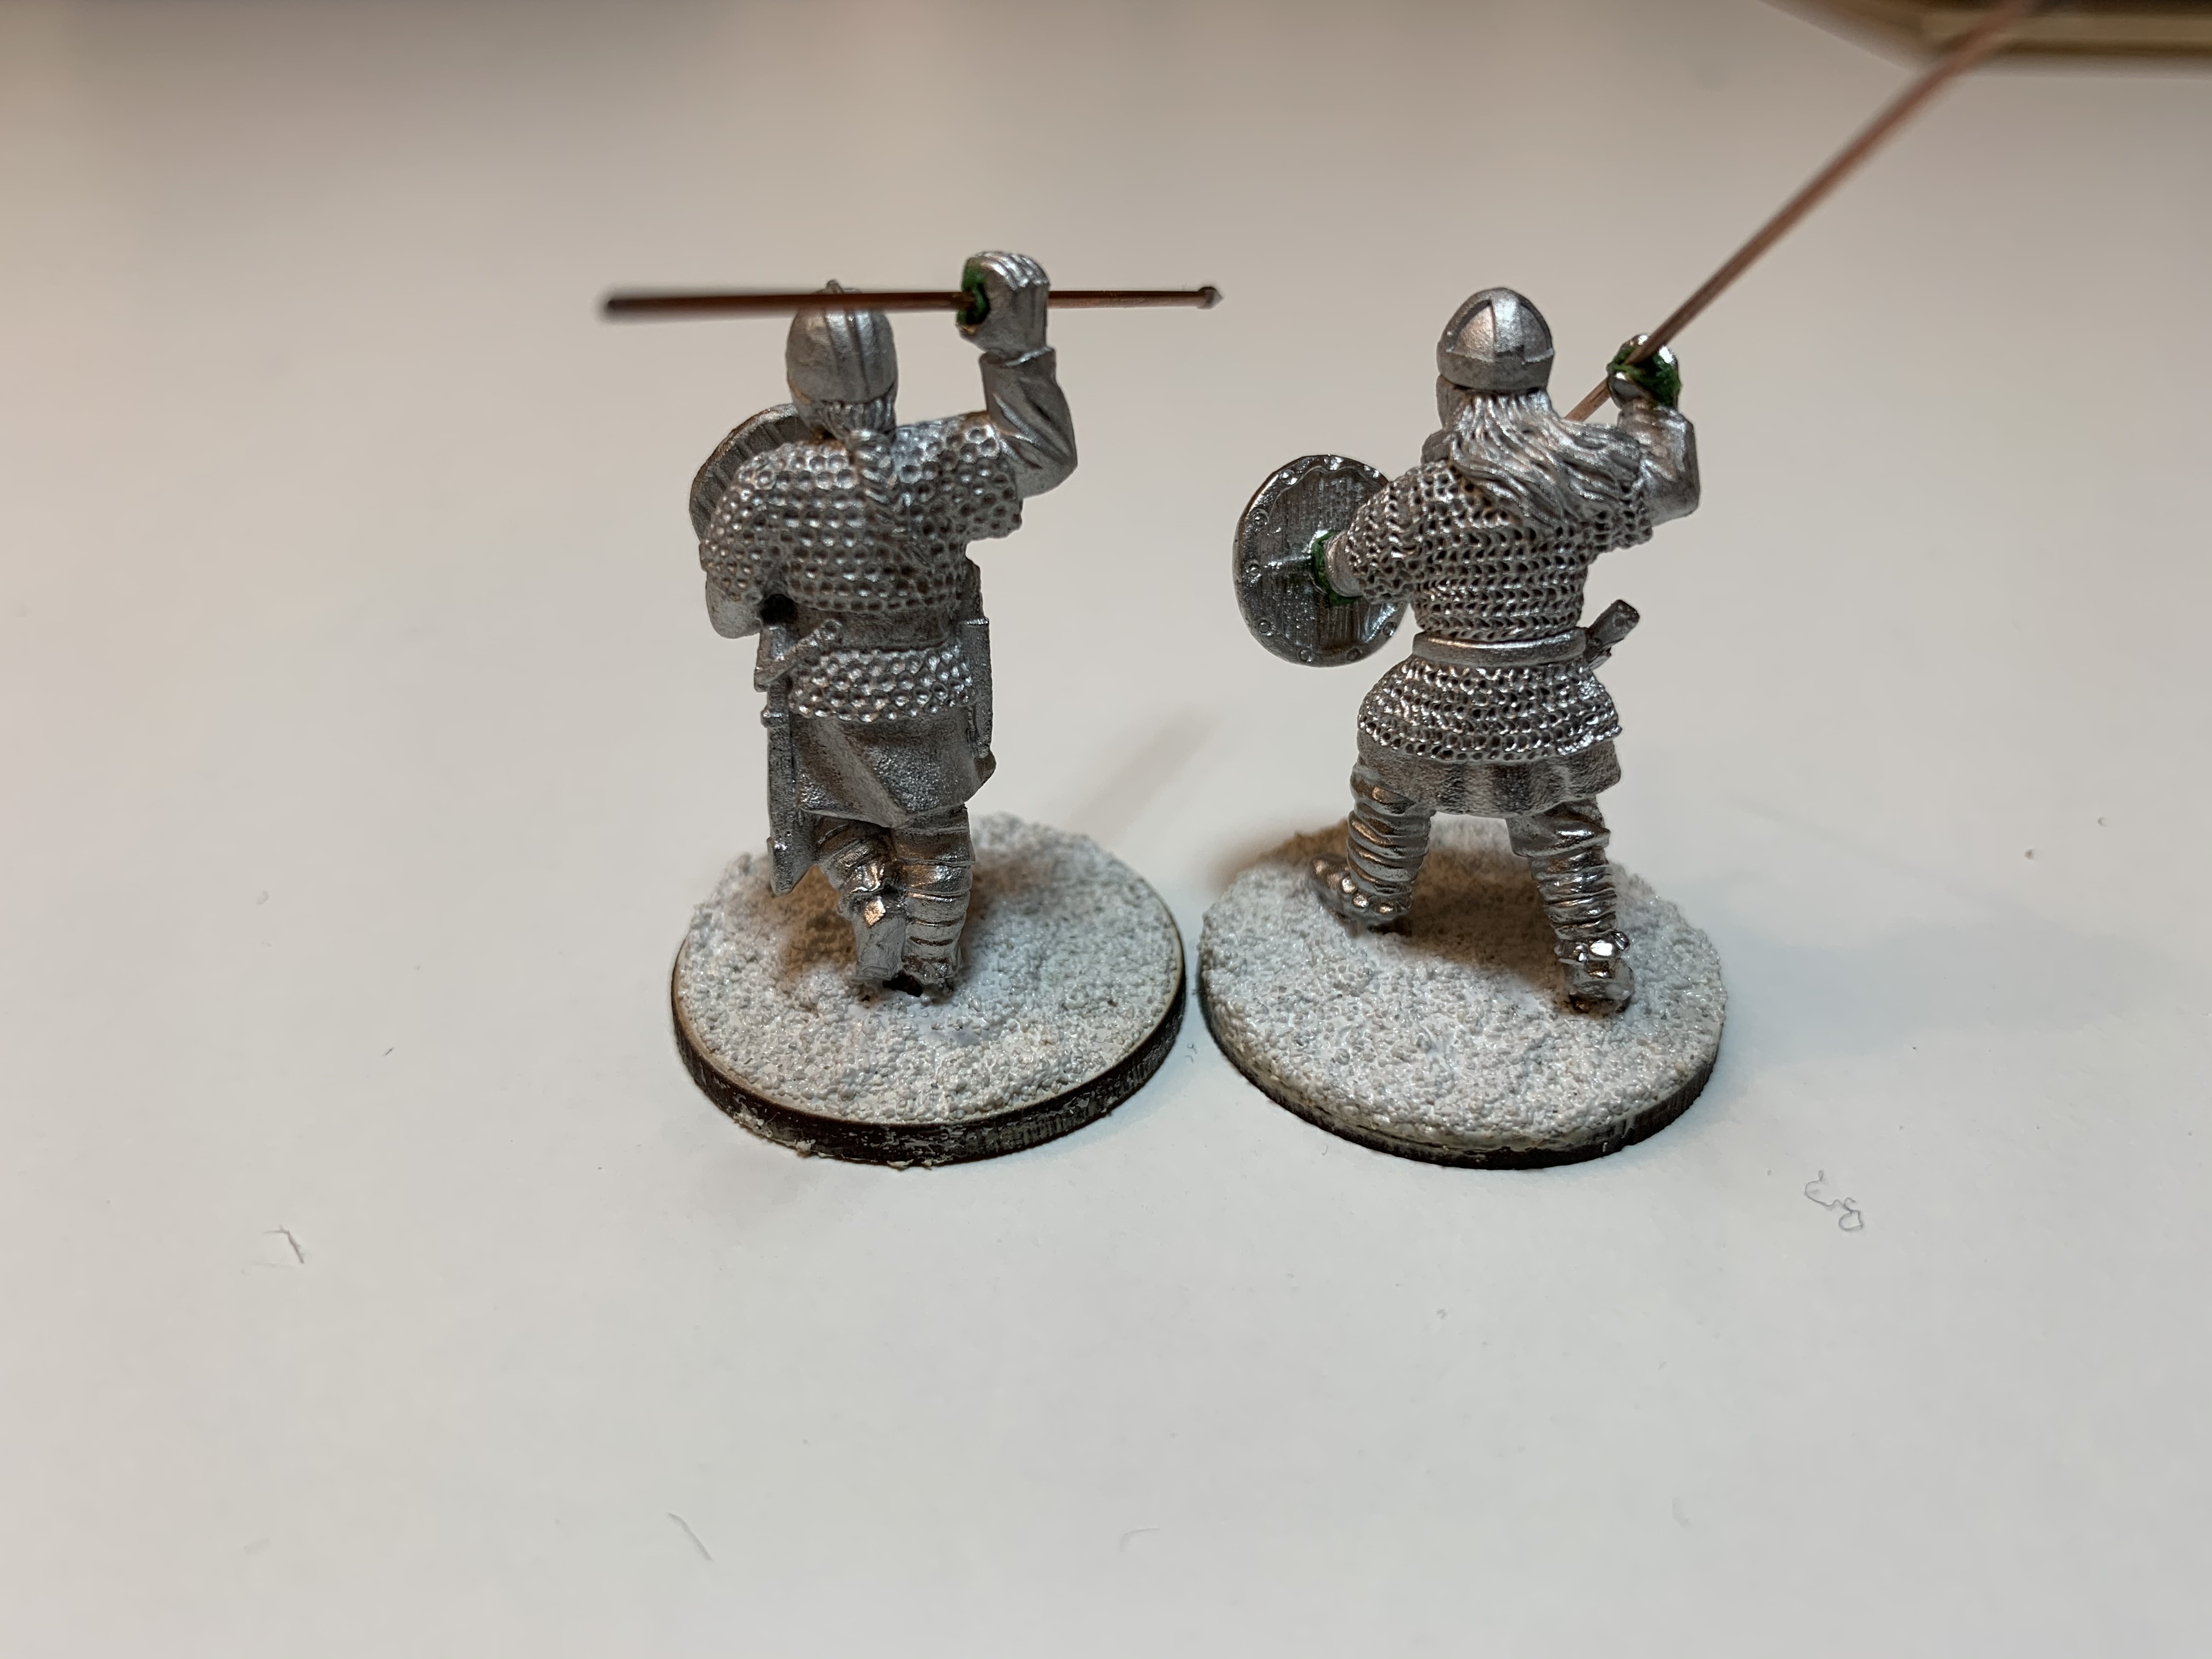
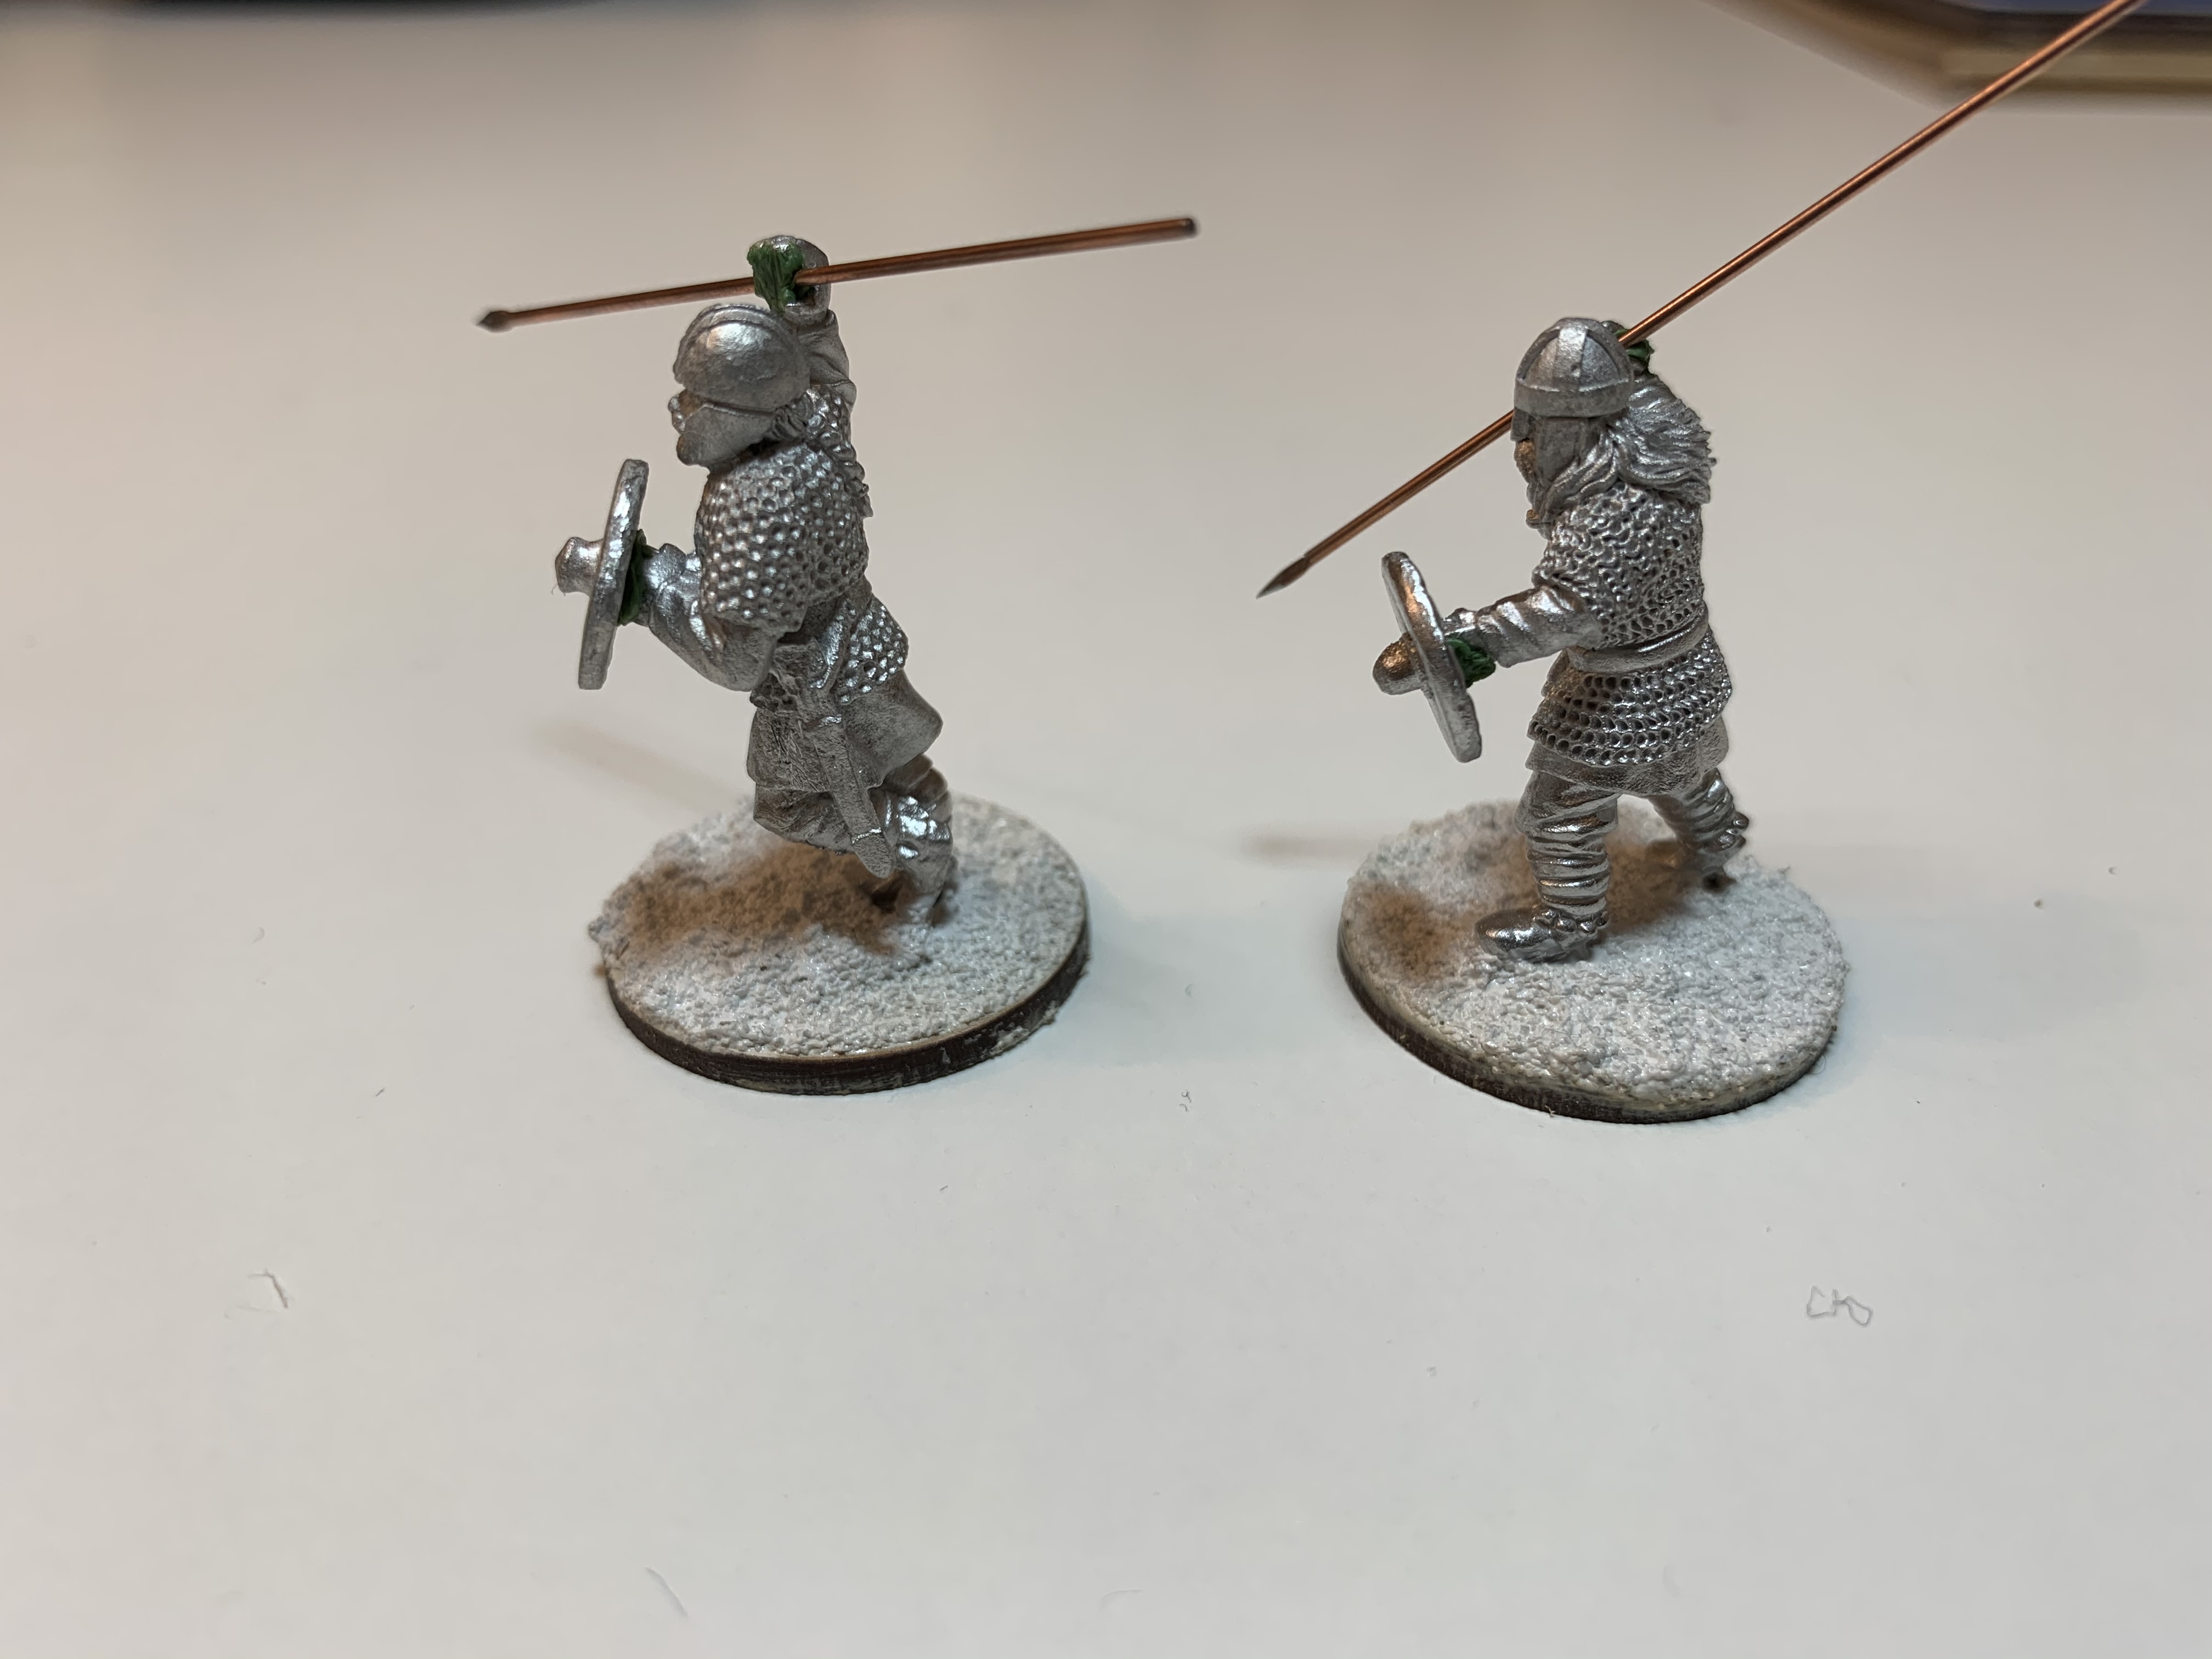
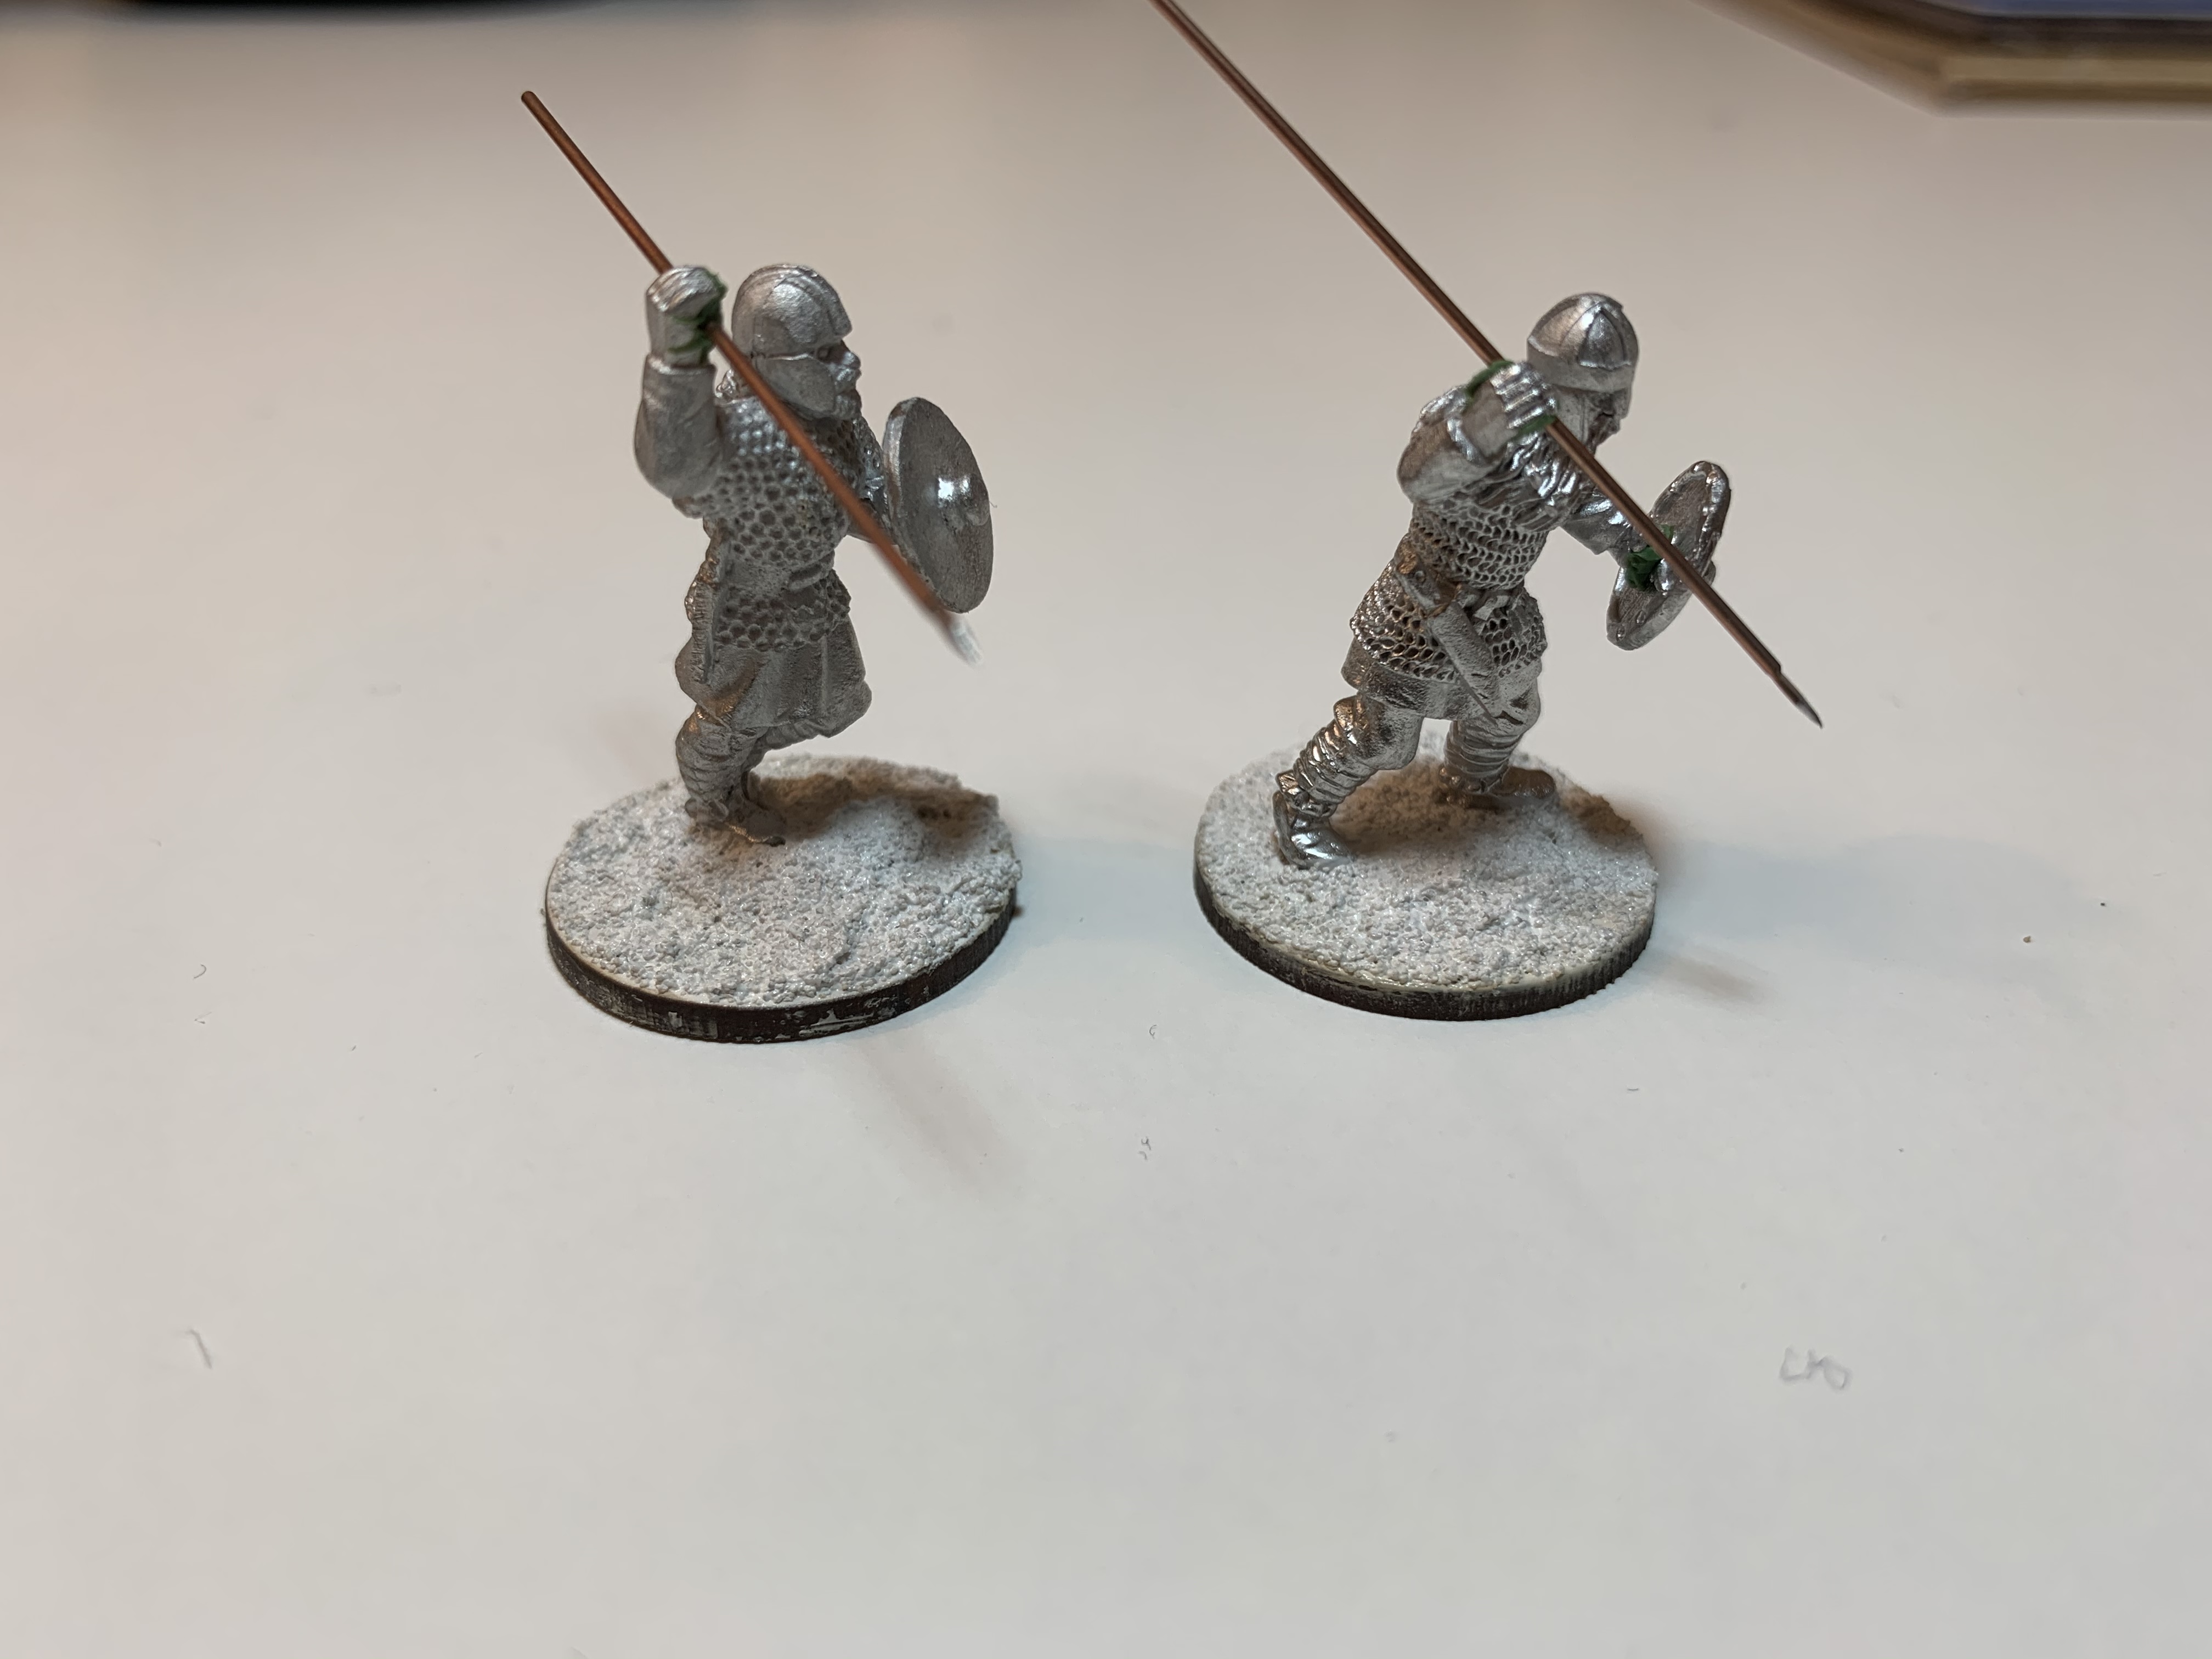
 The two nobles. If you look at the figure on the right you can see an attempt at sculpting a thumb.
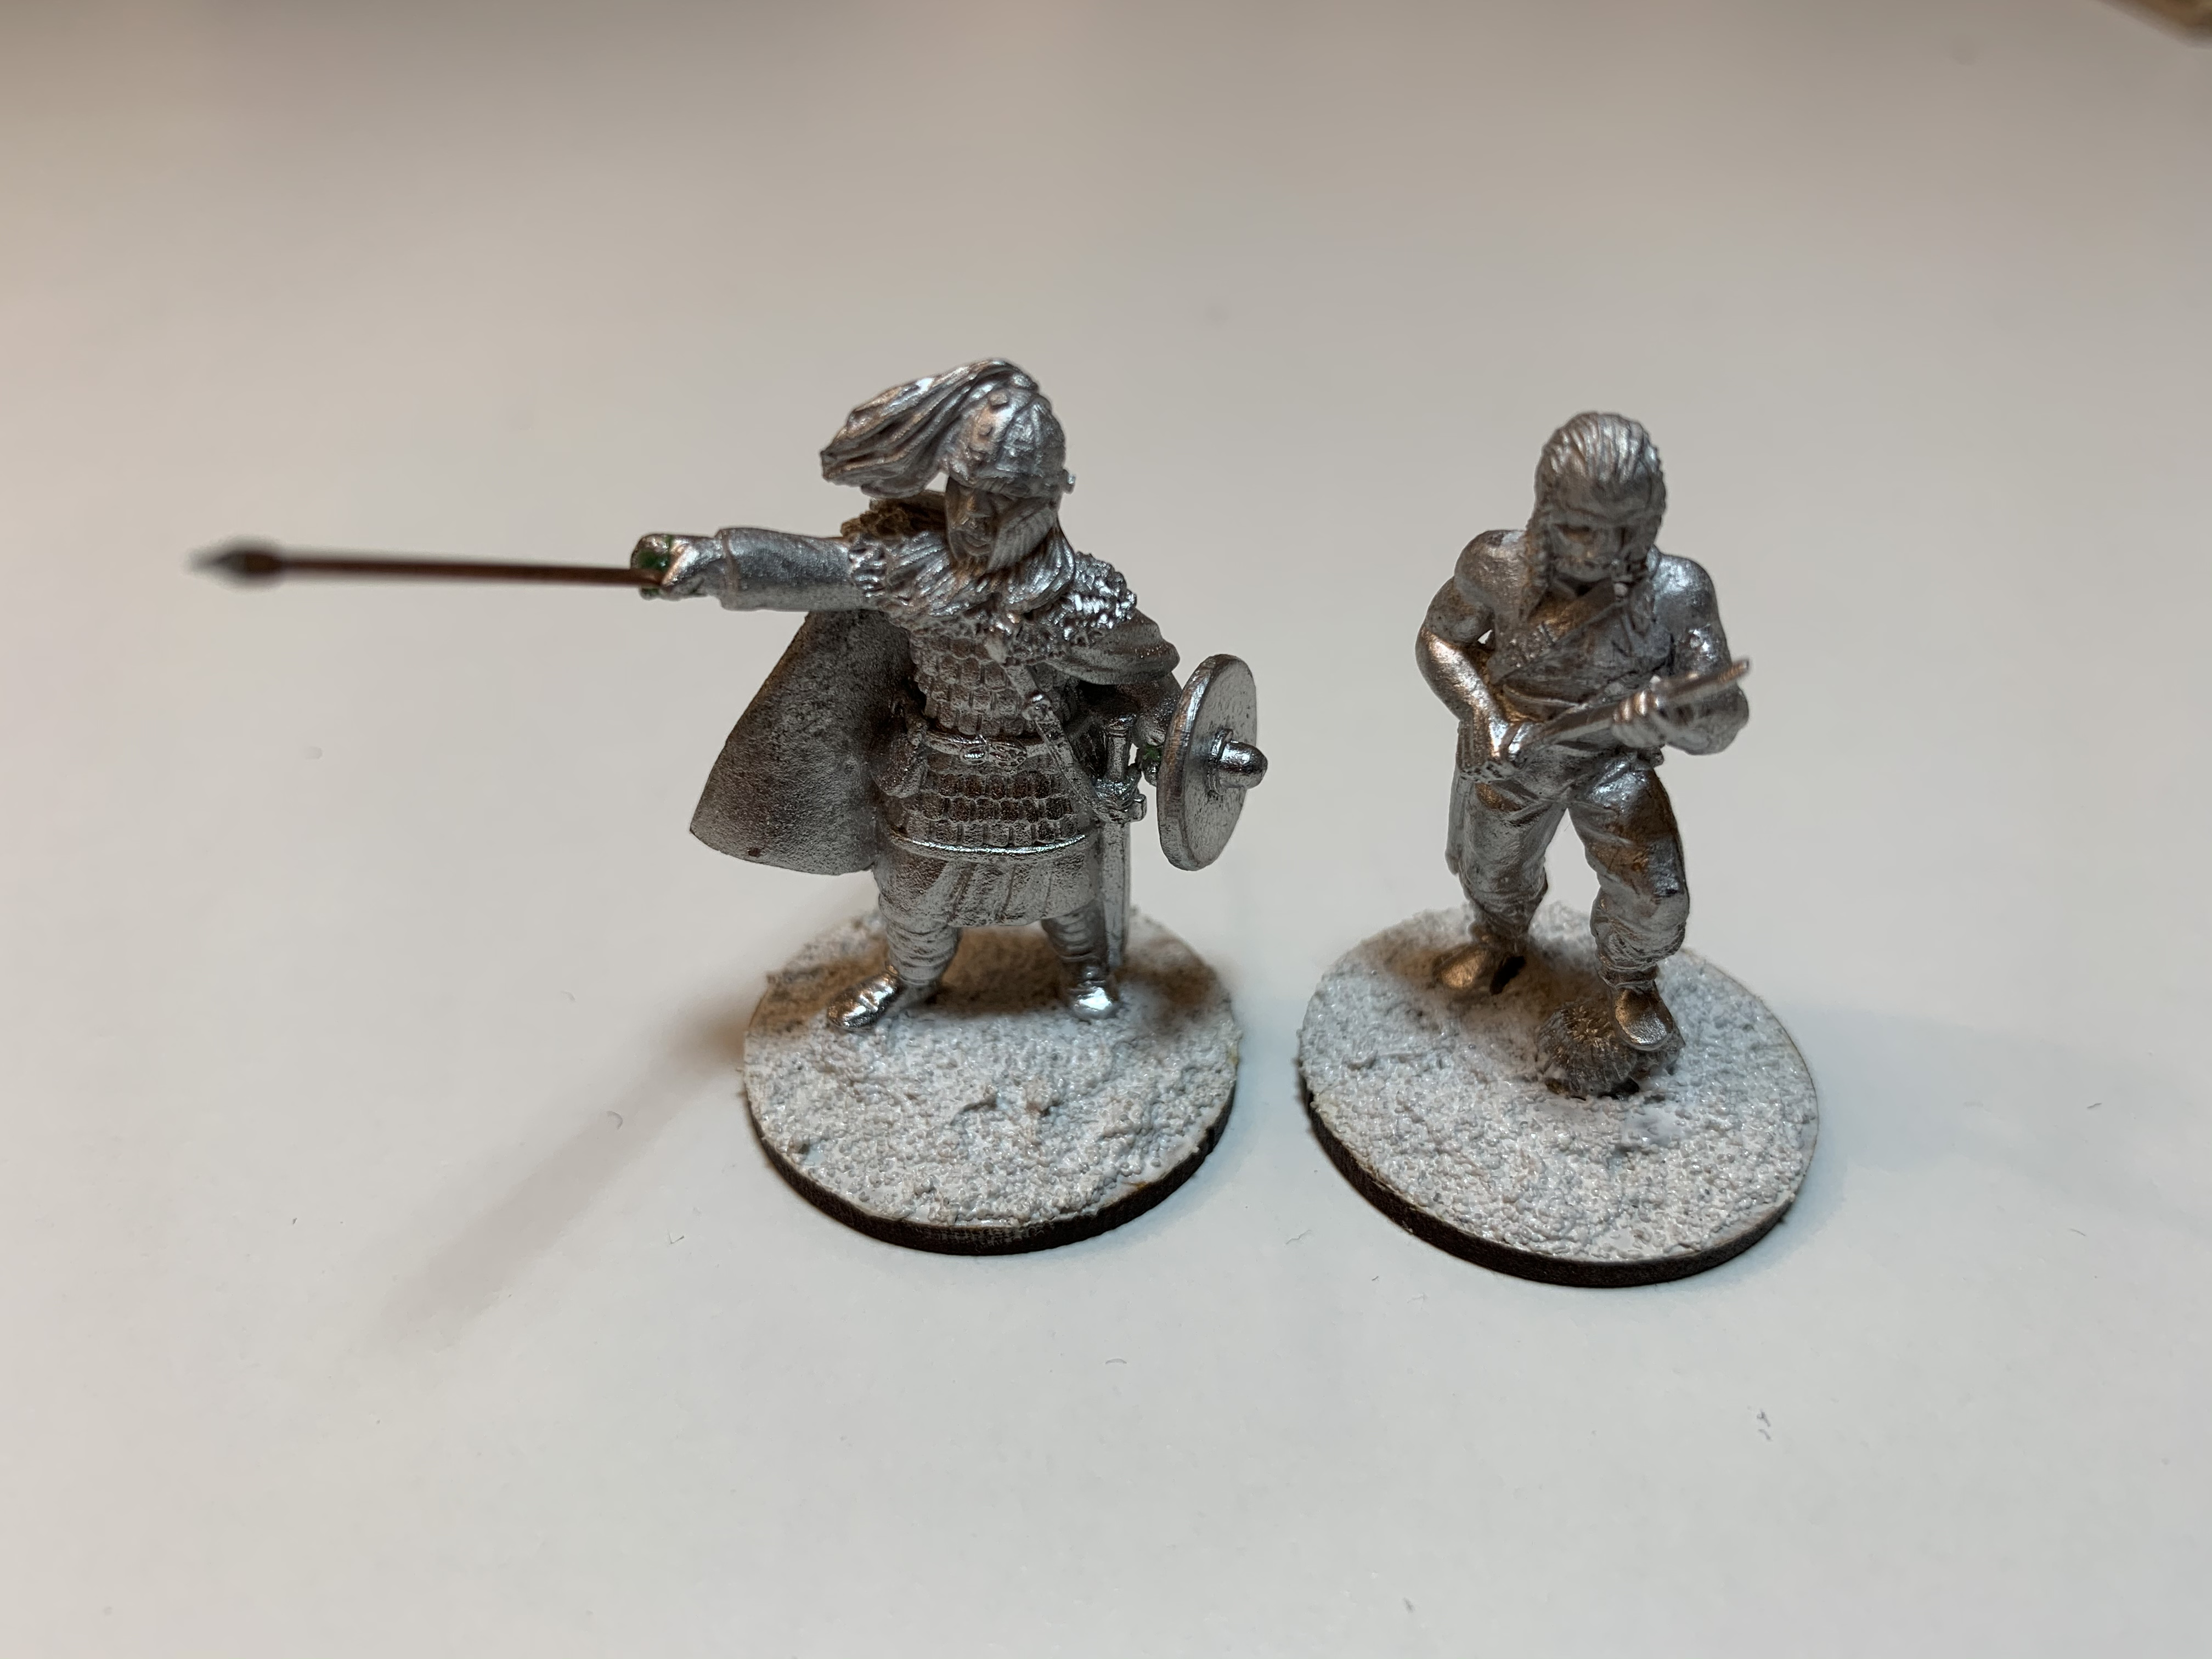 The Warlord and his Champion. On closer inspection I saw that the Champion is resting his foot on a severed head. Not sure whether to keep that or cover it up in the name of good taste...
Farmhouse completed
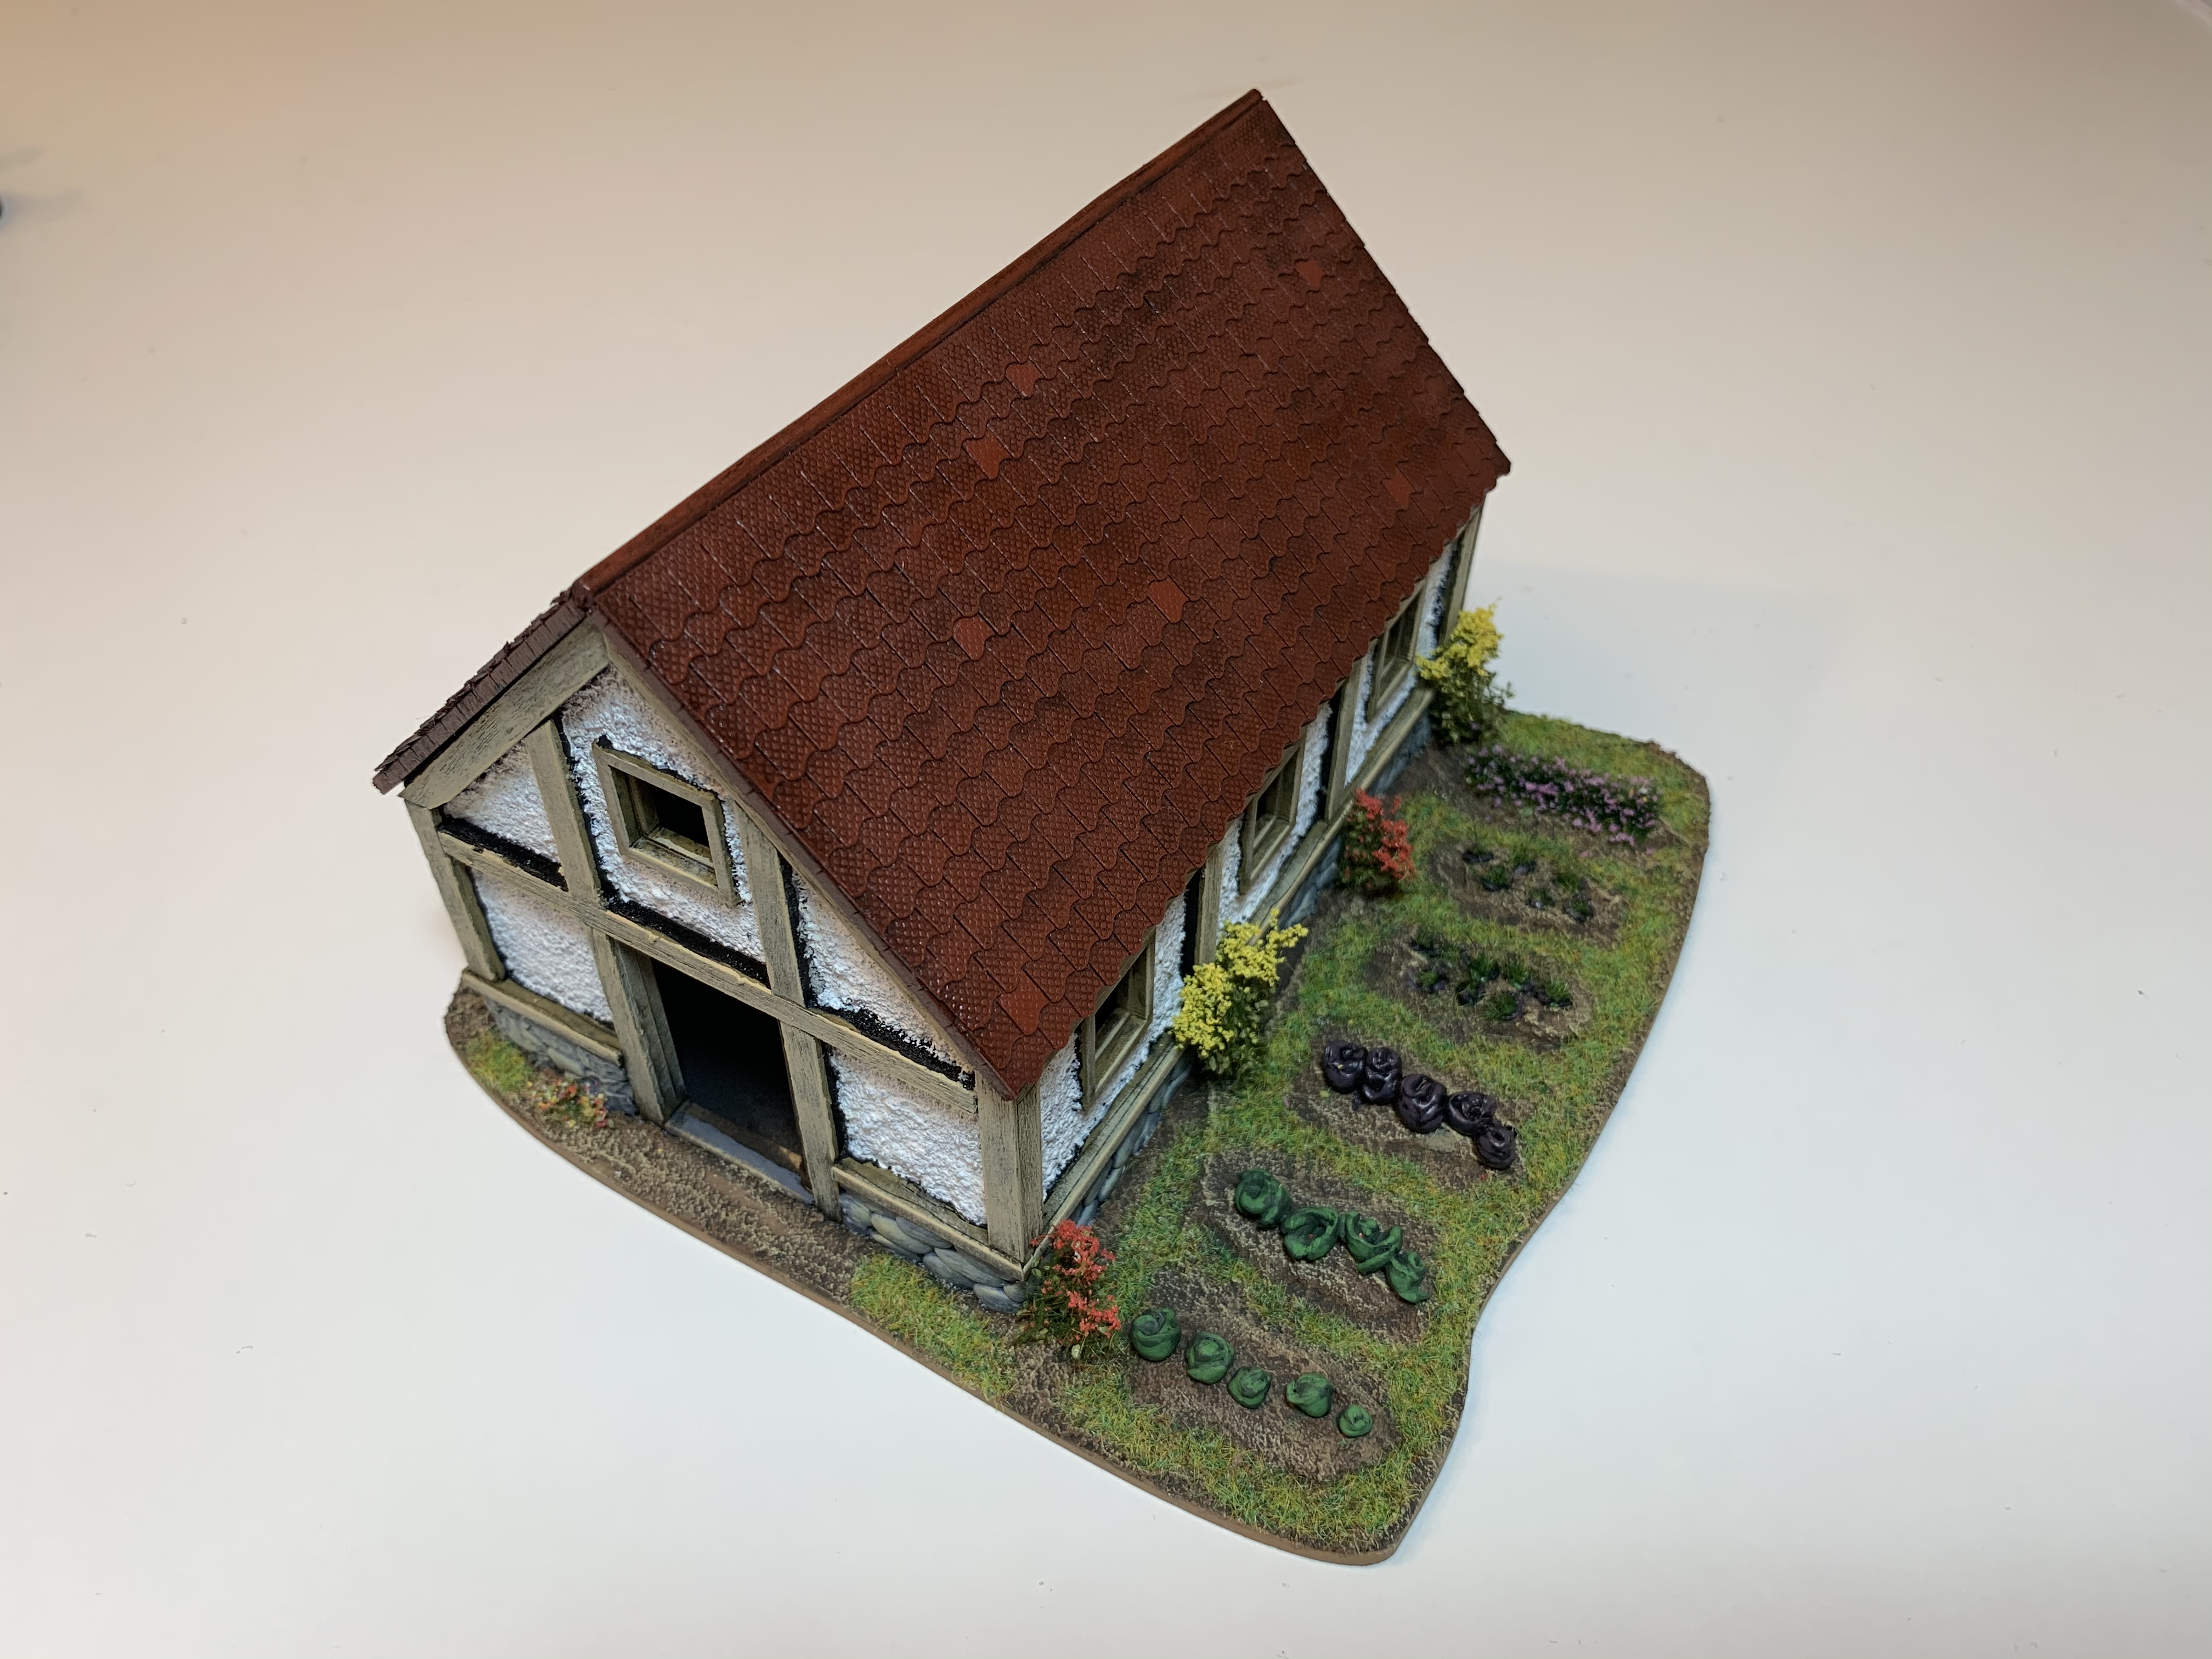
I’ve finally got round to completing my farmhouse. The actual building was painted some time ago, but I couldn’t work out how to do a convincing vegetable garden. Eventually I decided that it was more important to get the thing done than agonise over the theory of it. I therefore rolled out some flat leaves of green stuff and then curved them back in on themselves to make an approximation of cabbages. These were then painted blue and a deep purple, because I wanted at least one row of red cabbages as they are one of my favourite vegetables. I also pushed some trimmed down tufts into blobs of green stuff to make turnips and laid out a MiniNatur purple blossom strip to make a bed of lavender. With that, I called it done.
For those wondering (which may well be no one) I checked and cabbages, turnips and lavender were well known in Ancient times. I also seem to recall the Emperor Diocletian saying after he retired that he got more pleasure from tending his cabbages than he did from ruling the empire, so that seems pretty good authority to me. This may seem a little obsessive, but somehow I always notice when someone slips something like a pumpkin into a piece of terrain from the Ancient and Medieval world, which at that time should only be seen in North America. This is perhaps button counting and rivet counting at its worst!
Building a storehouse
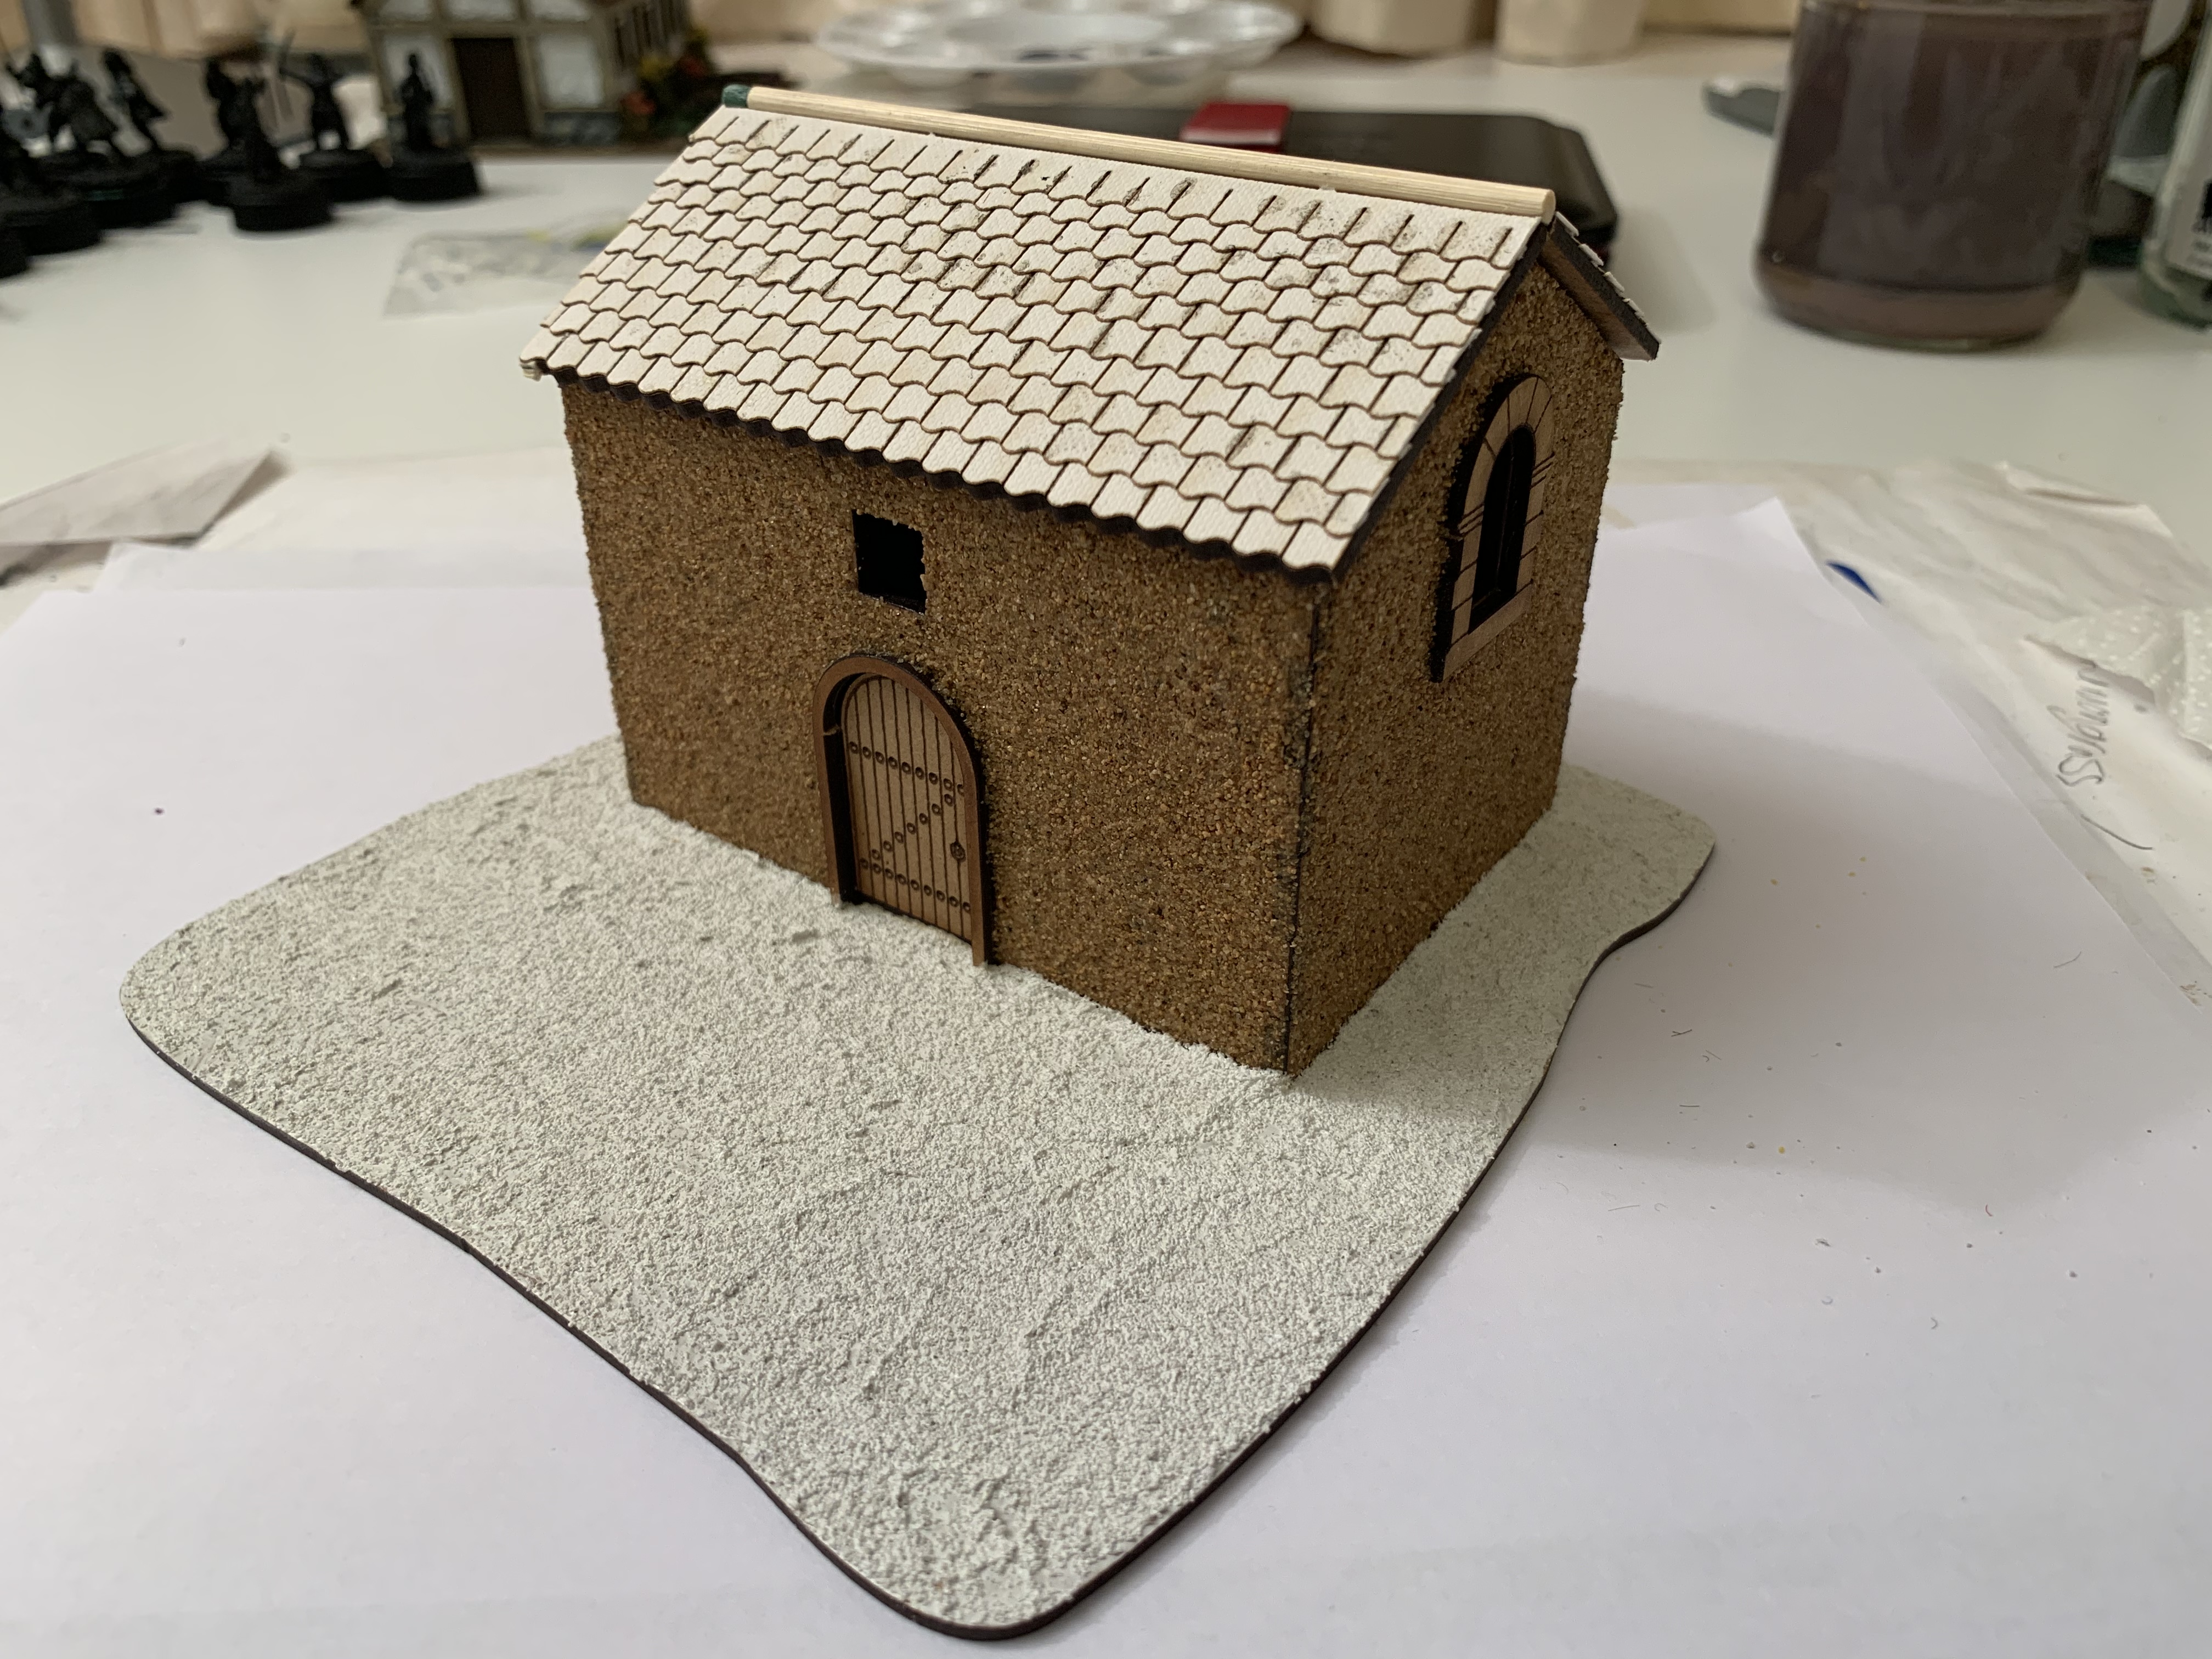
I recently added a storehouse to the collection of buildings making up my Romano-British farm. The image above shows the completed build. I spread PVA over the walls and then sprinkled sand on them before sealing it with a mix of PVA and water. The building was from Warbases as was the mounted MDF terrain base in which it is mounted.
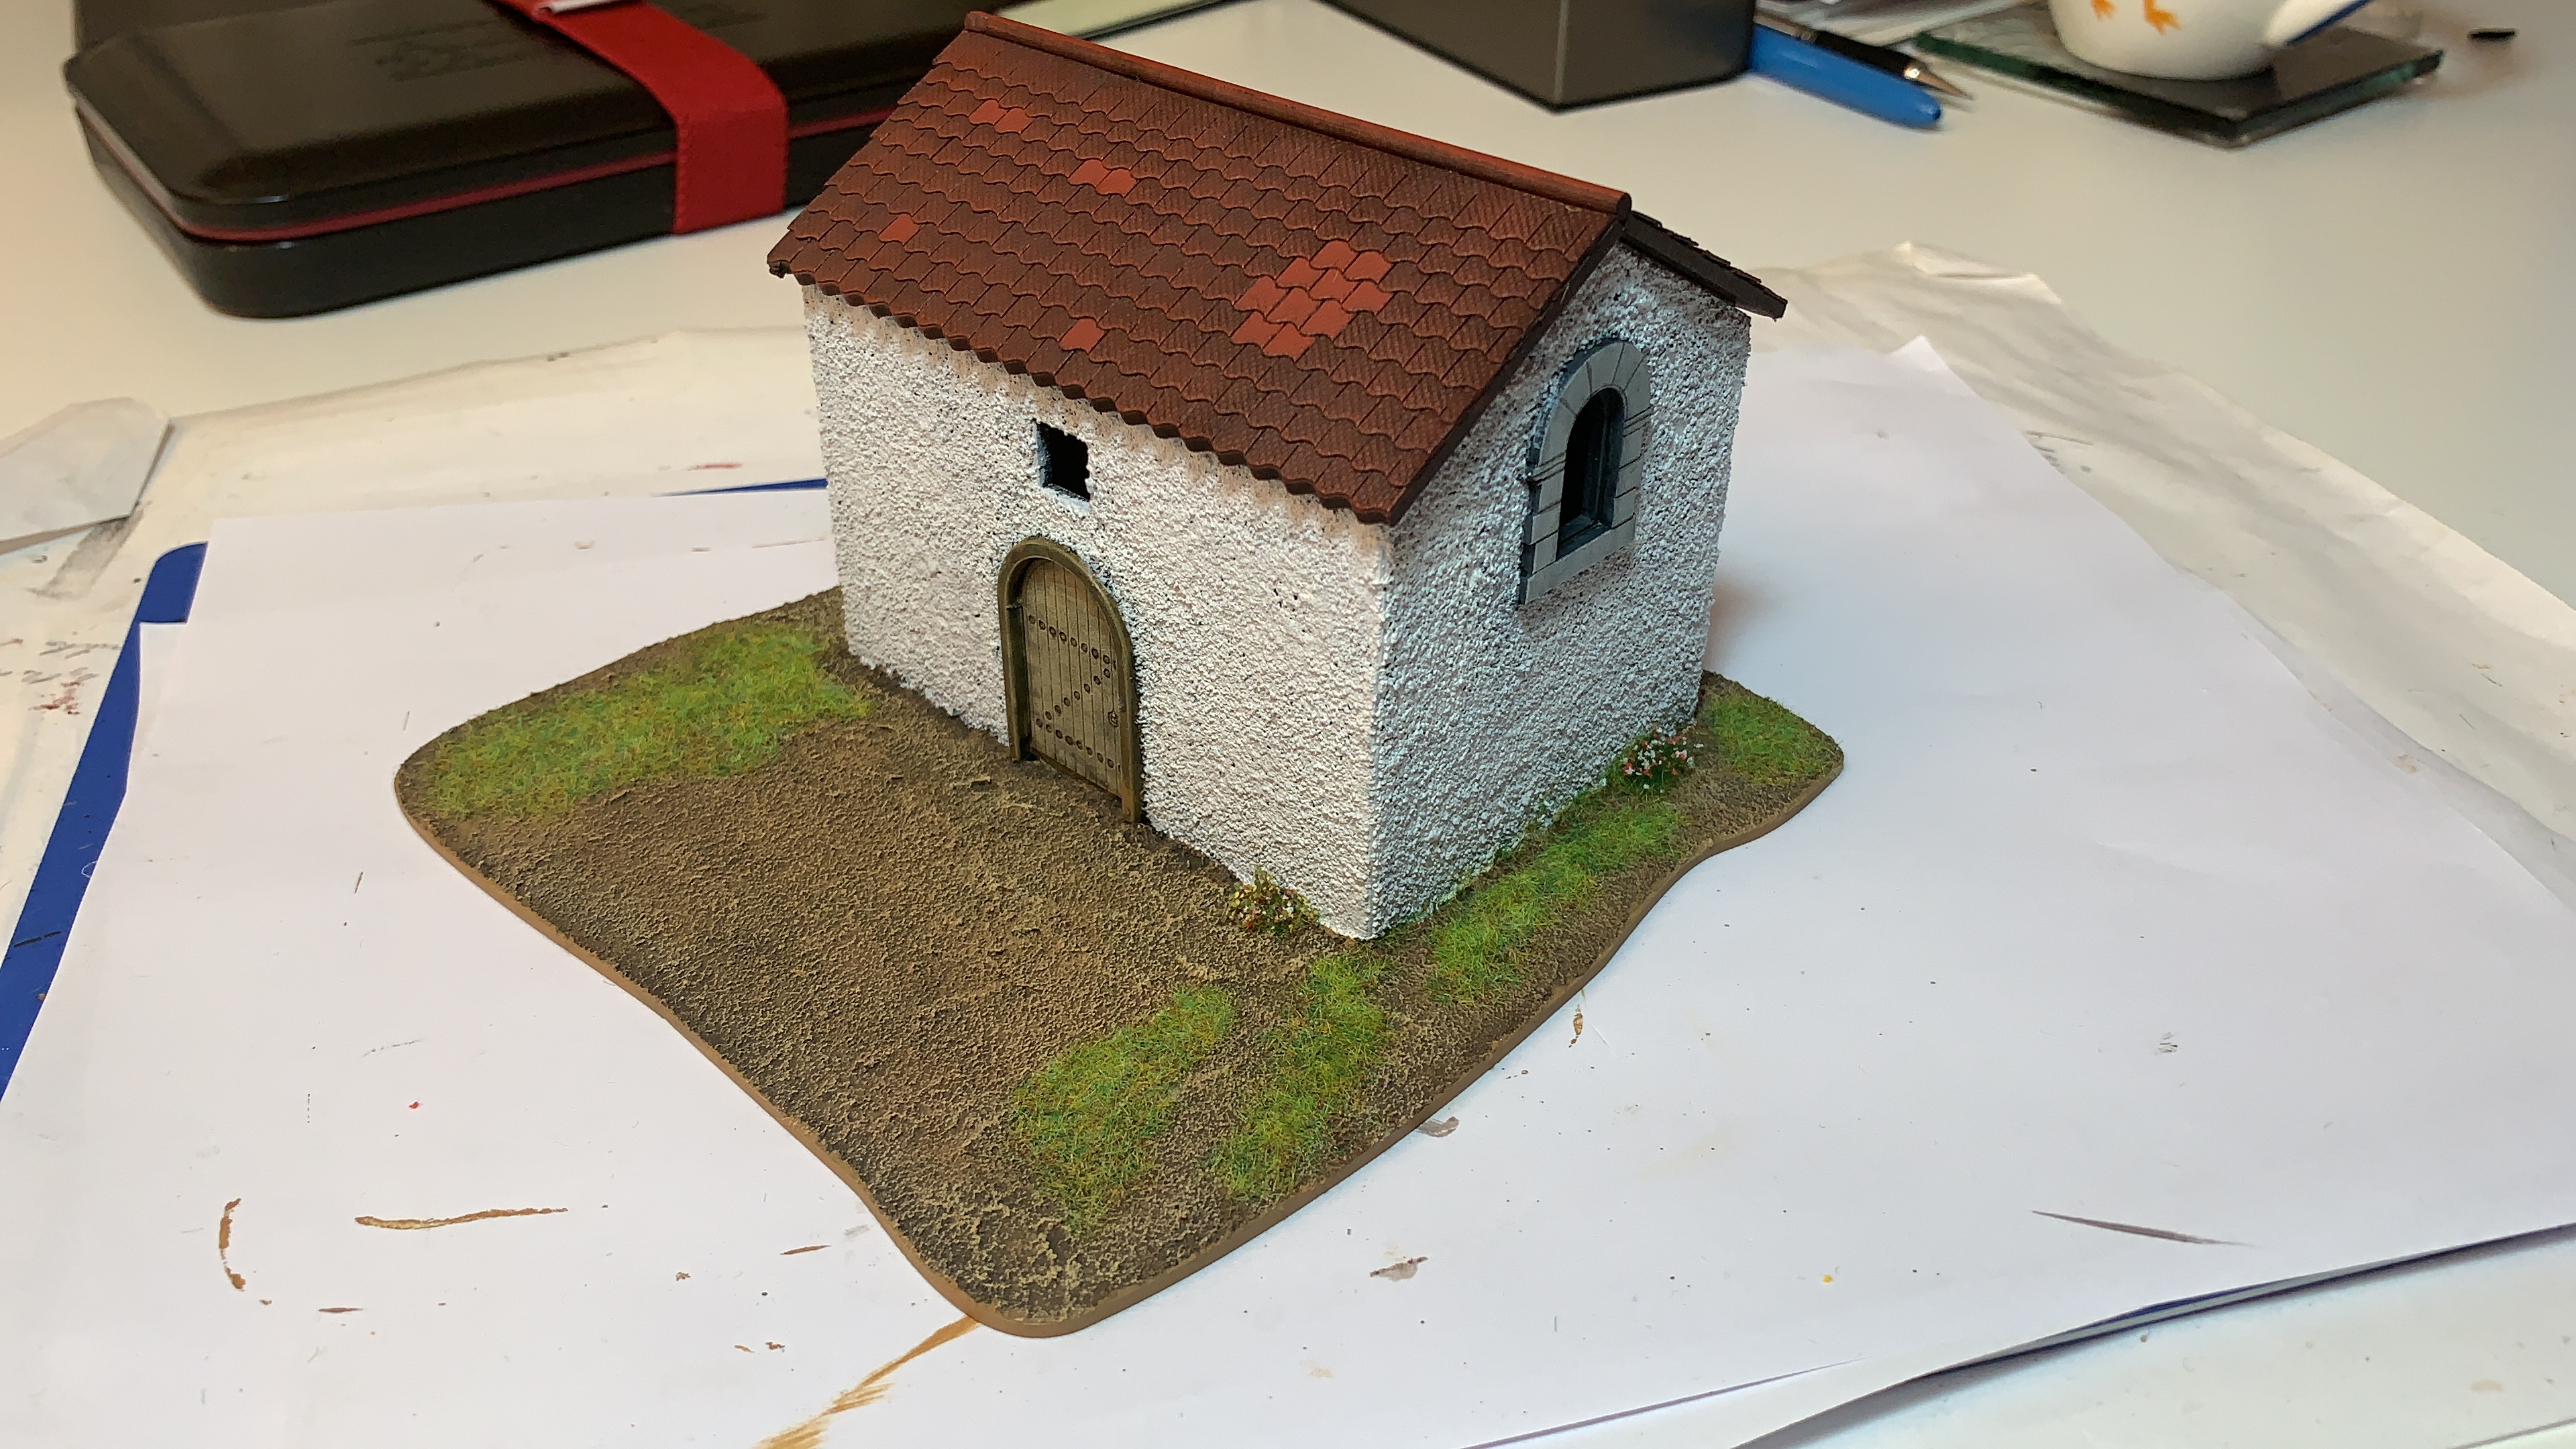
This shows the painted building. The roof tiles were painted VMC Hull Red and washed with Army Painter Strong Tone ink. I then picked out individual tiles with VMC Cavalry Brown to show areas of recent repair. I then drybrushed the lot with Cavalry Brown.
The walls were painted Light Grey, then Light Grey mixed with Off White, then finally highlighted with Off White.
The stone window was painted in the same way as the drystone walls described in the entry below, whilst the door was painted Khaki Grey, washed with AP Strong Tone and drybrushed with Iraqi Sand. I then picked out the details in AP Dark Tone ink.

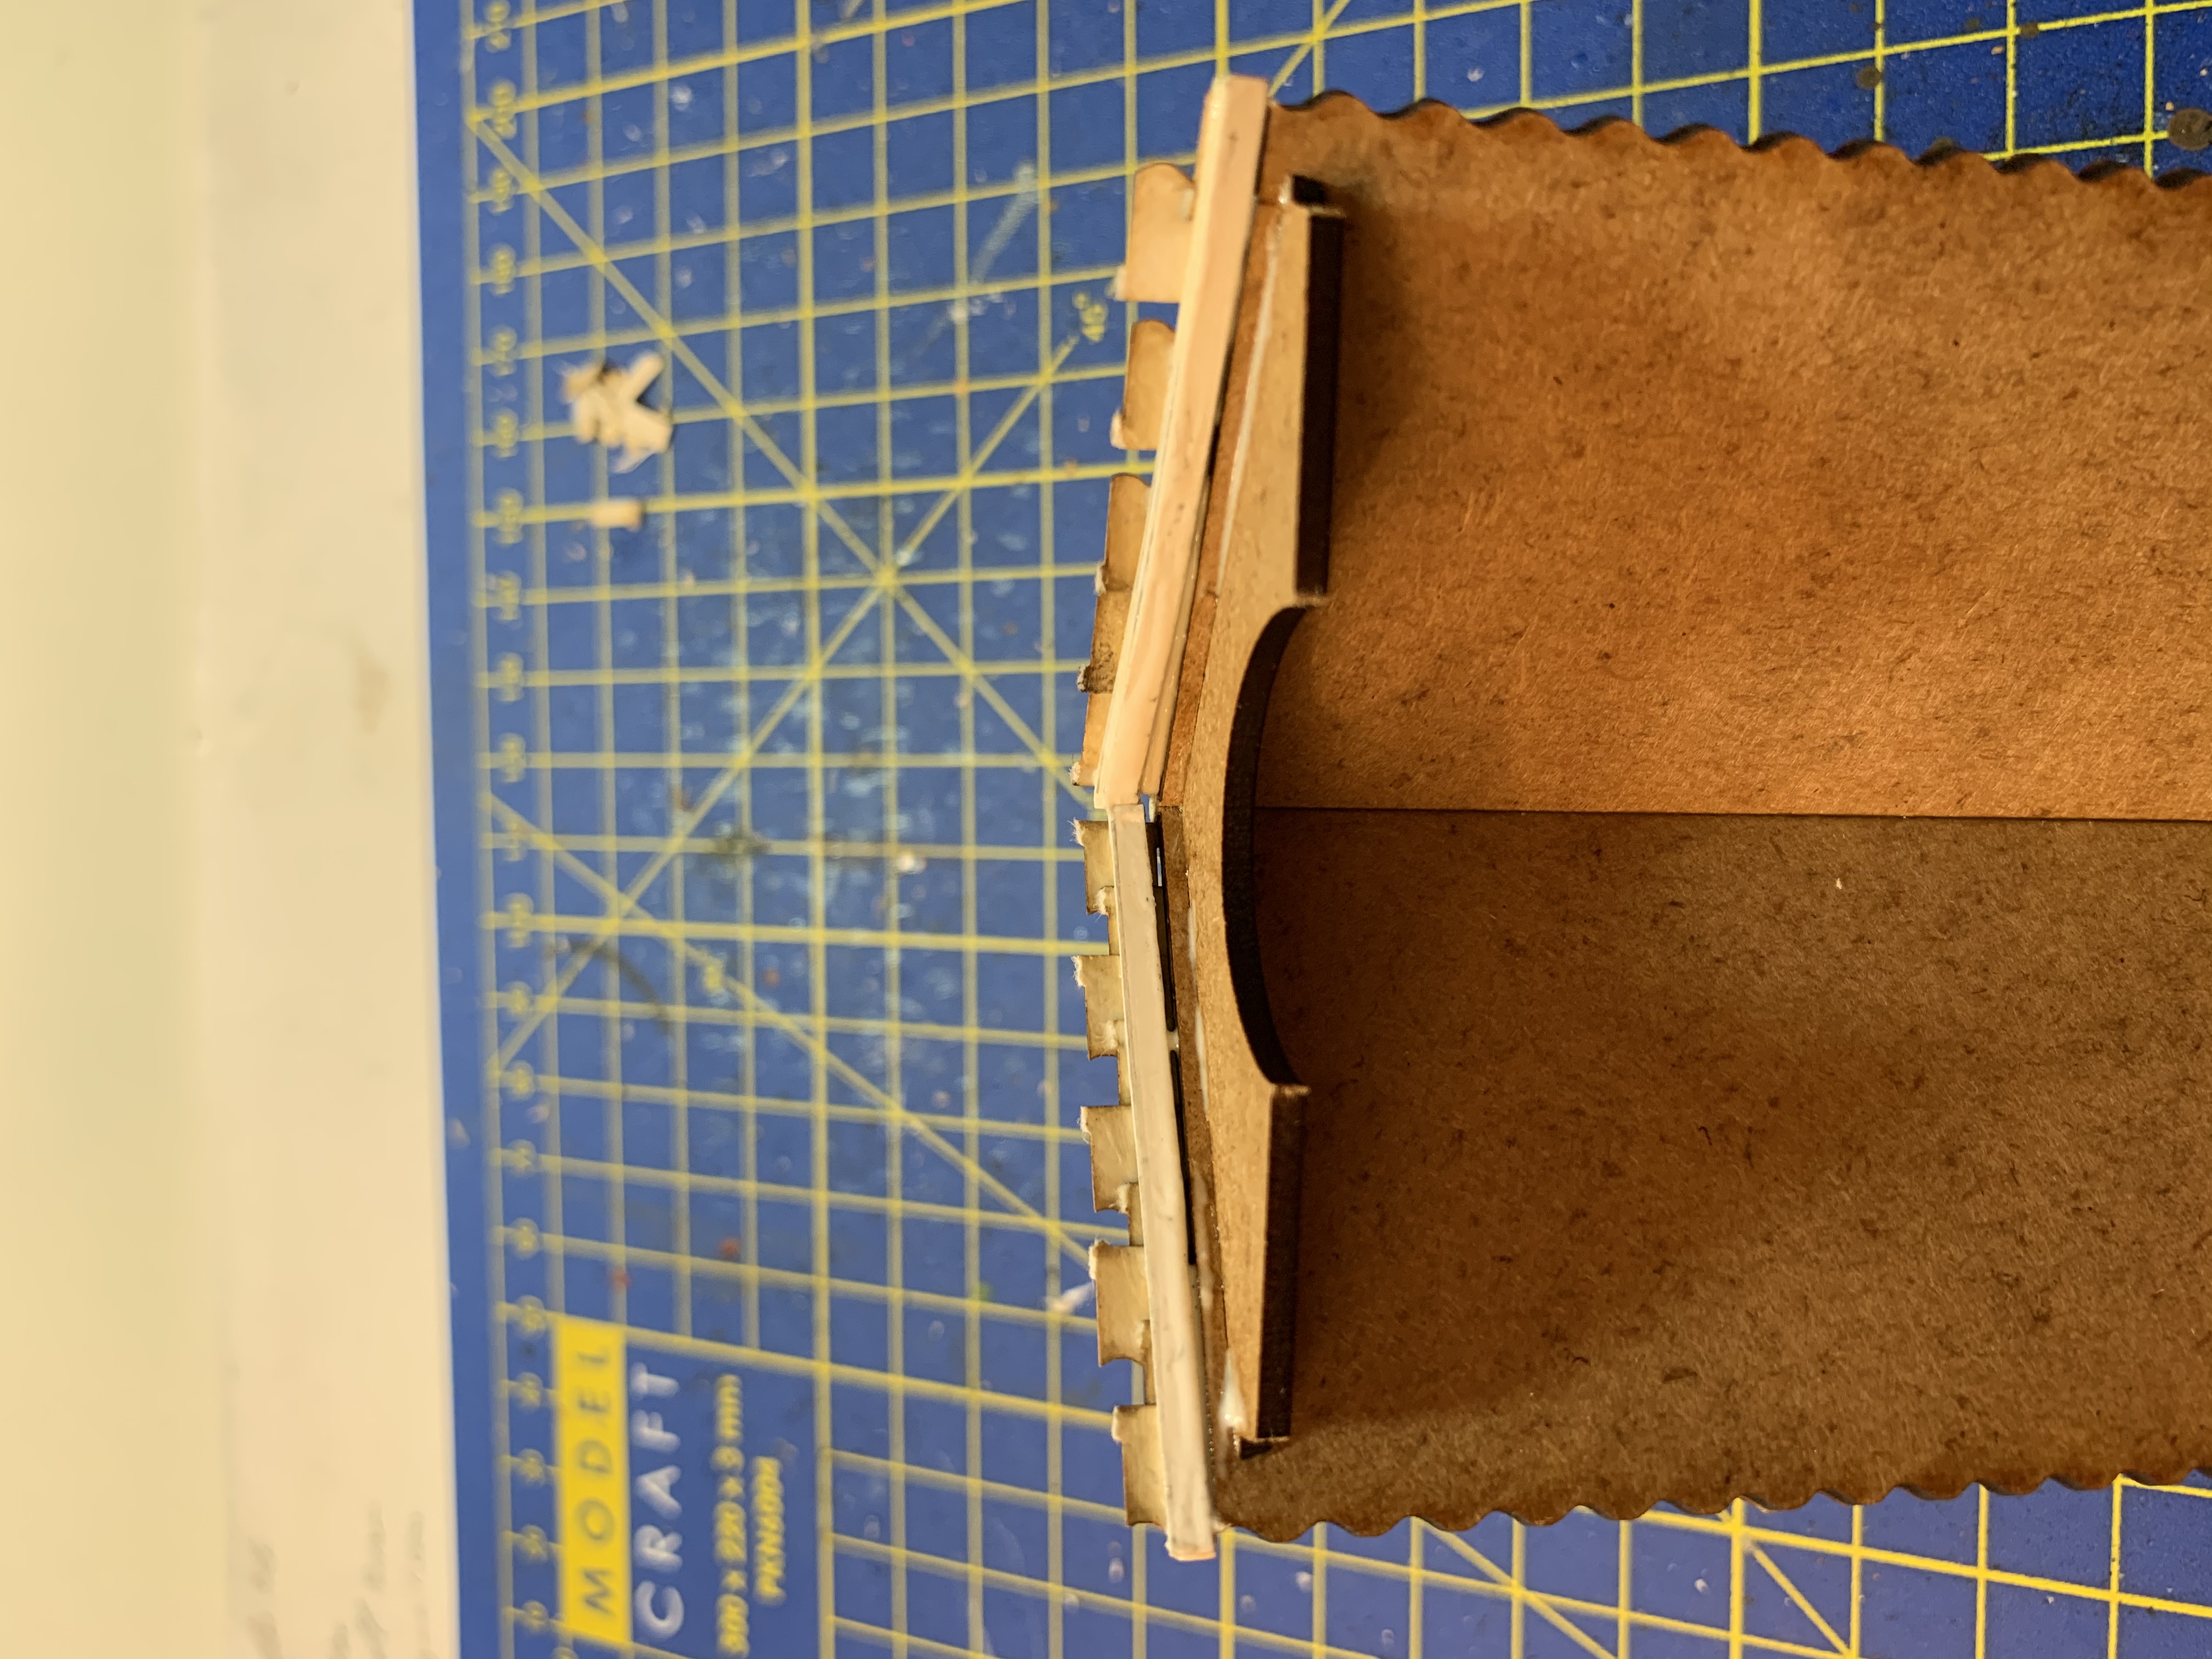

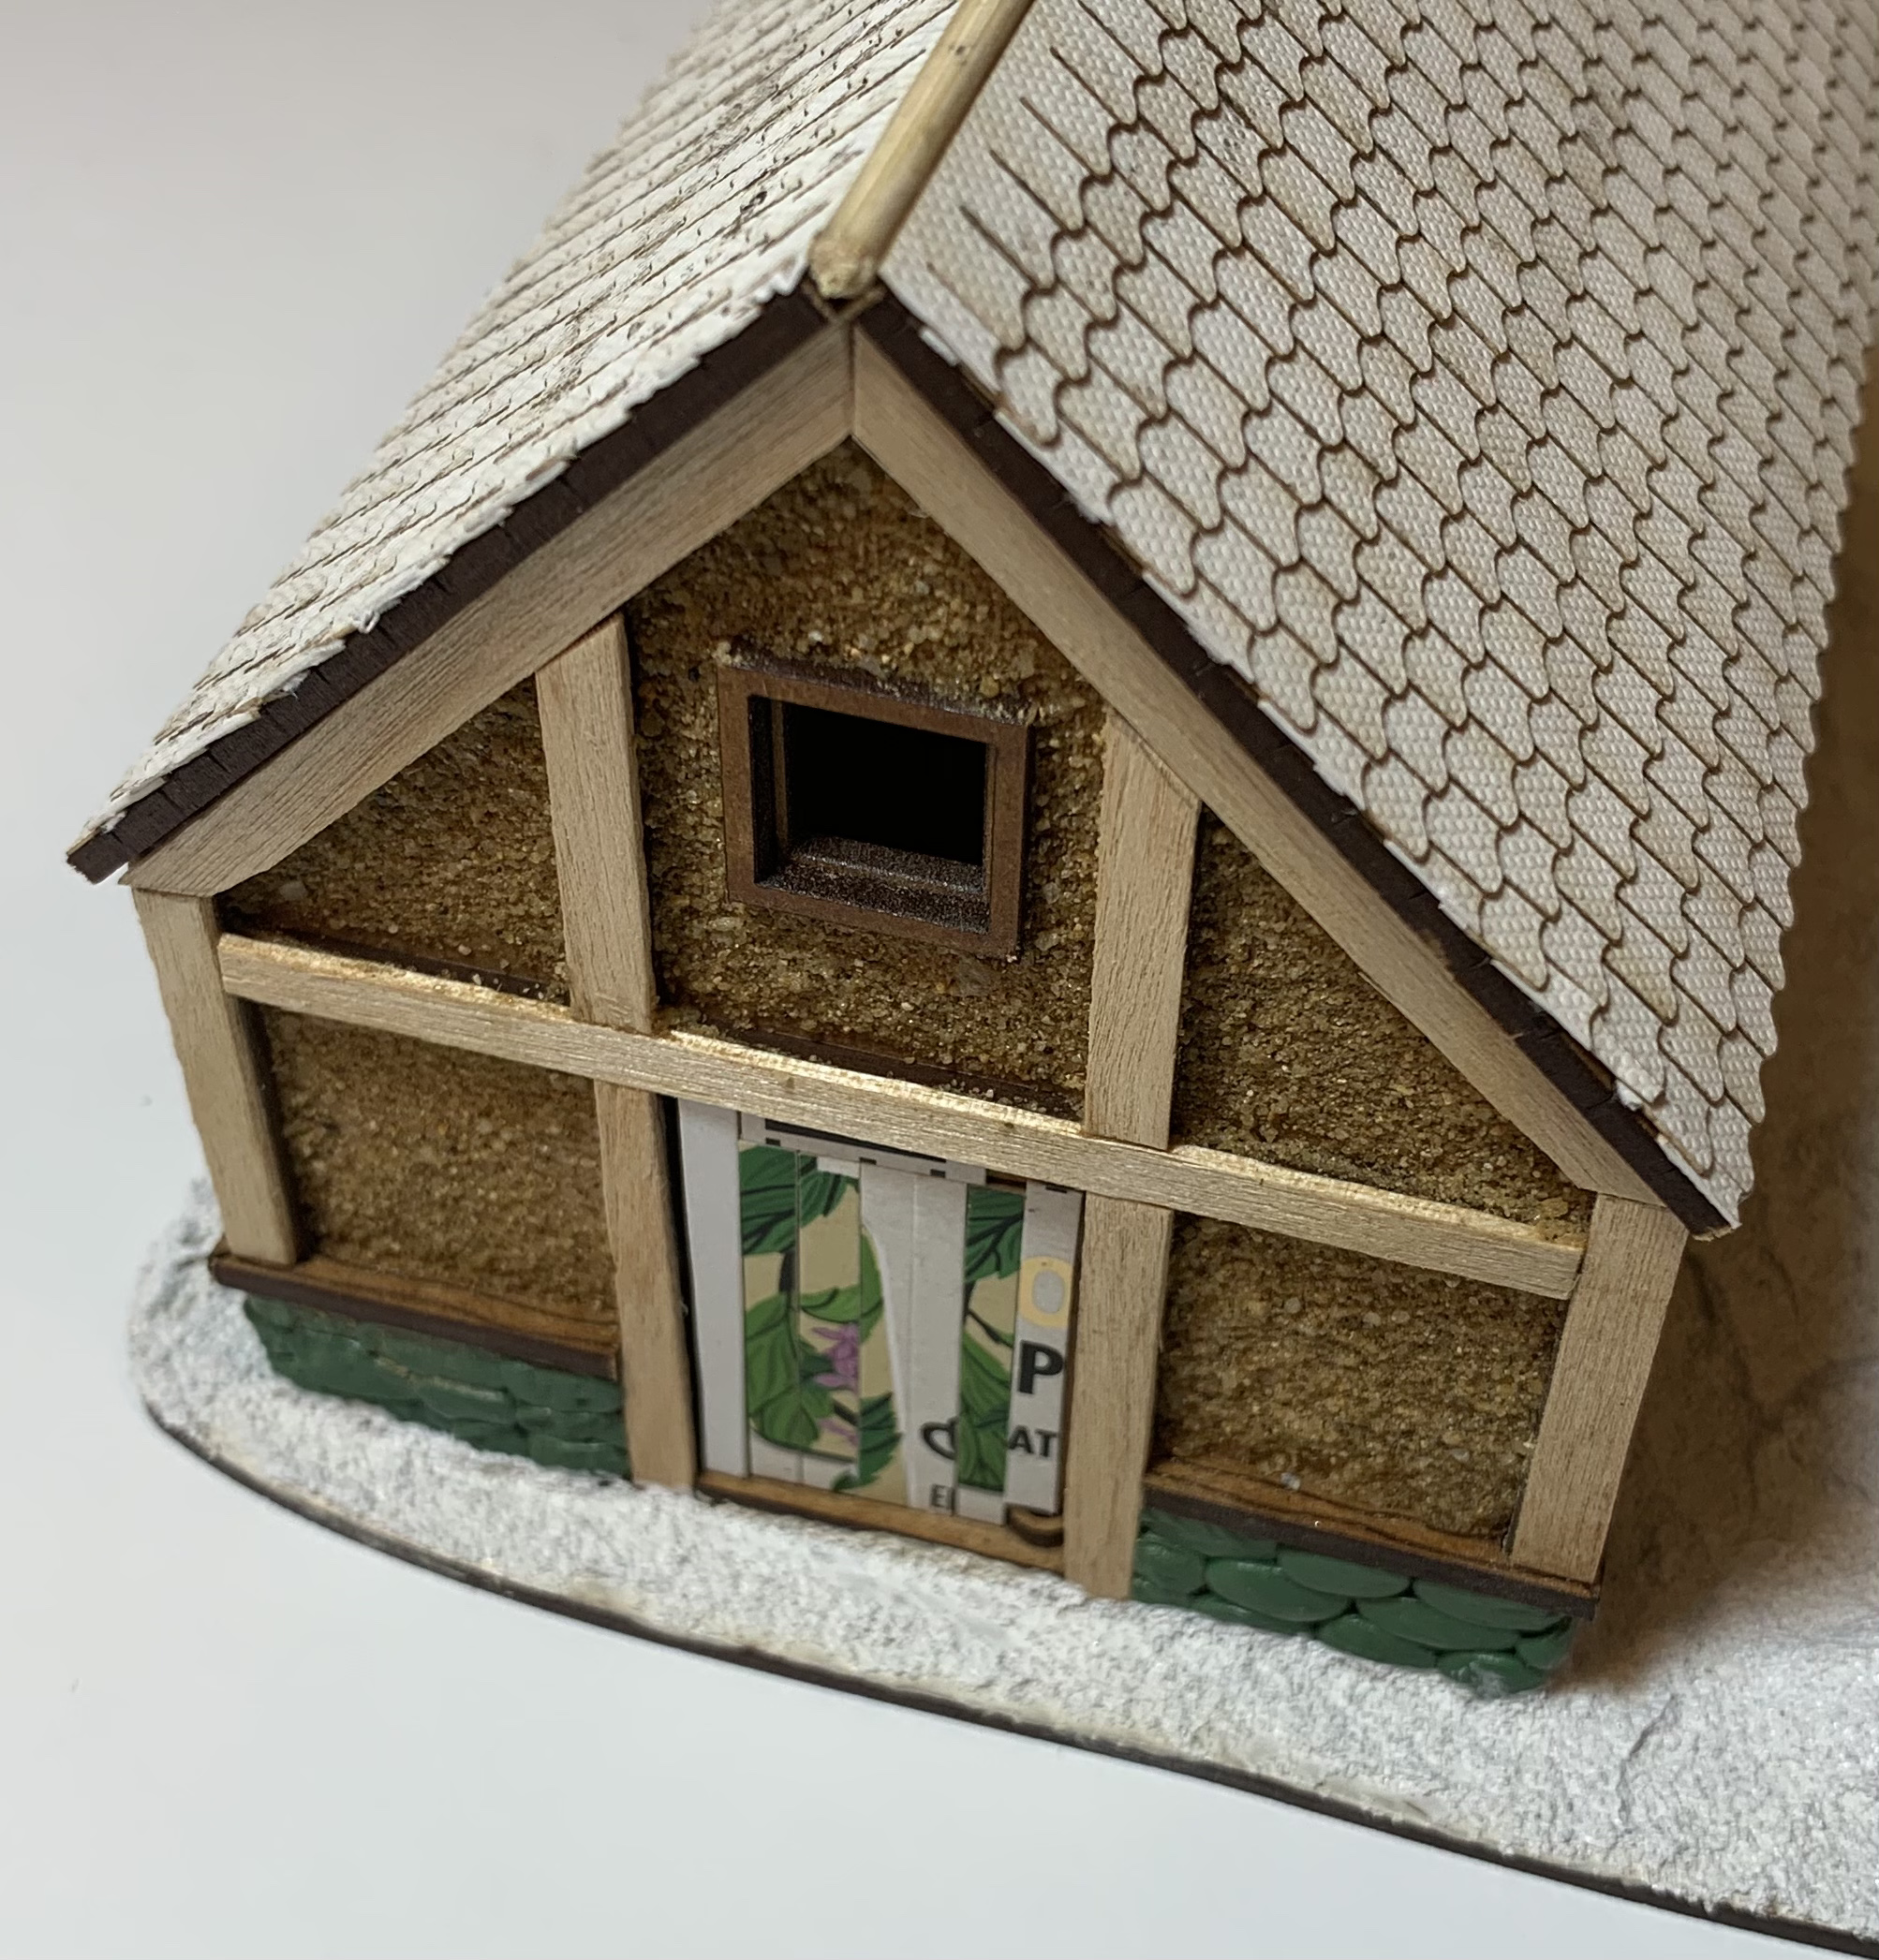
The storehouse is actually intended to be part of a larger Roman villa set and be glued in place alongside an adjoining building. As such, one end of the roof is flush with the wall while the other extends out to form eaves. As I wanted this to be a free standing building I needed to extend the end of the roof that was flush with the wall in order to make it look even.
the sequence above shows how I did that. When laying down the tile strips on the roof I took care to extend each row out to the distance I needed. Because the tile pattern alternates with each row, every other row needs to extend out a little further than the distance required. I then glued strips of card under the tiles and adjoining the roof. This extended it out sufficiently to balance the building and ensure that it wouldn’t be lopsided. PVA glue ensures this a rock hard. Once the glue holding the card strips in place was dry I trimmed off any excess tiles that were protruding beyond the now extended roof. The final step was to extend the piece of dowling that forms the apex of the roof. This was done by rolling a small piece of green stuff to the approximate shape and pushing it into place. If you look at the image at the top of this entry you can see it at the left end of the roof.
Drystone Walls
I’ve not had much opportunity to update this Project lately, but progress is being made. Over Christmas I decided that I would keep the Project live whilst I embarked on a starter force for the Saxon invaders. I’ll detail the planning process and a short miniature review in a later post, but in the meantime I got on with the far more prosaic task of painting some drystone walls.

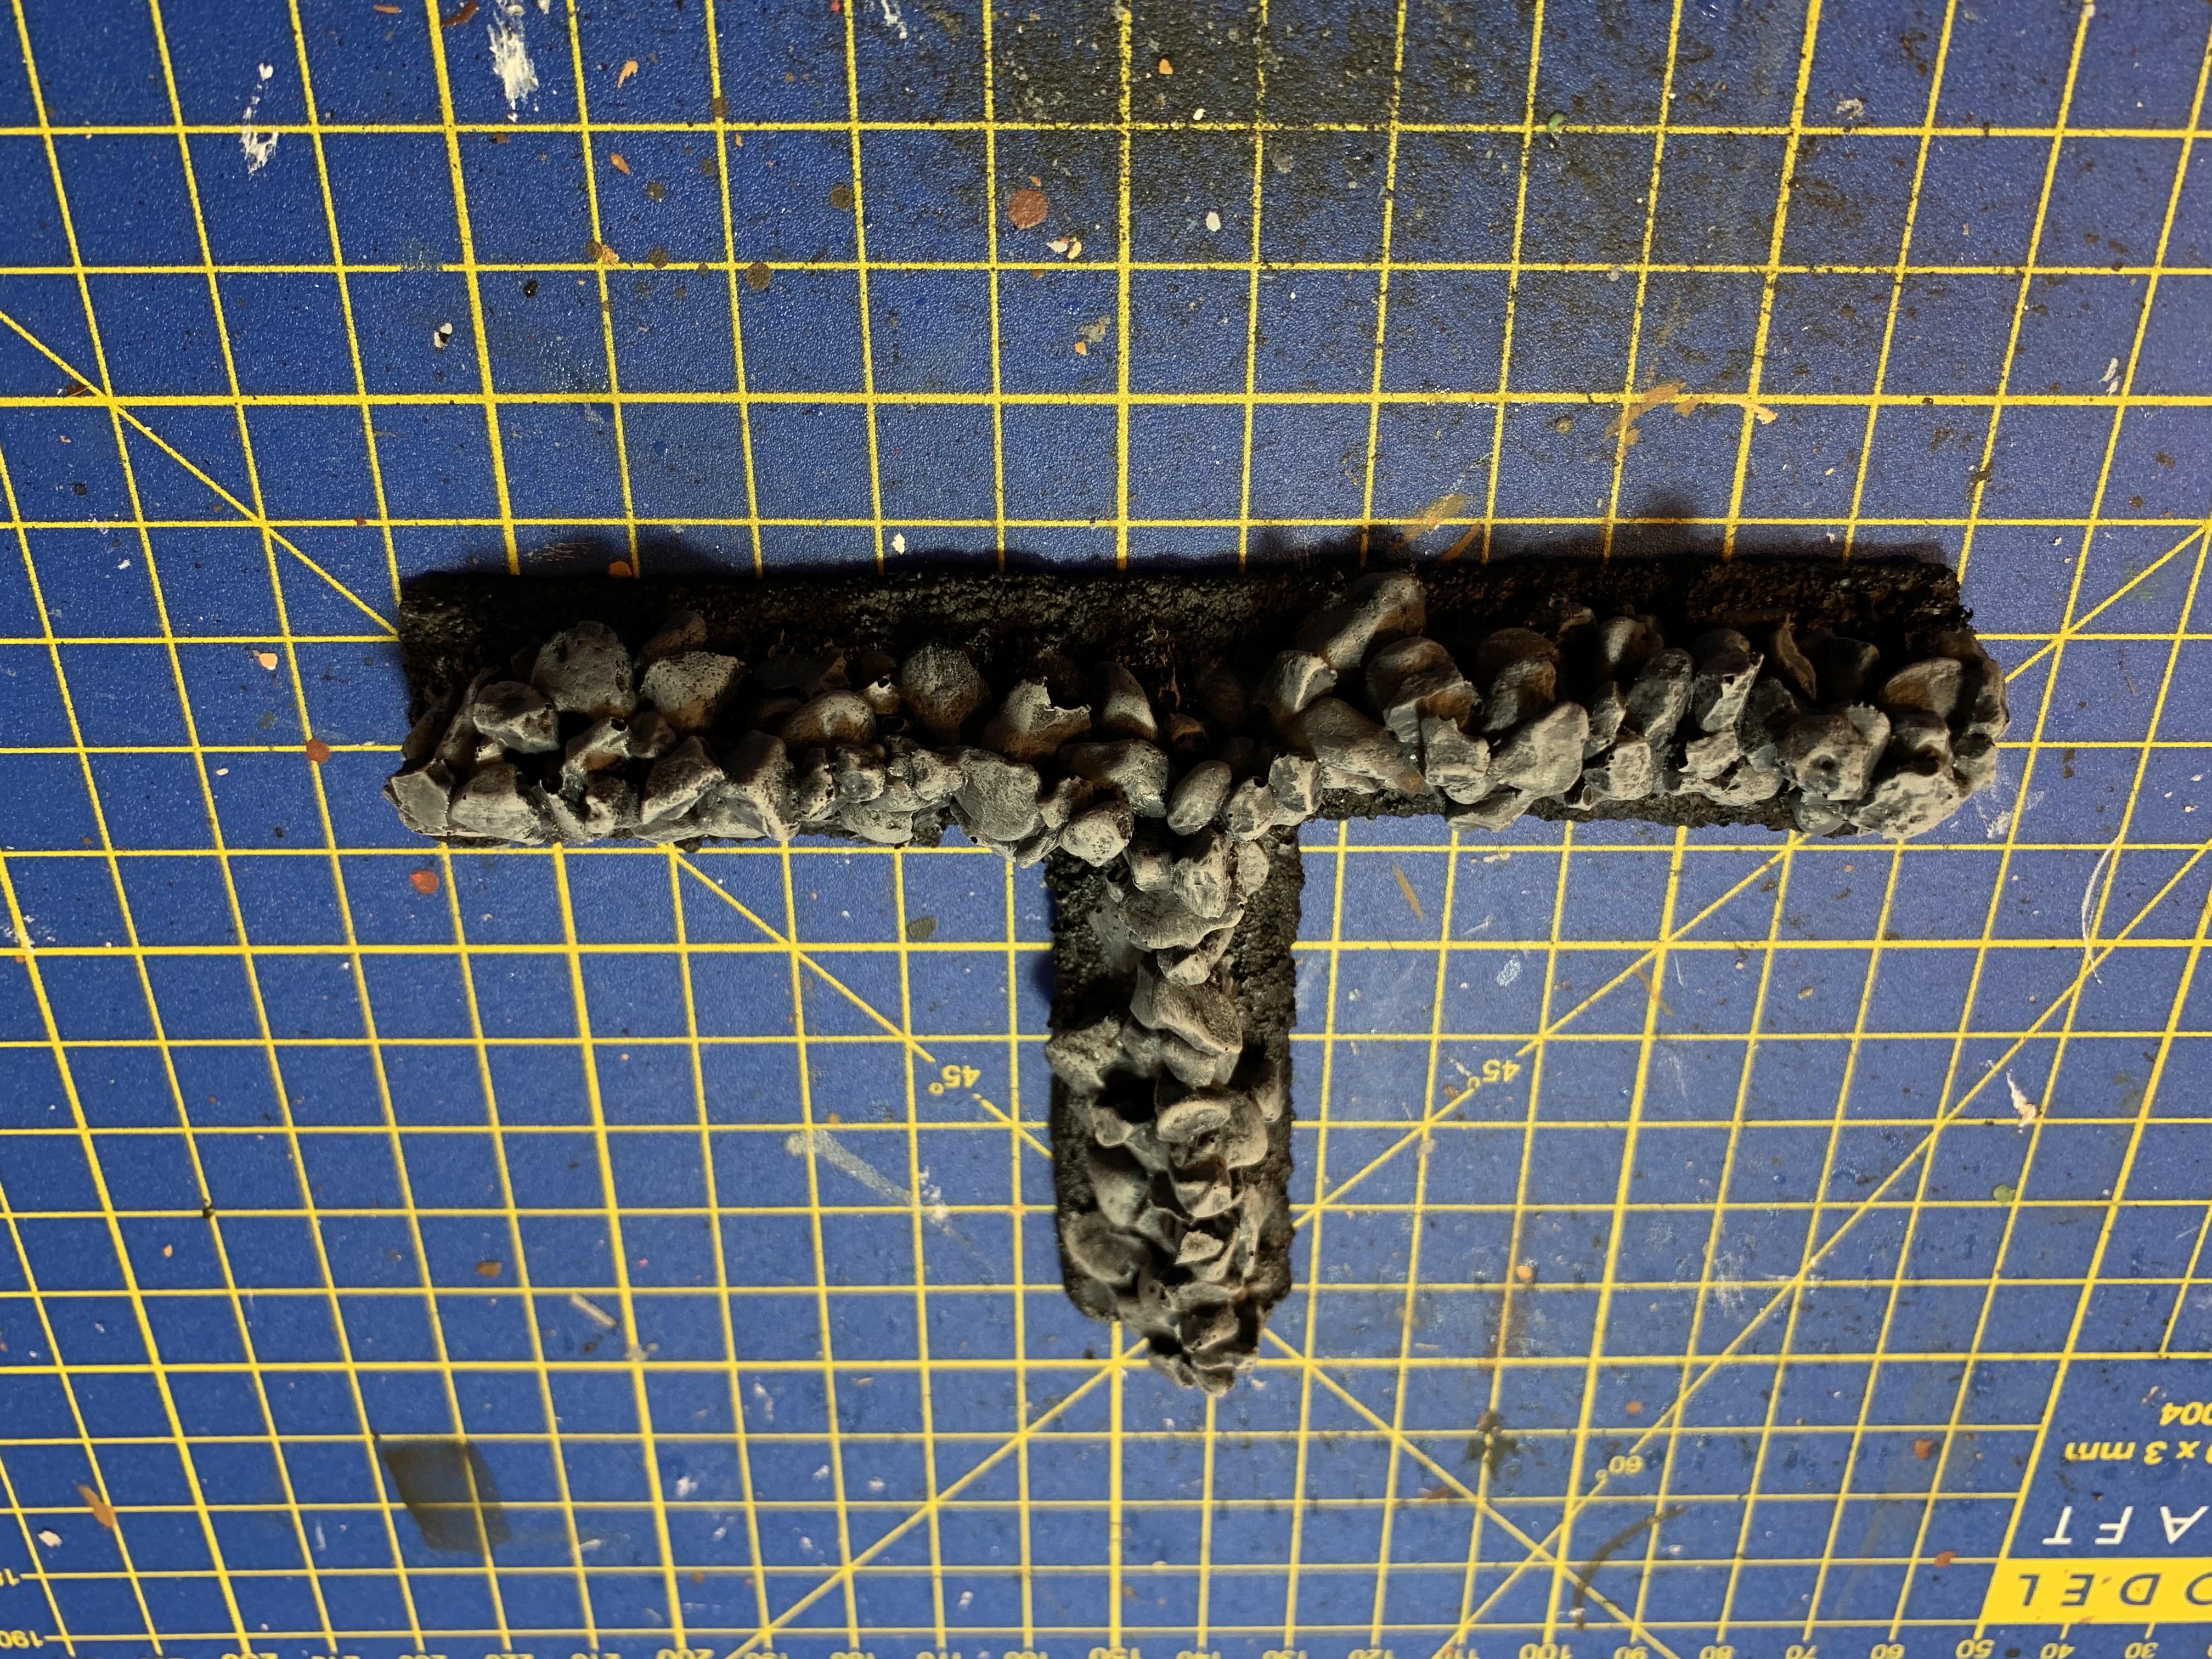
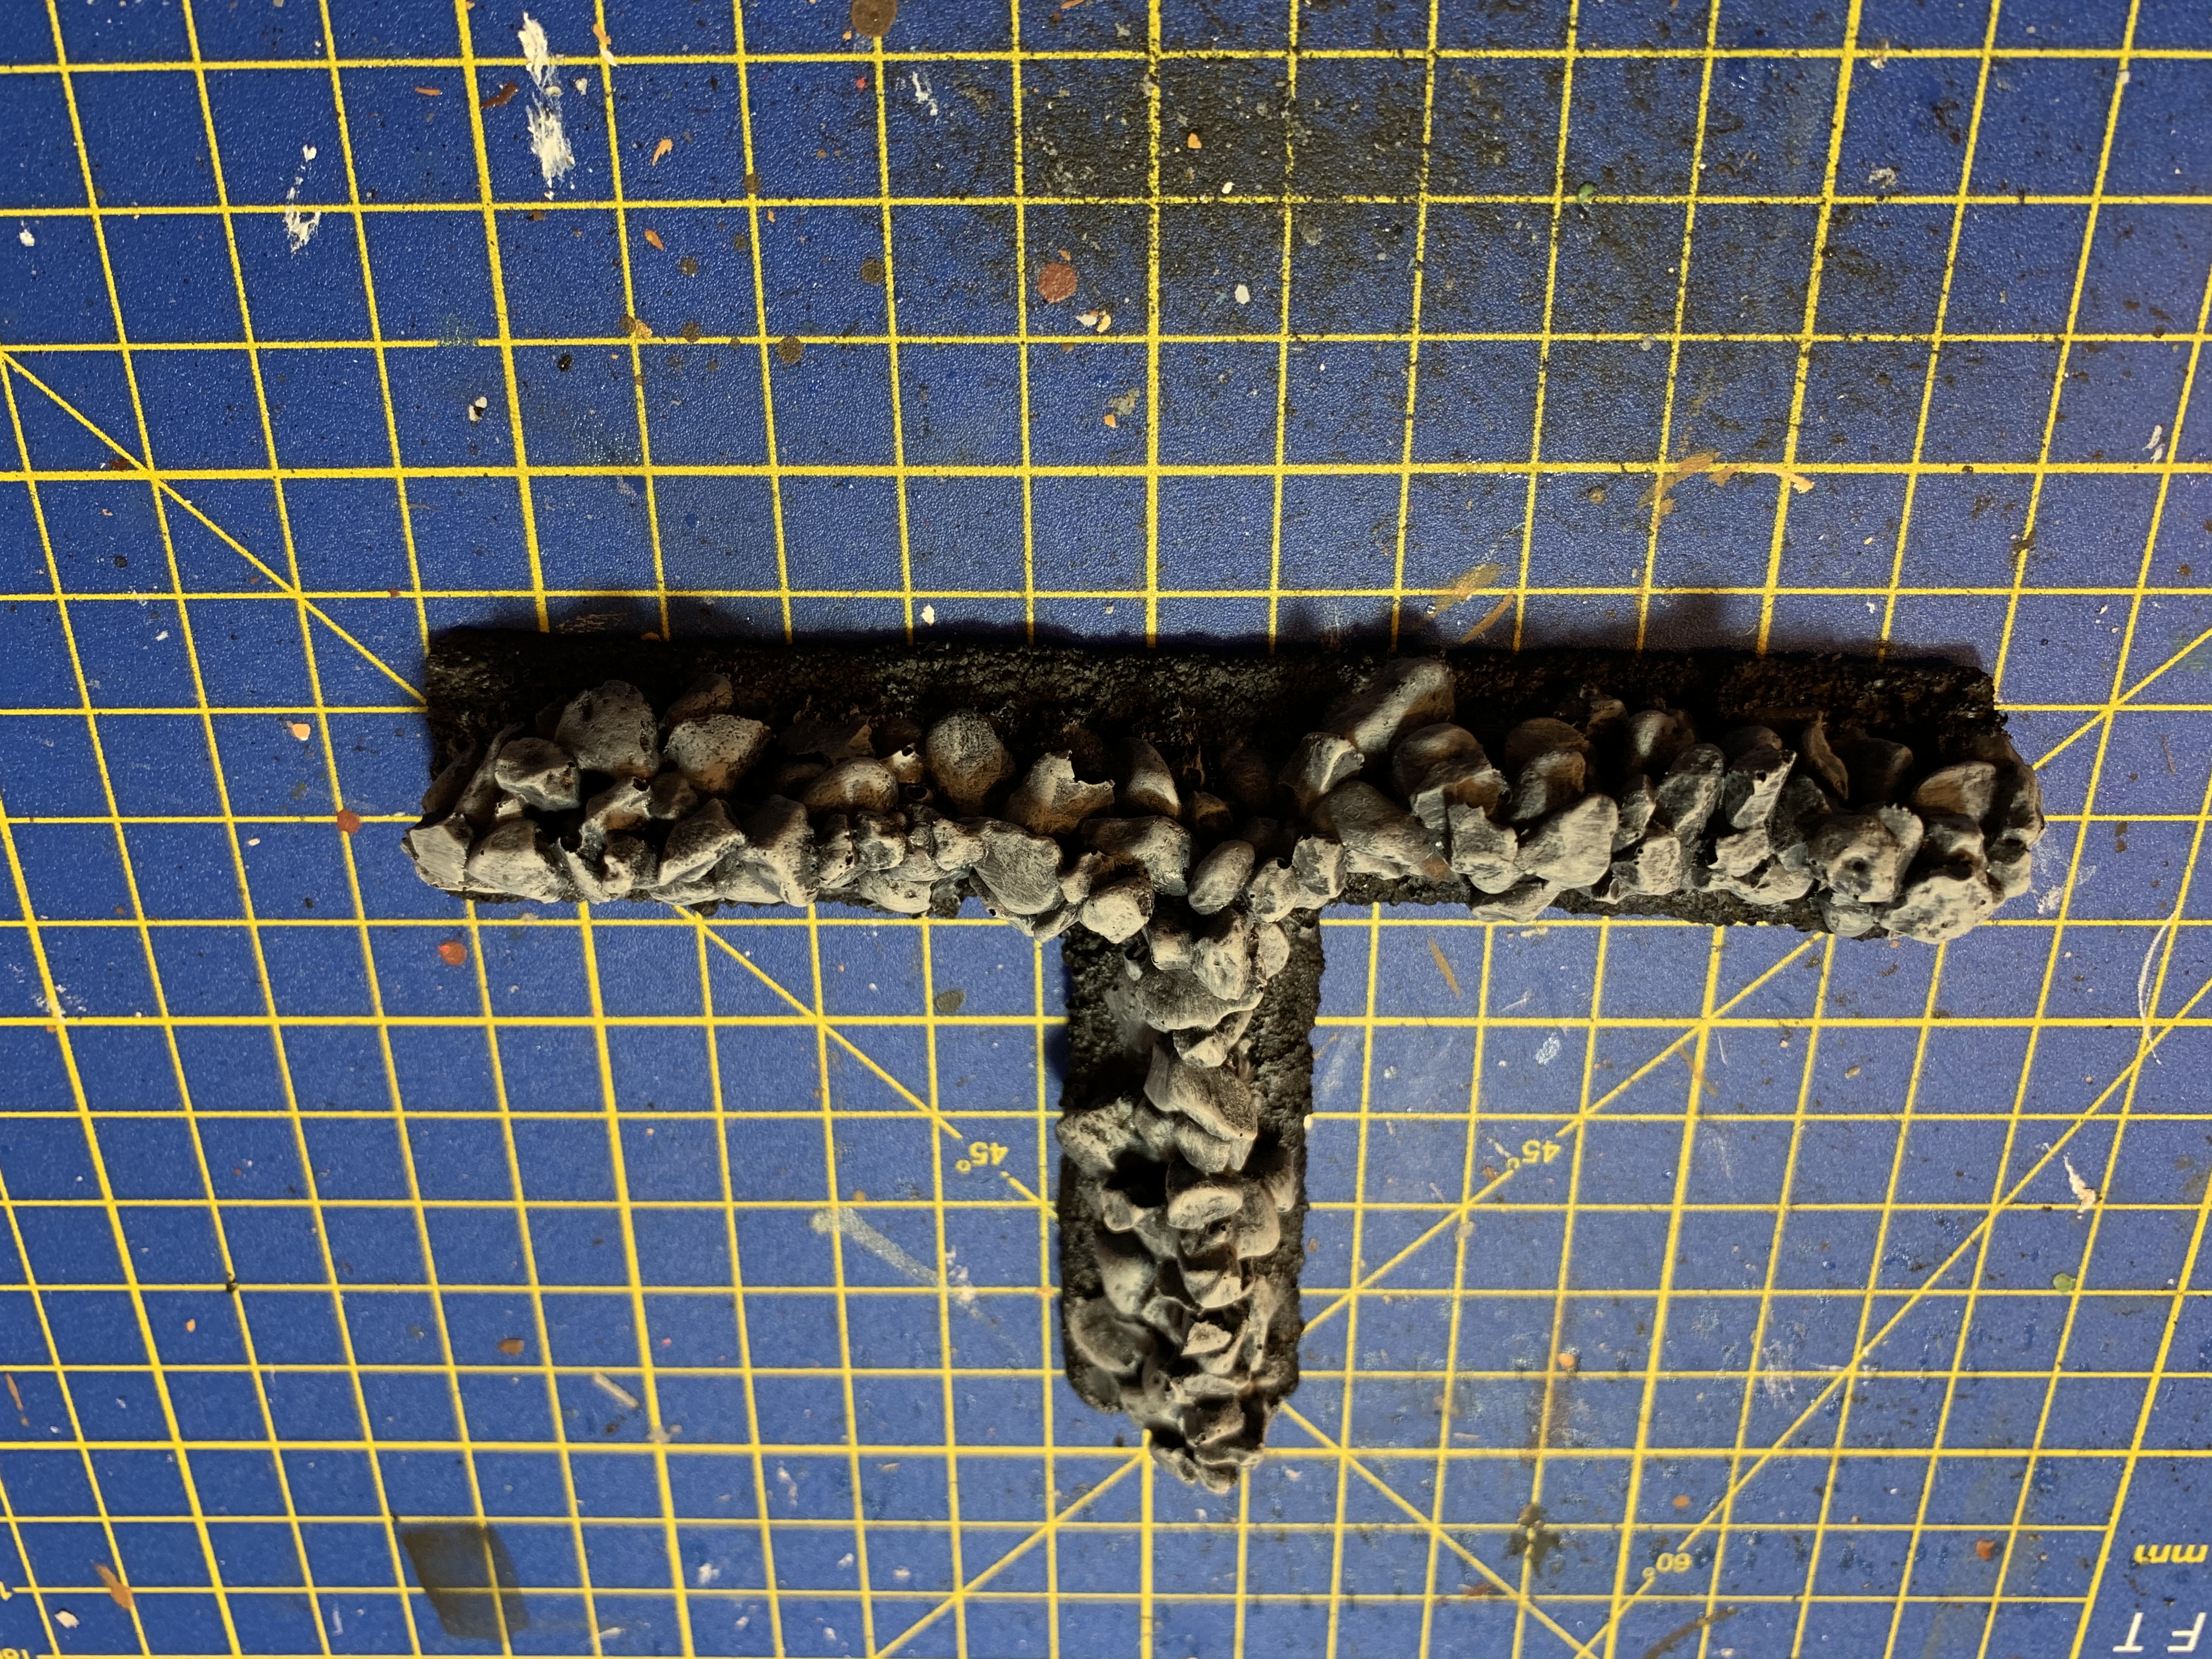
This might be the most tedious set of images ever posted on the OTT Project System, however, you never know when you might need some ideas about how to paint a rock, so here goes.
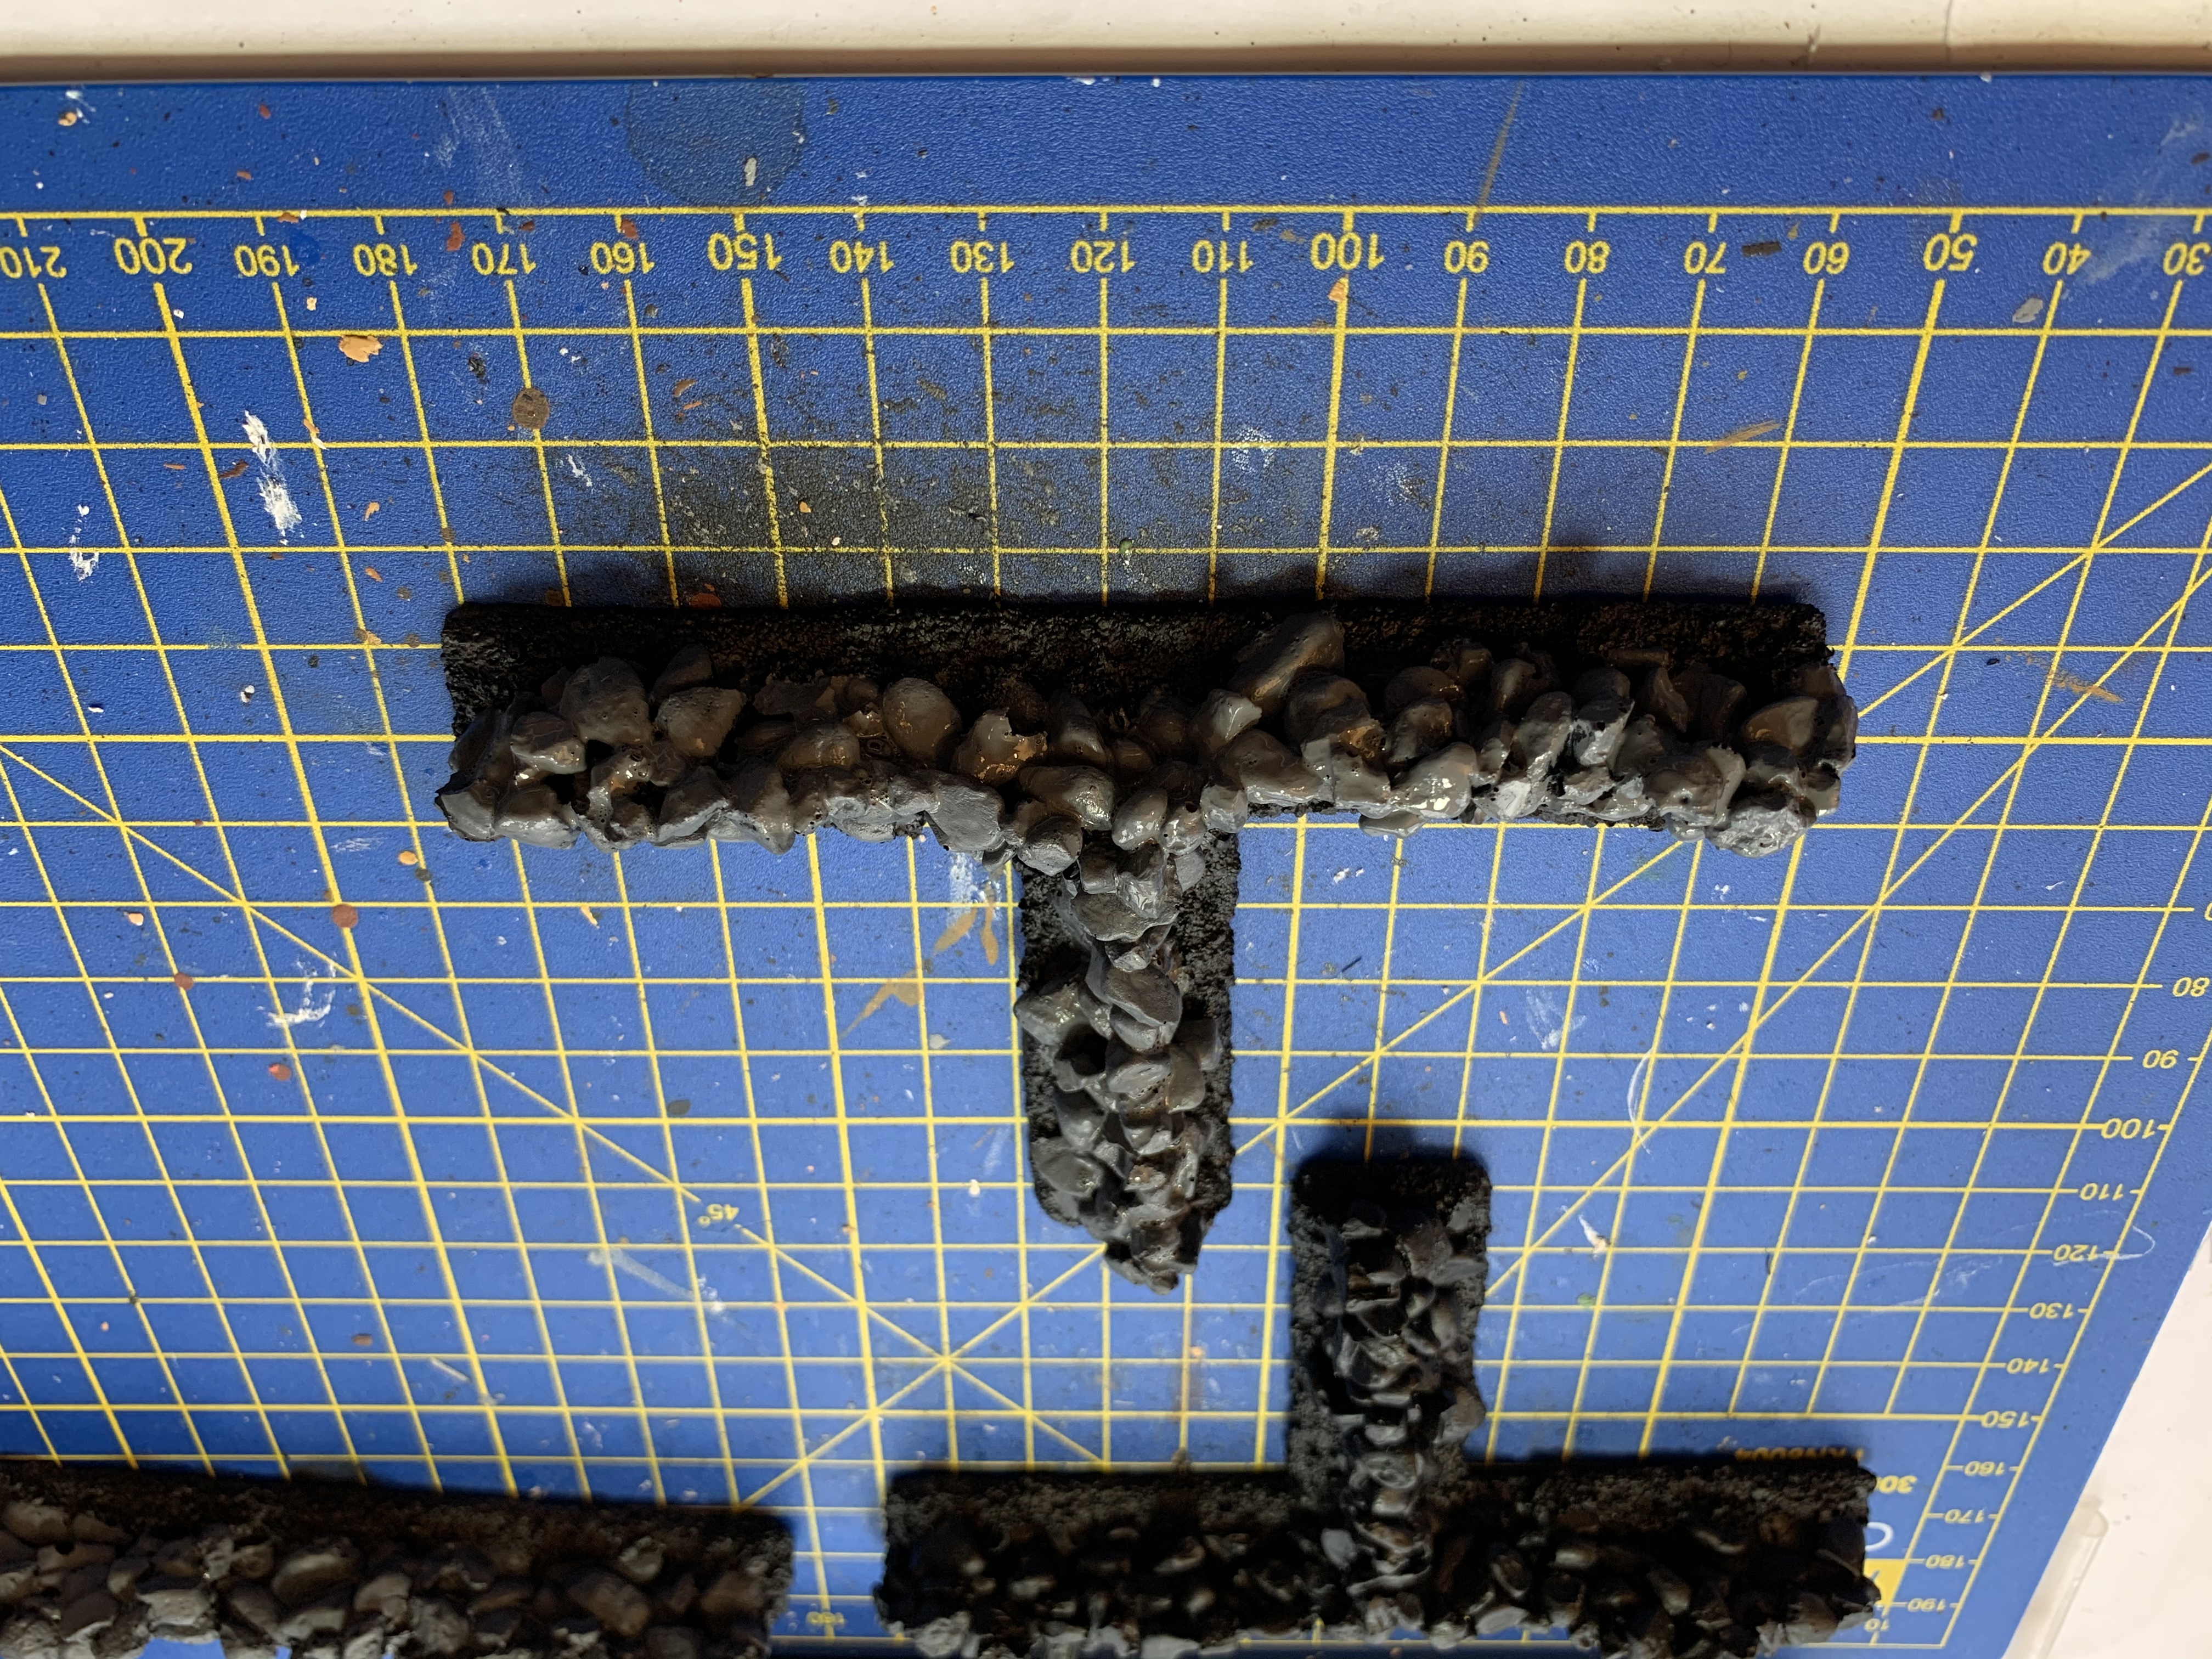
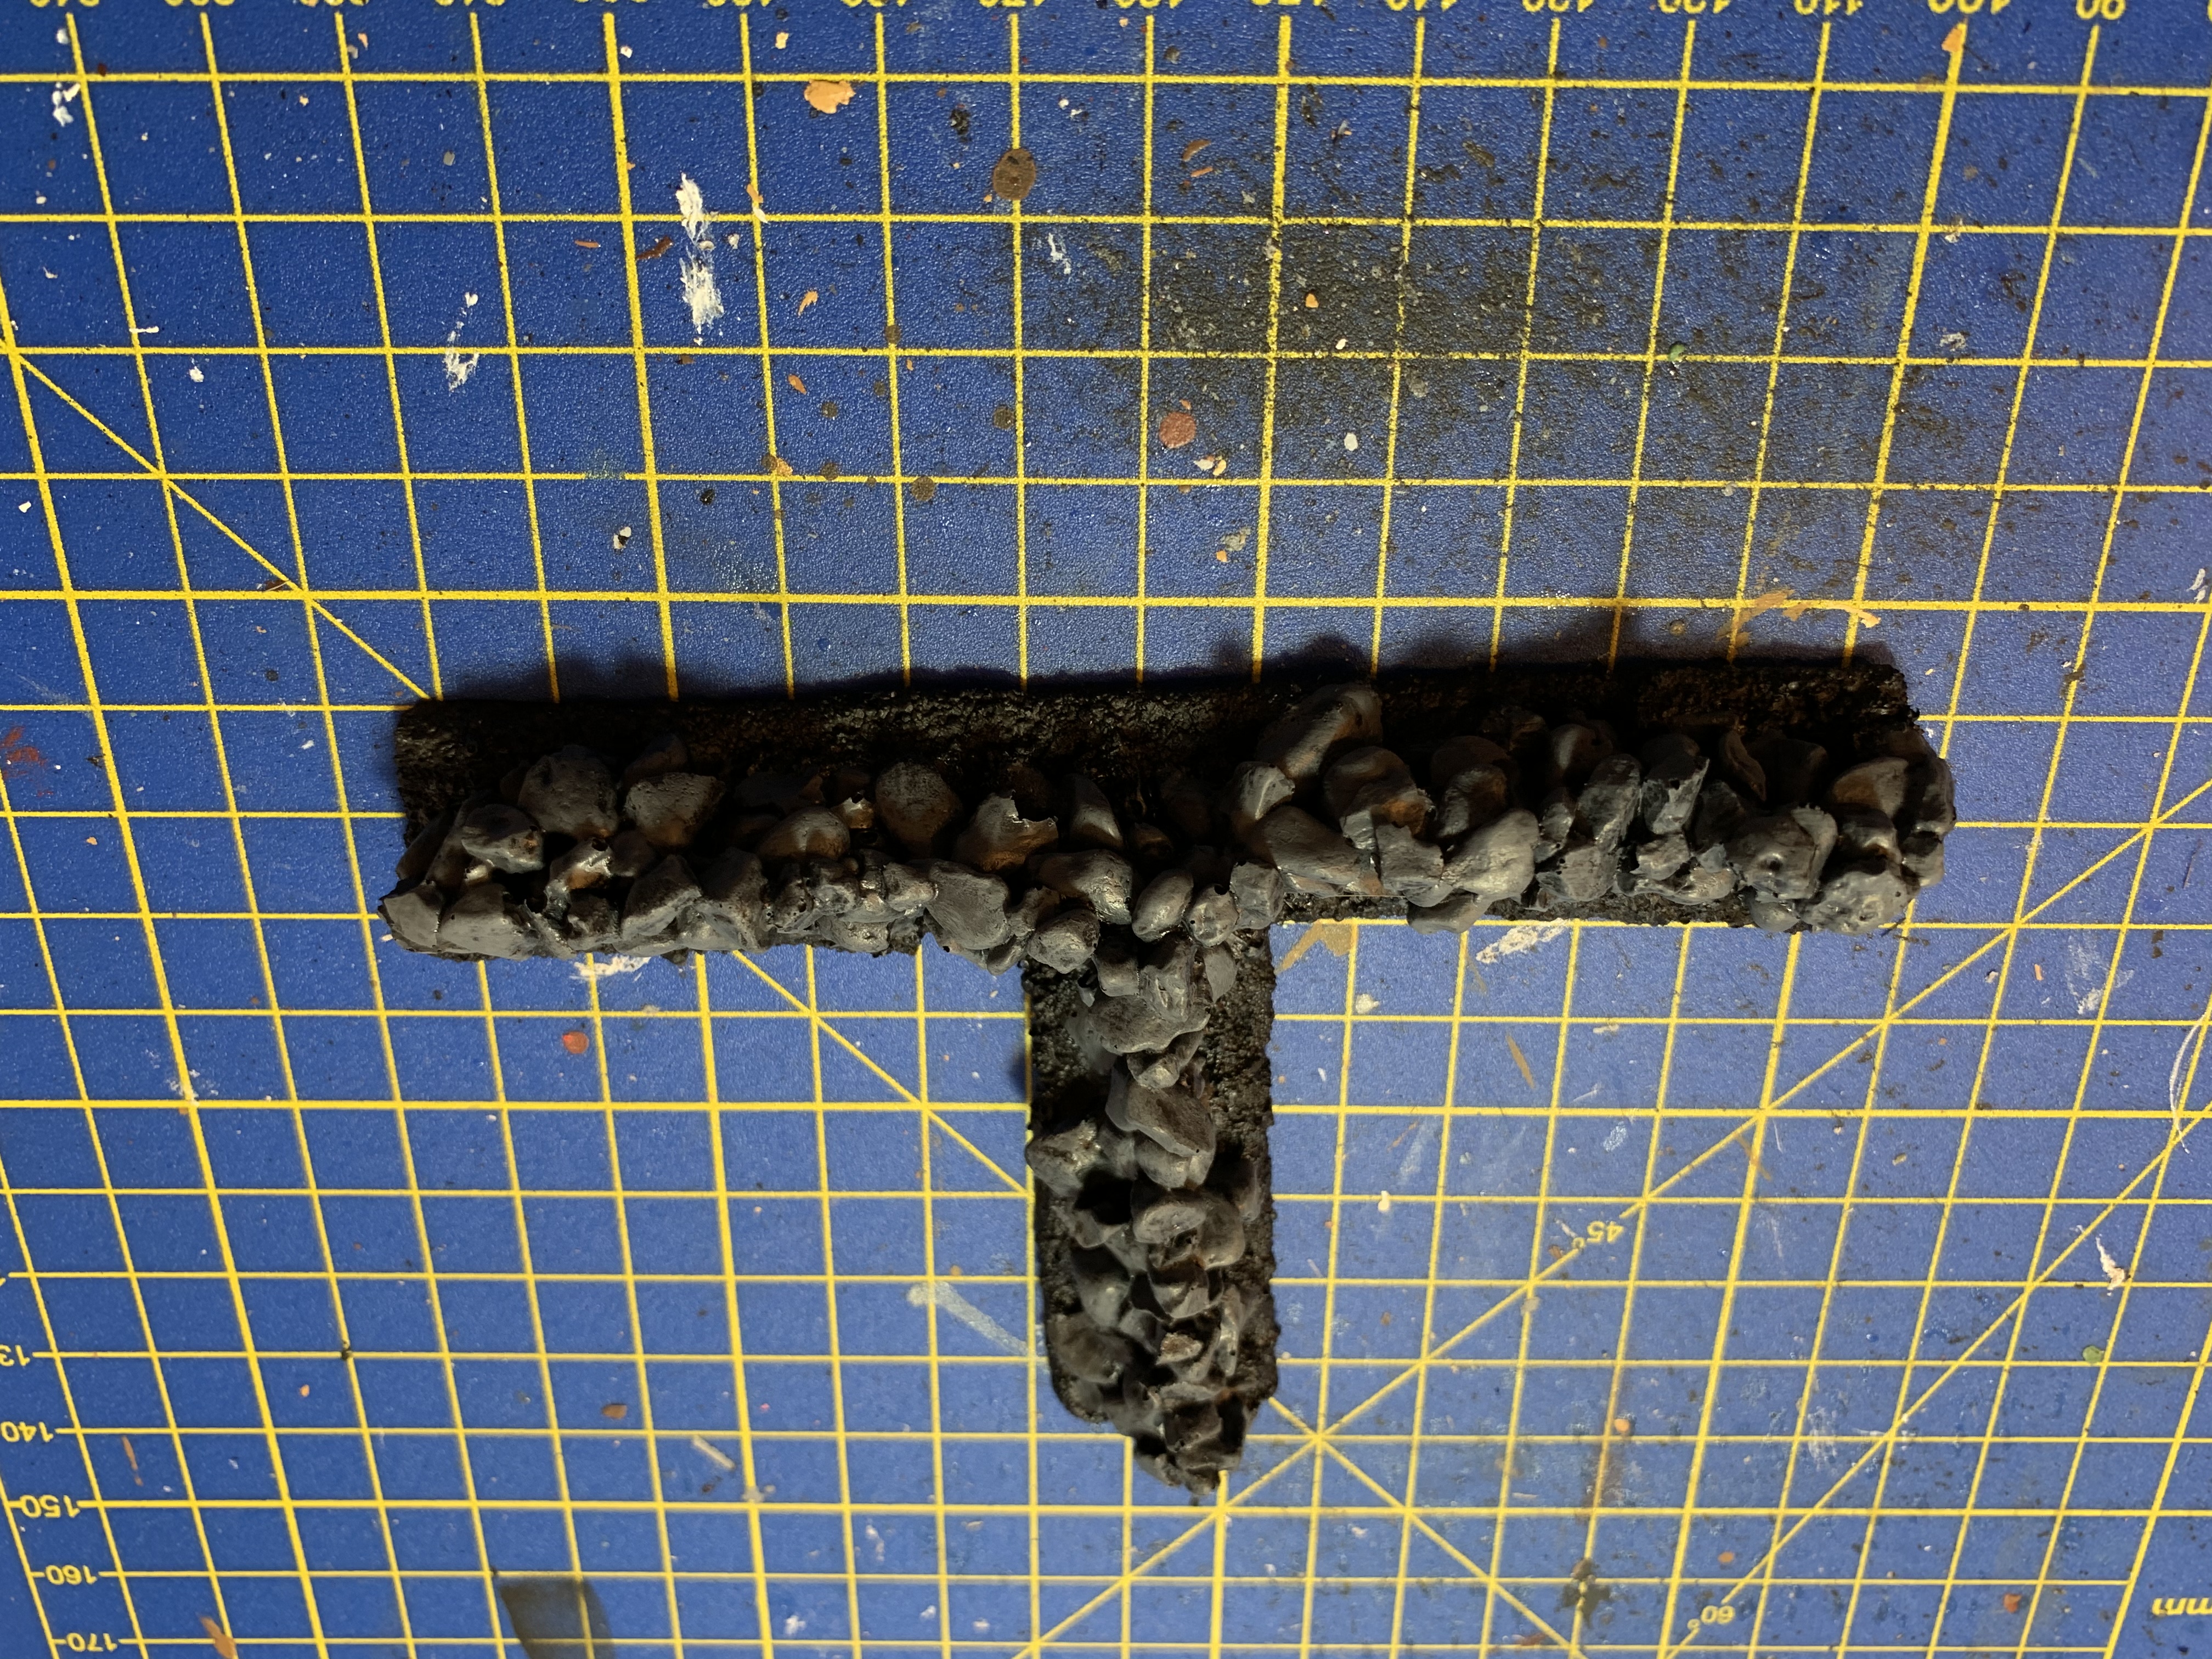
The walls were resin casts from Red Dragon Scenics. They arrived in good time after ordering and are pure white when taken out of the bag. After a wash in soapy lukewarm water, they were given time to dry and then primed black. However, there are a lot of deep crevices as you might expect with scenery of this nature and the spray primer didn’t reach every nook and cranny. To remedy this I applied Vallejo Black Polyurethane Surface Primer. This is meant to be applied with an airbrush, but works just as well with a normal brush.
Once the primer was on, I applied a Basecoat of London Grey (VMC 70.836). Next was a dry brushed highlight of Neutral Grey (VMC 70.992). In hindsight, the Neutral Grey didn’t really add very much and I think in future I will skip that step and go straight to the next two. These were a dry brush of Sky Grey (VMC 70.989) and a final light dry brushed highlight of Silver Grey (VMC70.883).
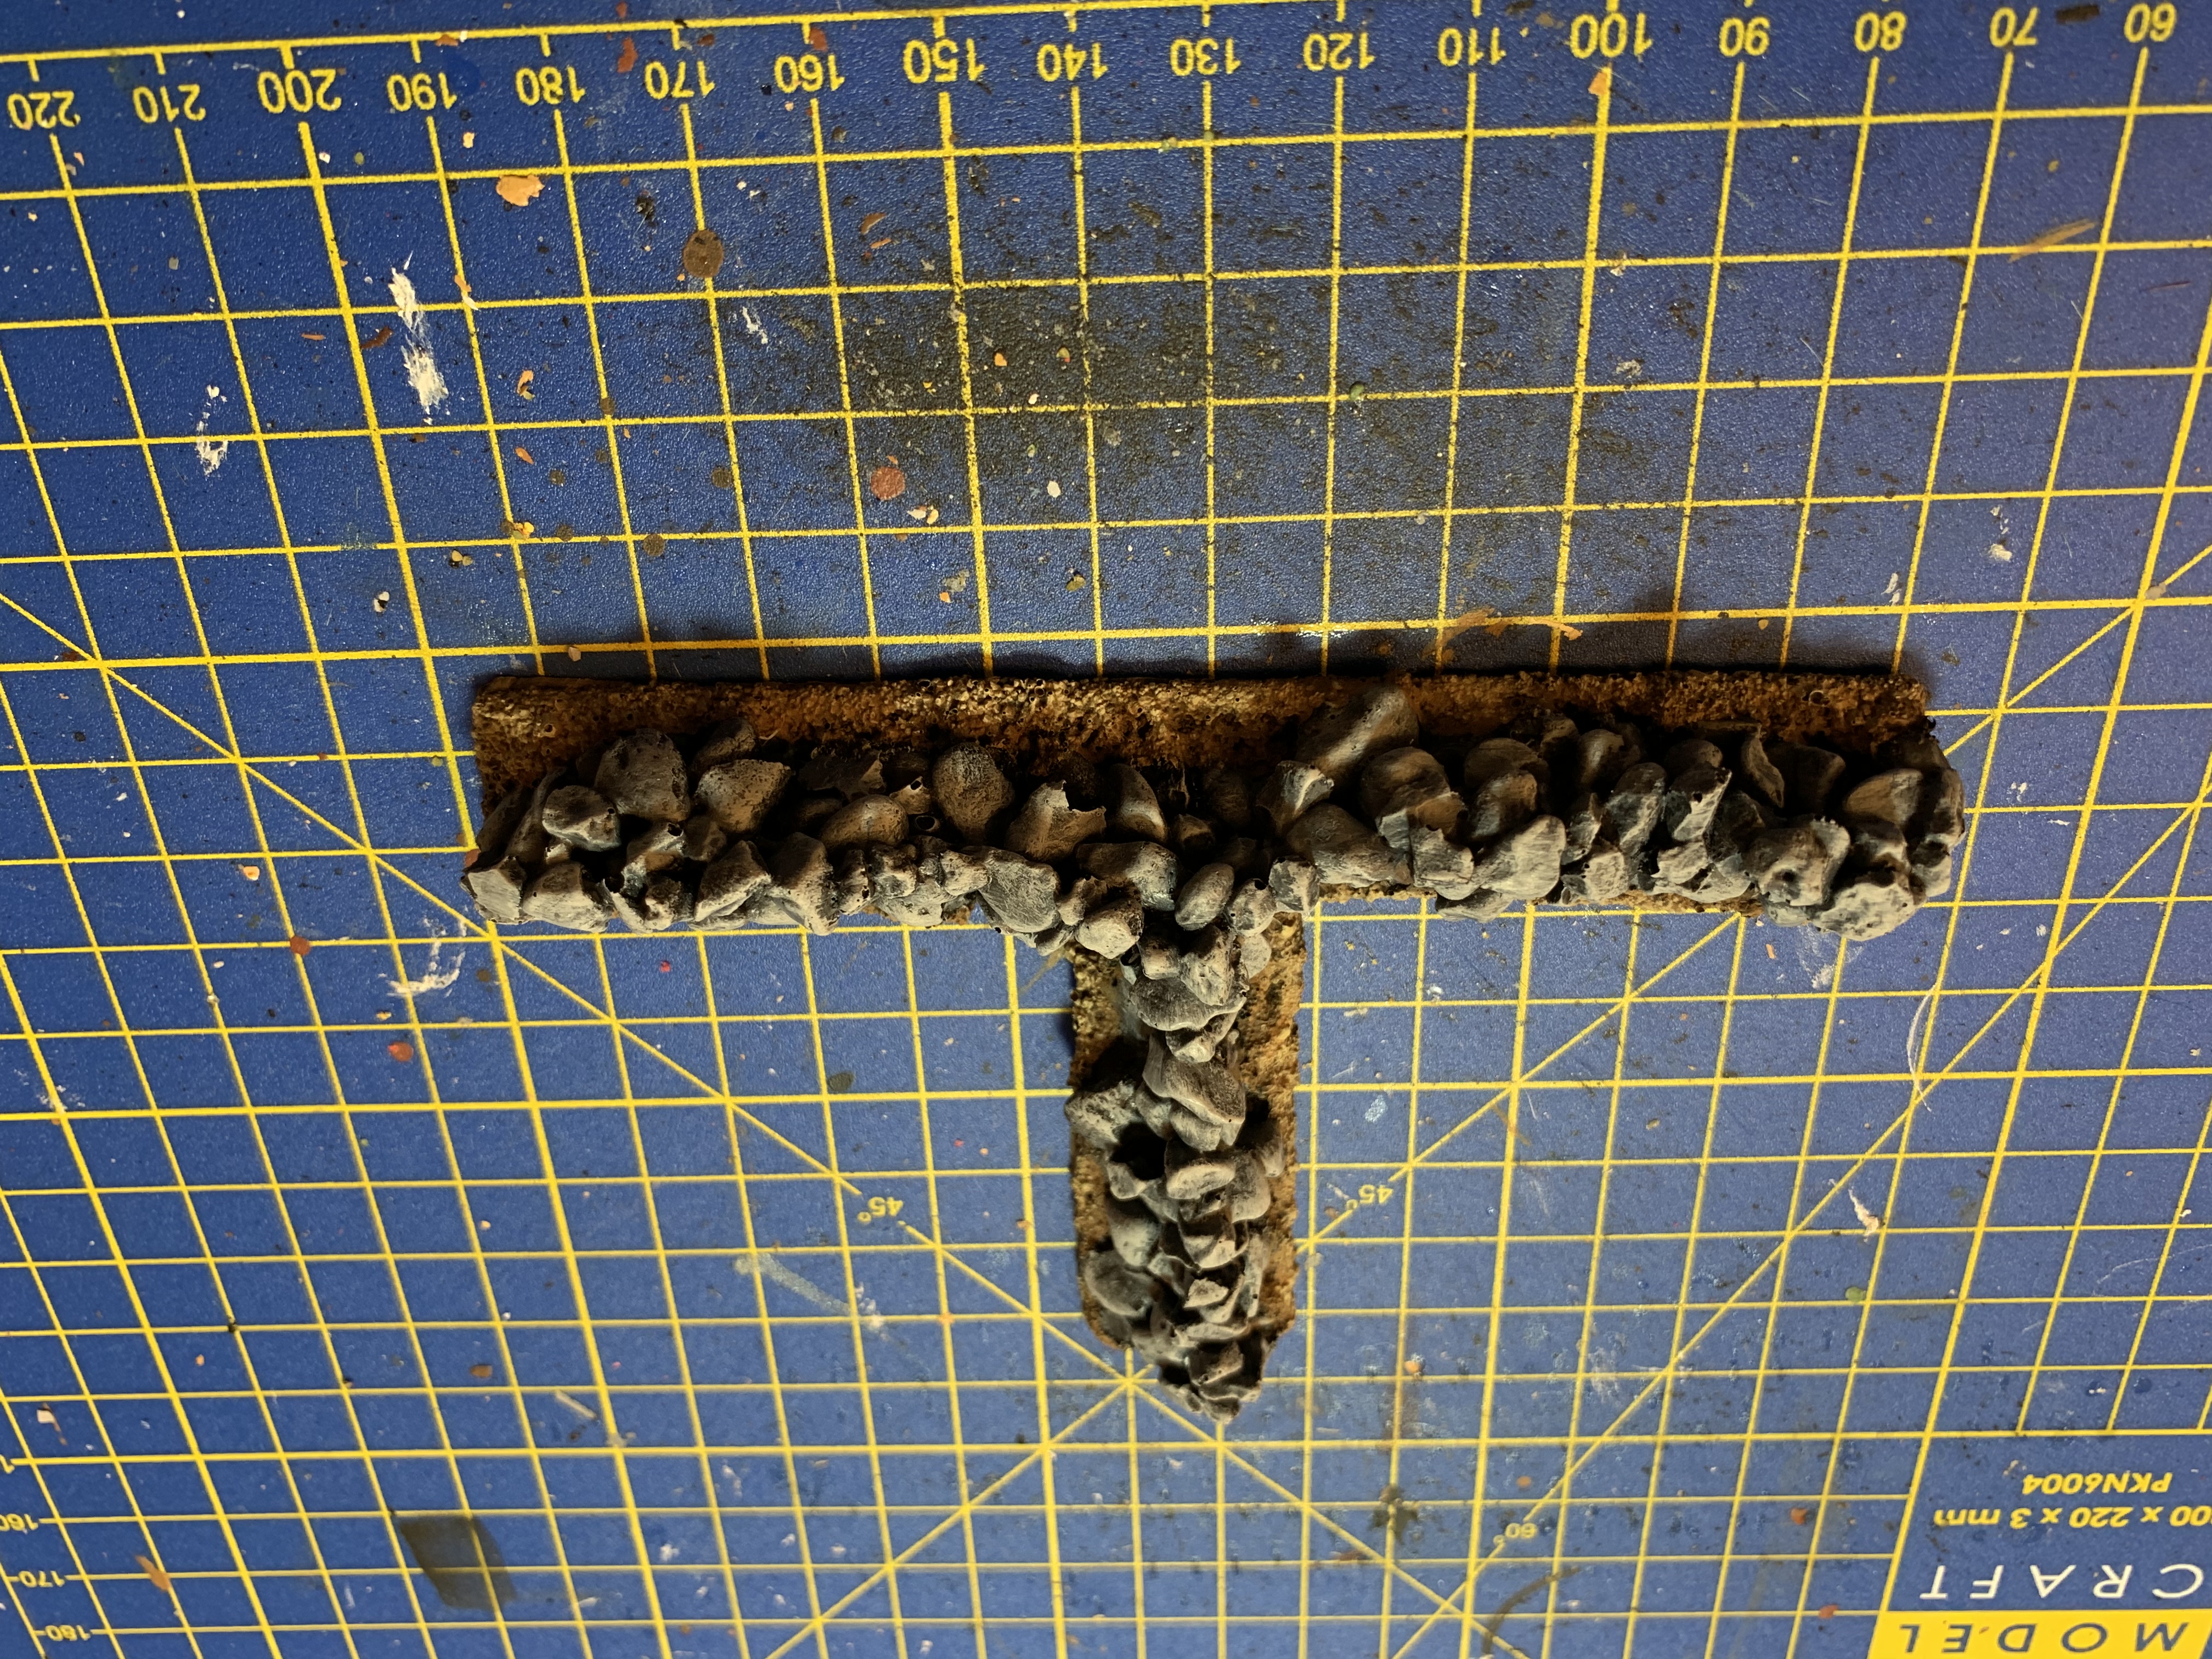
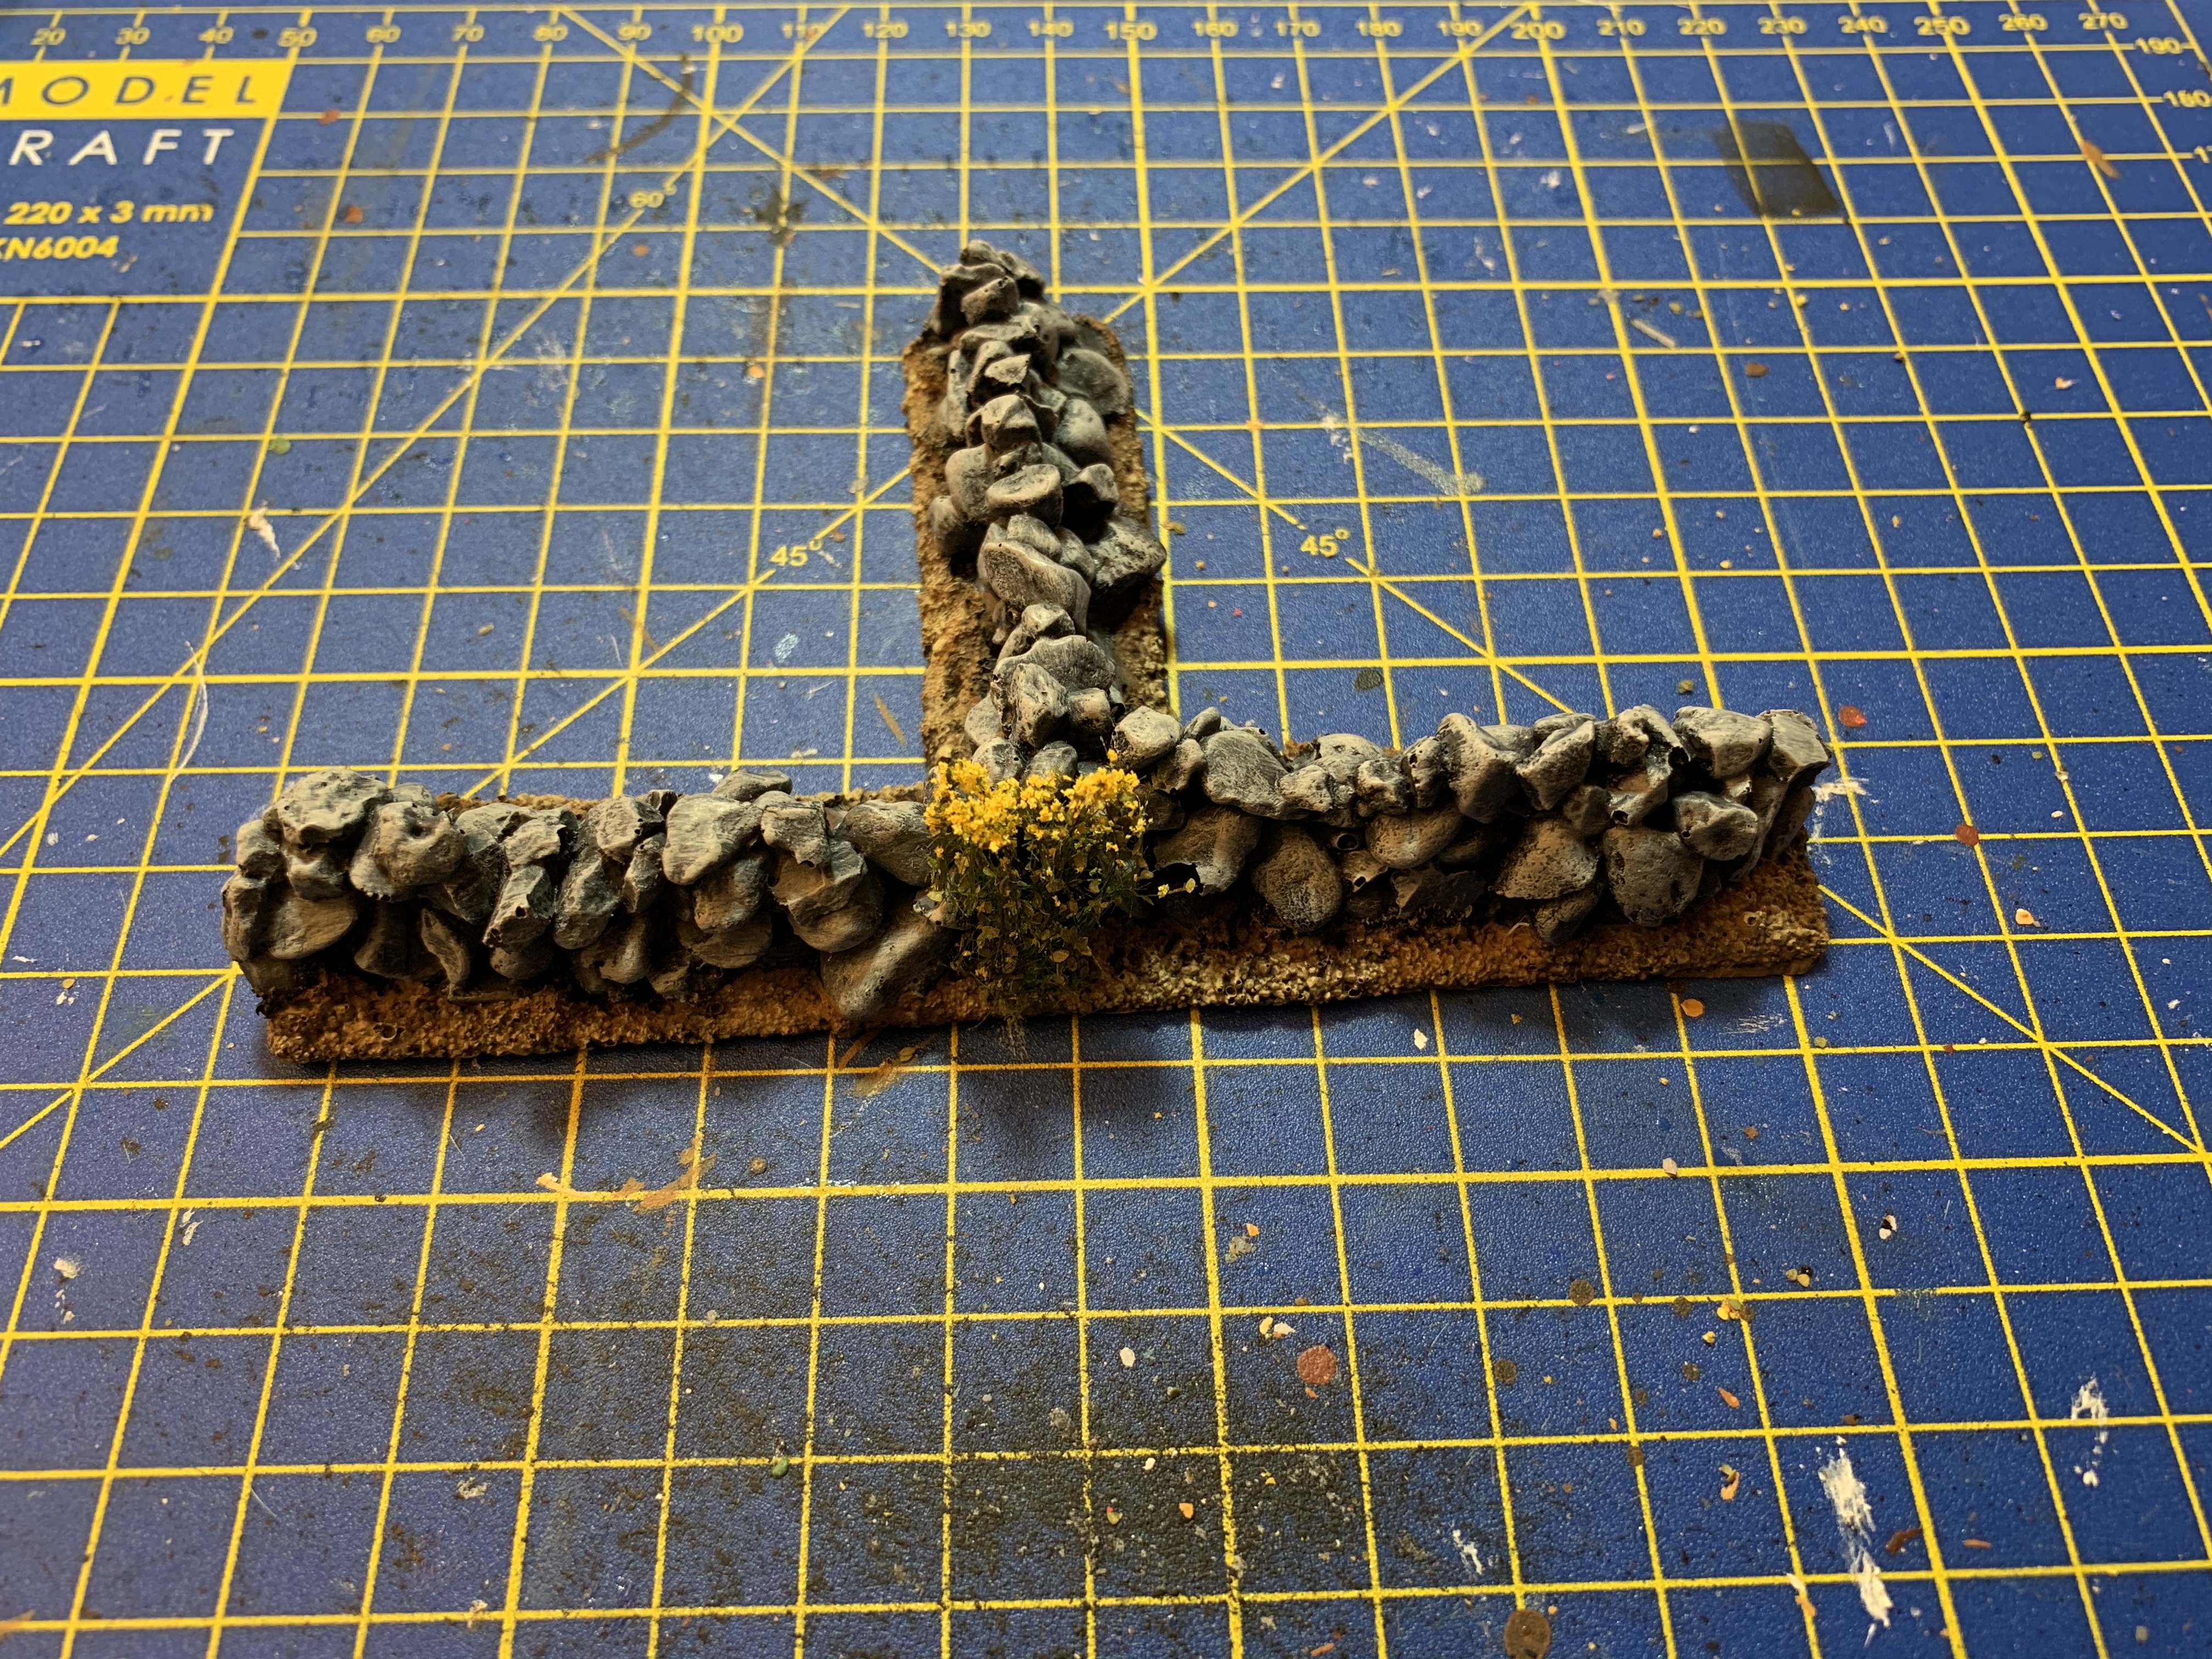
I then painted the base with my usual combination of earth colours which I’ve listed several times in earlier posts before adding some flowers and a bit of flock.
I have enough pieces to put together two inter-linked fields or to delineate the boundary of a farmhouse yard and its surrounding buildings.
Father Christmas was also rather generous on the terrain front this year, so there is rather a lot of updates to post on. In order, they will hopefully be:
Completing the painting of my farmhouse
Acquisition and painting of a Saxon force
Building and painting a storage barn
Building and painting a watchtower
Building and painting a church
Finding the time will be a challenge but I won’t be bored in this latest lockdown.
Farmhouse WIP

This will be the farmhouse for my Romano-British farm. I didn’t want to go for something as grand as a villa at this stage as it would probably dominate the tabletop and go beyond the small collection of buildings that the rules call for. Moreover, I’ve read recently about the Orton Hall archaeological site near Peterborough which has revealed just this sort of arrangement for a Romano-British farm, namely a farmhouse surrounded by barns and storage buildings. This is exactly the sort of look I want to achieve. I therefore used the Vicus House by Warbases. A Vicus is the name for the settlements that sprang up in the vicinity of permanent legionary camps, so this isn’t a specifically agricultural building. However, I think it will be ideal for a small scale farm similar to that at Orton Hall, where the owners ploughed the profits of their enterprise back into the business rather than spending it on flashy villas and mosaics.
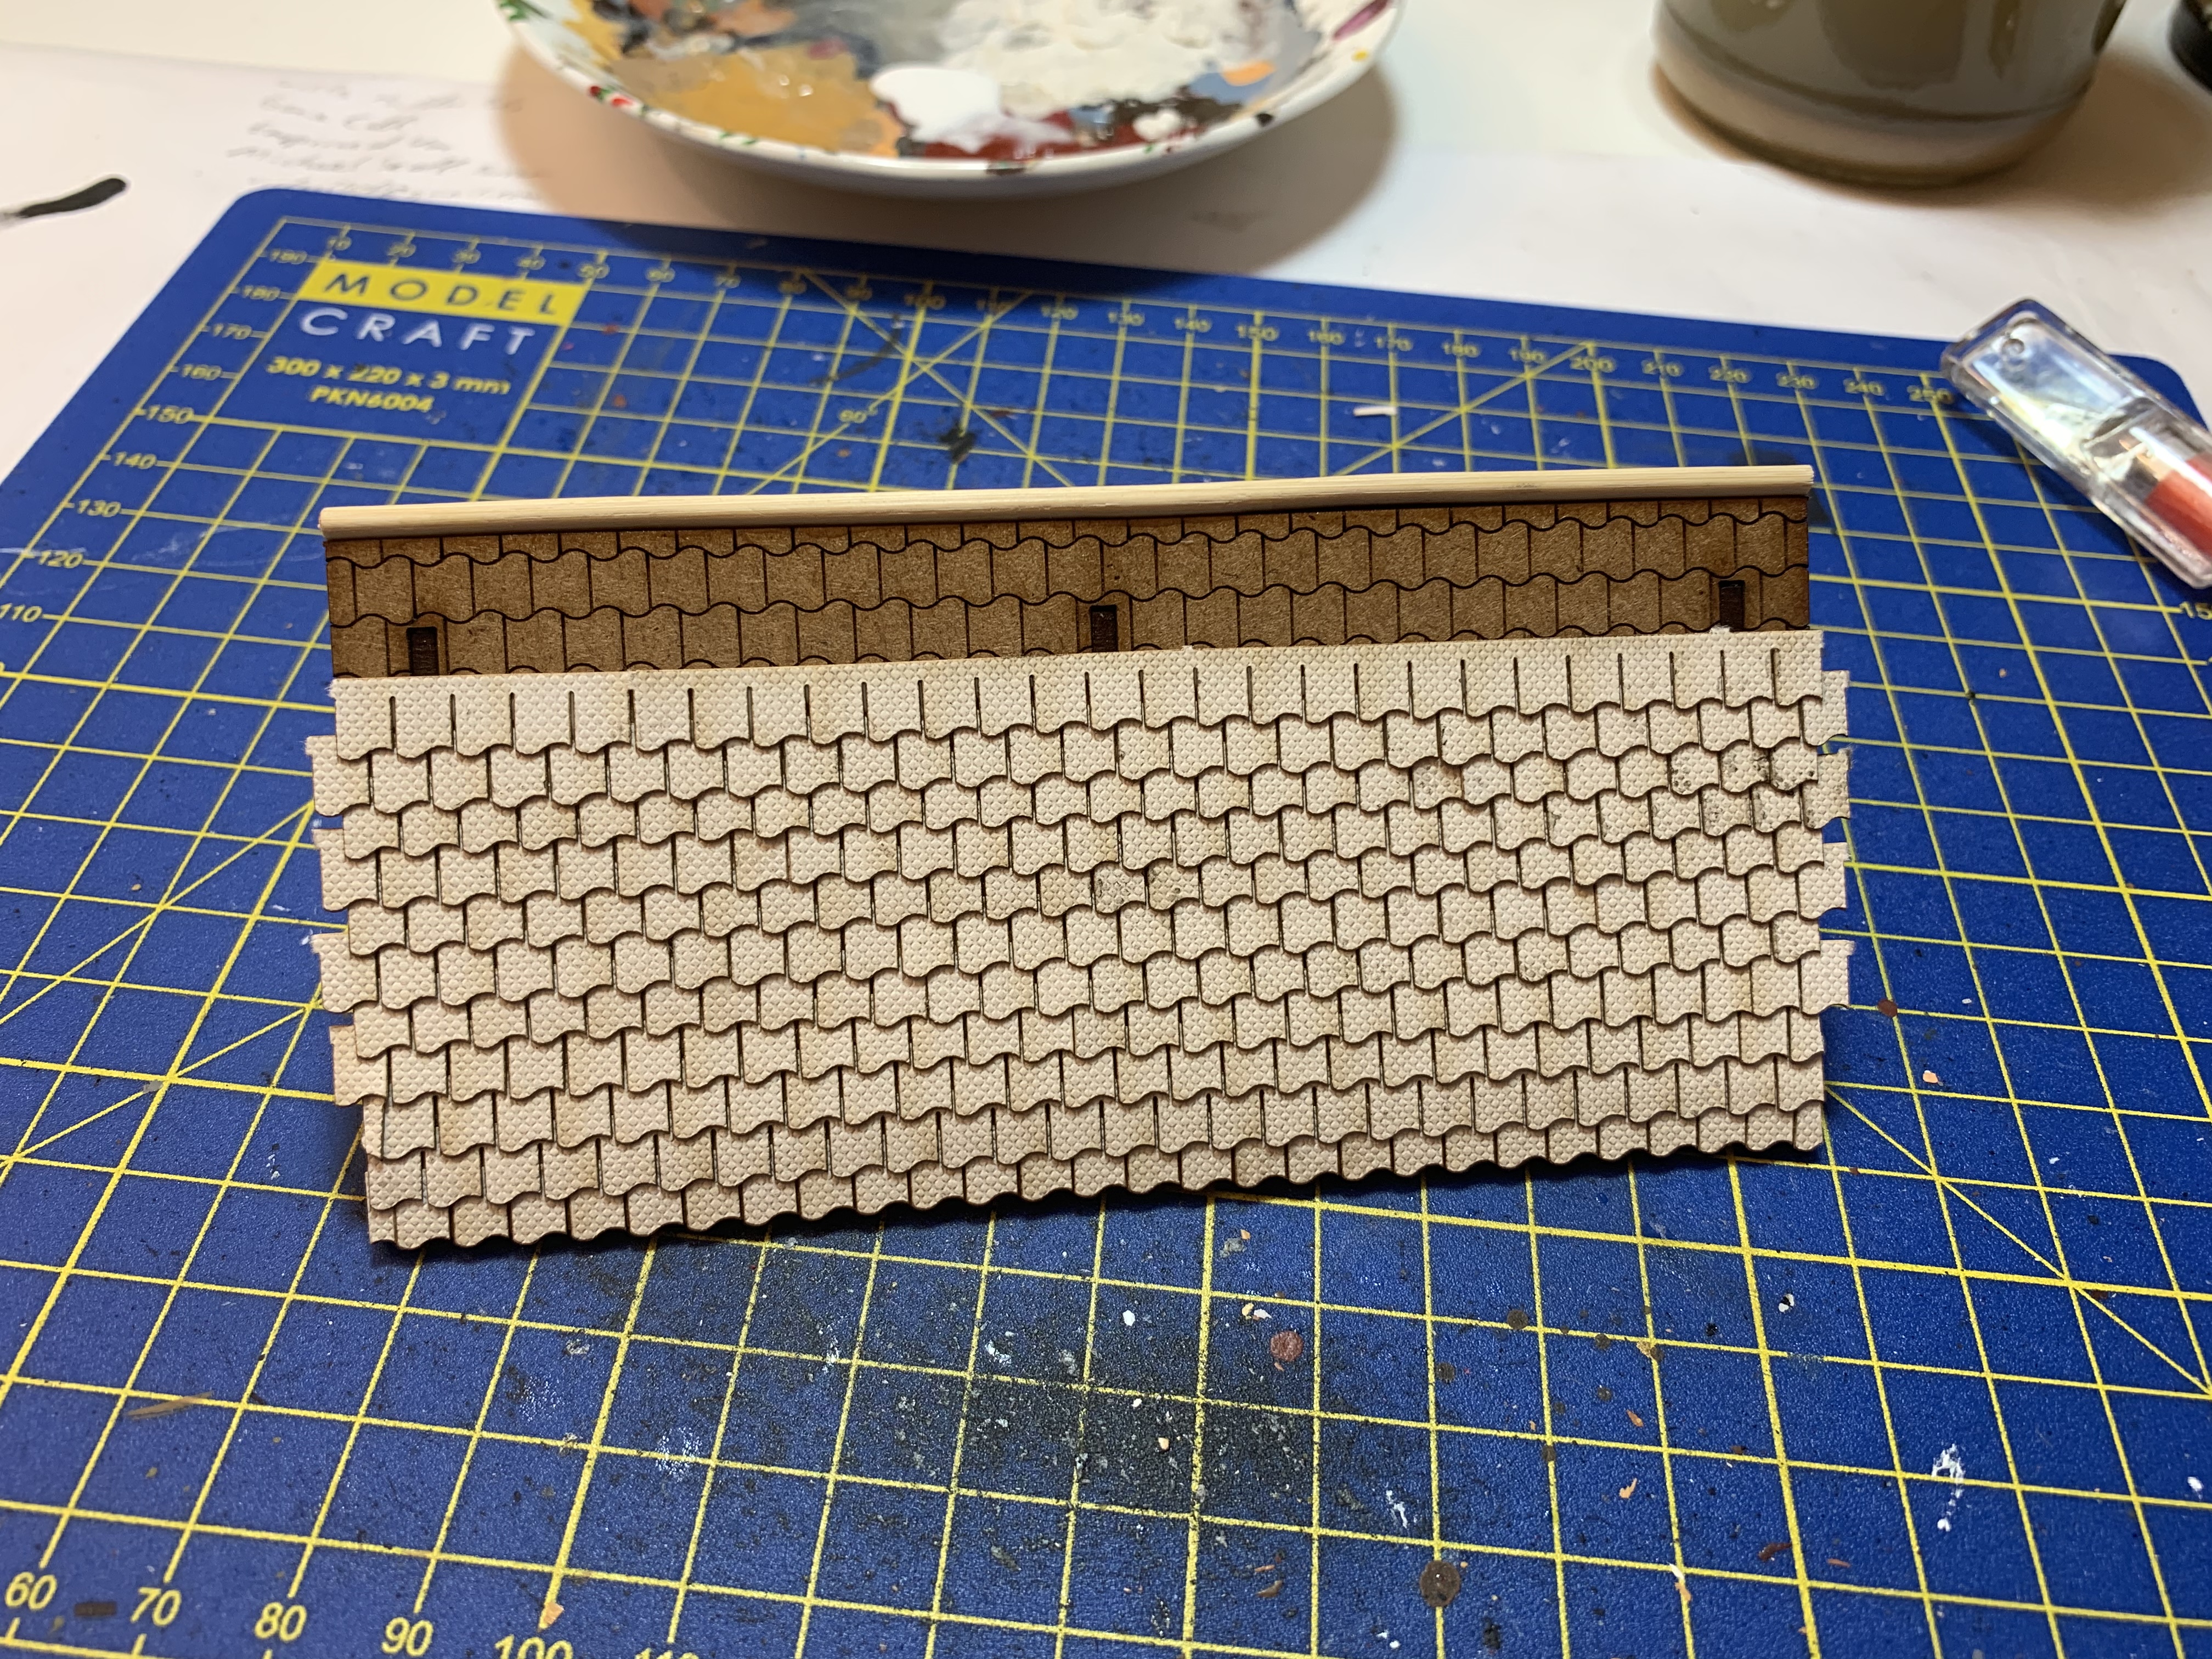
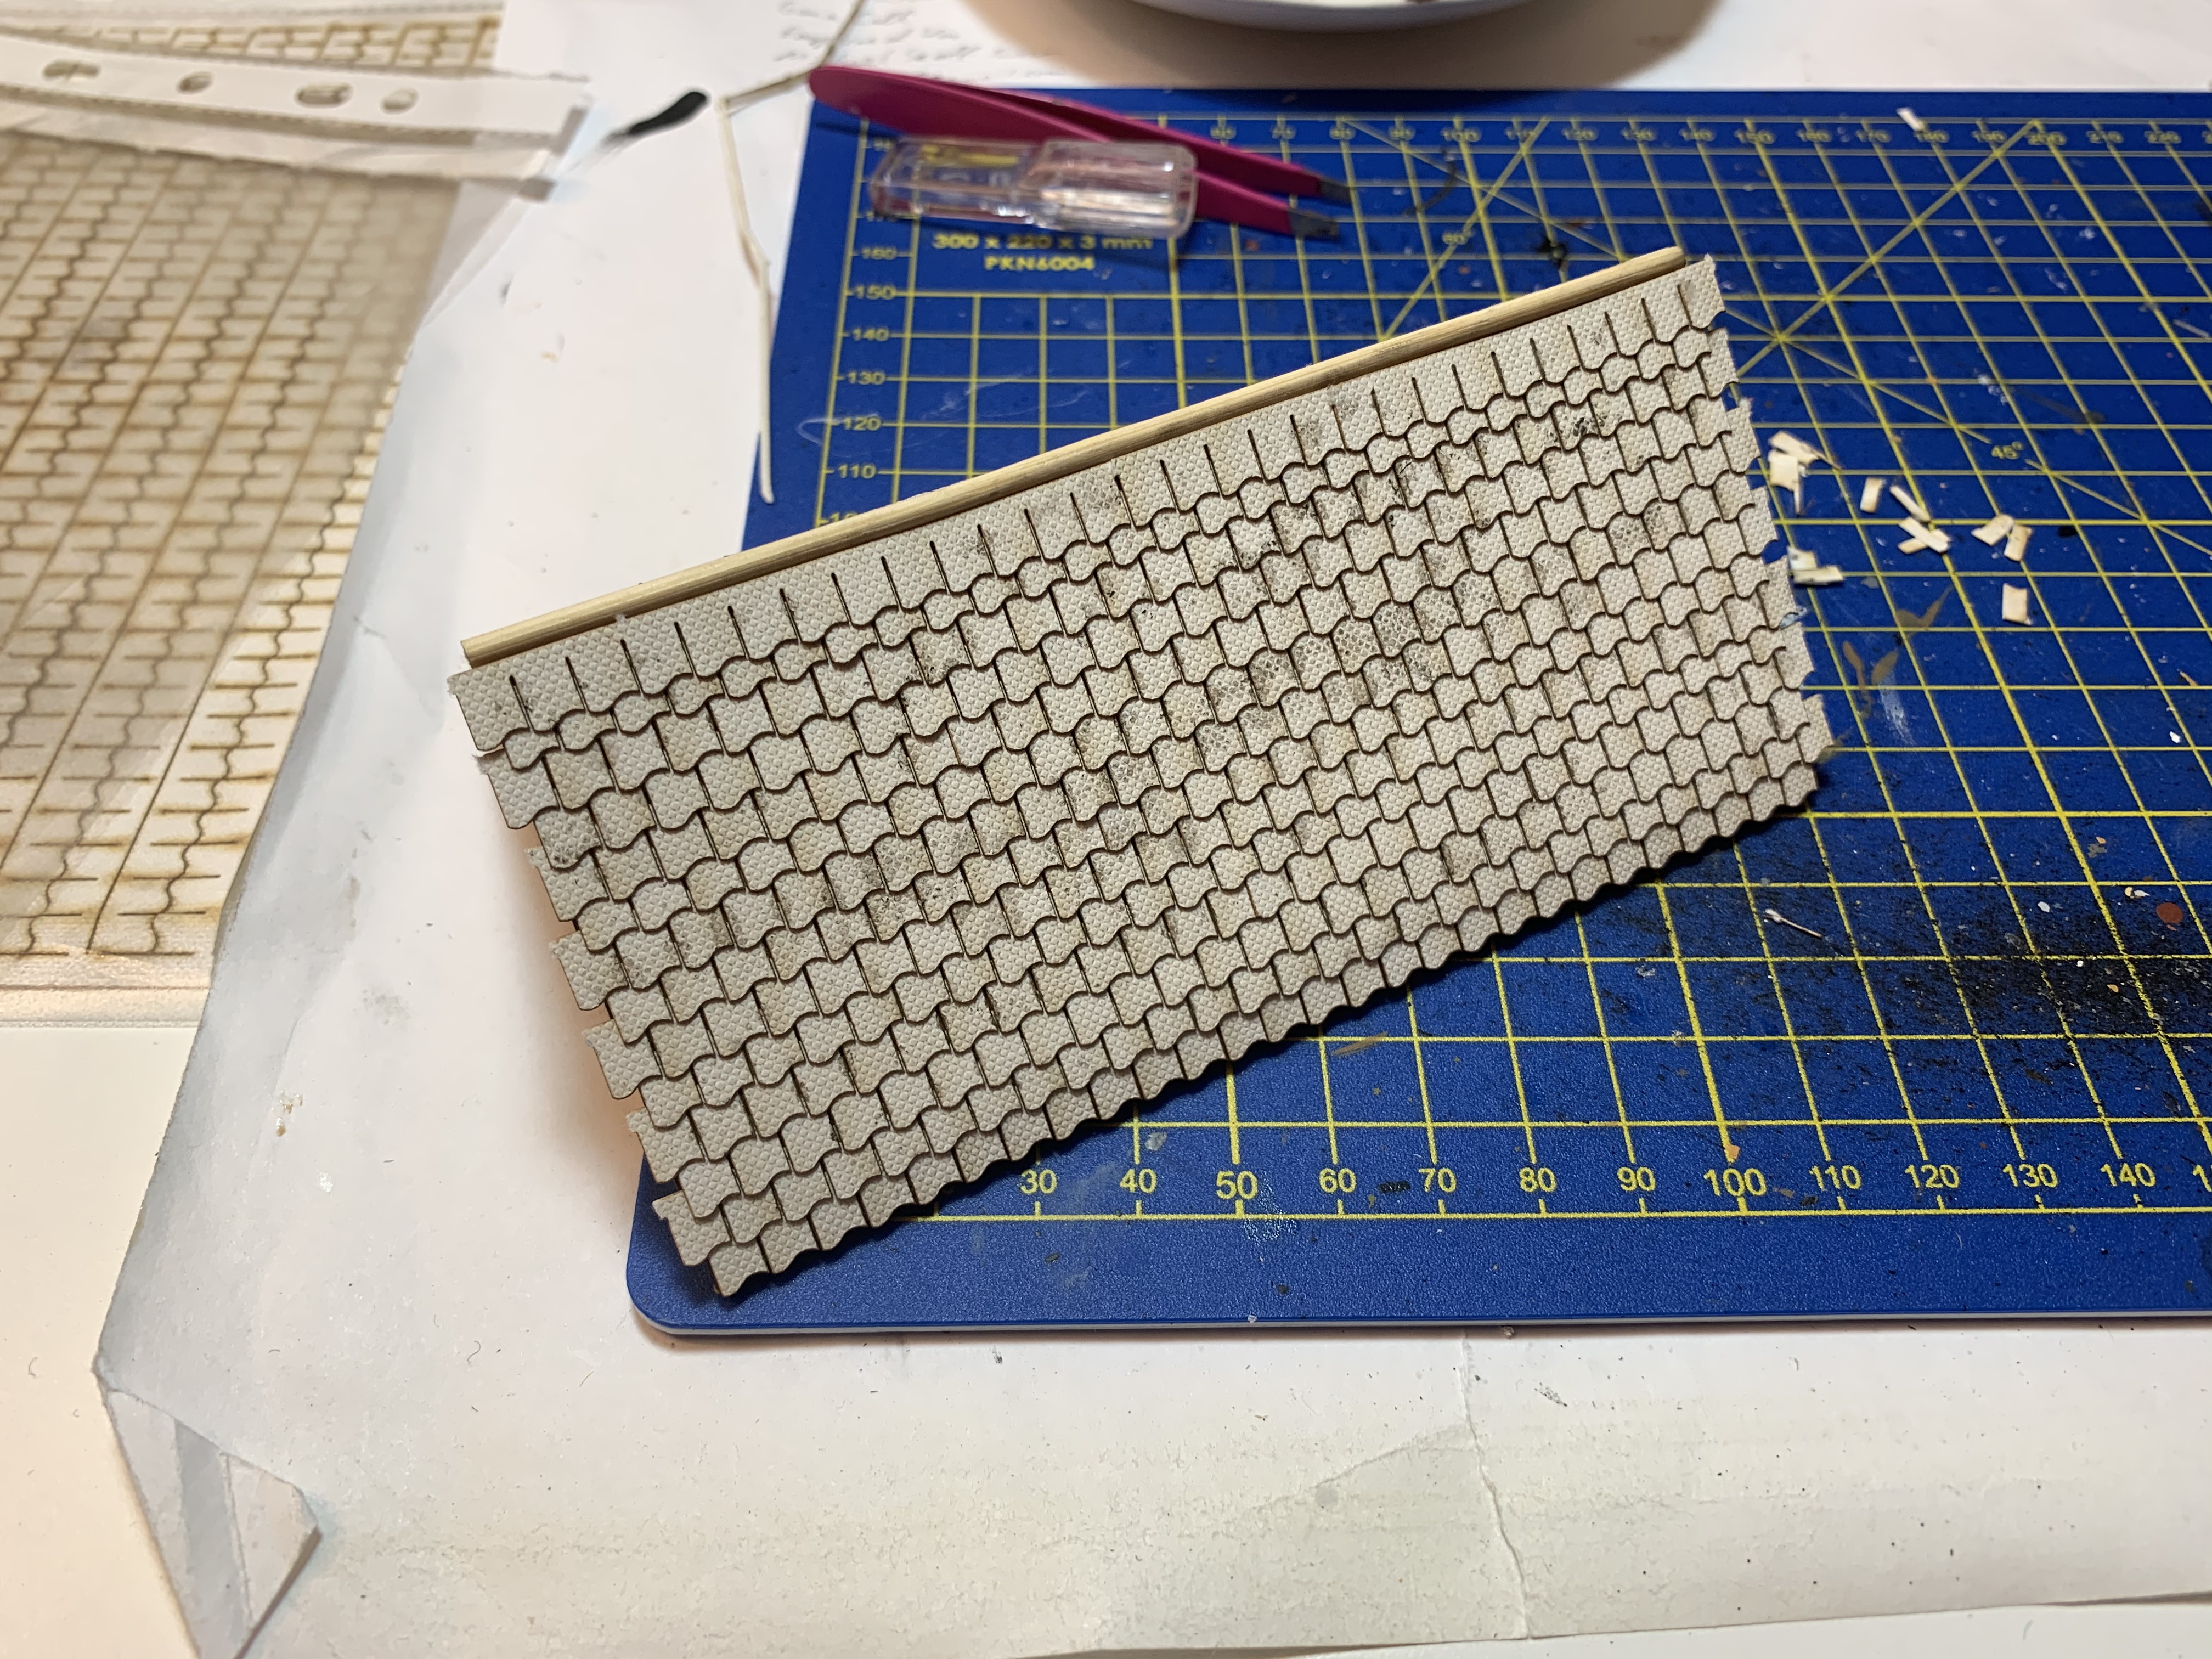
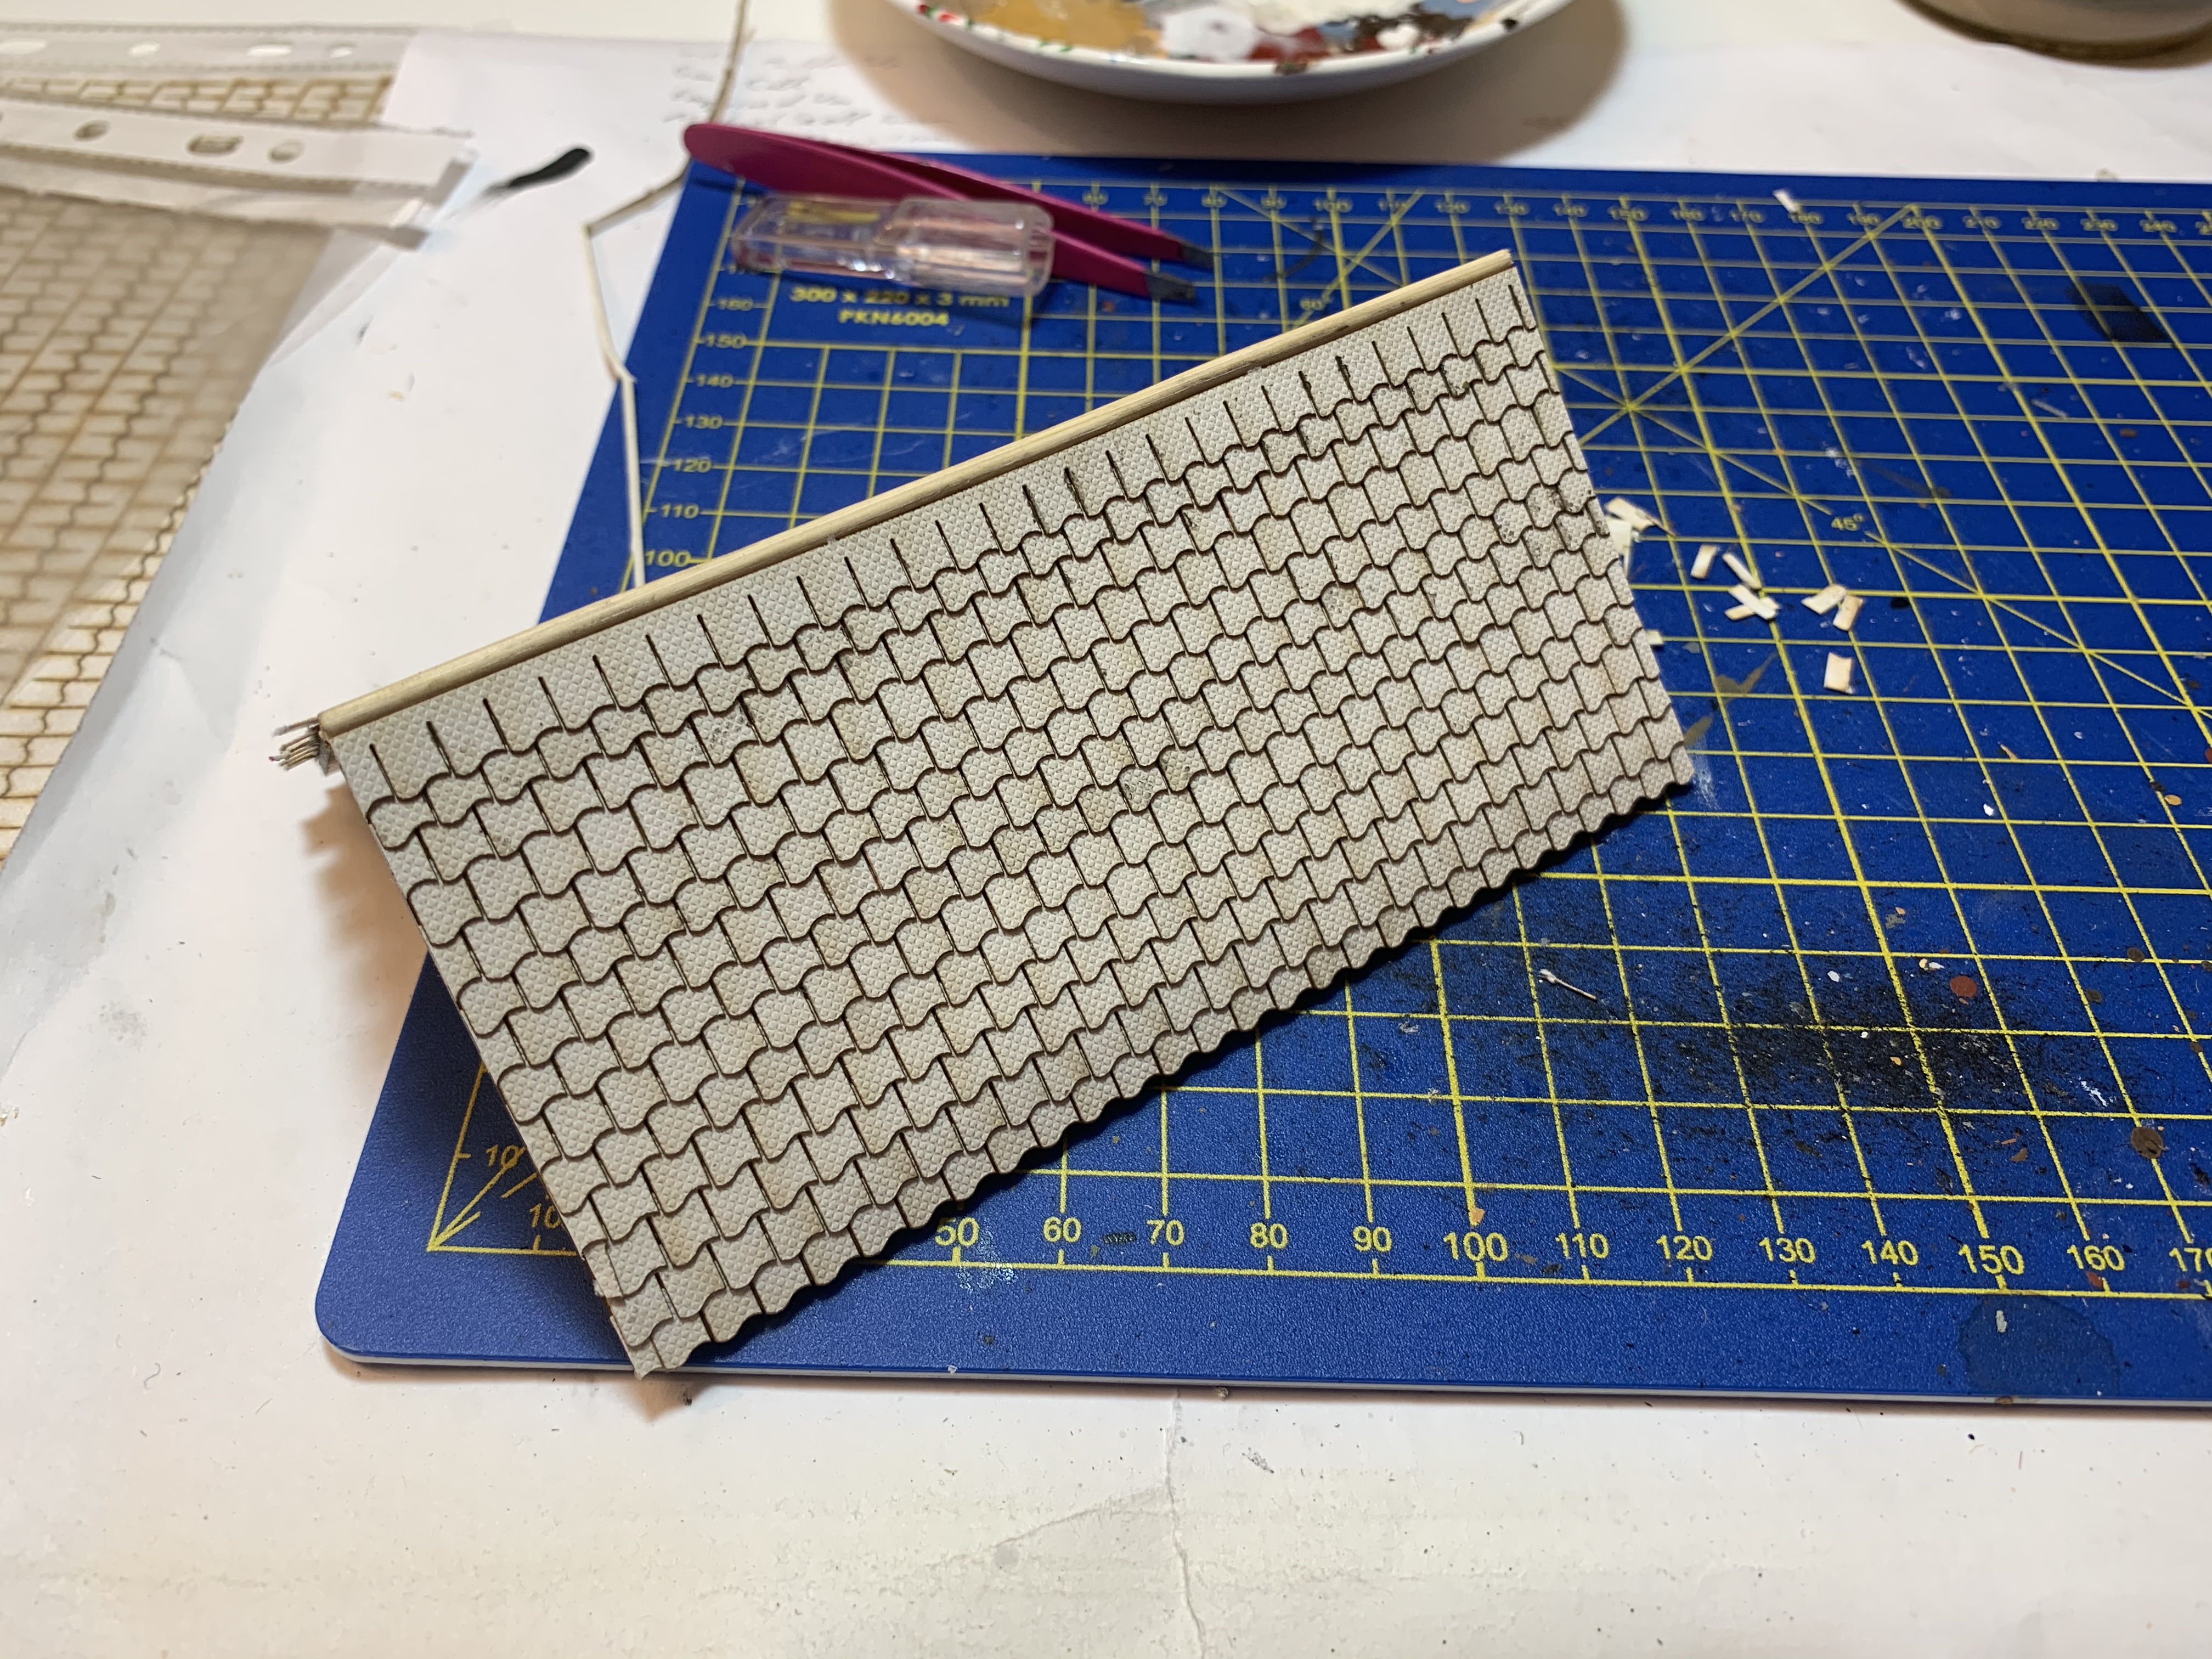
In the three images above, you can see the application of roof tile strips. These come from Warbases in laser cut A4 sheets. You can get them in a variety of different tile patterns, but for this building you need the pantile pattern.
Starting at the bottom, you pull off a strip and then line it up with the pantile pattern etched into the roof. You then glue it down with PVA. The next strip will be offset against the previous one resulting in a half-tile overhang at one end. This is intentional and the overhang can be sliced off with a scalpel once the process is complete. Make sure that this second strip is layered partially over the one below, just as tiles are in real life. Repeat this process until the roof is covered. This produces a textured surface on the roof that can be painted later and which hides the lug holes that you would have with the bare MDF roof.


The next three images show the application of further additional features to give body and texture to the MDF.
Coffee stirrers were cut to size with a sprue cutter and glued over the etched wooden beams with PVA. You need to take extra care where beams join at an angle to make sure they sit flat to one another. I got a slight overhang with one join, so trimmed it with a modelling scalpel so it lay more or less flush.
The walls in between the beams were coated in PVA and then covered in fine sand. The excess sand was poured away and once the glue was dried, the walls were given another coat of PVA to seal the sand in place. This gives an impression of a finer plastering job than the polyfilla daub added to my earlier pig sty for example.
The plaster walls sit on a stone foundation layer. These stones are etched into the MDF, but I used small pieces of Green Stuff to make it more three-dimensional. I pushed them into place with wet fingers . In doing so it isn’t necessary to be completely precise in following the etched pattern, but it is useful to do so approximately as it will keep you right when placing the interlocking stones at the corners of the building. You also need to make sure that the Green Studd for those corner stones is bent around the corner as that makes it look like it is a single stone viewed from two angles rather than a blob of flat epoxy pushed onto an MDF board. Every so often, once I had done a few stones, I would scratch in some sharp chiselled edges in order to avoid uniformity. This will also be useful later in providing texture for drybrushing.
The front door was covered in strips of card to simulate planking. I cut up a box that had been holding some herb tea, but any cardboard packaging will do.
Finally, the model was fixed to a 15cm x 15cm terrain base and the ground covered in Vallejo base texture. I heaped up some of the base texture into six raised beds that will become a vegetable garden. Admittedly, at this stage it looks like six freshly dug graves, but hopefully the addition of some cabbages will correct this unfortunate impression!


![Zenit Miniatures’ Samurai Warlords Now Live On Kickstarter [Updated]](https://images.beastsofwar.com/2026/02/samurai-warlords-launch-main-600-338.jpg)


