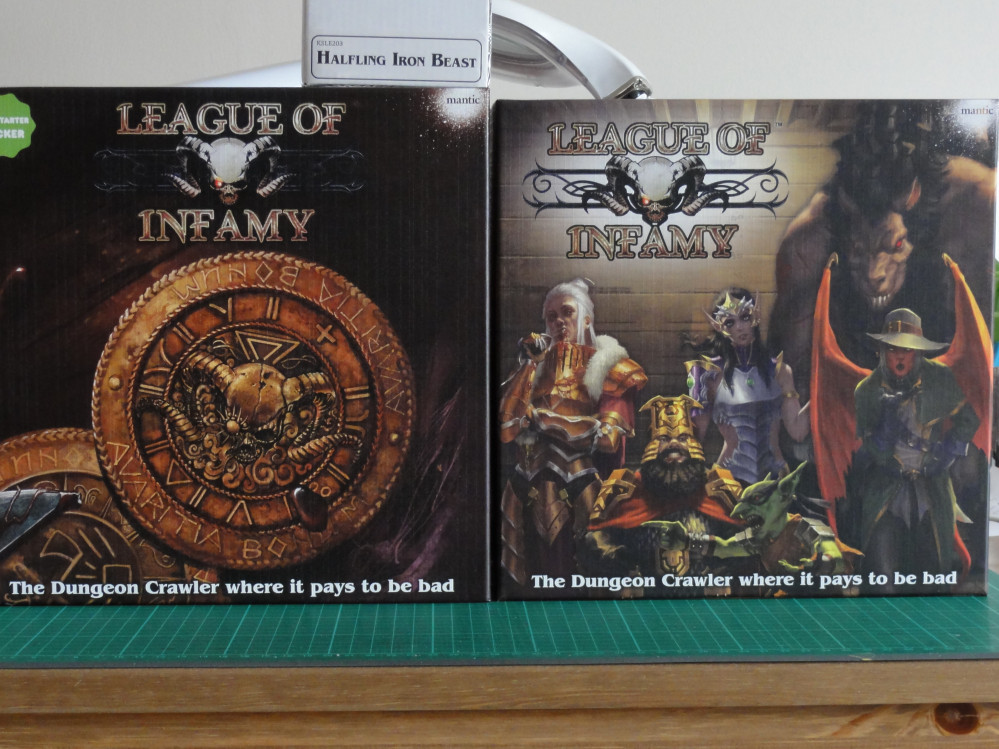
Very Slow League of Infamy Project


Recommendations: 1175
About the Project
I will be slowly working my way through painting the League of Infamy Kickstarter. As well as using the League of Infamy miniatures to play League of Infamy I intend to rebase the minis to Vanguard and Kings of War size (where required) before painting. This will also give me some more miniatures to add to Frostgrave.
Related Game: League Of Infamy
Related Company: Mantic Games
Related Genre: Fantasy
This Project is Active
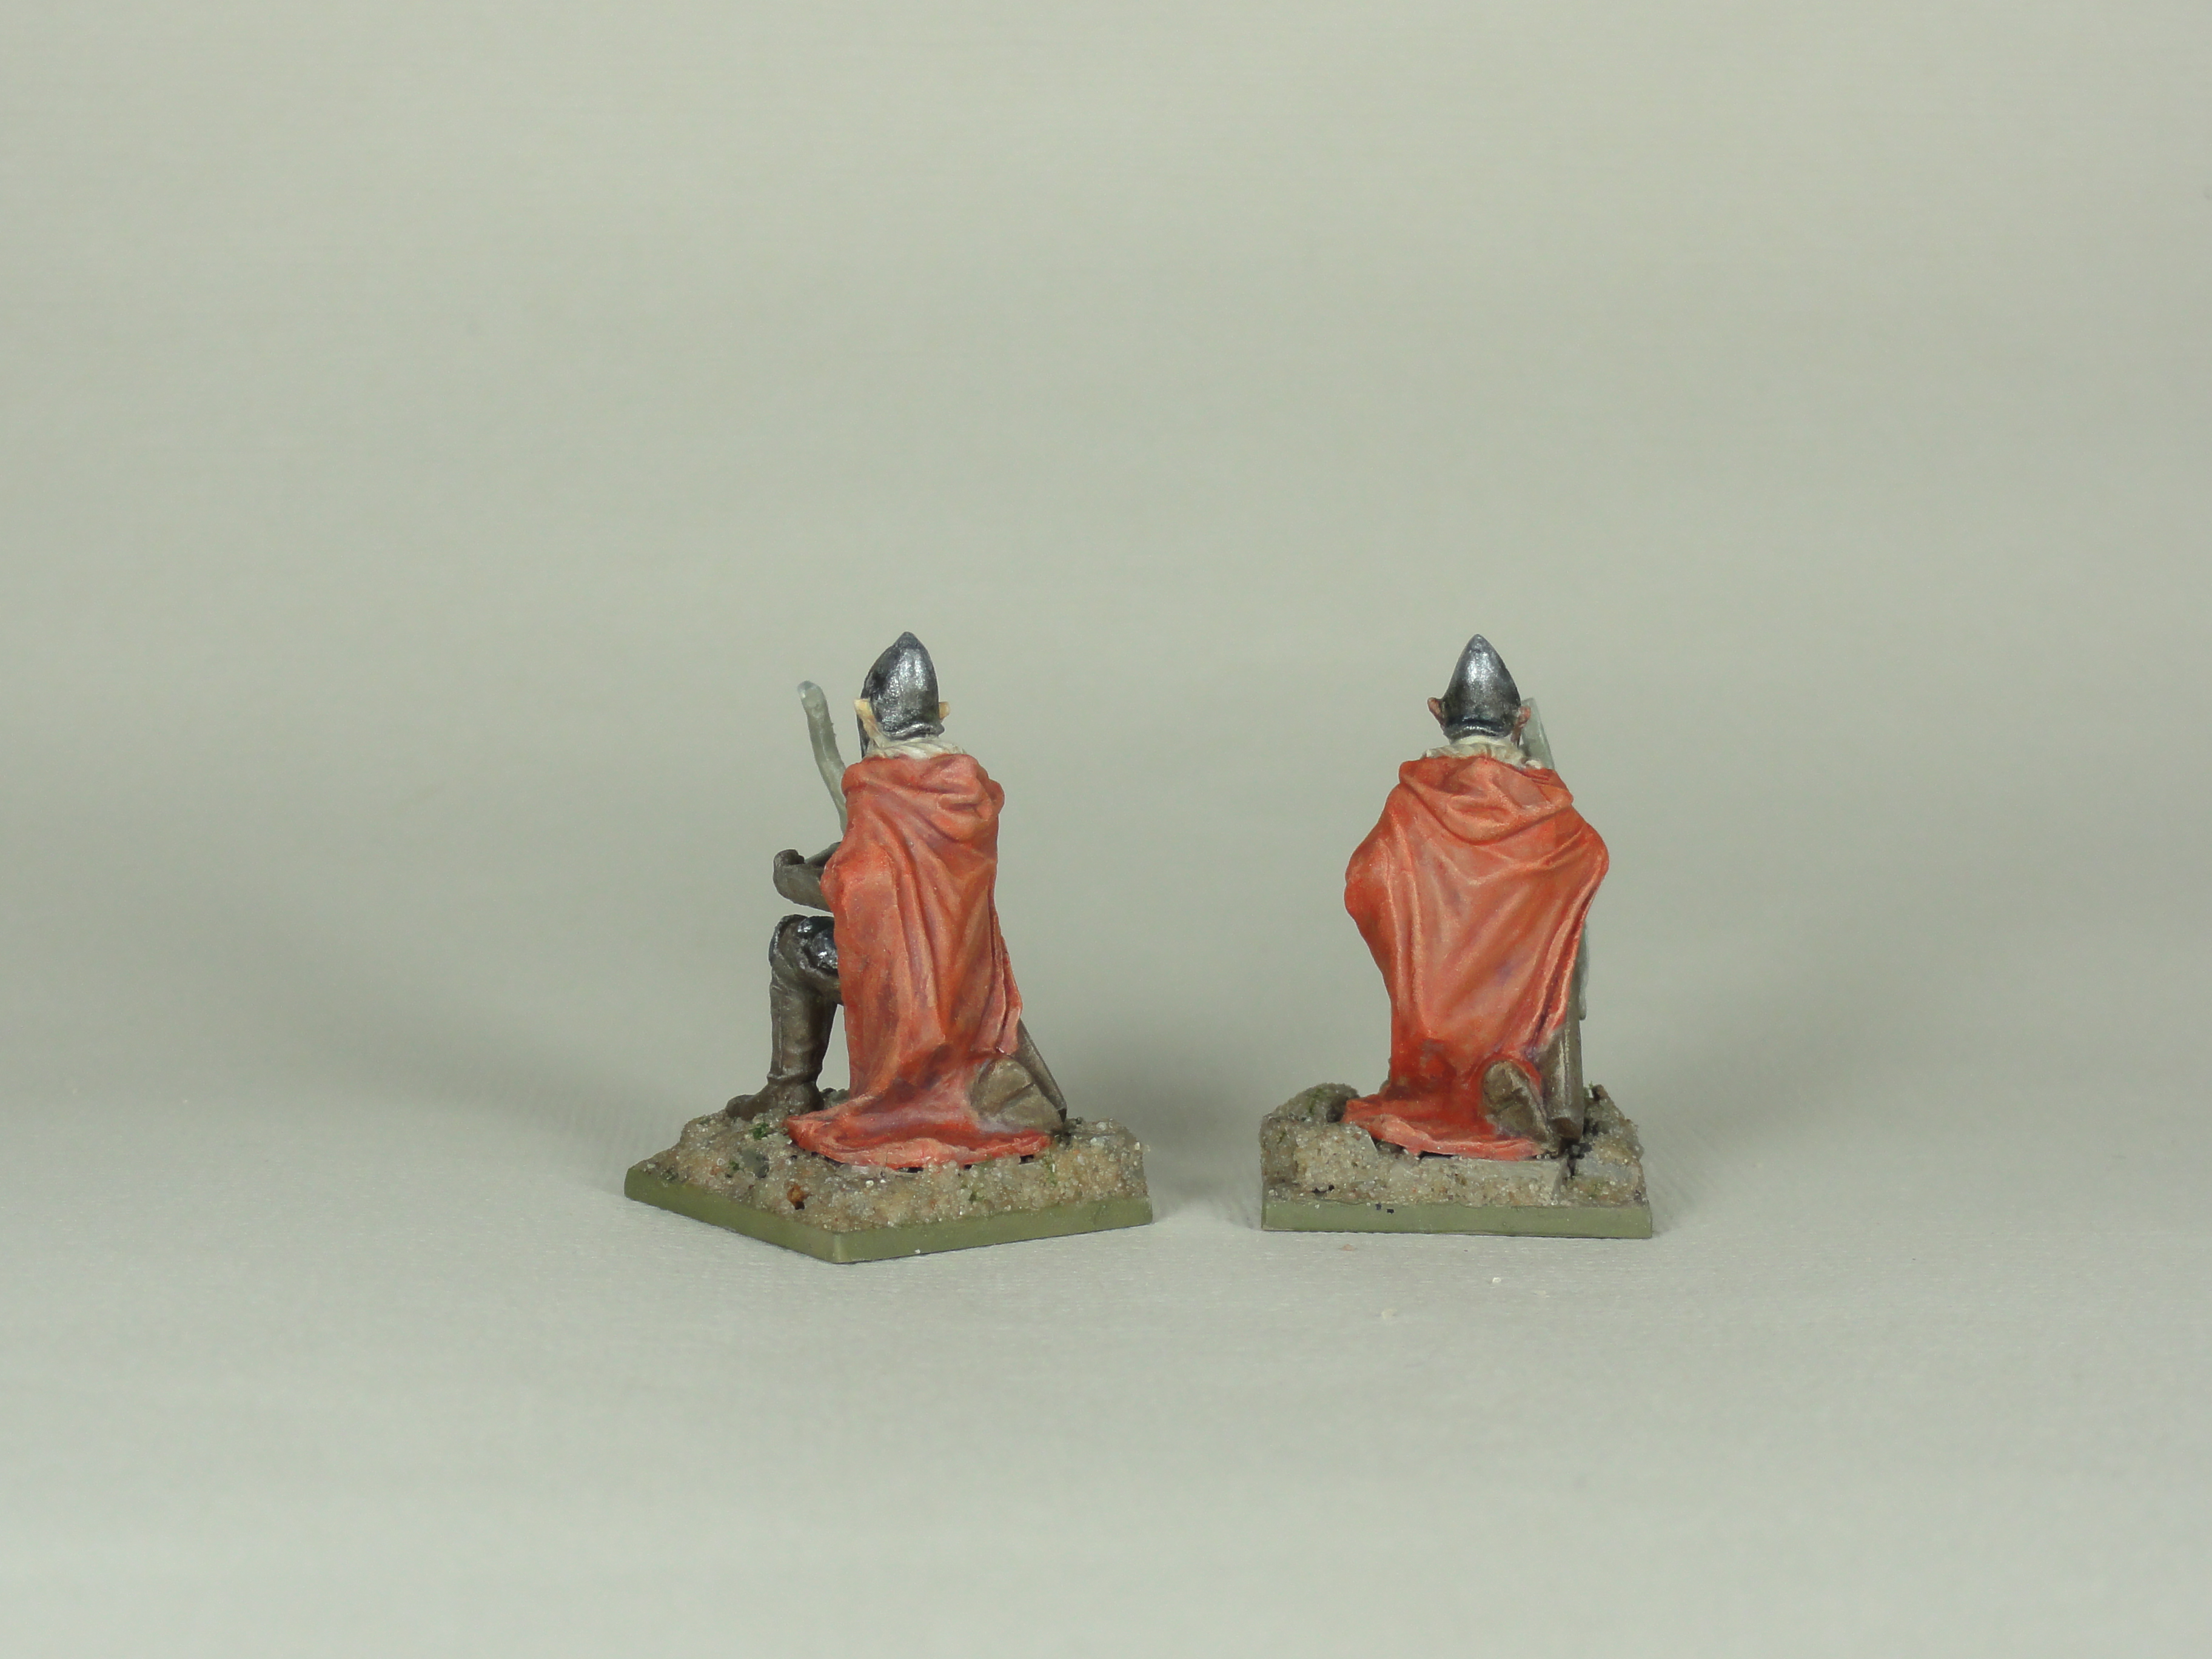
Week 19 and 20: Elf Archers
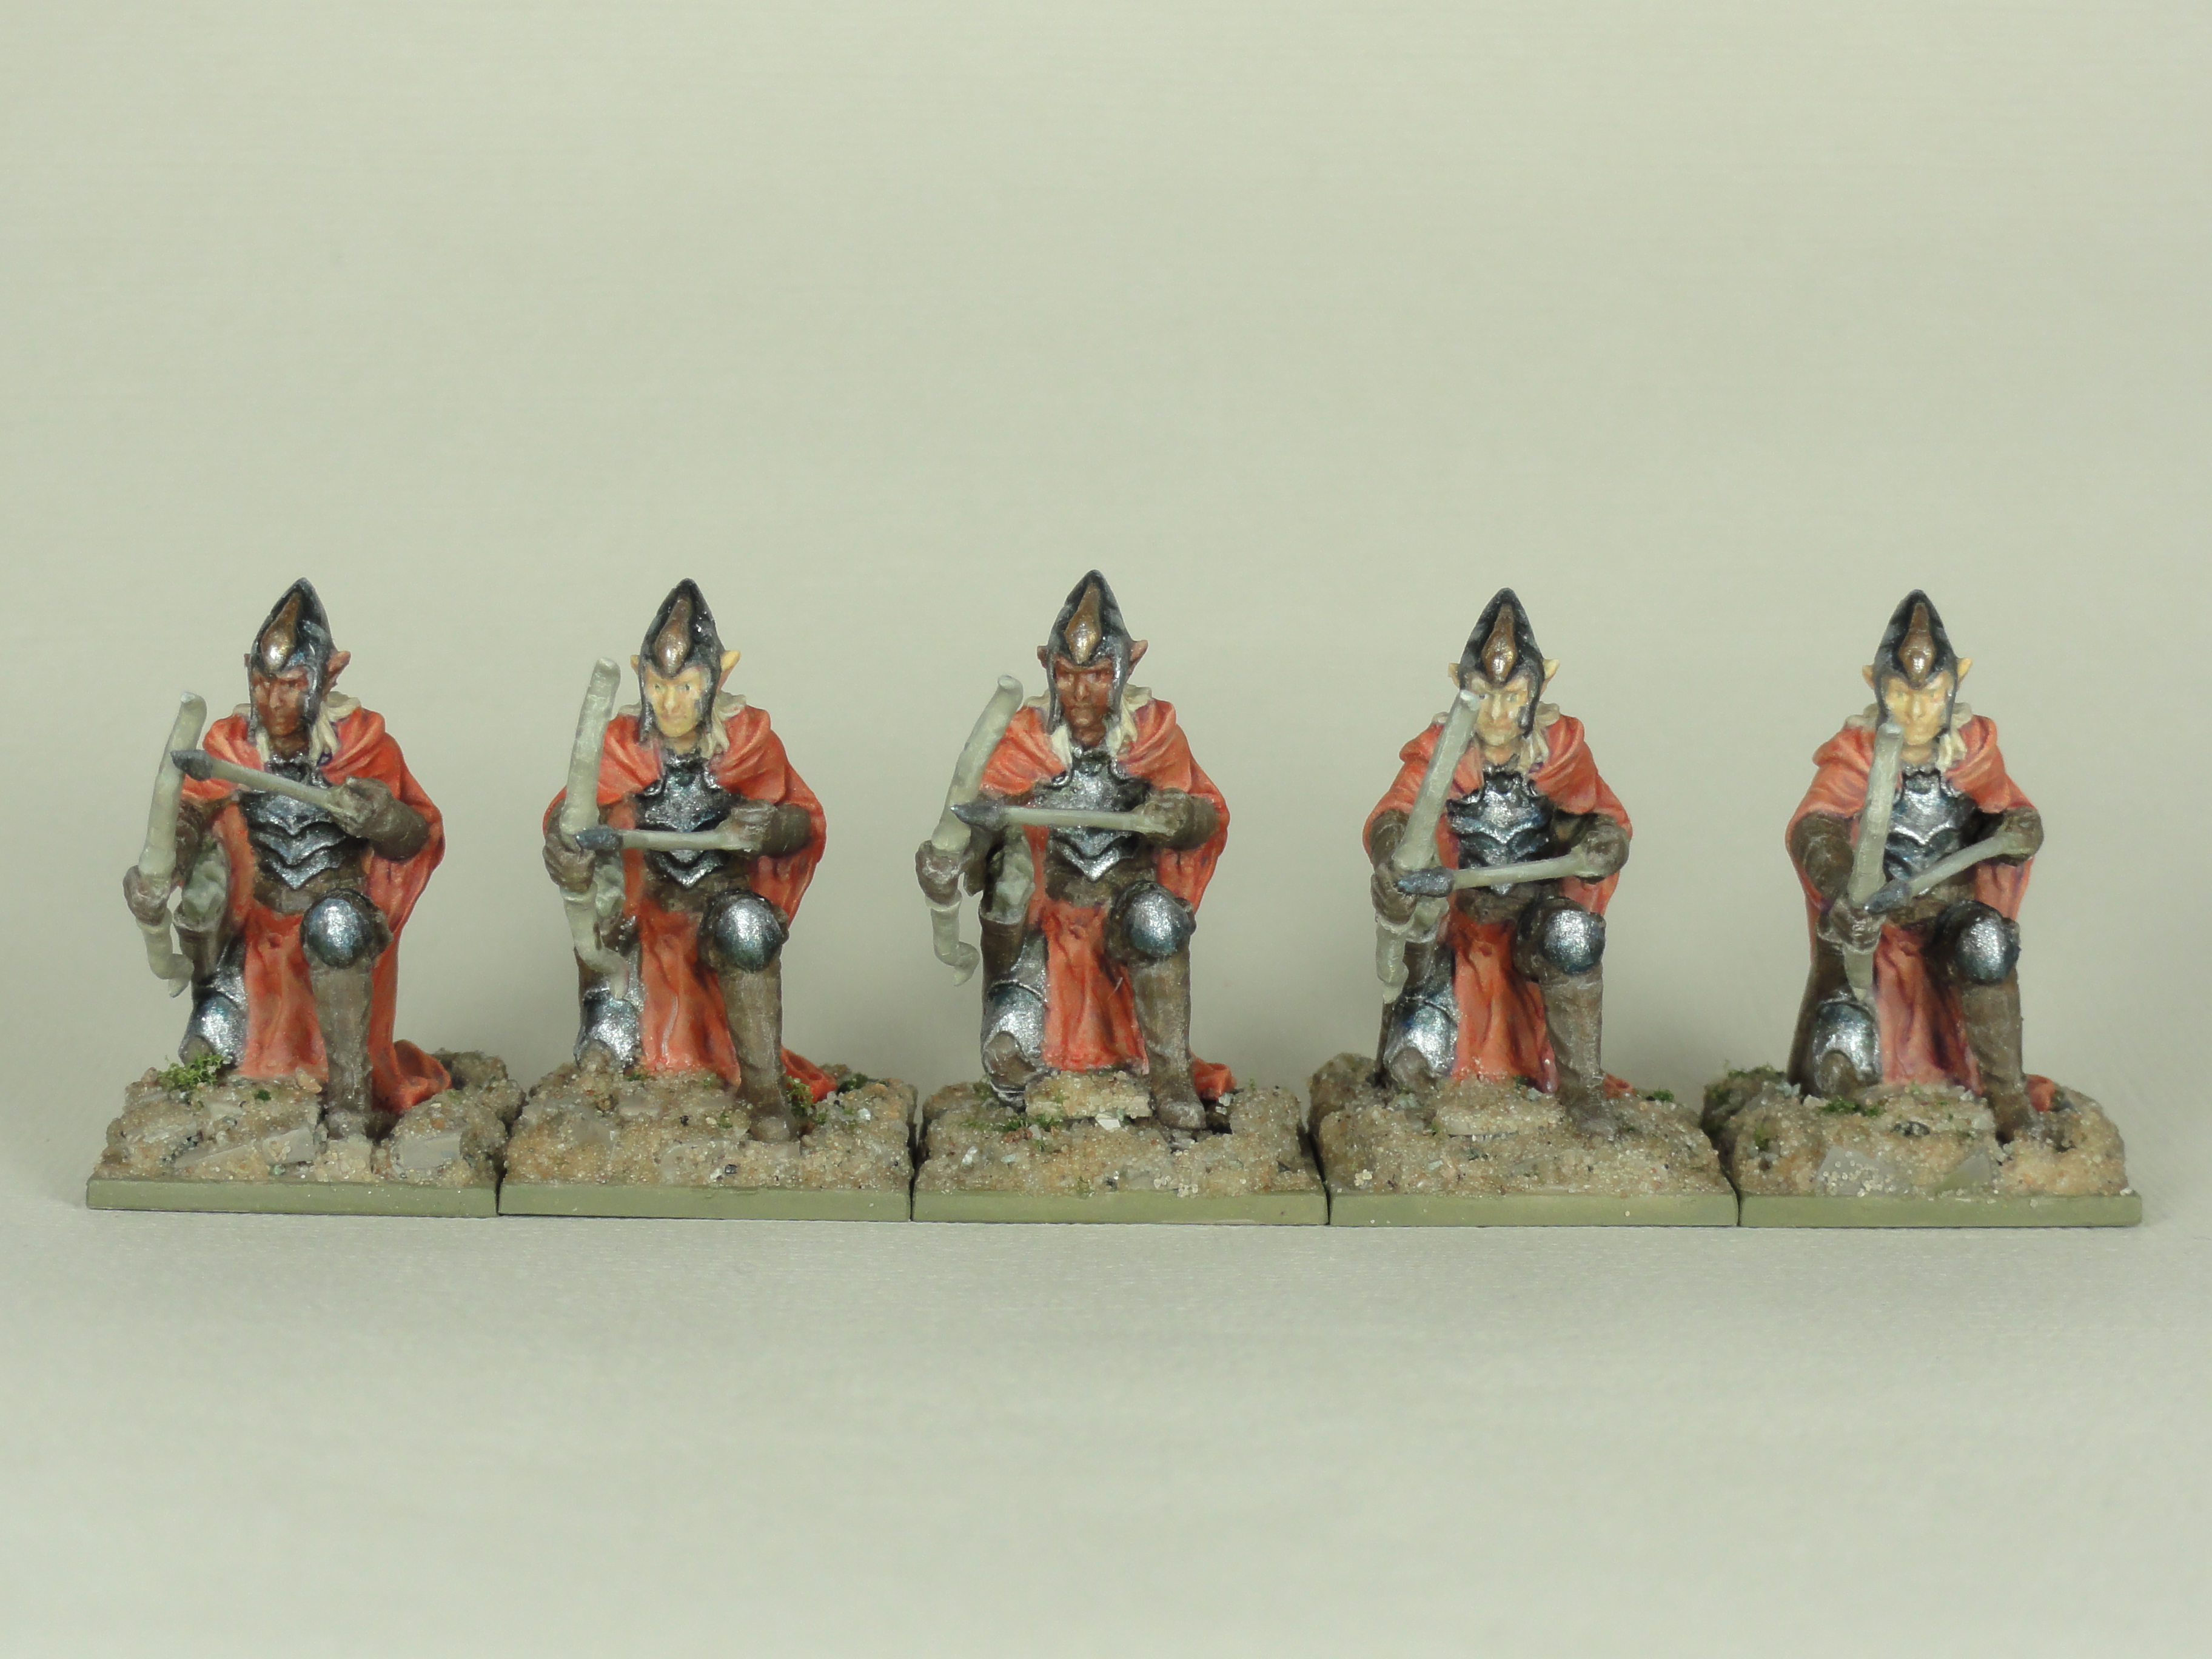 Finished Archers
As usual archers had been primed in week 7 with IDF Israeli Sand Grey Vallejo Surface Primer then Titanium White Liquitex Acrylic Ink was sprayed from above.
 Finished Archers
Cloaks:
- Base: Tan Earth (Vallejo Model Color)
- Wash: Violet ink (Vallejo Game Ink) + Wash medium (from previous weeks)
- Dry brush/Over brush: Tan Earth
- Dry brush: Barbarian Flesh (Army Painter)
- Dry brush highlights Ice Yellow (Vallejo Model Color)
- Dry brush upper most highlights Ivory (Vallejo Model Color)
- Glaze: Bloody Red (Vallejo Game Color) + Vallejo Glaze Medium
- Glaze repeated where necessary
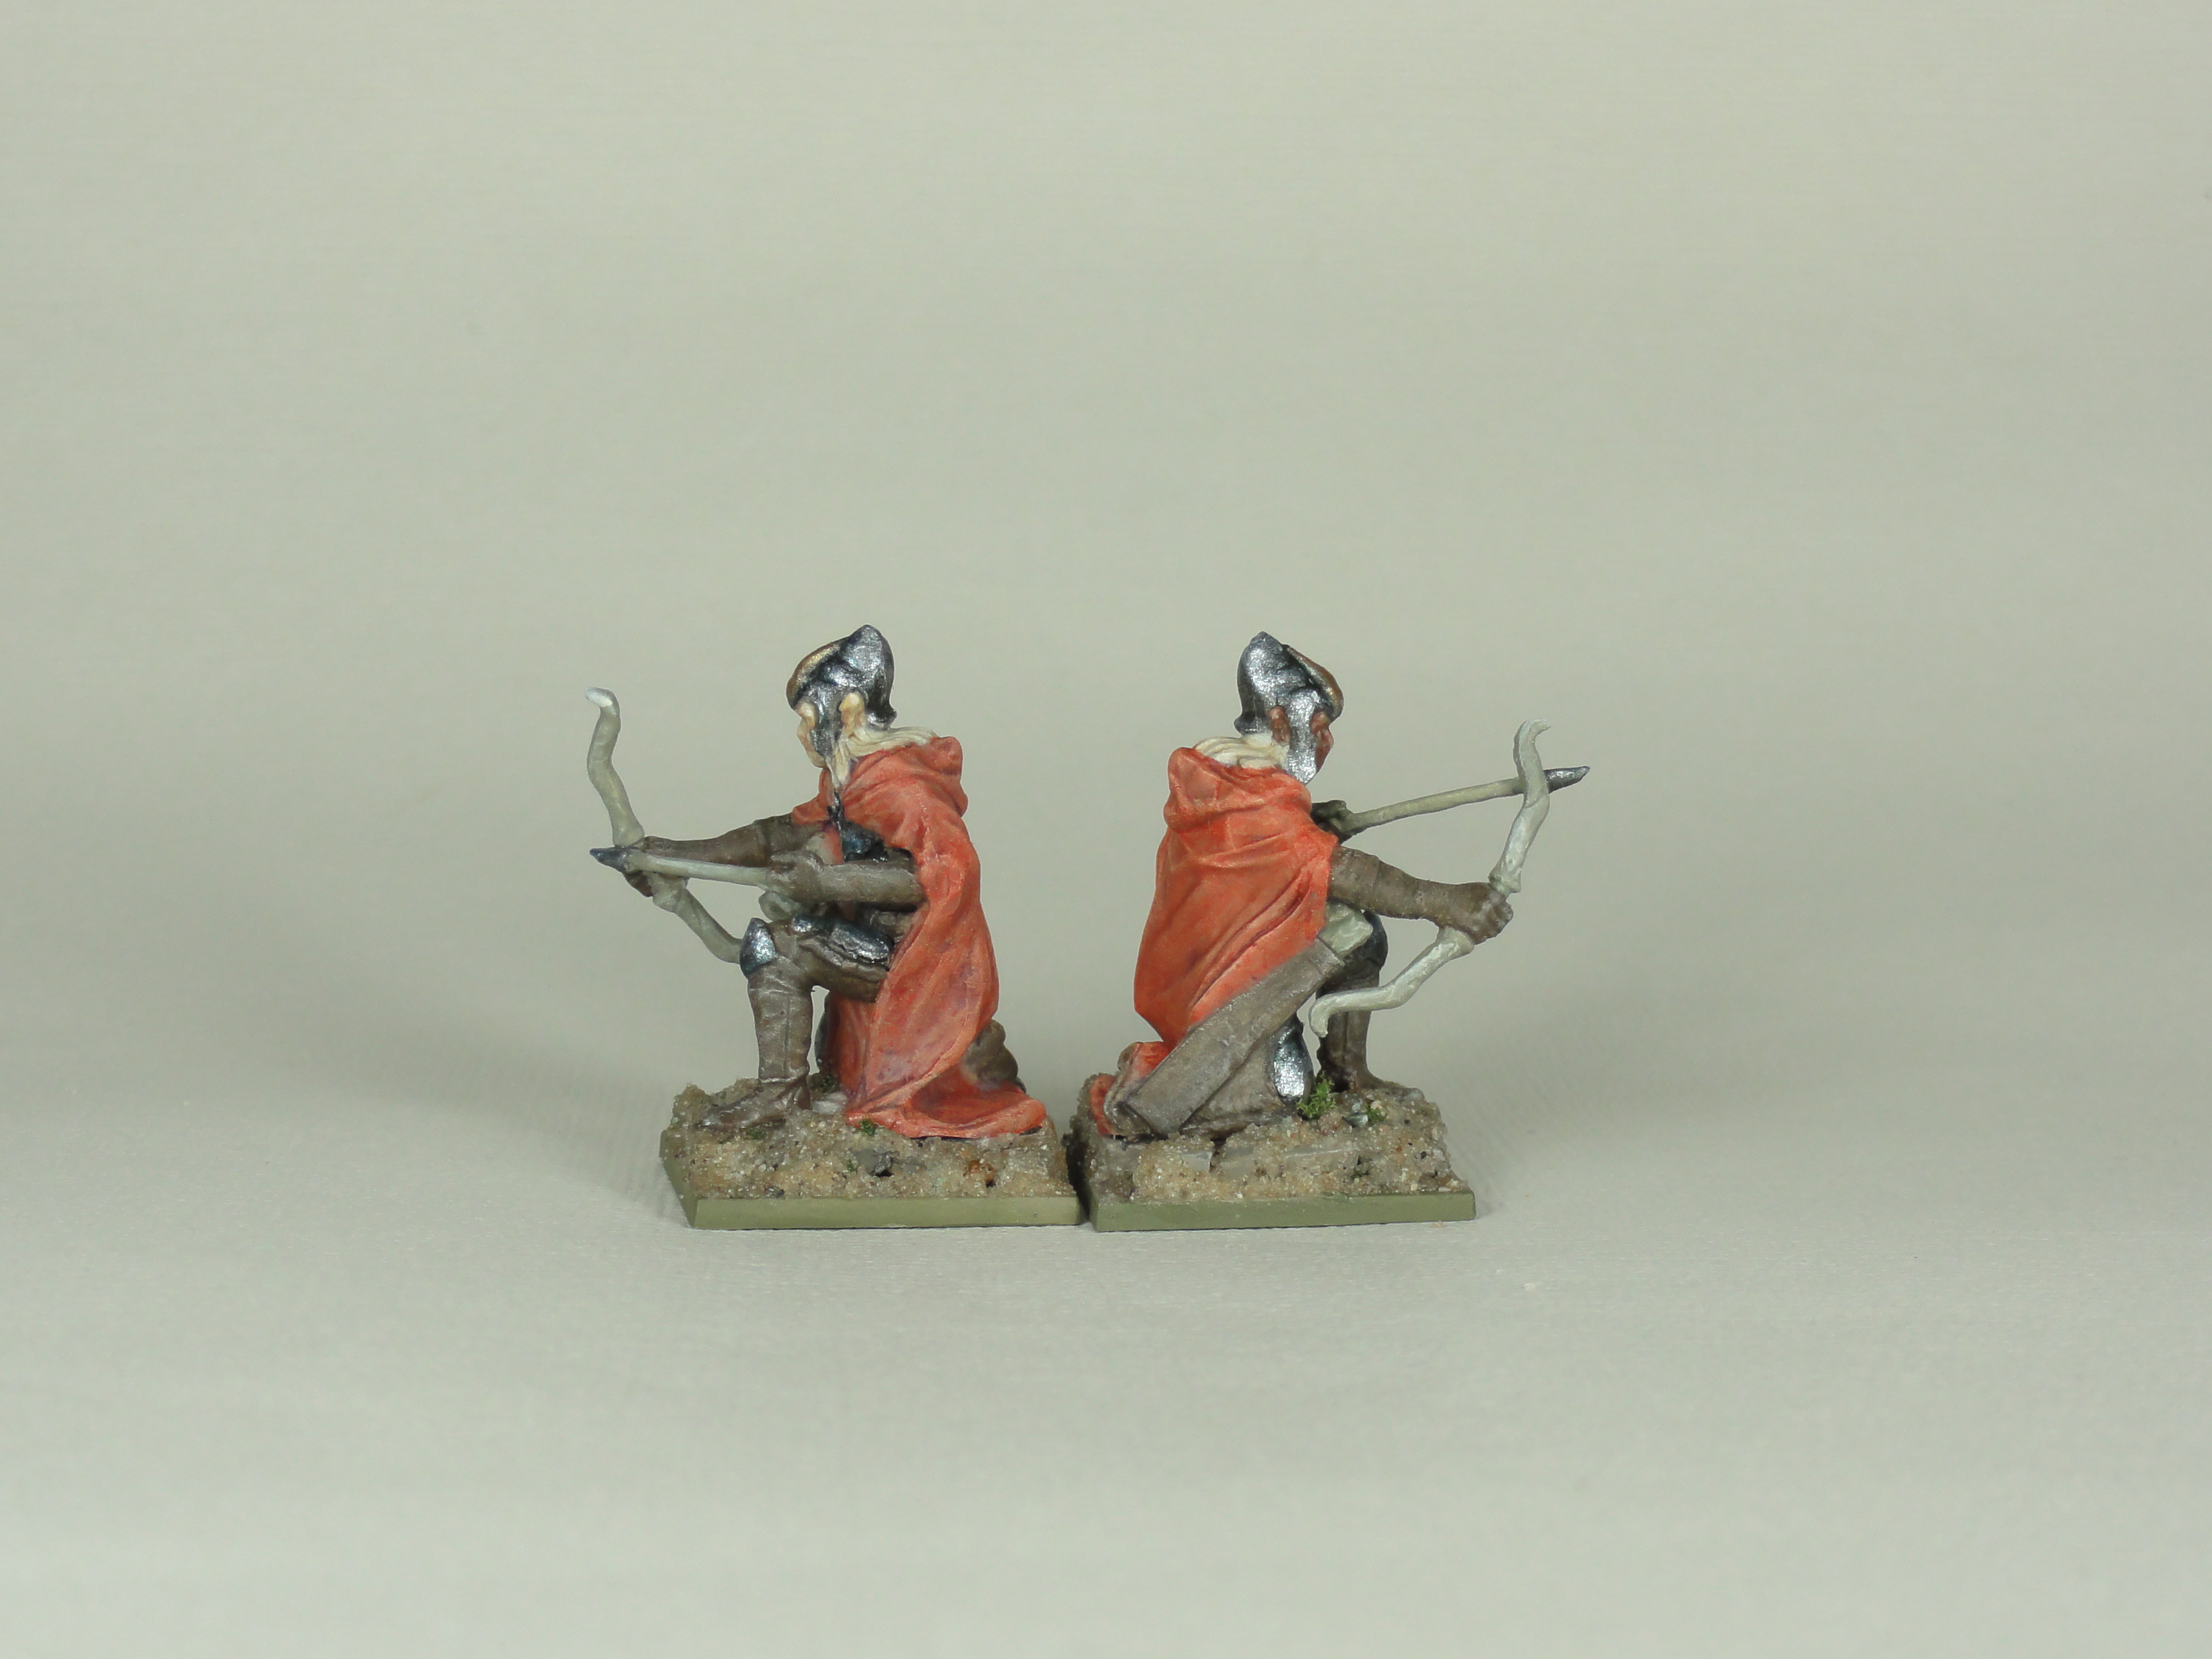
 Finished Archers
Leather/Quiver/Brown clothes:
- Base: Chocolate Brown (Vallejo Model Color)
- Drybrush: Pale Sand (Vallejo Model Color)
- Glaze: Chocolate Brown + Vallejo Glaze Medium
Arrows/Bow:
- Base: Green Grey (Vallejo Model Color)
- Highlight: Pale Sand
- Extreme highlights: Ivory
 Finished Archers
Hair:
- Base: Pale Sand
- Wash: Army Painter Soft Tone
- Highlight: Pale Sand
- Extreme highlight: Ivory
Skin:
Either
- Base: Dark Flesh Tone (Vallejo Game Color)
- Shading: Dark Green Ink (Vallejo Game Ink)
- Highlight: Tan Earth mixed with Dark Flesh Tone
or
- Base: Elf Skin Tone (Vallejo Game Color)
- Shadows: Dark Flesh Tone mixed with Elf Skin Tone
- Highlight 1: Elf Skin Tone mixed with Ivory
- Highlight 2: Ivory
Eyes are Ivory with Black pupils and were painted before the skin.
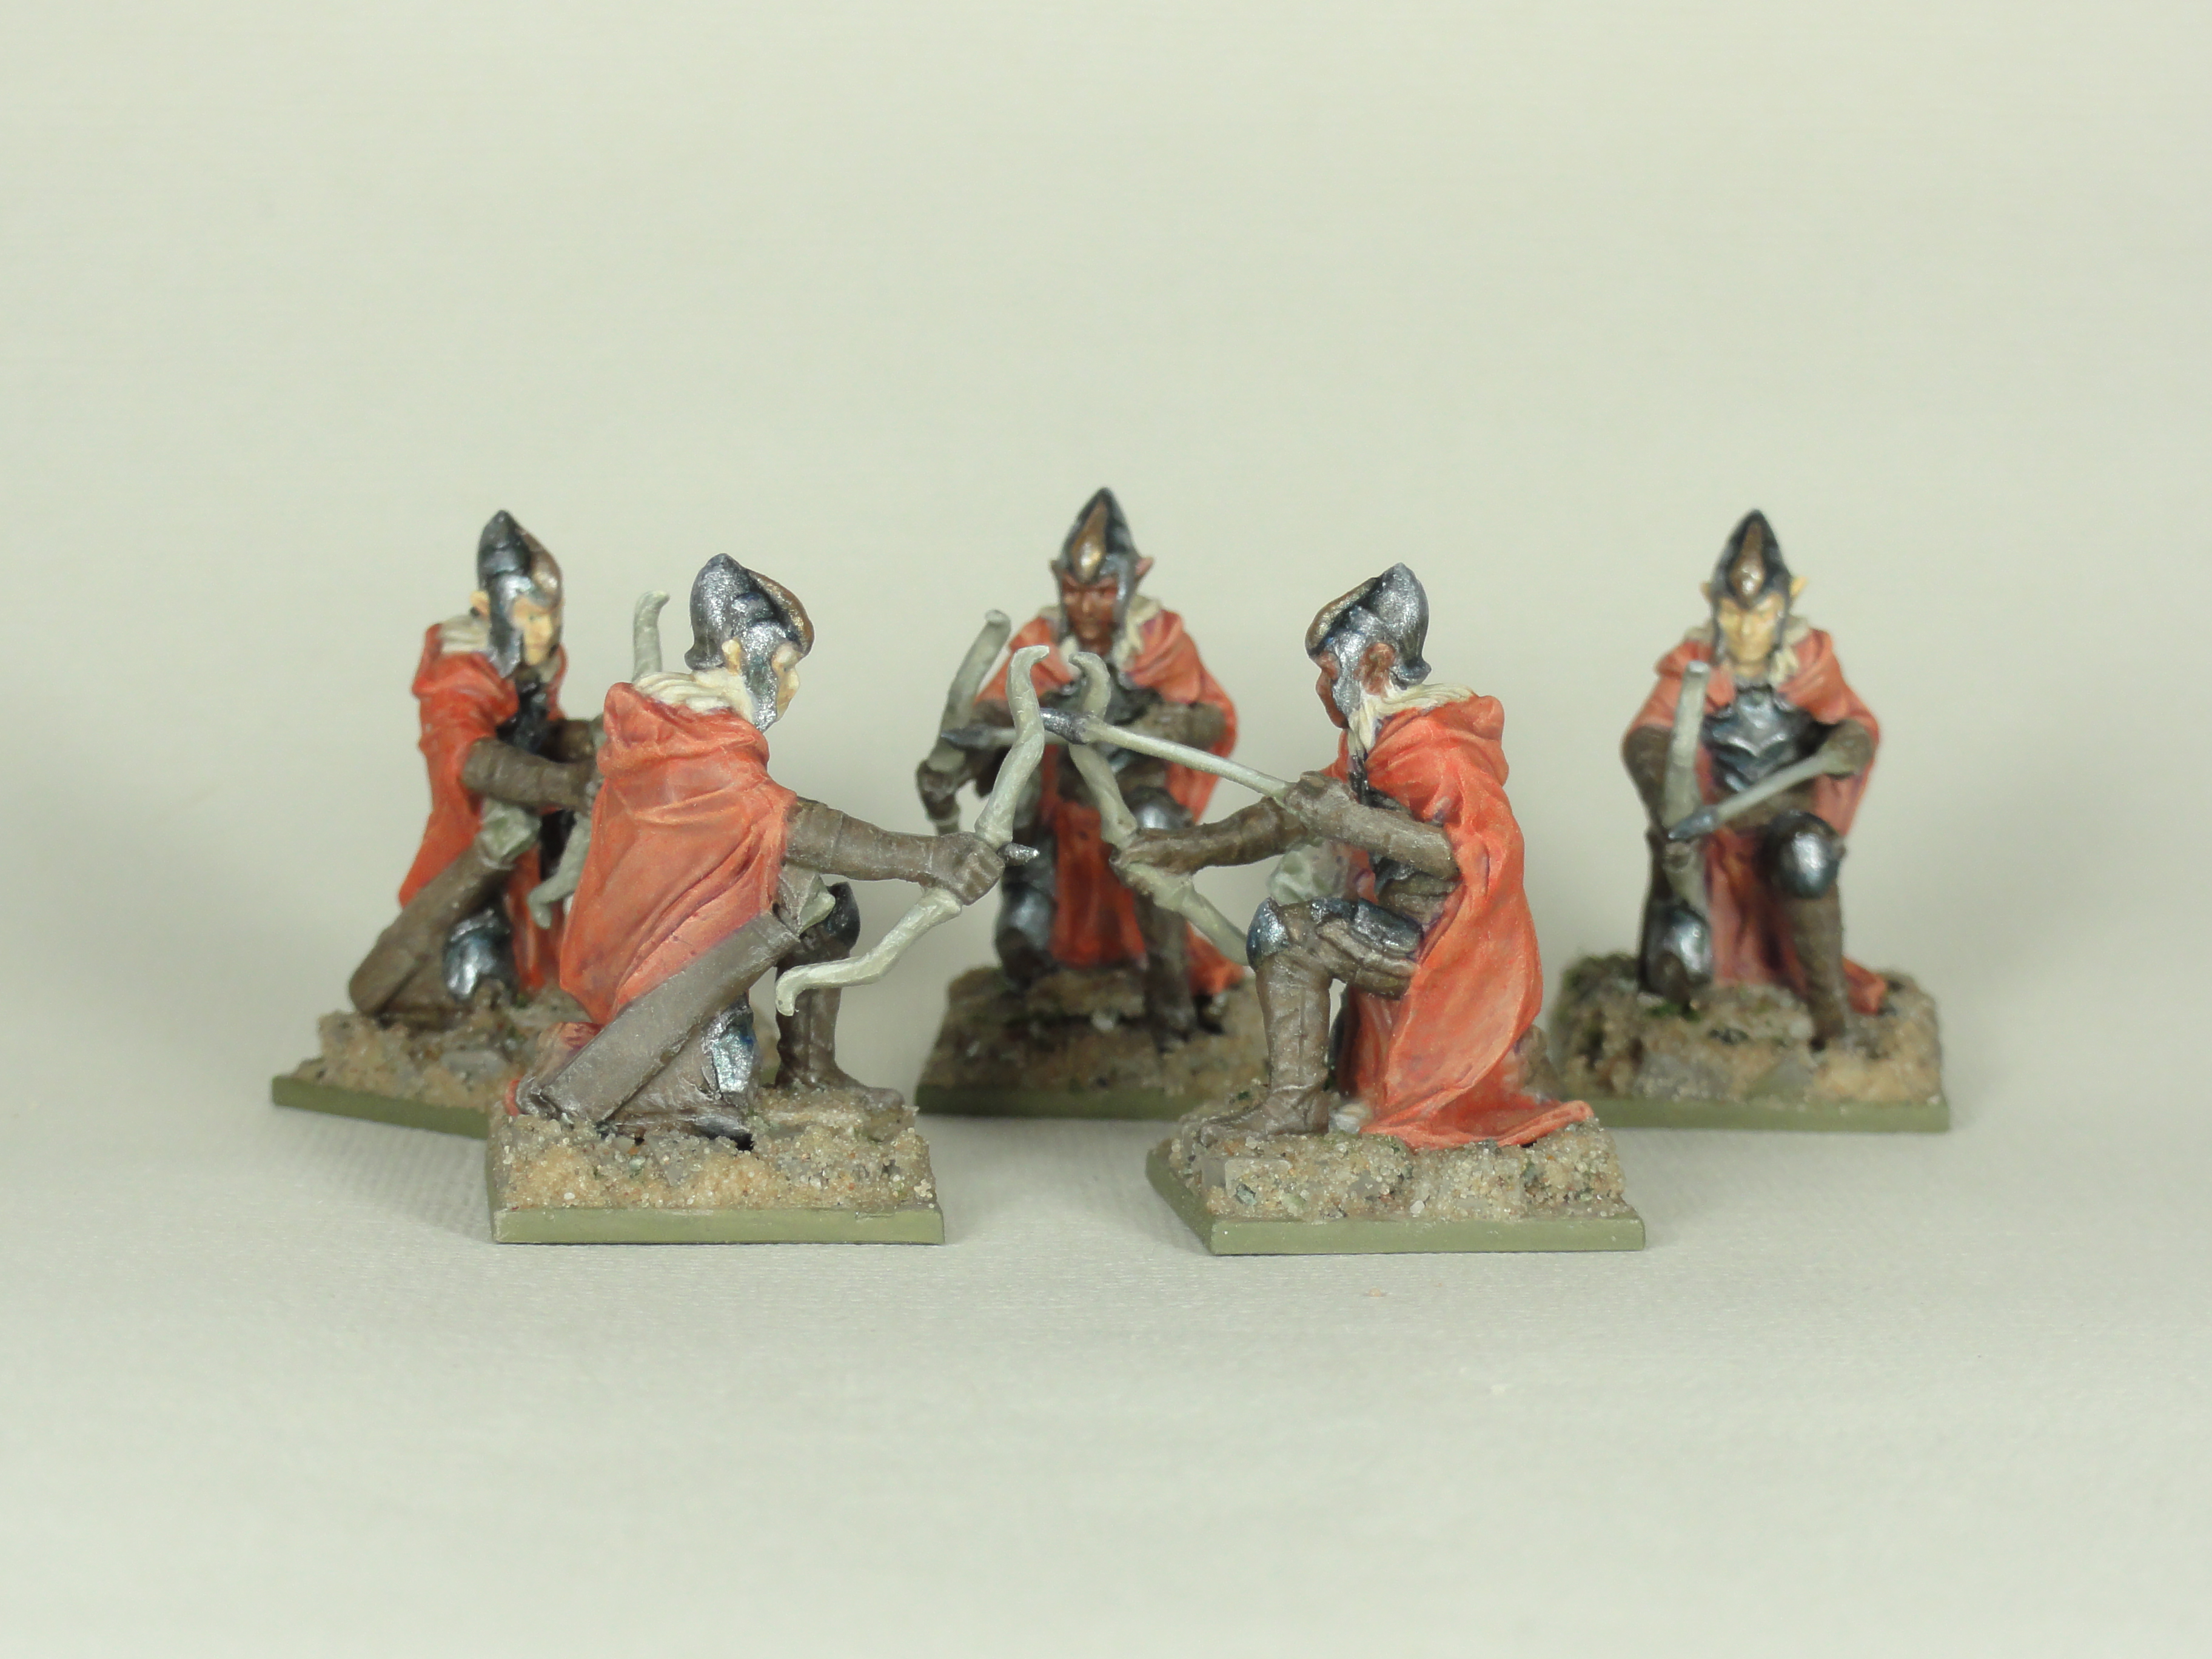
 Finished Archers
The figures were varnished in gloss then matt before any metallic paint was used.
The armour and arrowhead were done by trying to roughly follow Angel Giraldez’s true metallic silver tutorial. Warpaints Gold (Army Painter) mixed with a small spot of Red Leather (Vallejo Model Color) and highlighted with Silver (Vallejo Game Color) mixed with a small spot of white were used on the helmet front piece.
Armour/Arrowhead:
- Base: Black then Gun Metal (Vallejo Model Color)
- Wash in the shadows: a mix of Vallejo Black Wash (Flames of War), Sepia Ink (Vallejo Game Ink) and Blue Ink
- 1st Highlight: Silver mixed with a small spot of white
- Glaze Blue ink in areas then a mix of Blue and Sepia inks nearer the shadows.
- Last Highlight: Silver mixed with a small spot of white
I had some problems with the 1st highlight being gritty due to the bottle at some point being stored upside down, so there was pigment stuck in the nozzle. Once I took the nozzle off and cleared it the paint was a lot better.
Week 18 Dryads
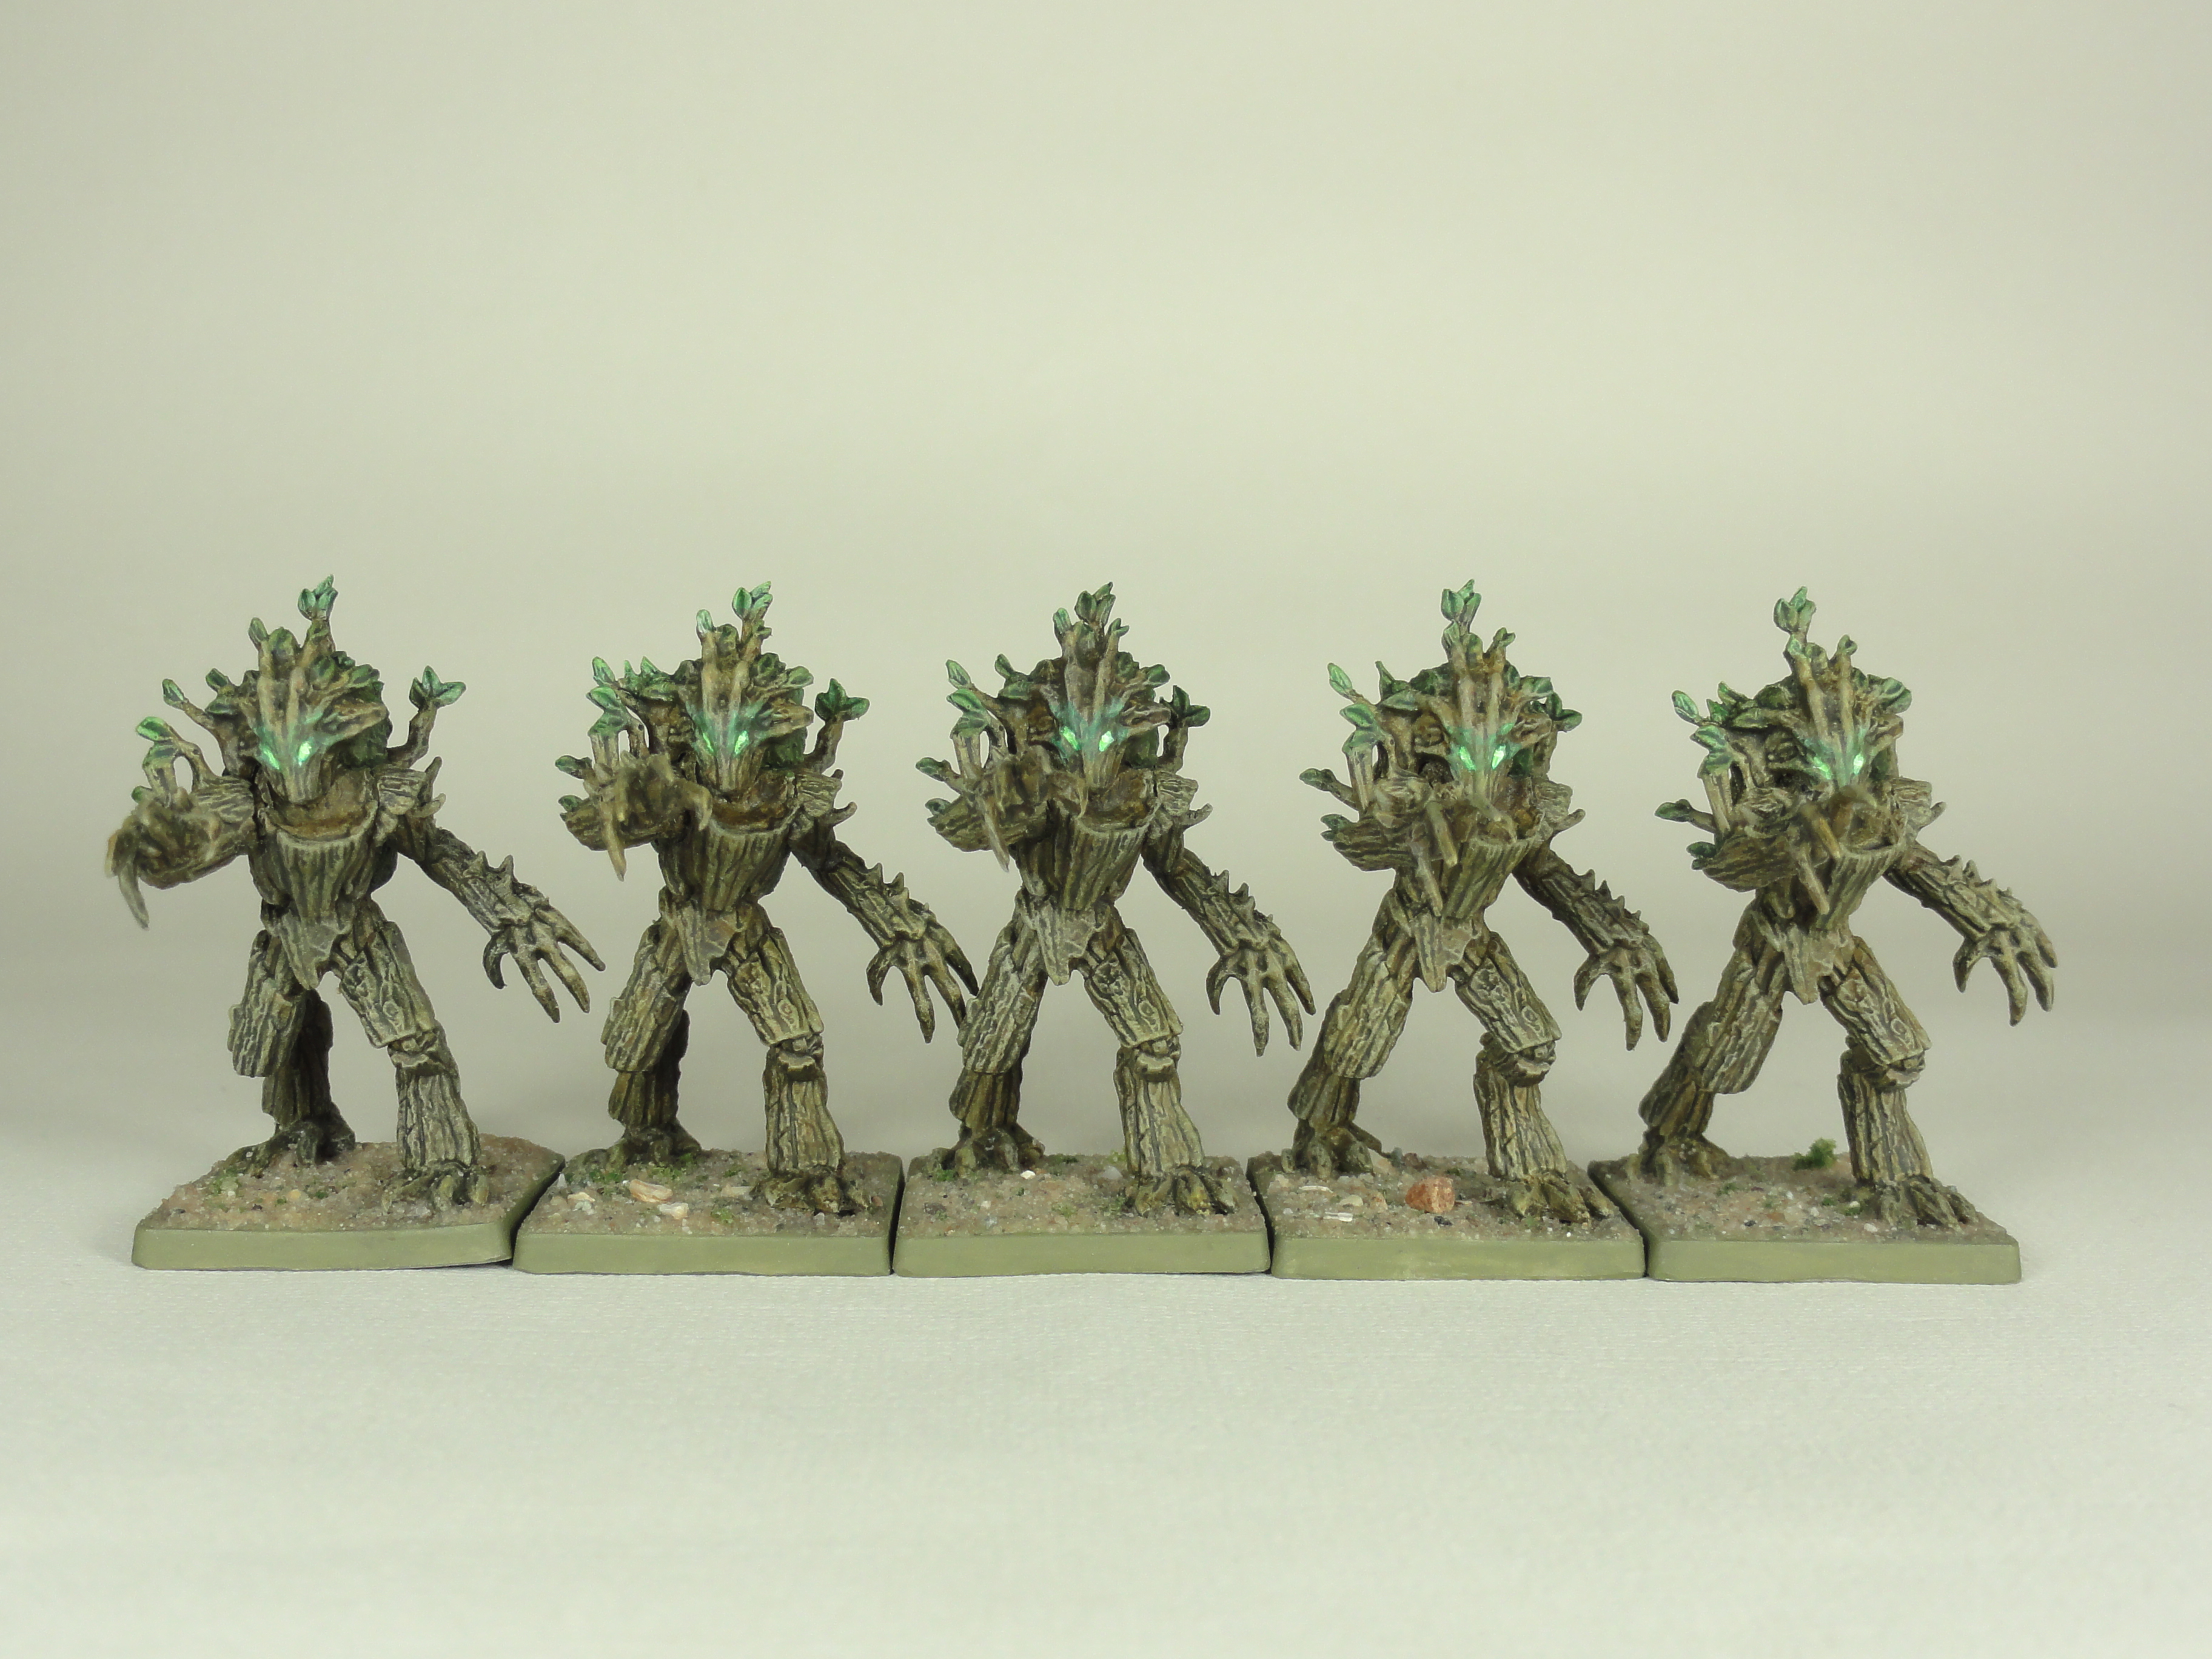 Finished Dryads
Tried to use the technique from Vince Venturella’s ‘Hobby Cheating 47 How to Paint Rich Sylvaneth Wood Tones’, but tried to get a slightly greyer tone rather than a rich one. https://www.youtube.com/watch?v=RLHsE7SgZyc
The Dryads had been primed in week 7 with IDF Israeli Sand Grey Vallejo Surface Primer then Titanium White Liquitex Acrylic Ink was sprayed from above.
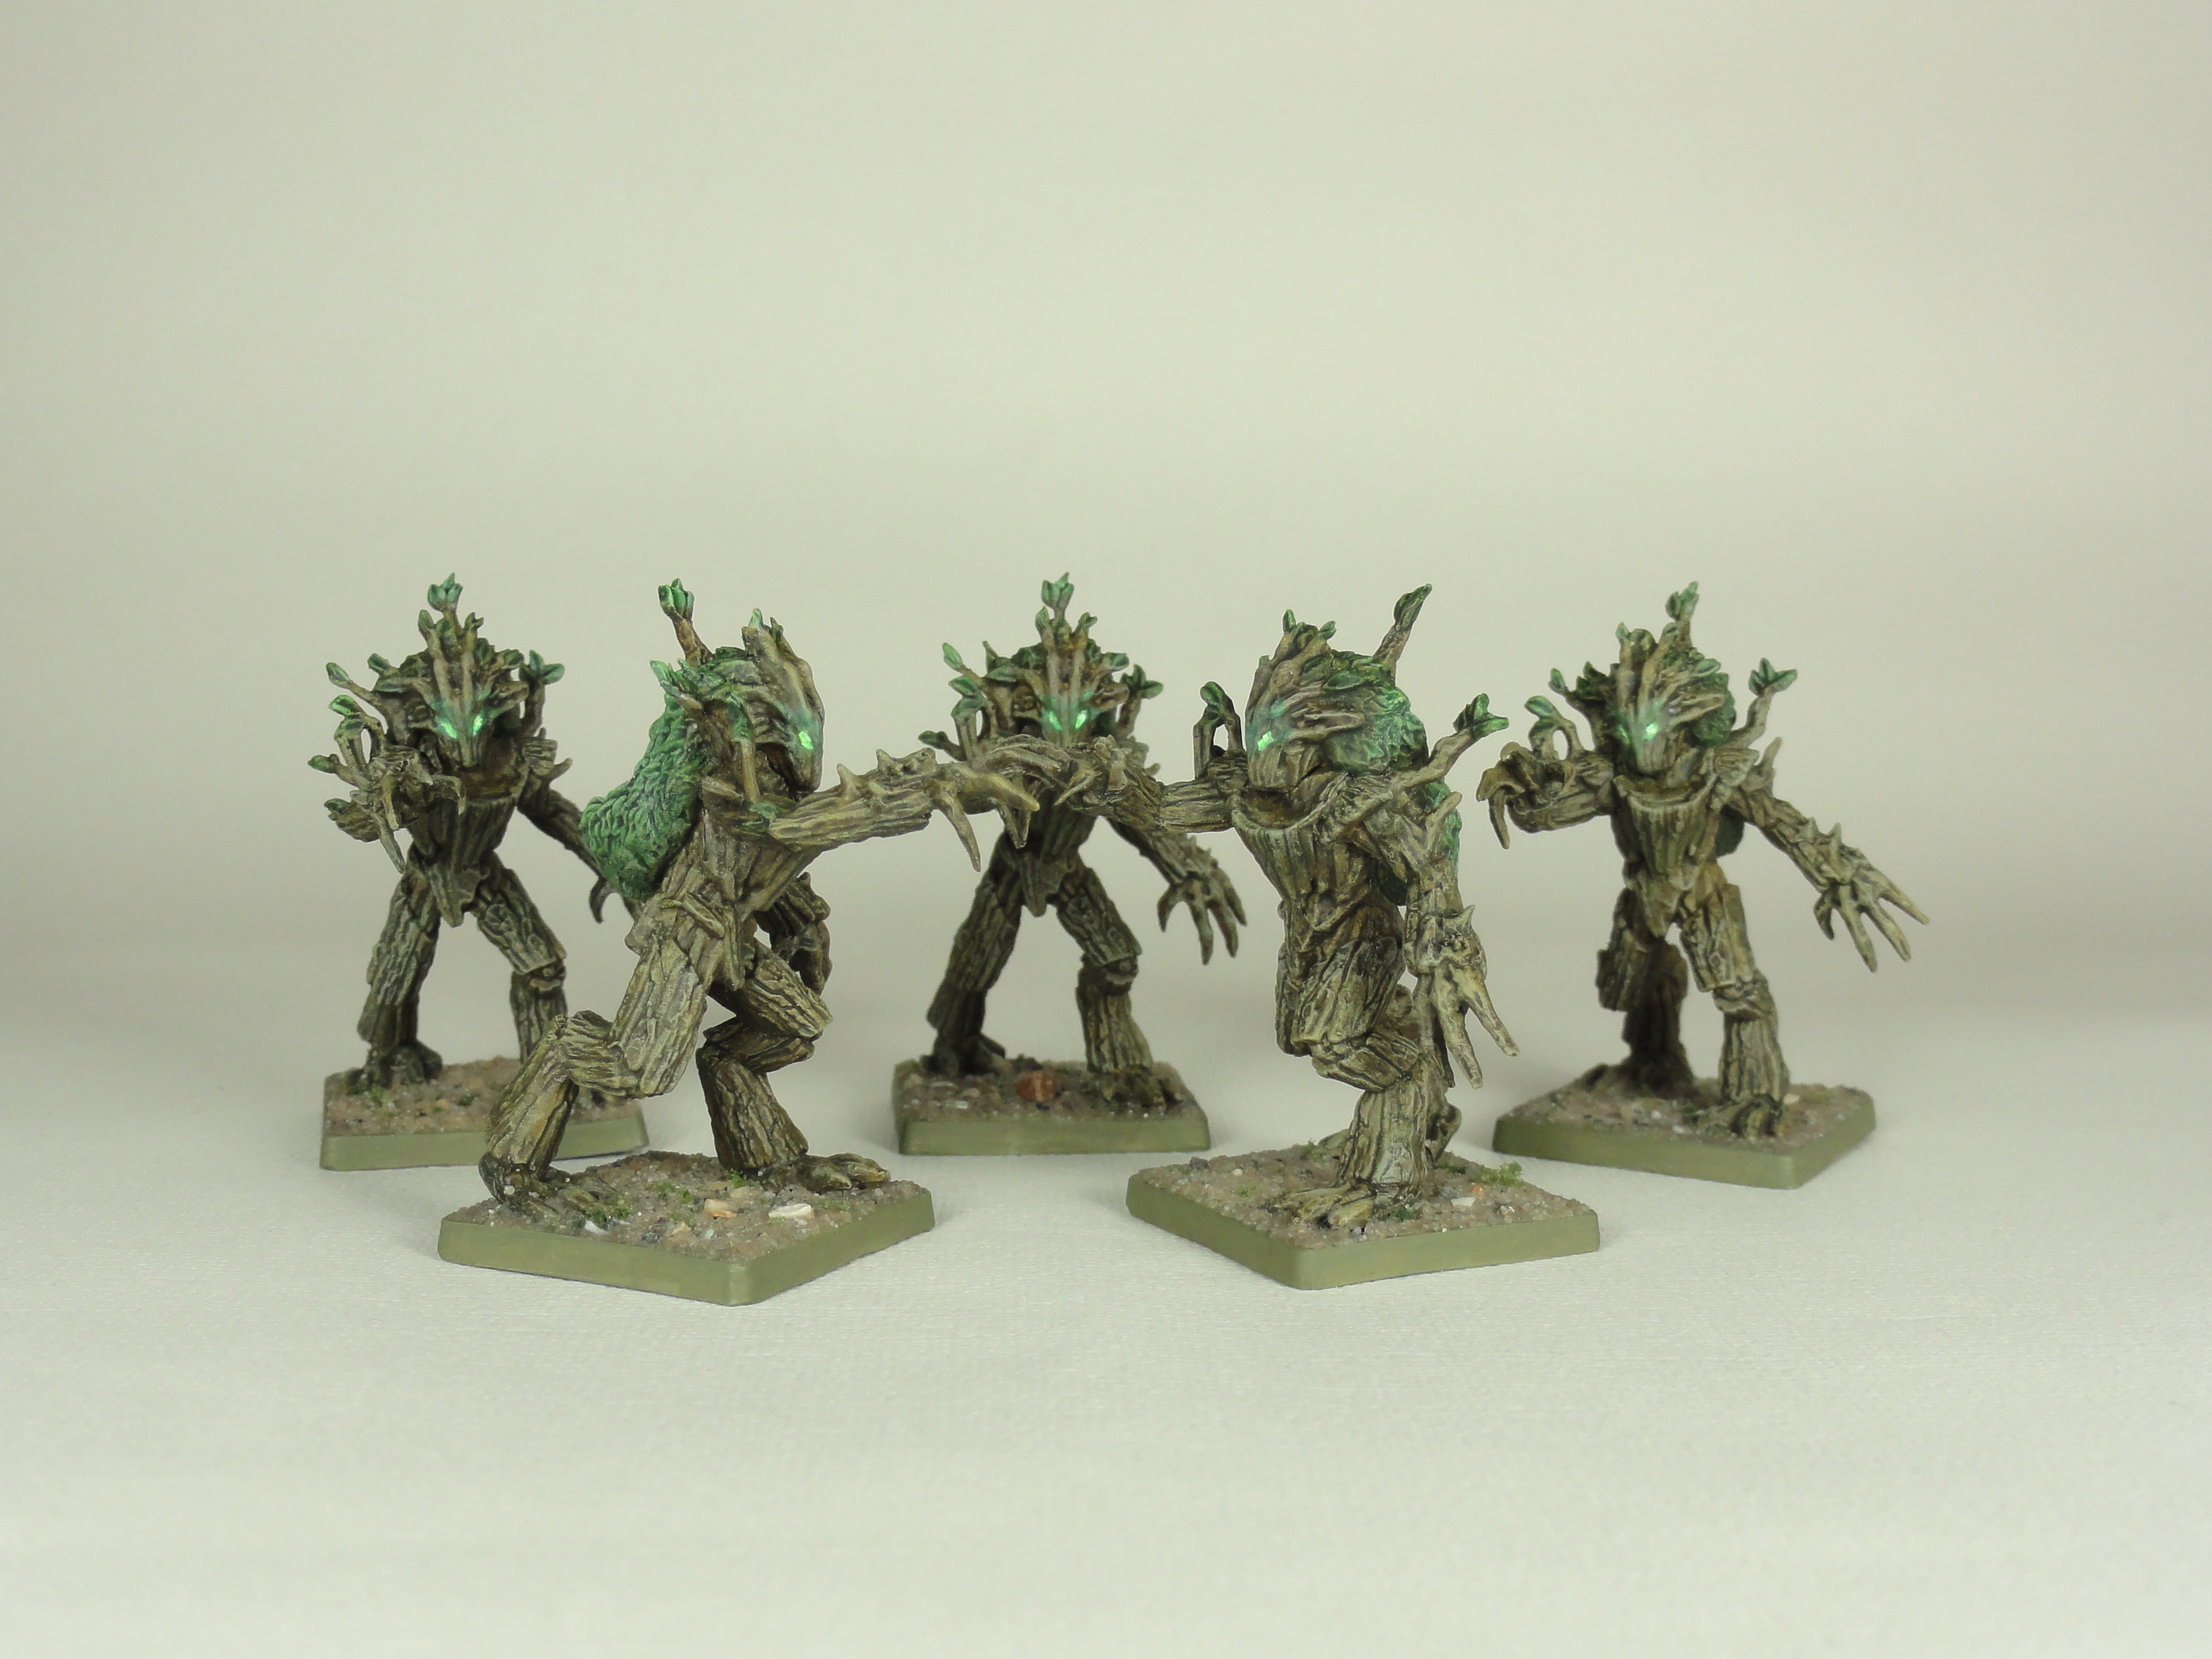 Finished Dryads
I applied a Paynes Grey Wash to the whole figure (1 part Daler Rowney Paynes Grey Ink to 3 parts wash medium – see week 14), then dry brushed Pale Sand (Vallejo Model Color).
The highlights were tidied up using Pale Sand. Undiluted Sepia Ink (Vallejo Game Ink) was applied to all the wood and Black Green Ink (Vallejo Game Ink) to the foliage.
 Finished Dryads
The wood was then dry brushed with Green Grey (Vallejo Model Color) and washed with a Sepia wash (1 part Vallejo Sepia ink to 4 parts wash medium).
After the wash had dried the wood got another drybrush of Green Grey mainly on the highlight areas. The foliage was tidied up with more Black Green ink and a second coat added to the shadow areas.
Although not that noticeable a green glaze (Black Green ink plus Vallejo Glaze Medium) was applied to random areas of the wood and the same was done with an orange glaze (Rust Orange Vallejo Model Air plus Vallejo Glaze Medium).
Basing was applied and the minis were gloss then matt varnished.
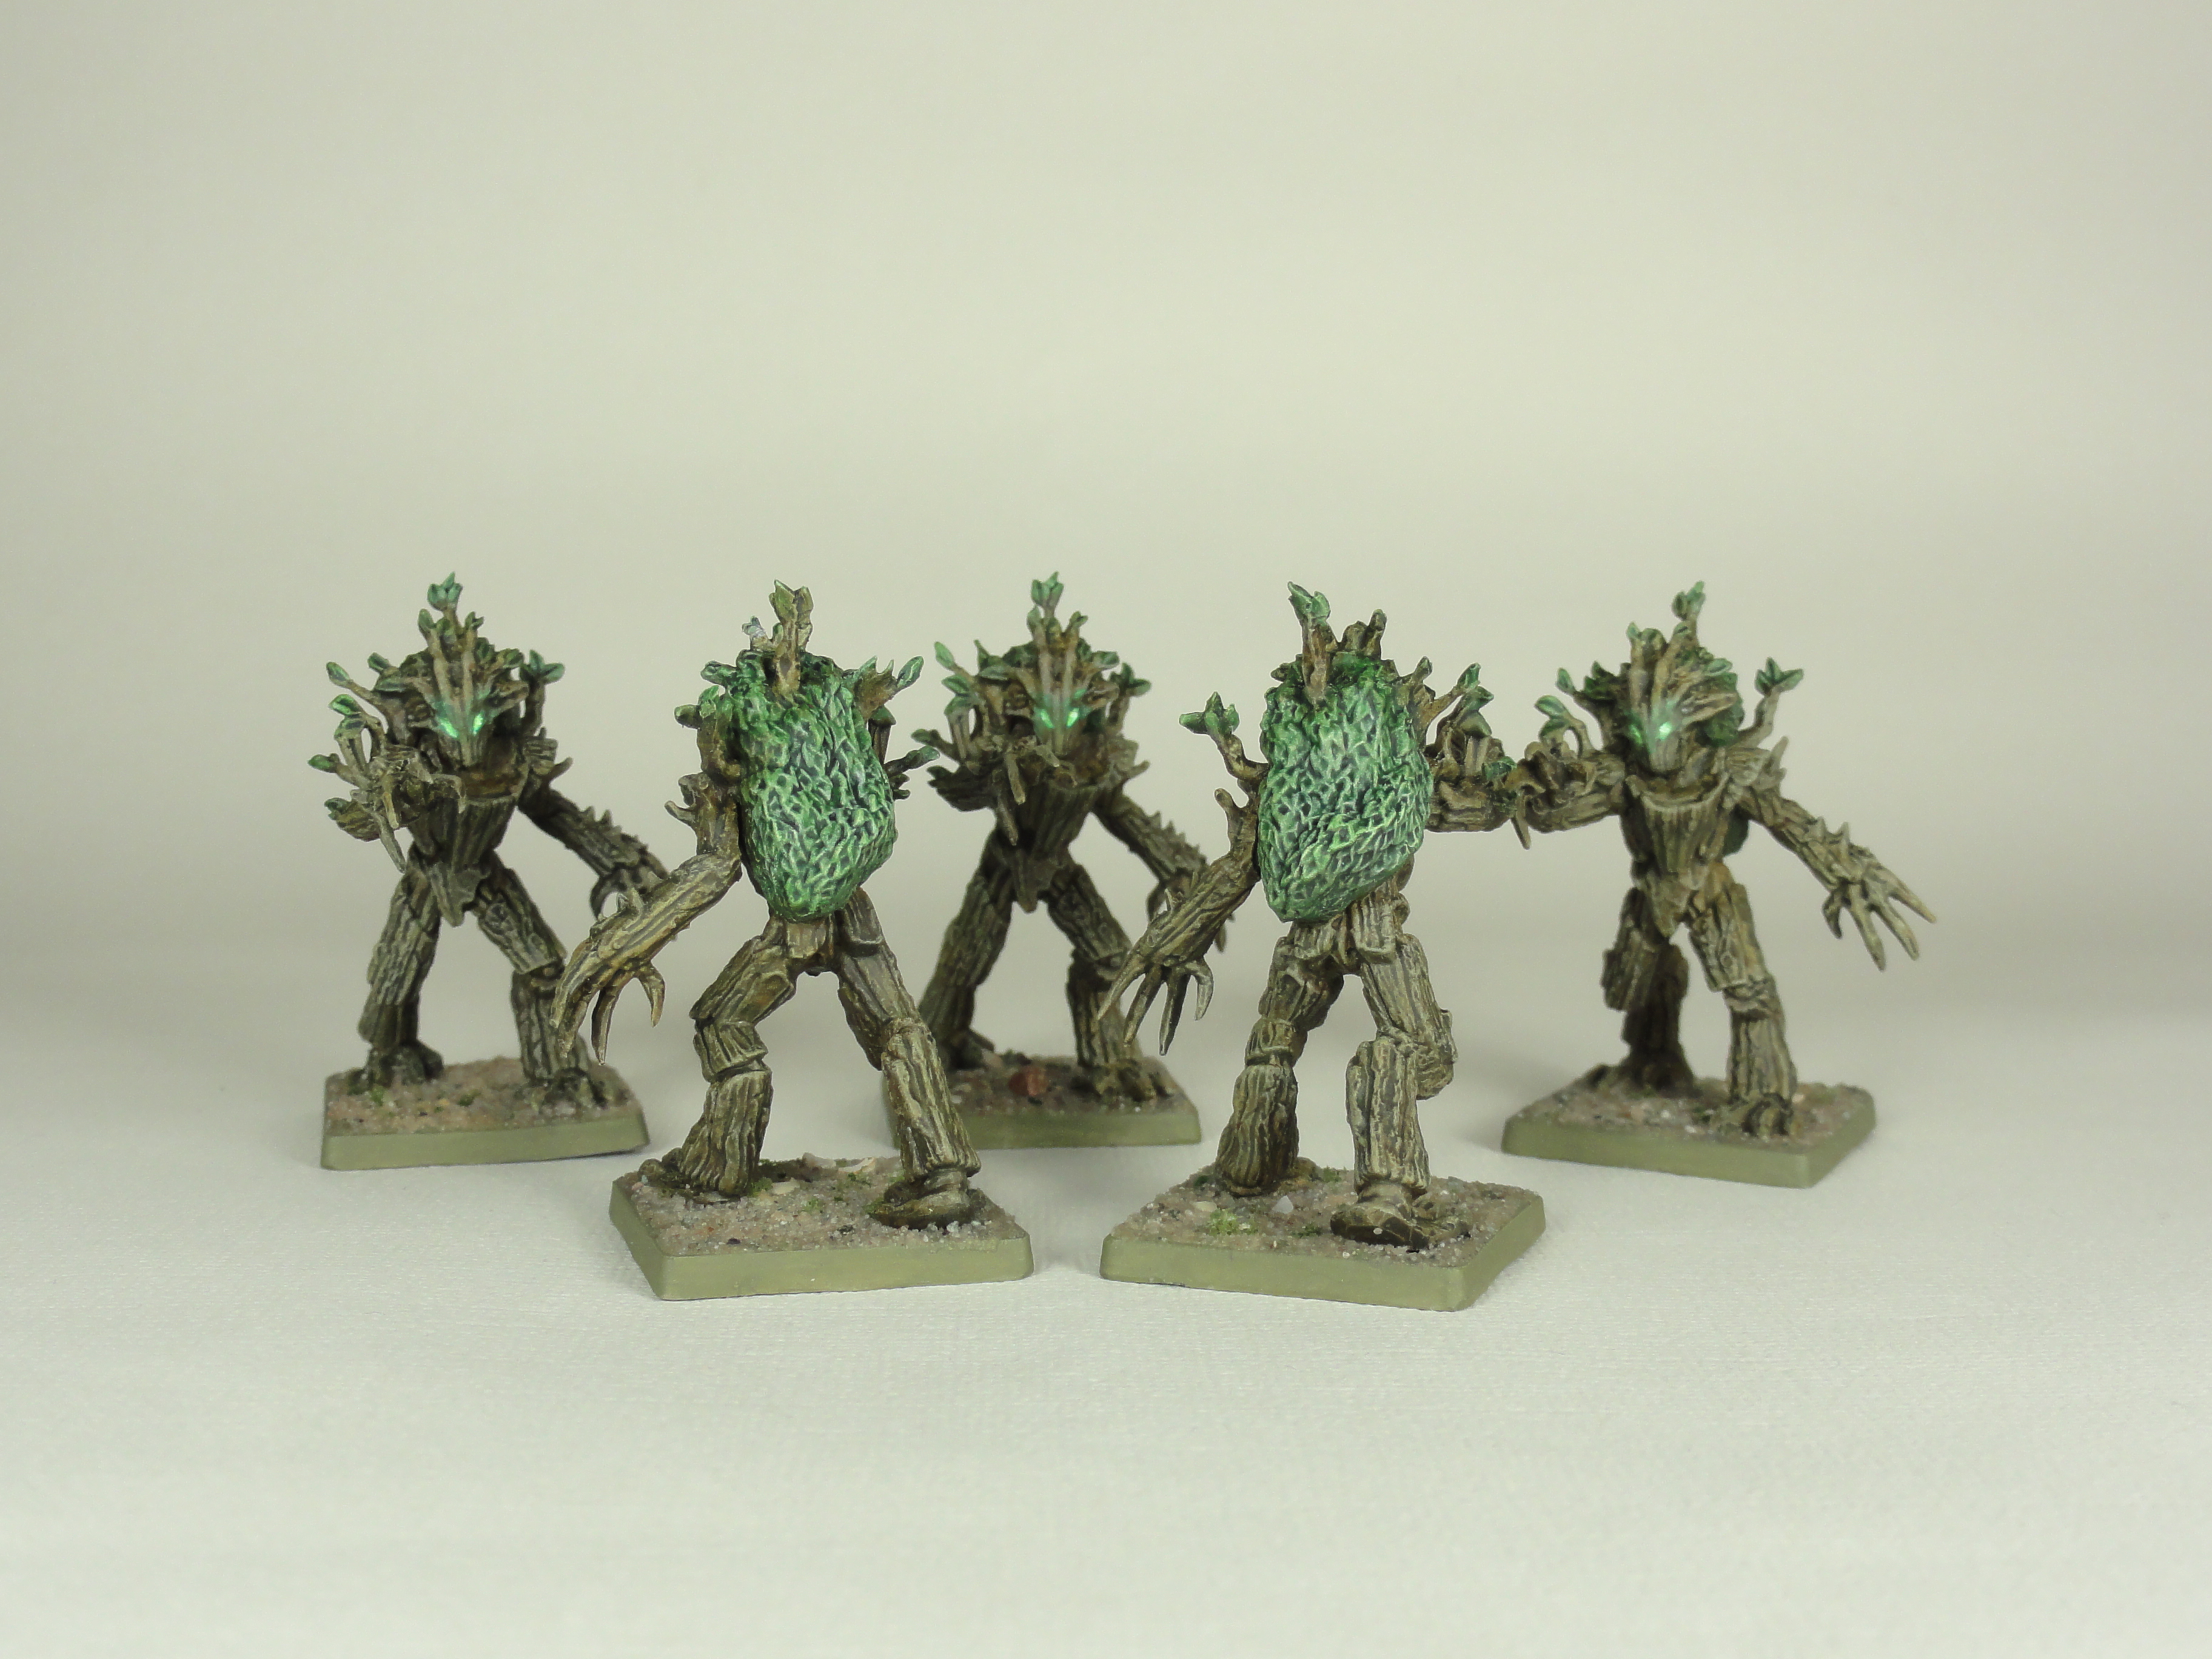
 Finished Dryads
For the eyes I looked at Sam Lenz’s technique from ‘How to Paint Glowing Eyes – Painting with the Pro’ (Tabletop Minions). https://www.youtube.com/watch?v=aOCaK3H-EmM
I went for a green to try and tie the Dryads into the Green Lady fluff from Mantic. A purple, blue or magenta would have been more poppy.
- White in the sockets
- A mix of Green Fluo (Vallejo Model Color) and white in the sockets
- Edge highlight the areas around the eye with the previous mix
- Diluted Waaargh! Green Ink (Citadel Ink) in the eyes and around them, wiping excess ink from the eyes
- Repeat the edge highlight with the Green Fluo and white mix
- Dot of white in the eye
- Thinned Green Fluo (no white) in the eye and over the edge highlights
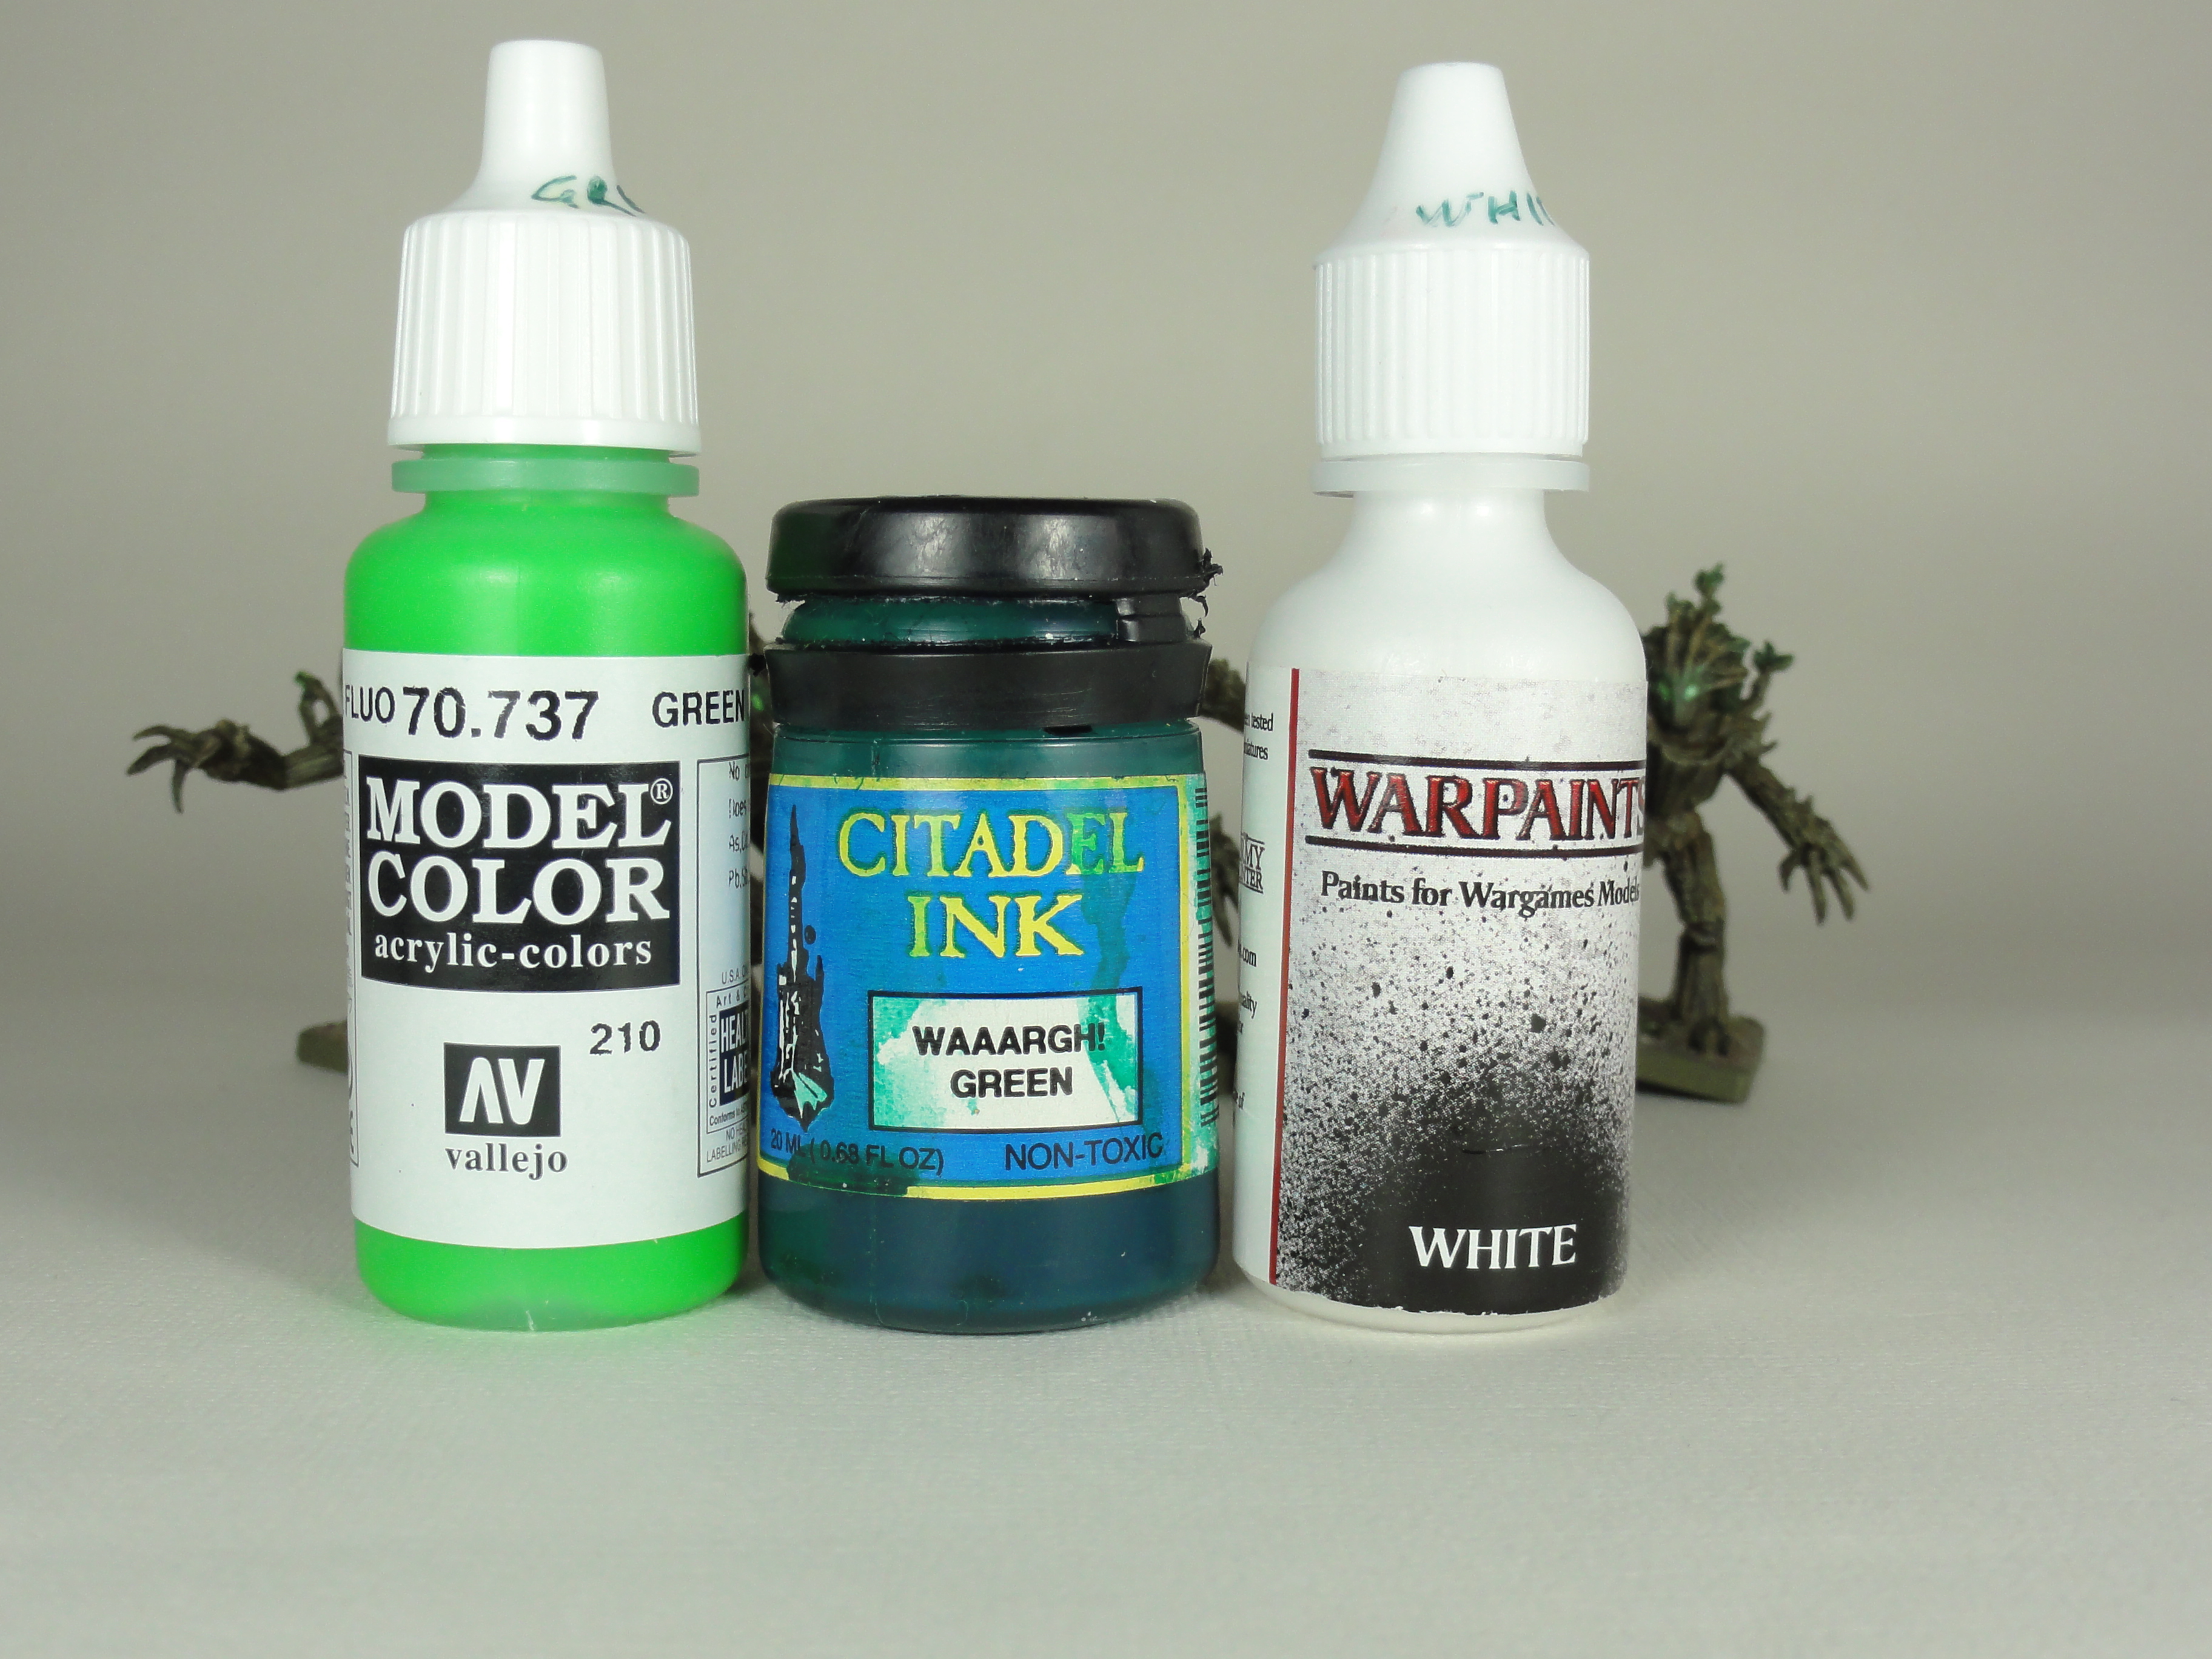 Green Fluo, Waaargh! Green Ink (out of production) and White
If I painted these again I would go for a different ink on the foliage of each Dryad (violet, orange, blue, red, green etc) and paint a smaller area of the eyes with the initial white.
Highlights could be improved. Some of the paint has a satin sheen before matt varnishing so I should go higher for the highlights before the matt dulls it down.
Overall I’m happy enough with these for a tabletop standard.
Edit to first post due to Halfling Beta list for Kings of War
I’ve edited my very first post on bases sizes for anyone using League of Infamy figures in Vanguard or Kings of War now that there is a Beta list out for Kings of War.
Edit:
No Half Measures:
- Halfling Infantry to 20mm bases
- Iron Beast listed as Titan so current base is correct
- Sauceror, Greedyguts and Feastmaster stay as 25mm bases
Week 17 Lynxes
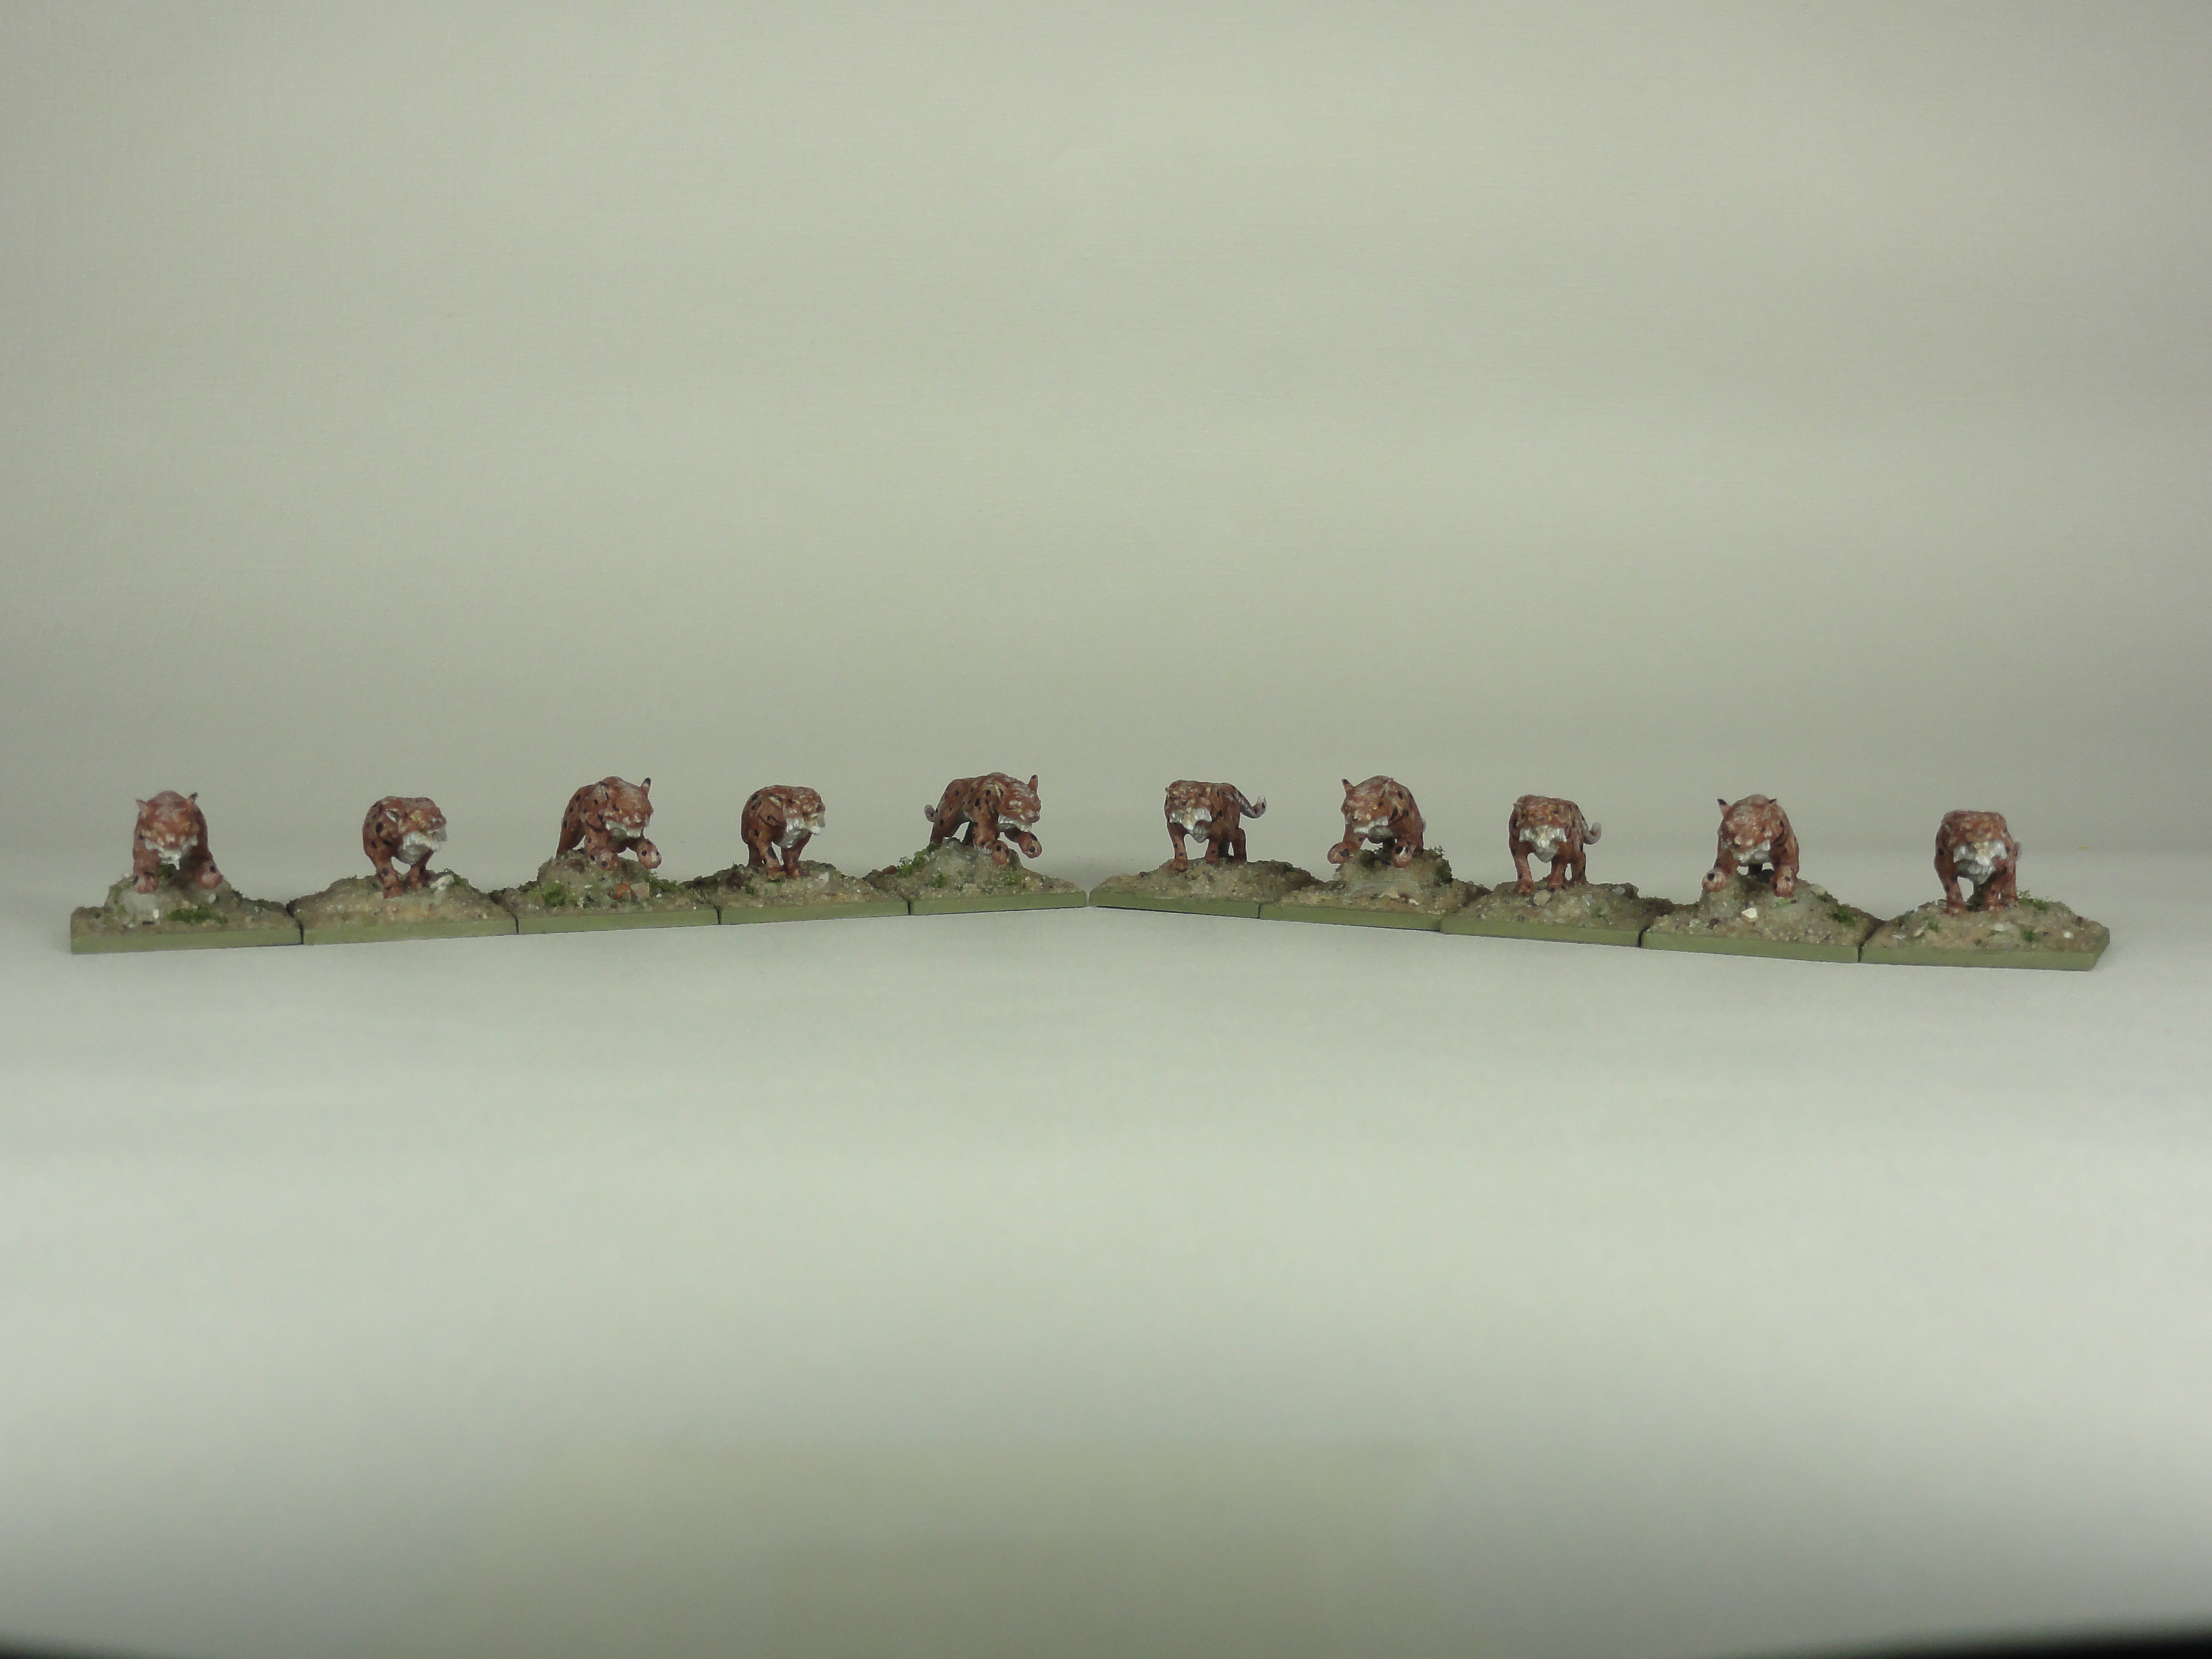 10 Lynxes
I didn’t quite get the technique right. There are 3 different shades of striations on the fur even though it only looks like one. I was trying to roughly follow Vince Venturella’s hobby cheating 251 How to Paint Fur Texture. https://www.youtube.com/watch?v=Jzk5DHKBEtY
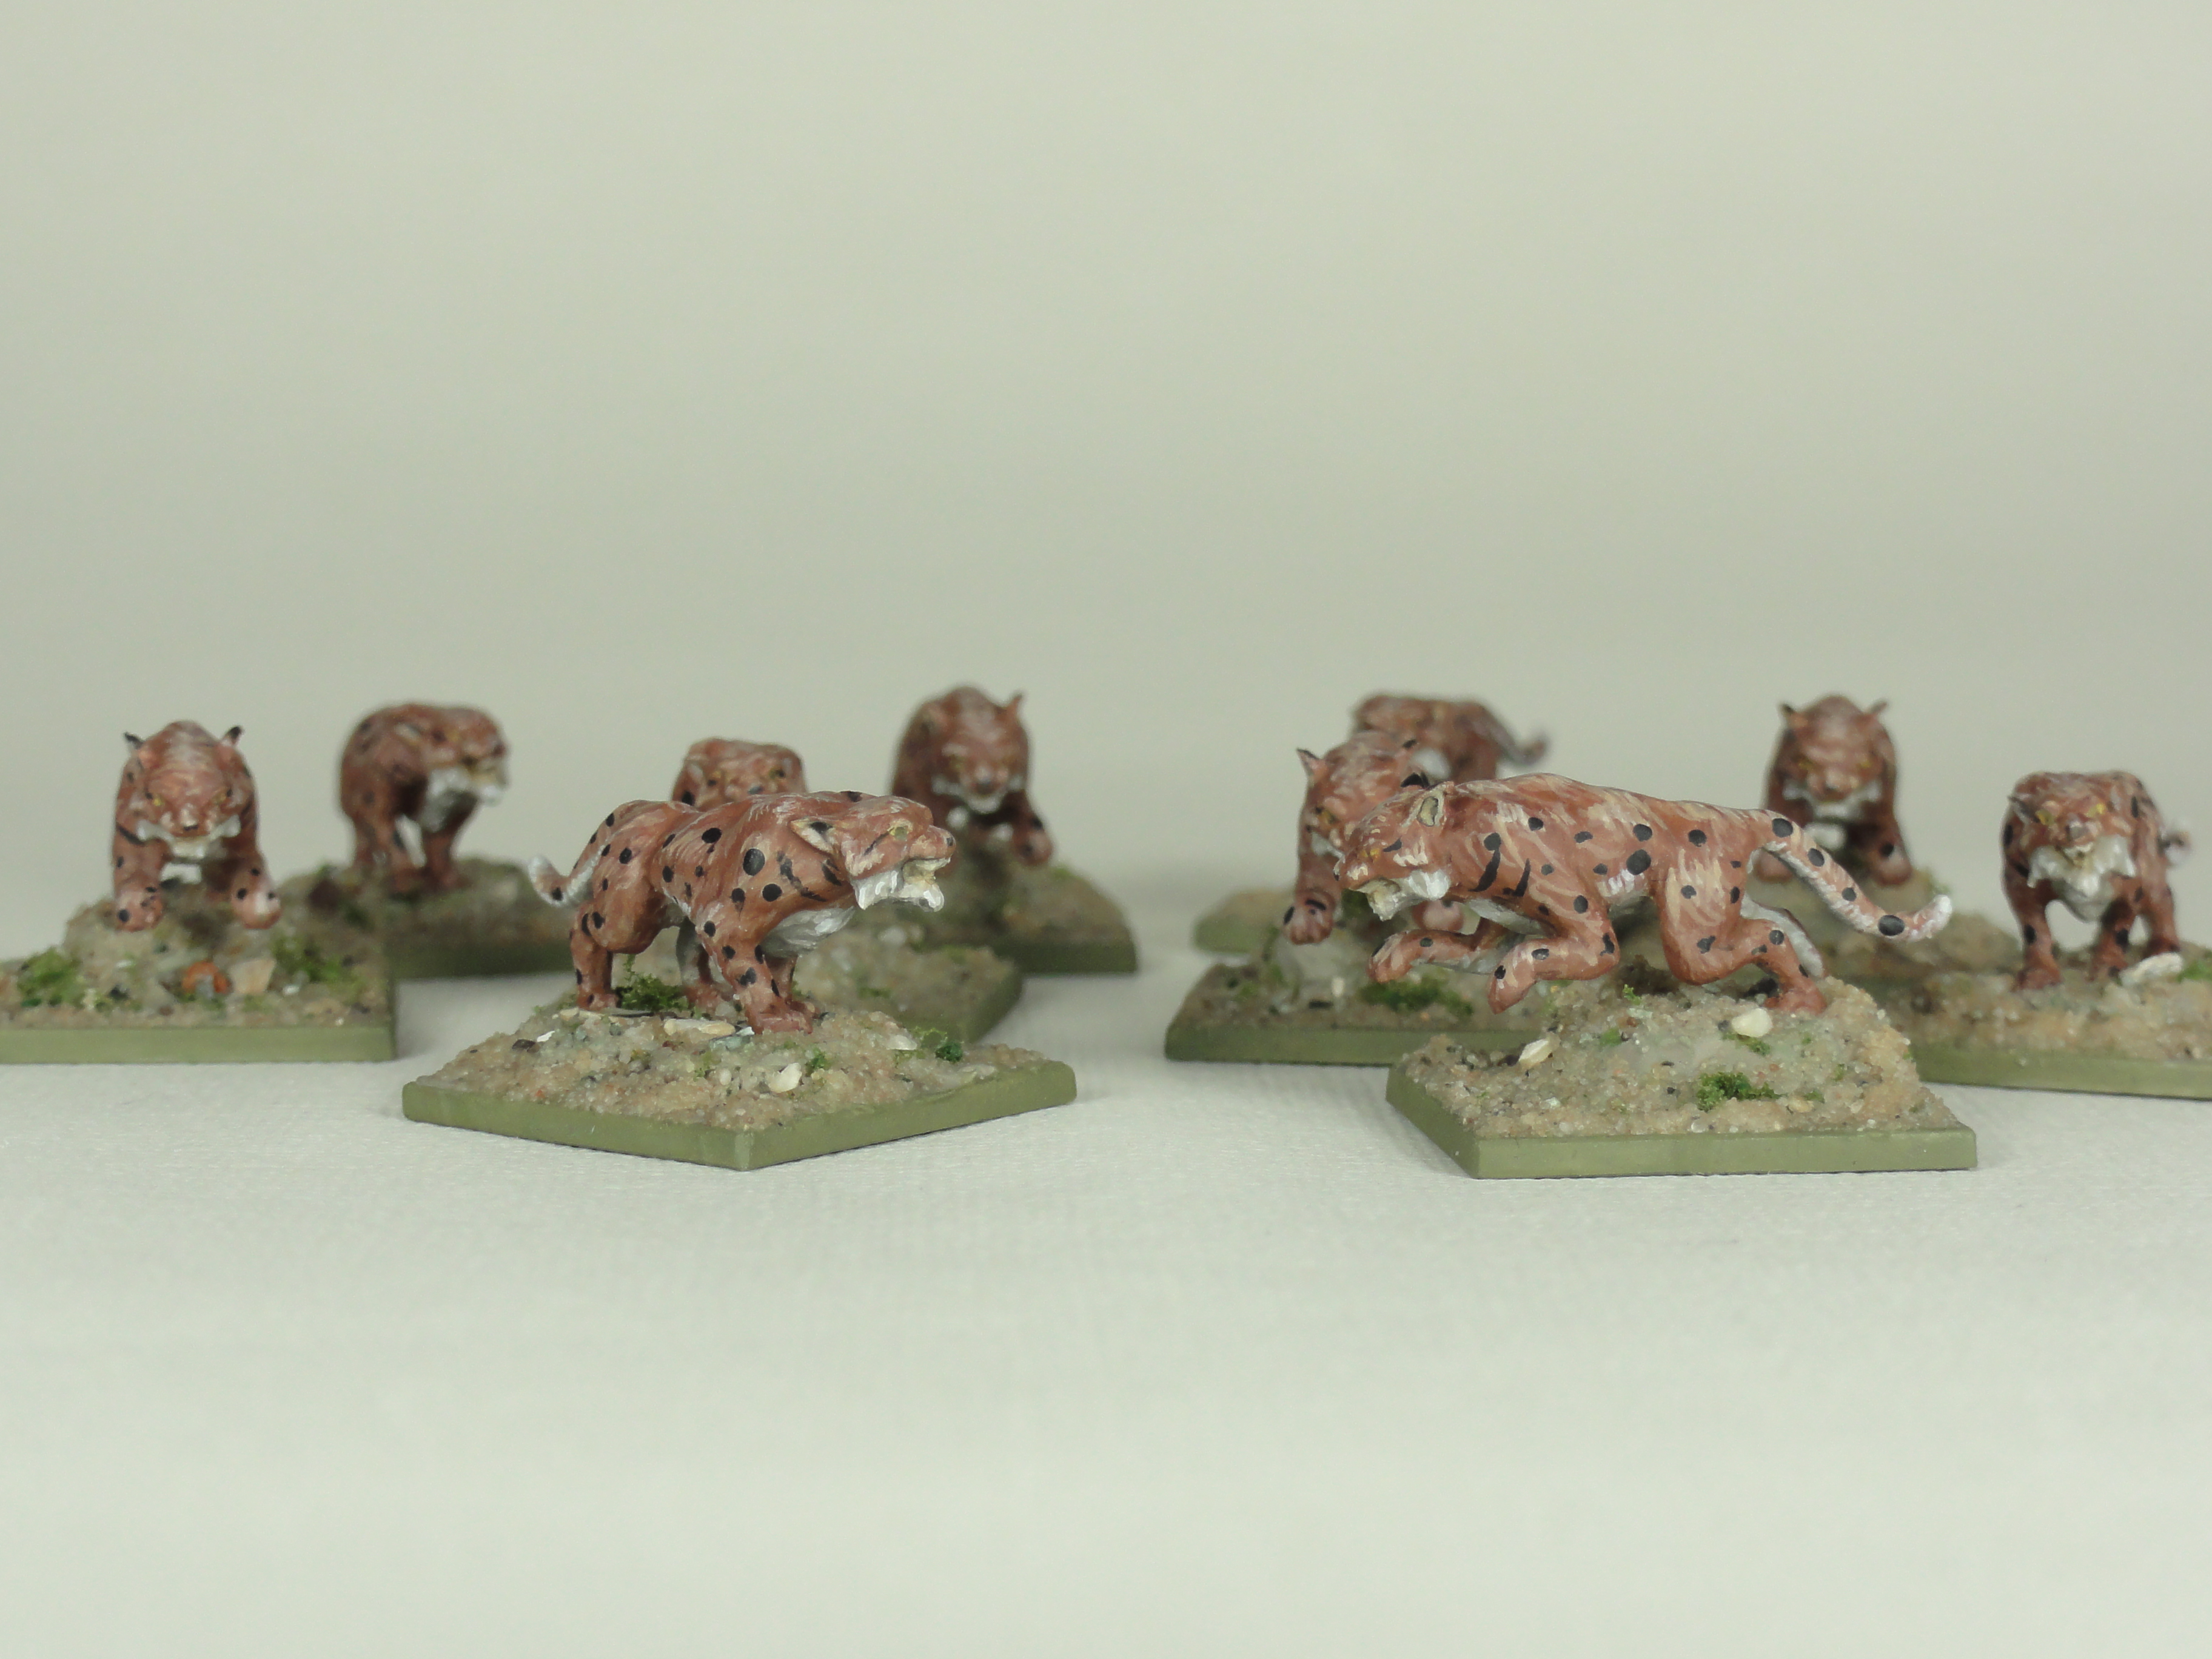
The Lynxes had been primed in week 7 with IDF Israeli Sand Grey Vallejo Surface Primer then Titanium White Liquitex Acrylic Ink was sprayed from above.
The eyes were painted first so that any mistakes in that area could be covered later:
- Base coat Elf Skin Tone (Vallejo Game Color)
- Yellow Orchre (Vallejo Model Air) over the top of the base coat
- Black pupil
Some of the Elf Skin Tone was also added to the mouth. The teeth were Bone White (Vallejo Game Color) followed by Army painter Strong Tone then re-highlighted in Bone White.
The base coat of the top half of the fur was Mahogany Brown (Vallejo Model Color) where as the bottom half was the IDF Israeli Sand Grey Vallejo Surface Primer.
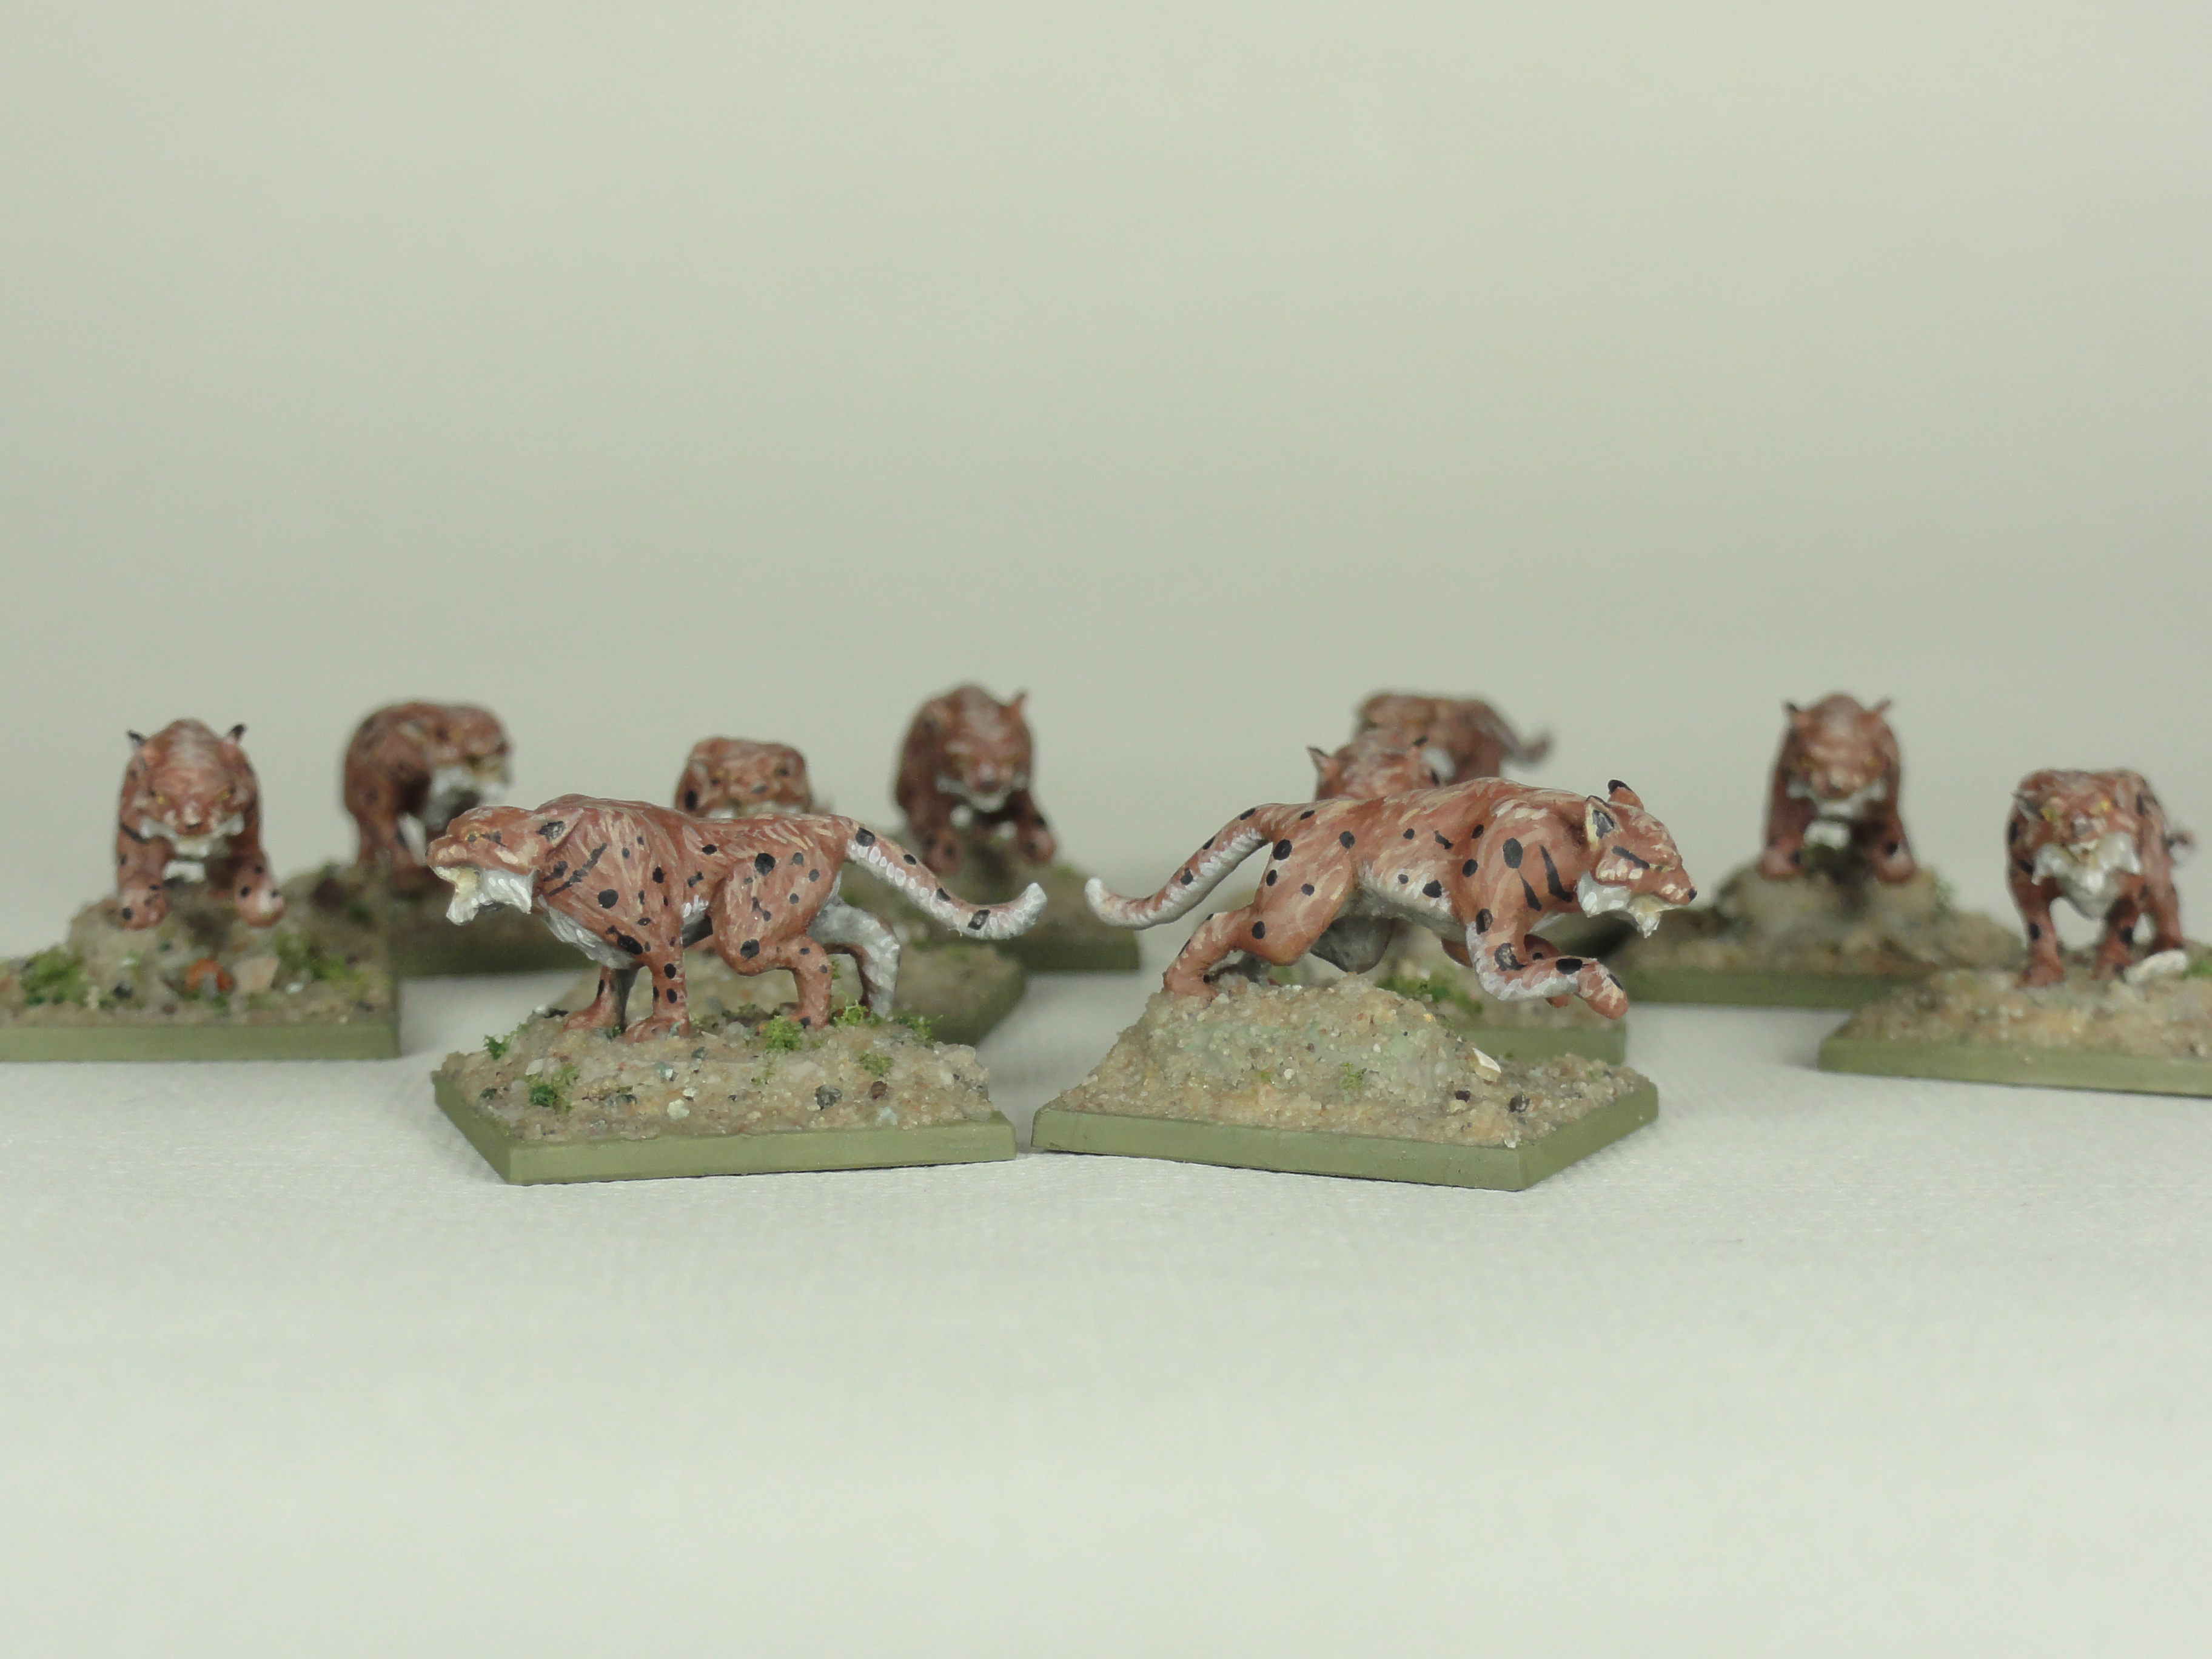
Thin lines of IDF Israeli Sand Grey Vallejo Surface Primer mixed with Ivory (Vallejo Model Color) and flow improver were added to areas of the lower fur. Some shorter lines of Ivory and flow improver were then added to highlight parts of the lower fur.
The upper fur had lines of Mahogany Brown mixed with Elf Skin Tone and flow improver added. Then shorter lines of a lighter mixer and finally very short lines of the mixture mixed with Ivory. Using a darker Caucasian skin tone like Barbarian Flesh may have worked better (Vince uses Sunny Skin Tone).
The markings round the face, neck and ears, plus the spotting were done using Liquitex Carbon Black ink. The spotting was done following Gerry’s technique but with an empty metal ball point pen cartridge as my spotting tool (COGs only https://www.beastsofwar.com/featured/gerry-can-how-to-add-dots-to-miniatures/).
Lynxes were gloss varnished then stuck to 20mm square bases. The edges of the cut base that remained attached to the Lynx were smoothed out with filler and re-primed along with the rest of the base. The rim was then painted Heavy Grey (Vallejo Game Extra Opaque) and the same basing material was added and sealed that I used on the Drakons. Everything was then matt varnished.
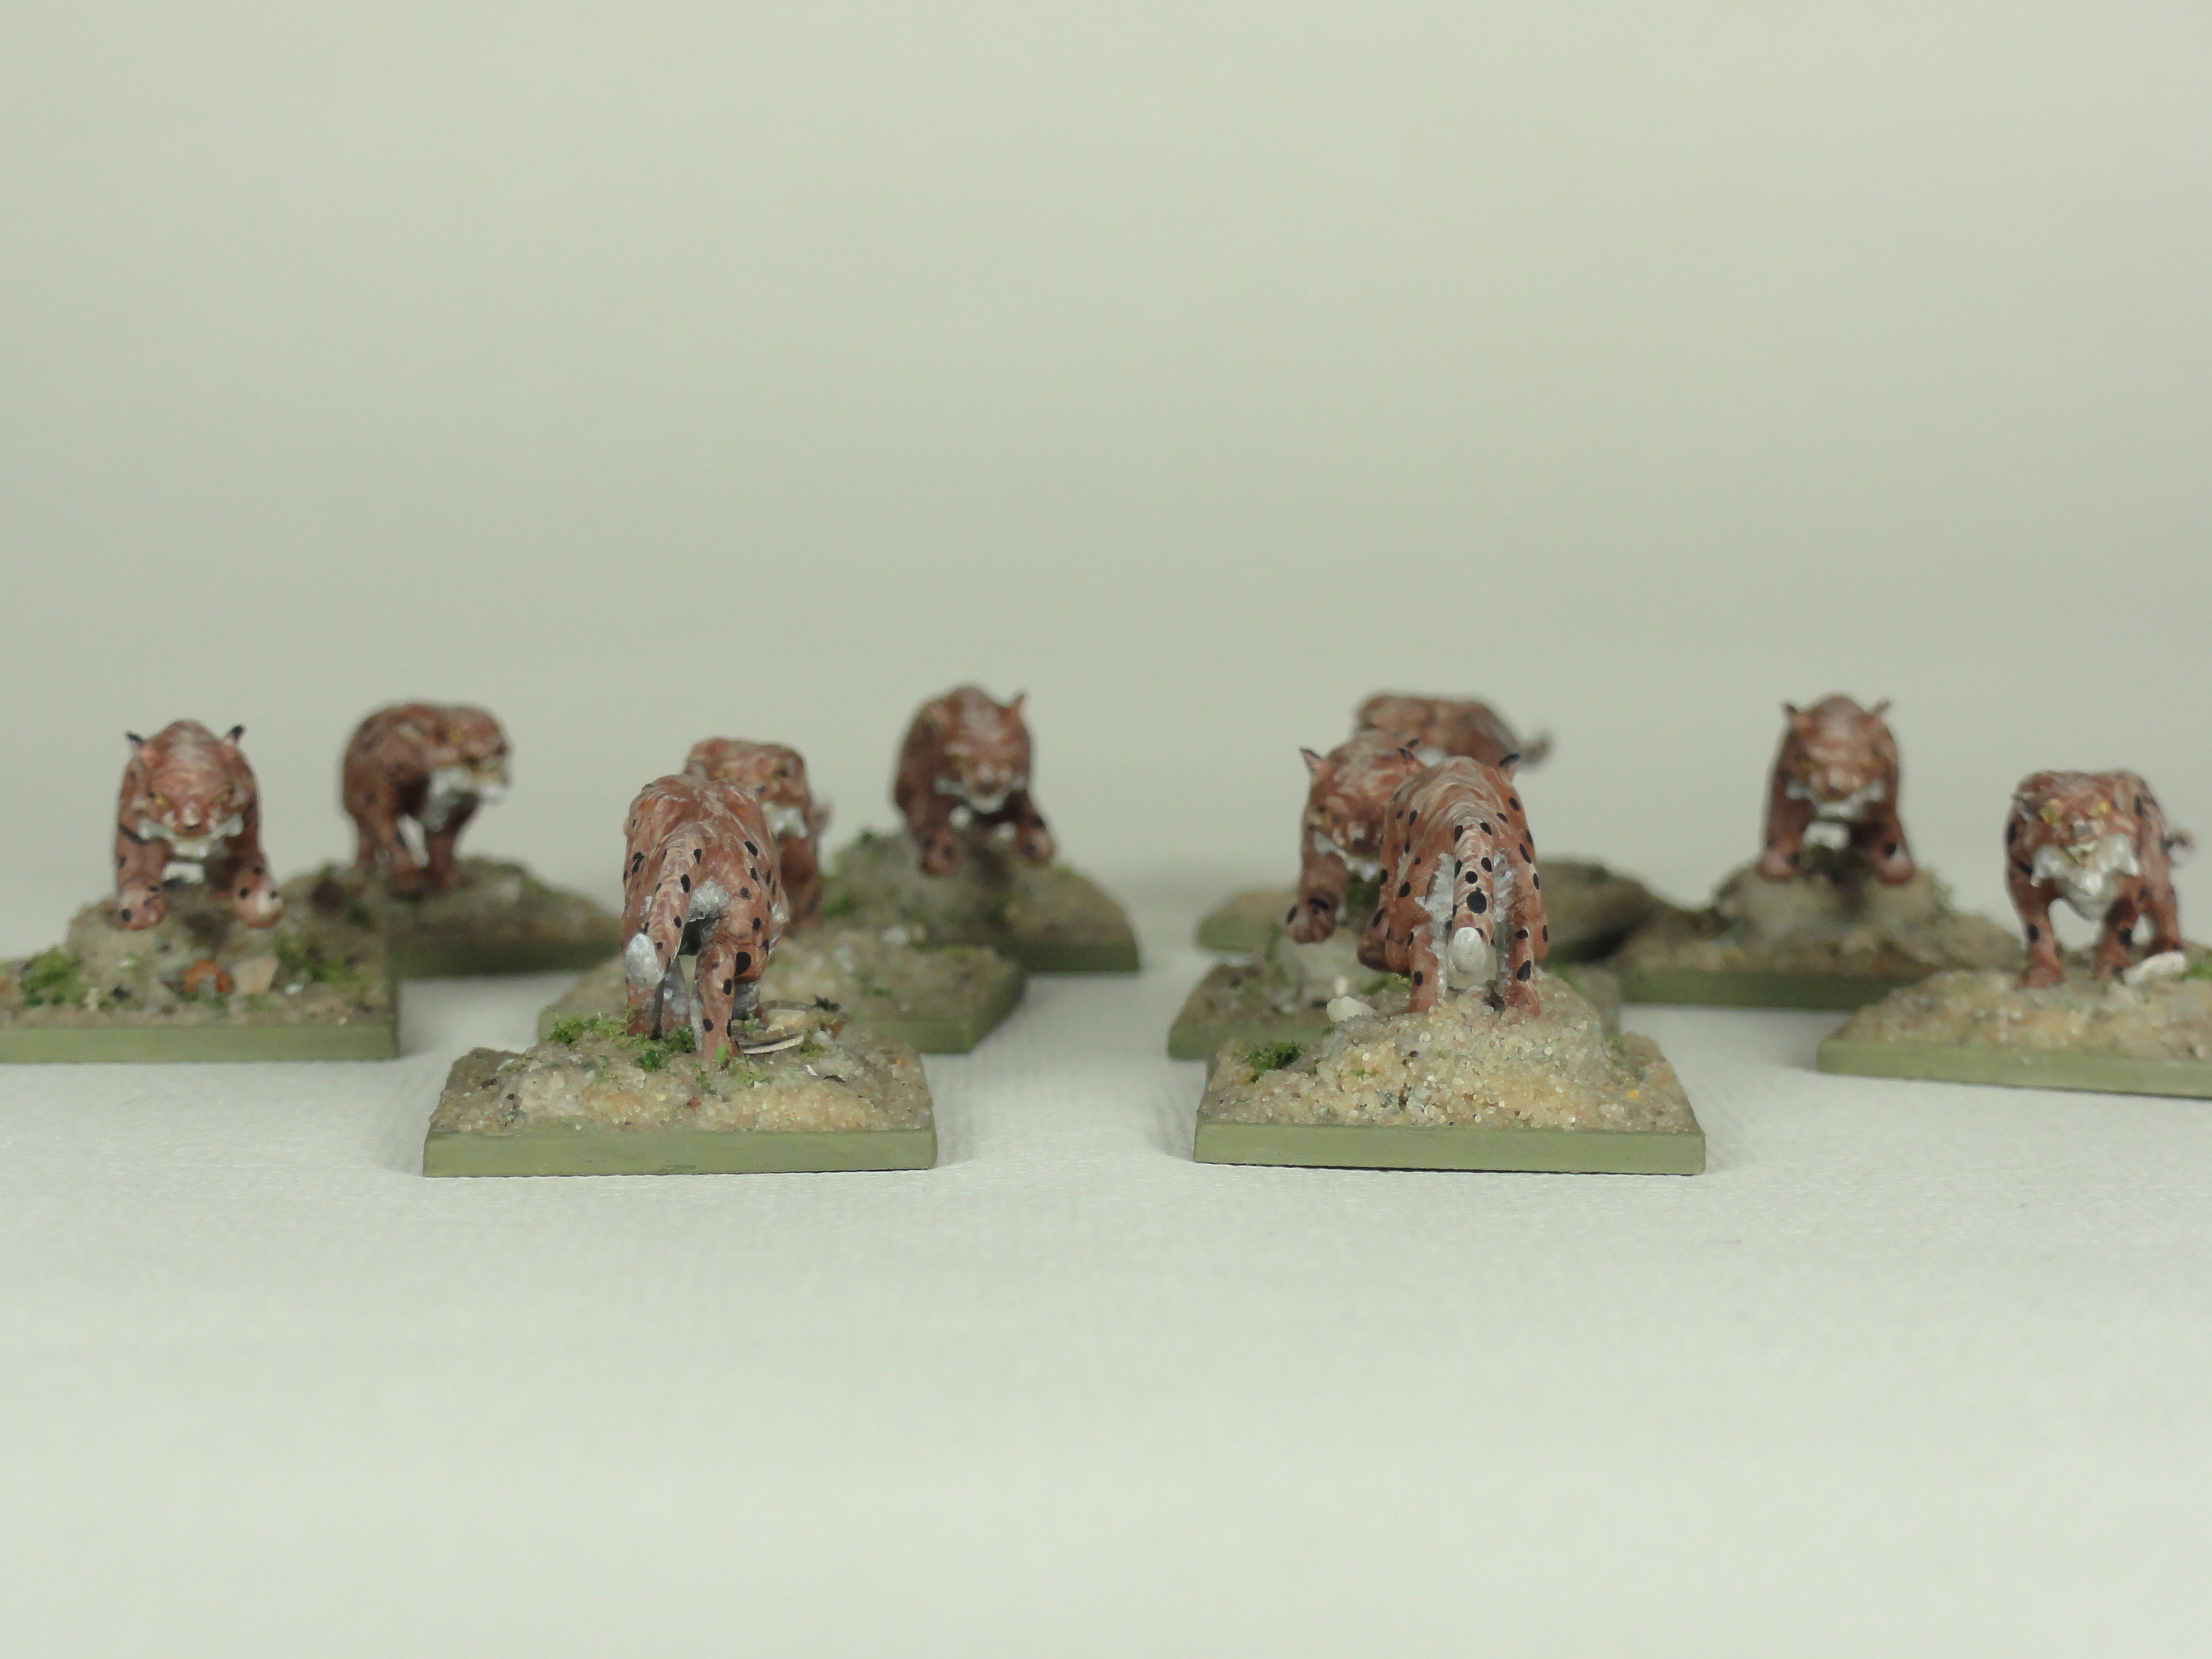
What could I do to fix these if I had time and not a back log of miniatures? I could do more striations over the top and deeper than the existing ones with more contrast between each smaller layer and add some grey to the spotting and markings.
Next week Dryads.
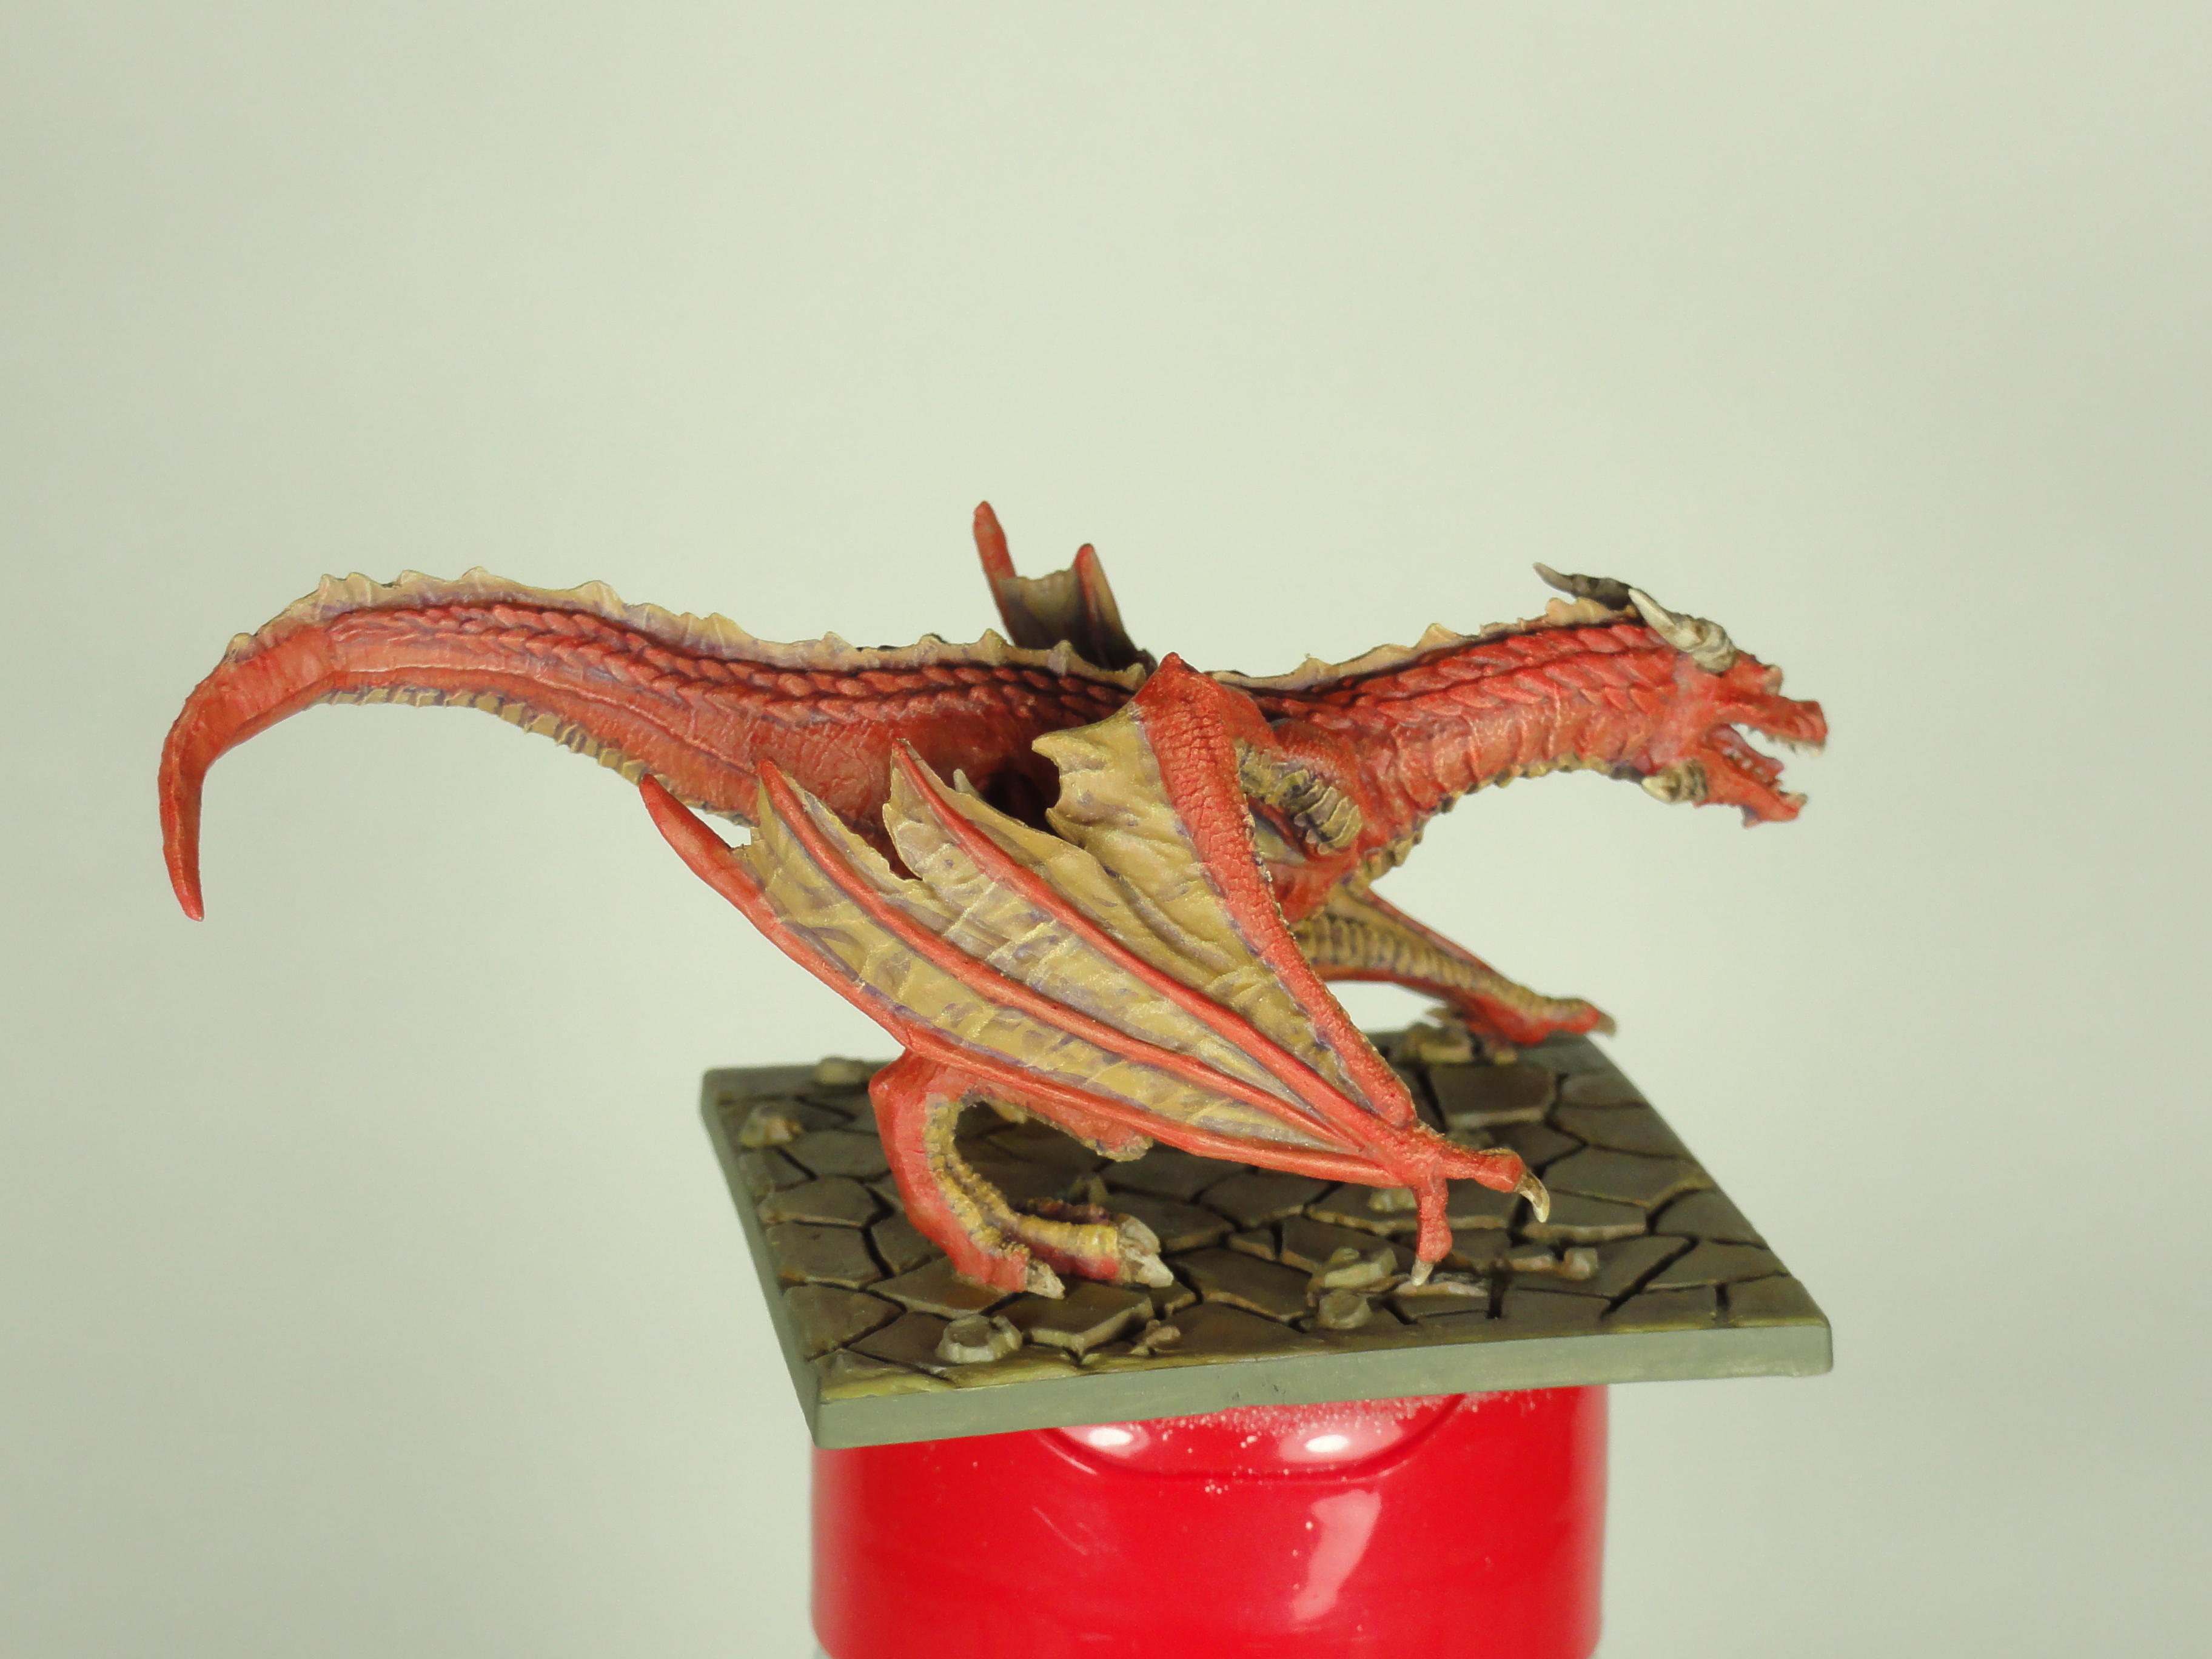
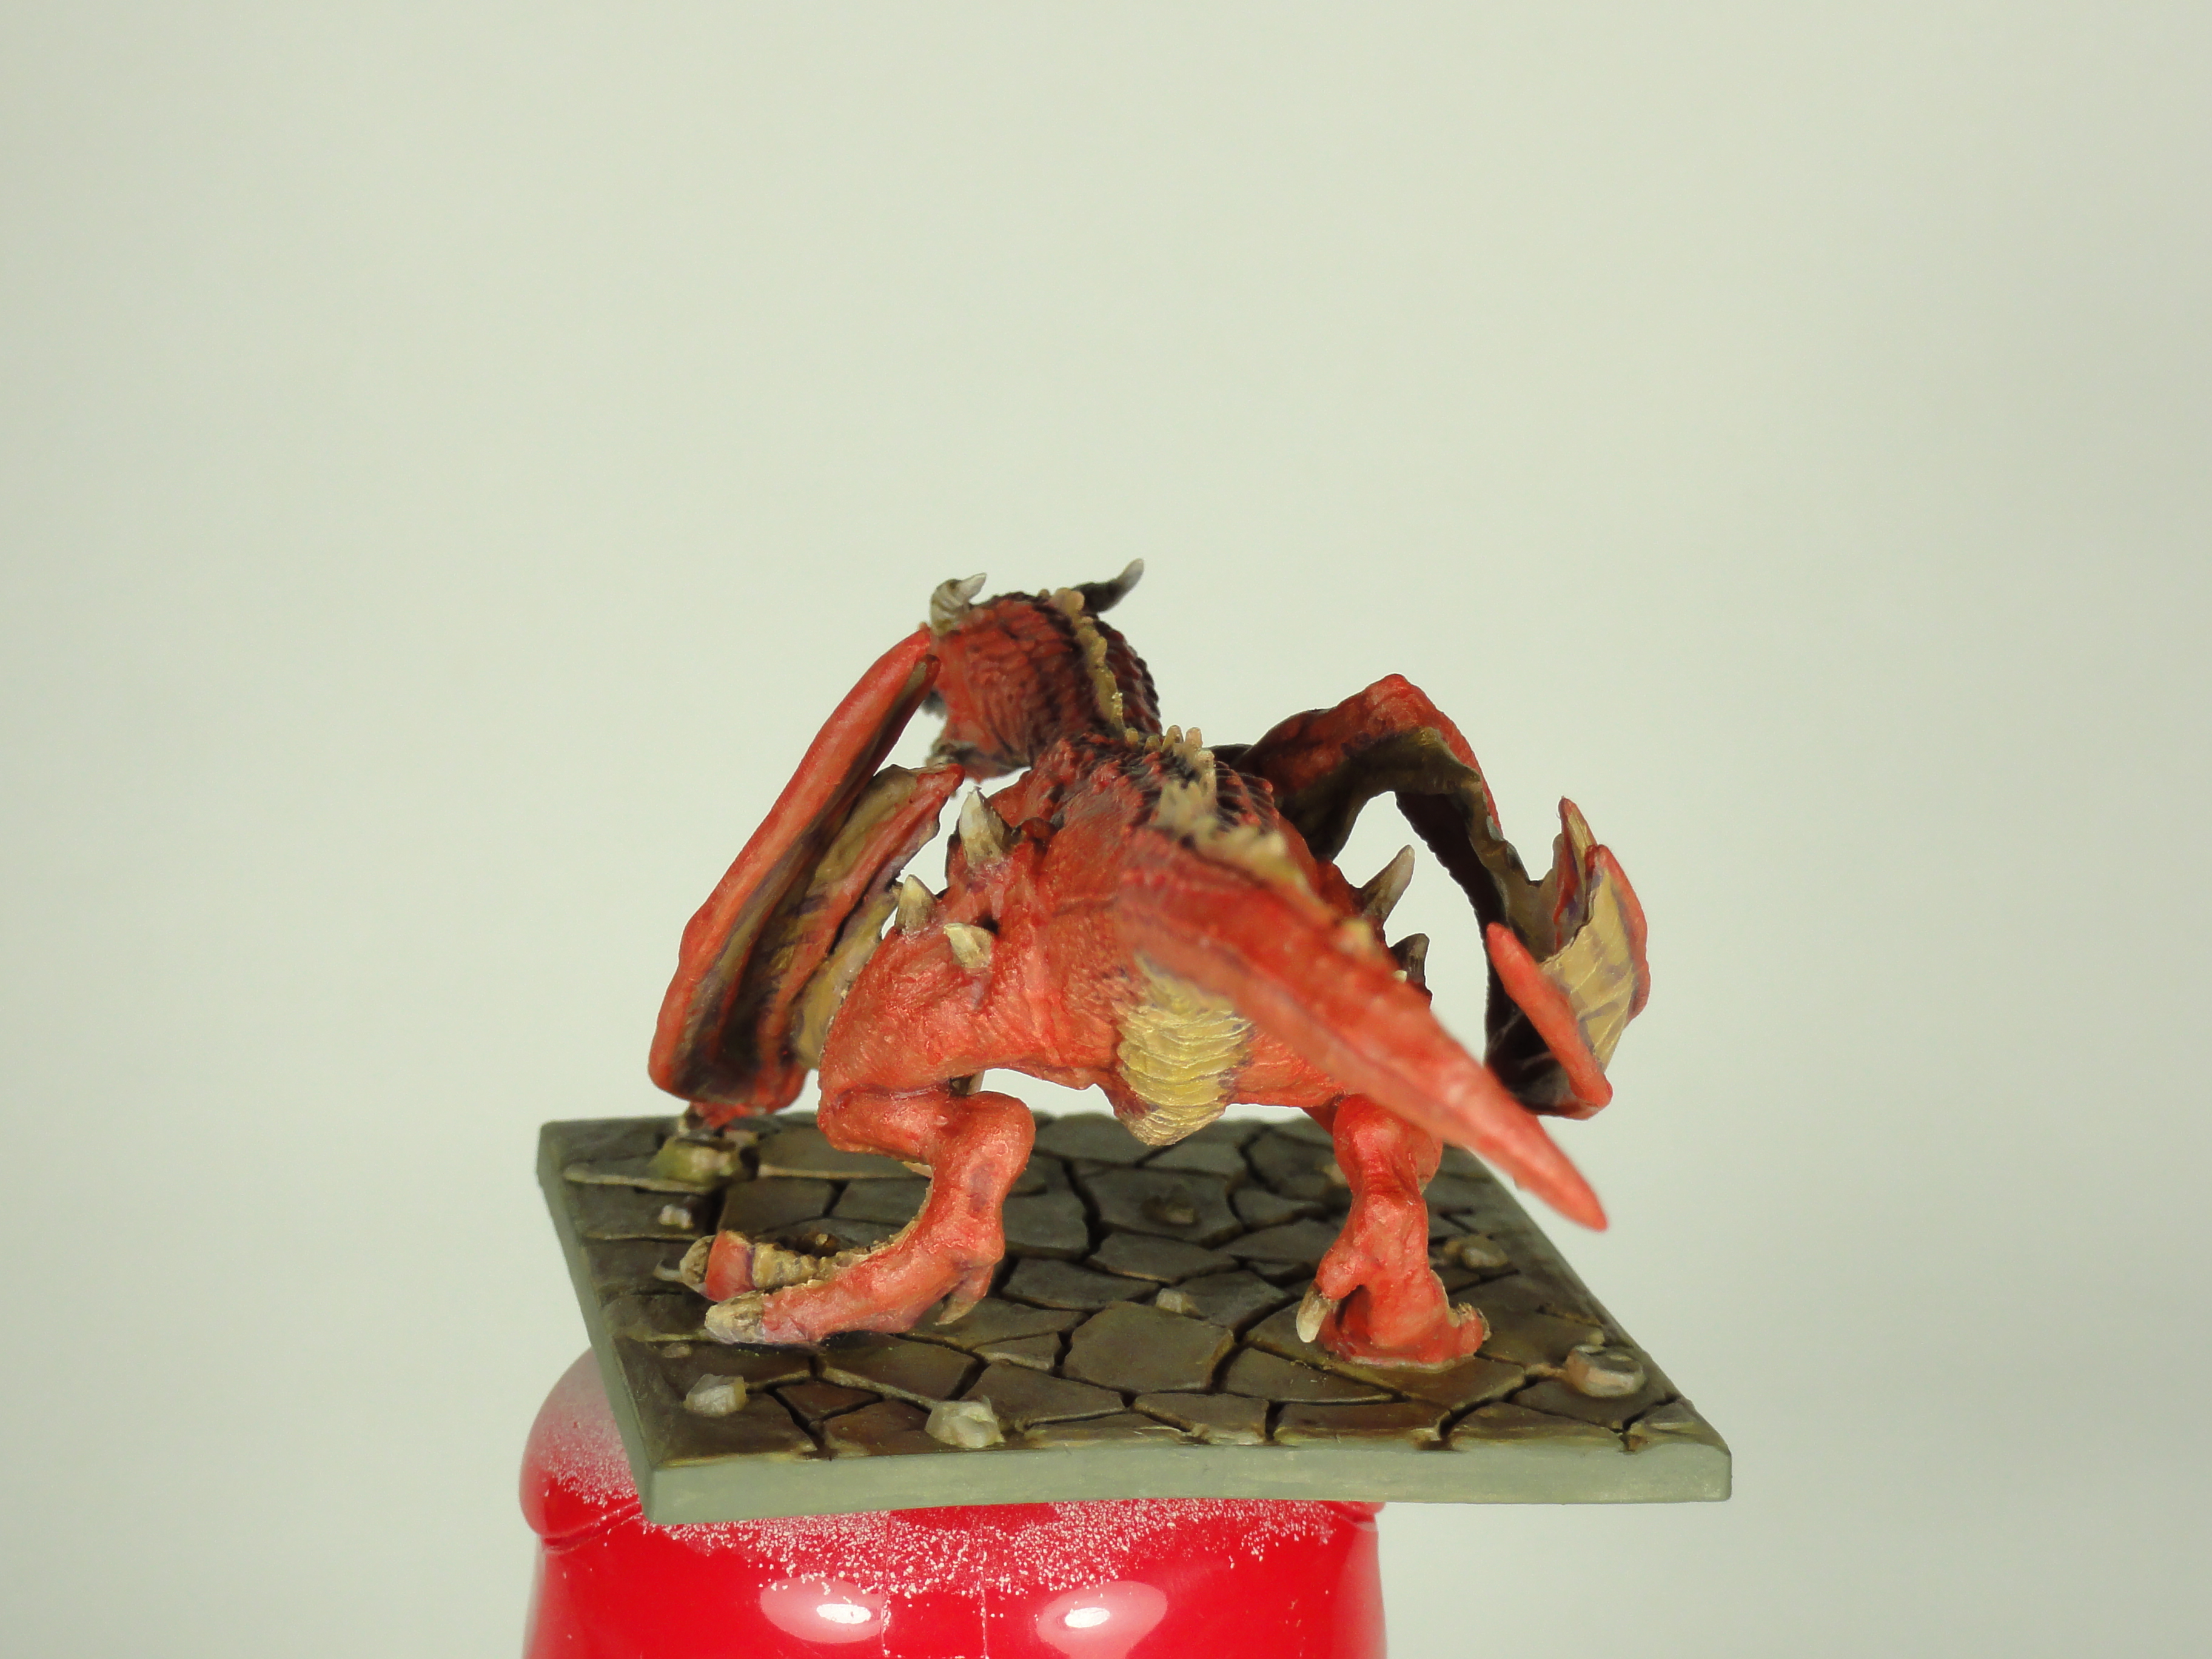
Week 15 and 16 Drakons done? Part2: Basing
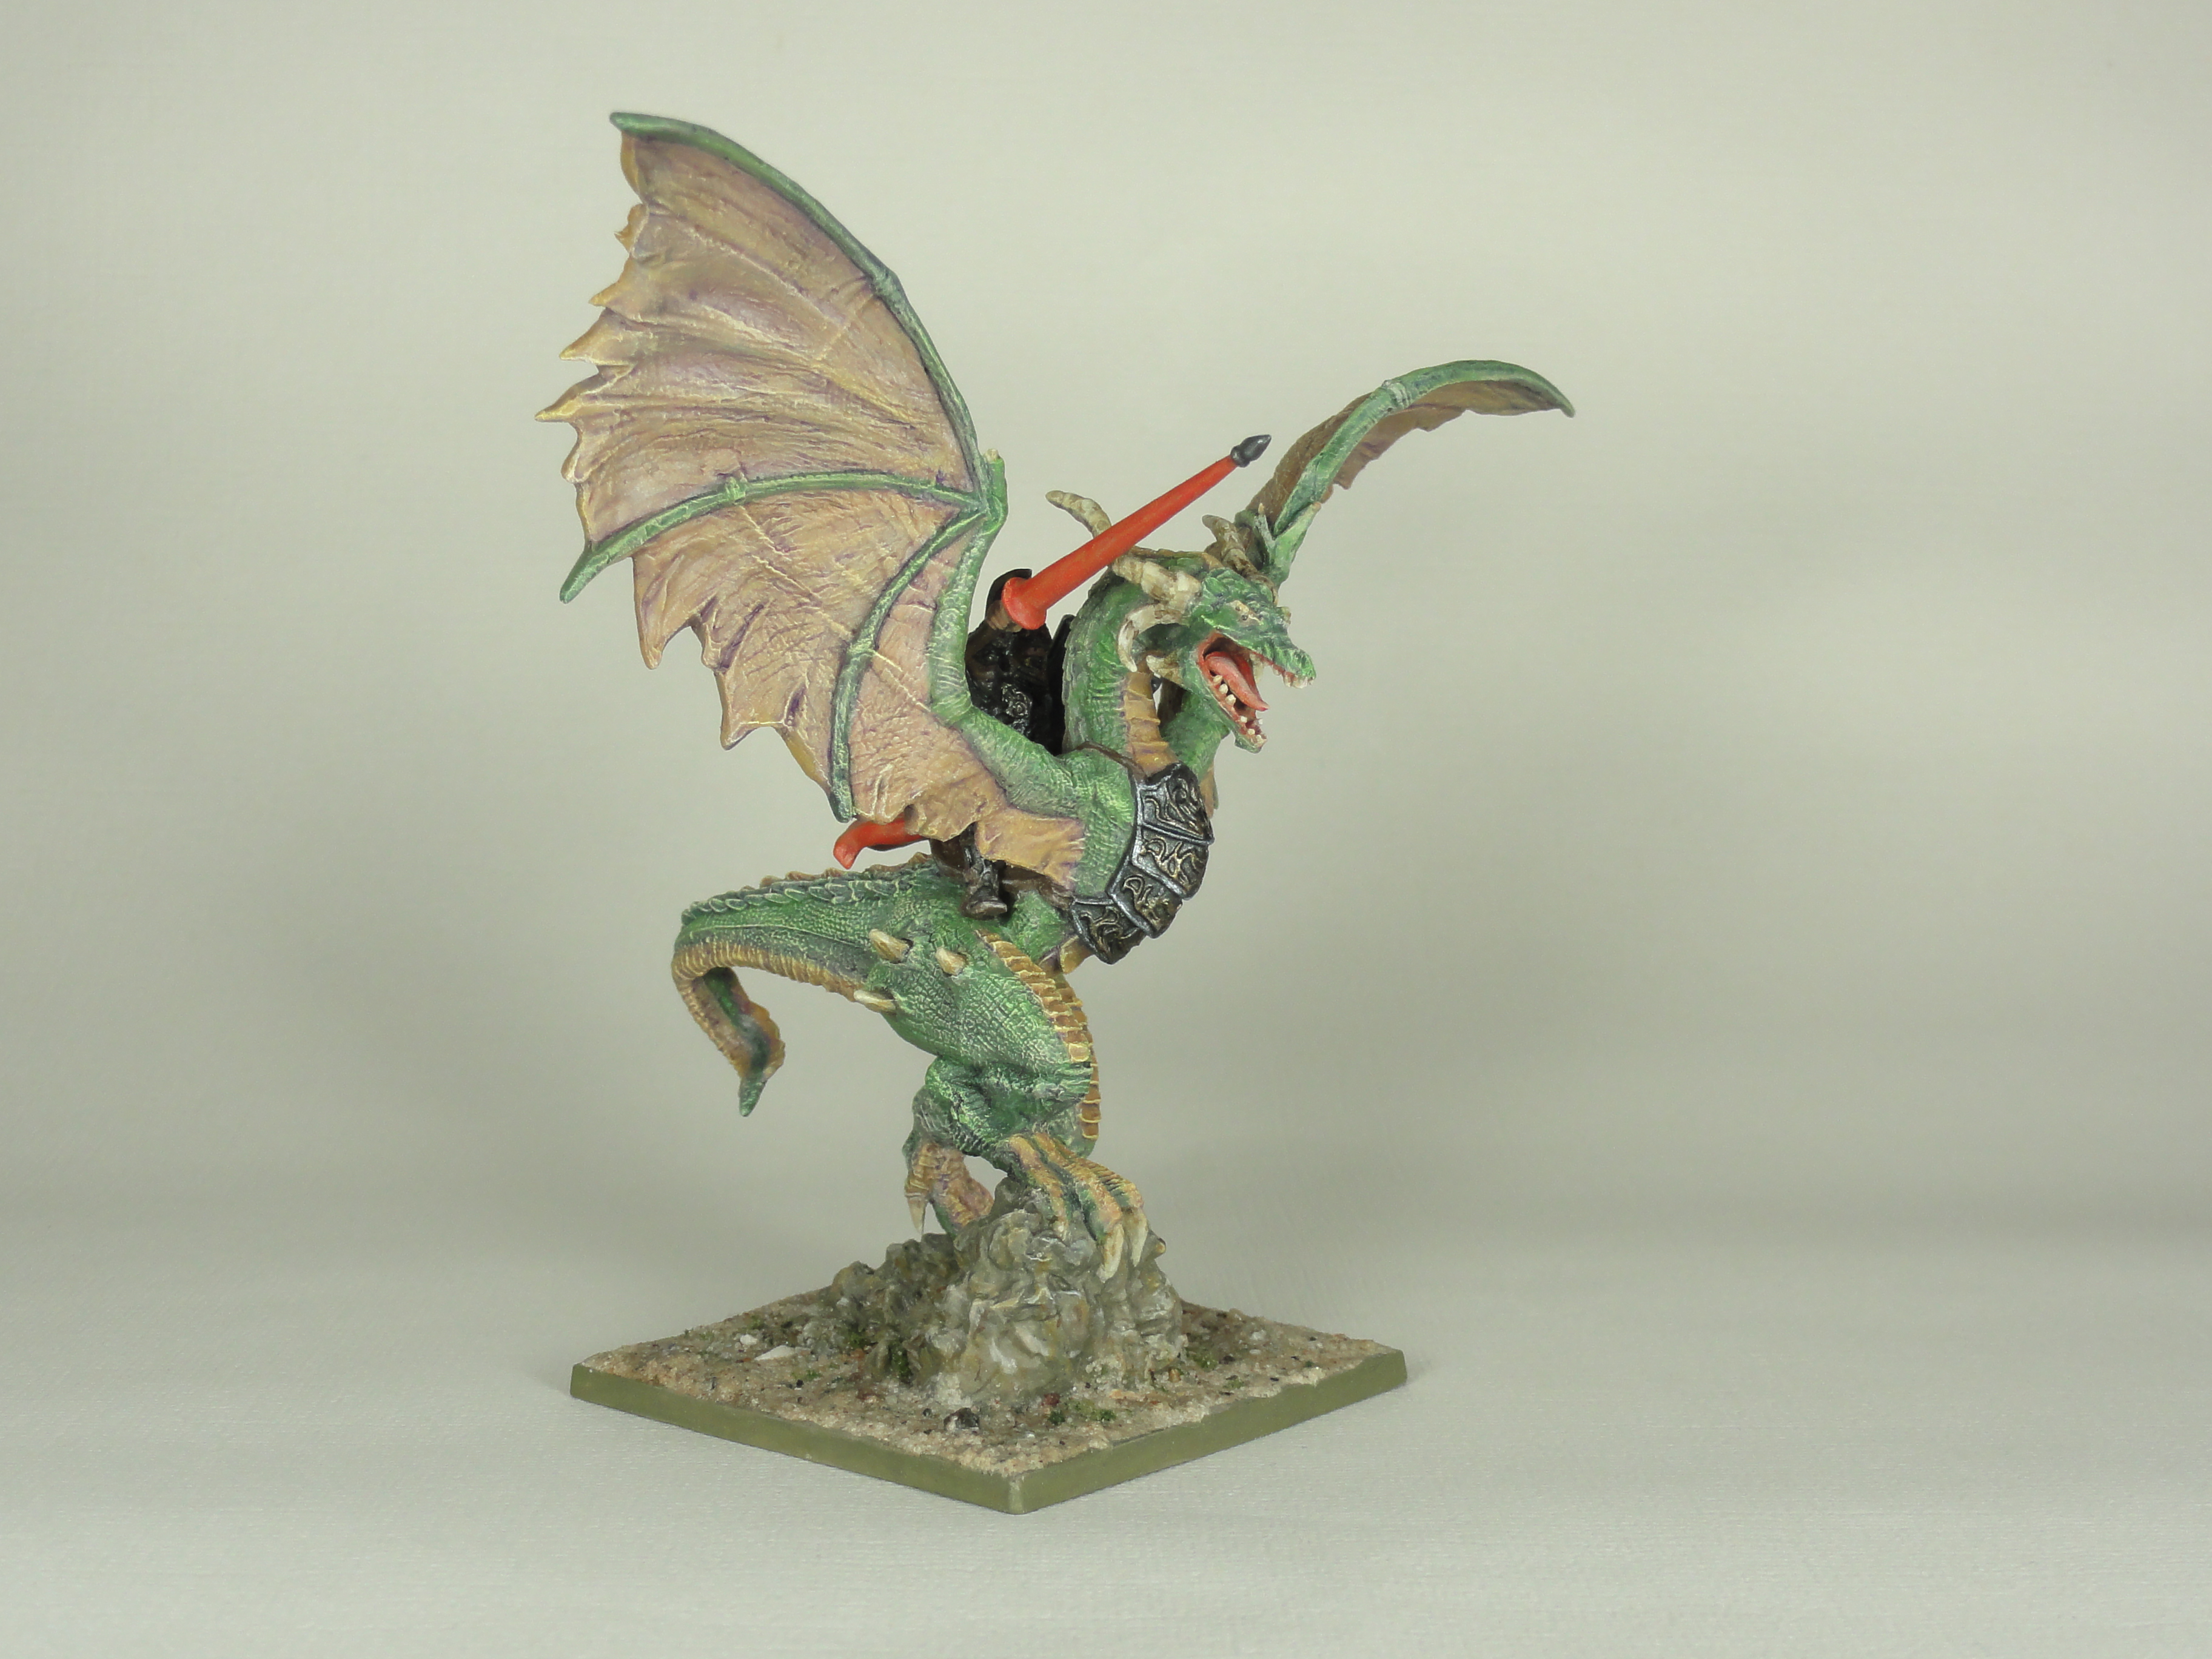
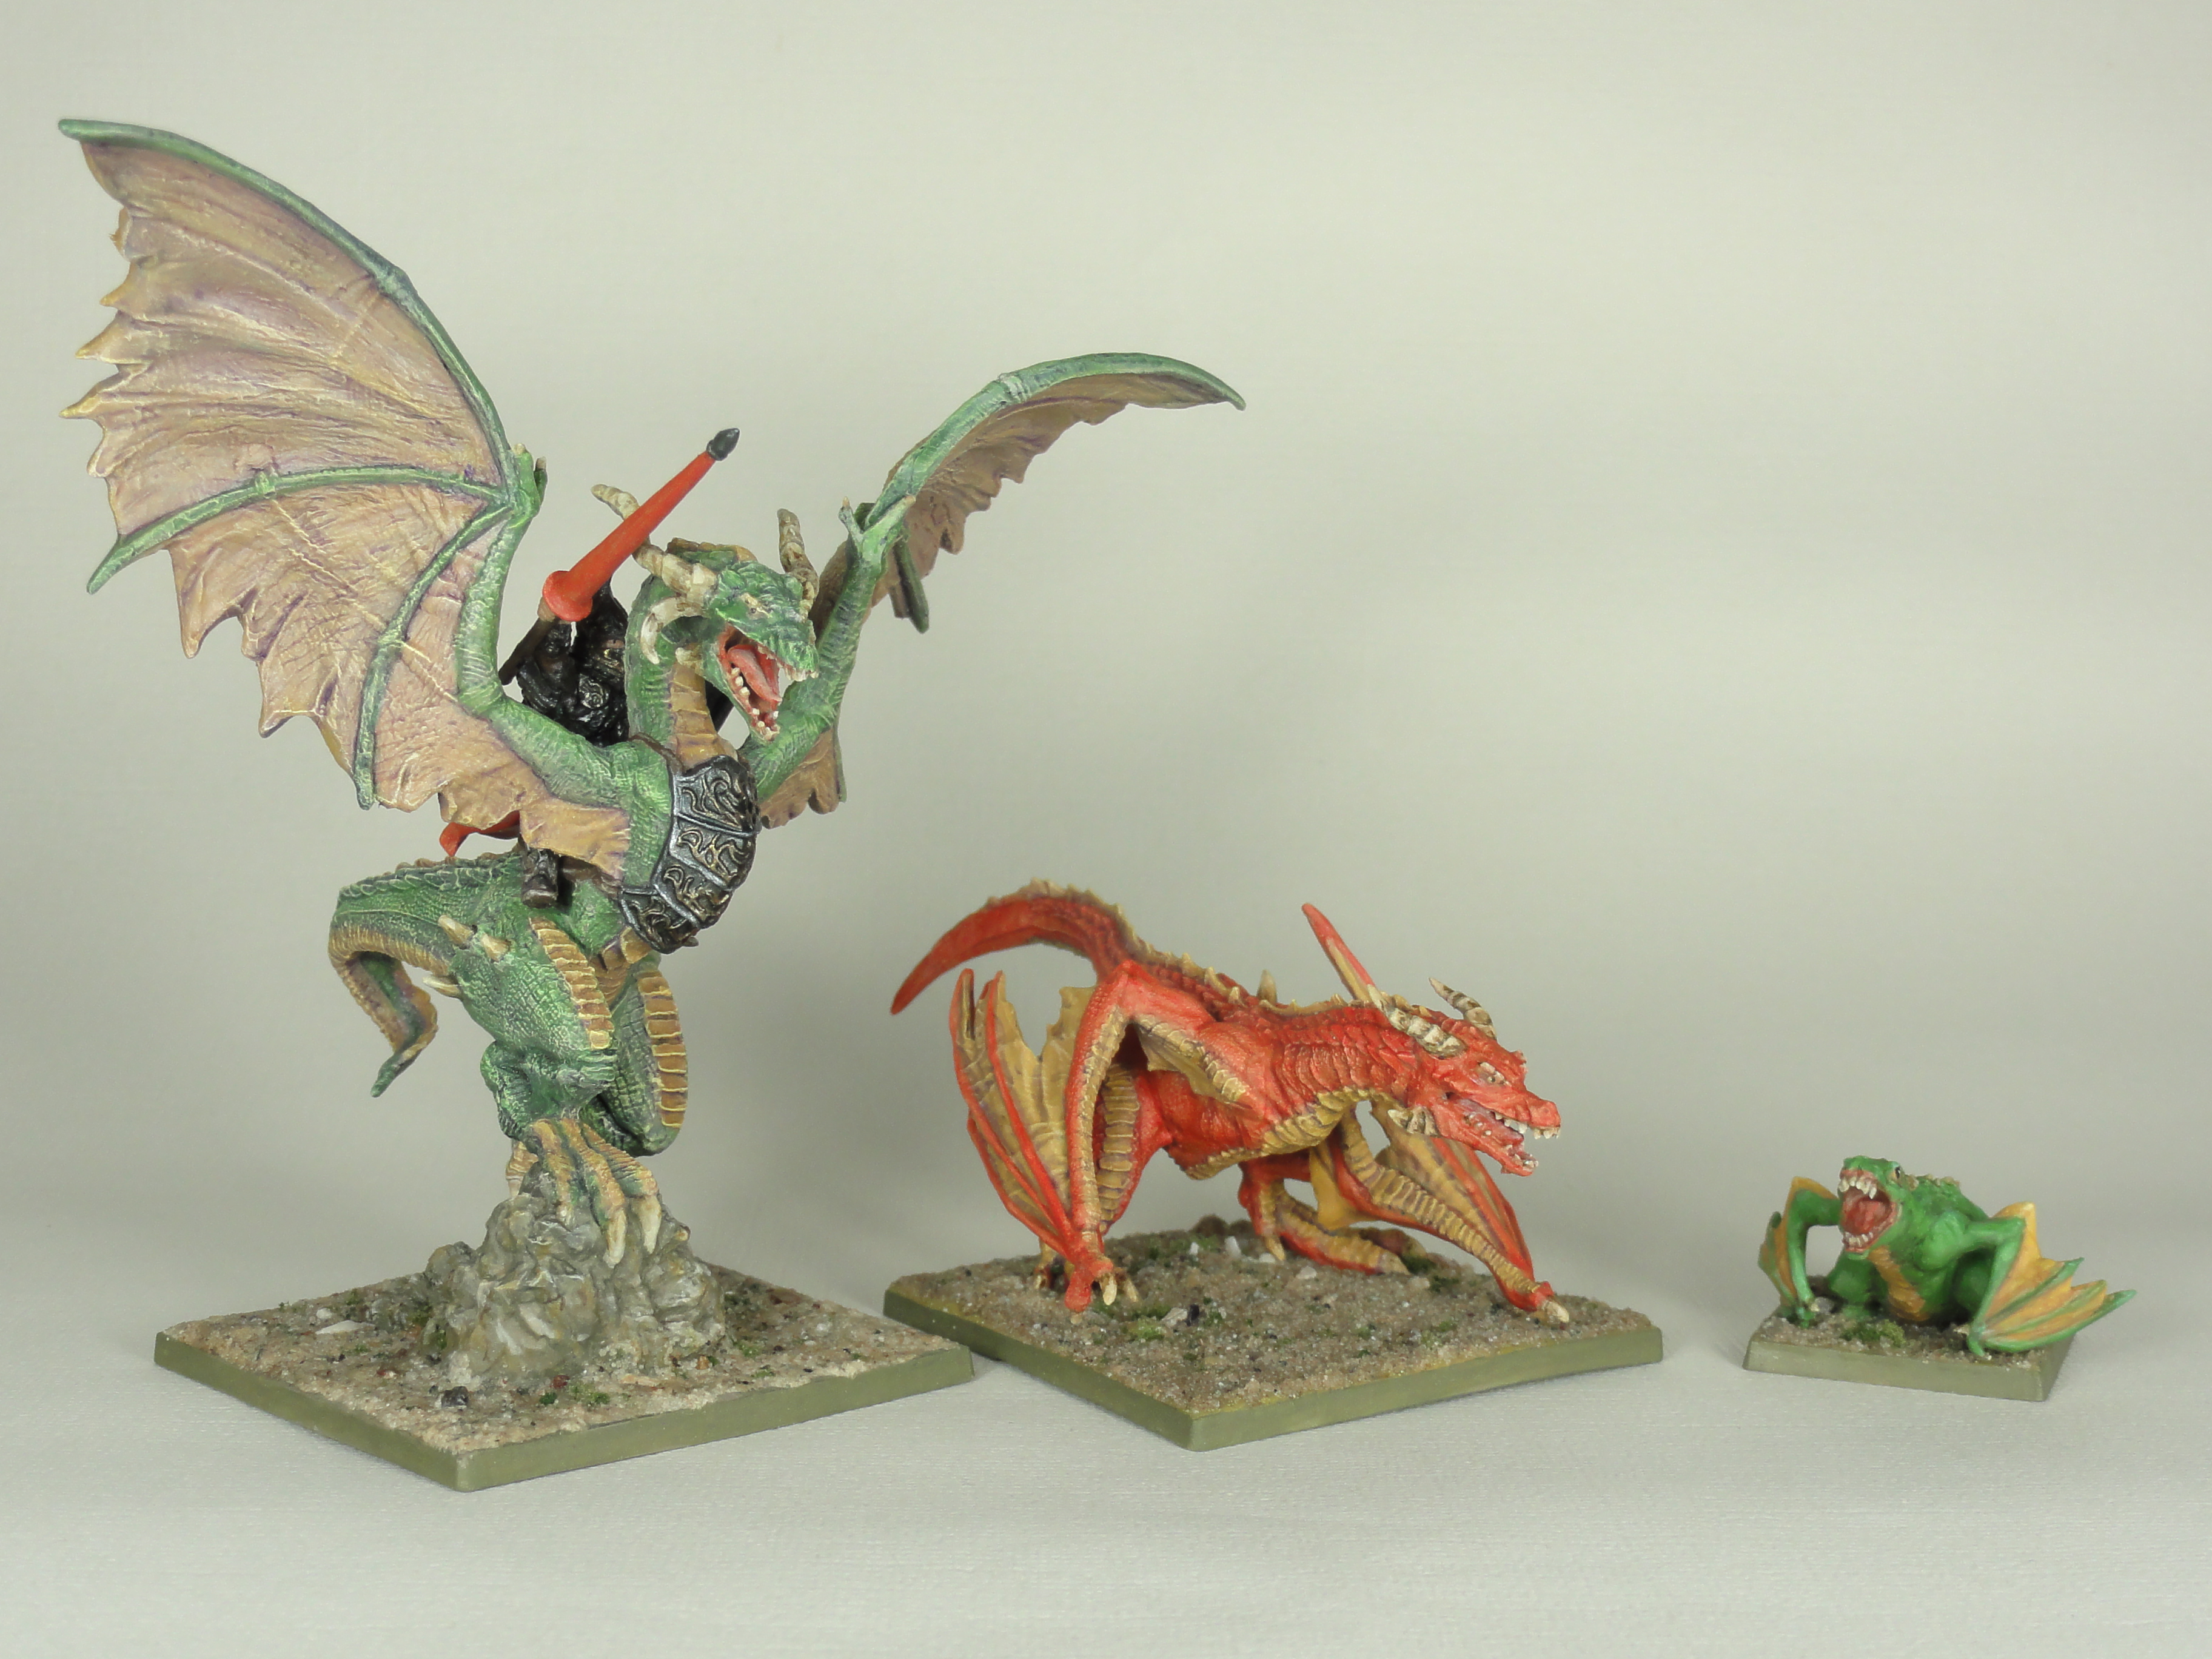 Three types of drakon
The Red Adult Drakon and the Drakon with rider (before the metallics) were gloss and then matt varnished.
I knew with the Drakon rider that I wasn’t going to keep a cobblestone look to the base due to the rock the the drakon was standing on, but after basing the figure I decided to go with the same basing throughout.
My reasoning was that as I was going to be using the miniatures across multiple systems the basing didn’t have to be cobblestone. Plus I wasn’t happy with the base painting I had already done and Gerry’s method would be quicker (Link for COGs https://www.beastsofwar.com/featured/gerry-can-how-to-make-custom-basing-mix/ ).
 The Drakon Family (Diddle dee dump)
Week 15 and 16 Drakons done? Part 1: Drakon with rider
 Horns, claws and bone spikes were done in the same way as week 7
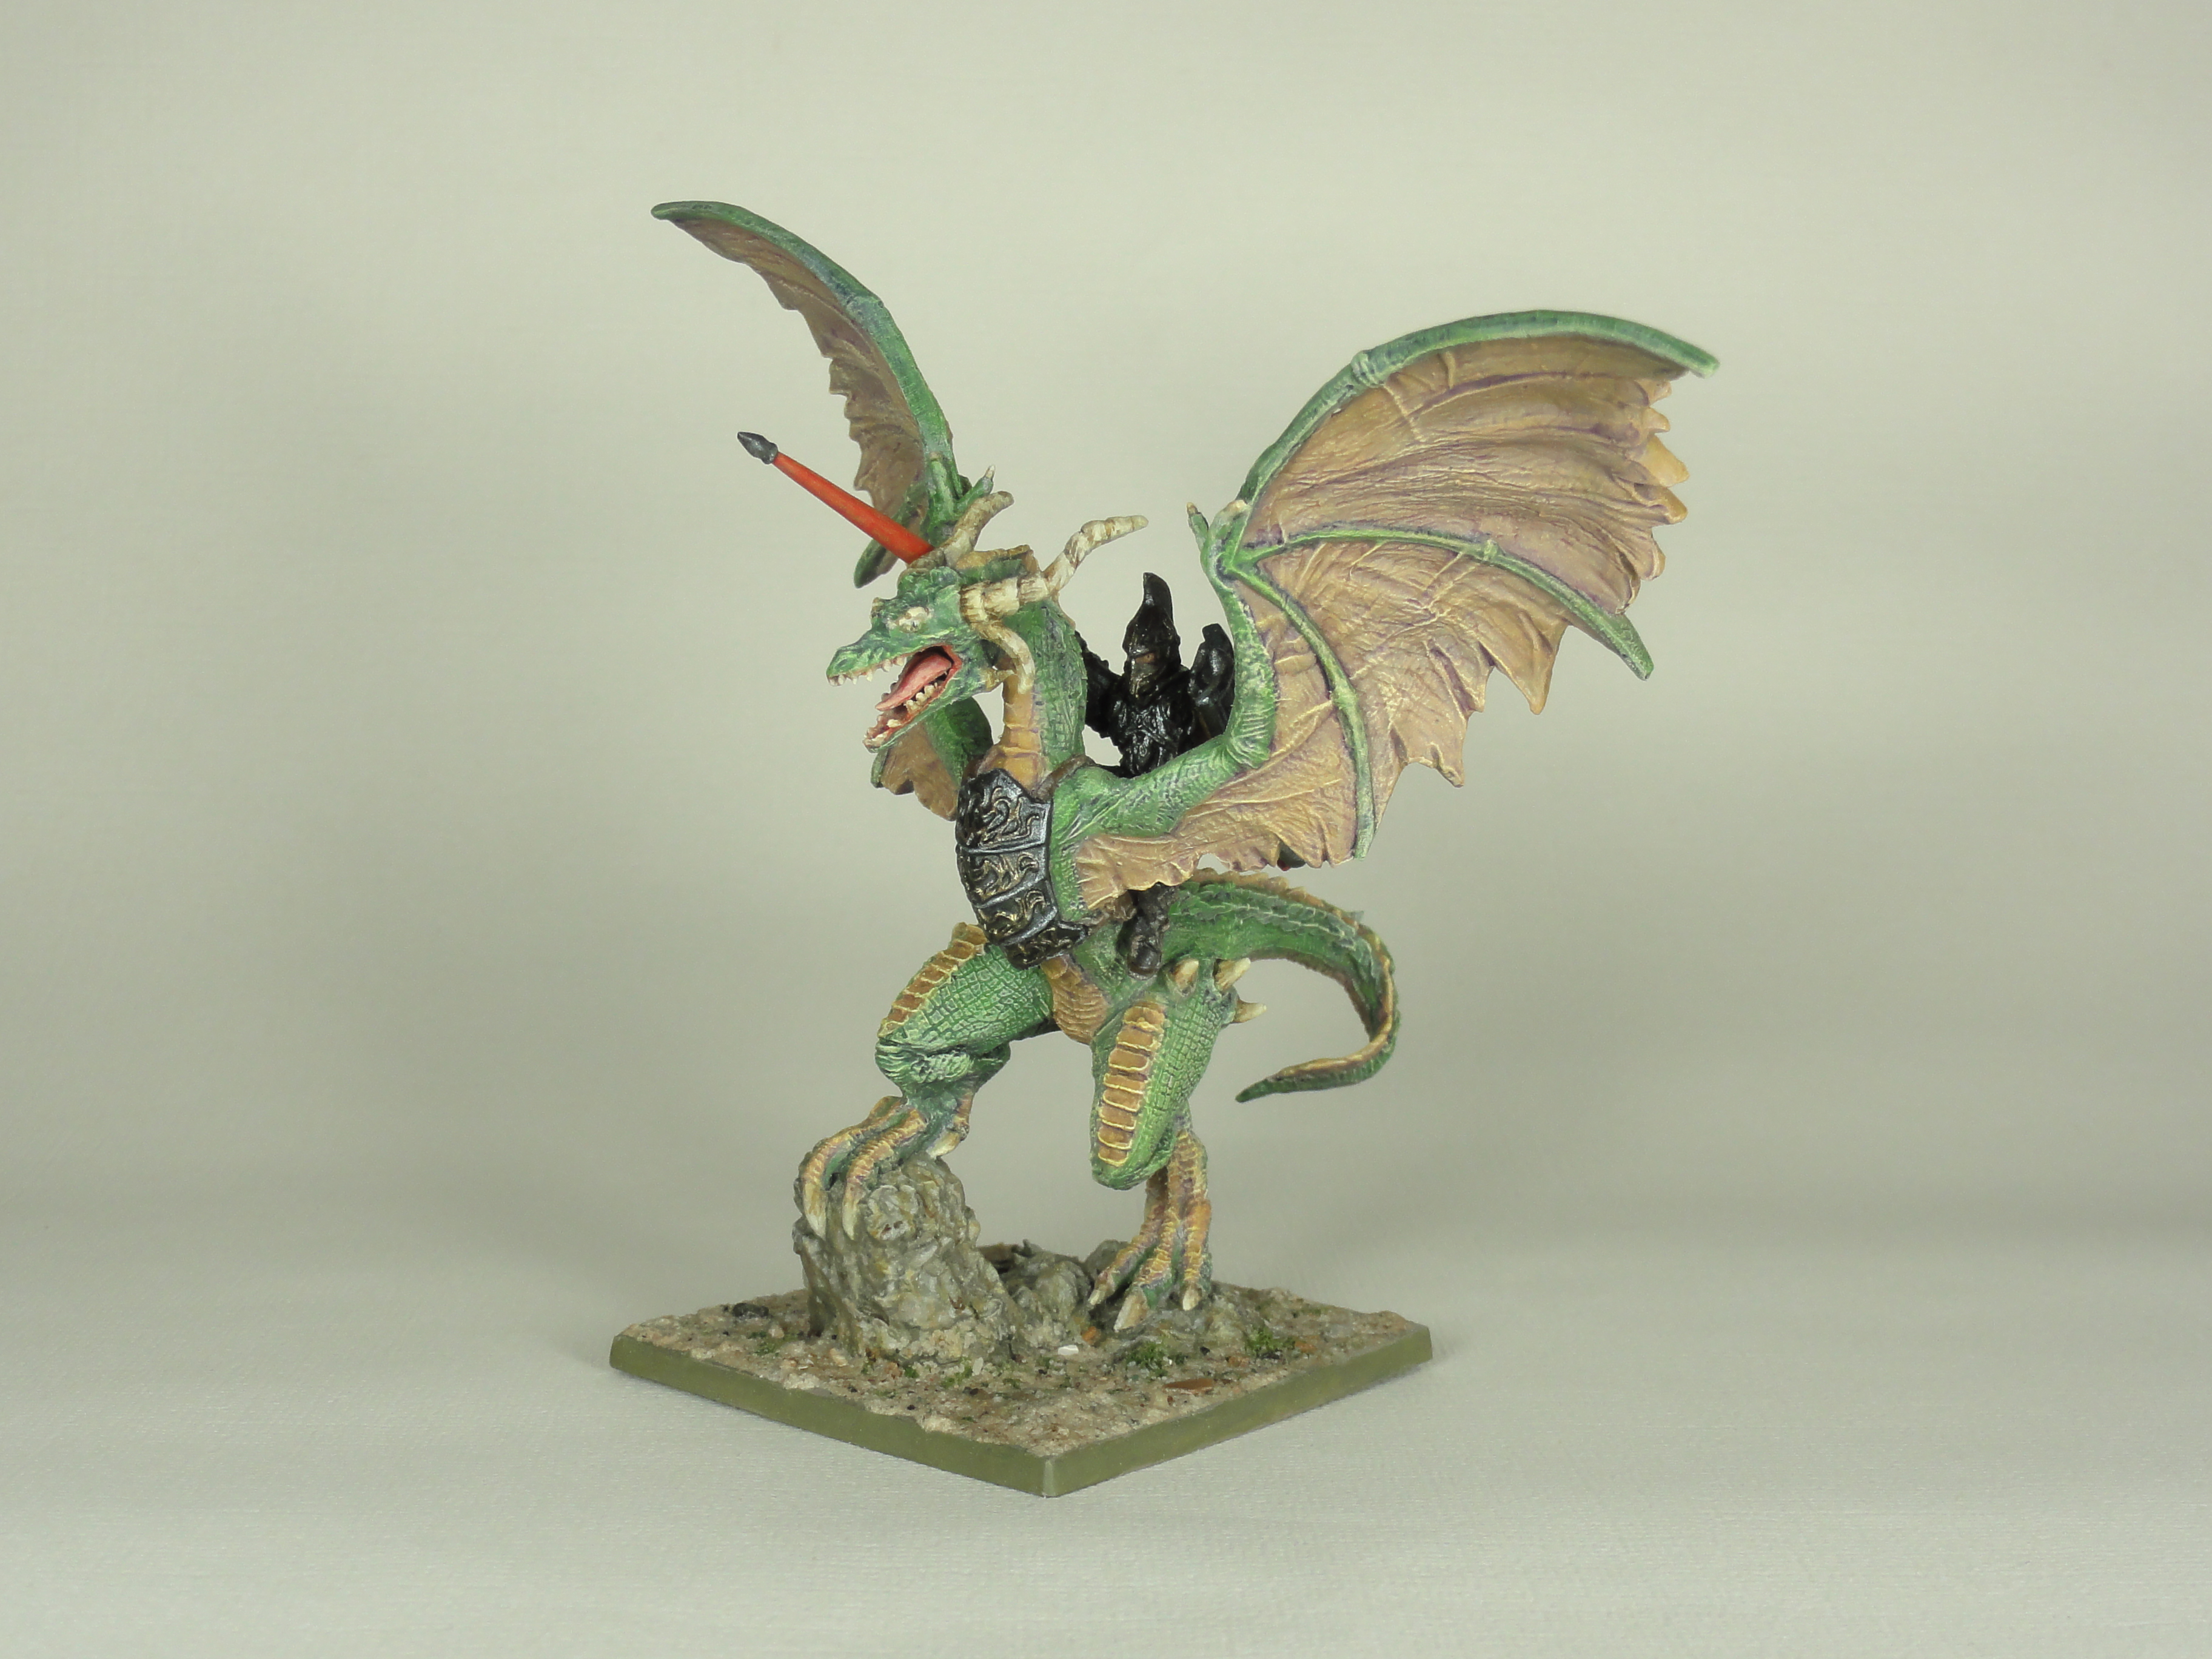 Rock
RockThe rock was base coated with a thin coat of German Field Grey (Vallejo Model Colour) followed by a Paynes grey wash, then paint I had been using on other areas was applied. I used the Yellow Ochre Glaze, Earth Tan and Chocolate Brown in random areas and then the bone white glaze on highlights.
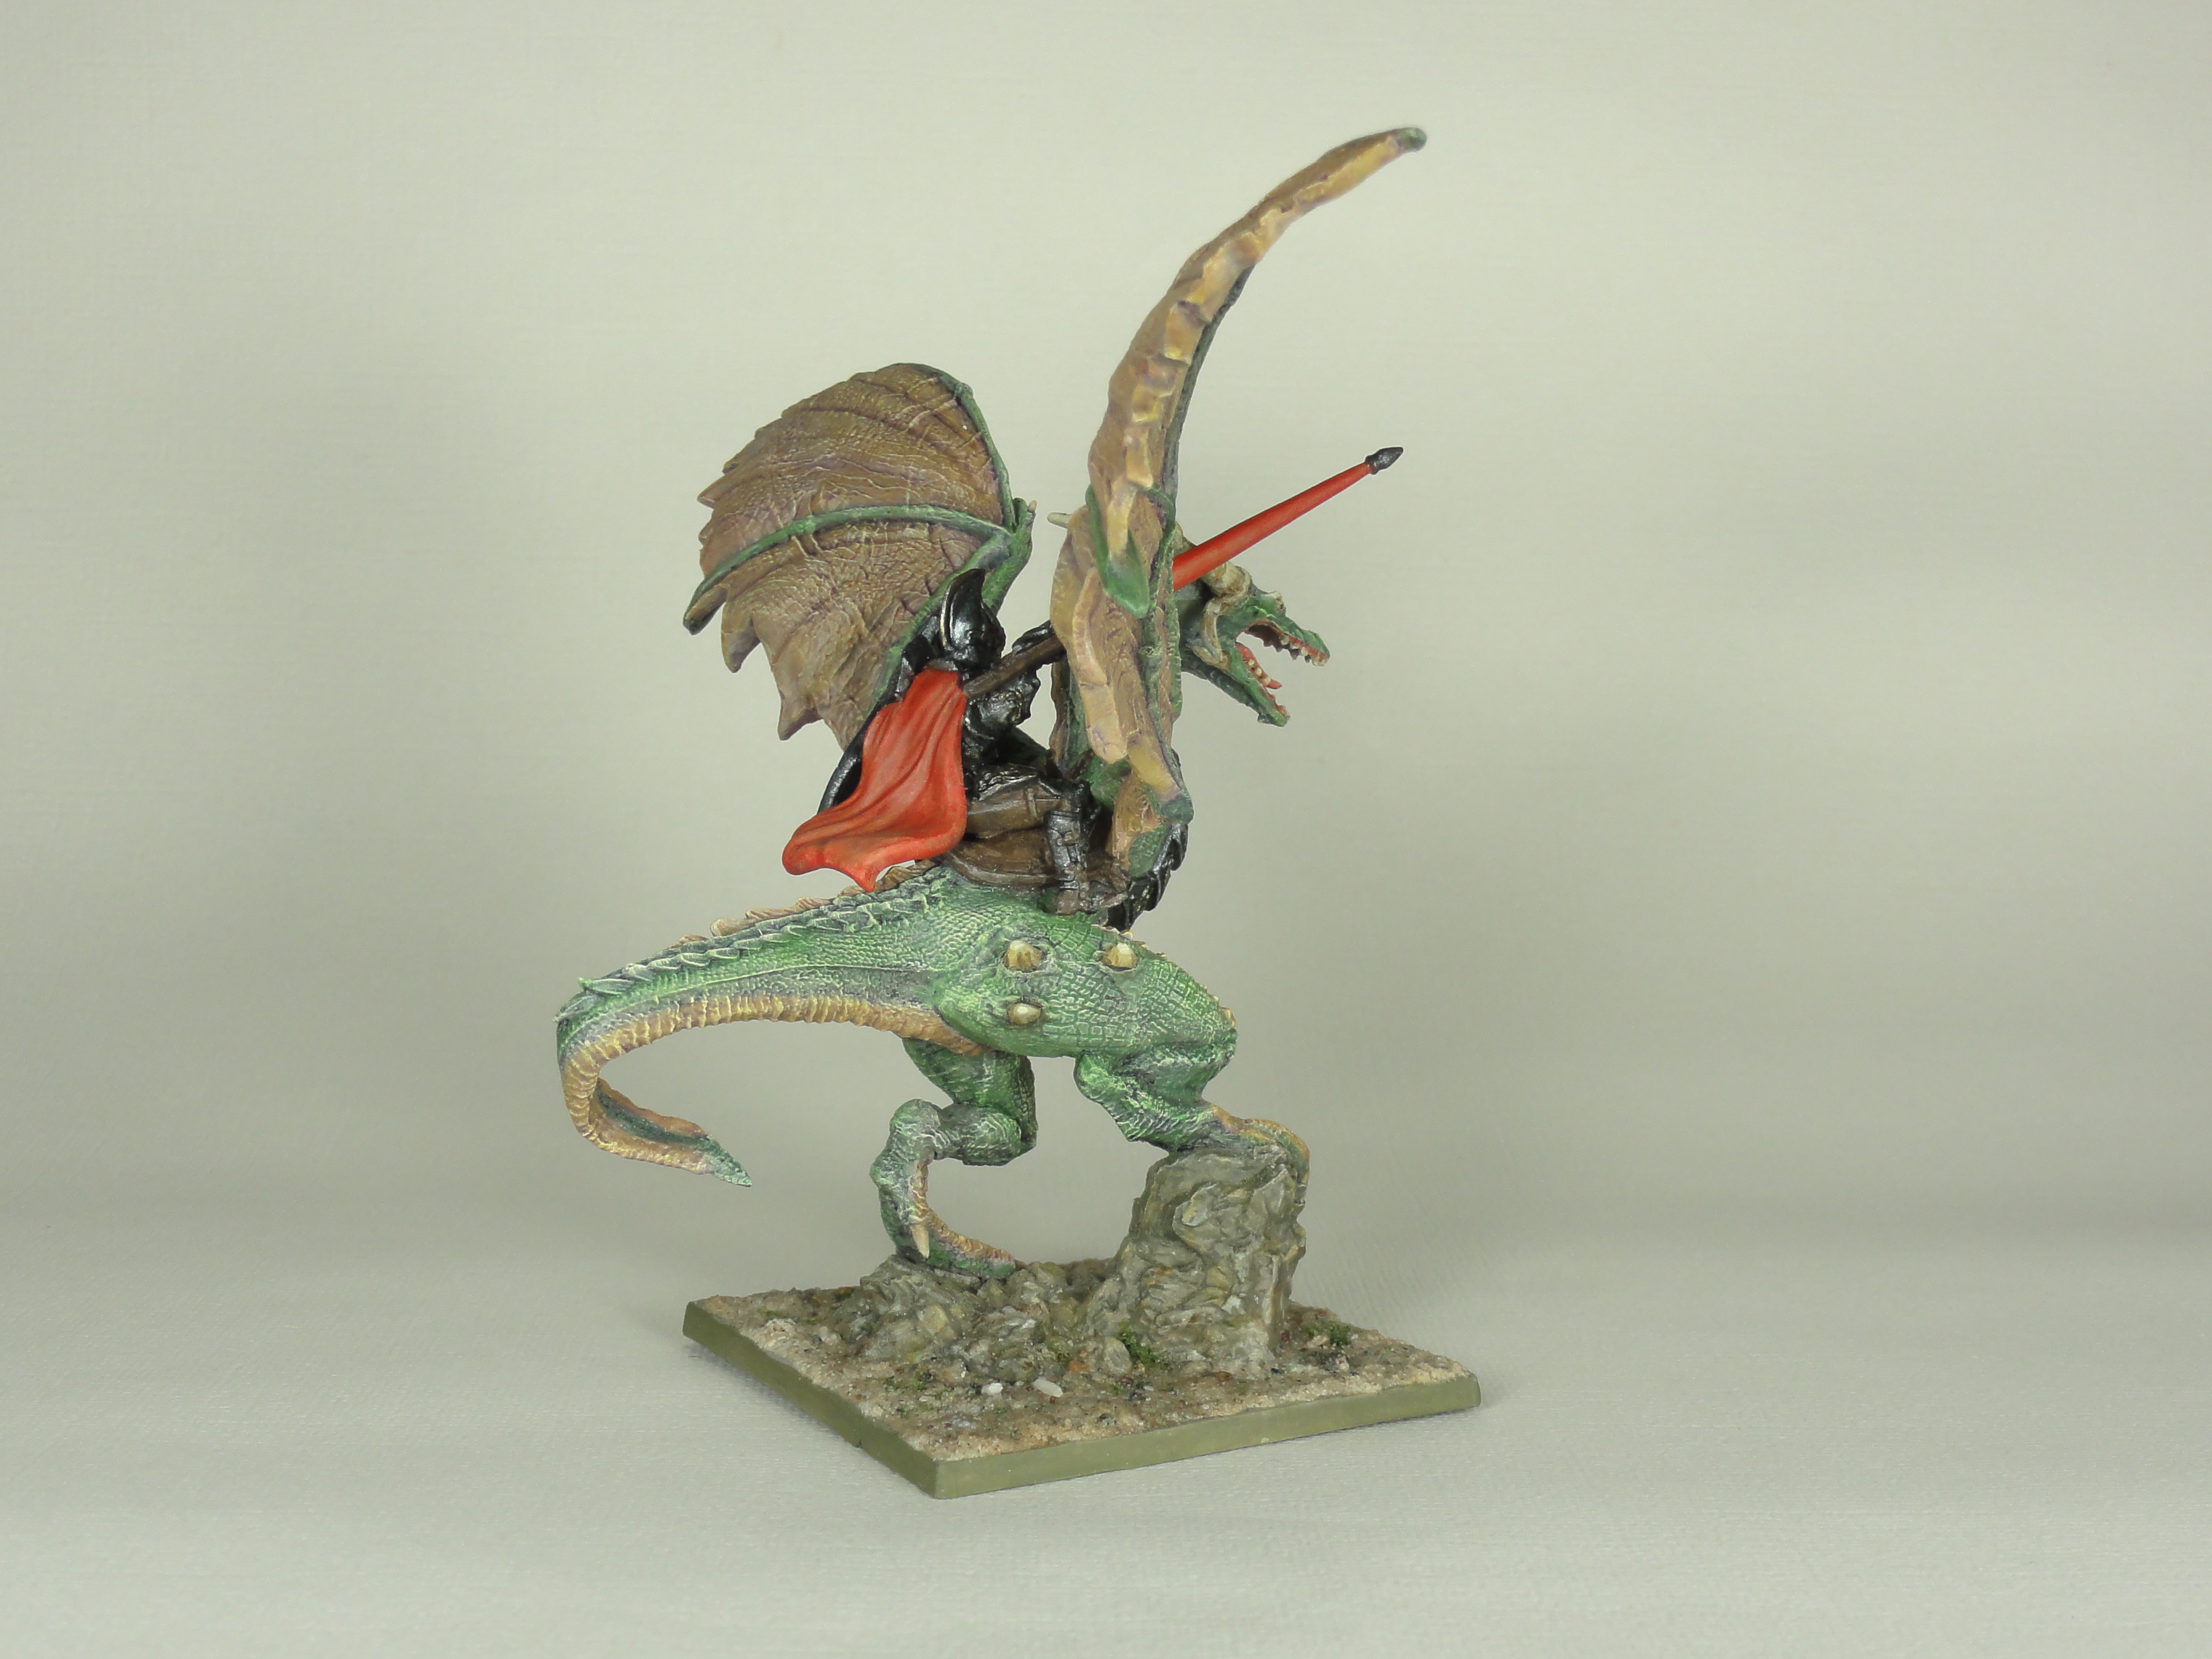
 Cloak and lance red glaze
The lance and the cloak were done using a similar method to the wings (Week 14):
- Tan Earth (Vallejo Model Air) base coat
- Violet Ink wash (week 14) on the cloak and in the shadows on the lance
- Tan Earth drybrush
- Barbarian Flesh (Army Painter) drybrush on the cloak, layered highlight on the lance
- Ice Yellow (Vallejo Model Color) drybrush on the cloak, layered highlight on the lance
- Ivory (Vallejo Model Color) drybrush on the cloak, layered highlight on the lance
- Bloody Red Glaze (week 12)
The lance handle, saddle, straps and clothes were base coated Chocolate Brown (Vallejo Model Color) and drybrushed Pale Sand (Vallejo Model Color).
 Armour
For the armour of the rider, the lance tip and the chest piece of the Drakon I had a look at what colours Angel Giraldez uses for true metallic metal to get some ideas ( https://www.youtube.com/watch?v=I_McGLgzoeY and https://www.youtube.com/watch?v=NRK2uMZbz3Y ). I then applied them in a slap dash way with the paints I had missing out several steps (Not a display model). I went for a darker armour rather than silver.
- Black basecoat followed by Gun Metal (Vallejo Model Color) mixed with the smallest amount of Panzer Dark Grey (Vallejo Model Air).
- A mix of Sepia Ink (Vallejo Game Ink), Blue Ink (Vallejo Game Ink) and Black Wash (Vallejo Flames of War) washed into the shadows with a second more Blue Ink wash away from the shadows.
- Gold (Army Painter Warpaints) with a tiny amount of Red Leather (Vallejo Model Color) was applied to the filigree and top crest.
- Silver (Vallejo Game Color) with a tiny amount of white was applied to some of the edges including spots on the gold.
 Skin
SkinThe skin of the rider was a base coat of Tan Earth followed by Barbarian Flesh mixed with Ivory on the raised areas and then a more Ivory mix to highlight.
Week 14 Work in Progress Green Adult Drakon
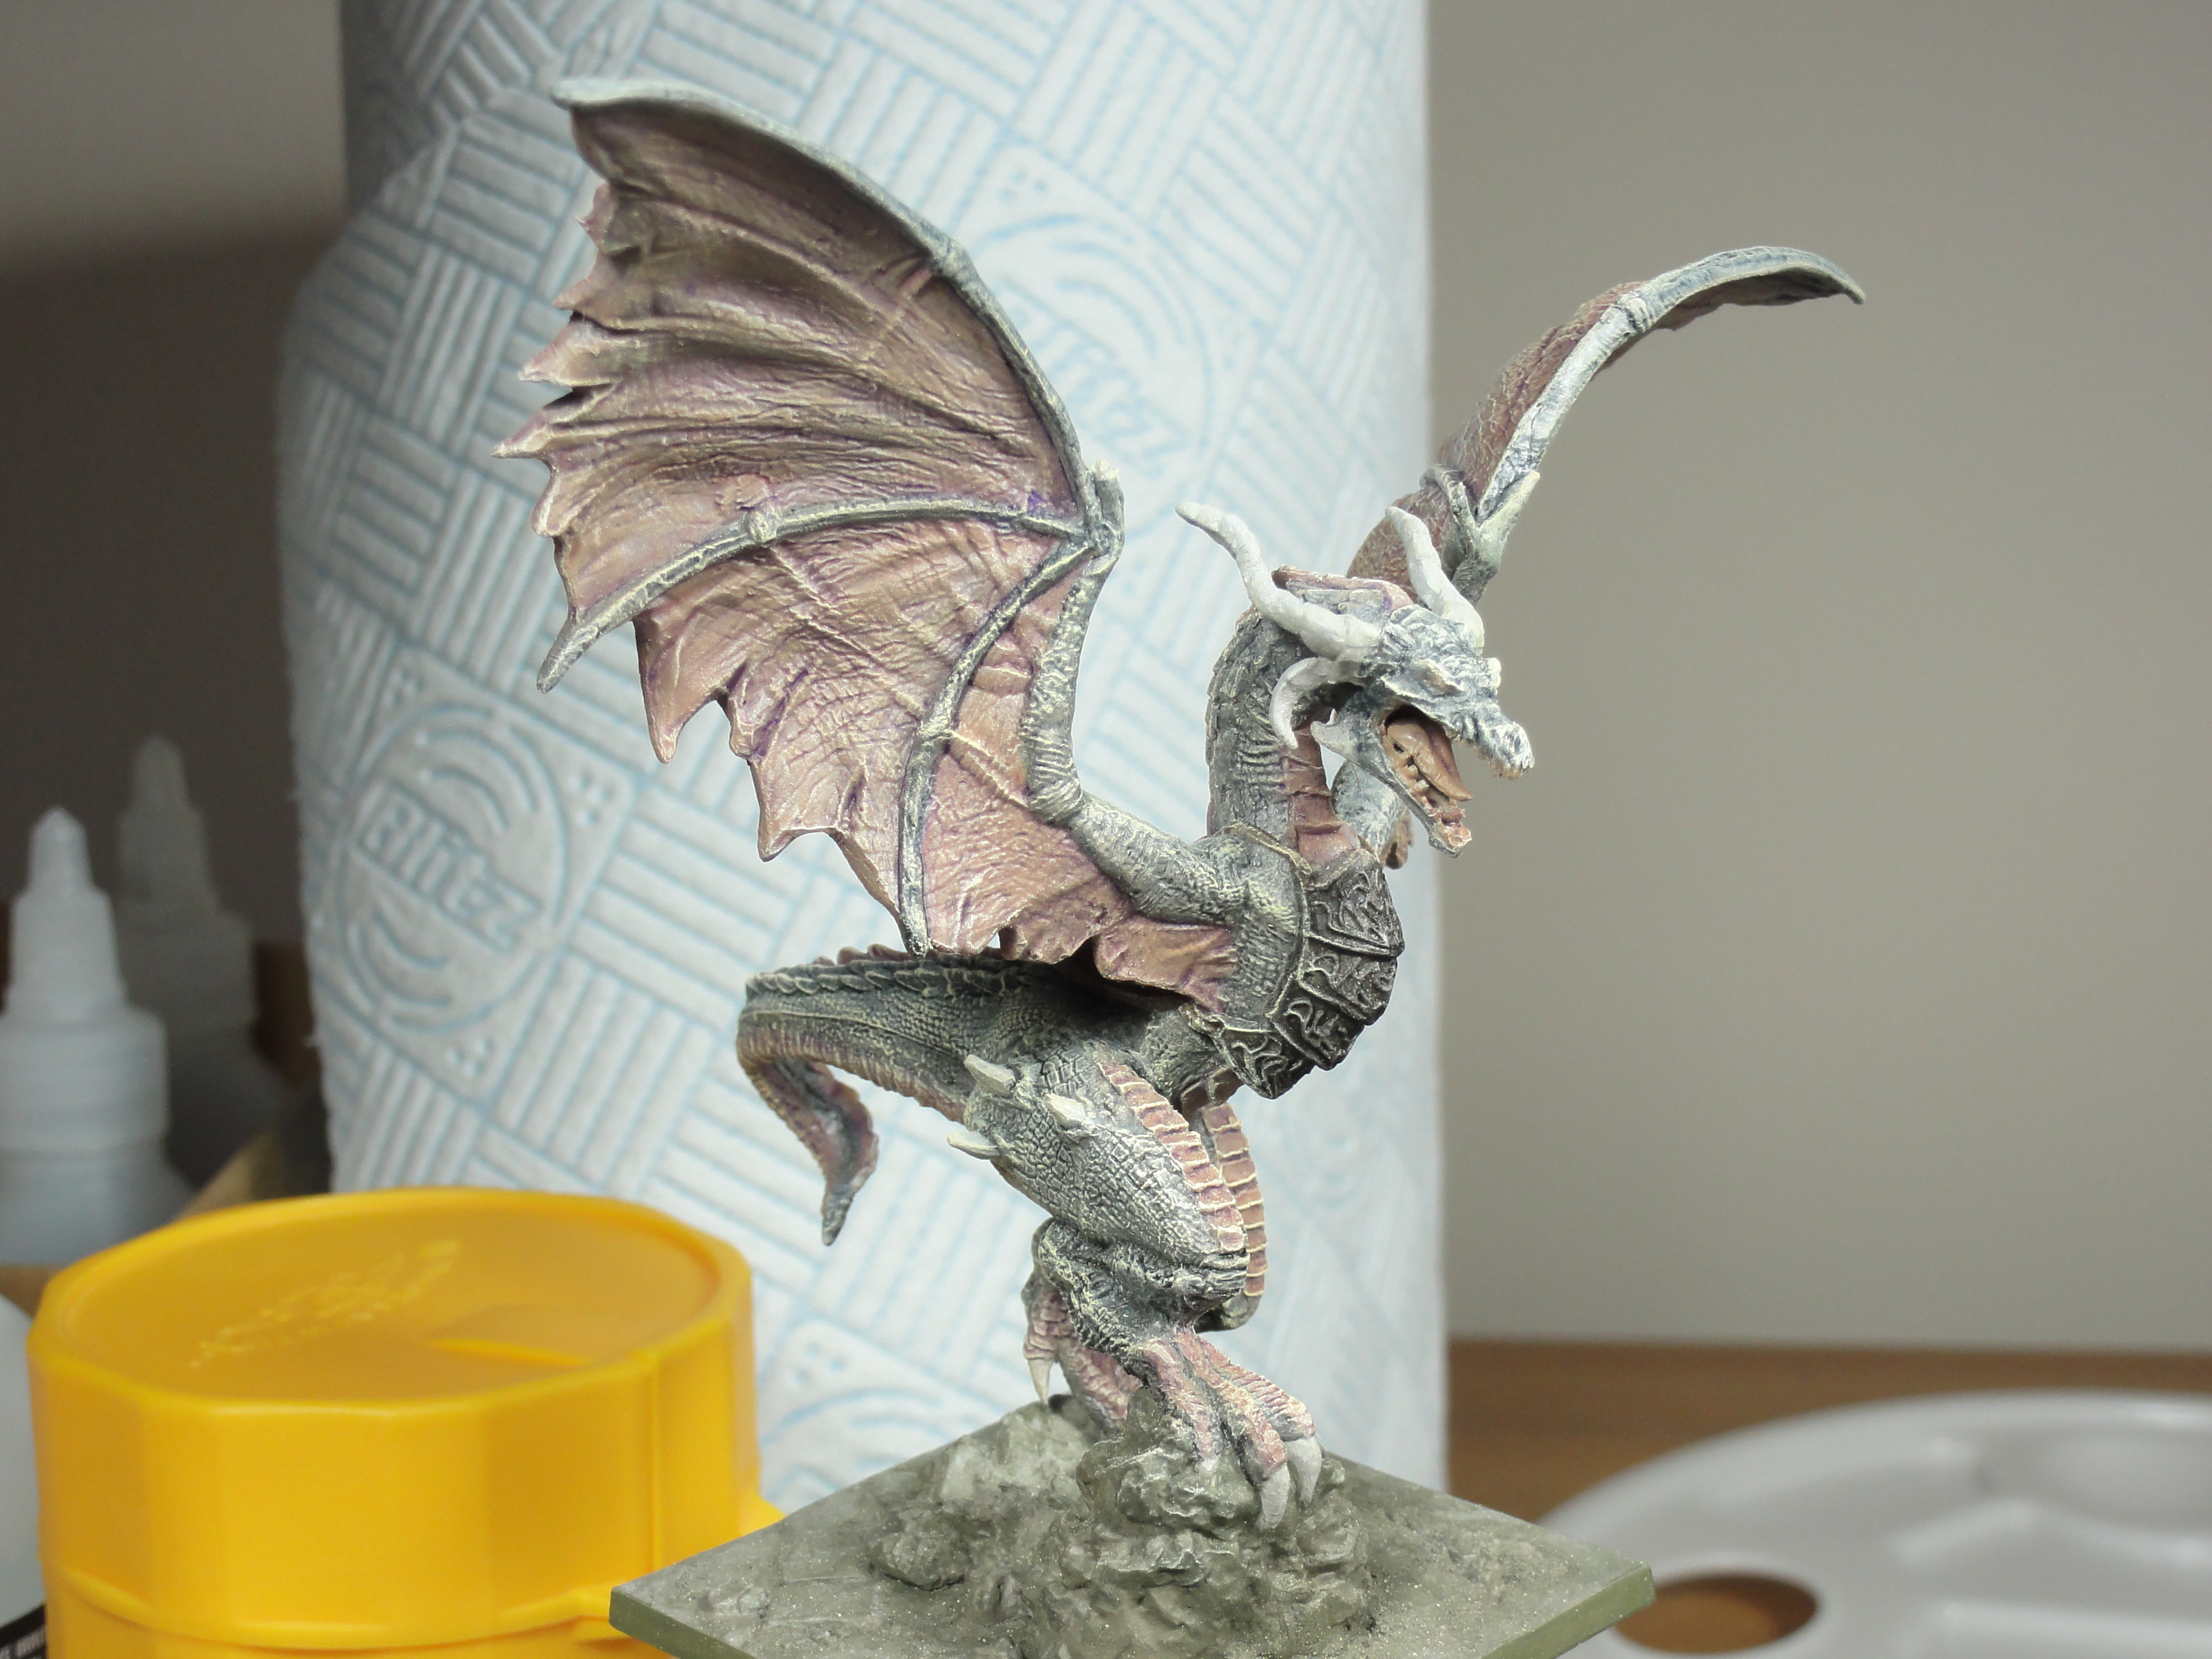 Under painting
Drakon was airbrush primed in week 7 with IDF Israeli Sand Grey Vallejo Surface Primer then Titanium White Liquitex Acrylic Ink was sprayed from above.
Made a wash of 1 drop of Daler Rowney FW Paynes Grey Ink to 6 drops of Wash Medium (COGs https://www.beastsofwar.com/featured/gerry-can-how-to-make-diy-professional-washes/ )
Applied the Paynes Grey wash to the areas that I wanted to paint green.
Base coated the chitin, eyes, wings, spine and underbelly Tan Earth (Vallejo Model Air), then applied a Violet wash. The Violet wash was 1 drop of Vallejo Violet Game Ink to 6 drops of wash medium.
I left both washes to dry overnight.
Dry brushed/over brushed Tan Earth on the chitin, eyes, wings, spine and underbelly. Followed by dry brushes of Barbarian Flesh (Army Painter), Ice Yellow (Vallejo Model Color) and then, on the highest points, Ivory (Vallejo Model Color).
The areas covered in Paynes Grey Wash were drybrushed with Ice Yellow then Ivory on the highest points.
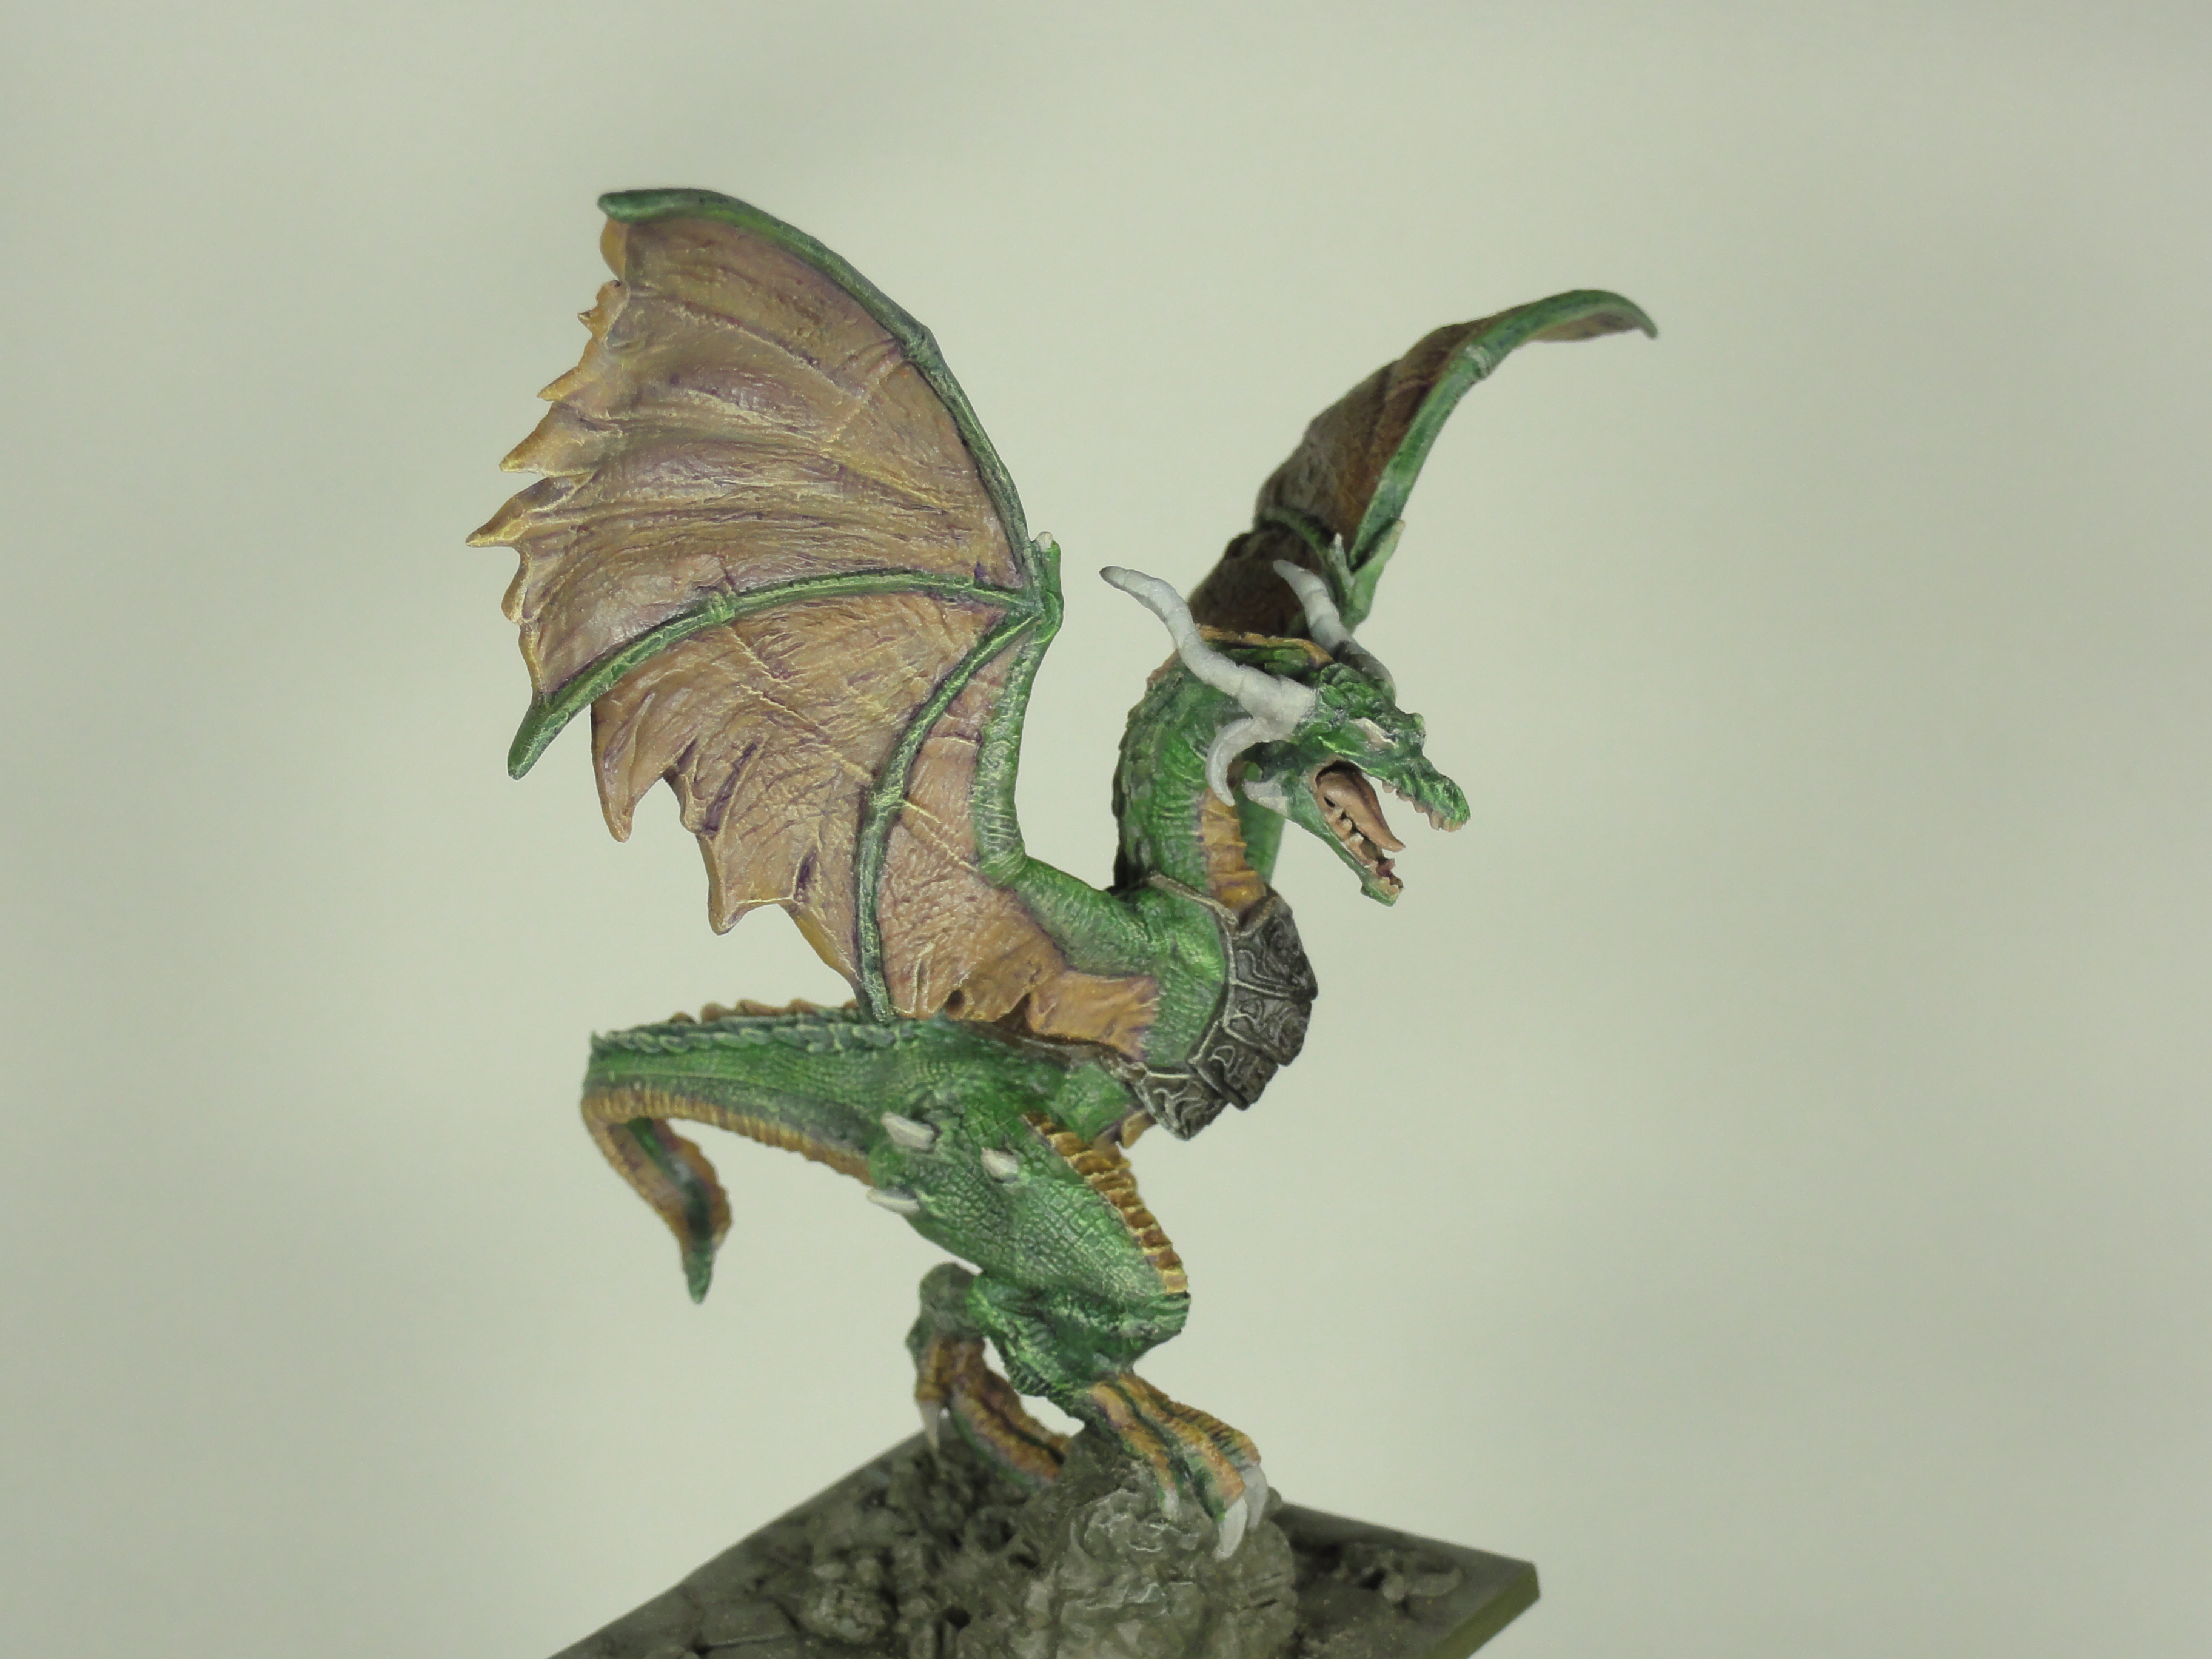
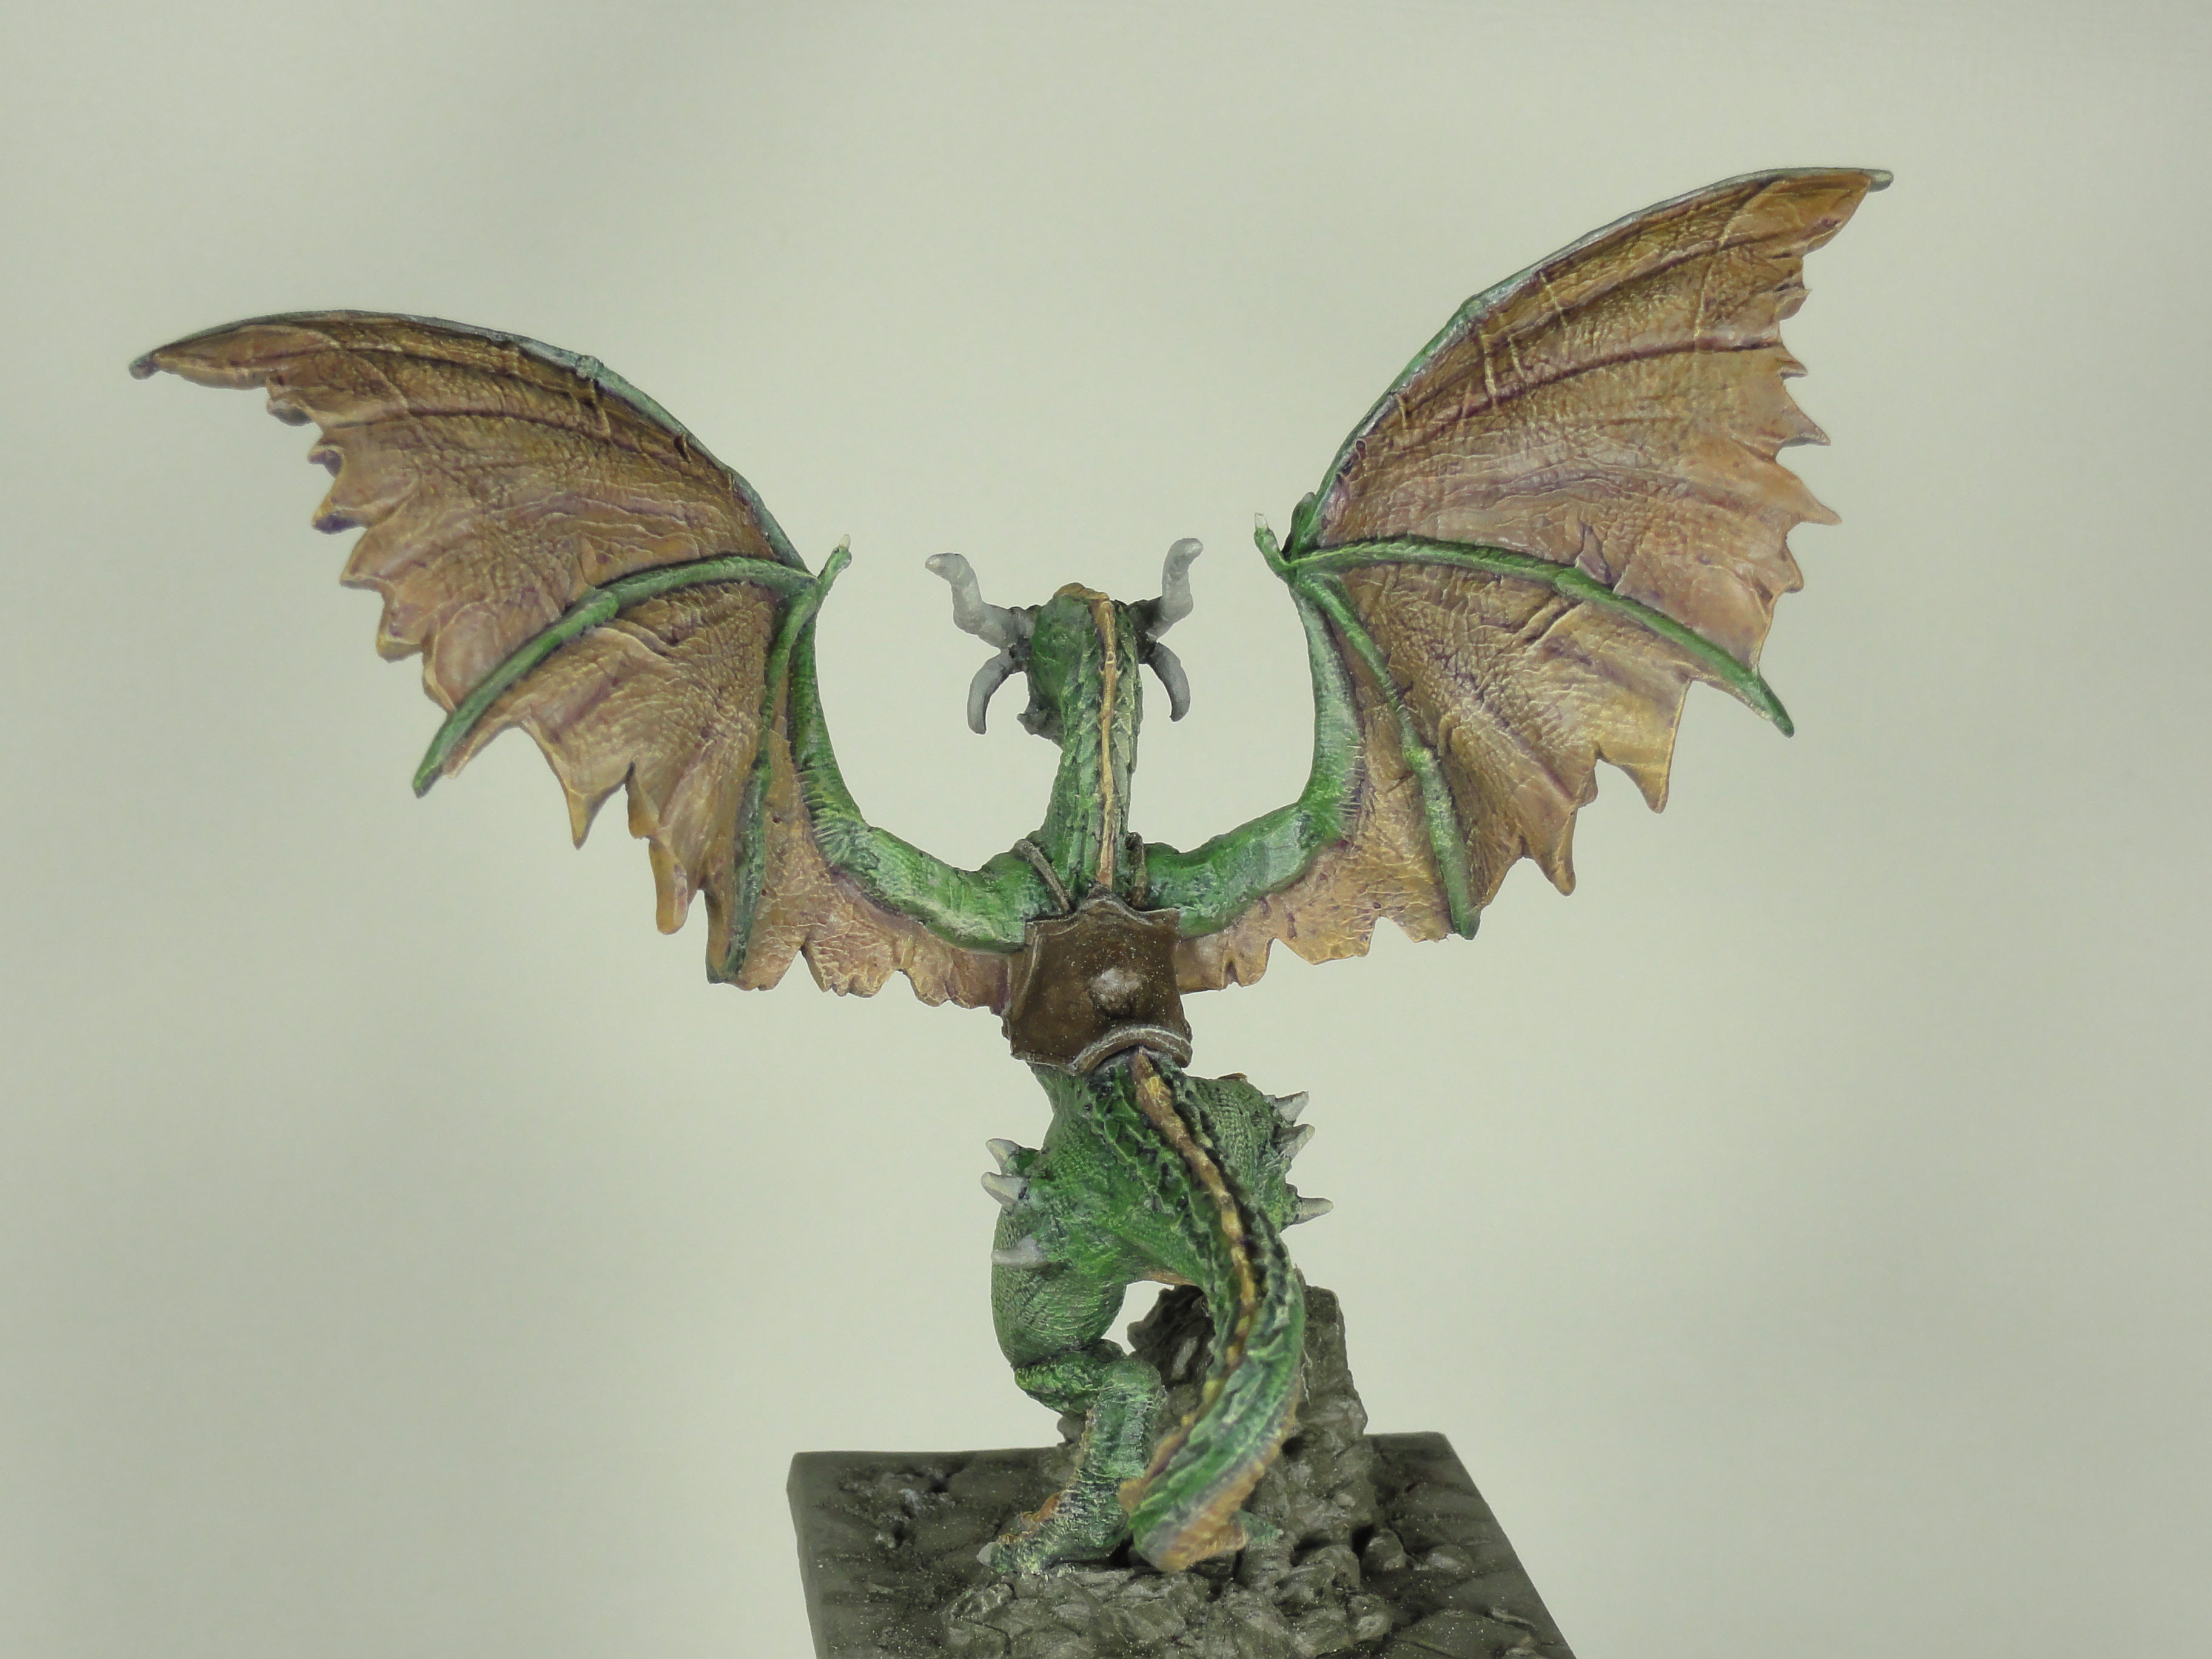

For the green skin I glazed a 50/50 mix of Goblin Green (Vallejo Game Color) and Vallejo Glaze medium.
The chitin, eyes, wings, spine and underbelly were glazed with a 50/50 mix of Yellow Ochre (Vallejo Game Color) and Vallejo Glaze medium. Several coats were applied in some areas.
Week 13 Adult Drakon Ready to Varnish
 Unvarnished Drakon
Glazed the wings, chitin, back ridge and eyes with Yellow Ochre and Vallejo Glaze medium (2 coats). The eyes also got a Black pupil with a dot of Ivory.
Went over the back scales with another glaze of Bloody Red and Glaze medium and touched up some of the other red areas.
Did the claws, teeth and horns the same method as detailed in week 7. Made a bit of a mess of the horns after they were looking decent. My Bone White glaze ended up make the horns looking like they were banded and I’ve tried to fix this by redoing the striations with sepia ink.
I will varnish this Drakon when I’m varnishing the other adult Drakon after it is painted.