![NO Weekender Or Cult Of Games XLBS This Weekend [Updated]](https://images.beastsofwar.com/2026/03/No_Weekender_and_XLBS_this_Weekend-225-127.jpg)


![1918 Spring Offensive Wargame | Full Rules Overview with John & Gerry (WW1 Tabletop Game) [7 Days Early Access]](https://images.beastsofwar.com/2026/03/unboxing-warfulcrum-games-1918-spring-offensive-review-coverimage1-225-127.jpeg)


Marvel Crisis Protocol by Lawnor


Recommendations: 166
About the Project
I've got a bunch of naked MCP stuff, and it's time to get it table ready. My friends are getting in to it so I need a squad ready to go ASAP.
Related Game: Marvel Crisis Protocol Miniatures Game
Related Company: Atomic Mass Games
Related Genre: Pulp
Related Contest: Spring Clean Hobby Challenge 2023
This Project is Completed
Evening 9: Zemo, Black Widow, Crossbones and Doc Ock
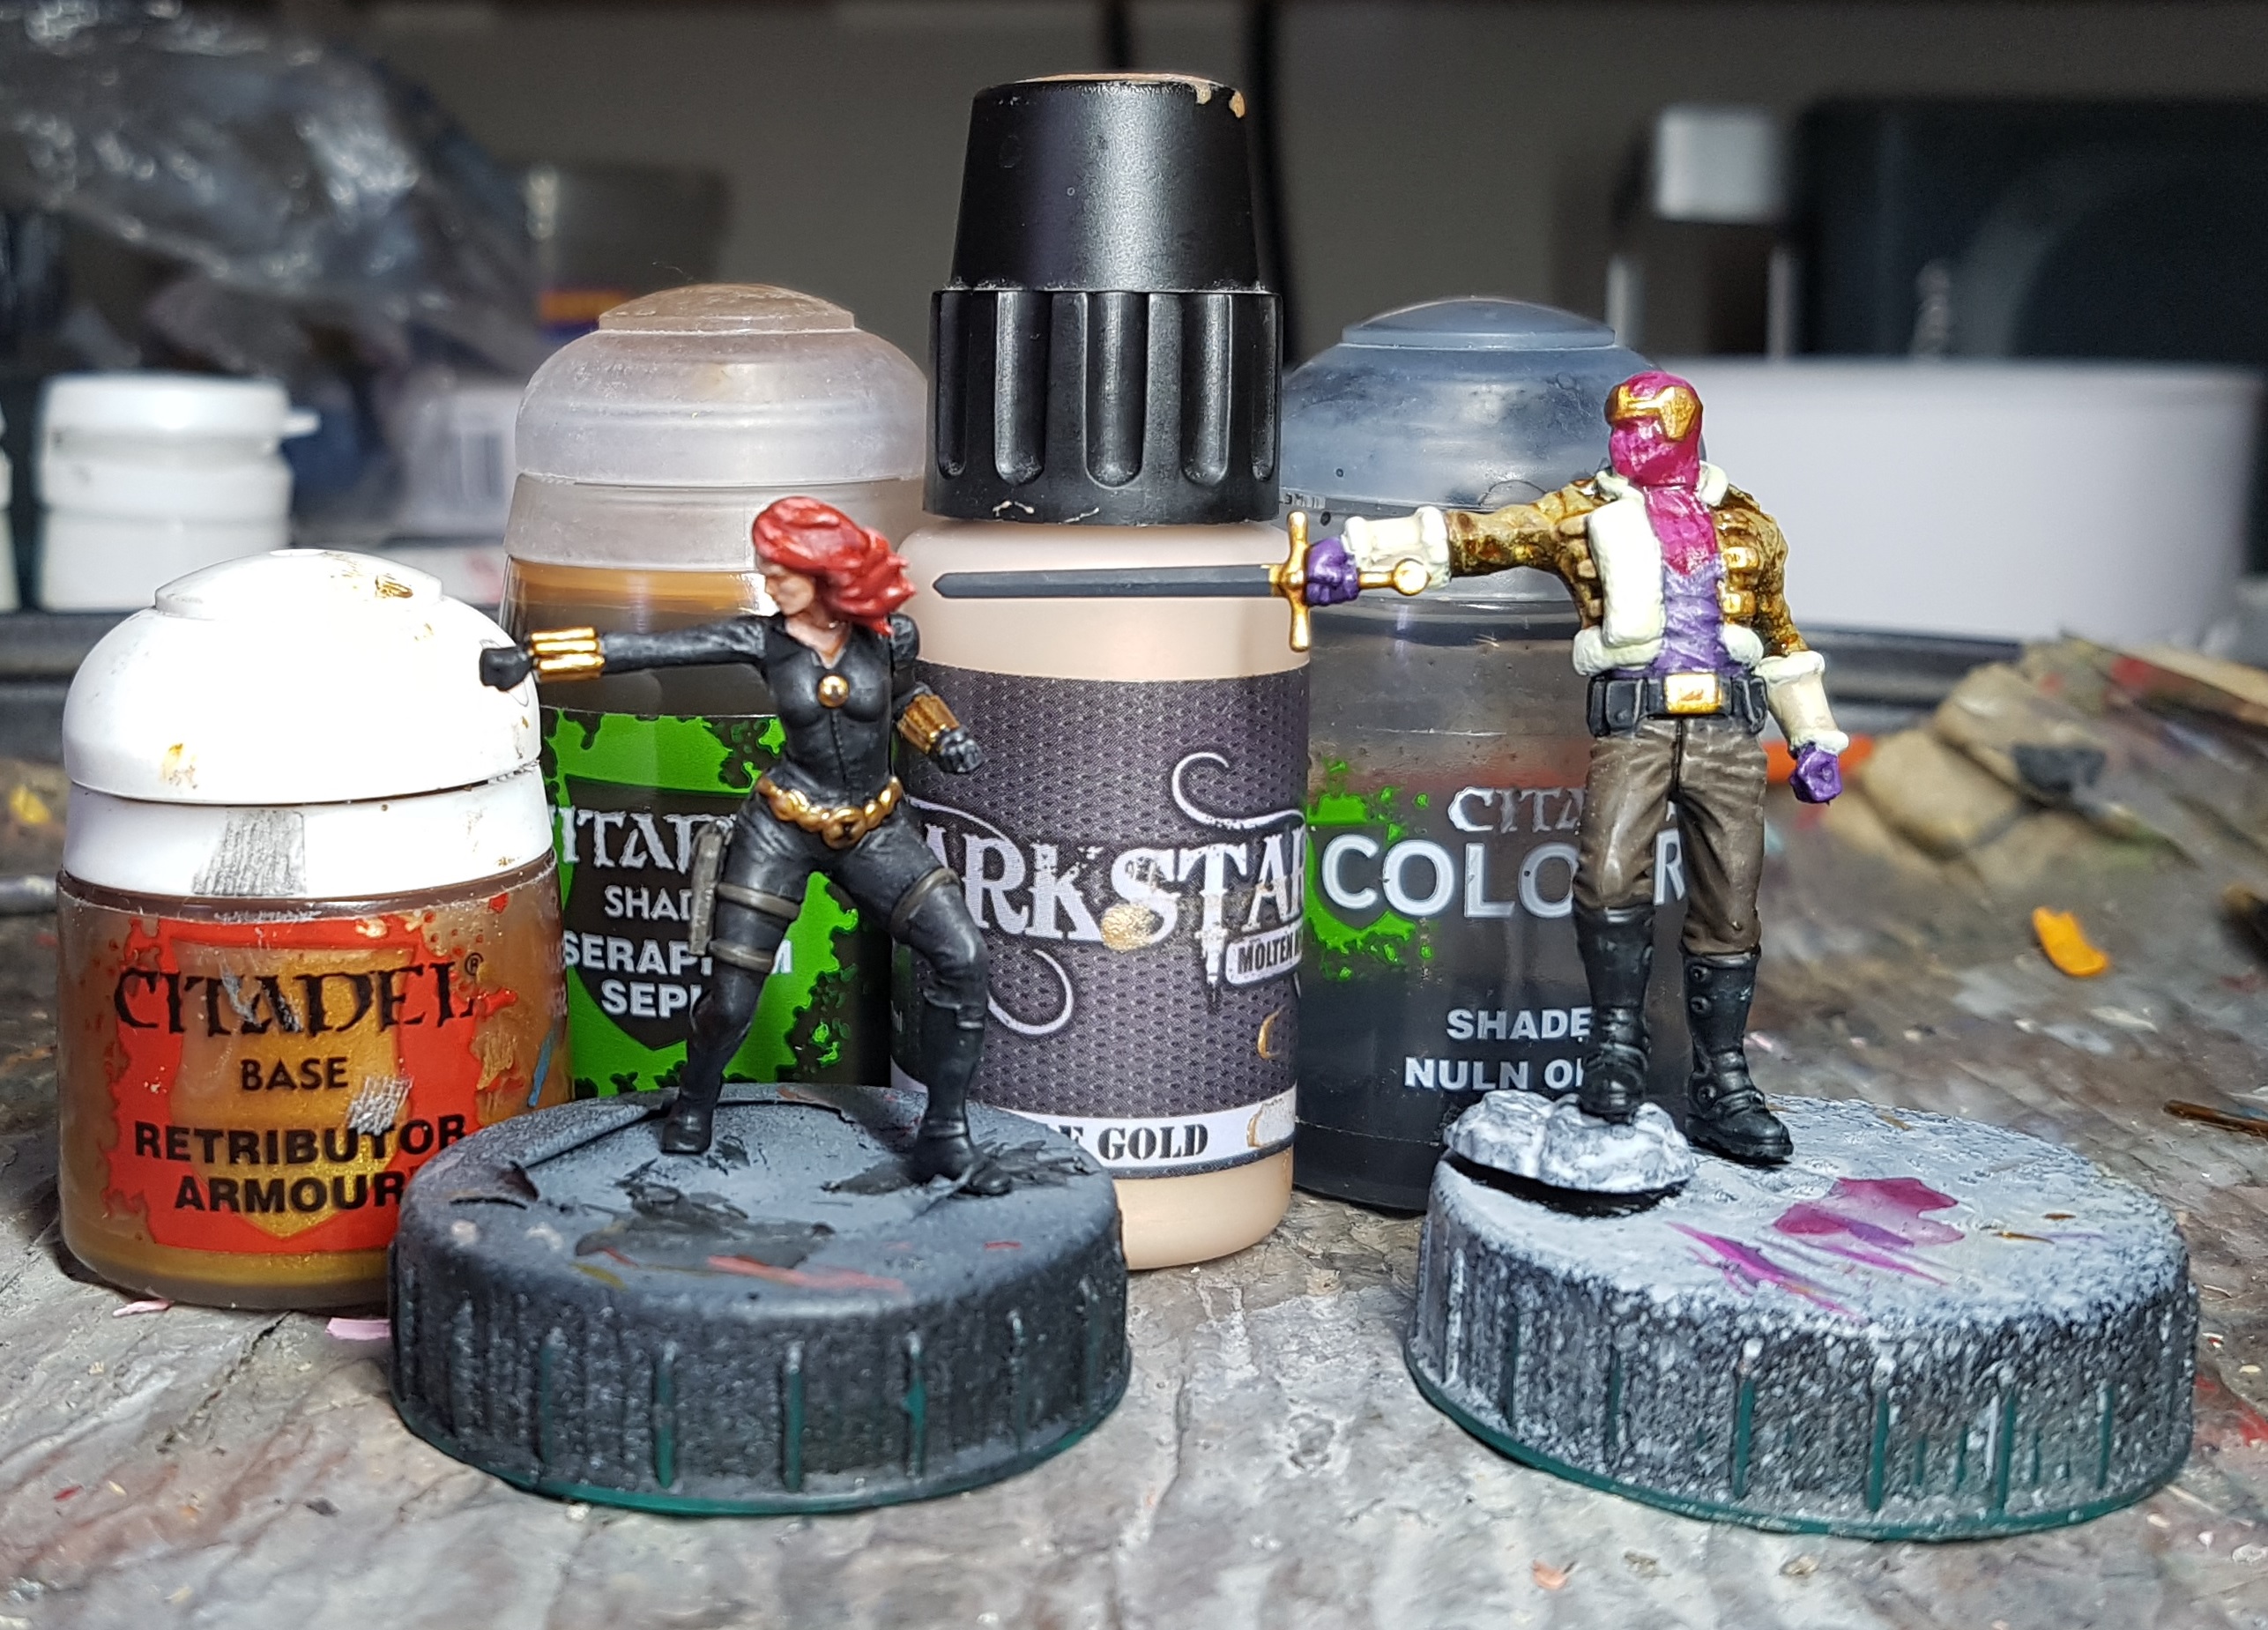
Easter Saturday. Another day of Getting Stuff Done, and my final game of Gloomhaven: Jaws of the Lion, but an evening free to paint. Zemo is finally ready for the gold, so lets get Black Widow back on the painting tray.
Base: GW Retributor Gold (Thanks to that magazine a few years back)
Wash: GW Seraphim Sepia (This combo makes for a nice warm gold)
Reclaim with base where needed
Highlight: Base mixed with Darkstar Pale Gold
Highlight: Pale Gold
Once dry, the emblems on Black Widow’s belt and pendant were inlayed with a drop of GW Nuln Oil. This was repeated once it was dry until it was a solid black.
Black Widow can now go sit in the Done pile, until I’m ready for eyes or basing.
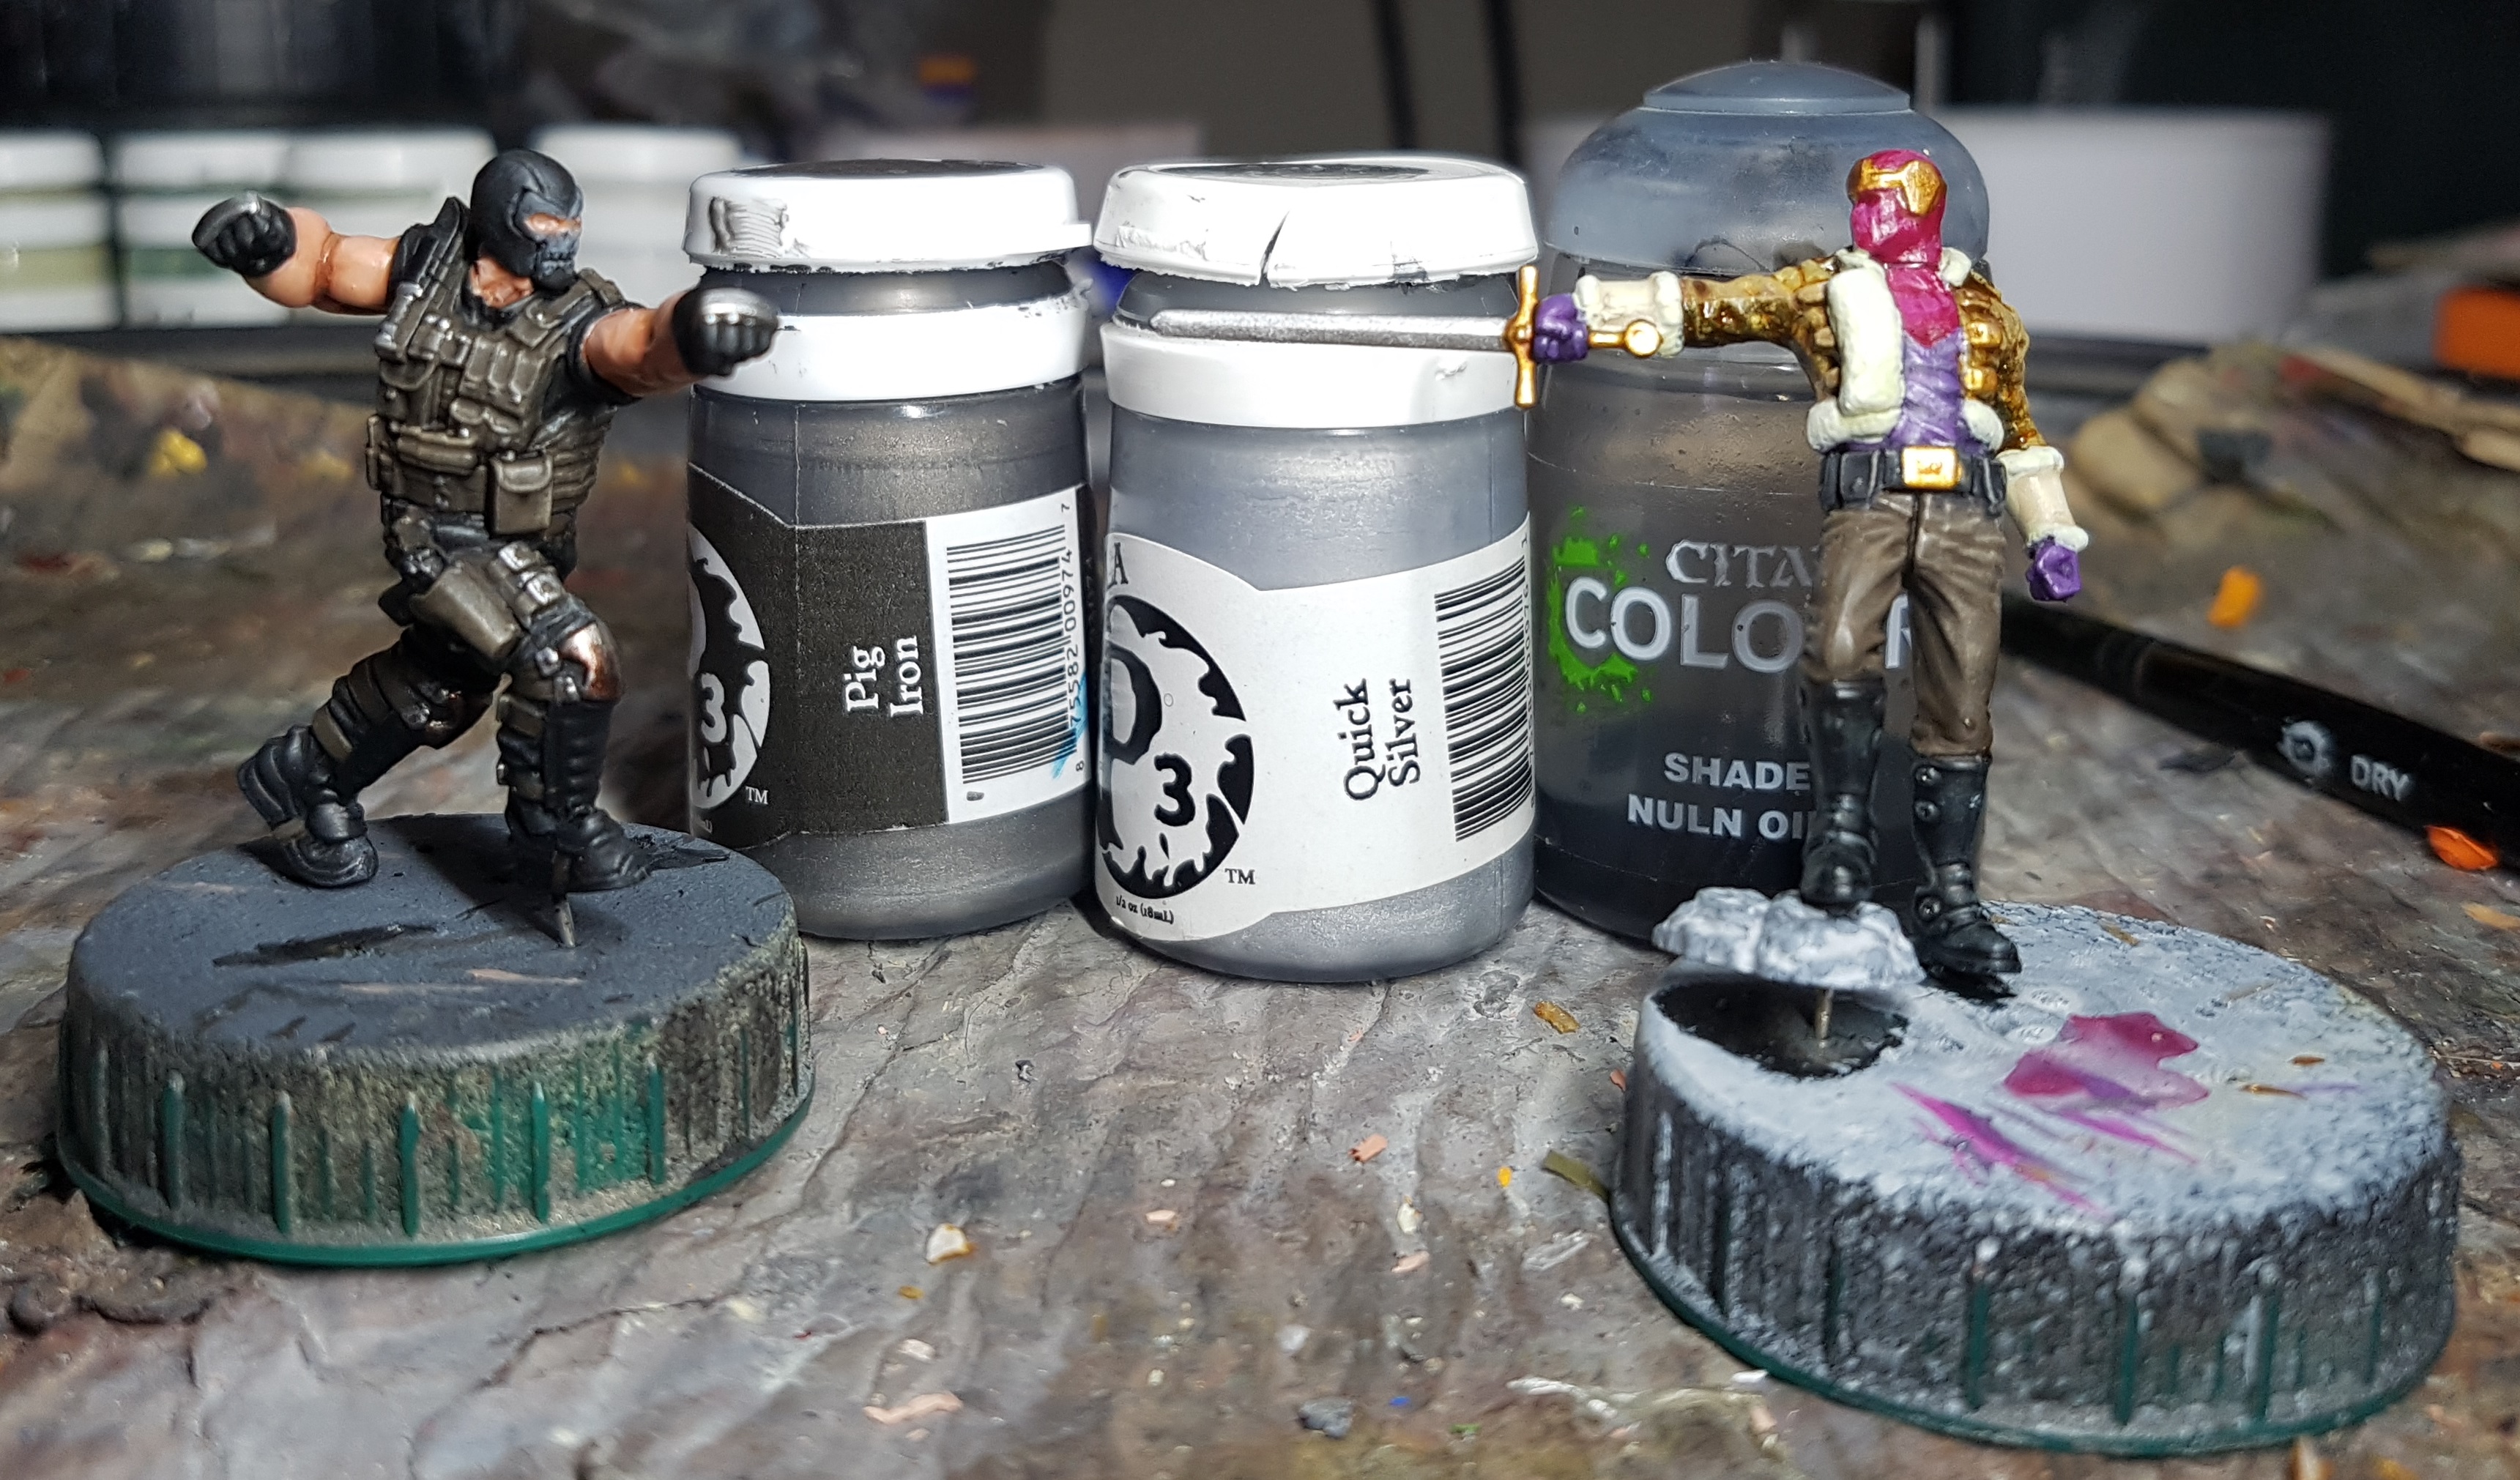
Time for that sword, and all the buckles and steel trim on Zemo and Crossbones. This was another instance where it became apparent that the models in the box are not the same as the ones on the box or on the website. My Crossbones has a single metal strip across the knuckles of each hand. On the box and on the website he has two rows of individual metal studs on each hand. They are giving us slightly different models to the ones they’re telling us they’re selling. It’s not a huge difference and nothing I’ve had an issue with so far, but I dislike the dishonesty and it makes me wonder what else they’ve done or will do that I’ve not noticed yet.
Anyway, Steel:
Base: P3 Pig Iron
Highlight: Pig Iron mixed with P3 Quick Silver
Highlight 2: Quick Silver
Apply targeted GW Nuln Oil where needed for depth or to tidy up any overpainting from the last few steps
Reapply any highlighting as needed.
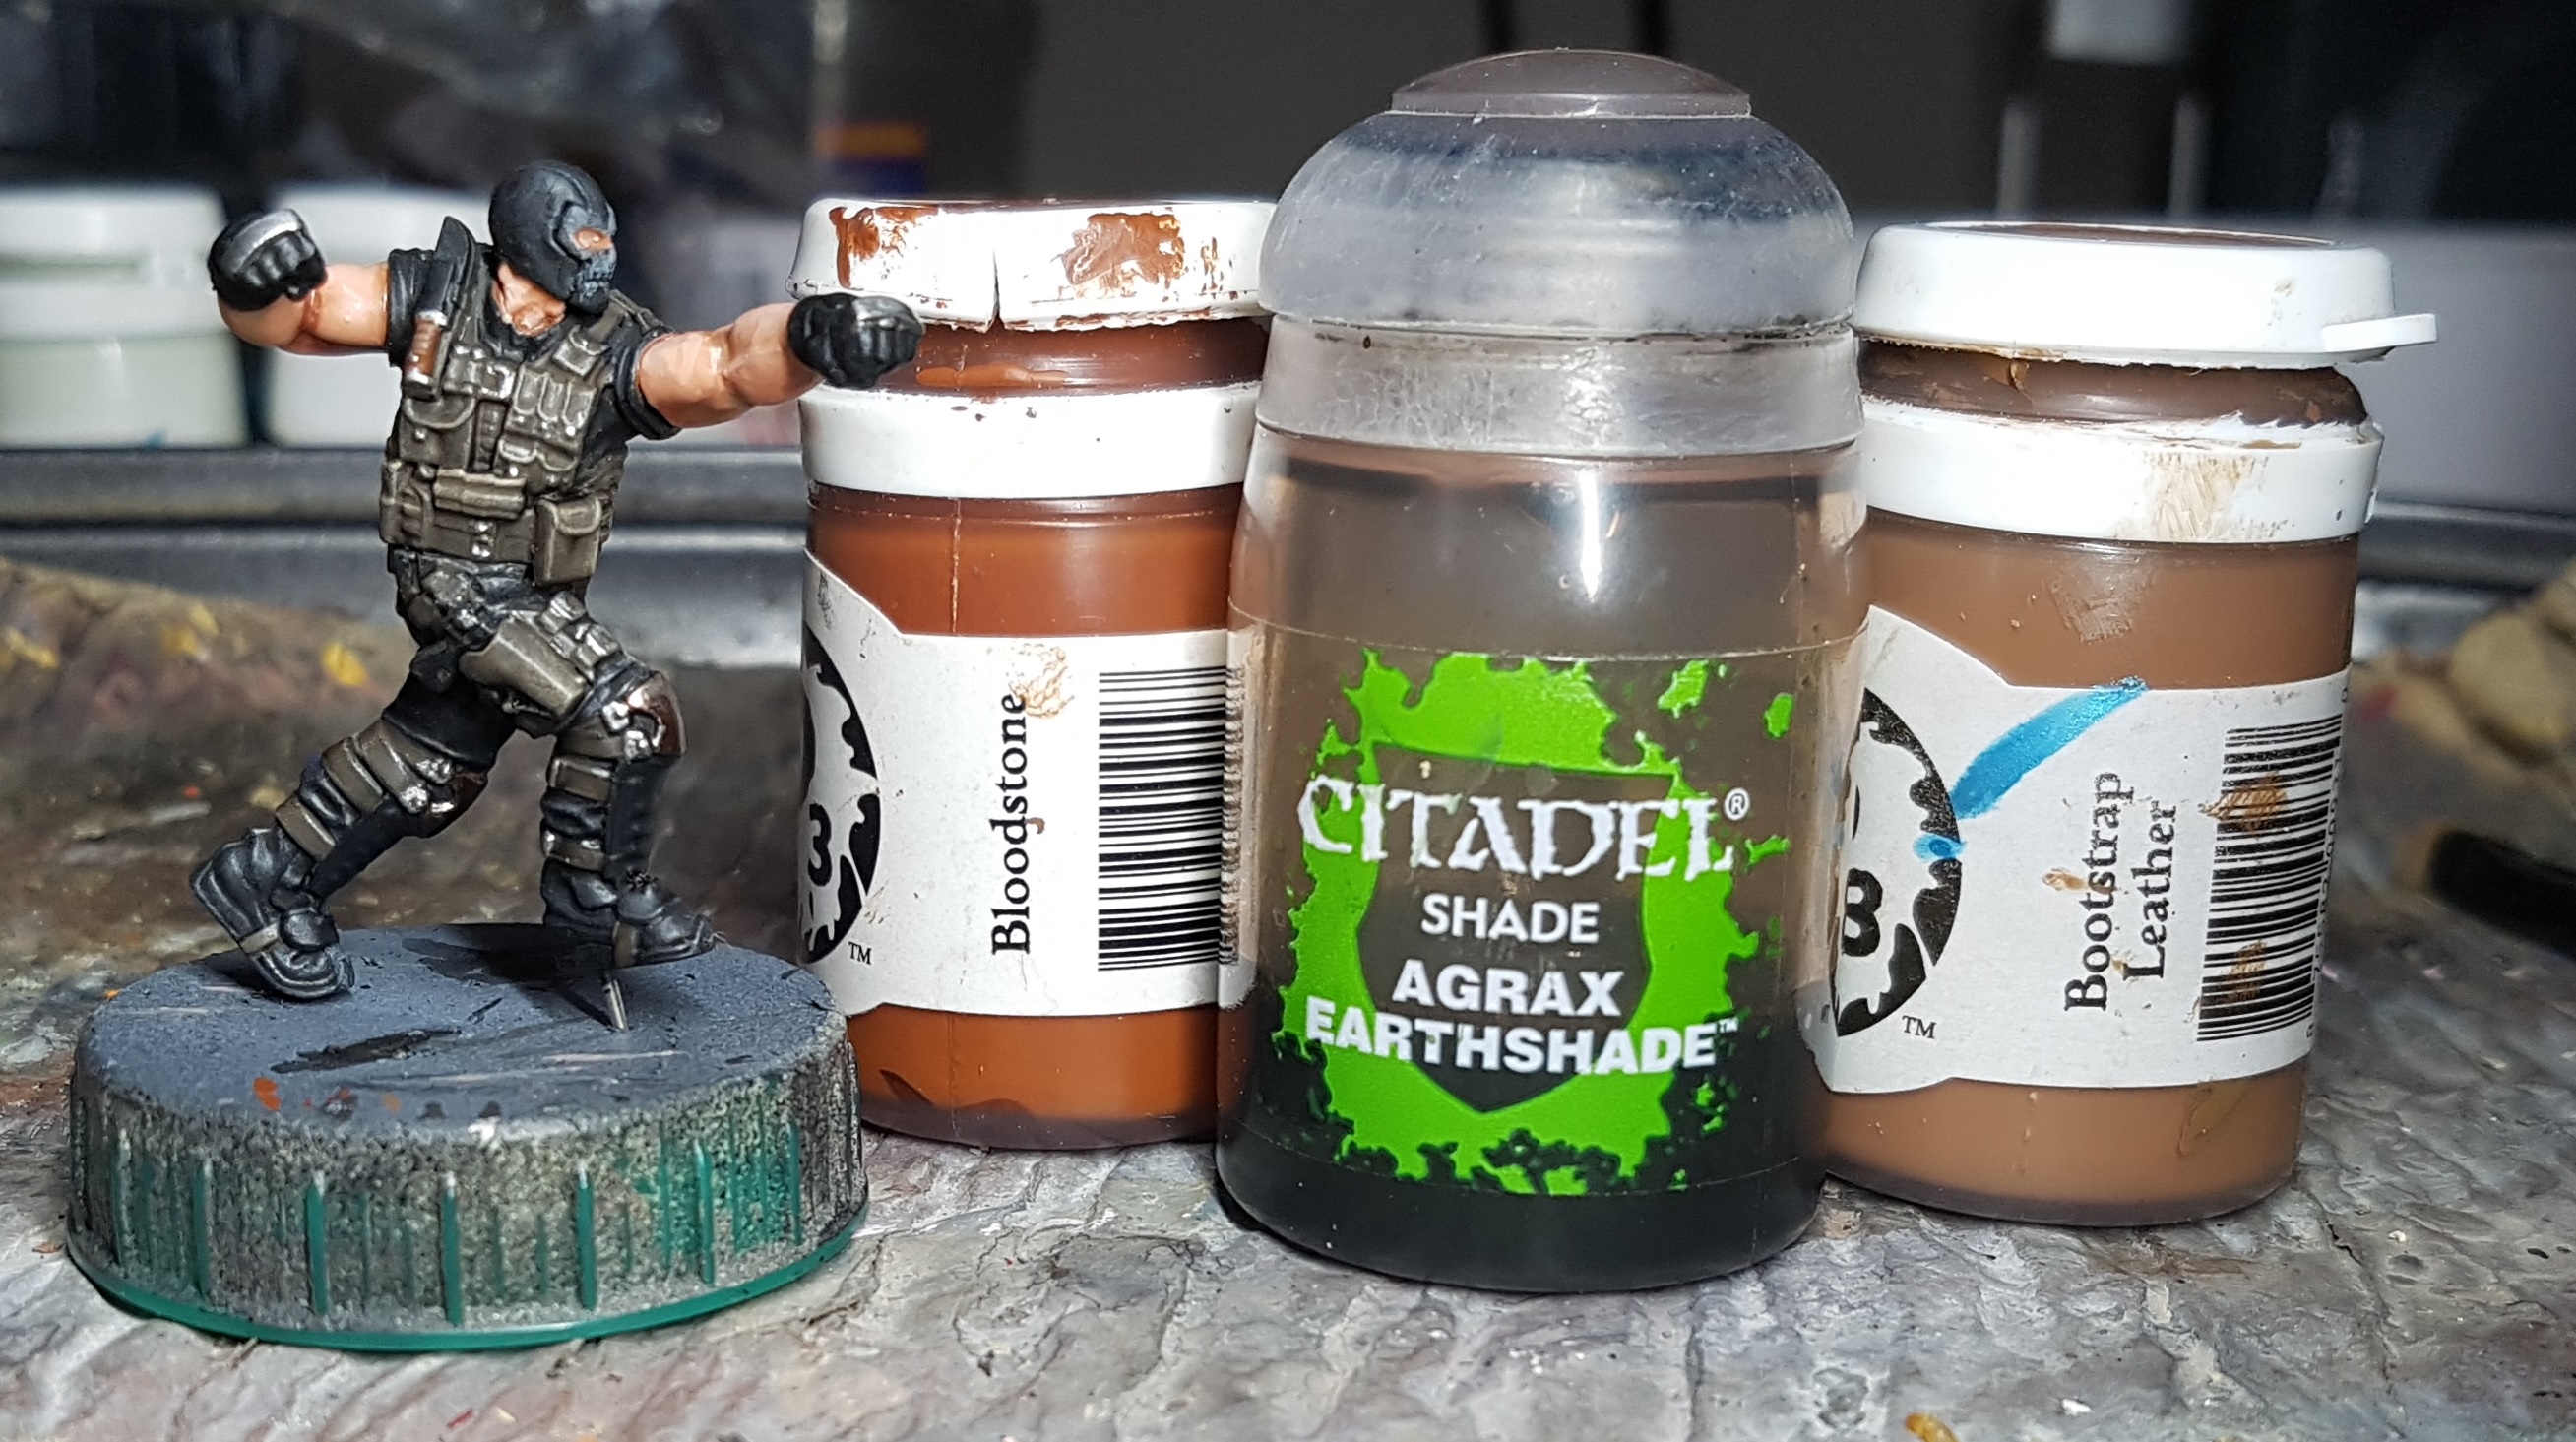
I almost forgot the hilt of Crossbones’ knife! I should have done this before the steel, but oh well.
Base: P3 Bloodstone
Targeted Wash: GW Agrax Earthshade
Highlight with a few lines of P3 Bootstrap
Repair any steel that needs it
Crossbones can return to the paint queue now, until I’m ready to do the white on Captain America
I should probably start work on Captain America now so I can finish Crossbones, but I’ll be honest with you: Spider-man intimidates me. All that webbing on him? That padded armour effect requiring each square to have its own highlights and shade? Eeek! That can wait! Plus, there’s Captain Americas shield. I’m not looking forward to that!
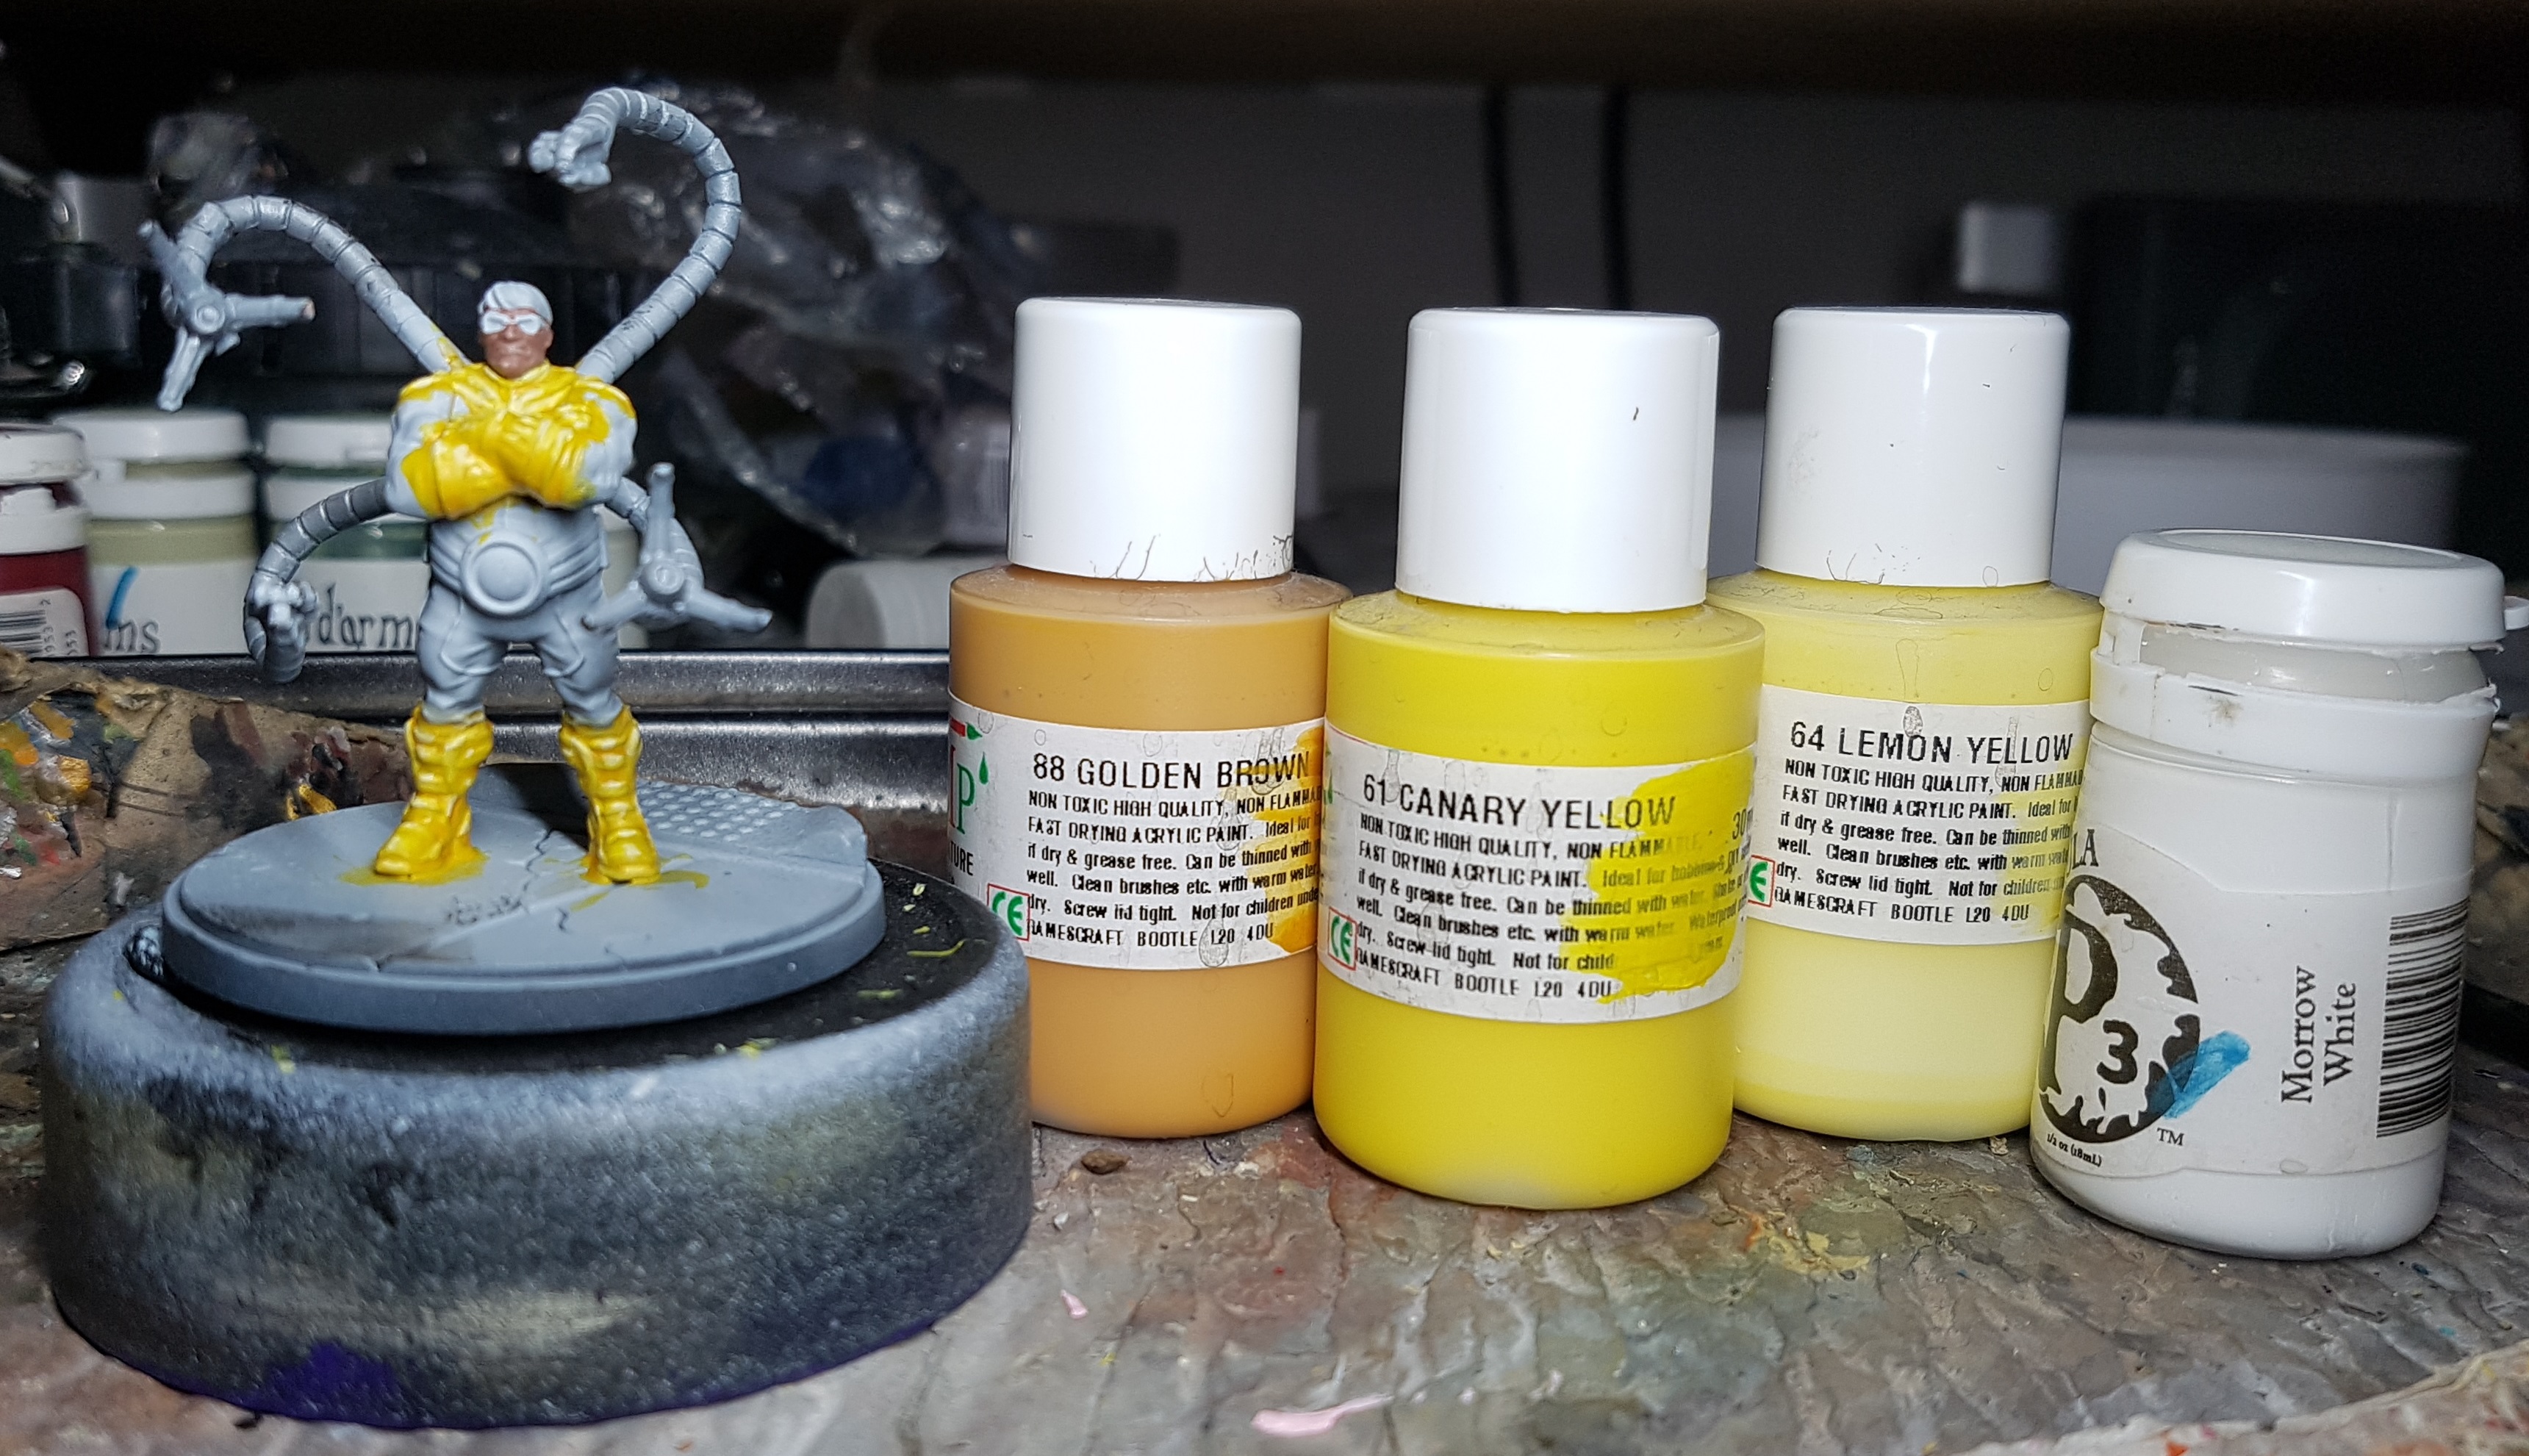
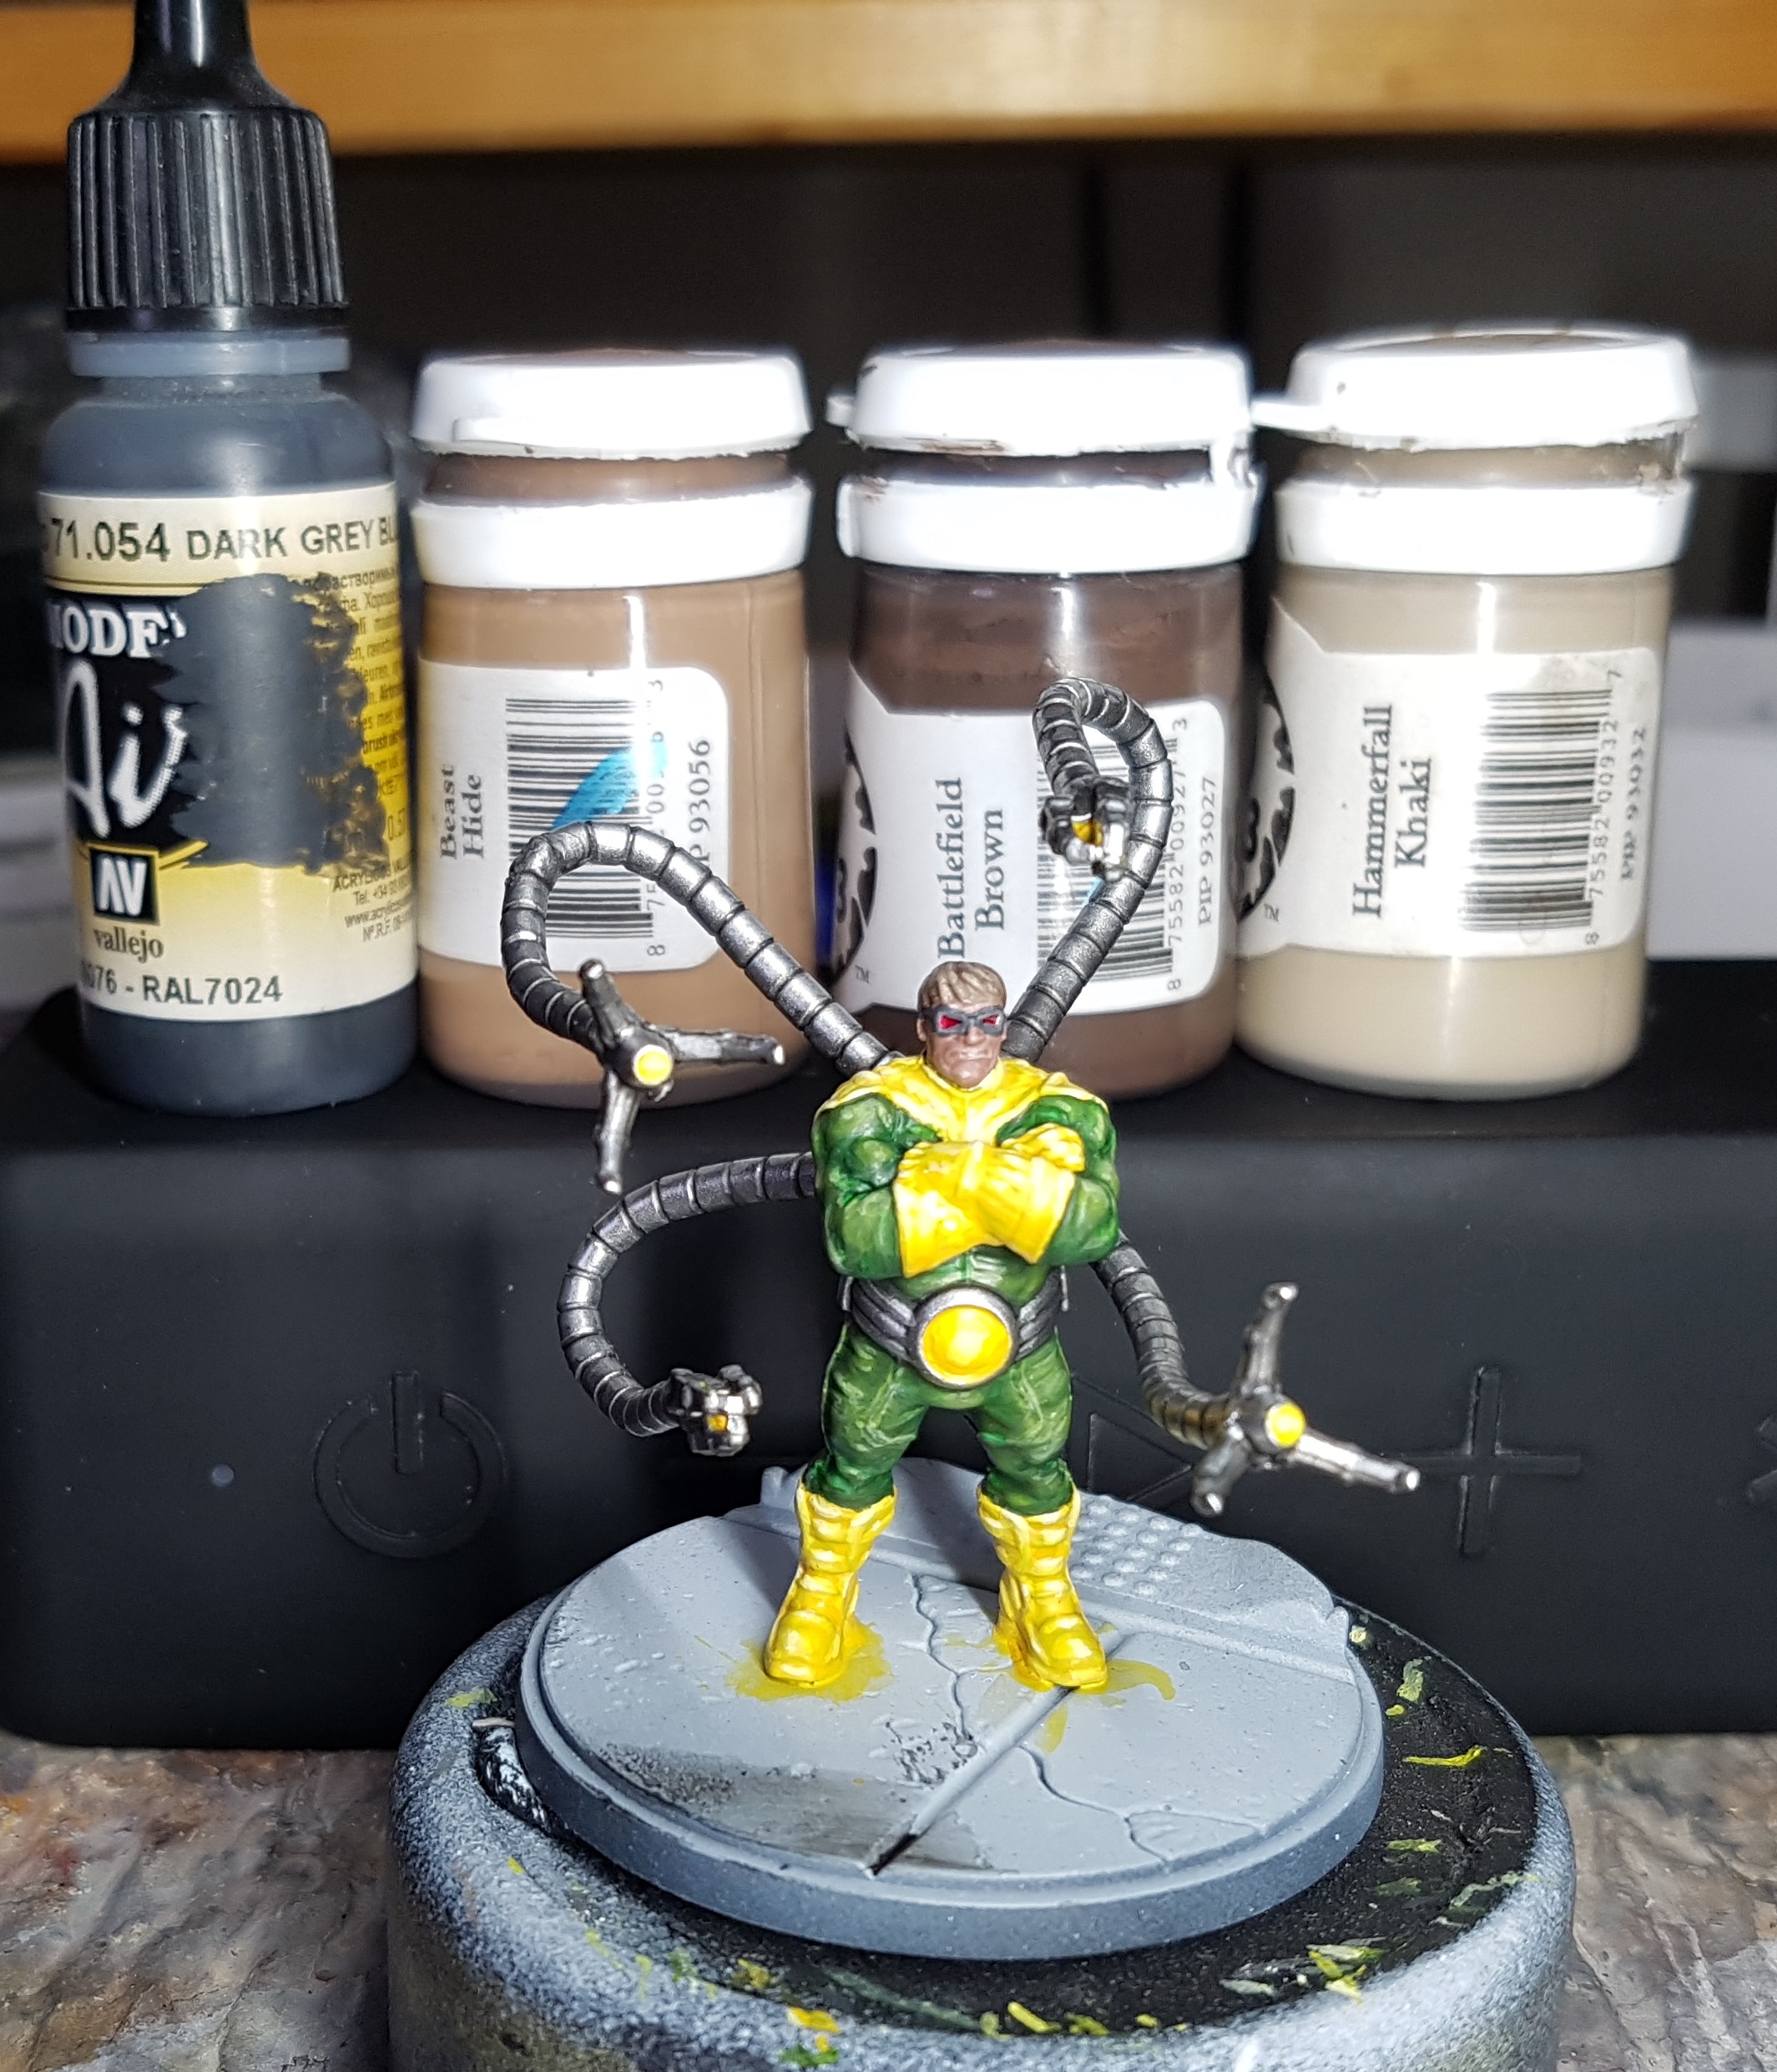
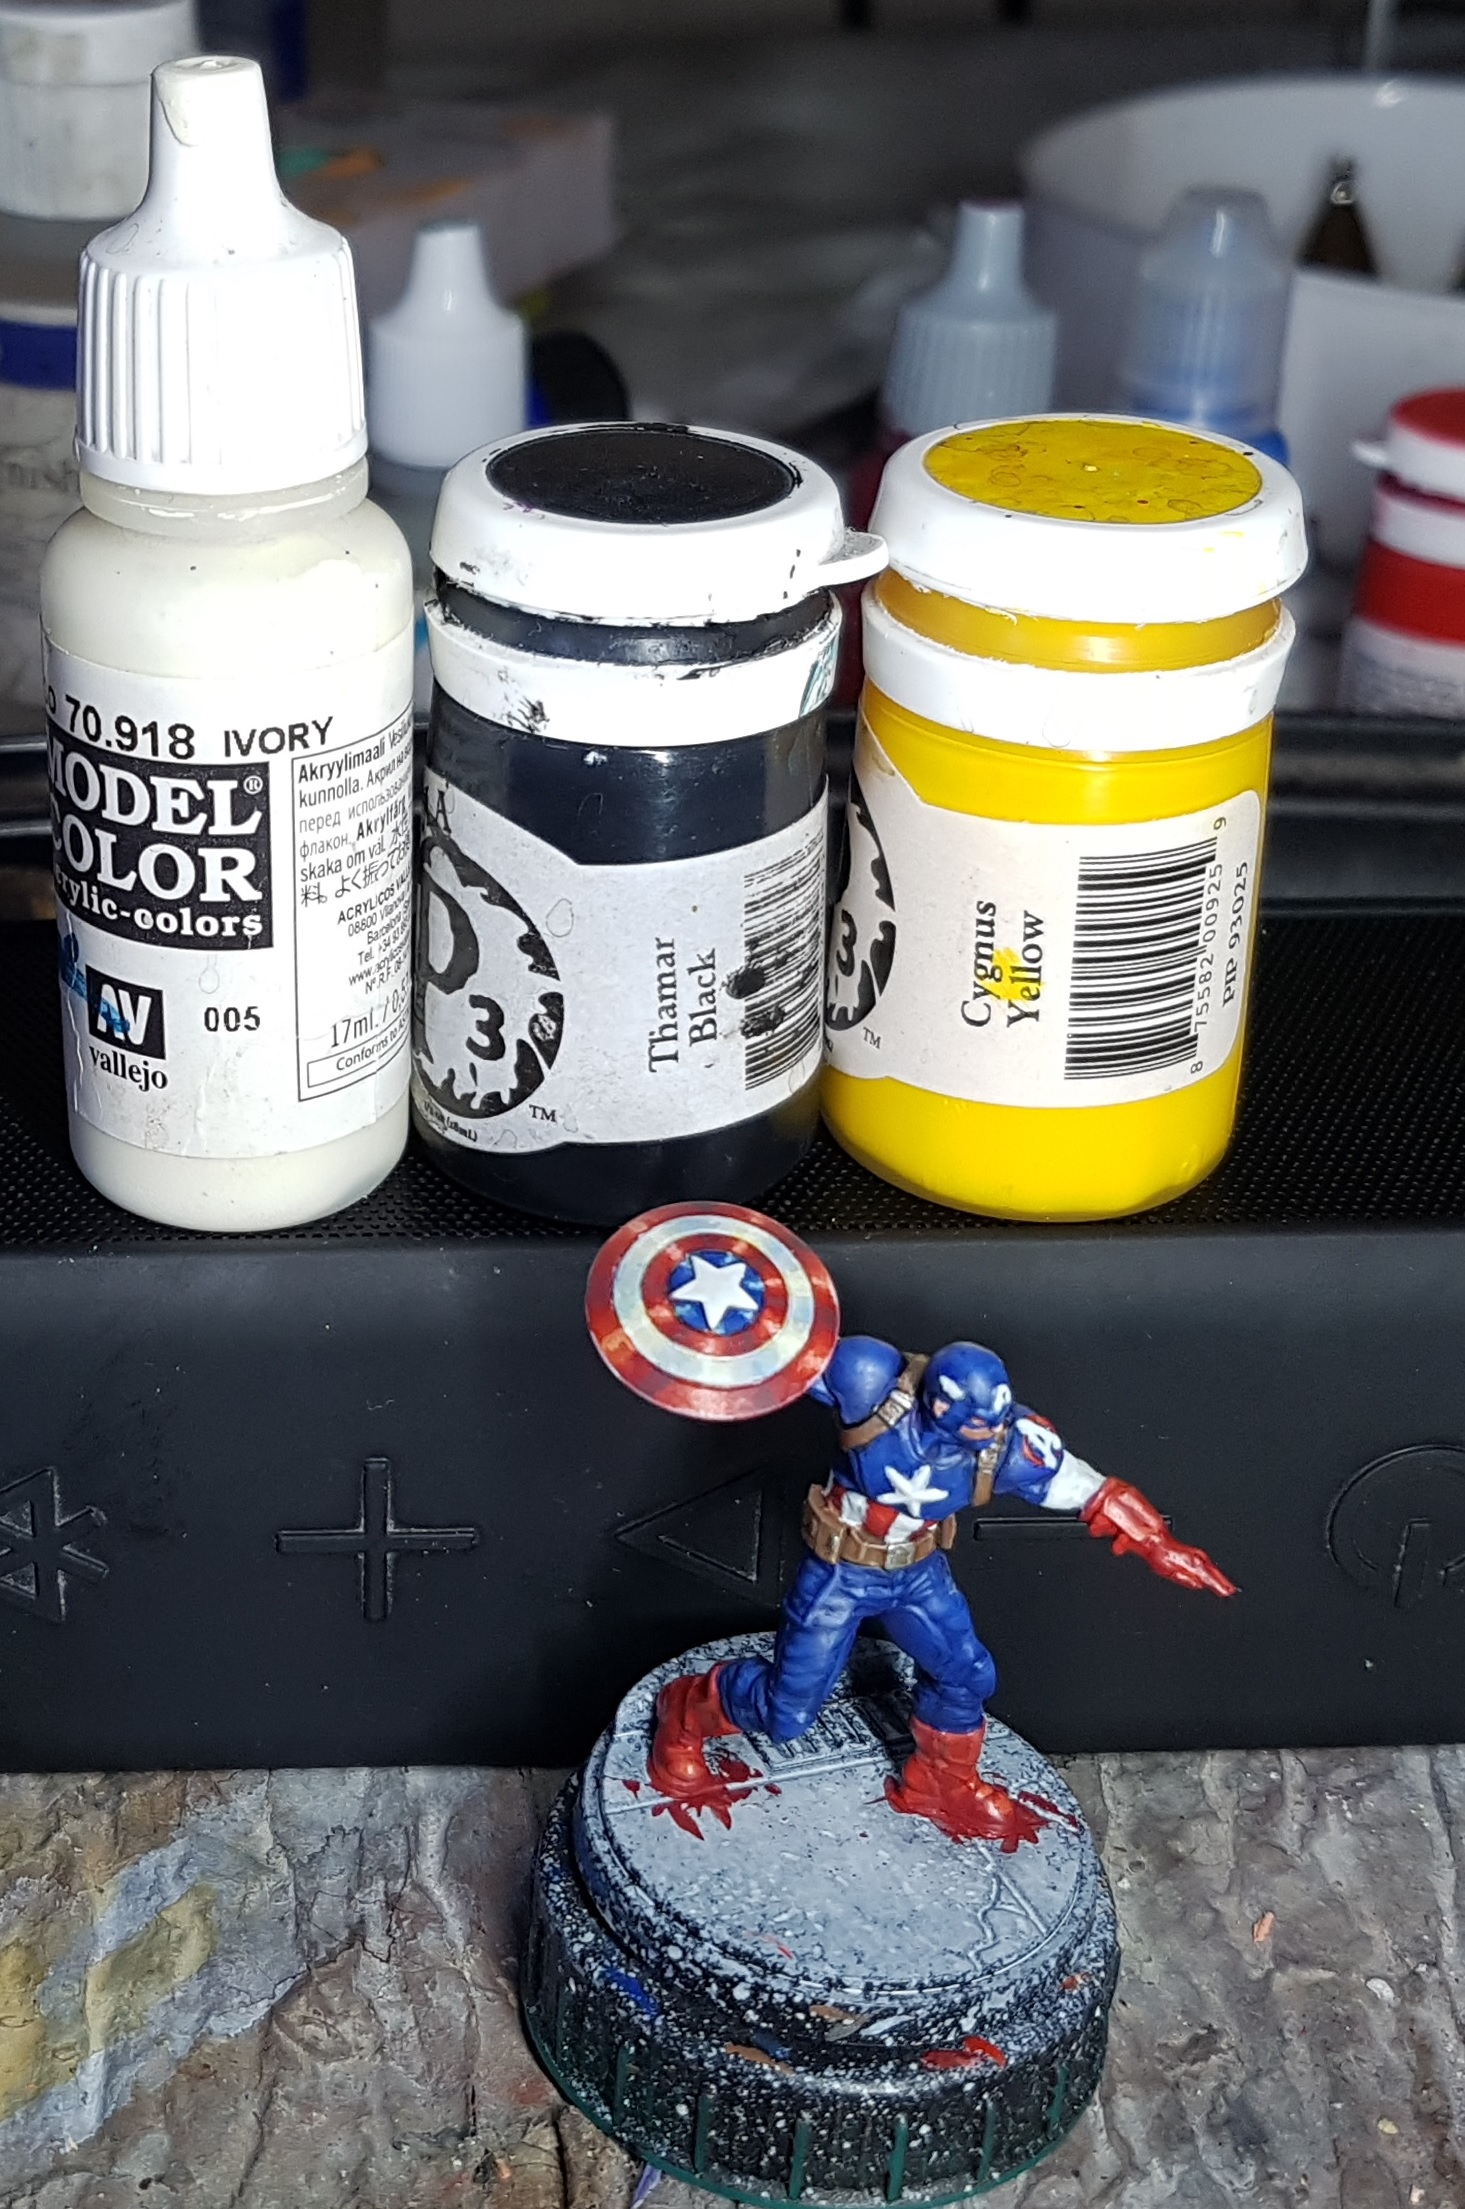
So one last distraction before Team Red and Blue: Doctor Octopus. Let’s do the yellow first as we all know yellow has poor coverage. I should probably have airbrushed on the yellow base colour and repainted the flesh, but I didn’t so time to live with the consequences.
Base: 50/50 mix of Gamecraft Miniature Paint Golden Brown and Gamecraft Miniature Paint Canary Yellow. This took more coats than I would have liked, and the detail may have suffered a bit. Airbrushing would likely have covered better with less.
Layer Shade: Thinned Golden Brown
Layer Highlight: Canary Yellow
Layer Highlight 2: Canary yellow mixed 1:1 with Gamecraft Miniature Paint Lemon Yellow
Layer Highlight 3: Canary yellow mixed 1:2 with Lemon Yellow
Layer Highlight 4: Lemon Yellow
Layer Highlight 5: Lemon Yellow with just a touch of P3 Morrow White
Layer Highlight 6: Add more white
Layer Highlight 7: Add more white
Layer Highlight 8: Add glint highlights with just pure white CAREFULLY!
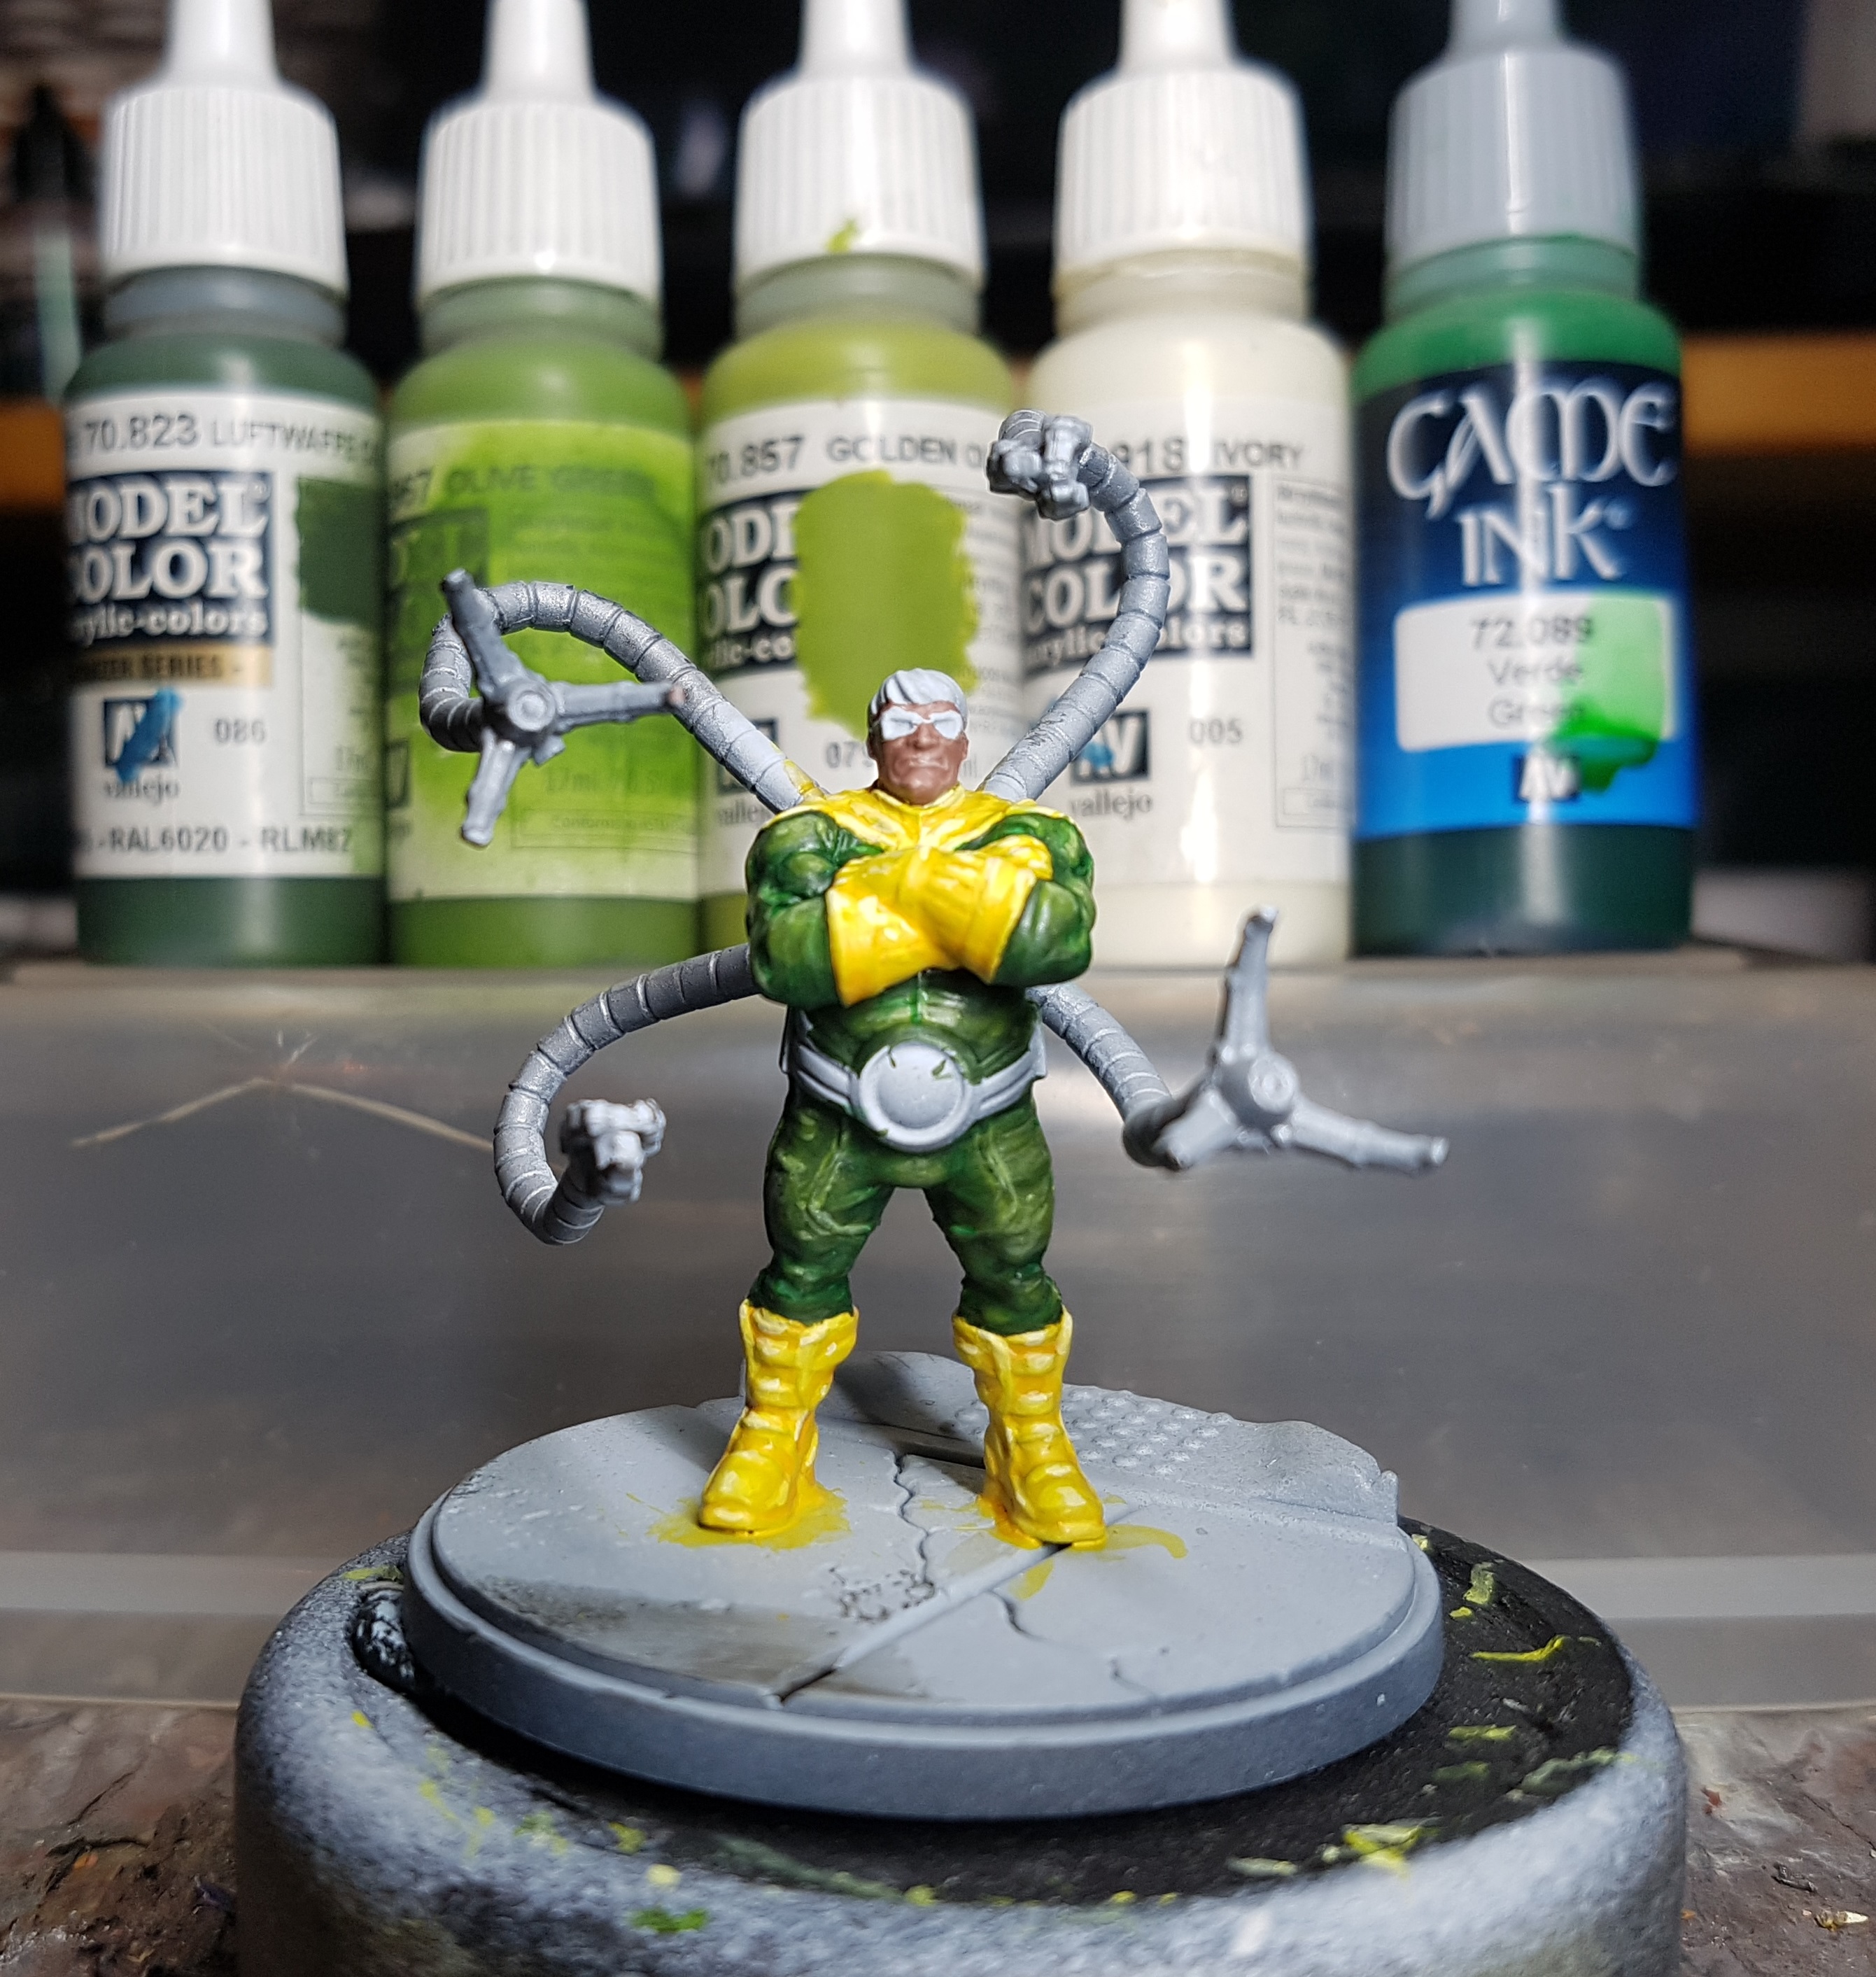
With the yellow done, it’s time for the green. I wasn’t sure how to go so I flicked through both the Angel Giraldez books looking for inspiration and fell on a recipe I’ve used before but thought looked darker than the studio’s green (PanOceania green), but thought it’d work well and I’d go with it anyway.
Base: VMC 70.823 Luftwaffe Cam. Green (Its’ the base, but it’s also the shade colour. I’m starting from the darkest colour here)
Layer 1: Above mixed with VMC 70.967 Olive Green
Layer 2: Olive Green
Layer 3: Olive Green mixed with VMC 07.857 Golden Olive
Layer 4: Golden Olive
Layer 5: Golden Olive mixed with VMC 70.918 Ivory carefully
Glaze: VGC 72.089 Green Ink thinned down to a glaze, and applied to the shaded areas to give more tonal variation. It’s a brighter colour than the shade, but that’s what Angel said to do and it seems to have worked out.
It’s about an hour later in the evening than I usually plan on packing up. I’ve truly gotten caught up in the layering there. It’s too late for a movie in bed tonight so I caught up on some TV instead. That’s 9 evenings worth of work done.
Full Day 1 (After 9 evenings): Dock Ock, Spiderman, and Captains Marvel and America
One of my plans for the 4 day weekend was to finish Jaws of the Lion, and then start Aeon Trespass: Odyssey. However, I seem to be having an allergic reaction to something in my gaming room. It’s happened the past 2 days, and it happened all last weekend. last weekend I was dog sitting so I was blaming it on the dog. I’ve never had an animal allergy before, but I’ve never spent more than a few hours with a long haired dog before that. The dog is long gone, but my itchy eyes and runny nose keep coming back. I didn’t have this issue when I was gaming in this room before Christmas. Well, the weather is really good so I’ve had all the windows open all weekend. Let’s hope that clears whatever this issue is. I’ve decided I don’t want a third day of my face attacking me, so I’m skipping ATO and spending the whole day painting instead. Let’s get Doctor Handsy finished.
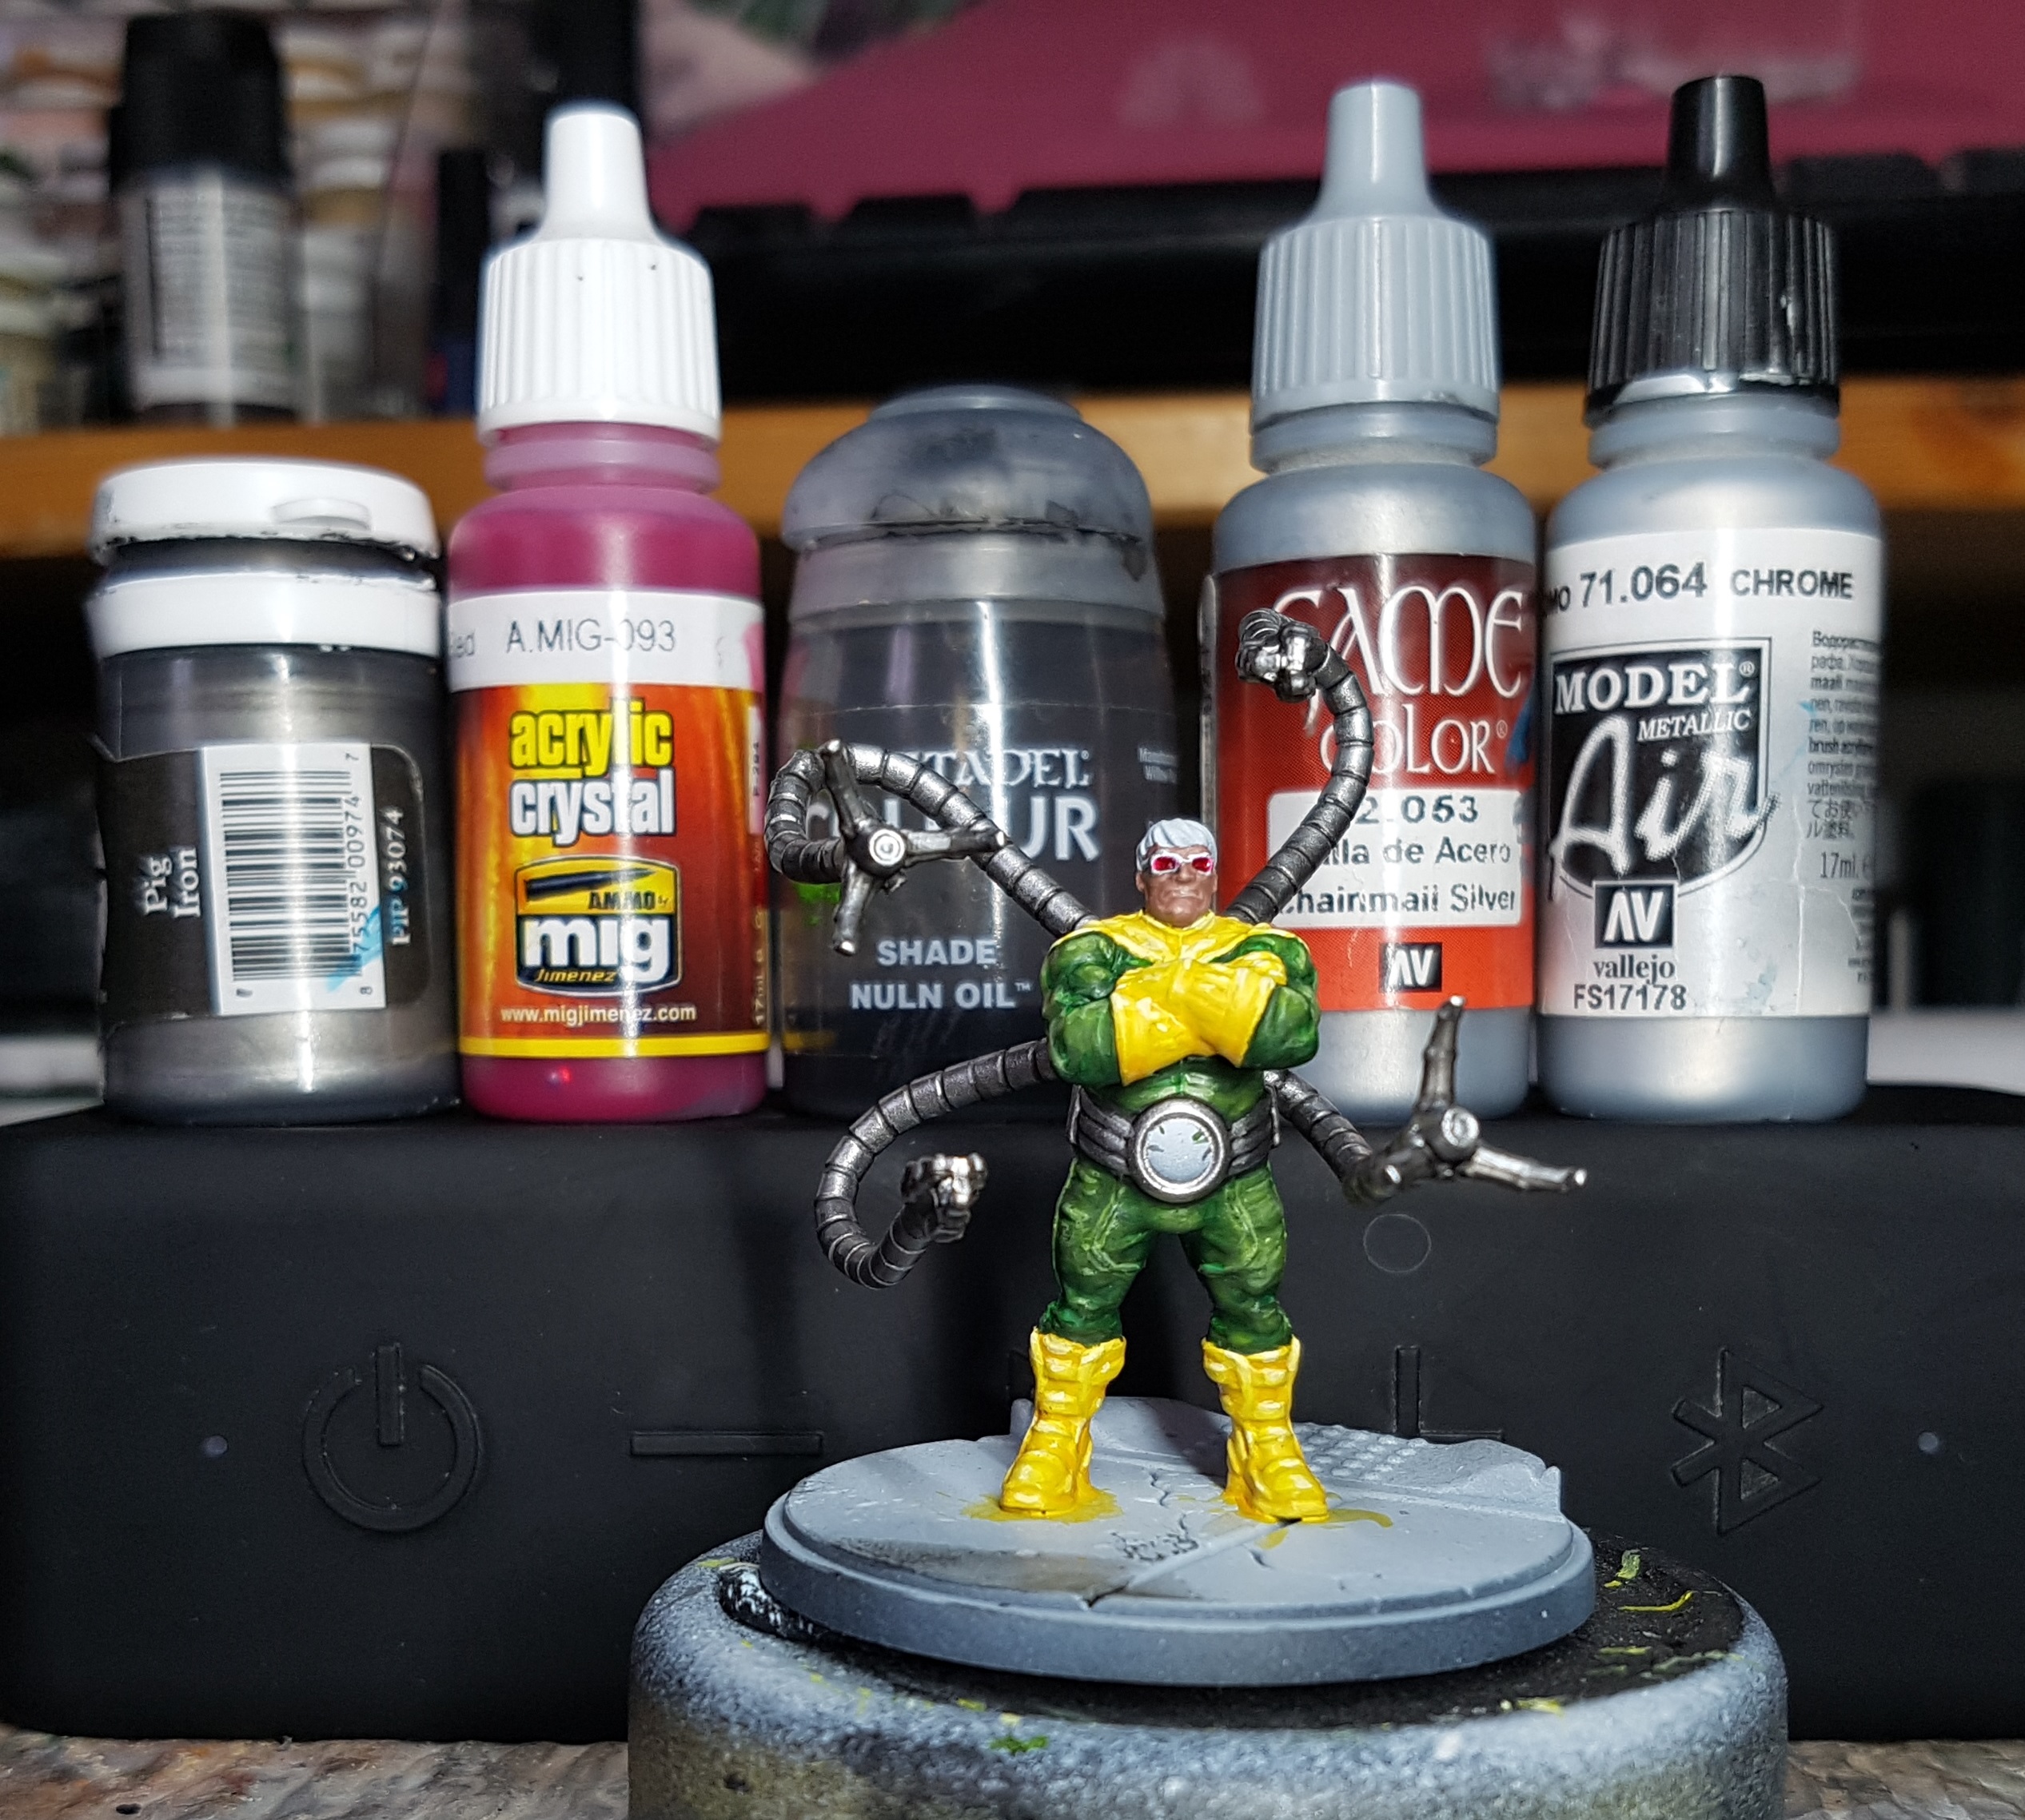
Tentacle Steel & Lenses
Base: P3 Pig Iron. Undercoat the lenses of his glasses too
Pin Wash GW Nuln Oil only in the gaps between the segments
Paint the lenses on his glasses with a drop of A.MIG-0093 Crystal Red. I used 2 coats, but 1 was probably enough.
Layer Highlight 1: Pig Iron mixed with VGC 720063 Chainmail Silver
Layer Highlight 2: Chainmail Silver
Layer Highlight 3: Chainmail Silver mixed with VMA 71.064 Chrome
Layer Highlight 4: Pick out a few careful glints with pure Chrome
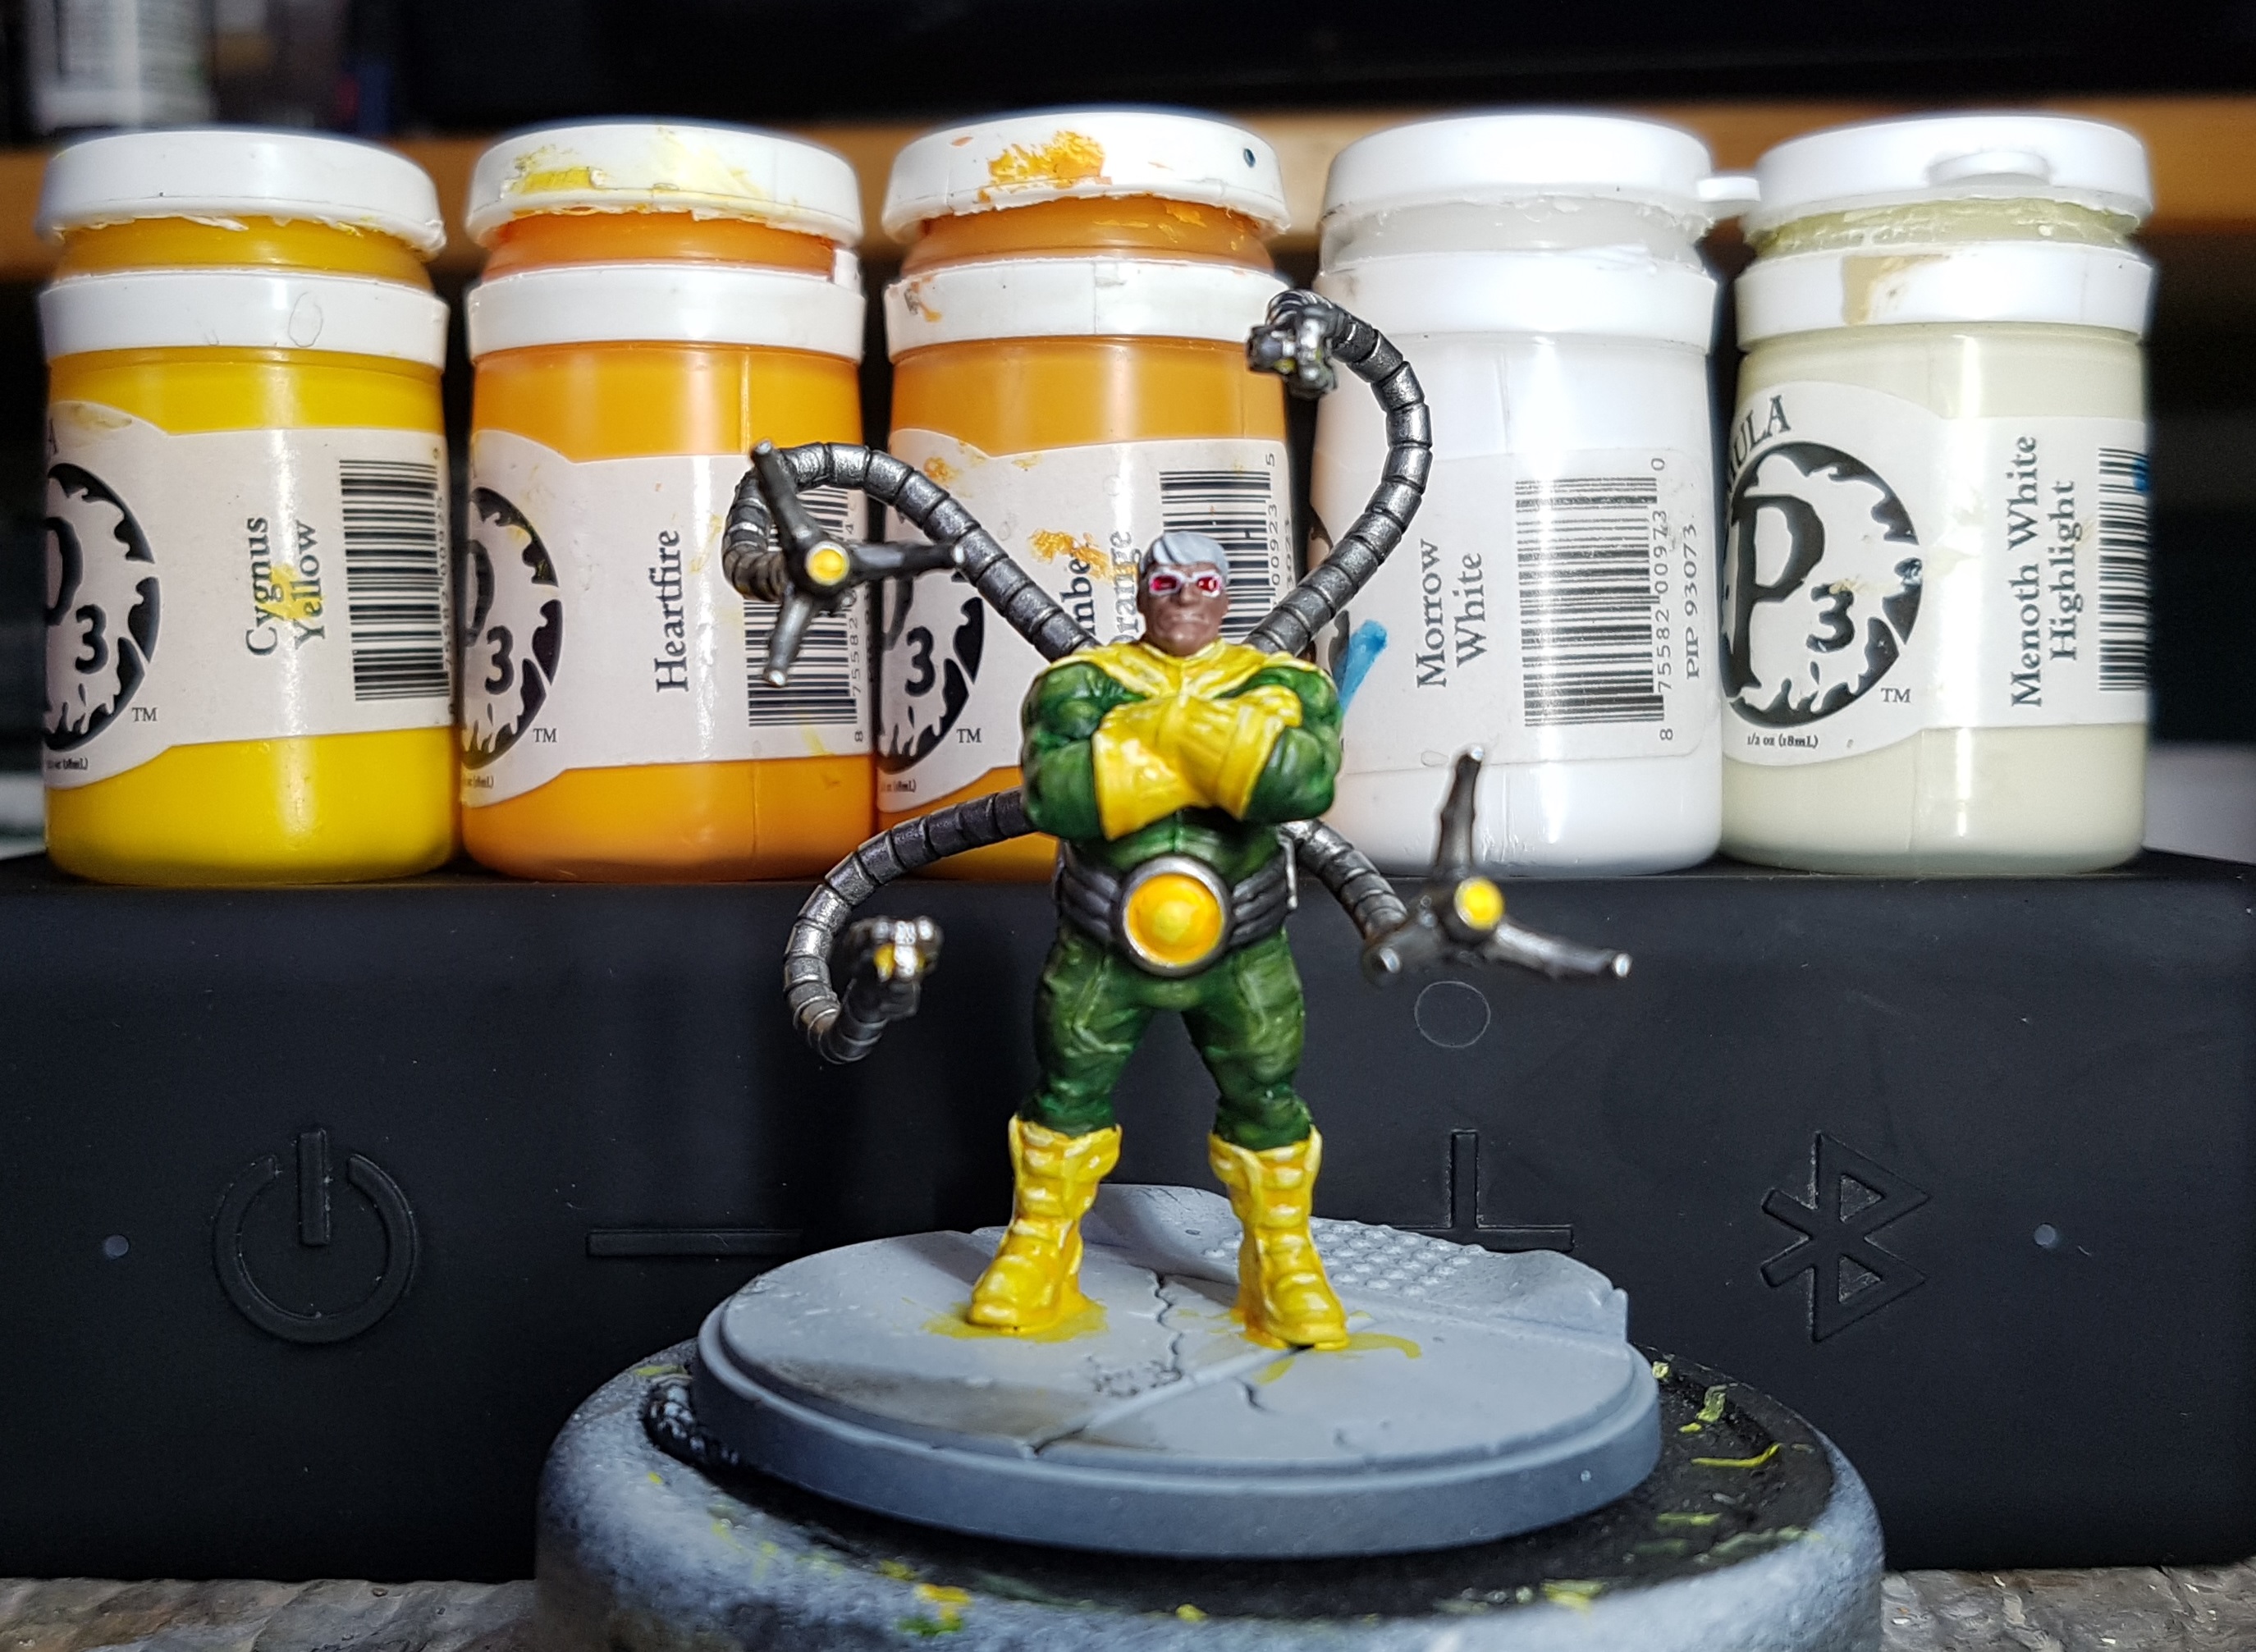
The next big colour is the glow. This was a trial and error paint job. I had a good idea as I’ve done similar things before but there was definite experimentation here
Undercoat: White or you’ll never get the vibrancy you need
Base: P3 Cygnus Yellow
Wash: P3 Heartfire over all of it
Wash: P3 Ember Orange only in the outer ring of each light
Undercoat a small circle of white in the middle again (Or a dot on the smaller lights)
Reclaim with Cygnus Yellow over that white on to the slightly darker areas.
Try a little wet blending between the different shaded until you’re happy or afraid you’re just going to ruin it.
Final Highlight: Cygnus Yellow mixed with a little P3 Morrow White at the brightest point of each light
Getting there. Just tidy up tasks and he can go sit on the Done shelf.
Glasses Frames: VMA 71.054 Dark Grey Blue
Hair
Base: P3 Beast Hide mixed with P3 Battlefield Brown
Wash: Battlefield Brown
Layer 1: base mix
Layer 2: Beast Hide
Layer 3: Beast Hide mixed with P3 Hammerfall Khaki
Glints: Hammerfall Khaki
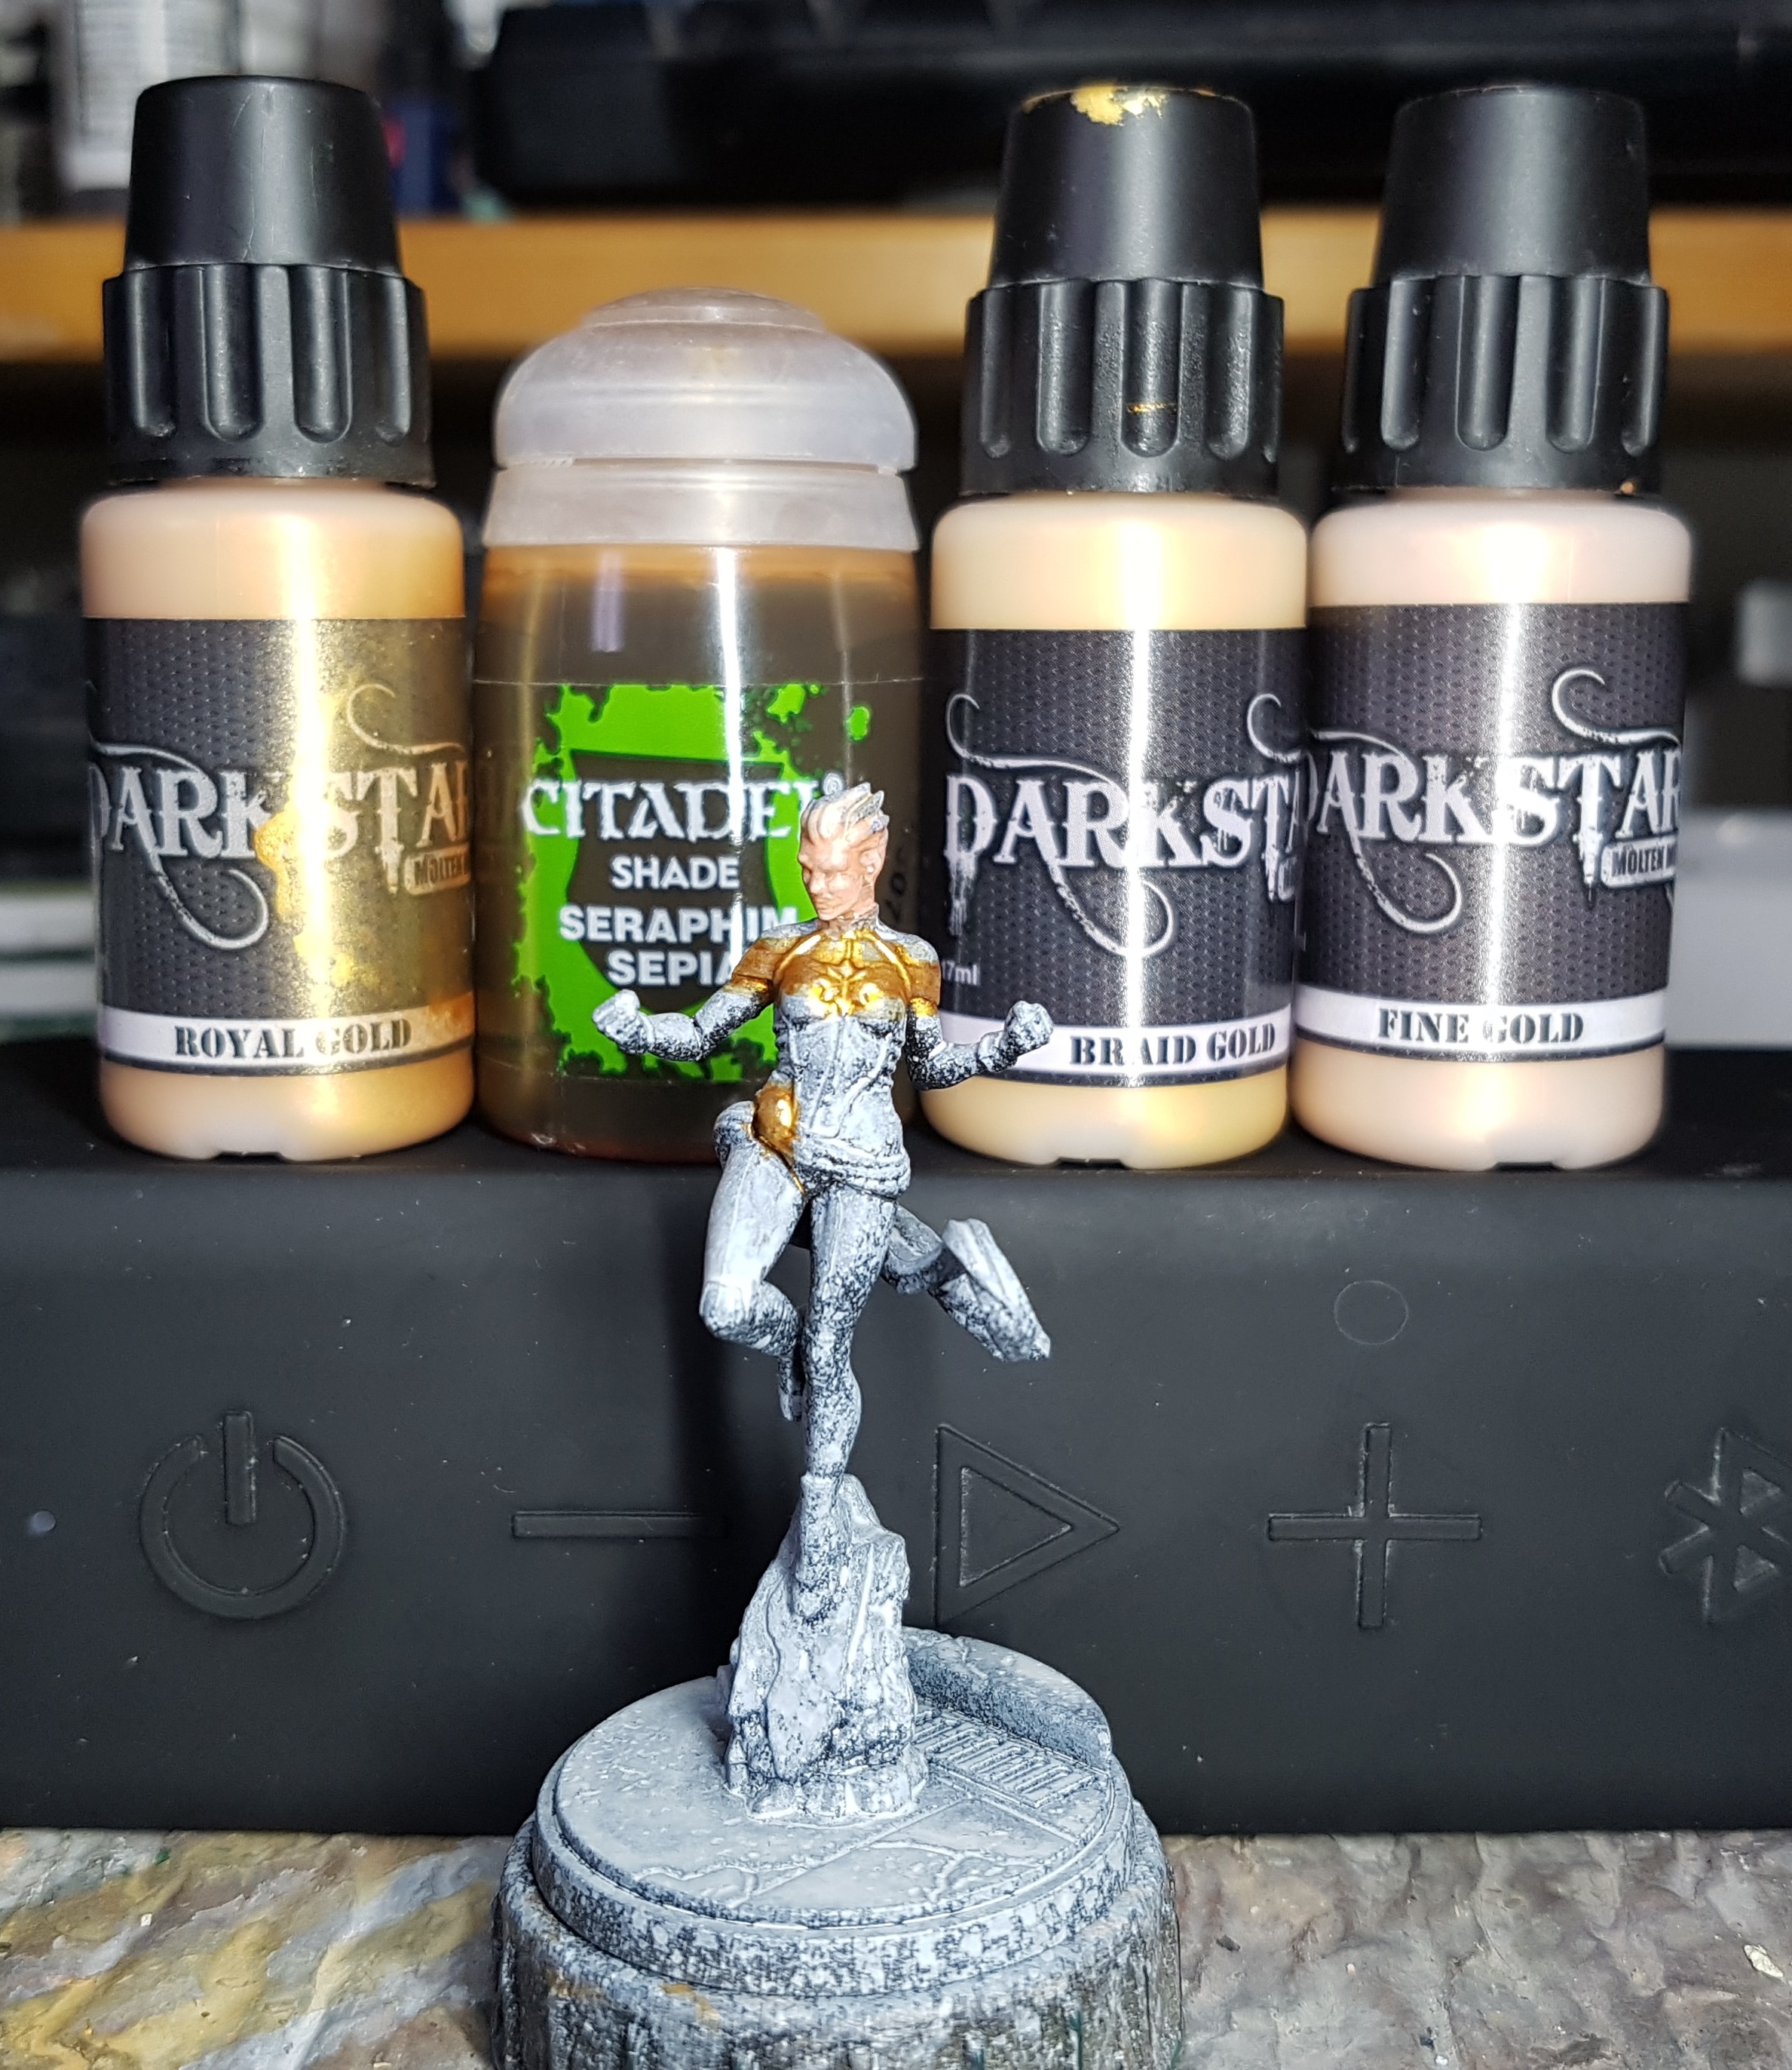
There’s no avoiding it any longer. It’s time to start on the red and blue guys. Looking at them, I decided that it’ll be easier to paint the gold on Captain Marvel first.
Base: Darkstar Royal Gold (I should perhaps have undercoated brown first)
Targeted Wash: GW Seraphim Sepia
Layer 1: Royal Gold
Layer 2: Darkstar Braid Gold
Layer 3: Darkstar Fine Gold
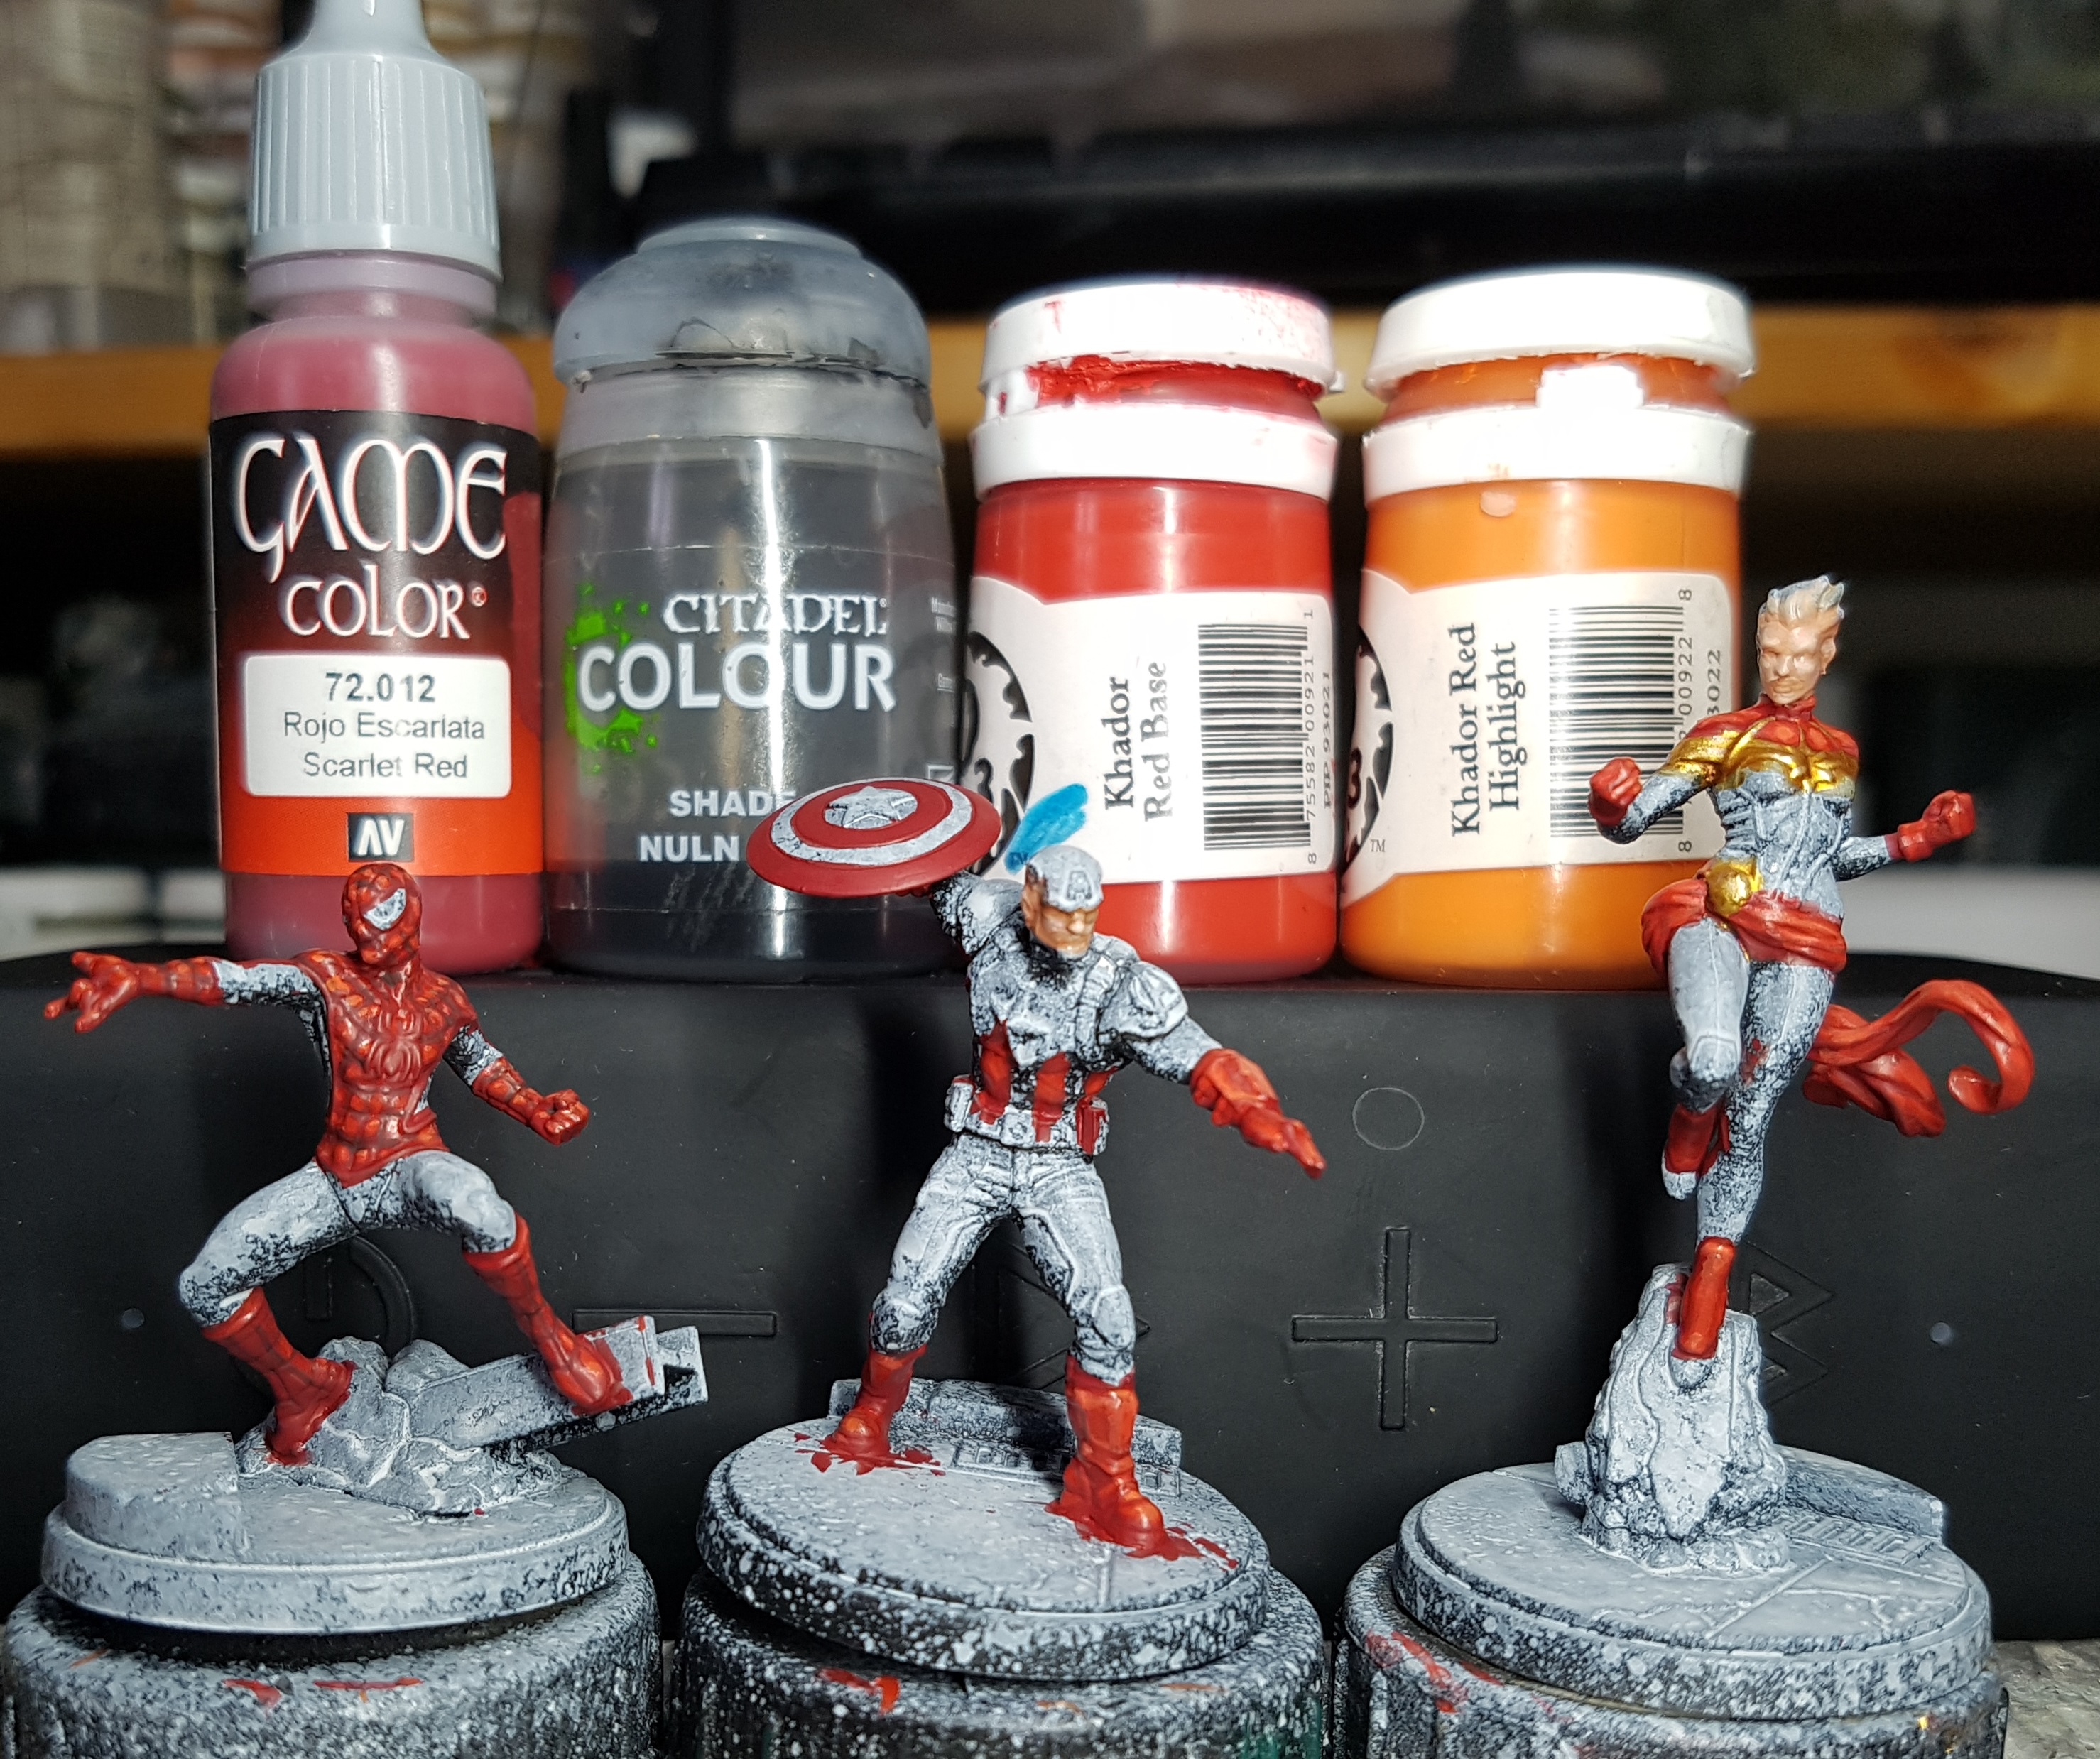
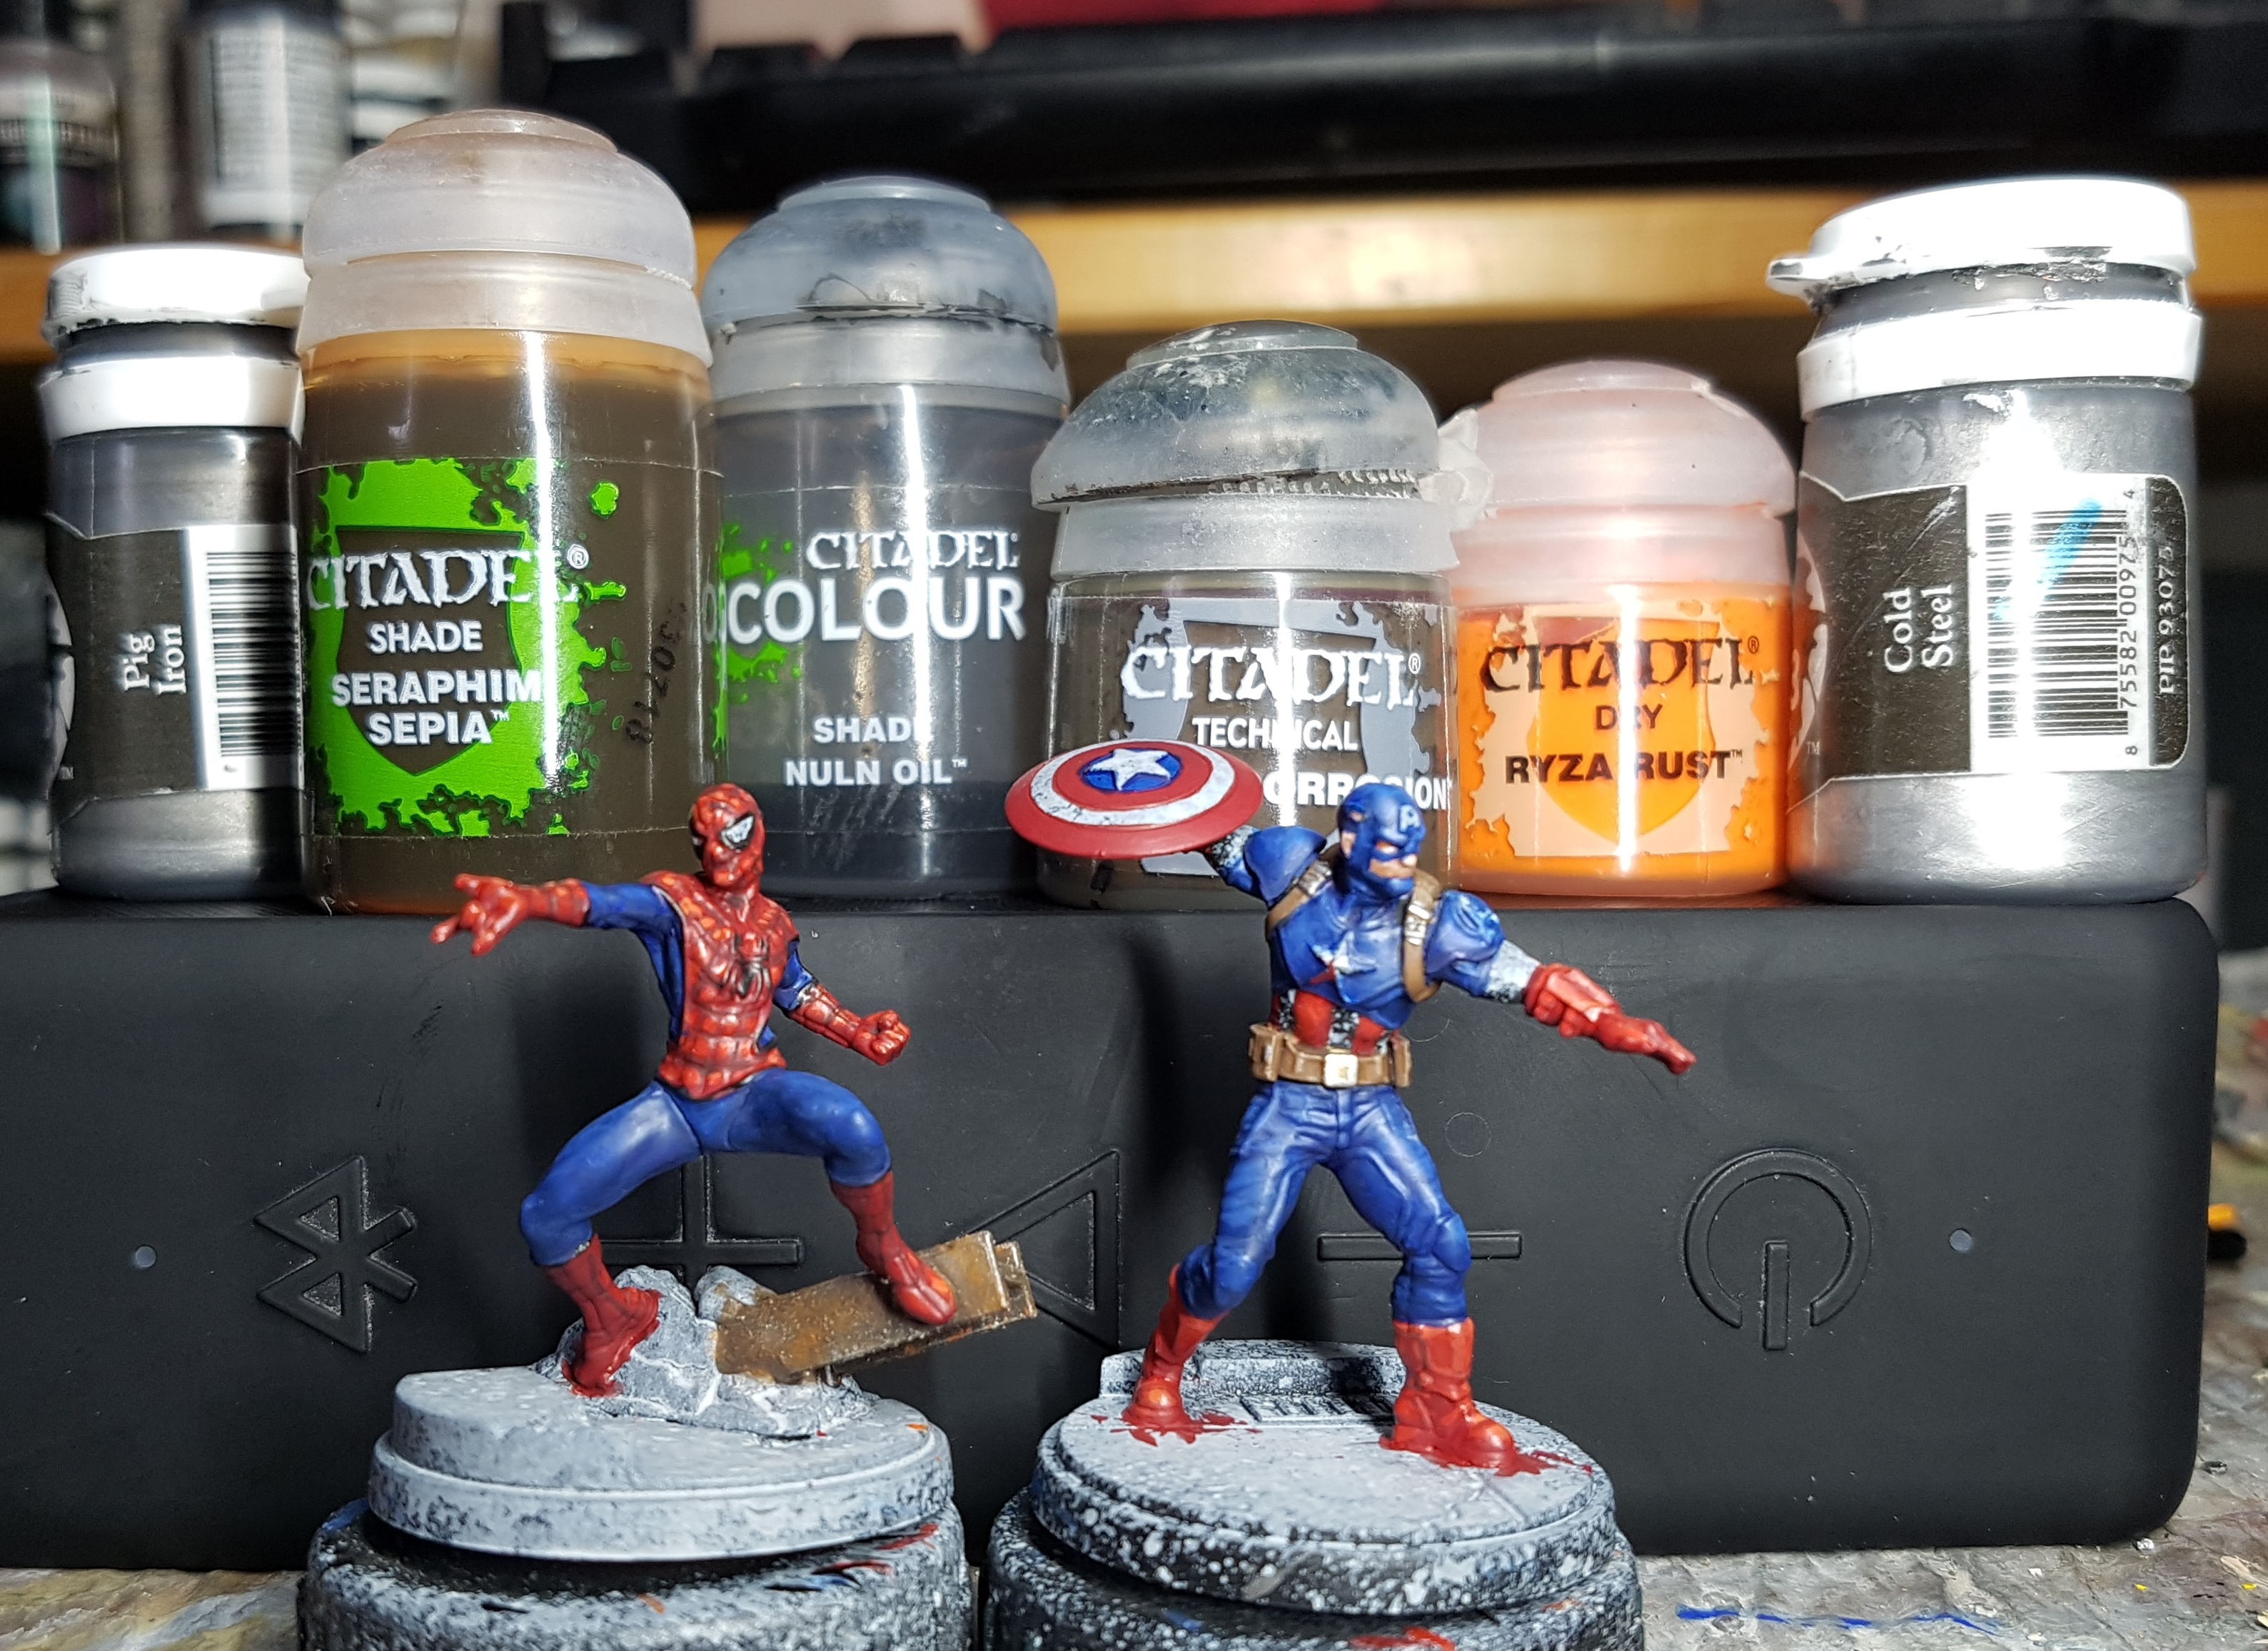
The red seemed like the next best colour. Red can be a bit thin so let’s put it down before I do anything else that might make it harder to get an even coverage. If I’d been thinking ahead I’d have undercoated Captain America’s bellow with a light grey before starting work so i can get a good coverage of white there later. It turns out I didn’t need to though as what i ended up doing went down well enough.
Base: VGC 72.012 Scarlet Red
Pin Wash: GW Nuln Oil between the segments on Spiderman’s quilted top. I should have taken the time to gloss varnish him first, and then matt varnish him after. It should have kept the wash more contained to the crevasses. I had the end in sight and just wanted to avoid slow down so I didn’t do this.
Layer Highlight 1: P3 Khador Red Base
Layer Highlight 2: Khador Red base mixed with P3 Khador Red Highlight
Layer Highlight 3: Above but with more Highlight
Layer Highlight 4: minimal highlights of just Khador Red Highlight
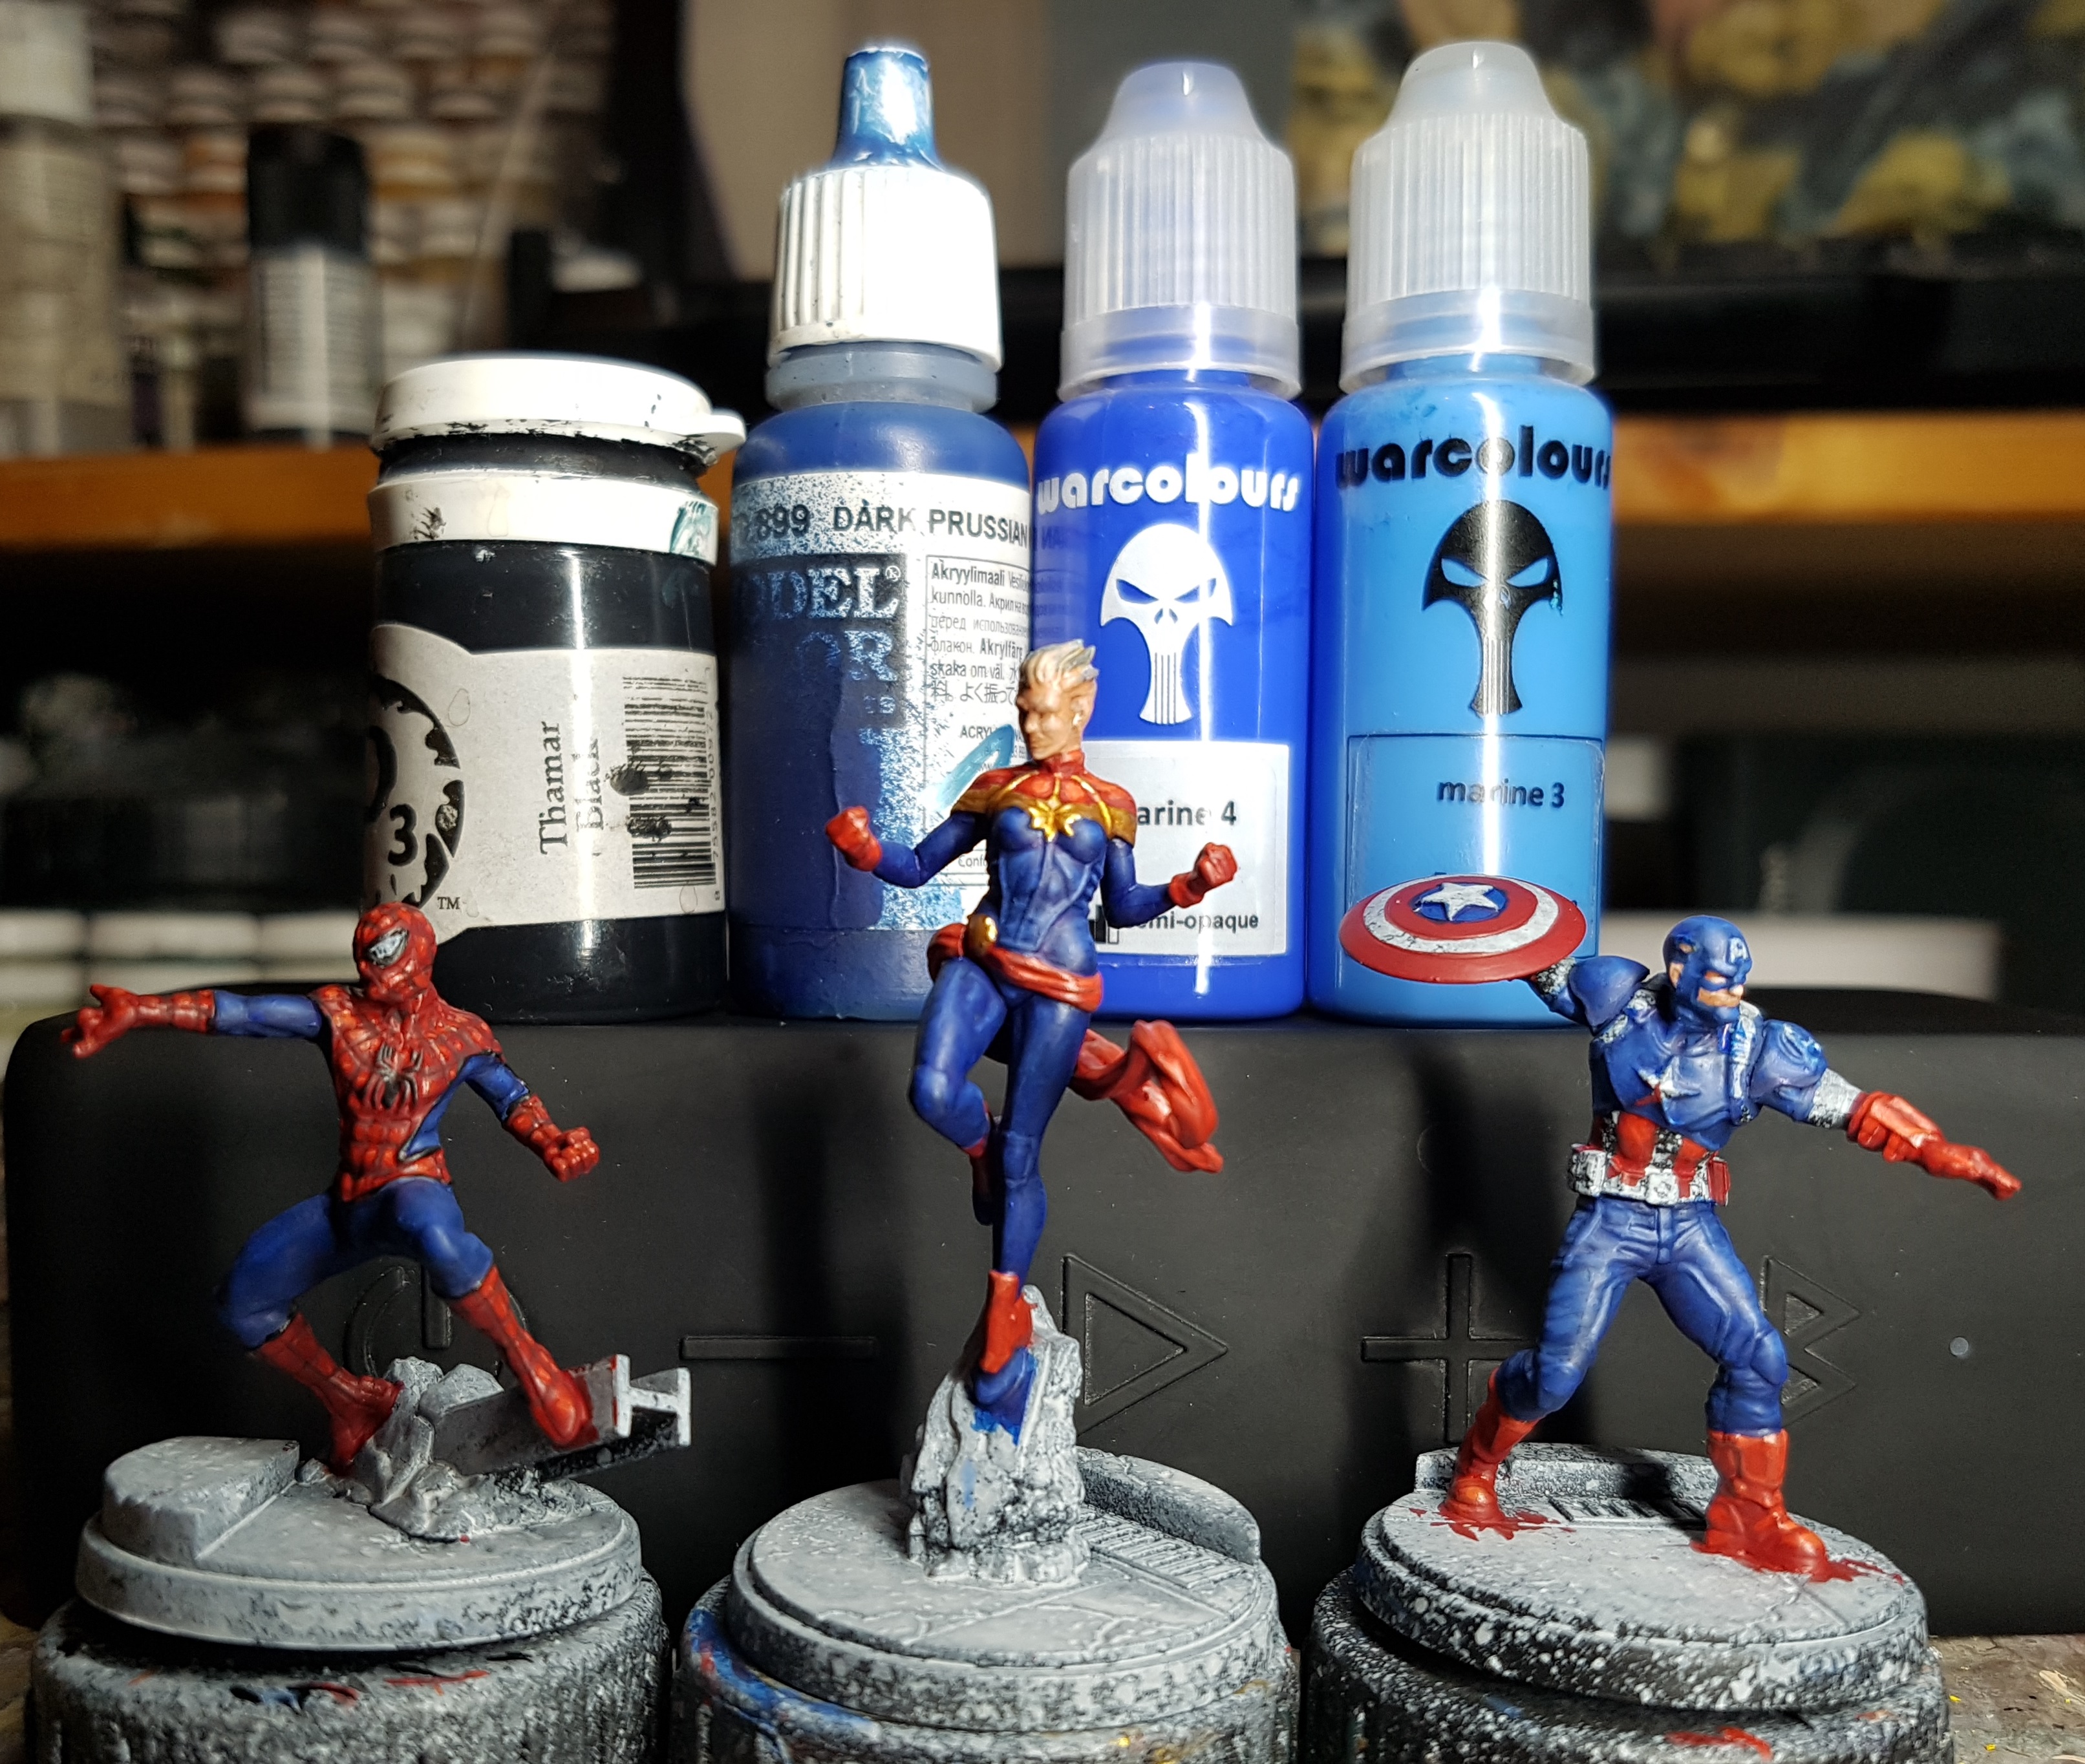
That just leaves the blue as the one last big task. I had an idea where to start, but wasn’t sure if it’d pan out. I think it did ok, but perhaps I could have pushed the highlights more on Spiderman?
Pick out the trim on Spiderman with P3 Thamar Black
Base: VMC 70.899 Dark Prussian Blue (I love this colour. It’s a deep warm blue)
Layer 1: Dark Prussian Blue mixed with Warcolours Marine 4 (I’ve based with this colour before. It Almost glows)
Layer 2: Marine 4
Layer 3: Marine 4 mixed with Warcolours Marine 3
Layer 4: Careful selected application of Marine 3
At this point I have only applied base colours to that shield. That’s a whole job to itself for later. I have a plan.
It’s too late now to start another colour, but it’s early enough for a movie. I’m 9 evenings and 1 whole day in. I went to bed and watched Nope for the first time. I can’t cope with horror movies. They show me things I can’t unsee. I can still see Karen Gillen taking a bite out of a light bulb and I only saw the trailer for Oculus a few years ago (2013. Was that 10 years ago and I’m still squirming???). No thanks. I also have issues with the whole alone in the dark thing afterwards. I’m a wuss. Every now and then I try some, and I like some, but I’ll usually only try them at home when i can stop them at any time, and have the time for a comedy afterwards.
I’ve heard good and interesting things about the Jordan Peele movies so I’ve been slowly working through the three of them recently. If you’re like me, then you should know these movies are safe. They’re horror toned, but everything bad happens off screen, or out of focus or in the distance. He’s also not trying to give you nightmares. He’s a story he wants to tell and he seems to make them viewable by everyone and not just those who love nasty horror movies.
I’ve watched all three now and they’re really good. They’re about a concept, and have an element of a mystery for the viewer to solve to them. Don’t do any research. Don’t watch any trailers. Enjoy them blind and you’ll have a better time. I knew some of the twists and still had a good time, but I’d have enjoyed it more if I was trying to figure it out with the characters. “Get Out” is like a reverse murder mystery. The murder hasn’t happened yet, but you know it’s going to. But how and why and by who? “Us” is more of a traditional (but still safe) horror movie, at least to begin with, but it’s more high concept with an interesting situation. Just don’t think too hard about the backstory because it doesn’t work. “Nope” was great. It’s got elements of SciFi and Western to it, while being set in the modern day. There’s something in the sky above their horse ranch that serves Hollywood, and it’s all about them figuring it out and the choices everyone makes. It’s currently 3 days later and it’s still demanding space in my head.
Anyway, this isn’t a movie review site and I’ve still got Monday to type up. Tangent over.
Full Day 2 (After 9 evenings): Spiderman, Captains America and Marvel, and Crosbones
It’s day 4 of the 4 day Easter weekend. I should probably go learn to play Aeon Trespass but I’m so close to finishing this round of the project. I’m also still not quite over whatever I’m reacting to whatever has been upsetting my face. I might also have an unplanned houseguest turning up at some random point in the day and I don’t want to be caught solo board gaming. It feels a little odd. I’m making excuses, so I give in and spend the day painting.
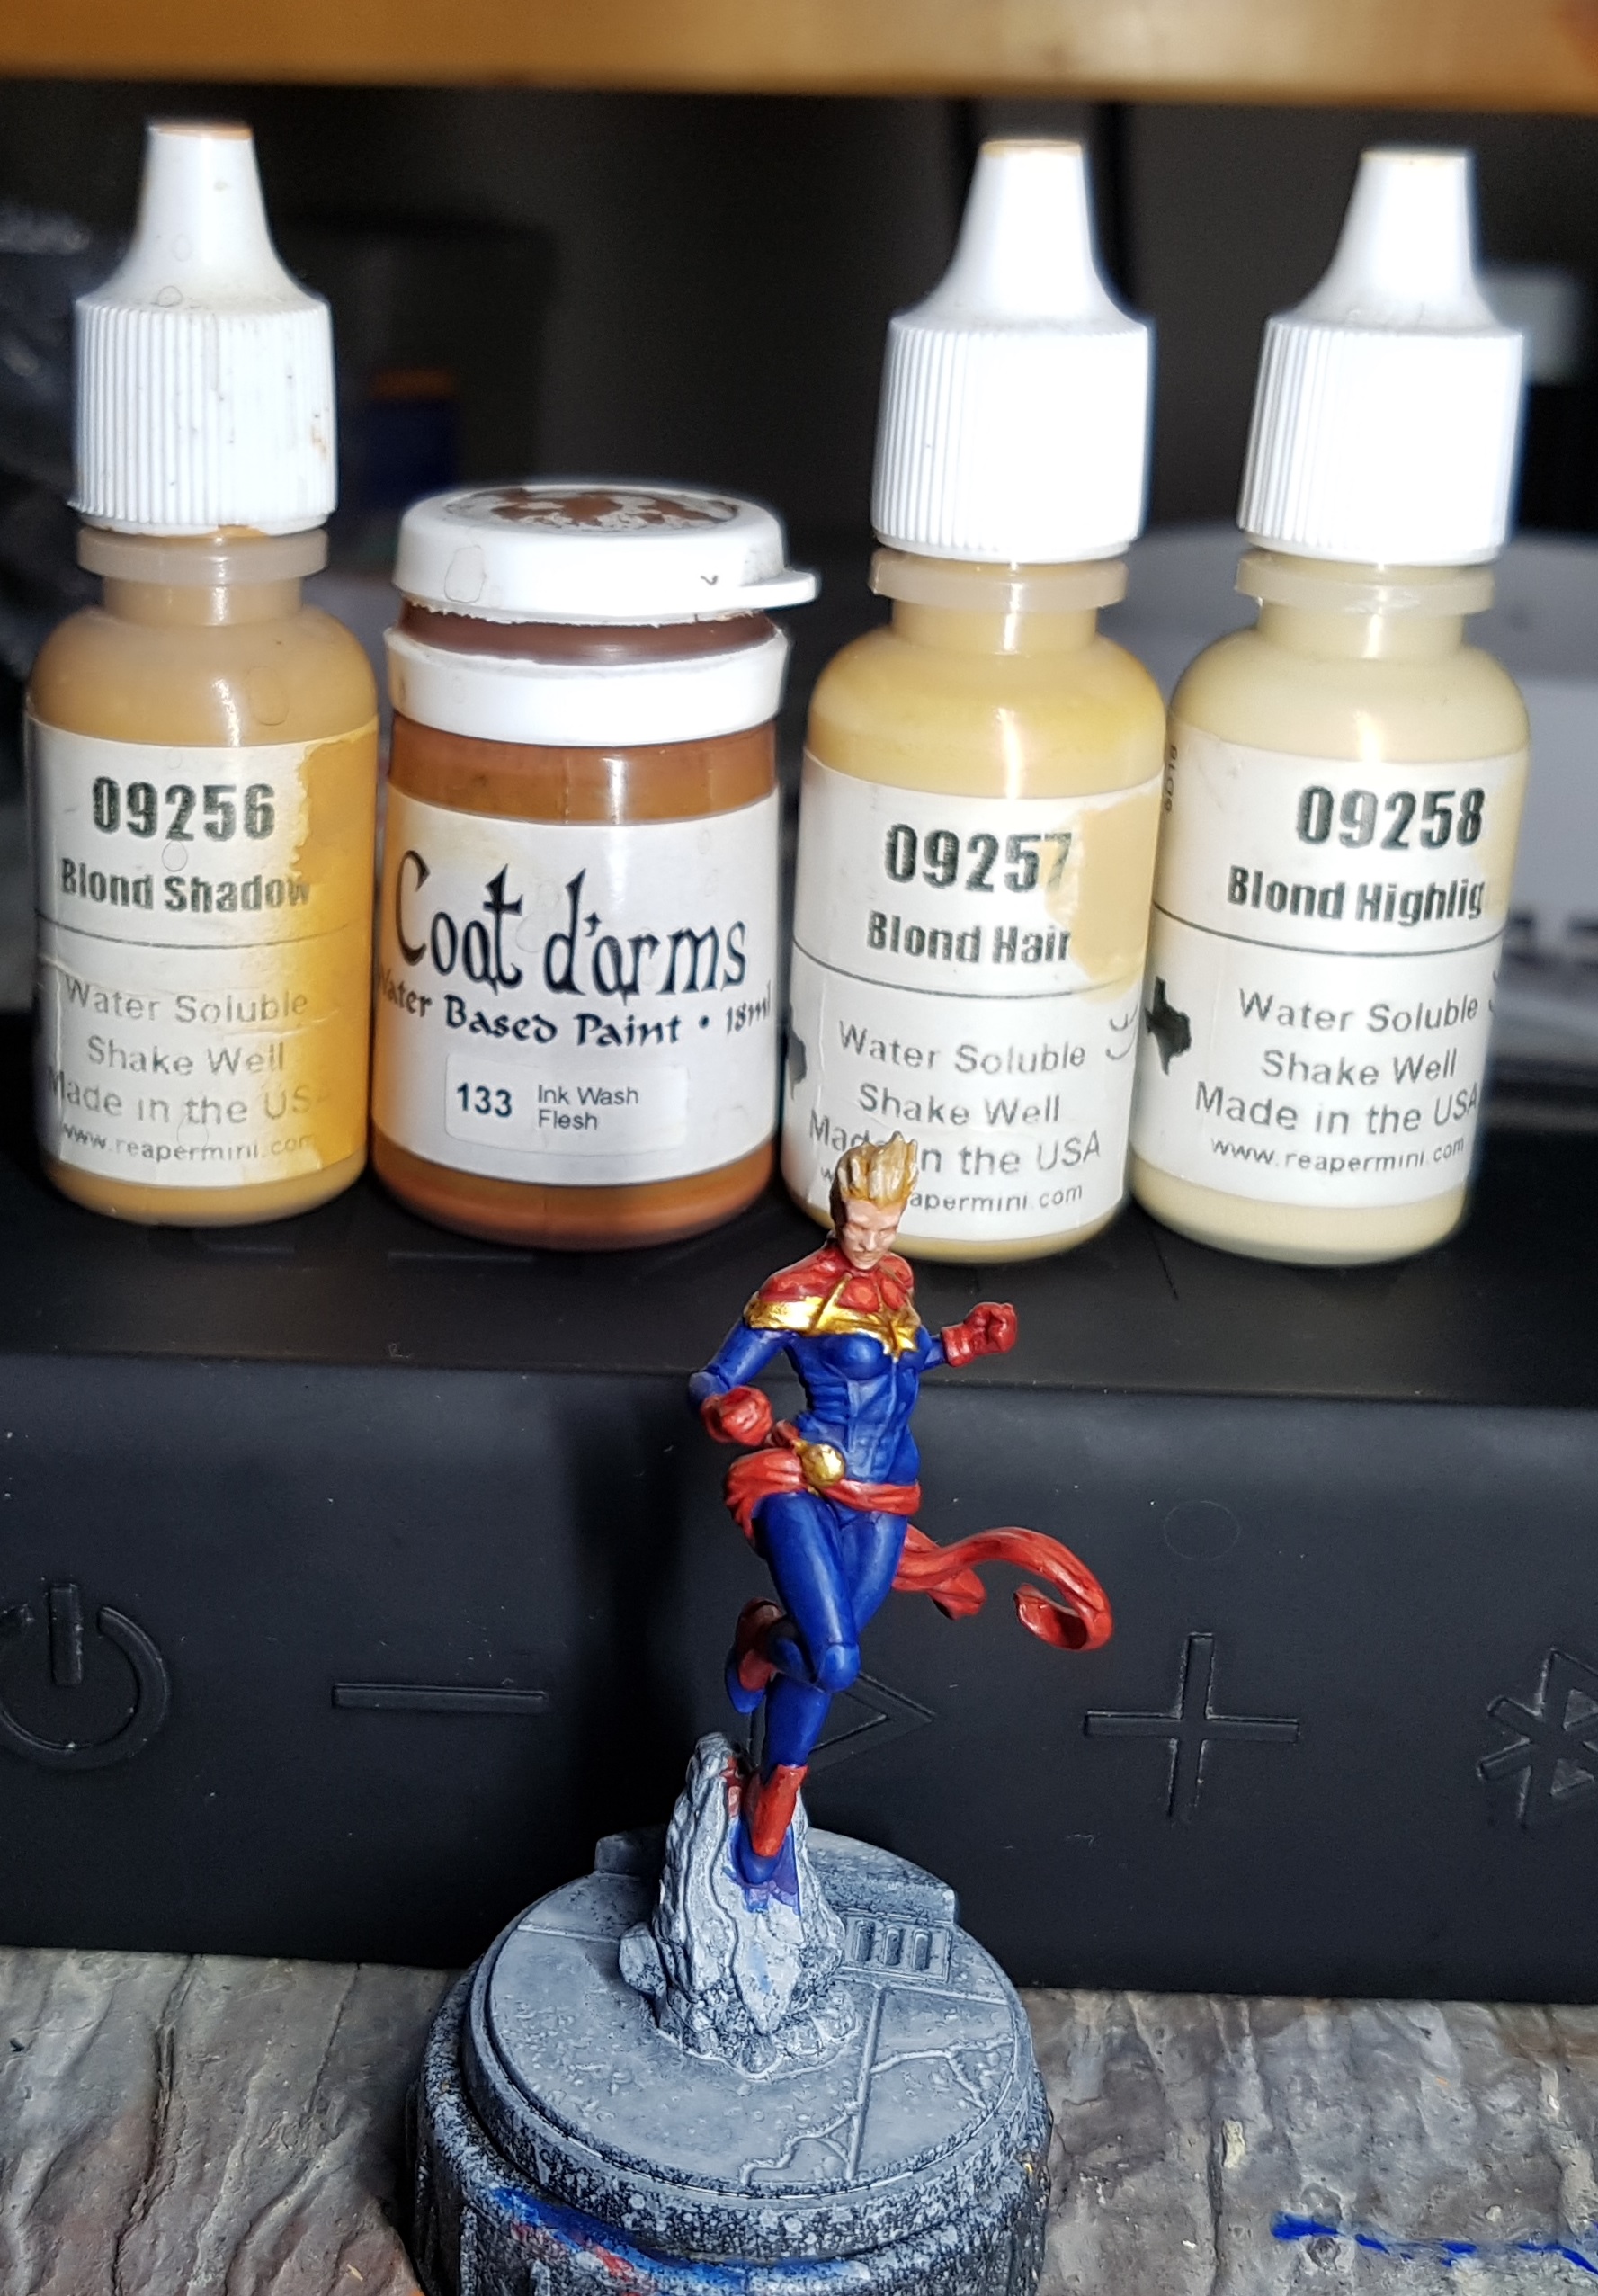
Lets thin the herd. Captain marvel just has hair to go so let’s do that. Should be quick and simple and a good way to start the days work.
Base: Reaper 09256 Blond Shadow
Wash: Coat d’arms 133 Flesh Ink Wash
Layer Highlight 1: Blond Shadow
Layer Highlight 2: Reaper 09257 Blond Hair
Layer Highlight 3: Reaper 09258 Blond Highlight
And she’s off to the Done pile
I’m putting off that white as long as I can. White can be a pain. Let’s do Captain America’s leathers
Base: P3 Bootstrap Leather
Drybrush and layer: P3 Hammerfall Khaki
Wash: GW Agrax Earthshade
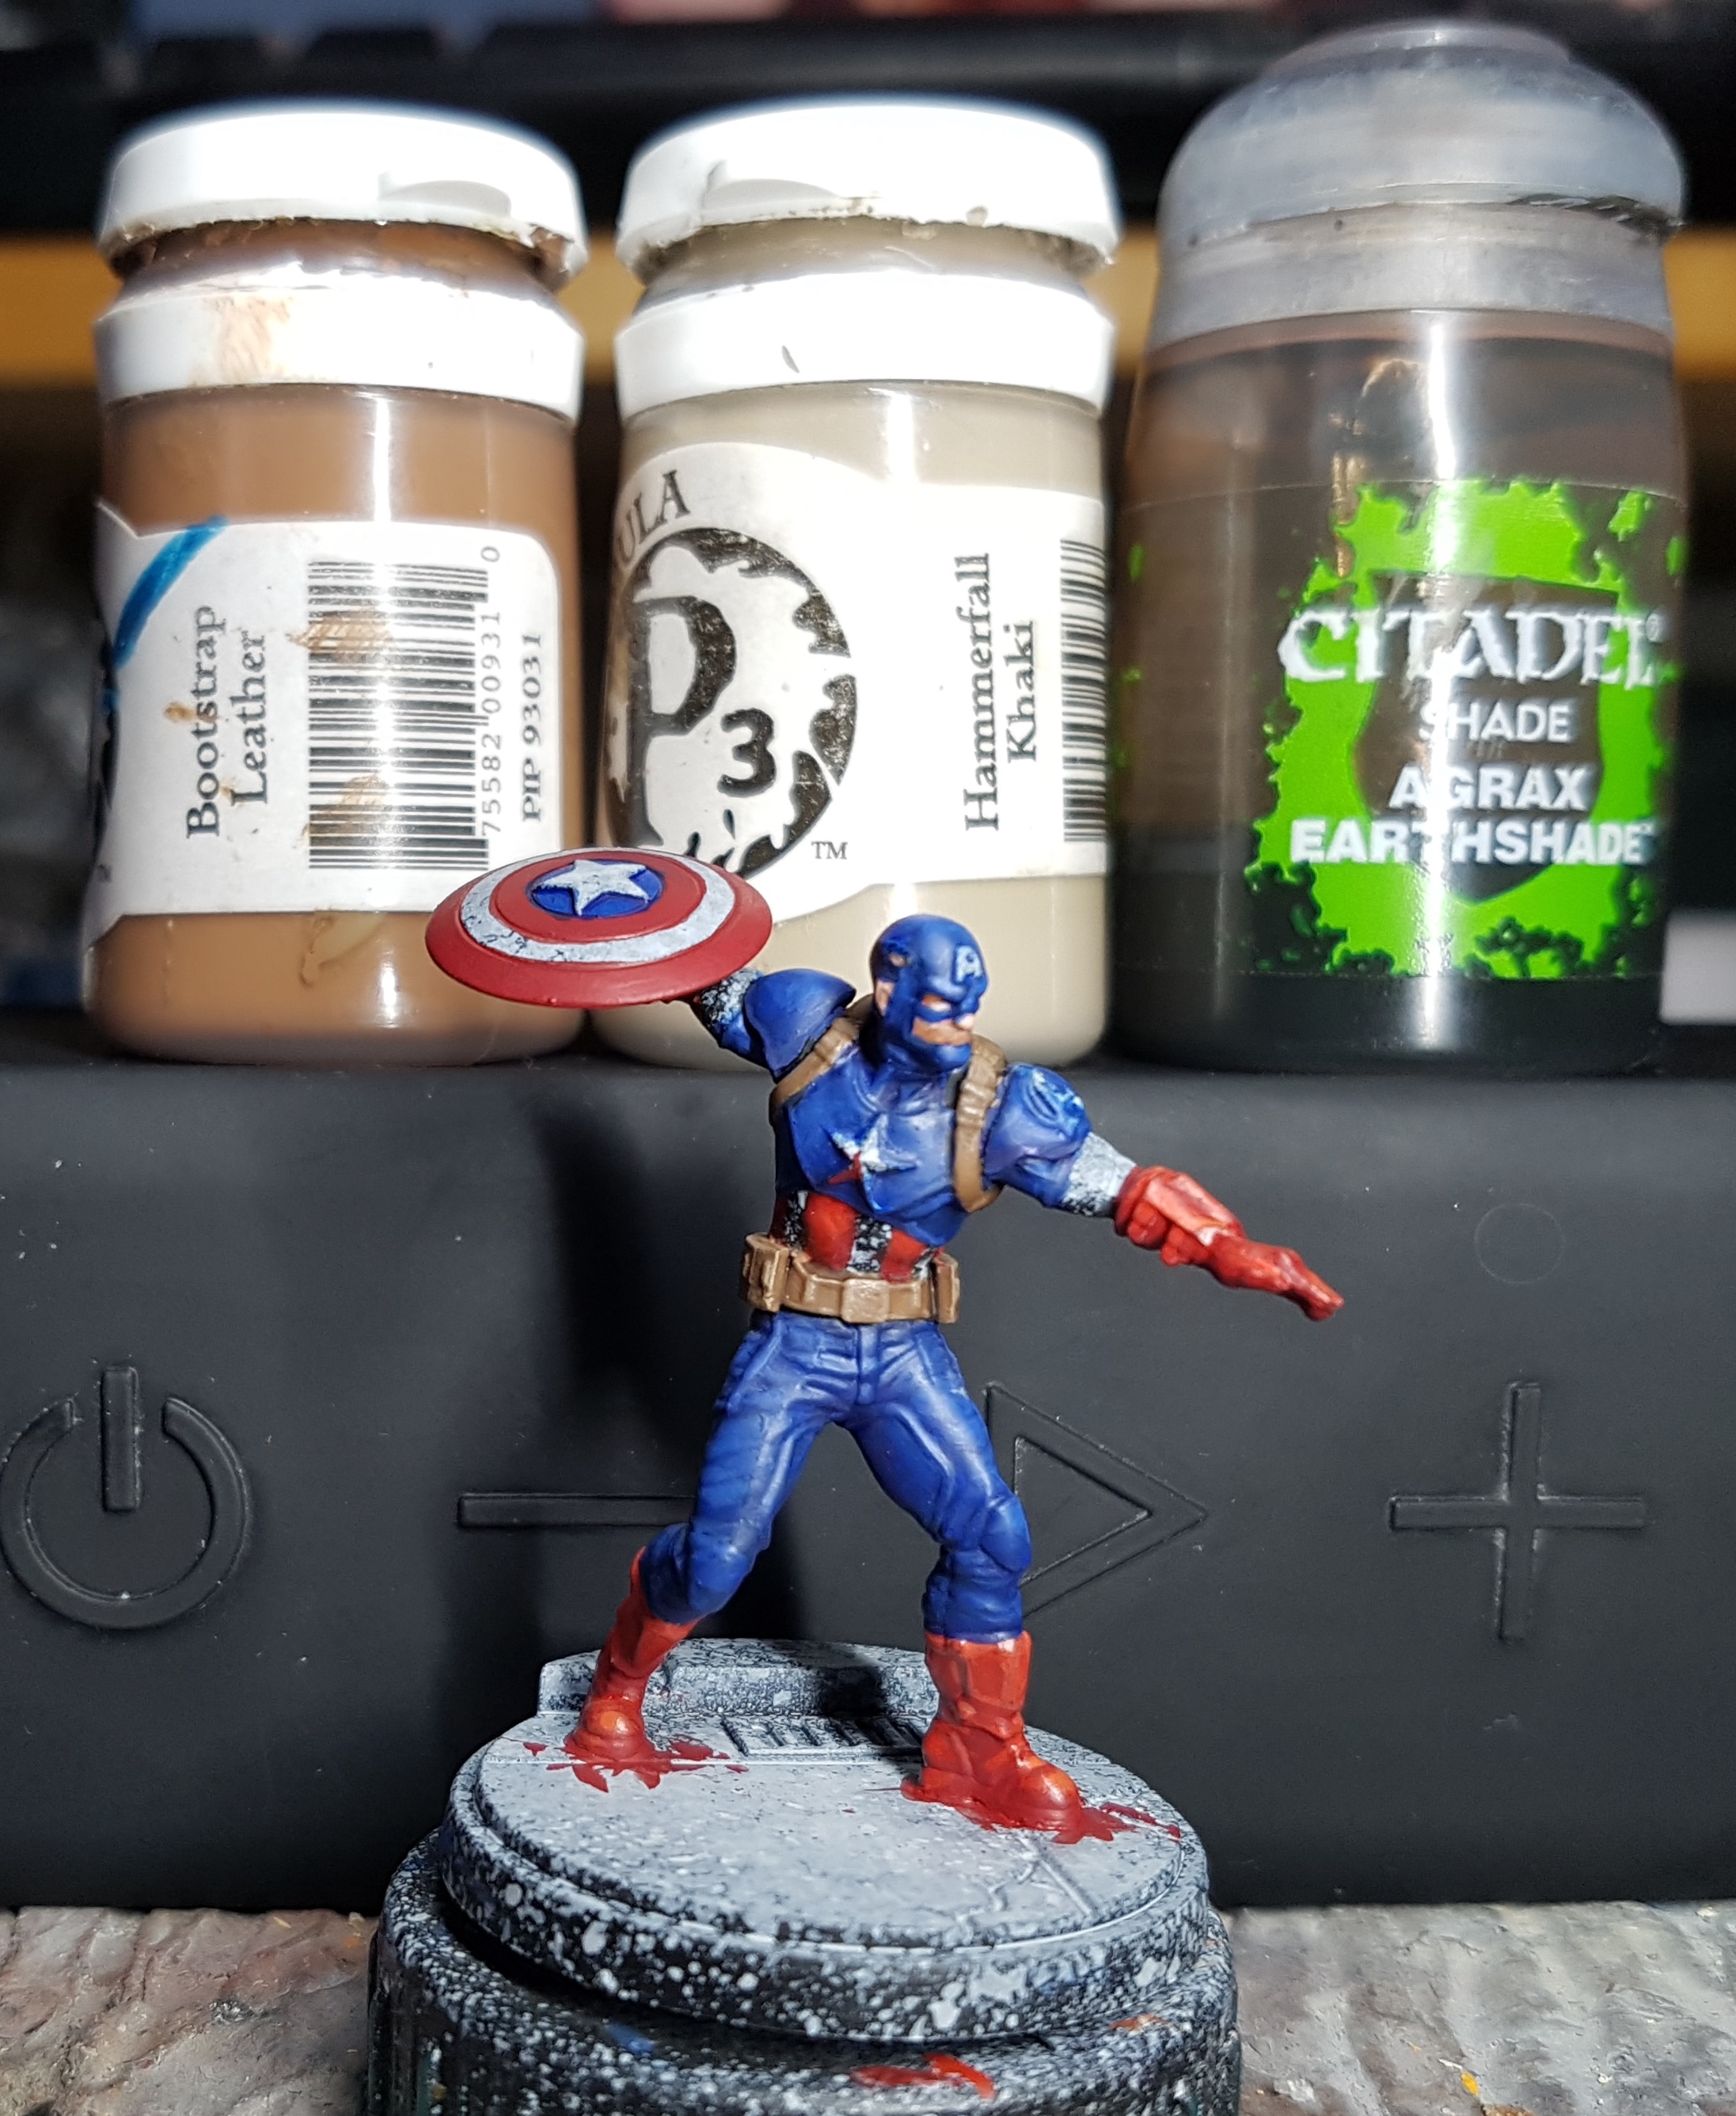
Still avoiding the white, let’s do the steel
Base: P3 Pig iron
Wash Captain Americas buckle with GW Seraphim Sepia
Wash the rest with GW Nuln Oil where safe
That girder gets one thick coat of GW Typhus Corrosion
Drybrush the girder with a little GW Ryza Rust to taste
Layer highlight buckles etc with P3 Cold Steel
Drybrush the edges of the girder (Anywhere that might get enough wear to work off the rust) with Cold Steel
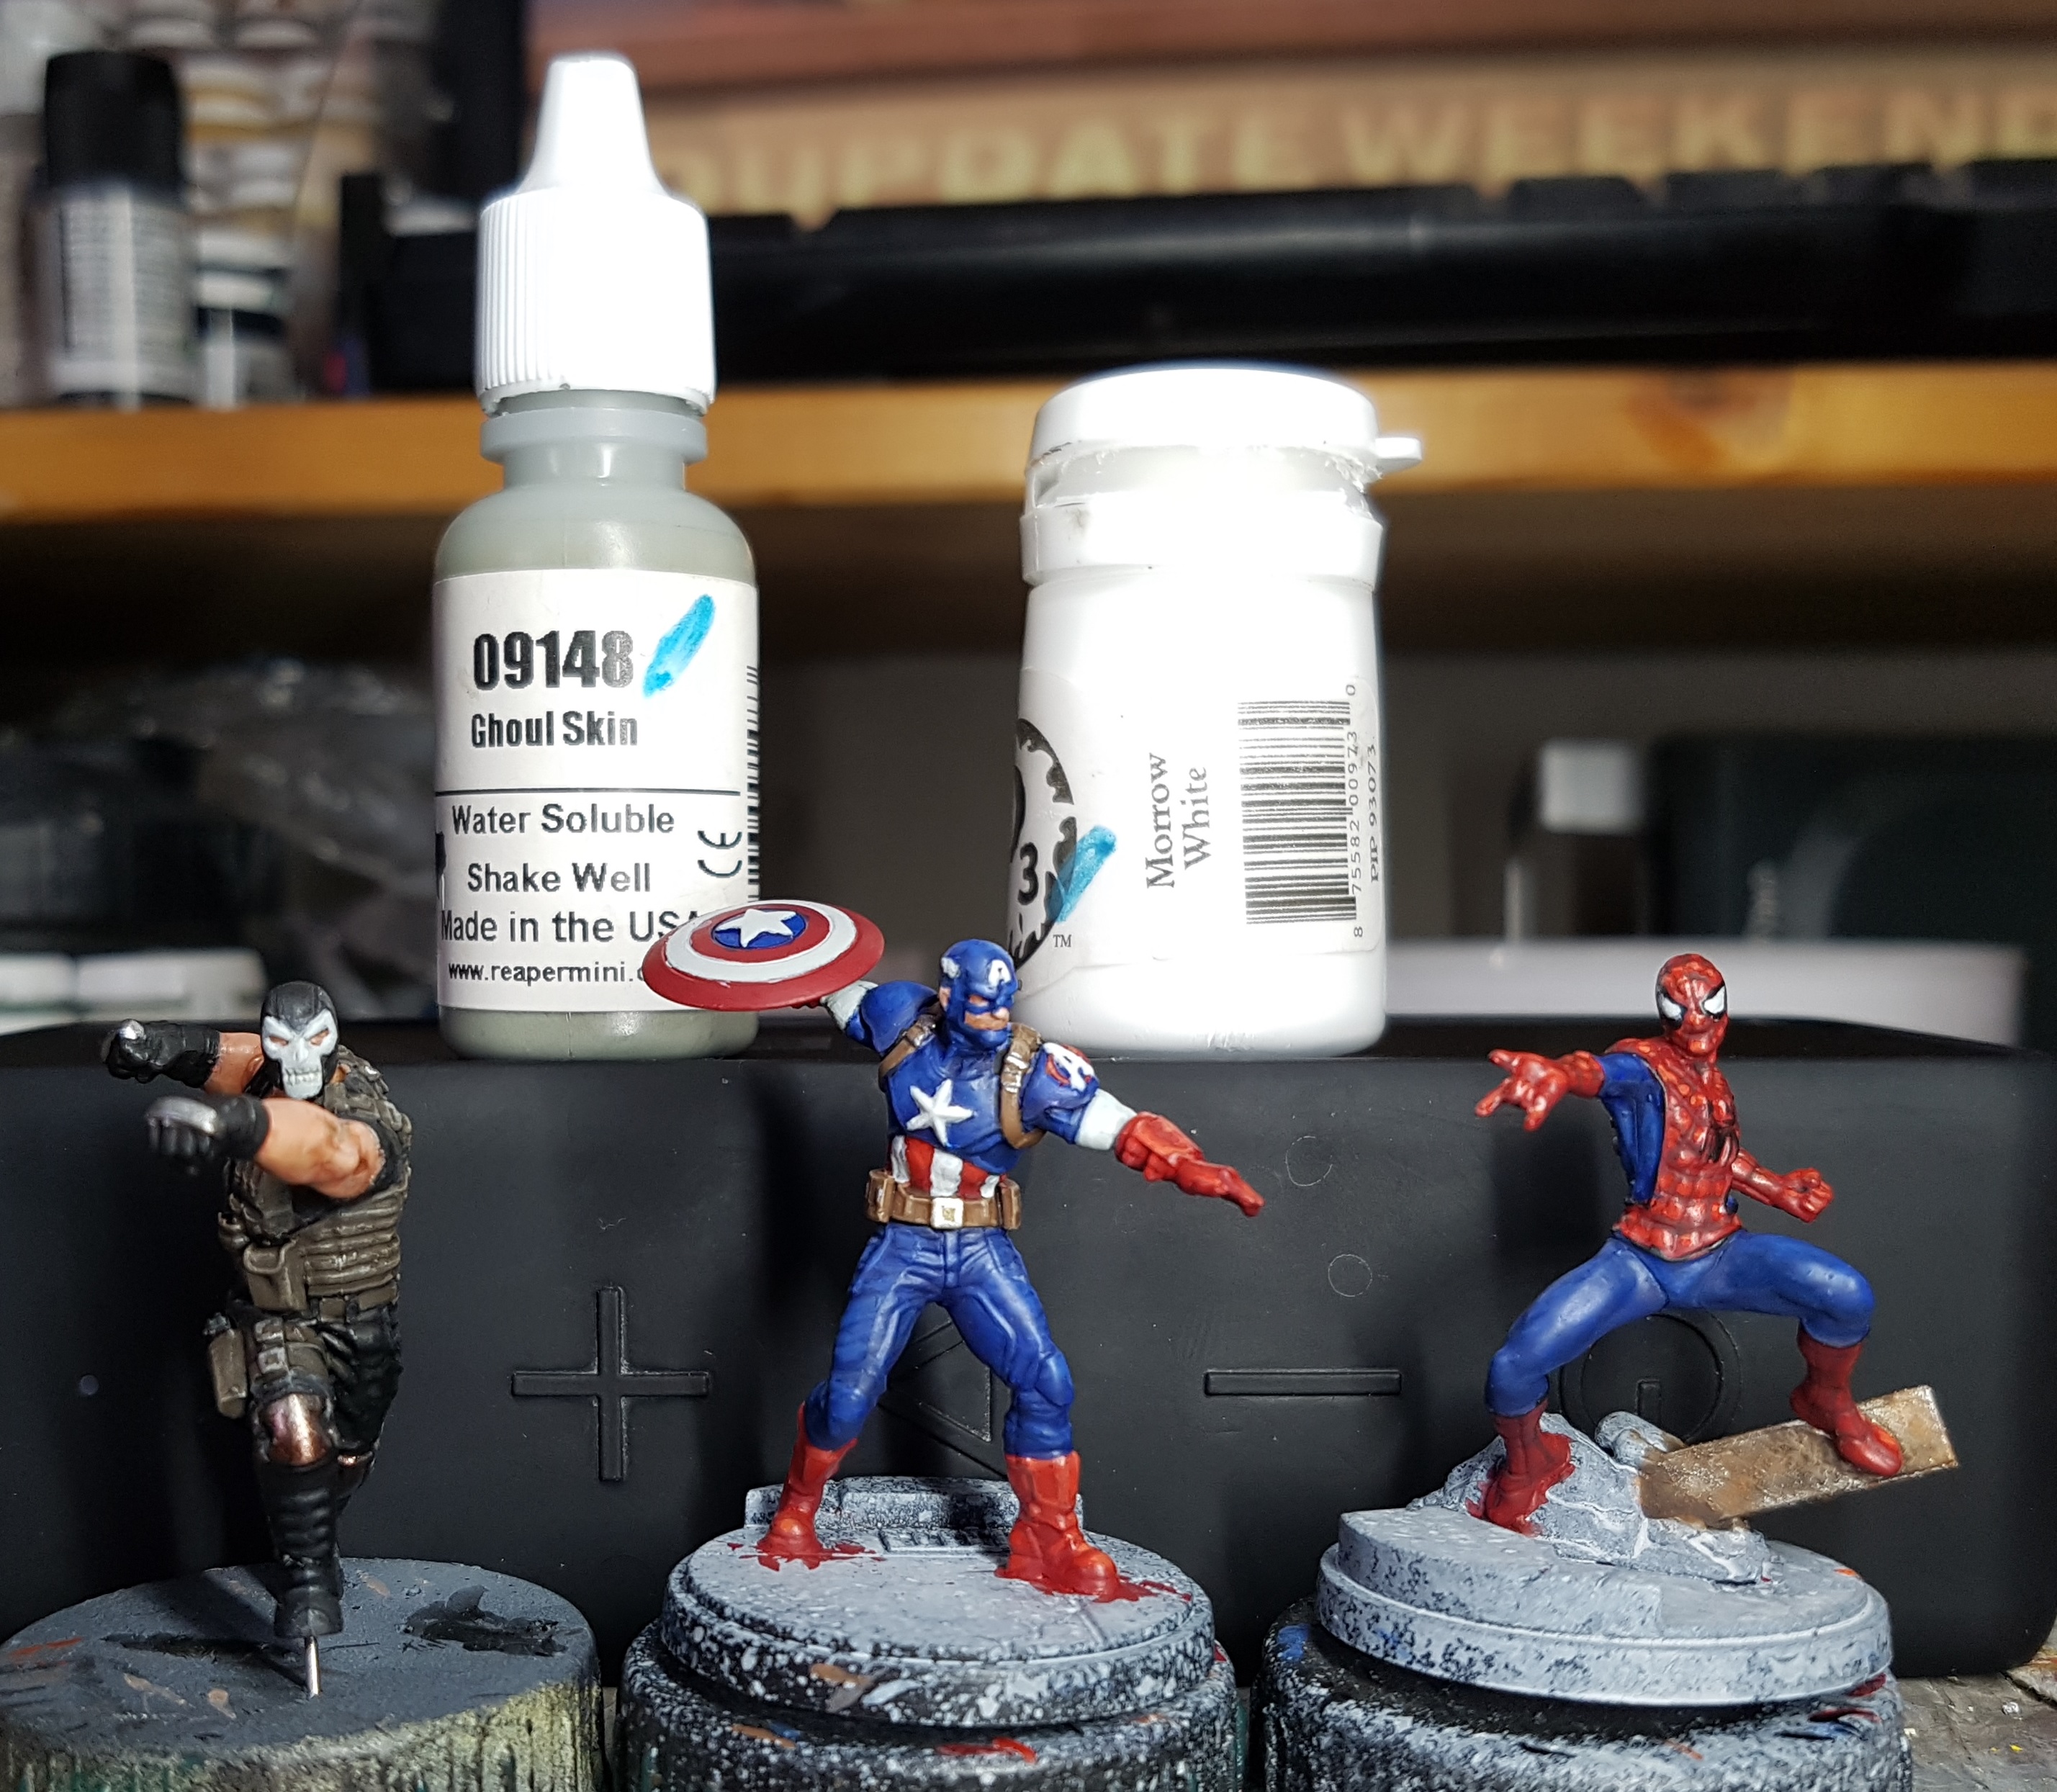
I guess I can’t put off the white any longer. Let’s figure this out.
Base: 50/50 mix of P3 Morrow White and Reaper 09148 Ghoul Skin to get a light grey
Pin Wash: Ghoul Skin just to the mouth of Crossbones’ mask
Layer 1: add more white to the above
Layer 2: add more white to the above
Never go pure white, unless you want some real high glints
Hmm. That was quite simple and worked well enough for how little white there is. It even had good coverage over that black primer. I’m not going to complain!
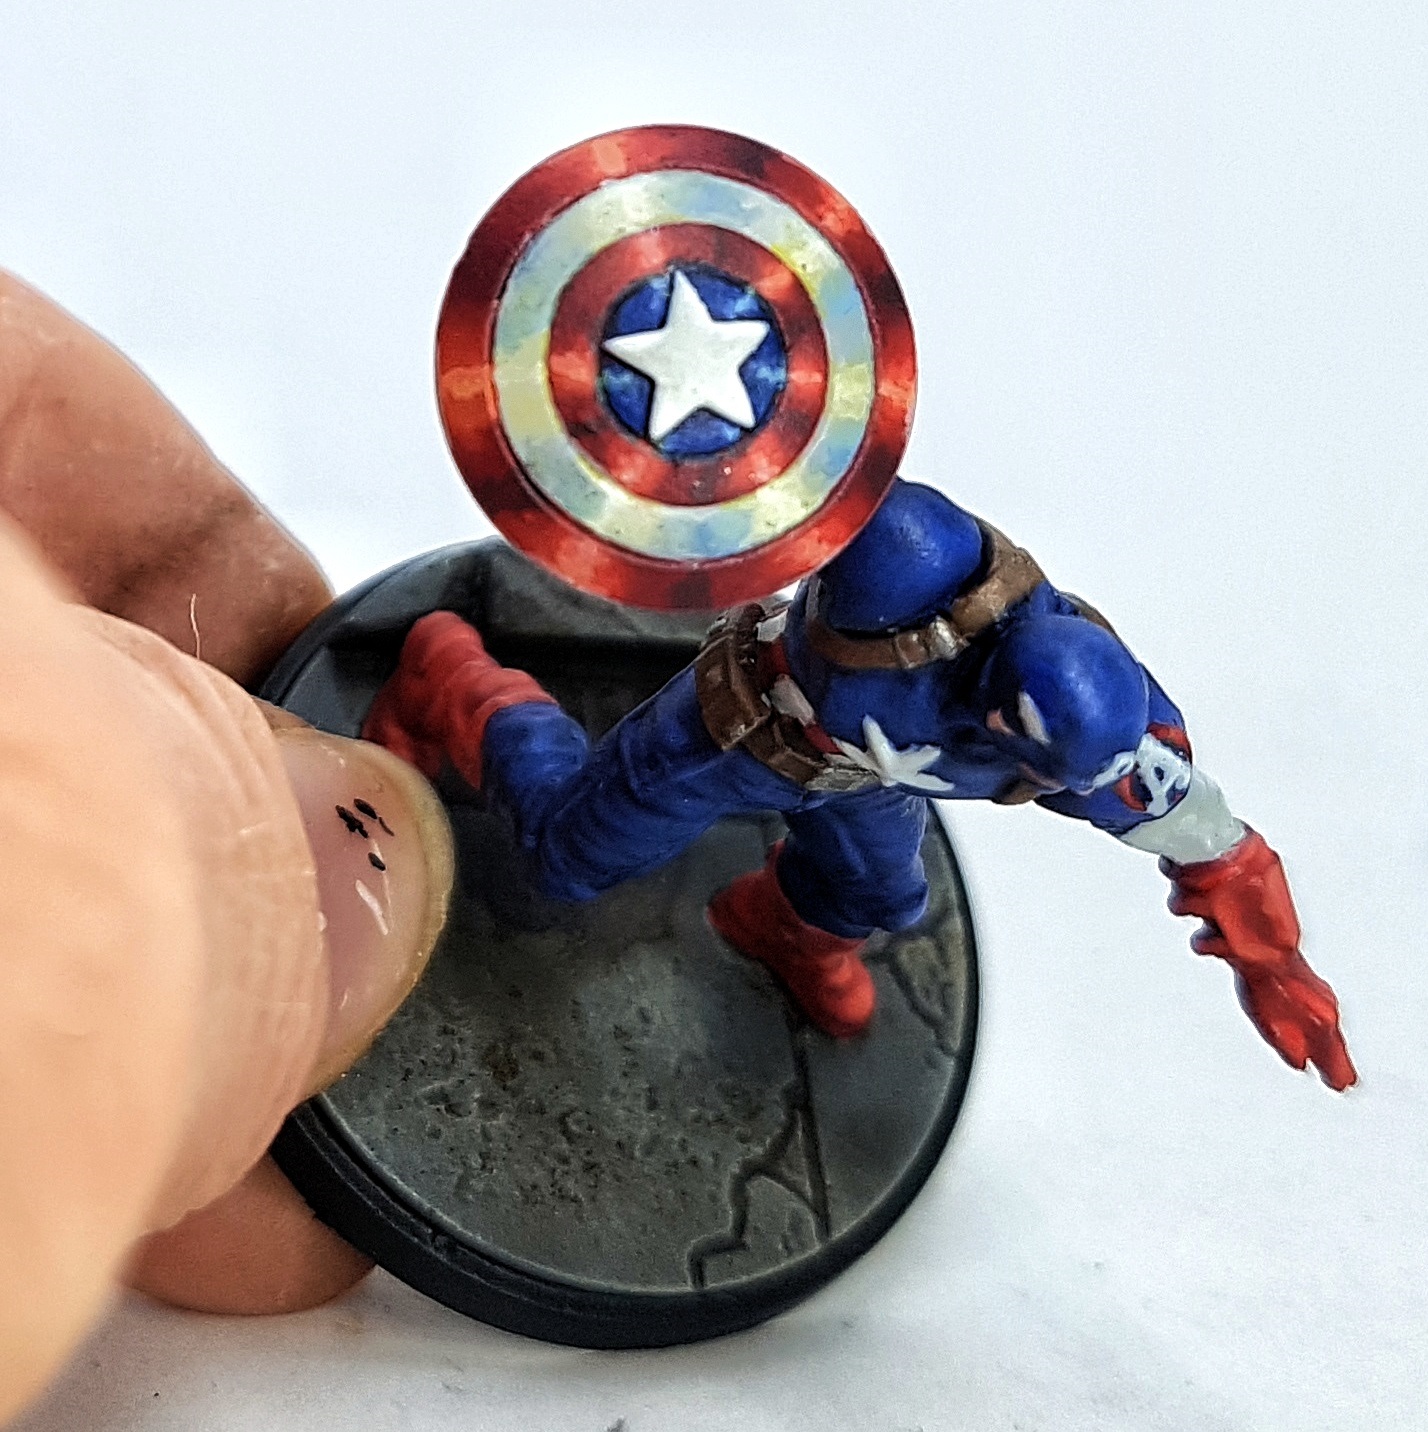
Well, there’s no avoiding it. Everything is done except the shield. I could have just painted it the same as the rest of him and it would have been fine. A little flat, but fine. I could have finished it with a gloss of satin varnish, but I feared it’d just look wet. However when I was doing my research I stumbled in to this video by Sorastra and I knew I had to at lest try it.
I got multiple tabs open. One showing his finished shield I could look at, and another with the video playing on, usually frozen at the start of his next step so I could see what he’d do ne with the current step. I didn’t use the paints he used, but continued to use the equivalent ones that I’d already used painting the rest of Captain America. I did use 3 extra paints:
P3 Cygnus Yellow instead of GW Yriel Yellow
VMC 70.918 Ivory
P3 Thamar Black
I didn’t understand the Why of some of what he did, and I could never have come up with this by myself. However, following his instructions, I didn’t find it hard to do this. I got my wet palette out for the first time in a long time and made sure all my paints were super thin, and I got better results than I feared for less effort than I expected. For extra thrills, know that I did all of this with a cheapo synthetic brush that I’ve been using for a few weeks and only cost me 8.5p, instead of the £10 ish I used to spend on Kolinski Sables. It should be trash, but it works well.
There’s just enough time left in the day for basing and varnishing. I’ll see you in the next post.
Full Day 2 (After 9 evenings): Basing
I forgot to take step by step pics here. Sorry. I got caught up in it all. I’ll just have to explain and hope it makes sense.
Drains and metal hatches:
Base: P3 Pig Iron
Wash the drains with GW Agrax Earthshade
Wash the hatches Italeri Wash Oiled Earth 4953AP. This doesn’t stain anywhere near as much as I hoped
Wash the hatches again with Oiled Earth, but add small patches of GW Agrax Earthshade and GW Athonian Camoshade to it while it’s still wet.
Tram Tracks
Base: P3 Pig Iron
Wash: GW Nuln Oil
Pavement Bumps
Undercoat the bumpy section white
Base the bumpy sections P3 Sulphuric Yellow (I googled “NYC bumpy yellow blind crossing pavement” or some such). Paint too much and reclaim back down to a square in the next step
Pavement
Base the stone: VMC 70.836 London Grey
Base the curbs / raised paving with London grey mixed with enough AK 11219 Sepia Ink to give it a browner feel (It took way more than I expected. This is much darker than GW Seraphim Sepia)
Everything
Wash all the paving, tram tracks, and the drains with Jan’s Magimix (6-8 Parts GW Nuln Oil, 6-8 Parts GW Agrax Earthshade, 5-6 Parts Lahmium Medium, 2 parts Athonian Camoshade. Thanks, Januinevision)
Drybrush some London Grey over the yellow bumps to provide realistic looking wear. There’s no way that paint would last on the corners of the bumps.
Drybrush all the stone with P3 Menoth White Base and a nice puffy makeup brush
Wet the drains, and a path out of them like it’s backed up. Apply some GW Typhus Corrosion to this and let it naturally soak out in to the water. Put it in thick, but let it move itself. You want texture, but you want it to look like naturally backed up sewage.
Paint the edges of the bases black.
I then remembered I hadn’t painted anyone’s eyes yet!
Base: P3 Menoth White Highlight
Pupil: P3 Thamar Black (Zemo doesn’t get a pupil)
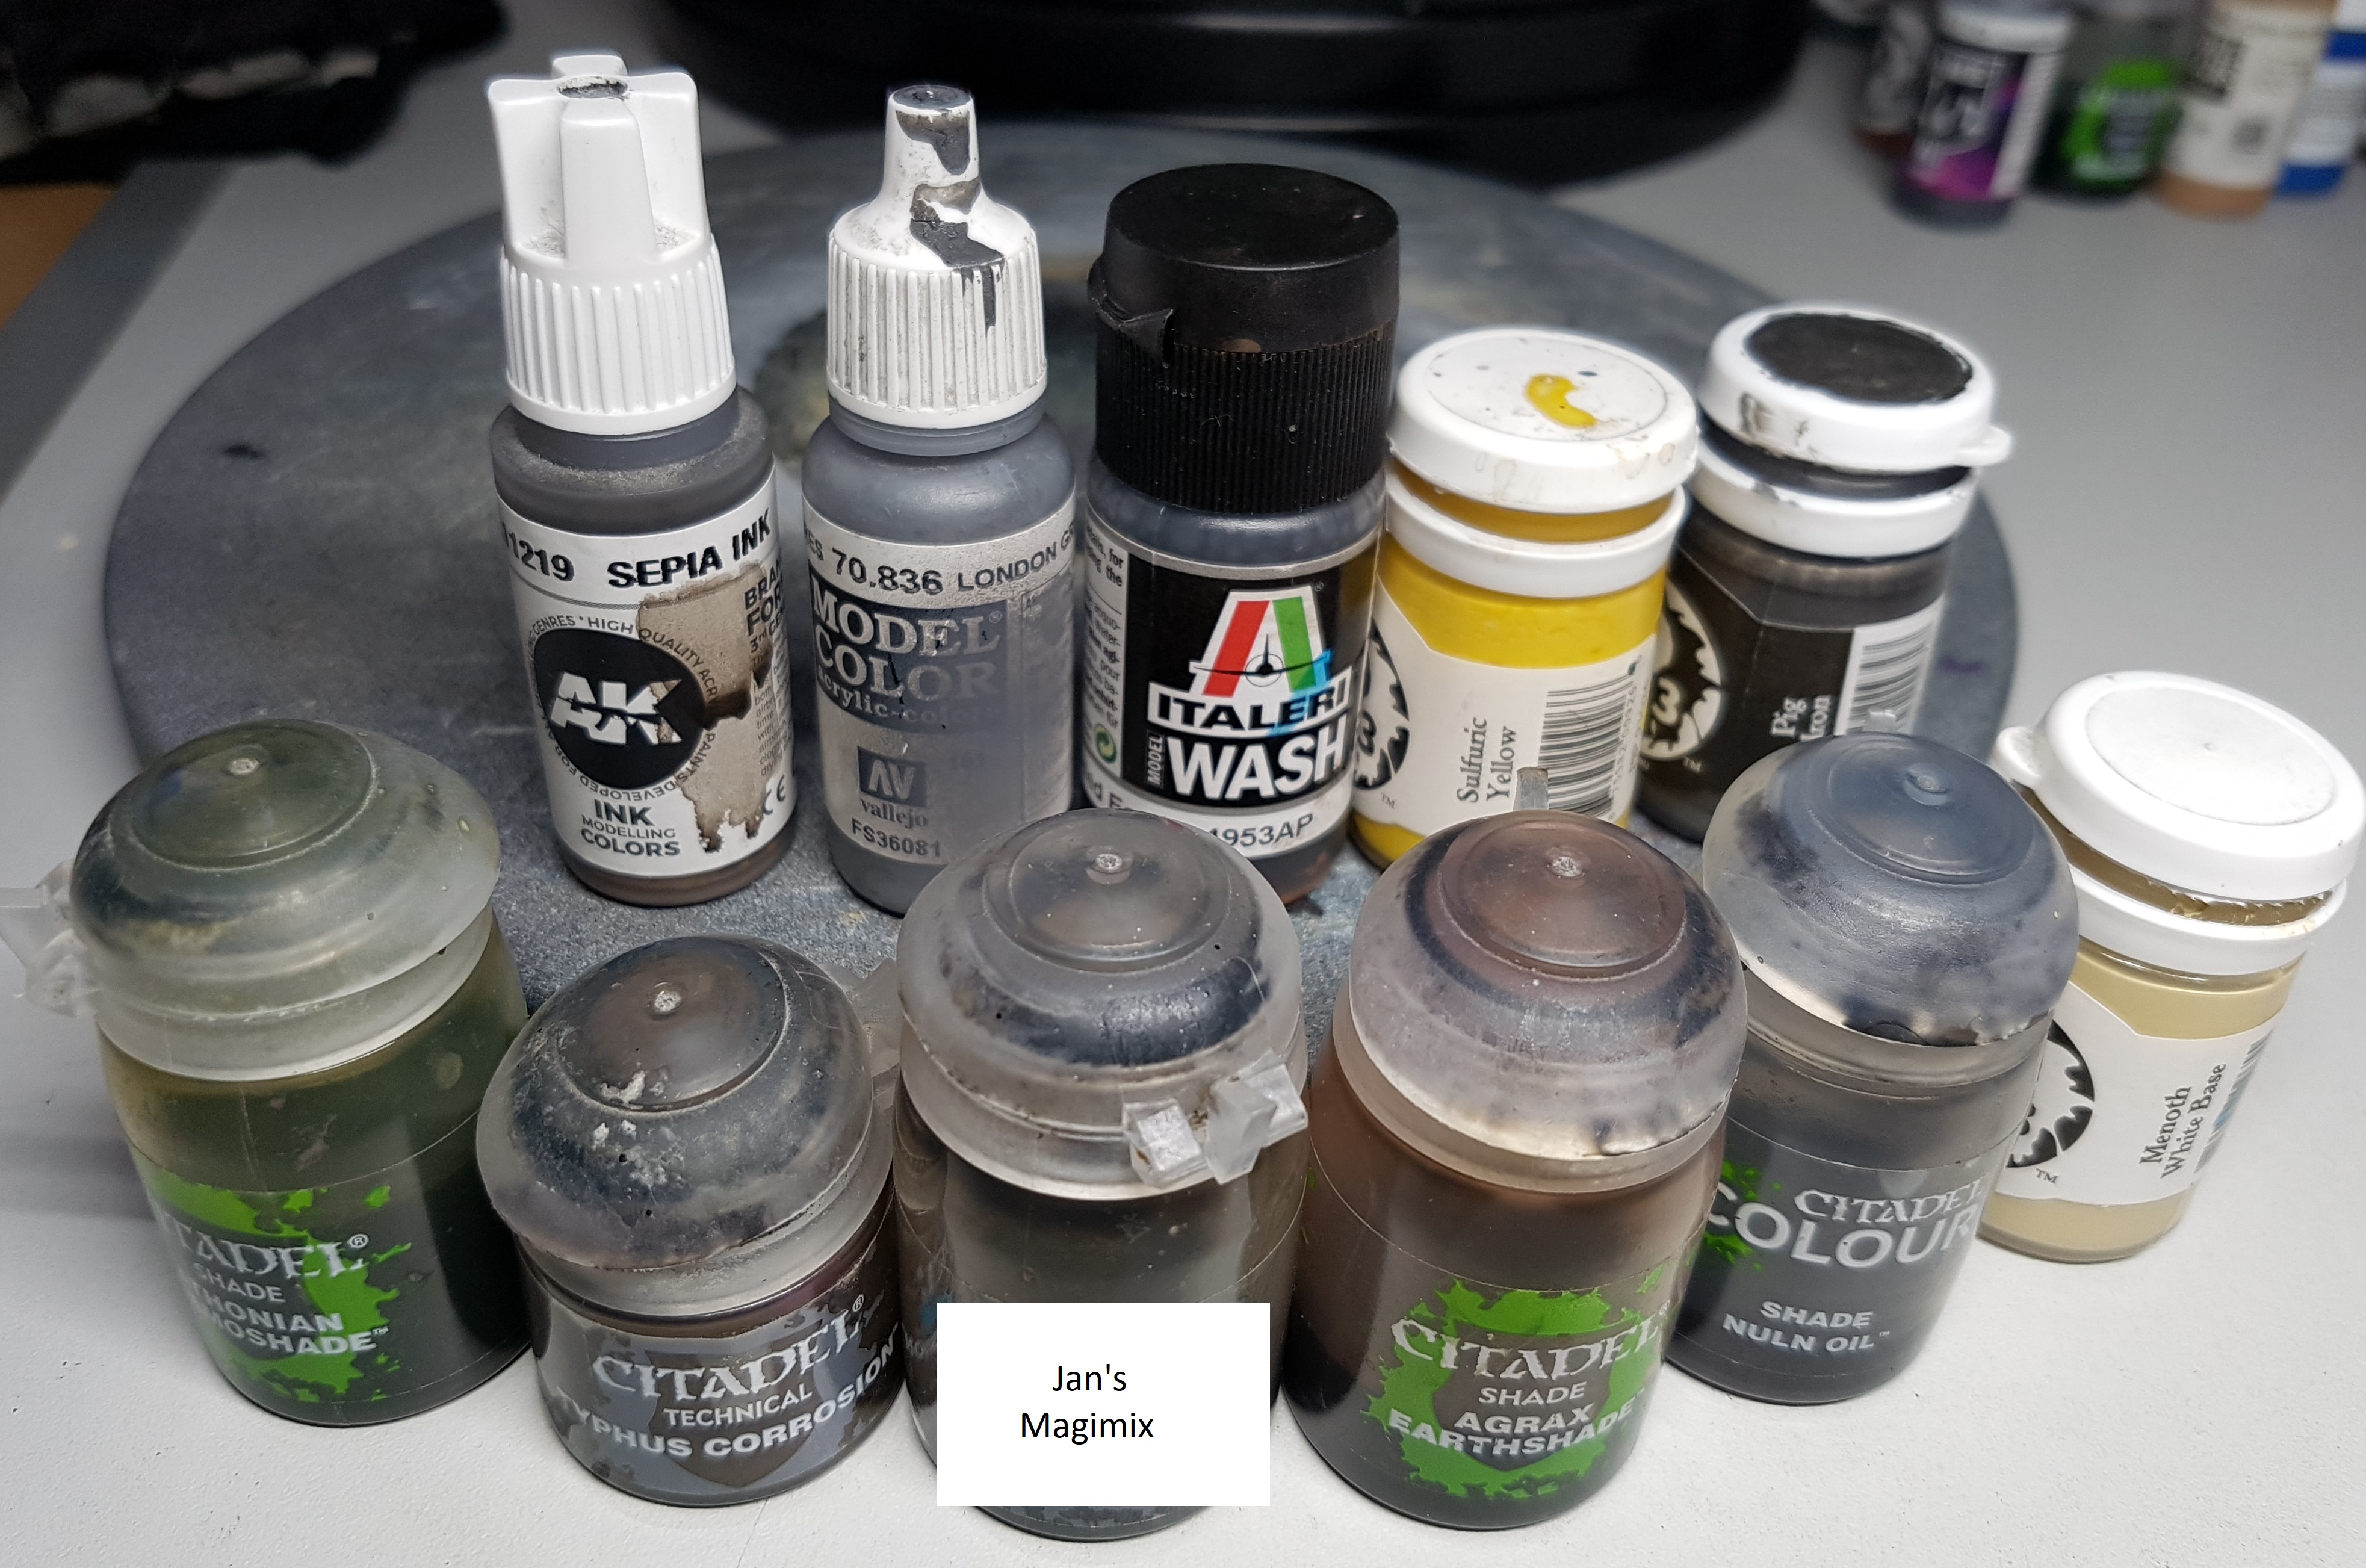 All the paints used on the bases
With everyone ready for varnishing, it’s time for a technique I got from experimenting after that Gerry Can on painting stone and Fogou beehive shaped buildings. Prep your airbrush in advance and wear a dust mask before opening any pots until after the first coat of varnish is dry. This could get messy if you’re not careful. It’s pigment time!
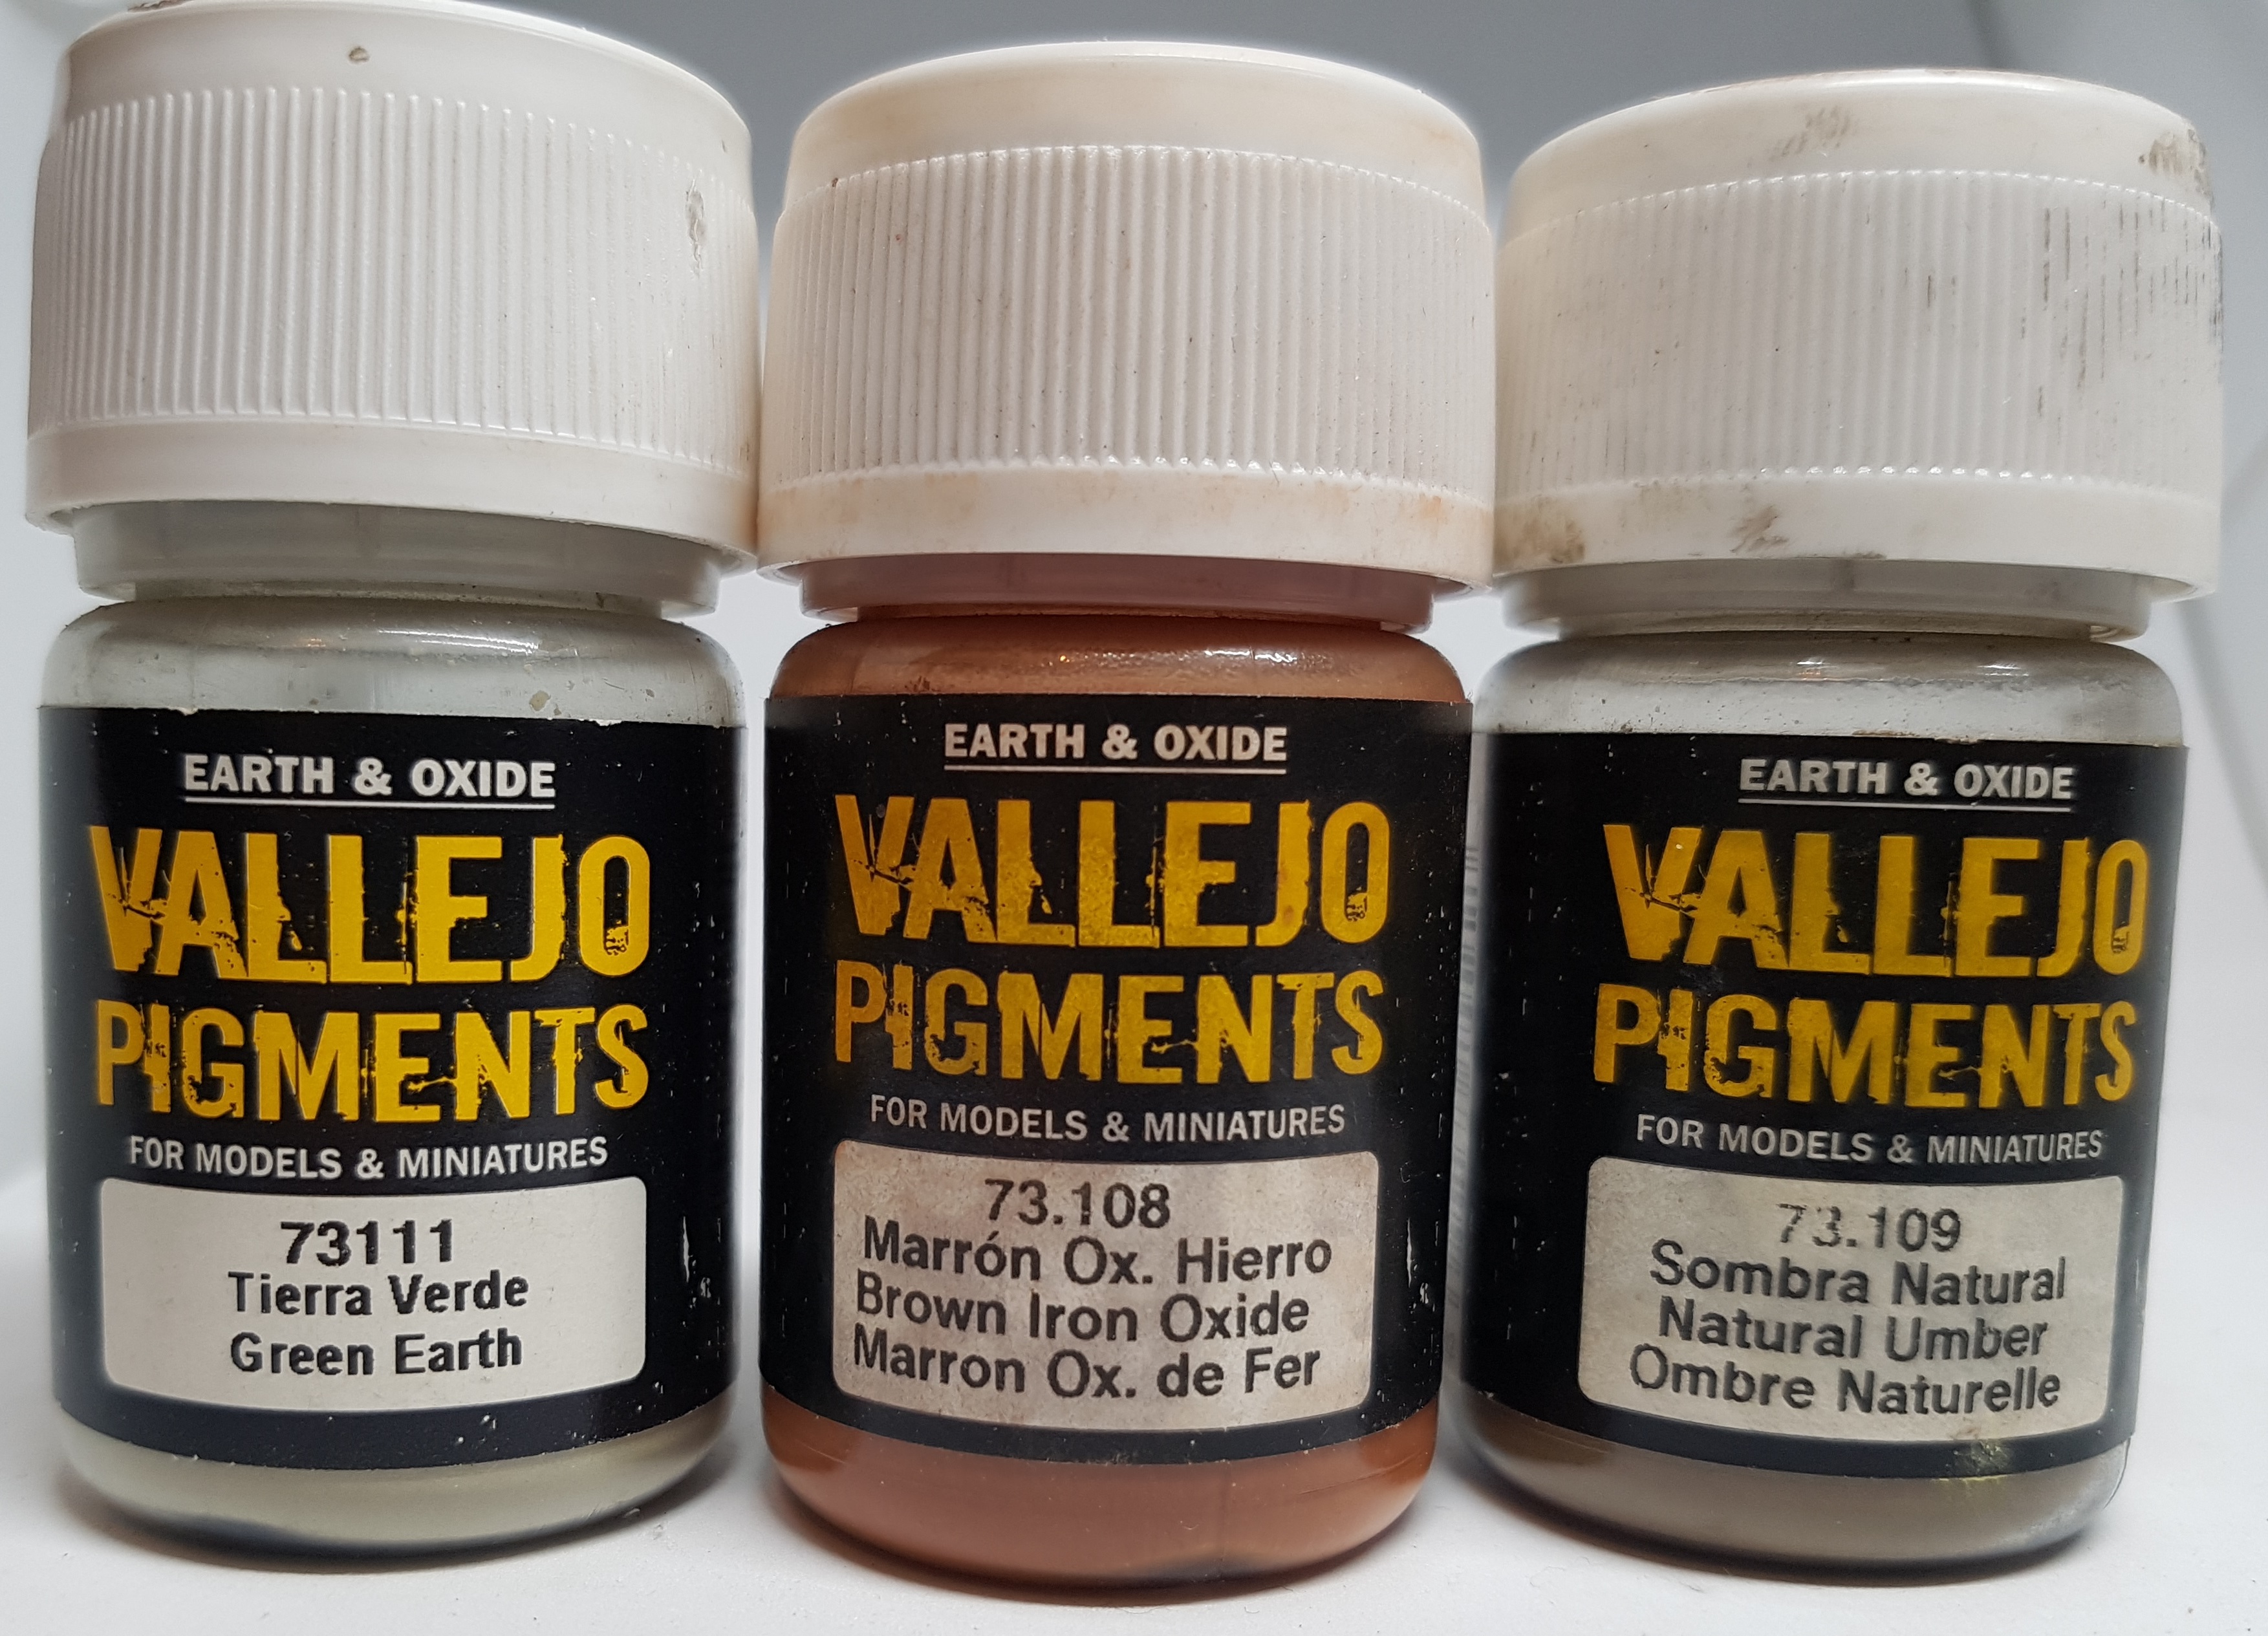
Put down some newspaper to catch any excess and clear a path to your bin ready to dispose of everything instantly. Grab a drybrush and open a pot of Vallejo 73.108 Brown iron Oxide. Dip the drybrush in and pick up some paint. Don’t overdo it. You don’t want a lot. Hold it over any metal hatch type bases and just tap the drybrush with your finger so some powder falls off. Move a little and do this again.
put away the Oxide and repeat this with Vallejo 73.109 Natural Umber and Vallejo 73.111 Green Earth over the stone areas. You can occasionally rub the drybrush into a surface, especially the rough damaged sections. Using the drybrush wedge some in the crevices of the rocks where dirt could have gathered naturally. Use your own judgement. Put the lids back on the pots and get rid of any loose pigment not on a base.
Most of this pigment is just loose and sitting there so keep your dust mask on and minimise any movement of air. Put your varnish in your airbrush and lower the pressure as far as you can. Test it pointing away from your models until you’re happy. Now spray it on to the bases from as far away as you can. You want the varnish to get there, but as little wind to arrive. Let it dry and then varnish as normal. I like one coat of Gloss, and then enough matt to take the shine away. I didn’t completely remove the shine from Iron Man and Ultron, just a little.
Some of your pigment will blow away. That’s fine. Just contain it. Don’t ruin your table or carpet. Most of it should diffuse and dissolve a little, making it look like natural dirt. Some of mine stayed a little more granular. NYC has become a battle zone with chunks of building being thrown around. I think dirt being about the place is more than fair.
Two whole days and nine evenings to go from sprue to varnished is pretty good work, I think. I’ve another model to finish, and then I’ll be back to work on the terrain pieces.
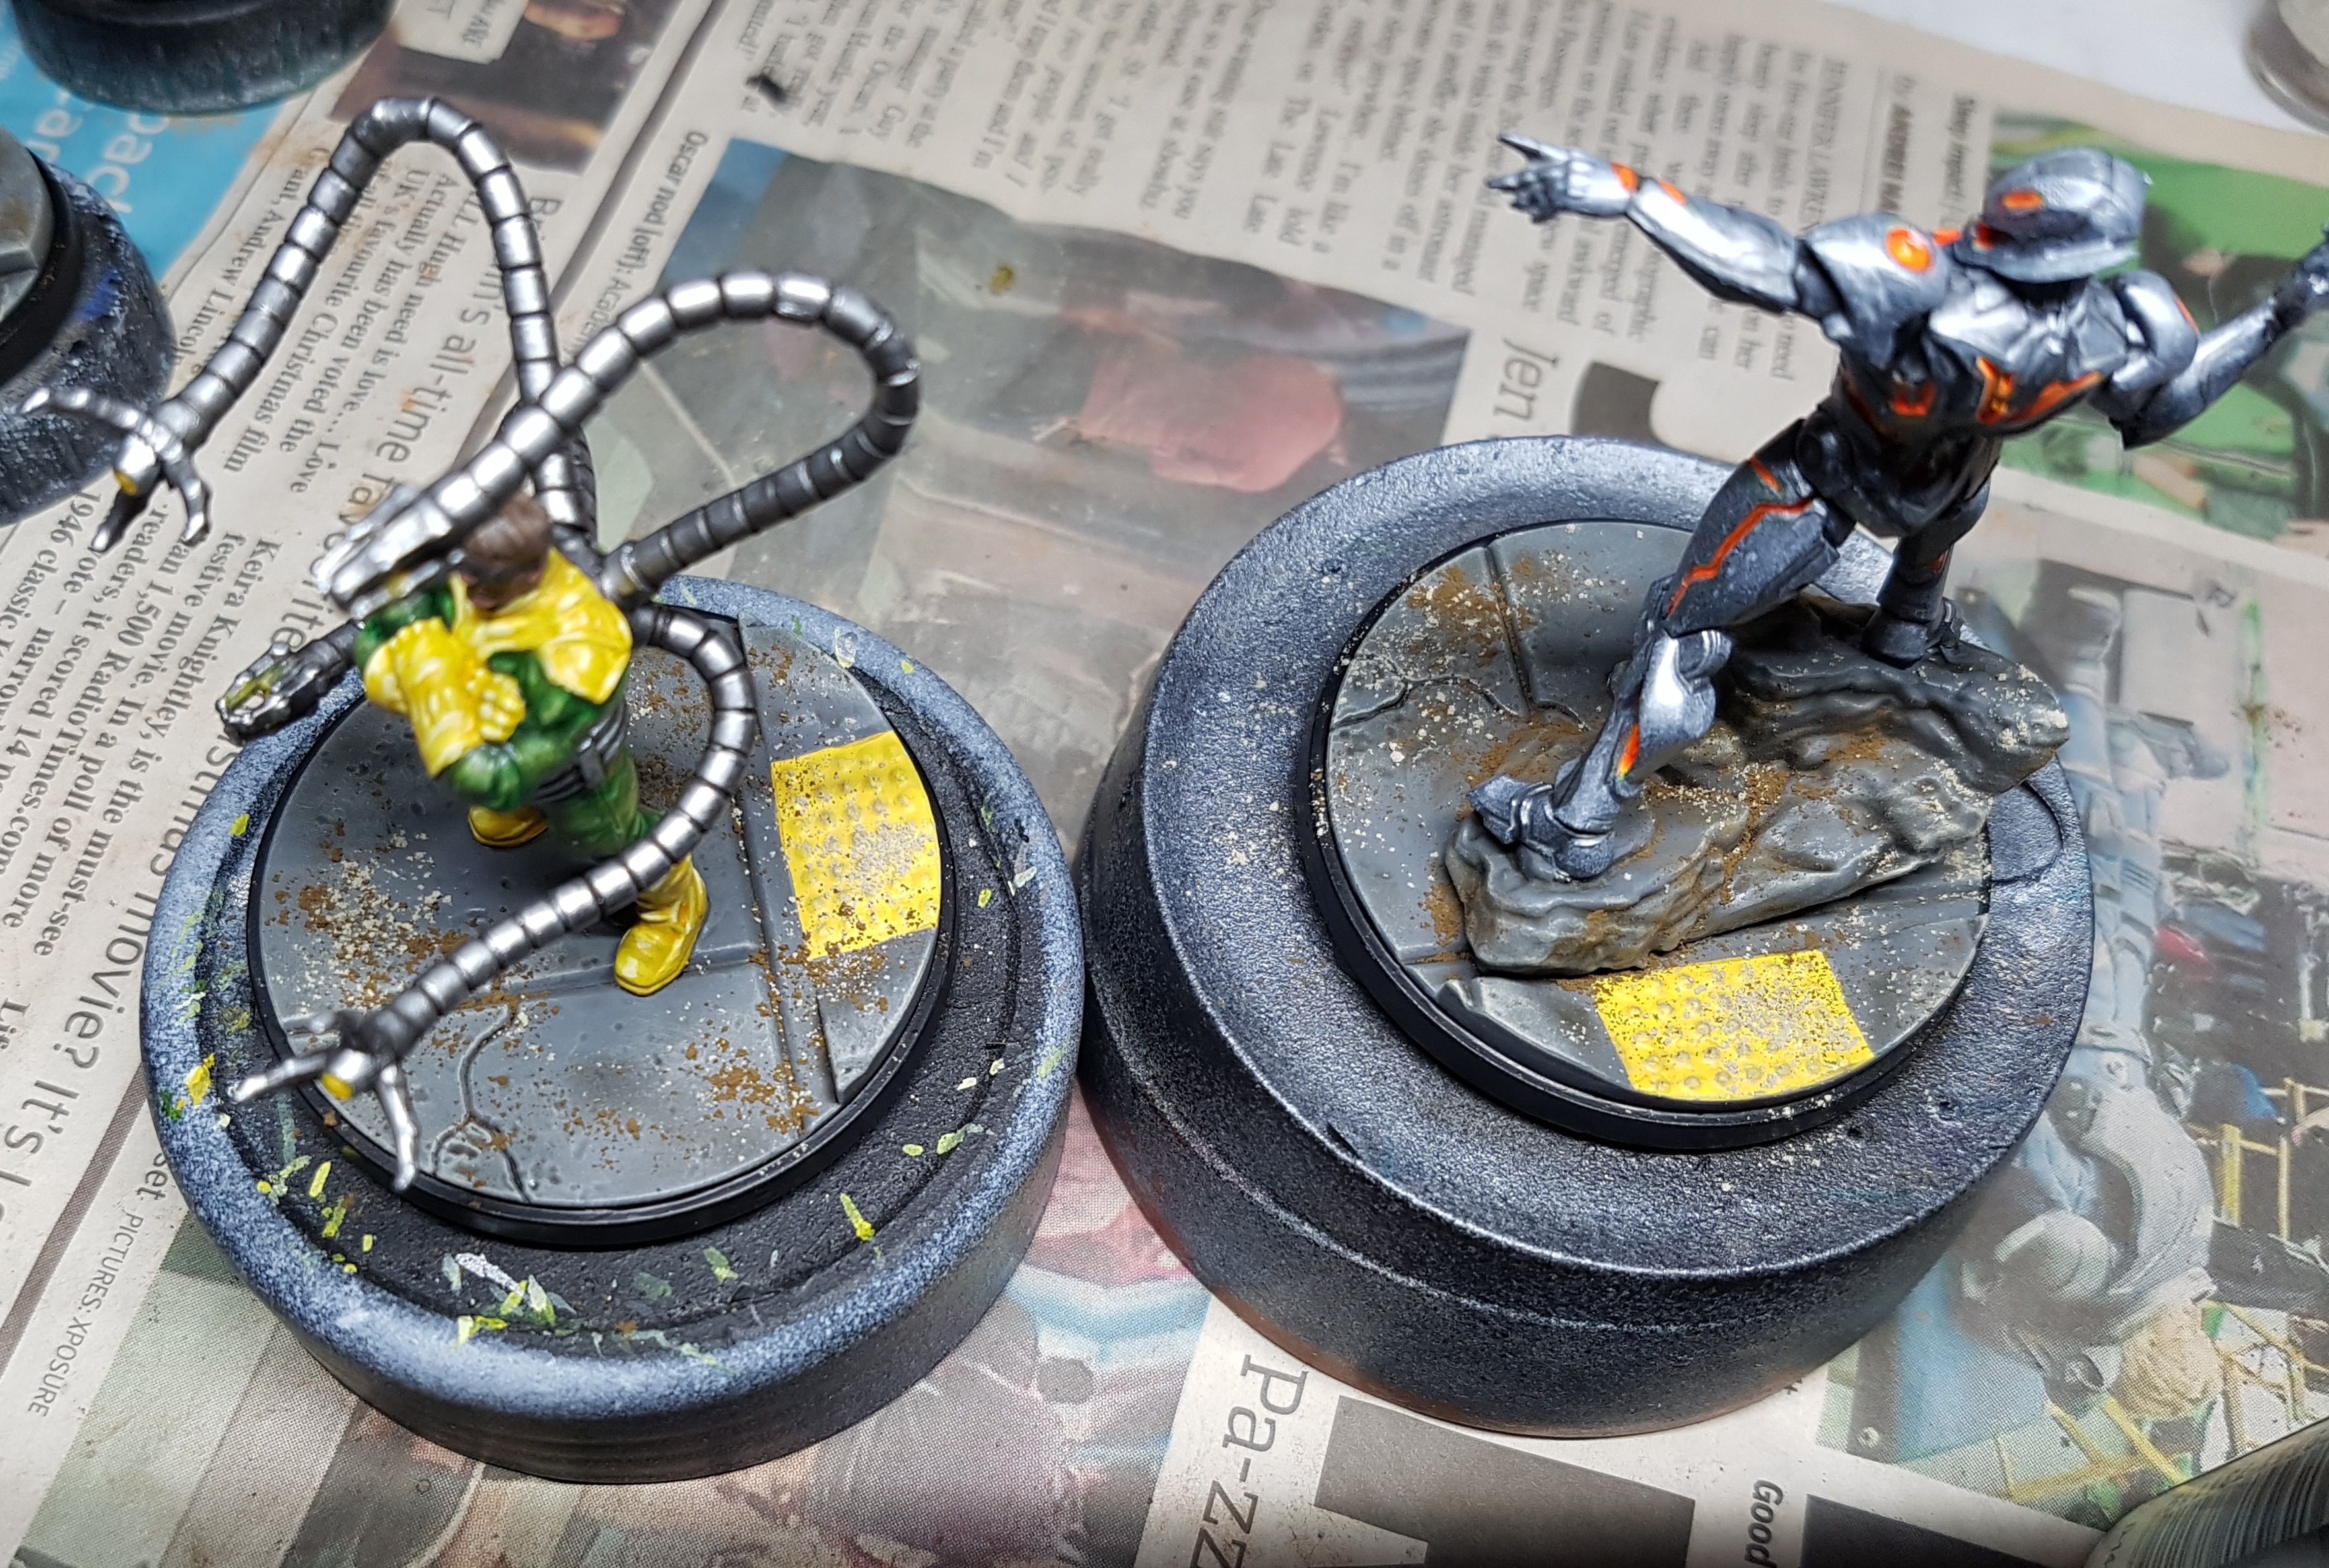
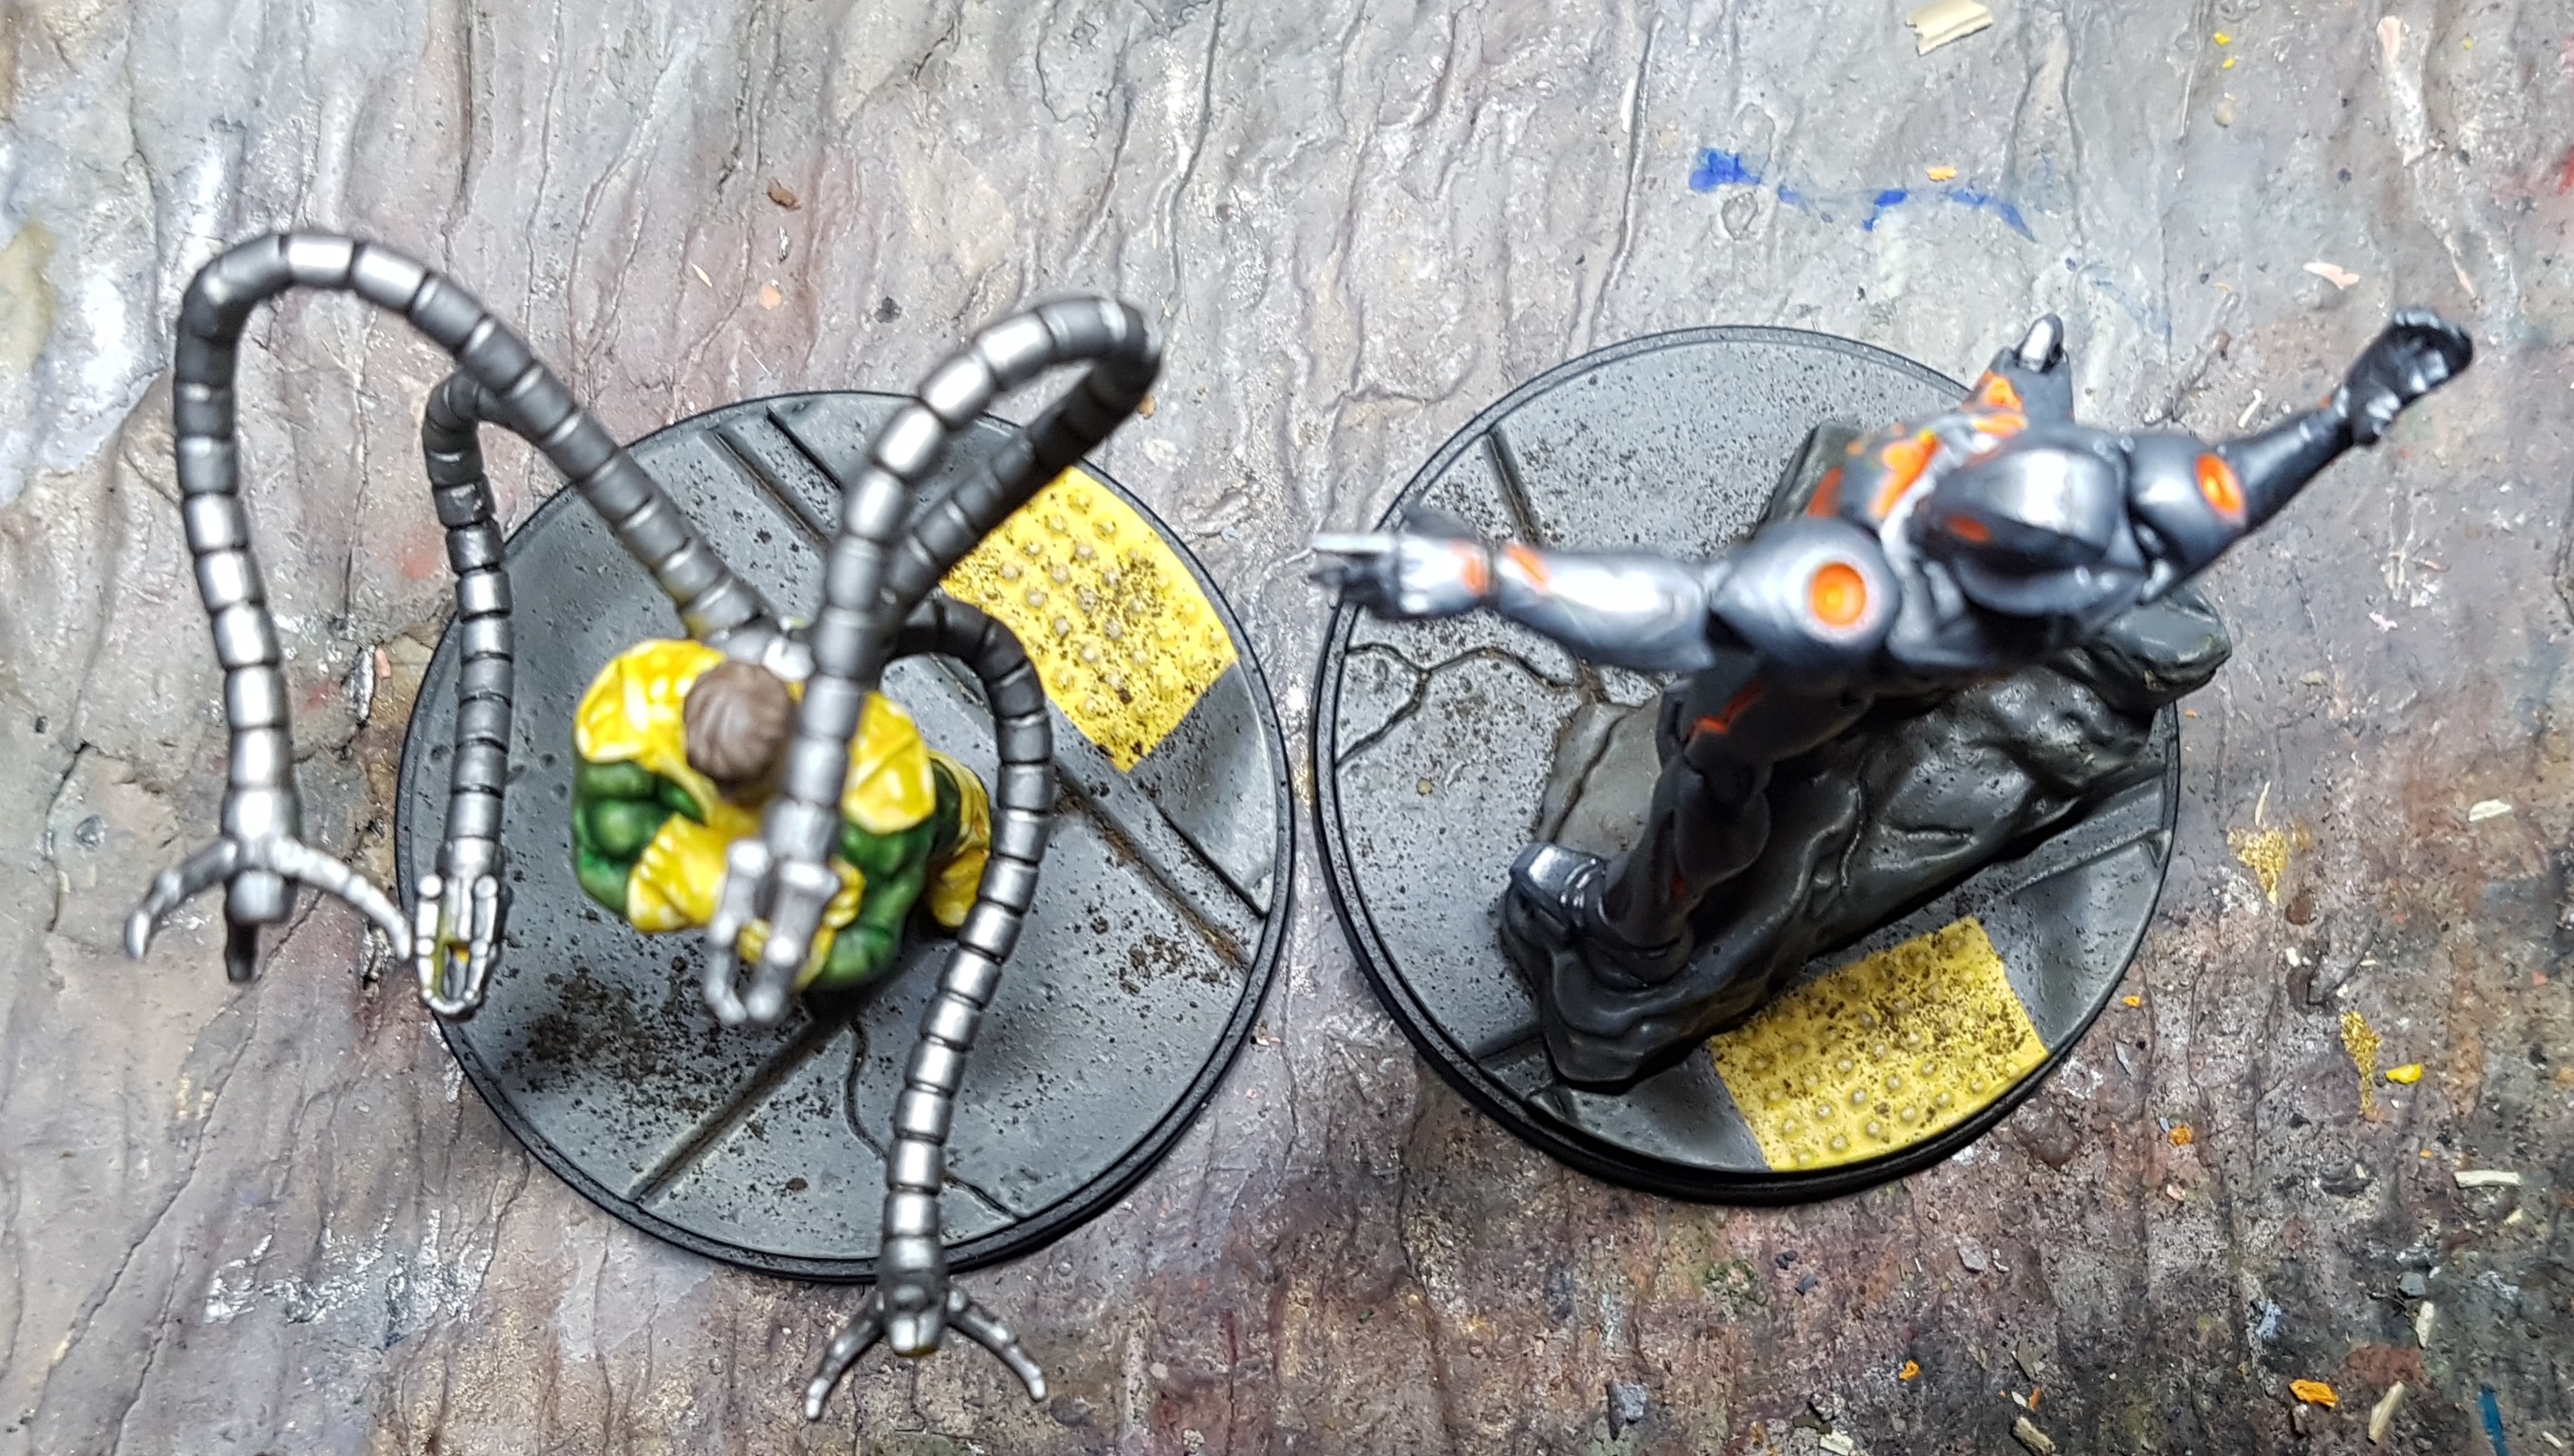 Here's those same bases varnished. Unfortunately this doesn't seem to show off the diffusion effect. I'll be sure to take more pics next time I do this and hopefully catch some good examples of how the varnish interacts with the pigments. All that dirt there is sealed in though, and isn't going to move. Looks like I could possibly do with another coat of matt. That's not so apparent in person.
Finished Core Set Characters Gallery
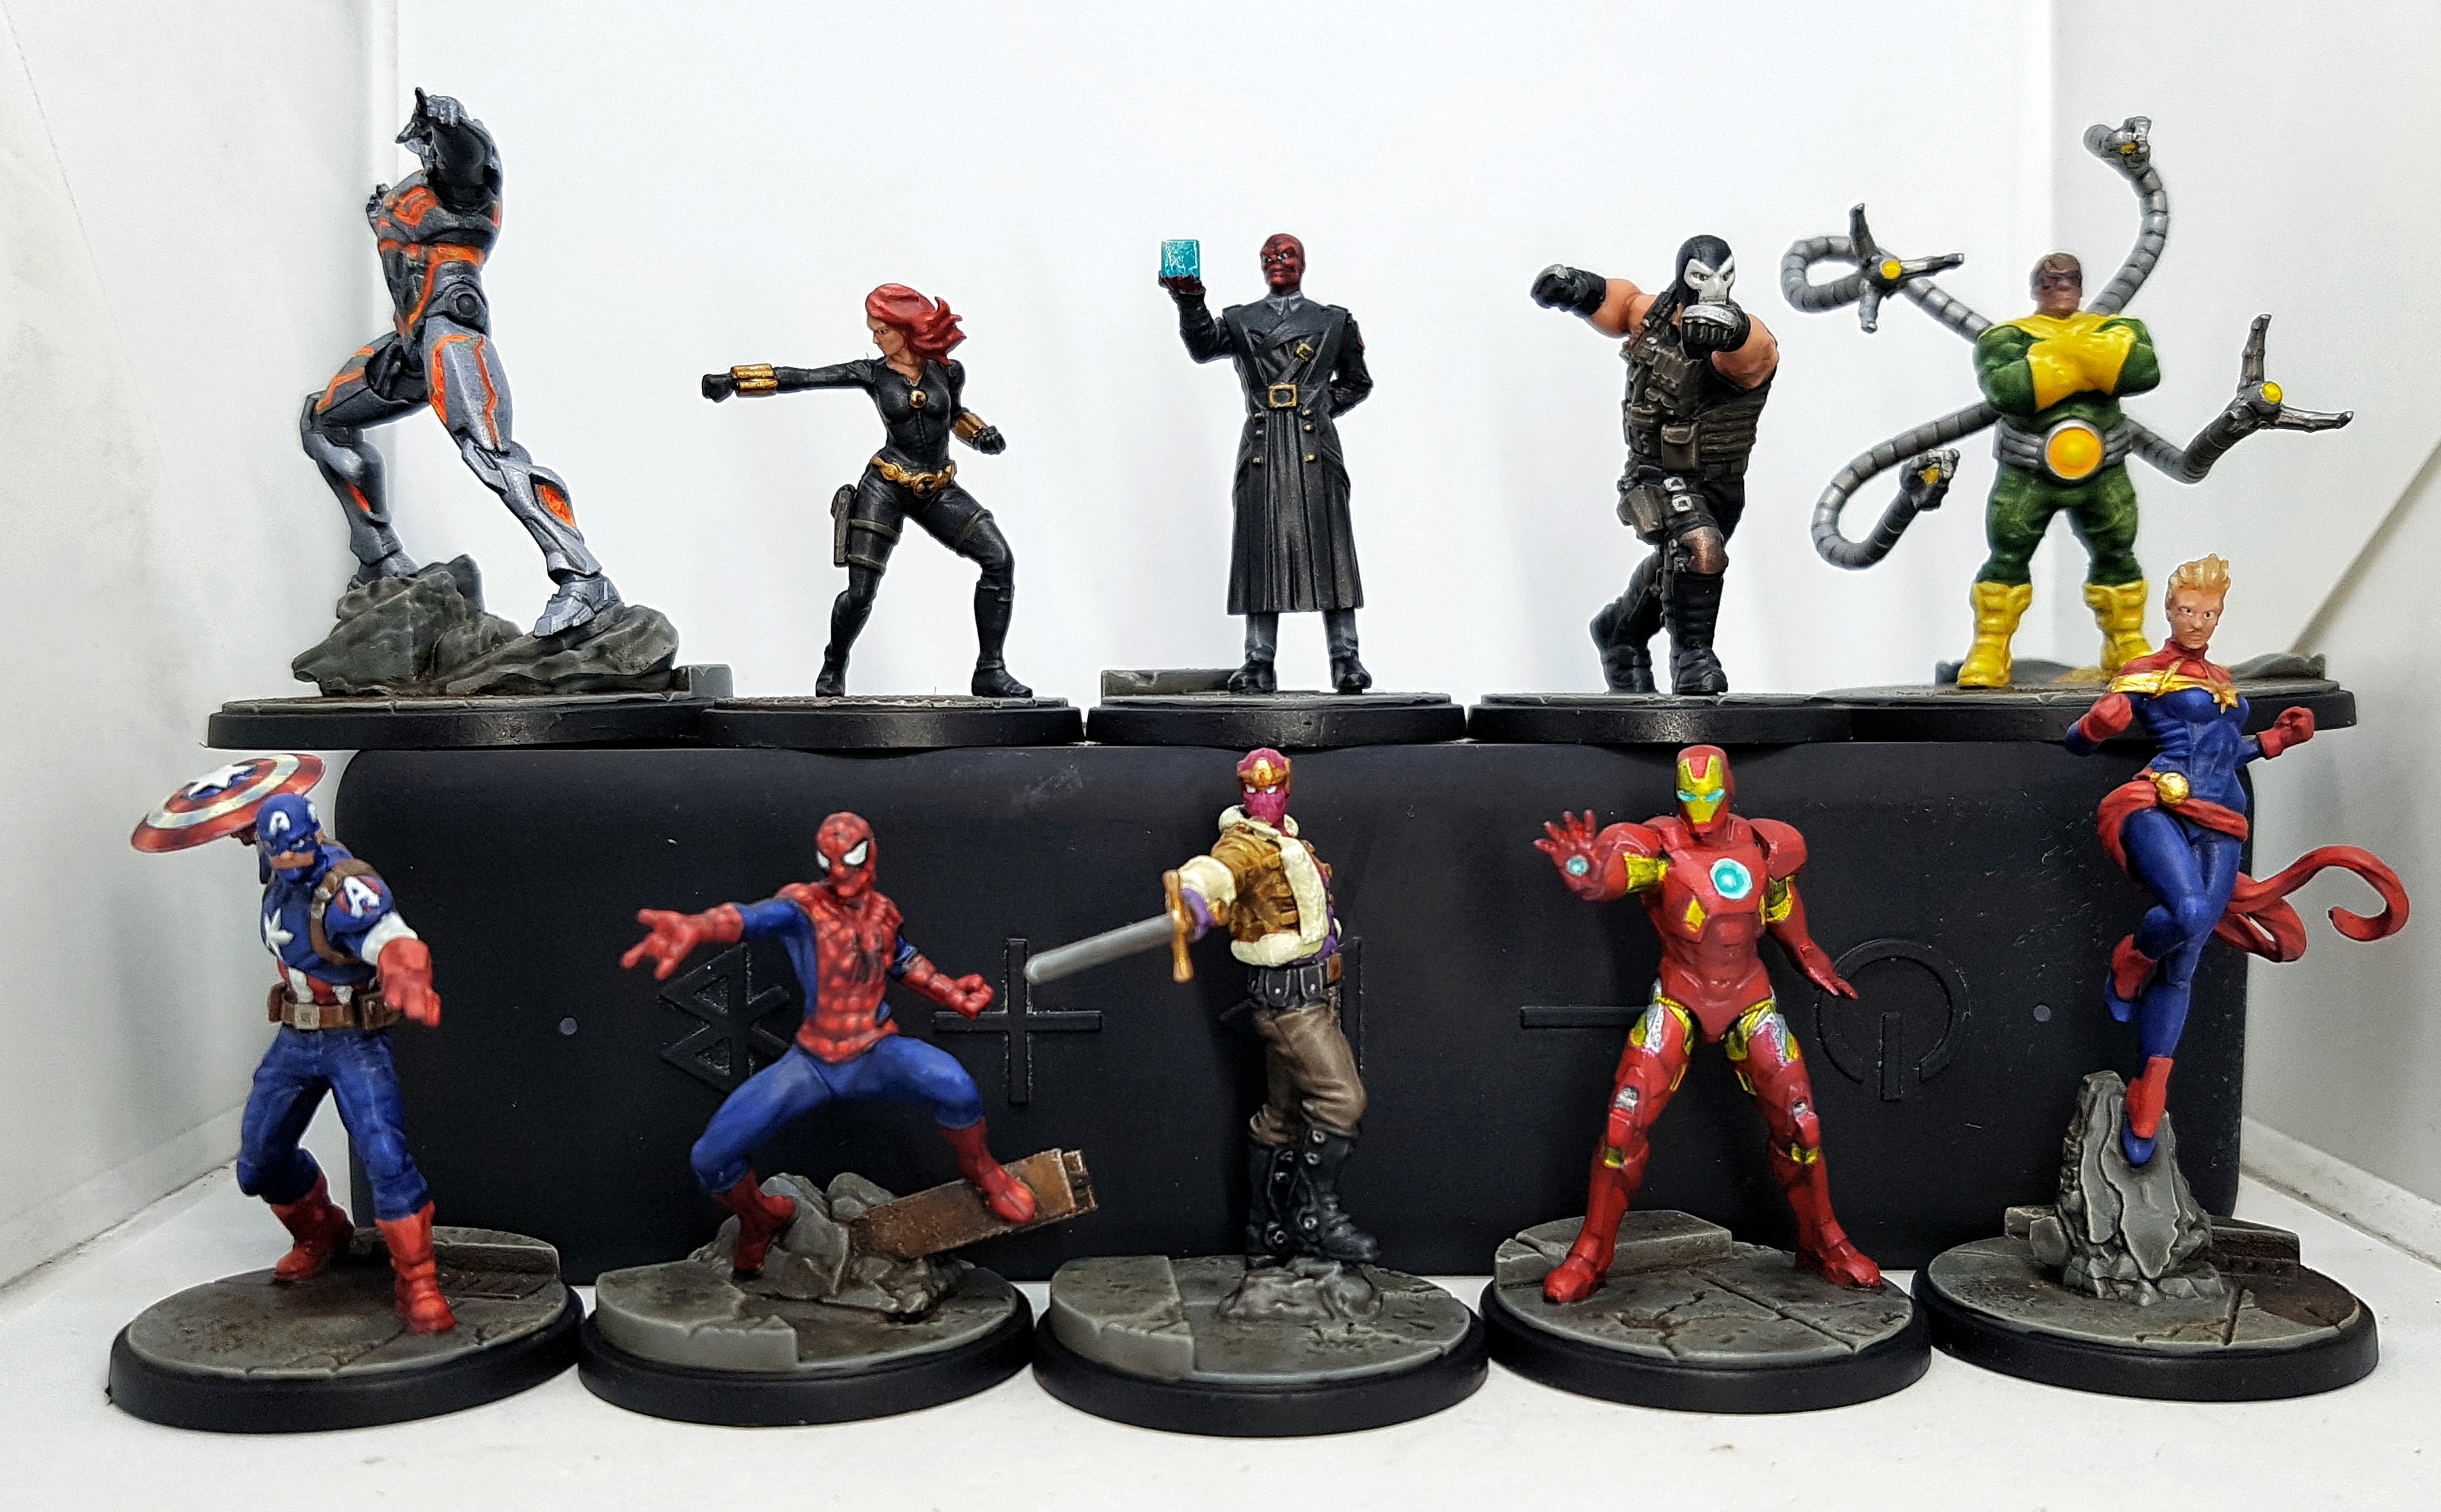
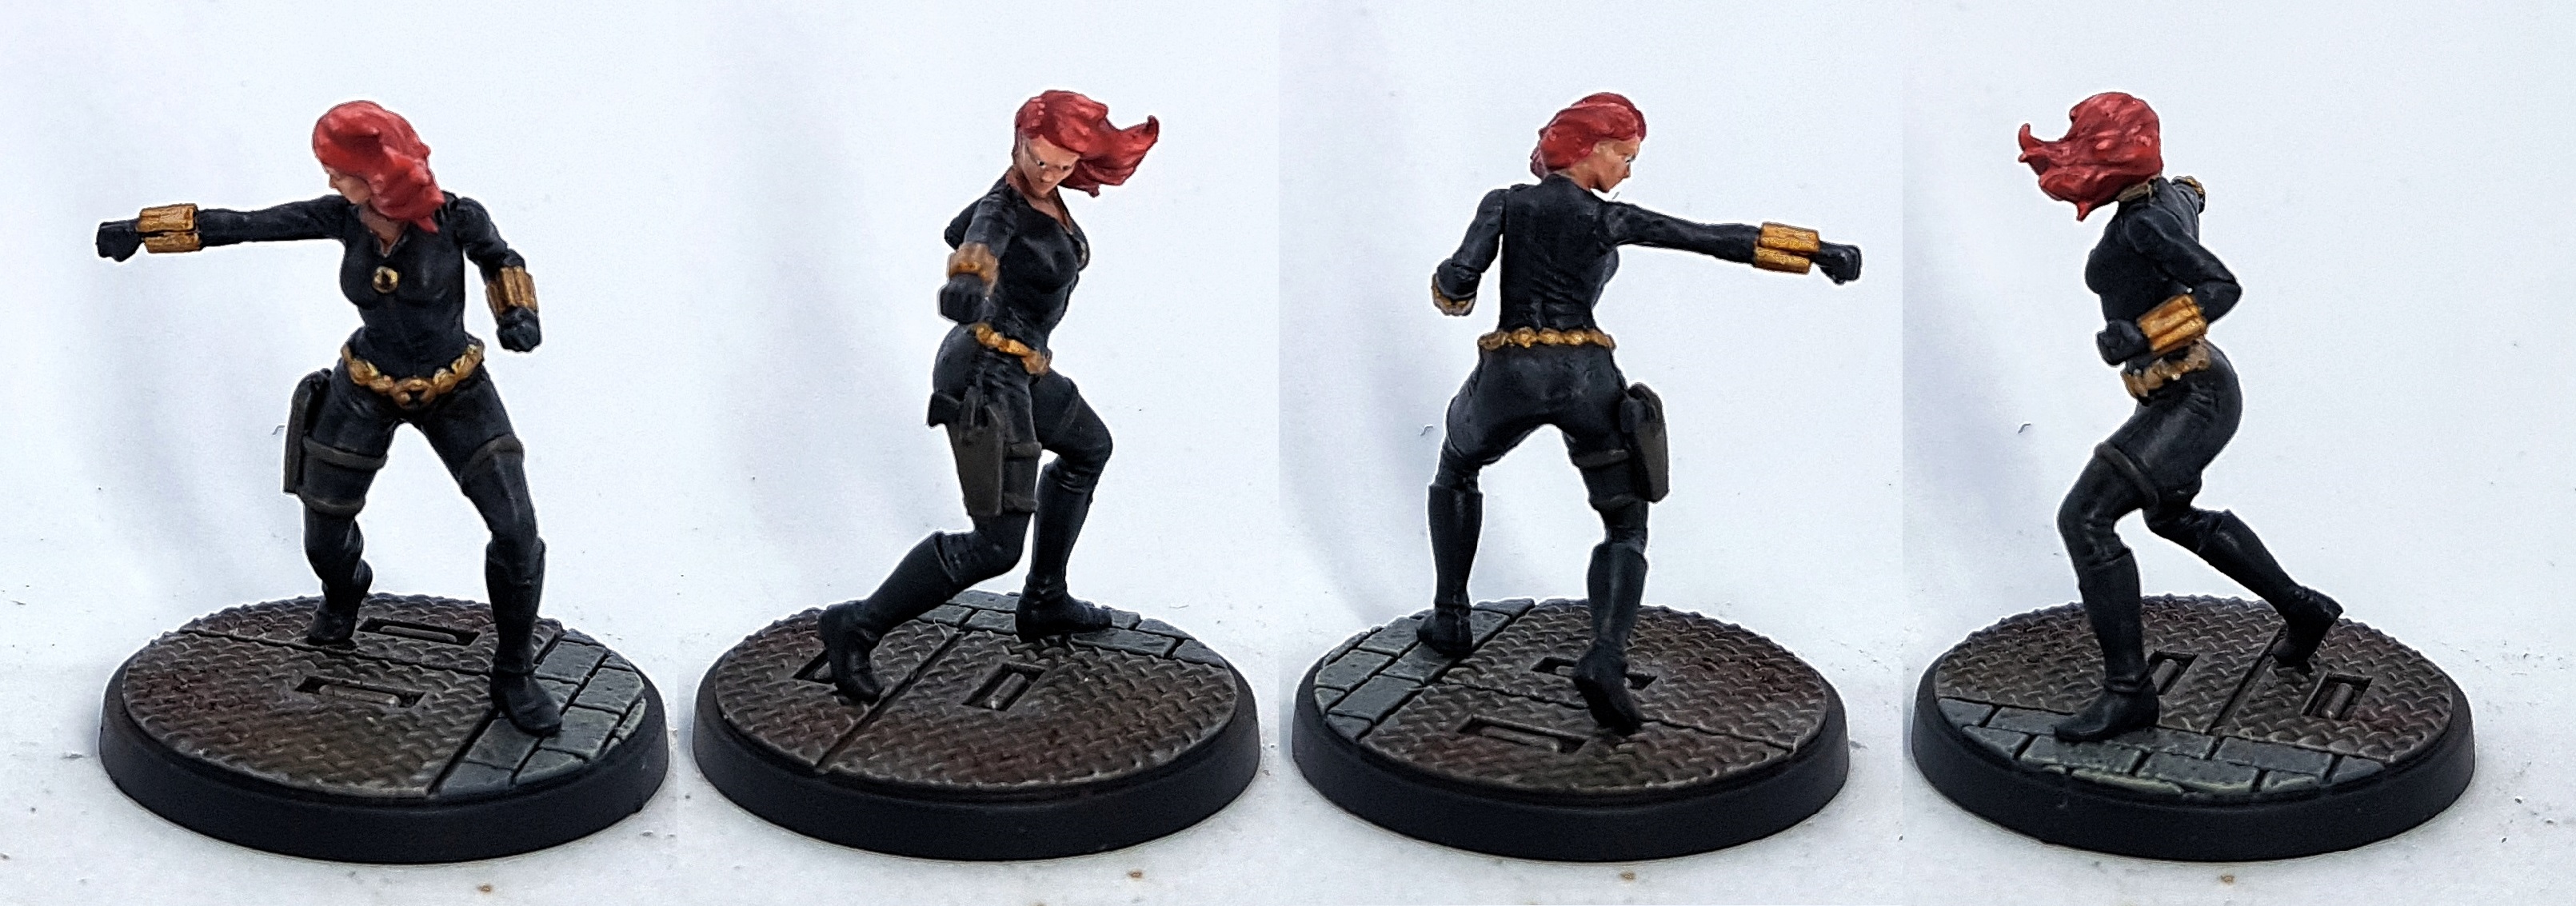 Black Widow
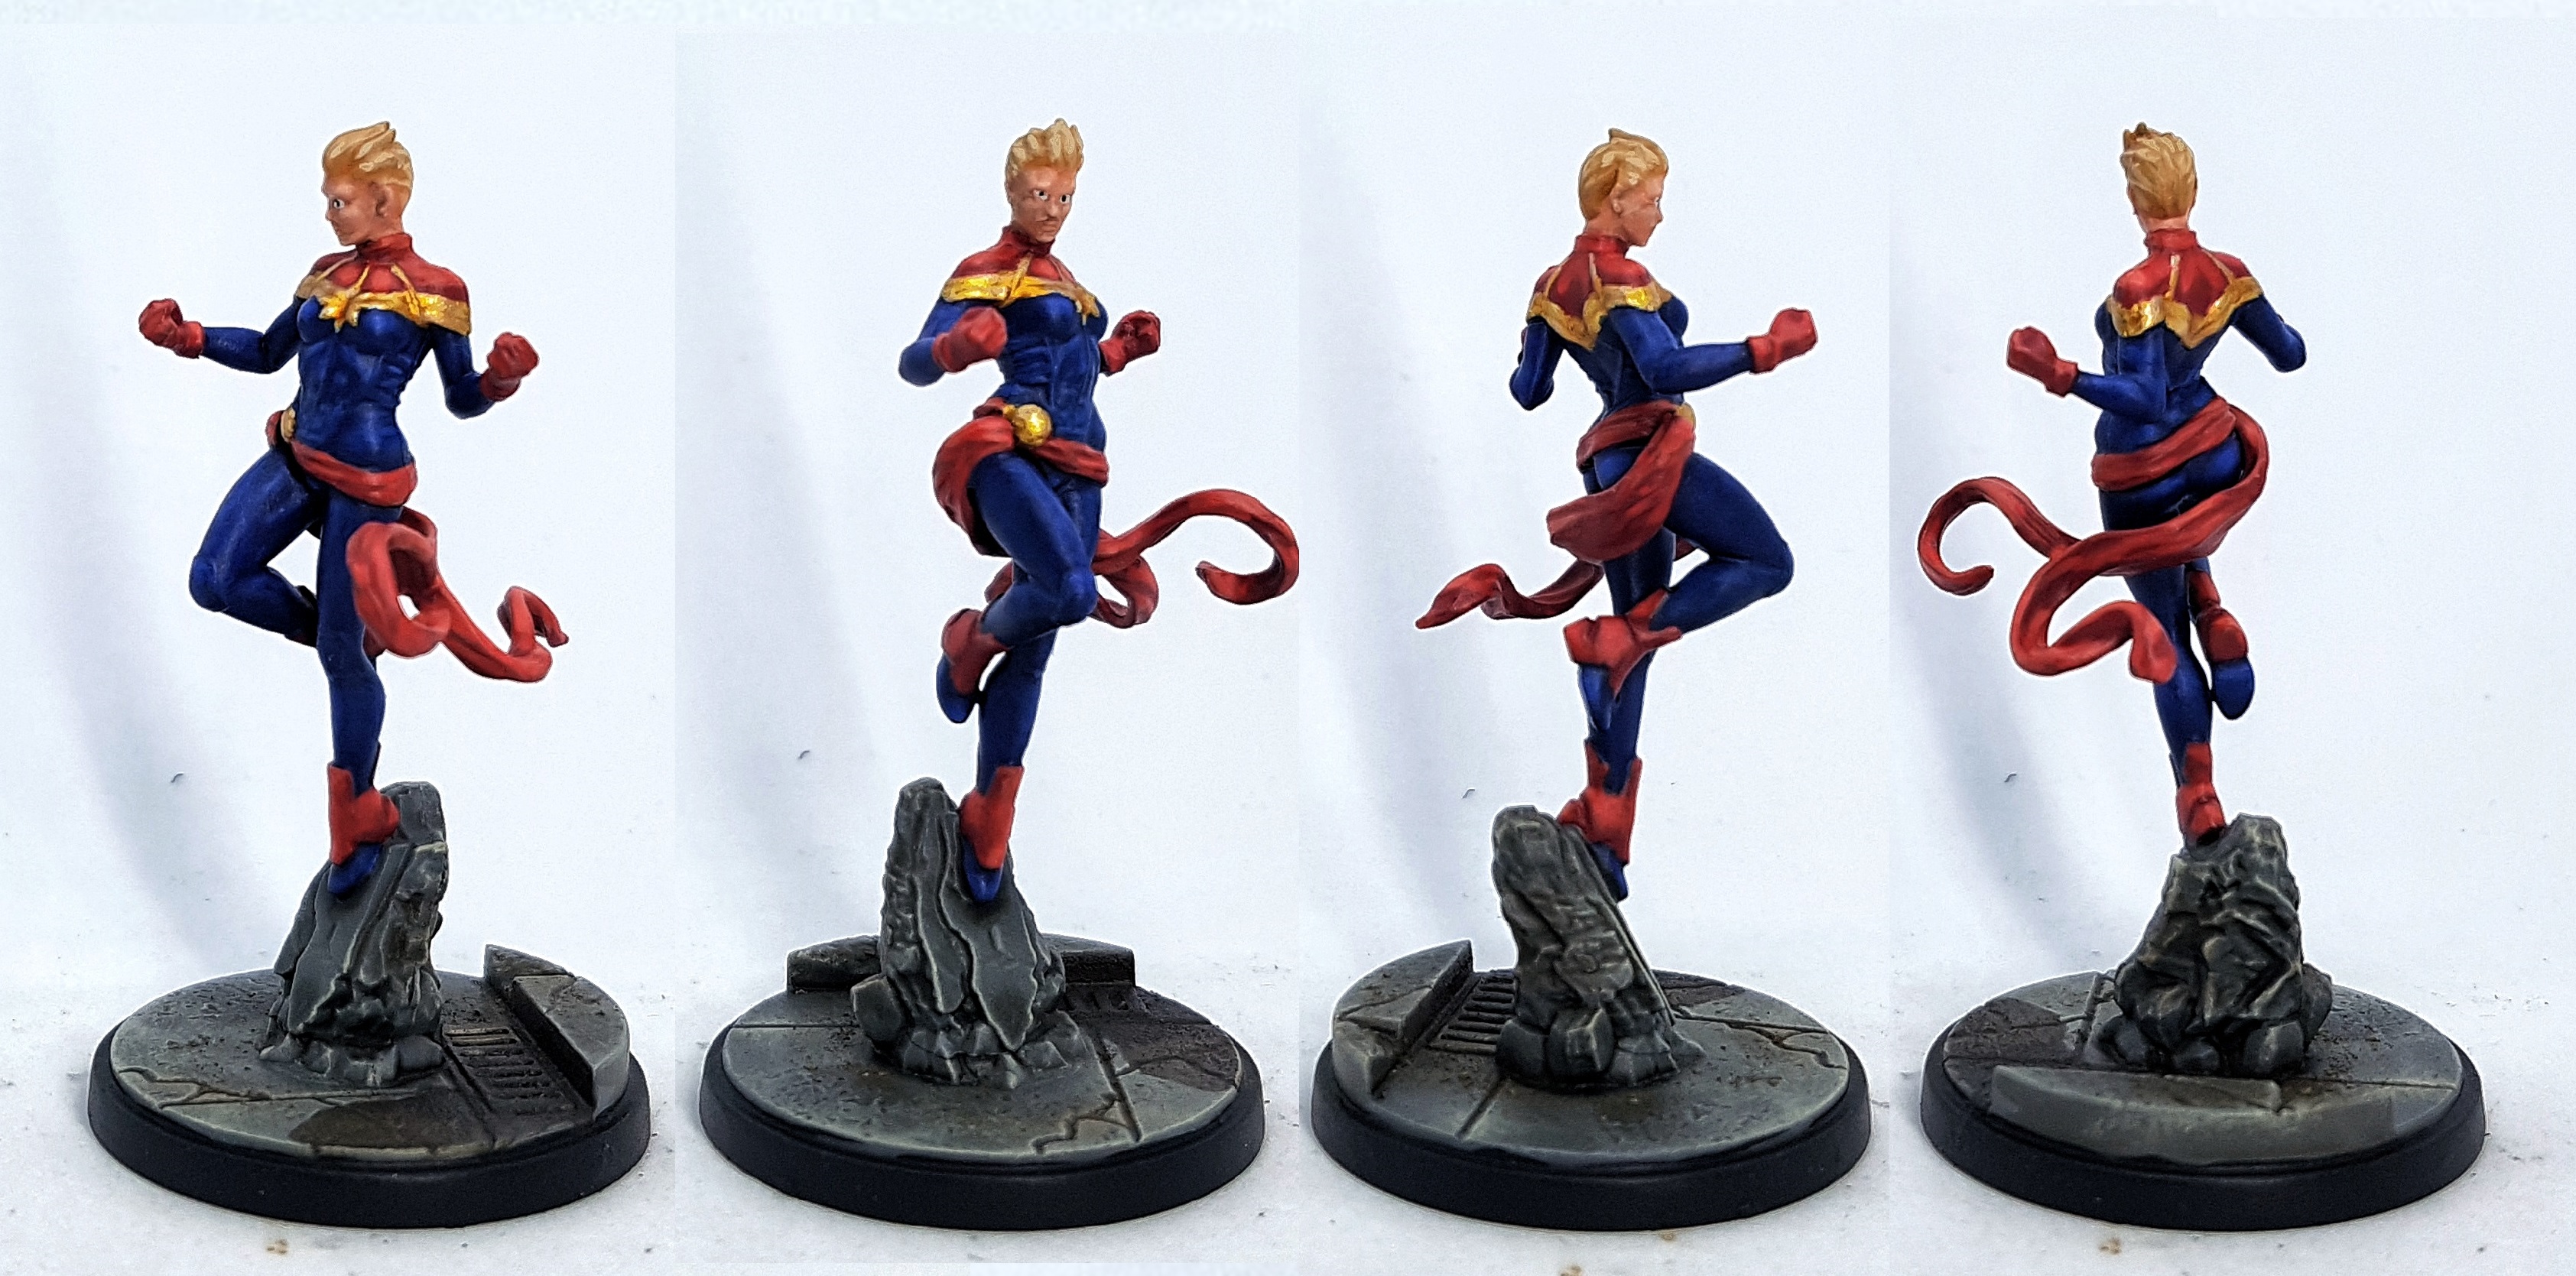 Captain Marvel
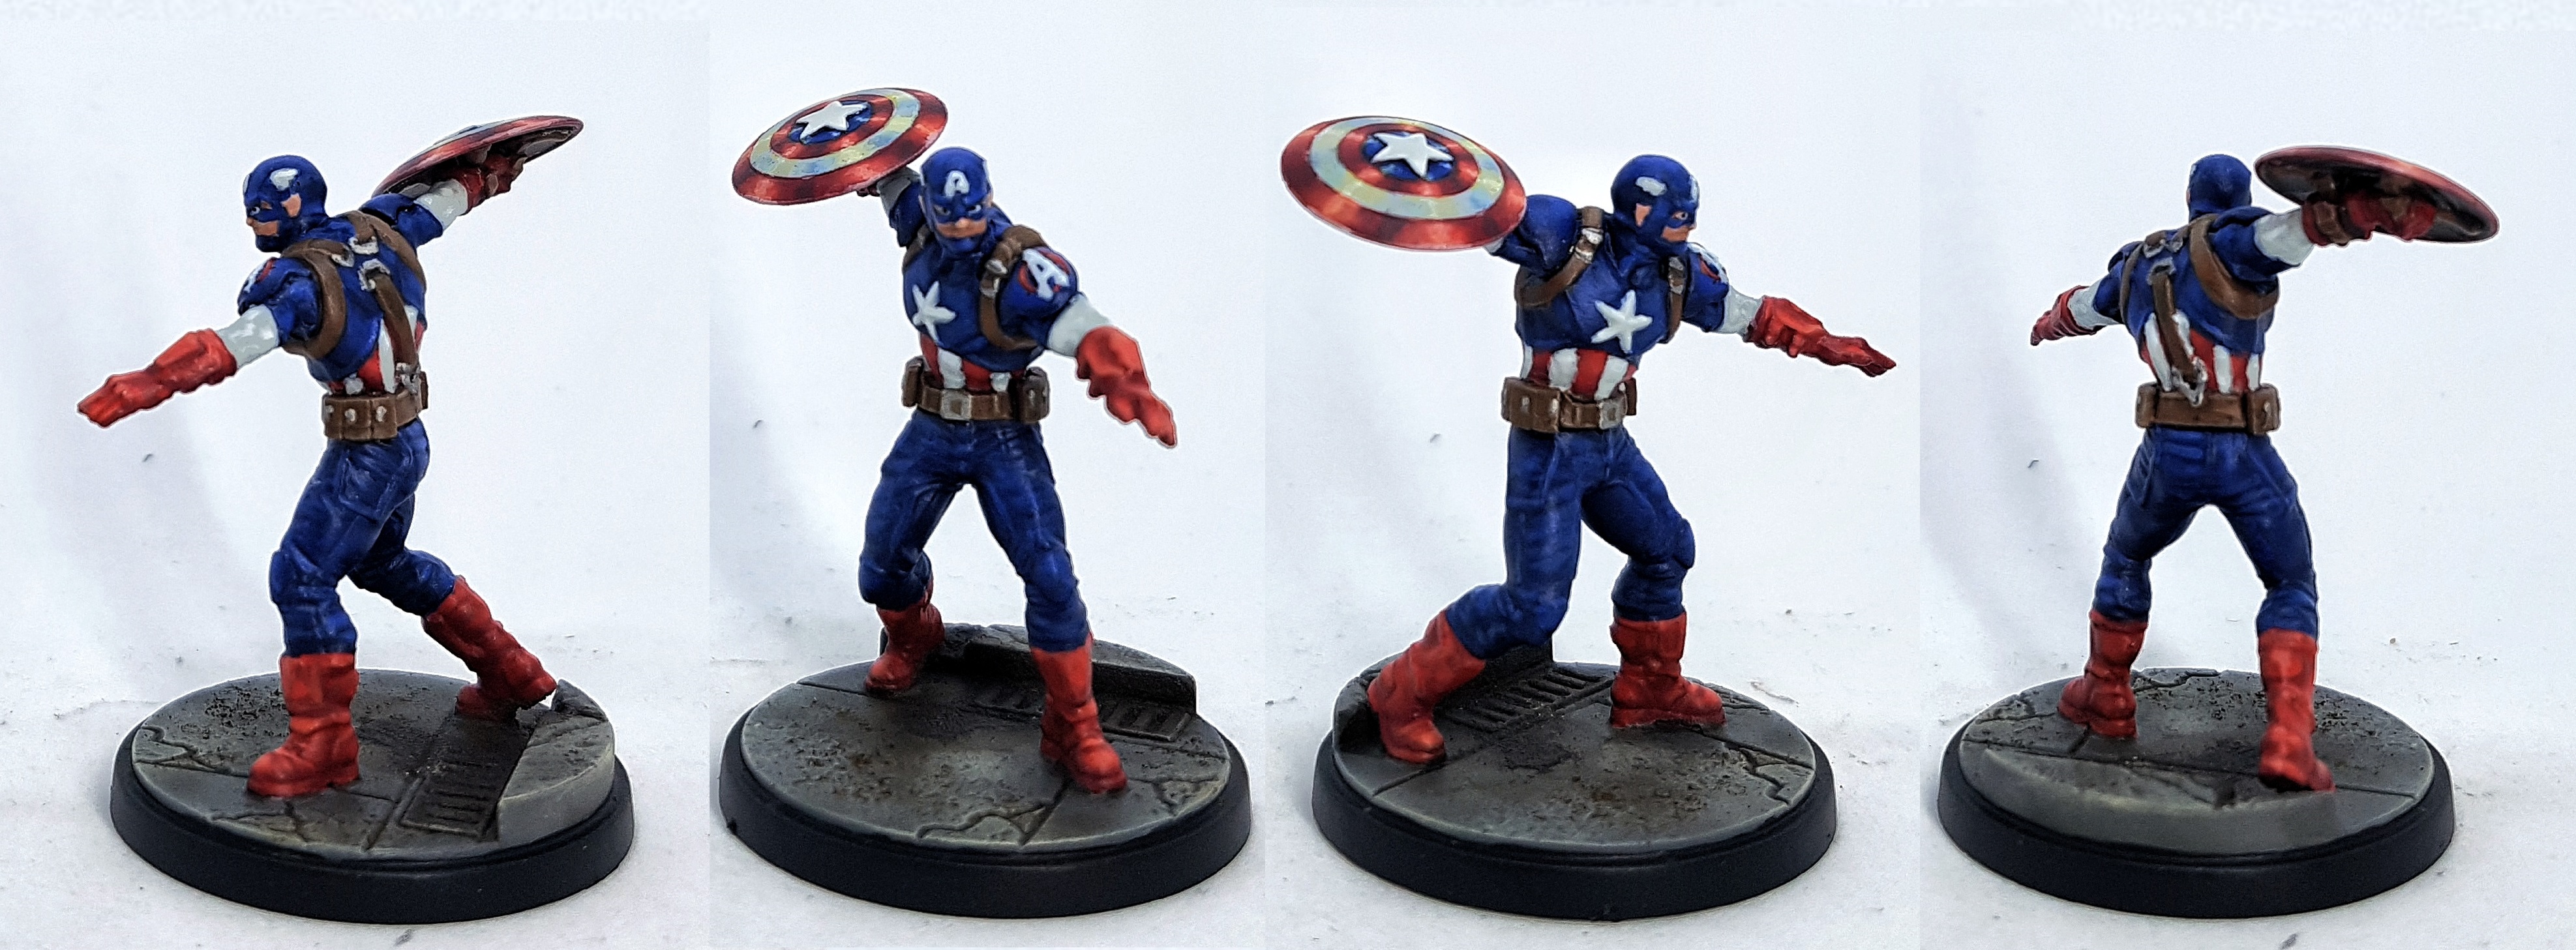 Captain America
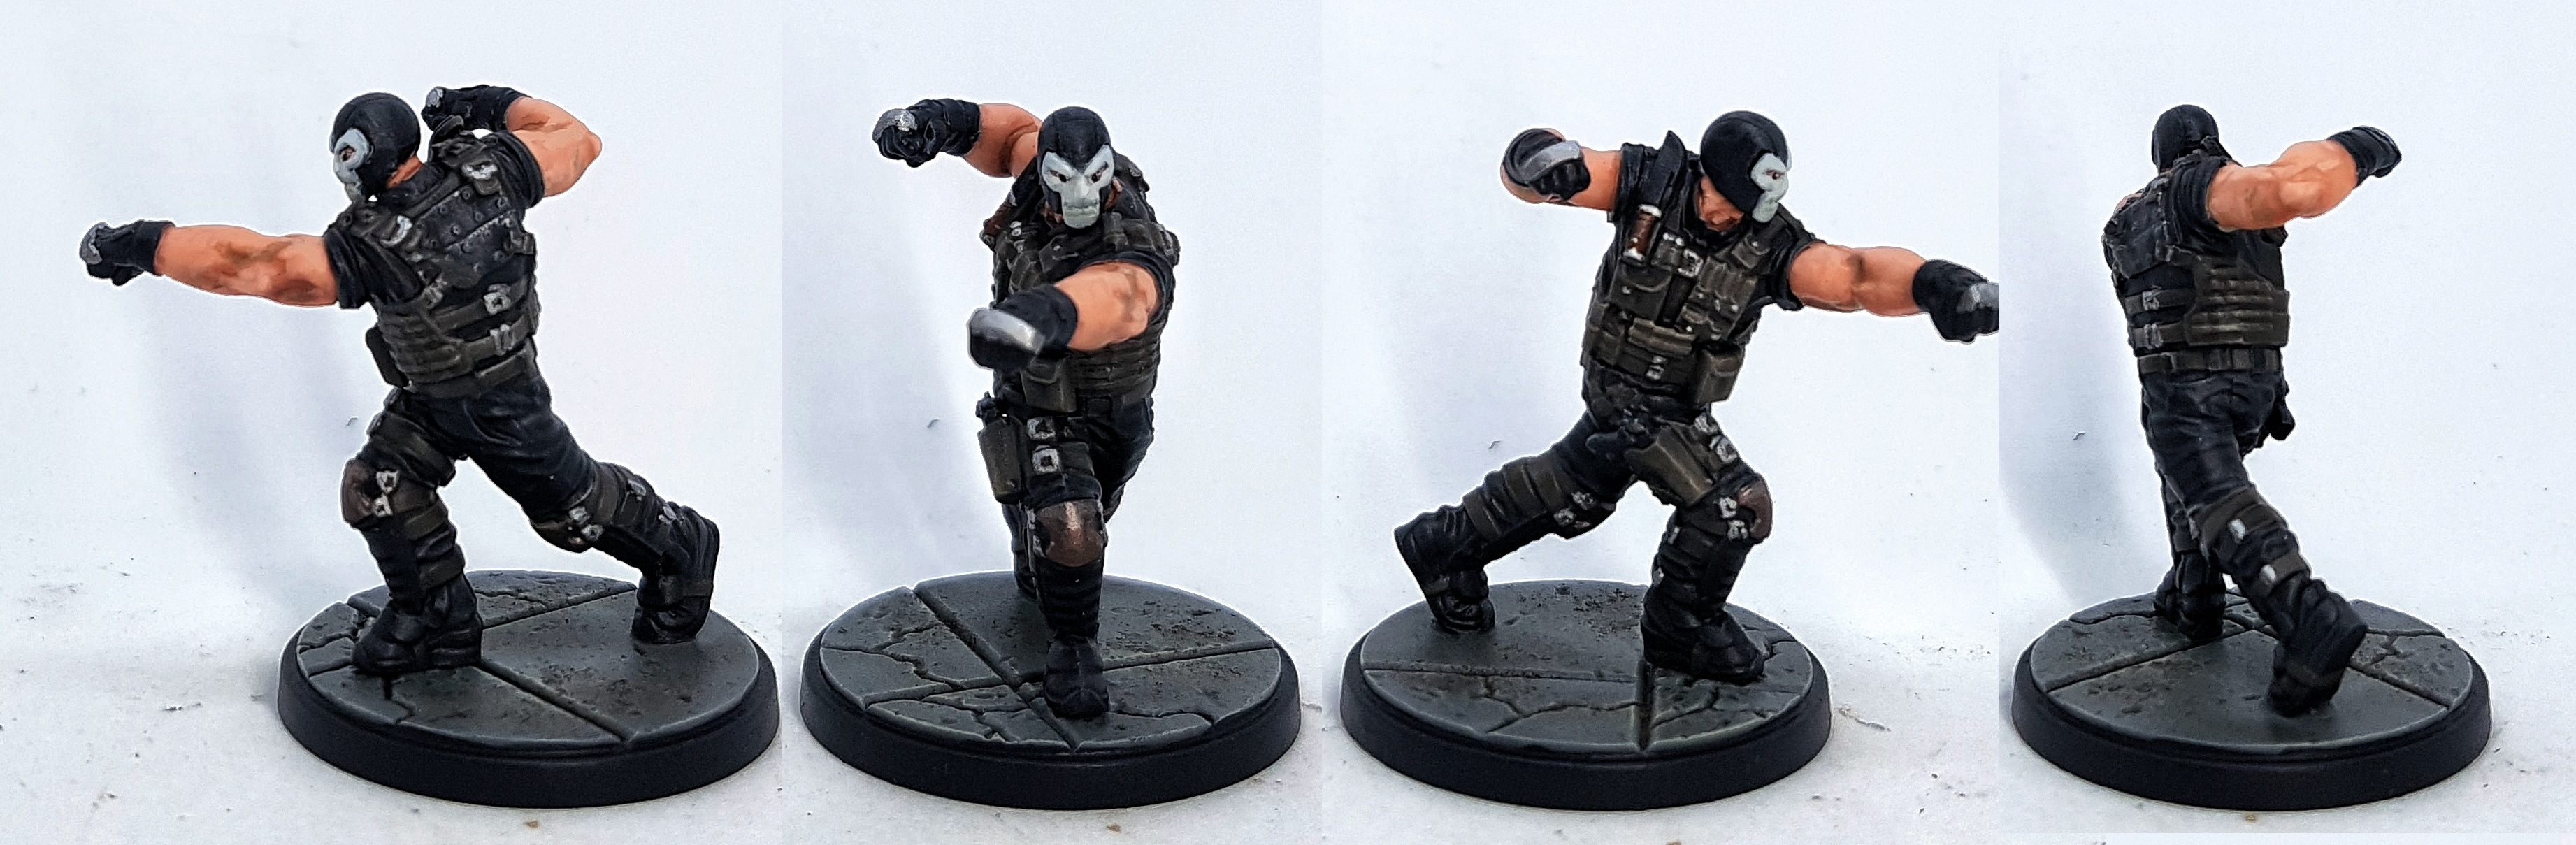 Crossbones
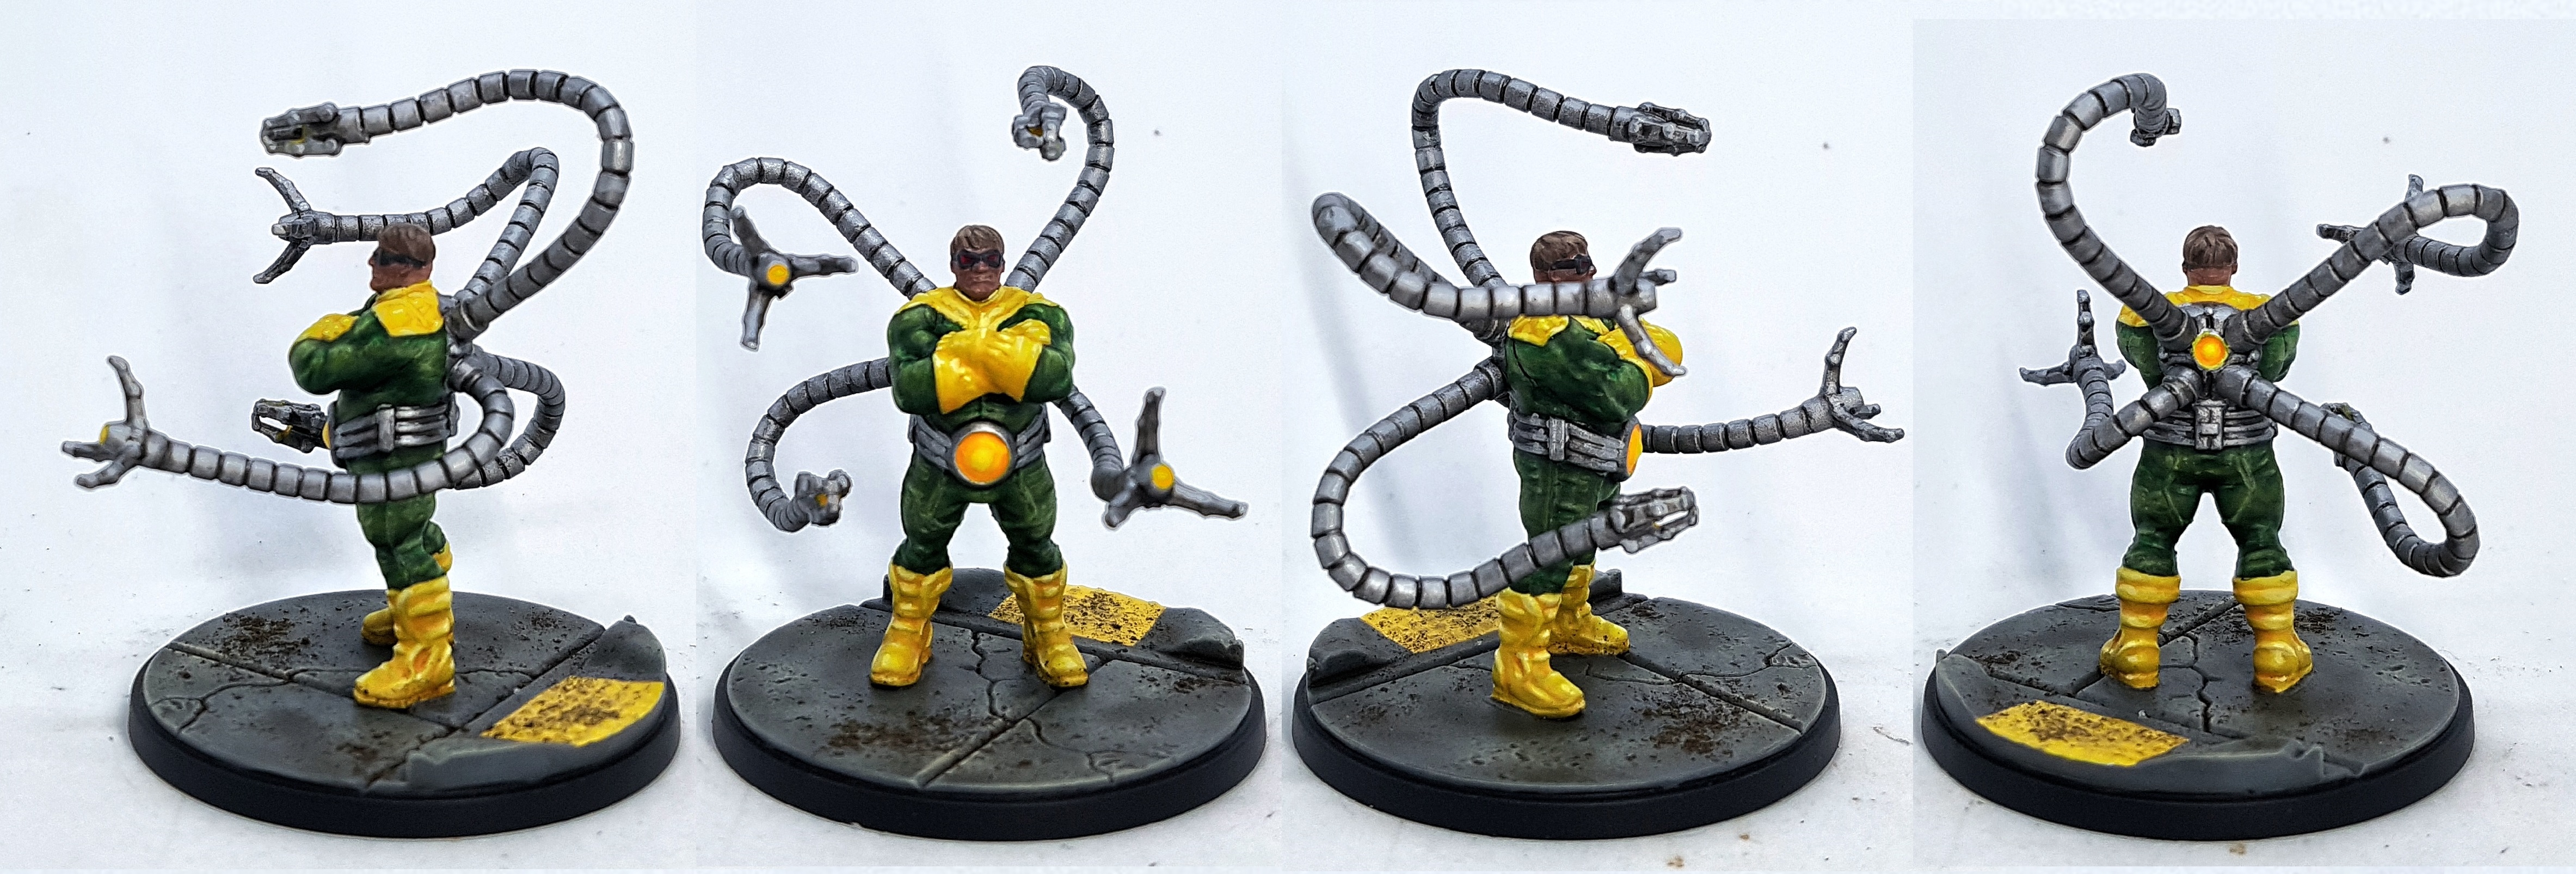 Doctor Octopus
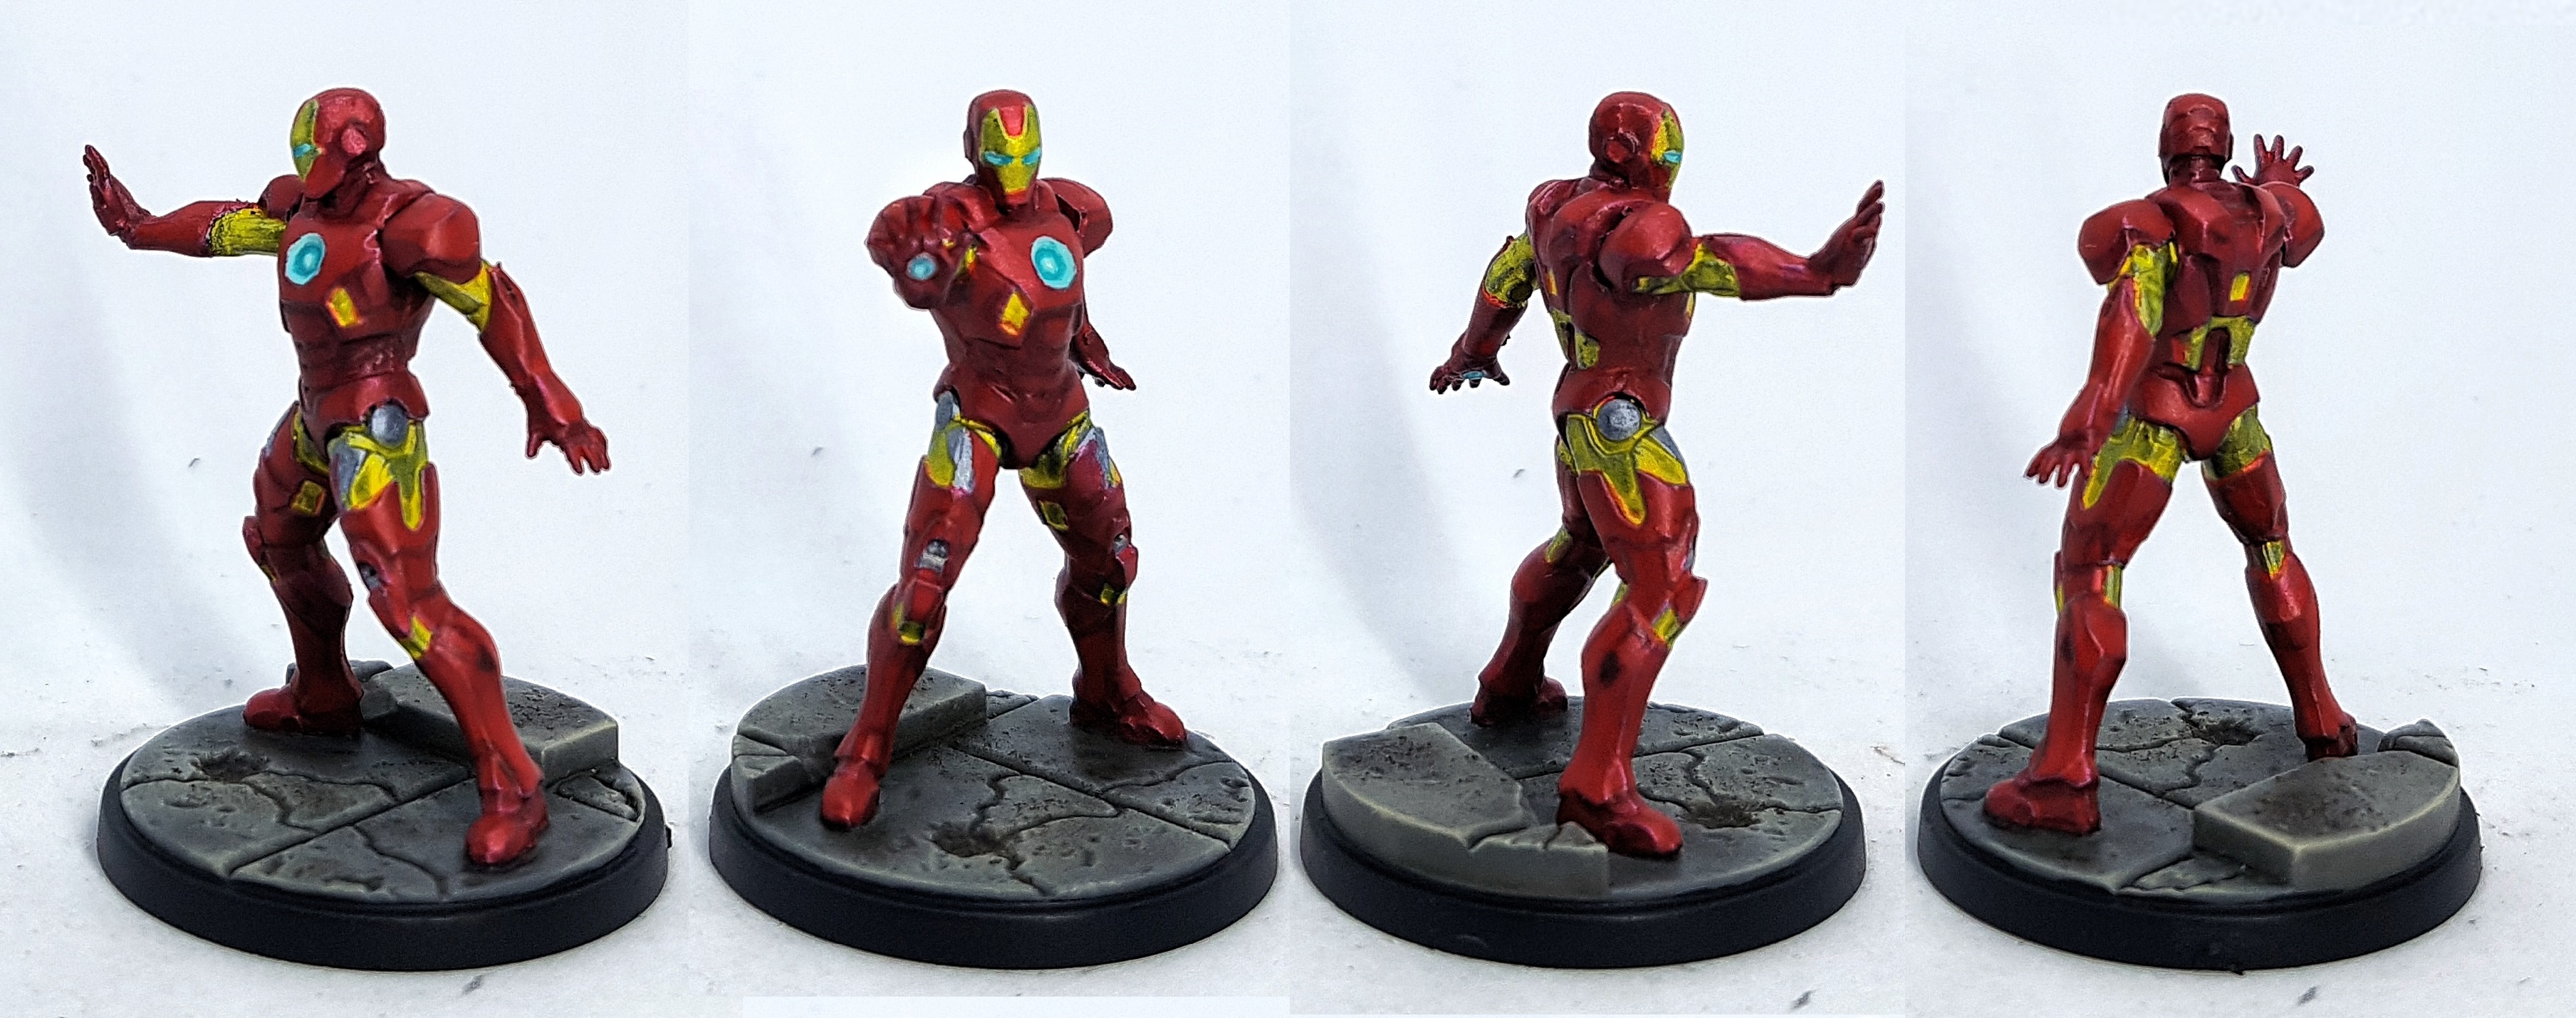 Iron Man
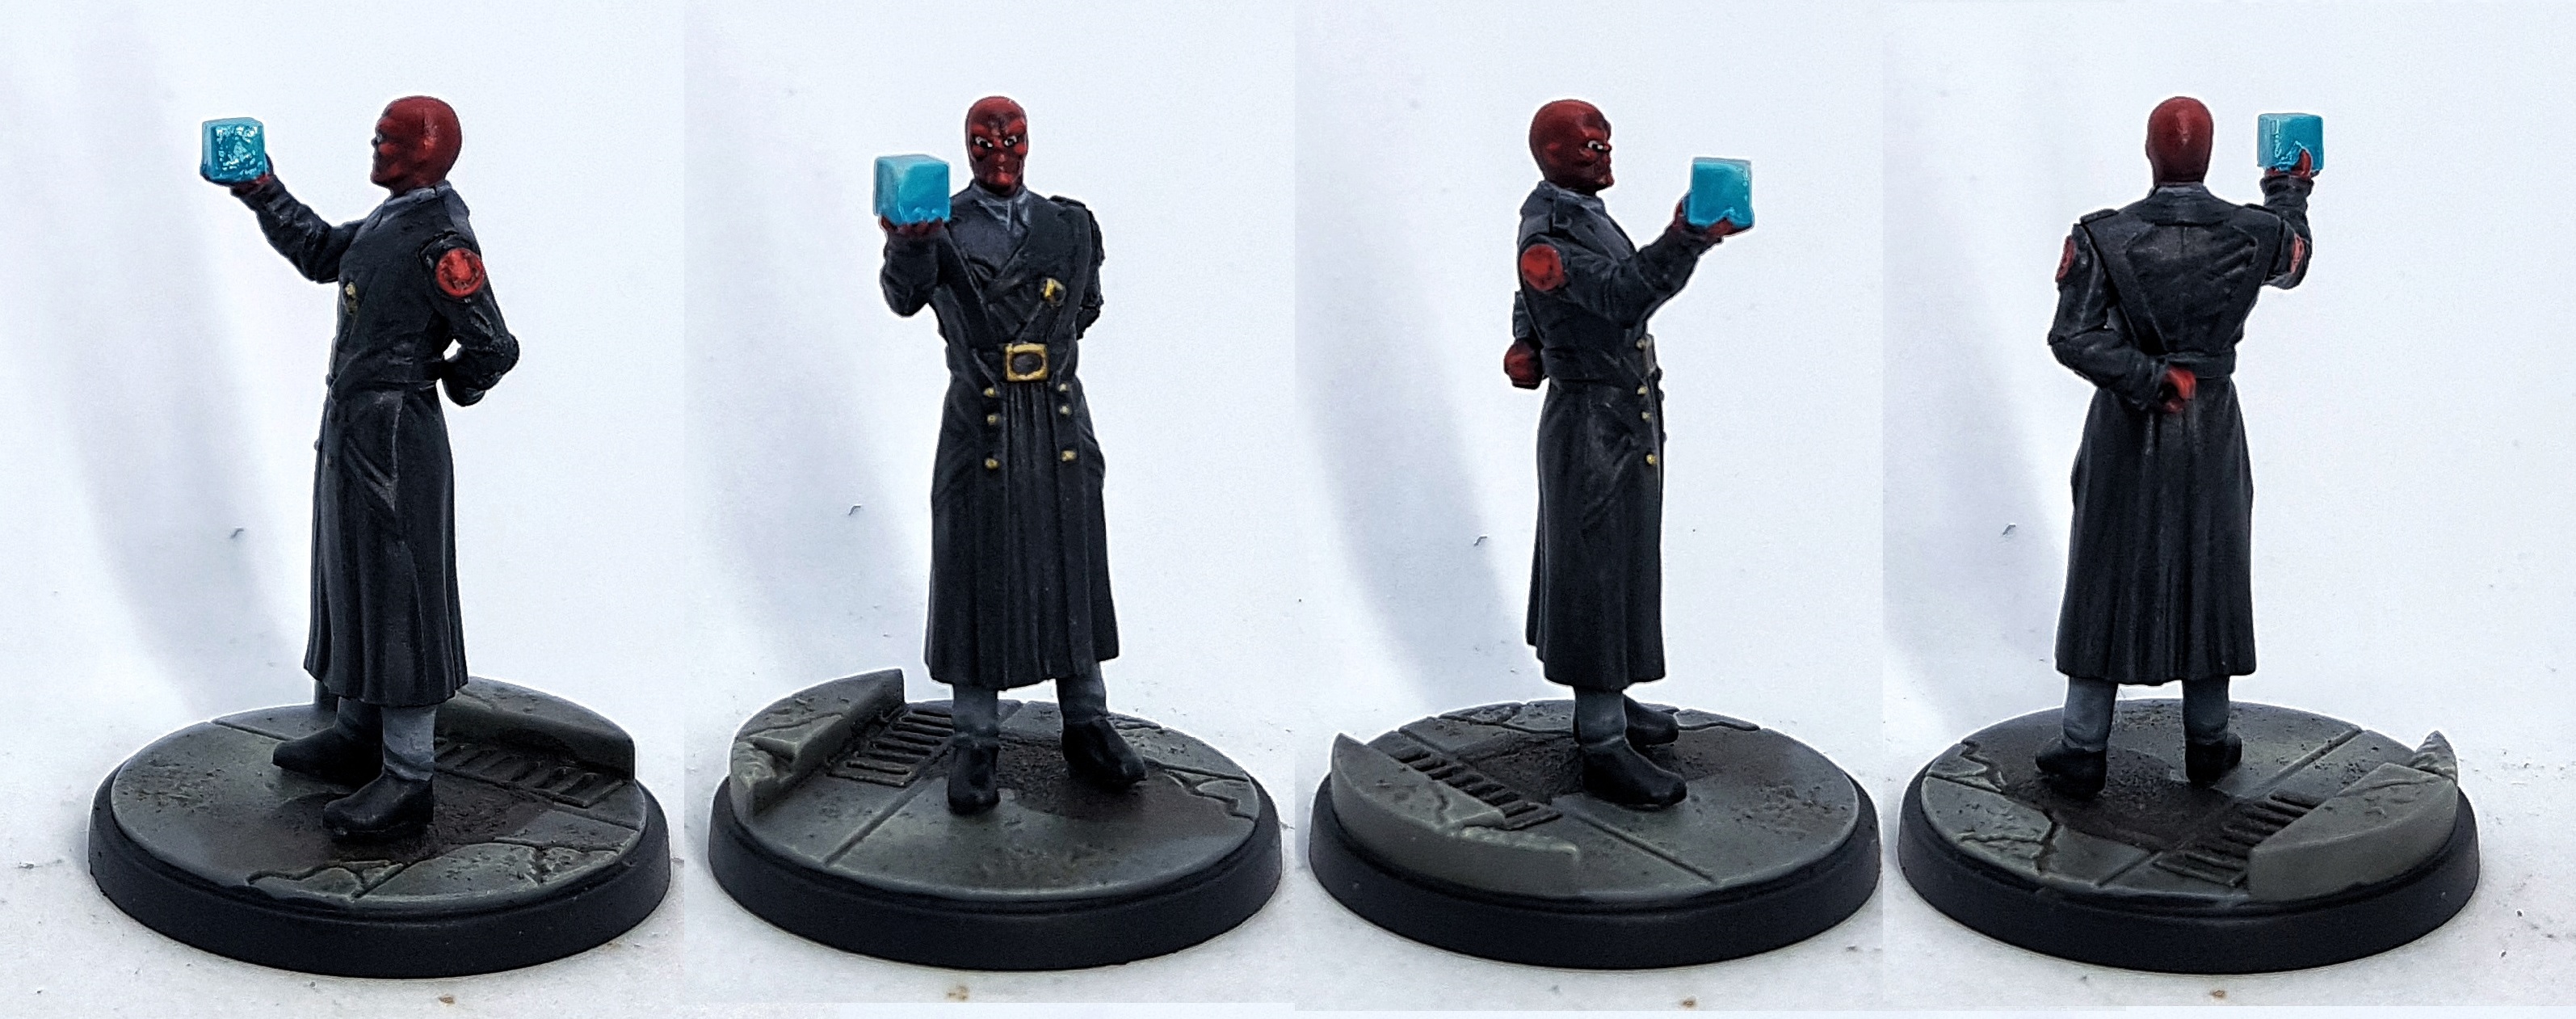 Red Skull
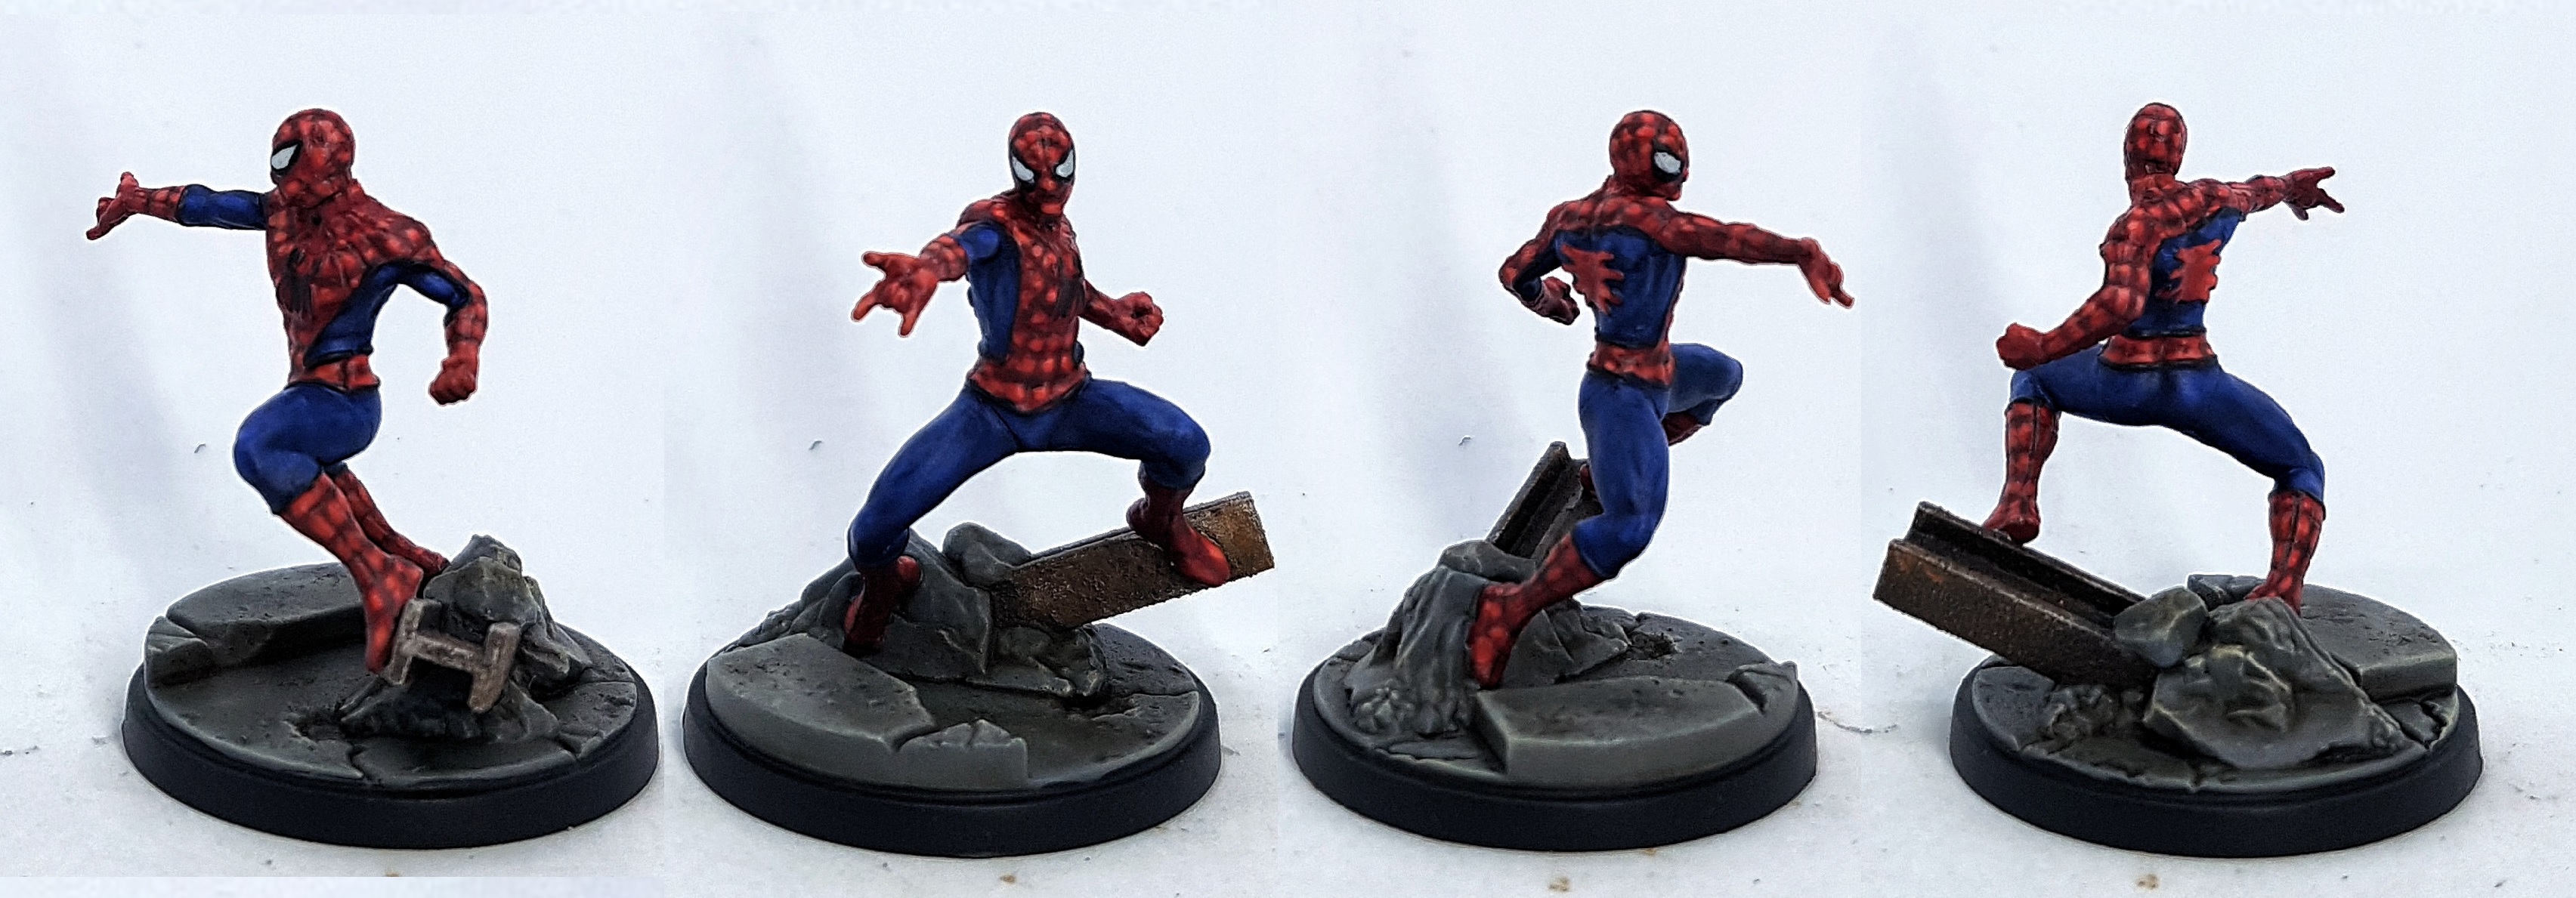 Spider-man
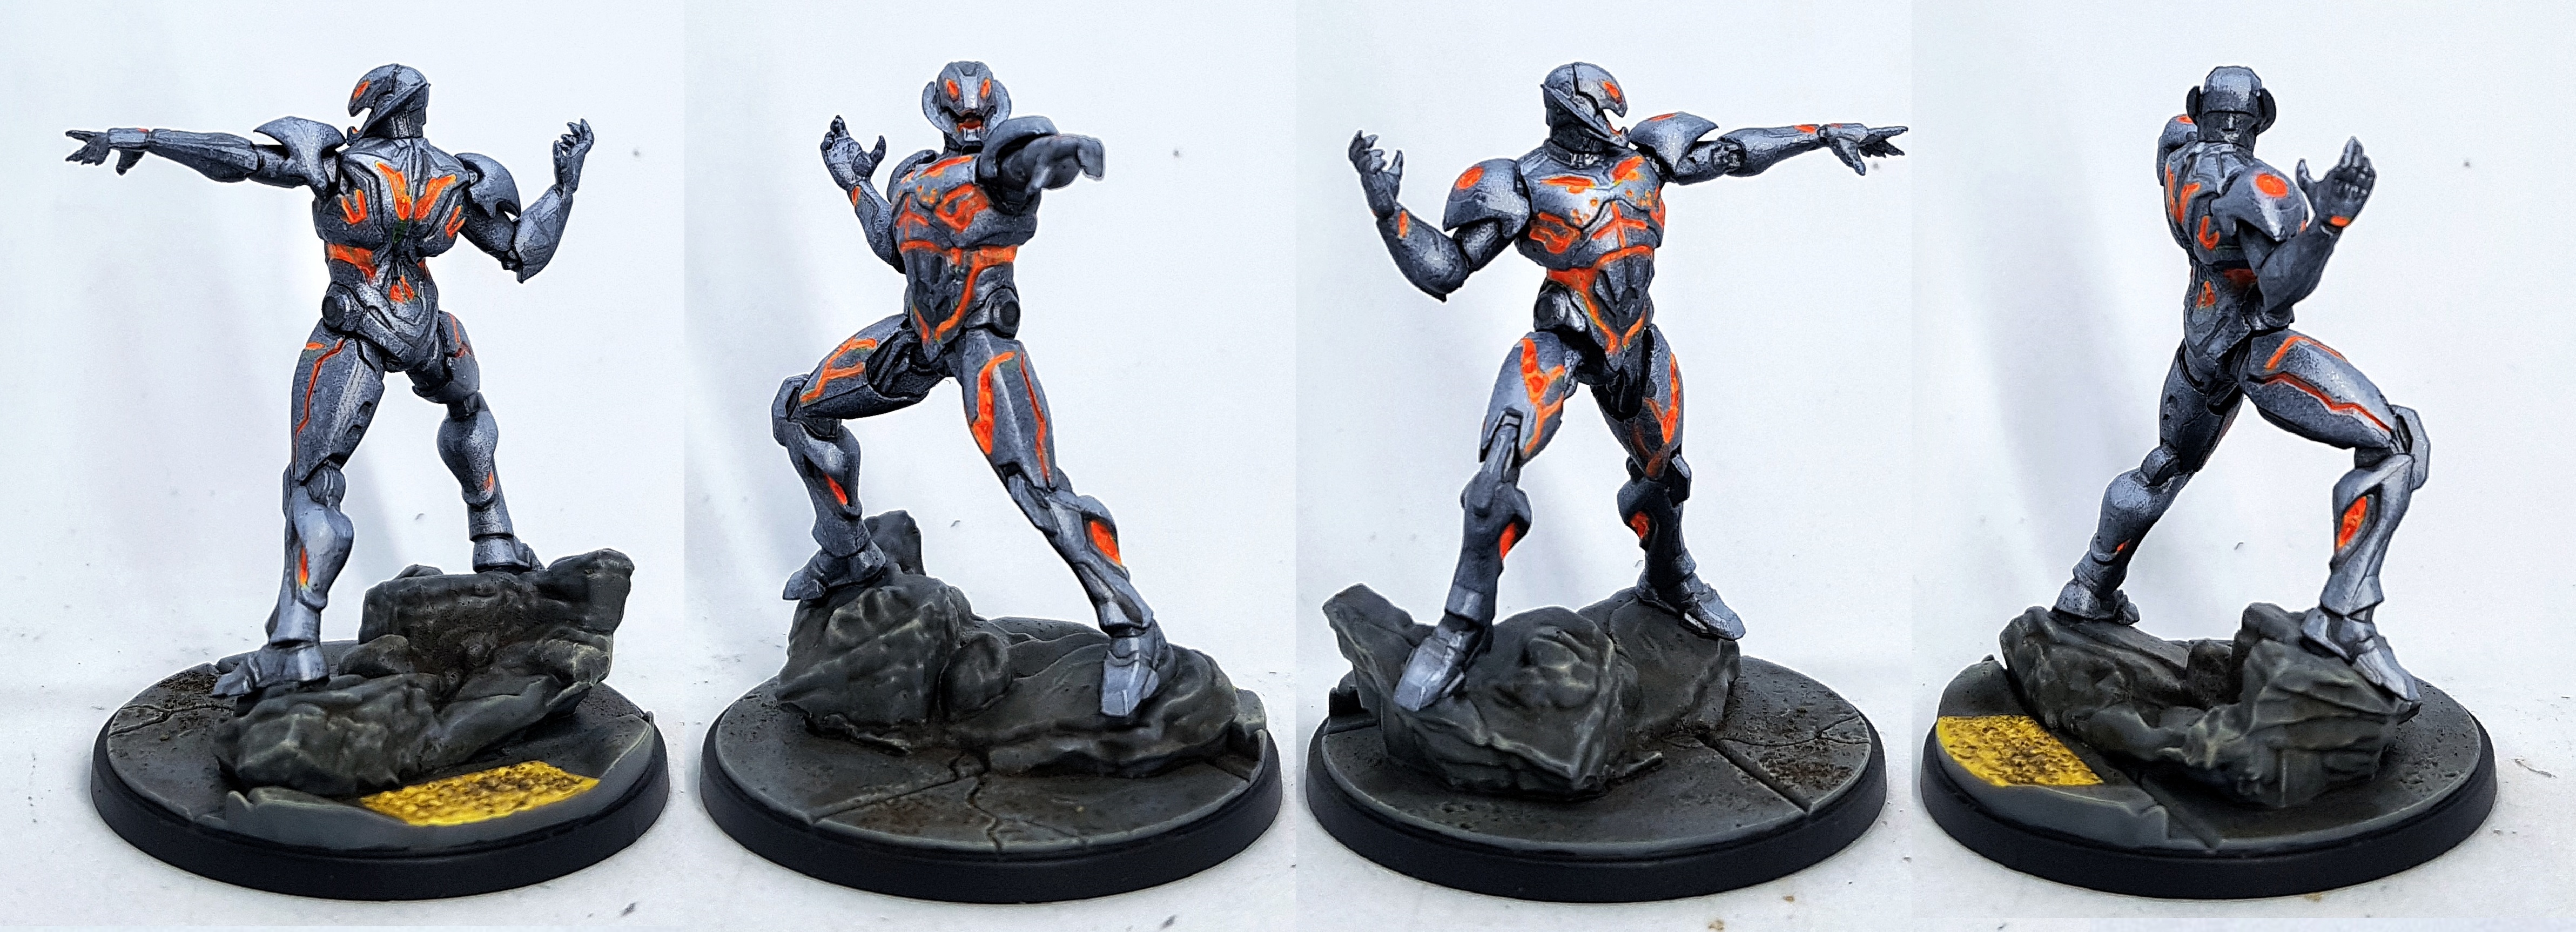 Ultron
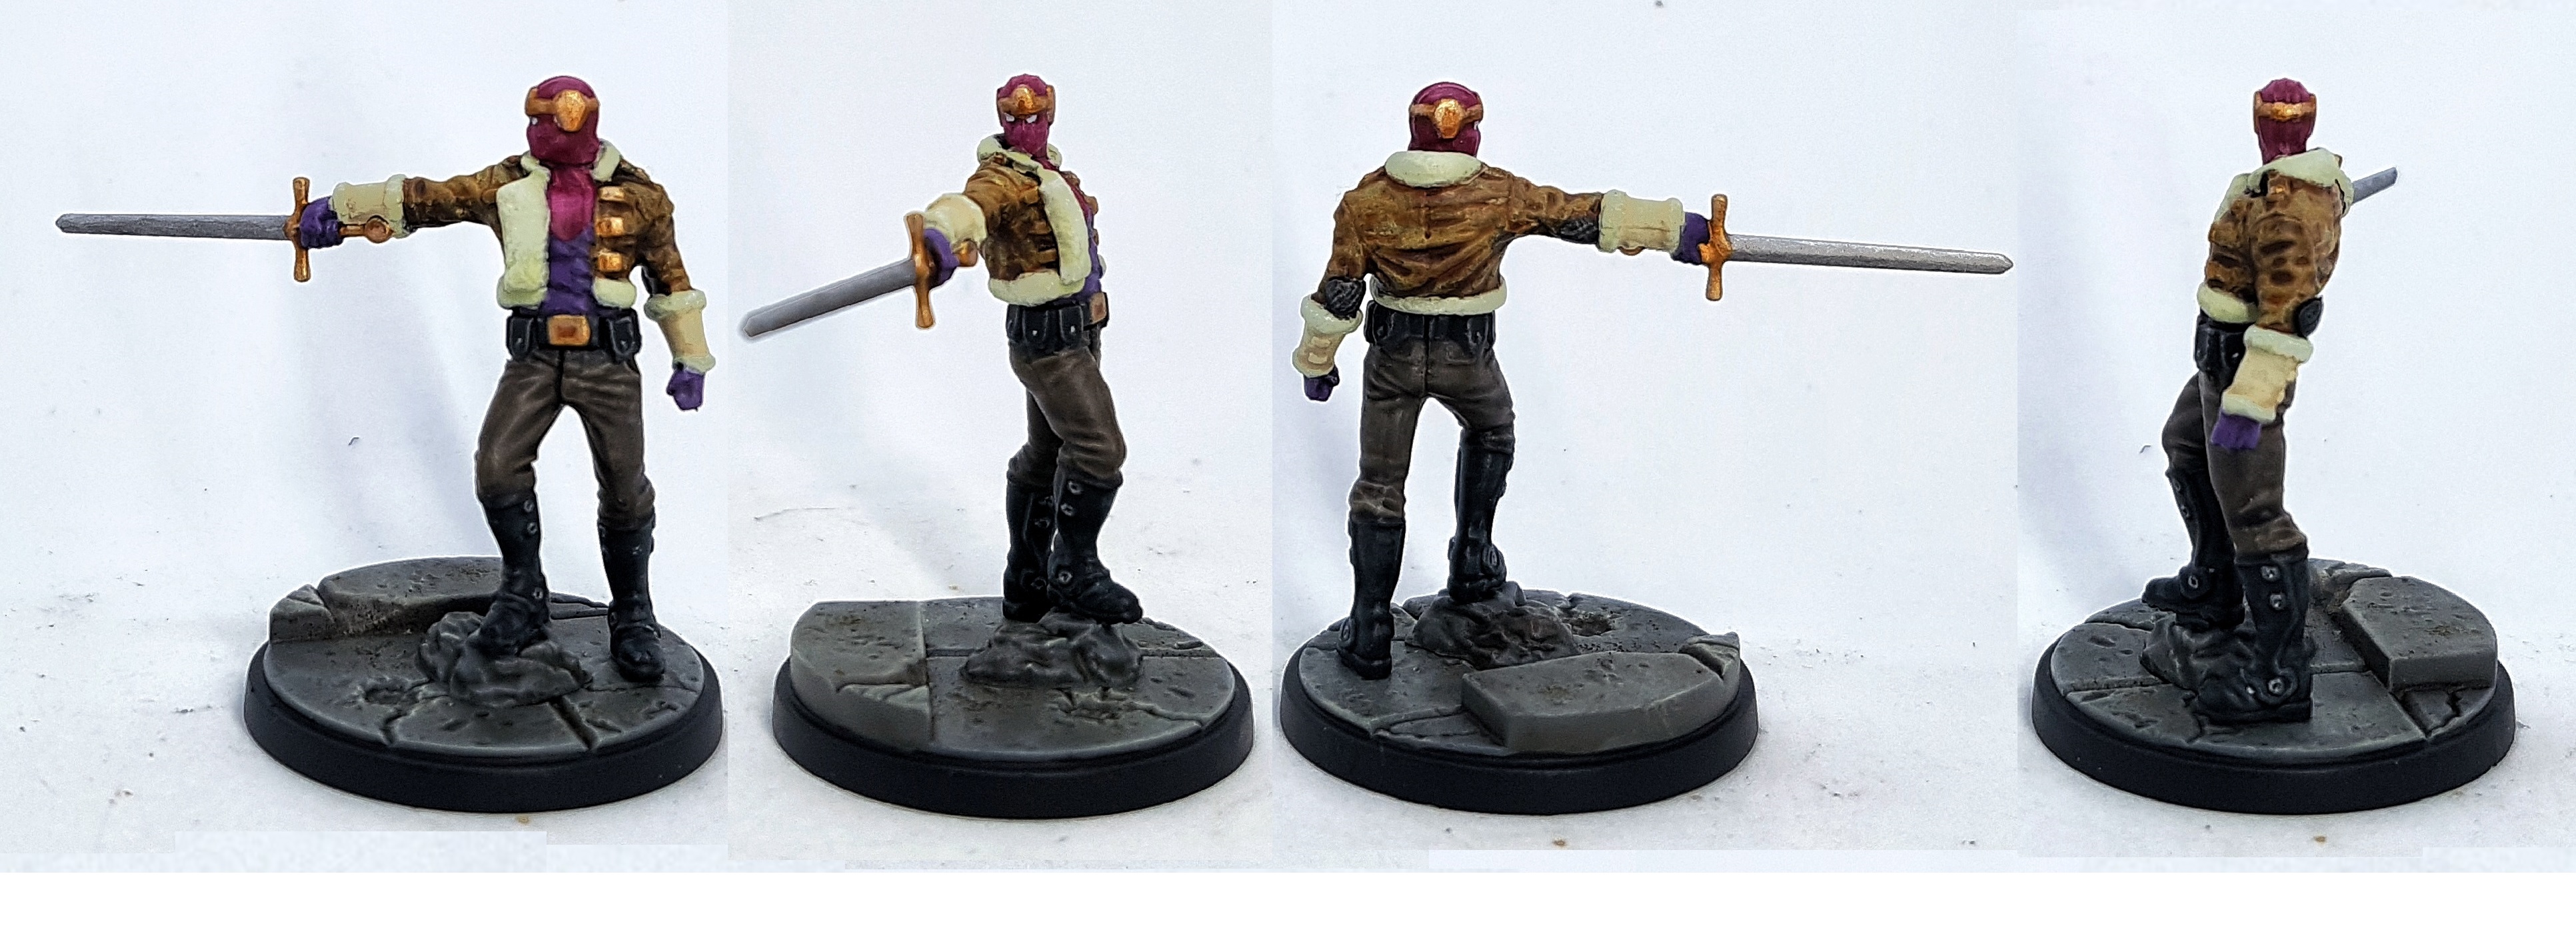 Baron Zemo
Toy Loader from Tescos by Lena Truckies
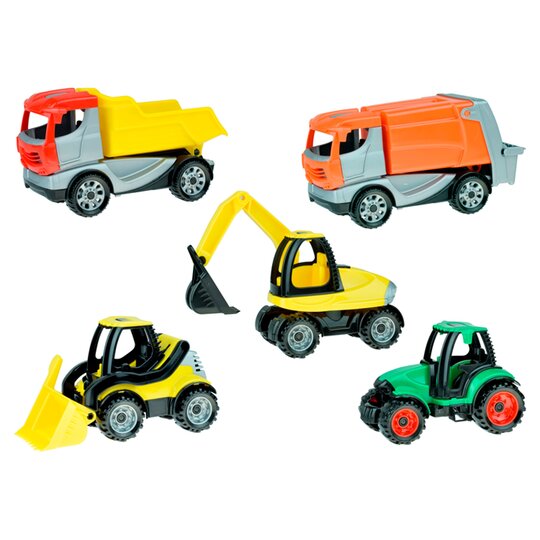
I was in Tescos last night and I always stop by their small crafts and toys section, but they never have anything of interest to me. This week I saw this Loader by Lena Truckies. It’s cheap fragile rubbish that’ll last being played with by a toddler for about five minutes. I don’t want it to be handled. I want it to sit still on the table and perhaps get thrown by The Hulk. It should be more than durable enough for that. I wasn’t sure on the scale, but for £4.75 I thought it was worth a punt. I took some pics in situ. it seems a bit large, what do you think?

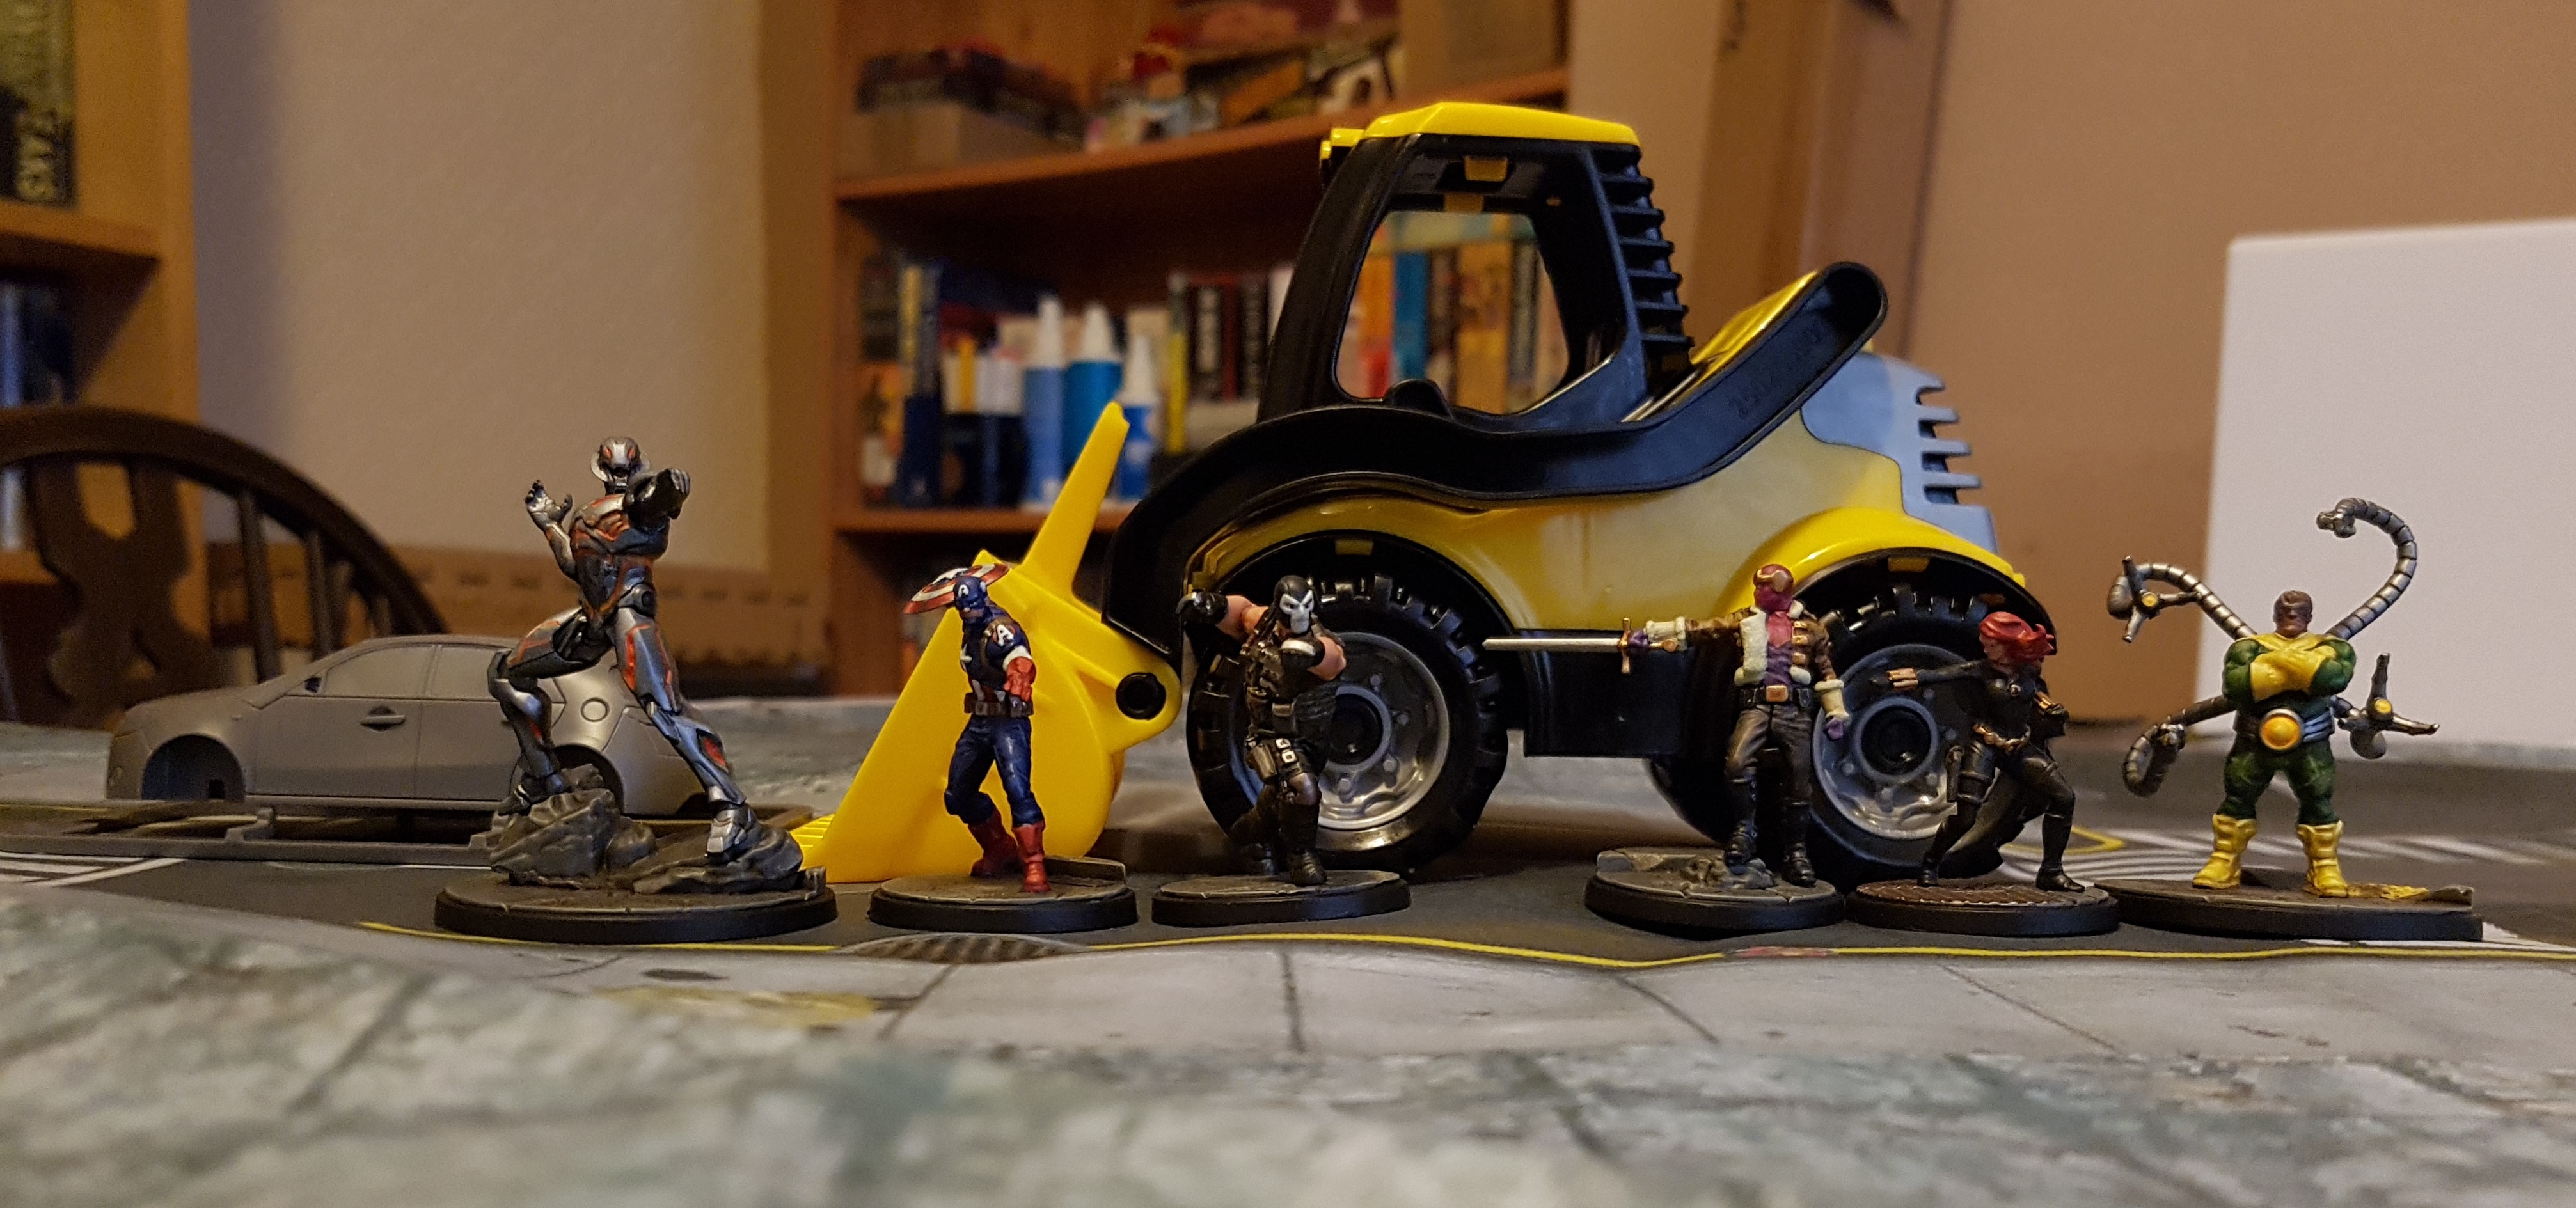
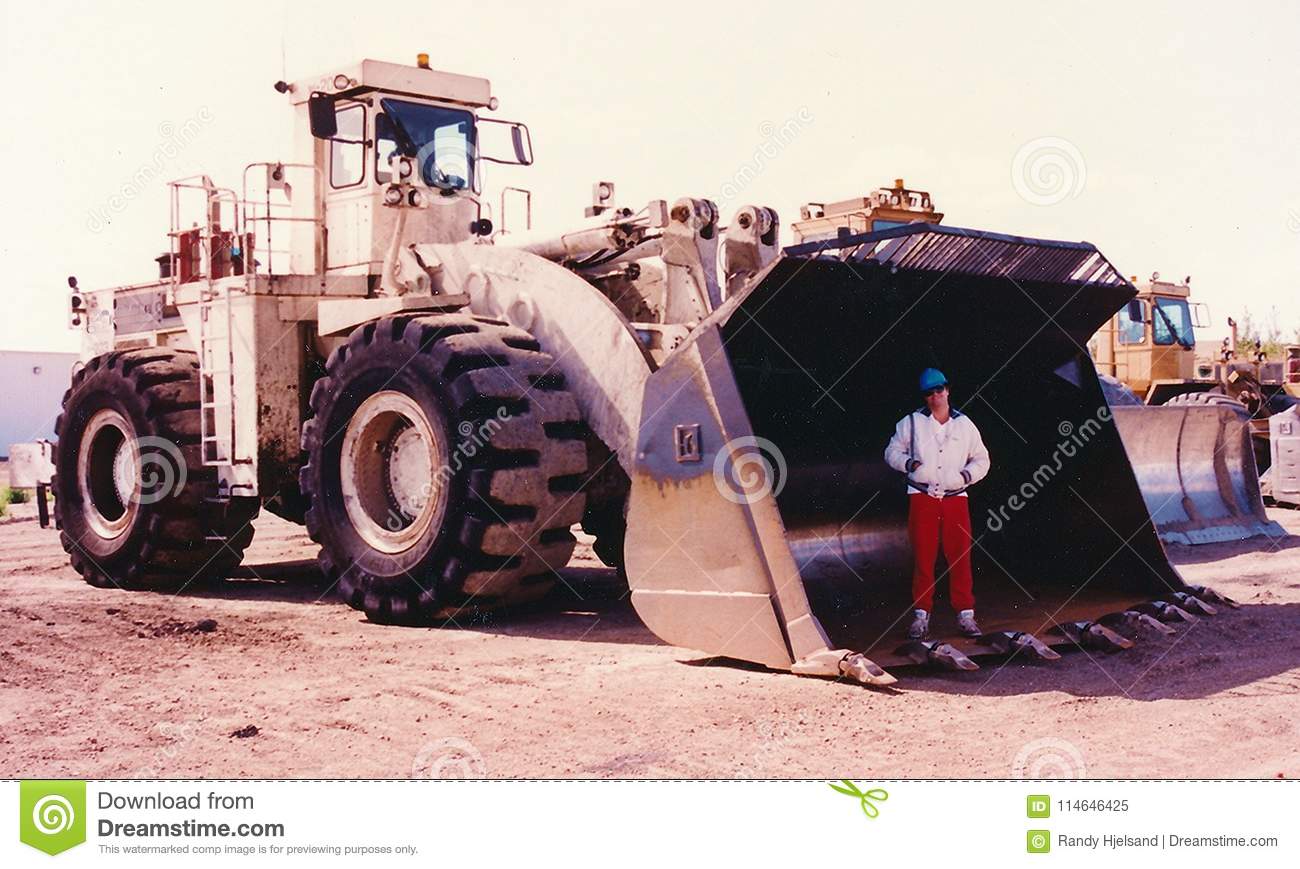
The thing about this type of vehicle is that they come in a variety of sizes (See below), so the only thing that really scales this vehicle is the contents of the cab, particularly the chair. There’s a slot in the chair for a little man to click in to so I’ll need to cover that anyway. I figure if I raise the seat part of the chair it’ll make it look like it’s for a seat for a smaller person, and change the apparent scale of the whole thing. I’ll have to repaint it anyway to make it look less like cheap plastic and that should also help set the scale and tie it in to the figures.
It’s not held together by screws, but plastic pegs. I could drill them out and then re-glue it back together when I’m done, but I fear I’ll just break it. With an airbrush it shouldn’t be too hard to repaint it as it is anyway. Prime white/light grey. All over spray a yellow shade. Zenithal/lateral spray a brighter yellow. Maybe add a little off white to the yellow and do a pure zenithal spray. Then just brush on some near black wherever I fell, and drybrush those edges with a dark grey and call it done. The cab opens up so I could even paint the chair a leathery tone to make it more apparent. Given it’s just terrain I can do a quick and lazy job.
I think if this was John, he’d just “prime” it with matt varnish and then weather it, as we’ve seen before. perhaps I should hunt down his R2D2 video and AT-AT videos (Were those the things he did?)
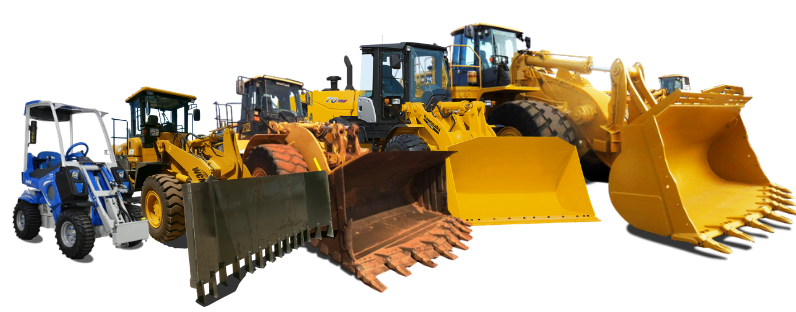
There’s five vehicles in this range. My Tescos also had the tractor in stock last night. I was tempted to grab them both, but decided it was smarter to only gamble £5 instead of £10 when I can always try again later. I suspected the tractor was more obviously out of scale though. If this works I’ll be keeping an eye out for the digger, and curious about how the two trucks look in person.
Has anyone worked with these? Any opinions on them, or on dismantling and reassembling after painting? Would you glue the wheels in place, or leave them free spinning? Would you risk your terrain rolling away?
It’s taken me forever to find the links due to the wonders of the OTT search functionality, but here’s the links to Johns videos on weathering Star Wars toys without doing a full repaint:
I’m not sure if there was more videos of this sort of thing. I can’t find anything on this site.
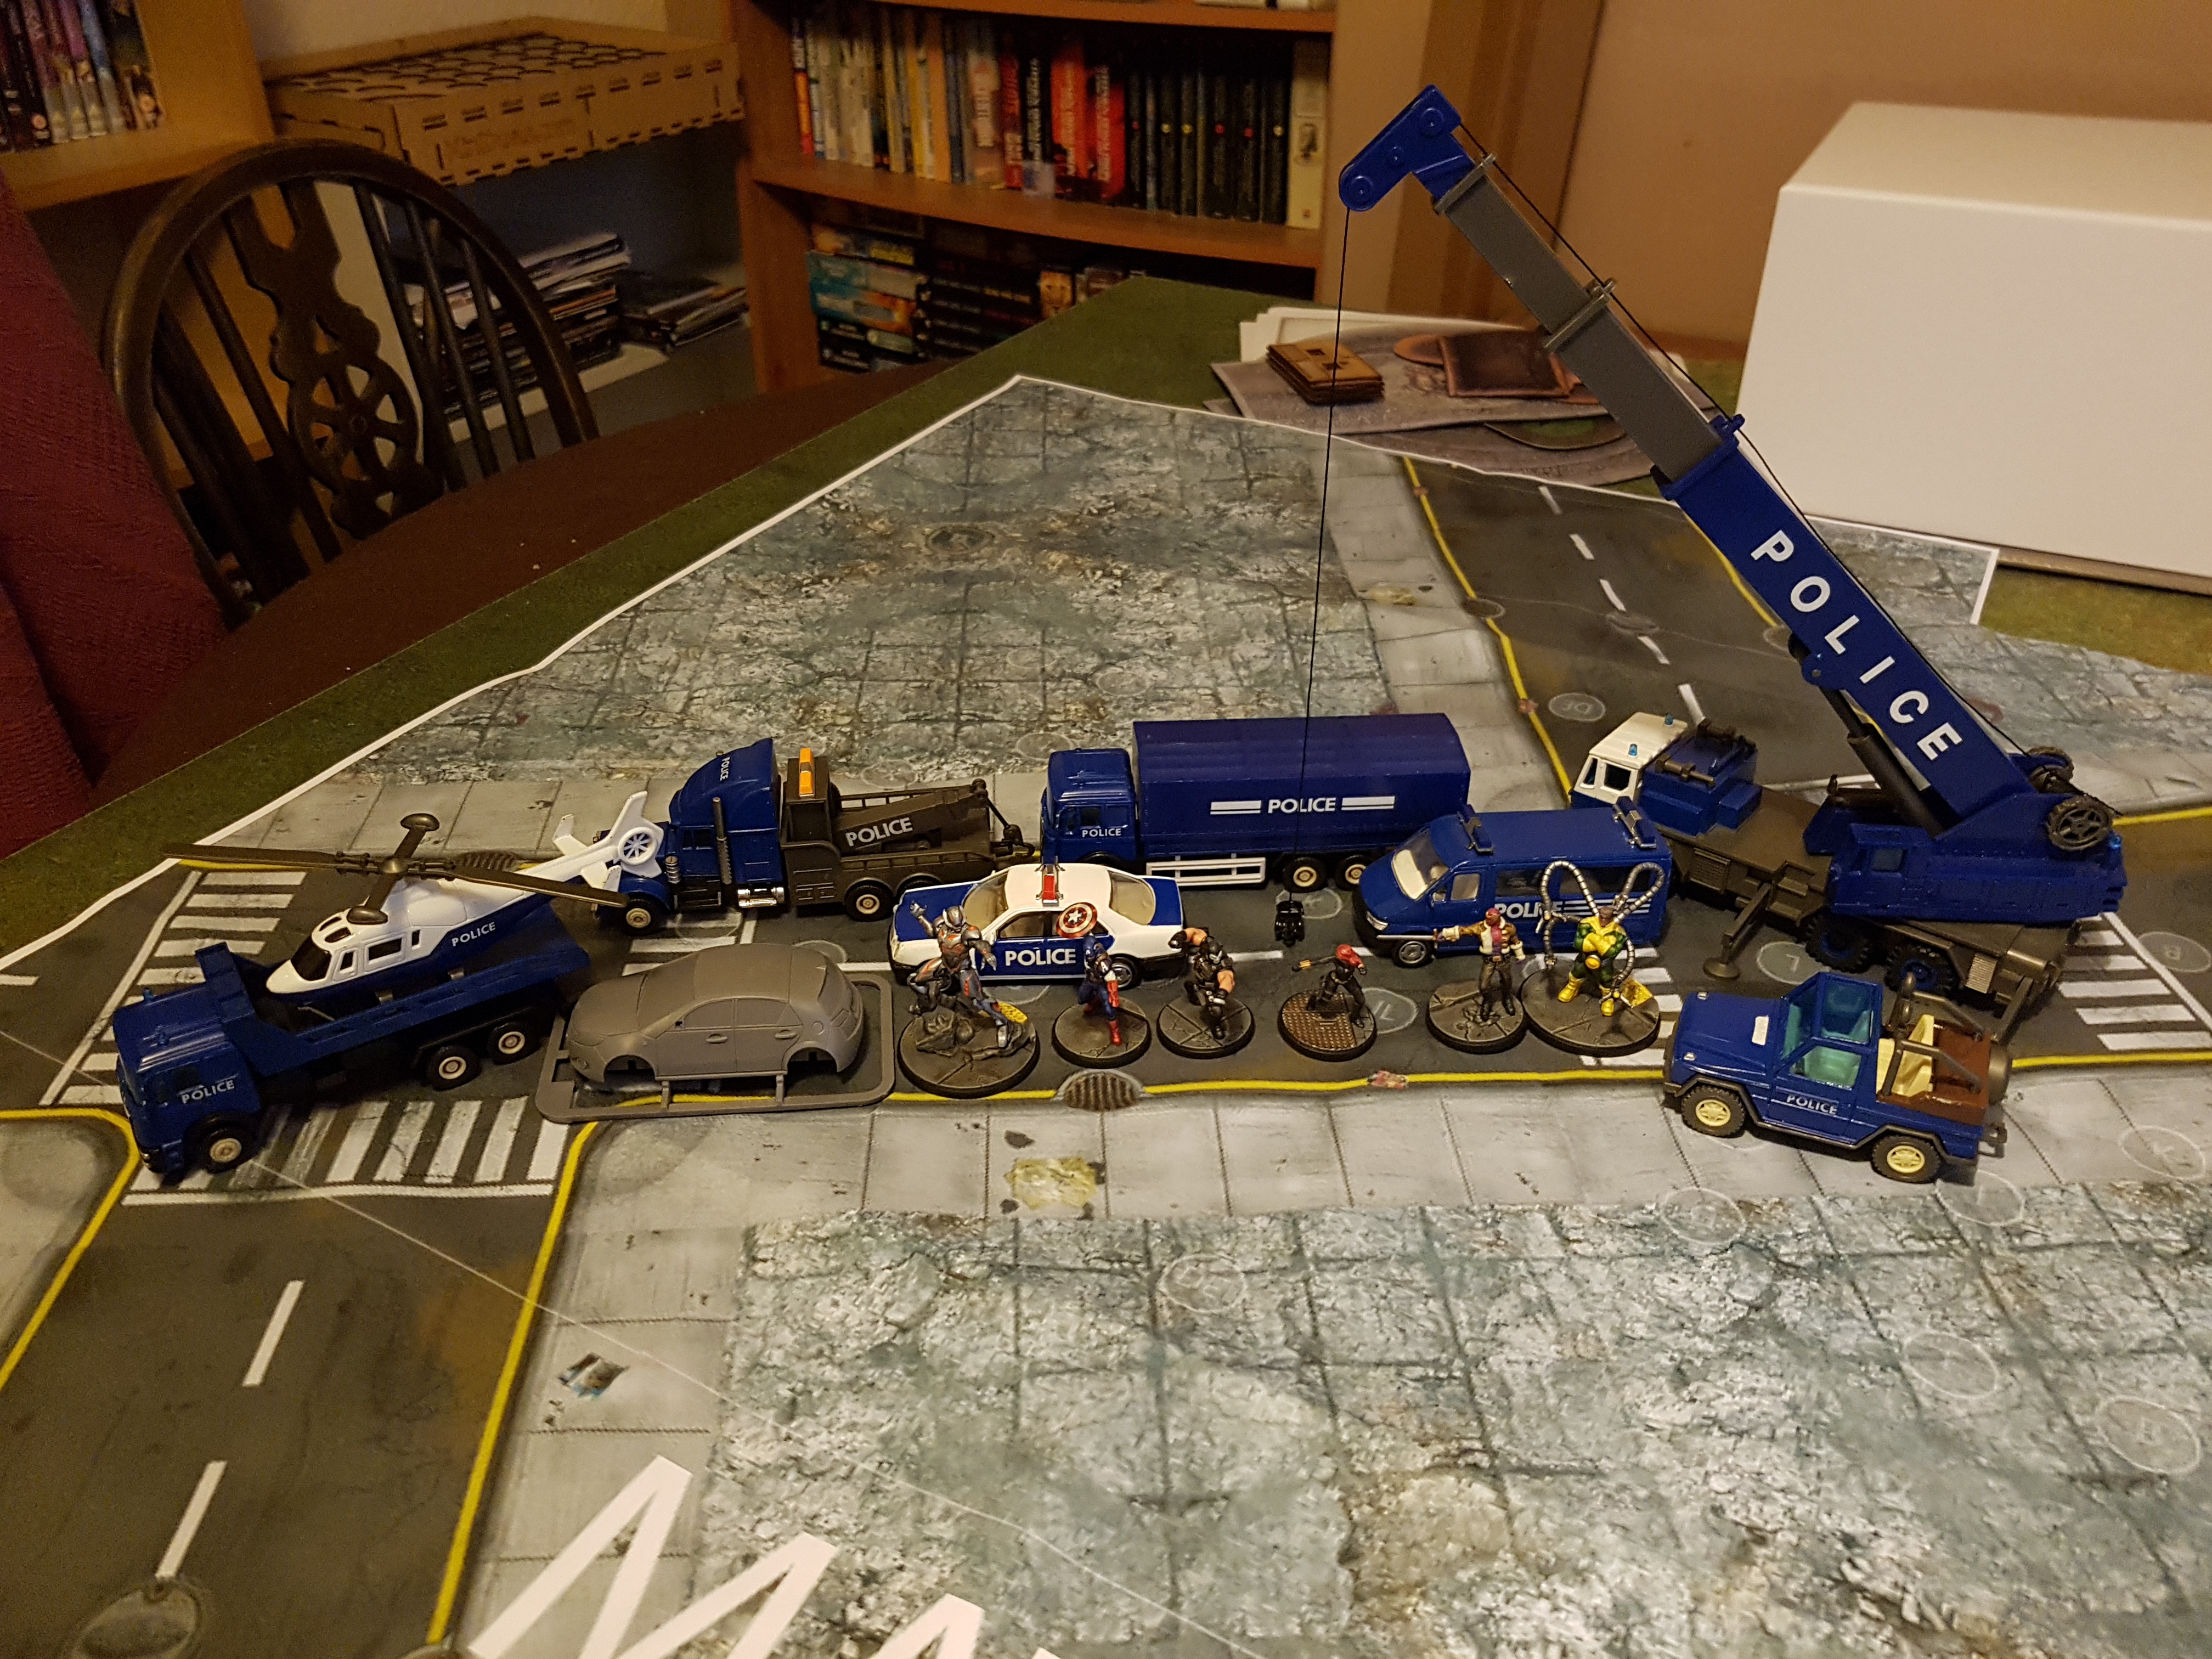
Ebay Police Bundle
I went scouring the toys on eBay a week or so ago. It’s really hard to work out what scale anything is, and toy cars are usually matchbox scale. The other issue is that postage will be the bulk of the price on die cast toy cars. So I had an idea. Don’t search “Car” or “Truck”, search “job lot” or “assorted” or “box” in the toys category. You’ll find boxes of stuff, instead of individual items, making the postage more economical. Things are less likely to be helpfully labelled, meaning you’ll have less competition bidding against you. You might find some great bargains of stuff buried in a large box that you can see one or two pieces on top of a pile you know you want.
Anyway, I found one auction of items that looked mostly around the right scale, but was hard to say for certain. I took a gamble on this pack of police vehicles for £11 after postage was included and I won. The postman just delivered them 15 minutes ago. They’re definitely more at the dainty end of things than the Lena Loader below, but I think they’ll turn out to mostly be in scale with standard issue human sizes, like Black Widow. I’ll find out tonight. 8 vehicles for £11 is cracking value. If it turns out they’re all no good I happen to know a couple of kids who’ll be grateful for this lot.
Meanwhile, here’s a pic with some 15 cm/ 6″ rulers, and a biro and keyboard for scale. The helicopter is probably too dainty, unless it’s a single seater perhaps. but the rest are probably about right. What do you think?
I’ll update this entry tonight or tomorrow with pics of the cars with game pieces near them.
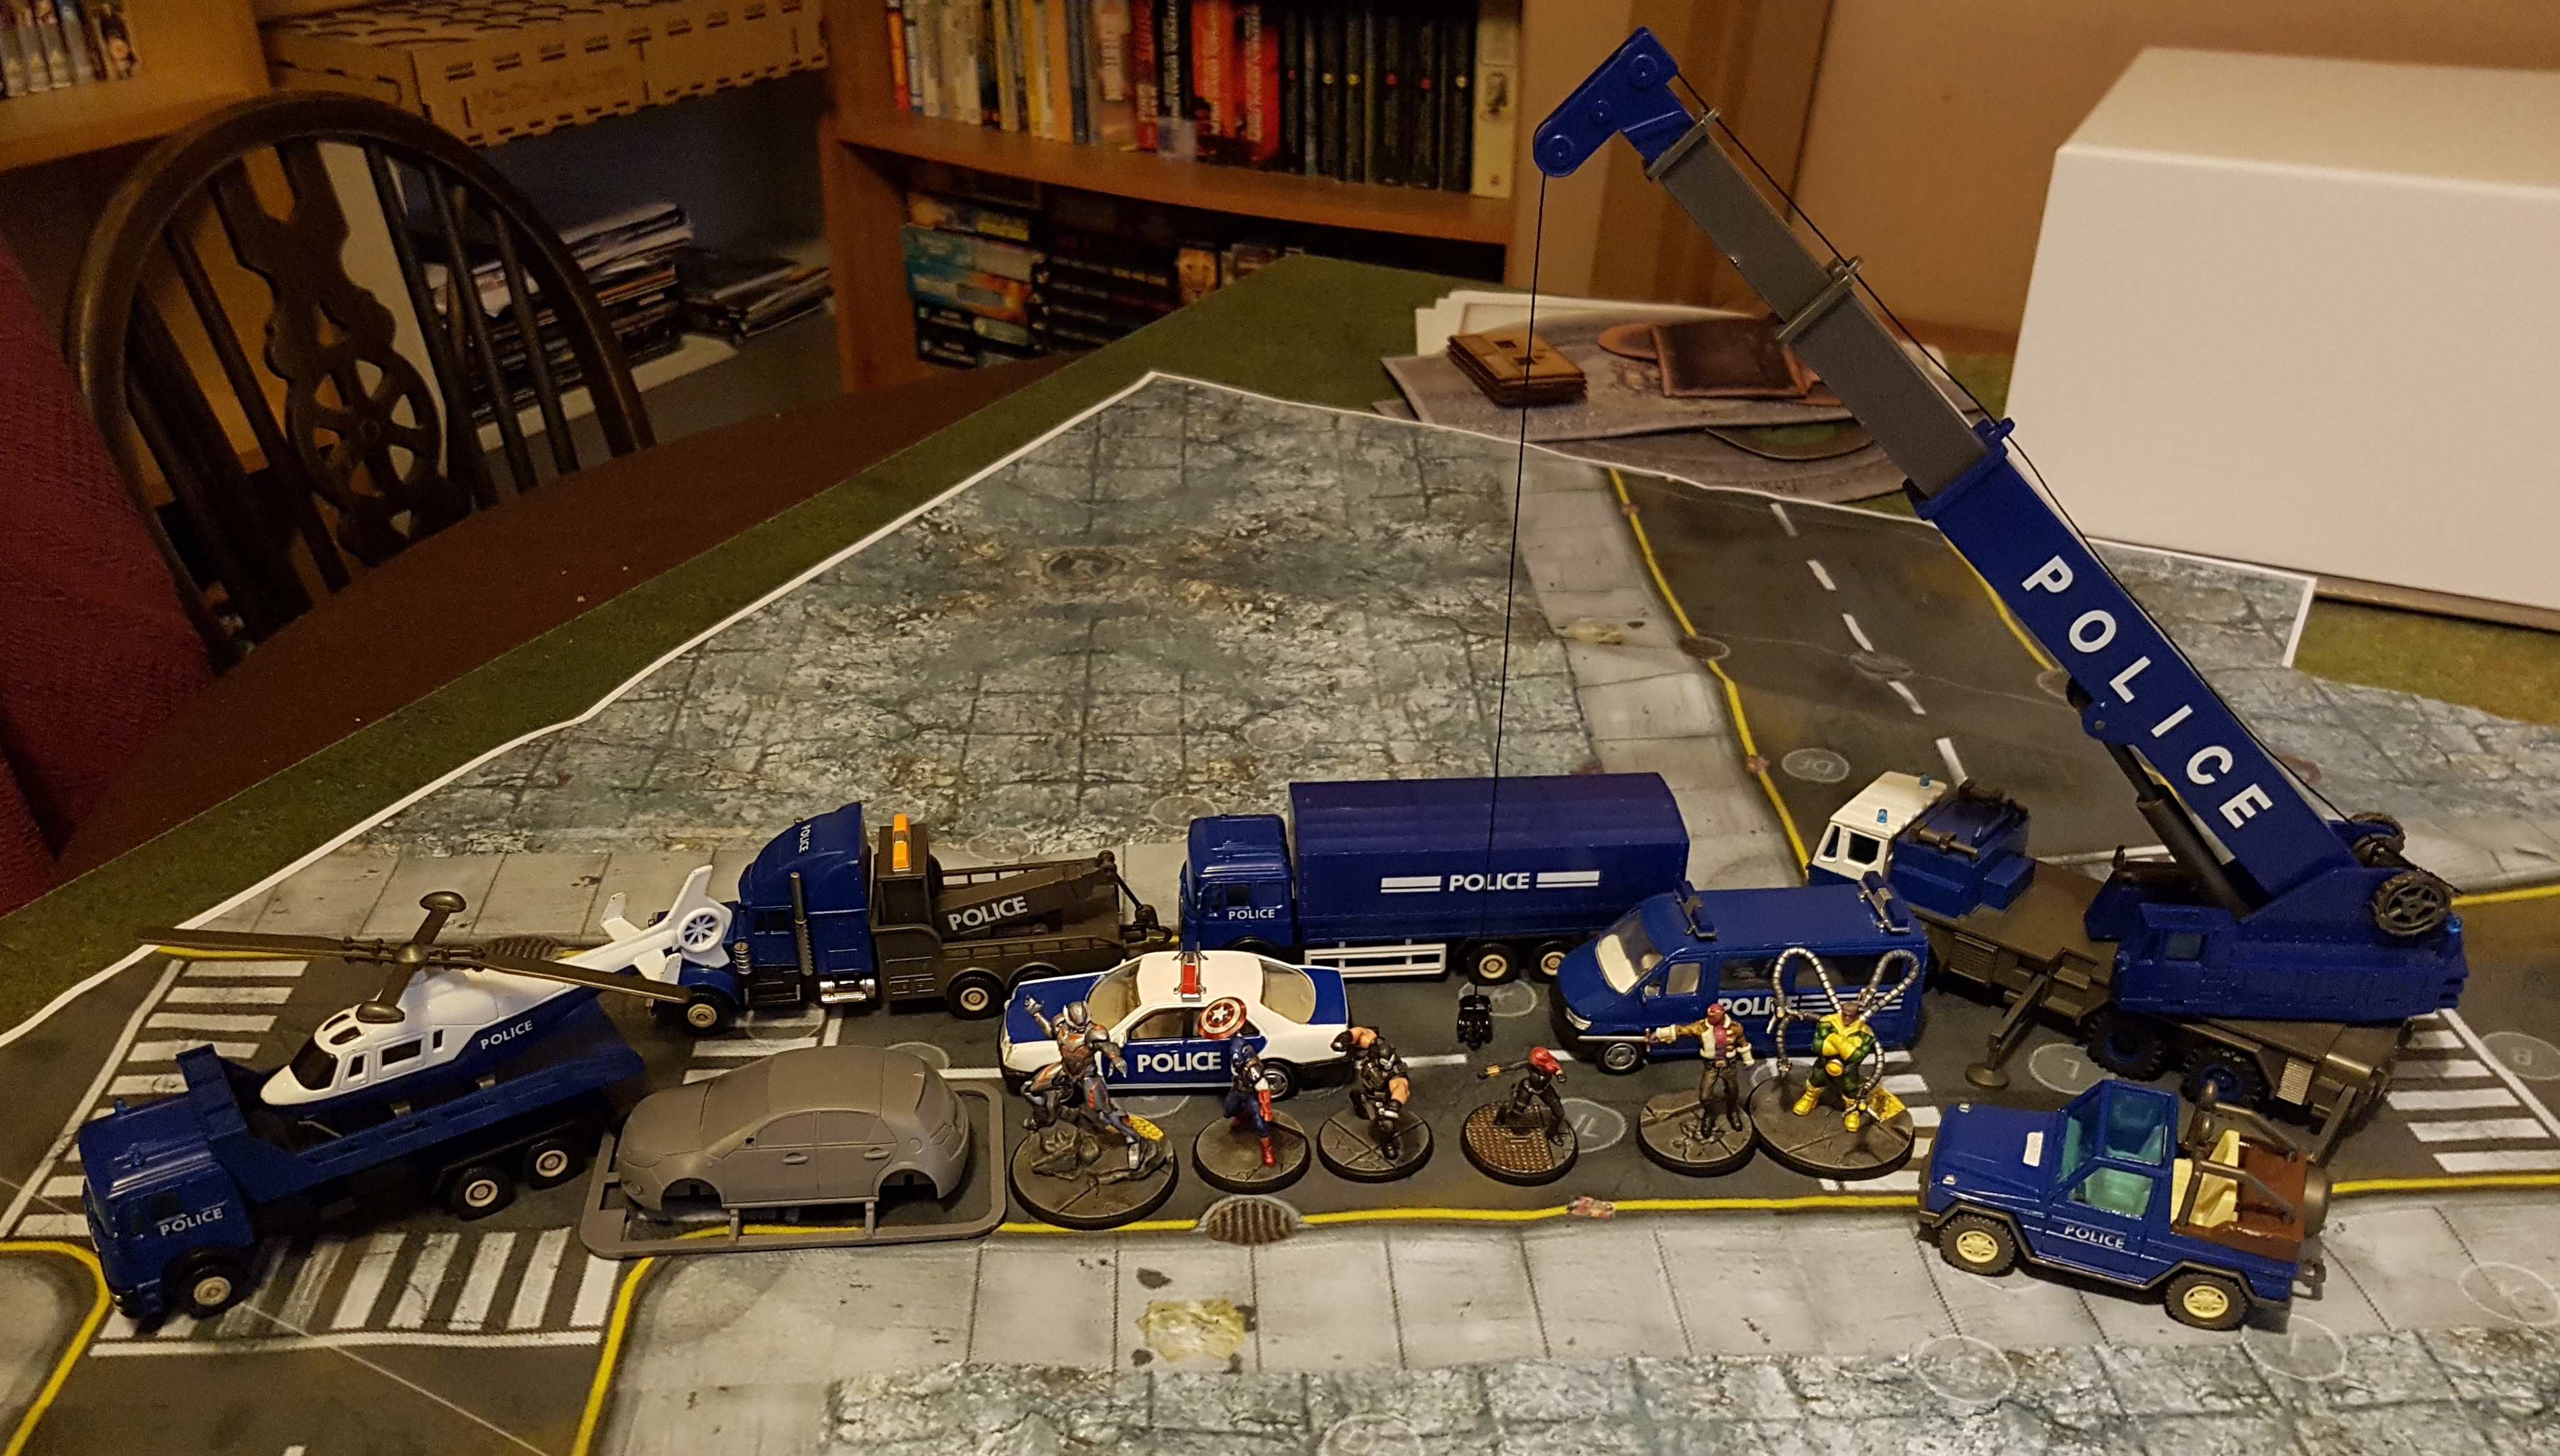
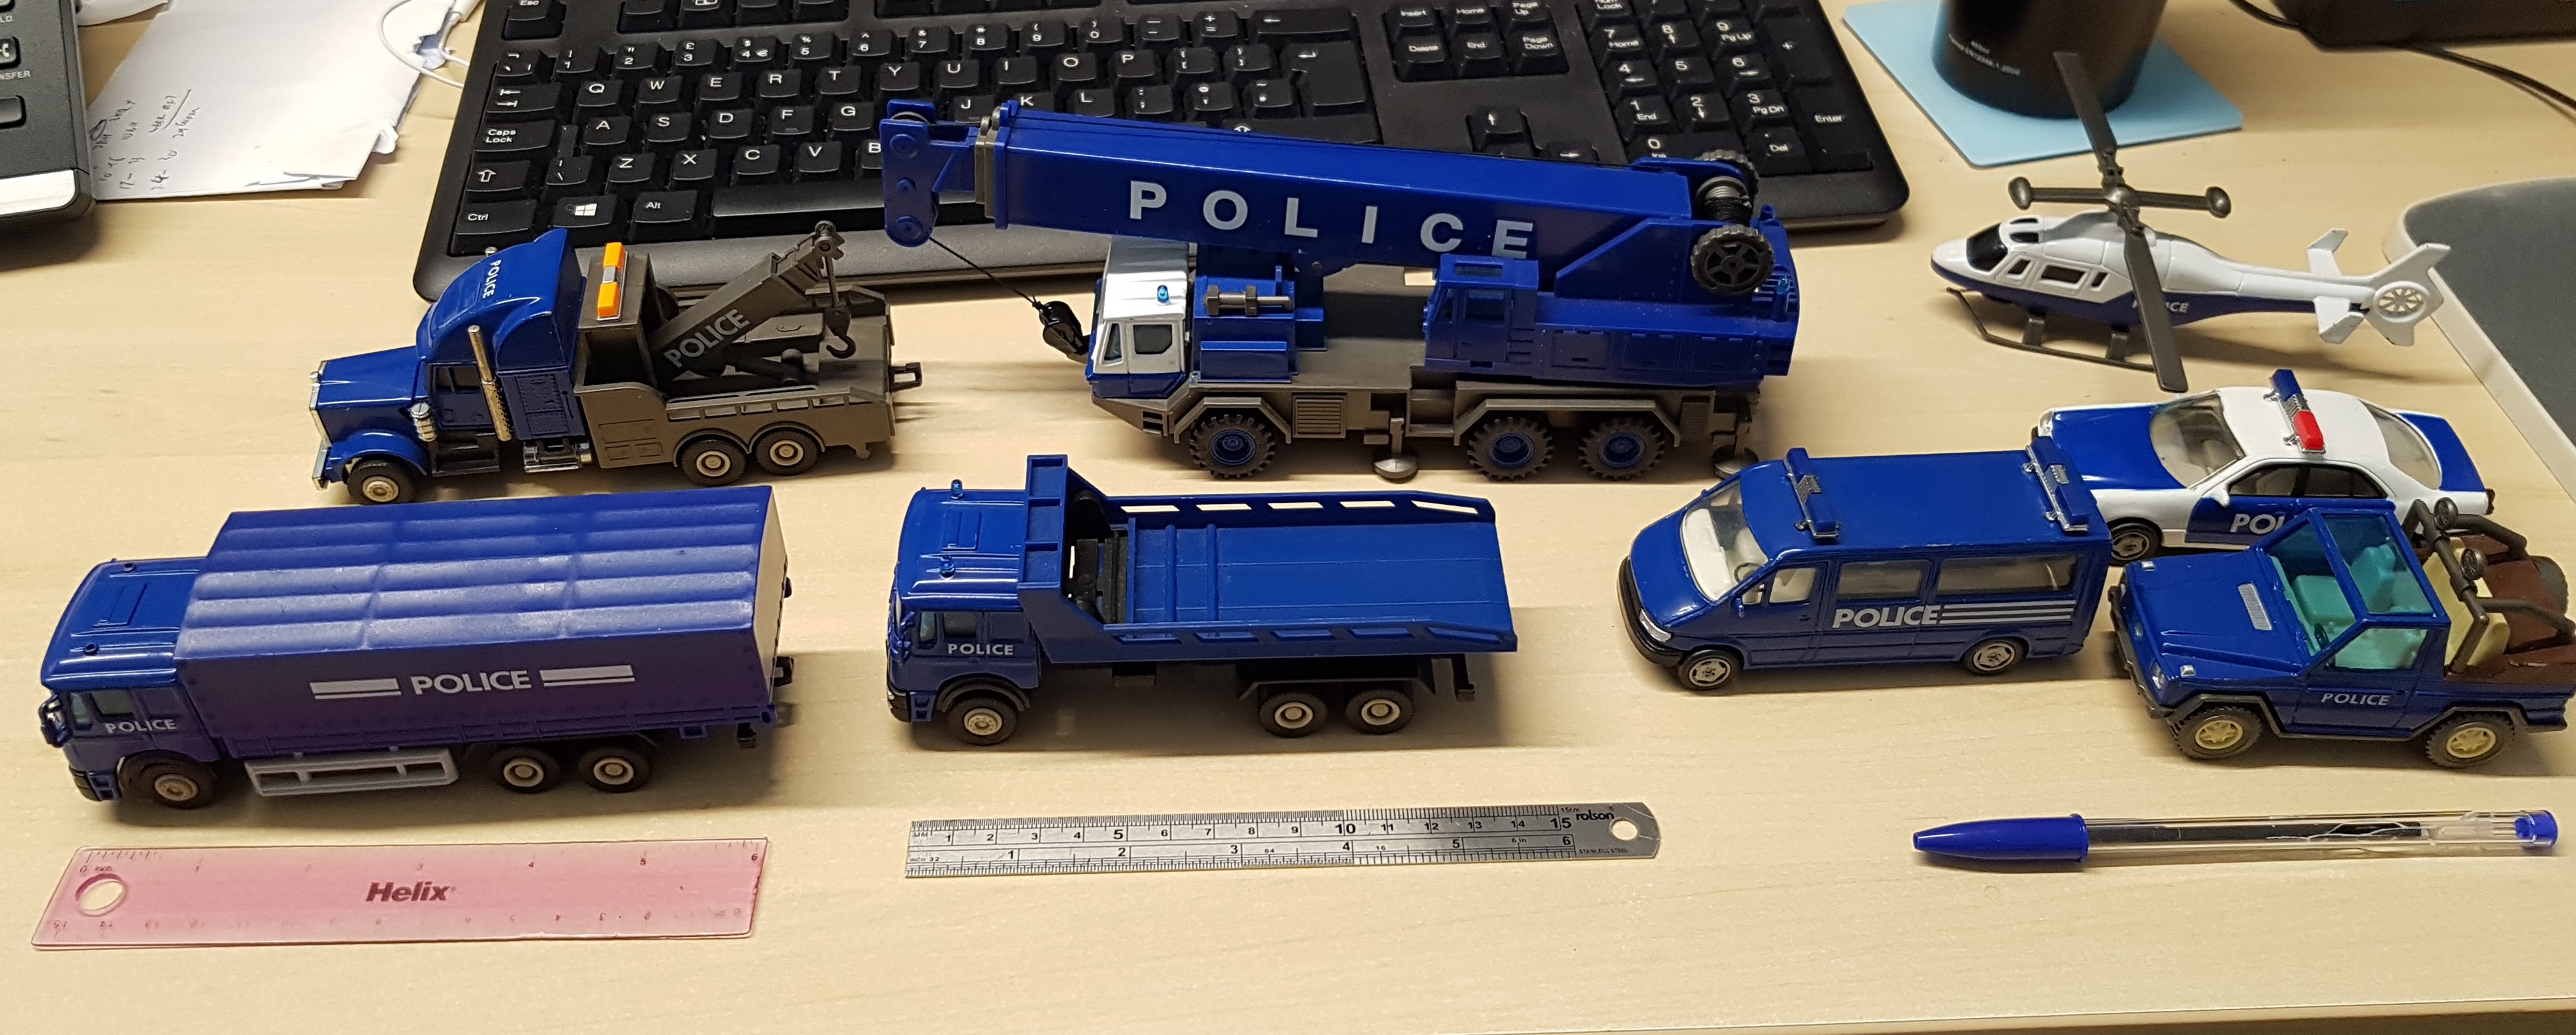 Everything appears to be fully articulated too. The cars are size 2, and the trucks should be size 3. I imagine that crane can be elongated and have it's supports out and call it a size 4 piece.
I’ve had time to get the cop cars on a table near the core set car and my painted characters. These vehicles do look a little dainty, but I think they’re close enough and cool enough that no one will care. That helicopter is definitely too small though. Opinions welcome.
Papercraft Terrain
Terrain is expensive, and it takes up time to build and paint it that we’d often rather invest in painting toy soldiers or actually playing games. As such I’ve dabbled in papercraft terrain before, and I think MCP is the perfect game to use it. Here’s a few pieces I had to hand.
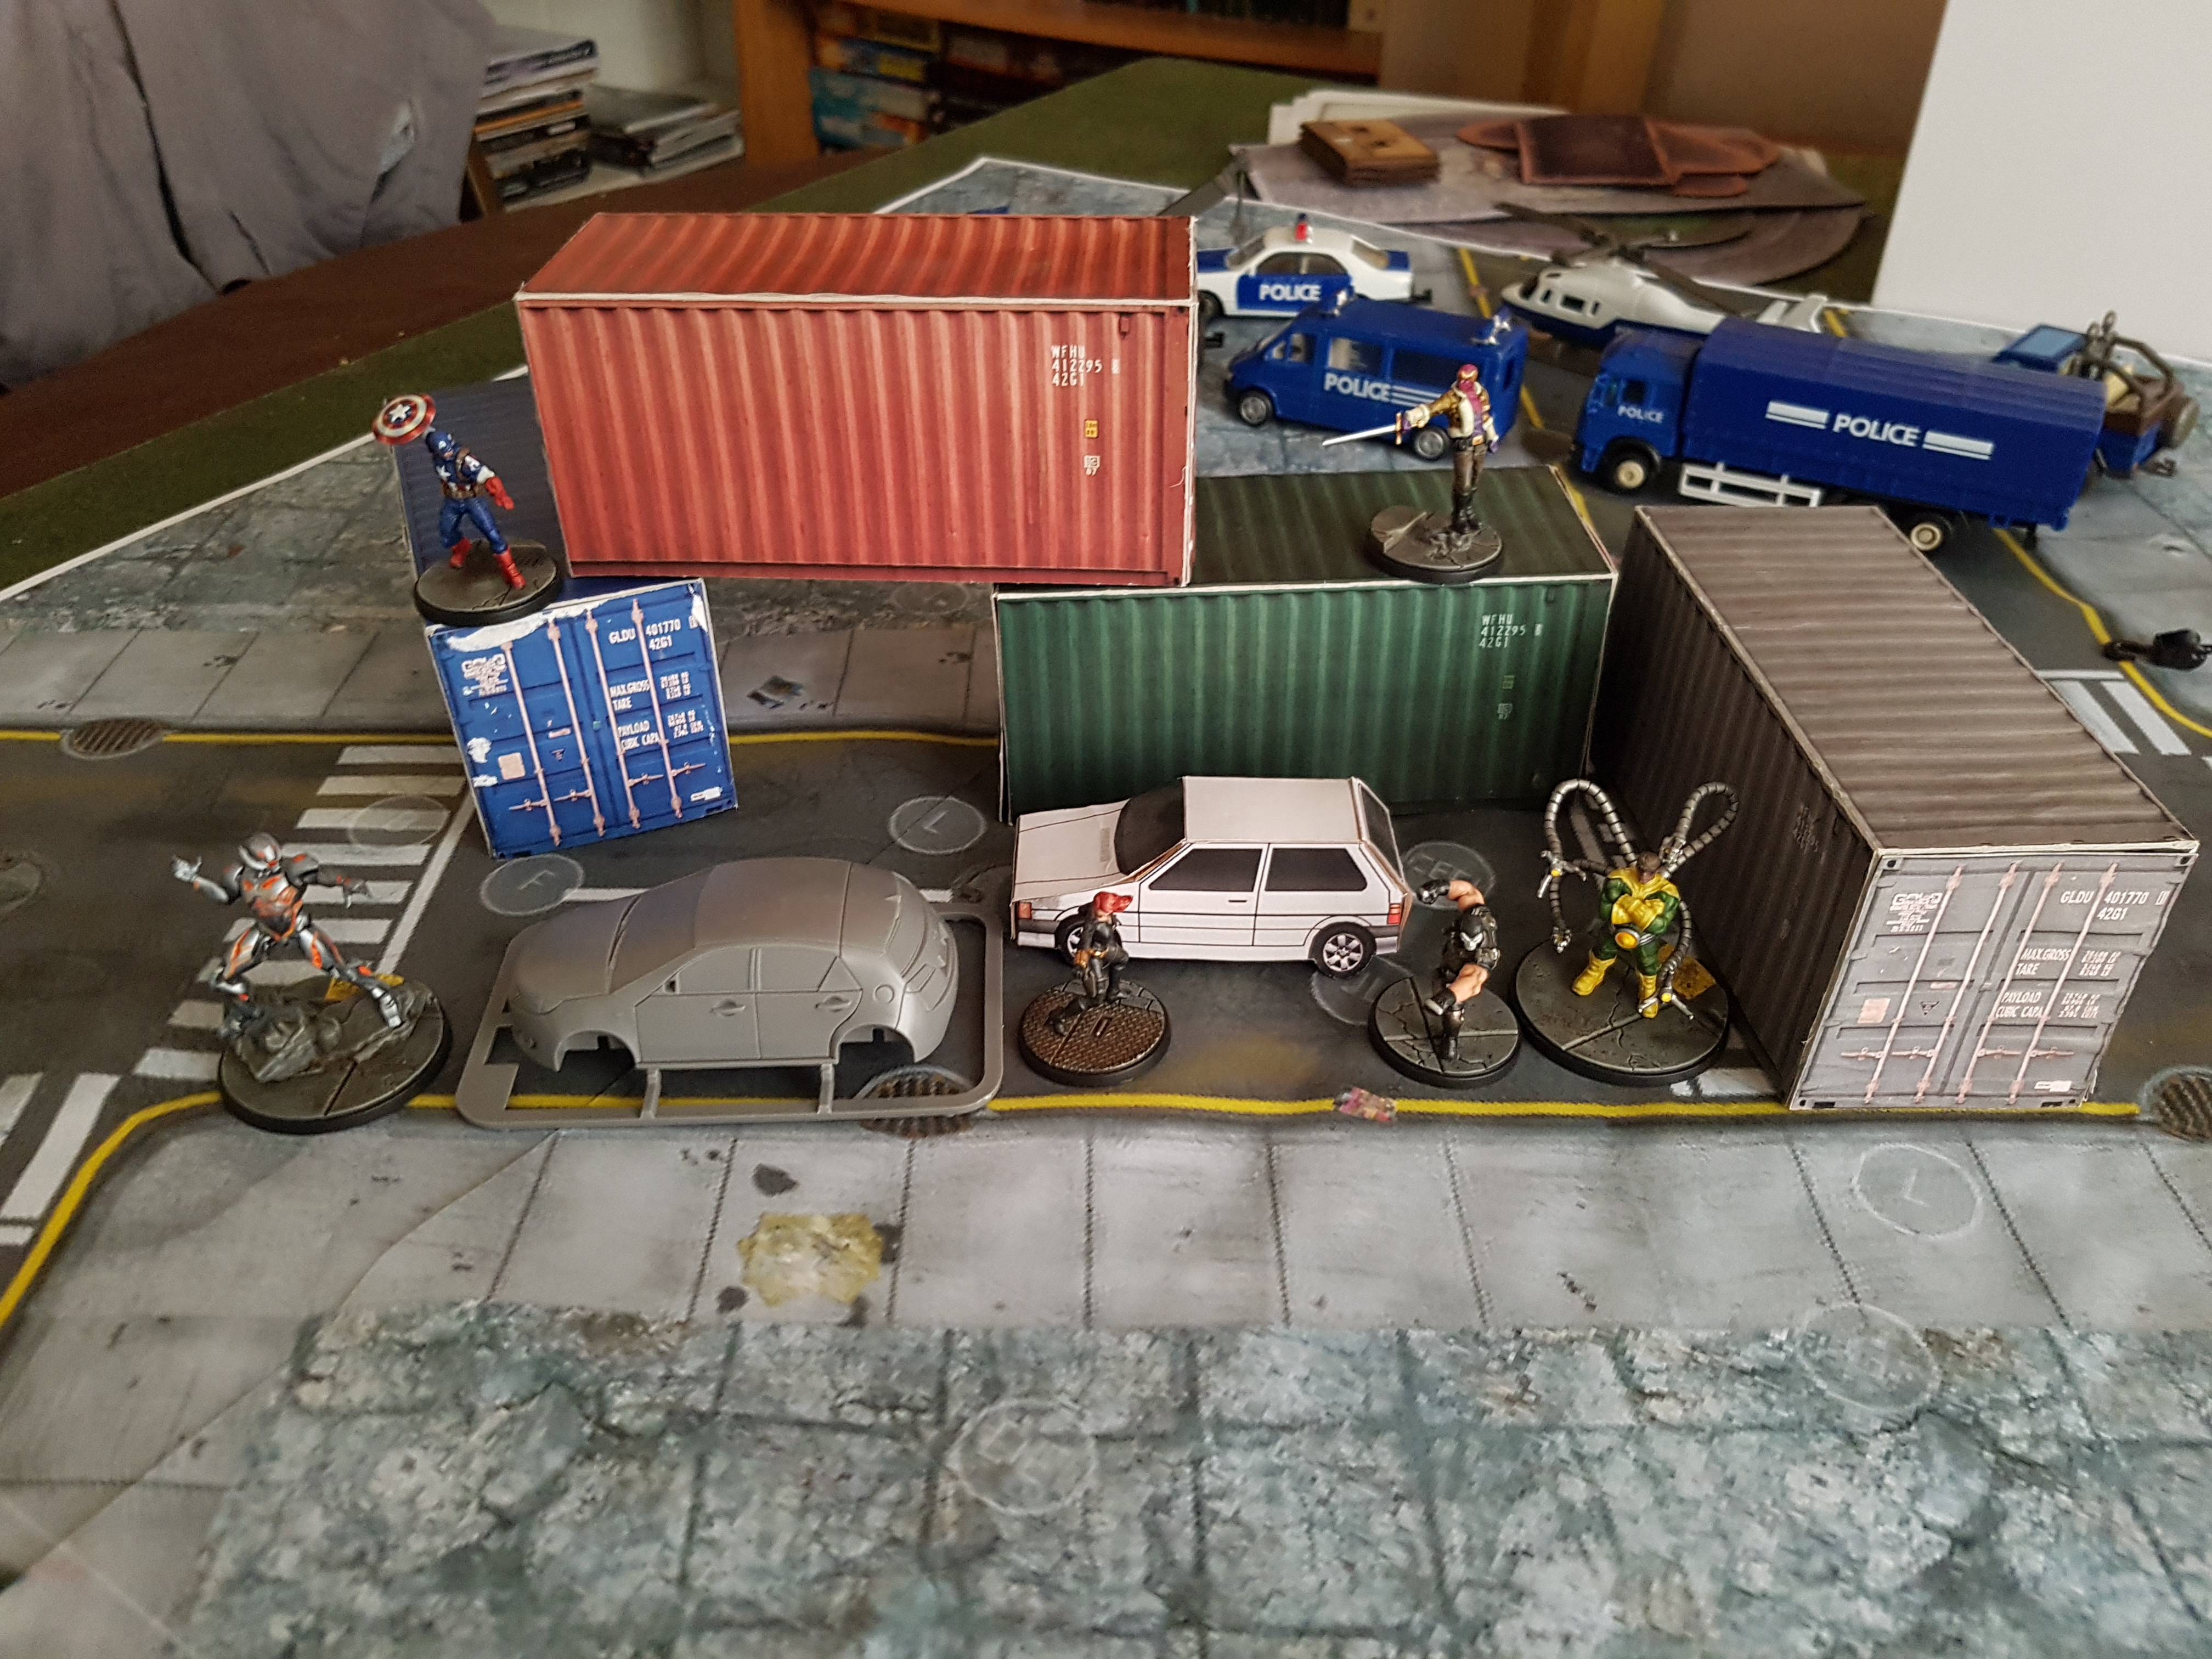 A papercraft container and car with some models and plastic terrain for scale
If you google “papercraft [insert item here]” you’ll find plans for most things in varying degrees of complexity. I’ve found lots of files to experiment with. The main issue is scale, but you can tweak that before printing to some extent, depending on what your printer can handle. You never really know for sure what you’re getting until it’s printed out.
If you have image files and you want to control the exact size of what prints out Gerry mentioned a great program during a Gerry Can on flags a while back: Ifranview. It lets you tell the printer the exact dimensions you want a file to come out. It doesn’t work with PDFs, but screen caps and the Snipping Tool can help with that.
They’re very simple to make. Just print the files using a convenient printer, often located as a place of work. Glue the paper to the inside of a pizza or cereal box using a pritt stick, or a glue you trust not to dampen and warp the paper, or affect it’s finish. Let it dry plenty before cutting it out. Allow larger tabs than the file suggests. You can always trim off later, but you can’t grow them. Score along the outside of the fold. Score along the inside too if you can, but be careful not to score too deeply. You don’t want it coming off. Fold and dry fit the whole thing, before gluing it together with superglue. Pritt stick isn’t really strong enough and PVA takes too long to dry.
Once it’s assembled and dried, these card backed printed shapes are fairly sturdy. The ones in this image are many years old and happily take being thrown in a box or having plastic models climb all over them.
With access to a printer, a few pizzas in your belly, and an hour or twos work you can fill most of a table with papercraft terrain for minimal cost or effort. Google and see what else you can find. Share links for good stuff below please. I’m on the lookout for a good wheelie bin or an appropriate street bin. They’d make good size 1 terrain, and they’re basically boxes in shape so they’ll be easy to build, and sturdy too.
Oh, and see that mat in that image, and with the police cars below? That’s printed on paper. I have access to an A1 CAD printer at work and Ifranview let me print in 3 foot strips. I found an image of an MCP mat online and was able to print it in two strips. It’s not exactly high res, but it’s good enough for a test of concept, and it’ll be fine once it’s covered in terrain. Maybe you know someone who has access to something similar? If you have a quality image for me to print I’d be grateful for a copy. Thanks.
My image was just grabbed from the Muse on Minis web store. I’ll see about doing something less pirate-y for my next mat. Does anyone know if AI art generators can be persuaded to make something suitable and at a high enough resolution? Surely a challenge for Warren Meets Mat Meets AI Art.


![StarCraft Tabletop Miniatures Game Pre-Orders Live Now [Updated]](https://images.beastsofwar.com/2026/03/starcraft-tmg-news-cover-600-338.jpg)


