
Marvel Crisis Protocol by Lawnor
Full Day 2 (After 9 evenings): Basing
I forgot to take step by step pics here. Sorry. I got caught up in it all. I’ll just have to explain and hope it makes sense.
Drains and metal hatches:
Base: P3 Pig Iron
Wash the drains with GW Agrax Earthshade
Wash the hatches Italeri Wash Oiled Earth 4953AP. This doesn’t stain anywhere near as much as I hoped
Wash the hatches again with Oiled Earth, but add small patches of GW Agrax Earthshade and GW Athonian Camoshade to it while it’s still wet.
Tram Tracks
Base: P3 Pig Iron
Wash: GW Nuln Oil
Pavement Bumps
Undercoat the bumpy section white
Base the bumpy sections P3 Sulphuric Yellow (I googled “NYC bumpy yellow blind crossing pavement” or some such). Paint too much and reclaim back down to a square in the next step
Pavement
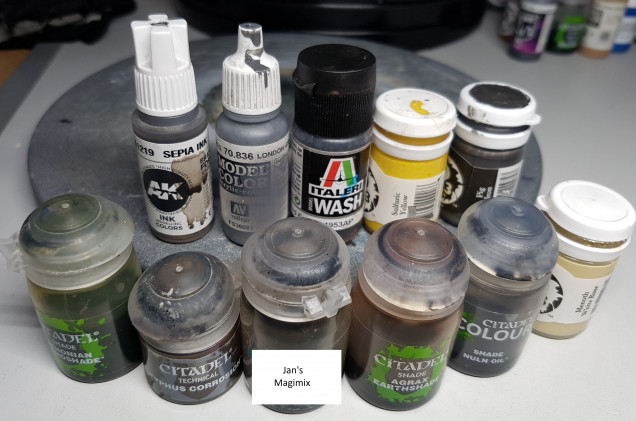
Base the stone: VMC 70.836 London Grey
Base the curbs / raised paving with London grey mixed with enough AK 11219 Sepia Ink to give it a browner feel (It took way more than I expected. This is much darker than GW Seraphim Sepia)
Everything
Wash all the paving, tram tracks, and the drains with Jan’s Magimix (6-8 Parts GW Nuln Oil, 6-8 Parts GW Agrax Earthshade, 5-6 Parts Lahmium Medium, 2 parts Athonian Camoshade. Thanks, Januinevision)
Drybrush some London Grey over the yellow bumps to provide realistic looking wear. There’s no way that paint would last on the corners of the bumps.
Drybrush all the stone with P3 Menoth White Base and a nice puffy makeup brush
Wet the drains, and a path out of them like it’s backed up. Apply some GW Typhus Corrosion to this and let it naturally soak out in to the water. Put it in thick, but let it move itself. You want texture, but you want it to look like naturally backed up sewage.
Paint the edges of the bases black.
I then remembered I hadn’t painted anyone’s eyes yet!
Base: P3 Menoth White Highlight
Pupil: P3 Thamar Black (Zemo doesn’t get a pupil)
With everyone ready for varnishing, it’s time for a technique I got from experimenting after that Gerry Can on painting stone and Fogou beehive shaped buildings. Prep your airbrush in advance and wear a dust mask before opening any pots until after the first coat of varnish is dry. This could get messy if you’re not careful. It’s pigment time!
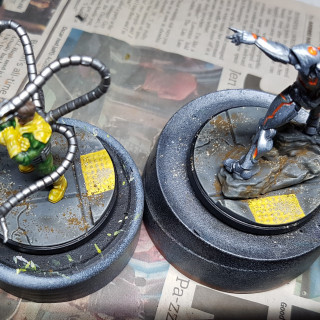
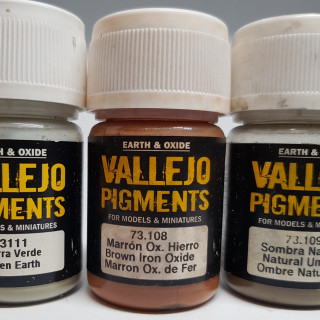
Put down some newspaper to catch any excess and clear a path to your bin ready to dispose of everything instantly. Grab a drybrush and open a pot of Vallejo 73.108 Brown iron Oxide. Dip the drybrush in and pick up some paint. Don’t overdo it. You don’t want a lot. Hold it over any metal hatch type bases and just tap the drybrush with your finger so some powder falls off. Move a little and do this again.
put away the Oxide and repeat this with Vallejo 73.109 Natural Umber and Vallejo 73.111 Green Earth over the stone areas. You can occasionally rub the drybrush into a surface, especially the rough damaged sections. Using the drybrush wedge some in the crevices of the rocks where dirt could have gathered naturally. Use your own judgement. Put the lids back on the pots and get rid of any loose pigment not on a base.
Most of this pigment is just loose and sitting there so keep your dust mask on and minimise any movement of air. Put your varnish in your airbrush and lower the pressure as far as you can. Test it pointing away from your models until you’re happy. Now spray it on to the bases from as far away as you can. You want the varnish to get there, but as little wind to arrive. Let it dry and then varnish as normal. I like one coat of Gloss, and then enough matt to take the shine away. I didn’t completely remove the shine from Iron Man and Ultron, just a little.
Some of your pigment will blow away. That’s fine. Just contain it. Don’t ruin your table or carpet. Most of it should diffuse and dissolve a little, making it look like natural dirt. Some of mine stayed a little more granular. NYC has become a battle zone with chunks of building being thrown around. I think dirt being about the place is more than fair.
Two whole days and nine evenings to go from sprue to varnished is pretty good work, I think. I’ve another model to finish, and then I’ll be back to work on the terrain pieces.
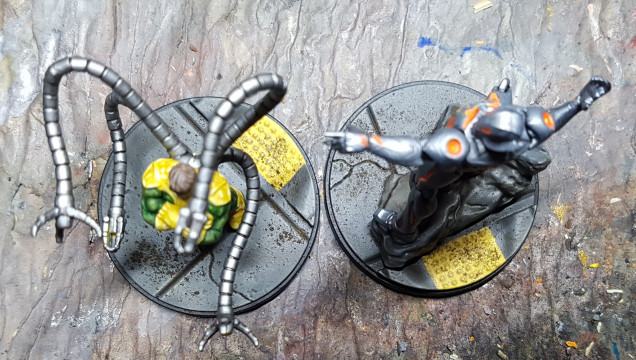 Here's those same bases varnished. Unfortunately this doesn't seem to show off the diffusion effect. I'll be sure to take more pics next time I do this and hopefully catch some good examples of how the varnish interacts with the pigments. All that dirt there is sealed in though, and isn't going to move. Looks like I could possibly do with another coat of matt. That's not so apparent in person.







Leave a Reply