


![1918 Spring Offensive Wargame | Full Rules Overview with John & Gerry (WW1 Tabletop Game) [7 Days Early Access]](https://images.beastsofwar.com/2026/03/unboxing-warfulcrum-games-1918-spring-offensive-review-coverimage1-225-127.jpeg)


Wee Free Men


Recommendations: 479
About the Project
Finally getting round to my Nac Mac Feegle army. Technically for Kings of War but really just an army for the sake of being an army.
Related Genre: Fantasy
Related Contest: Spring Clean Hobby Challenge 2024
This Project is Completed
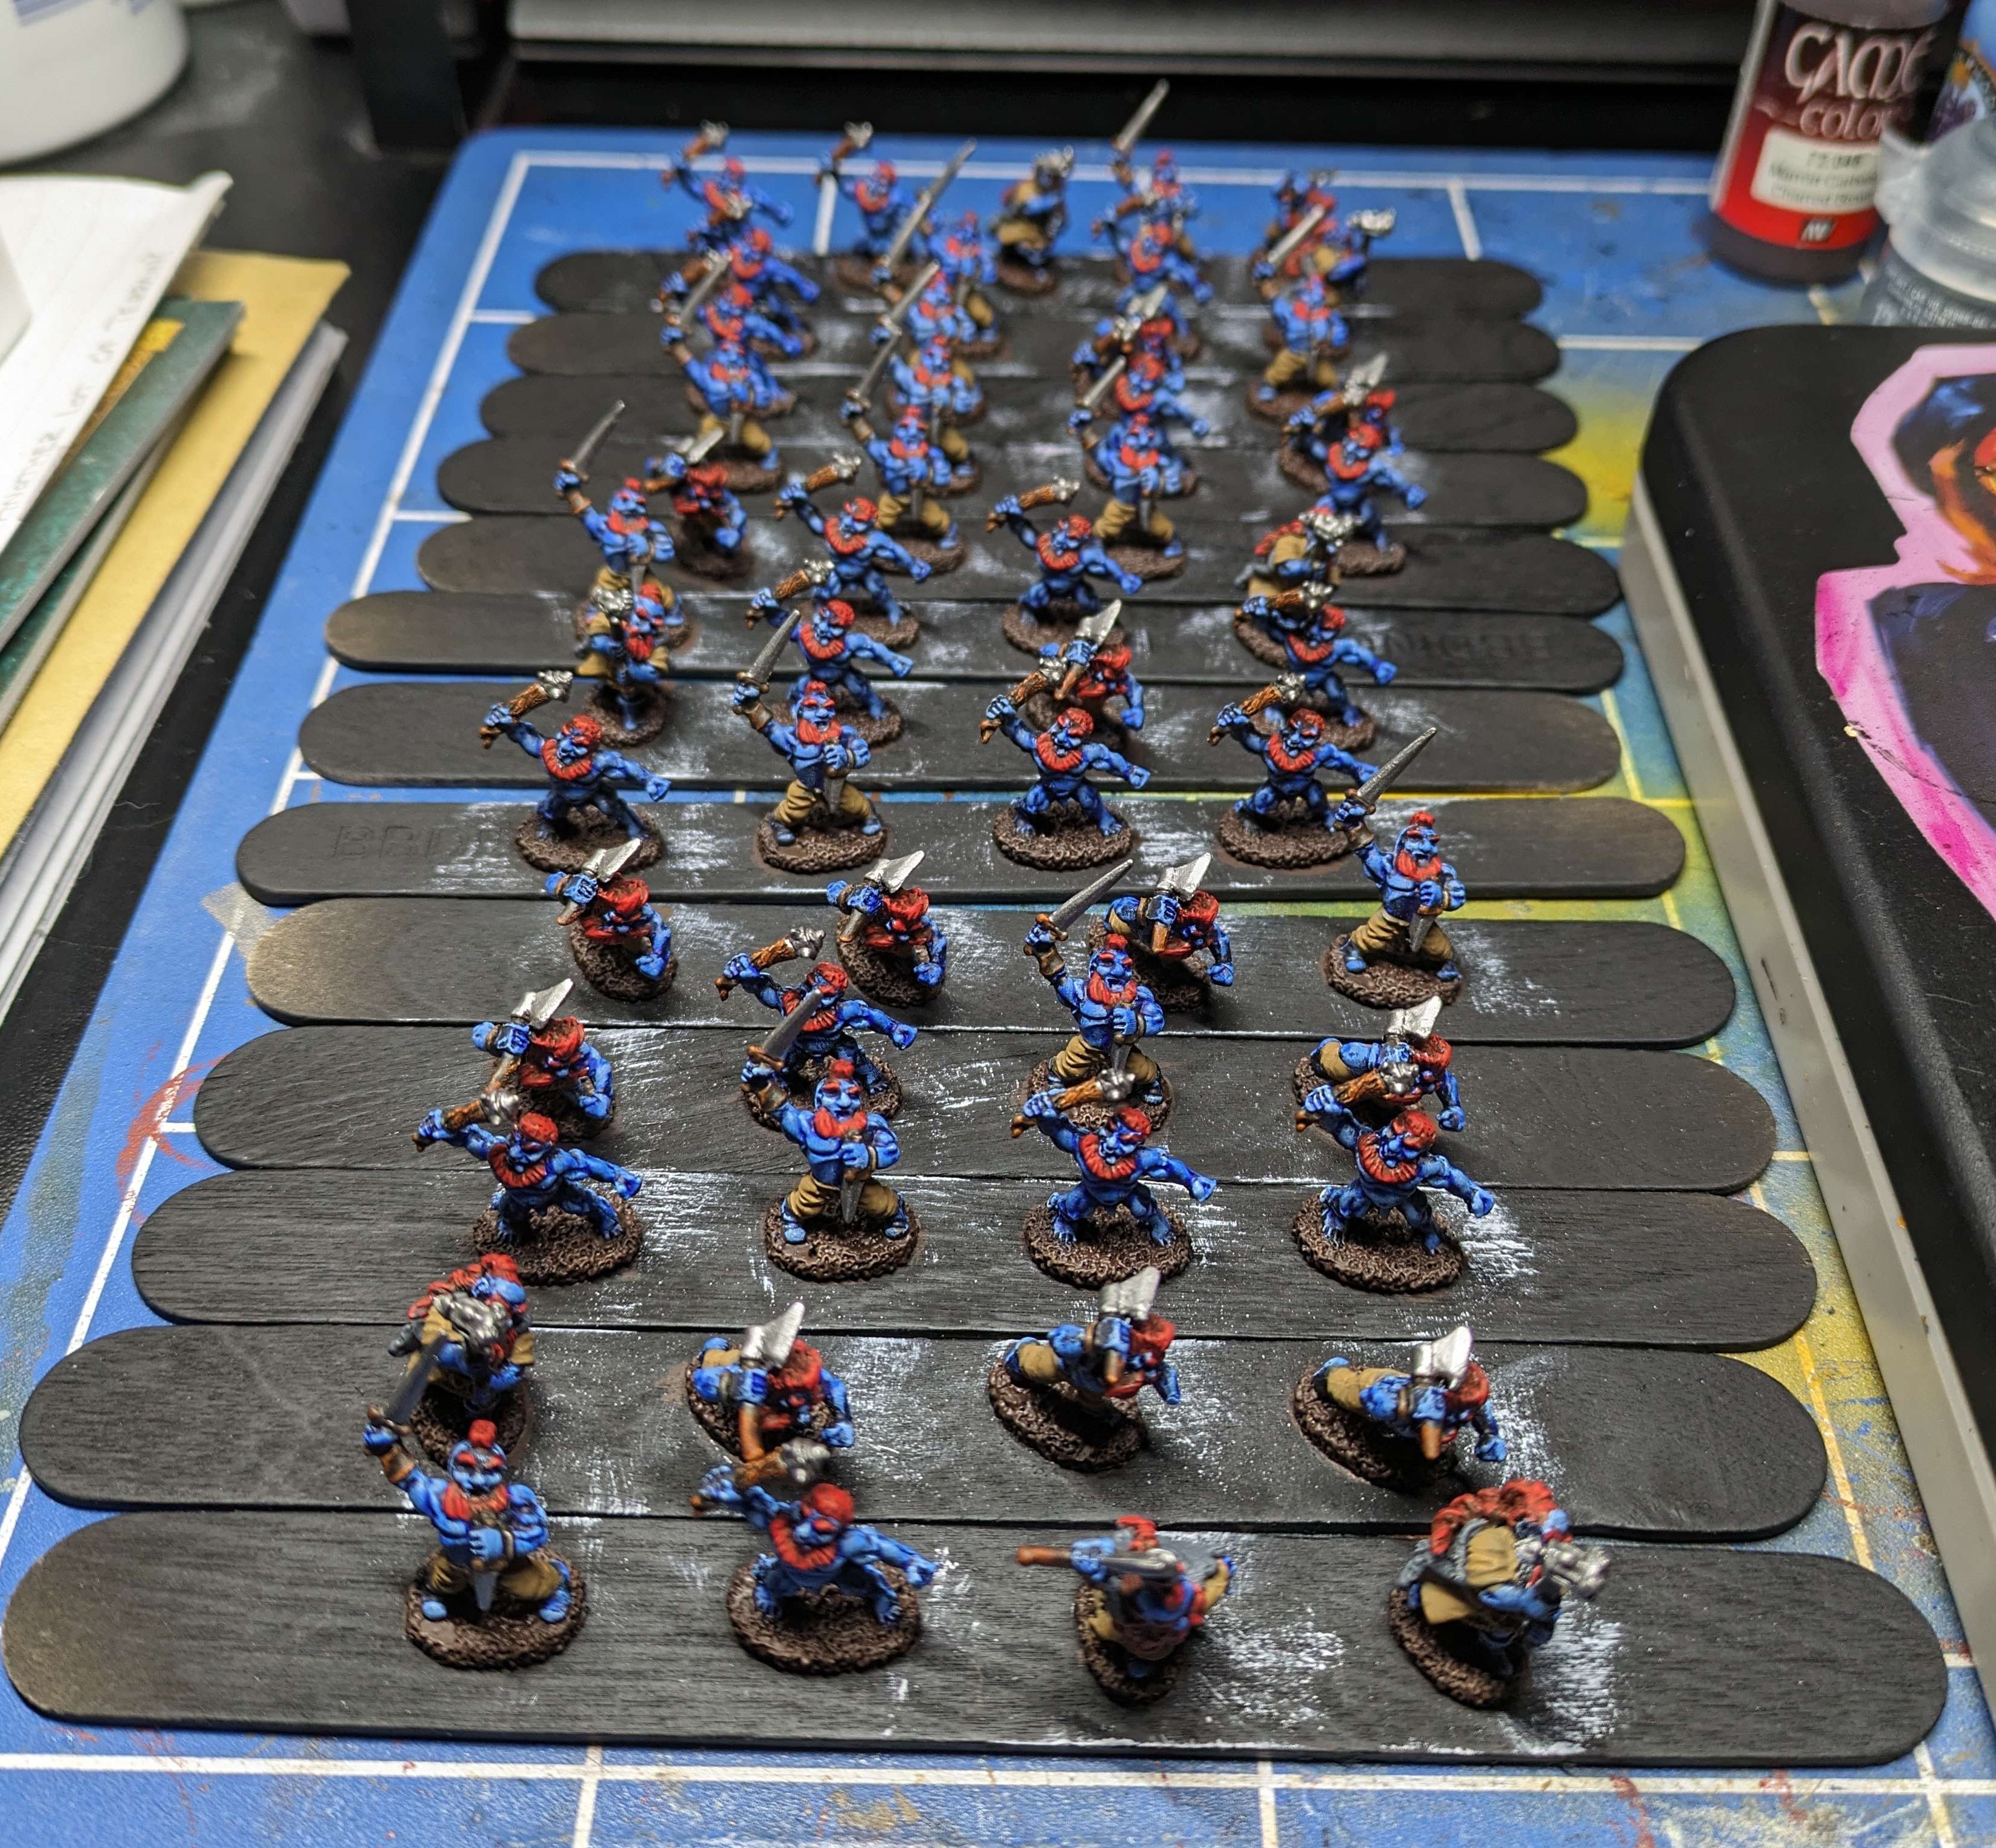
Little bits (and the men they are attached to)
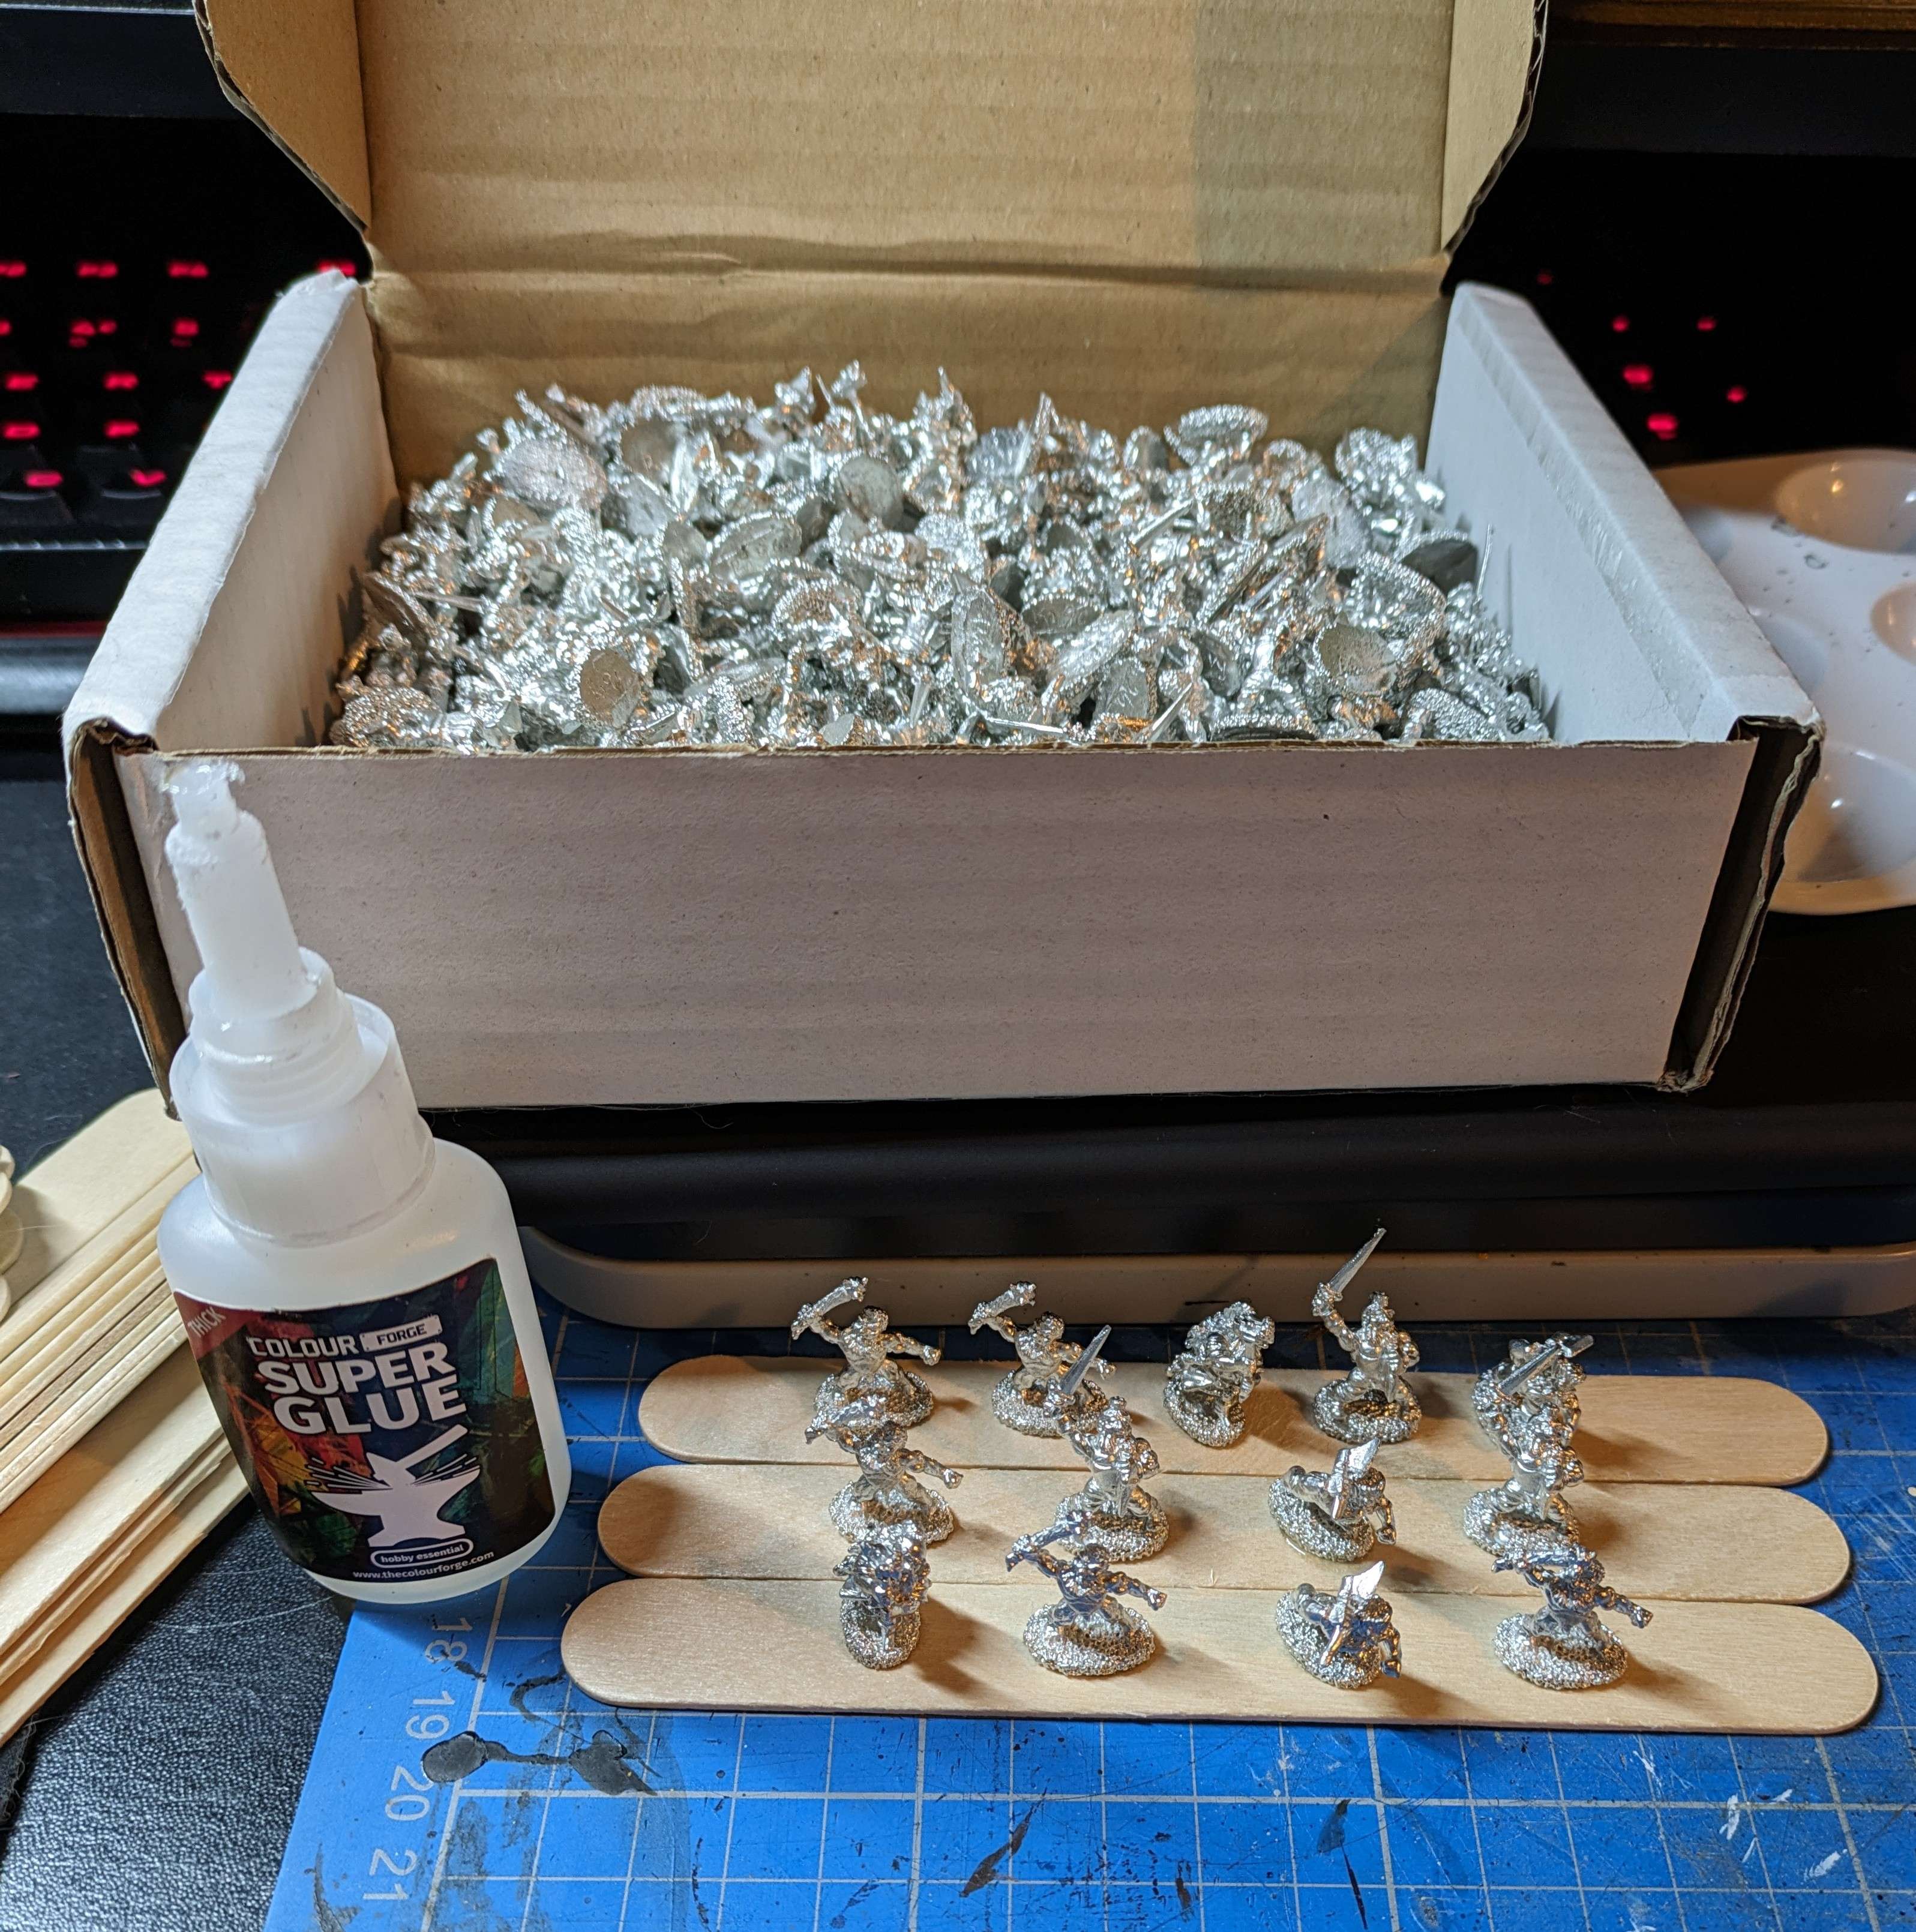
A quiet evening spent gluing feegles to tongue depressors. I have some cans of primer arriving this week (thrown out by the Easter weekend, I forget every year) so this was the extent of the progress this weekend.
I was going to just glue all of them but realised that was silly at this point. I know that there will be five regiment bases to cover with these “normal” models so just got enough ready to cover those. That box of cleaned minis would make a handy weapon in a pinch…
Time to Hit the Books
Somehow this four day week has felt seven days long. I have other hobby that I should be doing (promised to friends) but I came home to a couple of packages with things for this project and honestly, a weekend of diving back into the Disc sounds wonderful.
After a wonderfully unhealthy dinner, I went over to the bookcases and grabbed some inspirational reading.

While the army is just feegles in general, it has a lot of references to Wee Free Men in particular. This copy has been marked up with notes for the army for a long time now but going back through them has been helpful for refreshing my memory.
If you are a Pratchett fan and don’t have the HisWorld book, it is an excellent hardback that was created to go alongside a gallery exhibition. Checking the Discworld website, they have it in their clearance section down to £7.50 which is a fucking steal.
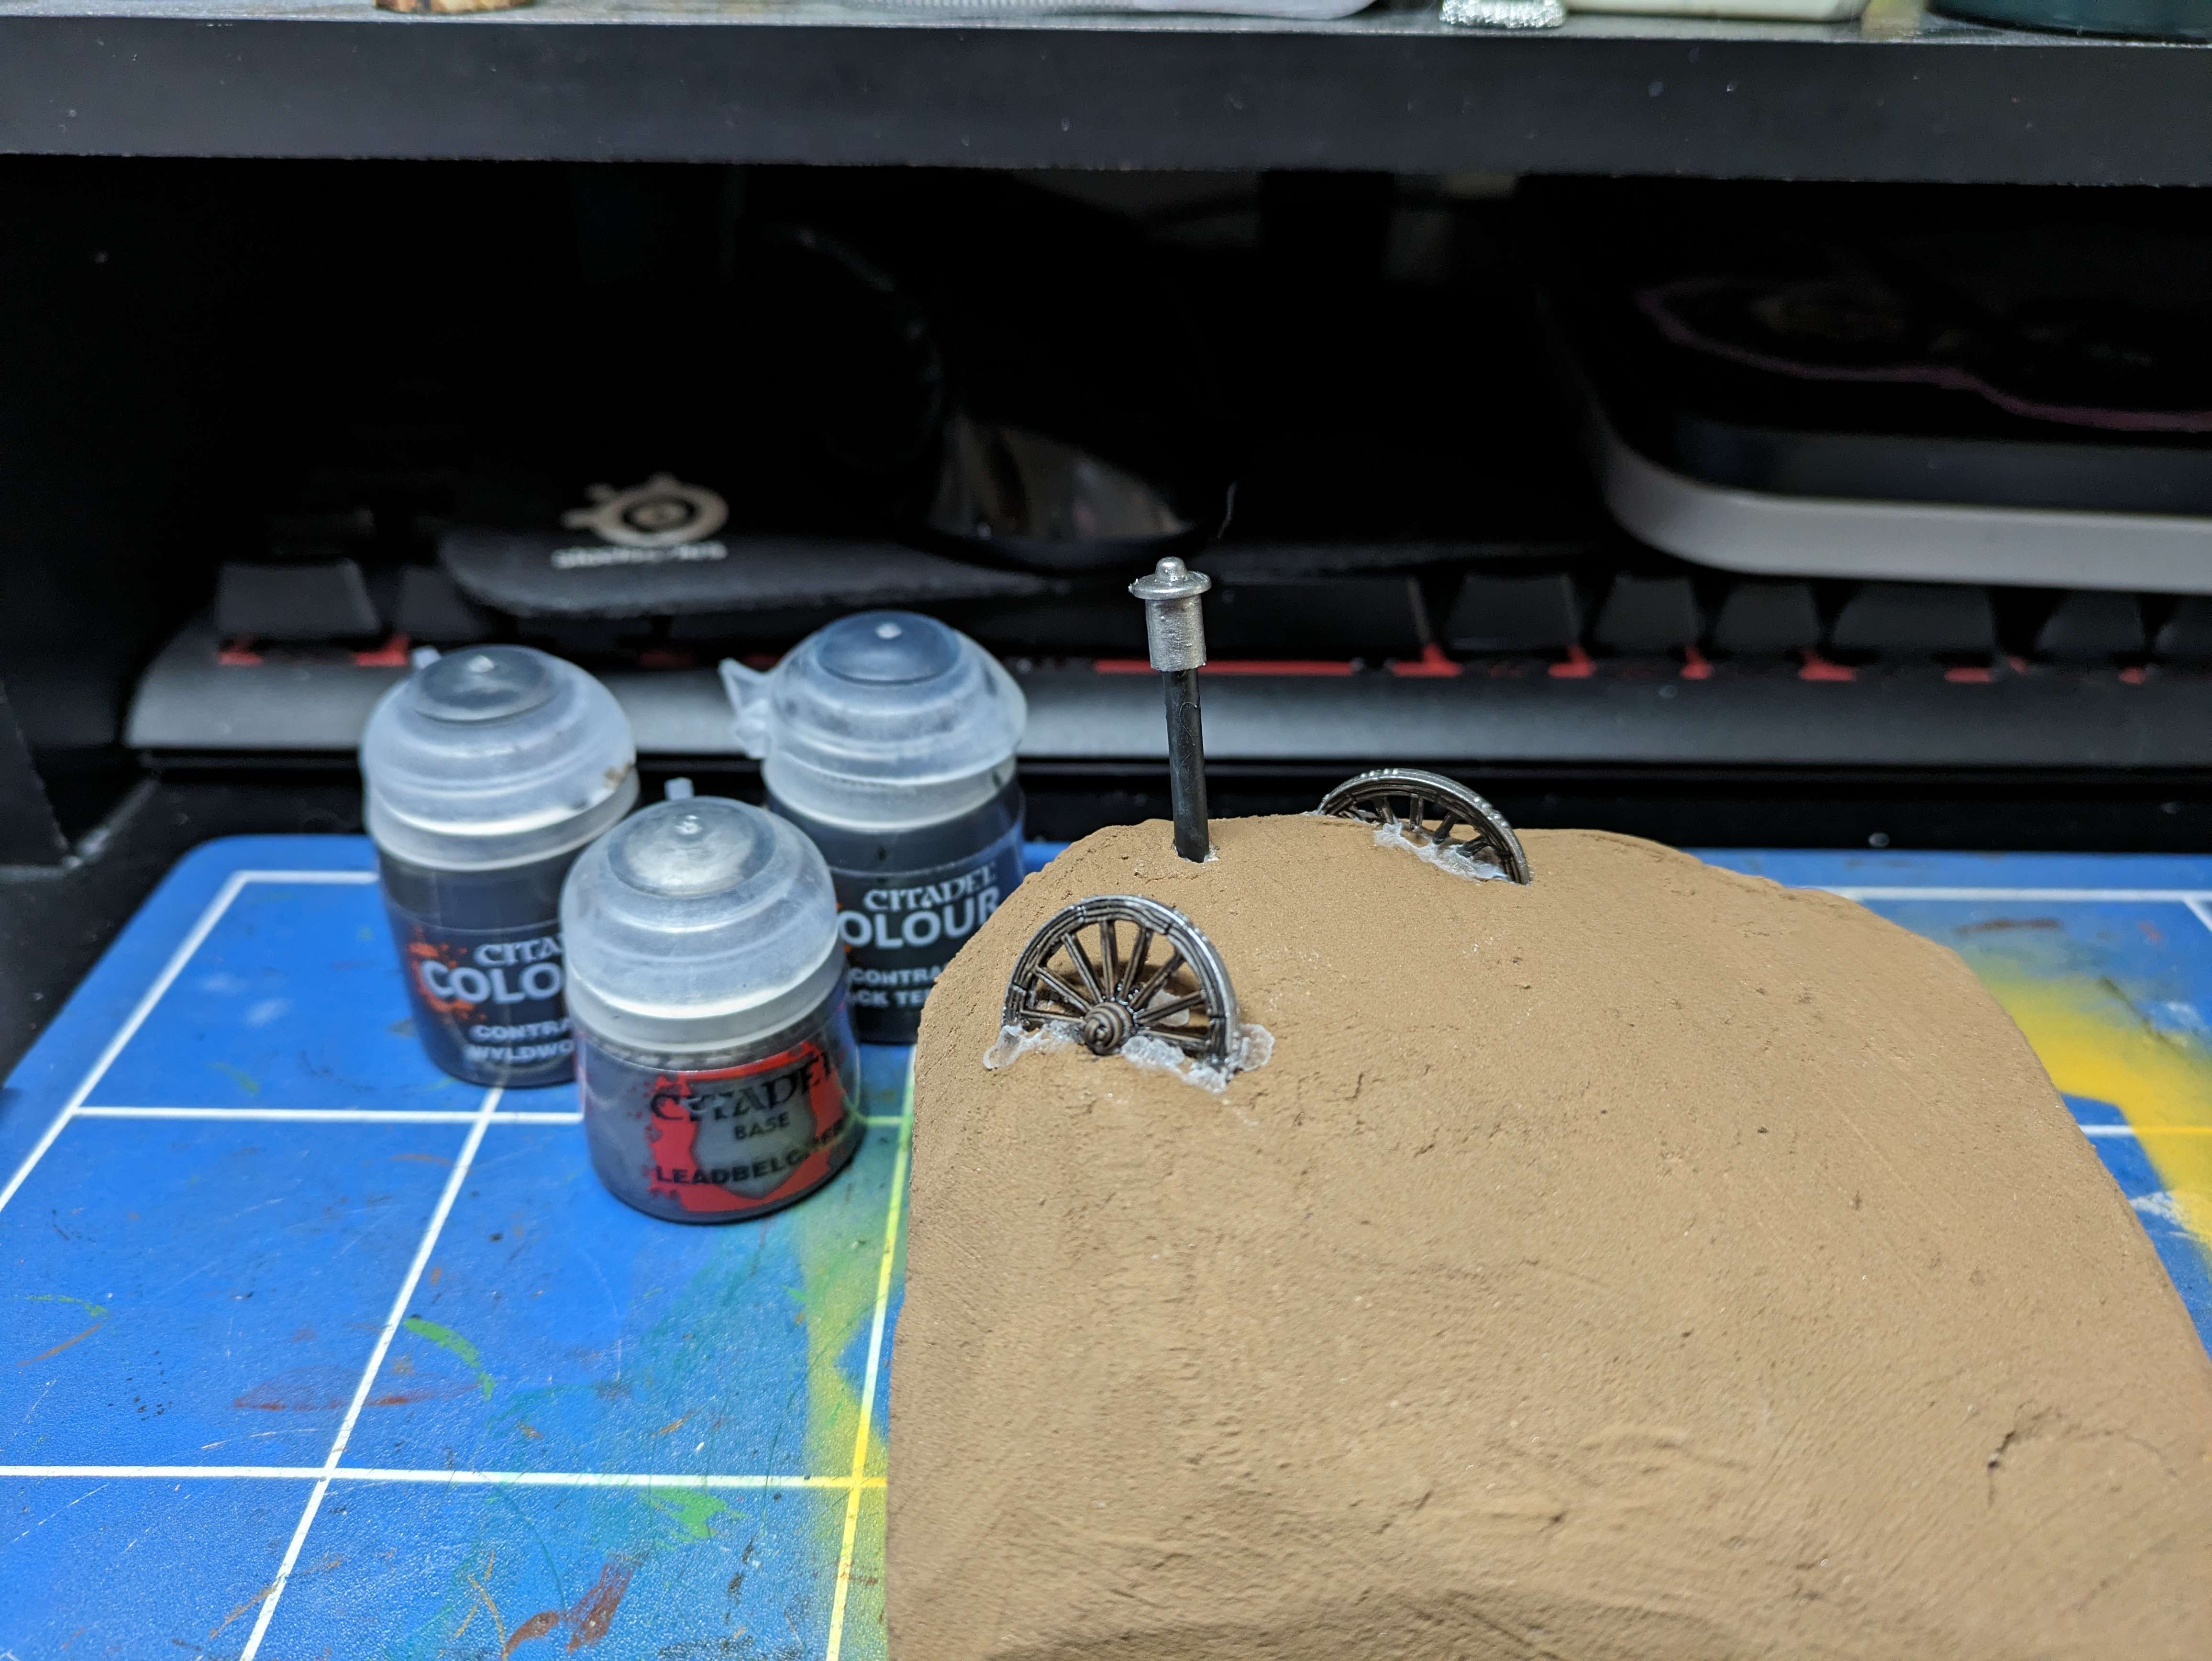
Bases Part 1
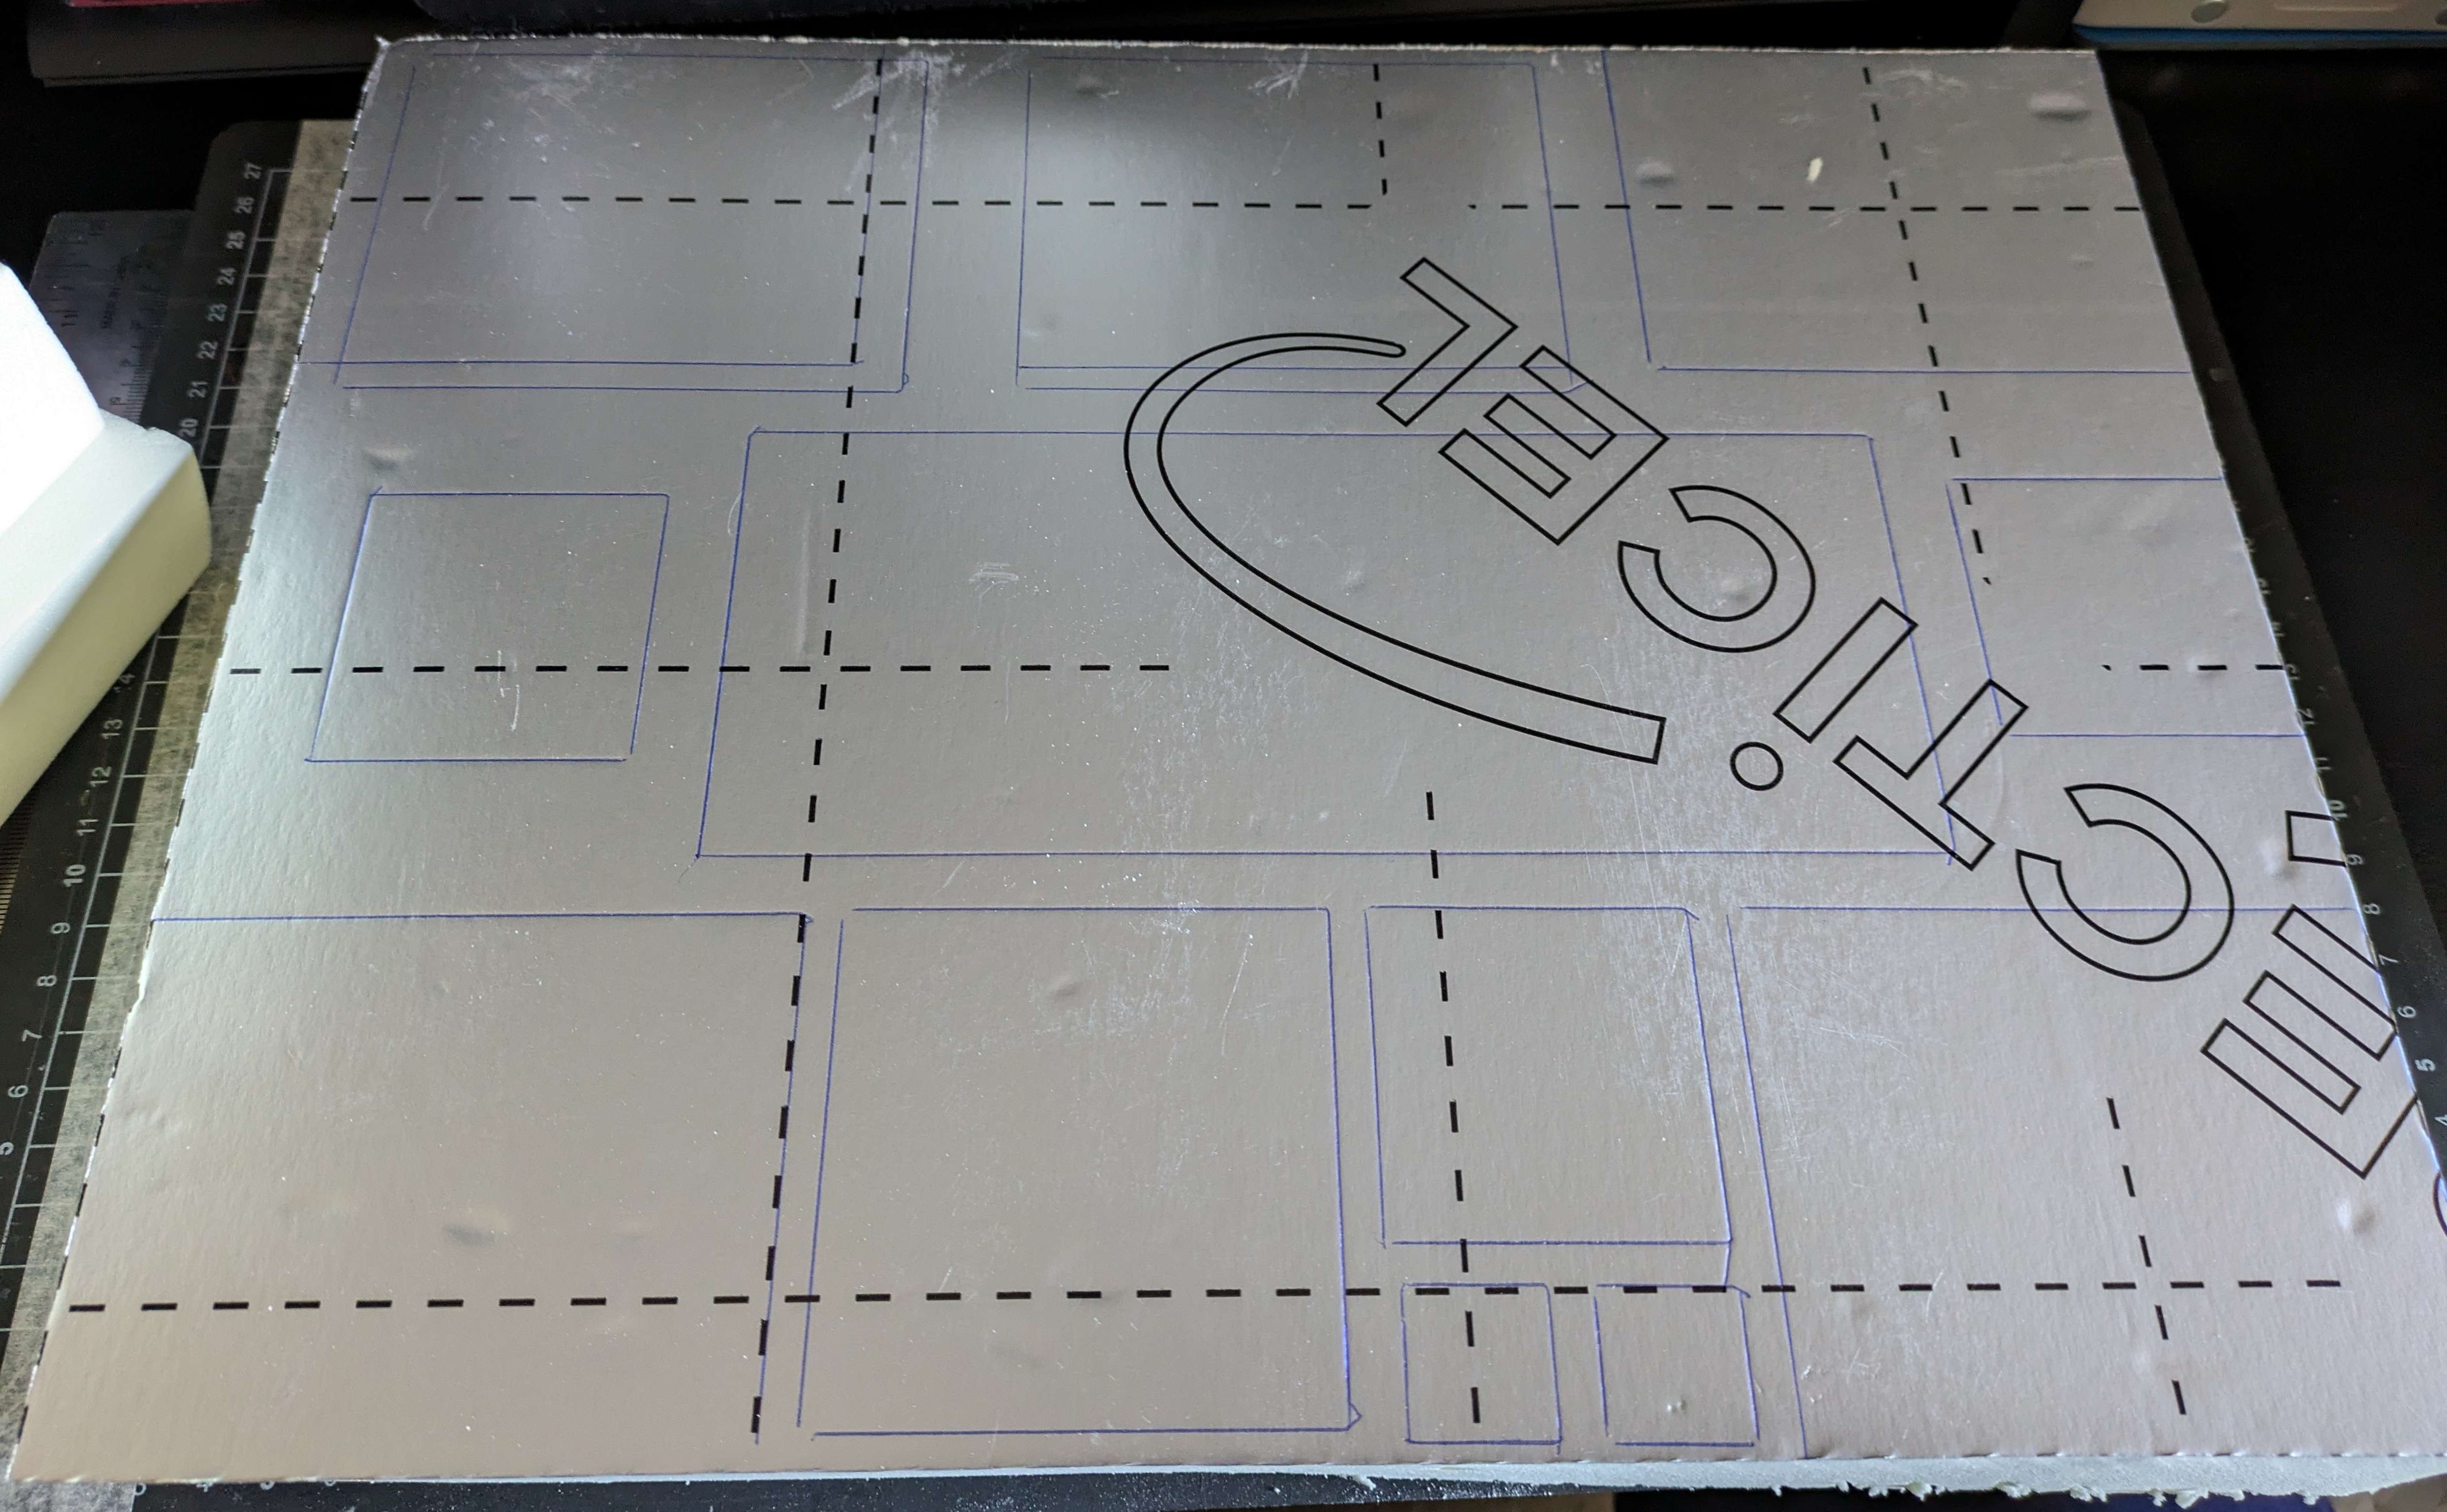
Another quick post today though about another slow process. I’m trying not to leave the basing until last like I usually do. In the future I’ll go into further detail but today’s main goal was to use some insulation foam and sculpt all the bases at once.
I’ve not really used the foam before but I’ve had a small sheet of it for a while in the stash. Cutting it down to the same size I marked out on my cutting mat before, I drew the base outlines on the bottom of the foam so I could check as I worked what would be on what base/lost in the trimming stage.
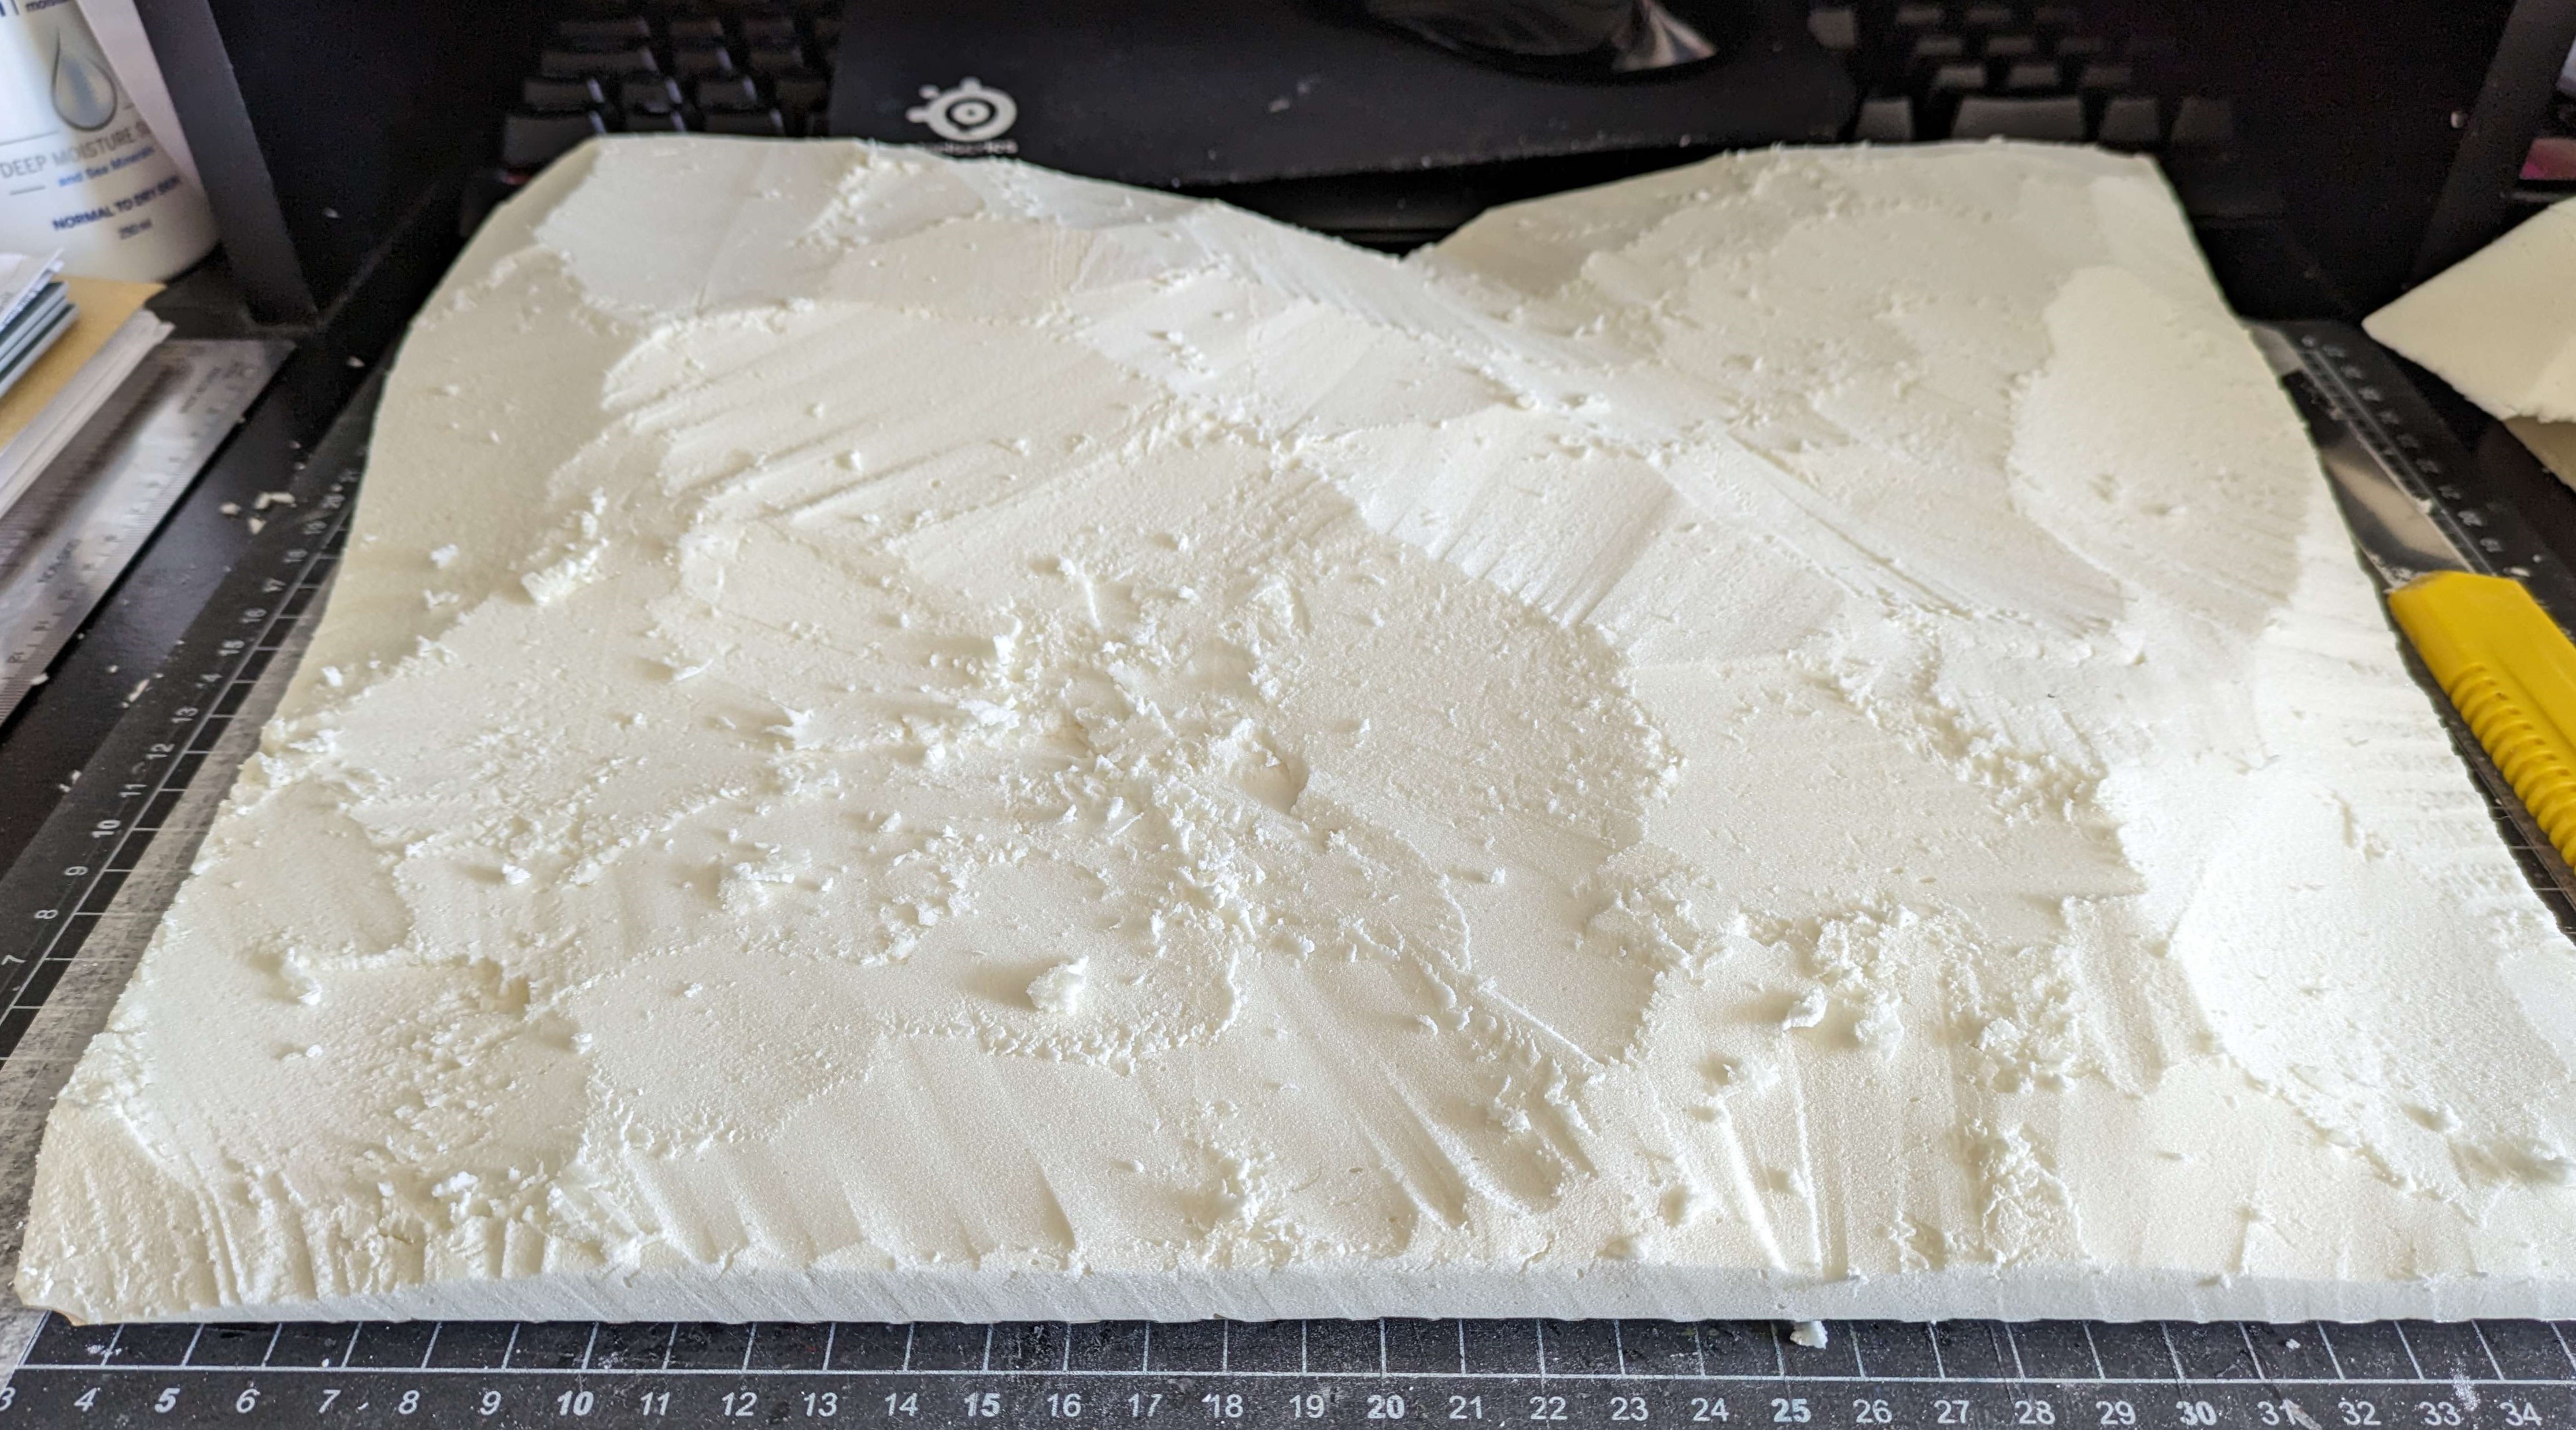
I then spent an afternoon listening to an audiobook and carving away with a utility blade. As someone who doesn’t usually take a ton of time on basing, I don’t have a great mental picture of what I am going for. There was a lot of going back and forth but eventually I got it to a place where I’m happy. Part way through I decided to cut out the base footprints and get them glued onto the MDF to prevent warping. I used a cheap but very cheerful grab adhesive which was cured enough within 20 minutes (or a perfect time for a tea break). Some more carving, making sure to mark the footprints for a couple of elements I know will be on them. This is a horribly messy stage and reminds me why I don’t do terrain making.
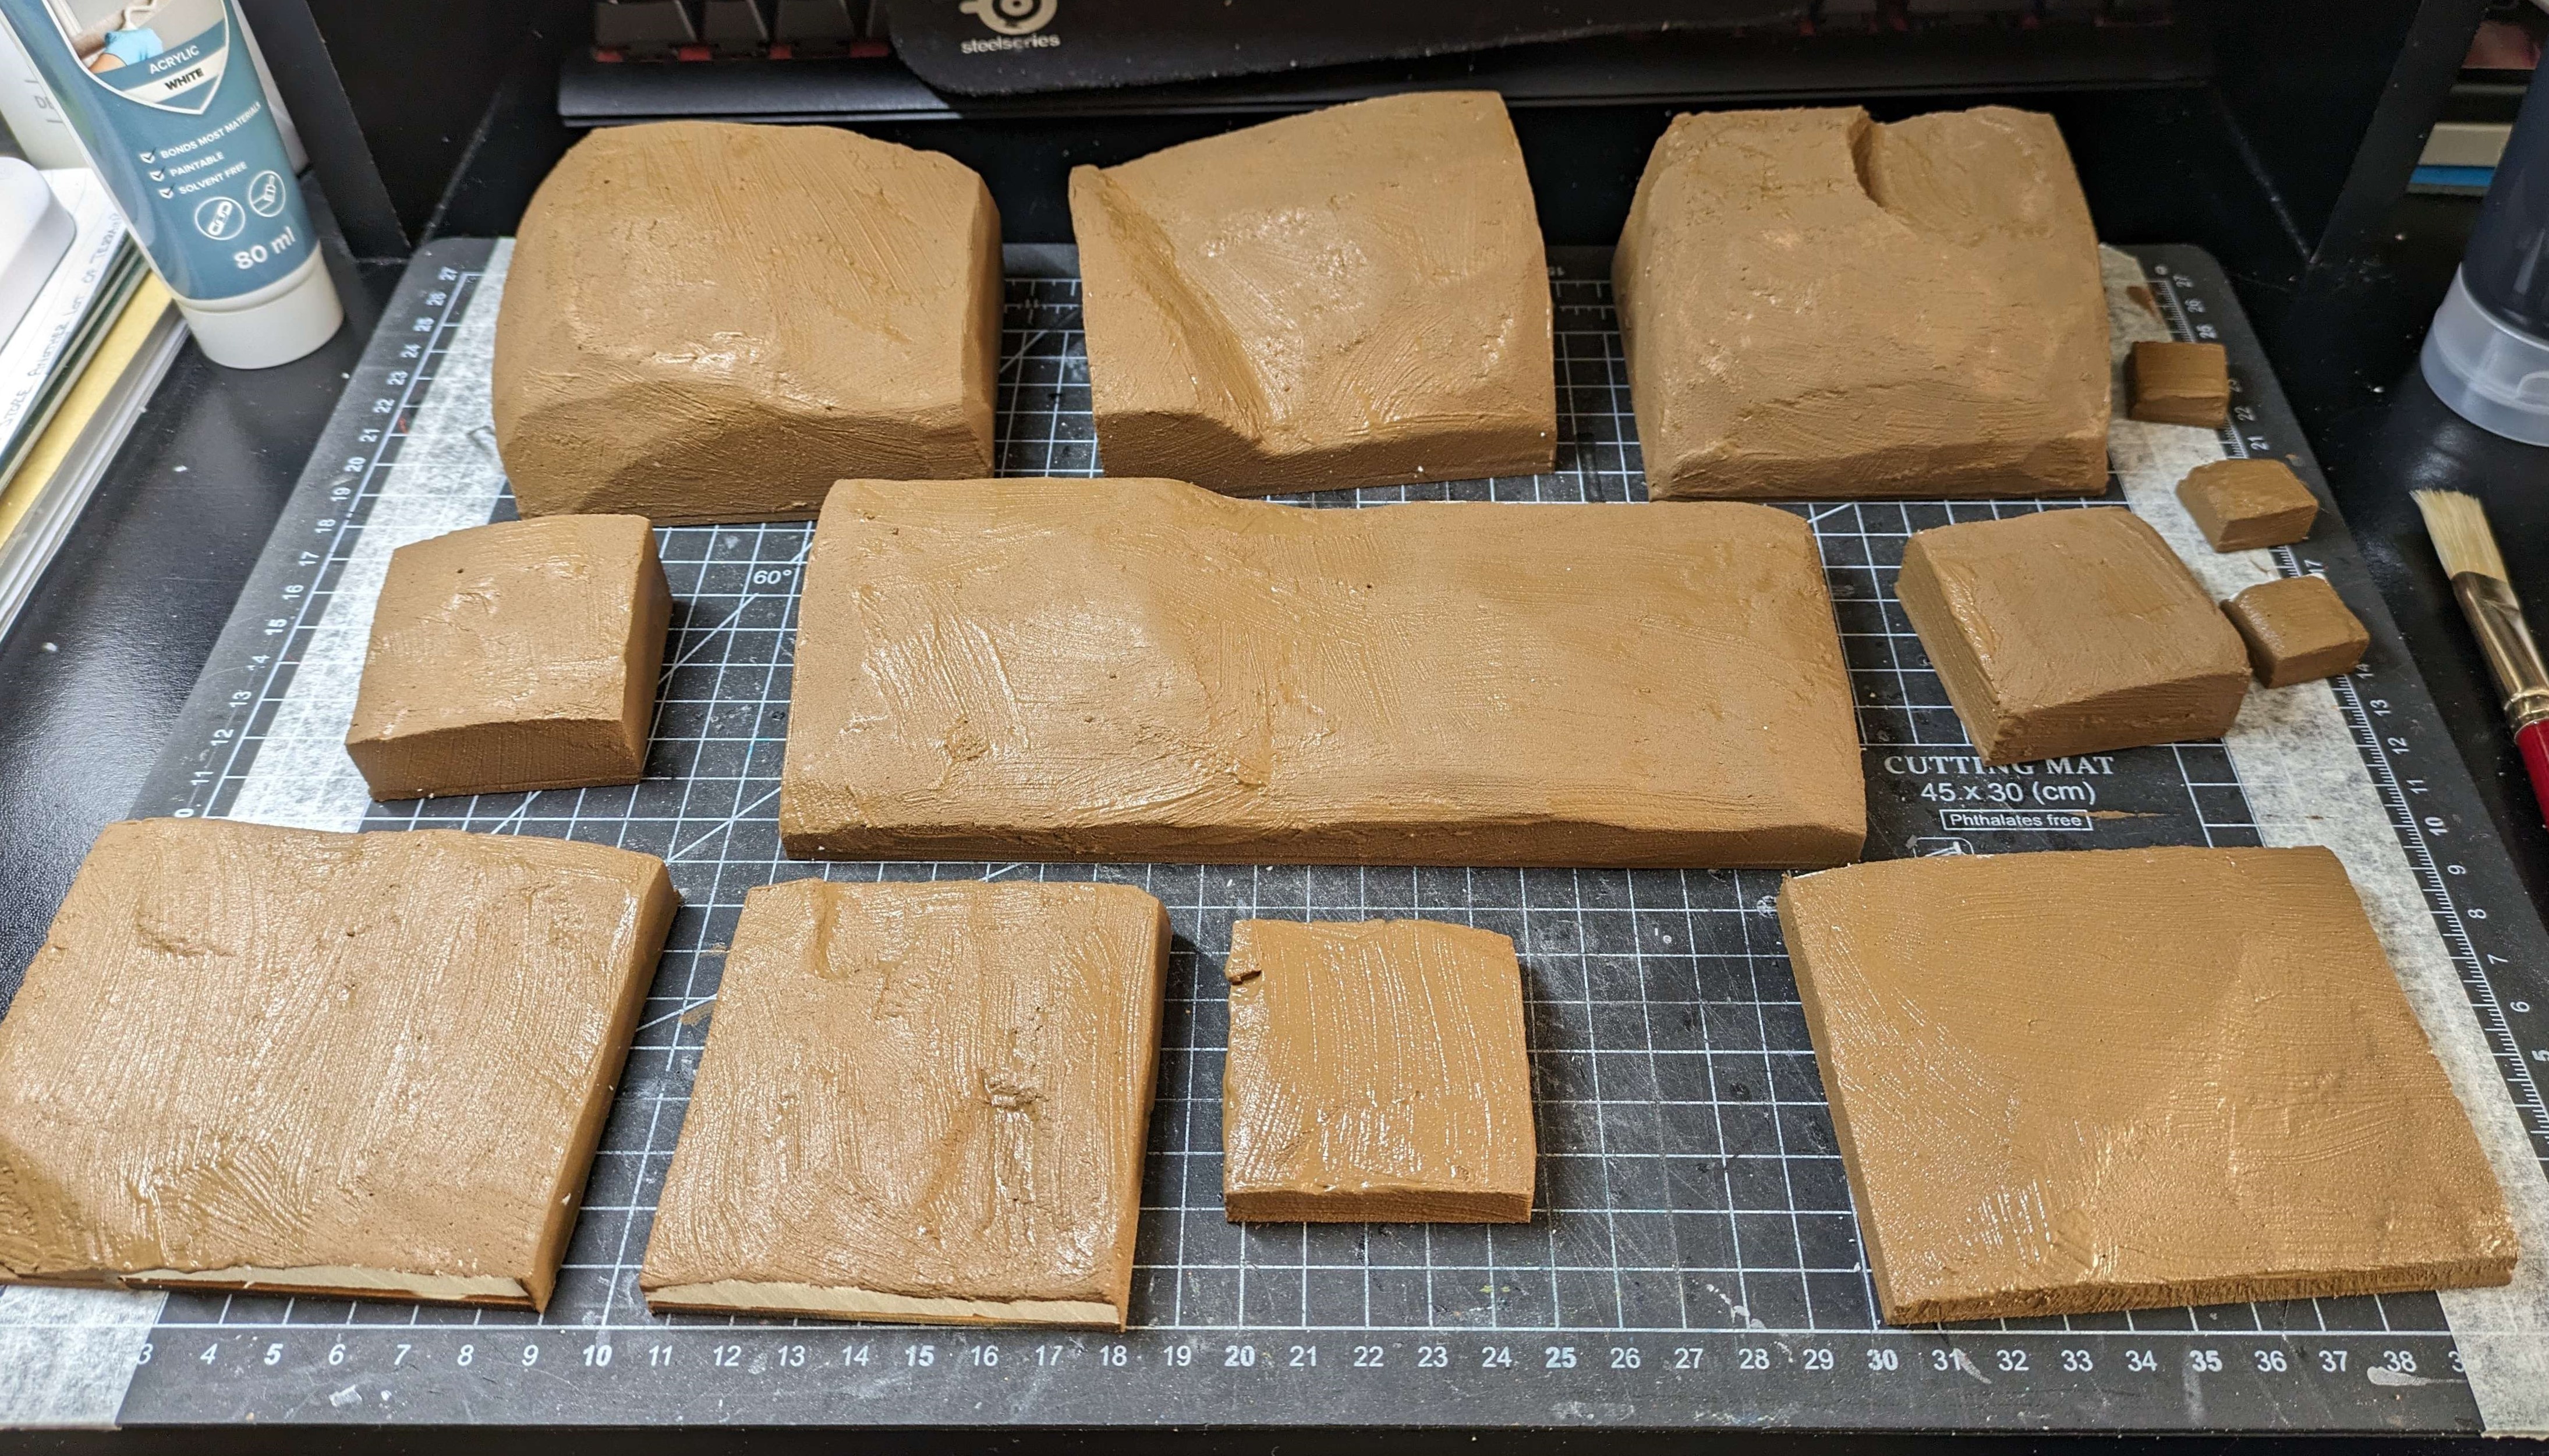
Next step was the first application of filler (with brown and black paint added). I’ll need to go back for a second pass on the areas I couldn’t easily get without mess and to touch up areas that I missed.
There is a lot more to be done but for the first afternoon, I’m happy with the progress.
Slow Progress
I’ve been a little frustrated in hobby time lately, I’ve got a flare up of carpal tunnel and so painting isn’t very comfy.
Coming back to this project and the test minis I painted, there still felt like there was something missing. The blue skin still felt a little flat. I decided to look around more online for other options and ended up with a bottle Two Thin Coats blue wash. Impatience won out and no test model was done. Or maybe the whole unit is test models. Perspective, eh?
The process to this point then is:
- Prime black
- Drybrush with white to zenithal/underpaint/whatever the heck you want to call it
- Two Thin Coats Blue wash over the skin
- Tidy up with white over the hair/beards
- Citadel Blood Angels Red Contrast for all the hair
- Citadel Gore-grunta Fur contrast over weapon shafts and the few wee bits of leather
- Army Painter Gun Metal over the other parts of the weapons
- Vallejo US Field Drab on all the cloth
- Citadel Mechanicus Standard Grey on the little bits of fur on the two poses that have some
- Vallejo Charred Brown for the puddle bases
At this stage, I’ve had to stop work. For the tartan, I need some pens and it is too close to payday for me to go out and get them right now. Hopefully by the end of next week, I’ll have what I need to finish them off.
In the meantime, I have some other bits to start working on…
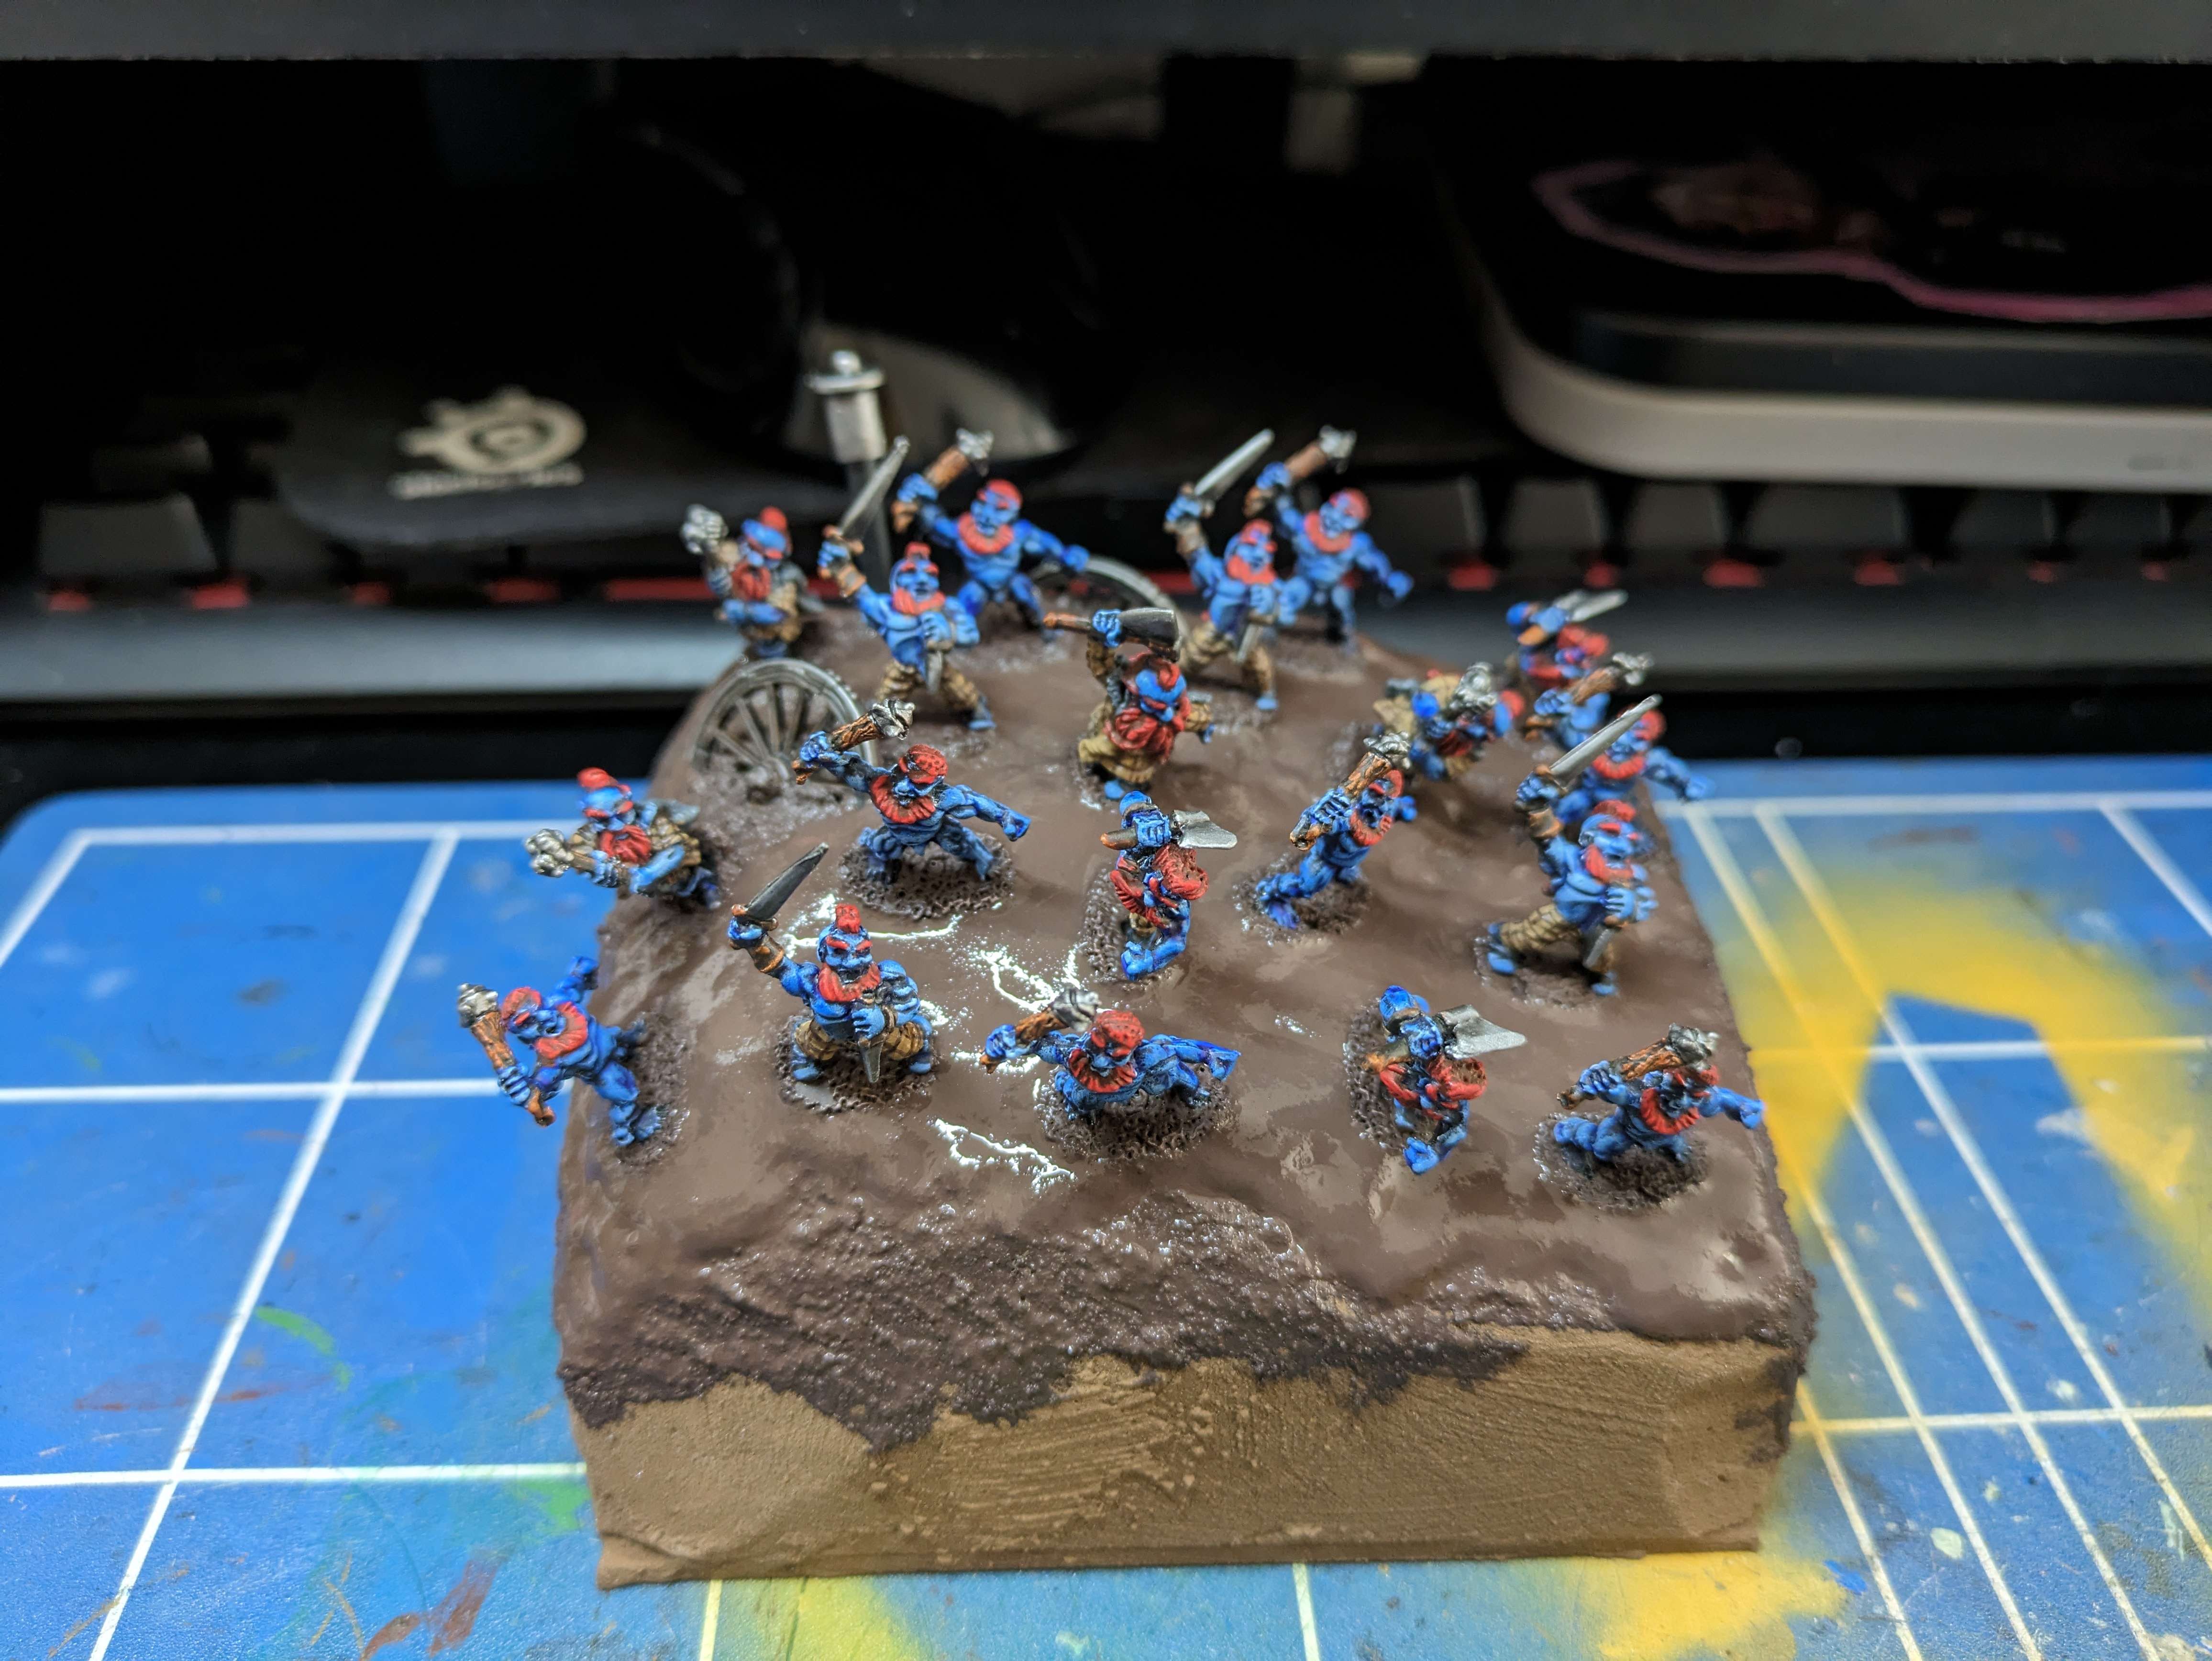
The Smurf Stage
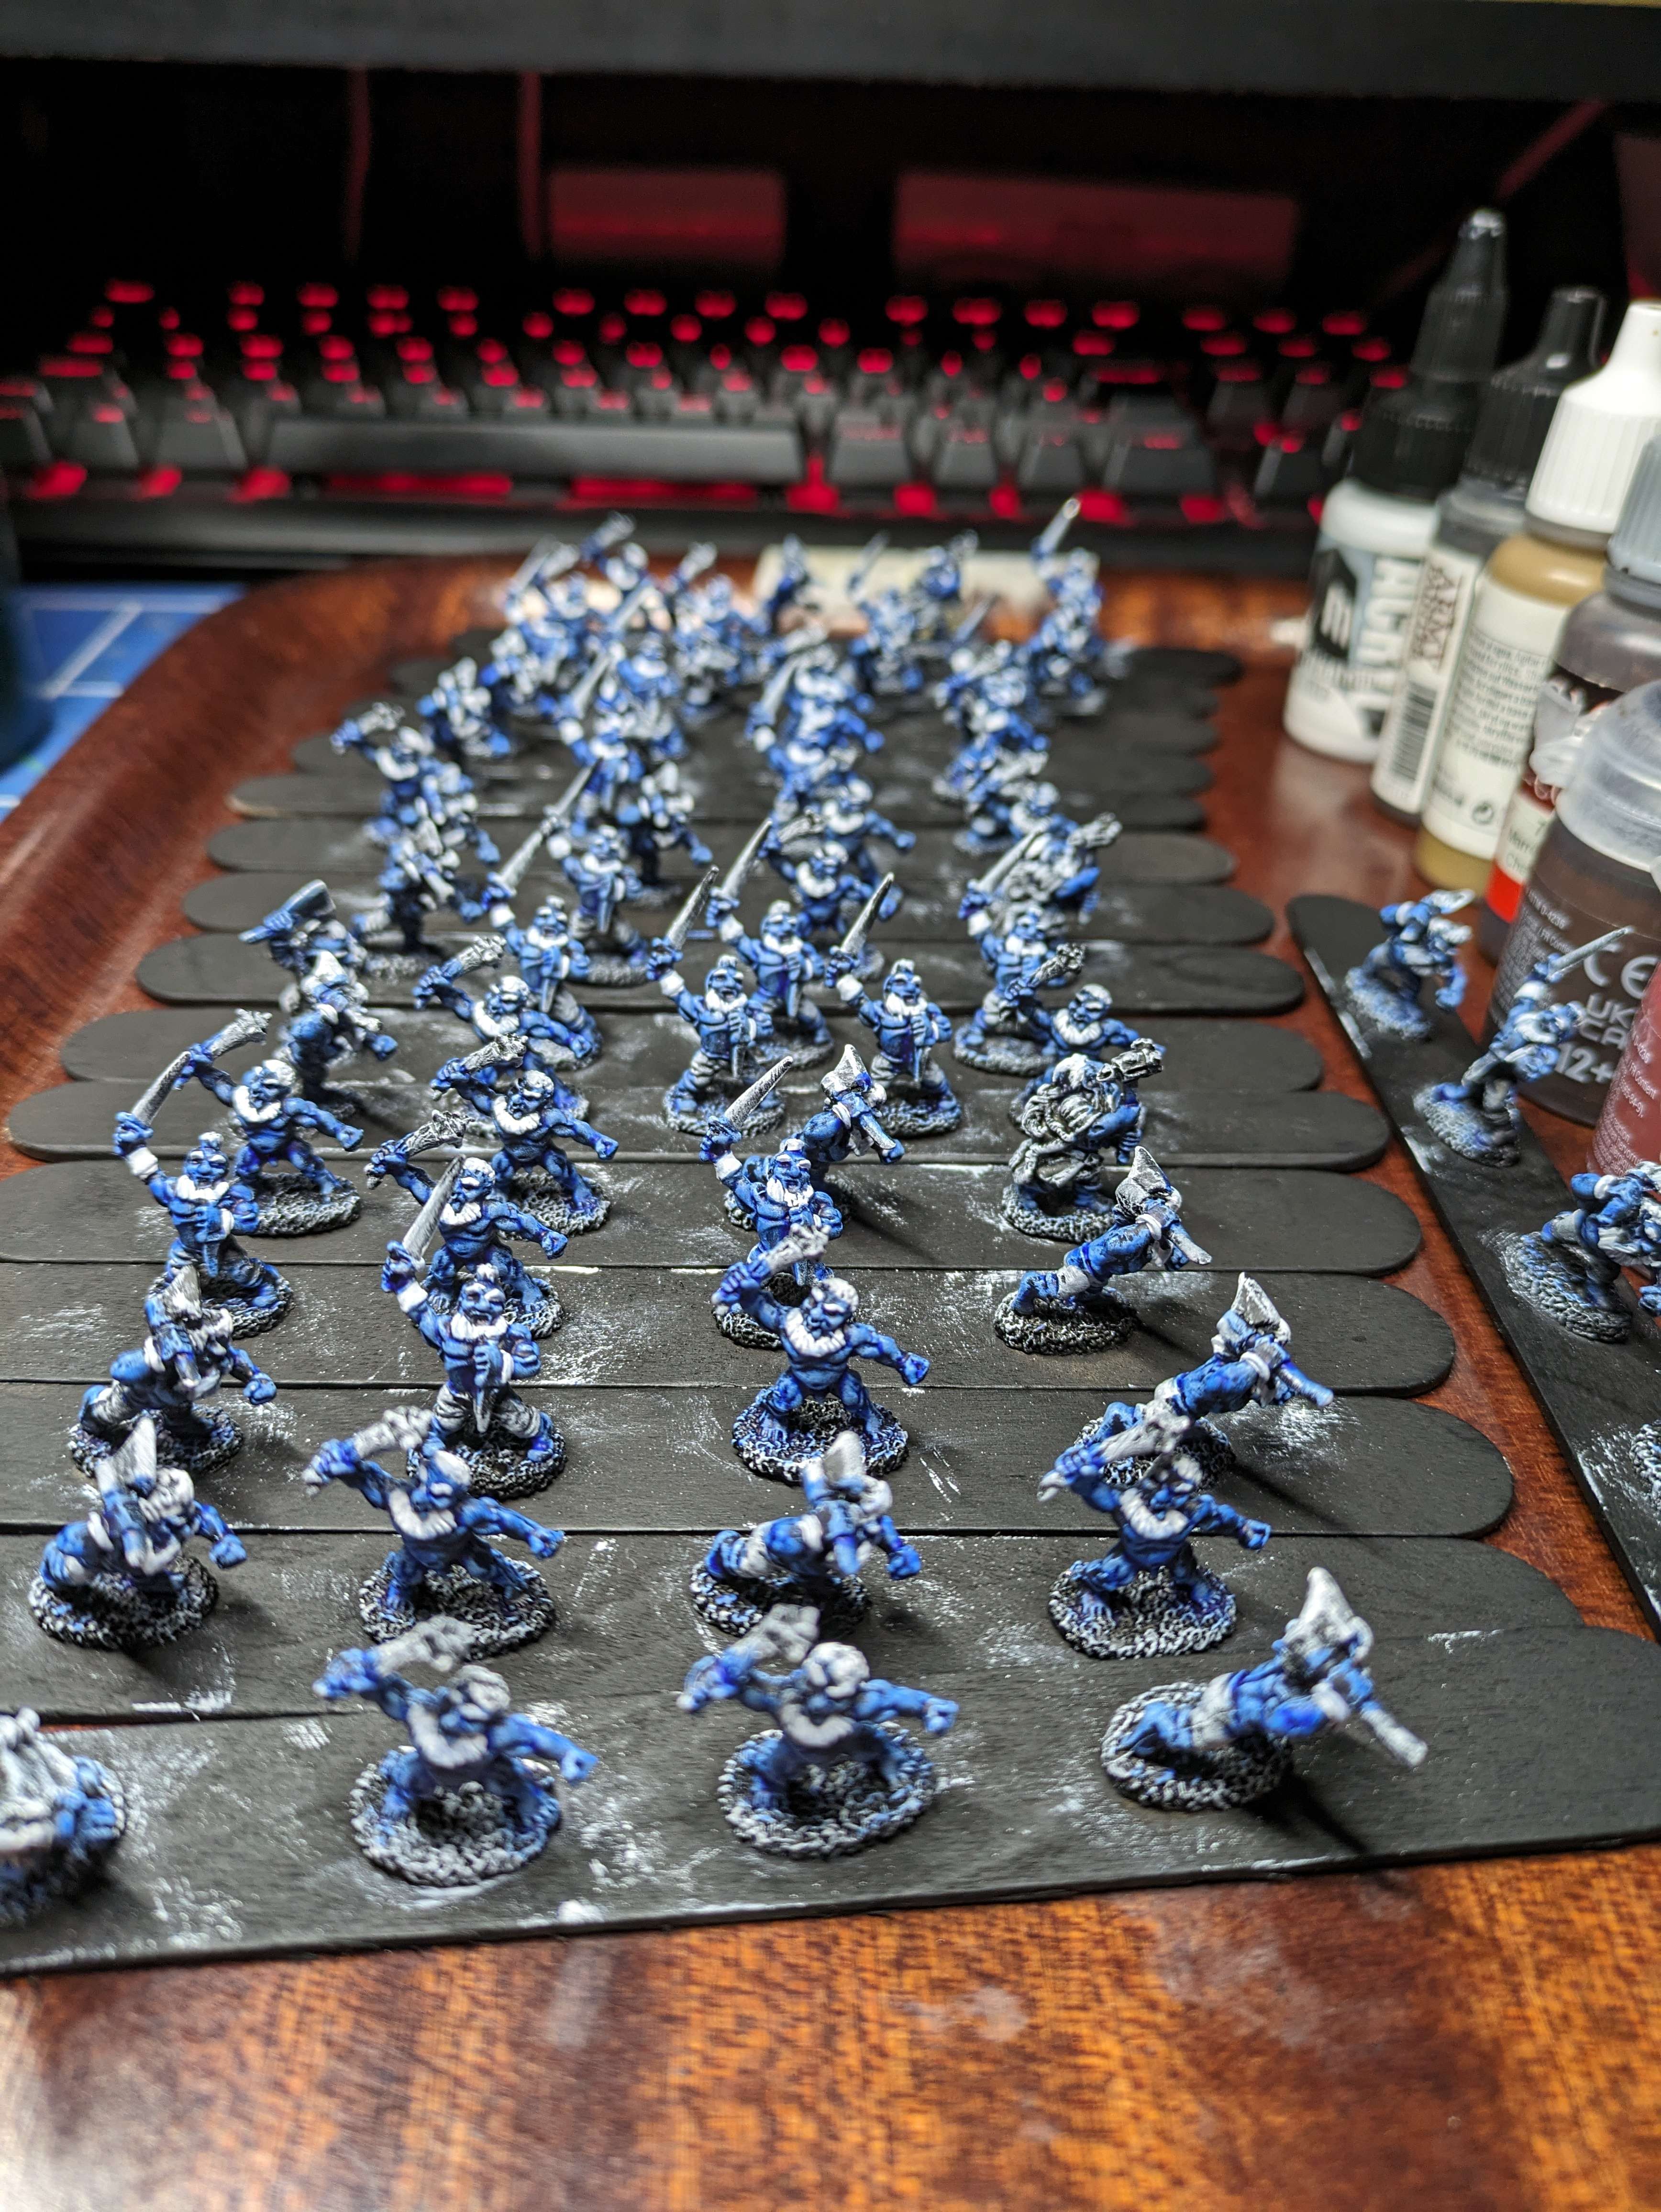
The reality of painting a couple of hundred minis for an army is that you will have to batch paint.
Yesterday I prepped as many minis (65) as I had tongue depressors for and today fit in two hours of the skin stage and what I’m now calling The Smurf Stage (going back in with the white paint to touch up for the next stage). I’m learning the blue wash’s behaviour; it scared me as I was putting it on because it seemed to pale but it darkened as it dried and I got the same results as before.
Self loathing
Have you ever hated yourself so much that you decided to do tartan on over 200 17mm tall miniatures? Even for me, this might be a new low.
A quick trip to Hobbycraft after work and I found what I was looking for. This pack of three fine nib brown pens. After a bit of trial and error, it looks like only the smallest will be useful for the feegles; the 0.5 can’t quite fit in the fabric folds and the brush one doesn’t go on quite as well. Being ink, the result is pretty shiny but there is still a wash and matte varnish to come.
In the meantime, I have plenty of chances to git gud…

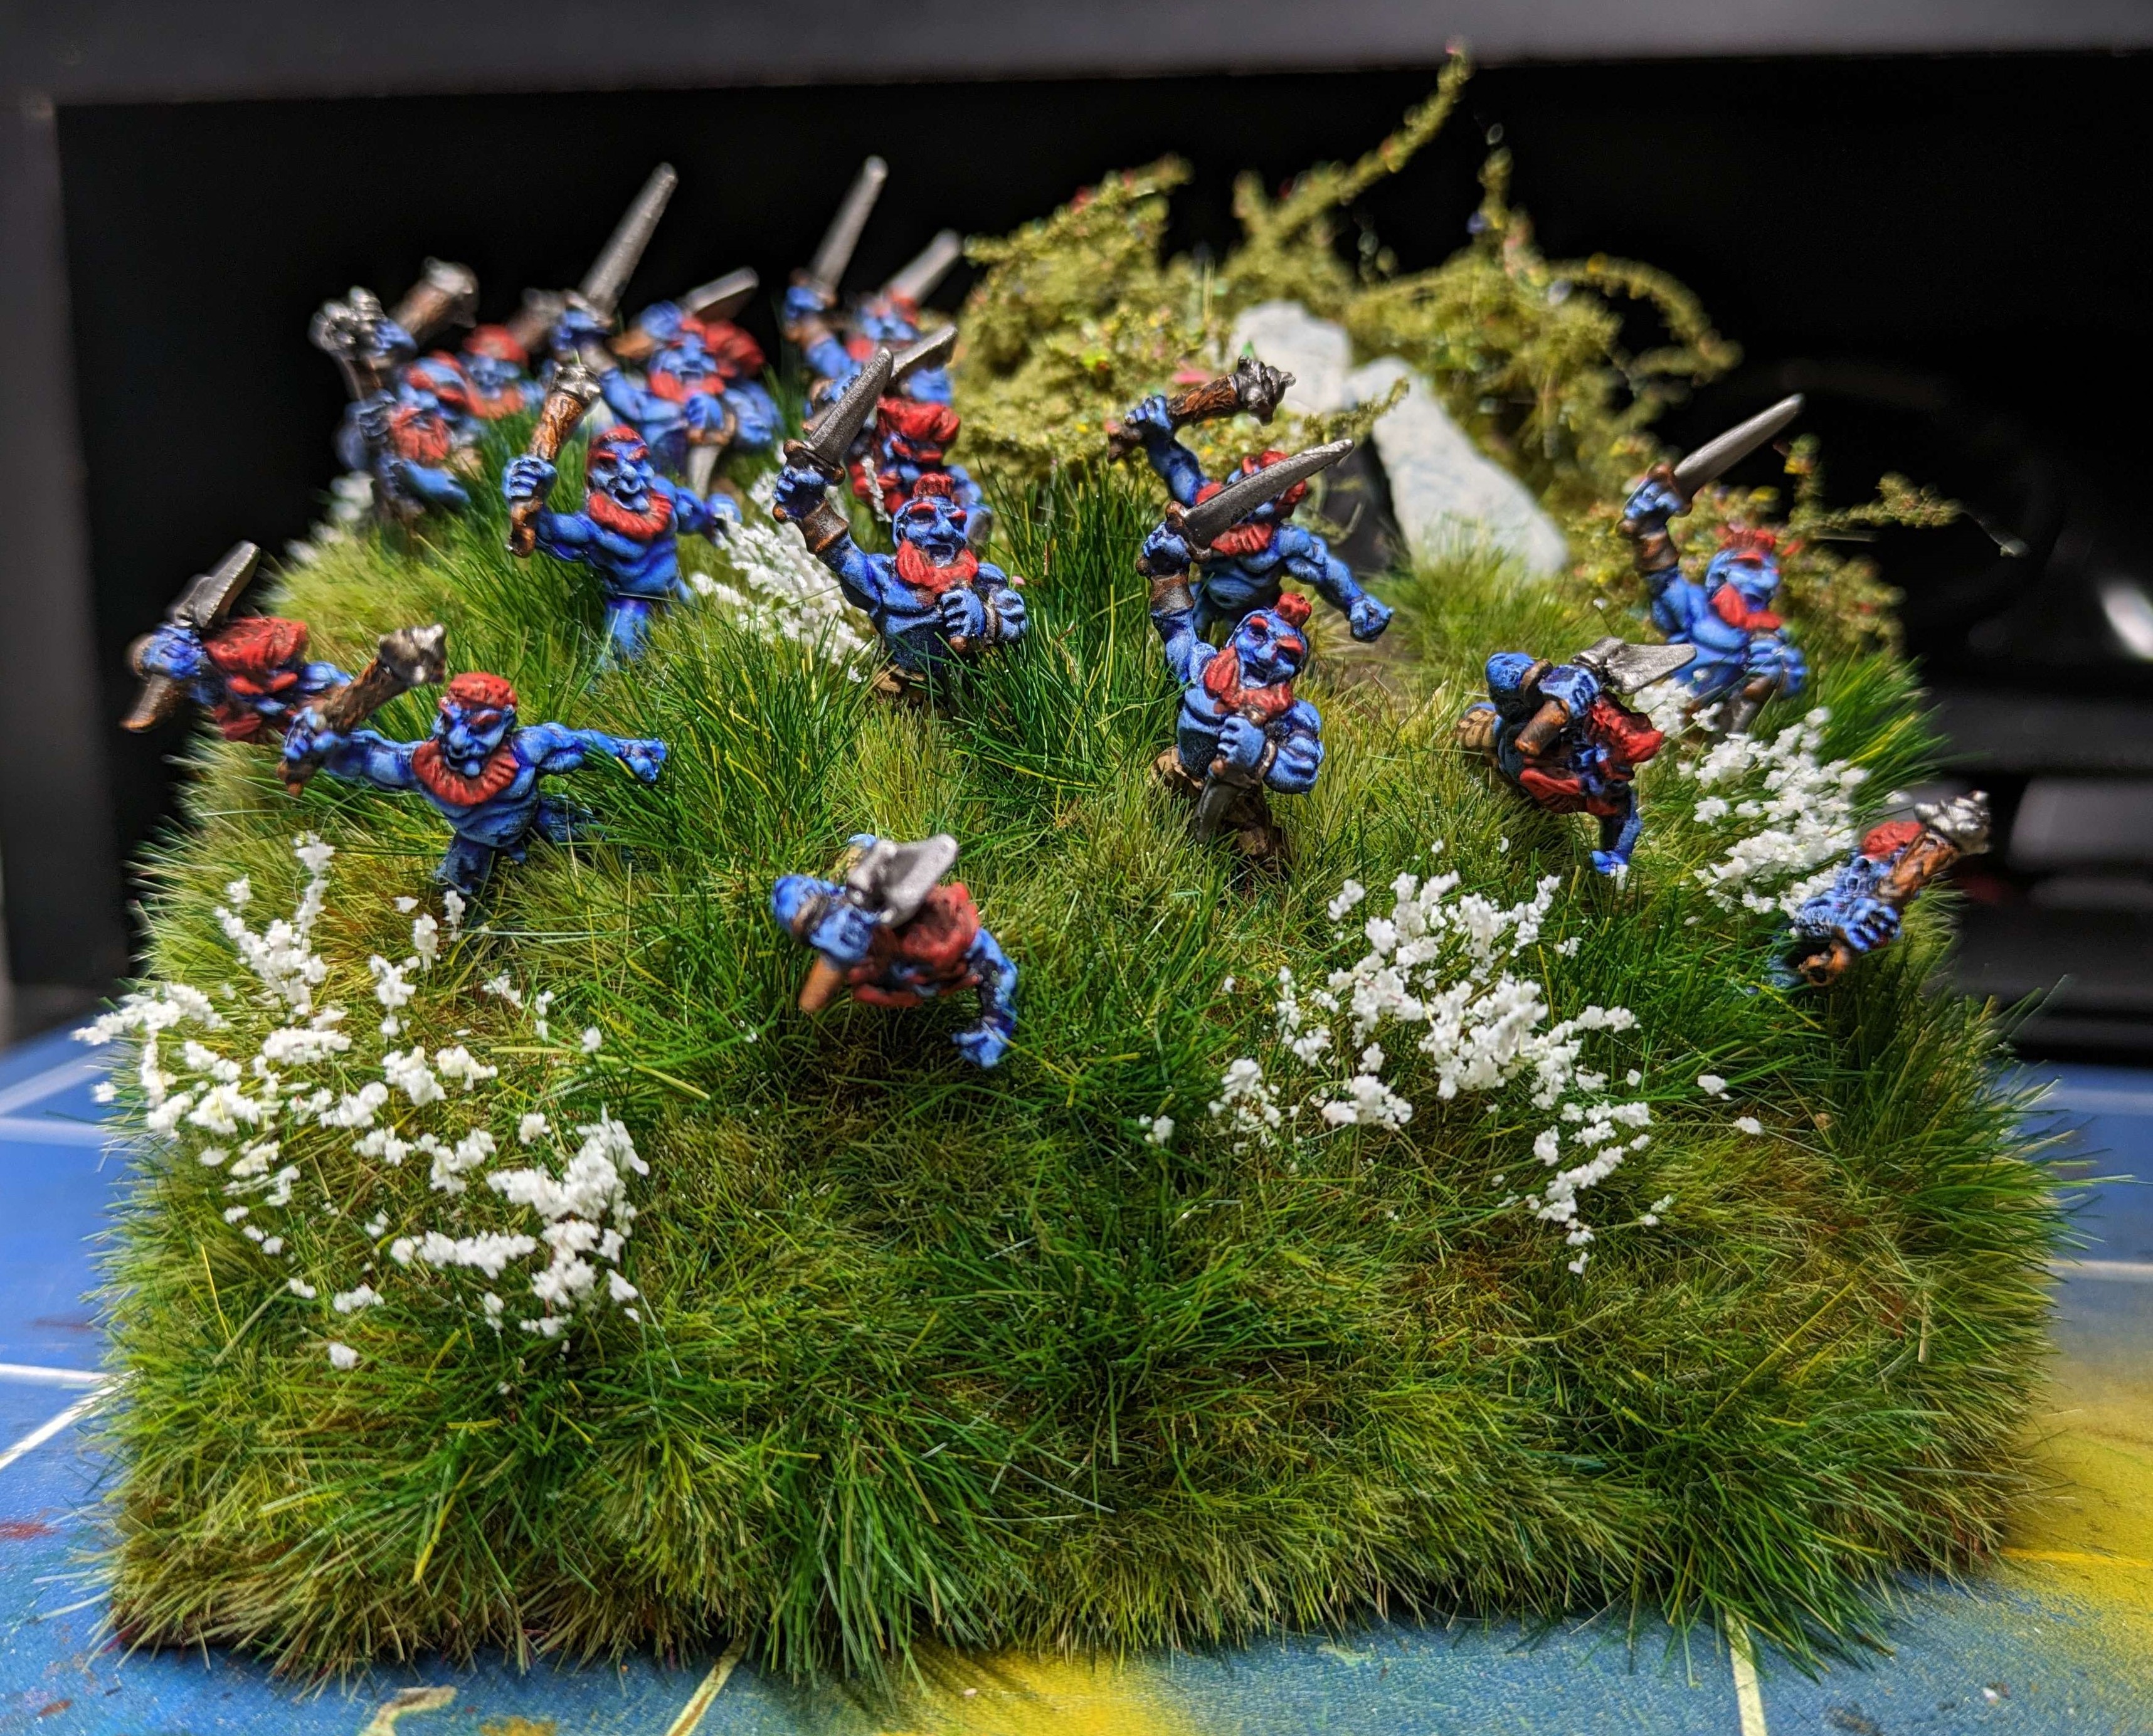
Luggit Gang No.1
On the day Granny Aching died, the men had cut and lifted the turf around the hut and stacked it neatly some way away. Then they’d dug a deep hole in the chalk, six feet deep and six feet long, lifting out the chalk in great damp blocks… Granny Aching had been wrapped in a woolen blanket, with a tuft of raw wool pinned to it… The chalk had been put back over her and Granny Aching, who always said that the hills were in her bones, now had her bones in the hills. Then they burned the hut. That wasn’t usual, but her father had said that there wasn’t a shepherd anywhere on the Chalk who’d use it now… Next day, when the ashes were cold and blowing across the raw chalk, everyone went back up onto the downs and with very great care put the turf back, so all that was left to see were the iron wheels on their axles, and the pot-bellied stove. (Wee Free Men, 2003, pg 108-109)
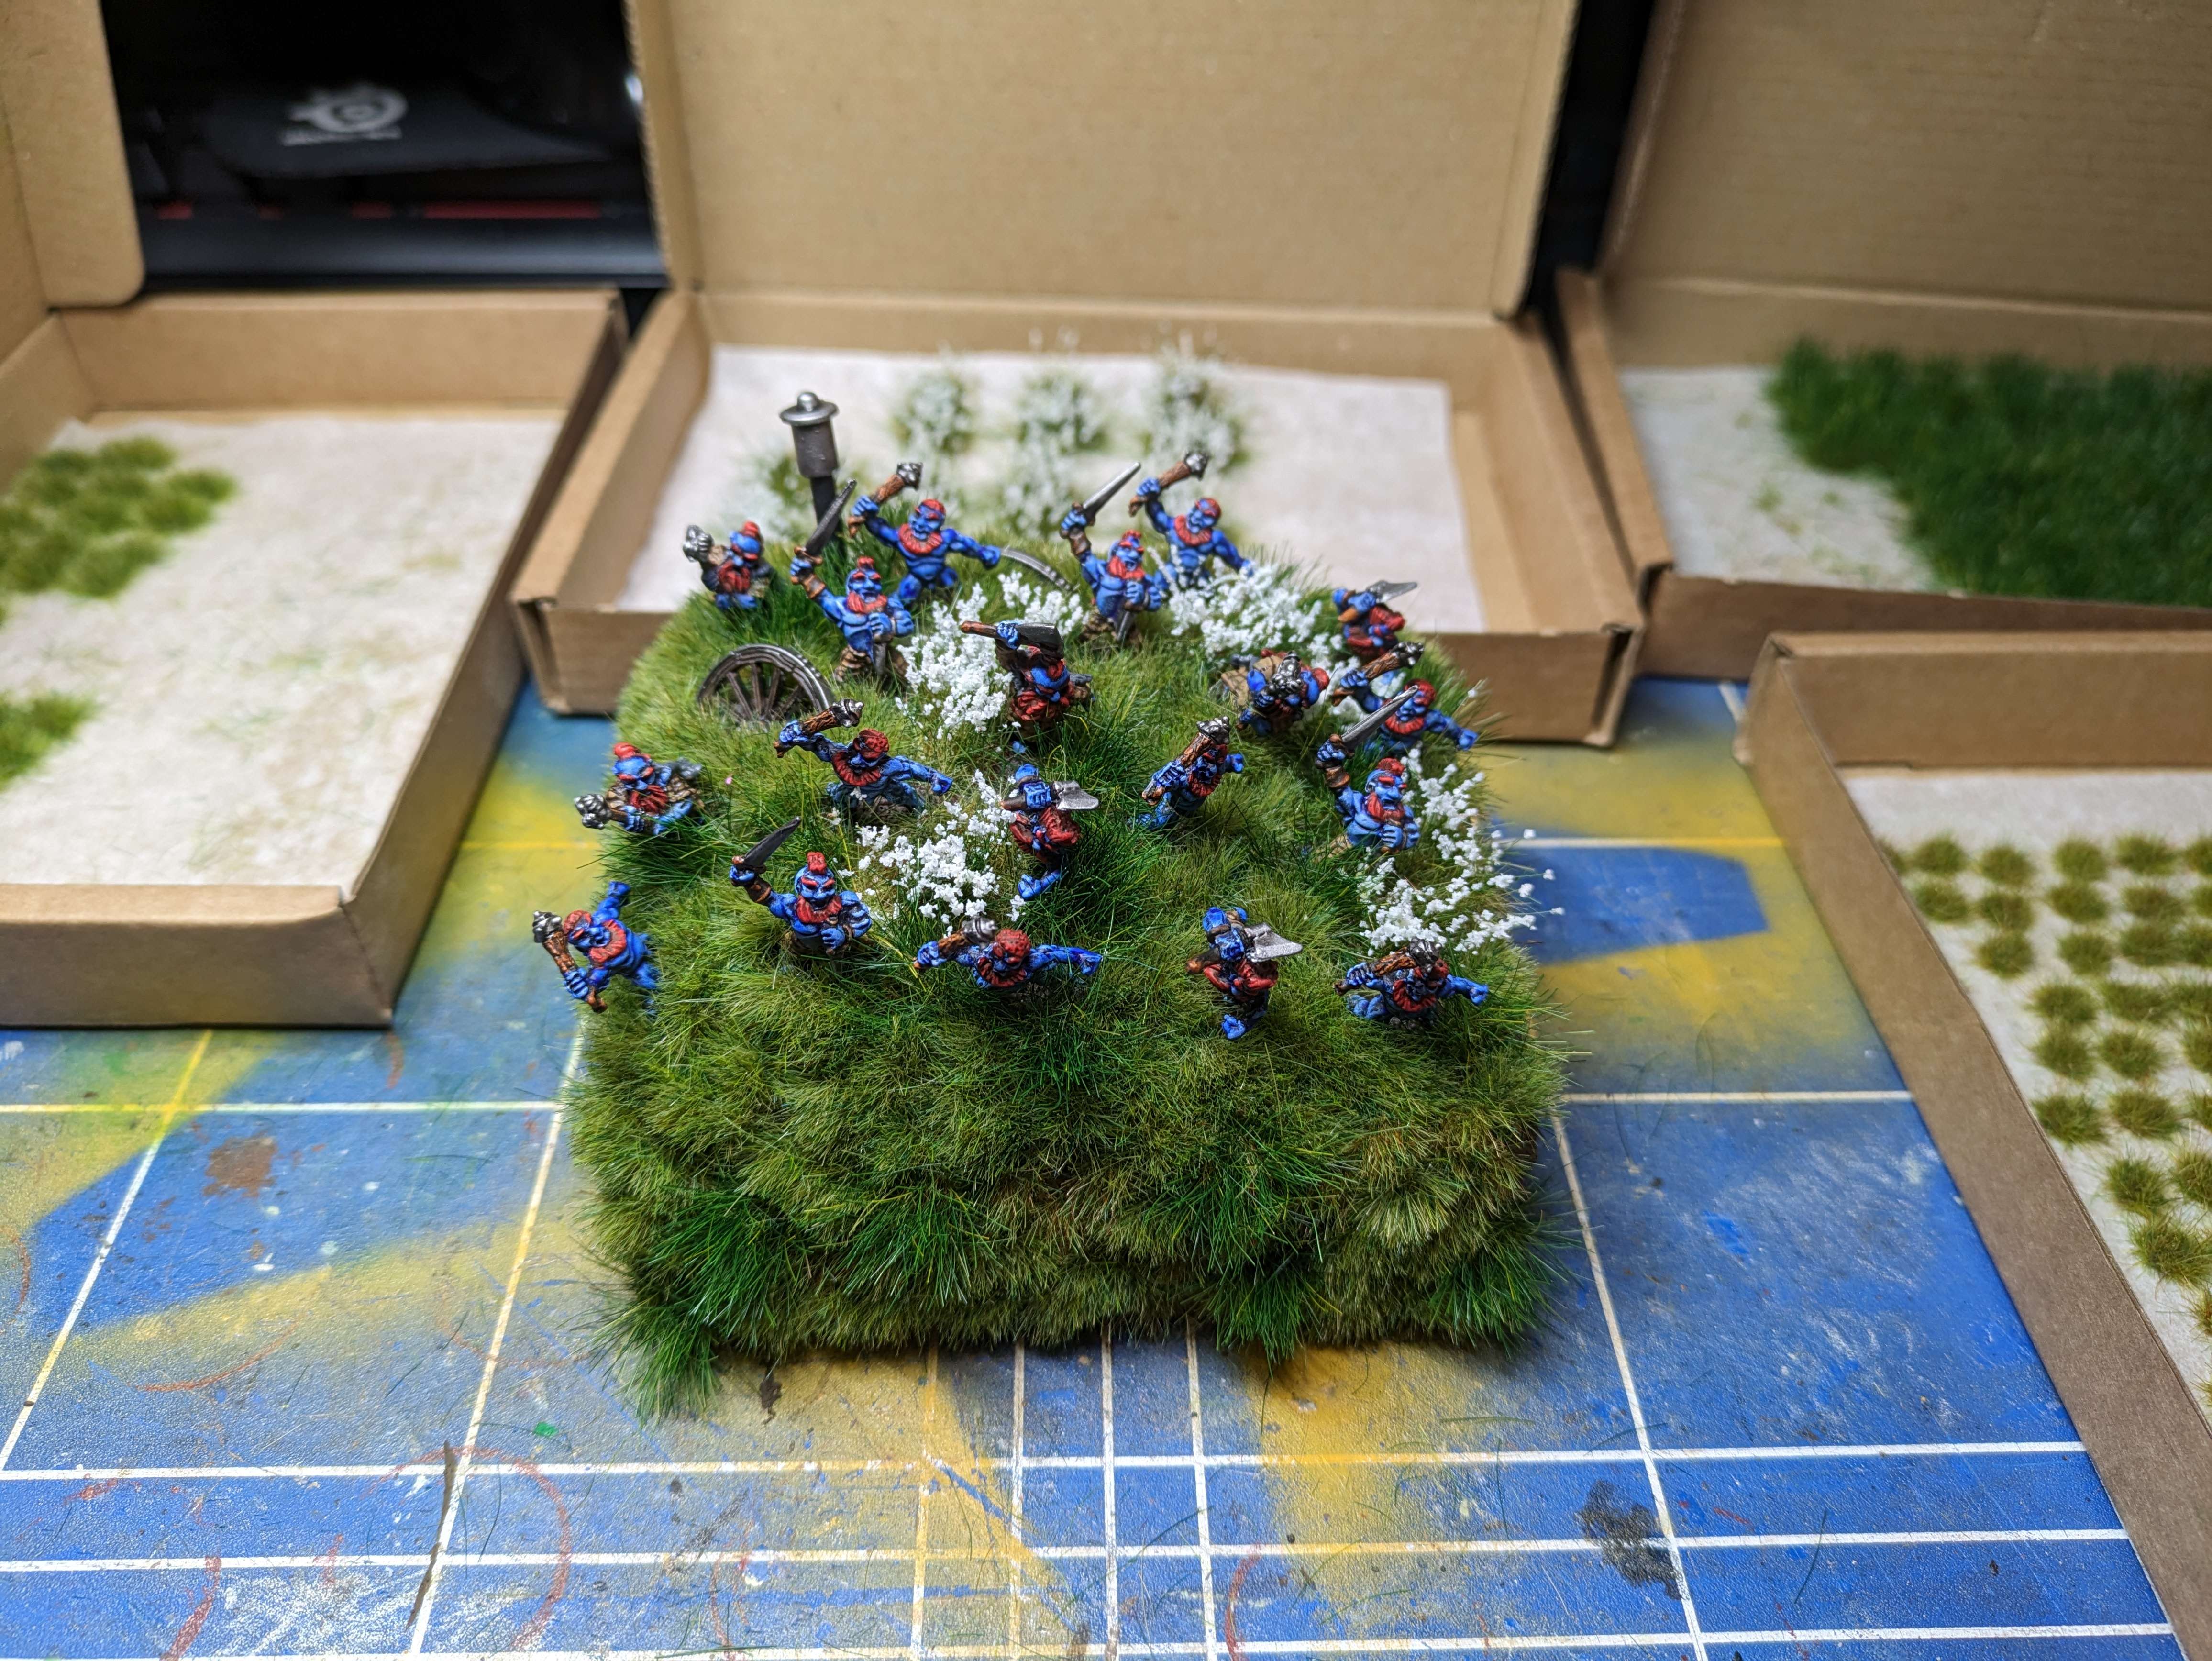
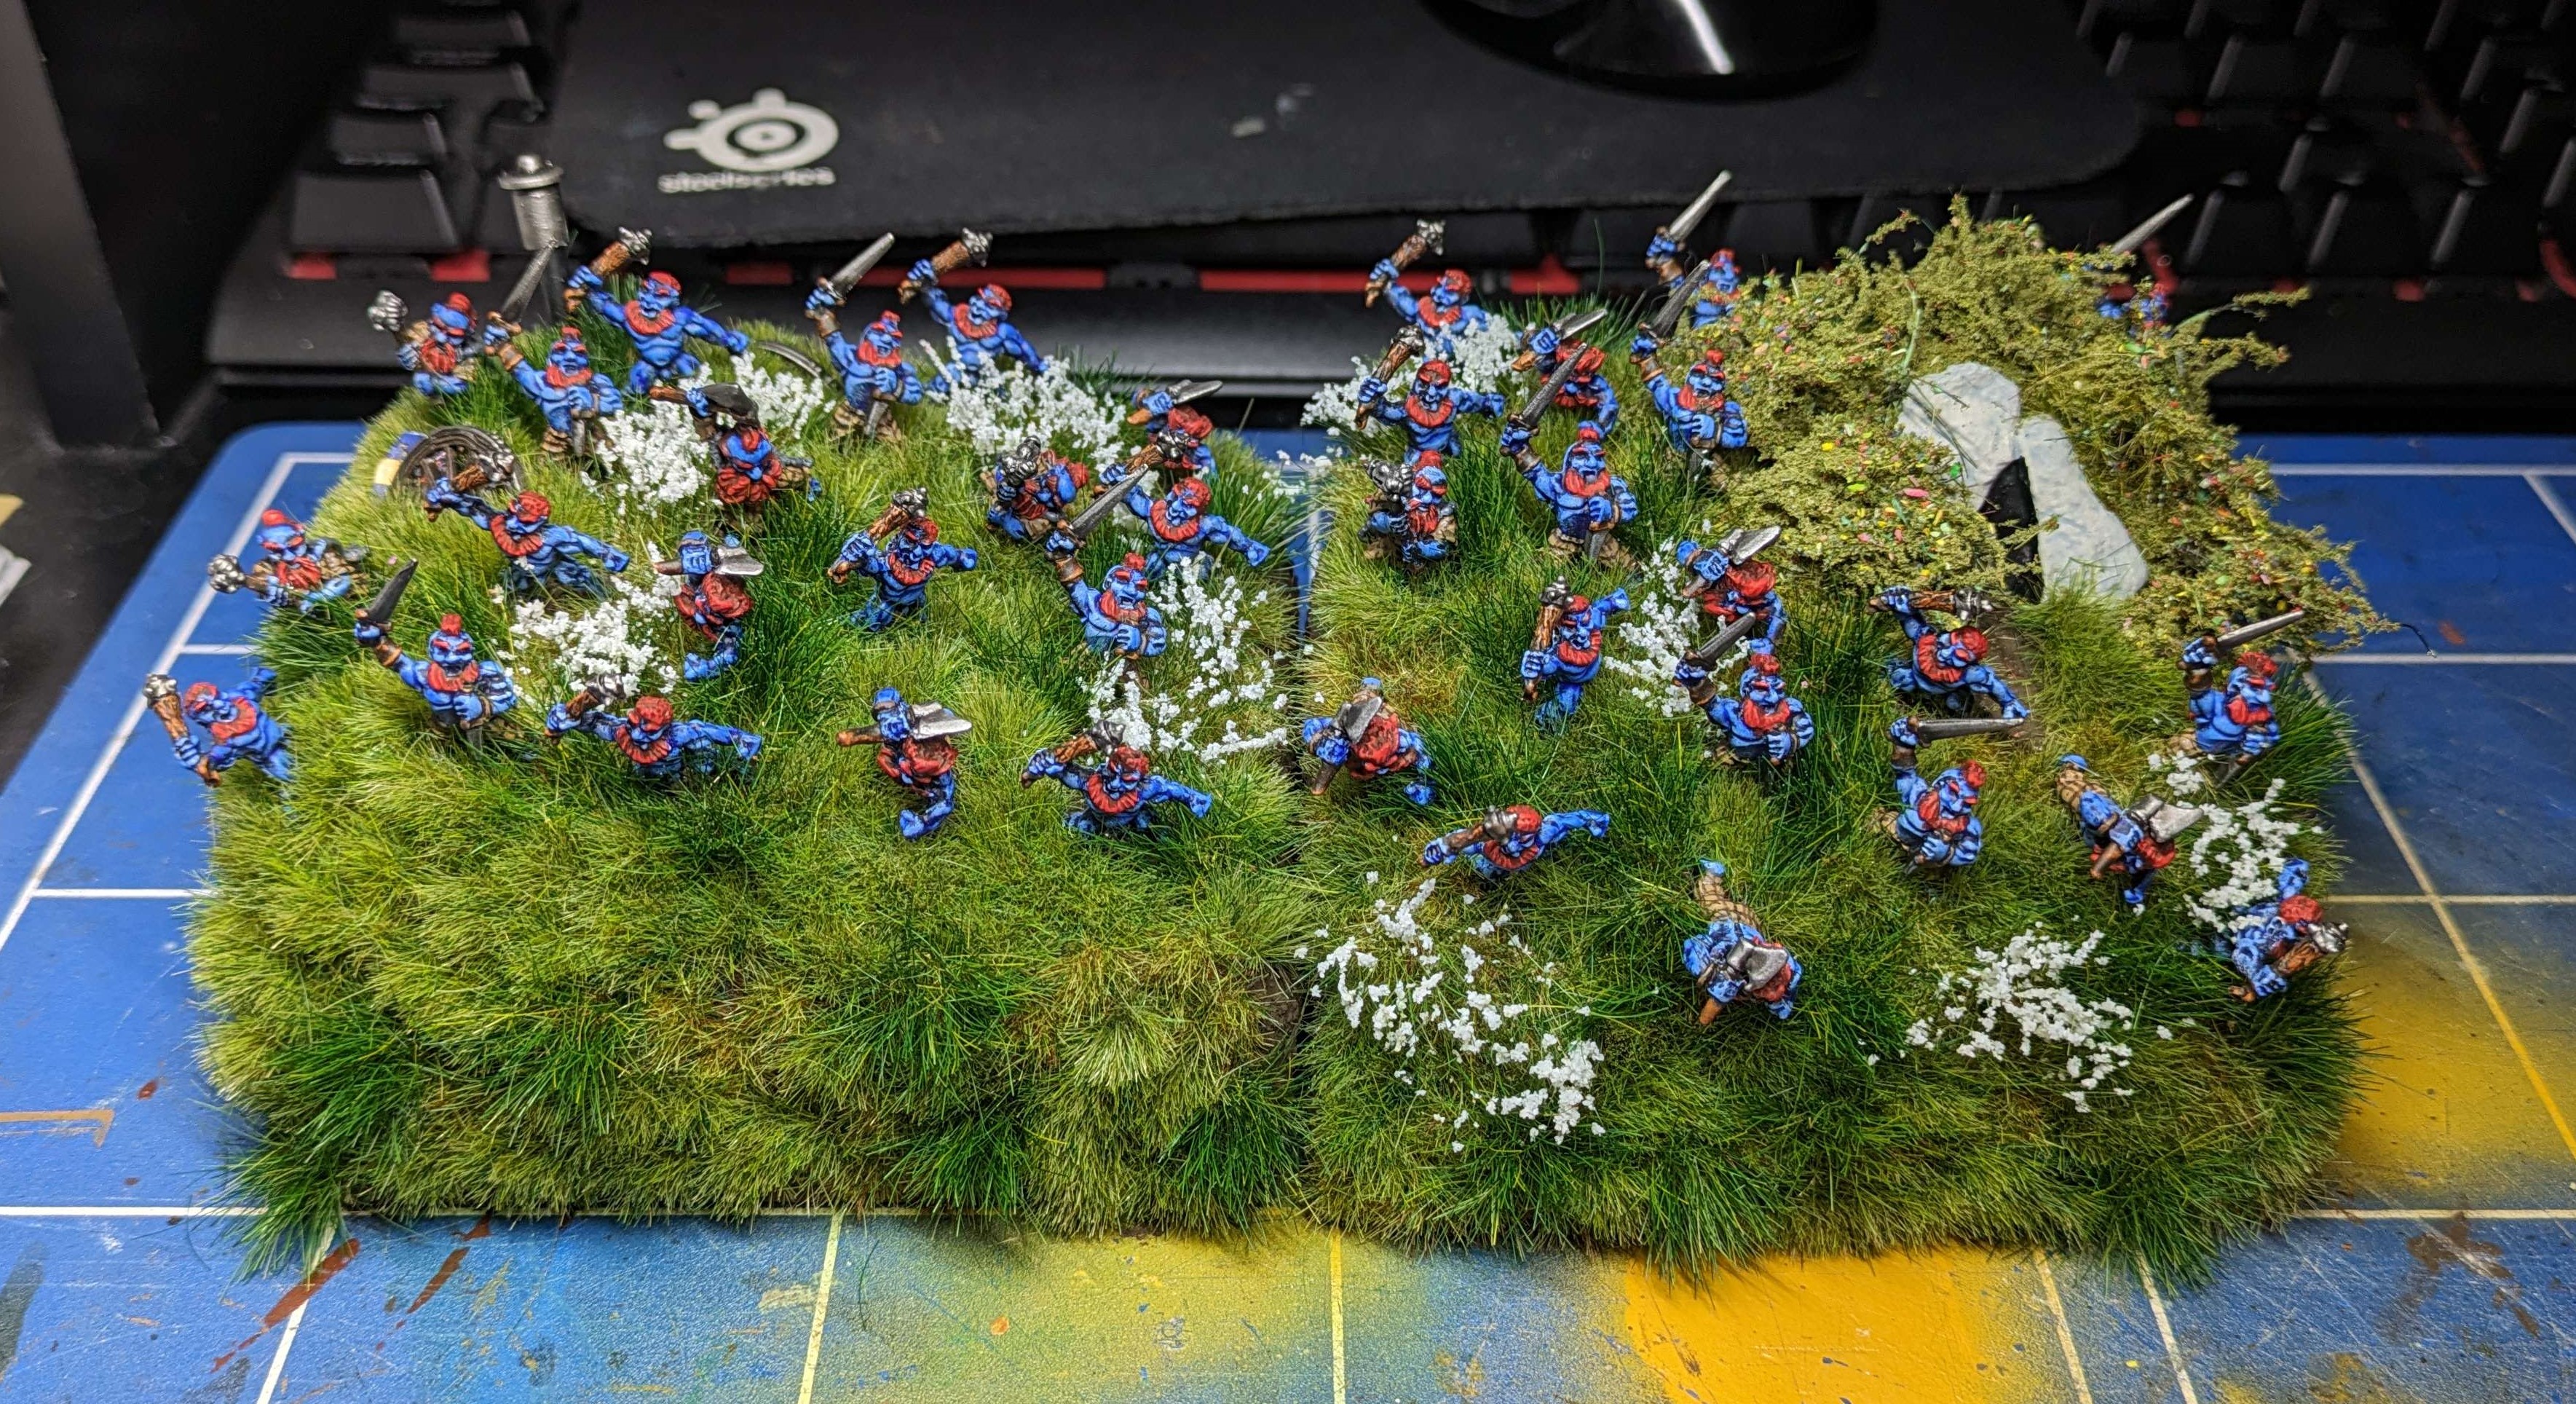
With five identical regiments in the army, I wanted a way of each being told apart (esp when it comes to magic items, I don’t like the immersion breaking act of sticking a card between the models). What with payday just happening and the last bits for the army now on their way, I wanted to get at least one completed base to push me forward in motivation.
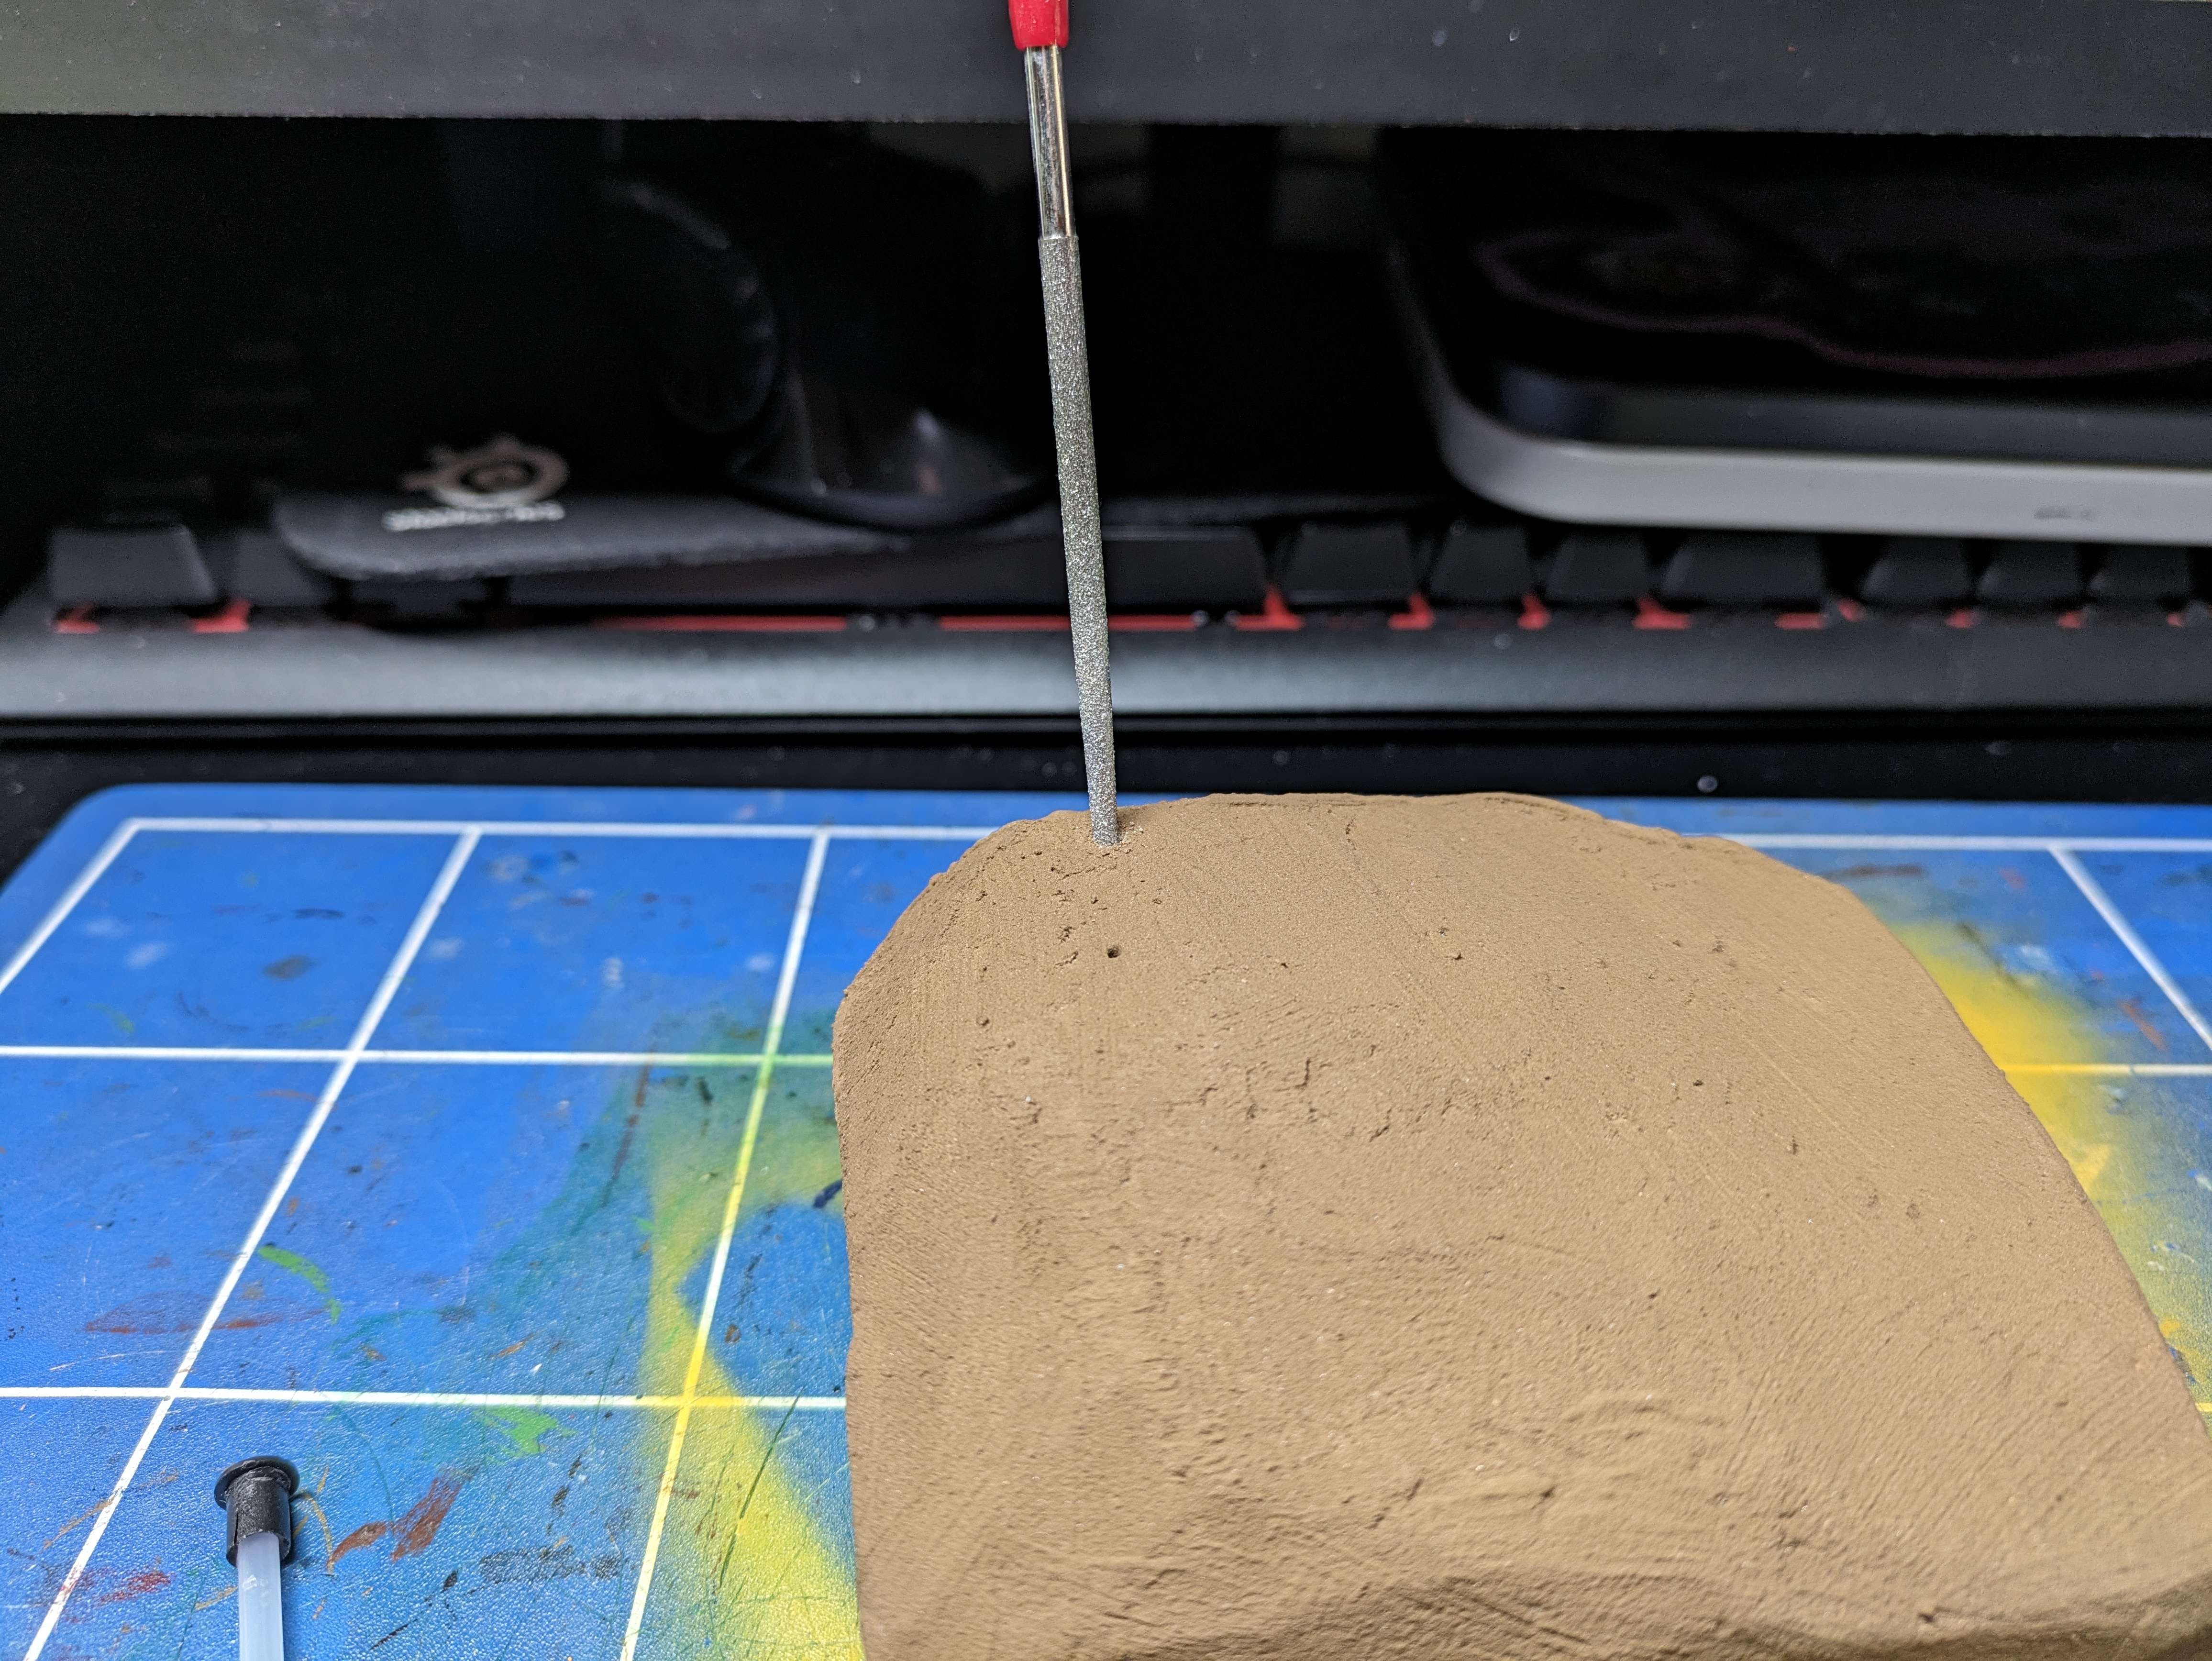
I started with the one that has the remains of Granny Aching’s shepherding hut on it. This is the point when I have to fully accept that scale is a flexible thing in this army… regiment bases aren’t as big as you think.
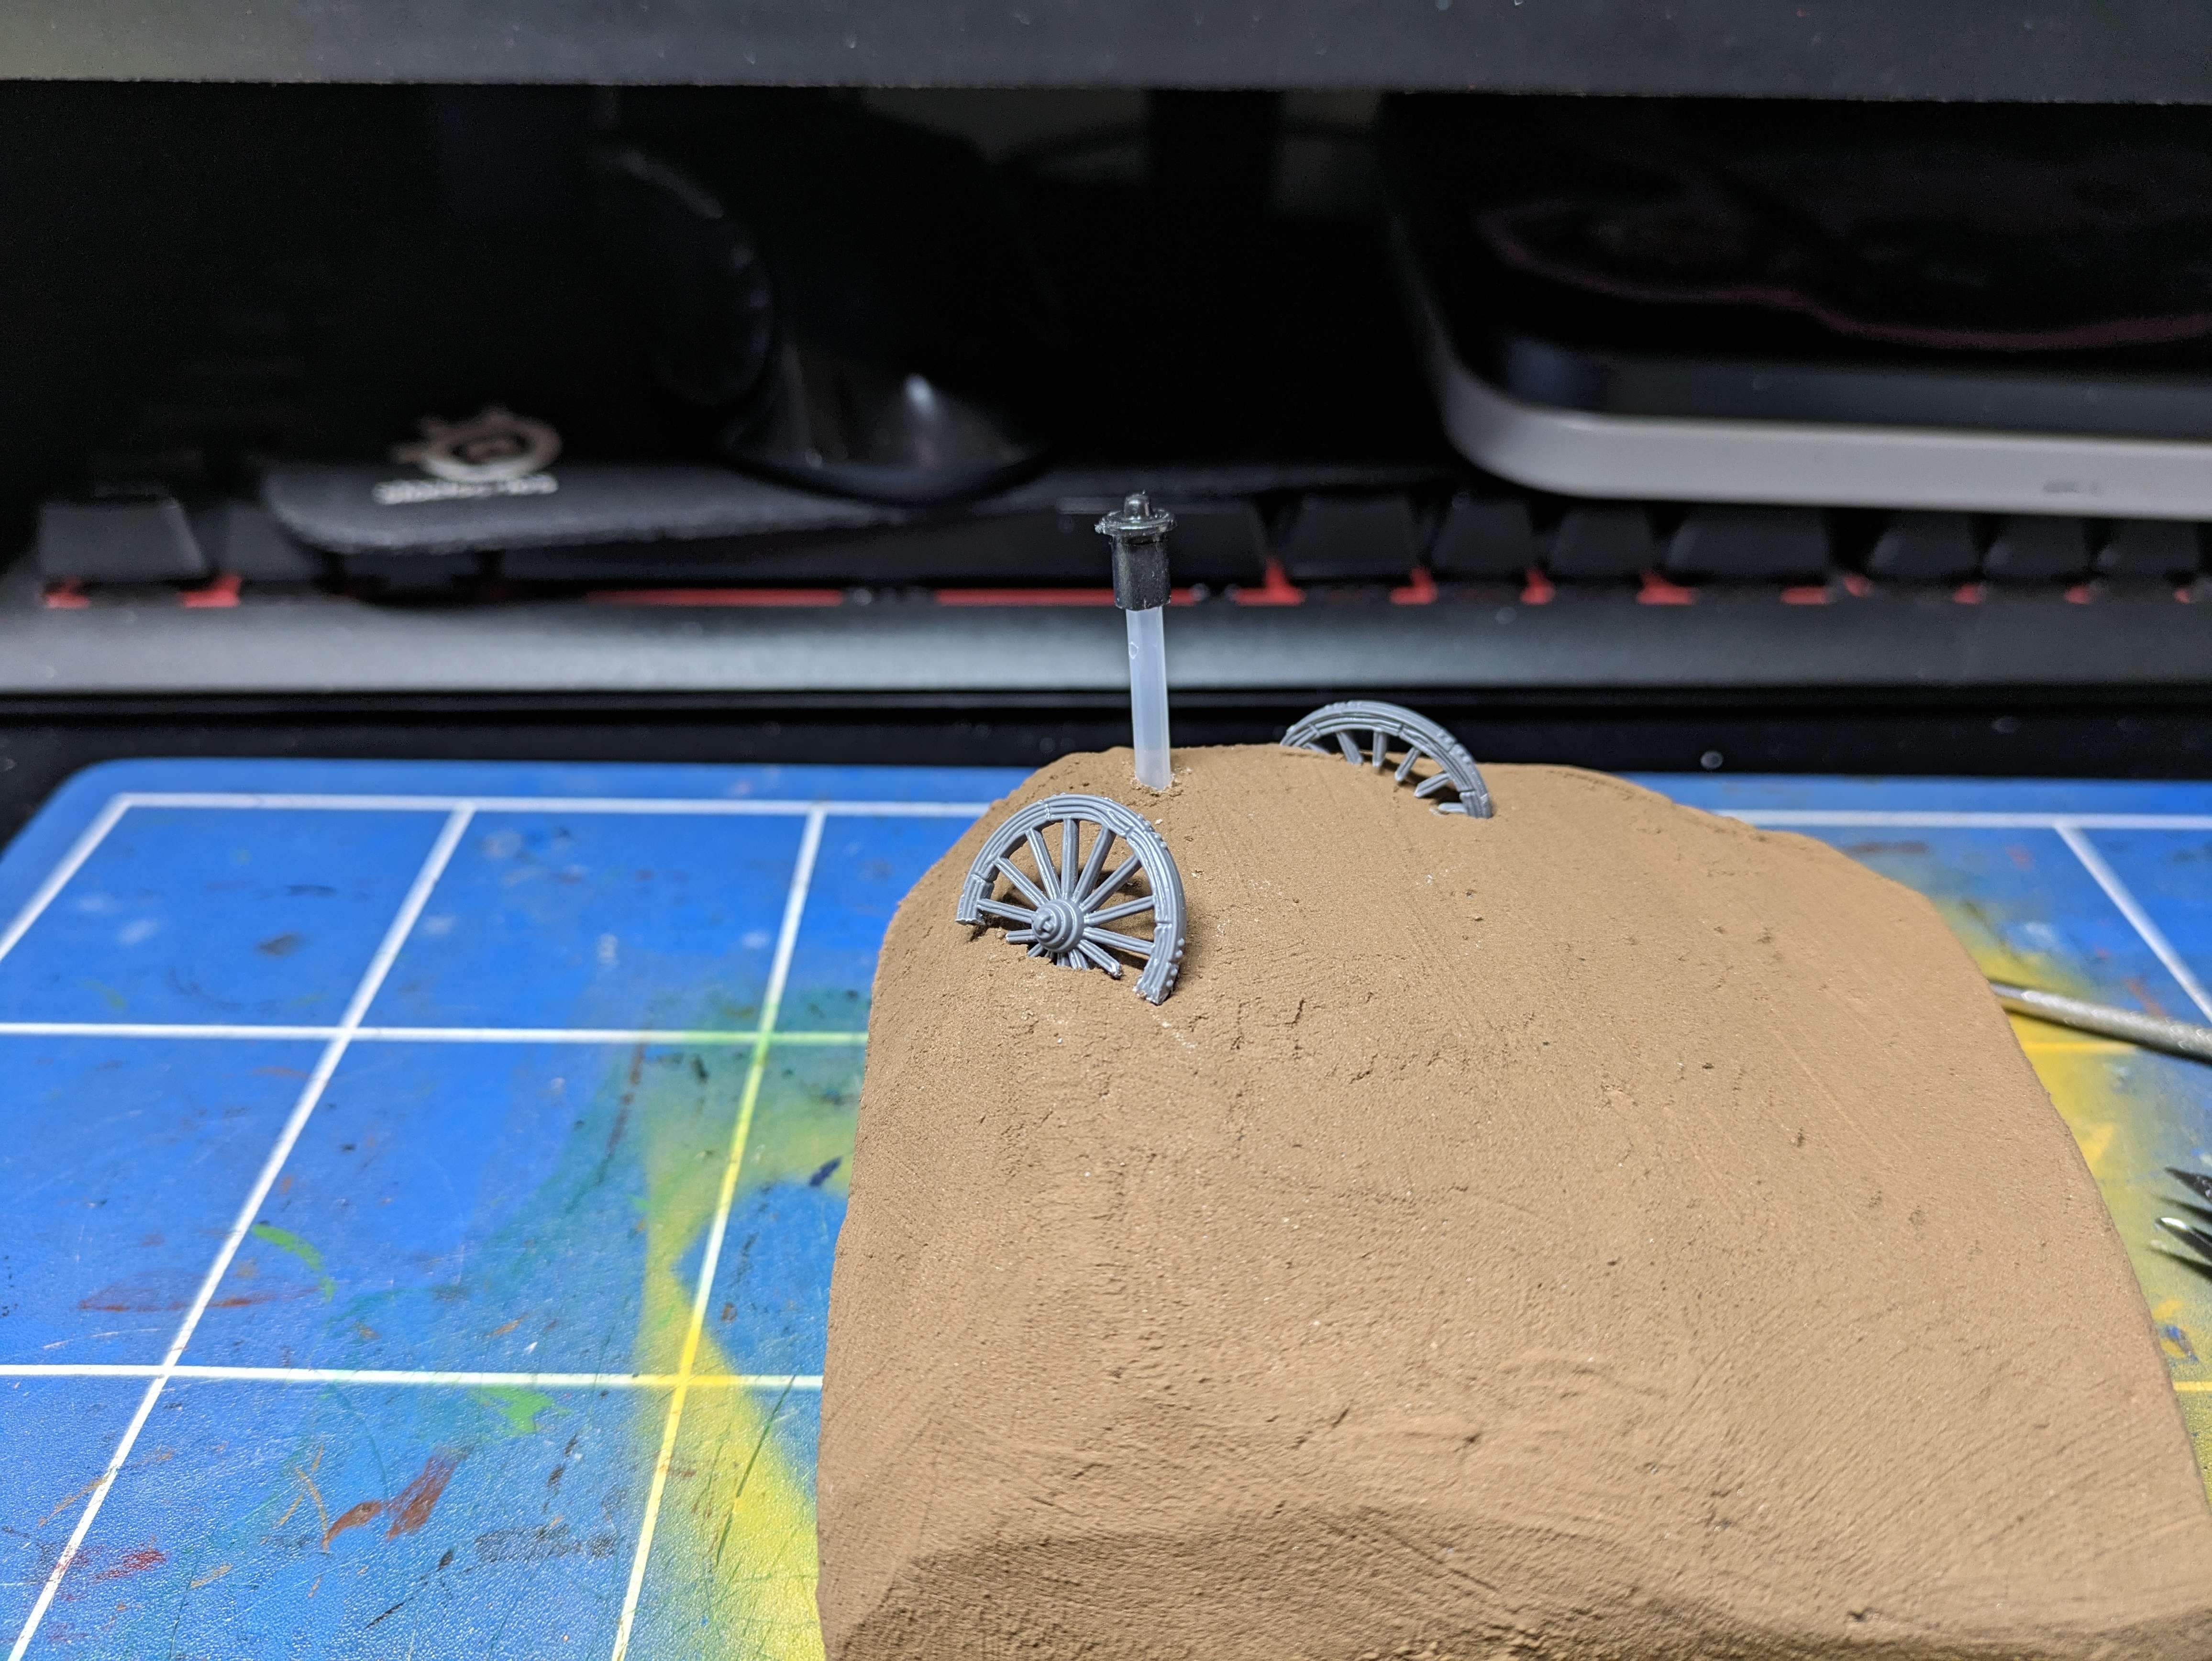
Pratchett himself had a shepherding hut and there’s photos in the exhibition book I talked about a few posts ago. The wheel for mine was taken from one of the plastic wagon kits from Great Escape Games and the stove chimney is a bit of water pistol.
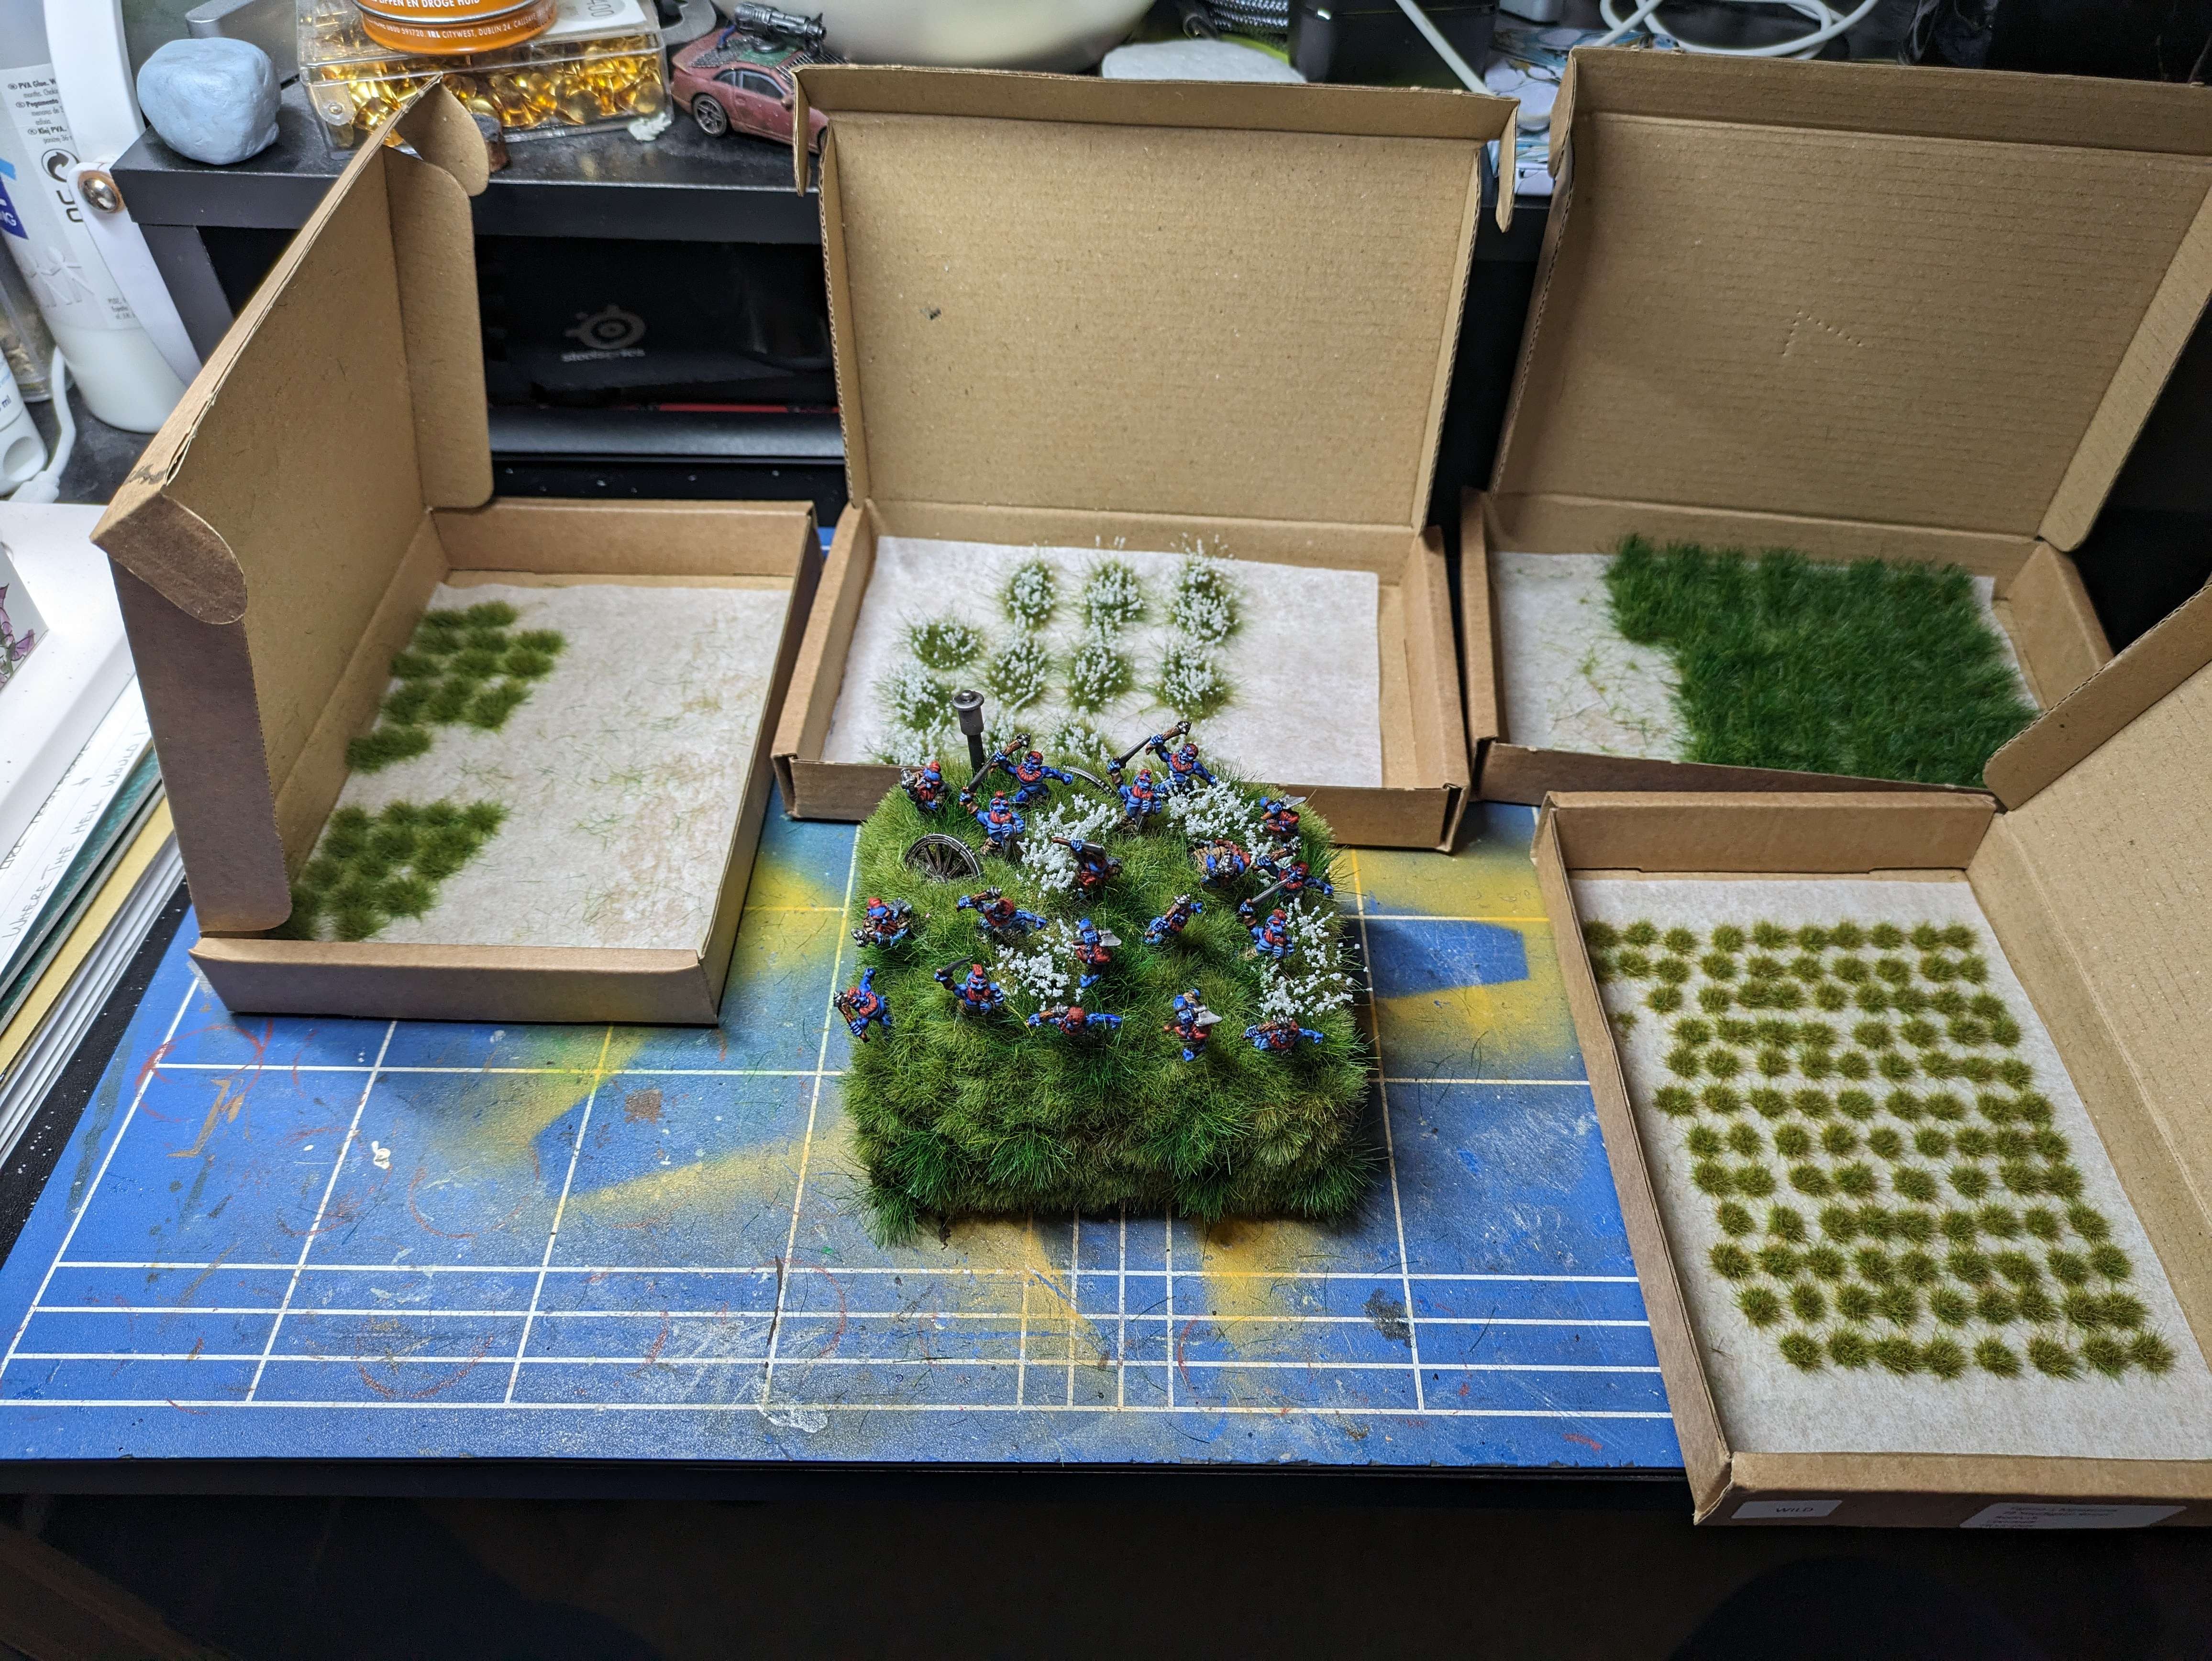
Once the hut was set in, I started to lay out some feegles. There are fewer of them than I originally thought would be on these bases but as I have gone on with the project, I’ve realised I need more space for grass tufts as you’ll see soon.
Super glue secured everyone but to add more stability I used a texture paste to level the ground. I used up the end of a bottle of Stirland Battlemire and then switched to AK’s Dark Earth. After it cured, I applied some tufts. I’ve got a load for this project from Tajima 1 Miniatures and they are excellent. From reading the books, we know the Downs are covered in white flowers and that often the only sign the feegles are around is the movement of grass. It made sense then to have the grass be higher on the models than I normally would. Getting these bigger elements in place first, I then went through with smaller tufts and laid out a good thick layer of grass to match the descriptions.
I’m still not sure the fronts/sides. I’m leaning towards keeping the sides the bare earth colour but having grass over the front so each base will look complete on their own stampeding towards the enemy.

I’m delighted with how this one turned out. After a few weeks of spinning my wheels, this was a big step towards how I see the army in my head. In fact, it gave me such a boost that I worked on three more bases on the same day (photos later once they are finished). The bases will have more feegles on them going forward but overall, this is the look I want.
Luggit Gang No.2
It was too big to be a rabbit hole and badgers didn’t live up here, but the entrance to the mound was tucked in amongst the thorn roots and no one would have thought it was anything but the home of some kind of animal. (Wee Free Men, 2003, pg 124)
The second regiment is another at the back of my display, this time of the entrance to the Feegle mound.
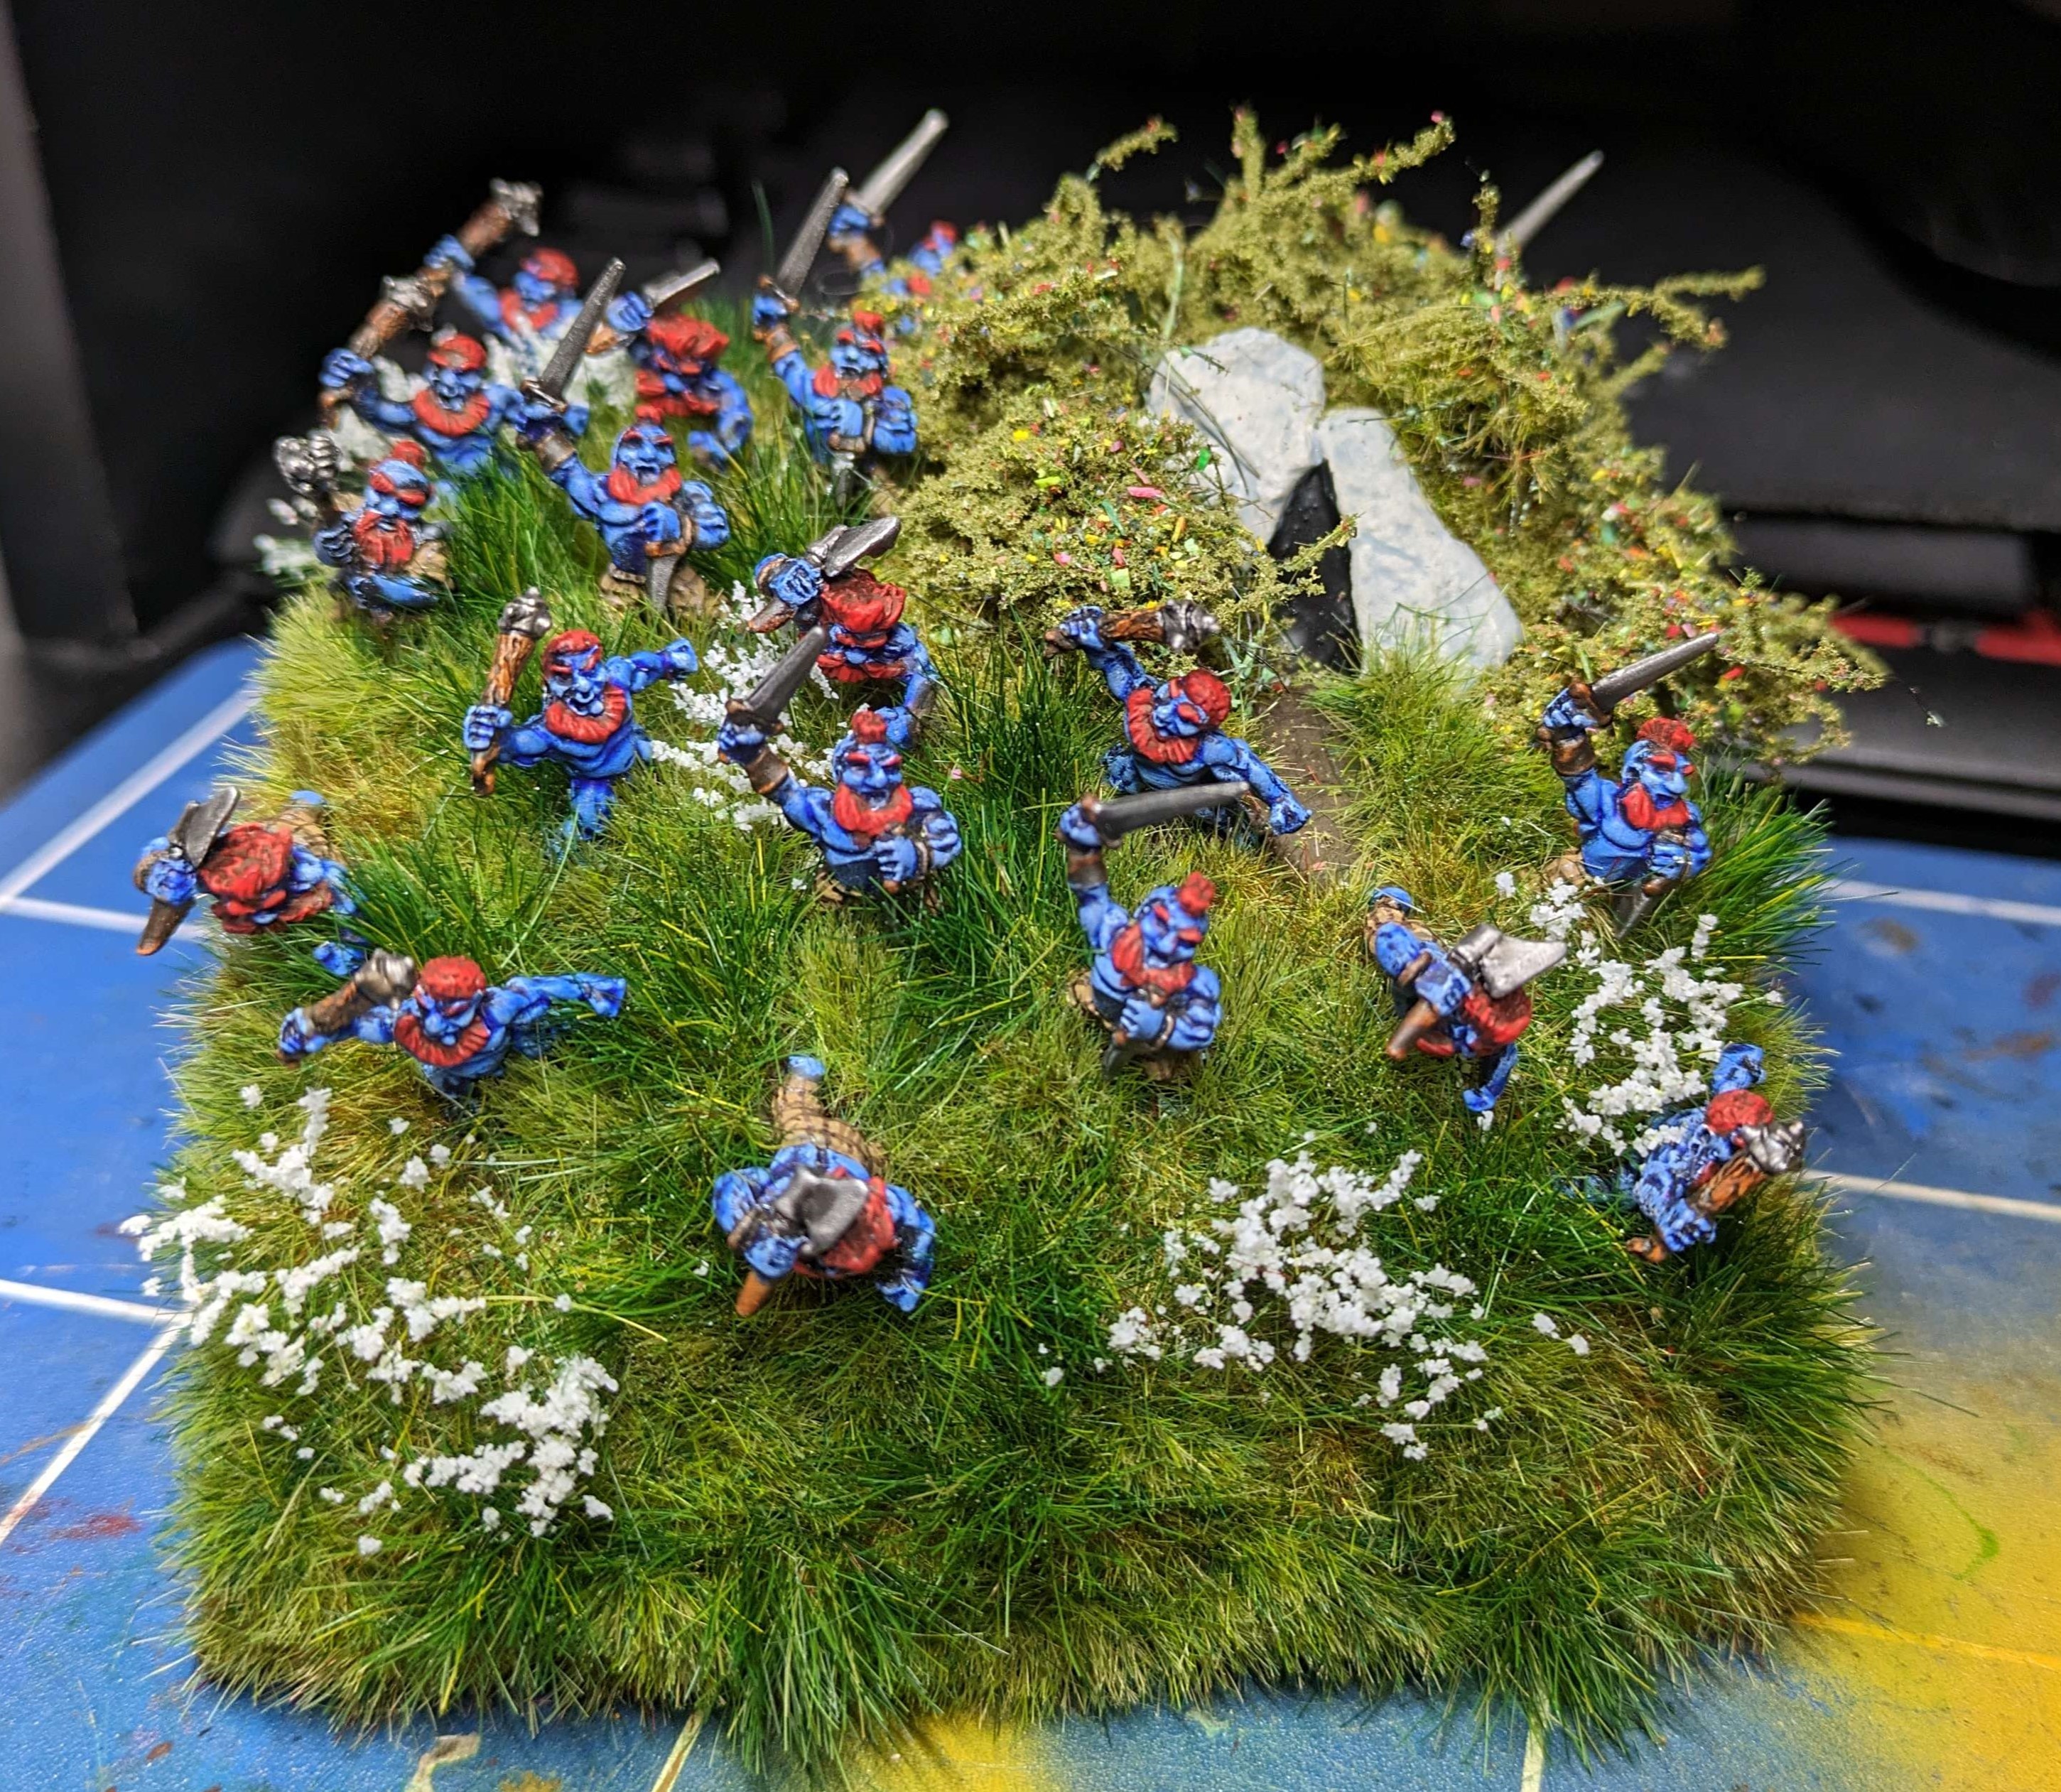
This is the point where I realised that I’ve made an expensive mistake. I should have bought a static grass applicator and mixed up my own static grass rather than using tufts. The Tajima1 tufts are fantastic, easily the best I’ve bought over the years. Not even a hint of needing to add glue to keep them stuck down, a nice mix of shapes and sizes and very little shedding. Can’t recommend them enough… unless you decide to make them the entire ground cover for a full 2000 point multi-based army! The cost is going to be eye watering but as they say in for a penny, in for over a hundred pounds.
Tufts used from Tajima1:
- Natural elements large summer green (the bulk of the ground cover)
- XL green
- Wild flower beds in white
- Wild grass tufts (free when you order five boxes or more)


![StarCraft Tabletop Miniatures Game Pre-Orders Live Now [Updated]](https://images.beastsofwar.com/2026/03/starcraft-tmg-news-cover-600-338.jpg)


![Mounted US Cavalry On Kickstarter For Dead Man’s Hand! [Updated]](https://images.beastsofwar.com/2026/03/us-cavalry-main-600-338.jpg)


