


![NO Weekender Or Cult Of Games XLBS This Weekend [Updated]](https://images.beastsofwar.com/2026/03/No_Weekender_and_XLBS_this_Weekend-225-127.jpg)


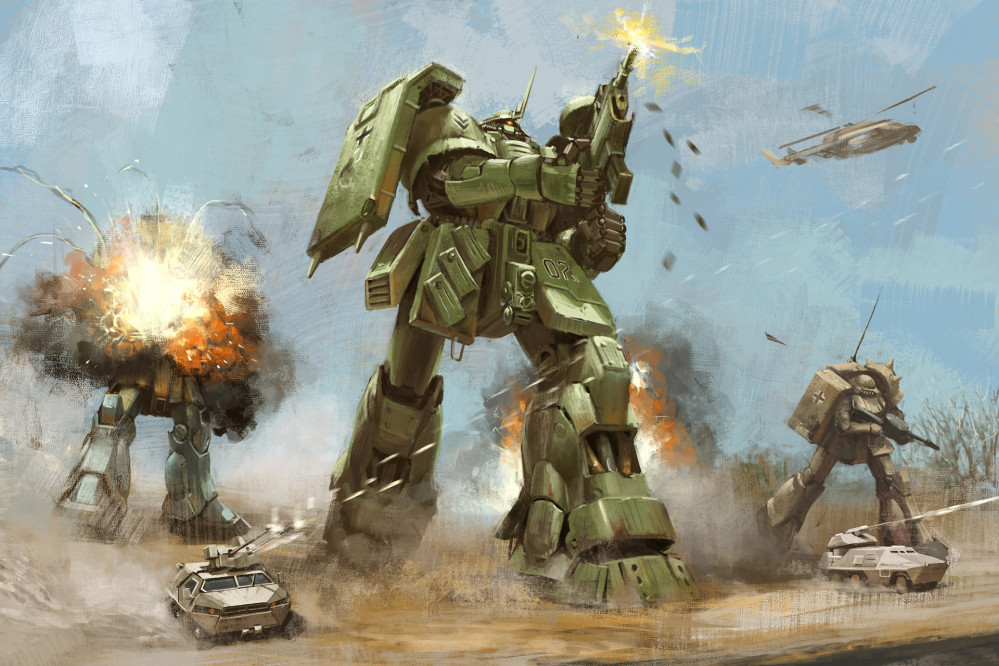
The Zurad (MSP 04a)


Recommendations: 369
About the Project
With all the Gundam projects popping up (and because I don't feel like painting armies), I was inspired to build another diorama with a Gundam. I have about 19 Bandai kits that I collected over 15 years and just left on the shelf. So I decided to take the oldest kits and try to upgrade them with extra detail. This kit is one of a Zaku 2. It is a very old kit and has very little detail for a HG kit - unlike the newer ones. Therefore this project will be my first 1/144 scale diorama and the first time I try to upgrade it by adding extra detail. This will be an imaginary Zaku prototype, like a paper panzer.
Related Game: Gundam Assemble
Related Company: Bandai
Related Genre: Science Fiction
This Project is Completed
The Diorama Setup has been Established
Hi everyone,
The diorama is now set. I know where I want everything to be. My plans changed several times, but I think I have nailed it down.
I had to do some milliput work on the building, so I decided to just paint everything. They take longer to paint than expected.
 Ground plan fixed in - for better or worse.
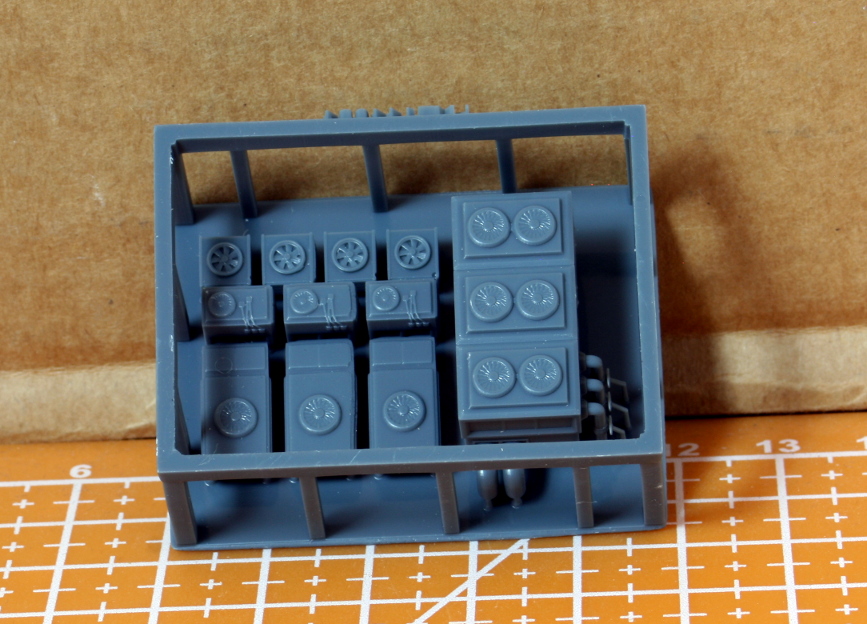 Printed out some detailing parts for the buildings.
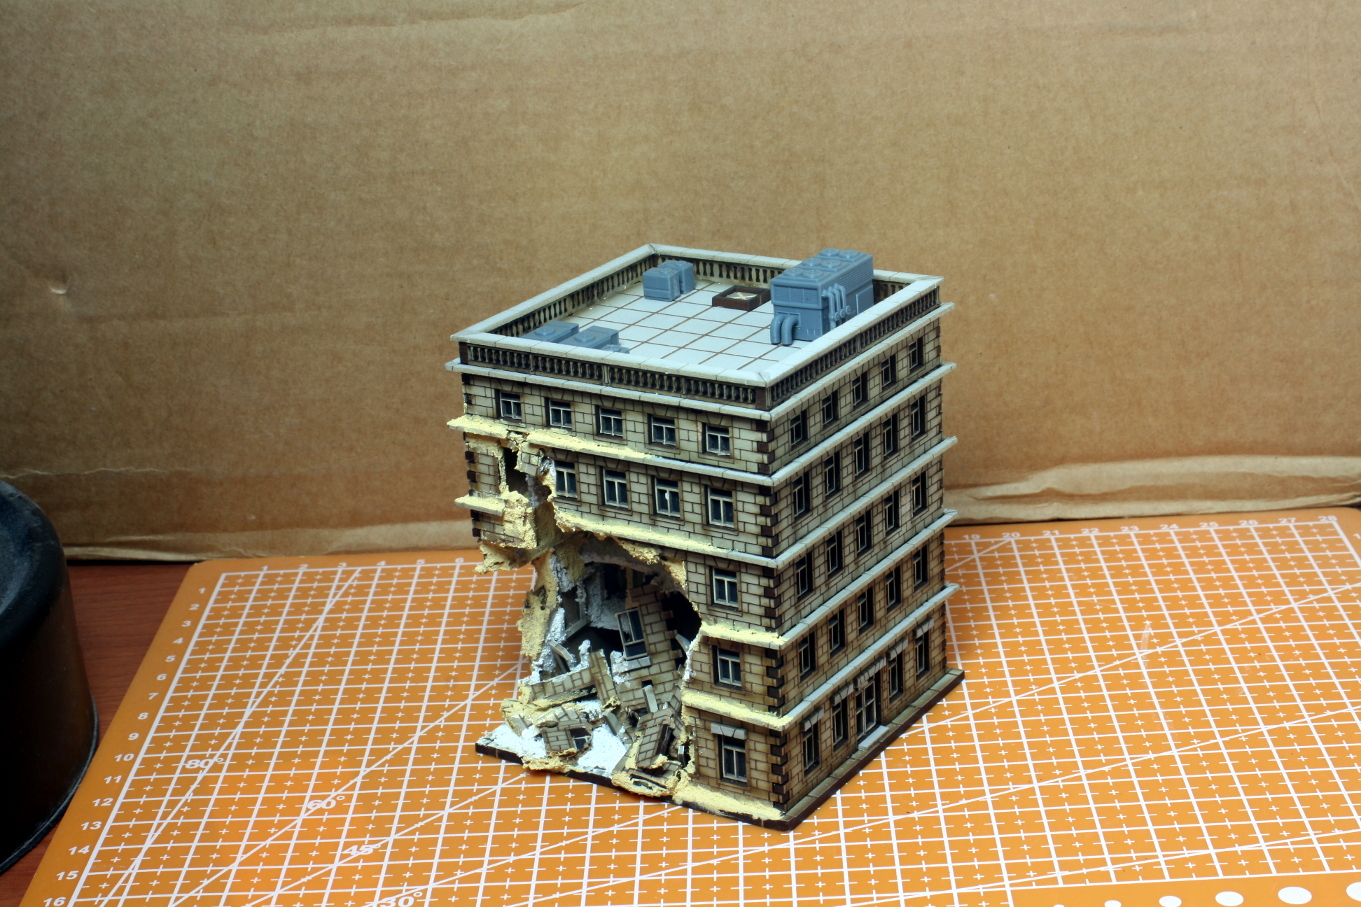 Some fixing with milliput and acrylic past.
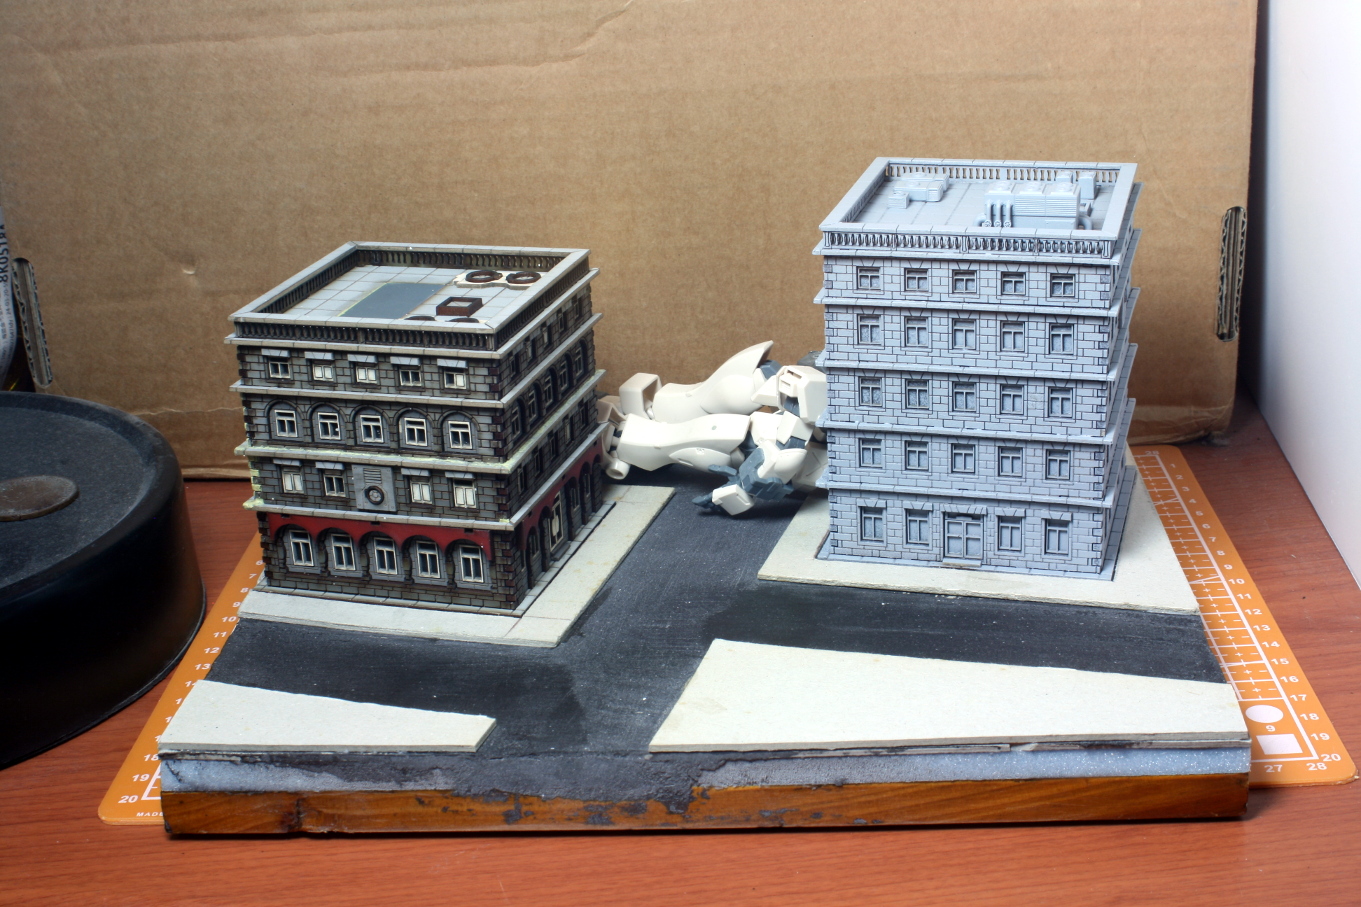 Last test fit before I start more work on the base.
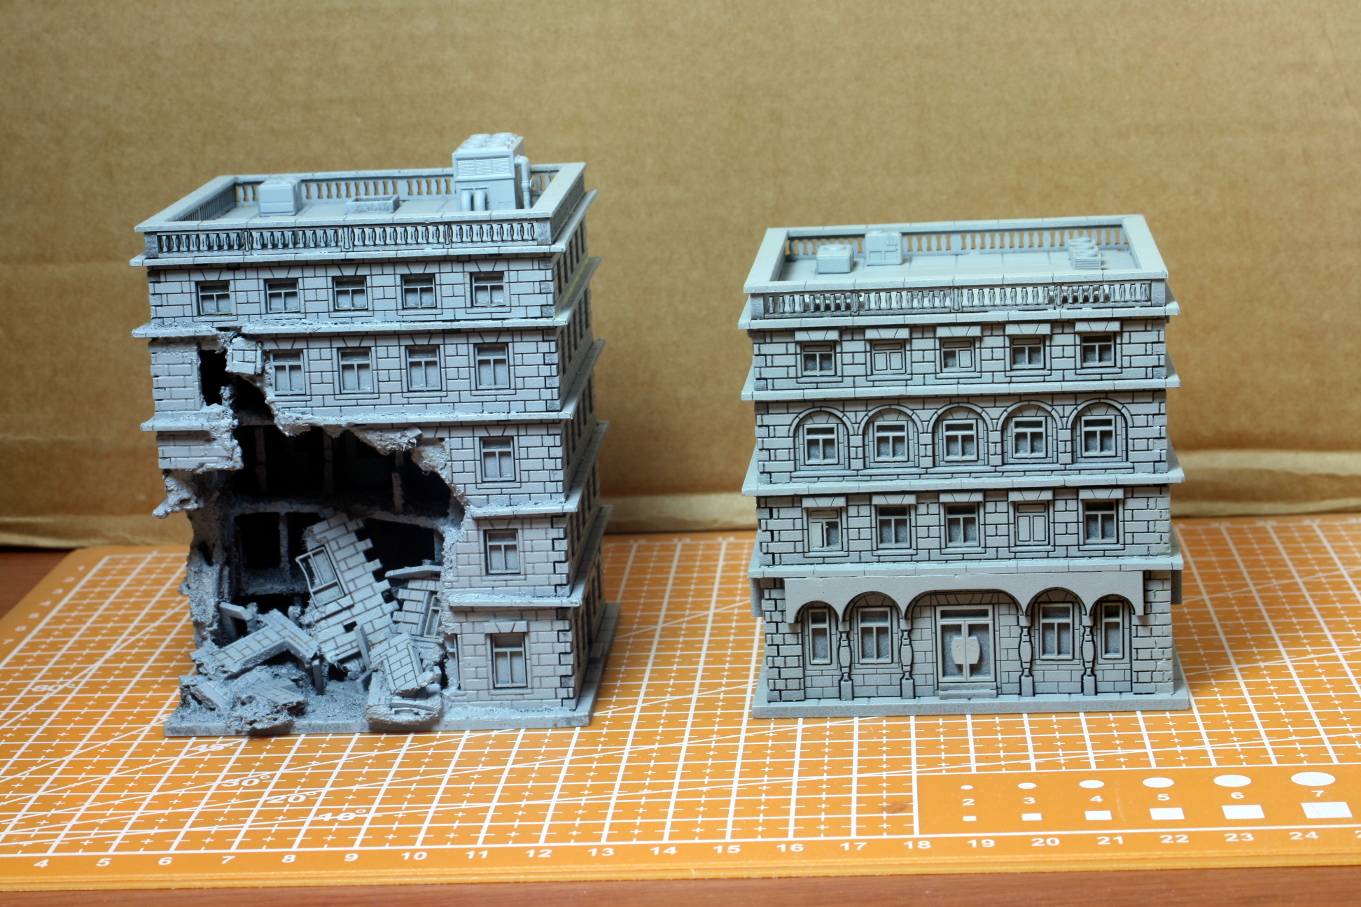 Primed with spray cans.
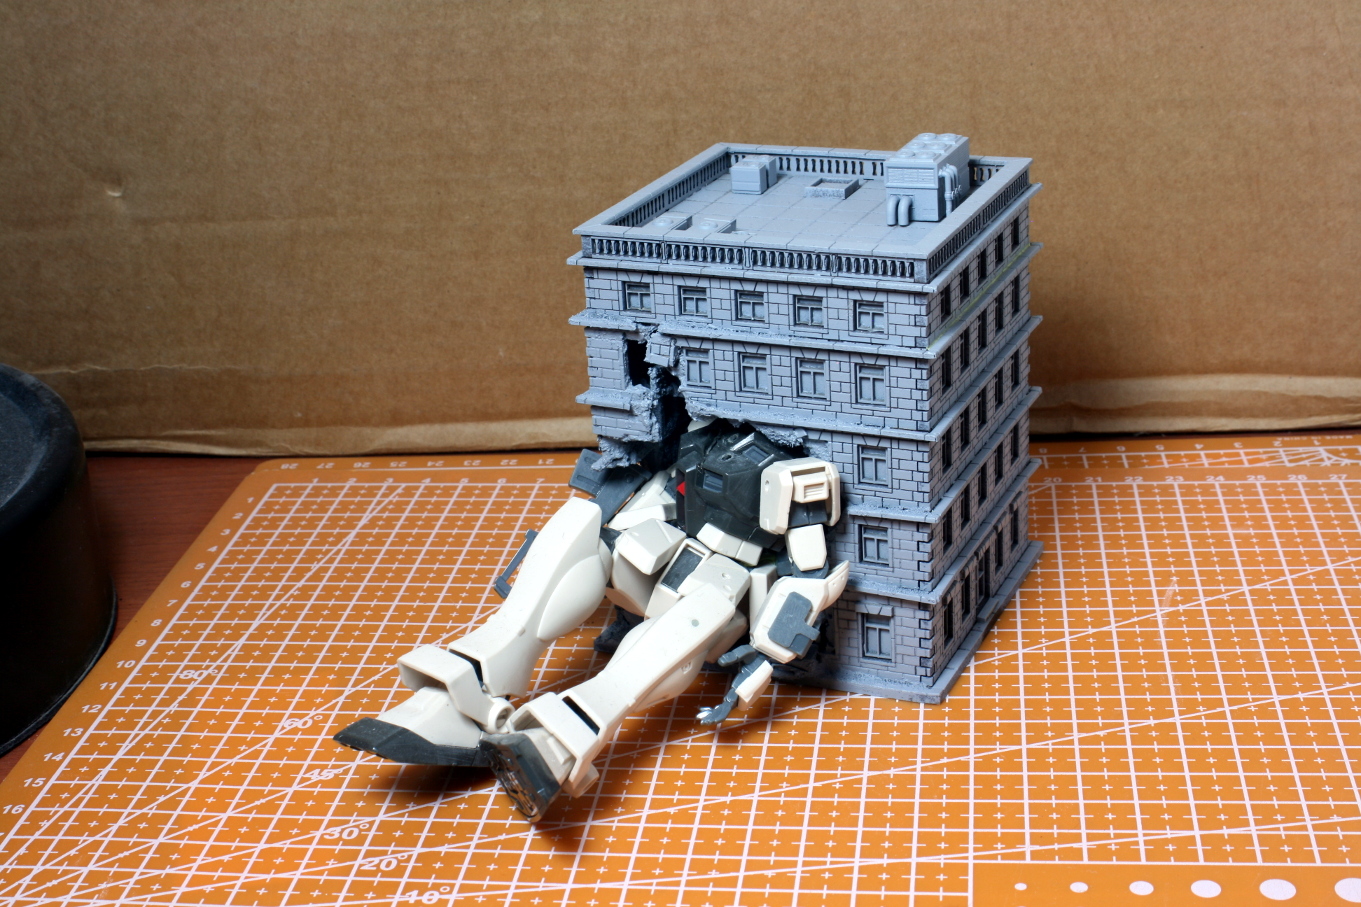 One more test fit before painting starts.
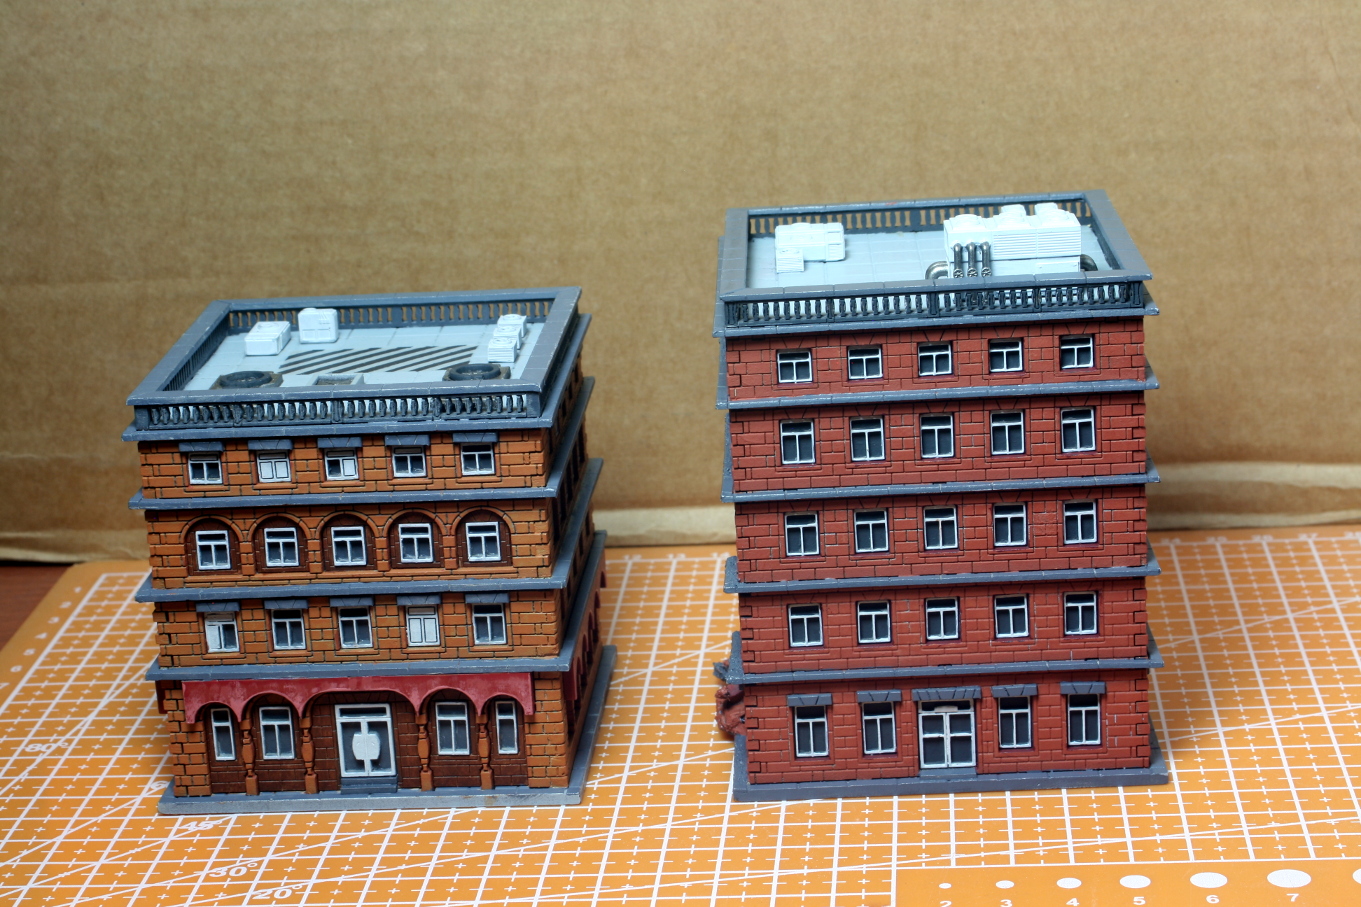 Base colours are filled in.
That is all for now. Until next time stay safe and have fun.
NR.
Working on Vehicles Part 1
Hi everyone,
I did not have any military vehicles at 1/144 scale from the Gundam universe of ‘Universal Century’, therefore I had to resort to proxies. One of my Diorama Commandments is to fill up all the space where possible. For this I chose some vehicles from Dropzone Commander.
I bought these, like a lot of stuff, at a discount during a November sale. Unfortunately, both APCs in the pack were very badly cast, and I had to try and fix at least one.
I used a spare part of a 15mm Panther tank from Plastic Soldier Company, and some thin plasti-card. It seems to have worked. The second APC was a hopeless case and did not make it in to the scene.
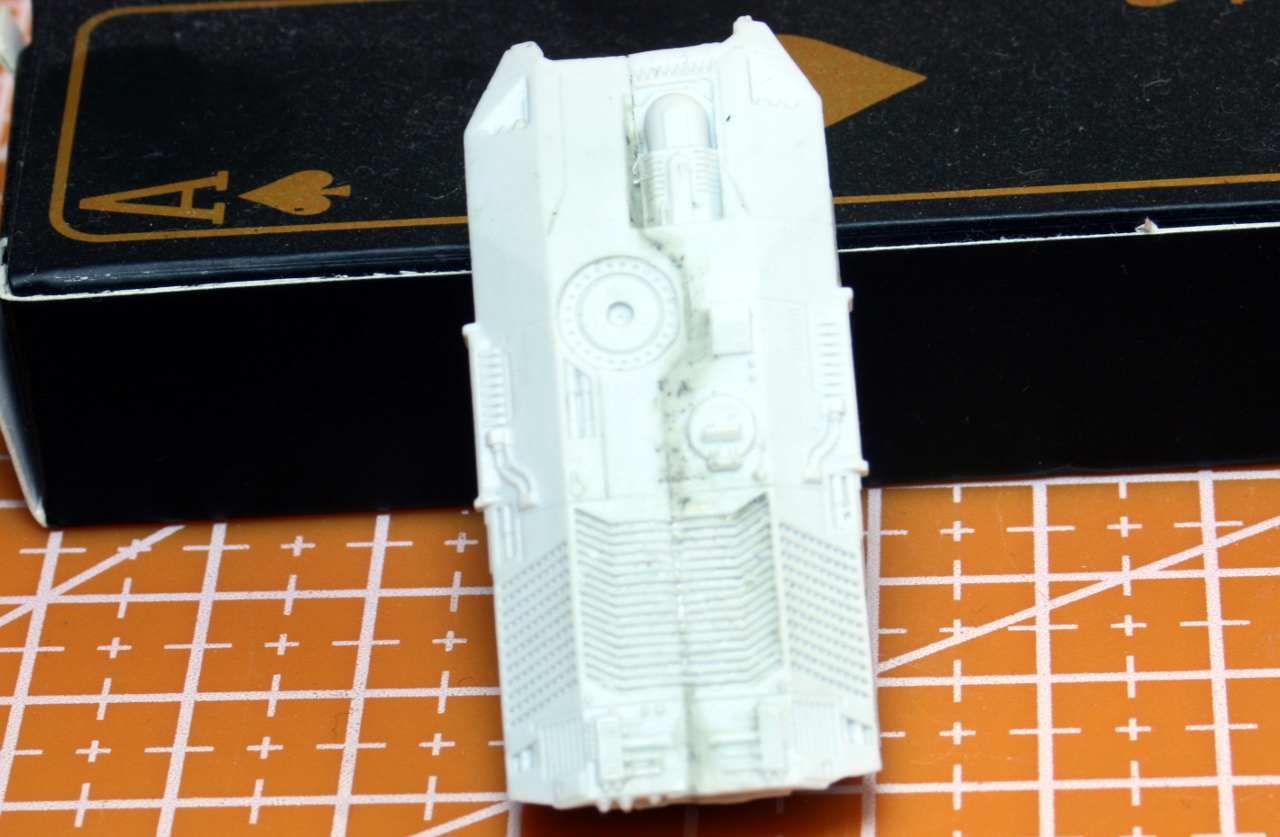 The grills of the APC do not line up, even after a lot of work.
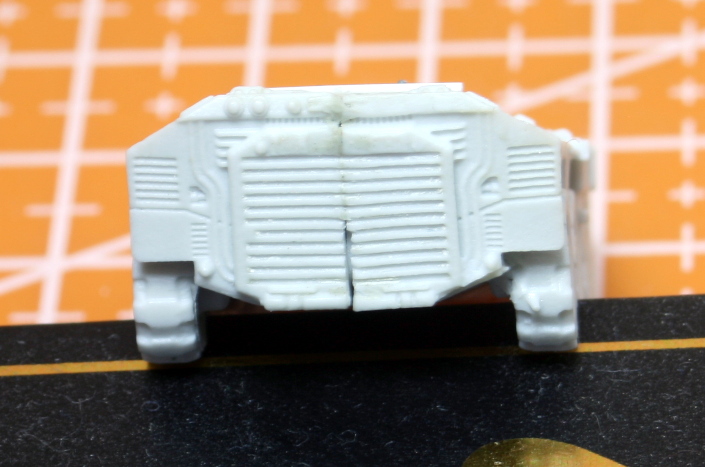 The rear door was even worse.
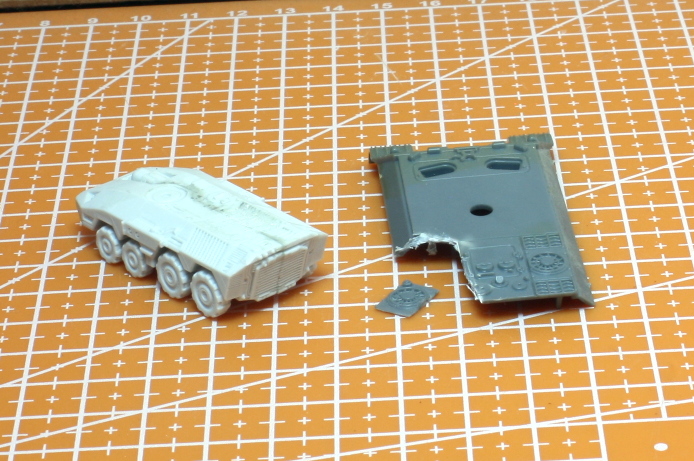 Using part of a 15mm Panther tank for modifications.
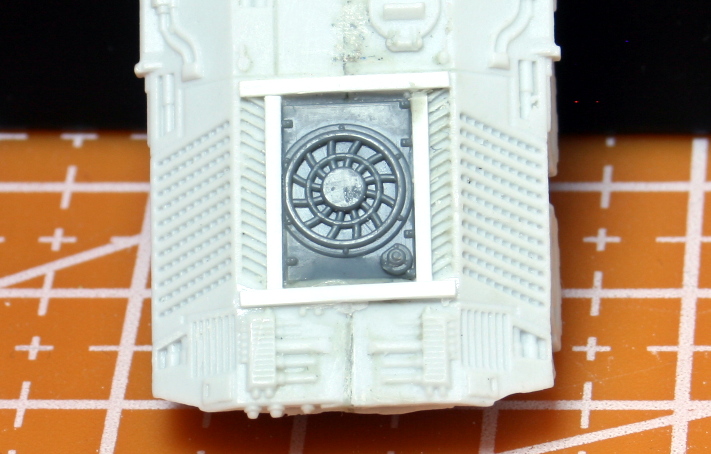 The grill corrected.
 Plasticard used to cover up defect.
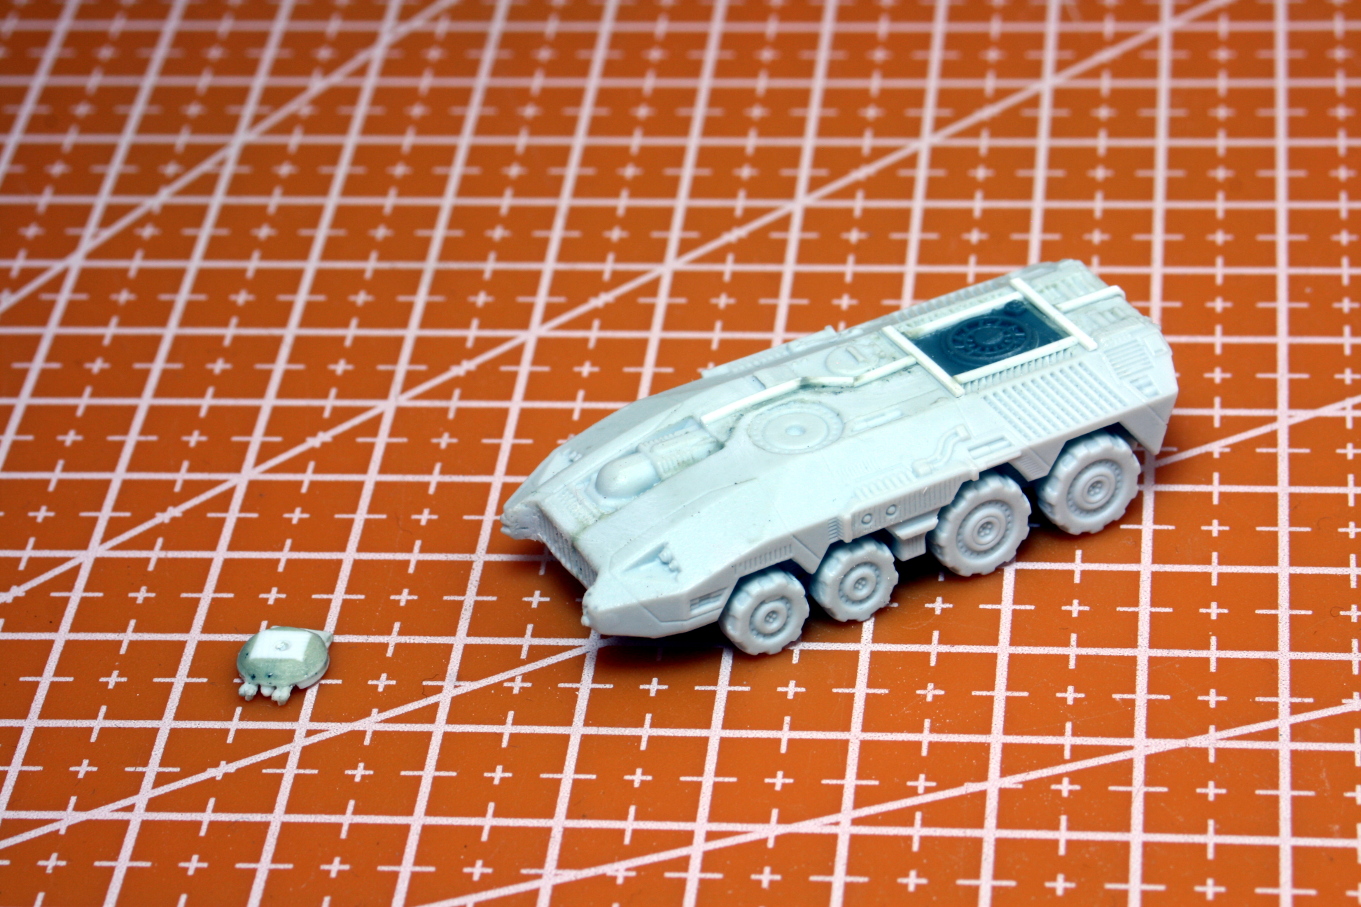 Added plasti-card along the joint line.
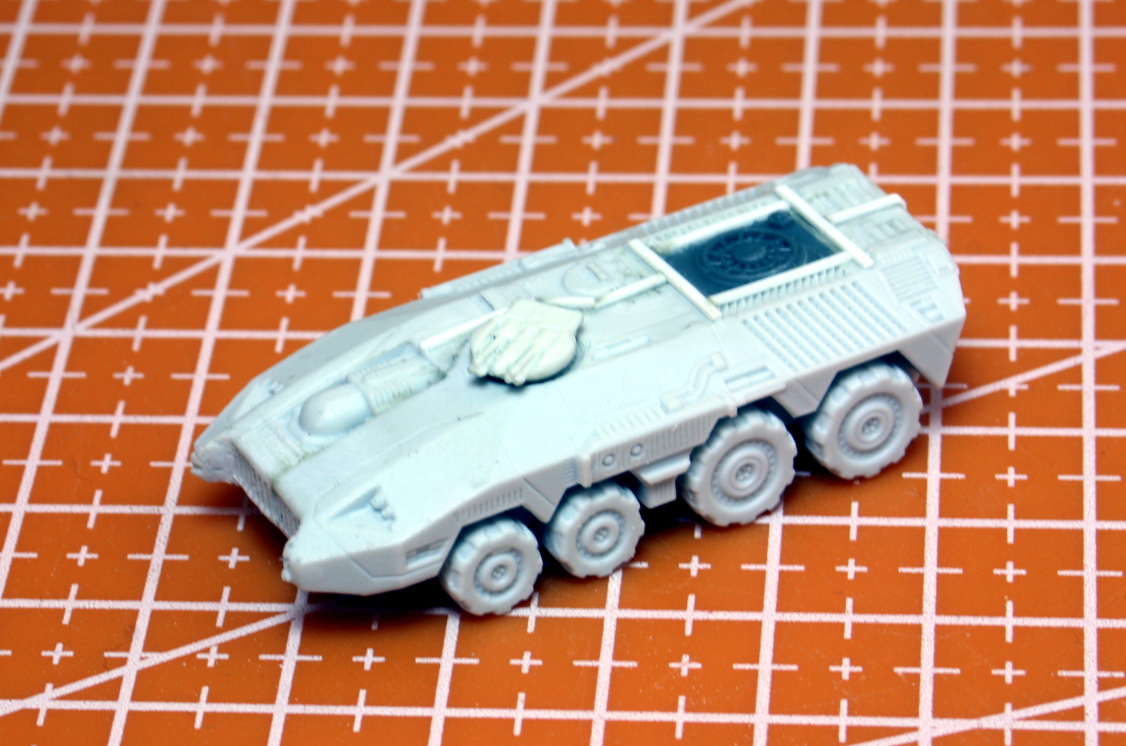 The finished conversion.
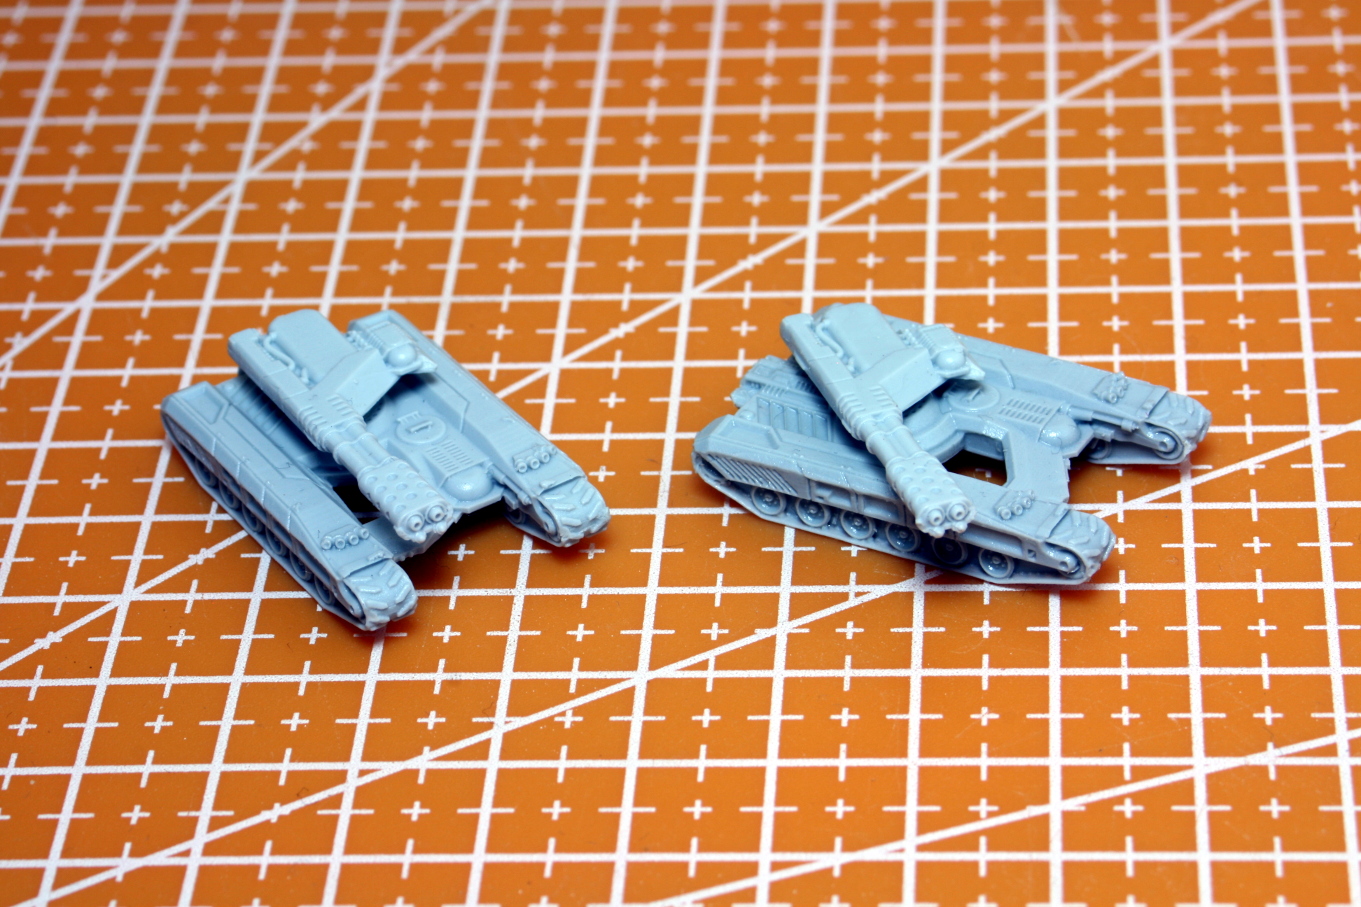 The tank chassis were Ok, but I could not use the other turret, so used the flame-thrower for both.
 That is all for today, hopefully I will have more soon. Until then stay safe and have fun.
OK.
A Few More Things
Hi everyone,
This past week I have been very busy at work, and it literally drained me mentally, besides physically. Therefore I did not do much.
I did manage to highlight the building and paint up the streets and start work on the base details – but that is it. I wanted to finish the base and start painting the robots – but alas the best laid plans…and all that stuff.
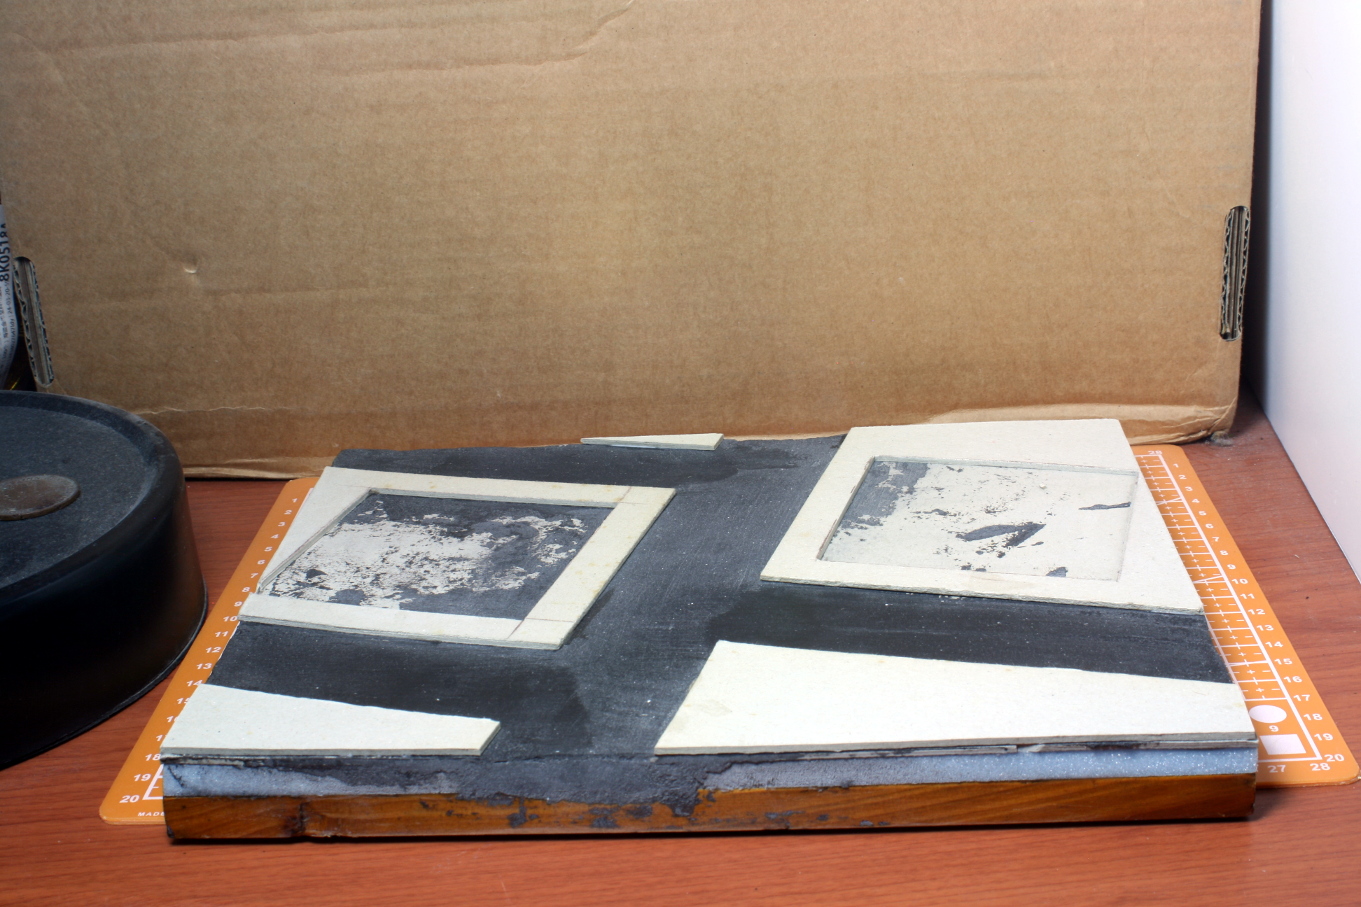
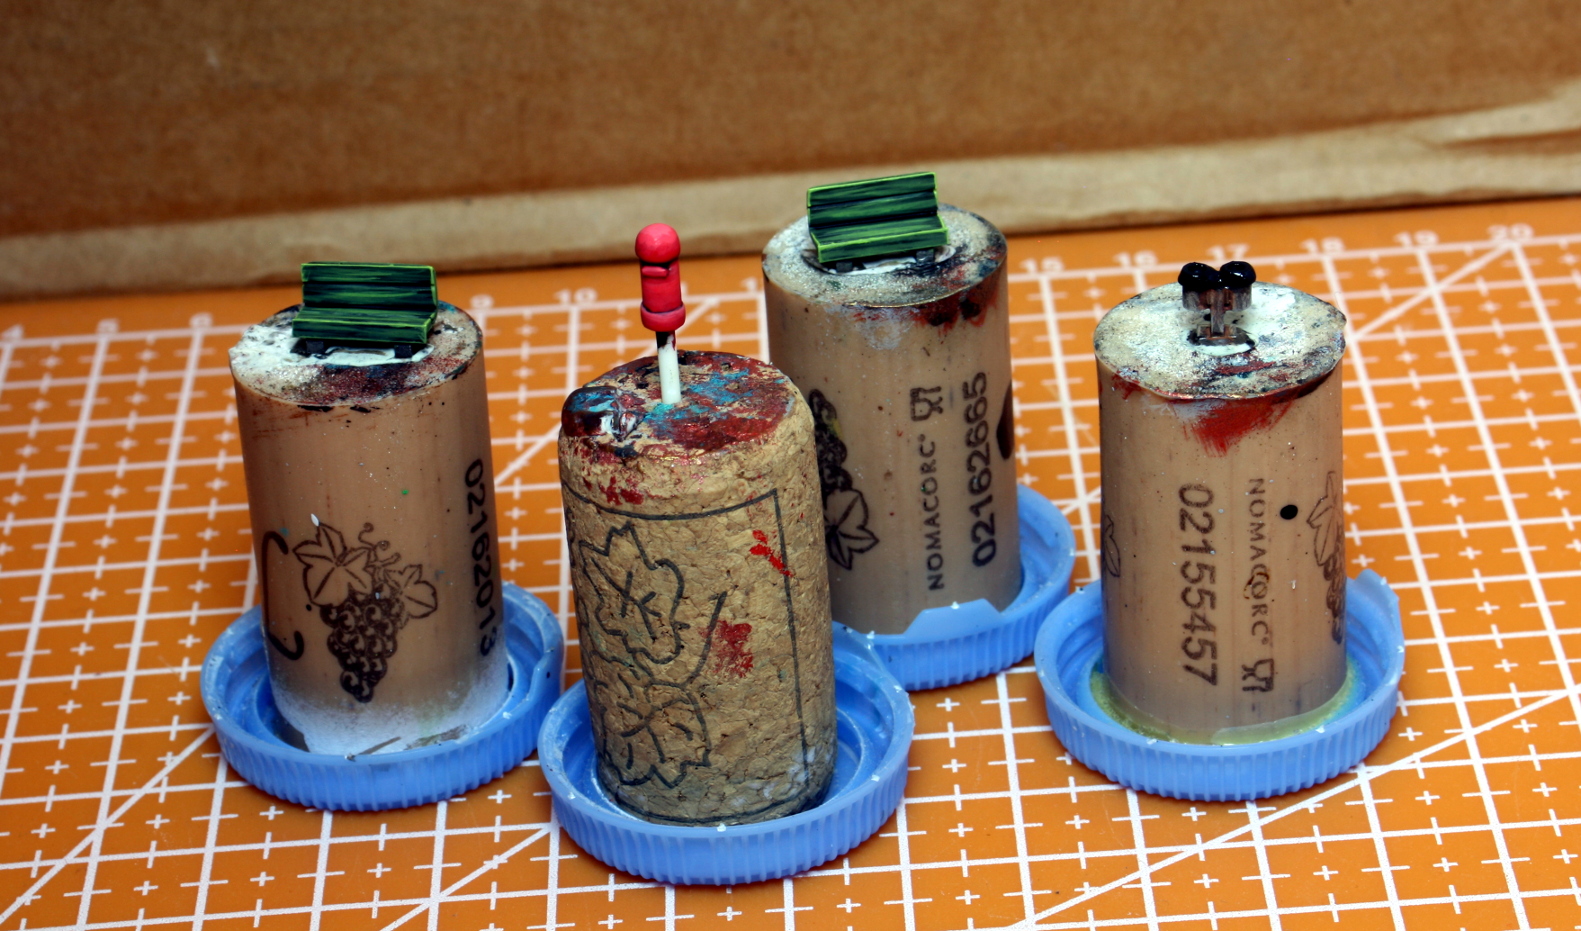
Due to the small scale of the scene (1/144th), I decided to go with printed paper and plastic strips for the ground details. I found some pavement samples on line and using GIMP, I constructed and printed out several pages. The cobblestone one I found online ‘as is’ and just printed it out.
The pictures below will tell a better story.
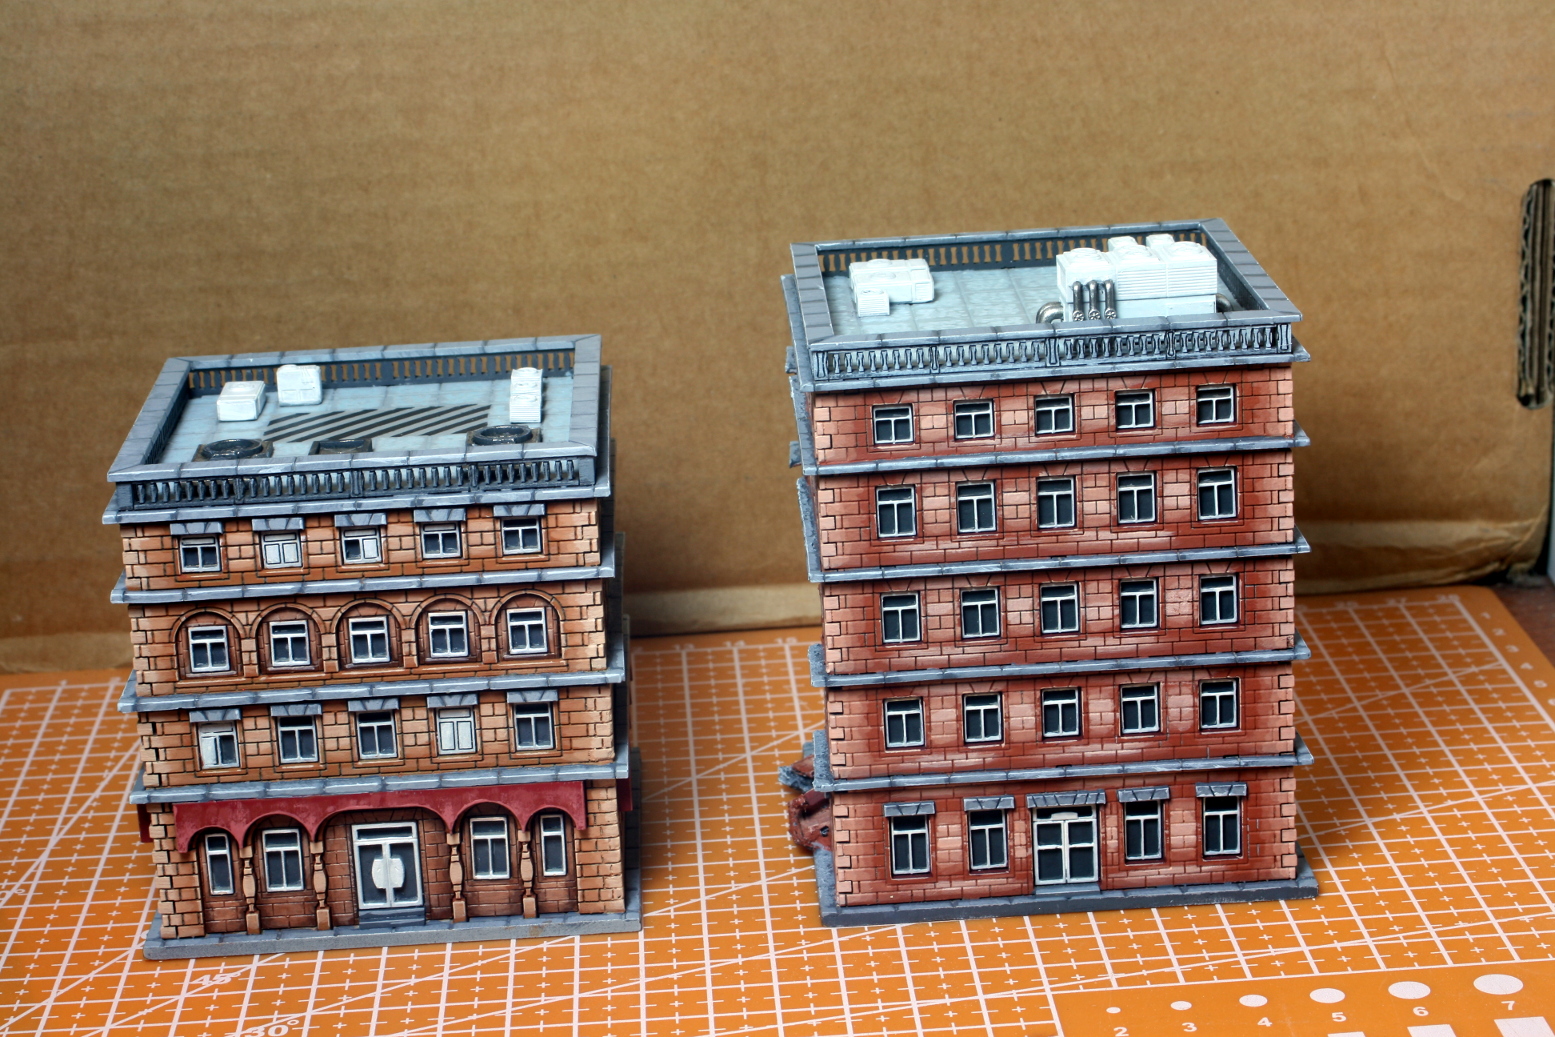 The two buildings were highlighted. It took more work than I thought it would!
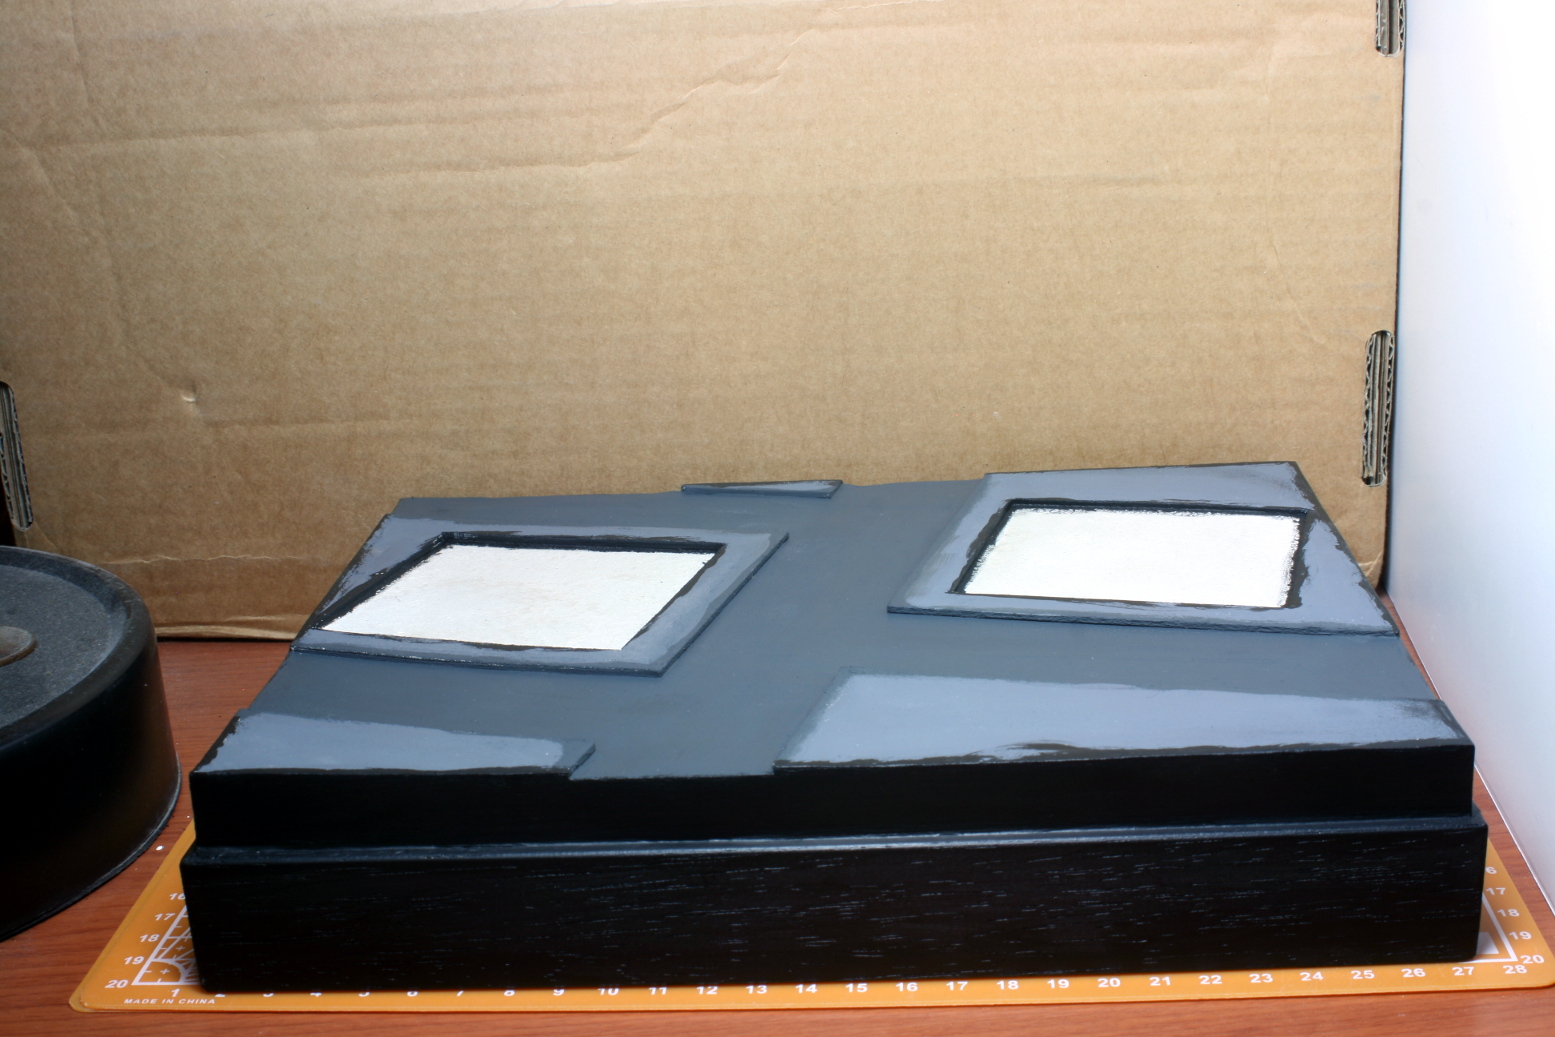 I painted the roads up with a dark grey.
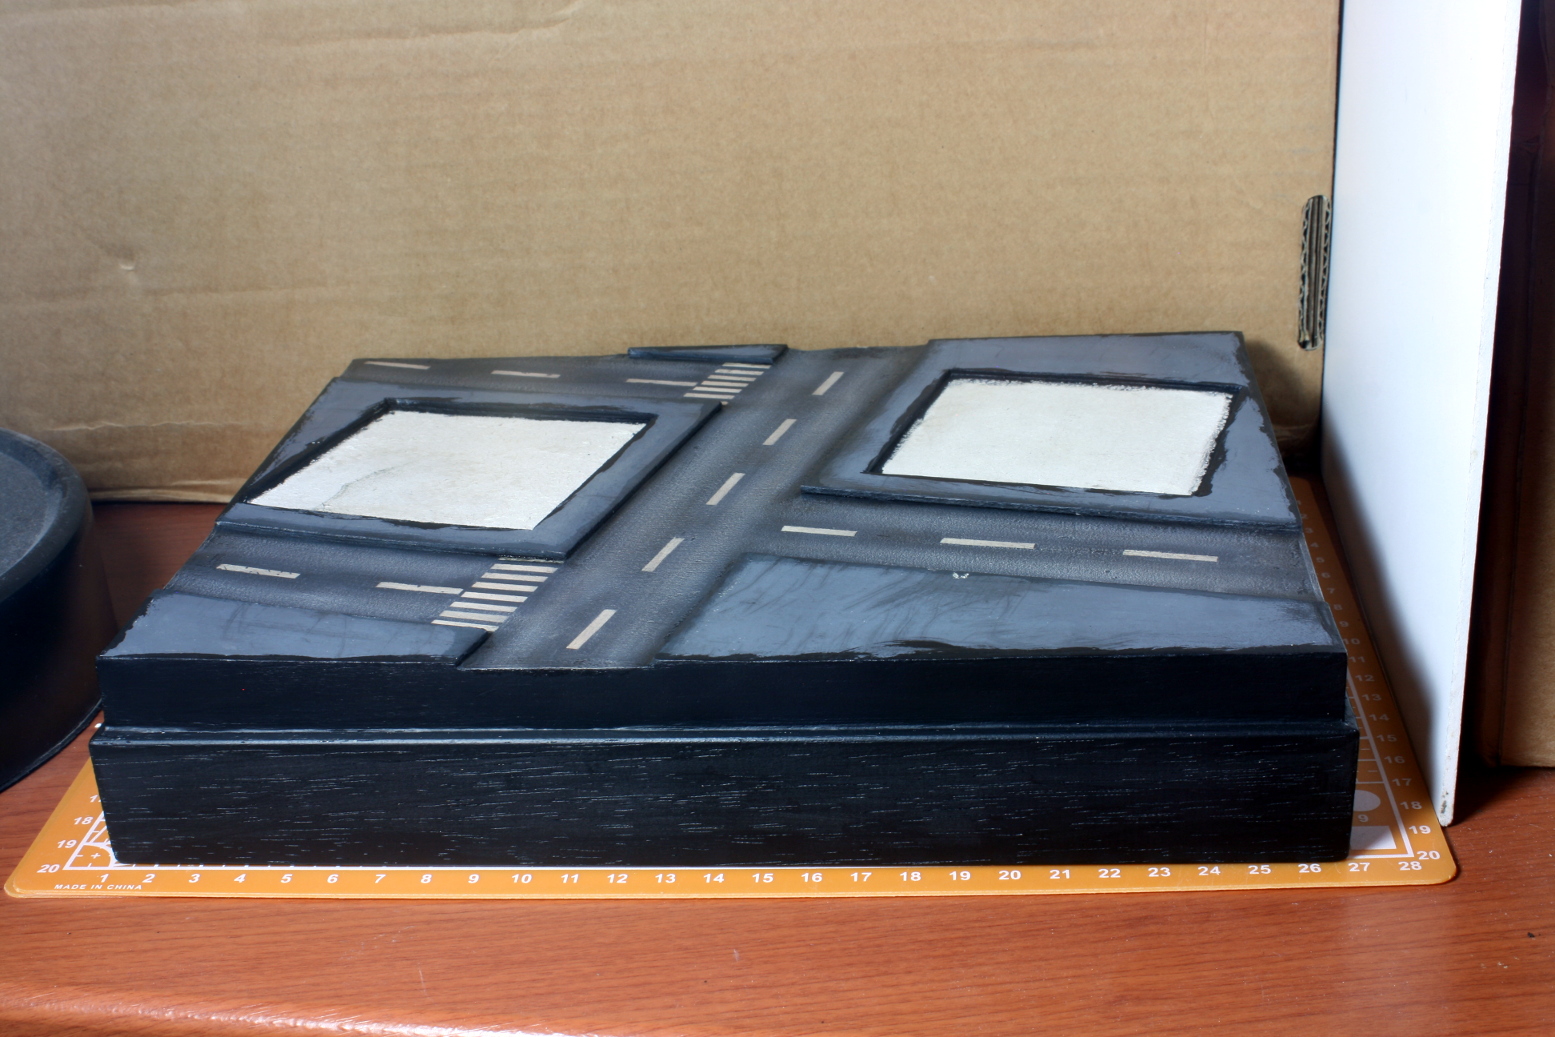 Details were added to the streets, then I drybrushed them and later gave them an oil wash.
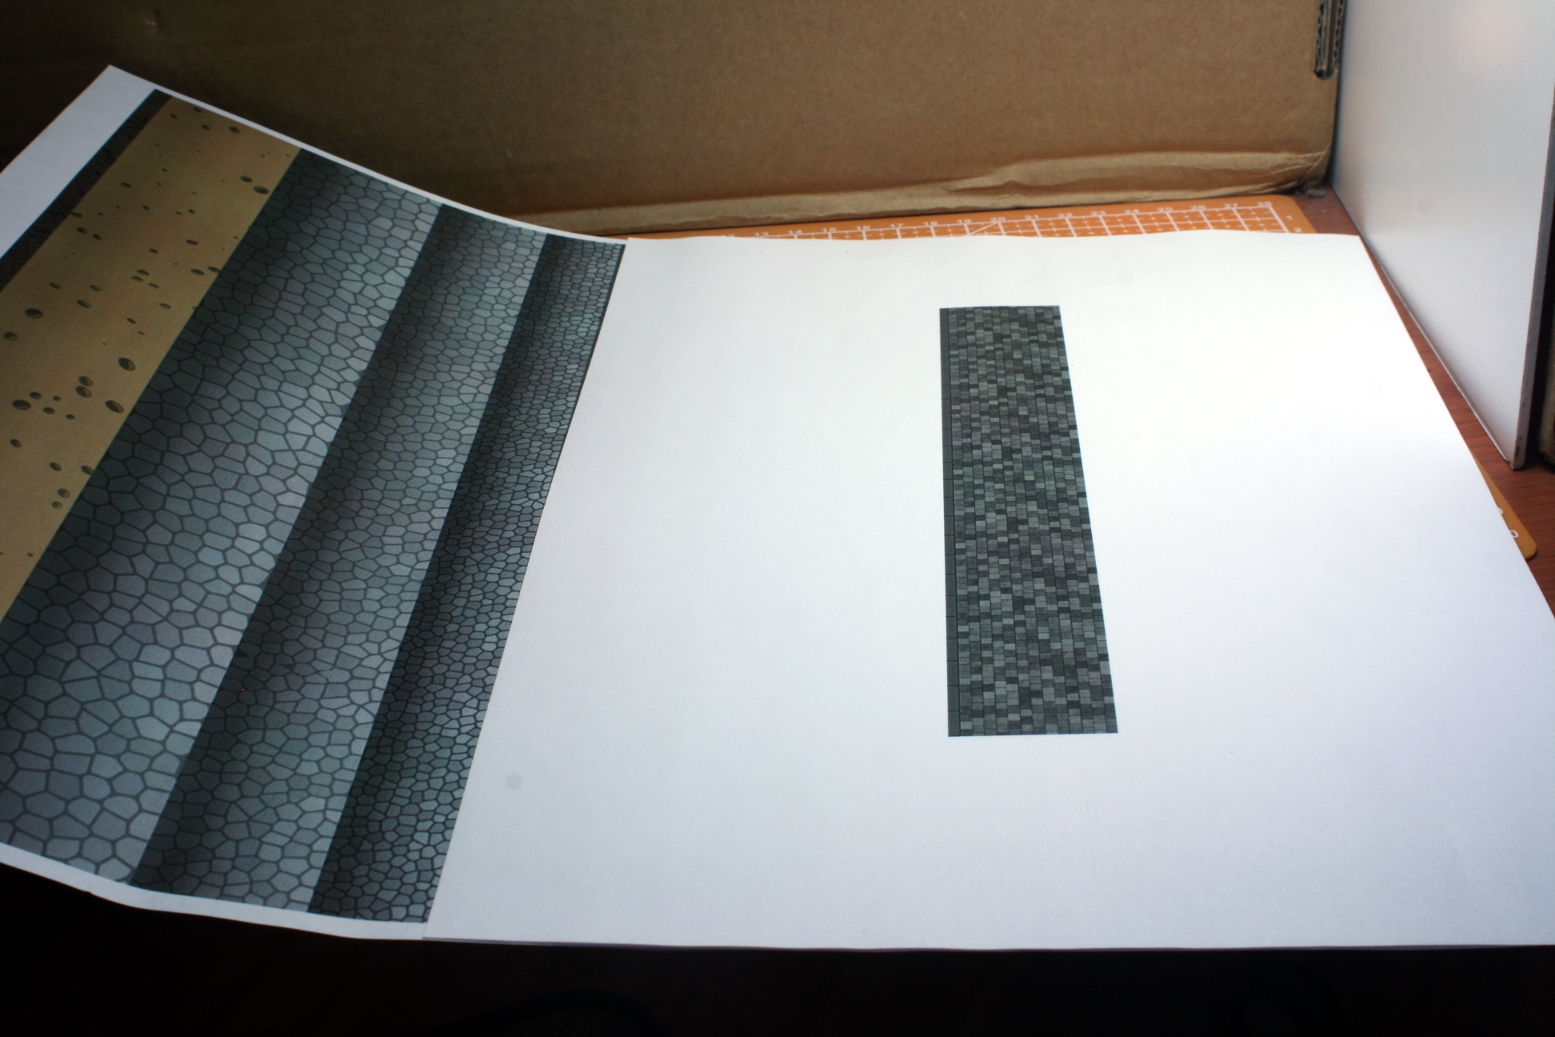 For the ground detail I constructed pavements on GIMP and printed them out.
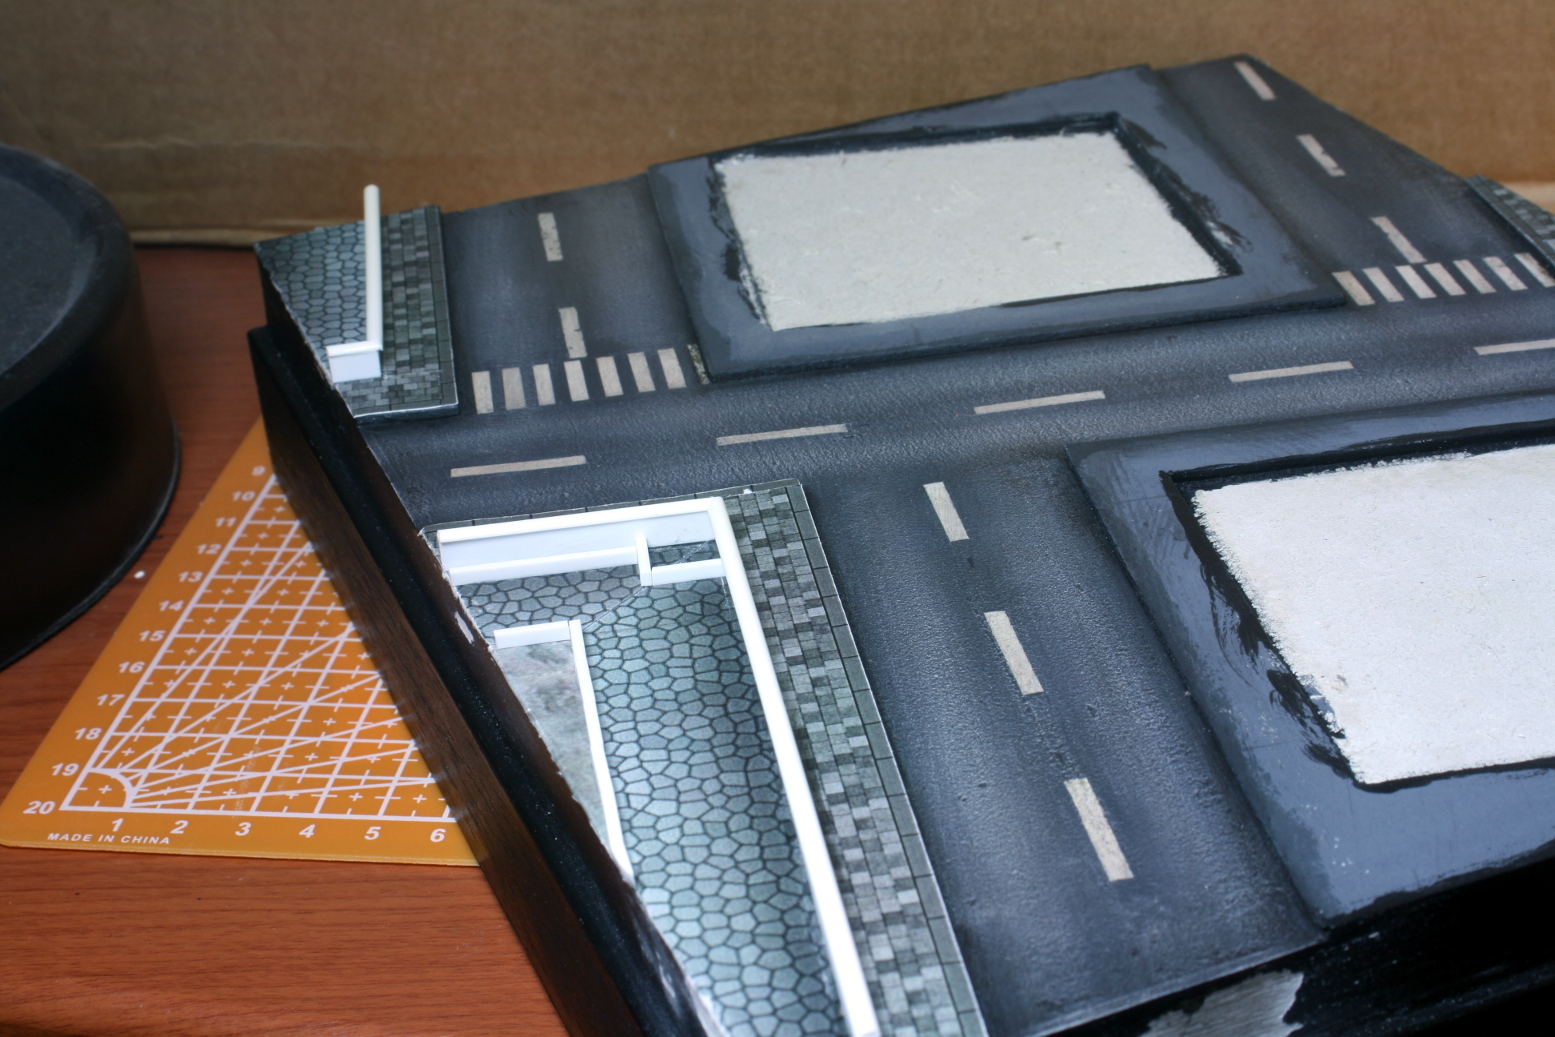 Using printed paper and styrene strips to build up detail. At this scale paper works very well.
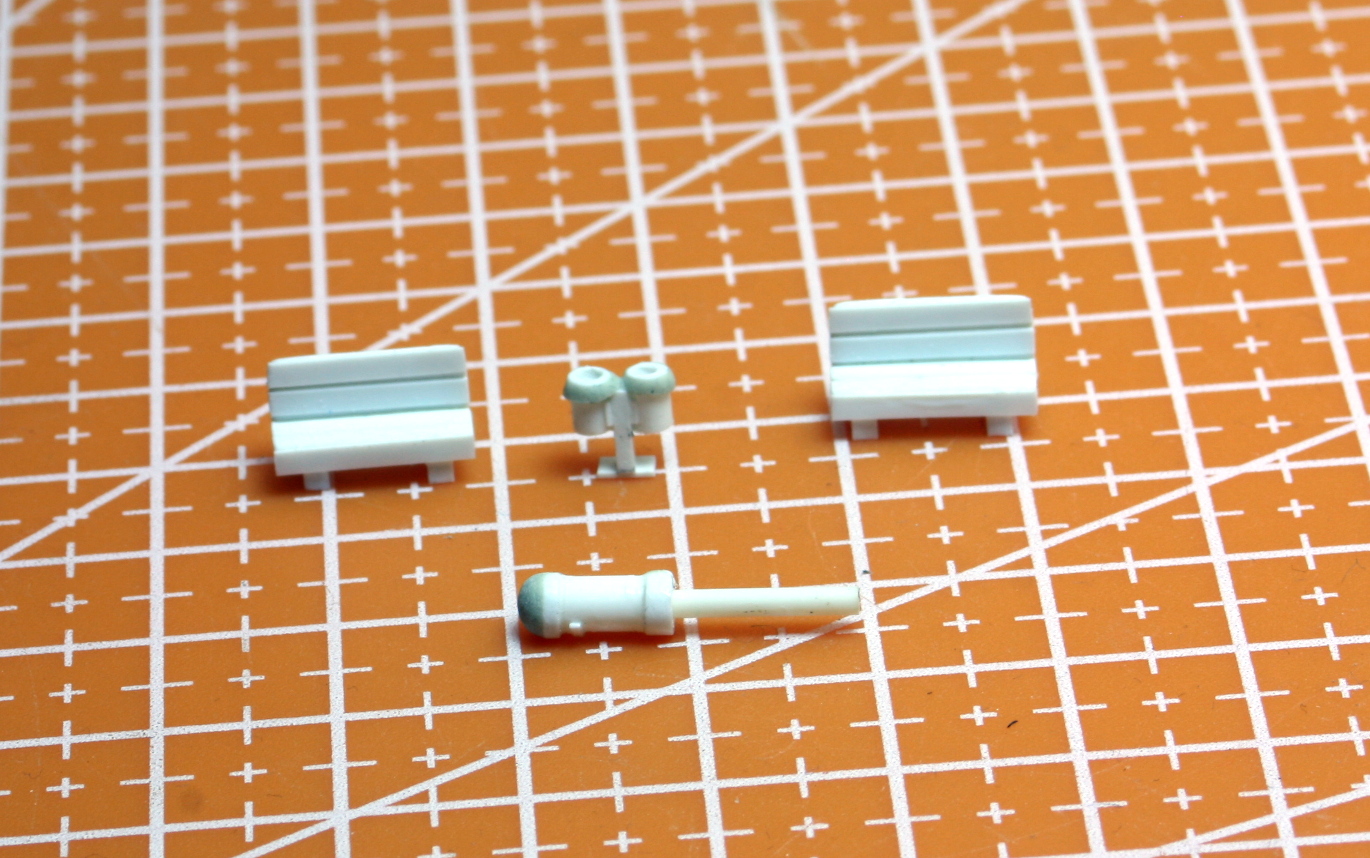 I built some random stuff with styrene to add interest to the scene.
 Tiny trees are still trees you bigot!
That is all for today. Hopefully, I will get the base finished this week. Fingers crossed!
Until next post, stay safe and have fun!
NR.
The Fist Details of The Base in Place
Hi everyone,
This may be a short post, but the work time I put into it was not short at all. The panel lining of the buildings took hours. The measuring, cutting and fitting of the paper pavements took several more hours, besides the touching up of everything.
I also did some weathering on the buildings with oil paints, but I think it needs more, so I should not have fixed them into place at this time. It was an oversight with hindsight. I live and I learn – the hard way!
 The tiny extras painted up.
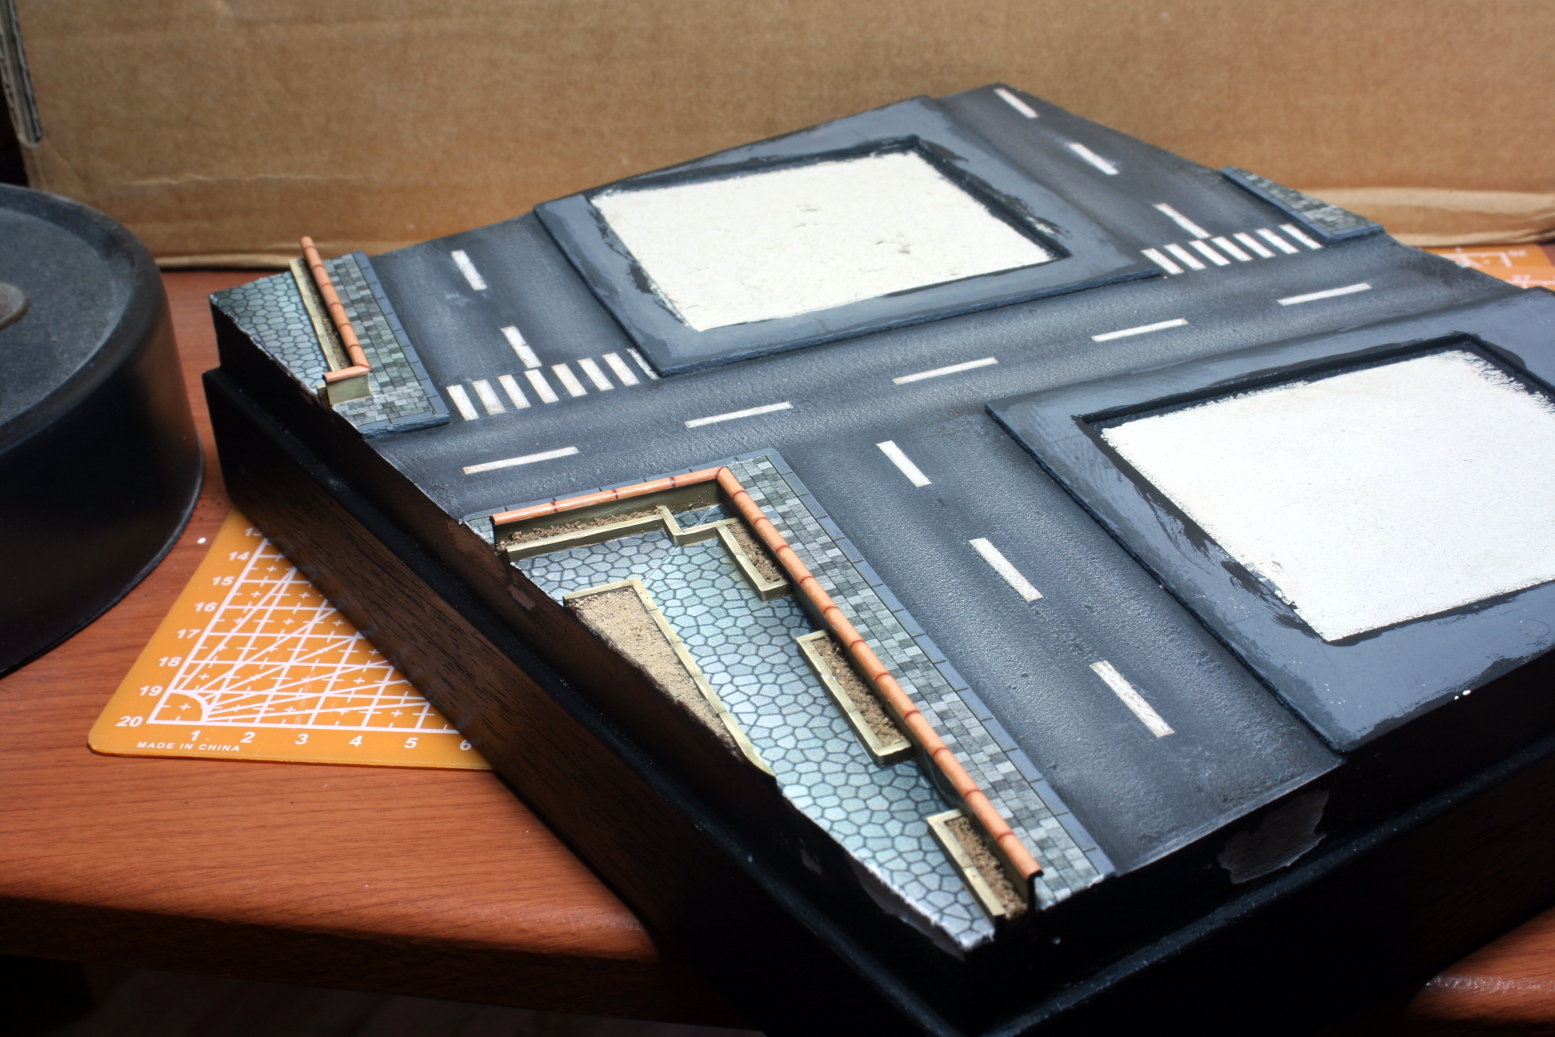 Painting up the little walls of the park and touching up the paper work.
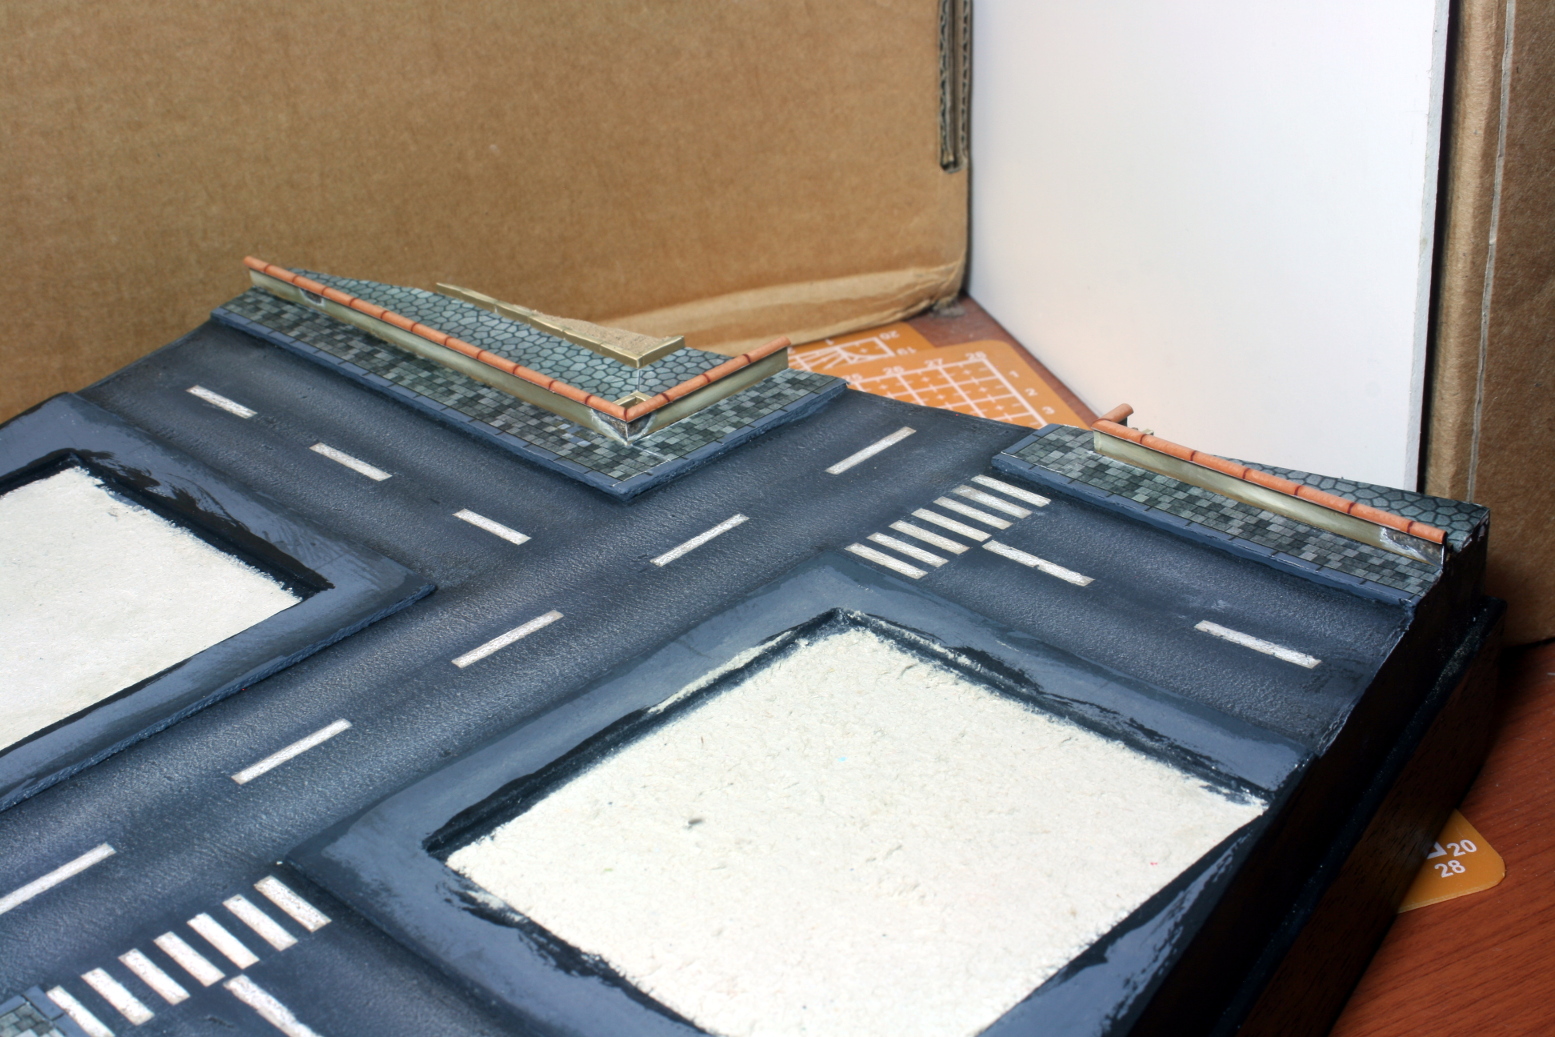 Another angle showing the painted wall.
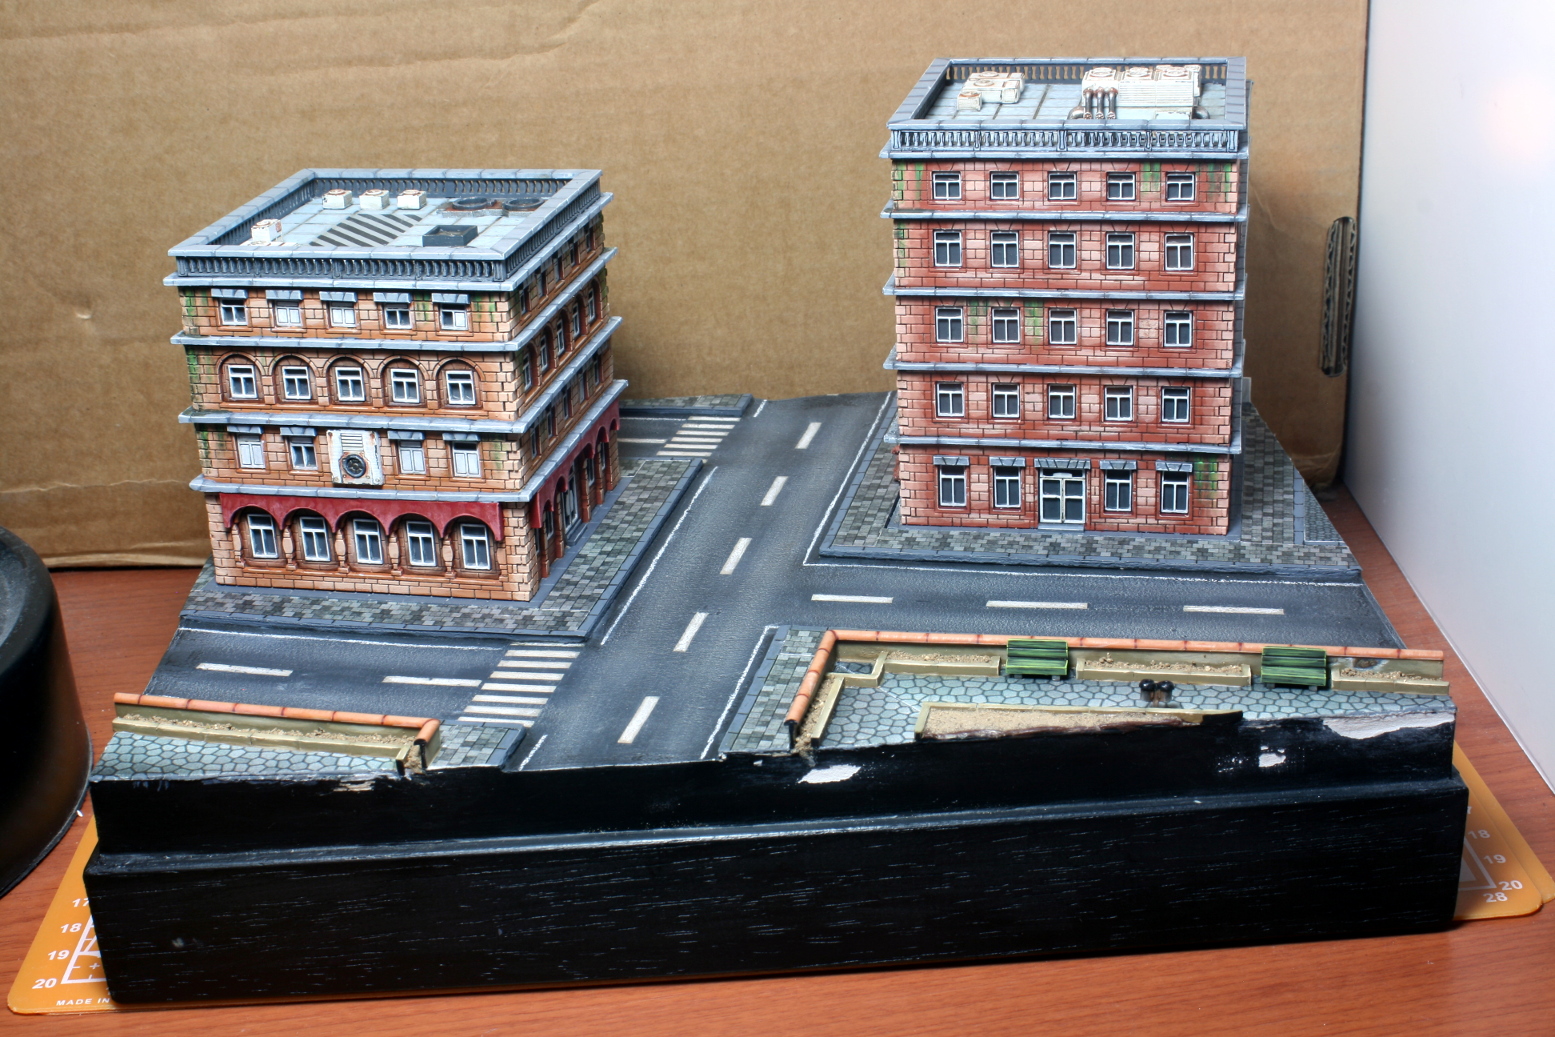 The building weathered up and fixed into place along with the paper pavements.
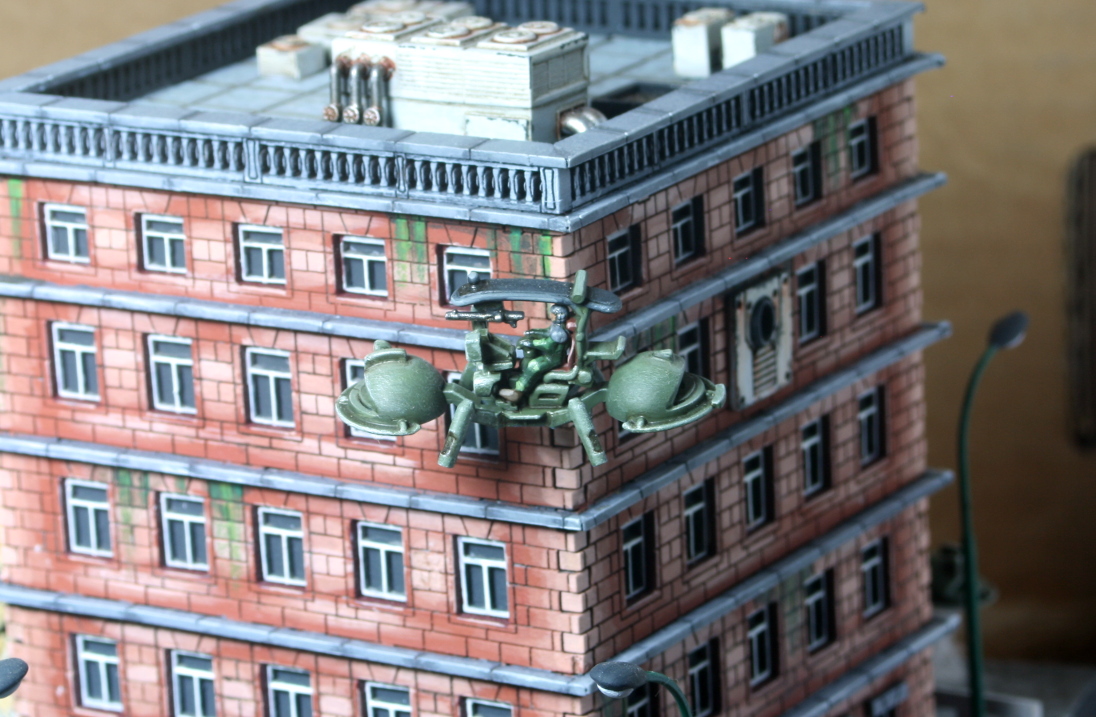
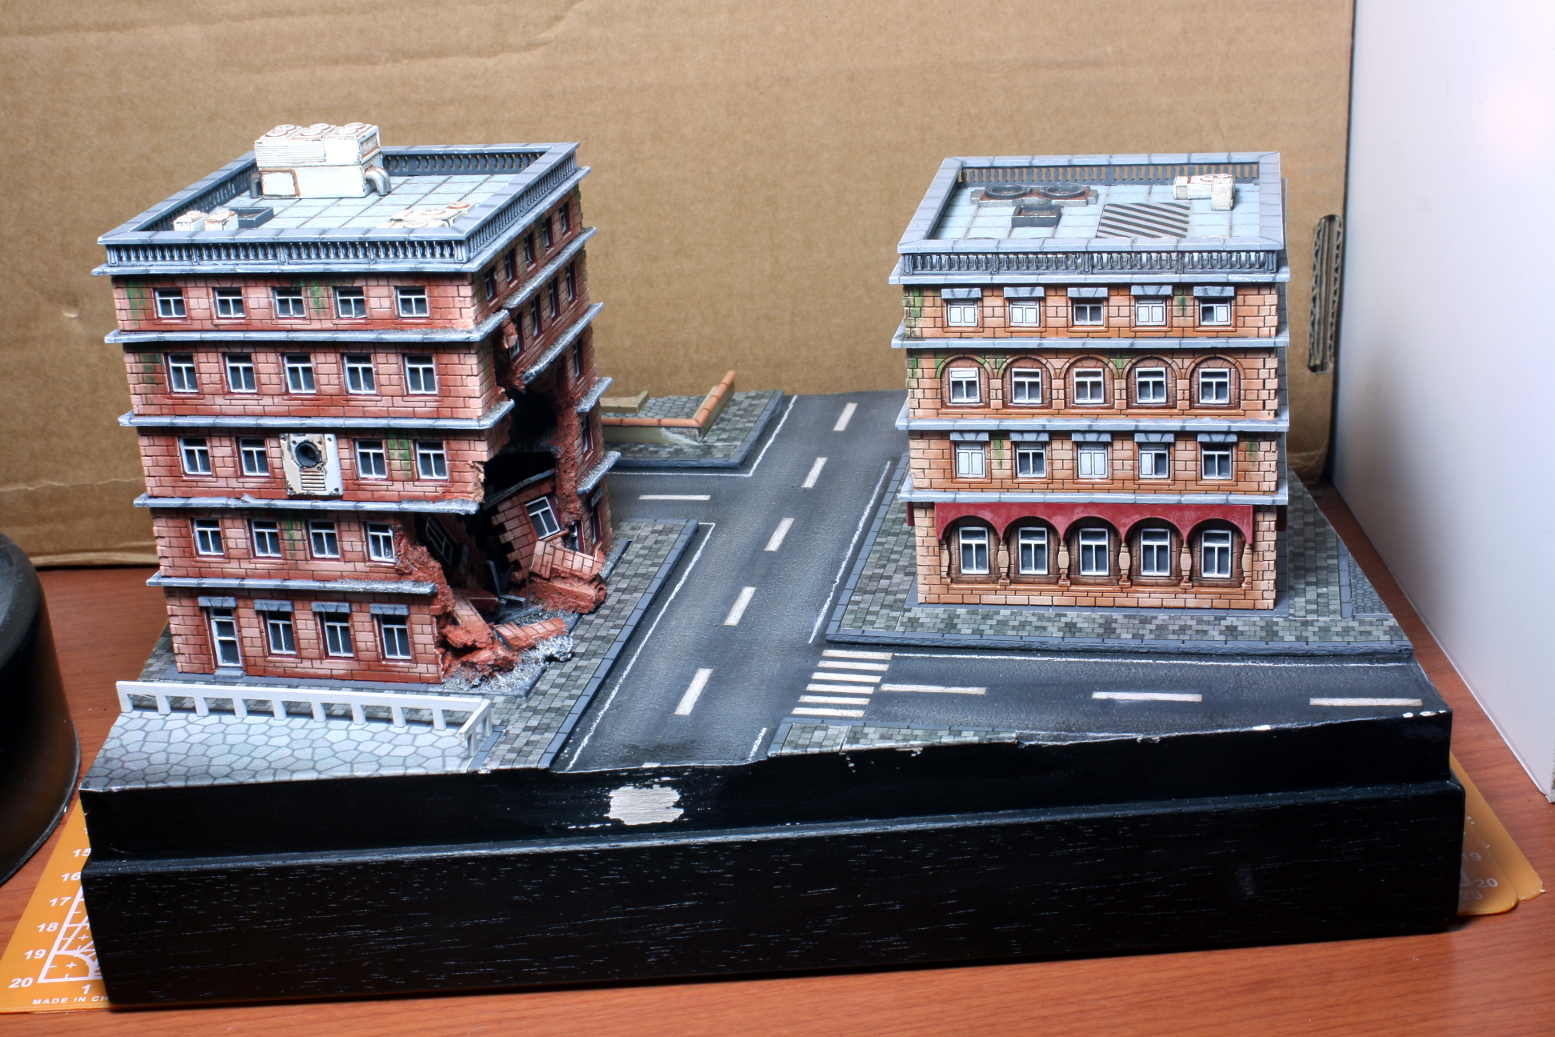 A view from the other side. I decide to add some railing with the building sprue.
Next week I might try to paint up some vehicles for the scene, because this stage took a lot out of me, so I want to relax a bit and do something easier.
Until next time, stay safe and have fun.
NR.
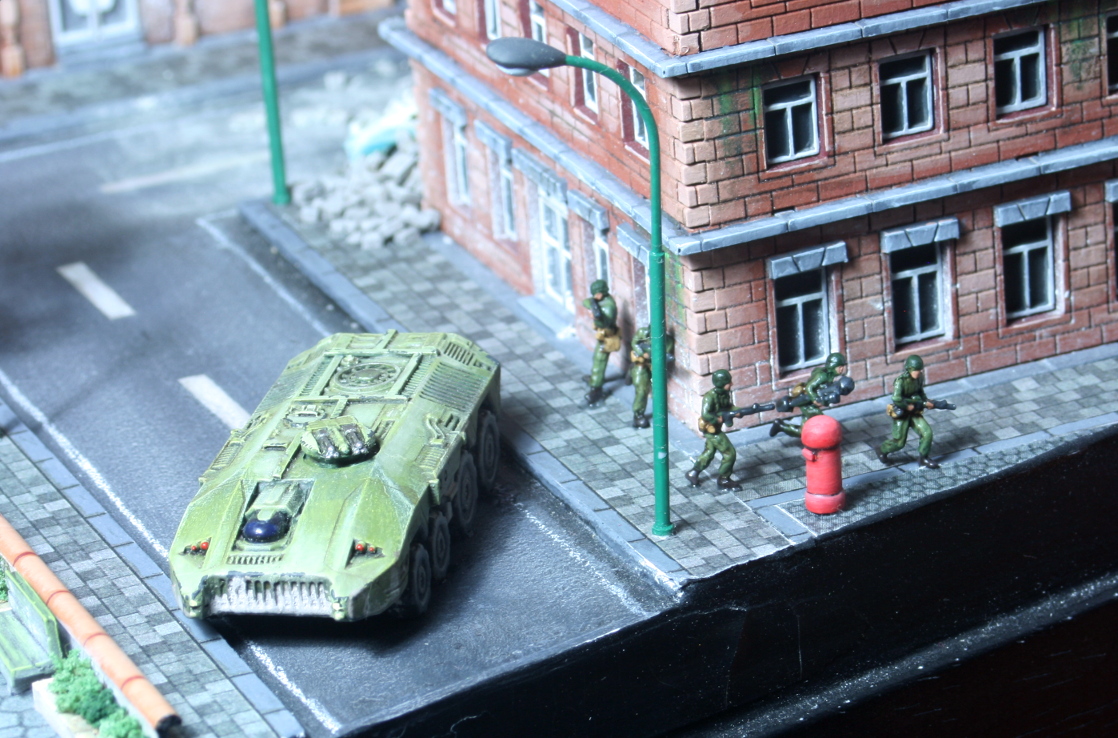
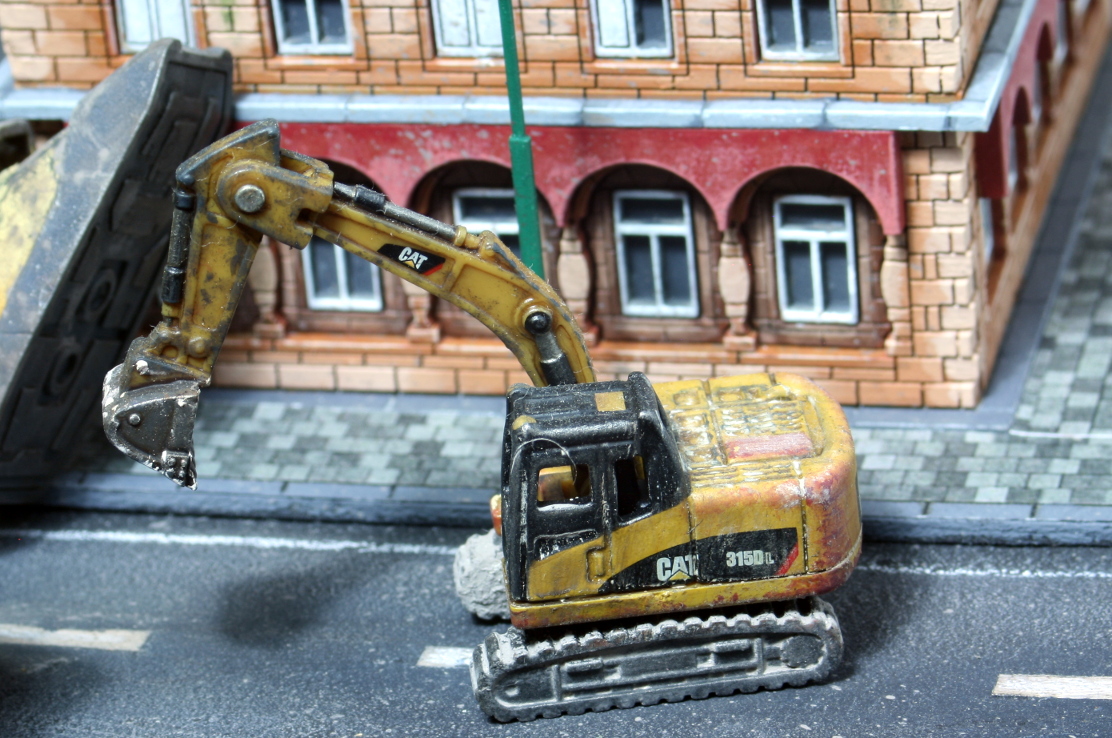
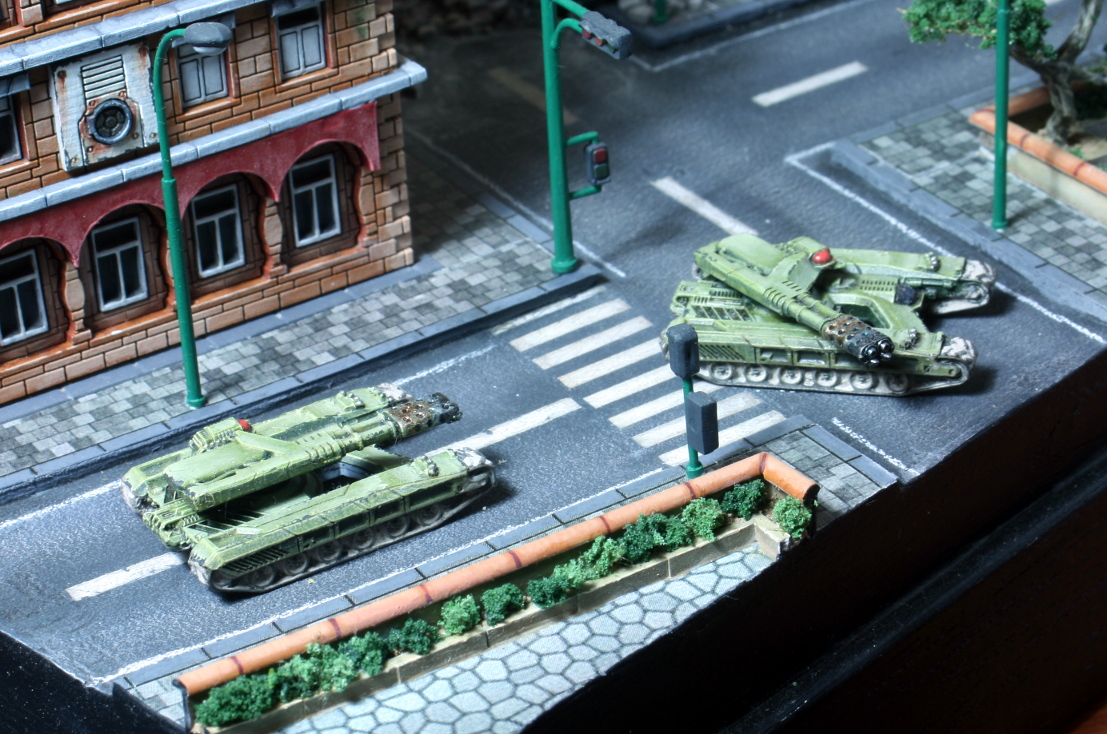
Working on Vehicles Part 2
Hi everyone,
I have been very busy the past couple of weeks at work and I got very little done, but I did manage to work on some simple things like the vehicles.
Below are the military vehicles ready and two of the civilian vehicles. I might add two more cars to the scene, unless it gets too cluttered.
The pictures below will tell a better story.
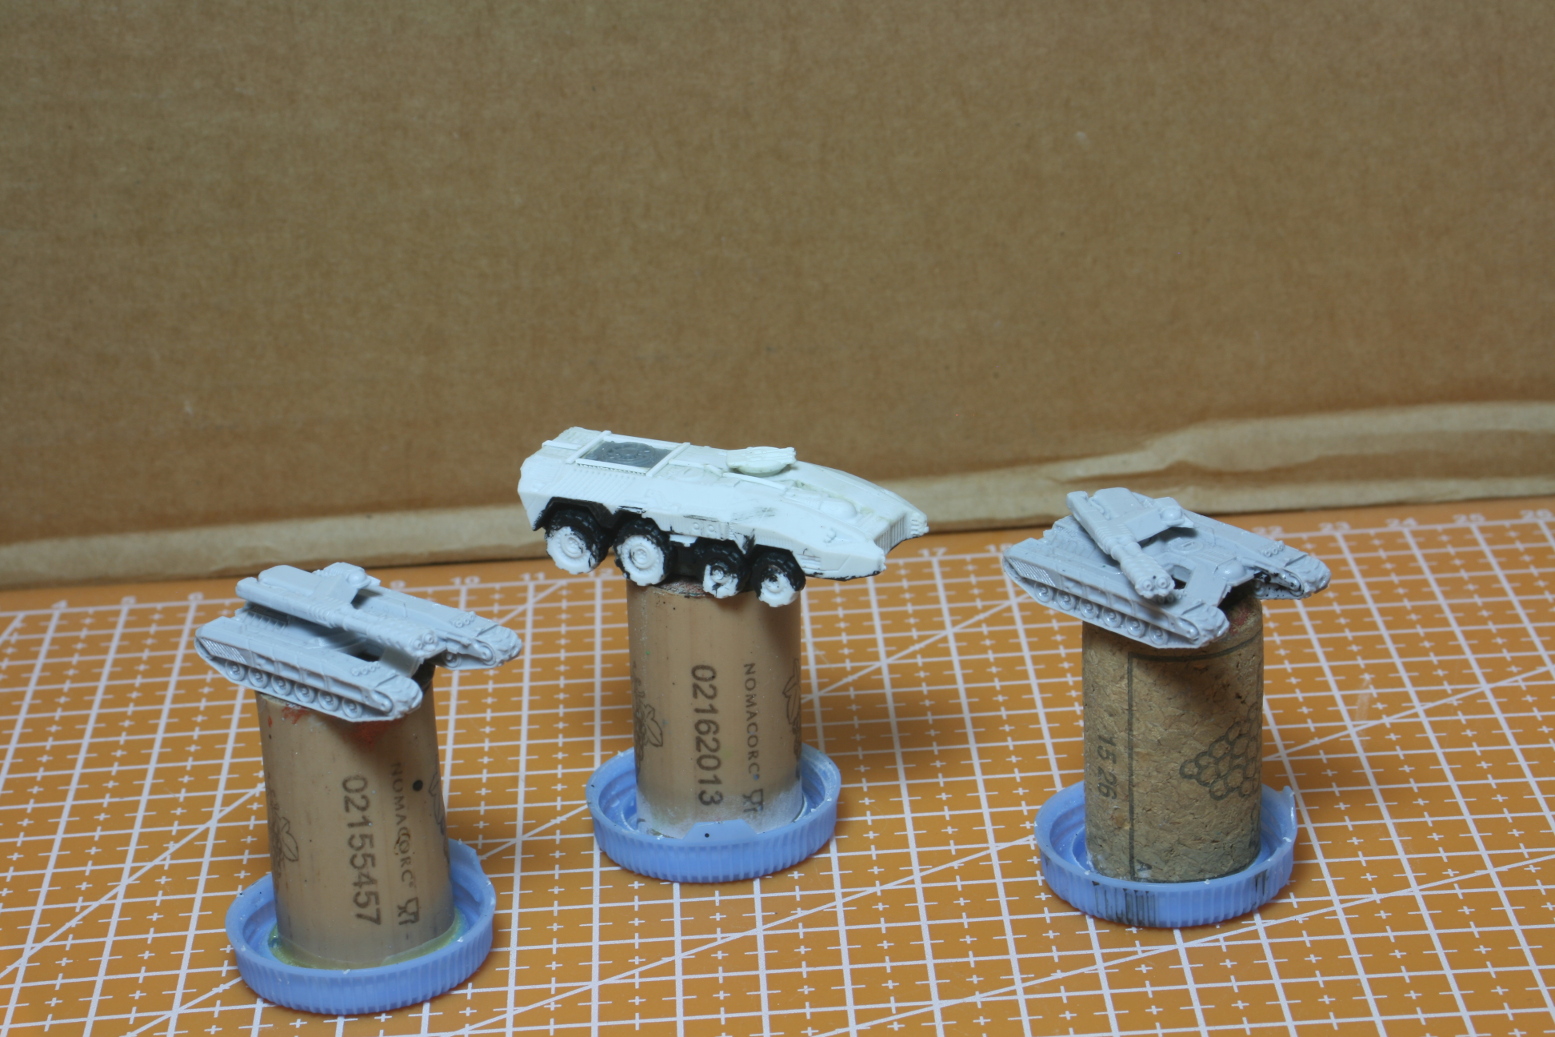 Military vehcles cleaned up and ready for priming.
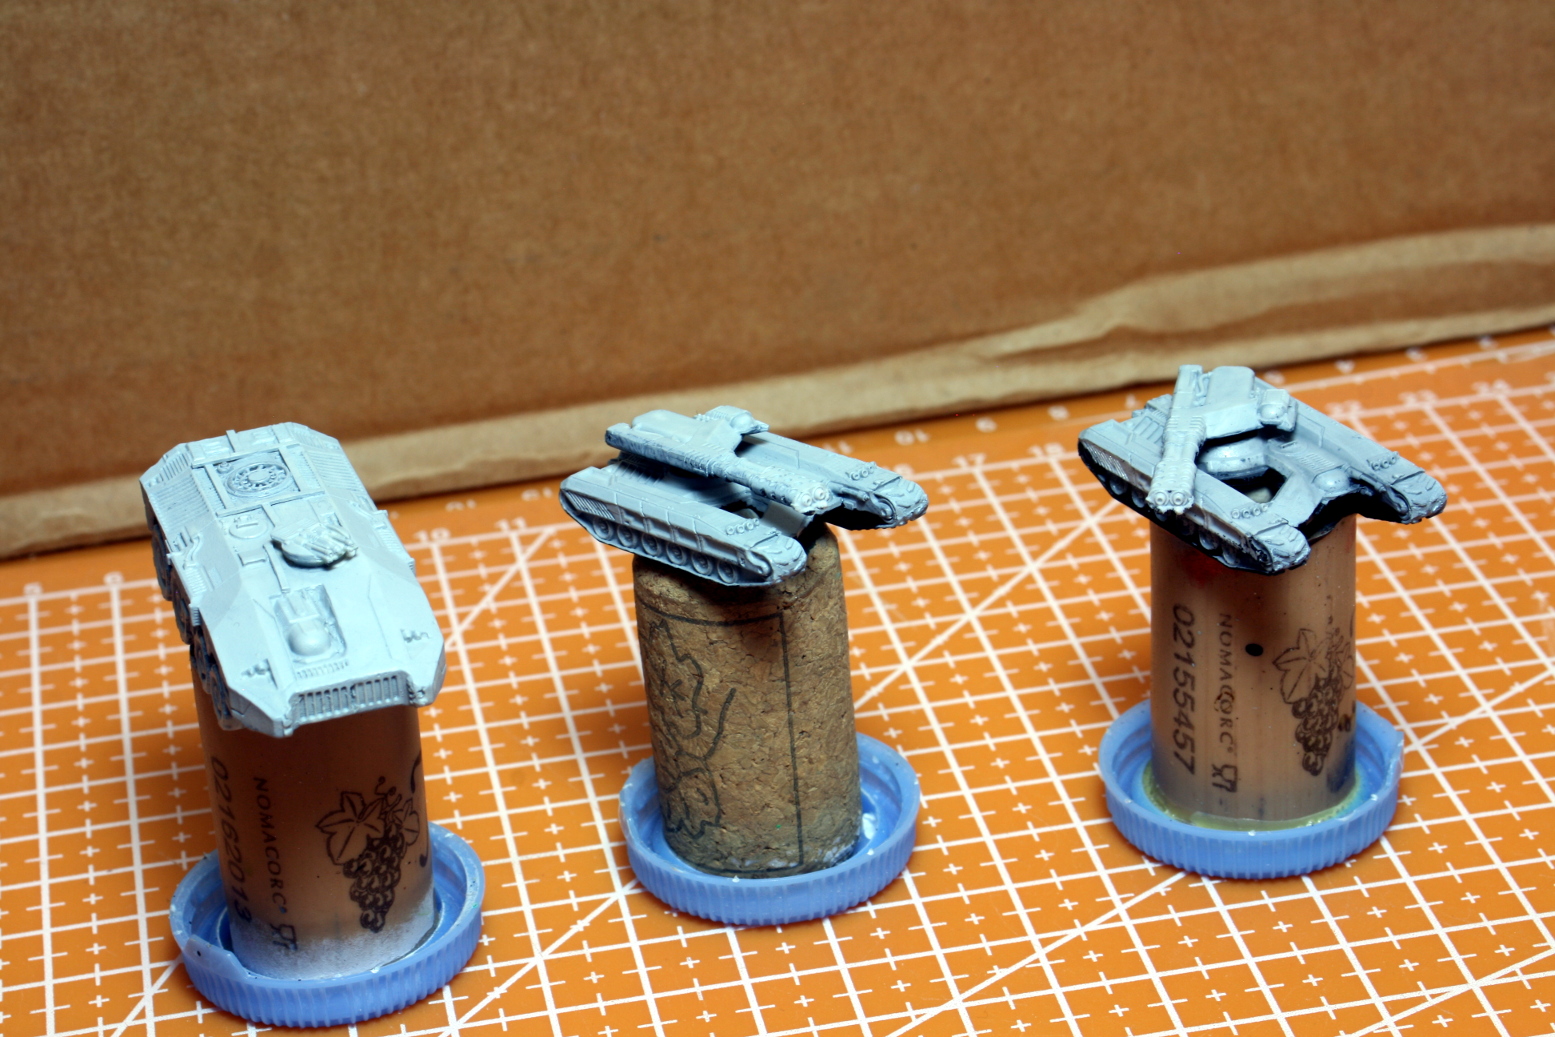 Military vehicles primed up.
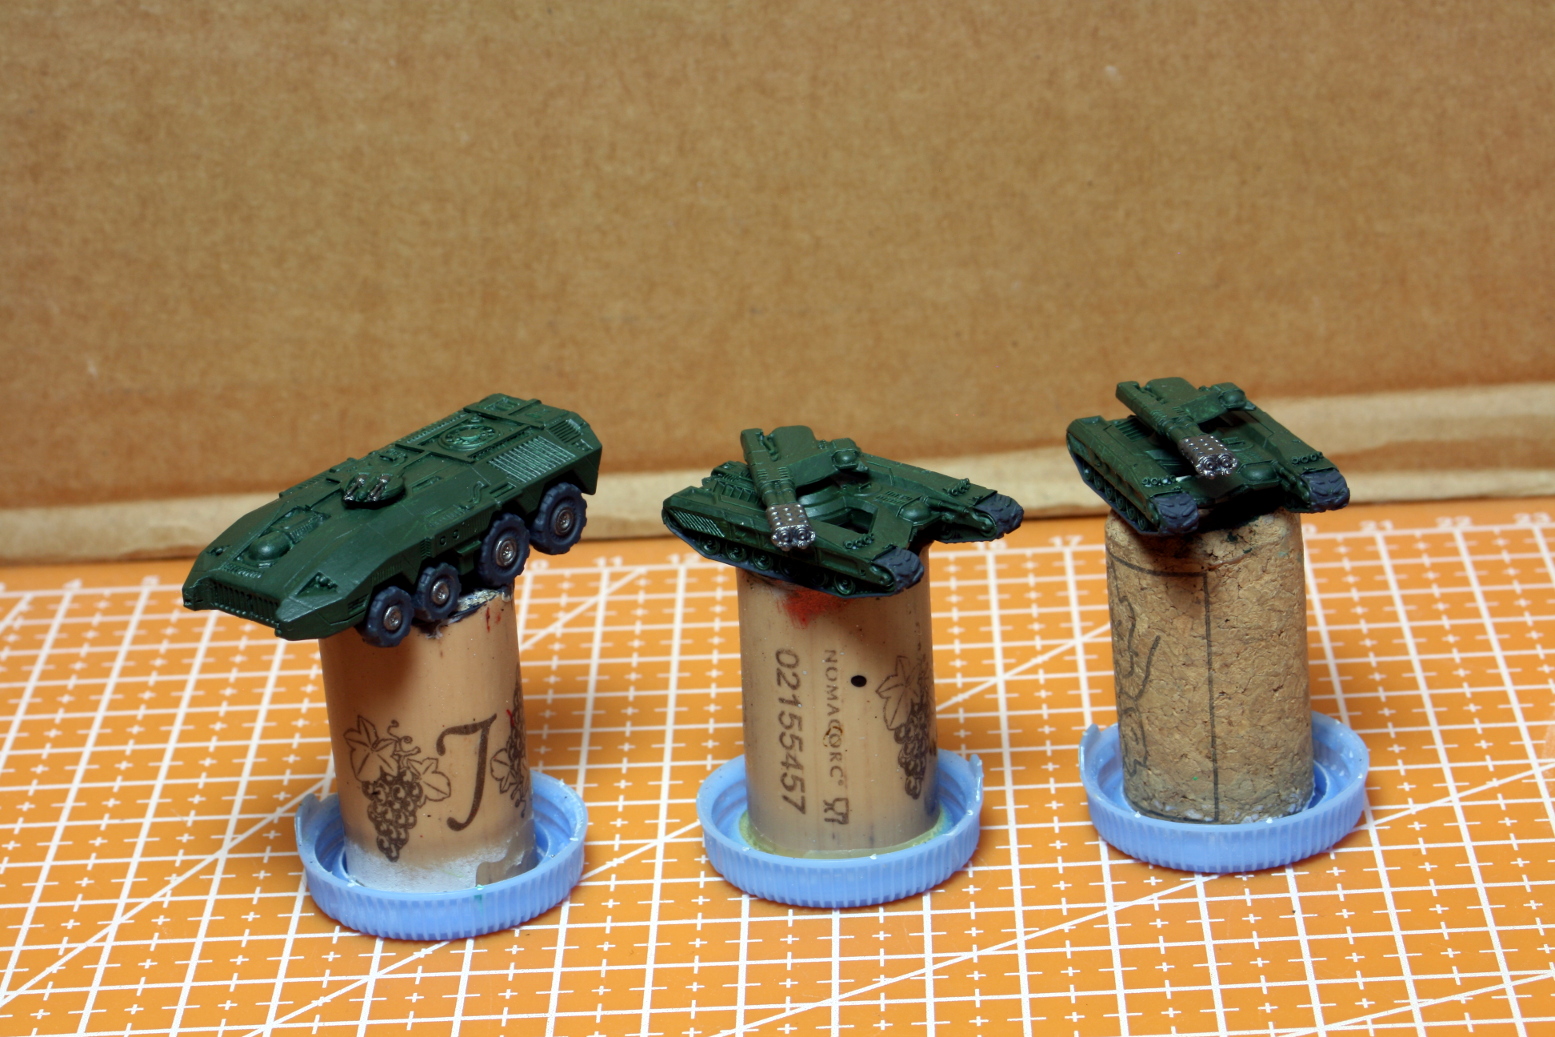 Military vehicles given a base colour of military greem. Zeon armour is usually green or tan.
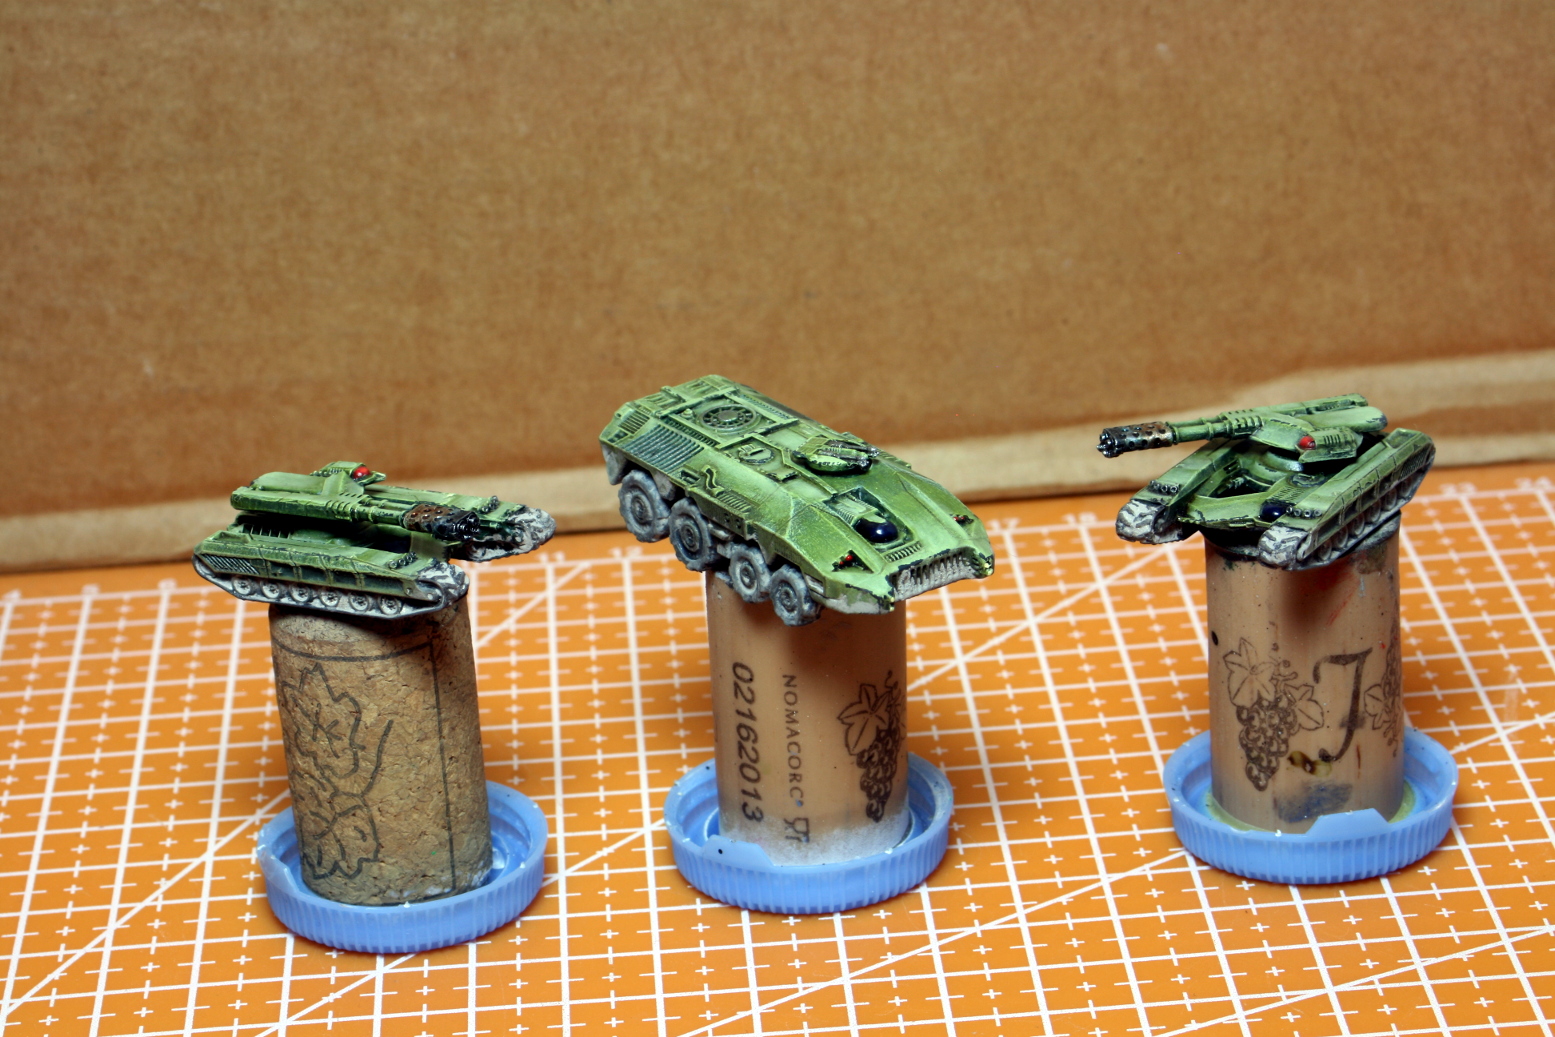 The armour has been shaded, given a wash, and weathered.
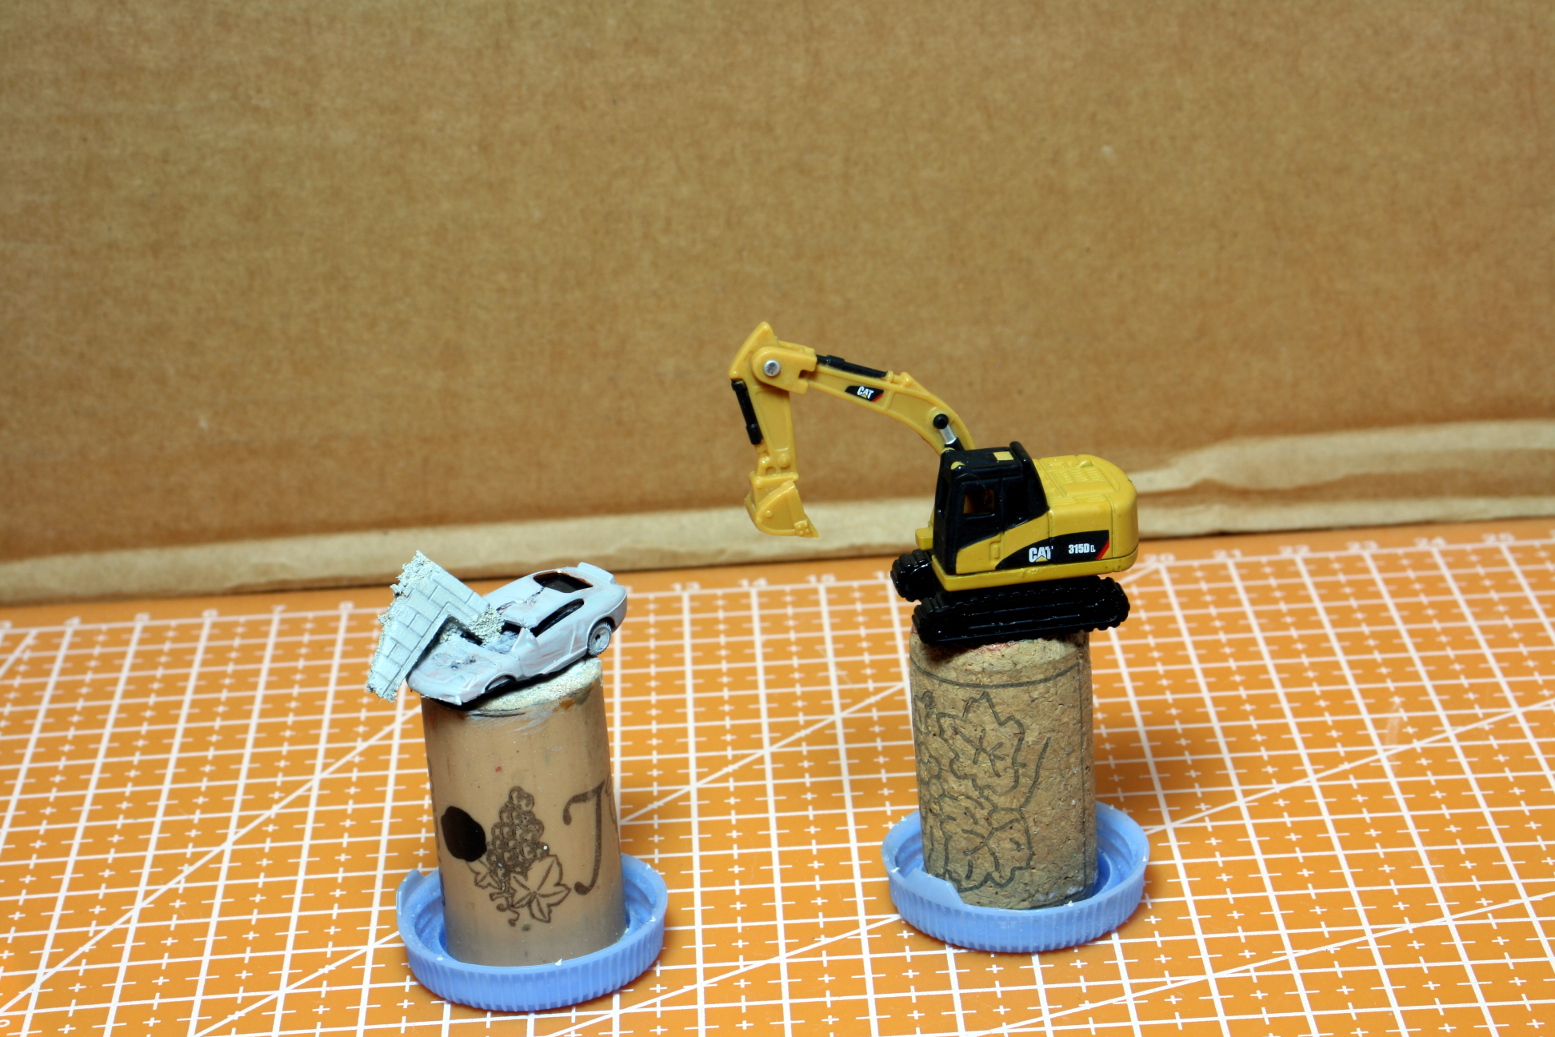 Civilian vehicles. The lifter was primed with a matt varnish, and the car was turned into a wreck.
 Civilian vehicles. The lifter was just weathered with minor painting, and the car was painted and weathered.
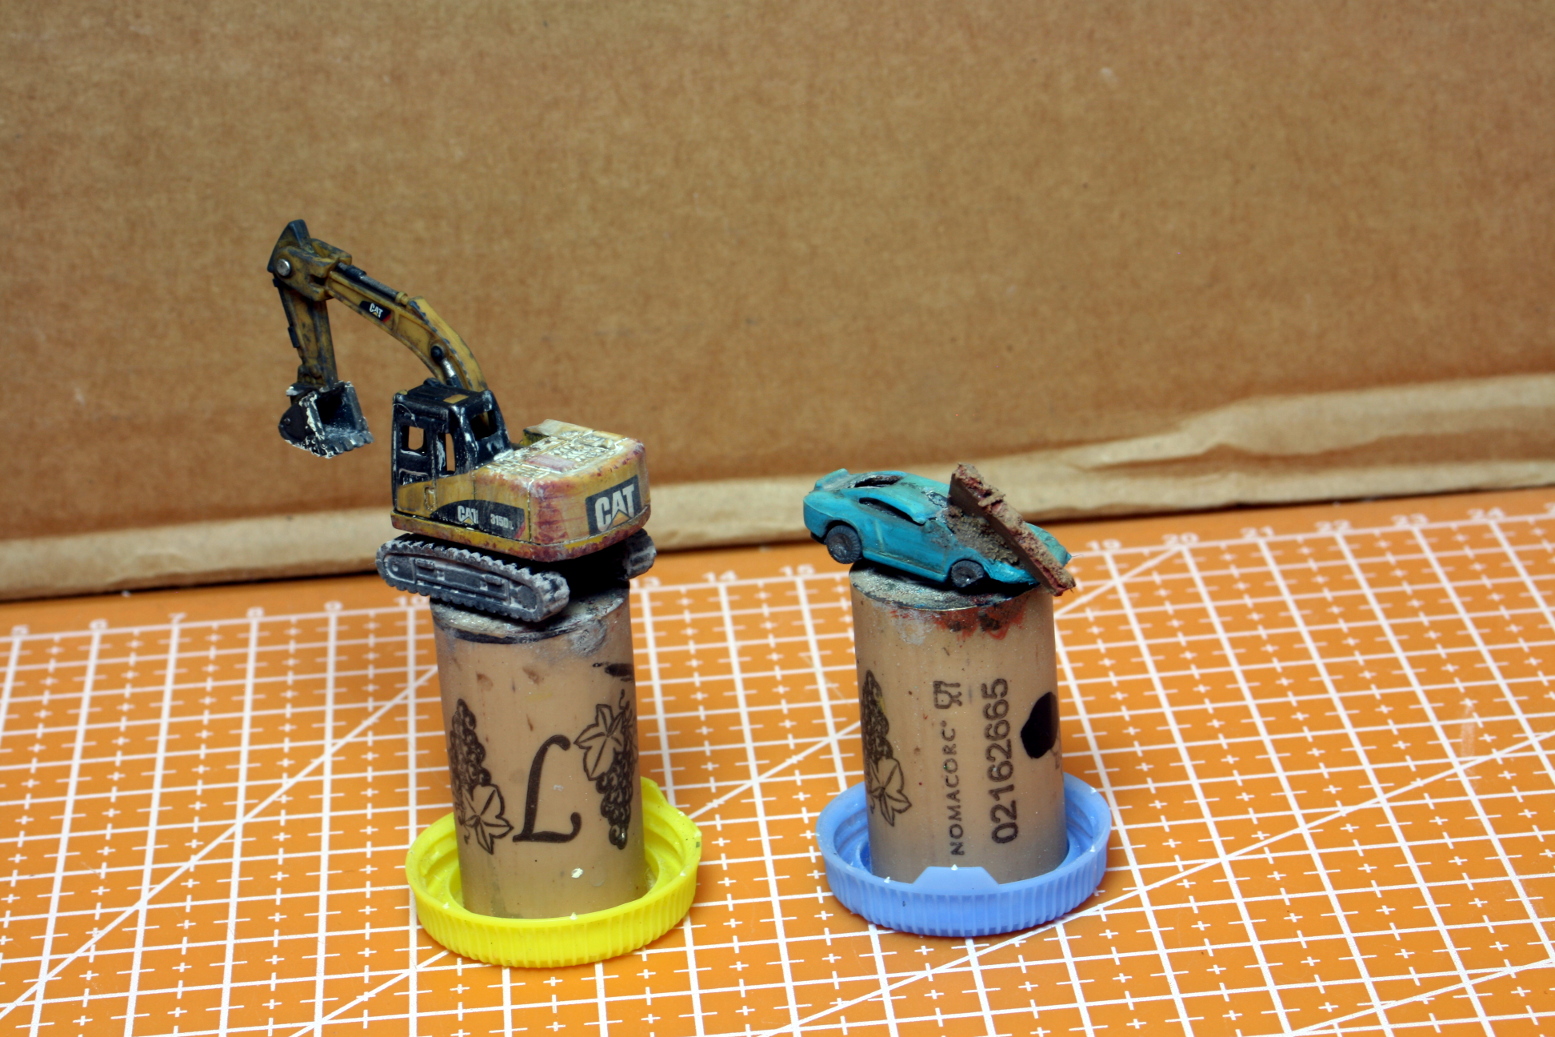 A different angle.
There are some light military vehicles to paint up, but I will leave that for a later stage. For the next stage it is crucial that I get the GM wreck ready in order to finish the base.
So until next time stay safe and have fun.
NR.
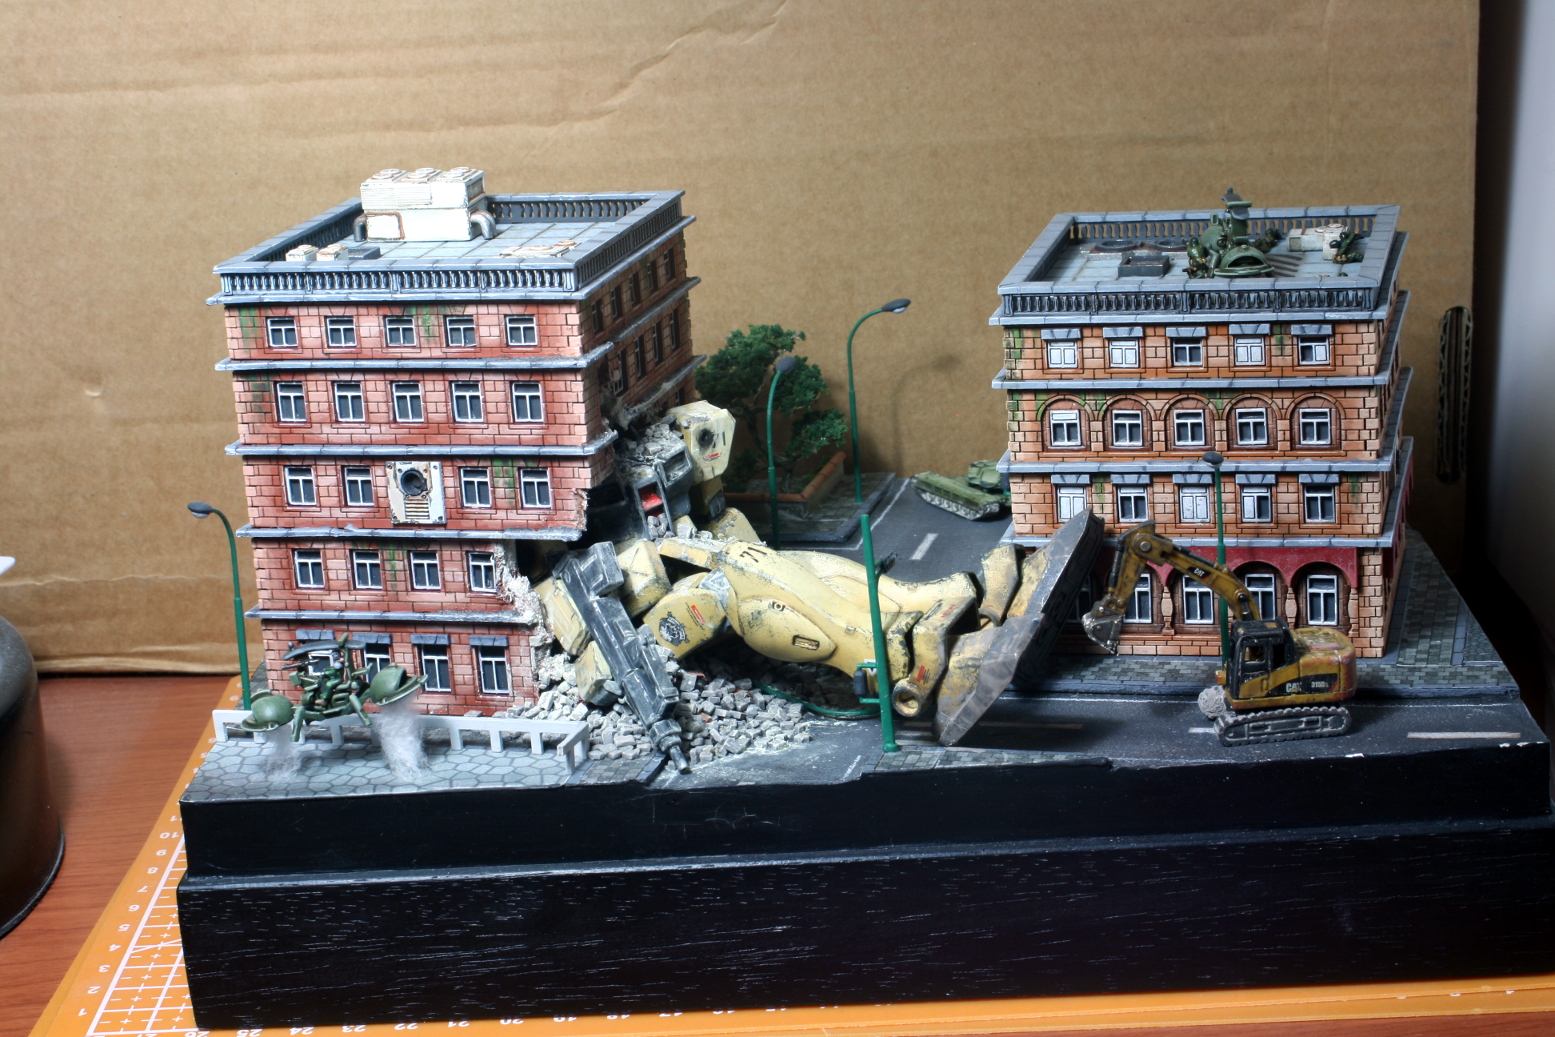
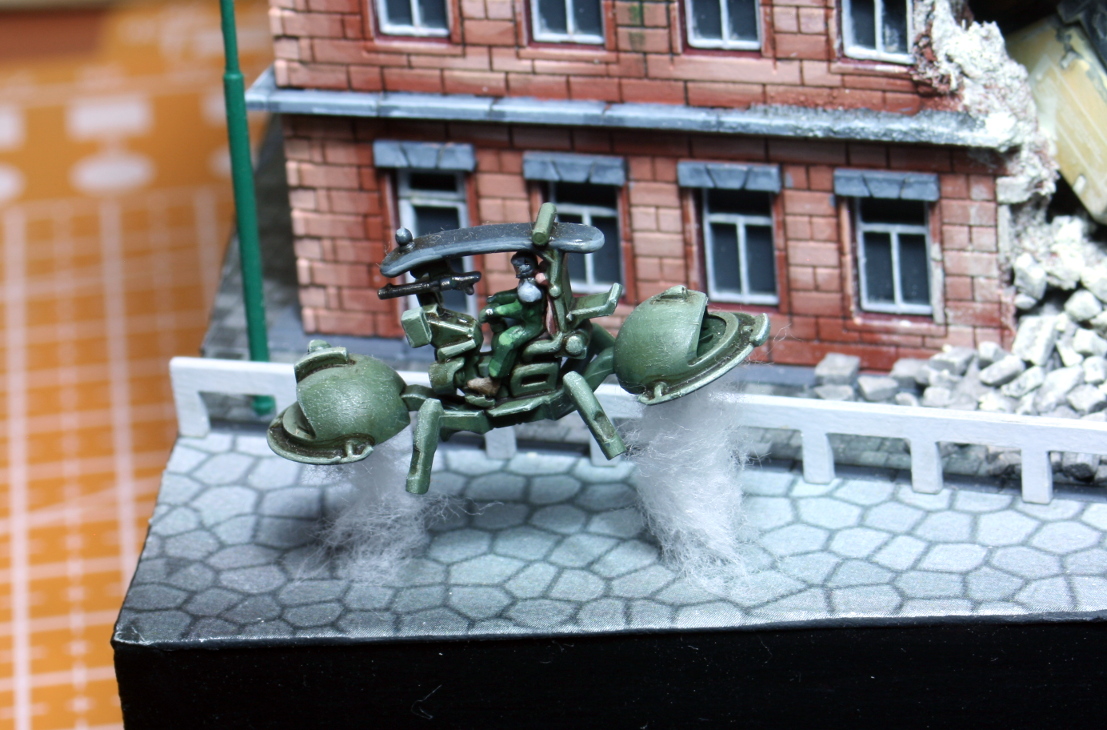
The Ground Work is finally Done - The Main Robot is next.
Hi everyone,
It has been a very slow slog, with work and the heat, but I have finally managed to finish the base. Now I just have to paint up the main robot (the Zurad) and a few more vehicles.
I did not take any pictures for the same reason. I only had between 30 minutes to an hour every other day and I had to make the best of it. That meant less pictures.
Just for your info, I decided to paint the mobile suit in the rubble in oil paints to see if it was possible. I have seen James Wappel paint WW2 tanks and oils – and they looked amazing. The result was quite good and I painted it up in about 3 hours shading and all. It did take 5 days to dry properly for me to handle, but I was in no hurry. Also, if I had used some fast drying mediums, the time would have been halved for sure.
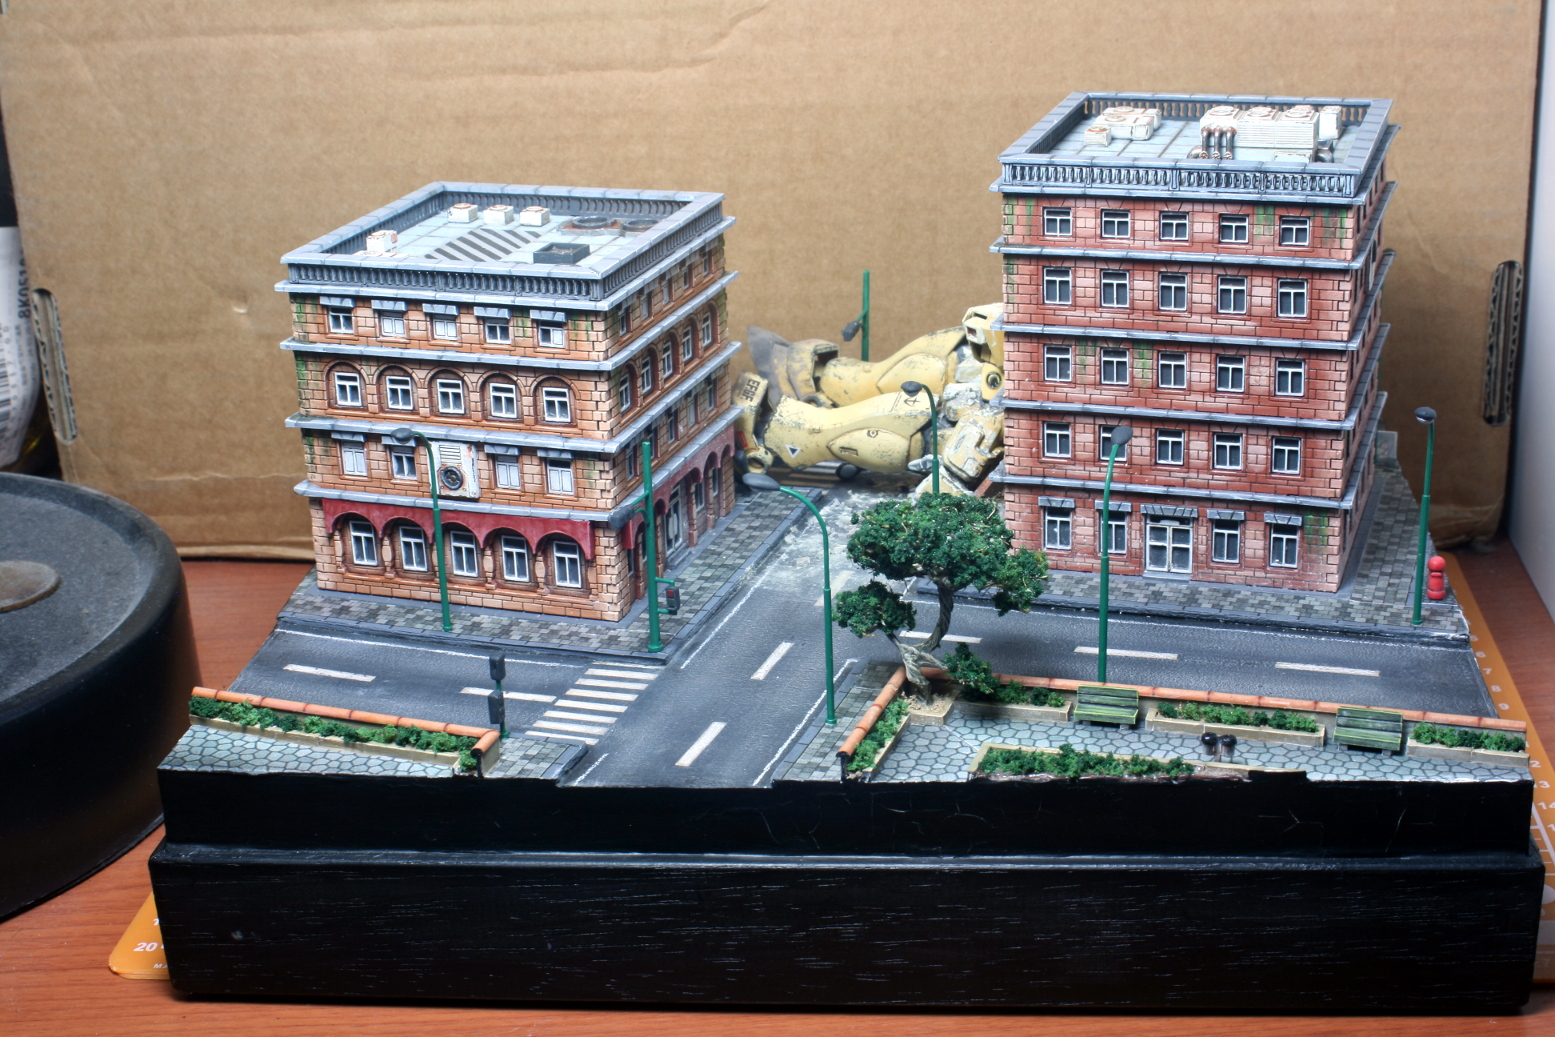 Finally added the street lights, the tree and vegetation, as well as the post box.
 The mobile suit was painted, panel lined and weather complete in oil paints - believe it!
That’s all for now. Maybe I will get some work done in this week, but unless I book a day or two of annual leave, it is going to take me some time to finish this project.
Until next time, stay safe (and cool!) and have fun.
NR.
Working On The Zurad Part 1
Hi everyone,
I have started working on the main robot. I decided to paint it in oils, because my airbrush is not suited for fine work. I had already painted the destoyed MG robot in the background with oils and it came out OK. So I decided to try it again.
I found that oils is also great to paint mecha, it grants you time to work on shadows and highlights organically. Also, since I do not have a lot of time to paint at the moment, I could leave it a few days to dry properly.
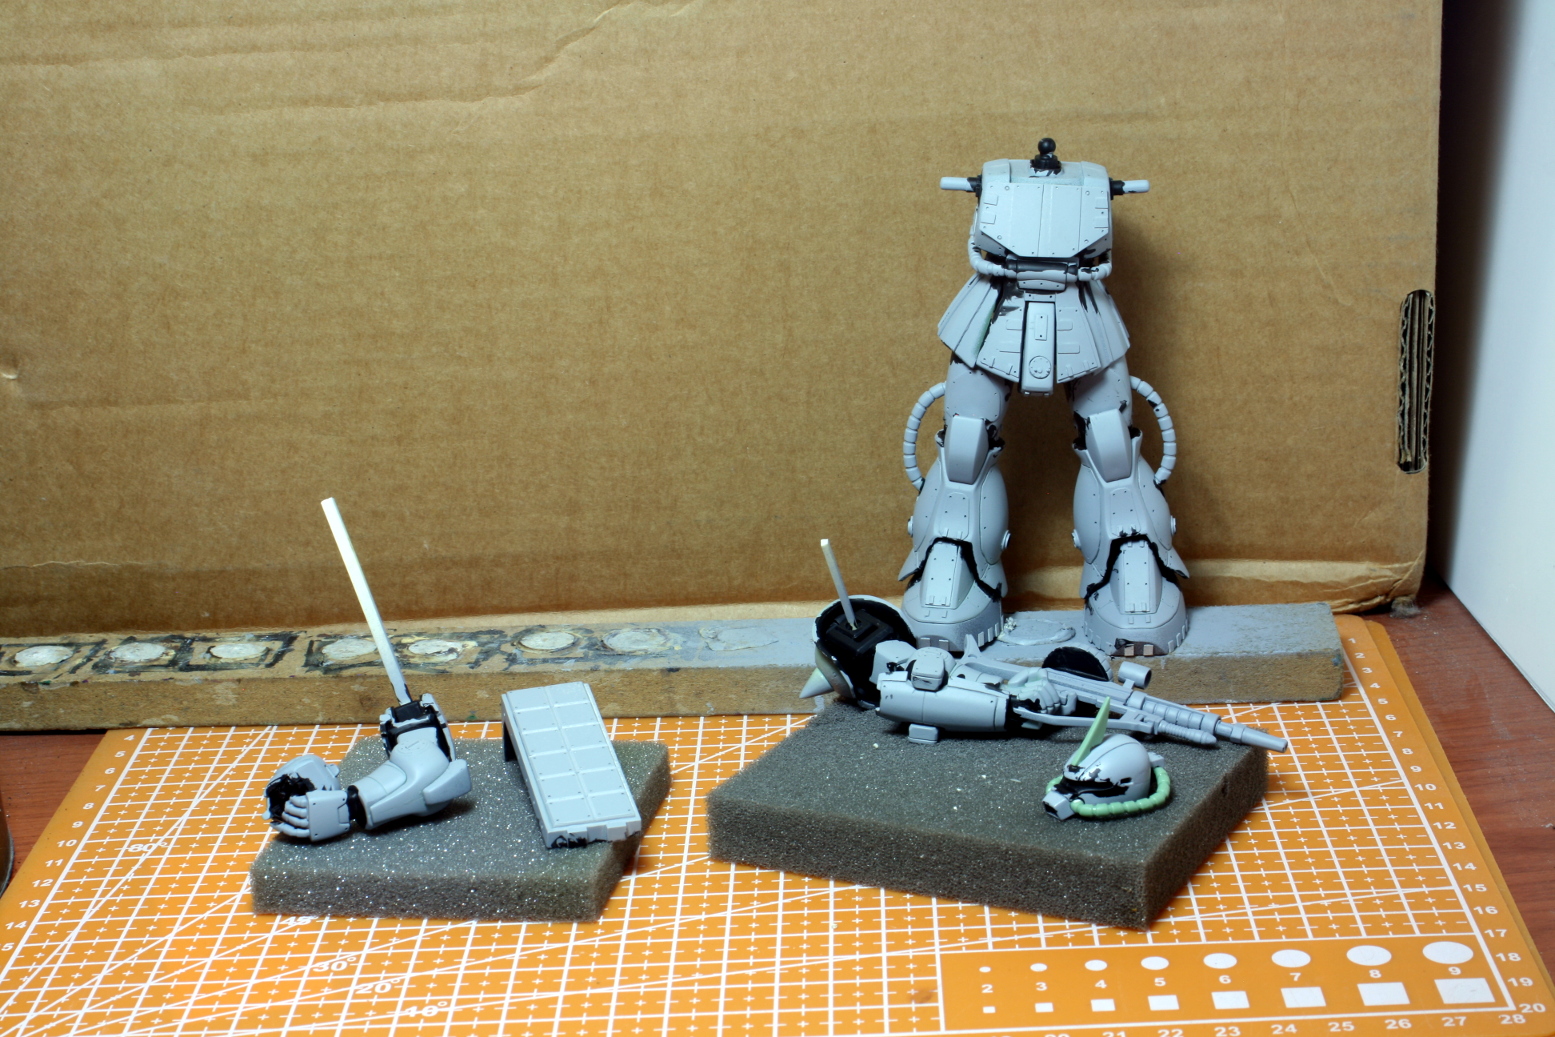 I primed everything by brush with Vallejo Ghost Grey Primer.
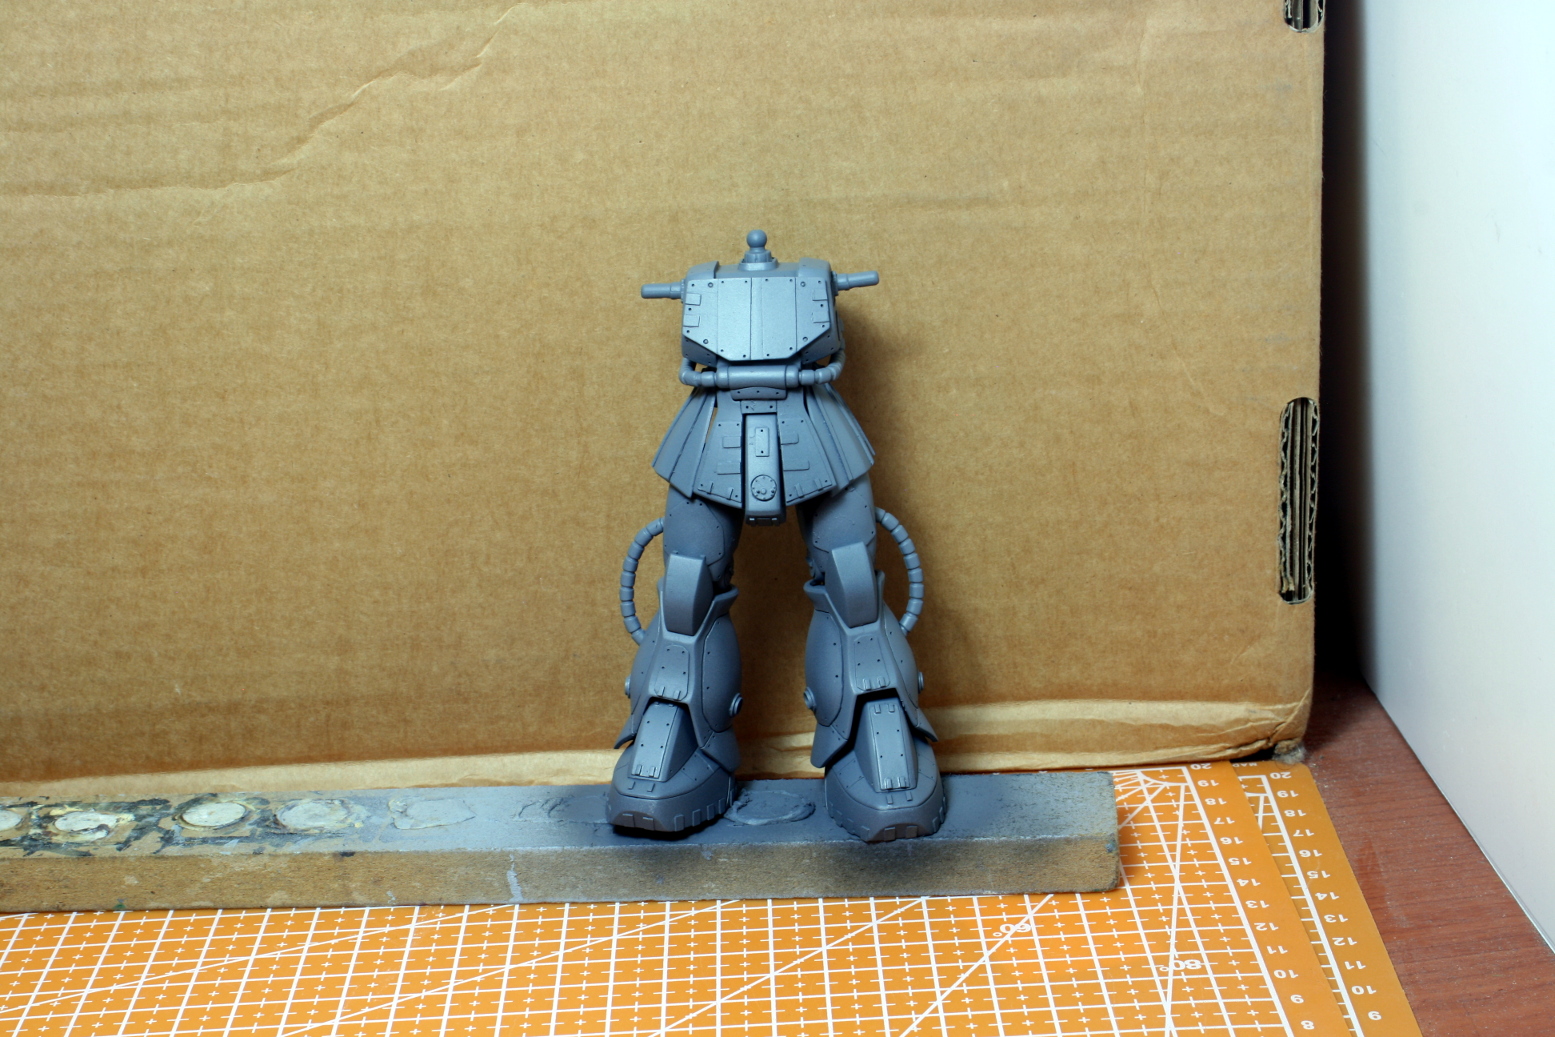 I gave the miniature a medium grey base in acrylic. I will build the oils on this.
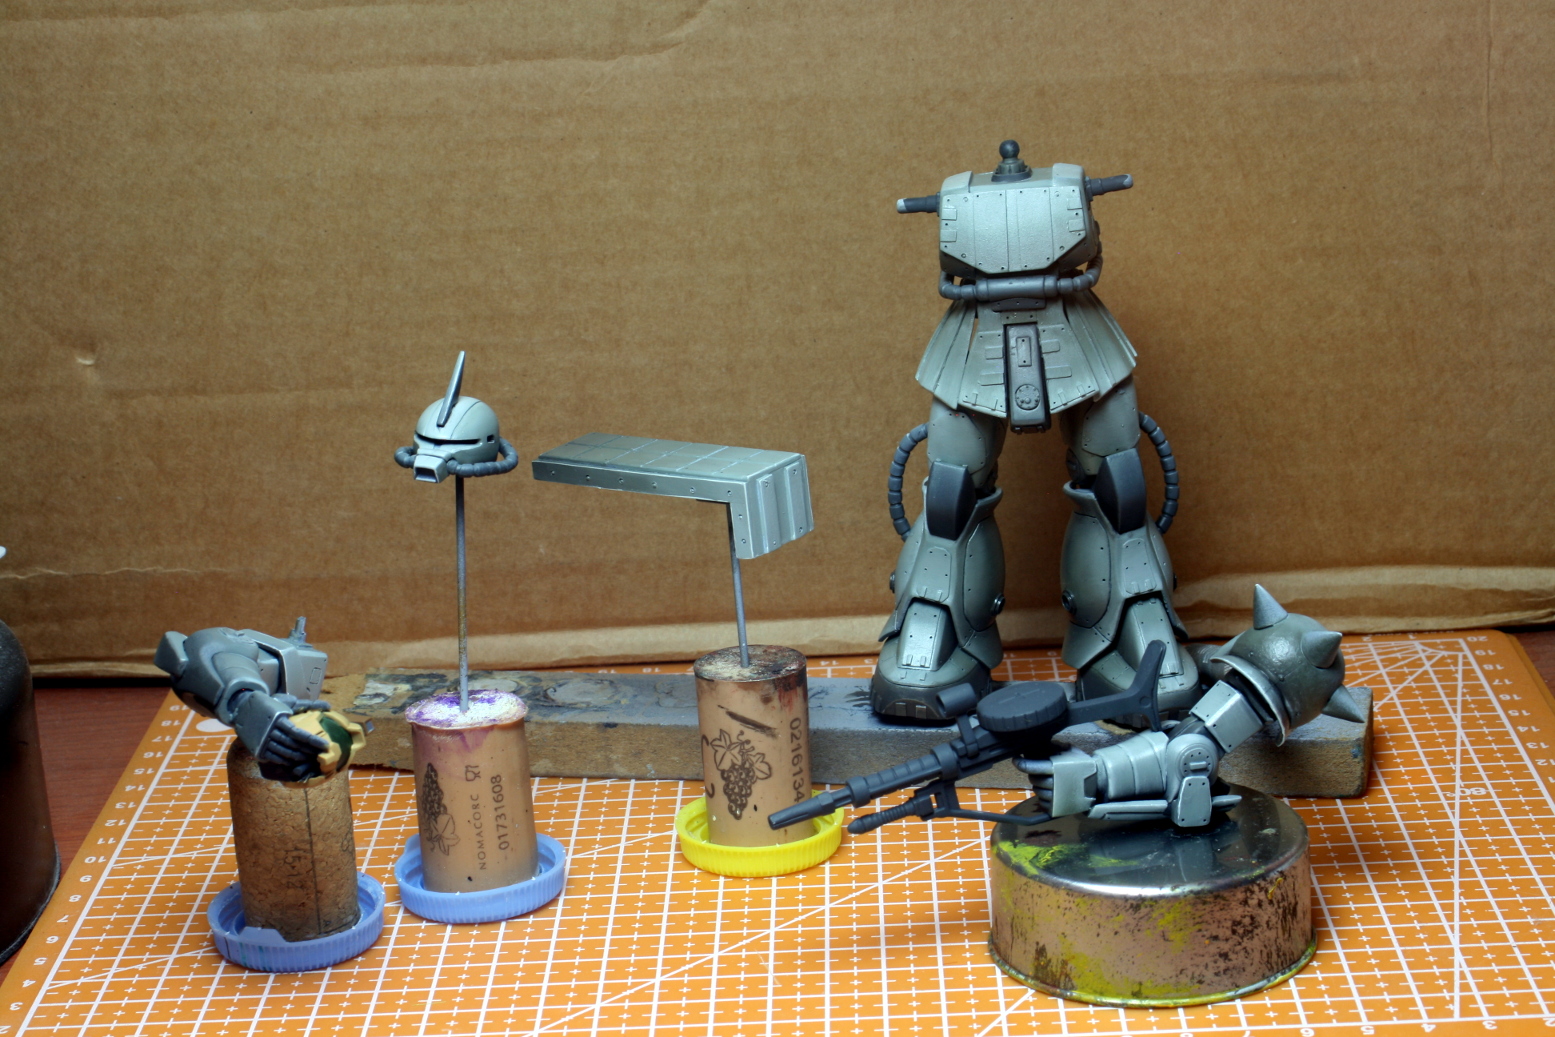 The Zurad painted up in oils.
 After letting the oils dry for severral days, I added some decals and panel lining.
With that the Zurad is almost finished. The next step is to add some weathering. In the meantime I still have a few extra things to add to the base. I think I will be able to finish this project sometime before December – if all goes according to plan.
Until then stay safe and have fun.
NR.
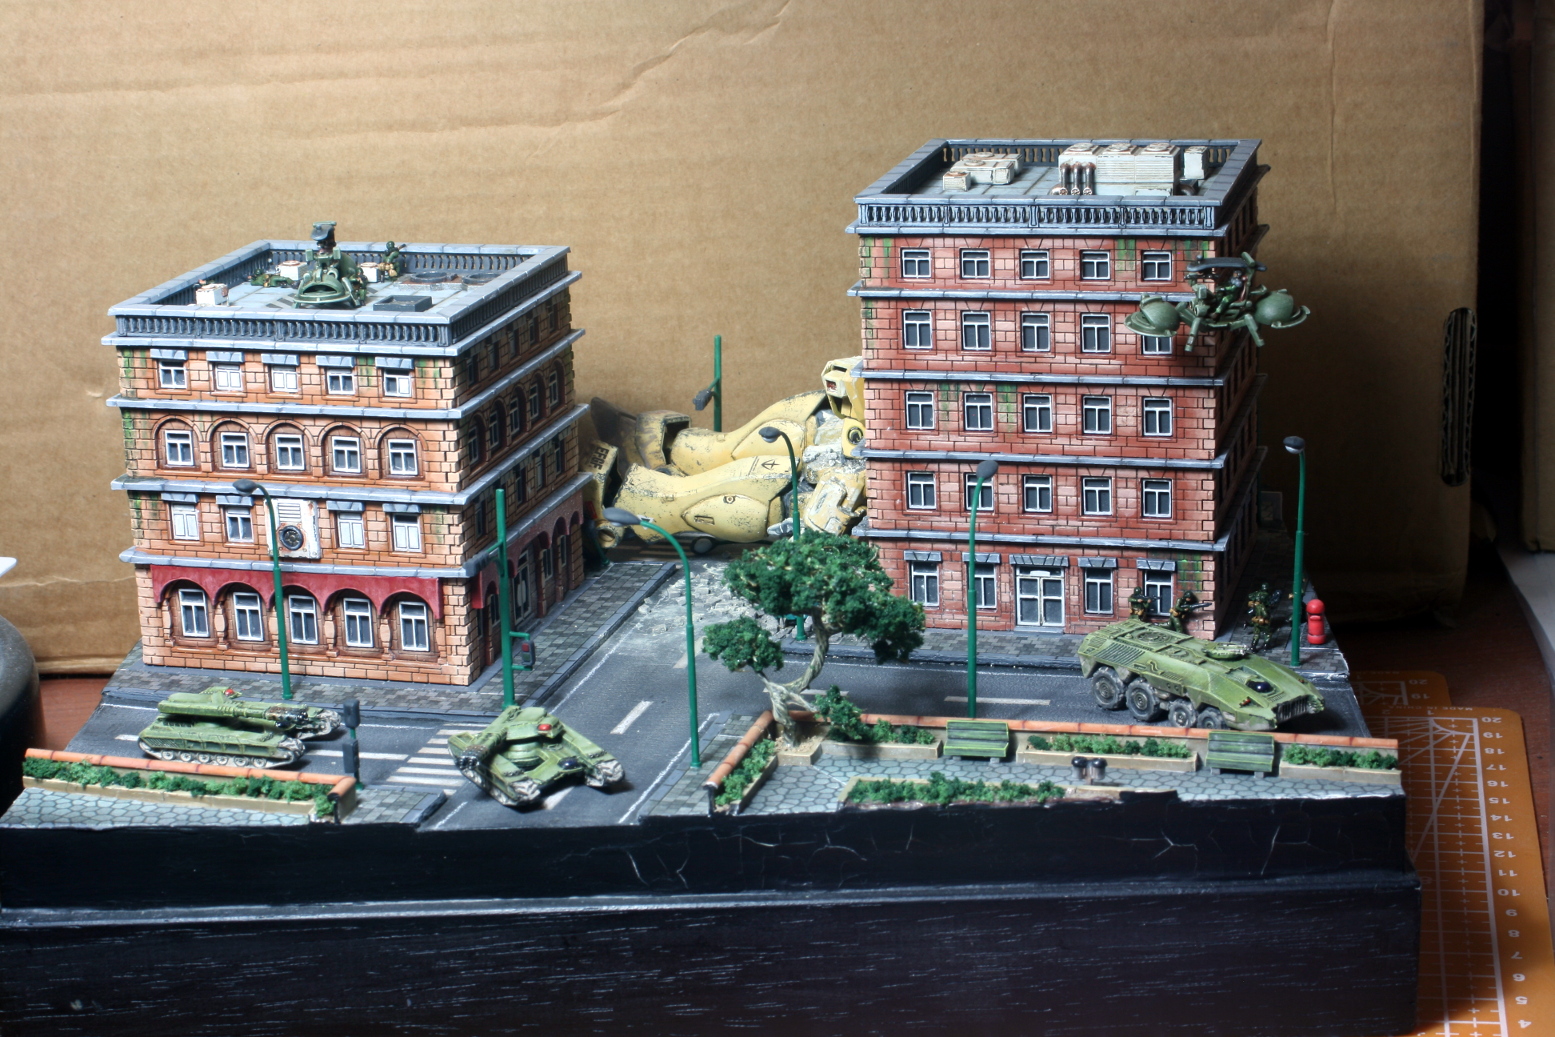
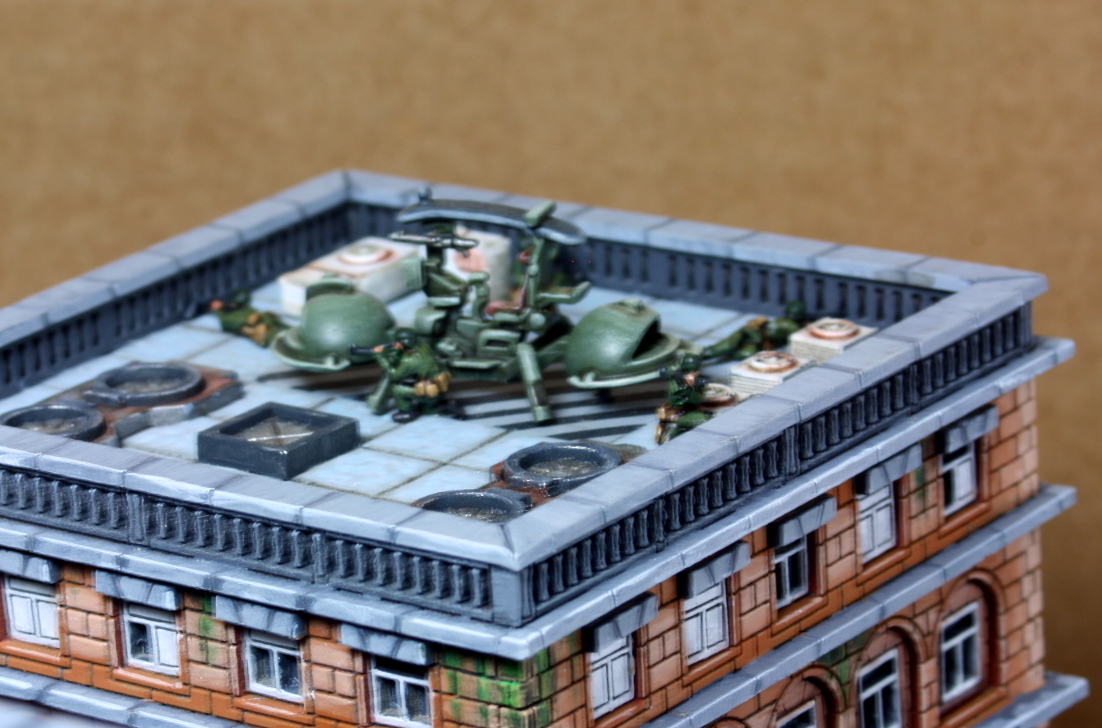
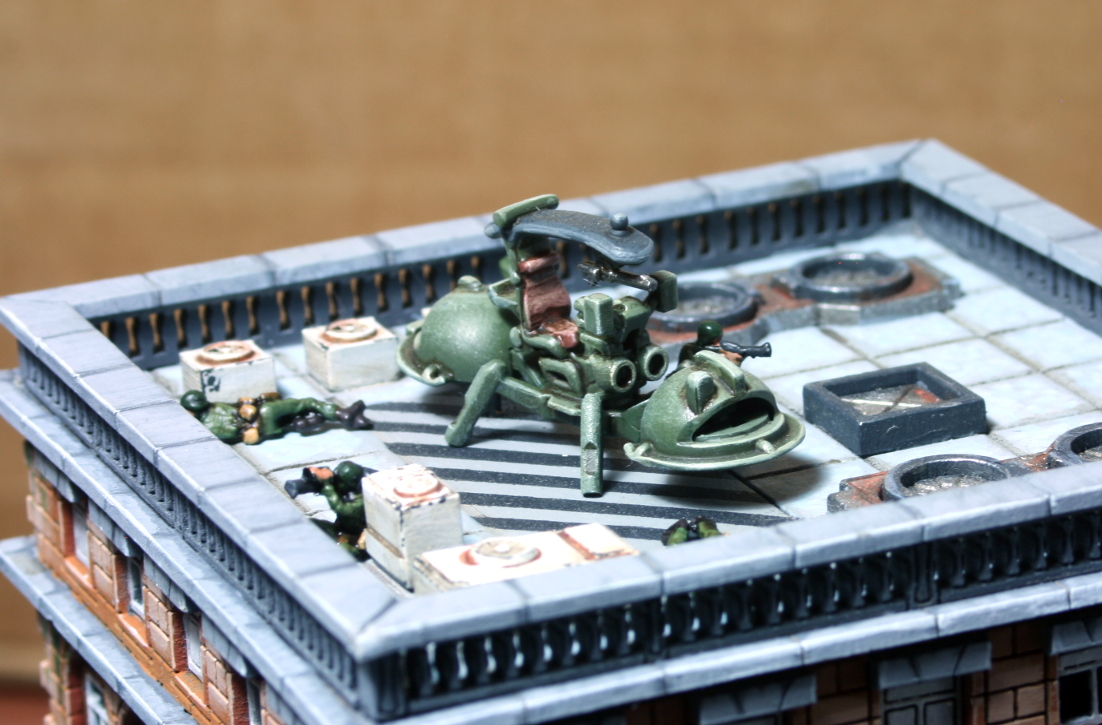
The Scene Is Now Set
Hi everyone,
There comes a time when you have to say, ‘It is done’. I have come to that moment with this diorama scene. I wanted to add more, but I needed to take a step back and think what would more actually add to the story?
I came to the conclusion that it would add very little to the story, so this part of the project comes to an end here.
I still need to finish the main robot, but it is another step in the right direction.
Now that this is ready, it is back to the mighty Zurad. Hopefully, I will finish it this week or early next week. In between, I am already gathering the items and materials for my next diorama – believe it or not!
Till next time, stay safe and have fun.
NR.


