


![Atomic Tank – The Robot Wars Review | Fast-Paced 10mm Sci-Fi Wargame [7 Days Early Access]](https://images.beastsofwar.com/2026/01/unboxing-hydra-miniatures-atomic-tank-the-robot-wars-coverimage-225-127.jpg)

![246 Dwarves in One Box?! | Wargames Atlantic Dwarven Host Unboxing & Review [7 Days Early Access]](https://images.beastsofwar.com/2026/01/unboxing-wargames-atlantic-epic-fantasy-battles-dwarven-host-coverimage-225-127.jpeg)


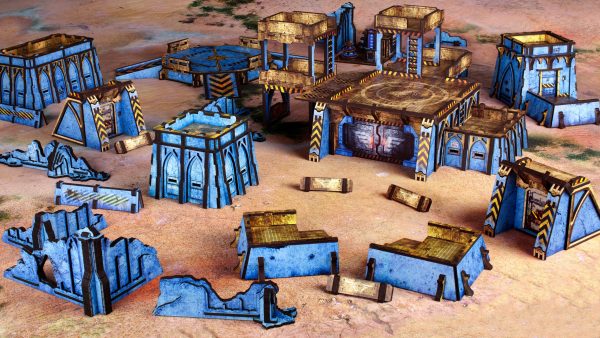
Infinity terrain: updating cardboard buildings (Mototronica pack)


Recommendations: 96
About the Project
I've had this old but very usable Infinity cardboard buildings for very long. It is time for some updates!
Related Game: Infinity
Related Company: Corvus Belli
Related Genre: Science Fiction
Related Contest: TerrainFest 2025
This Project is Active
Part 8: Bevel'd la vida loca.
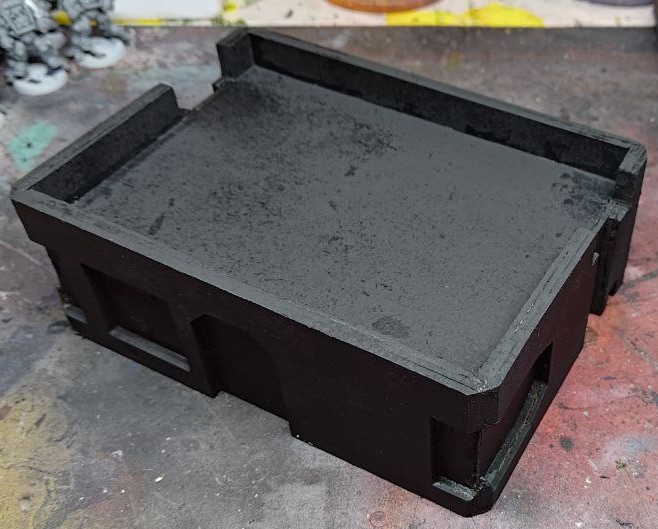
Finally took some time to fill the holes with a mixture of MDF dust and glue, and prime the building black.
I thought it looked really promising, so I started the next phase, adding the original texture to the structure.
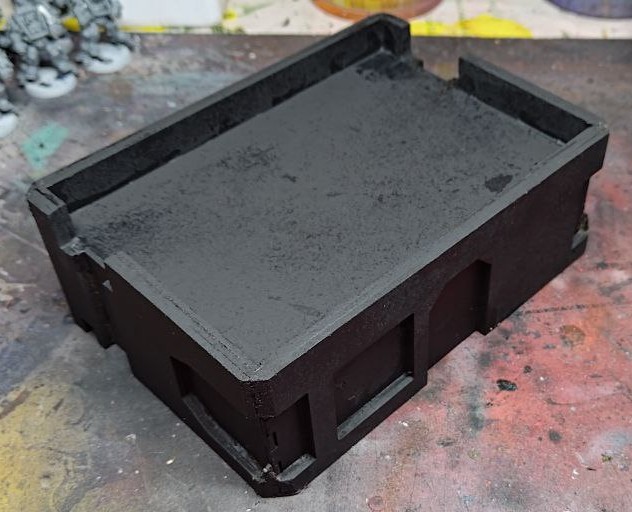
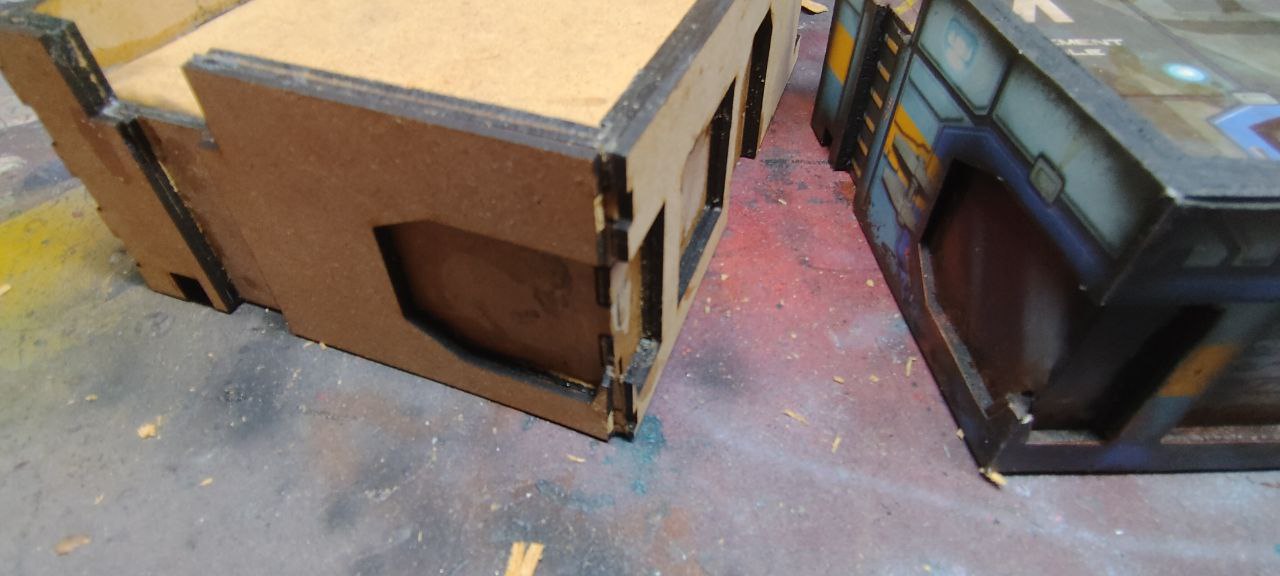
 It works so good beveled!
I thought I needed to cut some of the texture and leave the bevel black, idea I was not against really, but Happy accident and behold! I can wrap the texture around and gain some really cool corners!
Ok it is simple geometry and not “happy accident” but I’m eyeballing the whole process, so was genuinely impressed.
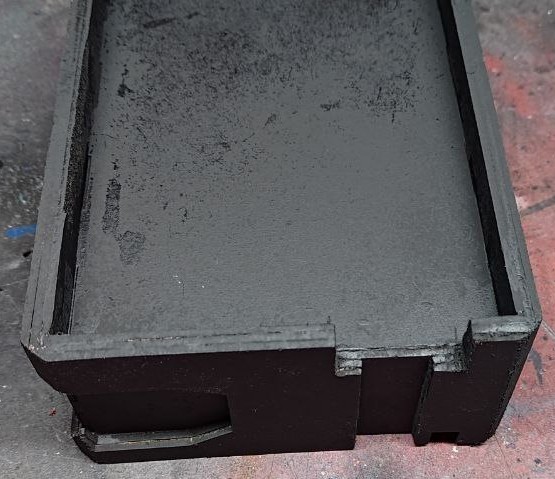
I will finish adding the rest of the texture (I’m only showing the side I already did, cheeky me) and maybe change some things of this design for the other two or three buildings I need to make.
I’m thinking of adding some kind of strut perpendicular to every layer of MDF to facilitate the assembly, a MDF nail so to speak.


Part 7: Failing is ok
 New building, lots of problems
I thought I had everything under control.
I made changes, rebuilding the vector designs for the laser cutter from scratch again, been really careful about dimensions and calculations.
And then I realized the MDF wood I had was 2mm thick, not 3mm as I thougth.
Lessons learned, first check the material, THEN start designing.
The first building I made was from 4mm MDF wood, and while it looked good, was a bit too thick, so I designed the new one thinking that 6mm total thickness (3mm for the inner shell that keeps the roof in place plus a 3mm outer structure) would look better.
If the MDF wood I had at home was 2mm, I could simply add an extra outer layer and gain the 6mm for the roof wall while also getting a deeper door and windows frame.
Win Win.
Except I forgot (again) to take into account the thickness of the material. As a reminder, I’m designing all of this in Illustrator with 2D vector drawings and doing all the 3D math mentally. It’s hard to remember all of that, I need to improve that part of the design process. Maybe I need some kind of CAD program, and a tutorial or two about how to use it.
It looks like this now:
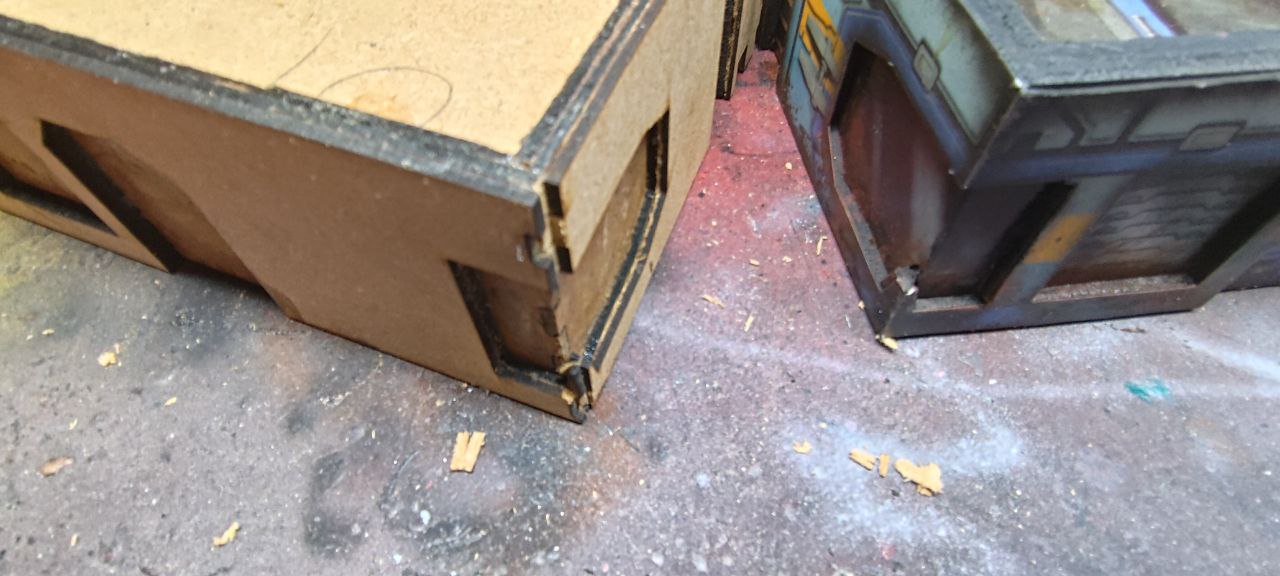
The main thickness has improved and I’m really pleased about how it looks, but all the corners are wrong. I don’t want and can’t make the building bigger, as I’m limited by the size of the original cardboard building.
I could make the two inner layers smaller to compensate, but I can’t be bother to redisign the whole thing again.
So I have an idea, a compromise that might work just fine.
I’m going to bevel the corners.
Part 6: Finale, for now
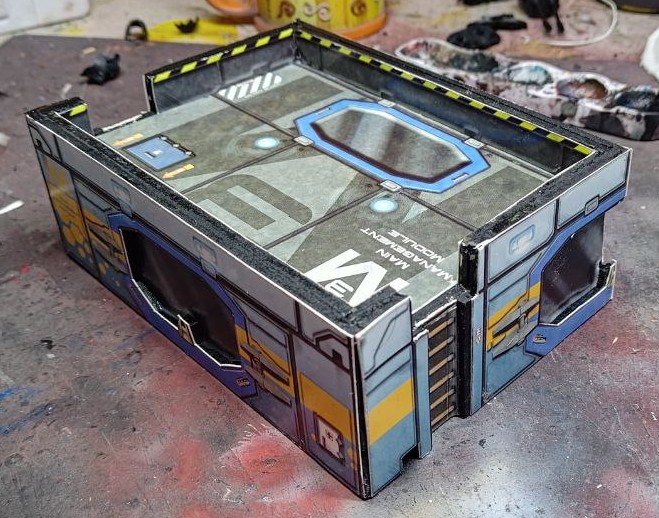
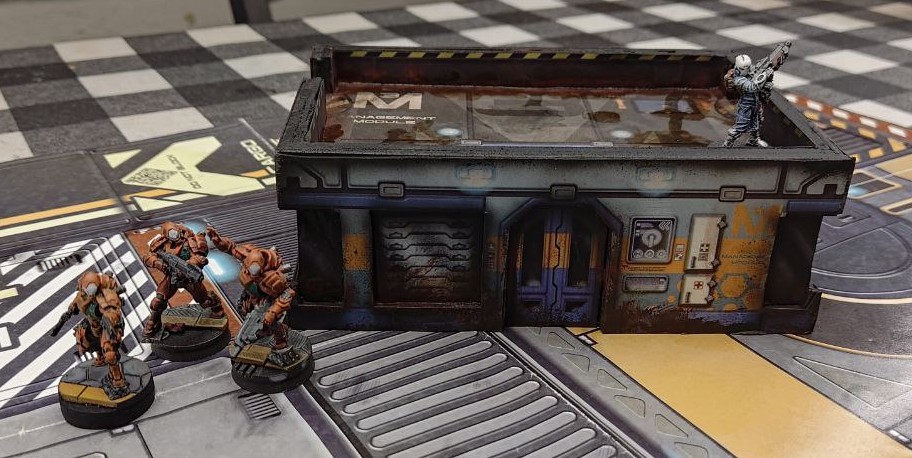 With a playing mat and some miniatures, it looks so good
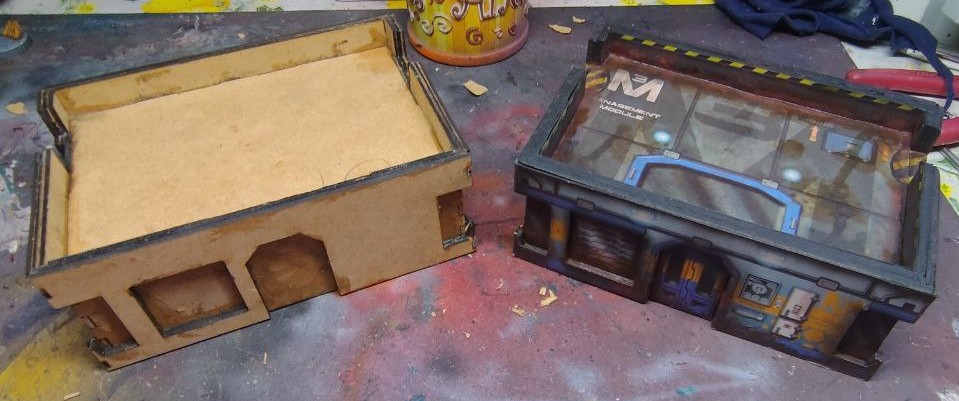
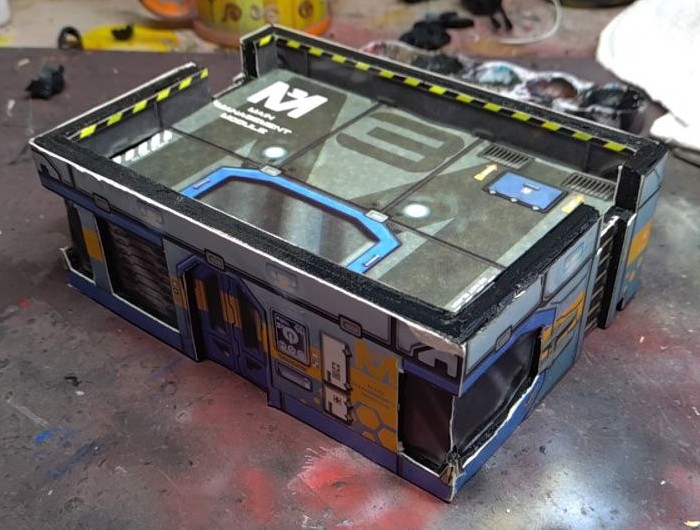
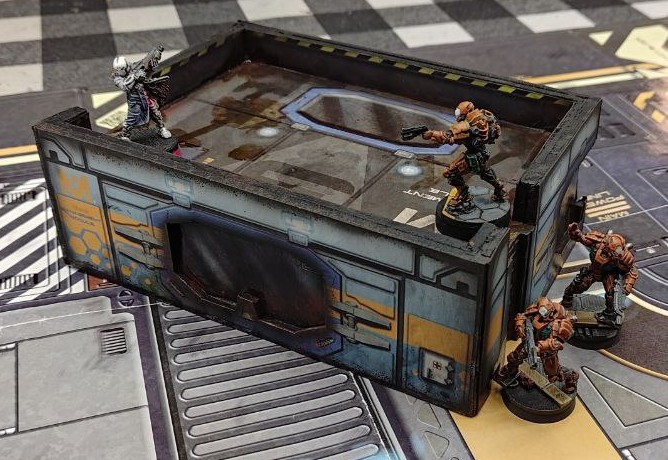 Another view, I'm very pleased about the end result
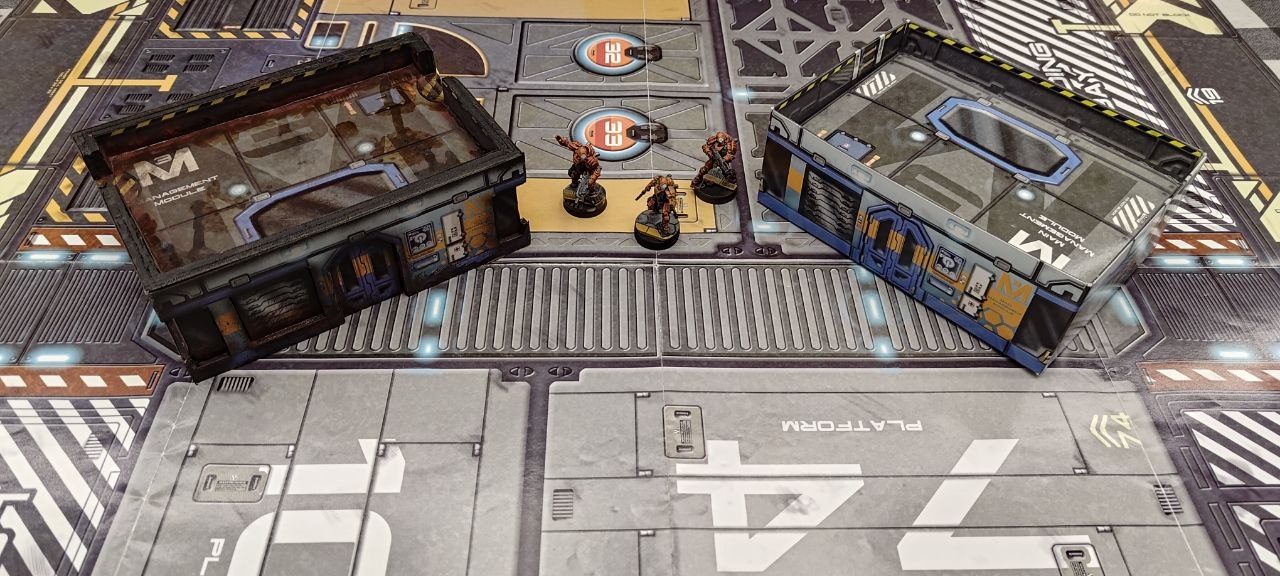 The comparation between them is like night and day
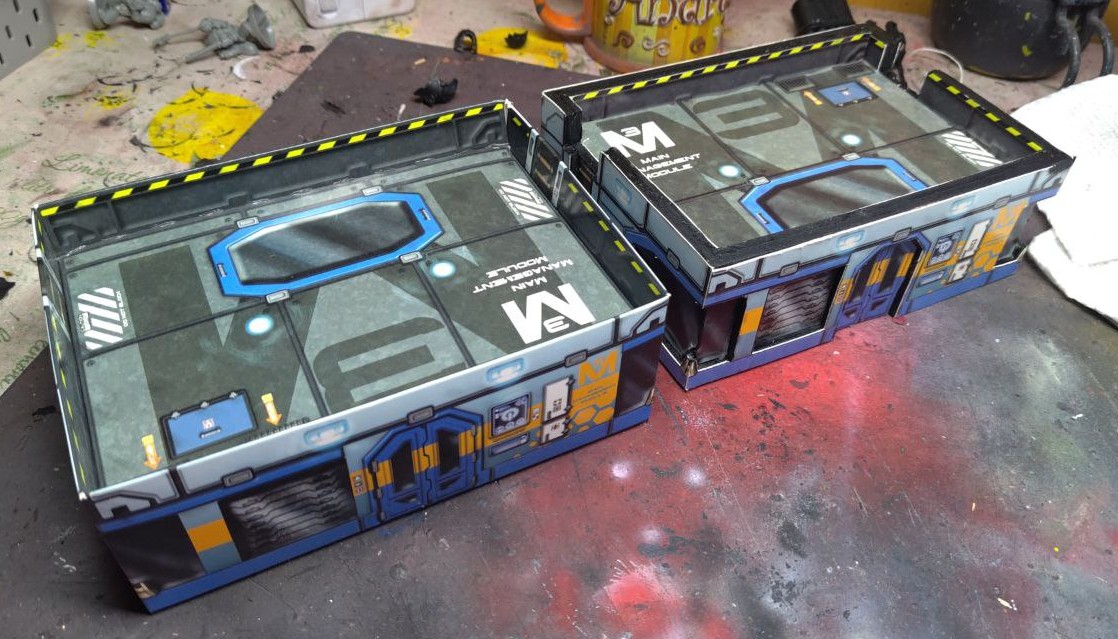
I still need to modify a few buildings, some to be the same as this one, at least three or four more, and some that I will further modify. At least one two story building using this same texture, and a flat wide one with the other building that came with the set.
I will update the project as the rest of the buildings are done, or maybe I will make a new project better.
I hope y’all liked this little hobby idea, and I will see you in the future!
Part 5: We can do it better
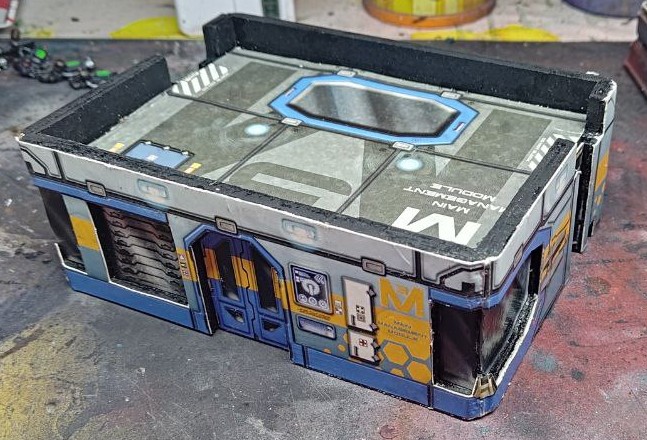
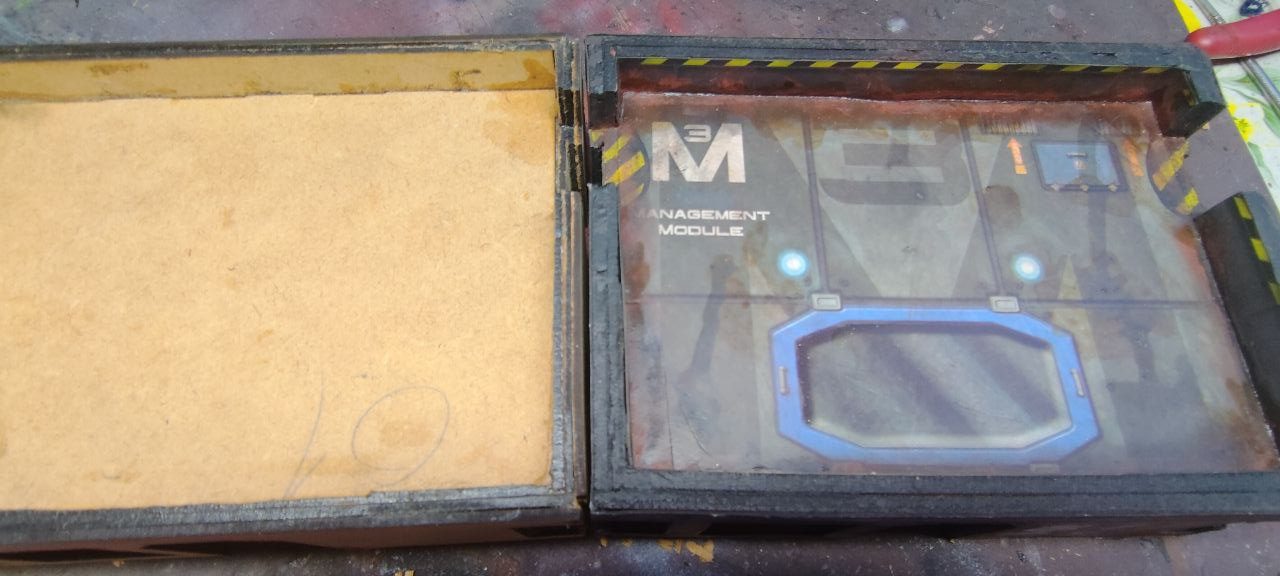
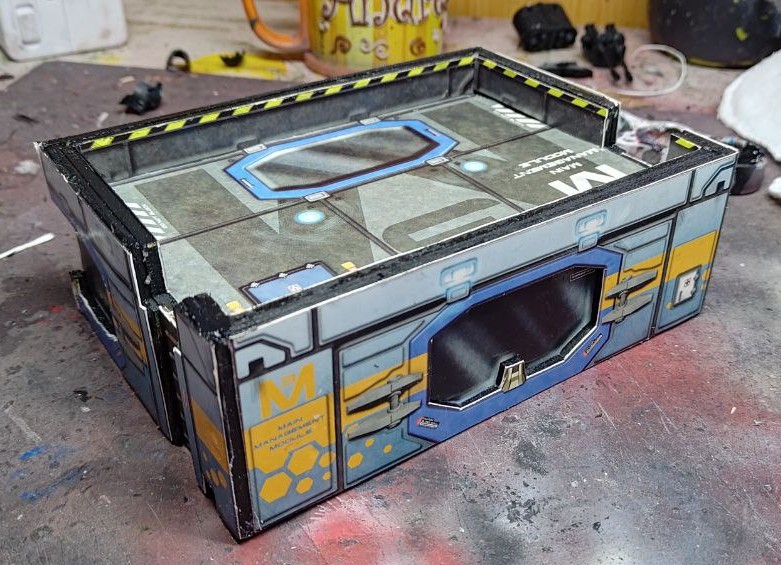
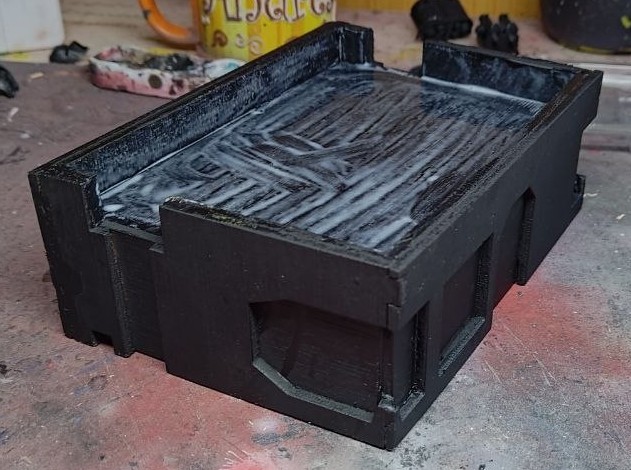
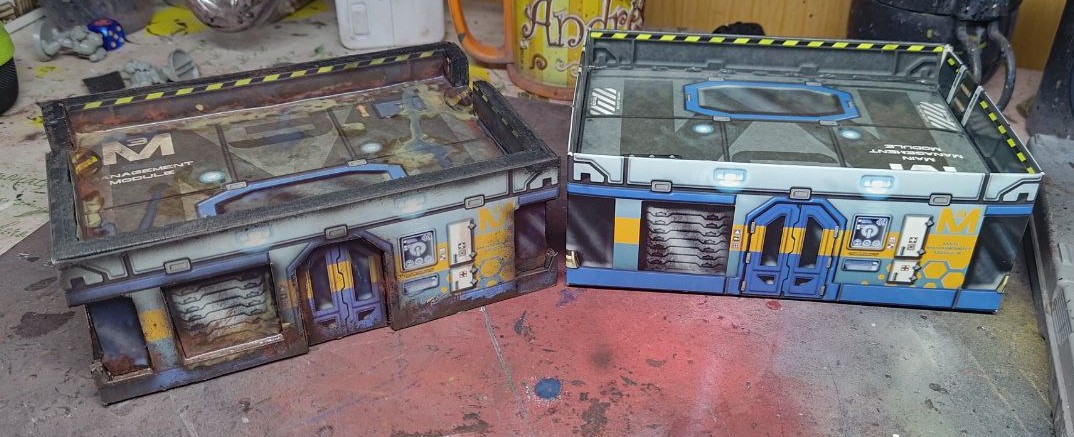 I just couldn't resist and upgrade. The contrast between the new and the old says it all.
Finally, I decided to give it a coat of paint to better blend the original texture to the black wood frame, and add some weathering. It’s suppose to be a scifi factory!
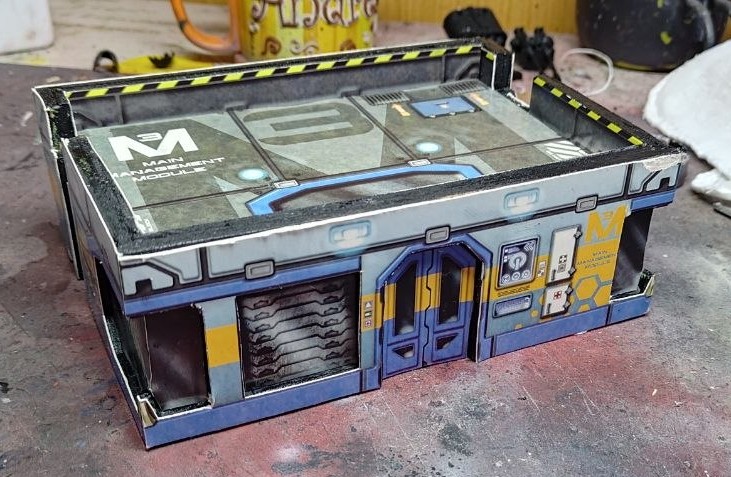
So I did a quick paintjob:
- Black airbrushed all the edges, to better blending and adding some more depth.
- Weathering galore. Maybe to much weathering, but I will make a few more buildings so I can vary the wear and tear.
- I hand painted some details, taking out some like the name of the building, not every one can be the “main management module”, and obscuring and adding new danger signals for the ladders, because I realized too late the roof texture was backwards!
And with that, the project was done.
Next, some cool photos!
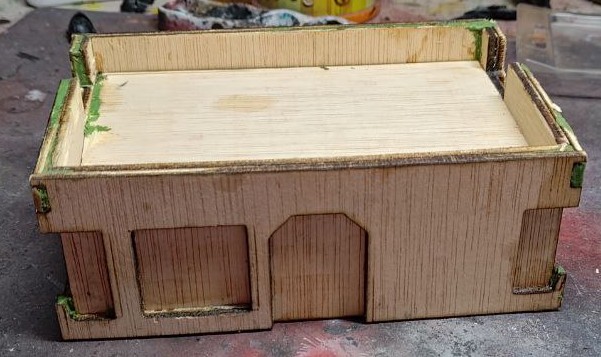
Part 4: Glued and done! (or is it?)
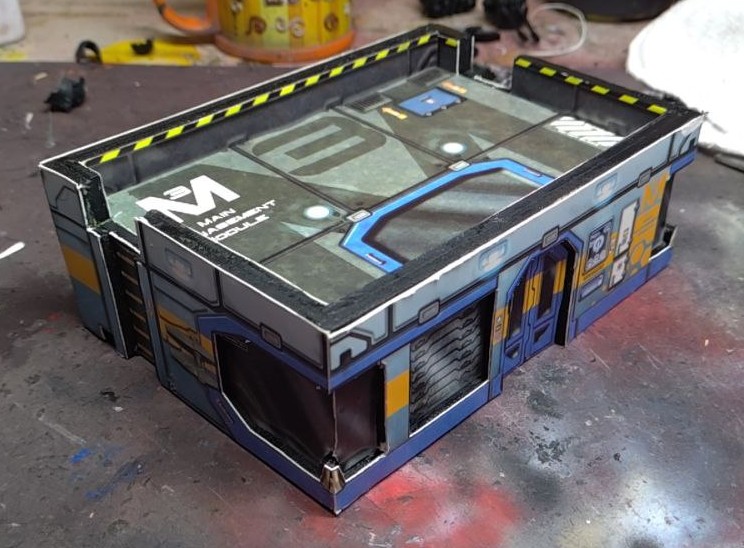
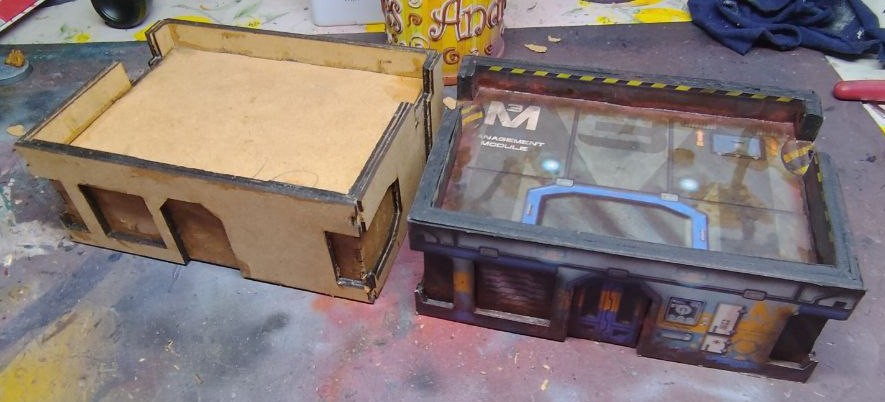
This next step is relatively simple, cut all the details from the texture, and glue them to the wood structure.
It’s a bit of work, but the end result looks and feels so good, the extra thickness of the walls feels just right, as we can see in this comparation with the original cardboard building.
 And with this the project is finished...
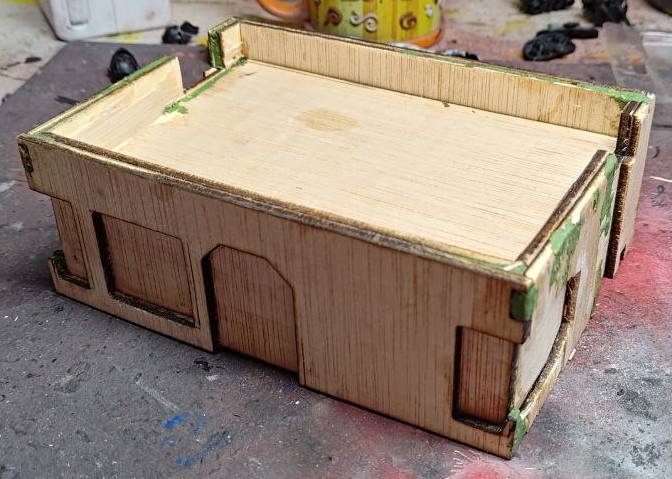
Part 3: Prime it black!


Because I want to reuse all the textured panels, I thought better to spray primed everithing black.
This is a “low effort” project, at least in theory, and I wanted something a bit abstract about the building. And black mixes so good with the original texture of the building, at least in my opinion.
Part 2: Cut! That! Wood!
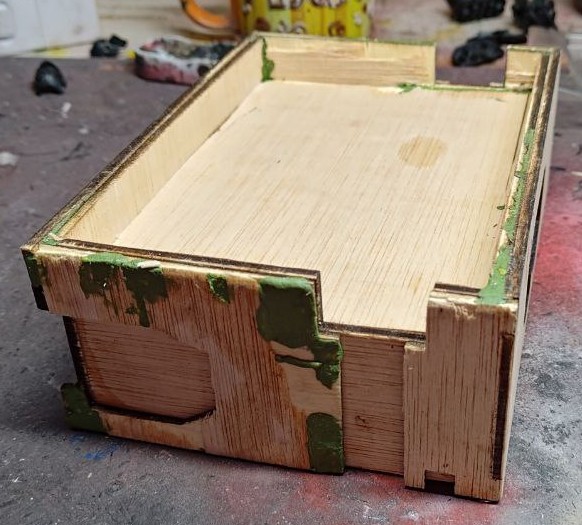
With all the sides traced, It was time for the Lasers! Is so strange having a scifi staple at home and using it for something like this.
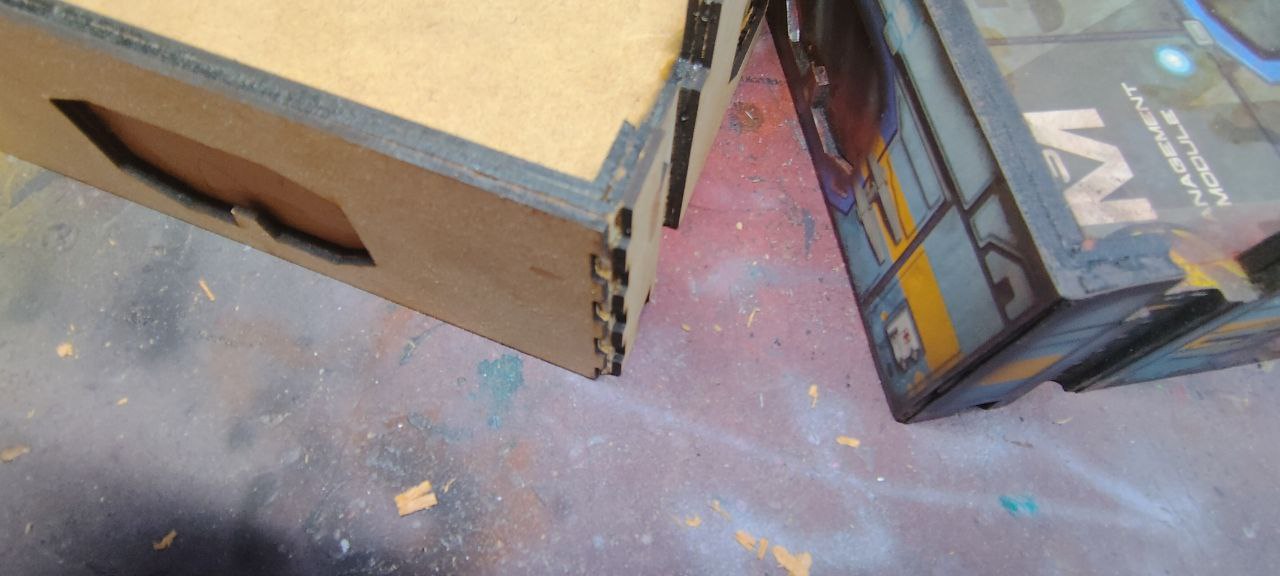
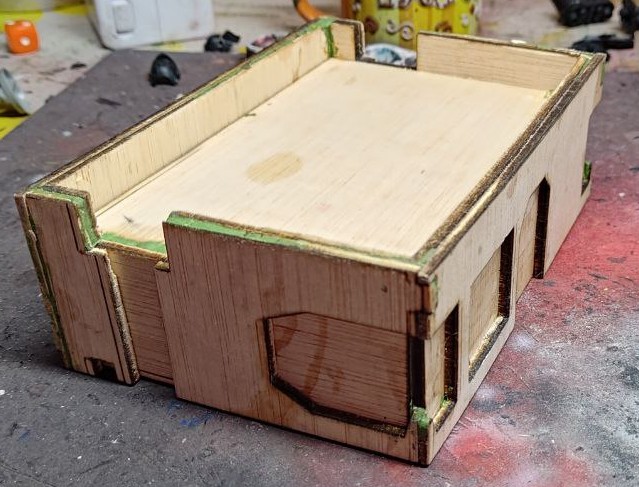
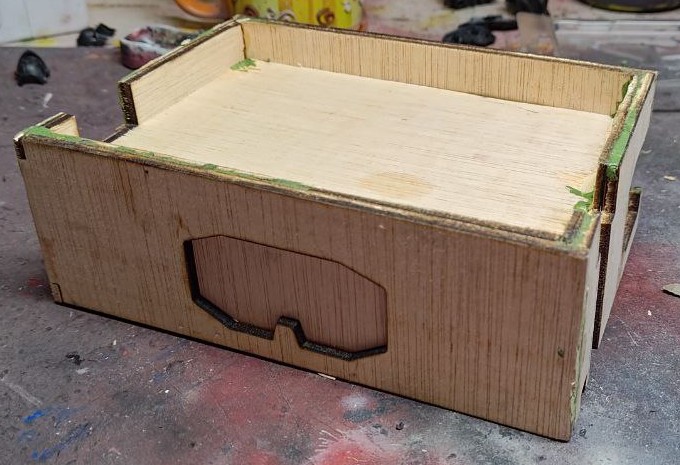
I made a few mistakes, so the building is a bit crooked:
- I forgot to mirror one of the sides, and the cut was not great so it has a bit of damage showing were it should been in the inside.
- The front side is a bit shorter, a tracing mistake I’m already correcting for the rest of the buildings (oh yes, I have more to come!)
- As a result, the roof is a bit smaller.
- I also forgot to include inserts to sustain said roof. I improvise some with leftover cuts.
The end result is a bit crooked and not as clean as I could have wished for, but this was the test building, and it served it’s porpuse. Lessons learned.
PS: I used greenstuff to clean some edges and fill some holes. Is not the cheapest product to do so, but I had a lot at hand. May use something diferent in the future.
Part 1: Prepping stage
 First things first. Cut! That! Box!
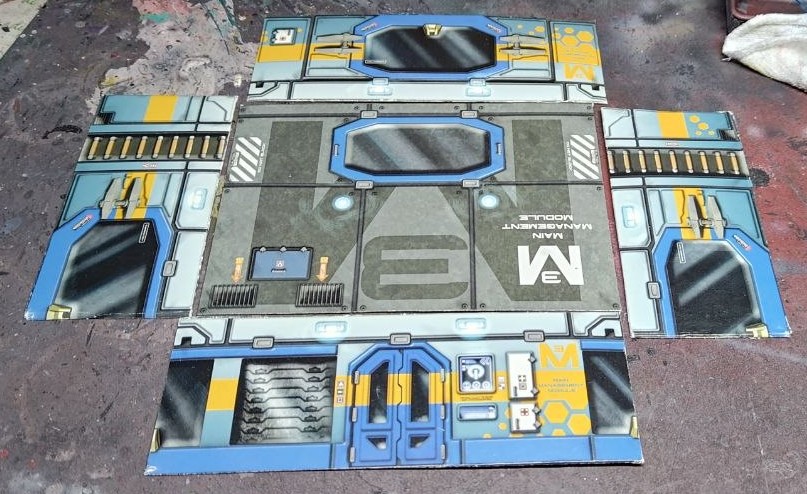
The first step of the process is to dissasemble the building, and then scanning all the faces.
I know, scanning things is soooo late 1900’s but because I need to create an SVG template in Illustrator, I thougth it useful to have the scans of the building to limit the amount of measuring (spoiler alert: it didn’t limit it).
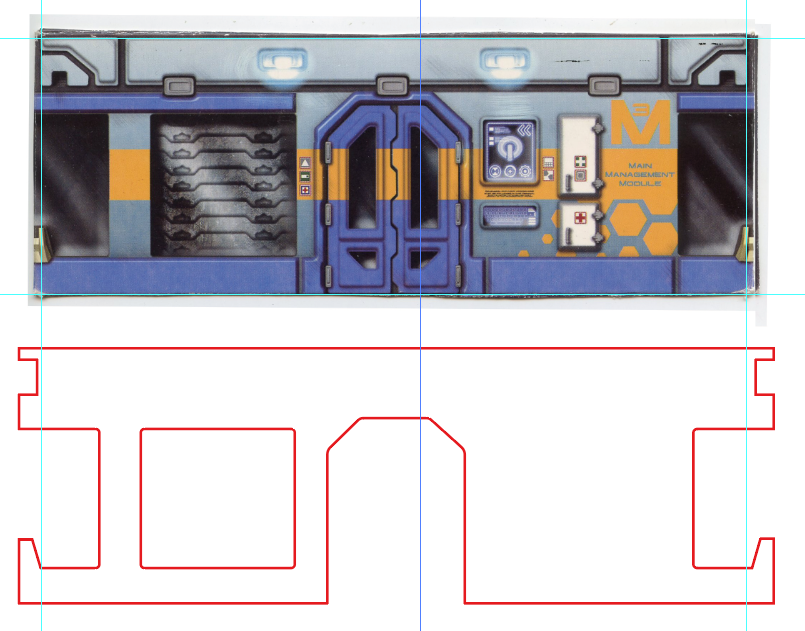 An example of the tracing of the building faces. I also cut down all the doors and windows, and some extra details.