


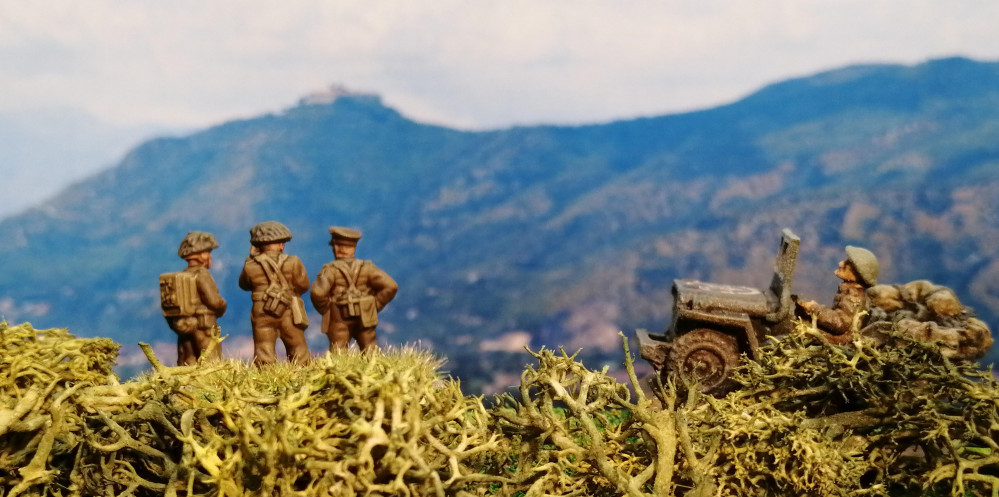
75th Anniversary of the Battle of Monte Cassino and Northern Italy (Gaming The Battles)


Monte Cassino - First Table Top Battle (Turns 5 and 6)
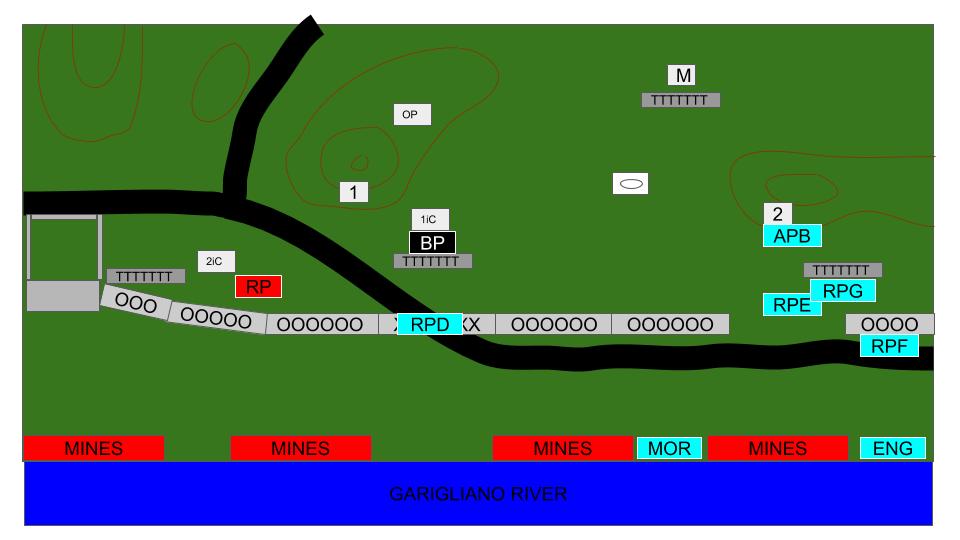
Once again, this project blog best read in reverse order.
Turn 5
RPD unpins and passes its morale check to remain in place! The MG teams also unpin and pass their morale check. On the 36th right, a rousing speech clearly lifts the troops as both AP B and AP F both leap up ready to continue the assault.
The last US rifle team deploys, RP G, and is fortunate to arrive toward the right flank as well, free from the minefield. There are now a lot of US forces on the right ready to go – can they push the advantage?
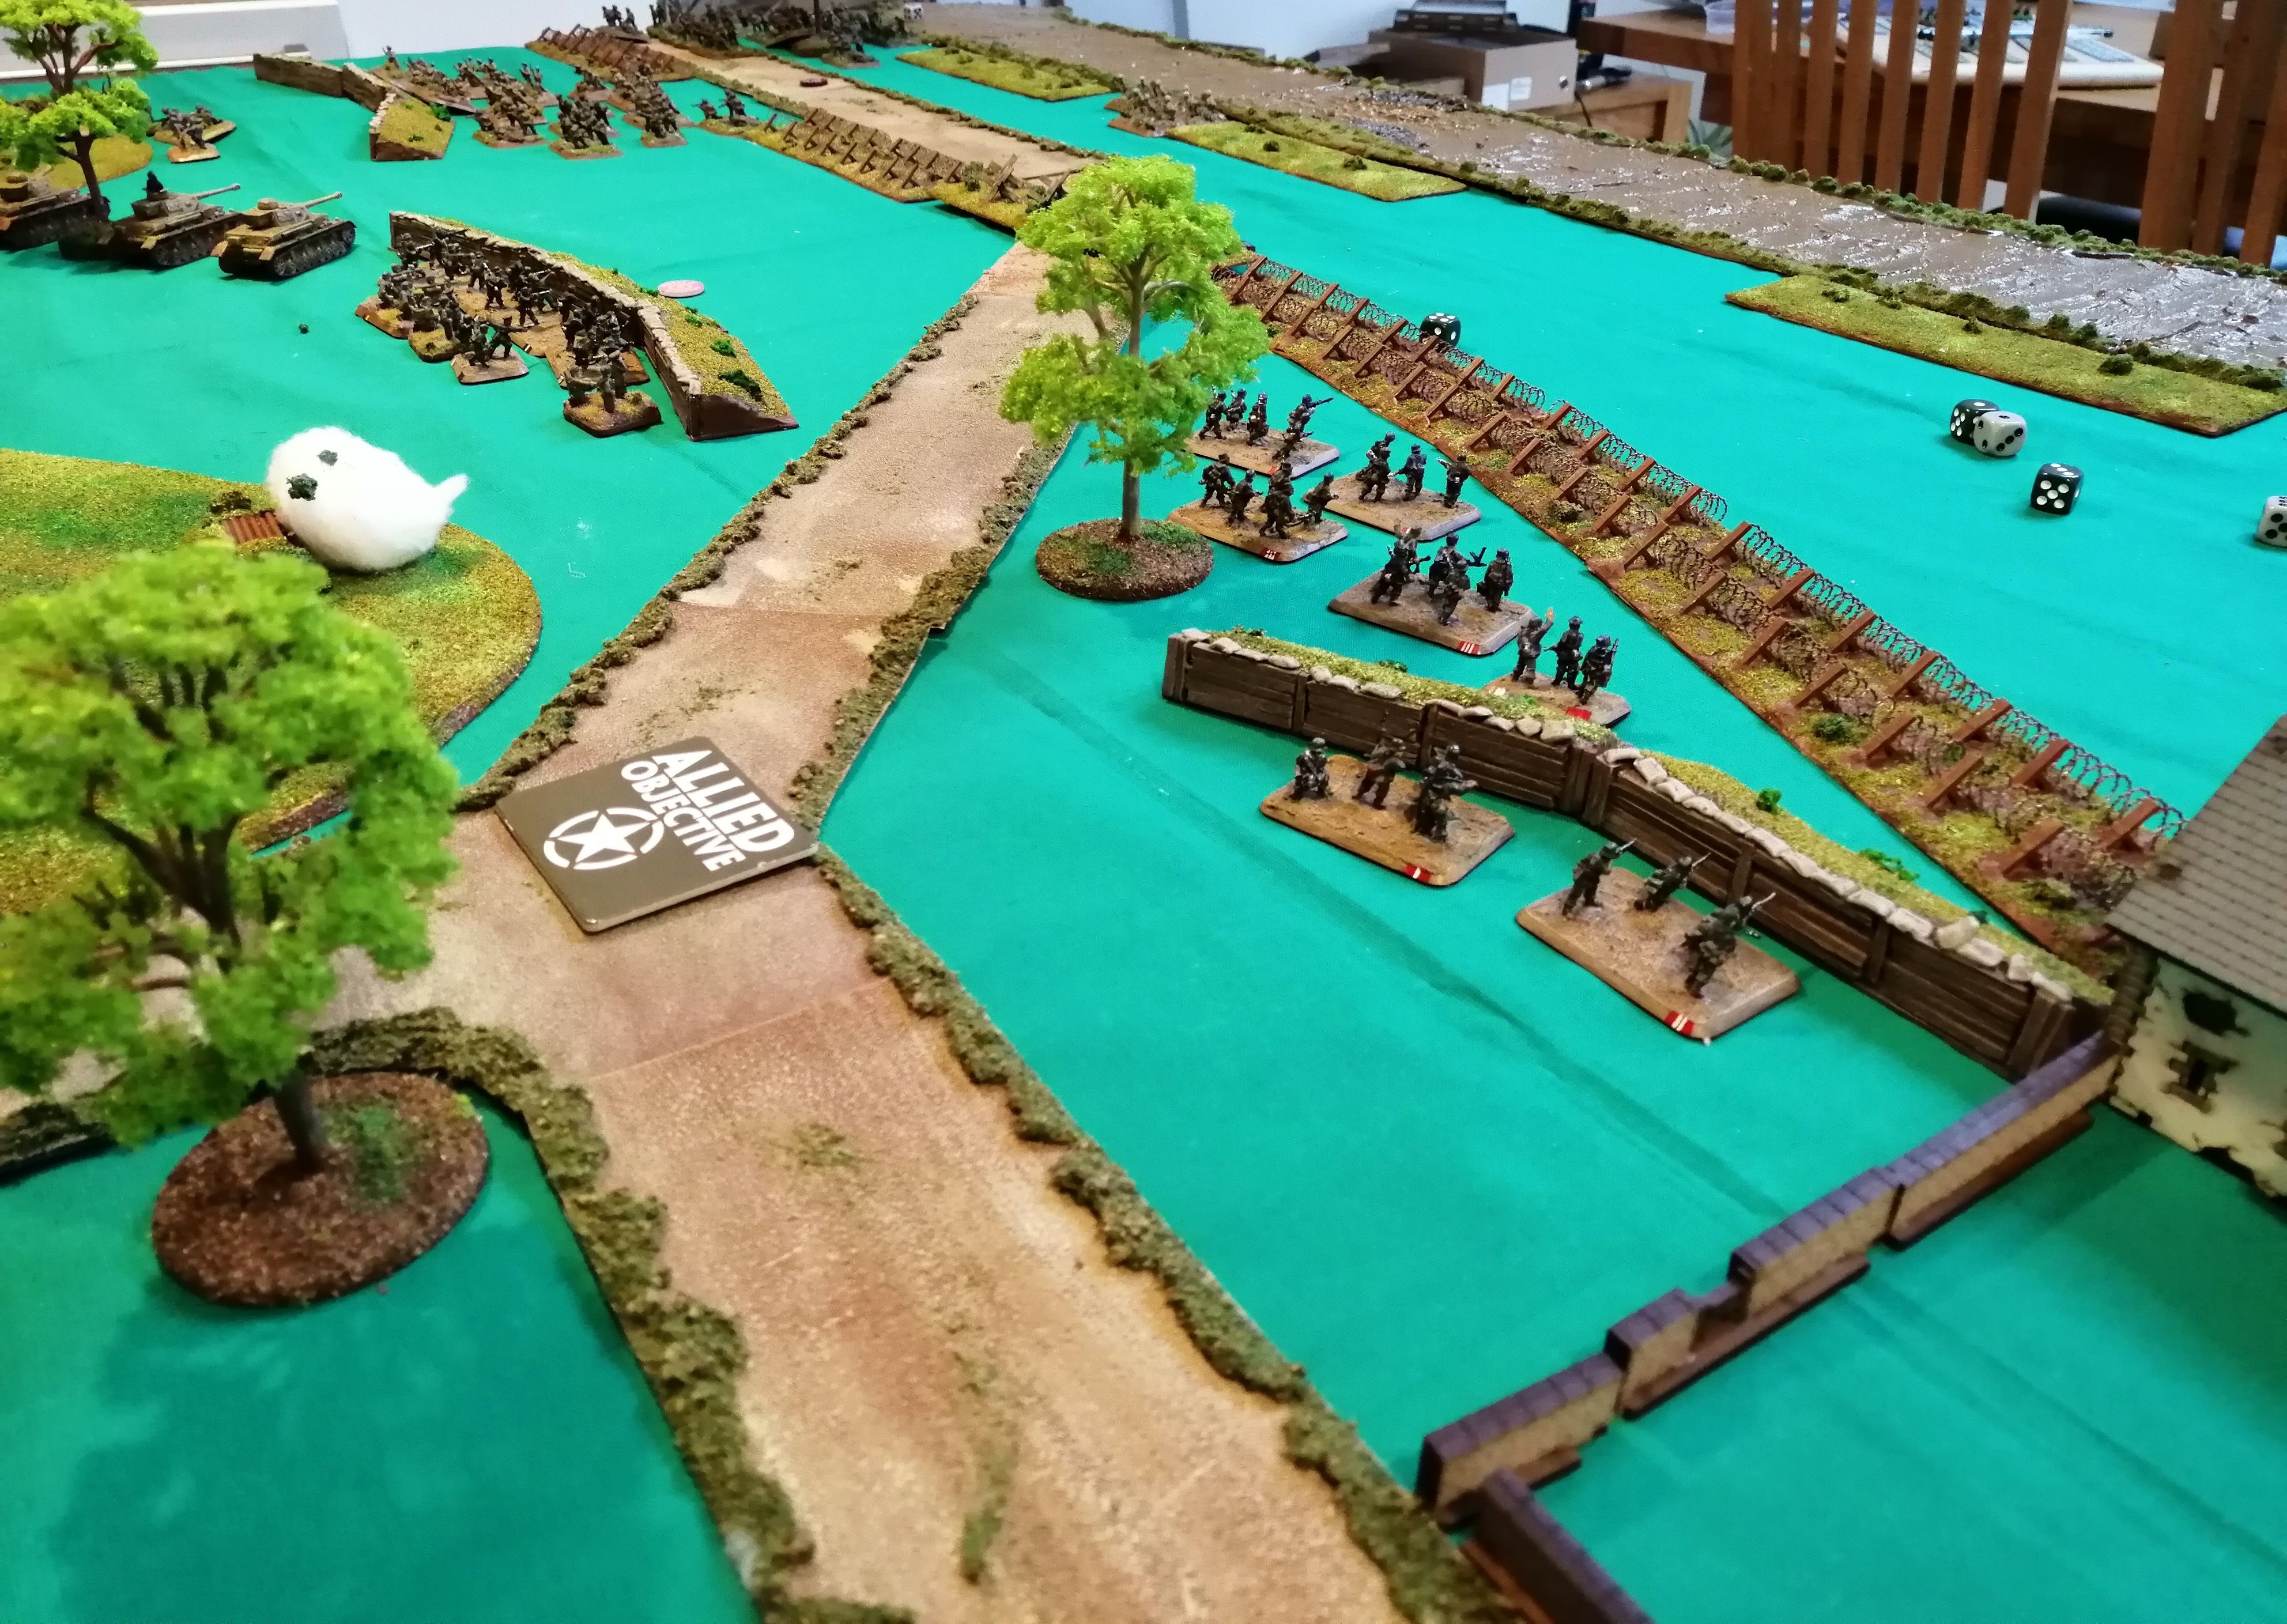
RP E tries to gap the barbed wire and is successful – this removes the obstacle from in front of them although they cannot move further this turn. RP F also try to gap the barbed wire but fail. However, the remainder of AP B who have not crossed the entanglements make good use of the gap created by RP E and rush round and through, advancing on Green Platoon, still pinned down in their trenches!
The newly arrived RP G waste no time advancing as well, heading through the newly formed gap in the barbed wire.
RP D, now finally unpinned, moves up to join the remnants of RP C left seeking shelter in the tank traps.
The Engineers make good progress on the bridge this turn, rolling 3 sixes to take the bridge score to 6! Just three more required to build the pontoon bridge and hopefully get some much needed armour support.
The two remaining MG teams continue to fire upon Green Platoon in their trenches and despite their reduced firepower, manage hit and kill one team. AP B, now within charge range fail to score any telling hits despite the flamers!
The tanks again smoke the HMG nests and attempt to take out HMG 2 with a direct shot. It proves unsuccessful however the mortar team repeat their bombardment against Black Platoon and manage to kill a team. The 36th are finally starting to deliver some payback!
AP B, now in charge range of Green Platoon in their trench, has a choice to either sit in the open or charge and take a lot of defensive fire from both Green Platoon and HMG 2. It’s a tough call but leaping up, waving his SMG, the 2iC urges APB forward into the assault! Green Platoon fire at the charging Americans but only manage two hits which are both saved. HMG 2 also opens fire but can only manage one hit which is again saved. With no lost teams and not enough hits to pin the valiant Americans, they hurl their grenades and leap into the trenches to engage the Germans up close. The assault is near flawless in its lethality and leaves just a solitary German team alive. The Germans counterattack but clearly dazed and bloodied from the assault, fail to cause any damage and the Americans finish off the job. With all resistance removed, AP B can occupy the trench and consolidate their gain. Suddenly, at the end of the 36th 5th turn, the heroics of AP B and 2iC have eliminated Green Platoon, gained their first Victory Point and started to expose the German left flank!
At the start of the German turn, Black platoon try to unpin but fail. Perhaps the events further up the trench line have them shaken?
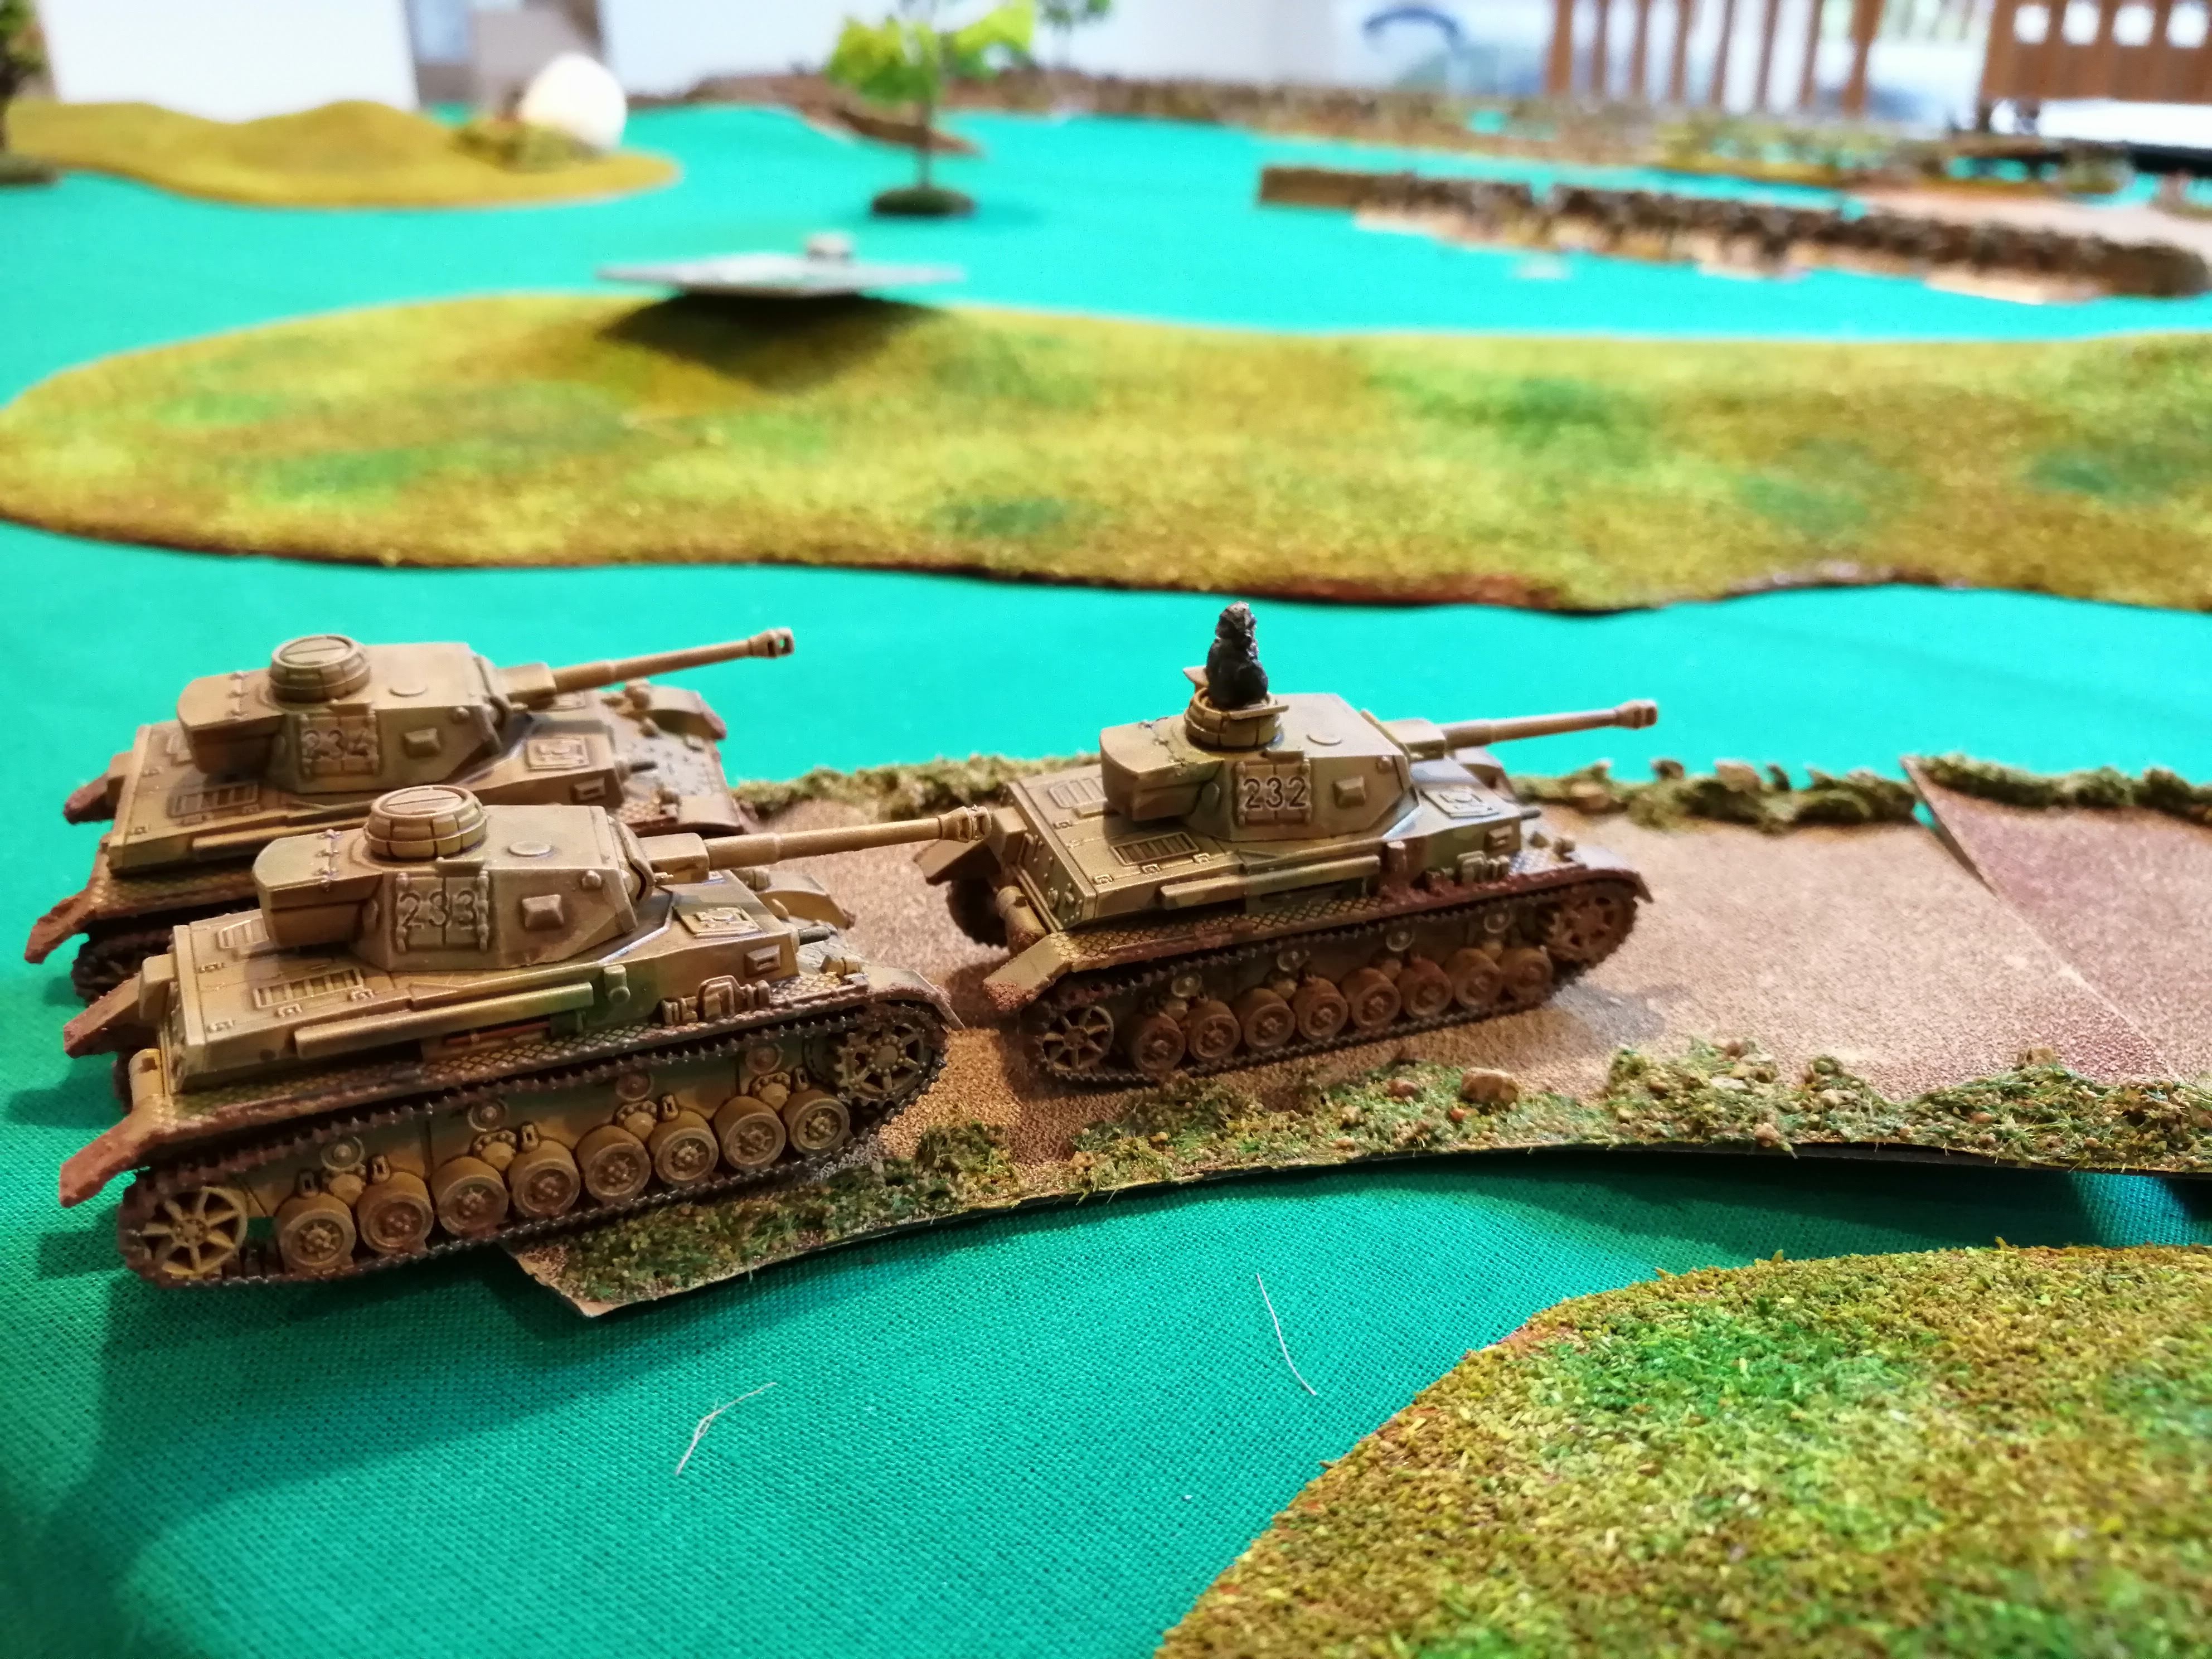
Visibly concerned, and wanting to plug the open hole in the trench line, the Germans deploy their three Panzer IV tanks on the road at the back of the board. The tanks advance toward HMG 2 looking to provide some covering fire and head off the advancing 36th.
HMG 2 continues to fire at AP B, as do the newly arrived Panzer IV’s, but with the added protection of being in the trench line, the incoming fire is a lot less punishing and AP B takes no further losses.
The mortar team opts to change their bombardment point, trying to catch the massing US 36th behind AP B. They manage to range in on the second attempt and catch RP E, RP F and RP G all under the bombardment. The mortars fail to cause any wounds but do cause all three platoons to become pinned as they hit the dirt to avoid the flying shrapnel.
The previously reliable German shooting starts to falter and the remaining German platoons fail to cause any wounds despite a significant amount of fire power. However, HMG 1 is able to remove the last remaining team from RP C, removing them from the game completely to gain a second Victory Point and to take a 2-1 lead.
 We catch the Assault Platoon just as they jump into the trenches to take on Green Platoon
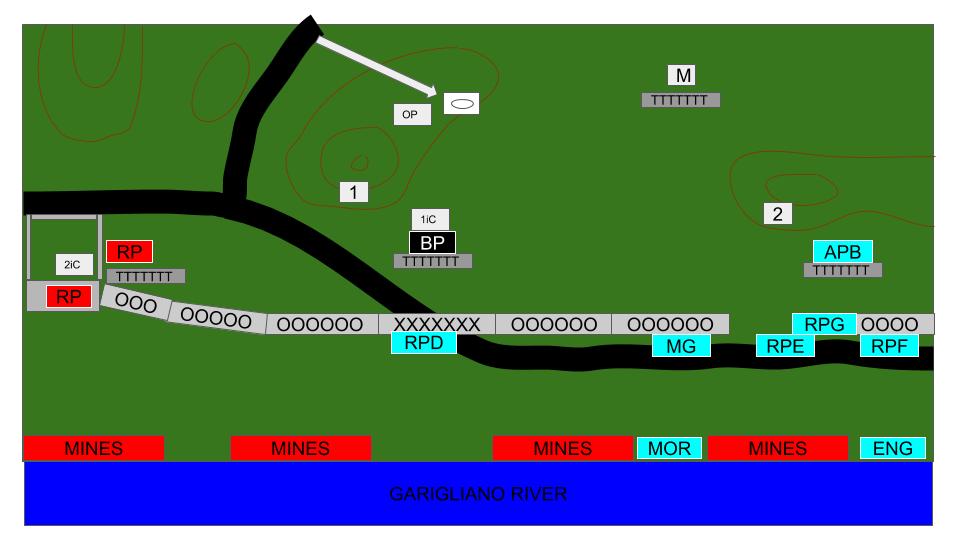 State of play at the end of the 5th Turn
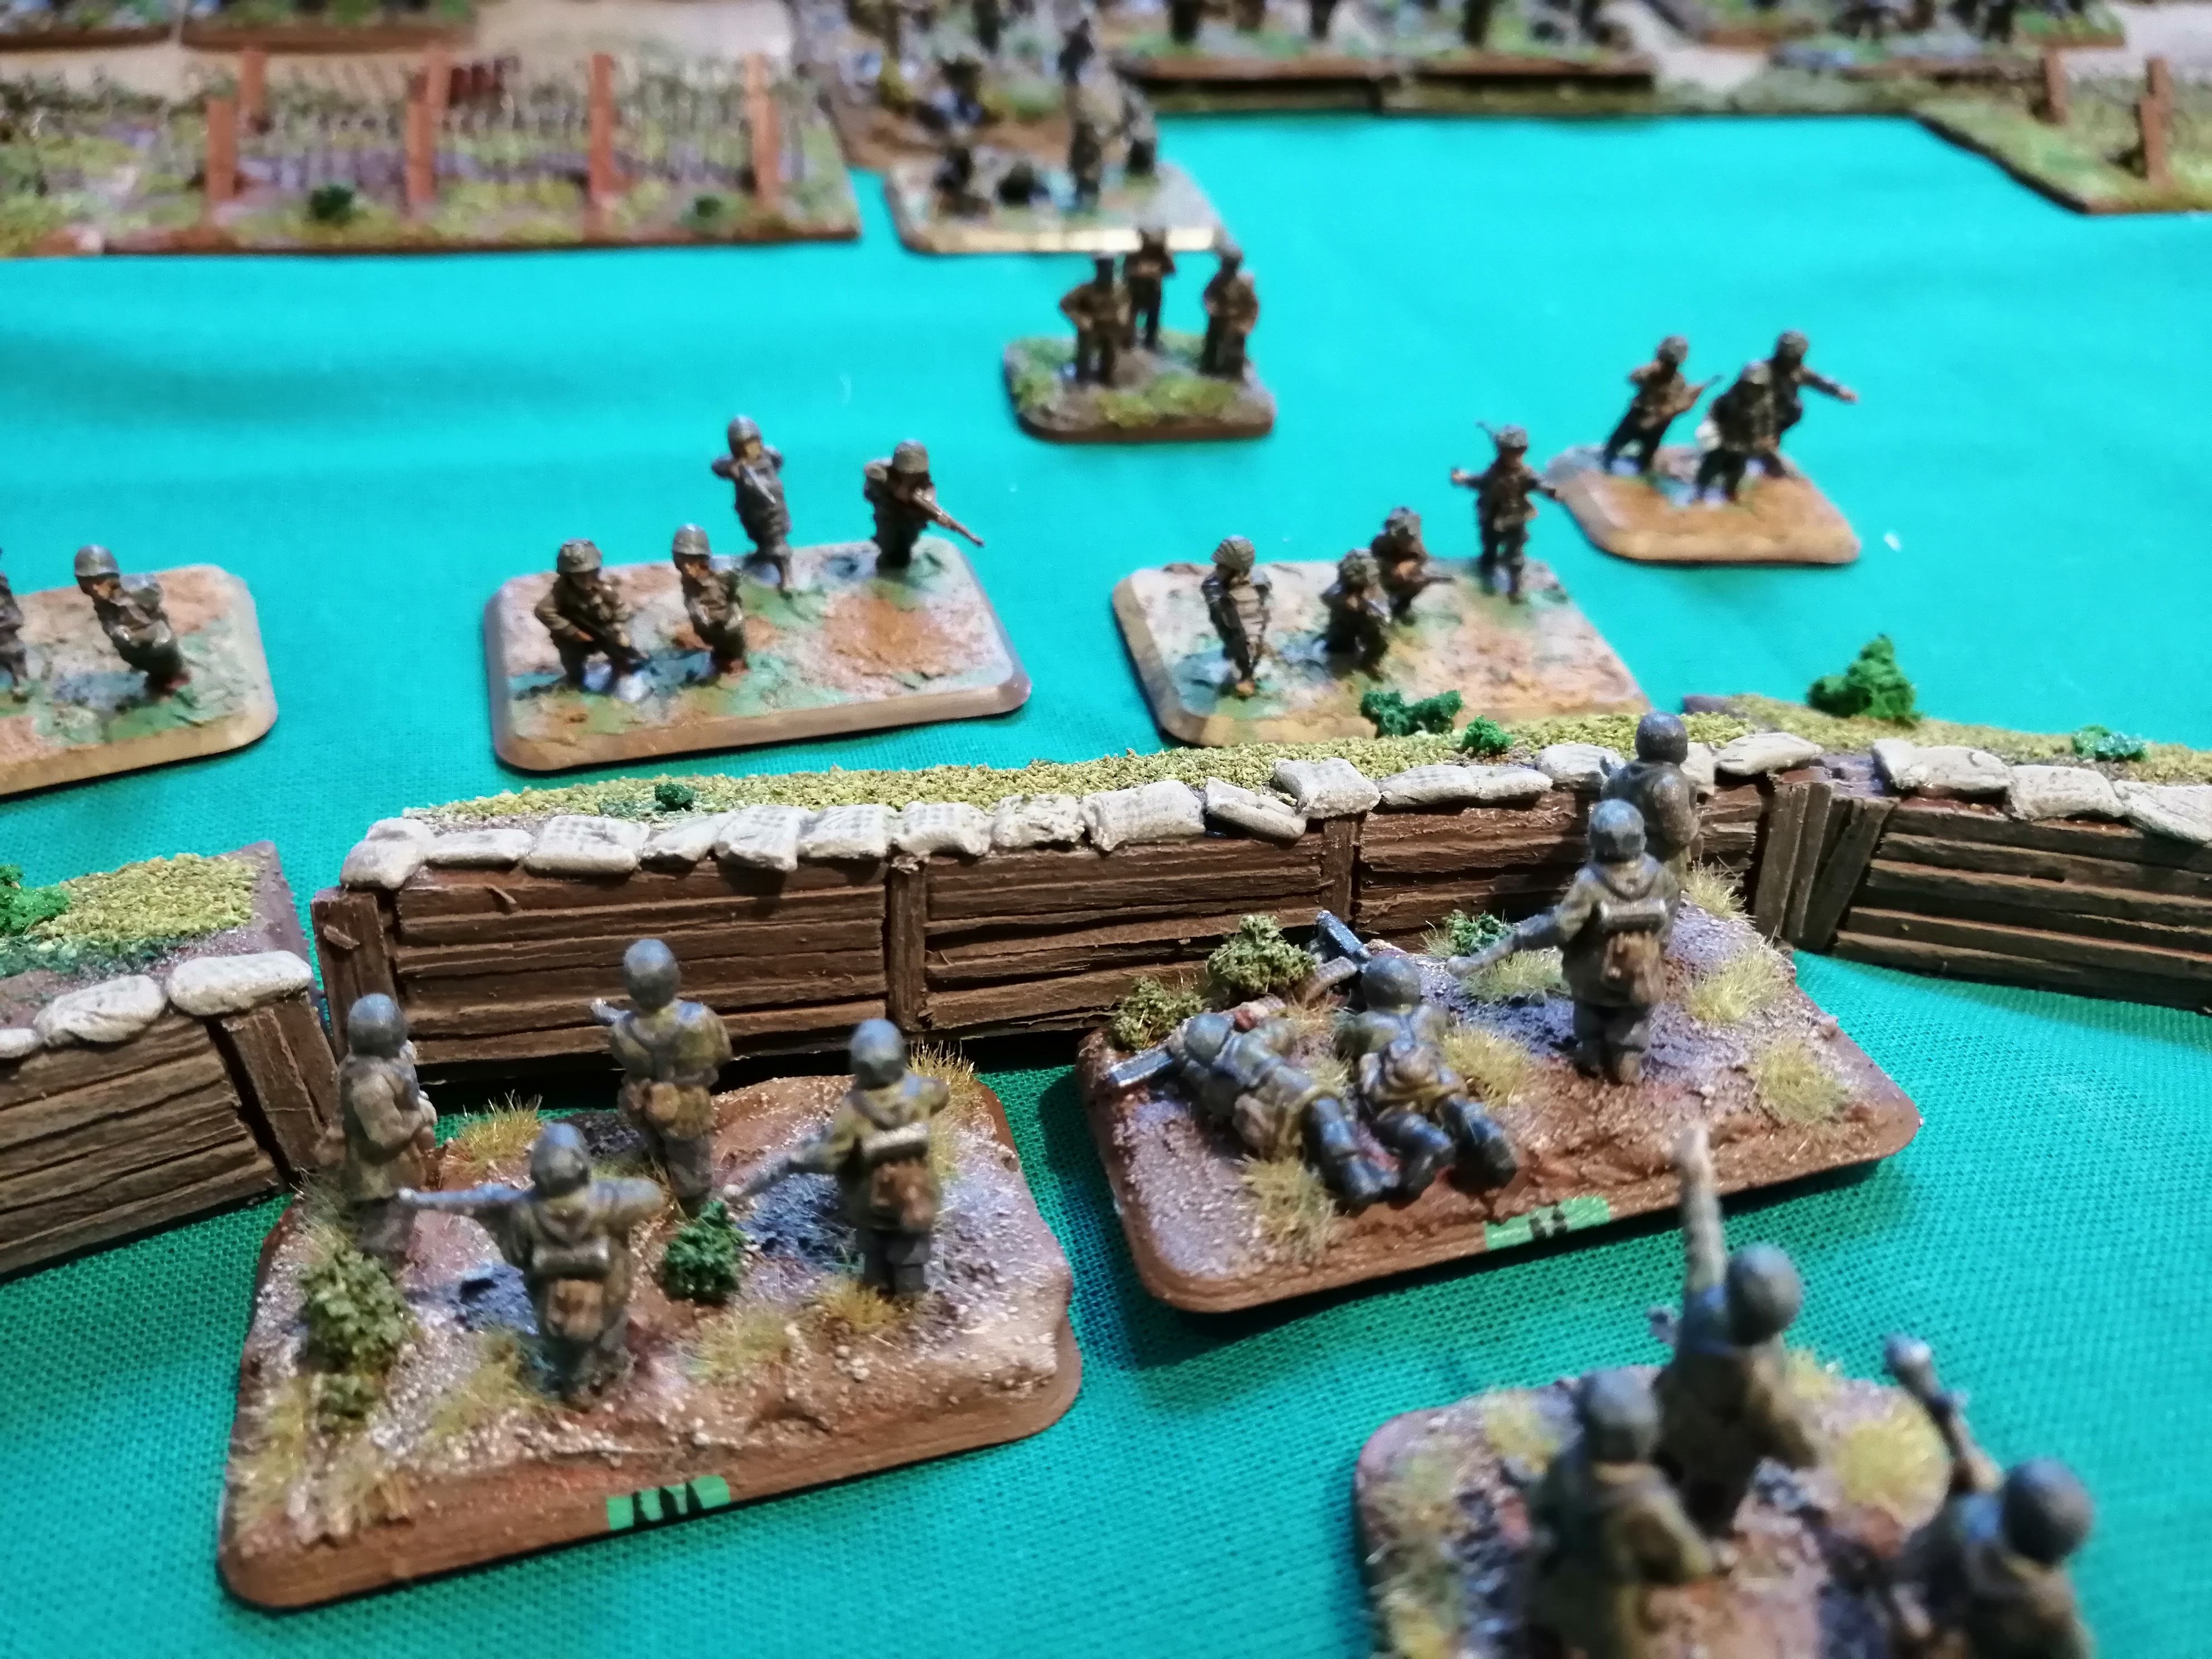


Turn 6
RP D, reduced to two teams, passes their morale check and stays in the fight. Further along the line, the two remaining MG teams fails their Morale and fall back, significantly reducing the firepower available to the 36th. Both RP E and RP G manage to unpin however RP F can’t lift themselves and remain pinned.
Both RP E and RP G continue to advance toward what was Green Platoon’s trench. 2iC recognises the threat that HMG 2 causes to the advancing rifle platoons behind, and with adrenaline surging through their veins, leave the safety of the trenches and advance on HMG 2, hoping that their remaining flame thrower will be enough to take it out.
Meanwhile, in the centre, the now decimated RP D moves further into the tank traps to try to gain some advantage from the cover available there.
The Engineer team continues with their attempt to build the Pontoon bridge but fail this turn to add to their bridge score.
The Rifle Platoons fail to make their shots count this turn, missing just about everything. The mortar team however is able to destroy another team from Black Platoon with a further repeat bombardment.
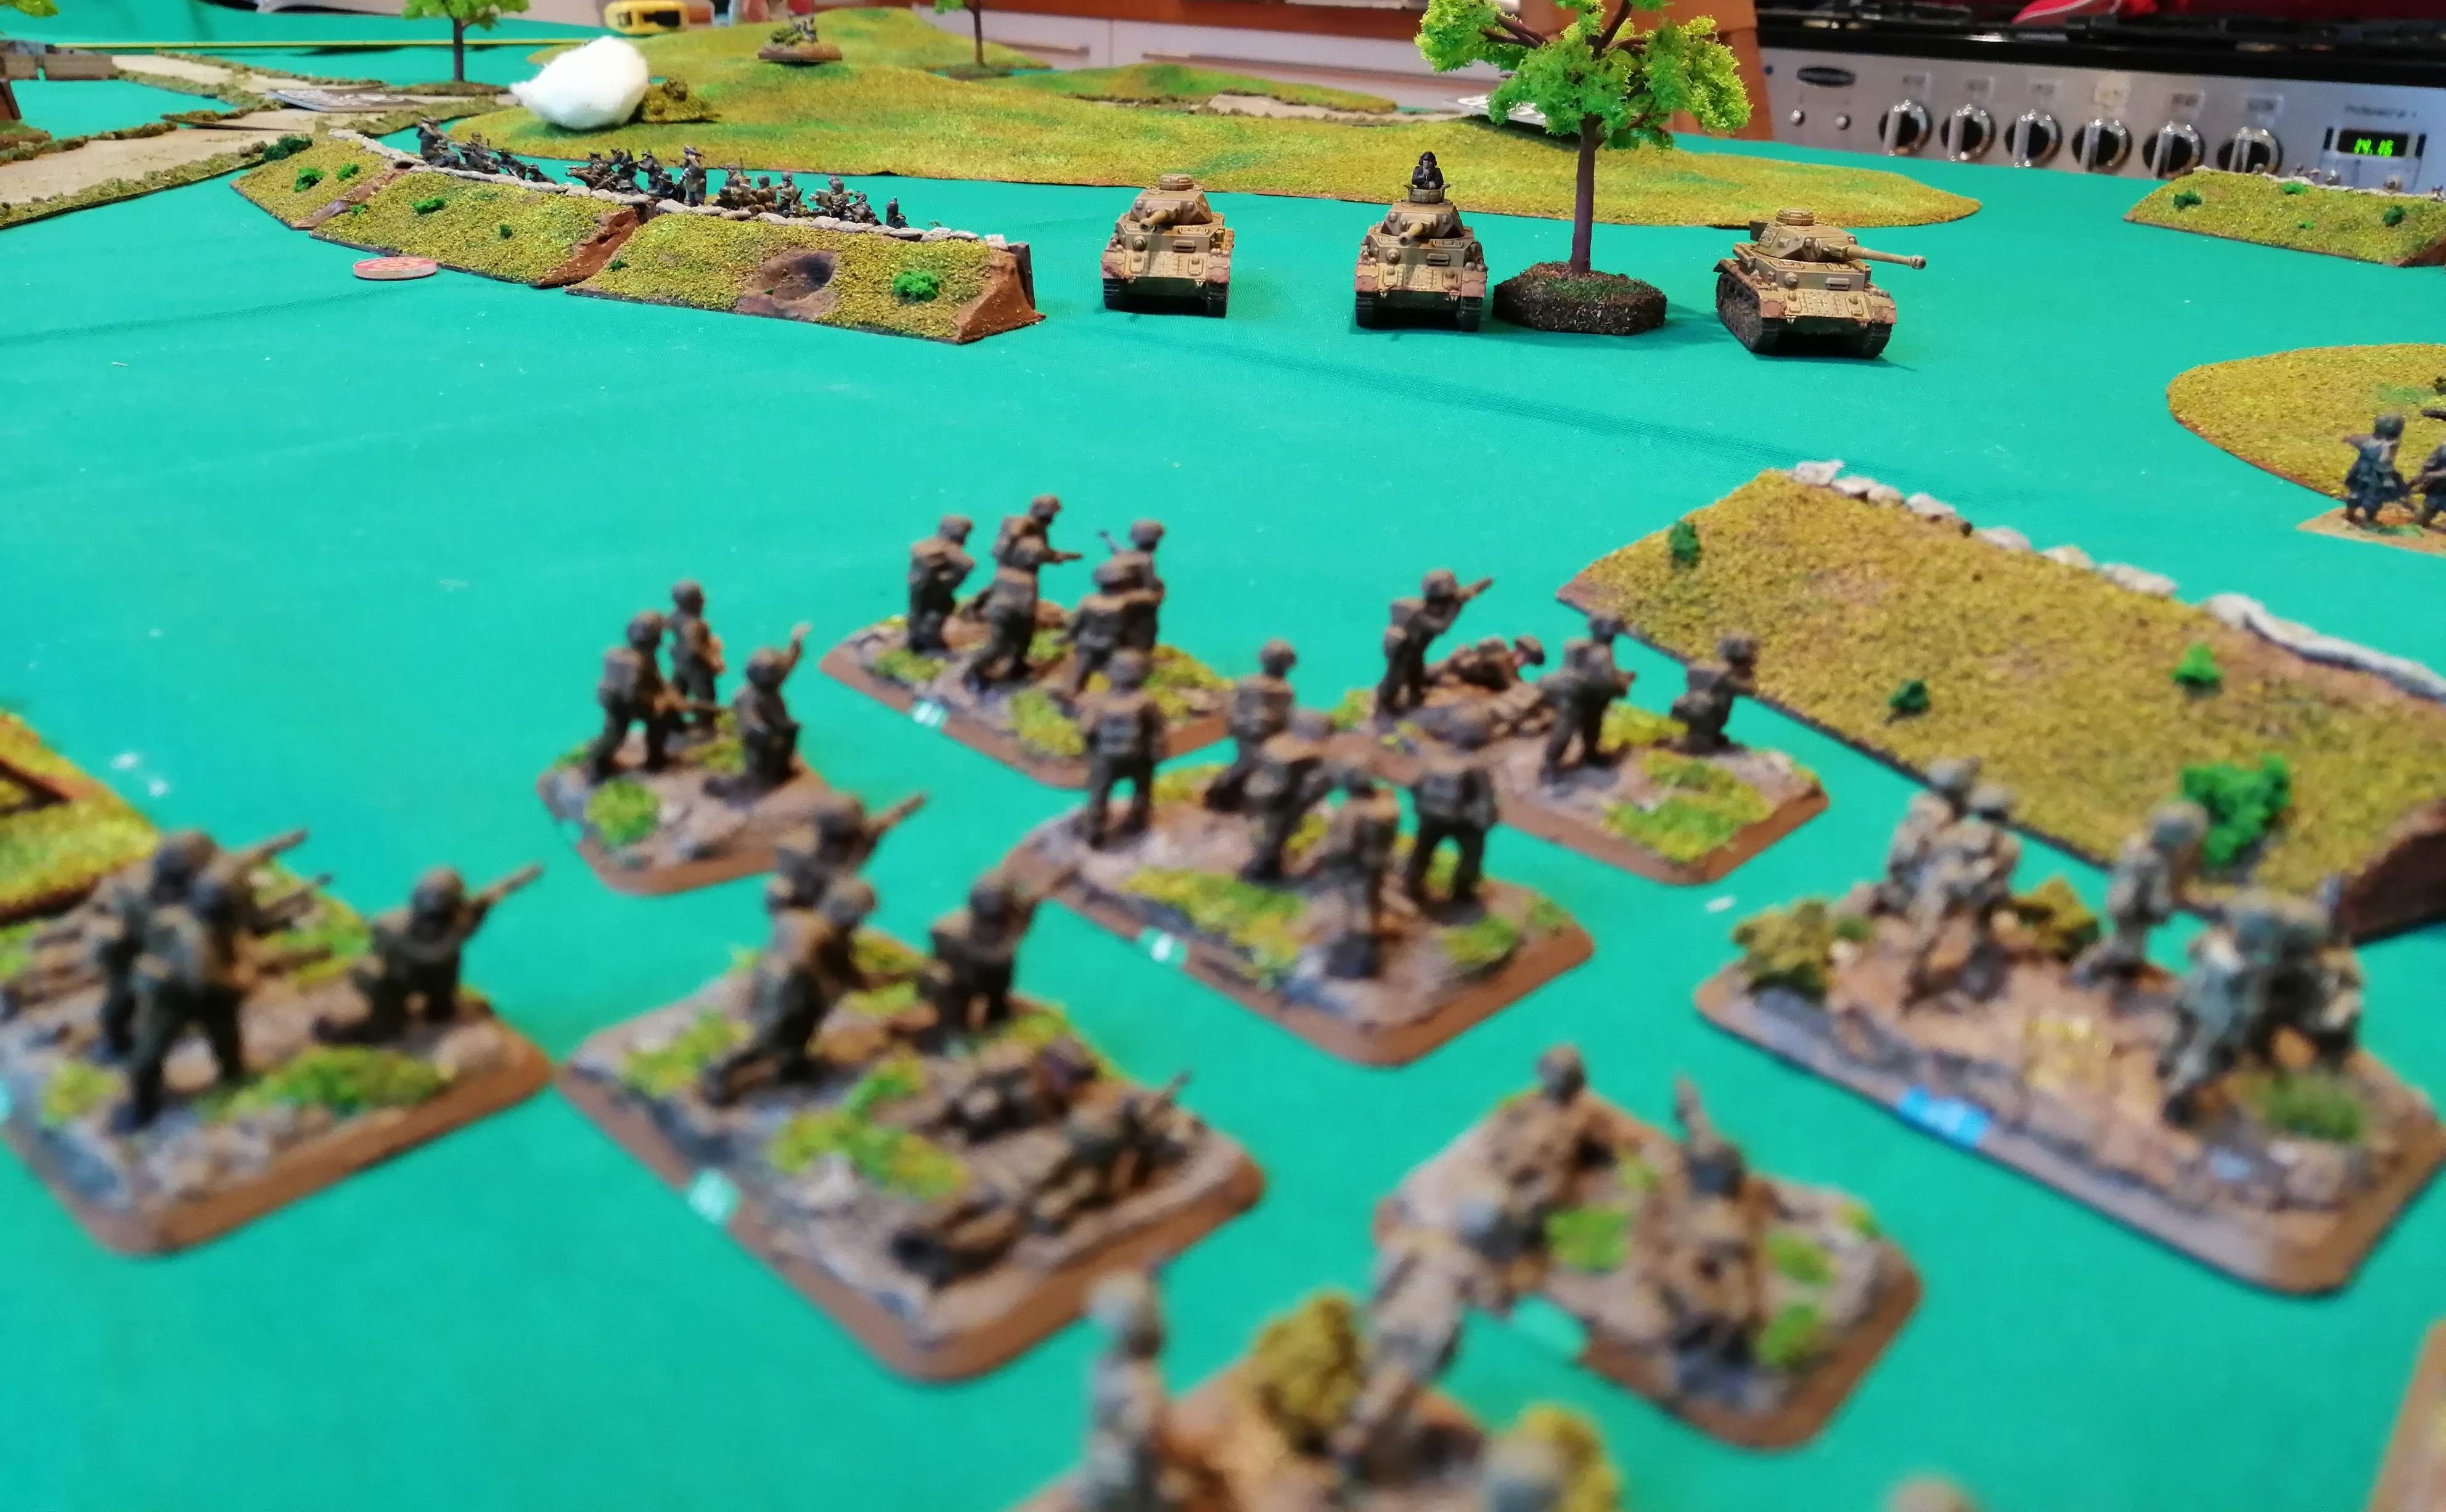
AP B, within charge range of HMG 2, uses their remaining flame thrower on the nest. This weapon is perfectly made for removing this type of resistance. With two shots and needing a 2 to hit, they roll snake eyes! AP B suddenly finds itself out in the open facing an HMG nest with three tanks heading toward them.
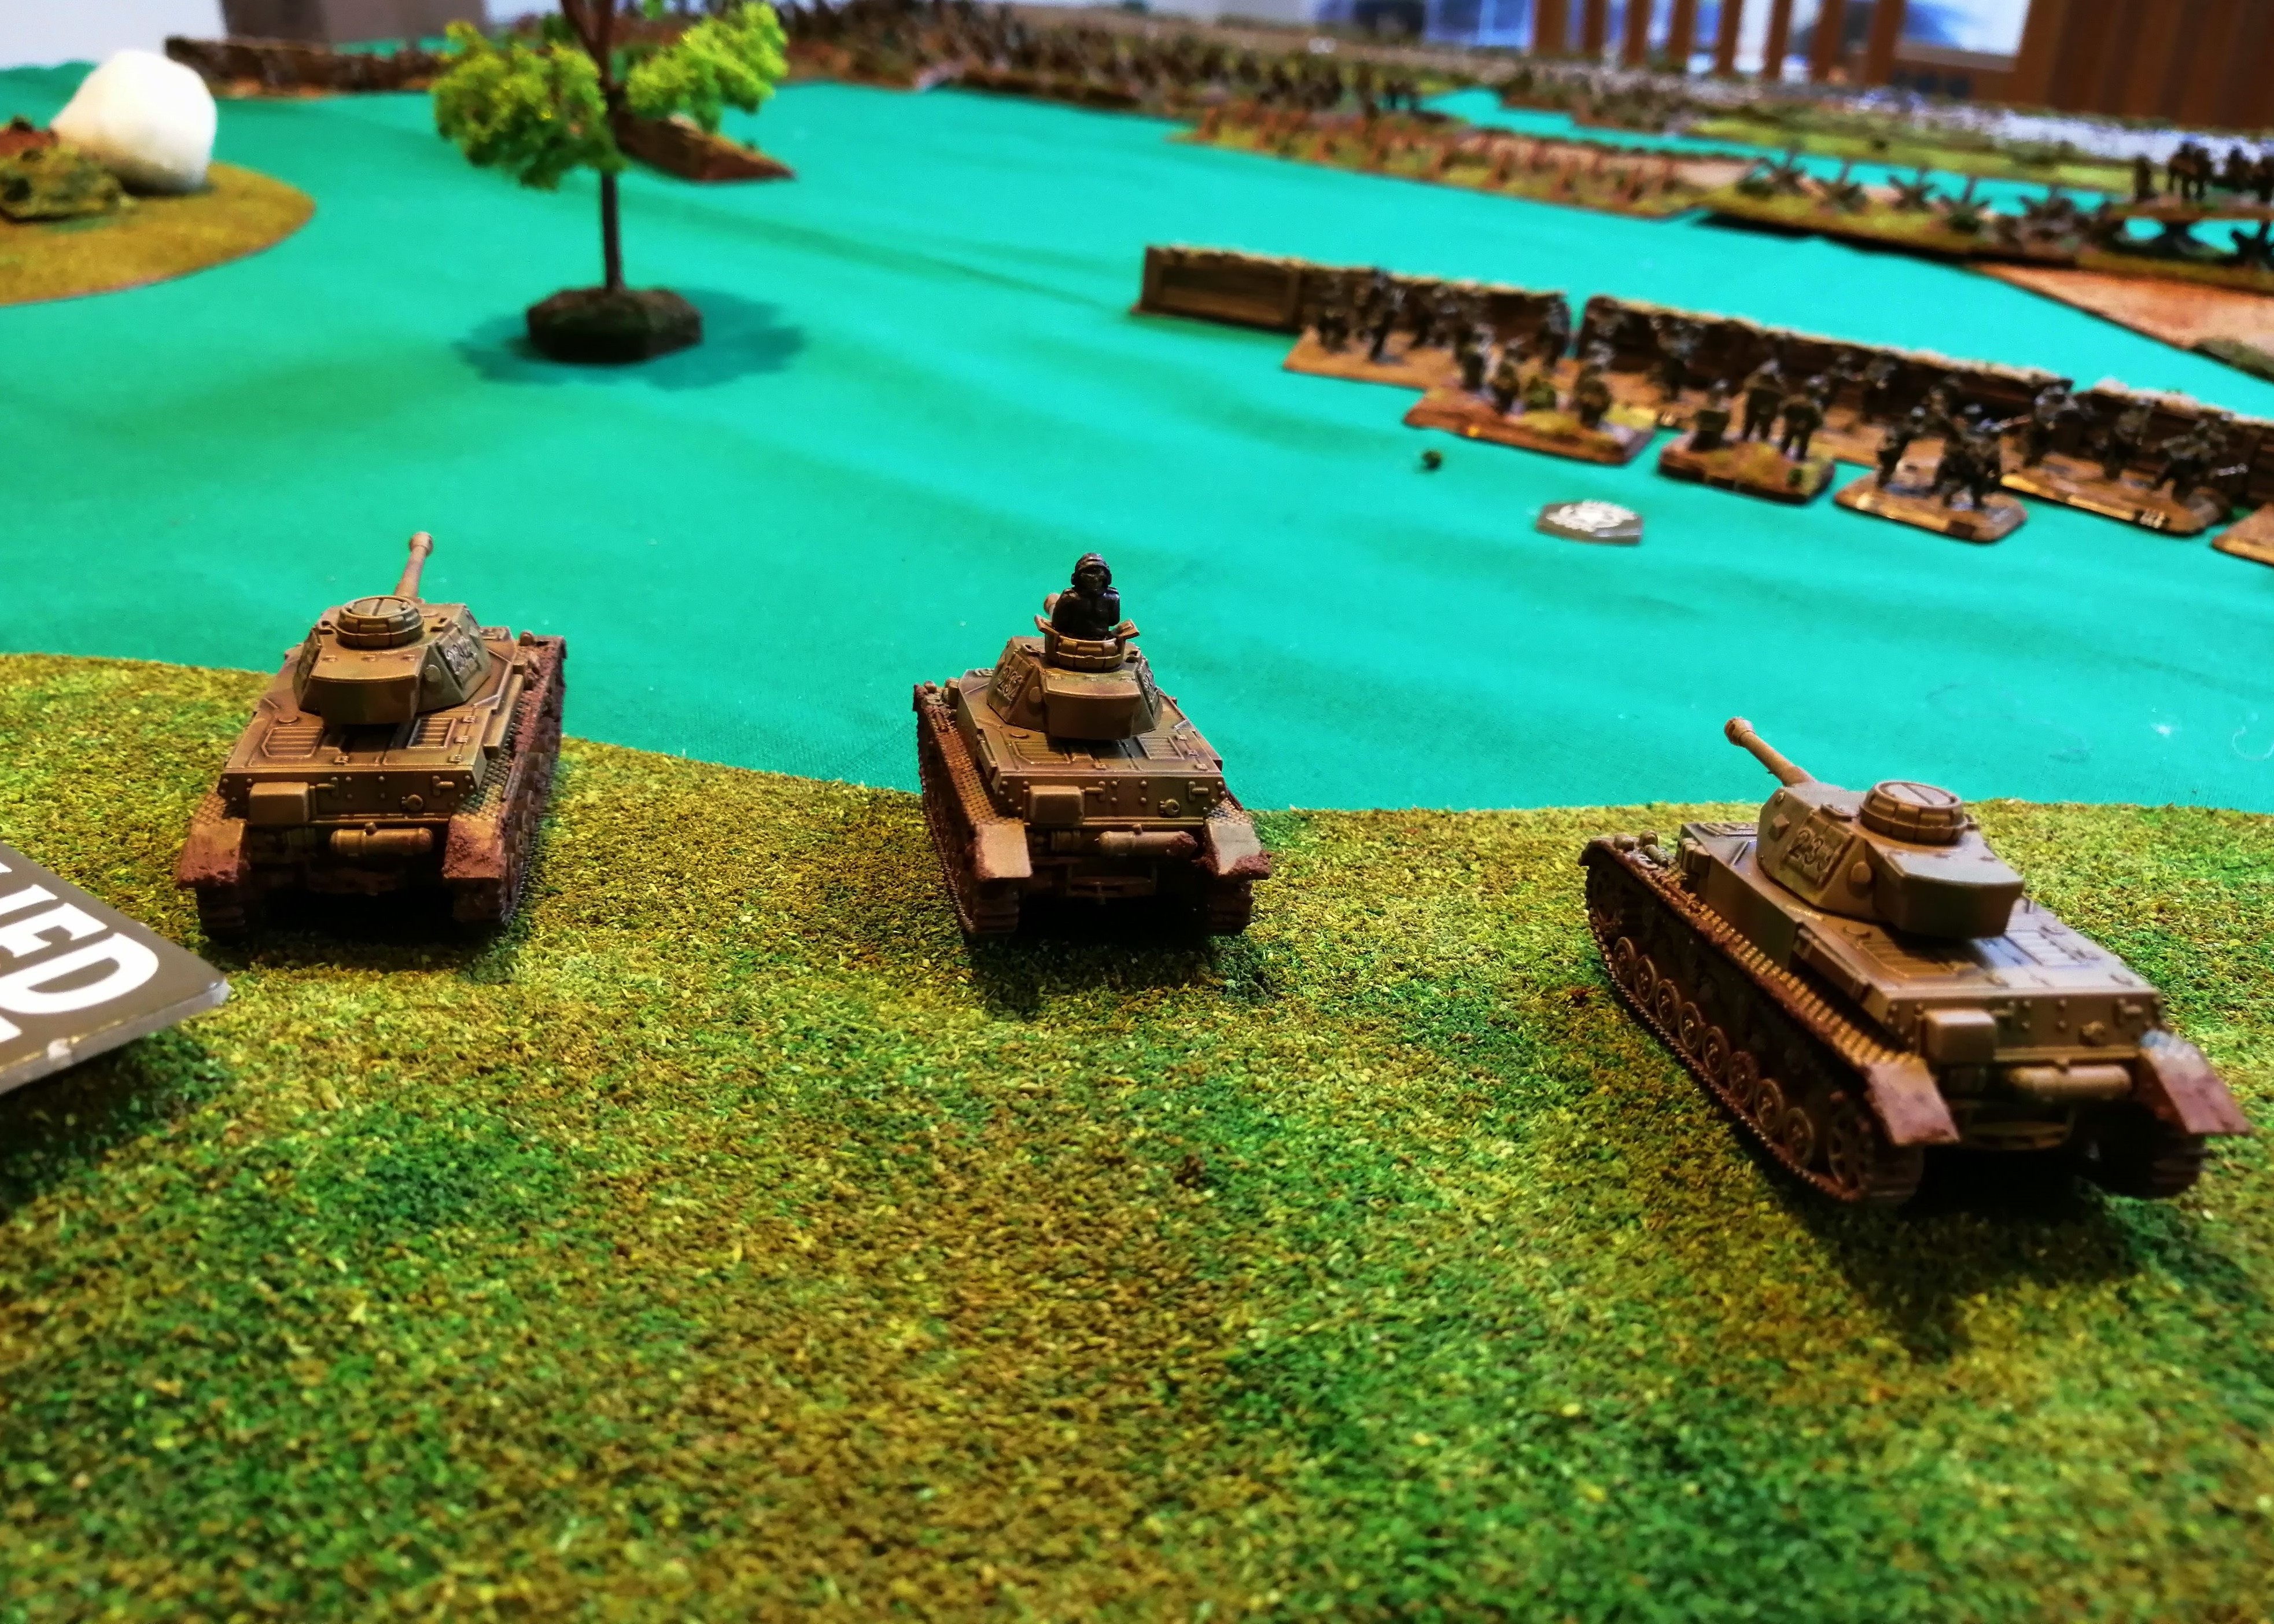
The US tanks smoke HMG 2 to try to protect AP B as best they can.
Once again, 2iC decides that attack is the best form of defence and he urges the men under his command to charge HMG 2. Despite the smoke, the nest causes 5 hits which is enough to pin AP B and cause the attack to fail. In addition, 2 teams from AP B are removed as casualties leaving AP B with just three teams, although the flame thrower team is still one of them.
With the action now on the German left flank, the 15th PG decide to relocate Red platoon to support the now unpinned Black platoon in the centre. In doing so, they hope to sweep up between the barbed wire and the trench line and catch the 36th the side. The 15th PG 2iC also transfers from the Red Platoon trench to the Black platoon trench to reinforce the defences there. Further back, the Panzer IV’s continue to advance and draw within MG range of AP B.
HMG 2 continues firing at AP B and it looks as if AP B’s luck has run out as they lose another two teams including their command team and the flame thrower. It’s just 2iC and a solitary rifle team left!
In the centre, Black Platoon kills another team from RP D while the rest of the German infantry shooting is largely ineffective.
The tanks choose to ignore what’s left of AP B and concentrate their MG fire on RP E who are advancing up behind AP B. The tanks cause 5 hits, pinning RP E but can only kill one team.
The mortar team attempts to target RP G and RP E, ranging in first time. One team from RP G is killed and the rest of RP G is pinned.
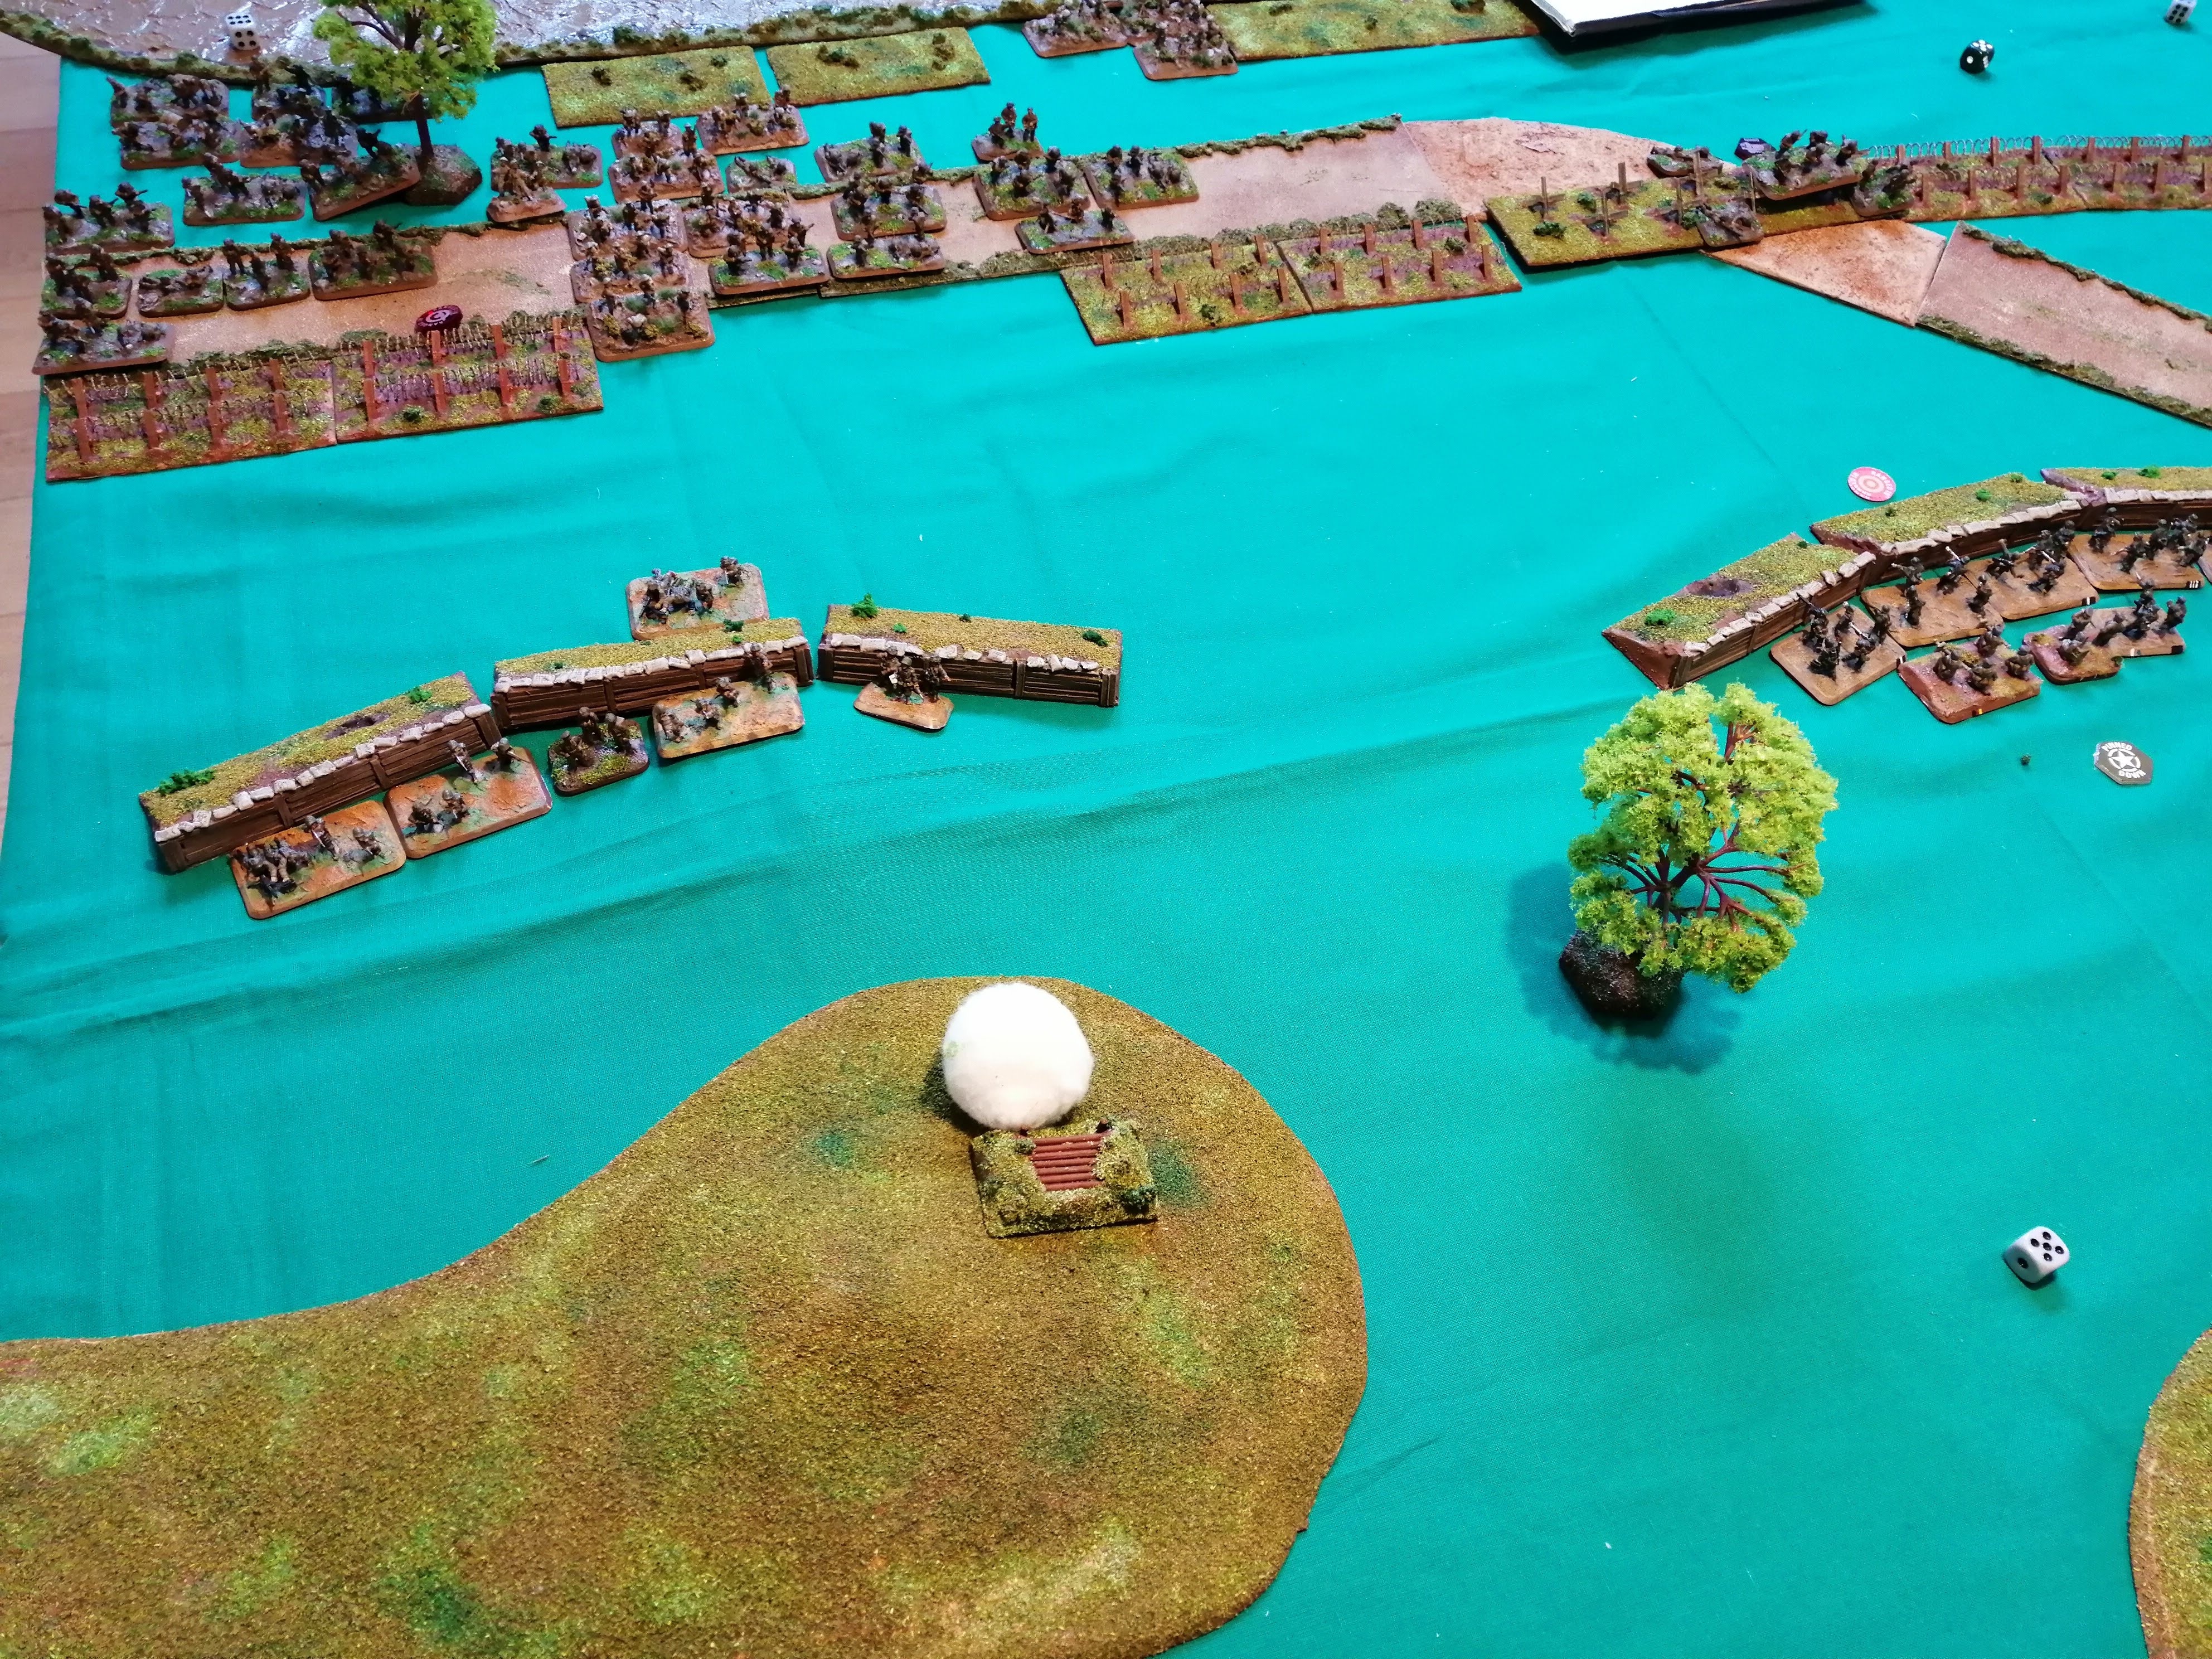
 End of Turn 6
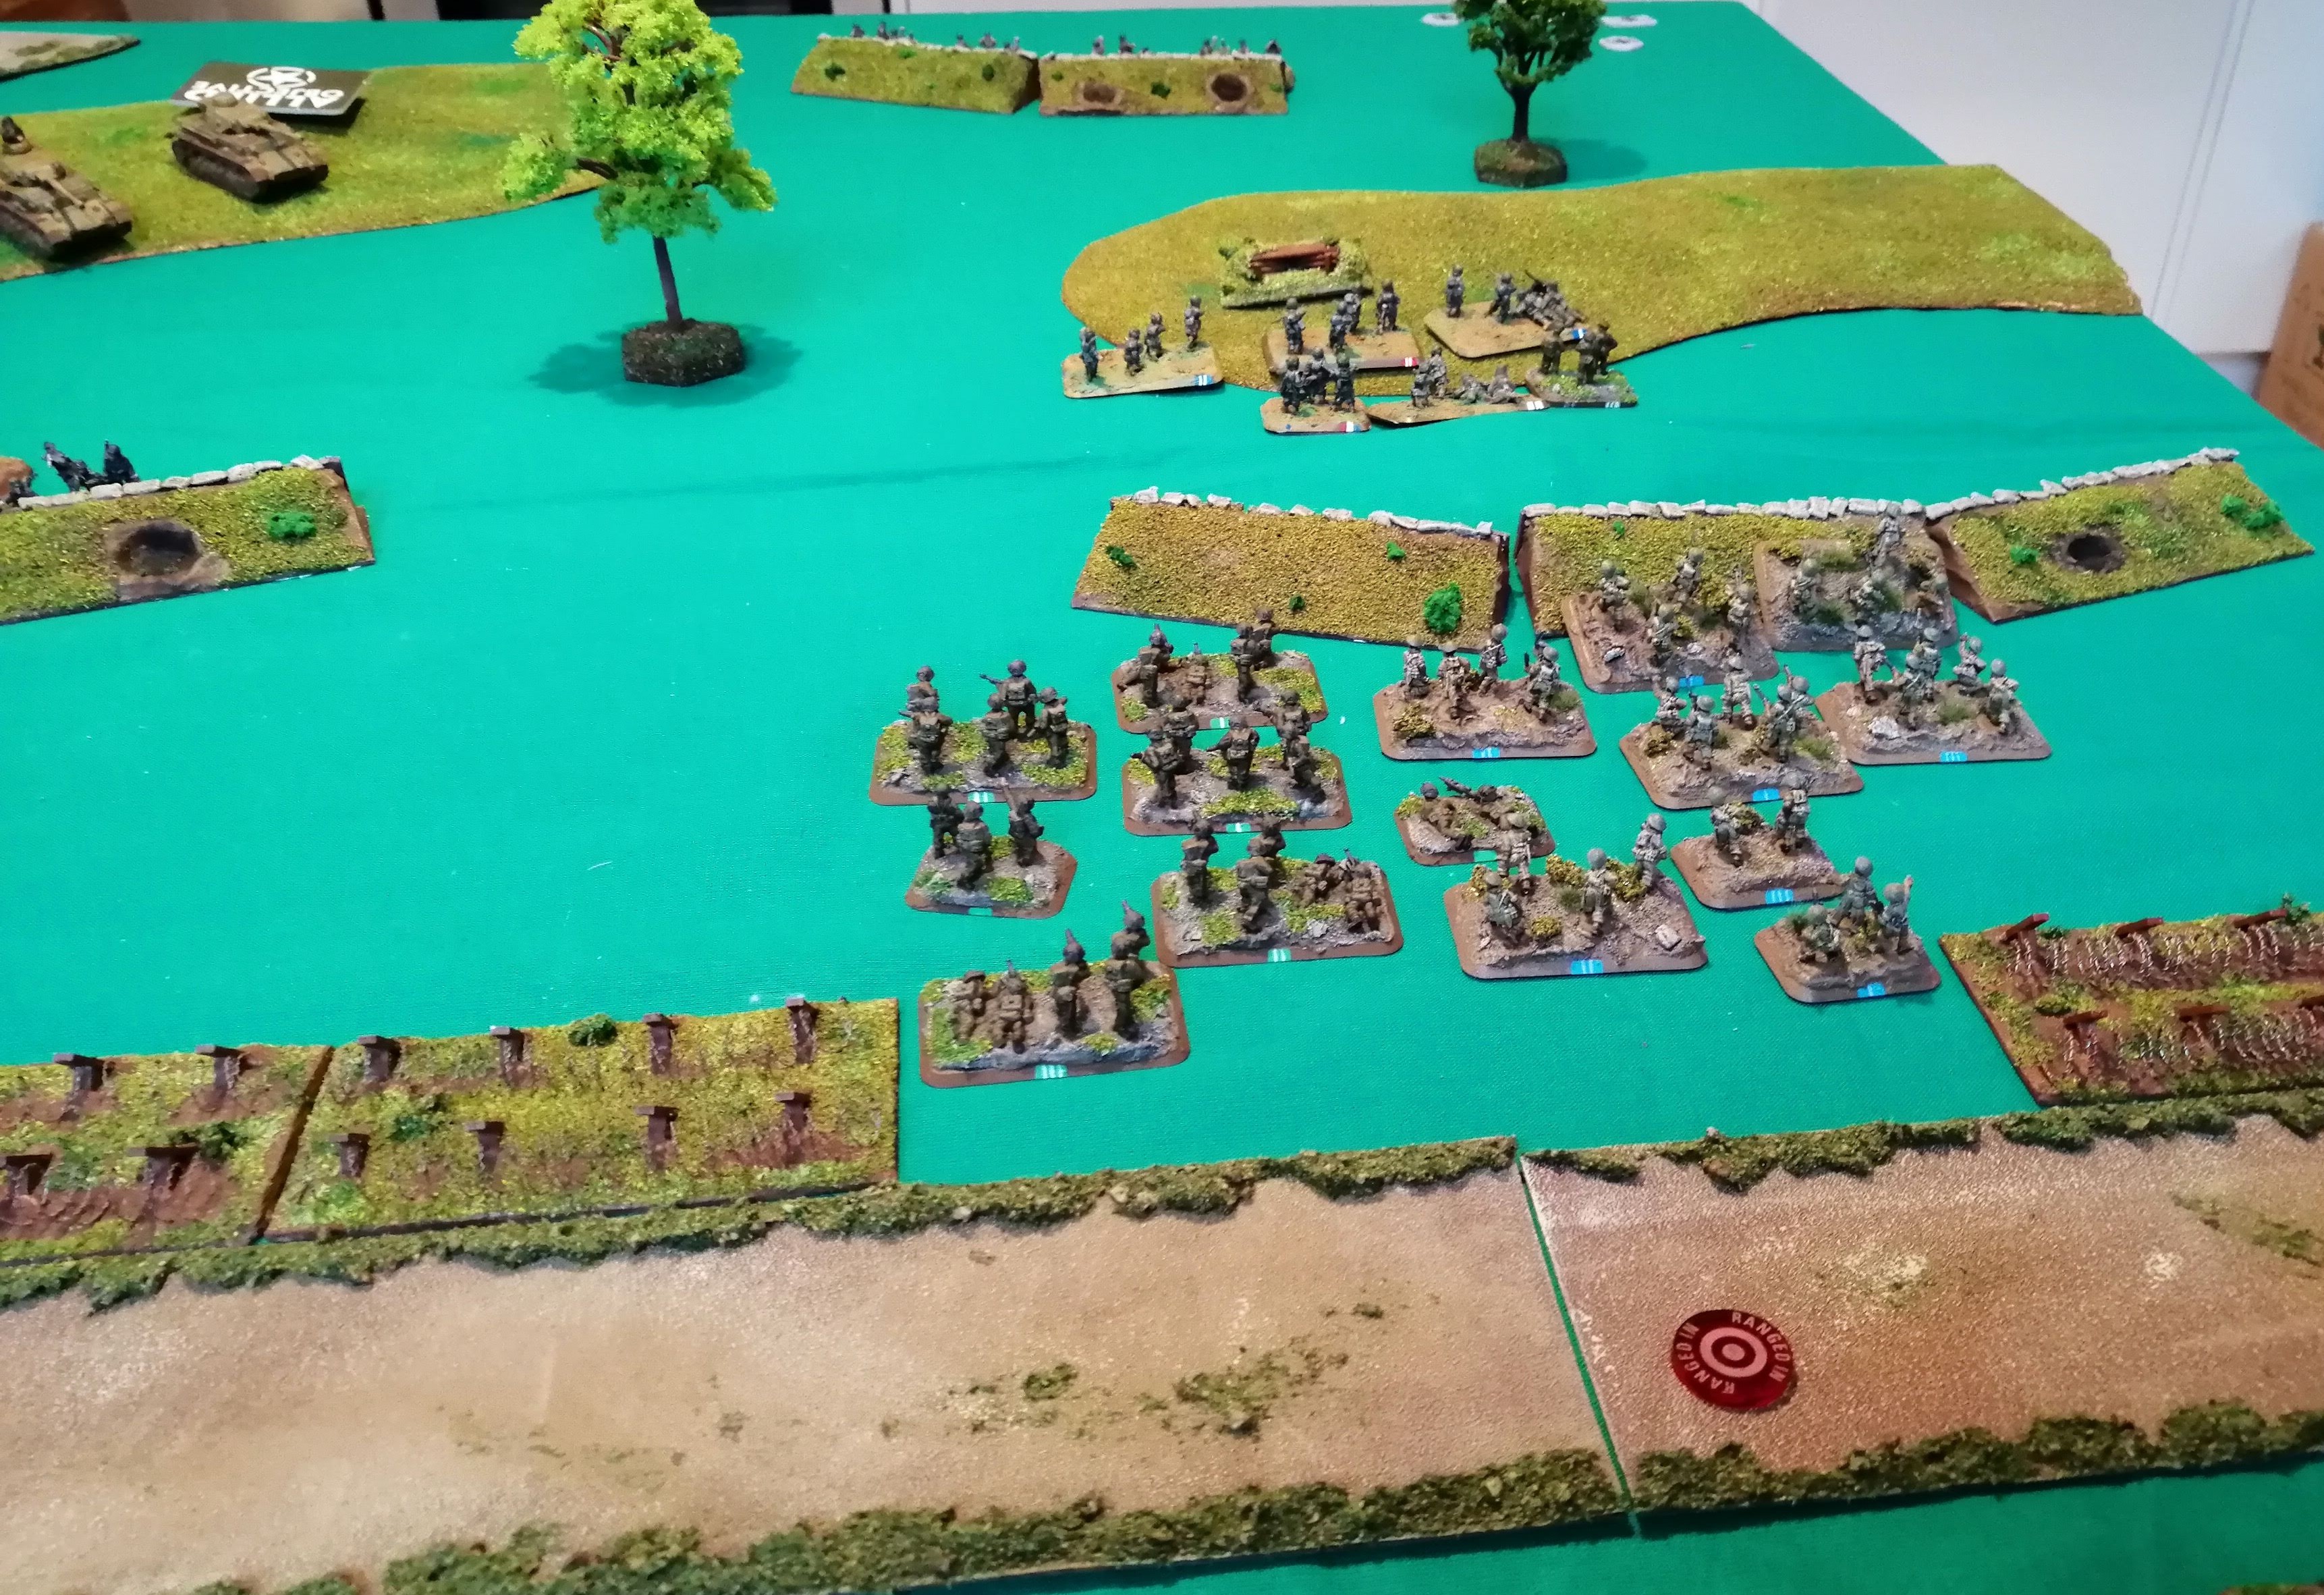 The Assault Platoon right in front of the HMG Nest
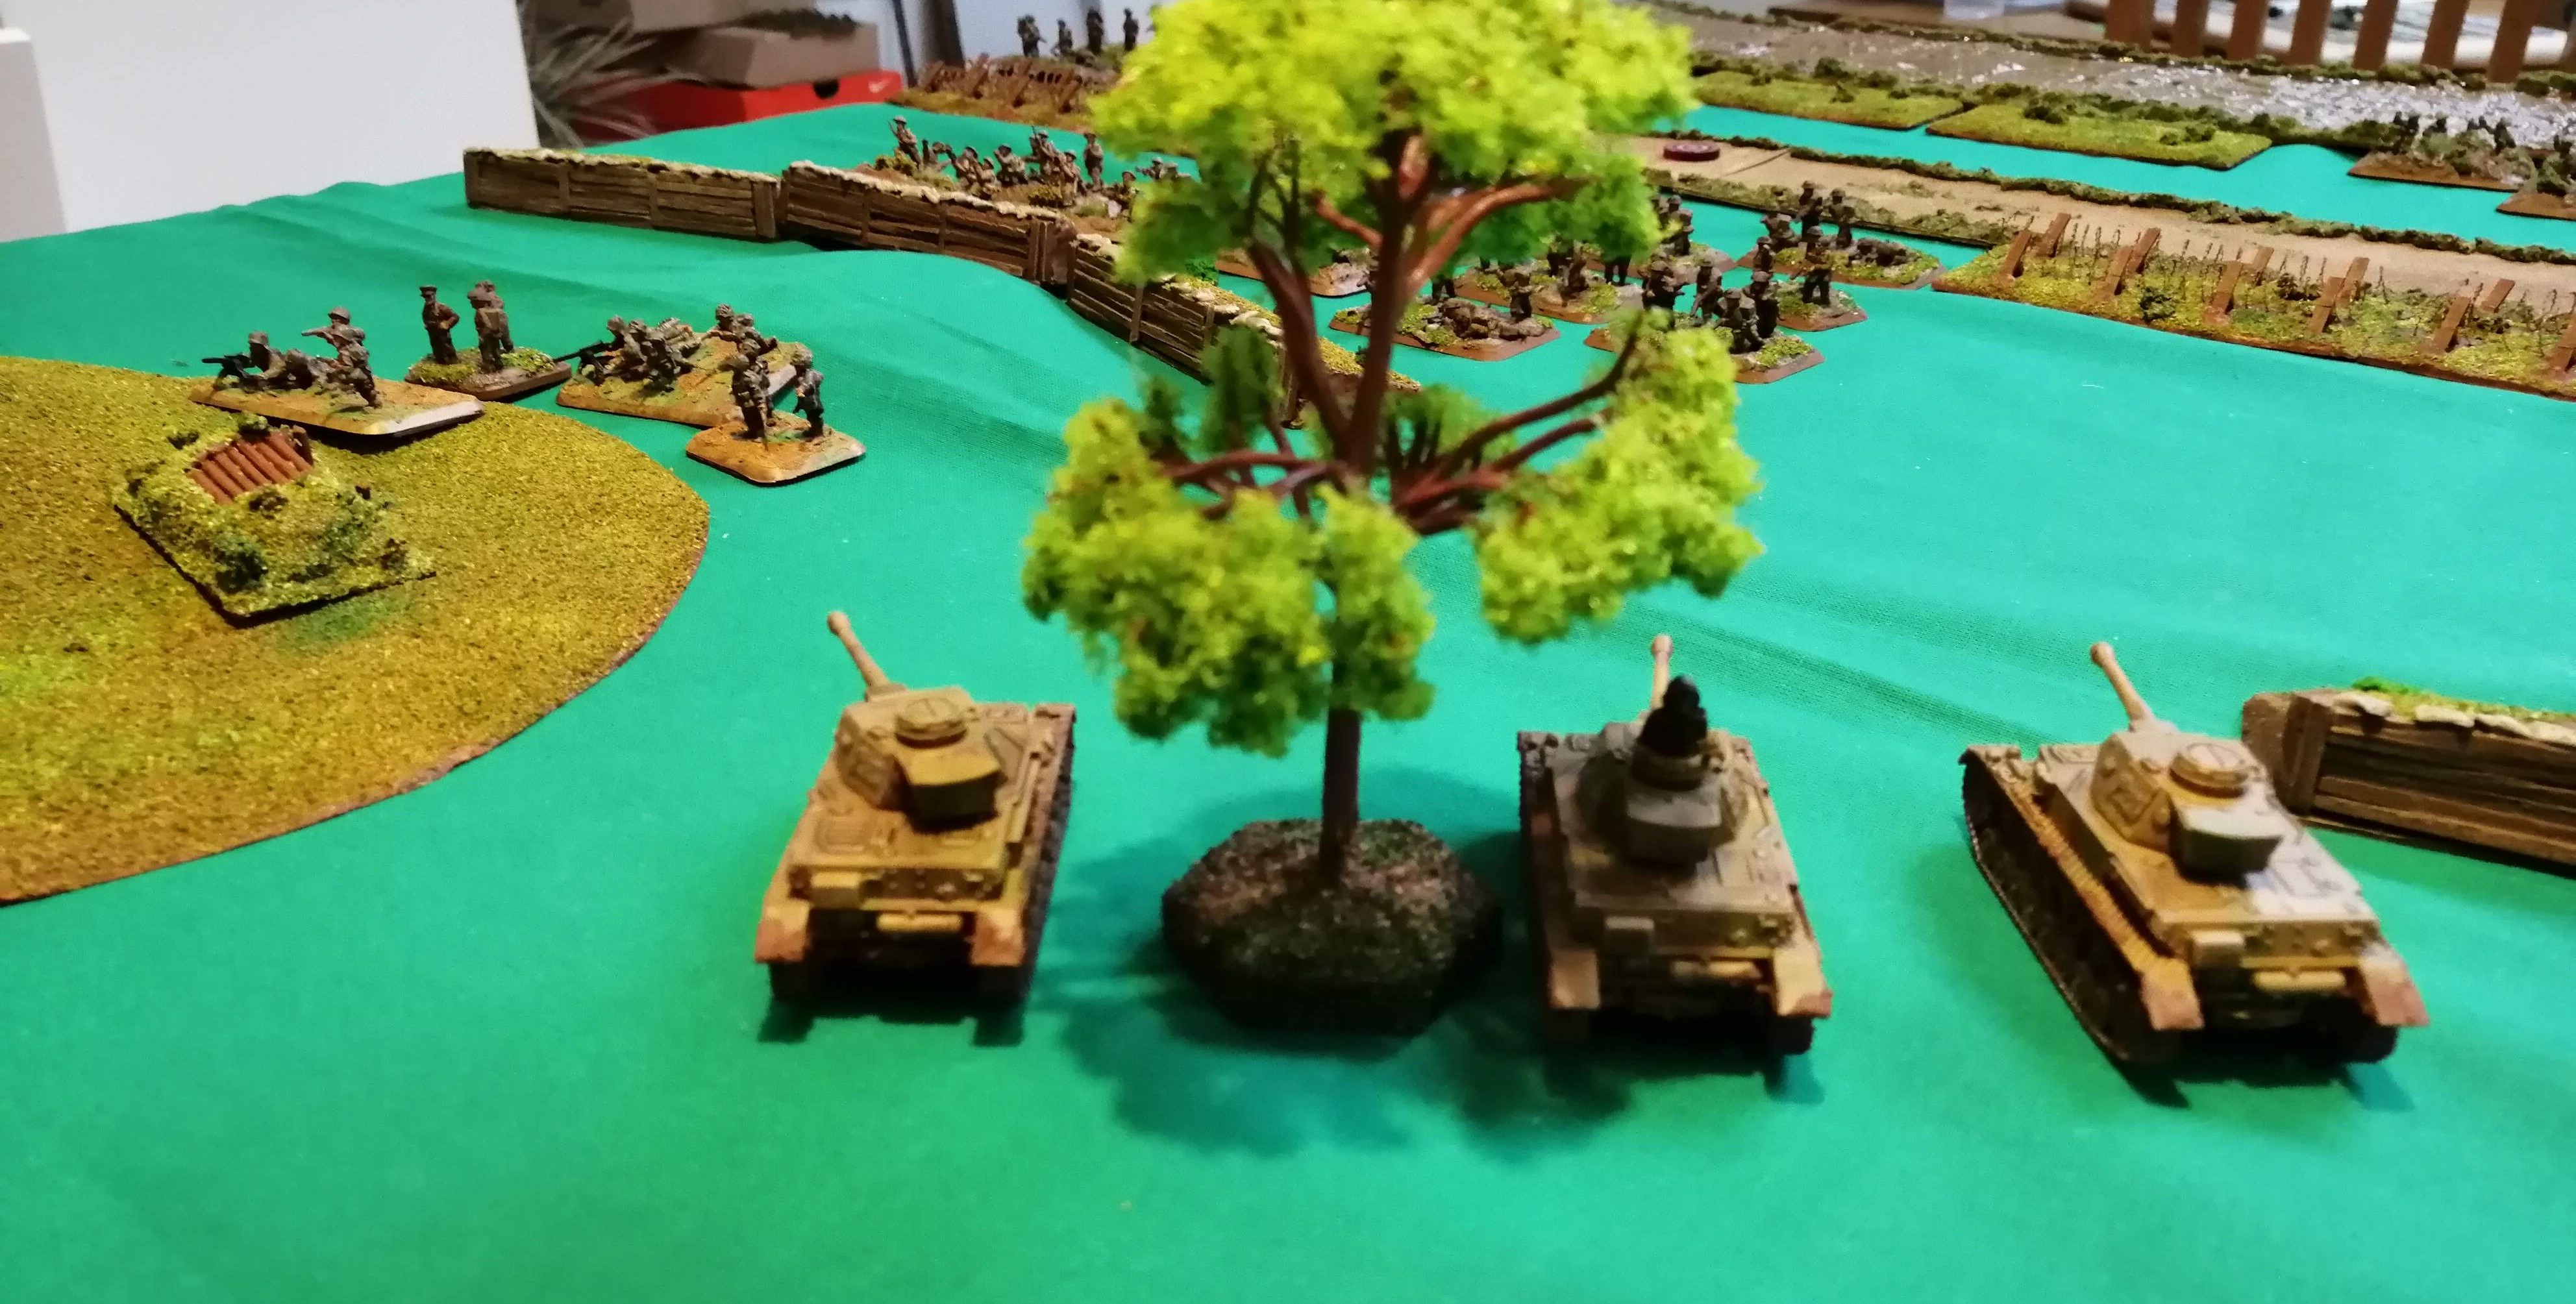 Panzer IVs threatening the US Infantry


Epic battle report – @redvers – and very detailed! I love the tactical maps in combination with the table photos. This really helps keep everything straight. Many people just post photos and since you’re not standing there at the table, it can be hard to visualize the larger context.
**now if those tactical maps were just done with hexes …**
Just kidding! Epic report! 😀
Thanks @oriskany. I think I got a bit carried away – might need to reduce the future battle reports as this has taken up a fair bit of time! And the tactical maps are as much for me as they are for everyone else – the memory isn’t what it used to be! But I’m drawing the line at hexes, there just aren’t enough hours in the day 🙂