


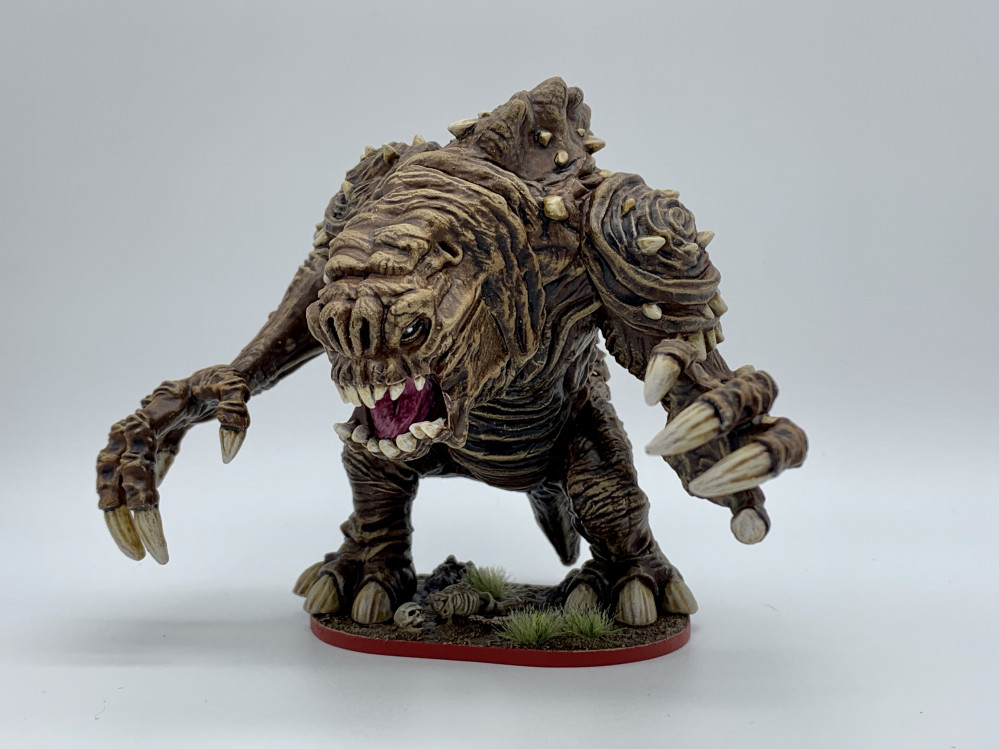
From Rancor, to Rancorsome!


Stage 8. Basing
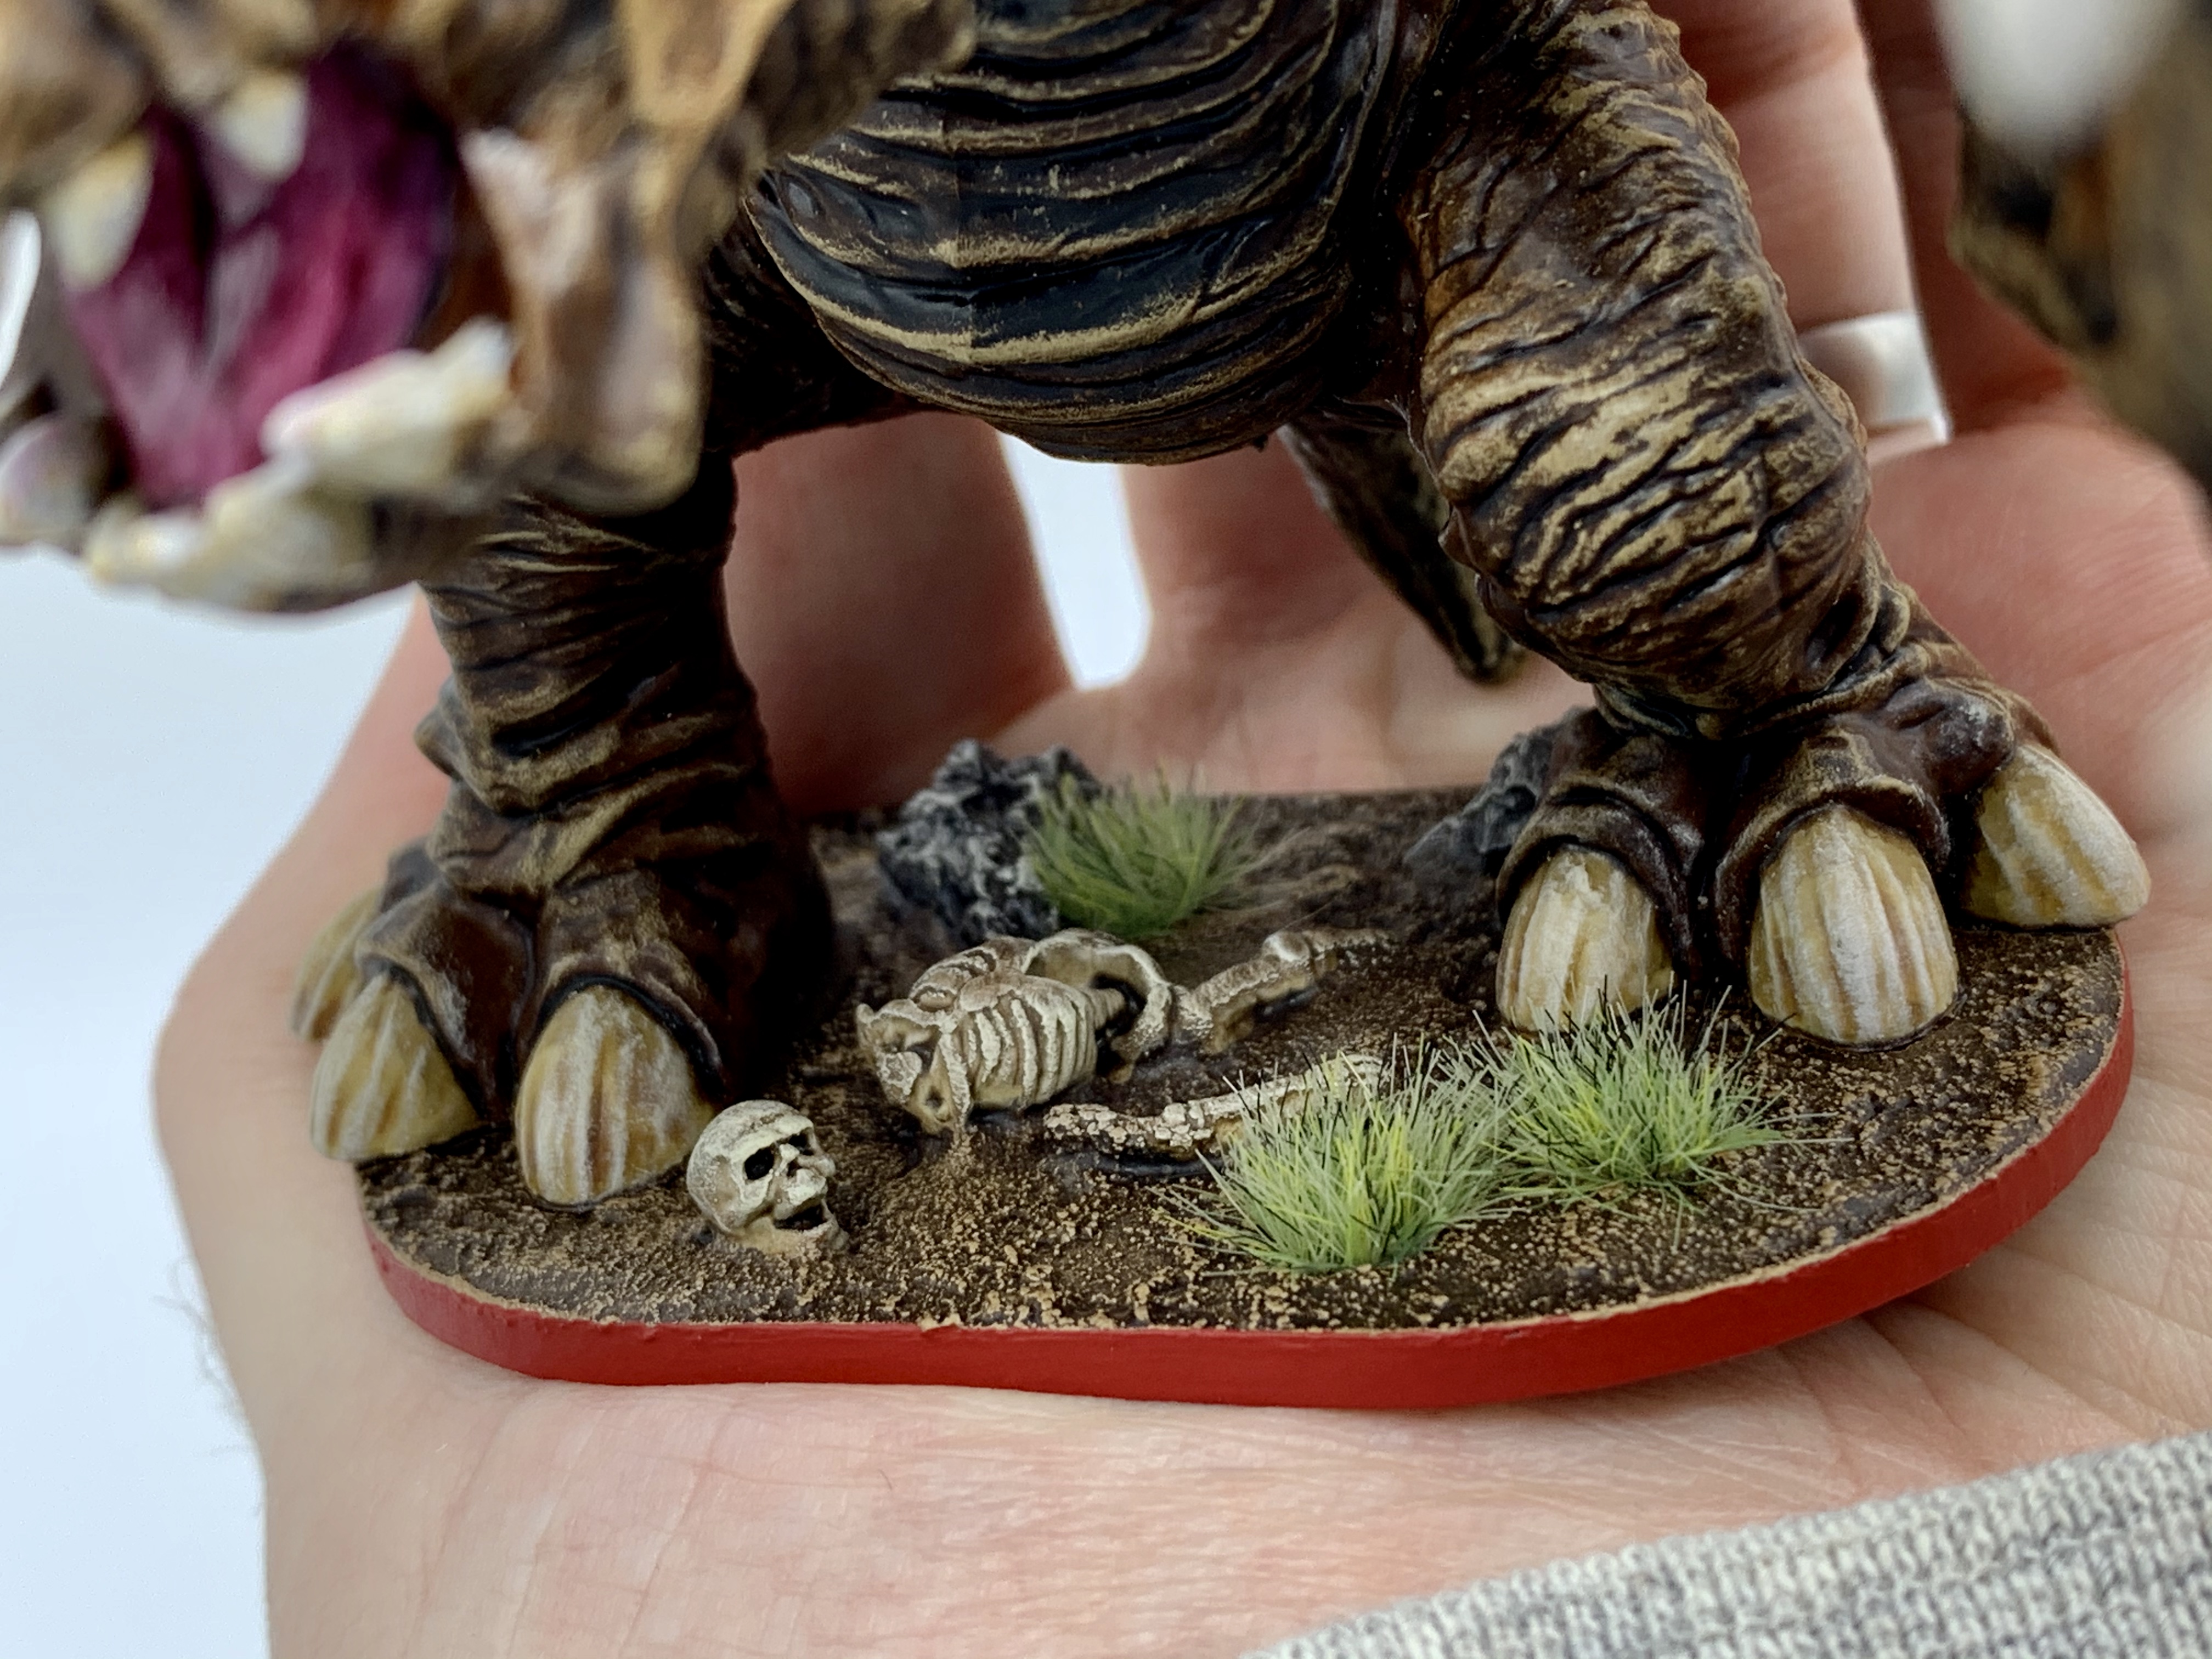 A completed base!
Stage 8. Basing
Basing is relatively new to me; aside from a Tattooine cracked earth effect (Tusken Raiders) and Hoth snow (Wampas) – I usually just paint my bases ‘boring’ grey. The Rancor was a great opportunity to get a little creative.
My plan was to create a muddy ‘swamp-like’ base with skeletal remains, a couple of rocks and some grass tufts – something I was able to achieve!
I started by using a pencil to mark out where the Rancor’s feet sat on the base. Then I chopped up an old wine cork (to create some rocks) and clipped some skeleton pieces off a cheap sprue I’d bought for this exact purpose.
Using Citadel’s Stirland Mud, I put a good few ‘splodges’ all over the base, making sure to avoid the areas I’d previously marked out for the Rancor’s feet. I was then able to place the cork rocks and skeleton remains in the ‘mud’ and waited for it all to set.
Once completely dry, I gave the base a spray of Mechanicus Standard Grey and base coated the mud (Charred Brown – Vallejo), the rocks (German Grey – Vallejo) and the bones (Ushabti Bone). Next was a complete drybrush of Deathclaw Brown, followed by a light drybrush of Zandri Dust, and a final lighter drybrush of Screaming Skull.
The final steps were to give the whole thing a shade/wash using Agrax Earthshade, then (once dry) a very light drybrush of Screaming Skull, before finally gluing on some of The Army Painter’s swamp grass tufts.
I enjoyed the basing process and will certainly be doing this more often – as the final effect really sets off the miniature. Coming up tomorrow… finishing touches and the end of the project!
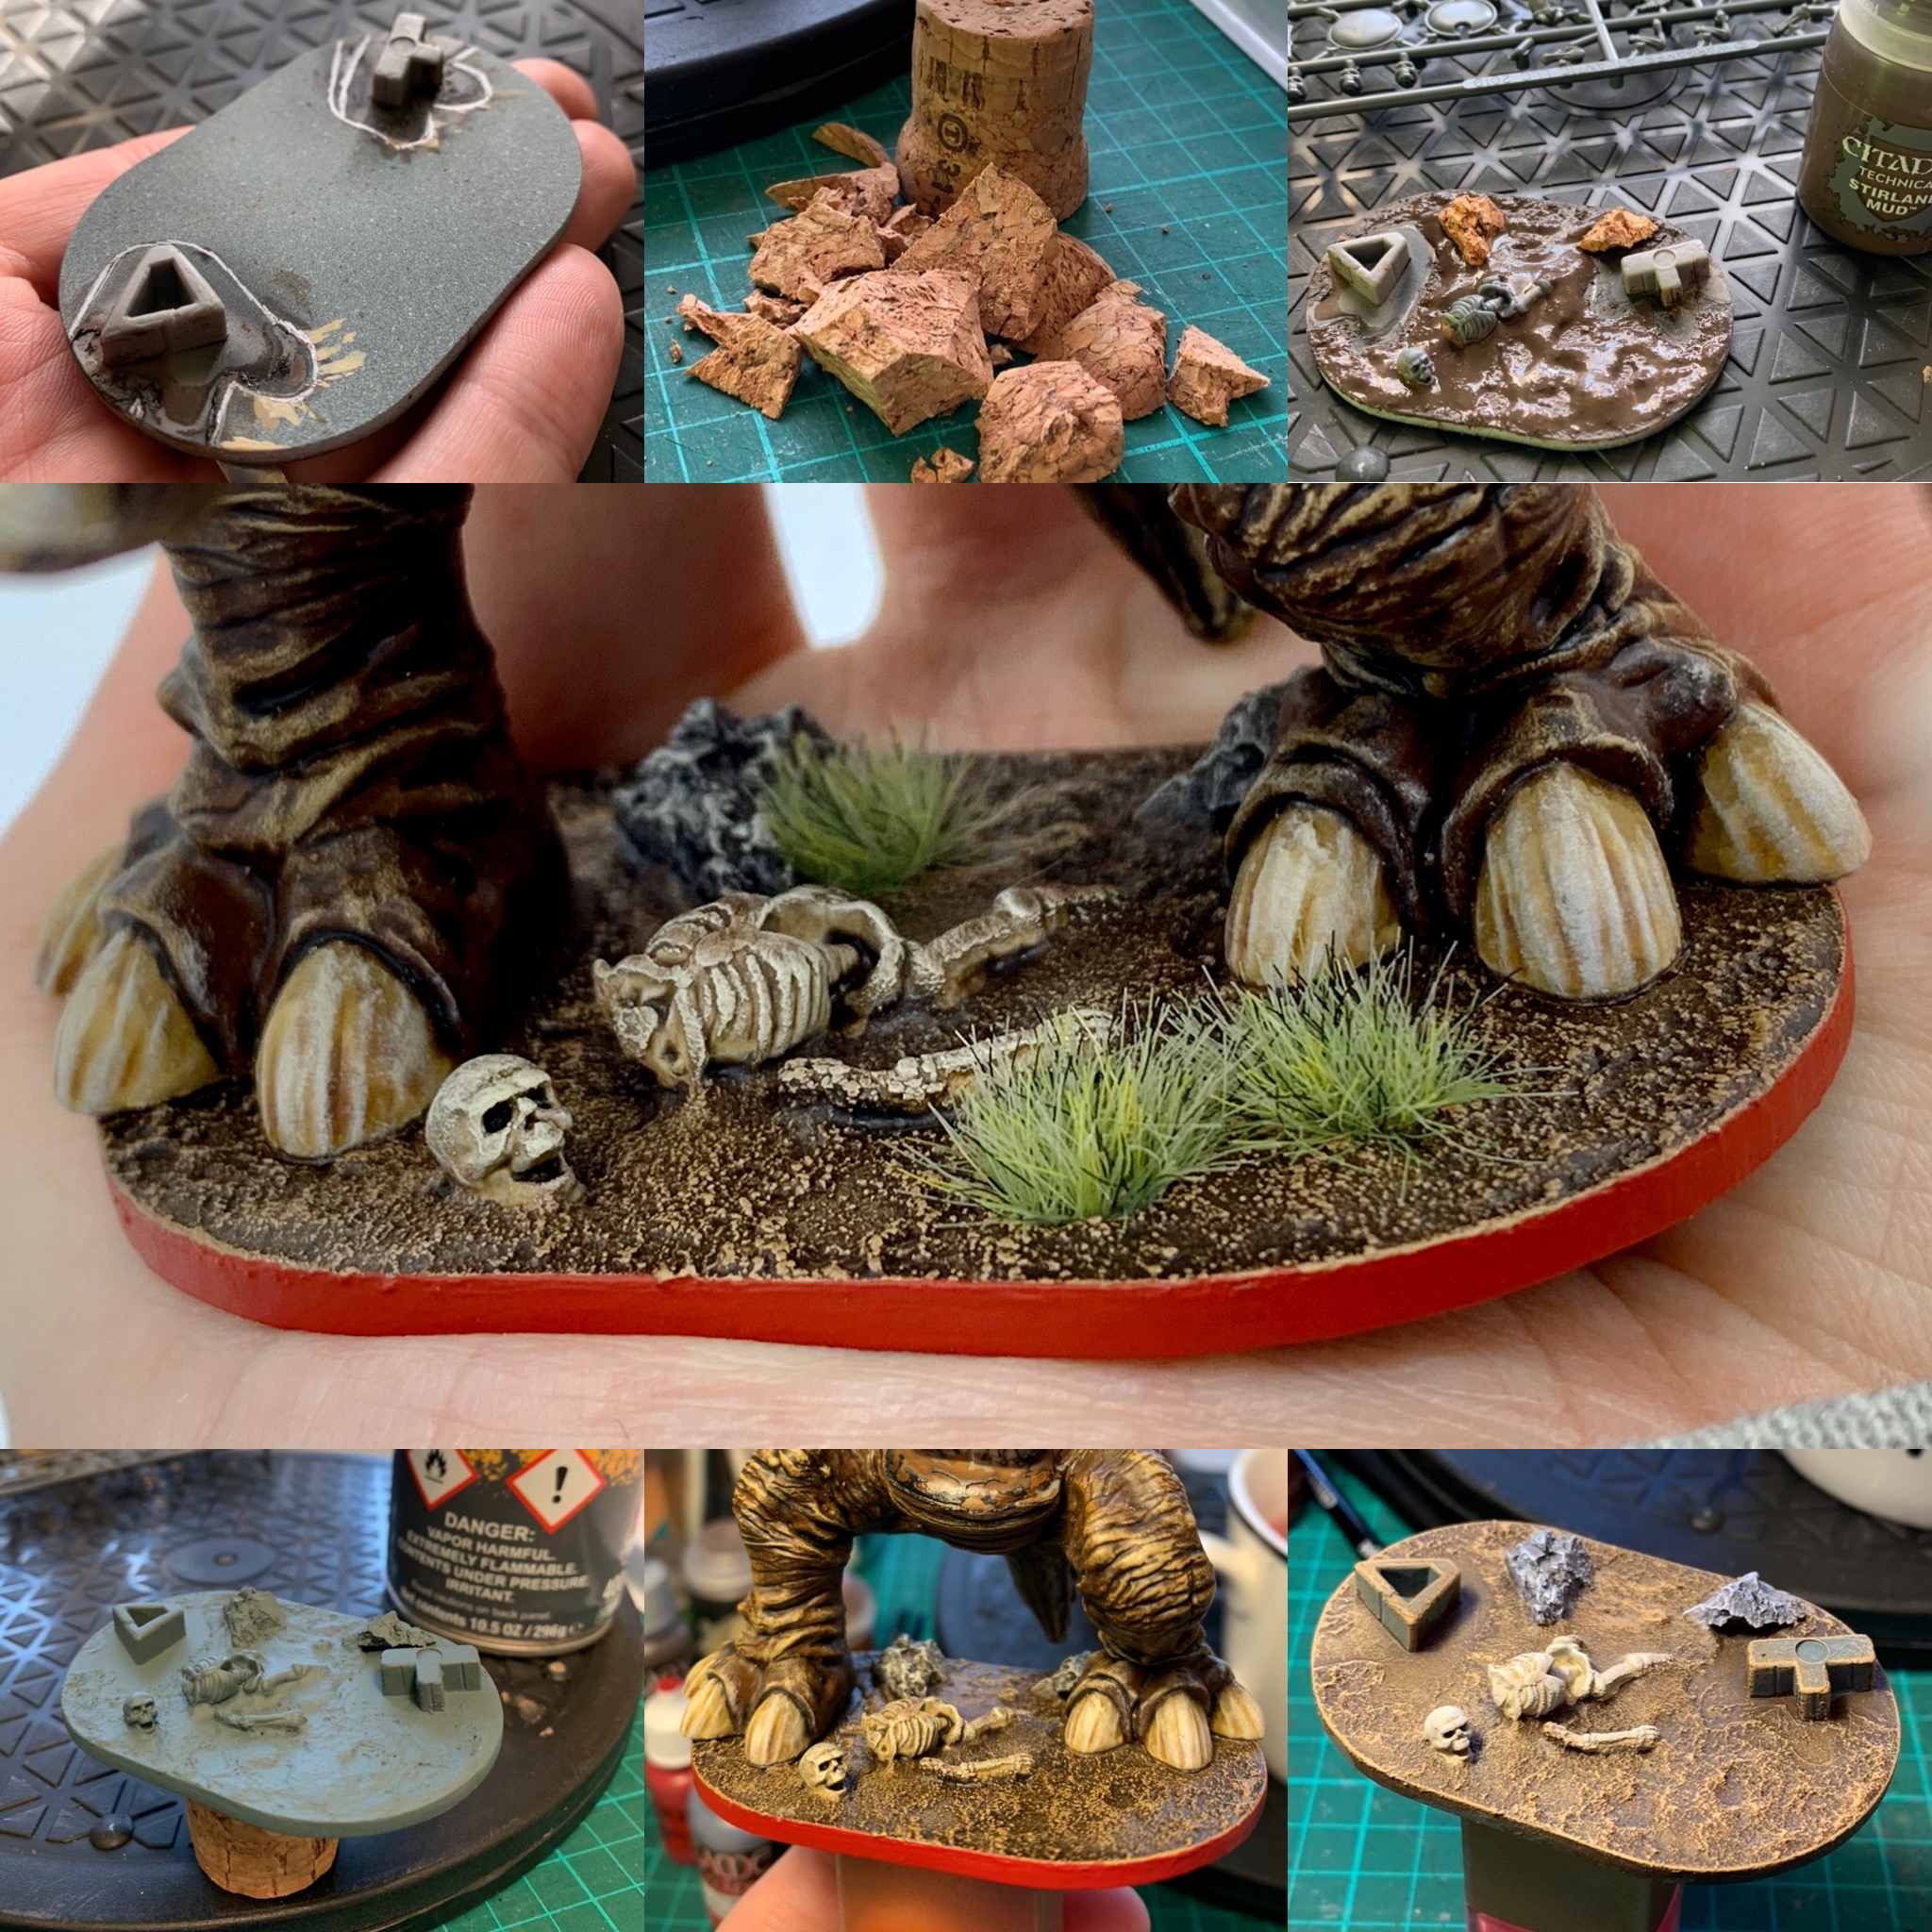 The steps I took from plain base, to swampy dread!


Leave a Reply