


![How To Paint Moonstone’s Nanny | Goblin King Games [7 Days Early Access]](https://images.beastsofwar.com/2024/12/3CU-Gobin-King-Games-Moonstone-Shades-Nanny-coverimage-225-127.jpg)


Spring Cleaning the Wasteland


It’s gotta be fast!
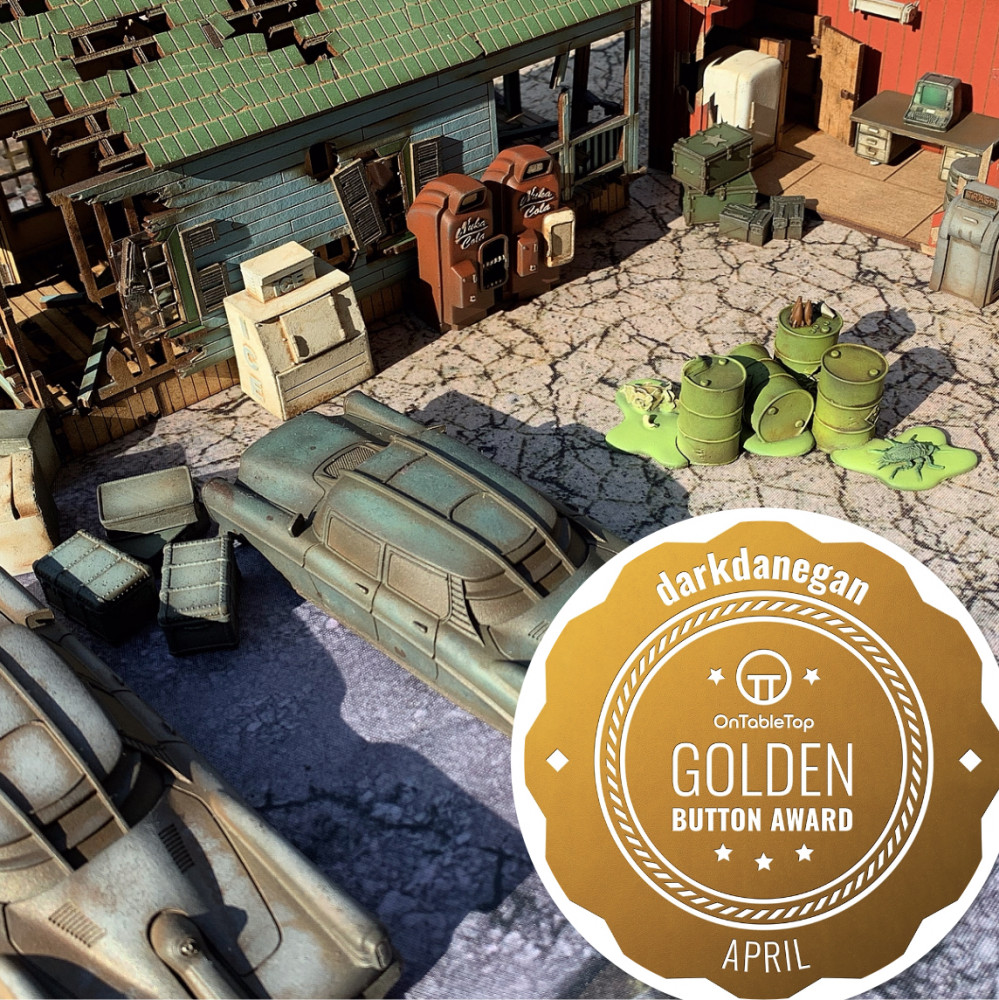
I love me some Fallout. I’ve been collecting Fallout Wasteland Warfare from day one and I think it’s one of the finest miniature games on the market. My finances have just about been keeping up with the release schedule but my hobby desk hasn’t! Most notably all the resin terrain kits that have been dropping regularly. I’ve been playing games with some MDF bits and bobs from 4Ground etc but these kits from Modiphius are required to make it Fallout. Time to get it done!
I washed and prepped as many pieces as would fit on my paint rack (which is the vast bulk of it which is awesome!) and got to work. I’ve been watching with interest the “reductive” shading and weathering techniques that are all the rage at the moment and thought terrain is the ideal place to practise it. It also leads to speed painting which is definitely the order of the day!
My basic plan is this:
1. Prime in black
2. Cover everything in burnt umber
3. Airbrush on a main colour for each piece.
4. Paint in any necessary details (only the absolutely necessary)
5. Sponge on some damage – either brown or grey depending on the base colour.
6. Airbrush on a coat of enamel wash (AK interactive Streaking Grime or Winter Grime)
7. Use white spirit and a cloth/sponge/cue tip to remove the enamel wash from flat areas and areas that need to look highlighted.
8. Quick touch up or add final details (e.g terminal screen)
9. Airbrush a Matt varnish.
10. Call it Done.
For areas of metal I also applied an oil wash in the same way as the enamel wash but before the enamel wash. Mostly black with a bit of brown. This is just to add more contrast to the metals, not sure it was actually required in the end.
Next we’ll take a closer look at the technique.


Leave a Reply