


Rooting Around - Turnip28 Spring Clean Challenge


Raising the Flag
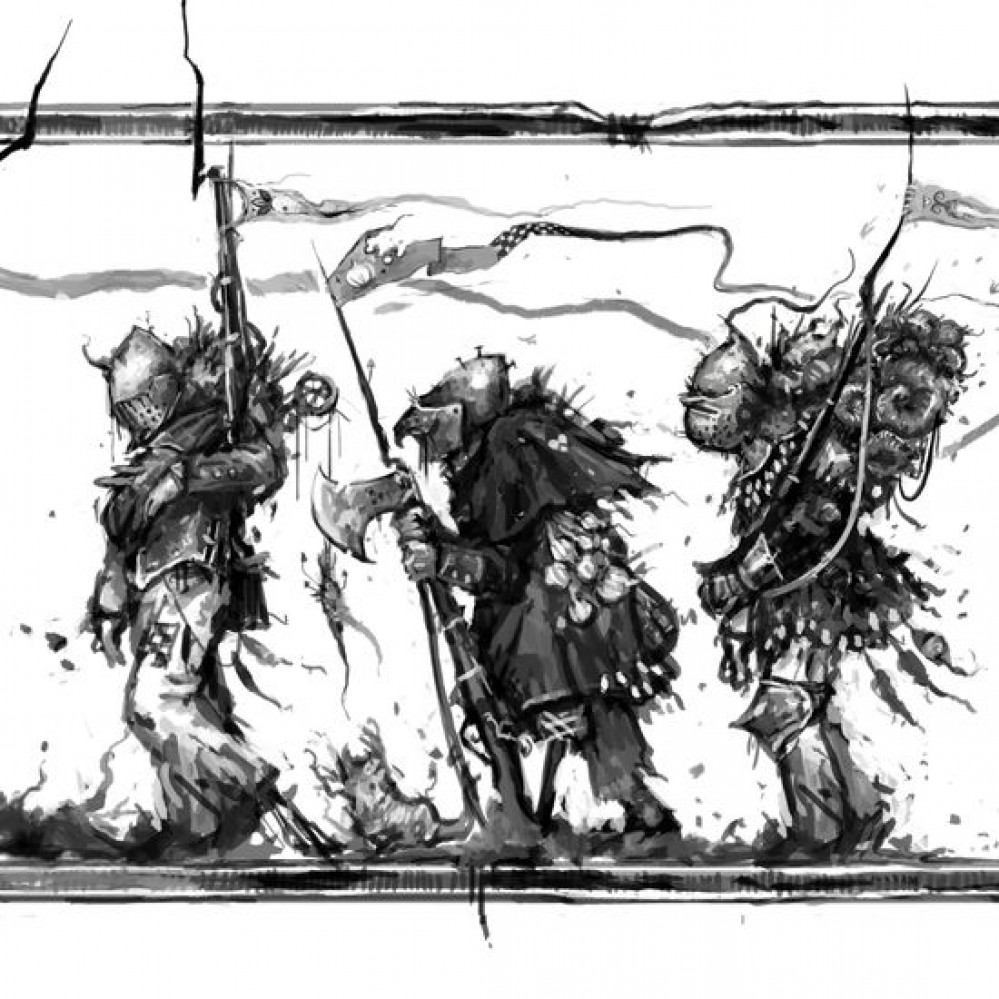
My Regiment needs a flag to march under. There won’t be anything off-the-shelf to buy for such a personal force, so time to make something appropriate.
First thing was a find some inspiration for the design. I quickly decided to use the lozenge shaped 1804 Napoleonic French as a basis. The colours are pretty much well established from painting the models – violet/red and green, with some blue trimming. I picked a random number for the Regiment, and have named them the 17th Beetroot (had to be considering the colour of the jackets).
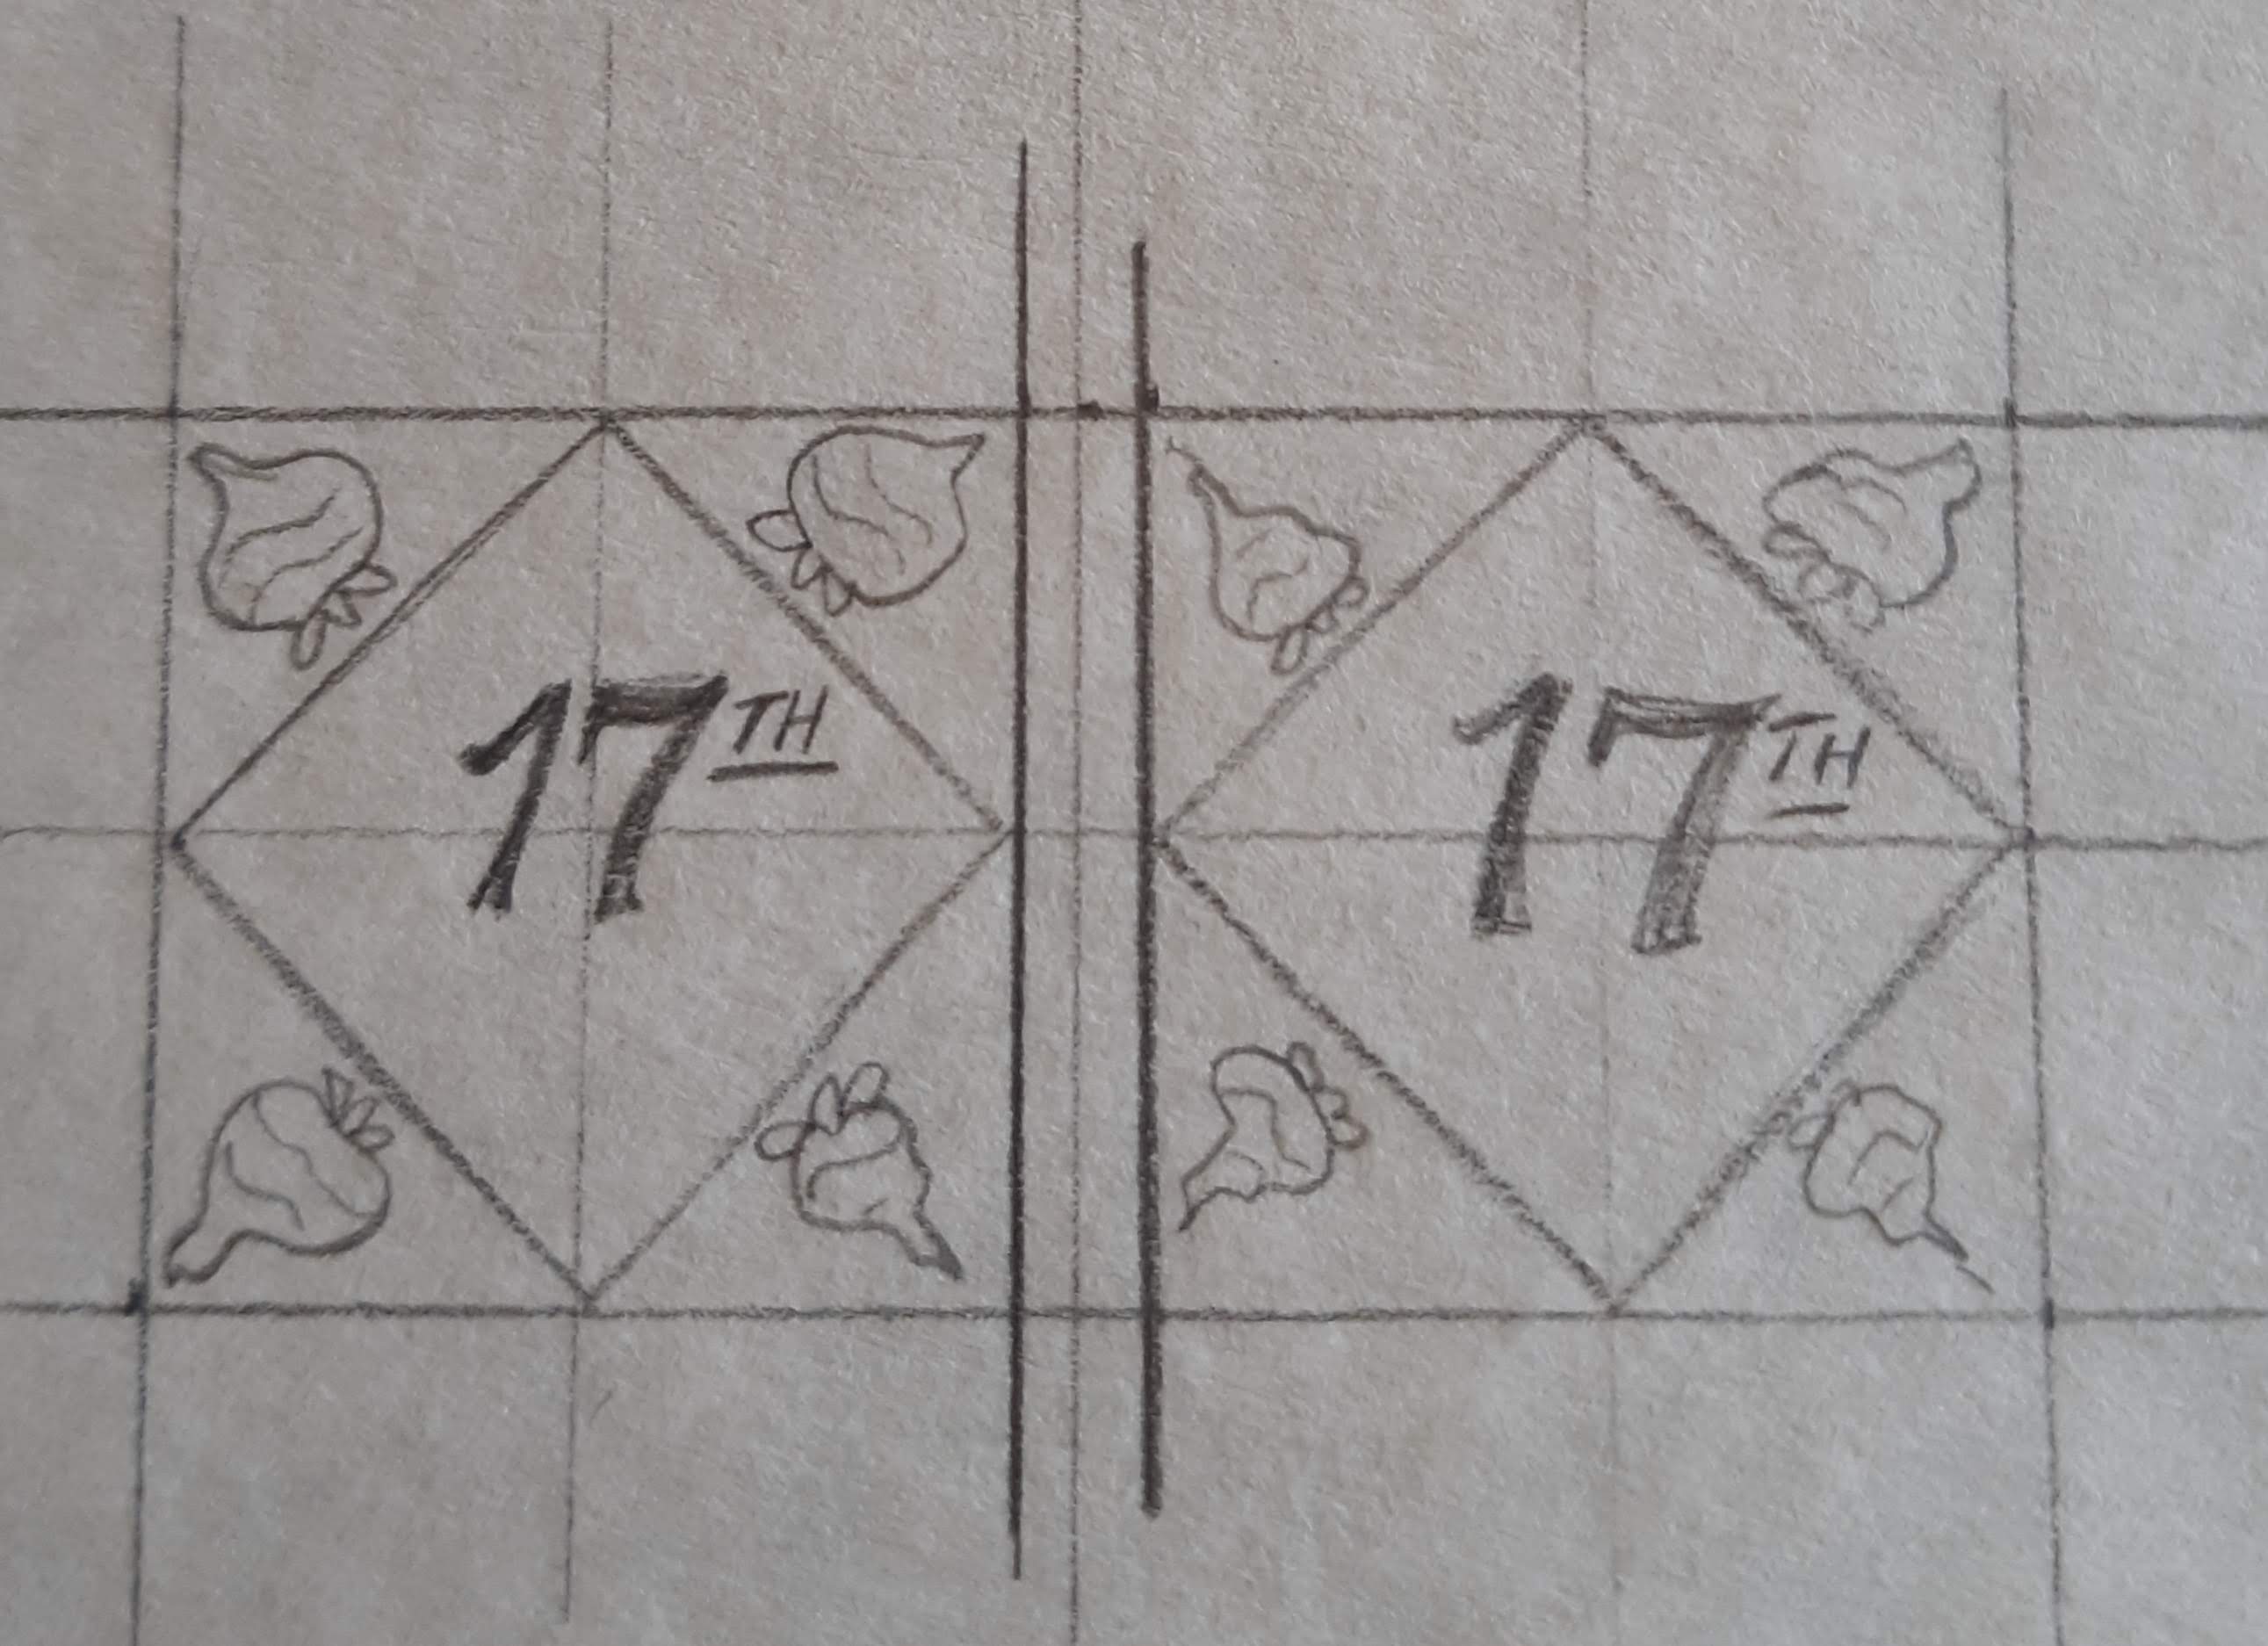 First step is sketching out the design in pencil on some relatively thick paper. I use some writing paper designed to be a bit coarse, as I think this gives the final thing a bit of additional texture. Rough sketches of the design only - it will all get a bit neater when painted.
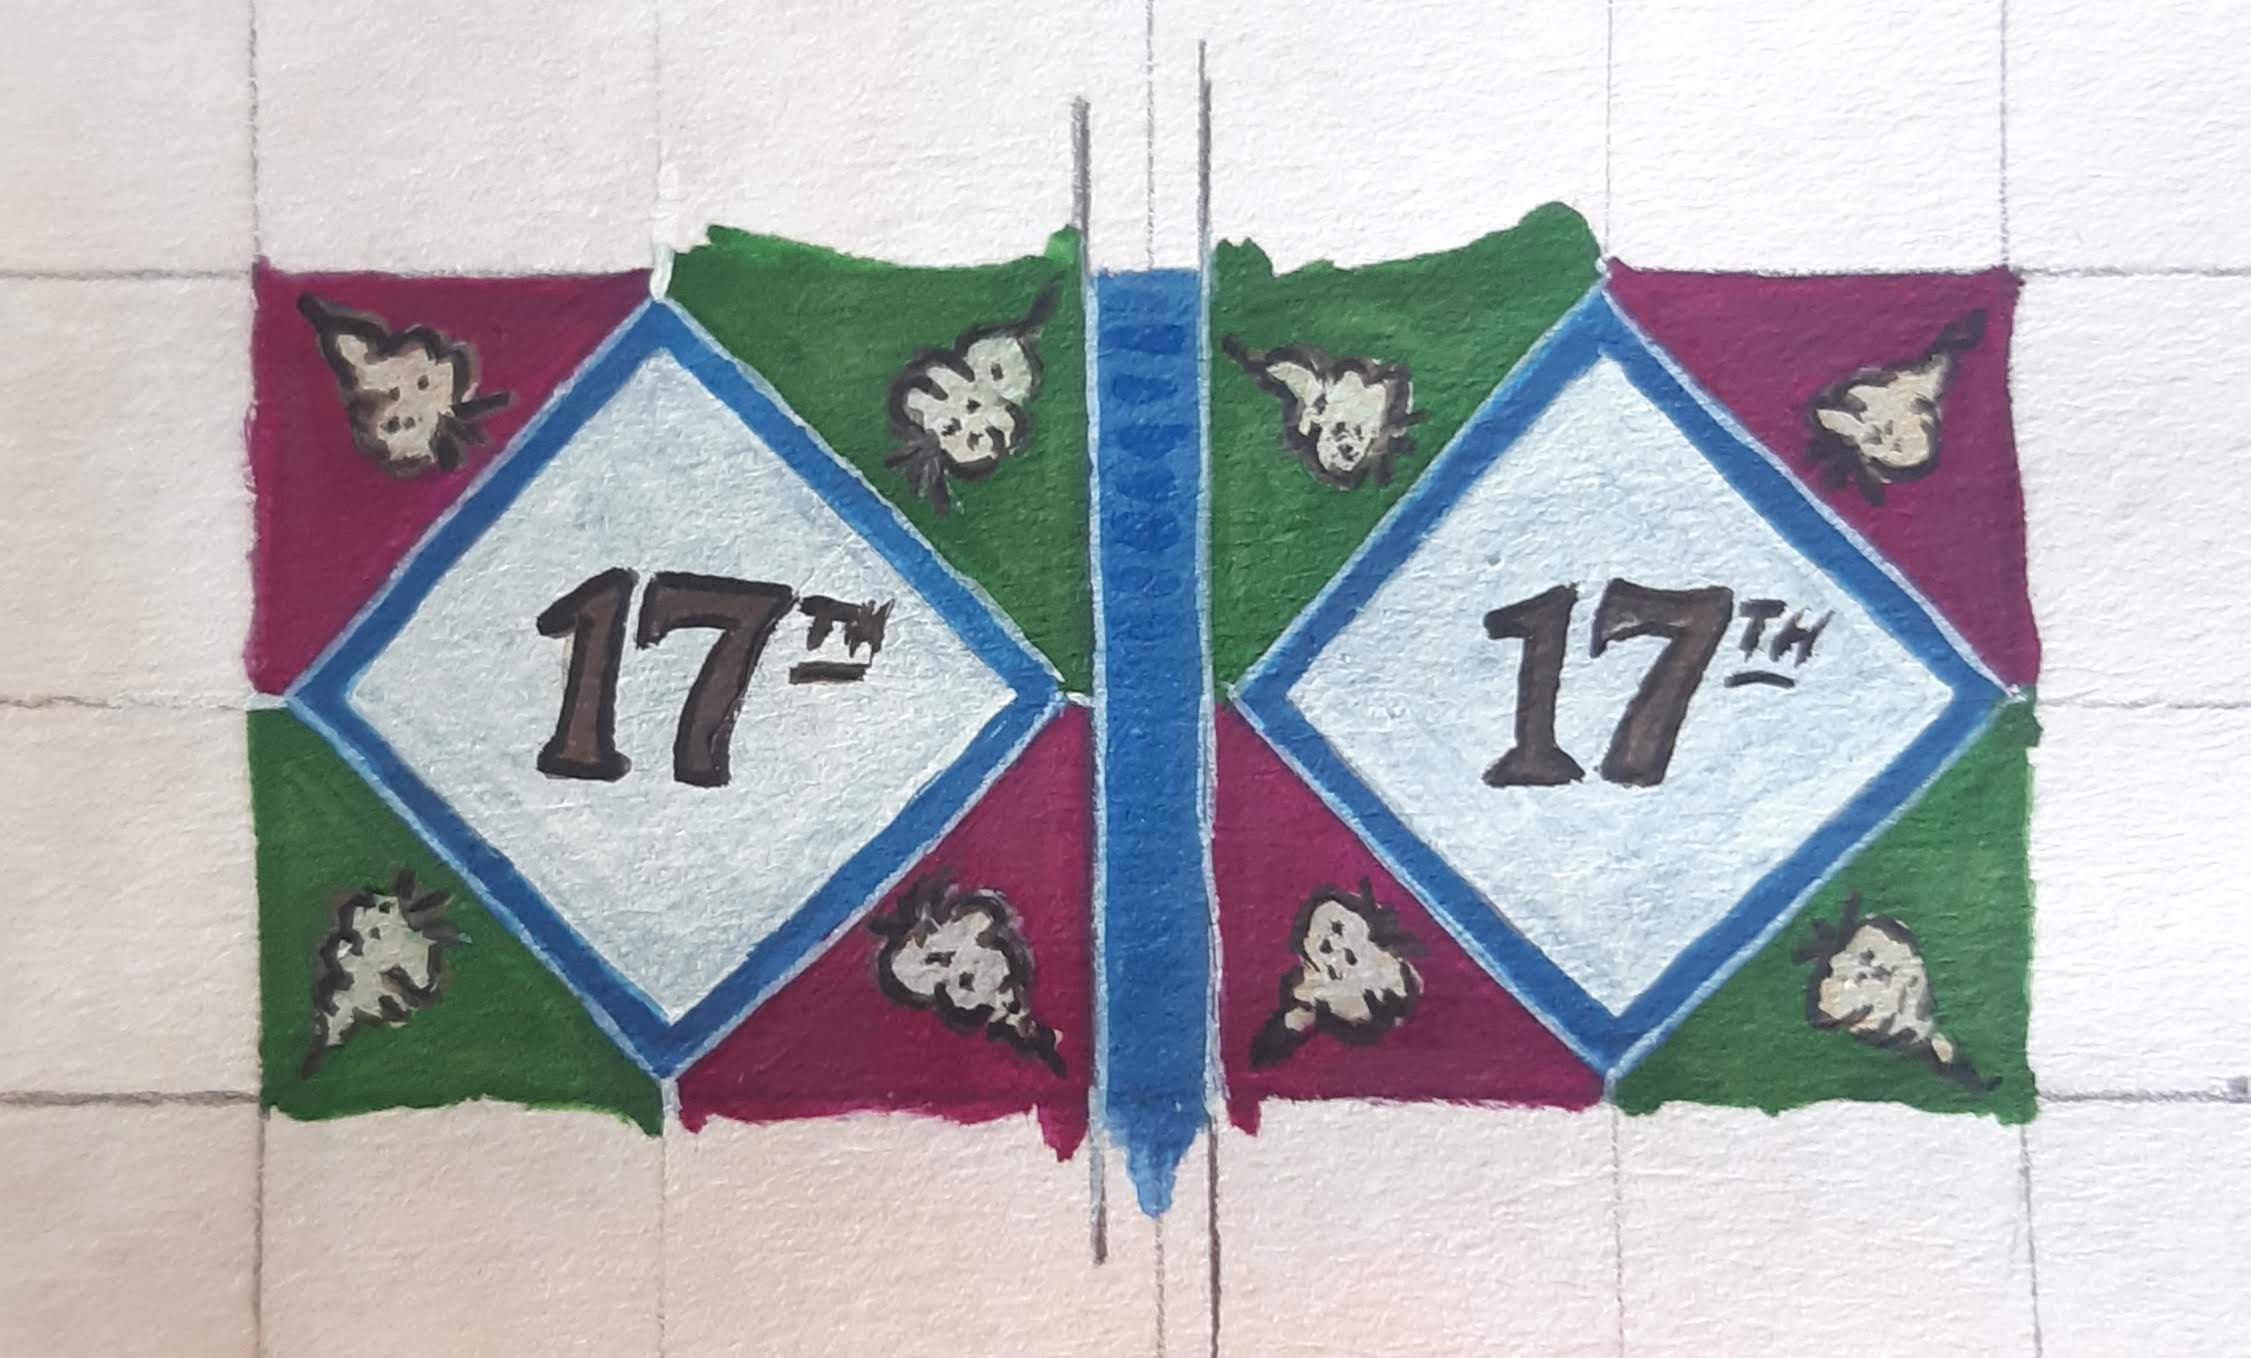 Colourised flag. This used all the same colours as detailed for painting the figures. The white centre was first painted in Vallejo Medium Sea Grey to give a solid foundation, before painting over with Vallejo Ivory. It gives it a bit more of a grubby white. Colours are still a bit bright though.
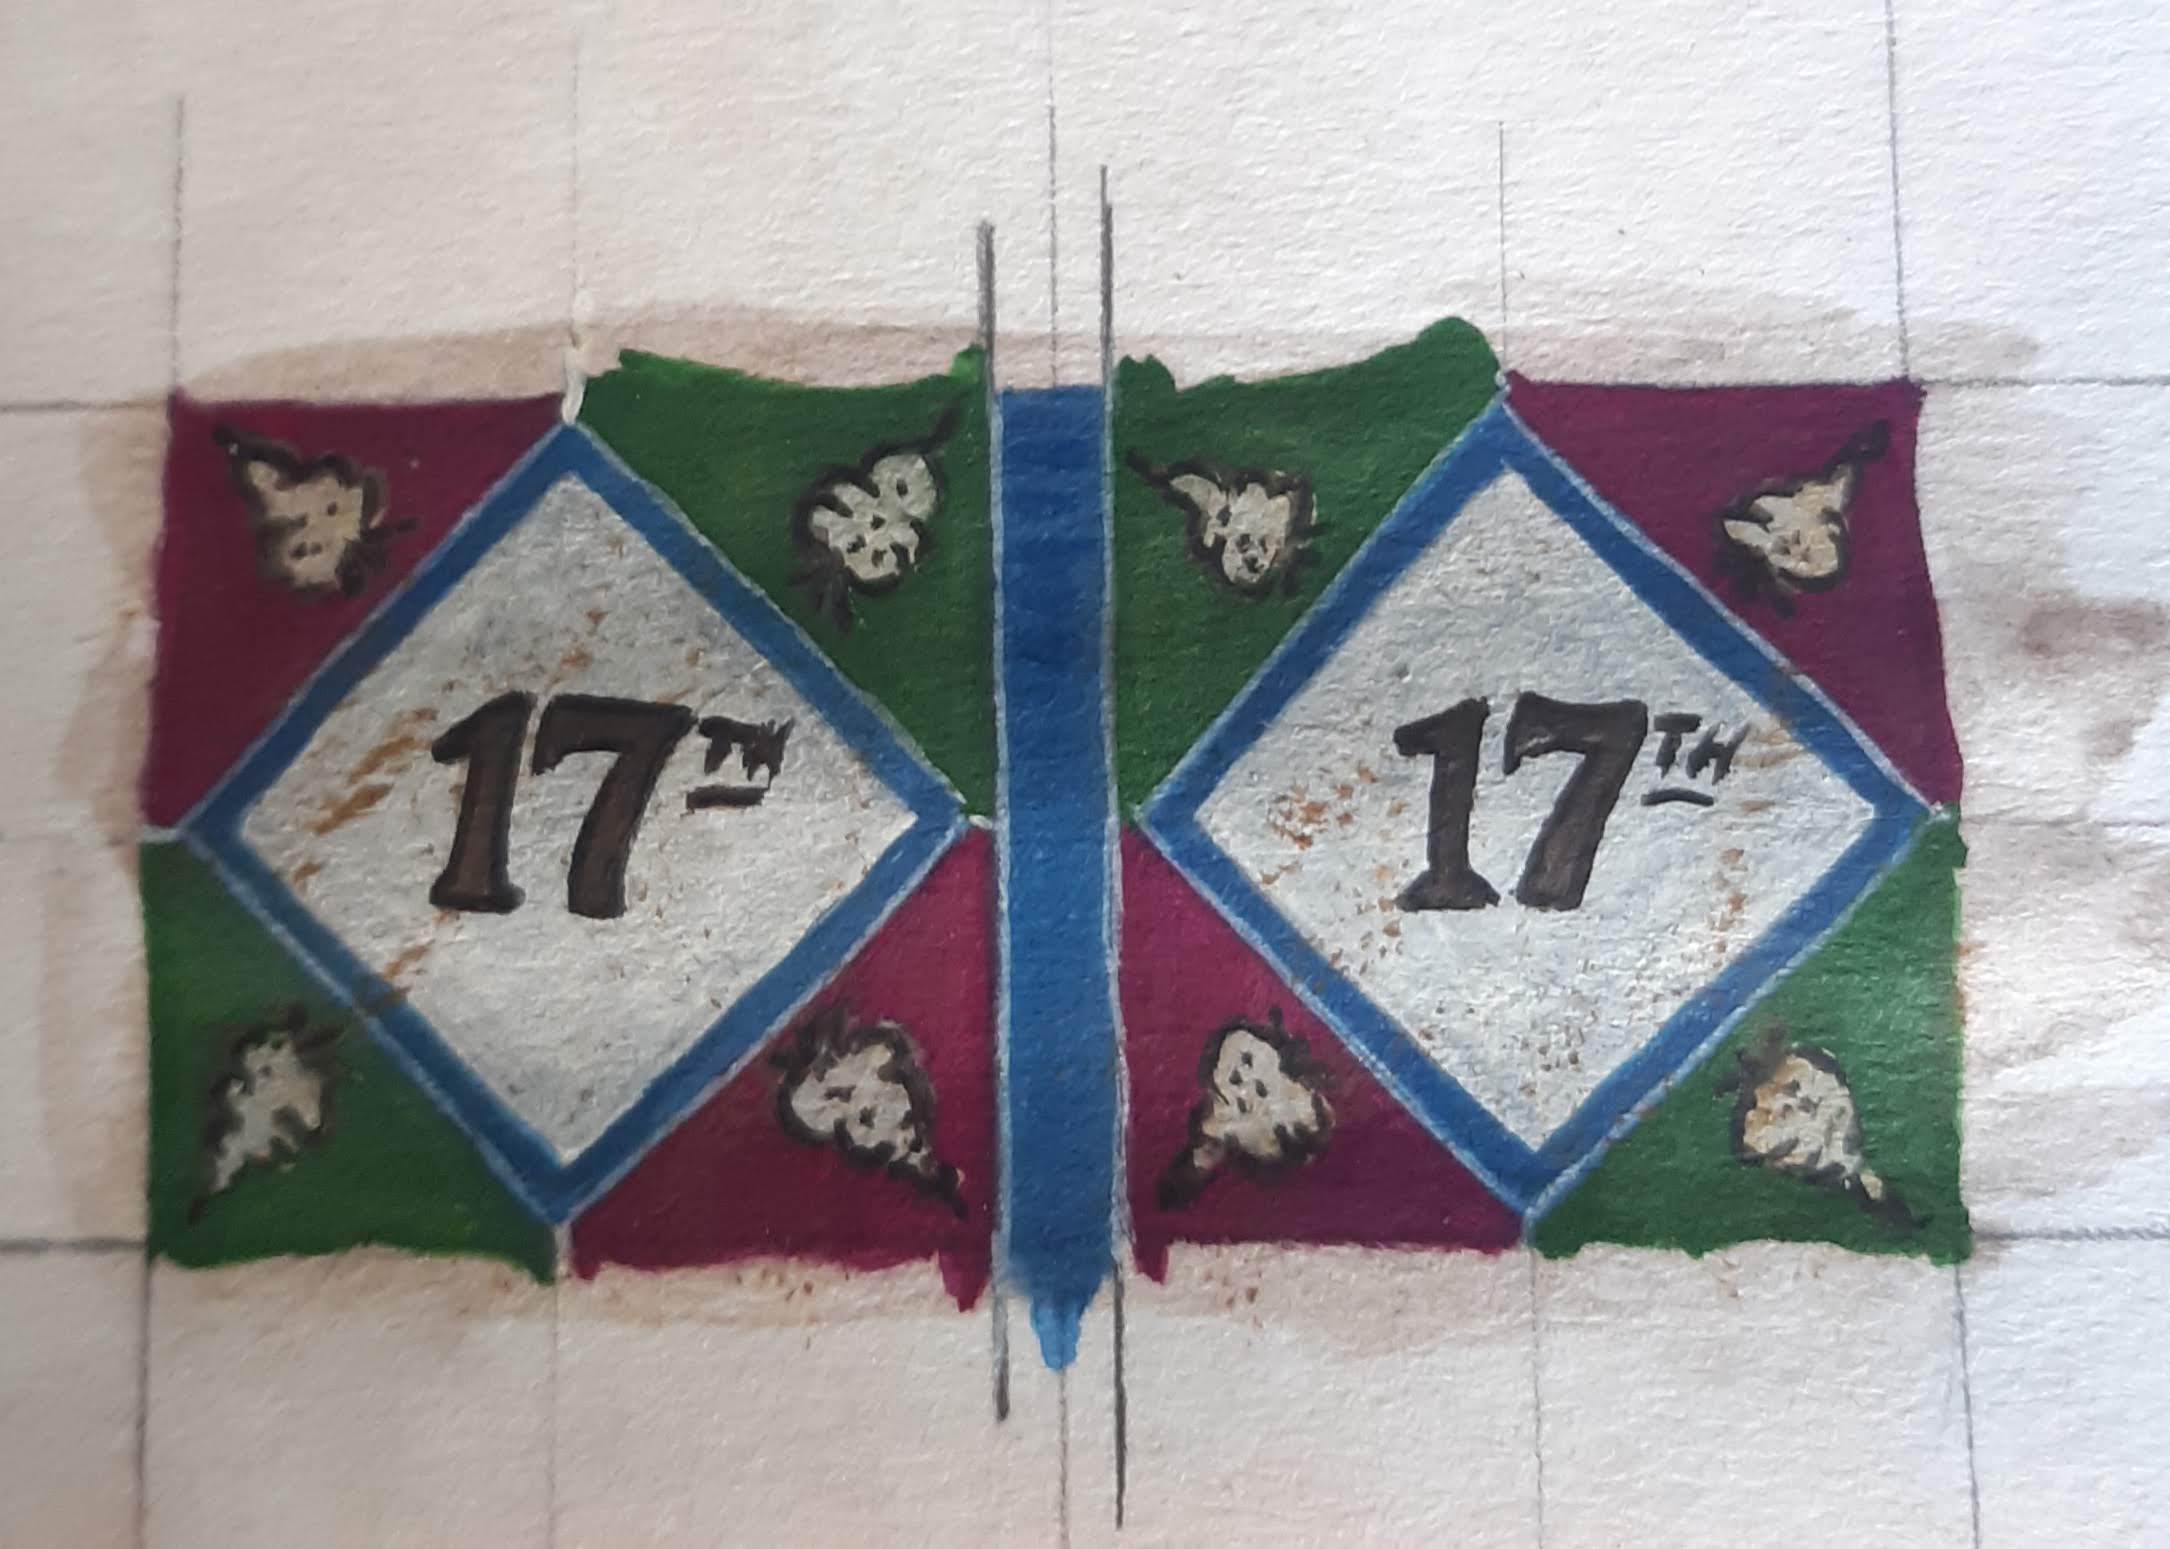 A thinned Umber wash is applied over the top to tone down the colours, and a bit of Vallejo Flat Earth stippled on as mud splashes.
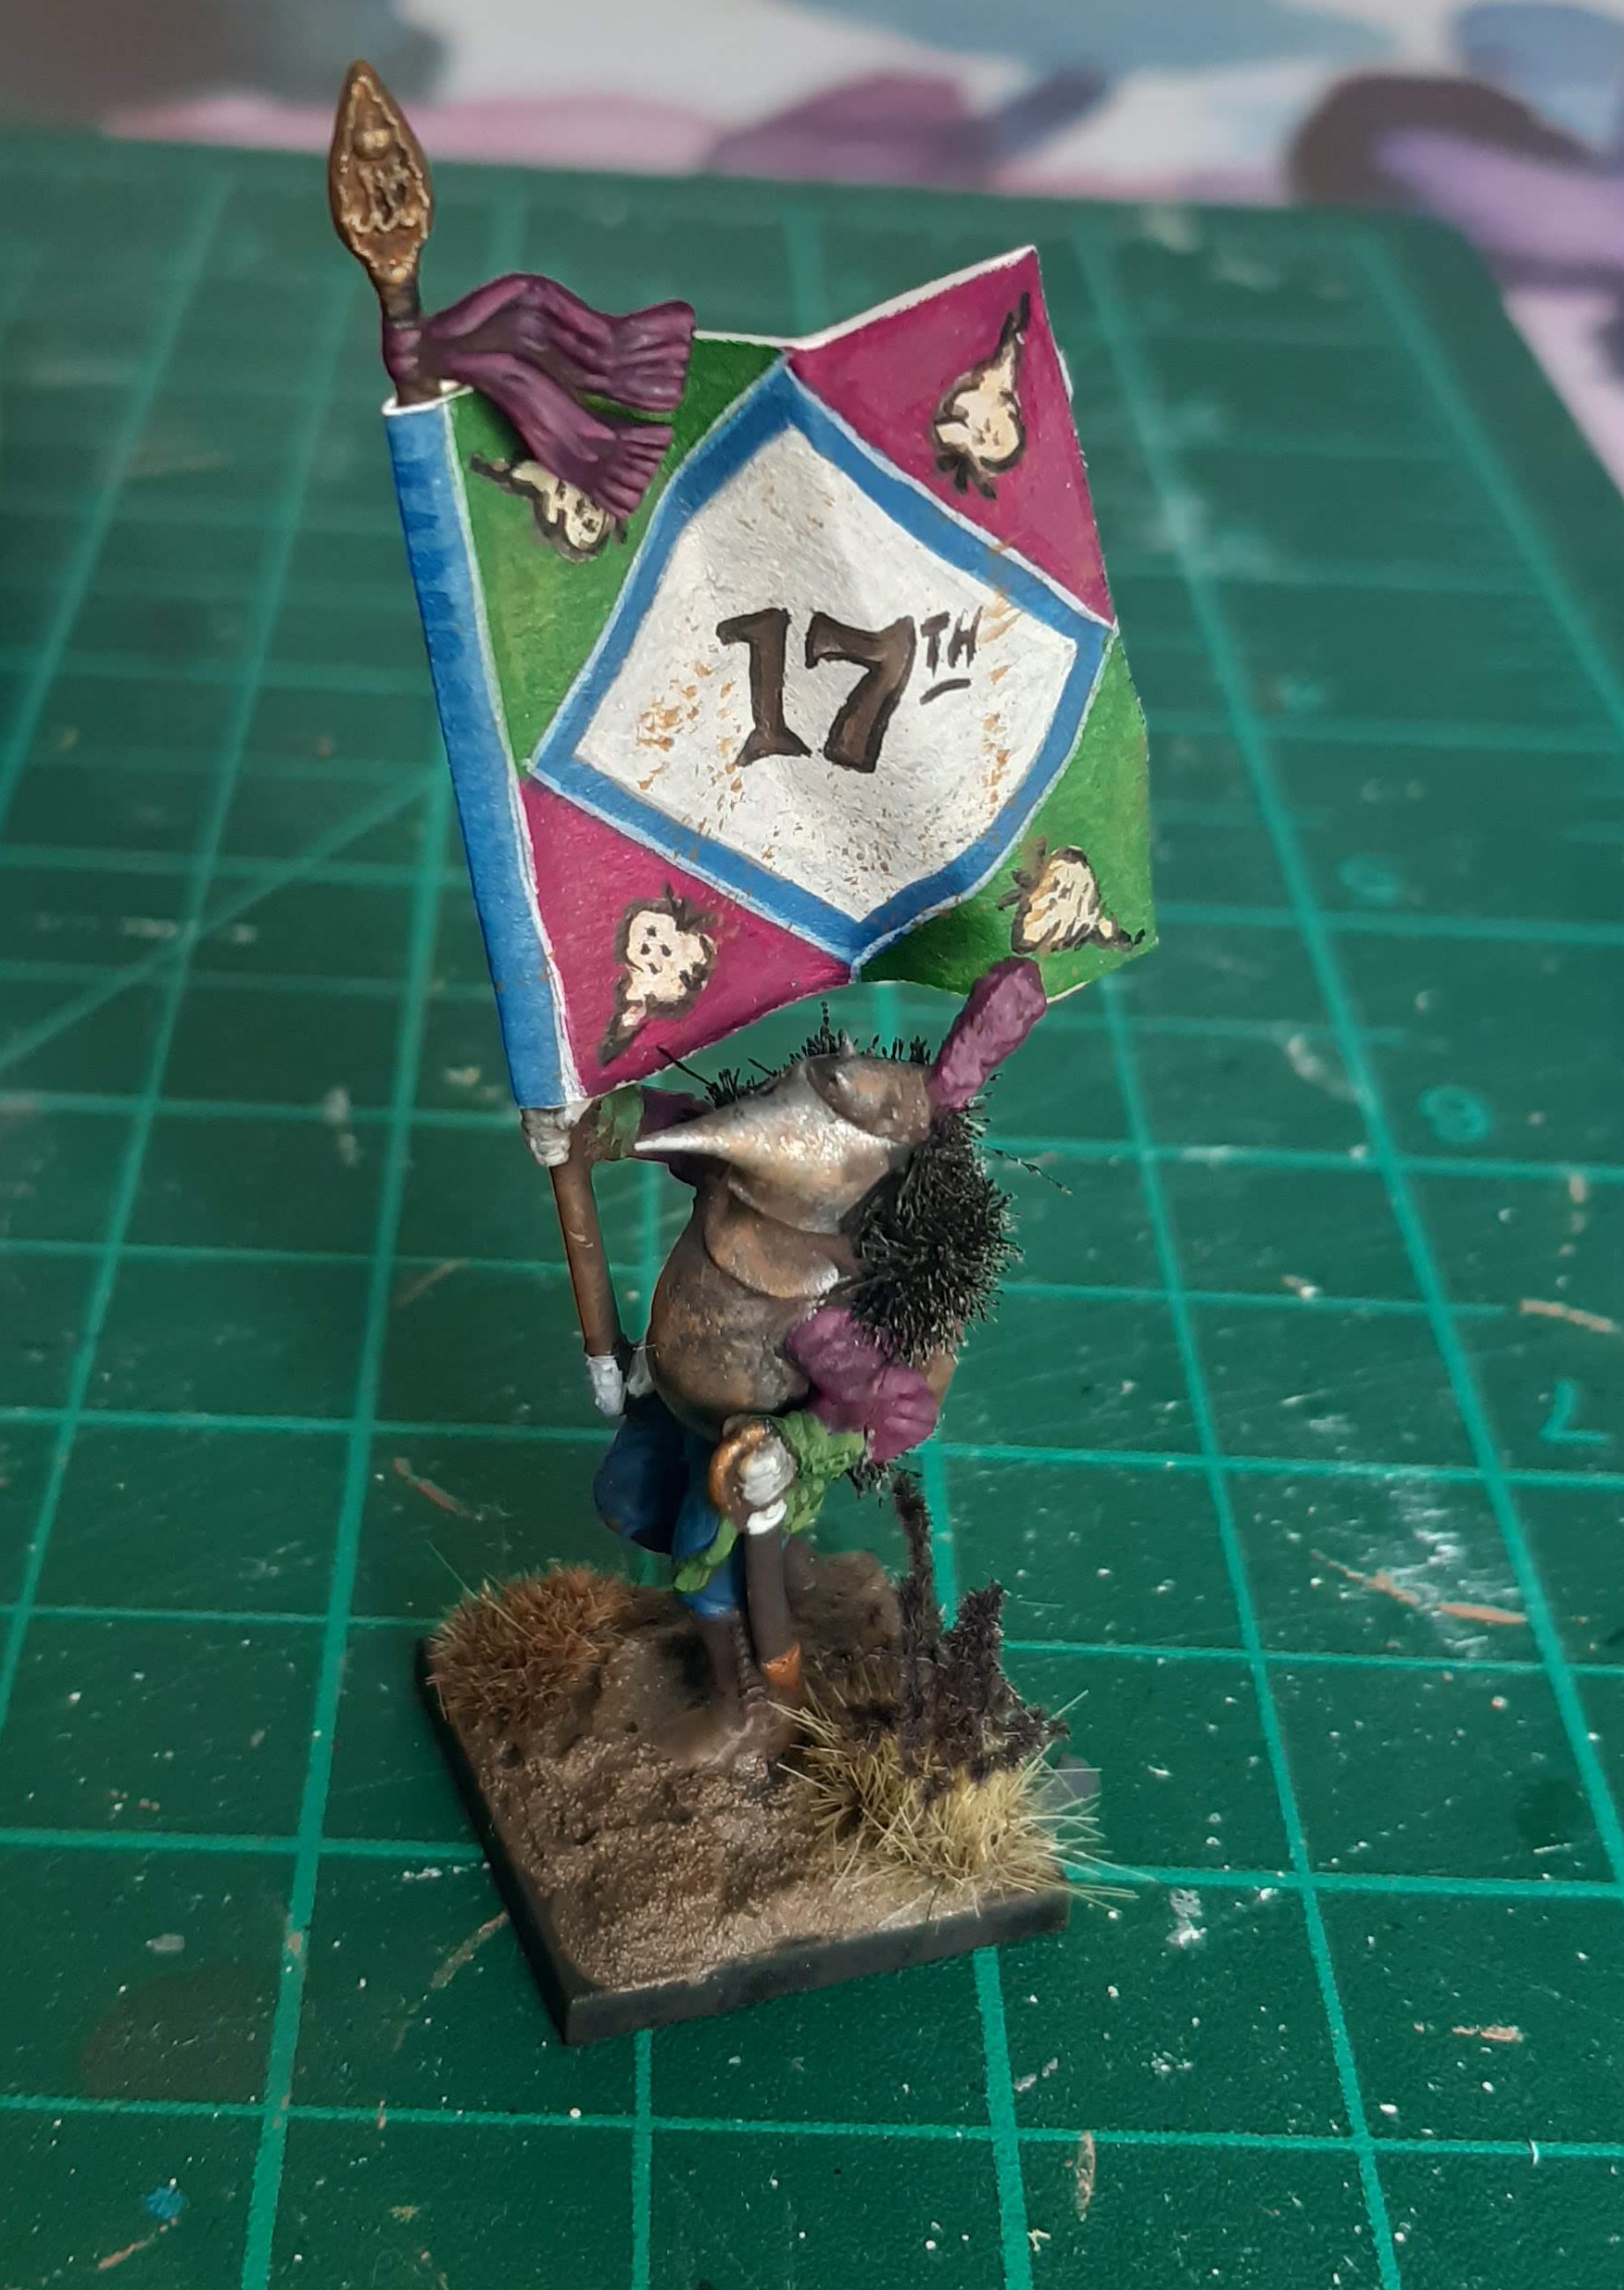 The flag was then carefully cut away using a sharp knife, before being glued together with pva. The paper is relatively thick and can be scrunched up a bit to produce the folds, which hold quite well without the additional of any foil between the two flag halves.
 Final step is to paint the edges of the flag to remove the white. This is a simple step that is often missed, which surprises me as I find it can make quite a difference to the end look.


Simply glorious! ???
Ta very much. Not much left to do for this project now; got the Brutes on my painting table about half finished, and then onto making up a cavalry unit, which I’m quite looking forward to messing around with.