


Journey into 3D Printing


Start

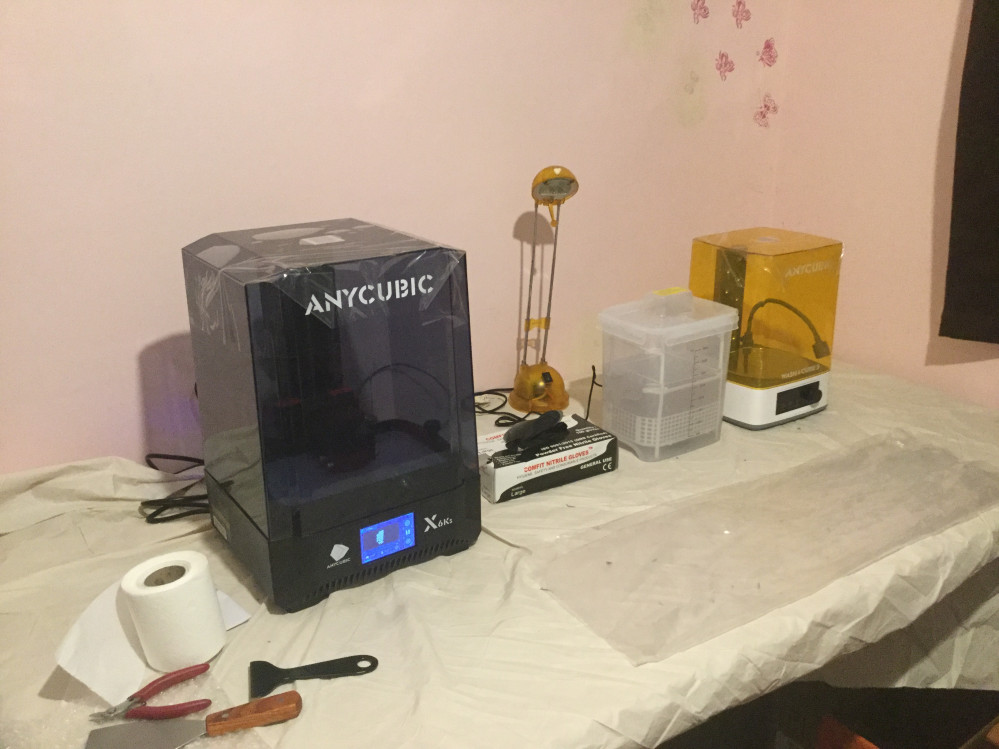
The boxes are unloaded and placed on a table with plenty of room for work flow and flying resin.
I have watched LOADS of youtube content on 3-D resin as I am fascinated with the possibilities for my hobby.
Spent the better half of Saturday setting out the parameters and settings on the 3-D slicer that came with the printer. I also downloaded Chitubox as have heard good things about the programme and they can be transfered into the Anycubic workshop then slice into the correct type of g code file.
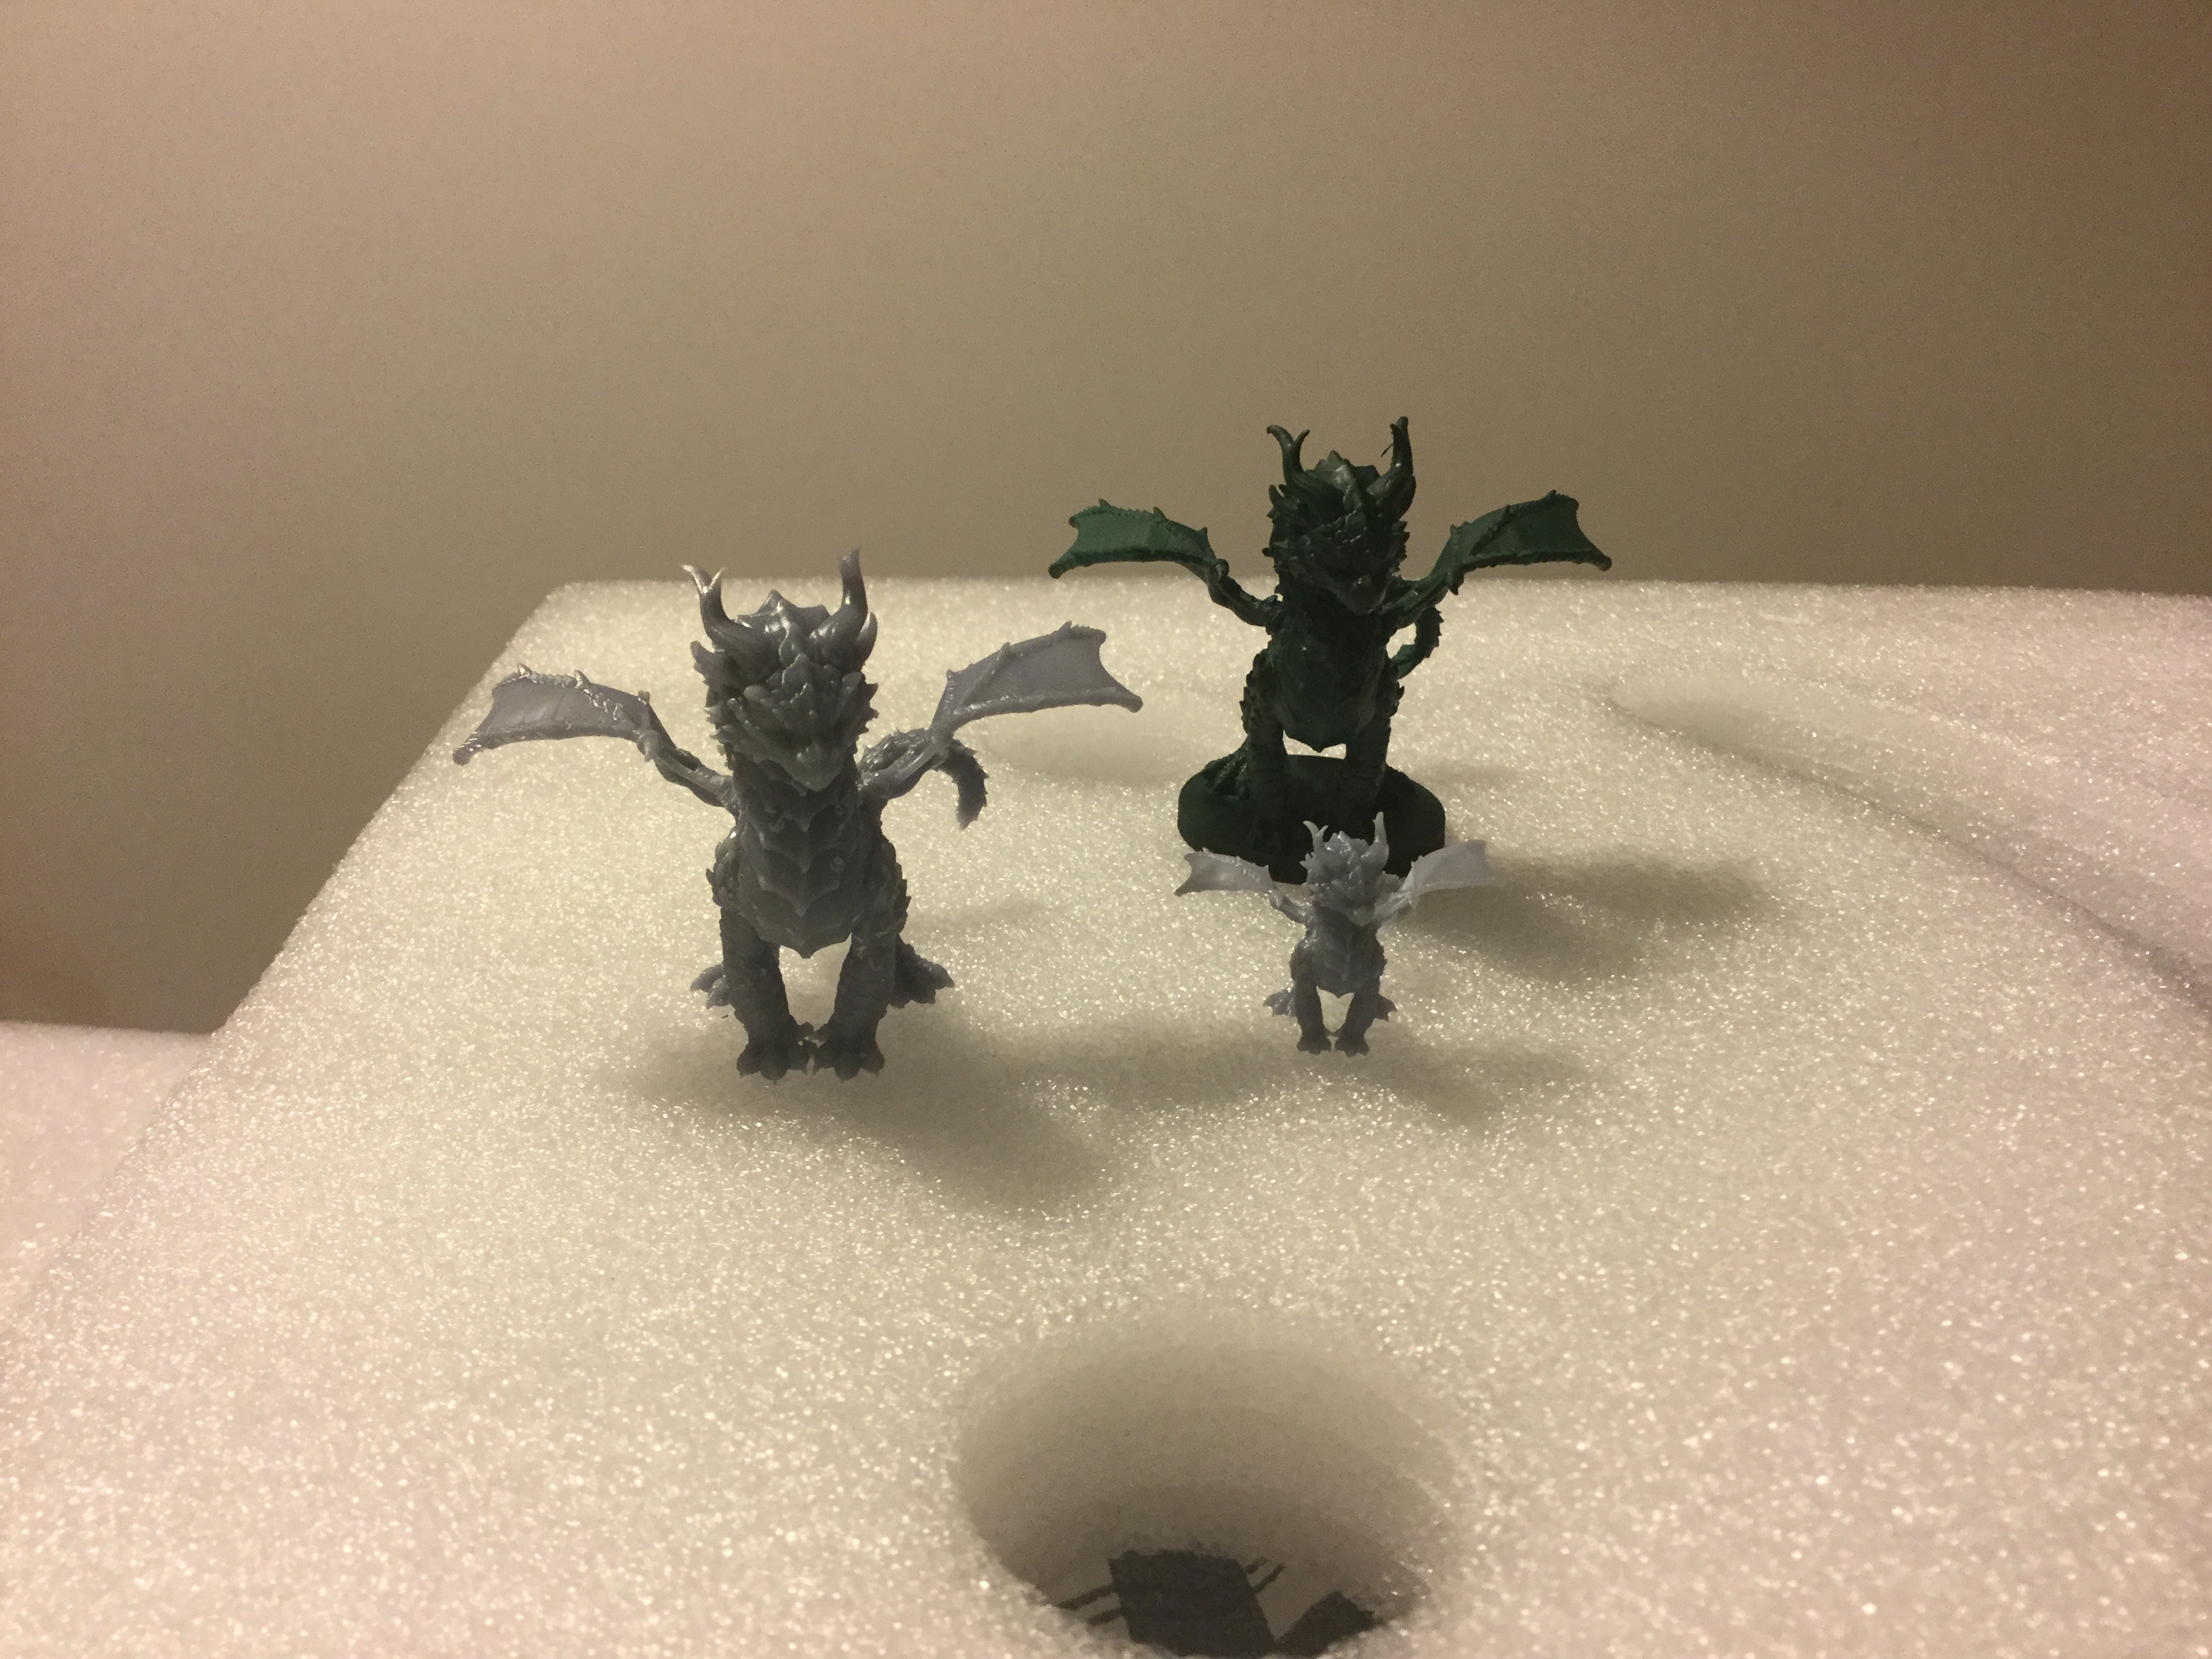 First successful prints after calibration
The original STL file was for the baby dragon. I played around with the scale to arrive at the sizing for the larger dragons.
The grey colour is the plain cured resin and the green is coloured primer from a rattle can to test paint adhesion to the model.
I still have to tinker with the file supports before printing as the larger minis were supported with TOO many supports, which made it difficult to separate after printing which resulted in 2 of 6 prints being damaged when the supports were removed.
Fixing the broken parts was fairly simple using the resin as glue and curing the affected area with UV to “set”it in place.
These parts needed minimal scraping and or filing to get the mini back to original detail levels.
Tech Details
Anycubic Photon X6K UV resin Printer.
Print base size. 195mm. X. 122 mm (the printer can raise to 200mm)
Wash and cure 3 station
This has a plastic sealable tub which holds 5 litres of Washing medium and a parts cage ( I am using isopropyl alcohol) I think I am going to get a second container to per-wash the prints to keep alcohol cleaning to a minimum. It also has a turn table and UV light bar at the back for curing after washing.
Water wash resin +
This resin advises to wash the prints in alcohol on the side of the bottle with 85% isopropanol. Even though it is water washable this gives a better result…see YouTube
The printer settings for the slicing programmes and different resin can be found on the manufactures websites. They are all different so you have to check before doing ANY printing, including the Test prints.


Leave a Reply