


![Atomic Tank – The Robot Wars Review | Fast-Paced 10mm Sci-Fi Wargame [7 Days Early Access]](https://images.beastsofwar.com/2026/01/unboxing-hydra-miniatures-atomic-tank-the-robot-wars-coverimage-225-127.jpg)


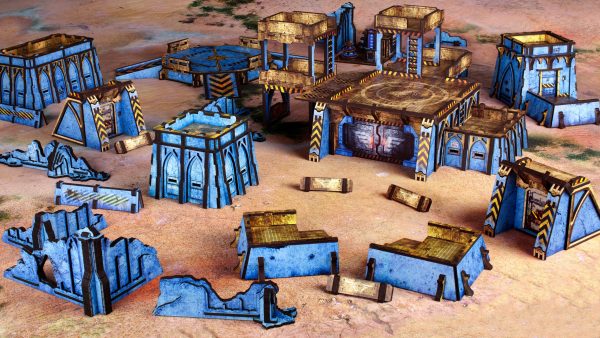
Infinity Terrain


Recommendations: 942
About the Project
designing, Building and painting Infinity terrain, plain and not so simple...
Related Game: Infinity
Related Company: Corvus Belli
Related Genre: Science Fiction
This Project is Completed
Revenge of the staircase.
Long time no progress. I took a few weeks off from this. I burnt out on this project so moved on and messed around. Now I am back cutting and printing again.
Usually my burn outs happen when something doesn’t go right. This was no exception.
I cut out 100 parts it takes to build this staircase. this in itself is not slow or difficult. It was good to see I managed to laser cut the fibreglass mesh. I rush to assembly on my old GW brush that would make the core.
Problem was I was using superglue and going this (started in the light) in the dark. It was ok not great until about 2/3 of the way up. Then I glued a stair in bent and then proceeded to put the rest on and only noticed when I was done. I then broke it numerous times trying to fix it and in the end it was not very accurate and not up to my own standards.
 This was ok as a concept and would have been good in non high sci-fi setting. This started my burn out as this took about 2 hours to assemble incorrectly, probabaly more.
So I did learn from my mistakes. I learned to play more and have more fun. I have played 4 games of infinity in-between then and now which is more than I have played all year. I am now no longer using the starter rules and am having to copy with the loads of special rules. I did miss not having the landing pad around to use to play on so I guess I had to get back to it and that meant dealing with the staircase.
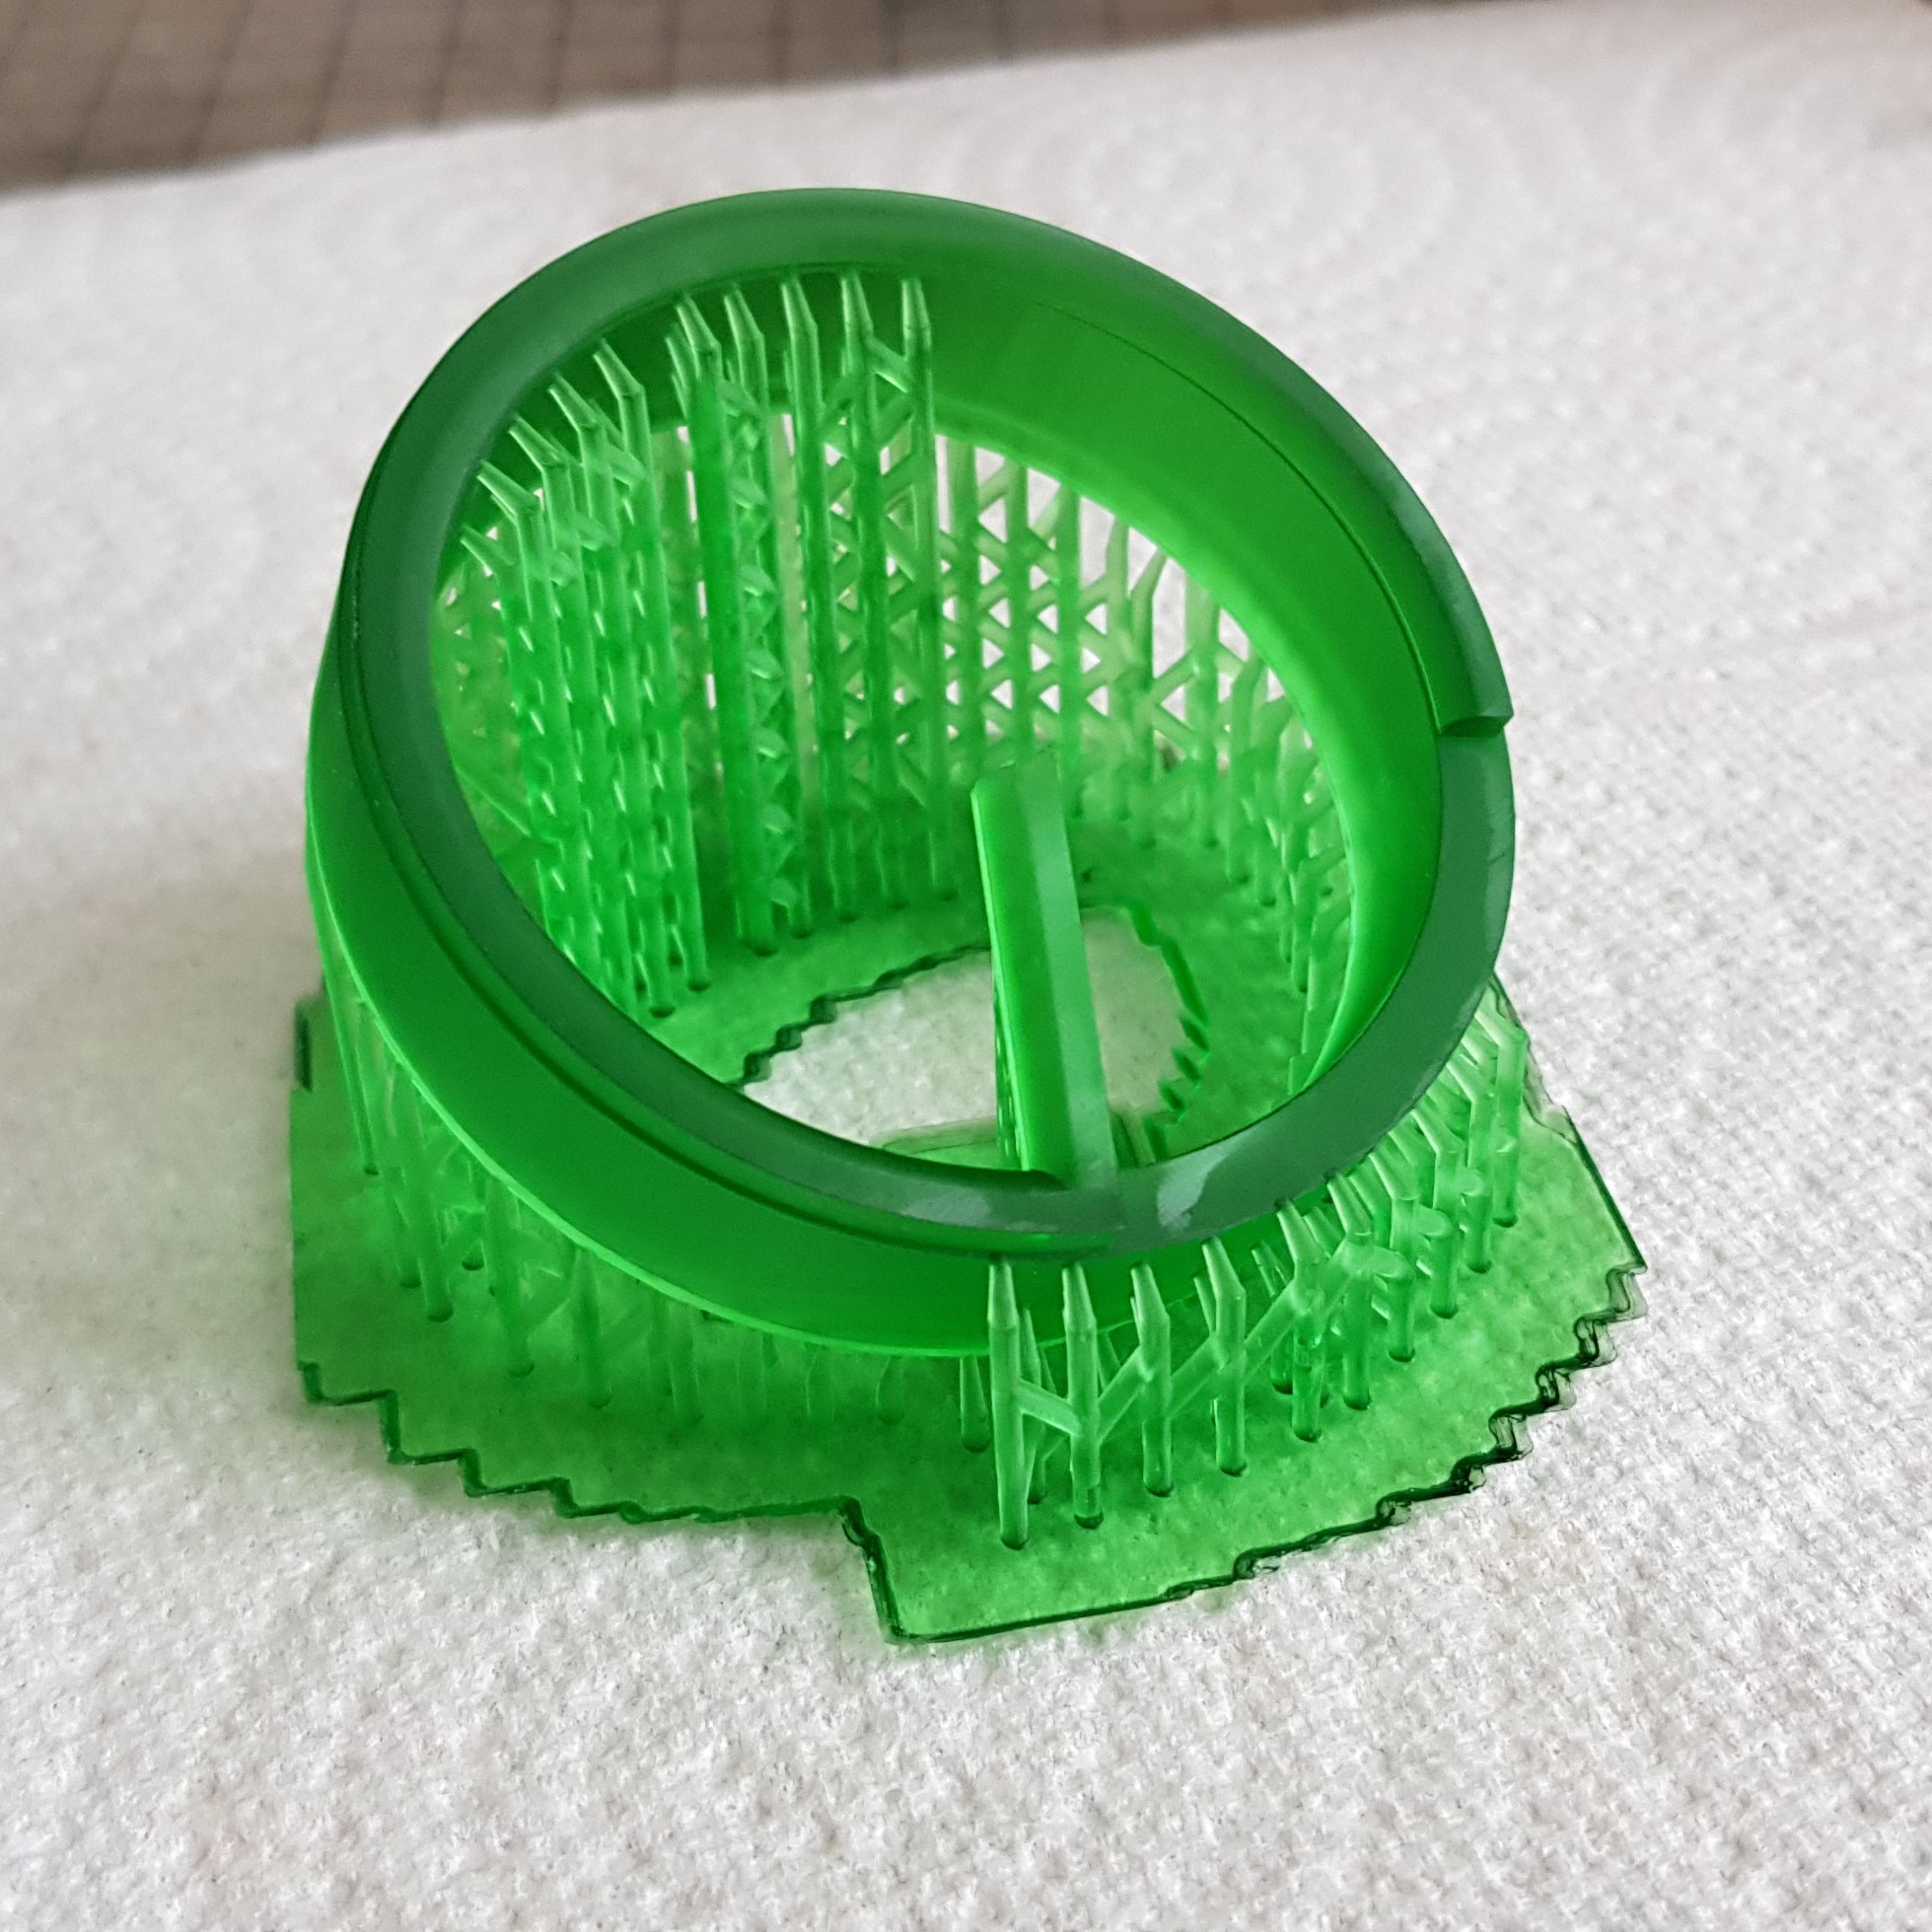
I started with the banister one of the issues was even though I was kind of accurate with the rotation it wasn’t great. So last night while playing infinity I got the print on the go. This is the largest print I think I have done so far on the photon and for such a small part.
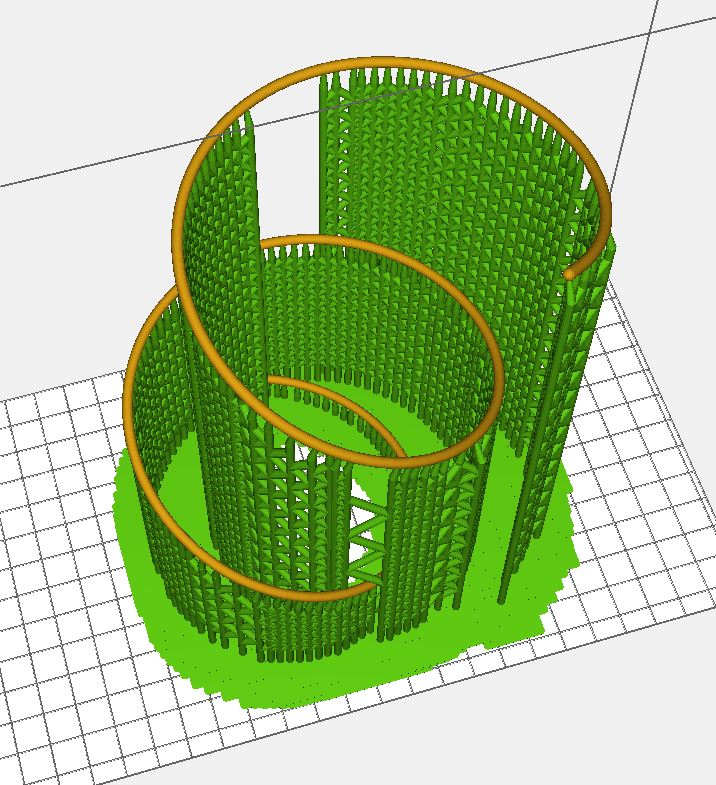 This is the slicer. I done auto supports and removed some to make sure it was supported but the support was not through the model. Bellow the banister it has holes for the uprights and this should allow me to keep the correct distance.
  This was my final game of infinity last night it was a 3 way fight with a HVT in the middle that needed to be escorted to an extraction point.
  I got two types of rod for the middle this time but decided on plastic but I will use PVA instead of superglue.
 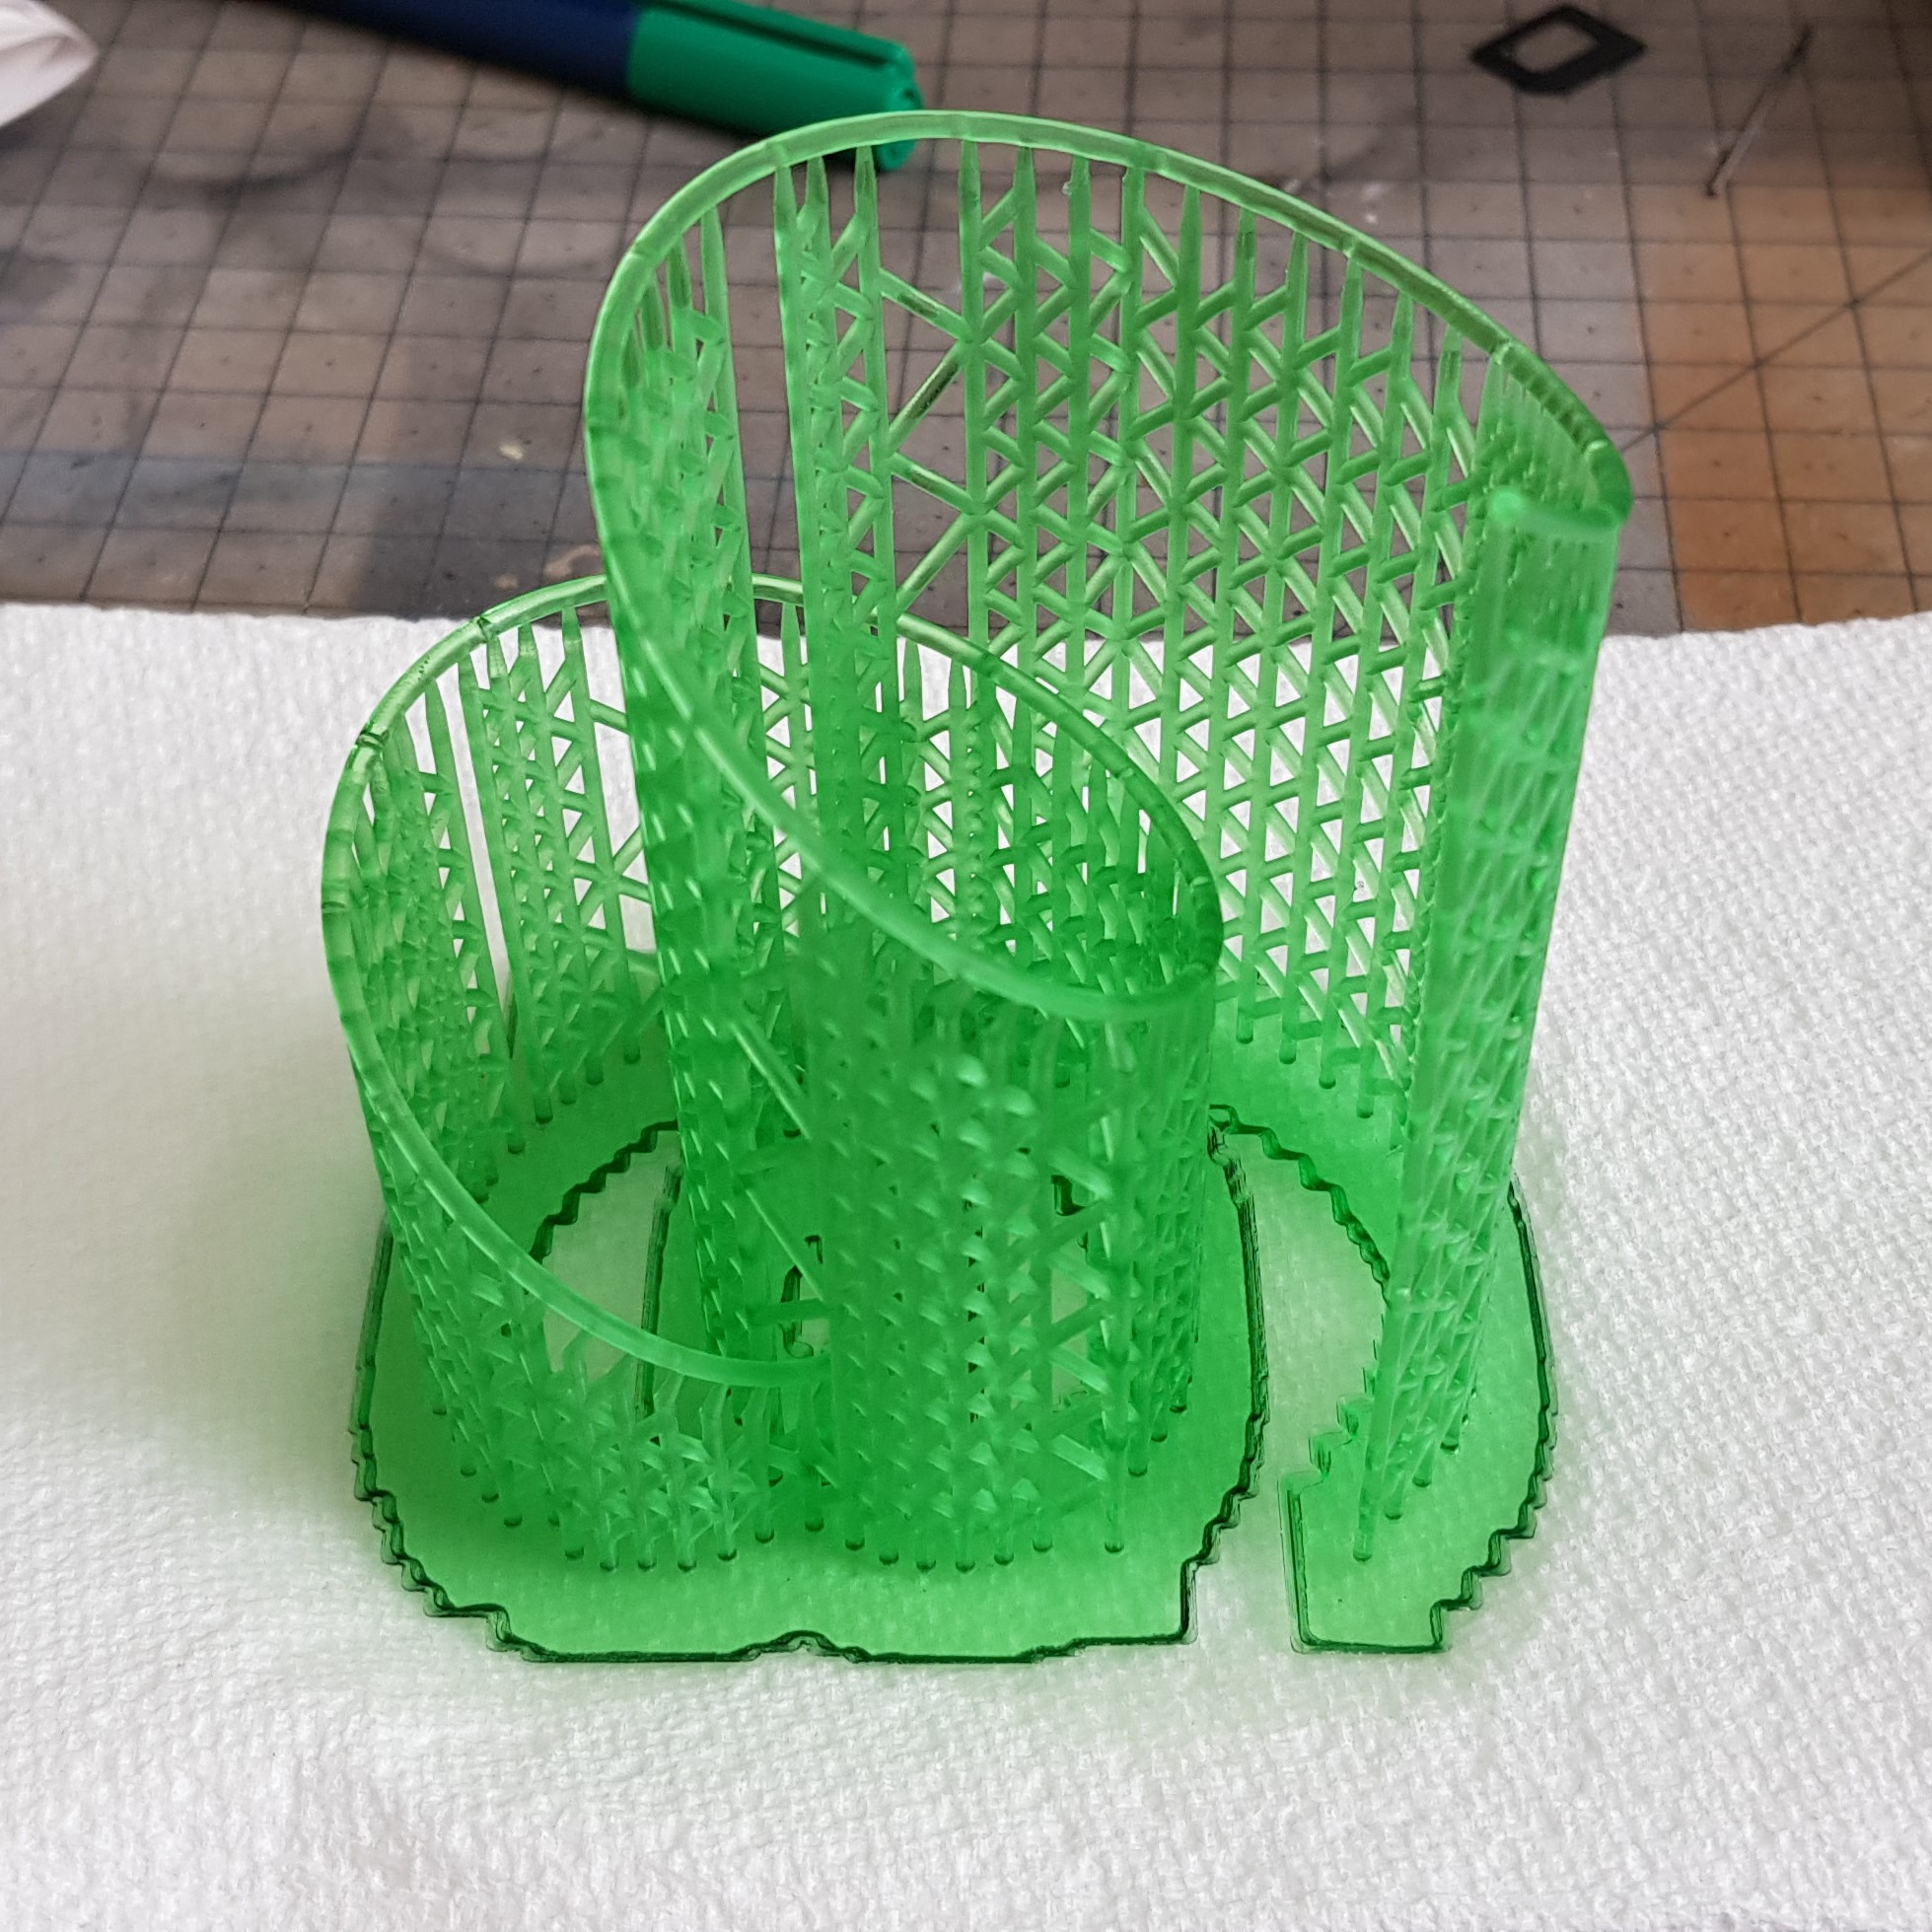 Print finished overnight this was impressive that it came out. I wont cure this until it's stuck on the model or clean the support points.
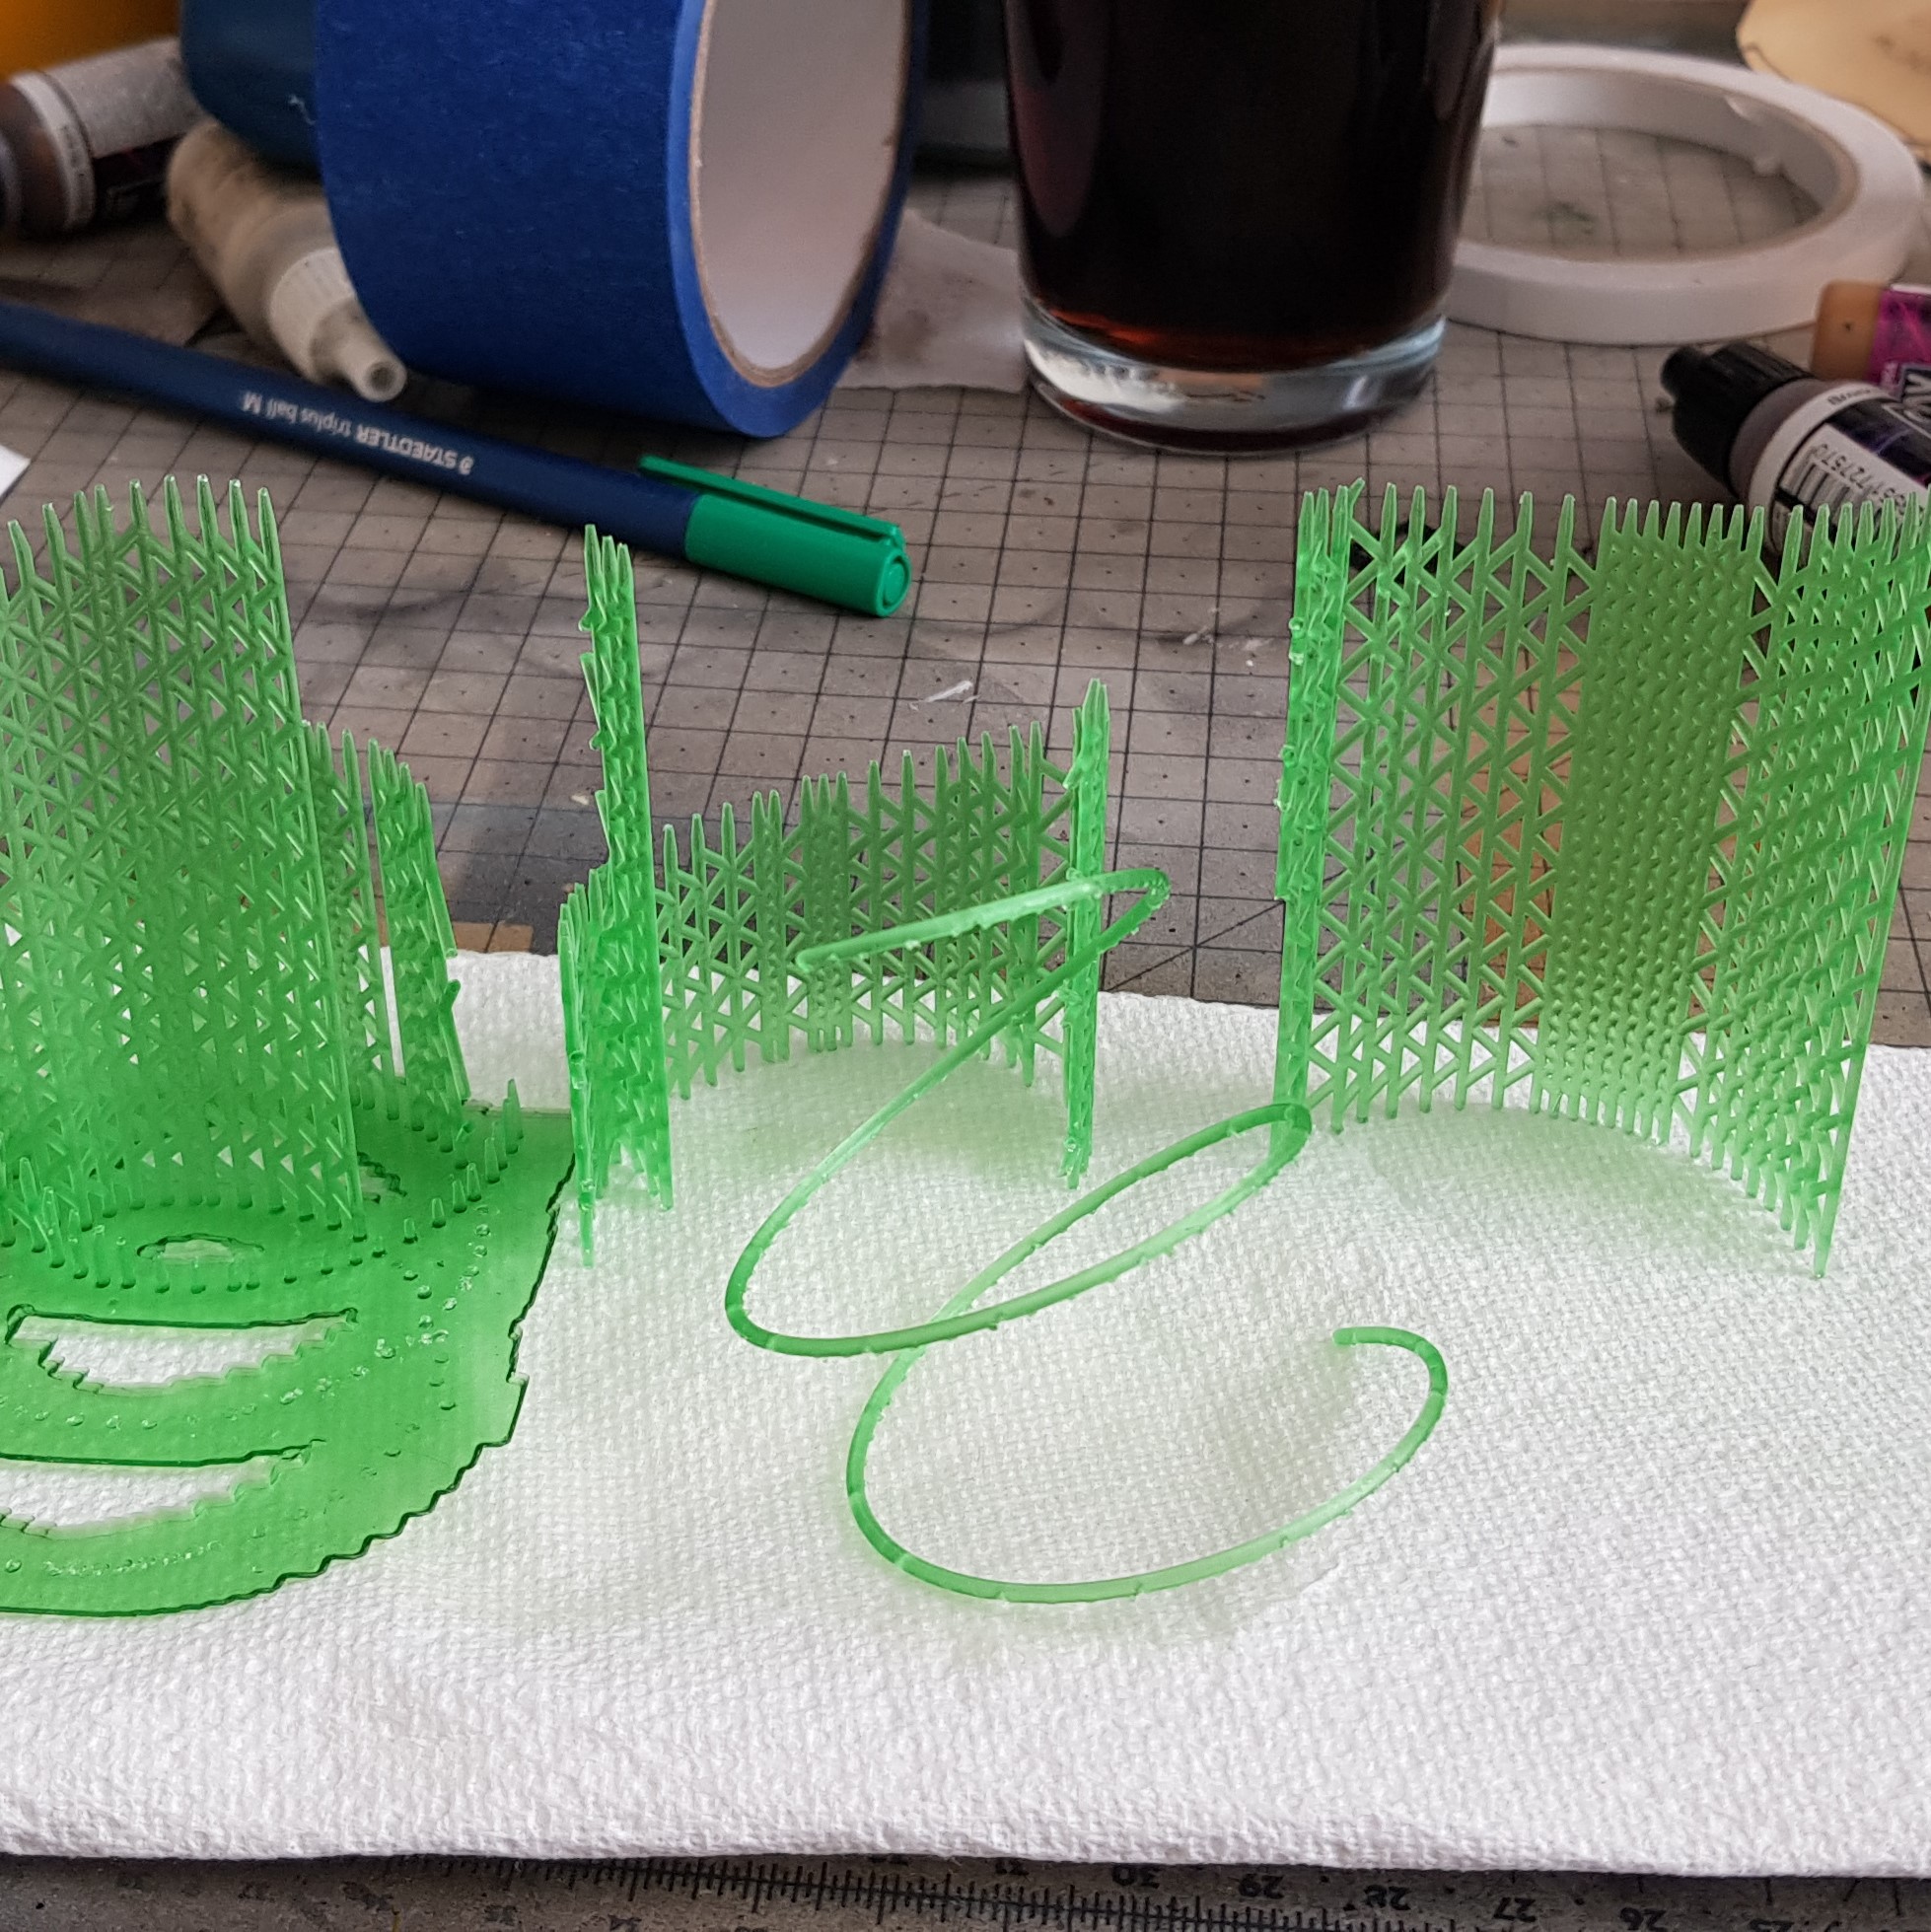 Talking of support. Here is it removed to try and not break it.
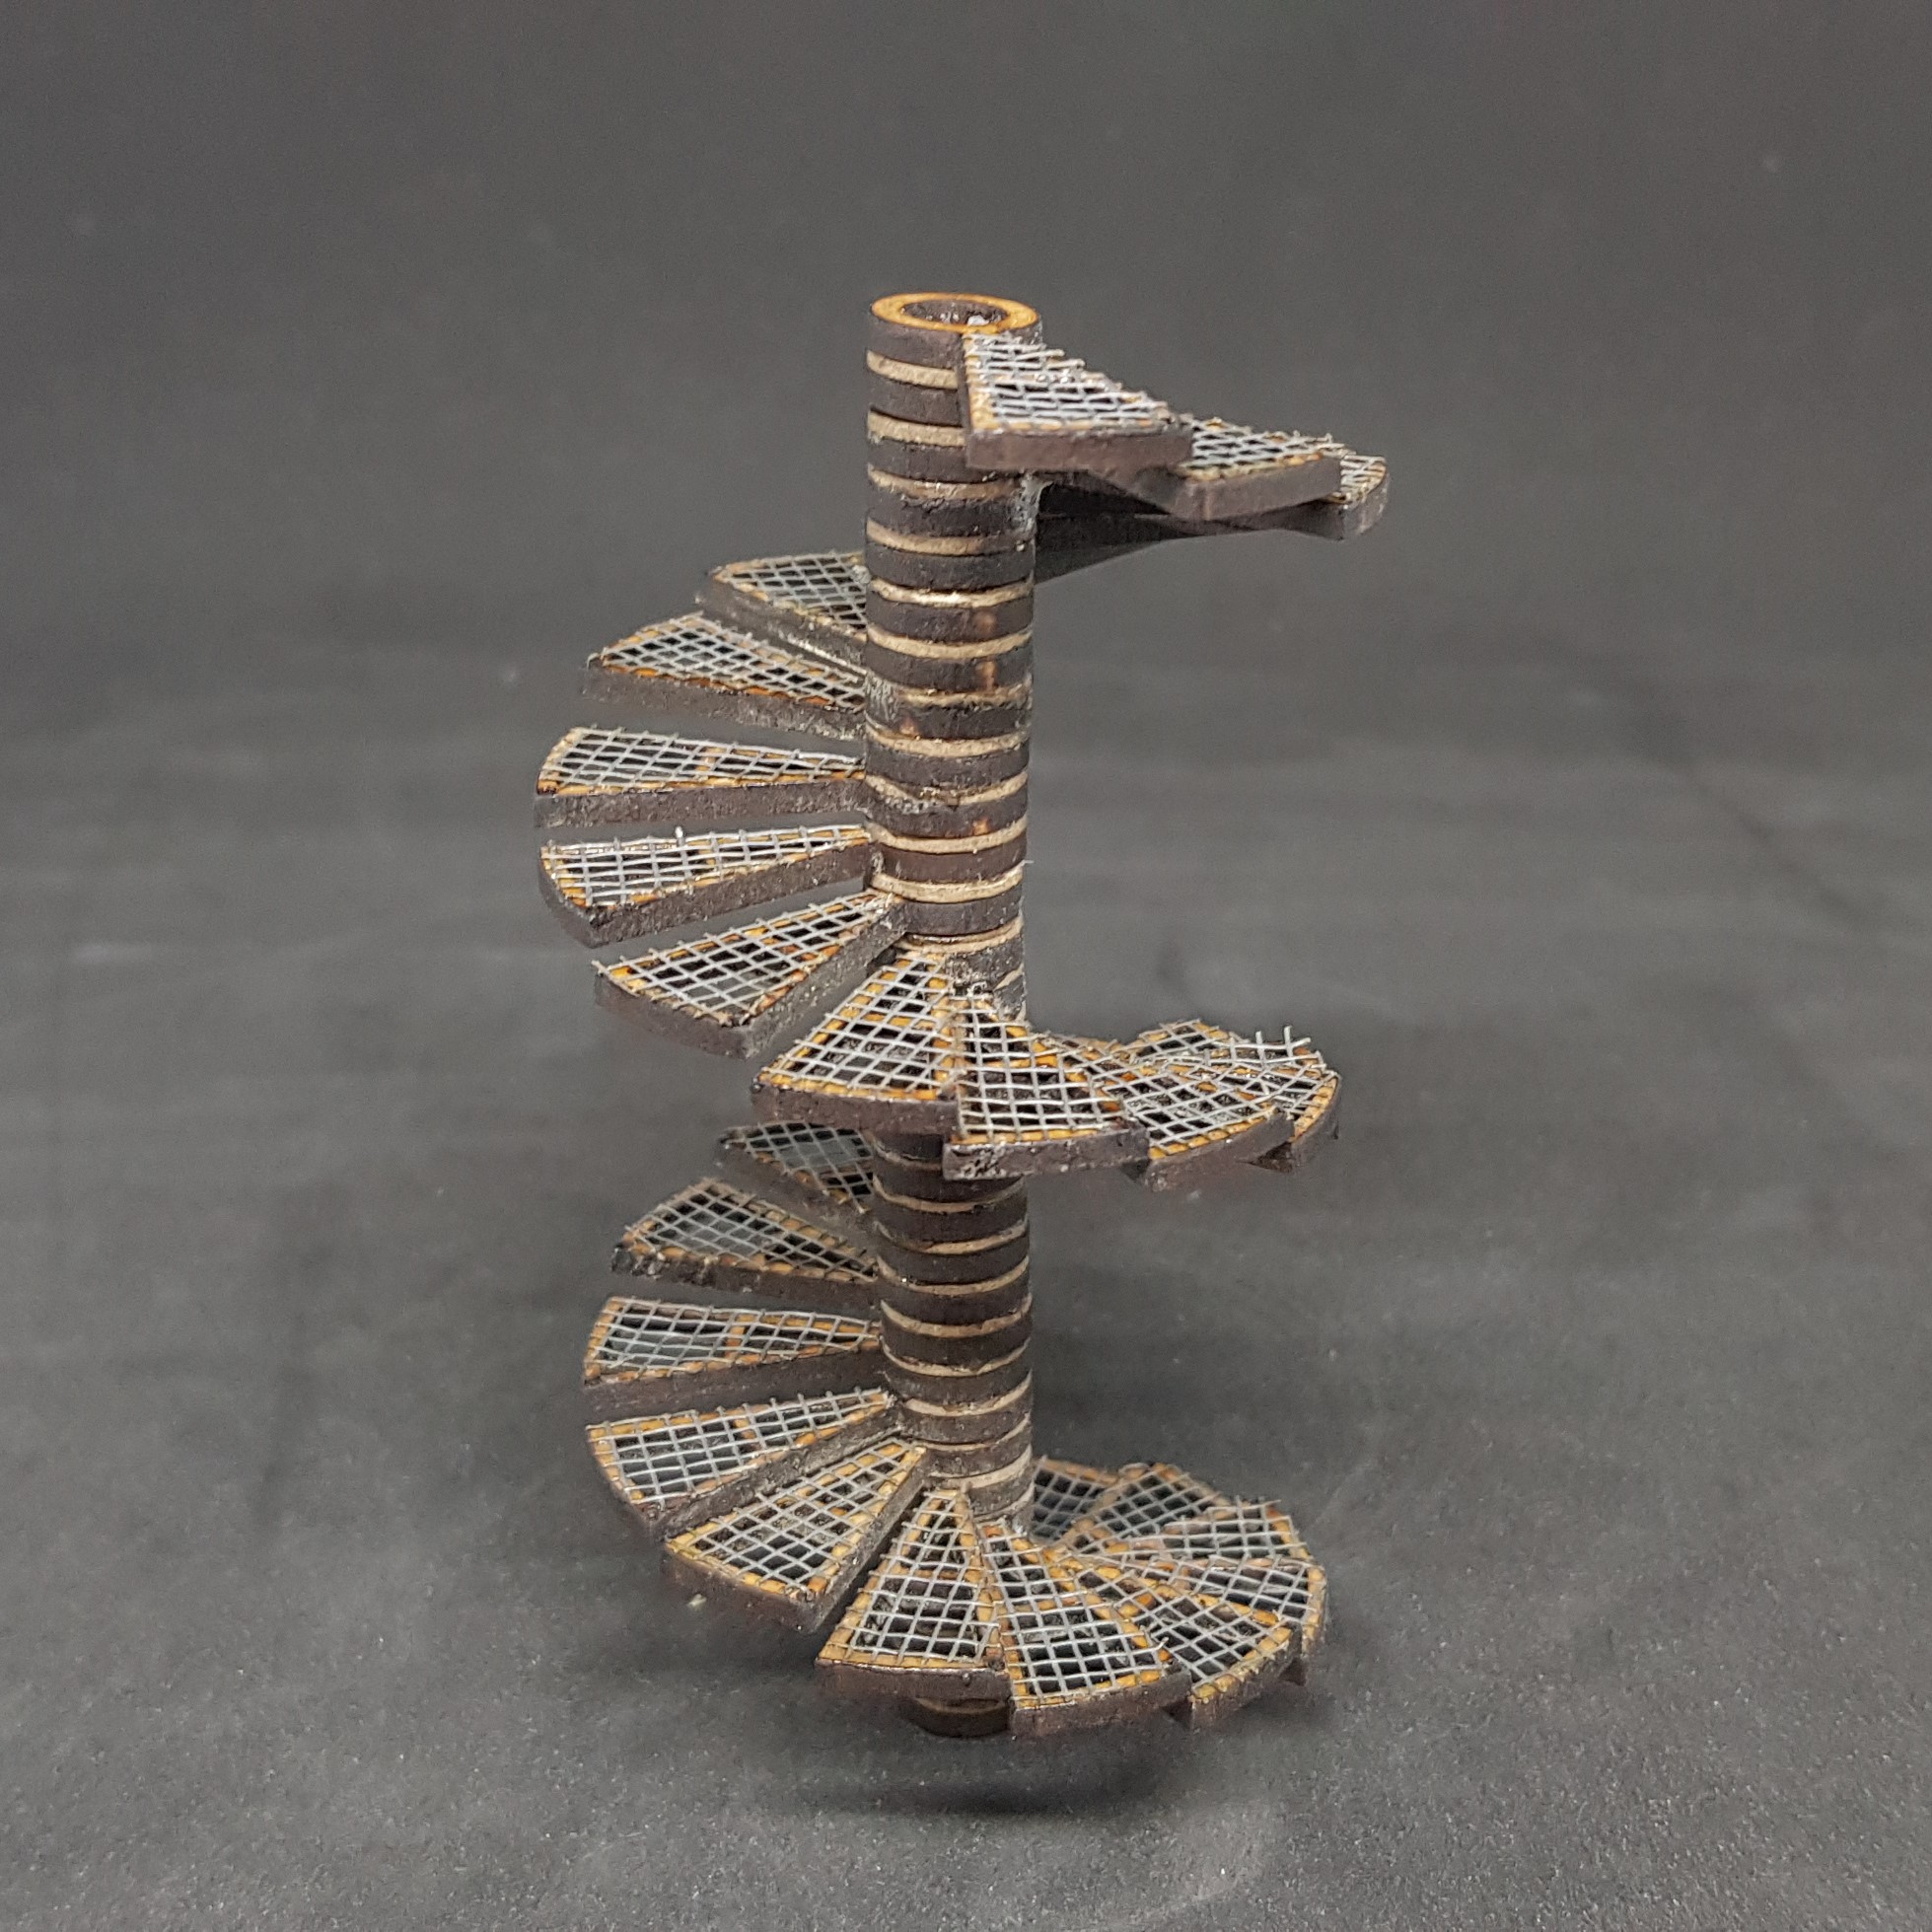
 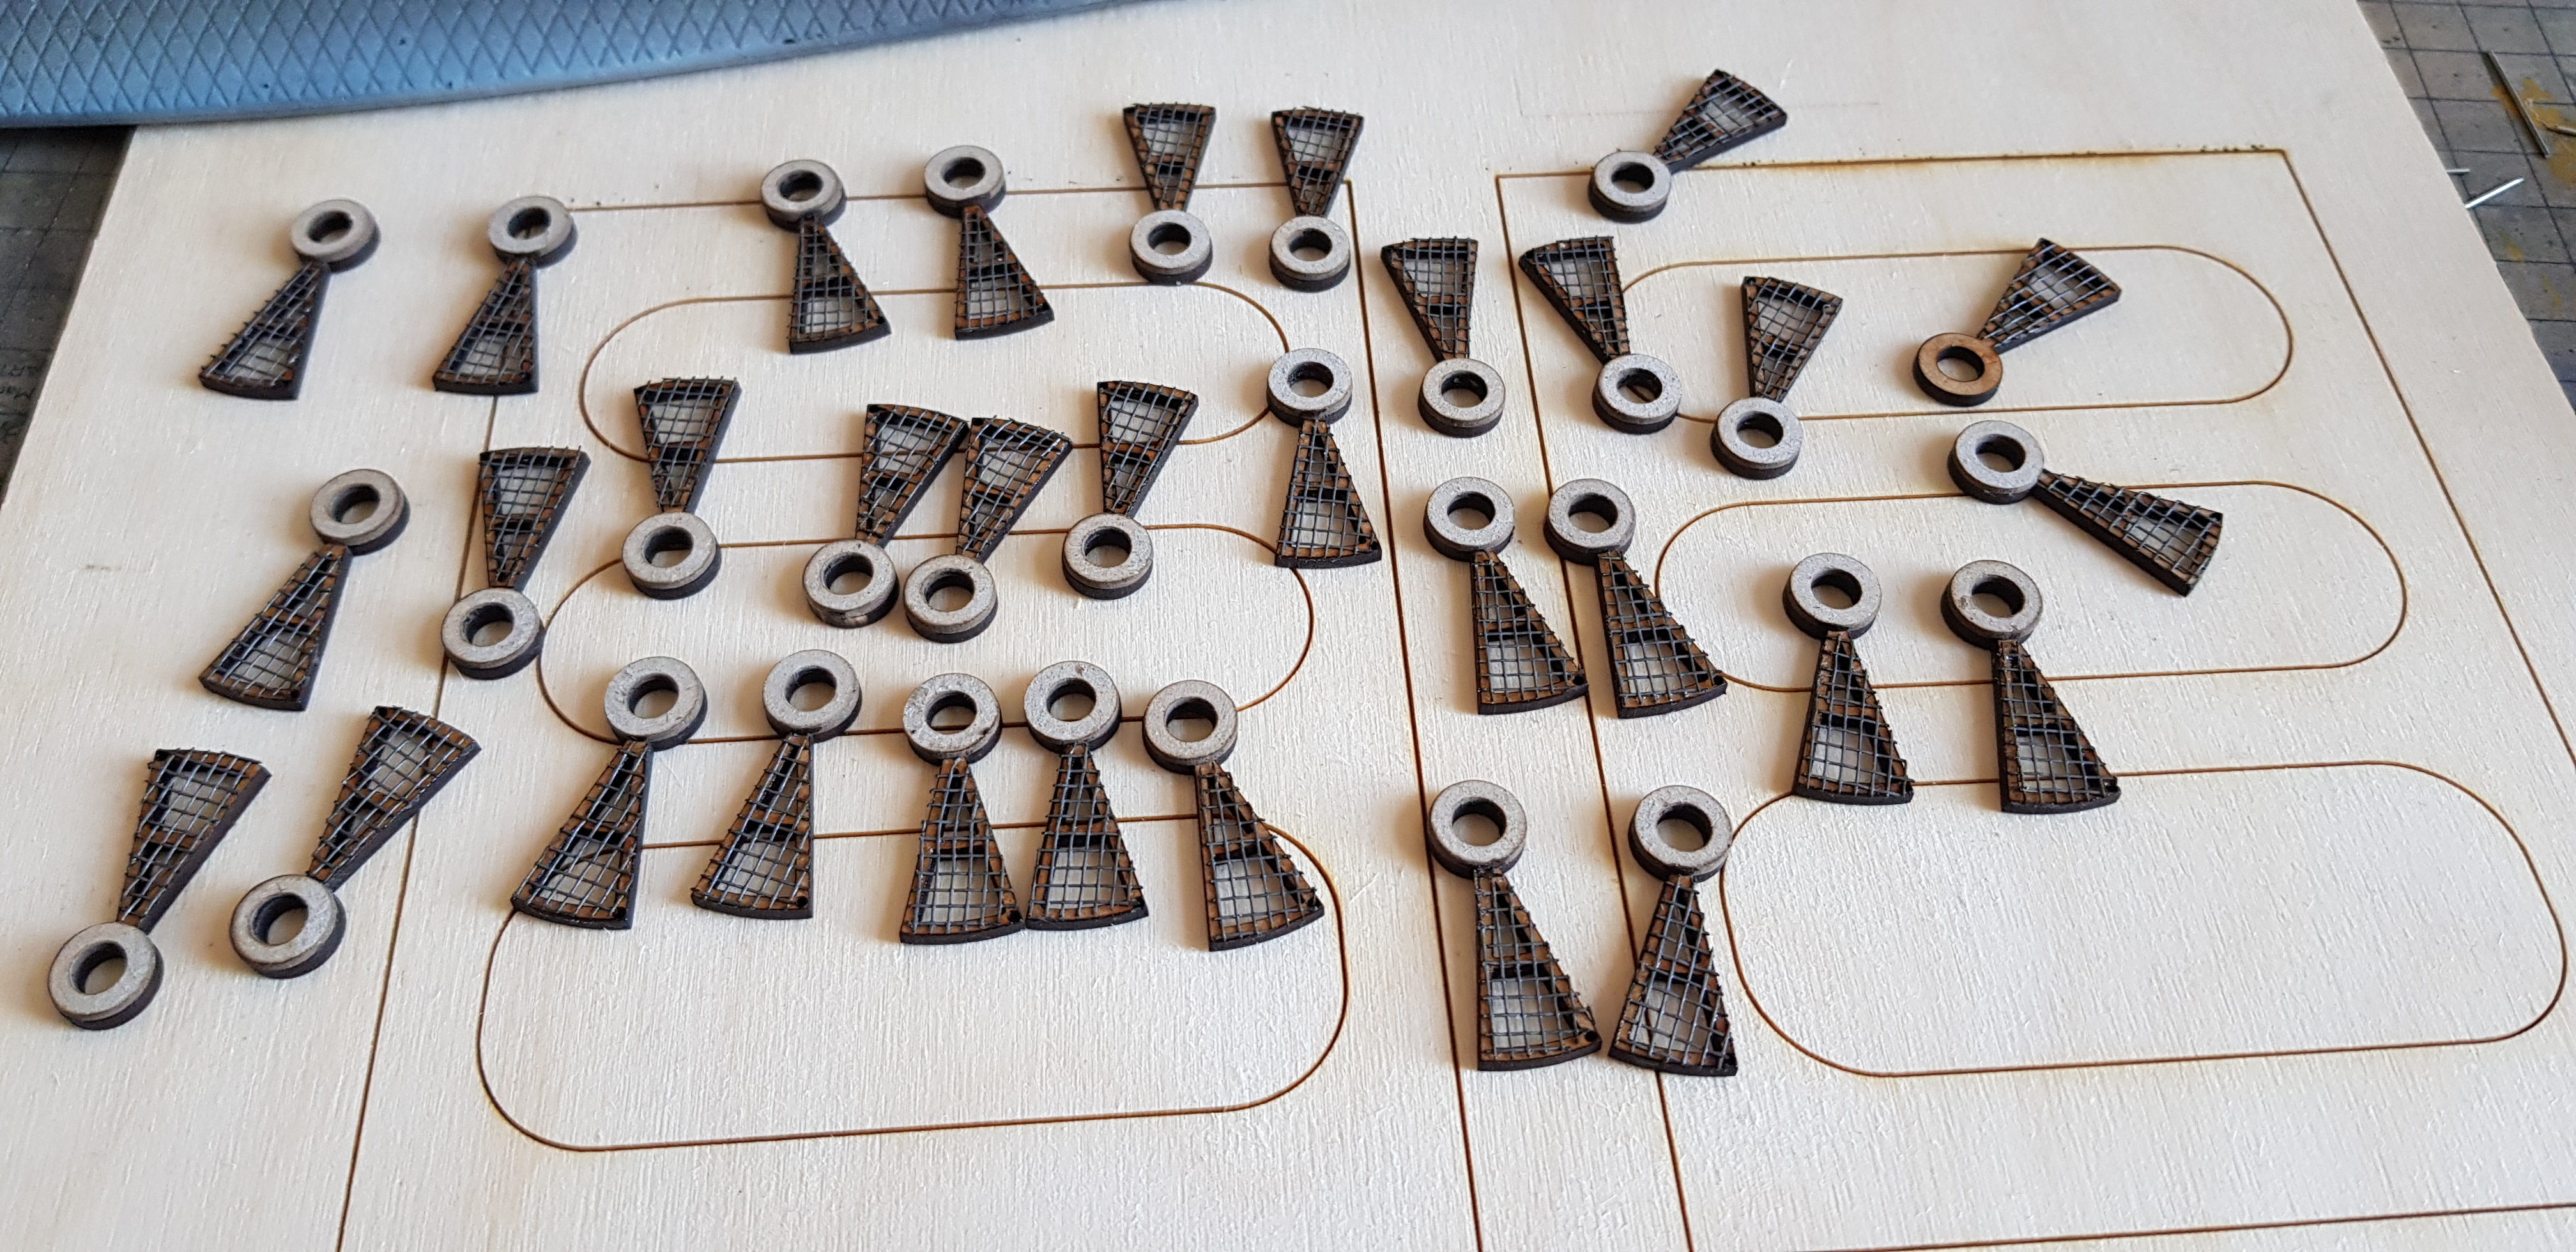 I then laser cut the 100 parts again to make it and came up with a cunning plan. Better than my last nights games of infinity which I lost. These subassemblies were done with superglue and each one sanded down to between 2.95 and 3.00mm I then cut paperclips into 19mm strips and glued them into the cut holes.
 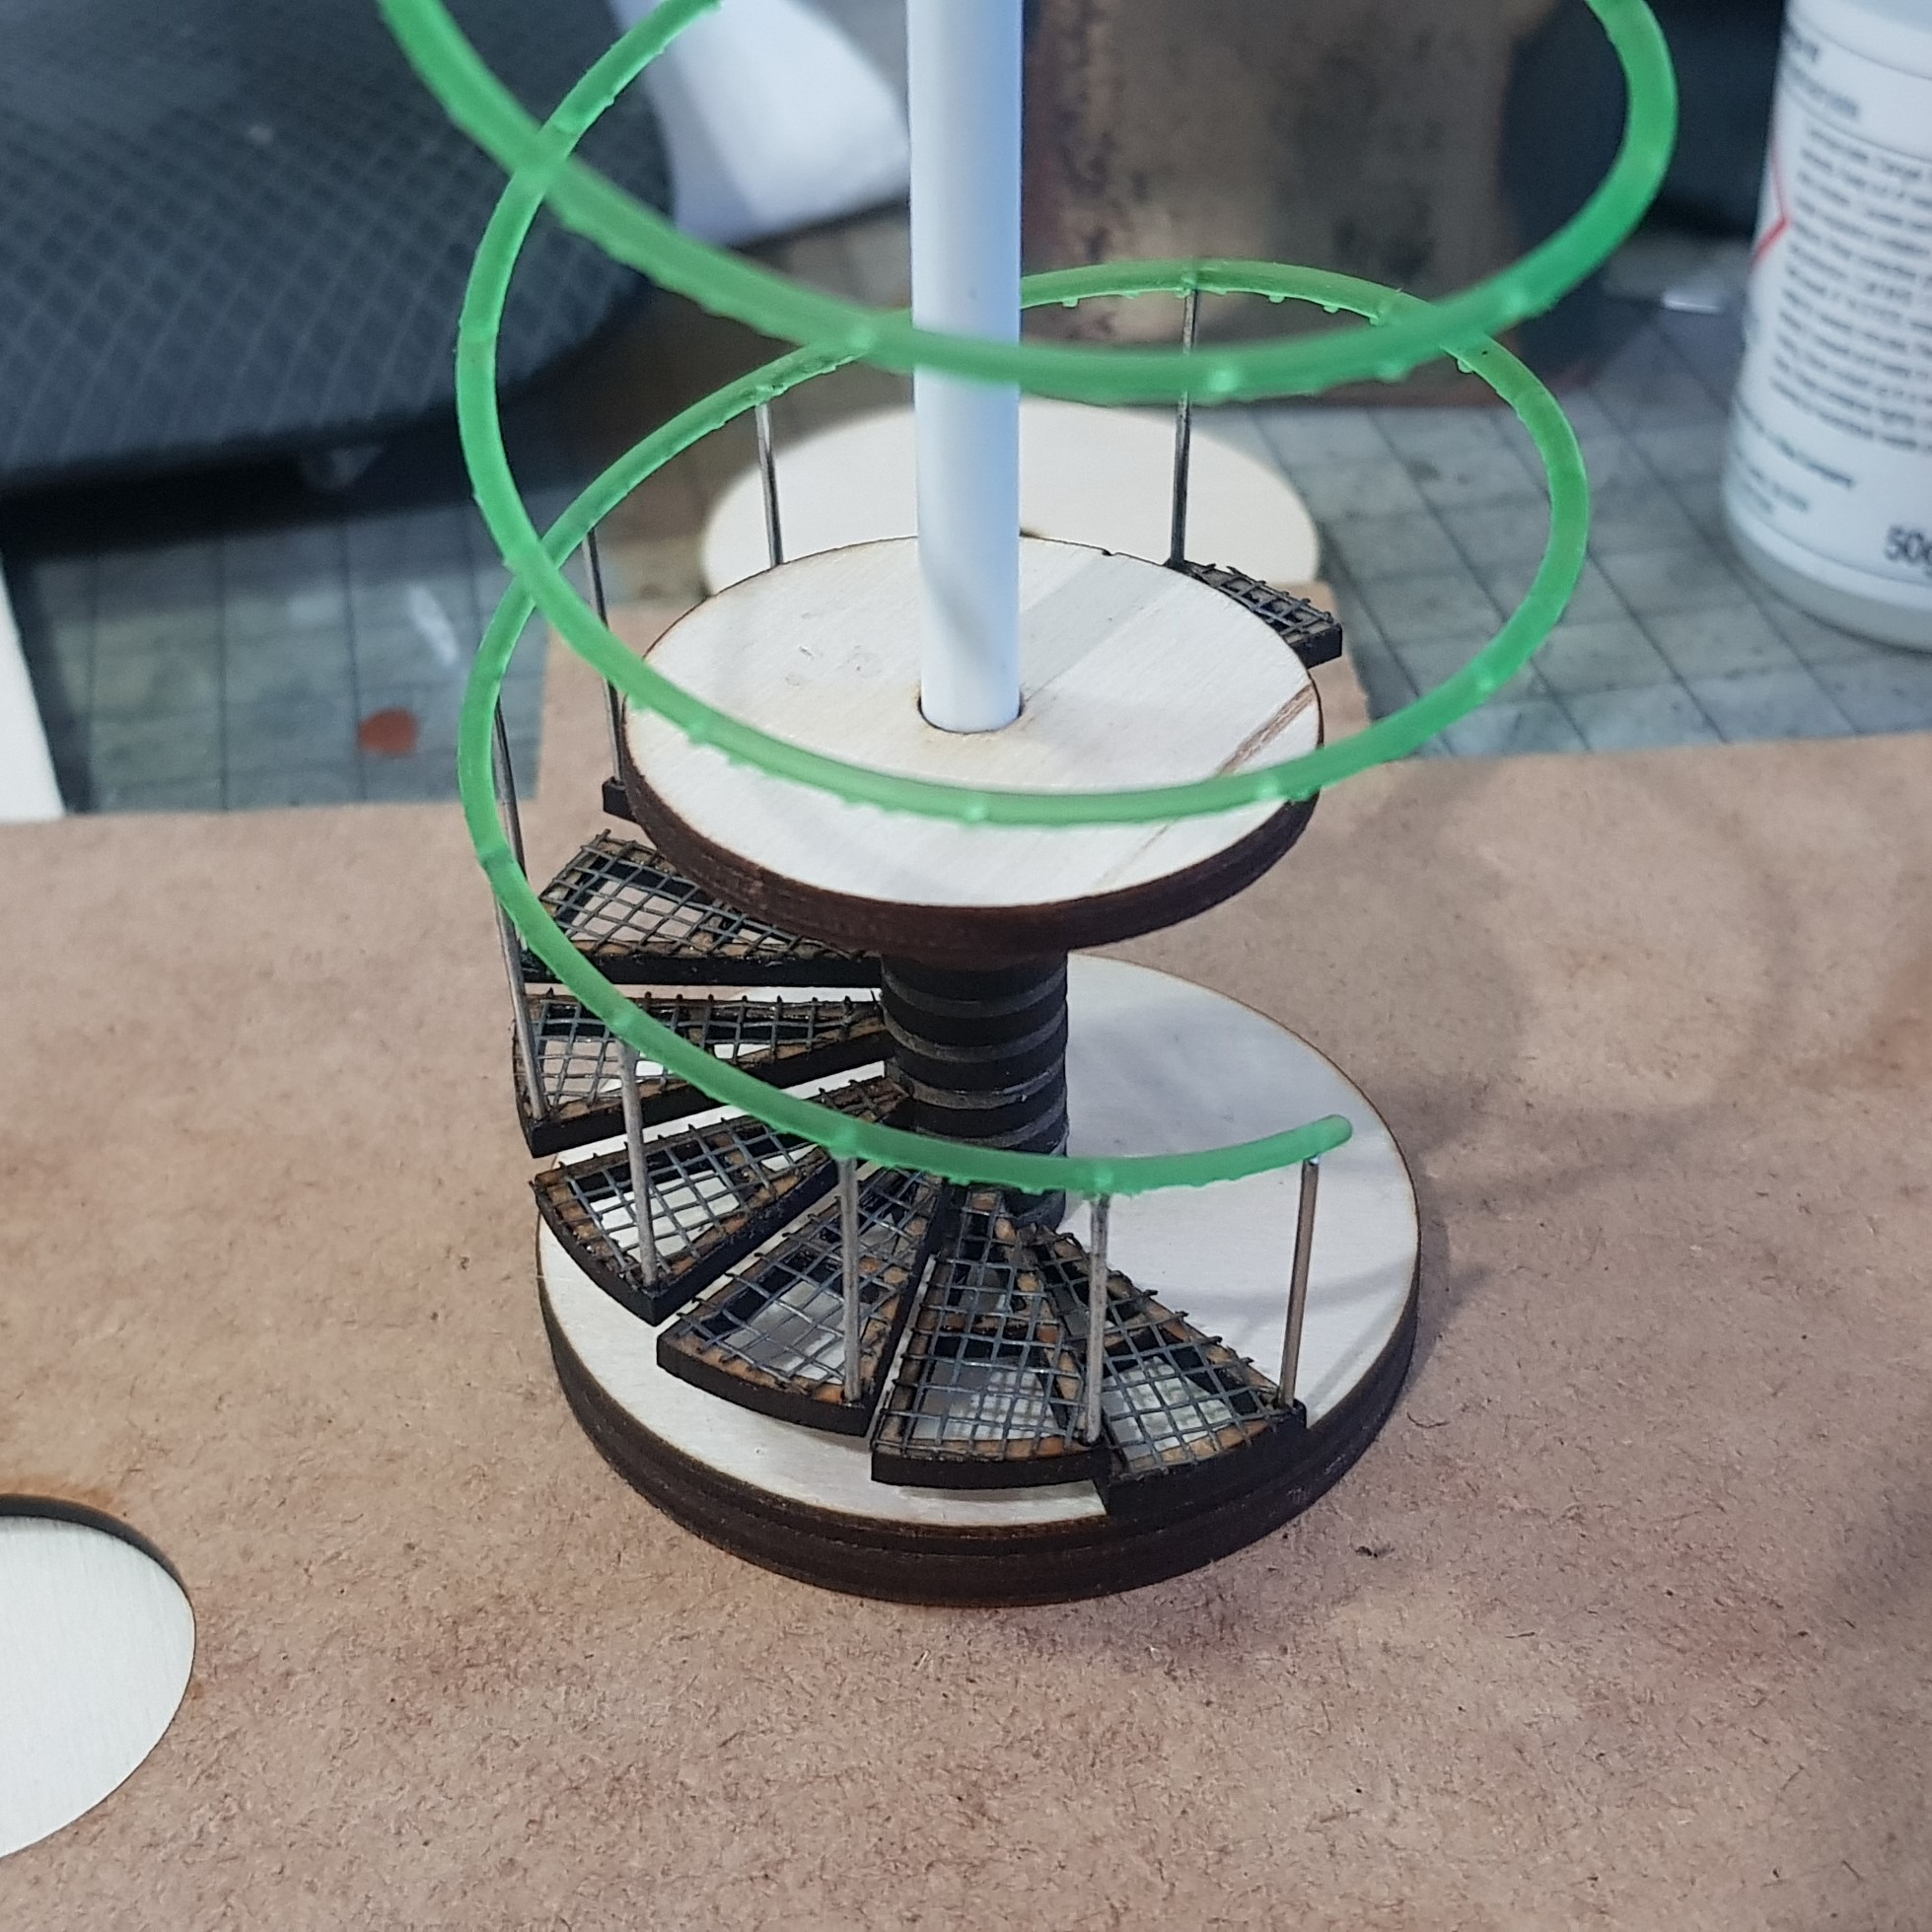 I made a way to hold this flat by making a couple of disks the same diameter as the staircase. I also made a smaller disk to use as a press to try and keep the height correct. I then placed one subassembly down and then pressed, took the press off and placed the next after I had 3 down I glued on the railing and moved some of the treads to make them the correct distance. I then done one at a time pressing in-between. gluing the bottom in PVA and the top of the upright with superglue into the bannister.
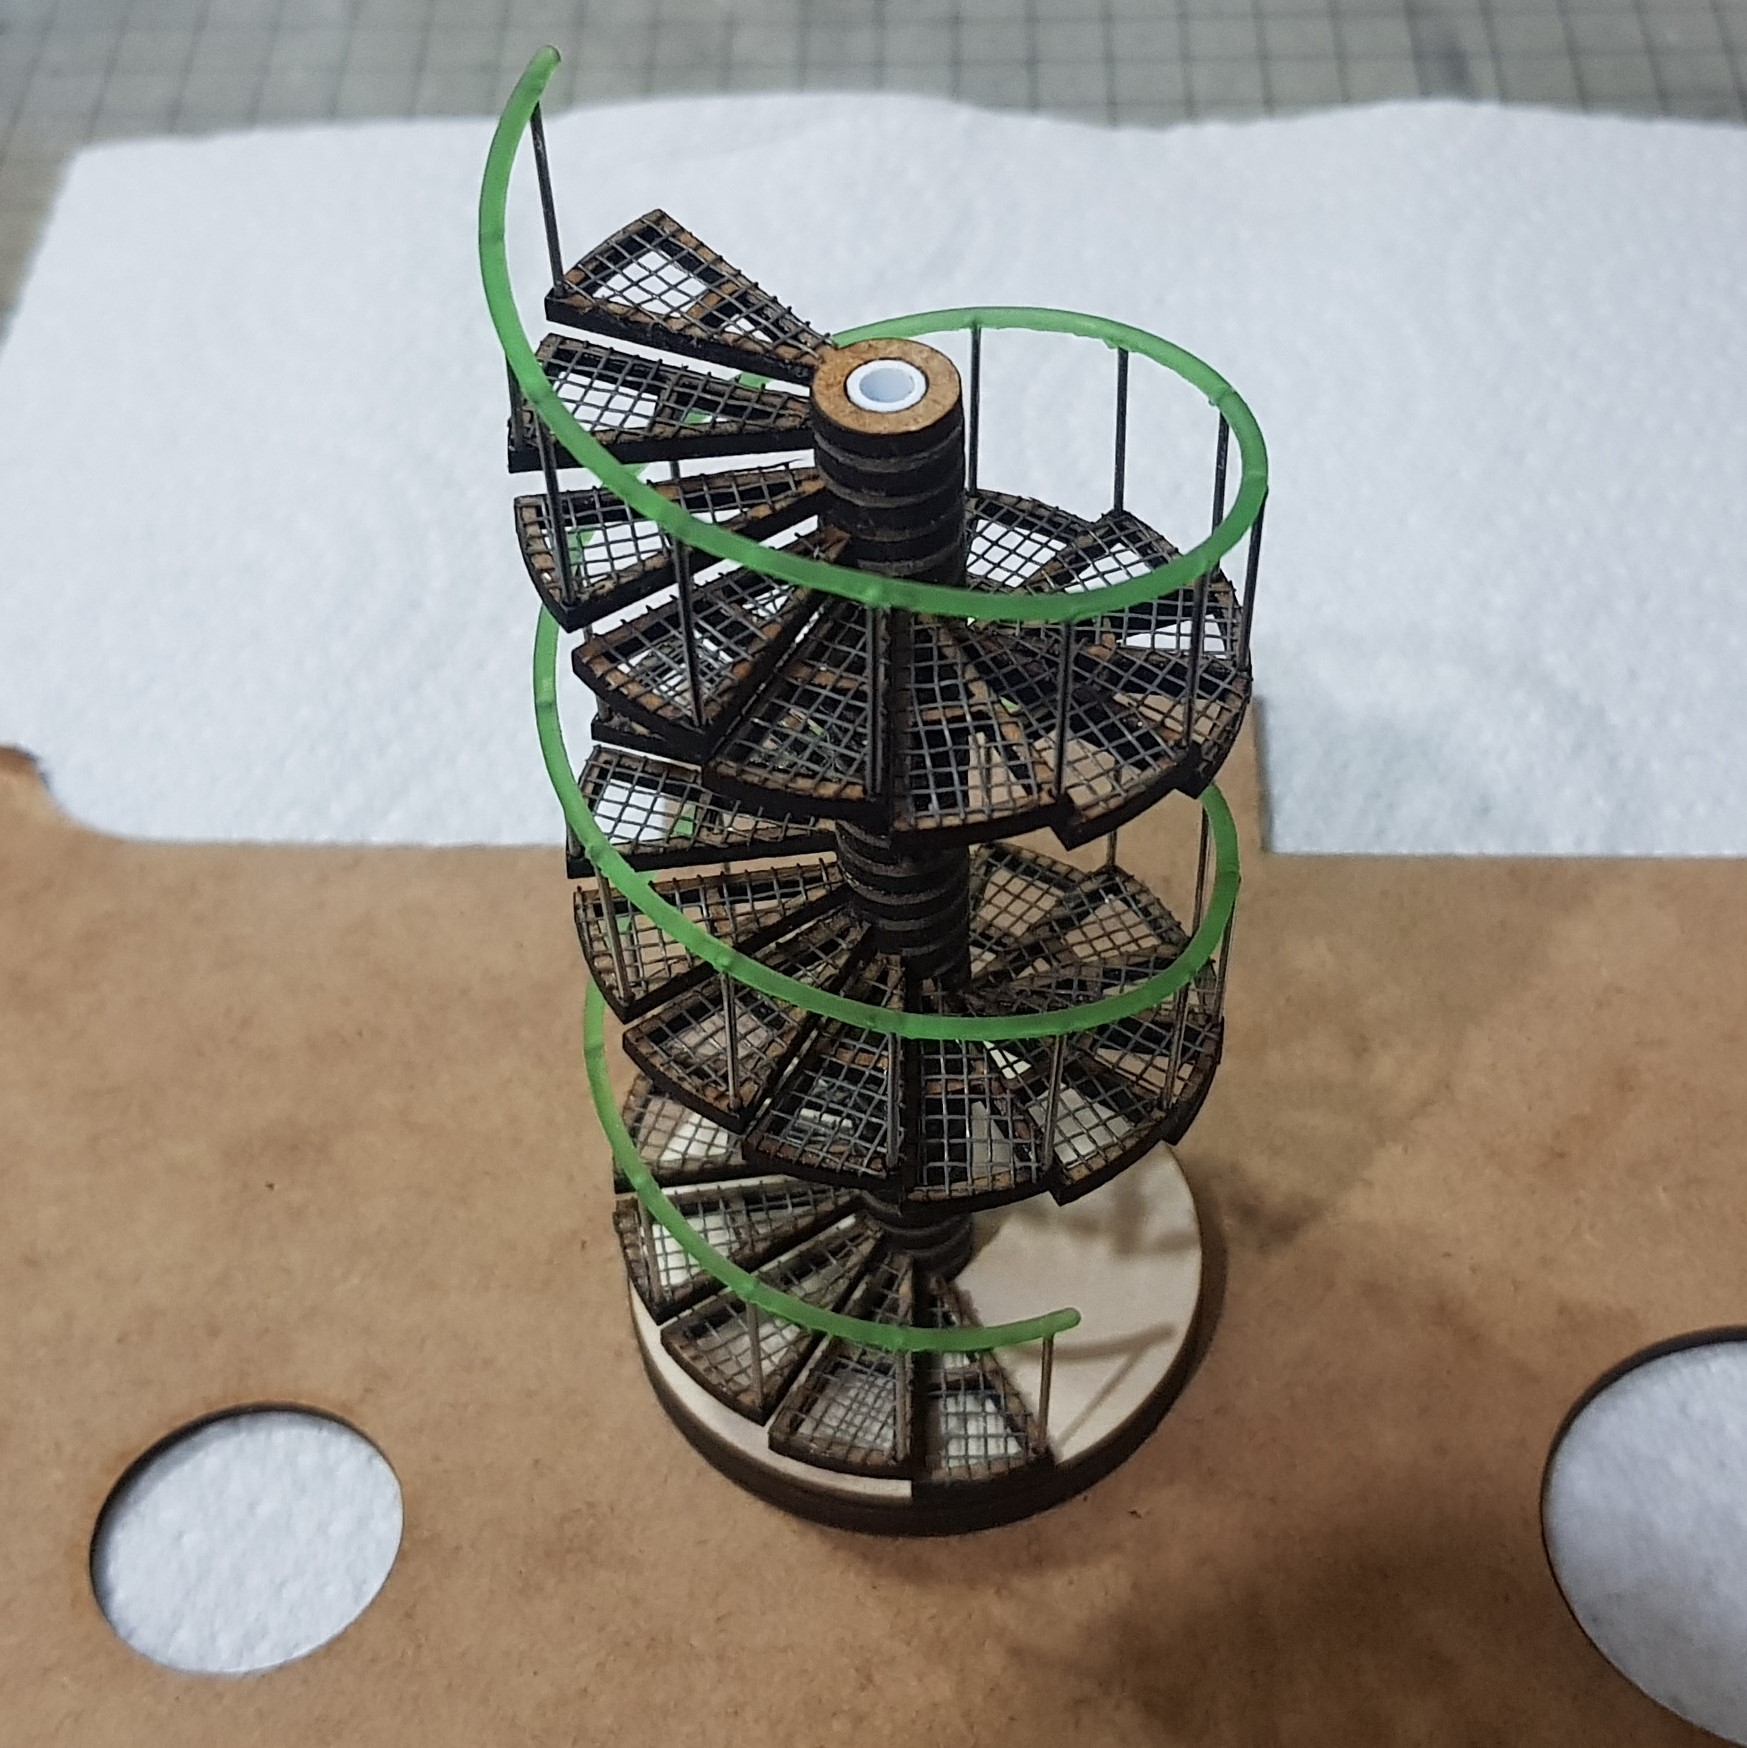 I then finished and used a needle file to remove the sprue lines and cut the top. Quite pleased with the result. It's not perfect but I am still pleased and at least this will fit.
 I have the 3D printed parts for the second platform printing just now as I type. I have already laser cut the top and bottom of the platform. I will be doing this over the next couple of days and then I will be ready to start assembly and then painting again.
I don’t think I have learned my lesson for making and designing things that are very complicated. Cant wait to get this finished though.
More to come.
Platform has a friend
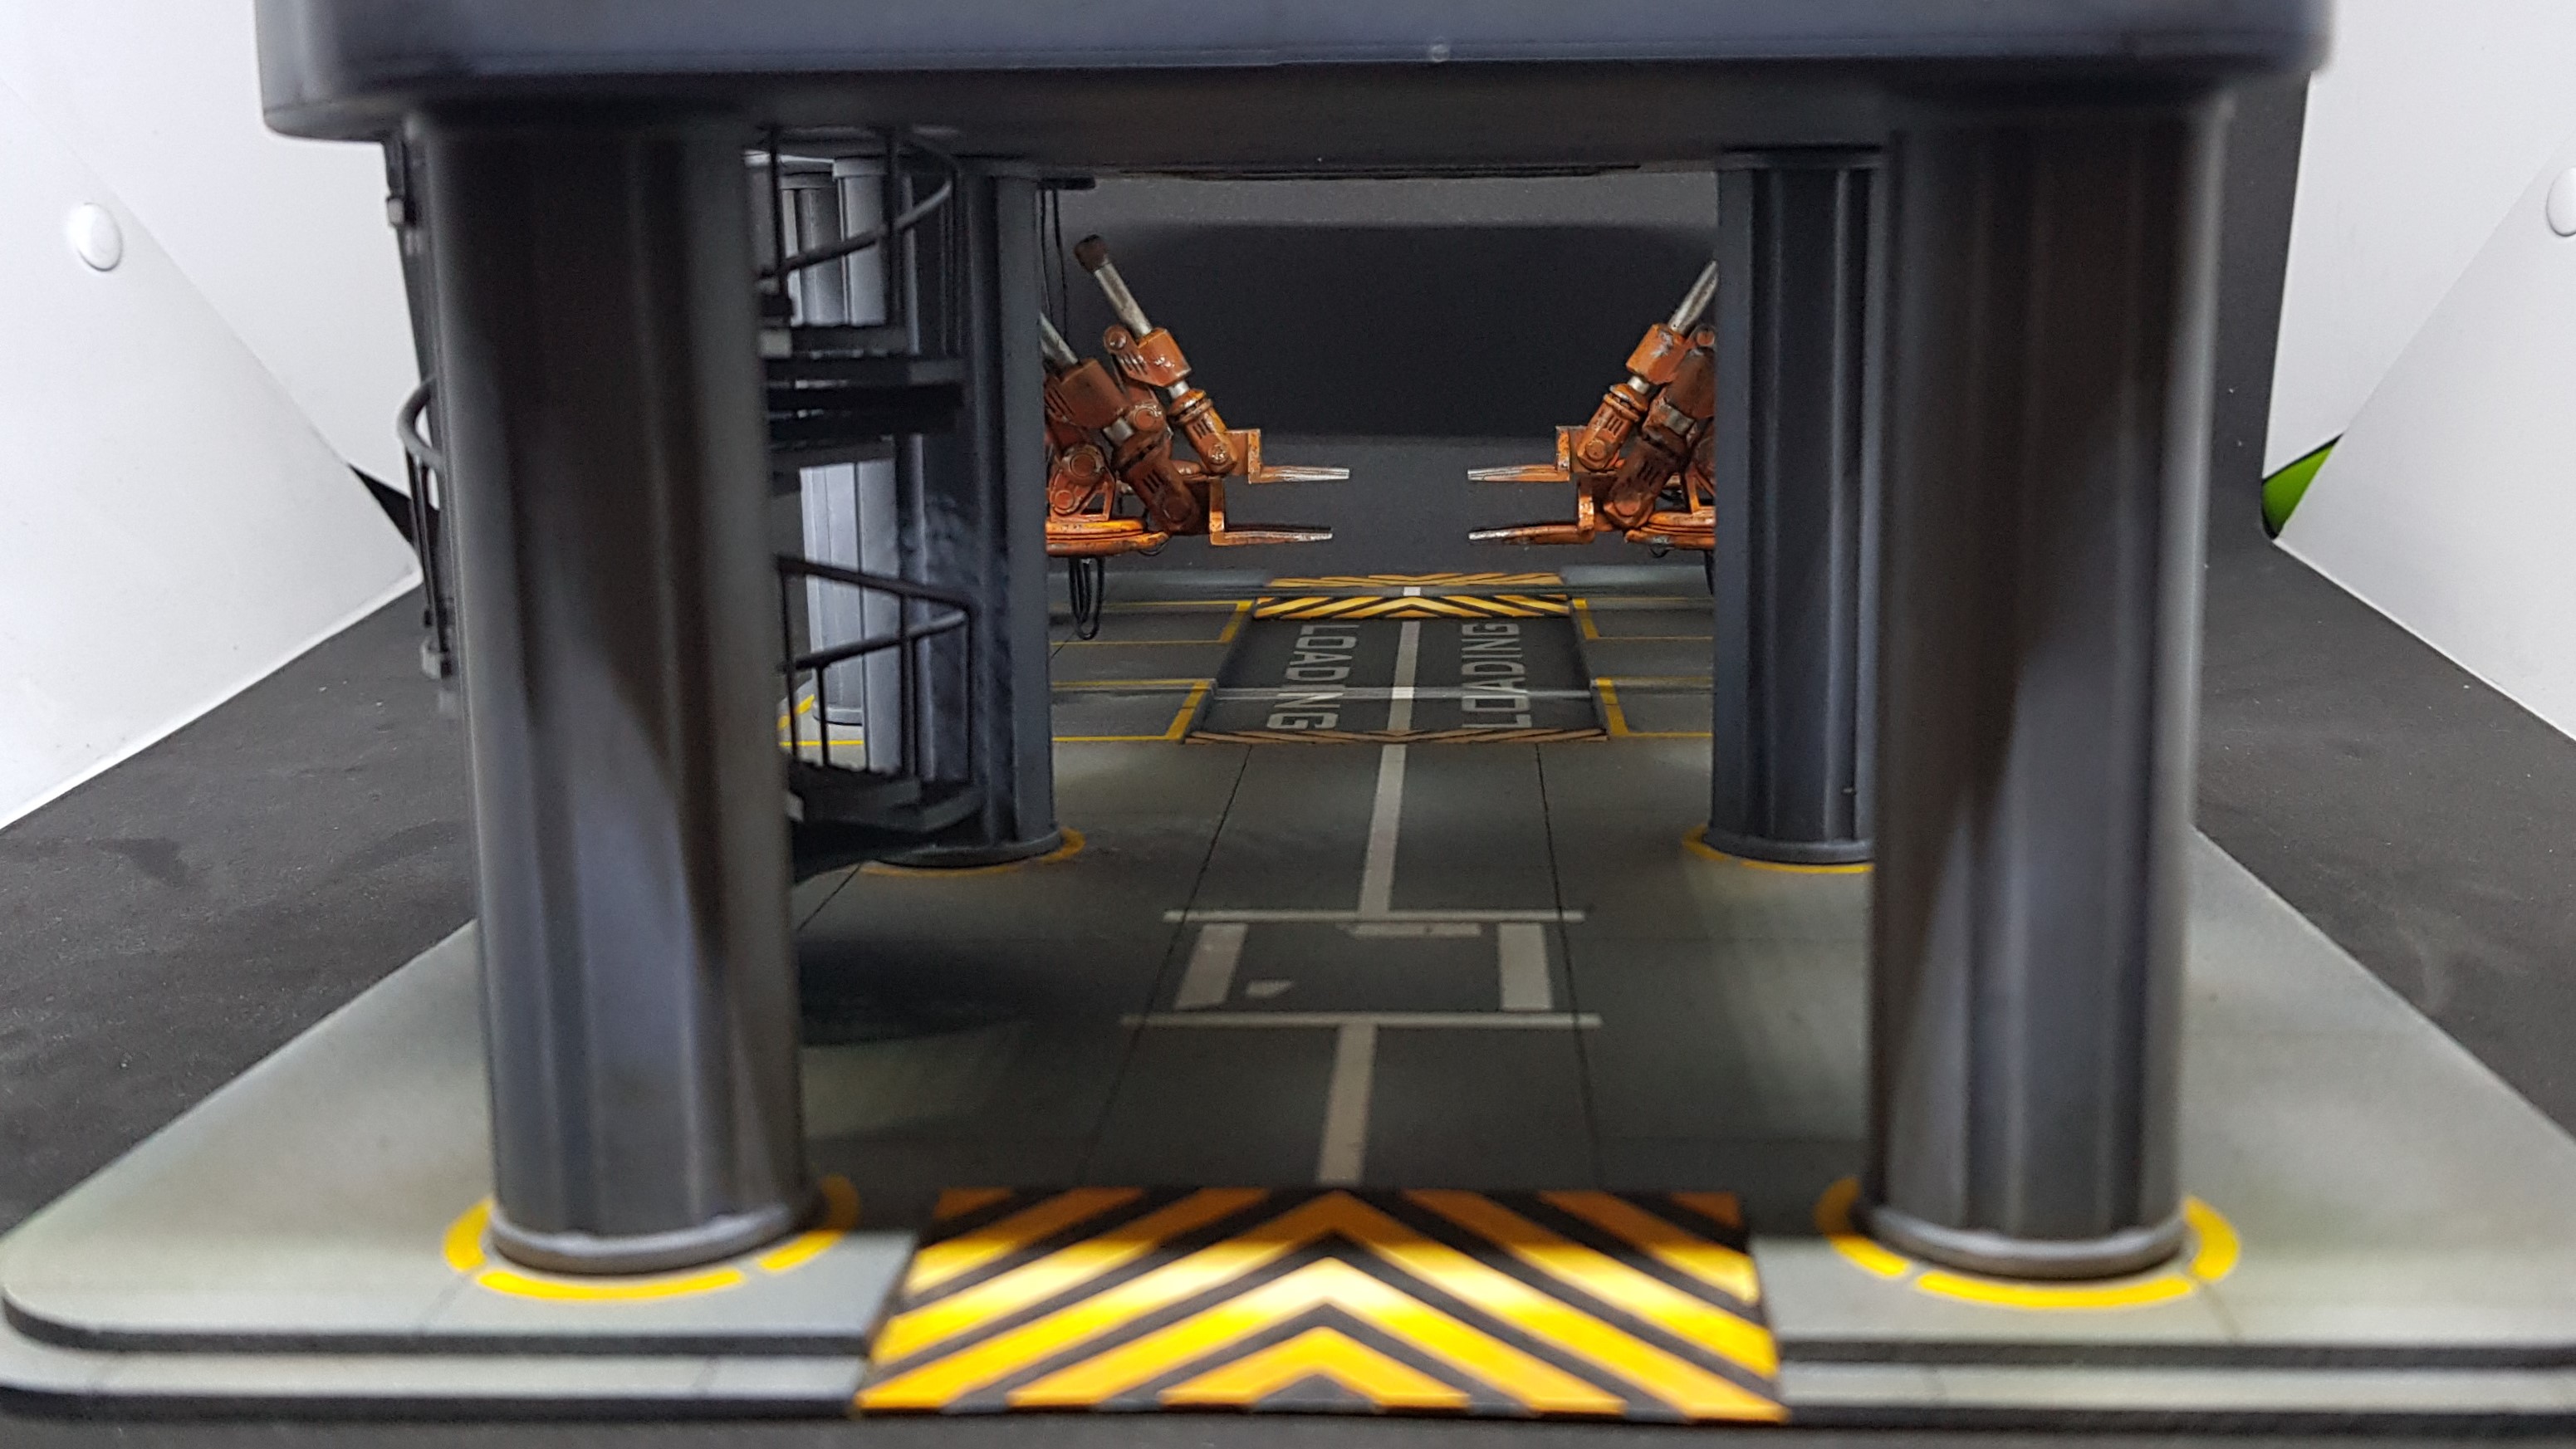
Since I got over the roadblock that was the staircase I went ahead and finished the second platform for the landing control tower.
I started by 3D printing the sides I had the platform top and bottom laser cut already. The issue I had was I need to somehow assemble this onto painted components. Yet keep it separate for painting.
I don’t this my making an assembly but somehow managed to make it quite accurate to fit after painting without snapping anything.
 An example of the 3D printing that was done. This was made in once piece to aid assembly.
 Completed assembly
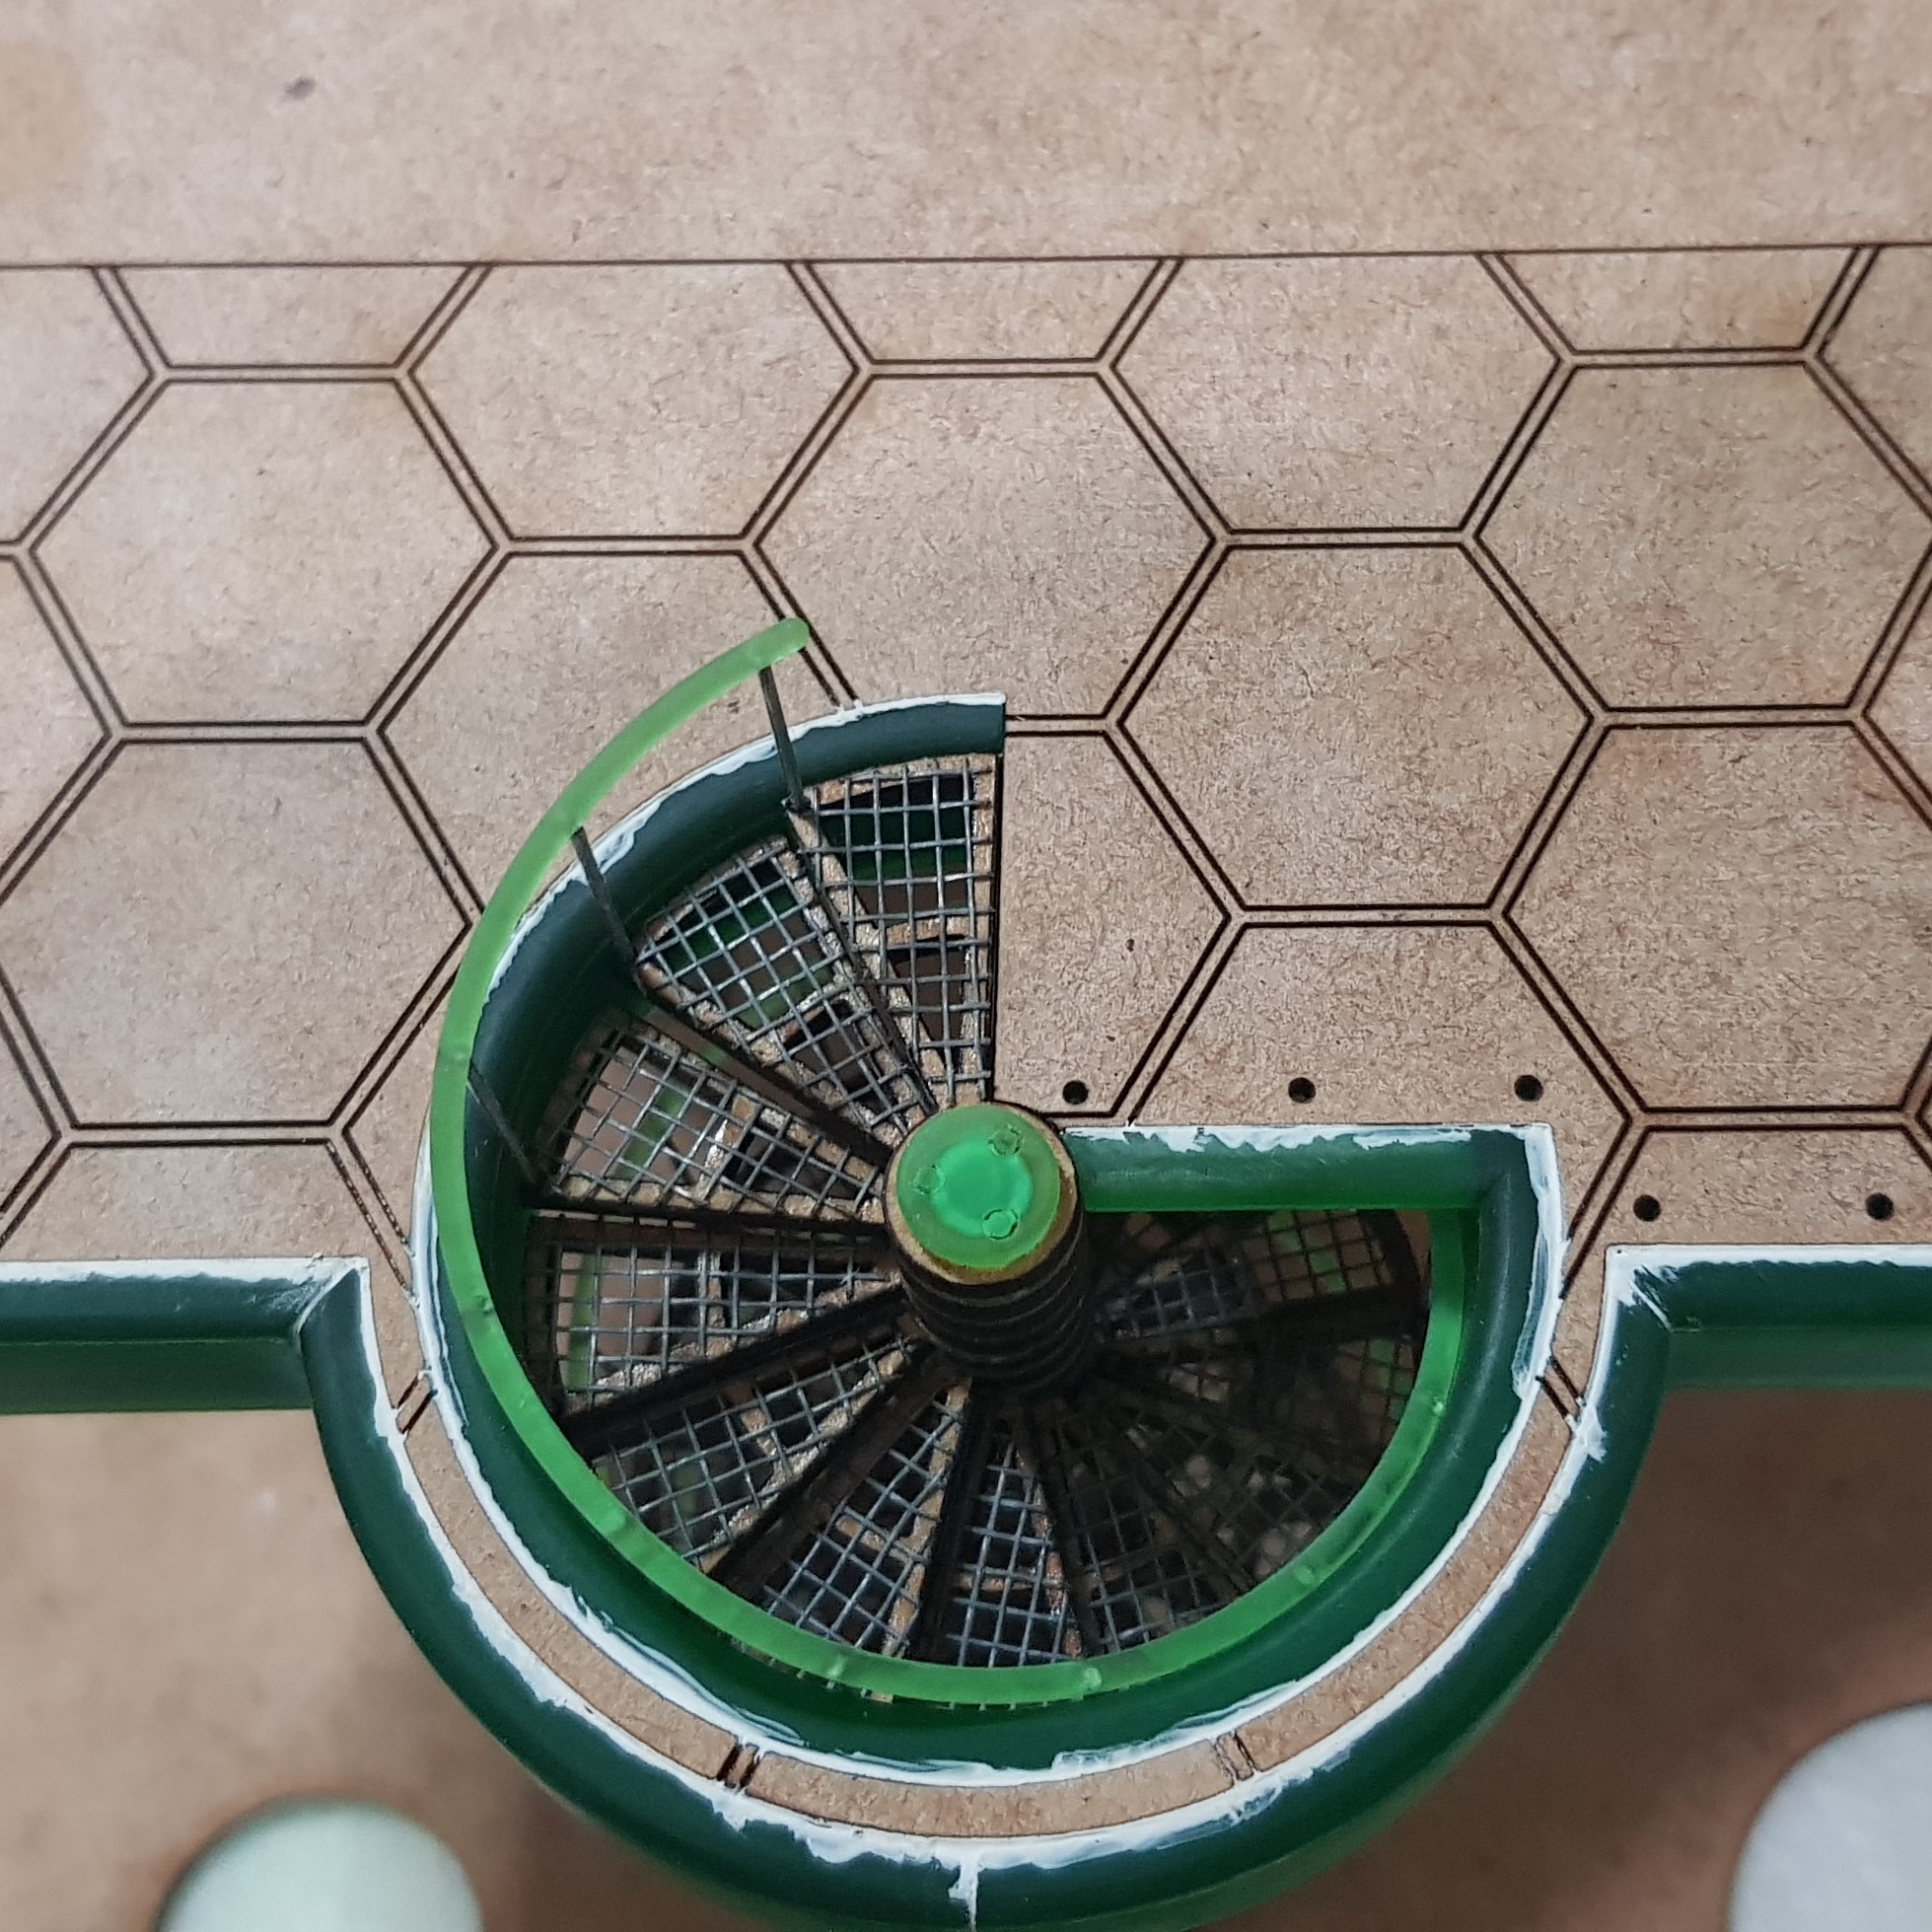 This was also filled as before and then sanded.
 So I have my assembly. I primed this in black and then done a zenith filled again sanded and then primed again.
After this I went about painting. I wanted this to still be old but I wanted this to be newer than the other platform. This should have evolved and parts and spares brought in. I decided to try and make the paint slightly brighter. I don’t know if this will come out especially in pictures.
I left a peg at the bottom of the assembly and put plugs at the bottom of the platform as before to guide it into position.
I did need to use a hammer at a point as everything was too tight when glue was added but this brute force method seemed to work. Drying superglue waits for no man.
After everything was in place apart from relief I started to feel excitement.
This is extremely difficult to photograph I may need to get this onto a table to photograph properly.
 New view thorugh the new platform.
 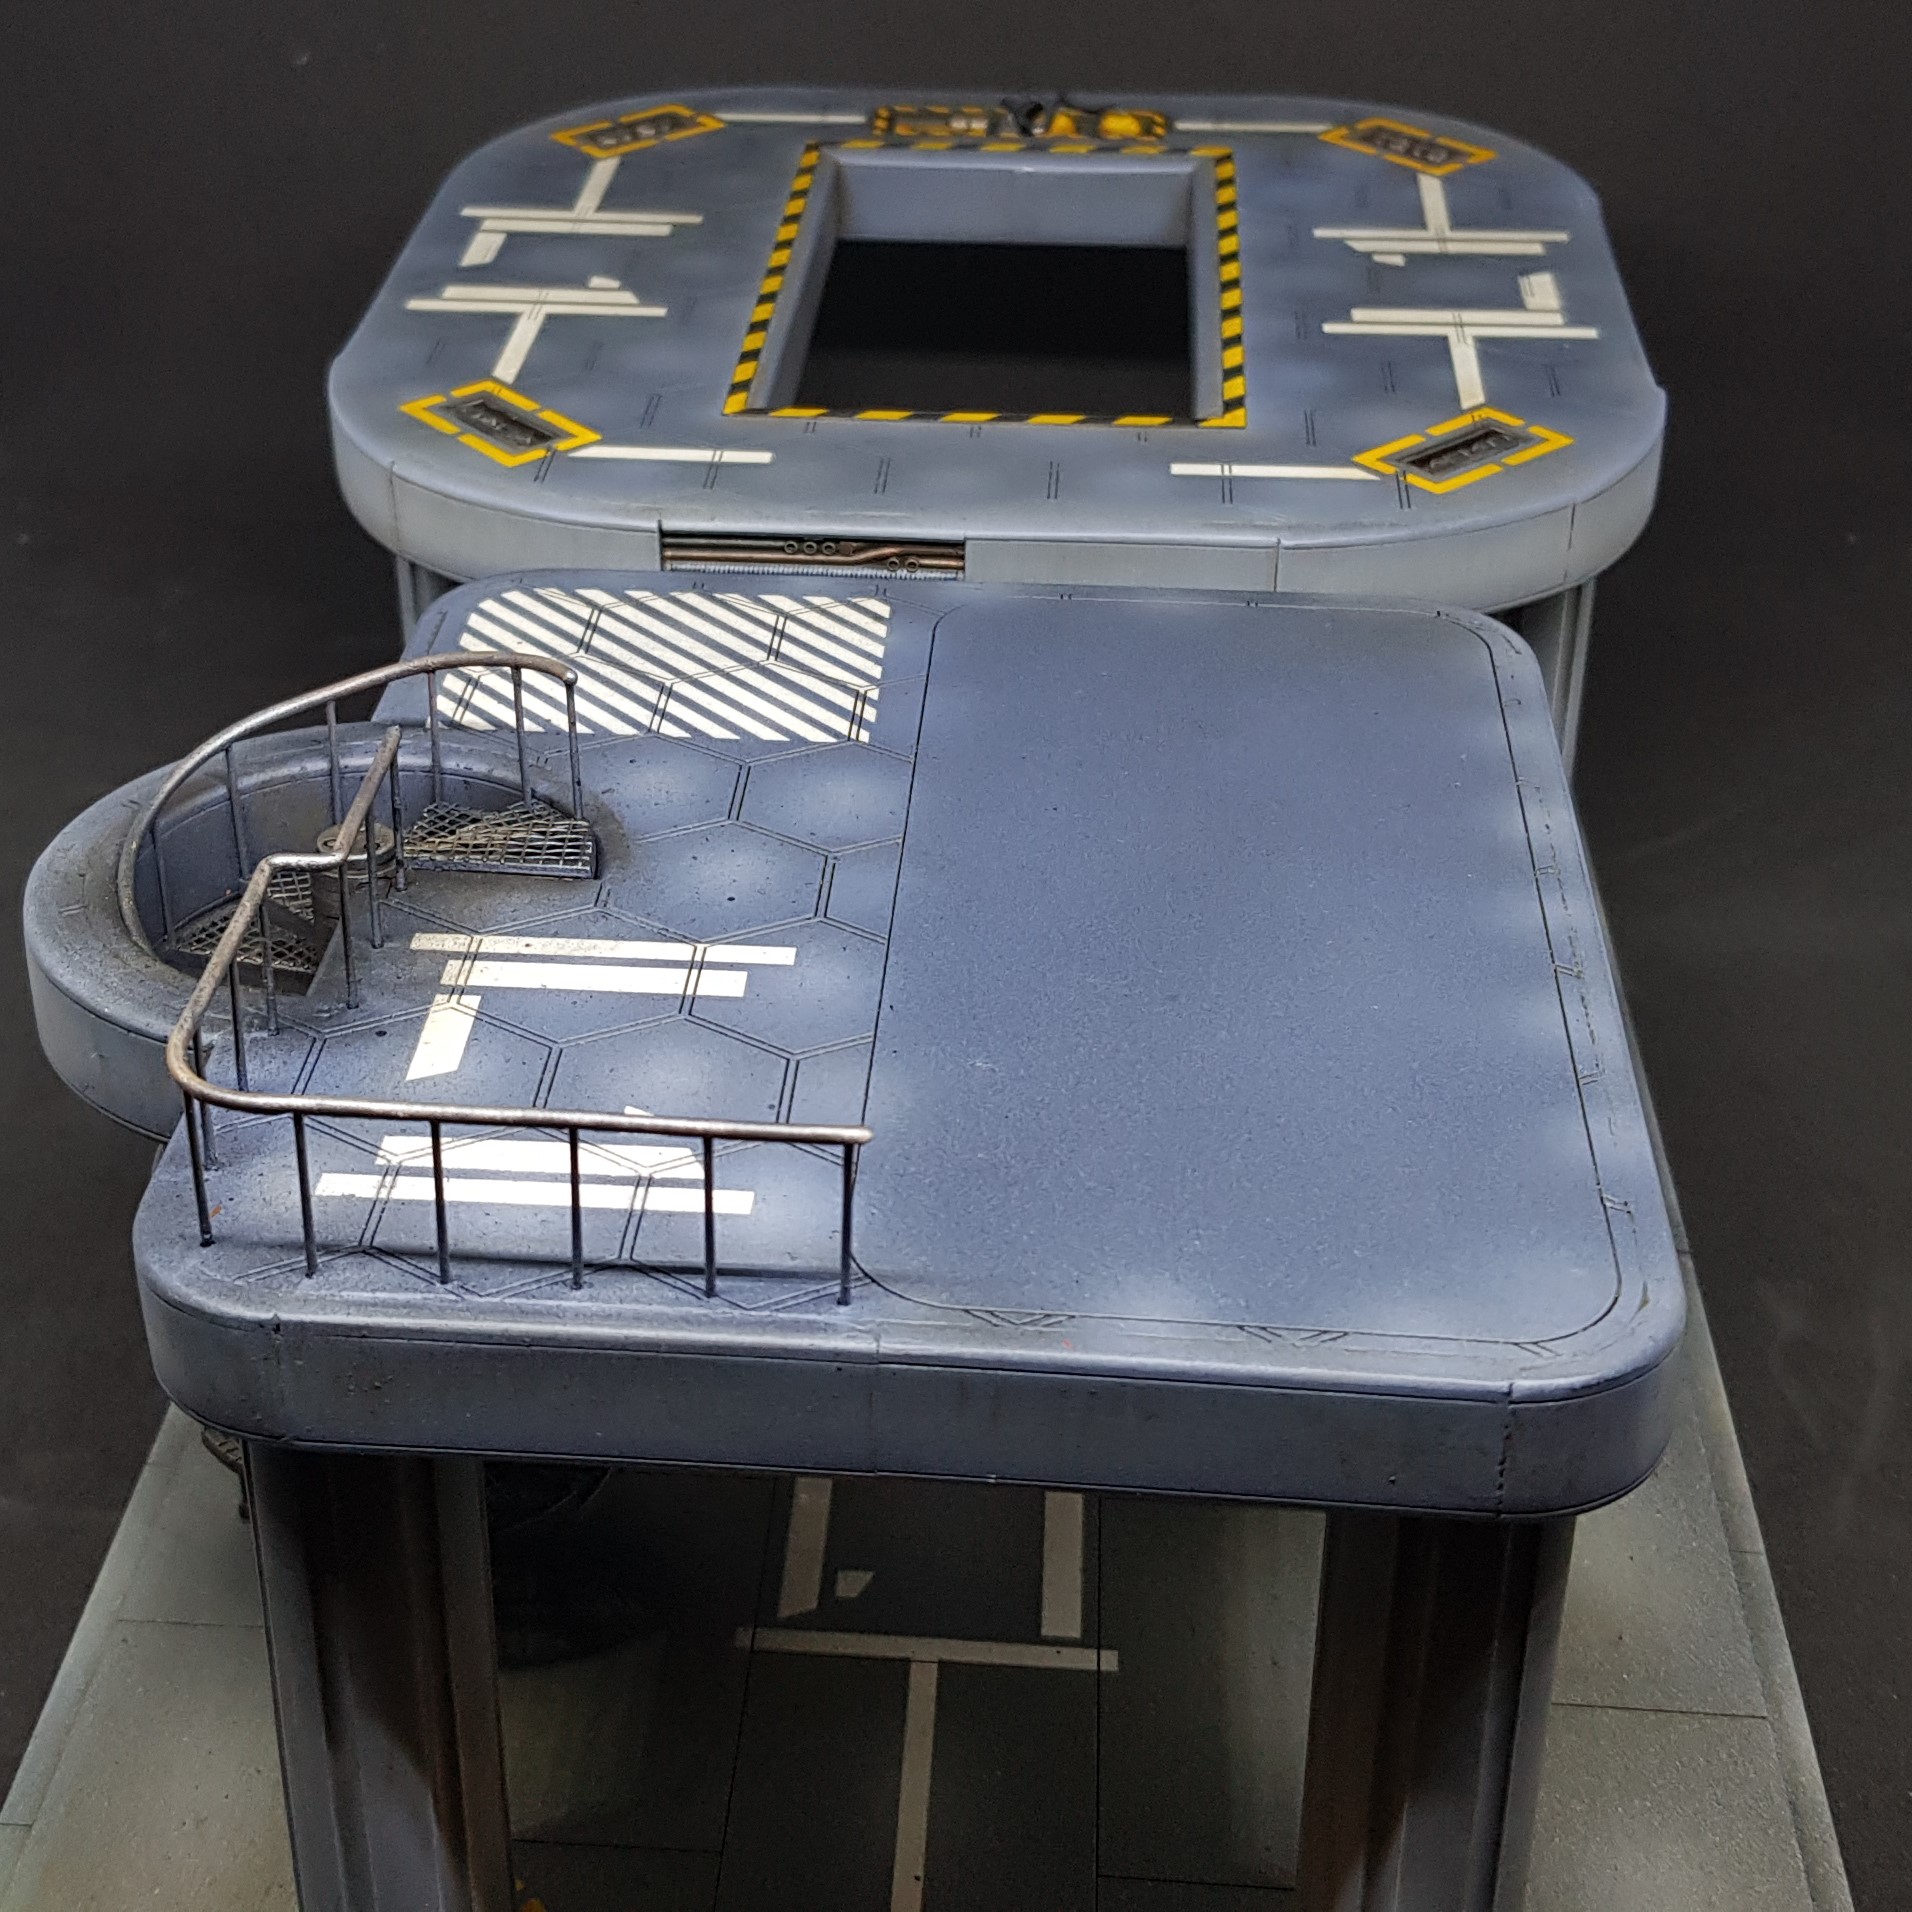 platform now shaping up.
 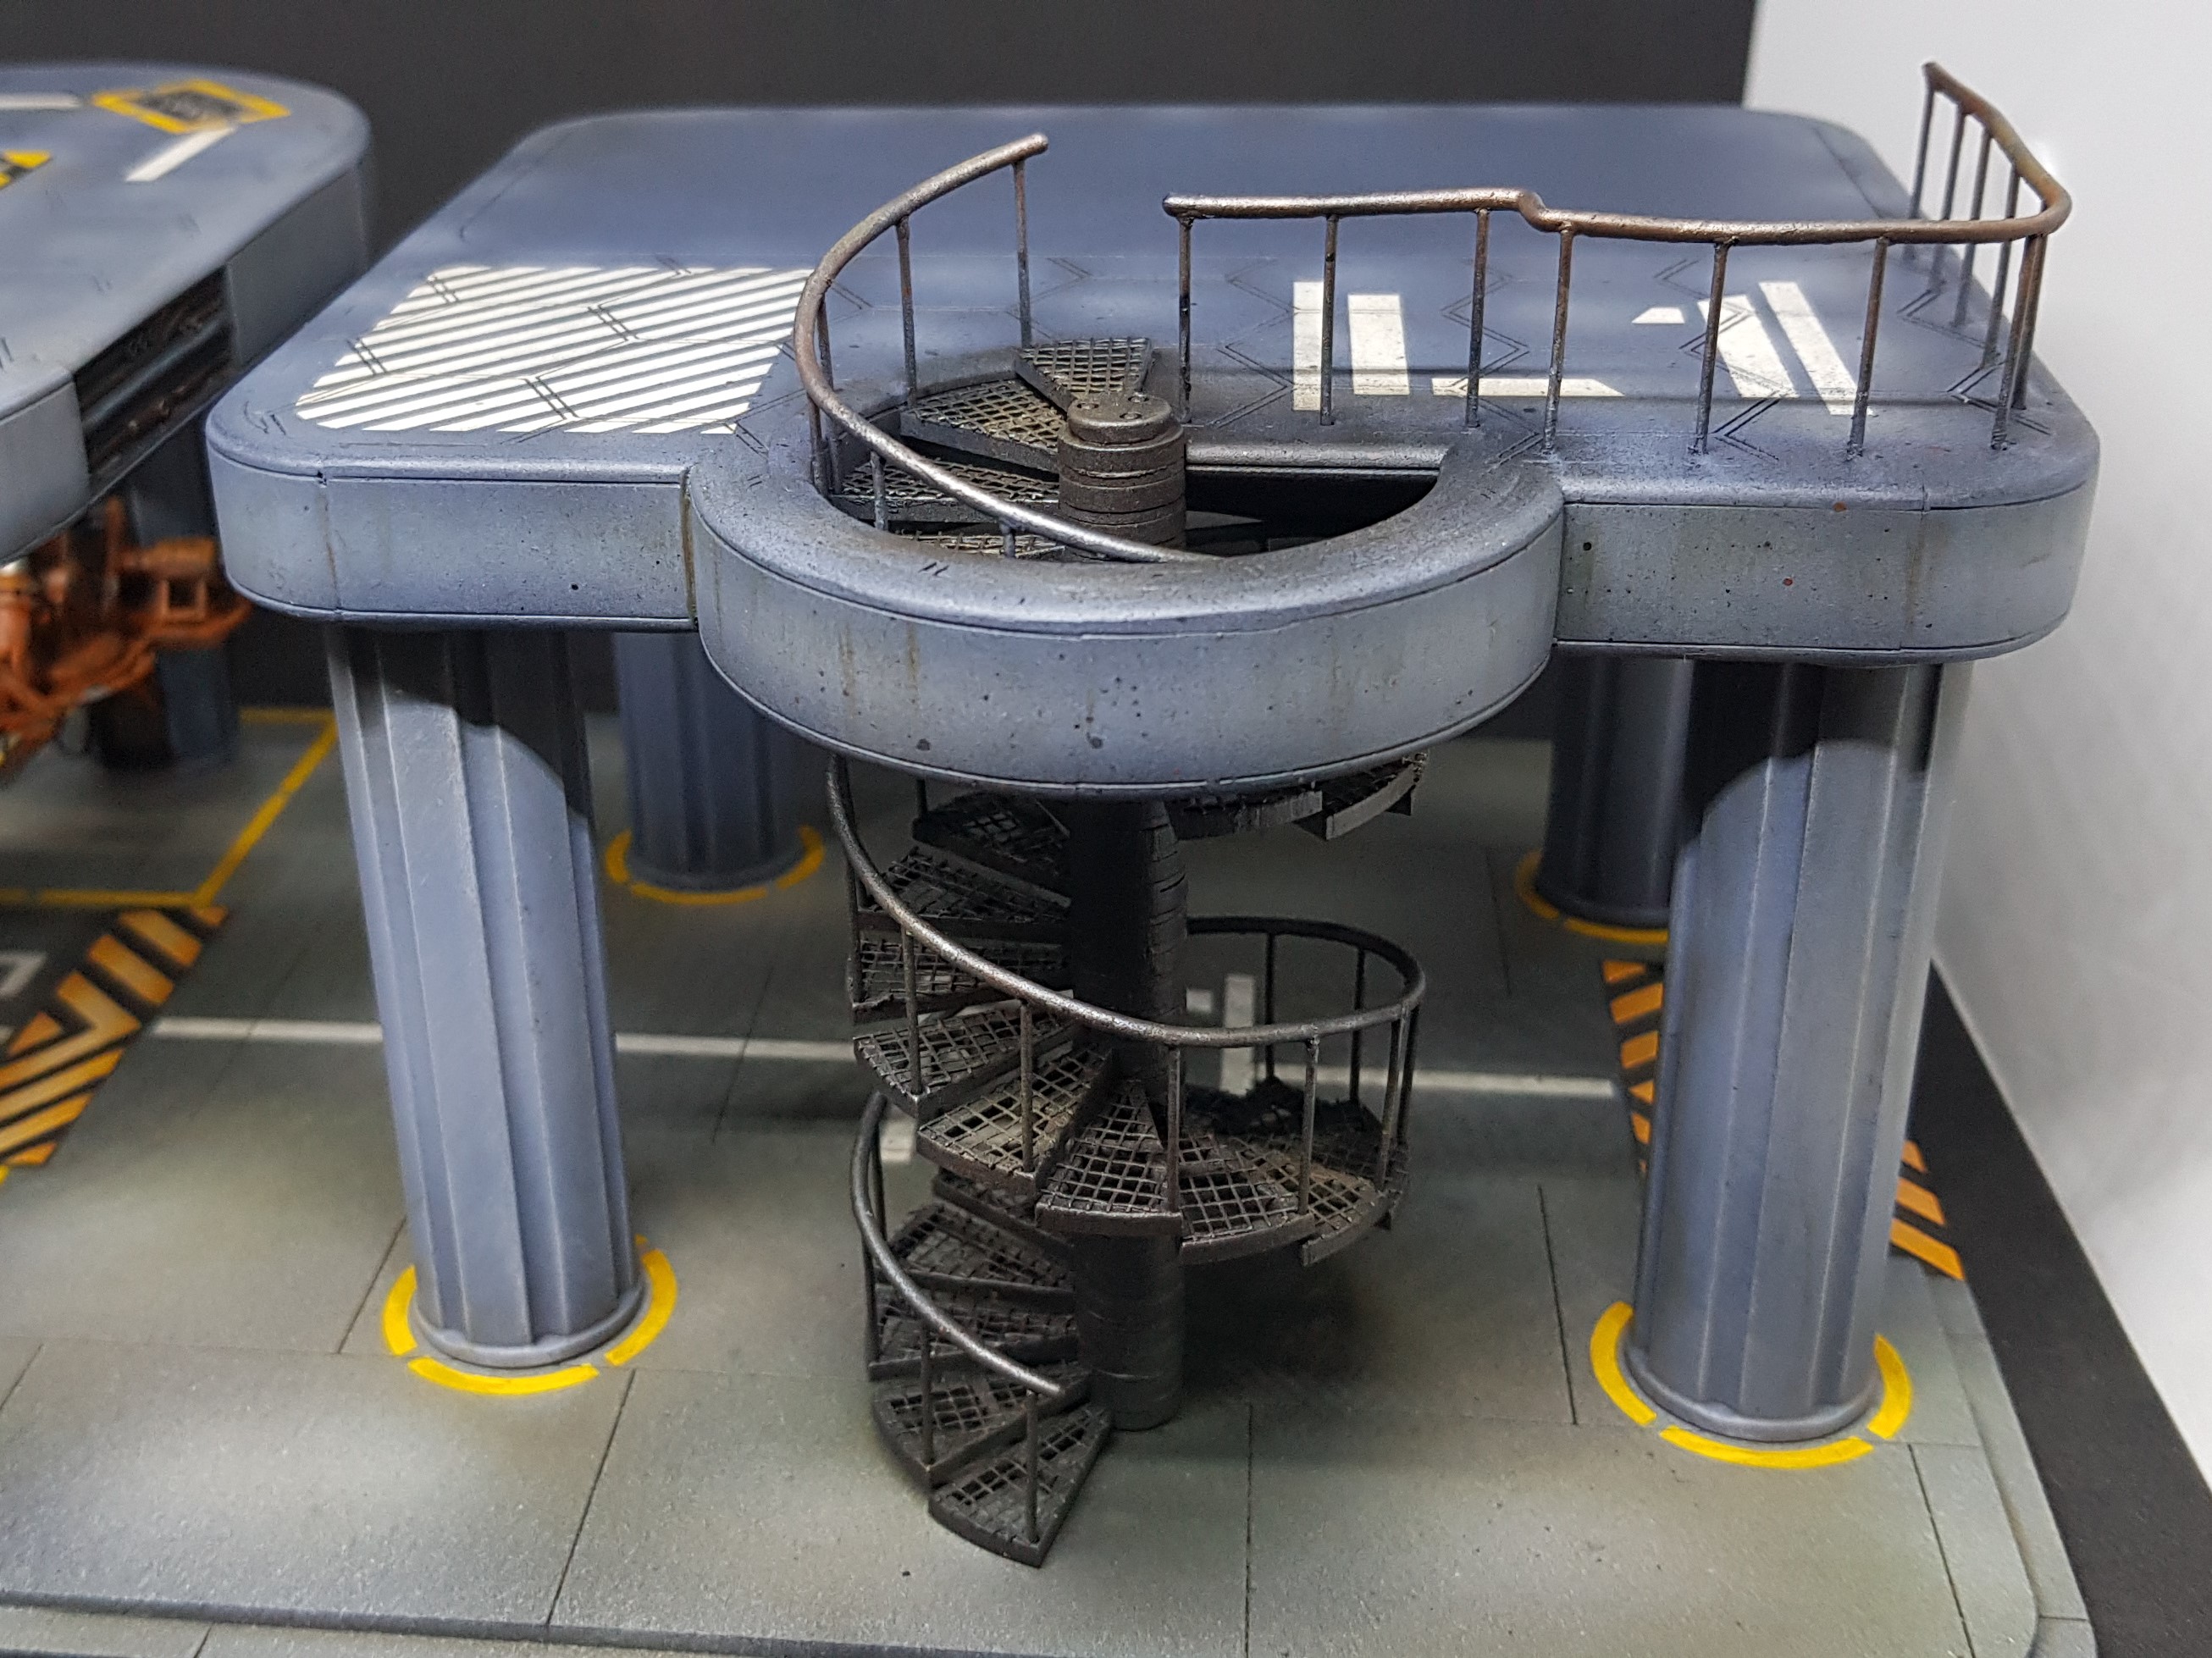 Staircase
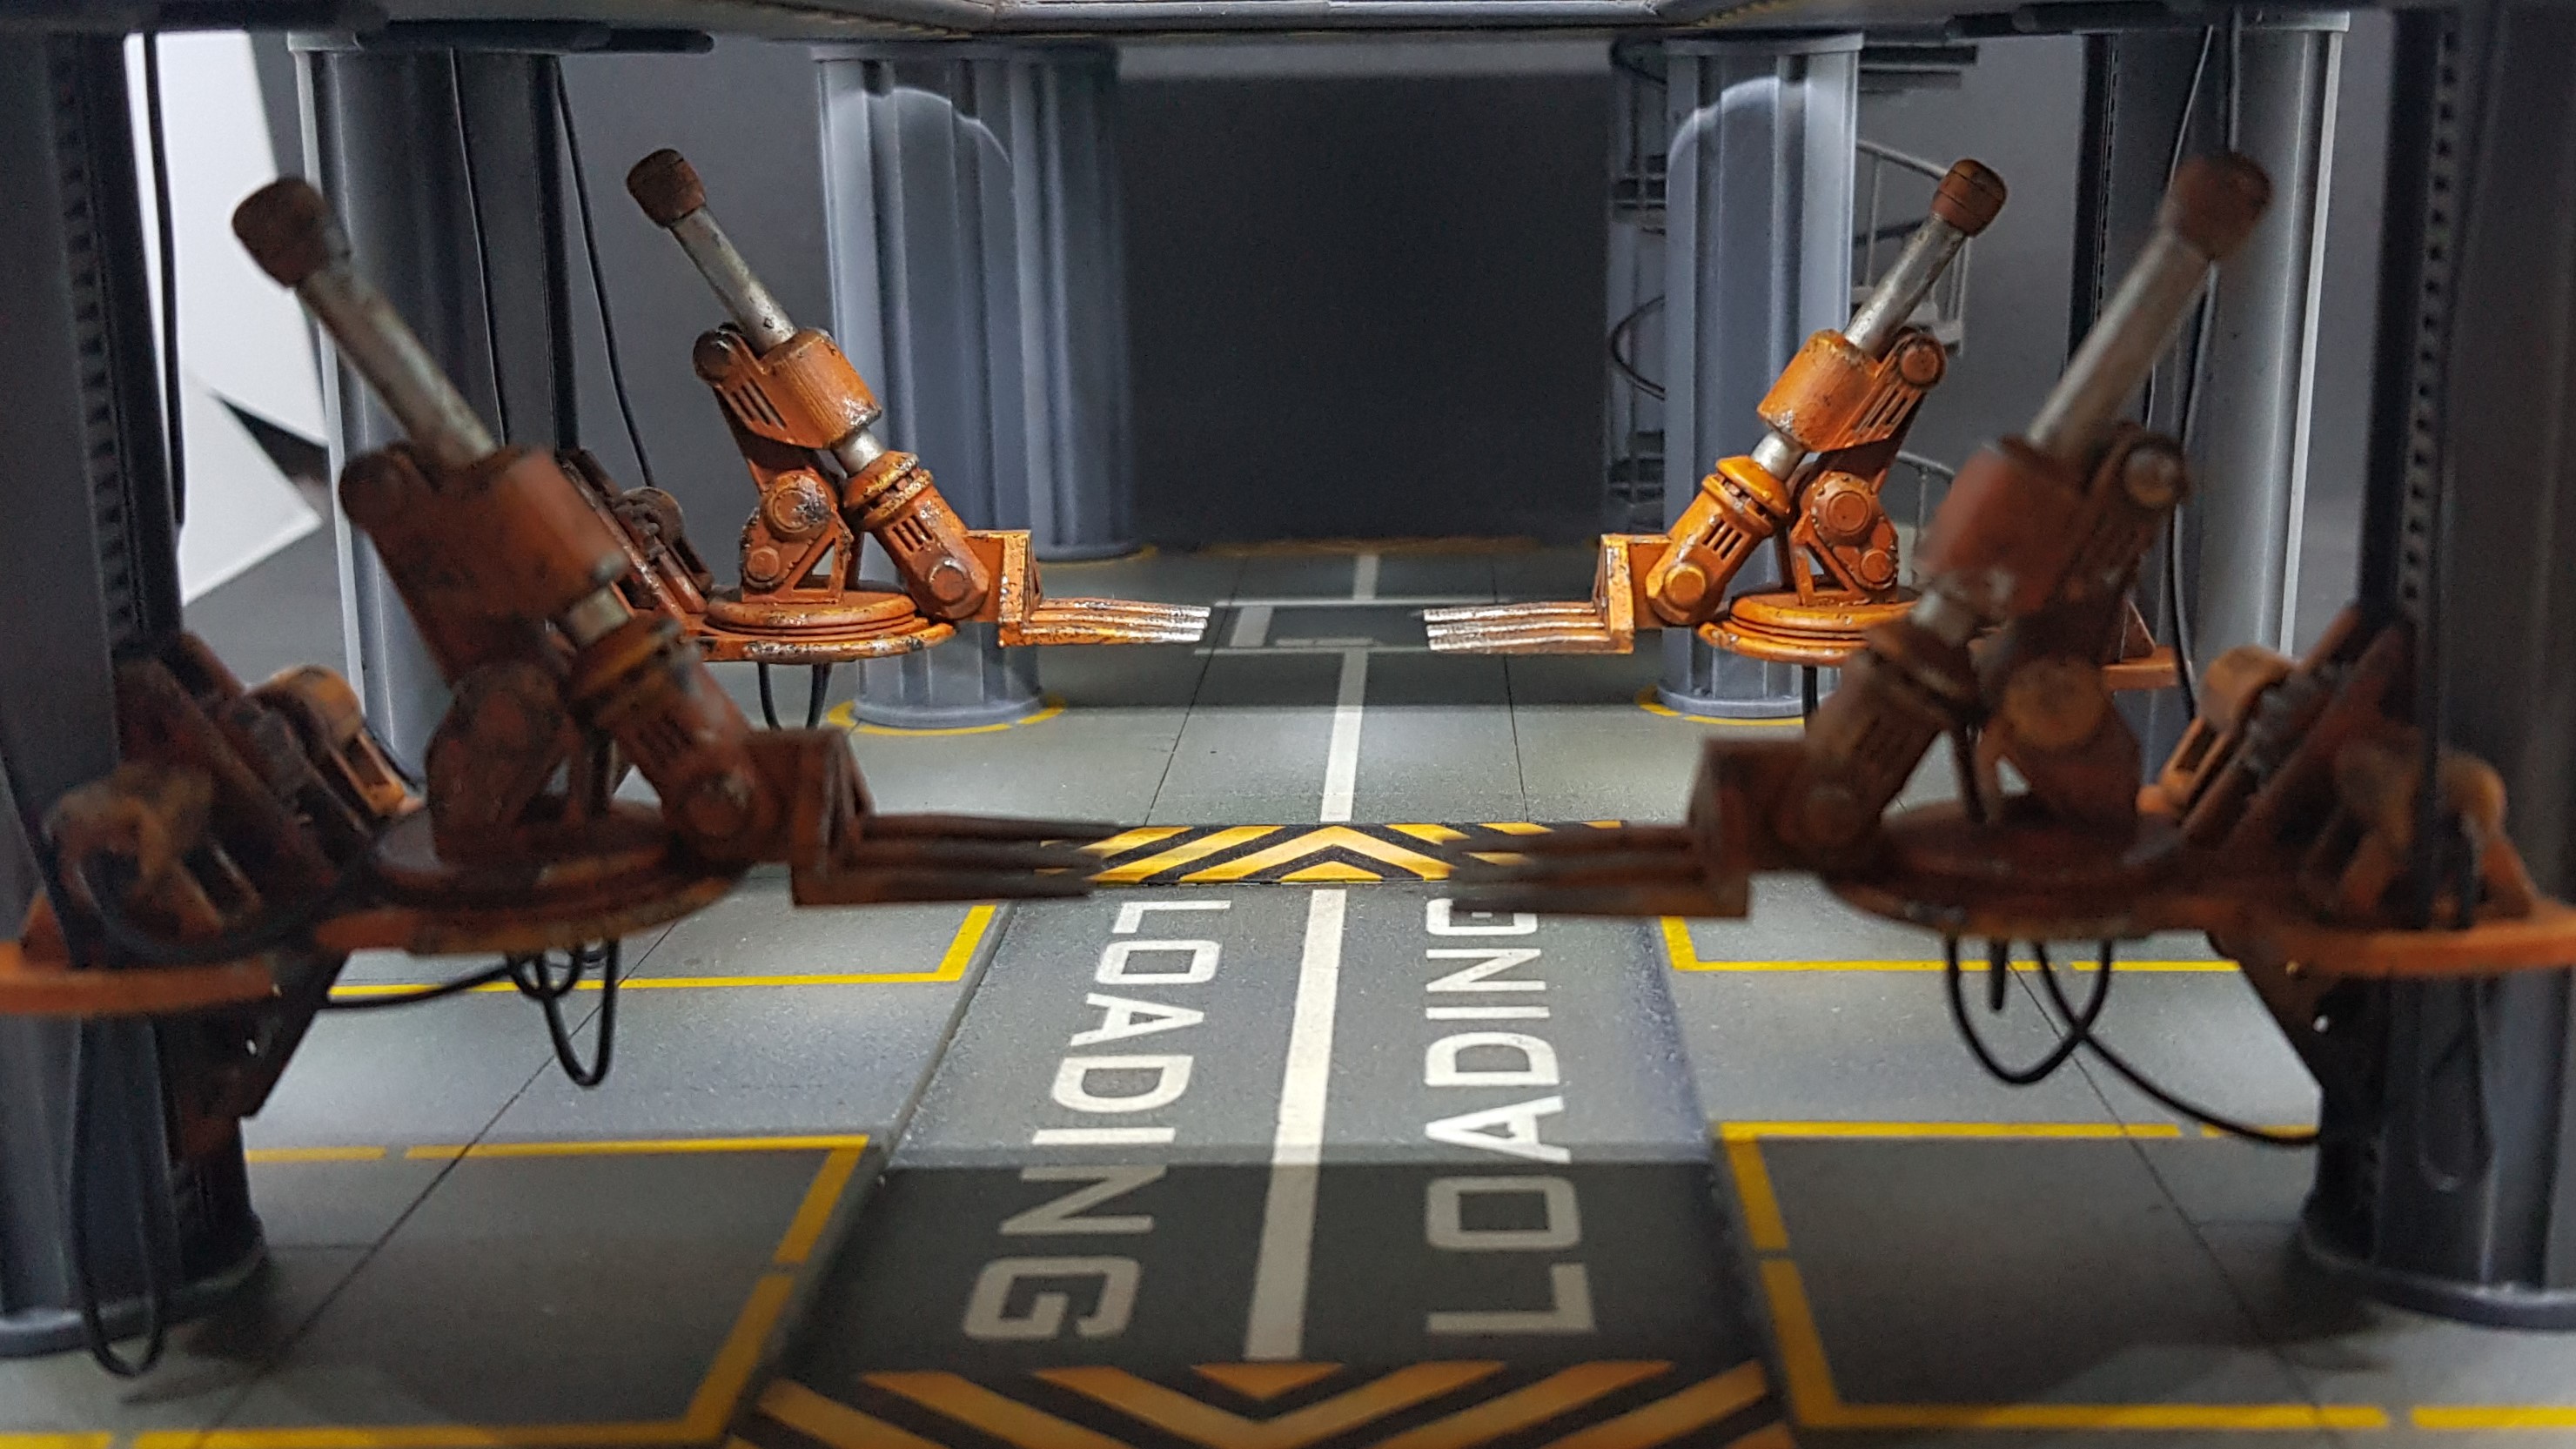 Old view but now updated.
 My plans have changed, well the timings have. I want to get this table ready so I my miss off the vehicles for now and revisit this.
I want to move onto a new project but still have things to learn here and want to get this done.
I still have 2 more levels to do not including satellite dishes. A gangway to get dross the platforms more crates and storage to give hard cover.
Much more to come.
Side step for a car
So I decided I would be painting all day and not doing terrain. My wife had other ideas and made me go shopping. Before we went I was on the infinity UK Facebook group (cheating on BOW). A guy seen a picture of a great scaled model car and was looking for the store it was purchased from. Everyone commented on where they thought it came from, it was perfect in everyway and I don’t have those stores near me. I found it in Tesco…
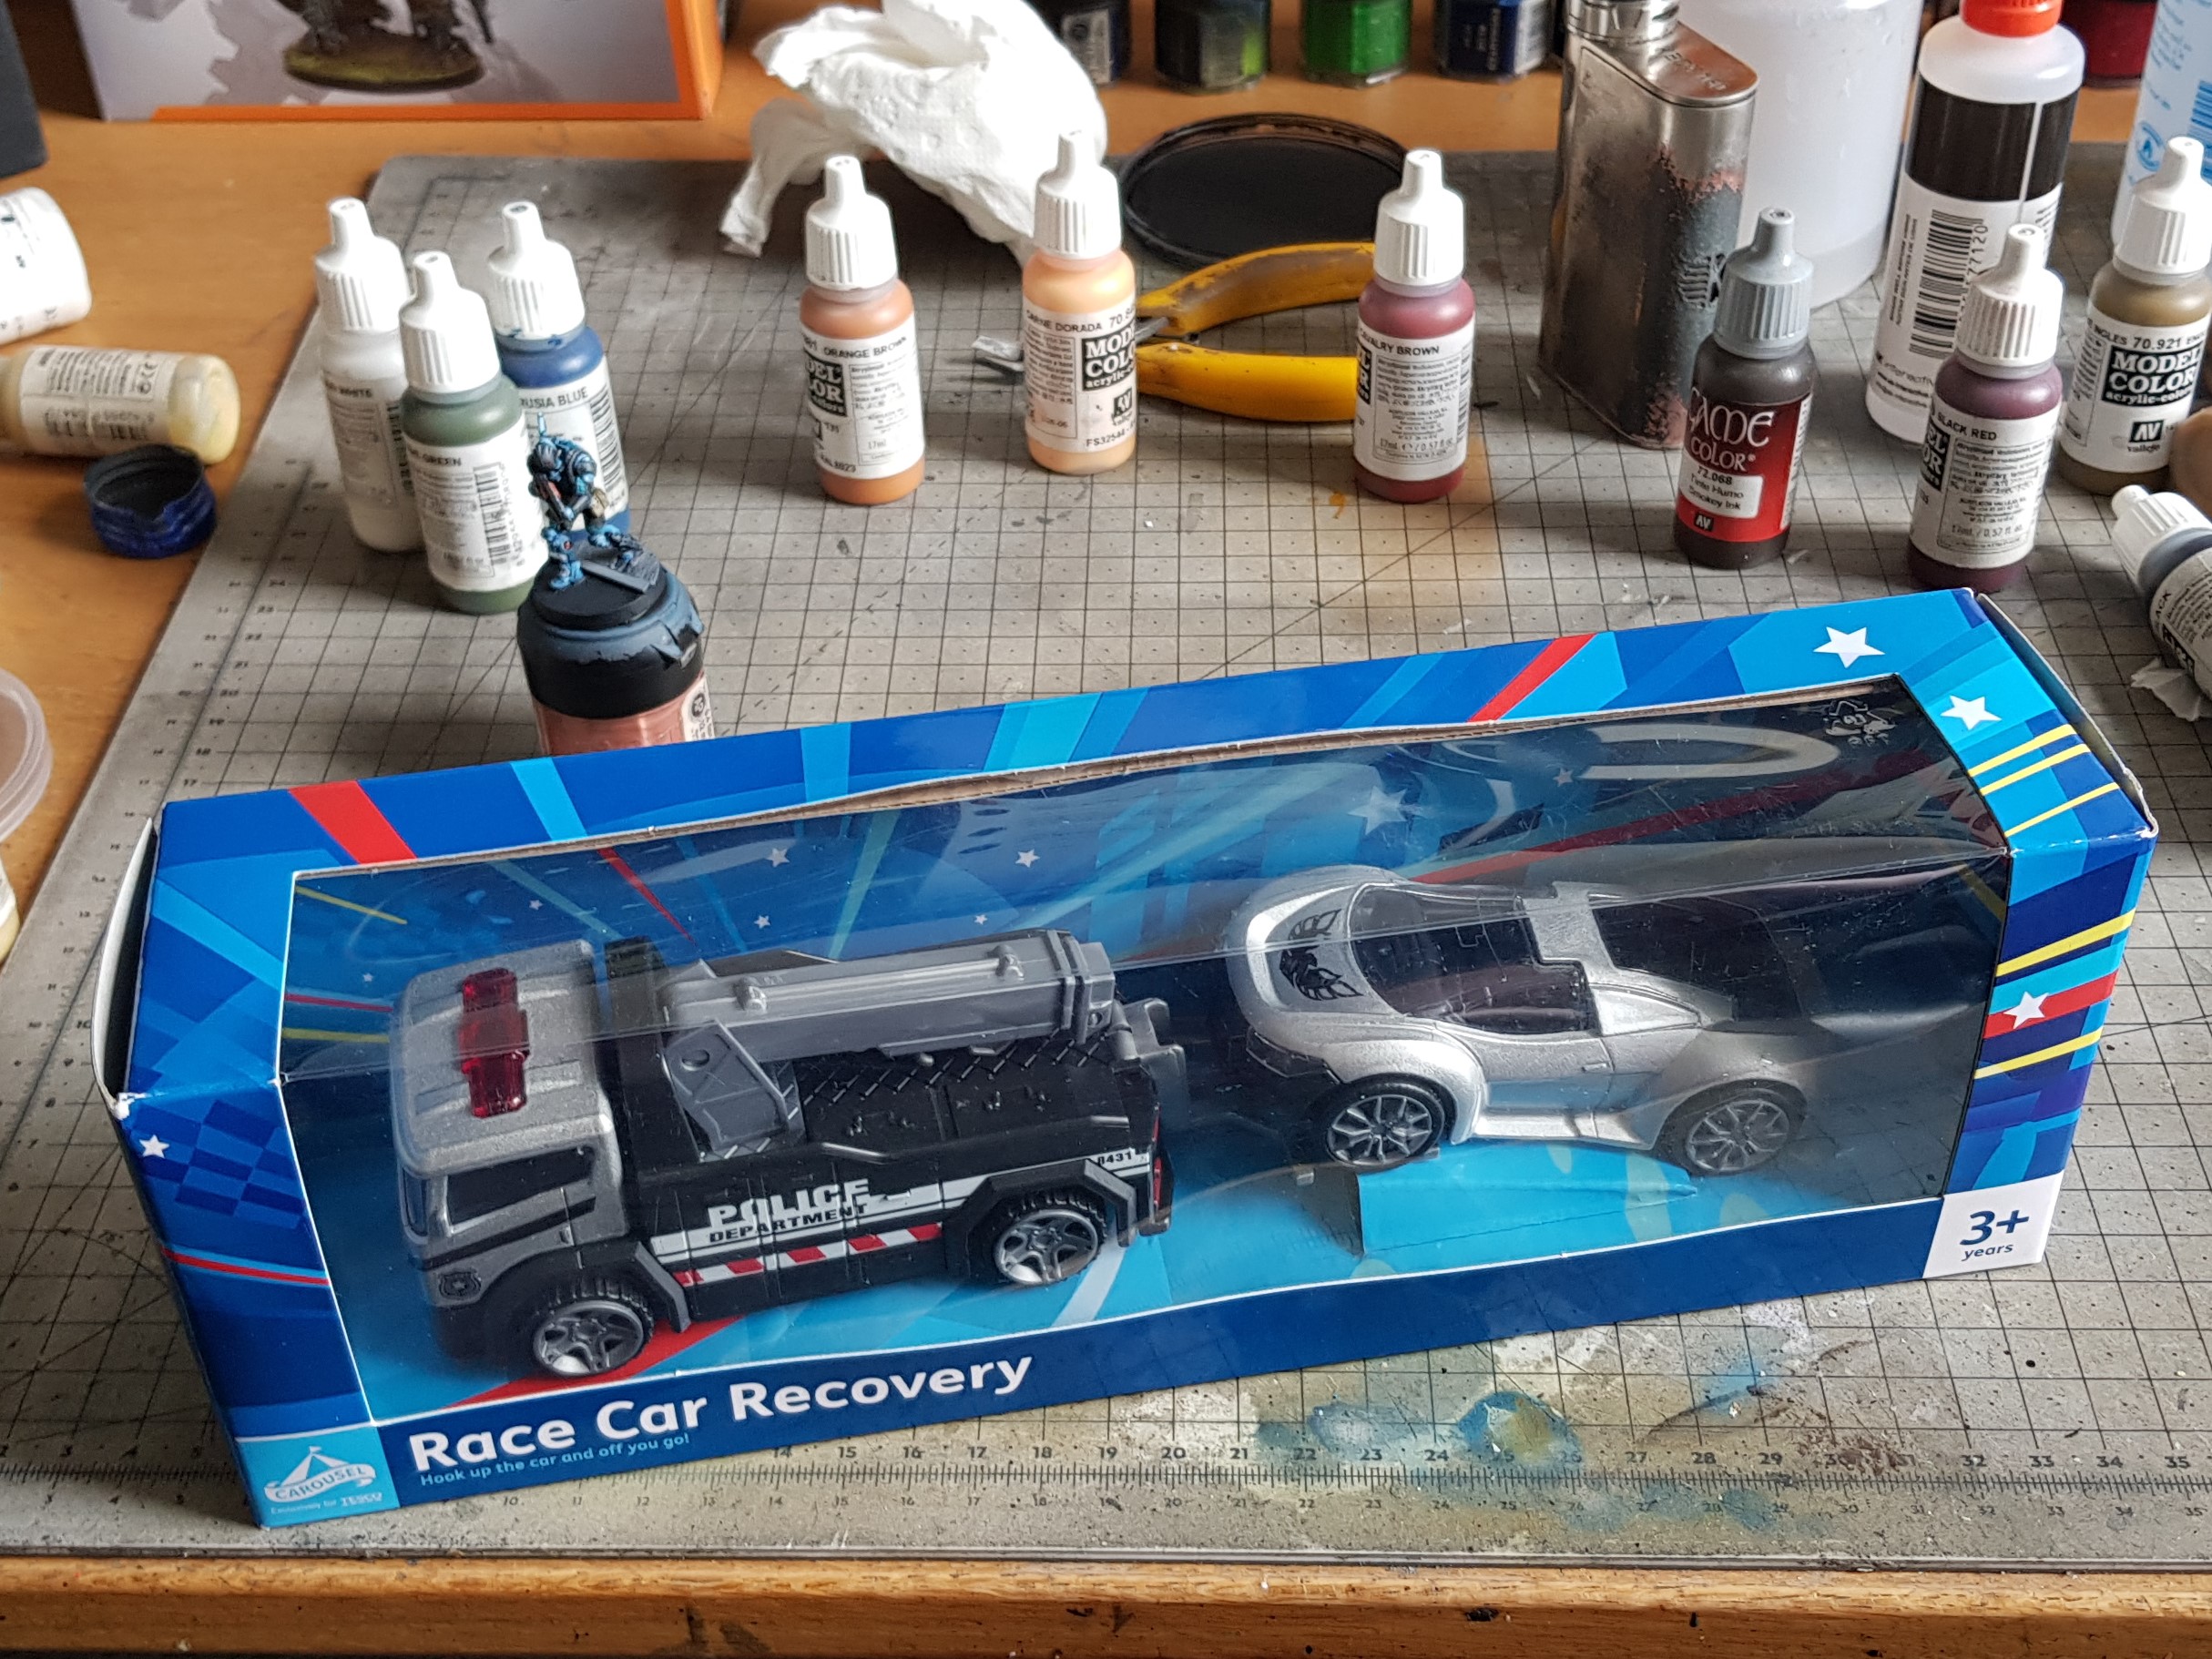 The toy car set in tesco was £5 I dont like the truck it seems like a smaller scale but may (will) have other uses for it later.
  I took apart the car with a screw driver it's a metal body and axel the rest is plastic. Sanded the body with 600 then 1000 grit sandpaper I couldn't get into the right curves so used a rotary tool with a wire brush on it to get in. Sprayed matt black. cut off the made in china and test marks on the bottom sanded and sprayed again matt black. I had to sand some of the scratched canopy sanded in 1000 - 2000 grit and then used T-cut and cork to buff back to clear. I then cleaned and back sprayed with white blue and dark blue . I also done orange yellow and white on the headlamp section. I pulled off the tyres and used gun metal on the alloy wheels and done.
 -
Black AK interactive Black Surface primer AK178
-
Dead White Vallejo 72.701
-
Magic Blue Vallejo 72.721
-
Imperial Blue Vallejo 72.720
-
Moon Yellow Vallejo 72.705
-
Orange Fire Vallejo 72.708
-
Gun Metal Vallejo 72.754
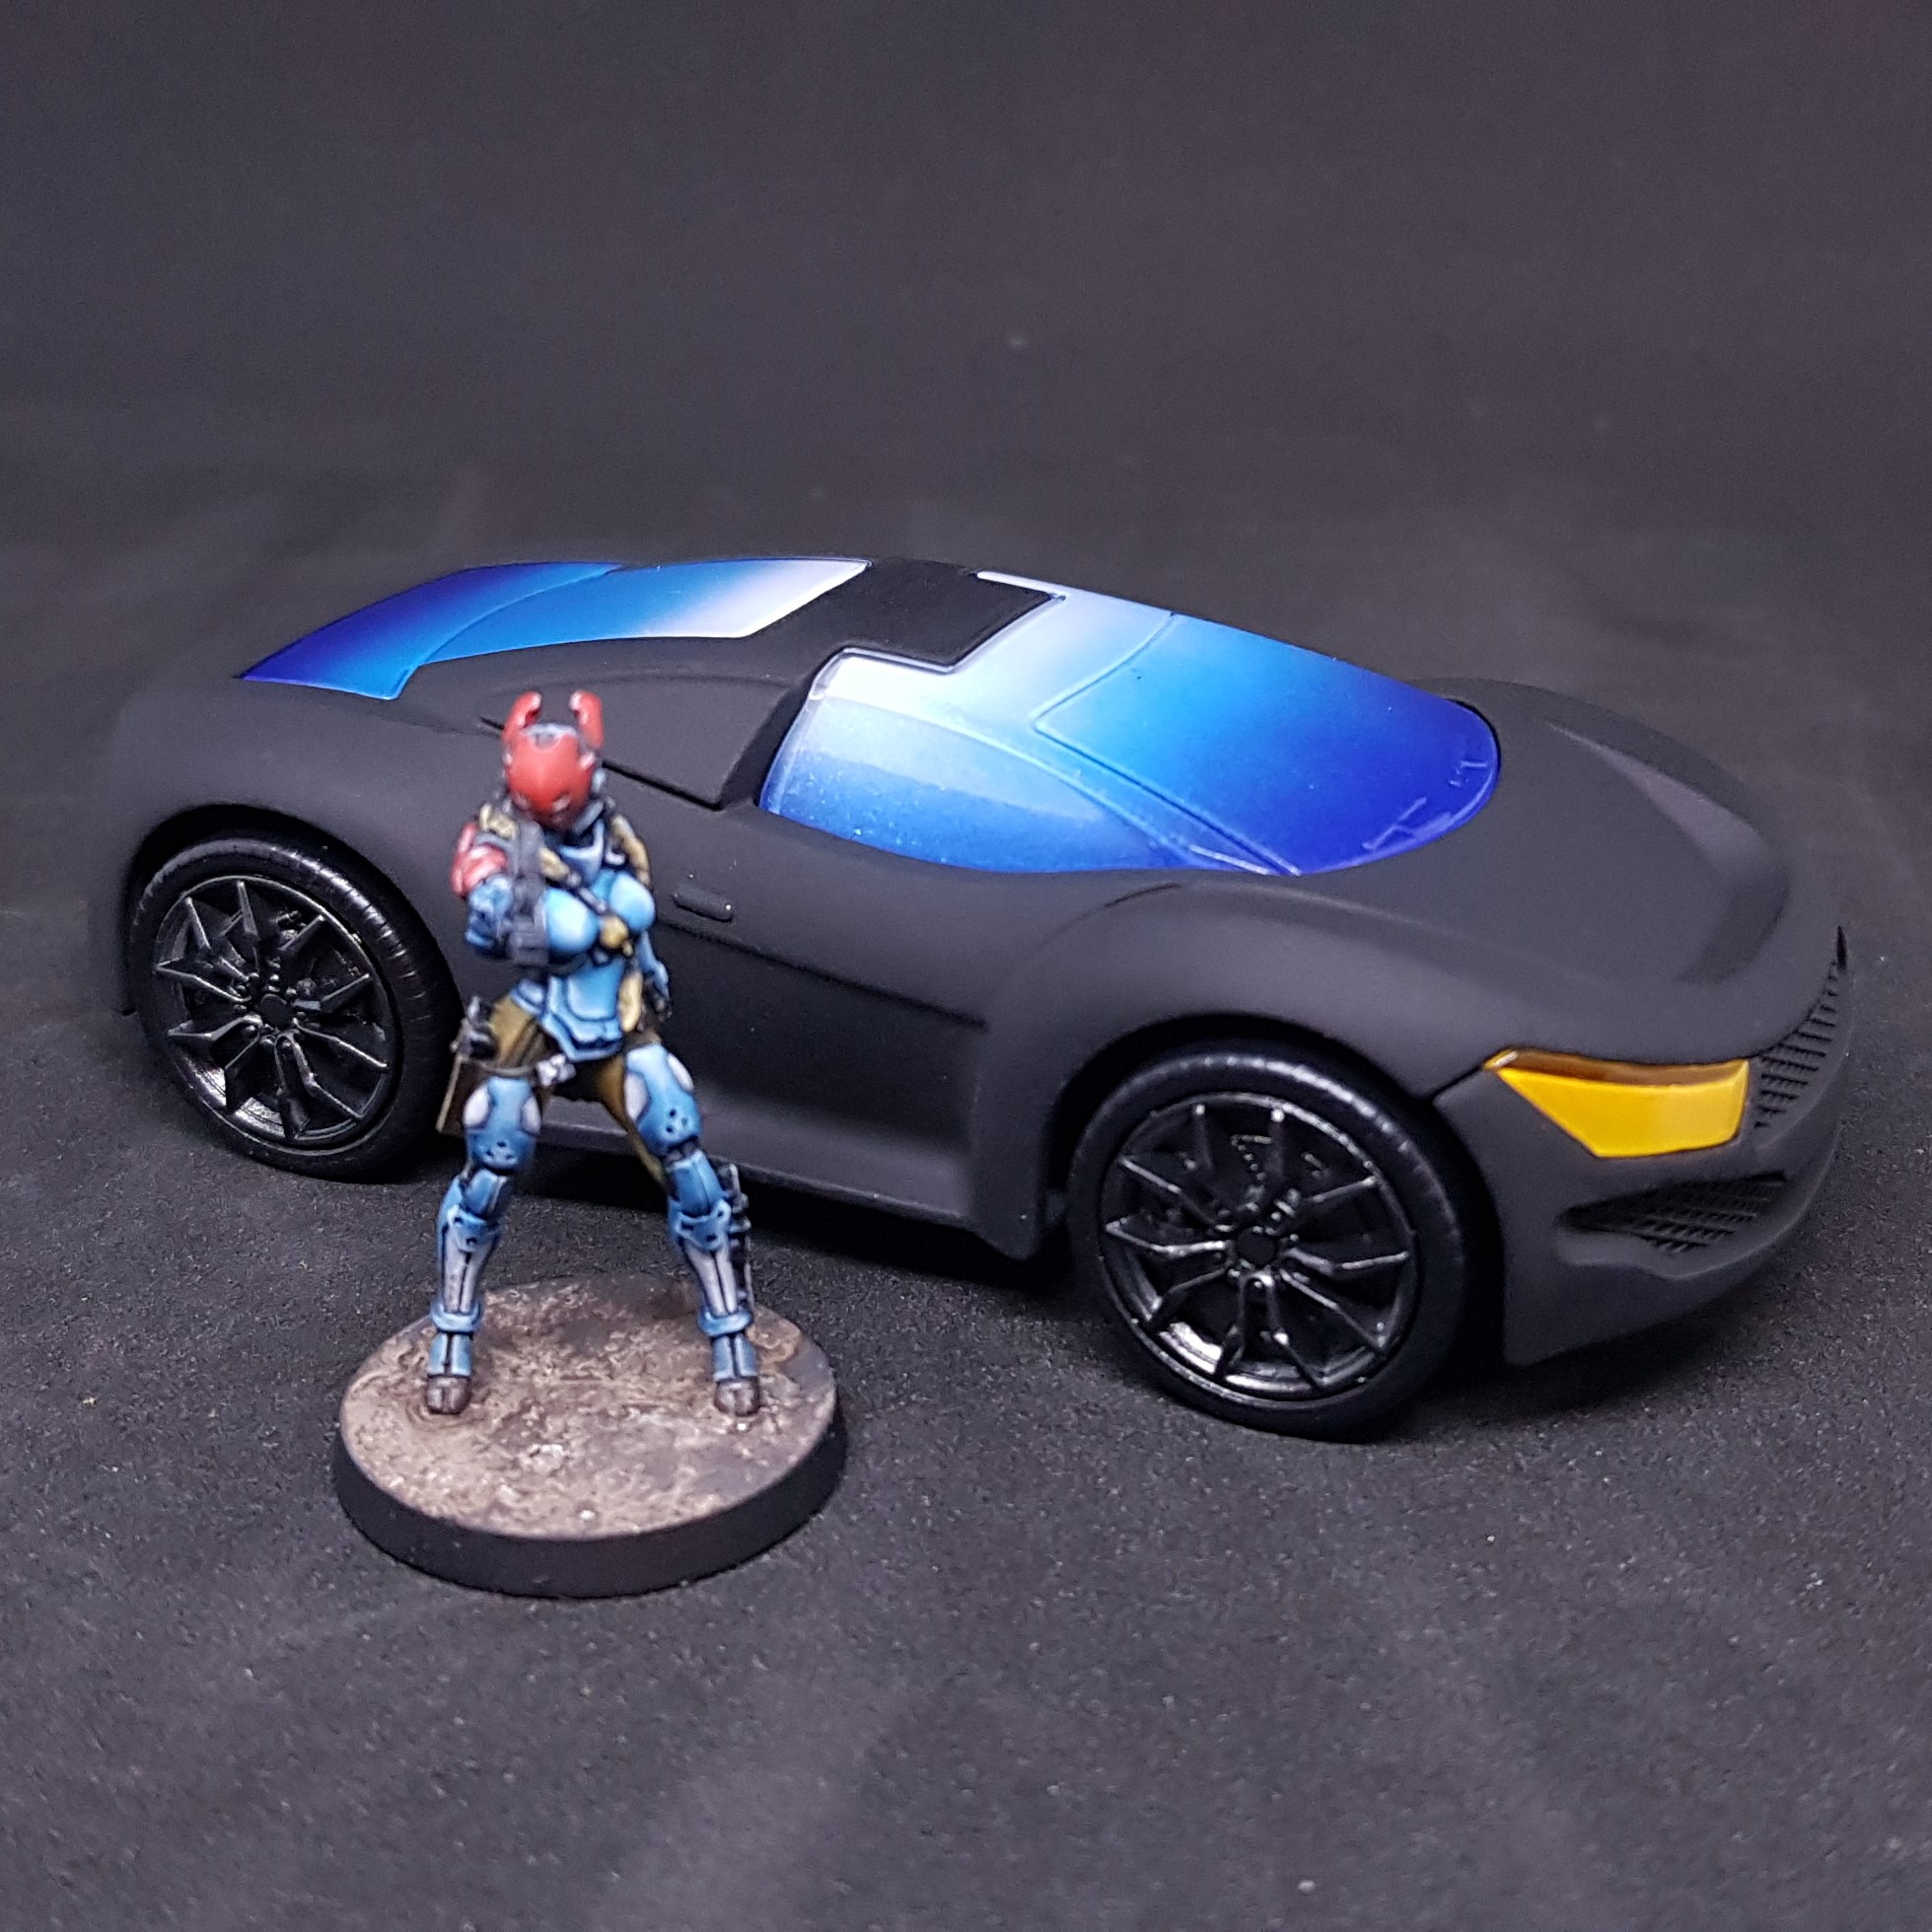 The semi finished car. (enough to use but I will do more later)
So I will be getting a couple more of these. They are the car of my tiny little dreams. It’s so perfect in scale but it distracted me from painting further than the shopping trip that’s the only downside.
Oh well off to eat the food I got.
More to come if I can stop painting and distracting myself.
Ok I stopped painting and started designing and building again.
I have procrastinated enough. It’s time to take this to the next level (or two). Sorry this will be a bit wordy but I wanted to get down all I learned.
This project is a test bed for lots of new equipment and techniques to find out where the limits are at this current time. Things do not always go smoothly and they shouldn’t but it seems to create a bit of apprehension in doing the next steps. If this was a job I would power through as a hobby I kind of let it get to me.
With the raised pads having rounded corners it was never going to happen that I could place a square building on top. It aesthetically speaking needs to be a design feature throughout the elements of the building.
I didn’t want to print 3D printed corners to the building (this was plan B). I needed to come up with a way to do rounded MDF and card just like the earlier buildings. Luckily enough I didn’t need to invent a way but I had to do some research. I did try cutting someone else’s design about a year ago and started a very small fire. So I knew I couldn’t rip off someone else’s work. The problem then was the lines were to close together and the laser went over the straights twice which just caught fire (again small fire). I did however learn while doing this and thought I could do it so it would work on my laser (which does not have air assist). So I started my design.
 This is the final design its staggered 6mm lines they are staggered by 1/3 then a 1/3 blank then 1/3 line. I don't think it matters on the size.
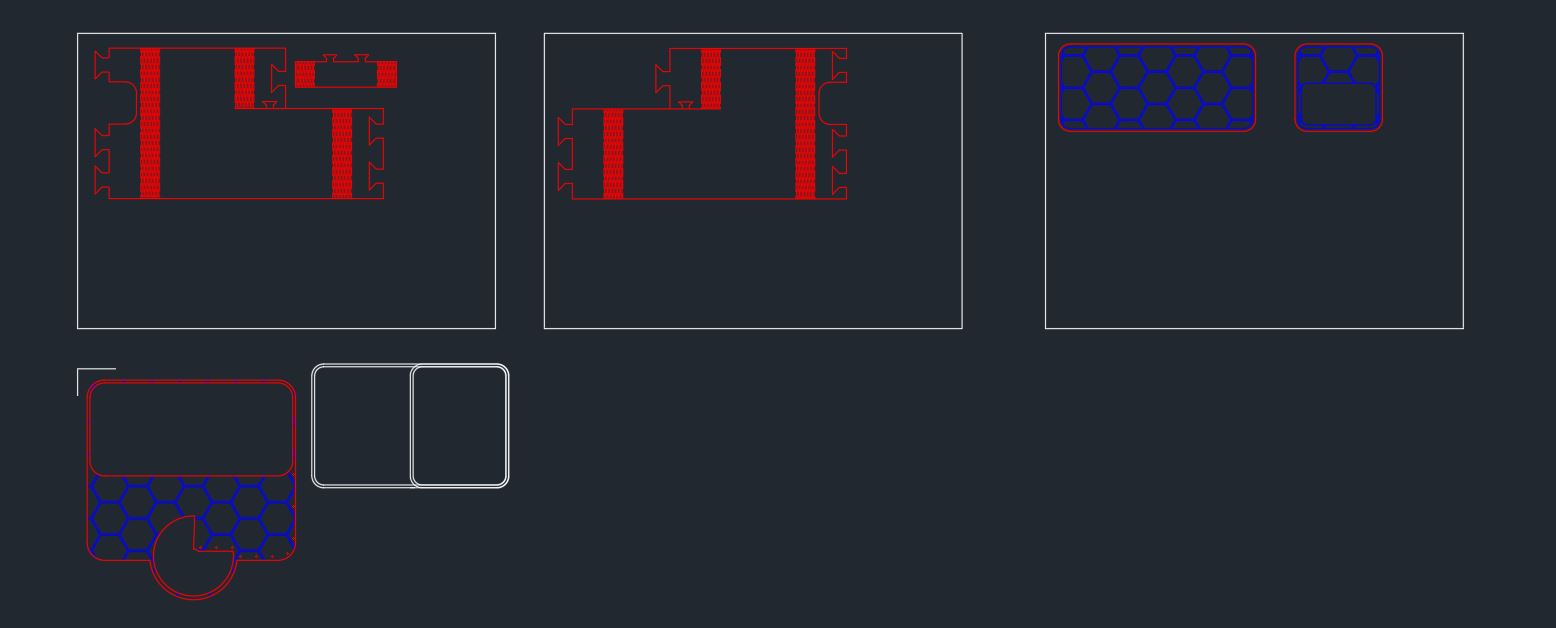 This is the full drawing for the base building before any details are added on. (this is version 1.3)
So after I designed the base building, I made a grave error. I used the place holder building from the Fusion 360 model to base the dimensions on. This meant a made a building that was to big on one dimension and to short on another. I also managed to mess up the bends but This did prove the concept would work. I also made a second mistake and measured the exterior length of the curve of the bendable flat sections. For some reason I though this dimension should be correct as this is the longest part. It was not the case I measured the interior curve and this was the correct dimension. This is because it flexes around the smaller interior dimension. In hind sight this was a stupid mistake but cost some time.
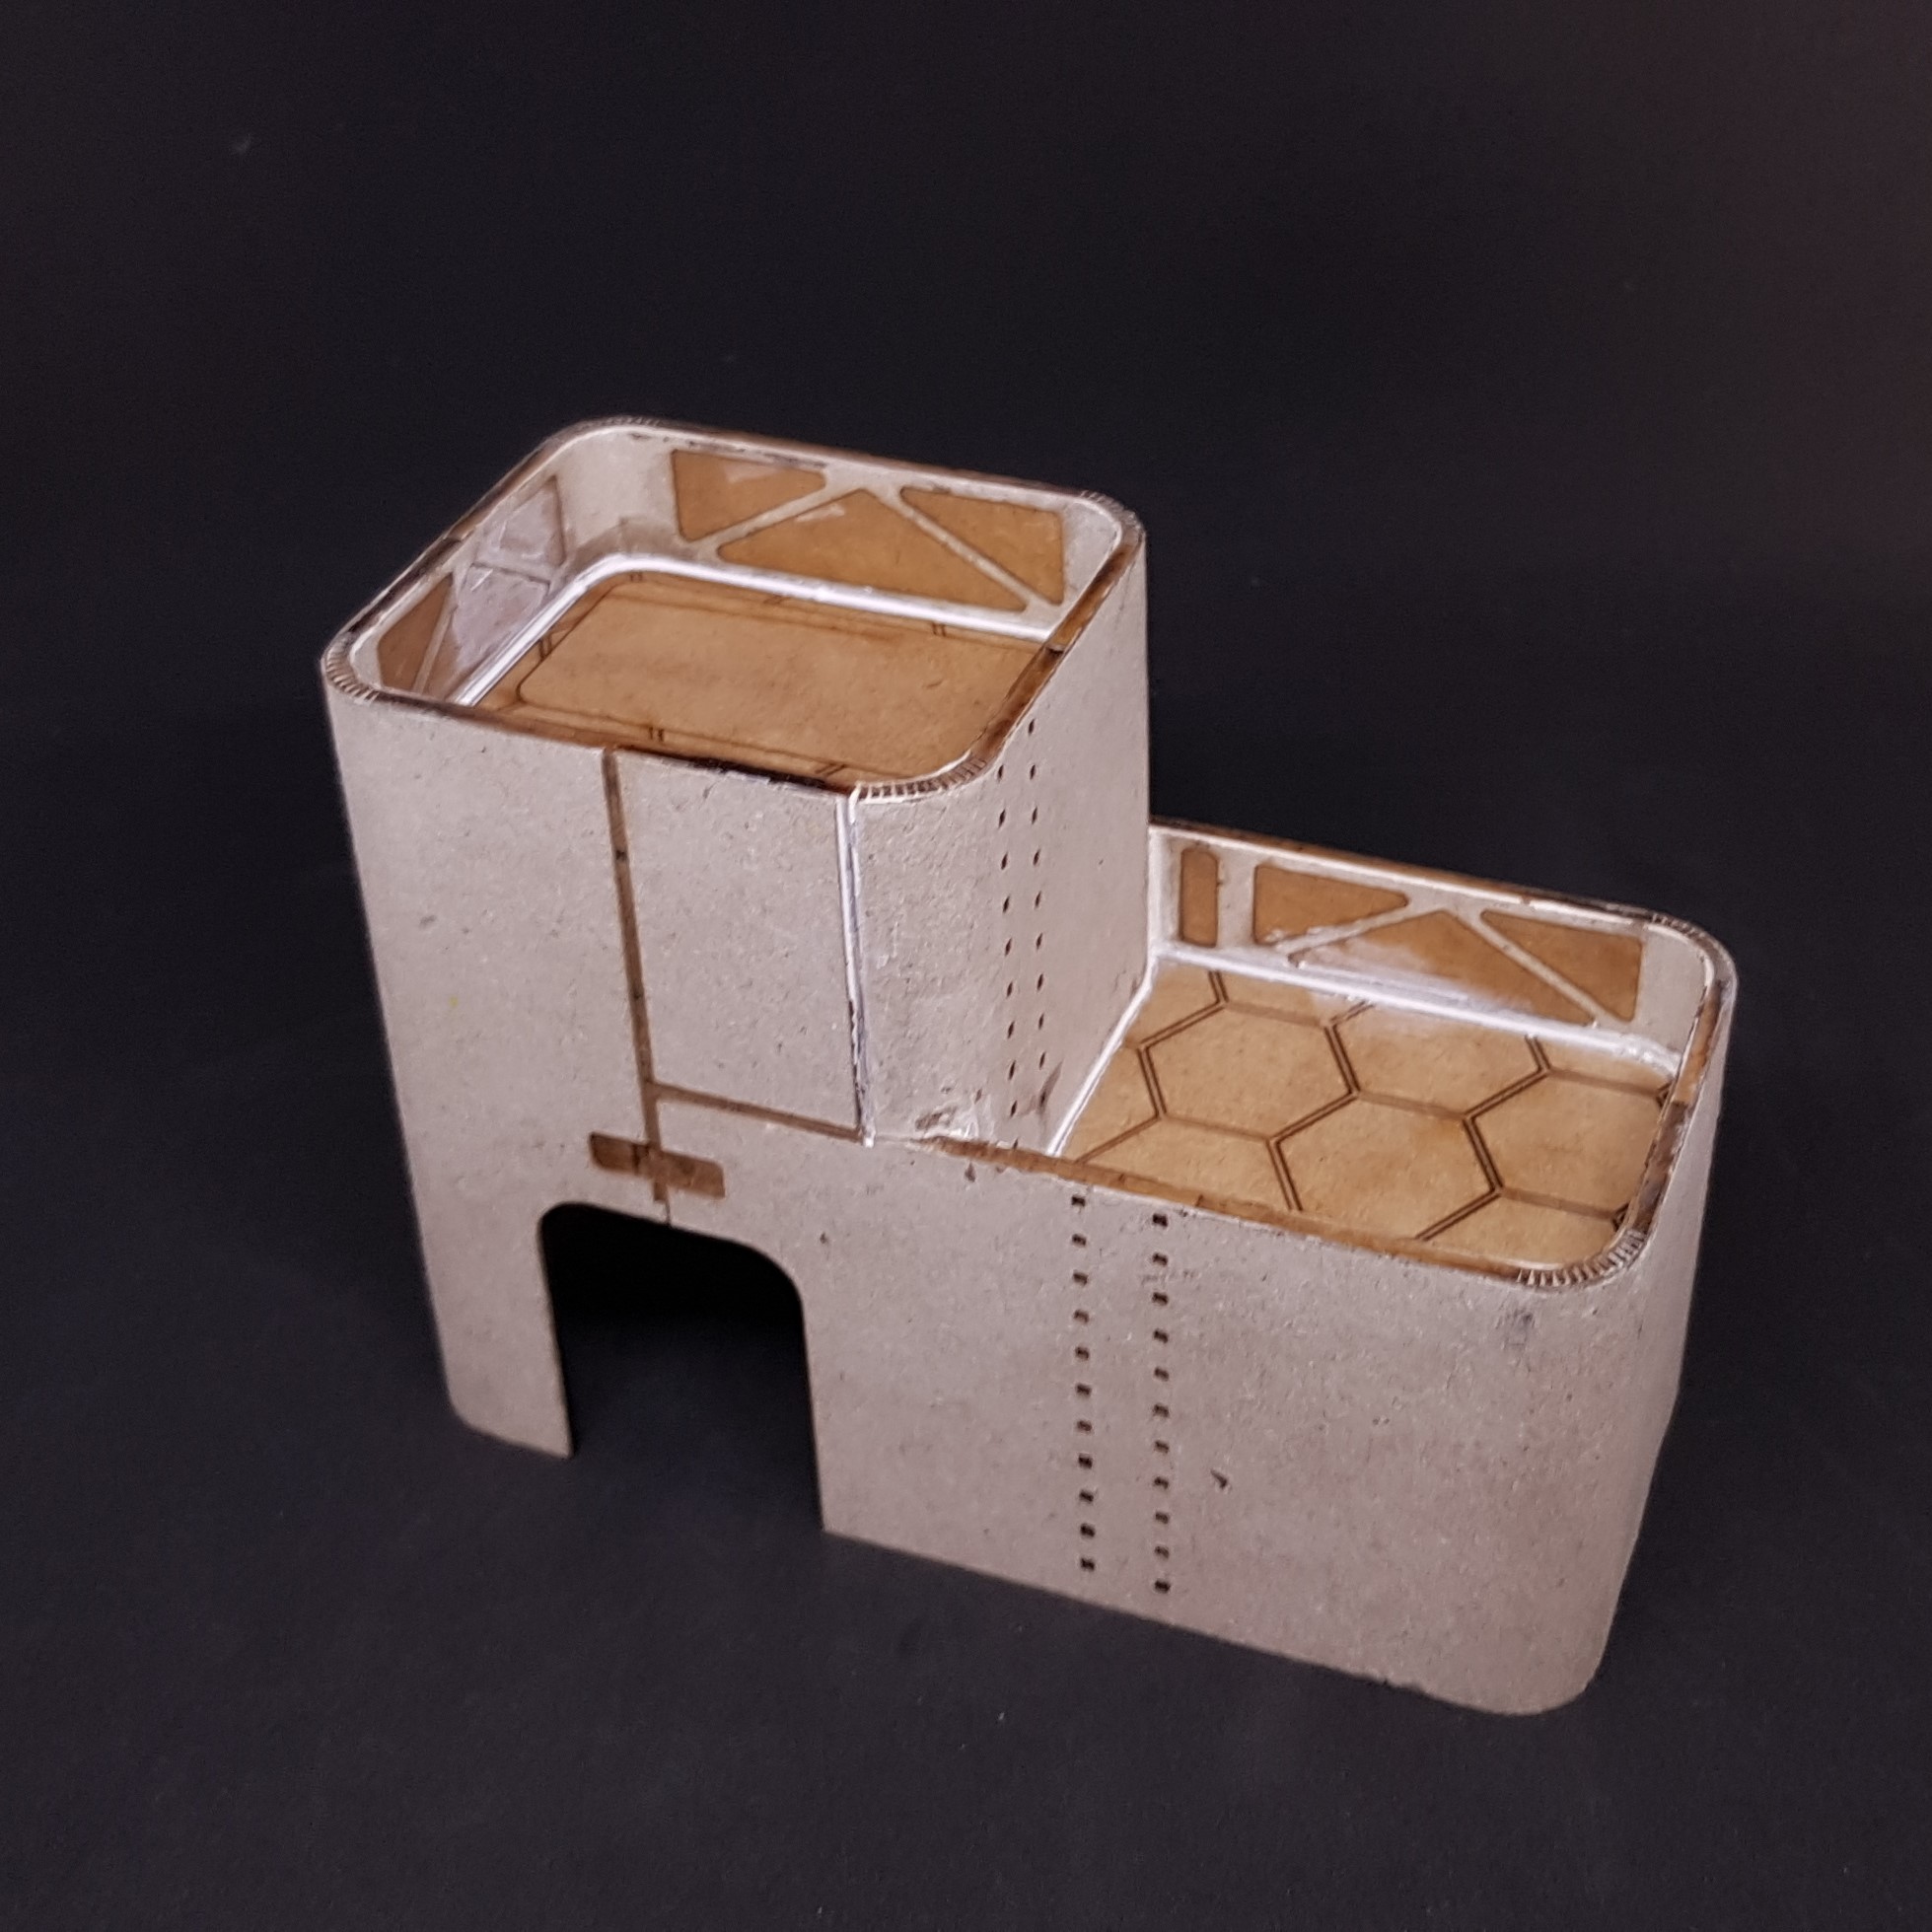
I didn’t want 1000 parts. I have made this mistake before this 7 parts but only 5 are really required (two stops and bottoms for the rooms). Which as far as I’m concerned is great to get this complex shape. The only issue was the 1st floor is lower than the rim. I wanted to keep this for gameplay but would have been easier to make it flush. I made a part that had the flex on the outside to match the rim. I used cove tail like joins as it’s quite springy. this helps to lock the sections in place for gluing.
Here is what turned out to be.
 This is the finished flats before assembly
 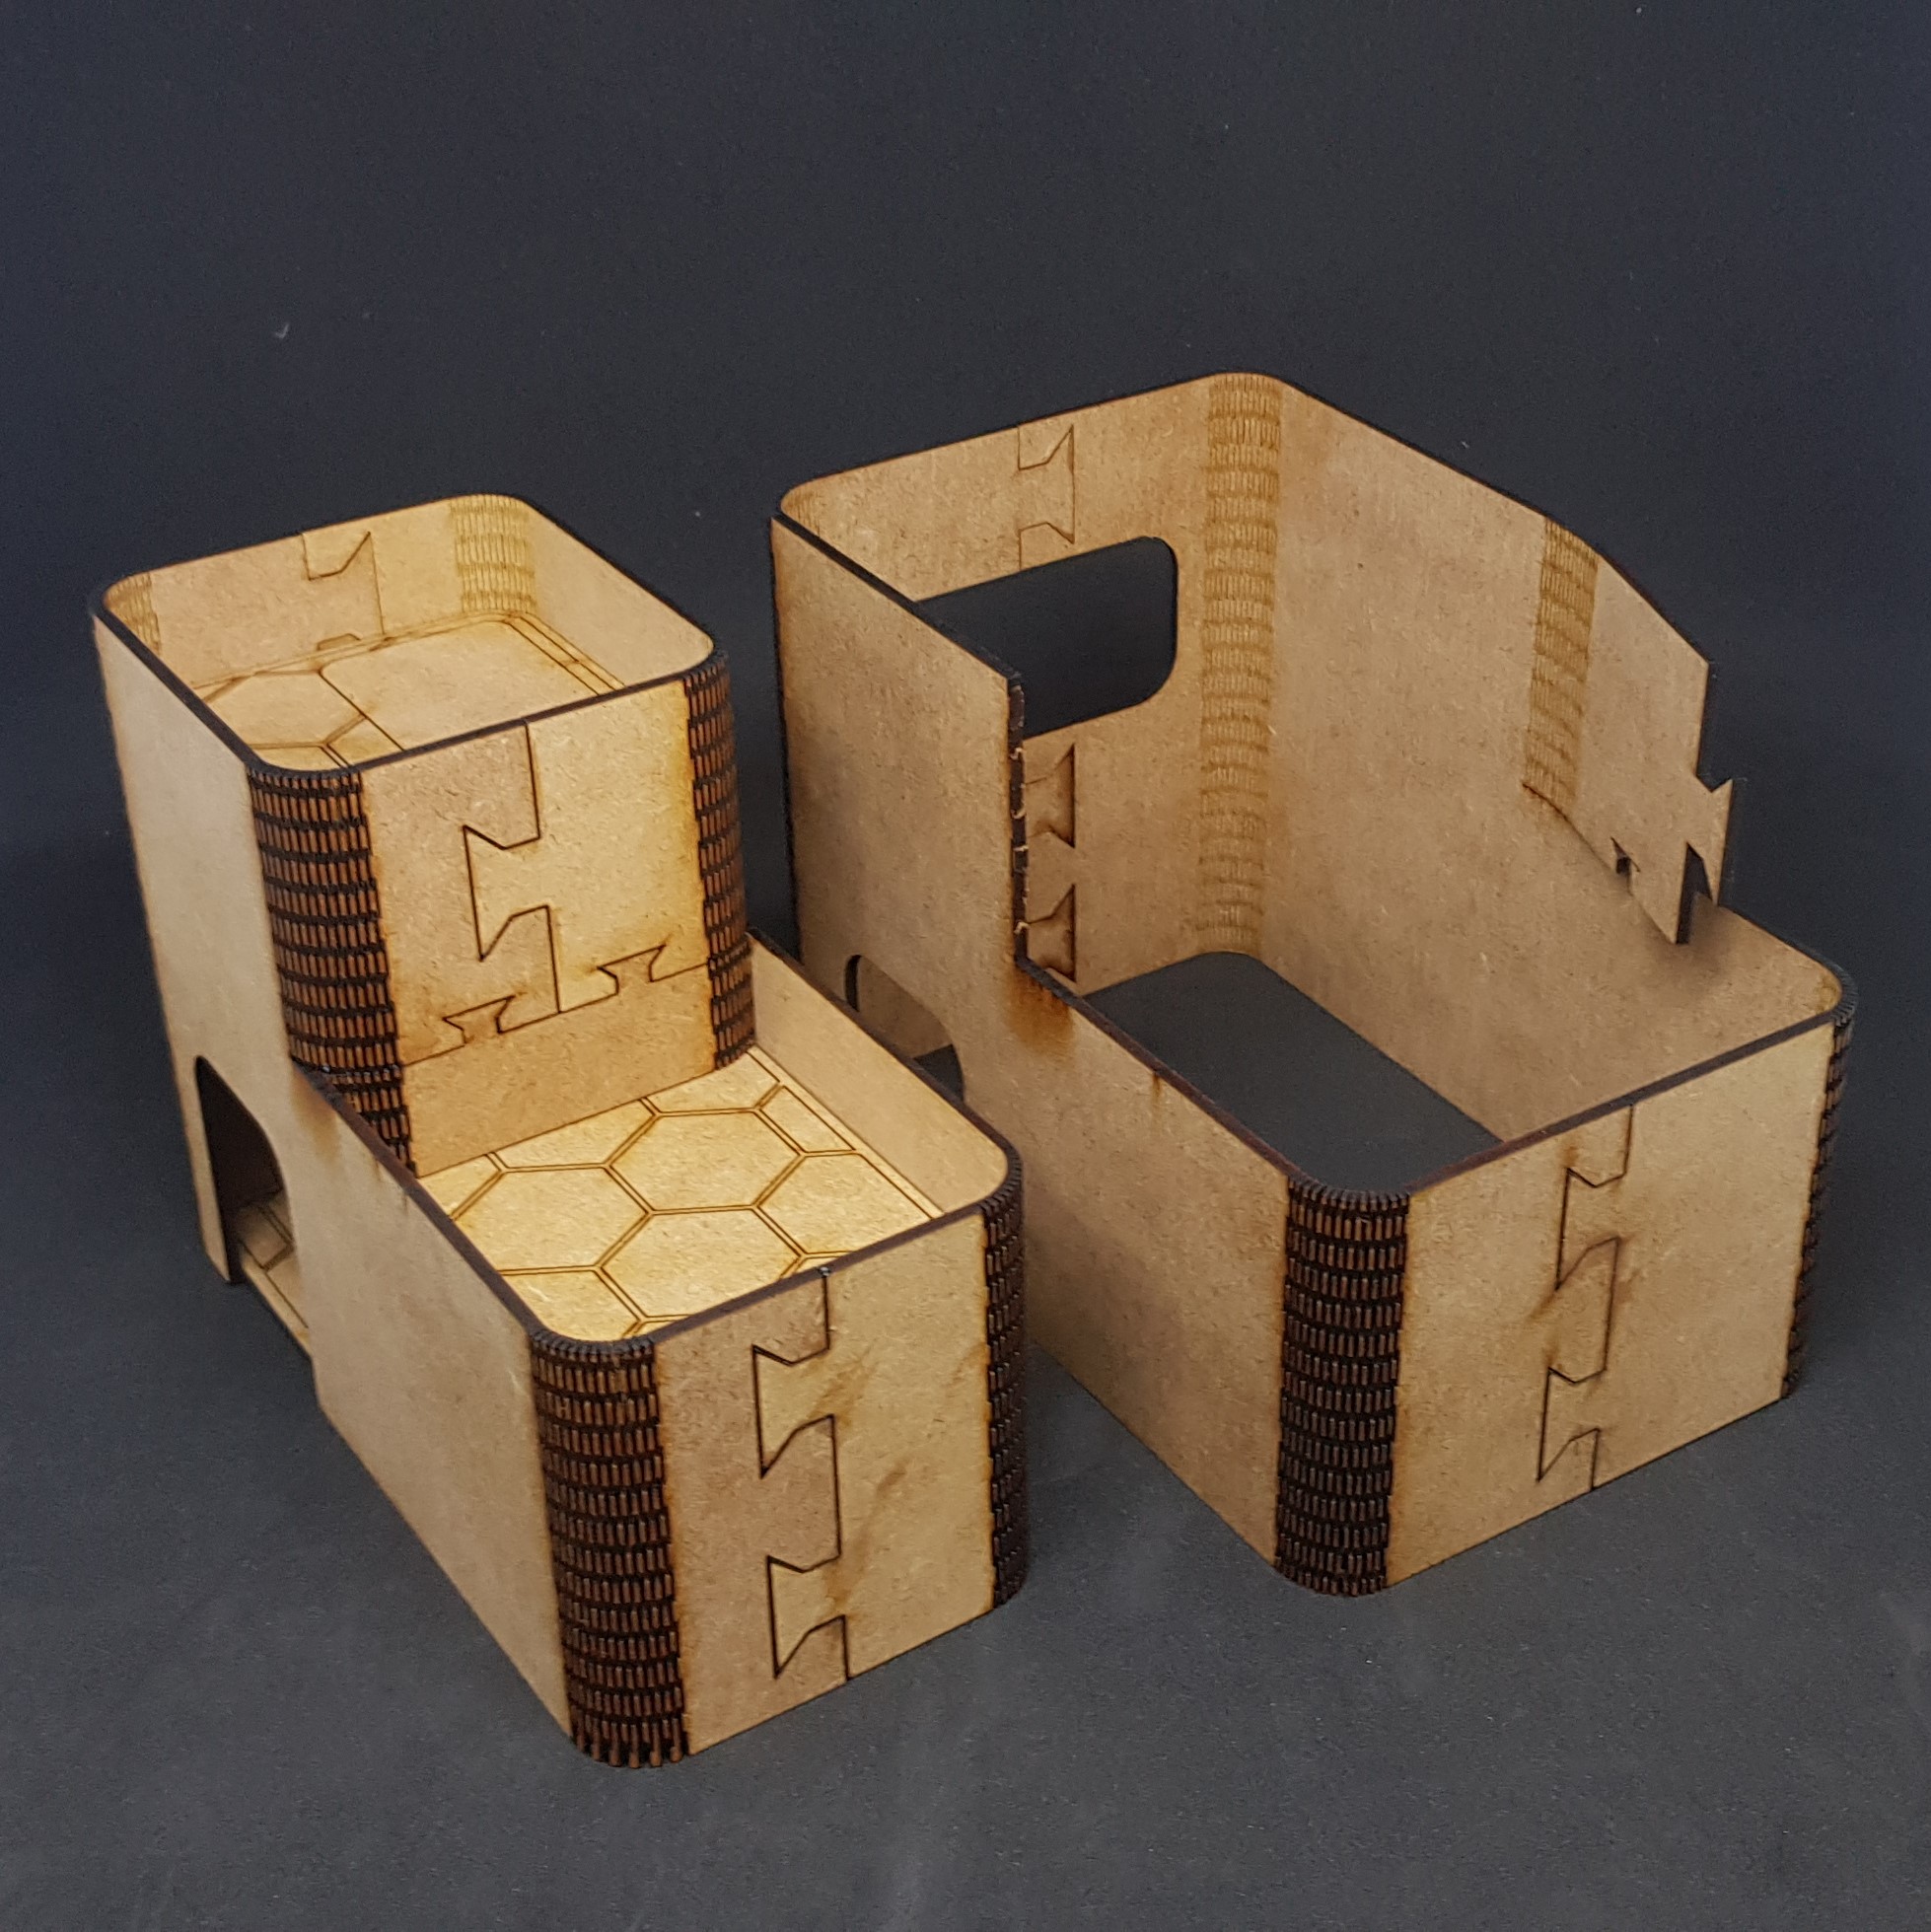 Test model vs finished model
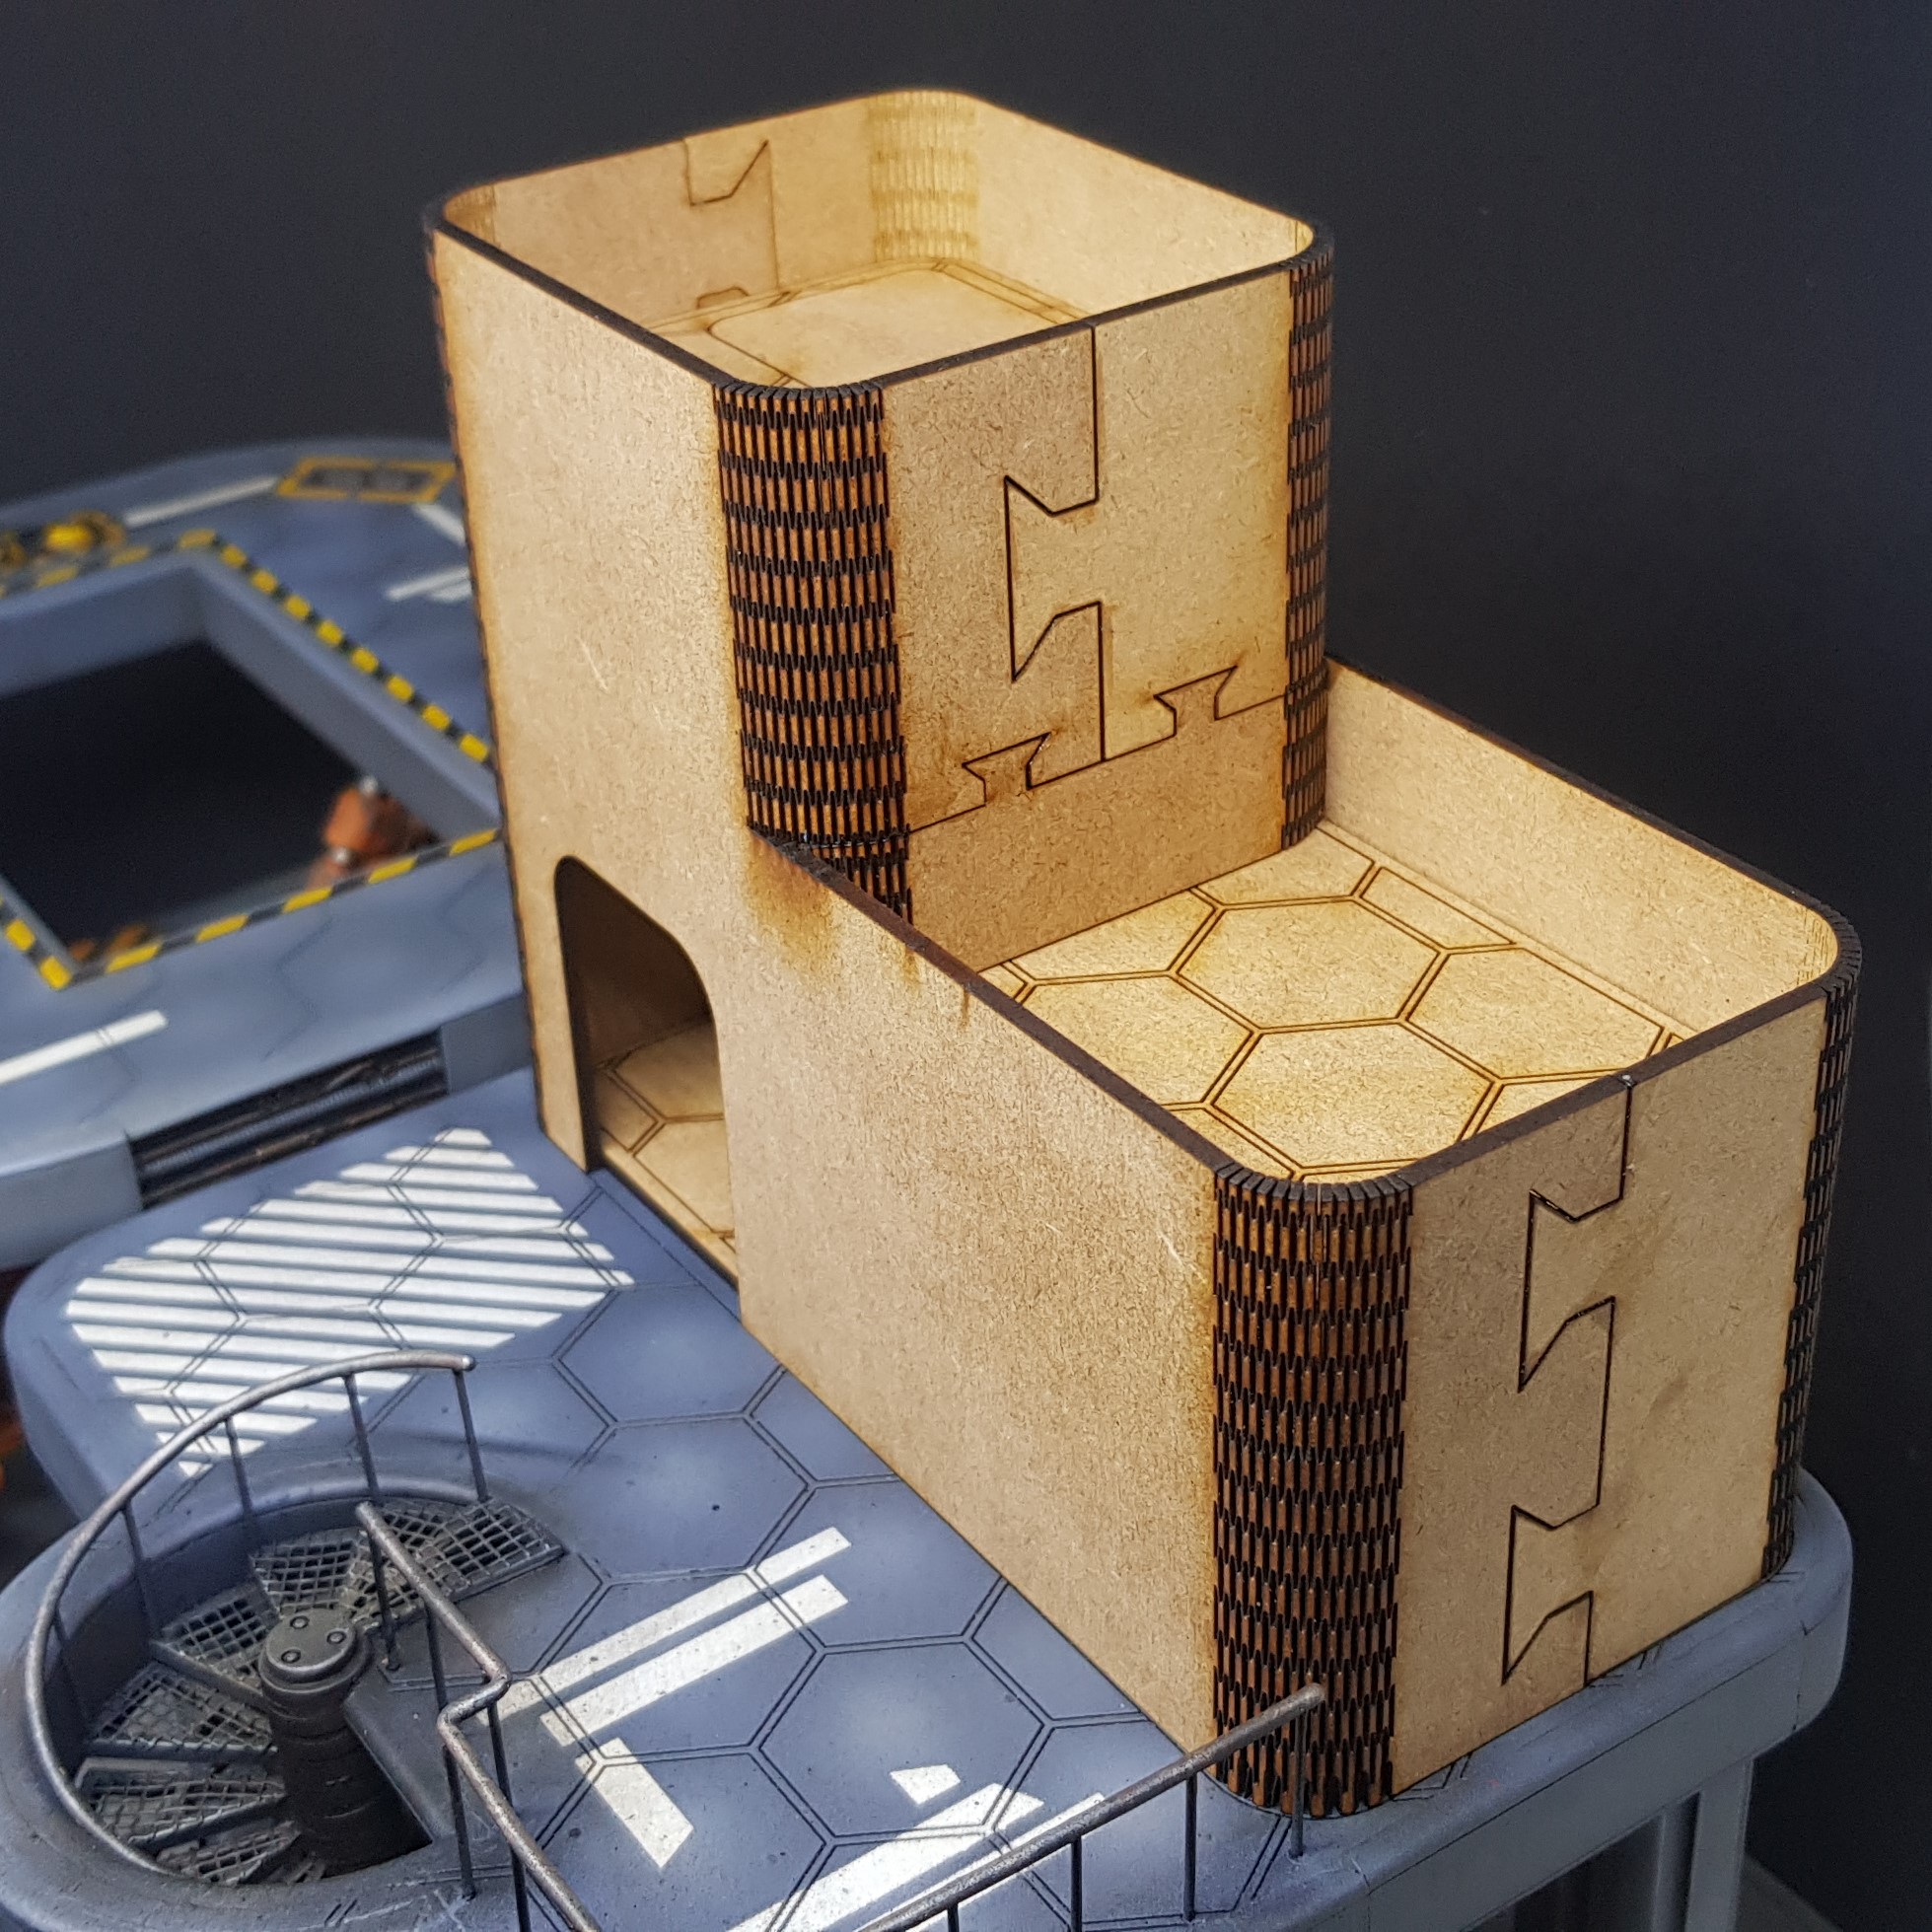 finished base model in place it now fits perfectly.
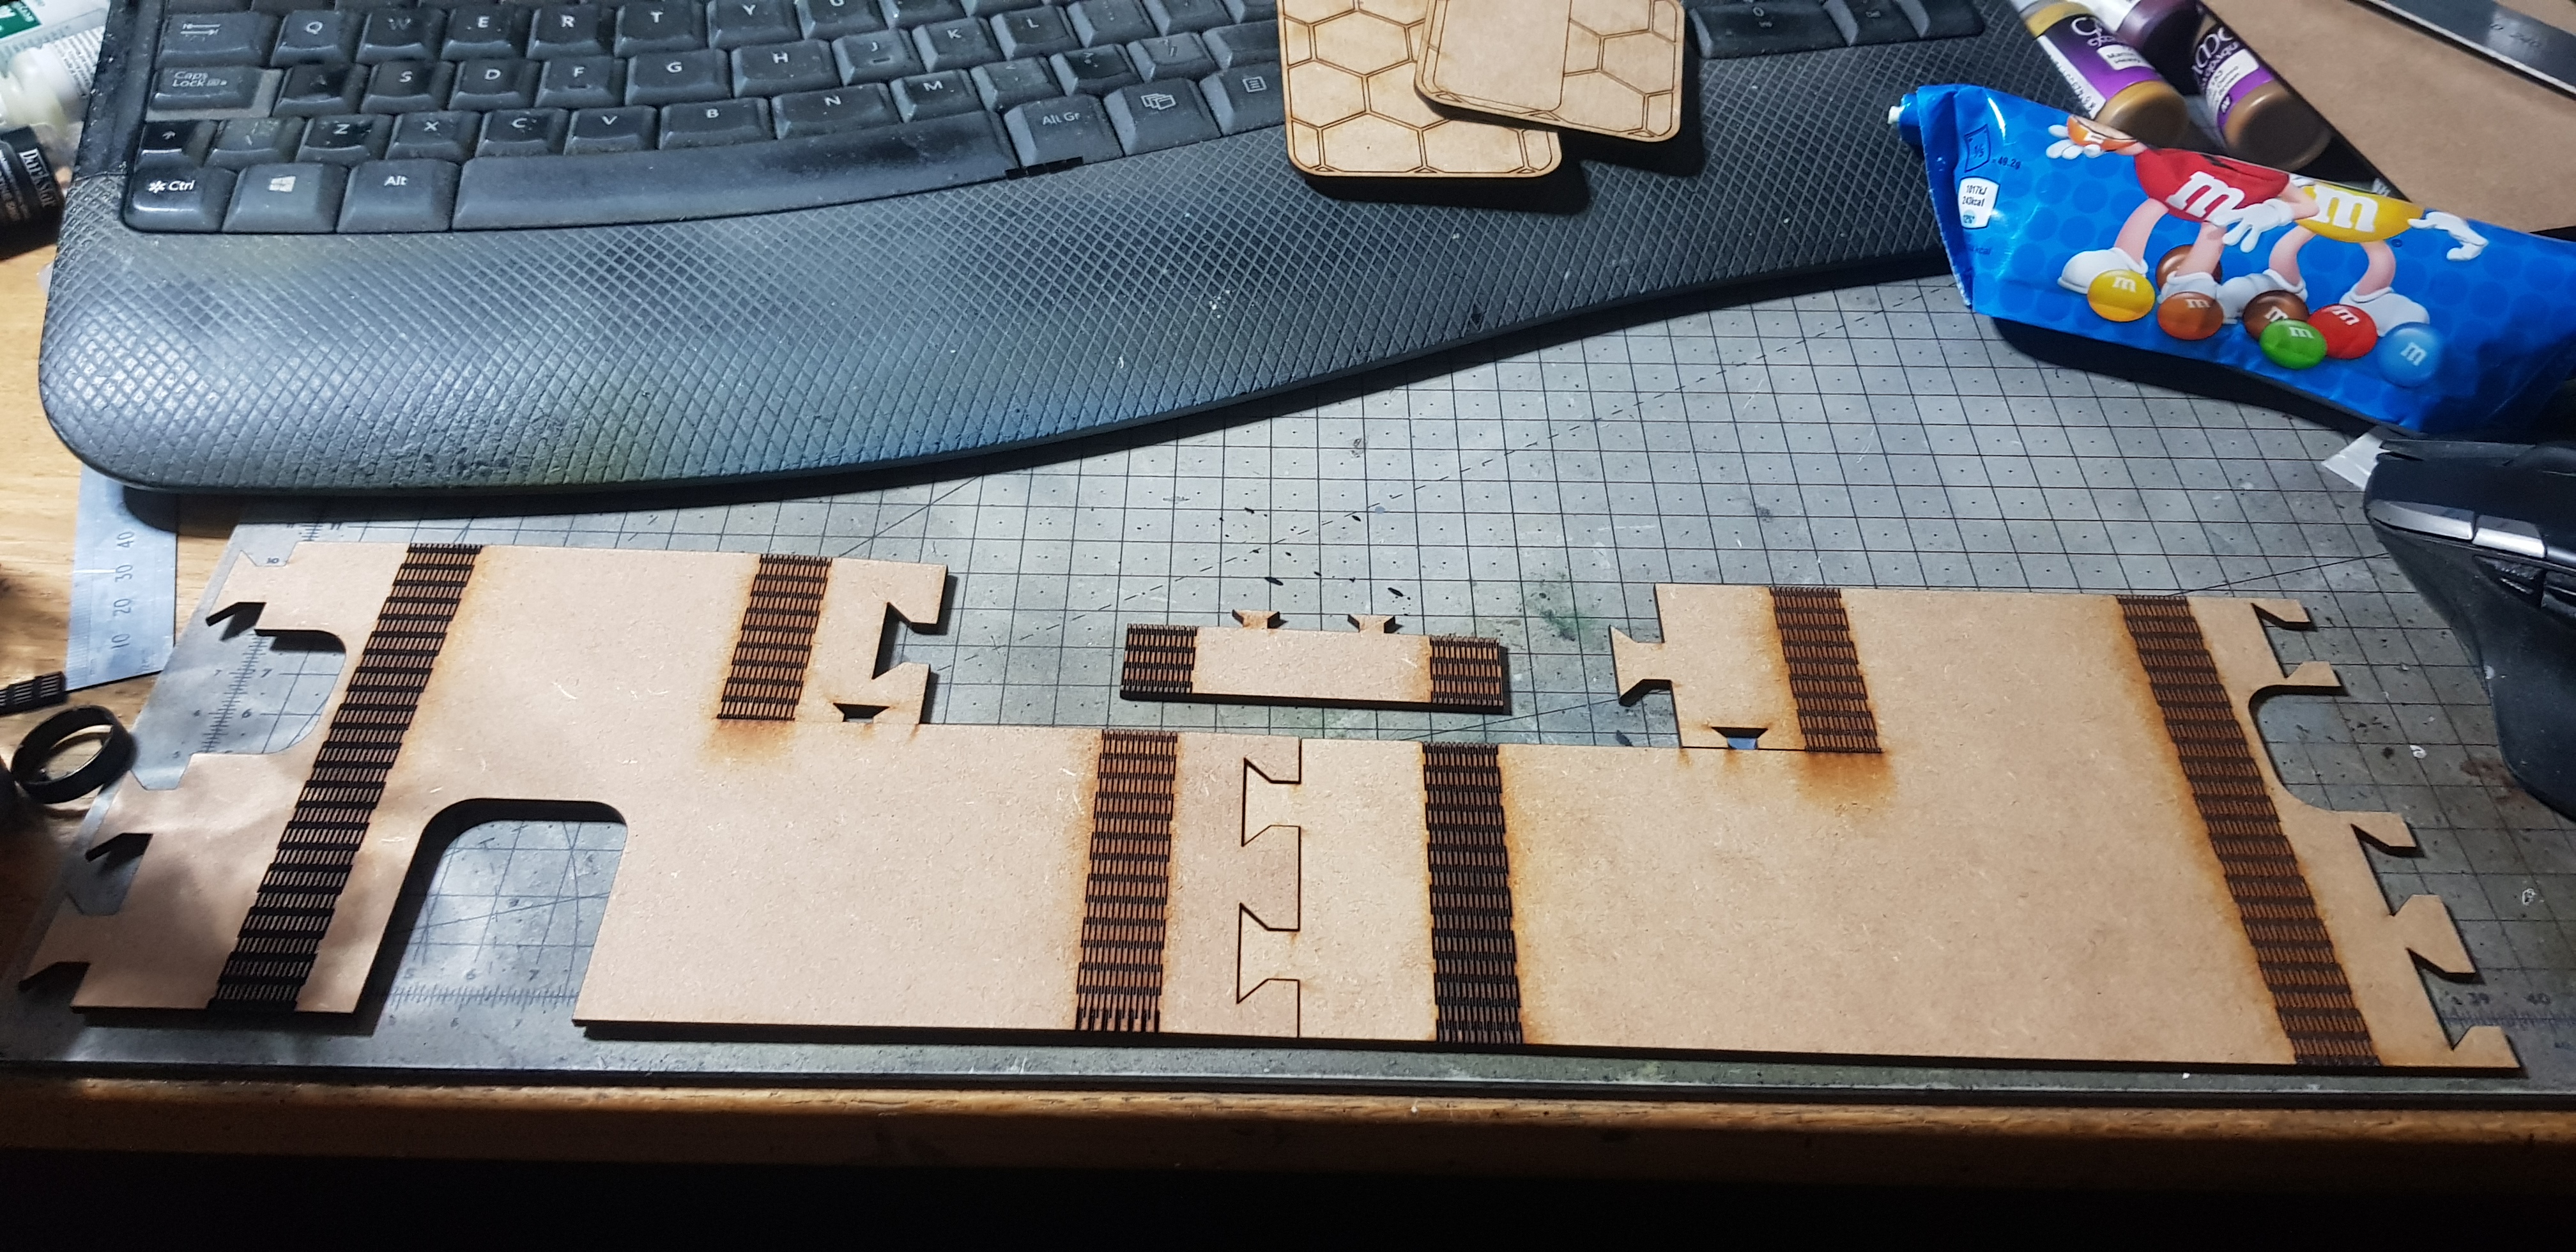
 This is my first finished project using K40 whisperer for the entire thing. It’s a much faster workflow than using Corel laser. I go right from CAD to cutting. No need for reference marks. I did have some issues with so many individual lines on the drawing my laser cutter hates this and sometimes stops responding mid cut. I wasted 3 bits of wood due to this (probably about 50p down the drain) I used the rest for the tops and bottoms so not a complete waste.
You also don’t want to play with the curves to much. throwing them around like a floppy taco is probably not a good plan. I did break my test piece doing this. Glad it was wrong anyway.
There are loads more ways to bend MDF and wood in general. There are some weird methods but this seemed the simplest and the best for my needs on this project.
Now I need to design the exterior parts and get these cut and attached. I hope to get this done this weekend (ever heard that before?). Then I need to design and make the radar dish or tower for the top.
More to come, sorry for all the words. I don’t want to have to re-learn this skill. I promise more pretty pictures than this.
Anyone seen my muse?
I should have finished this project by now. Unfortunately I appear to have lost any creative thought I have (hopefully just this project). I started to hit a wall. Making parts to fit on curves seems to not comply to any mathematical theory I can fathom.
I make parts mathematically correct that does not fit to the reality. It’s probably glue thicknesses but It seems to far out to be that.
I tried to push ahead making each component and placing it on to give better reference points for positioning parts. Nothing works cleanly and this isn’t usually a problem. Compromise, adapt and overcome is usually the order of the day.
It’s a wall a have been trying to hit for three weeks and almost no progress. I have no choice but to order the retreat and pick another battle. This project is regretfully going on hold for pastures new. I will come back but it will be when my moral has recovered.
So this is the last update for a while, this will however enable me to talk about my new project I have been side lining It will however be a new project starting from scratch.
Now what did I manage to do in 3 weeks?
Not much. I clad the building in 0.5mm card sprayed black and put on the stairs and some of the hazard stripes the window and door are put in position and the vents on the side. Here is some pictures of where it stands just now.
 pre paint and a few components front
 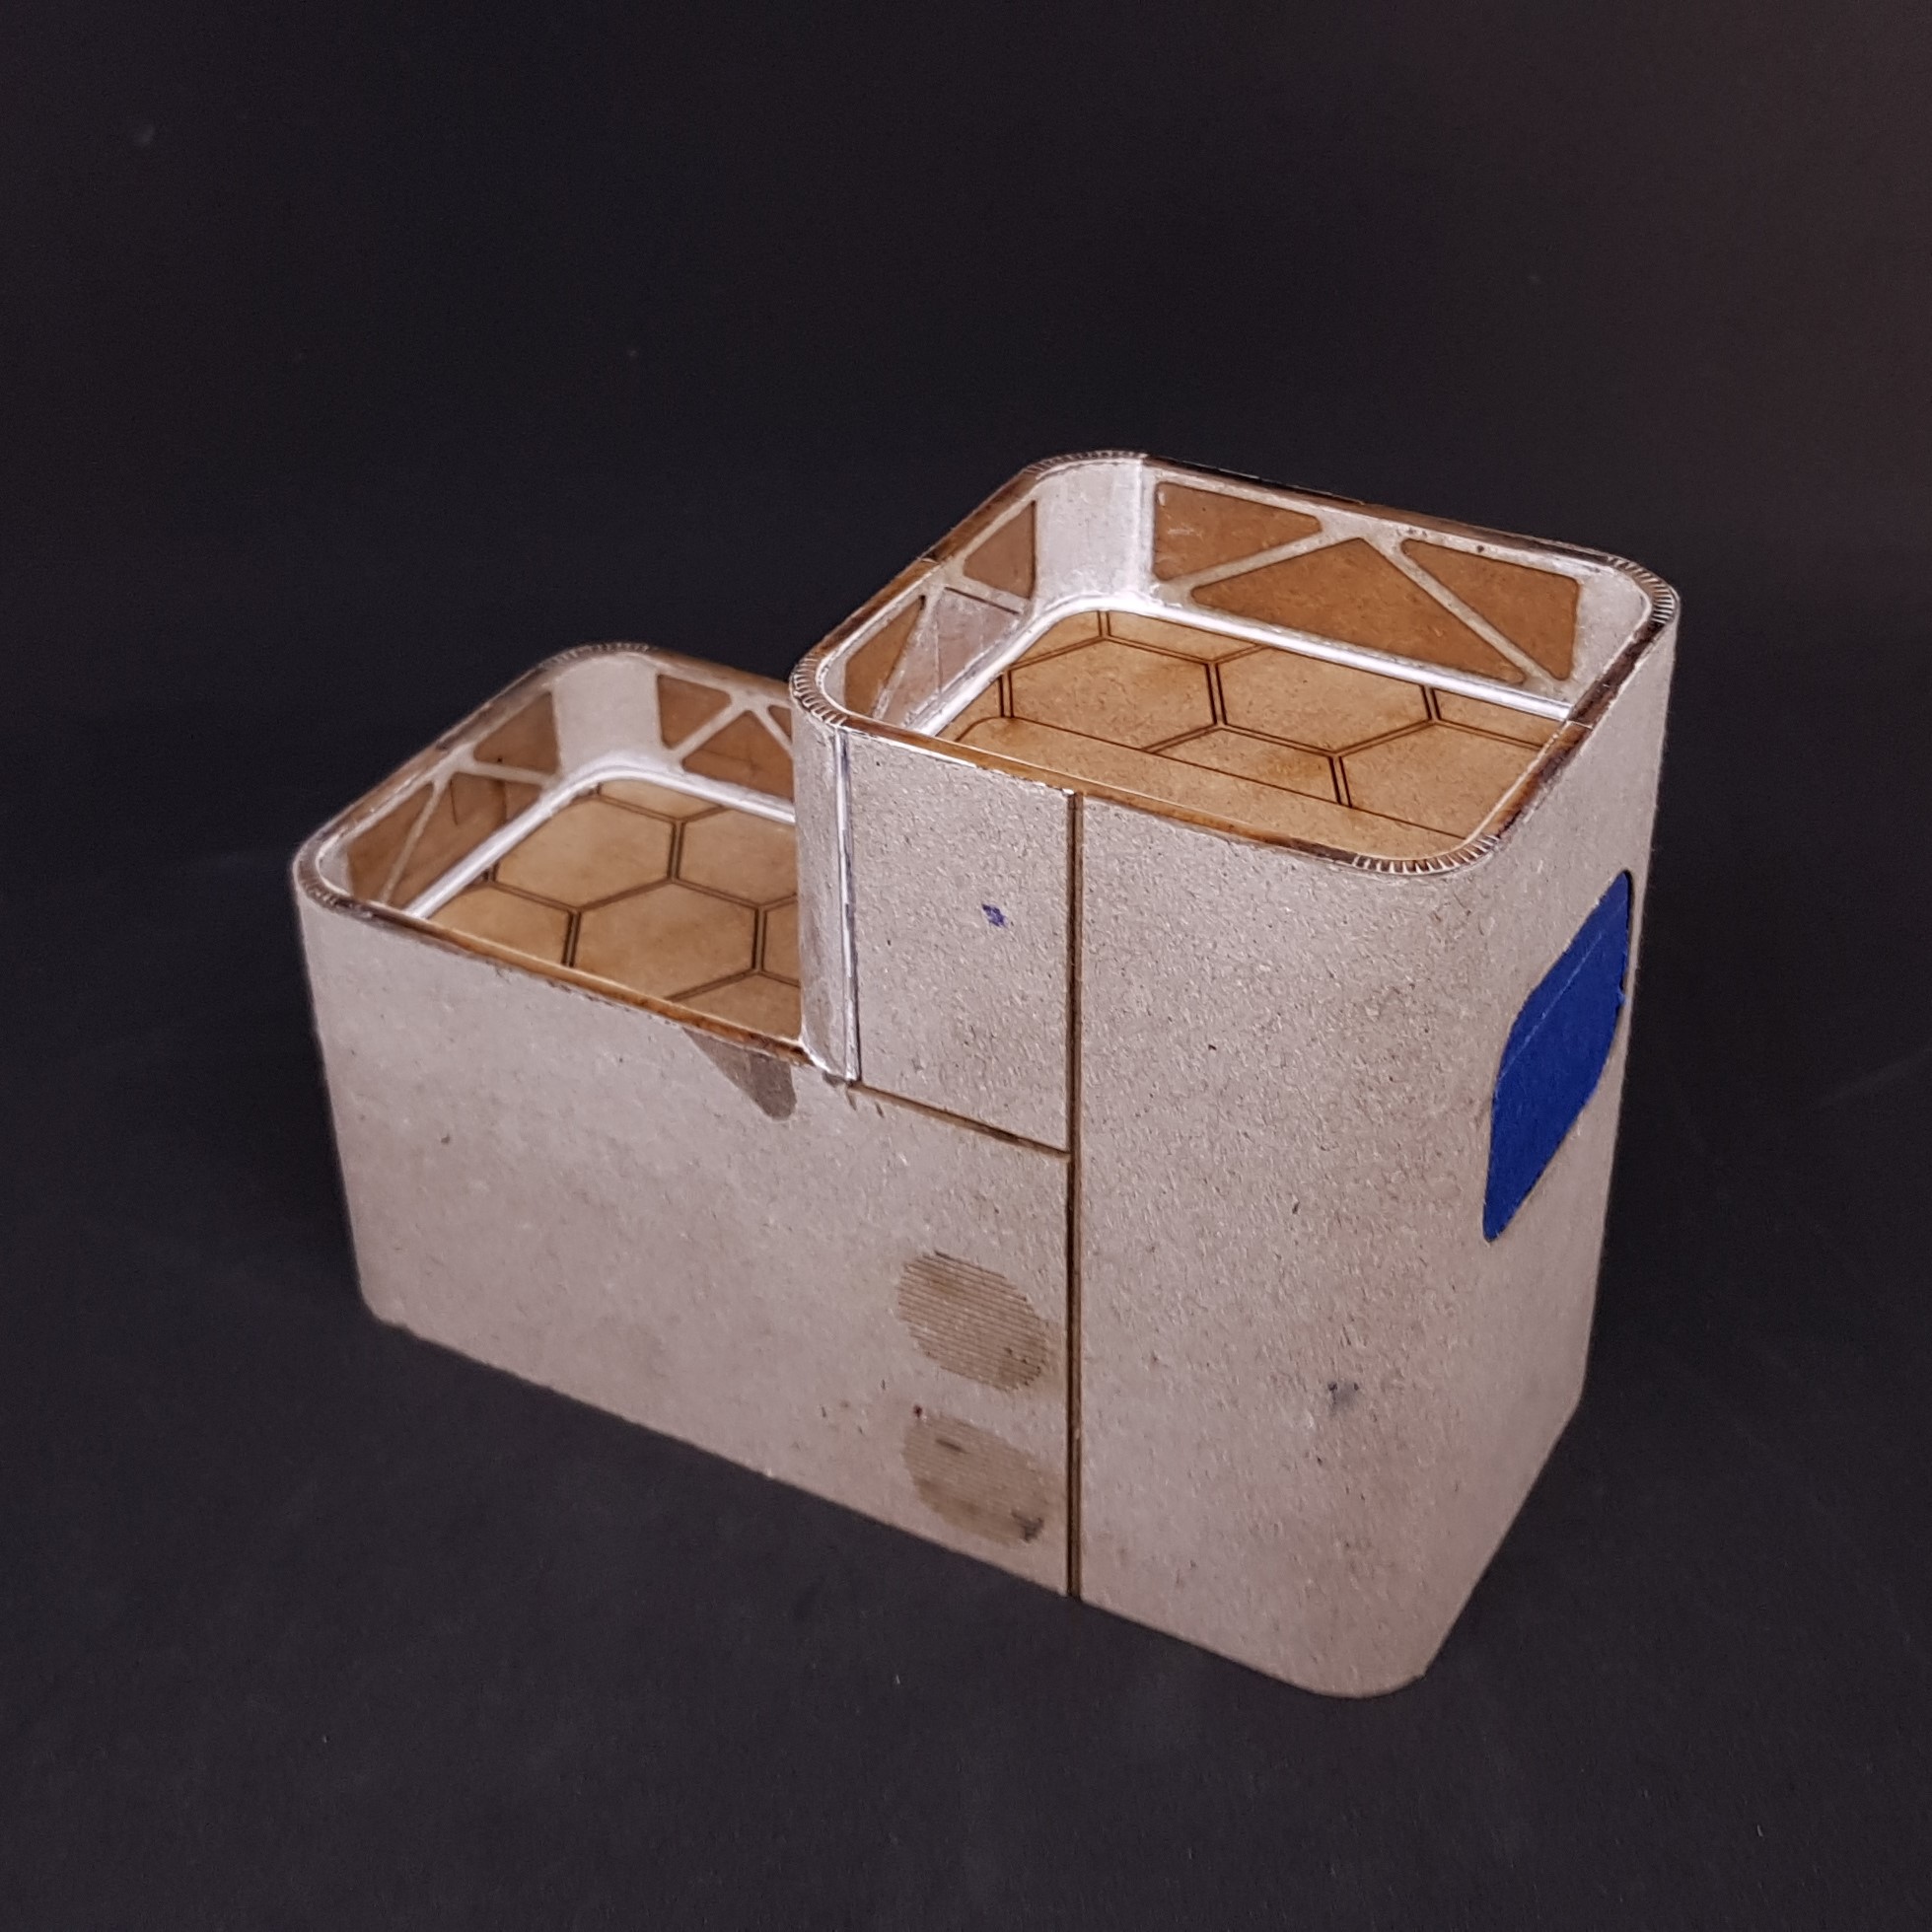 pre paint and a few components back
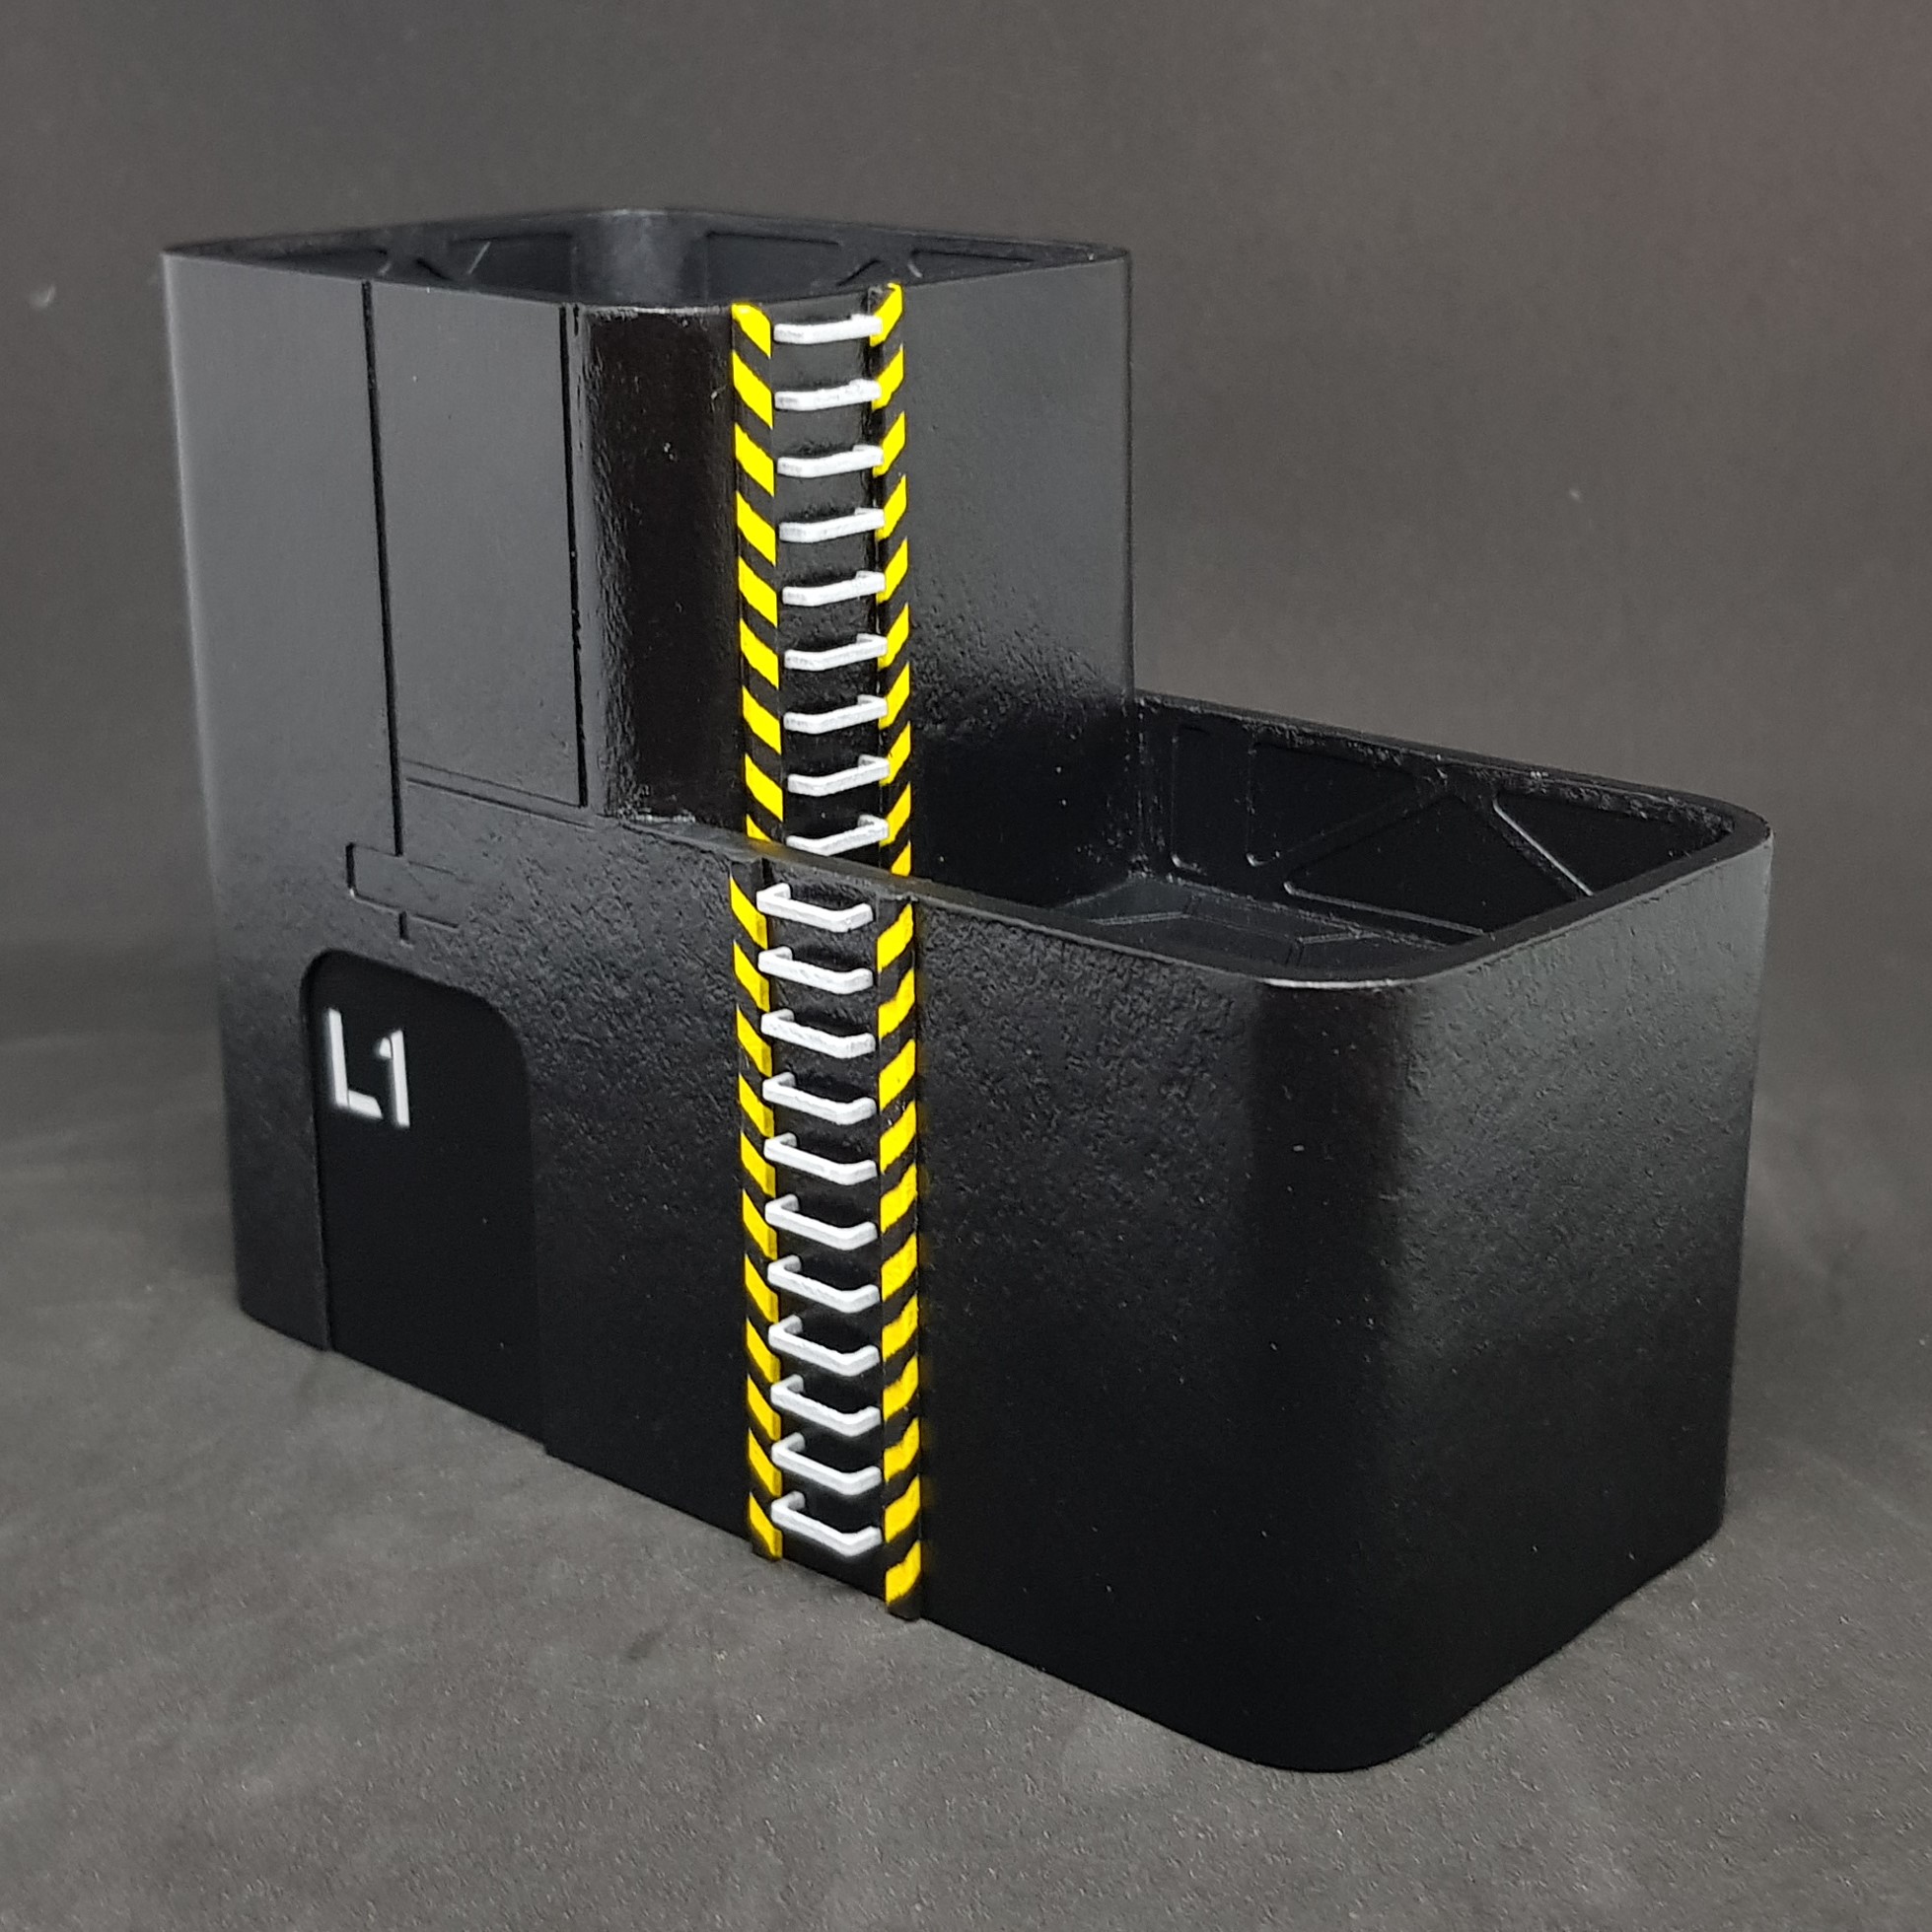 post undercoat paint and a few components Front
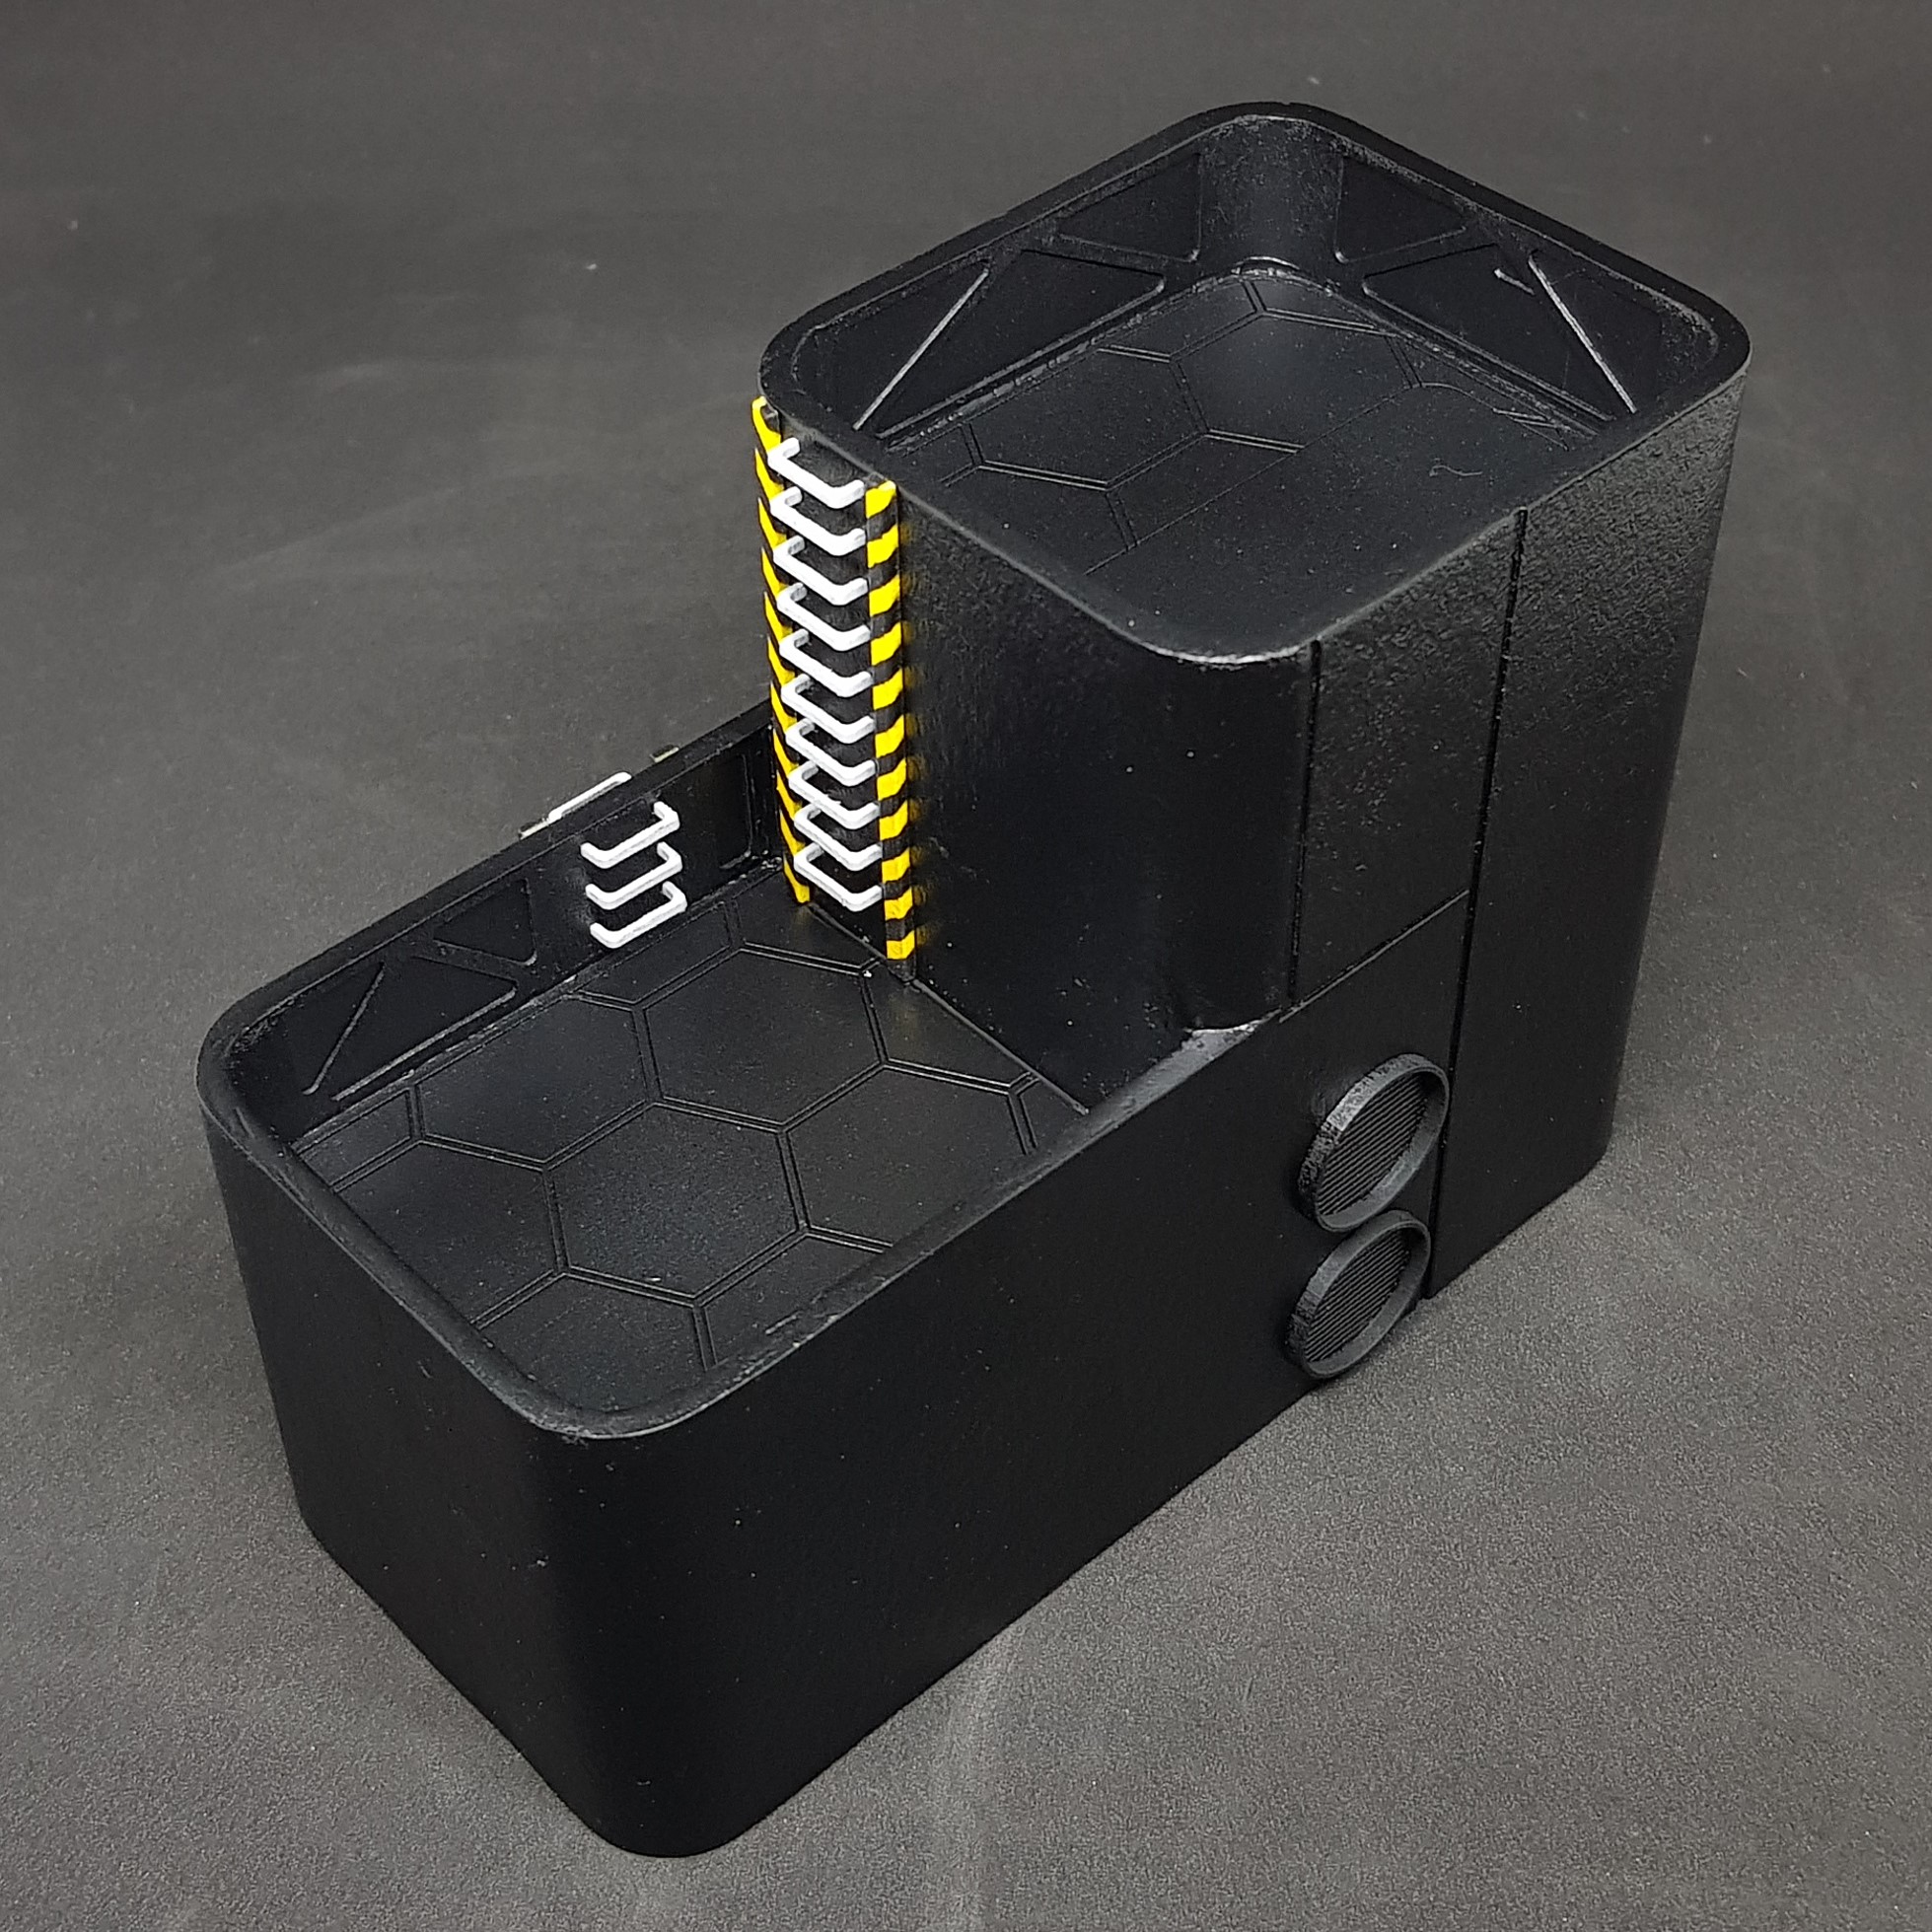 post undercoat paint and a few components back
I may have lost the battle, but I am sure I will still win the war.
More to come, just in while.
Crunch time.
I hate having things left unfinished projects. They are shameful (to me) I had to stop myself moving forward with my other projects until I finished the last building in this series.
I still have / had not got a lot of enthusiasm for this anymore. I don’t know why. I remember the good times, then I just lost it.
So for the past couple of weeks I put all off all my other projects and didn’t allow myself to have fun. the next two updates took way longer than it should. This should have been 3 days work. It took much much longer.
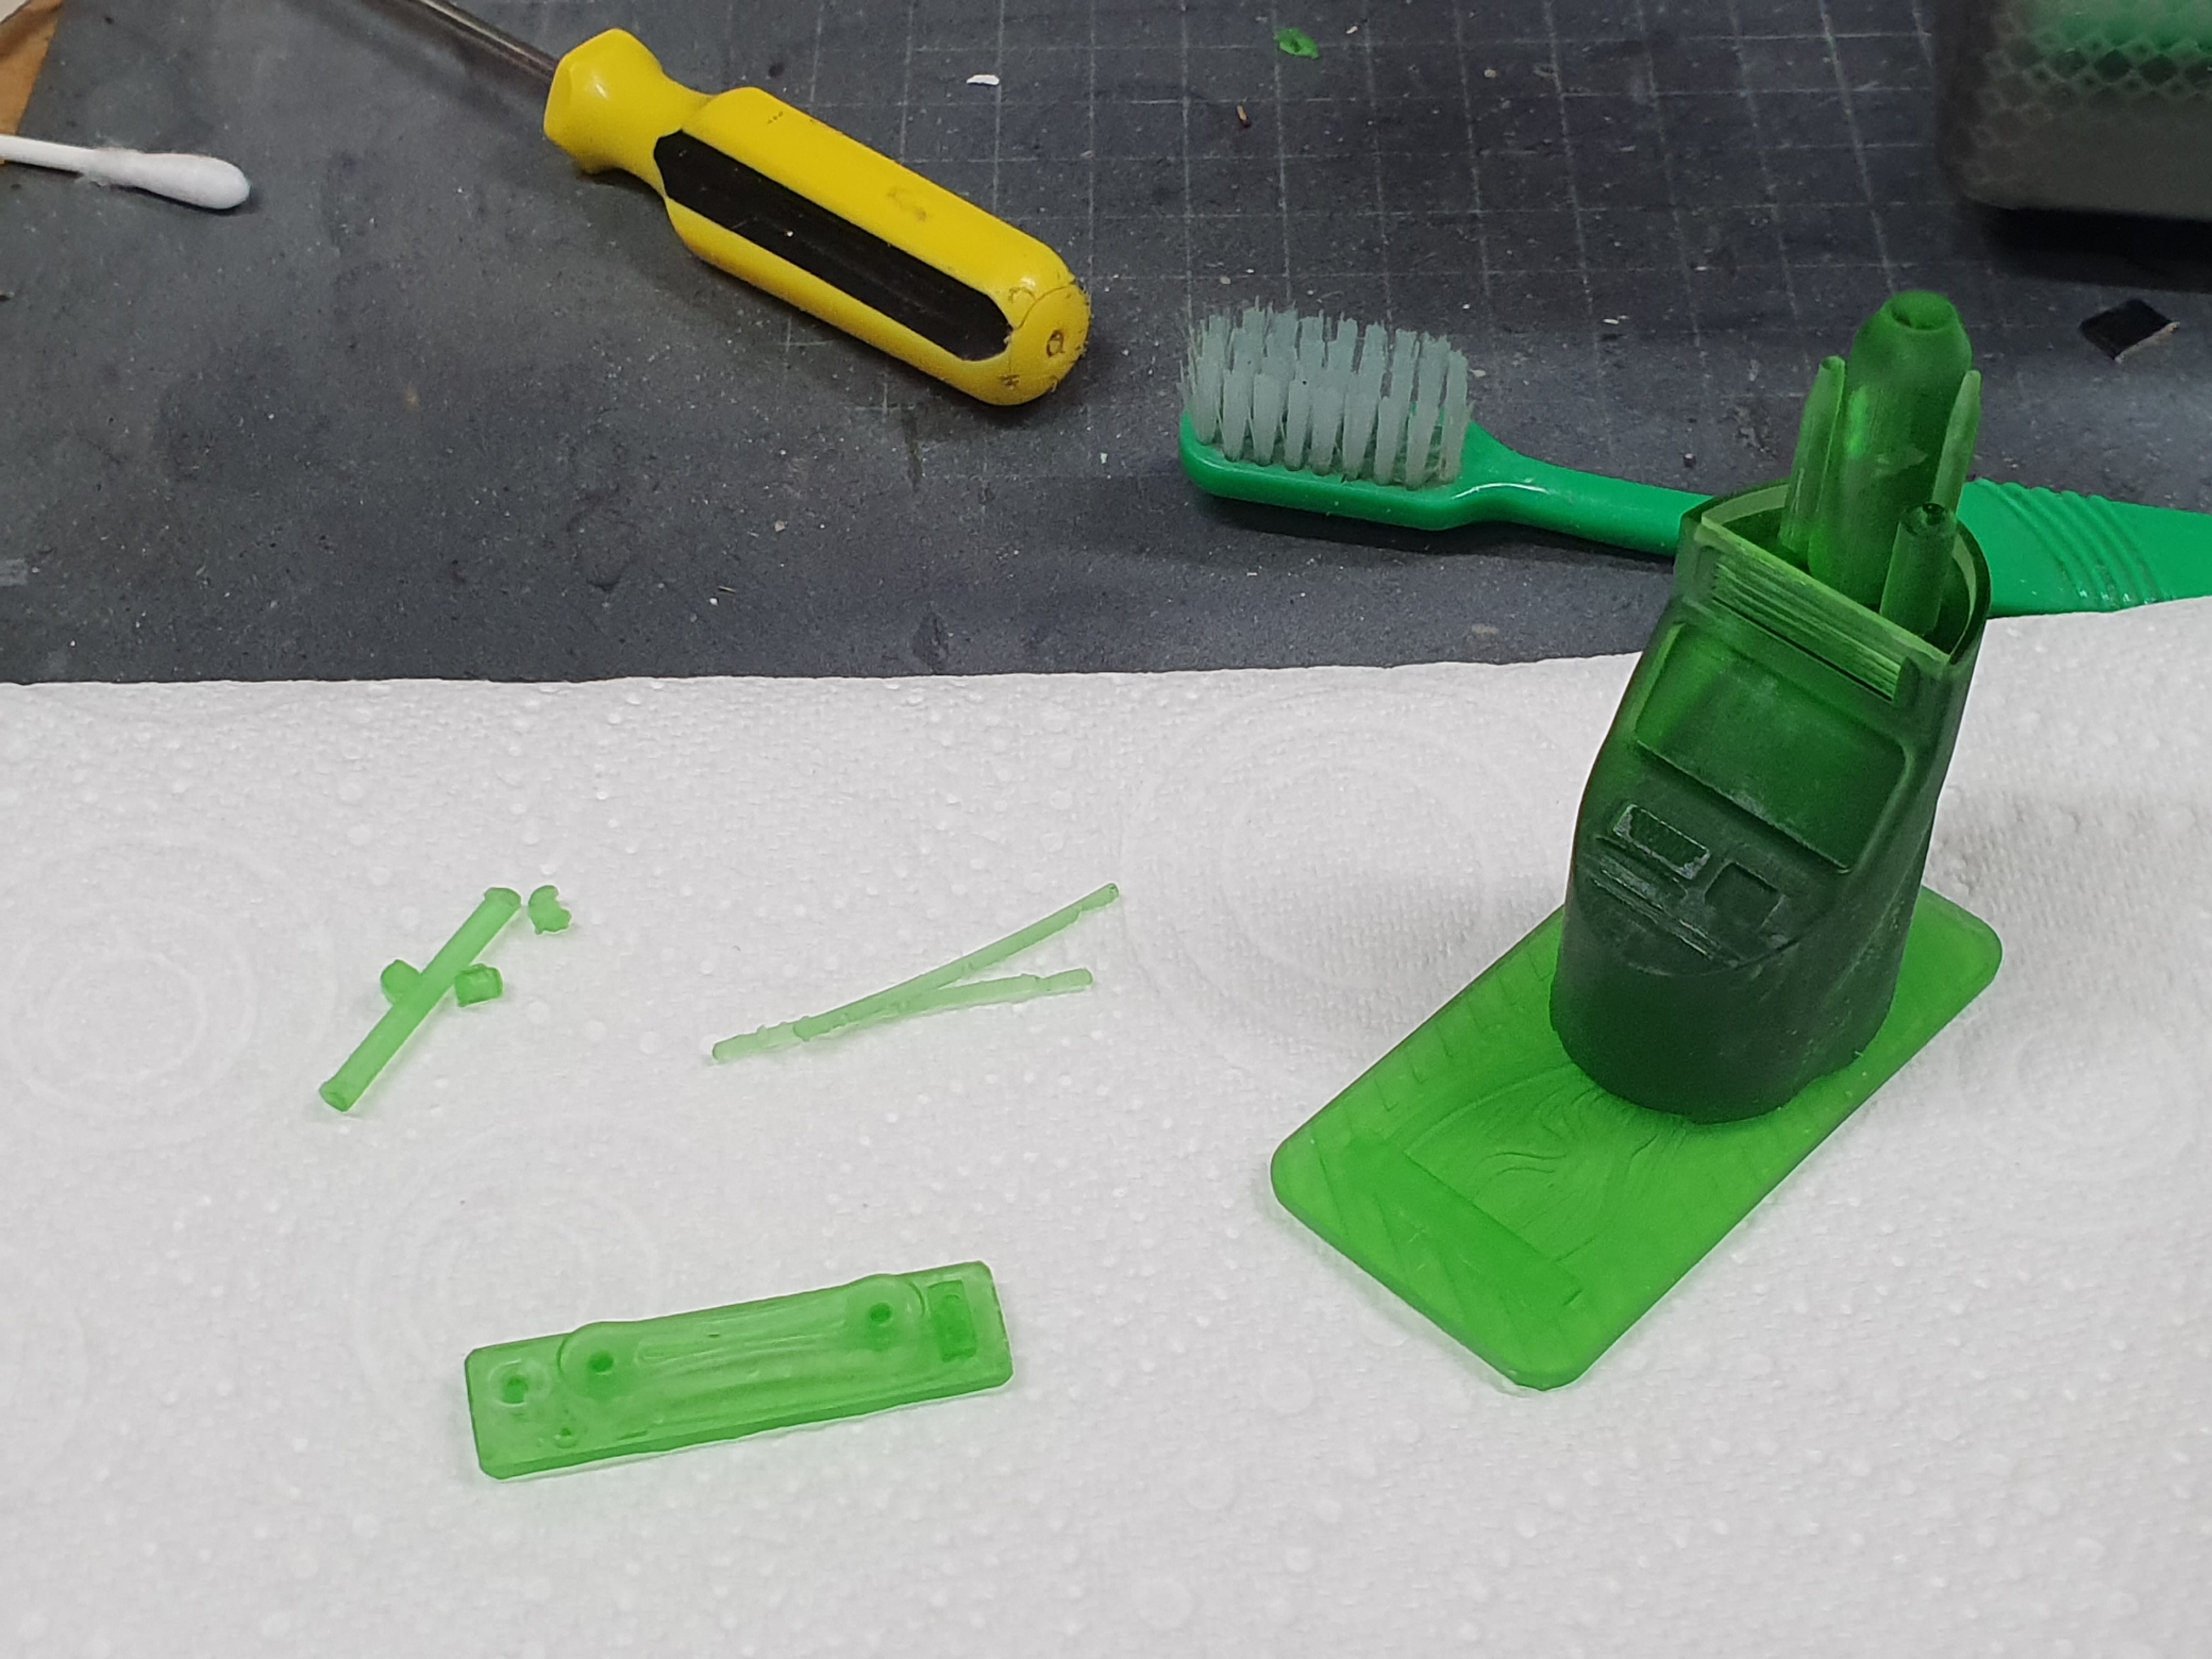 I needed a com tower. I wanted a dish instead I opted for antennas. I also wanted some kind of fuel pump and some railings for a movable bridge. I modelled this in fusion 360 and printed on the Anycubic.
 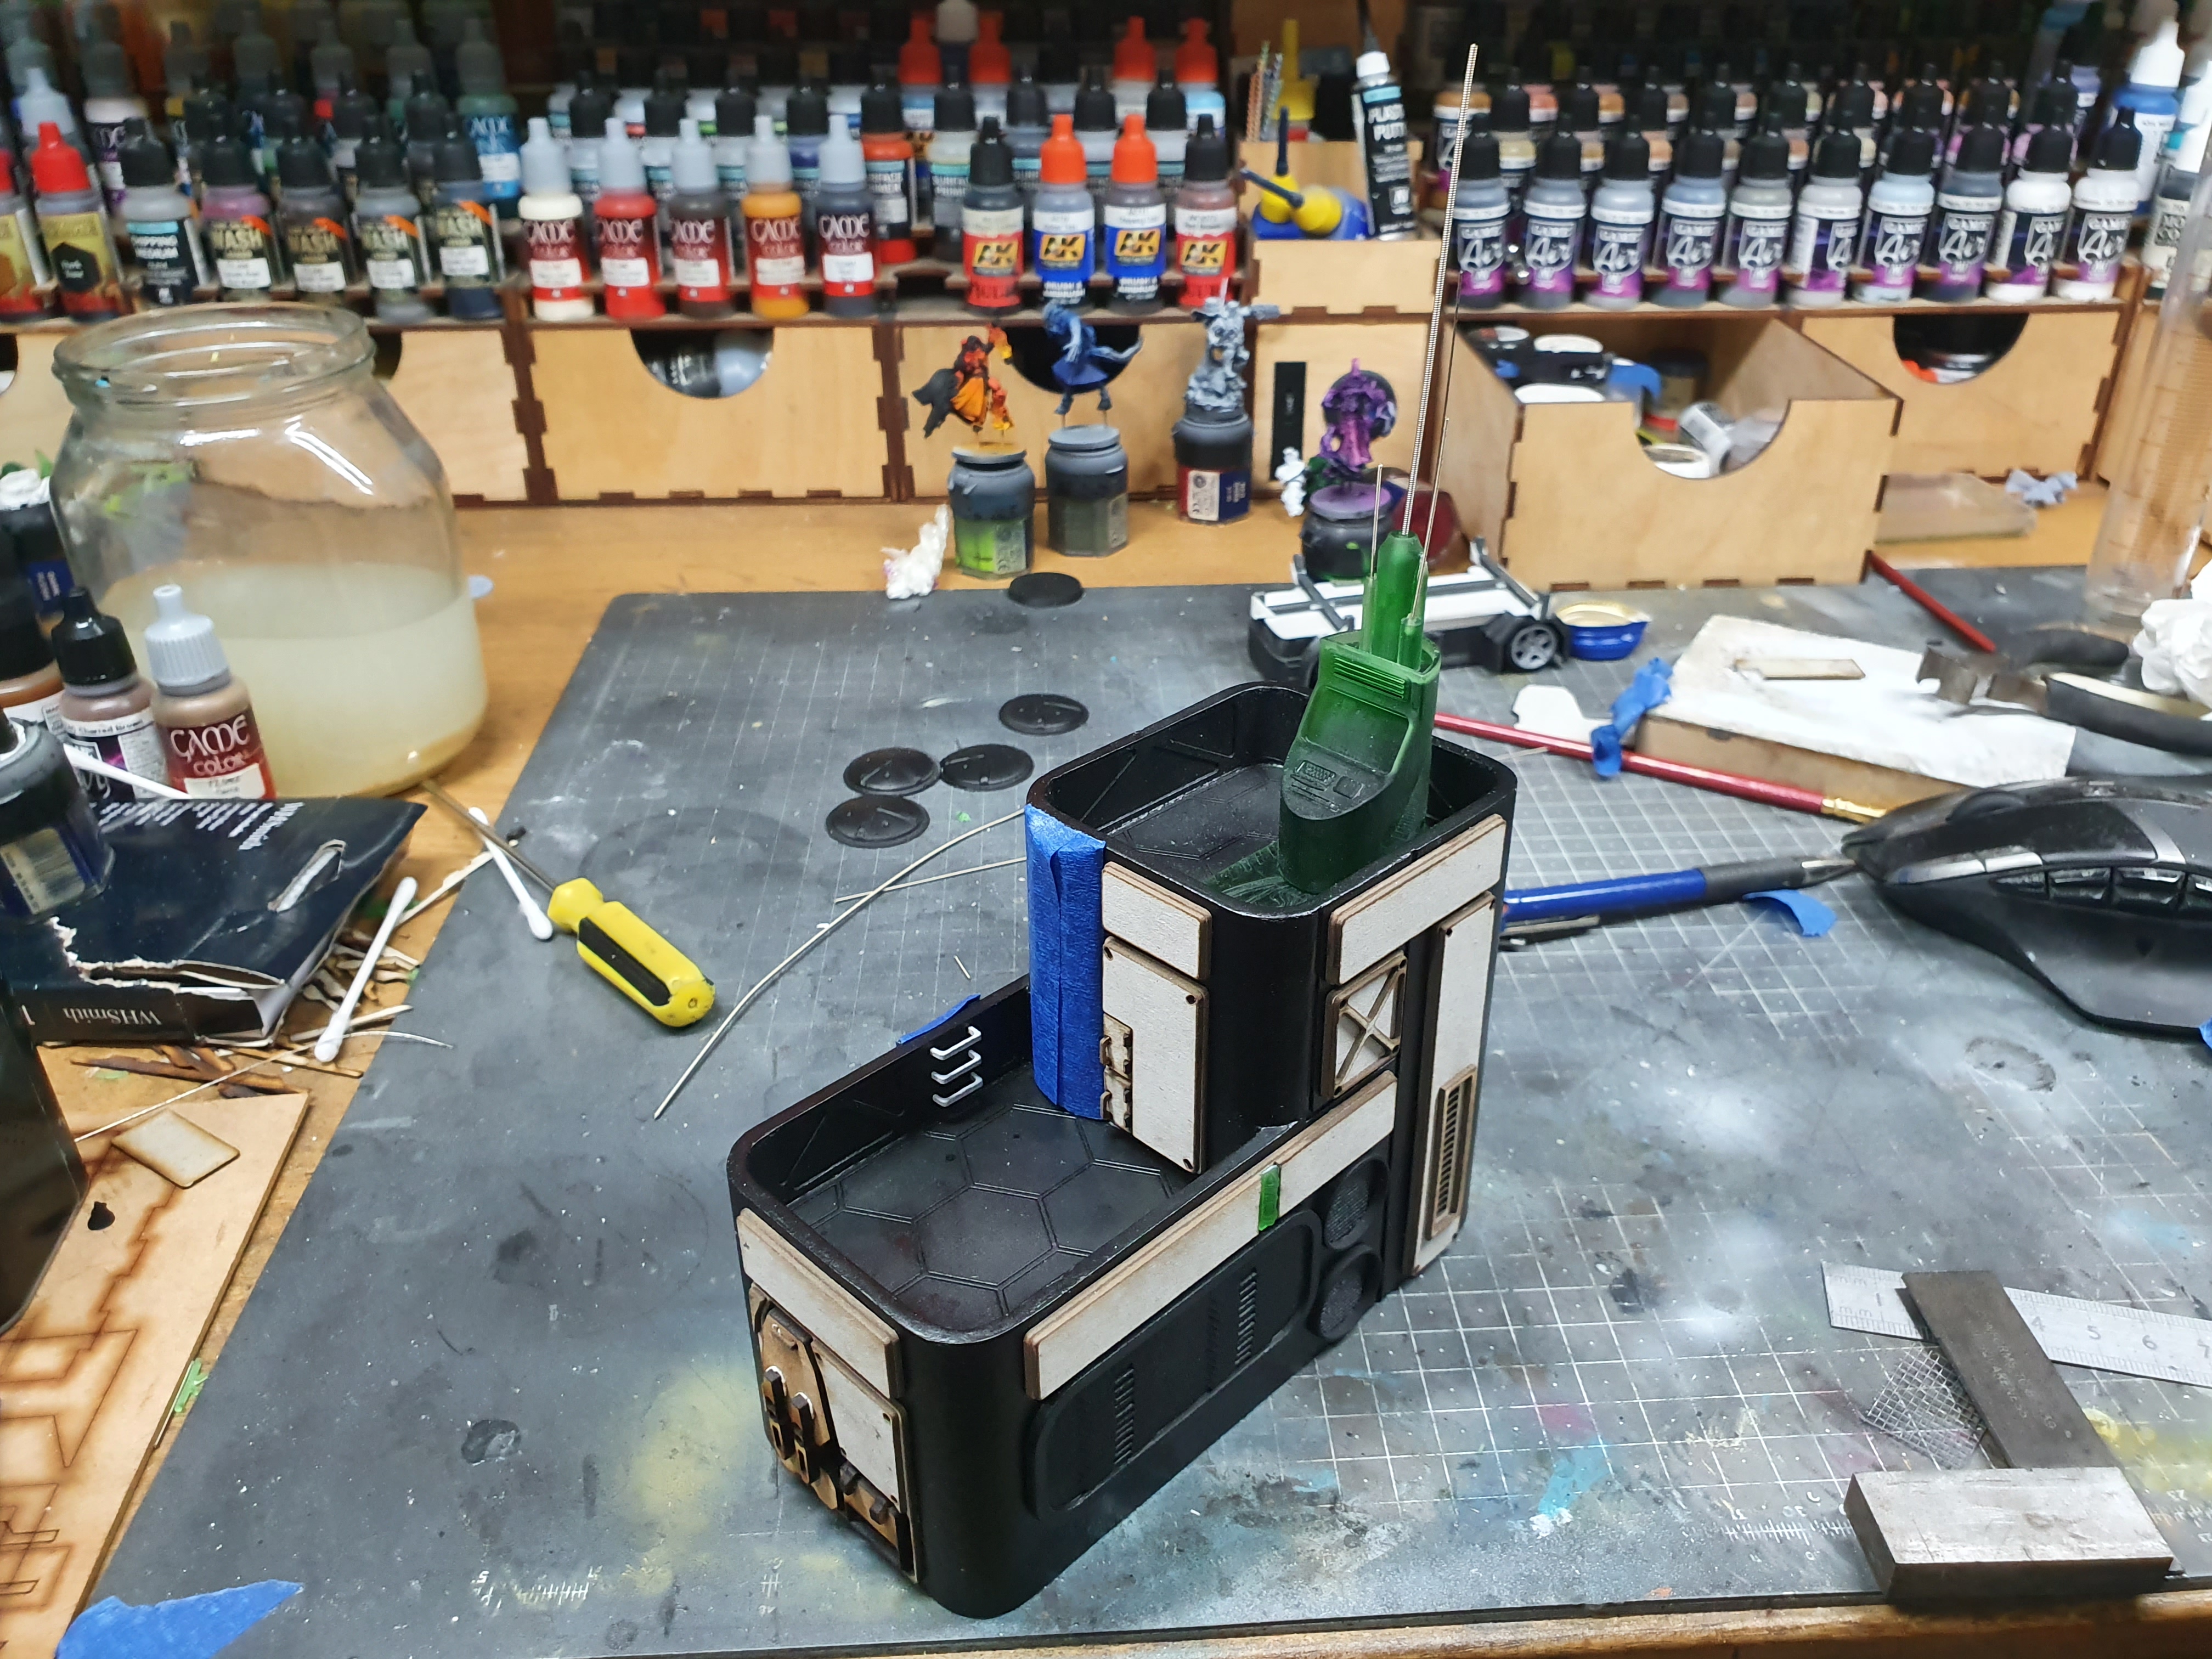 I lasercut more panels. This want the original plan it was supposed to have wraparound panels going over the curves. This is where I burned out before I went simple. I changed some of the shapes for visual interest and stuck them all down.
 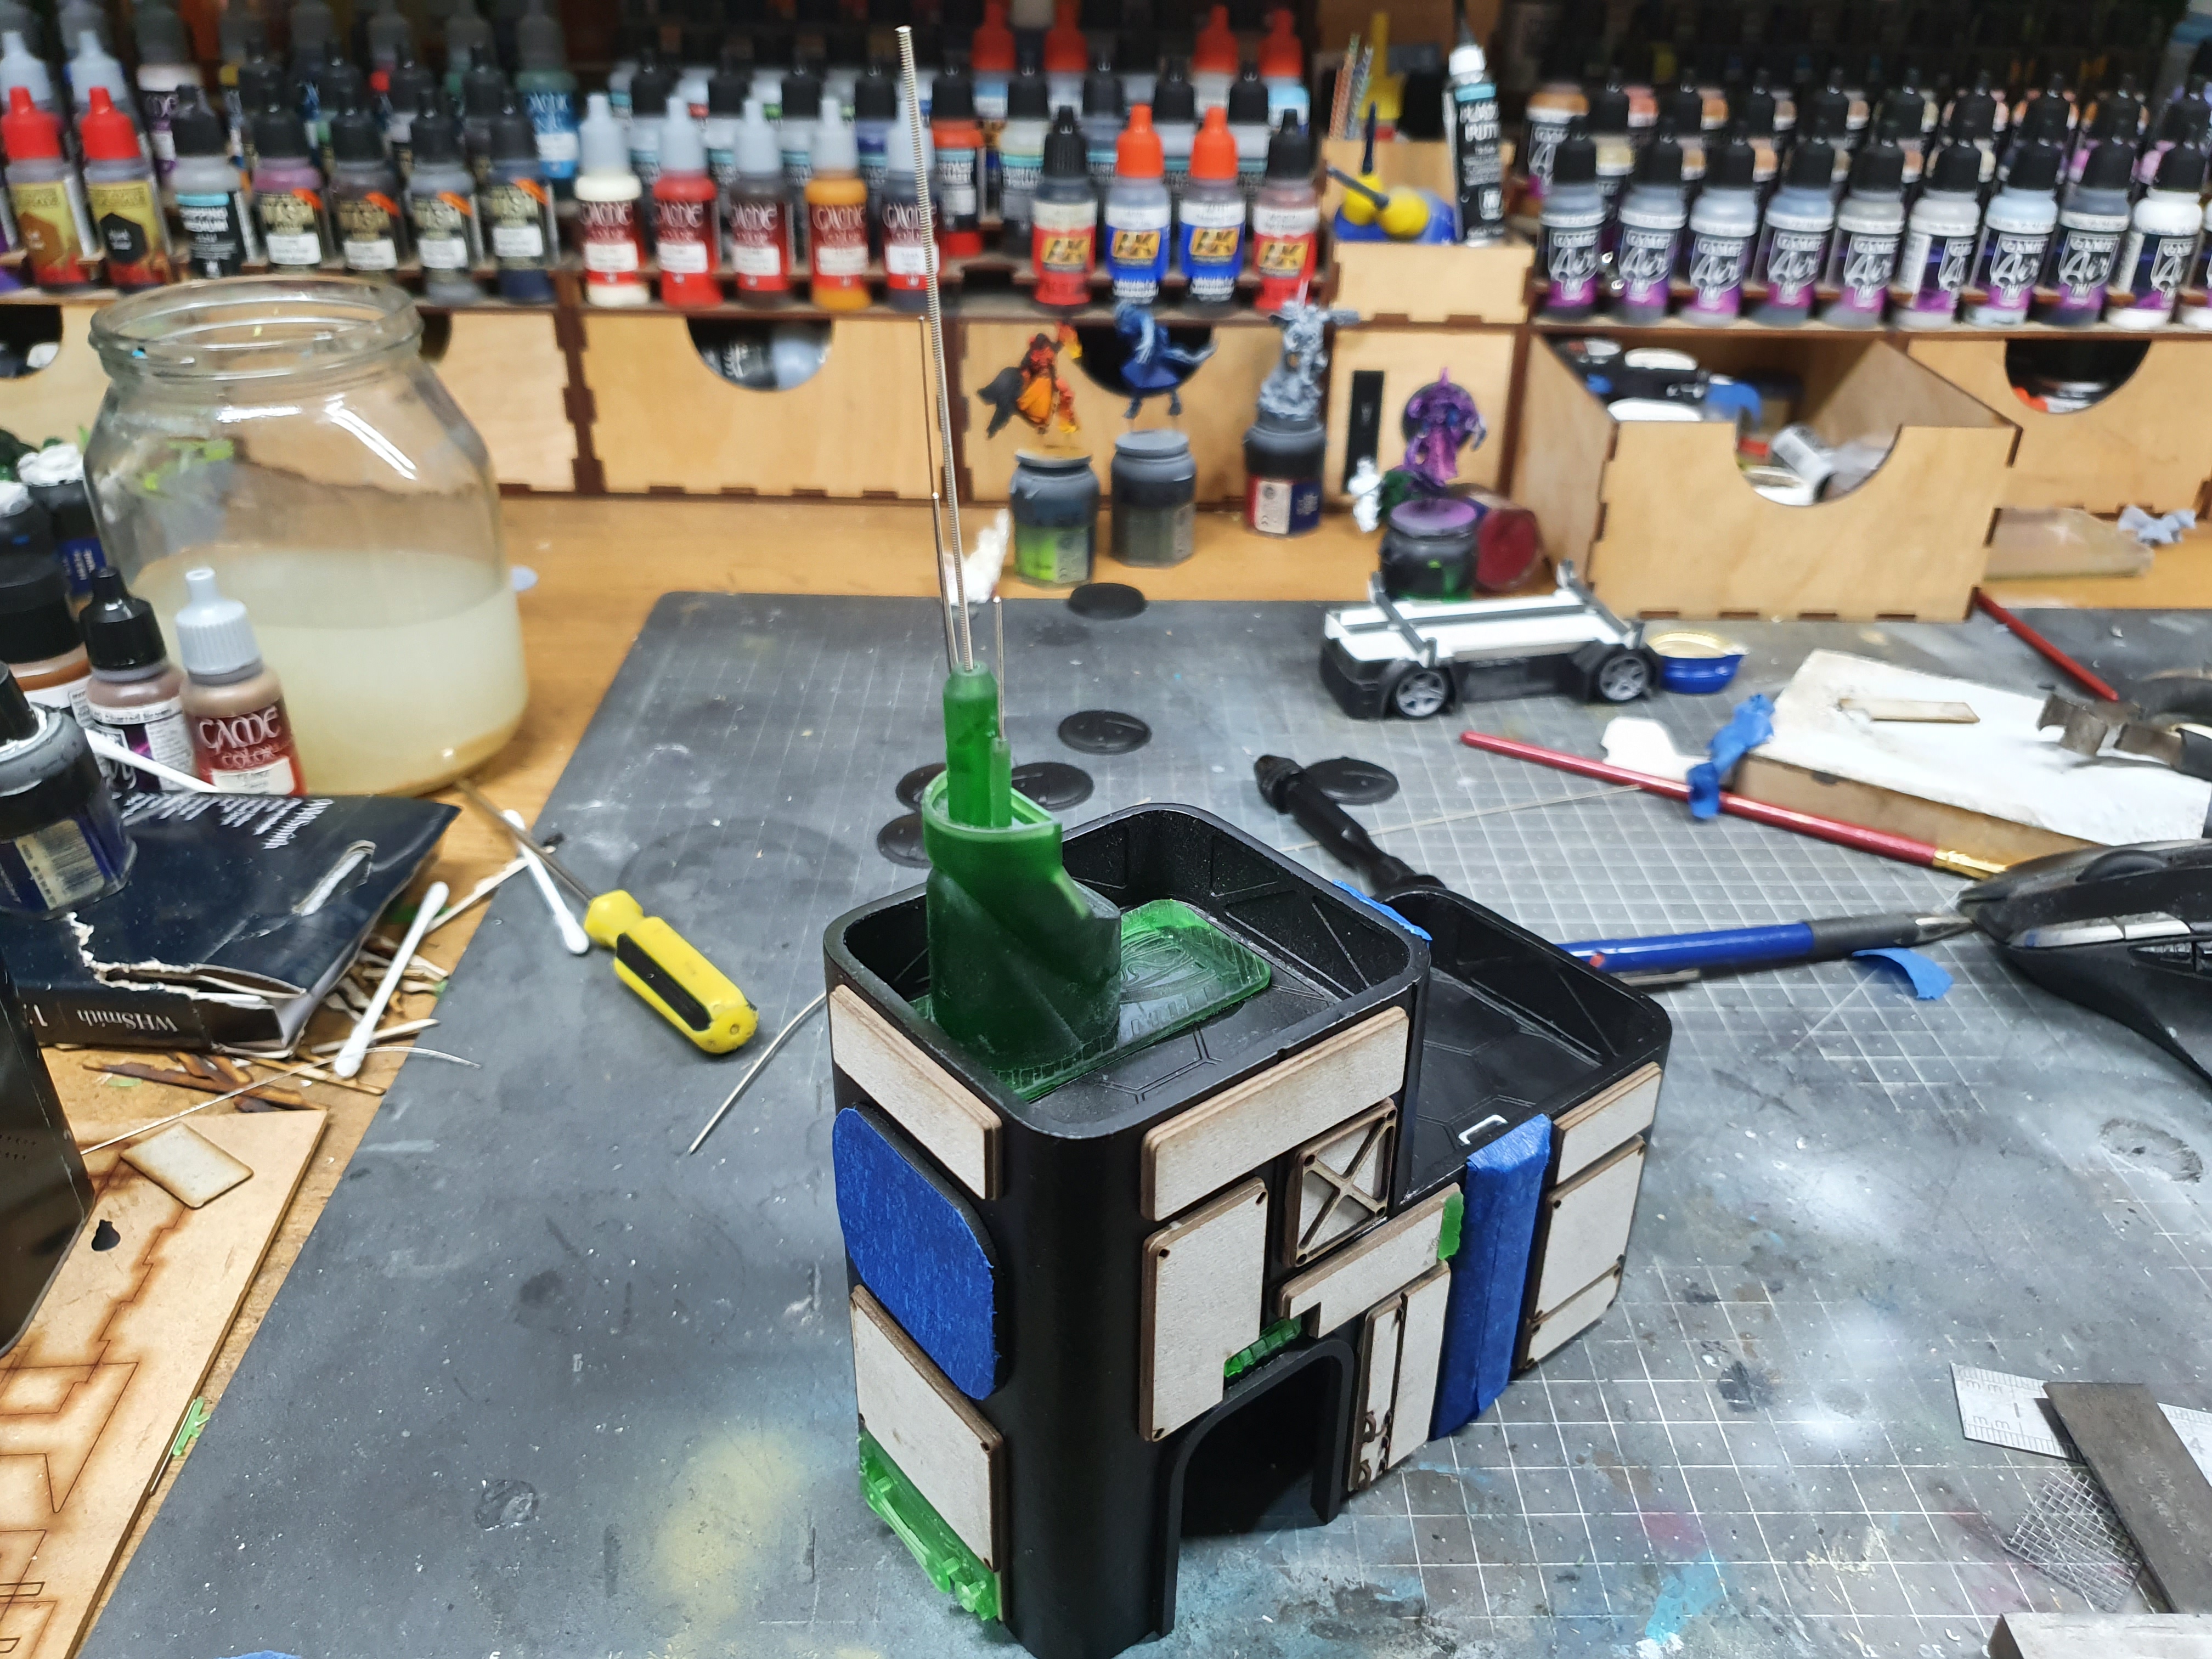 I drilled out and glued in guitar strings also masked all the painted or glazed sections ready for paint.
 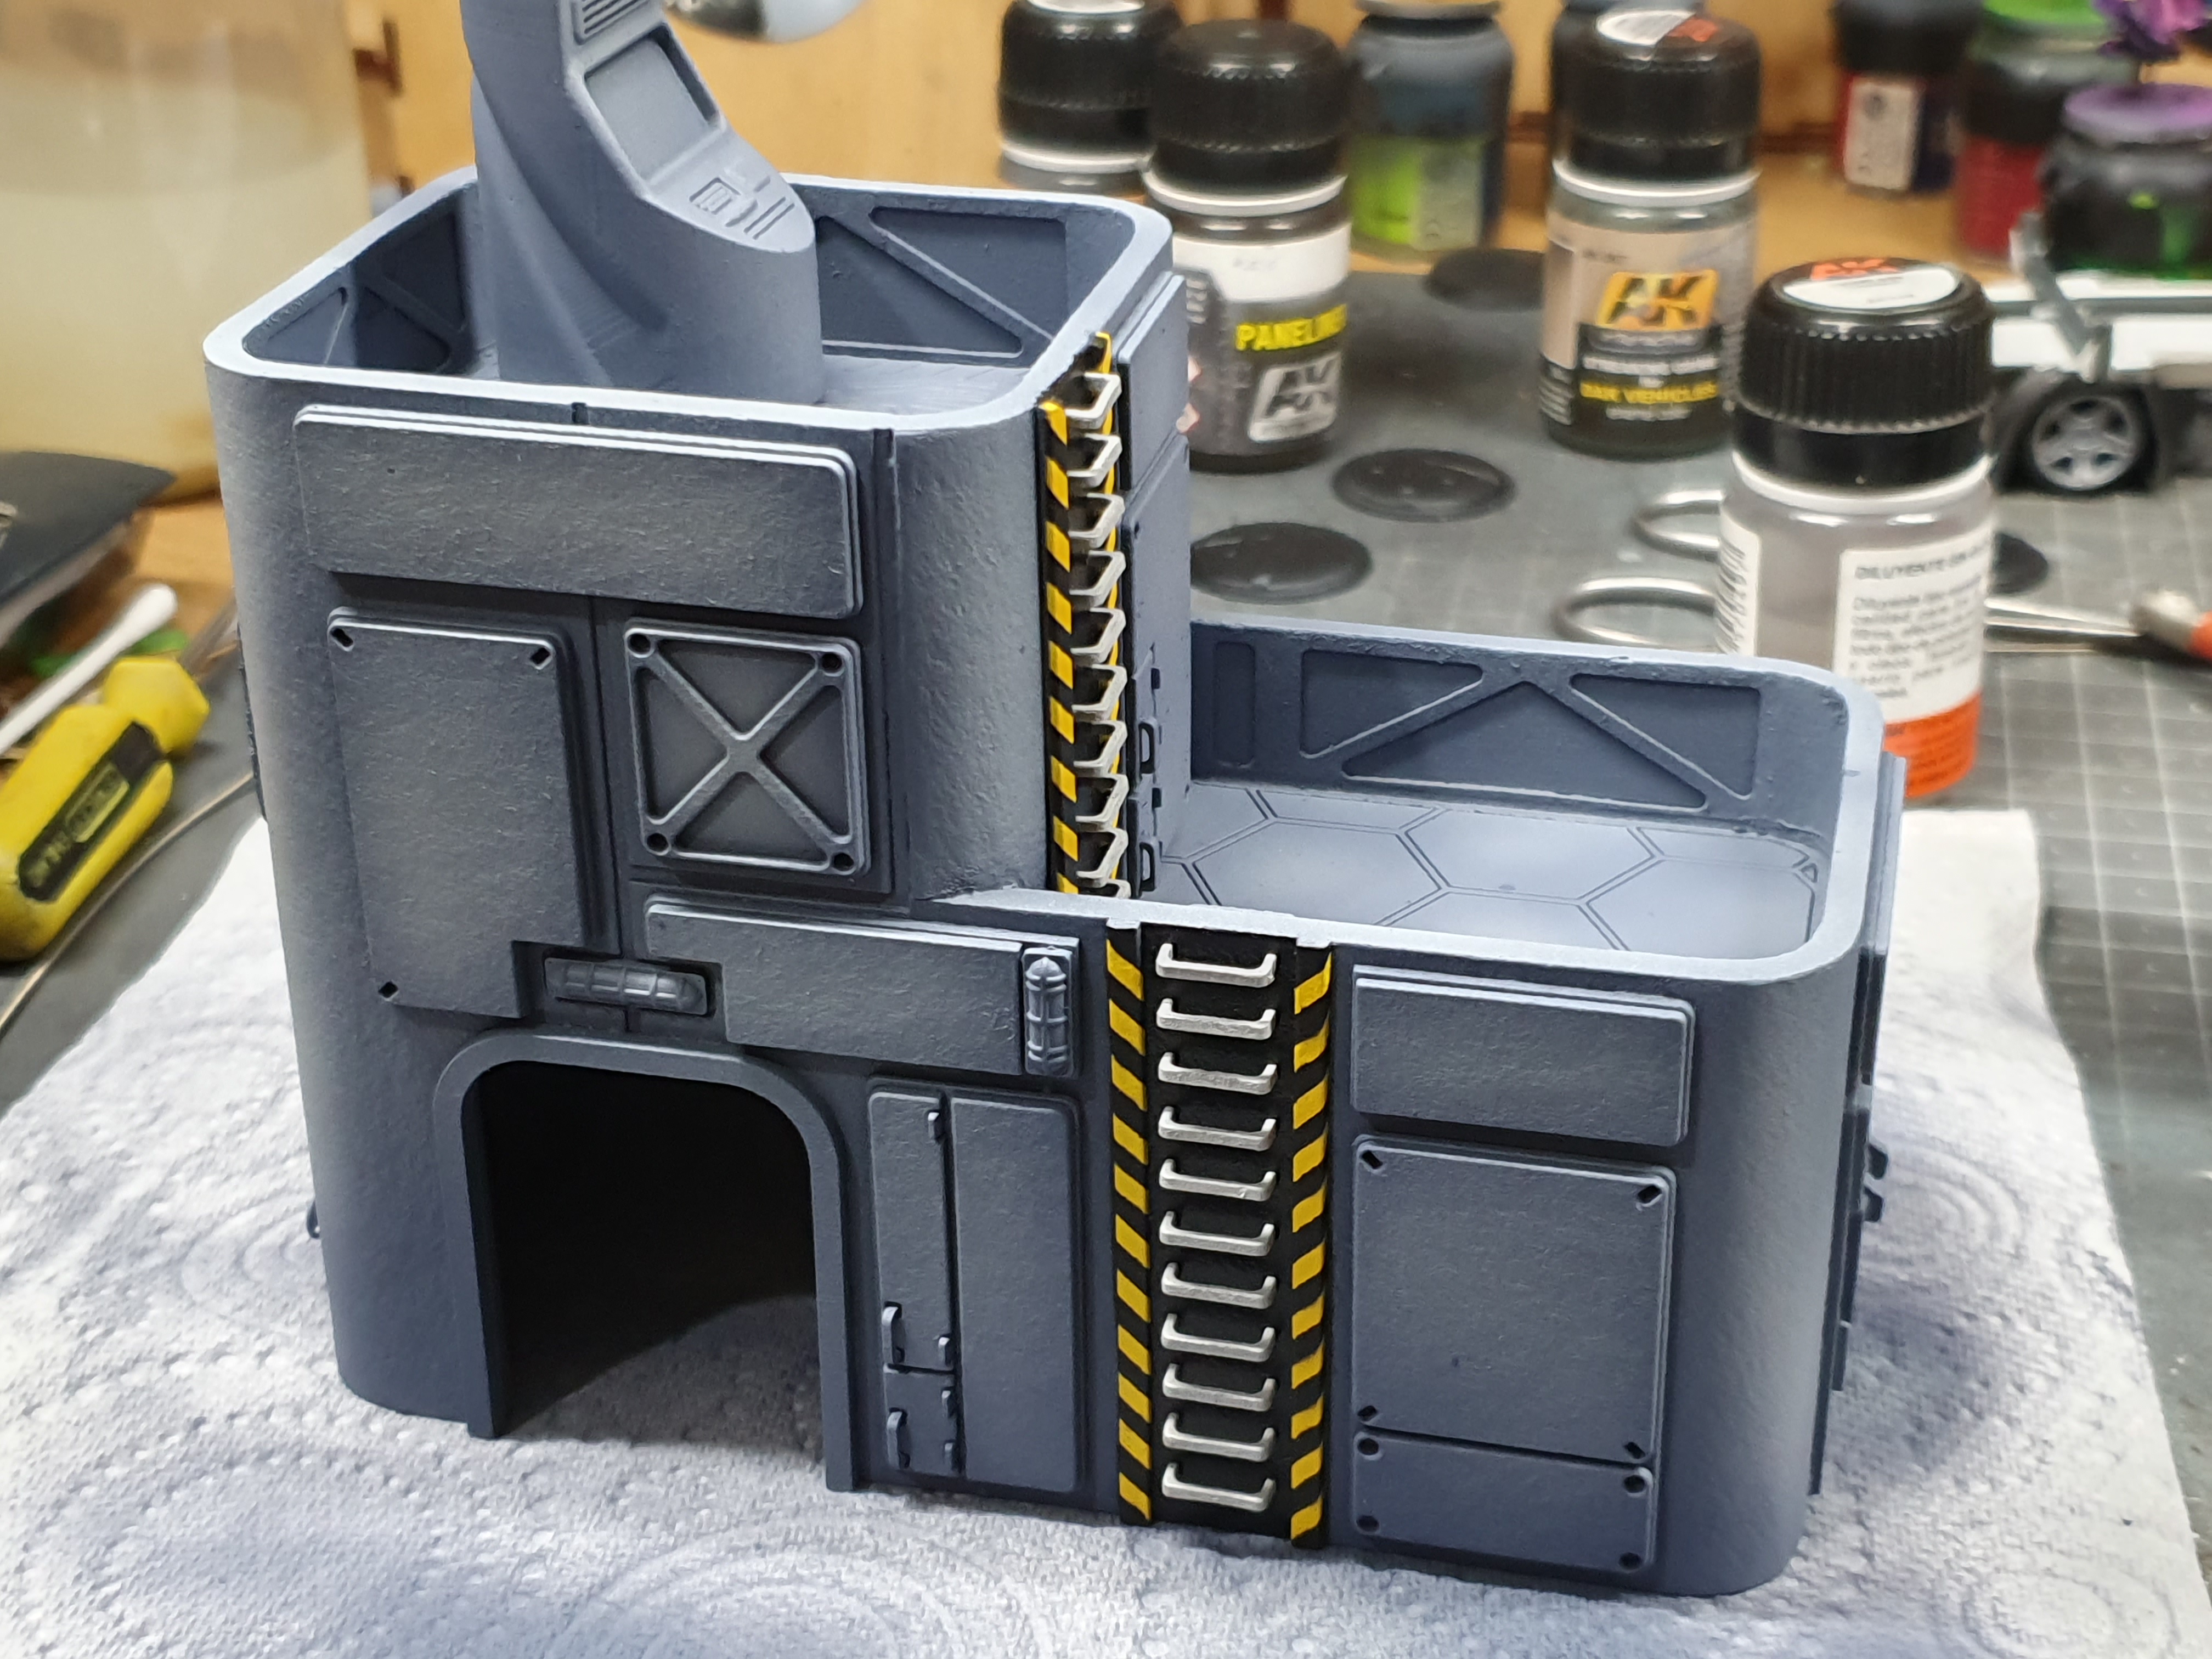 I air brushed the same way as the rest of the model. I didn't want much contrast between the sections.
 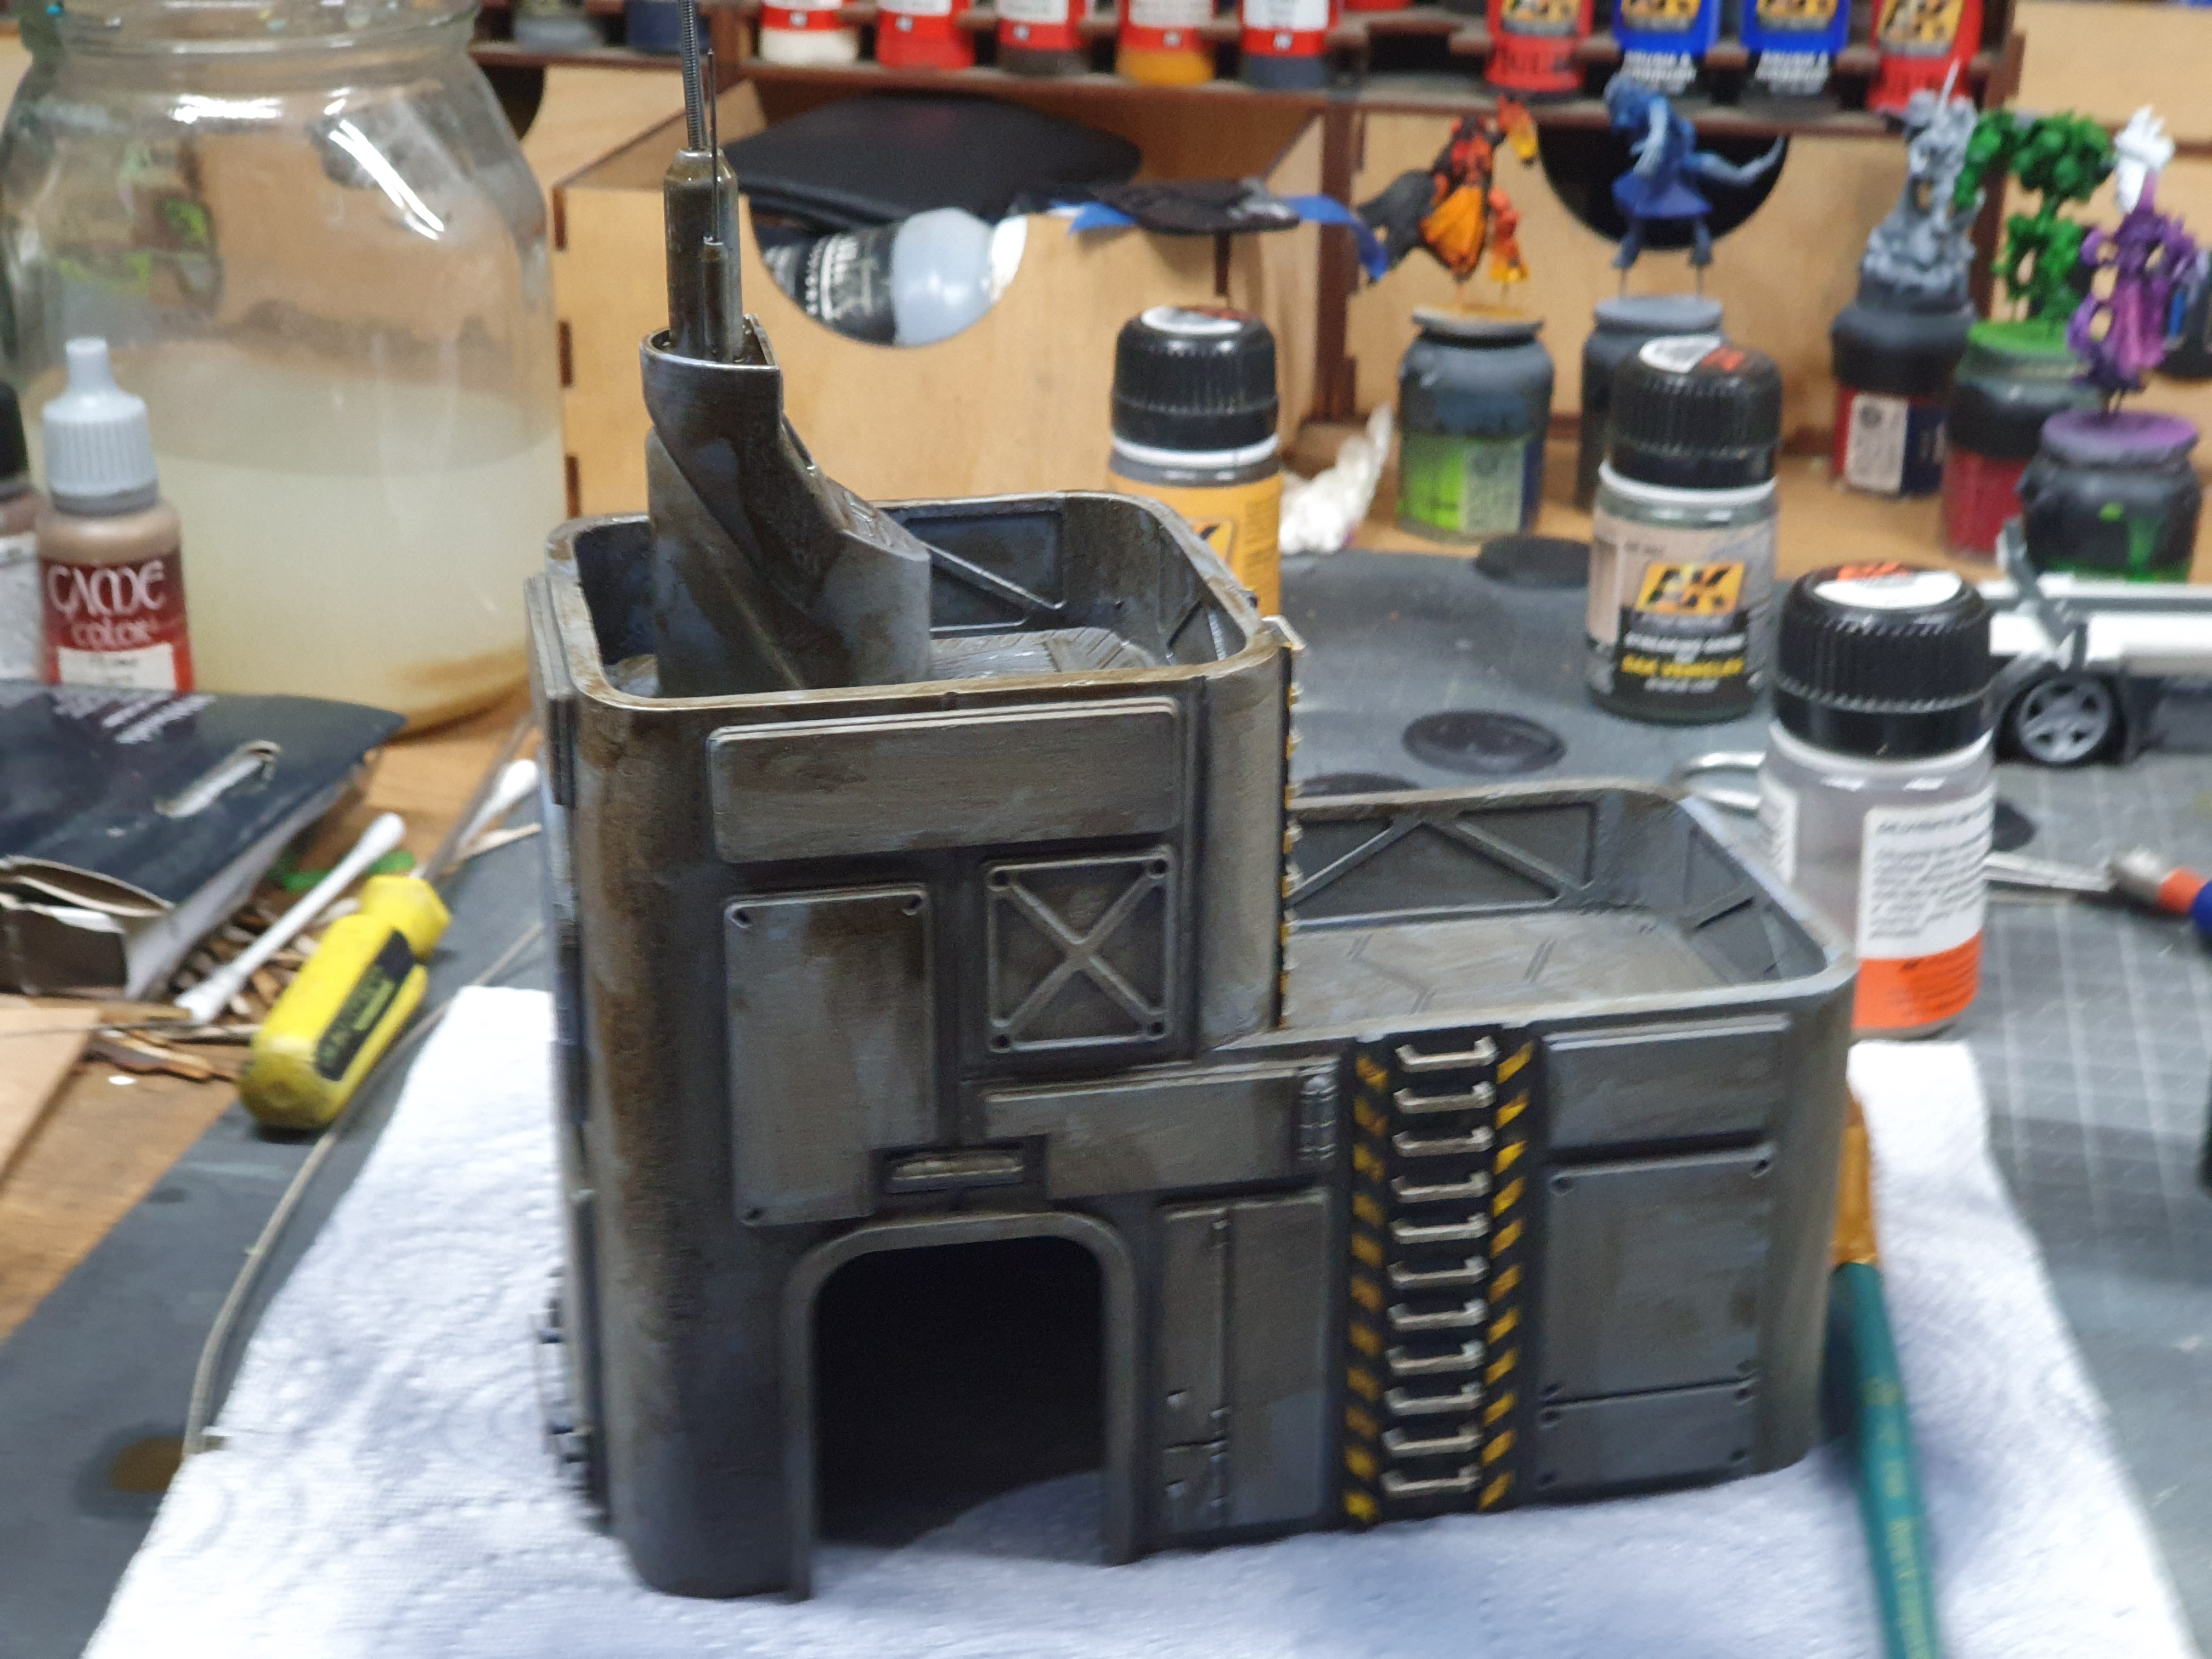 After everything was dried I went in with some brown oil wash. as you can see not the neatest of jobs. Looking great!
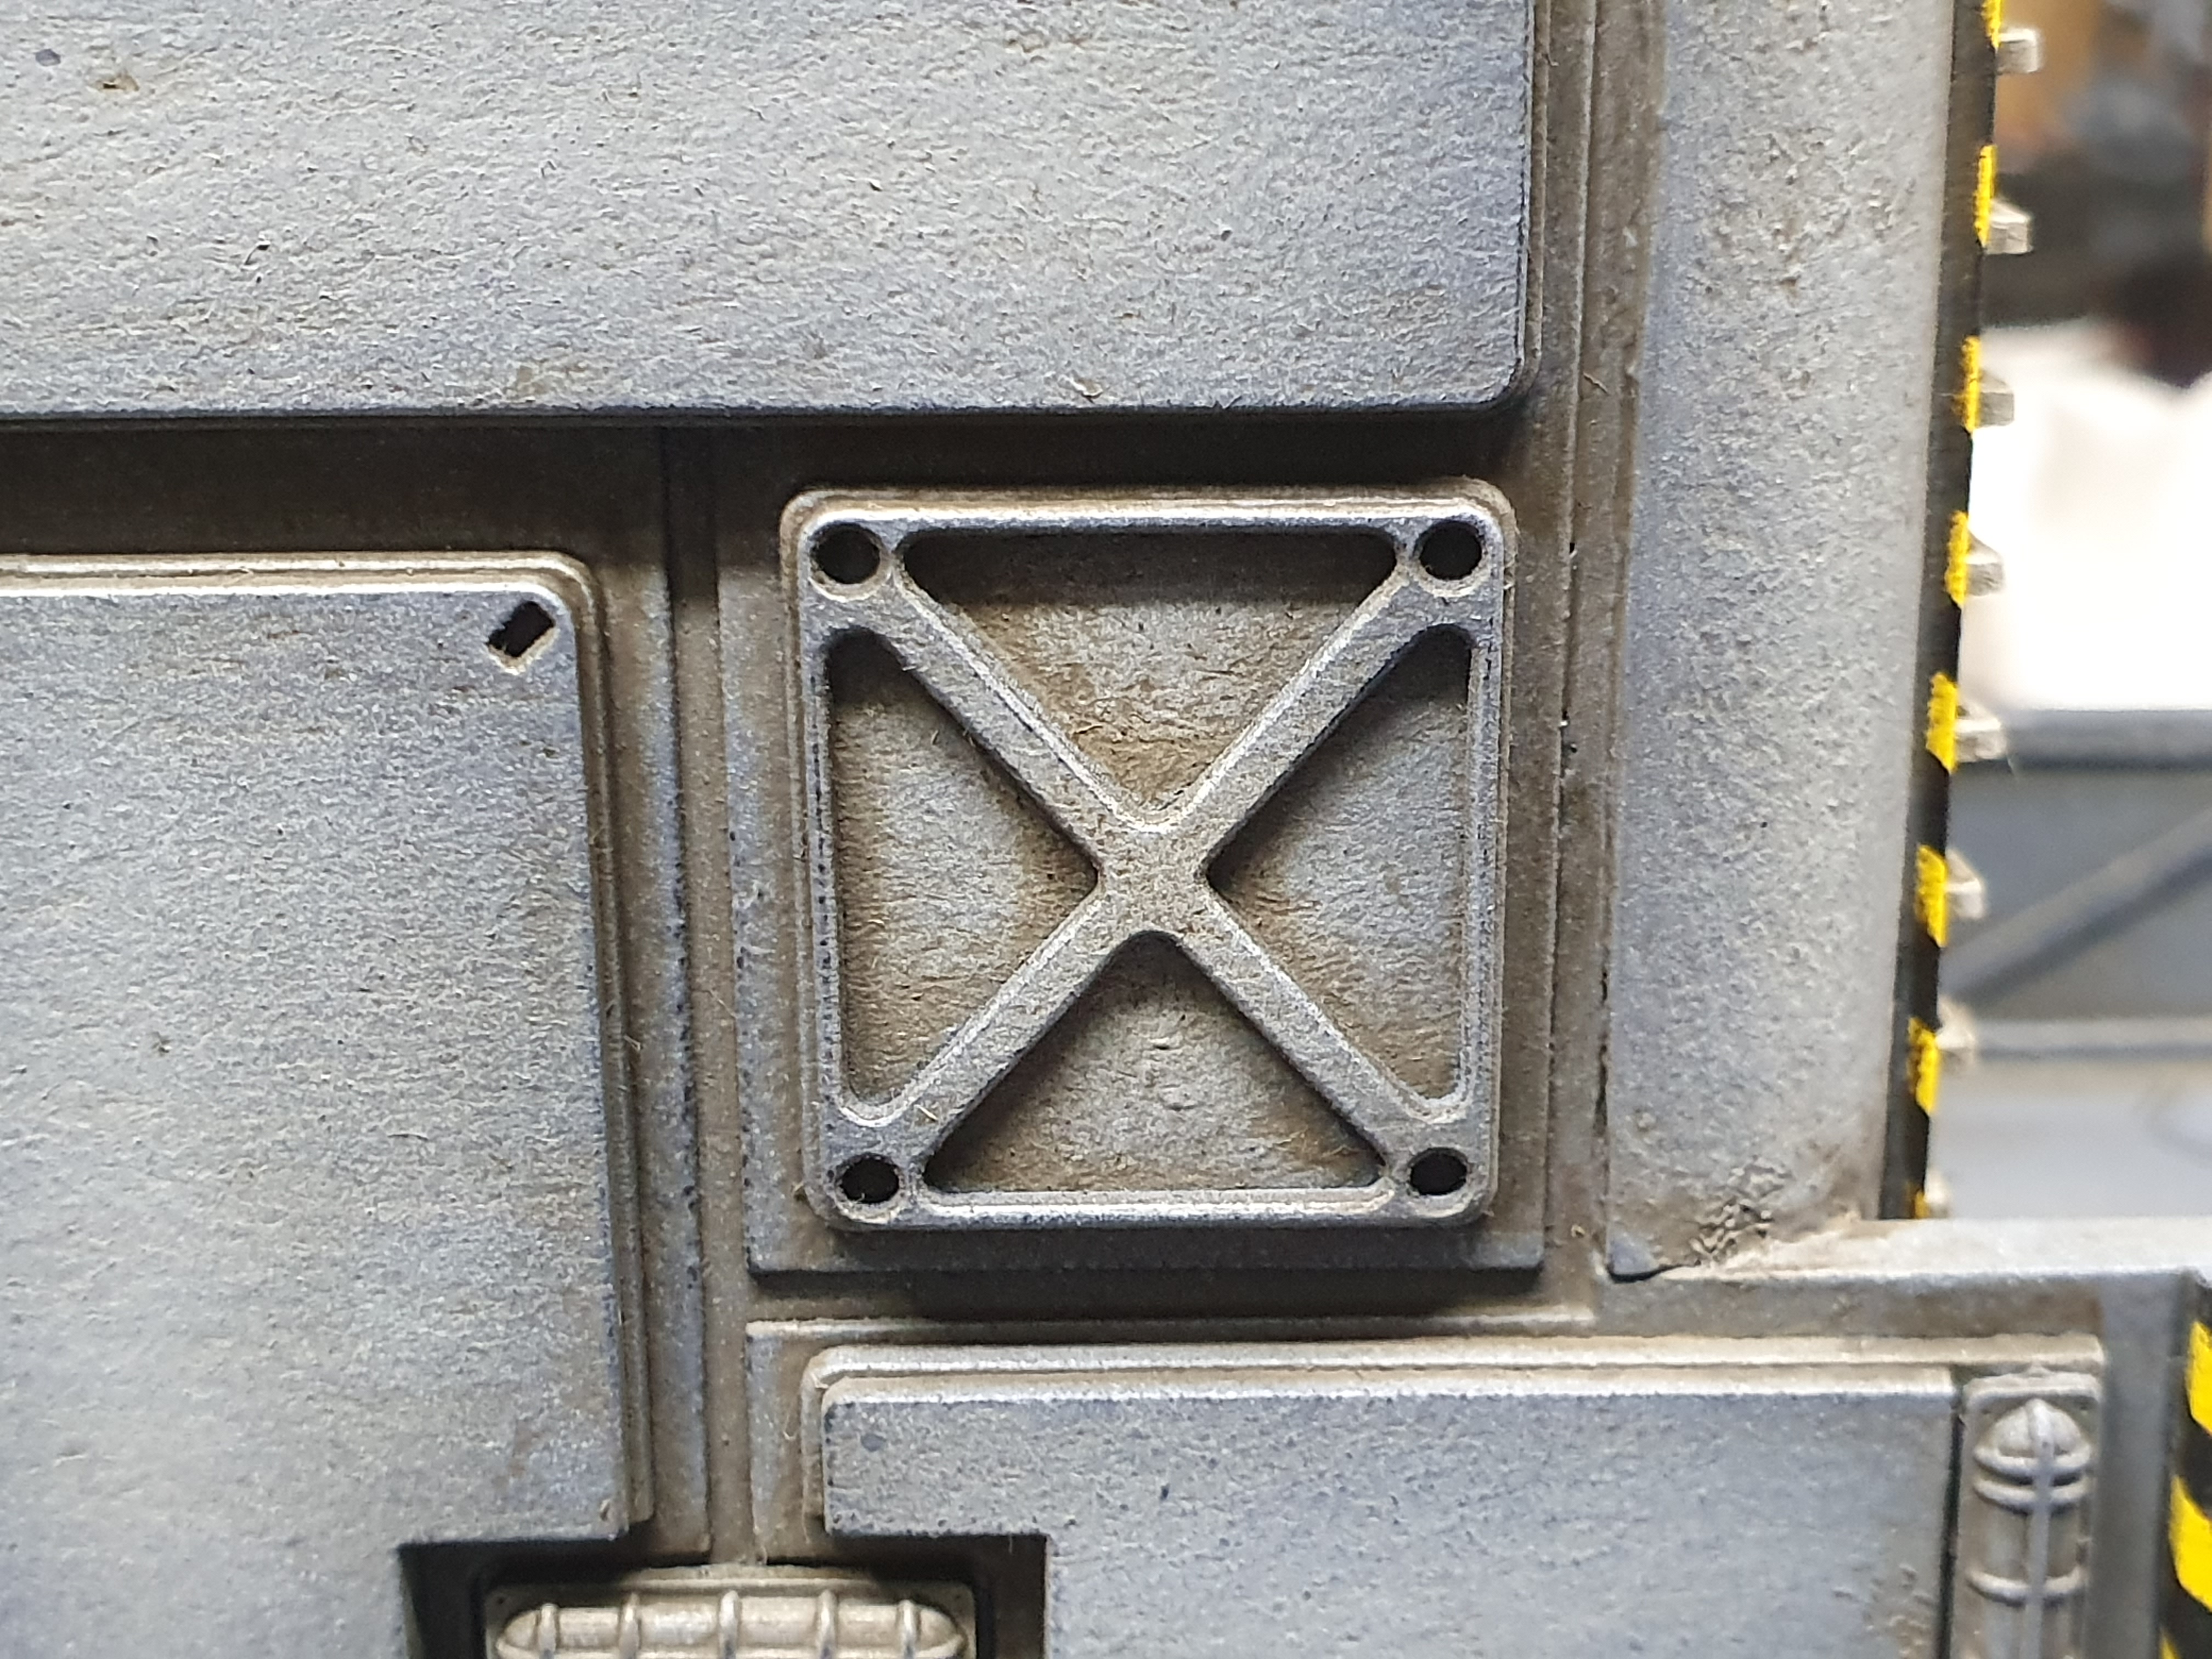 I then used a rag with white spirits on it and removed most of the oil wash.
So I stopped recording what I done from this point. I again was not feeling it. But I continued until it was complete.
To finish the painting I highlighted and then used some streaking effects on the model in greens and oranges.
I then airbrushed OSL on the lights and on the console and then used water effects for the glass on the console.
More to come.
The Finish Line
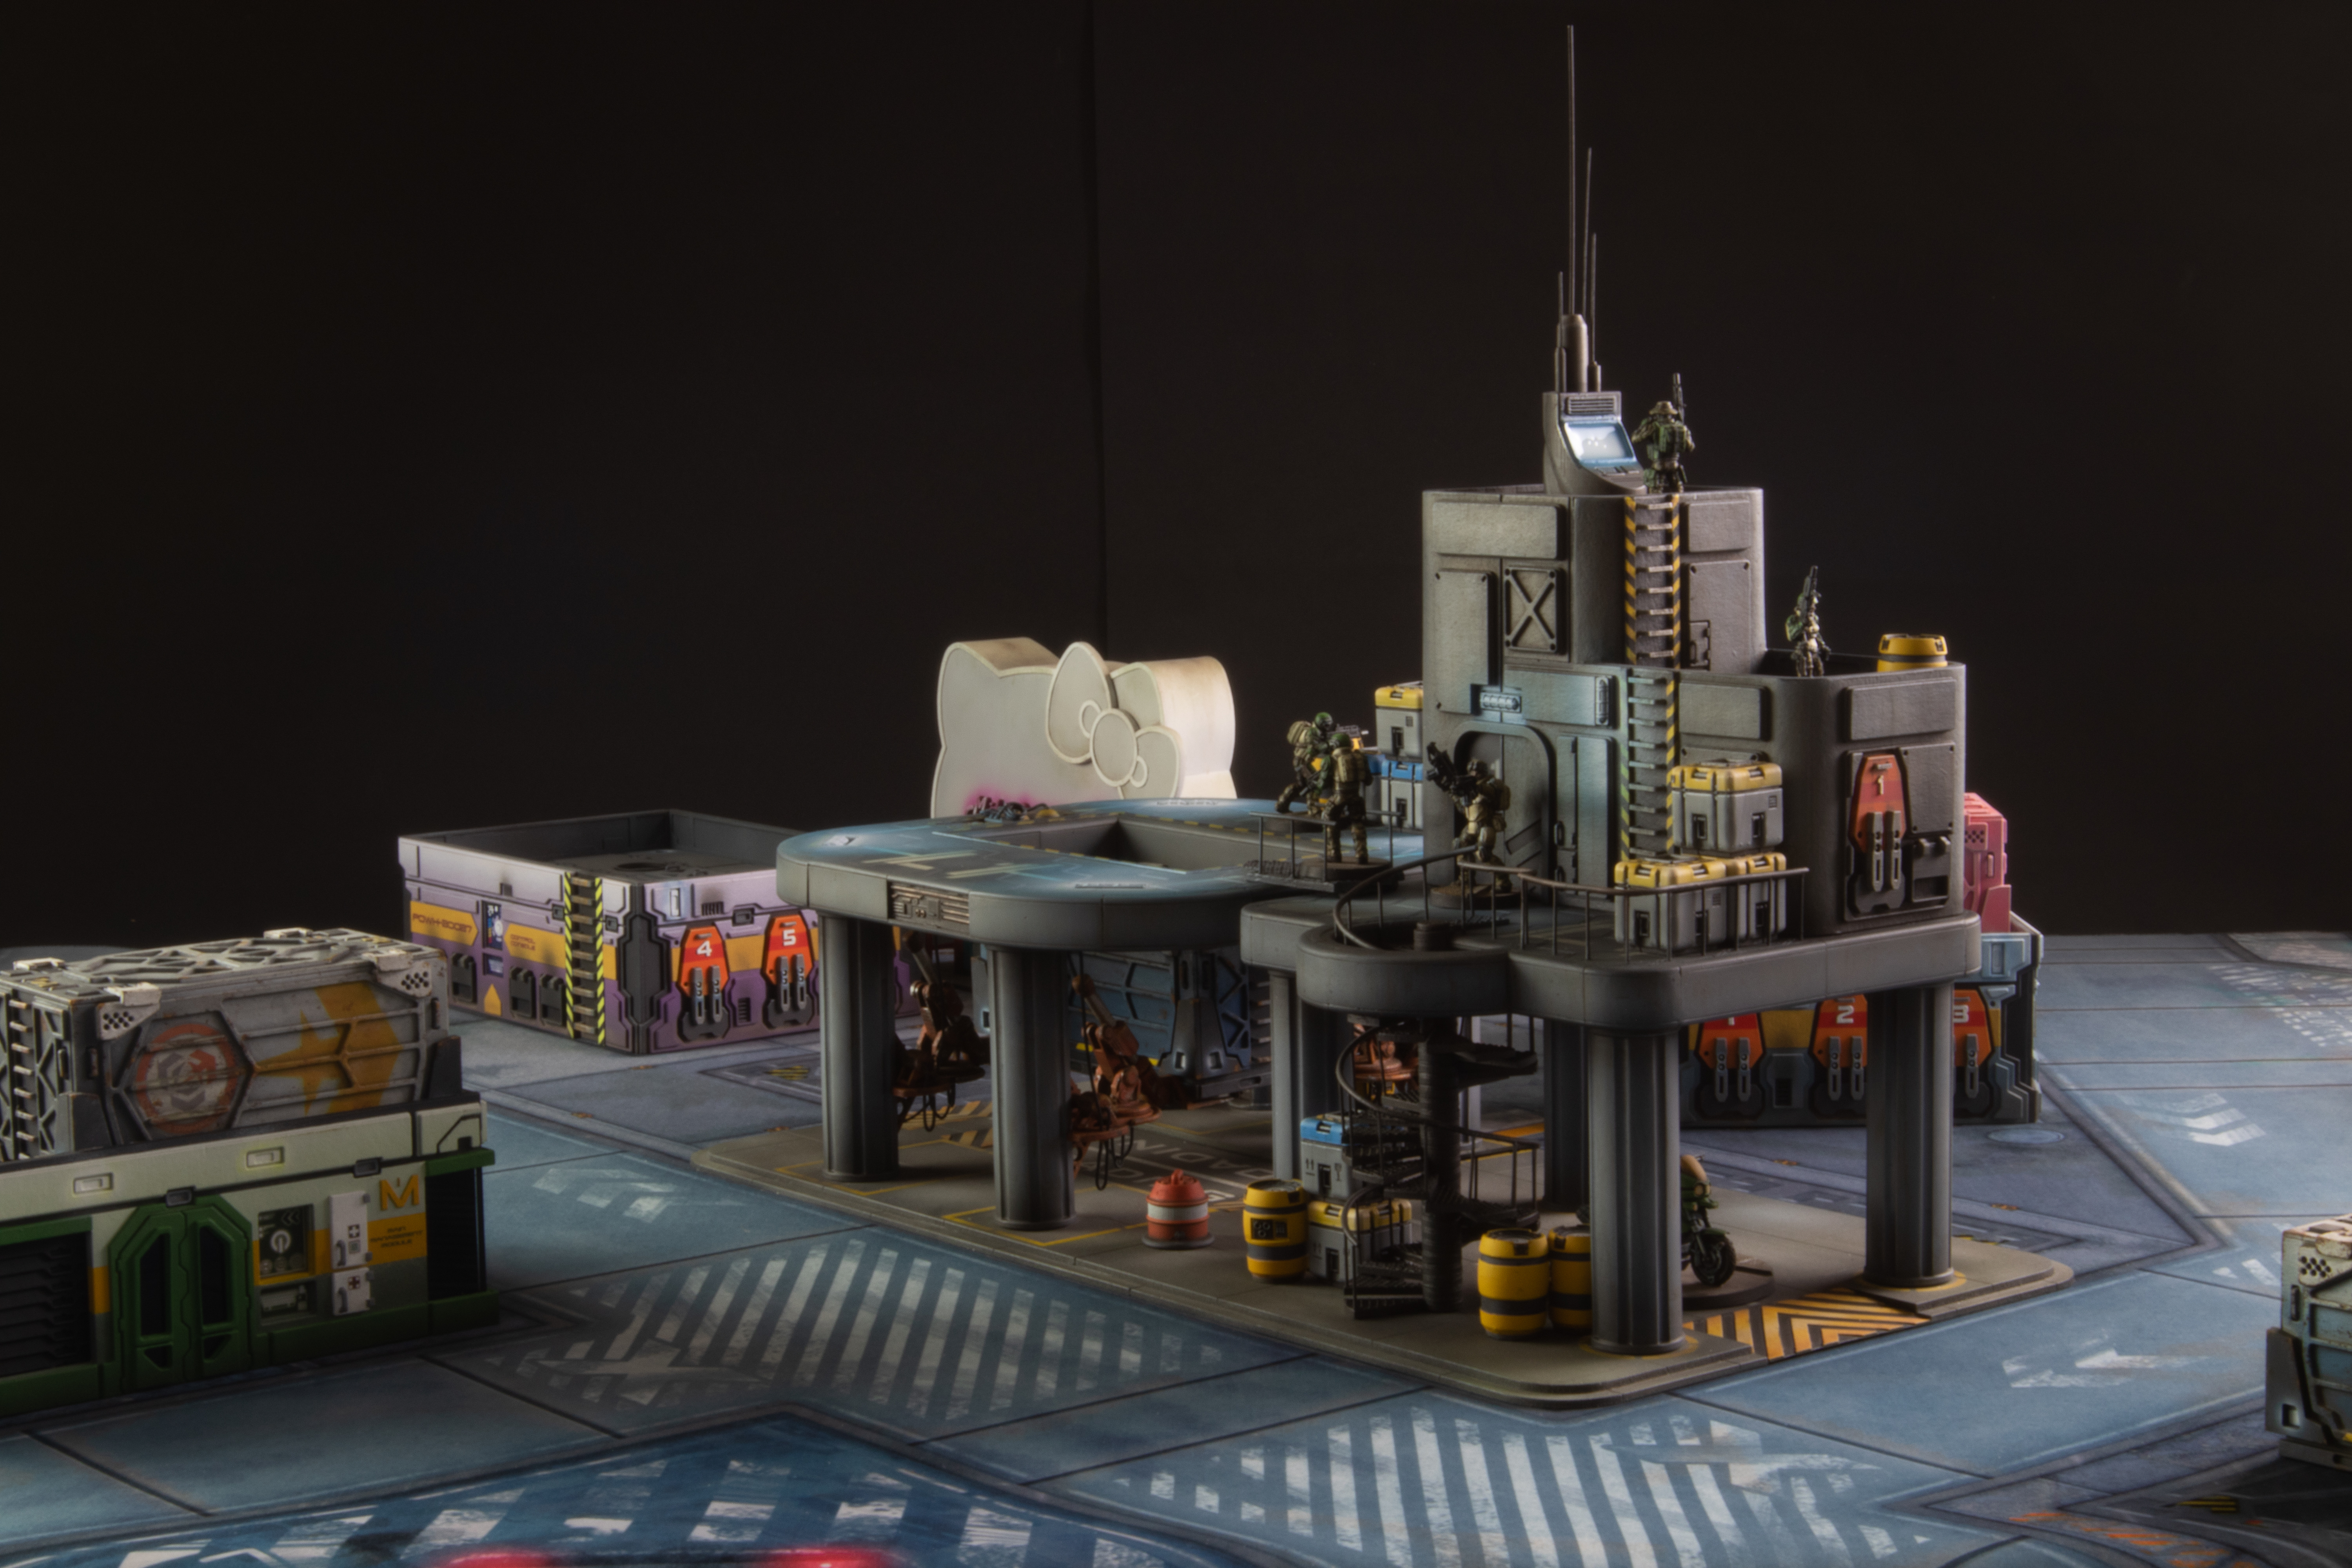
So I have now taken final photo’s of the last section of the project. It still feels good to finish it.
 A bit blurry but it's done
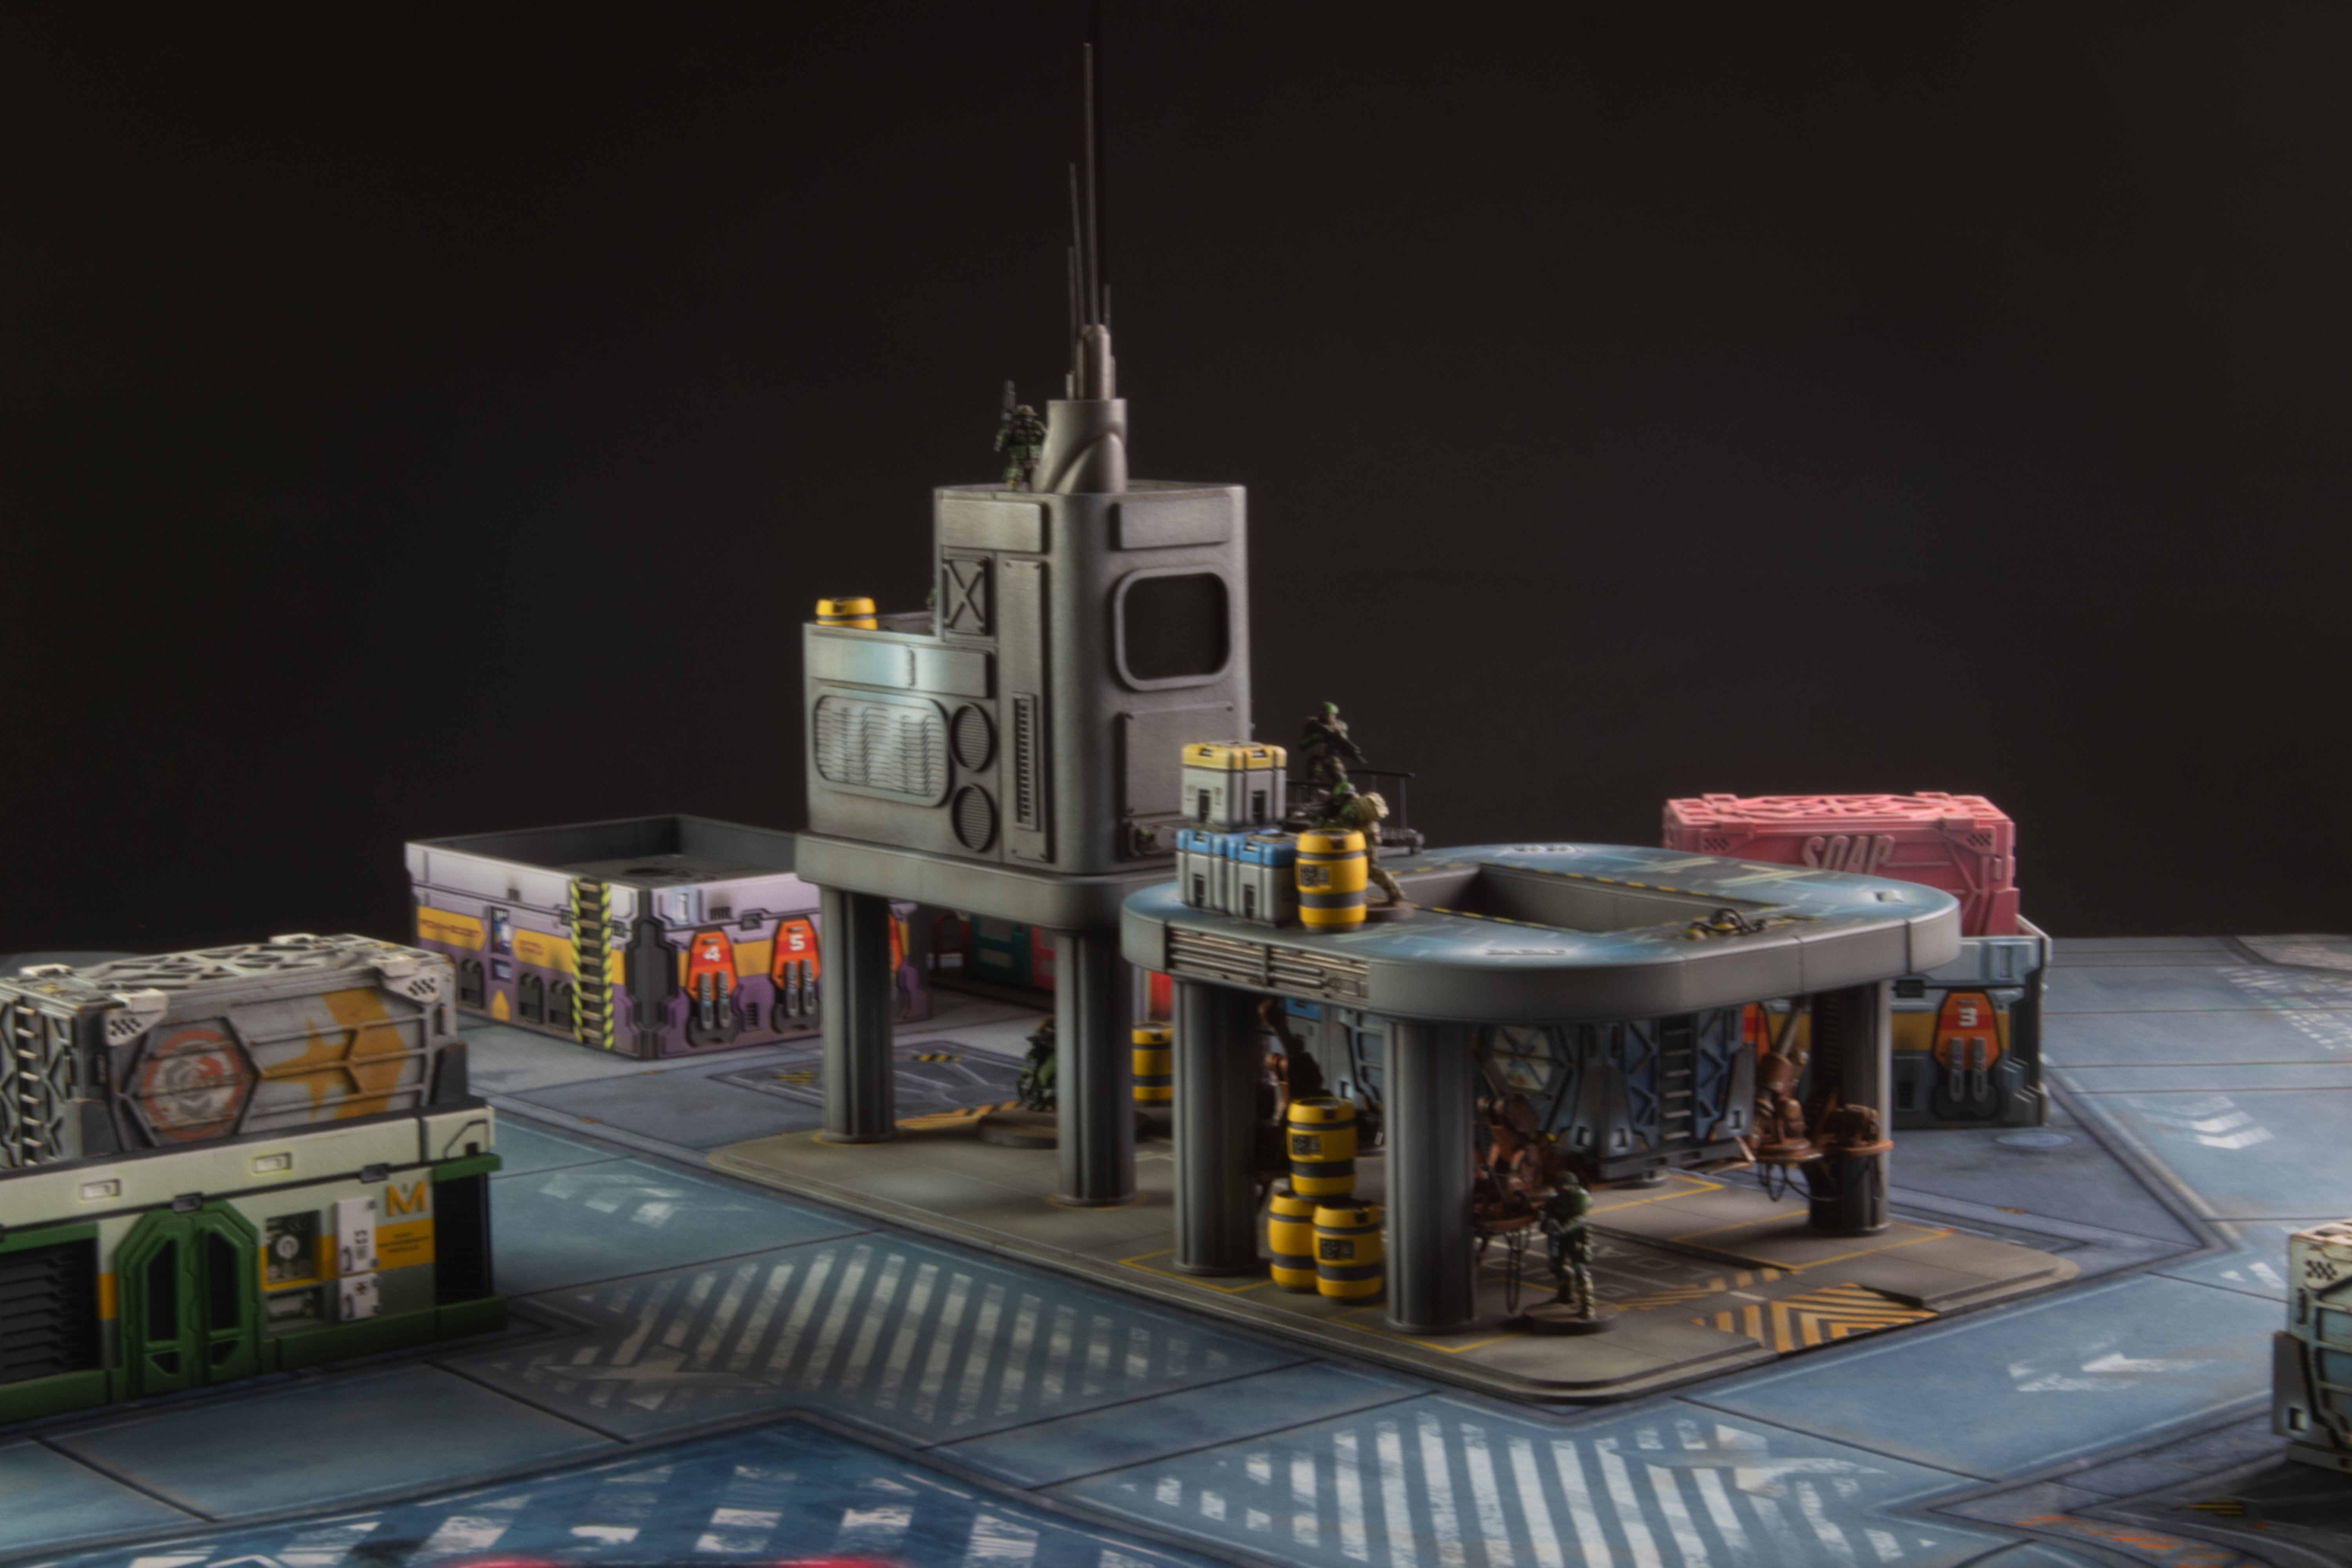 Again a bit blurry but again it's done!
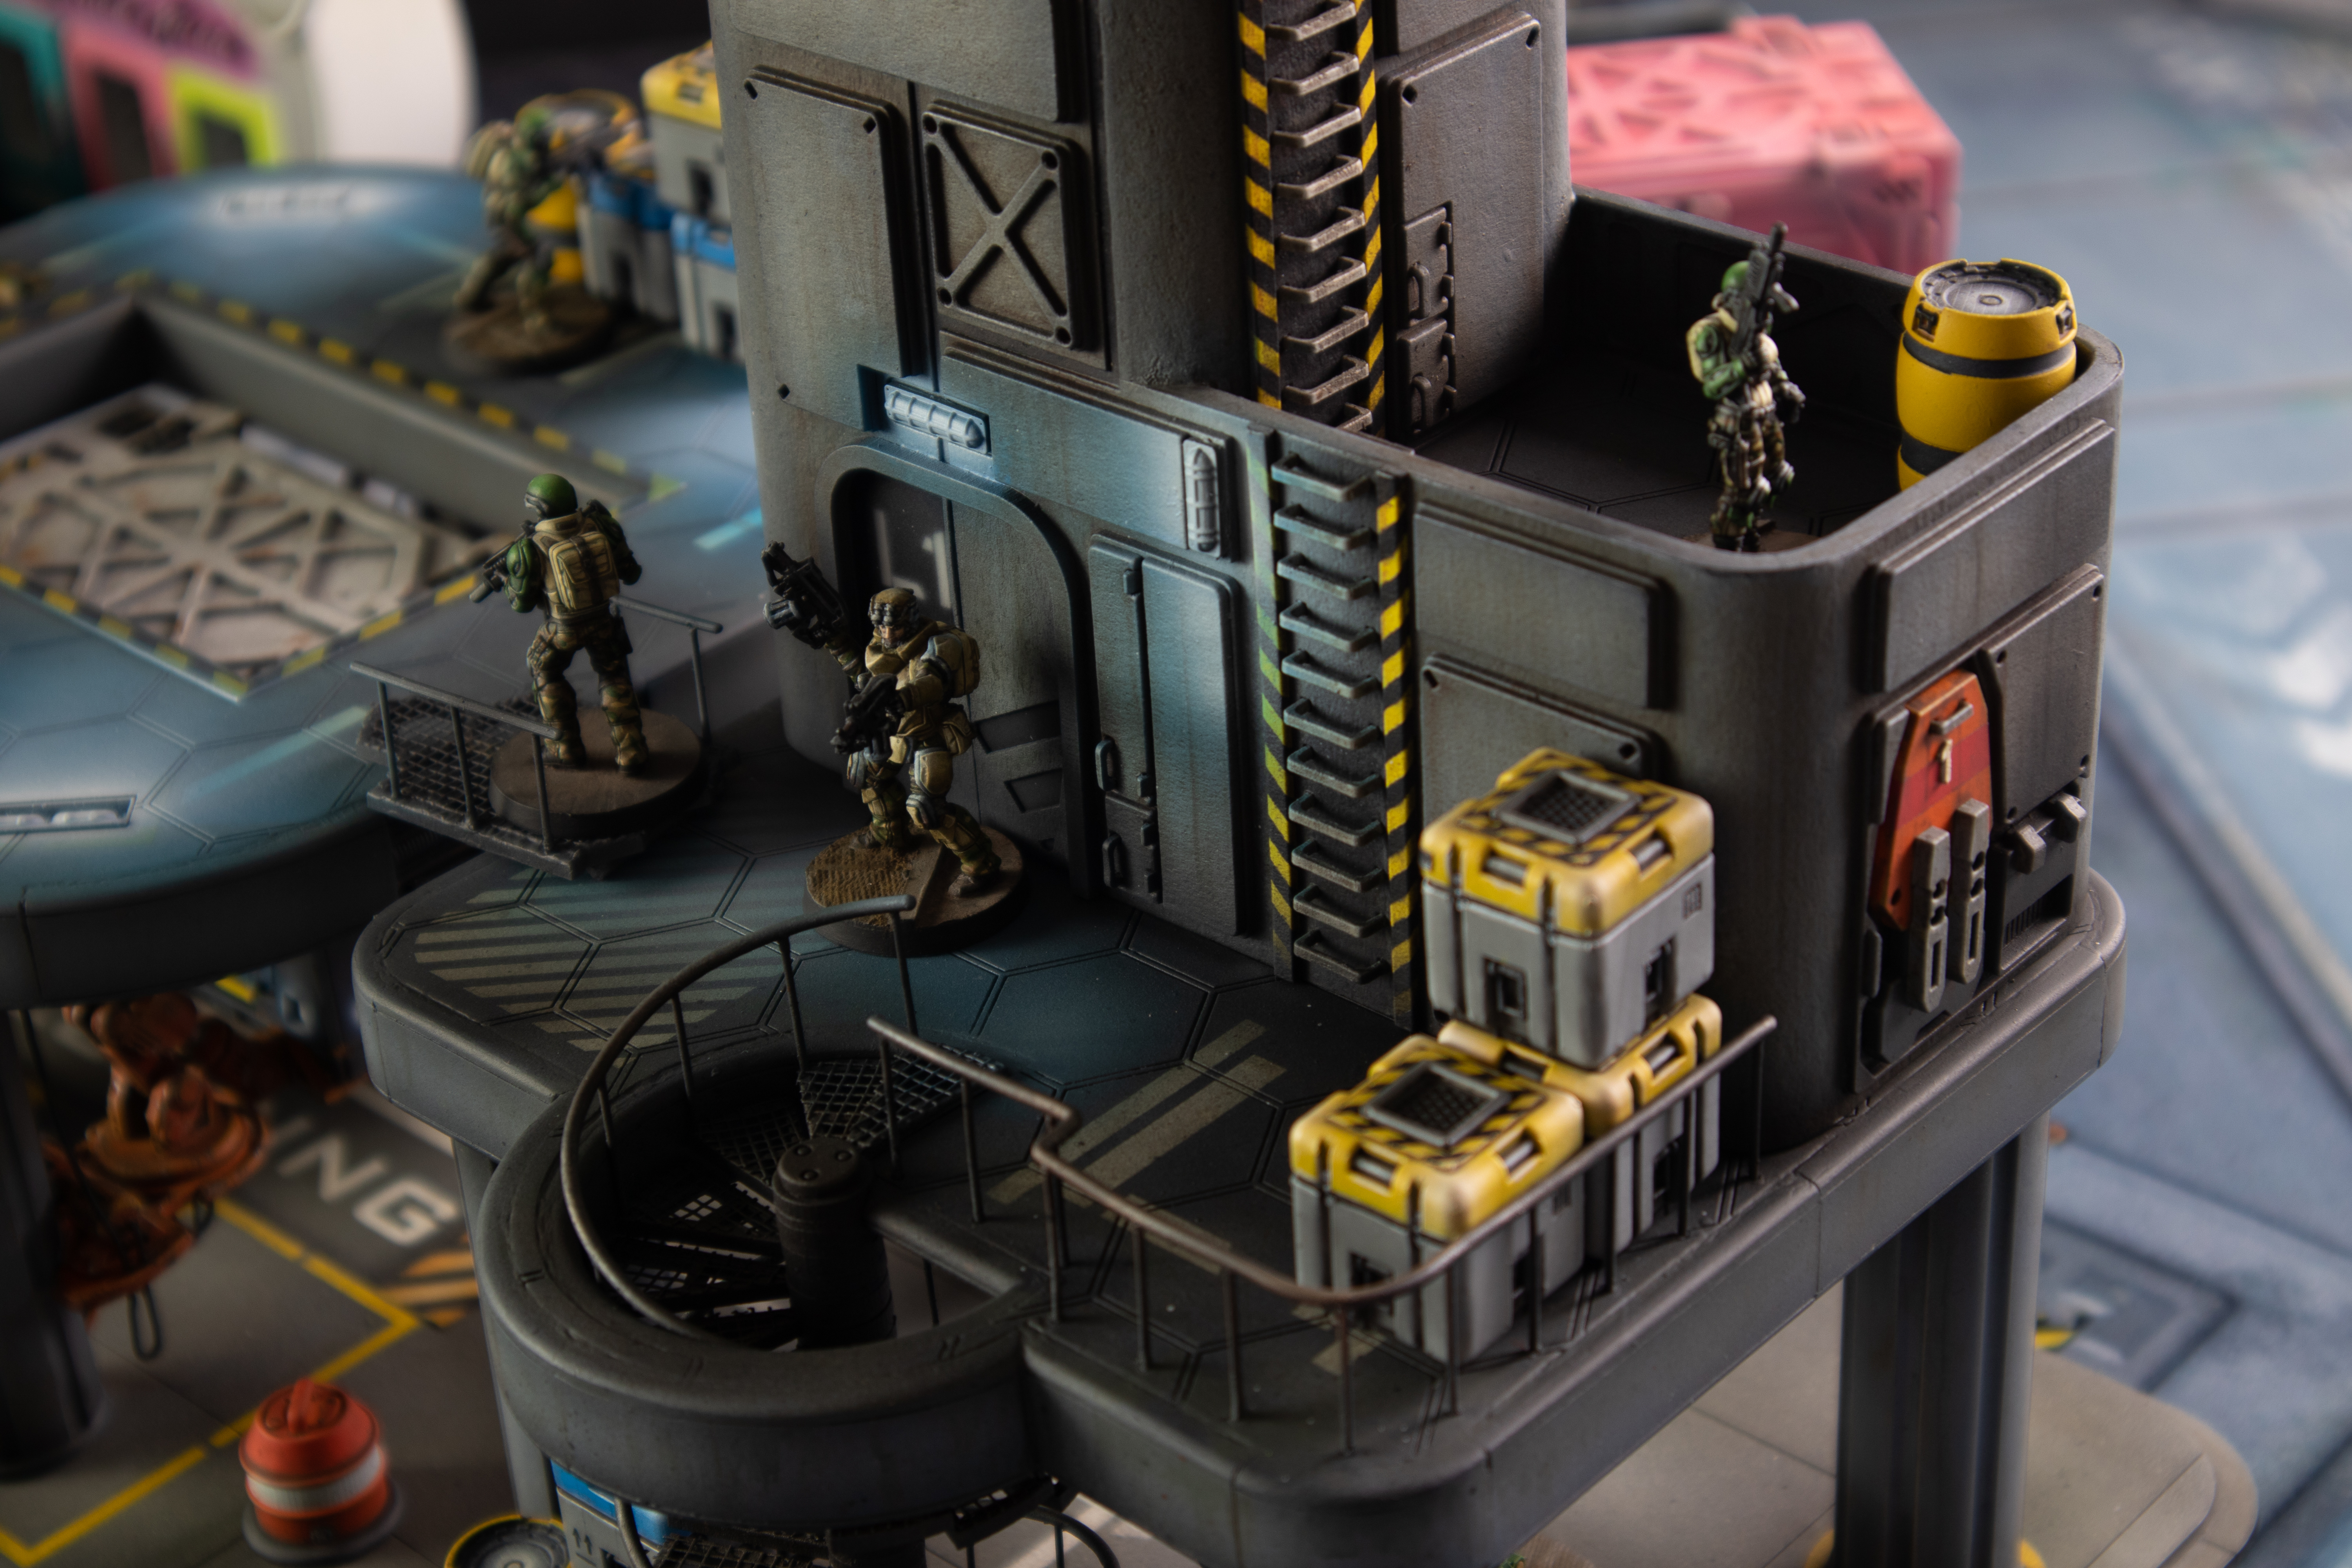 Back end.
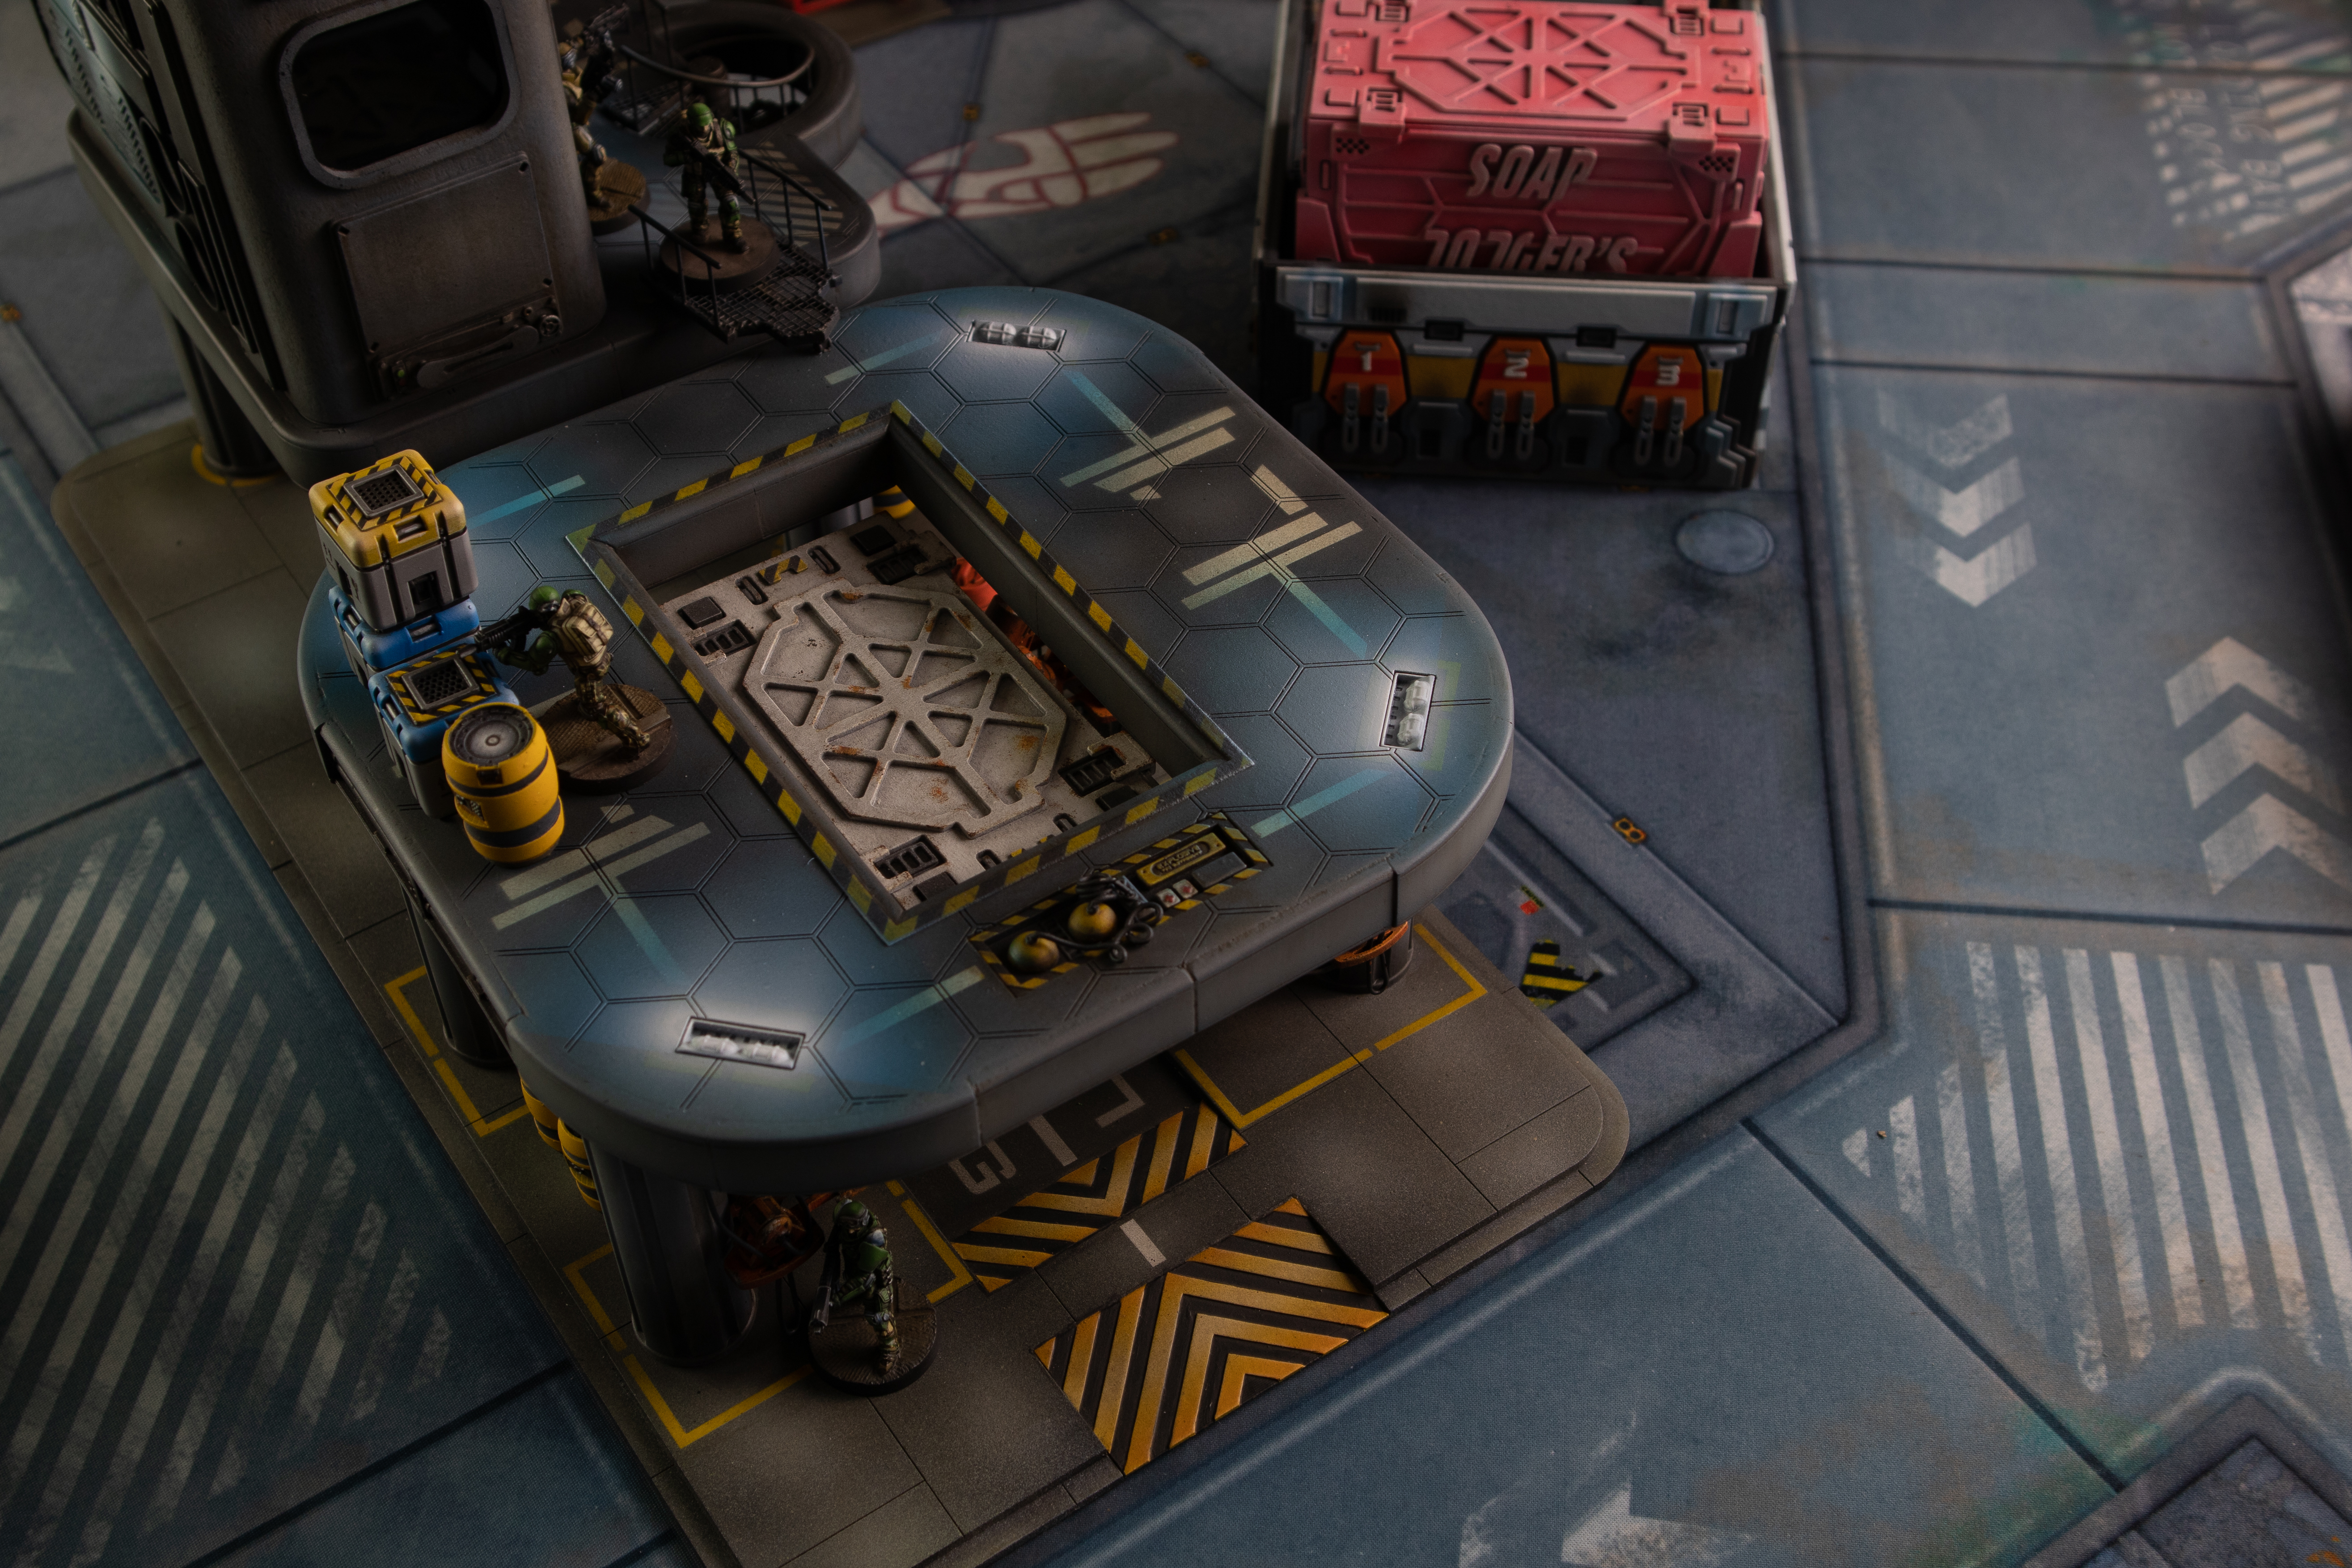 Landing Pad
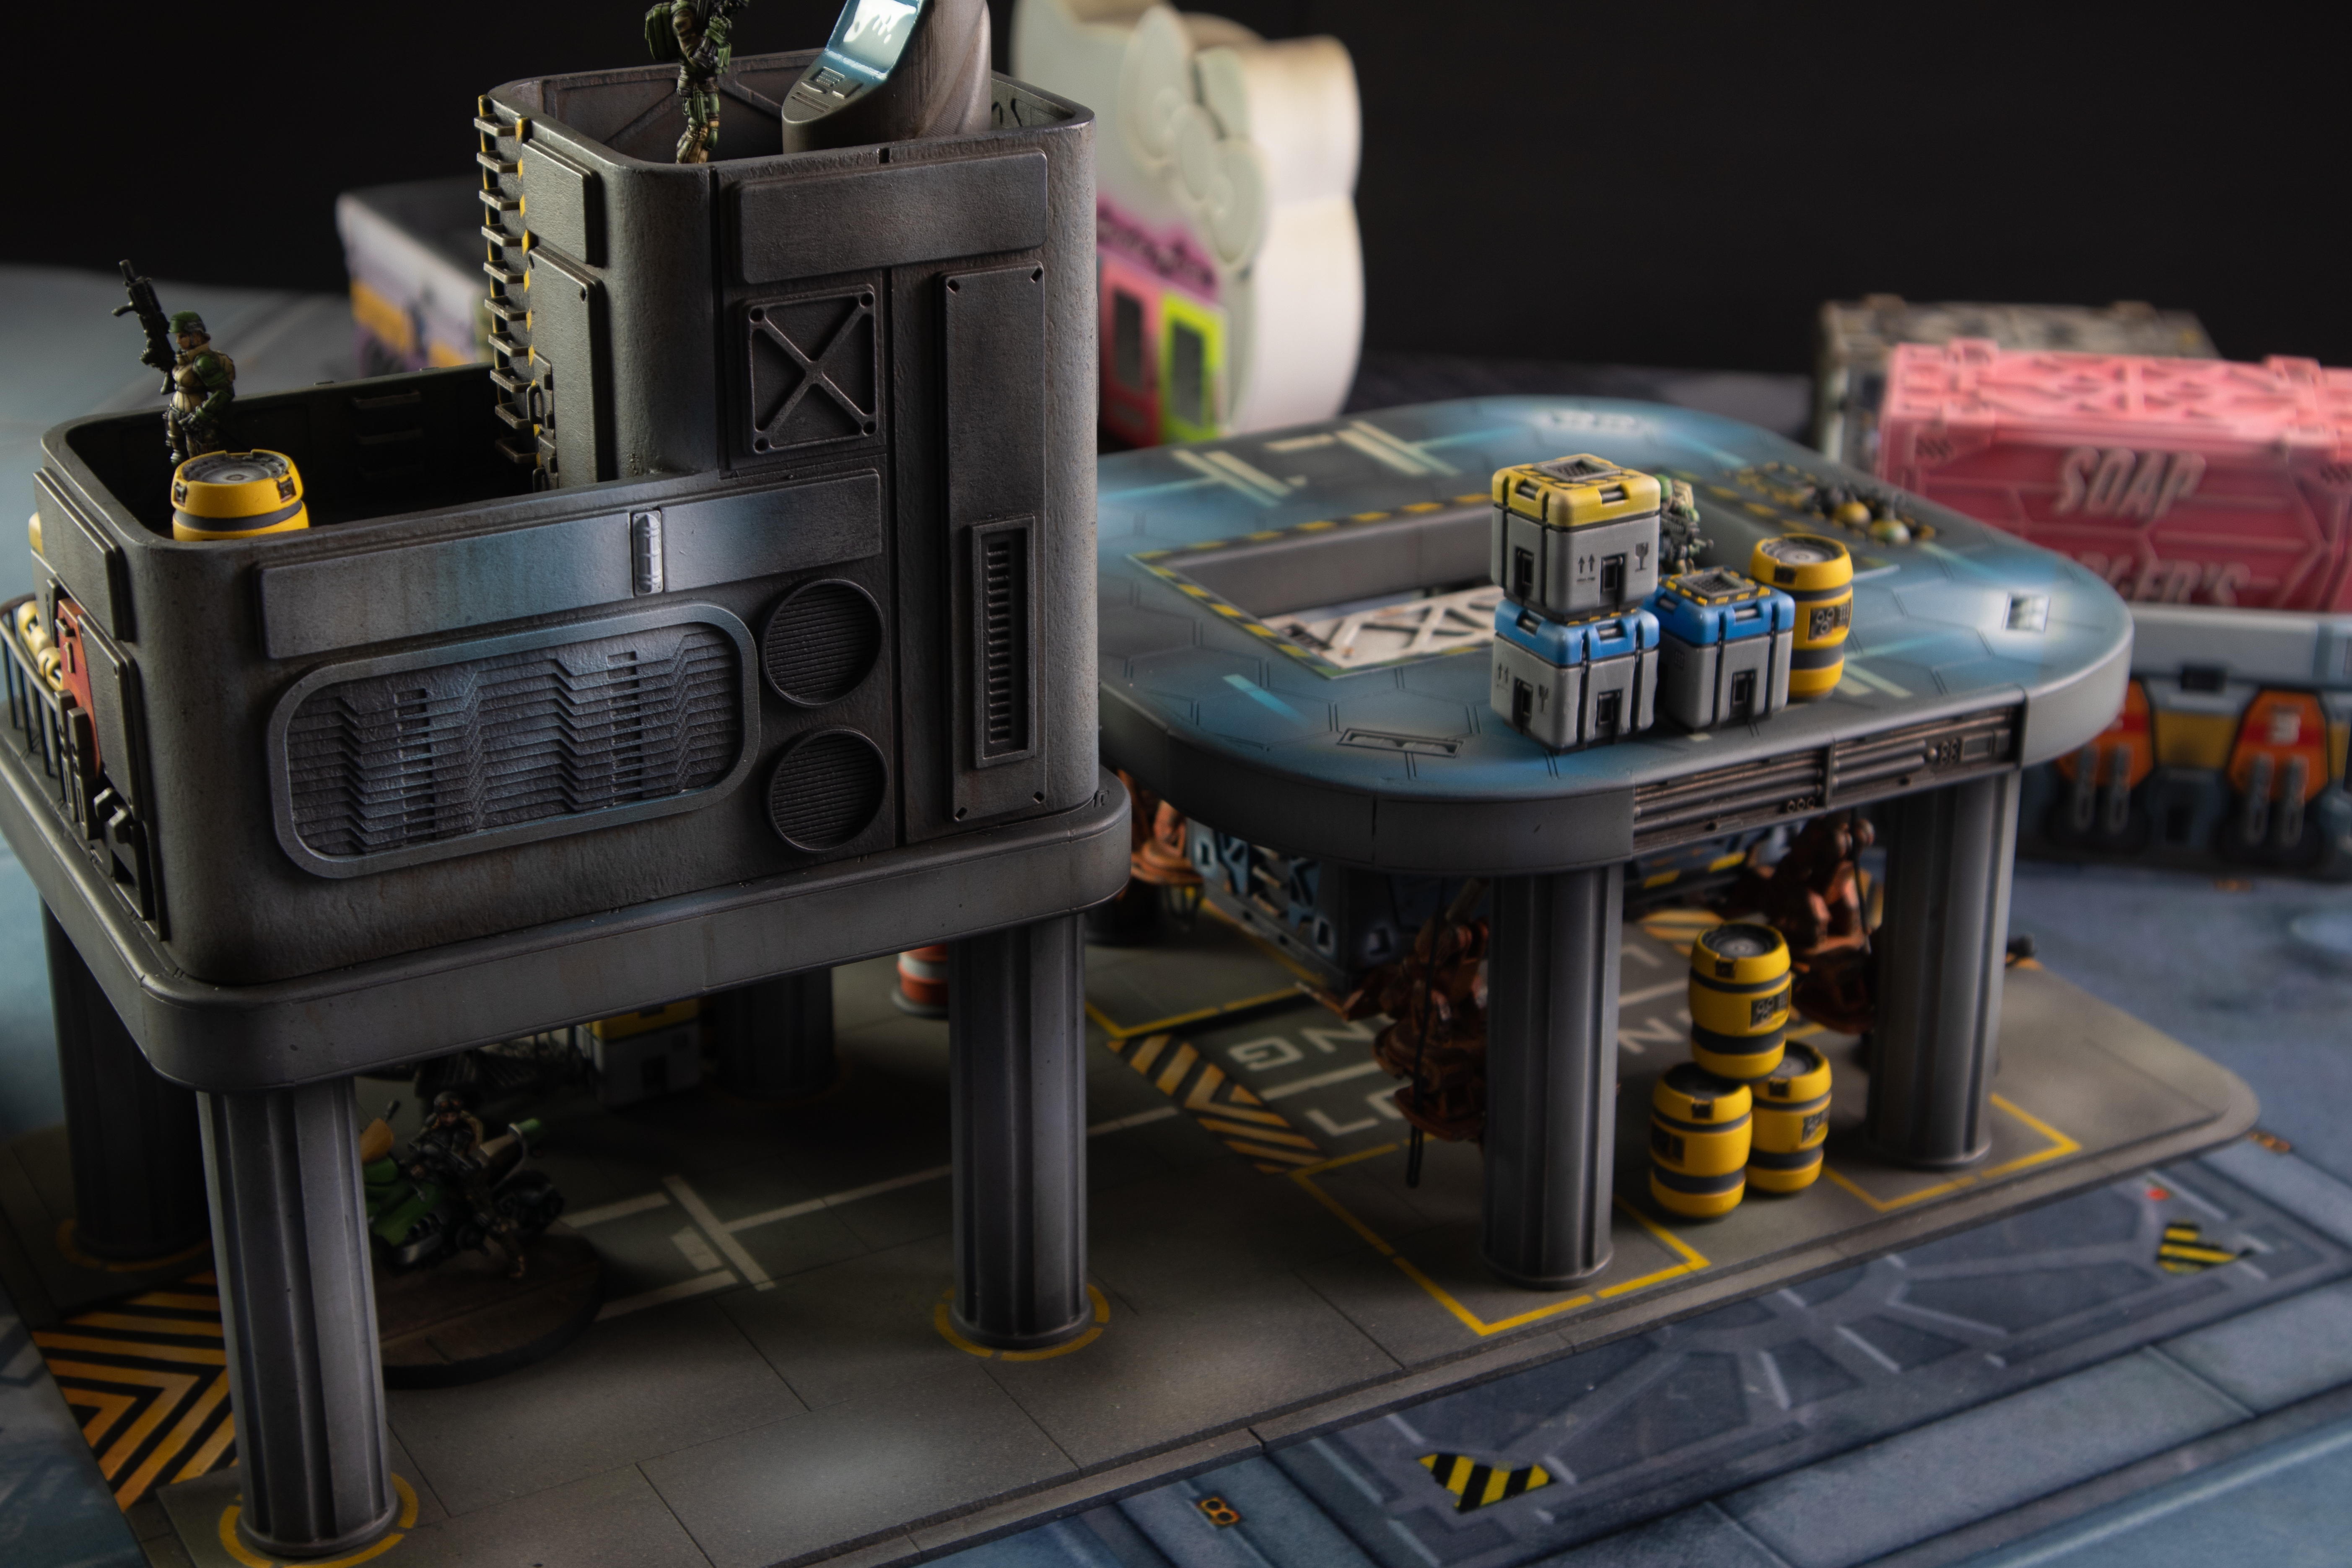 Reverse landing pad
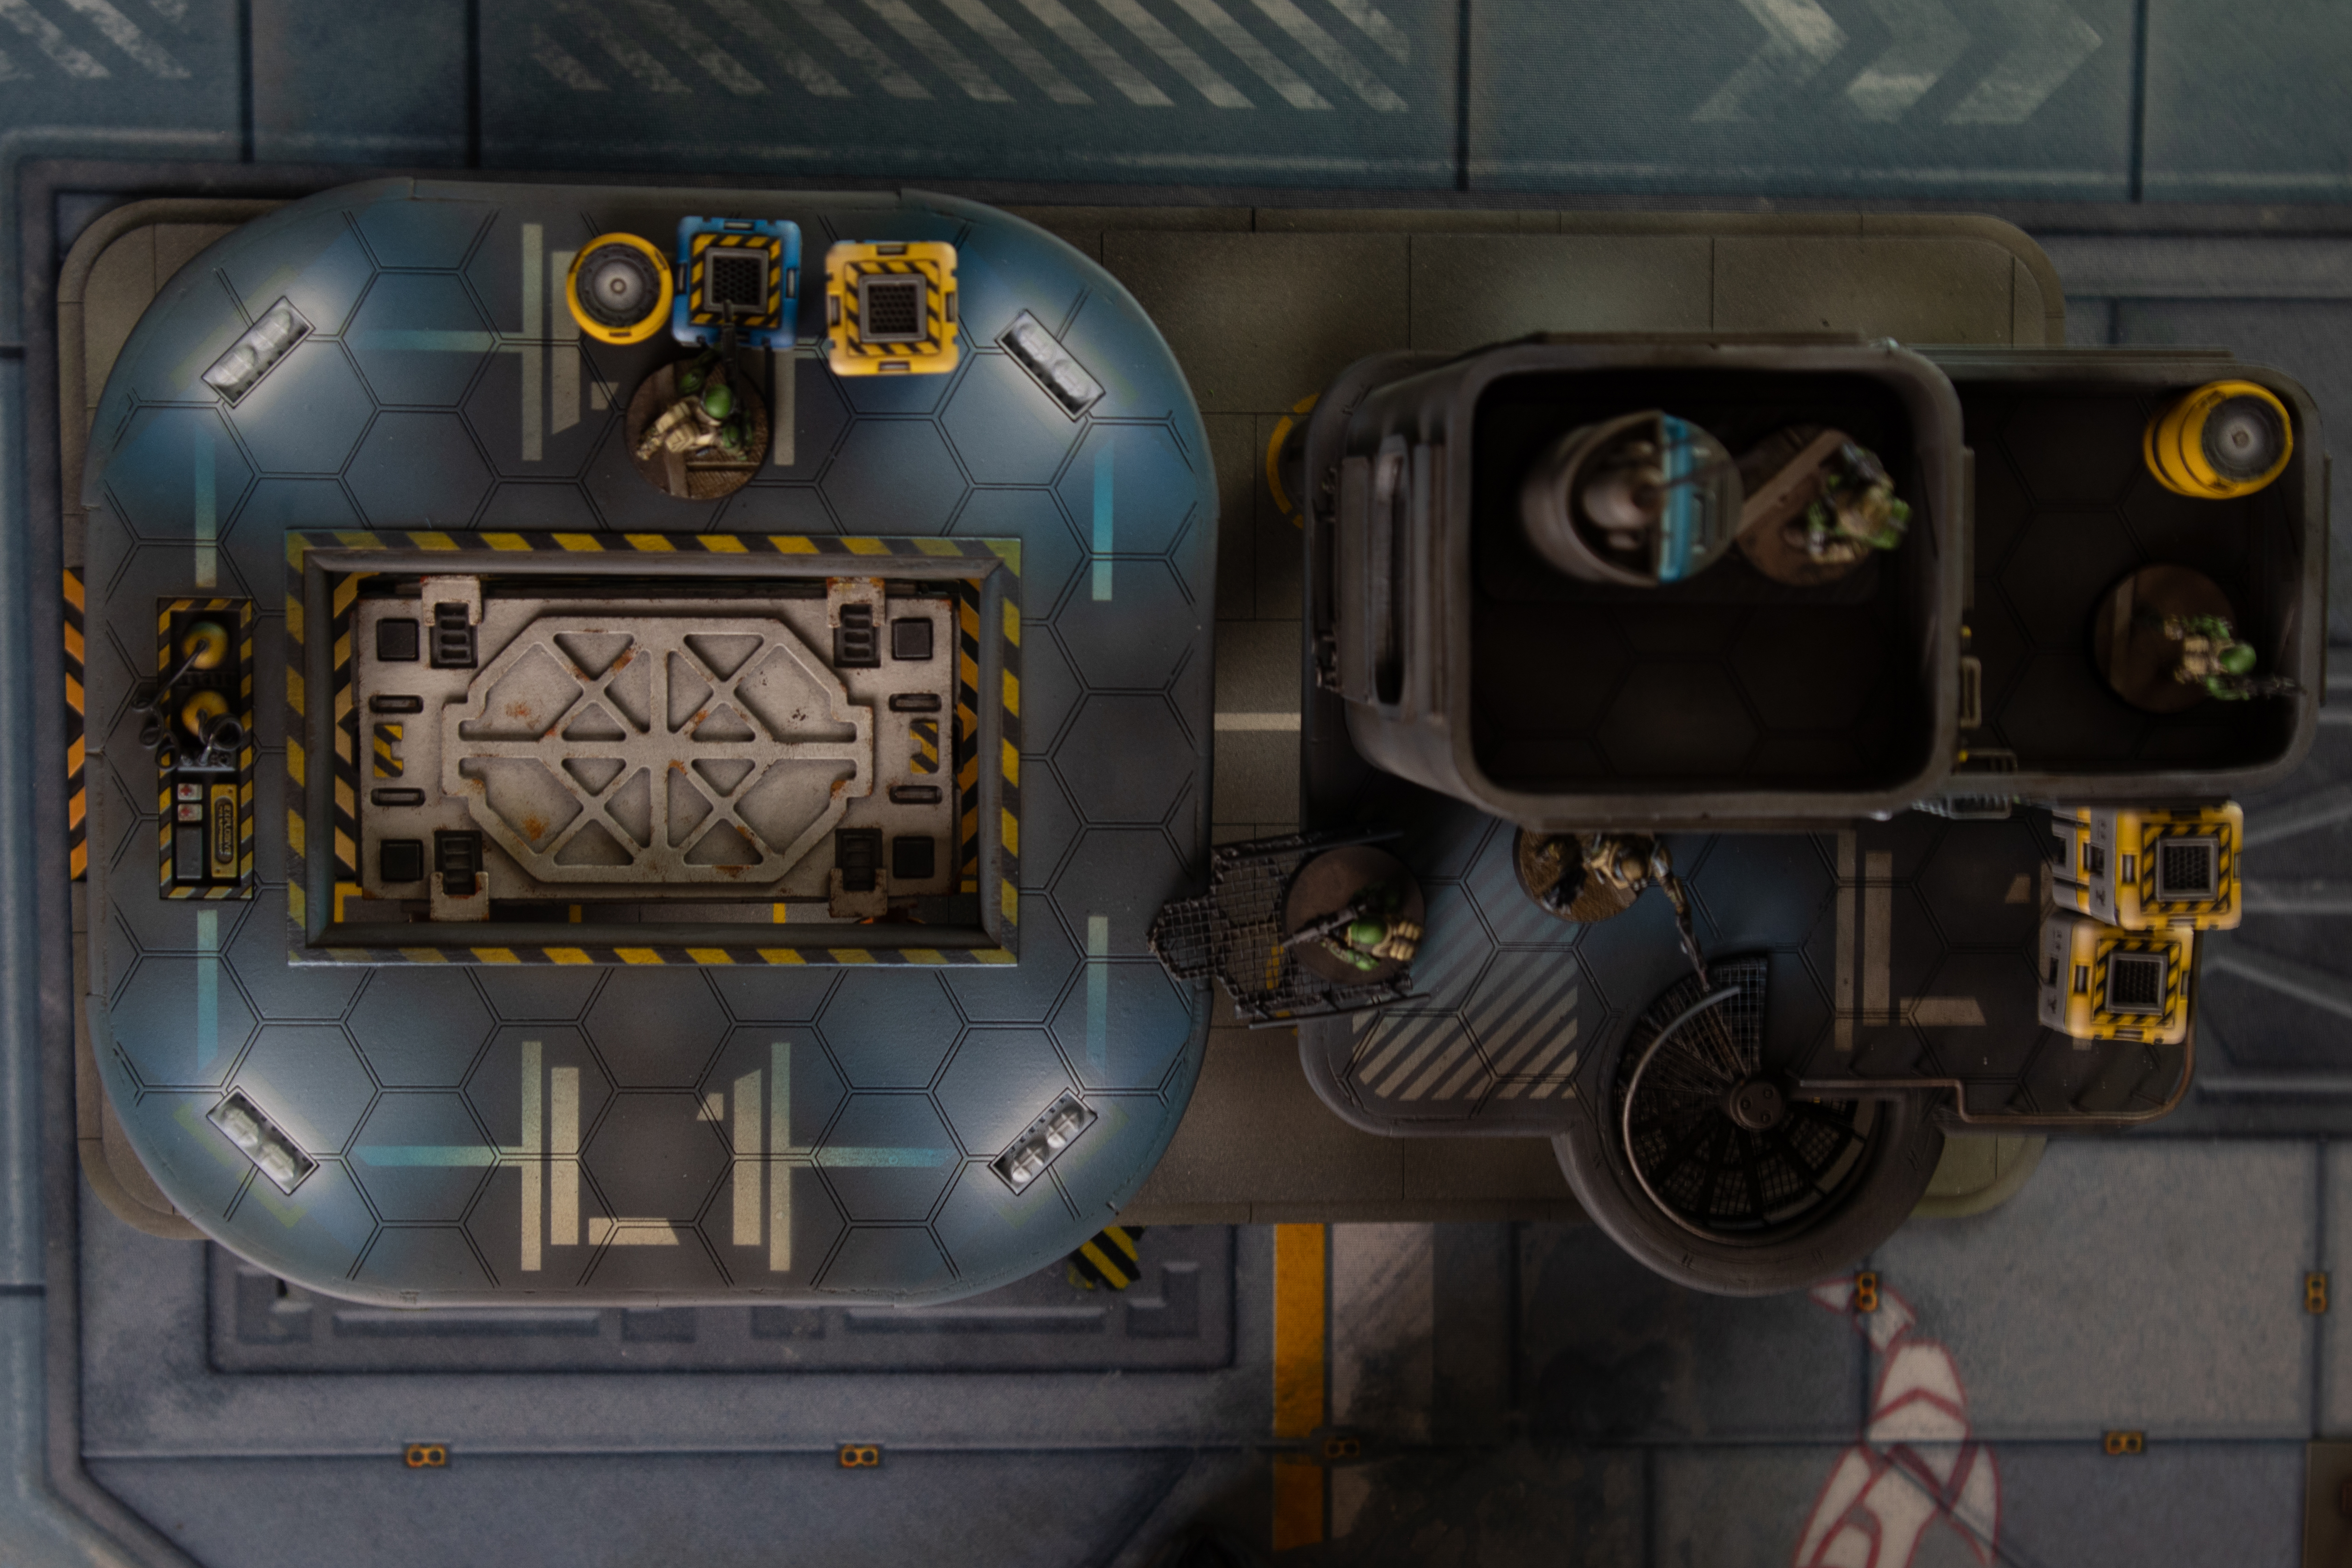 Plan View
 loading
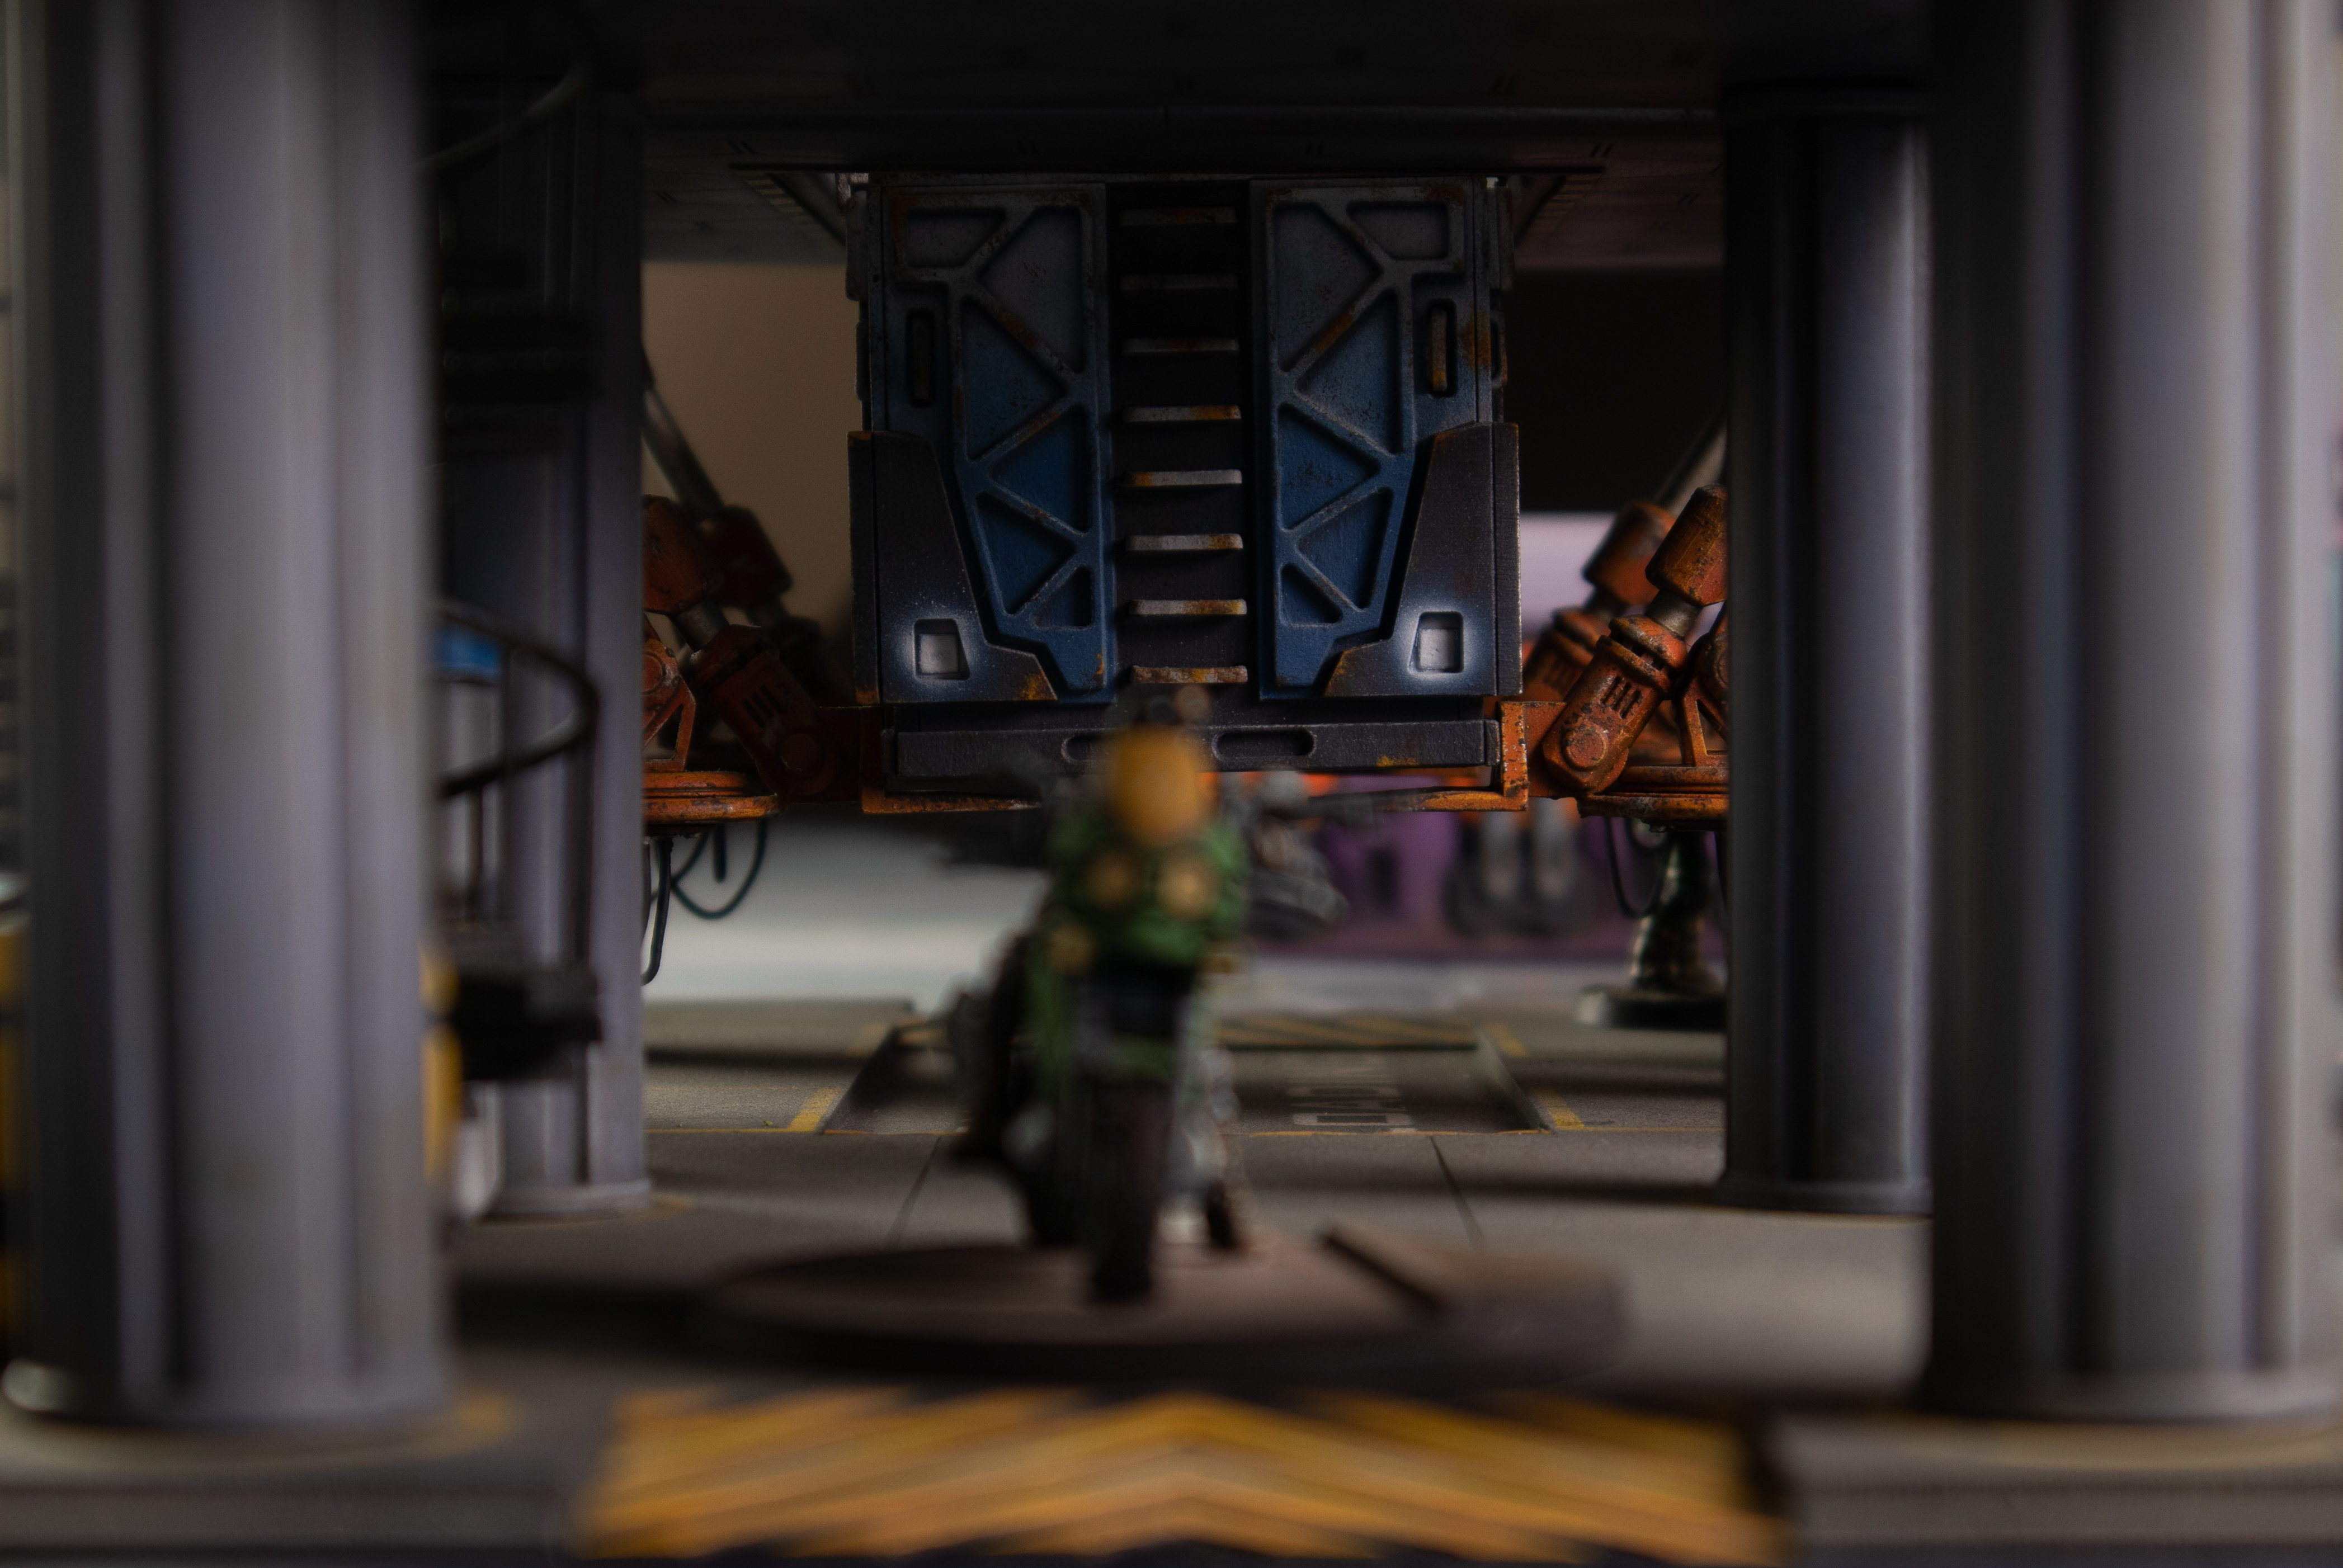 Front to back
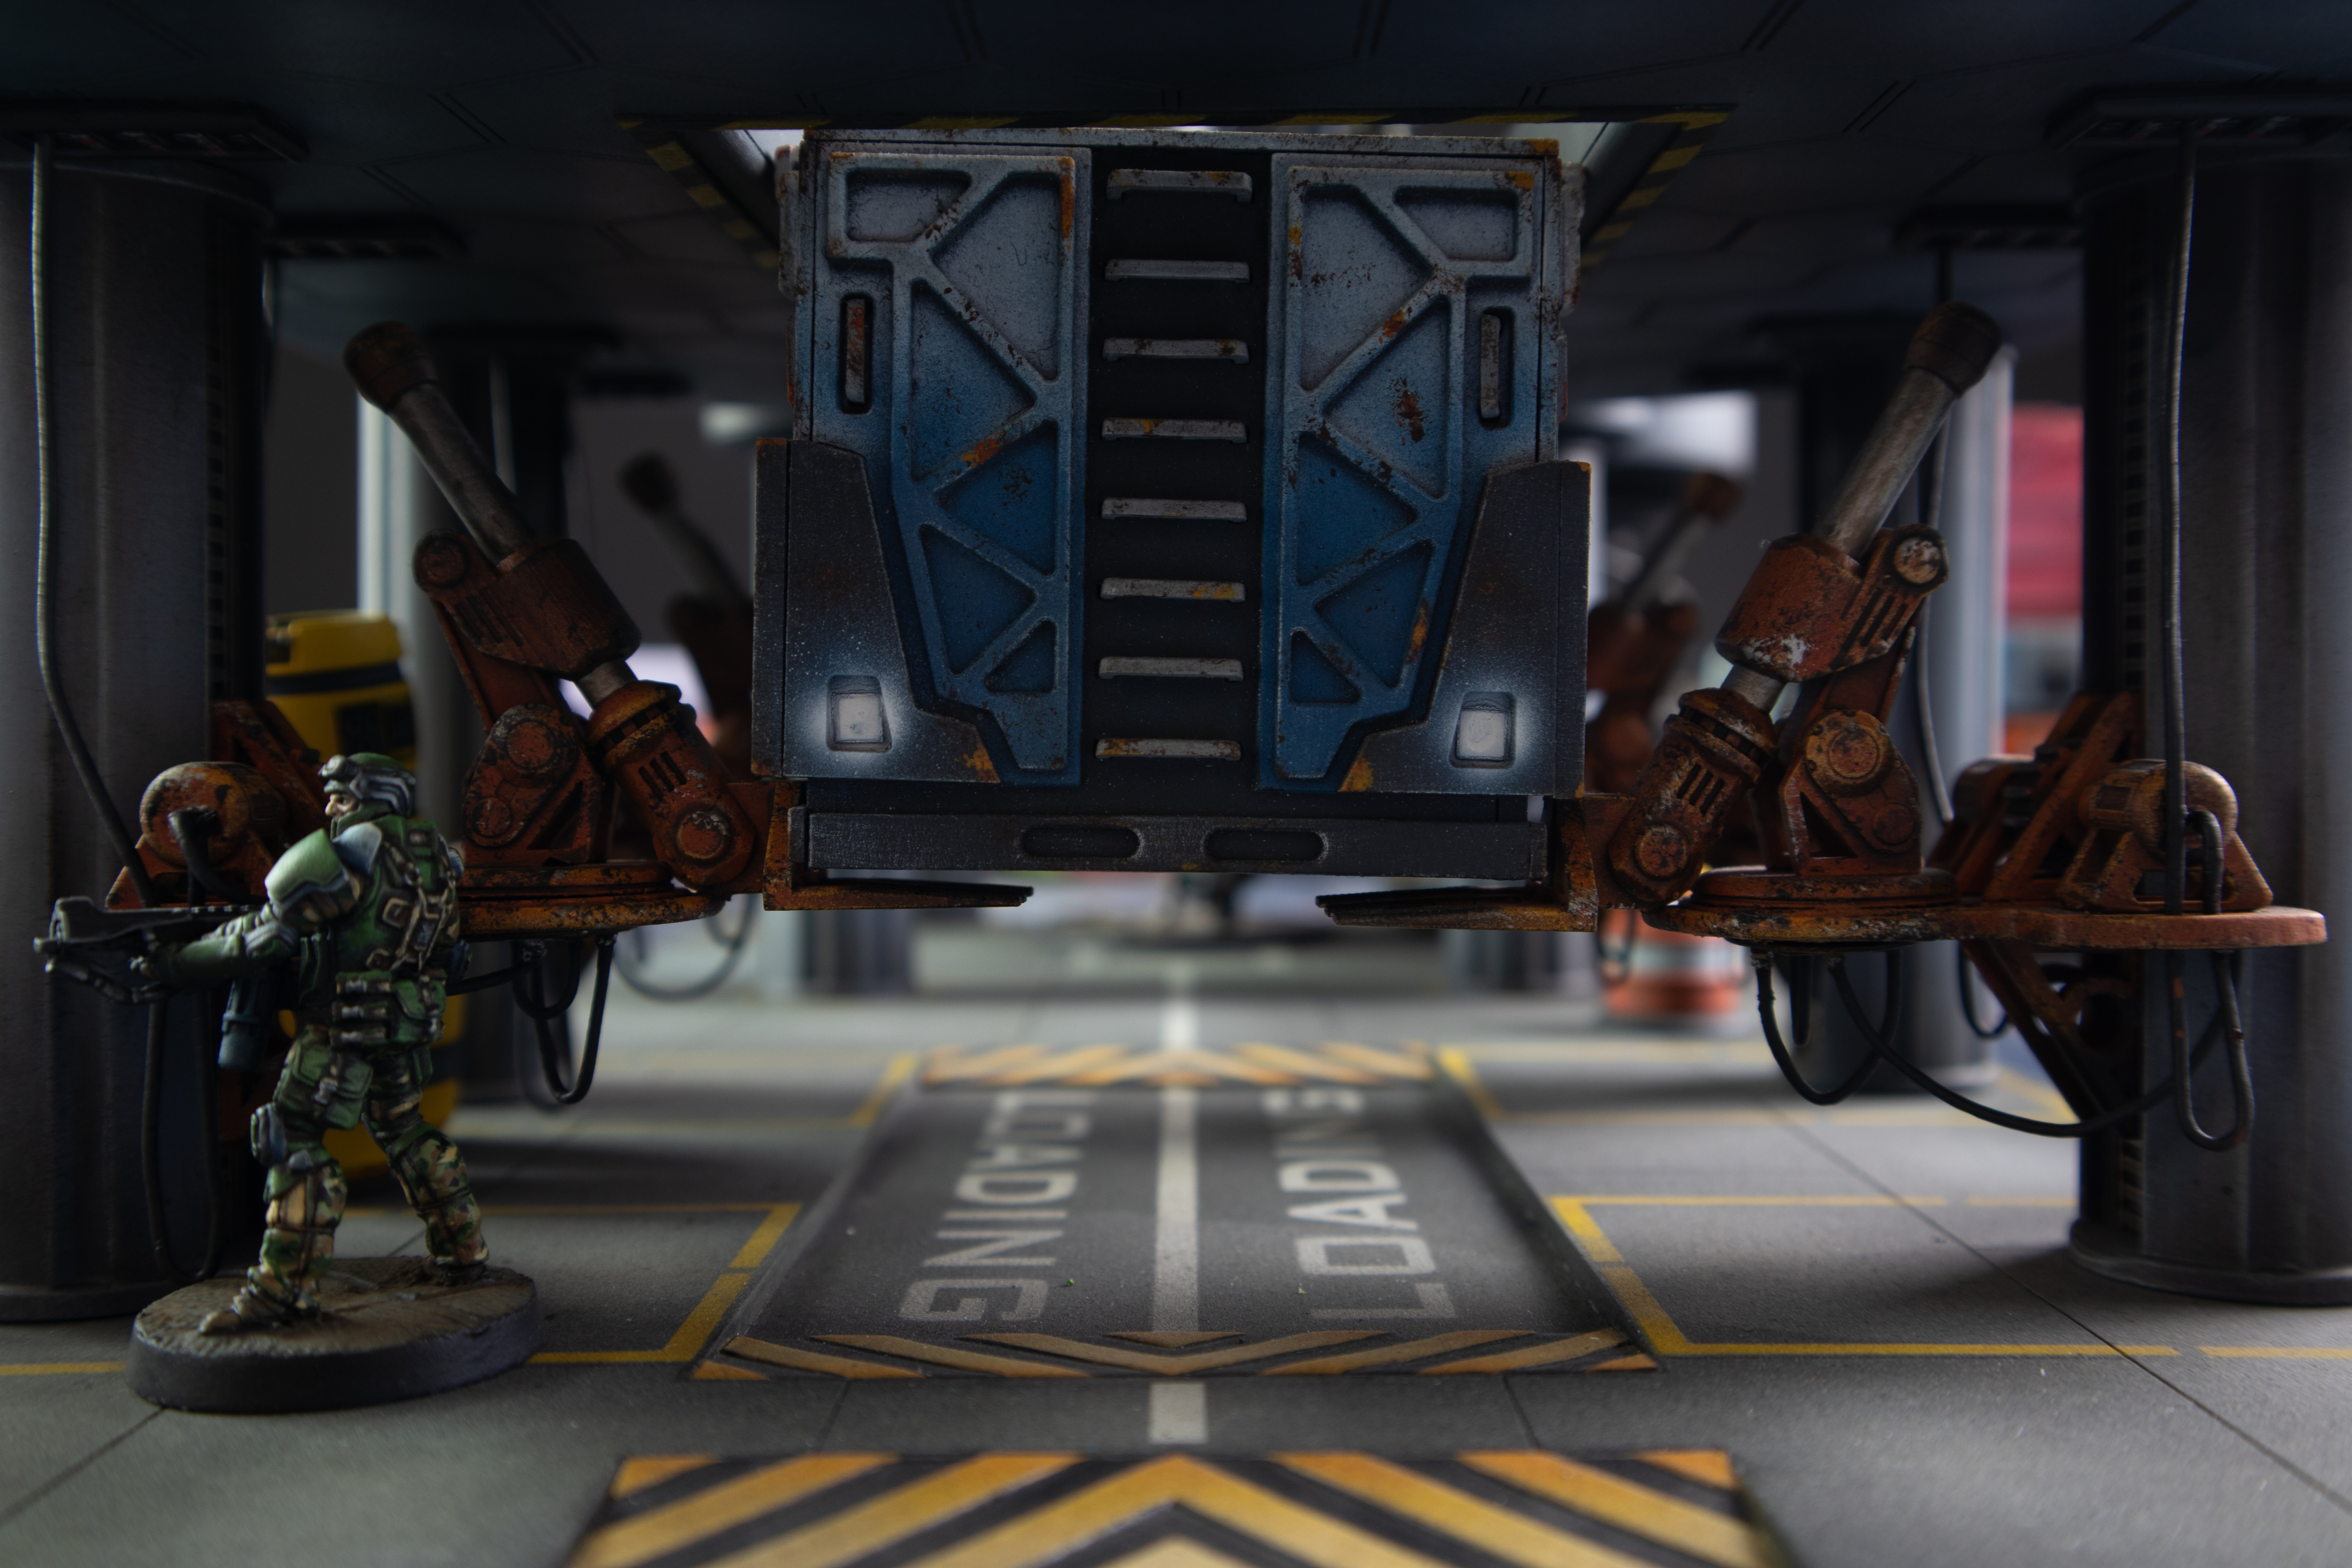 Back to front
So that’s it, it’s all over. I am going to close this project it has been open just over a year. It has been great I have a full table of scenery for my infinity games. If I make more I will make another project but it wont be in this style.
I have learned loads while doing this. The last section in particular combining the laser cutting I learned at the start and then the 3d printing in the middle. It’s been real.
More to come, just not here 😀