
![Perfect Historical Wargame Objectives! Victrix Treasures & More Reviewed [7 Days Early Access]](https://images.beastsofwar.com/2026/02/unboxing-victrix-treasures_-chests-_-market-stalls-coverimage-225-127.jpg)


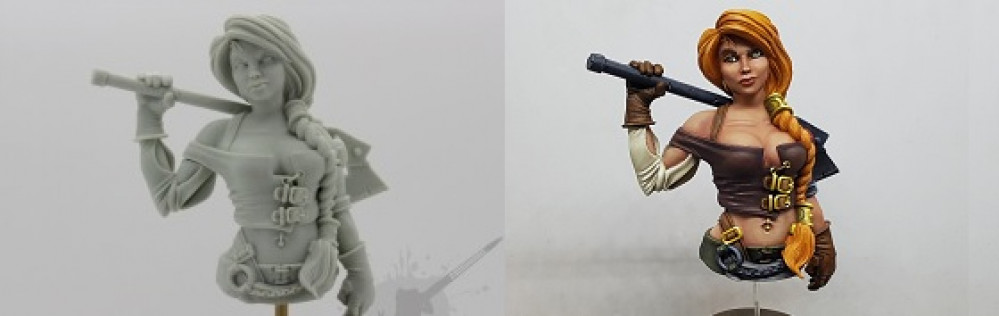
Brisket Bust by Broken Toad: Lawnor’s first ever bust (& a cheeky attempt at winning the Spring Cleaning comp)


Recommendations: 396
About the Project
I've had this bust for 6 months and been avoiding it. Busts are intimidating. I've cleared a lot of my backlog and the KS project I want to be working on is trapped in France (I think) due to Coronavirus, so I'm running out of excuses. Time to paint her up.
Related Game: Guild Ball
Related Genre: Fantasy
Related Contest: Spring Clean Hobby Challenge (Old)
This Project is Completed
Preparation
She comes in 4 parts. She got a warm soapy bath, and was left overnight to dry. I cleaned up the few minimal mold lines and then gled her right arm on. There was a small gap between arm and body so rather than use liquid putty I tried a trick I’d heard. I painted a few layers of varnish into and over the gap before priming. It’s filled the gap quite nicely.
All the separate parts were then mounted on Lawnor brand hobby holders (Sponsored by the local dairy and Diversy Lever) and then given a zenithal prime using an airbrush, Stynylrex black primer (I need more of this stuff. Will the OTT store ever stock it? Got a good supplier in the UK anyone?) and Vallejo 74.601 Grey primer. She was then put on the side to dry for a day or two as I hear 24hrs+ isn’t needed, but the primer works better if it gets it. I was also finishing off another project.
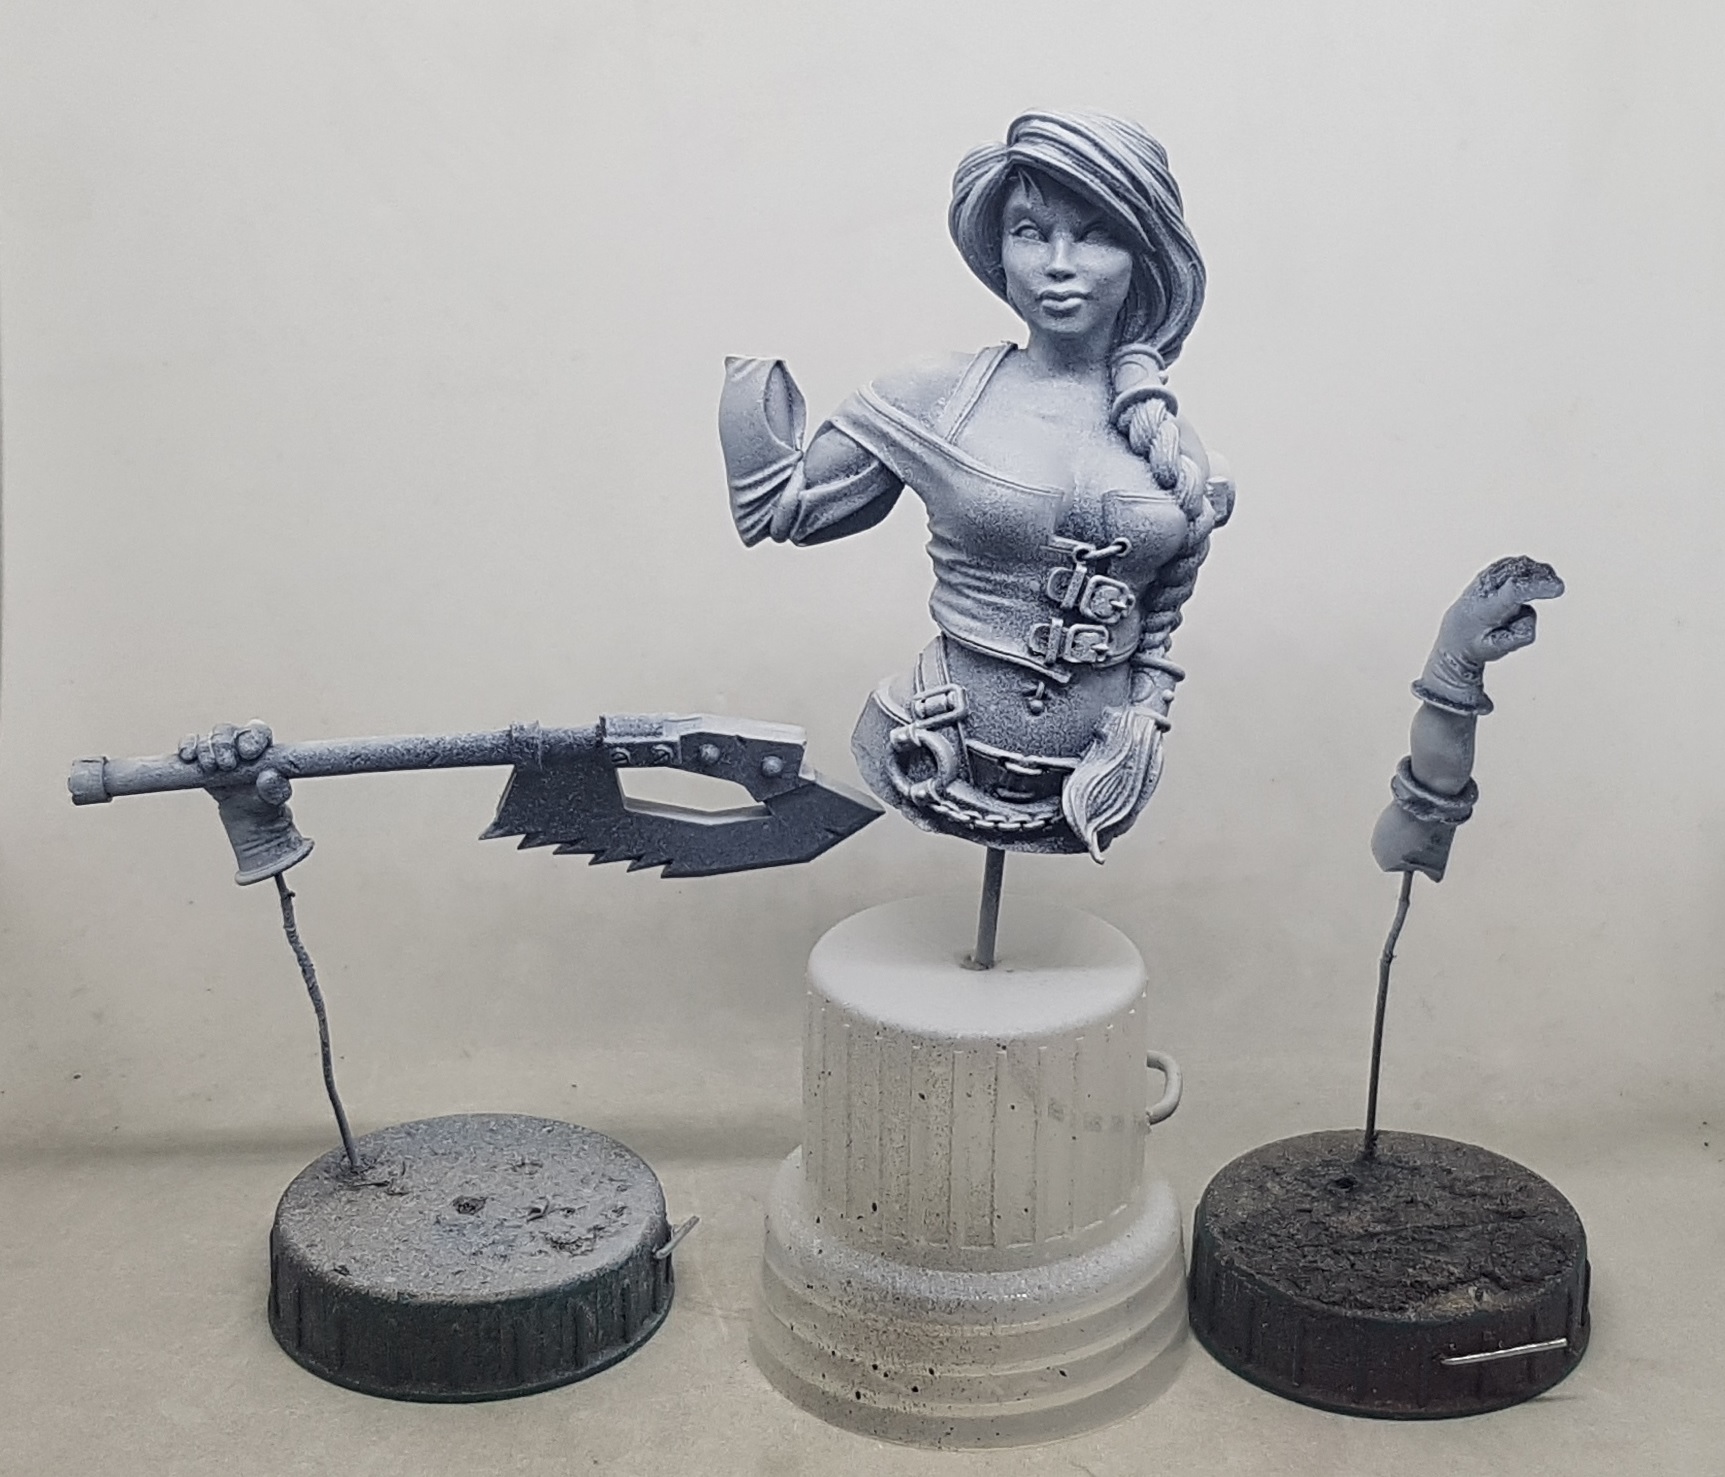 Primed and ready for painting
Things I’d like your help with:
- I don’t know how to paint the metal. Ledbelcher seems inappropriate on a bust. Anyone got any helpful guides they can link to? Non Metallic Metal seems the way to go.
- I’ll be using a similar bottle cap to make her final plinth. I’ll need to fill the end with something I can drill in to to support the rod. I could use green stuff and pad it down there, but does anyone have any alternate ideas? I was considering melting plastic, but the cap would melt. I also don’t know how to melt without it just catching fire.
- I have other similar projects on the horizon that have semi-transparent sheer materials (White lace and black stockings). I’ve no clue where to begin with that stuff. Guides would be appreicated.
It might not count so ignore this if you want, but I’m gonna throw this in the ring for the Spring Cleaning Hobby Challenge 2020, as I started her last year (I washed her and sat her on my desk to paint just as soon as the classes were over, but then got distracted/intimidated and never got further), and because £50 is £50.
Starting the flesh
A while ago I took part in a bust painting class online at MonkeysWithFire on Twitch, lead by Pascal Rooze . We got the head from a bus, a few paints and 2 classes on painting the flesh and the hair. I’ll be following the classes again while working on Brisket:
My results from the class:
I’ll be using the same paints for the flesh:
Instar Sunburnt Flesh
Instar Caramel
Instar Golden Sand
My base tone was a mix of 4:1 Caramel: Sunburnt, mixed up on a Redgrass Wet Pallette. I’m also new to wet pallettes so my dampness might not quite be right at times. I think I applied around 4 coats, only applying extra coats where they were needed, allowing it to dry fully between coats.
 Skin basecoat applied
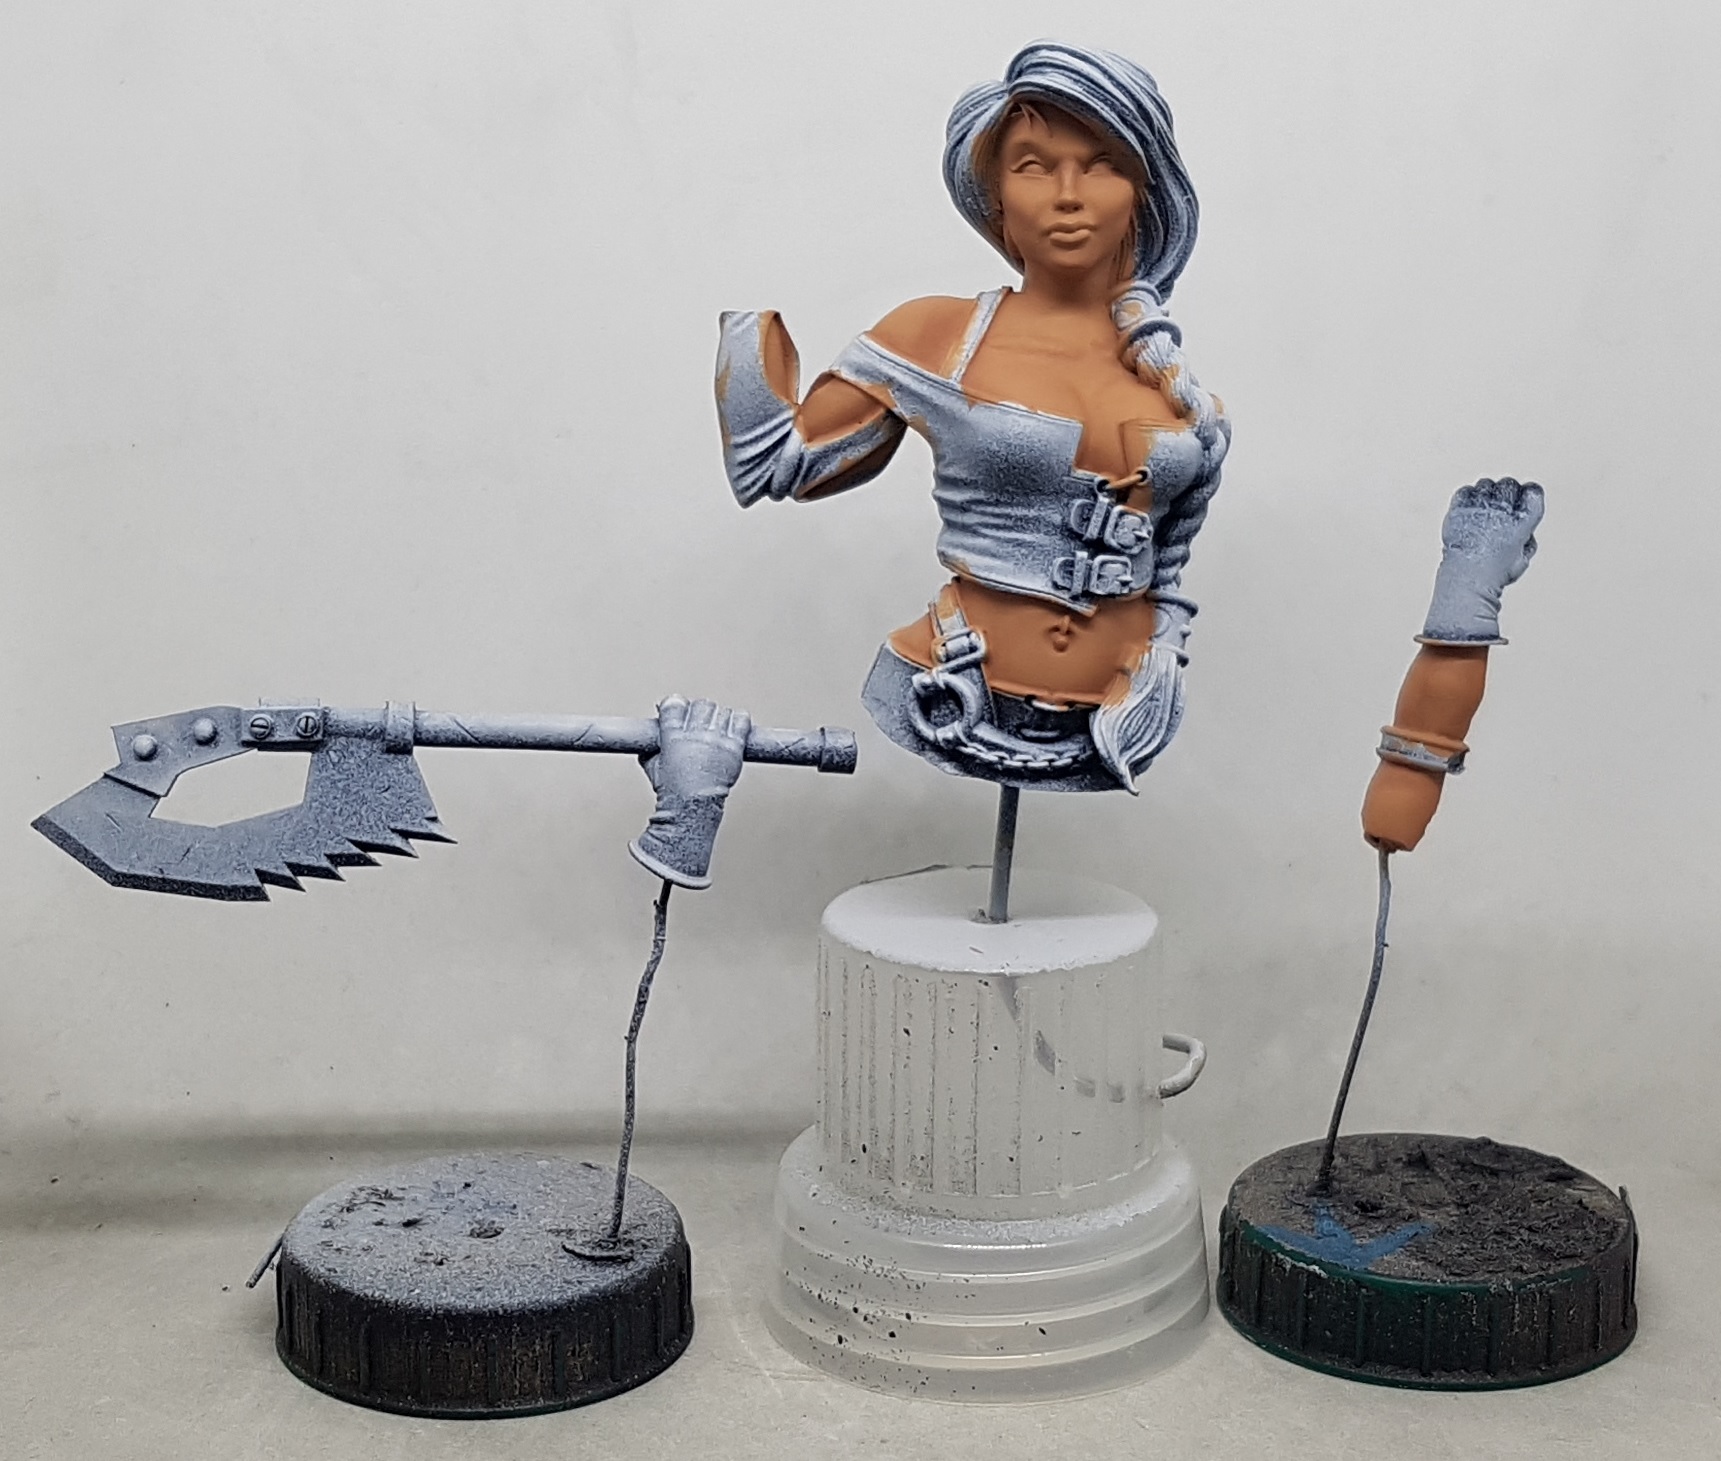 First shade applied with 2:1 mix of Caramel:Sunburnt. I'm not sure I'm using the wet pallette correctly. How do you tell if its wet enough or working right? My dinner has just gone in the oven, so a short break, then back to work.
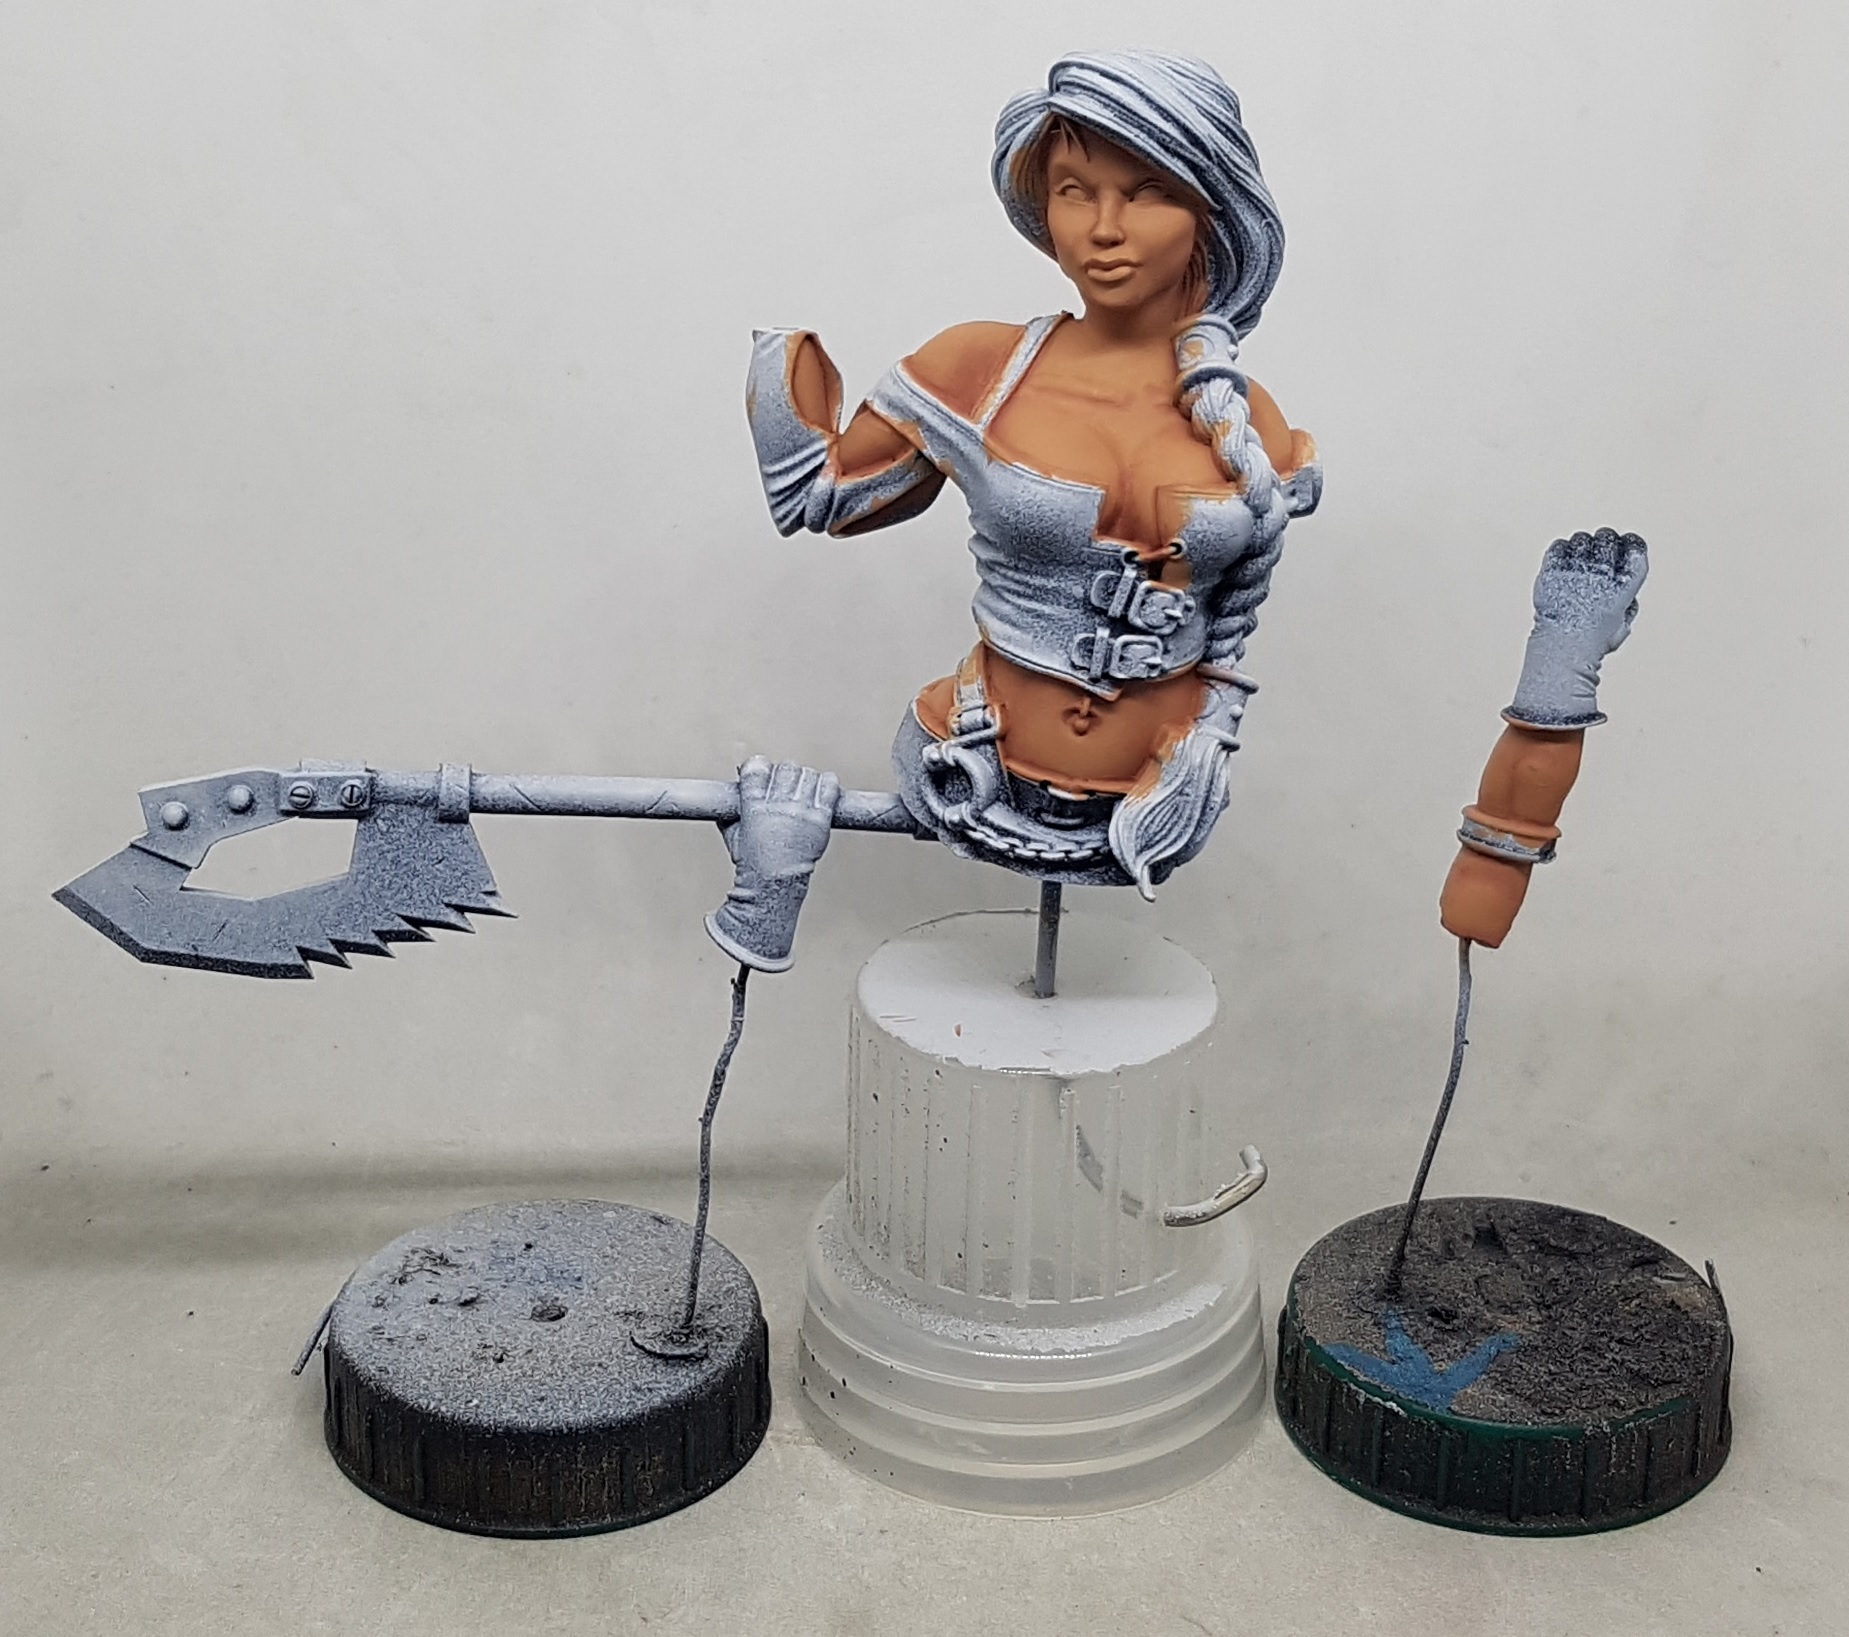 Second Highlight applied. Almost entirely Sunburt with just enough Caramel to just alter the colour. I've started realy blending the layers with a second licked brush. Depth is appearing, but it is a little messier than I'd like.
 The line between the two shades was then blurred with a dilute mix of the first shade. I imagine after the highlights are done the line between the base and the shades and higlights will be similarly blurred with the base colour. On to highlights.
 First highlight applied with Golden sand with just the tiniest amount of the base colour. It looks a little stark and blotchy but I'm assured this will be fixed later, and if not, I can glaze over it to smooth it all out. I was having isuses with the transitions on the rounded surfaces, but I had better success with painting them, giving them a moment to dry a smidge and then dabbing them with my finger to remove/smudge it all. Using a licked brush to moisten the surface before applying the paint helped at times. I ned to work on my paint consistency. At the end there I hit the magical "milky" everyone talks about and I finally got it. I need to aim for that next time.
 Second highlight is the first with some white added. Once this is done a little of the first highlight and the base colour were mixed together and thinned and used to soften the edges of the highlights.
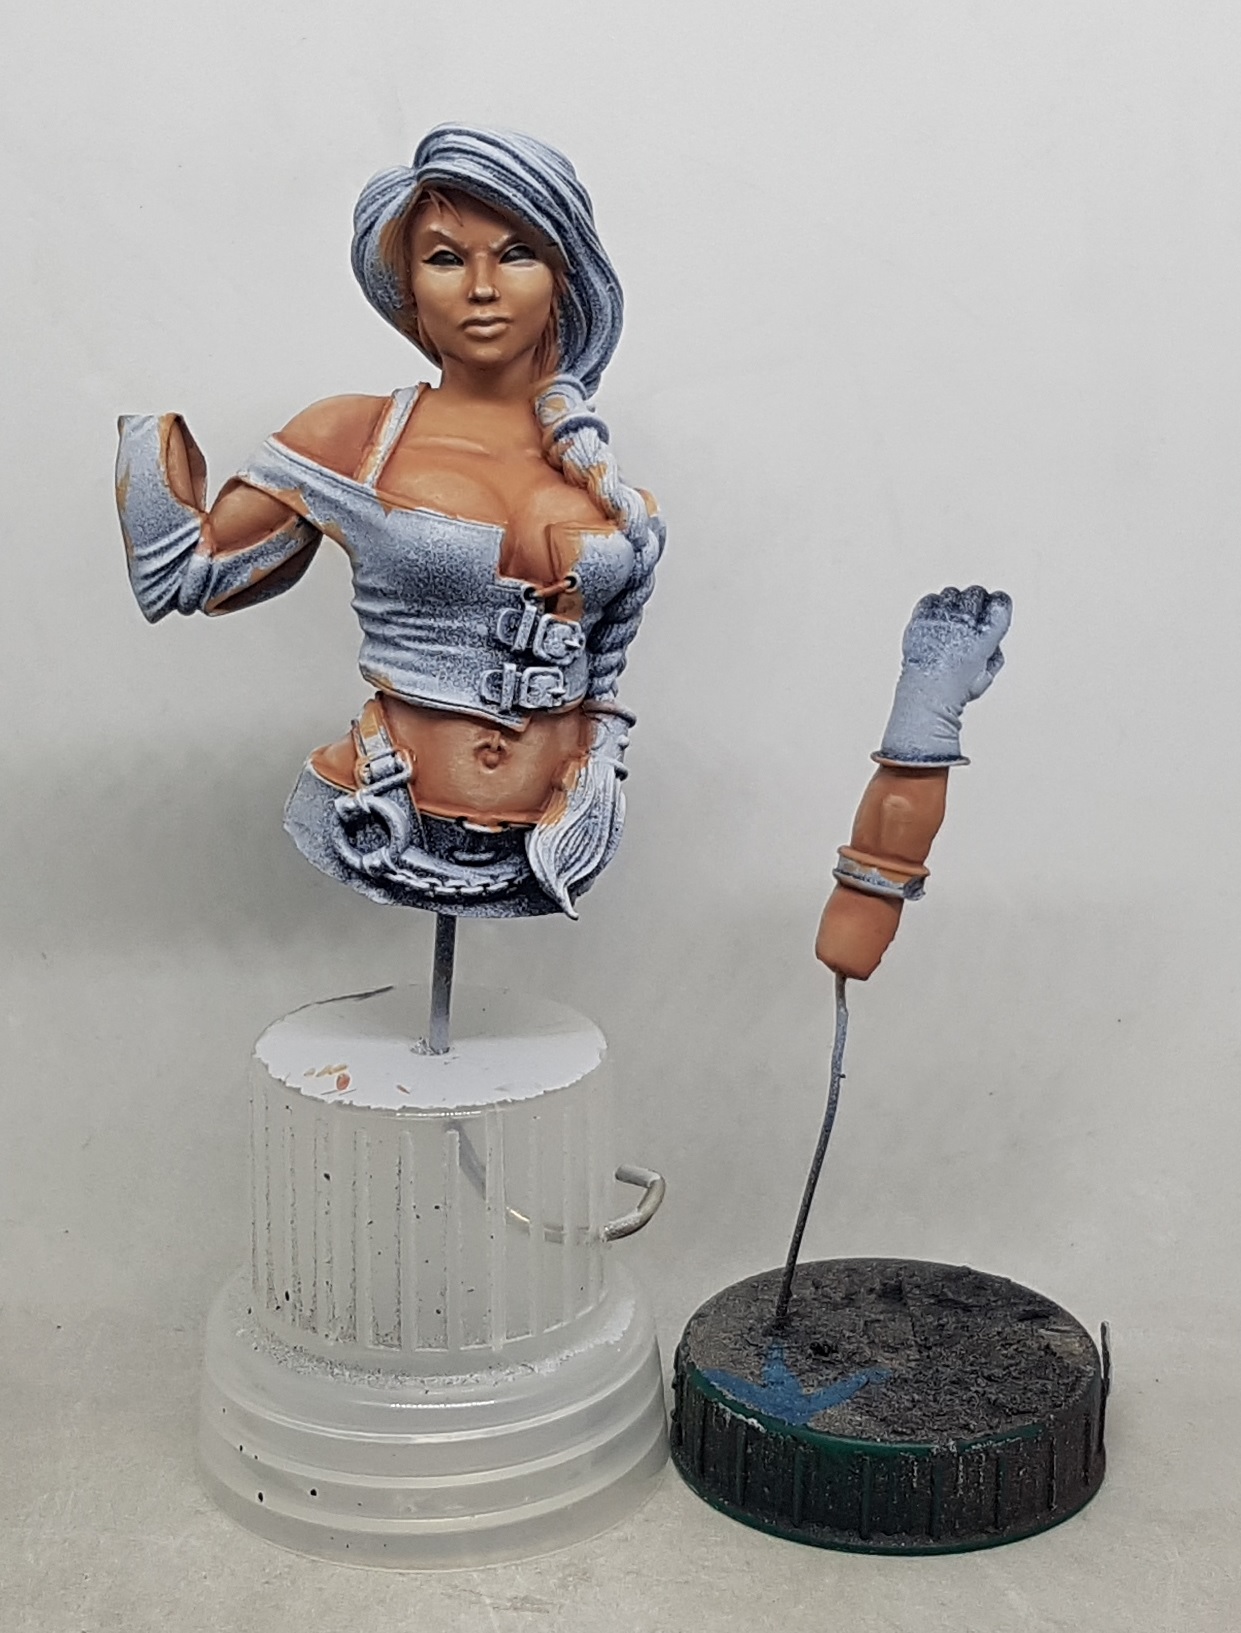 A final spot highlight of almost pure white was applied to the end of the nose and the edges of the eyebrows. Deep shade of 5ish:1 Sunburt:black was applied to the underside of the chin and other dark areas. A little more plack was added and applied only to the deepest regions. The eyes were picked out in black (And the excess was painted over again with flesh tones). This takes us to the end of video 1
 For anyone playing along at home, here are all the paints used so far. Any time I was applying a shade or highlight I mixed in a little Lahmium Medium in the hopes of enhancing its transparency
Finishing the skin and the face
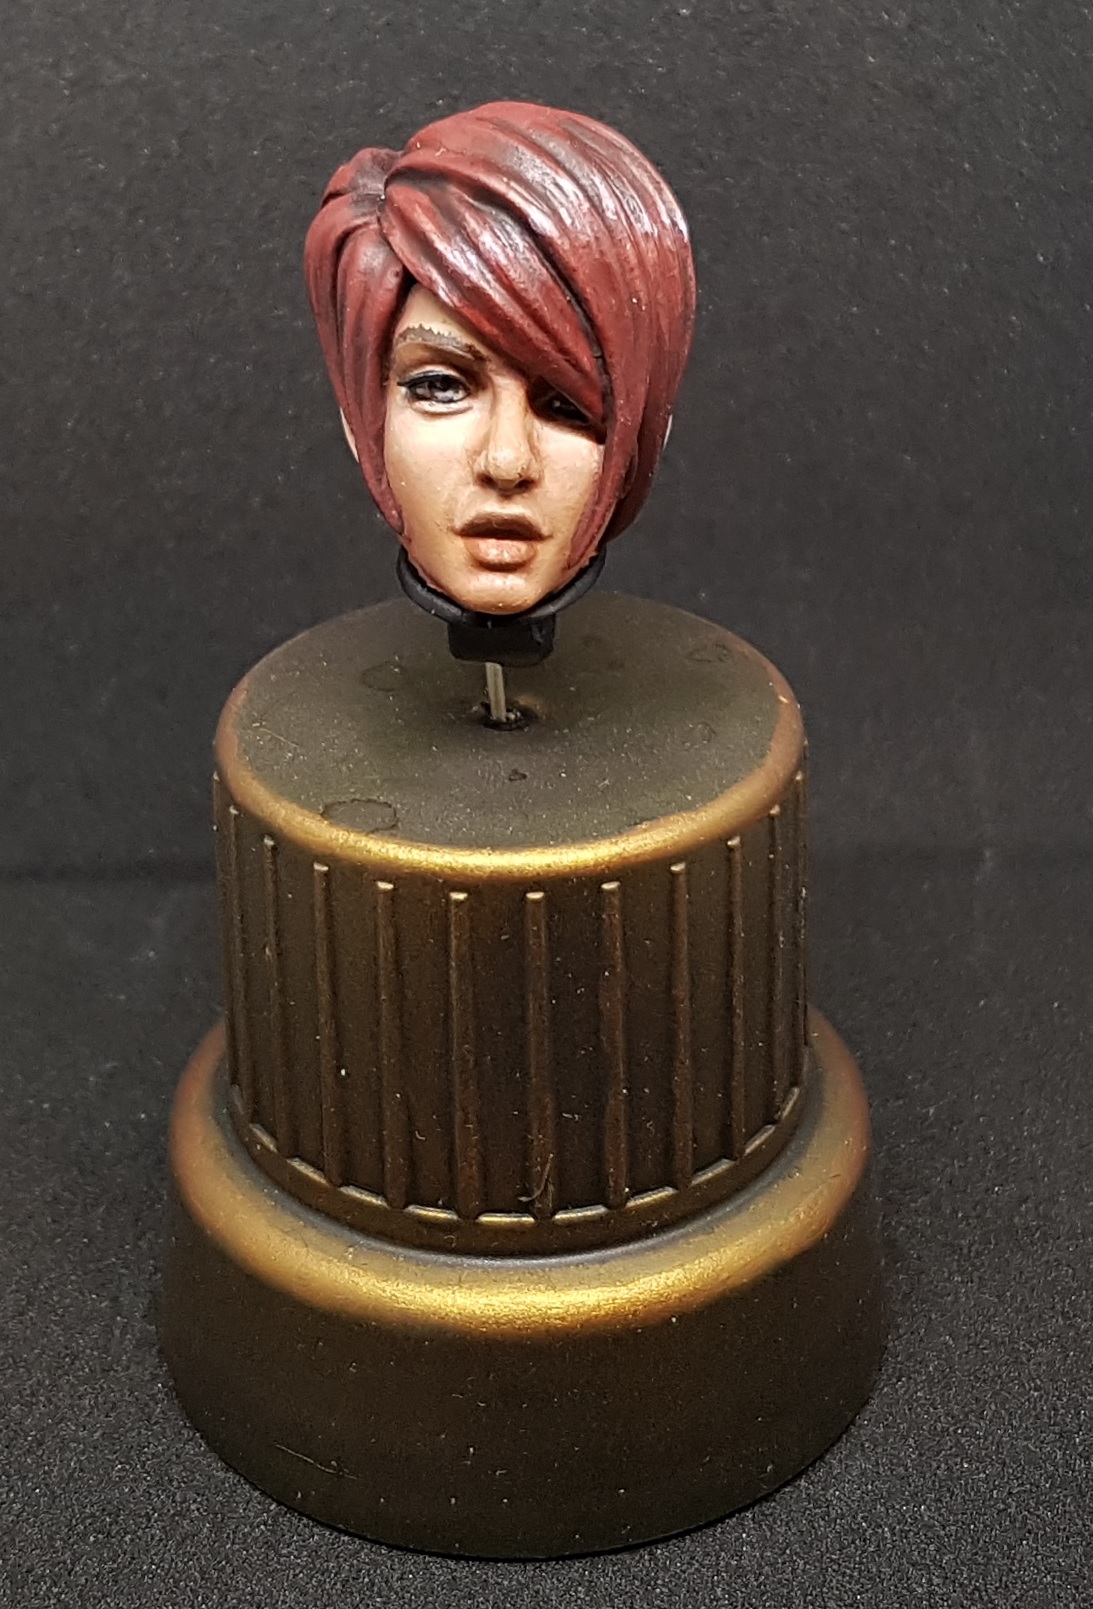
 Thhe eyes were blocked out blaock, then painted over with the final off-white highlight, leaving just the thinest edge black. The pupil and iris were painted black and then the iris was painted off white. I picked VMC 70.857 Golden Olive for the eye color and painted the iris. I mixed a little royal red (Not sure which colour. it was already on my palette) in to the green for the shade, and a little white for the highlight. Everything was painted as per the video, just more clumsily. One thing I'm learning is that photos are a great way to catch the mistakes you can't notice with the naked eye
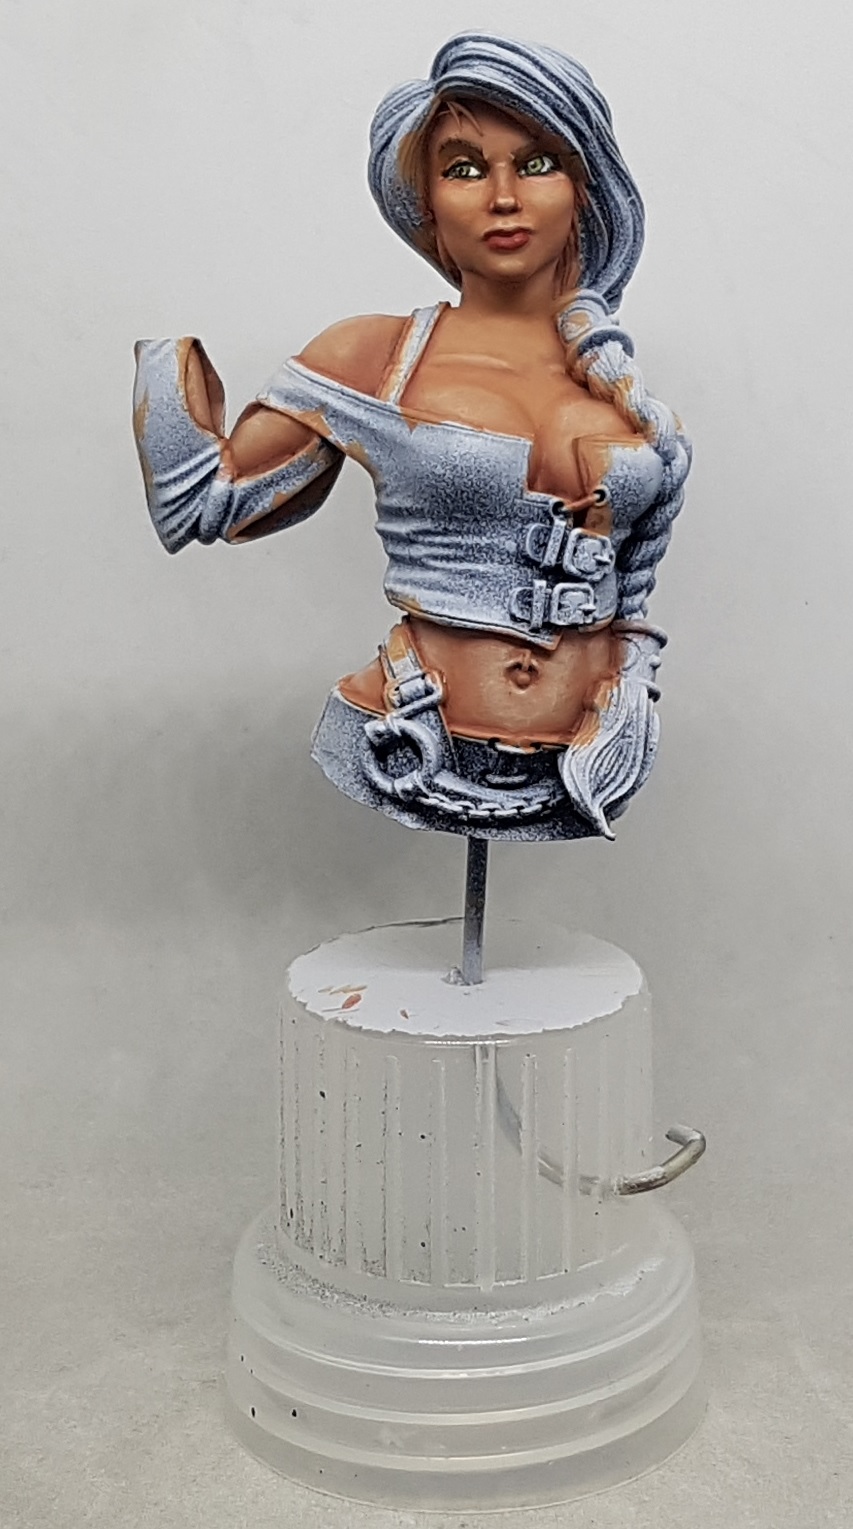 I've followed the video up to the end of the flesh, just before it gets to hair. If I do this again I hope I remember to paint the eyebrows before the eye shadow as its easier to fix things that way around. I'm off to make a glaze out of the first highlight to try and fix some of the blotchiness, but maybe end up ruining her.
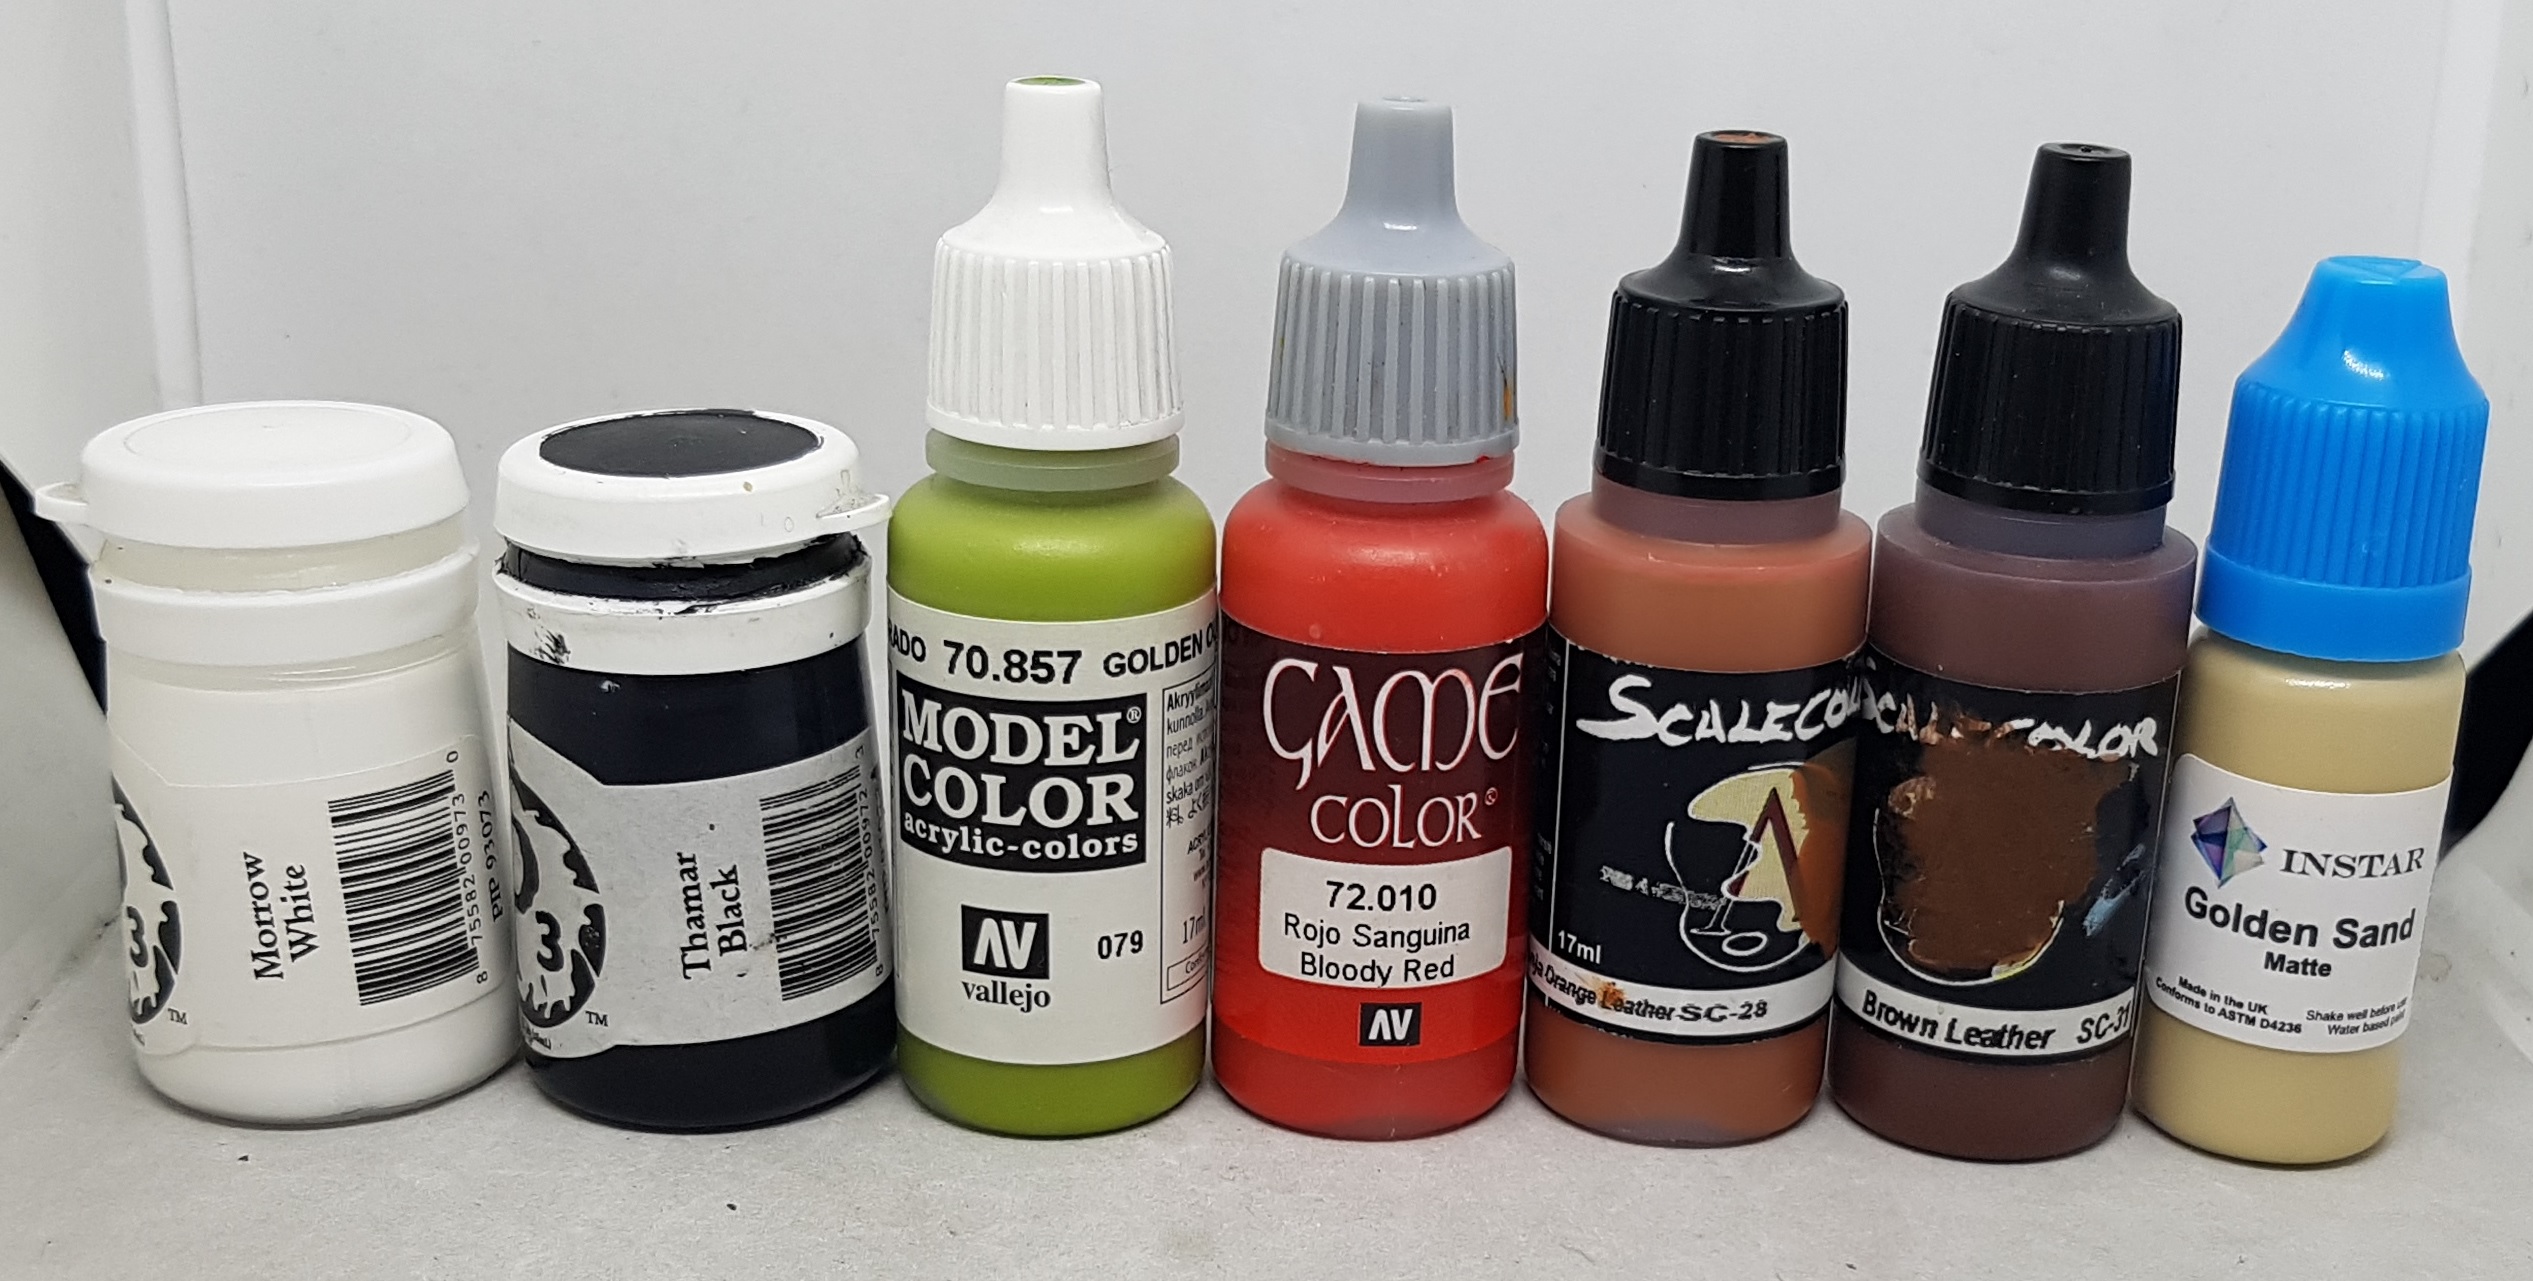 Here is all the paints I have used in these steps
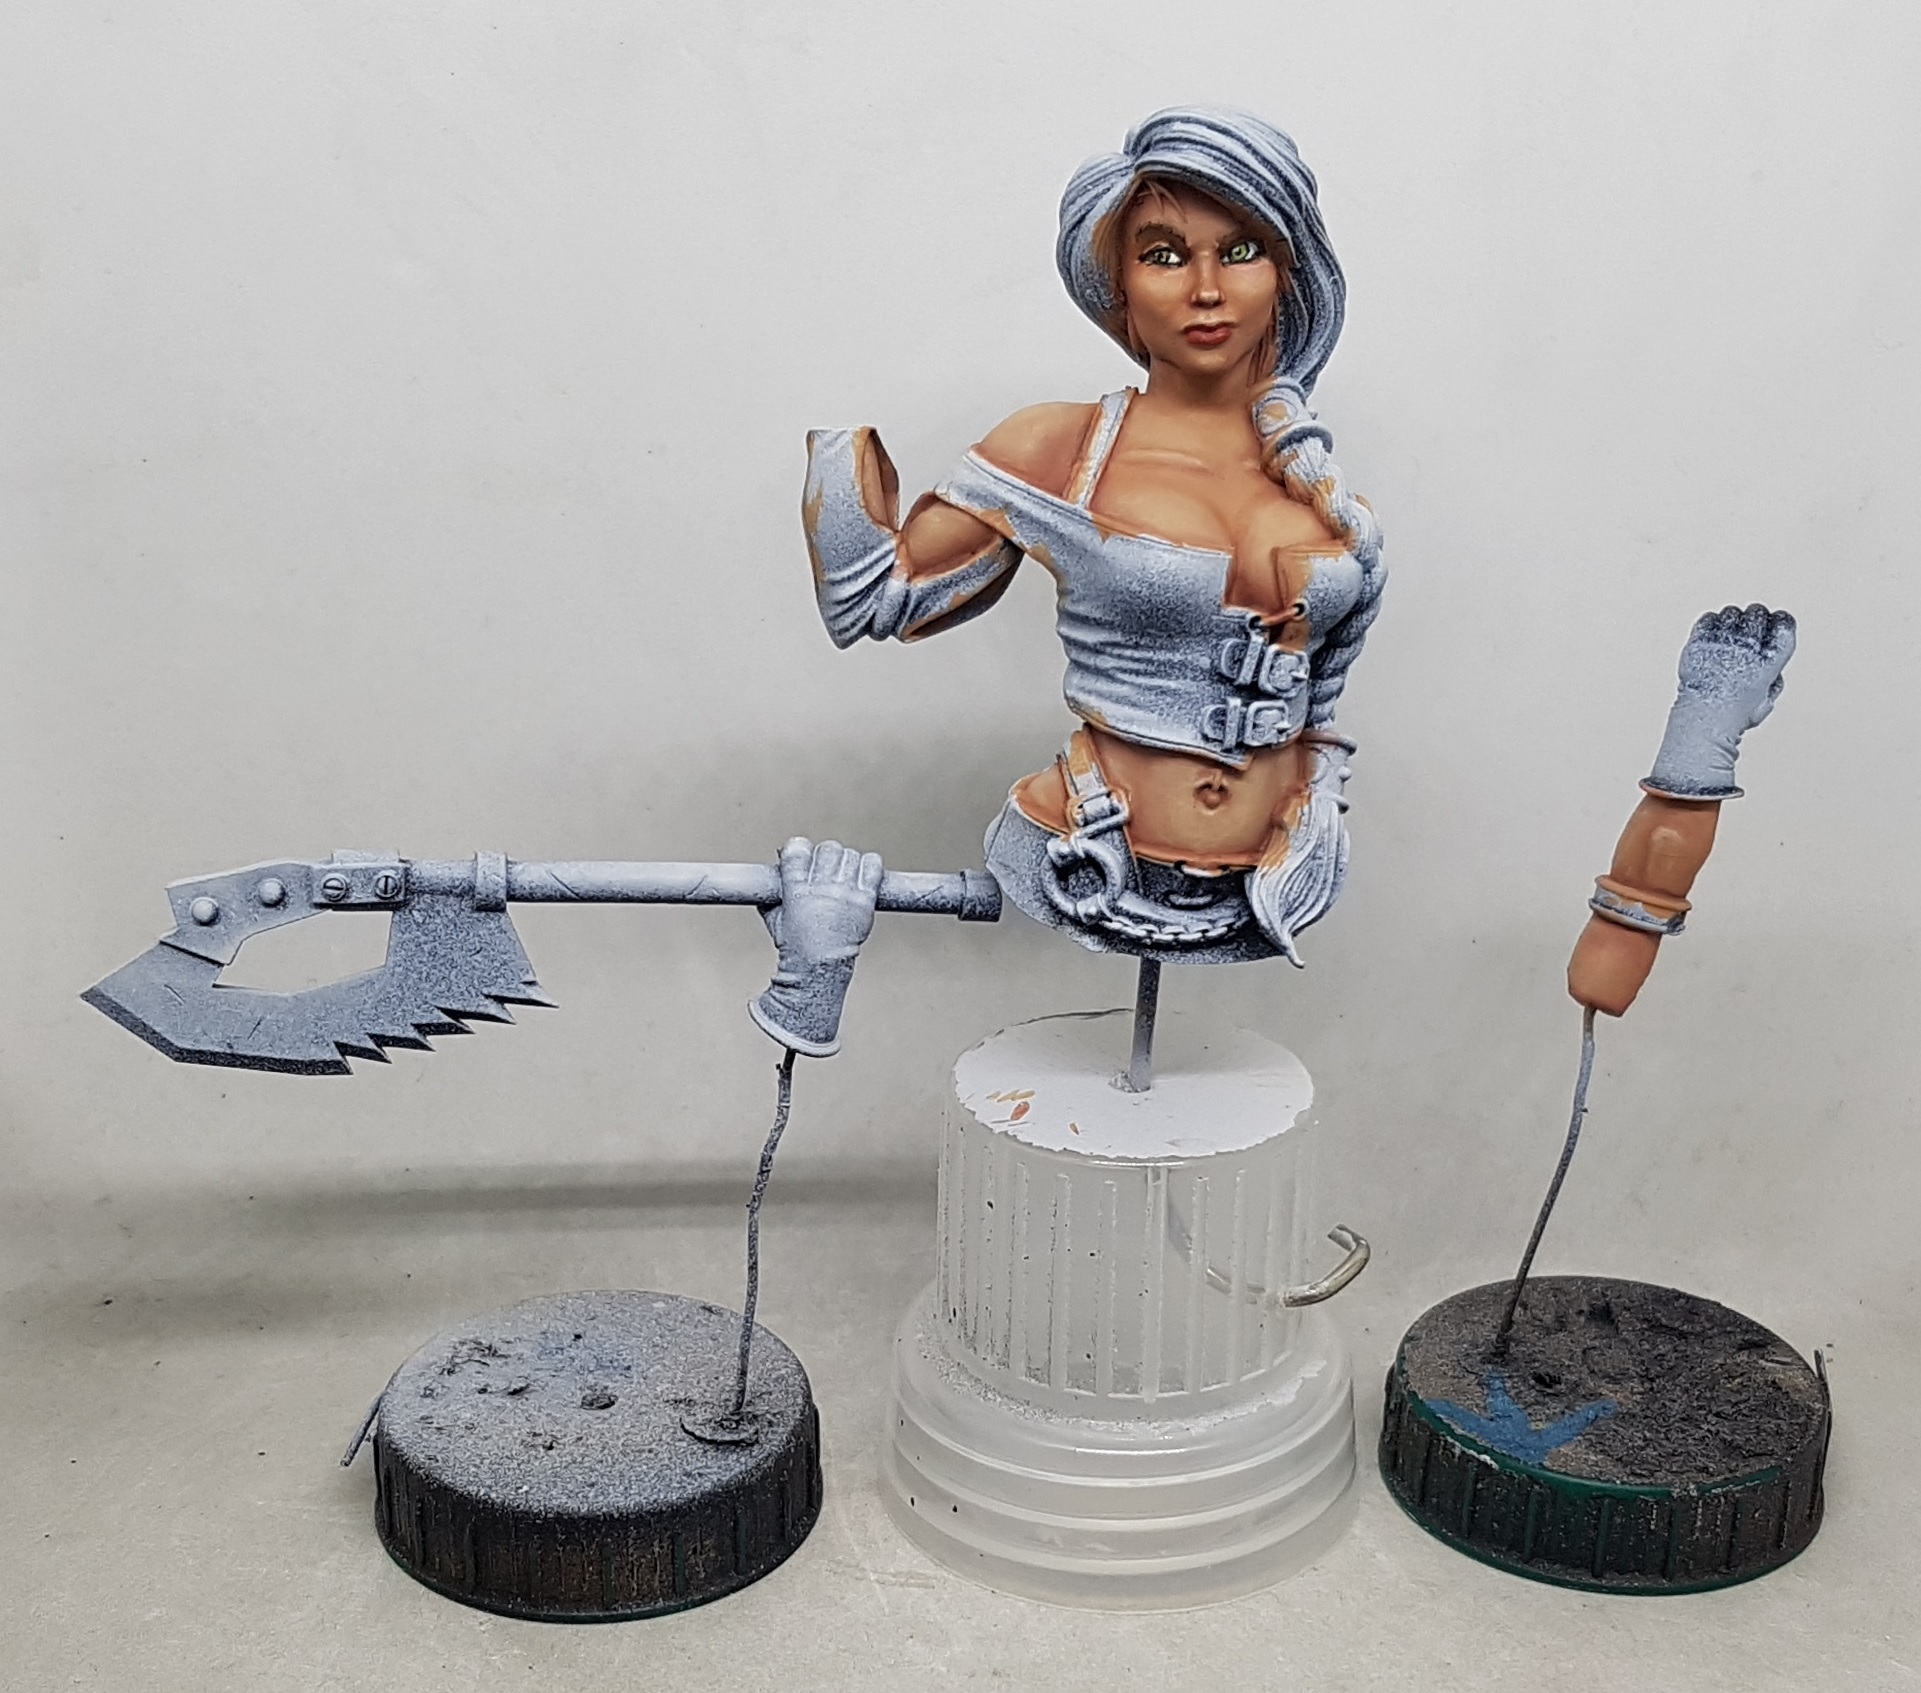 Glaze applied over the blotchy body highlights. She's looking better
Hair and bodice
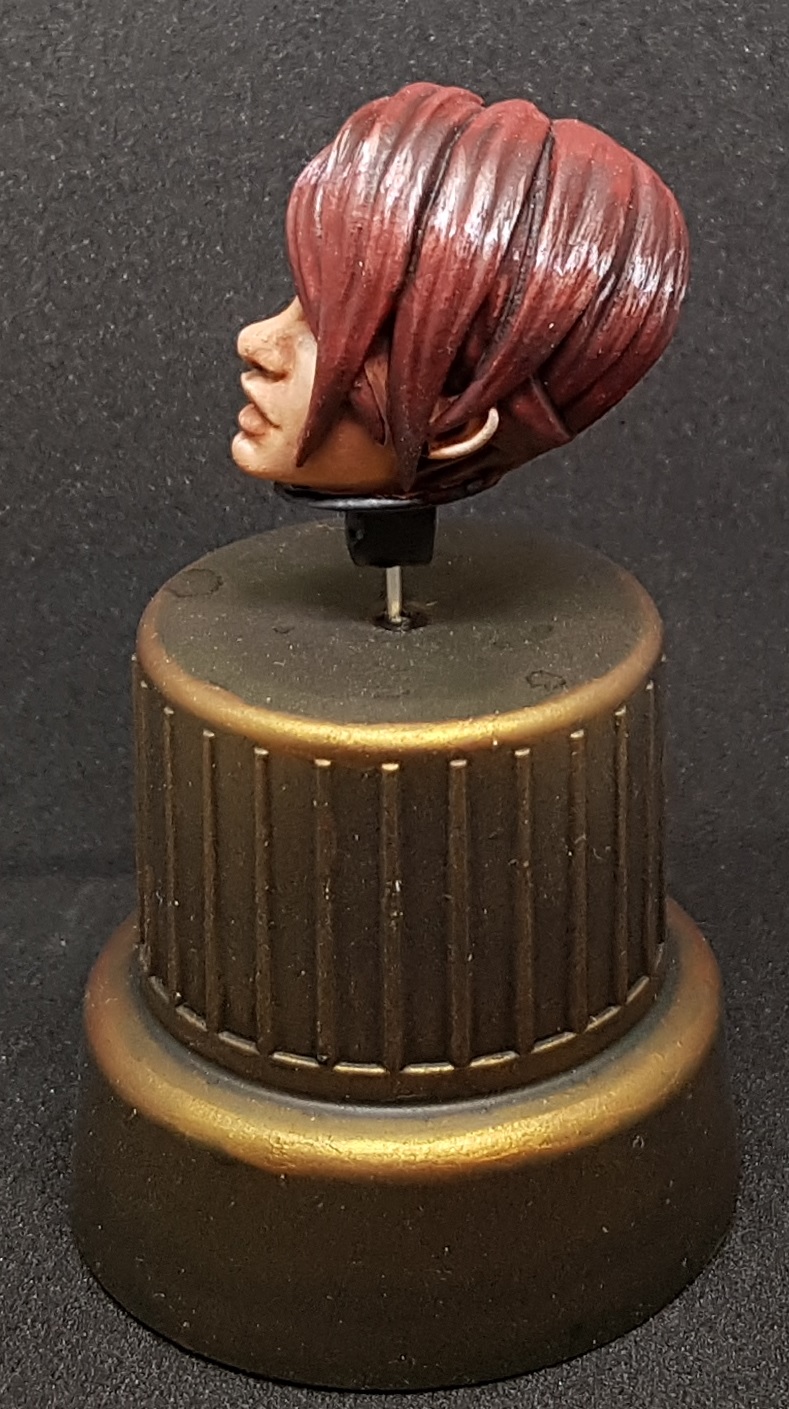
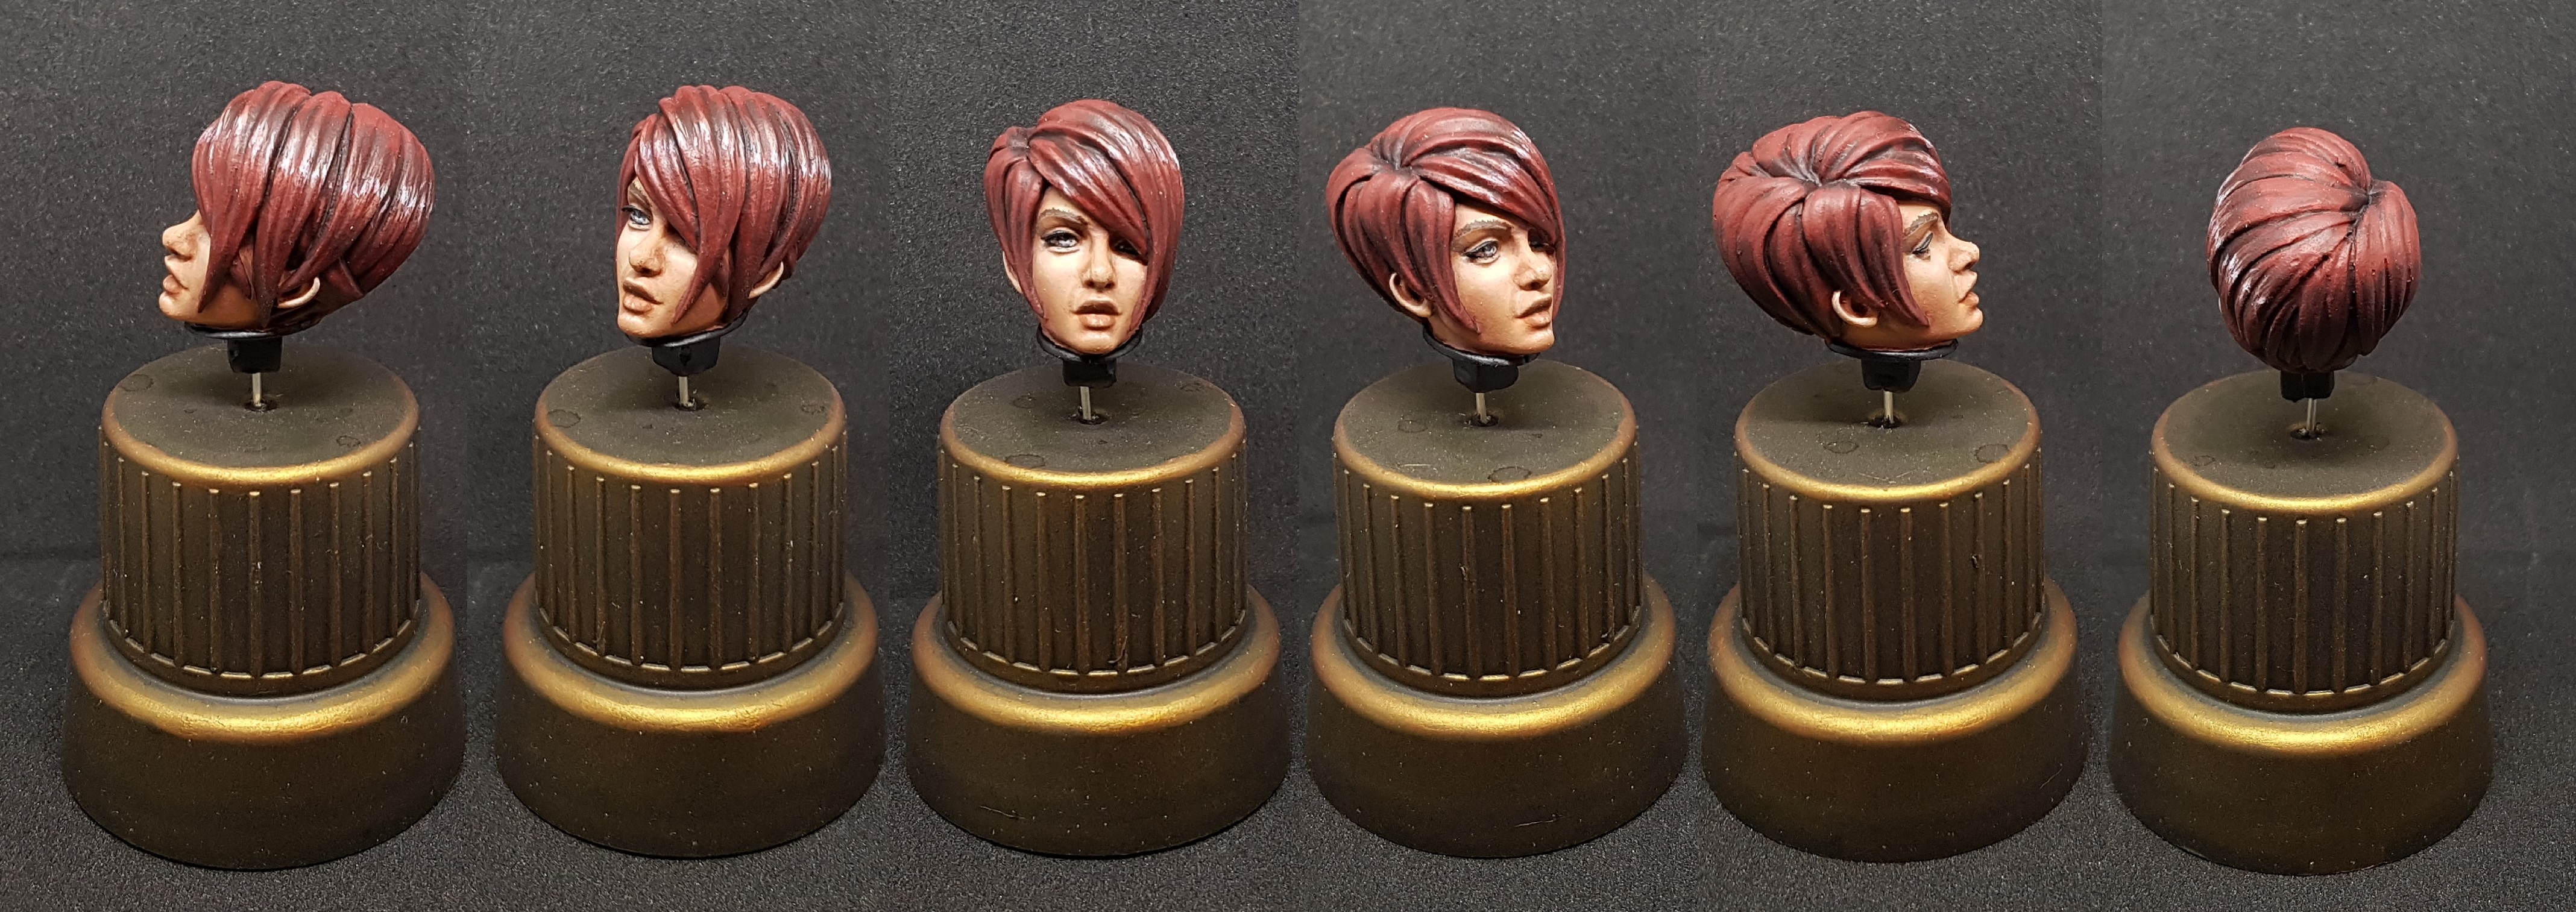
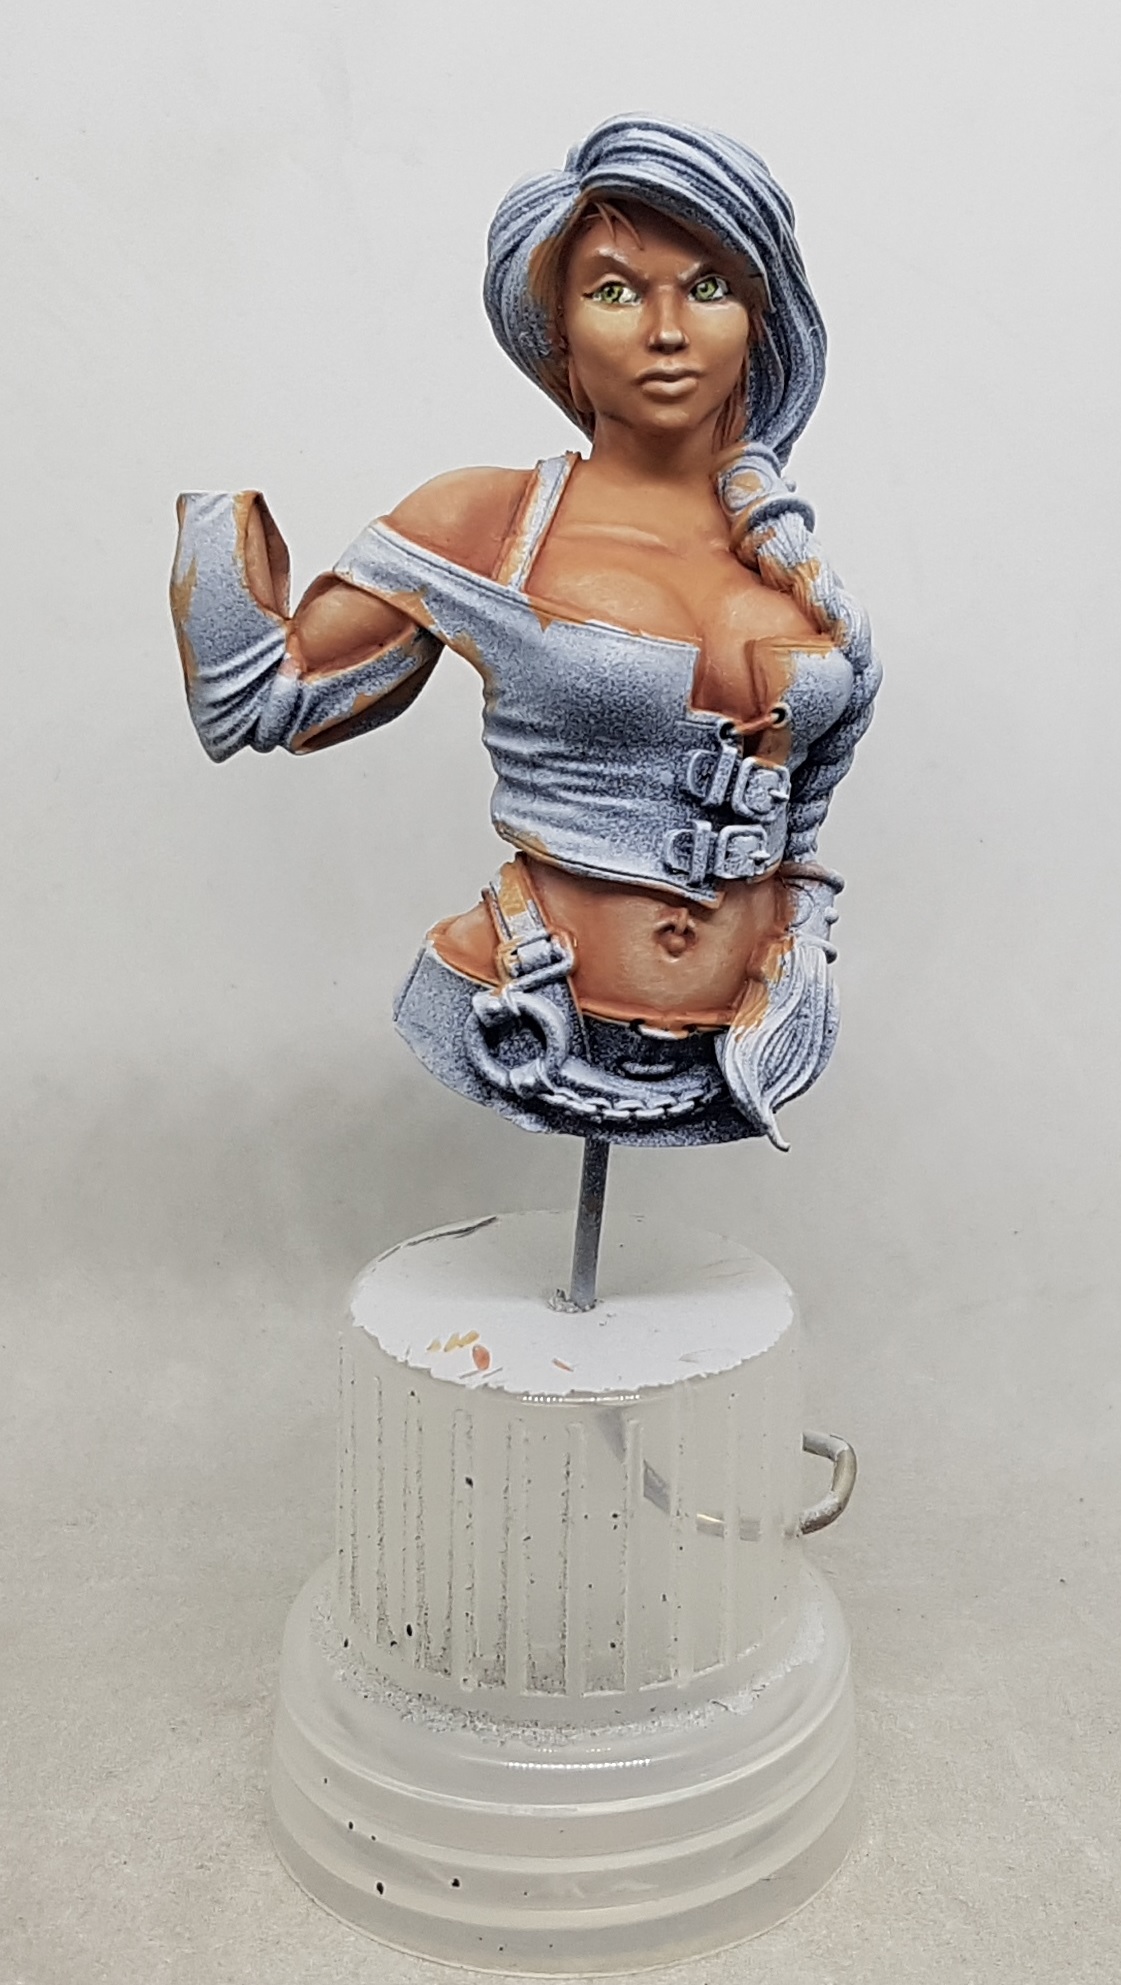
 I'm base coating the hair and the bodice at the same time as they touch each other a lot and I was expecting each to contaminate the other. The leather I plan on painting the bodice has given me different results in the past based on a black or white undercoat, so I've painted most of it black, but left the strips around the edges and the straps. I hope to have 2 different looking leathers in the end. We will find out soon if this works. The hair was given a few coats of 2:1 Coat d'arms 224 Horse Tone Bay: P3 Ember Orange
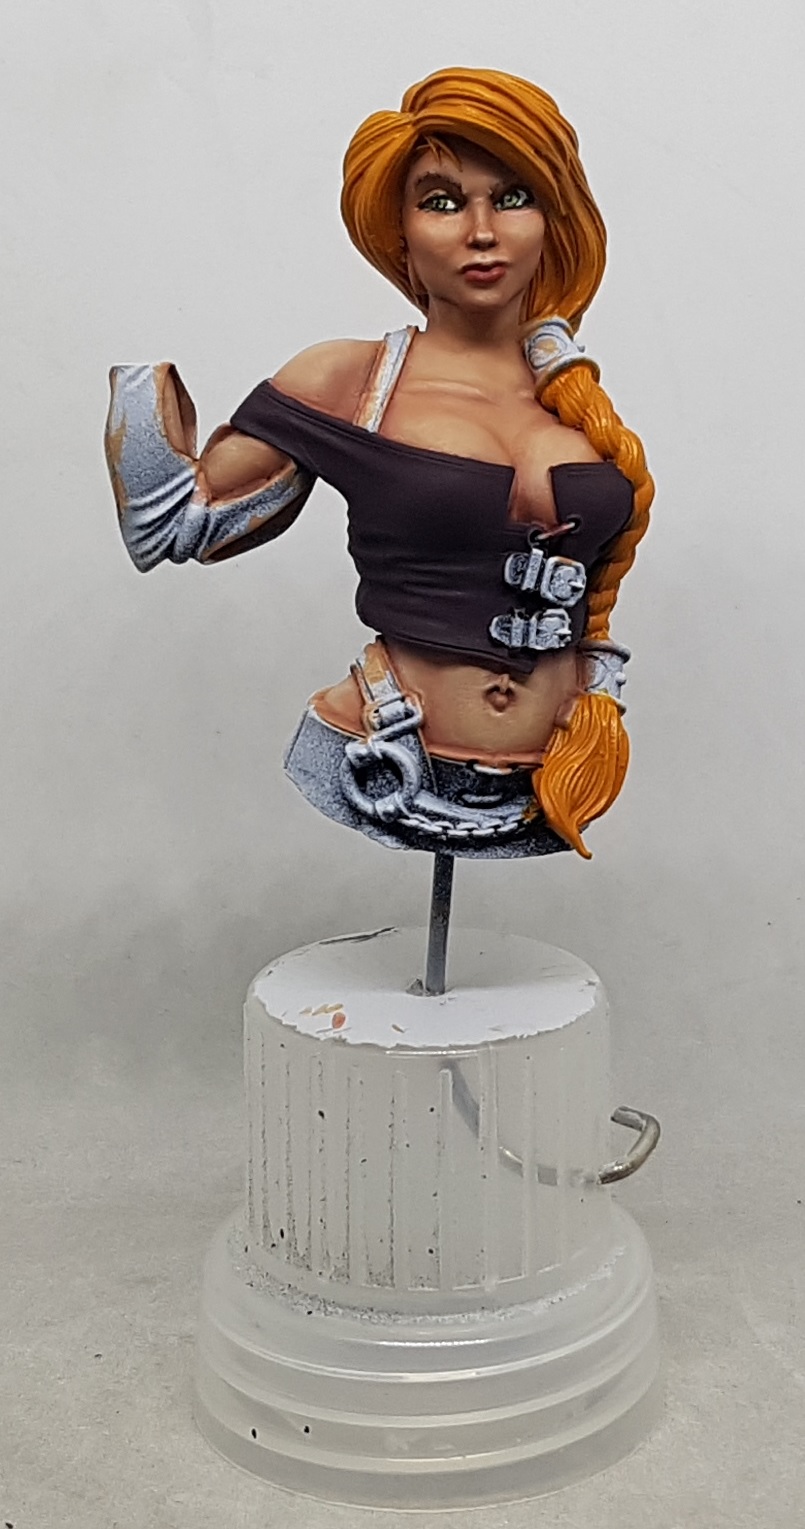 Bodice base colourScale75 SC-32 Black leather. The 2-tone plan didn't work but I think I'm happy with it, and it means I can worry less about undercoating for it in the future. Its 10pm now so I'm off to bed. In the morning I'll work out what I'm going to do about the hair.
 Back to the hair. I'm trying to follow the advice from the videos still, but the shapes and colours are quite different now. My first shade was 2:1 the base colour: P3 Bloodstone. I then made a deeper mix with an extra helping of Bloodstone and only applied that in deeper or darker areas.
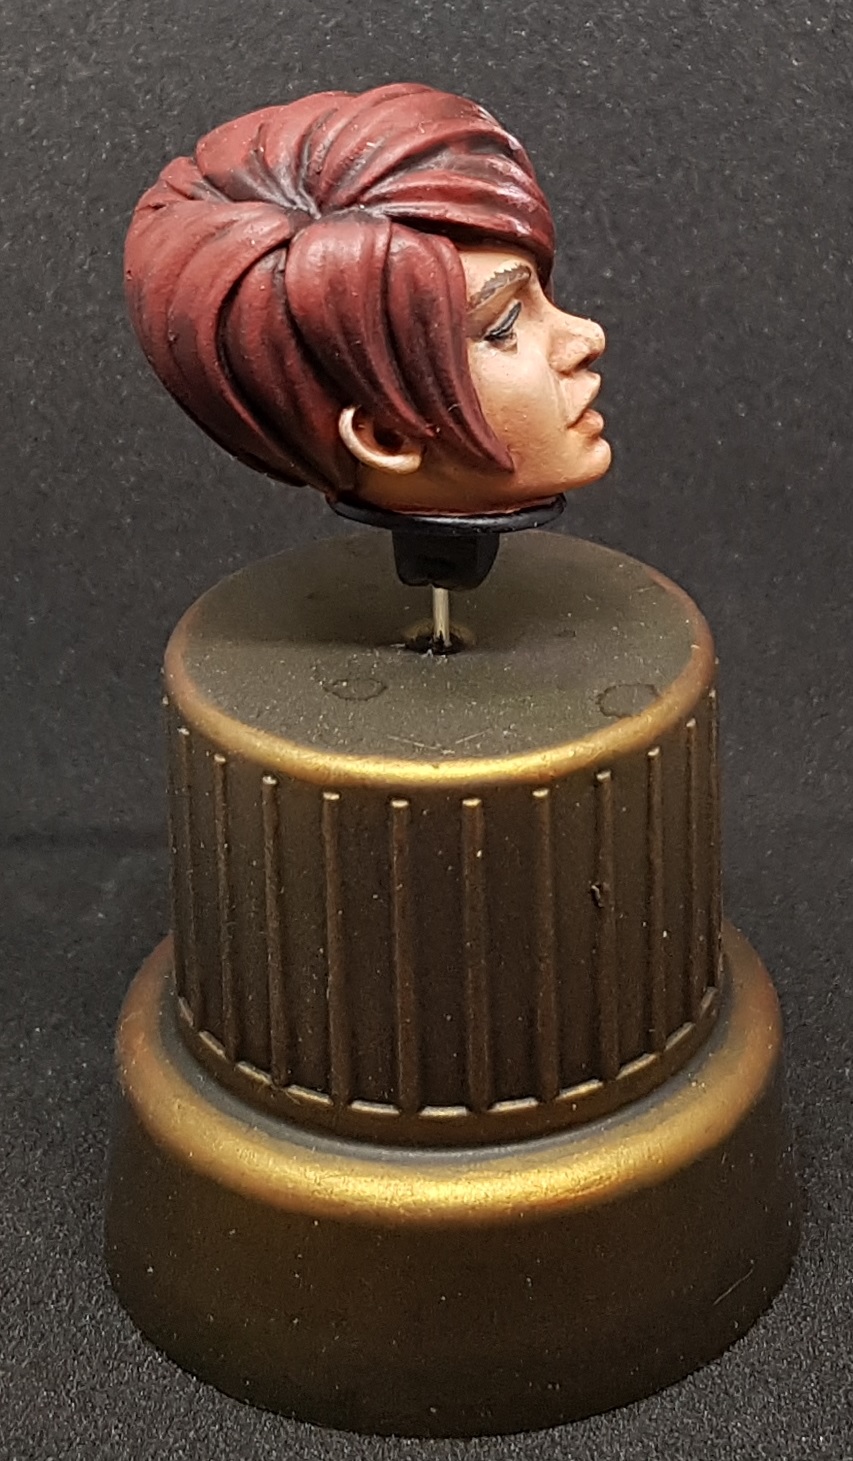
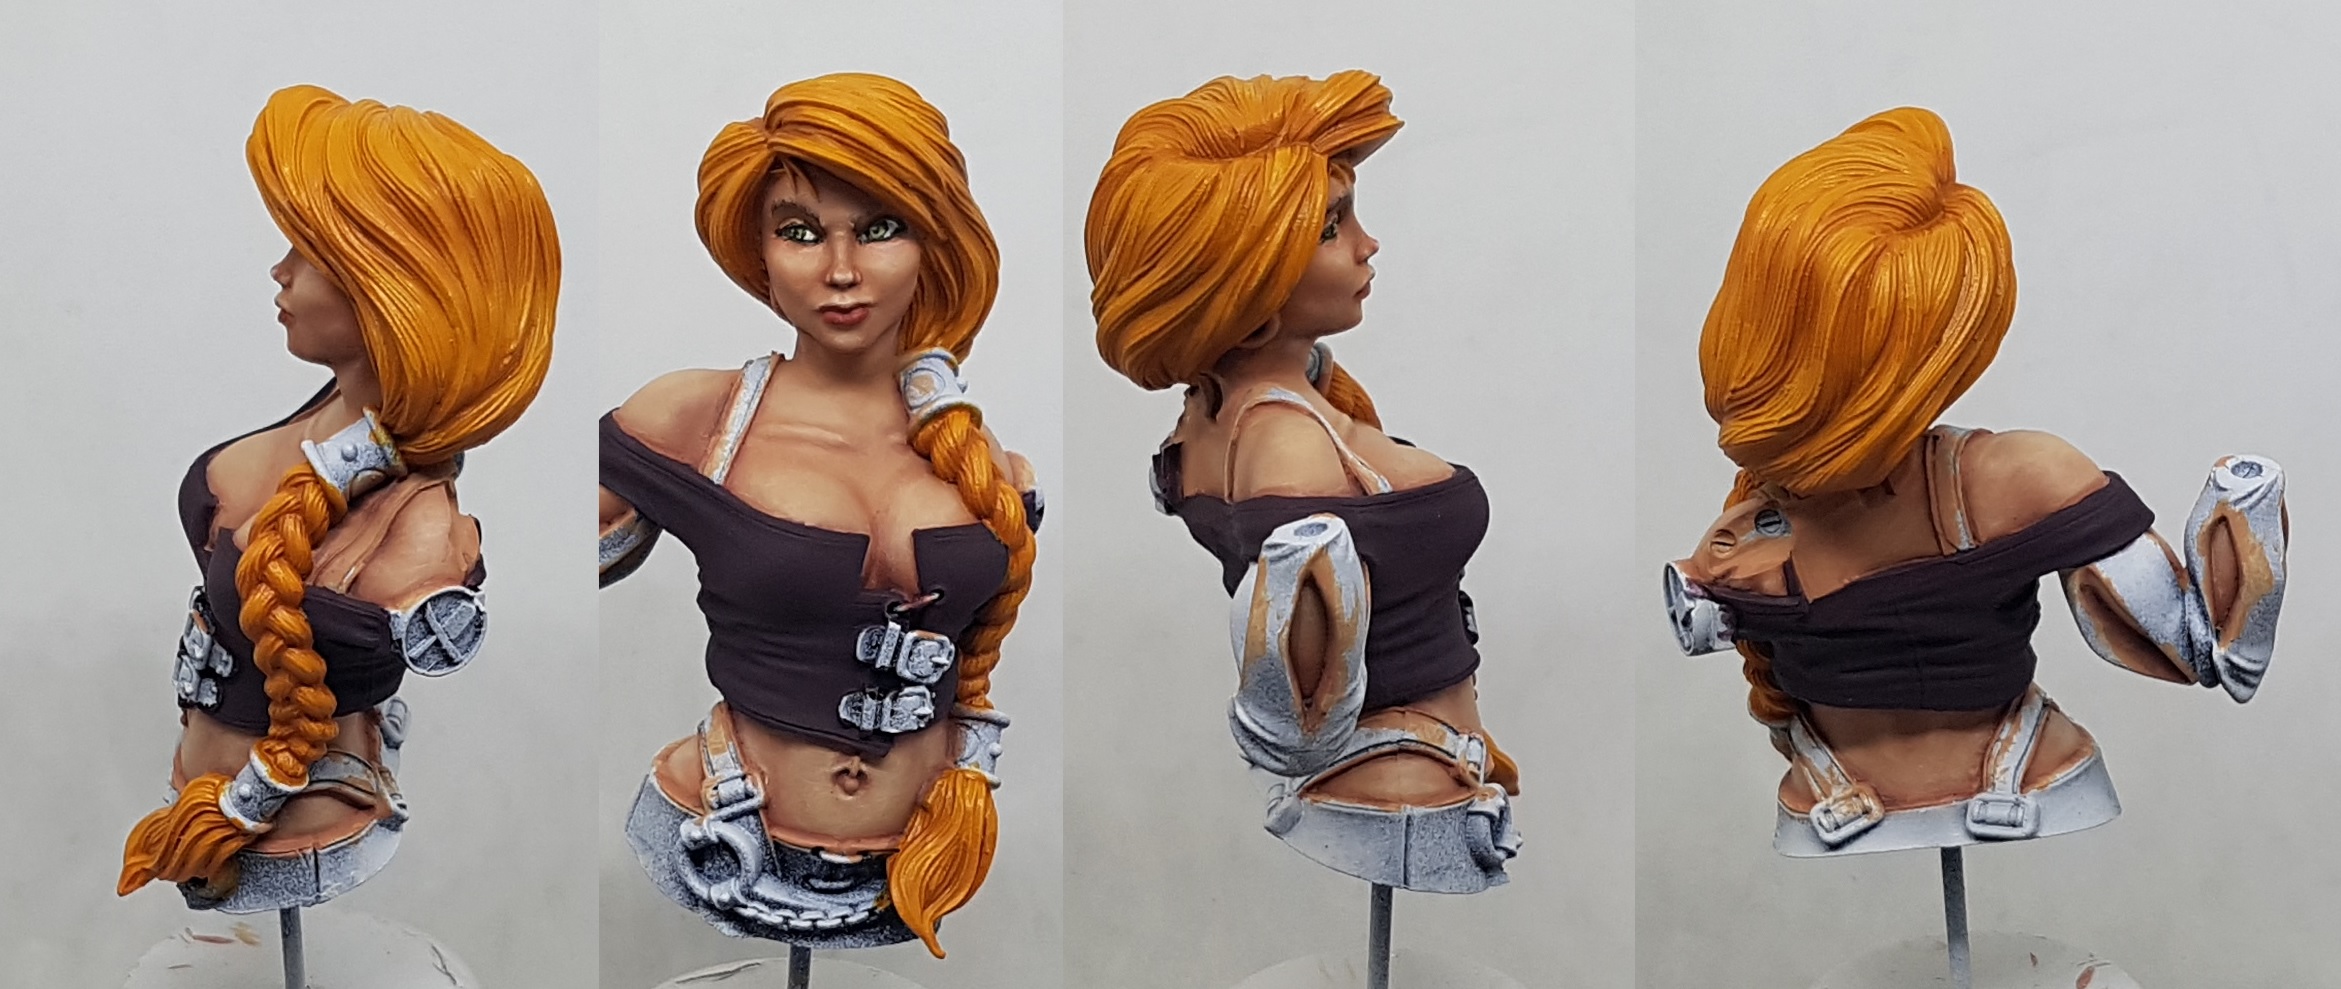 I made up a mix of 1:2:1 Horse tone : Ember Orange : P3 heartfire and applied my first highlight, doing my best to reclaim the round nature of the braid segments.
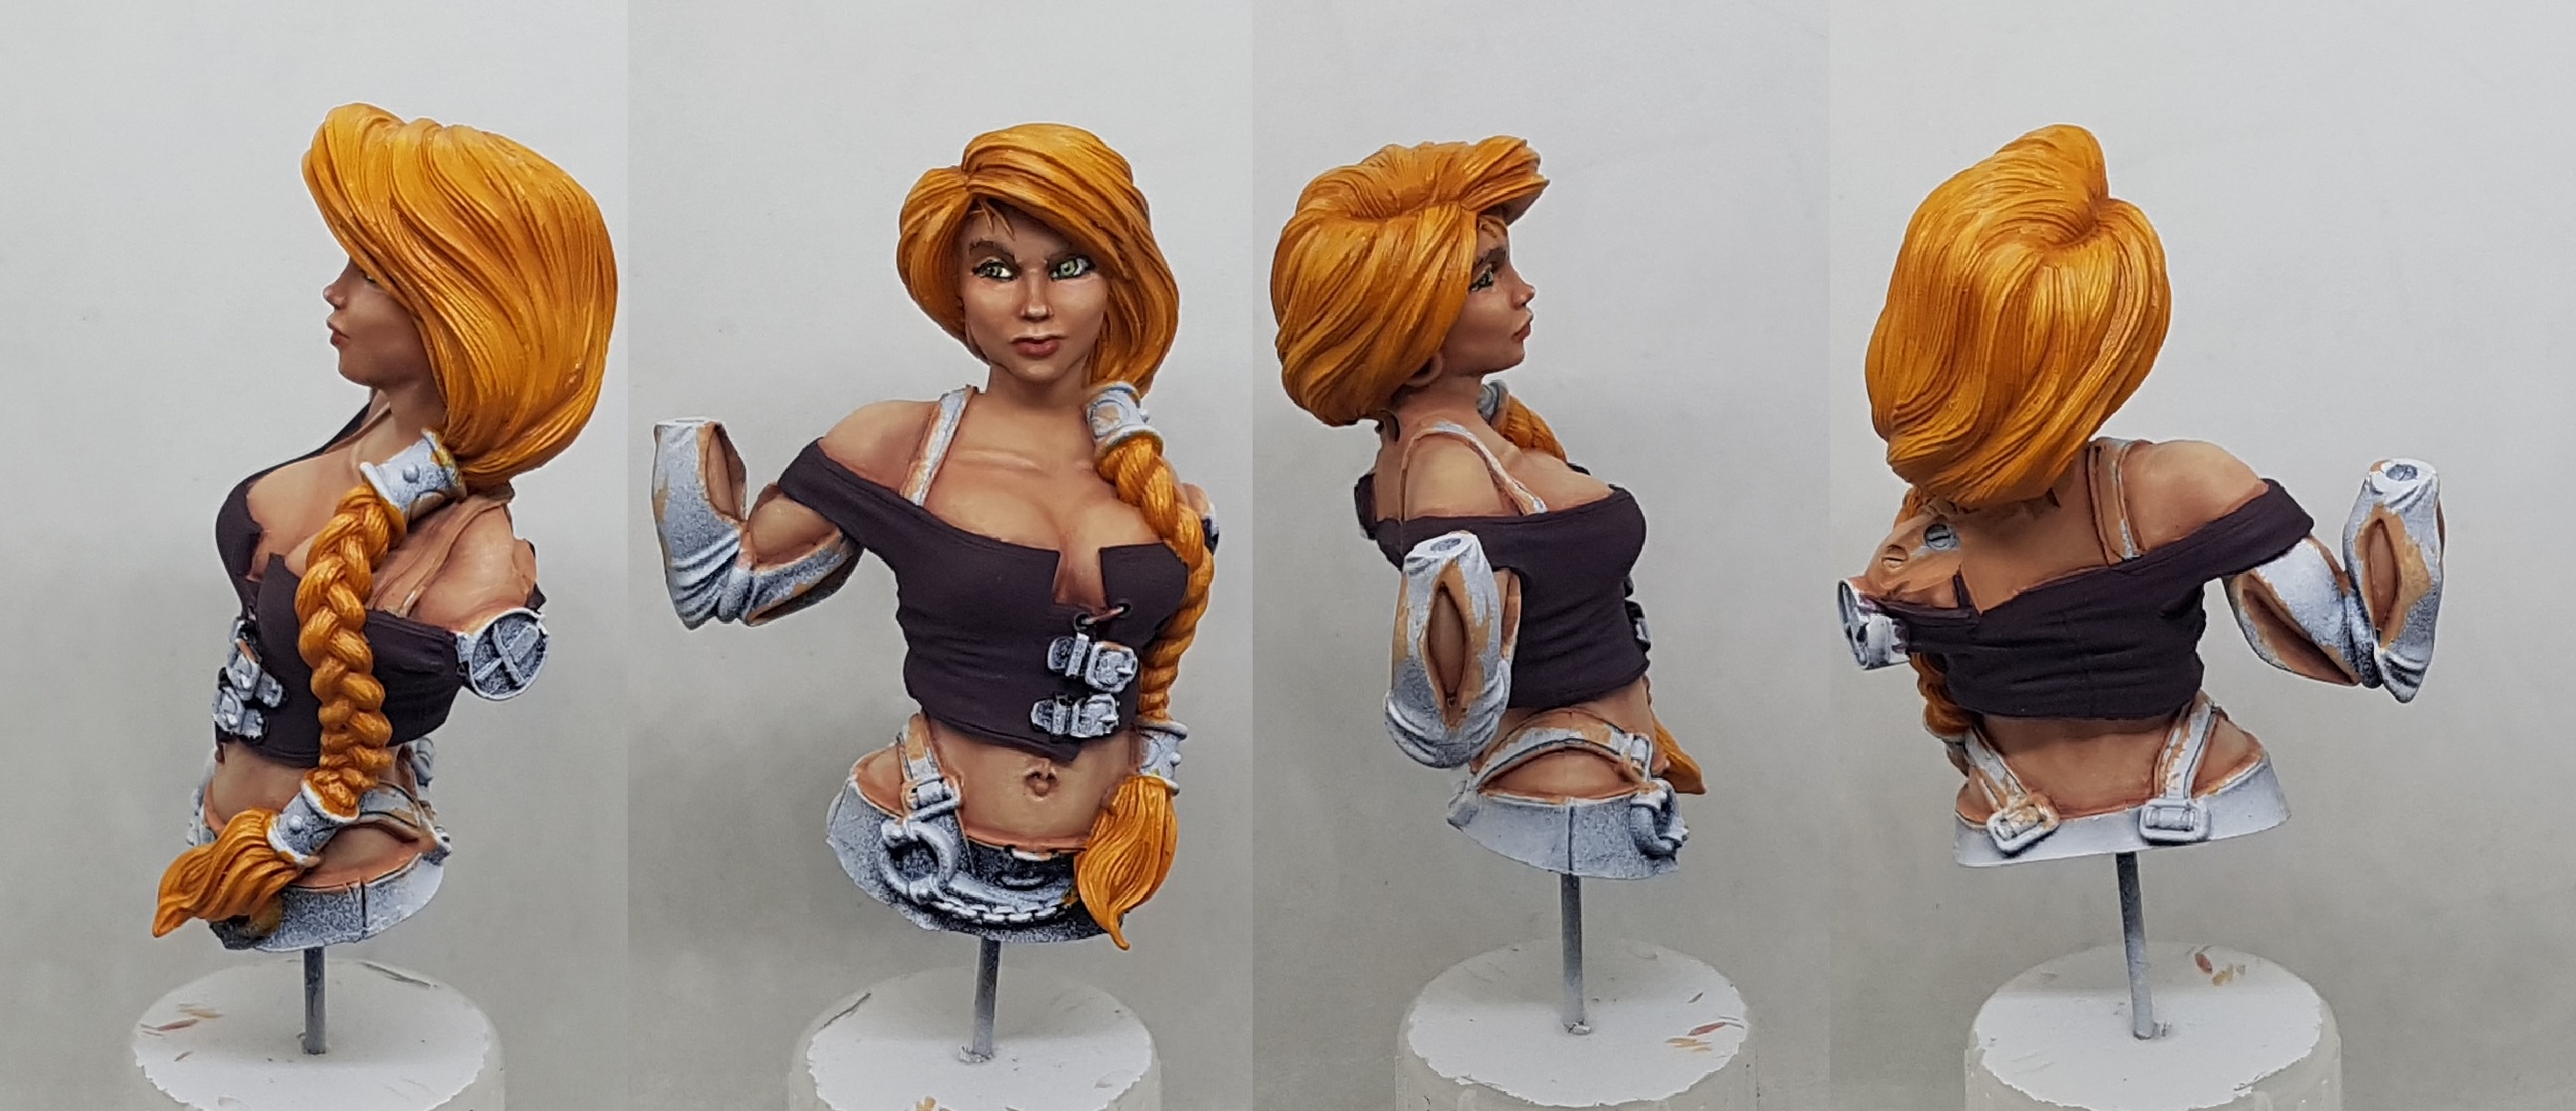 Next highlight was the previous but with 1 part P3 Menoth White Highlight. The final extreme highlight was 1 part Menoth White Highlight mixed wiht 1 part previous highlight. i went back and forth between the two at times. had I had earlier shades still to hand I would have dipped in to them too.
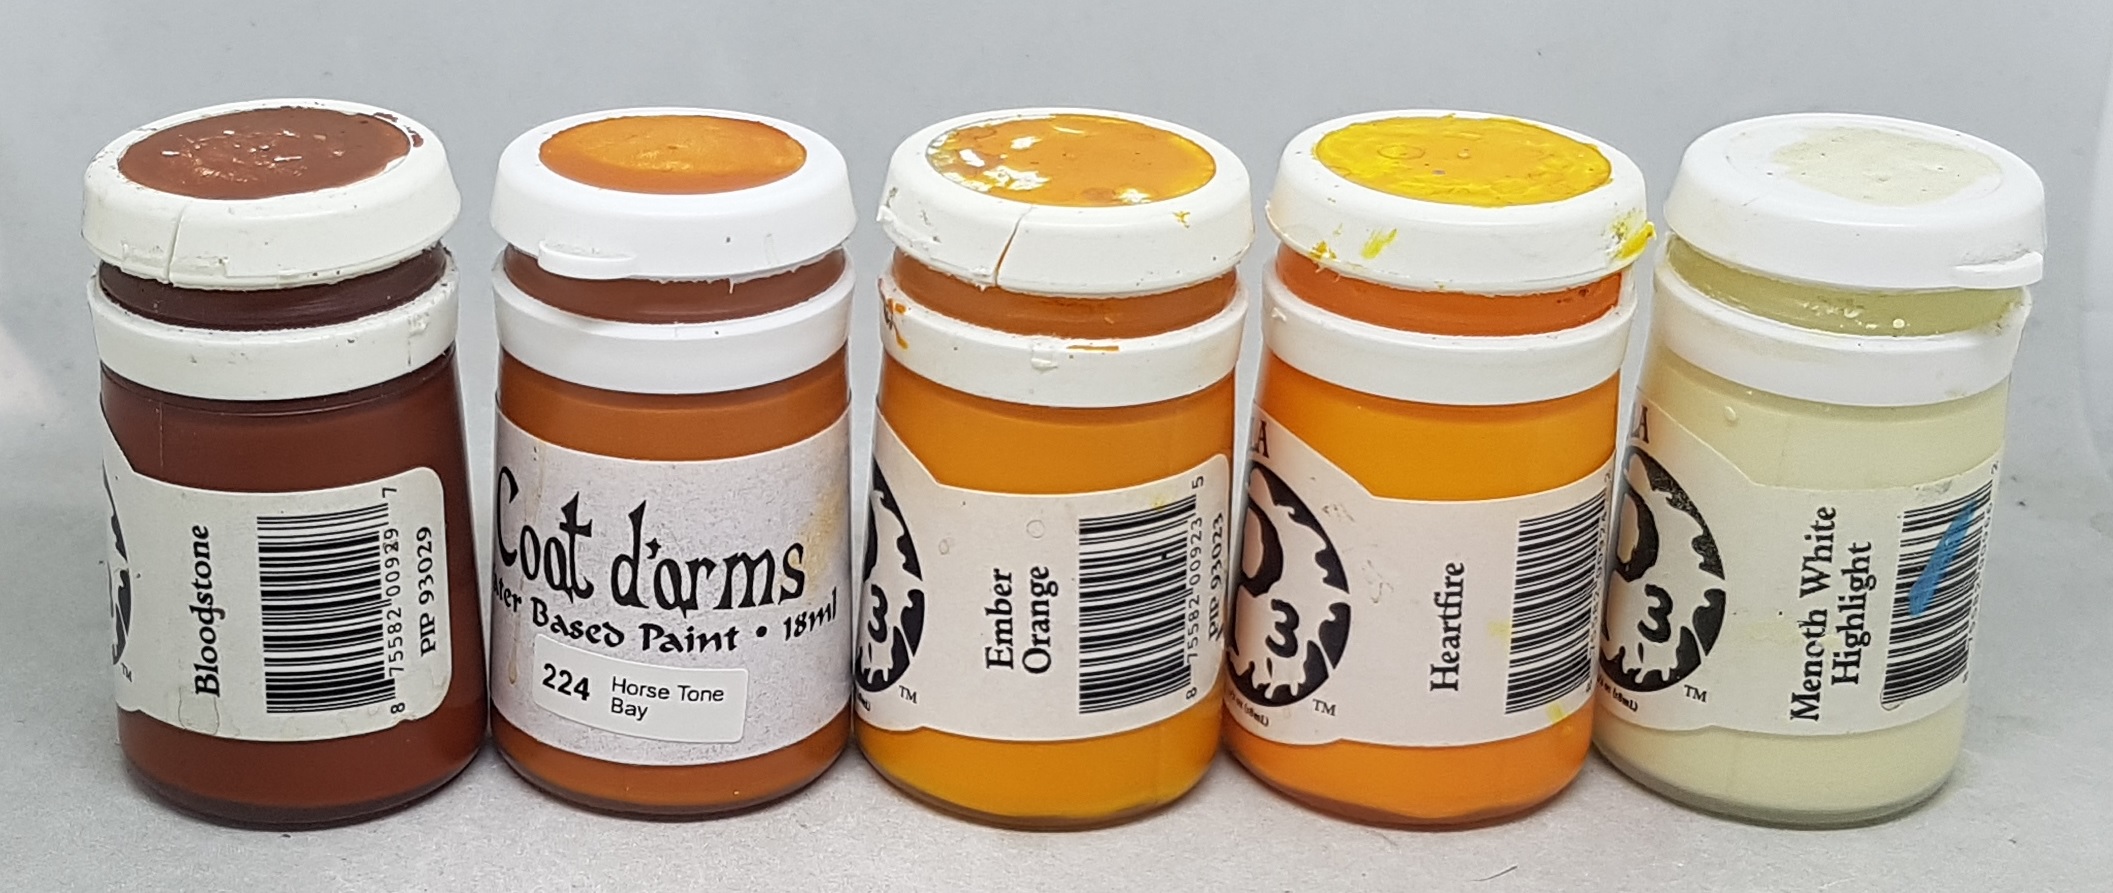 All the paints used in the hair. The zenithal undercoat certainly helped provide variety in strand colour so I suppose the primers count for this too.
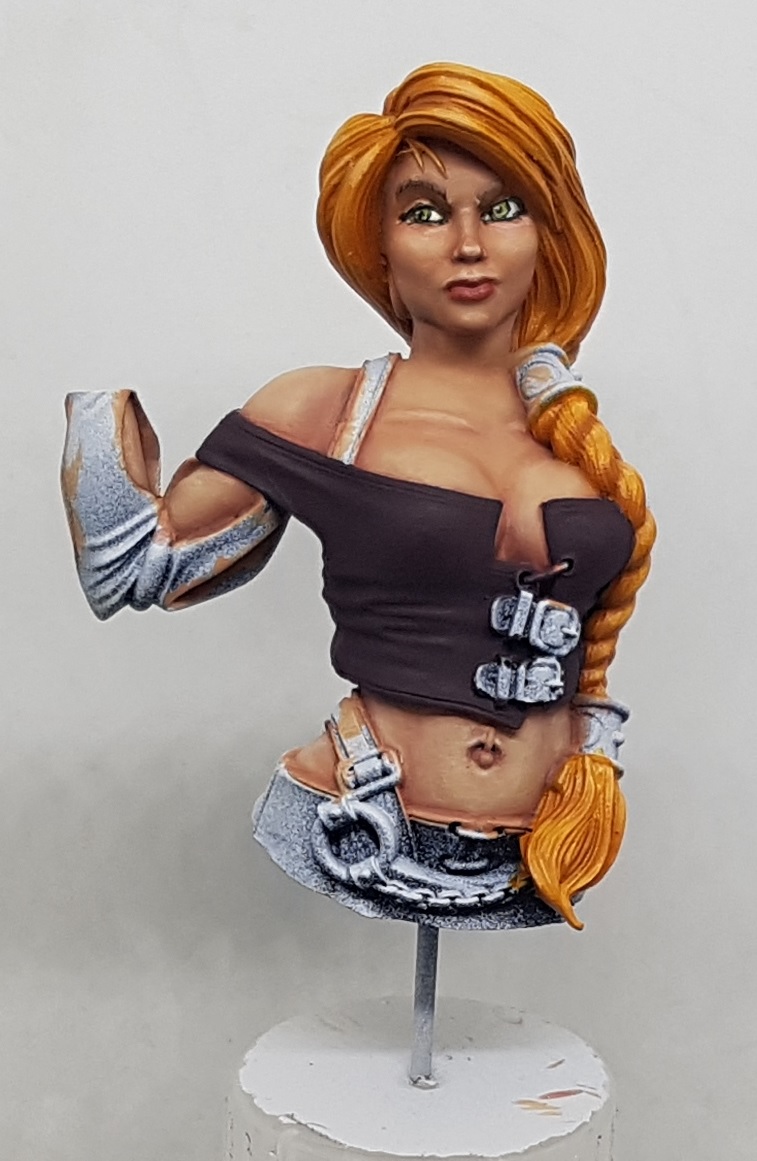 Back to the bodice. Everything except the darkest spots were given a coat of 50/50 mix SC-32 Black Leather and SC-30 Red Leather
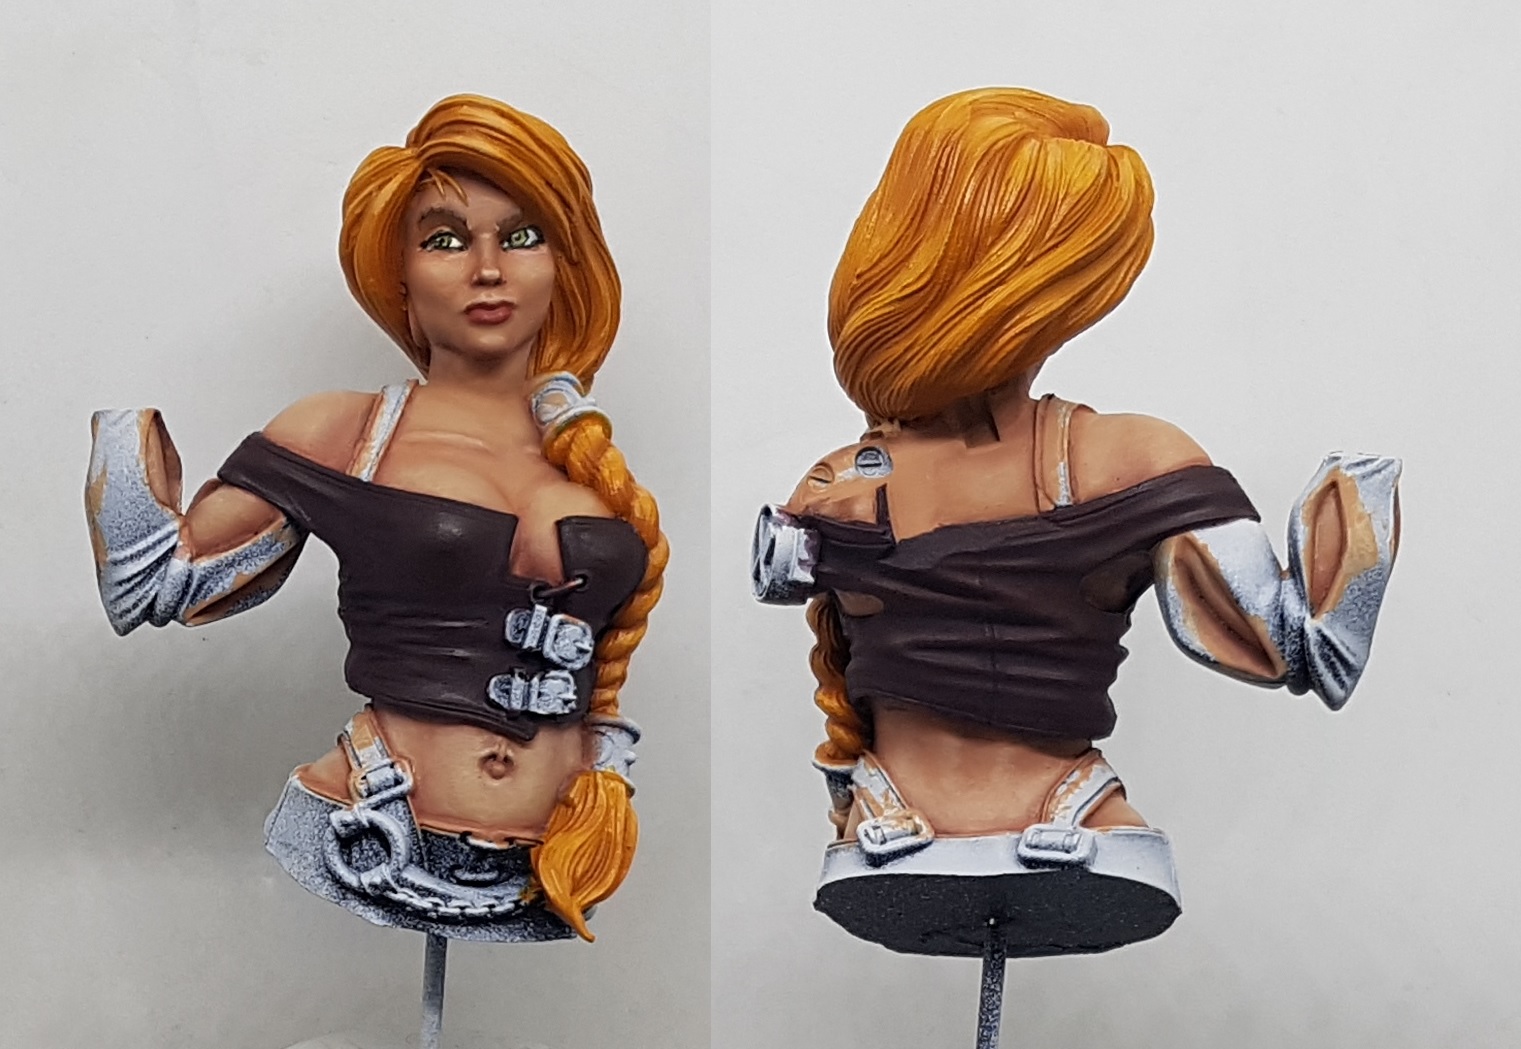 Next highlight was pure Red Leather. This was then mixed 2:1 with SC-28 Orange Leather for the next highlight. It's a little too subtle for the camera but its adding warmth to it. The creases on the back are looking pretty cool.
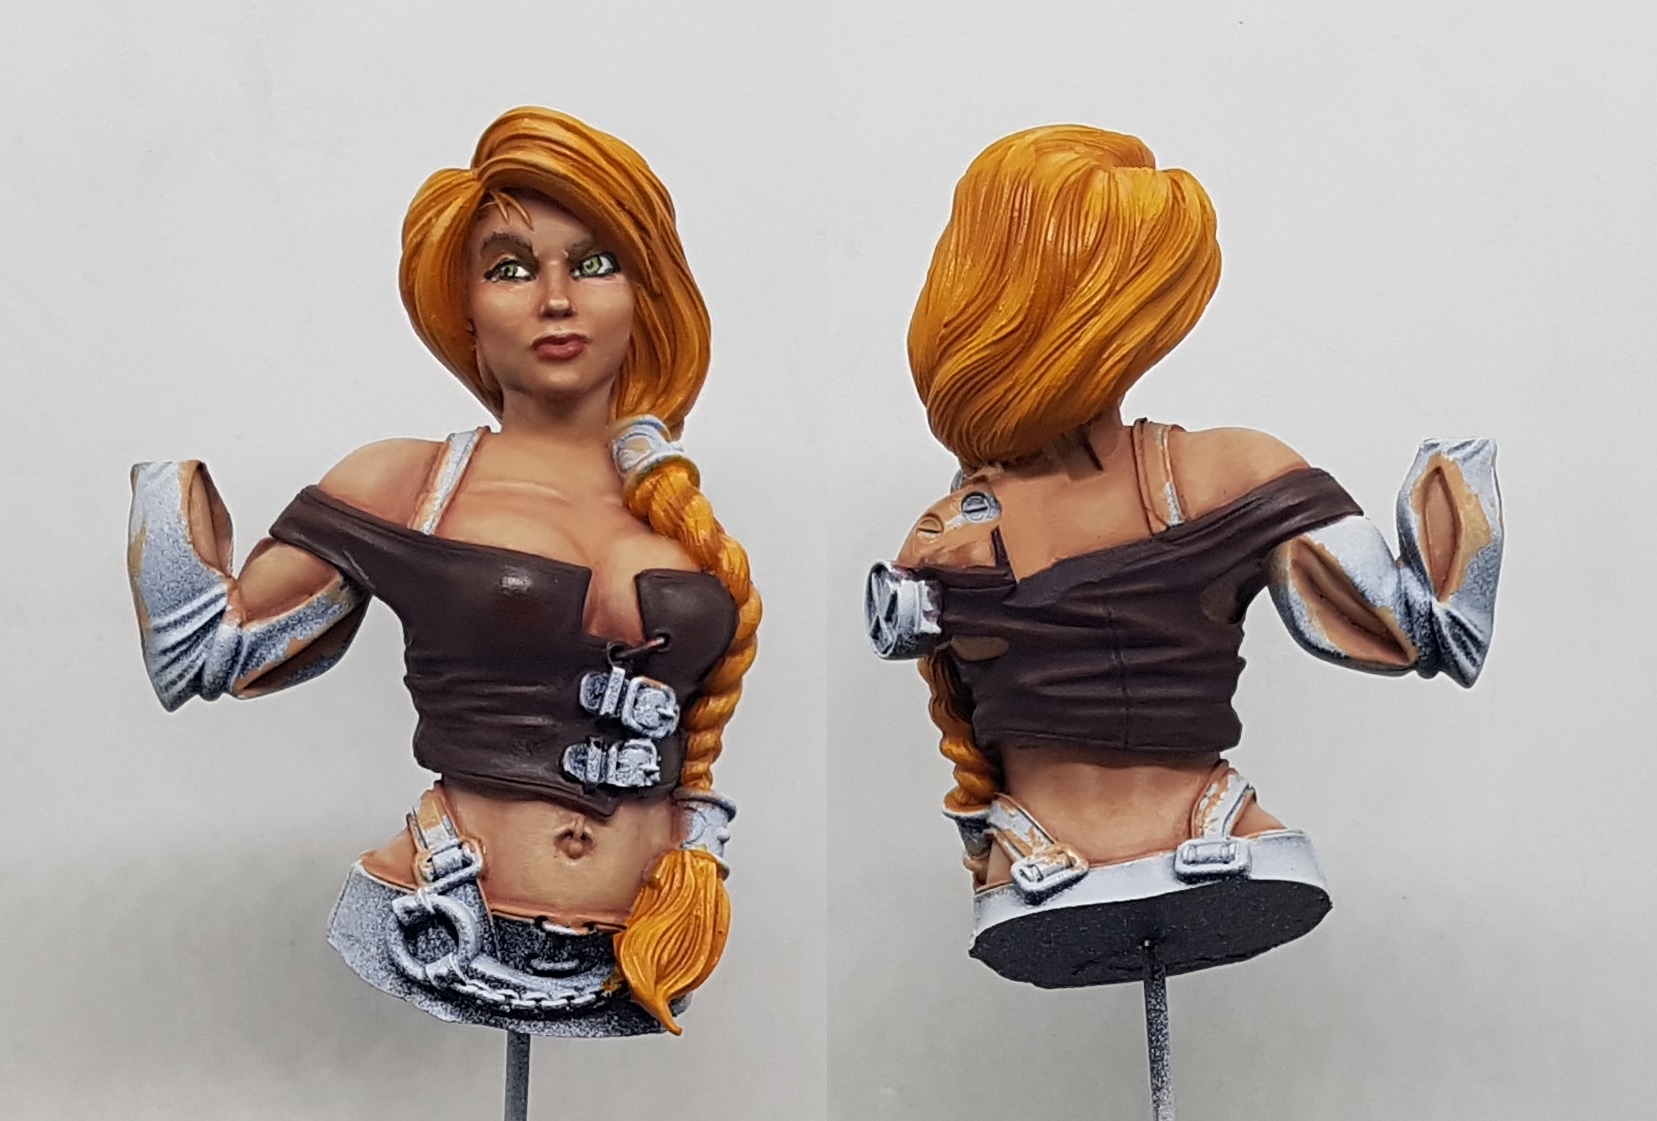 1:1 Mix of Red Leather : Orange Leather this time. Again its not showing up much in the pic but its adding a polished red sheen to everything. I got it super thin and applied many layers to the open areas
 I increased the amount of Orange Leather in the mix as far as I could without it overpowering the red, and then added ALL the water to it. Many layers were carefully applied over the open surfaces that neeed bring up and now it can finally be seen in the photos and looks quite good in person
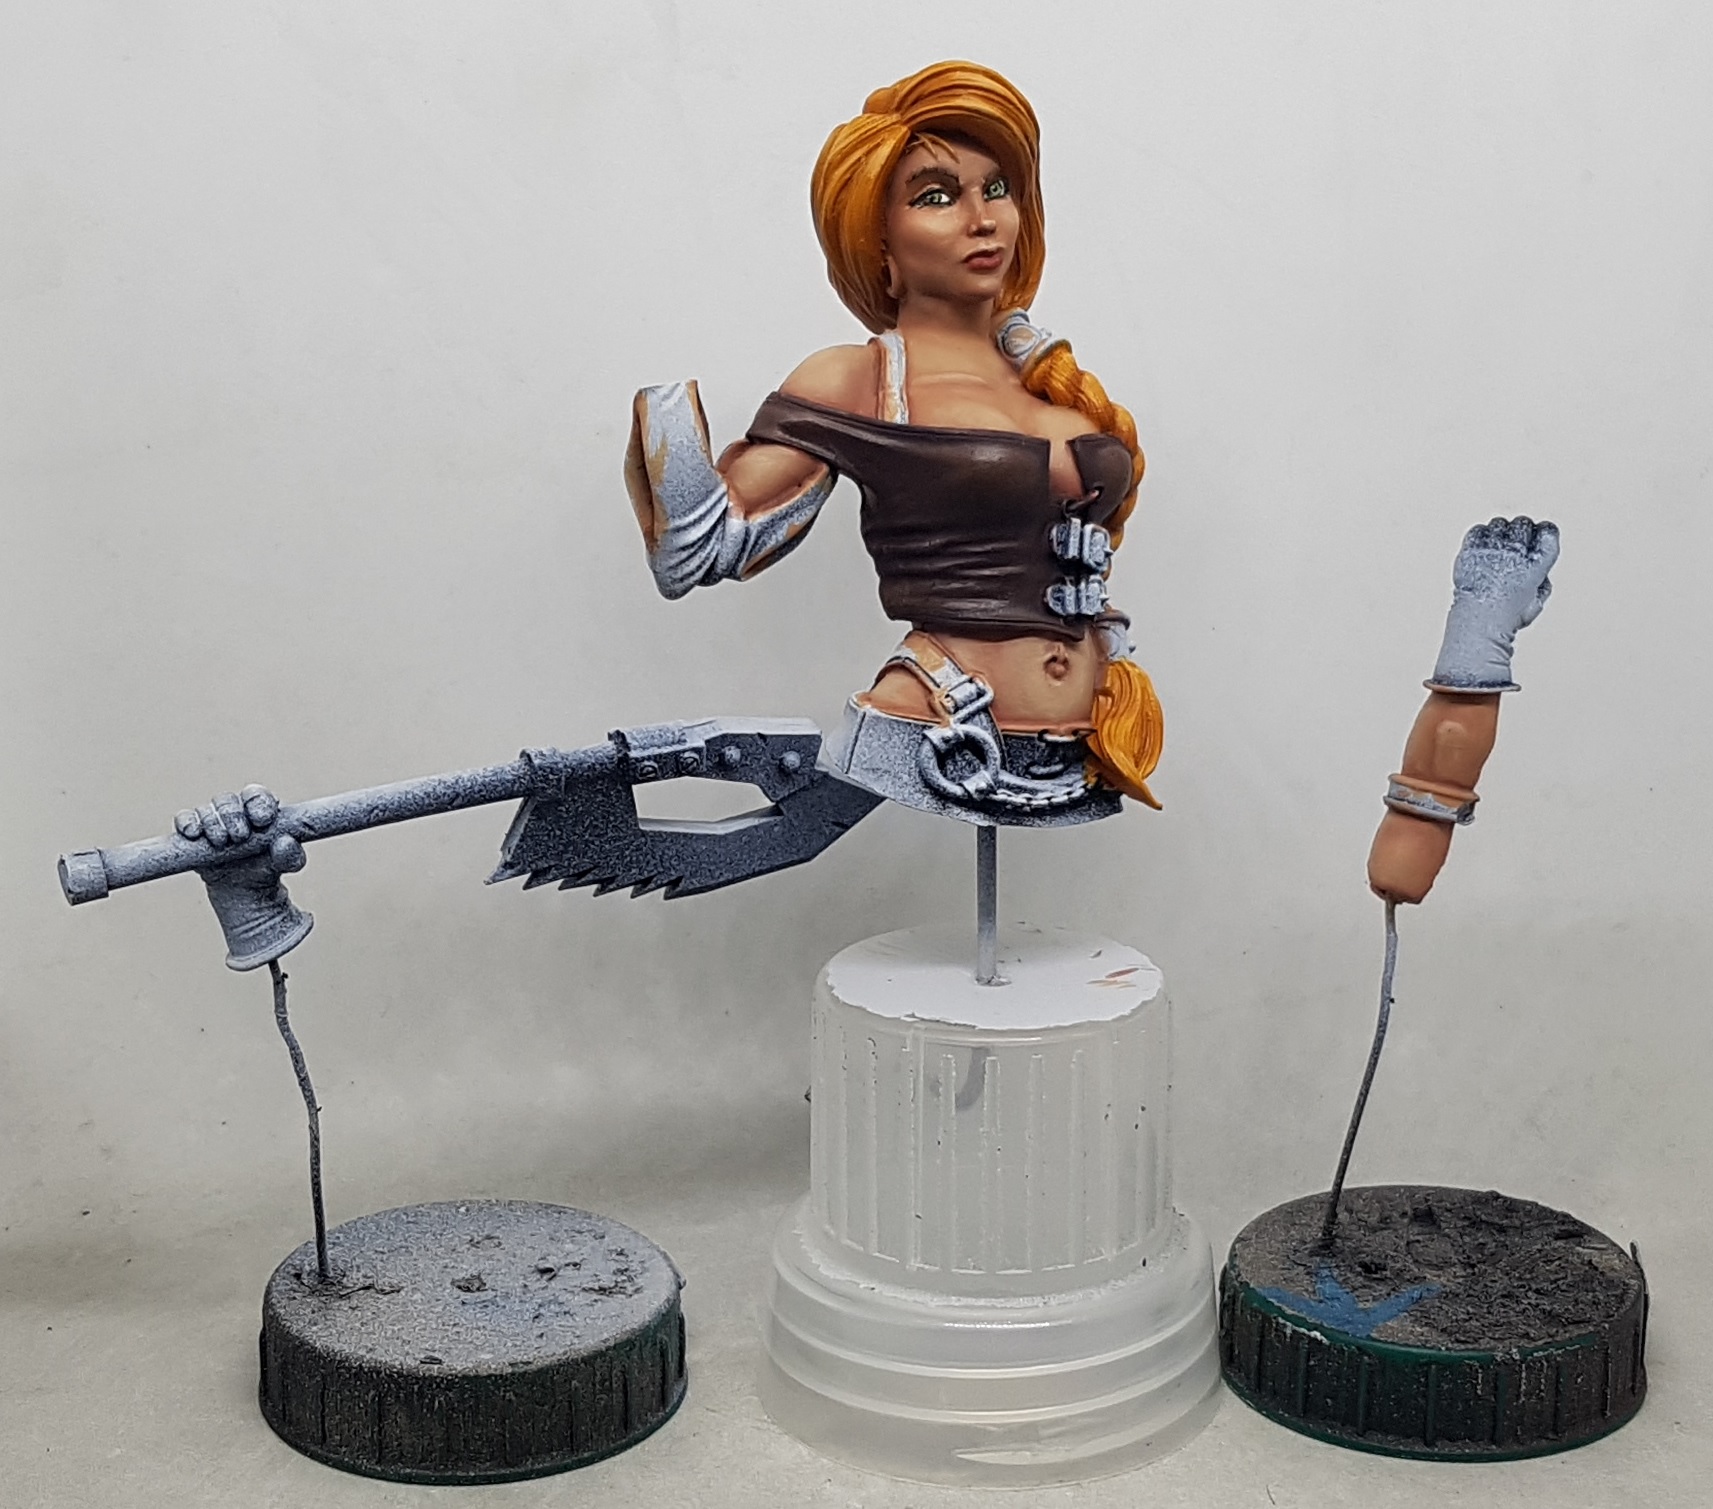 I thinned down 2:1 Orange Leather : VMC 70.918 Ivory and applied highlights on the sharper edges. I then put a few drops of water in a well and mixed in 1 brush of this and used this to highlight the surfaces carefully. That's the bodice done, I think.
Trousers, shirt & apron
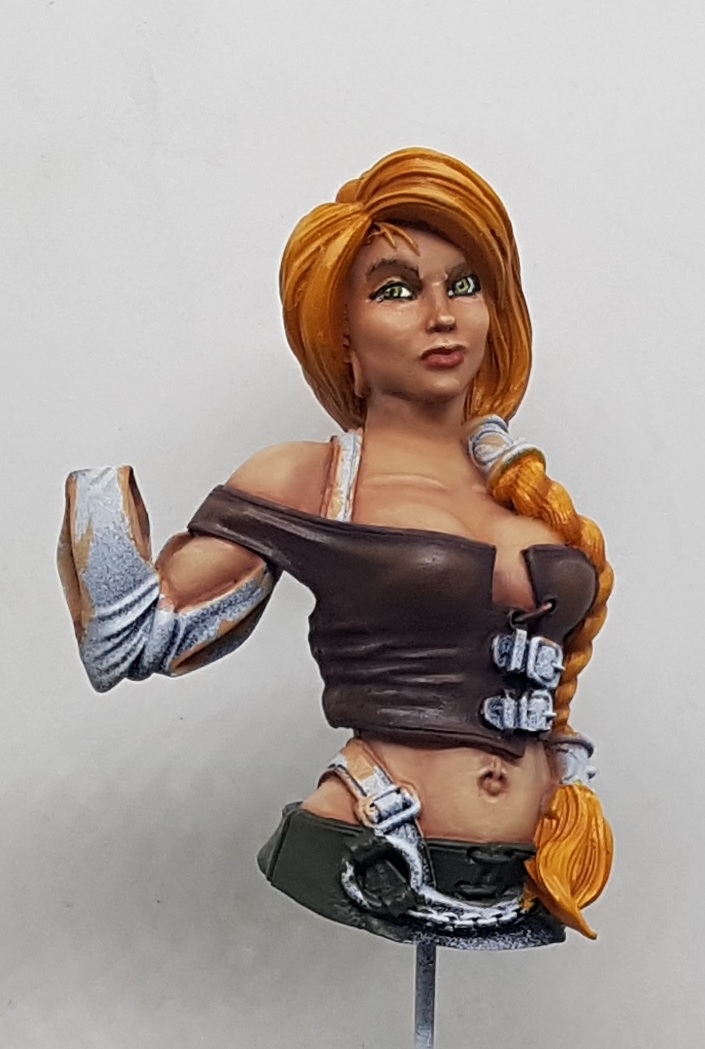 I started with a base coat of P3 Cryx Bane Base. I've only just notices she is wearing an apron. Not sure what to do about that yet, but I'm thinking grey? I feel I should work some red in to her outfit somwhere but not sure it's appropriate anywhere. There's red in the bodice so I might end up leaving it at that.
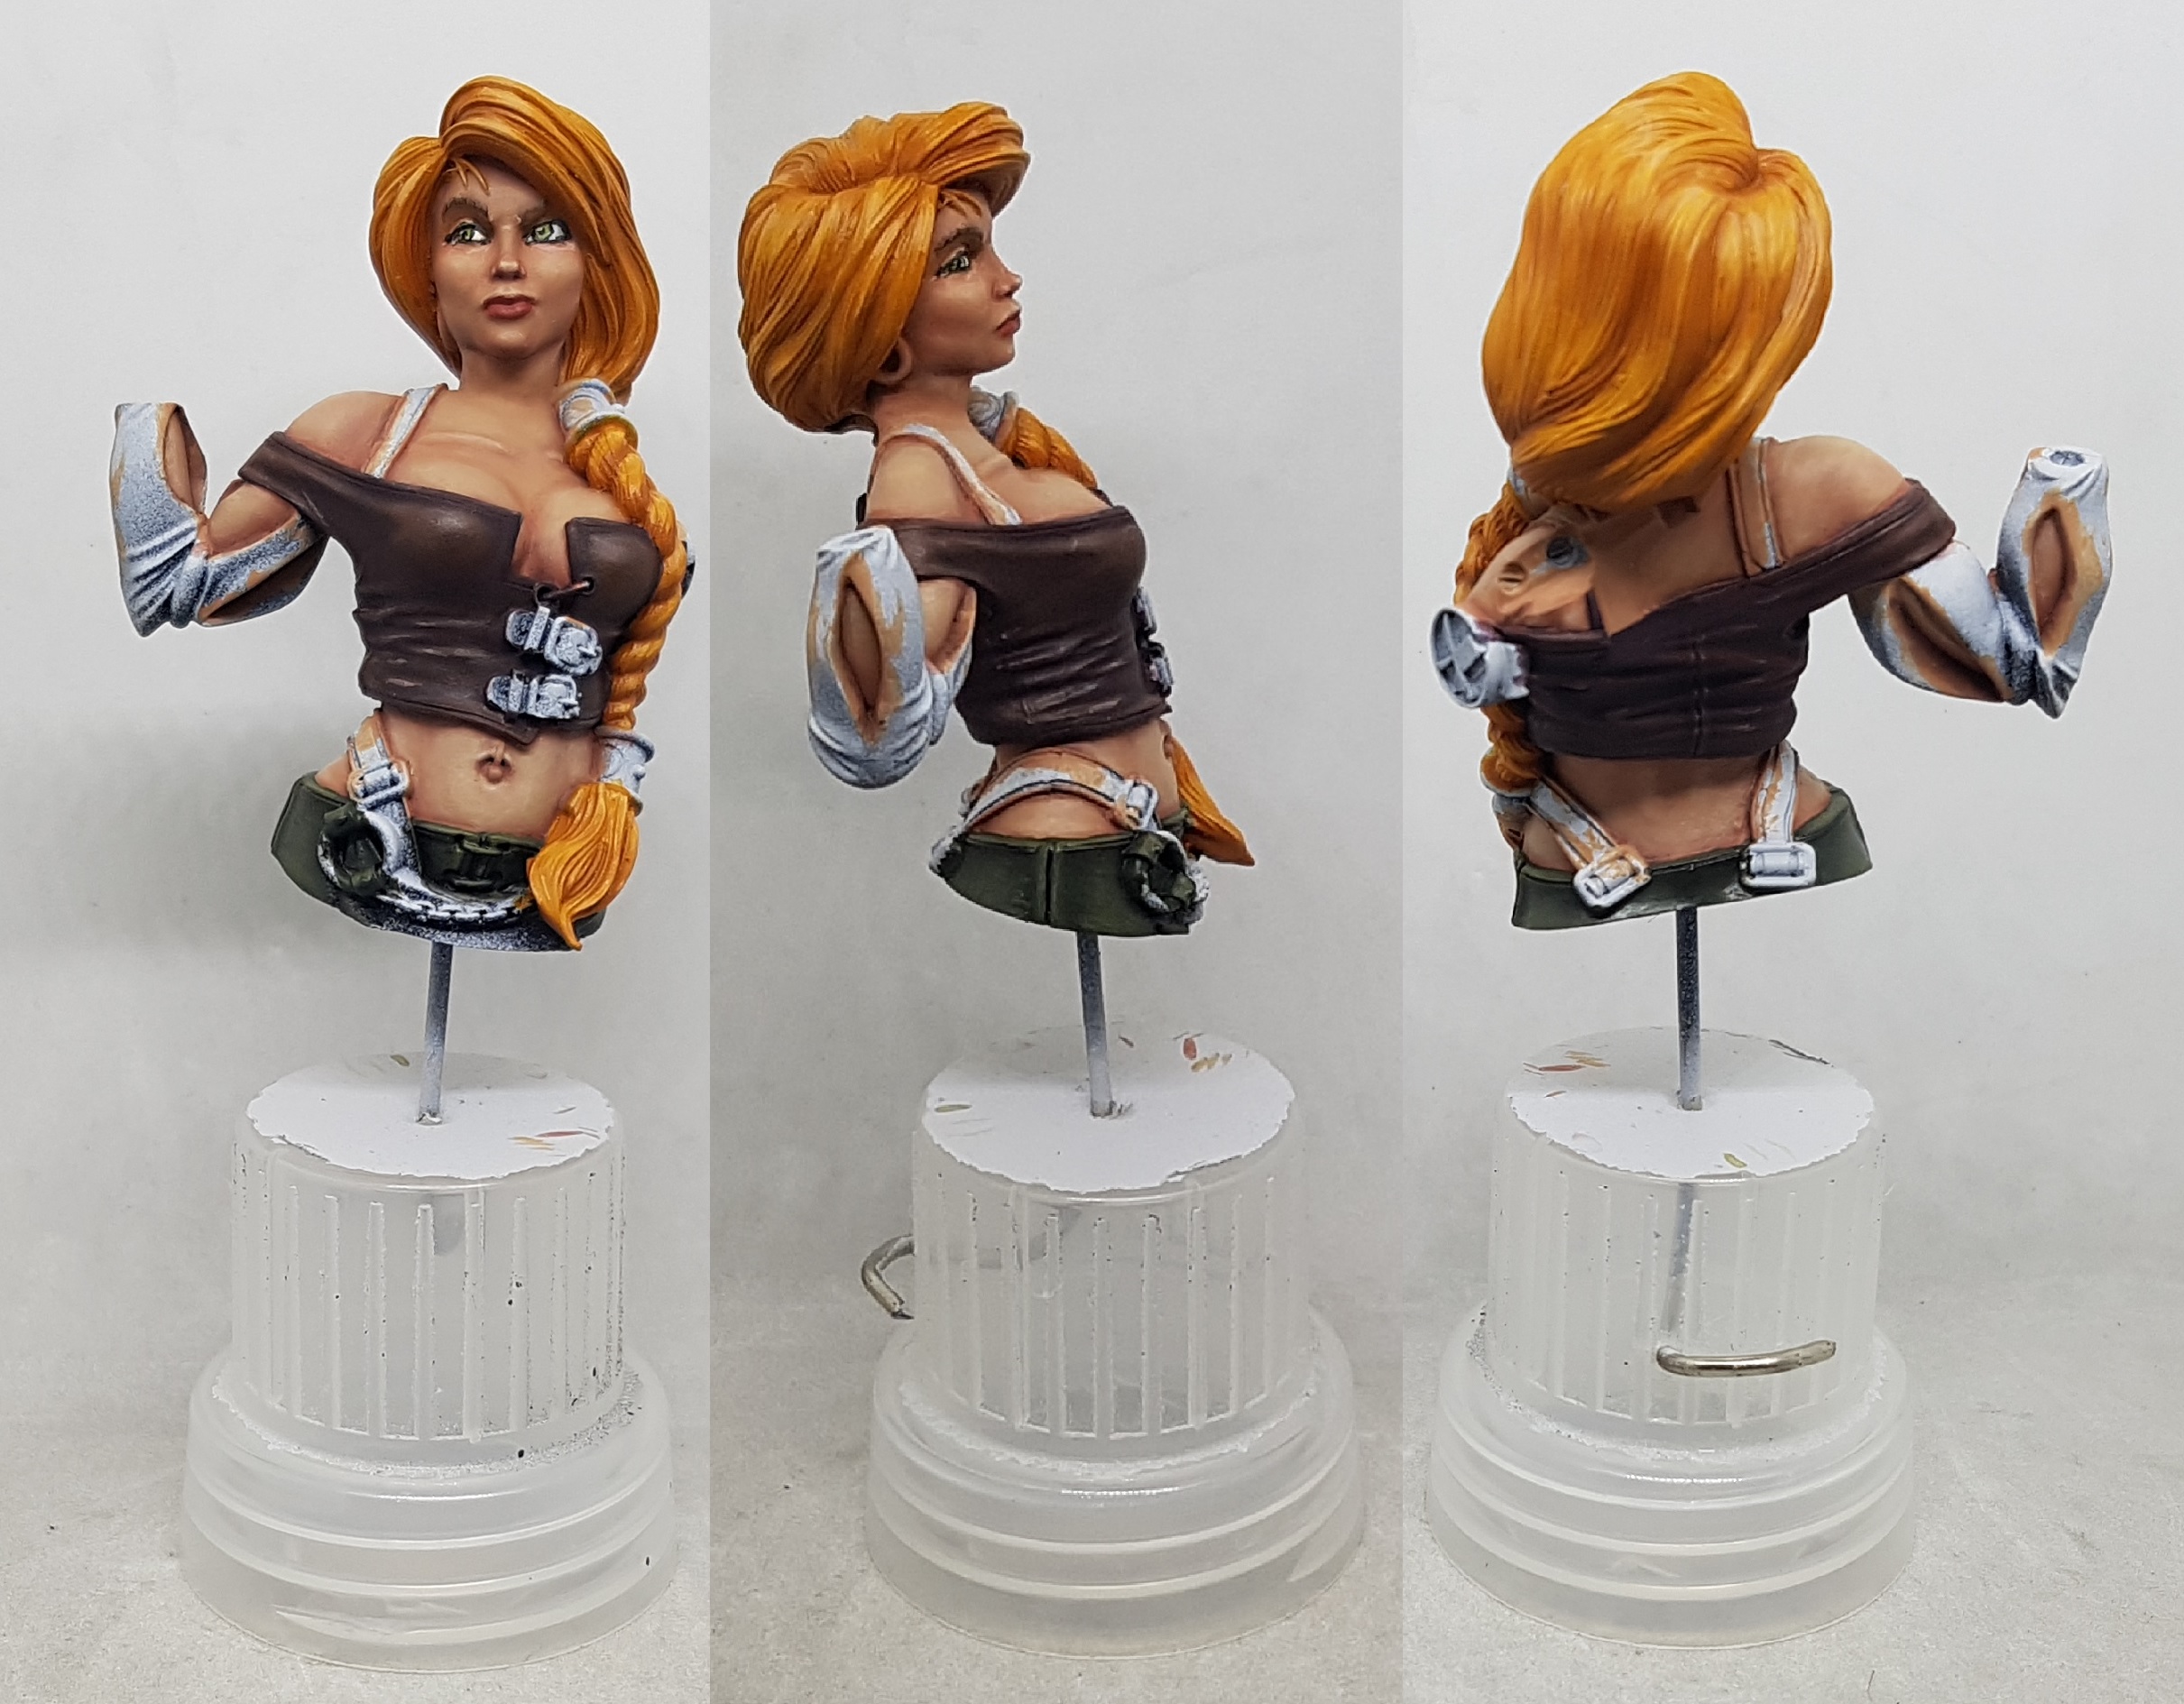 I mixed a little black in to the base colour to make the shade, which I applied in to the recesses and around the edges of overlapping surfaces. I thinned this down to water and applied shade over some of the surfaces. I mixed a little of the base with some AK Interactive 124 Olive Base and thinned it down with water and Lahmium medium and used it for a highlight. I then added more Olive Base for a higher highlight, and eventually used it pure for an edge highlight. It just kind of painted itself real quick.
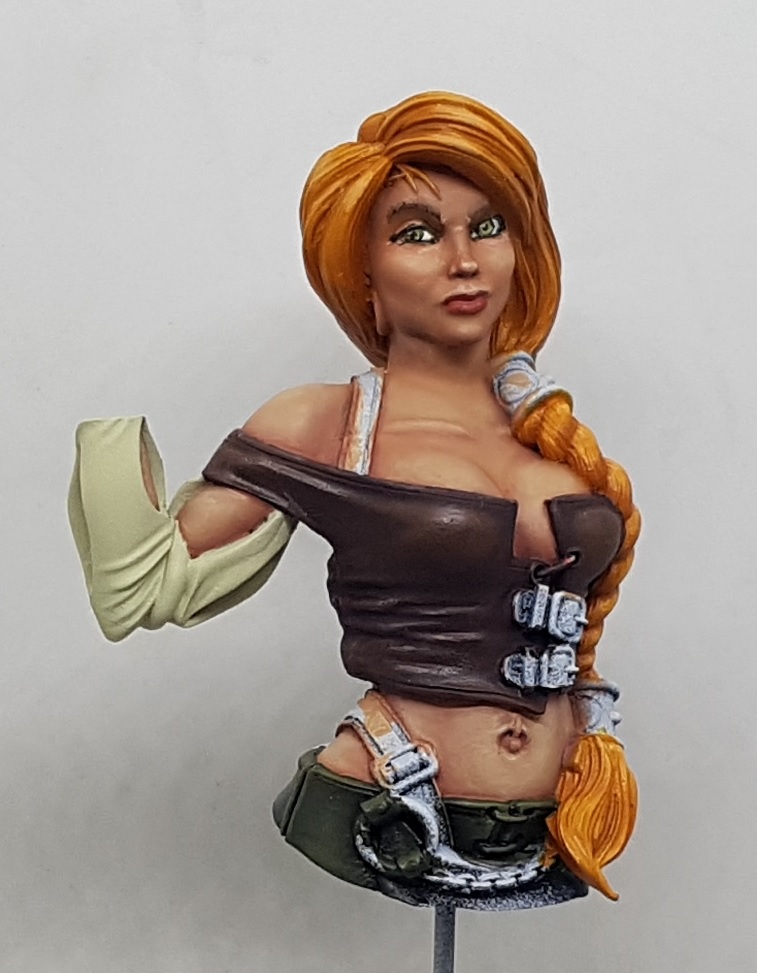 The shirt sleeve was base coated with Andrea Color White 1 Base
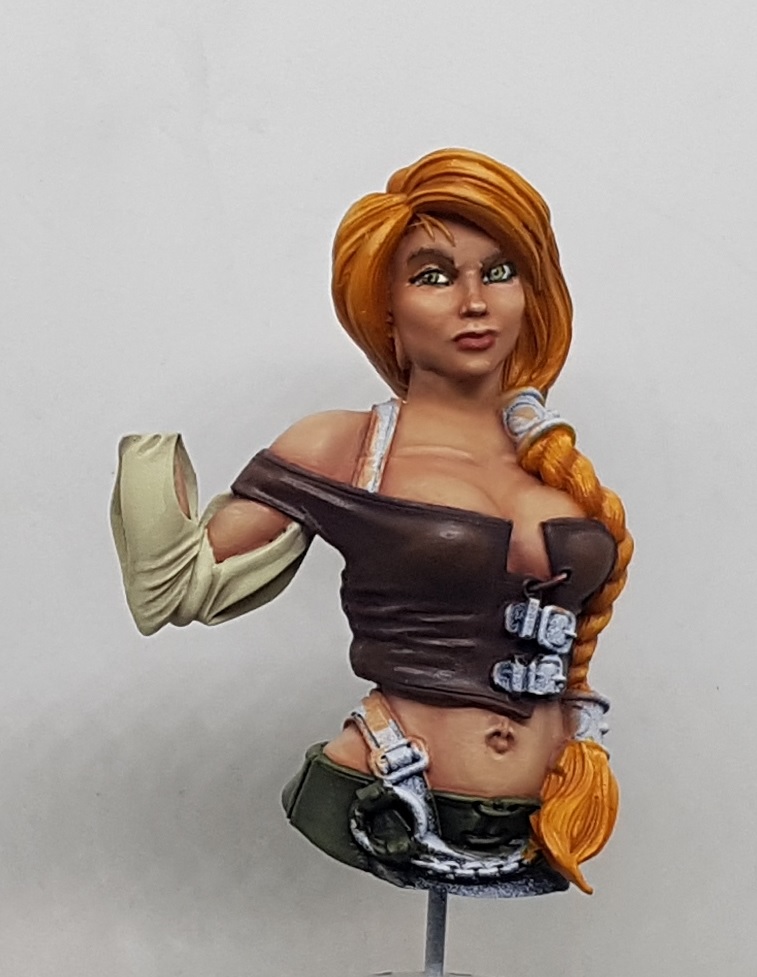 A glaze was made from the base colour and increasing amounts of Andrea Color White 6 No2 Shadow, and eventually pure No2 Shadow and used to apply shade
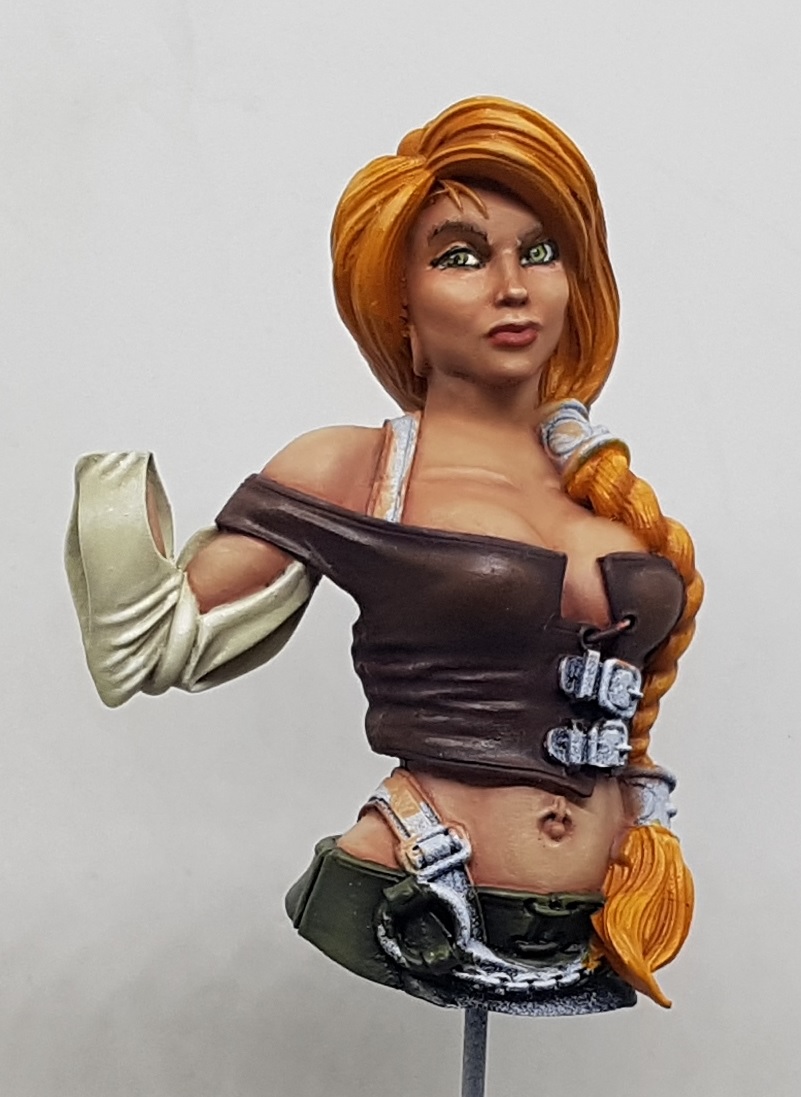 I softened the edges of the last shade with some thinned base colour. Then progressive amounts of White No2 Light were mixed to create highlights, eventually moving to pure No2 light, then adding in VMC 70.951 White and eventually pure White. I'm going to have to clean up the flesh inside the sleeves at a later date after this.
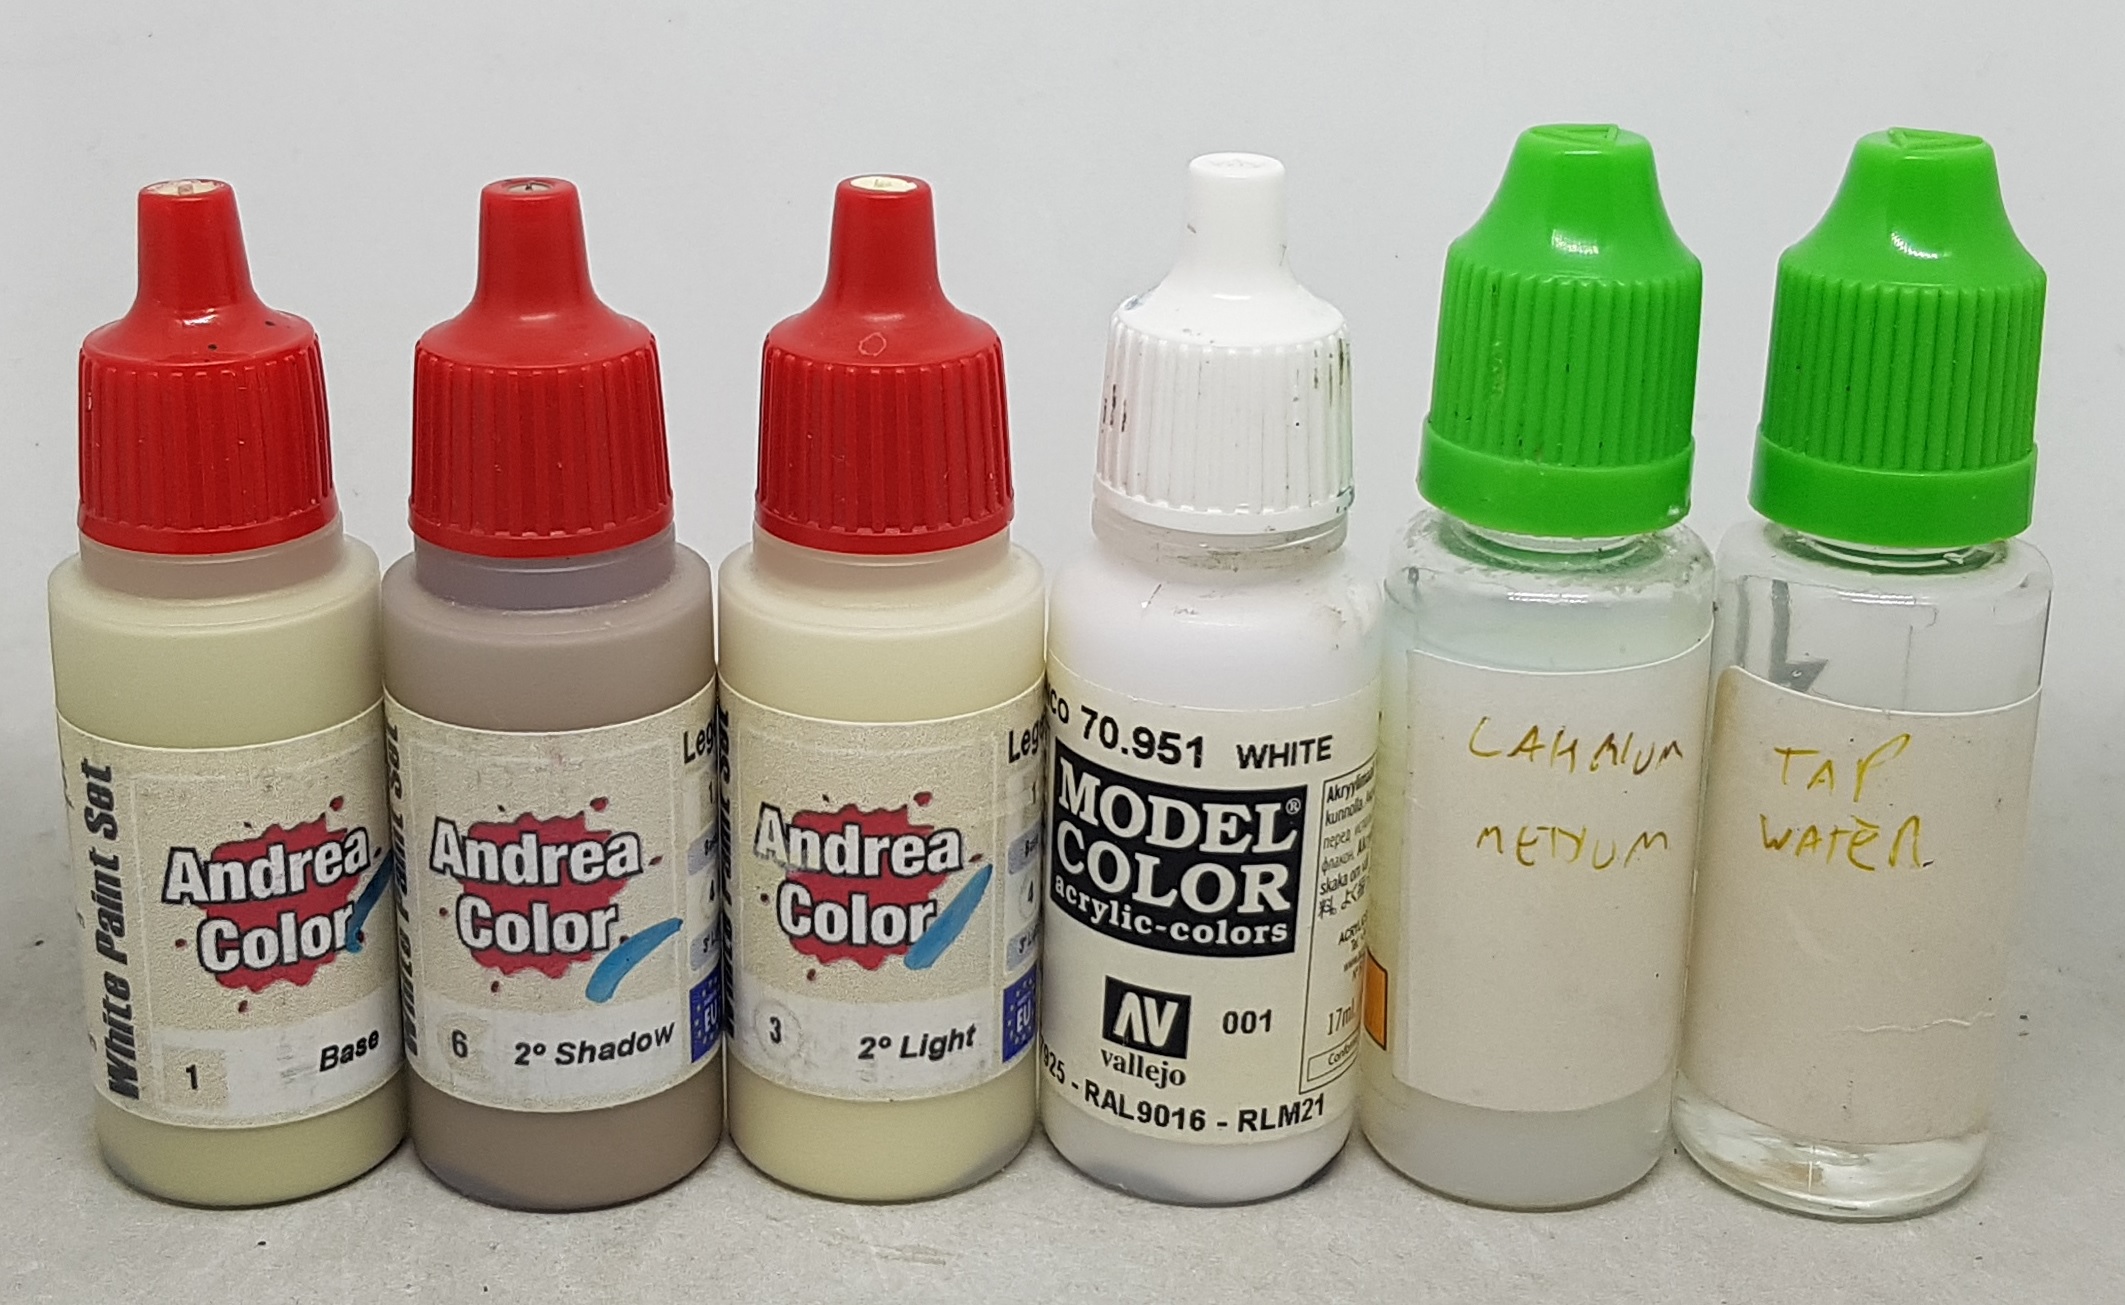 All the paints used in the white sleeves
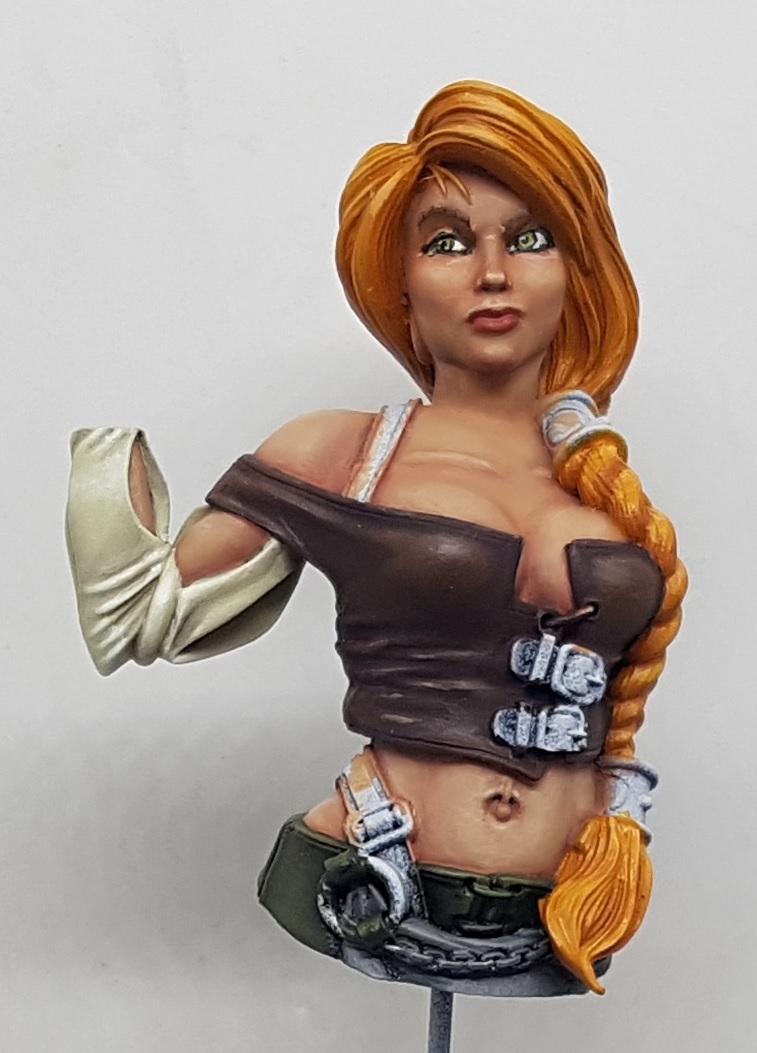 Apron time. Base colour was Hataka Ocean grey. Using the paints below, I then shaded down to a mix of Ocean Grey and Black, and all the way up to a mix of Hammerfal Khaki and Gris Bleu Fonce. Not the best, but its a minor detail and it'll just be background to the chain
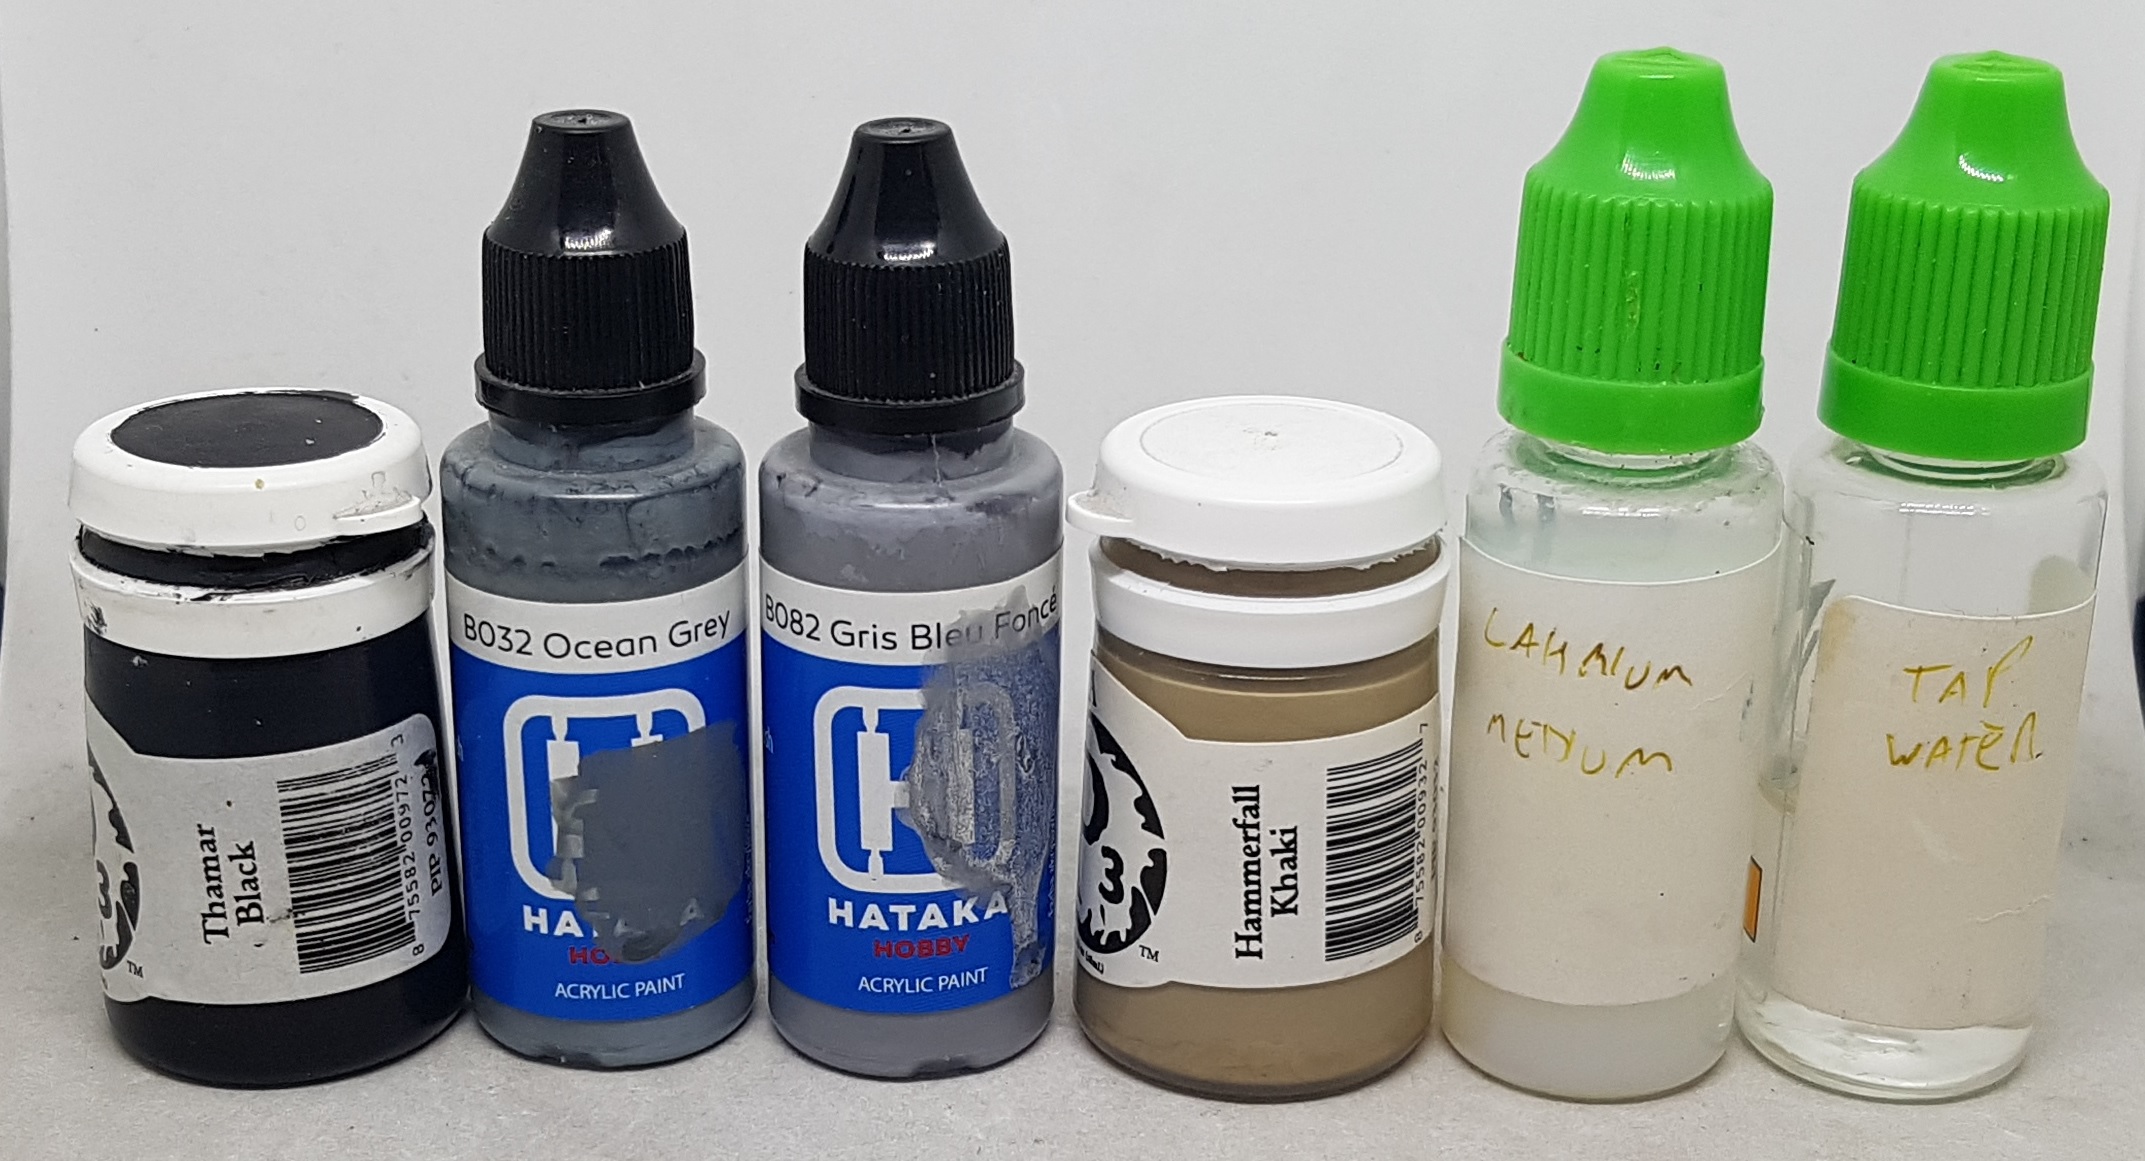 Apron paints
Straps and gloves
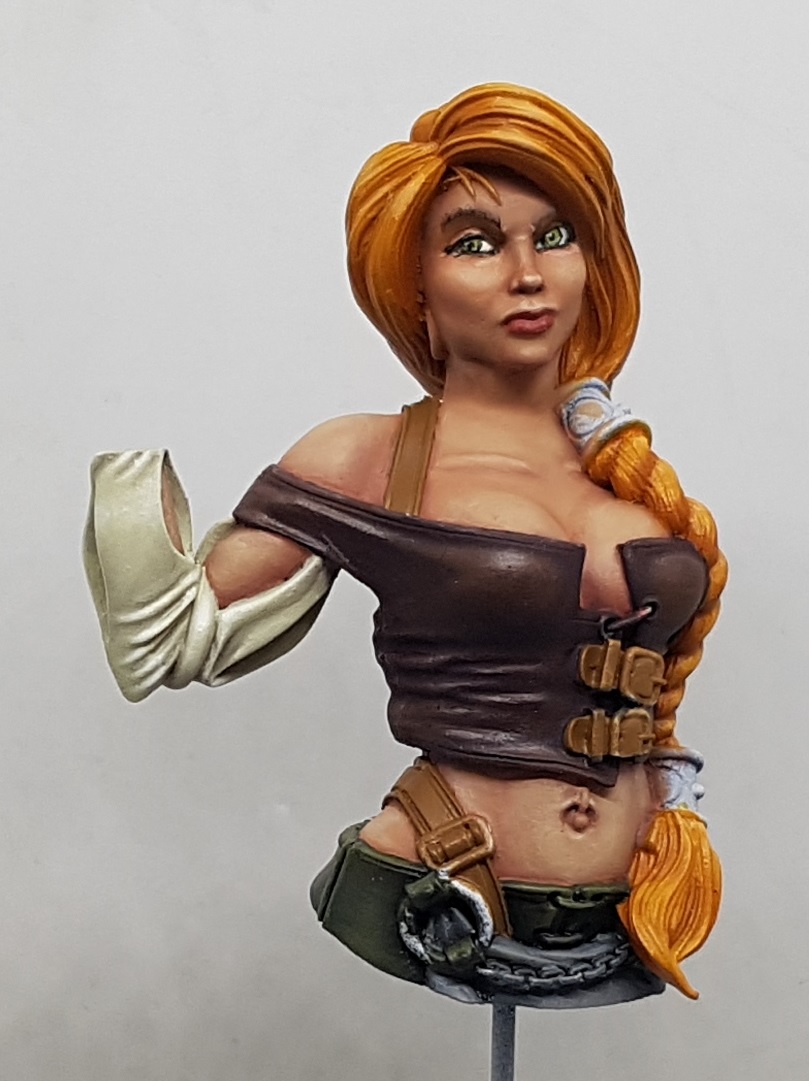 The straps were based with a 50/50 mix of Reaper MSP 29828 Woodland Brown and Reaper MSP 09254 Brown Wash. I got this recipe as part of a Forrest Troll kit and it was for his skin, so lets see how it looks as leather
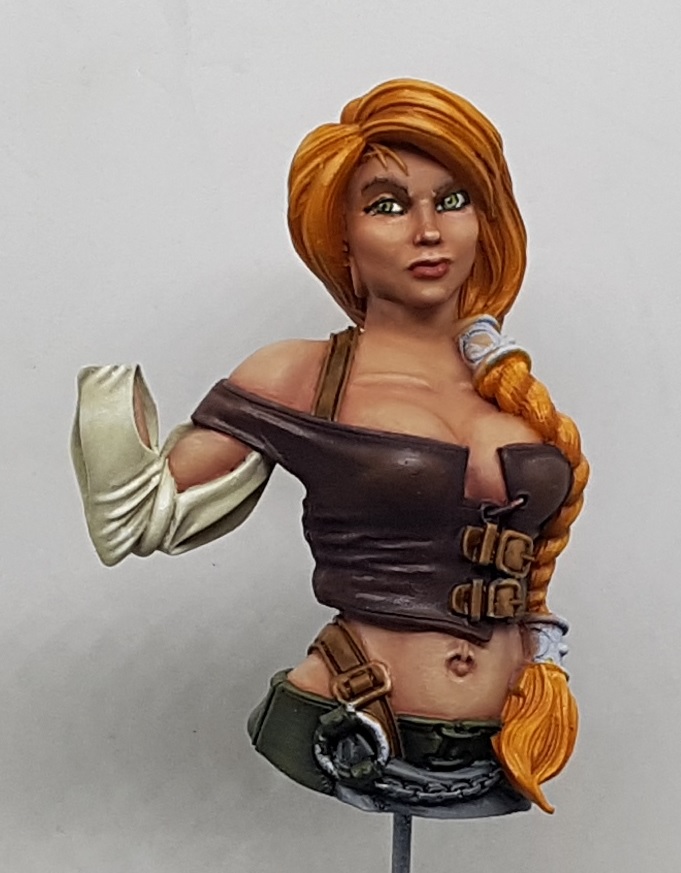 I started off applying a glaze of 50/50 Water/Brown Wash, encouraging it to sit in the grooves. I then reclained some of the high areas with the base colour, and highlighted further with a glaze of 50/50 Woodland Borwn / Tusk Ivory for highlights. I then glazed over them with the first glaze to try and unify everything. There was a little back and forth between the layers.
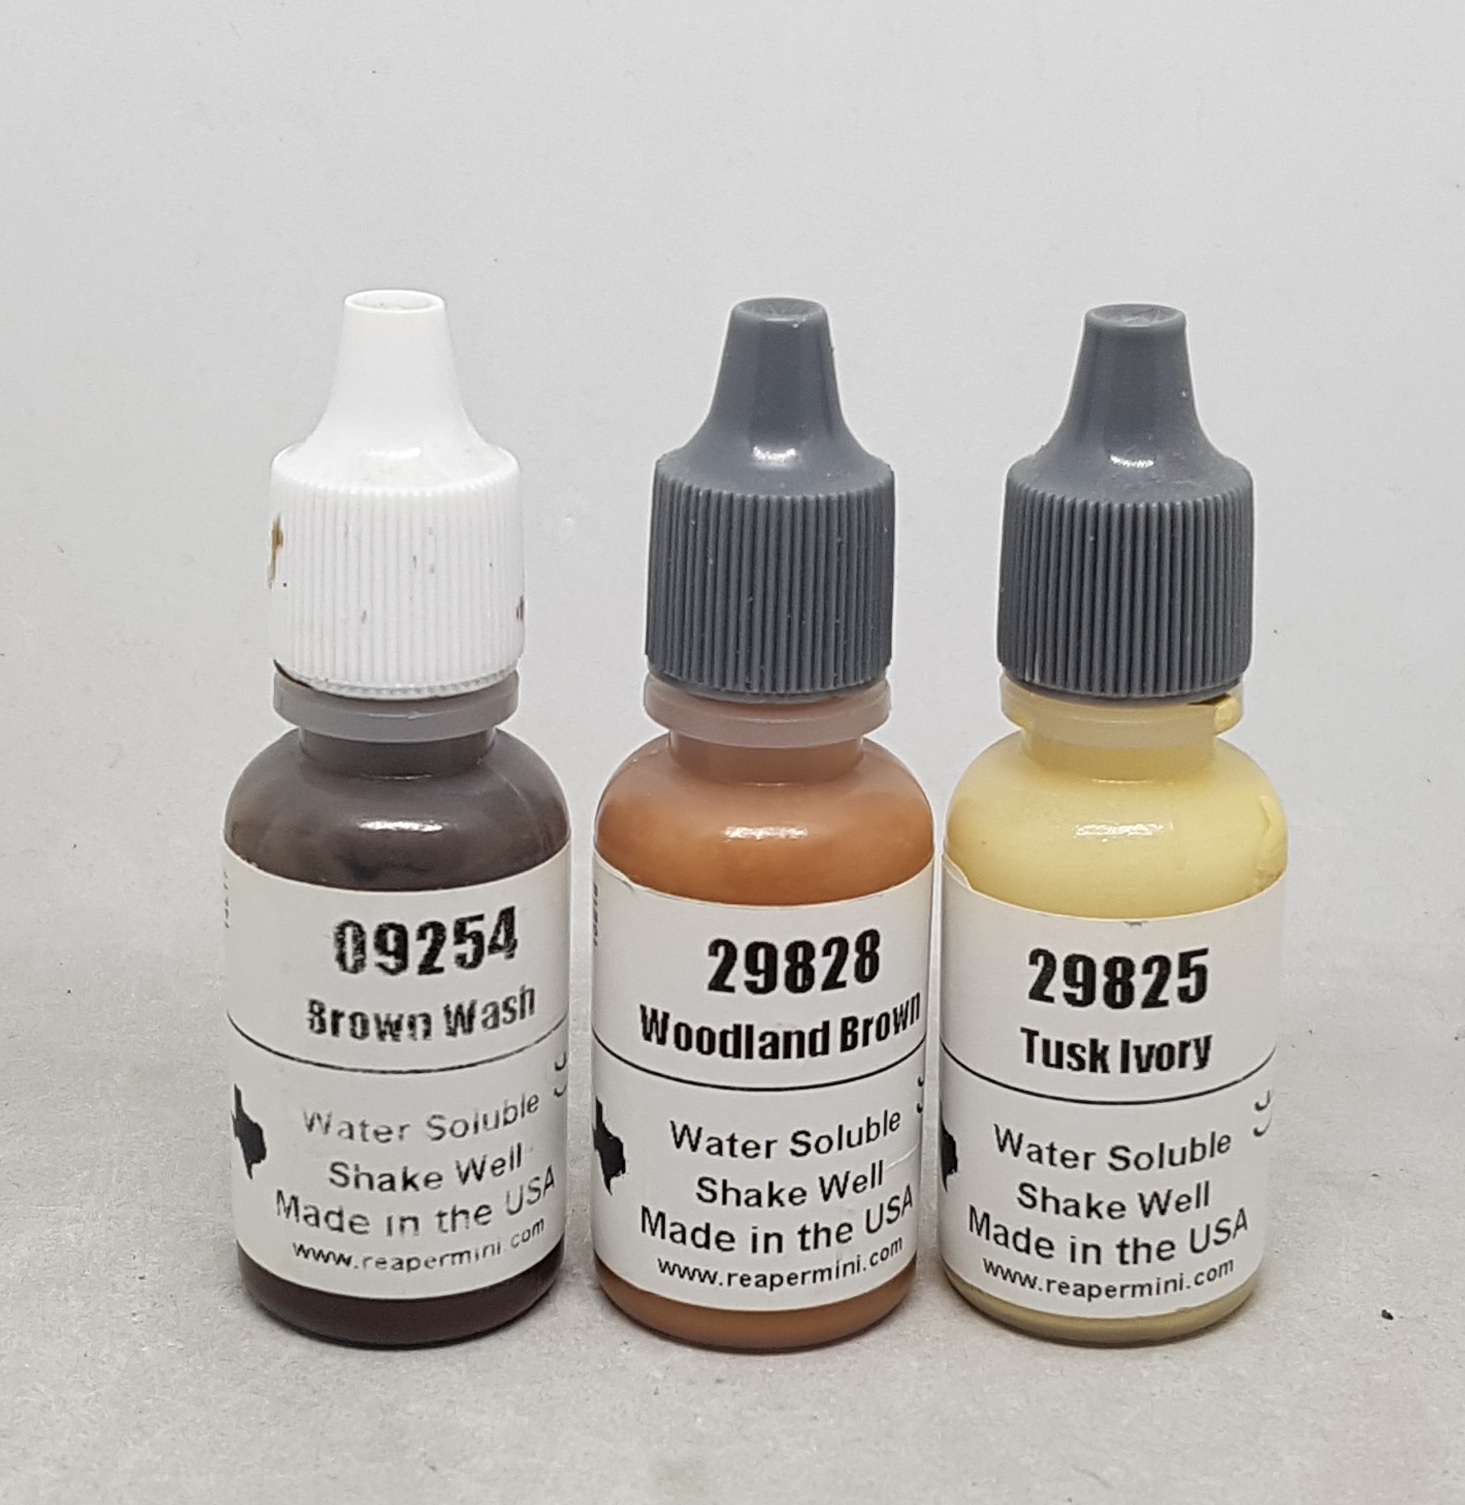 The paints used on the straps
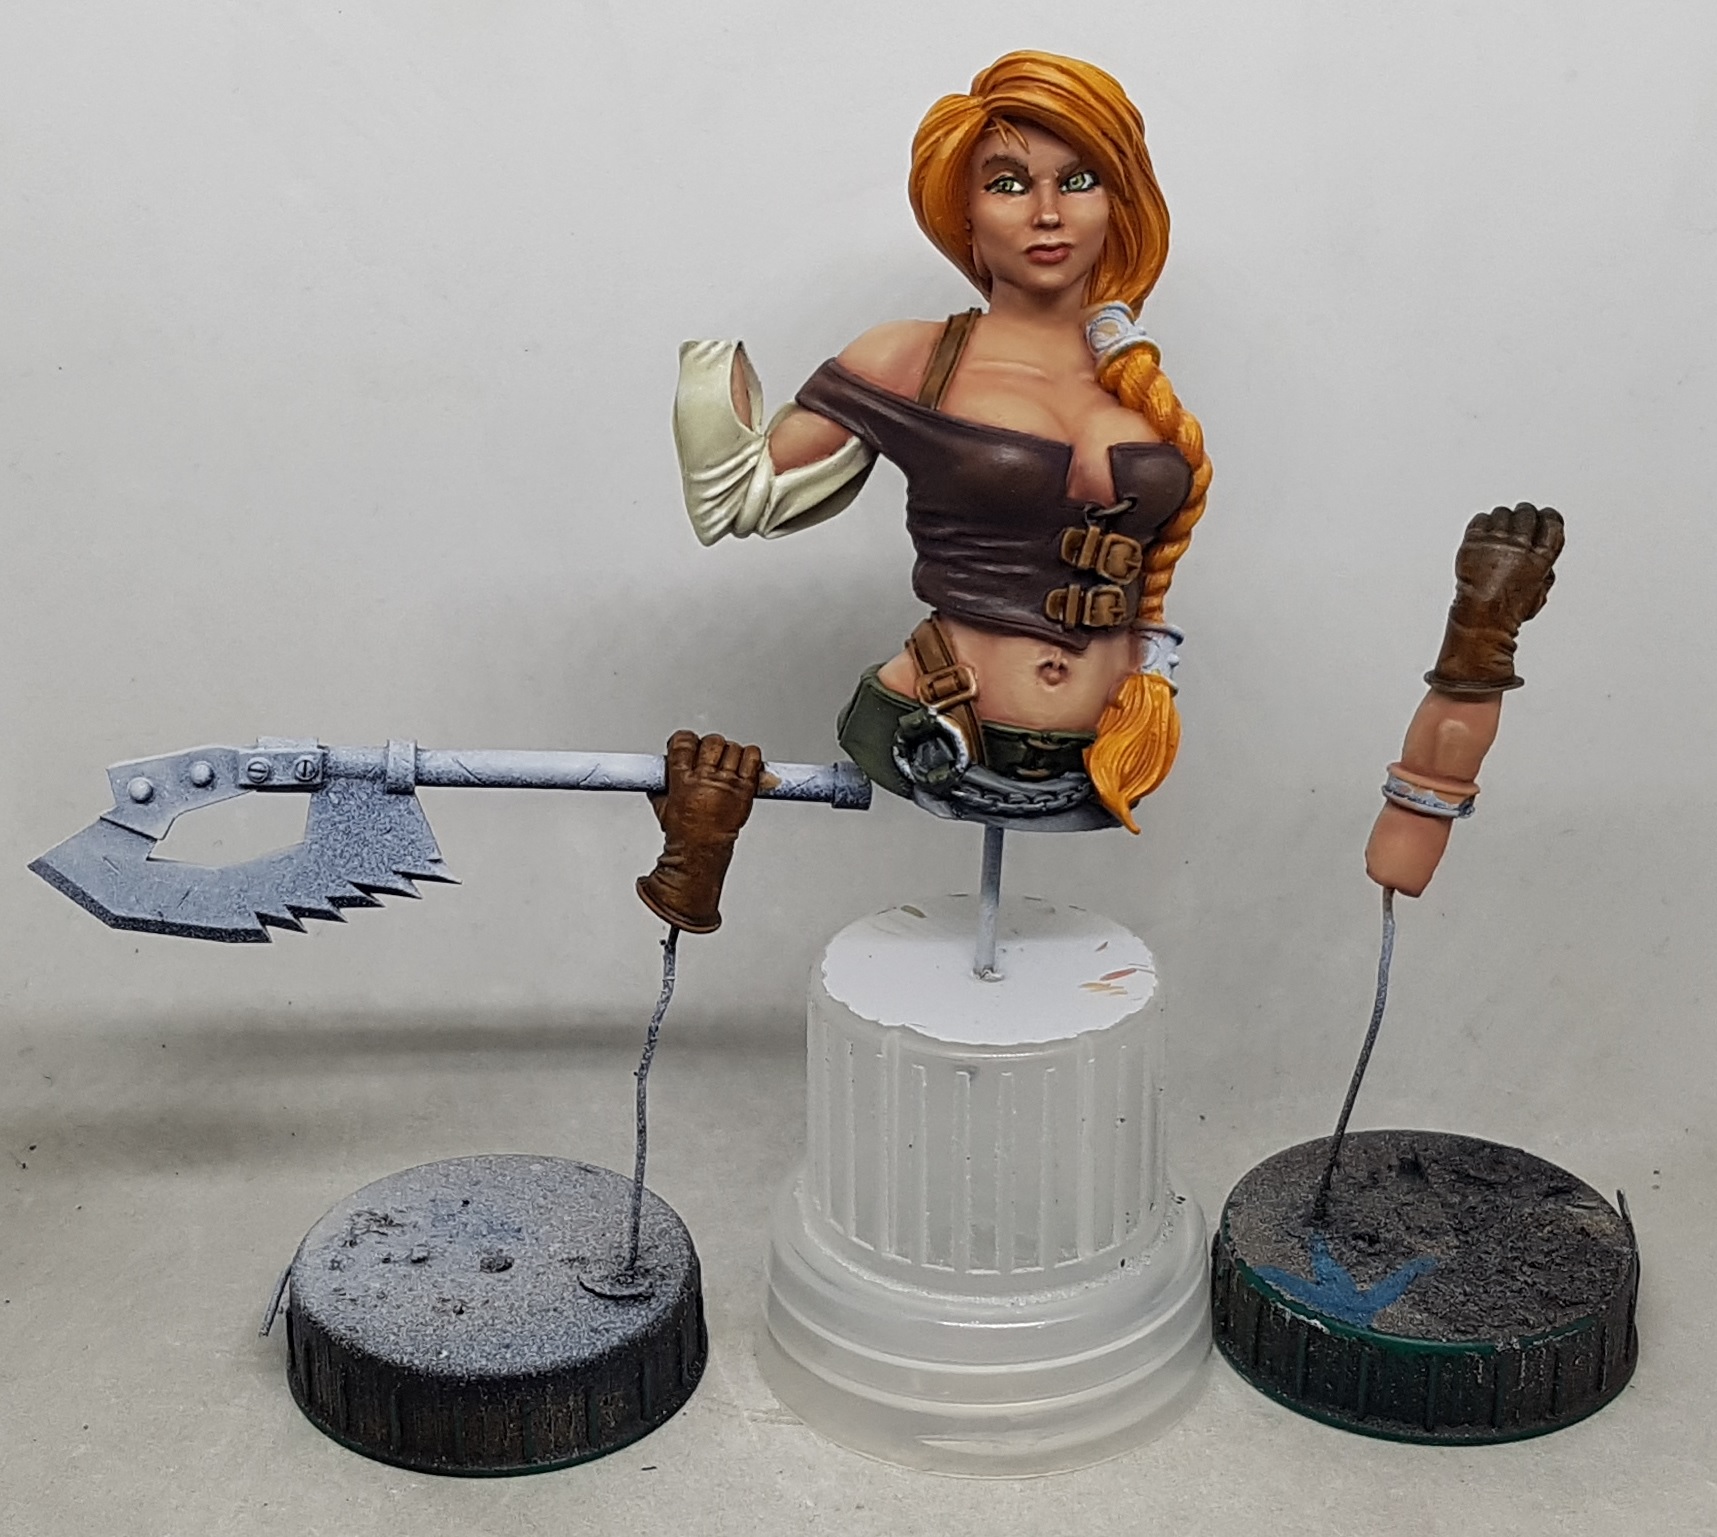 These gloves actually did paint themselves. I diluted some VMC 70.939 Smoke and it went on smoooth and semi transparent and after 2 coats the zenithal prime did its job and they looked like worn leather with no further work. I did mix a little of this witn some thinned VMC Panzer Aces 310 Old Wood and highlight further. I do fear I'm getting lazy and complacent as I near the end of this project.
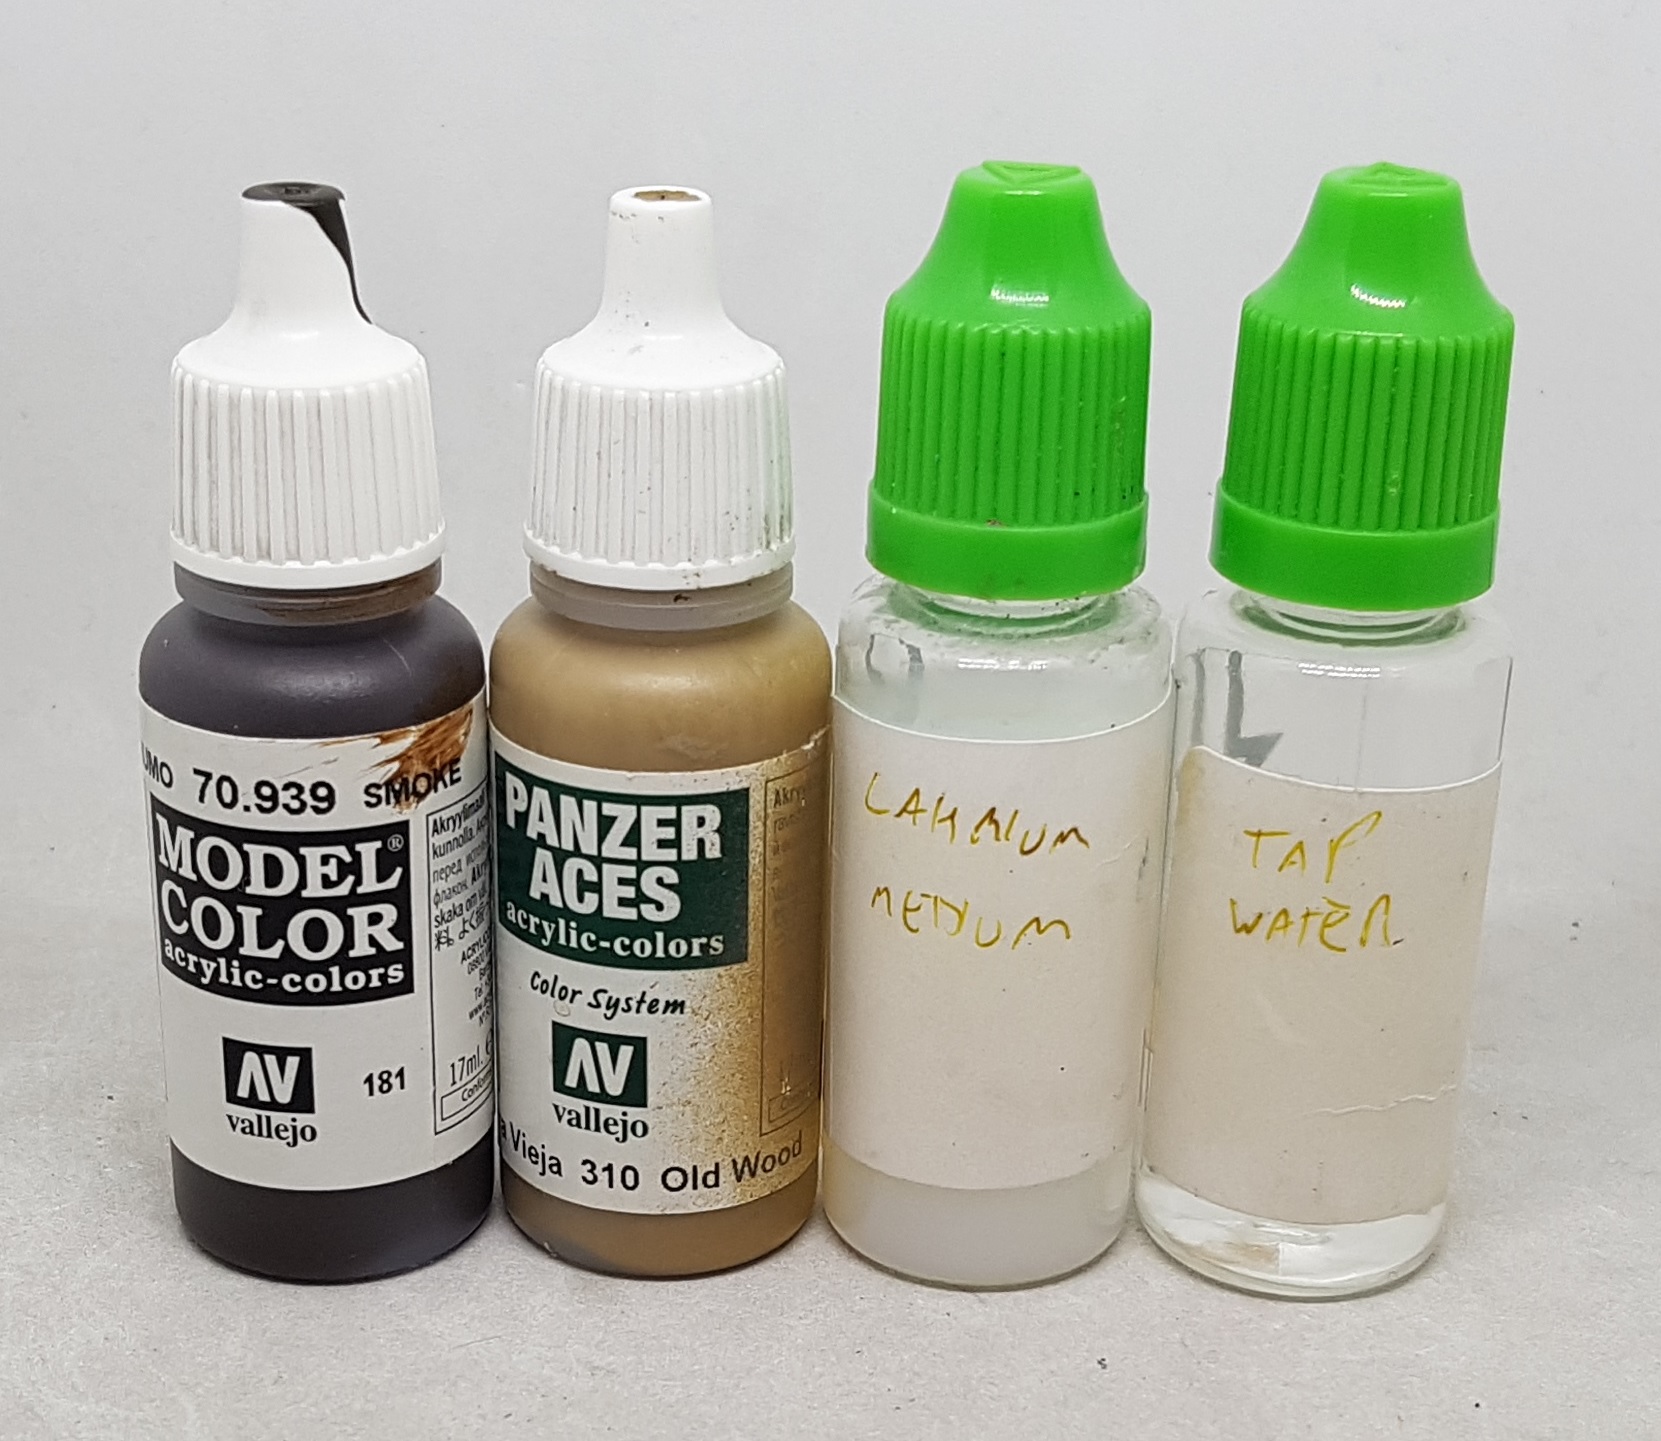 The paint used on the gloves and the laces on the trousers and bodice. The laces got a final glaze of Smoke after highlighting, as the highlights were dominating them.
Gerry had some advice in a recent officially Unnoficial Hobby Hangout with Sundancer. he suggested next time I do a leather like I did these gloves, I should apply chipping and weathering before applying any wash/glaze/semitransparent paint over the top so it shows through but is stained and unified in to the leather. Something to think about for anyone following this later, including myself.
This just leaves the Non metallic Metal, which I really don’t know how to do. I have an Asset Drop guide with paints for NMM gold which I have never tried. Now is the time I guess. As for the iron, I don’t really have a good starting point. I have a Scale75 guide but not the paints that go with it. Dunno how easy it is to work out what equivalent paints I may already have.
Non Metallic Metal Gold
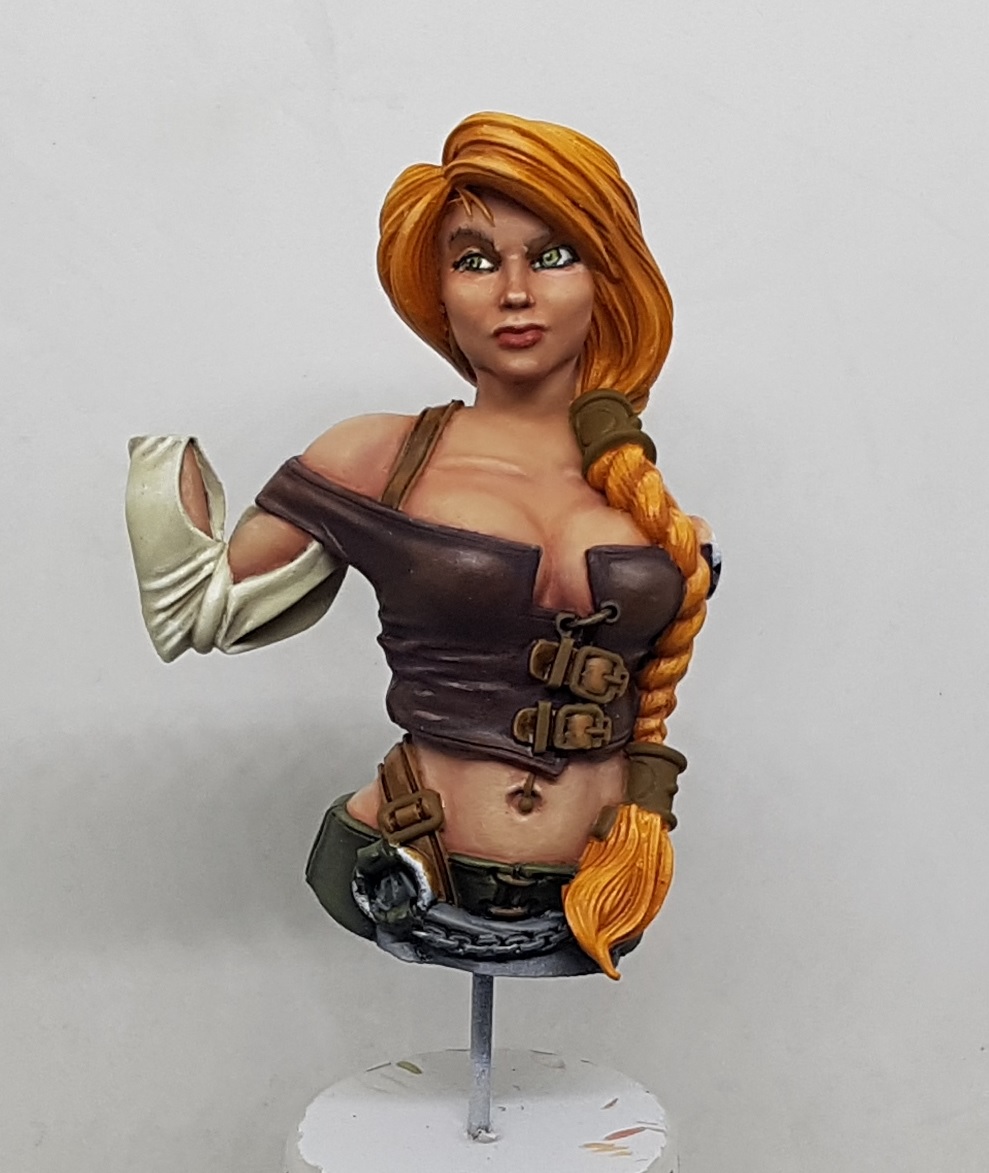 The gold areas got a base coat of Reaper MSP 09301 NMM Gold Shadow, While painting this I discovered that her bottom belly buckle is missing its underside! Given I'm this late in to things and you won't notice unless your eyes are at her belly button's level I'm just going to go with it. I've googled for pics (Their website is currently down) and it appears to be missing on all of them. Odd.
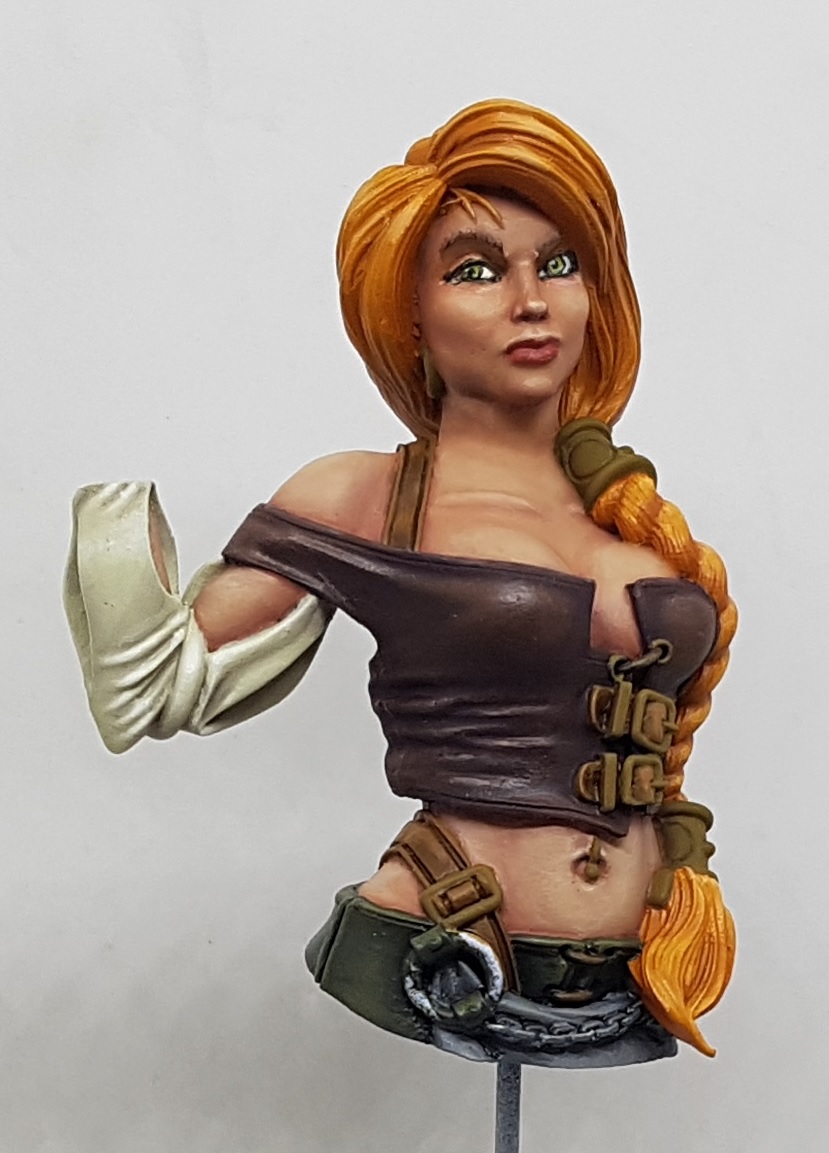 Nothing new to look at yet. All but the deep shadow areas got a coat of 2:1 NMM Gold Shadow : Reaper MSP 09302 NMM Gold Base
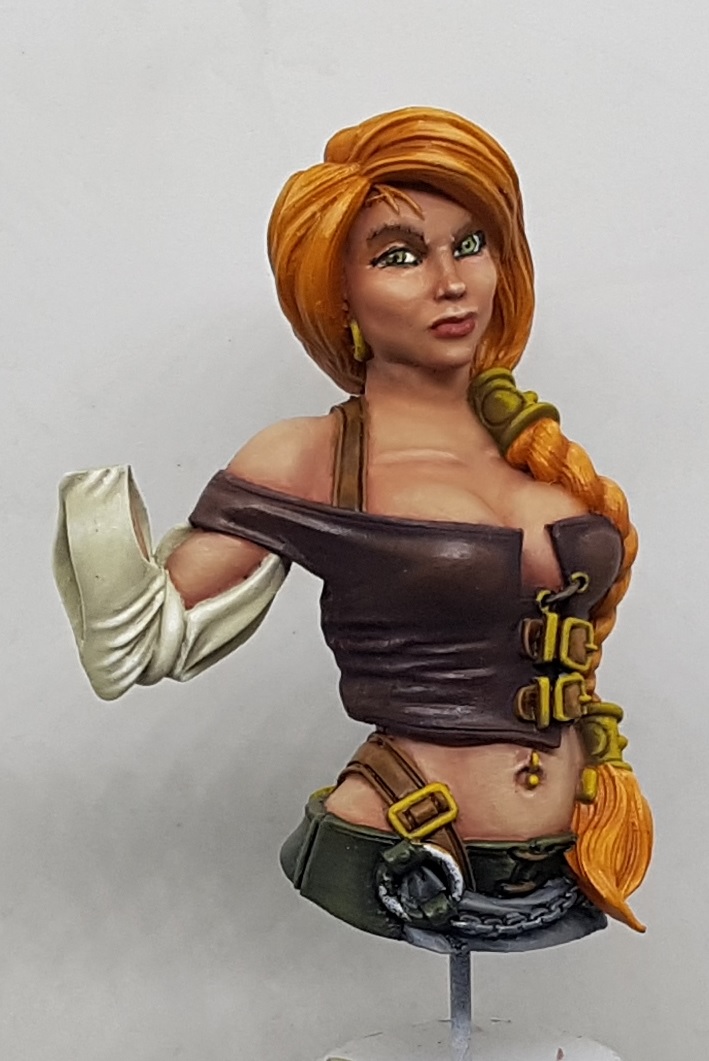 Next layer was pure NMM Gold Base, only over areas in the light. I have no idea what I'm doing here and it looks horrible and I'm staring at all the pots of metallic paint asking myself if it would really be so bad if I used them. I'm hoping this is one of those schemes that only stops looking terrible with the final highlight. Gotta see it through once at least before I condemn it.
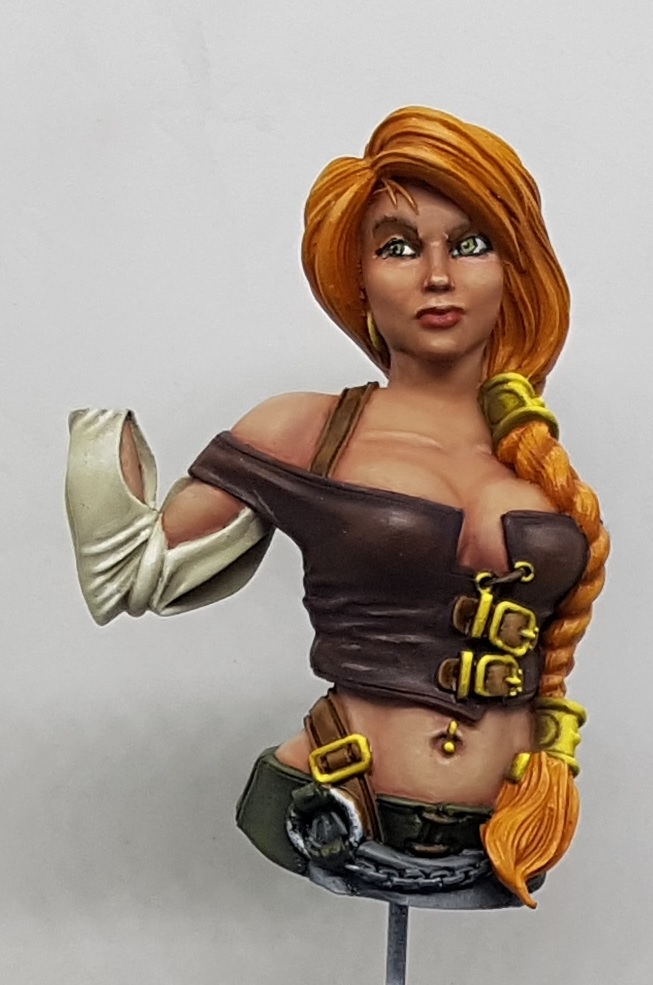 I took the highlights up with 2:2 and then 1:2 NMM Gold Base : NMM Gold Highlight and eventually pure Highlight. I really think I've hit upon something I'm not going to get to work. I can sort of see what its trying to do but its just not working for me. Theres 3 more steps so I'm going to follow them through and then I have to make a decision to either try again, find something different to try, or go true metallic. Would true metallic really be so bad on a bust?
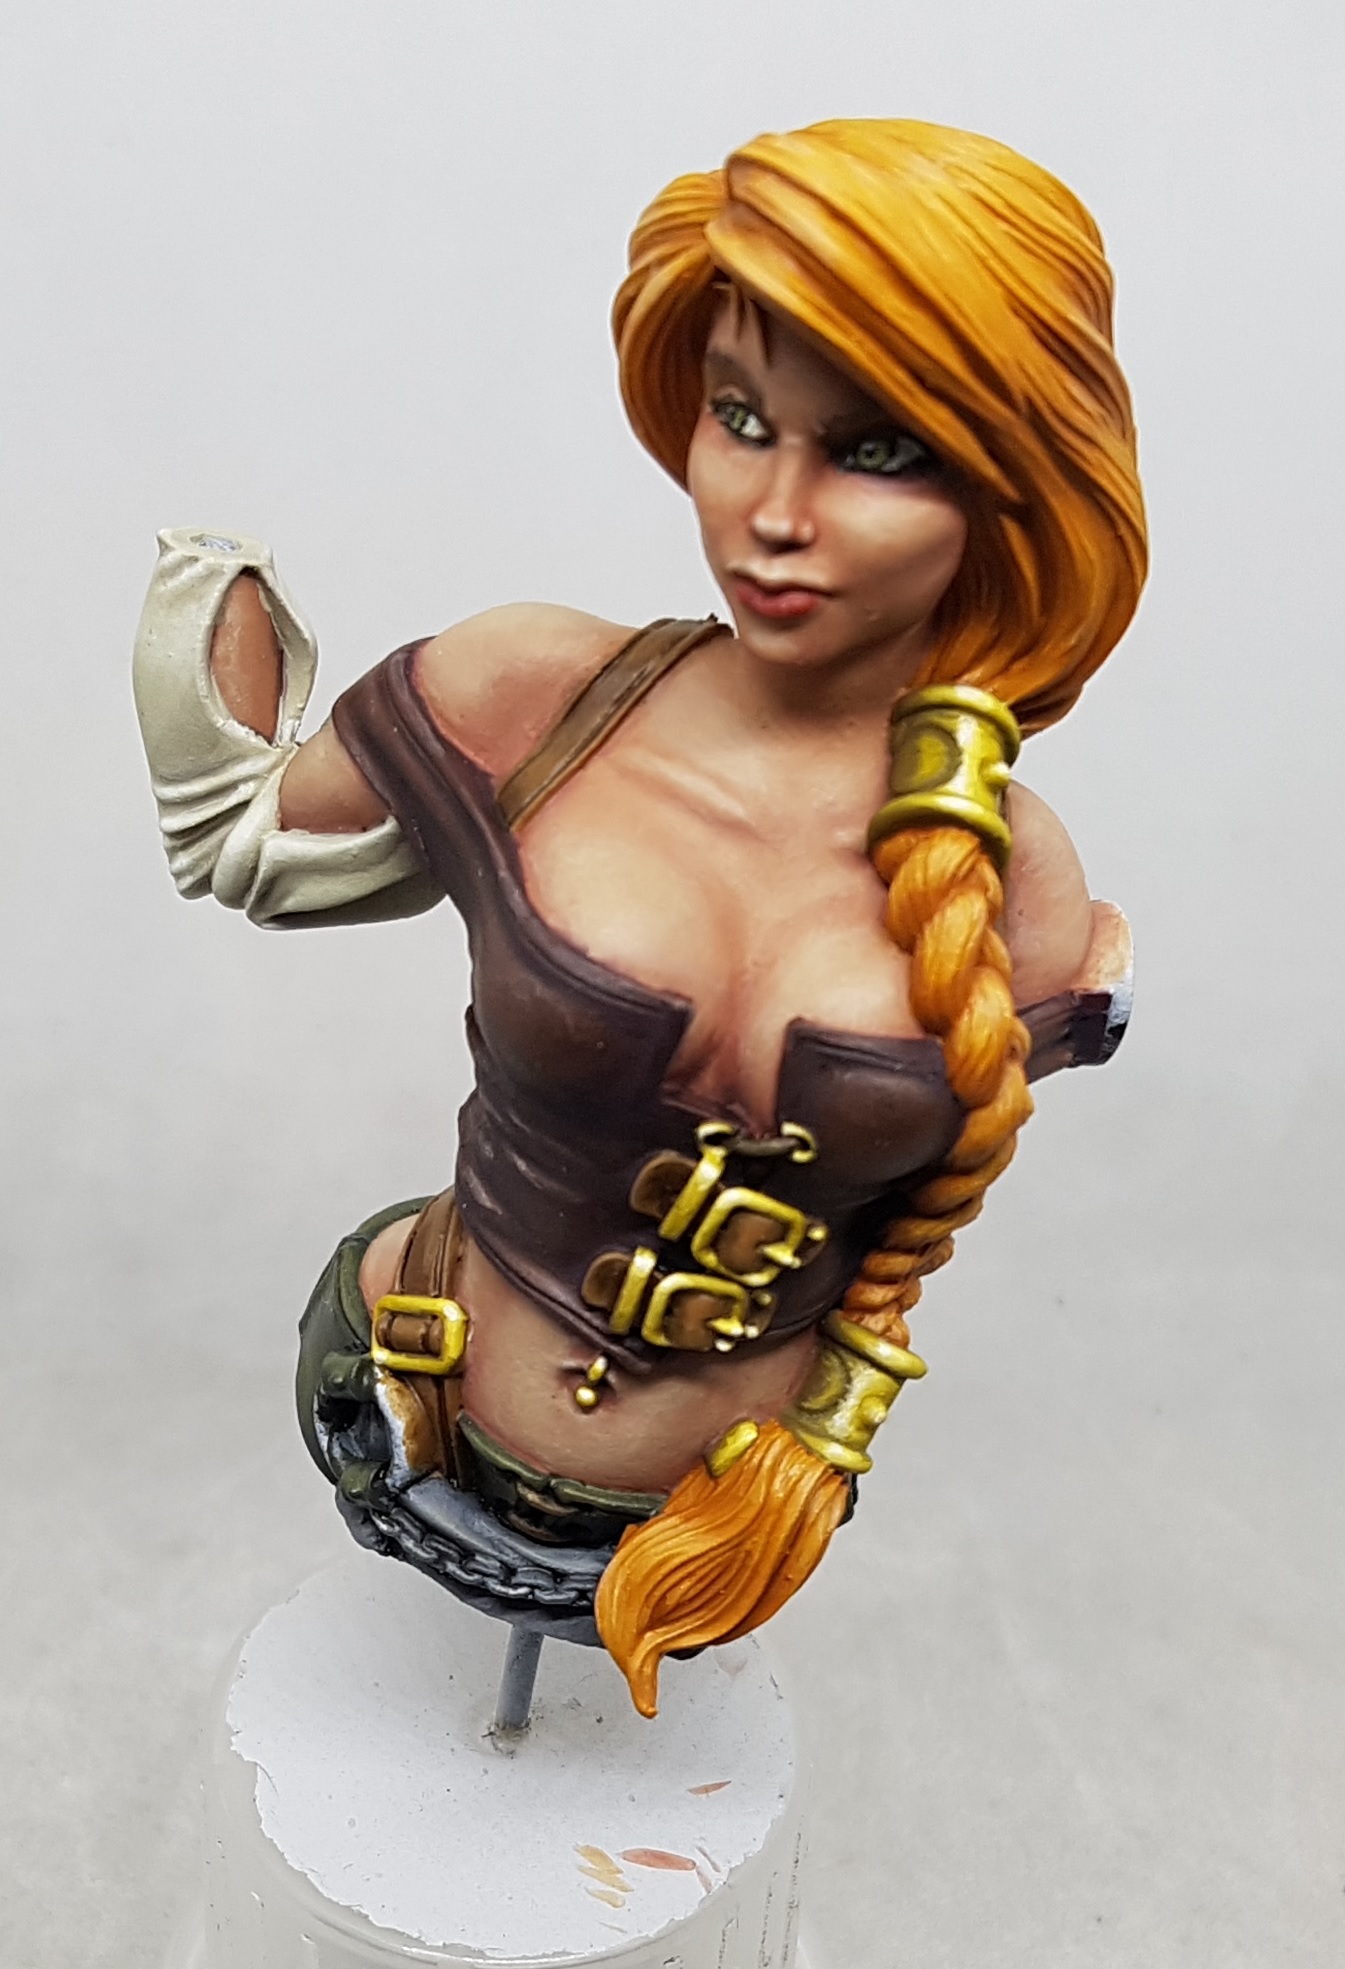
So I came here to post an updated pic having finished the scheme off looking to moan about the end result being poor, but it seems I can’t take a representative pic of it. The photos look better than in real life. They actually look good. Adding the final 3 layers has definitely improved things, but I think it isn’t quite there yet.
I’d love some constructive feedback on the NMM as I am still not happy with it and I don’t know if I’m a simple extra unknown step away from making it pop, if I should be happy with what I have, or if I should accept defeat and use true metallics. Would a mid tone glaze or two, followed by reclaiming the extreme highlights help?
I also don’t currently know where to begin with NMM iron, especially on flat surfaces like her axe head.
So here’s the steps I took since the last update:
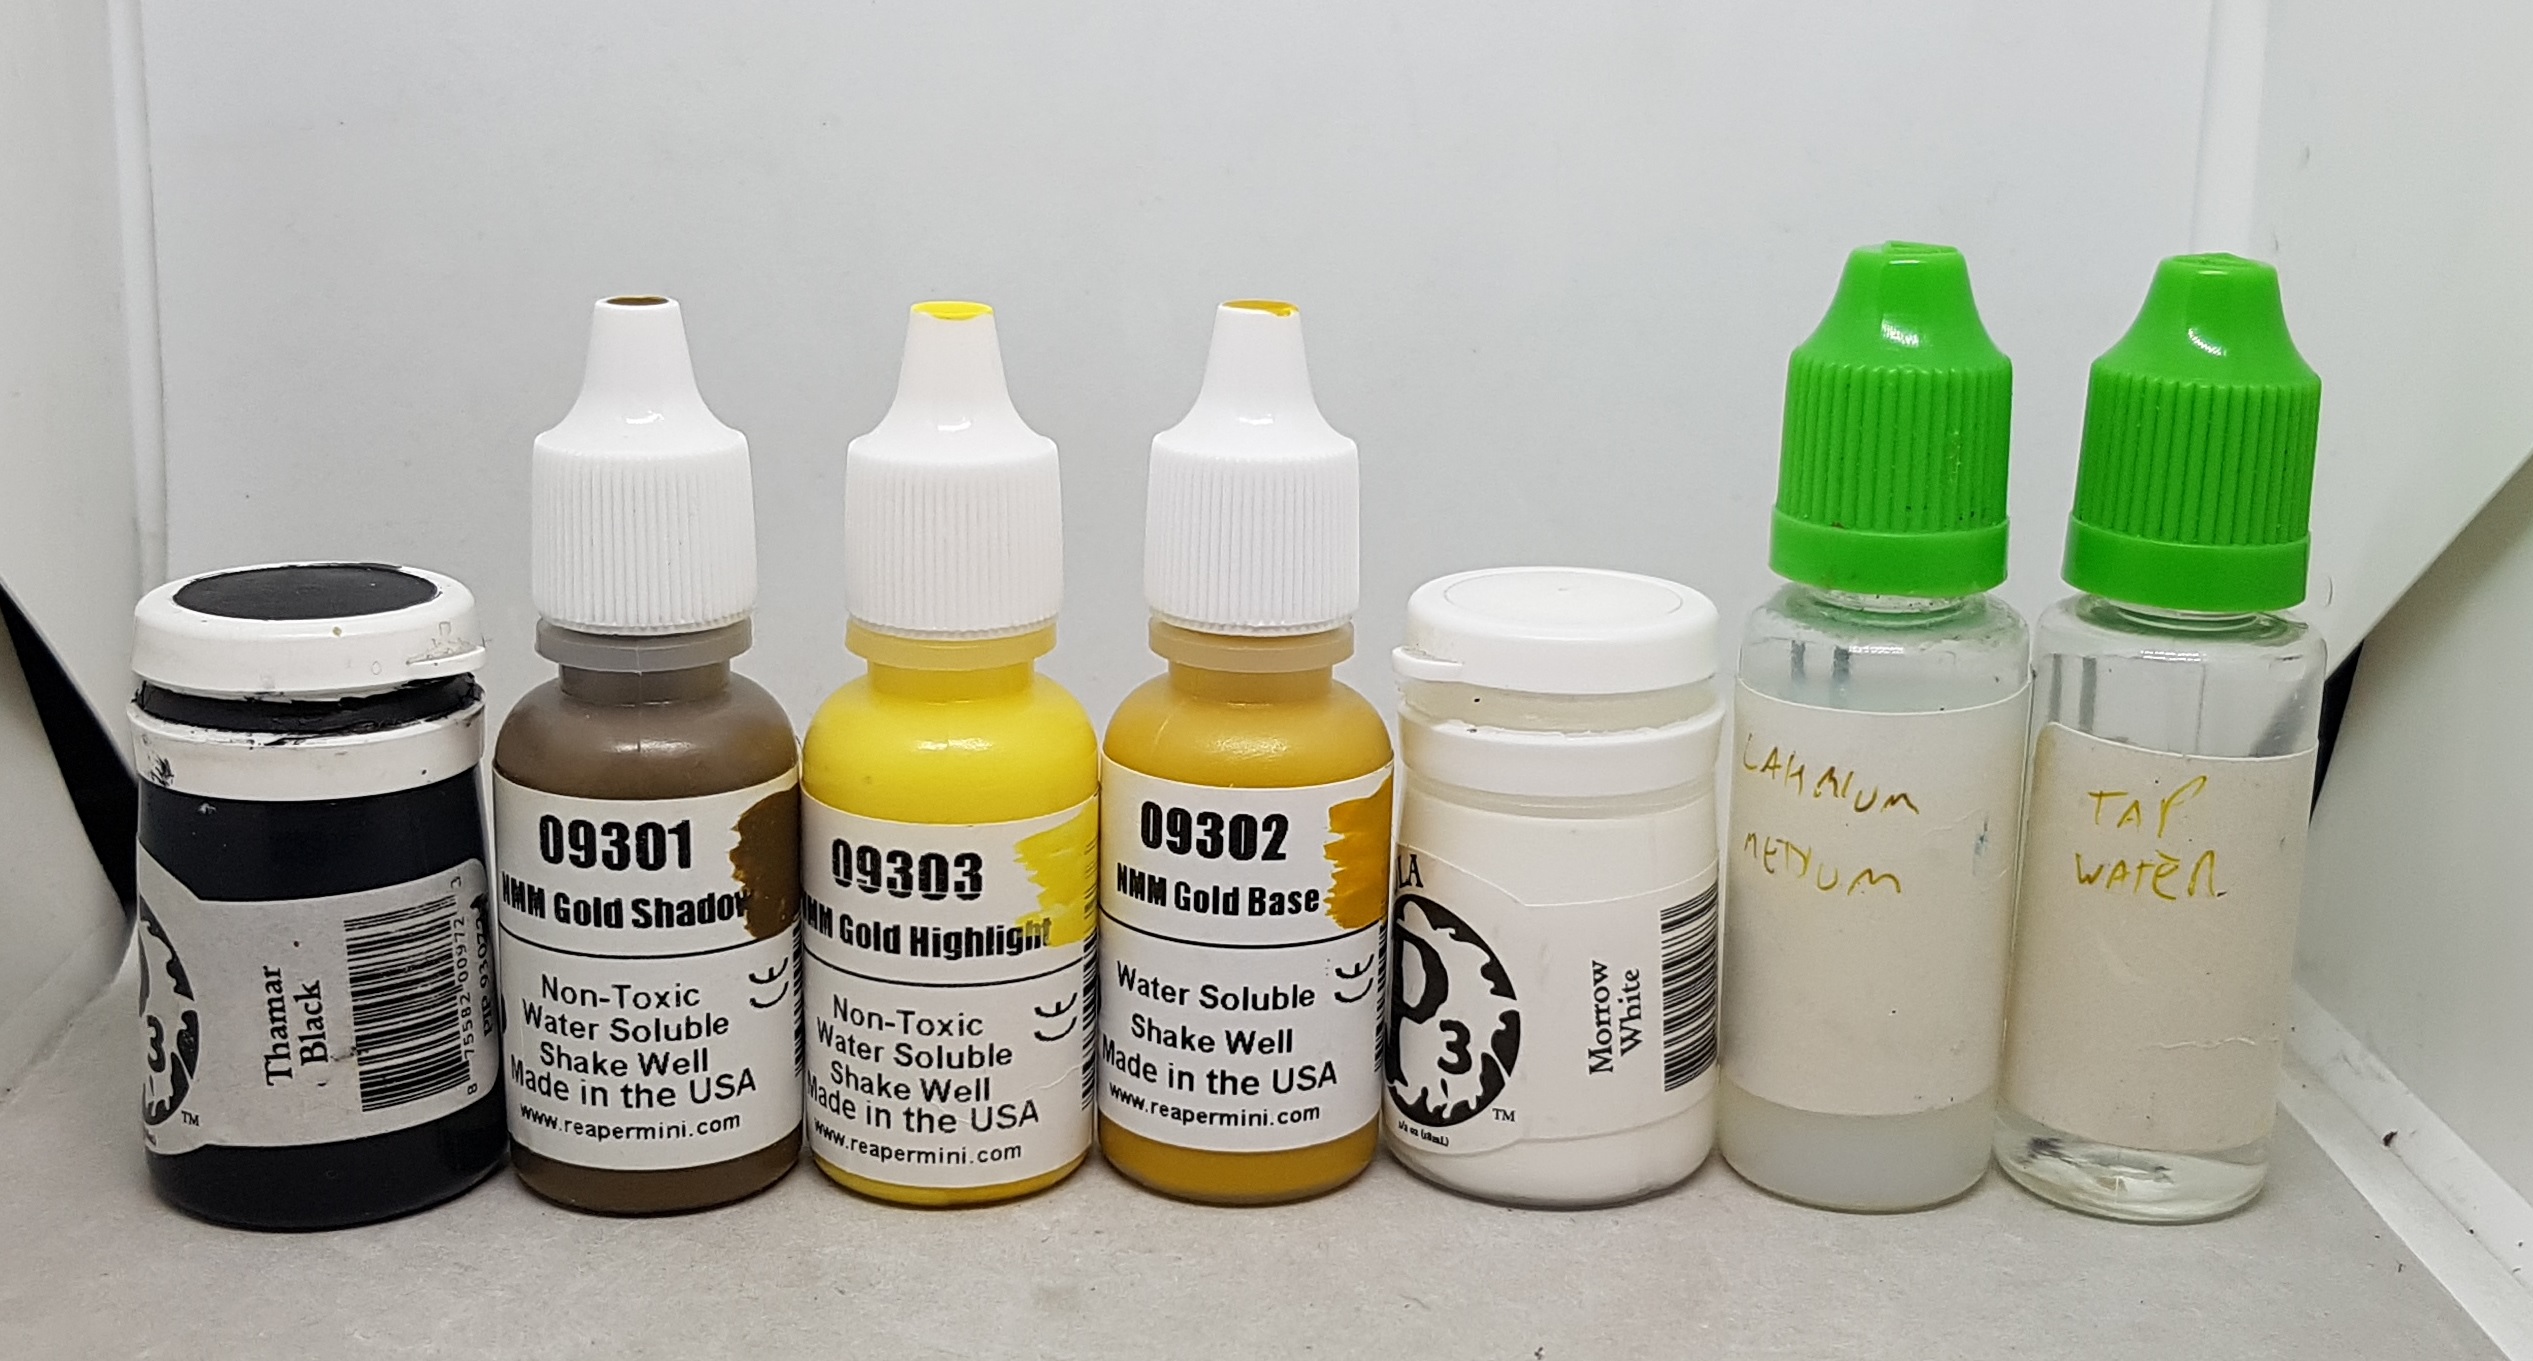
Shade along edges and inside the engravings of 1:4 Black : NMM Gold Base
Extreme Highlight 1:1 White : NMM Gold Highlight
Dot highlight pure White
Again, feedback and advice greatly appreciated. I’ll likely be painting her again tomorrow evening and I’m not sure which way to go now.

Getting my mojo going again
The NMM has been a stumbling block for me. As has ending the 4 day weekend and having to stop painting and pretend to be a functioning adult. I’ve had no idea how to paint the large flat surface of the axe head, and I’ve not been overly happy with the gold so far. I’ve also been doing a bit of heavy duty gardening so my hands haven’t always been reliable for high detail work So across the week I’ve been painting something lighter as a palate cleanser, as well as watching youtube videos on NMM. By giving my mind something else to focus on, I was hoping the back of my brain would absorb the information andcome up with answers while I wasn’t looking.
I really think my brushes are on the brink of death now. I possibly shouldn’t paint anything until I can get more, but who knows if anything will turn up if I order some? I’ve one brand new size 1 Game Envy Spear I’ve never tried. Looks a little longer and bigger than I’ve previously been comfortable with. I’m gonna do what I can with what I’ve been using and experiment with that when detail is required. I hope I like it.
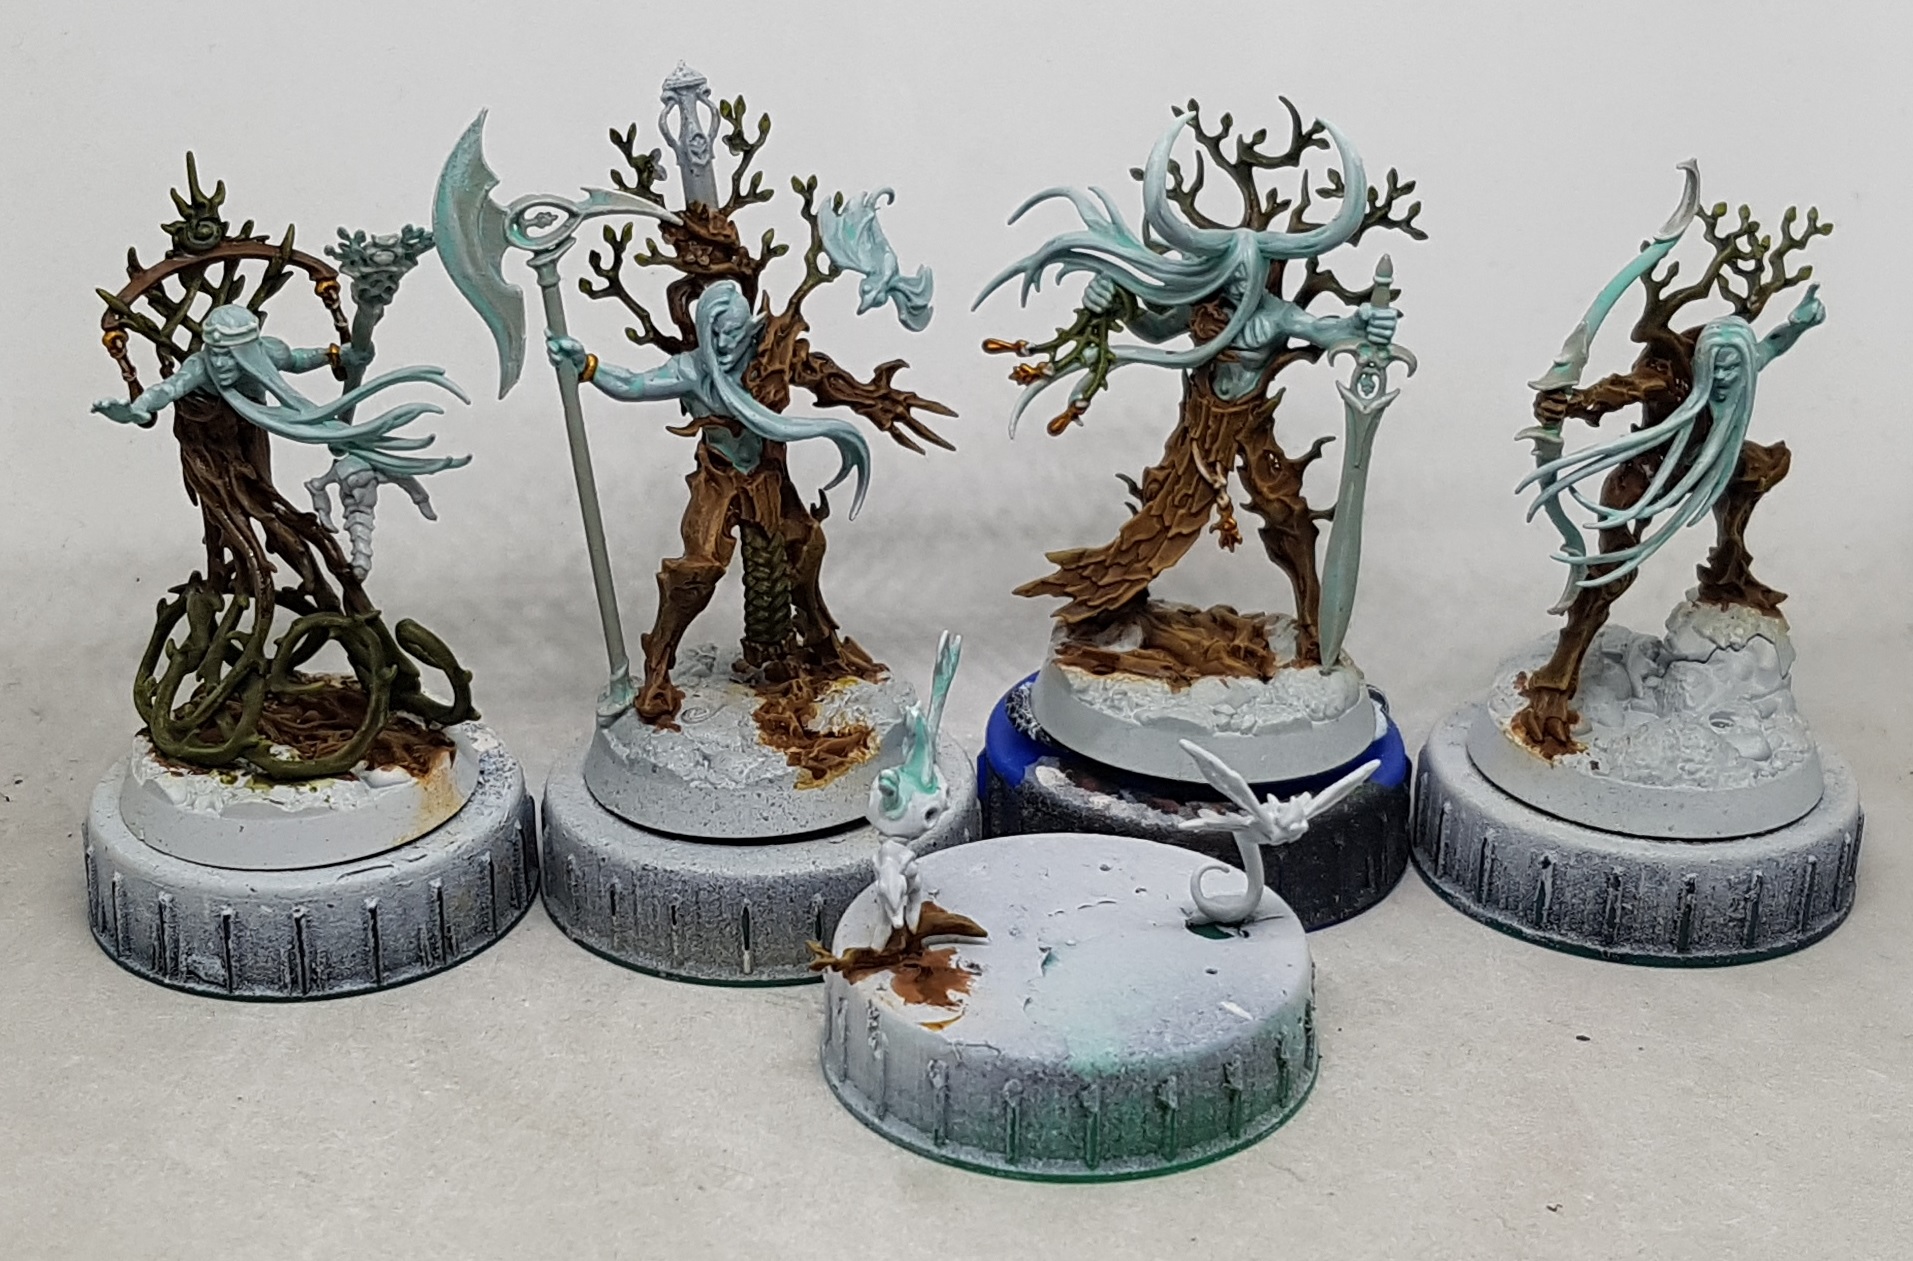 Ylthari's Guardians. My hobby detour. Not finished yet. Light enough than I can relax, but interesting paint jobs nonetheless. Whoever decided that guy on our far left needed the most decorative base deserves a good smack. There's just no way to get a brush inside that cage of vines with any degree of aim or control.
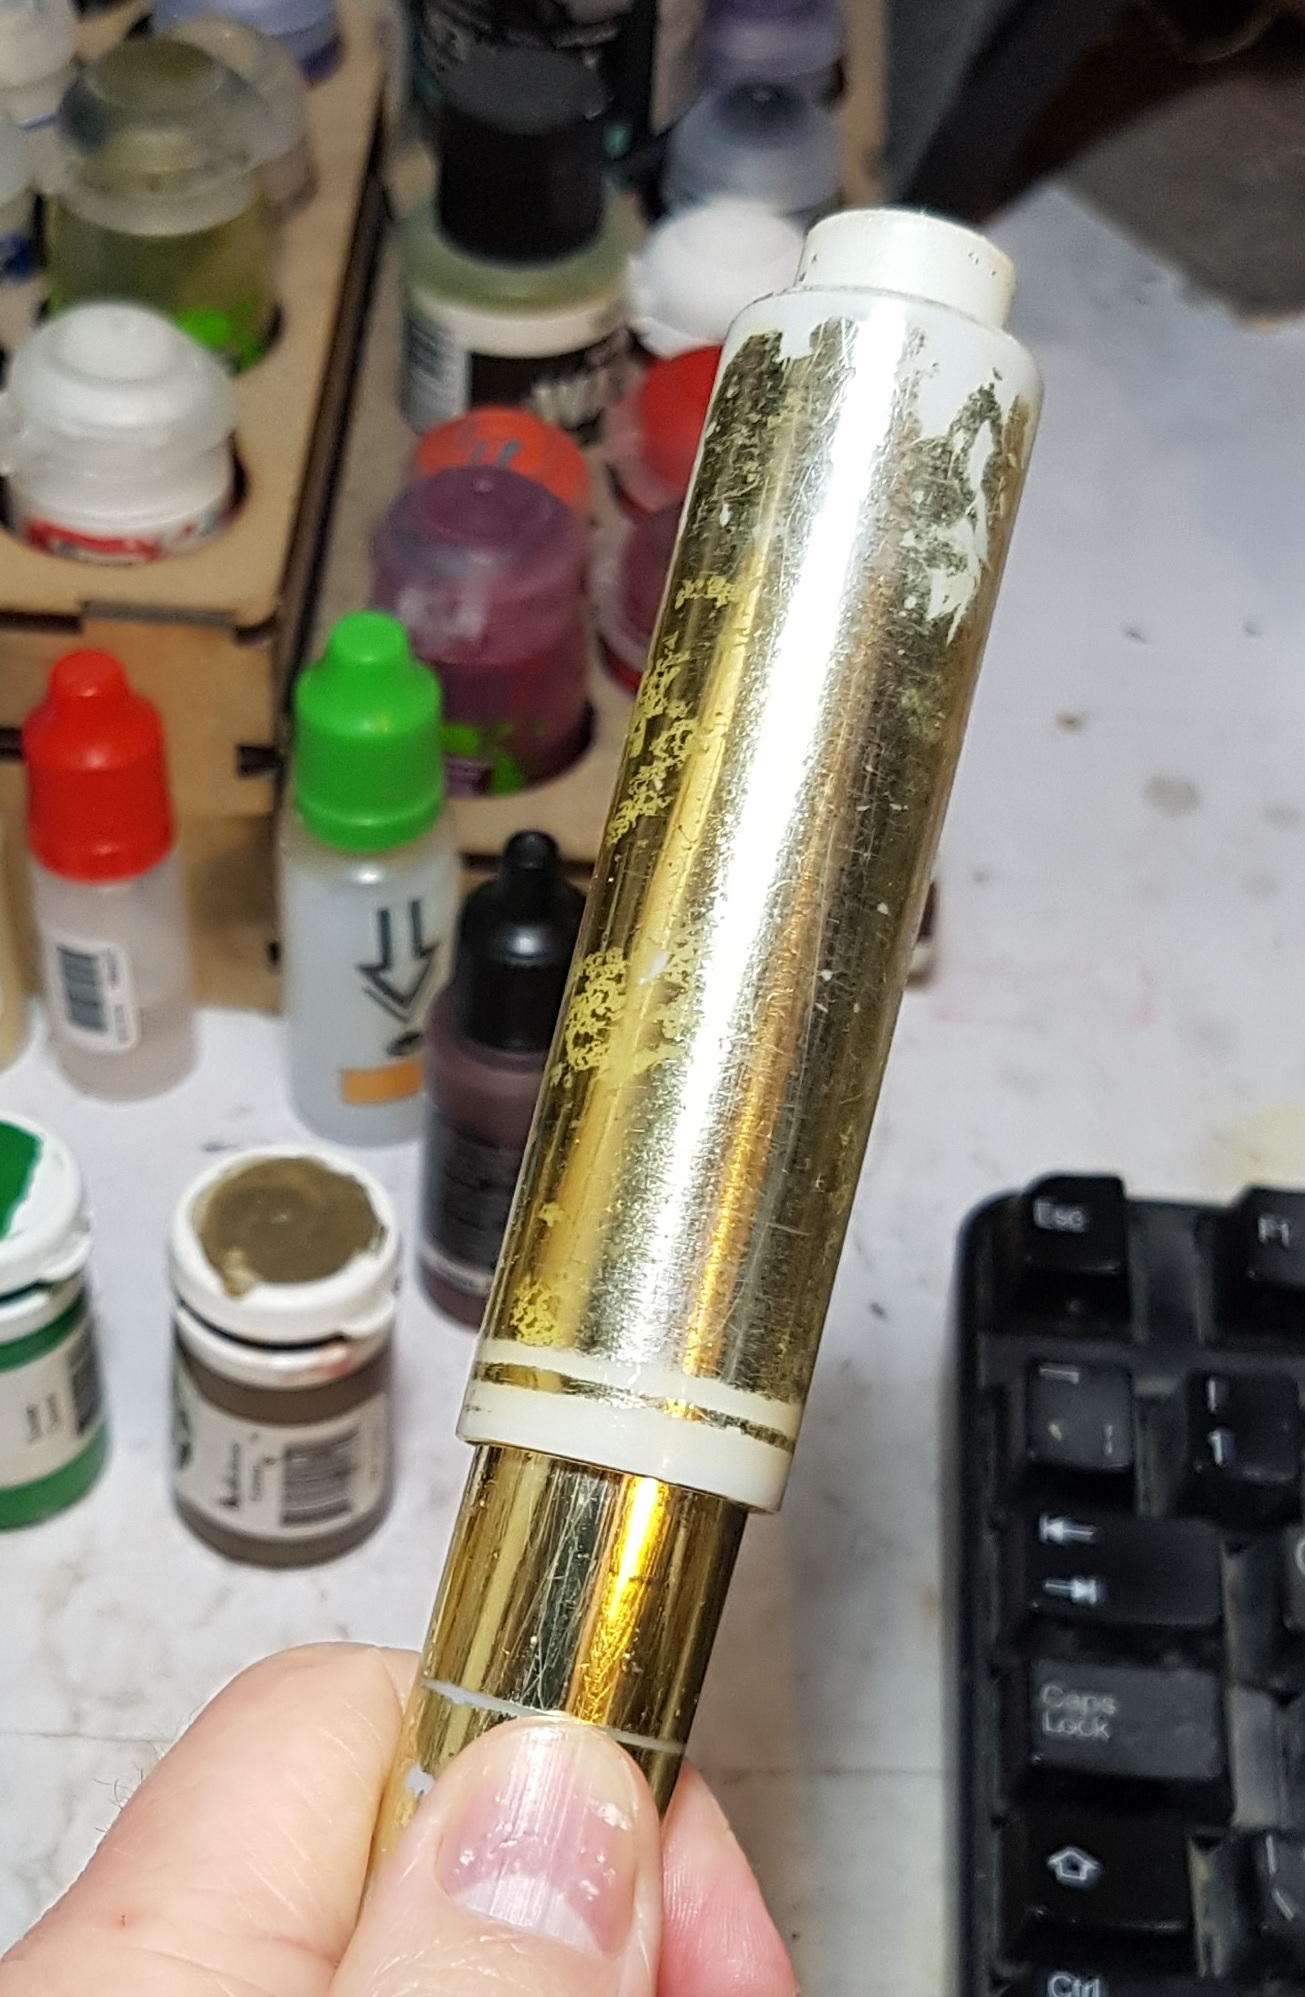
I was also able to find a gold cylinder in my house that I could take photos of with the light source exactly where I wanted it. This should let me see how the light should look on those things. If I decide to go back on them I’ll use this as a guide.
 Some fine photoshop work here. Well, MS paint. Question: If this is the limits of my digital arts skills, should I avoid buying a 3D printer or is the essential software simple enough if I use other peoples designs?
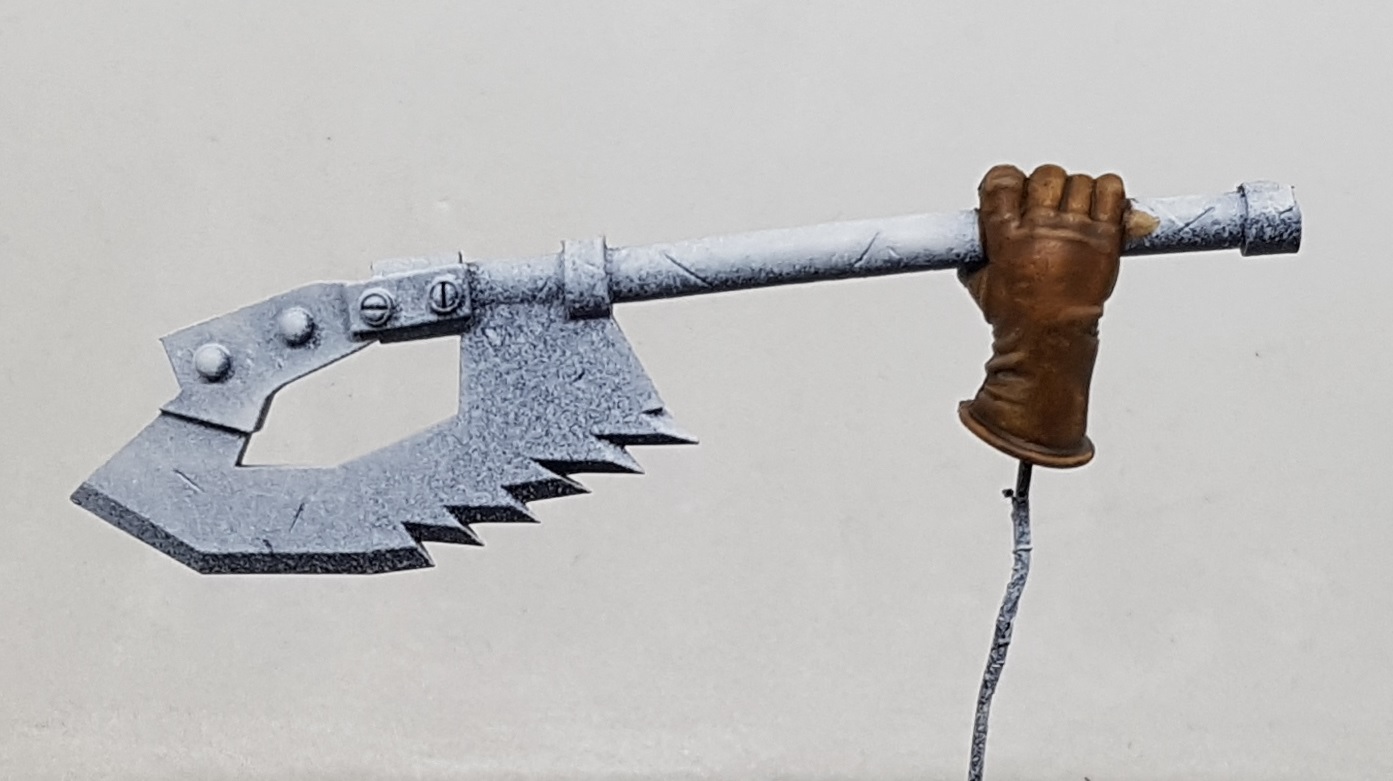
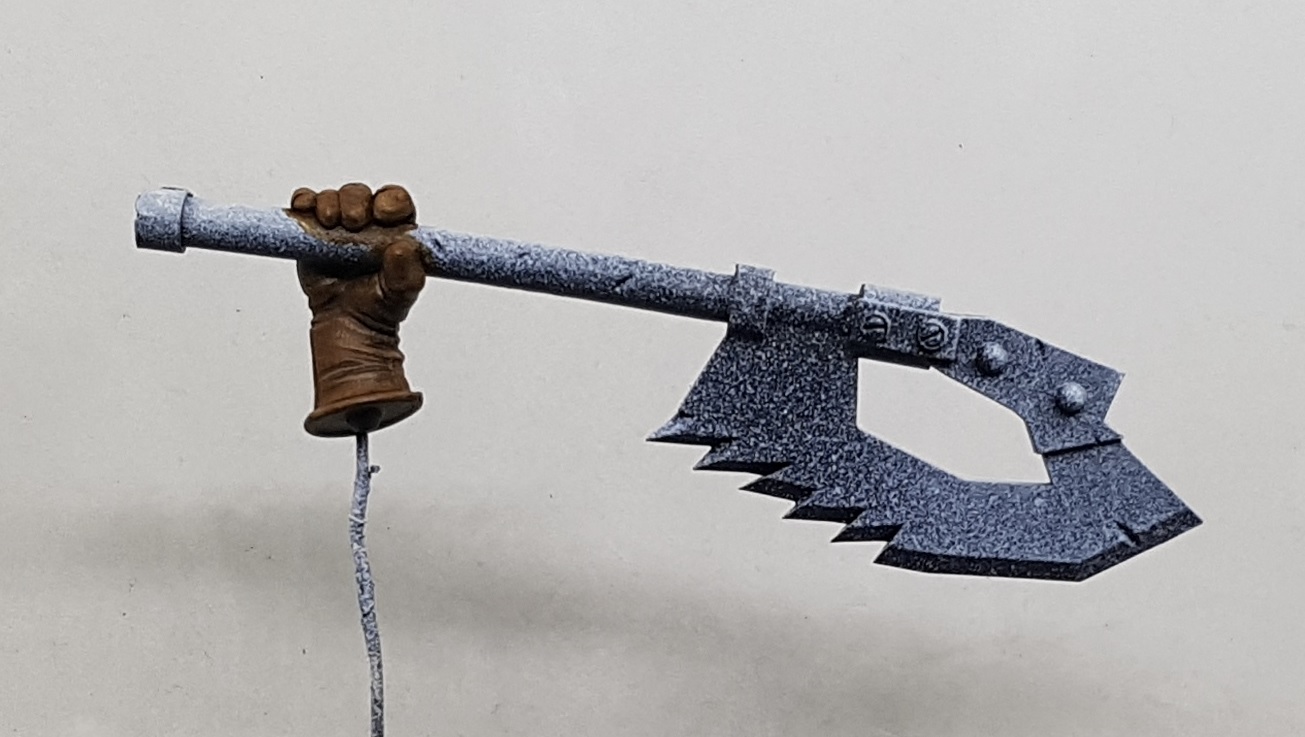
As for the axe, I’m currently seeing it as 3 surfaces.
- Theres the cylinder of the handle. I have an idea how to do that. Just fade from dark to light, with the light being about 1/3rd or 1/4 of the way down on the front and back.
- Theres the blocks above the axe head. I could paint them dark grey and just edge highlight. Suggets they are a denser, less refined, less polished metal. or I could repeat what I do wiht the blade up here
- The blade. Do you know how hard it is to google for a picture of an axe head at this angle thats not rusted, painted red, or covered in whatever that black coating is? I’ve been watching videos, googling for photos, flicking through my guides, and staring at Avicenna’s work trying to work out how to even begin and where to put my lights. In bed last night, around 2-3am, I decided it was simpler than I thought and I just needed to fade from white down to black, but with the black at the top and the white at the bottom, keeping the midtones dominant. I think this is an over simplifaction and I really wasn’t sure where the light would hit the axe and how it would change at the edges. Then I realised all that is already mapped out for me by the Zenithal preshade. I have taken lots of pictures of the axe for reference later.
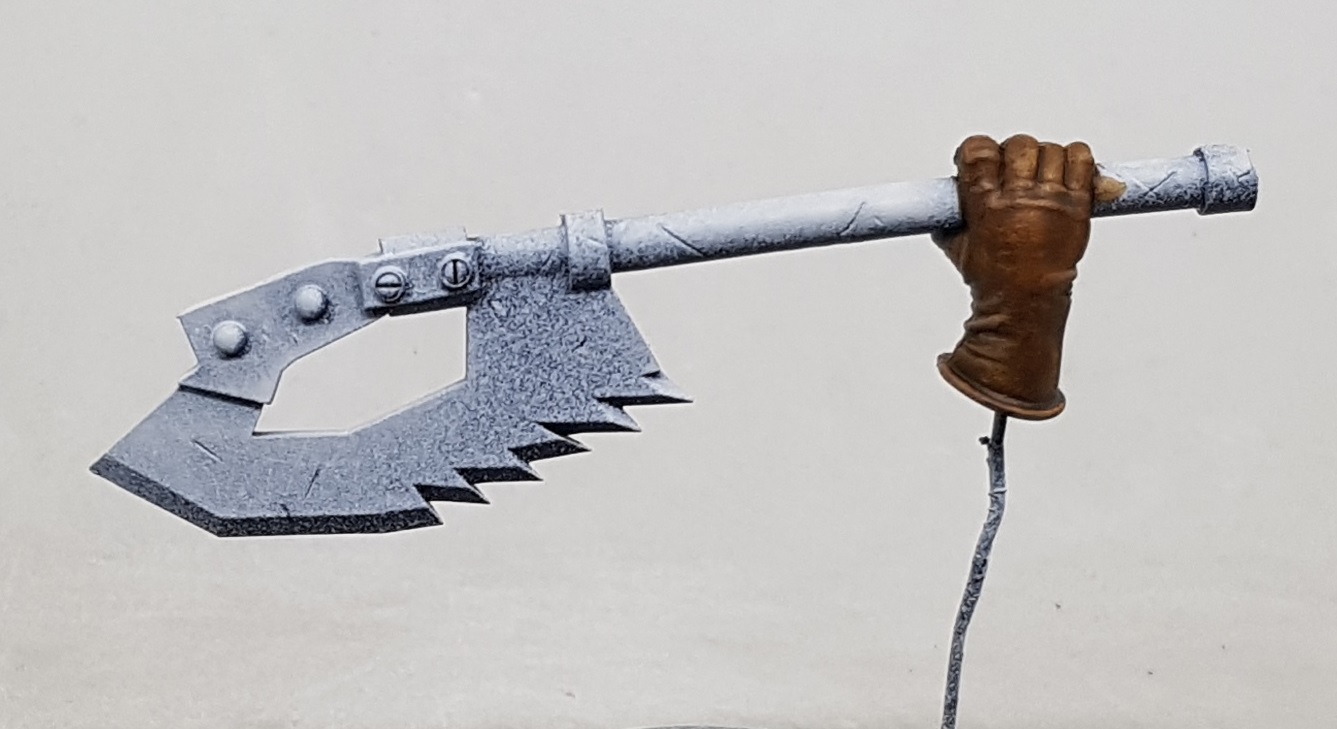


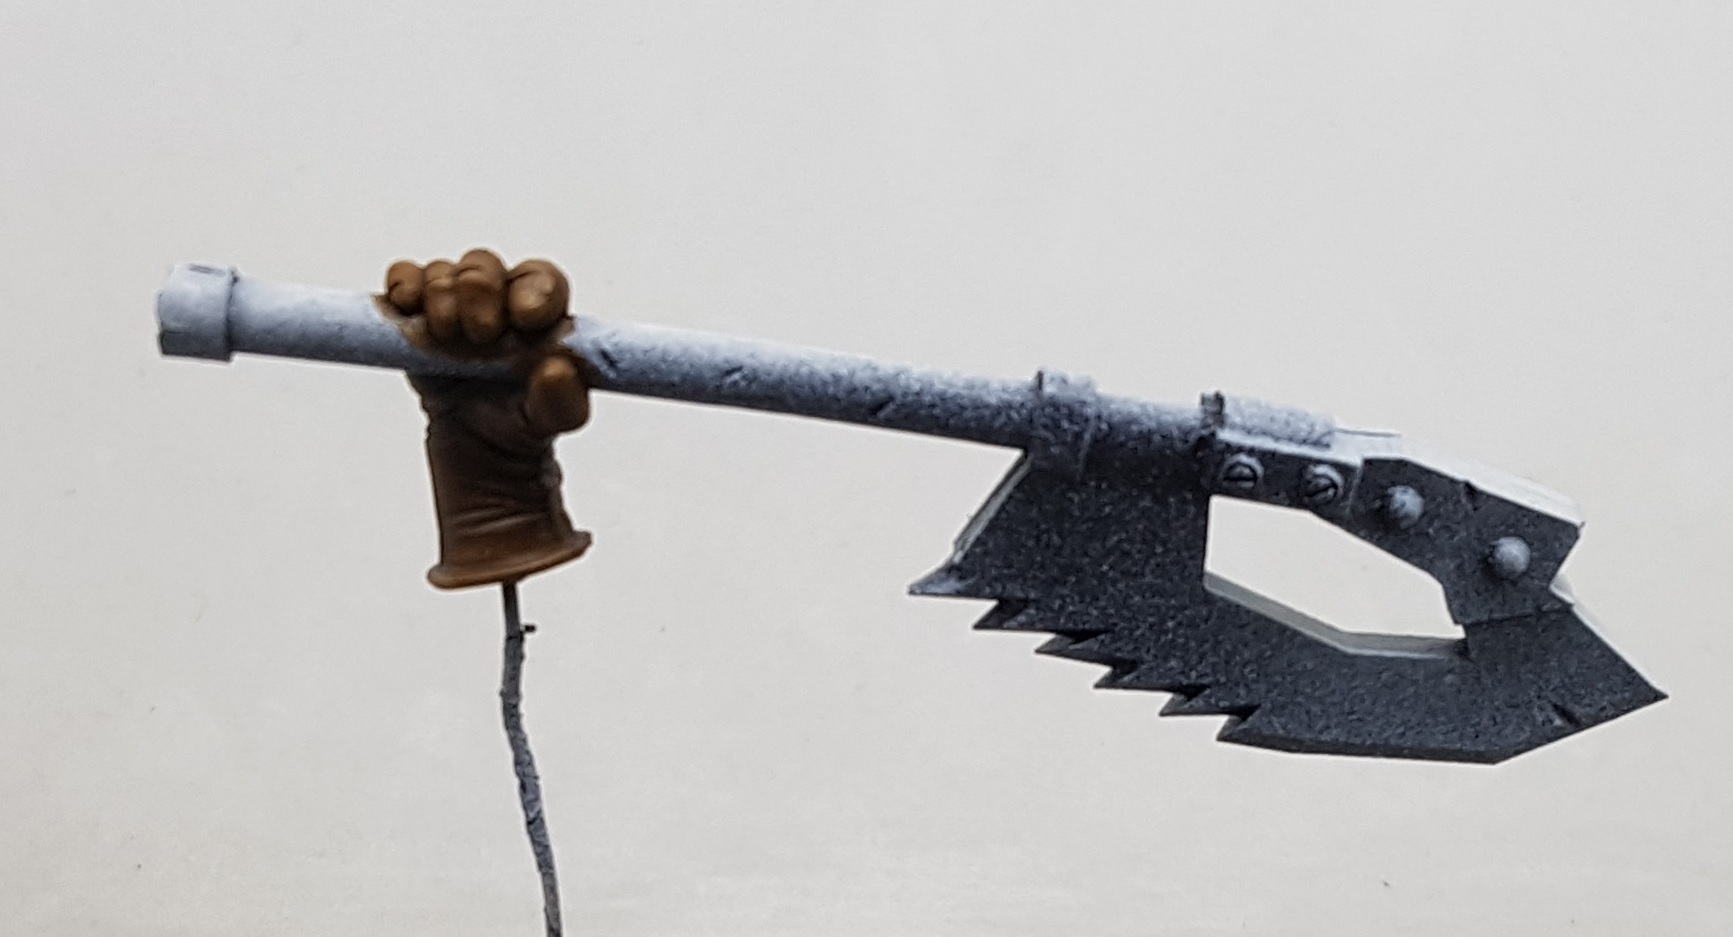
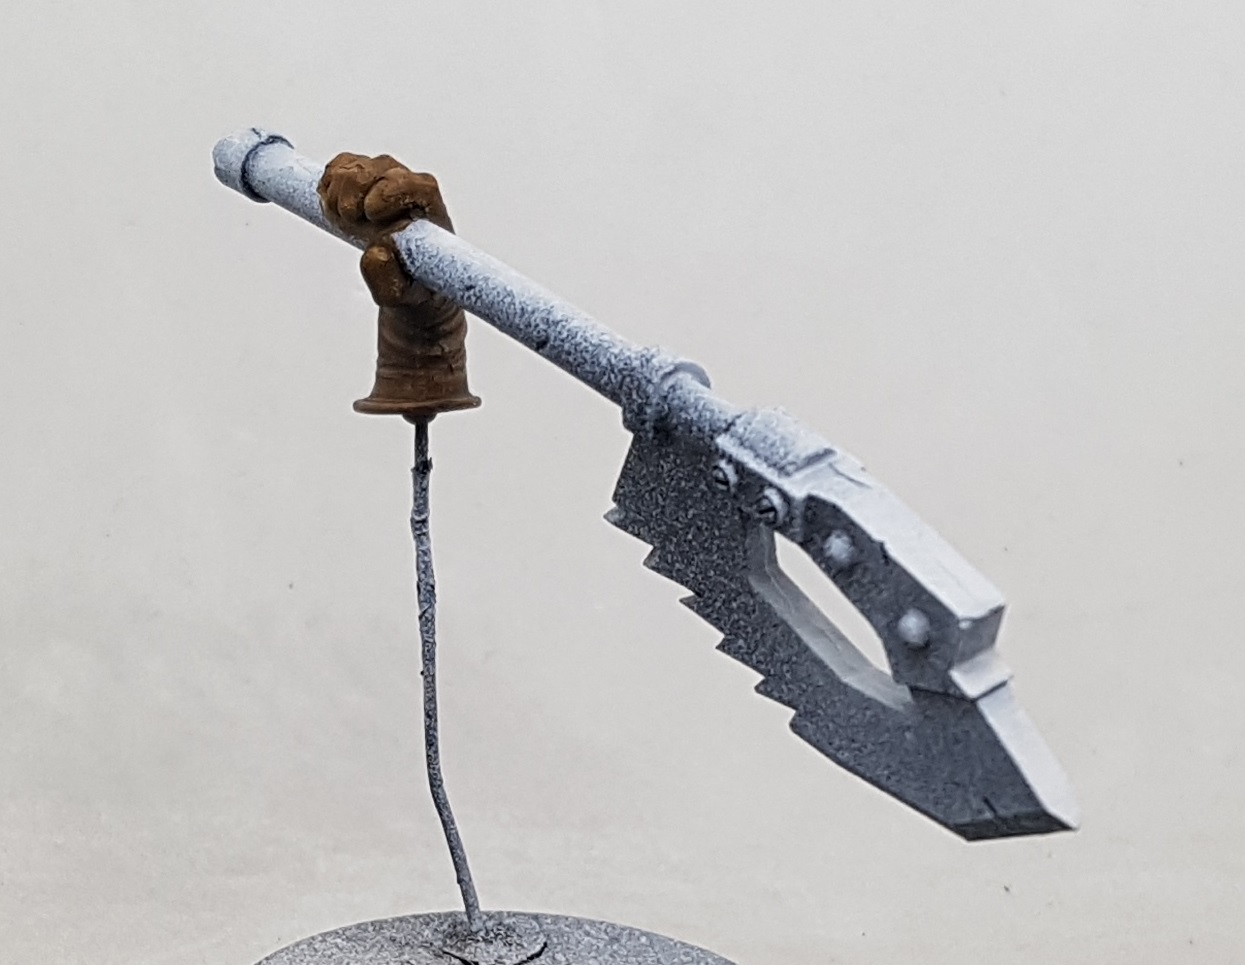
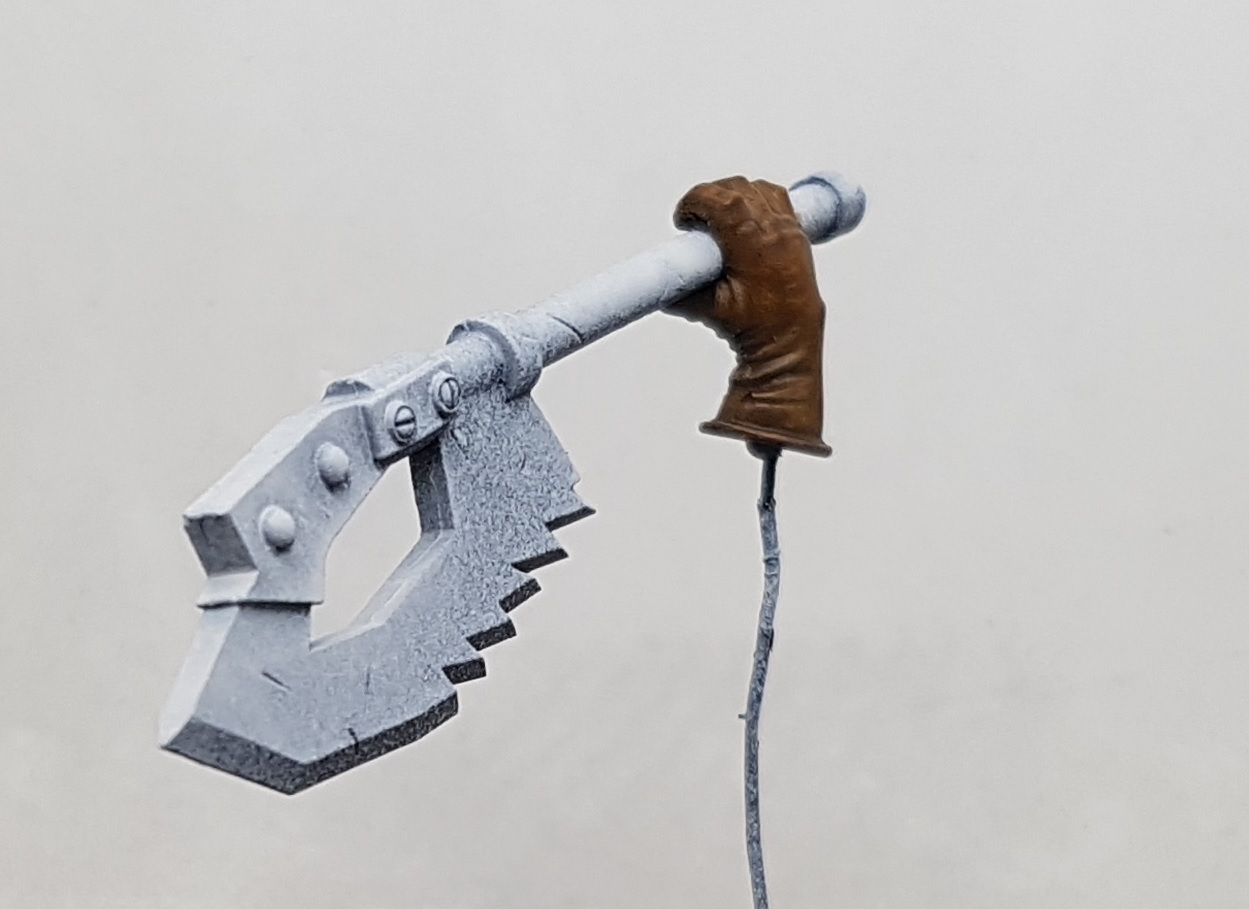


As for the paints I’ll be using, I was considering grabbing a wide selection of all my greys (I own quite a few!), but I saw Angel Giraldez’s NMM guide in Volume 2 and he only uses 4 paints. He did it through an airbrush, which I won’t be doing, but I see no harm in taking his advise, and seeing what I can do with a brush, wet palette, and hopefully a lot of patience.
I have gone in and fixed the skin inside the white sleeves using the paint already on my wet palette. The palette is full so I needed to do this now so I can change out the paper.
Hmmm
Wet palette
Palate cleanser
Pallet truck
There’s no wonder I can never spell that word without googling it.
 My iron NMM paints
And that’s NMM successfully postponed for another hour. I am king procrastinator! Time for the loo, a fresh coffee and a clean up of my wet pa.. *Scrolls up to check*… palette, and then see how much more time I’ve wasted before actually picking up a brush for this.