
![Perfect Historical Wargame Objectives! Victrix Treasures & More Reviewed [7 Days Early Access]](https://images.beastsofwar.com/2026/02/unboxing-victrix-treasures_-chests-_-market-stalls-coverimage-225-127.jpg)


Klorophil’s Warhammer Armies


Recommendations: 211
About the Project
Hi, With the advent of the 9th Edition of Warhammer 40K I finally decided to get back into this huge hobby. This will be a repository of everything that I will craft, paint, built etc. related to the Grim Dark Future. Hope you enjoy it!
Related Game: Warhammer 40,000
Related Company: Games Workshop
Related Genre: Science Fiction
This Project is Active
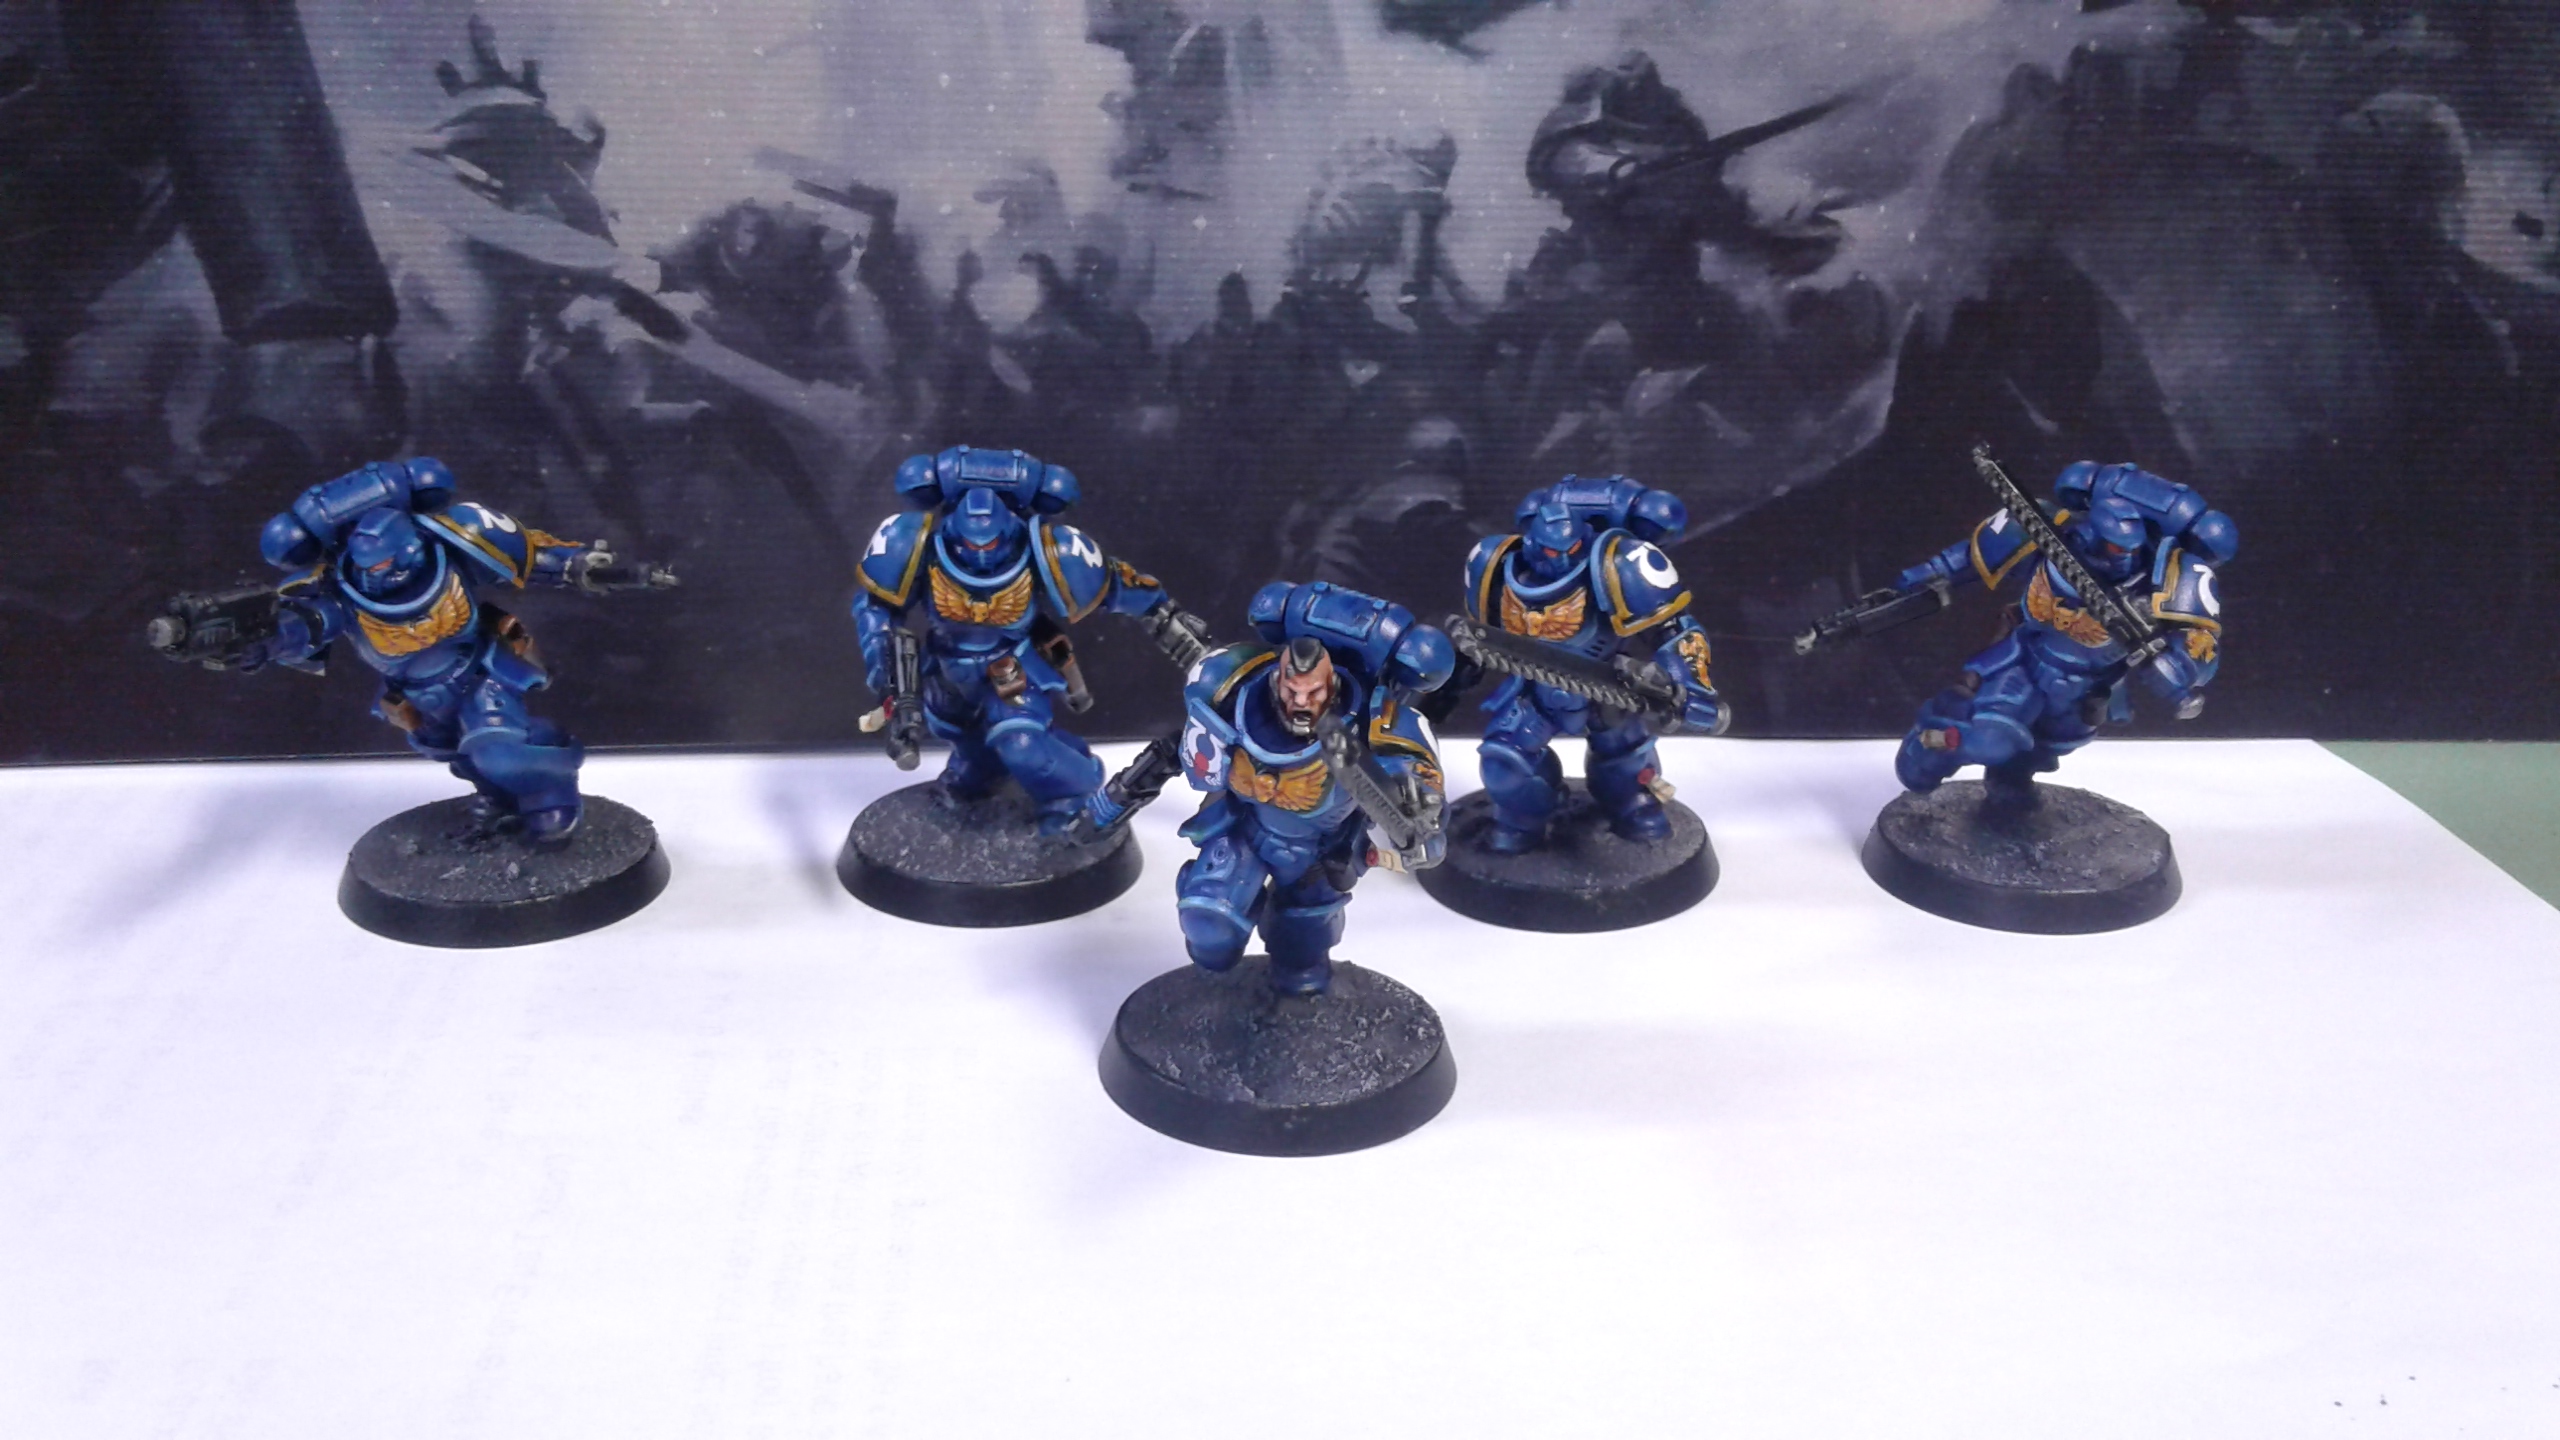
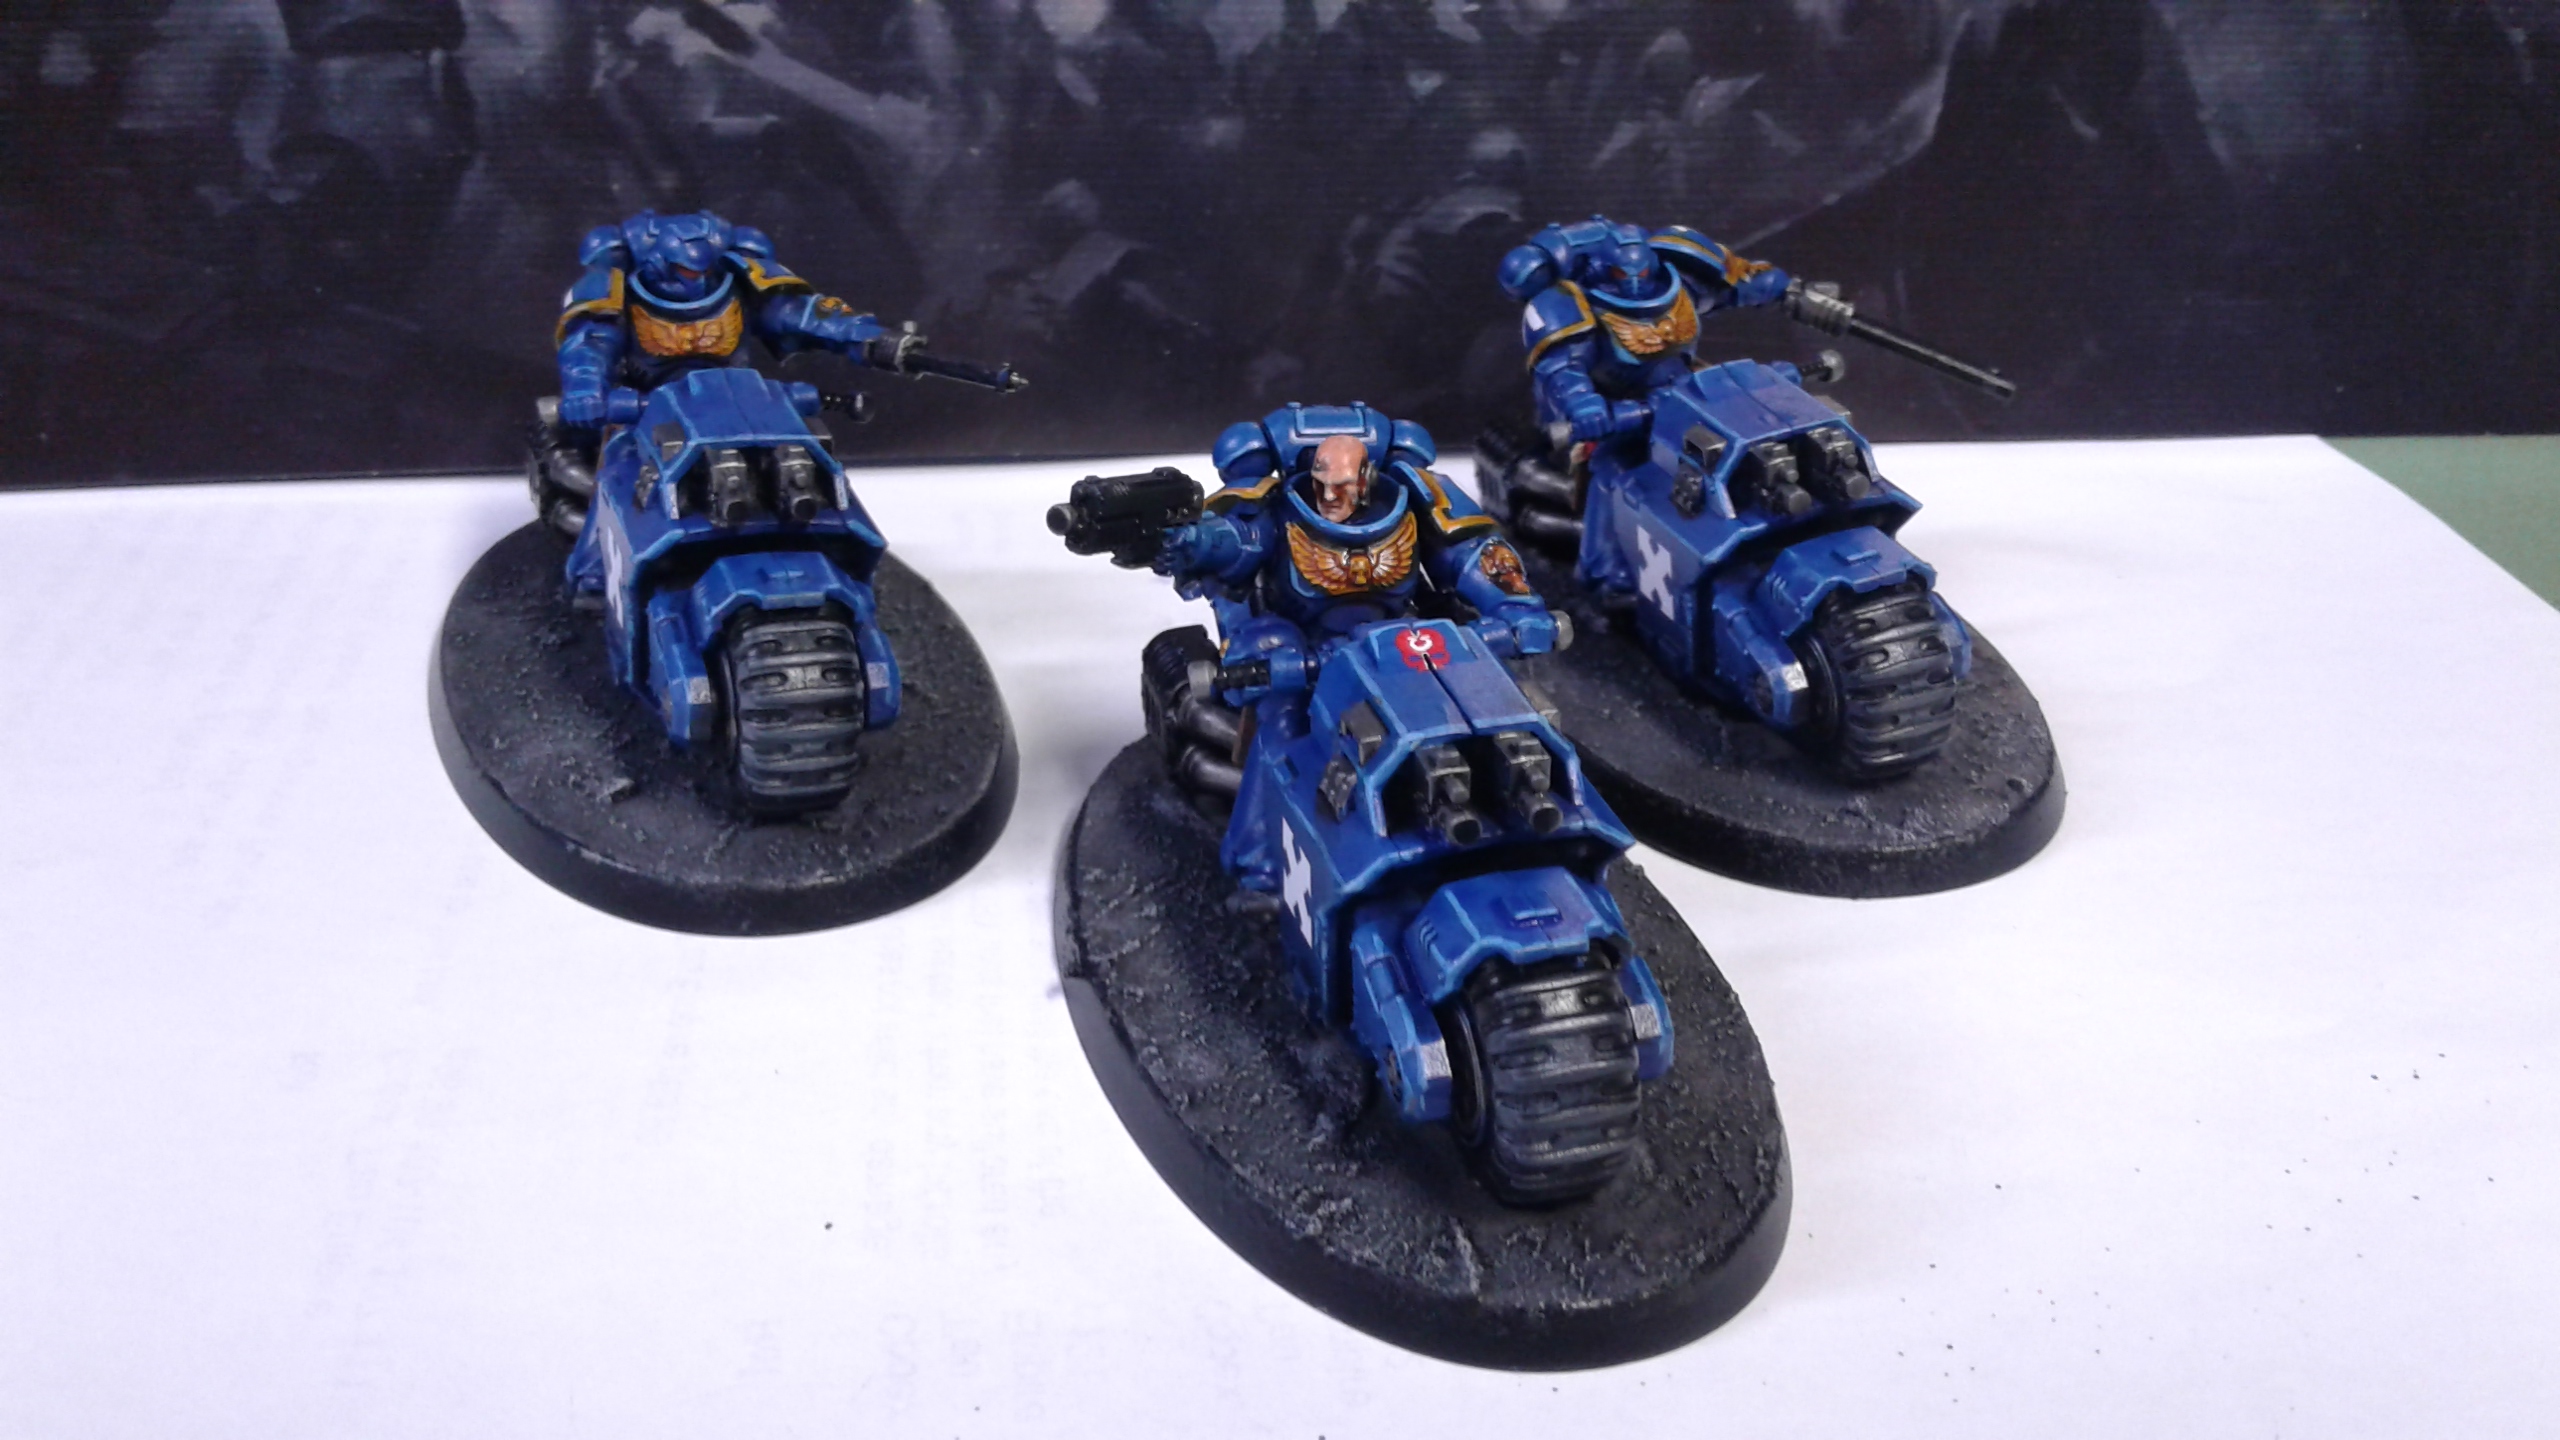
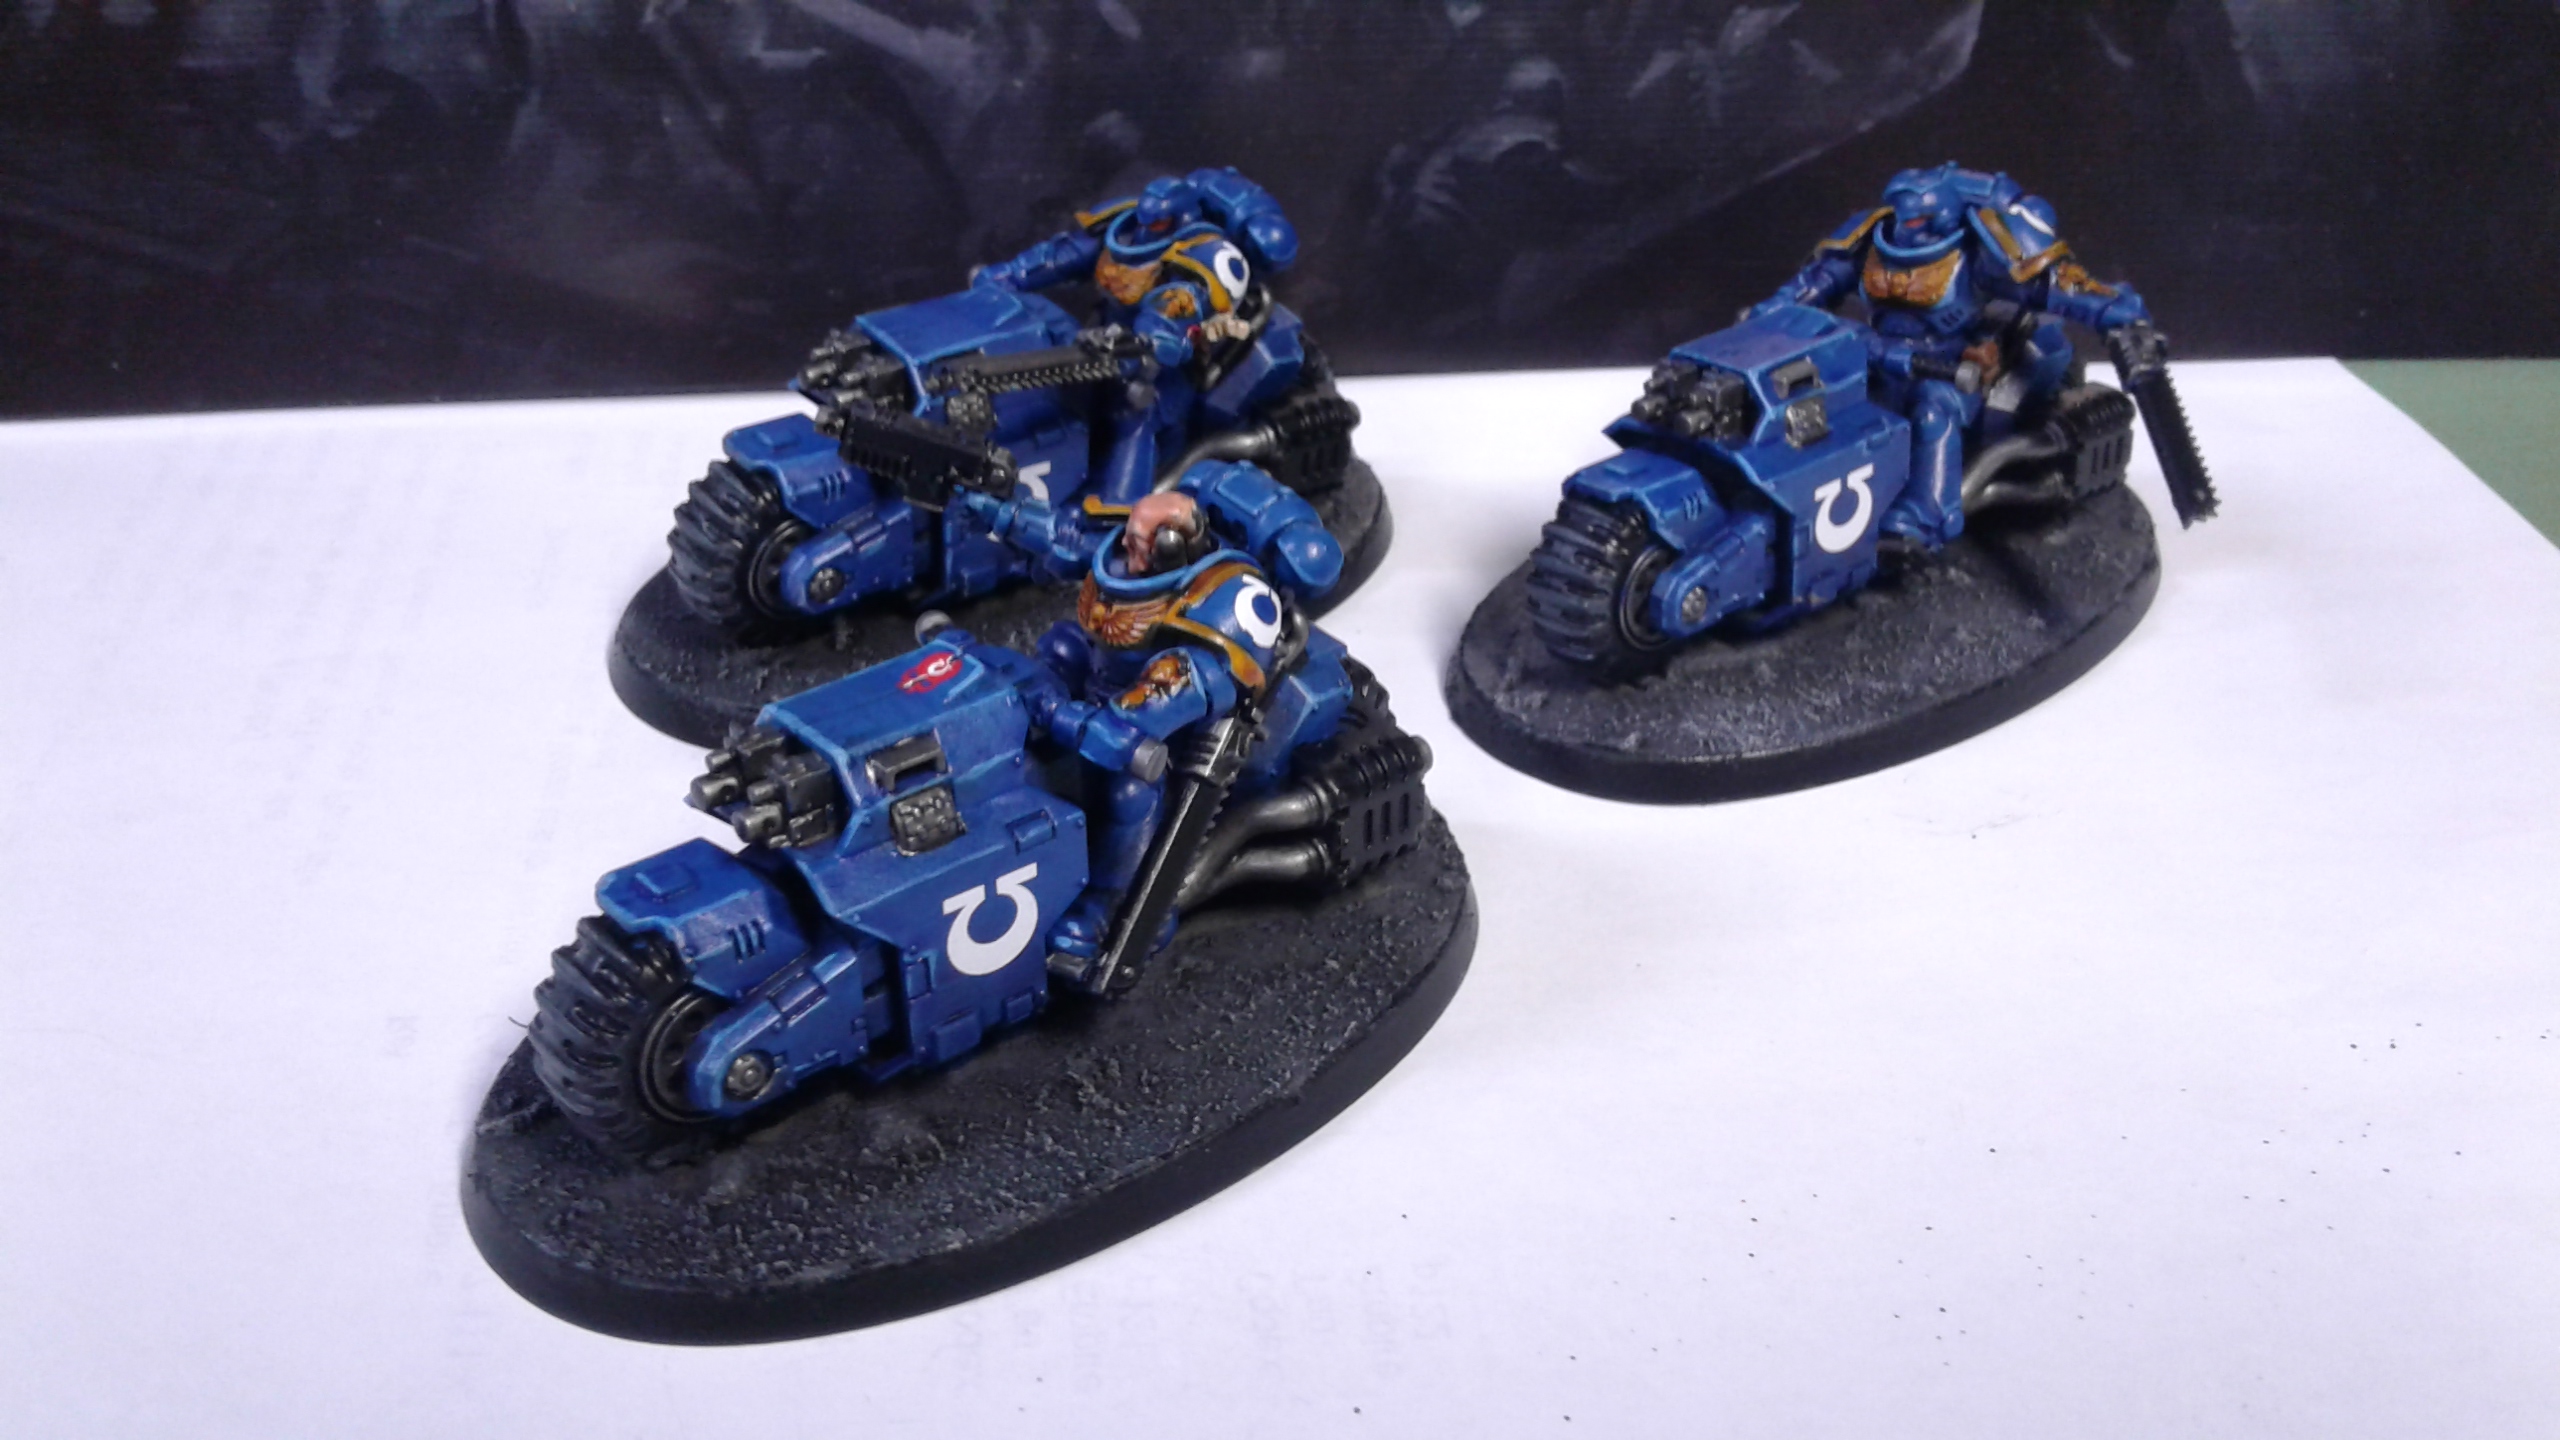
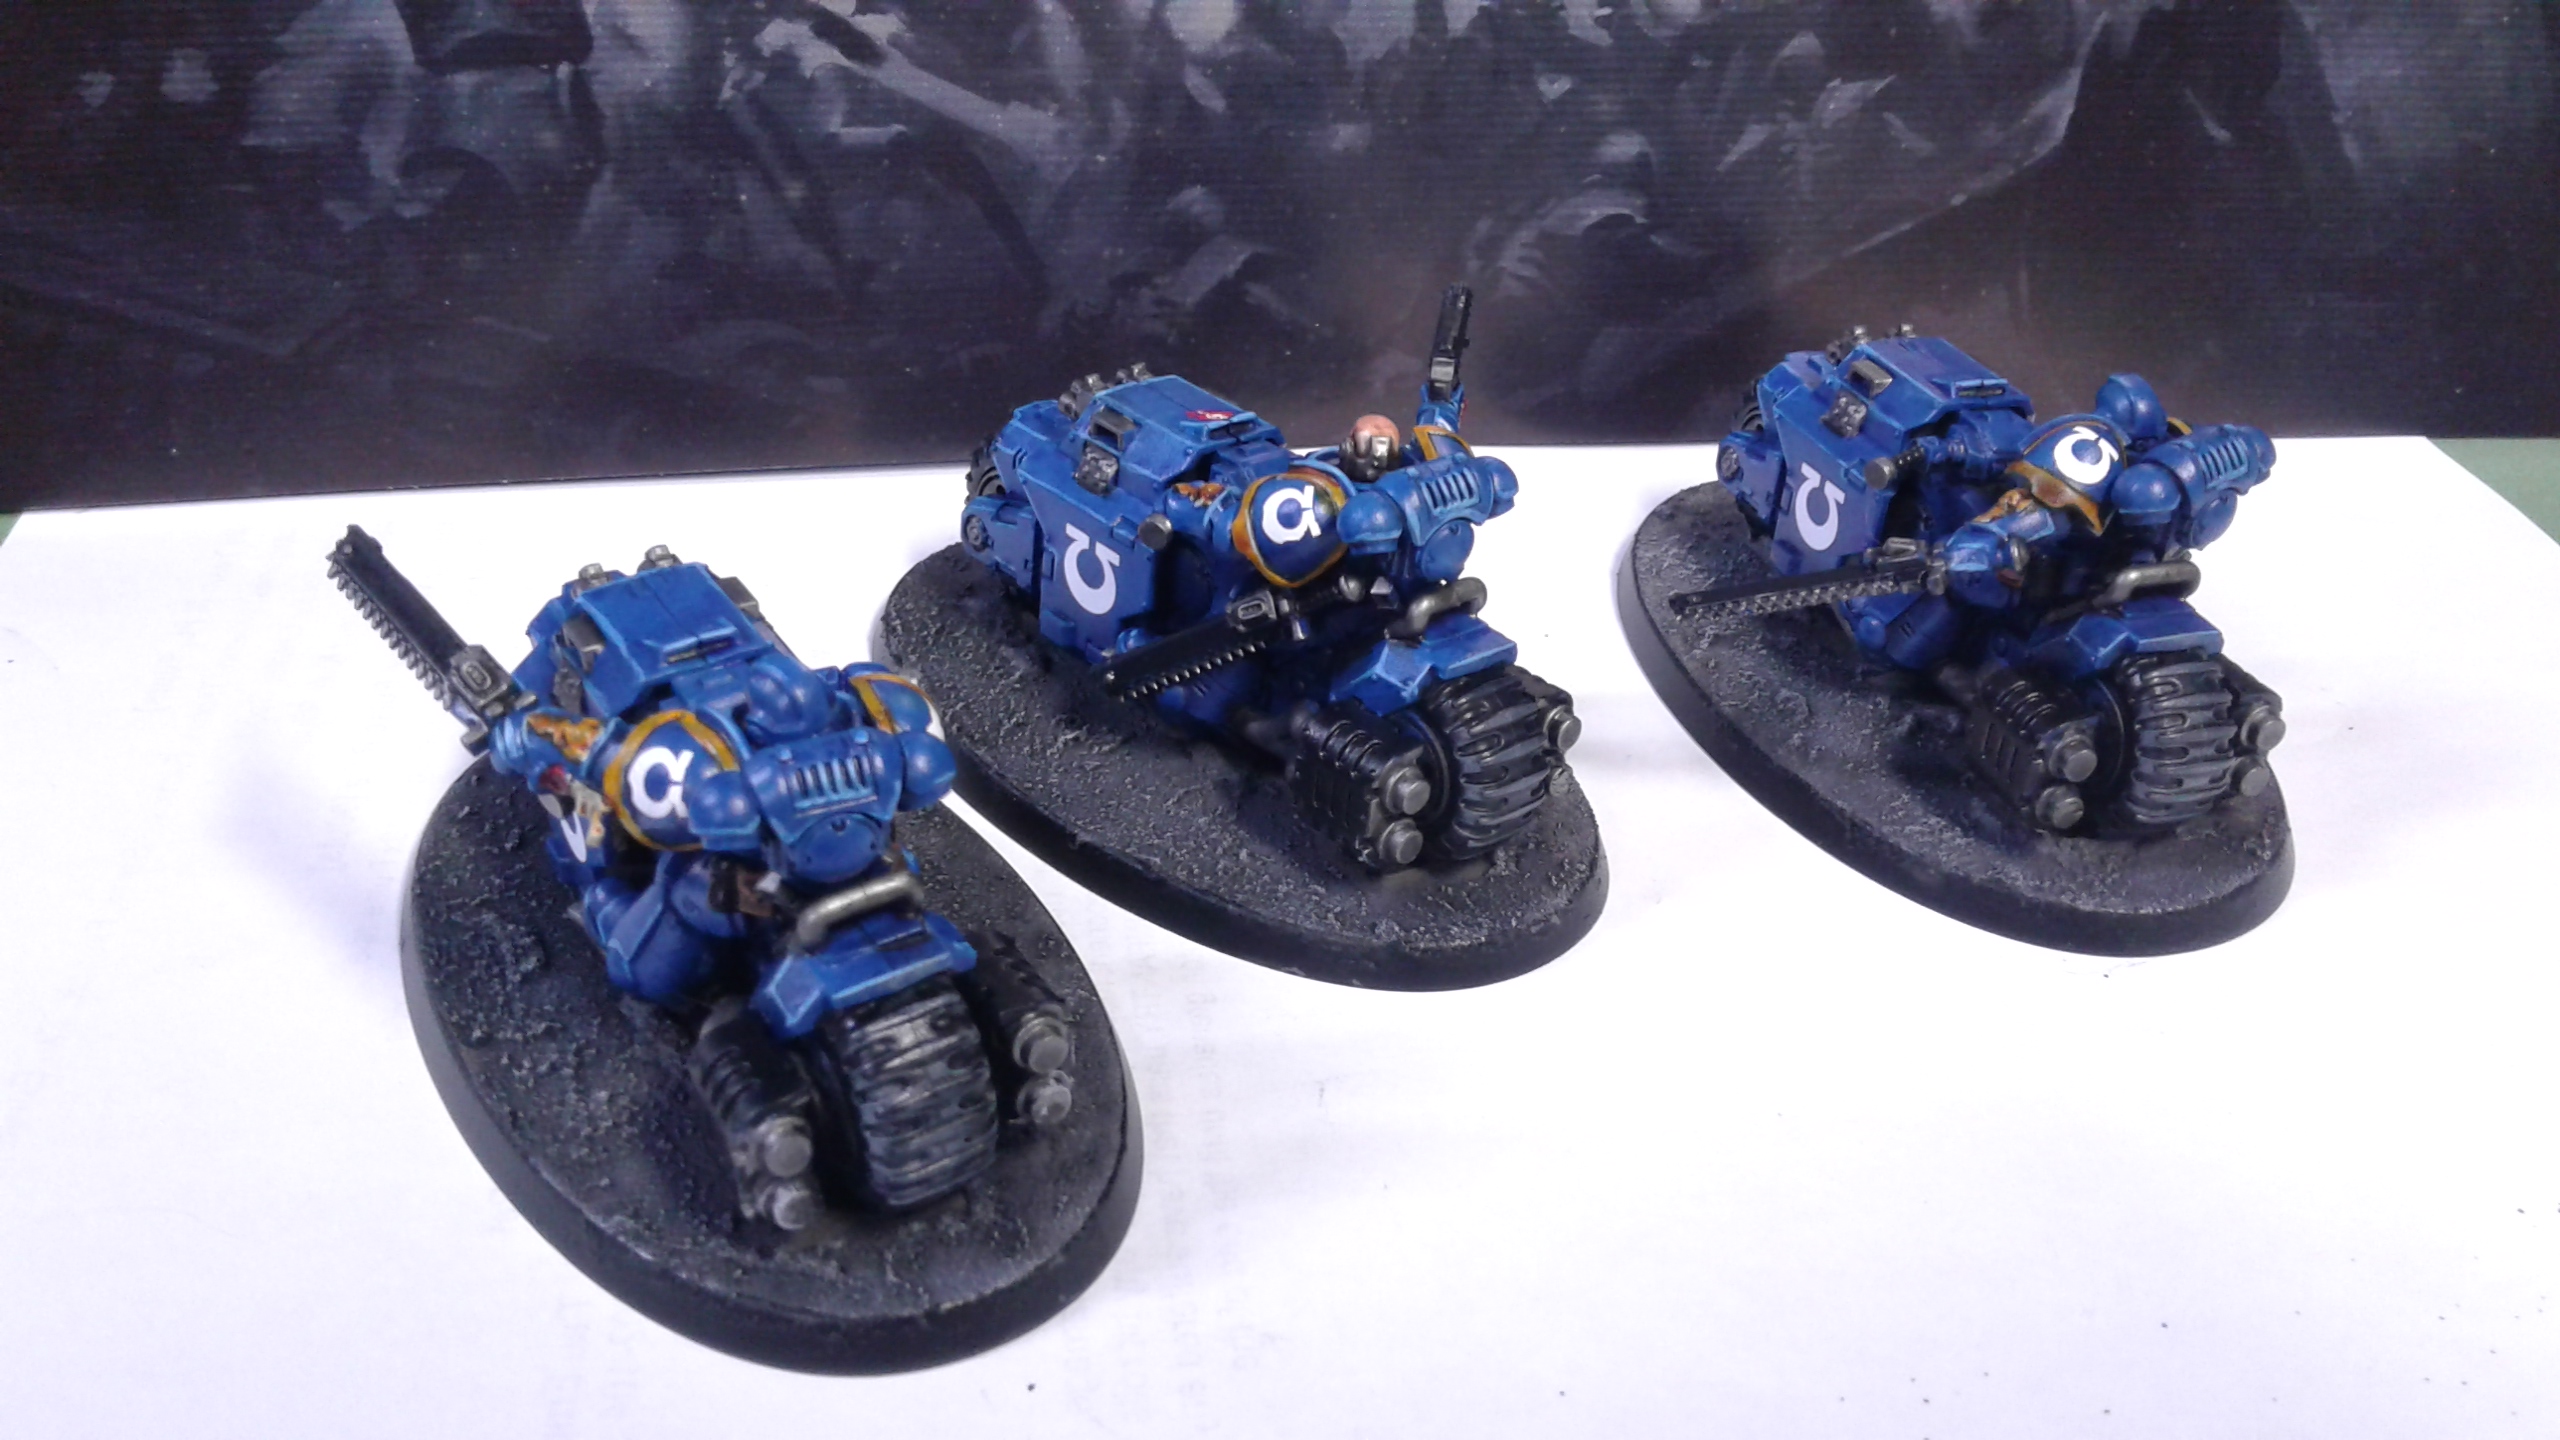
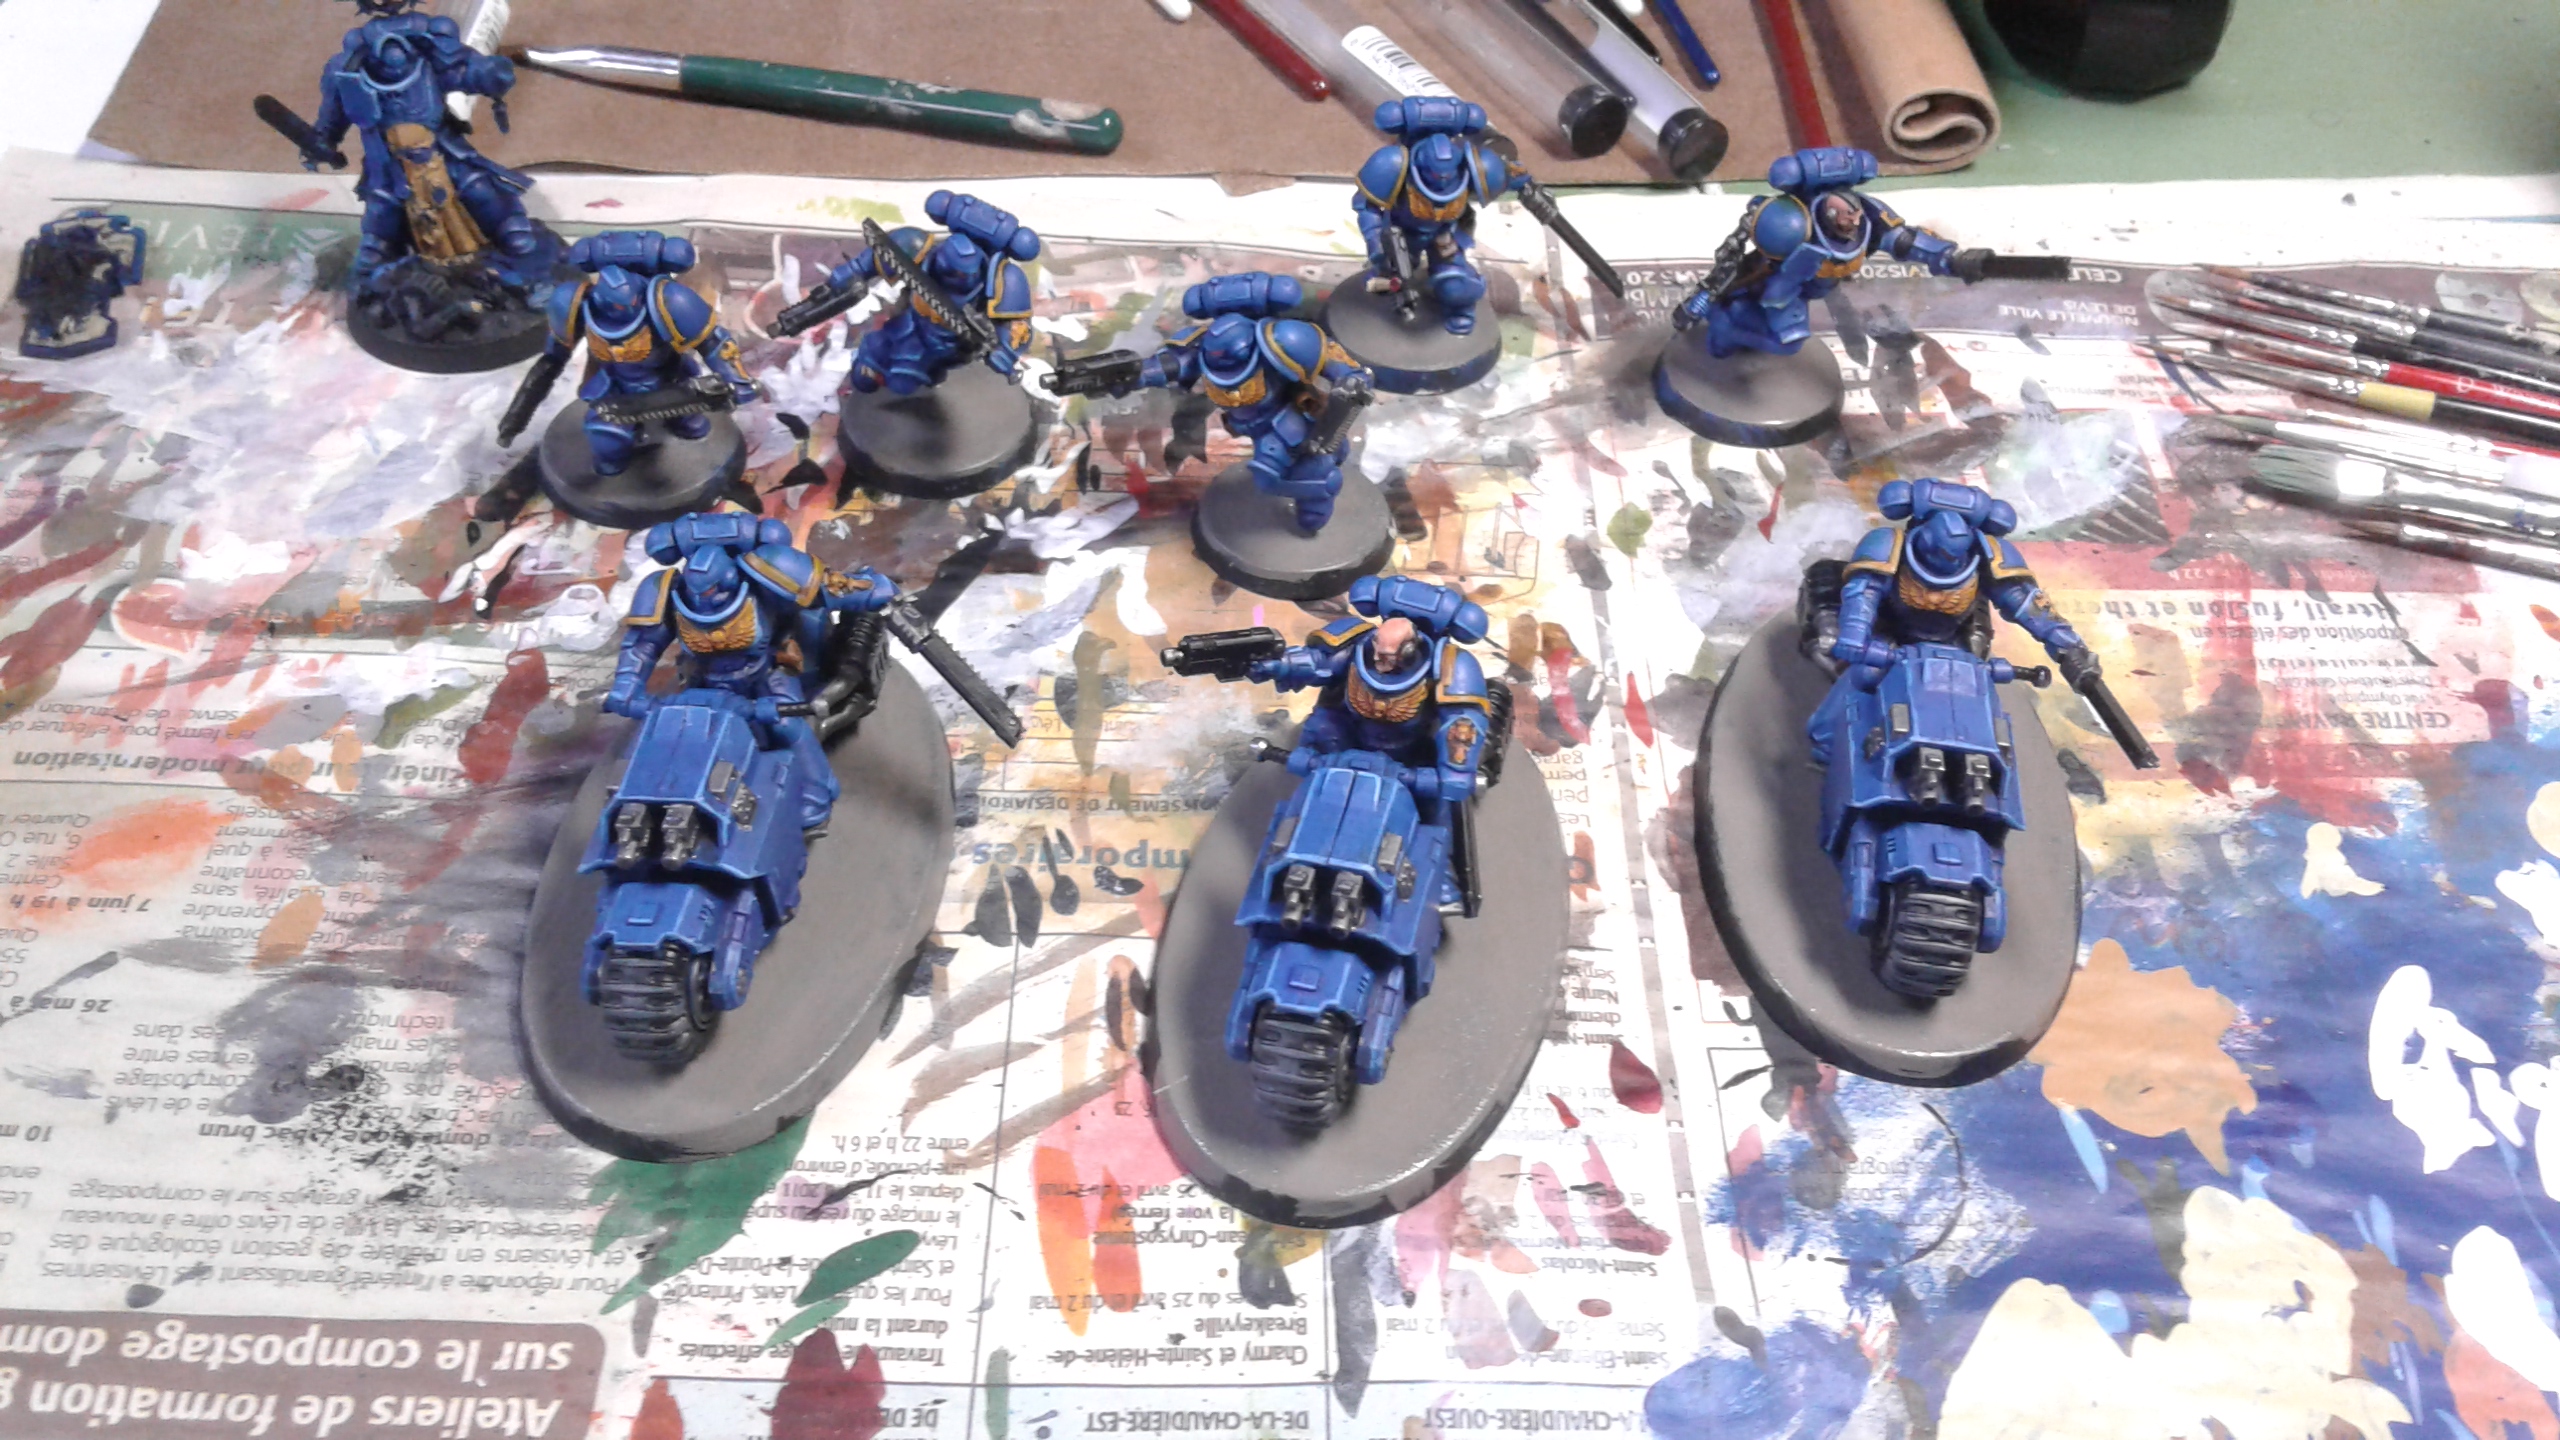
A part is done!
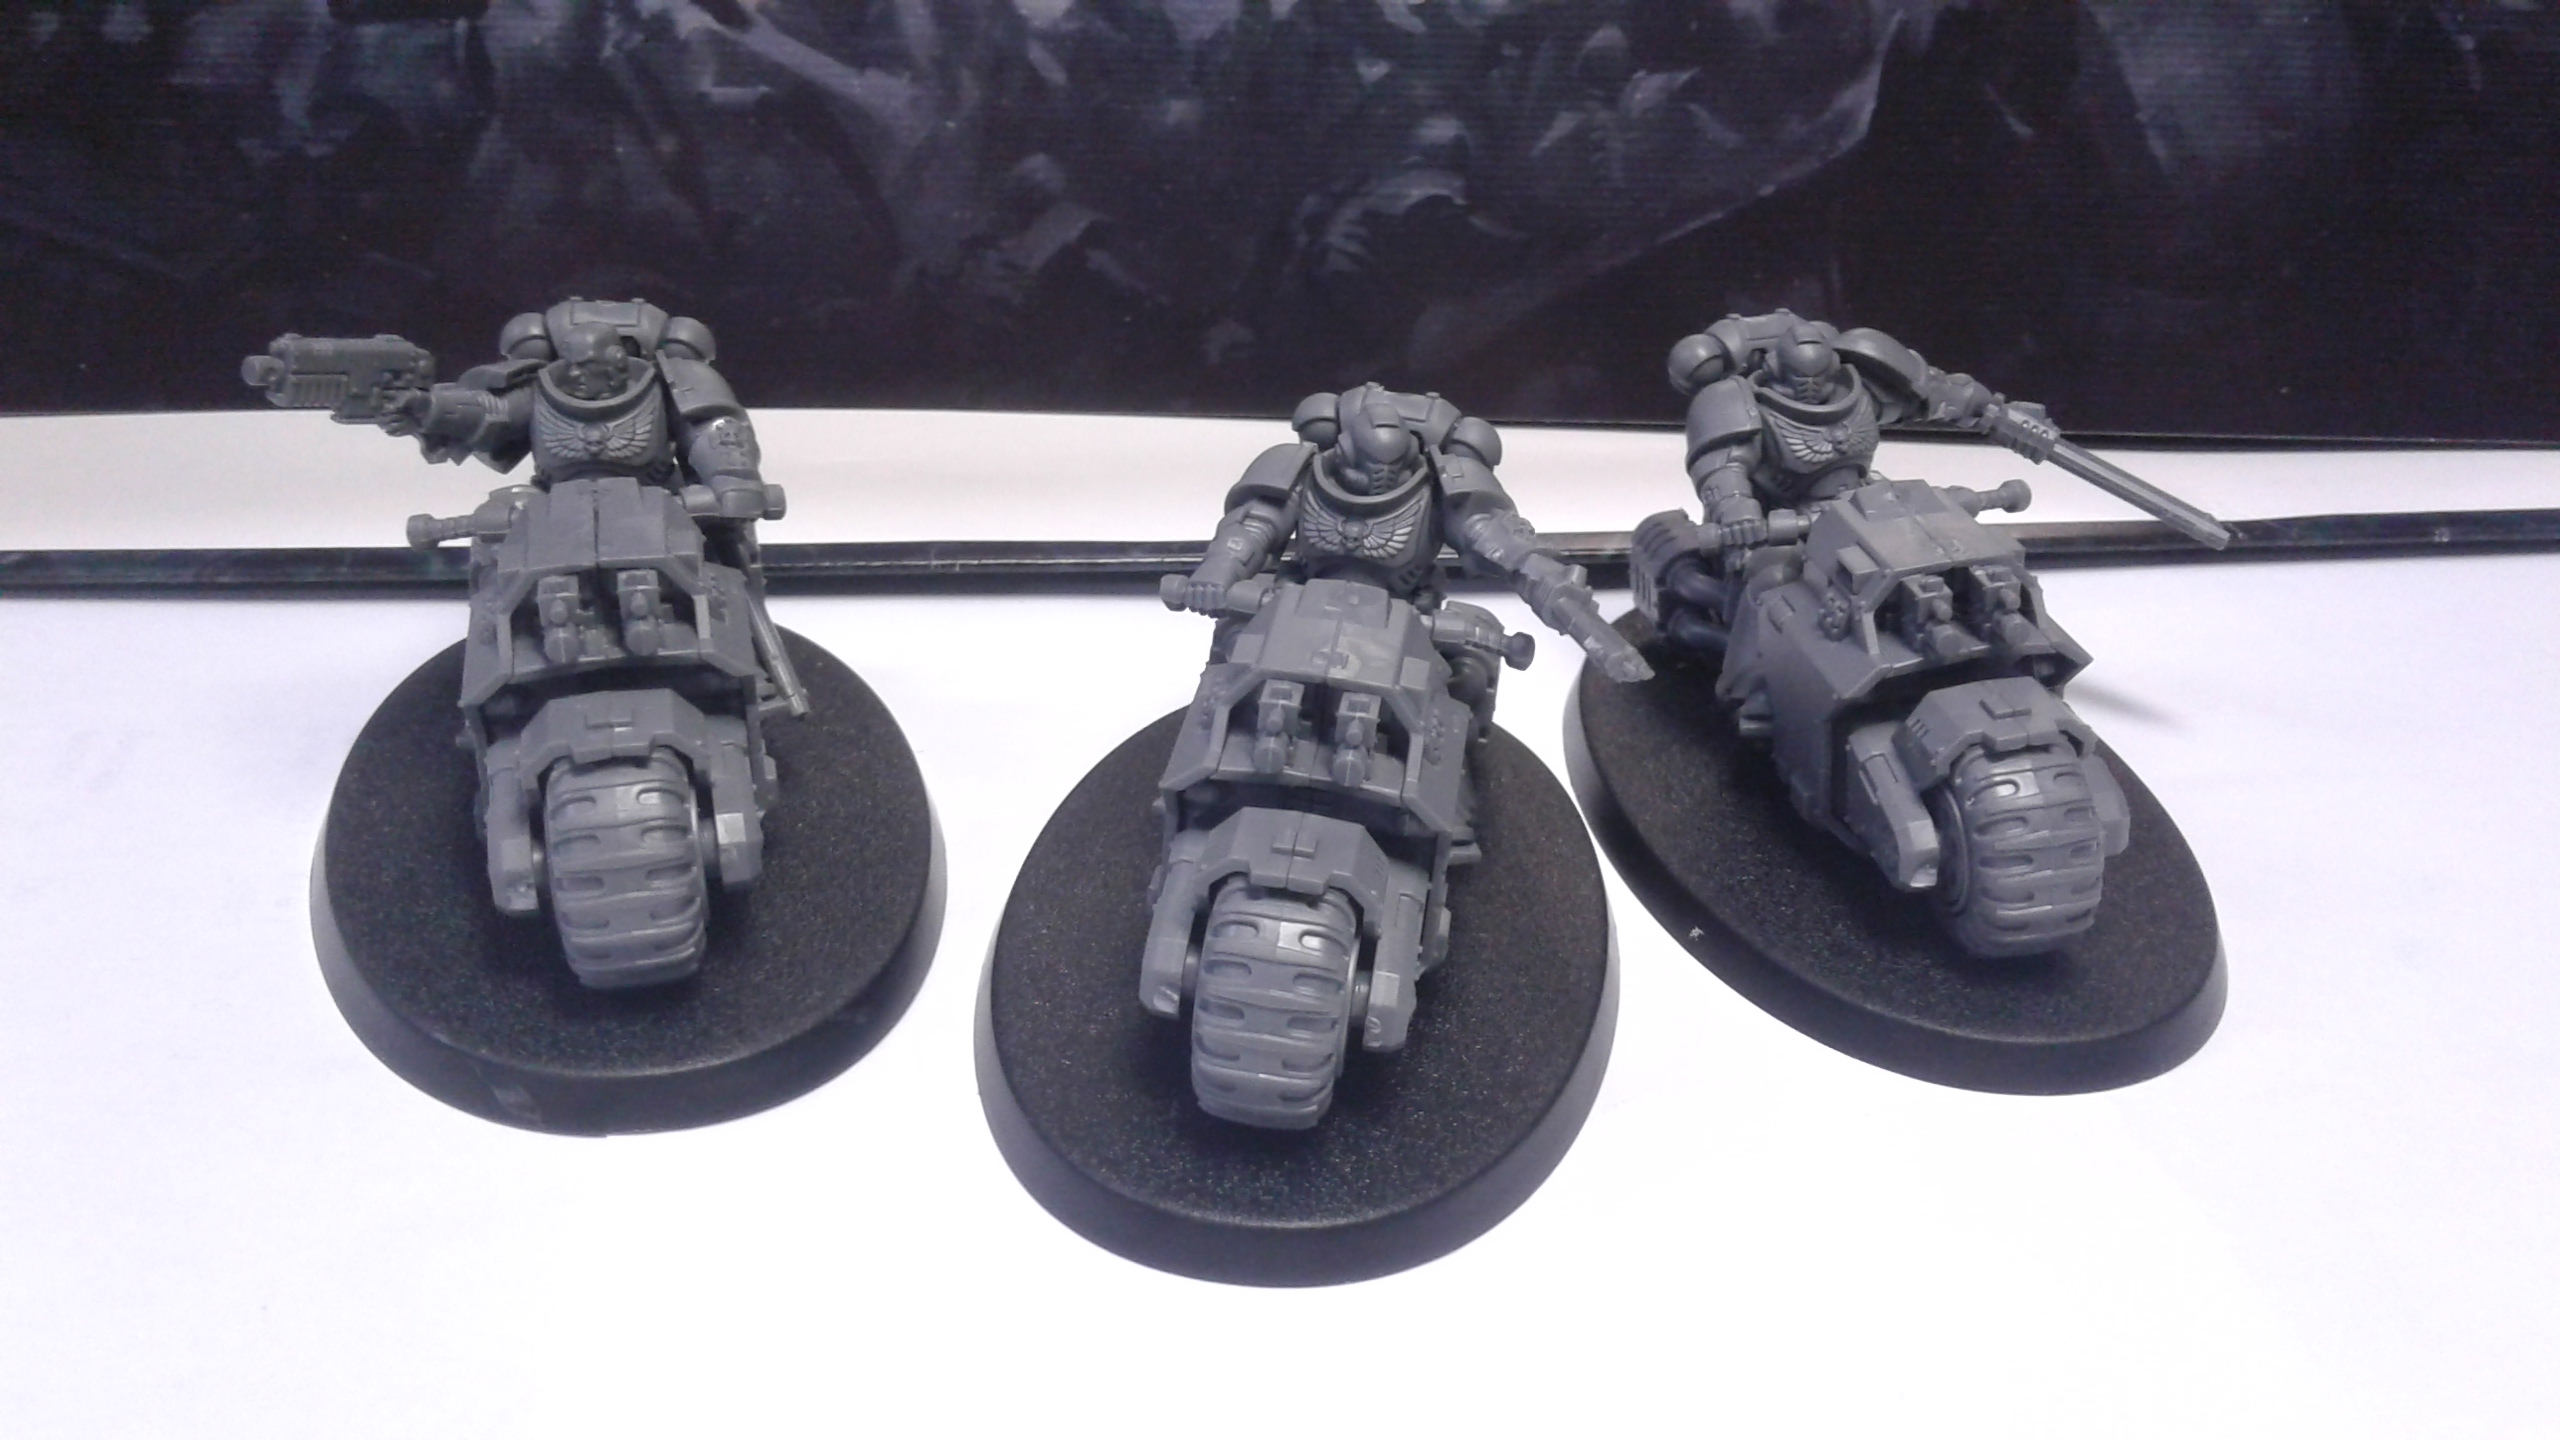
So here is the finished Assault Intercessor squad as well as the Outriders bikes, ready to play. I tested two varnishes before deciding. First was Army Painter’s Anti-Shine. It is a great varnish but not necessarily the finish I wanted. It muted everything way down. I settled on Rust-o-Leum’s Matt varnish. Not great but its satin finish was what I was looking for.
Bases were done with Citadel’s Astrogranite Debris Technical paint. I had a pot of this laying around that’s why. I’ll finish this one and then give a try to the classic coffee grinds and PVA glue. The Astrogranite Debris was washed with Citadel’s Nuln Oil Wash and then drybrushed with a home mix of black and white Liquitex Heavy Body paints.
And that’s it. Only the Captain is left. I also have the Codex in the mail, so will wait until I get it to upgrade my small detachment.
Cheers!
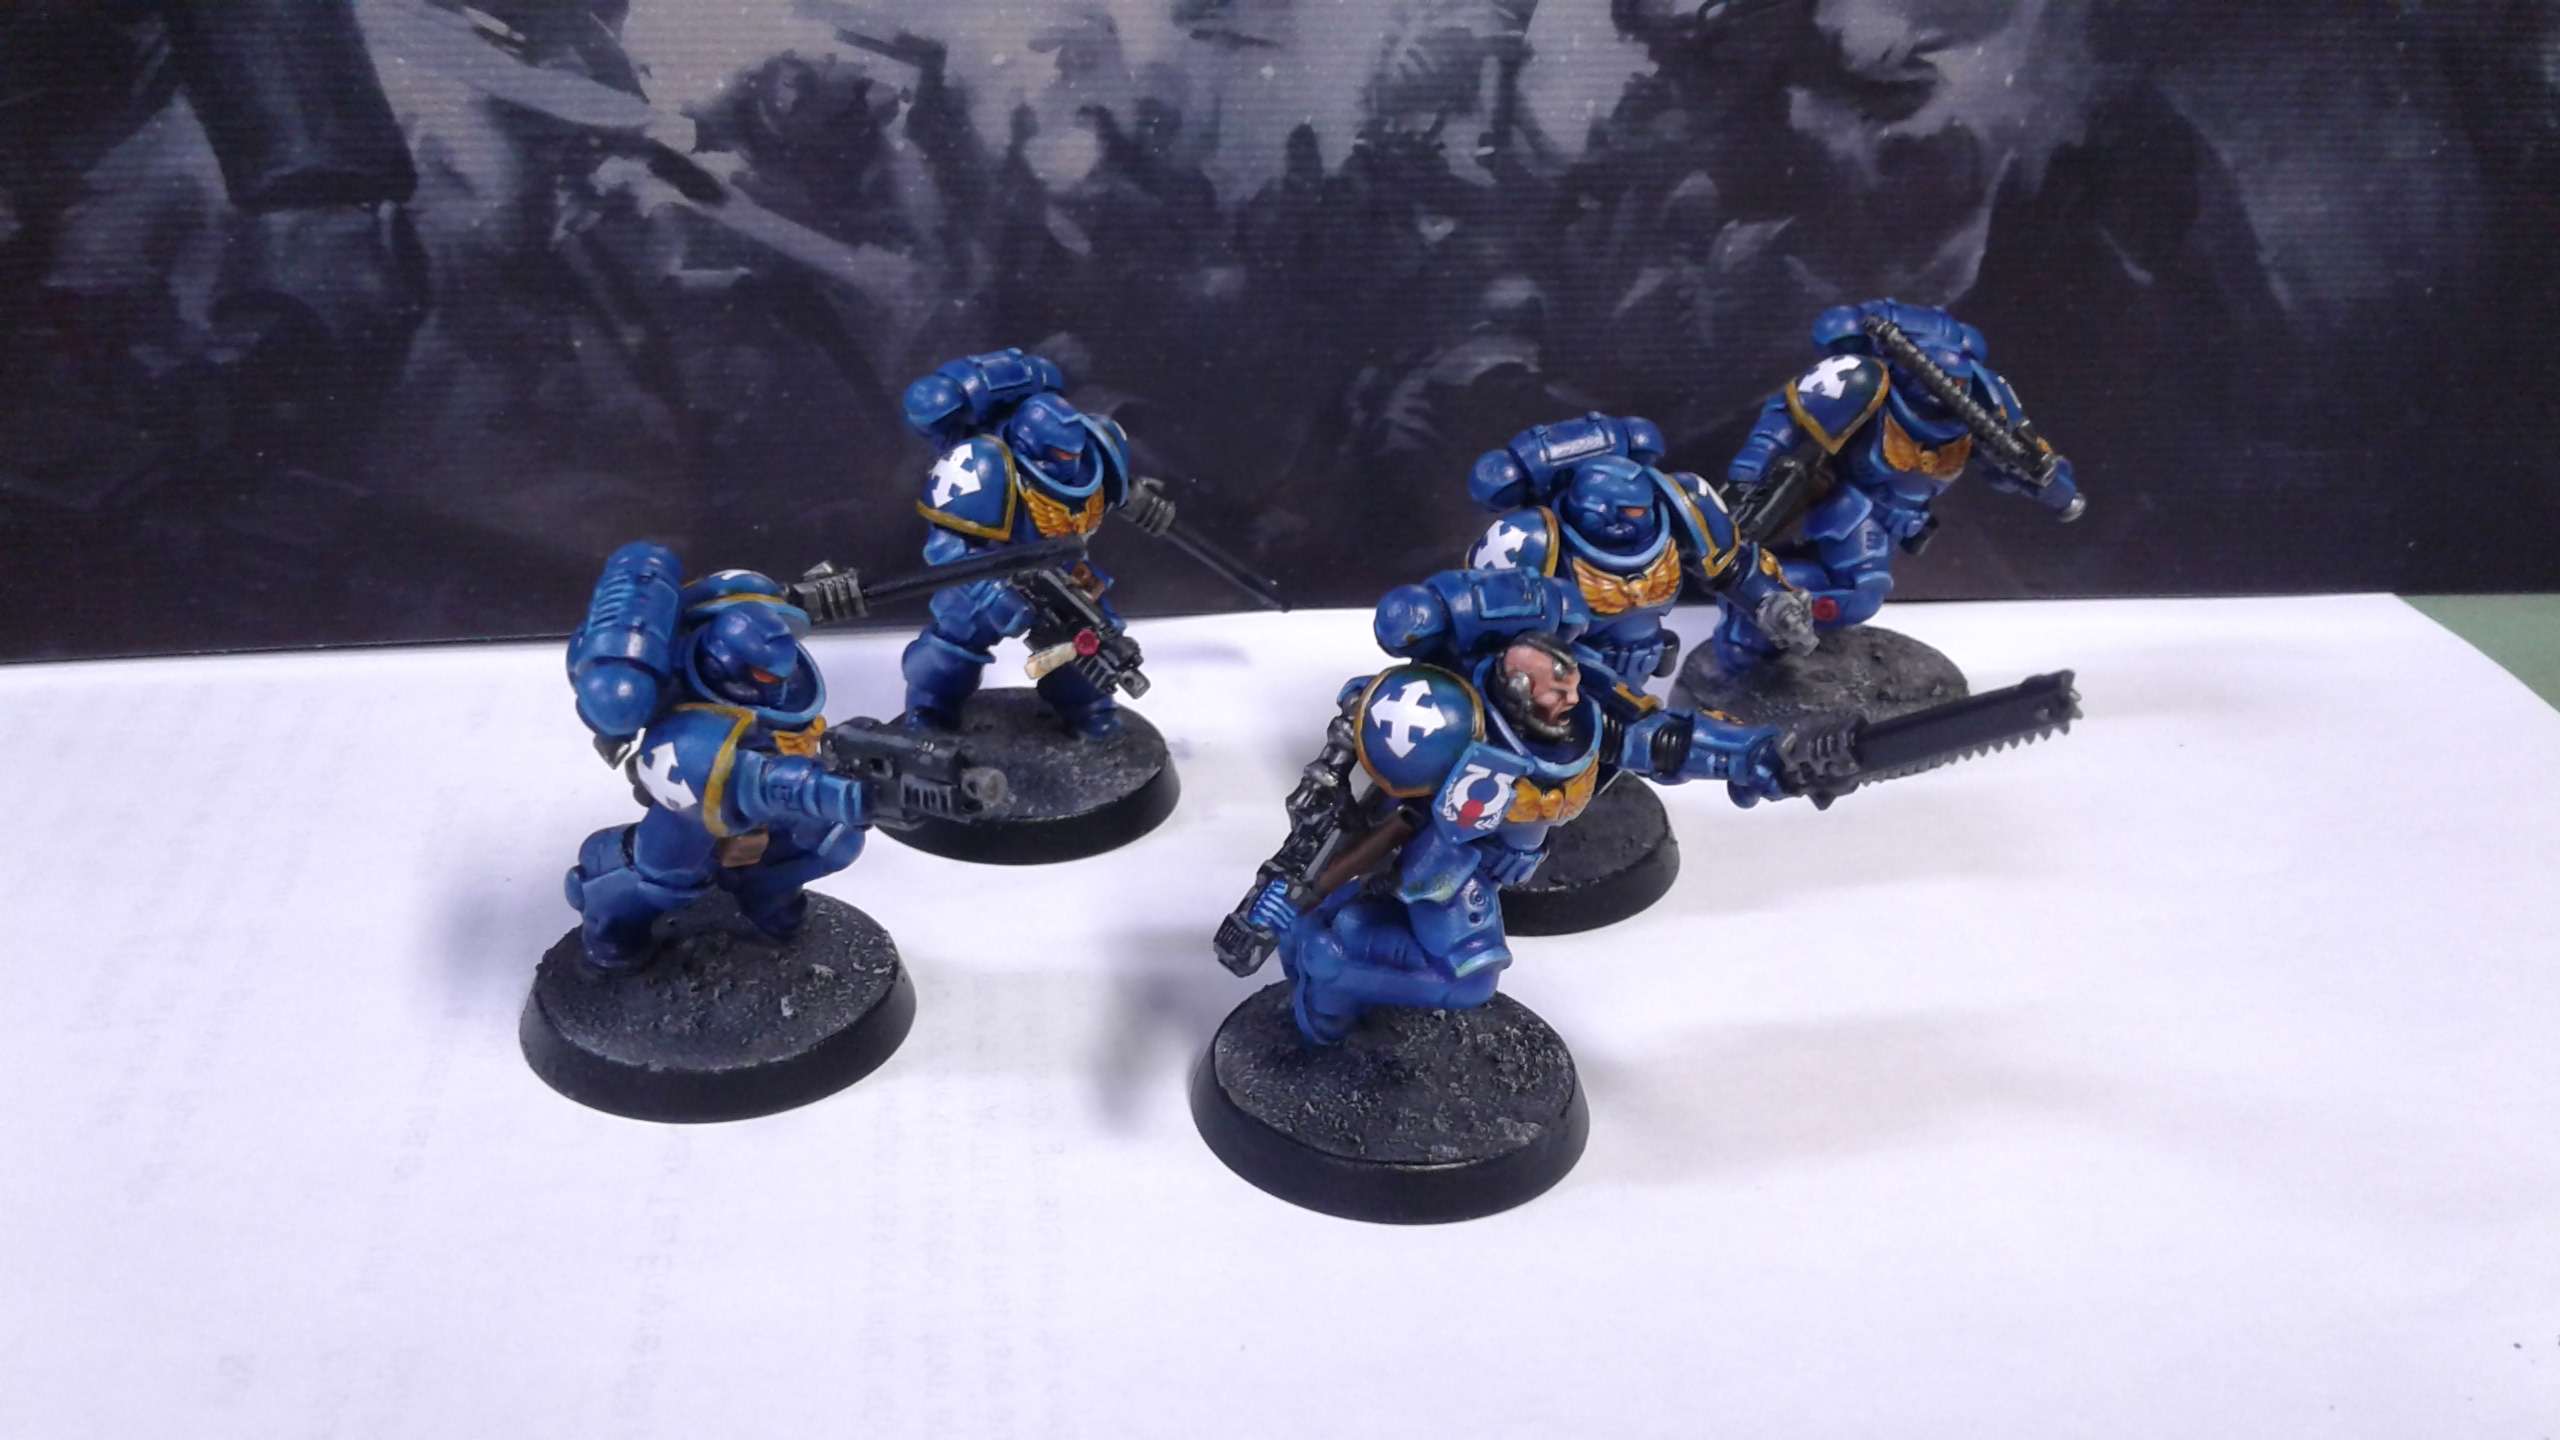
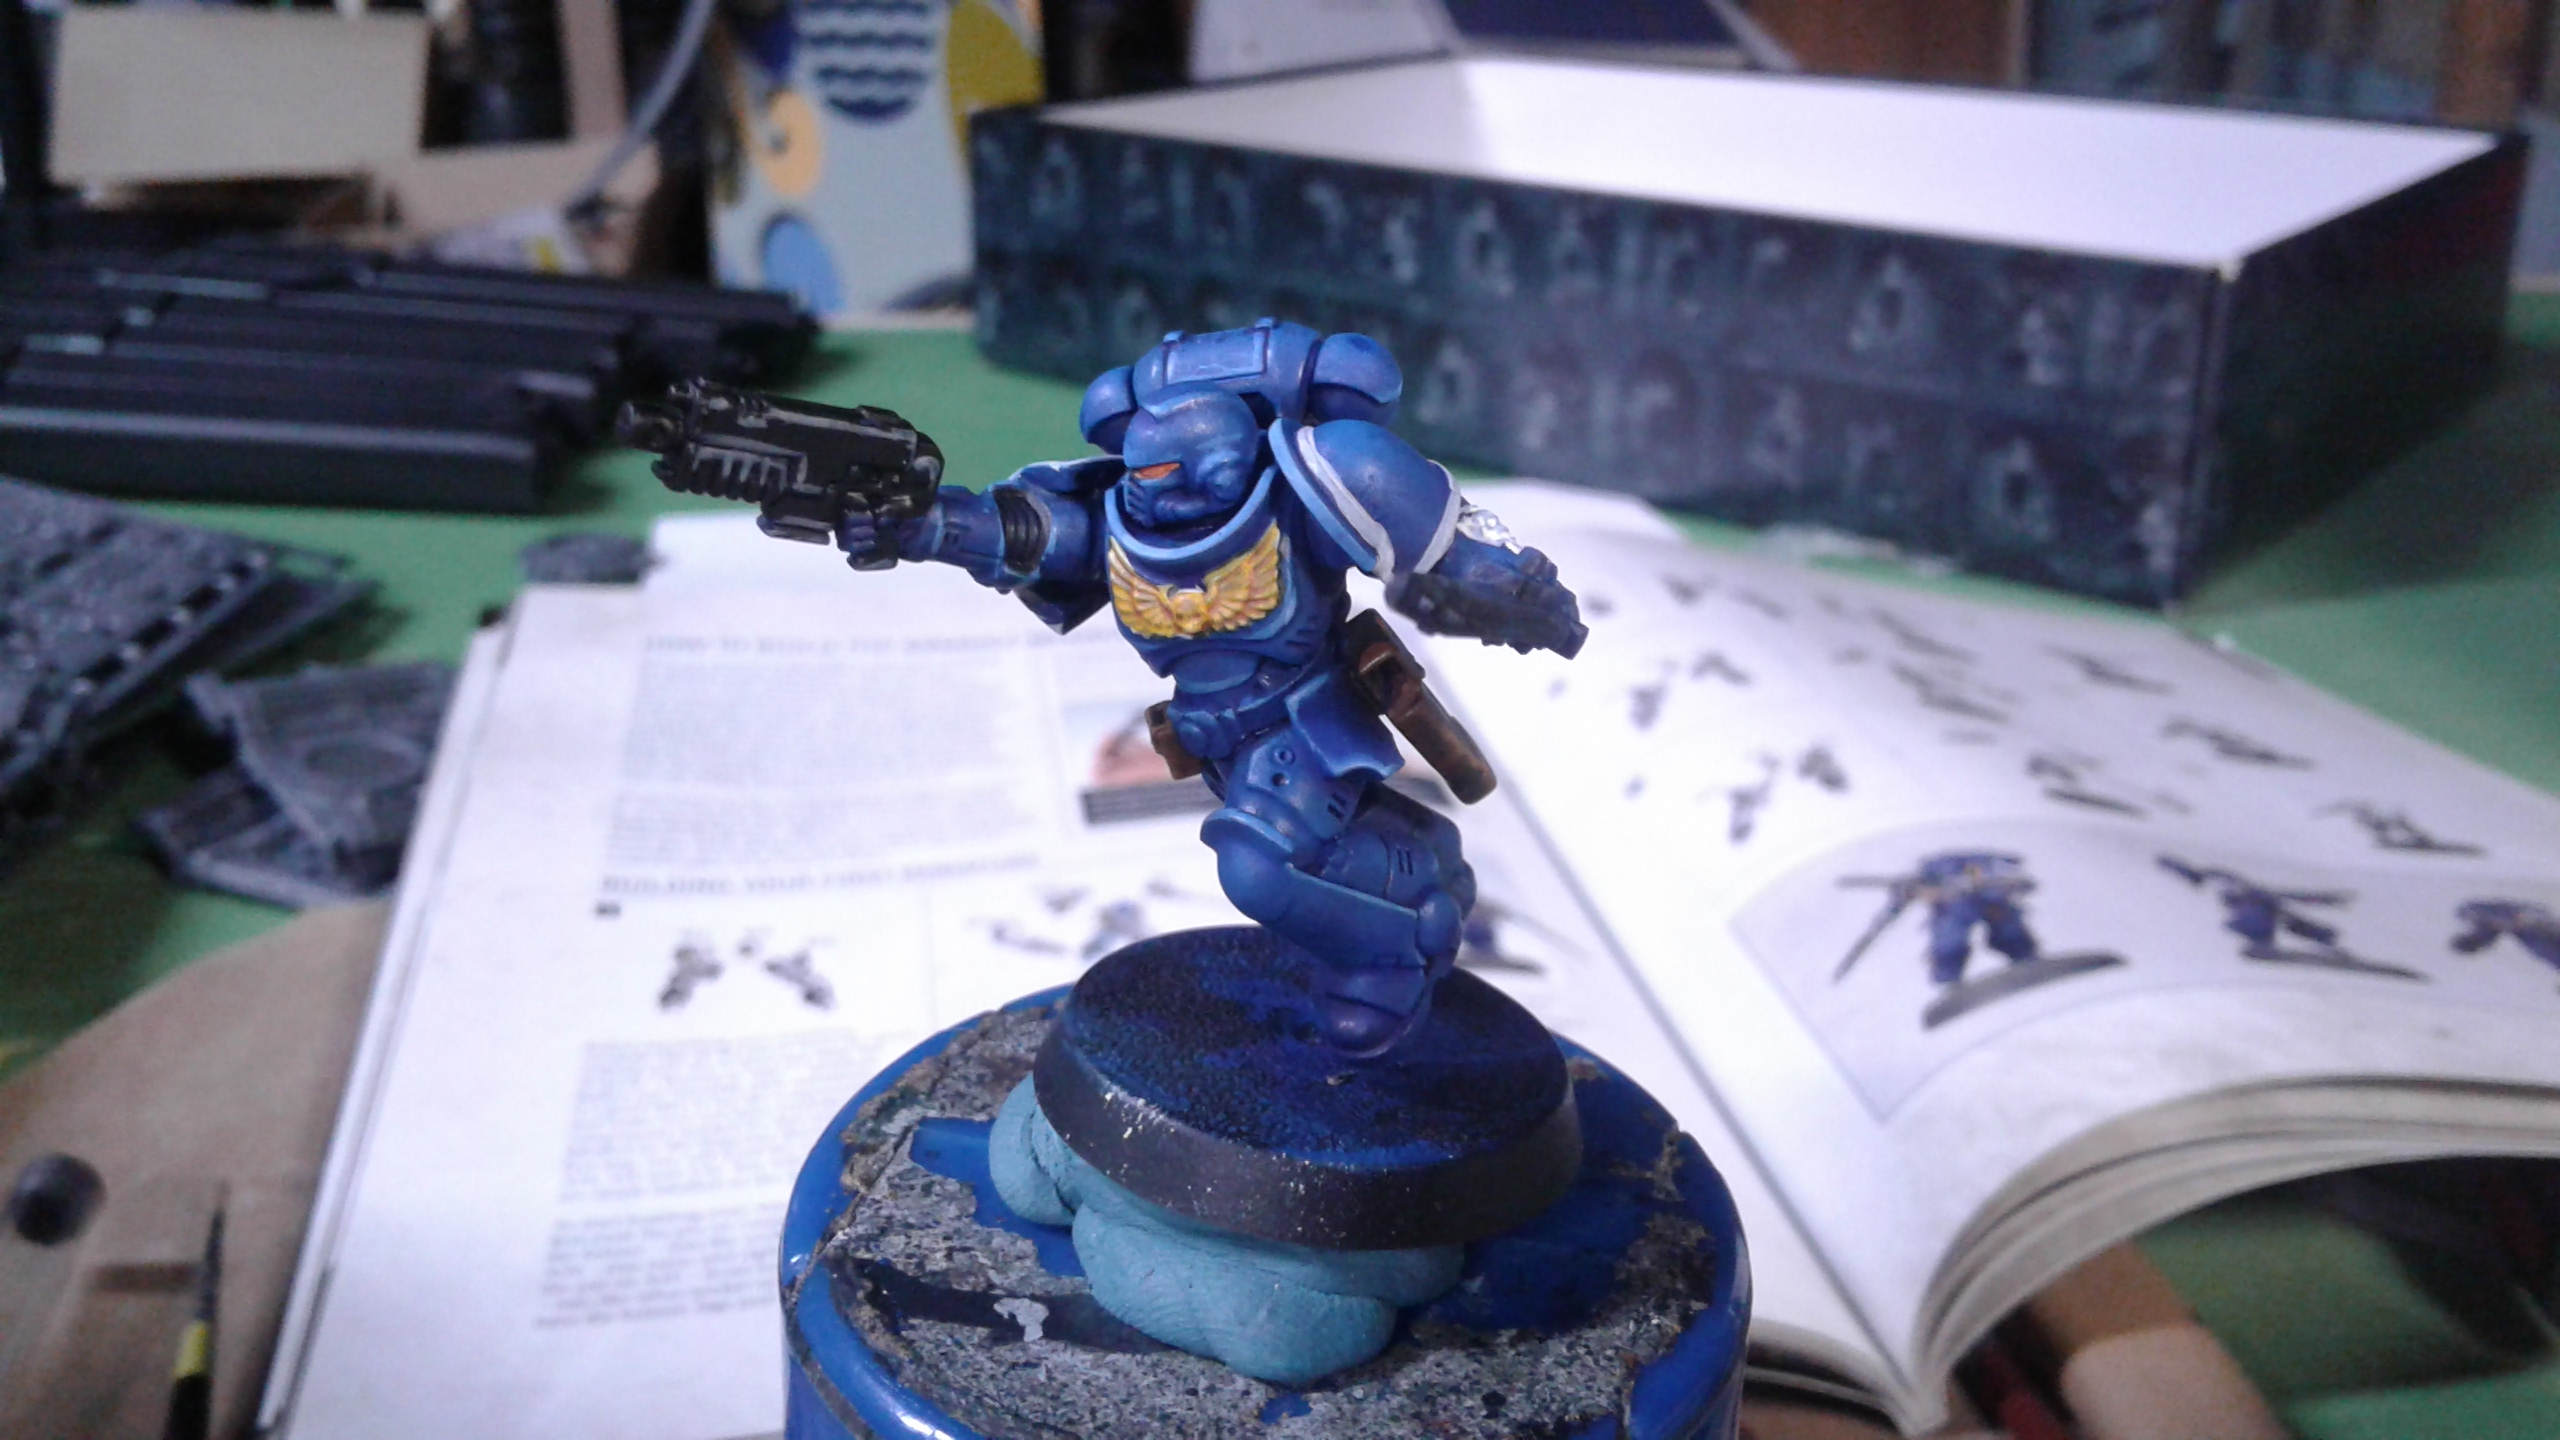
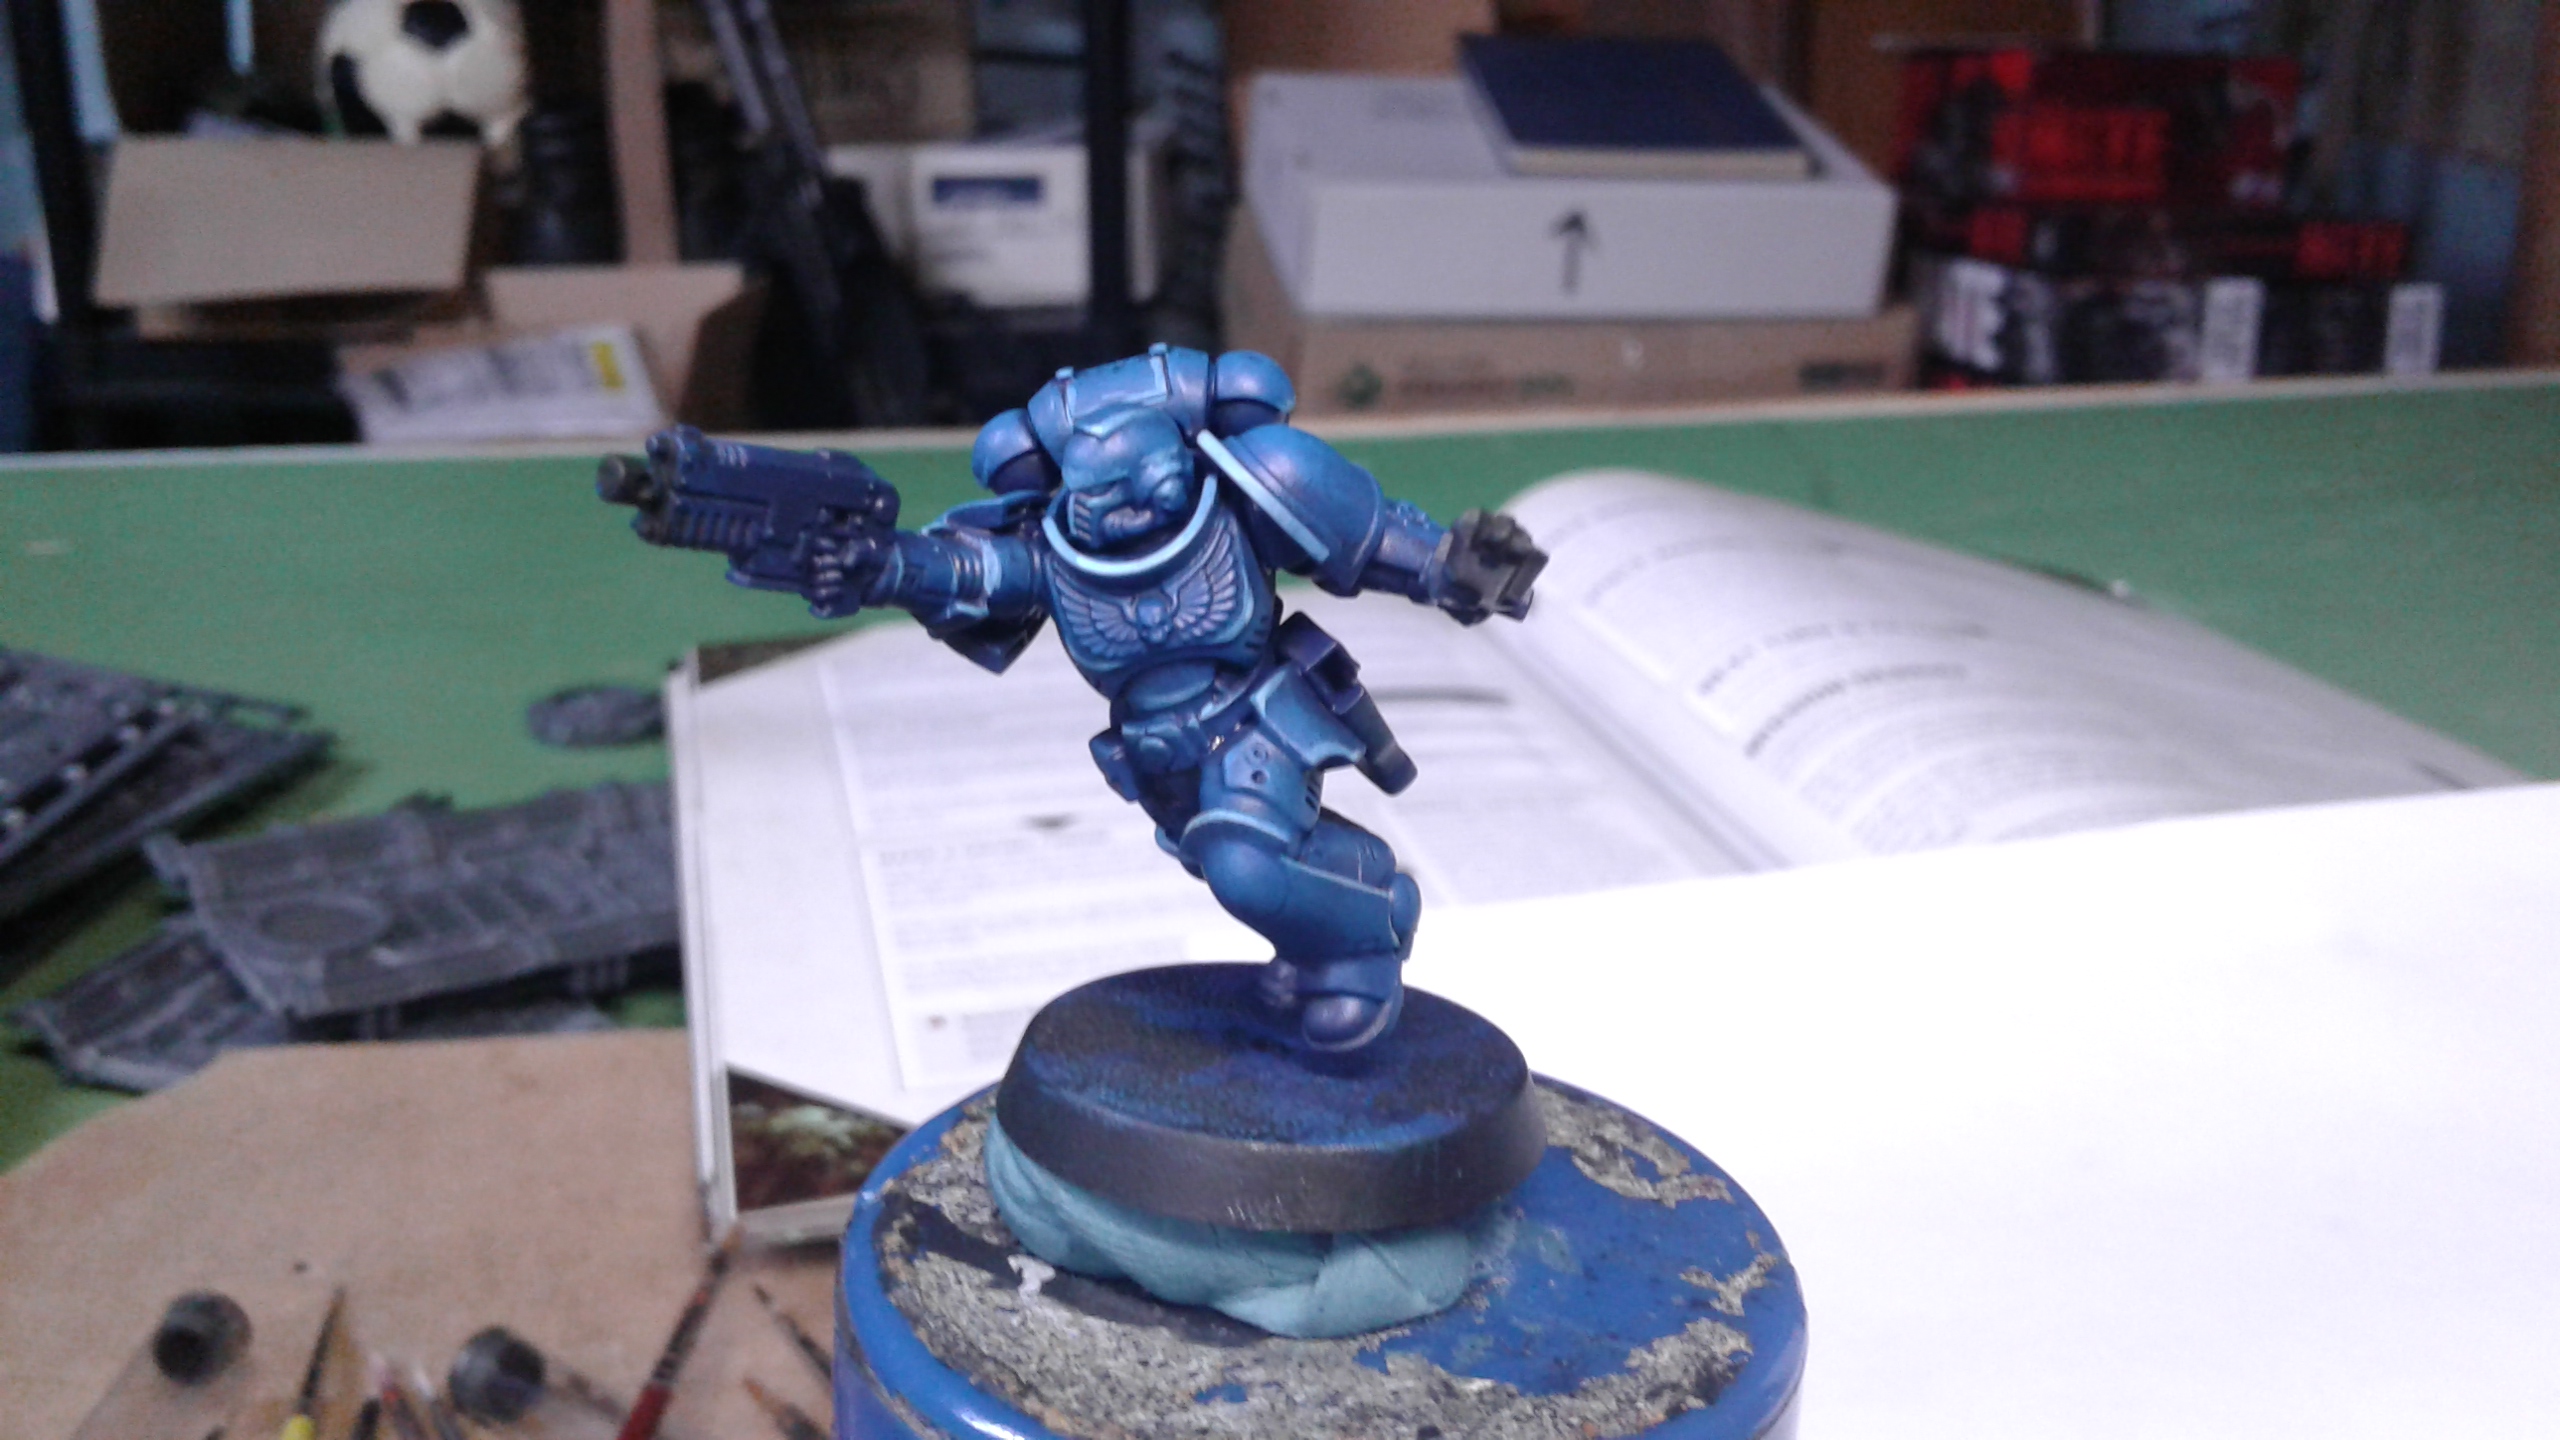
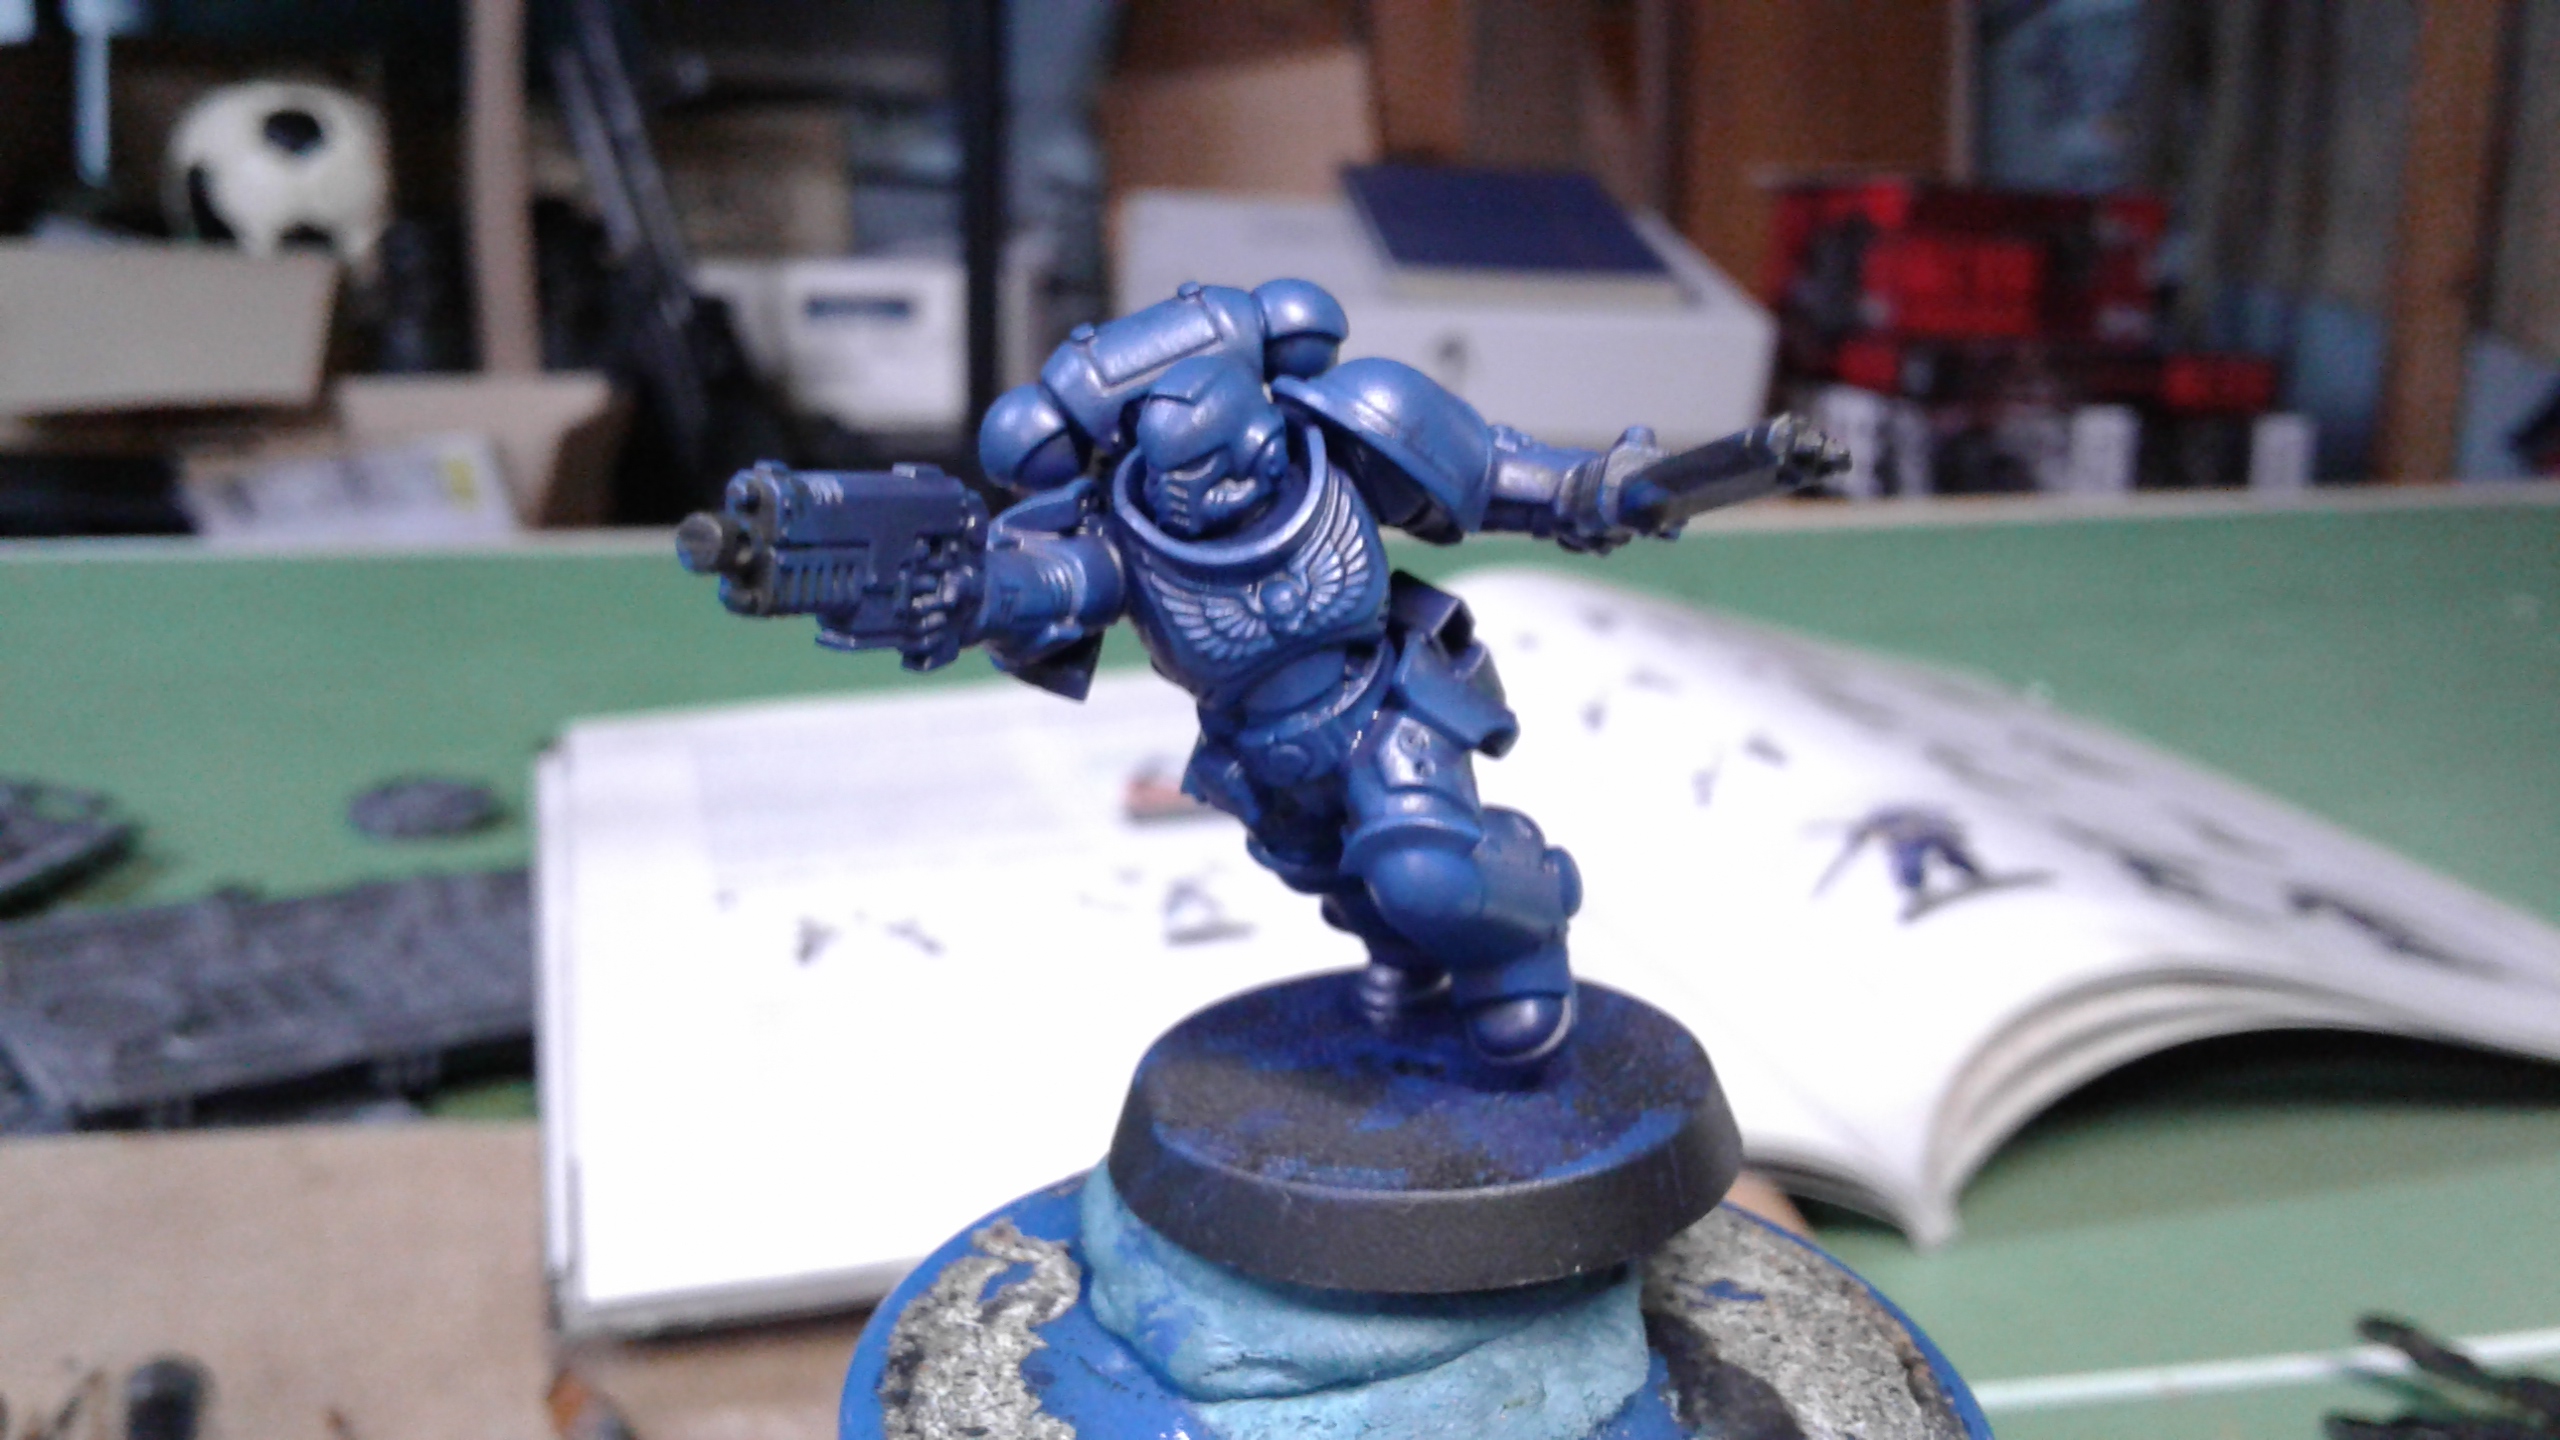
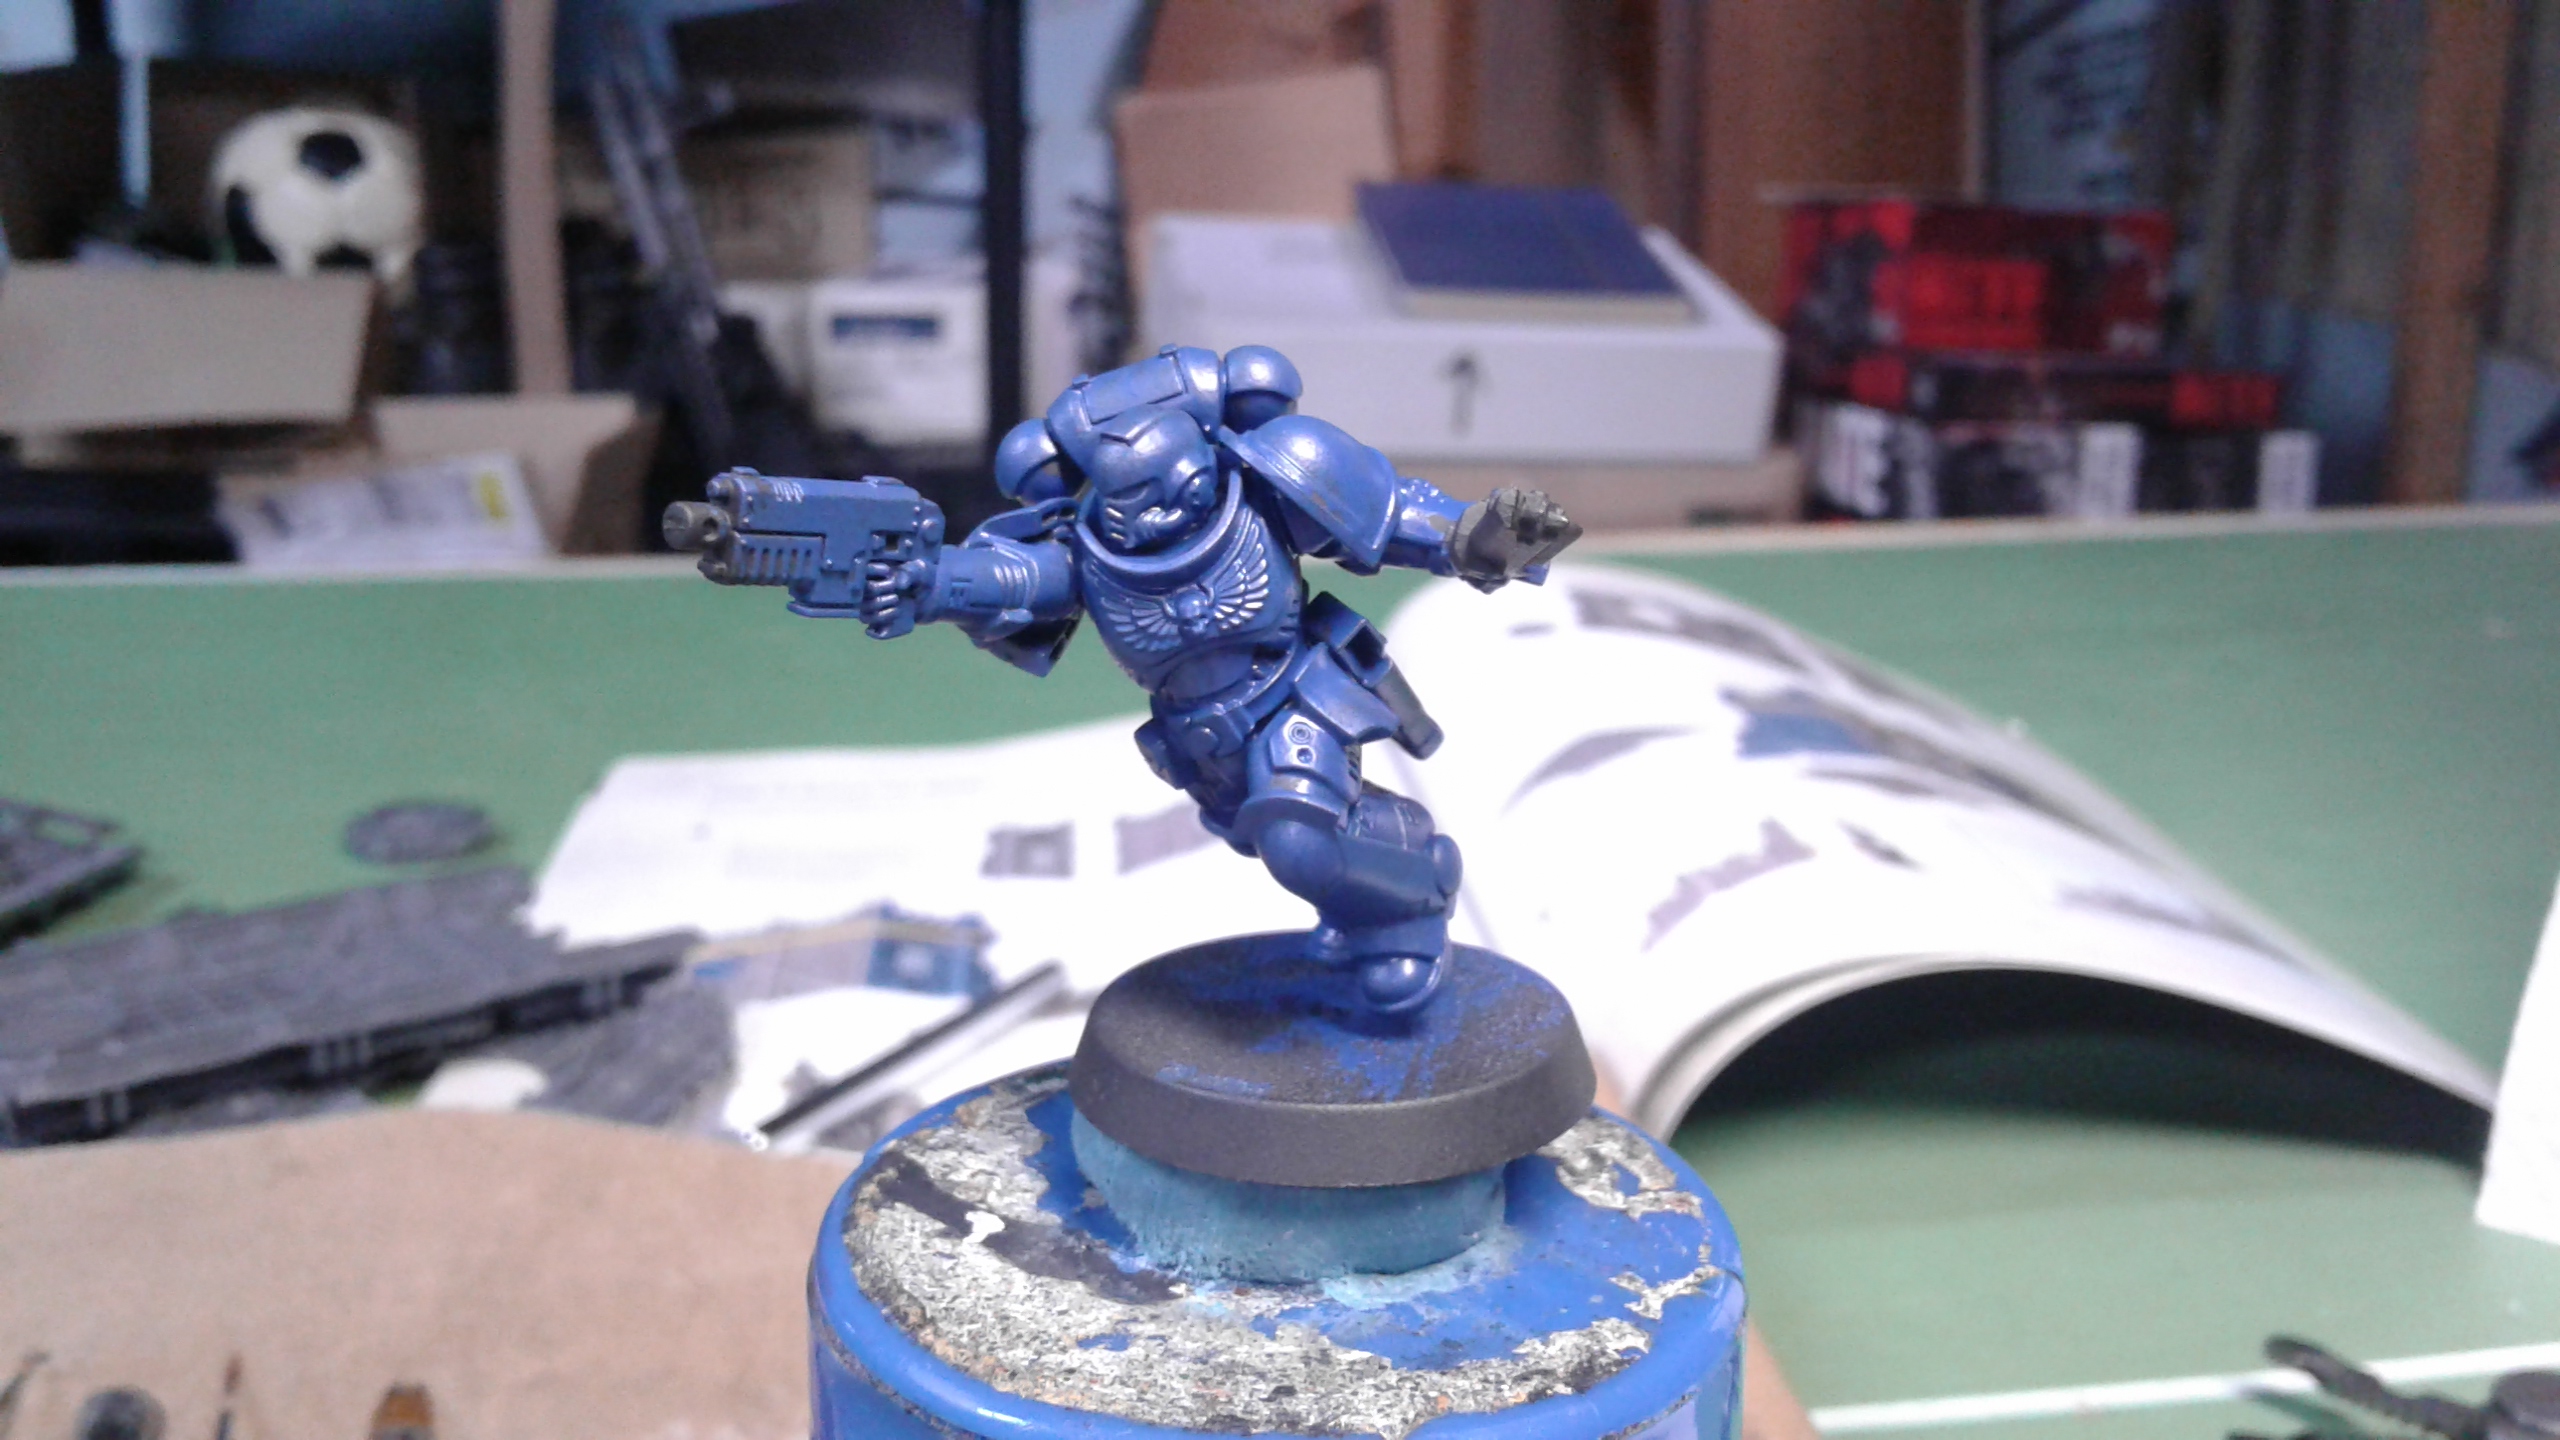
Finishing the details.
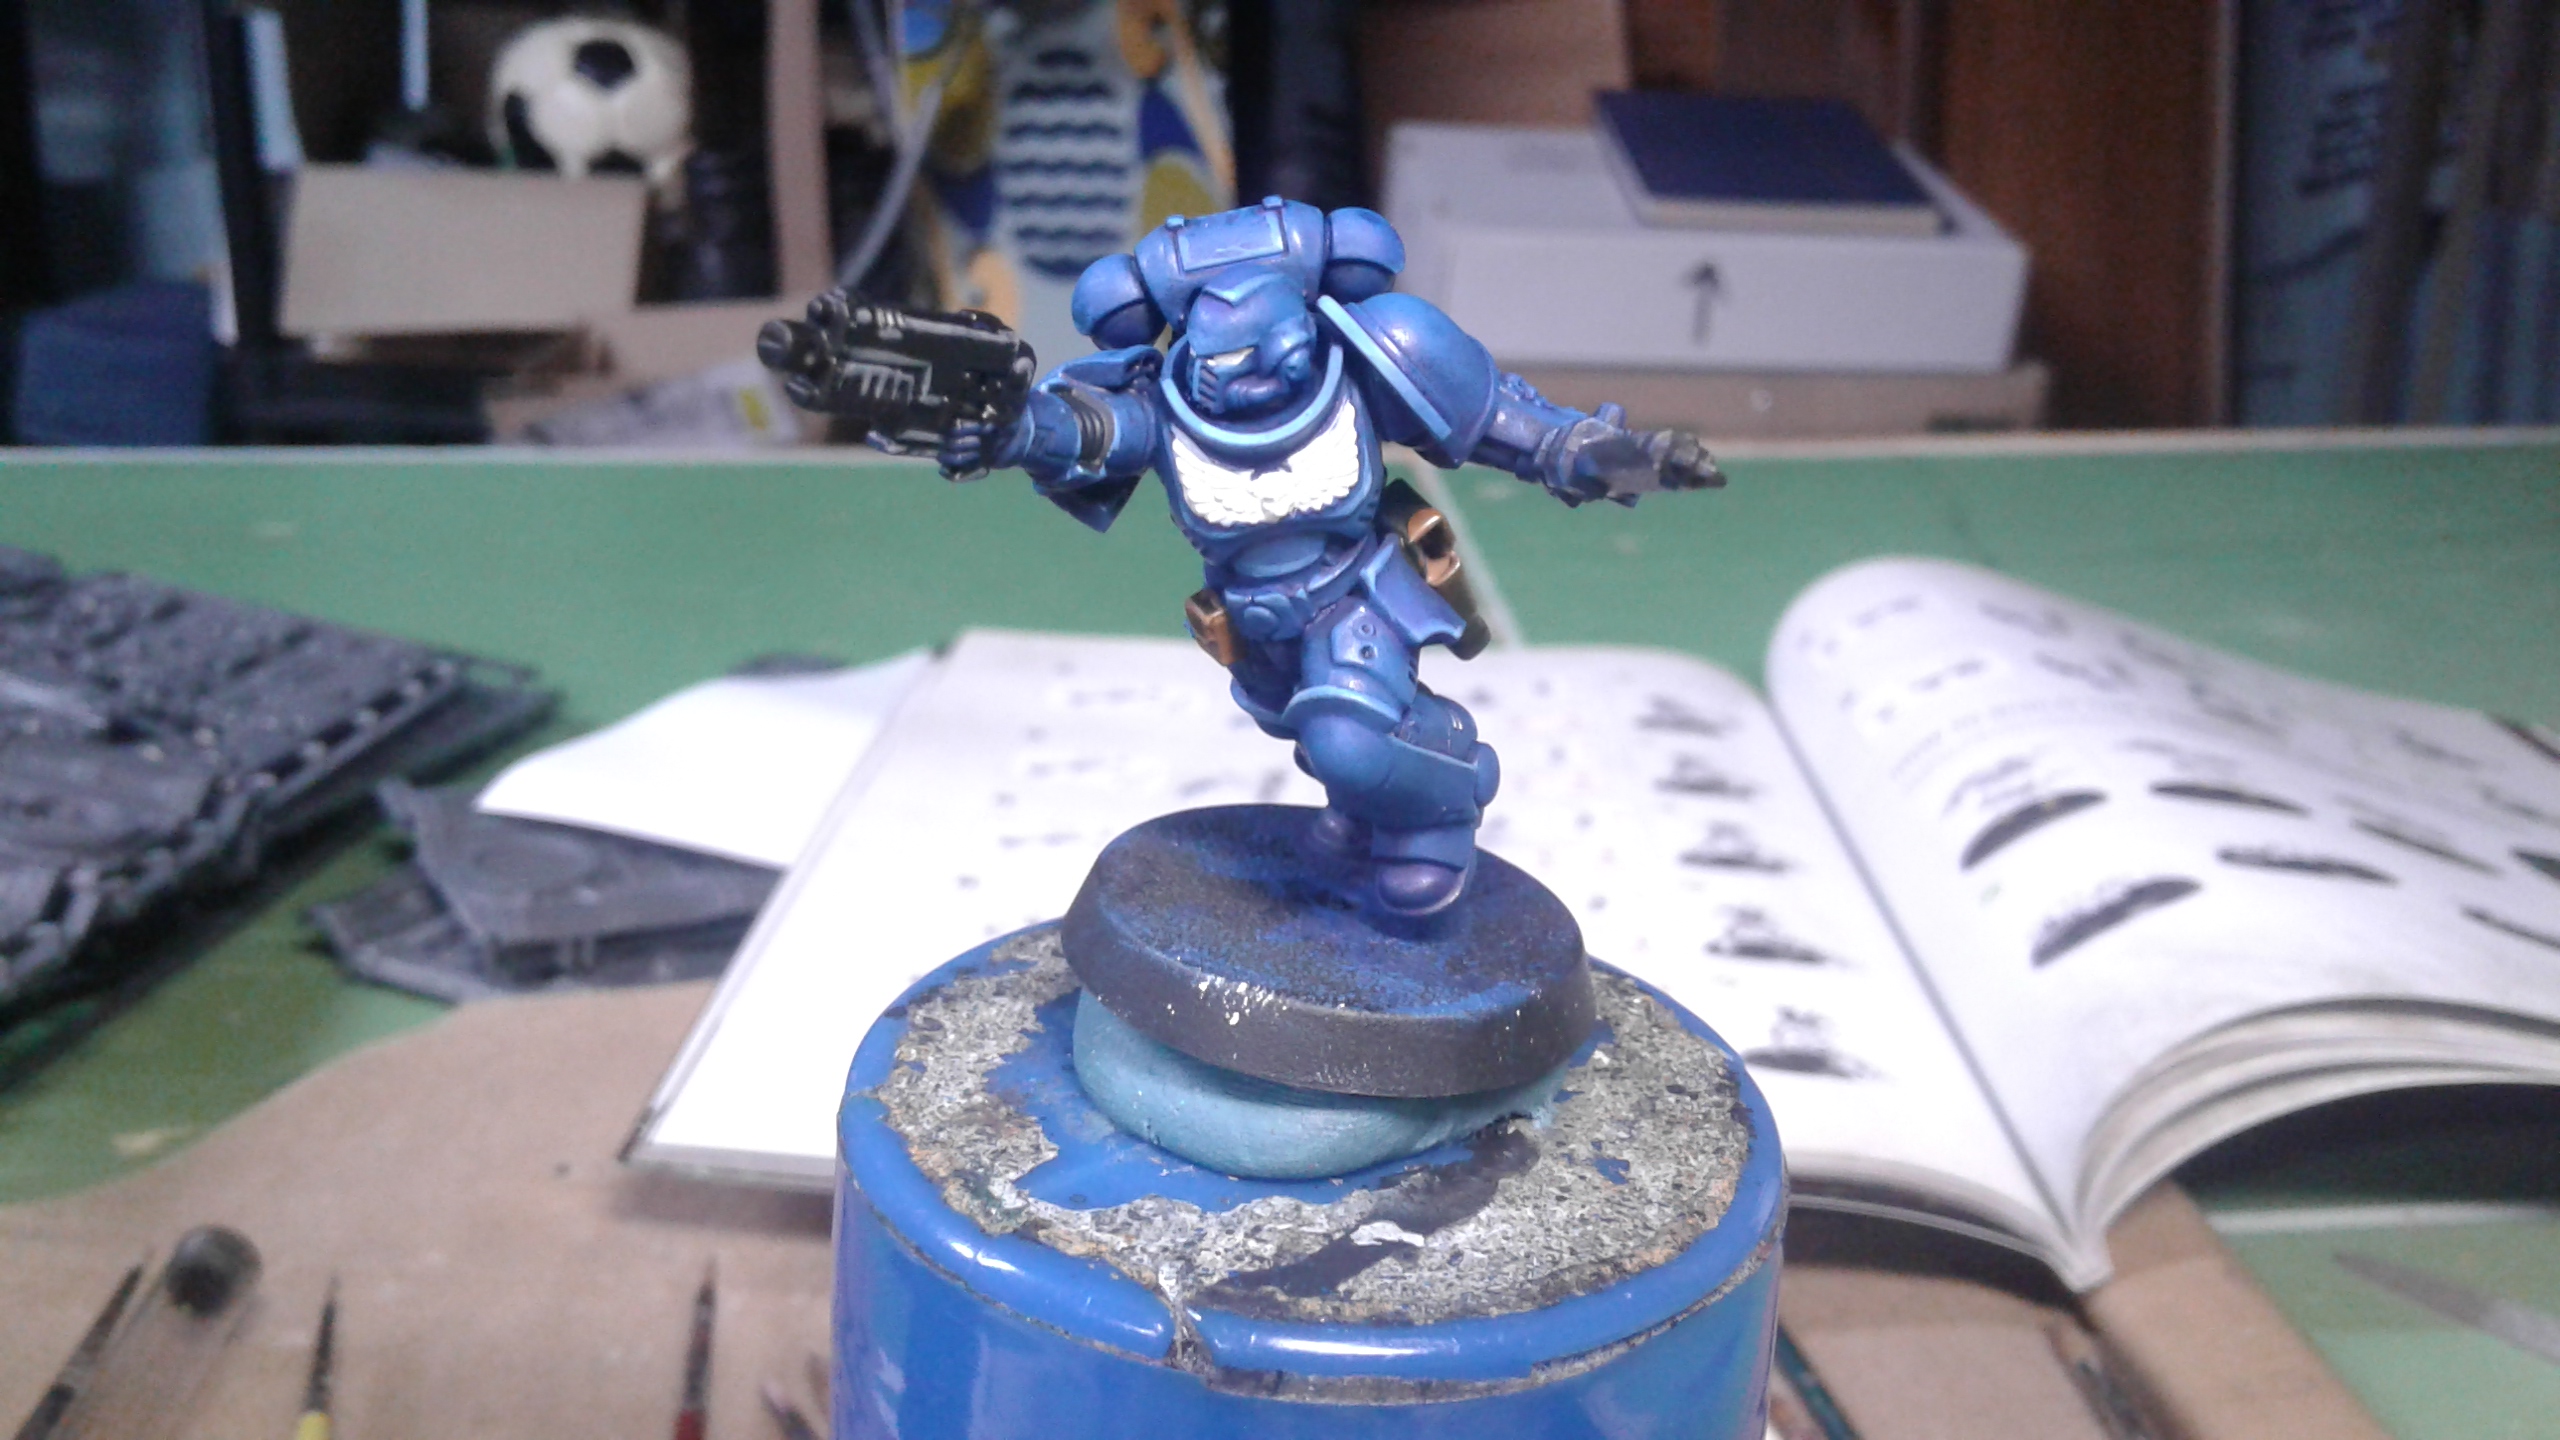
I decided to try to do a kind of non-metallic metals for the golden parts of the armor. Not so sure that I like the result. Let me know what you think.
Once a coat of P3 Menoth White Highlight was applied to all parts that were to be gold, I added a coat of Citadel Nazdreg Yellow Contrast. Once that was dry I added a wash of Citadel Reikland Fleshade Wash. The Nazdreg acted as a metallic gold and the Reikland is the wash that I always apply to golden parts. It brings a nice warmth and depth to gold metallics. I’d say it kinda worked, but I don’t feel like it’s gold. Anyway, it’s a nice contrast to the overall blueness of the model.
The helmet’s eyes is simply Citadel Gryp-Hound Orange Contrast. I hesitated between red or green but I think orange is nice and a little bit different. There are thousands of Ultramarine minis out there so I wanted mine to be a bit different.
You’ll see in the group shot below that it’s almost done. I won’t bore you with more painting steps. However, I will simply talk about the bases. They will later be covered with Citadel Technical basing stuff. I forget the name right now. It’s basically grey paint with sand in it. So I put a basecoat of P3 Bastion Grey on there. Any old medium grey would work here. It’s simply there to provide a background colour for the basing material so that bare patches don’t show too much. I guess I could also have left them black, as grey to black is not too contrasting. However, if you’re using a lighter shade of basing material this step becomes essential.
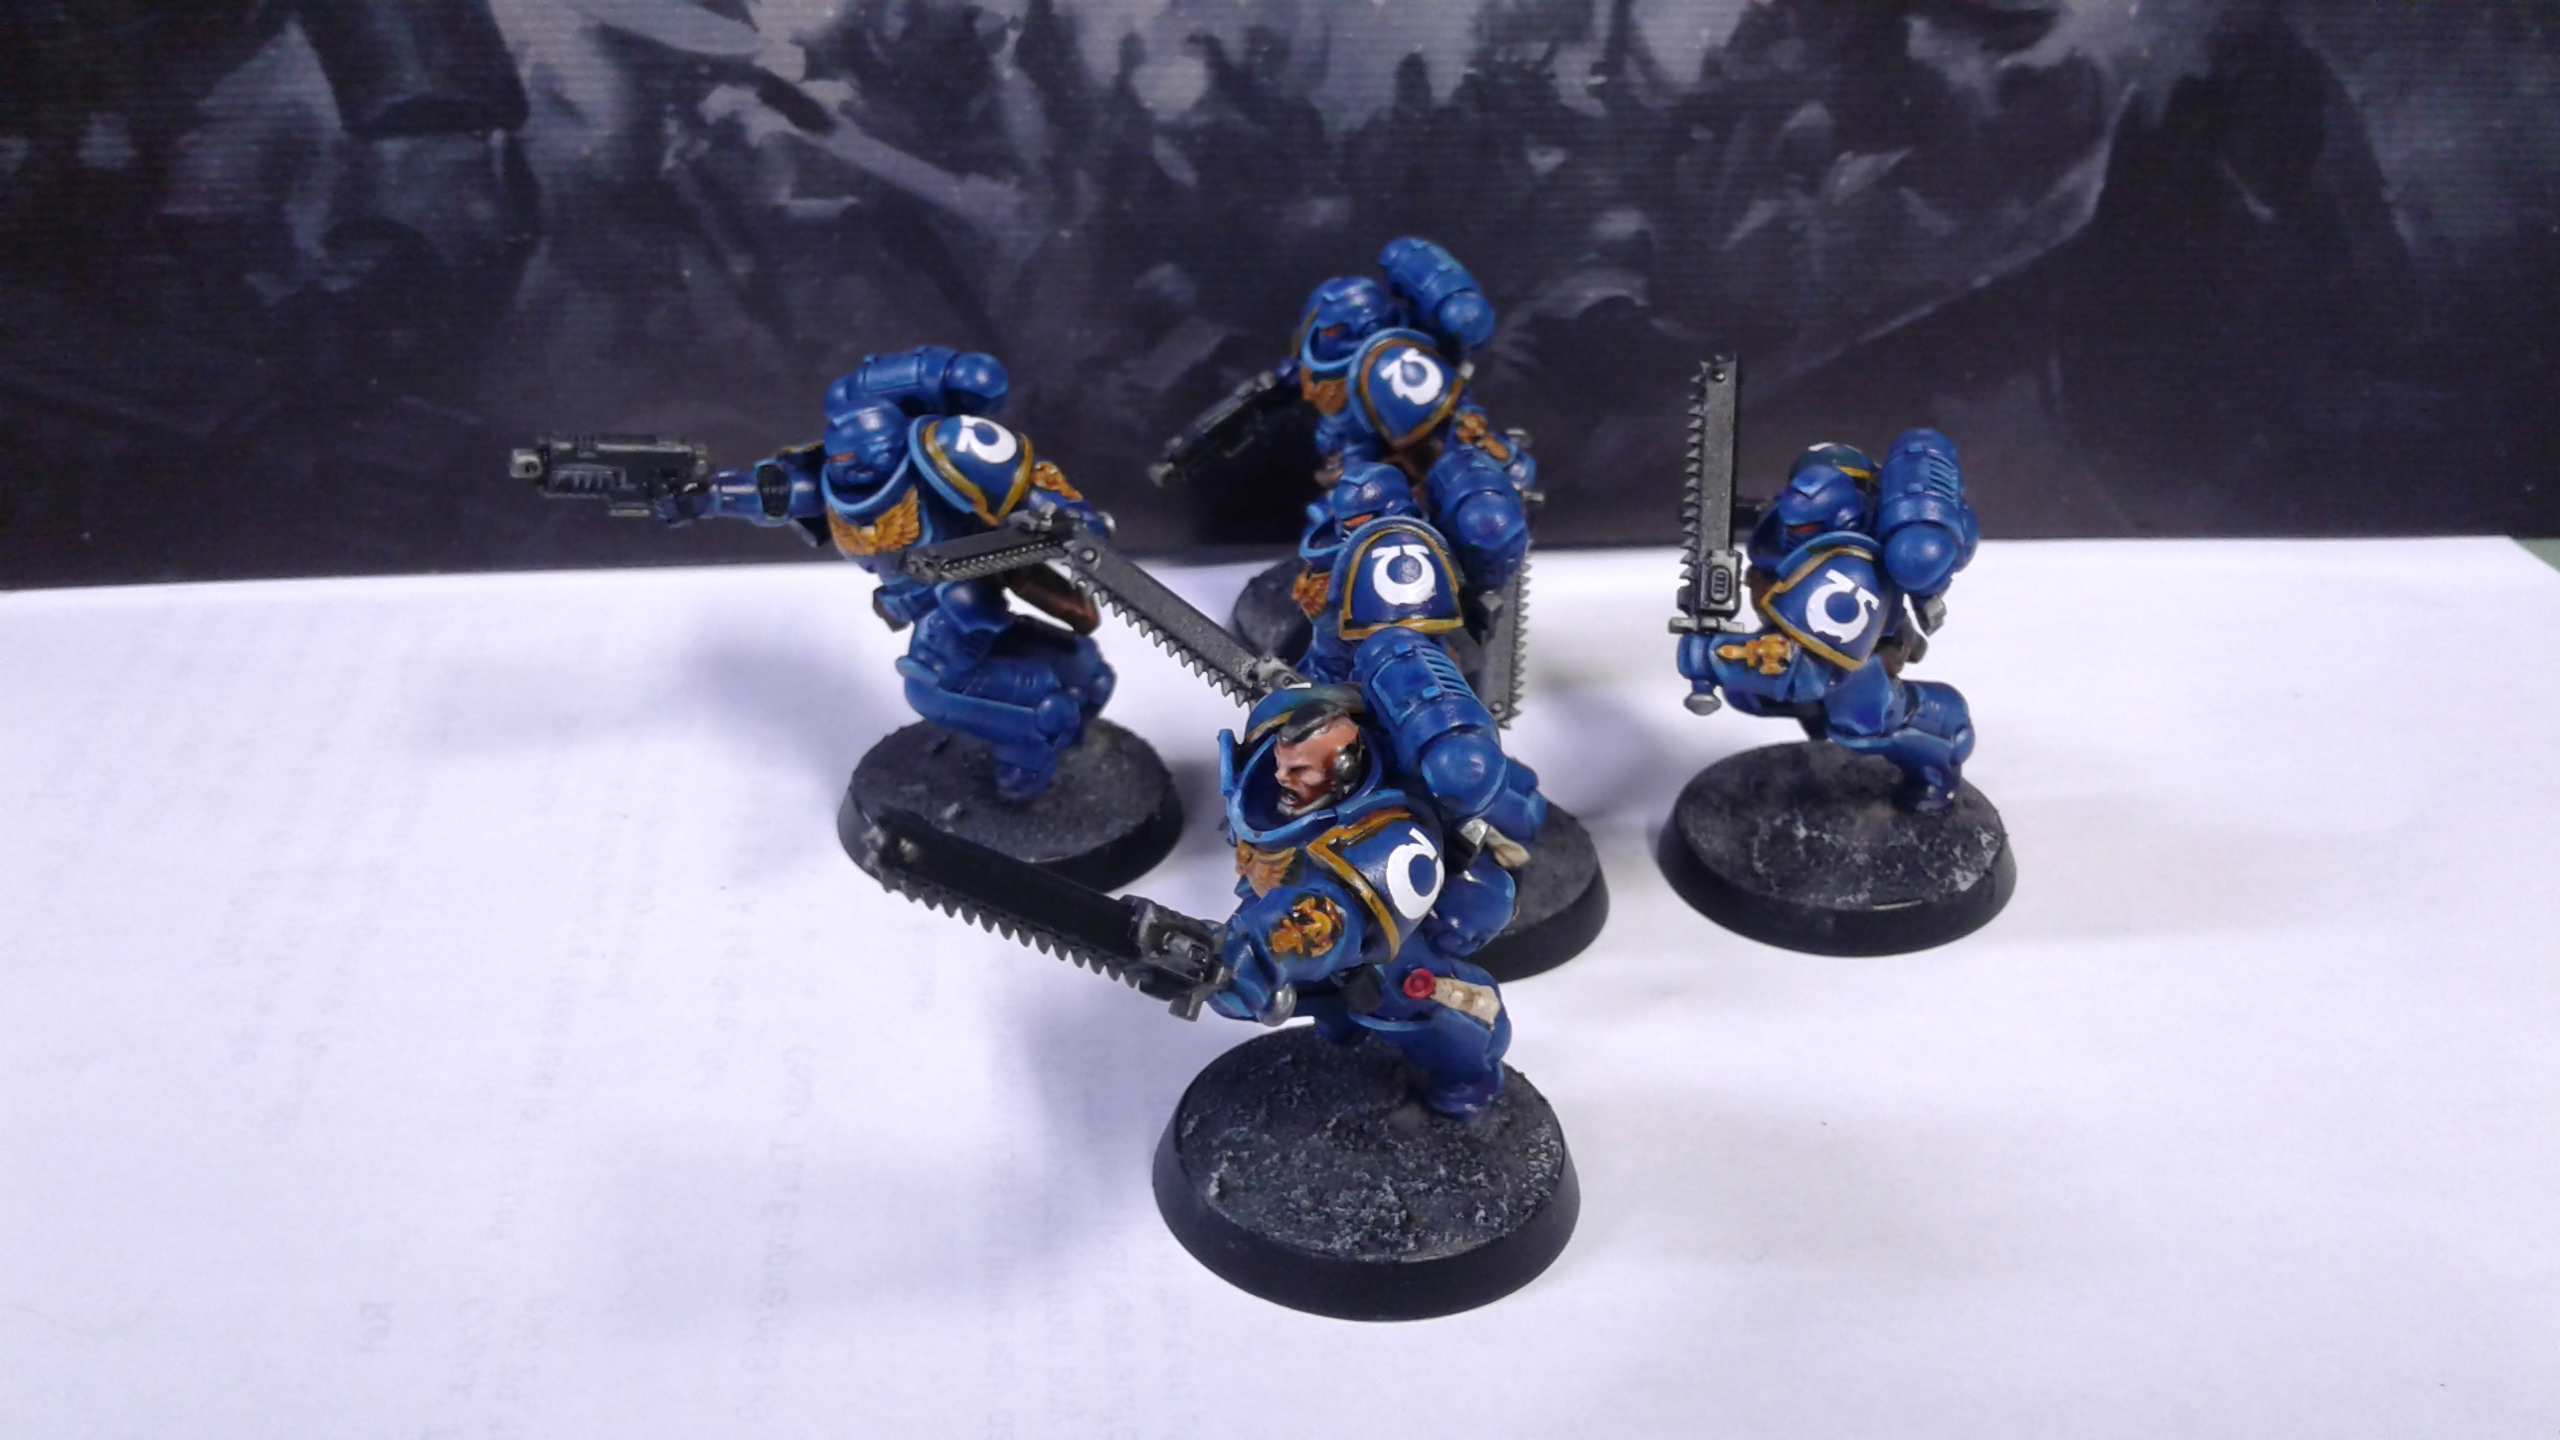
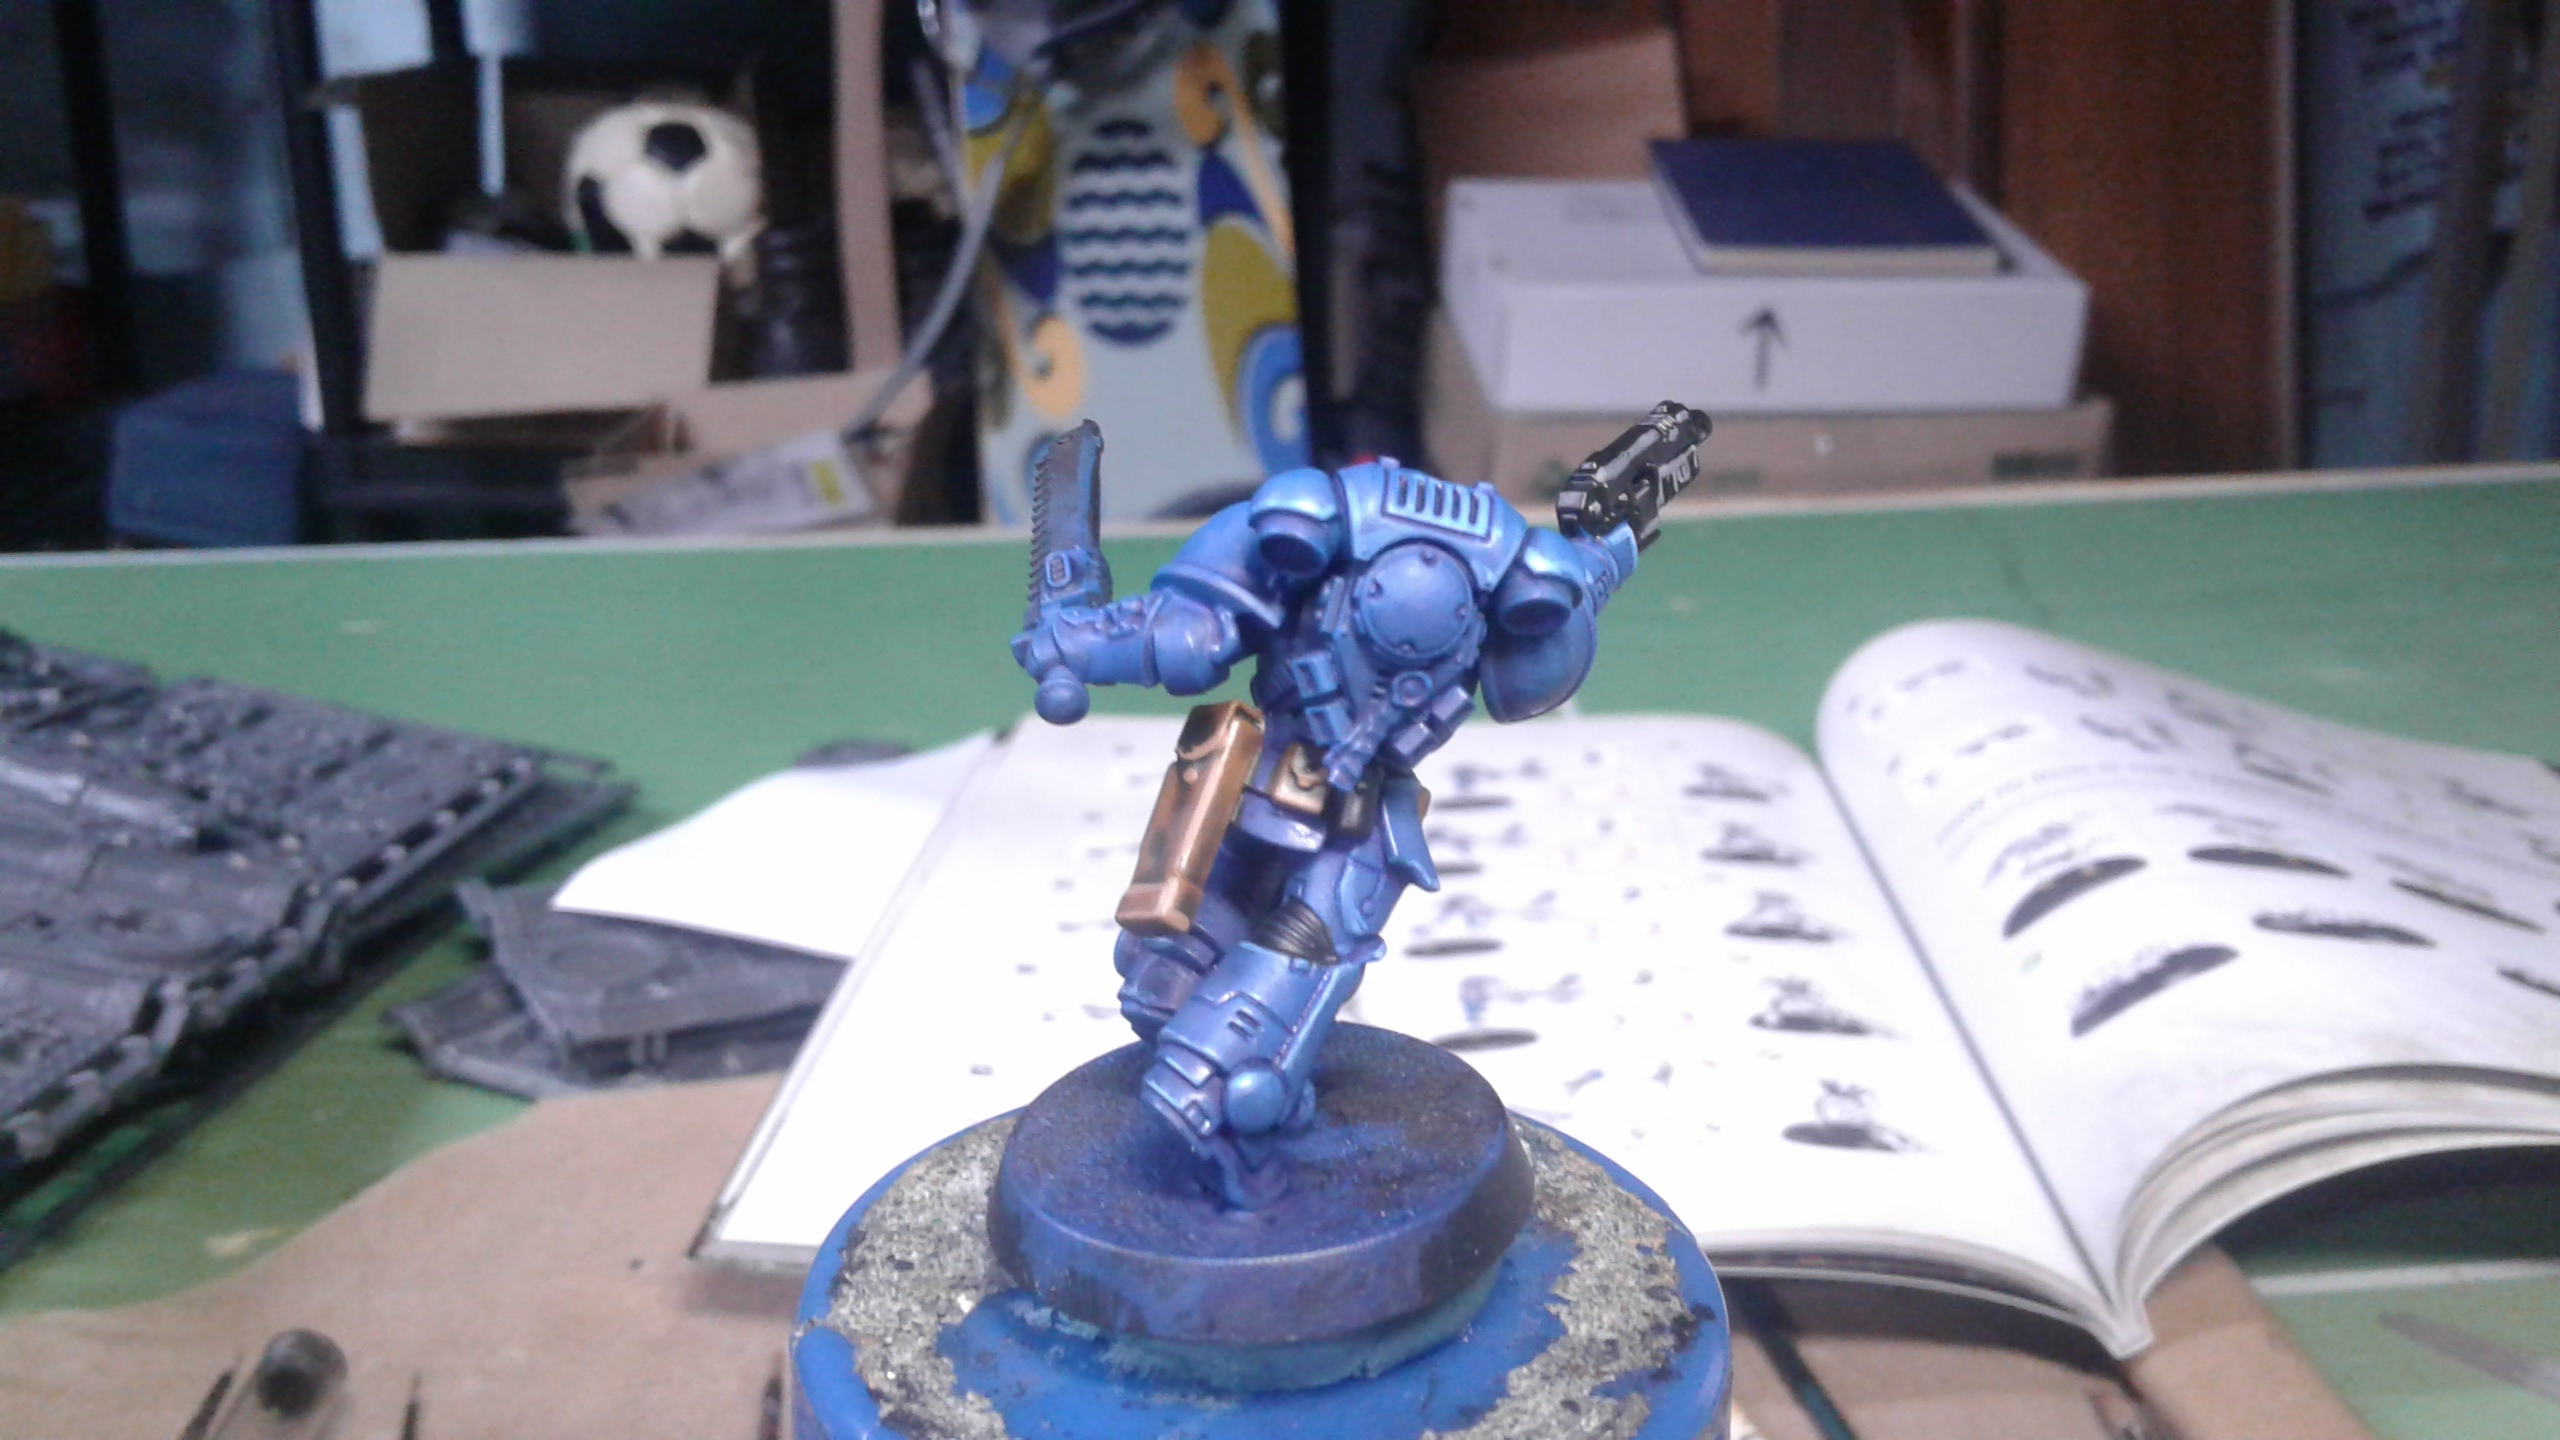
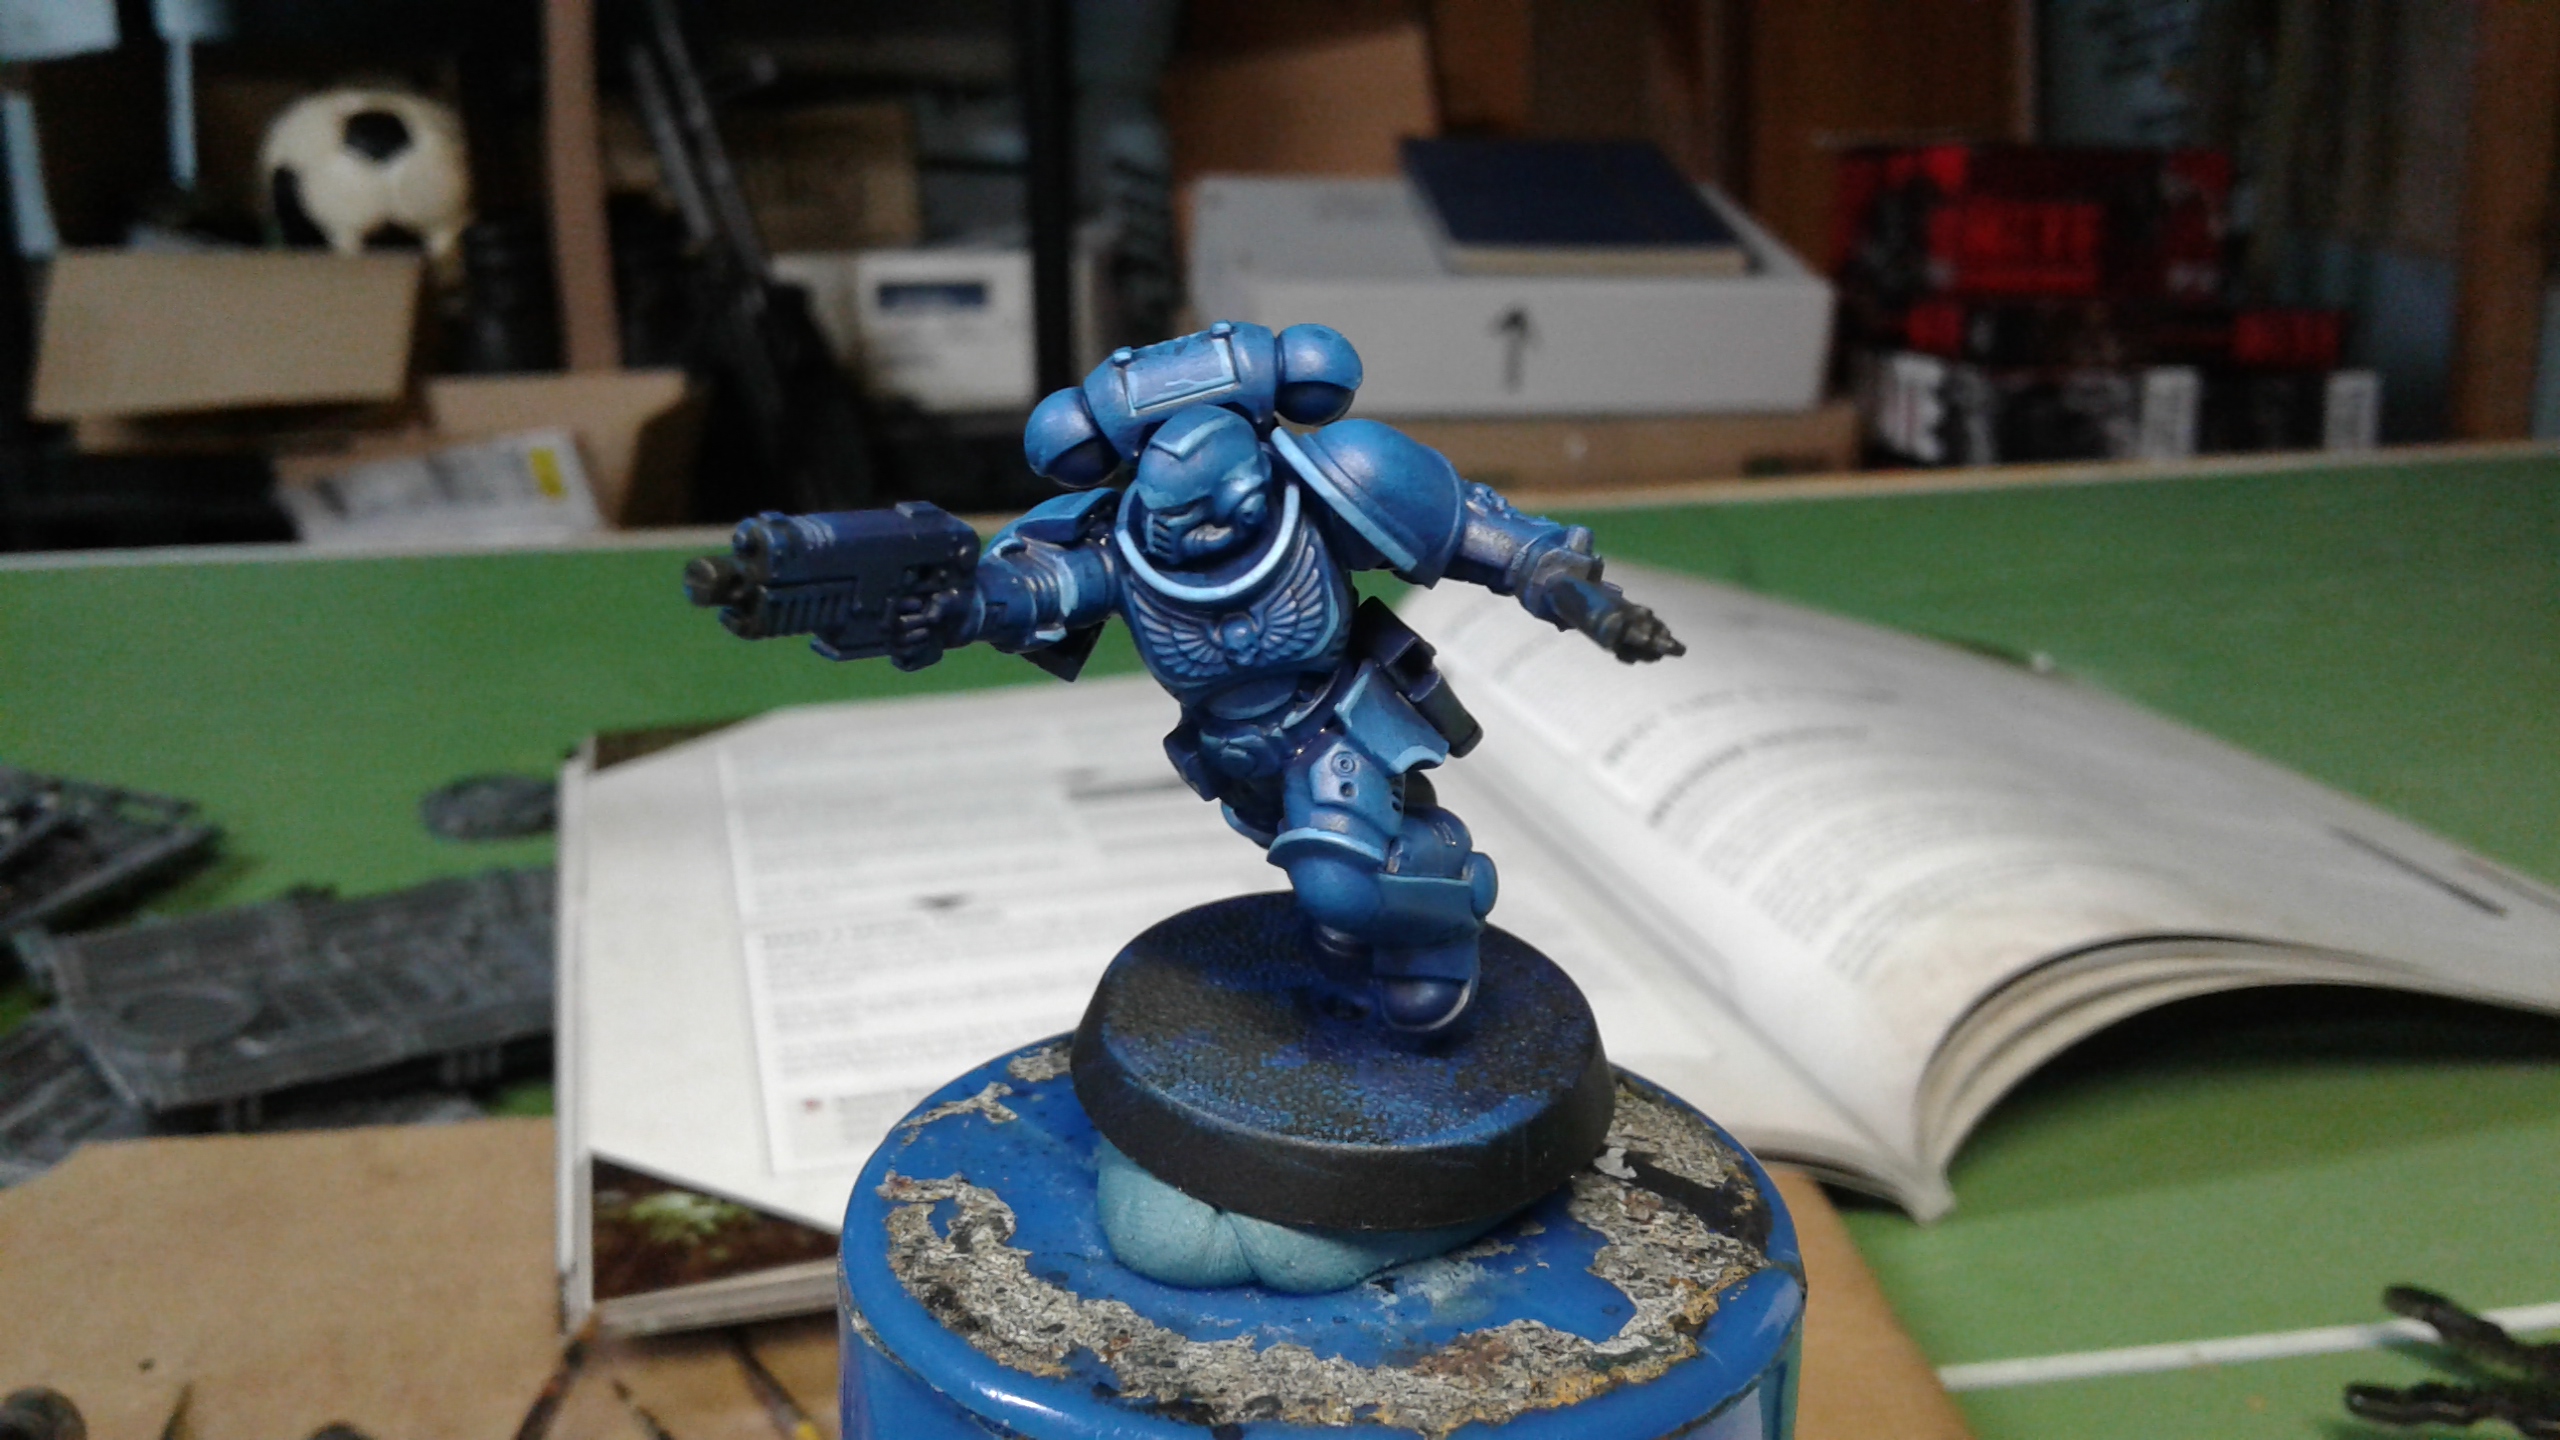
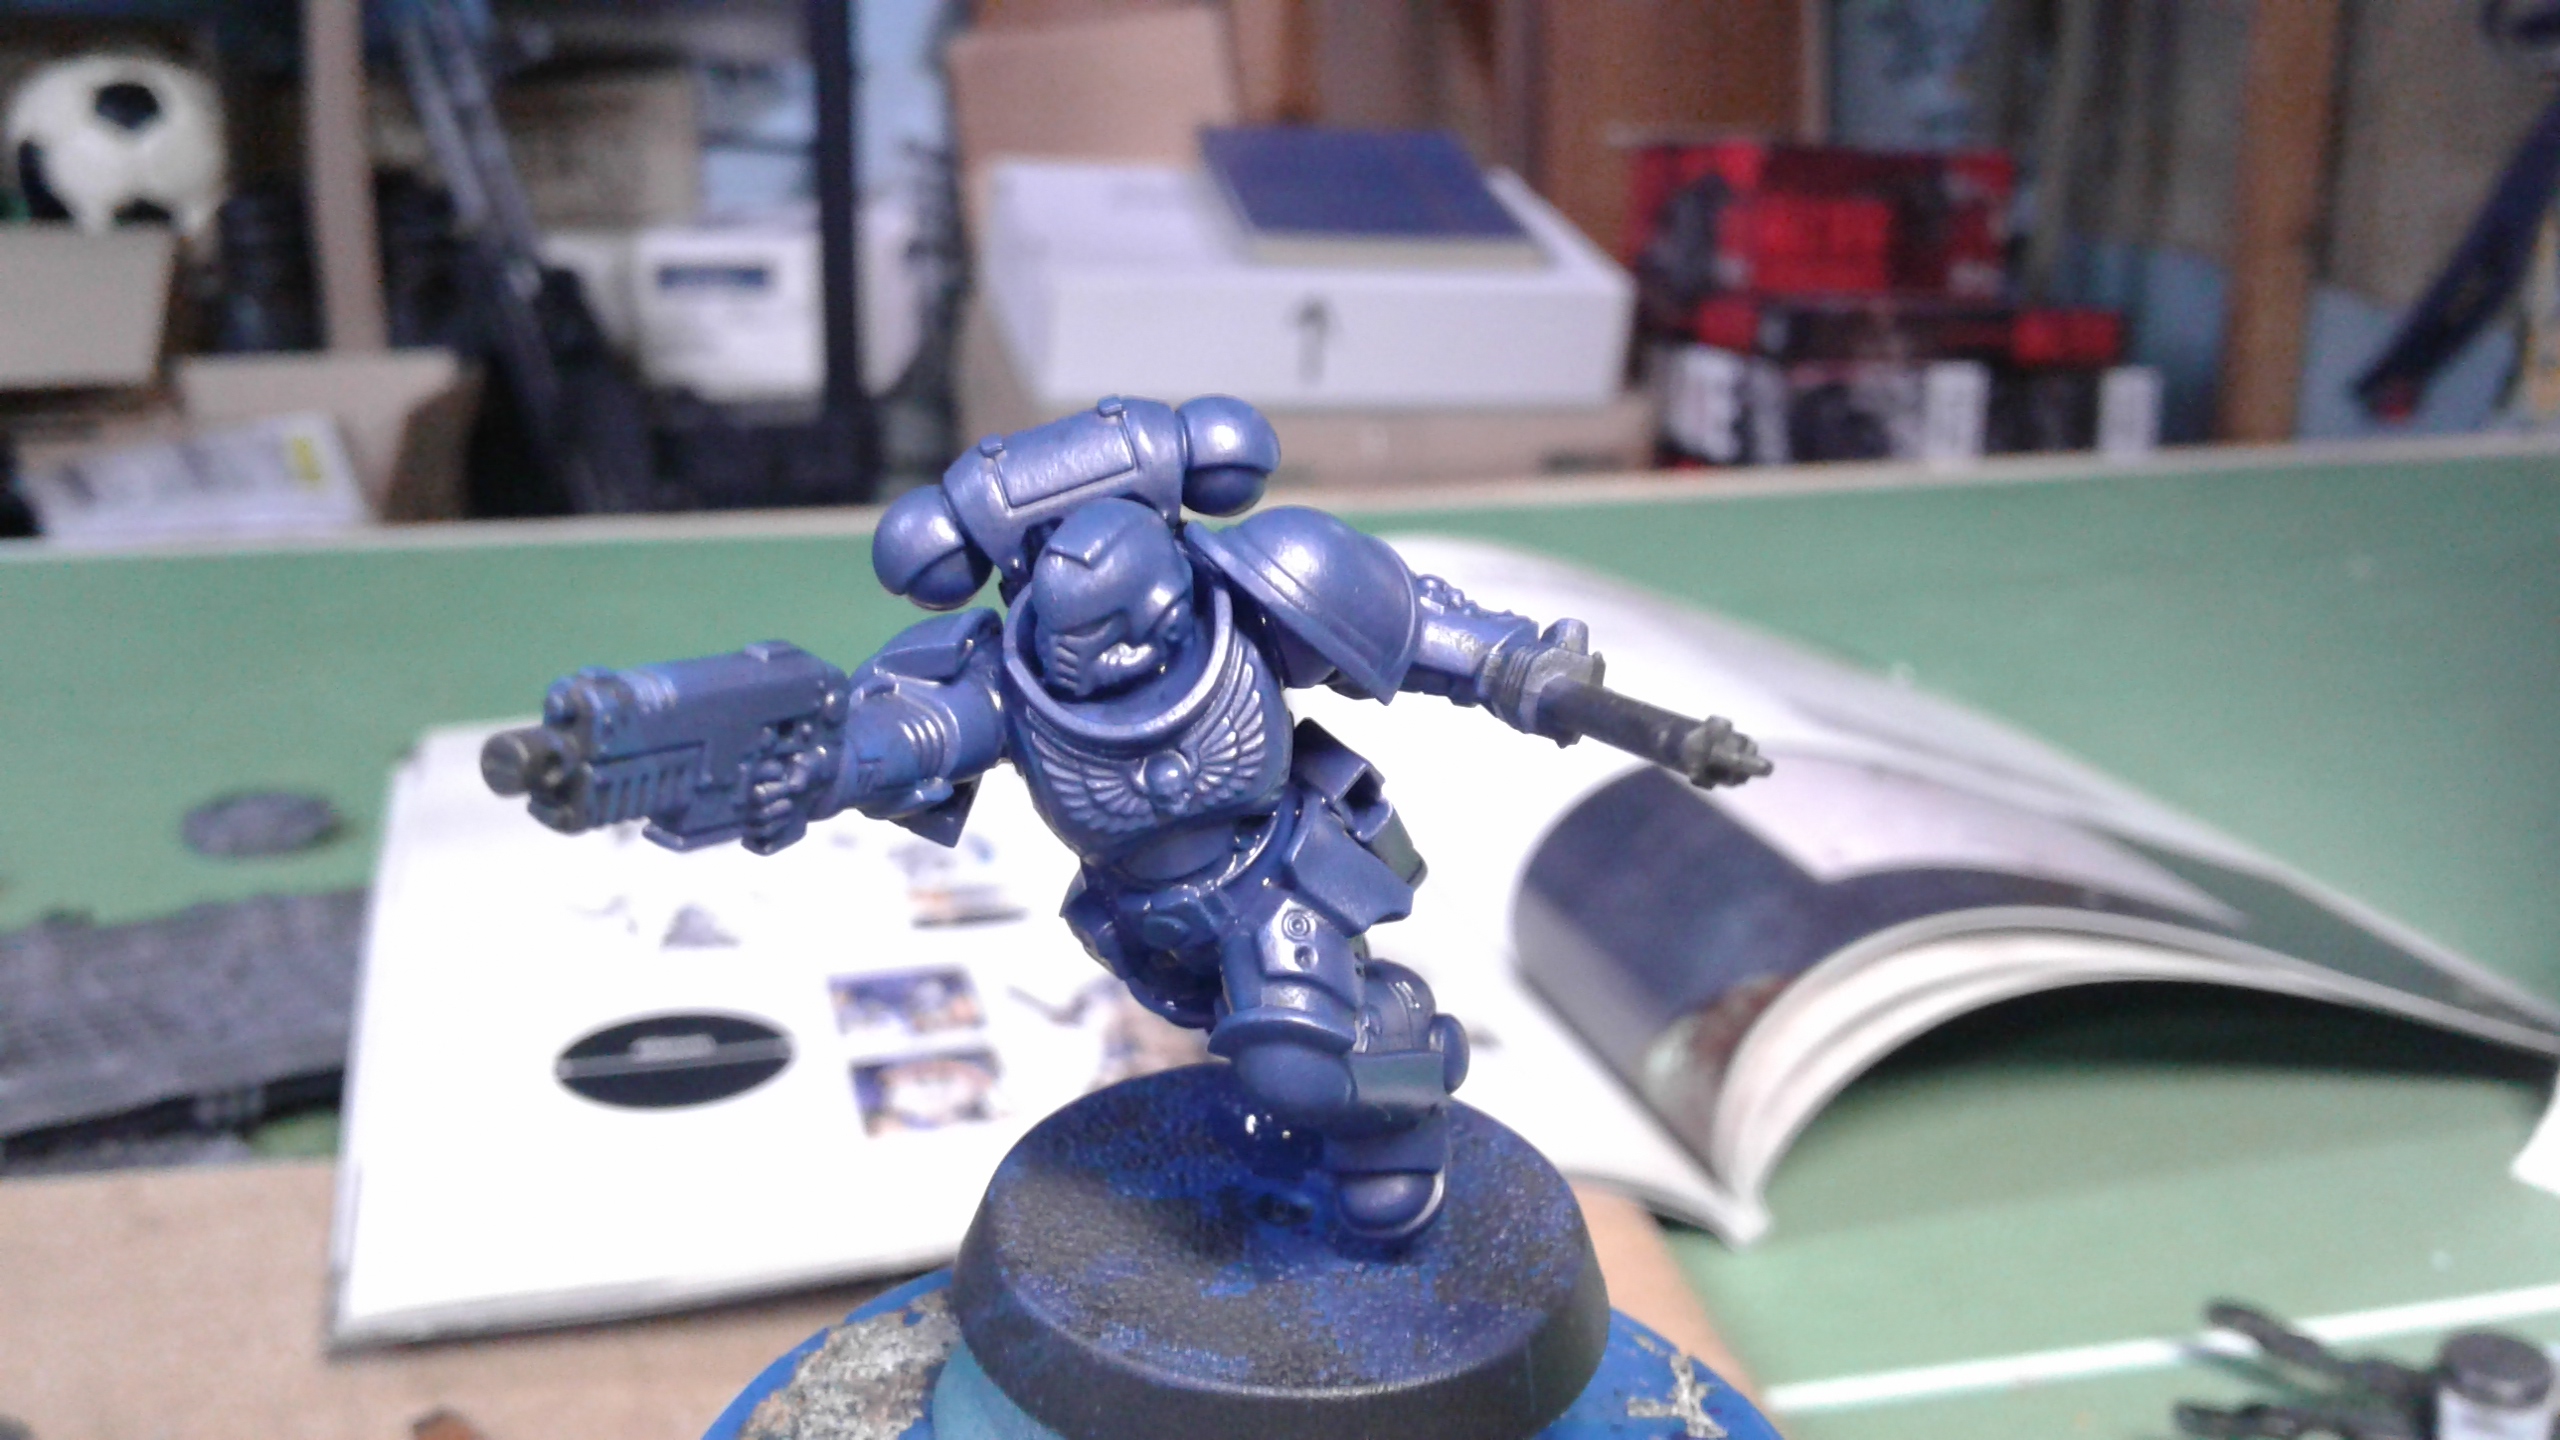
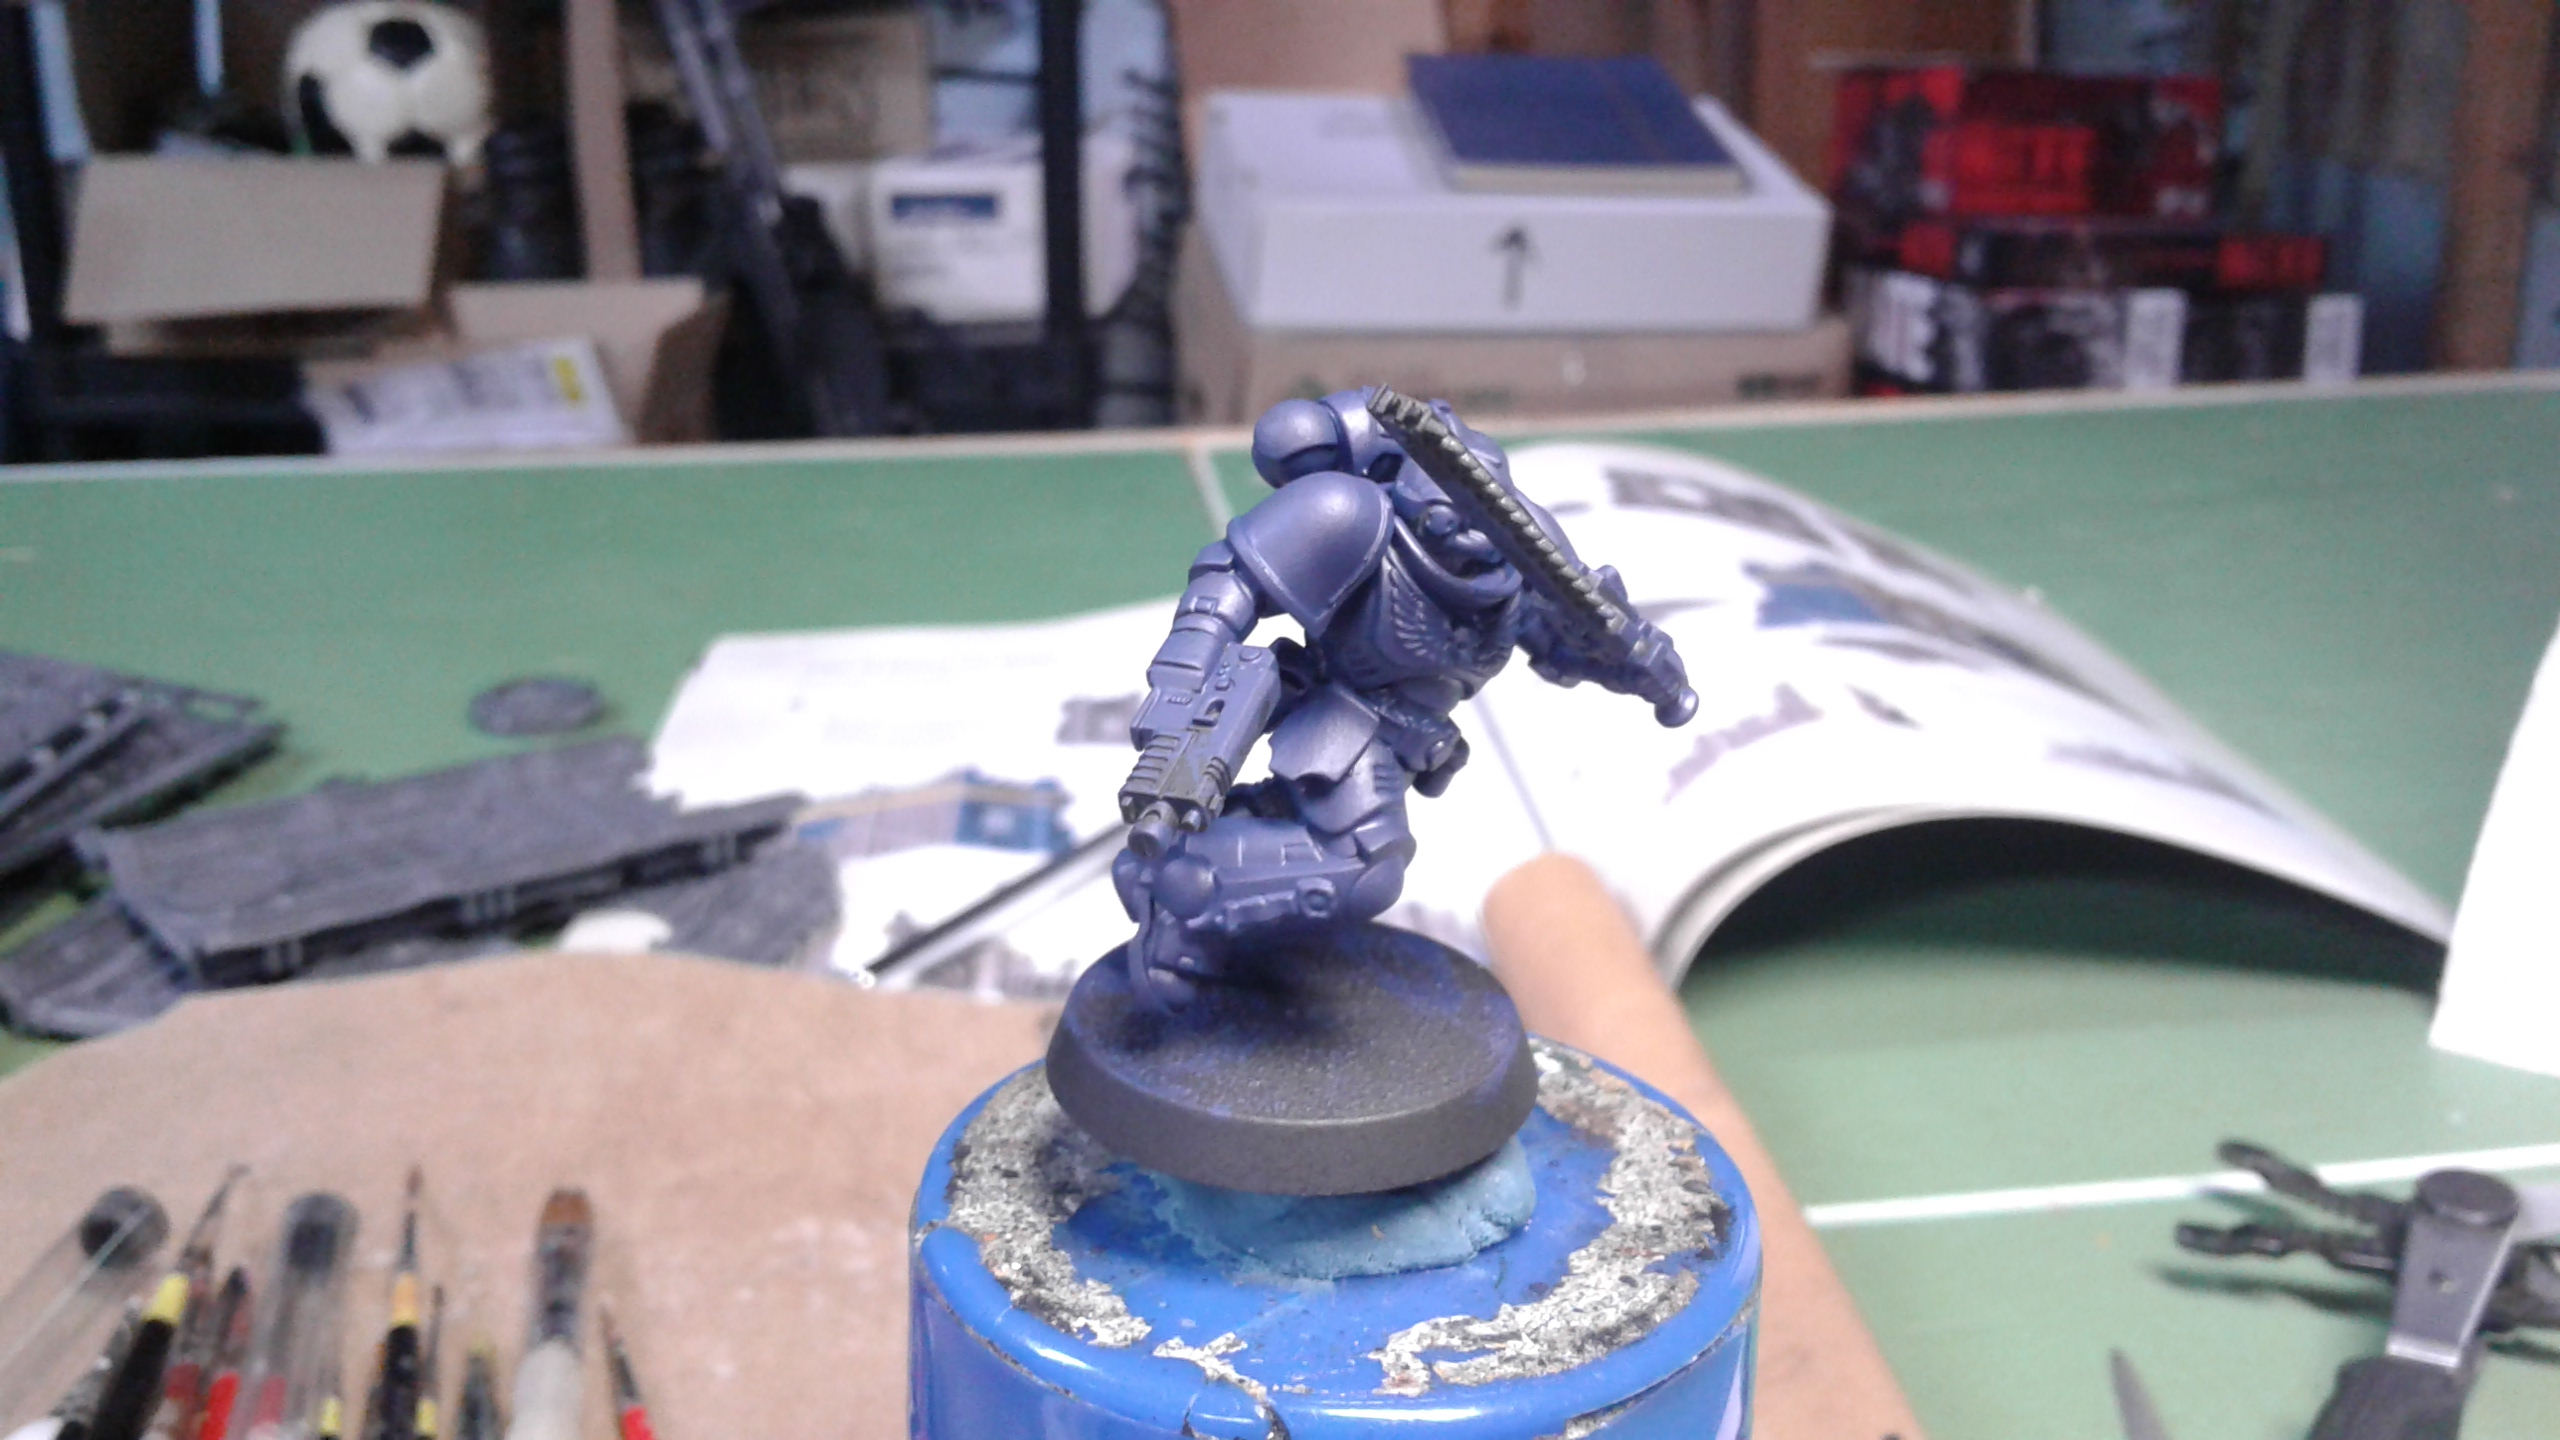
Picking up the details.
Now that the armor was done, I needed to pick up the details. Leather was done with P3 Bootstrap Leather. This was then washed with Citadel Snakebite Leather Contrast. I then edge highlighted with a second pass of pure Bootstrap Leather. Complete!
The bolters were painted with P3 Thamar Black and edge highlighted with a mix of P3 Thamar Black and Liquitex Titanium White. I used Liquitex because that’s what I had handy but any old pure white would have worked.
I will need to work on my edge highlighting technique. I don’t find it too difficult but it requires excellent brush control. Just don’t drink too much coffee beforehand. I did find that having the right brush and paint consistency is critical. It’s better to have a bit brighter color but with a milk-like consistency. This way it’s easier to control the flow of paint from your brush to the mini. Having a brighter tone will also mean that it will dry a bit darker on the mini since you thinned the paint down a lot. Let transparency work for you. I used a 00 Windsor Series 7 brush for this. I guess any good sable brush could work, but I adore my Series 7s. Also, a bigger brush could work too if you’re good with brush control.
You’ll see that I also picked out the imperial eagle as well as the helmet’s eyes. I used P3 Menoth White Highlight (MWH) for that. Again thinned down to a milky consistency. I will use Contrast Paints on those parts later and I found that MWH is really good proxy for Citadel’s Wraithbone Base. Since I don’t like Citadel’s Base paints I prefer using MWH. A word of advice though, be sure to wait until the MWH is thoroughly dry before either applying another coat or applying your Contrast Paint. You may end up with bad results otherwise.

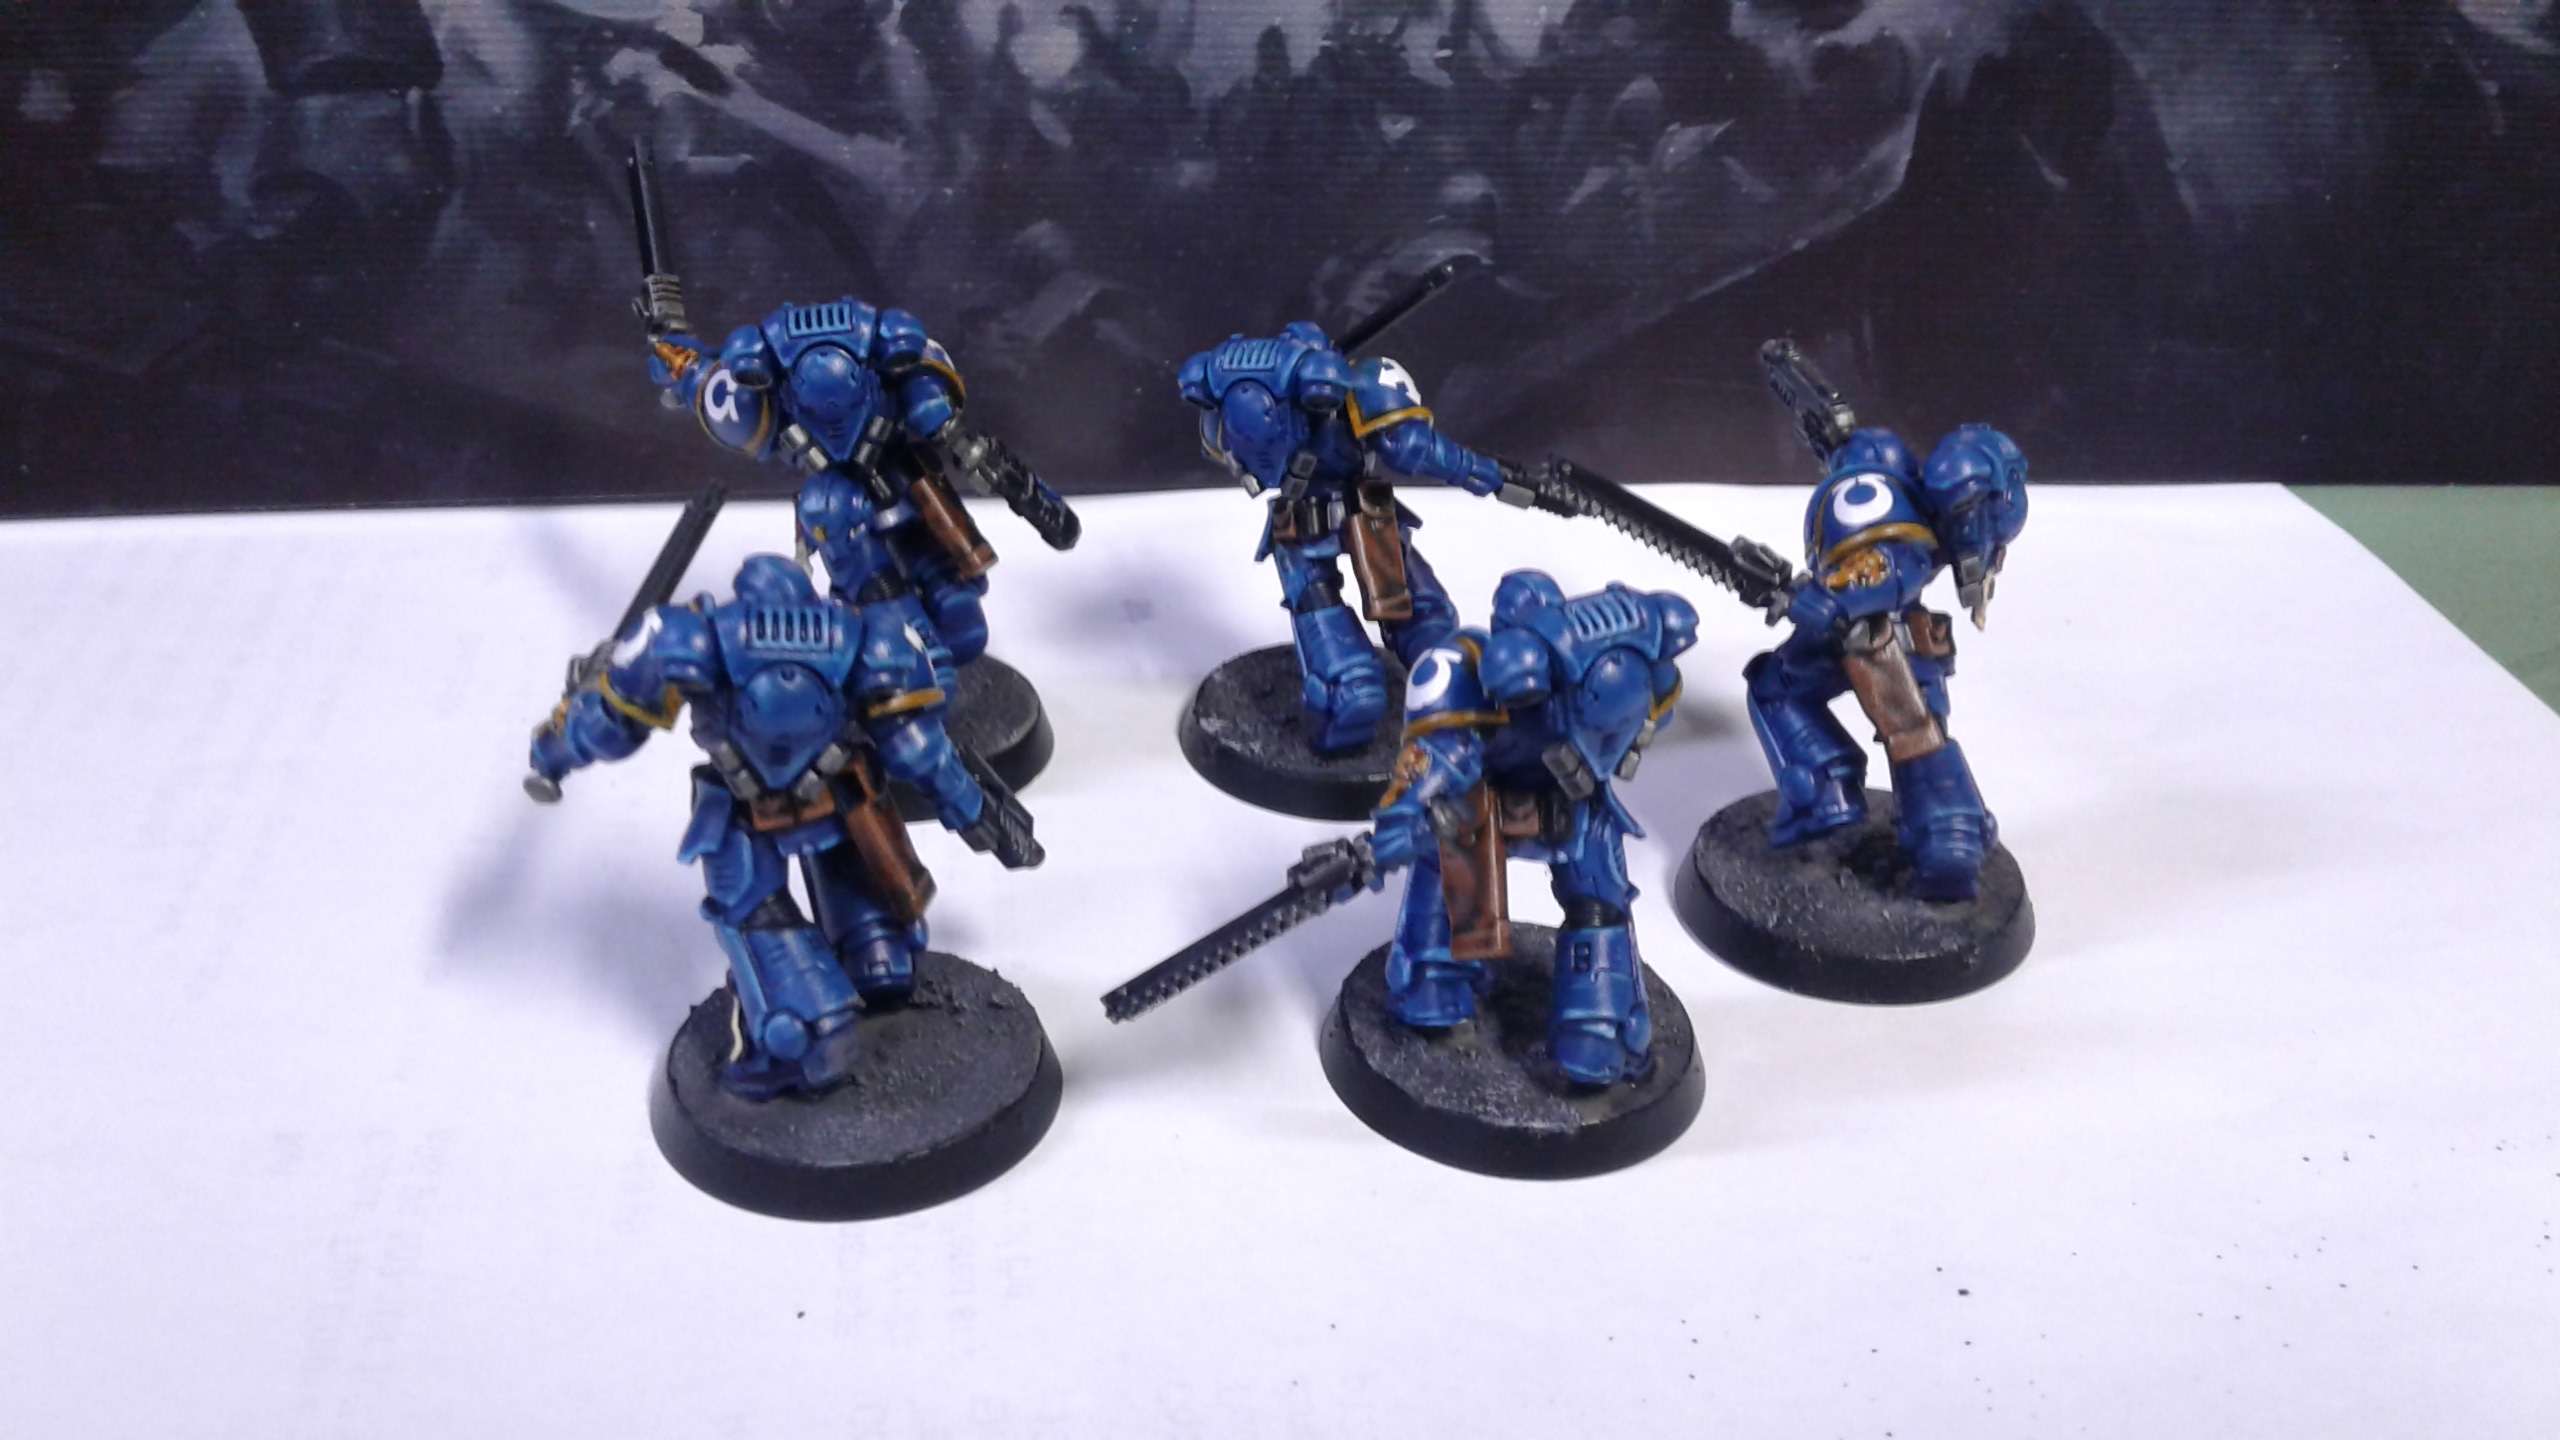
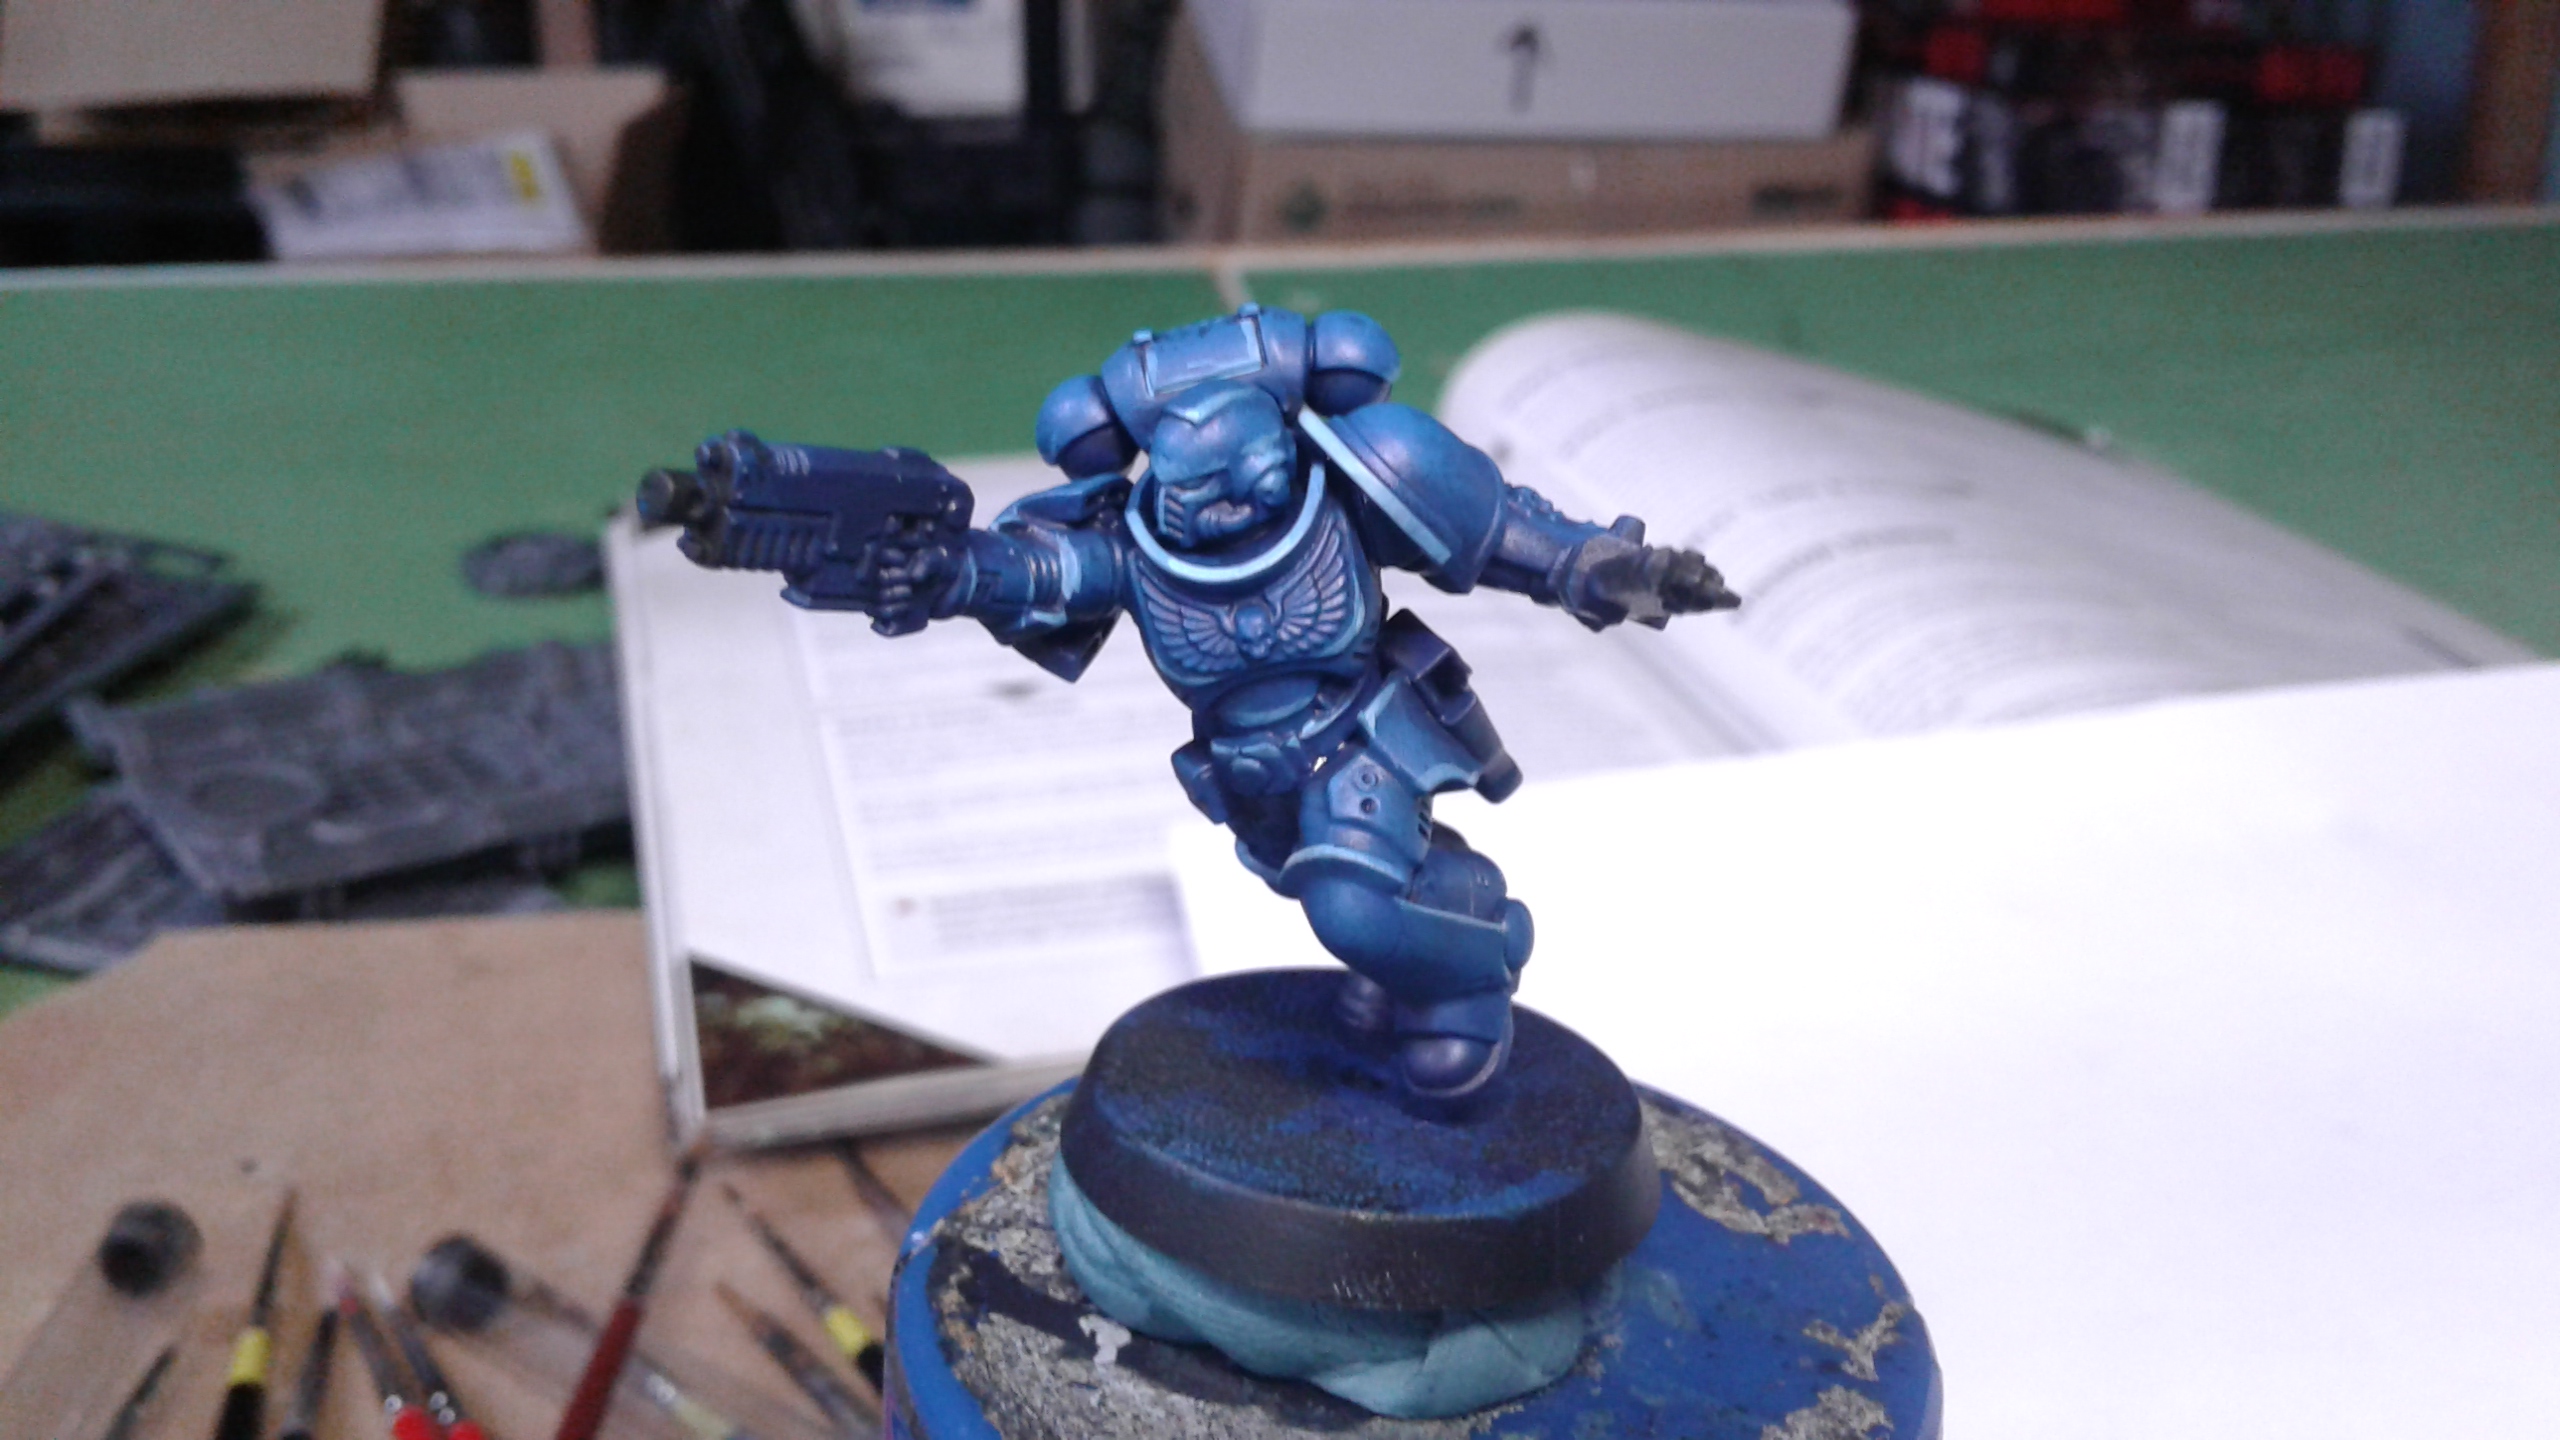
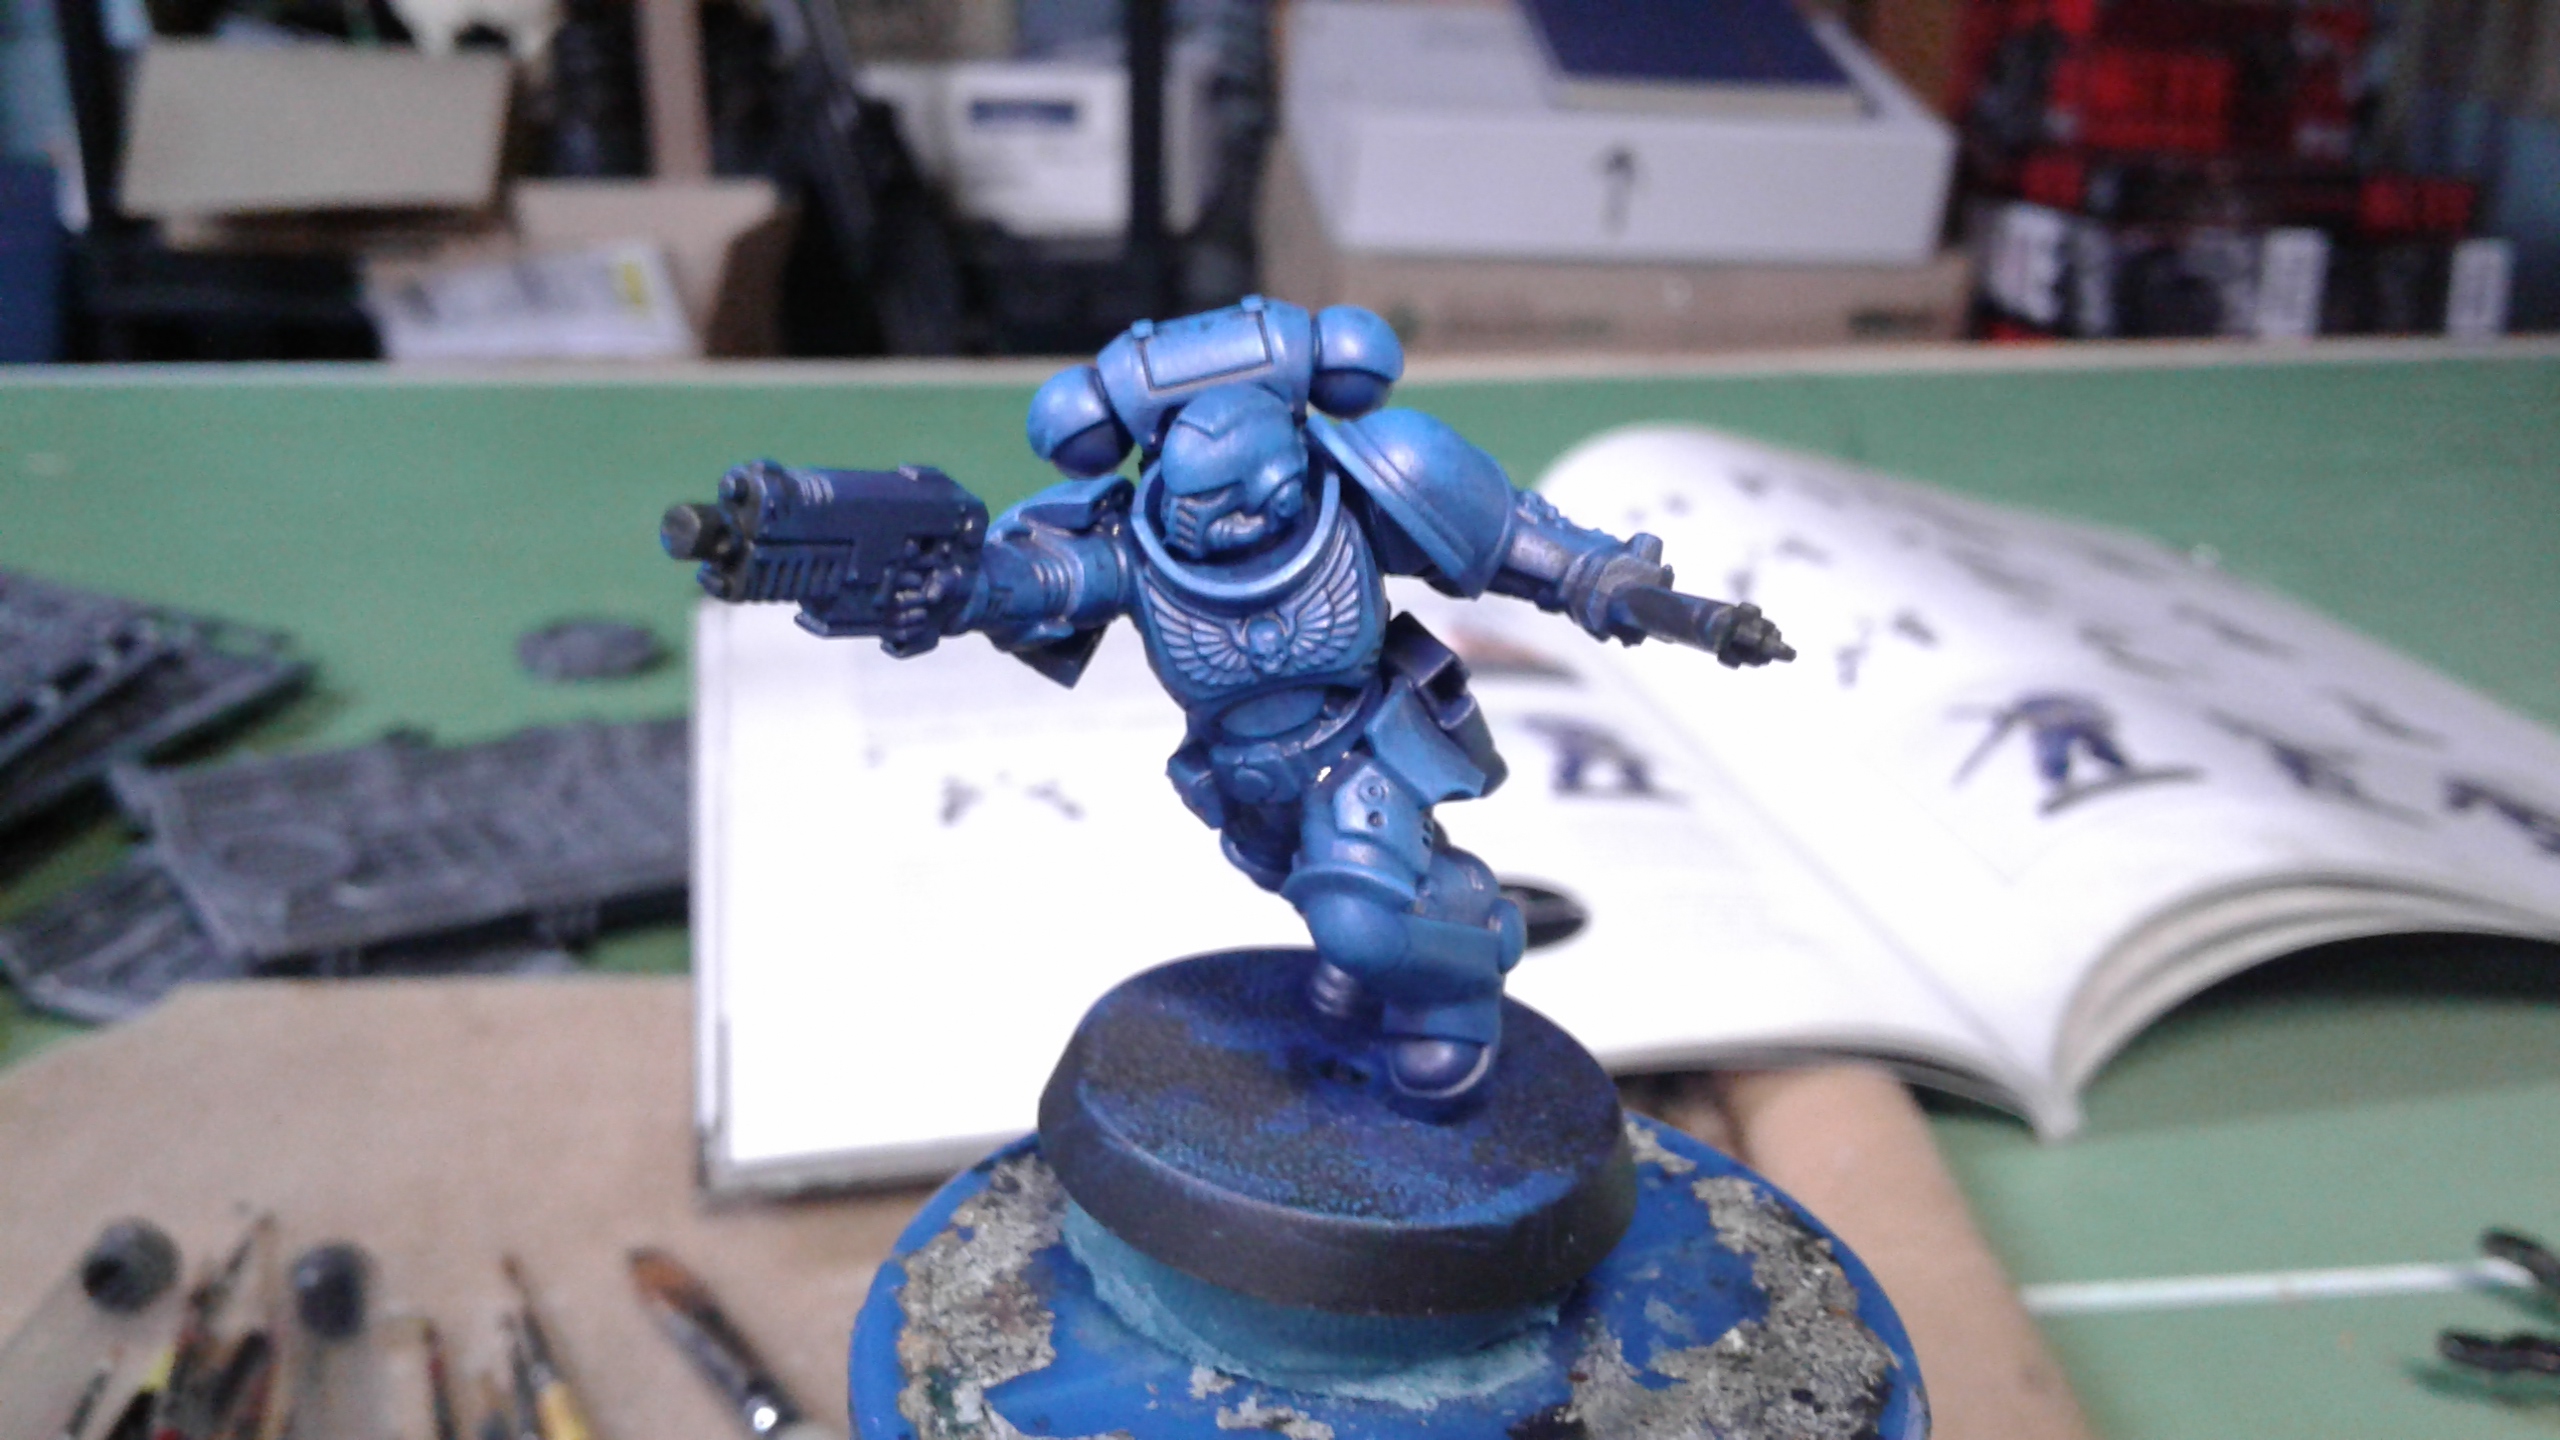
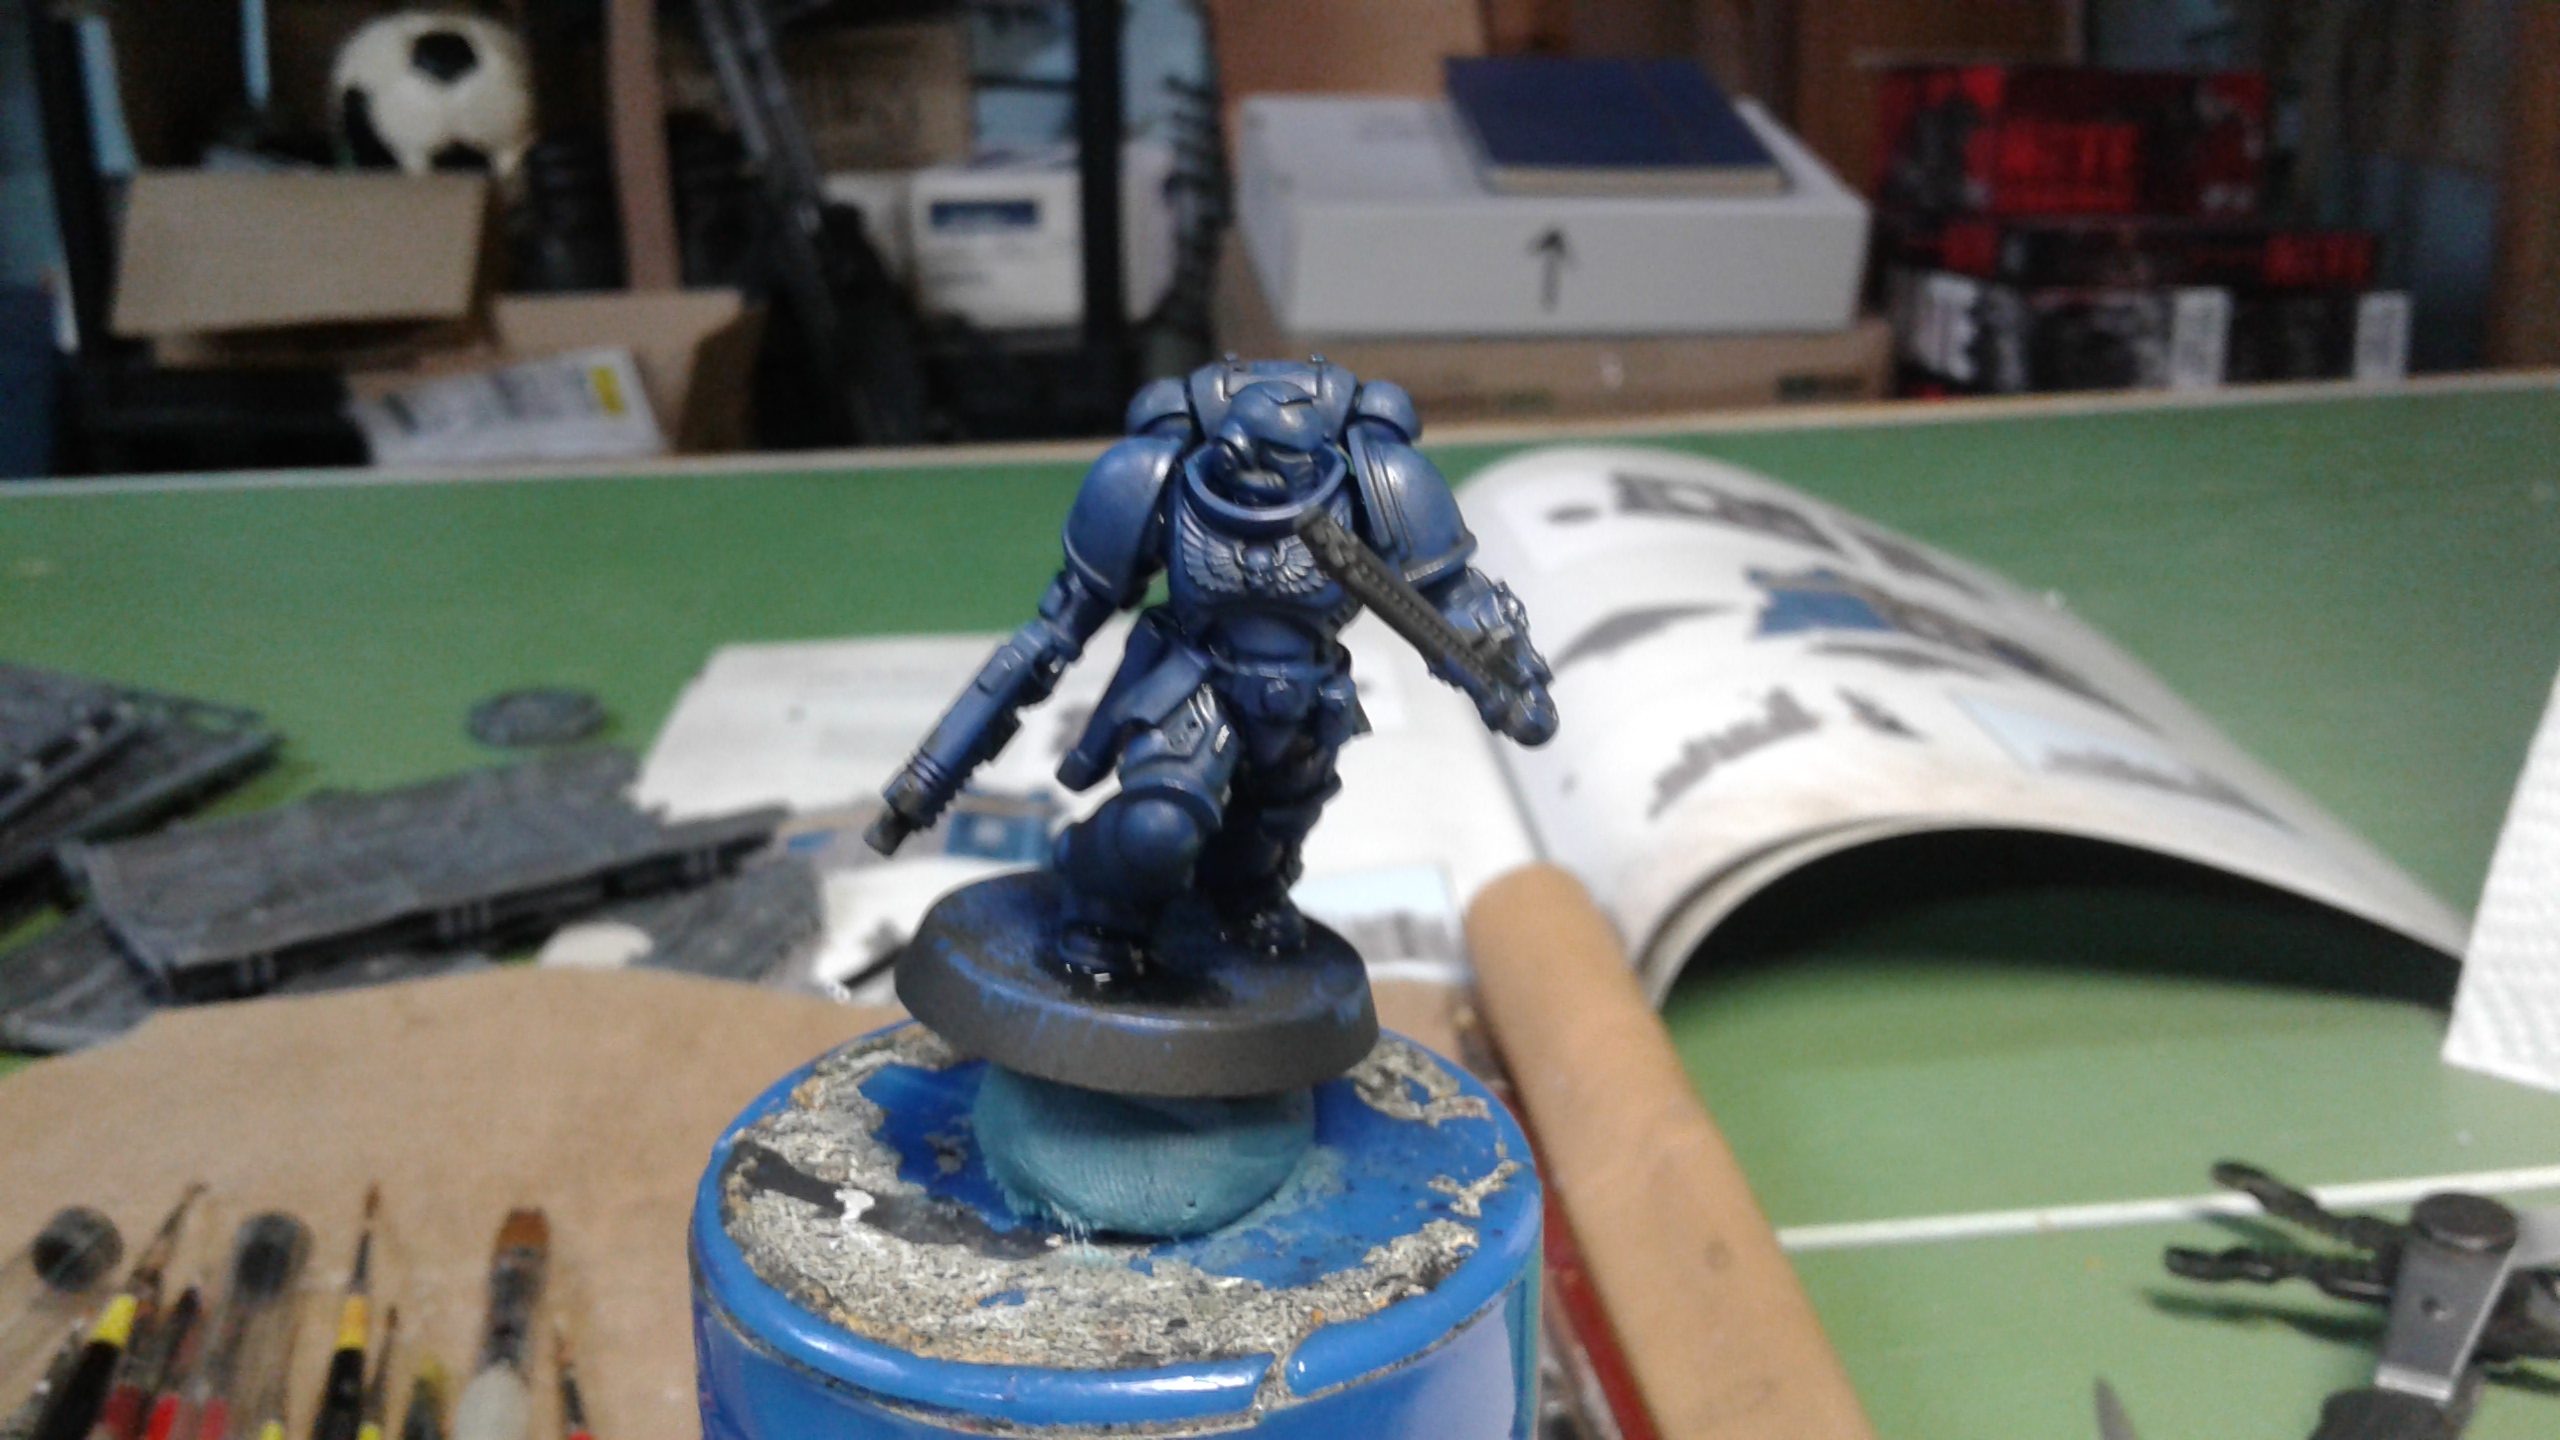
Painting the armor.
So the basecoat was done. The Nuln Oil toned down the blue pretty heavily so I needed to bring that up. Always following the same principle of quick and easy, I decided on drybrushing the whole lot.
I used my wet palette to do that and a stiff bristled square brush. I didn’t invest in a good one, simply the cheapest one I could find at my art store and that was the right size. I put all my colors on the wet palette. Those were Cygnar Blue Base, Cygnar Highlight and Frostbite.
All from Privateer Press Paints, P3. I find those paints better for coloring. They have the right texture right out of the pot. They may not cover as good as Citadel’s Base paints, but I much prefer painting two coats than having a paint that is too thick and that would obscure some details.
I used the wet palette to gradually mix those three paints together. It also left me with my previous colors for edge highlighting. I used a mix of 25% Cygnar Blue Highlight and 75% Frostbite for that. I then made a second pass with the same mixture but with Menoth White Highlight added. This pushed the saturation way up and kind of cleaned my mistakes a little bit by steering the eye away from them.
Drybrushing can make color transitions a bit harsh. Also, you can kinda see the brush strokes in certain parts. That was taken care of with a glaze of Citadel Gulliman Blue Glaze. I used it pure. In retrospect, maybe I should have thinned it down a bit as it darkened the model a bit too much. I’m still quite pleased with the final result that you can see below. A squad of 5 Intercessors took maybe 30 minutes to do, excluding the Wash and Glaze drying time.
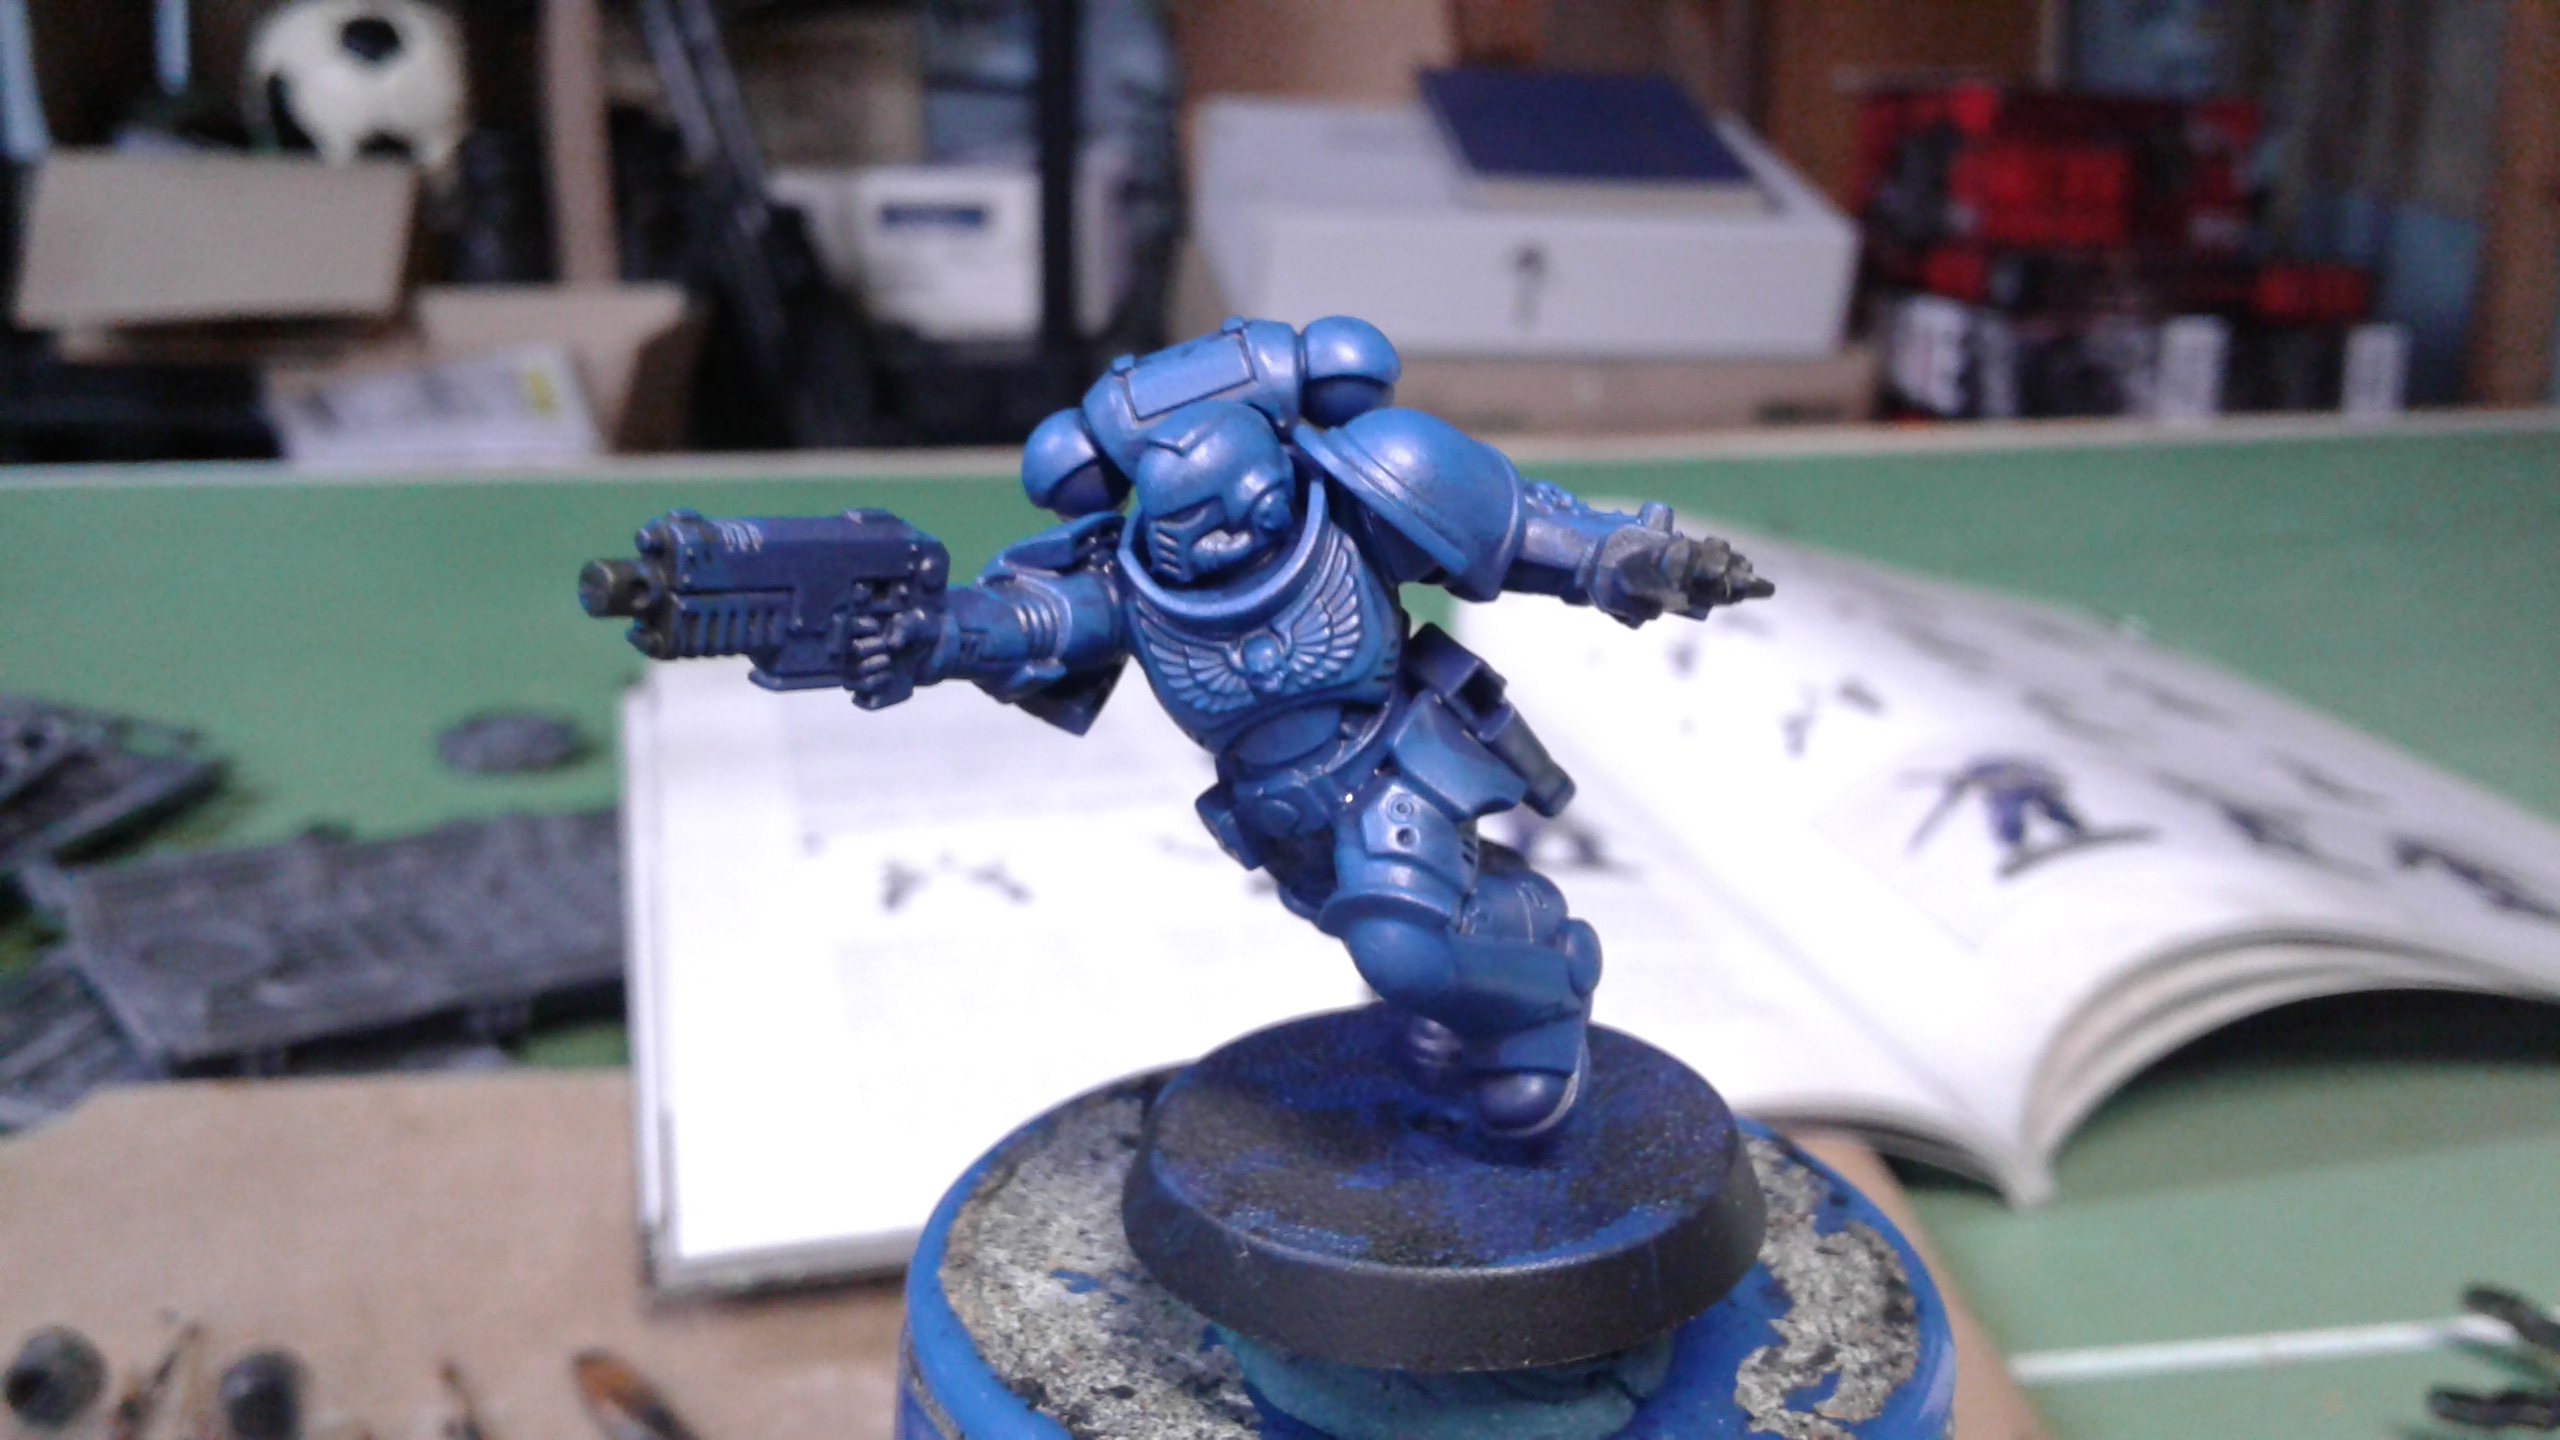
Color tests
So I wanted to have a quick and easy way to paint my army of Ultramarines. Here are the color tests that I did before settling in on my preferred recipe.
First, everything was primed pure black. No zenithal priming. I decided on this as the minis would be primarly ultramarine blue. So a dark basecoat would be fine and actually help the blue pigments cover the mini more easily. If I ever missed a part of the mini in my future painting, it would only mean that a pretty deep recess would be pure black. This is good as it would automatically create a shadow exactly where I need it.
Two of the minis that you see below were basecoated with pure P3 Cygnar Blue Base. The other one was basecoated with pure P3 Exile Blue. Then one of the Cygnar Blue one was covered with Citadel Ultramarine Blue Contrast. The next one was covered with Citadel Nuln Oil Wash and the Exile Blue one was left as is.
Contrast over Cygnar Blue Base didn’t do much difference so I dismissed this idea. Pure Exile Blue was a little too dark for my taste. I finally decided on Cygnar Blue Base with Nuln Oil. The Nuln Oil would take care of the deepest recesses and let the Blue Base shine through, while tinting eveything a deeper blue tone. Perfect!!
A small adviced for those of you searching for your perfect paint scheme. Look at your minis in different lights. What might seem pretty bright under your work light may be too dark in normal sunlight or with the lights that you usually use to play your games.
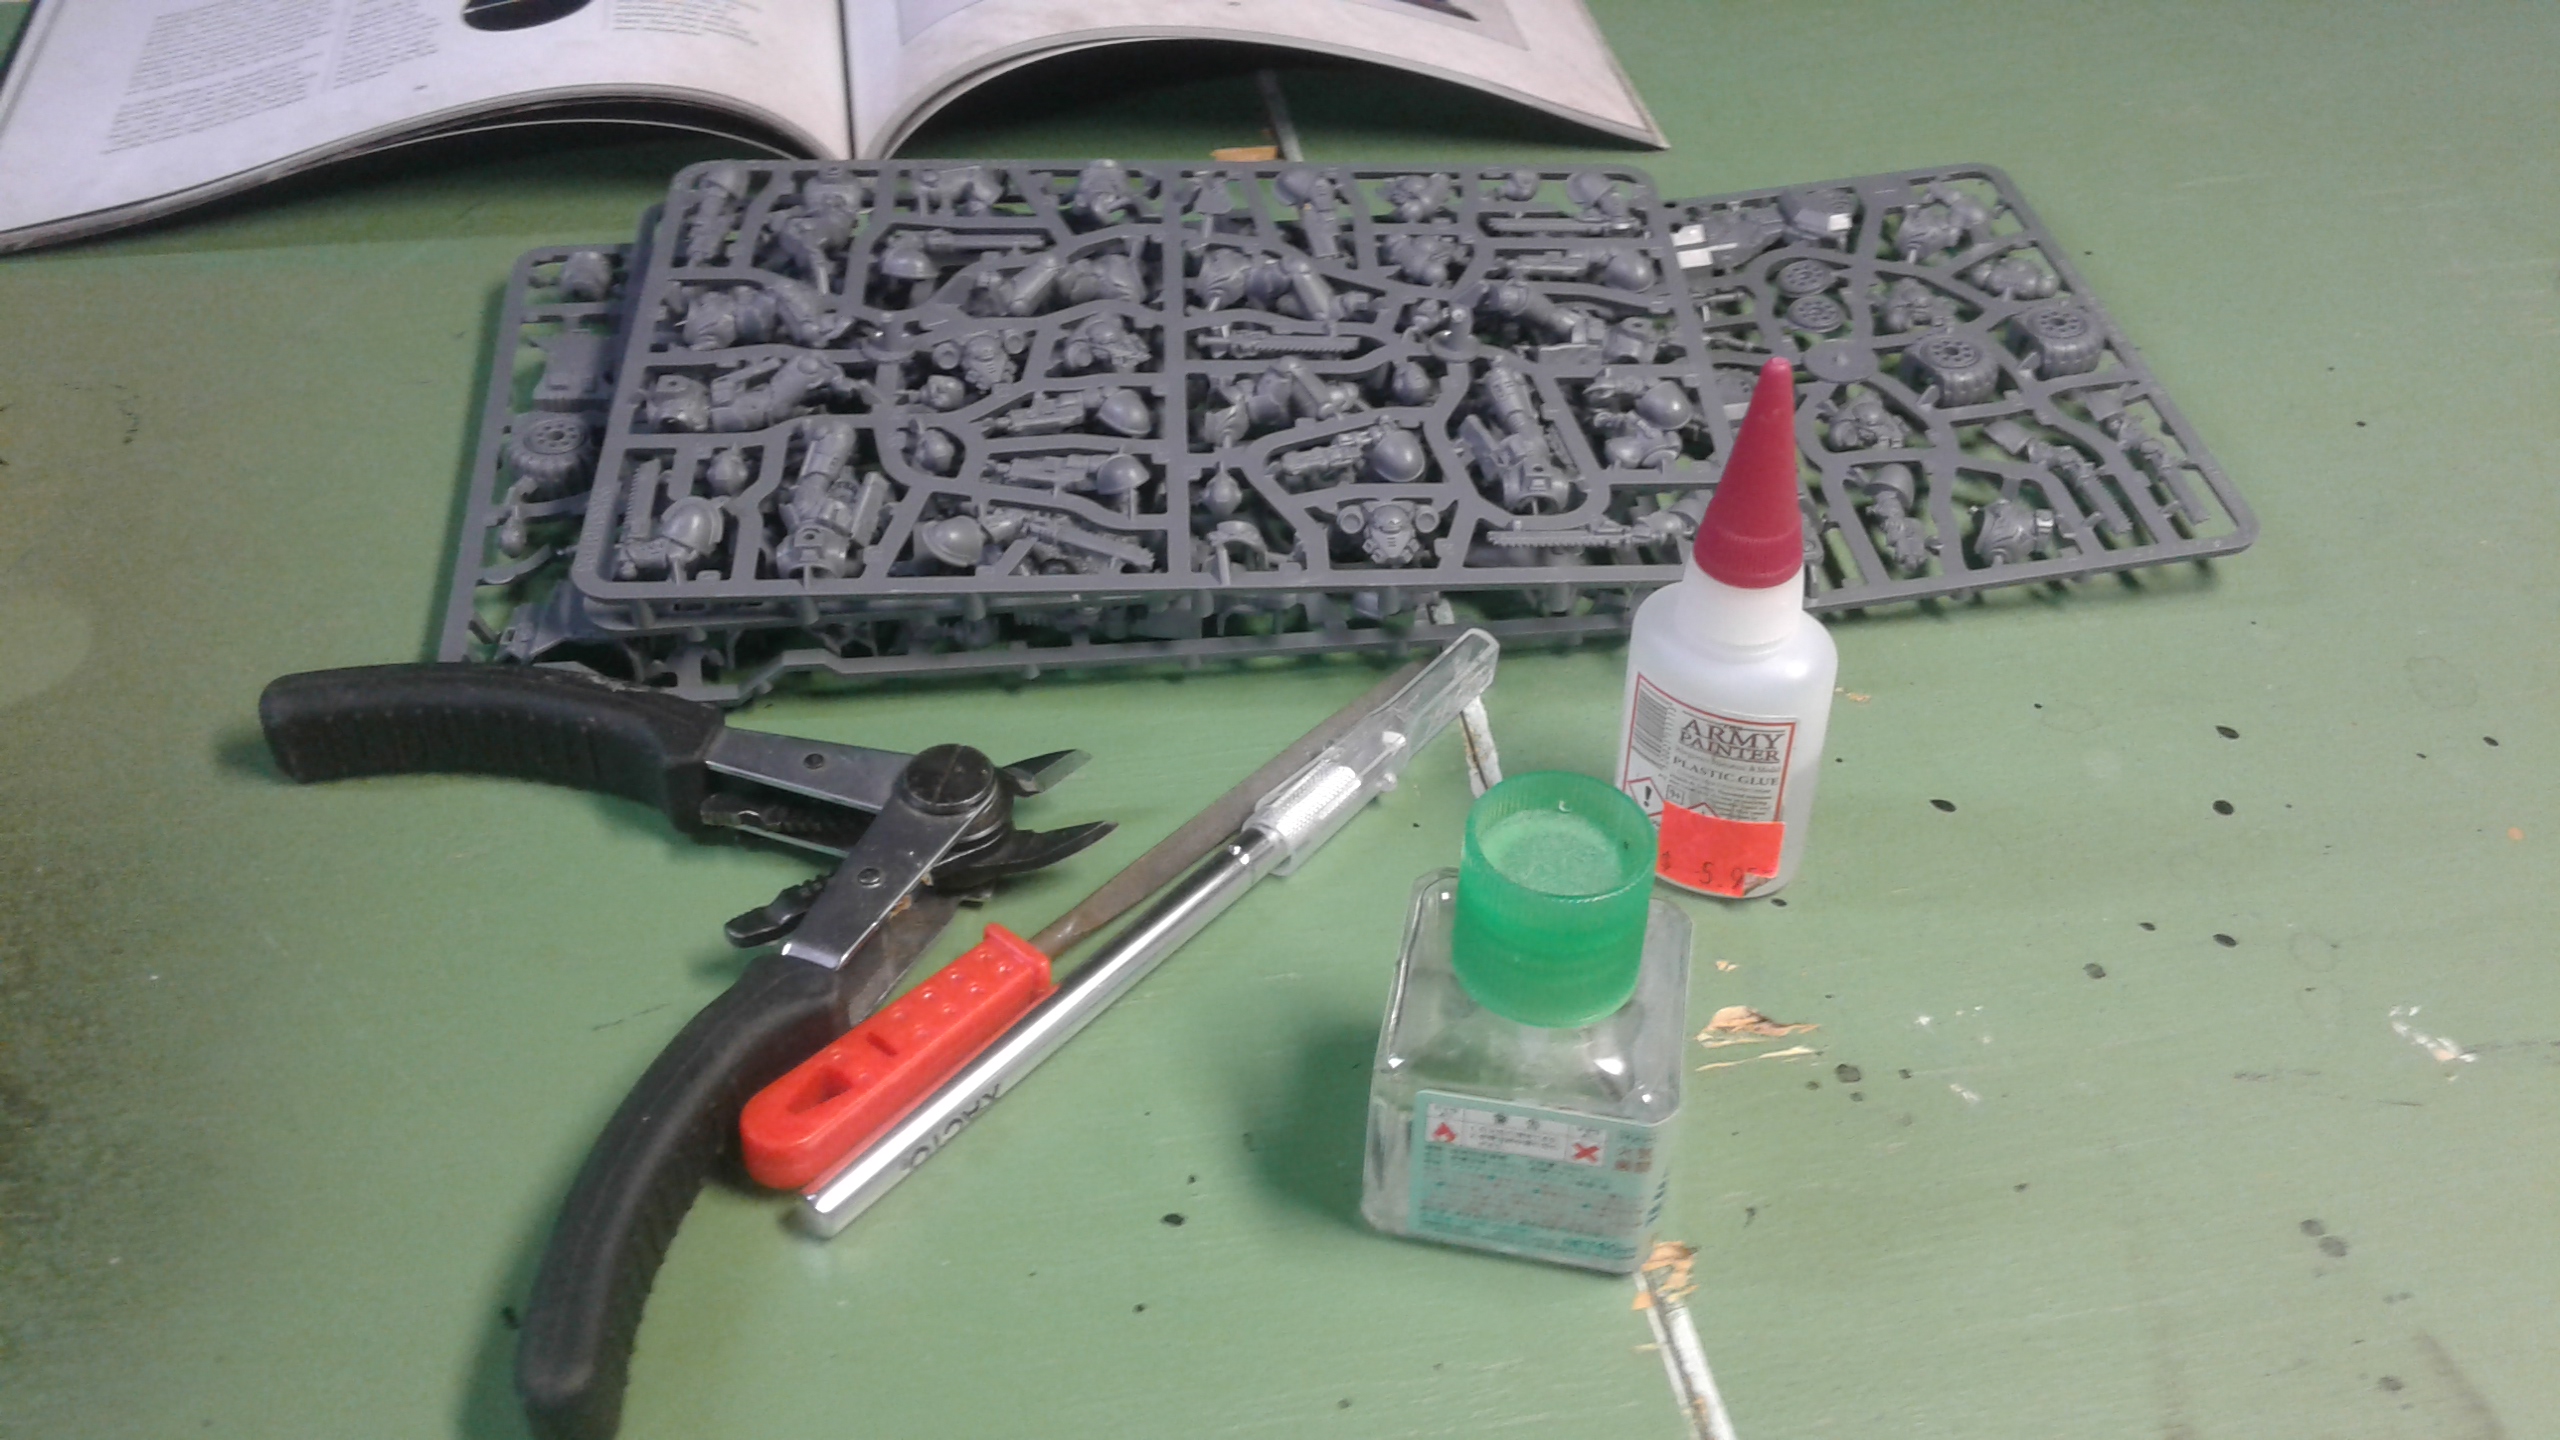
Assembling and priming.
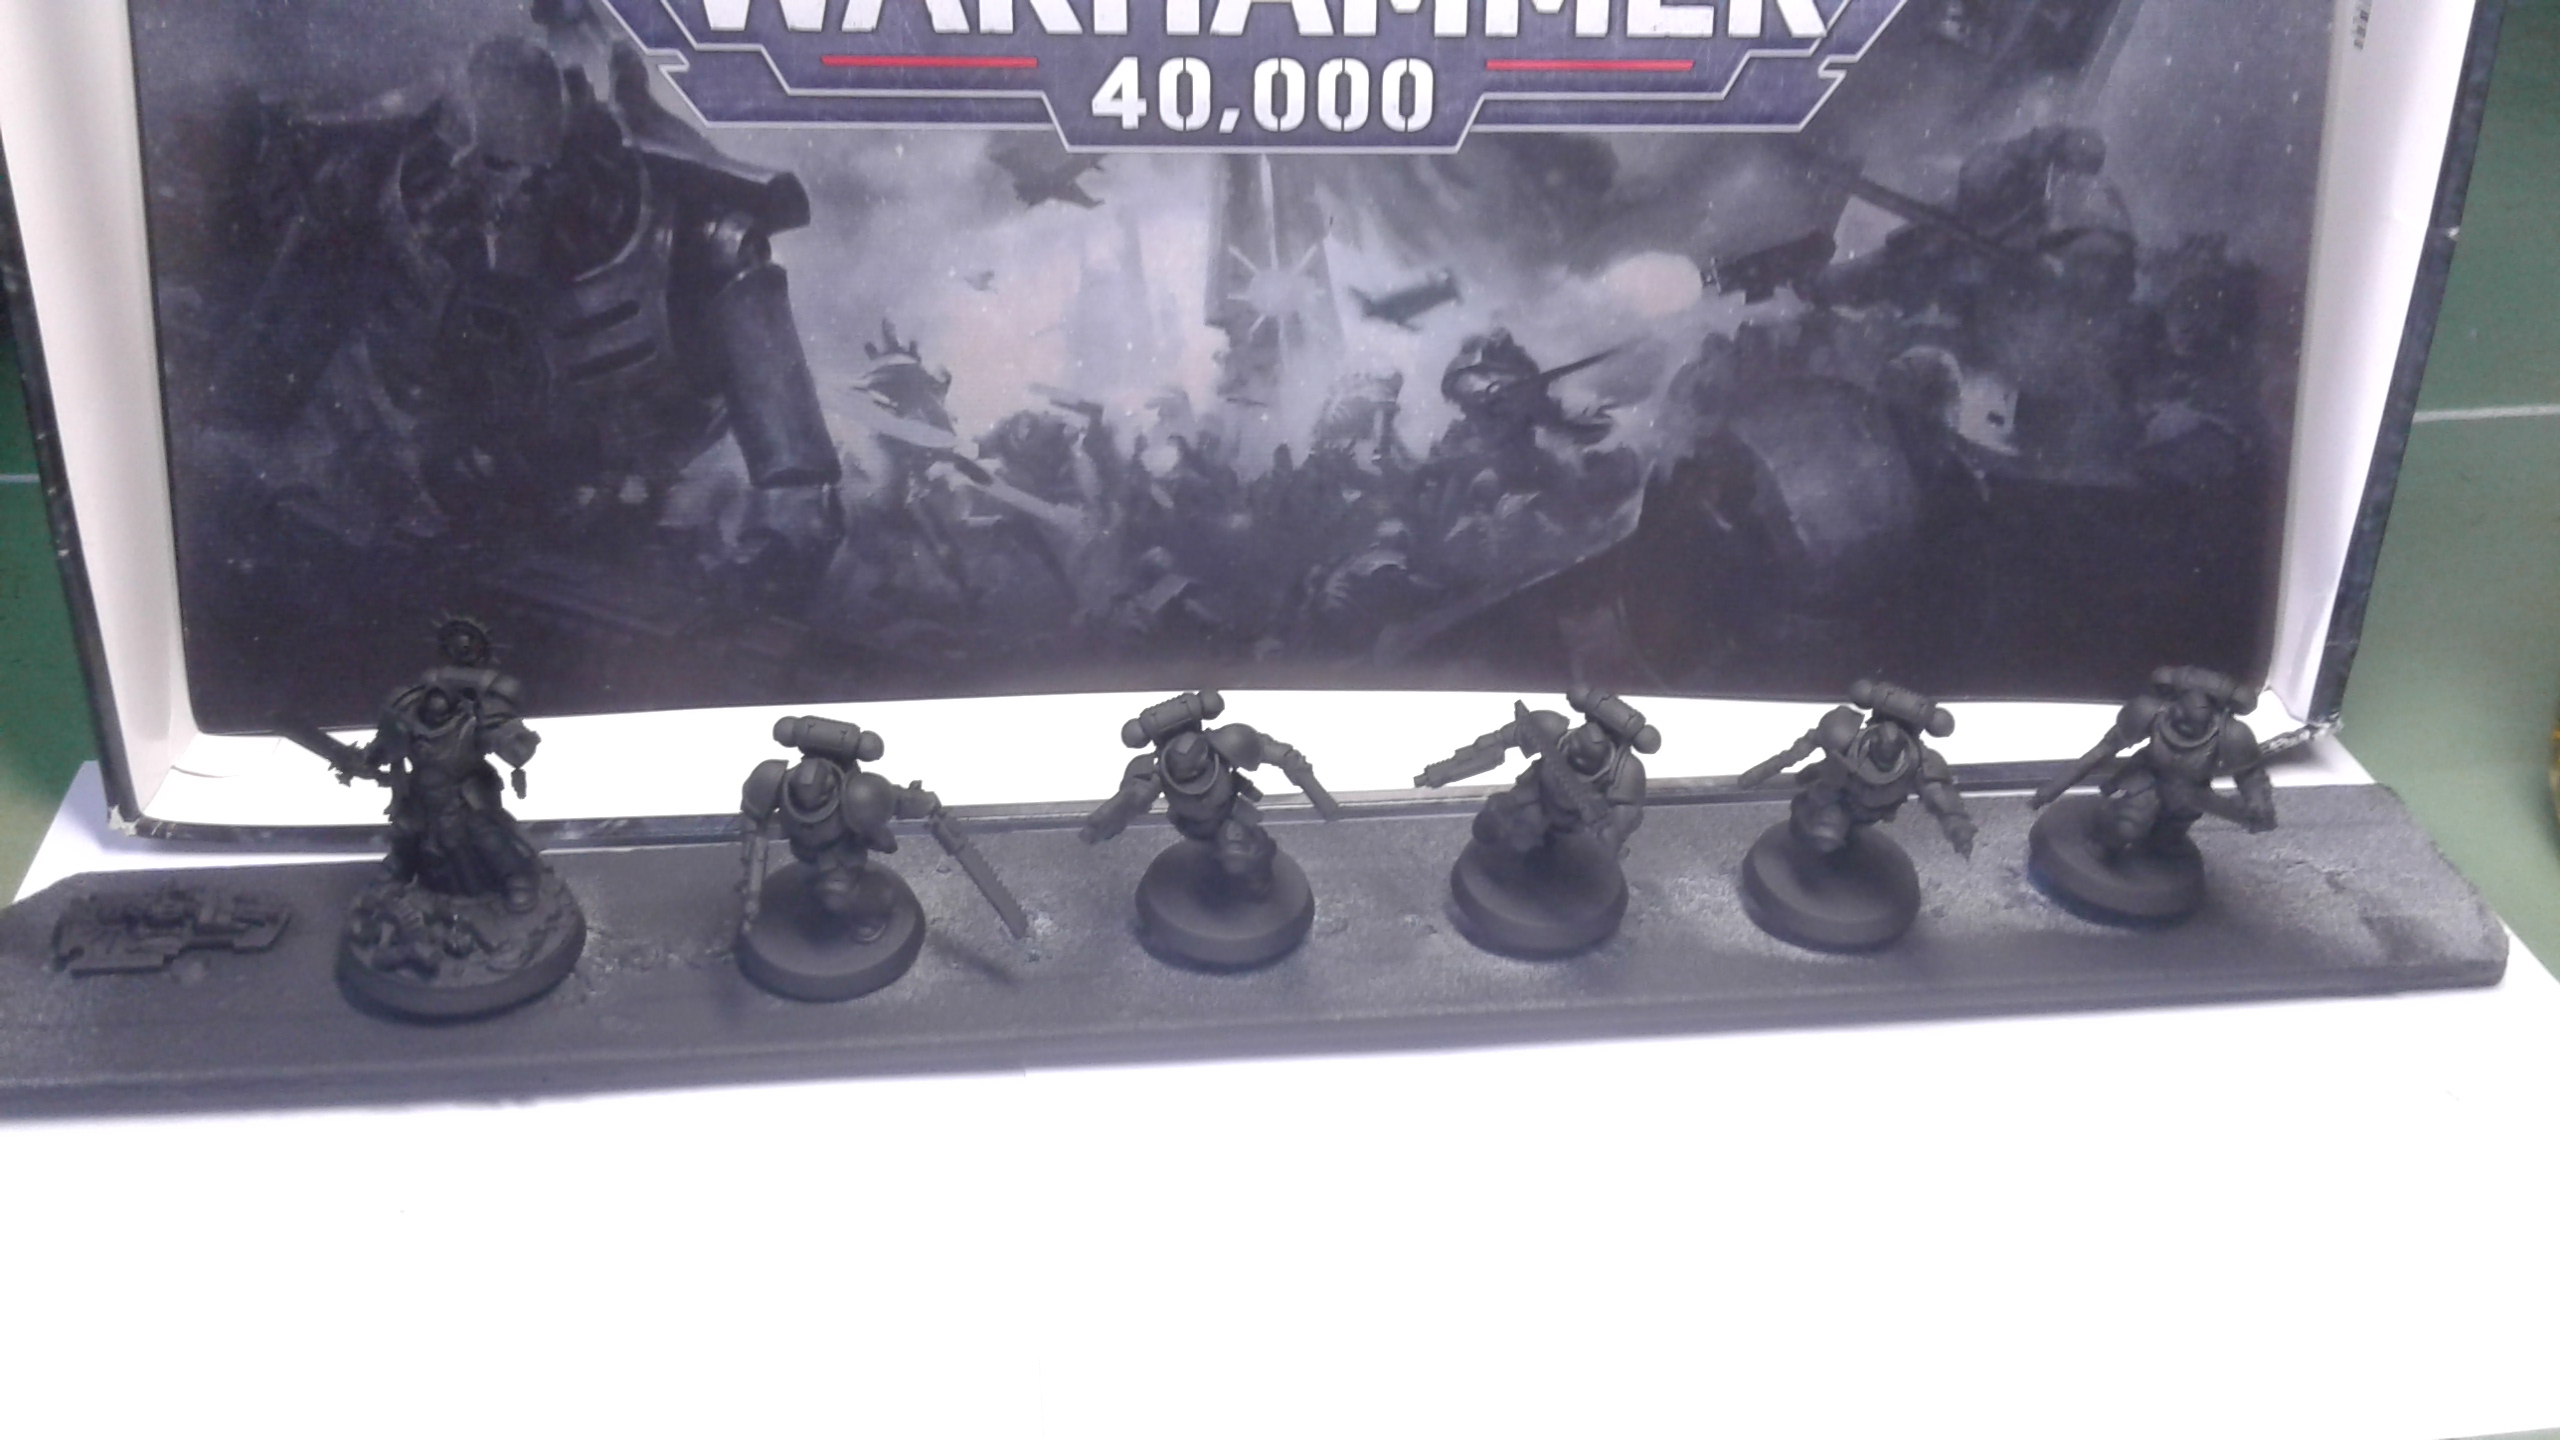
I already have assembled and primed all minis. I have to say that I’m pleasantly surprised by how easy it is to build those figures. I understand that they are the snap-fit kind so I’m wondering what normal models will be like. Nonetheless, they are some of the highest quality minis I have seen in a while. I first started playing 40K with the 3rd Edition. We had some plastic models back then but bigger ones were pewter and quite difficult to assemble. Now the fit and finish is perfect.
I’ll try and exchange the Necrons with one of my buddies who’s playing them. He bought the Indomitus box and might be persuaded into parting away with his marines.


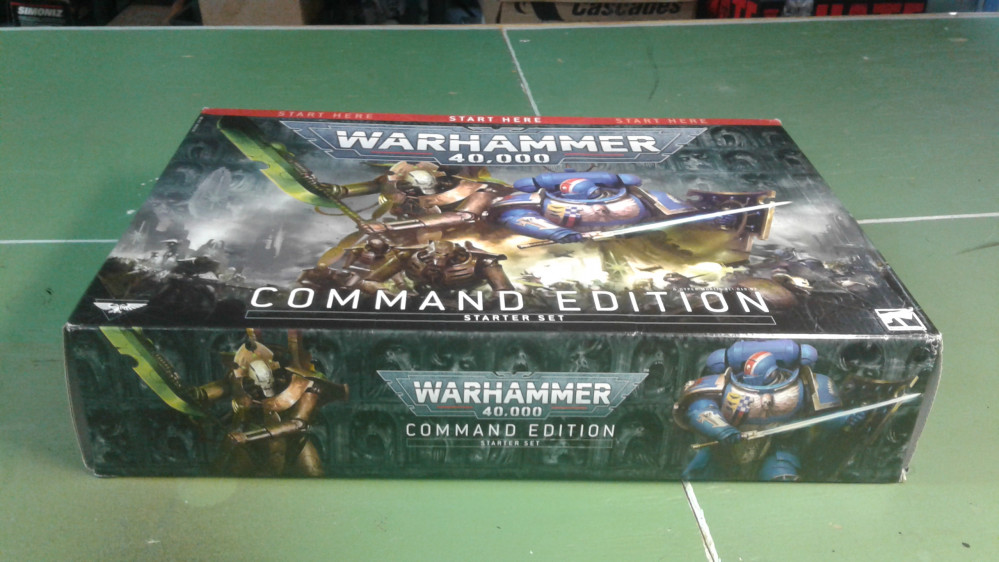
The Command box
My first step back into the hobby has been the new Command Starter Box. I decided on playing the Ultramarines as a beginner army. I think it will be easier to learn the rules that way. Space Marines seems to be quite easy to play. However, they also seem to have a lot of depth and there isn’t a single model that I don’t like.
Here goes nothing.