


![Perfect Call Of Duty-Style Miniatures? Wargames Atlantic’s Operators Review [7 Days Early Access]](https://images.beastsofwar.com/2026/02/unboxing-wargames-atlantic-operators-coverimage-225-127.jpg)


Tuscany Hill Village Terrain Build


Recommendations: 1109
About the Project
I started this project some time ago. It's a slow burner. But I've decided to turn it into a project so that I have a reference point but also to get some help along the way. This is my attempt at trying to recreate an Italian Hilltop village in 15mm....
Related Genre: Historical
This Project is Active
Turning to 3d Printing for salvation
With the mdf a little blocky and not quite offering the fidelity that I want, at least in 15mm, I decided to turn to 3d printing. I do not have a 3d printer and I have no intention of buying one so after searching the internet, I found Treatstock that allows you to upload STL files, select the printing medium and get instant quotes on the cost. Sounds perfect for what I want to do.
Having never tried 3d printing, I wanted to run off a test print to get some idea of how this might work and what I will need to do.
I decided to stick with the Ikea flat pack Italian house approach, primarily because I had learnt Inkscape as a design tool and it was easy to mock something together.
For this test, I opted for a basic town house, nothing elaborate, just to test out some principles. I opted for the cheapest printing option and this is what I got back.
 Flat pack Italian House
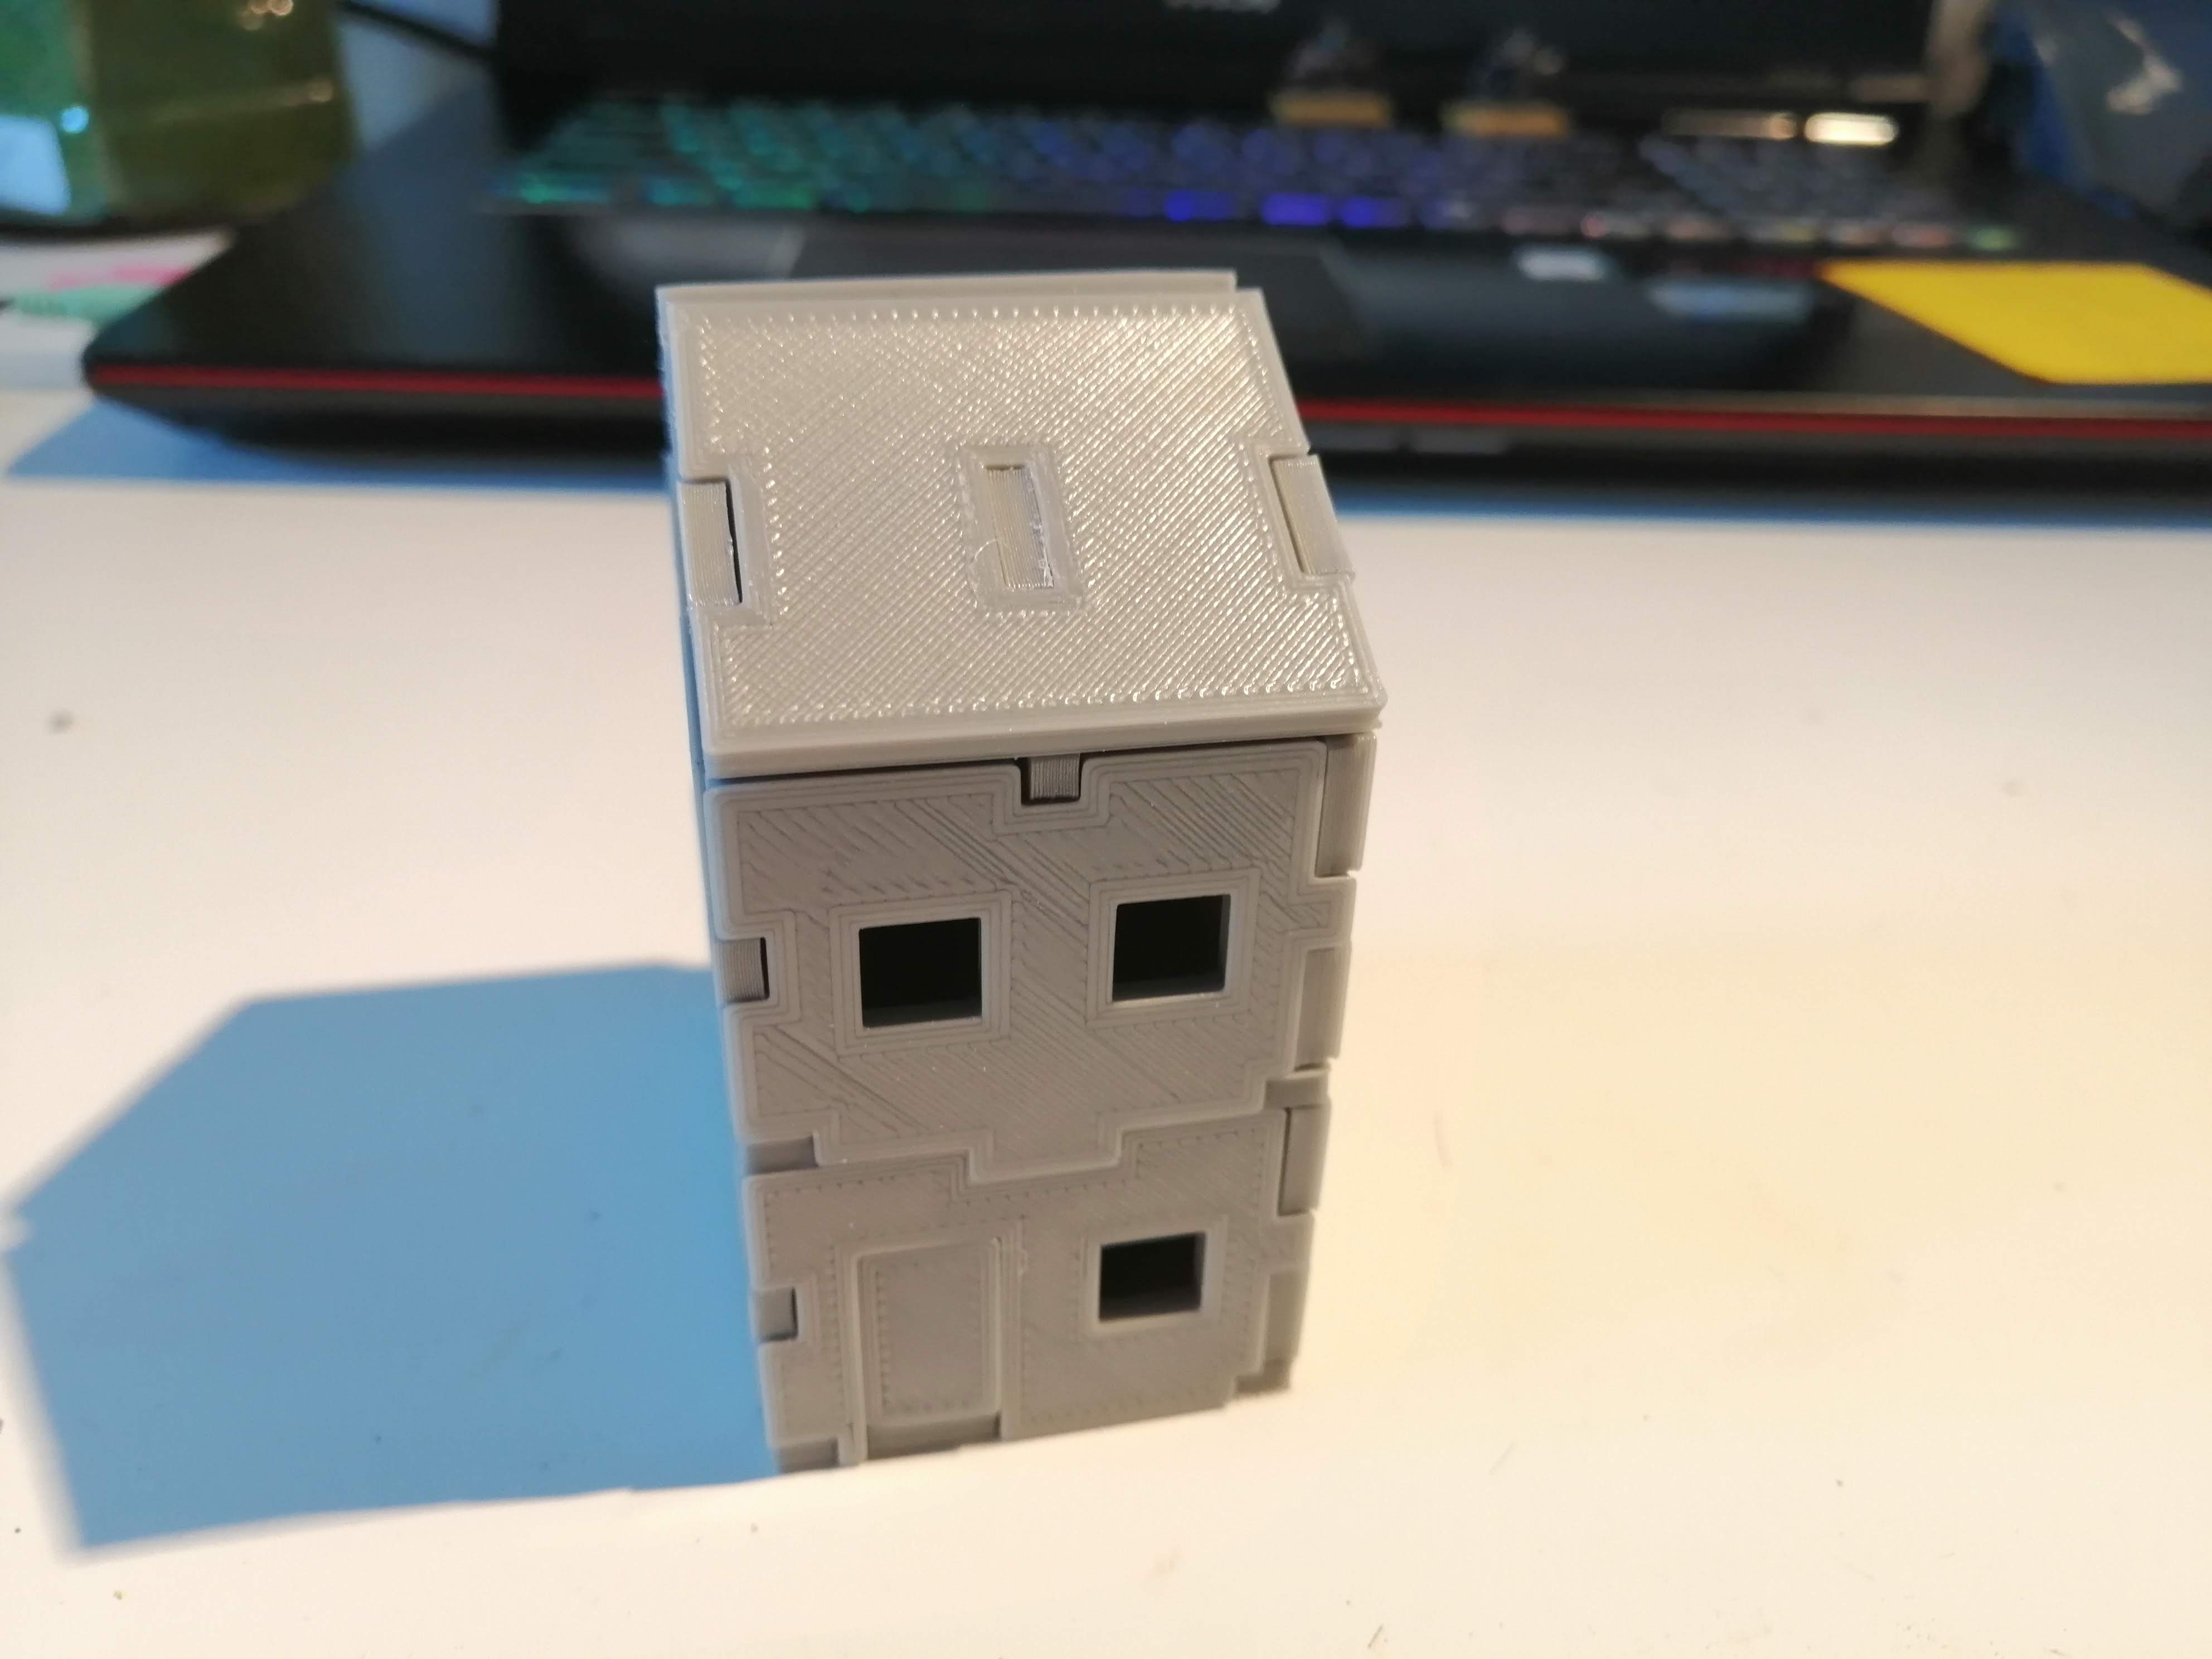 And the built house
I’m not worried about the stepping on this model, that can be dealt with. The big positive for this approach is that the accuracy is better and I can control the thickness of the material.
I don’t however like the joints – that’s going to take some fixing.
Therefore, I think the only way to proceed with 3d printing is to build the models in some package as whole pieces, rather than flat pack.
I’ve therefore downloaded FreeCad as the tool to design my own buildings!
Another mdf building, just to see
As already stated, this project is charting the past few months of effort on getting this to work, so I’m currently playing catch up with the experience so far.
Not overly content with the church, I thought I would design another building and get this cut up in mdf. I designed a large town house with balconies to represent a more ‘well to do’ building.
Here’s the pile of pieces for the main building and the floors that they constructed
The balconies were also made from the 3mm mdf but were fiddly. It took some time to glue these together
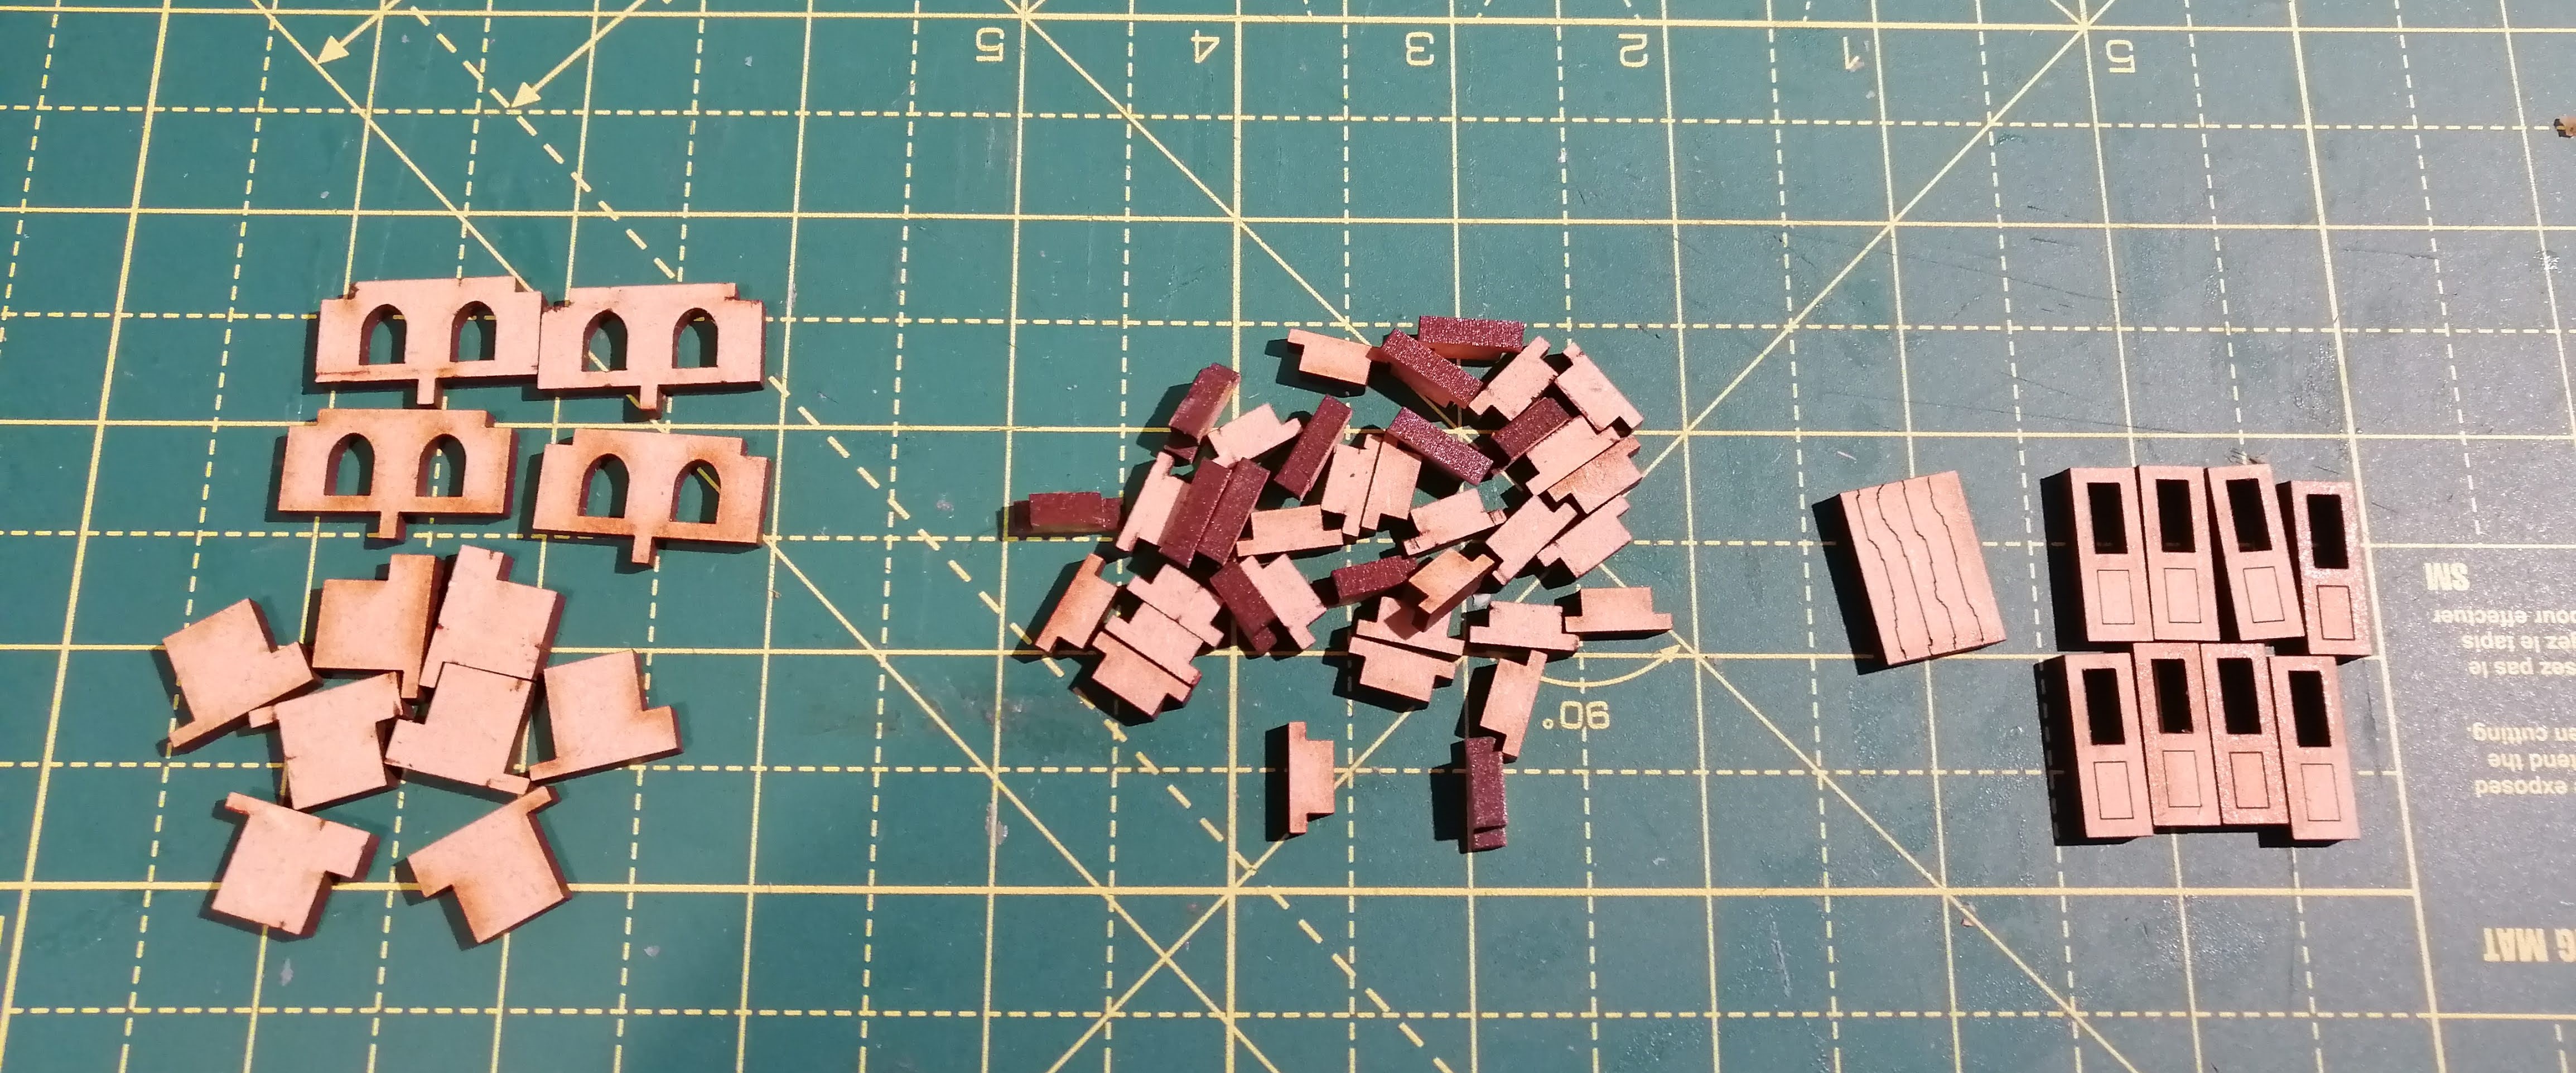 Bloody fiddly little bits
When finished, I got the below building (excuse the poor angle of the photo shot – at least it is in focus!)
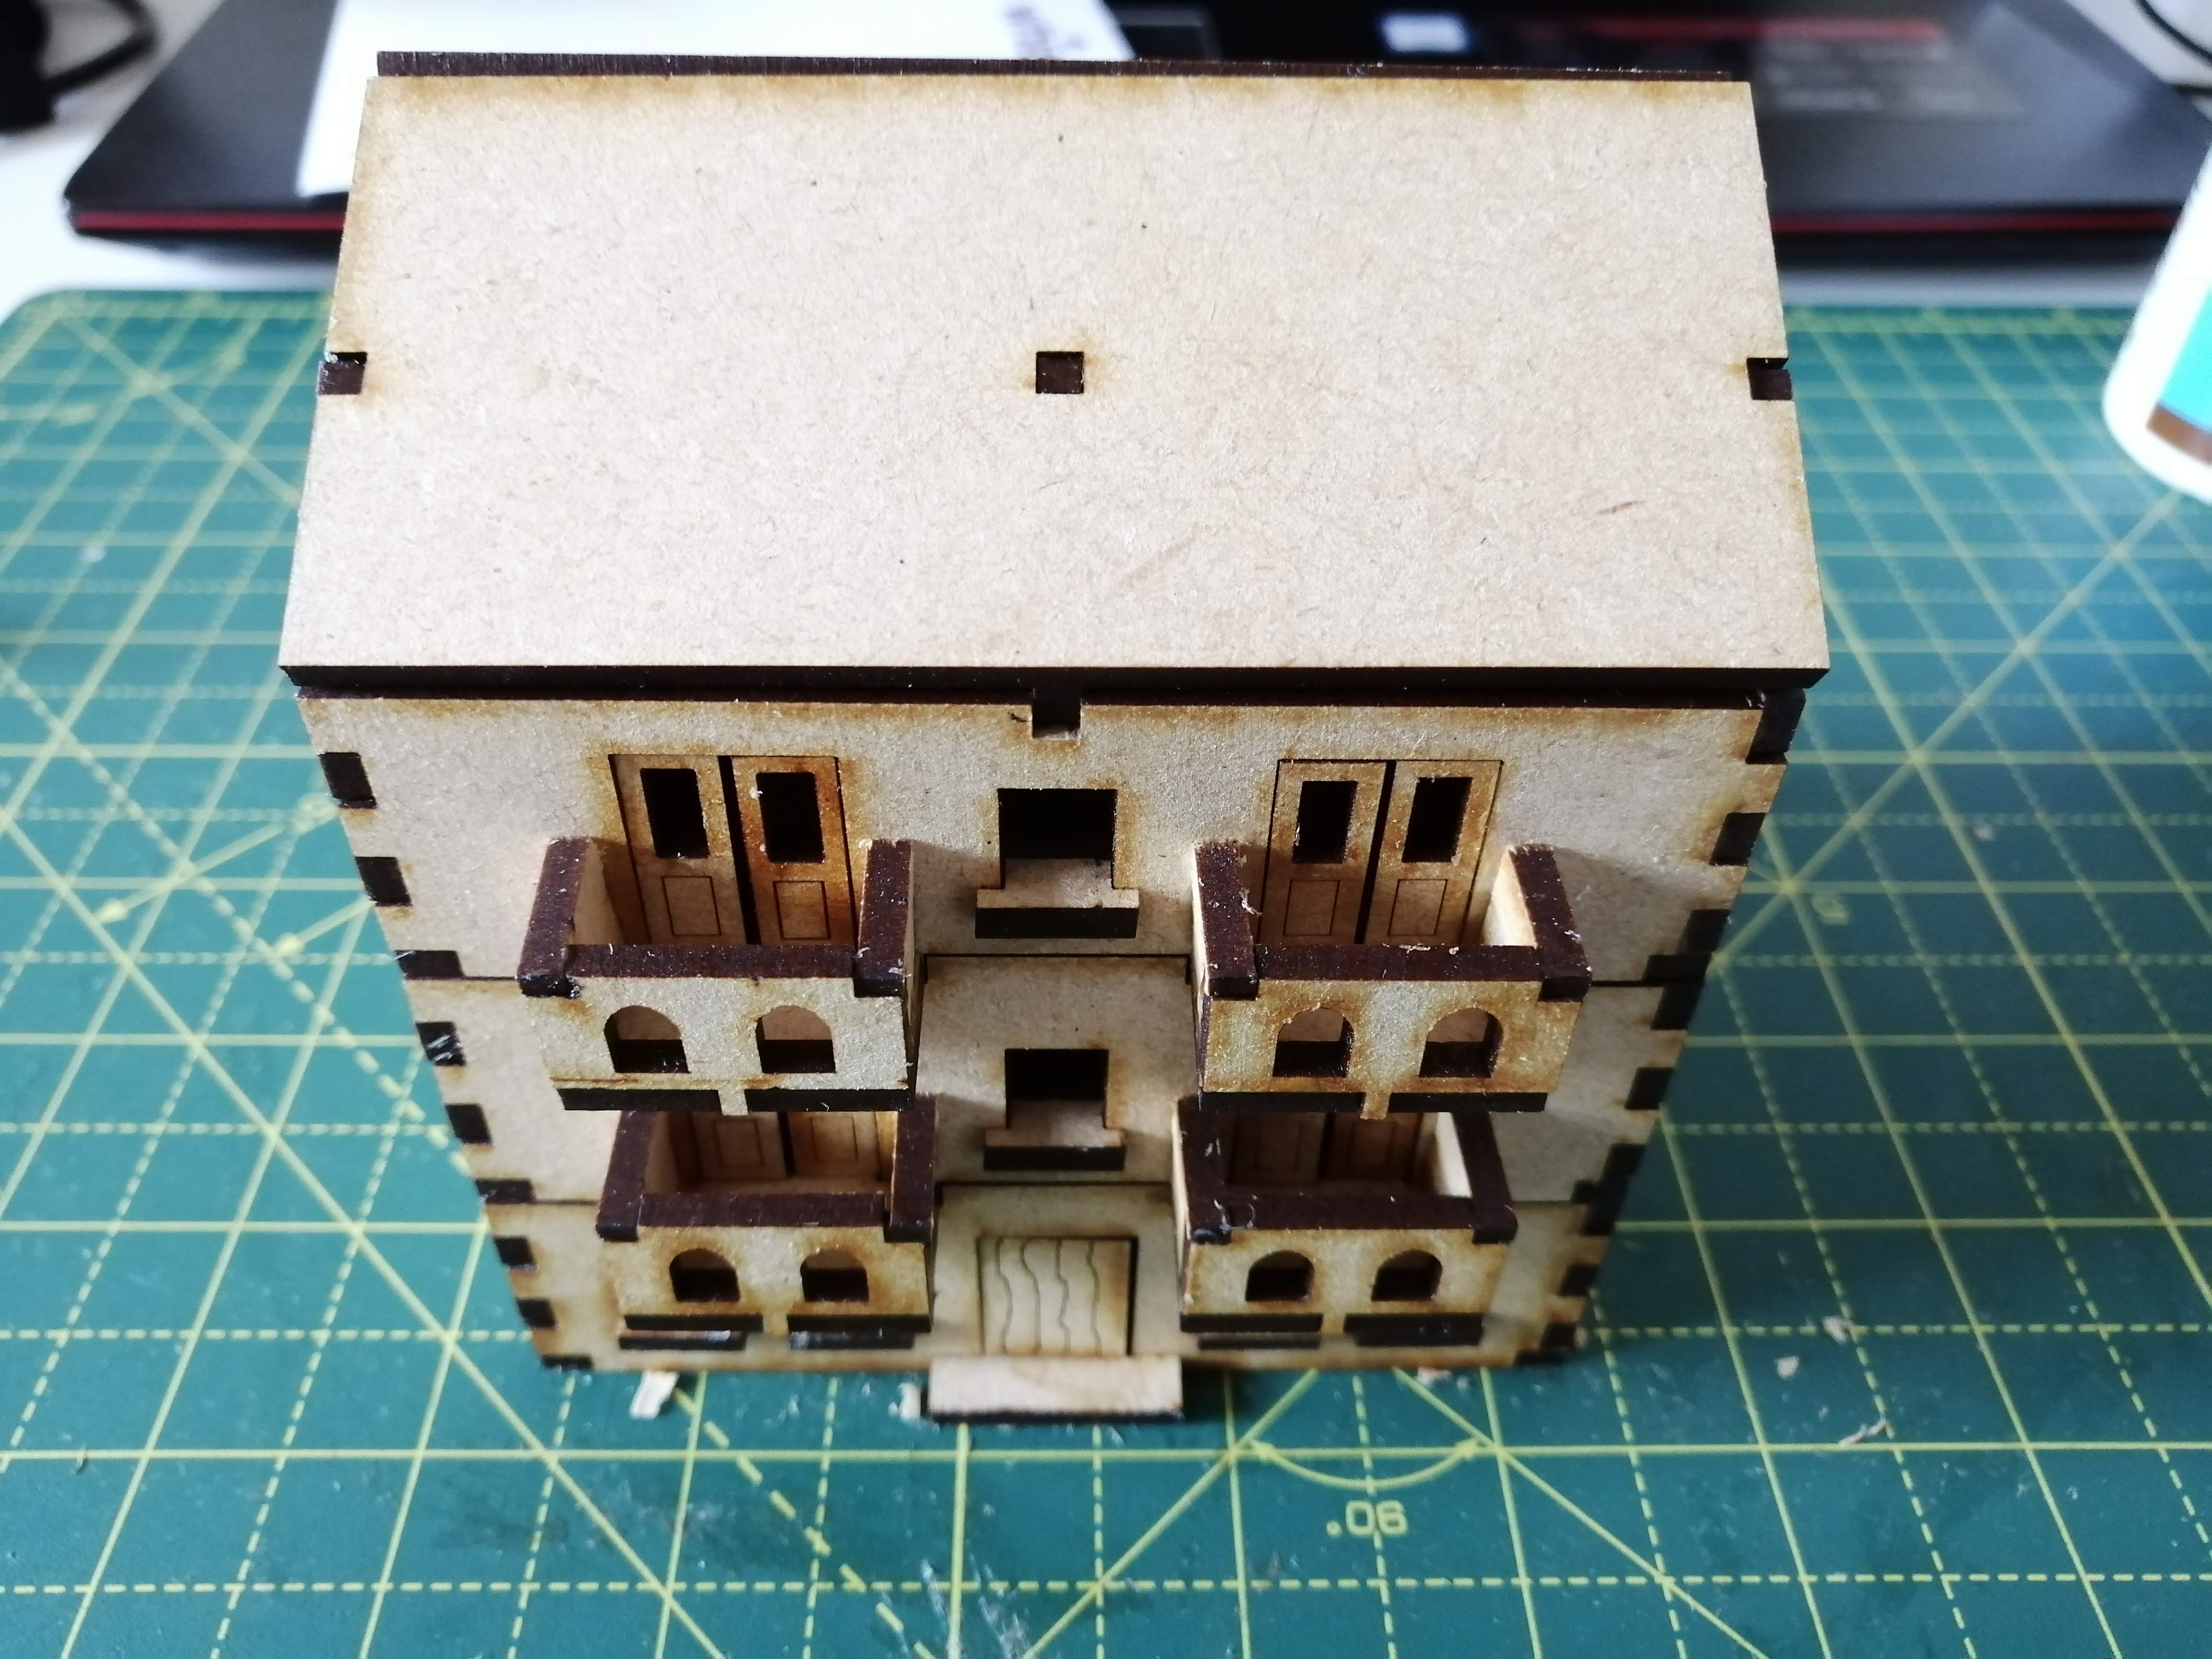 Front
Front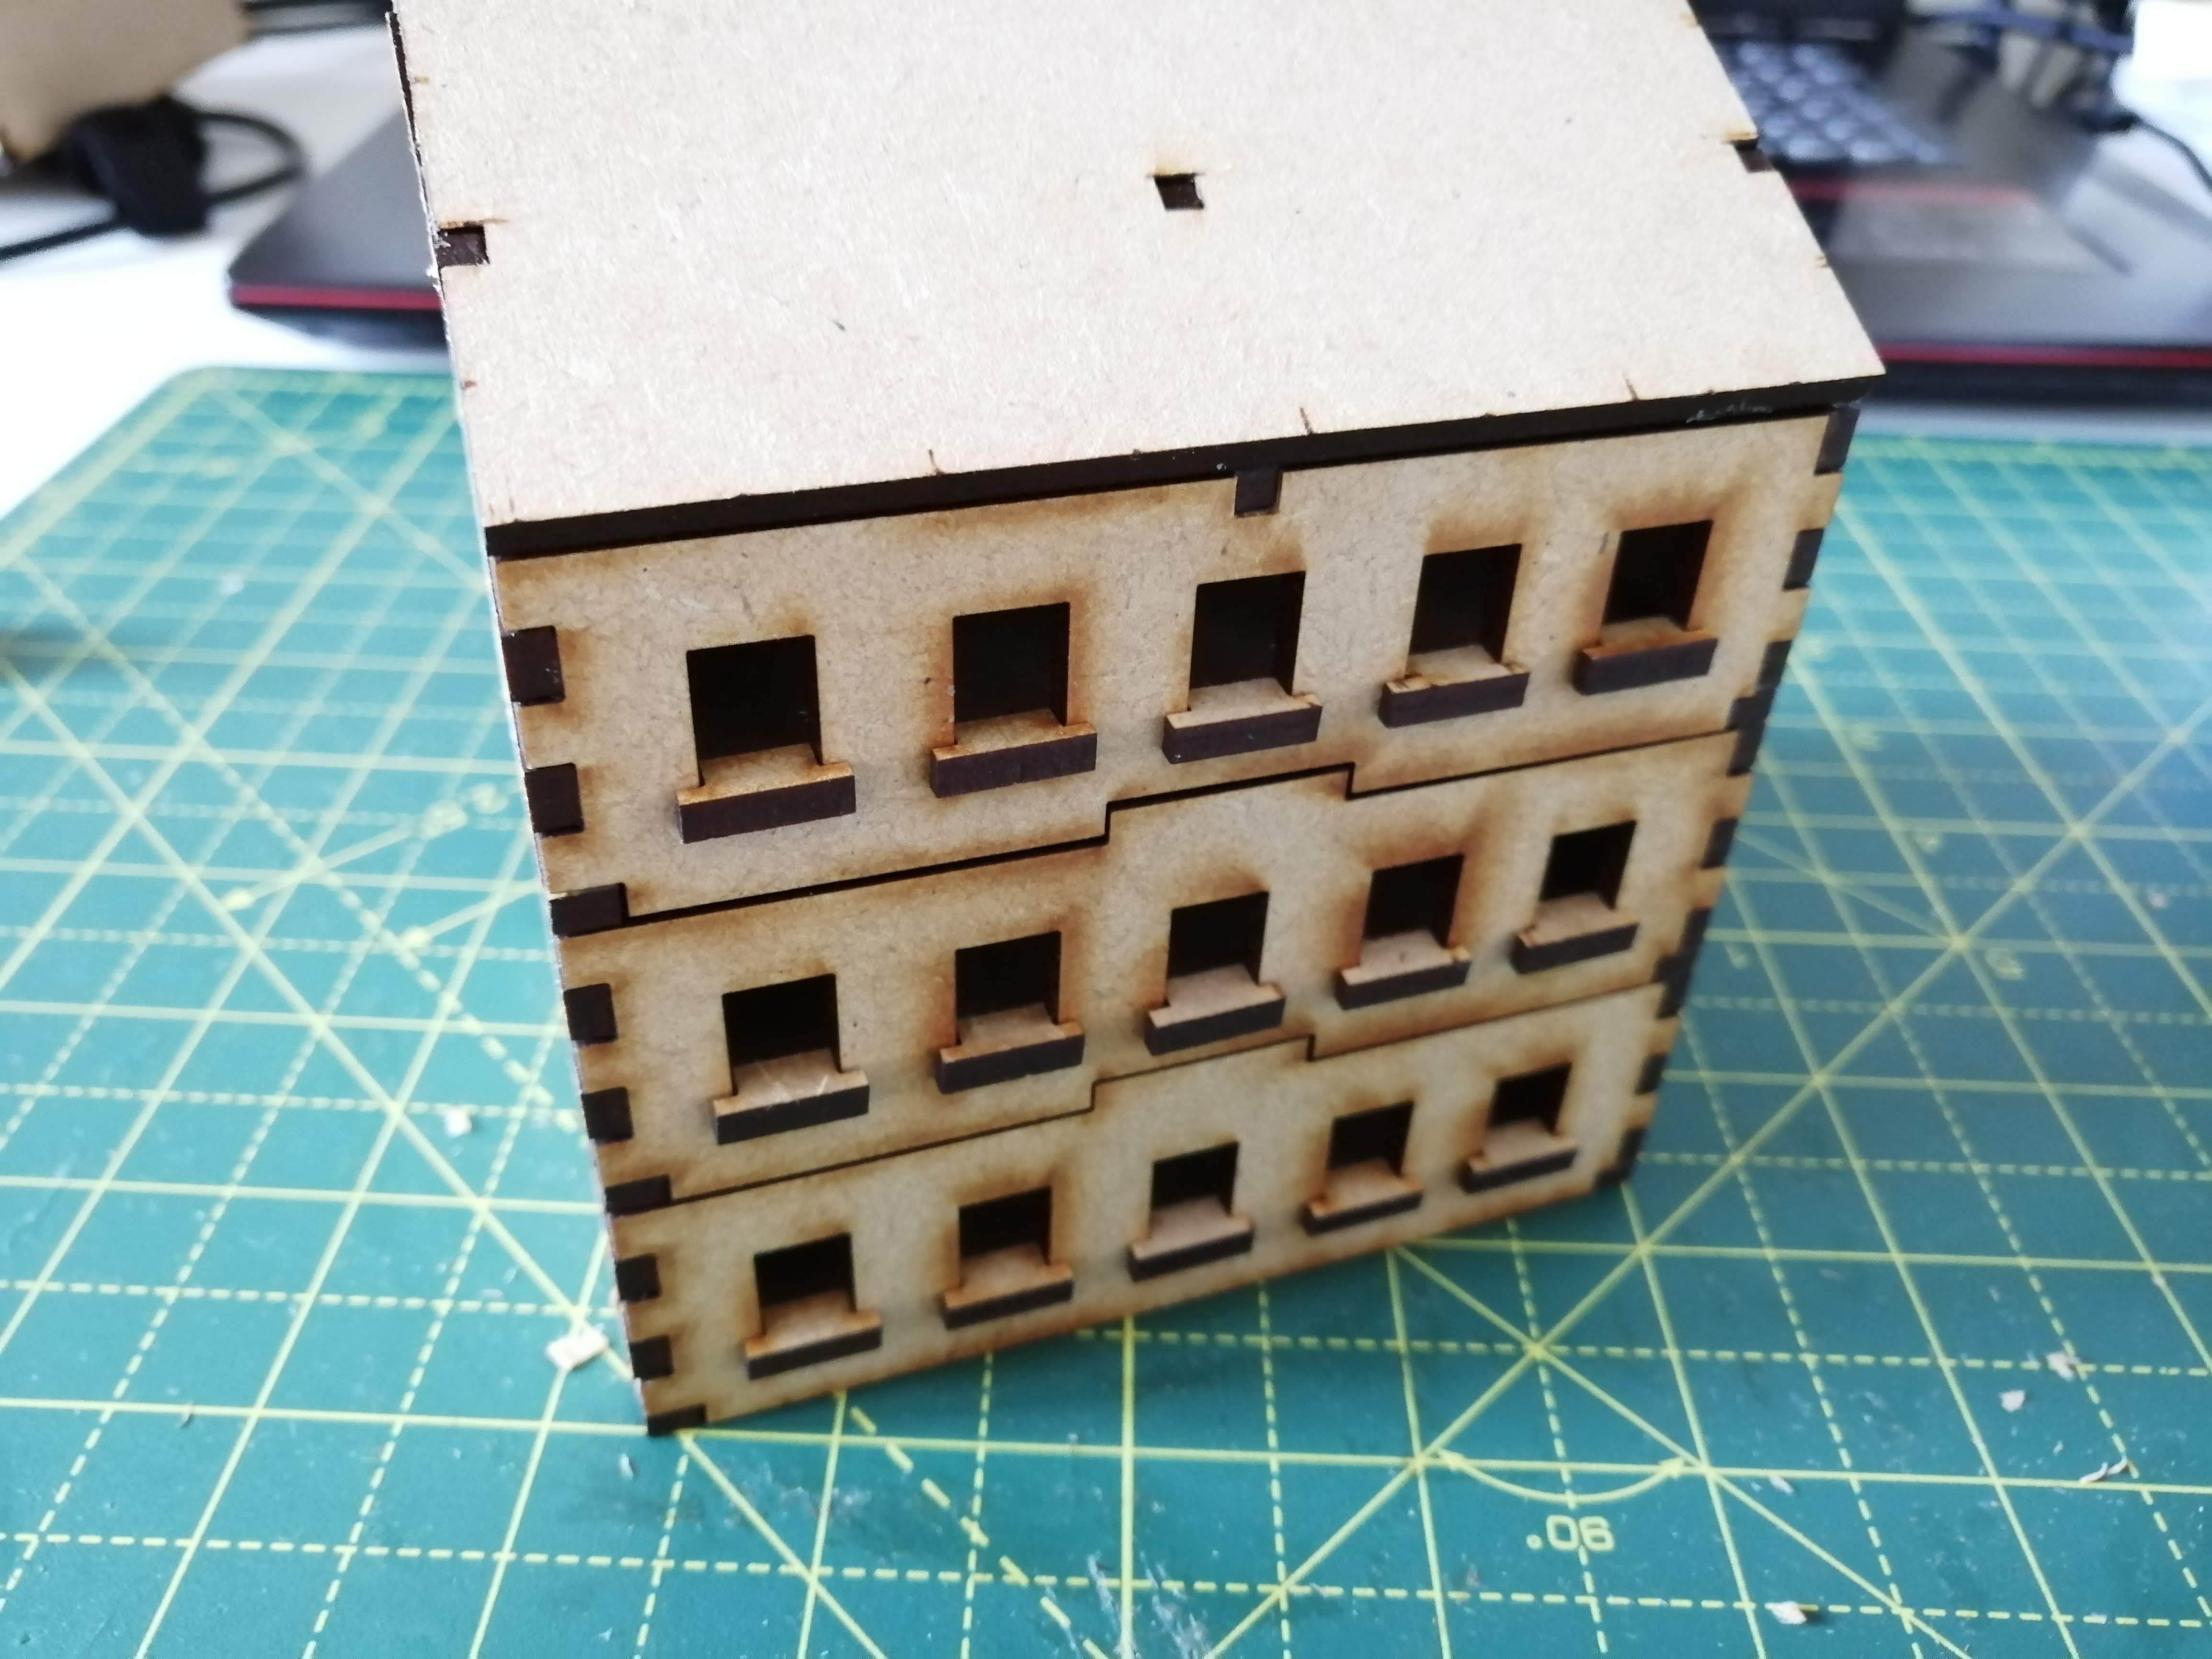 Lloyd shot
And my conclusion?
I don’t really like it. I think the limitation of having to use 3mm mdf just makes it a bit too blocky and it isn’t doing it for me. I could look for a service that provides thinner mdf but I’m not sure my design skills are really up to scratch in this medium. The other challenge is that so far, I’ve been lucky in that my designs have been thought through and worked. Where they haven’t, such as the church roof, I’ve been able to bodge it, but if I do get a design wrong, it’s going to get costly very quickly.
So, I will keep mdf as a fall back option but I need another approach to getting the buildings I want. I’m therefore thinking 3d printing is perhaps the way to go. I don’t have a 3d printer and I’m not likely to get one either so I will be reduced to using online services to print the building out.
Painting an Italian Church
Picking a colour was difficult but easy at the same time. I studied some reference photos of villages and found variations in the colour of the stone used in construction leading to a tough decision on what to opt for. The variations of sand from a yellow to a faded tan were quite diverse across the different villages. Then I looked closer at the last picture below of San Gimignano and realised that different buildings in the same village (even different parts of the same building) were made out of different colour stone. So does it really matter what colour I opt for as long as it is somewhere in the yellow to faded tan range? Probably not, but I will likely need to use a number of different shades across the different buildings to get that mismatch look.
I also notice that some of the buildings are clean cut stone that looks quite uniform. At 15mm, I think I can get away with not representing each individual stone. However, some of the buildings use different stone in the construction. I may need to look at how to get the texture for these before painting.
In the end, I opted for a faded tan colour and bought a cheap acrylic spray can. I had problems sealing the mdf. I sprayed it with a varnish first and then a primer before adding the acrylic but this didn’t work and it needed several layers. You can see from the pictures below that the base colour is pretty thick and, in my opinion, looks poor.
For the roof, I replicated the approach I used in the spring clean challenge but tried a different primer. I think this now looks too dark for Italy and needs to be more orange than red. The roof is just attached with blue tack and can be re-done.

Now this is just the base coat for the walls (the attempt at the roof is finished) so it does need shading and weathering but I was sure on the overall effect. It just looks too ‘blocky’.
In short, I’m not sure about the colour and I’m definitely not sure about the use of mdf in this build.
Building an Italian Church
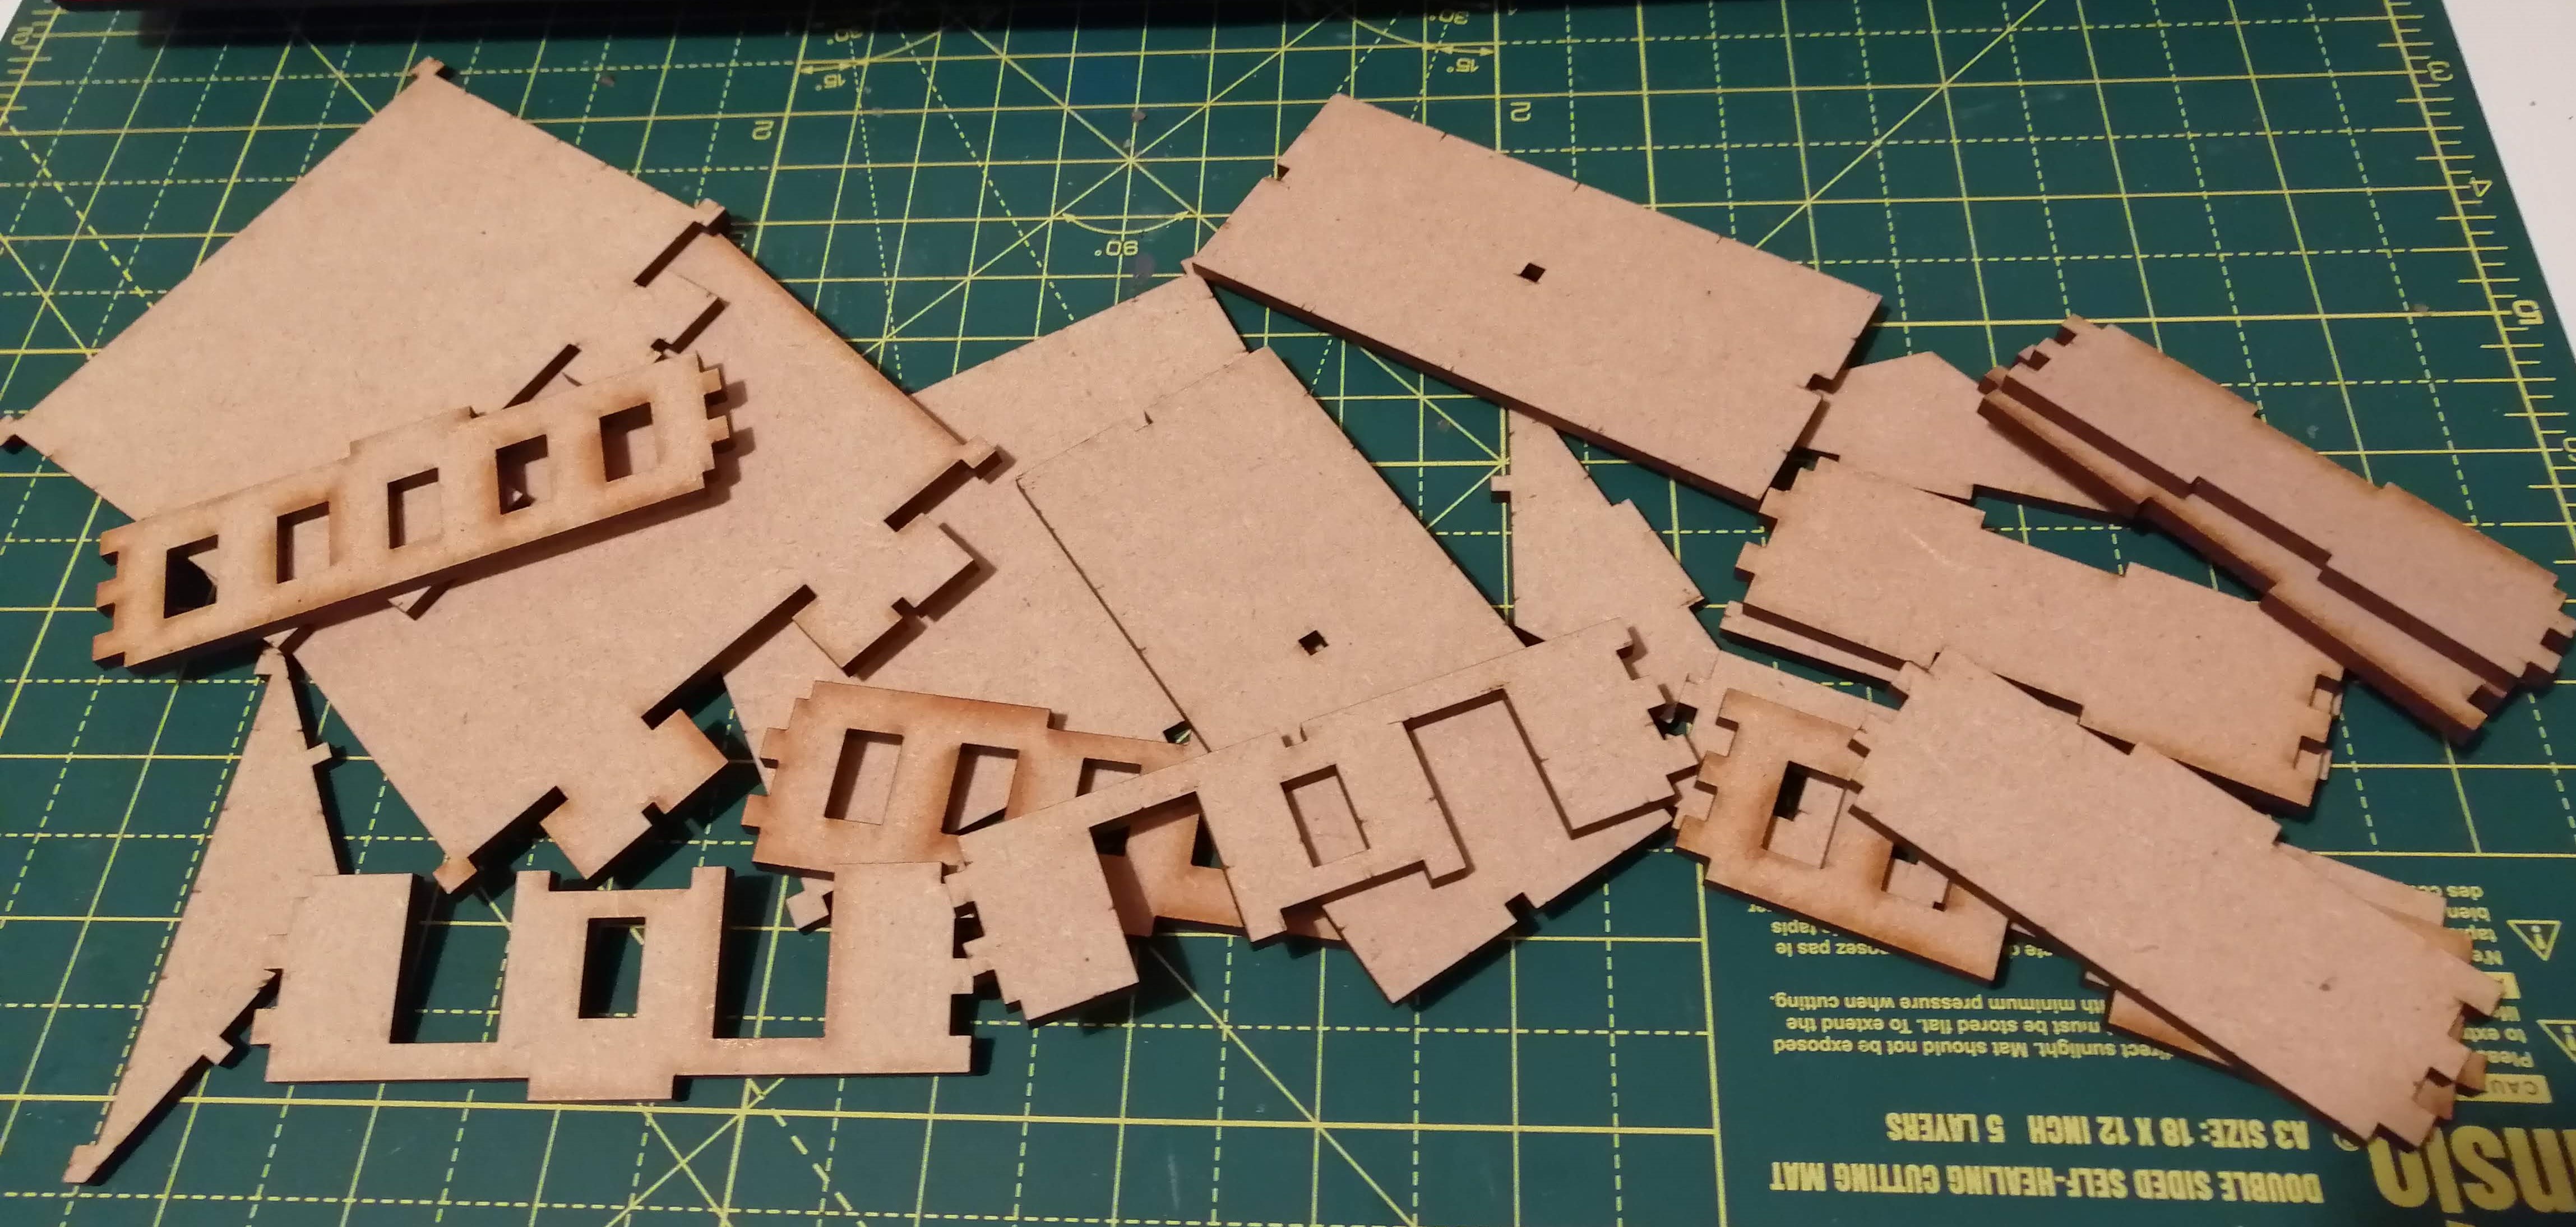
Having sent the file containing the design for the Italian church to Razorlab, I received the following pile of mdf through the post. It took about a week to turn this around, so a good service overall.
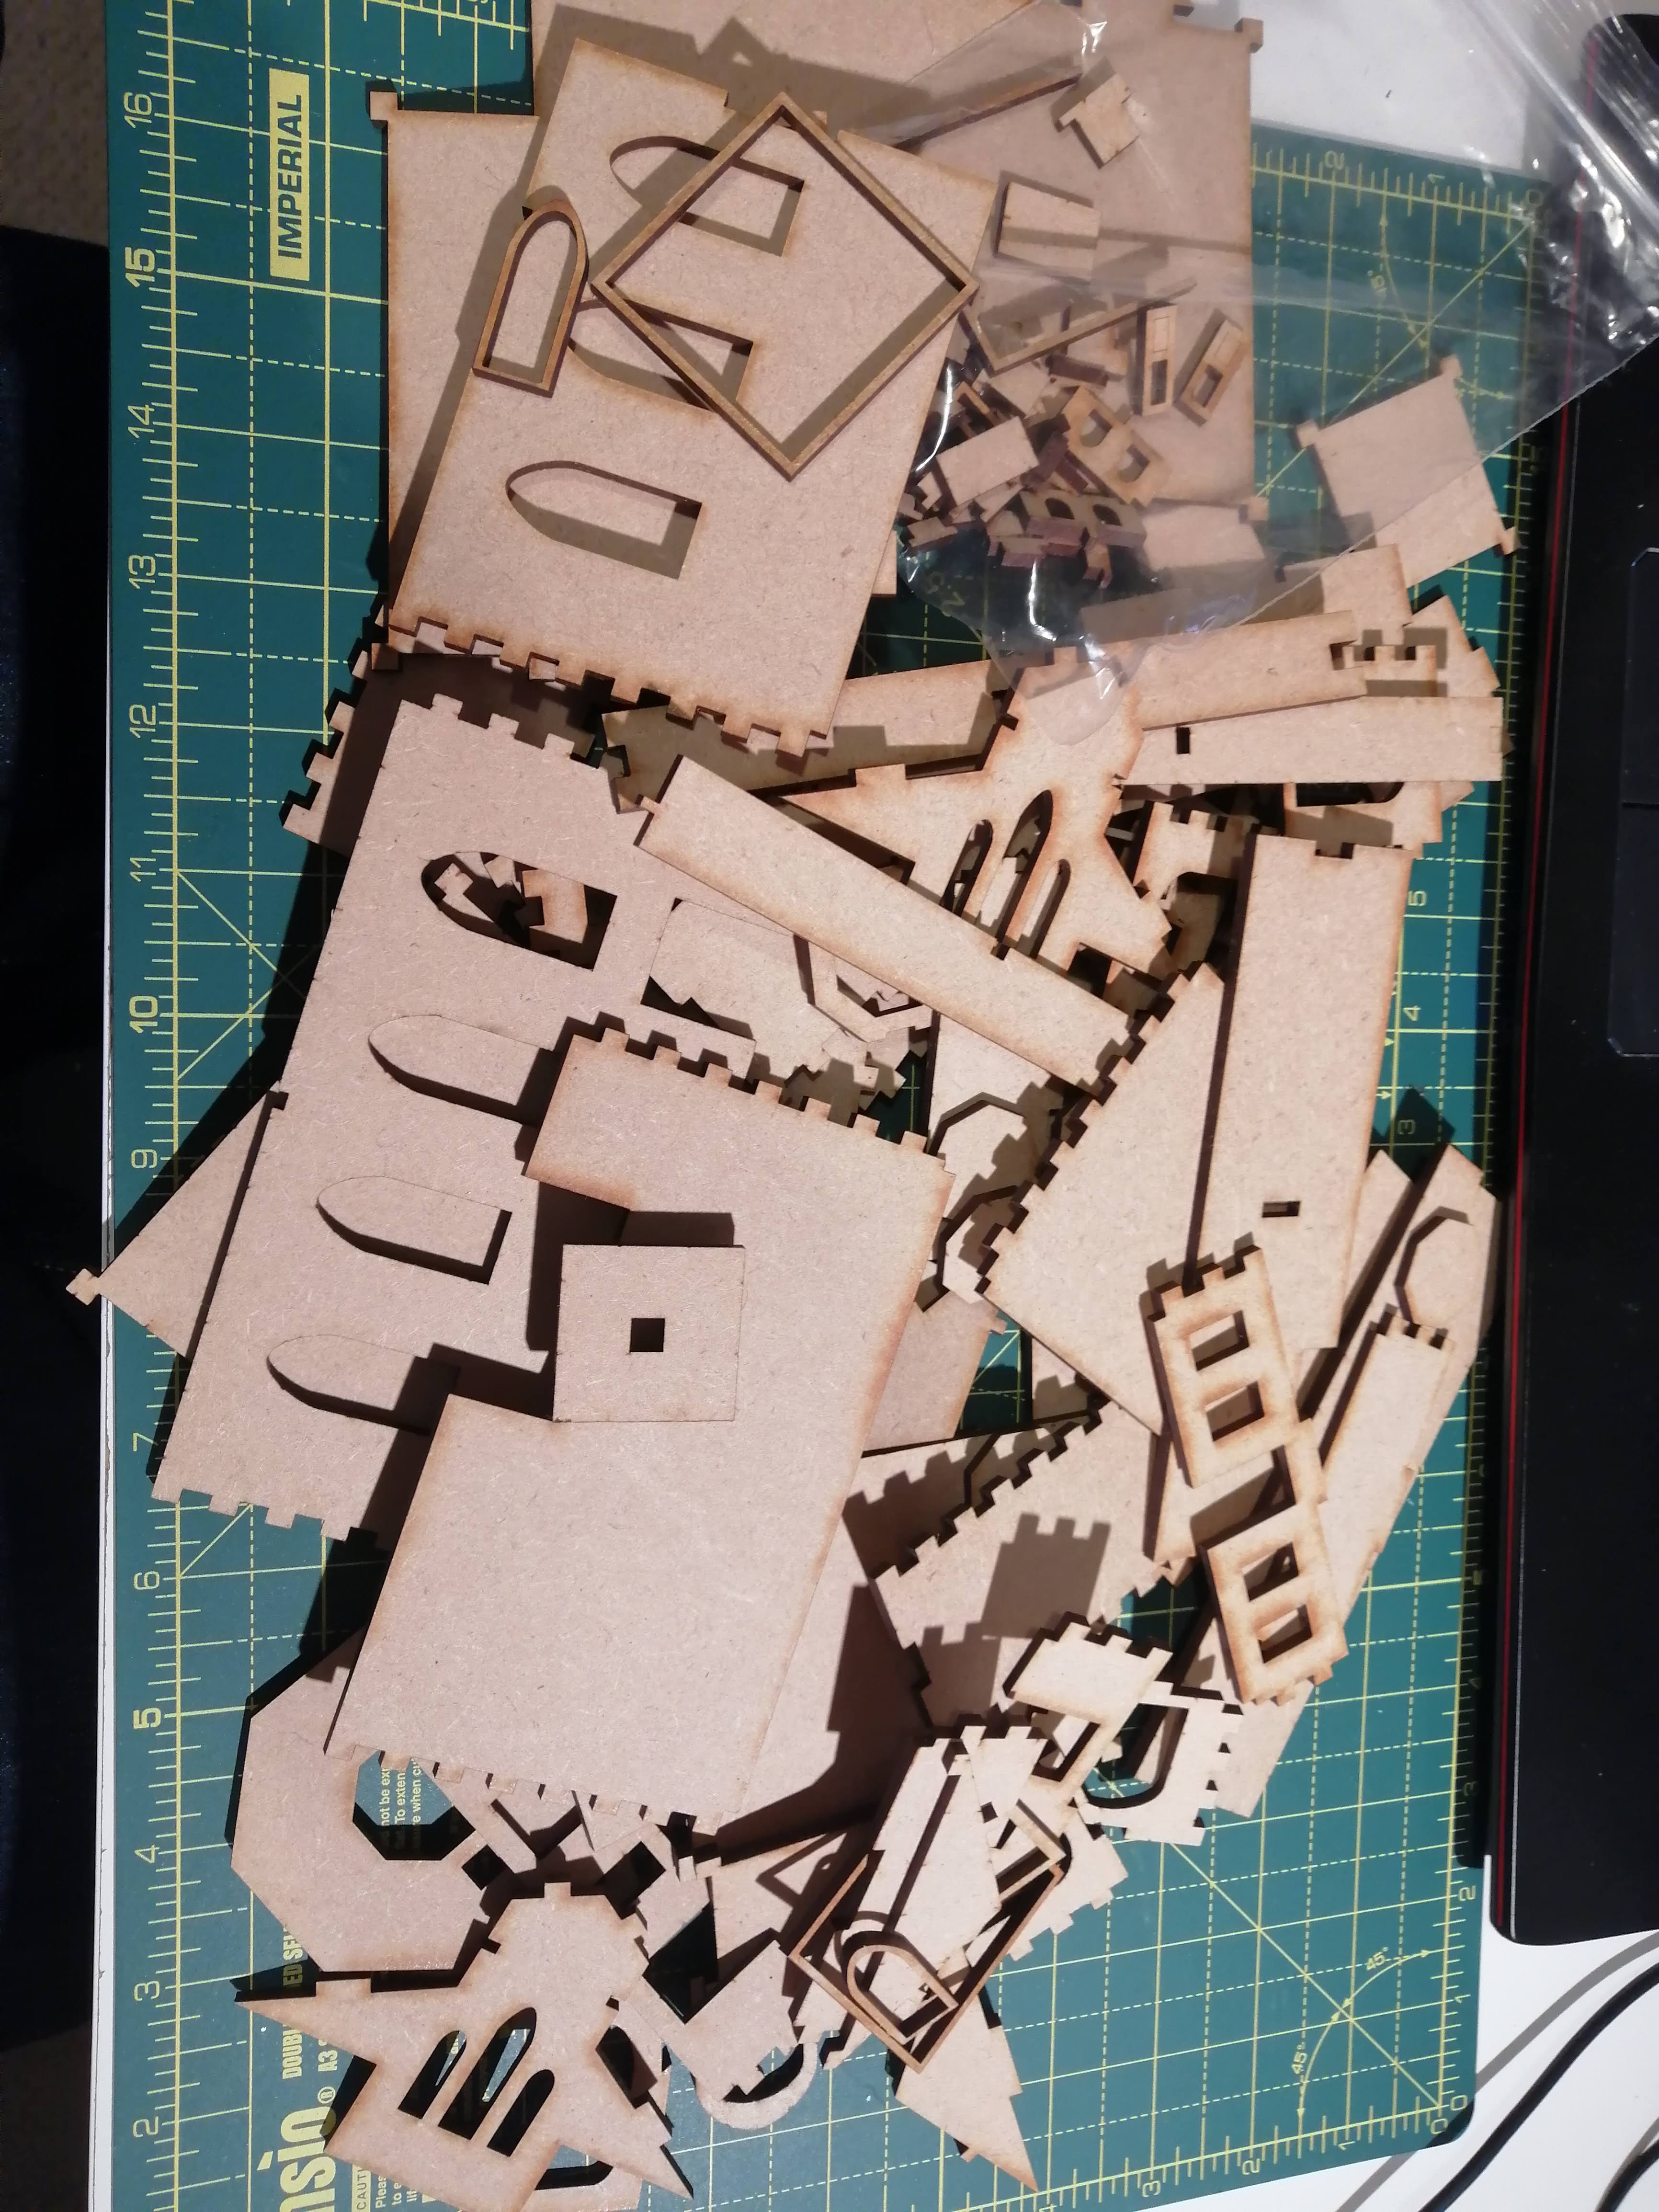 A pile of mdf, cut to my design
Now for the moment of truth. Was me design, maths, planning on paper and all the thinking correct?
Let’s separate everything out.
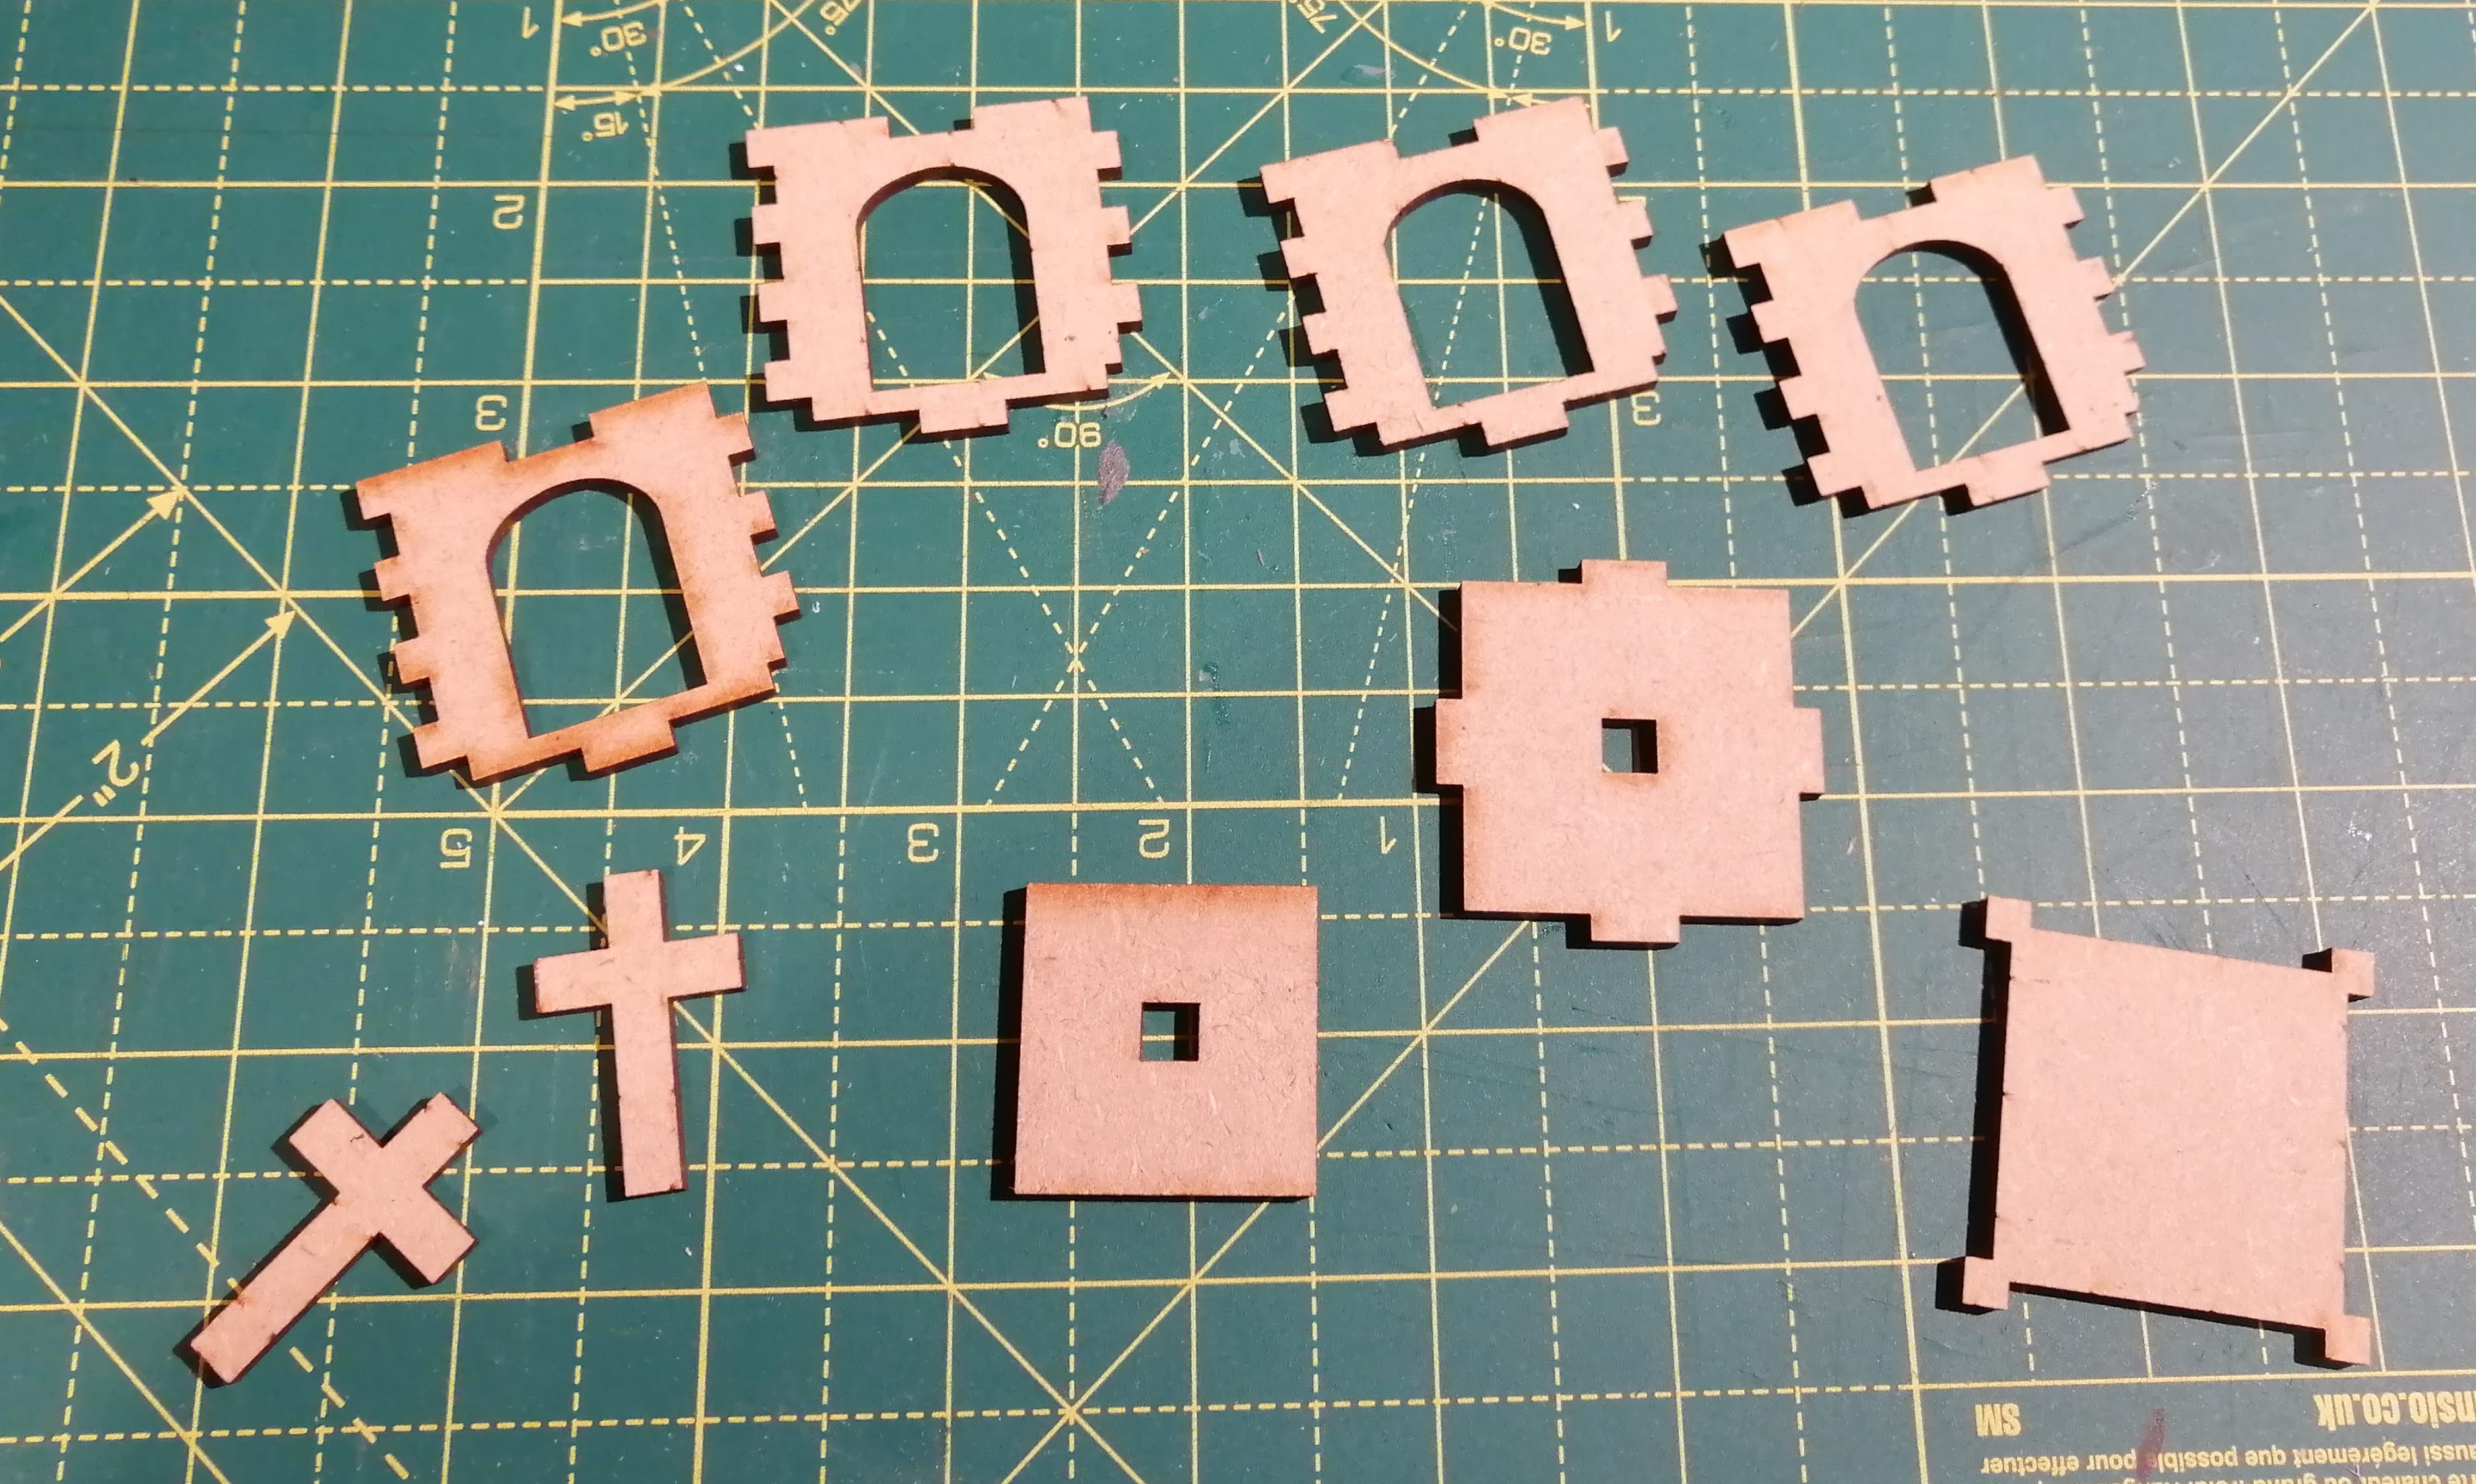
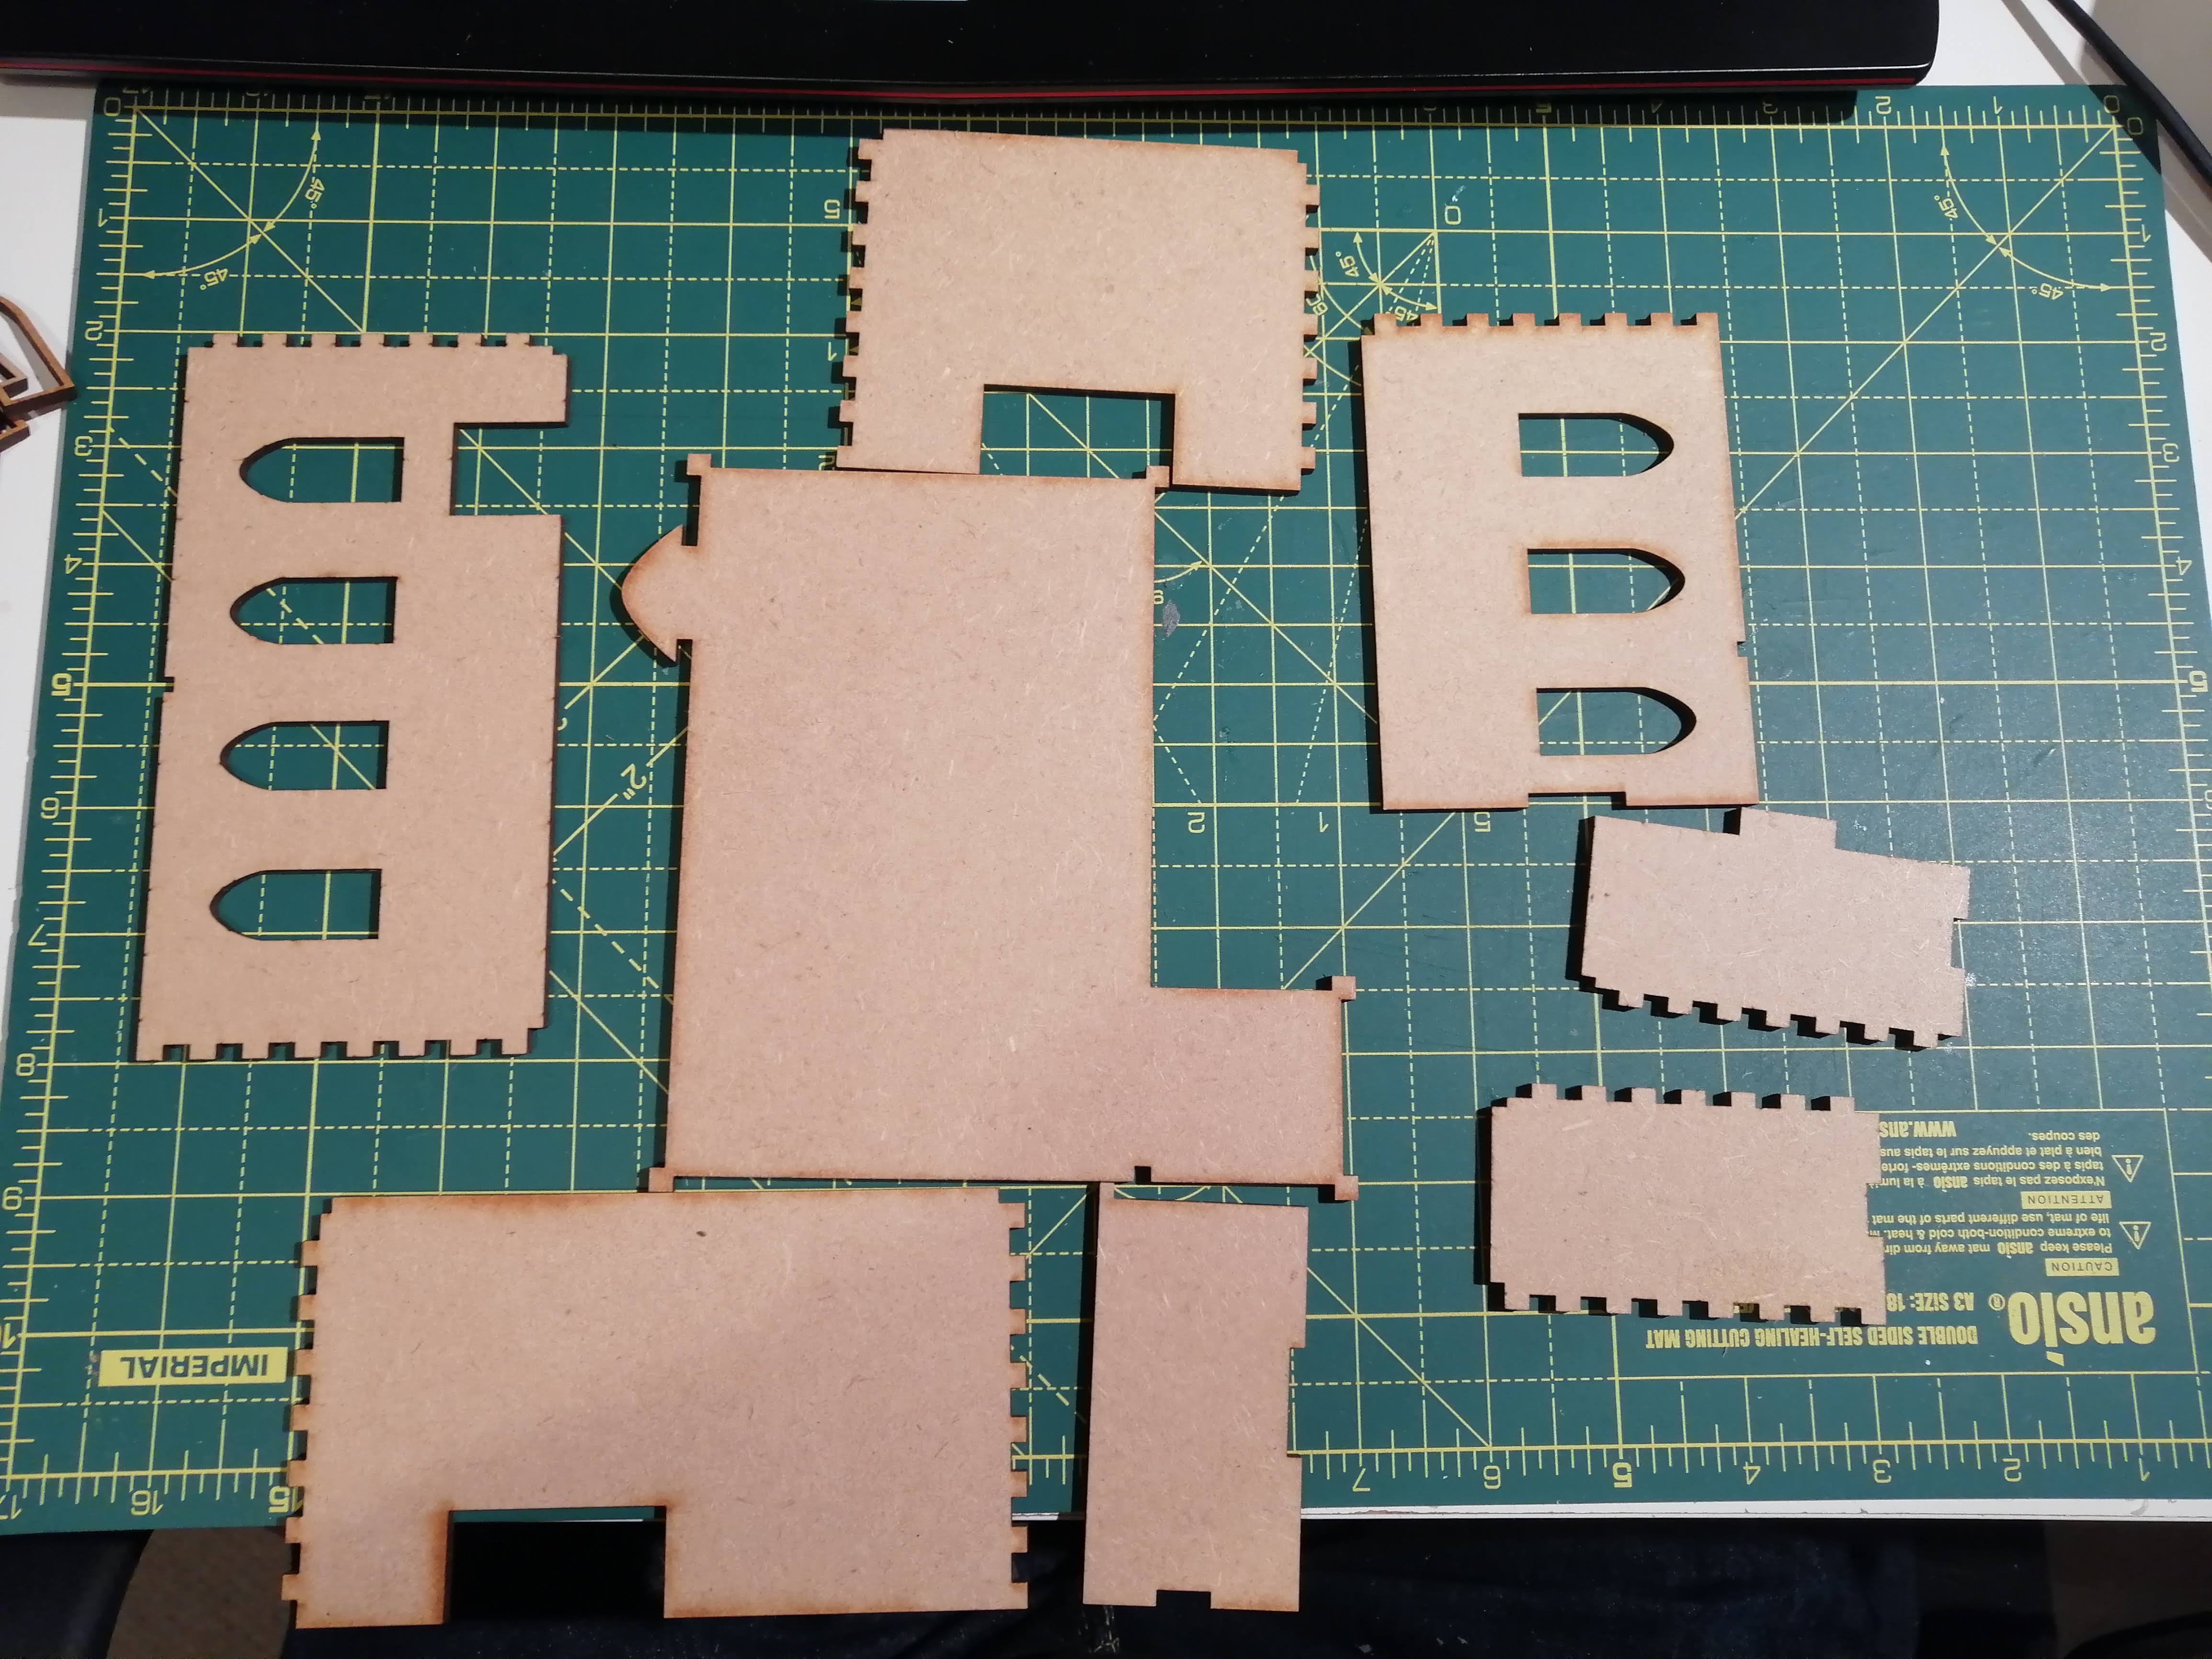
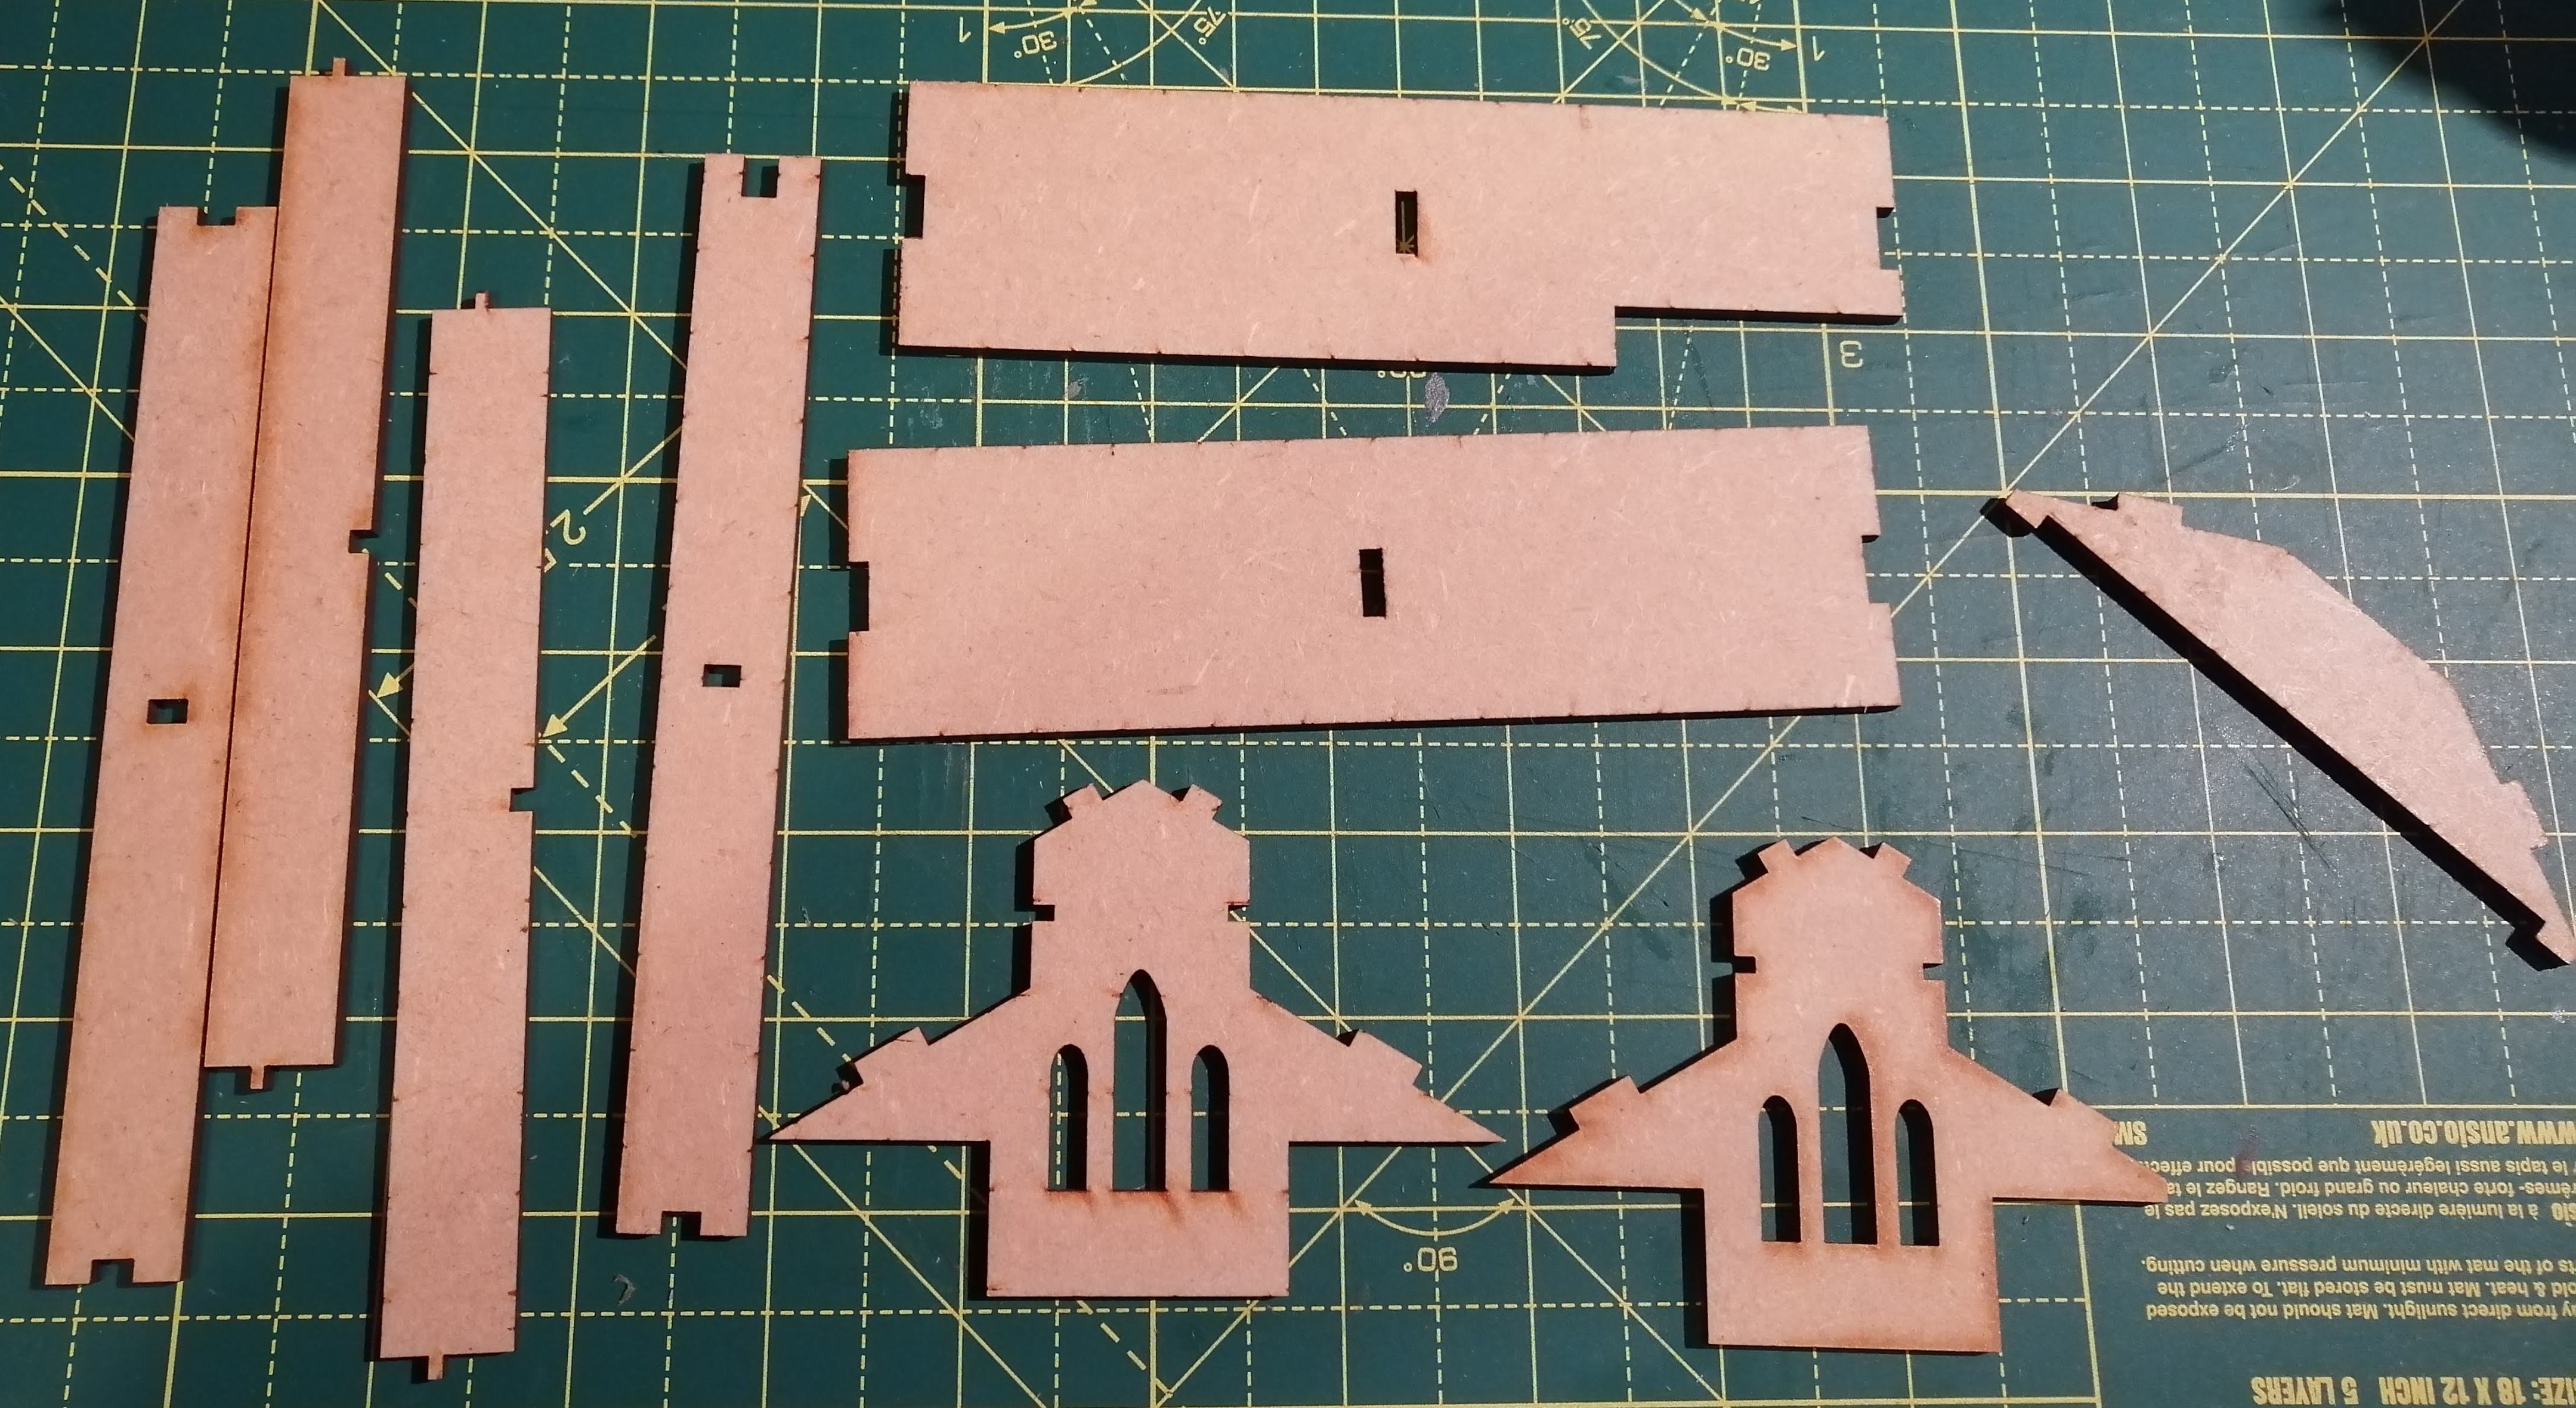
In the below pictures, we have all of the components for the church and then split out into the components for the church bell tower, the main body of the church, the upper roof and the well.
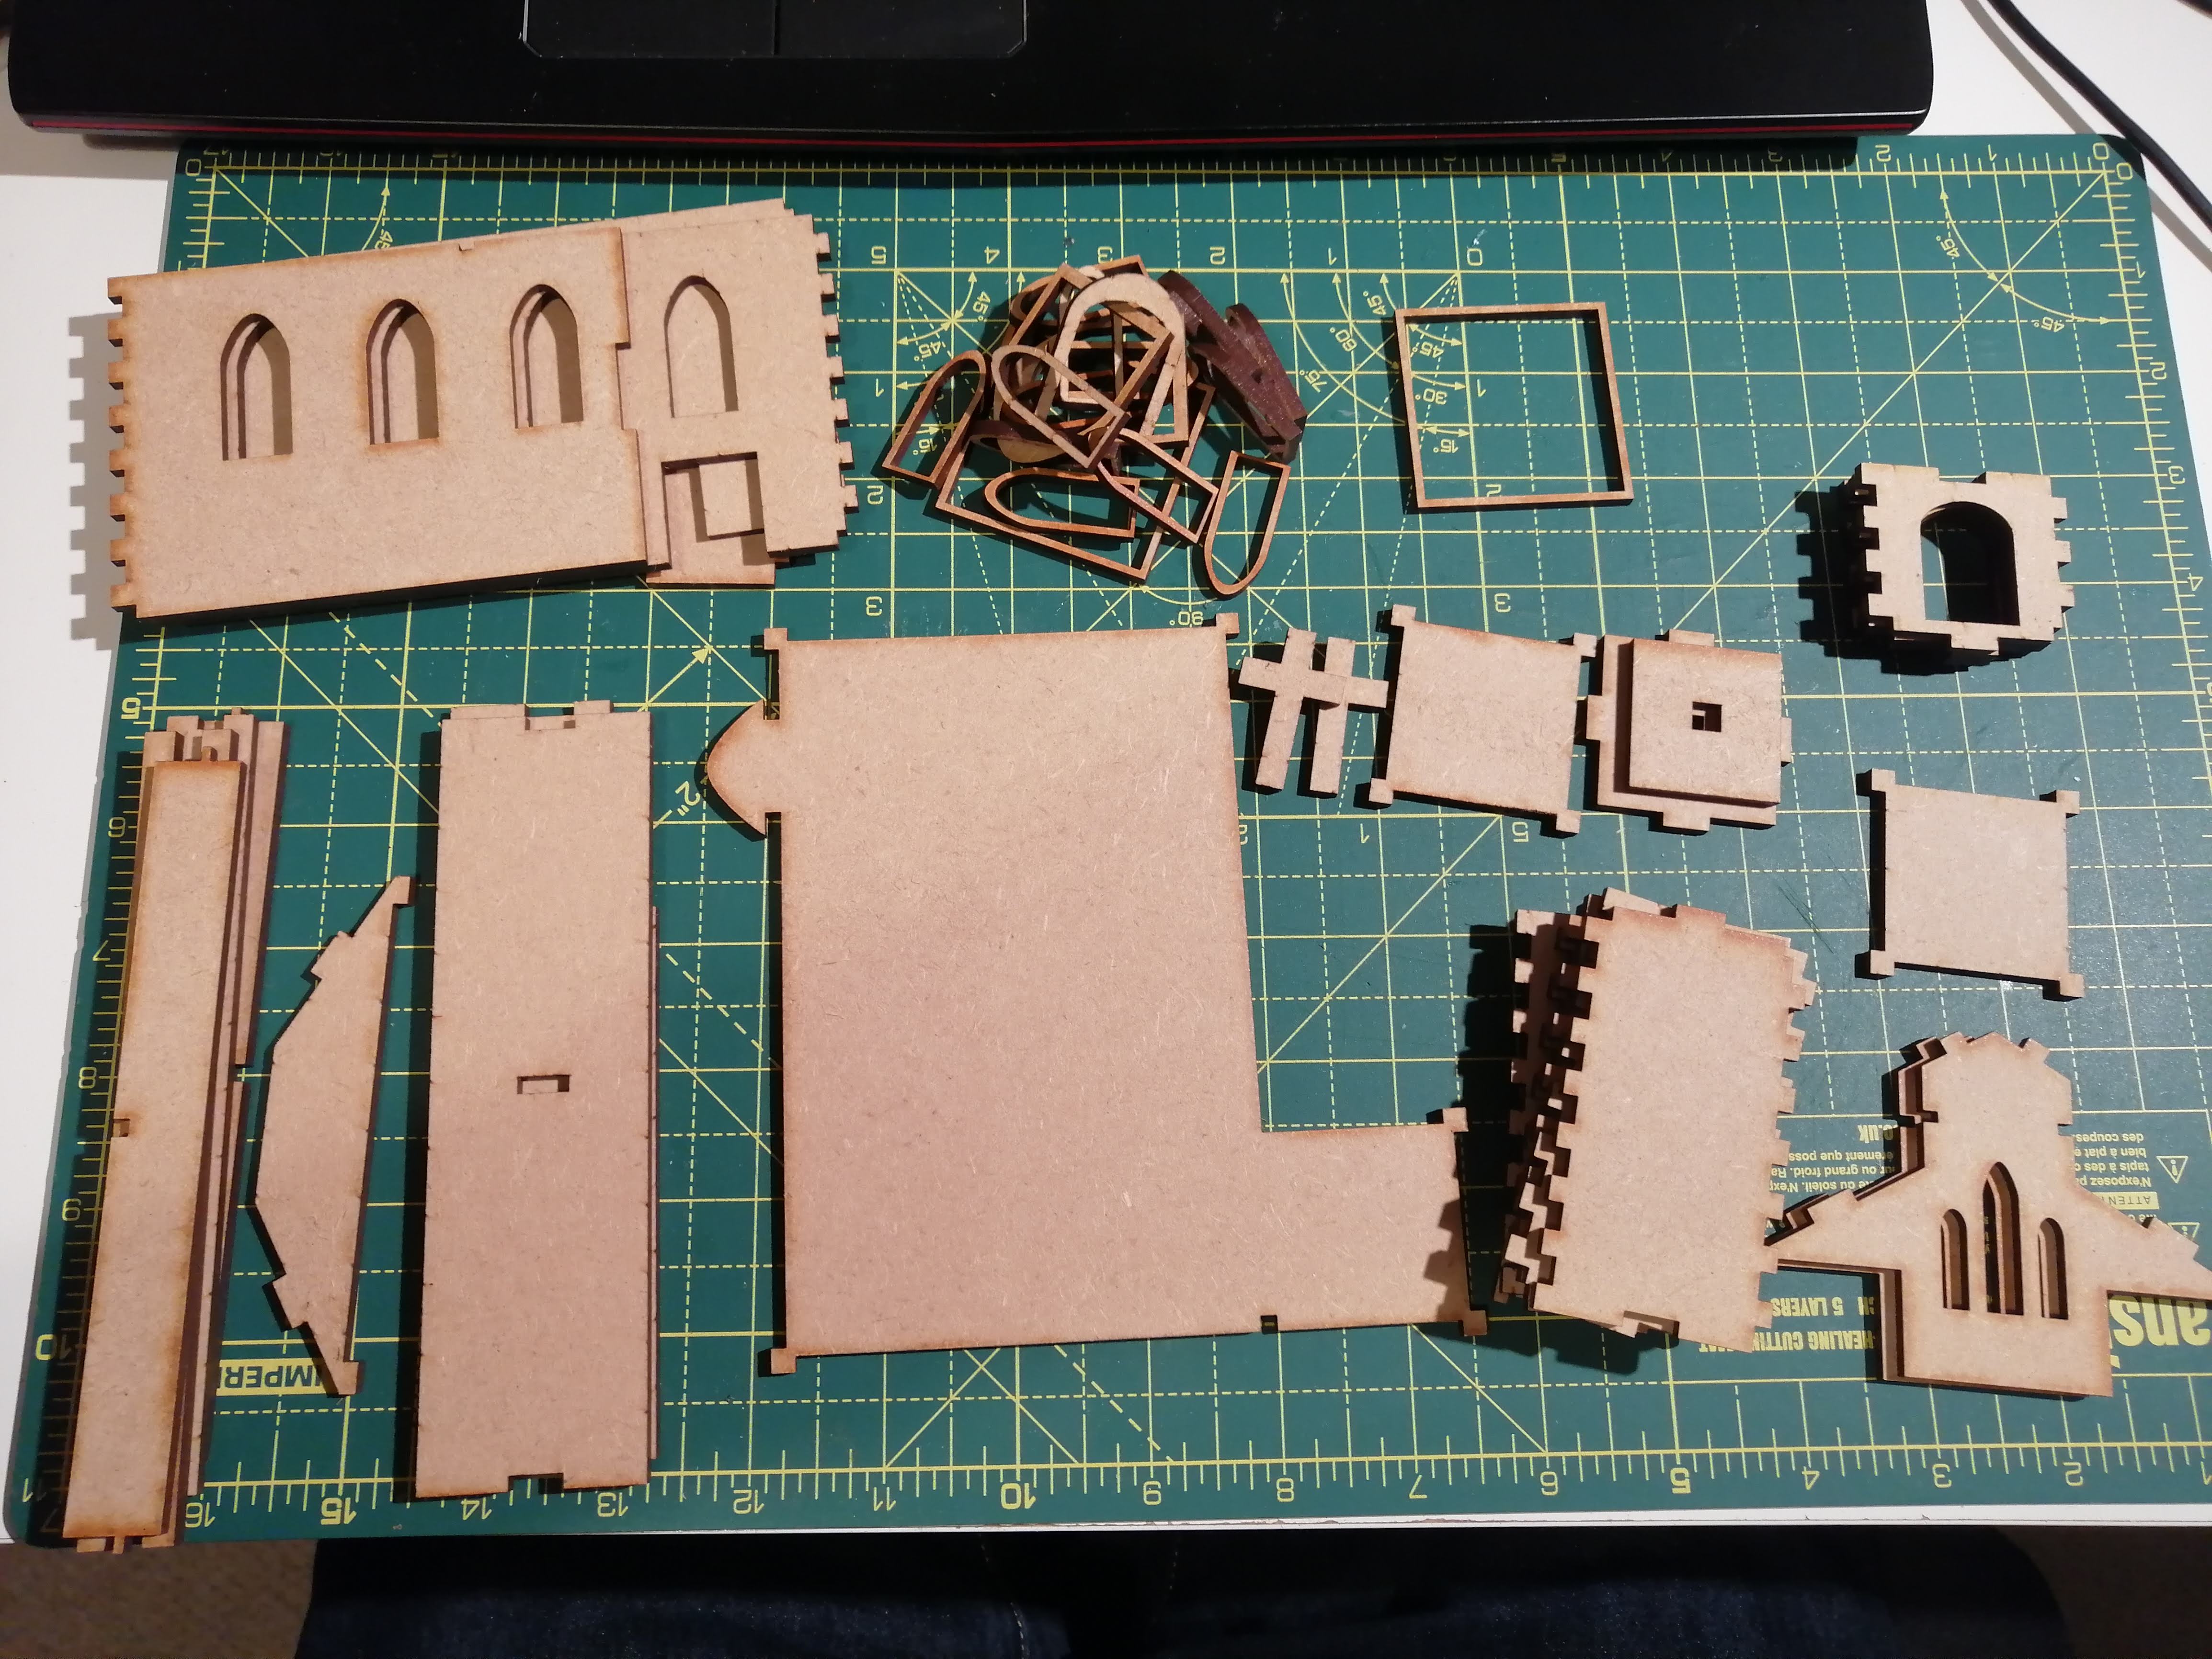
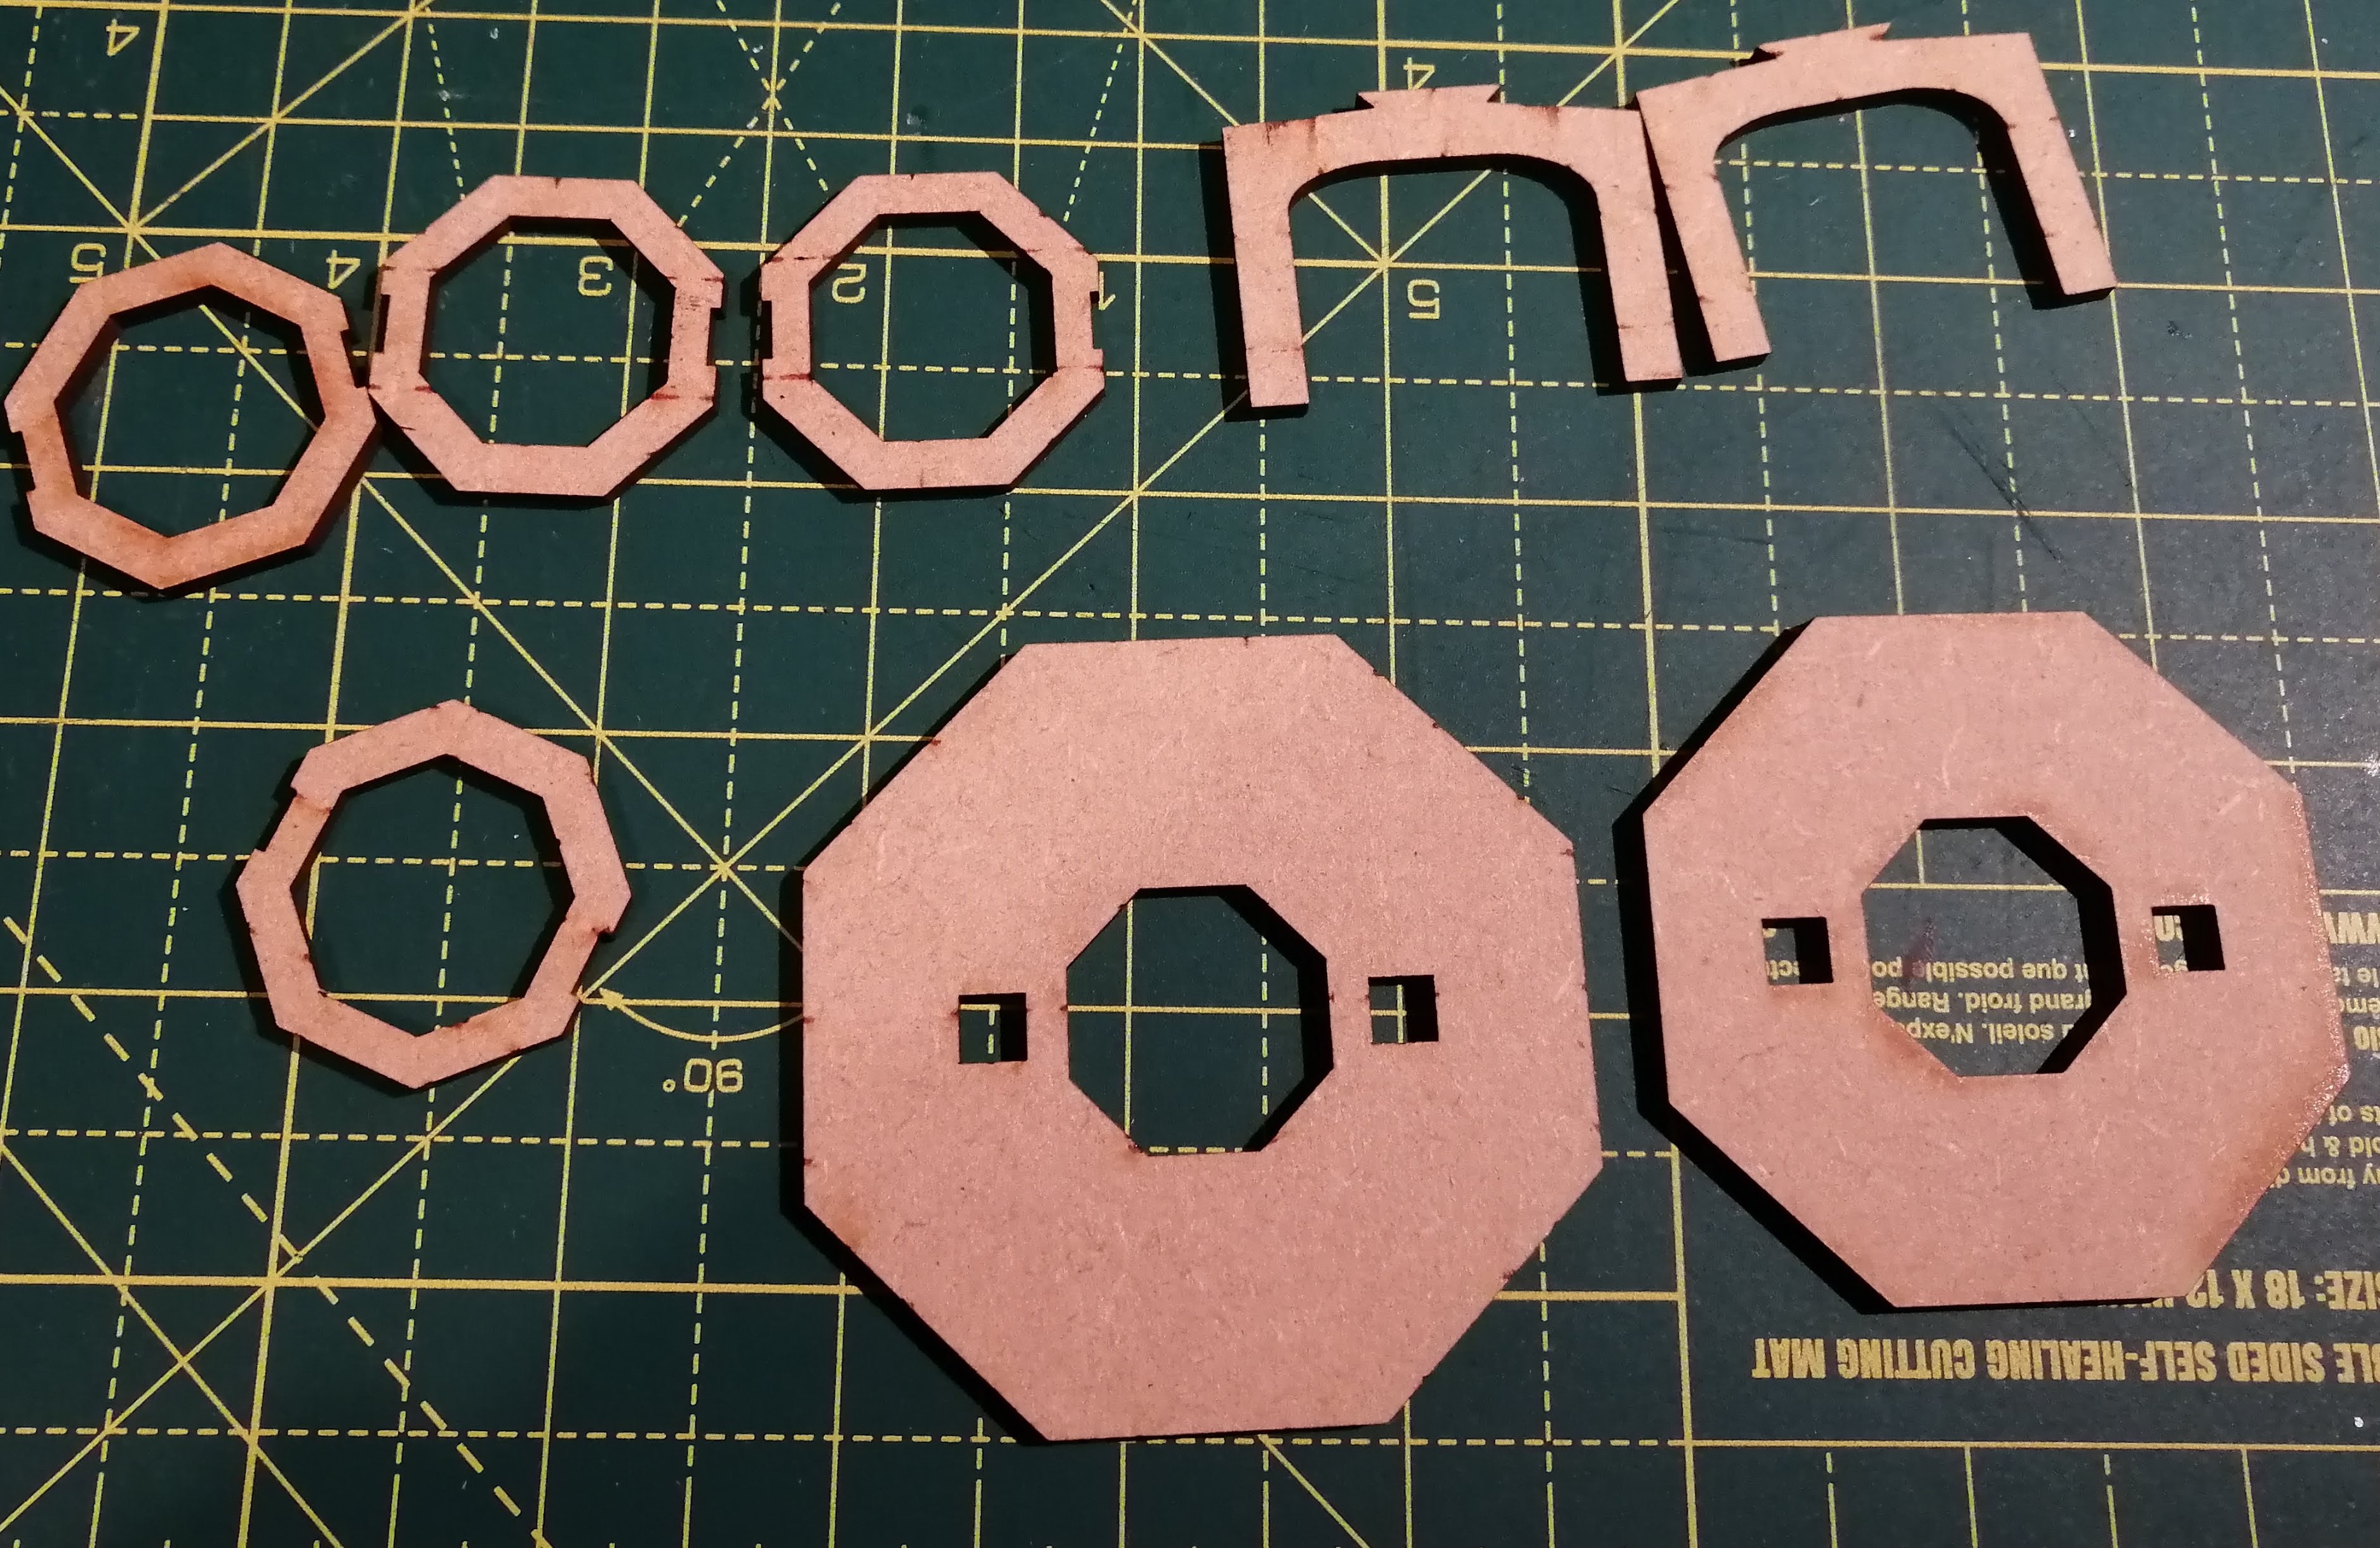
There were some problems. The biggest issue was that the material wasn’t exactly 3mm but was slightly thicker. Whereas the laser cut very accurately, perhaps to less than 0.1mm. This meant that where I had designed a gap for 3mm, it wouldn’t fit. This was solved with some sanding and careful cutting but this added considerably to the construction time. So for the future, add some additional space to allow for the material to be bigger than expected.
The other issue was with my design for the church roof. Where the roof met the tower, I neglected to cut the roof away. This wasn’t a major disaster as I could manually trim it and this will get covered with the plastic roof tiles but it was a little frustrating.
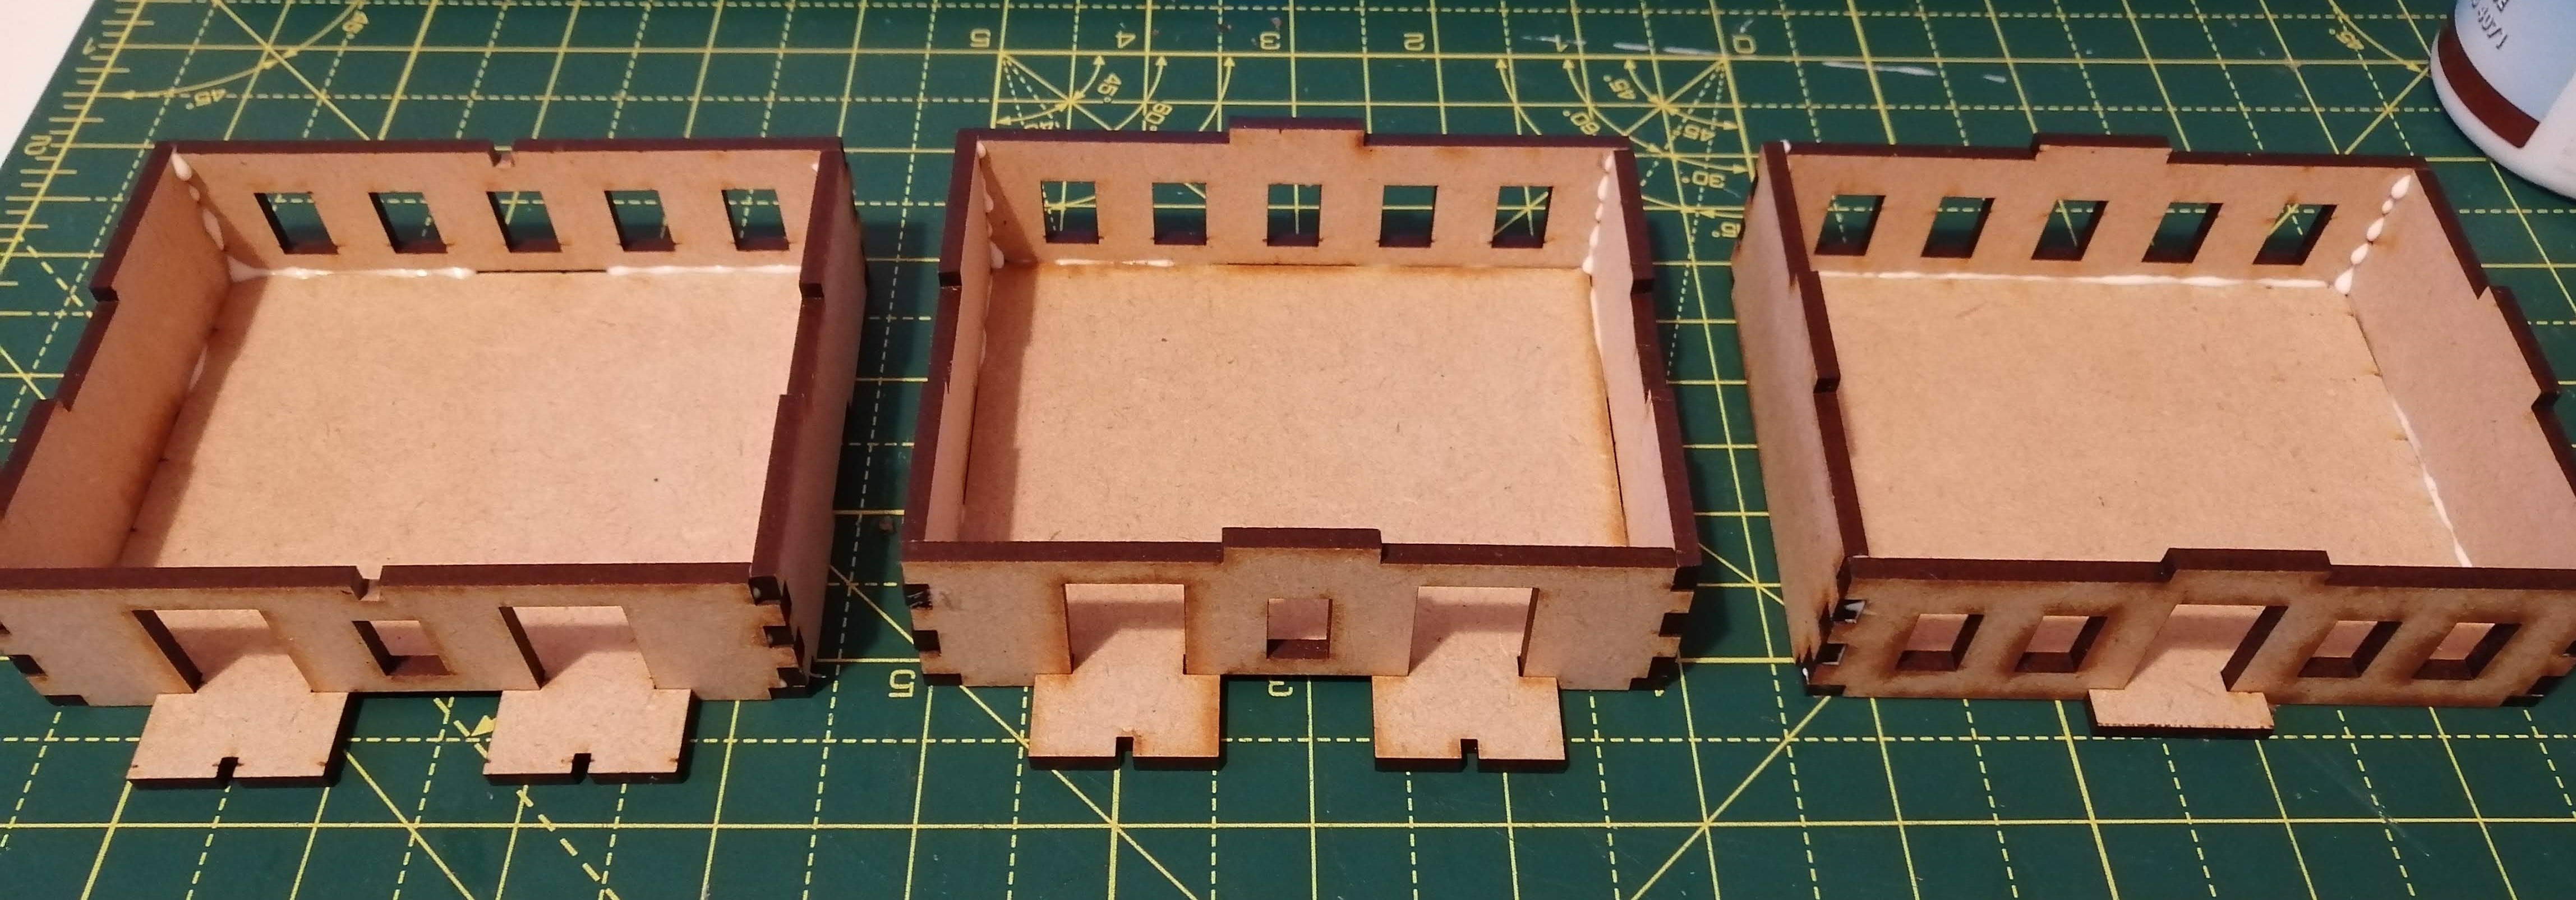
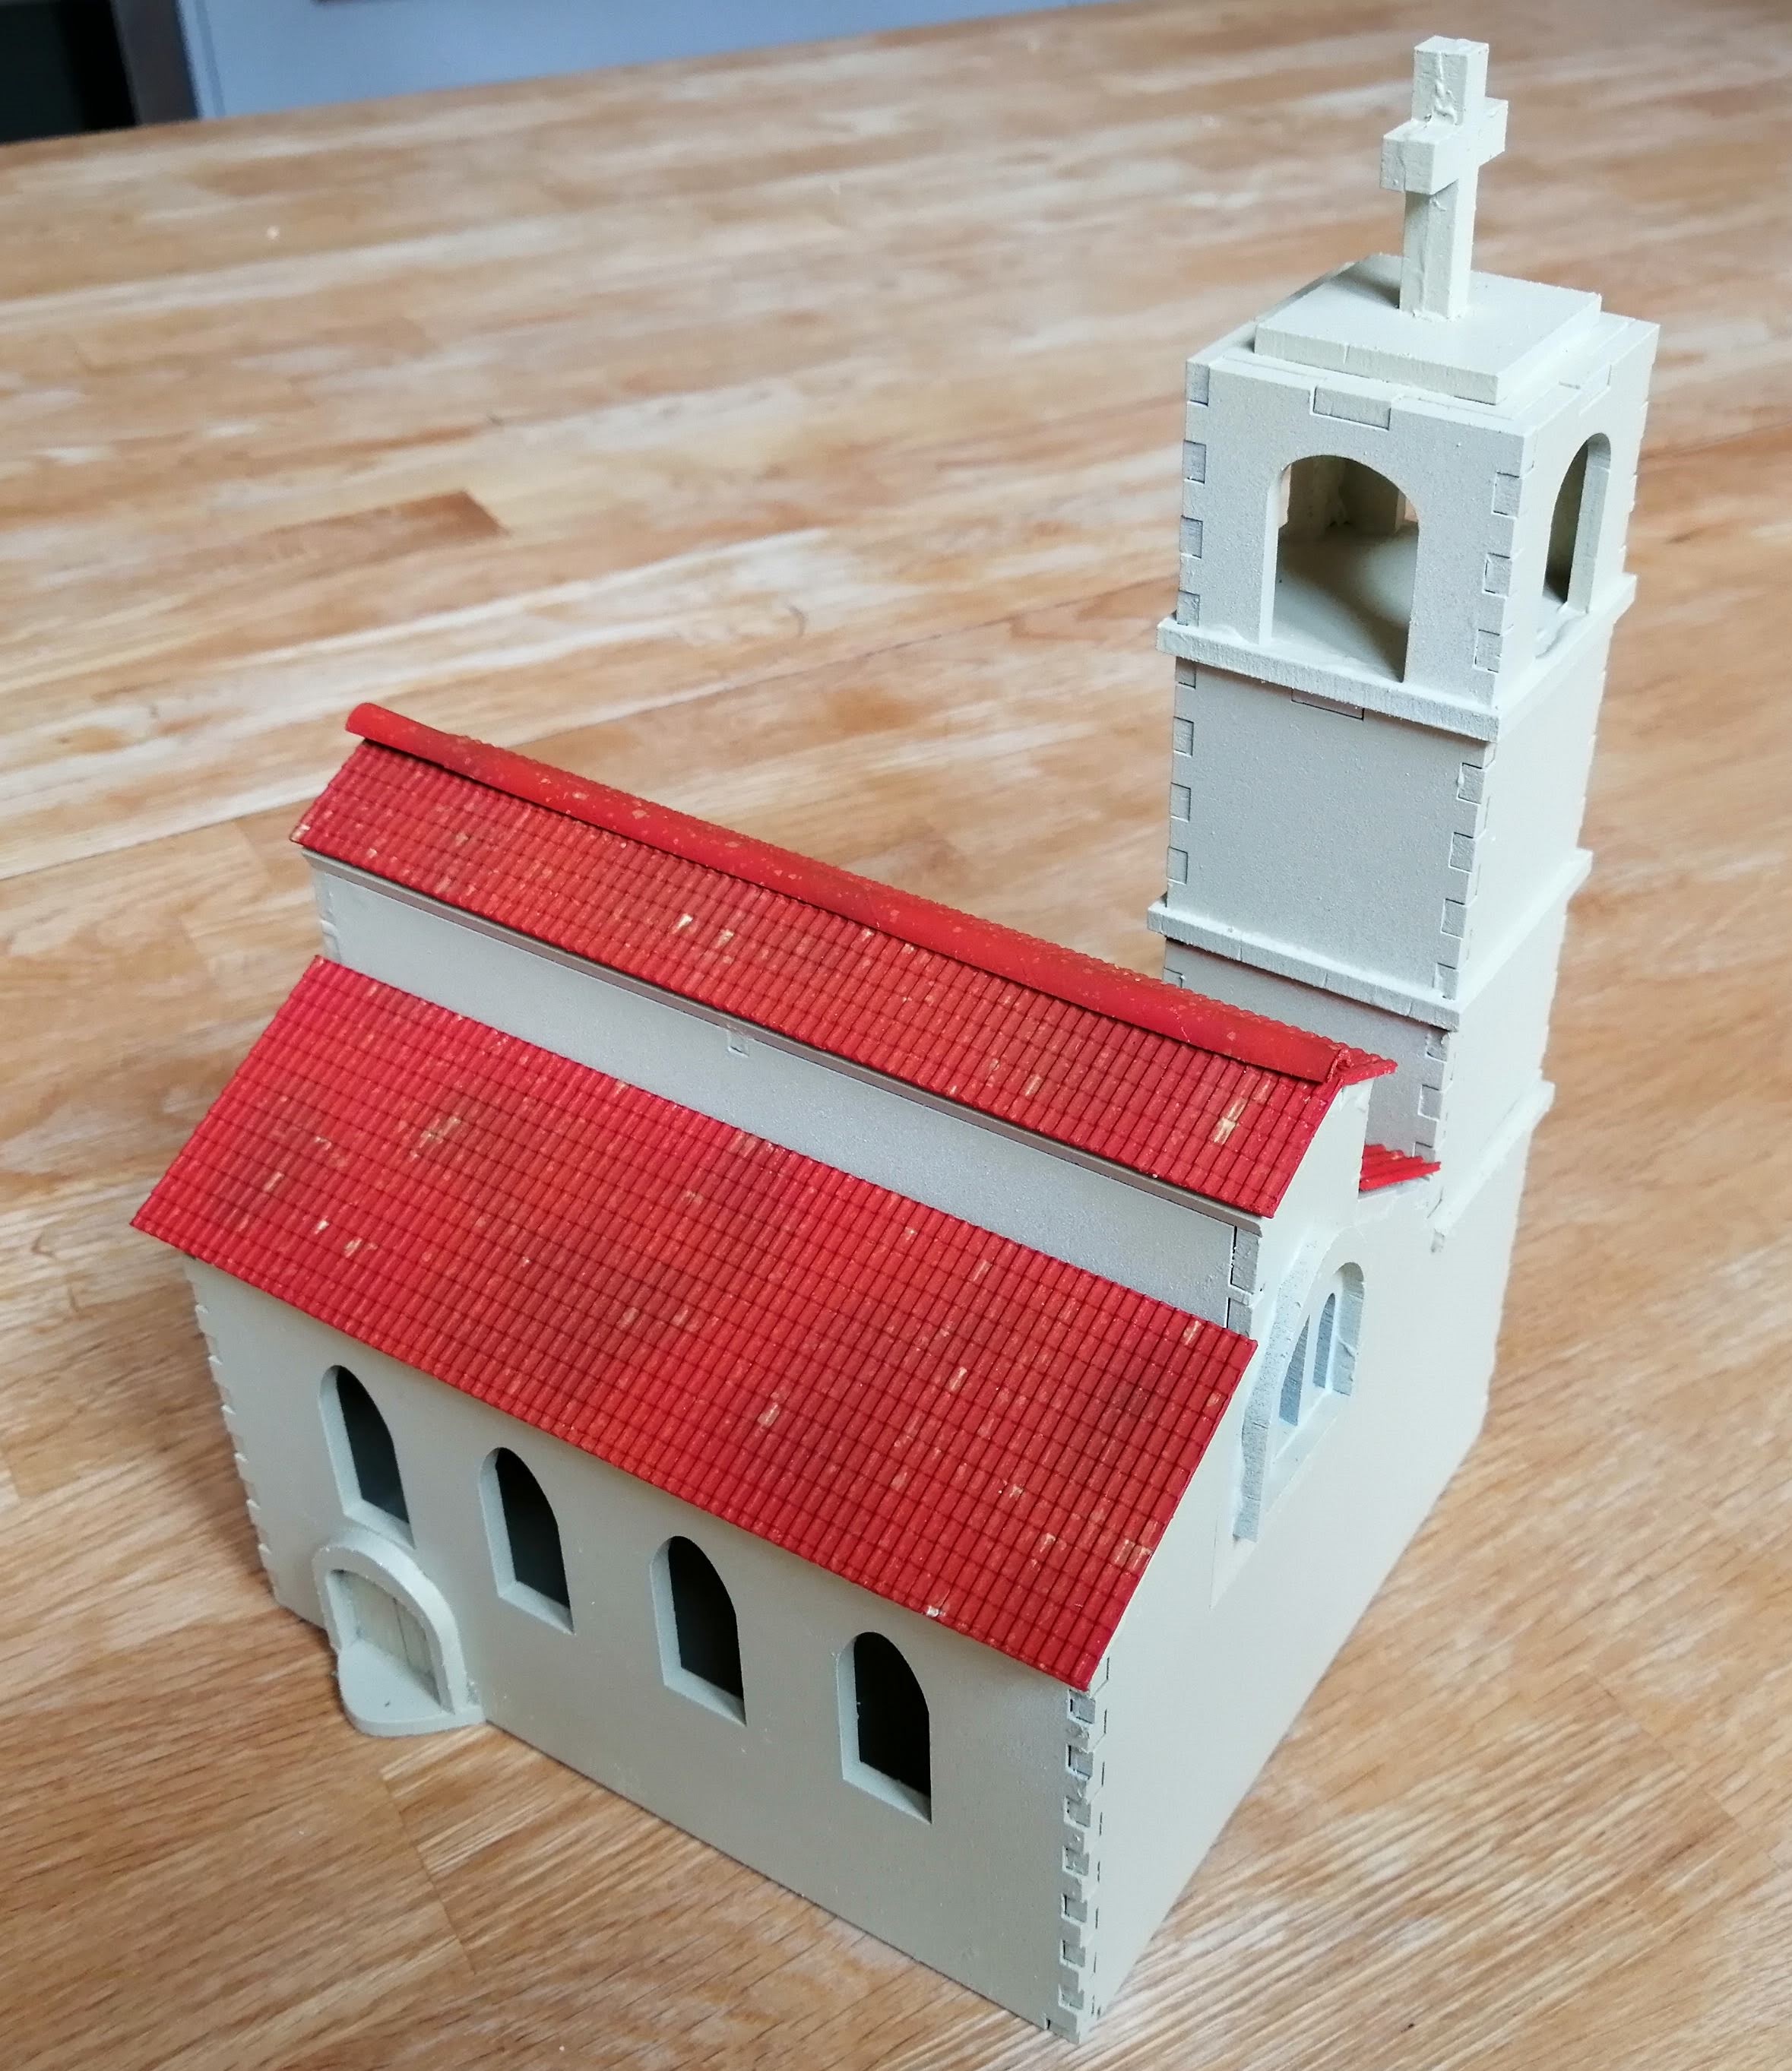
So, this is how they turned out. You can see the bell tower in parts, then with the parts put together and the church well
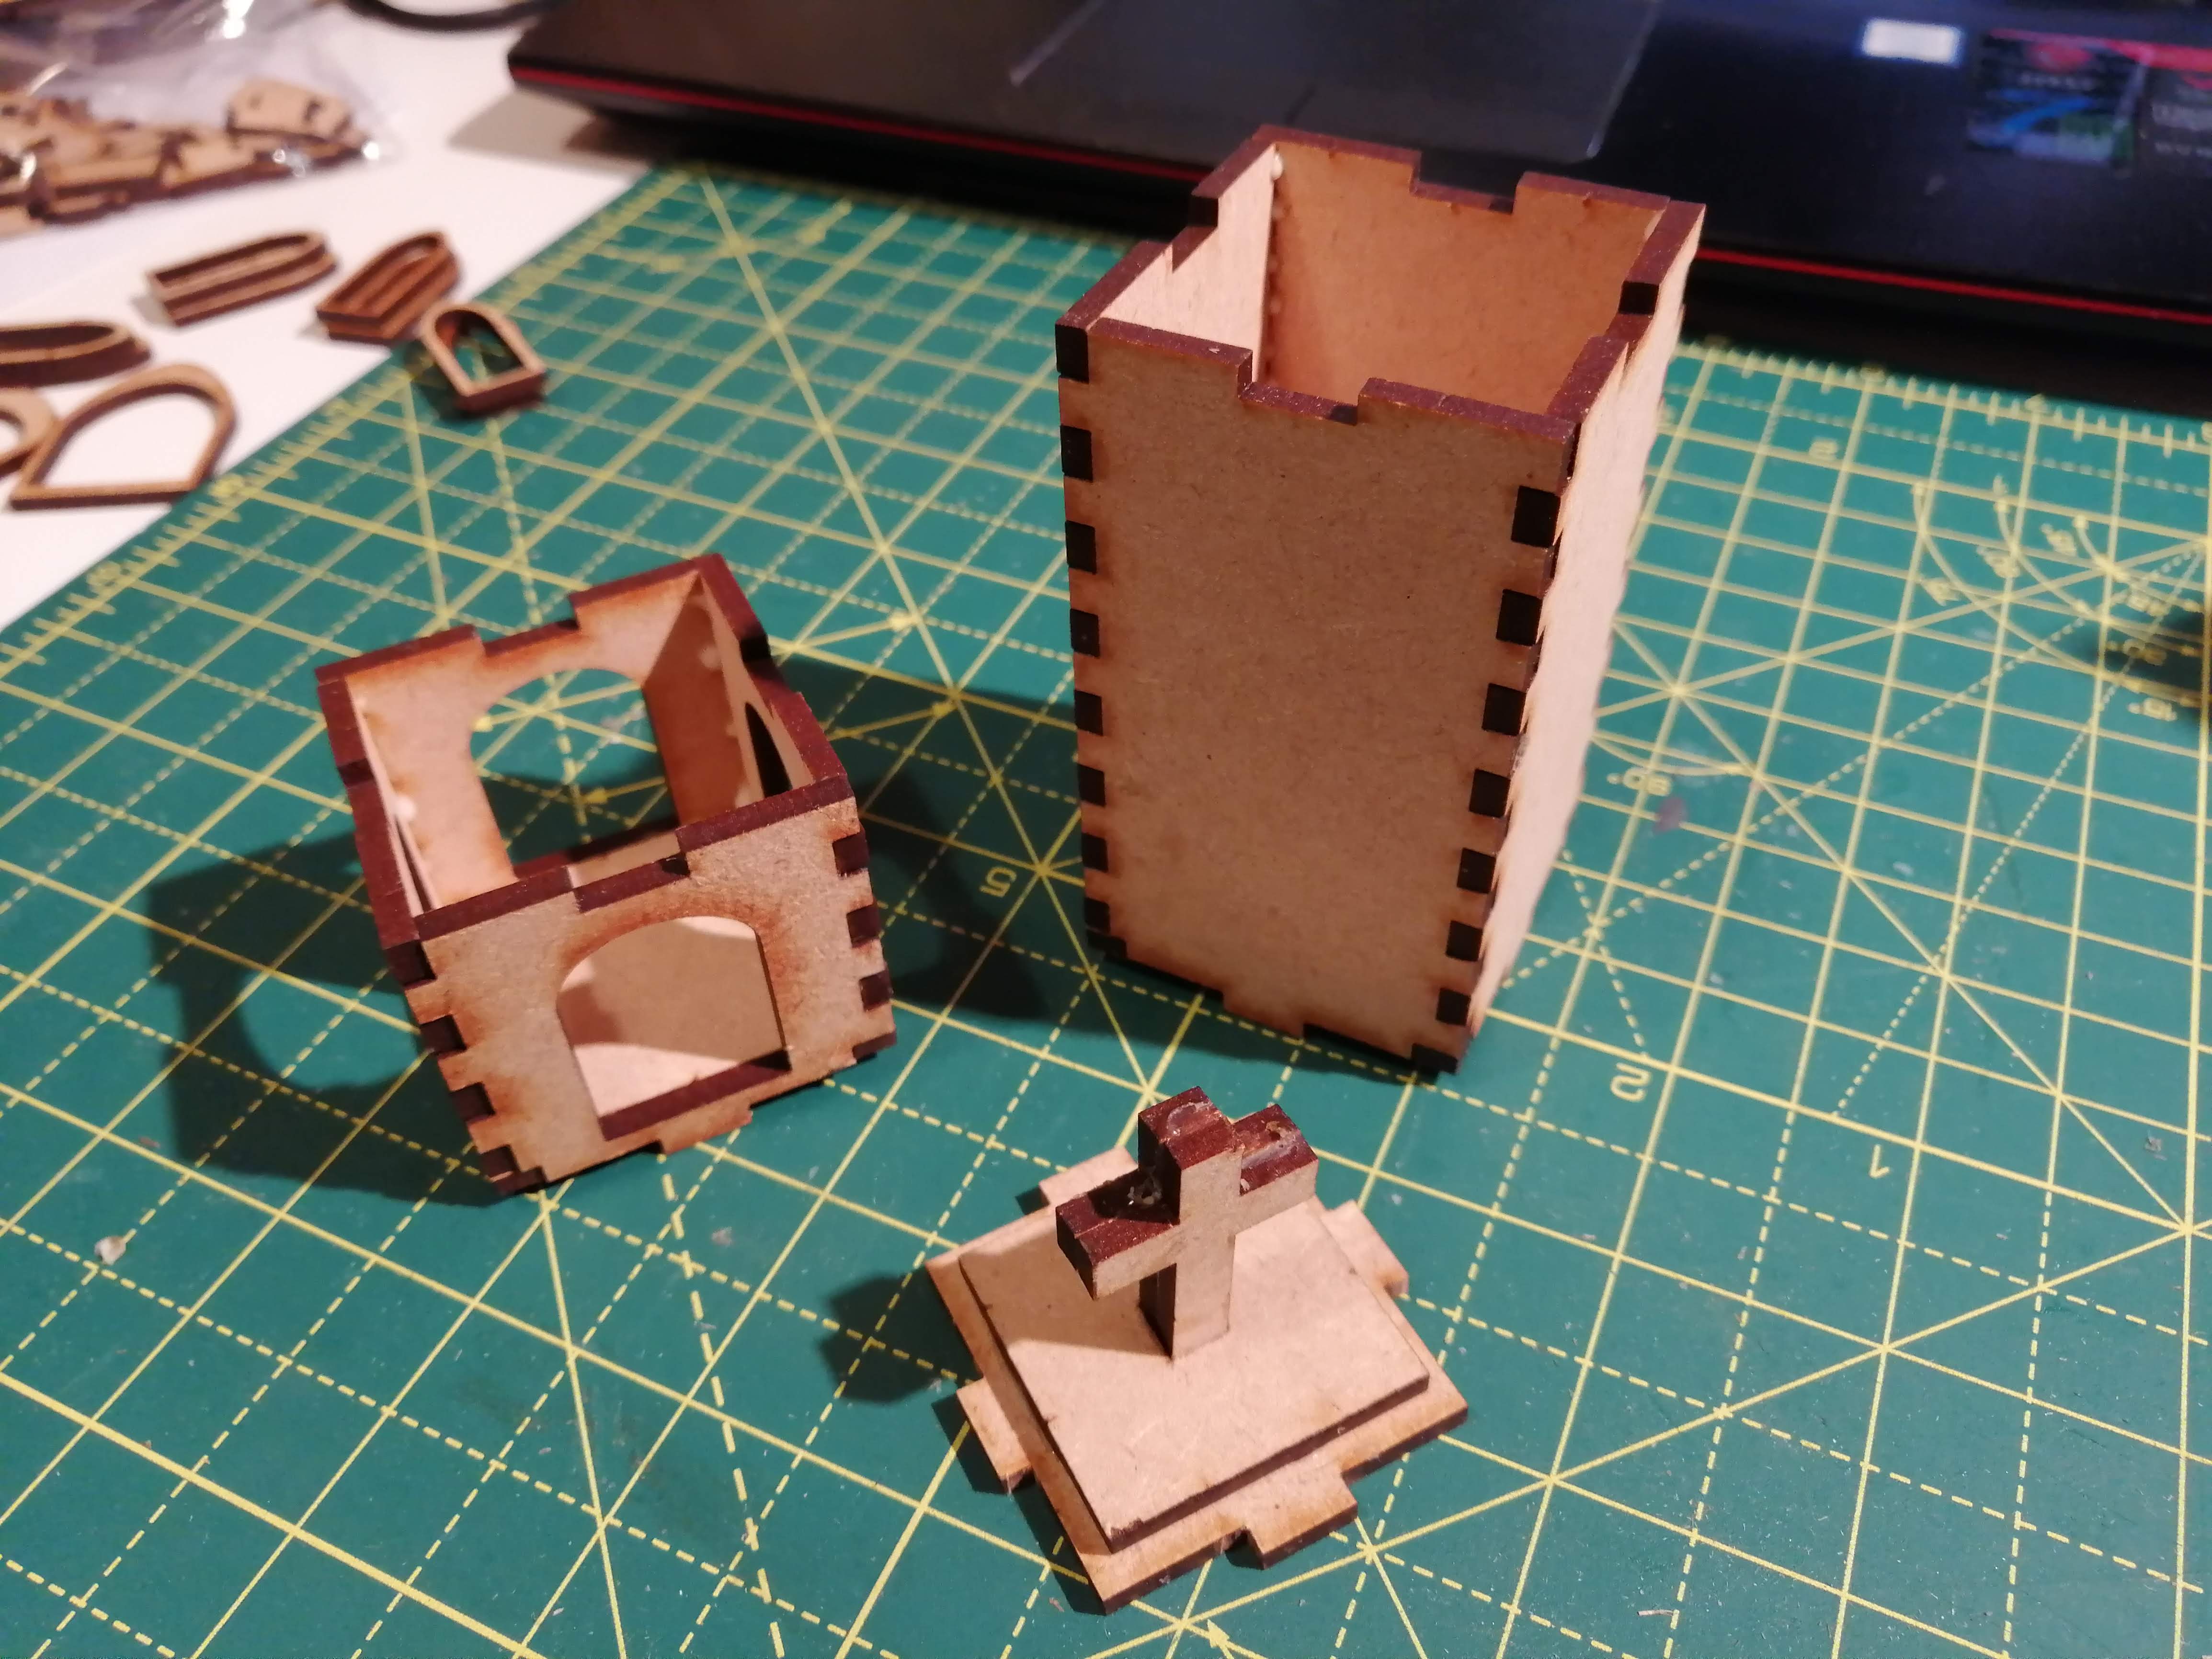
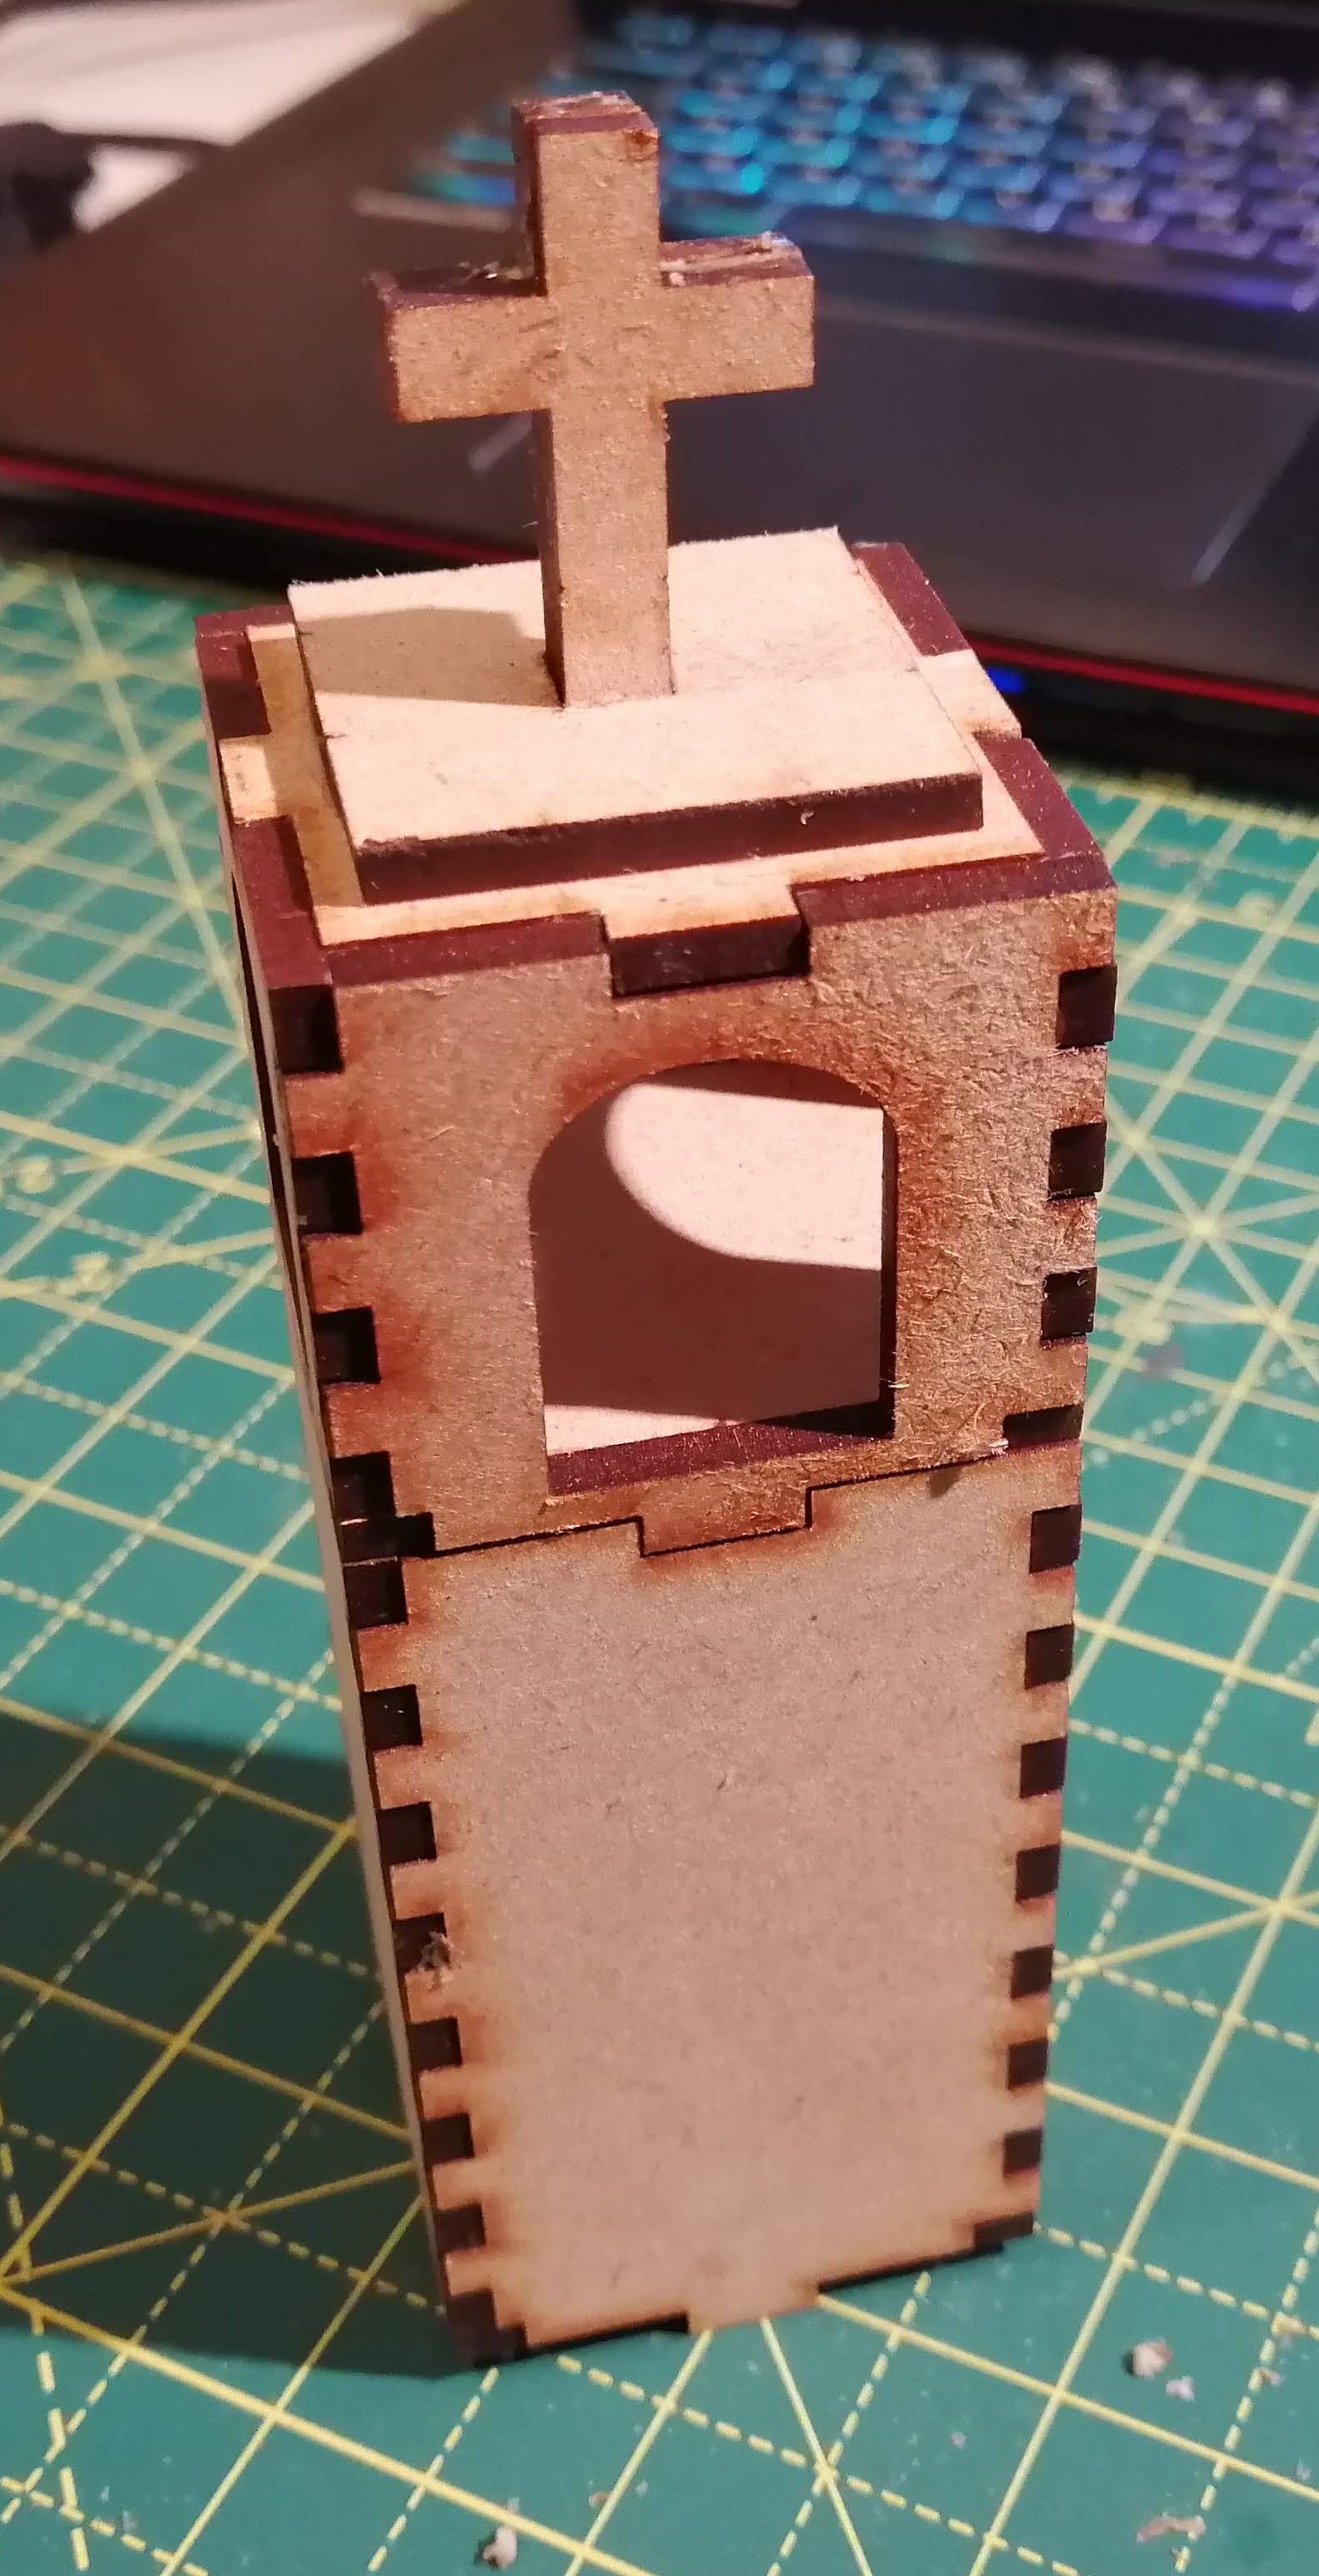
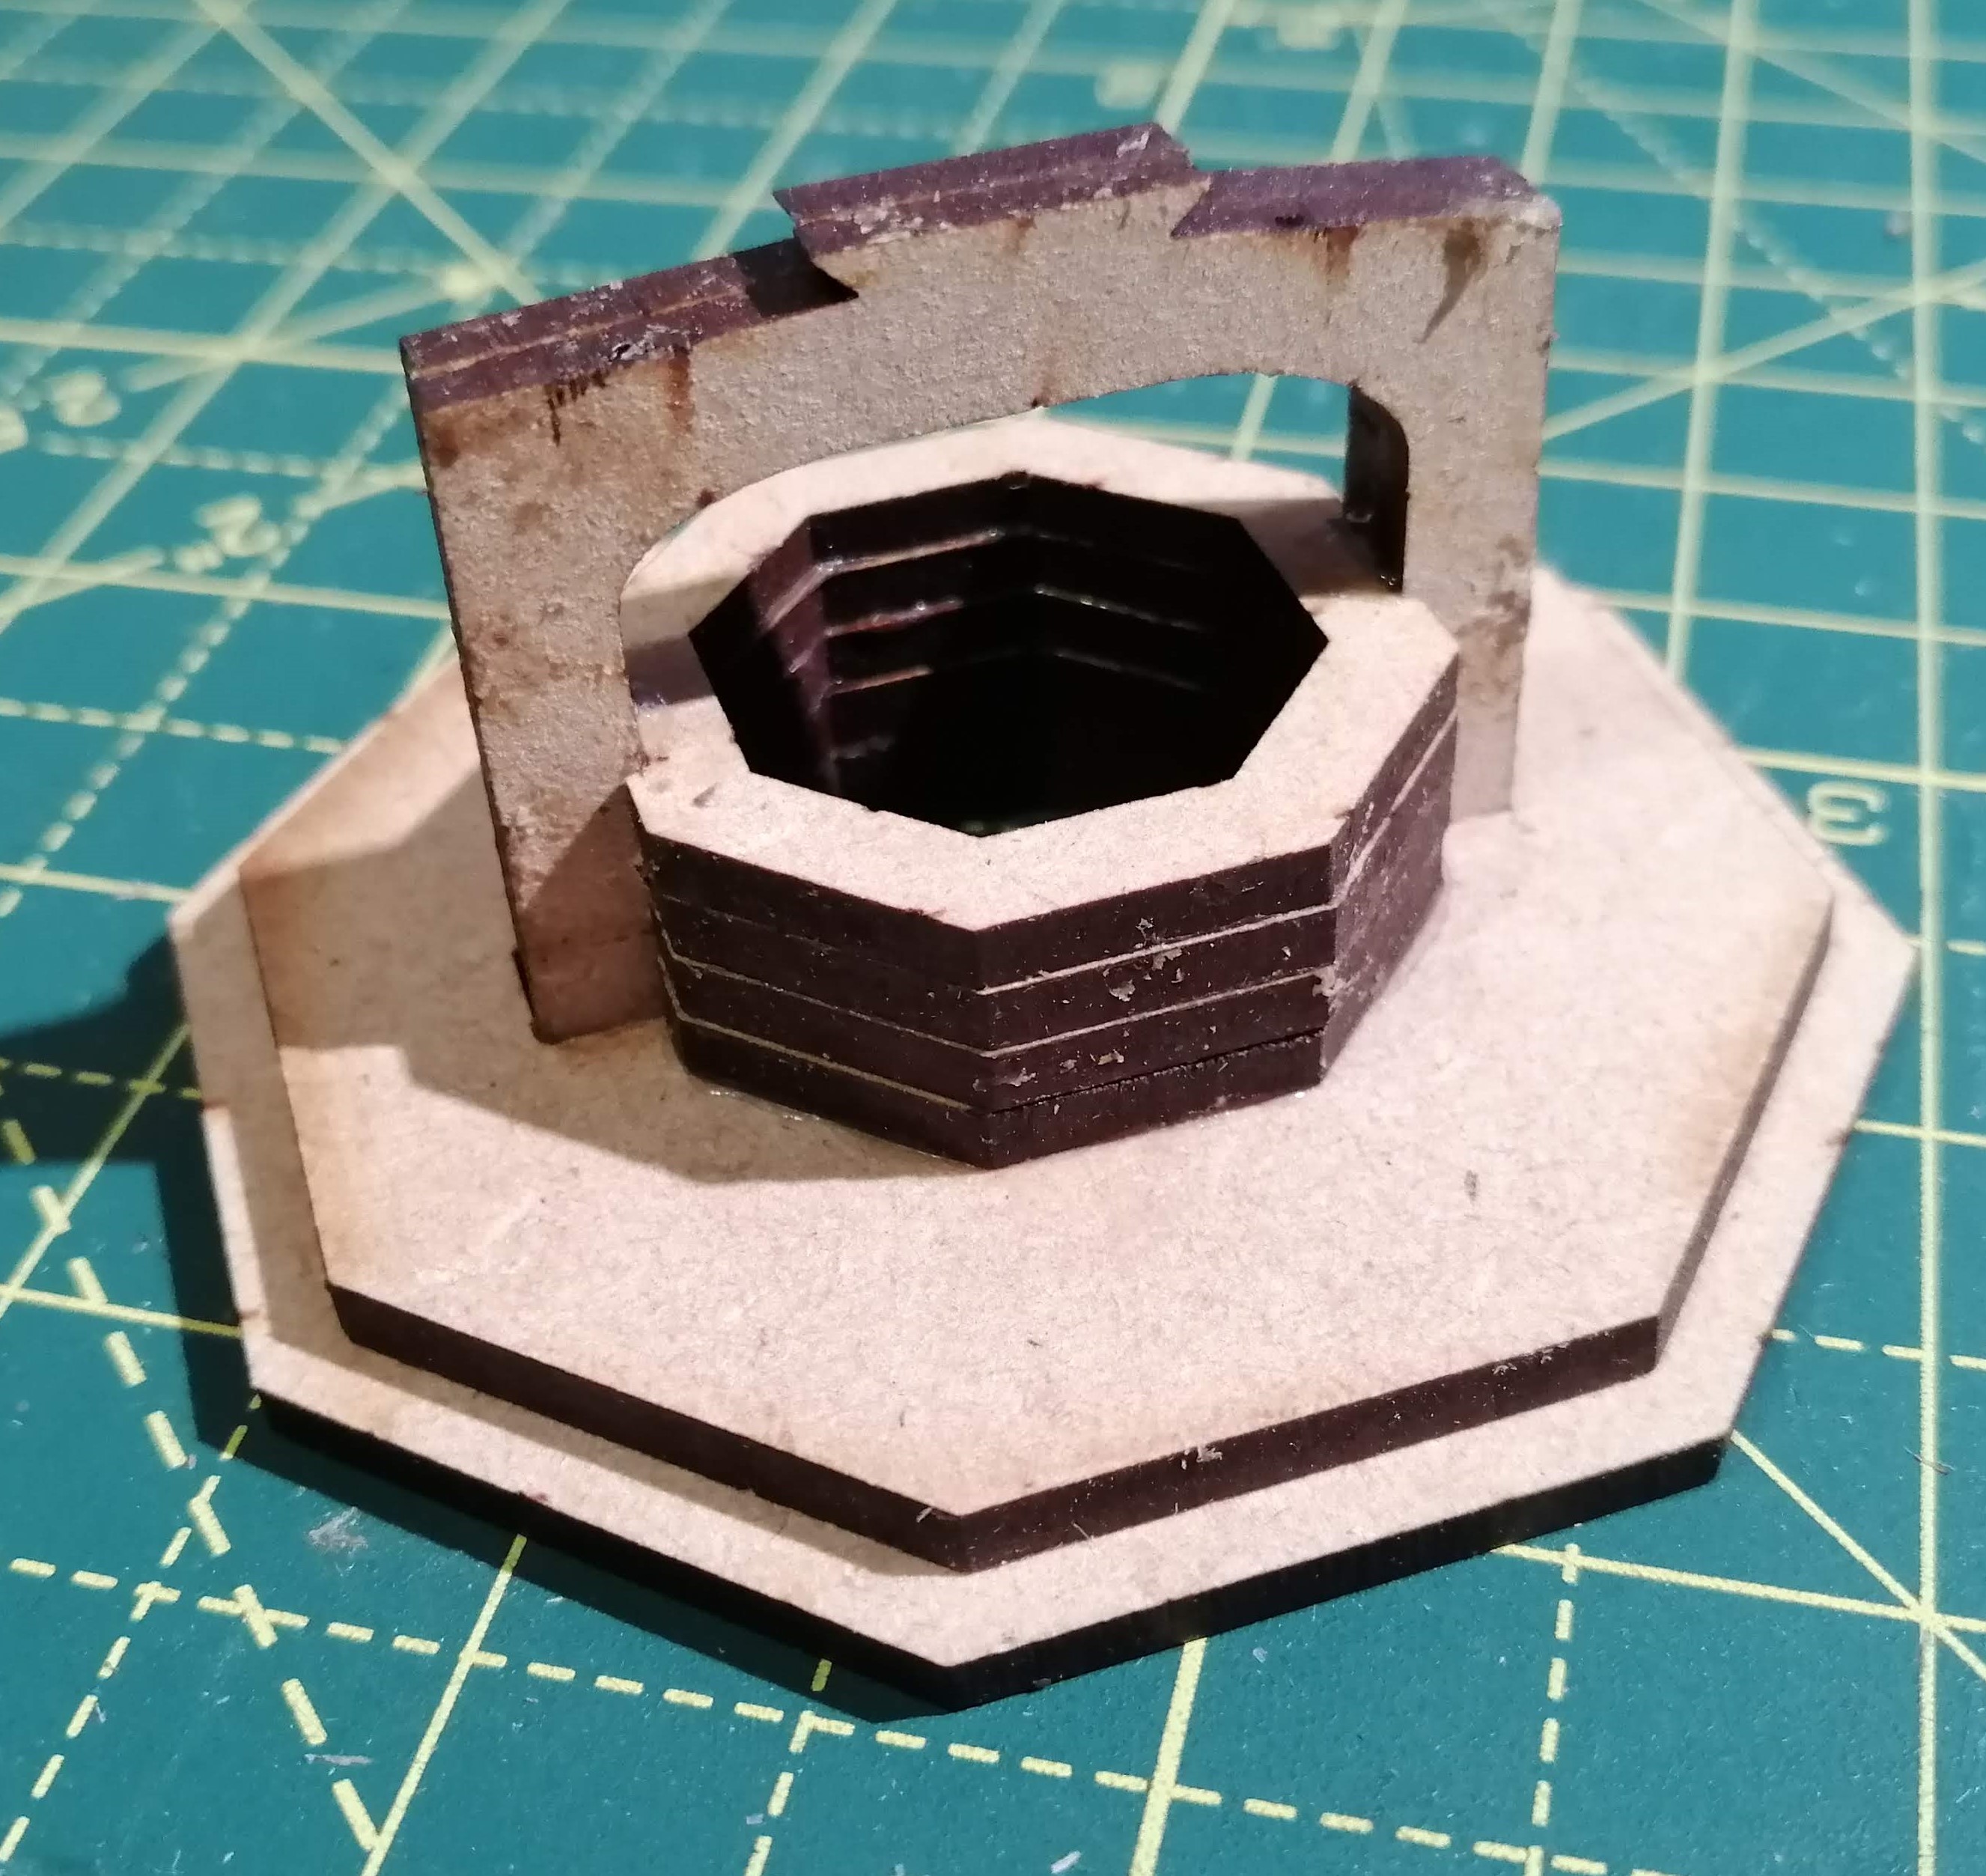
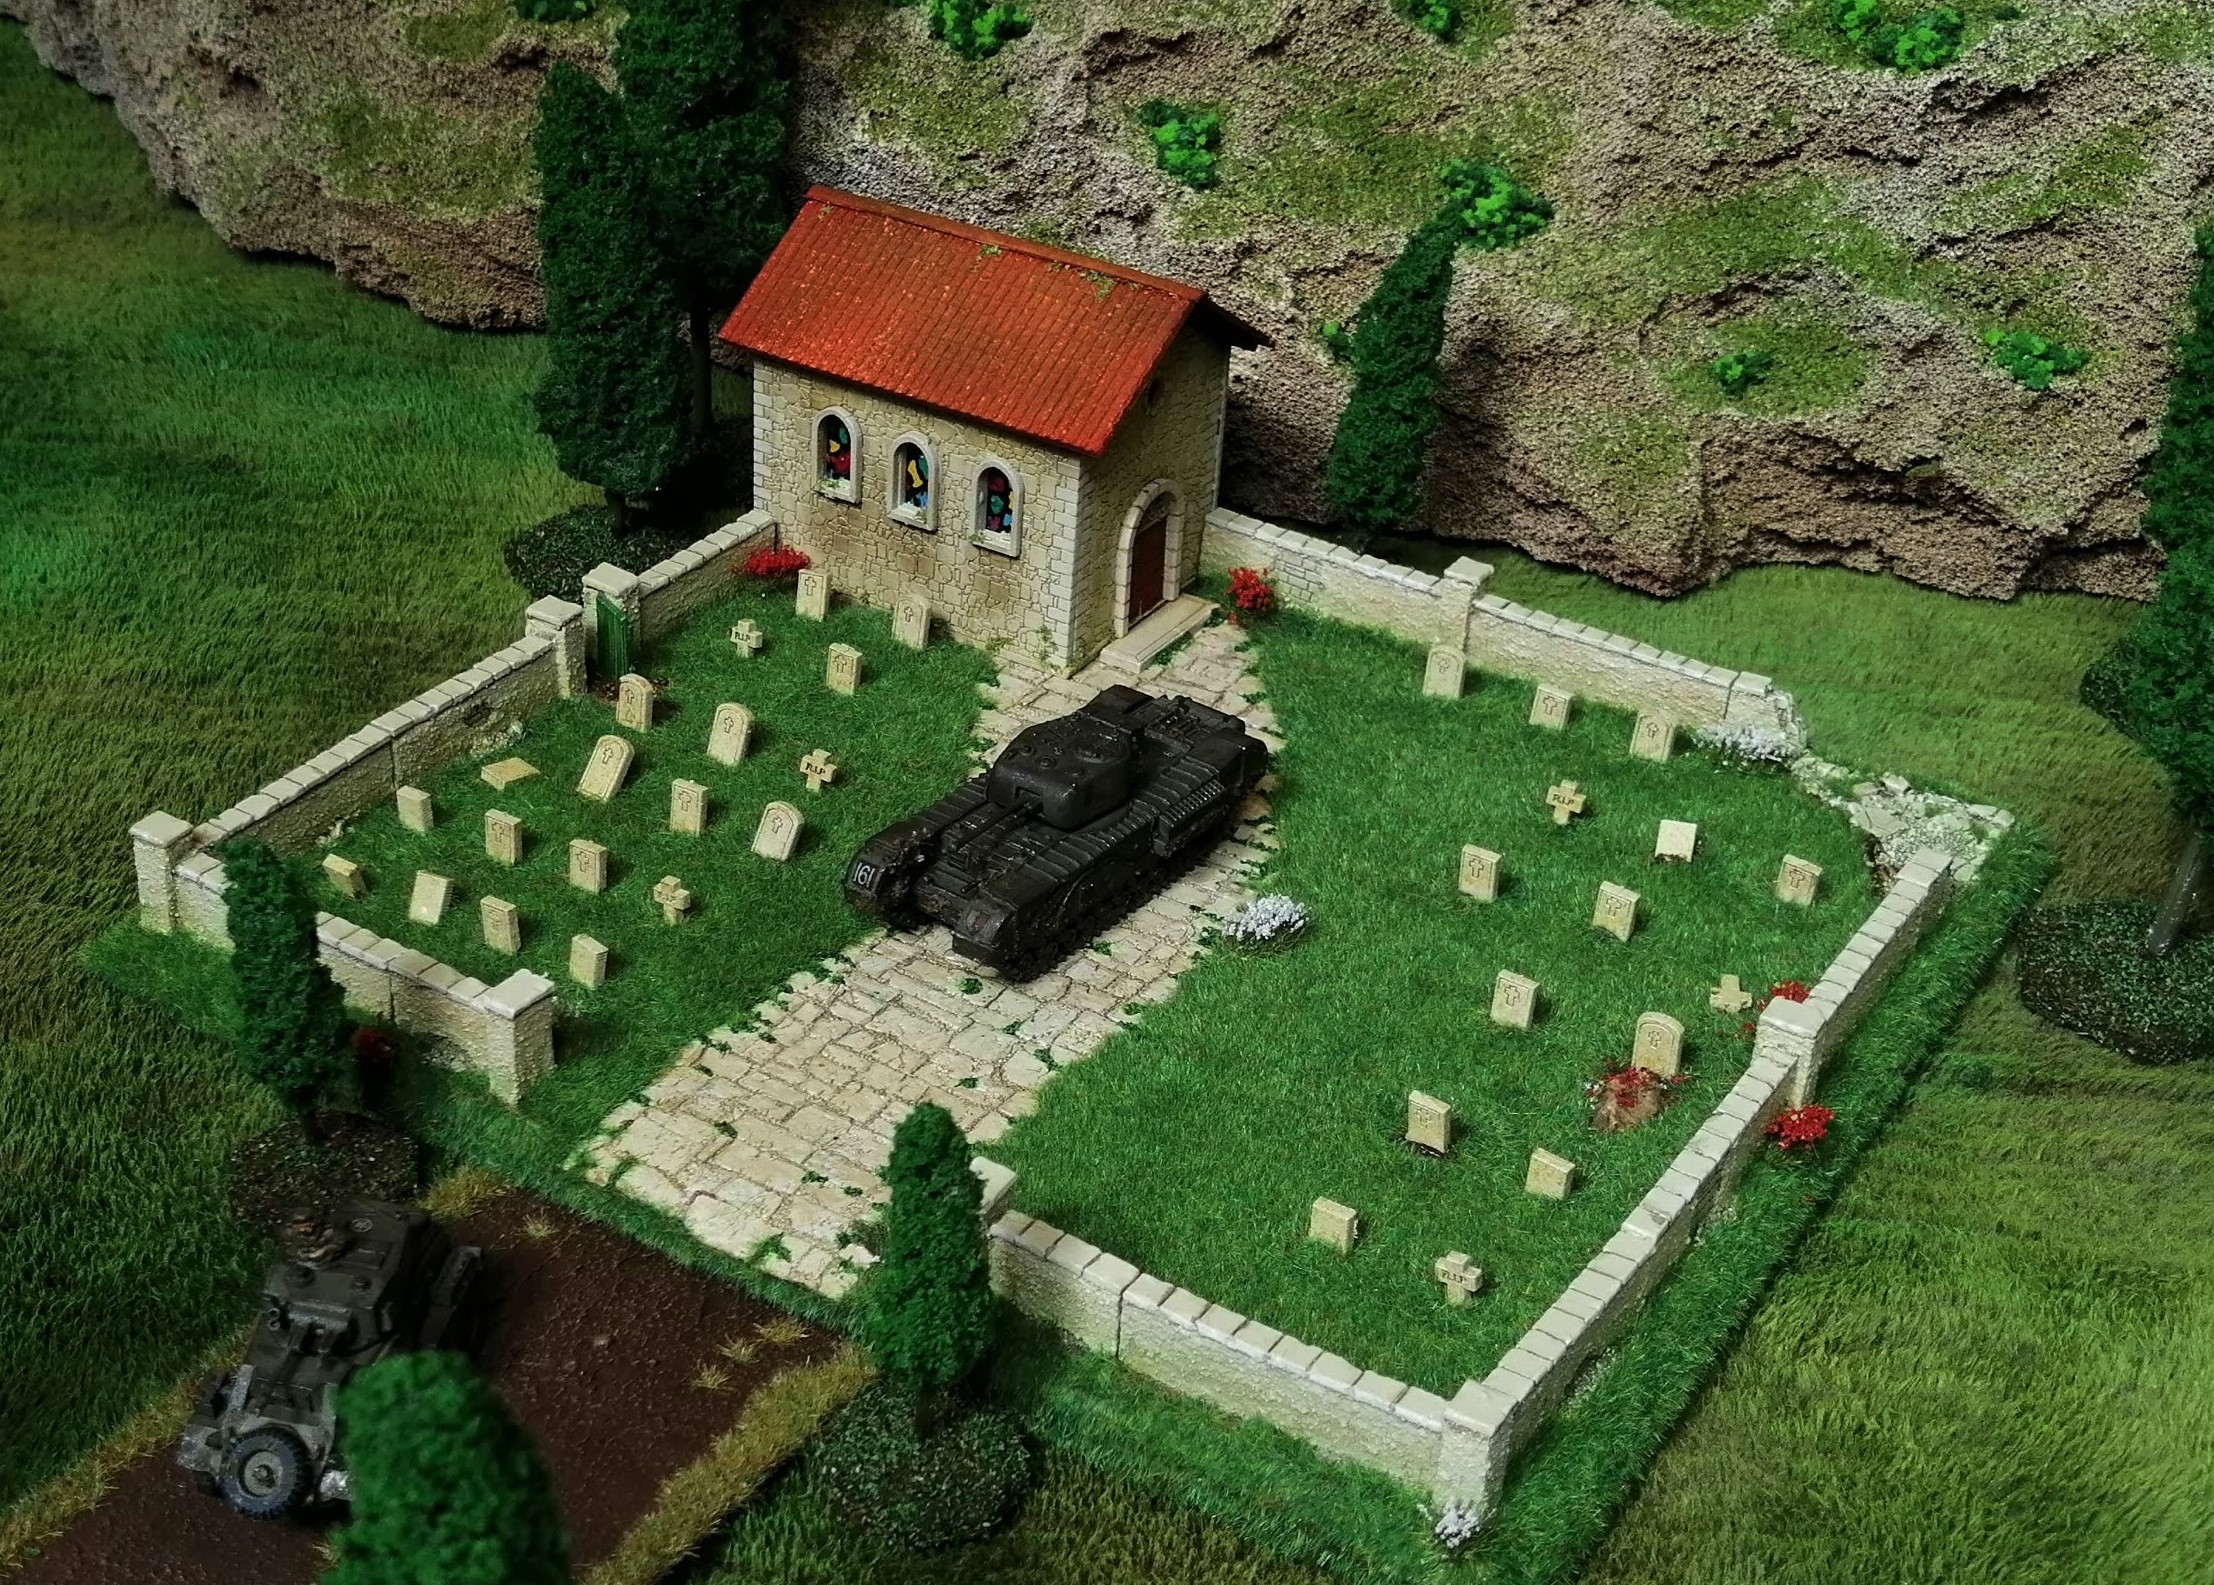
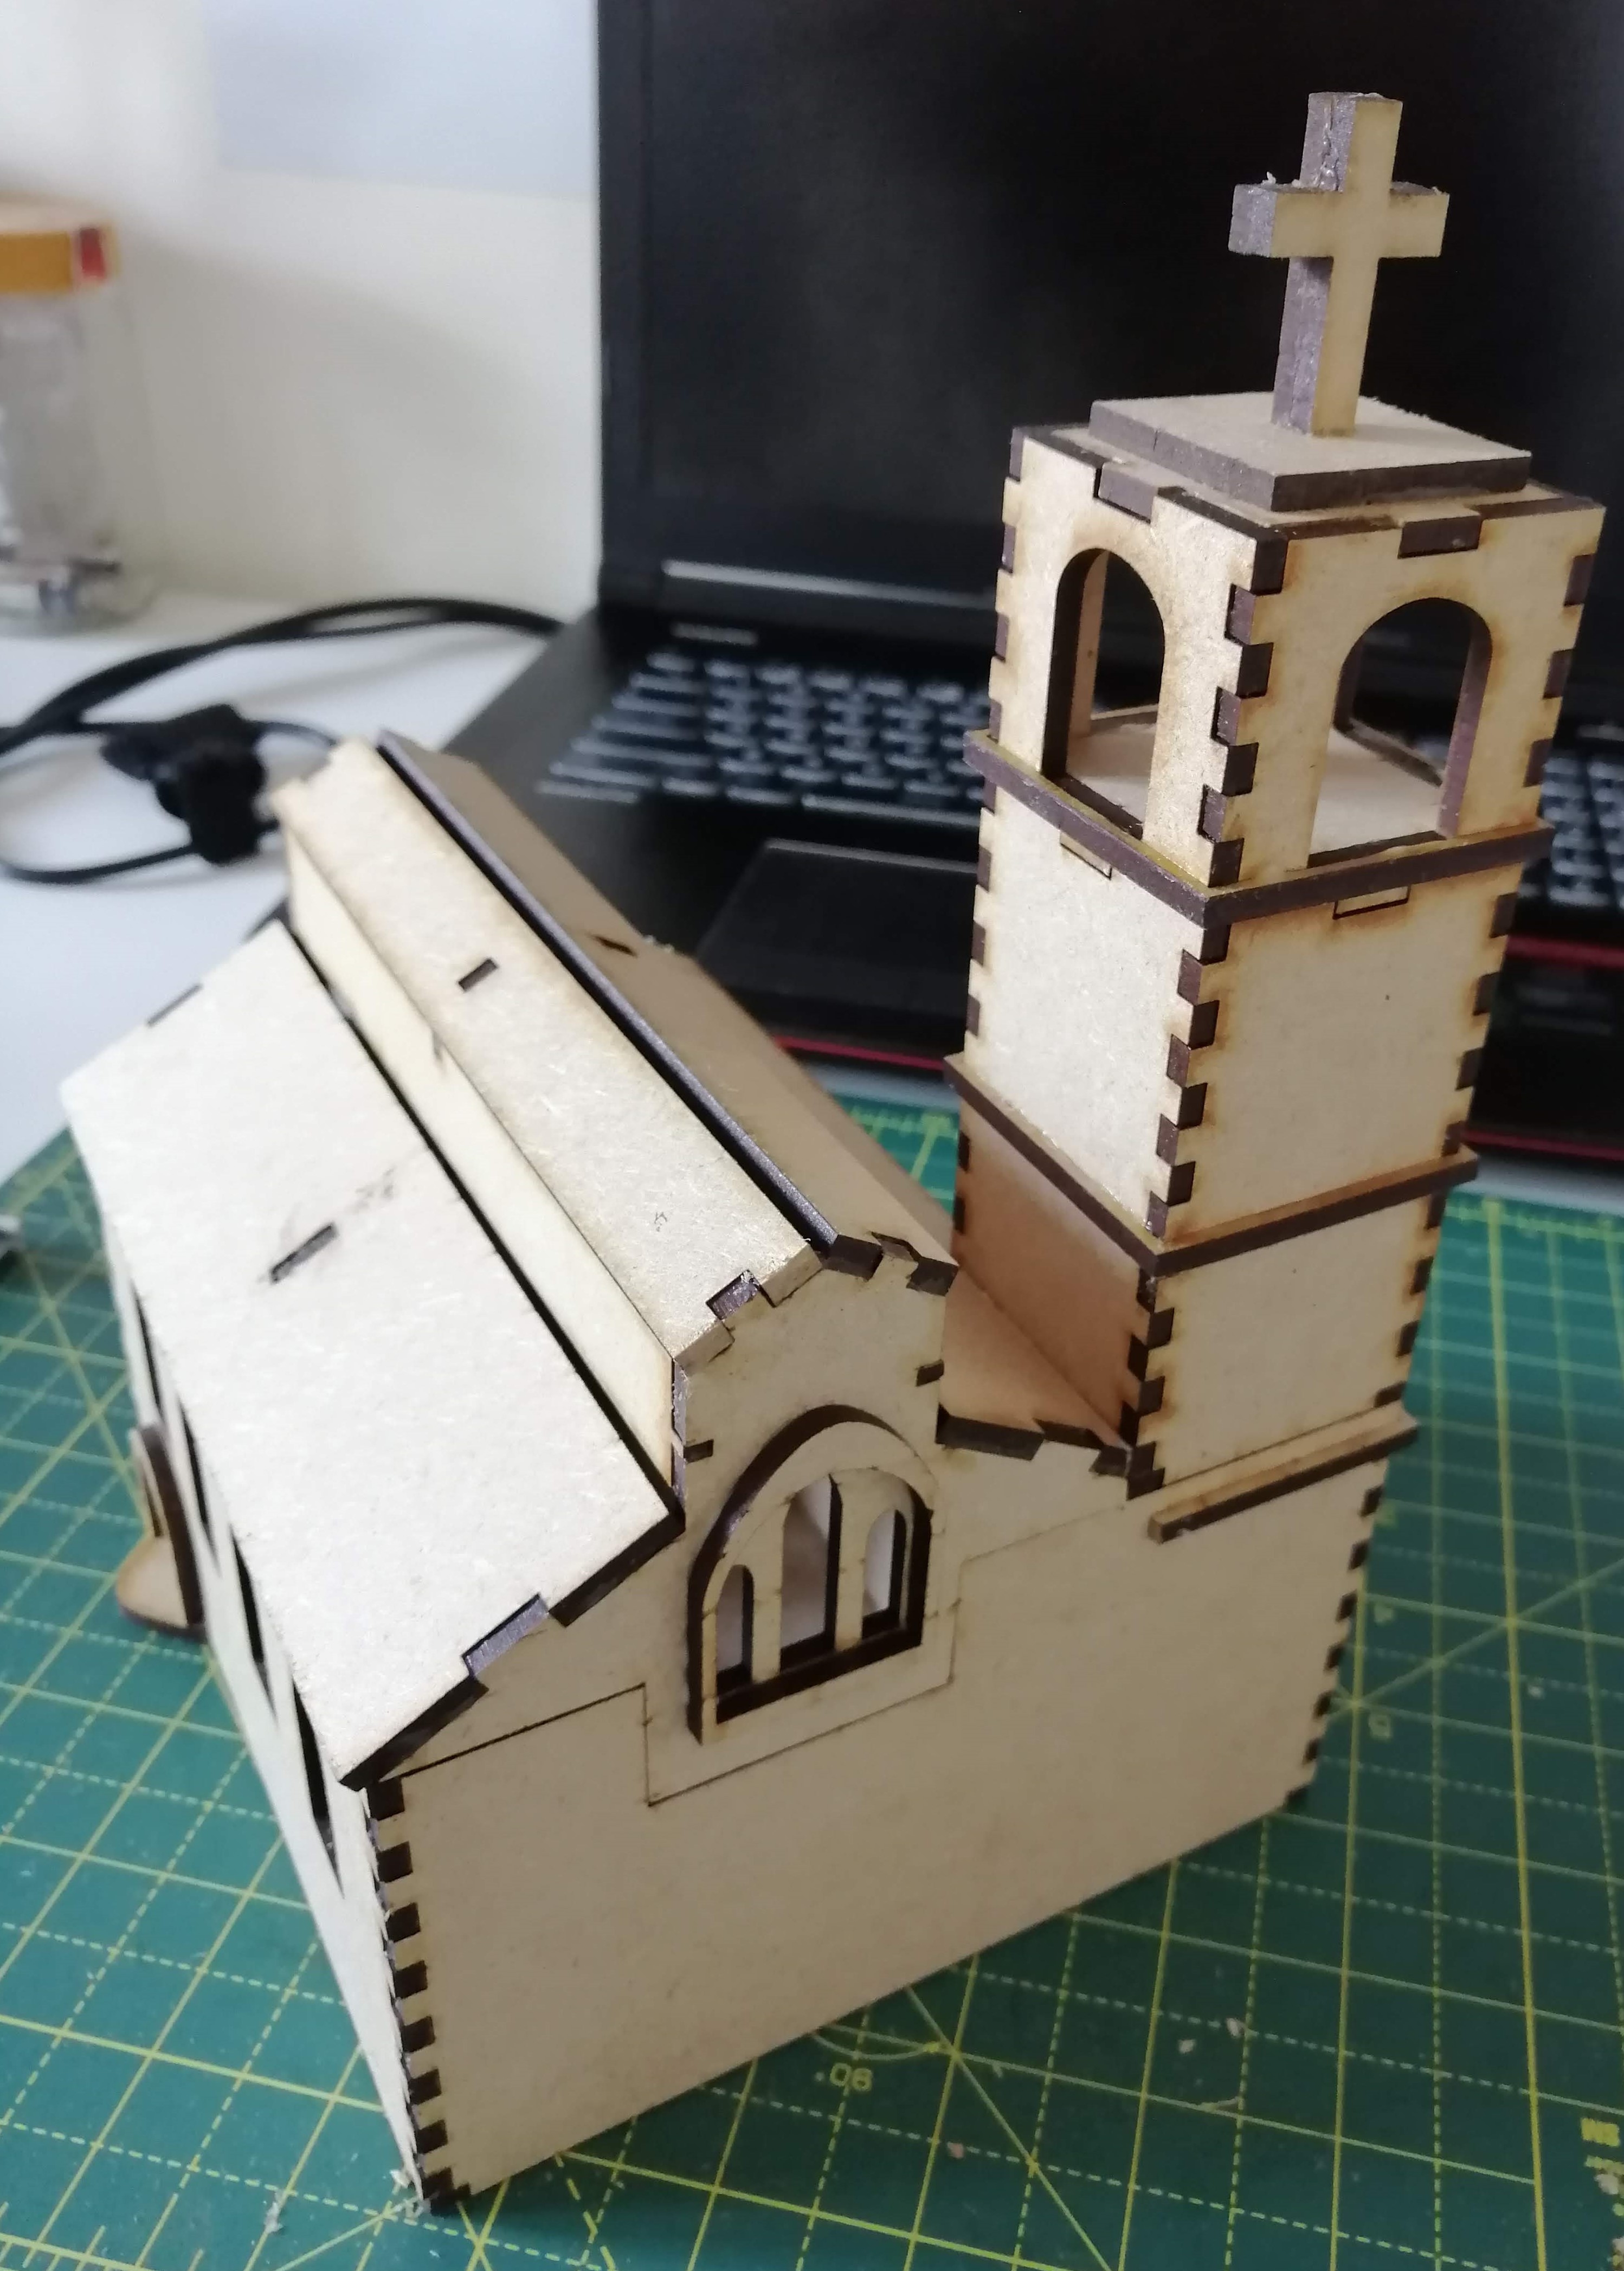 Completed Church
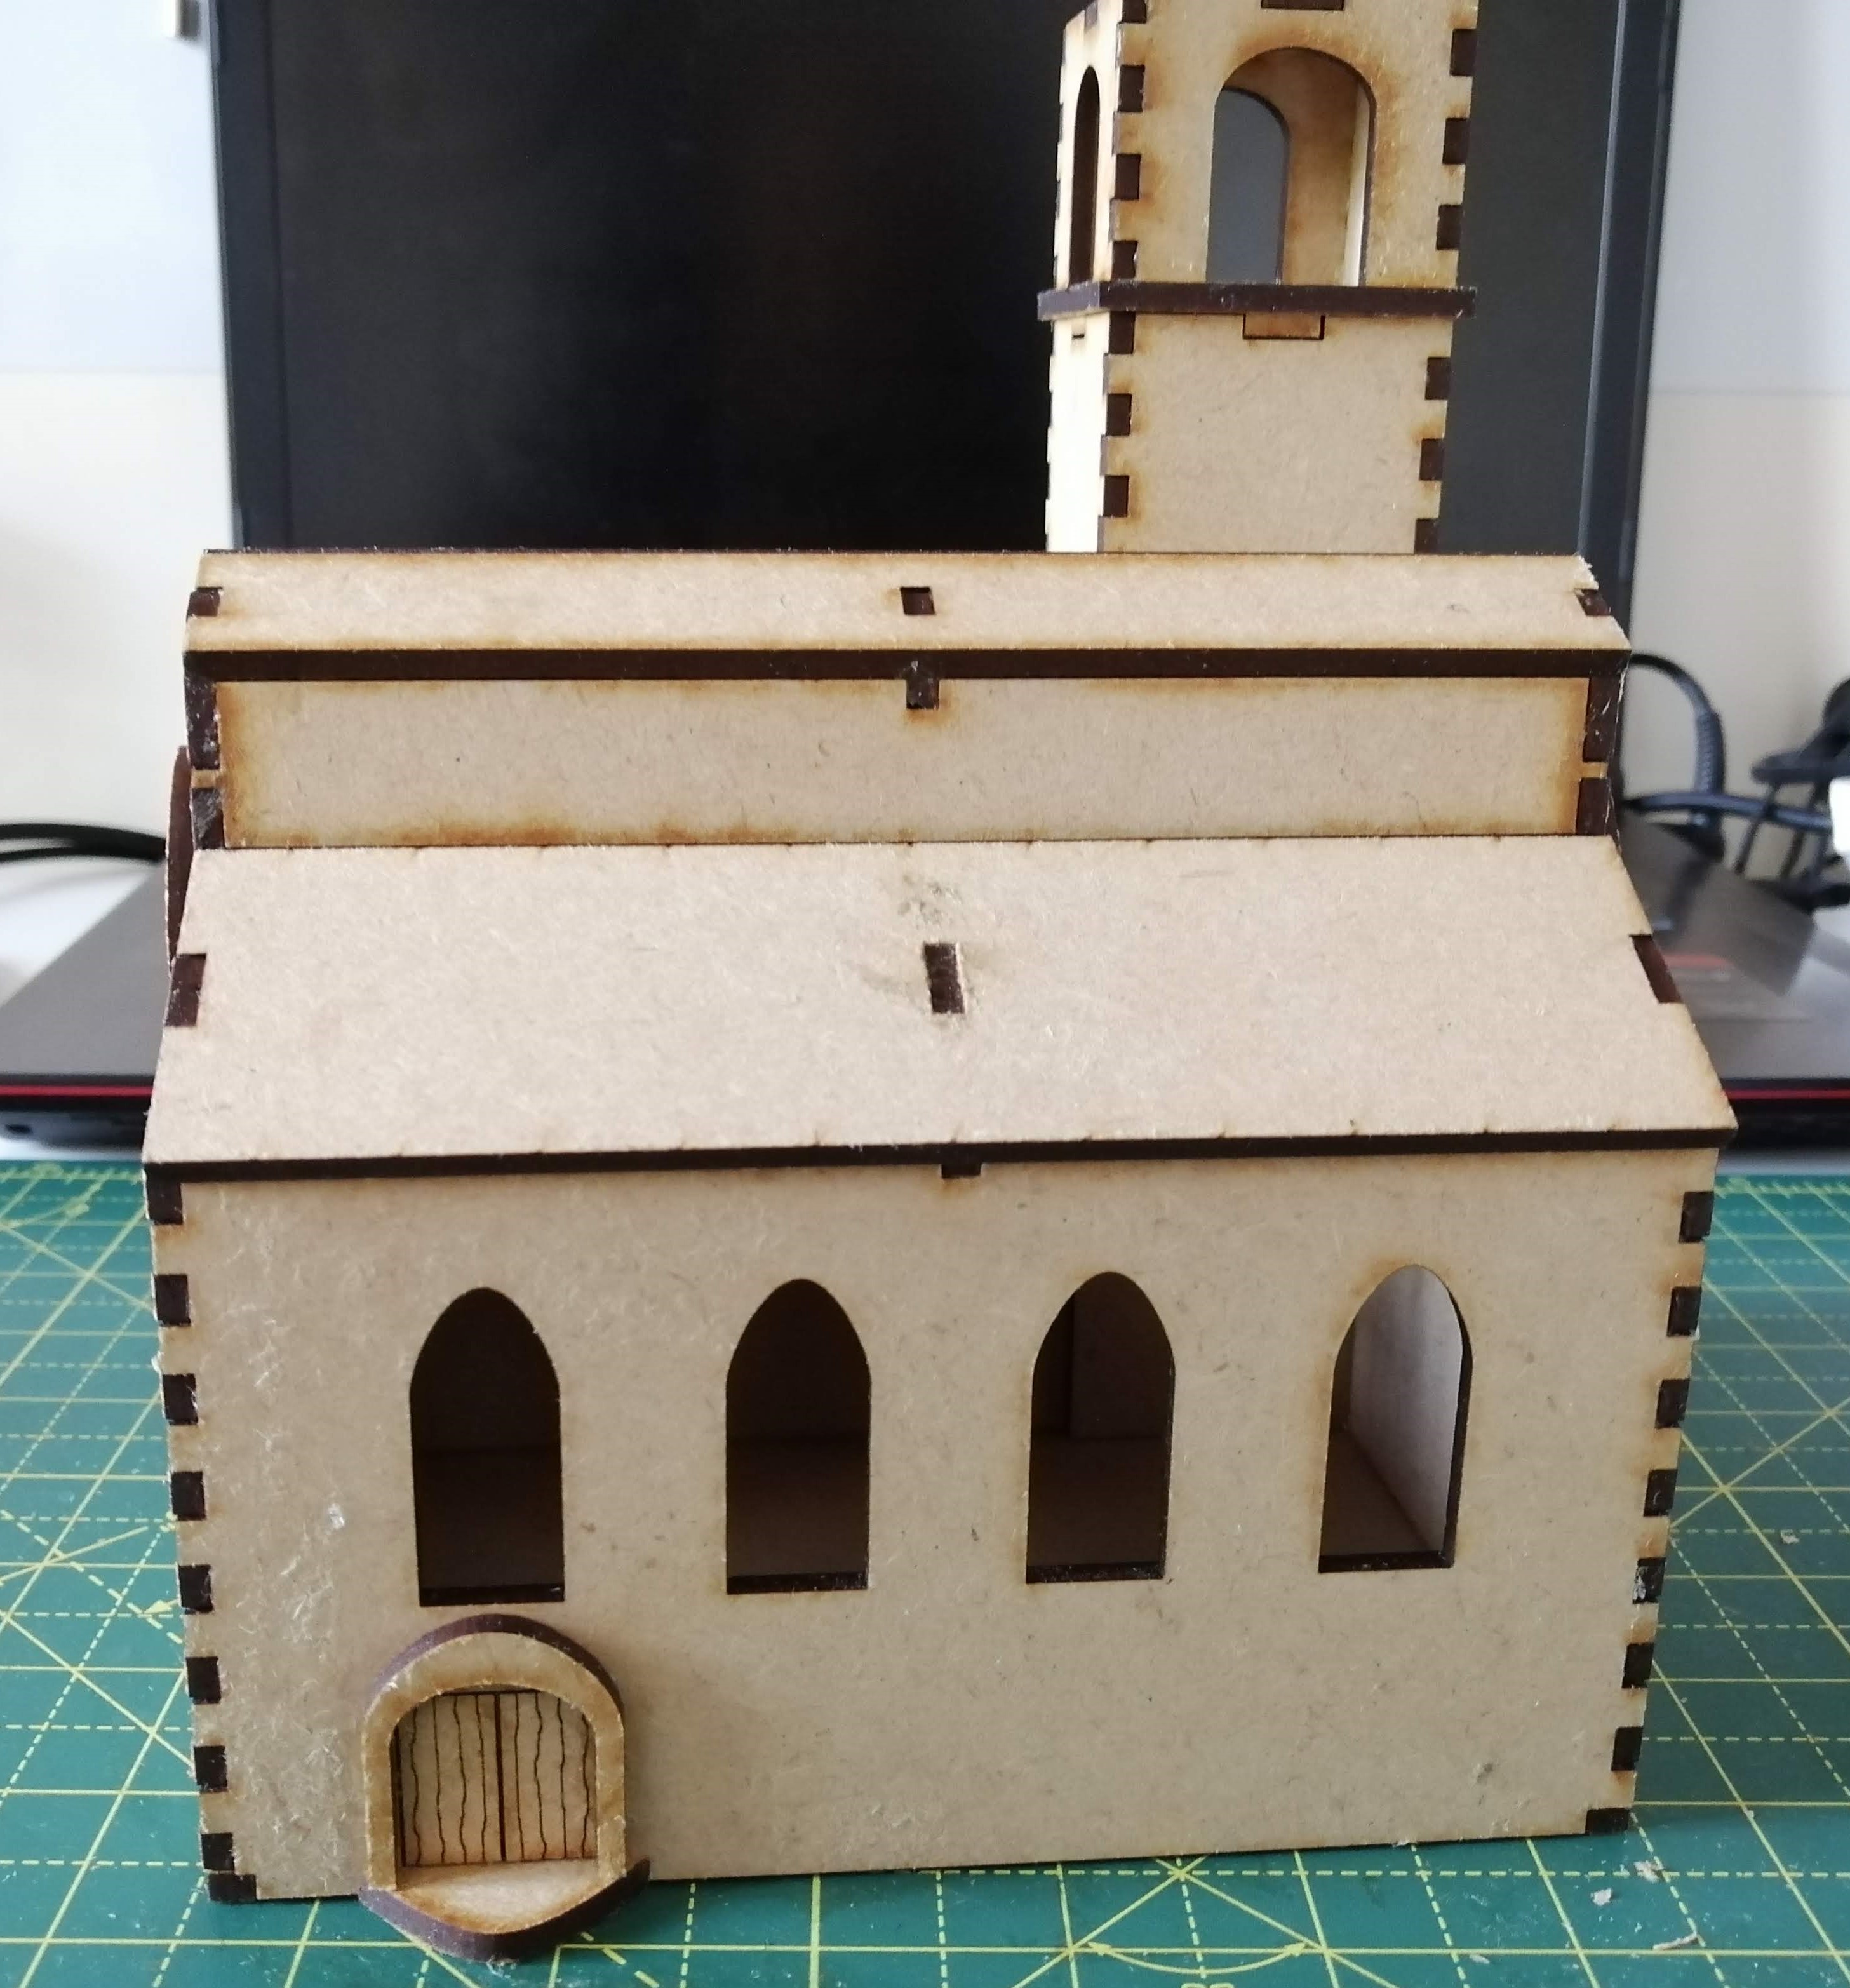
If I’m honest, it looks alright but not great. Before I pass full judgement, it needs to be painted and have the roof applied. I also designed window frames where I plan to mount stained glass windows into. These steps might bring the model up to par.
Designing a church
I spent some time looking at pictures of Italian churches around Tuscany, particularly medieval ones. There appear to be some common design features that I need to try and replicate, namely,
- tall bell tower
- a ‘double’ roof
- a relatively plain exterior
Some of the larger churches in the bigger towns take on more ornate features. This makes sense as these churches were likely to be more important and have more money. But as I’m aiming for a village, a plainer option would be the way to go.
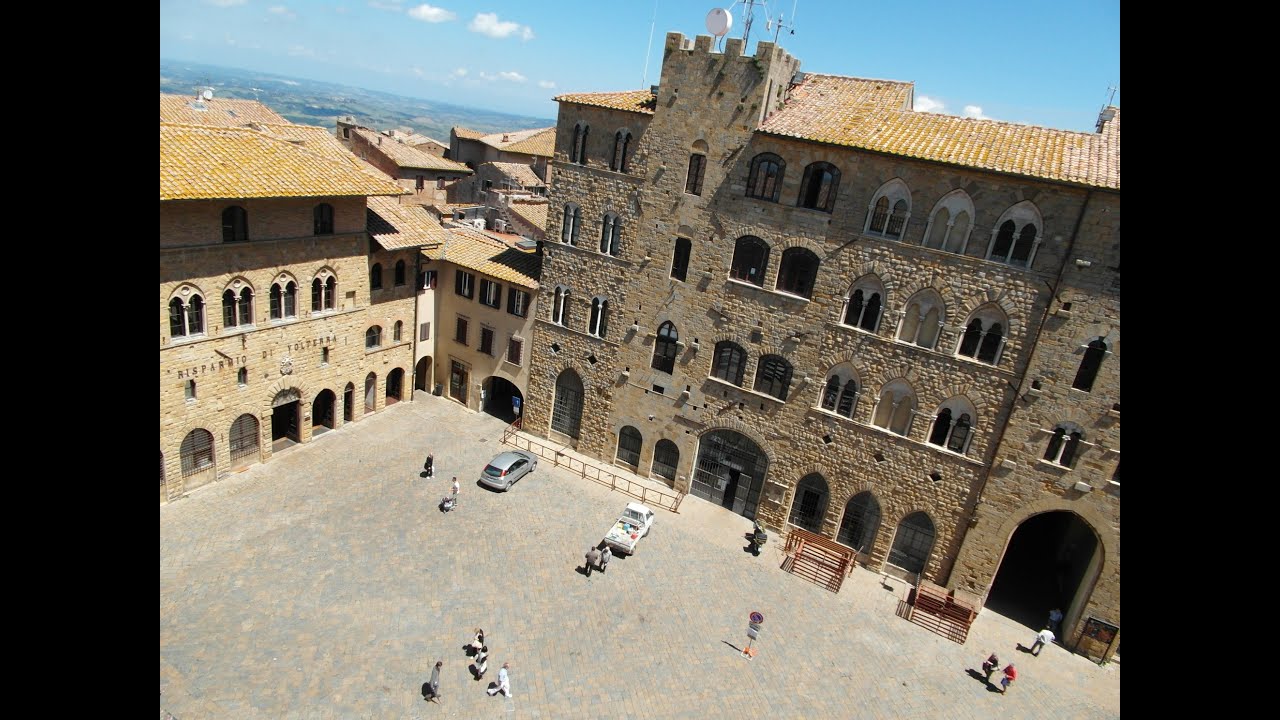
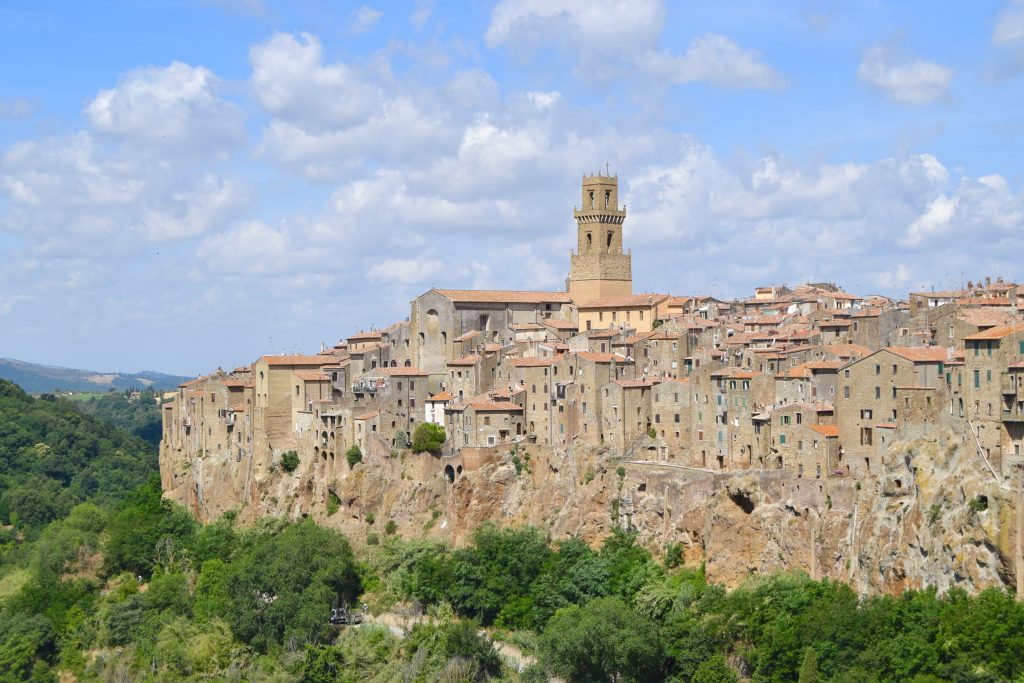
 Church in San Gimignano
I’ve picked San Gimignano as a reference point as it contains many of the features that I want to include in the village. I’ve also been lucky enough to visit and have plenty of reference photos.
As you can see from the above picture of the town church, the entrance is plain. You can also see the double roof that I want to replicate as well as the bell tower in the back ground.
All this will need planning!
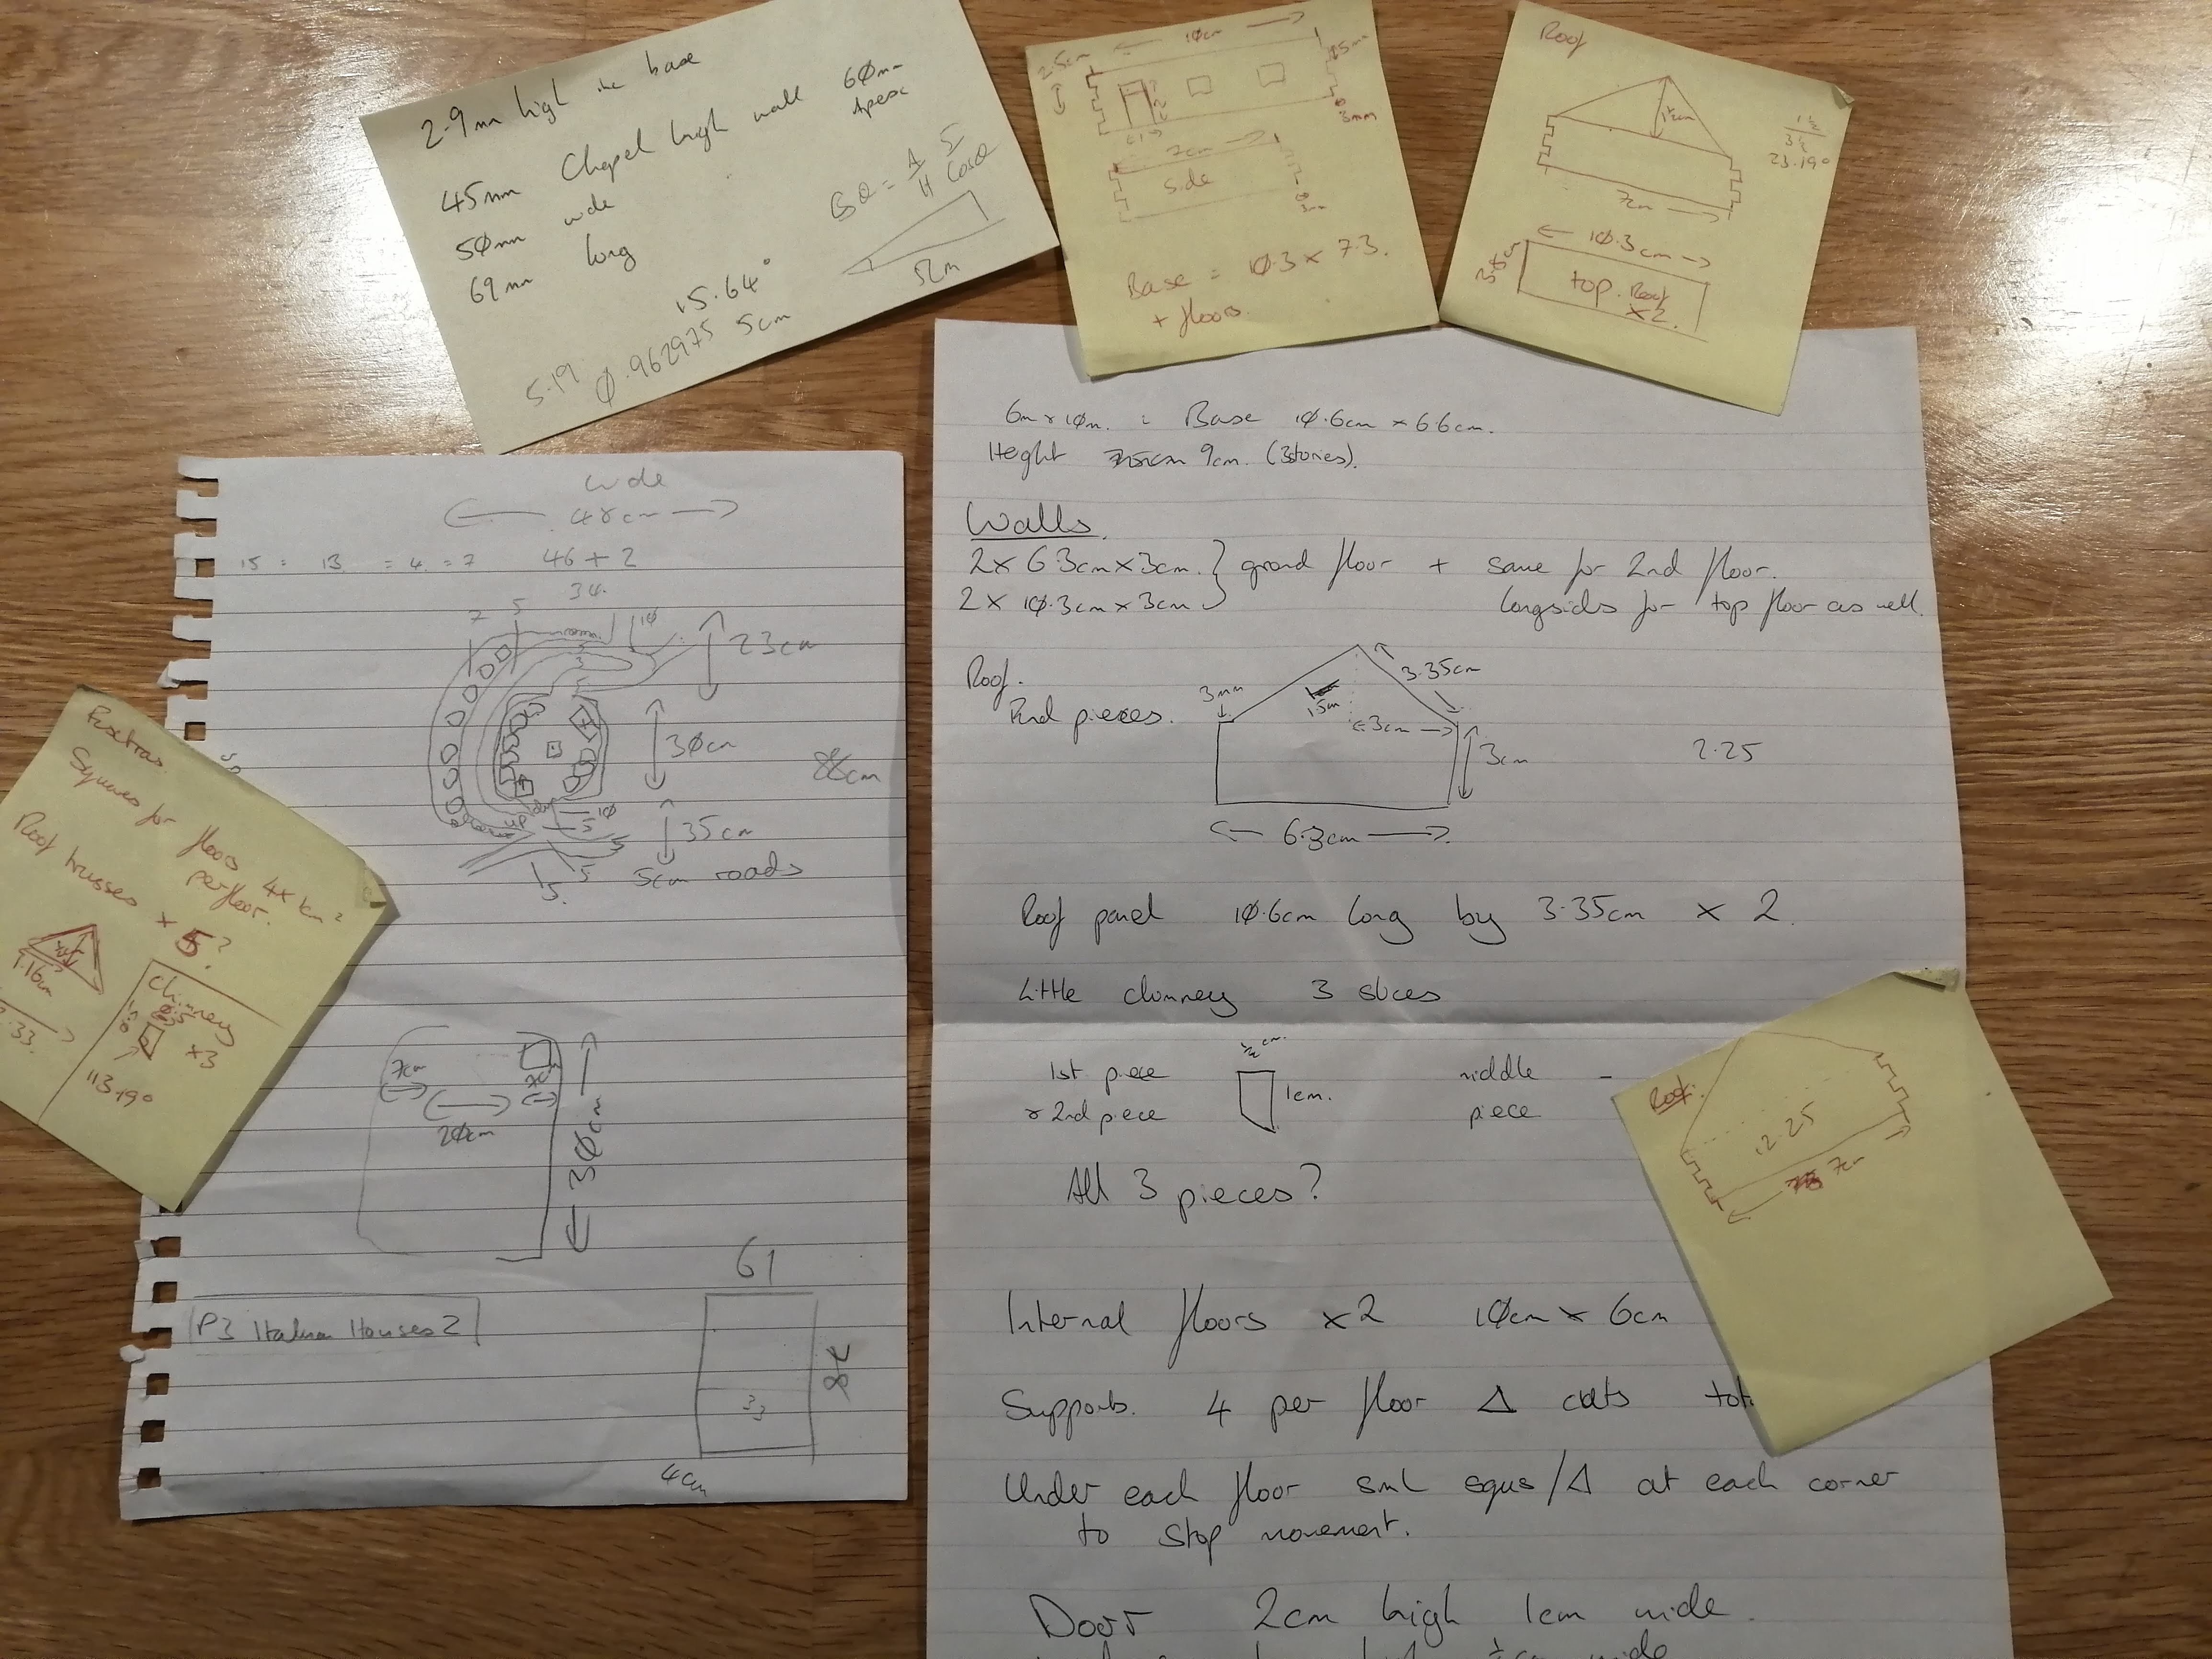 My 'detailed' planning!
Getting the roof right was tricky and I finally found a use for all that trigonometry that I learnt at school. It appears that mnemonics are actually useful as I still remember the Silly Old Hitler Couldn’t Advance His Troops Over Asia or Sine = Opposite over Hypotenuse, Cosine = Adjacent over Hypotenuse etc etc
This all led to the following design in Inkscape:
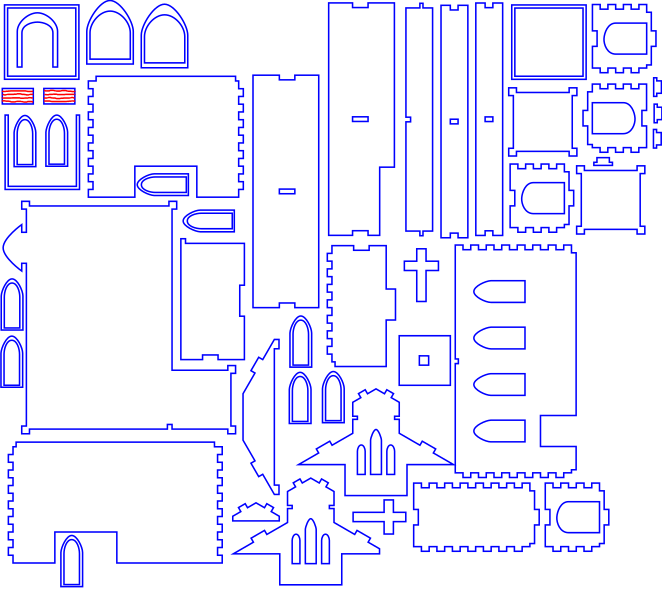 Part of a flat pack church
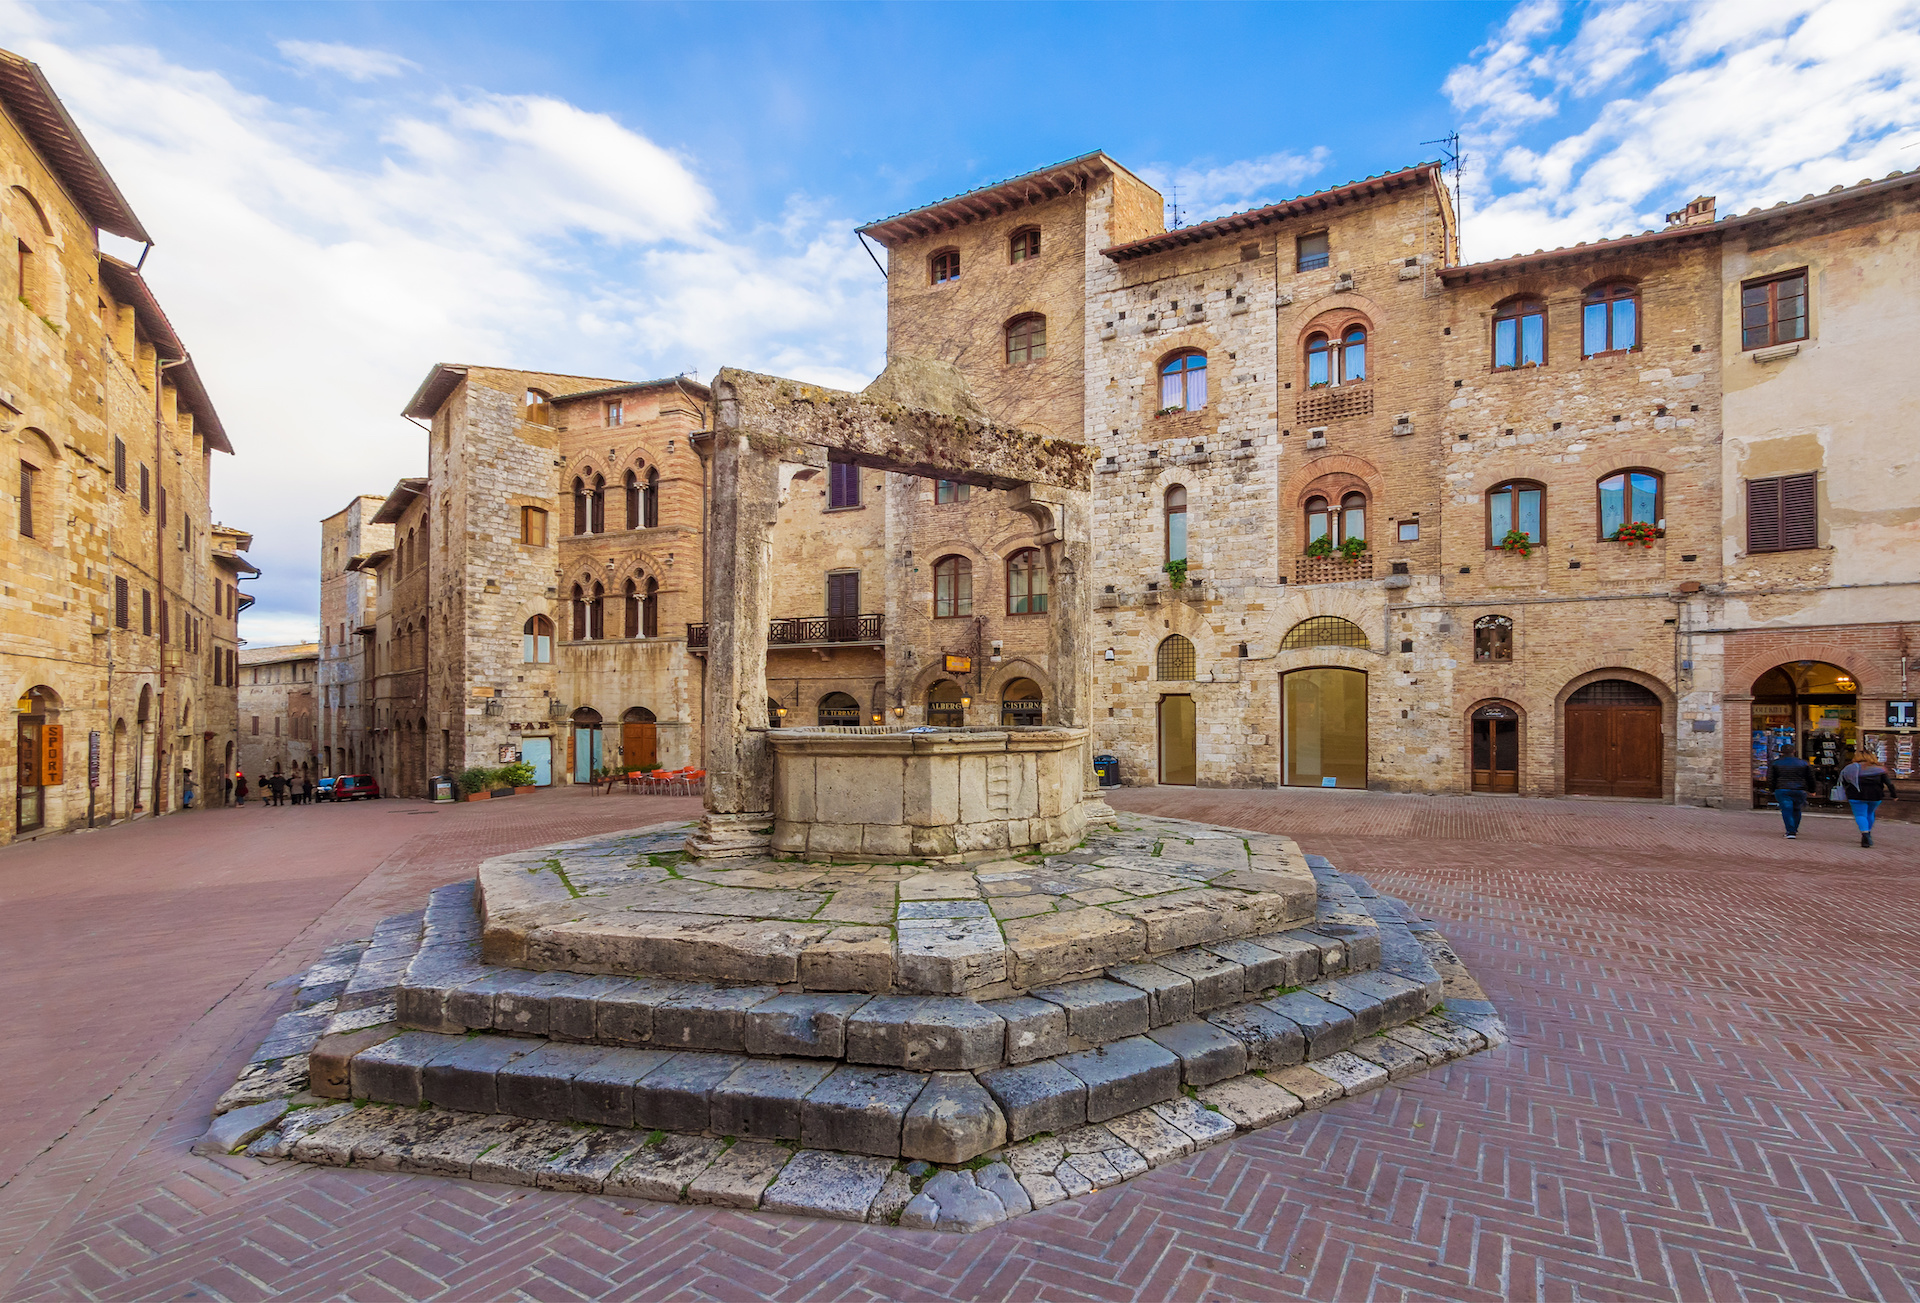
I also had space on the material for something smaller so quickly designed the town well, again using San Gimignano’s piazza well as influence
 San Gimignano's well
Department of Planning and Building Control
This will be a stylised village but I need to think about the buildings that I need to include. My thinking is I need at least some of the following,
- Church. Italy is a deeply religious country and every village has at least one church. This really should be the dominant building and needs to have a tall bell tower
- Town hall
- Town square with well or fountain
- A tower. Towers are a feature of hill villages!
- A couple of bigger, ‘posher’ buildings
- A selection of two and three storied town houses of various sizes to create the ‘random’ look
That should be enough to get an Italian village feel.
To make these in MDF, I plan to make them as ‘flat pack’. This means disassembling the buildings into a jigsaw that, when put together will make a 3d building. I think, with some careful planning, I can design some basic principles that can be adapted to make the more complex buildings. Once I have the designs, I can send them to a lazer cutting service
3d Jig Saws
I found a company online (Razor Lab) that will take files and pass them through their laser cutter. To use this service, I need to use their standard material, 3mm thick mdf.
I had planned to start with a basic house to test some principles but cost of materials made it a better option to go for a bigger building. And I’m impatient and wanted to see what I could achieve. So I started with the church and found I had room on the material for a town well.
Basic Principles
mdf doesn’t really support curves, at least not with my limited level of ability and experience (I’m not 4Ground!). So I need to keep to straight lines and right angles where possible.
I’ll need joining points for each piece, so will need to build in tabs. I plan to keep these uniform across all of the models, that way, I can’t get confused. I also plan to design the floor layer to have the same corner tab configuration and size, again to reduce the risk of error.
I’m going to do all of this in the free software Inkscape. I like free…
Buildings
I’m going to start with the buildings. Getting this right will be the key. But there is a significant problem…
I’ve taken a look around the internet and I cannot find 15mm scaled Italian buildings, at least none that look decent. I’ve found some Spanish/Mediterranean pieces which look ok, but really look more Spanish rather than Italian.
This presents a problem as no buildings, no hill village.
I think I have two options, I can repurpose buildings already available on the market and make them look Italian or design my own.
On the plus side, during the spring clean challenge, I found a plastic sheet designed for the model railway community. One side of the sheet is moulded to look similar to the roof tiles you find in Italy. This is at least a start although it’s not exactly right. I may need to revisit this at a later date….
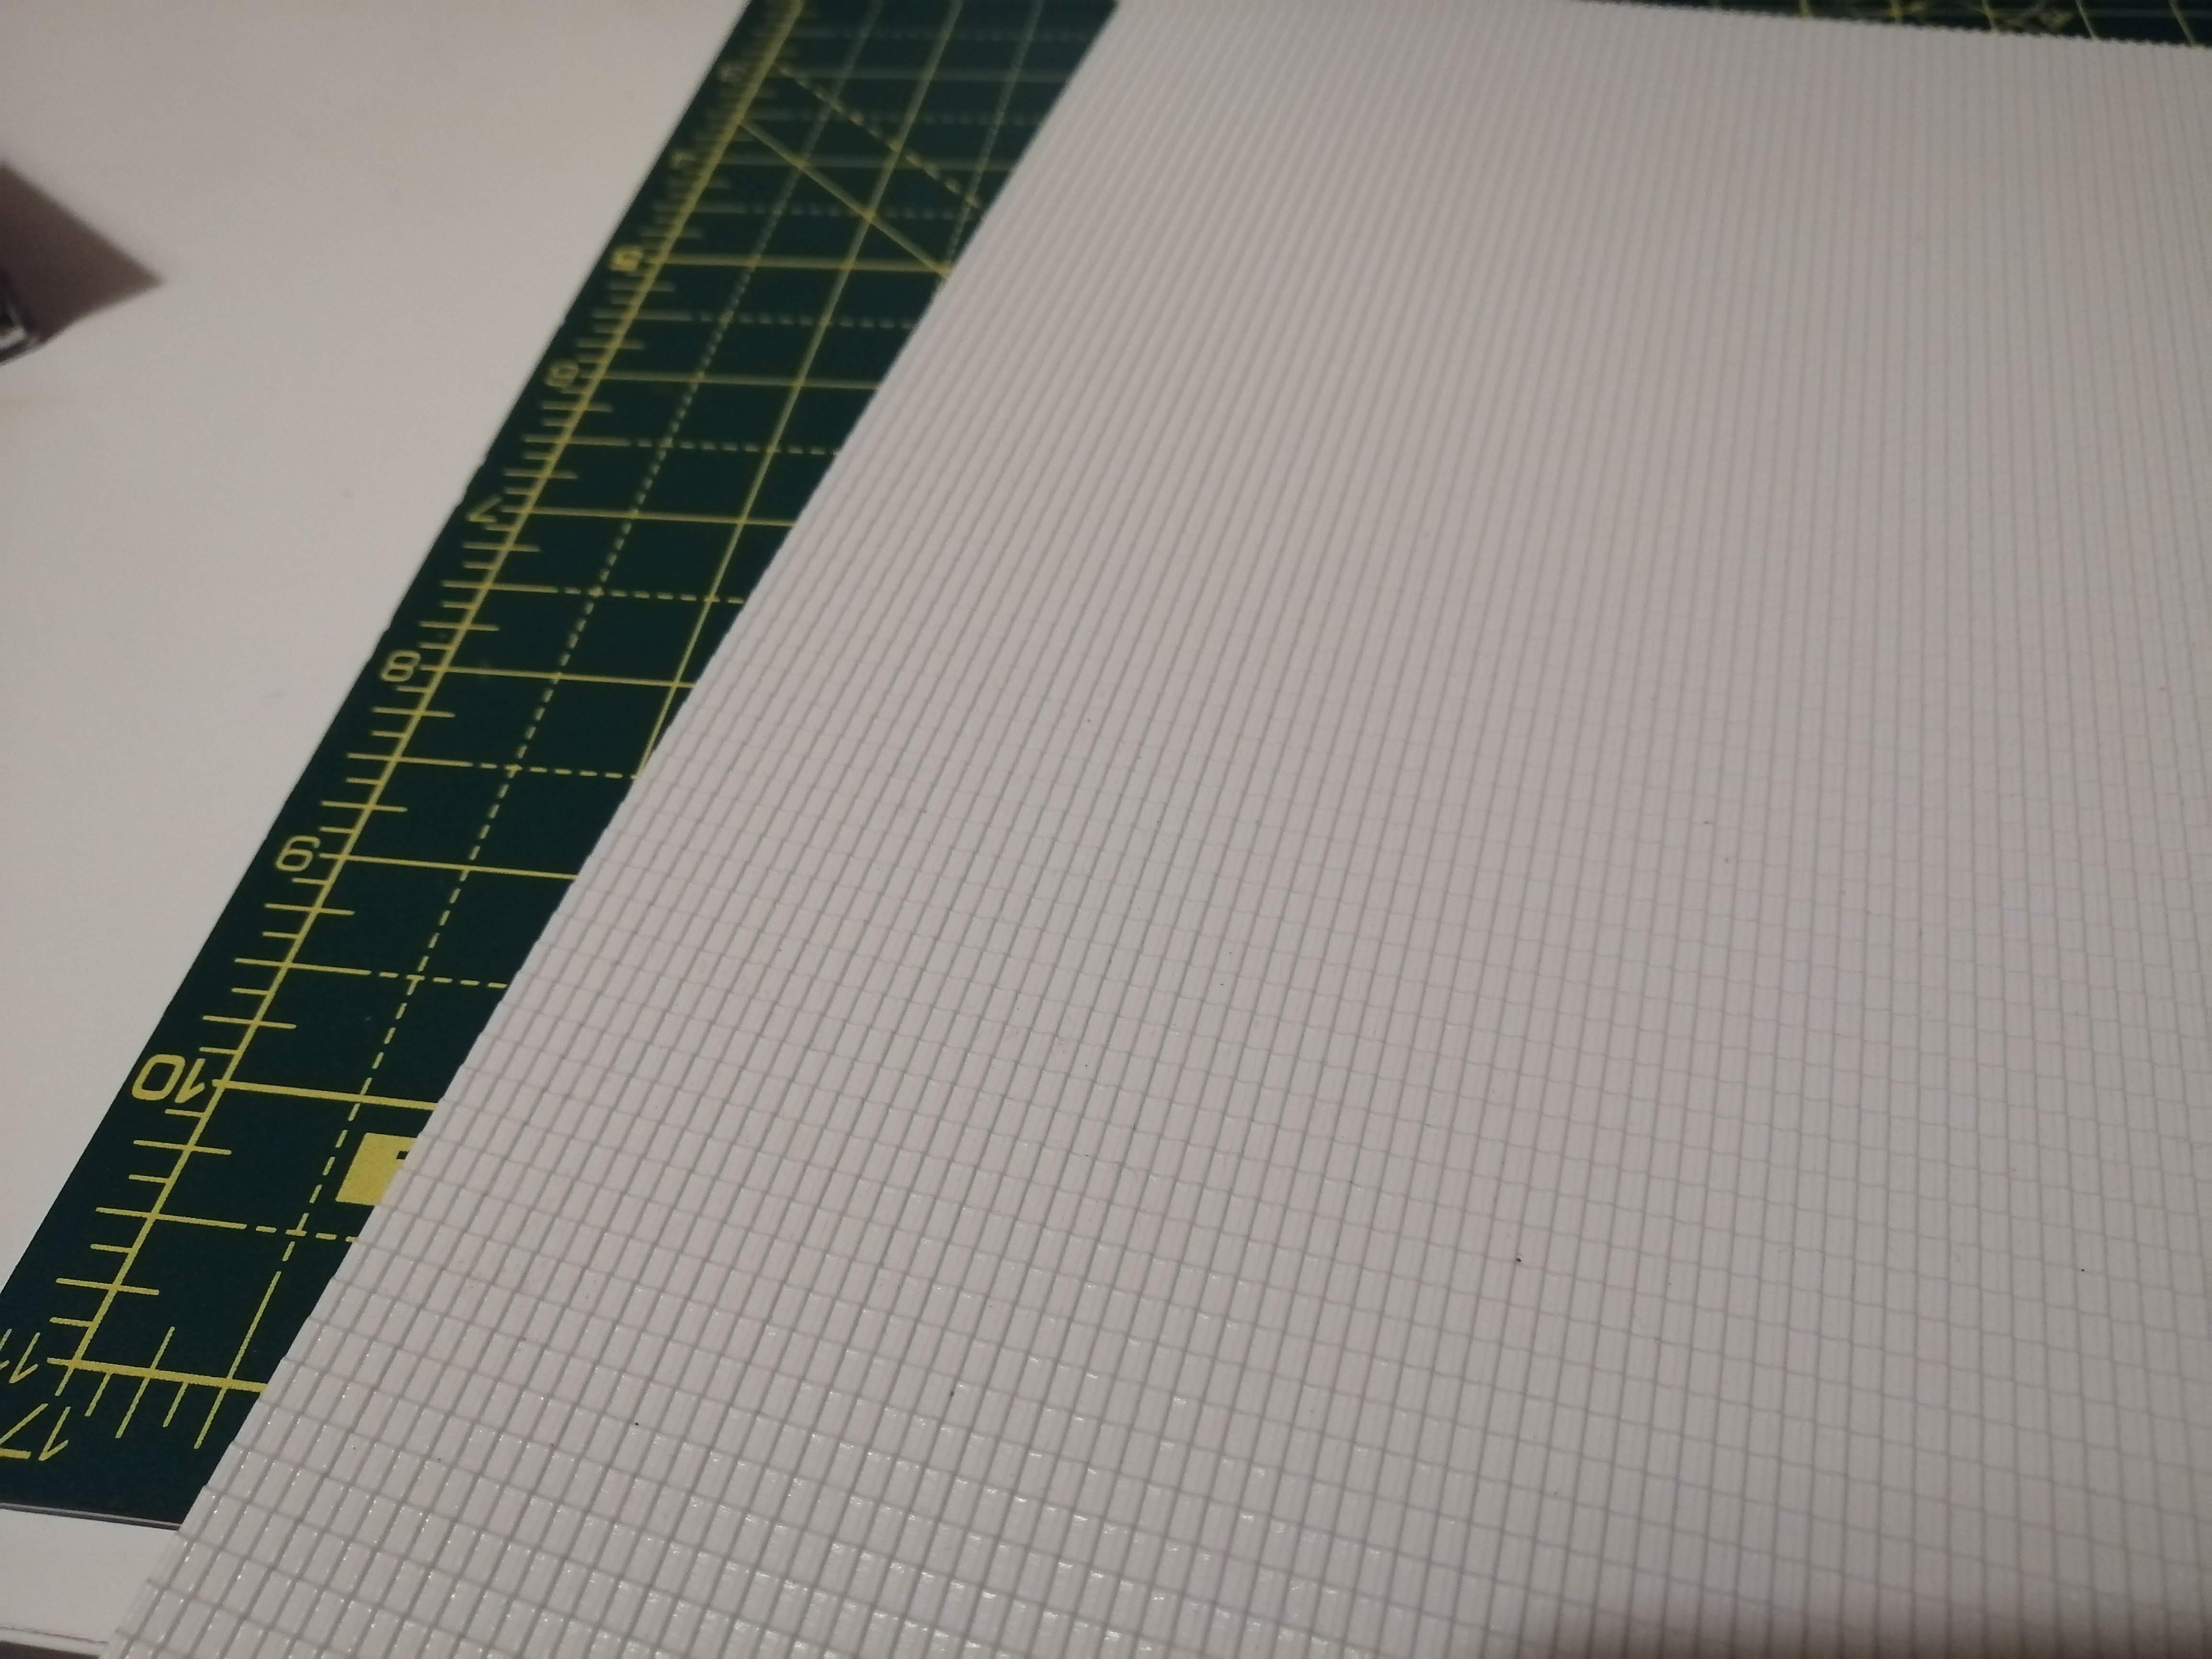 The roof tiles. At least a starting point
The options for designing my own buildings:
- Scratch build them
- Use mdf
- Use CAD and 3d print them
Of the above, I think mdf would be the easiest option to try. I don’t have a 3d printer and my skills to scratch build are non-existent.
An early trial
I took the opportunity during the Spring Cleaning Challenge to put together an Italian Chapel. For that project, I used an old mdf kit that I spruced up. This is what I came up with:
 My finished spring clean project
During the project, I was able to test some basic principles, such as colour of the stone and the colour of the roof tiles. I’m hoping to take some of this into this project.


