


![NO Weekender Or Cult Of Games XLBS This Weekend [Updated]](https://images.beastsofwar.com/2026/03/No_Weekender_and_XLBS_this_Weekend-225-127.jpg)


Egyptian Mythology Display – Spring Clean 2024


Recommendations: 510
About the Project
With pandemic lethargy setting in (I'm still not comfortable attending gaming clubs) I was looking for a different style of project. A also wanted to use my resin printer more. Marrying the two I decided to print off all the Raging Heroes' Gods and Heroes of Egypt models and produce a diorama/display with them.
Related Company: Raging Heroes
Related Genre: Fantasy
Related Contest: Spring Clean Hobby Challenge 2024
This Project is Completed
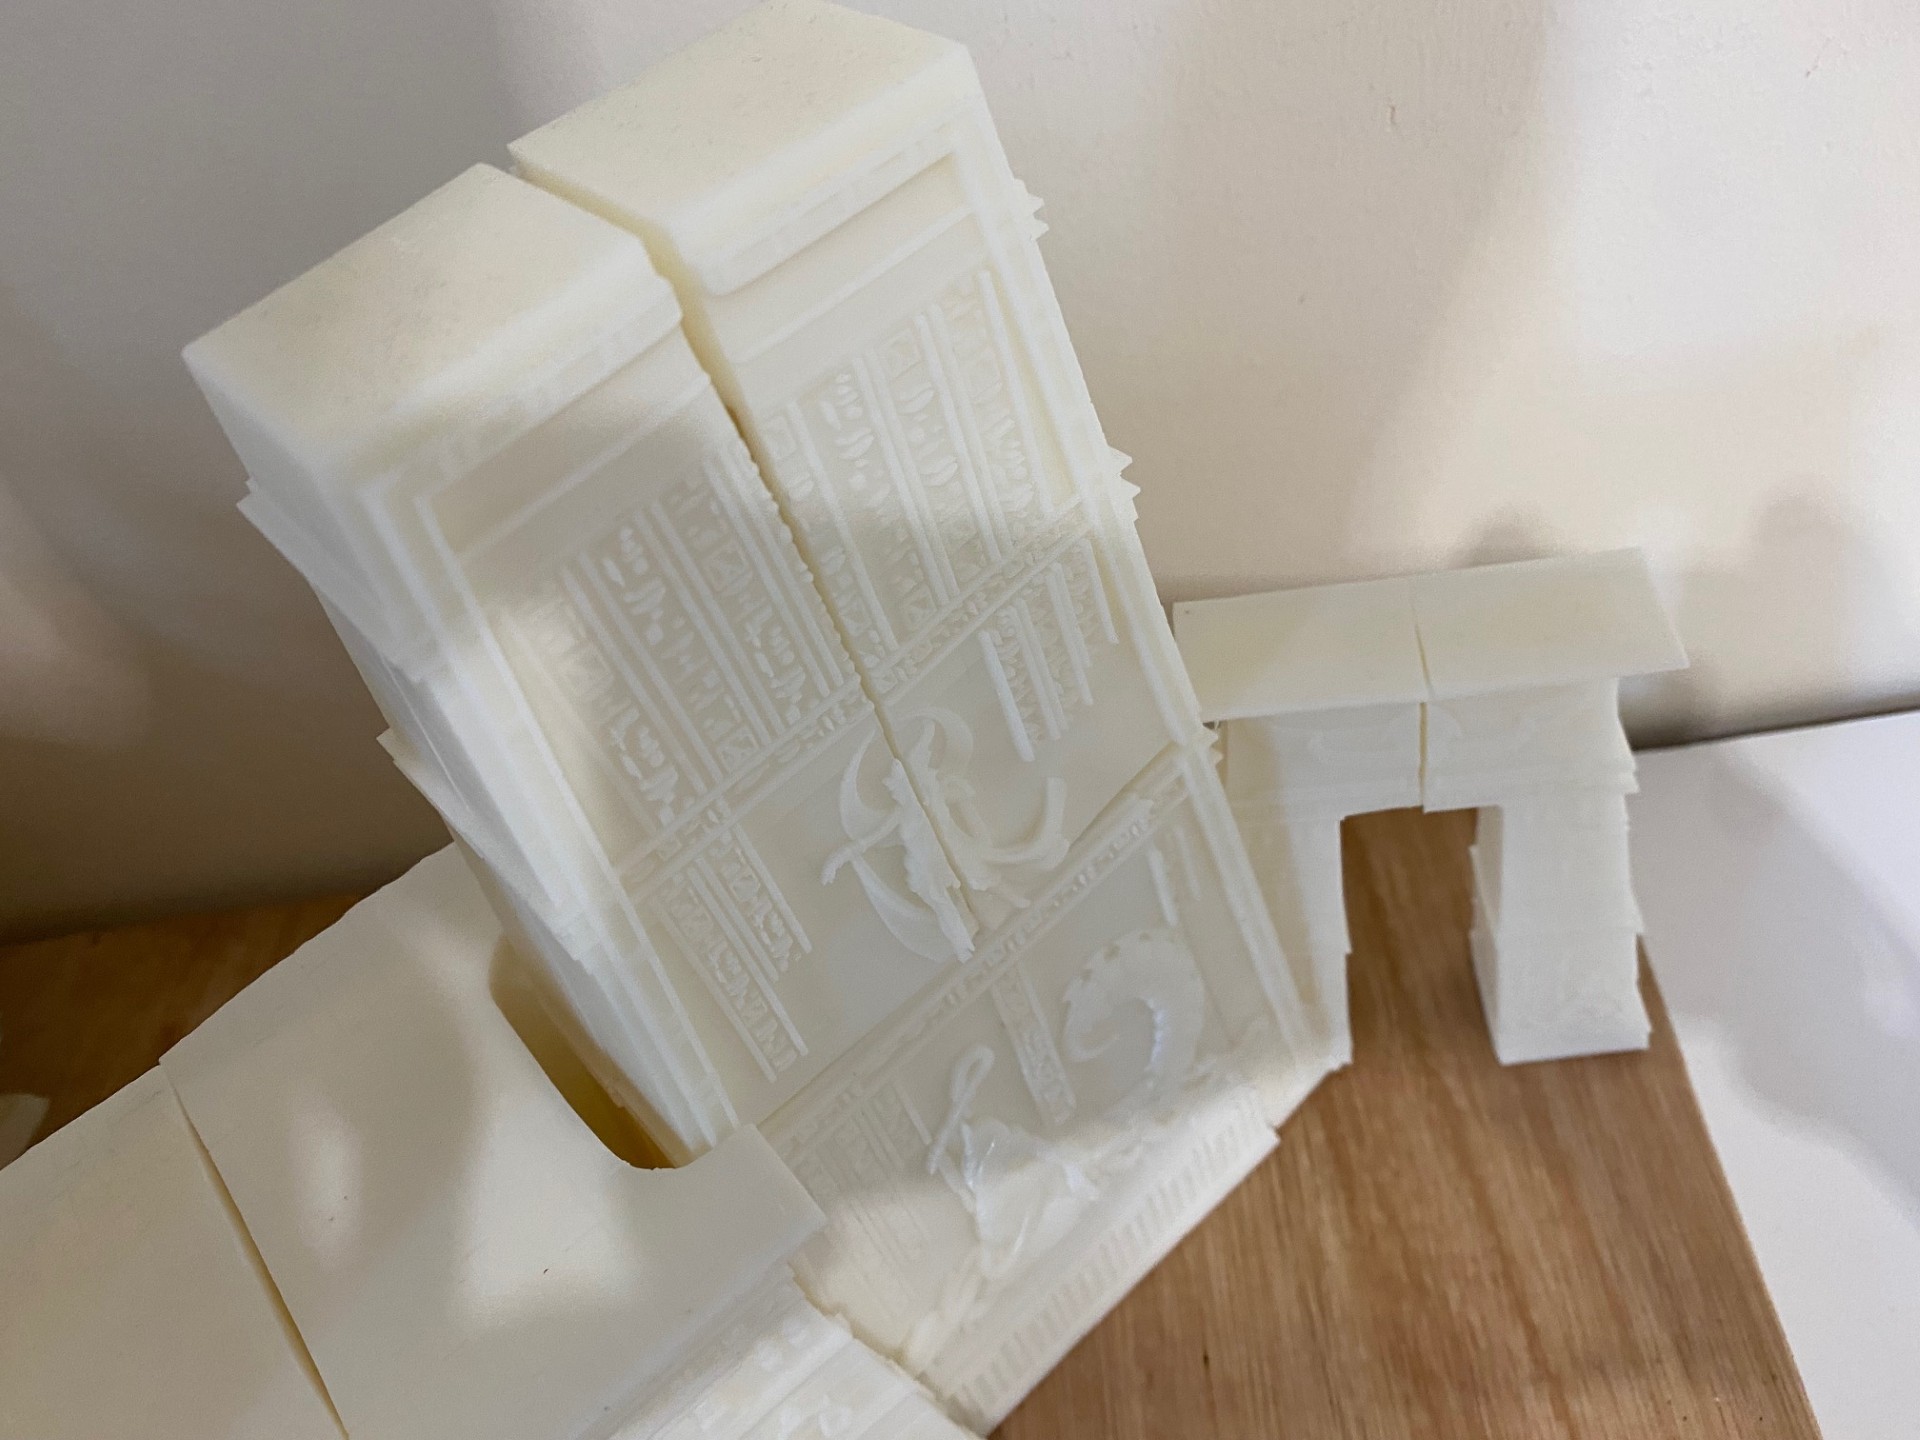
Solving the puzzle
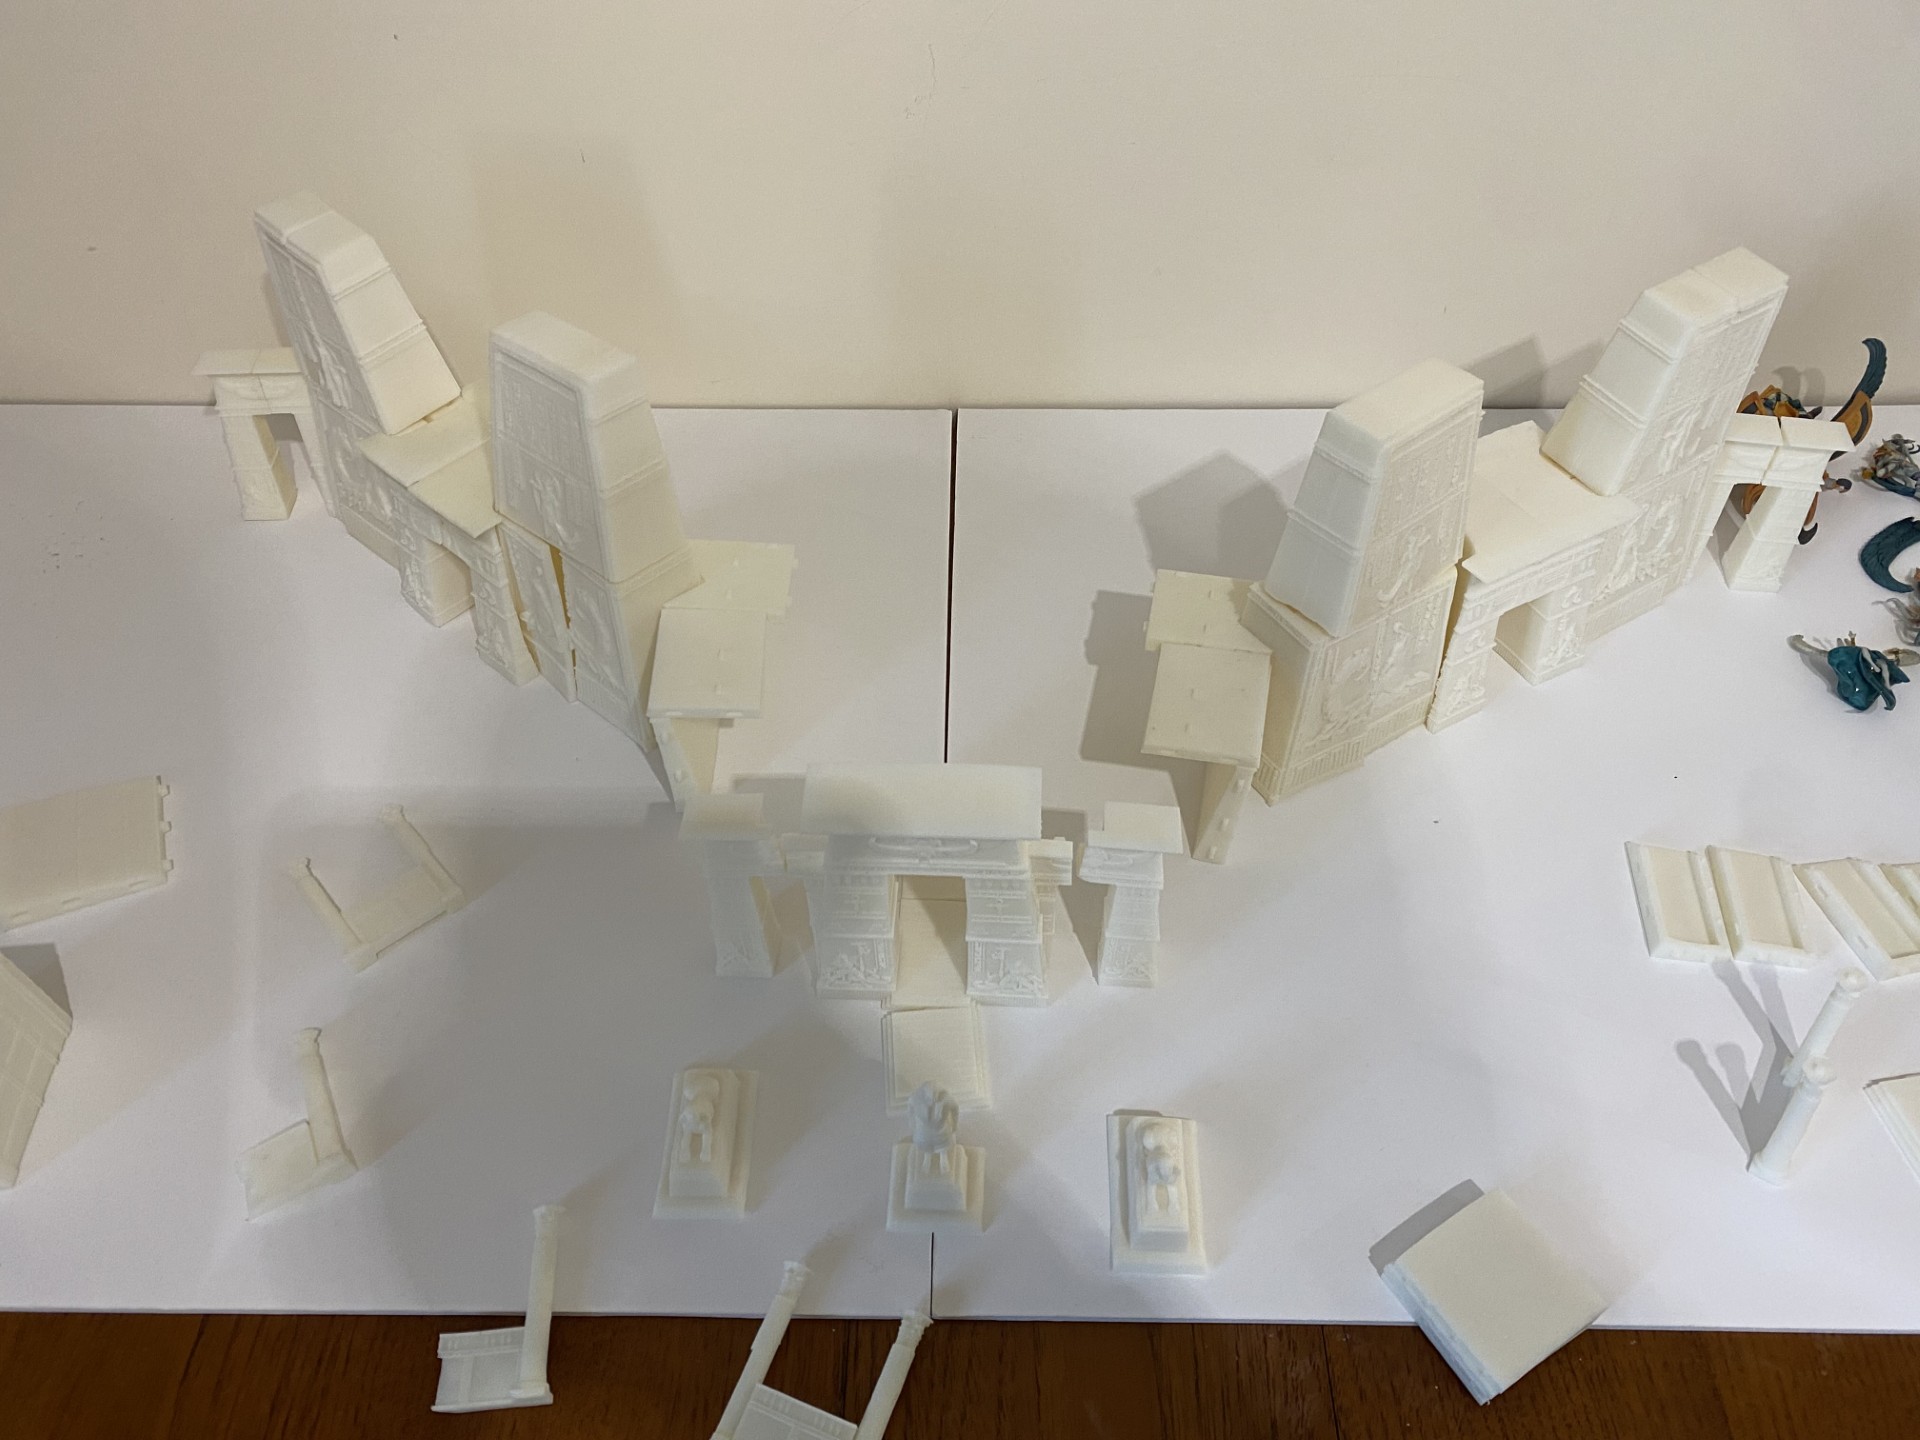
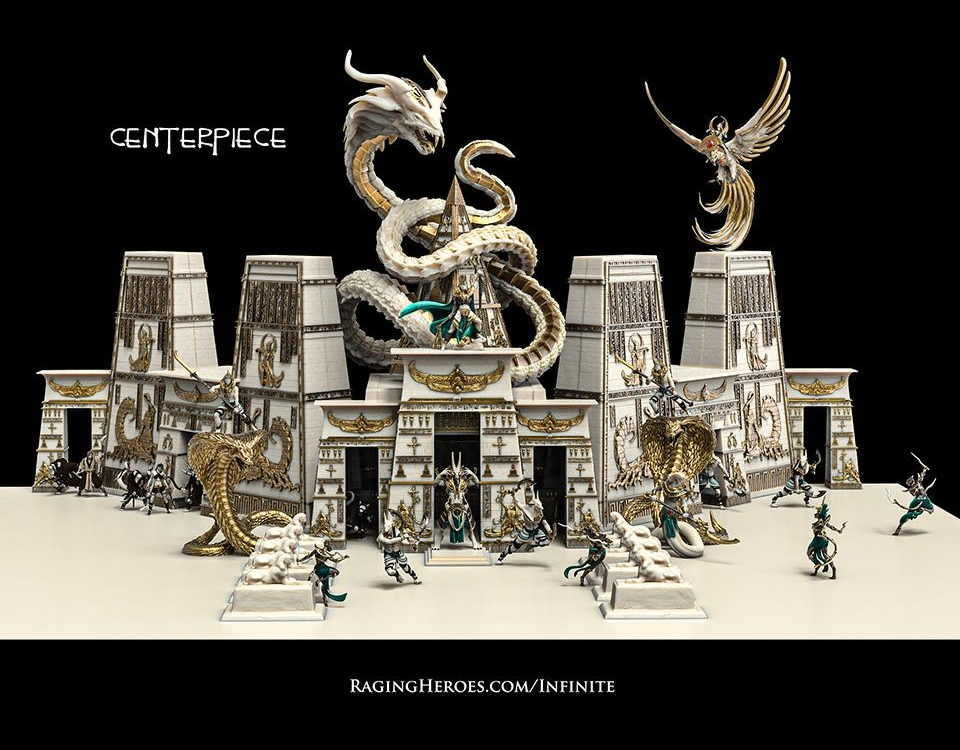

After playing around for about half an hour I managed to get the wings roughly assembled. The centre remains a challenge though. Looking on the Heroes Infinite website there is an assembly image. I’m starting to get the feeling that I didn’t print off all the parts.
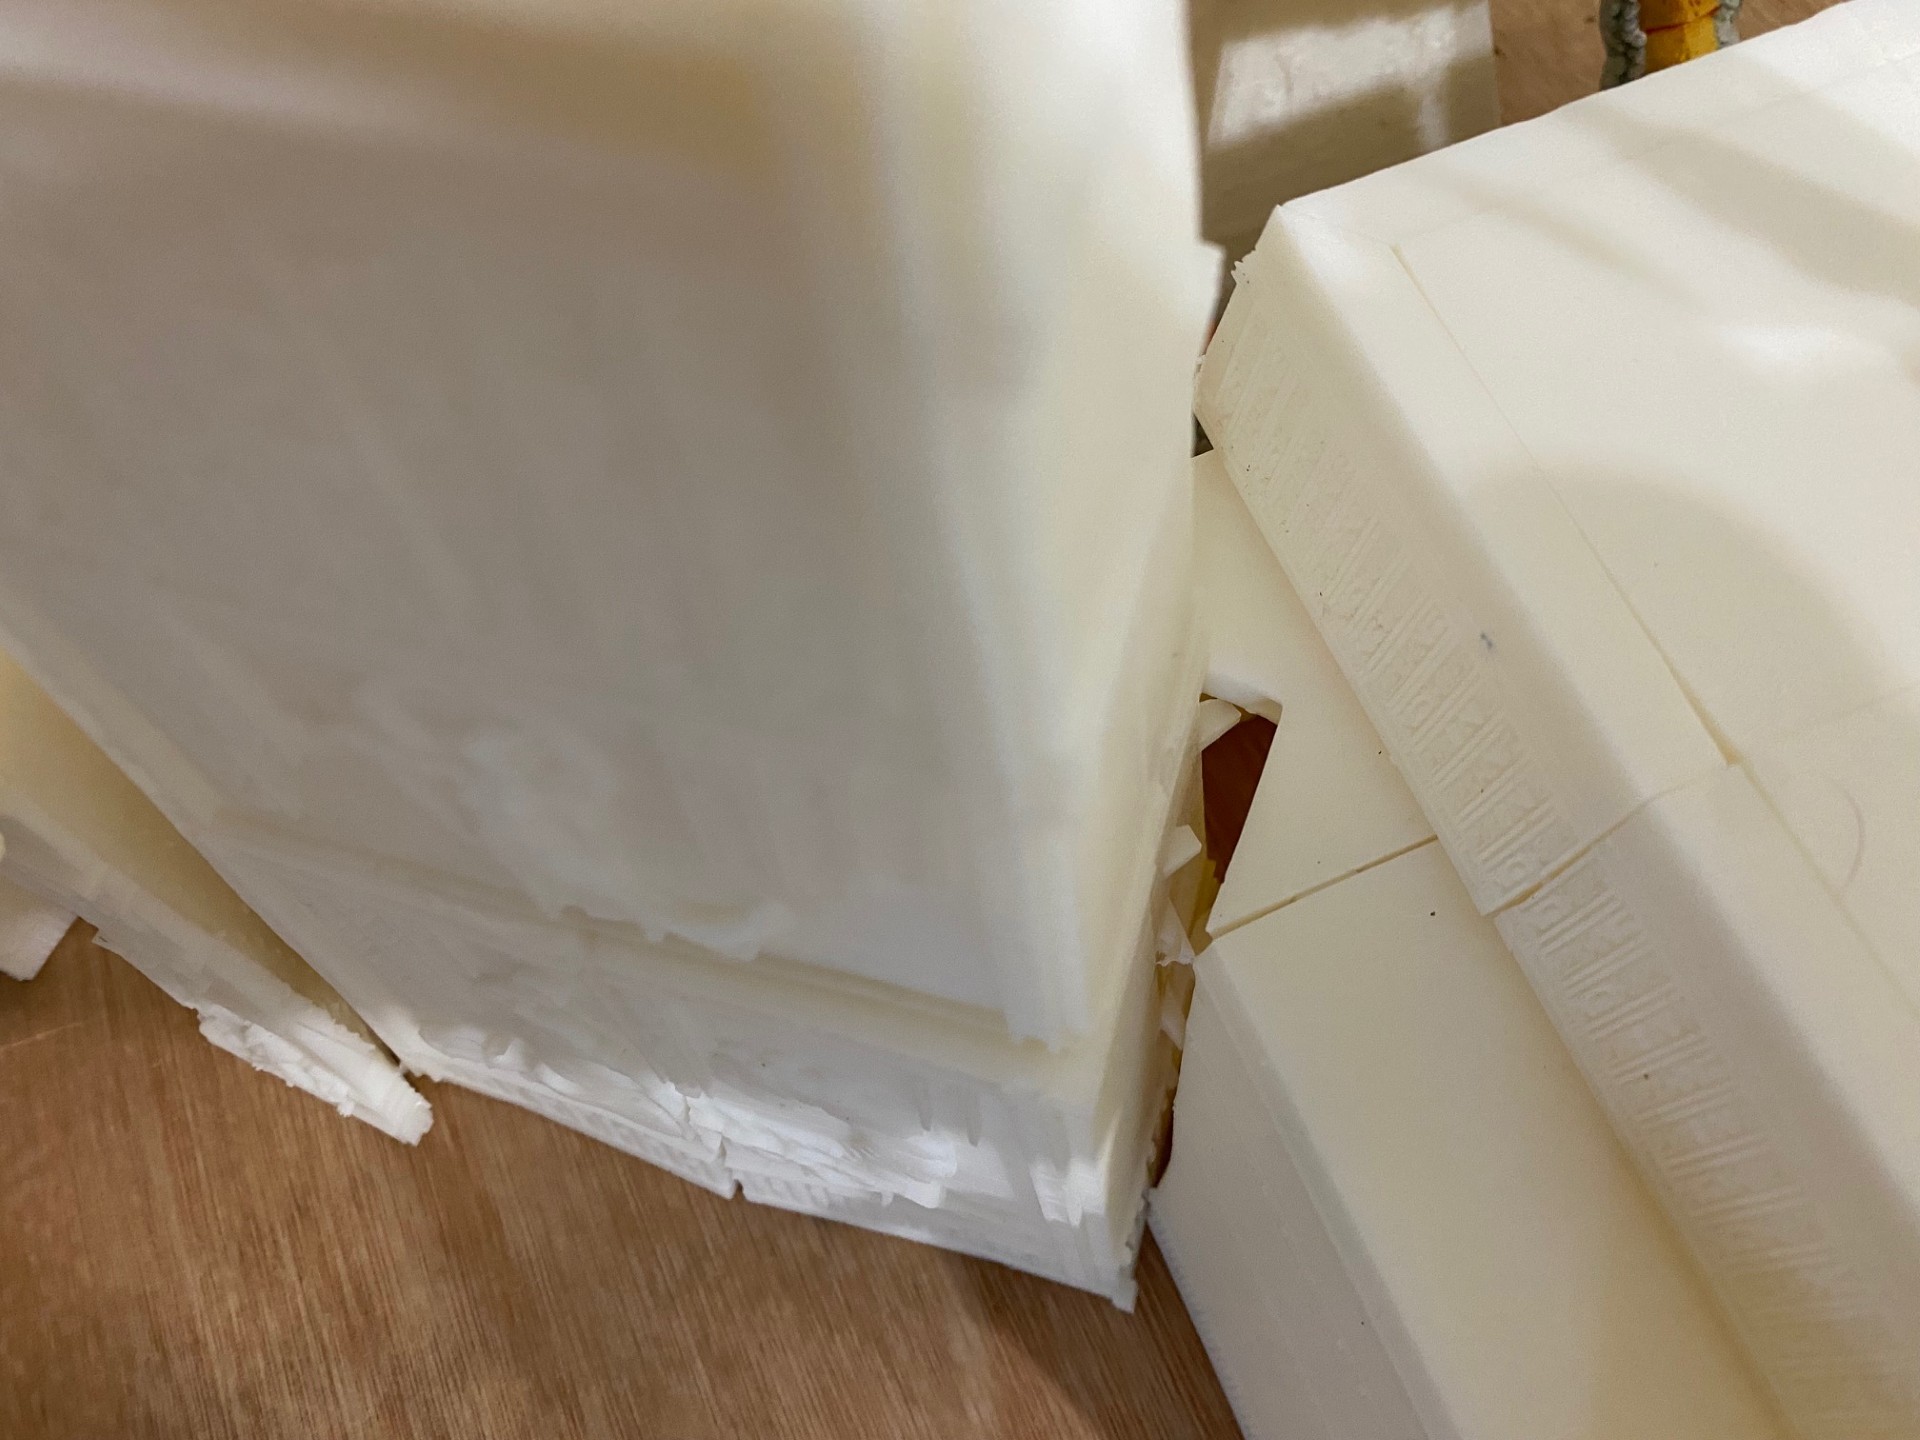
What is definitely the case is that pretty much every pair of surfaces that are supposed to marry together don’t fit very well. I suspect I just wasn’t very good at running my printer when I printed them off.
I may just get around all these problems by building it all as ruins.
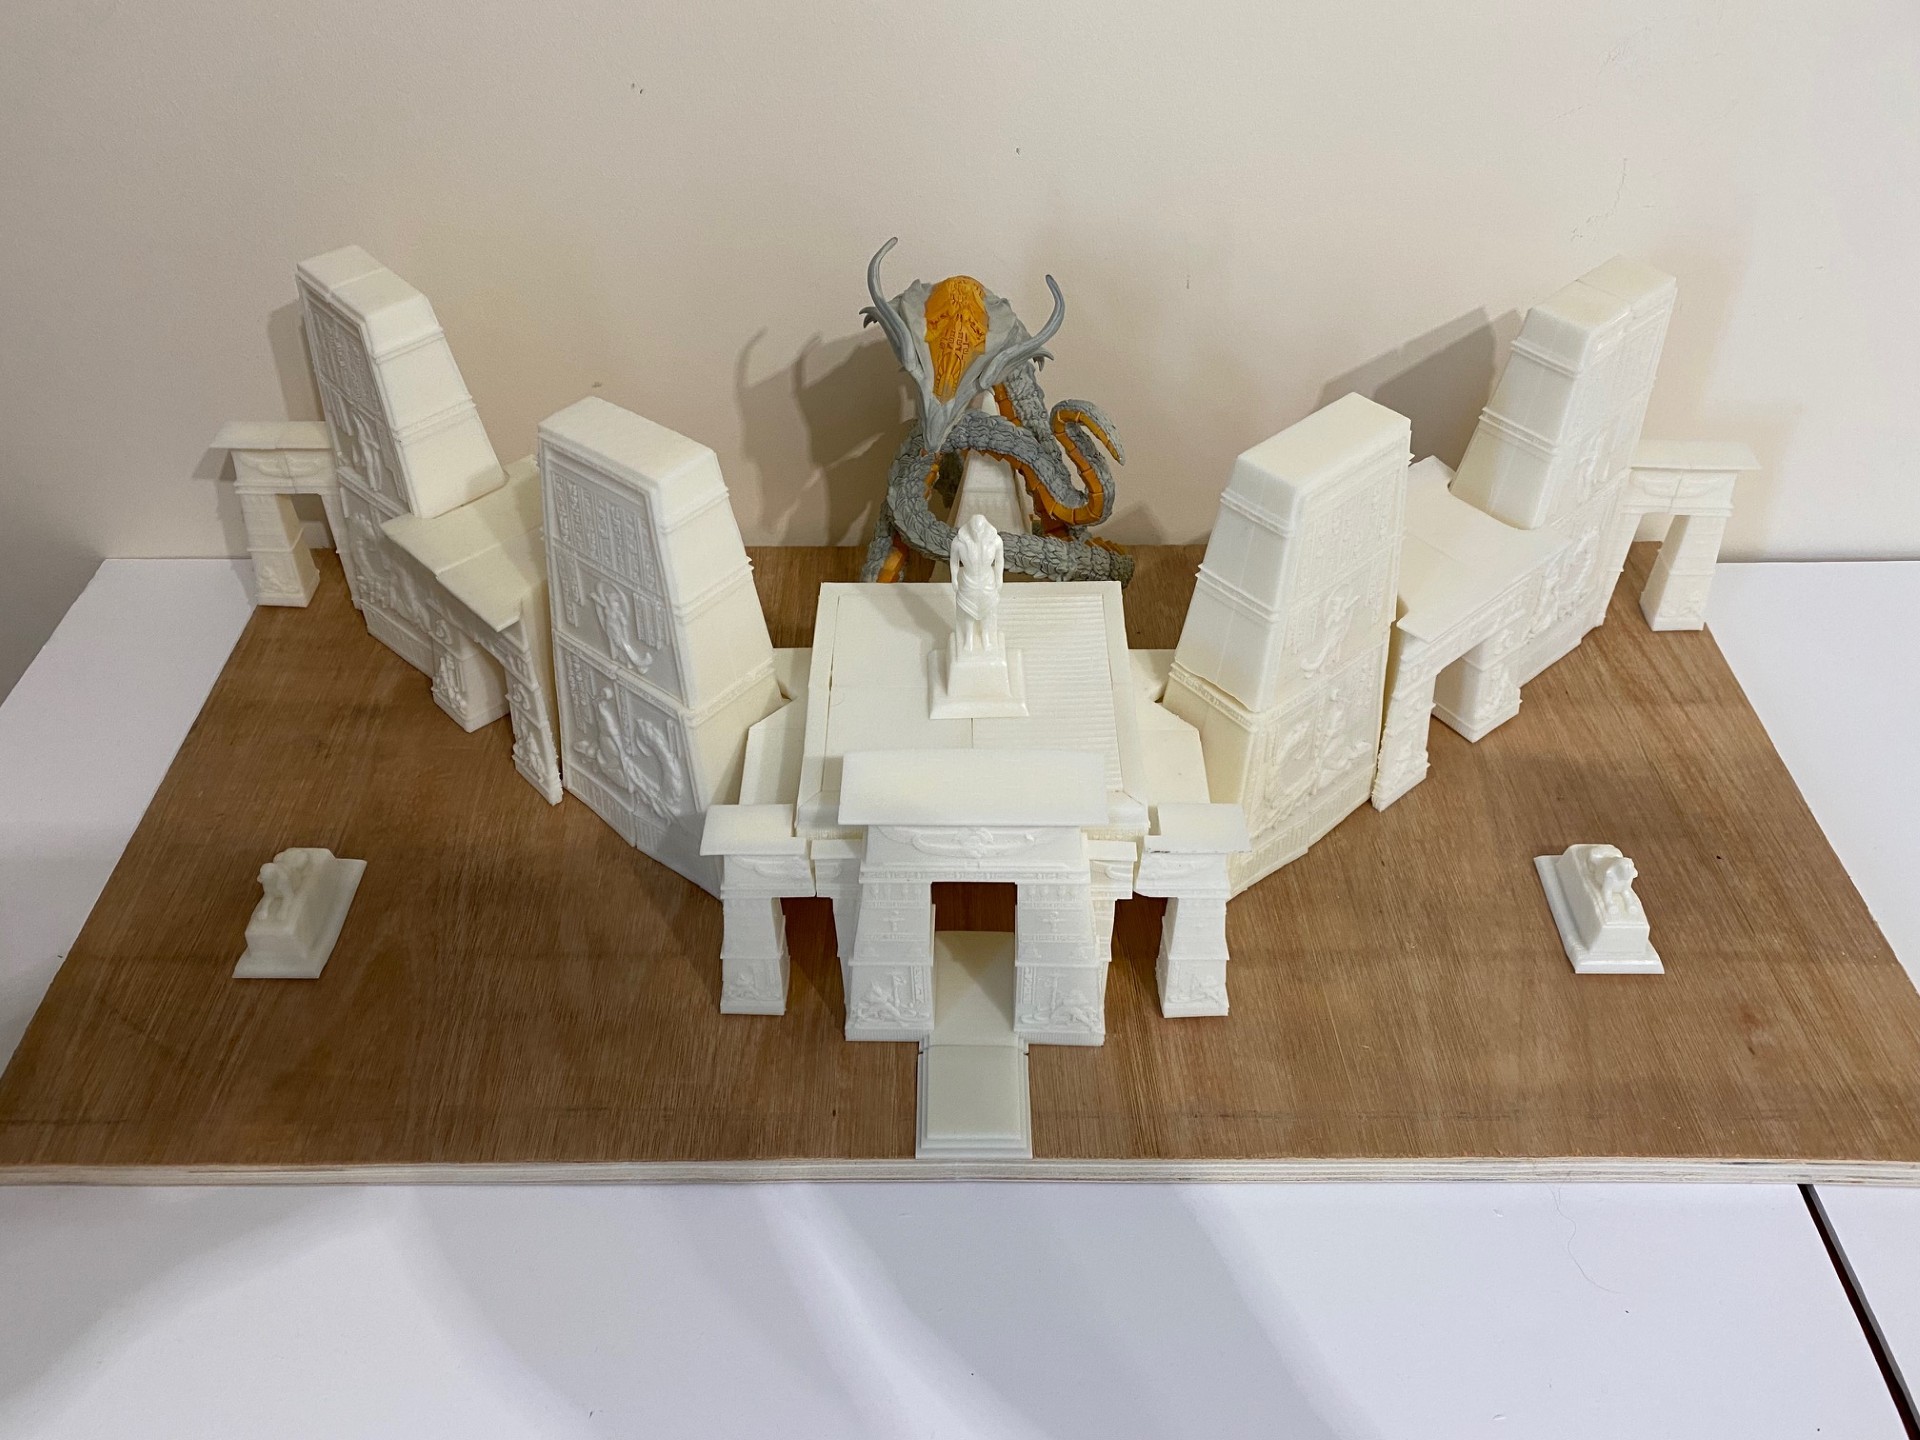
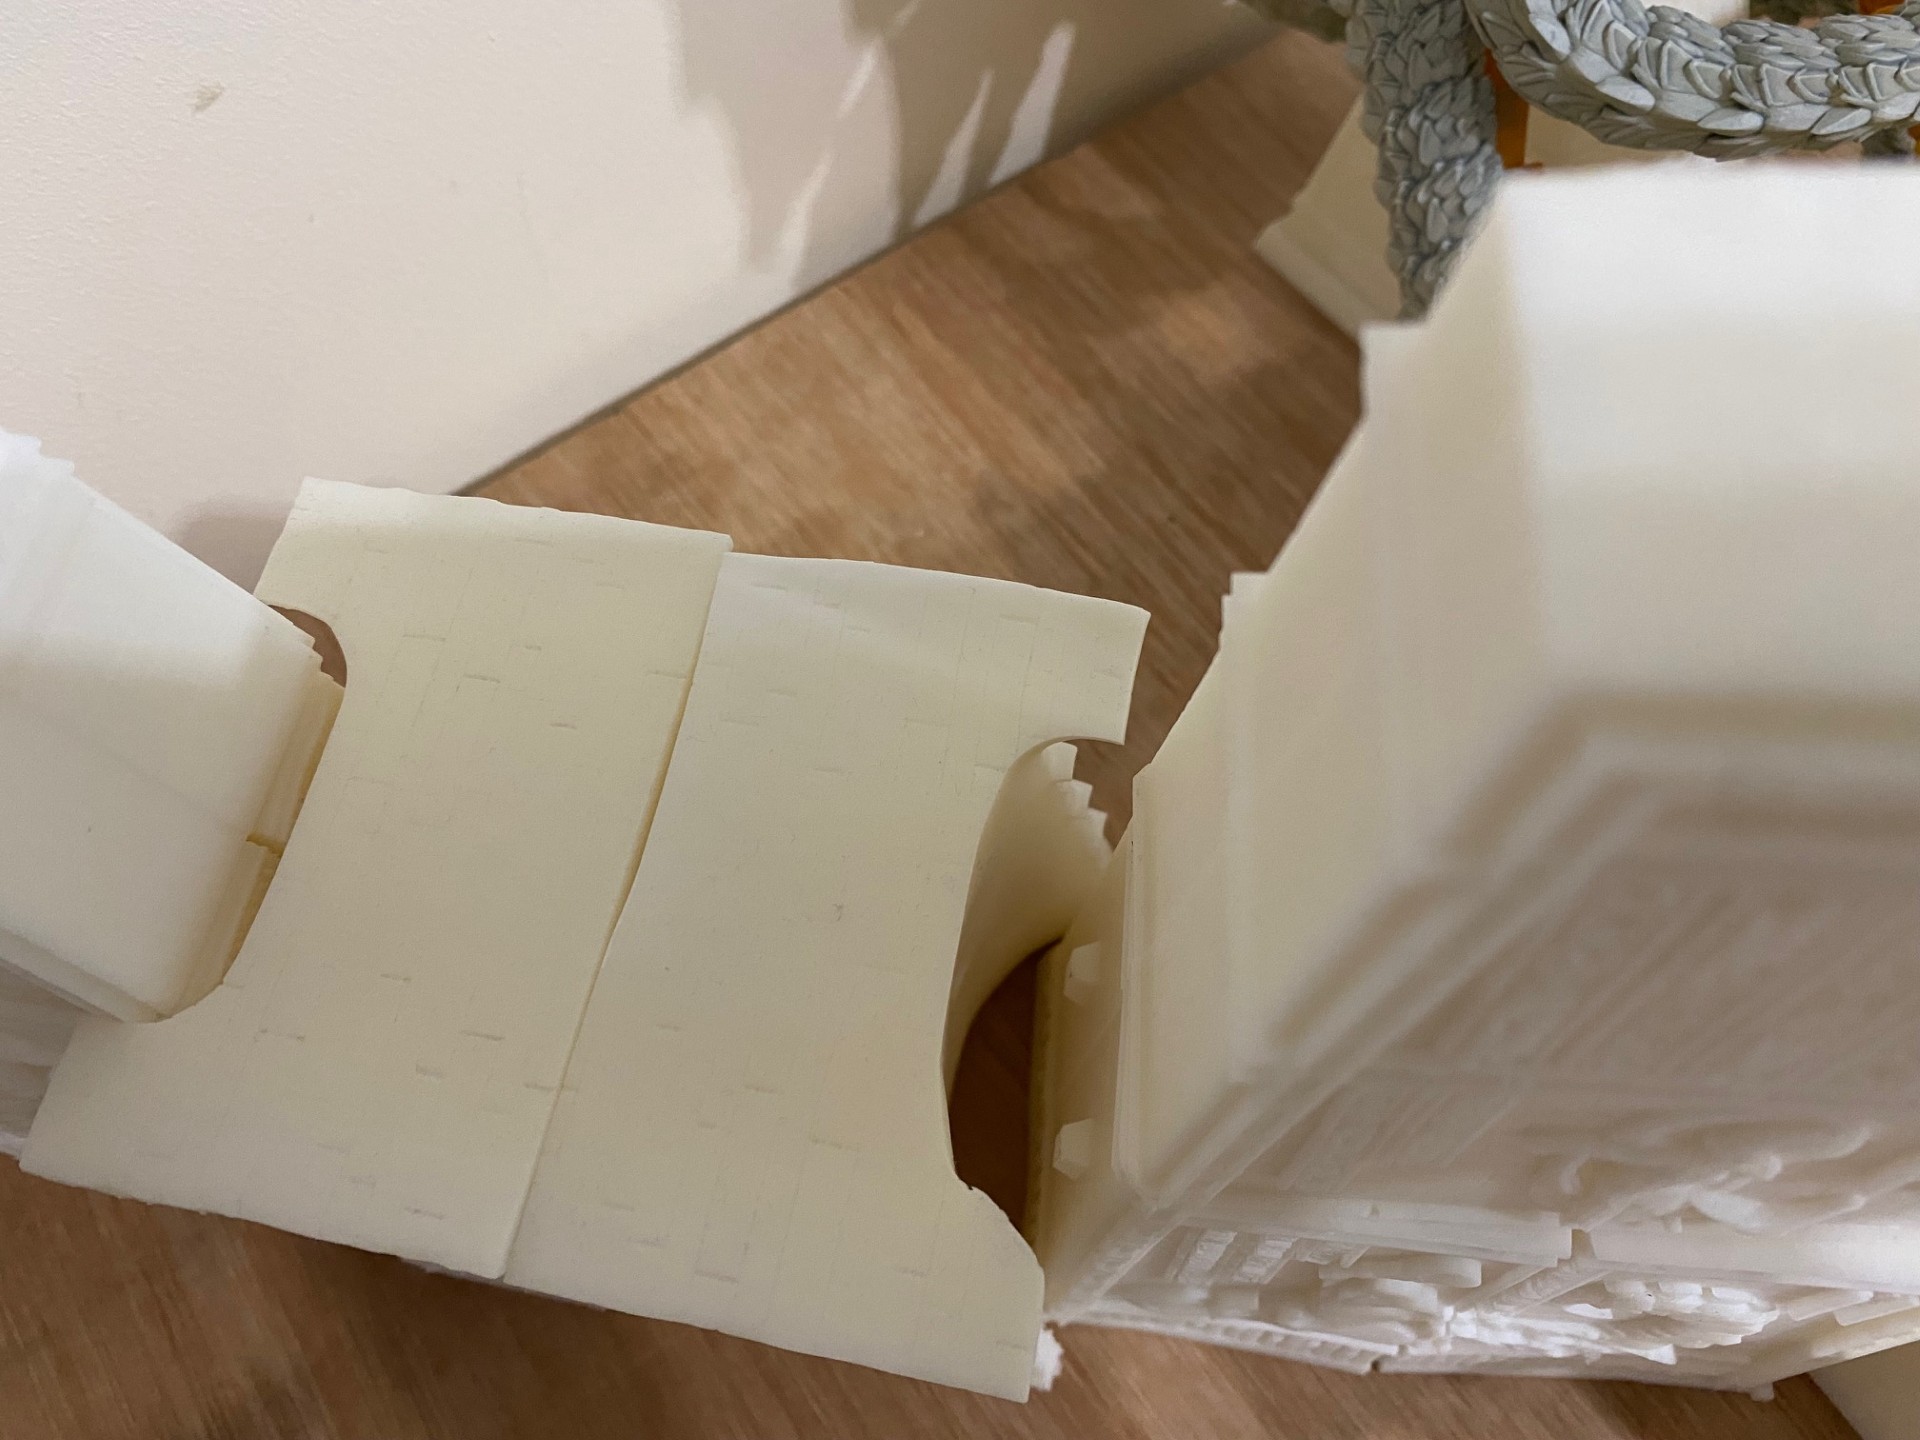
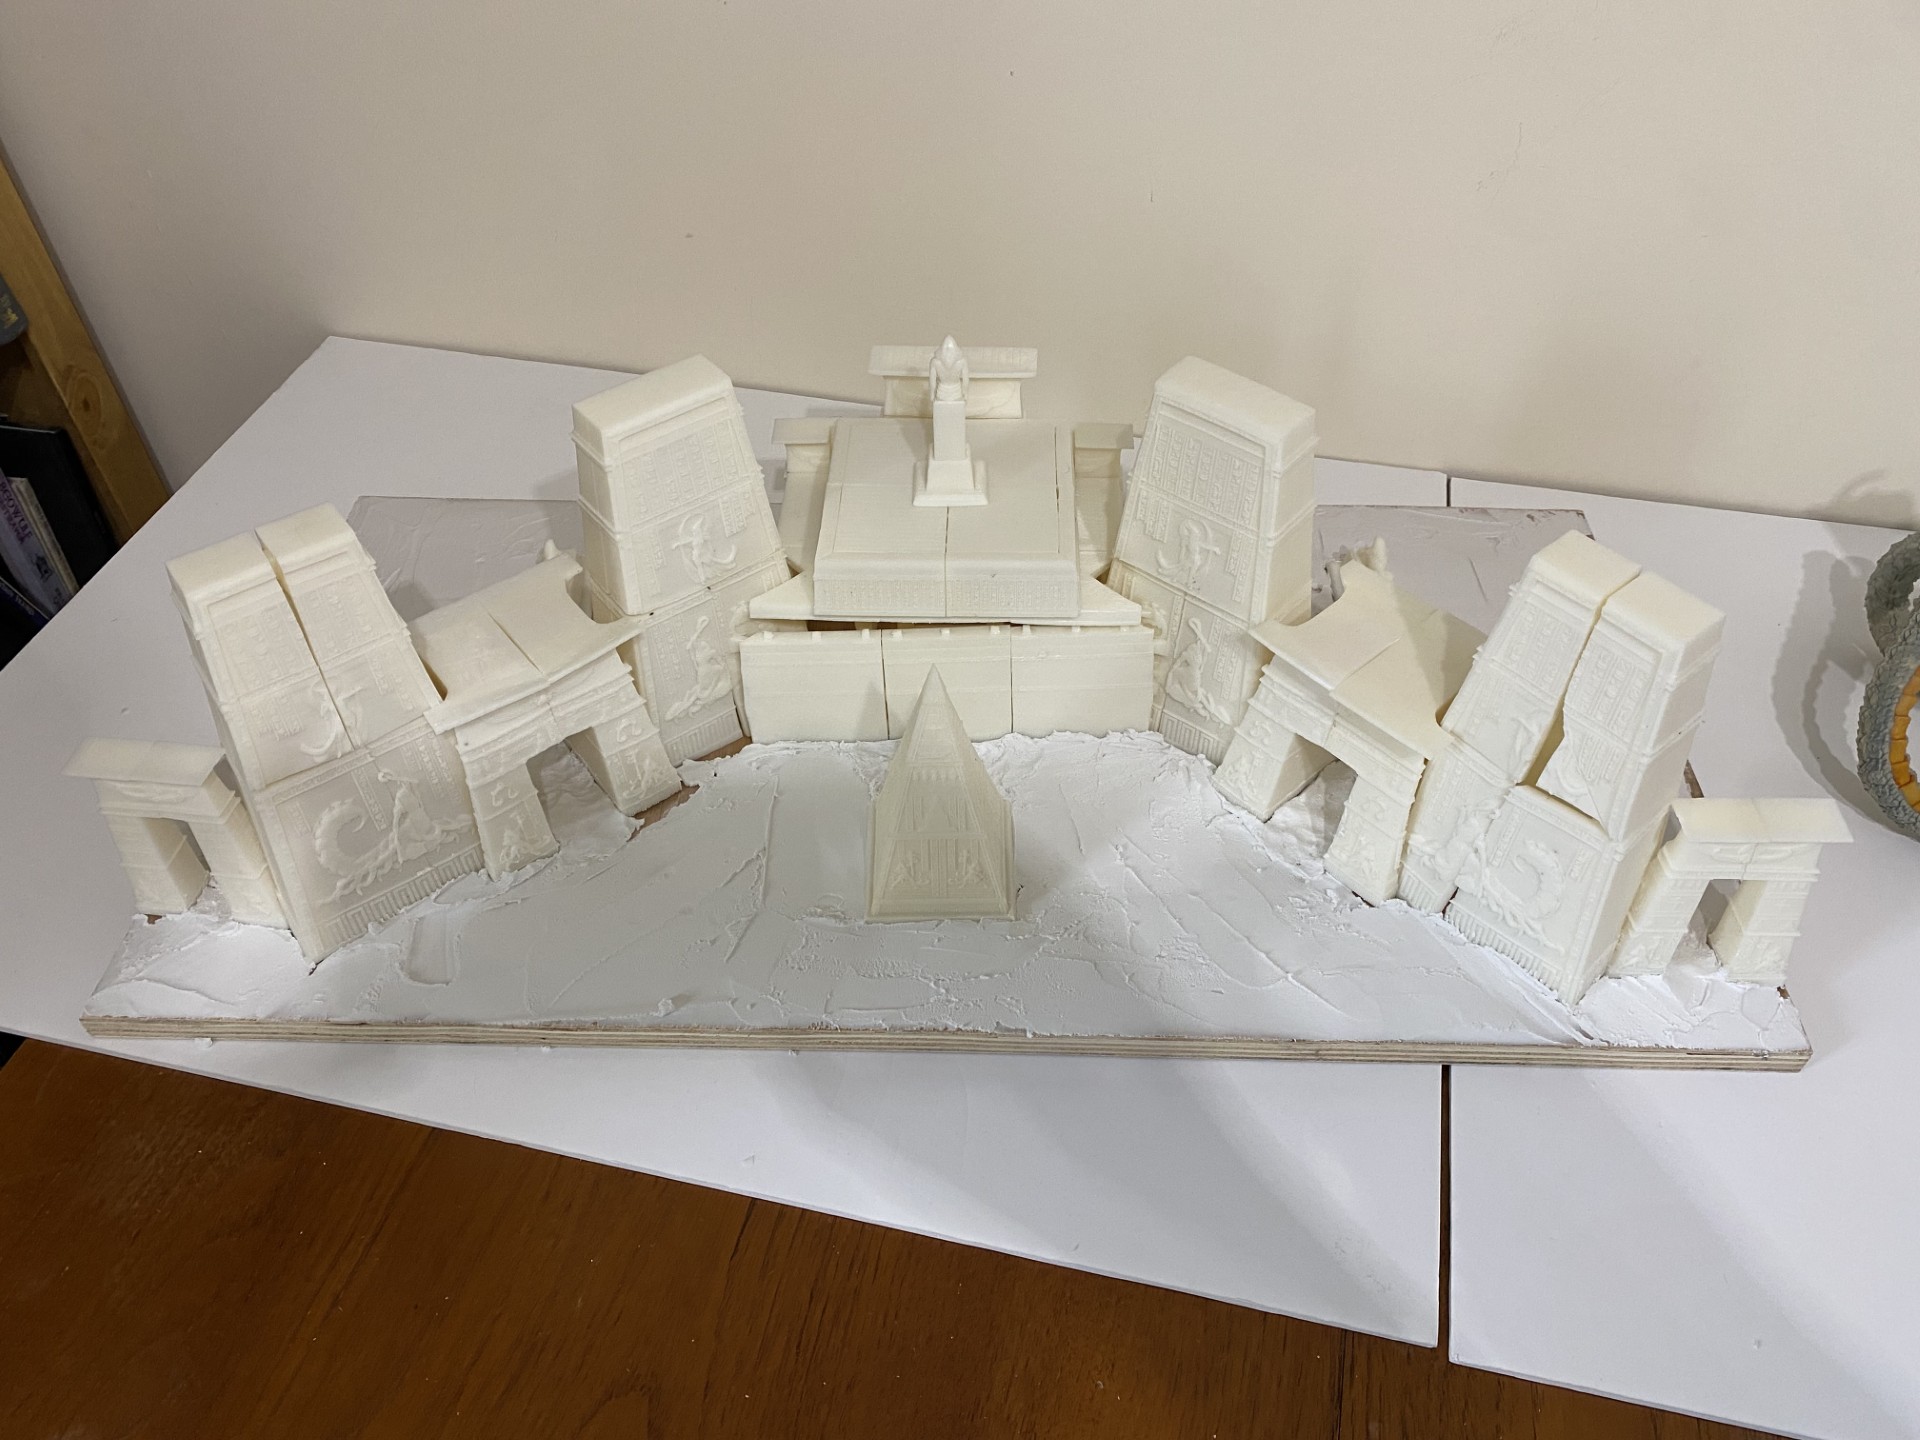
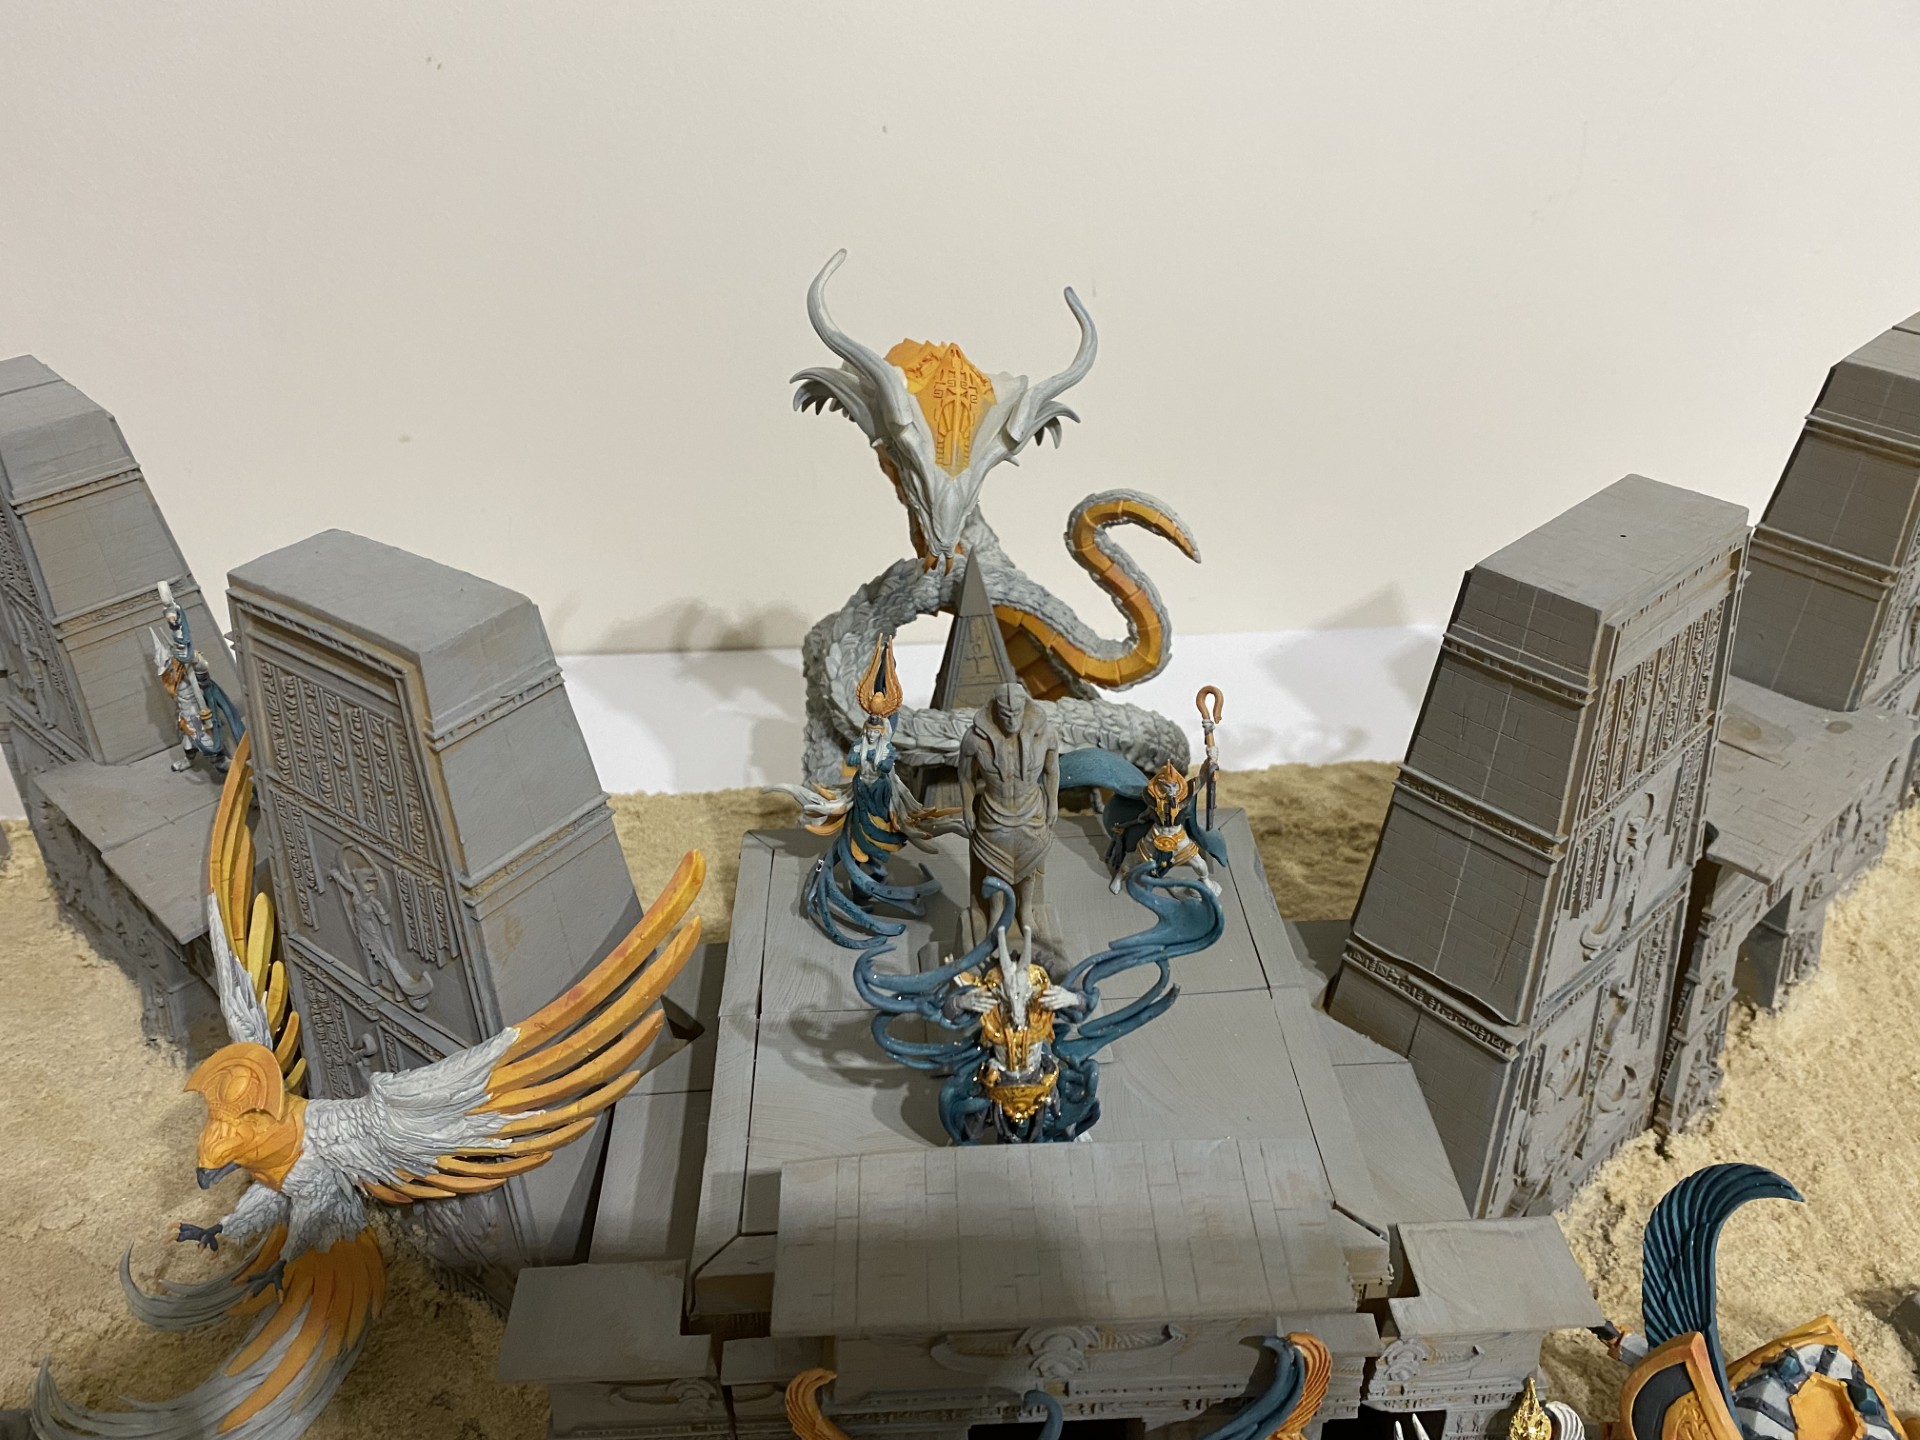
Puzzle solved!

I managed to assemble the entire setup and figure out where everything goes. The central chamber was particularly challenging as many of the parts used there have holes and lugs that are interchangeable.
I now know that the entire assembly is 35 cm deep, 80 cm wide and 25 cm tall. I can start to shop for a suitable box to mount it all in.
While shopping, I can also start to glue it all together. Some lugs will need removing as they’ve not printed well enough to match their holes. Gaps will then need filling.
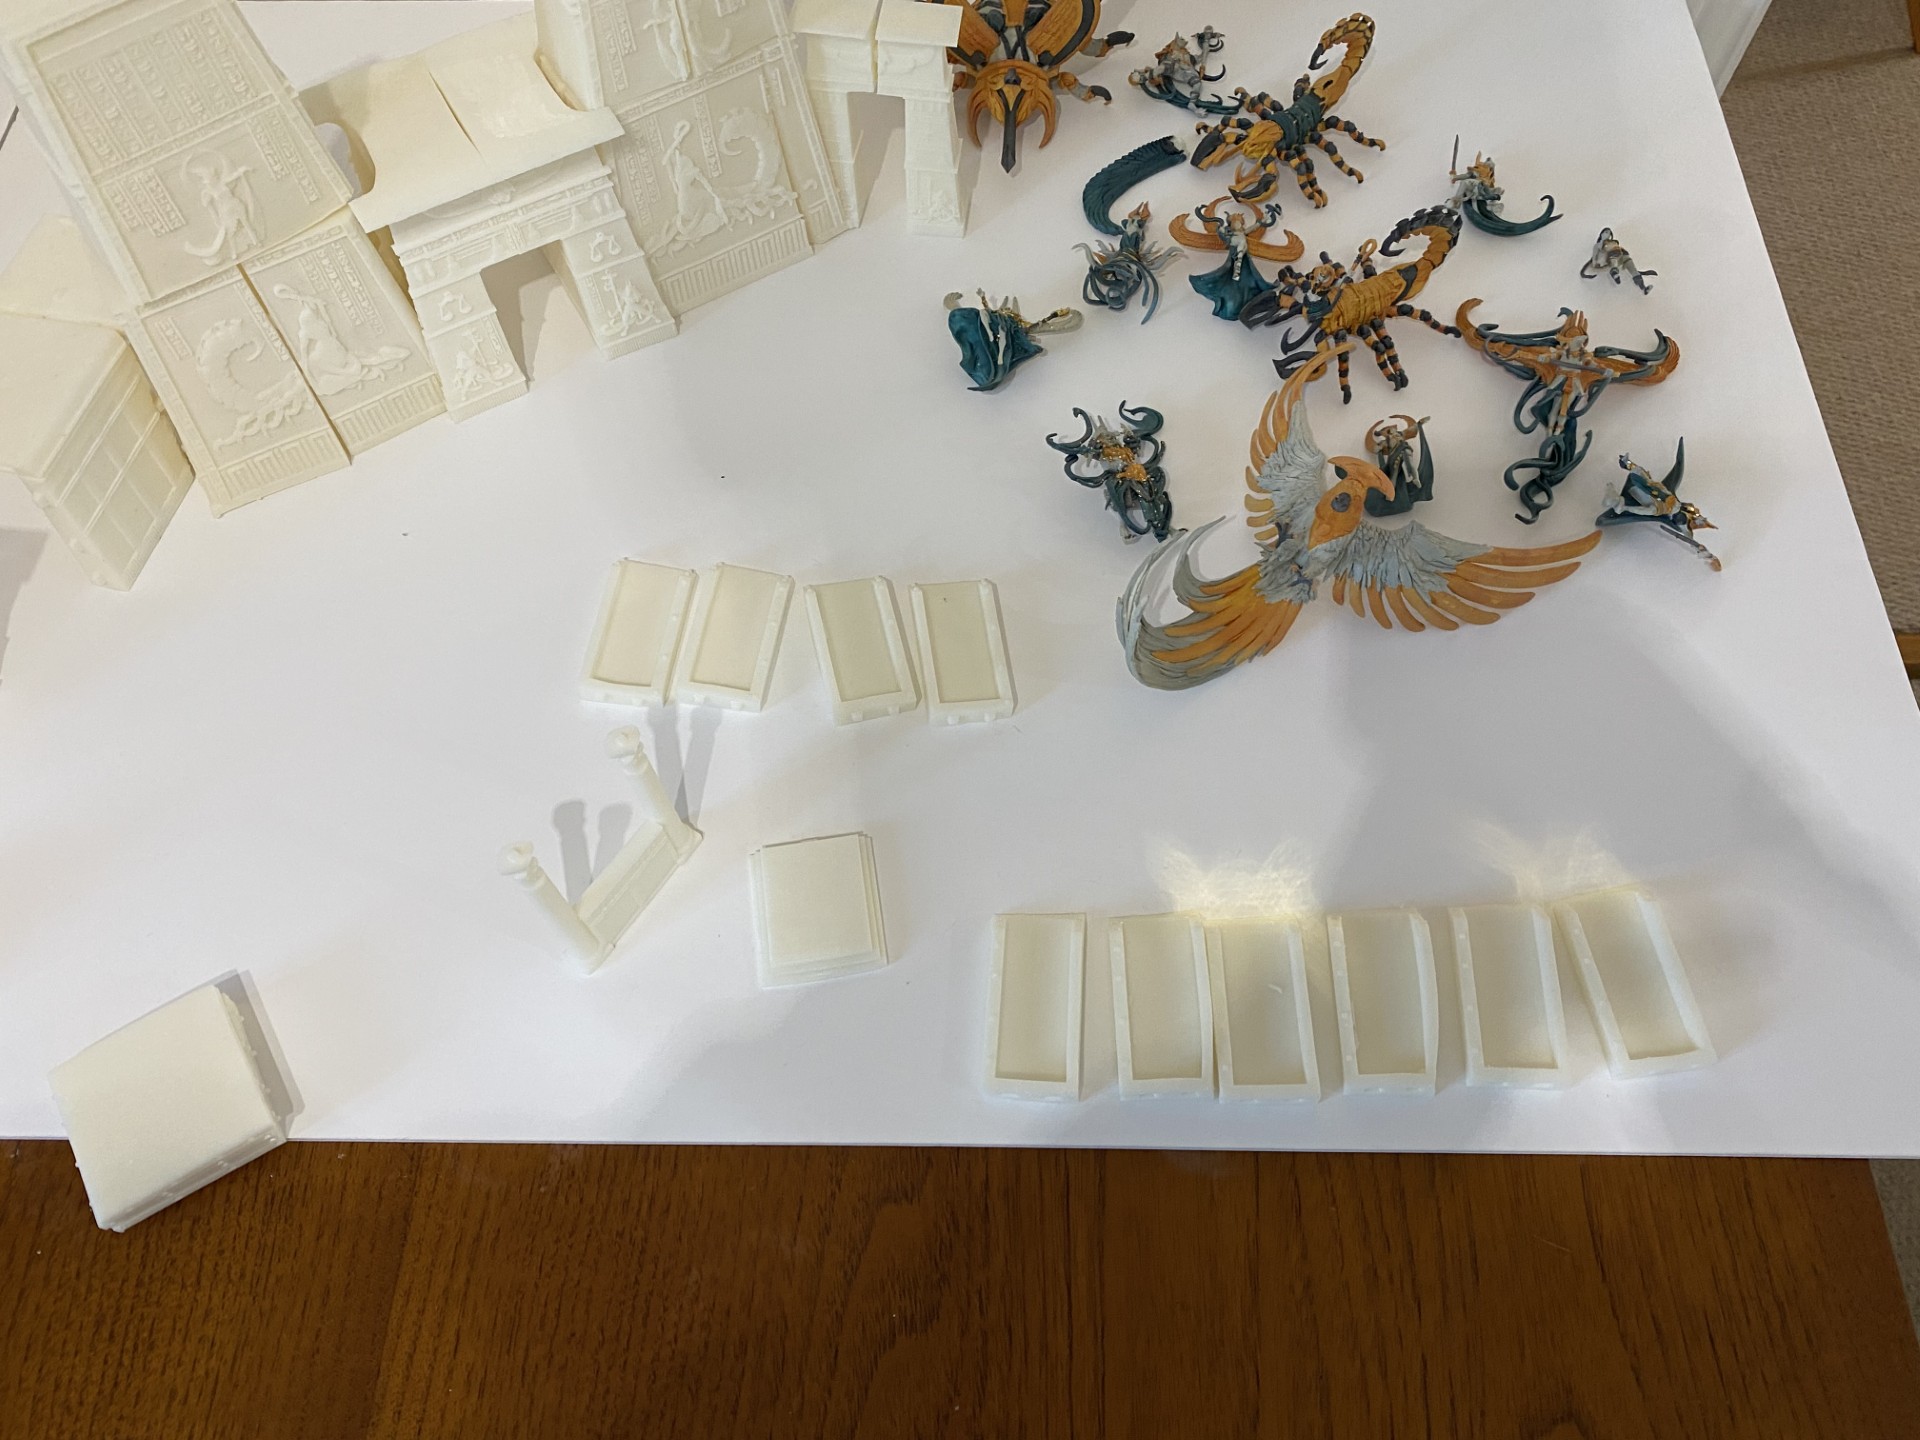
Parts glued together. Snake found.


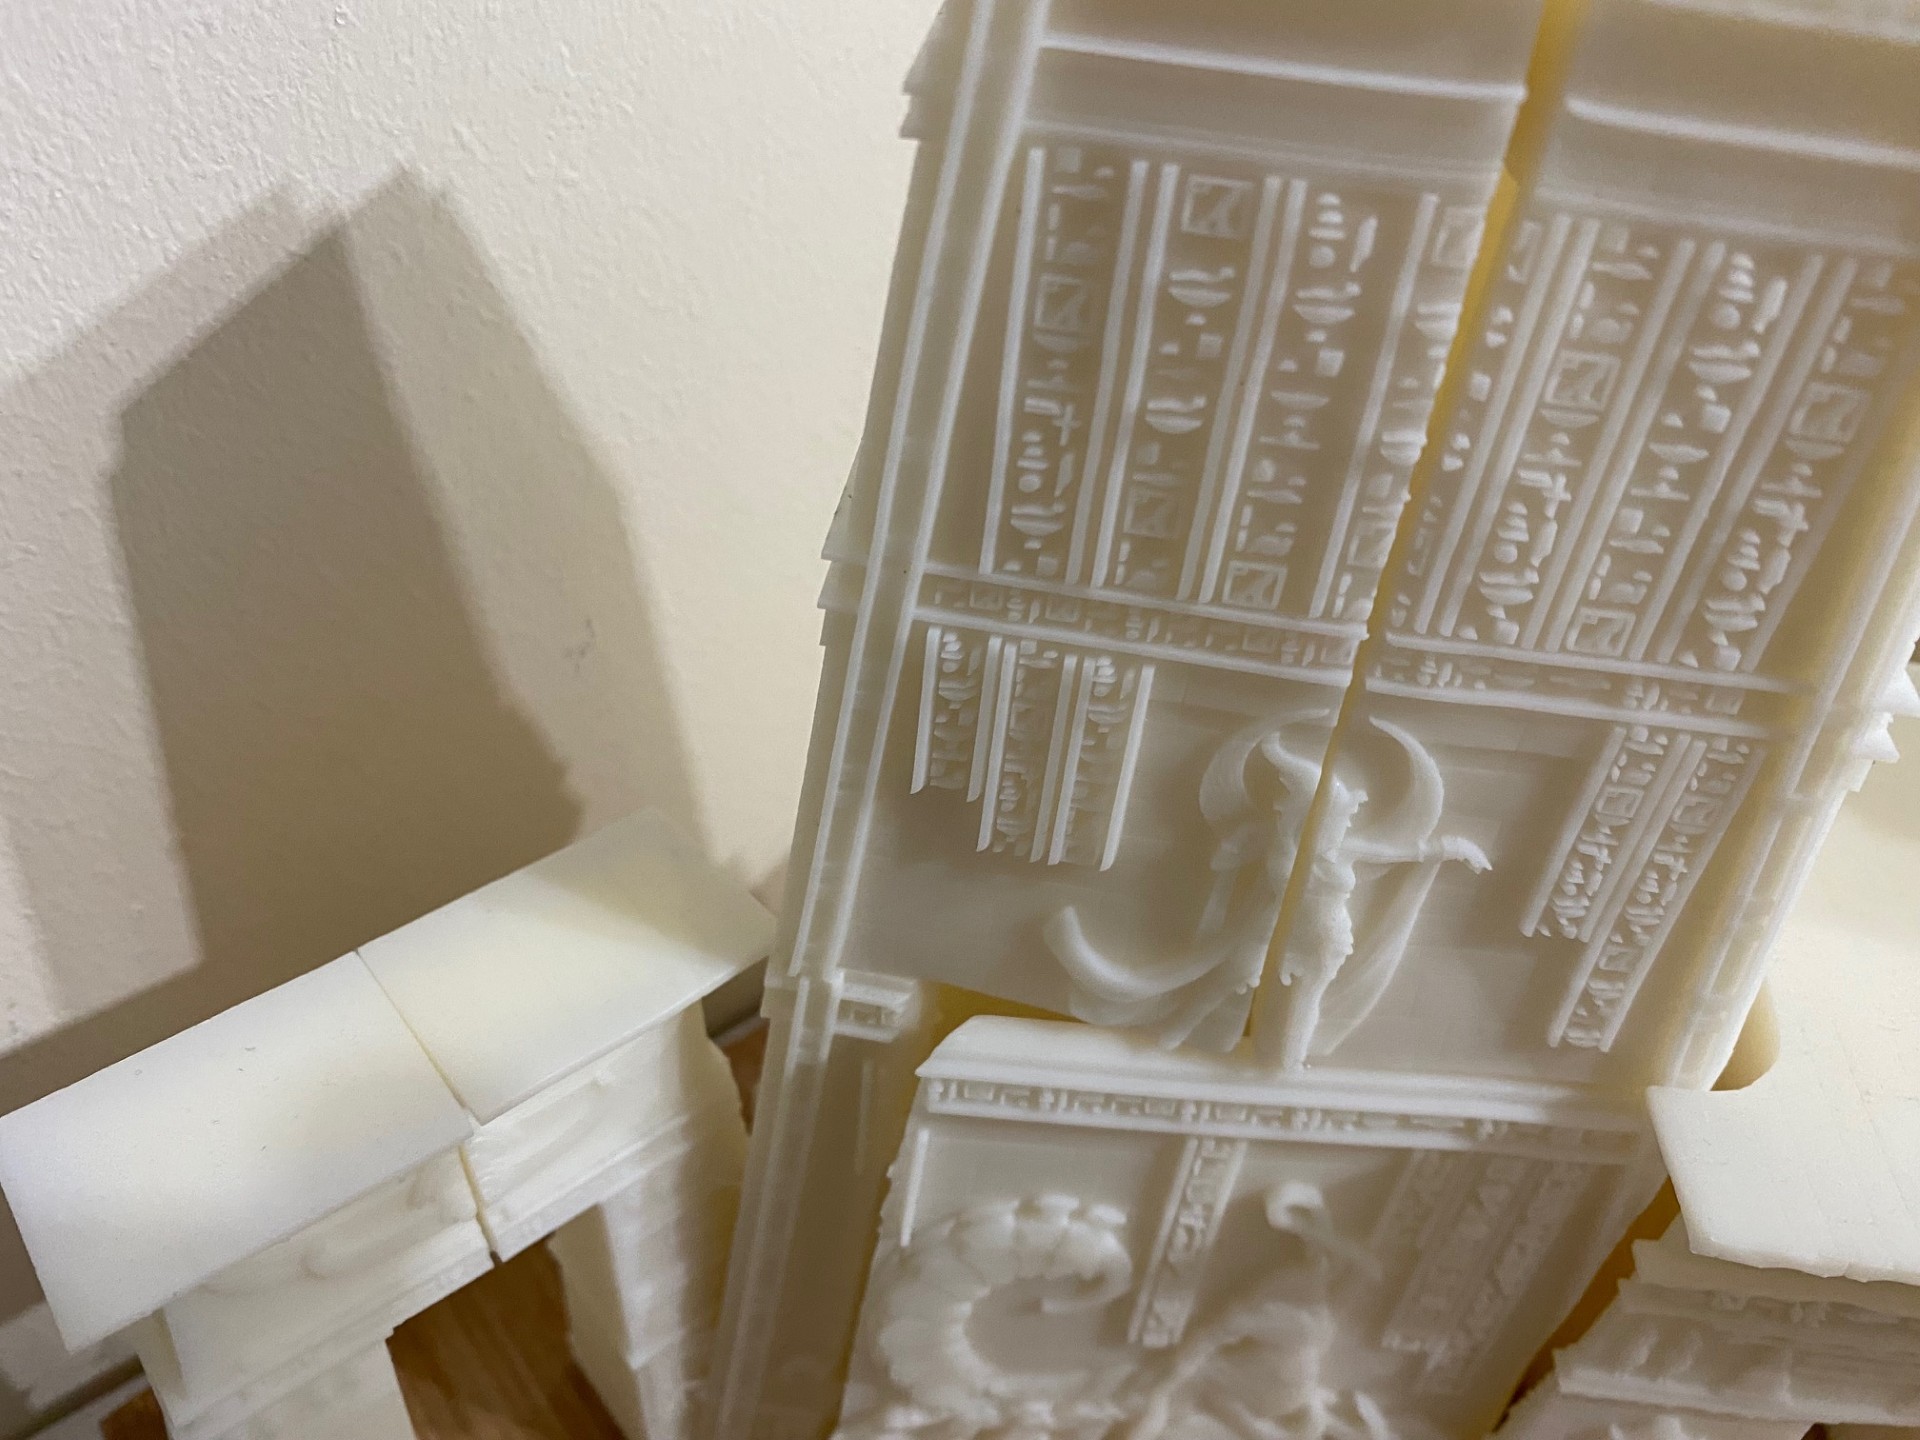
I’ve glue most of the parts together into large sub-assemblies. I guessed it would be impractical to glue everything together into one big assembly at this stage.
I also found the pyramid and large snake model that goes in the background in a storage box.
Originally I planned to mount it all in a rustic wooden crate, but shopping around I found you don’t really get them big enough. Plan B was to find some old plywood in my garage and cut it to size to make a base. It needed to be 80 cm wide and 40 cm deep to fit the full assembly.
You can see from the pictures that there a lots of mis-prints which stop bits fitting together seamlessly. These parts were some of the last prints I did on my first 3D printer just before it died. It had been from a kickstarter where they had deliberately designed a printer to be as cheap as possible. That, combined with my inexperience printing, is probably why so many parts came out deformed. Until I tried to assemble everything in the past week many of these miss-prints weren’t obvious. I’m not fussed. I’ll try to make them look like cracks and present the structure as partially ruined.
Next I need to glue the model to the wood. Does anybody have recommendations for gluing resin to wood? I was thinking a 2-part epoxy would work well.
Then I want to put something on the base to look like sand dunes. Again, any recommendations? I was thinking a filler but I don’t know if it will adhere to the wood.
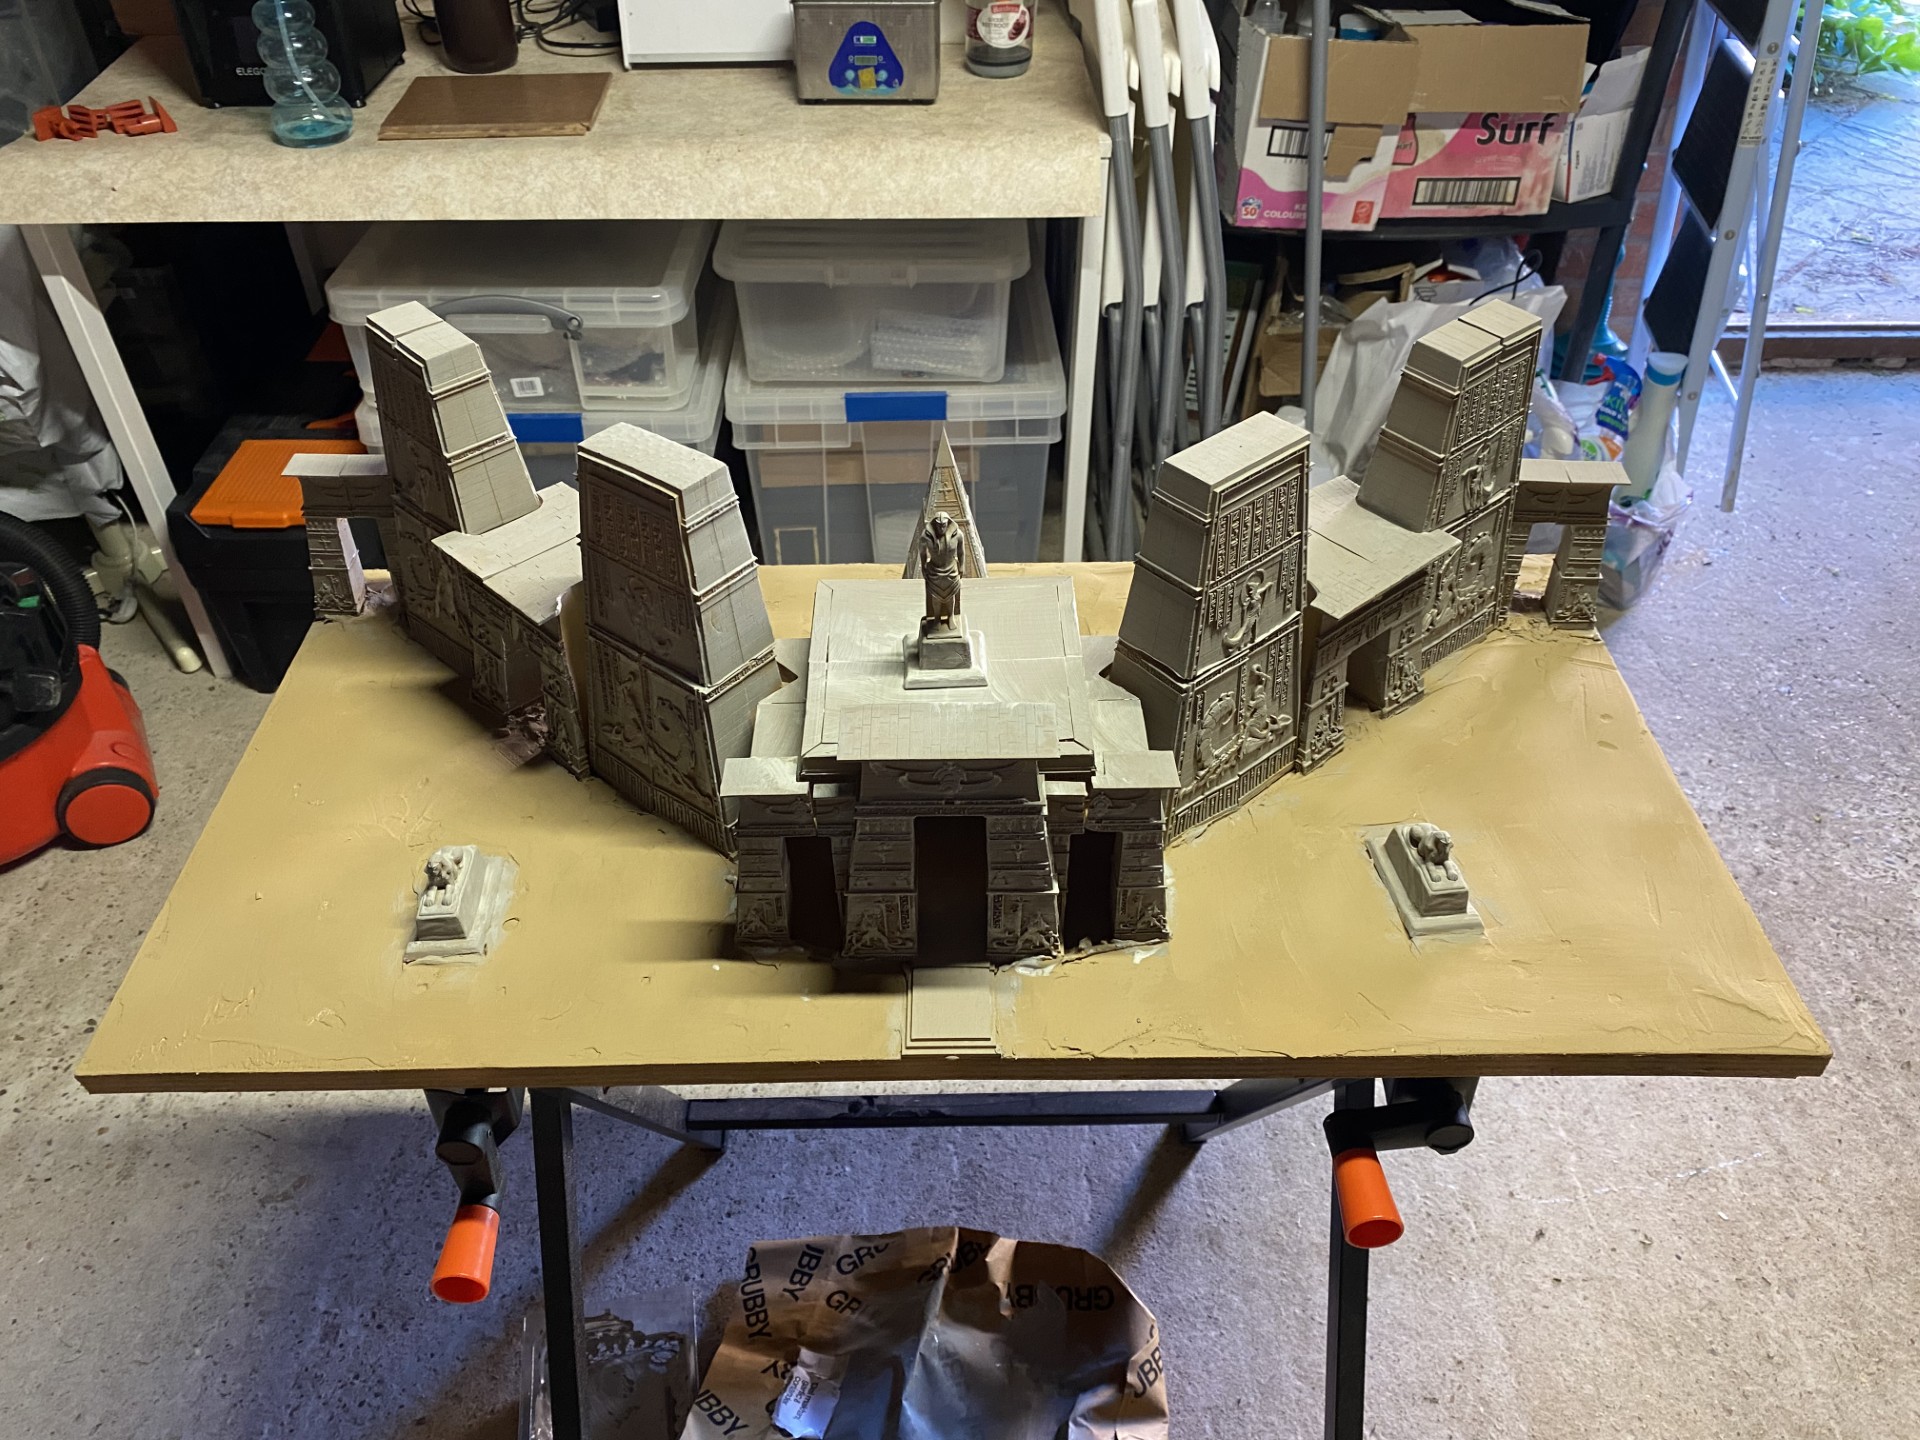
Epoxied and filler applied
Yesterday I used two part epoxy Gorilla glue to glue the printed parts on to the wood. Today I used some half-used pots of filler from the garage to cover most of the exposed wood. The intention is to just give me some subtle undulation to the surface. One pot of filler was about 15 years old so was almost like plasticine, but I managed to get it on. Whether it sets properly and adheres remains to be seen.
This photo is taken from the rear. By pure chance most of the print defects are going to be hidden on the rear of the display. The main reason for photographing from this angle is that I noticed after applying filler and going to rotate the piece, is that it is now quite heavy and there’s nowhere convenient to grip it. Probably won’t be as bad once the filler is dry, but I may have to look into securing some handles to it.
Paint time
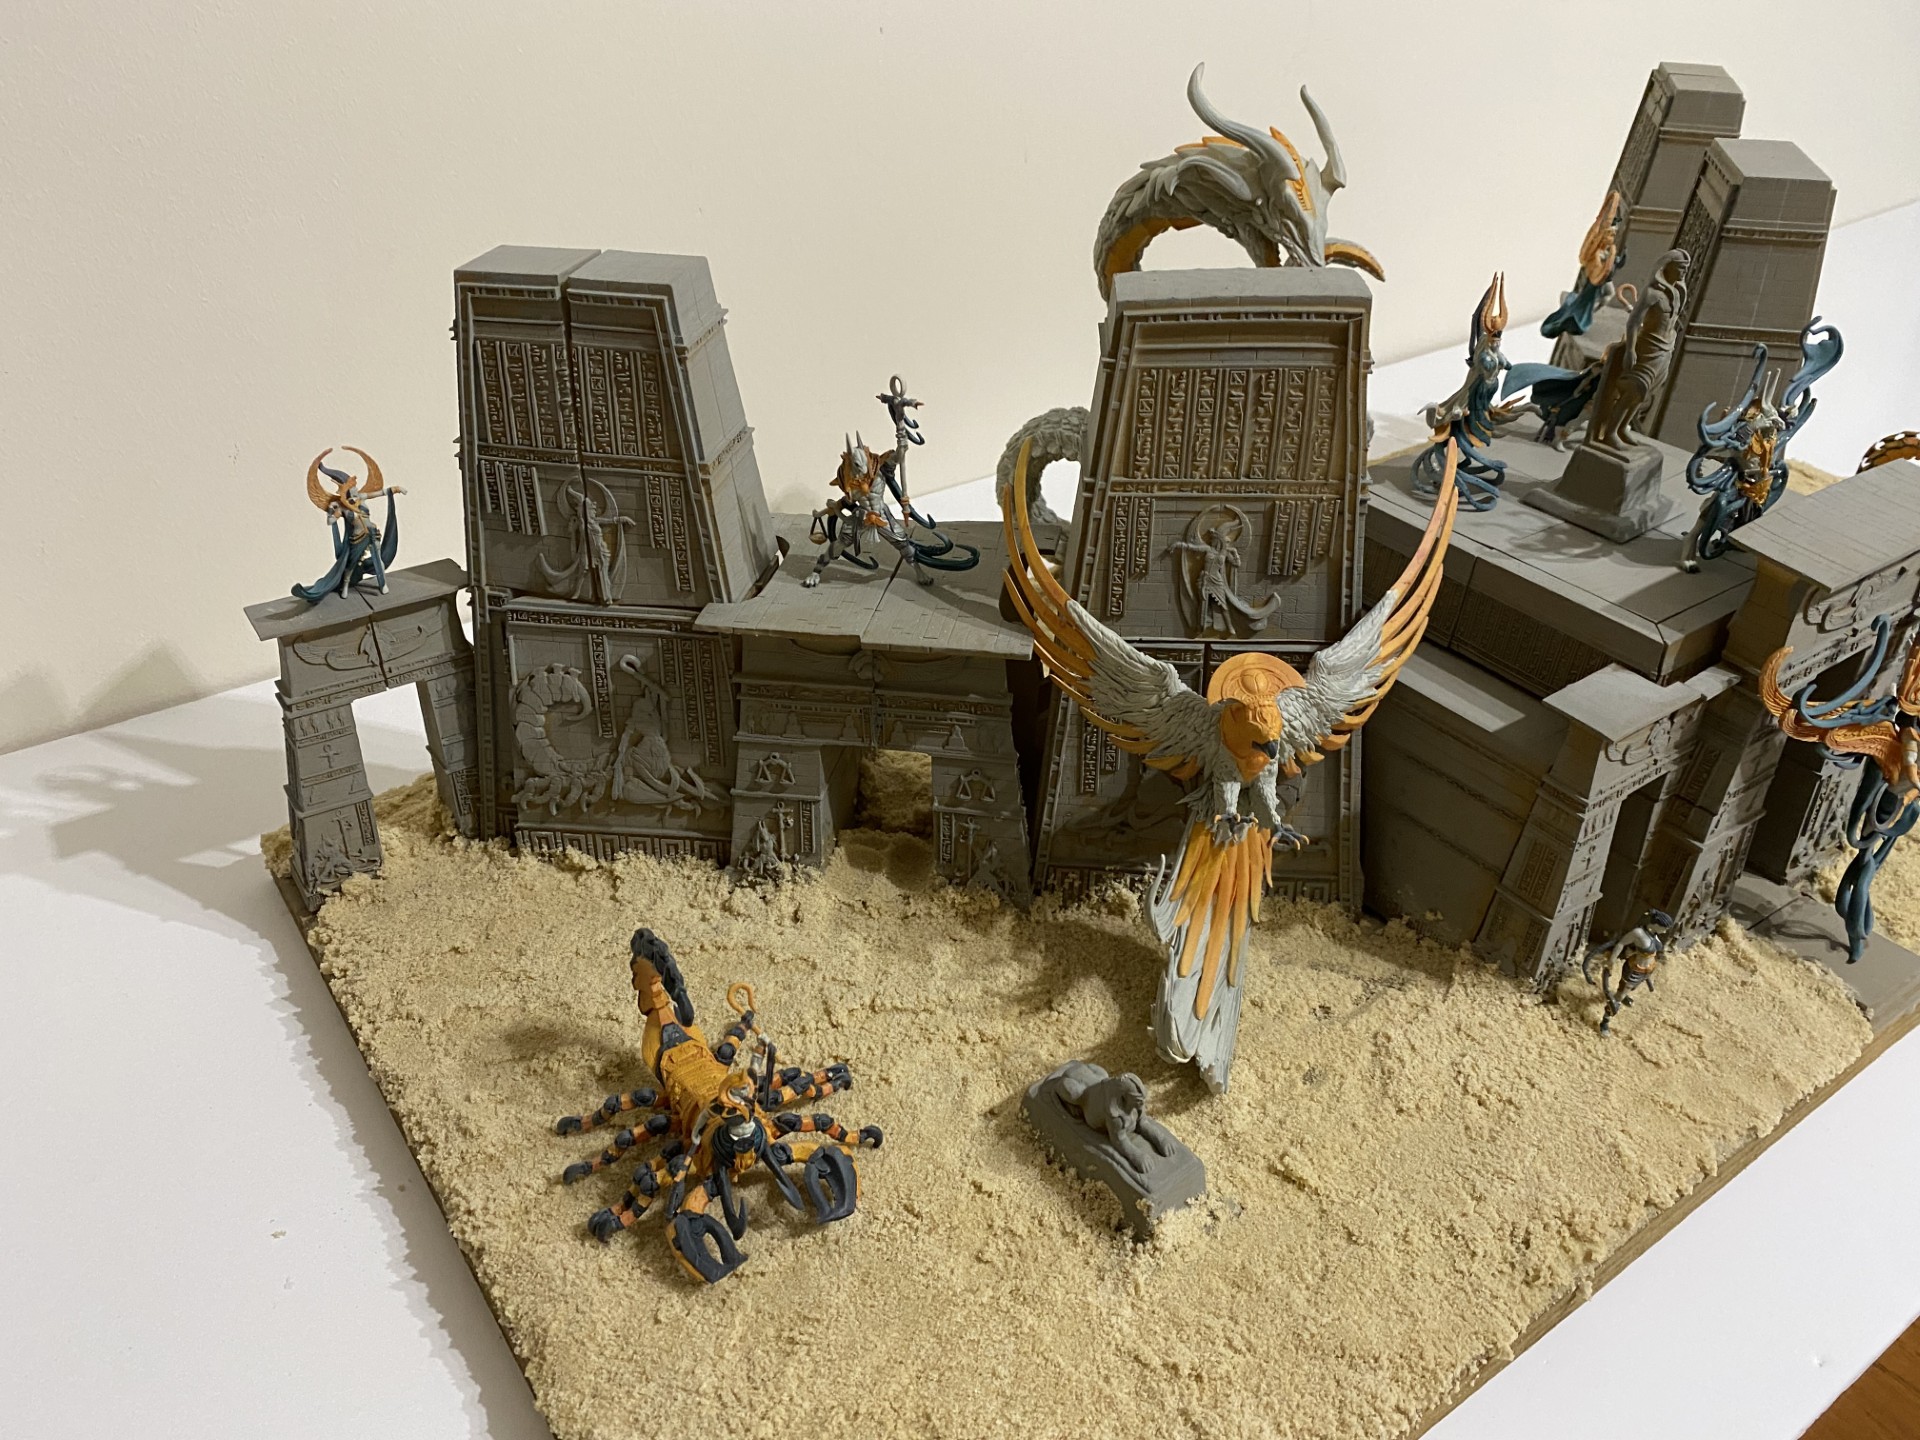
I gave the filler a quick sand to get rid of the worst tooling marks. Then I sprayed everything in Zandri Dust. I then used some cheap poster paints to mix a light grey with a hint of yellow. Using a 2″ decorators brush I overbrushed the entire structure. I then added more white to the existing mix and went over it with a drybrush.
Sand
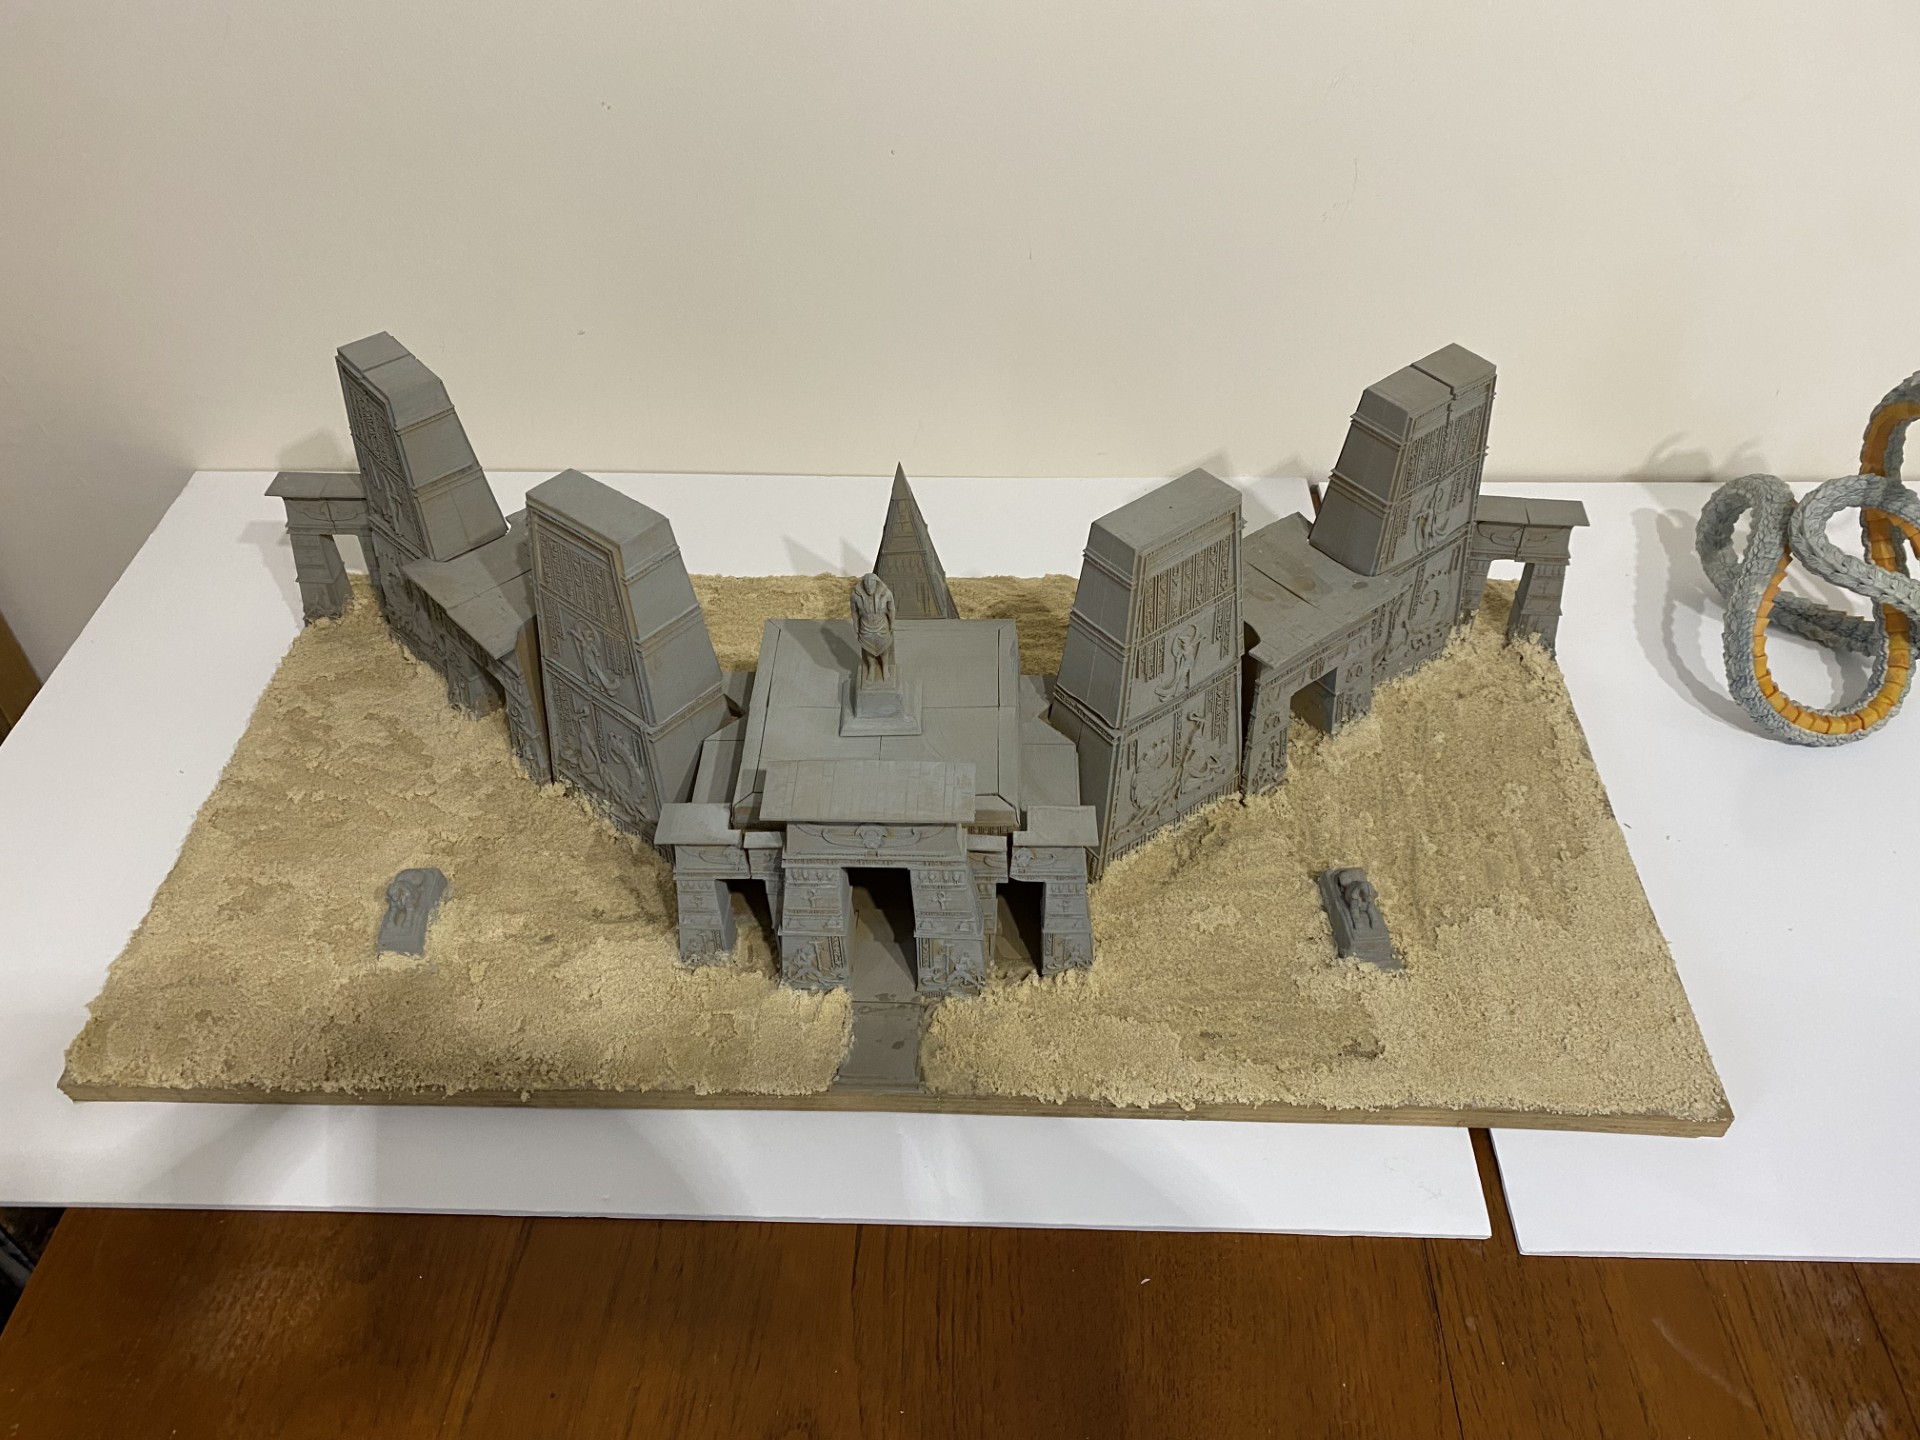
For sanding the desert I had a choice of spending £6 to buy about 200g of modelling sand, or spend £3.50 to get about 10kg of kids play sand. No surprise which one won.
First I took by trusty 2″ paint brush and applied PVA glue over the entire base of the board. I then applied about 1cm of sand and left it 24 hours to dry. I then used an old hoover to carefully suck off the excess sand.
The results didn’t look too bad. My plan was to seal it by spraying on a 50:50 mix of water and PVA, but it was so thick it came out the sprayer rather gloopy. So I decided to add another layer of sand and then wait another day.
After the second layer had dried I once again used a hoover to carefully suck off the excess sand. The end result was ok but actually I think I’d have been better stopping after the first layer. It’s hard to tell if the sand is glued down or has just dried out and formed a crust.
I guess time will tell.
Finished
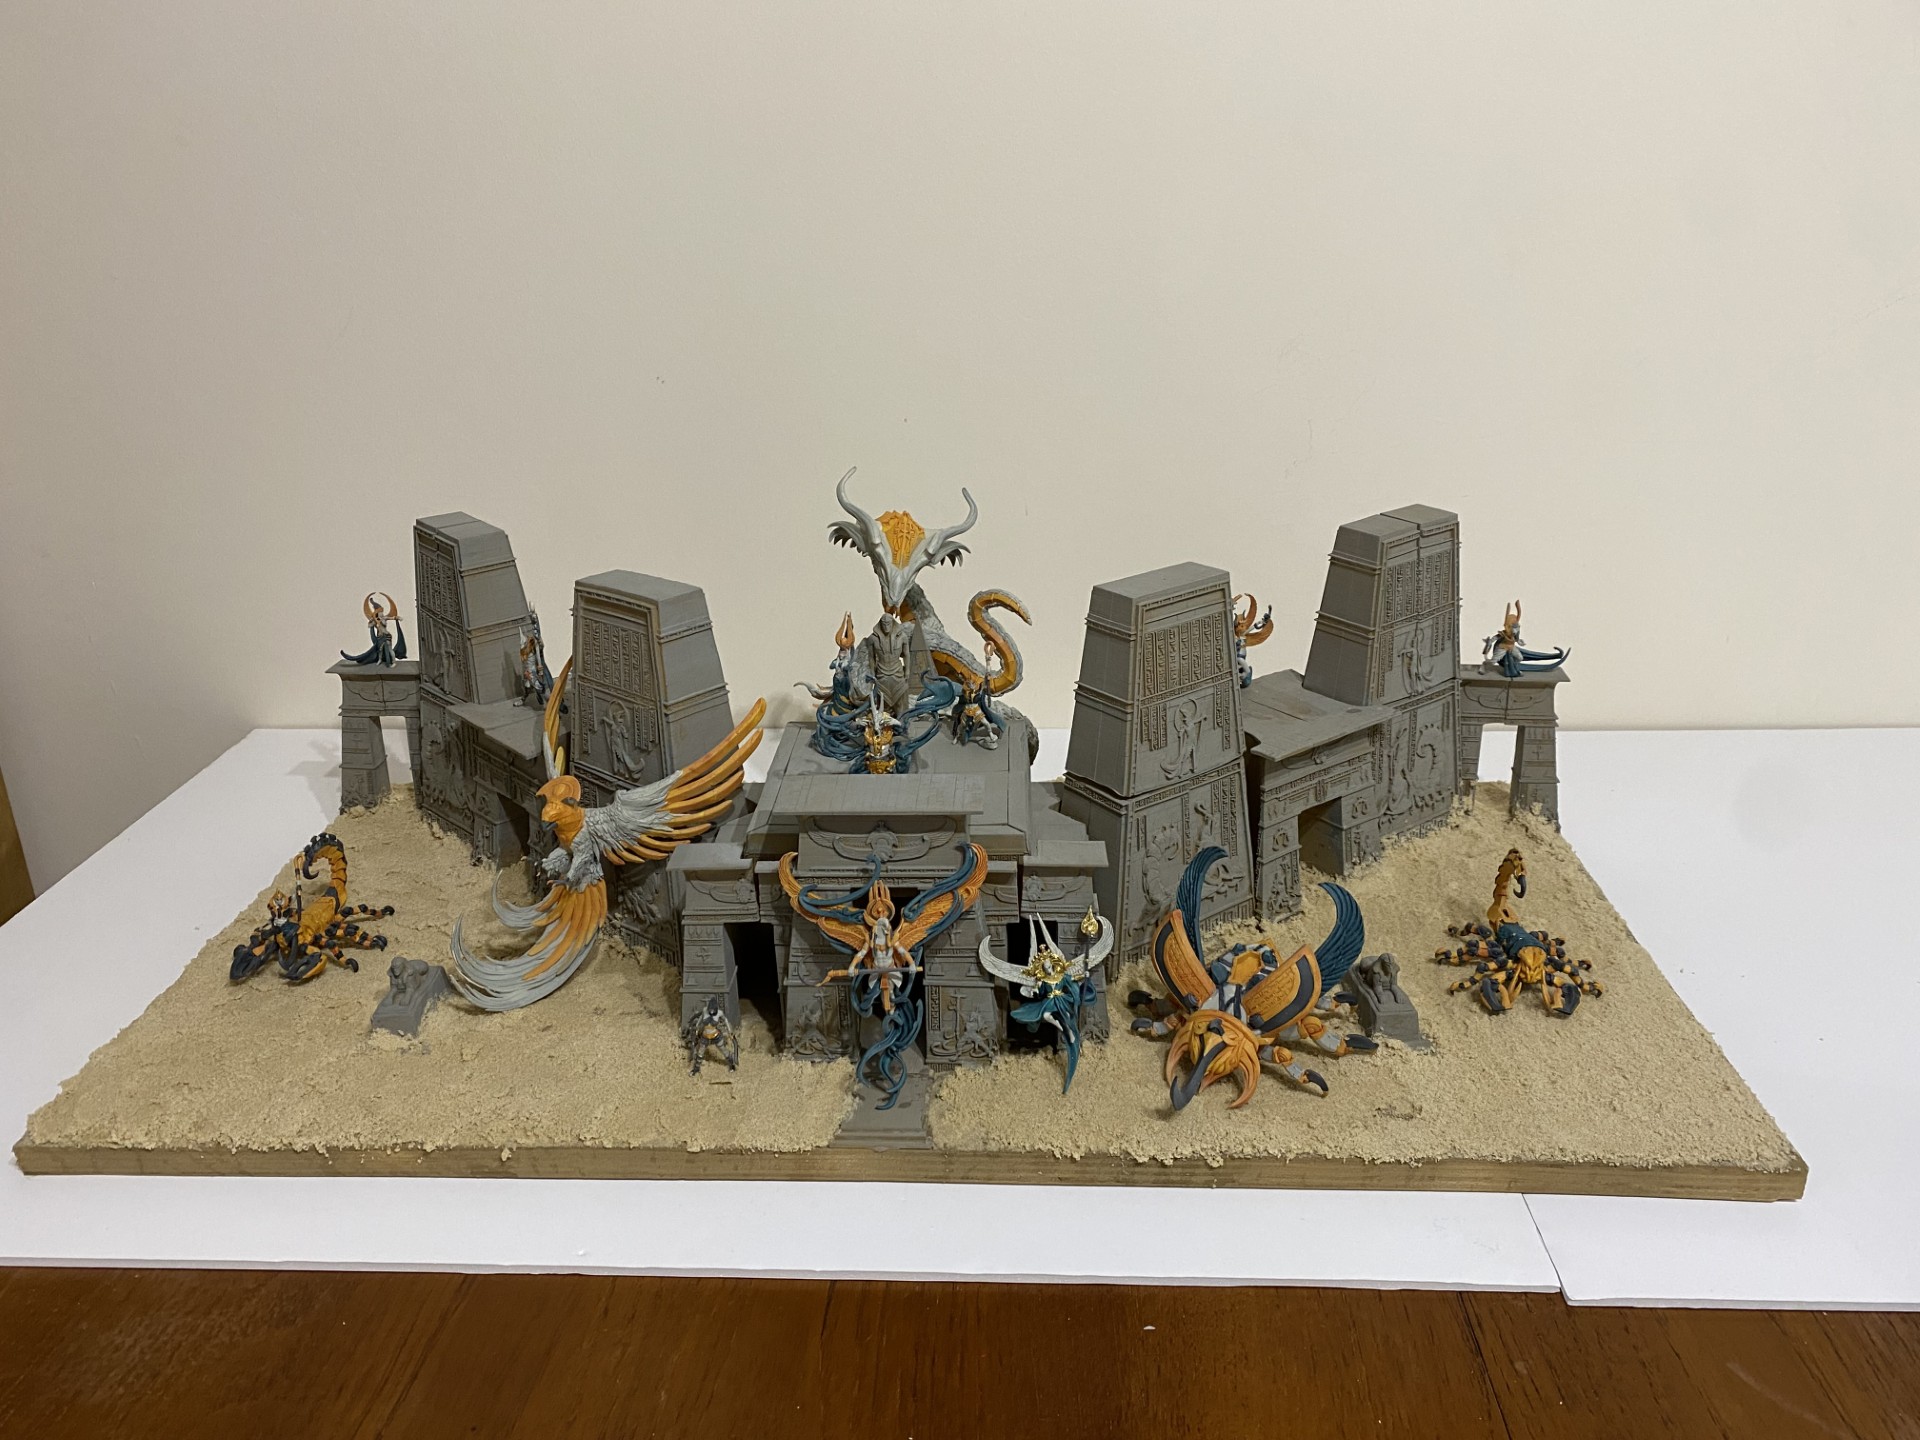
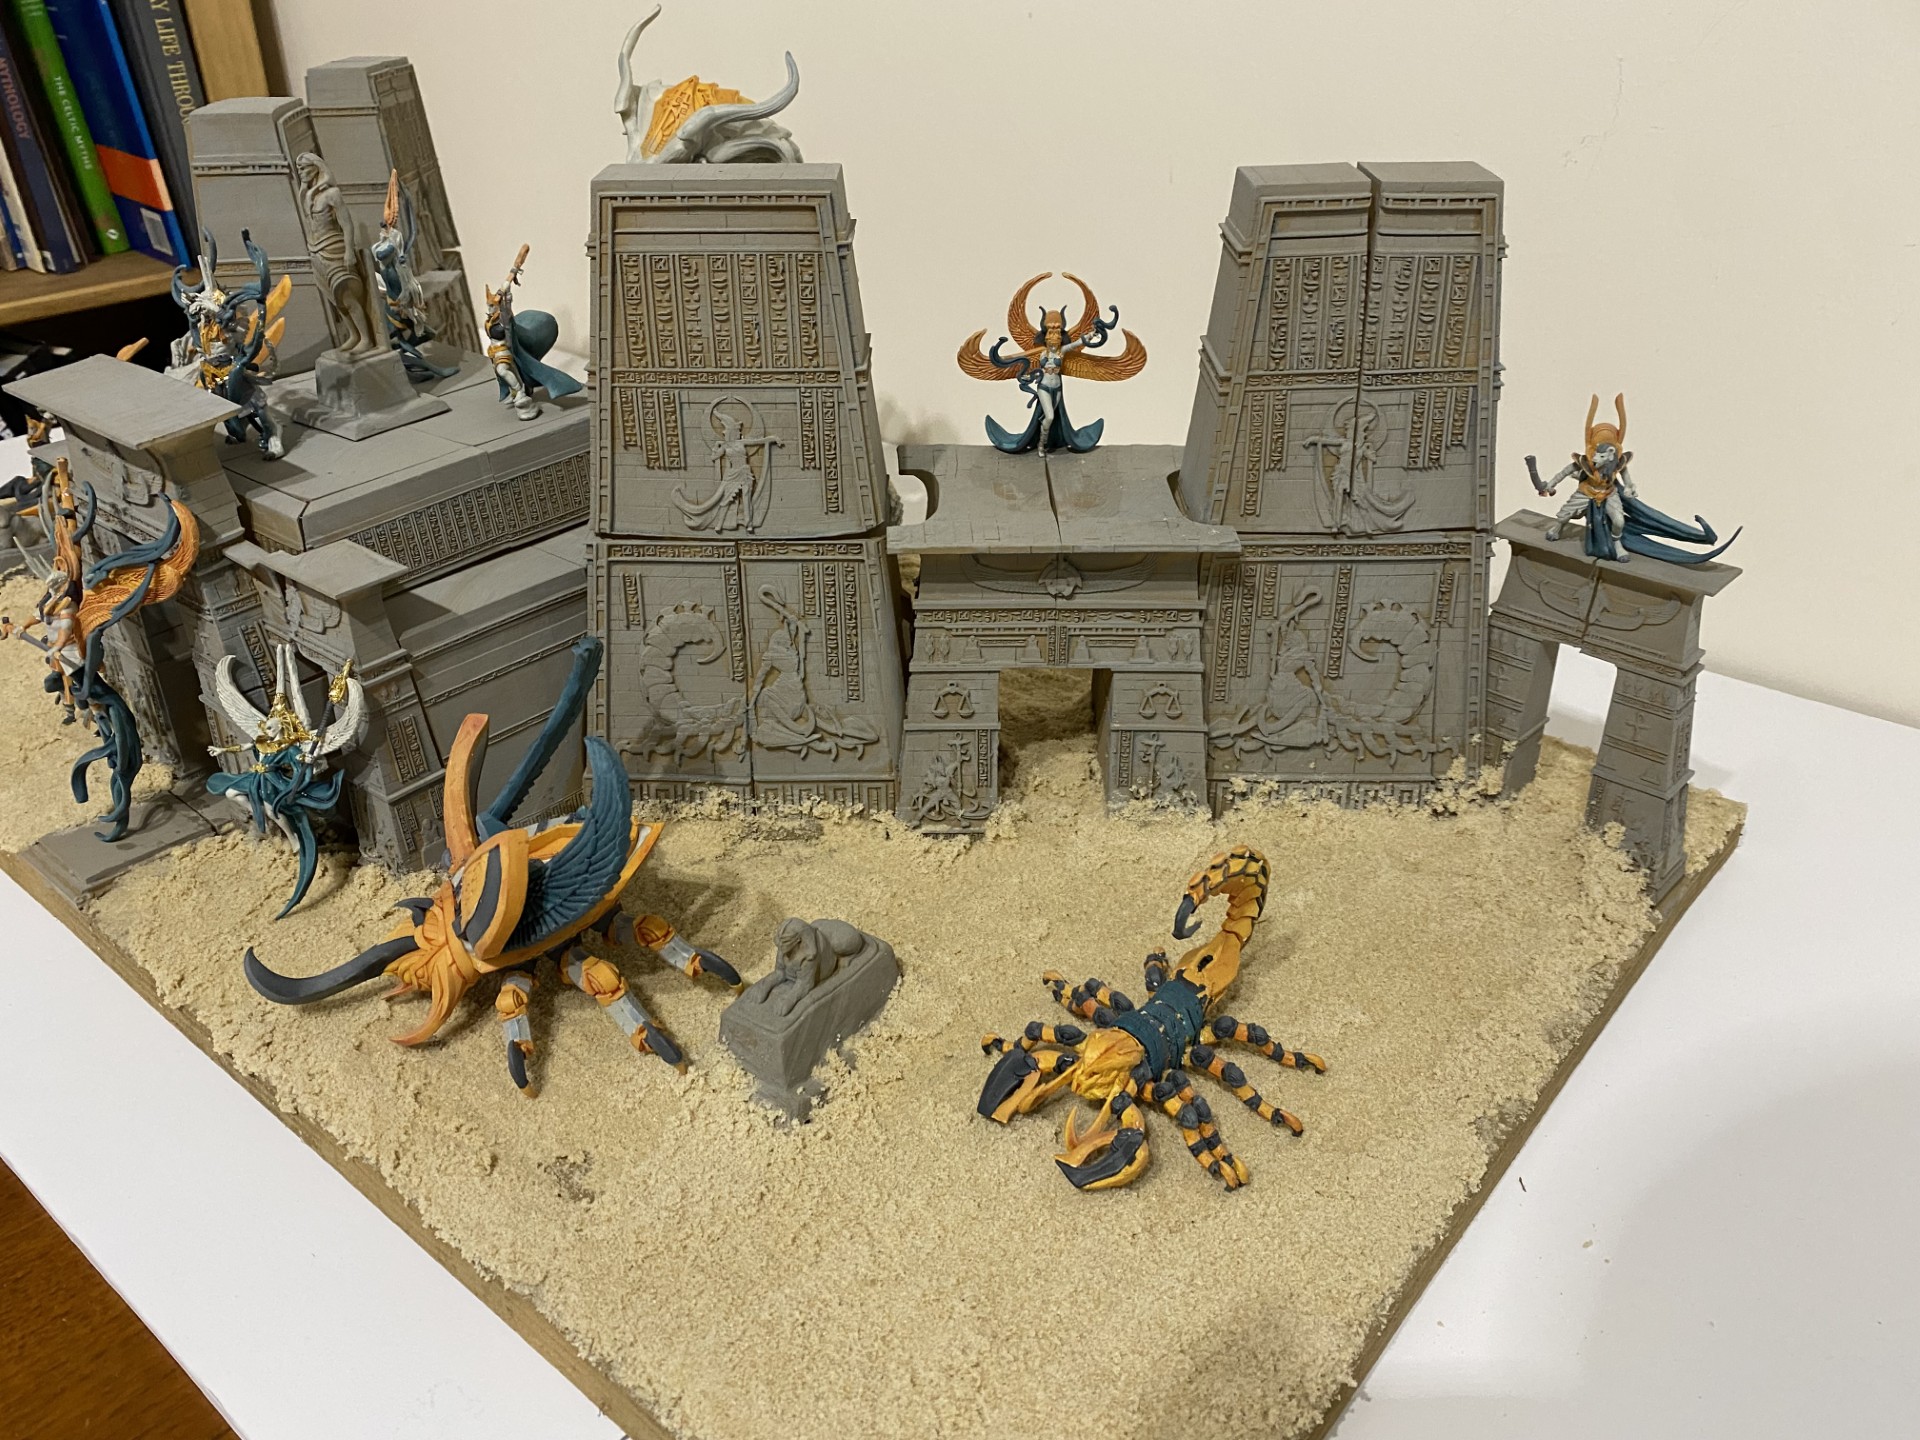
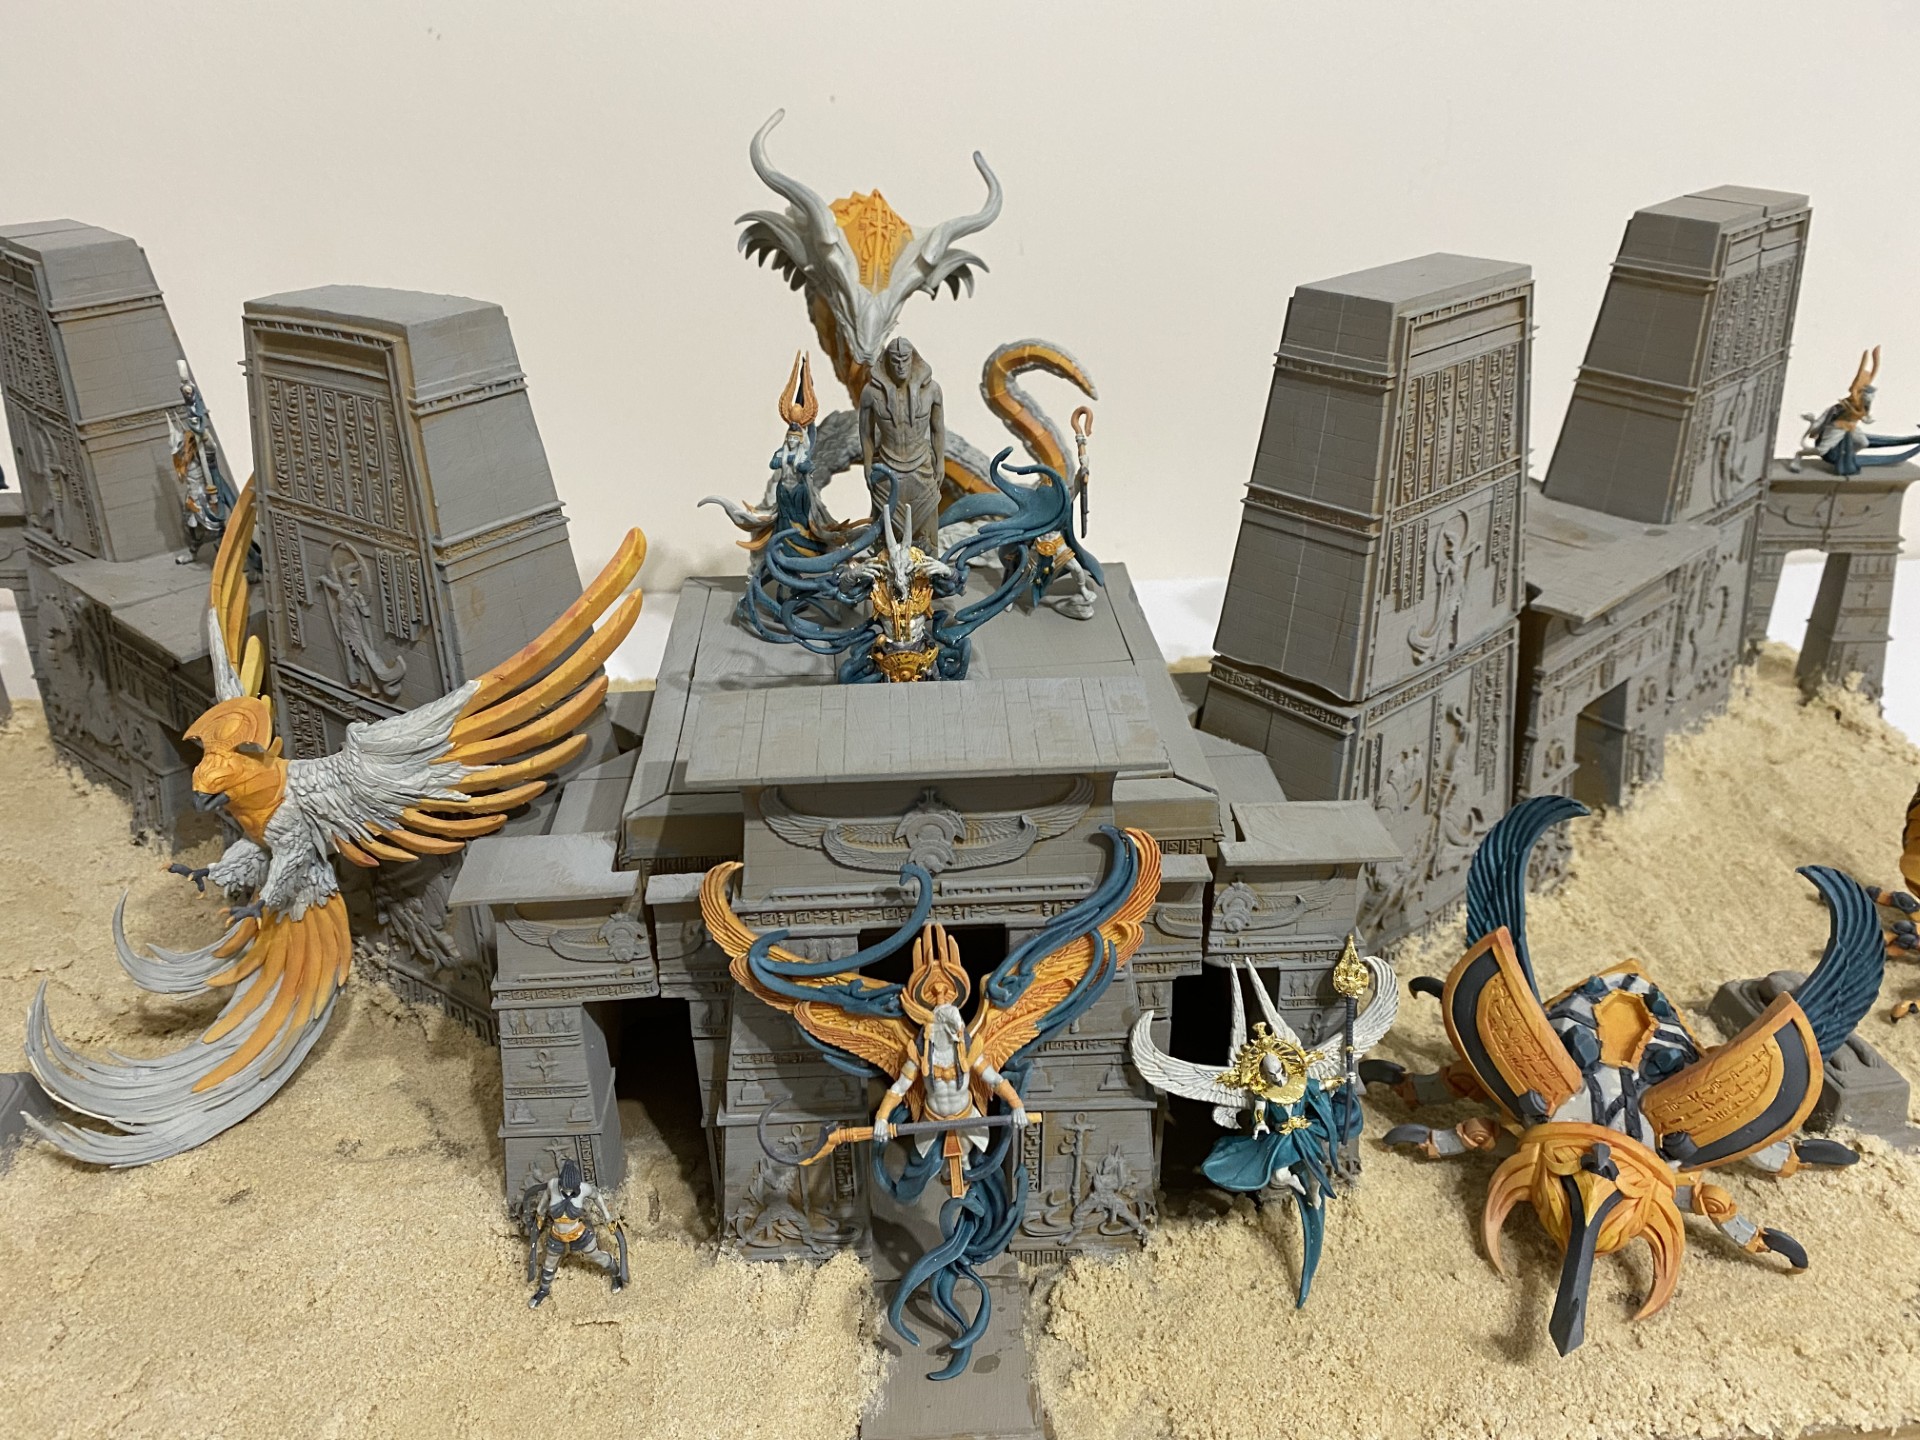
All that remained to do was superglue the models on to the scenic base.
Easier said than done, as I quickly realised about half the models aren’t designed with any sort of surface suitable for gluing them down. Many of the humanoid models seem to be floating and at best have the tip of some cloth to touch the floor. Even the normal humanoids just have some relatively small feet touching the floor.
The giant bird just has the curved part of its tail – to try and use the spindly feet for such a large mini would be asking for trouble.
These models aren’t going to be very secure. Just as well I plan to store this on top of a 6′ tall bookshelf where no-one can touch it.
Final twist
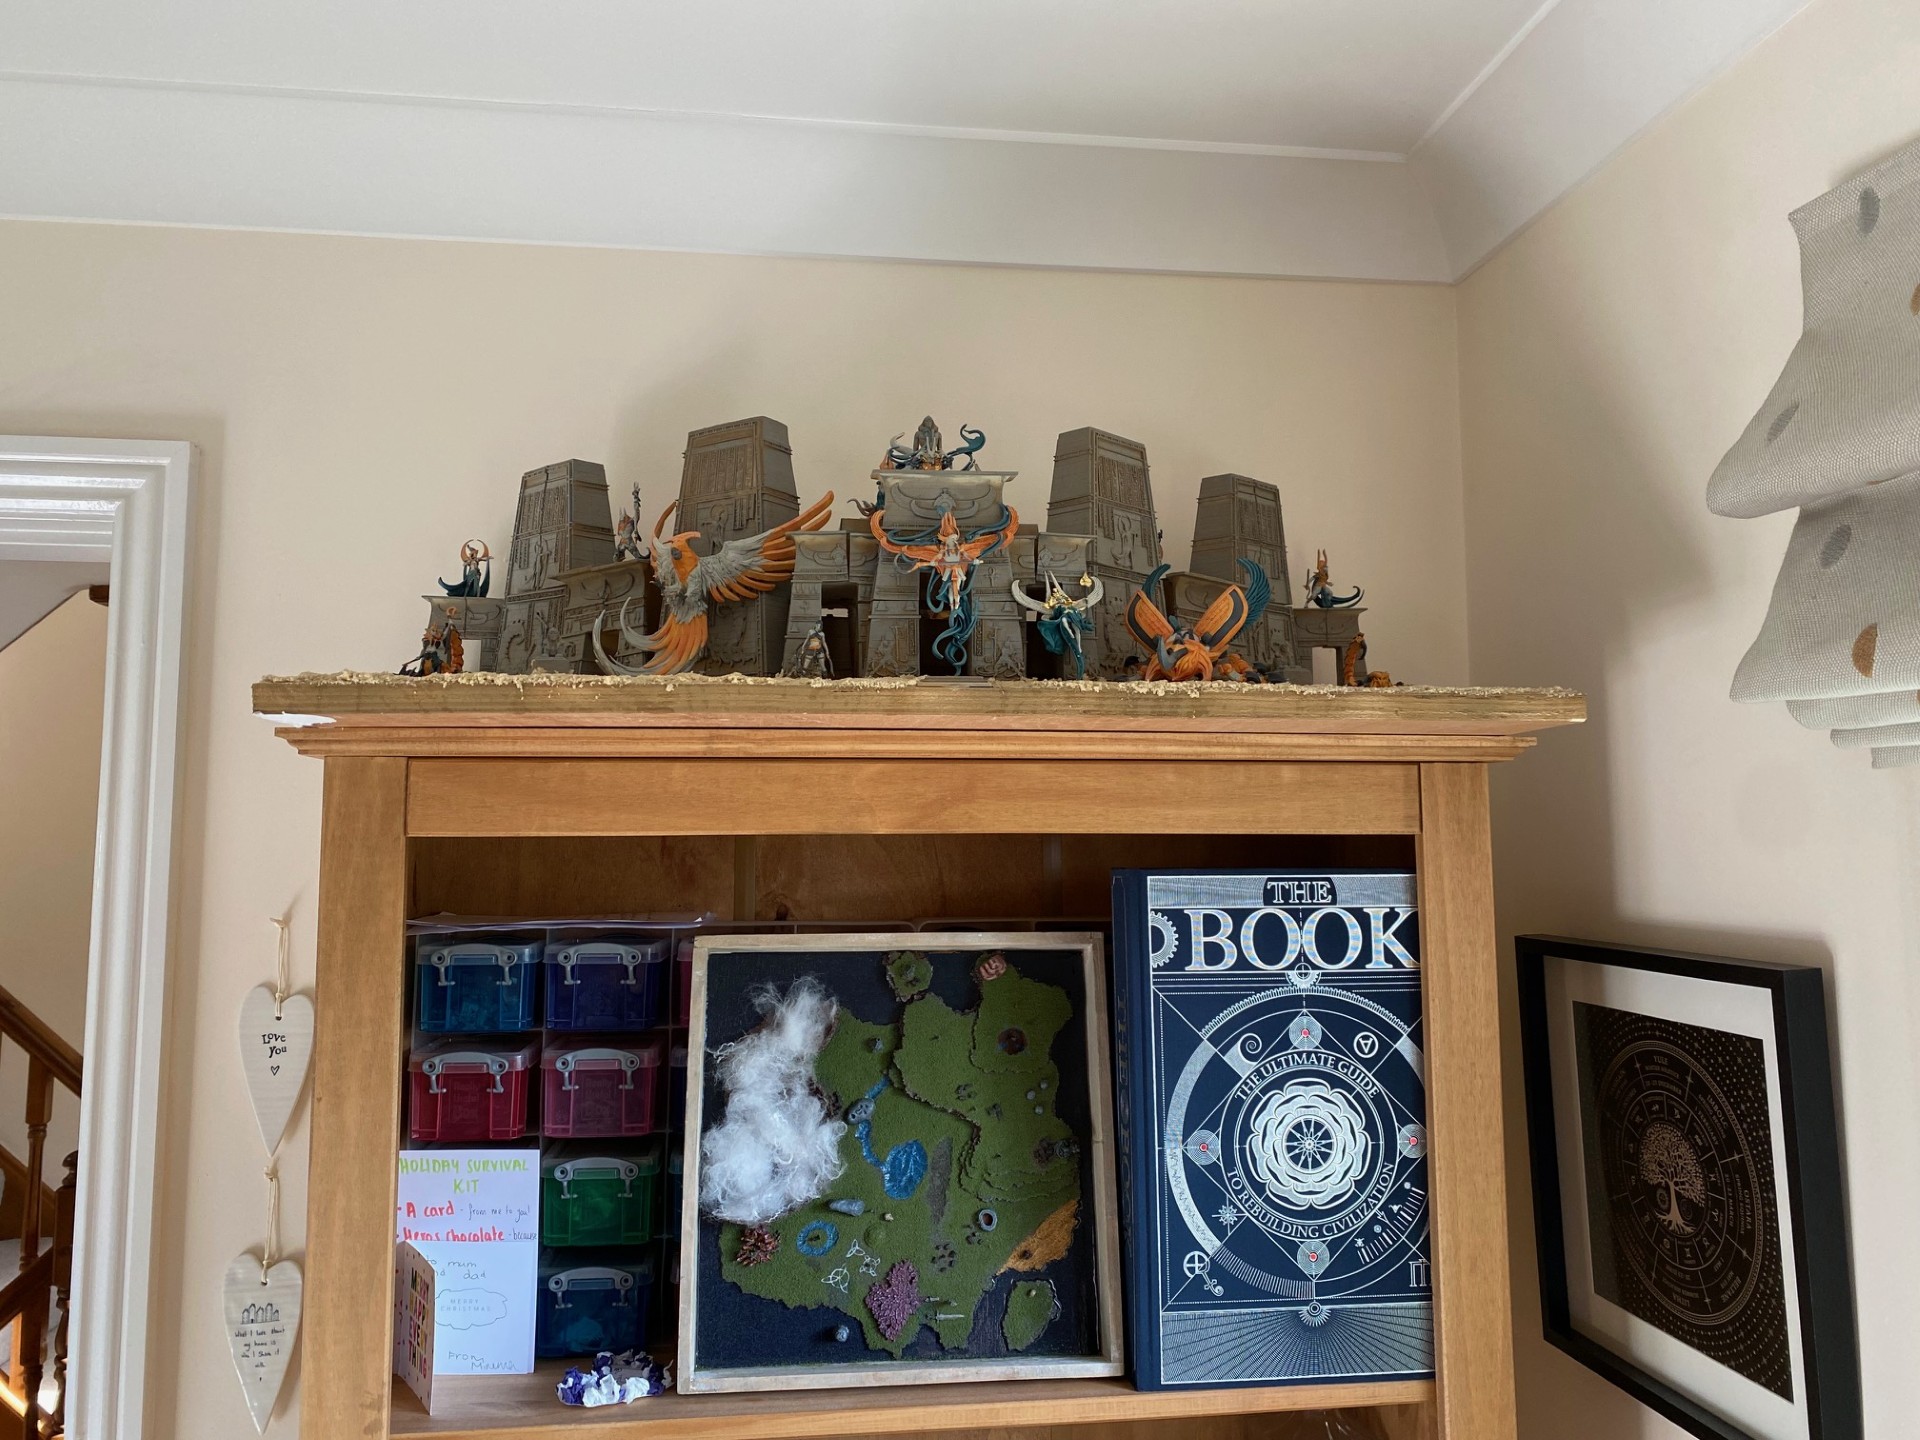
Here’s the display in situ on top of my bookshelf.
The final complication came when I tried to lift it today and found it was glued down to the foam board that I’d rested it on. Despite leaving the PVA to dry for 24 hours in the garage, there must have been enough wet glue to seep down the wood and glue it to the surface. You can see the white of the foam board stuck to the bottom left corner where I had to tear it off.
I should have learned from the example of Lloyd’s shed.
Also with it positioned so high I can see where I missed painting the undersides of some of the over-hanging pieces. But I can live with it.


