


![Atomic Tank – The Robot Wars Review | Fast-Paced 10mm Sci-Fi Wargame [7 Days Early Access]](https://images.beastsofwar.com/2026/01/unboxing-hydra-miniatures-atomic-tank-the-robot-wars-coverimage-225-127.jpg)

![246 Dwarves in One Box?! | Wargames Atlantic Dwarven Host Unboxing & Review [7 Days Early Access]](https://images.beastsofwar.com/2026/01/unboxing-wargames-atlantic-epic-fantasy-battles-dwarven-host-coverimage-225-127.jpeg)


To the Trenches! Chain of Command


Recommendations: 424
About the Project
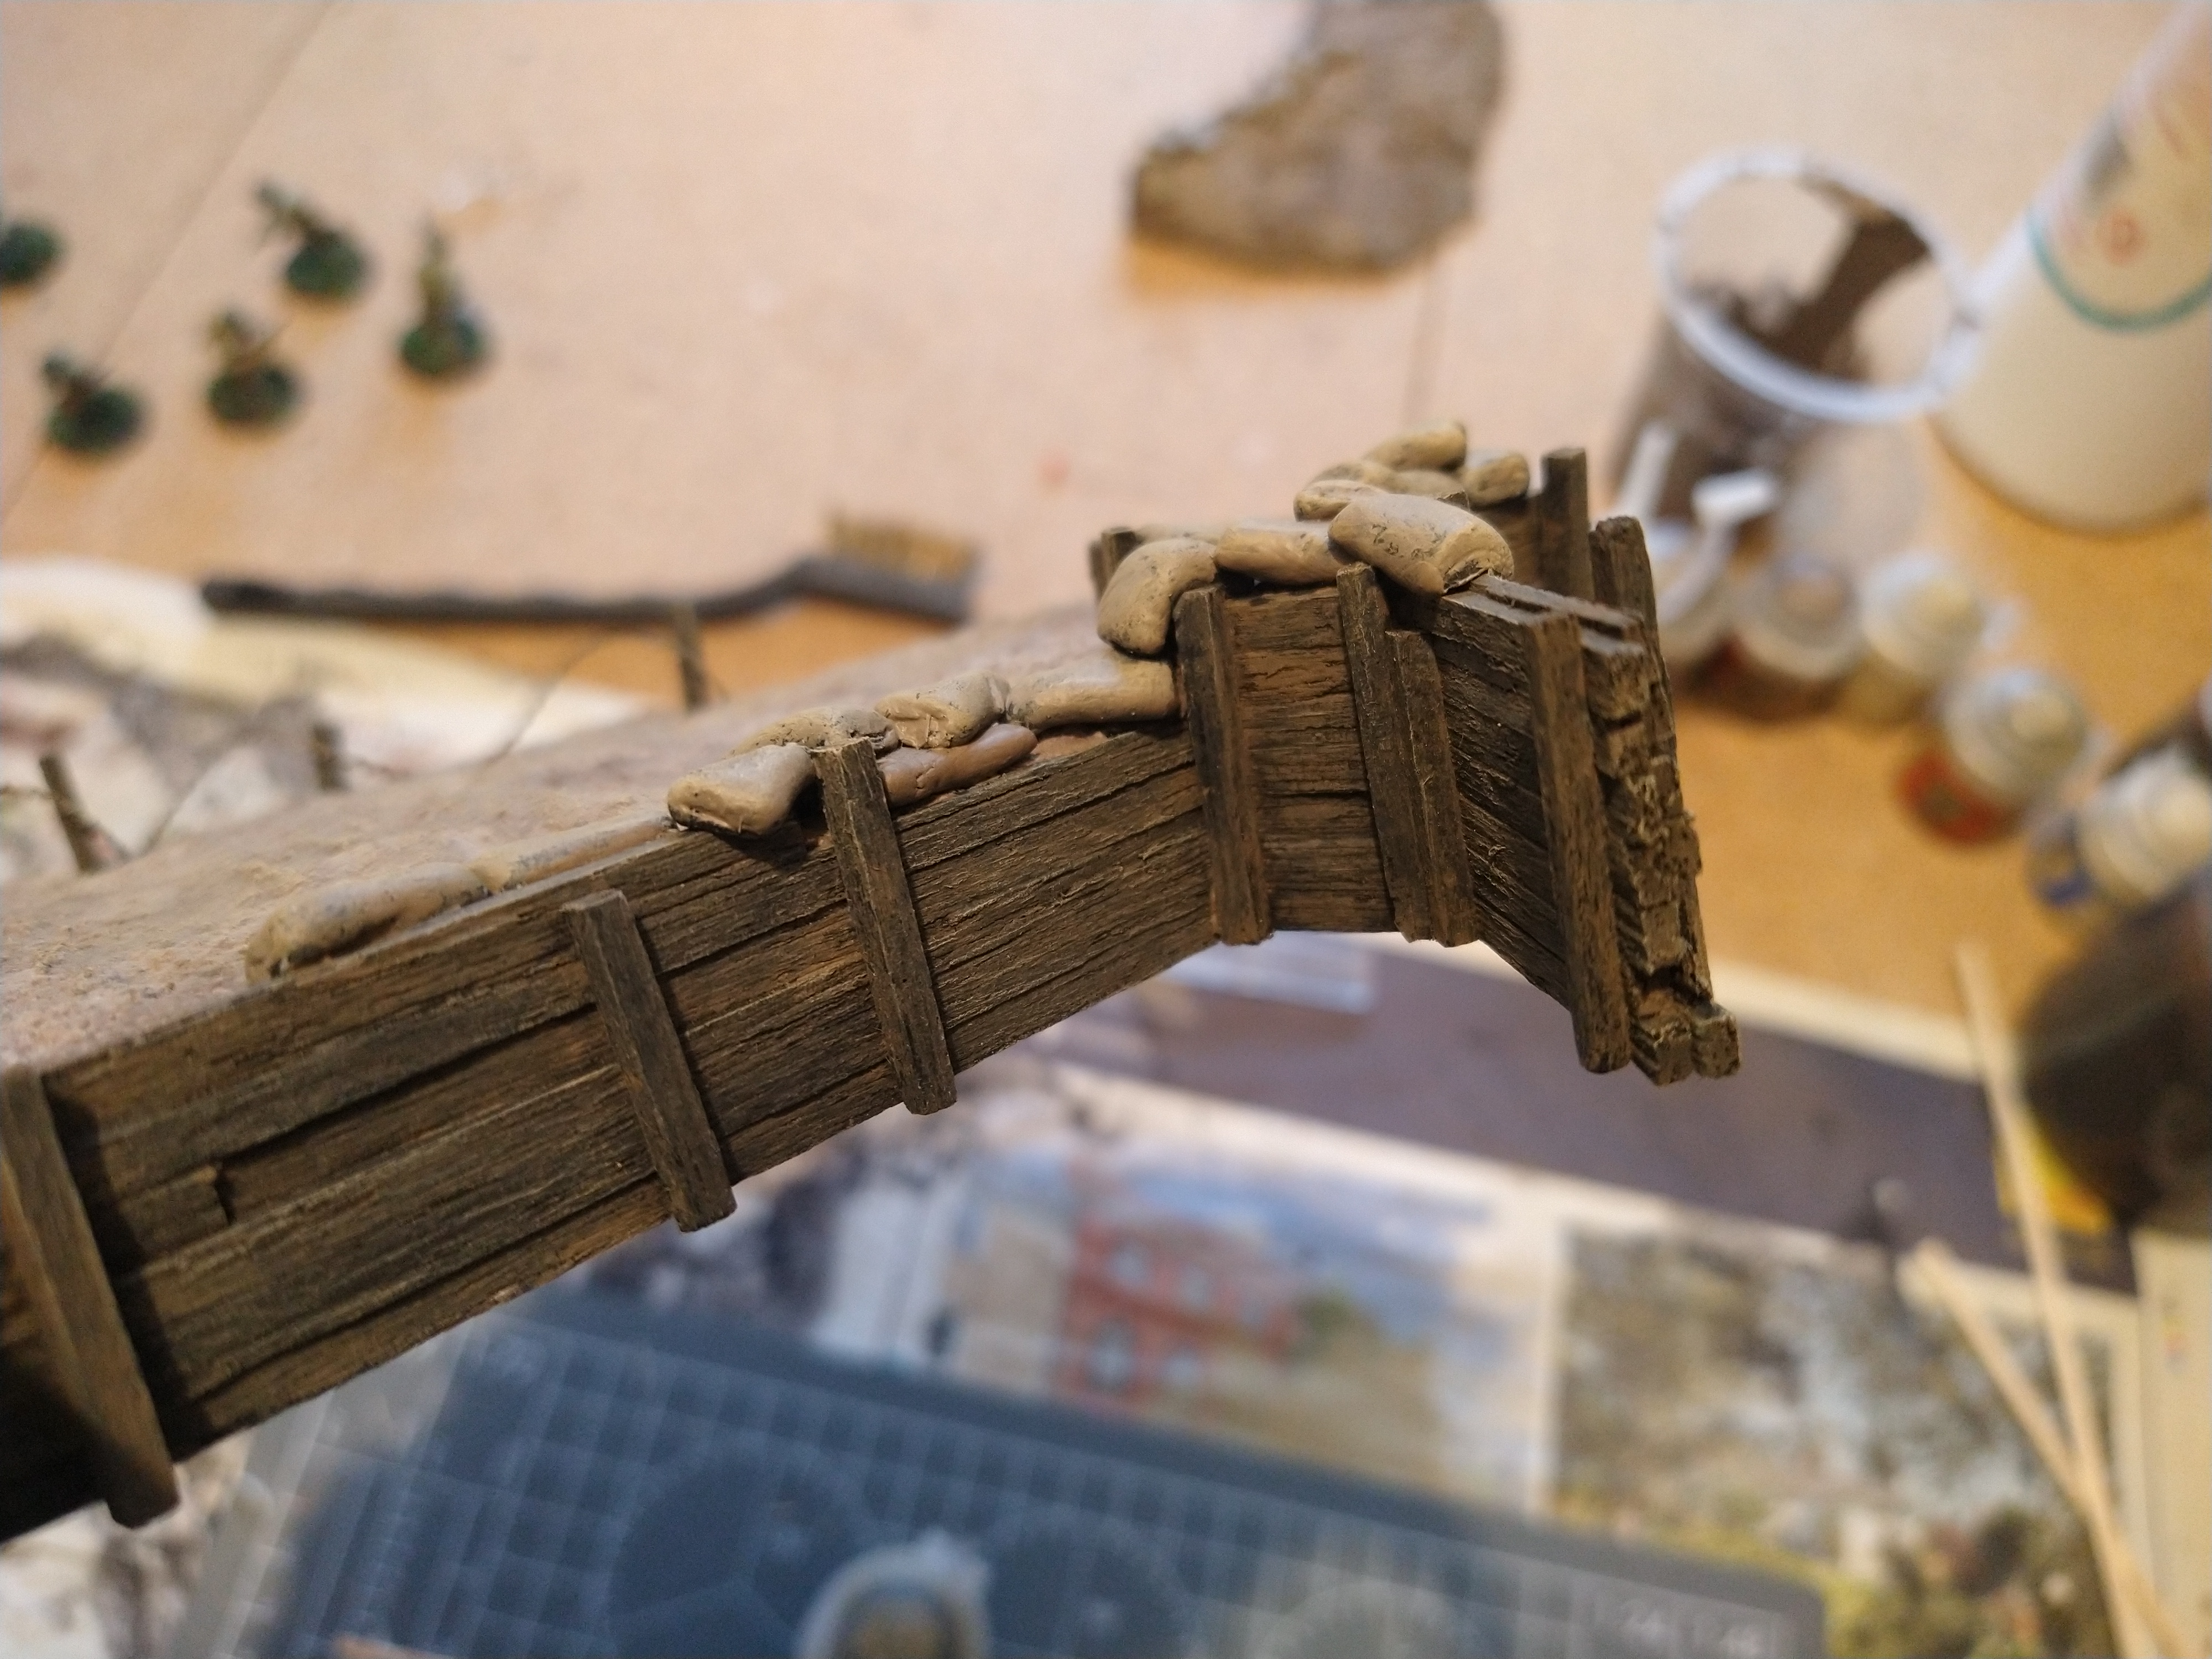
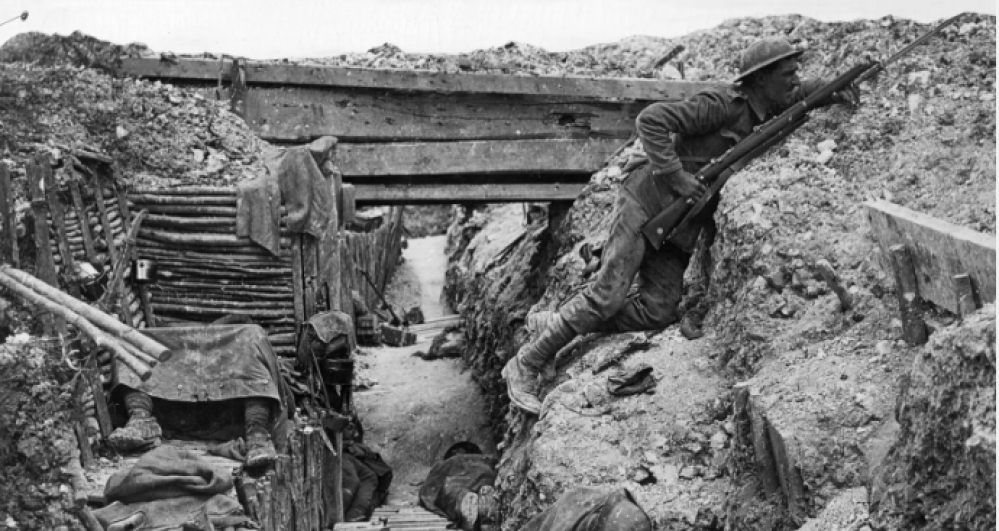
Recently have been able to get a regular number of games of Chain of Command in and has got me back into the creative space of building more terrain. Ive started with creating sections of a Trench network.
Related Game: Chain of Command
Related Company: Too Fat Lardies
Related Genre: Historical
Related Contest: Spring Clean Hobby Challenge 2024
This Project is Active
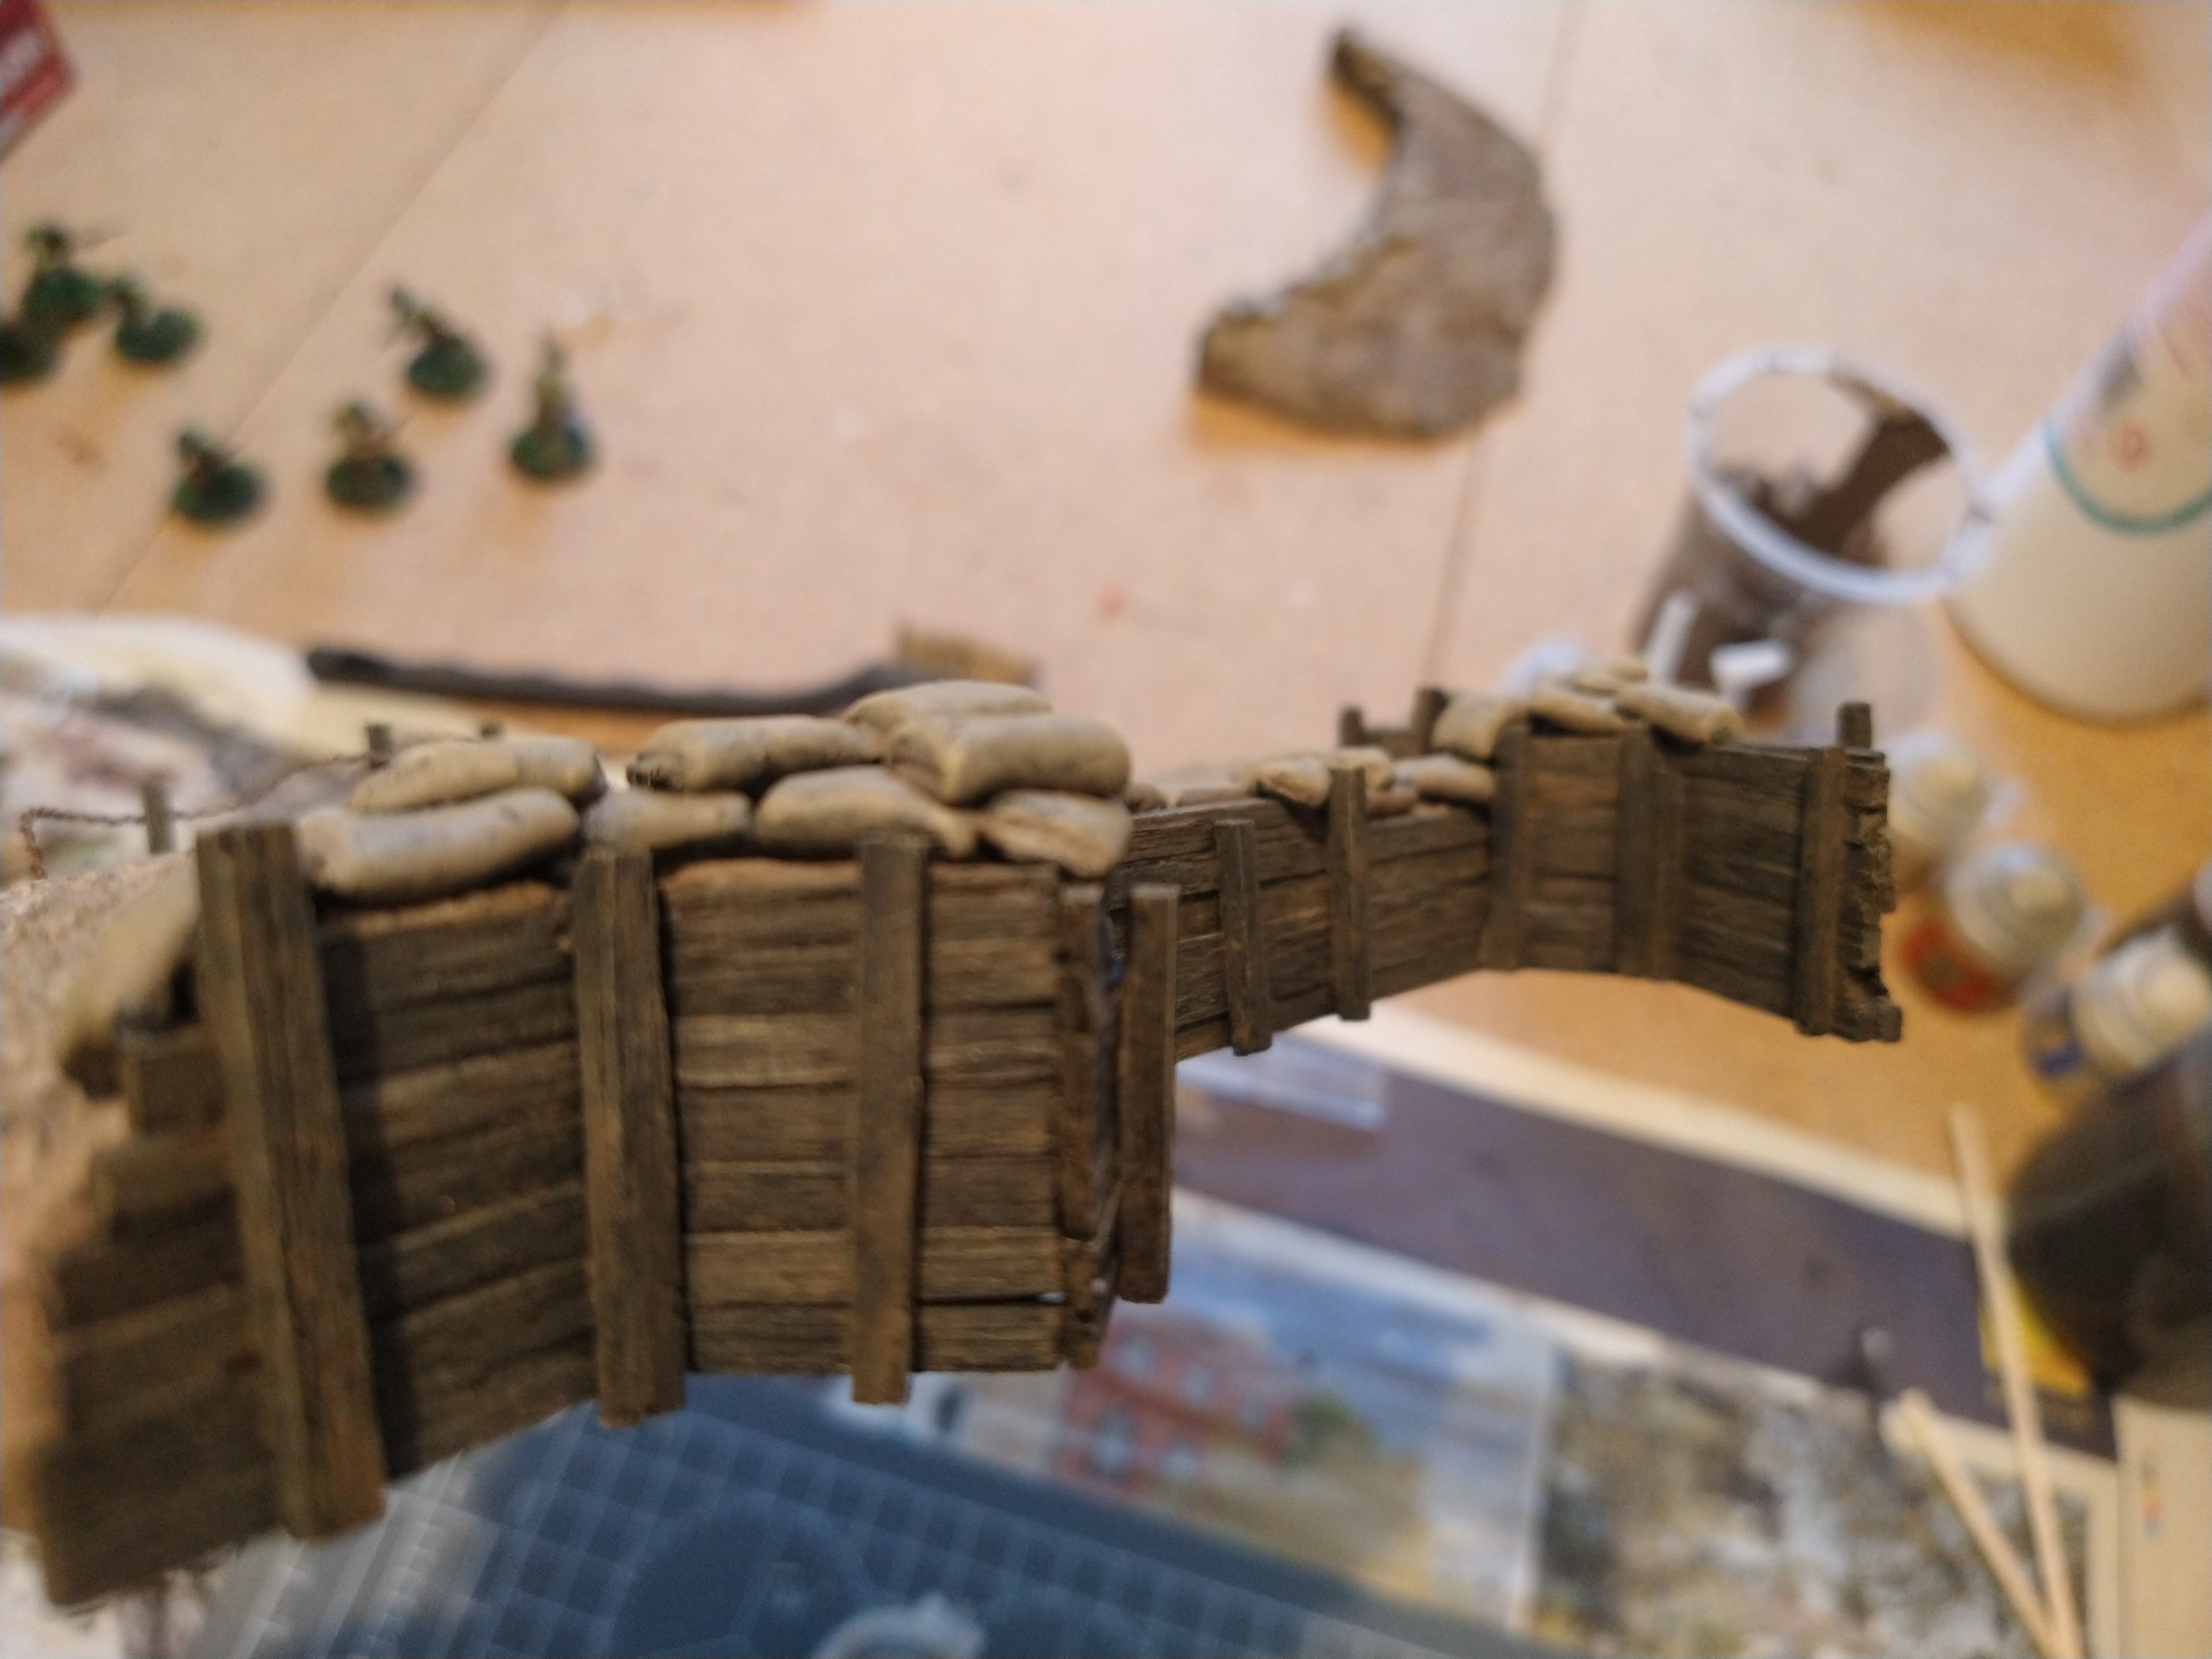
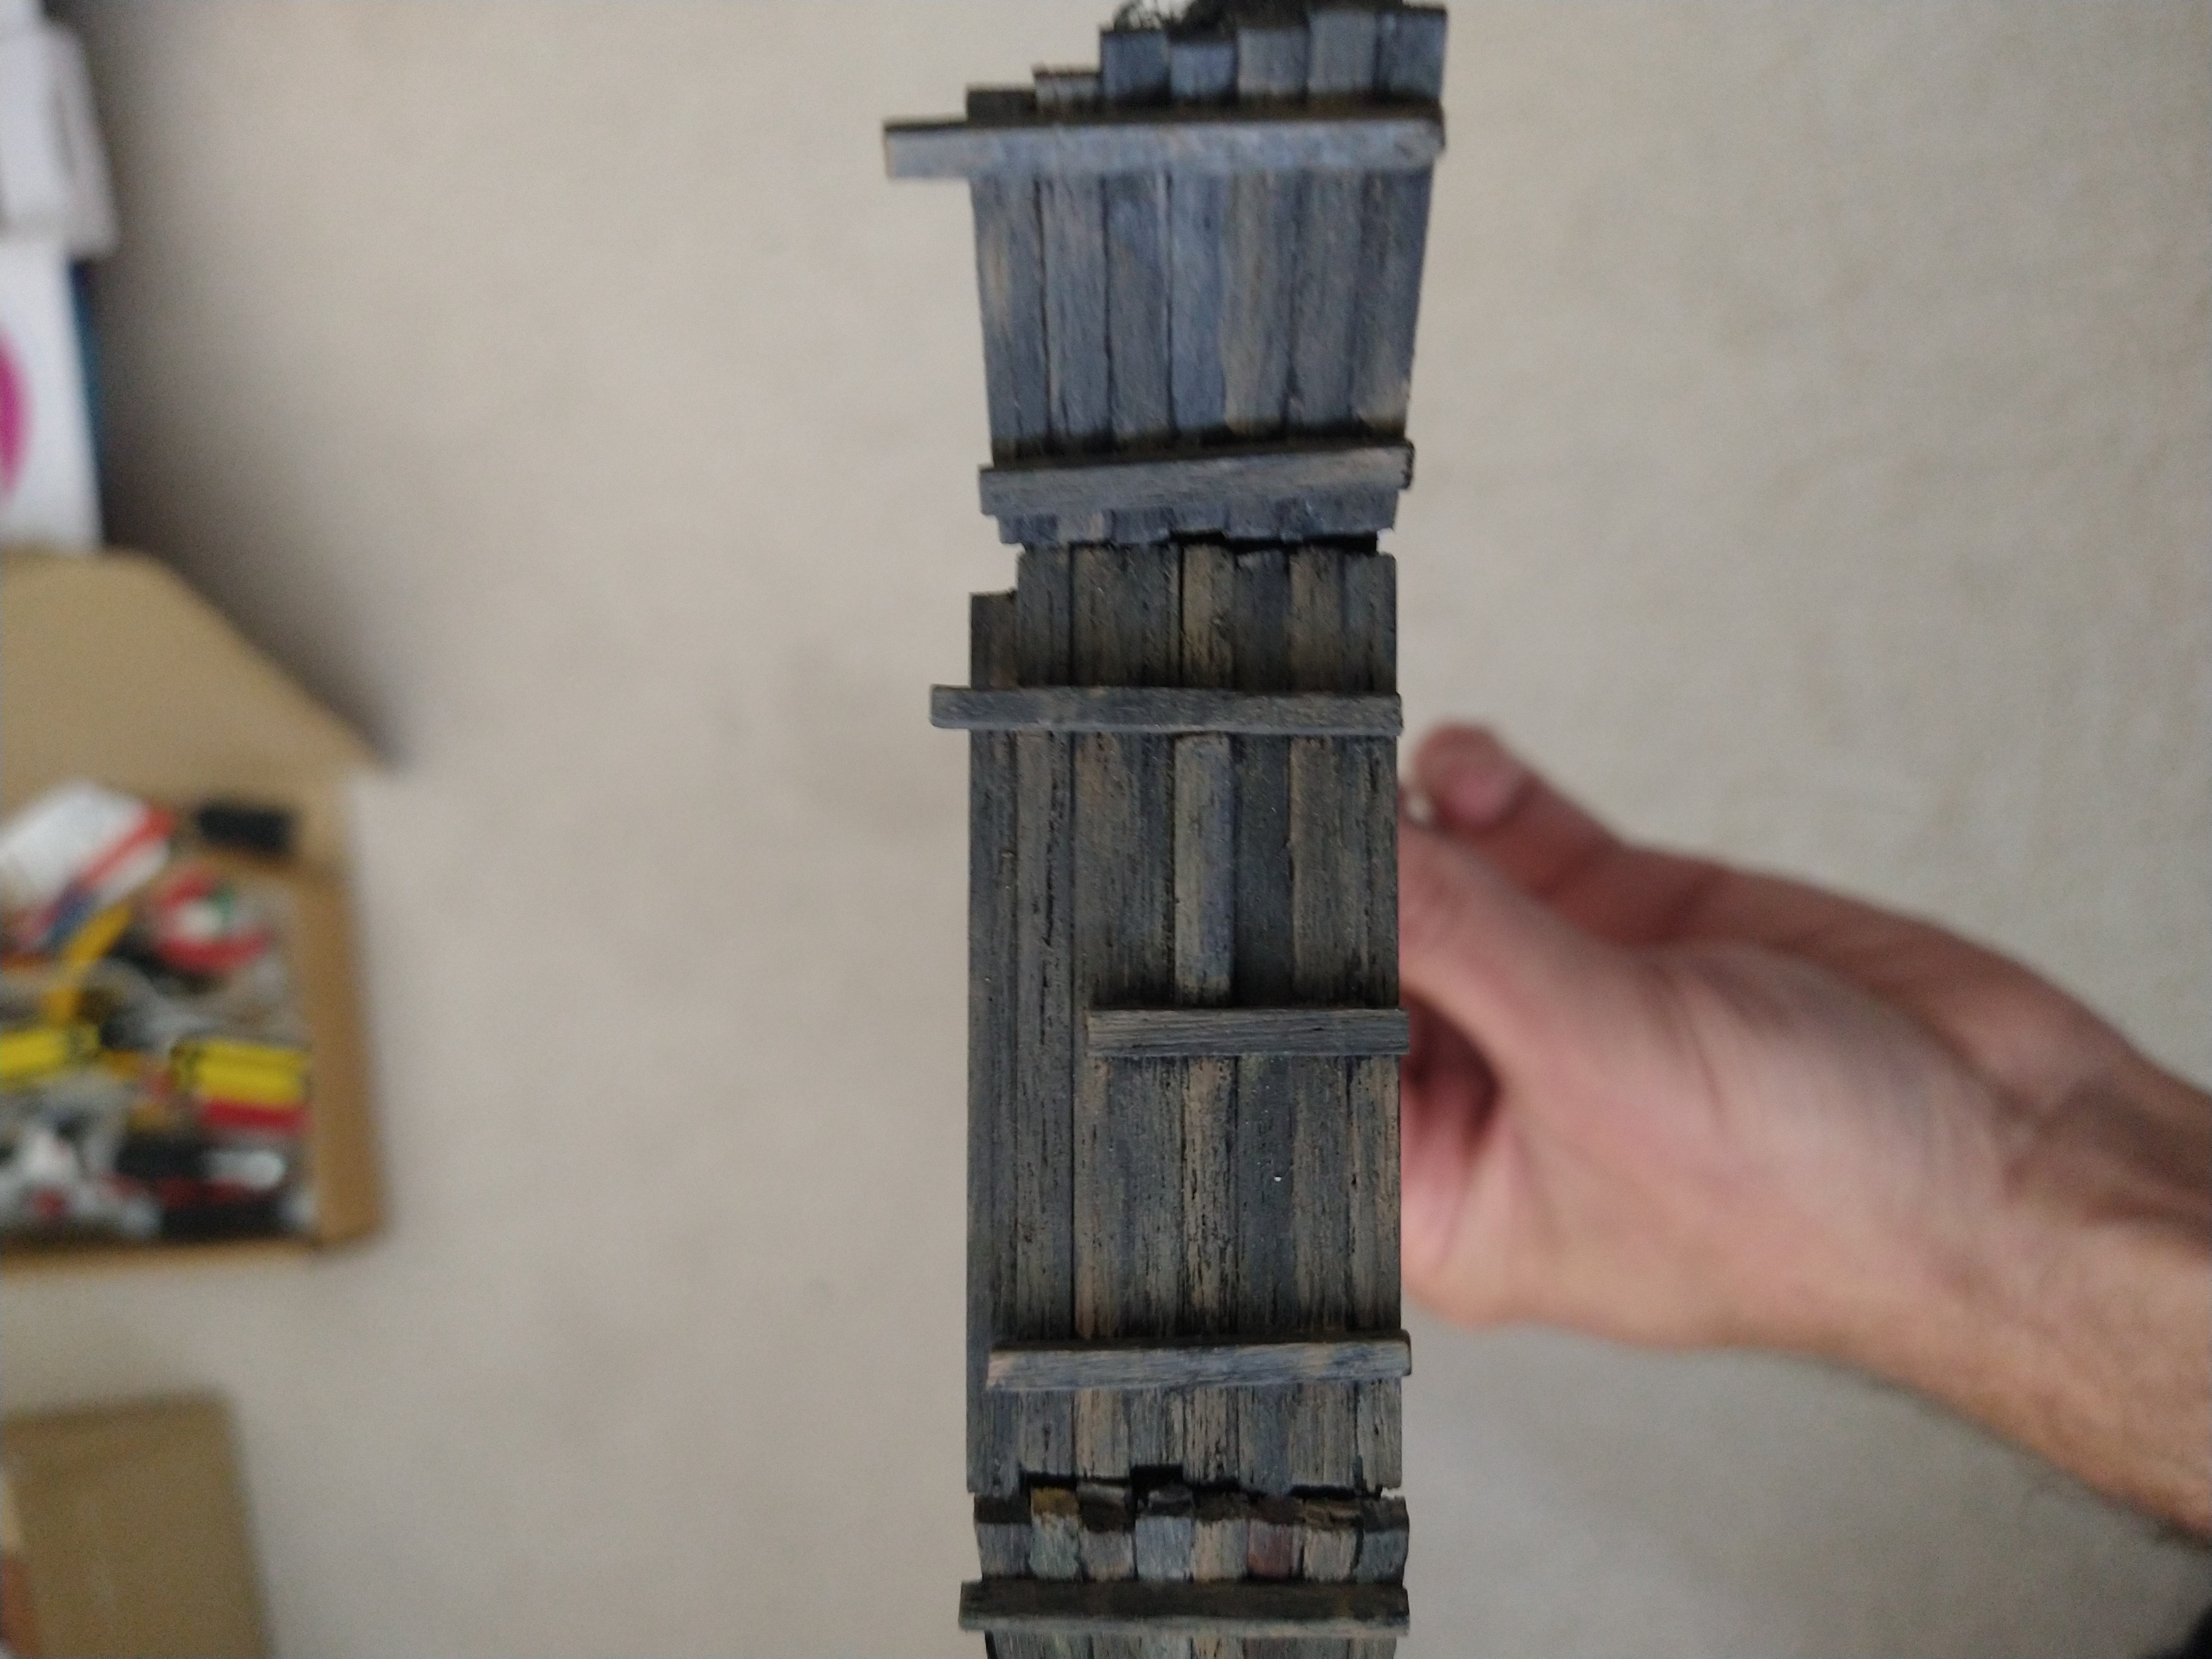
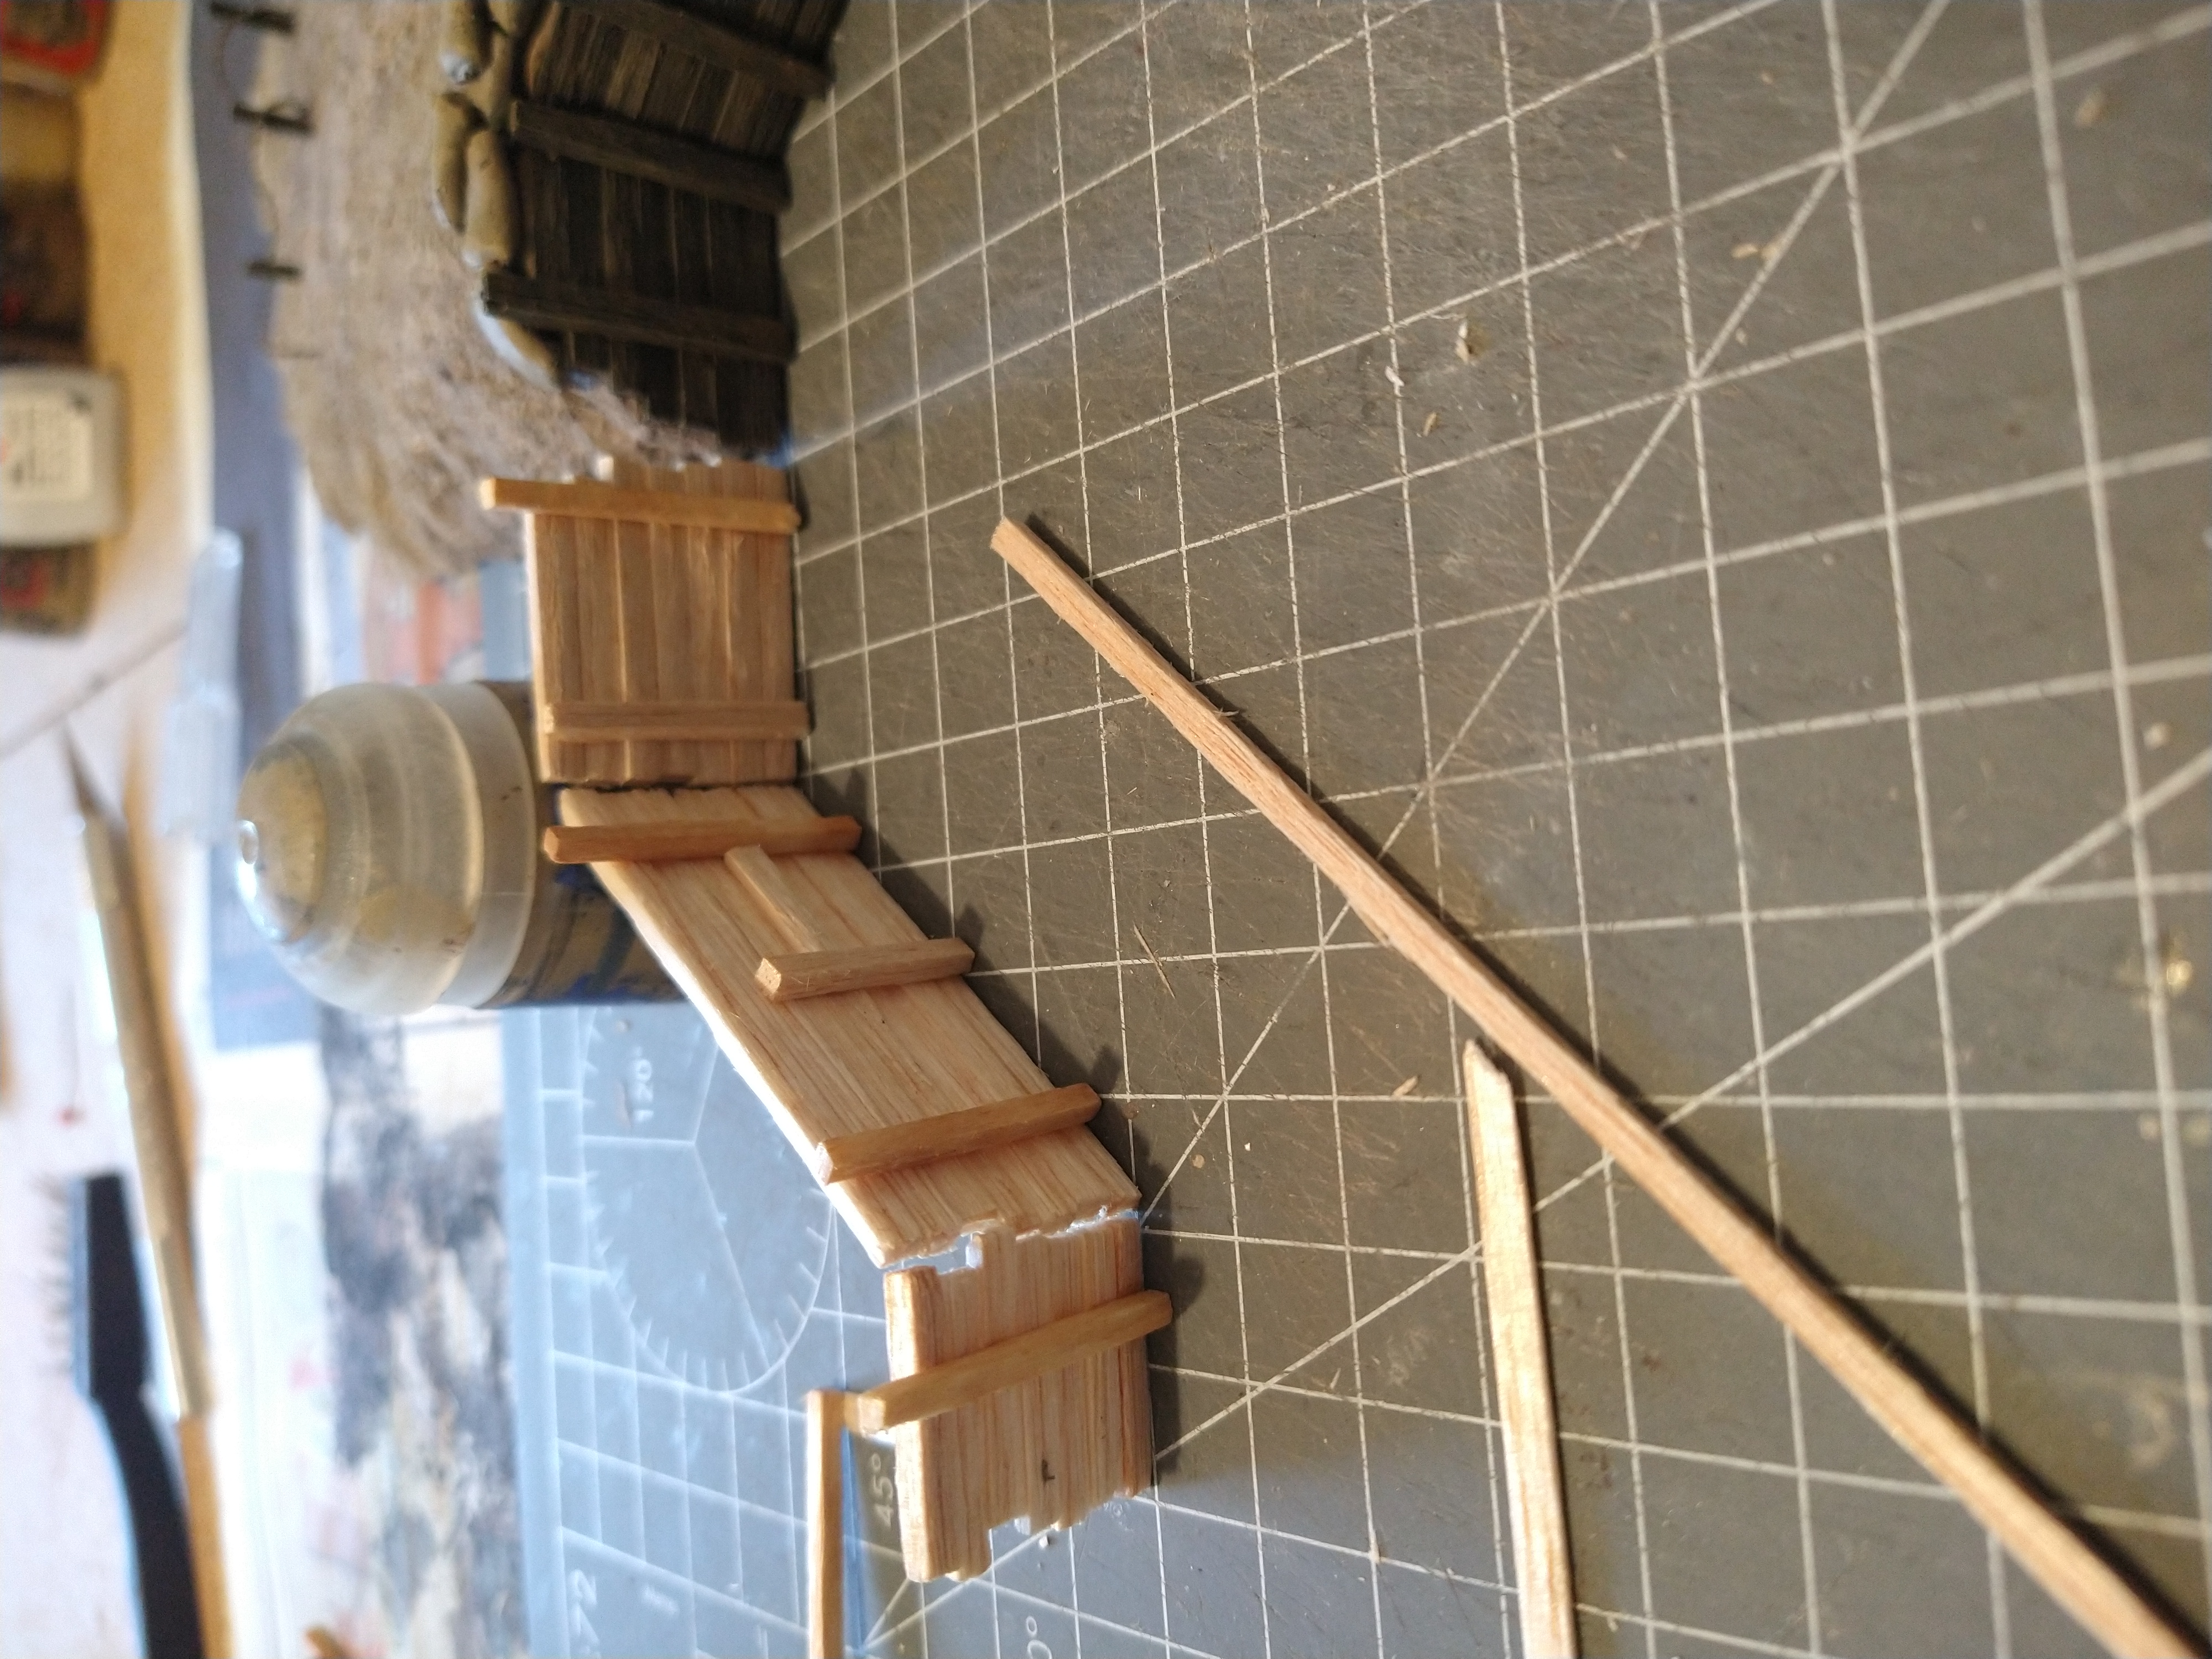
How its done .... Painting
Painting is pretty simple.
The Main colour used was Steel Legion Drab, with a little bit of Tallern Sand and Baneblade Brown.
Essentially I do a heavy wash. I wet the brush, take on a bit of paint and then paint across each plank.
This means that there is differing amounts of pigment to each plank to add variation, and every so often, ill use each the tallern sand or baneblade brown paint (but sparingly).
The pictures below show how it looks once dry. The final picture is showing the dried piece below the completed test piece.


How its done ....
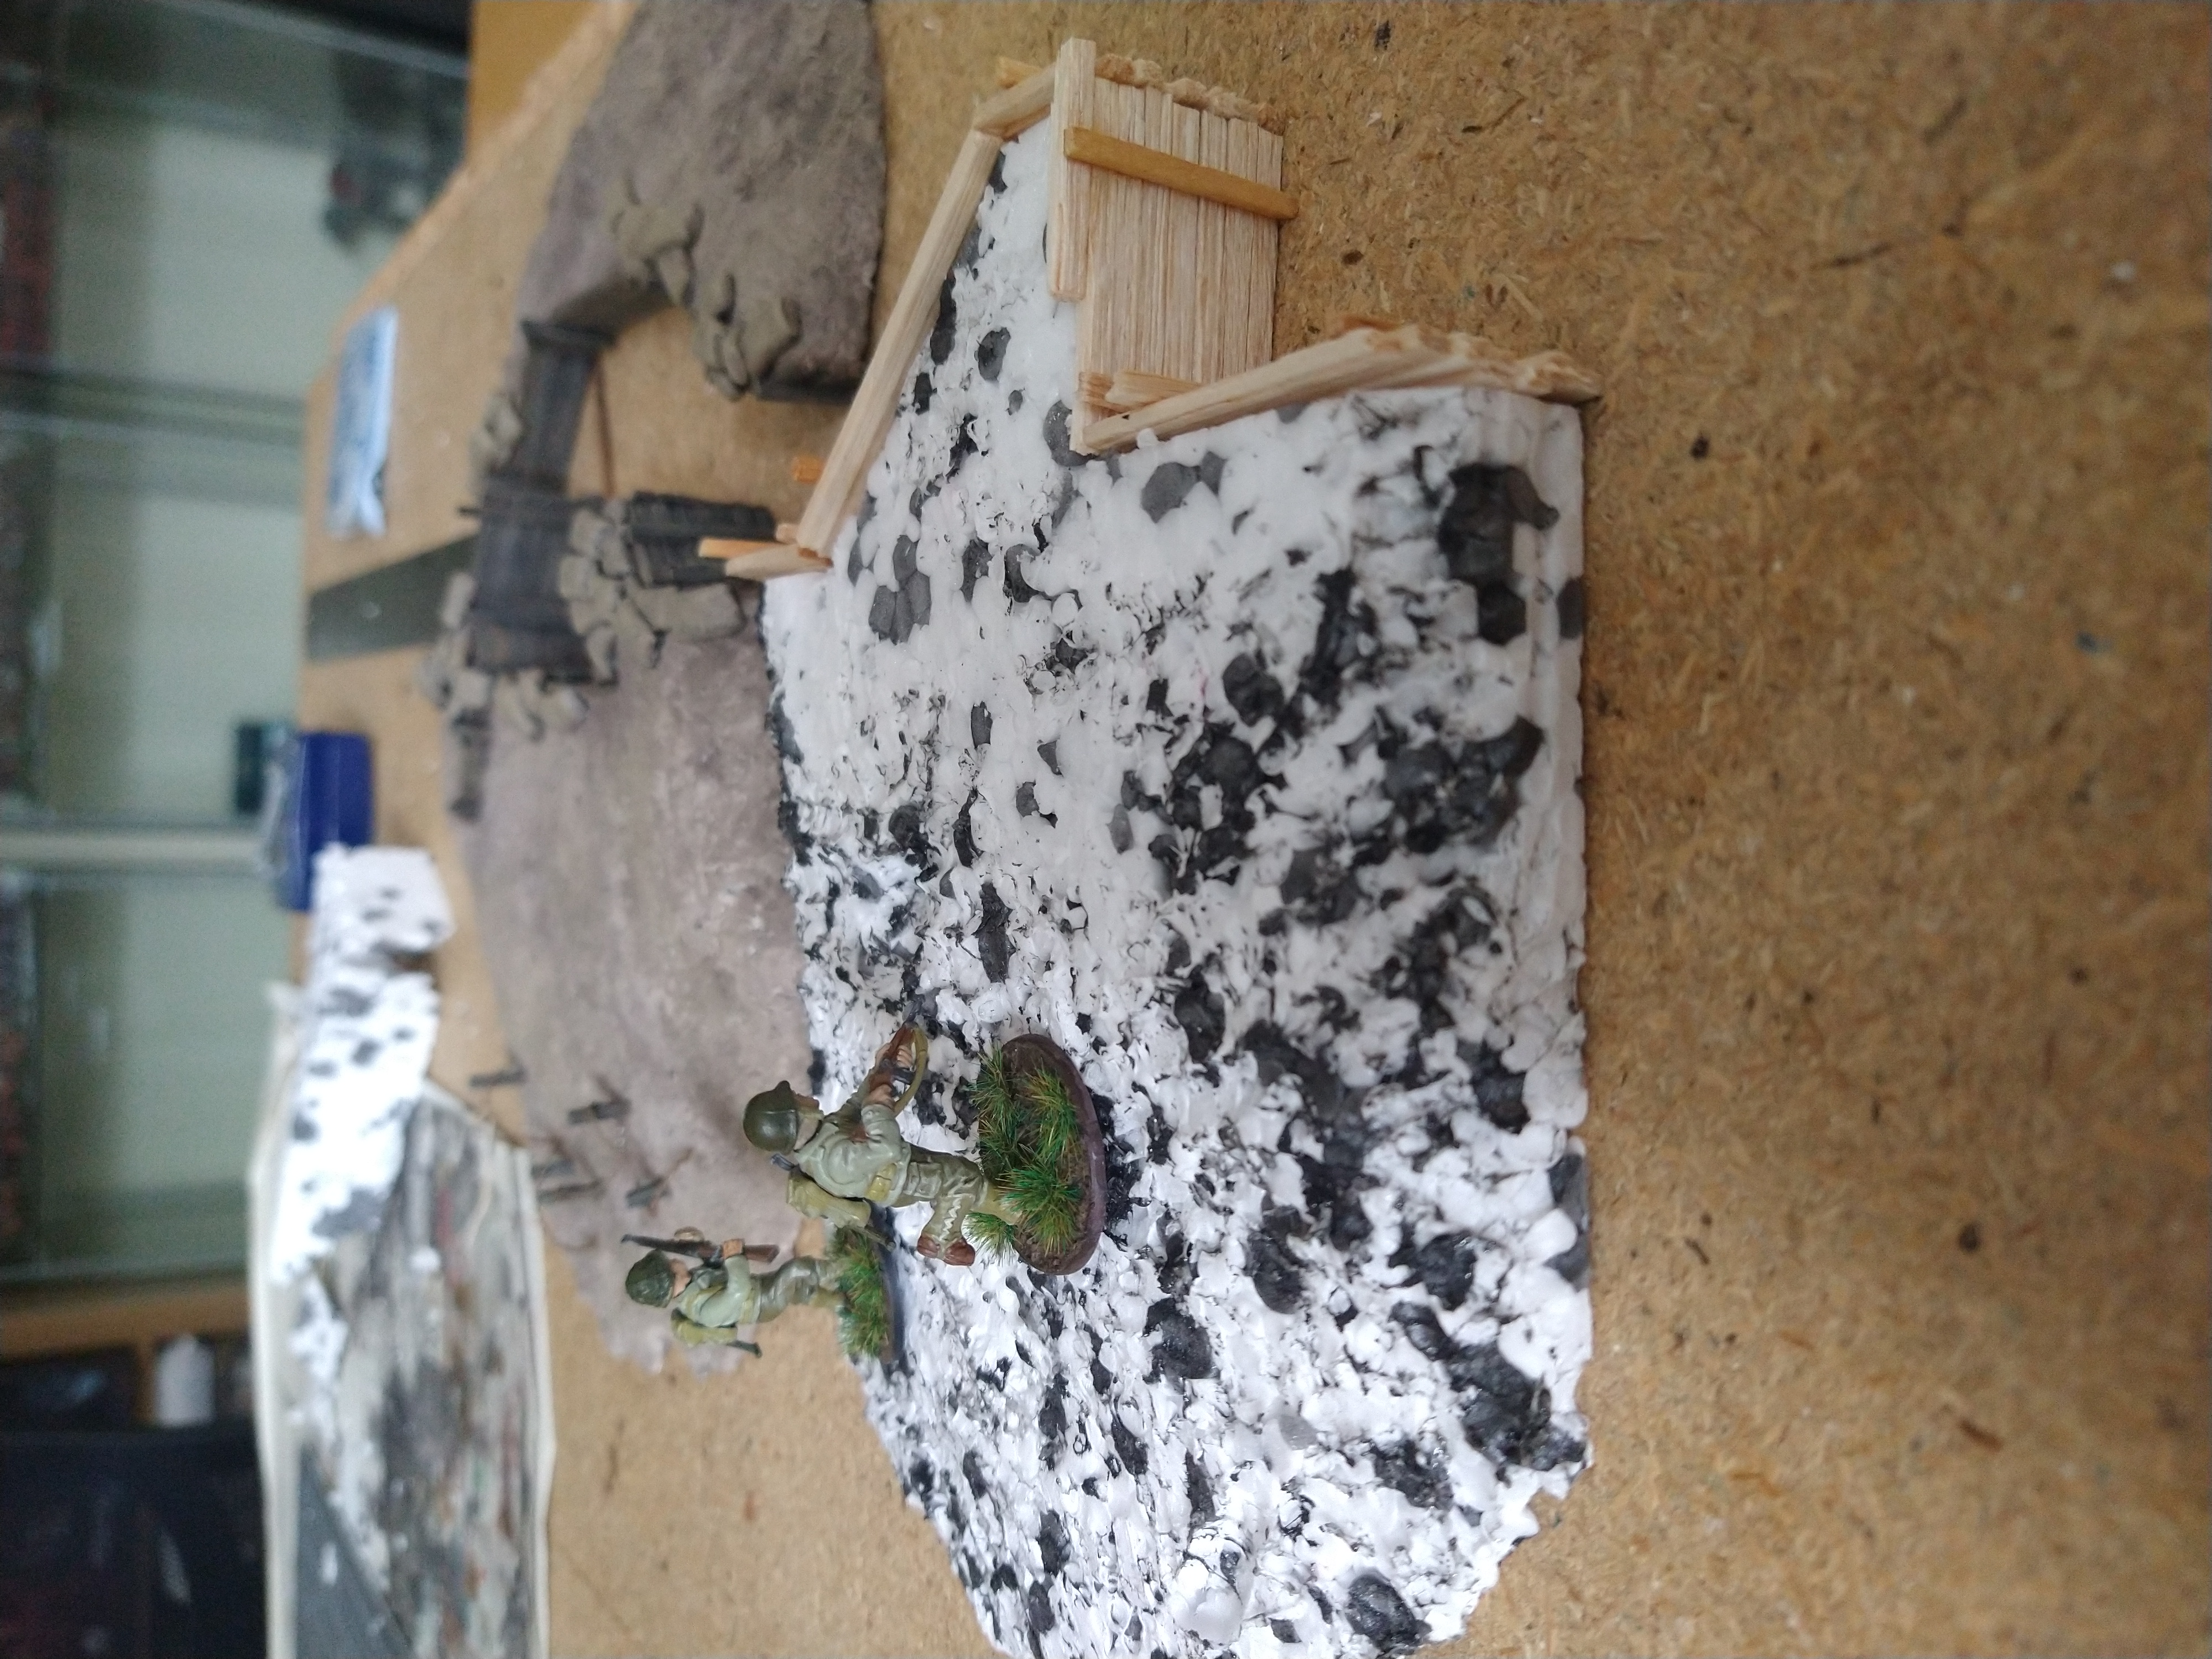
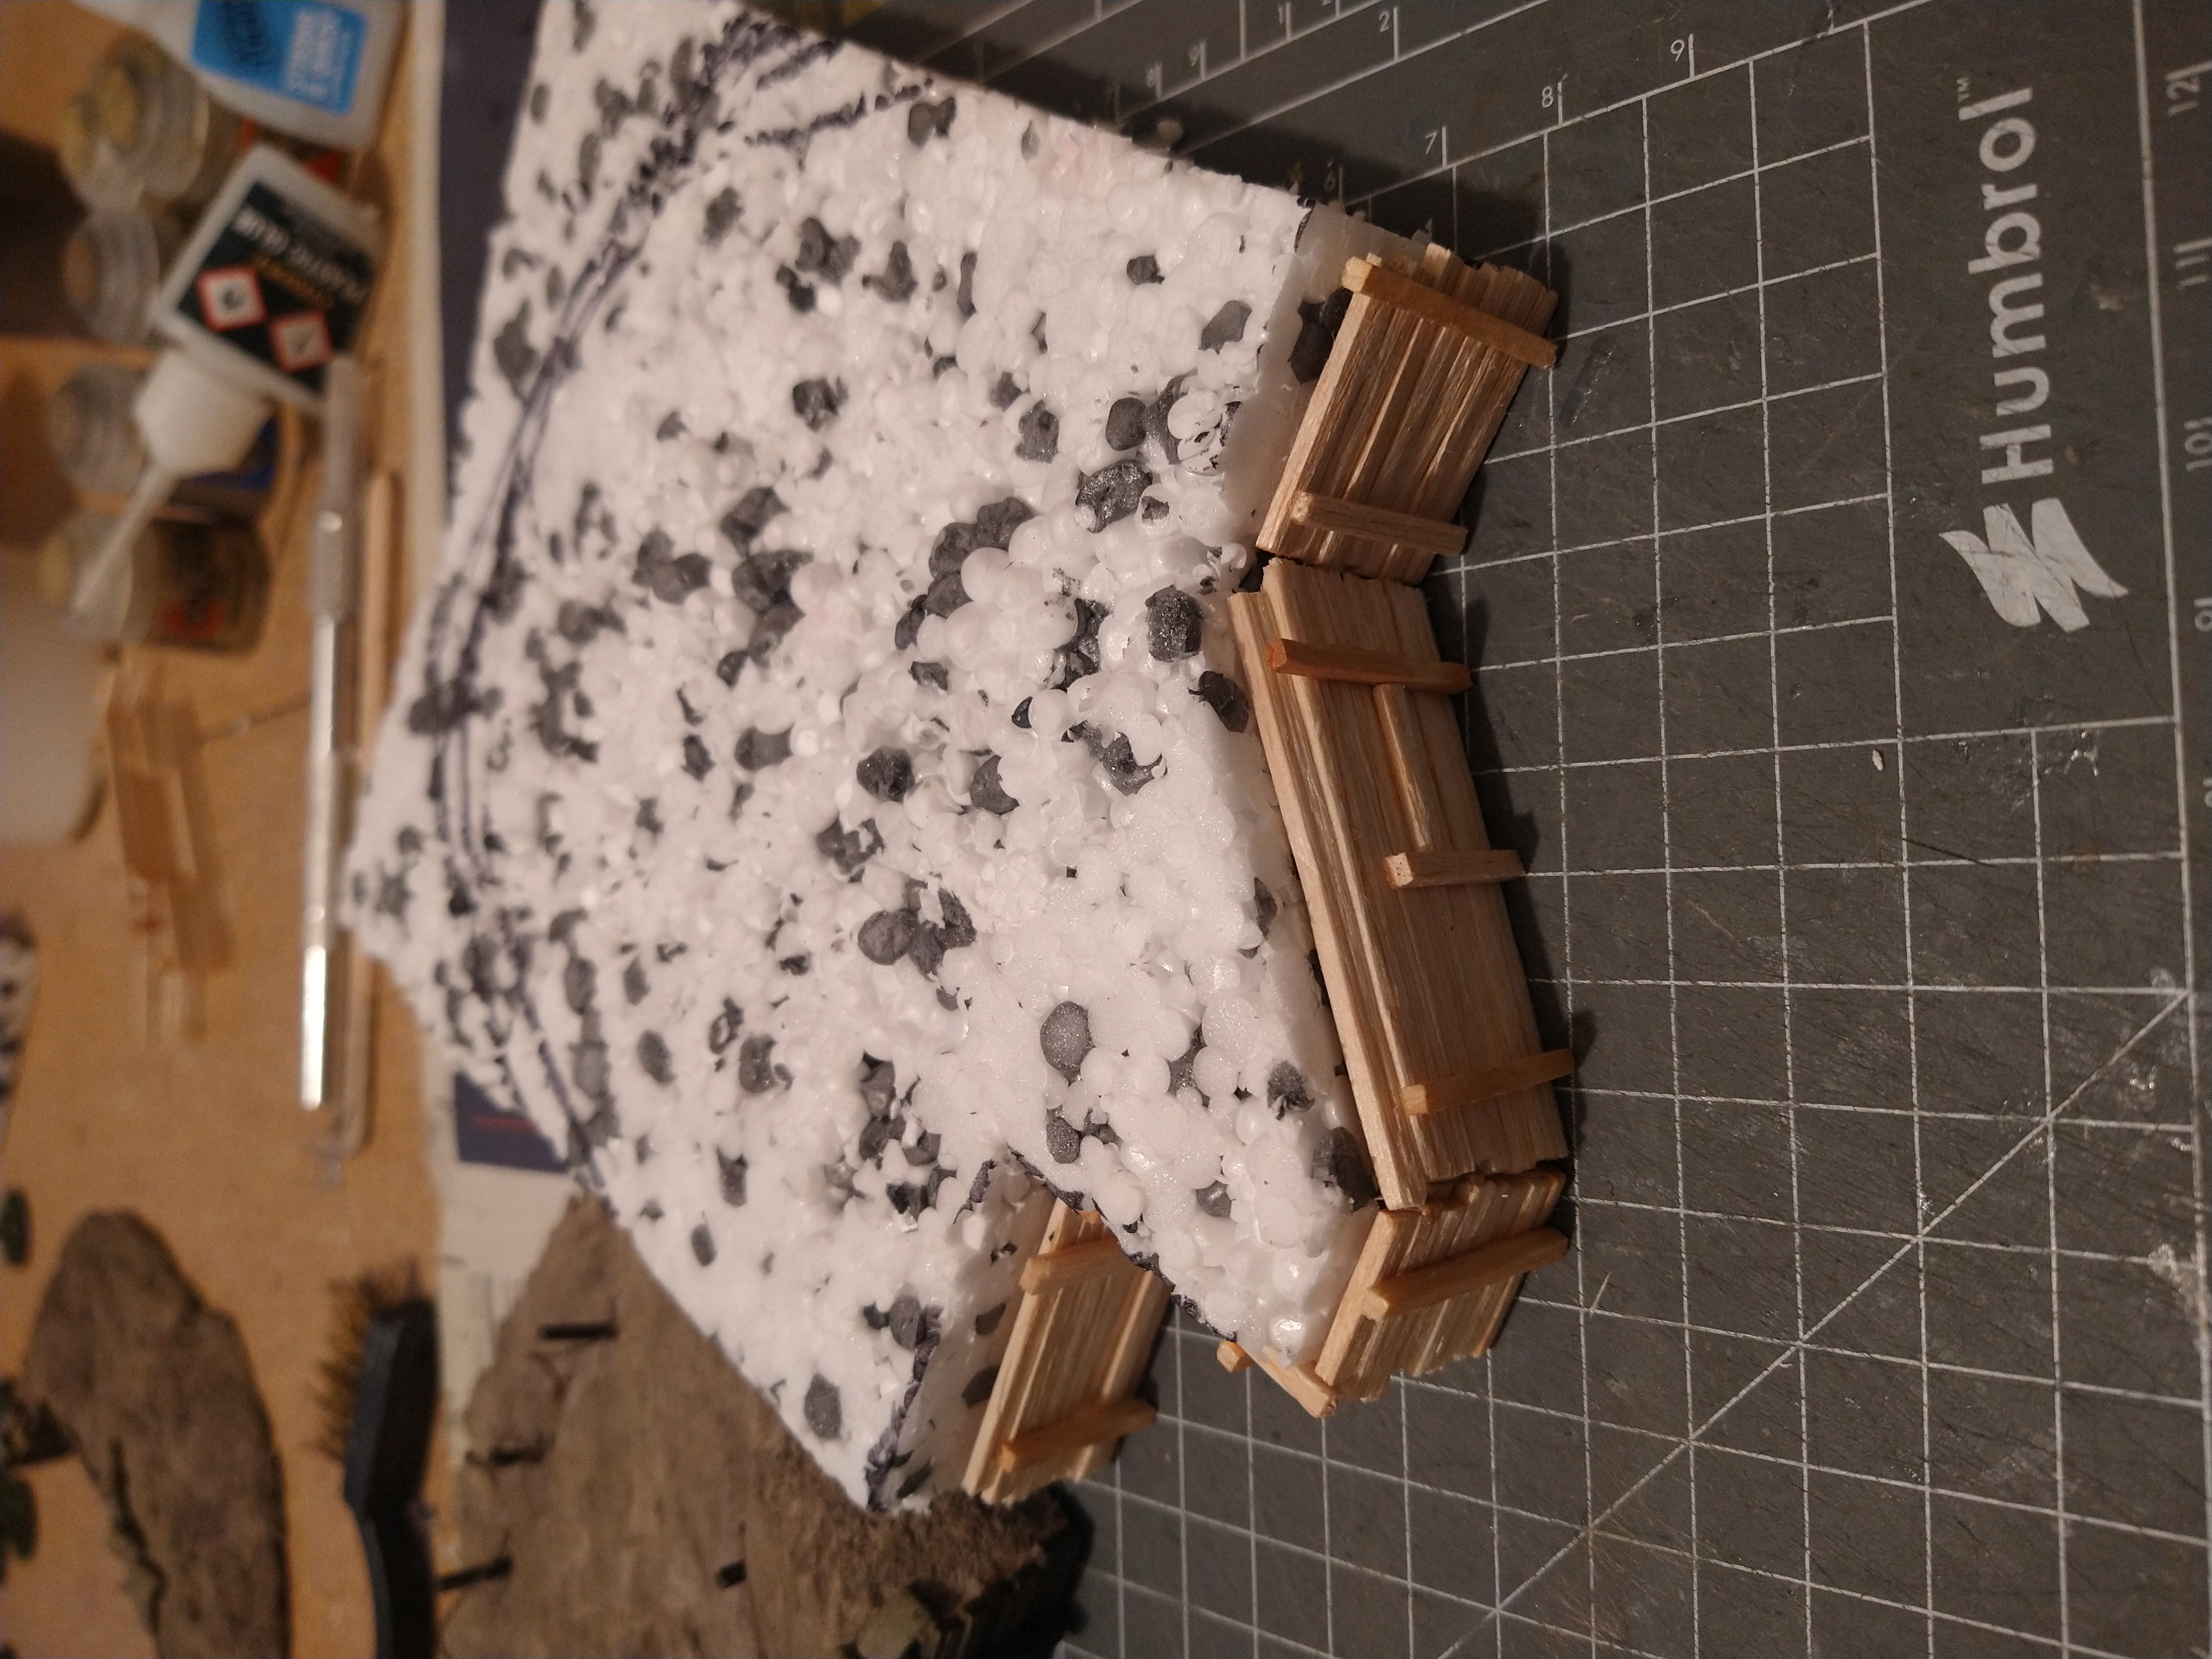
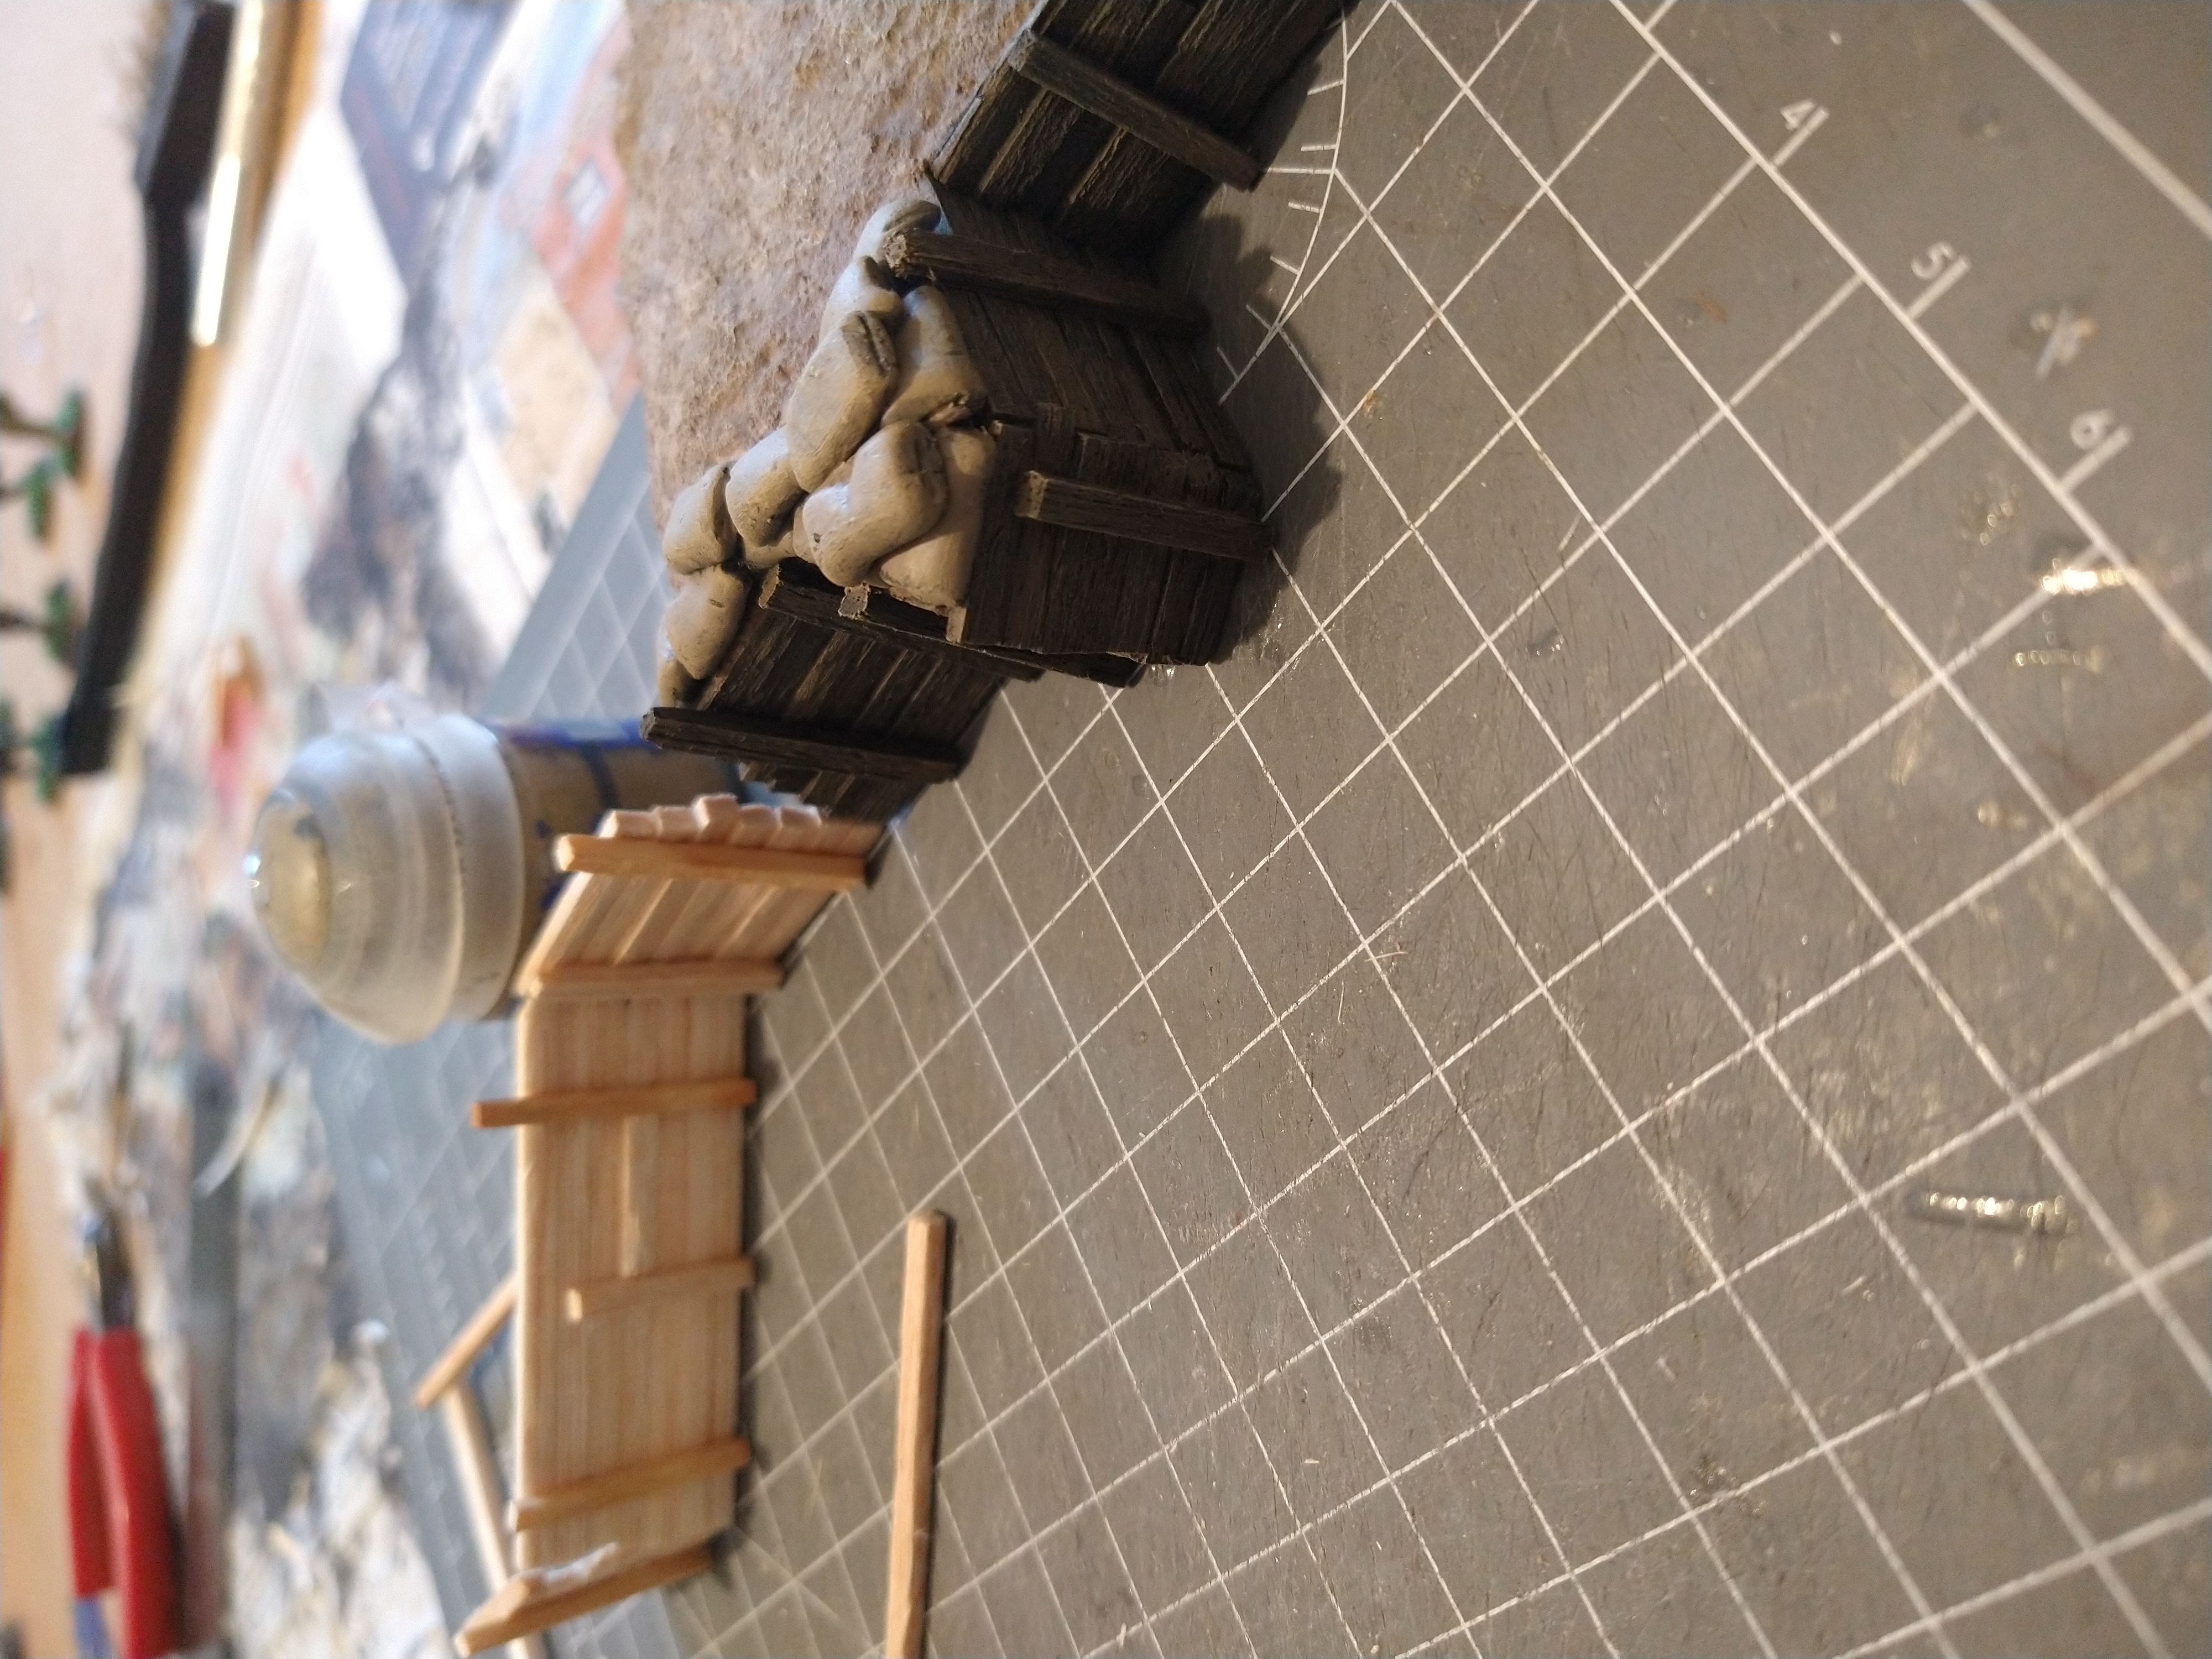
And then, its shaped with a gentle downslope with a hot knife.
In the image below you can see that a figure will stand on the groundwork without tipping over.
I also found that because a hot knife was used, the scorching gave the polystyrene a nice crispy feel which helps make it a bit less likely to break and warp.
A small shell crater was also carved into the slope, but its a bit hard to tell when the polystyrene is in its raw form.
Then before gluing the wood to the polystyrene, I undercoat the wooden panels as well as painting the facing of the polystyrene that it will be glued to in an effort to stop any annoying “white” bits showing through (or any light bleed).
How its done ....
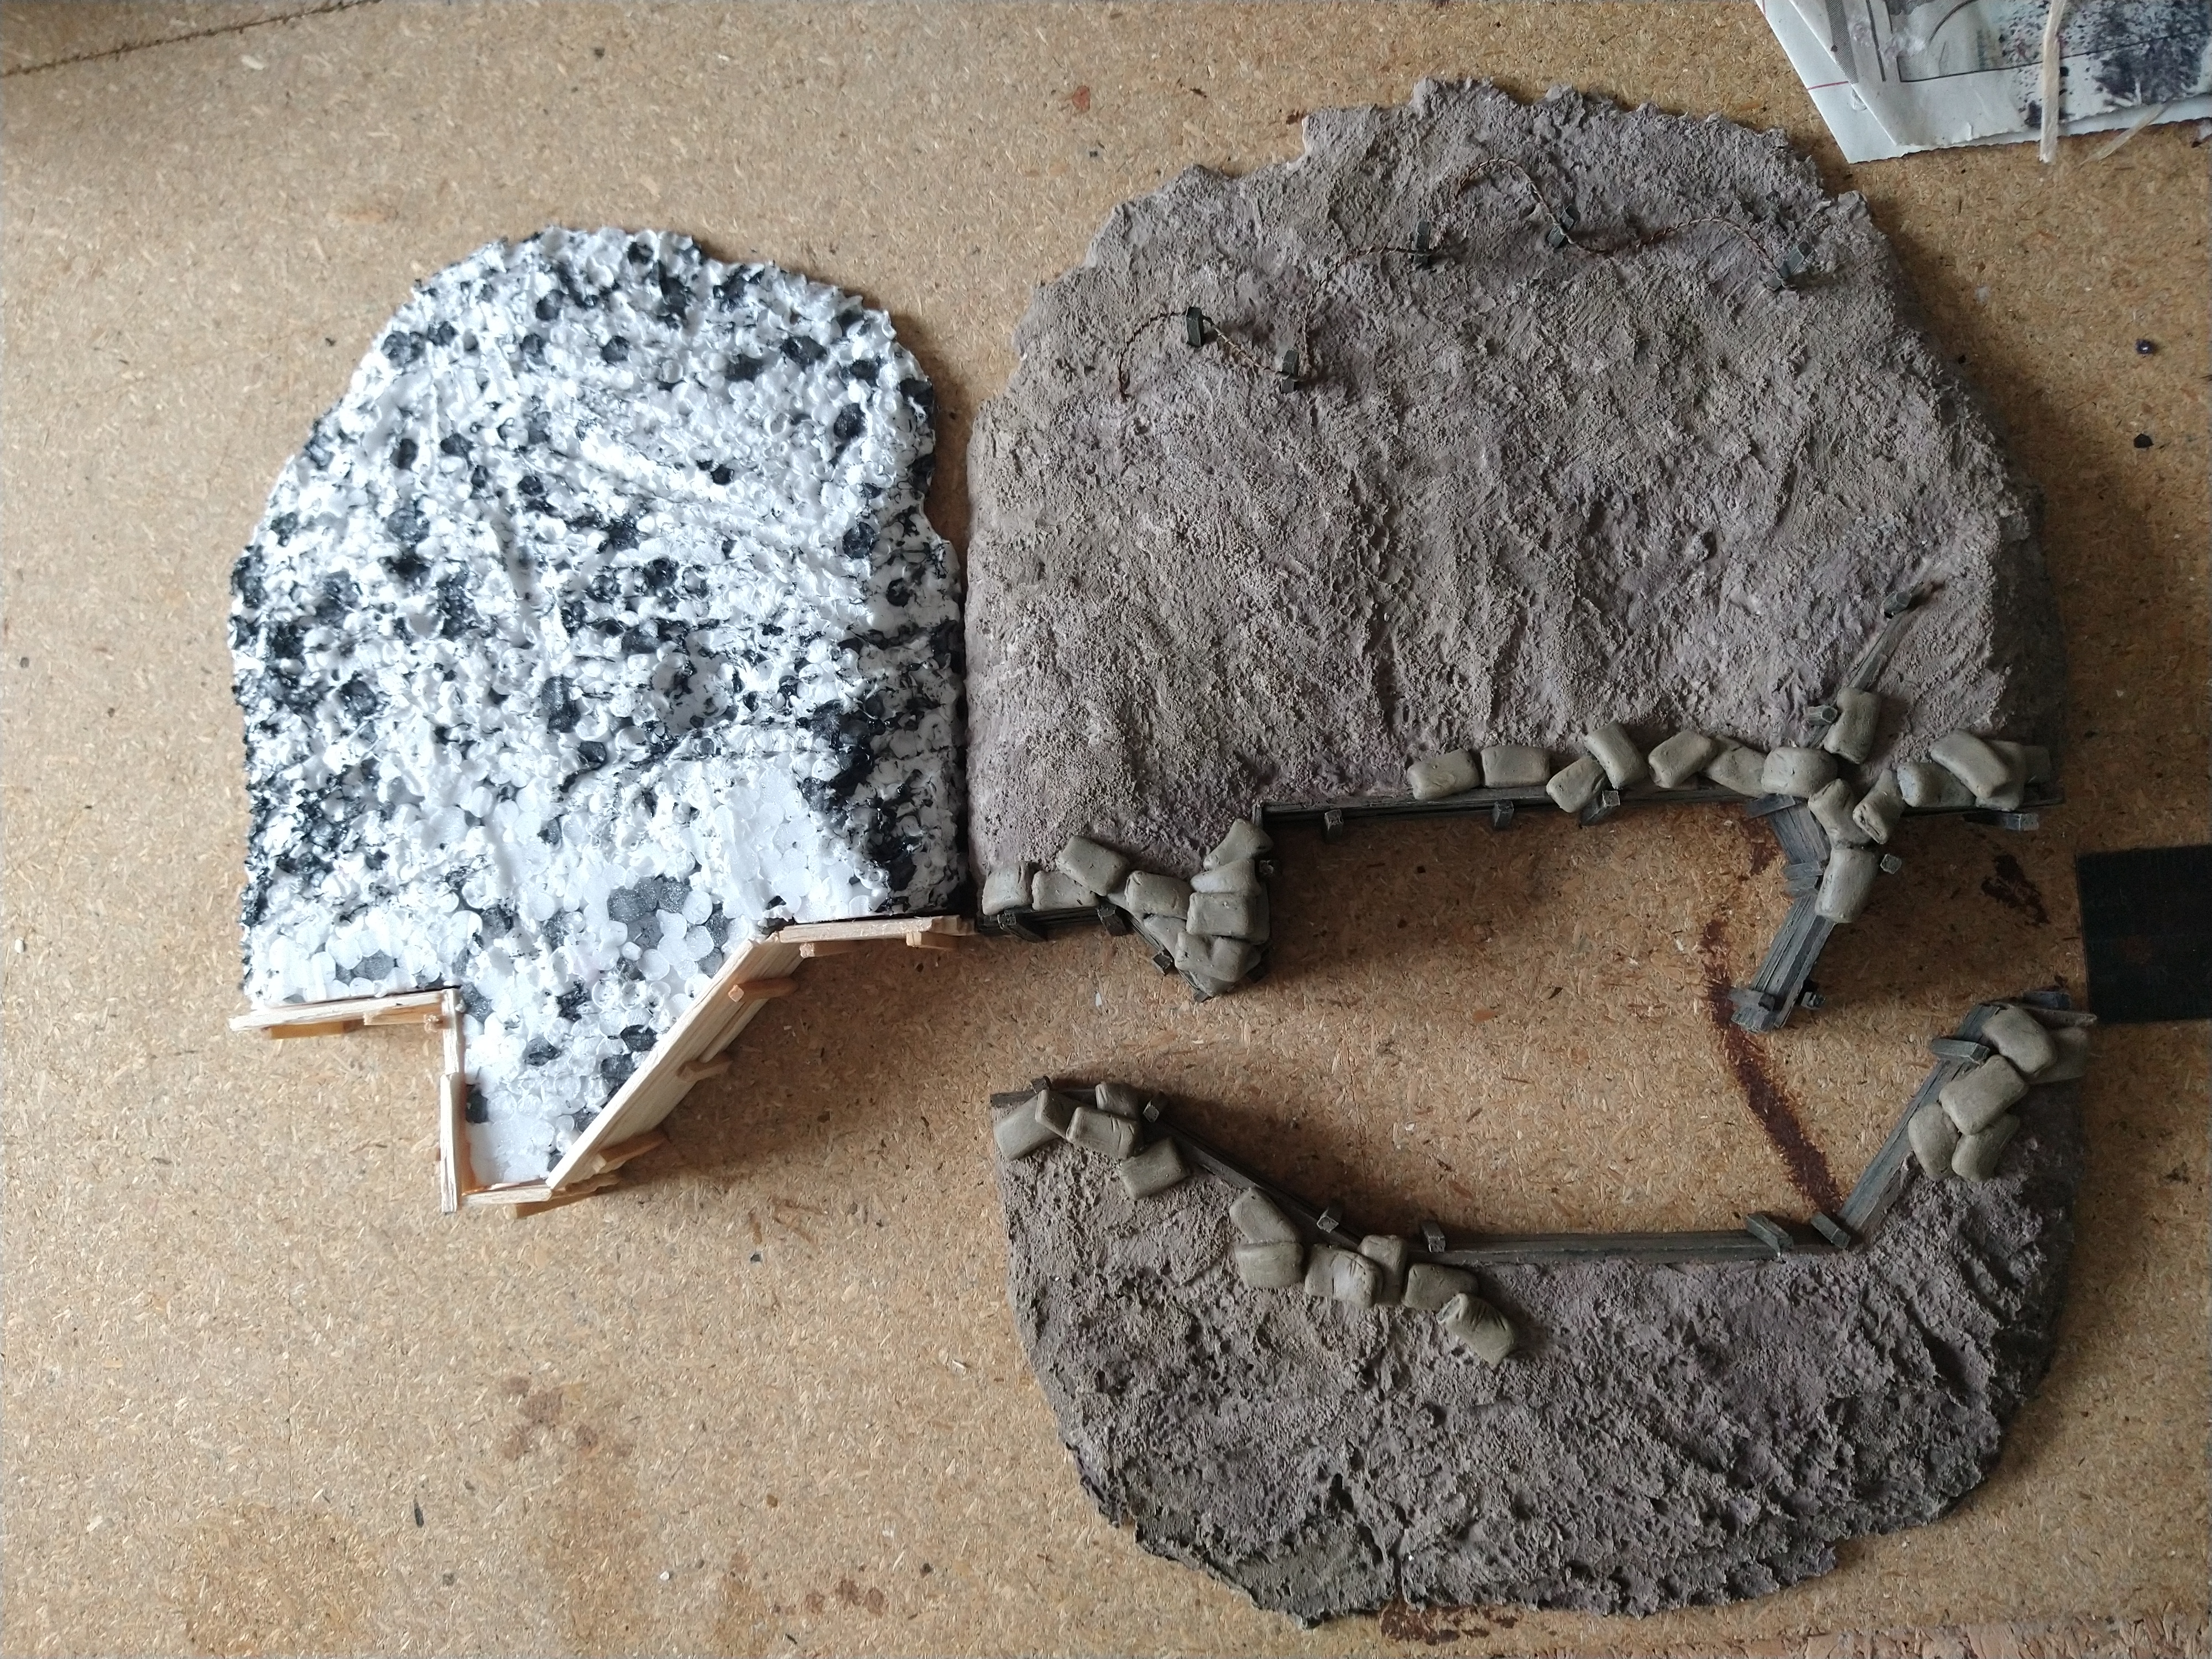
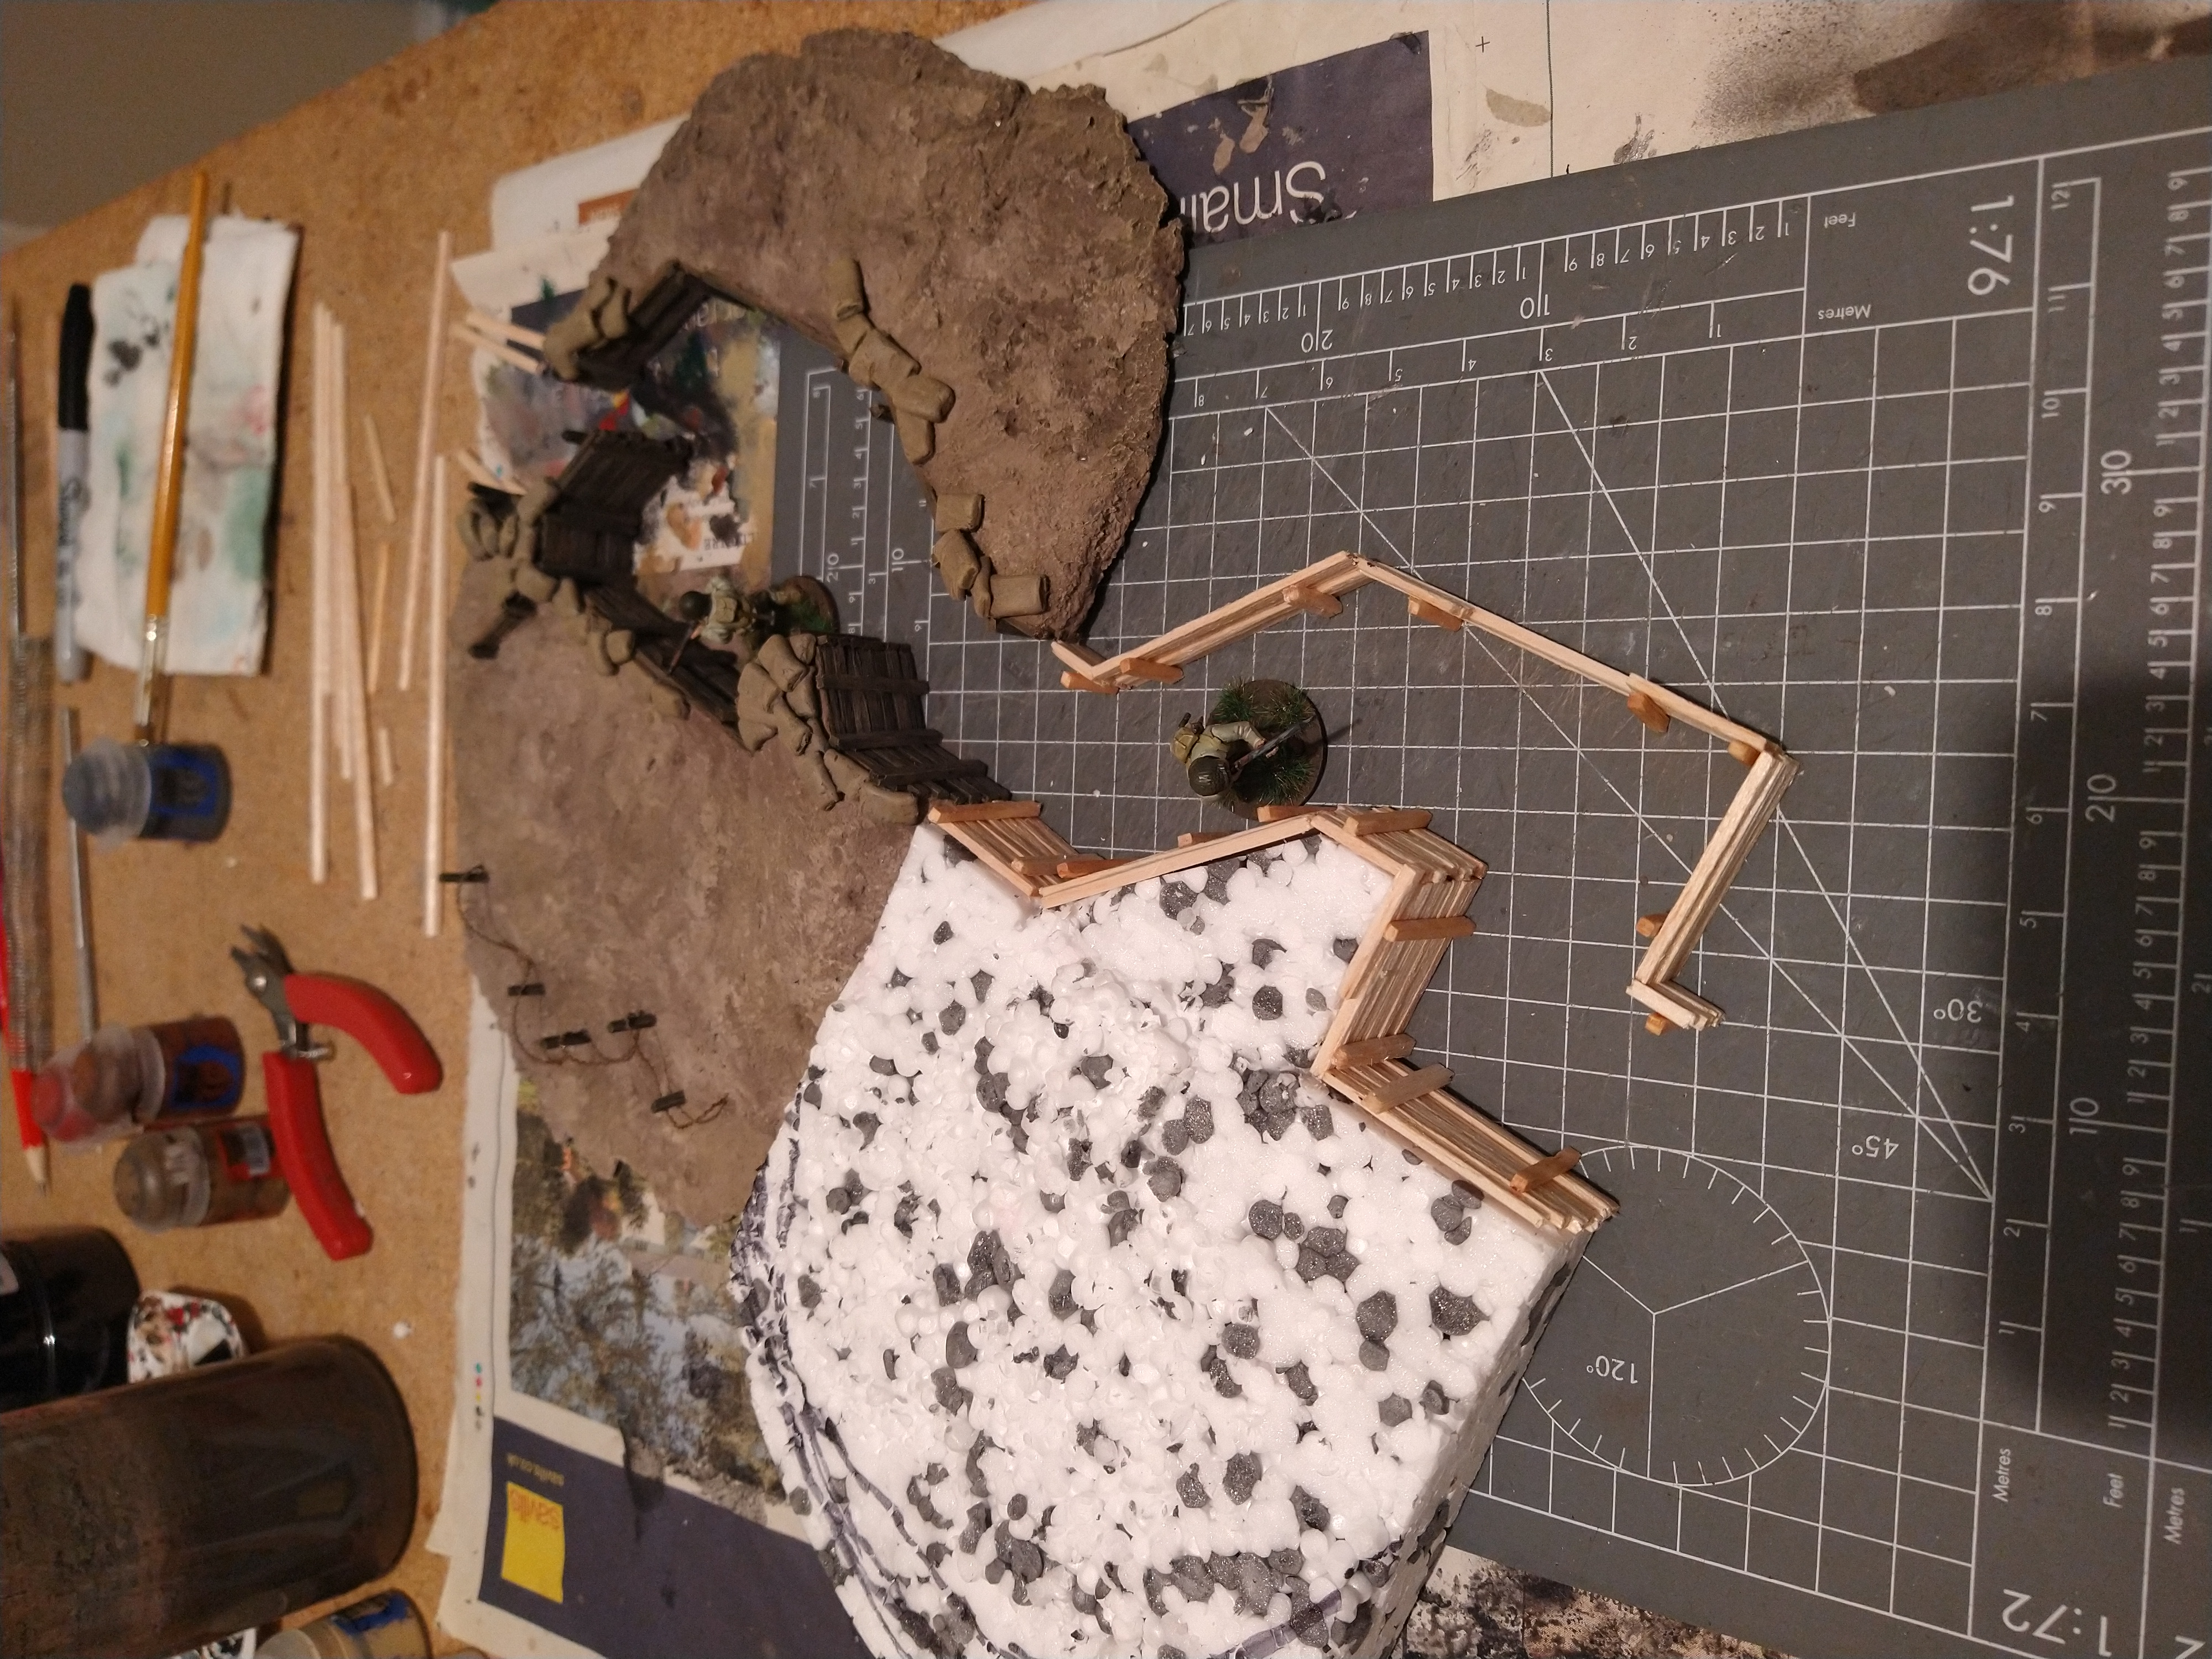
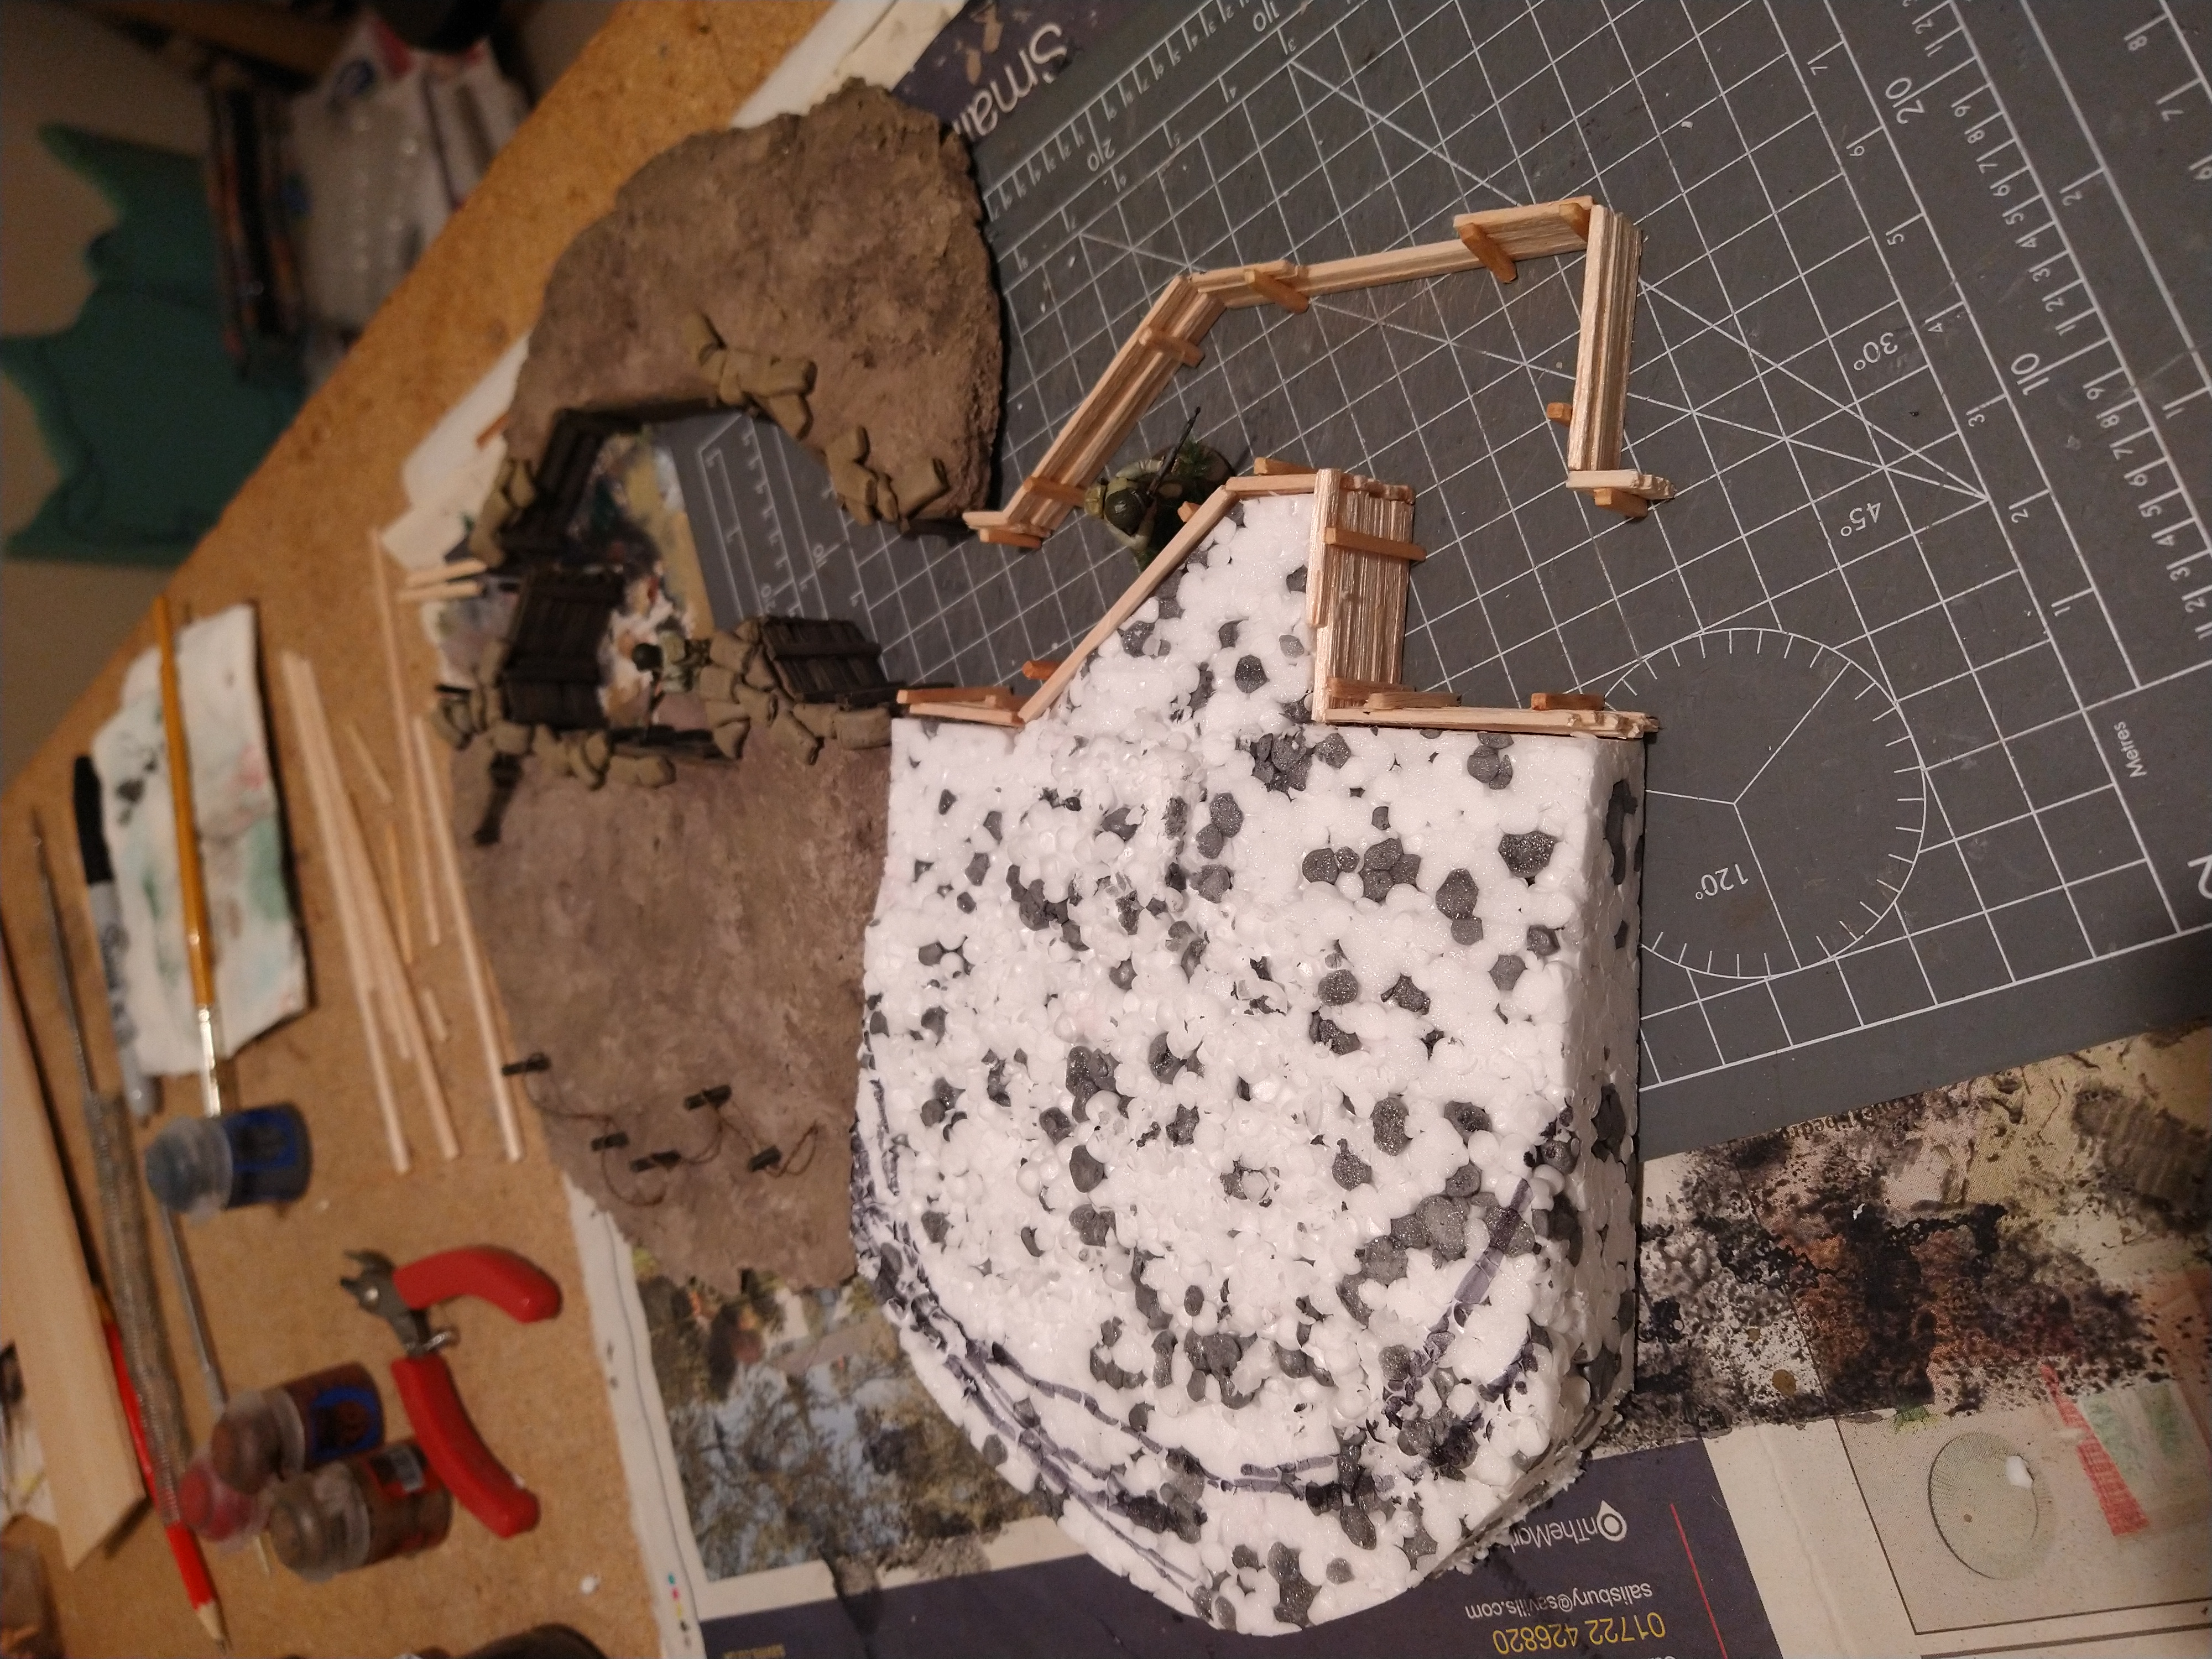
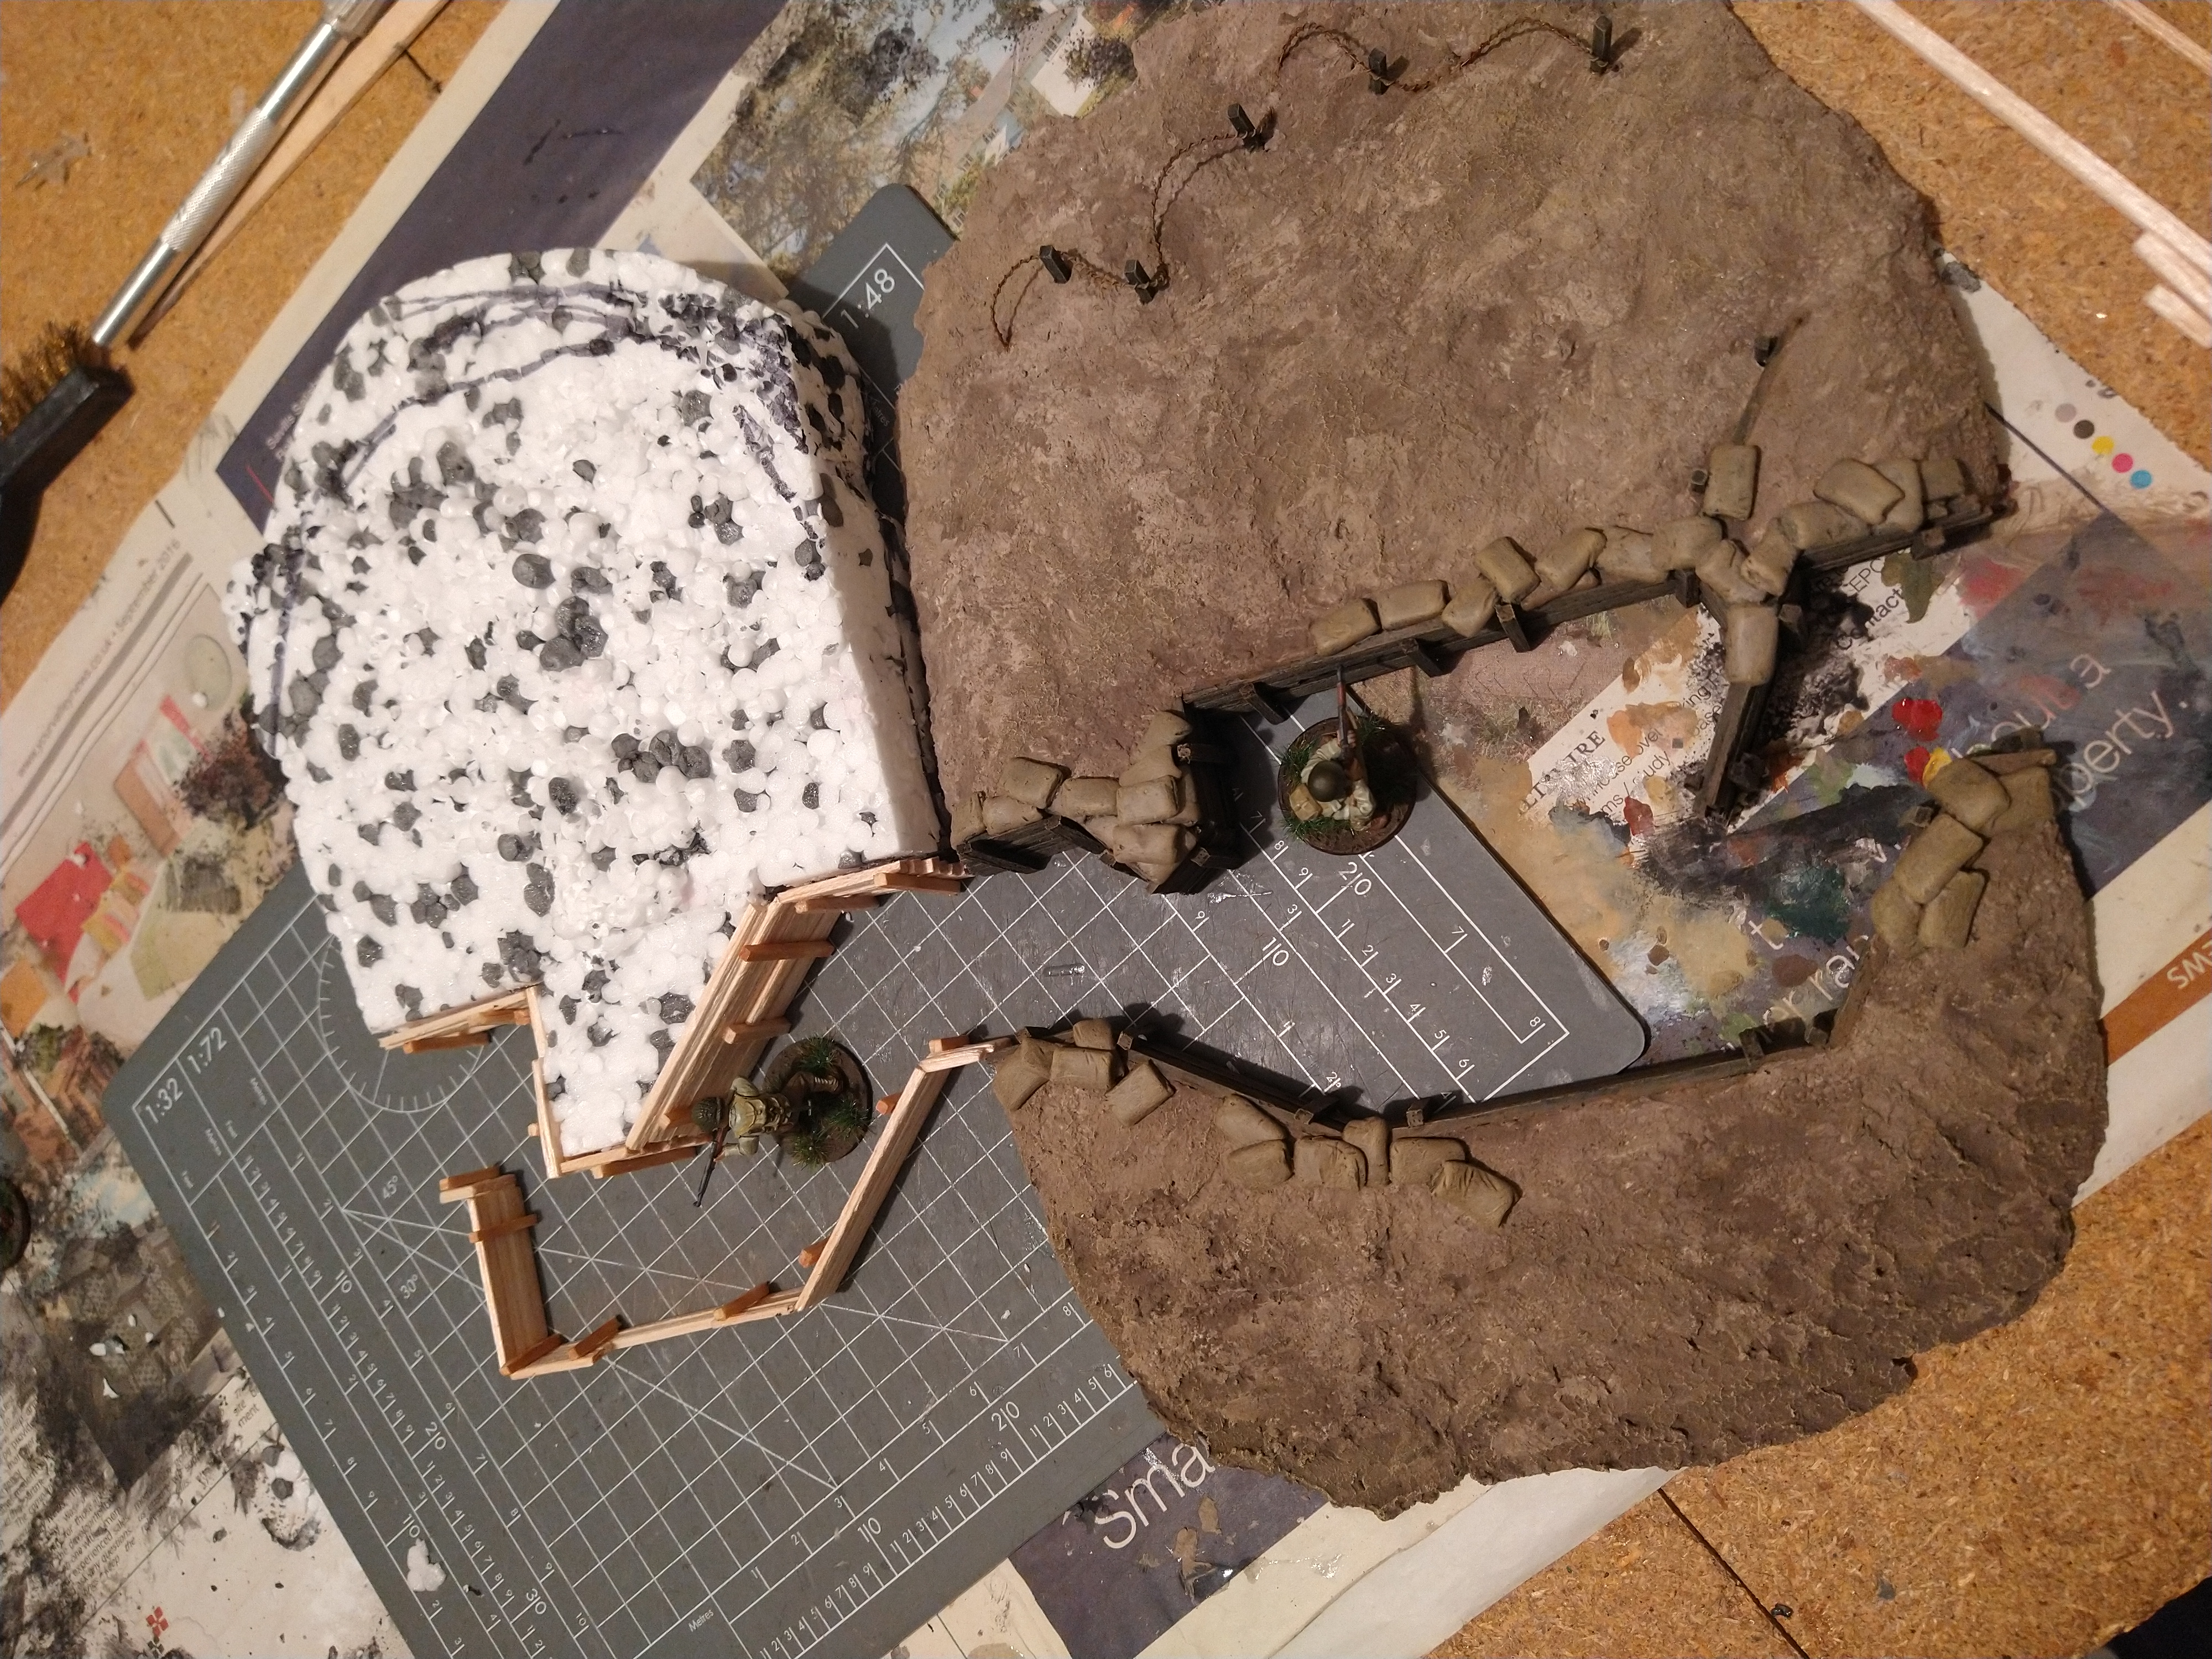
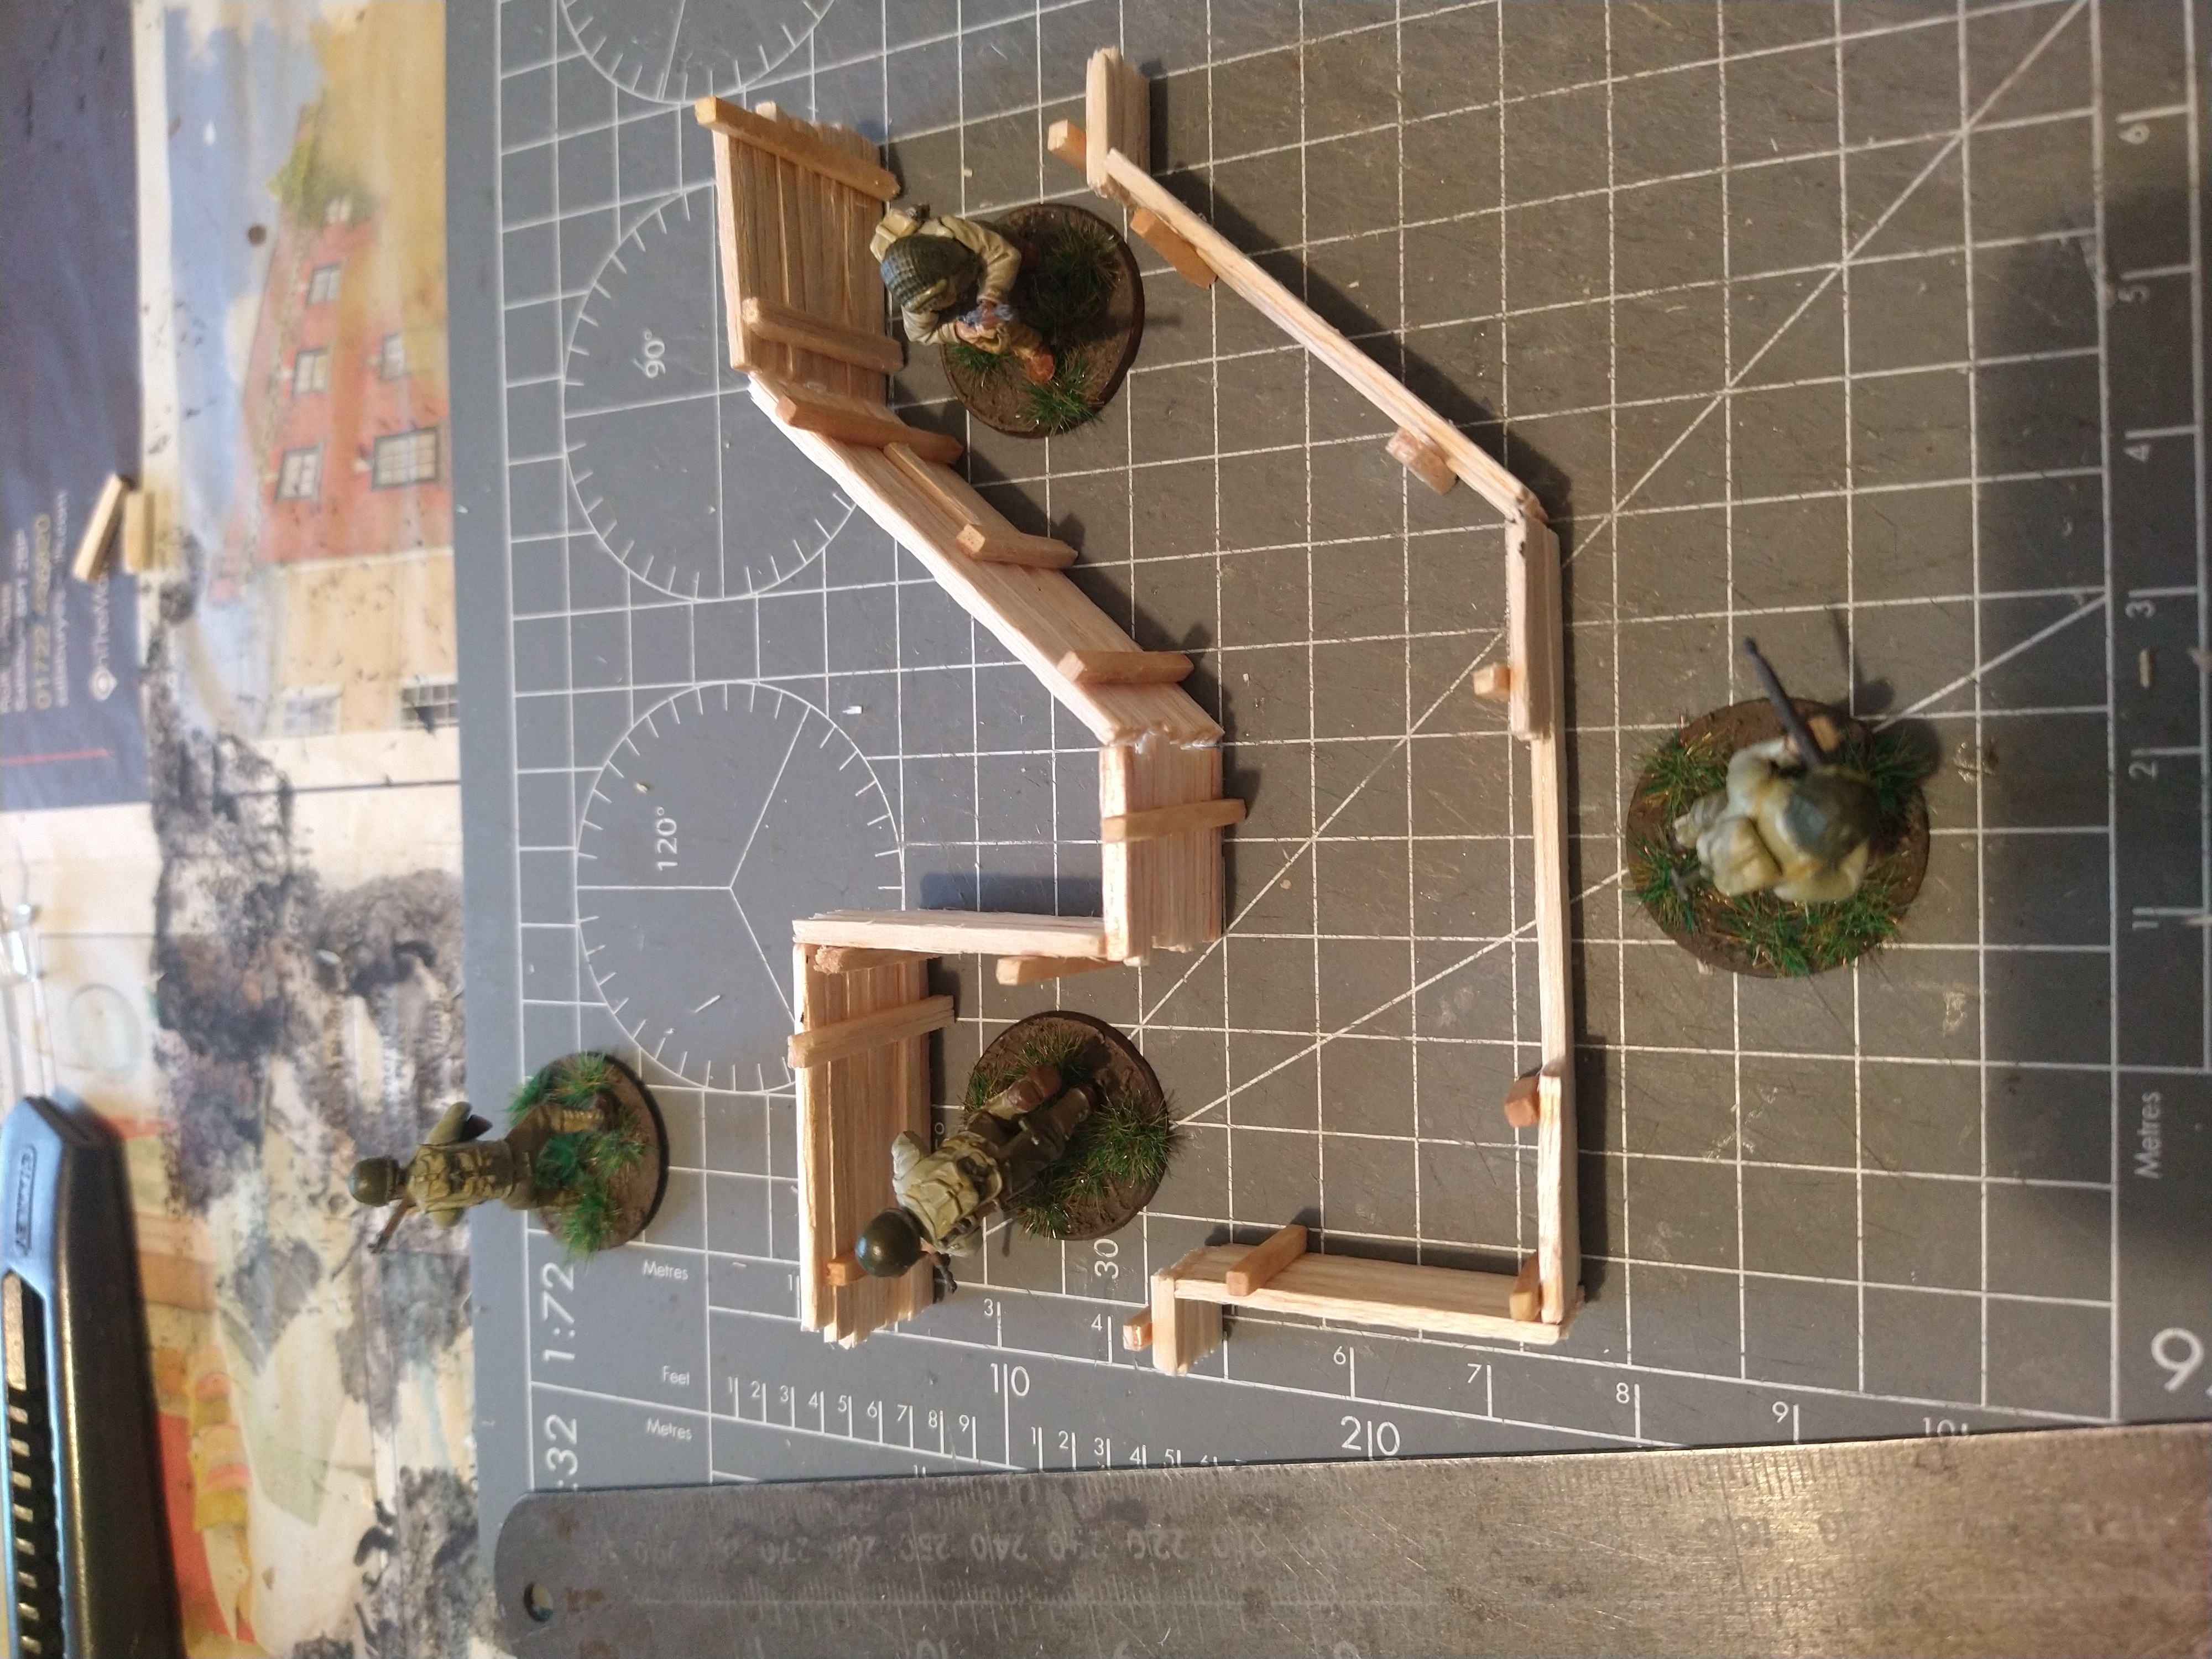
Once the walls have been constructed its time to move onto forming the ground works.
I cut a piece of polystyrene roughly to height. The sides are cut so they pretty much line up with the first test piece on each side and then cut the back to the shape of the trench.
How its done ....
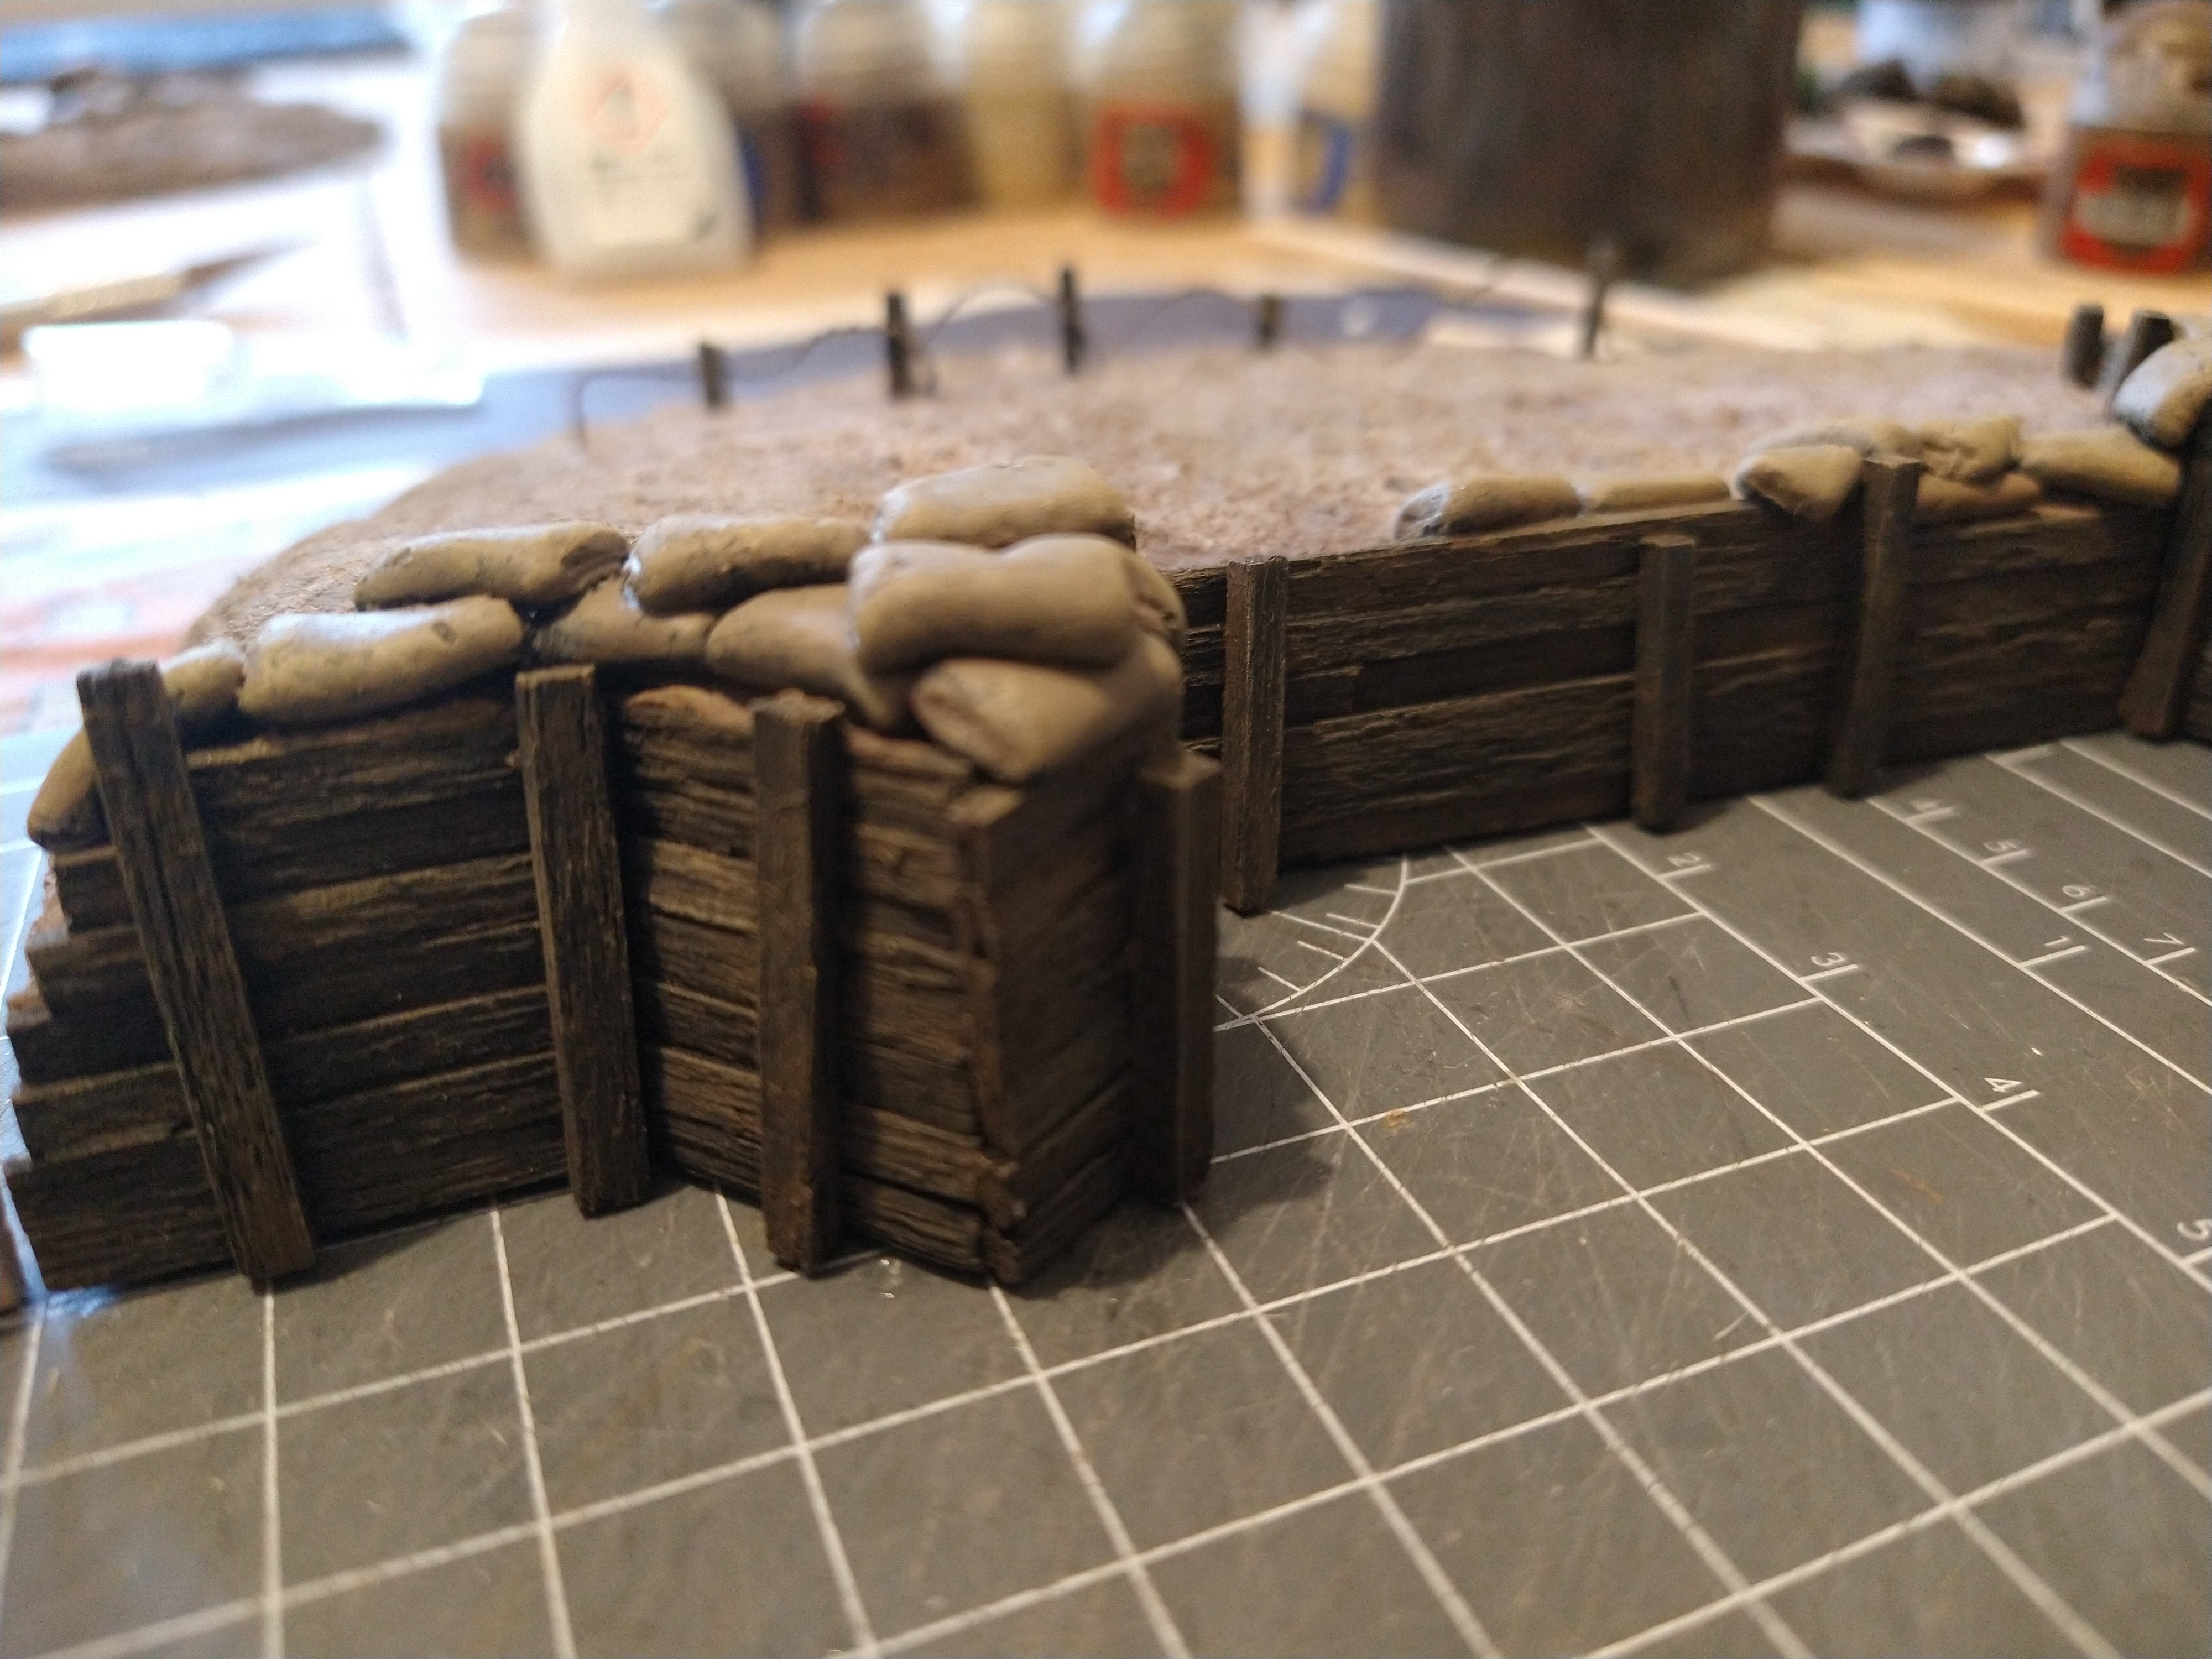
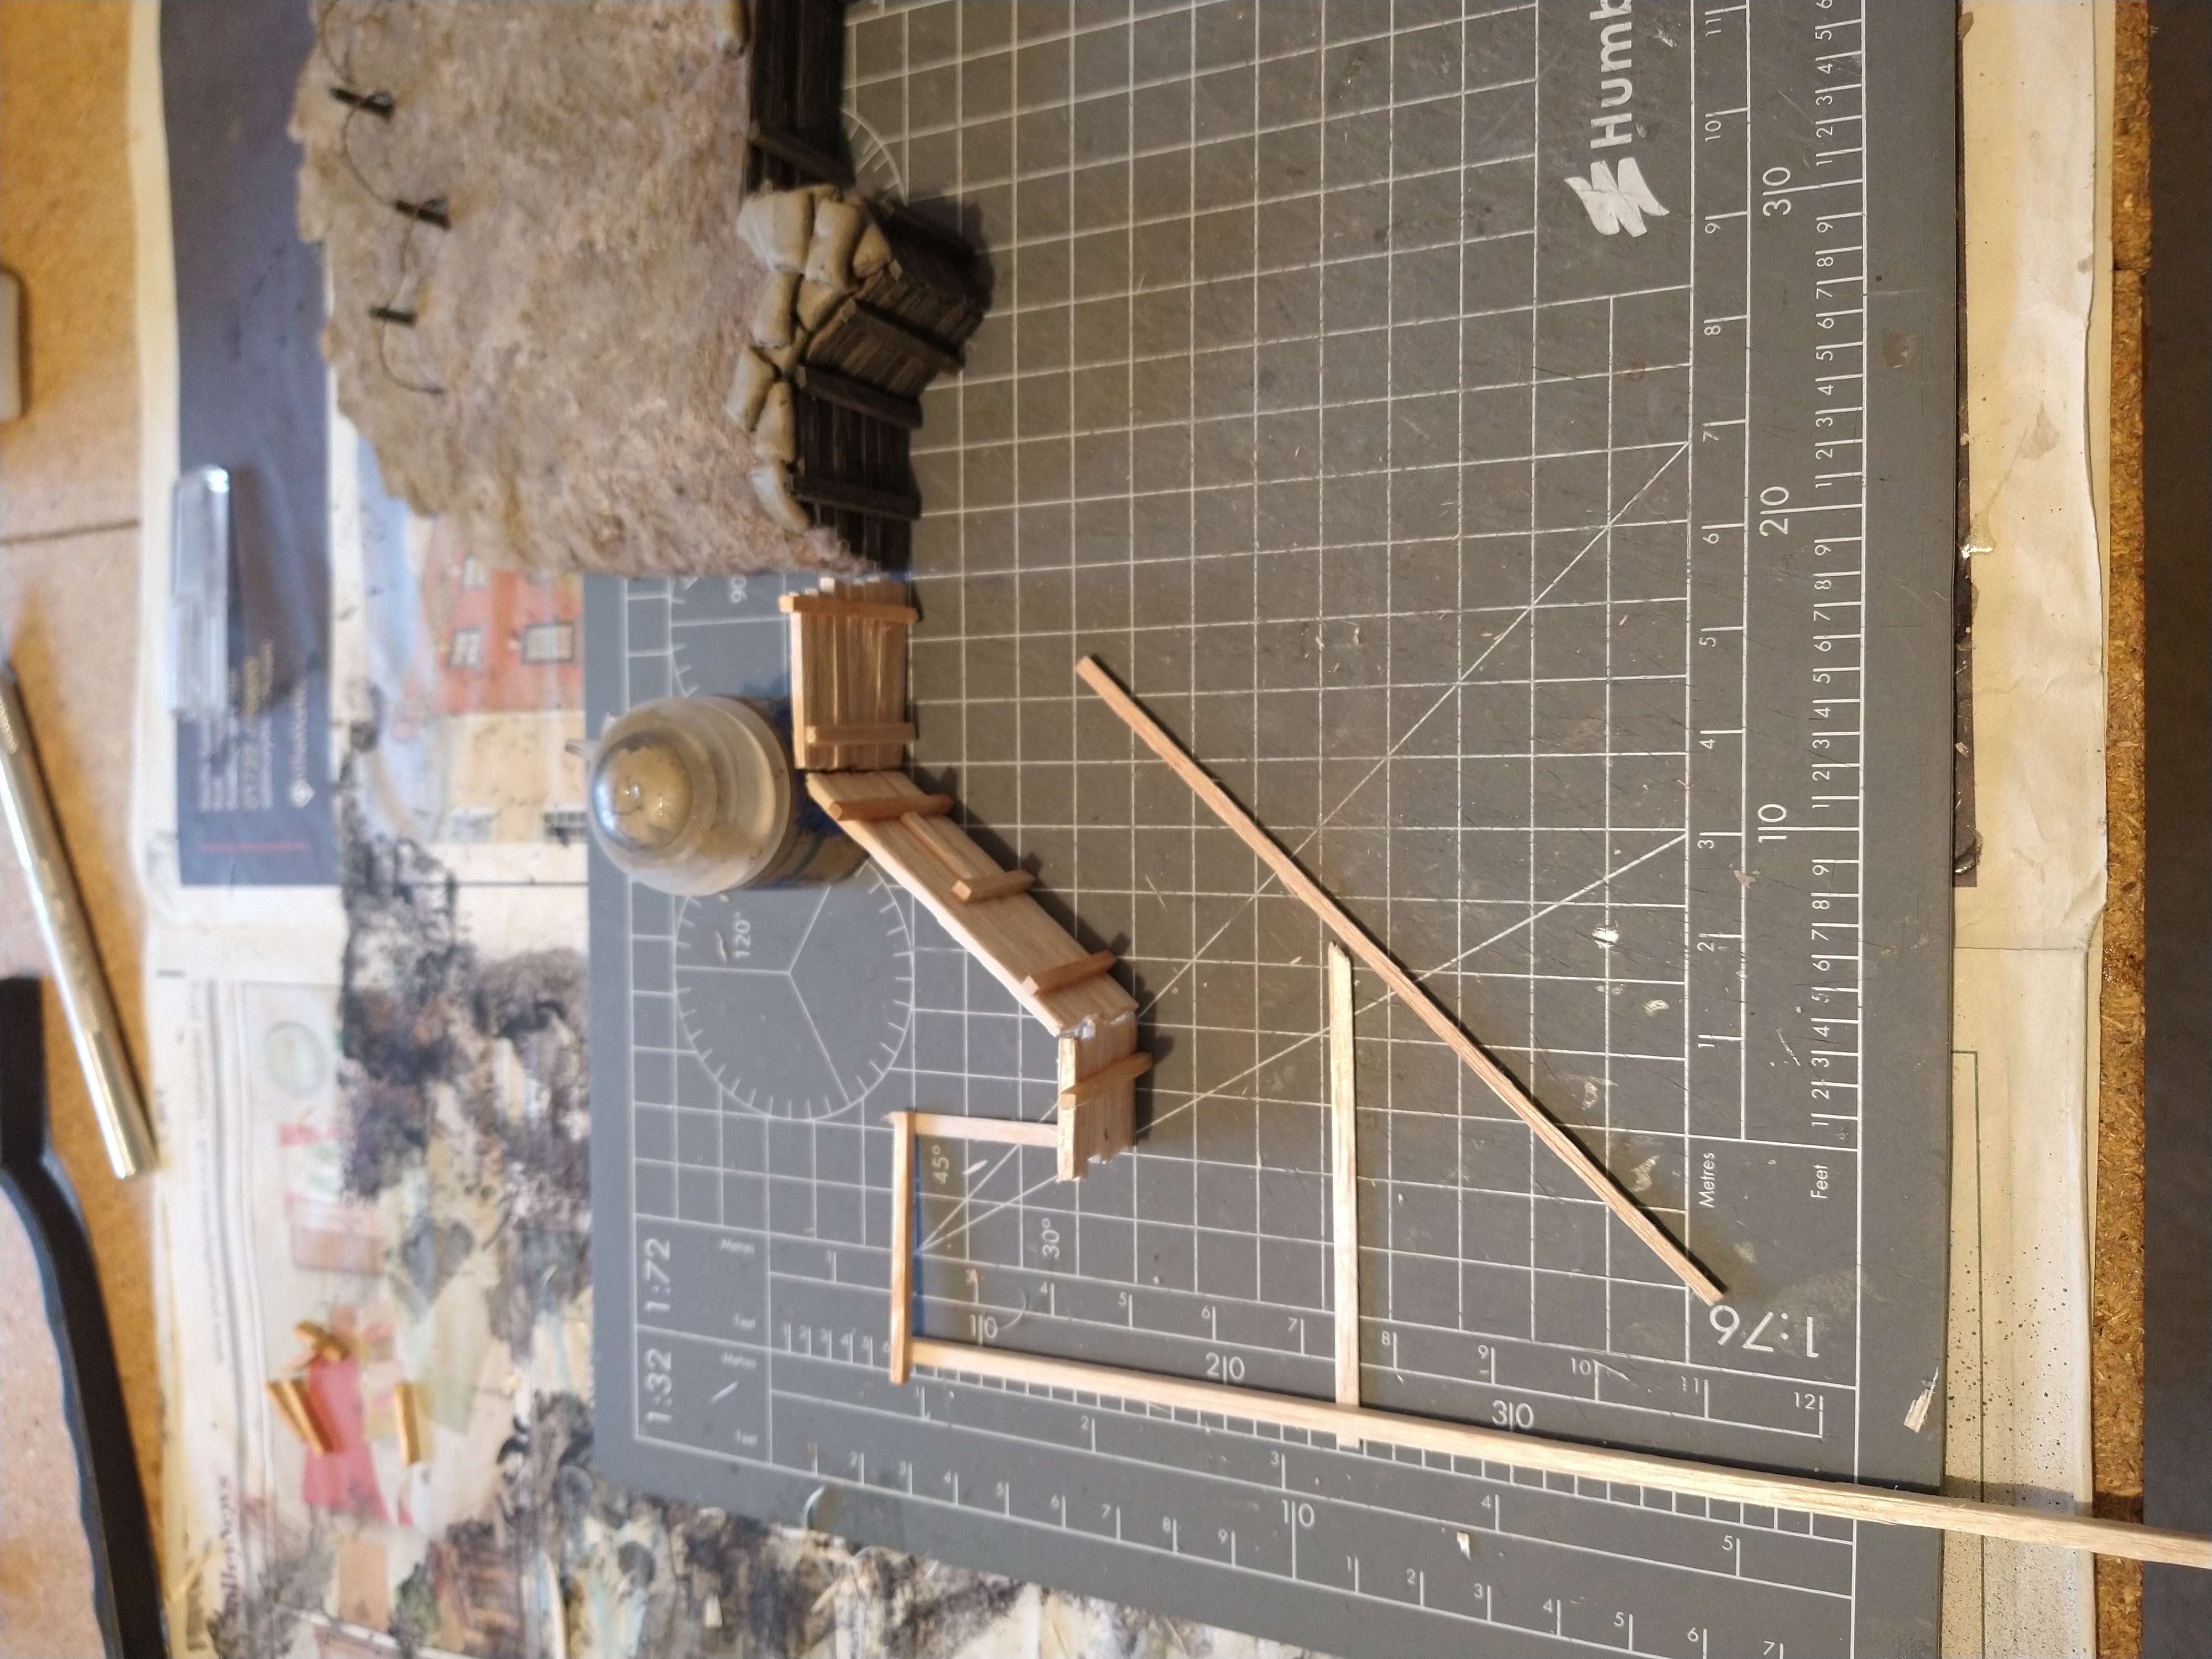
Once the front portion has been built, I can then work on the rear section woodwork.
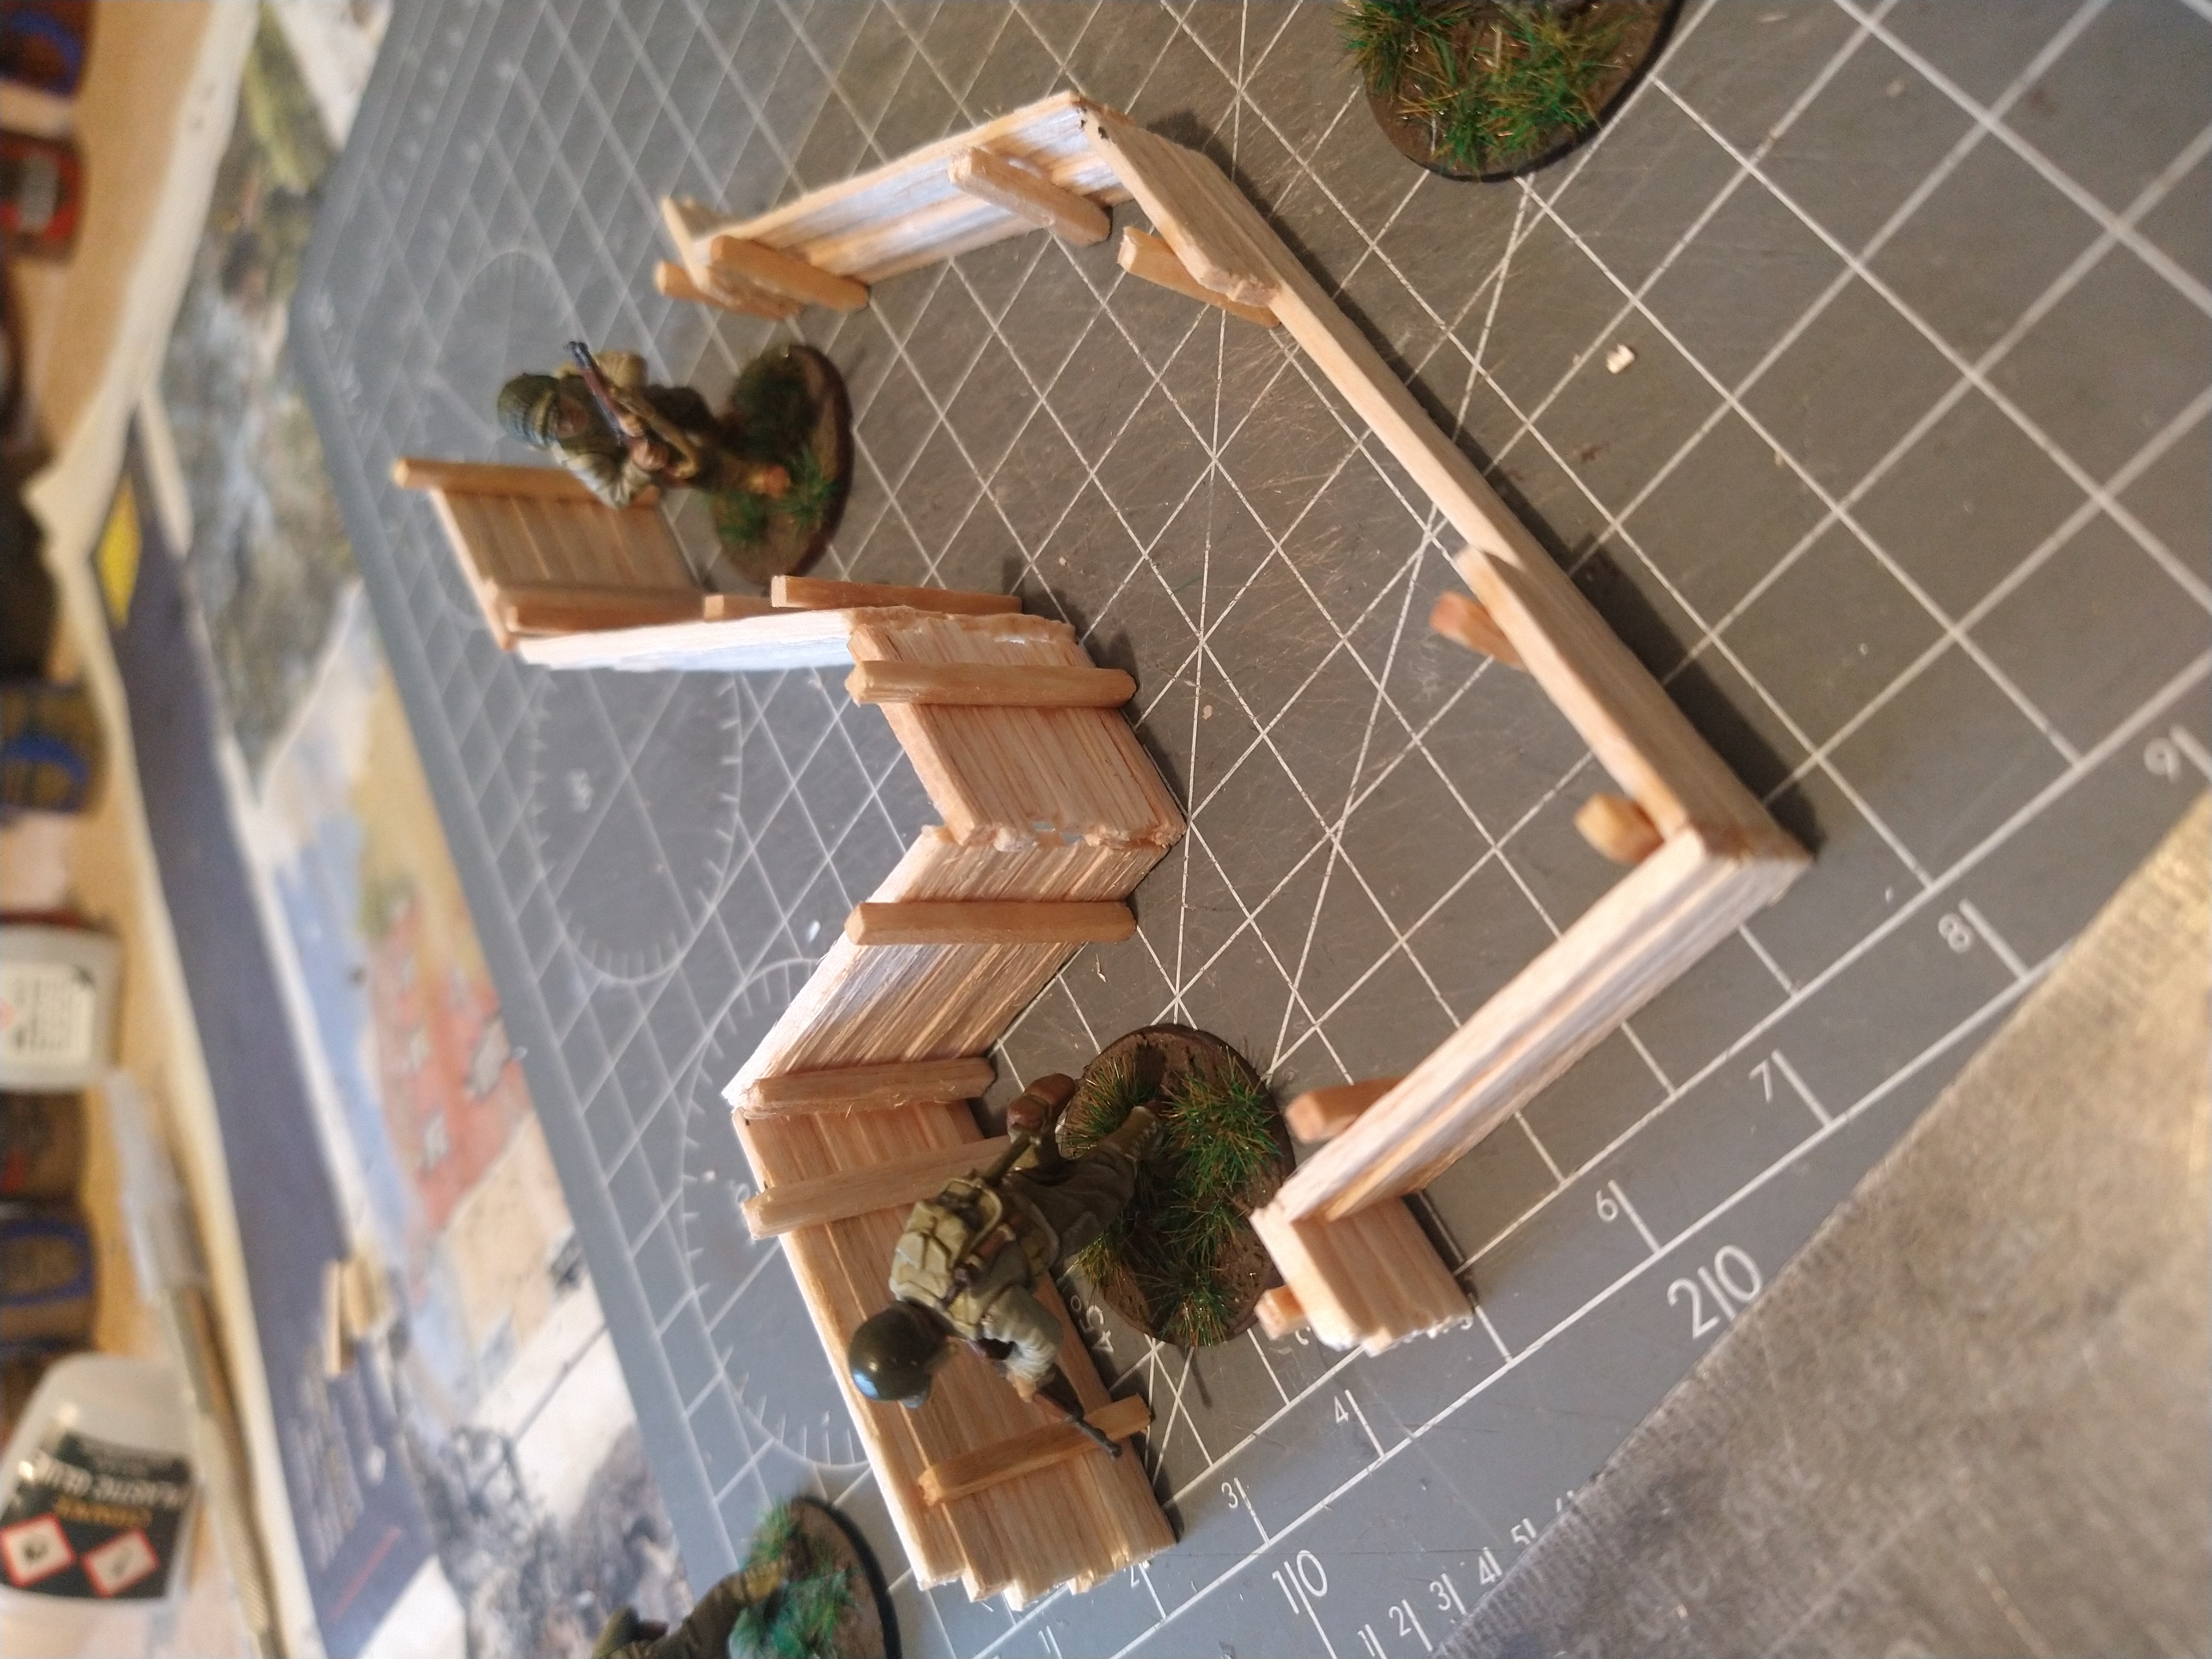
This is kept to 4 planks high – as mentioned at the start of the project, this is so it represents the trench, but also makes it easier to move miniatures within the trench system.
In this example, the middle section is only two planks high (which will become clearer in later posts of the ground work construction).
The rear is built in mind of keeping approx 3.5cm between the front/rear walls to accommodate the bases of miniatures, as well as it looks nicely to scale.
How its done ....
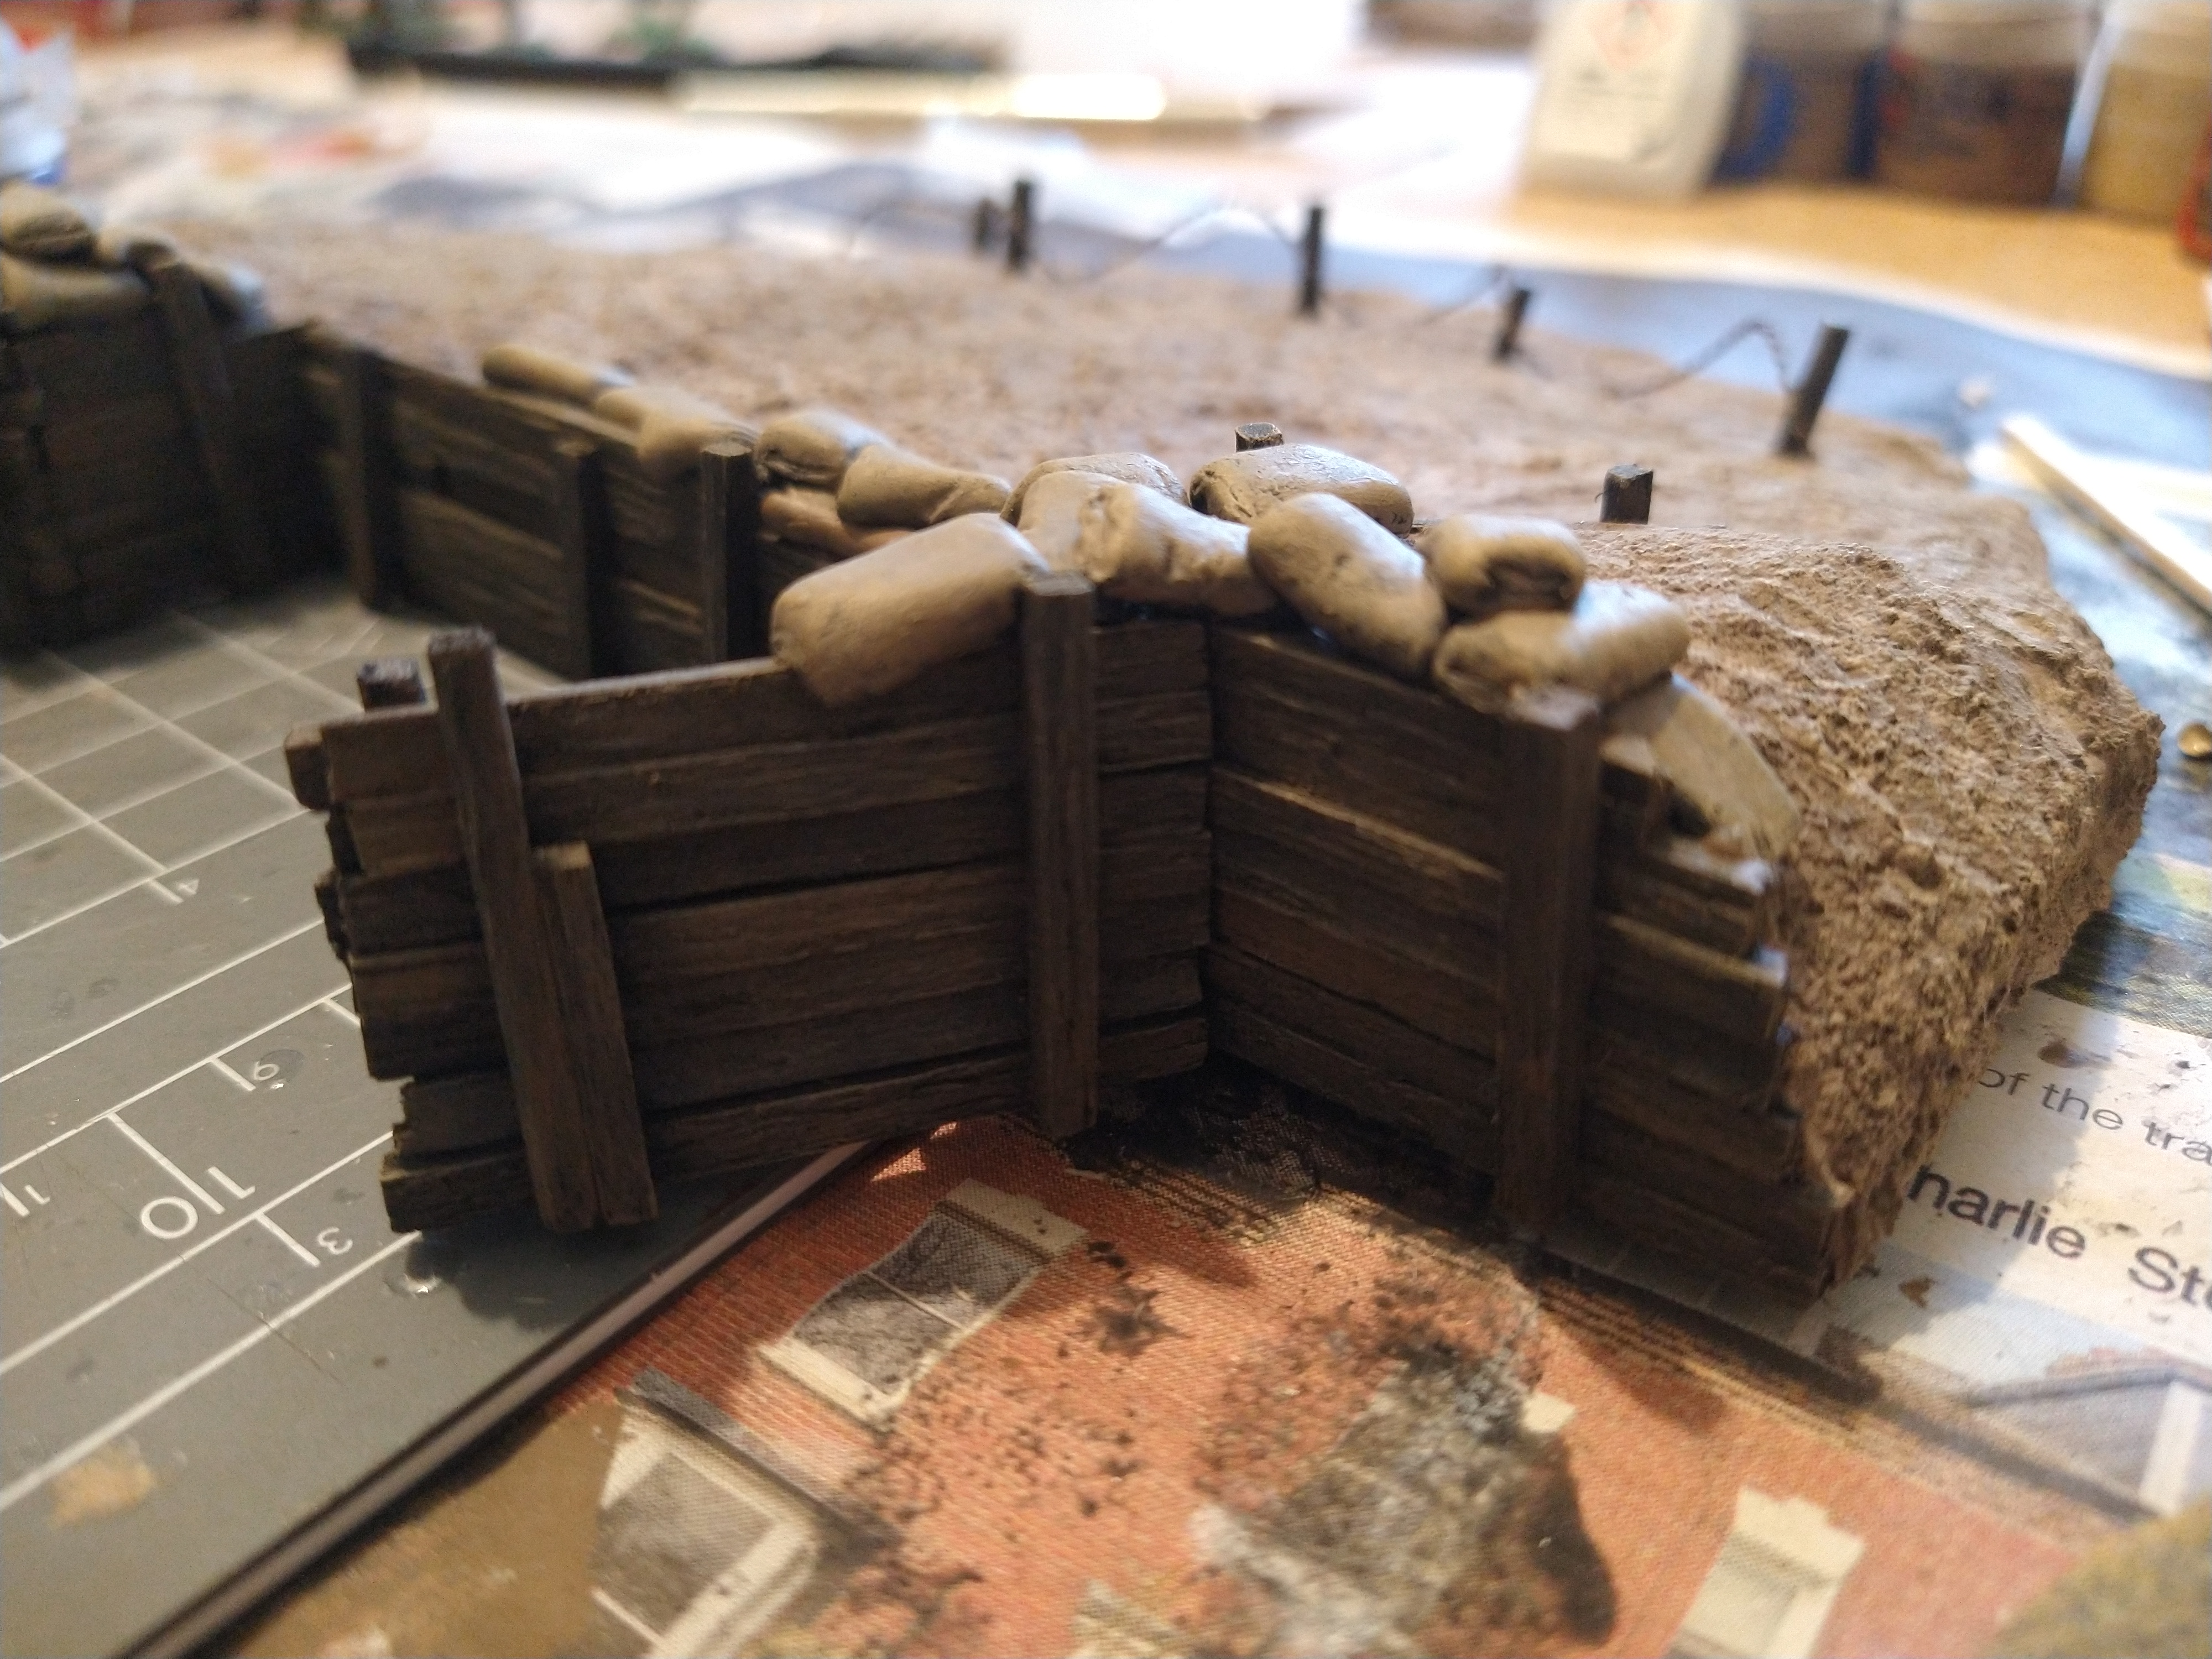
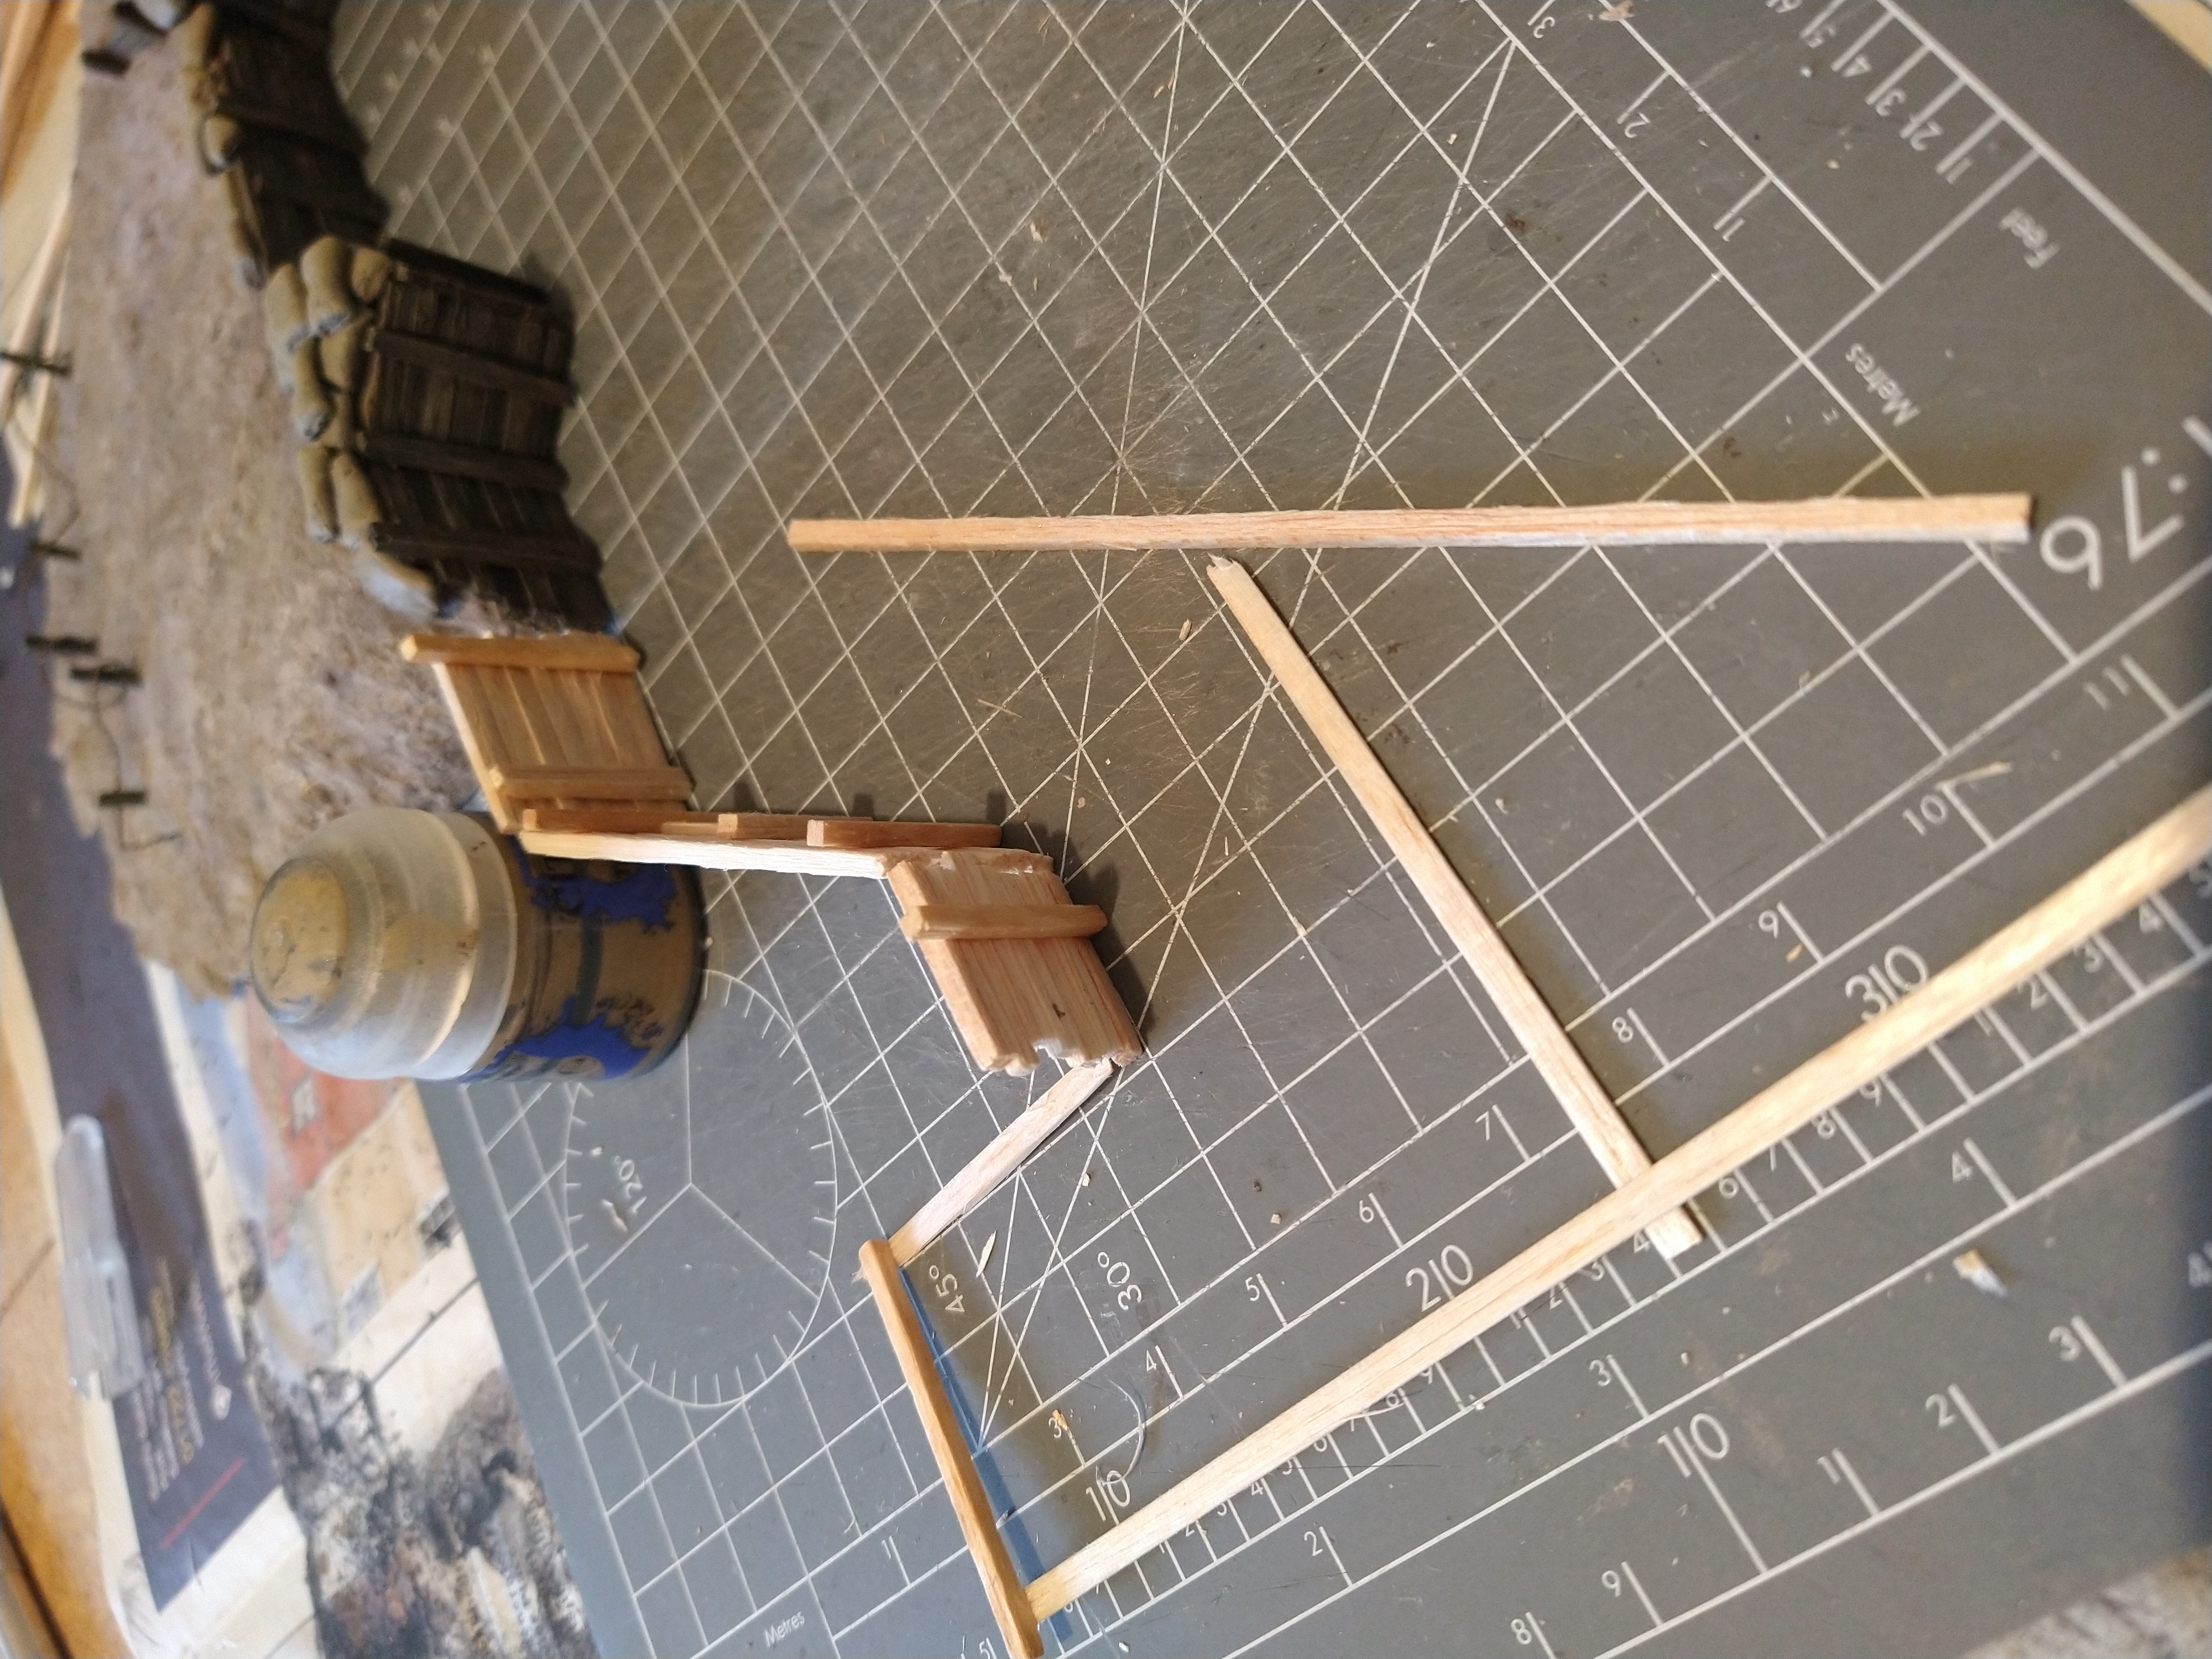
I build up the front of the trench first and that will then shape how the rear section needs to be consturcted.
Generally, the walls are 7 planks high – but I add in some variation of this in places.
As each panel is make, I glue them together (I expect this to break several times through moving / positioning – but it allows me to see how the shape is forming).
As I construct, I keep using off cuts of the strips of plywood to “plan” out the final shape.
I always aim to build so I have approx 3.5cms between the front section / rear section – which gives plenty of space for a standard base to fit.
How its done ....
Once thats done, Cut the strips down to the size you want to create each “panel” of the trench wall.
The supports are matchsticks cut down to size (I vary the length of these to add some interest when looking at it once painted etc).
First, I glue the planks together just using a few spots of superglue. the supports are then glued on after using the cutting matt to make sure the support and bottom plank are the same height (genius!) so that there is no wobble or wierd visual when glued into its final position.

How its done ....
I dont think anything I have done here is going to be “ground breaking” or “Revolutionary” but this is the process I went through to make the trench section.
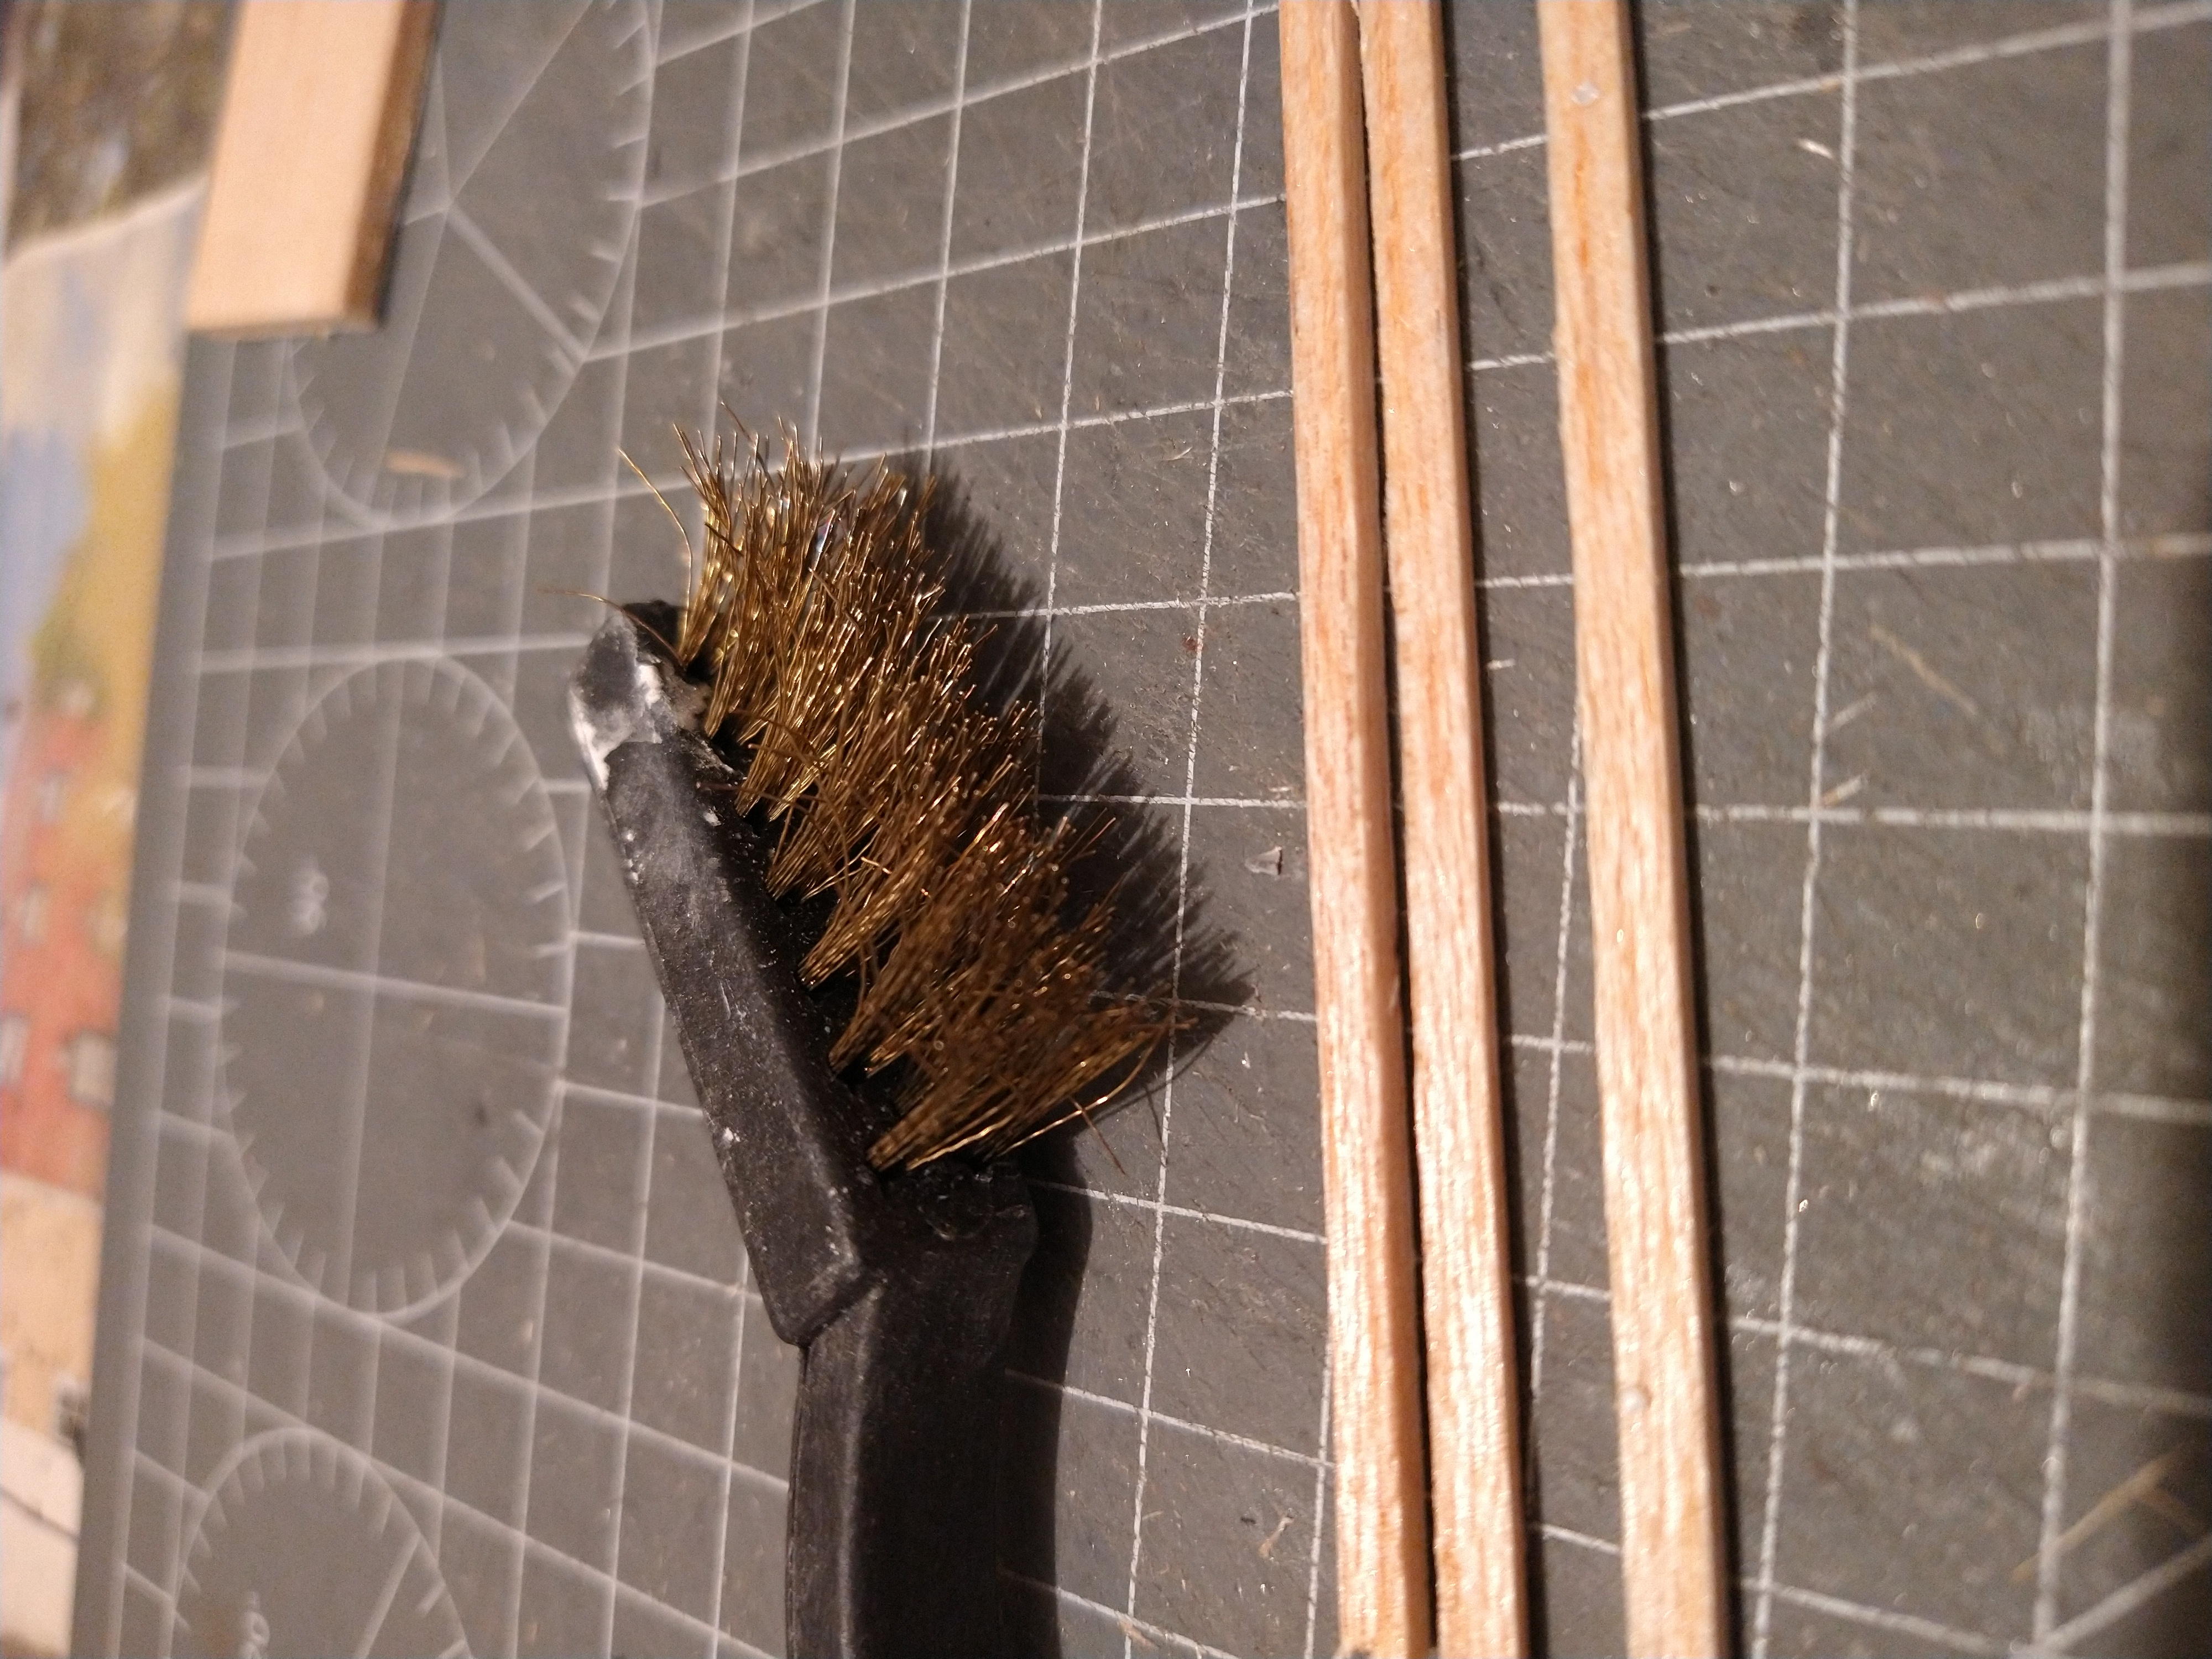
I used 2-3mm thick plywood, and cut some thin strips (about 1-2mm wide). the thickness of the plywood would be the finished facing of the wooden planks in the trench.
Once cut, I simply run a small wire brush over the length of the plywood to add more graining (I did this on both sides, purely so that when cutting to final size and glueing, it didnt matter which way I glued the pieces together).