Something of a Maze


Recommendations: 467
About the Project
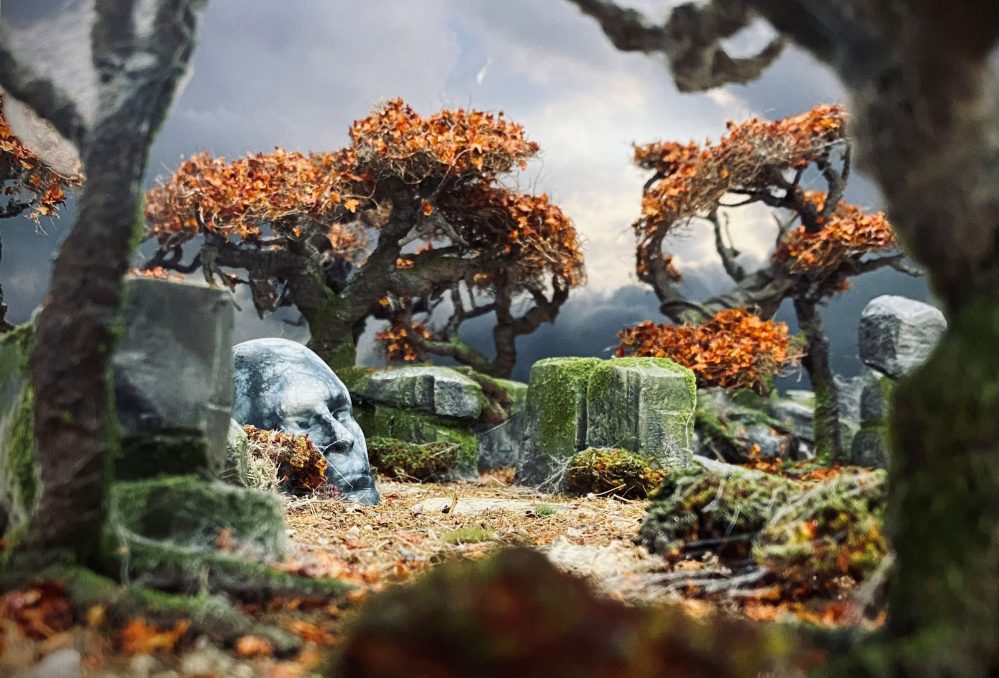
The forest looms before you, a twisted and foreboding realm where ancient trees writhe, their gnarled branches grasping for the sky. The air is heavy with the scent of damp earth and decay, and the silence is oppressive, punctuated only by the creaking of ancient limbs and the soft rustling of leaves. The trees seem to claw across the rocks, their roots like talons gripping the stone, as if trying to pull themselves free from the very earth itself. The bark is twisted and grotesque, like the skin of some ancient, leathery beast, and the branches are like arthritic fingers, reaching out to snatch at the unwary traveller. Dead trees stand like sentinels, their branches reaching towards the sky, as if in supplication or warning. Moss covers the rocks, a soft, emerald shroud that seems to muffle the sound of footsteps, making it impossible to shake the feeling that you are being watched. Old statues lie half-buried in the undergrowth, their features untouched by time or the elements. They seem to mark the graves of forgotten gods, or perhaps they are ancient guardians, tasked with watching over secrets that have long since been lost to the ages. The forest floor is a tangle of roots and rocks, with hidden dangers lurking in every shadow. The trees close in around you, their branches tangling overhead, casting deep, foreboding shadows that seem to move like living things. This is a forest of ancient, primal power, a place where the very woods seem to be alive, and where the laws of nature are twisted and distorted. It is a place that seems to draw you in, like a moth to a candle flame, promising secrets and power, but threatening only madness and despair. As you step into the forest, you feel a shiver run down your spine, a fear that is hard to shake. You know that you are not welcome here, that you are an intruder in a realm that is not your own. The forest seems to whisper secrets in your ear, tempting you to stay, to surrender to the darkness that lurks within.
Related Genre: Fantasy
Related Contest: TerrainFest 2025
This Project is Completed
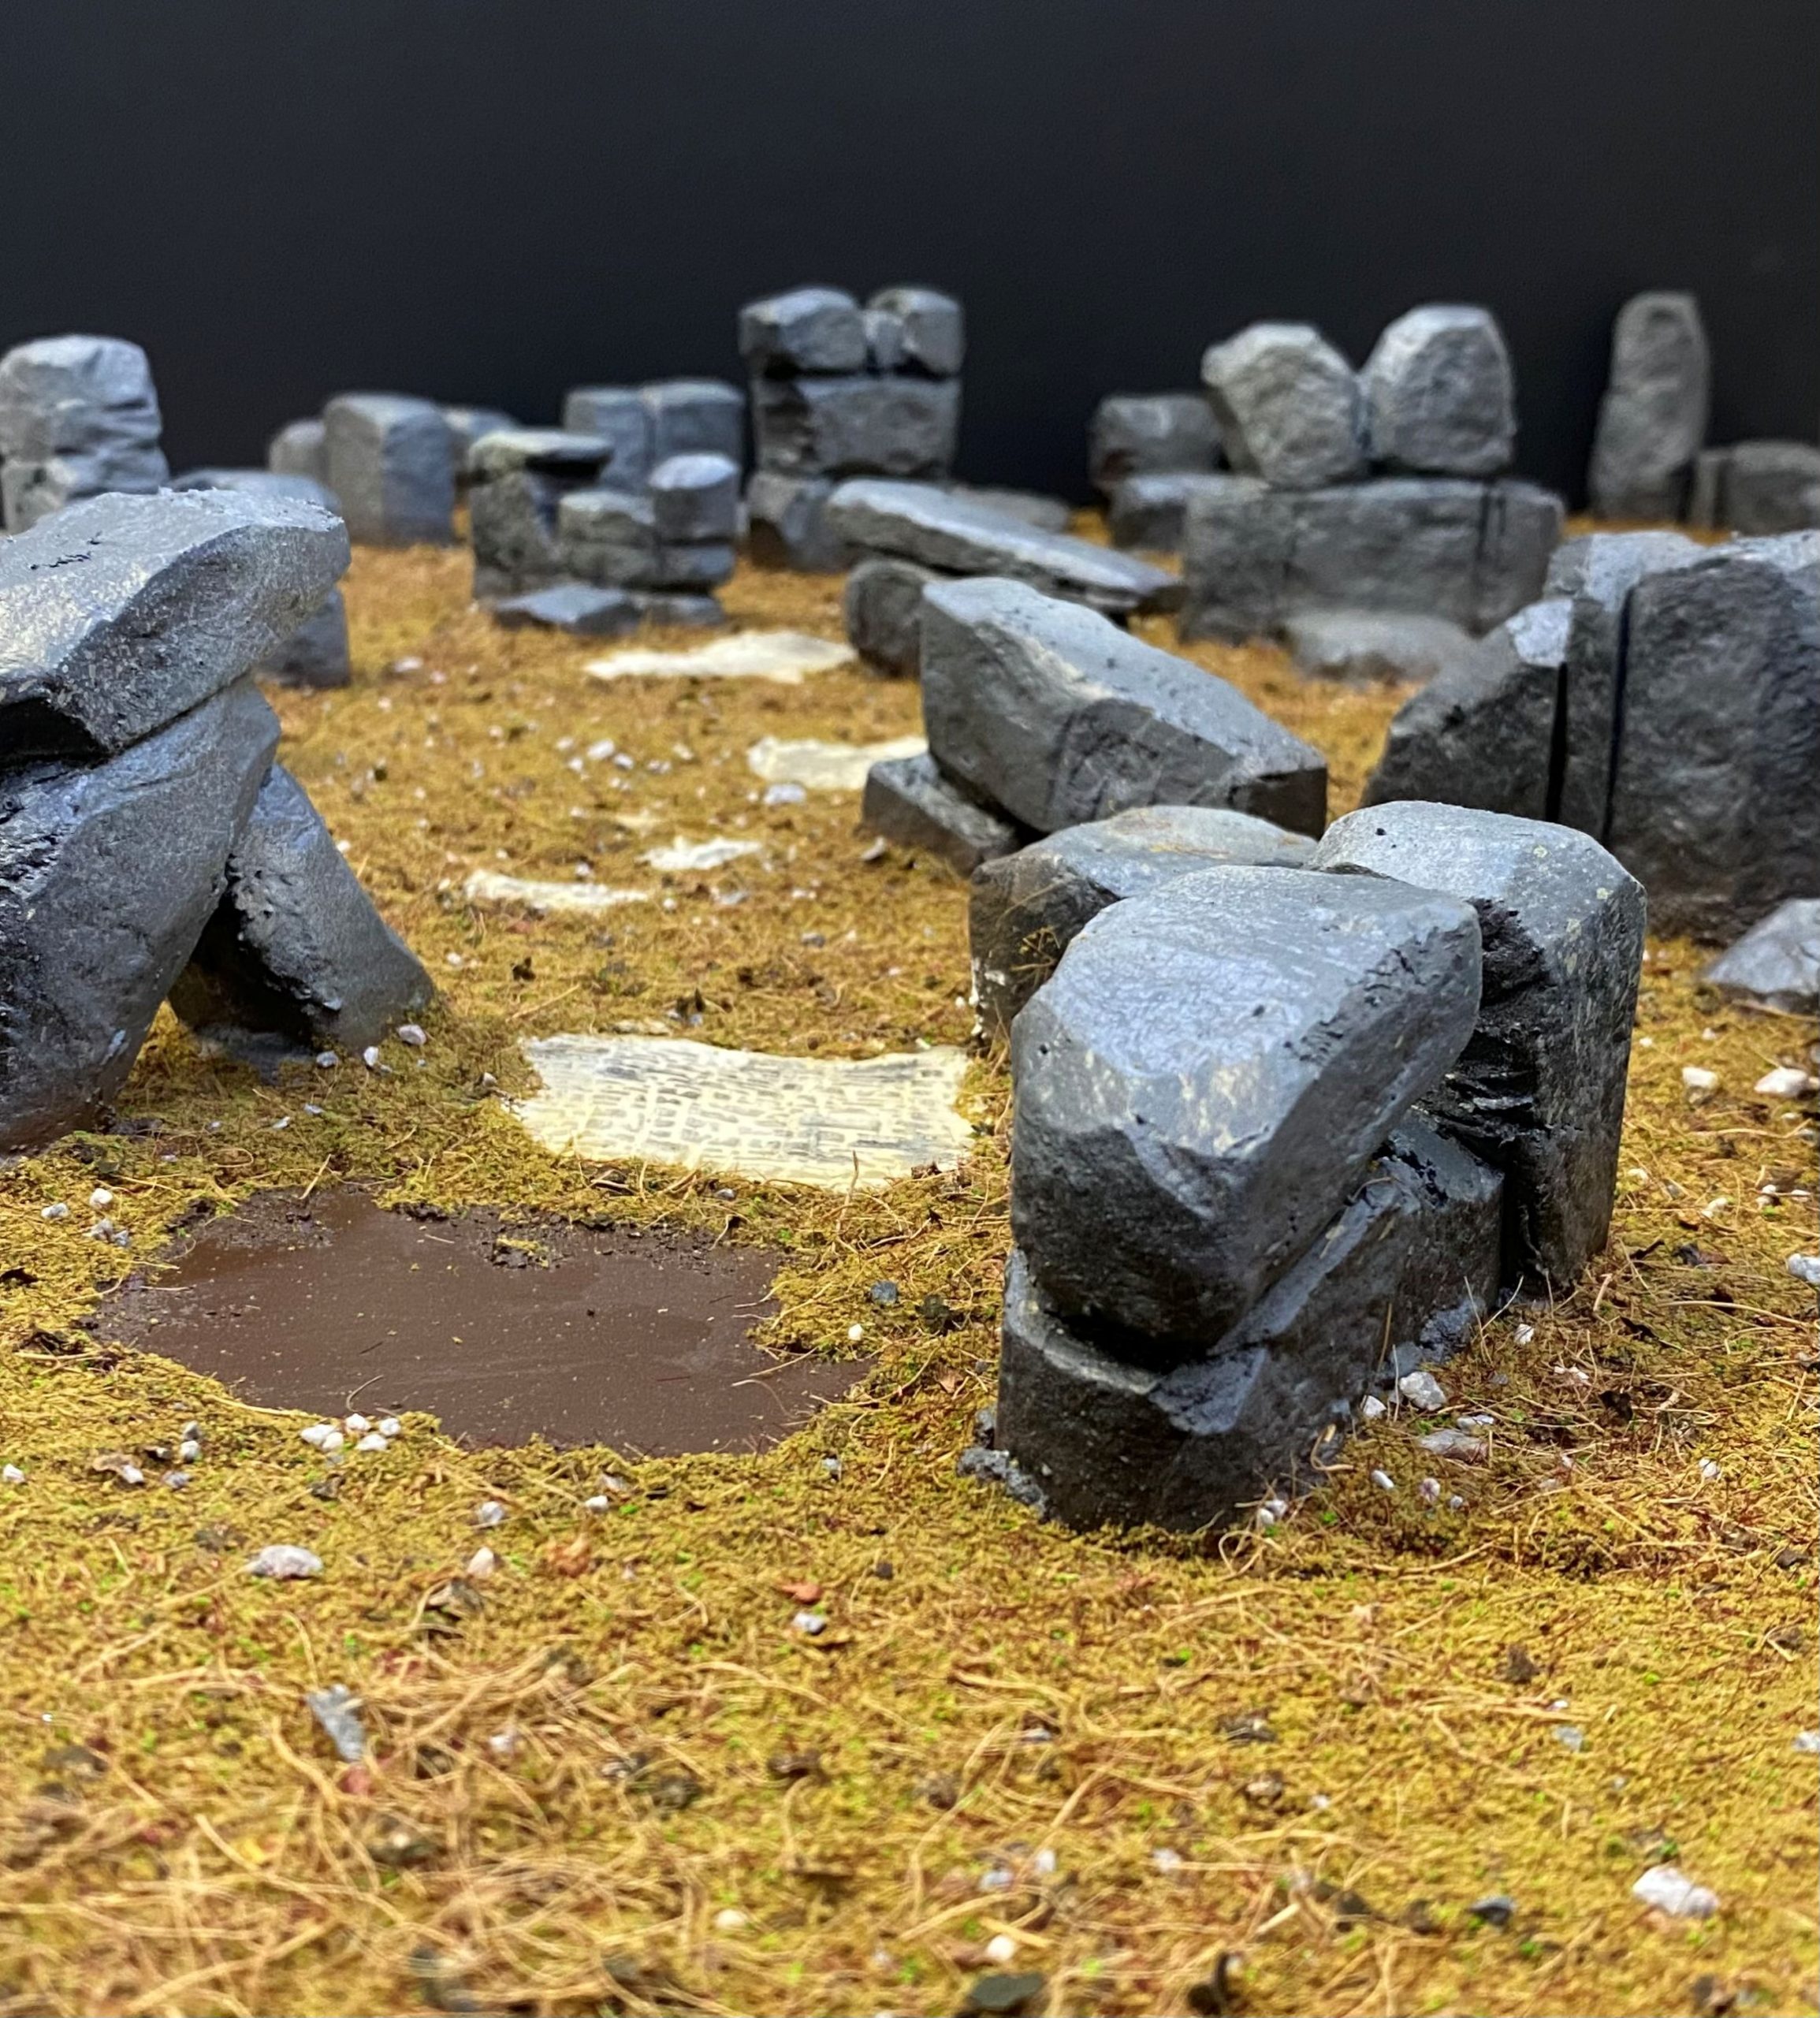
Rocks and stuff.
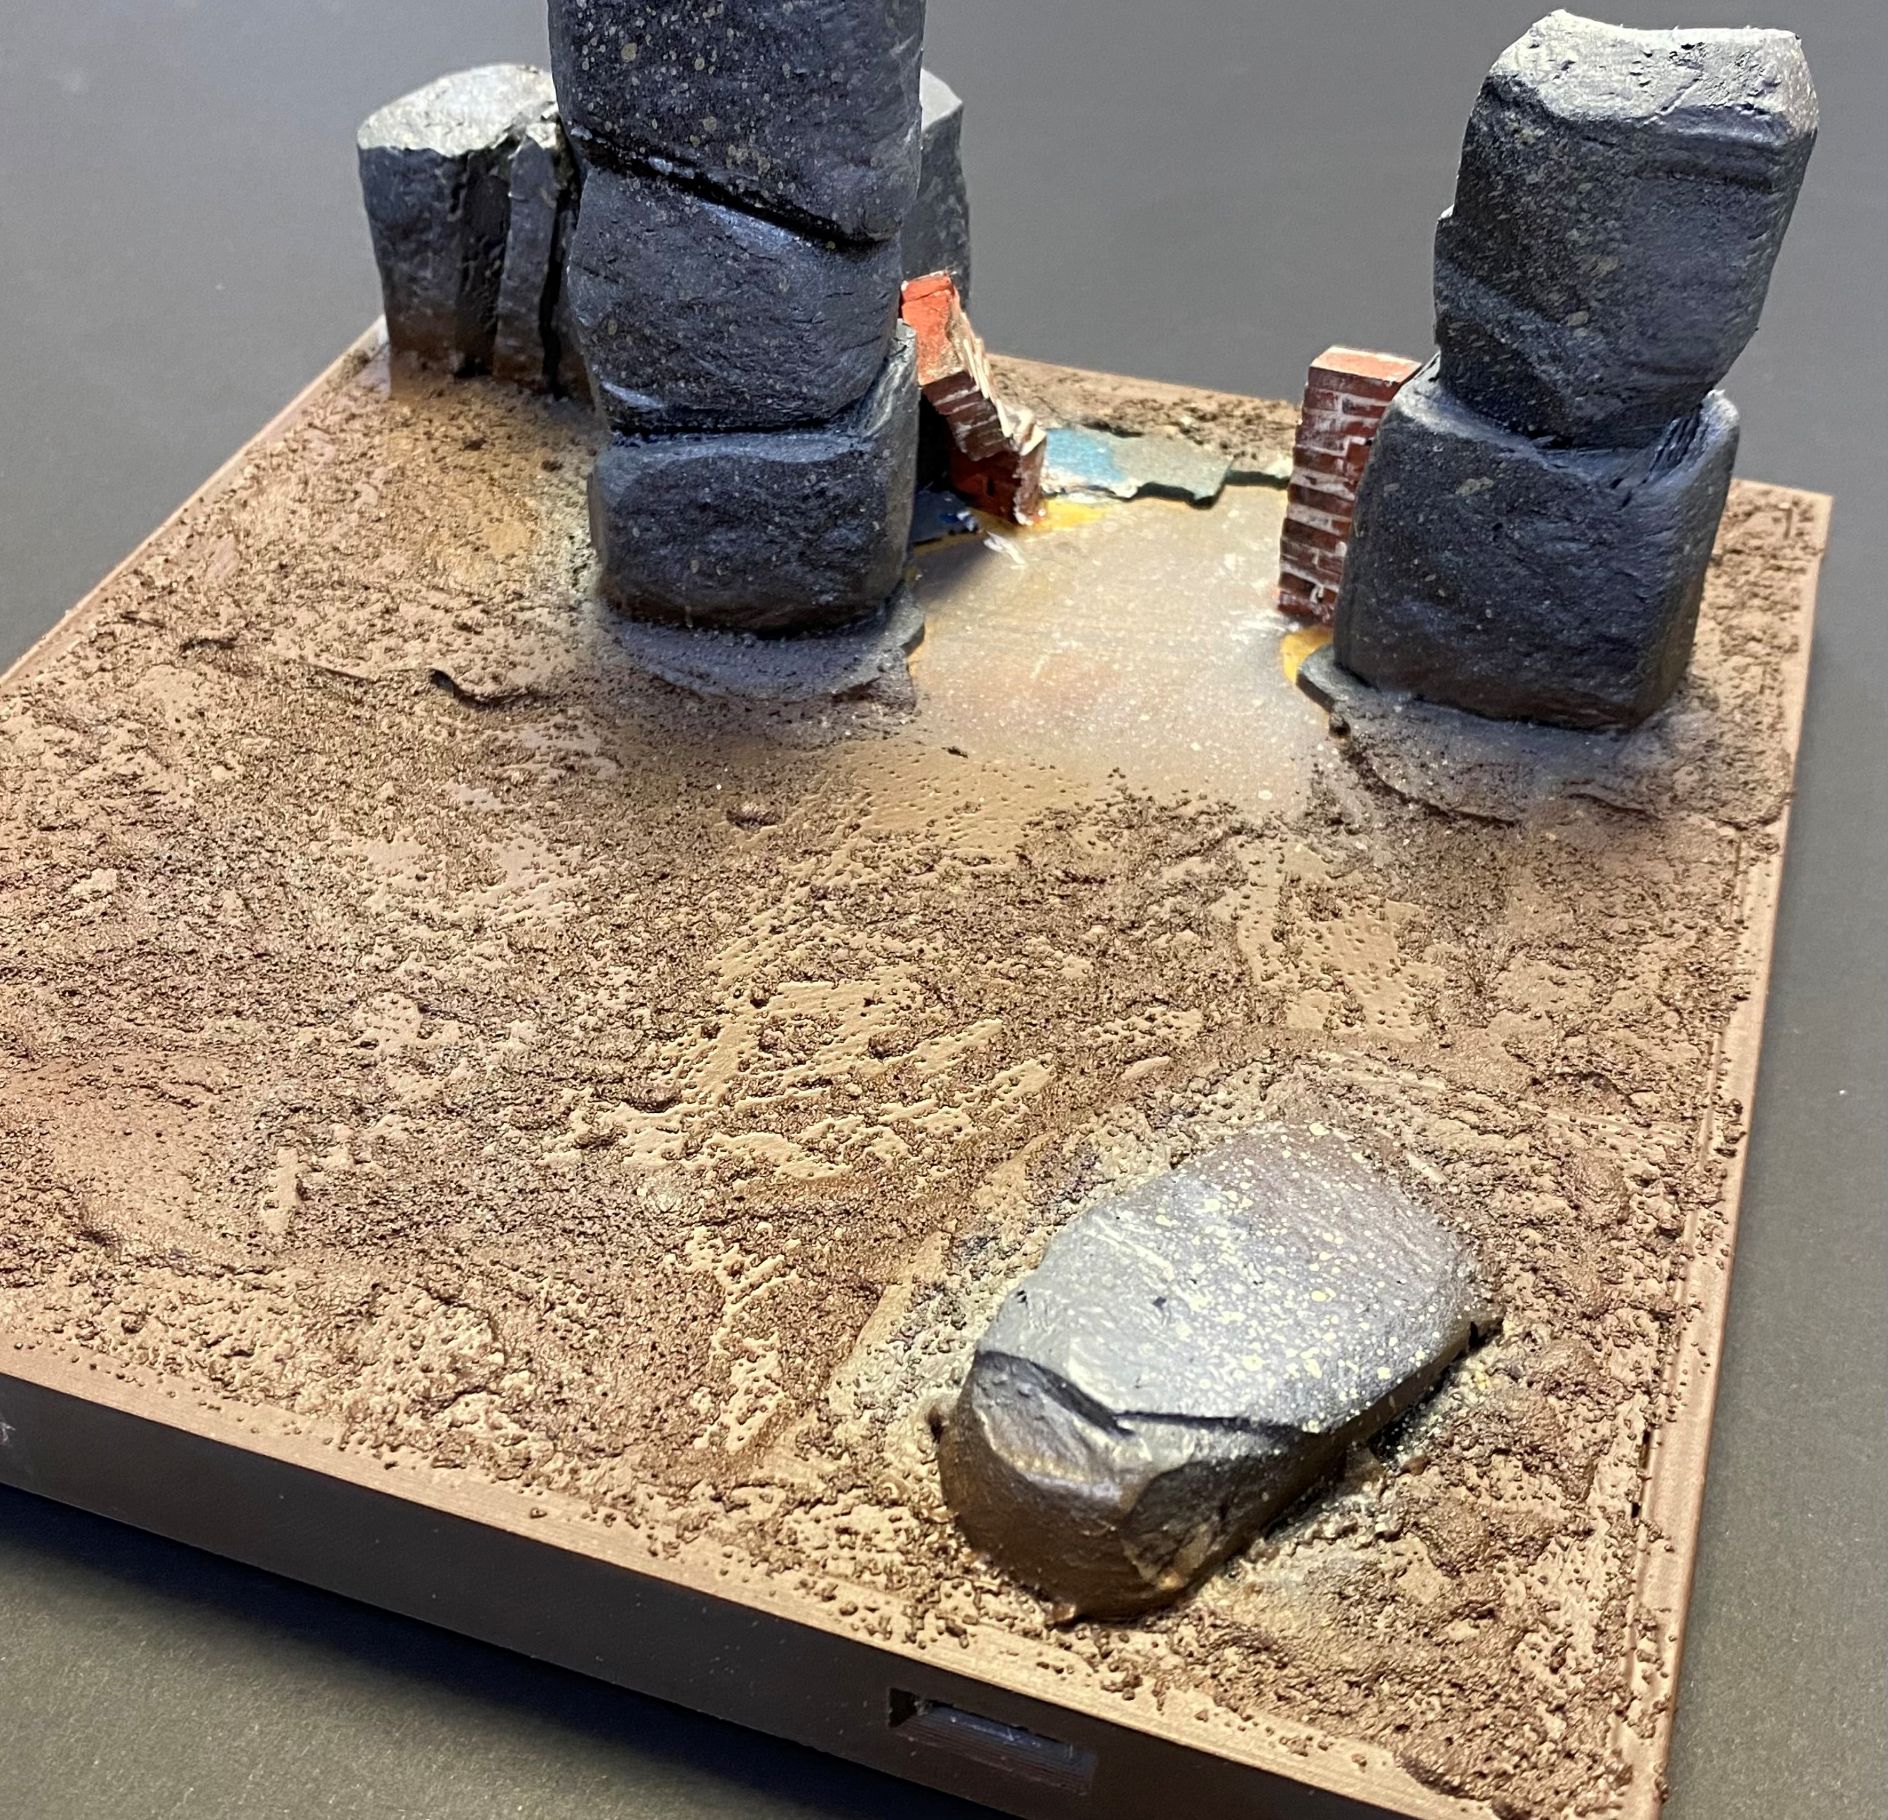
I used a single block of XPS foam to carve out some shapes to represent rock formations. I could have made each stone out of a separate piece, but I figured that by carving each piece to look like several rocks, it would negate the need to glue them together and possibly add some structural integrity to them.
To do this, I used a sharp knife and just took my time. I tried my best to create some interesting angles to some of them so that they didn’t end up looking like they were all carved from foam that was the same thickness.
I used 4 different heights of foam blocks. I am hoping that it is not too obvious that, in reality, these are just made from the same 4 repeated shapes.
Once carved into shape, I then used a ball of scrunched up tinfoil to make a rocky-like texture. I do have a rock-textured roller that I could have used, but just fancied keeping this old school.
Finally, the rocks were stuck down with hot glue.

I then mixed some beach sand, PVA glue, and some coloured oxide powder. I am not sure what it is called in different places, but it is a material mixed with cement to create coloured cement.
Honestly, the oxide is completely optional. I like to use it as it makes it really easy to see what has been covered with PVA and what hasn’t.

Next up was some Matt Mod Podge, which I had left over from my Dungeonalia build. This I had mixed with black paint. Again, the paint is completely optional, but it does help to show what you have covered with this stuff and what you have missed.

The Sand, PVA, Oxide mix was applied to the base and the Mod Podge to the rock formations. I gave the rock formations two coats for some extra protection.
Once dry I used an Oak Brown spray to dust over the whole thing to create a good undercoat to build up from.

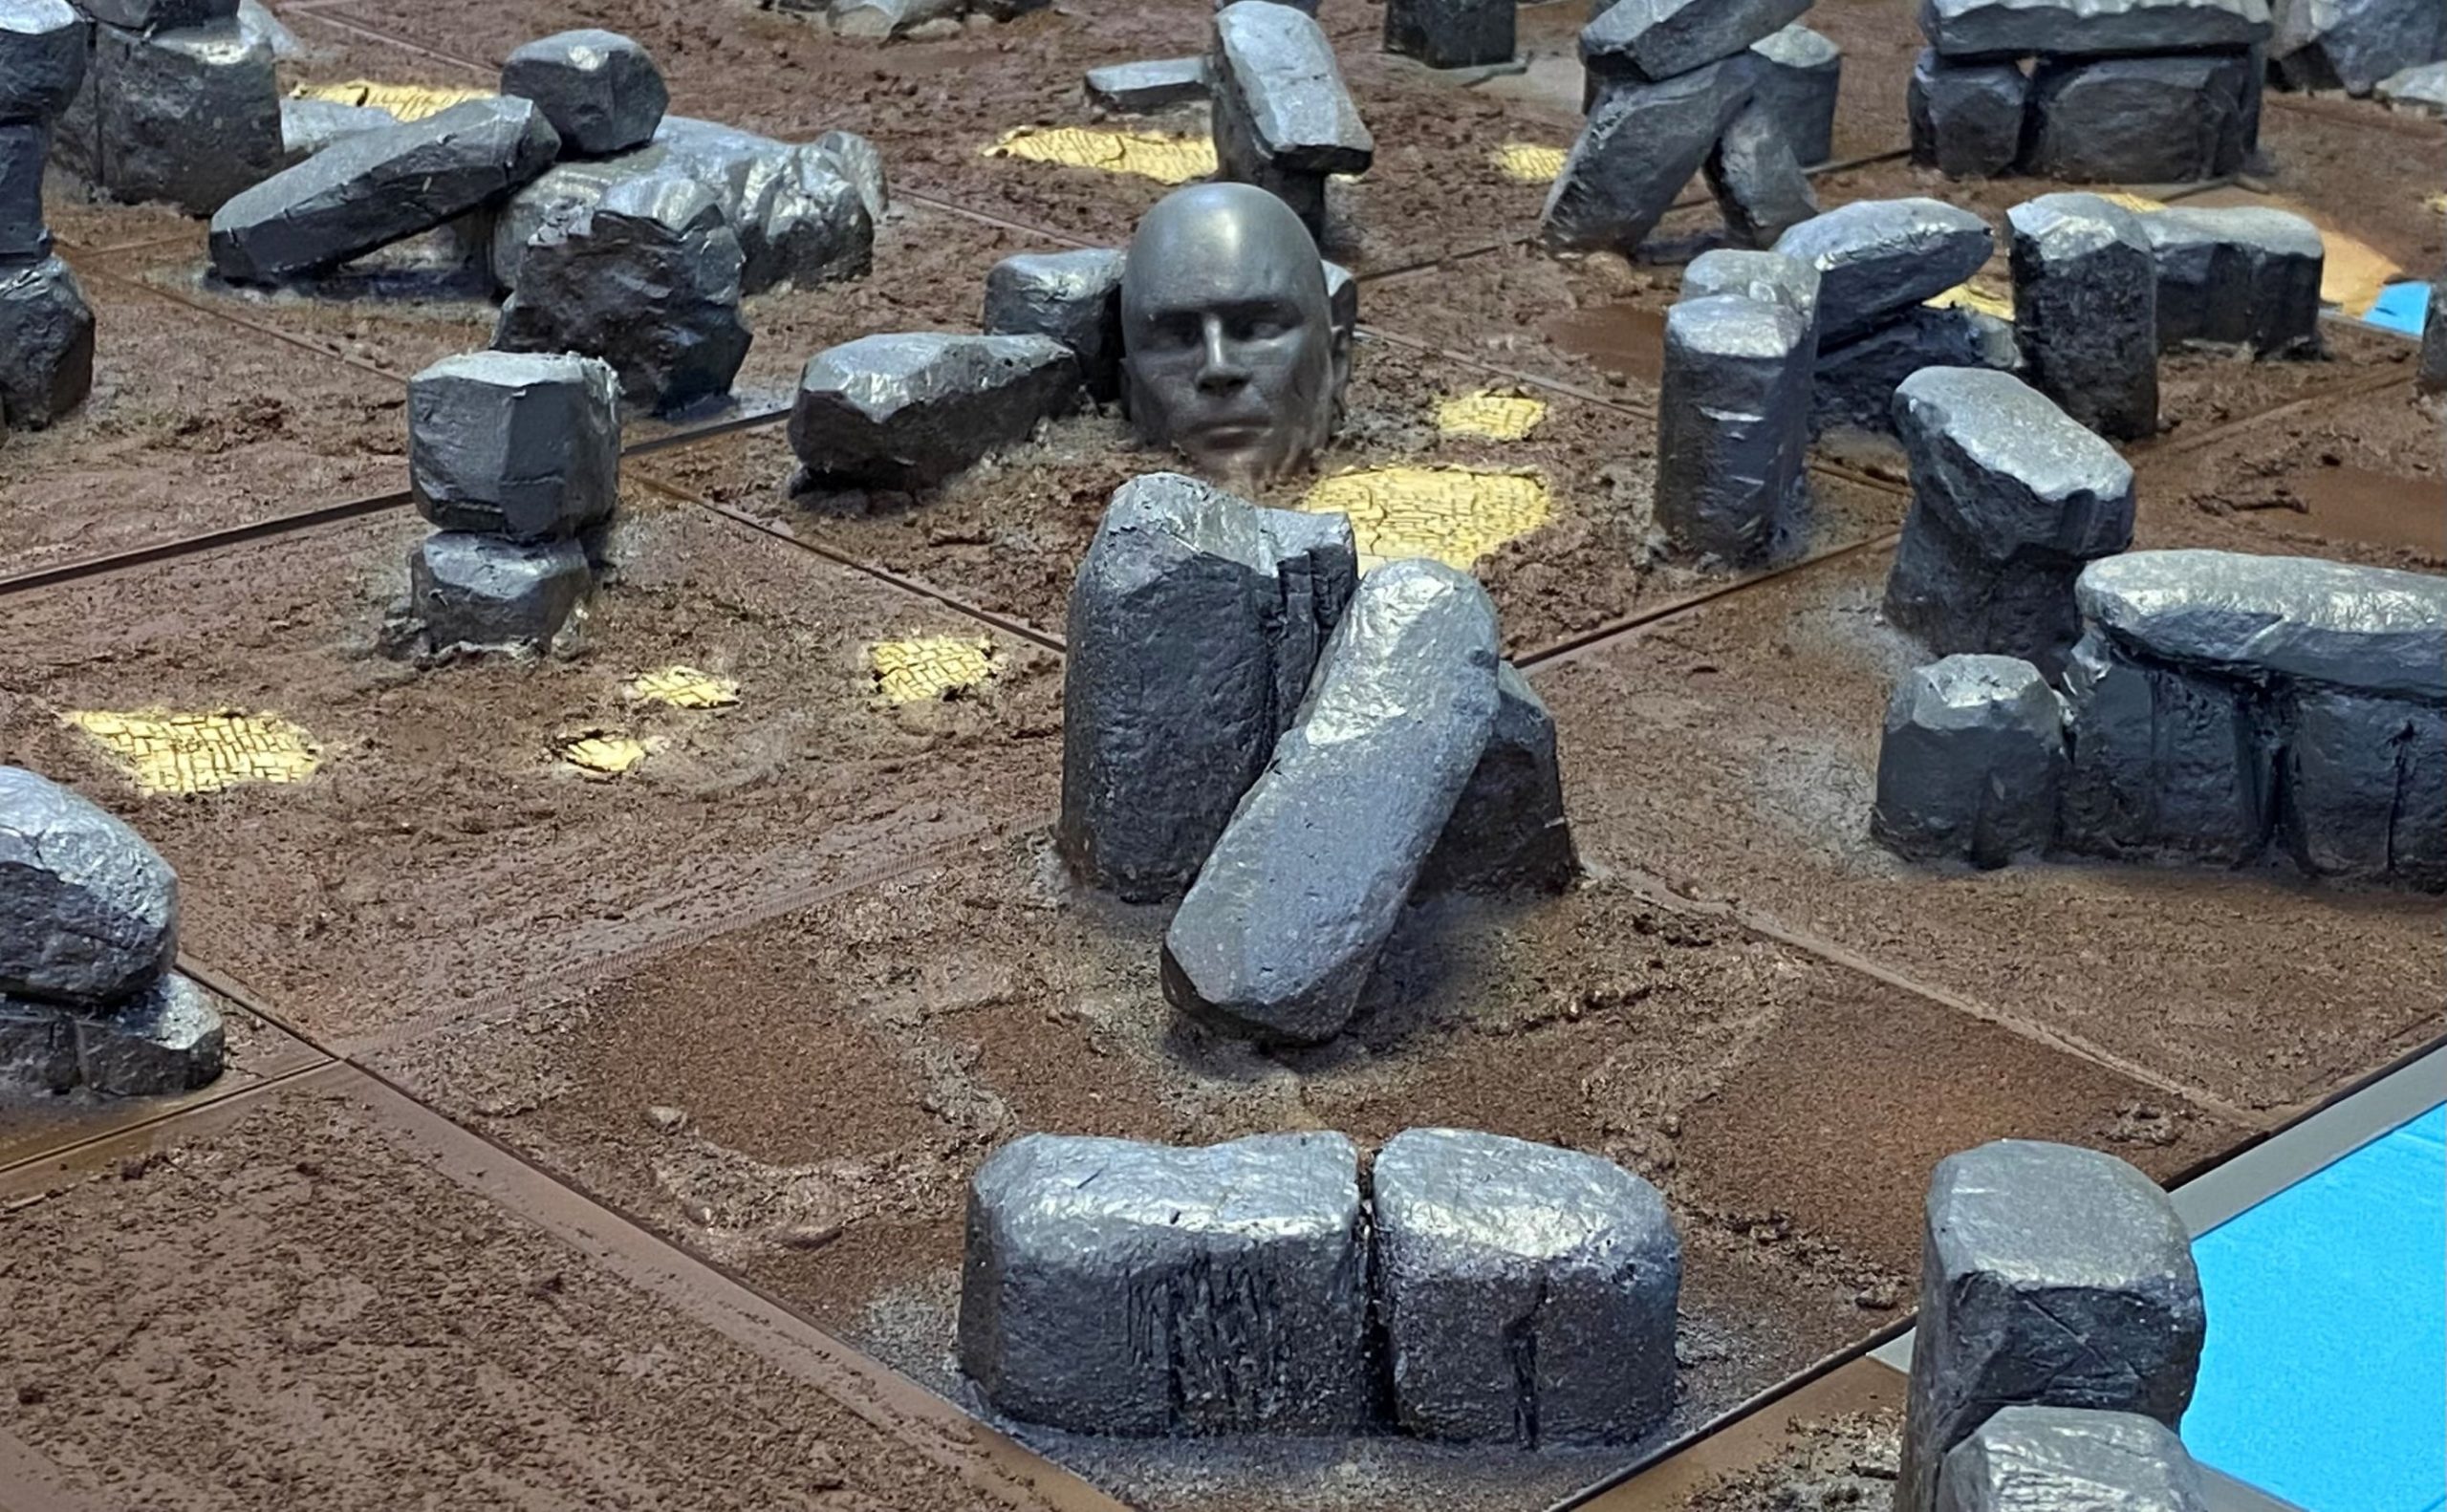
I also added a few other elements to the bases to give some variety. Like this head, for example. Apparently, a little head should never be overlooked.
This was 3D printed on one of my filament printers just so Sundancer can zoom in on it to admire the mould lines 🙂 (I joke, of course)
I have a few bits of this large statue that will be scattered around and eventually covered, to some degree, with plant life and weathering.
I rather like the idea of there being some obviously man-made elements in this forest. Who built them, how long ago, why were they built, so many questions.

So that is where I am up to at the moment. Work is pretty busy for me at this time of year, and the heat is almost unbearable. It makes it very hard to get motivated, although drying time for things is ridiculously fast.
I have a few other elements that have to be added before I can start painting and then detailing. Also, possibly a few electronics that I may add to the build. Time restraints permitting, of course.
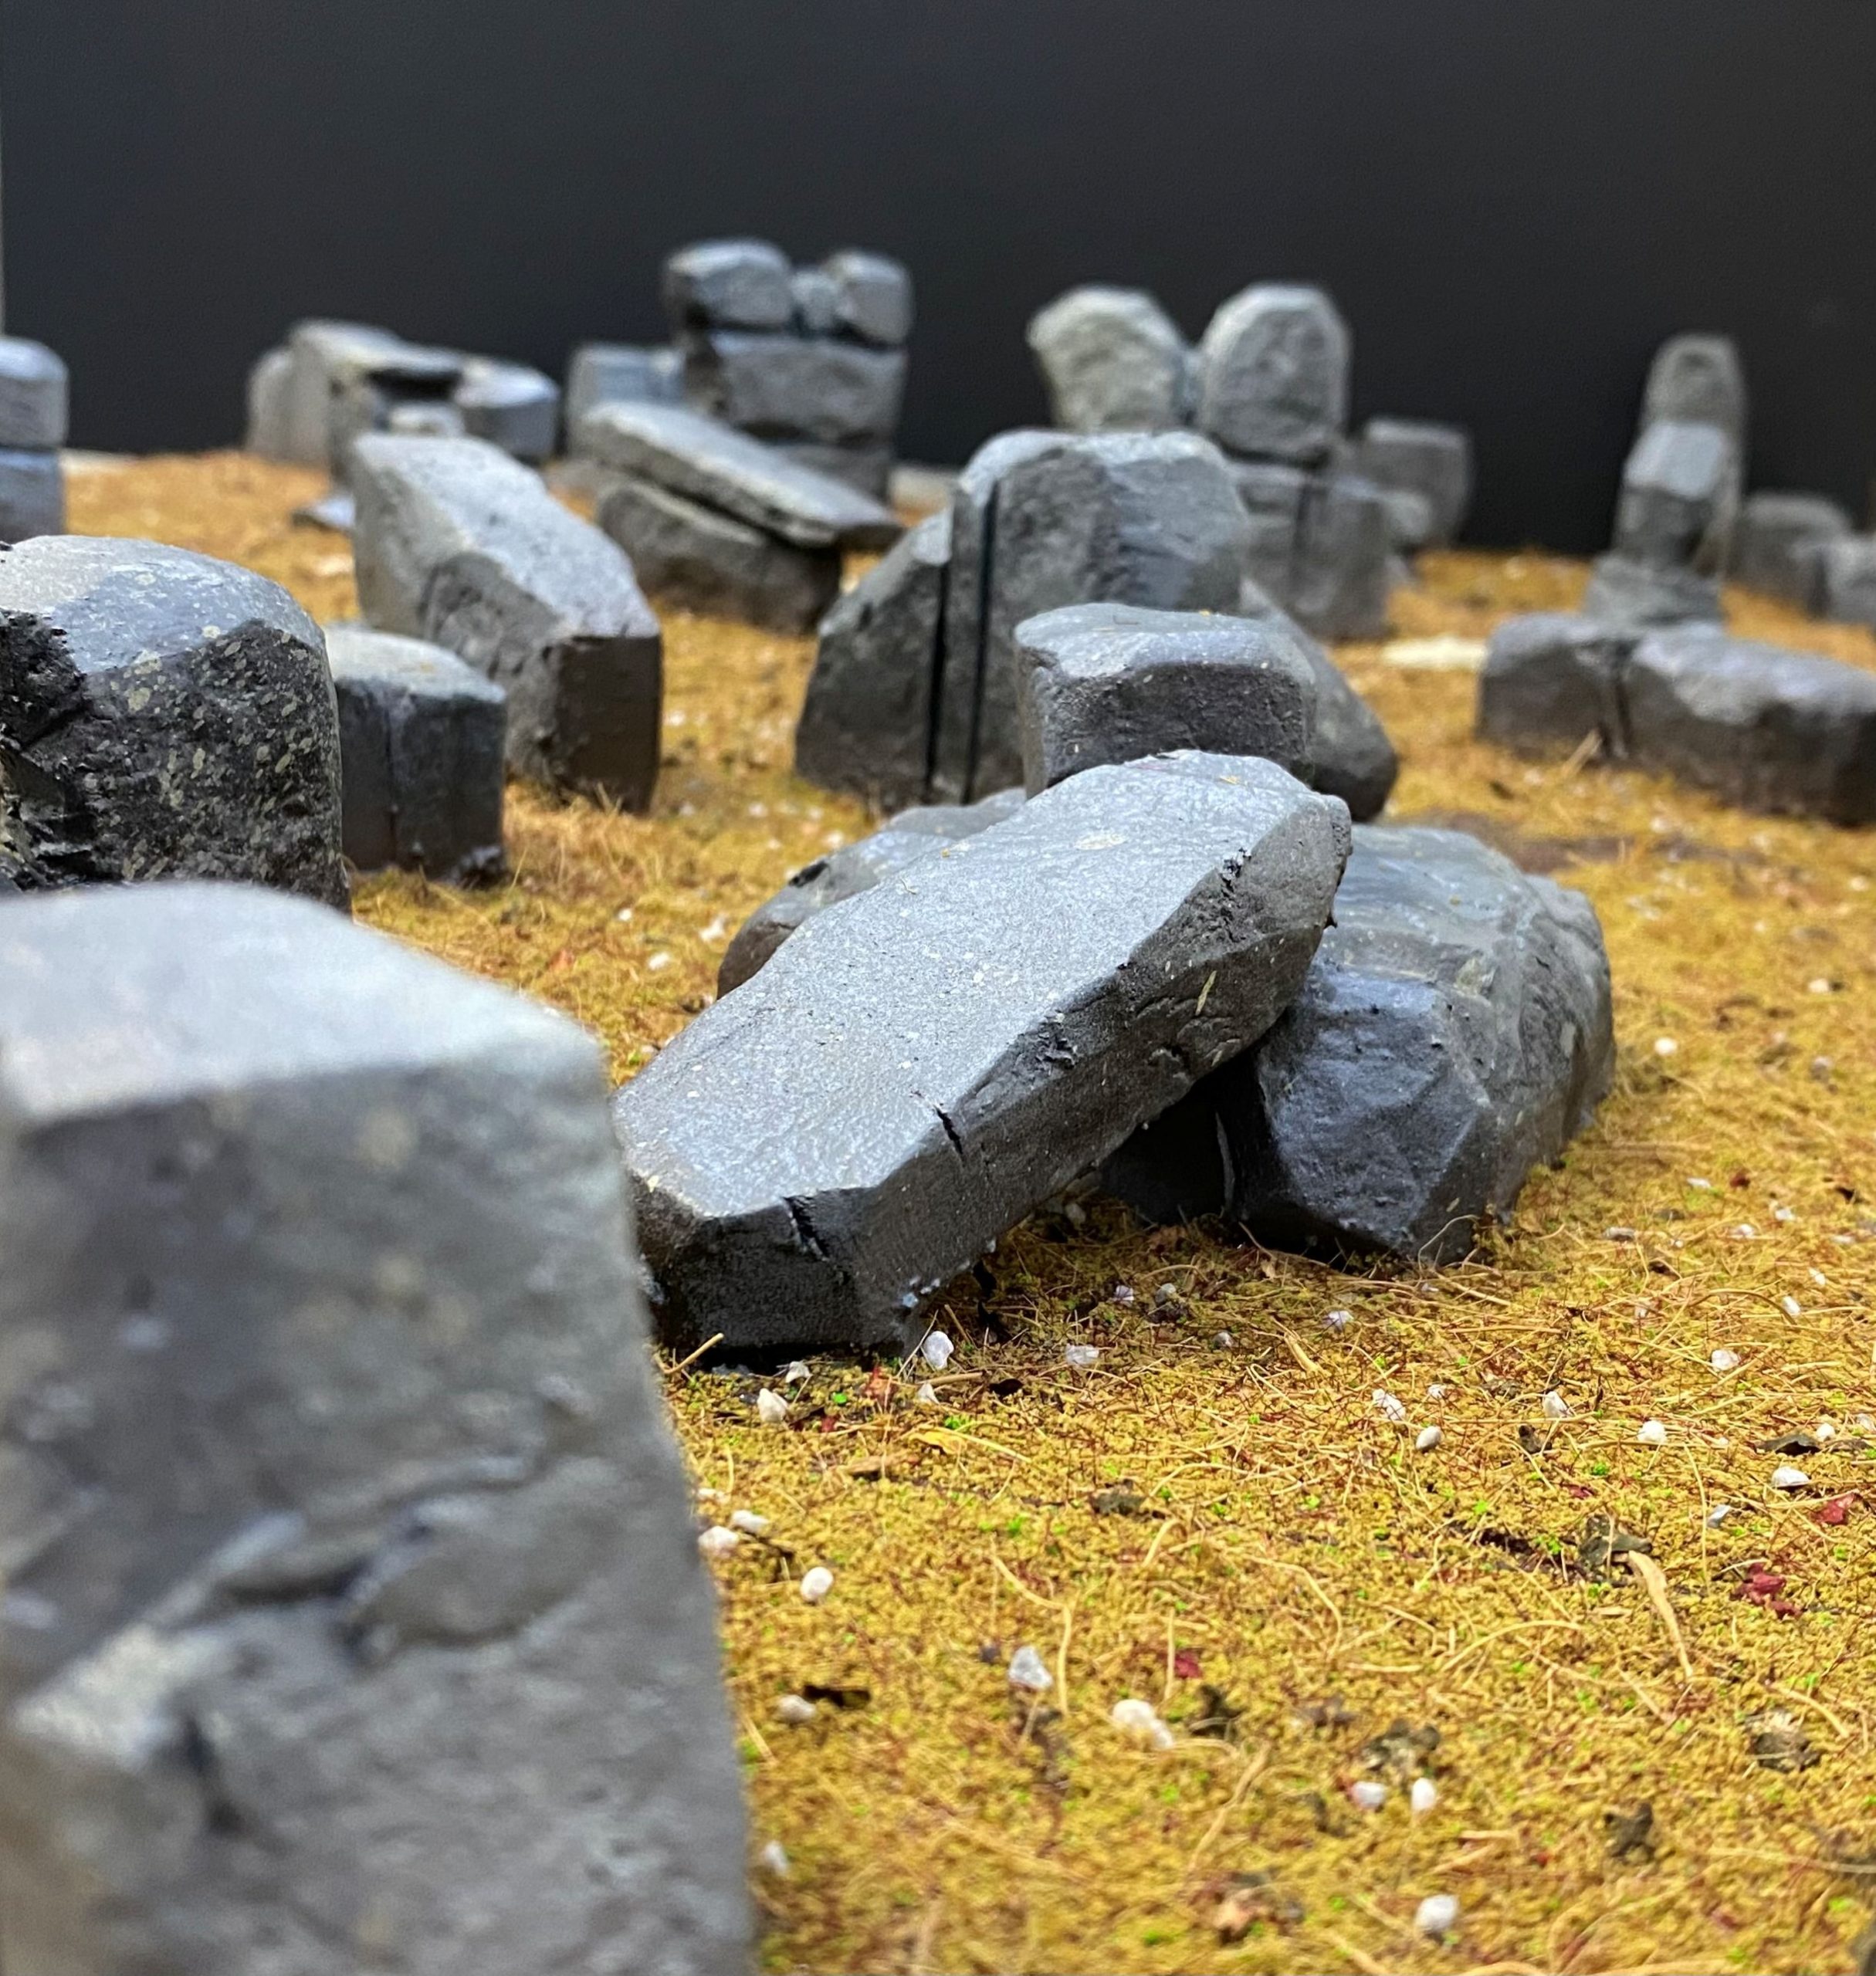
Rock Placement
I just thought I would add a small post about rock placement.
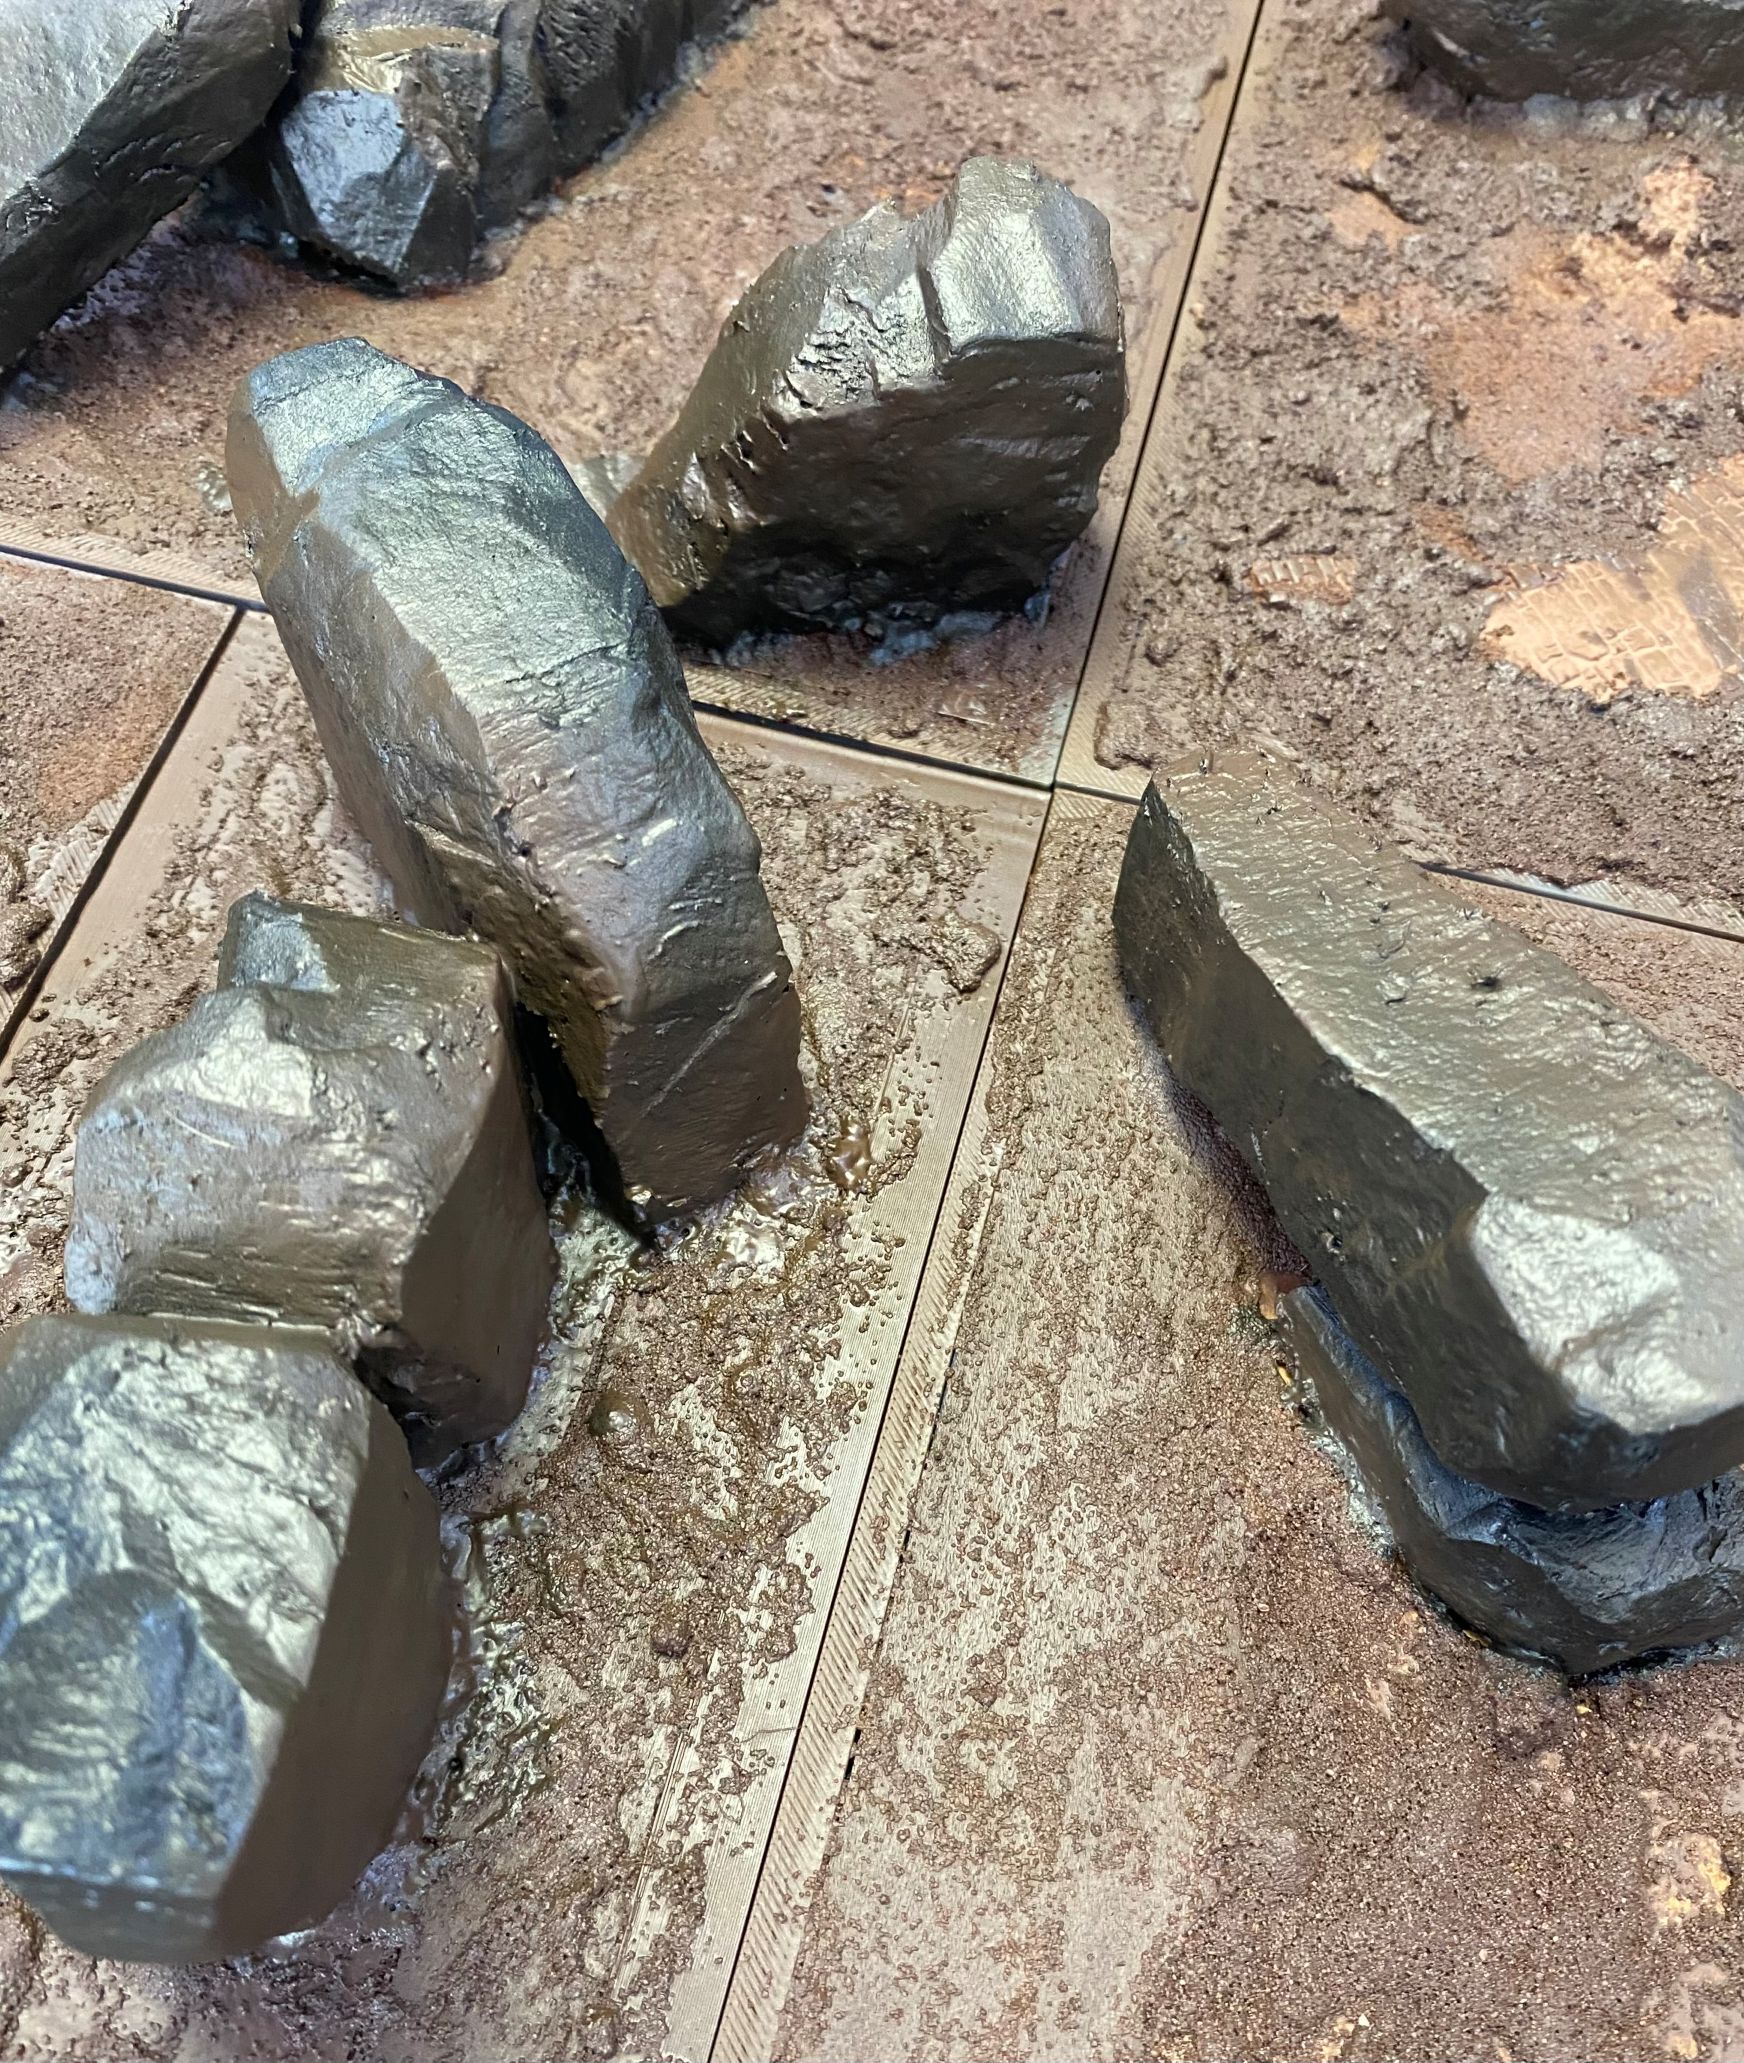
I have tried to angle the rock formations so that the majority of them do not run parallel to the layout edges. I have tried to add them at slight angles for the most part.
My reasoning for this is that straight lines look less natural, so when I see straight lines running parallel with the table edge, my brain automatically sees it as looking a bit off.
With the rocks at a slight angle, I find it helped confuse my brain a bit and makes the whole layout feel a lot less manufactured. I think that this will add a lot to make the whole ‘it’s a maze’ feel a bit more confusing and harder to work out direct paths.
I have also tried to add the rocks in such a way that they create pathways between them, which can be changed up by simply rotating or moving different tiles around.


Angling the rocks has allowed me to position different tiles next to each other in some interesting ways to create openings.
By going up to the edges on some, it has also allowed me to create some more solid, impenetrable walls.

I will use a similar methodology when it comes to placing the bushes, trees and other elements so that hopefully when it all comes together, it helps to create a maze-like feel.
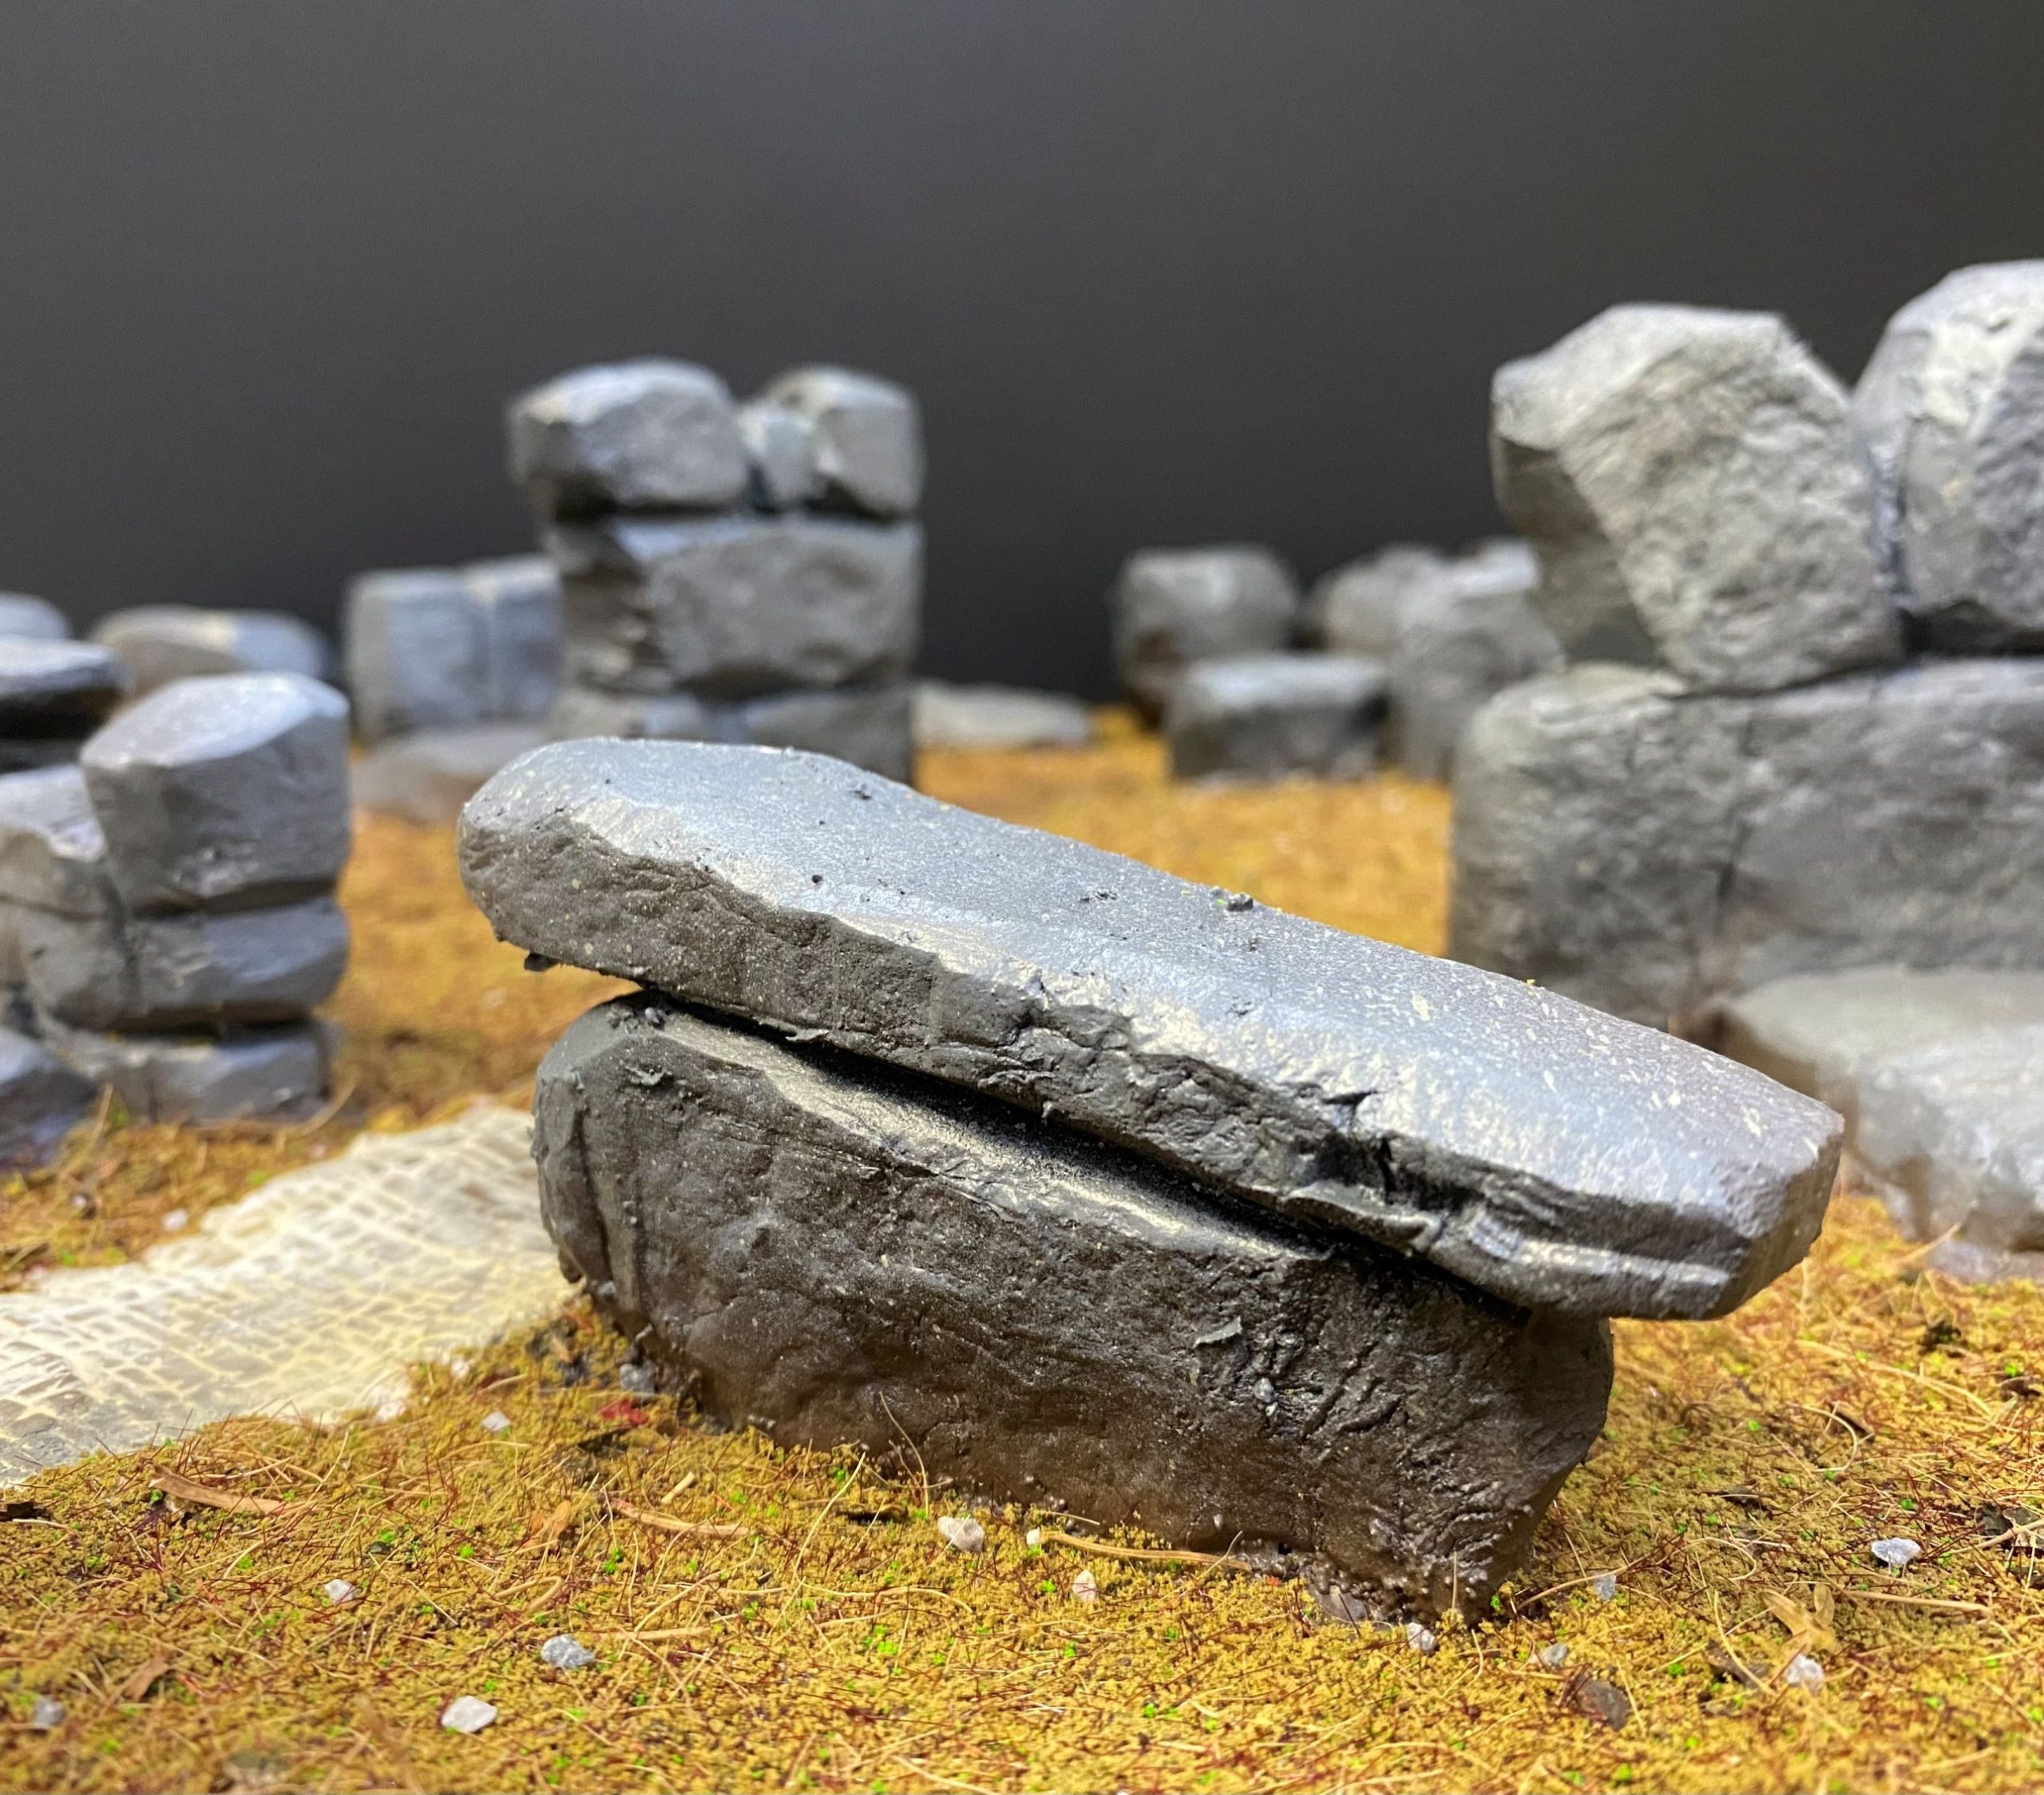
Current Position
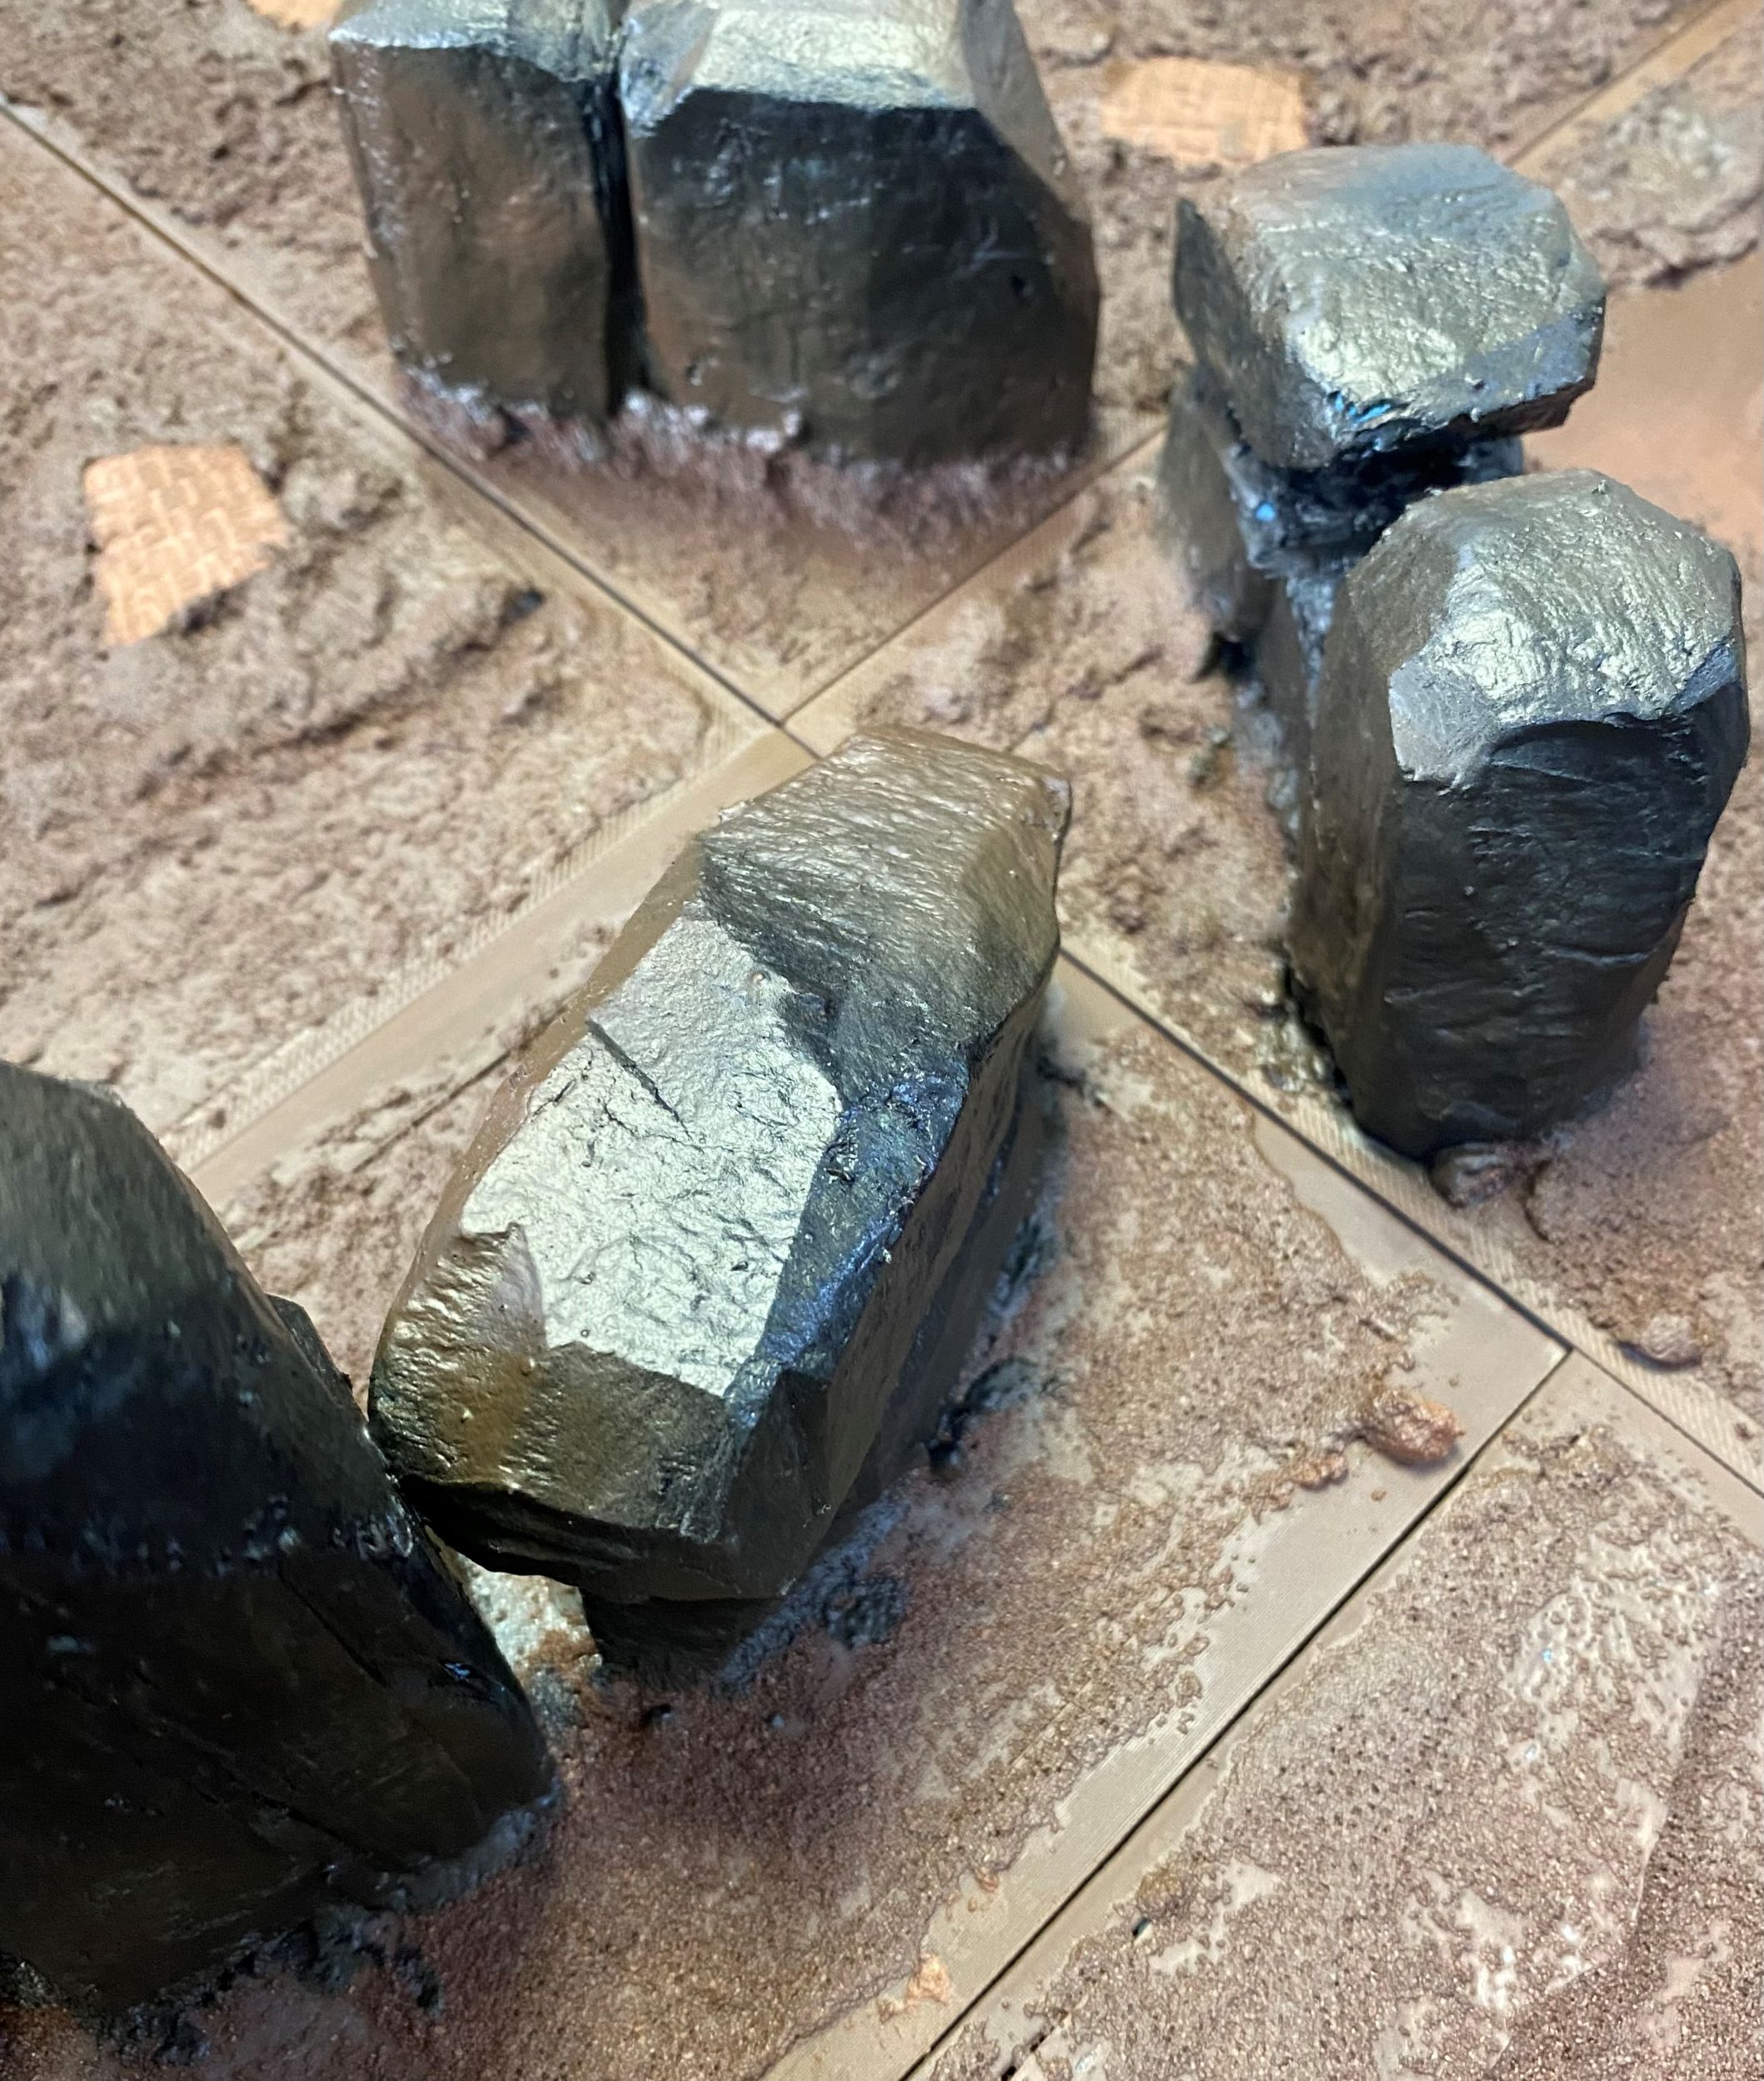
The next step was to give all the rocks an undercoat in a different colour so I could start to visualise the different elements interacting with each other.
For this, I turned to my trusty Rattle-cans.
I love using Rattle-cans on terrain, it just makes things so much quicker.
I literally just grabbed whatever colours I had that were in Grey, off white or bone(ish) colours and sprayed the rocks.
Once I have a few more elements stuck down, I can start weathering the rocks, but for the time being, I just needed them a different colour so that they were easily distinguishable from the brown undercovering of each tile.
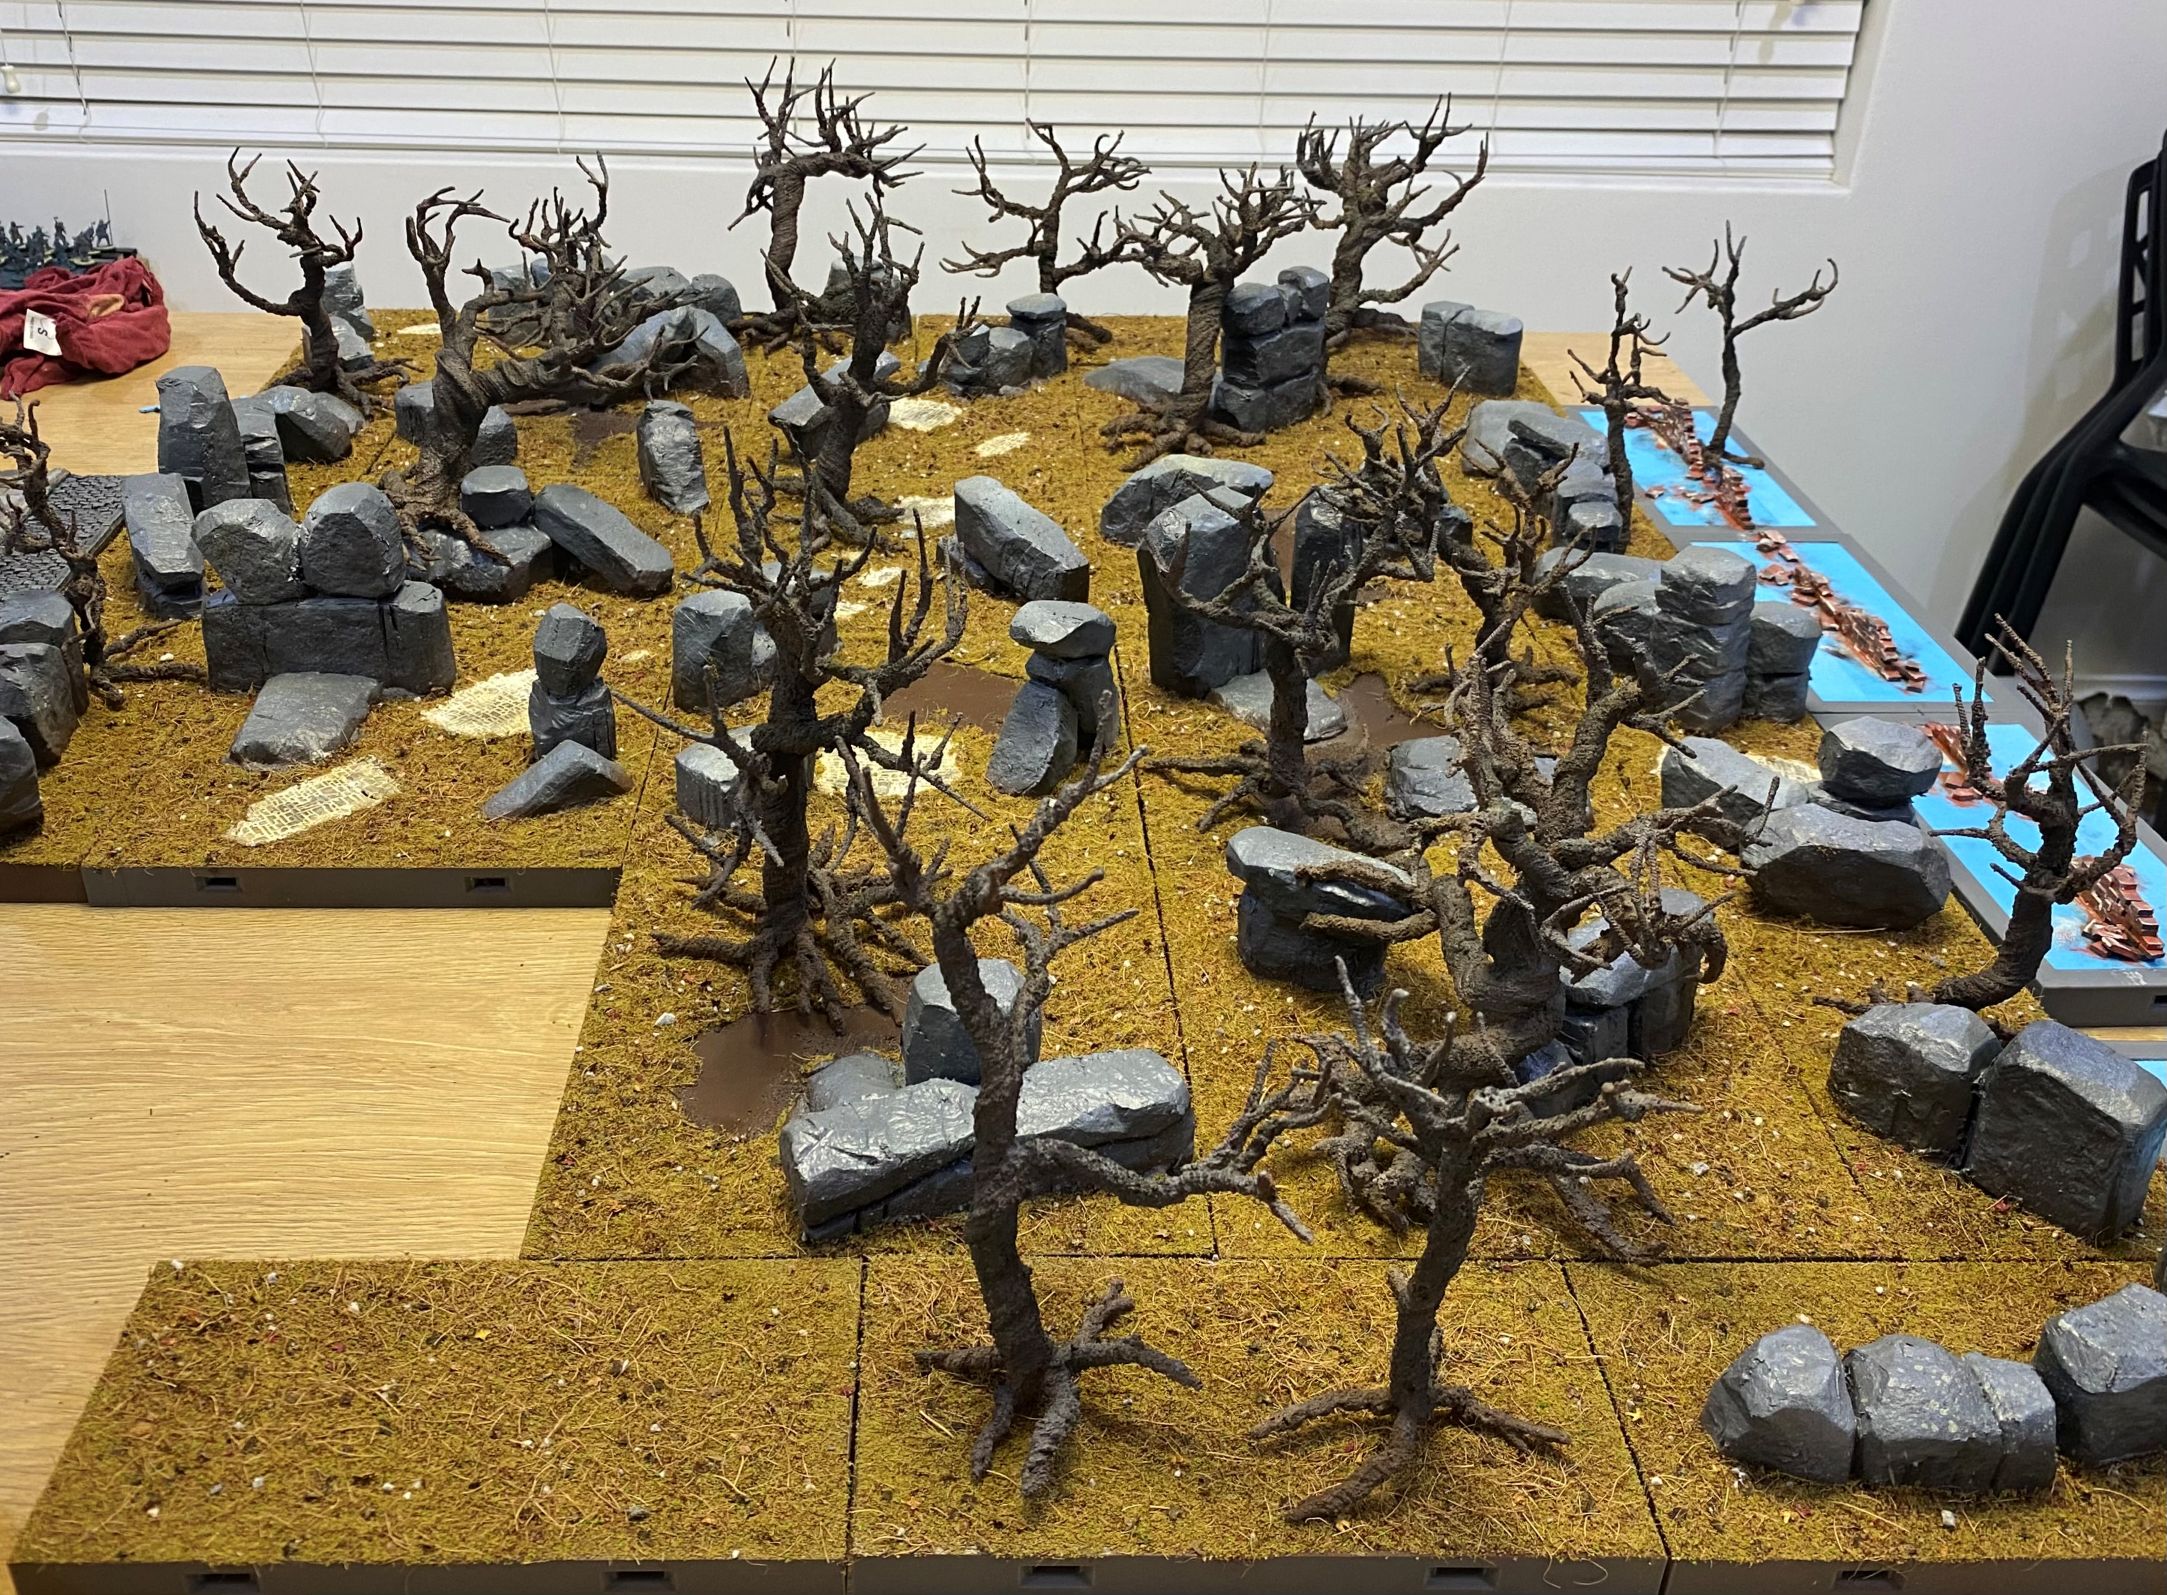
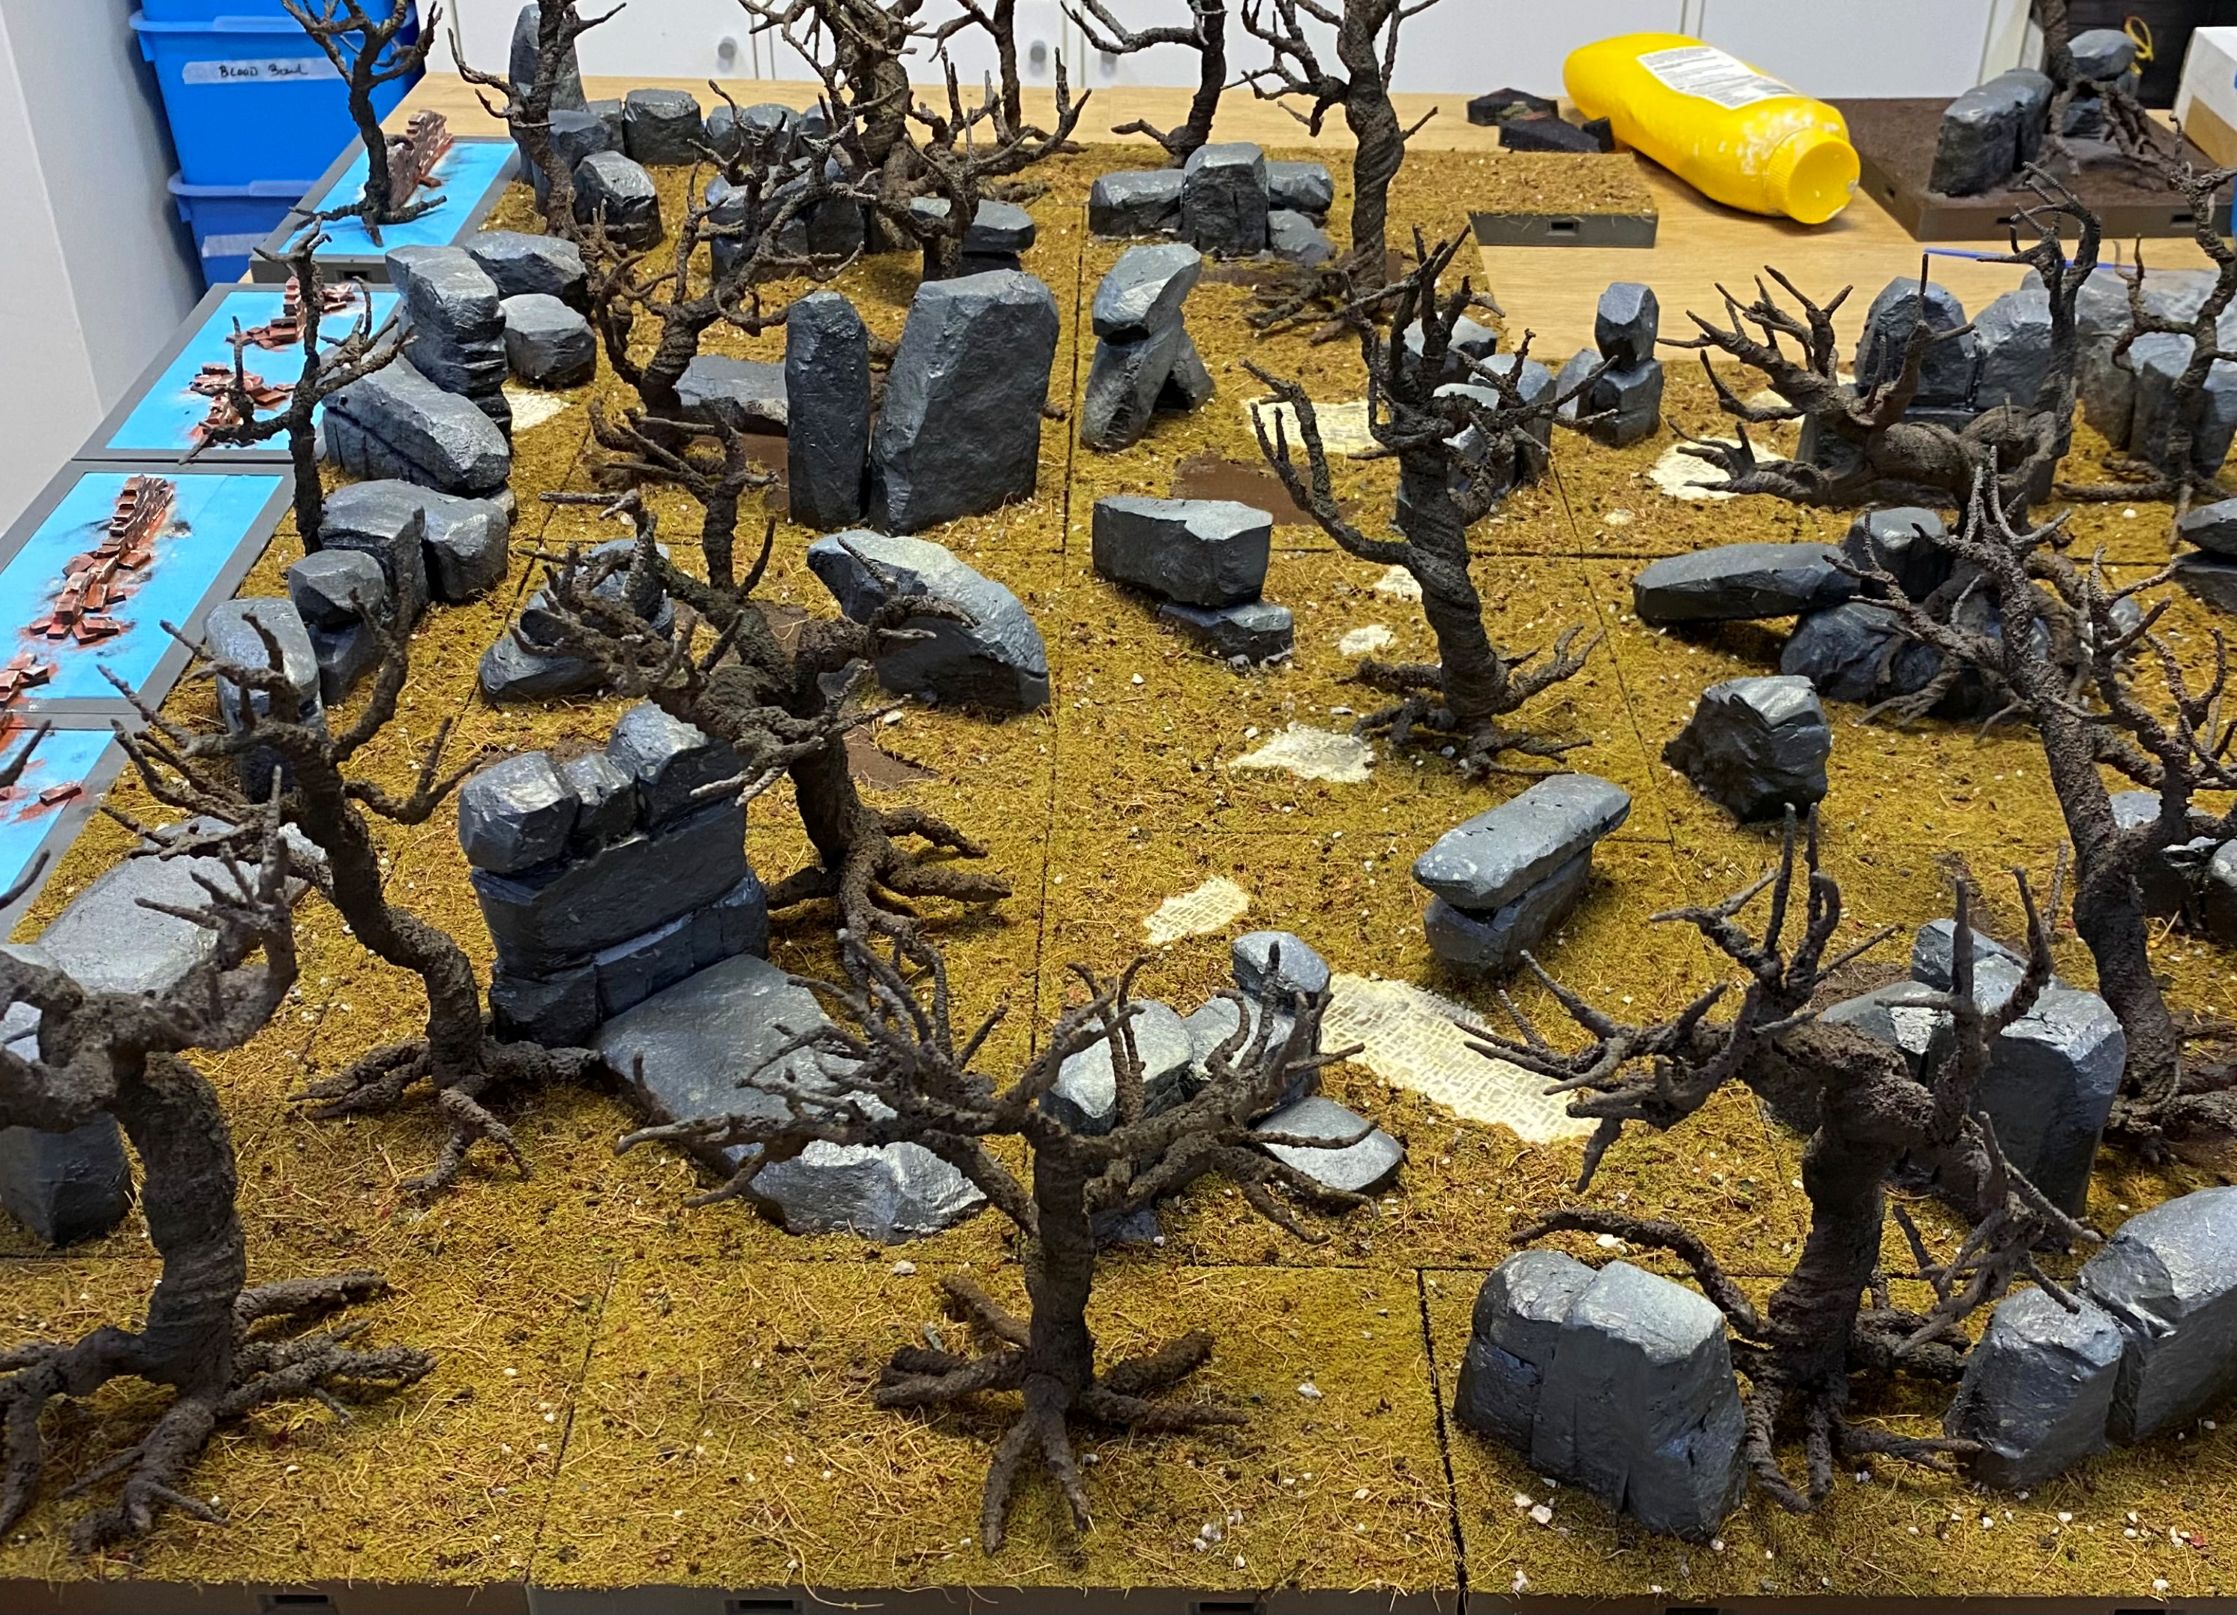
You will see there are a few tiles that are still untouched and rather blue-looking. That’s because I have a plan for those, but I needed to get some of the other tiles up to a certain point before I can implement it.
At the moment, it does look like there are a lot of rocks. I am hopeful that when the plant life gets added, it will tone that down a bit. The rocks are great for standing models on.
I then went about just randomly plonking tree armatures around.
The difficult part with this is that I need to make sure that I don’t end up with what looks like a grid of trees.
I need to remember to make sure that I have enough space between trees to allow hands to get in there, and also to ensure that the branches don’t extend beyond the boundary of the tile they are placed on.
If the branches go beyond the boundary of a tile, it means that it will not always be possible to position any tile next to any other.
There will be some tiles that do not have trees on them and some that have more than one. I hope that this will help get rid of the ‘Grid effect’ that could otherwise be caused by having one tree on each tile.
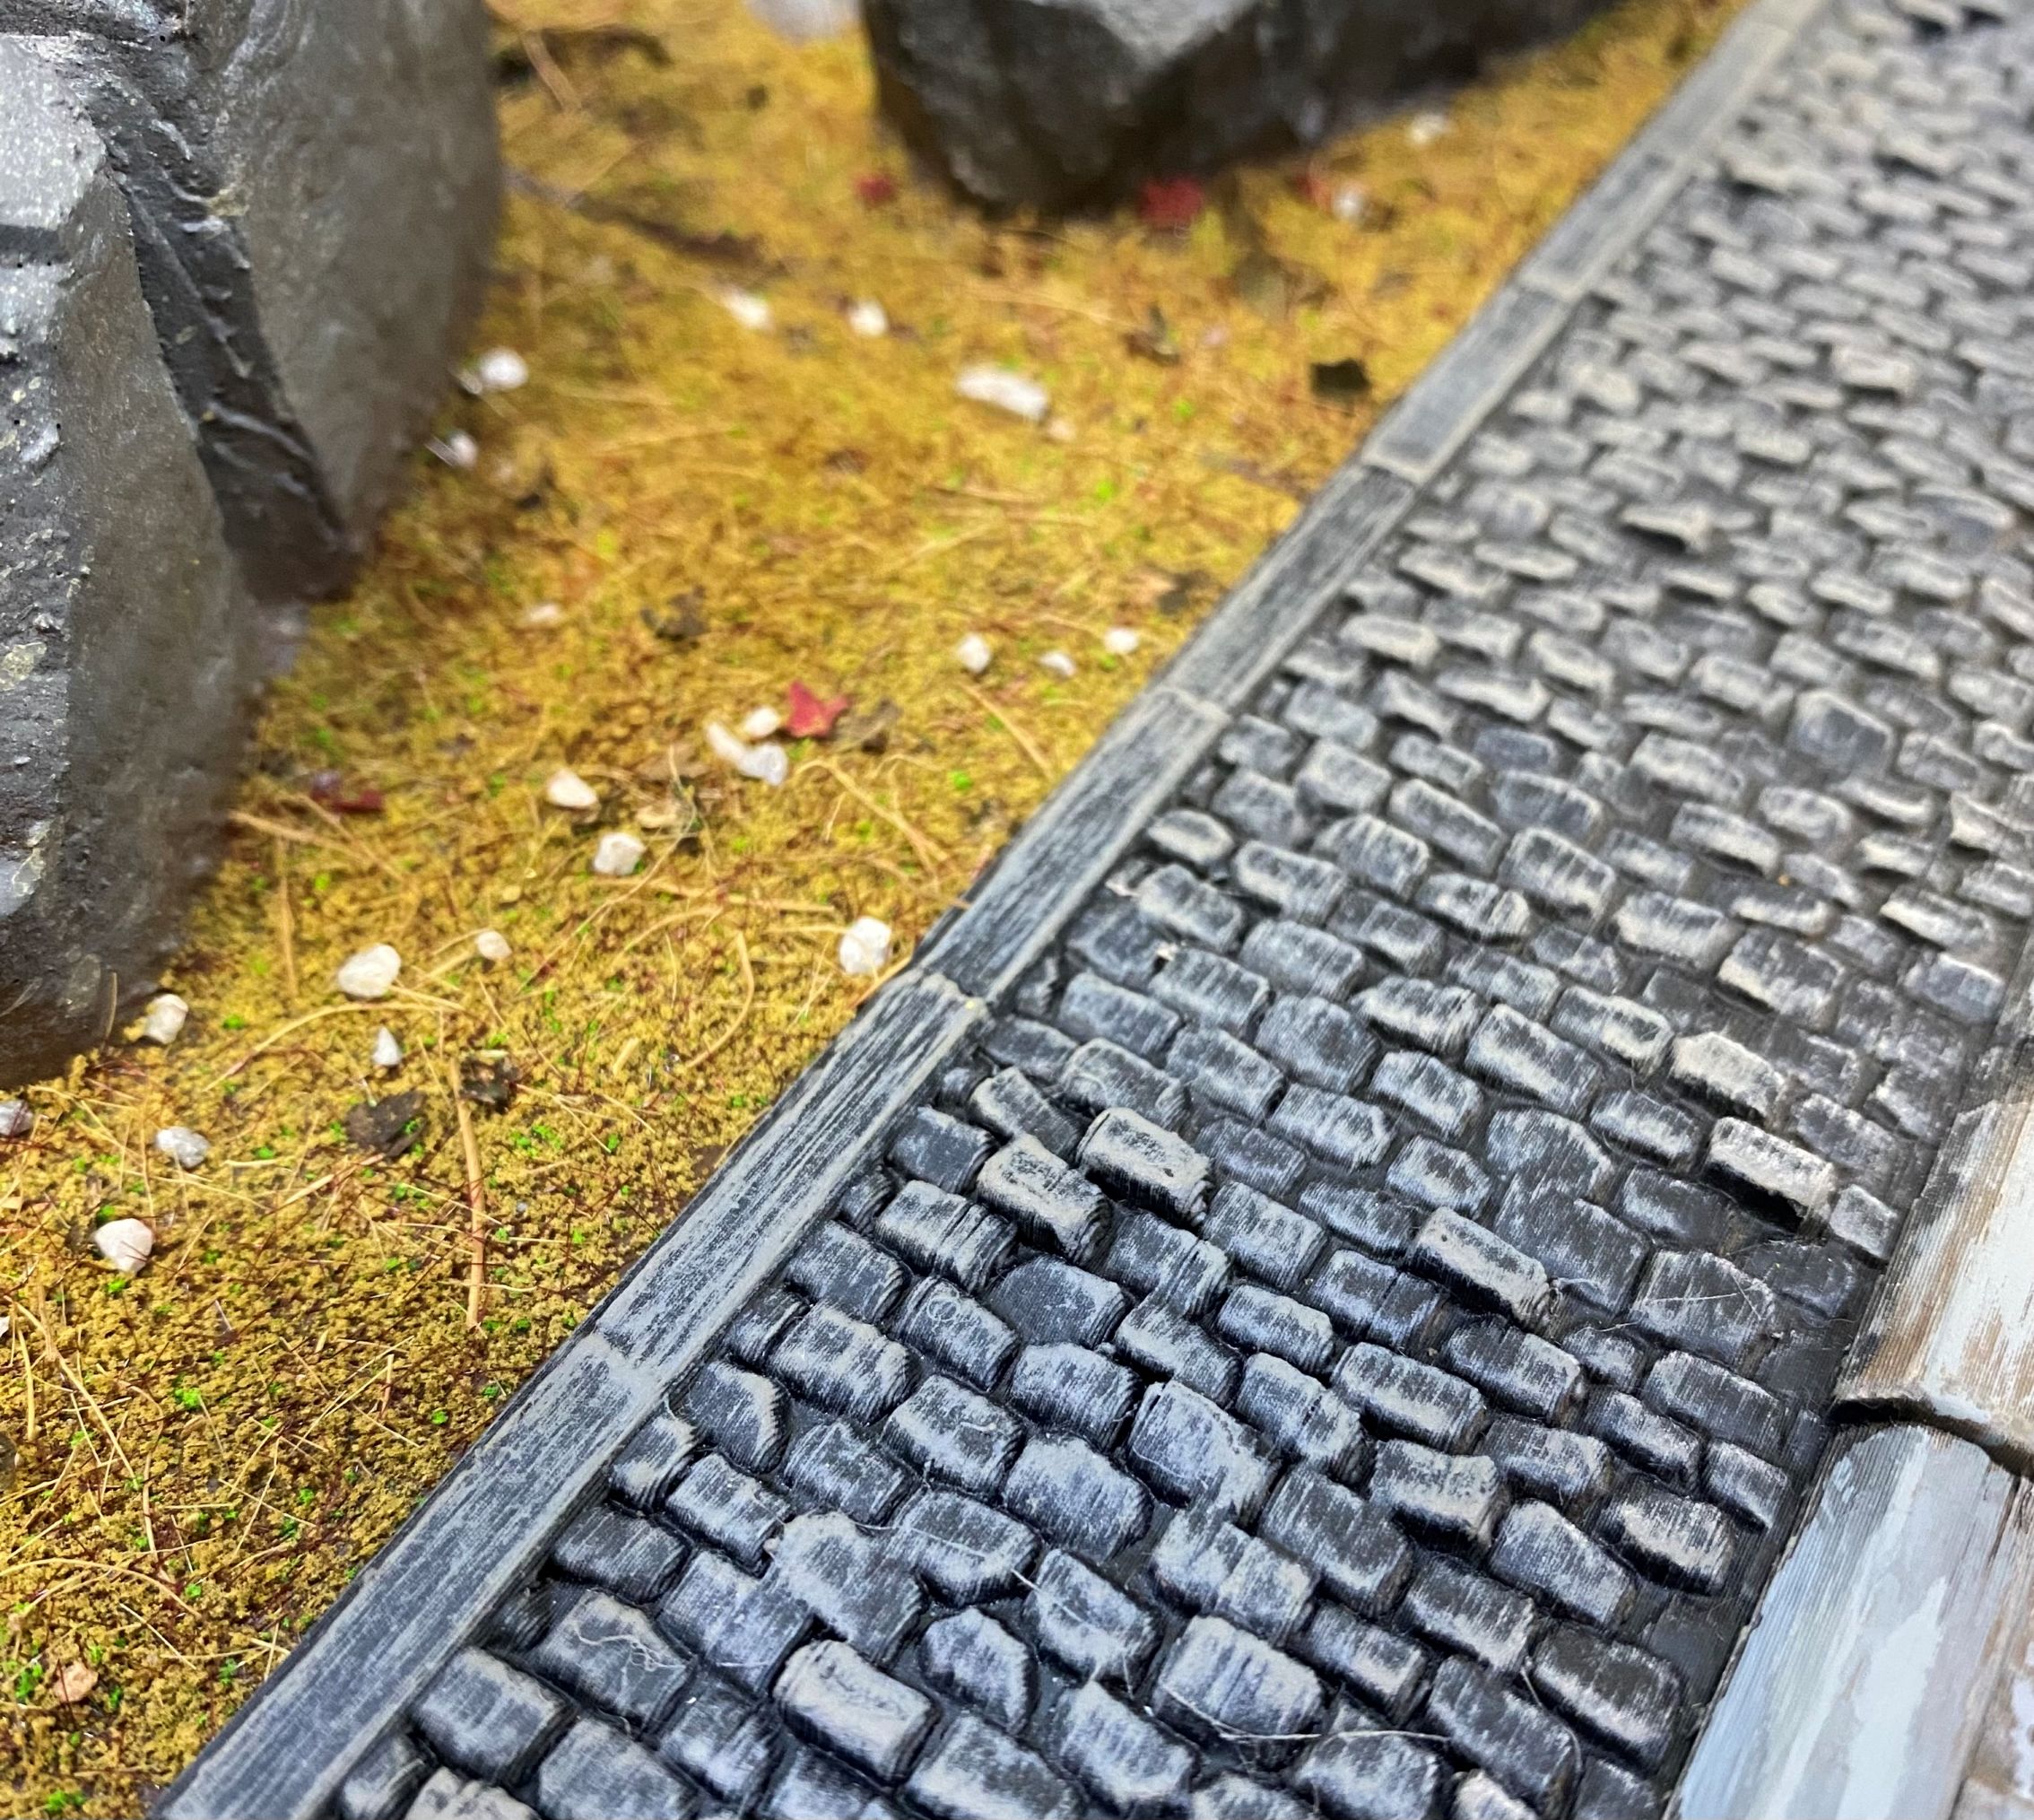
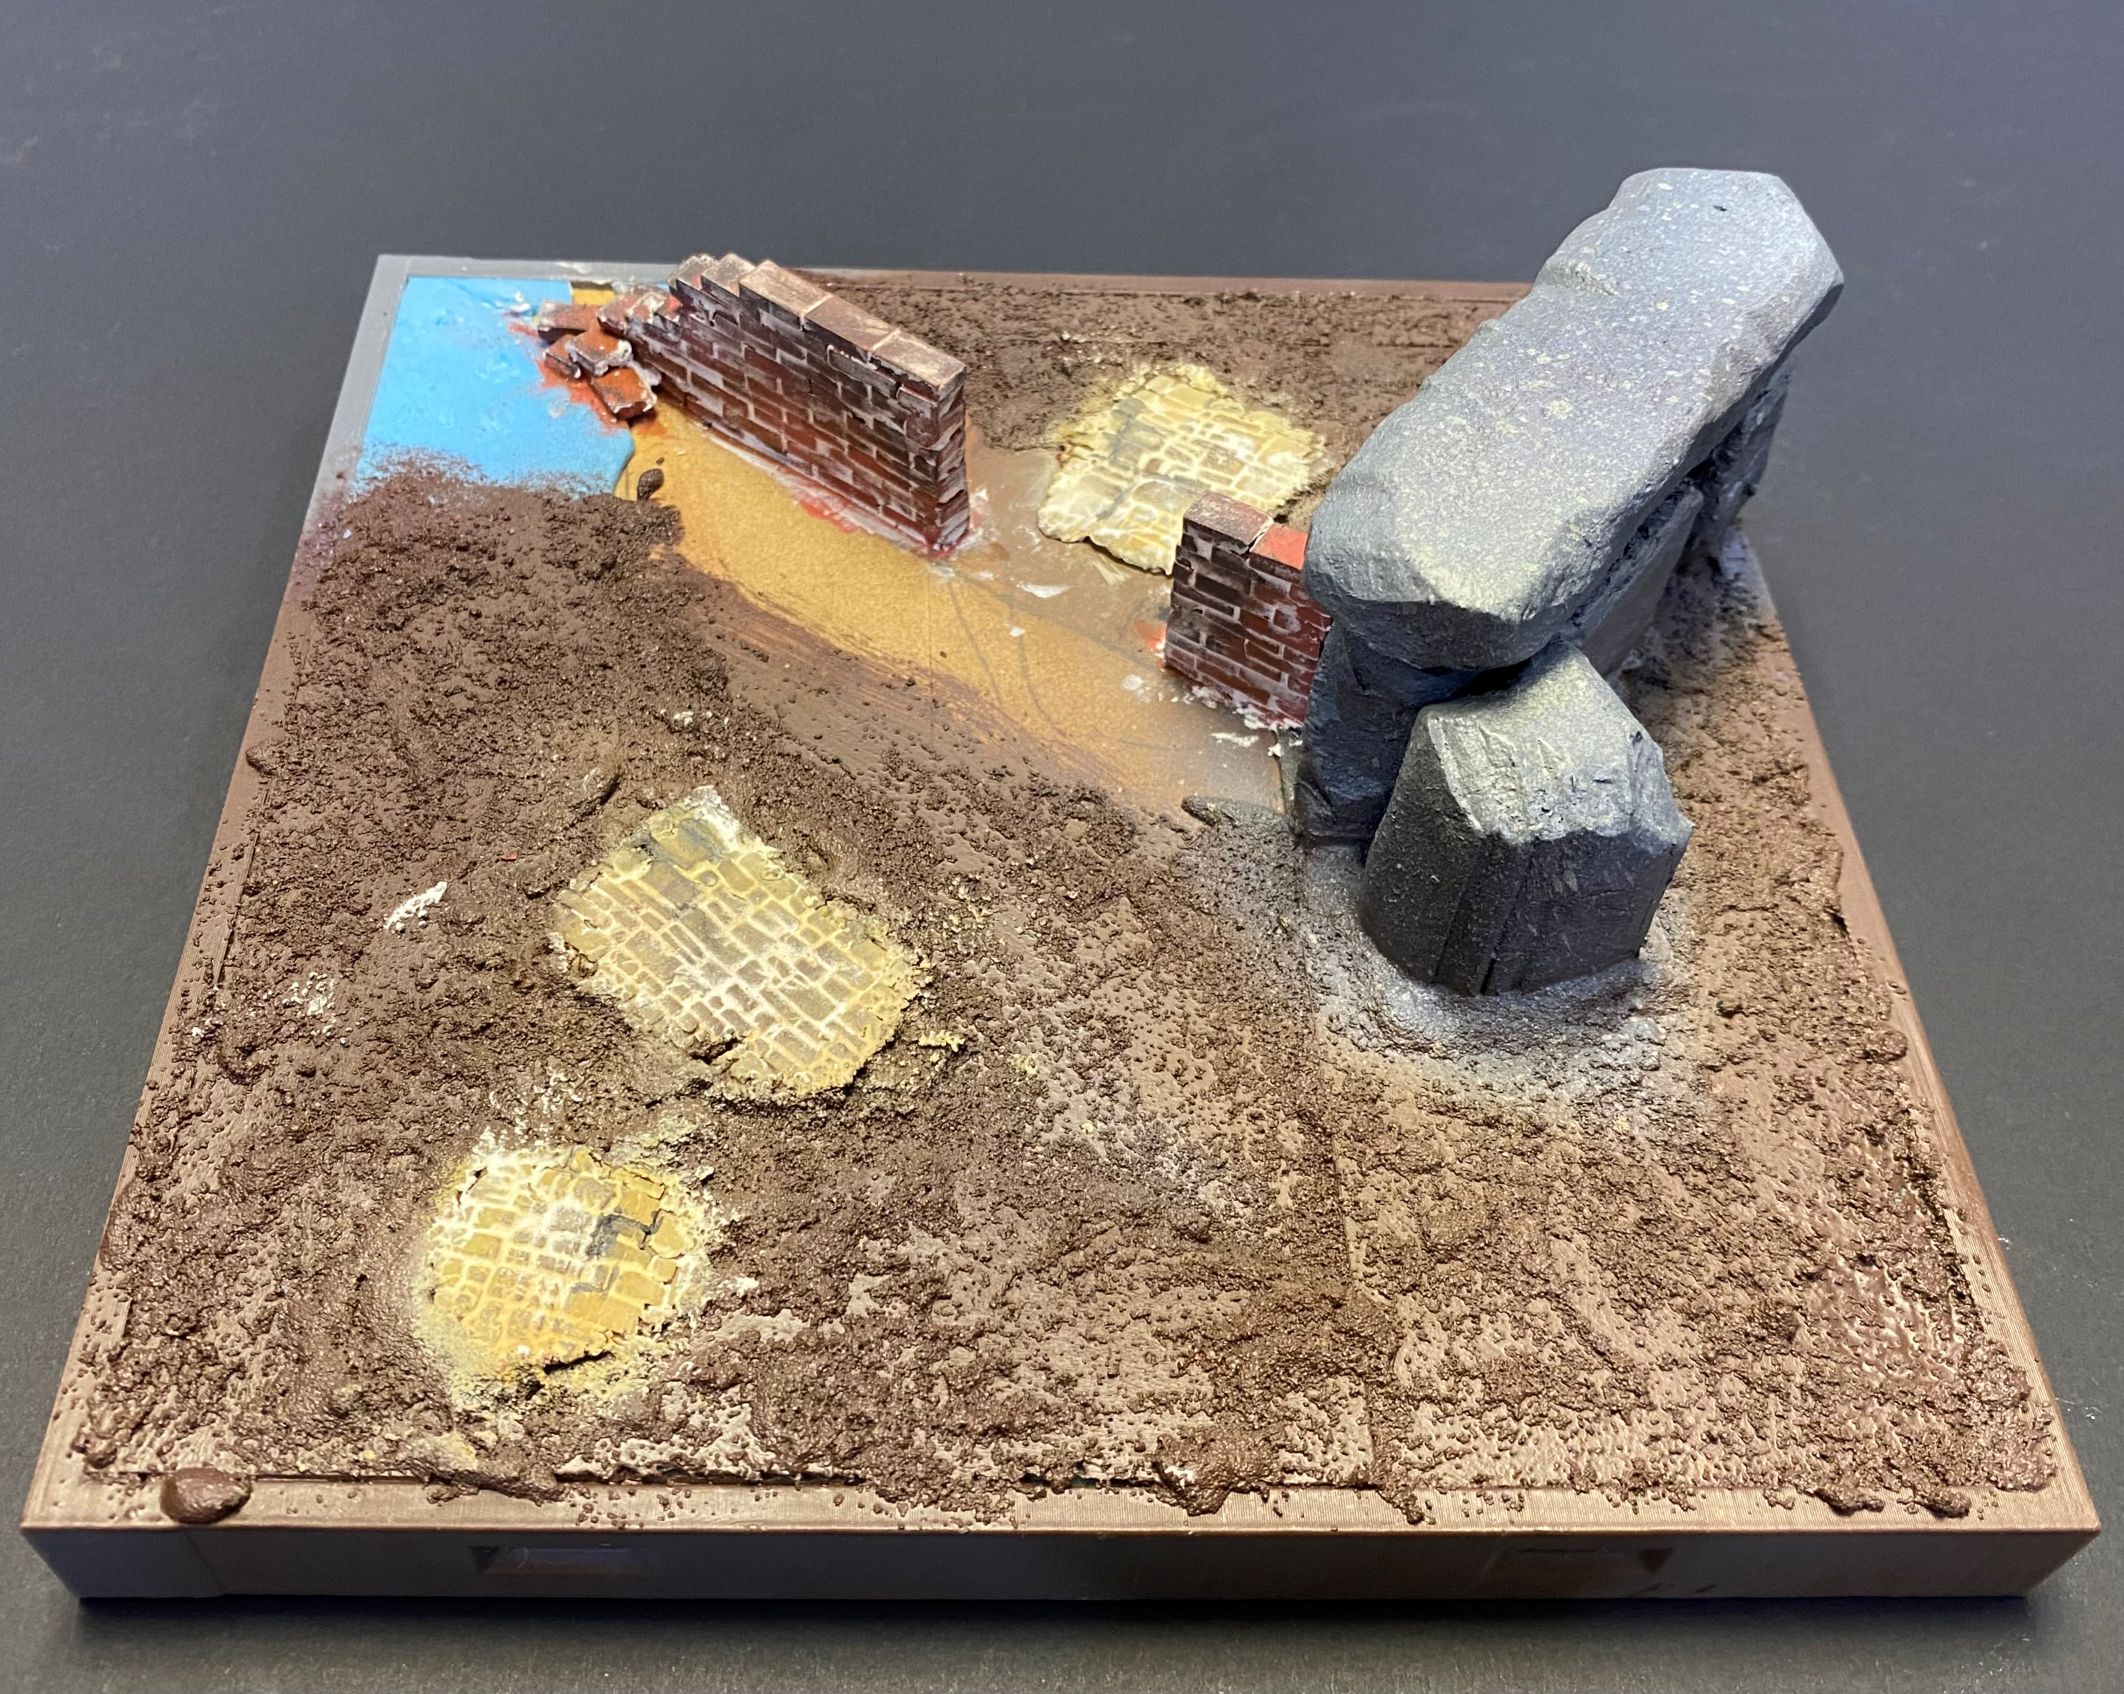
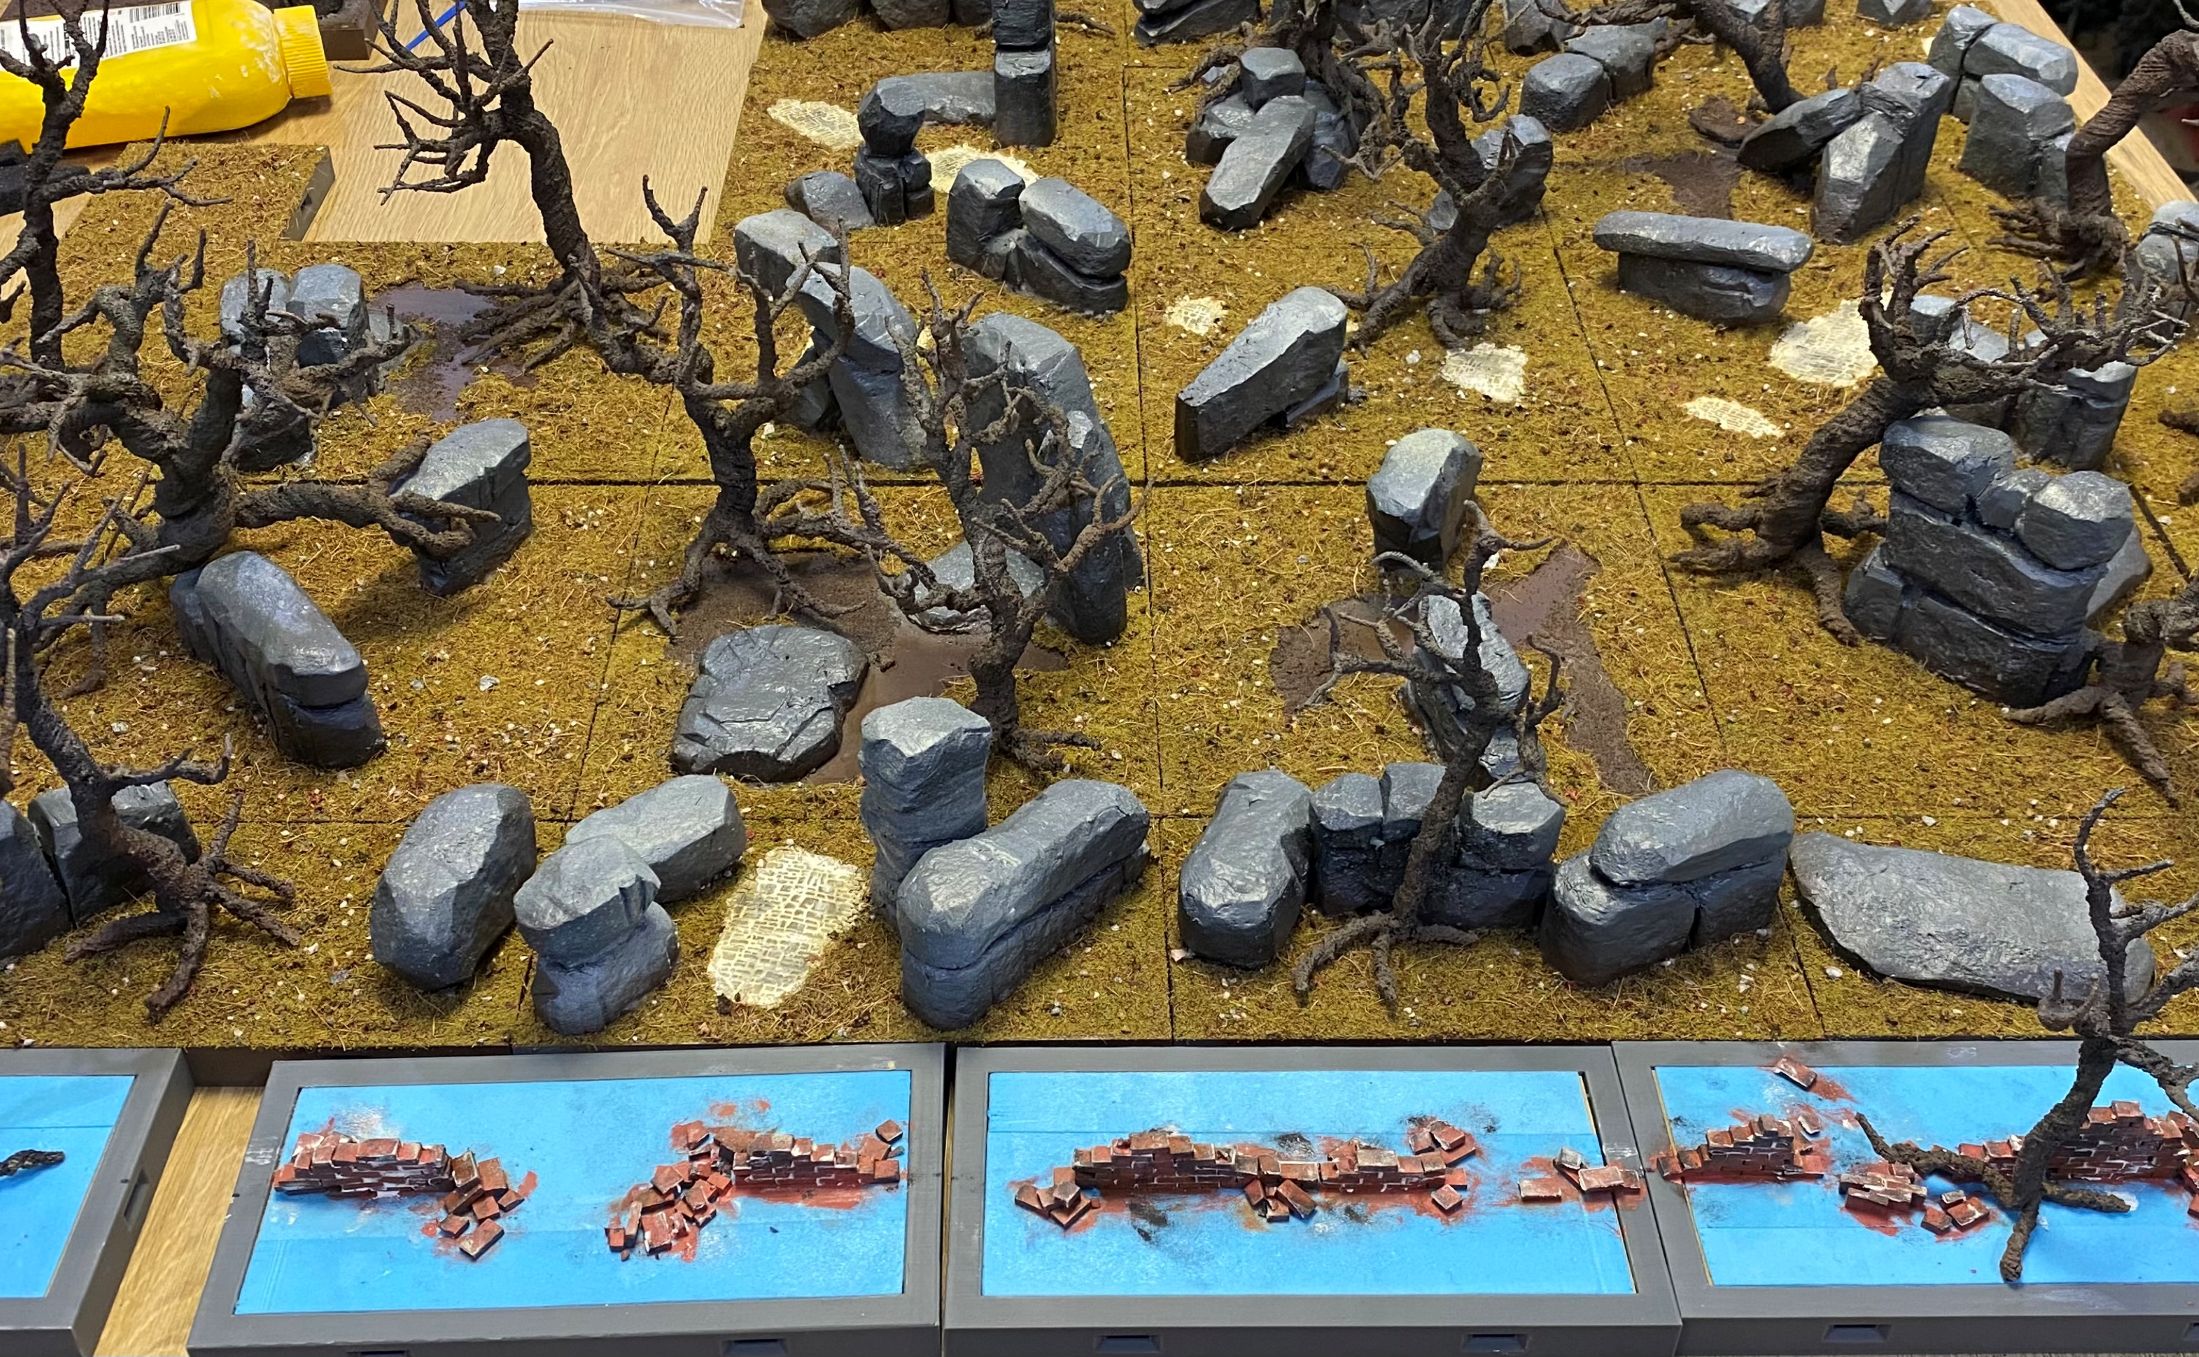
On a side note, yes, I did paint the brick road yellow.
I just couldn’t help myself. It won’t remain as vibrant as it currently is, but it will definitely have a hint of yellow brick road to it.
Flock it
Because I am doing this build on a budget and trying to use up leftover bits and pieces as much as possible, I took the approach of mixing up a whole host of different basing materials. All bits left over from other things. Some are so old I cannot even remember what they were used for.
Into a tub went brown and green flocking materials, not the static grass kind that is all the rage these days, but the bits that look like fine sponge particles. To that, I added some leftover chopped-up coconut fibre and a load of small rocks. Finally, I had a few partially filled bags of leaf scatter in different colours. Not enough of any one colour to do much else with, so those too went into the tub.
I also have lots of other leaves, but I have a decent amount of those, so they were spared from this mixing pot.
I then shook the whole thing up like a madman playing with a maraca.
I weathered the yellow brick road using the exact same method as I used when doing my Victorian Buildings. To summarise, a quick dry brushing and then some wall filler smeared across the surface before being wiped off with a damp cloth.
Finally, some dark grey wash slapped around here and there to add some grime.
 I have left some areas smooth as I intend to add some water features to this.
The first layer of ground covering has done a reasonable job of hiding a lot of the joins in the board.
When I get around to adding some of the plant life and then fallen leaves, etc, I think it should help make the joins a lot less noticeable.
As mentioned at the beginning of all this, I want this set to also be able to fit in with my existing Victorian Terrain Tiles.
I figured that I could eventually have a road leading through the forest, which could make for some interesting scenarios down the track, a few I have in mind for a rainy day.
 The Forest tile alongside on of my urban terrain tiles.
So, what’s next?
Well, I have many trees to do that will have to be attached to the tiles before I start adding bushes and smaller plants and then moving on to fallen branches and leaves.
I also have some more man-made structures to add, prior to making them look overgrown.
Then, of course, fungi, moss and weathering need to be done.
The edges all need to be rimmed in black.
Oh, and I have to paint the broken statue parts.
Just another brick in the wall
I imagine that before the forest became what it is now, there were signs of life and civilisation. The fallen statue and pieces of brick road are two such elements, but I wanted to include other bits to give a sense of time and ageing.
With that in mind, I decided to add some walls. Not only would this give me another texture to work with, but it would also introduce another colour palette and, of course, add to the maze element by including some other features to navigate around.
Sticking as close as I could to ‘old school’ methods, I set about using lots of individual bricks and a set of tweezers to build some old, ruined walls.
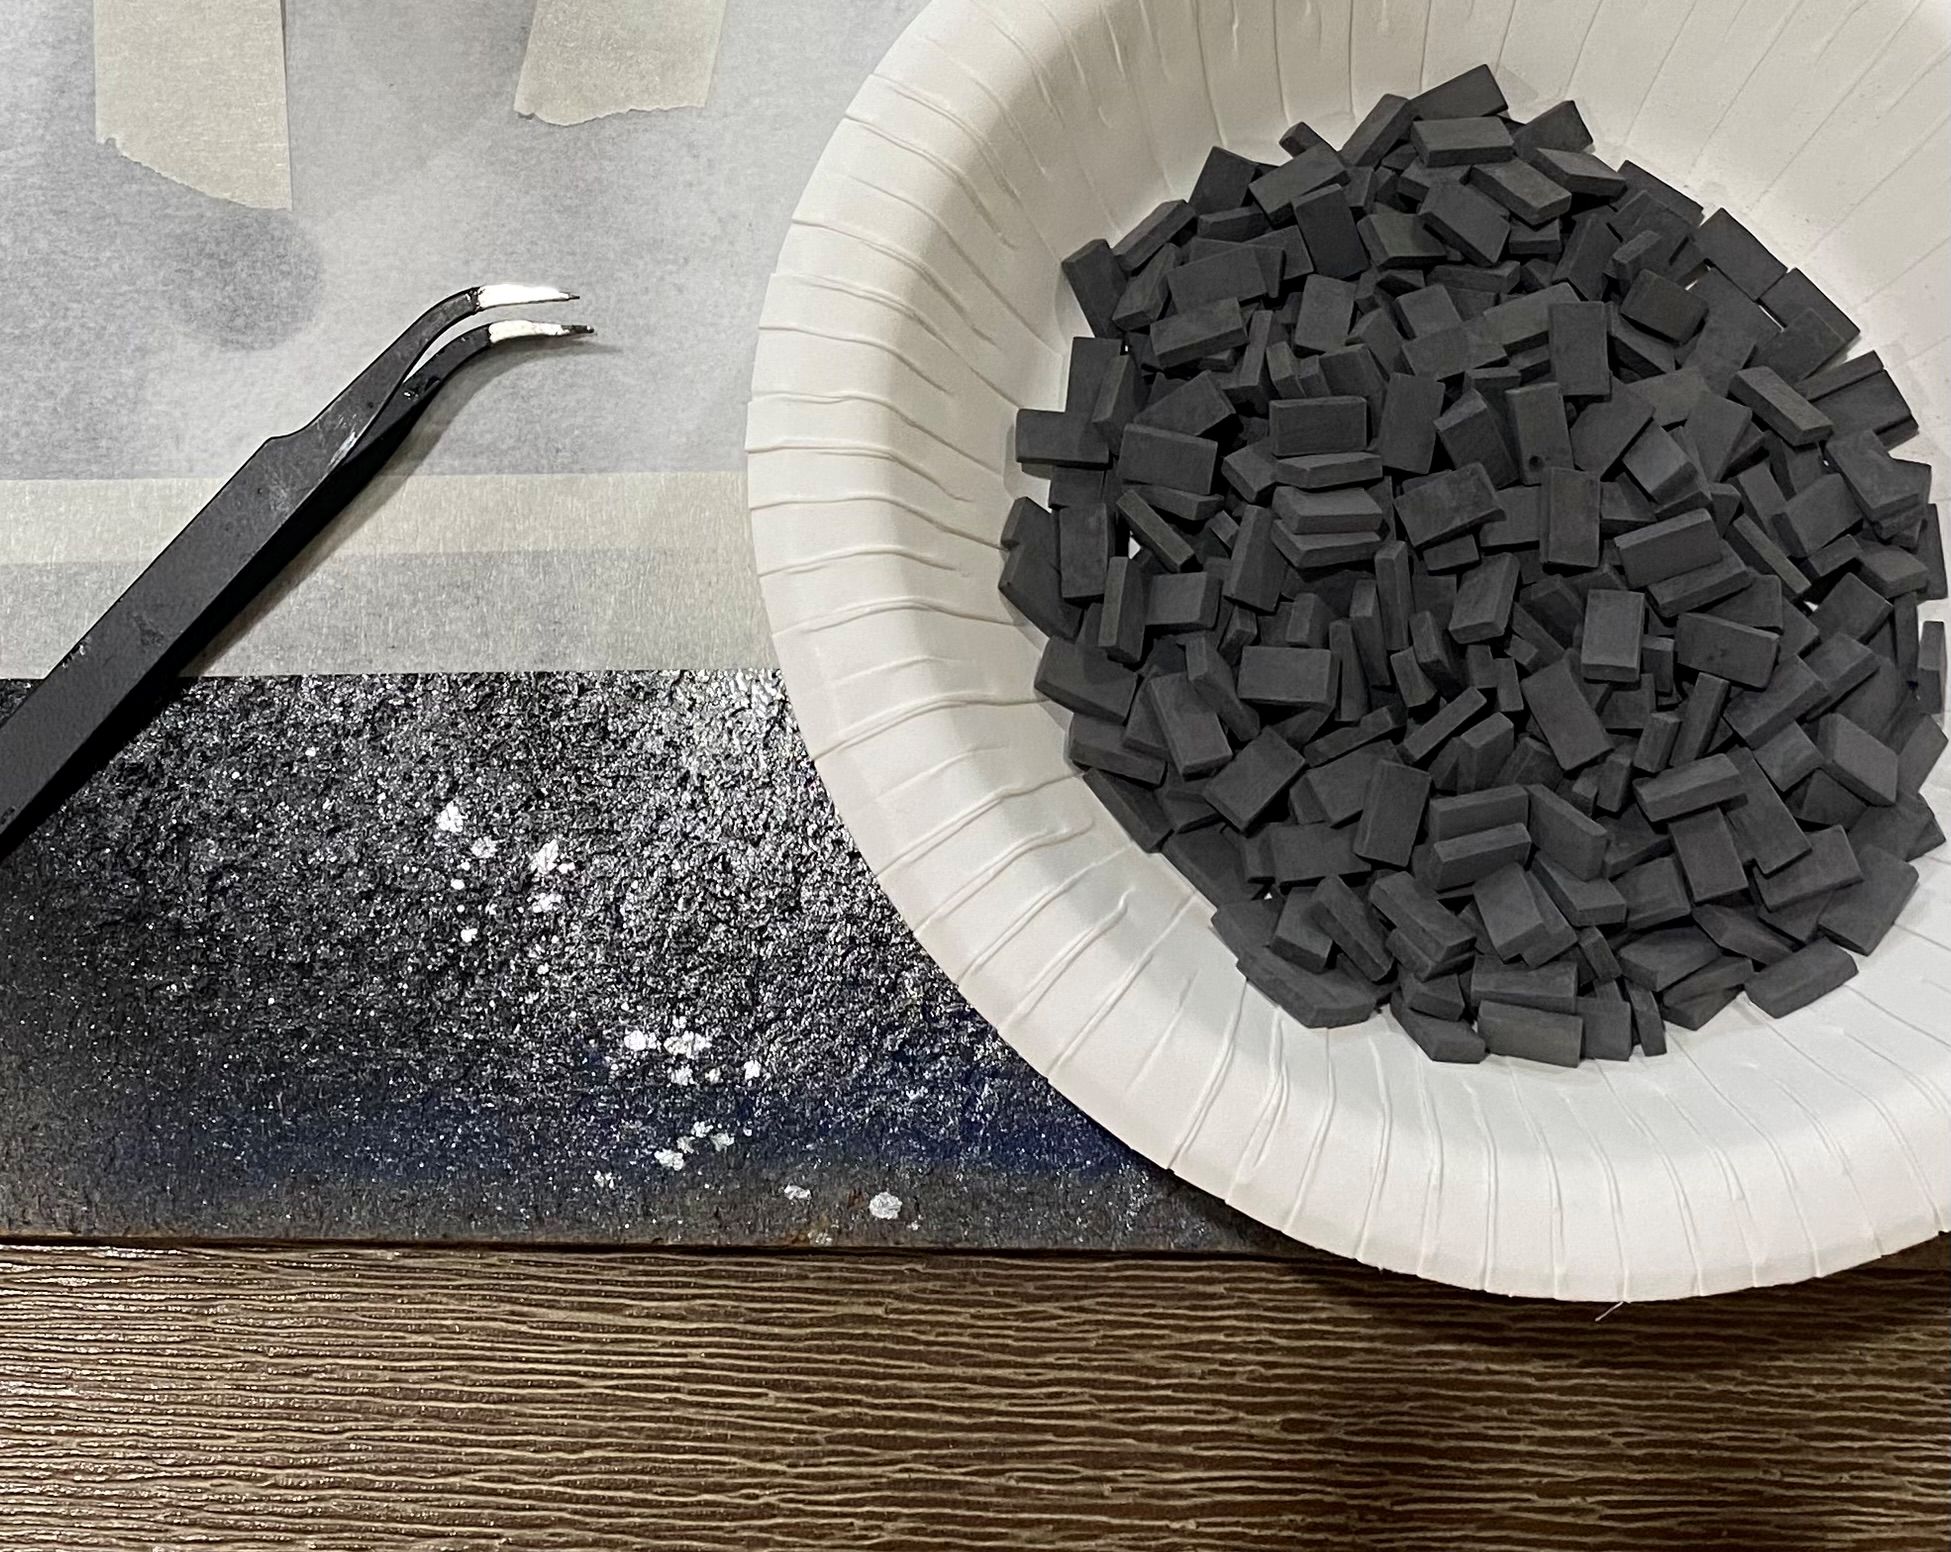
I don’t think I will be changing careers to become a brickie any time soon.
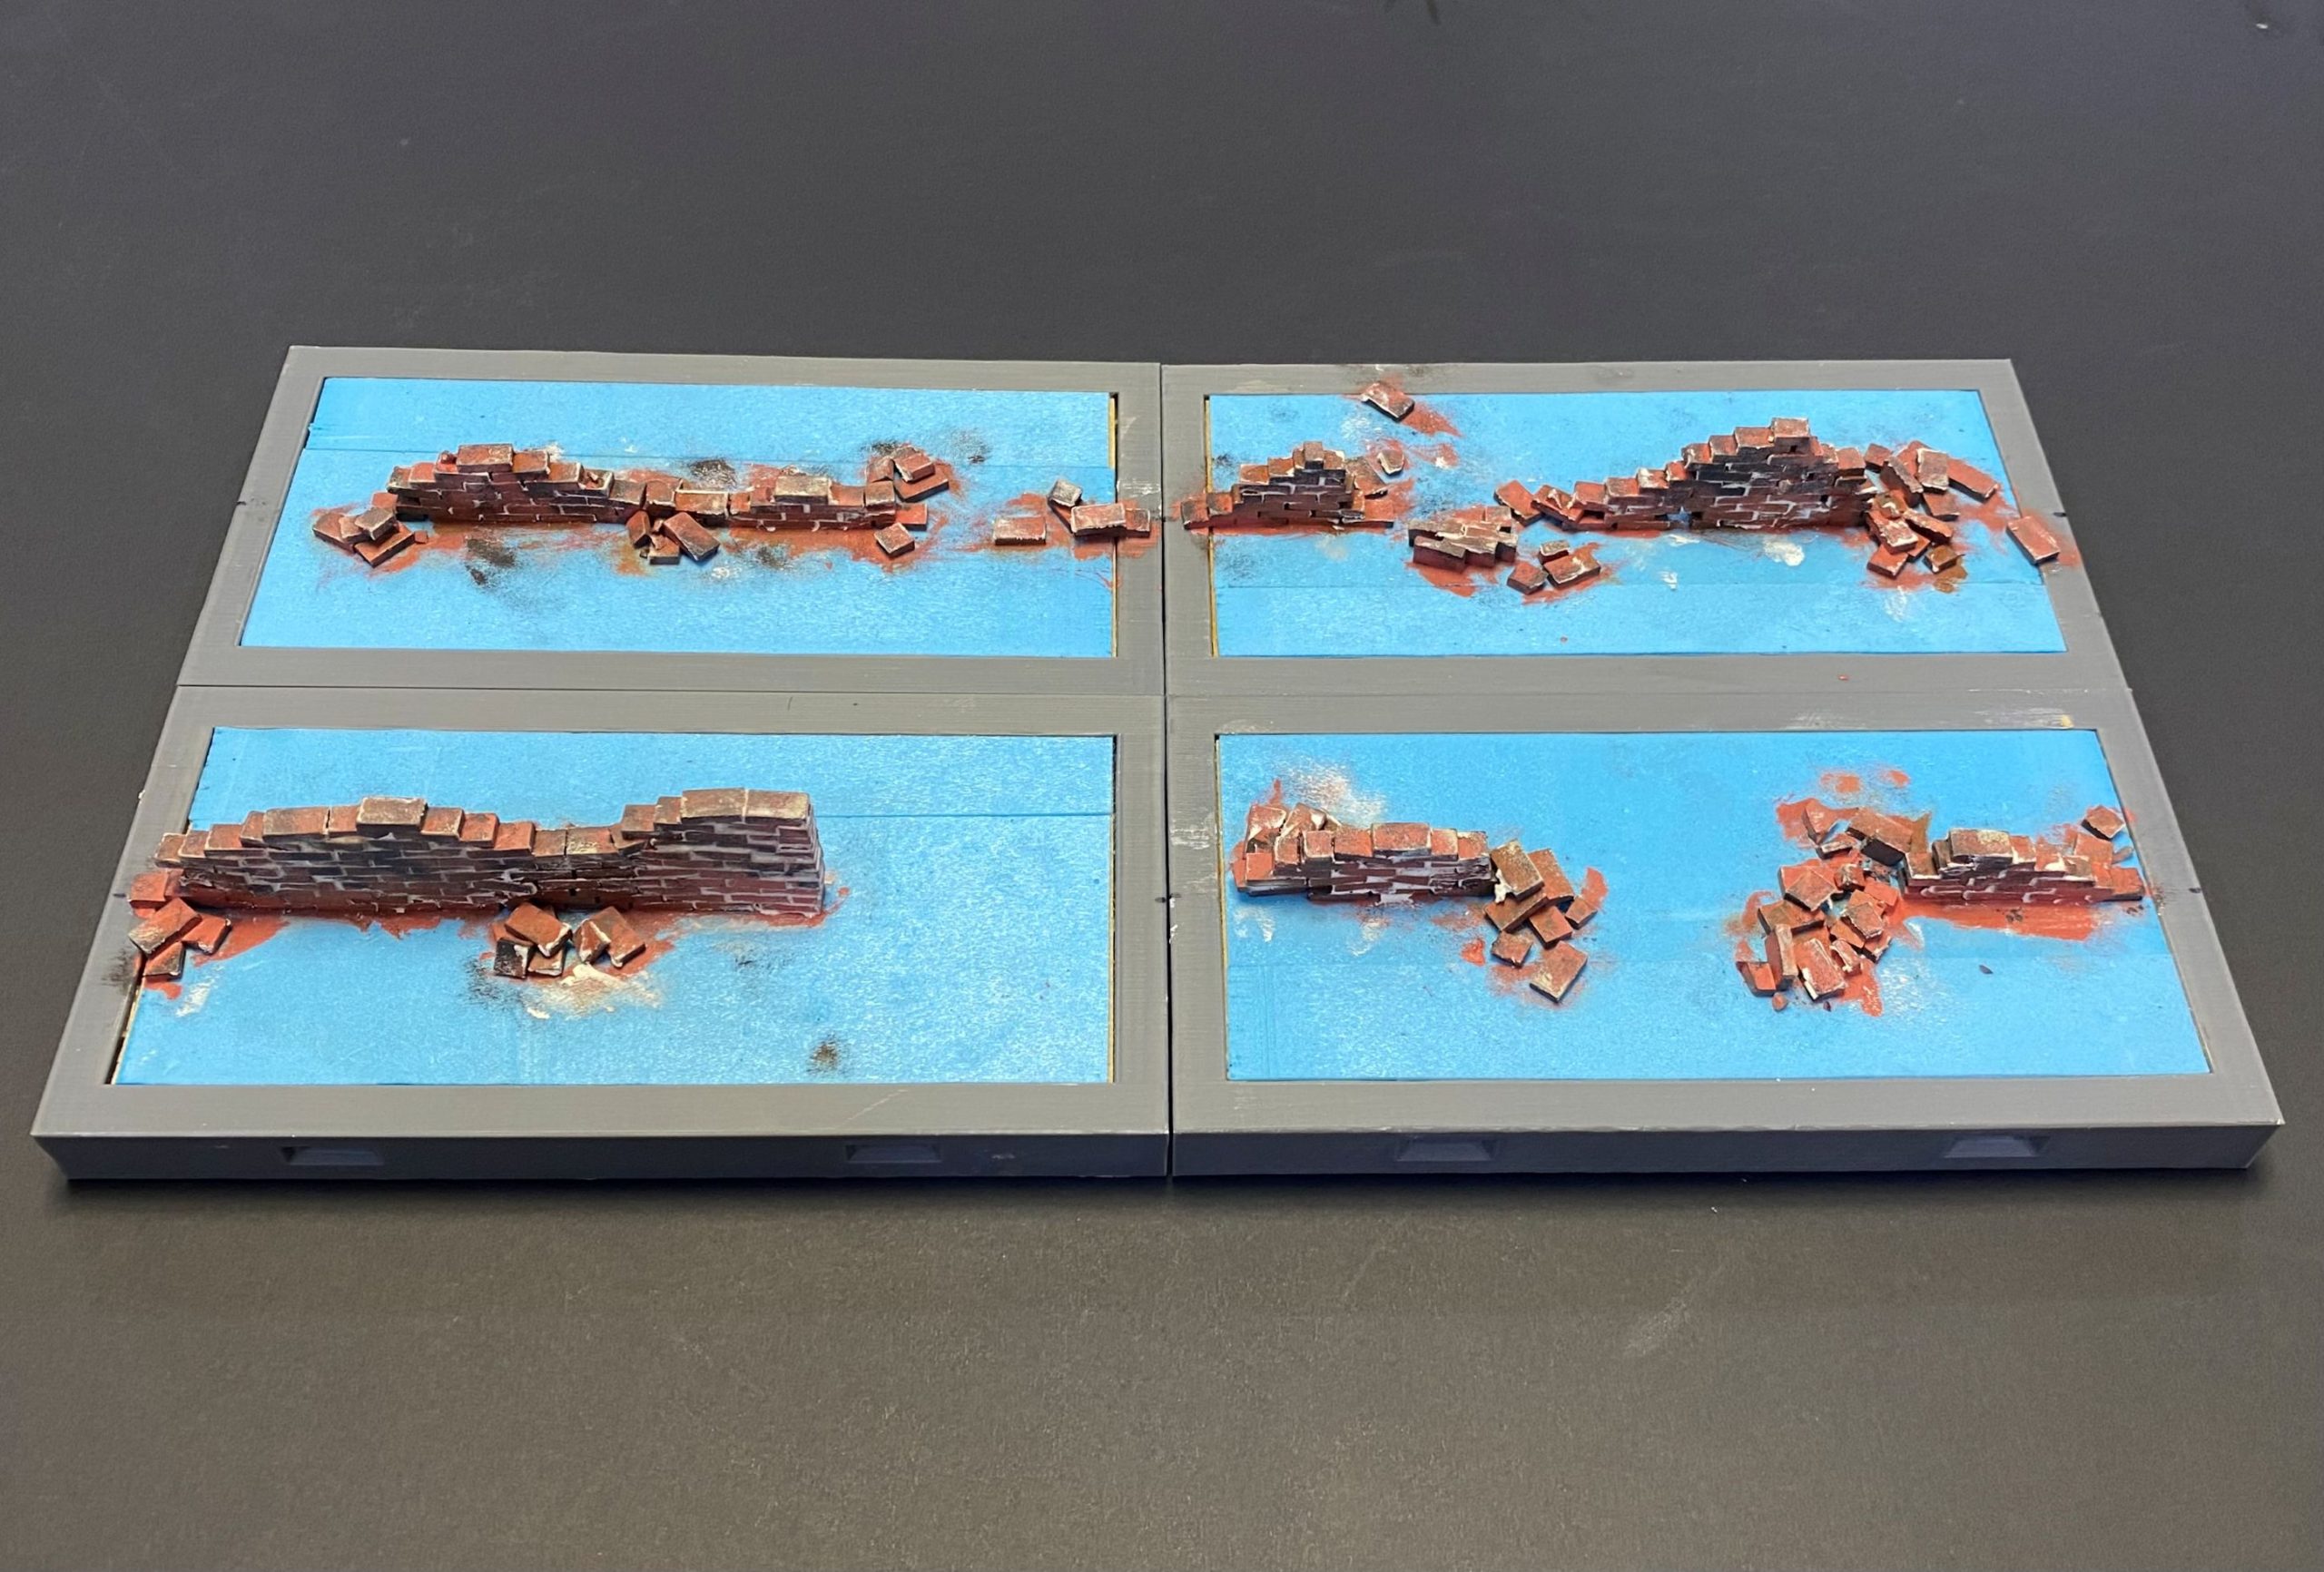
I used PVA glue to stick each brick down individually. I ended up making several wall sections on several of the terrain tiles, but for this, I will follow the journey of one of those tiles.
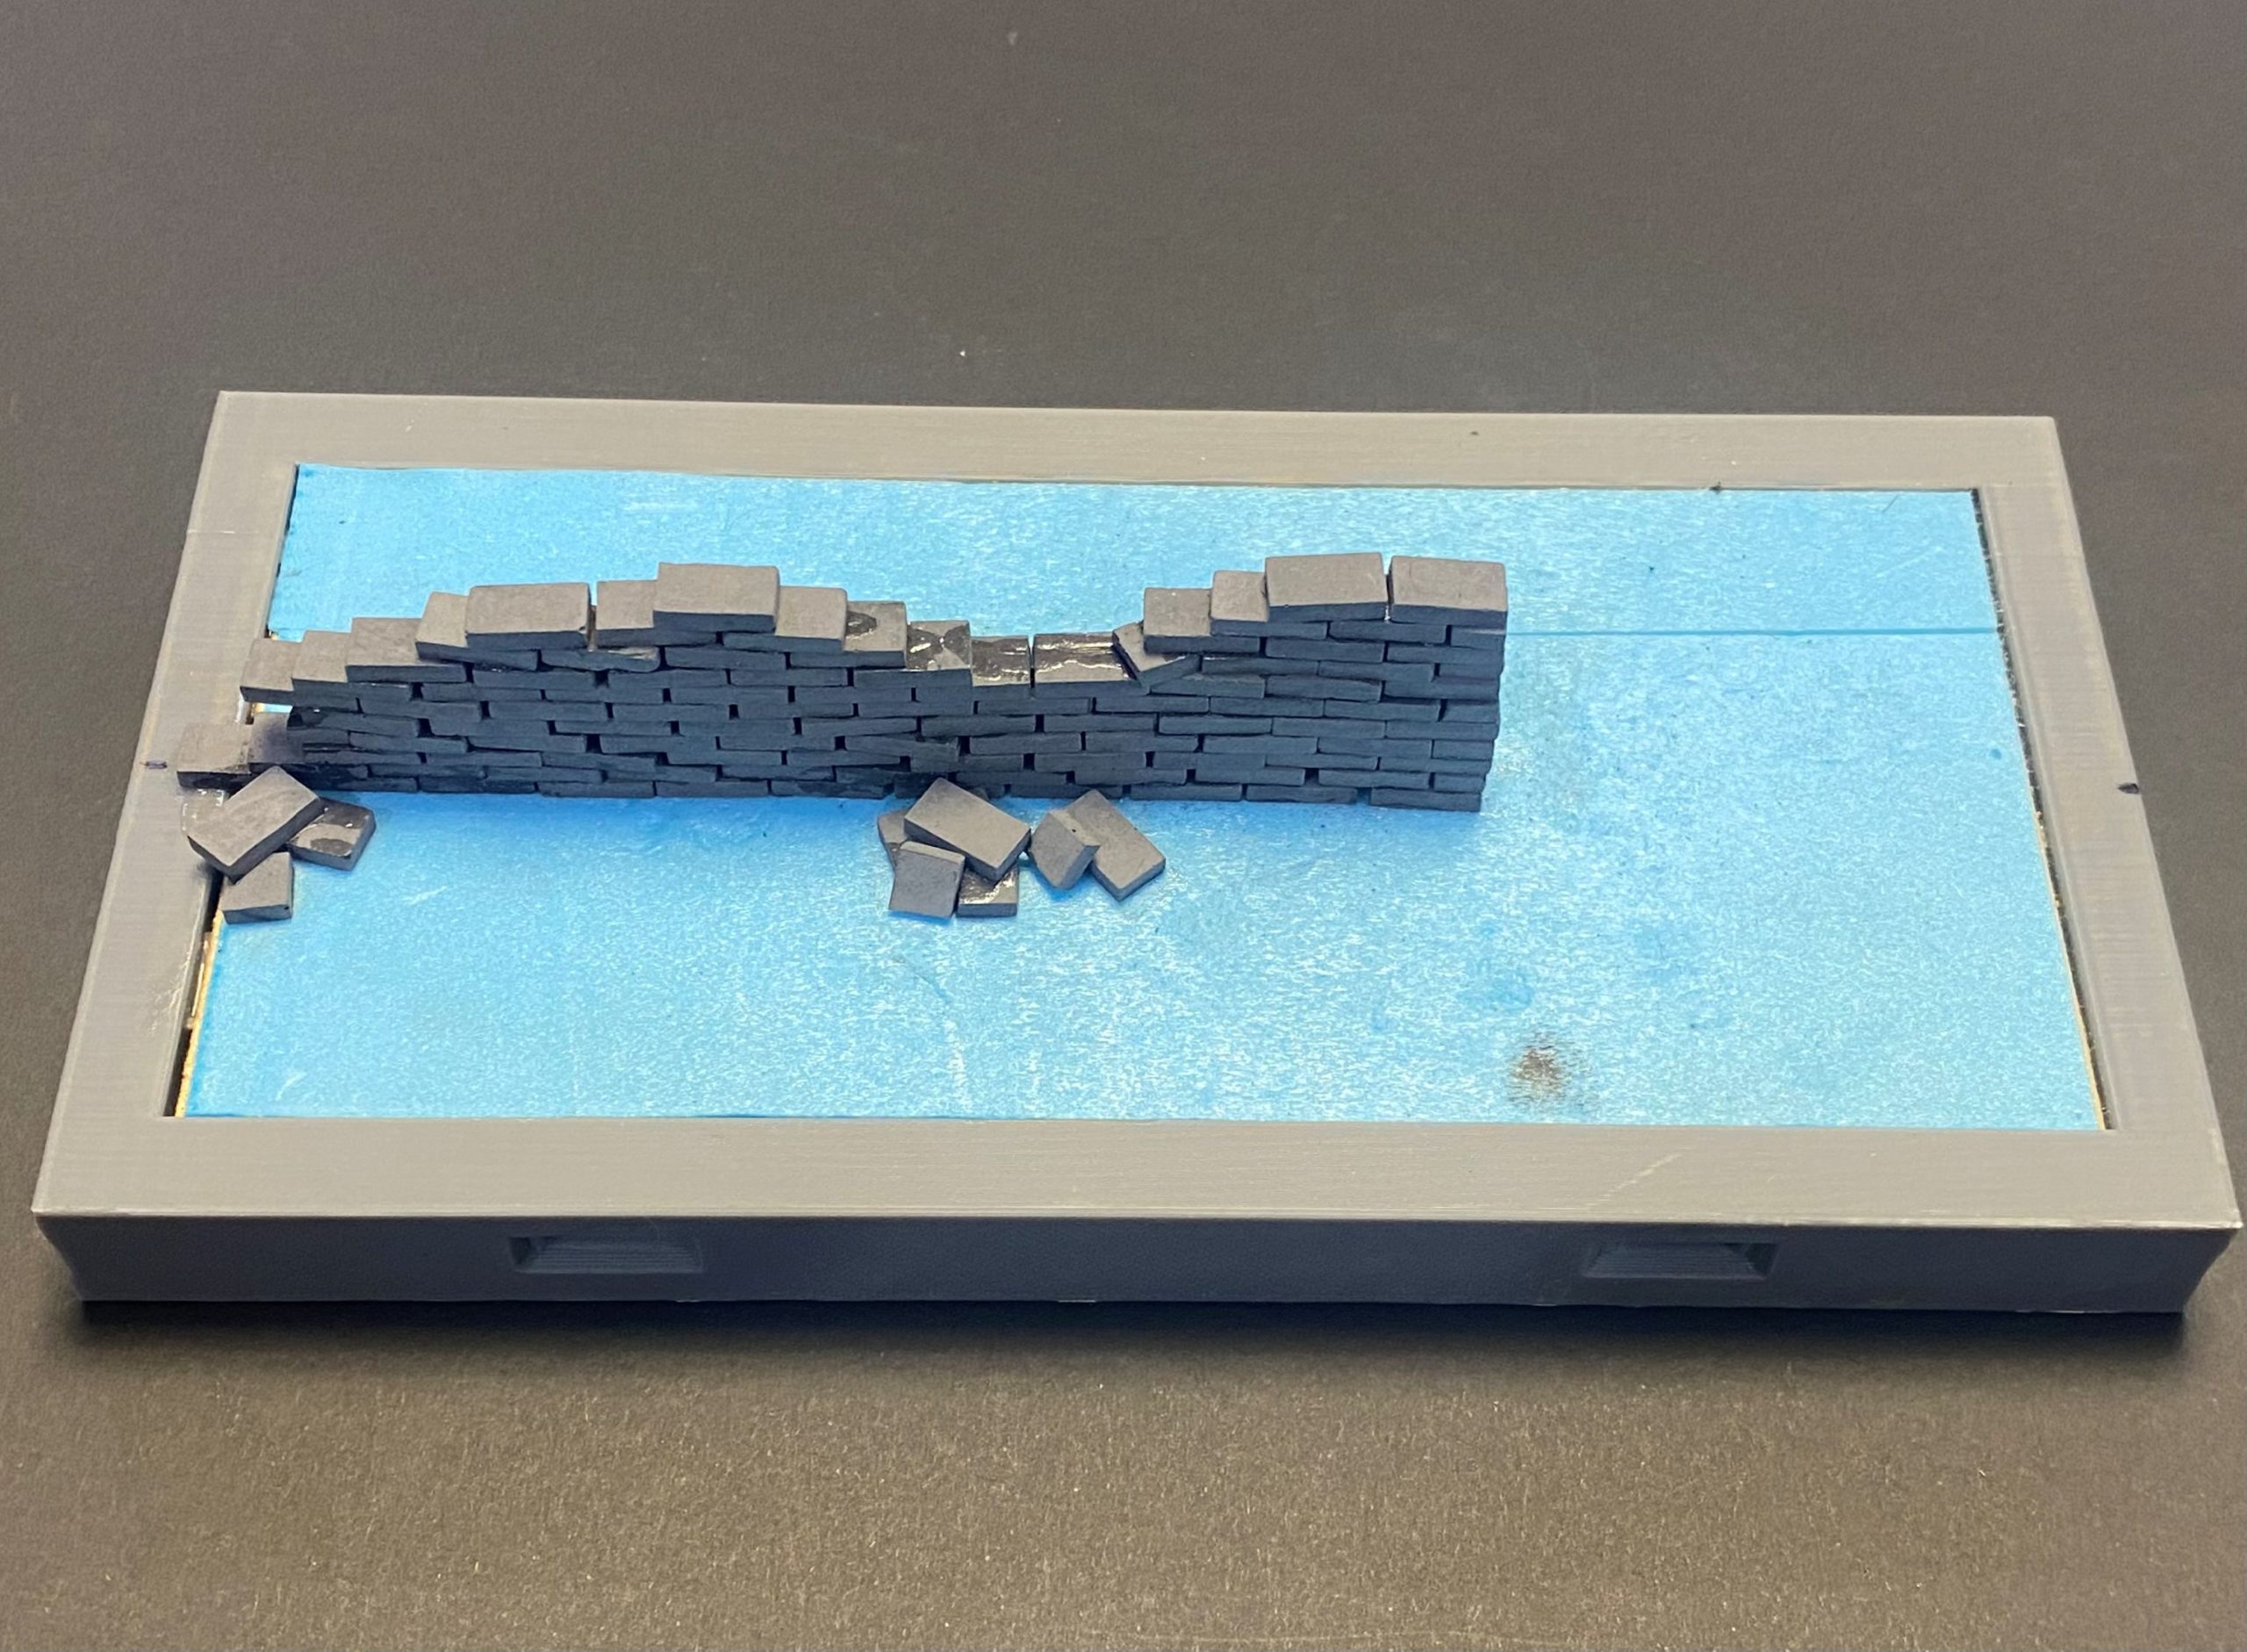
With the bricks in place, I could then set about painting them.
I needed to get them painted before I add the ground cover, as some of the bricks will end up embedded in the earth. Plus, it would also make it a lot easier to add the grout.
I started with a fairly light terracotta colour and then dabbed a few different shades over the top using a sponge. I deliberately went a bit lighter than I otherwise would because I figured they would start to lose that contrast once I start to do the weathering, once everything is in place.
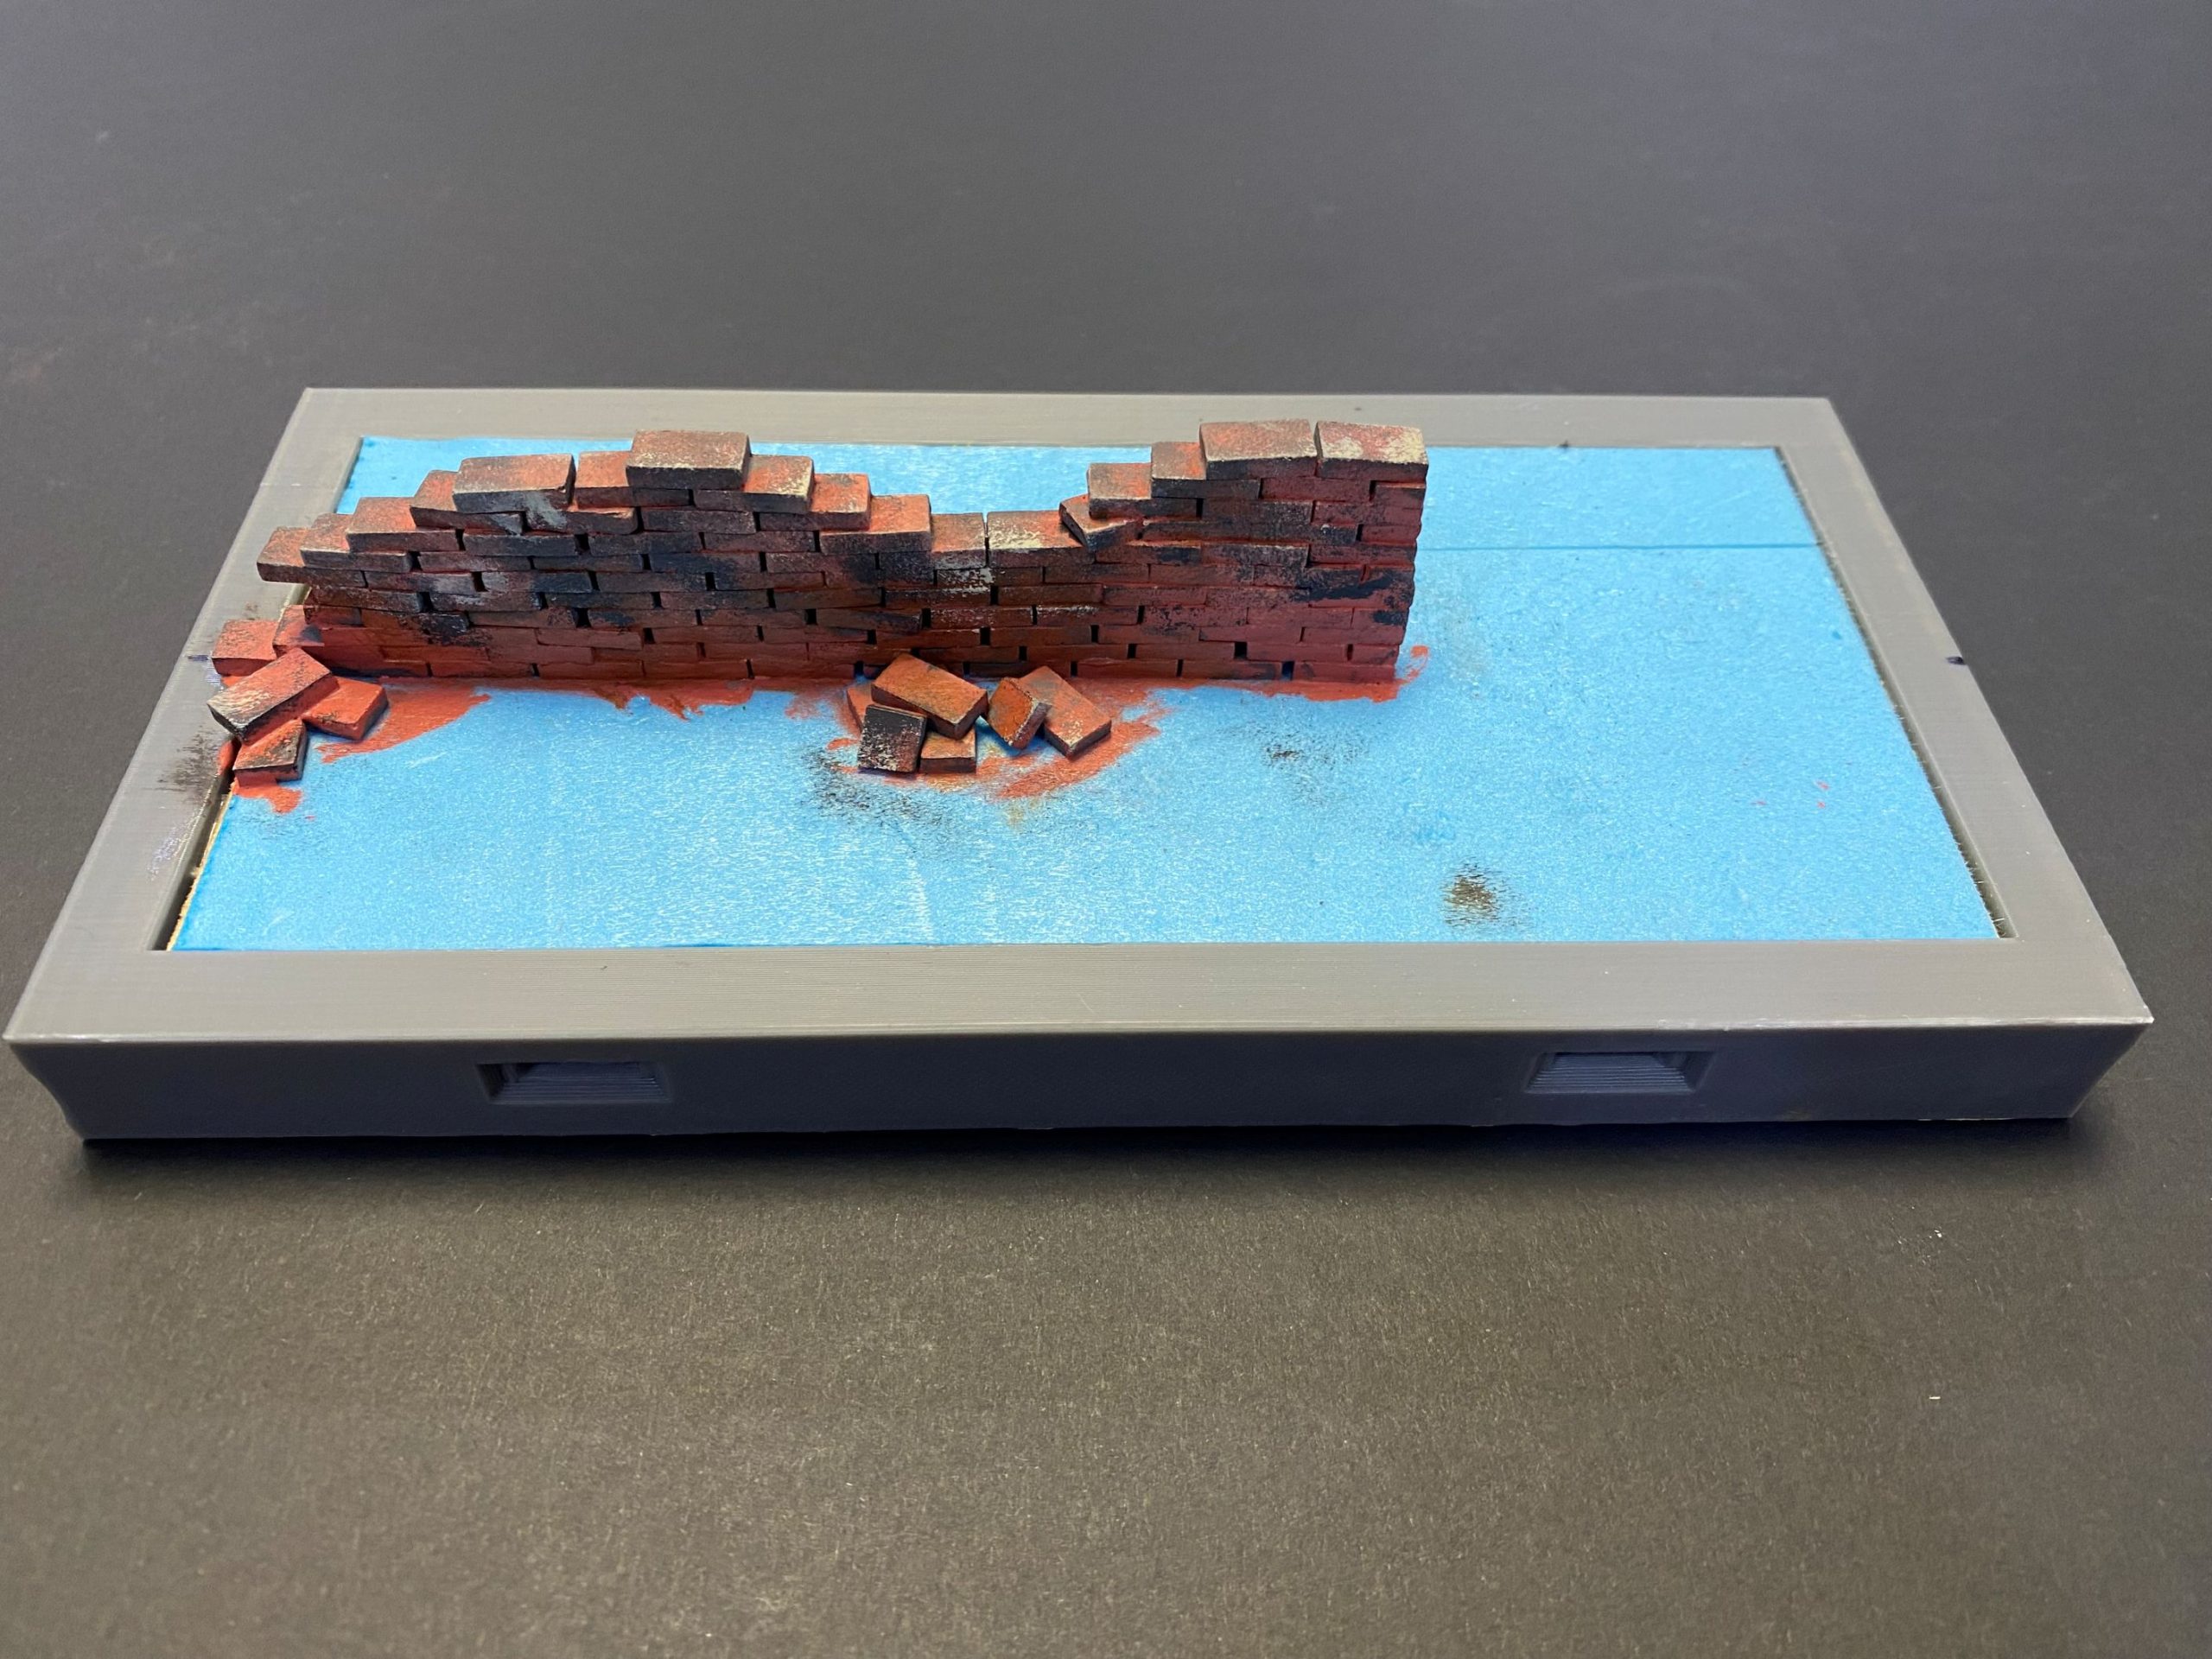
As always with the brickwork I do, I added a layer of premixed wall filler.
When applying the filler, I think it looks nicer if you deliberately leave some parts without filler, especially where the broken sections are.
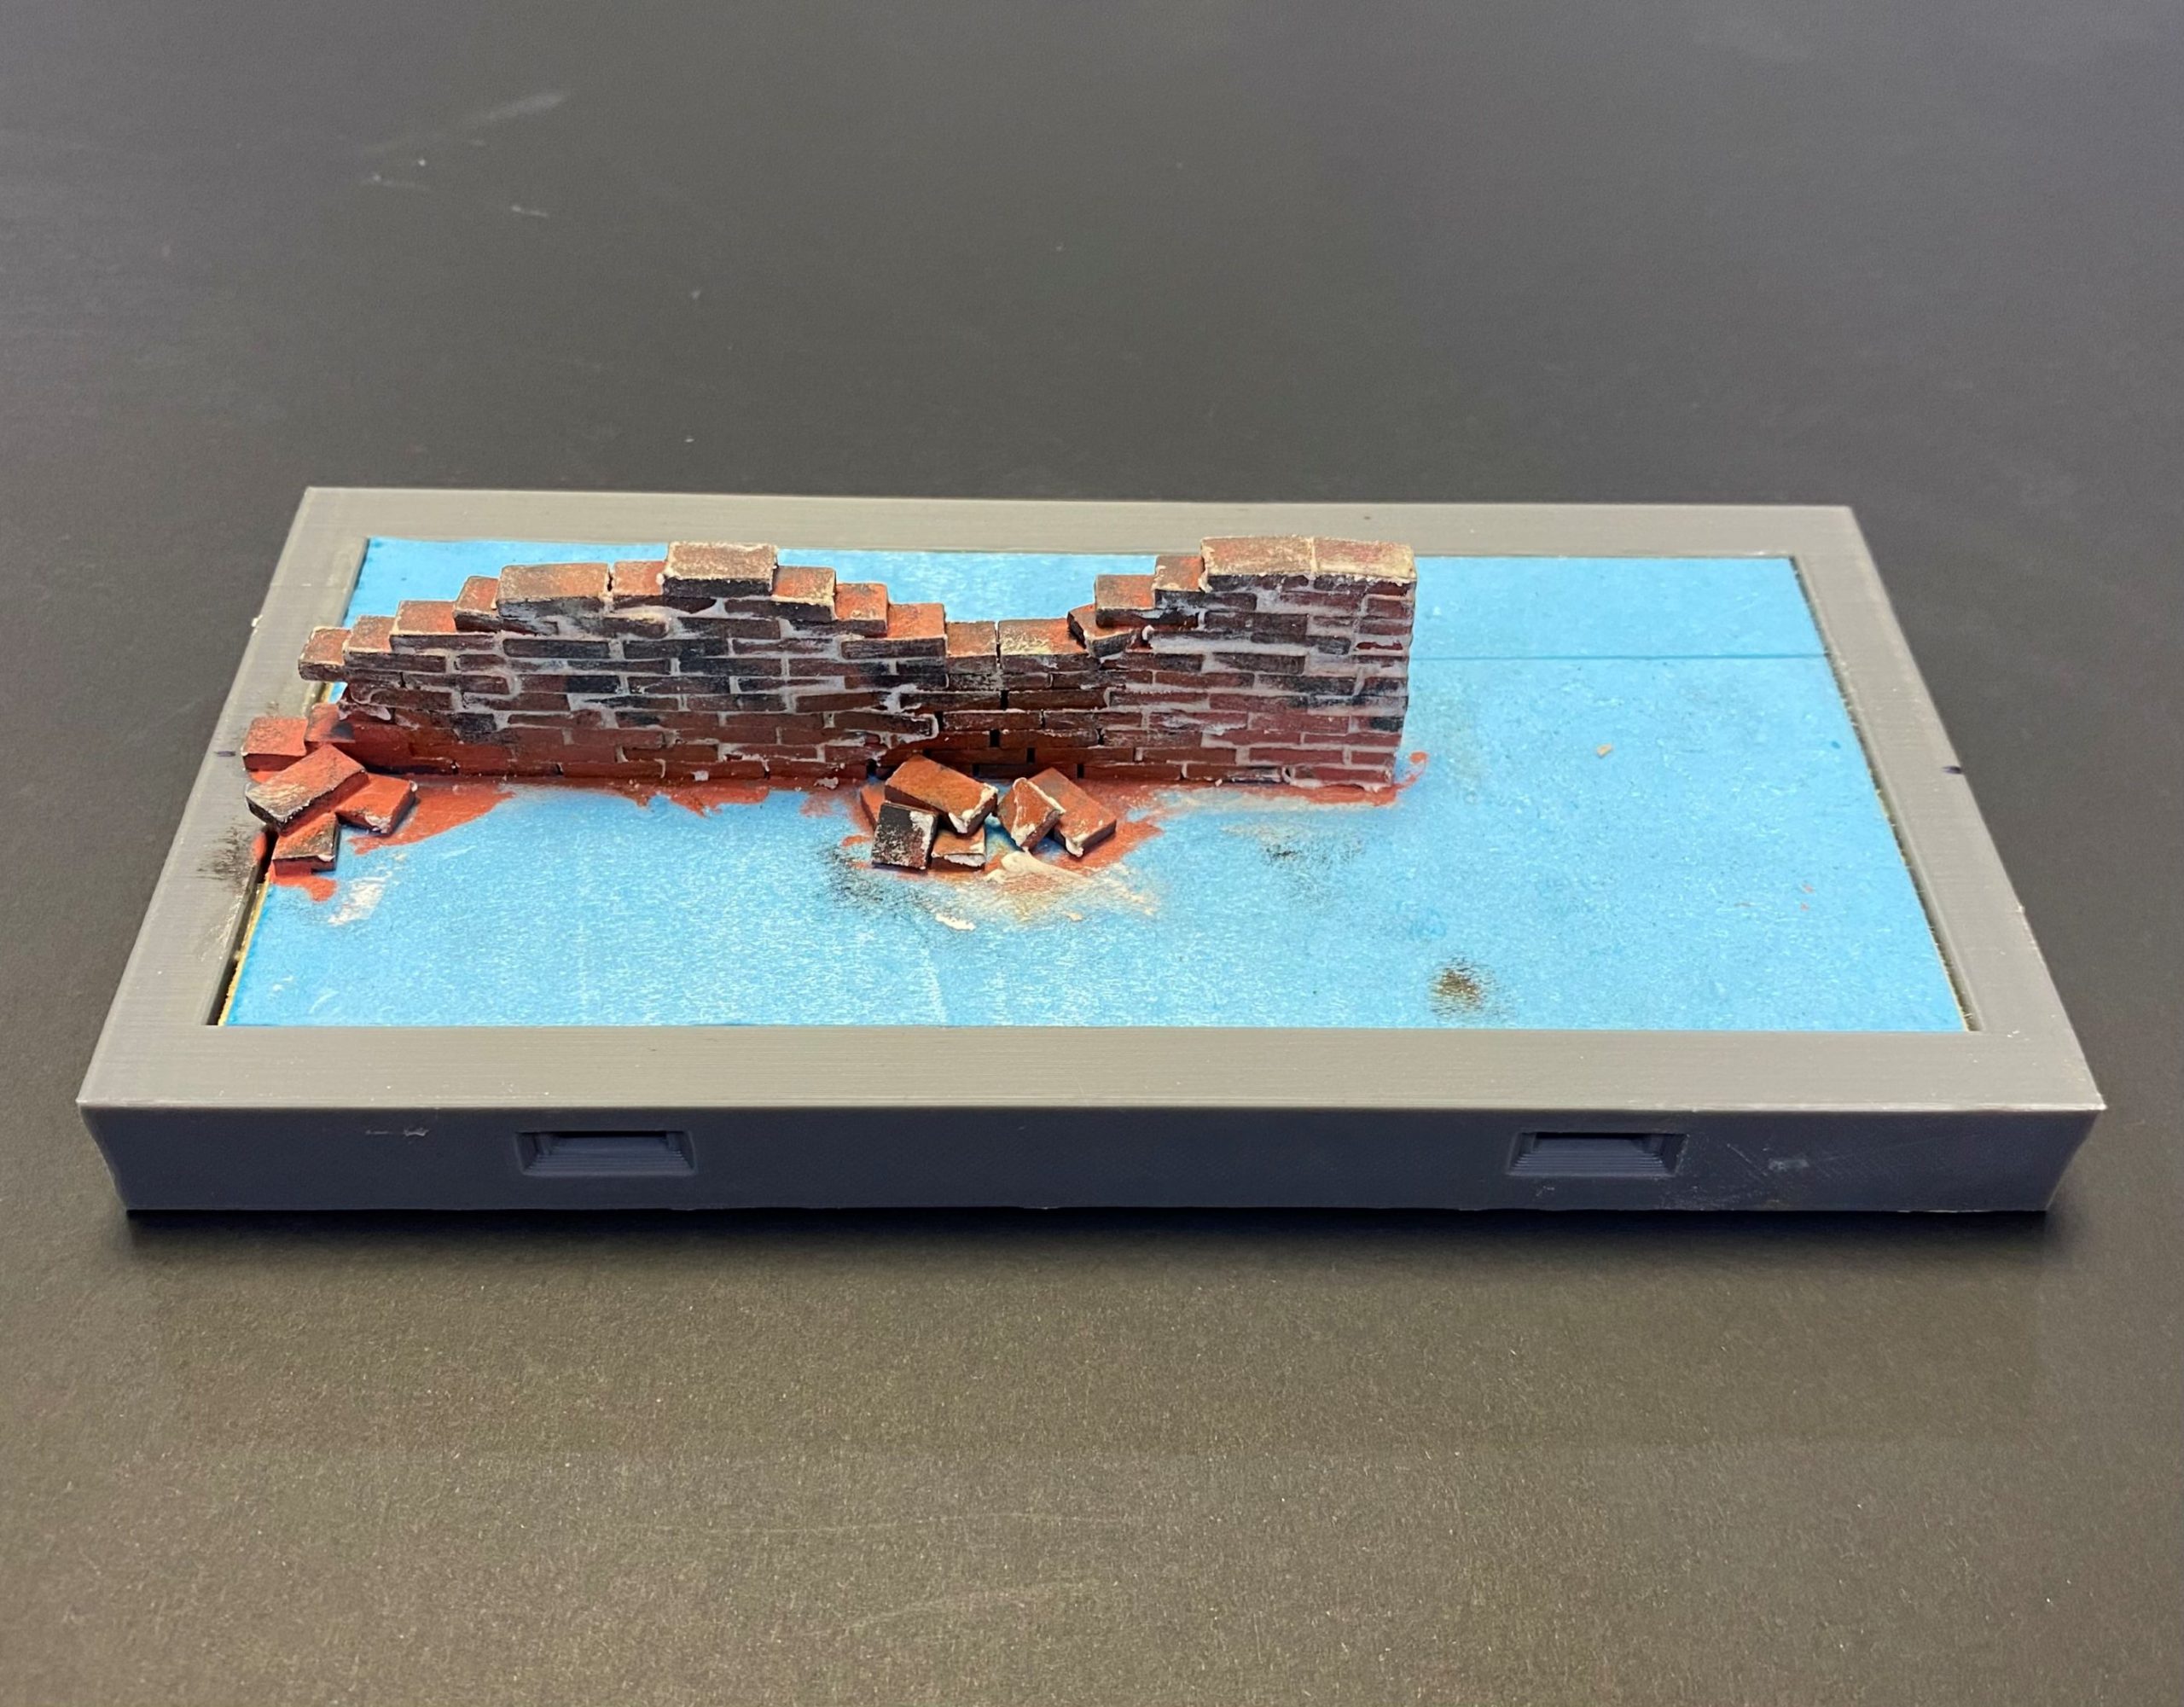
After that, I let the filler partially dry before giving it a quick rub with a slightly damp cloth to tidy it up a bit.
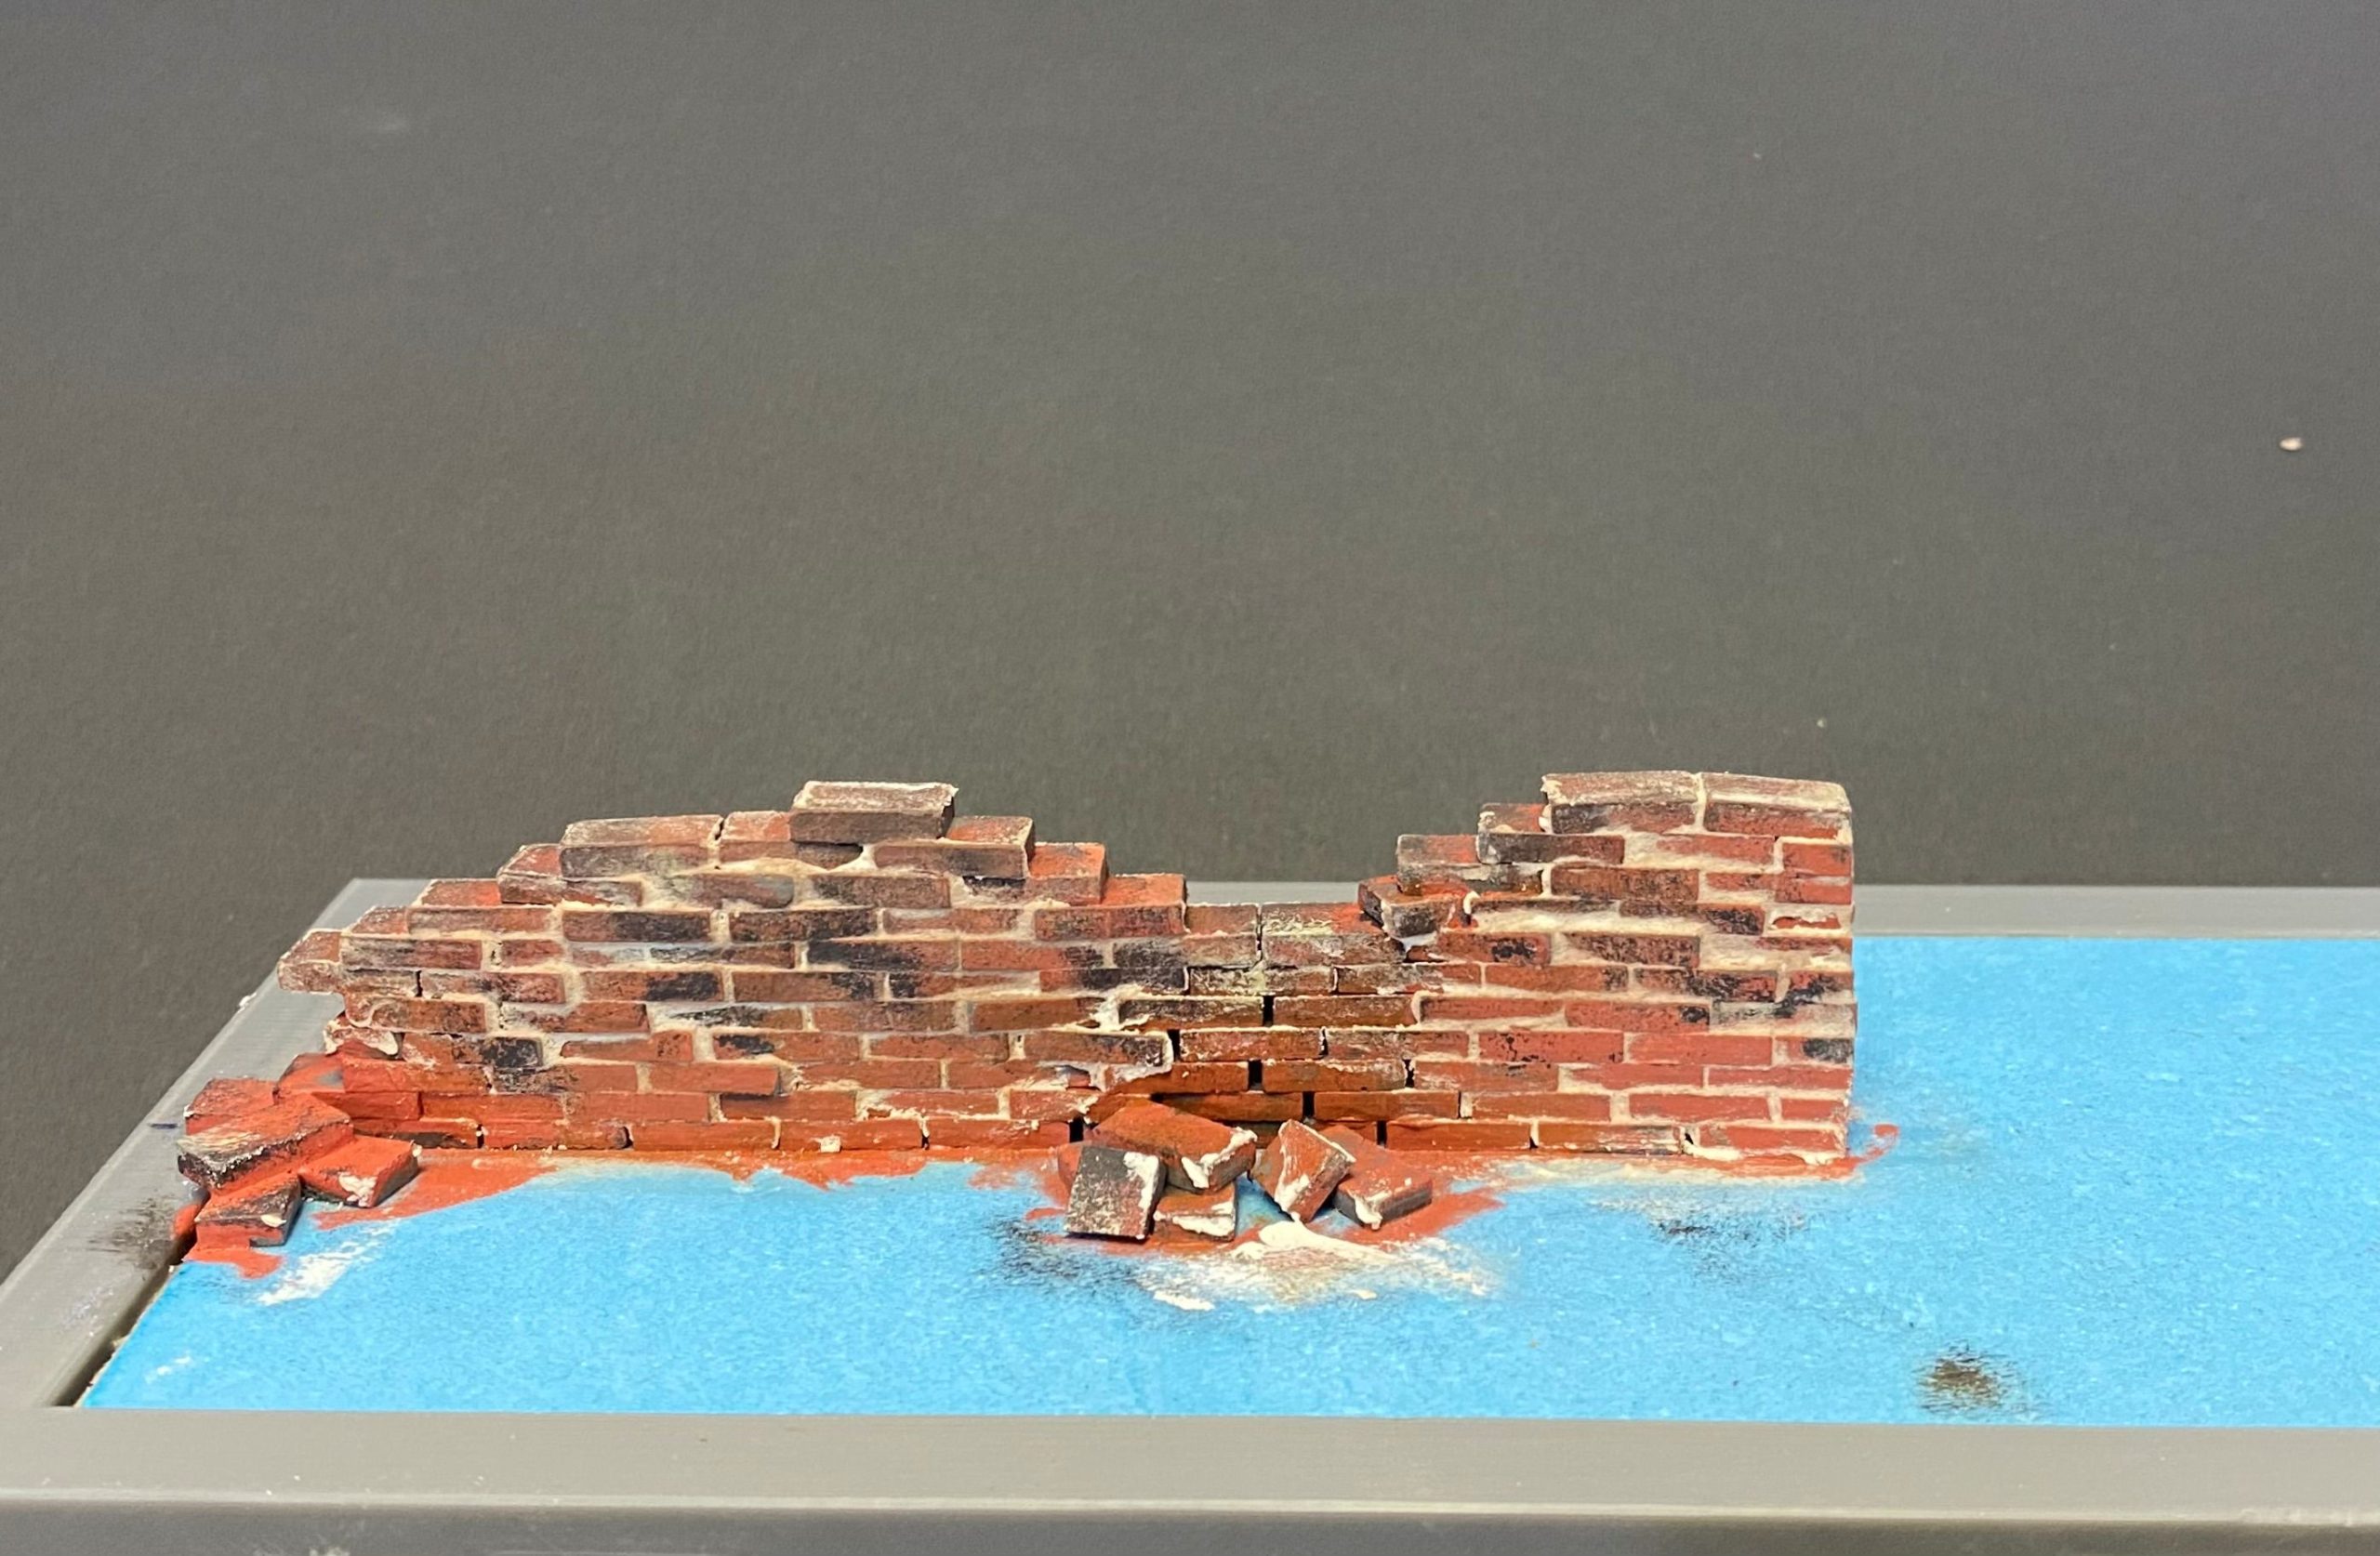
The next stage will be to add the ground covering and flock, and then something to the end of the wall to fill that gap that I have intentionally left bare.
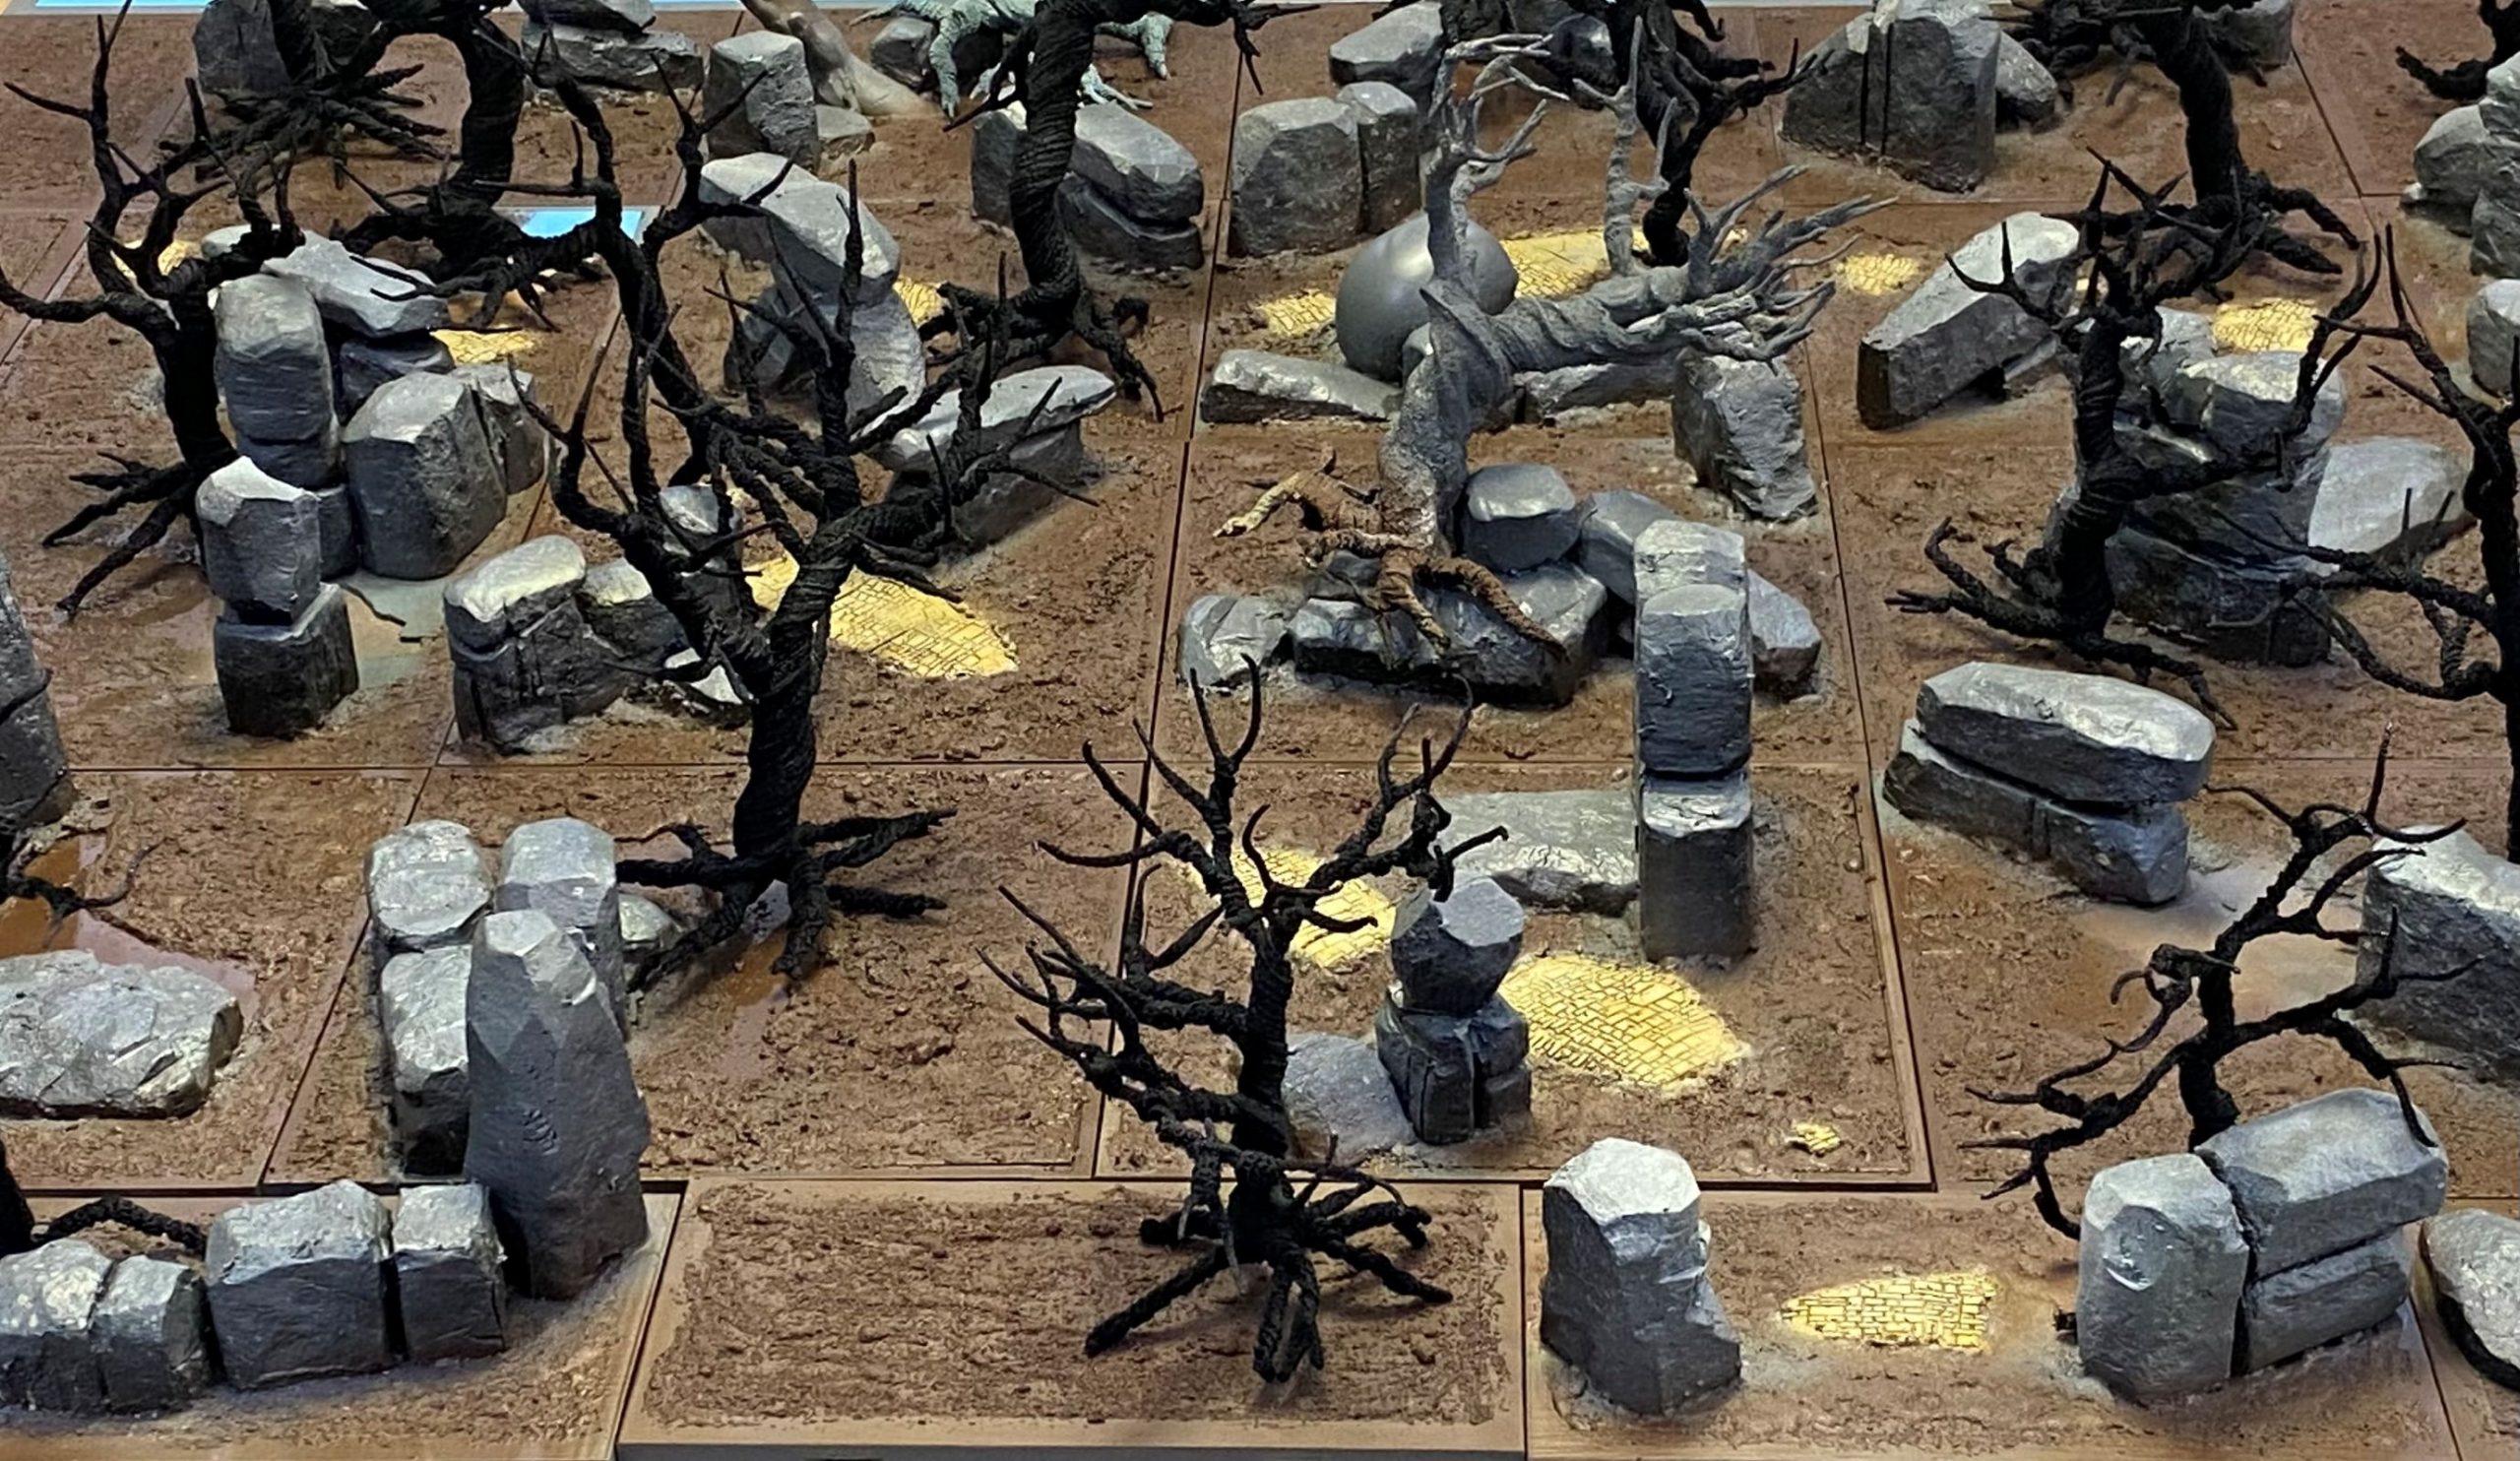
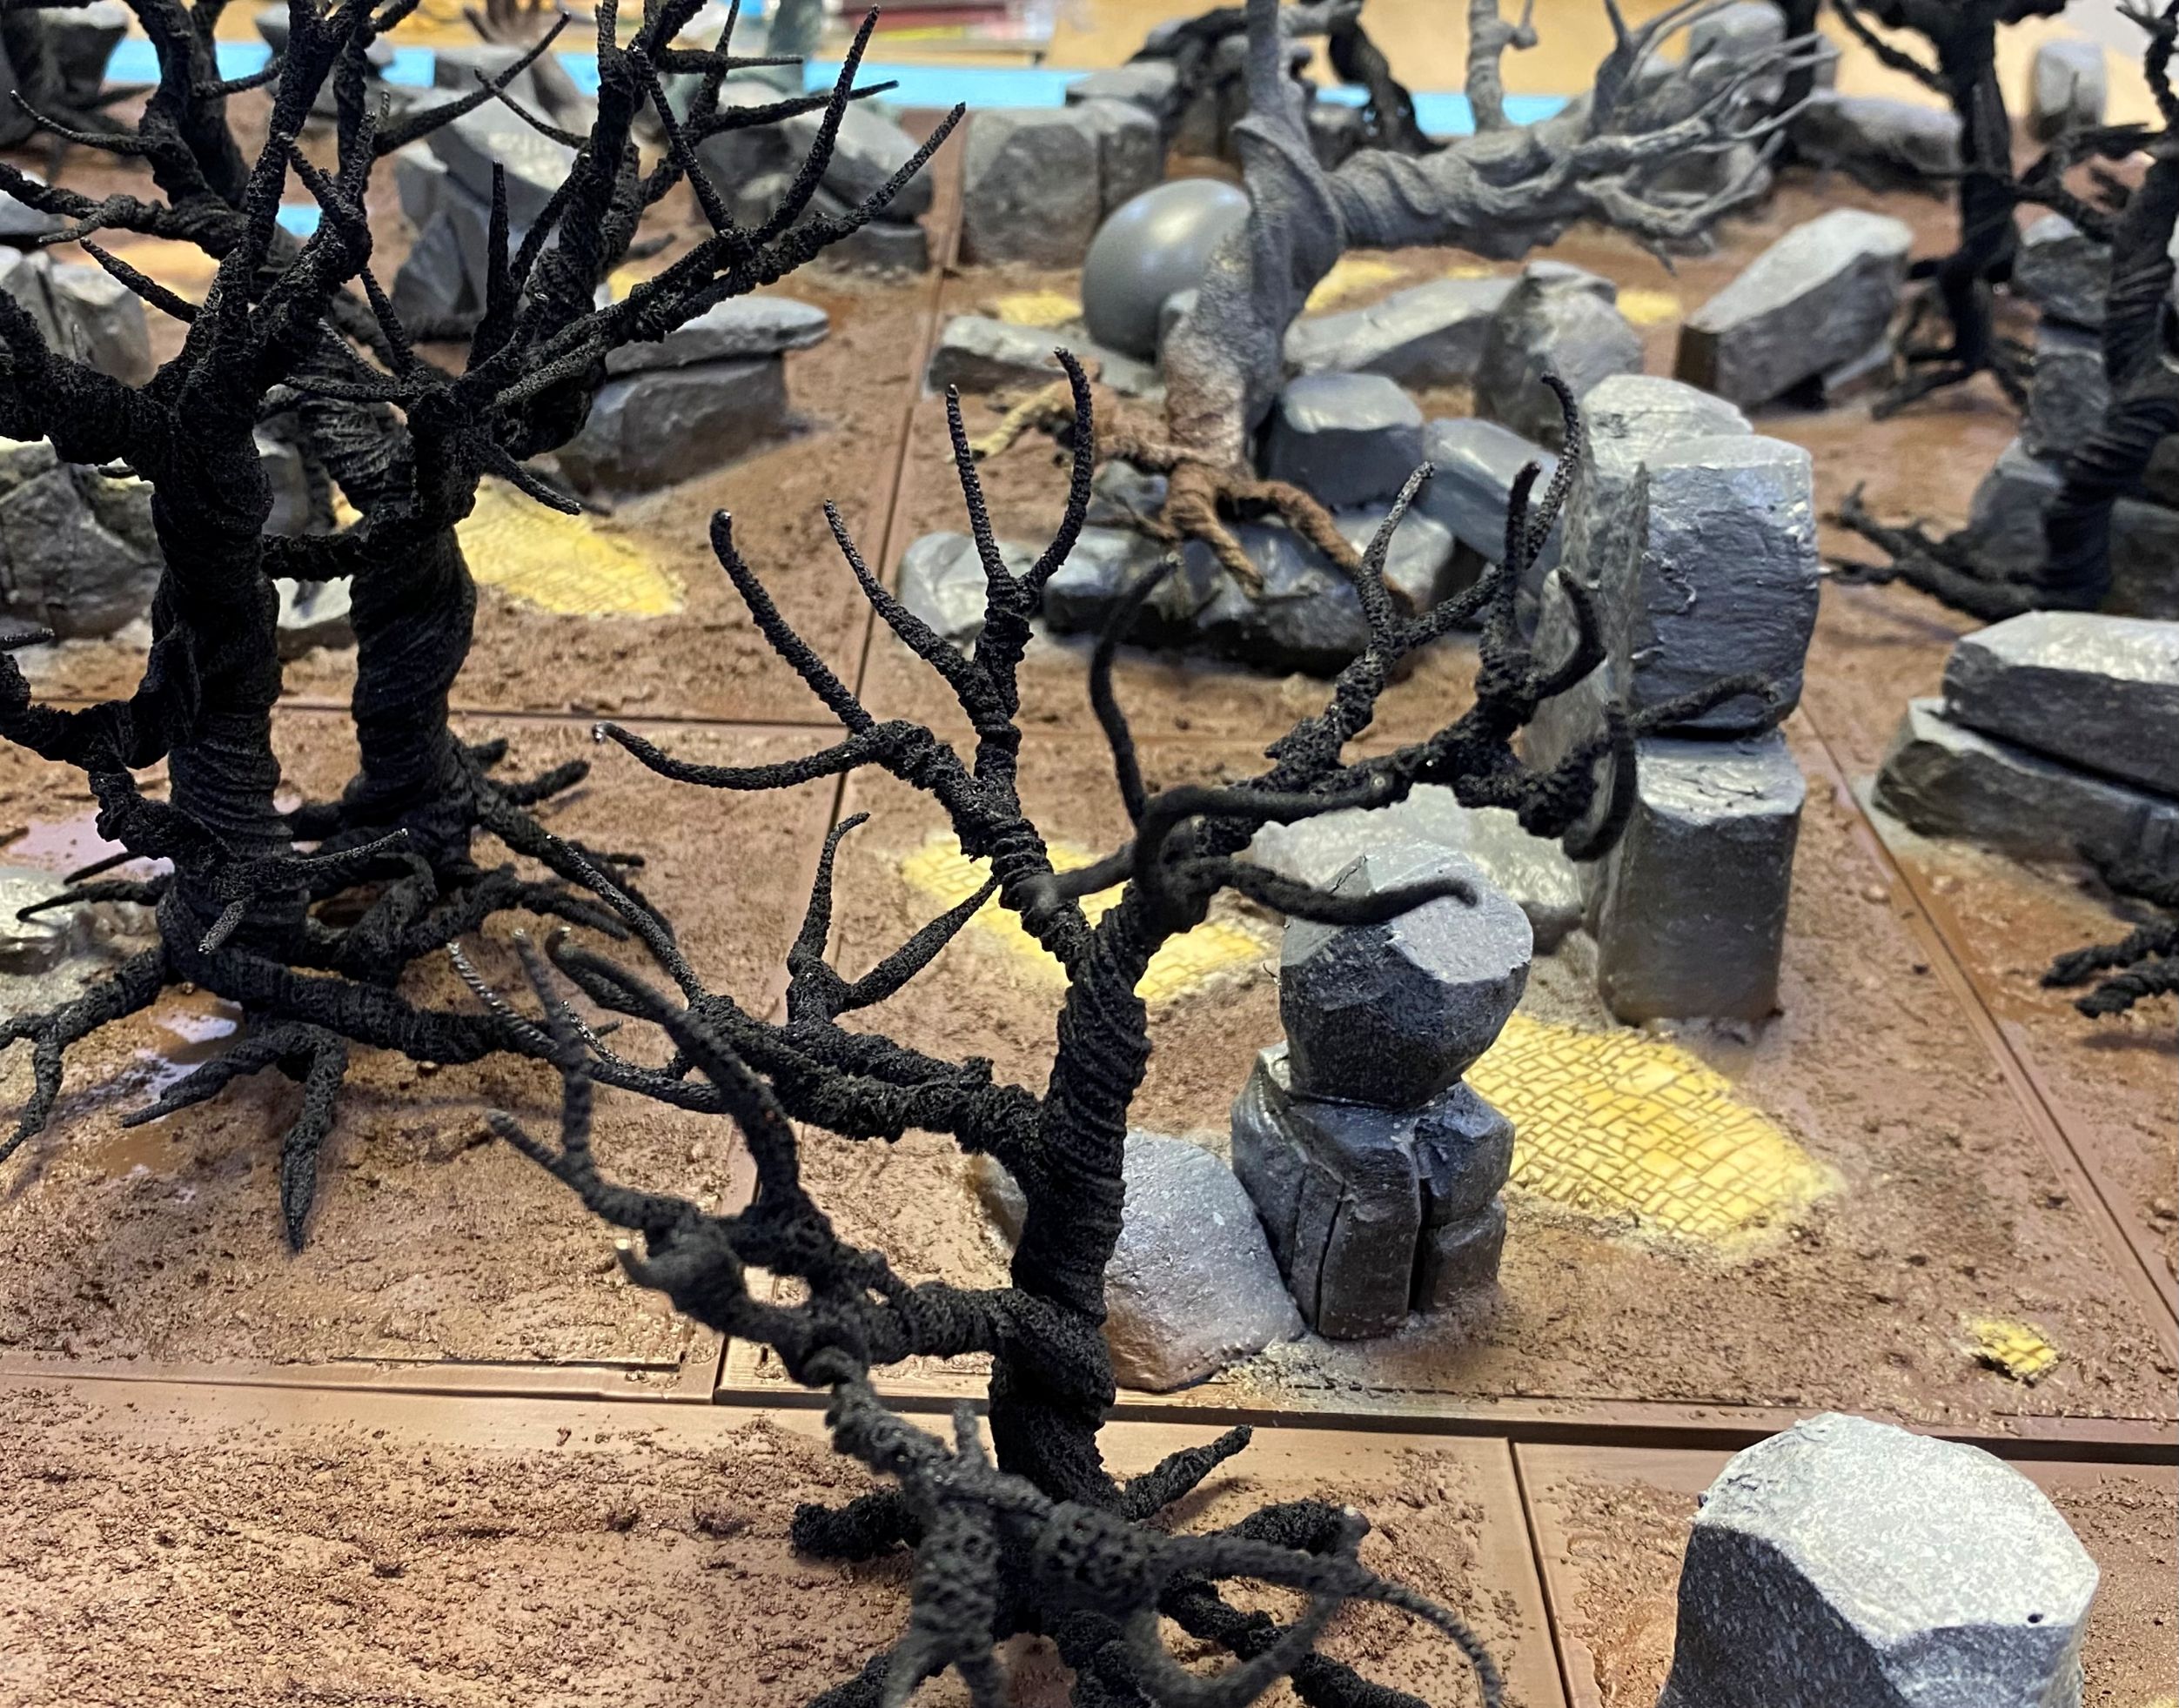
Tree placement
Took the time to start placing out some trees to get an idea of how things are starting to look. I will cover more on the trees soon.
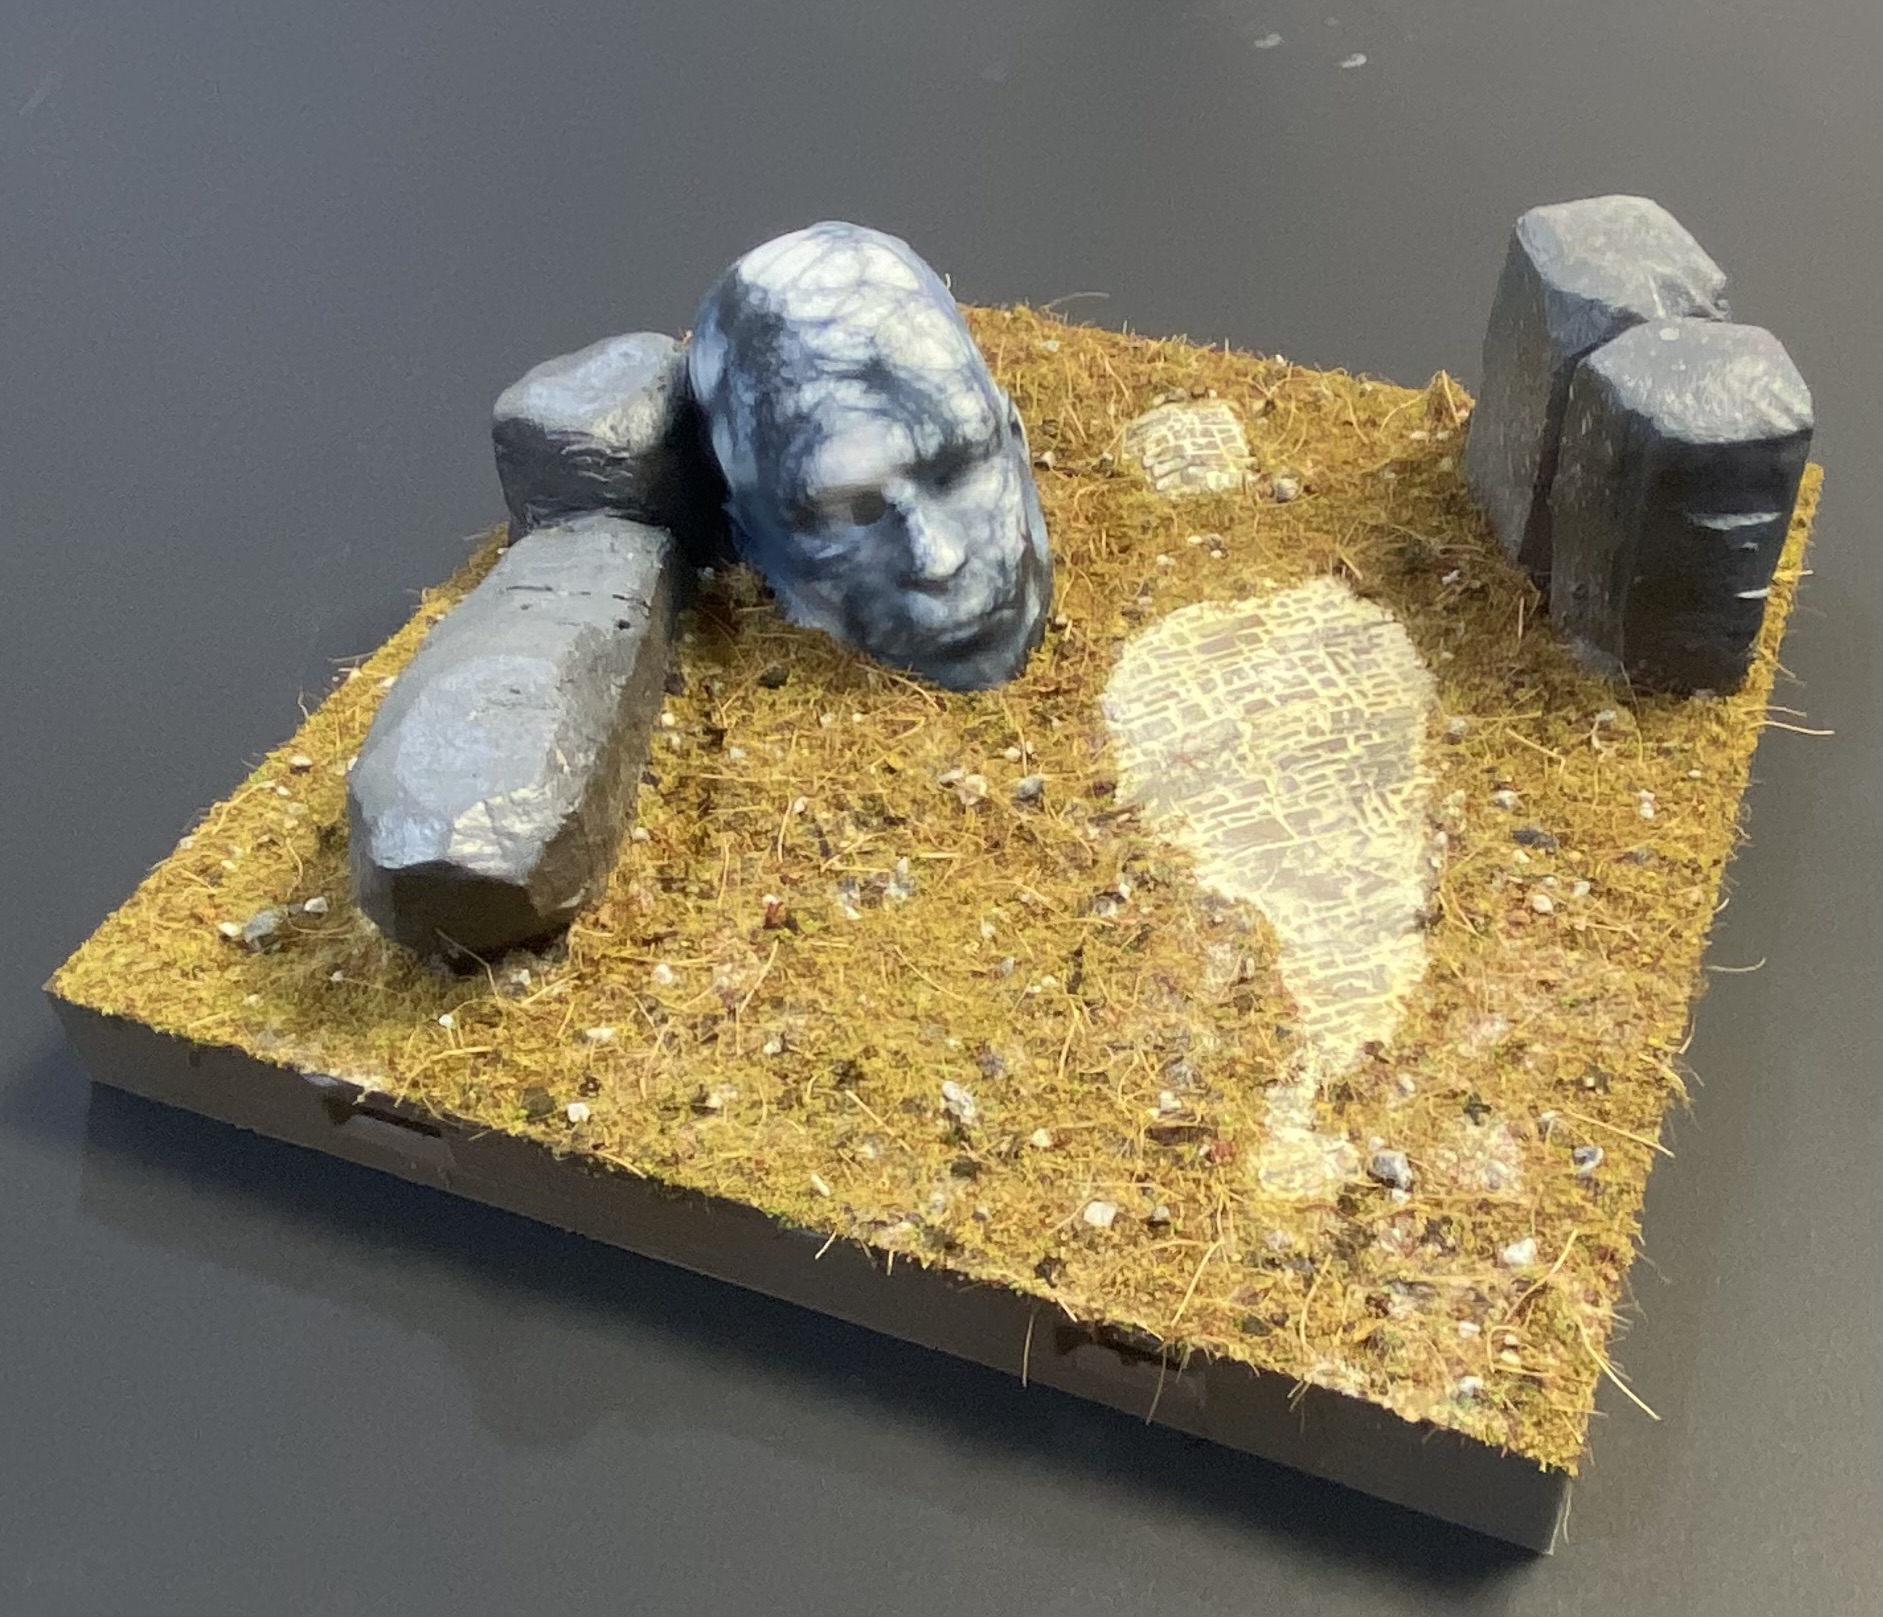
Marble Head
This morning, I set about painting the marble features of this setup.
It was just an excuse to add another texture and a set of colours to the build, and to create a few feature tiles.
These are the only 3D printed parts for this build. I printed them out on one of my Creality K1 Max filament printers using my usual PLA+
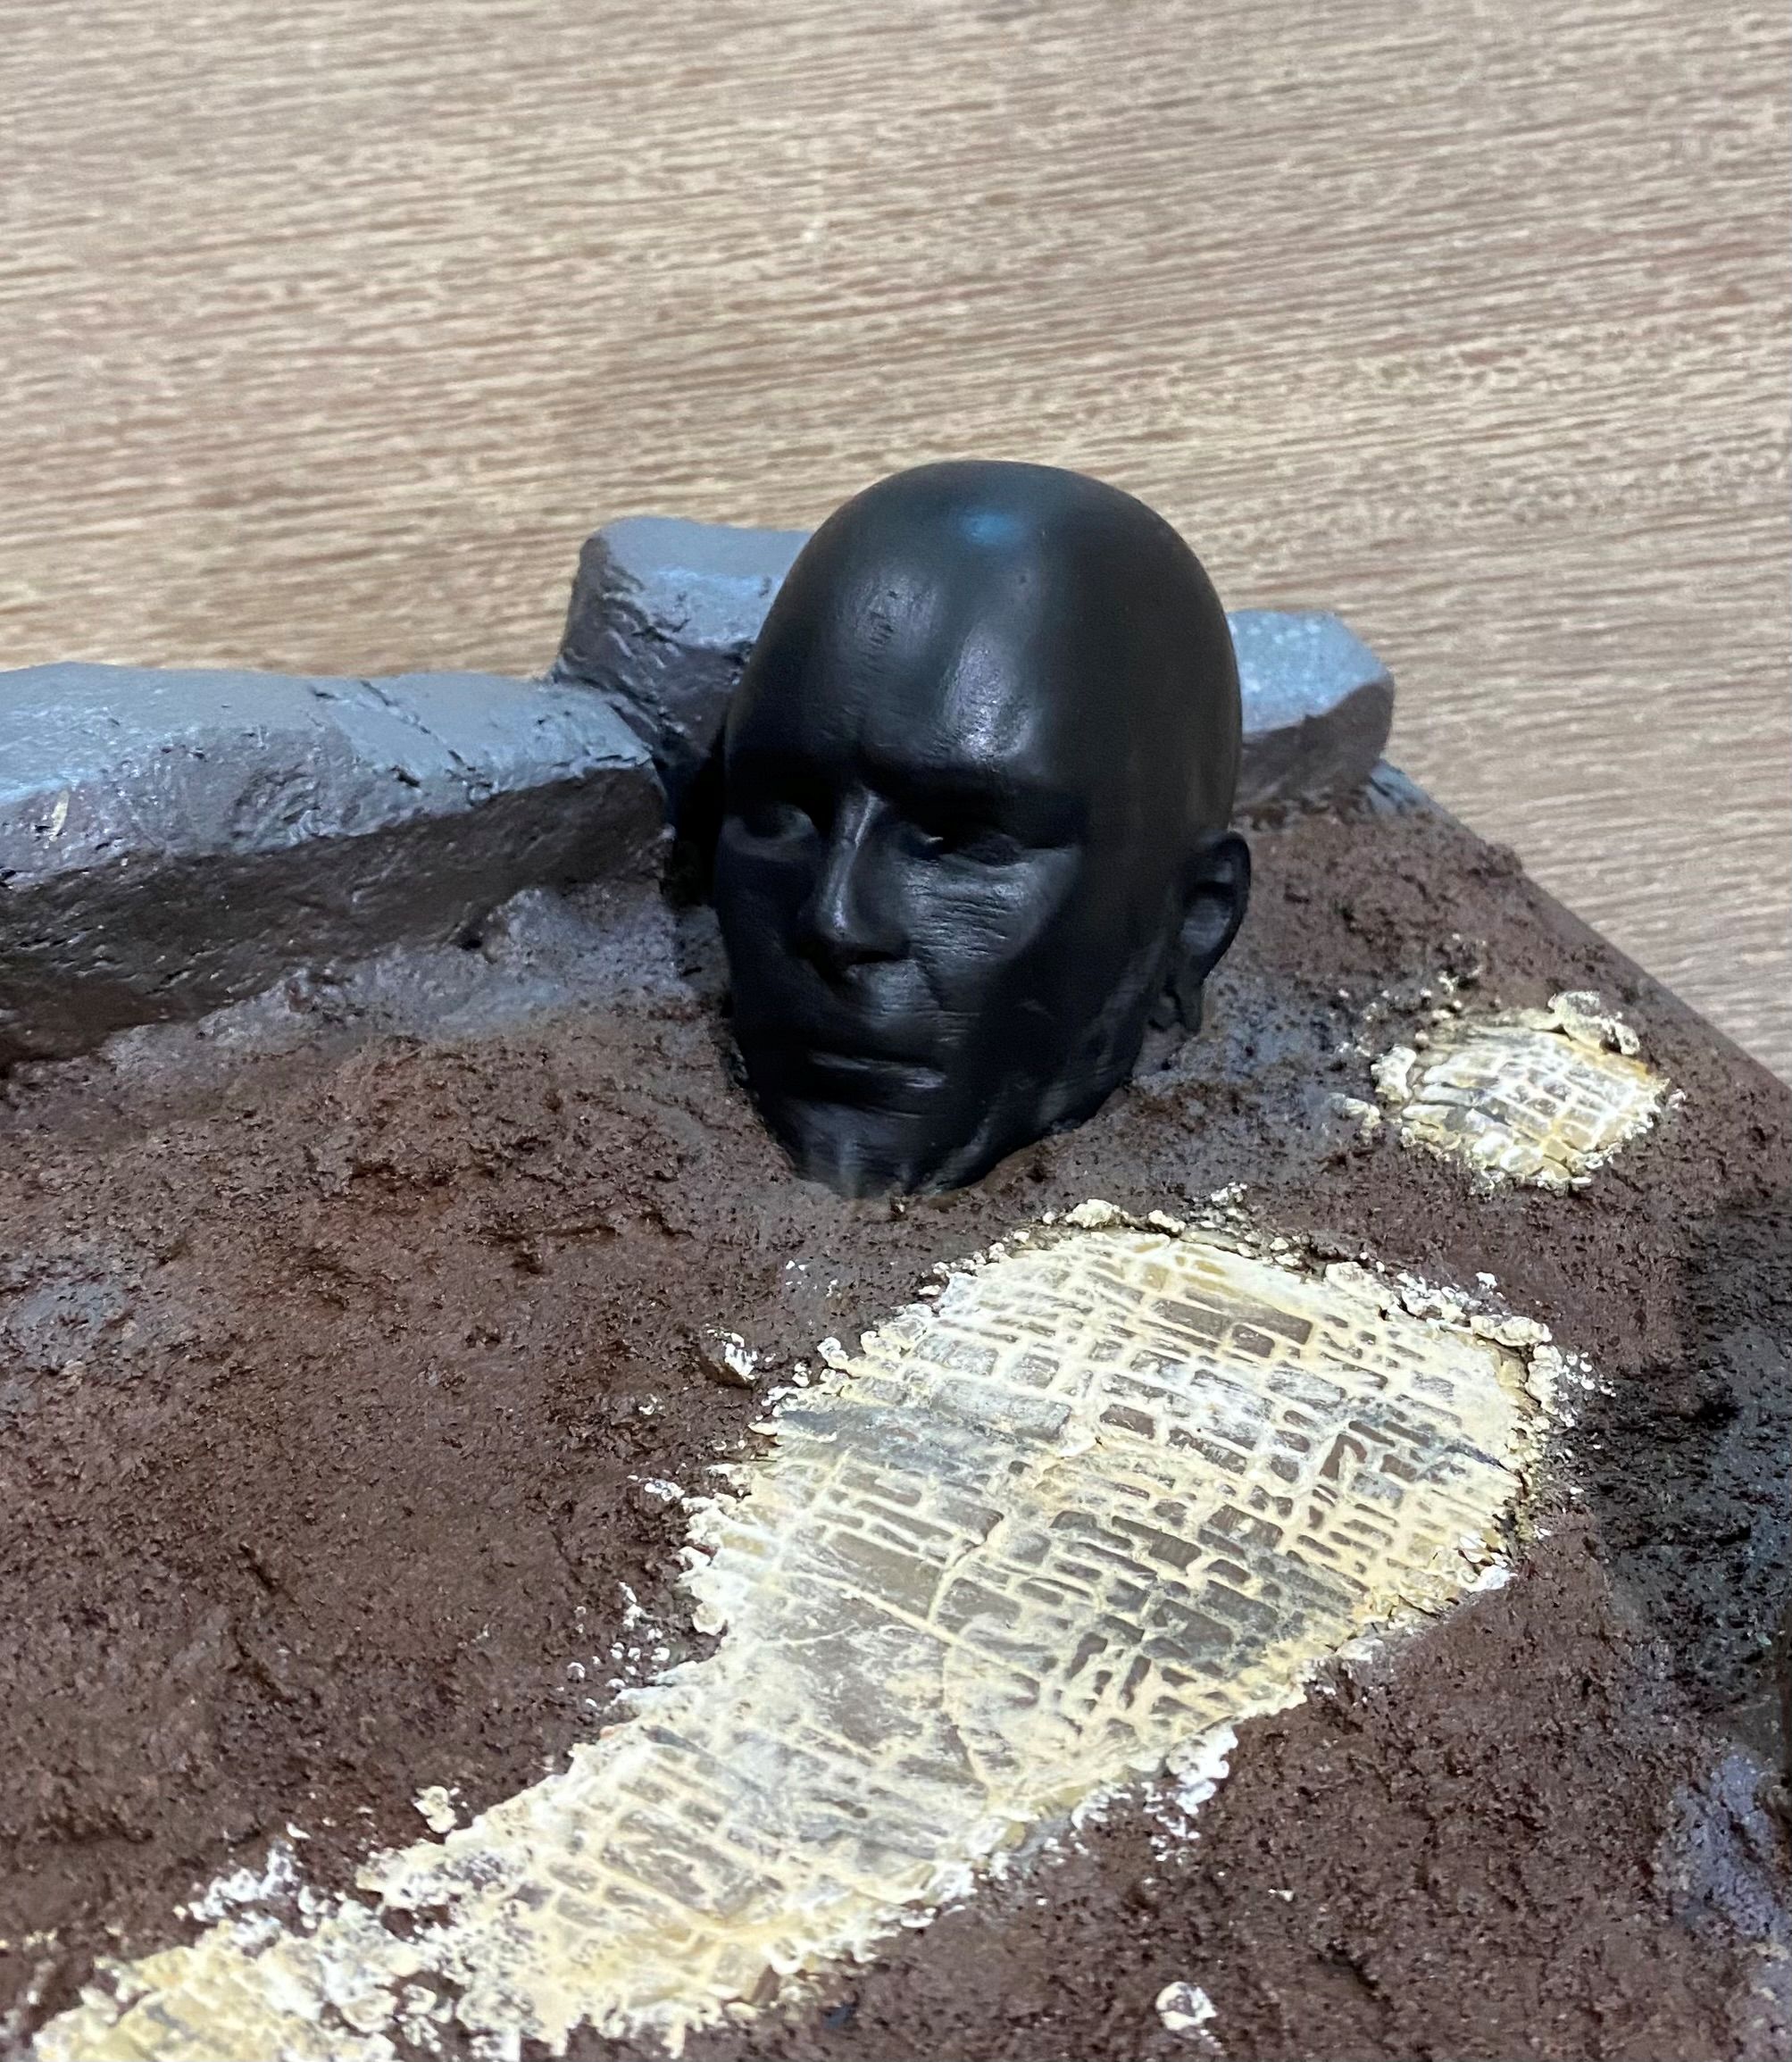 I started off by painting the statue with contrast black paint from Games Workshops range, although any black would have done the trick.
 I then got hold of some dried-out baby wipes. Luckily having kids I had some of these in the car, even luckier my kids are a bit older now and as these have been sat in my car for a few years now in the glove box they were well and truly dried out.
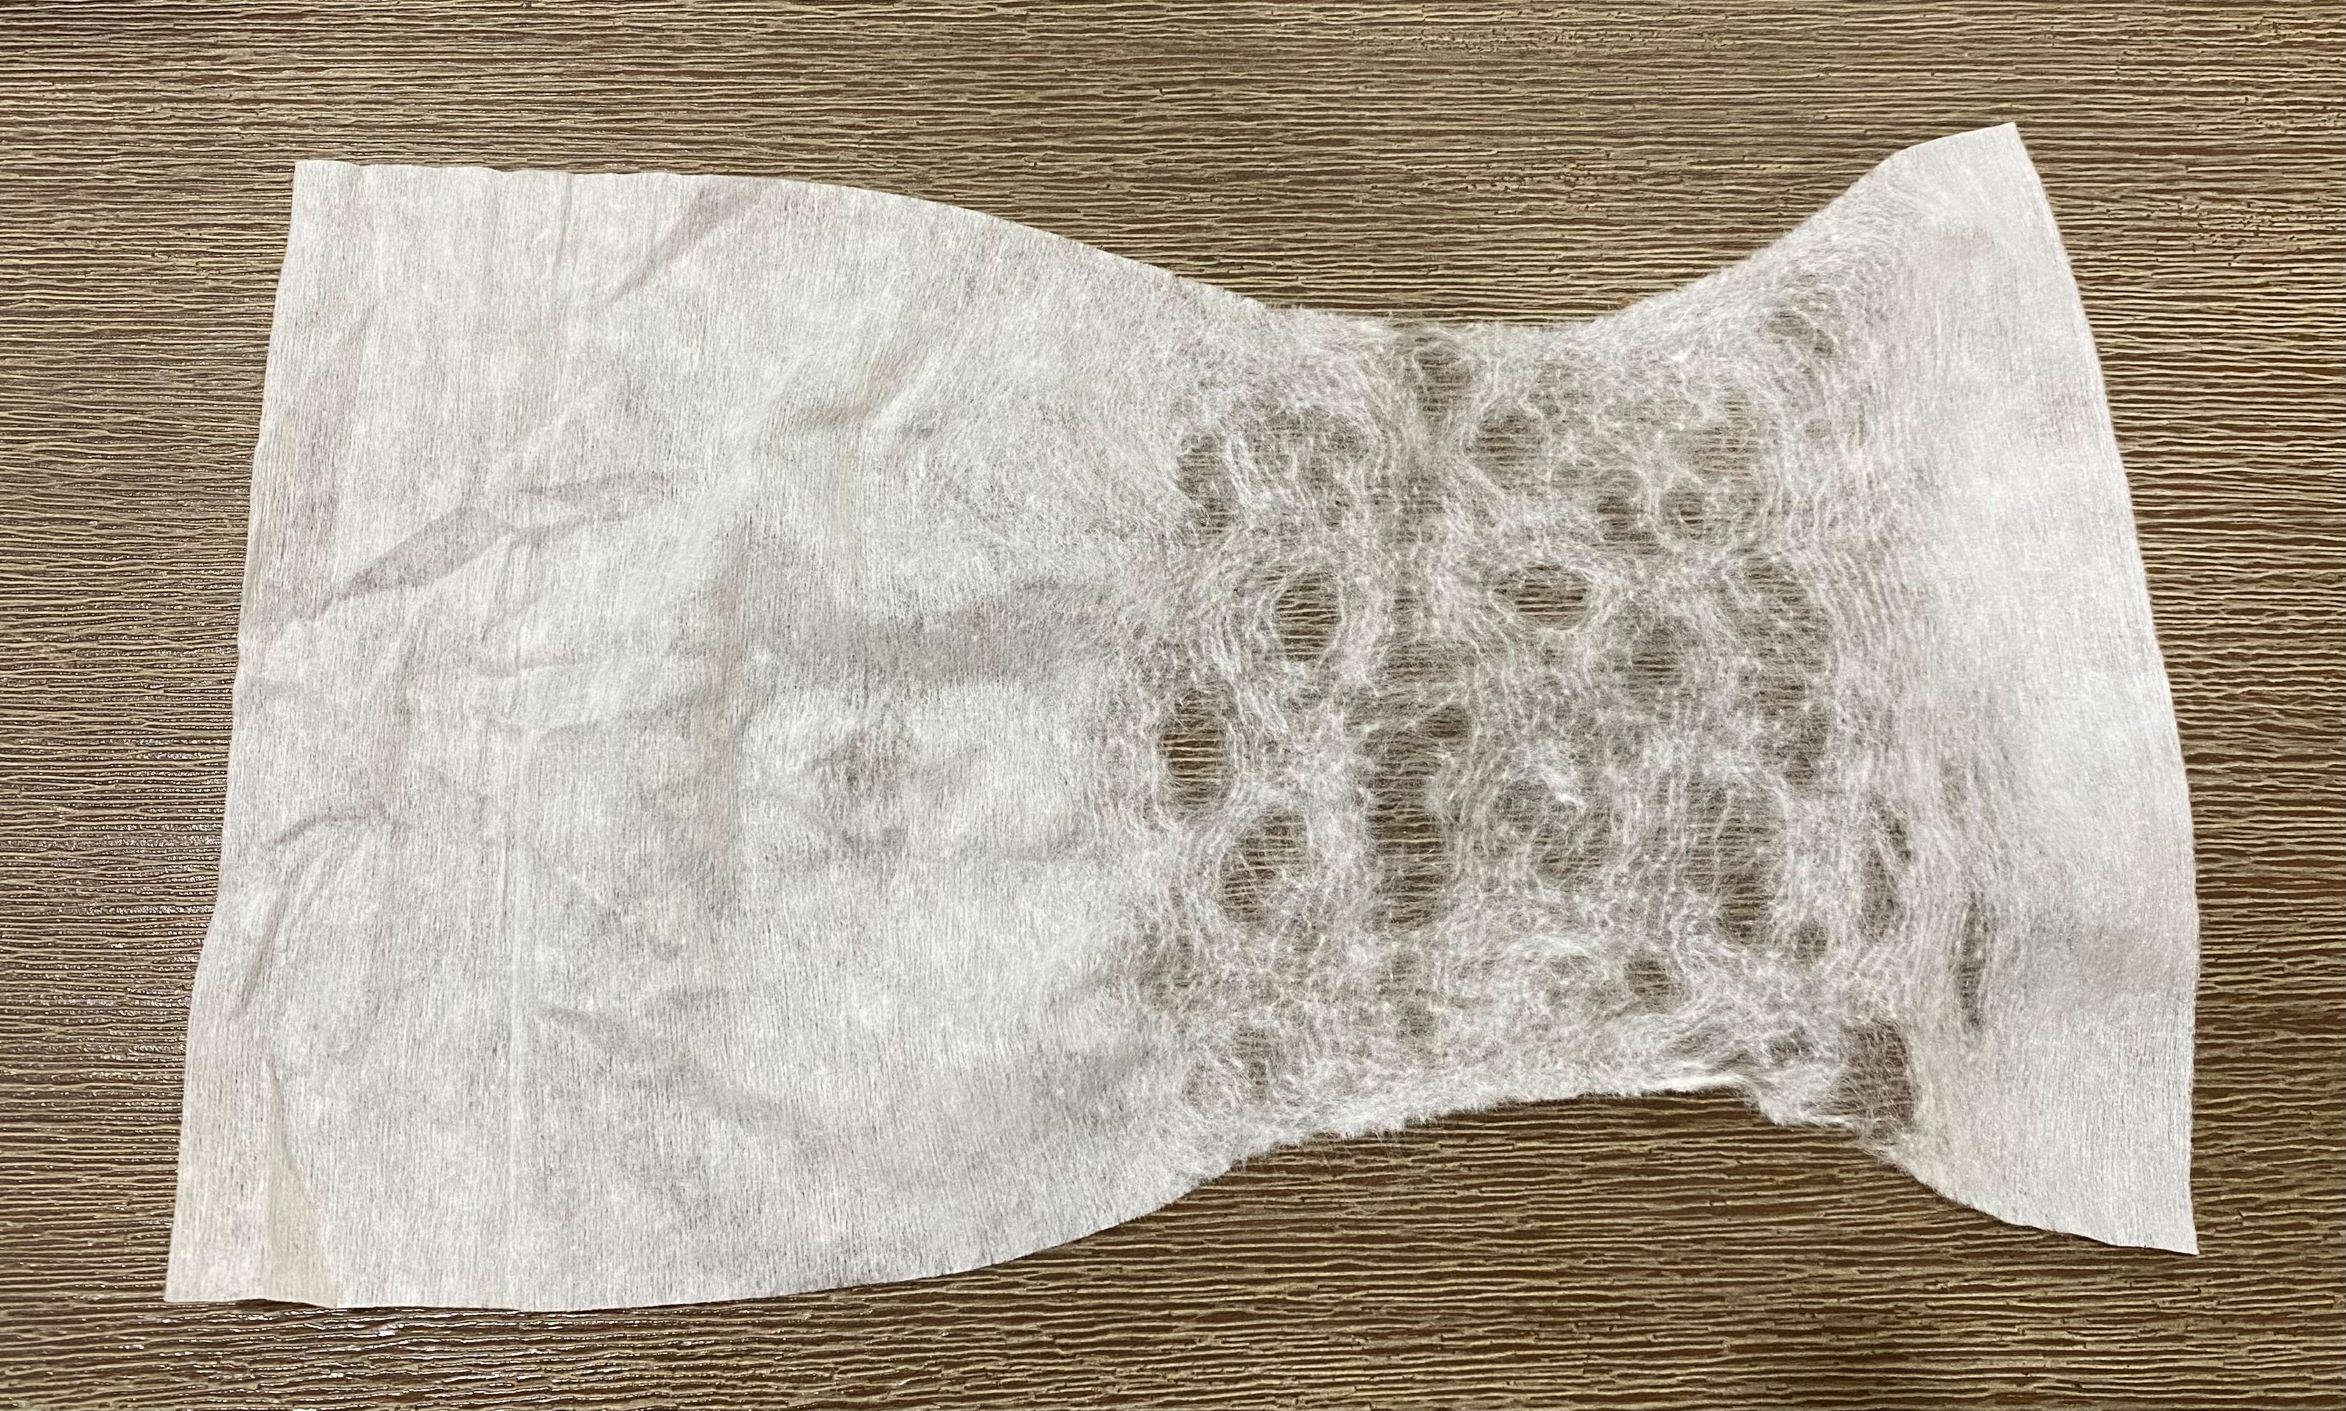 I teased the baby wipe apart by pulling on it gently. The more holes you create when doing this the less 'veins' will be created with the finished effect.
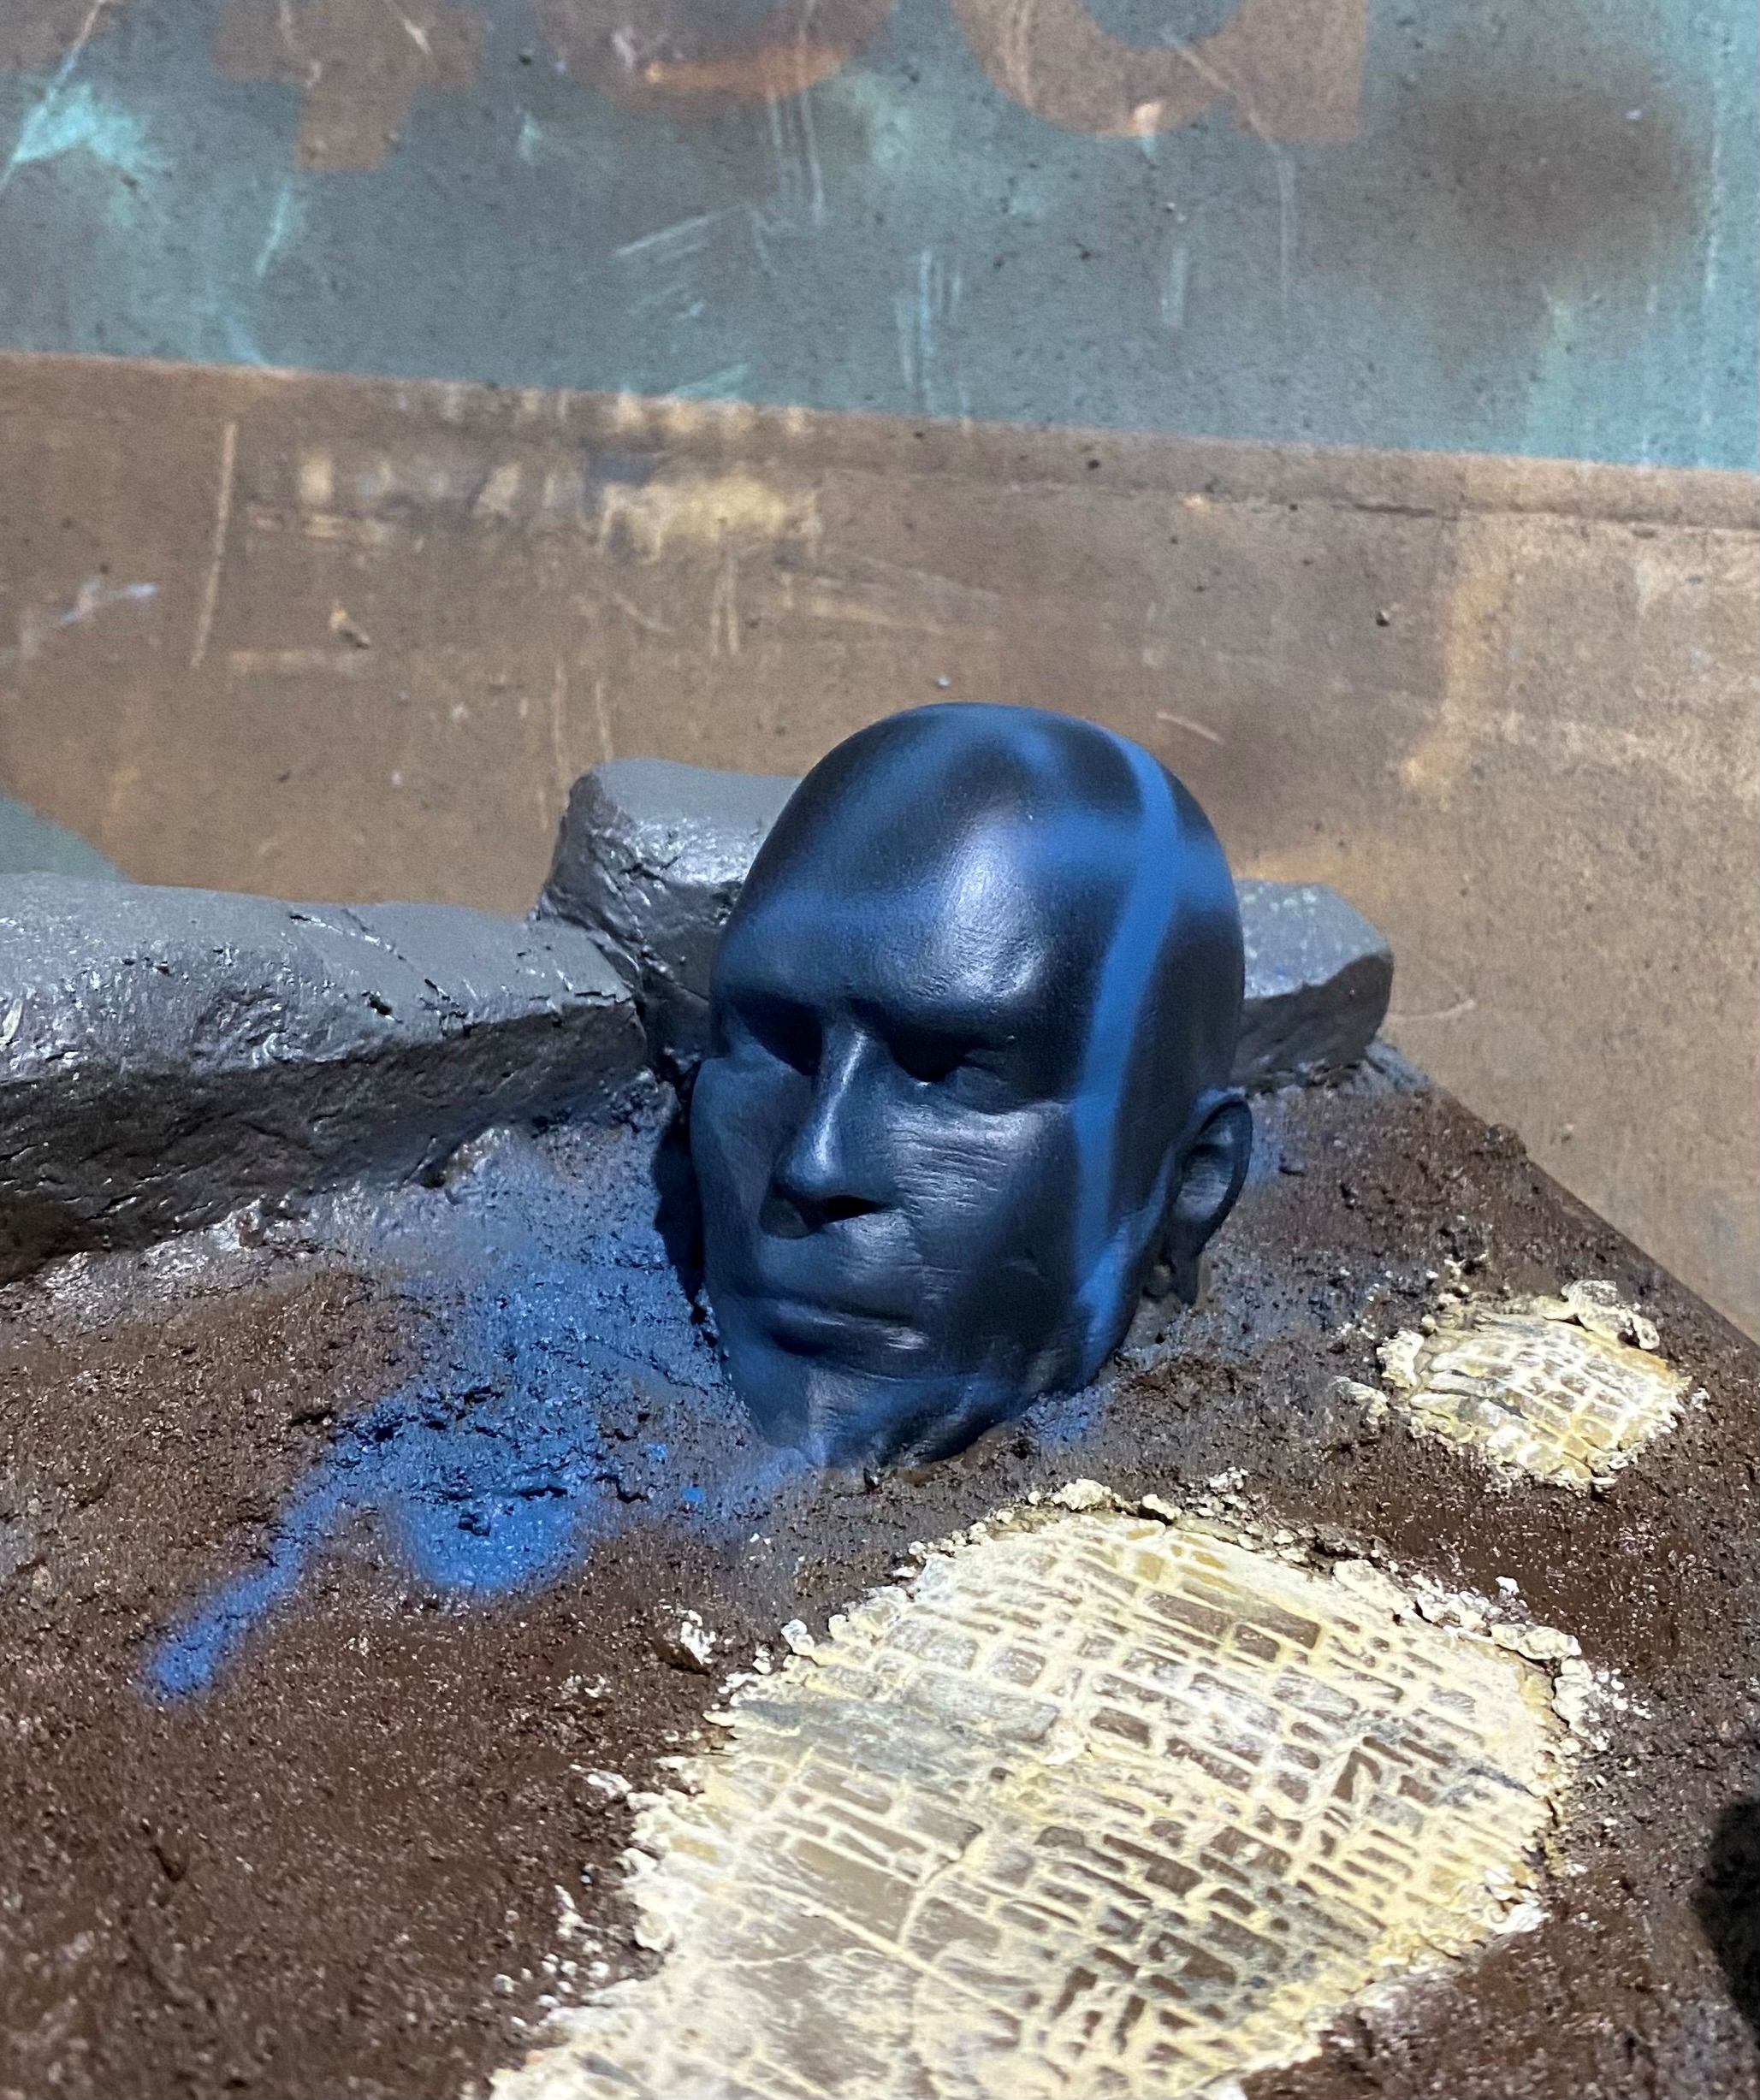 I then sprayed on a few lines with a blue and a bluish grey. You can use any colour for this, and this step really is completely optional and can even be left out if you prefer.
 Next is to cover the statue with the baby wipe. You really want to get this as snug a fit as possible. This can be tricky with irregular shaped things. As I plan to have some plant life around I know that I can hide any bits I am not happy with later down the track.
 I then used a cheap airbrush to apply some off white followed by some white to the statue. I concentrated most of the white to the top of the model.
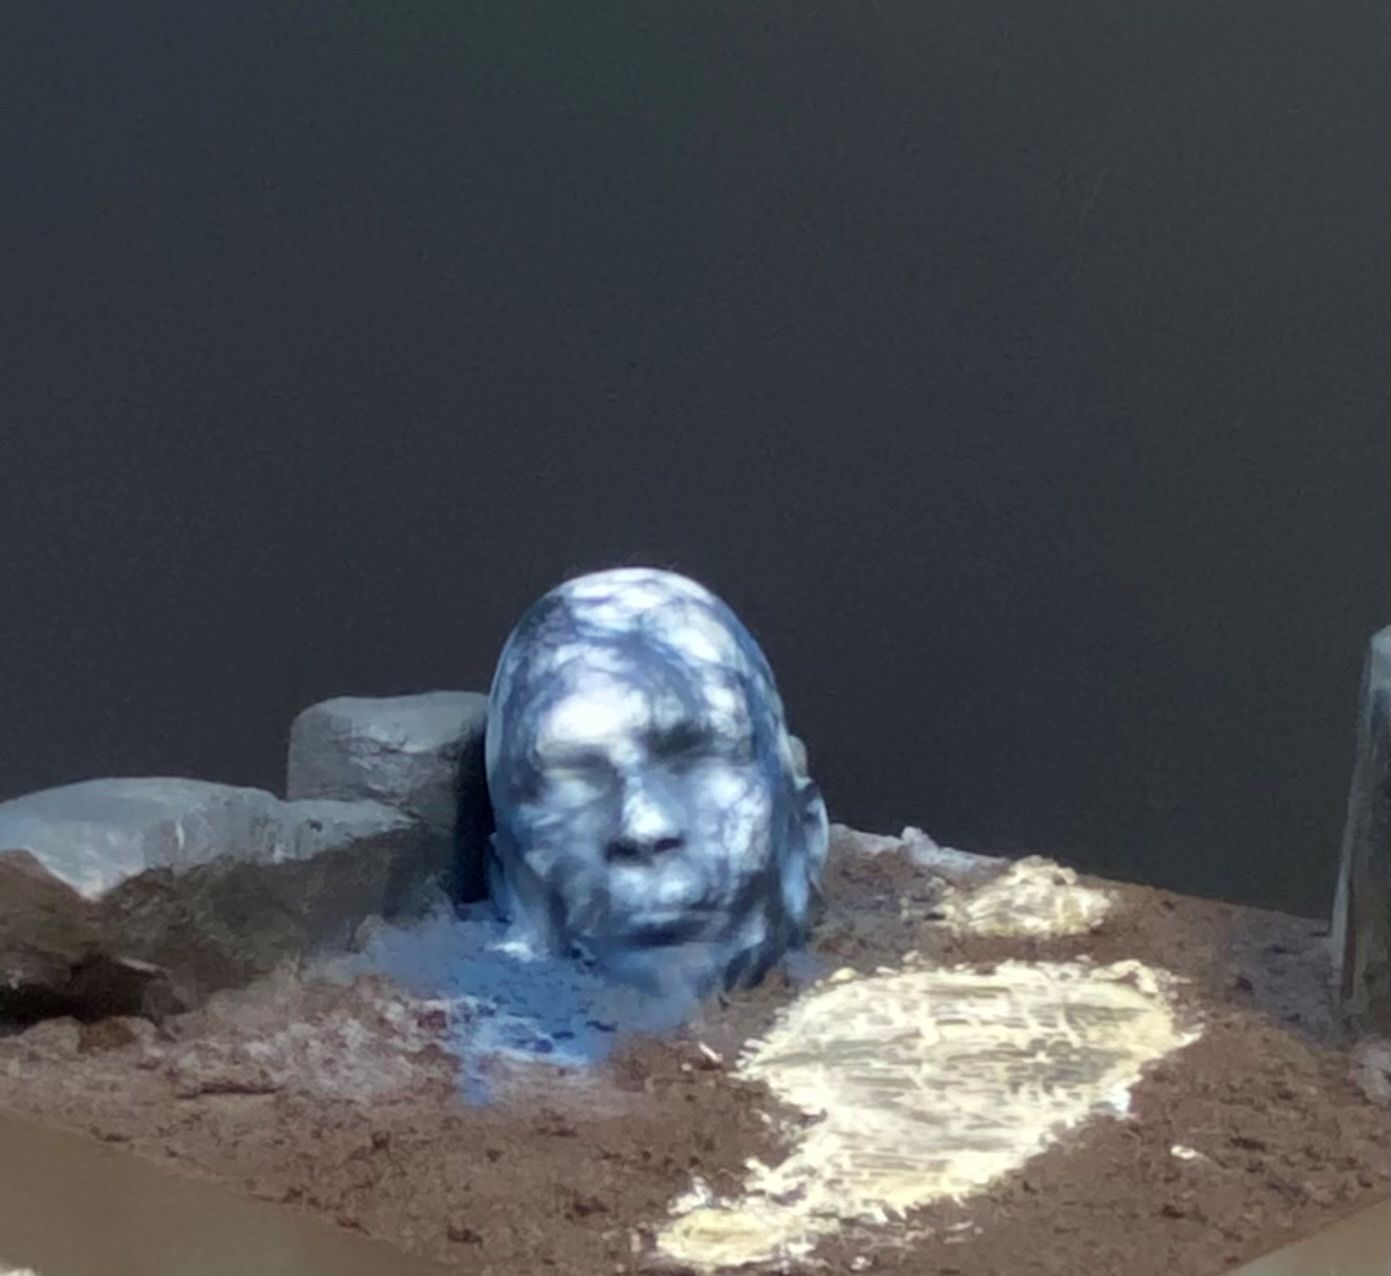 Finally, remove the baby wipe and you will end up with something a bit like this.
Obviously, I have a fair amount of the darker colour showing on mine. If you take the baby wipe off and find it too dark for your liking, you can simply add another layer of baby wipe and go over it again with off-white and then white. This will turn some of the current darker lines into very pale grey lines, which also creates a nice effect.
First layer of ground cover
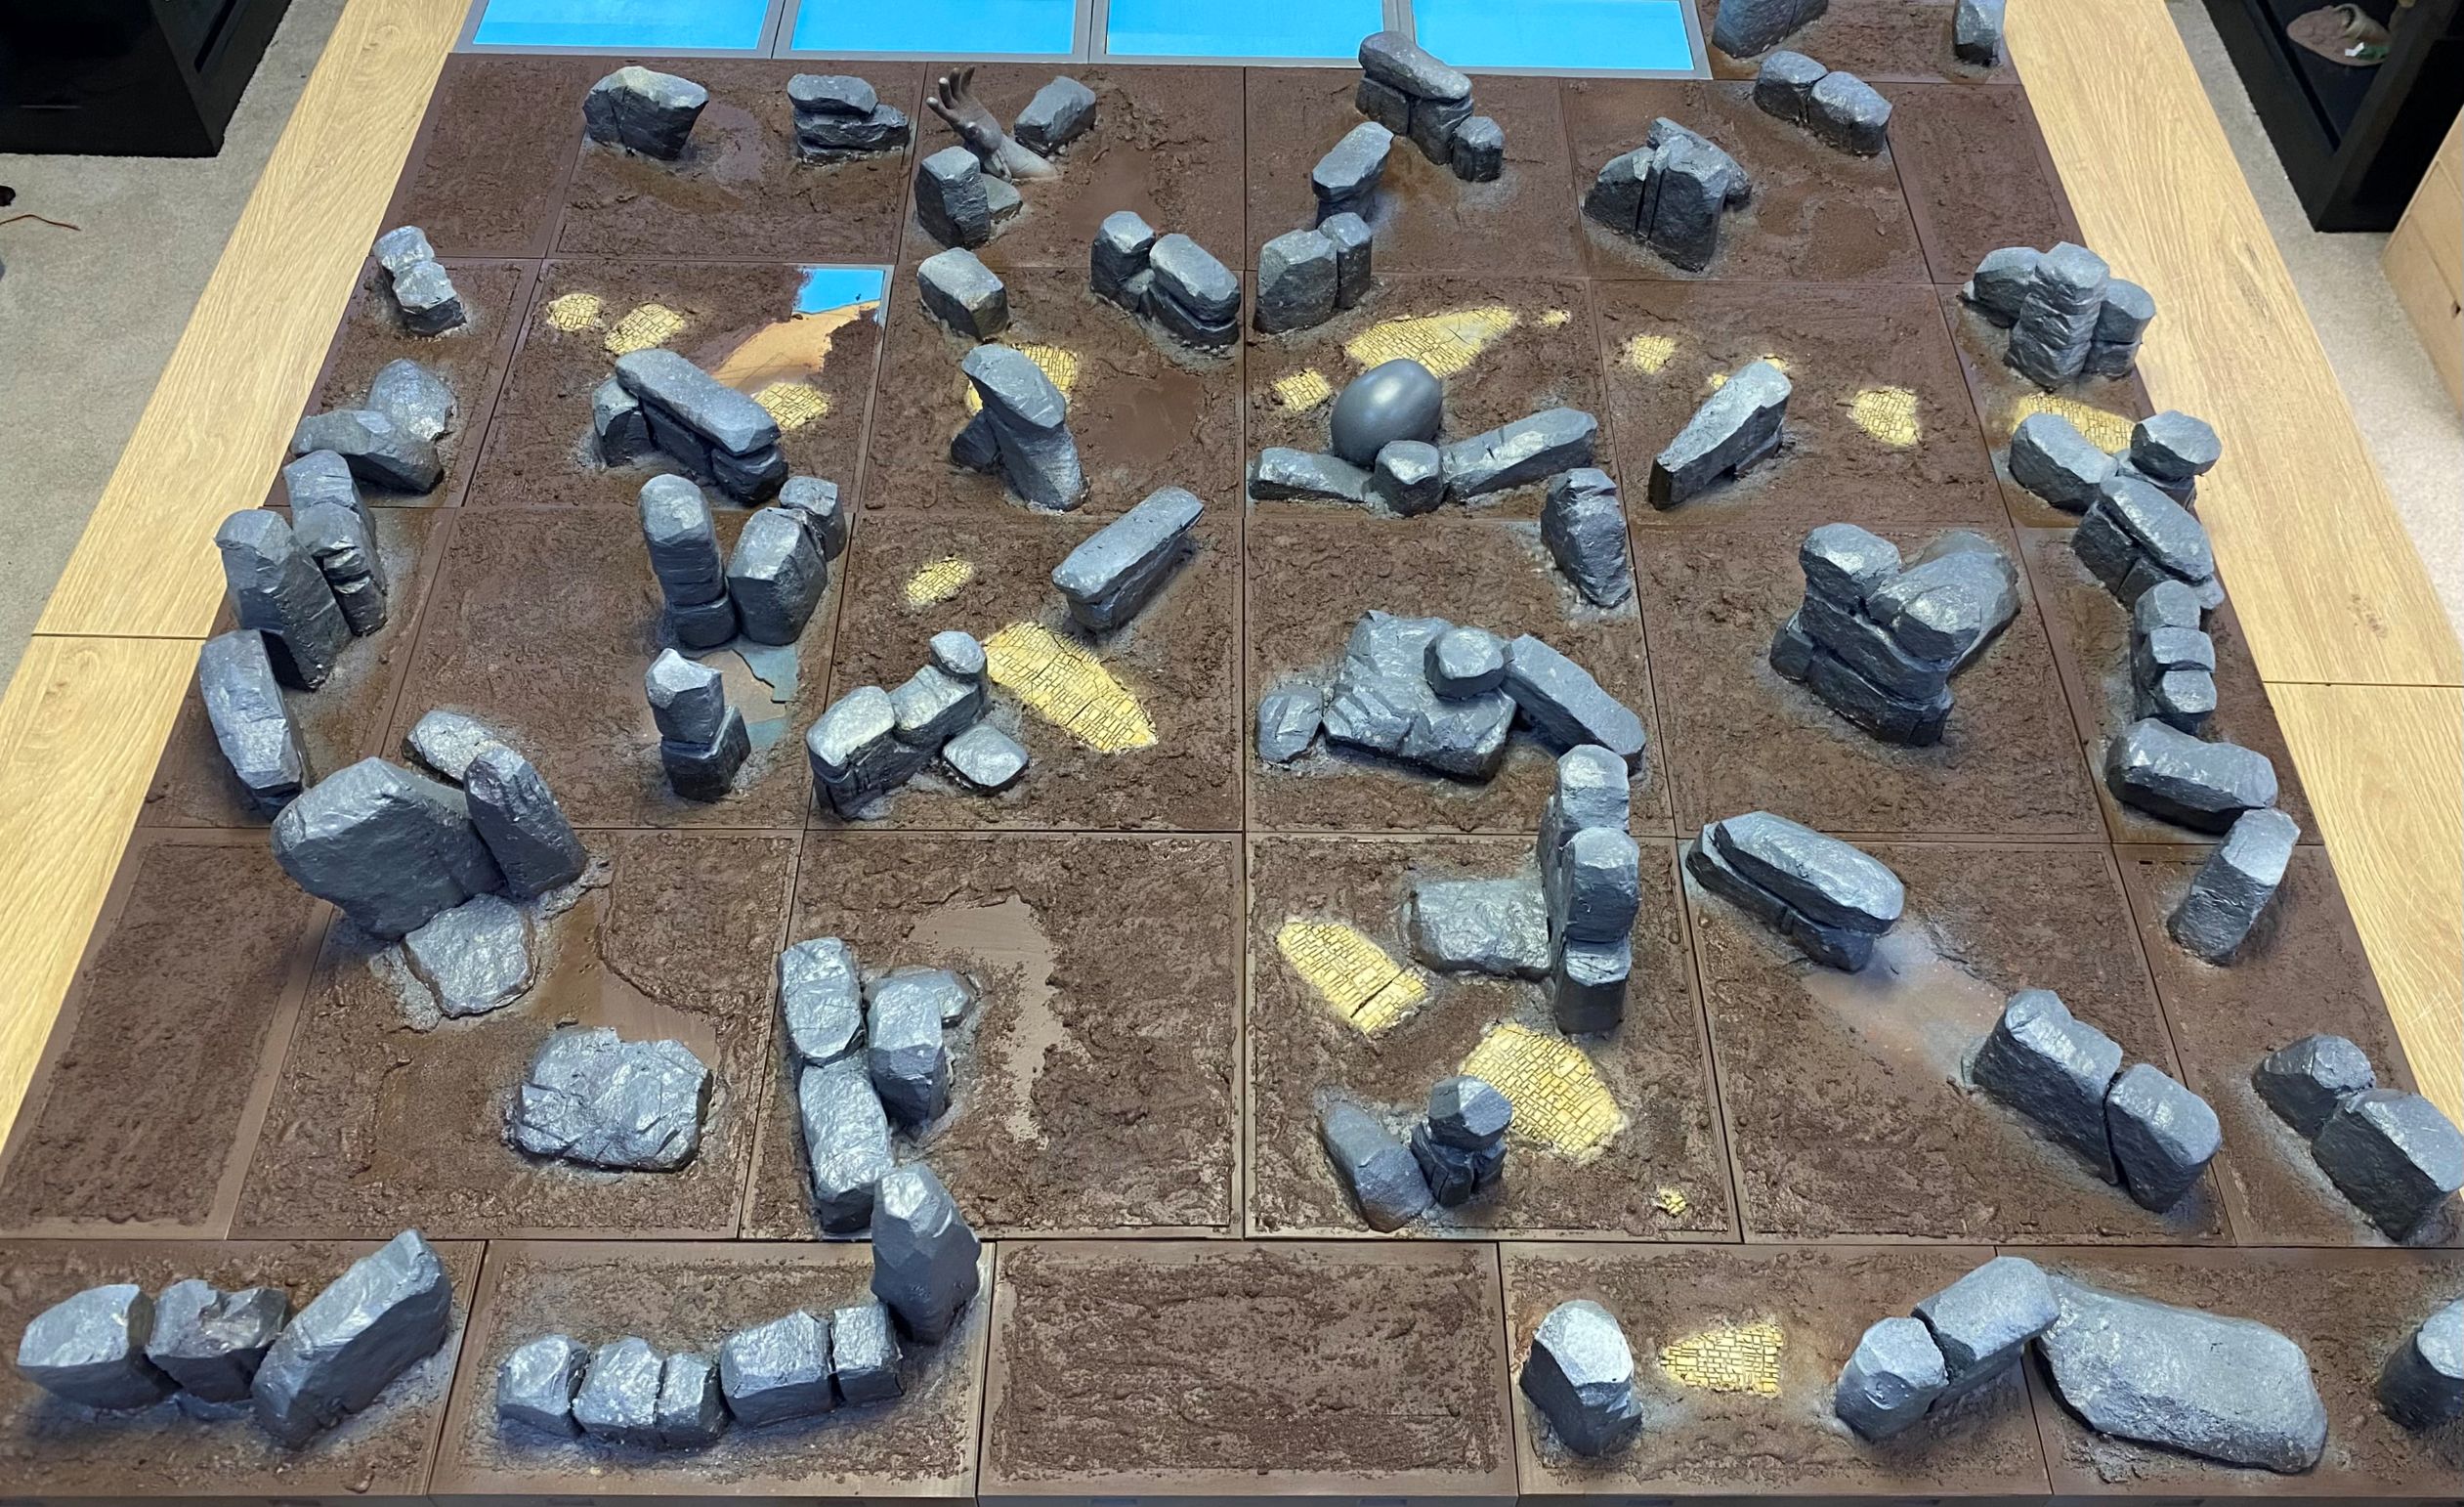
Finally finished off the first layer of ground cover.
Once this is all set nice and firm, I can go about attaching the trees, then move on to actually making each tile look a lot less uniform.
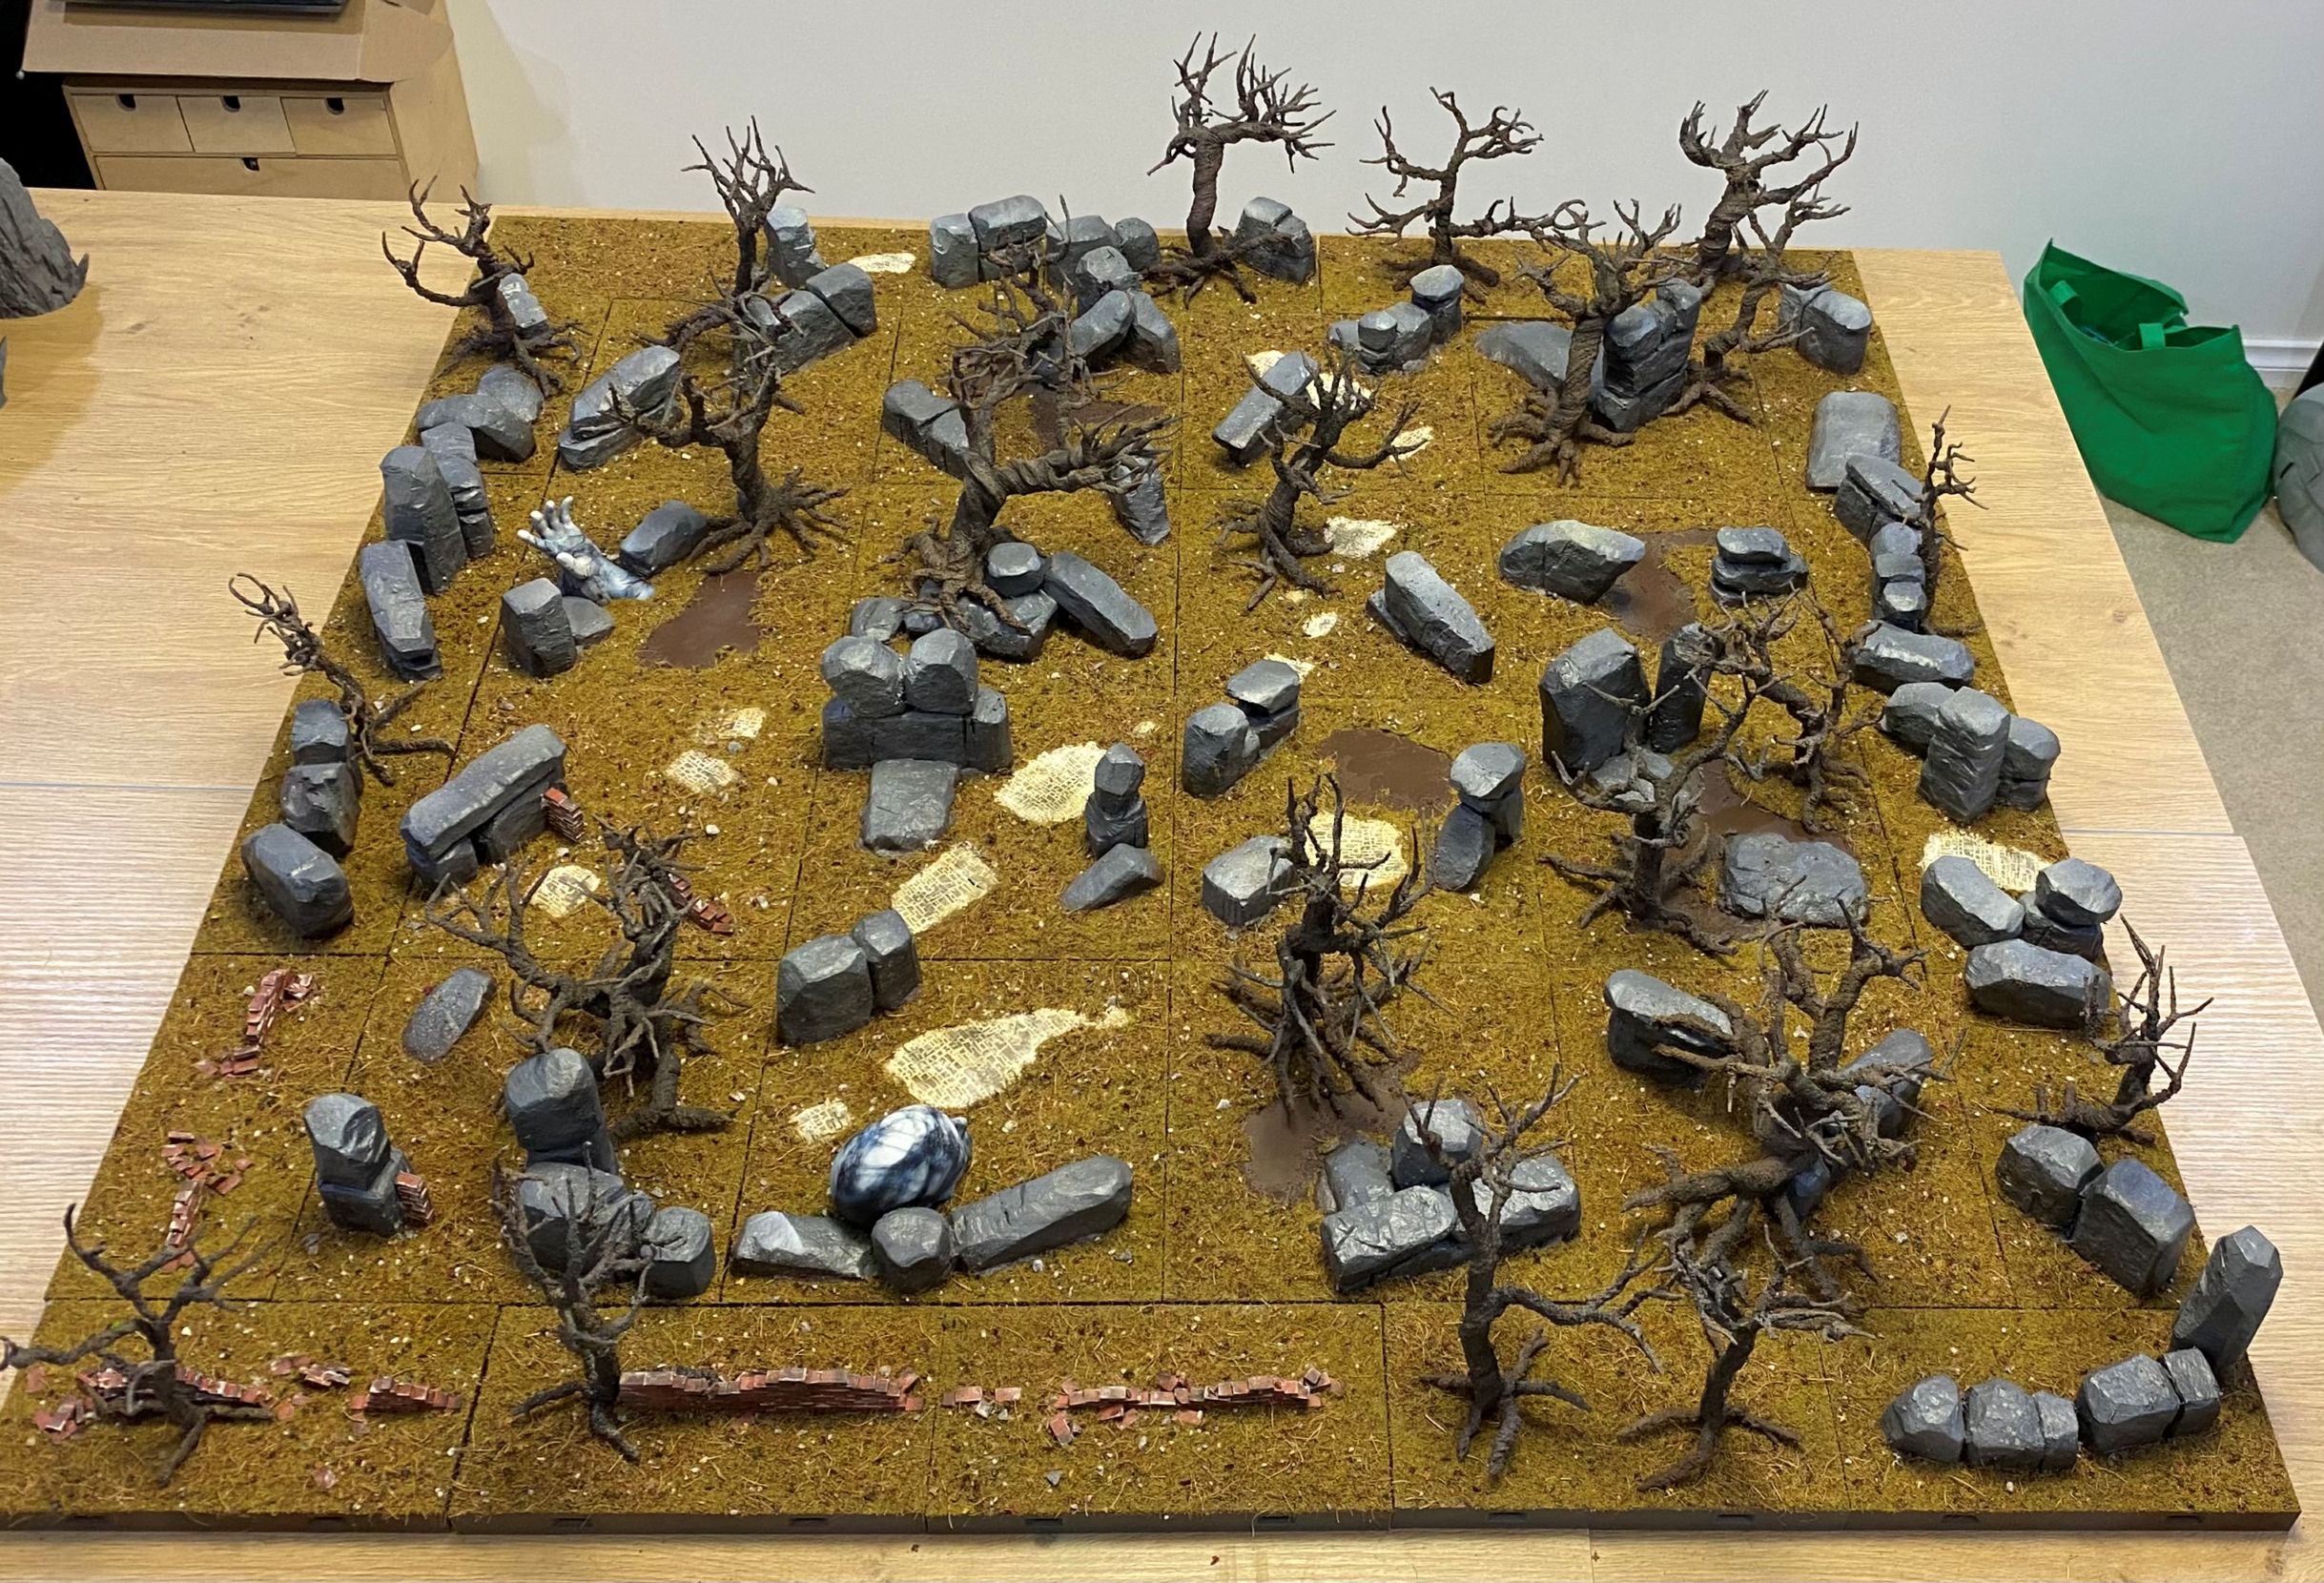
So, this is the current state of play. I have just placed the tiles down and have not actually clipped anything together. They look a little uneven in the pictures because there are a few loose rocks on the table, so they are not all lying nice and flat as they will at the end.
I have tried to keep some open spaces because, as nice as it would be to have a full forest, it would be a nightmare to manoeuvre figures around. I guess I have aimed for a happy medium.
I think when I start adding some of the plant life, it will fill the gap between the treetops and rocks a bit. At the moment, it looks like it needs some very low-level elements and some mid-range to help create the illusion of density.