


![NO Weekender Or Cult Of Games XLBS This Weekend [Updated]](https://images.beastsofwar.com/2026/03/No_Weekender_and_XLBS_this_Weekend-225-127.jpg)


Grave Expectations (Terrainfest 2025)


Recommendations: 64
About the Project
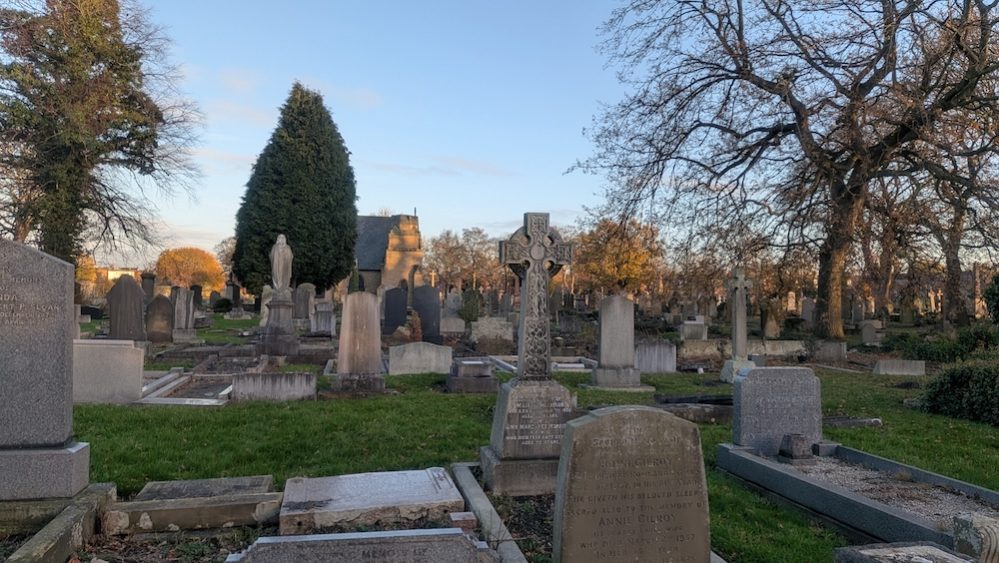
Does it even count as a Terrainfest if it hasn't got someone unpacking their 'Sigmarite Mausoleum' and mashing it together with gravestones, coffins and sarcophagi that they've been hoarding for years? I'm more than happy to fulfil that role this year. Taking inspiration from projects from admiralfb and Demonsub I hope to finally get a modular graveyard made this terrainfest.
Related Genre: Fantasy
Related Contest: TerrainFest 2025
This Project is Active
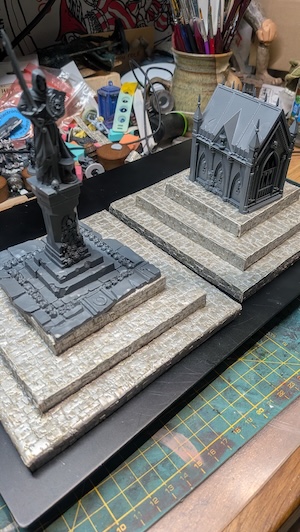
Painting another mausoleum
In my slow spring clean of my hobby space I found one of the buildings that I’d built but that had been overlooked when painting. I brushed on some primer and got to work…
 Zenithal prime
 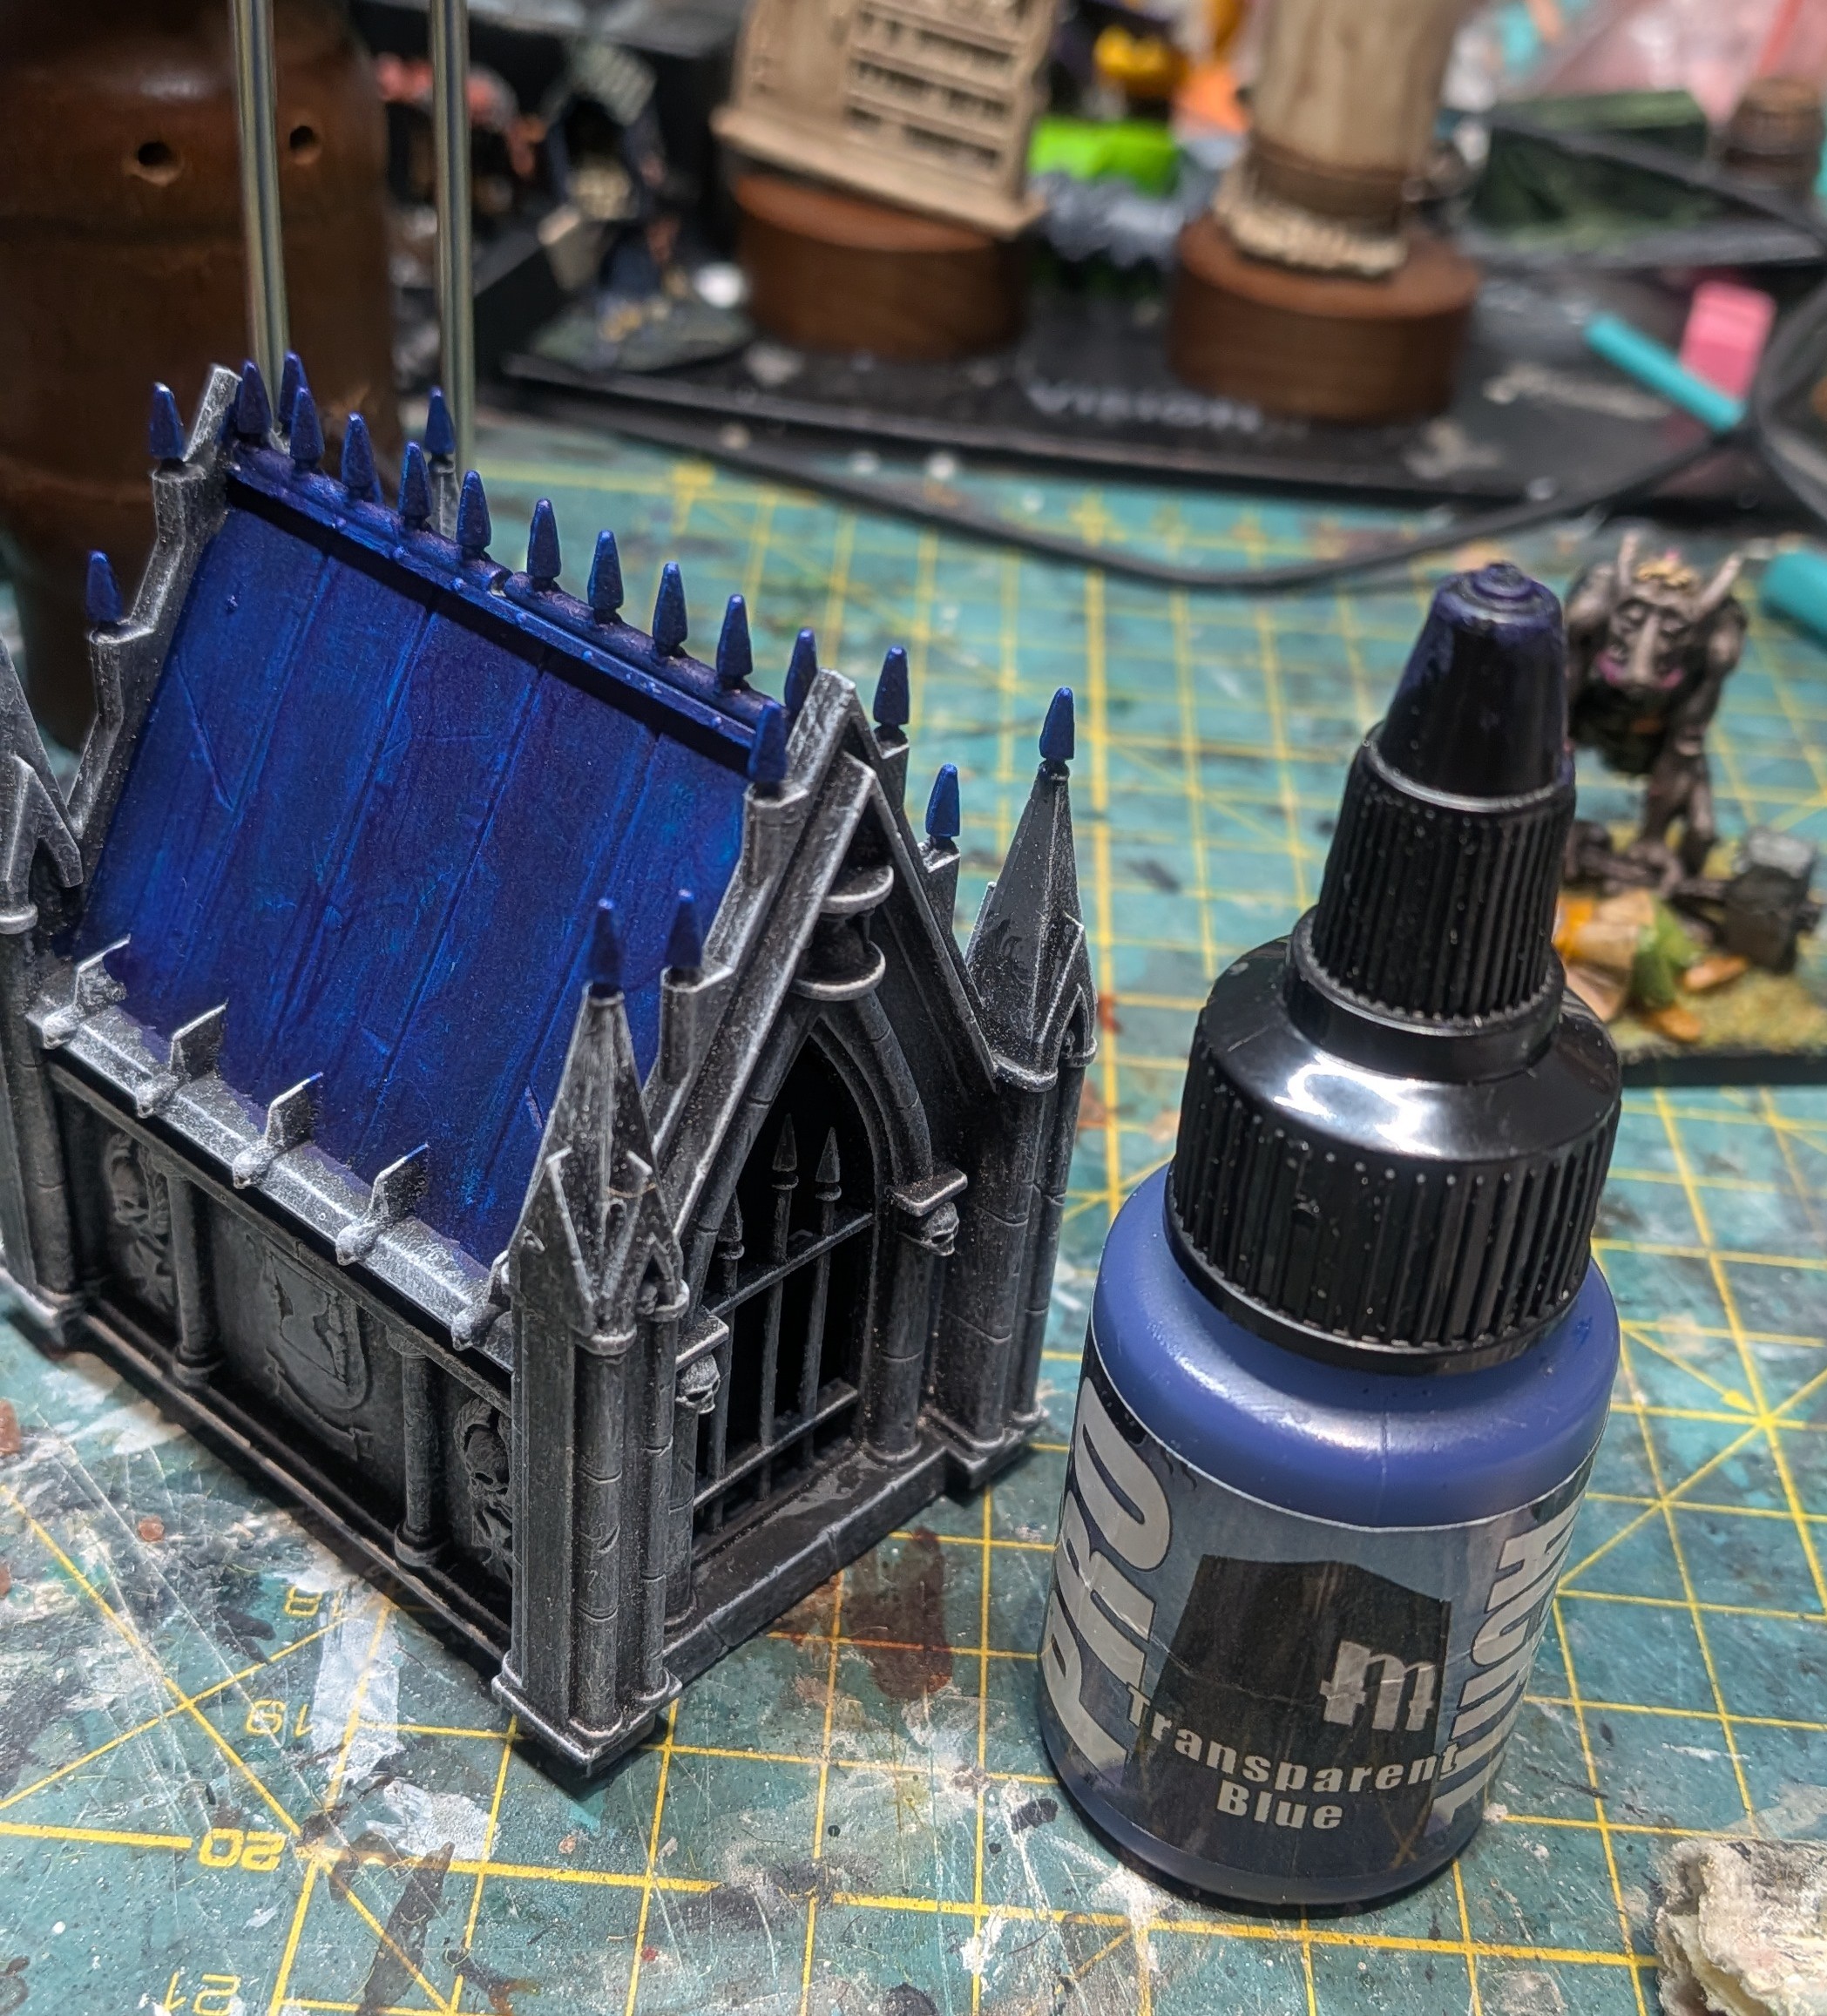 Transparent blue on the roof
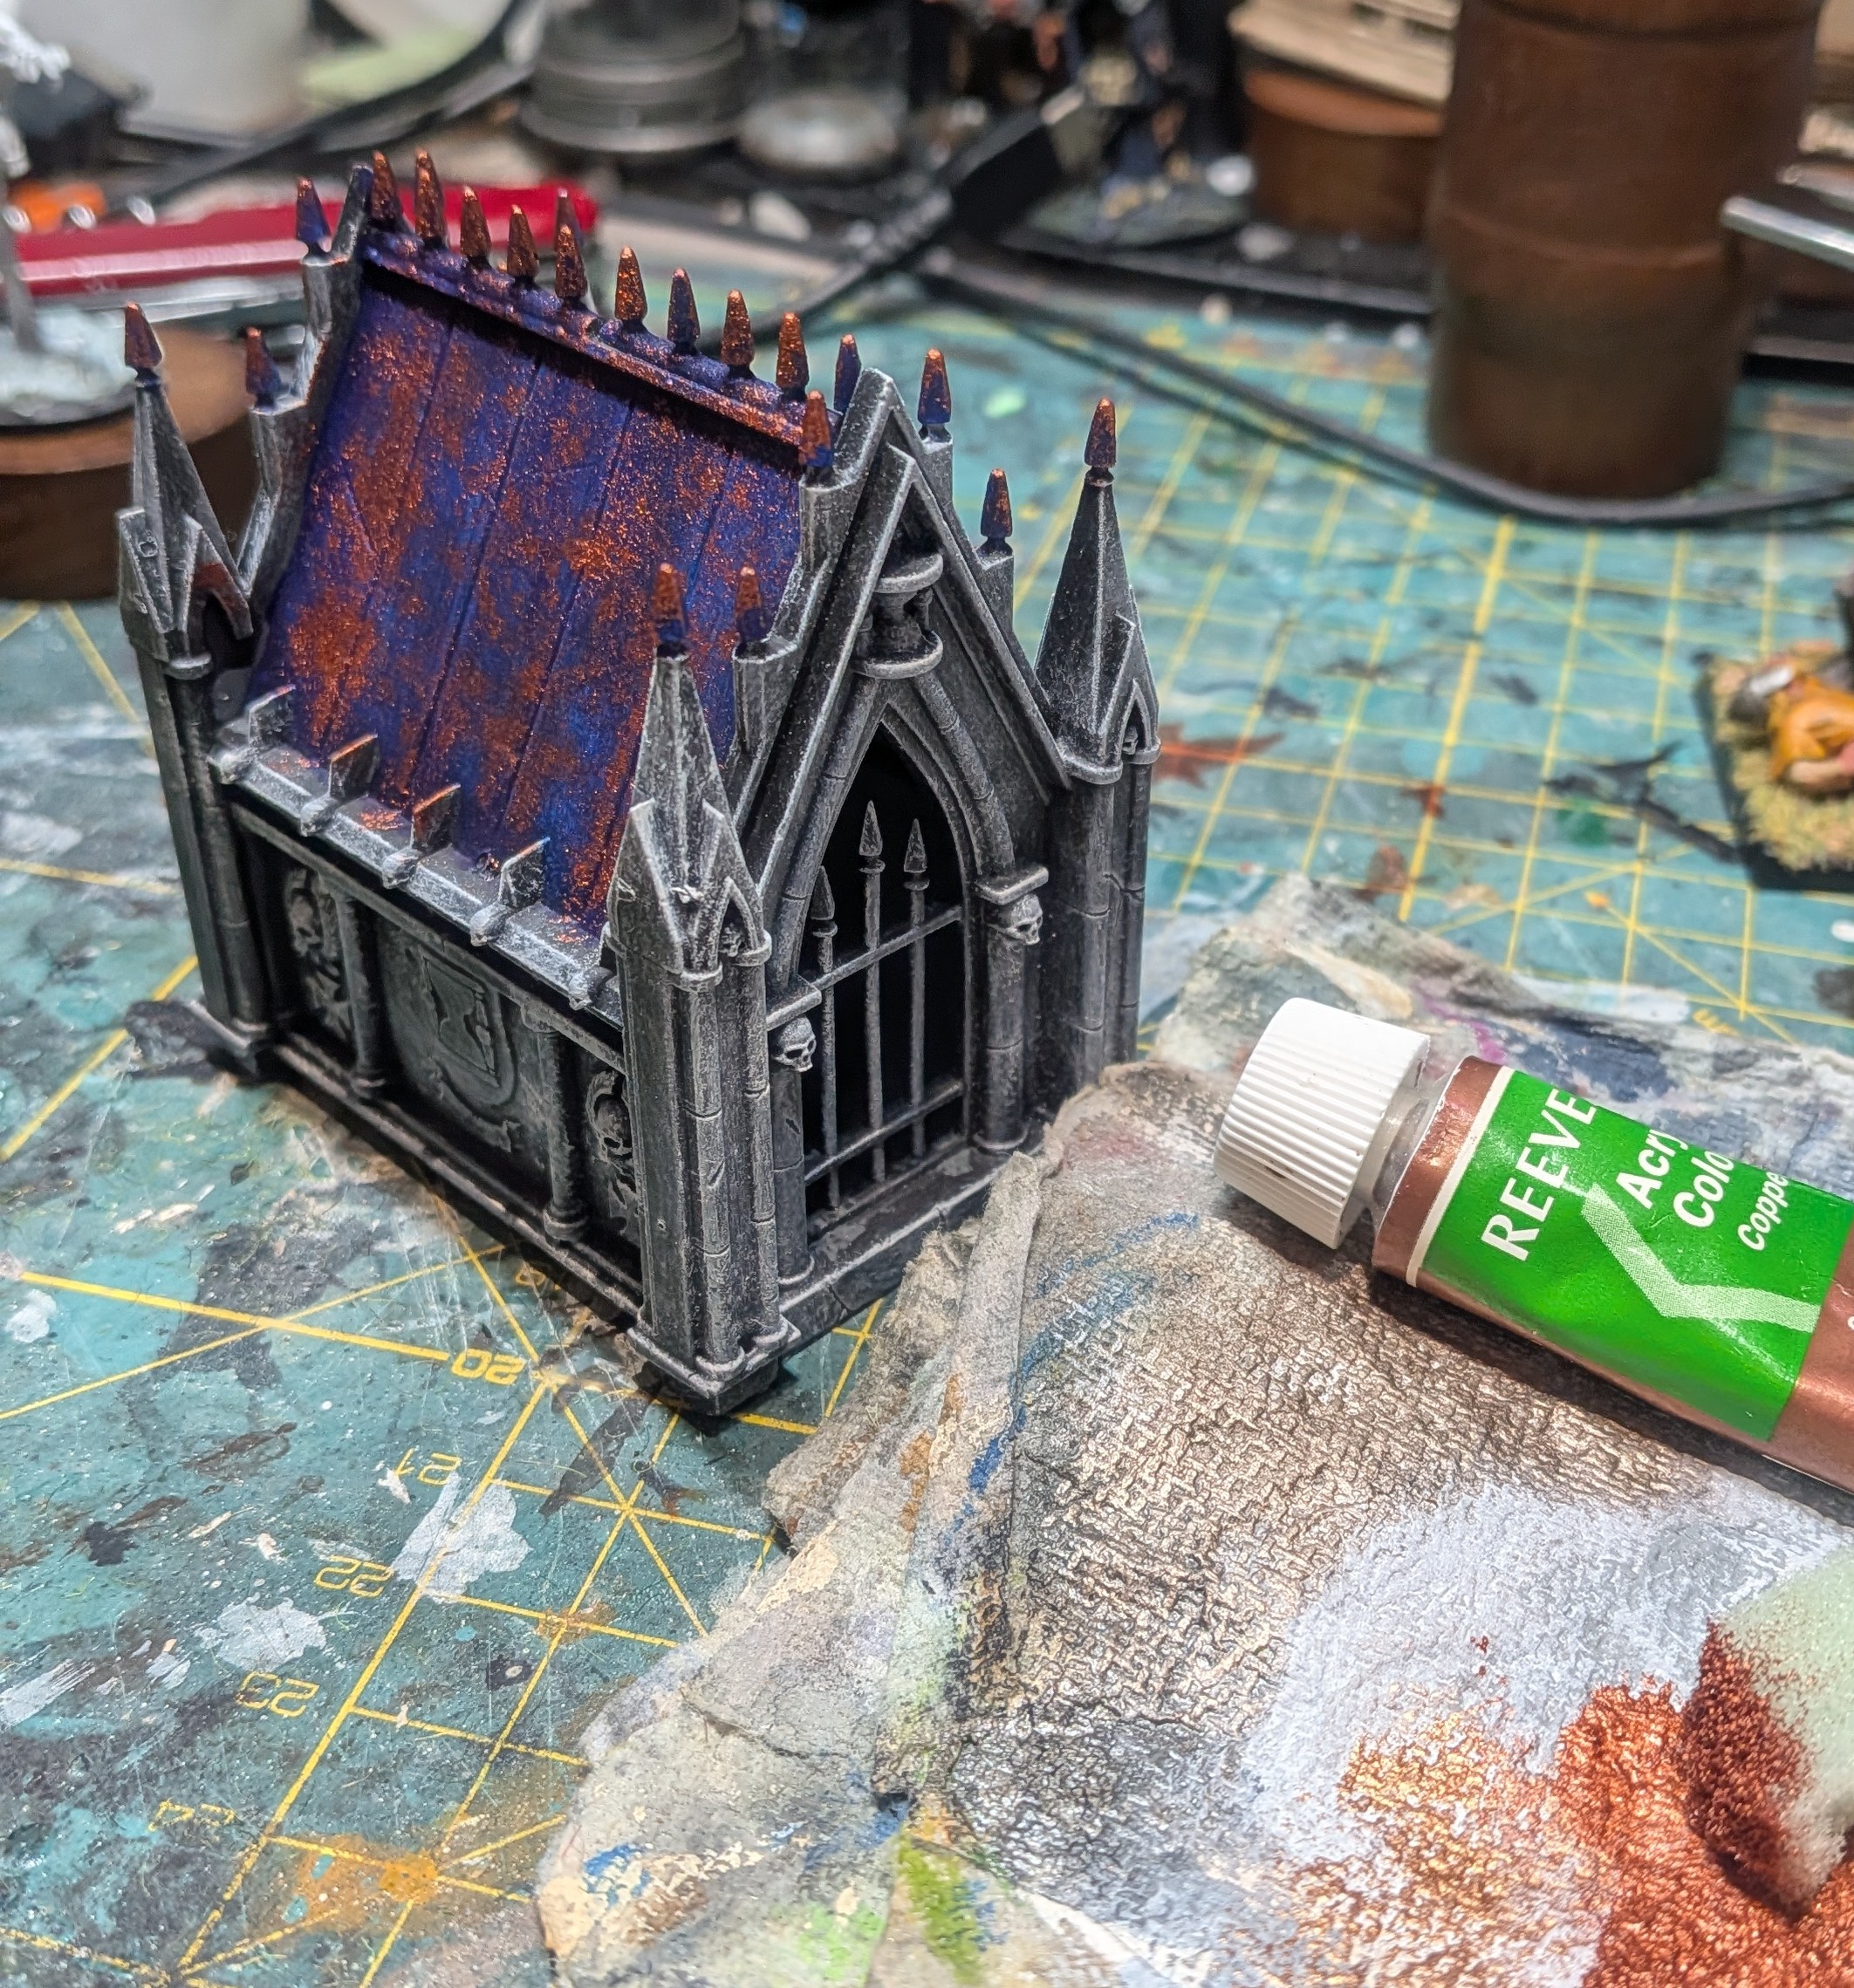 Sponge of copper on roof
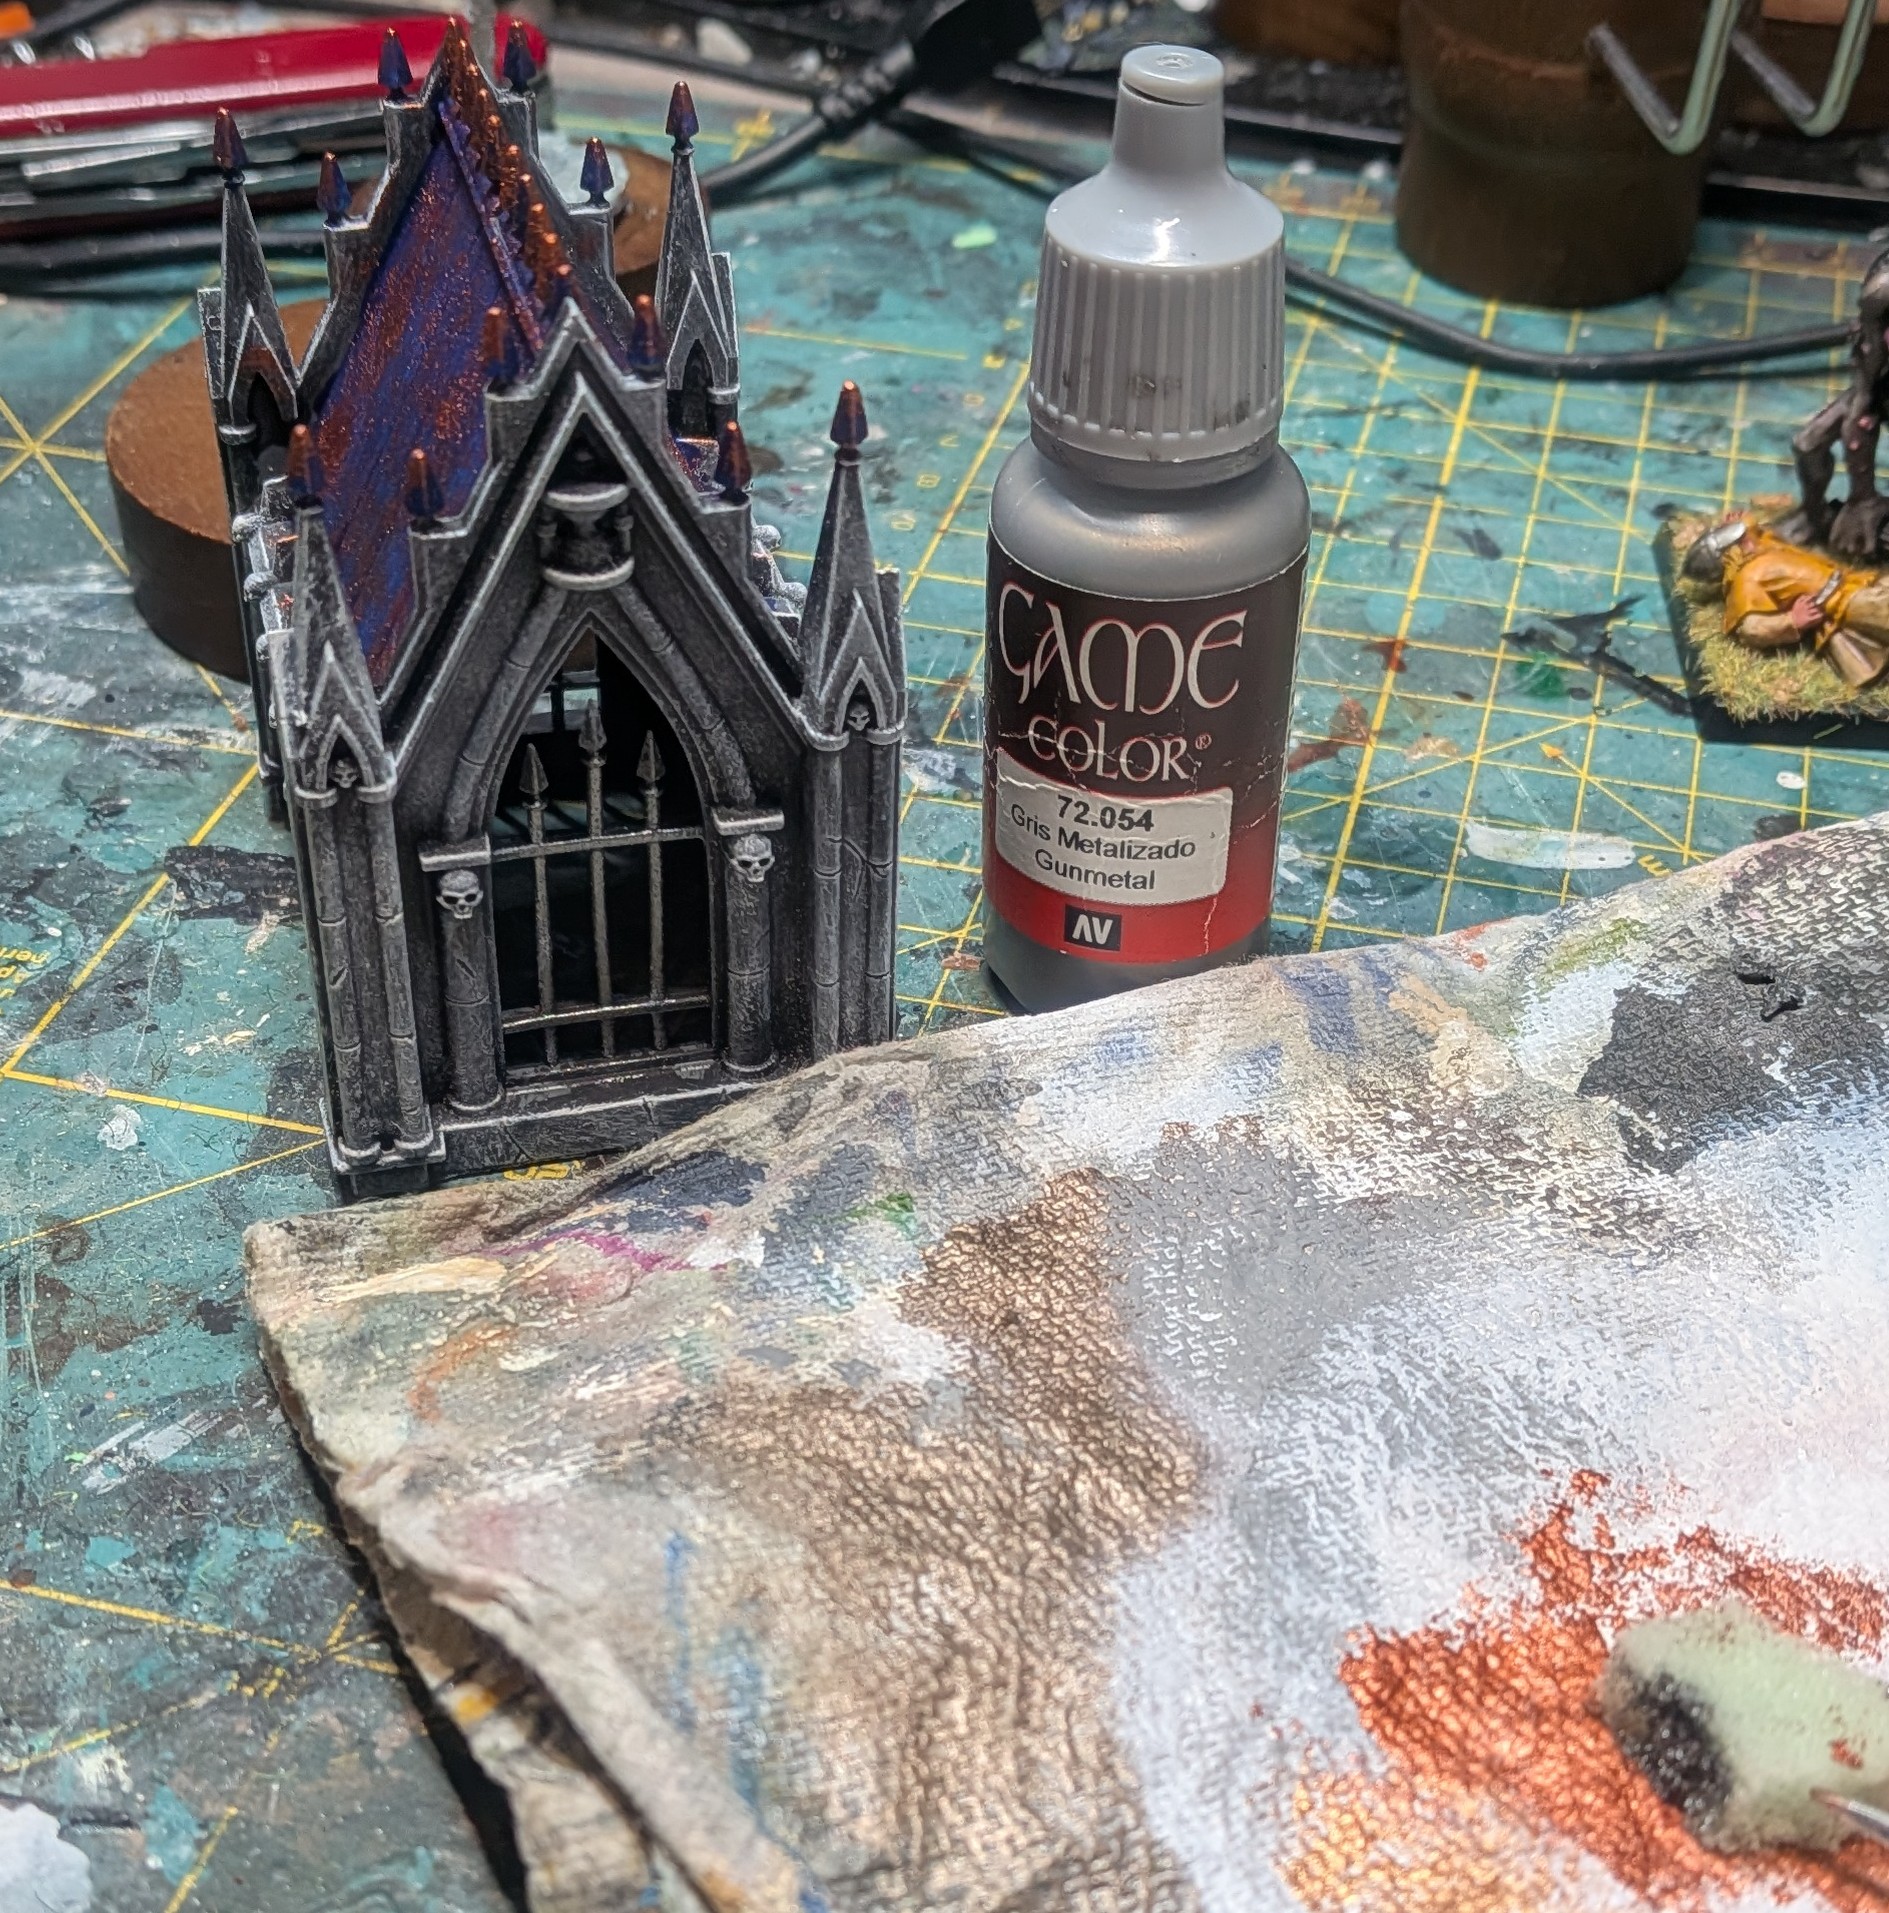 Sponge gunmetal on gates
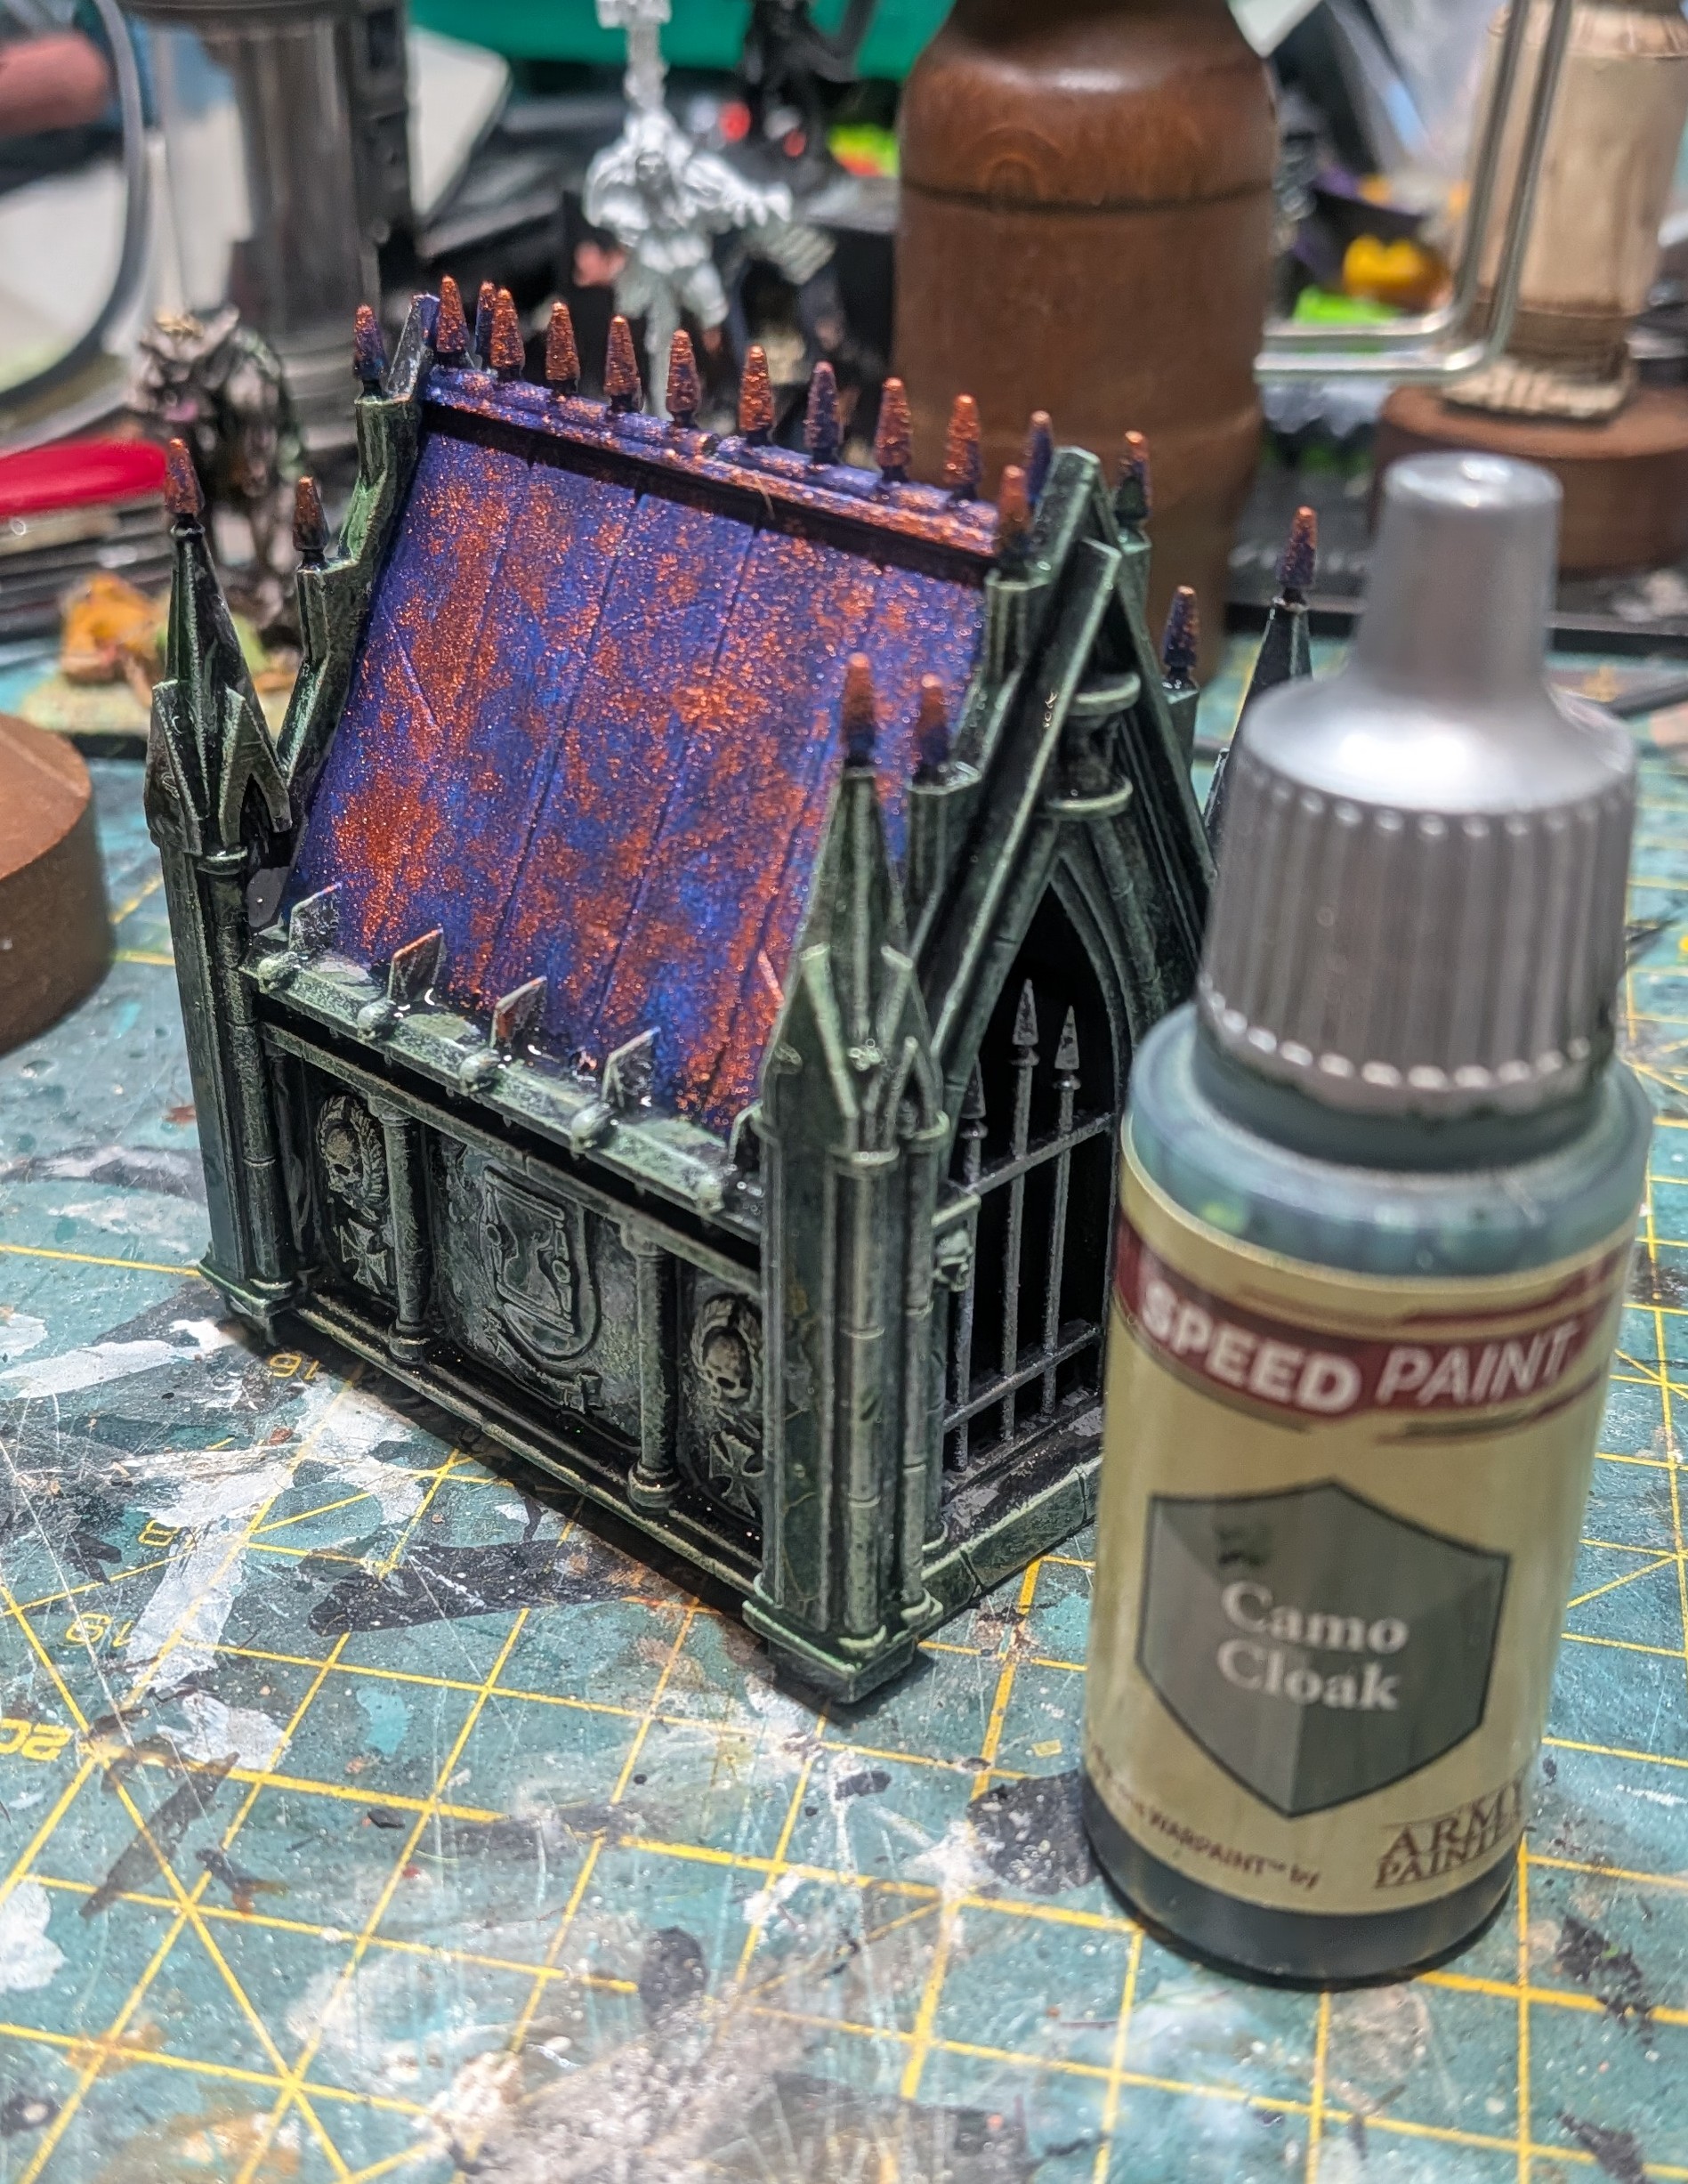 Speed paint for masonry.
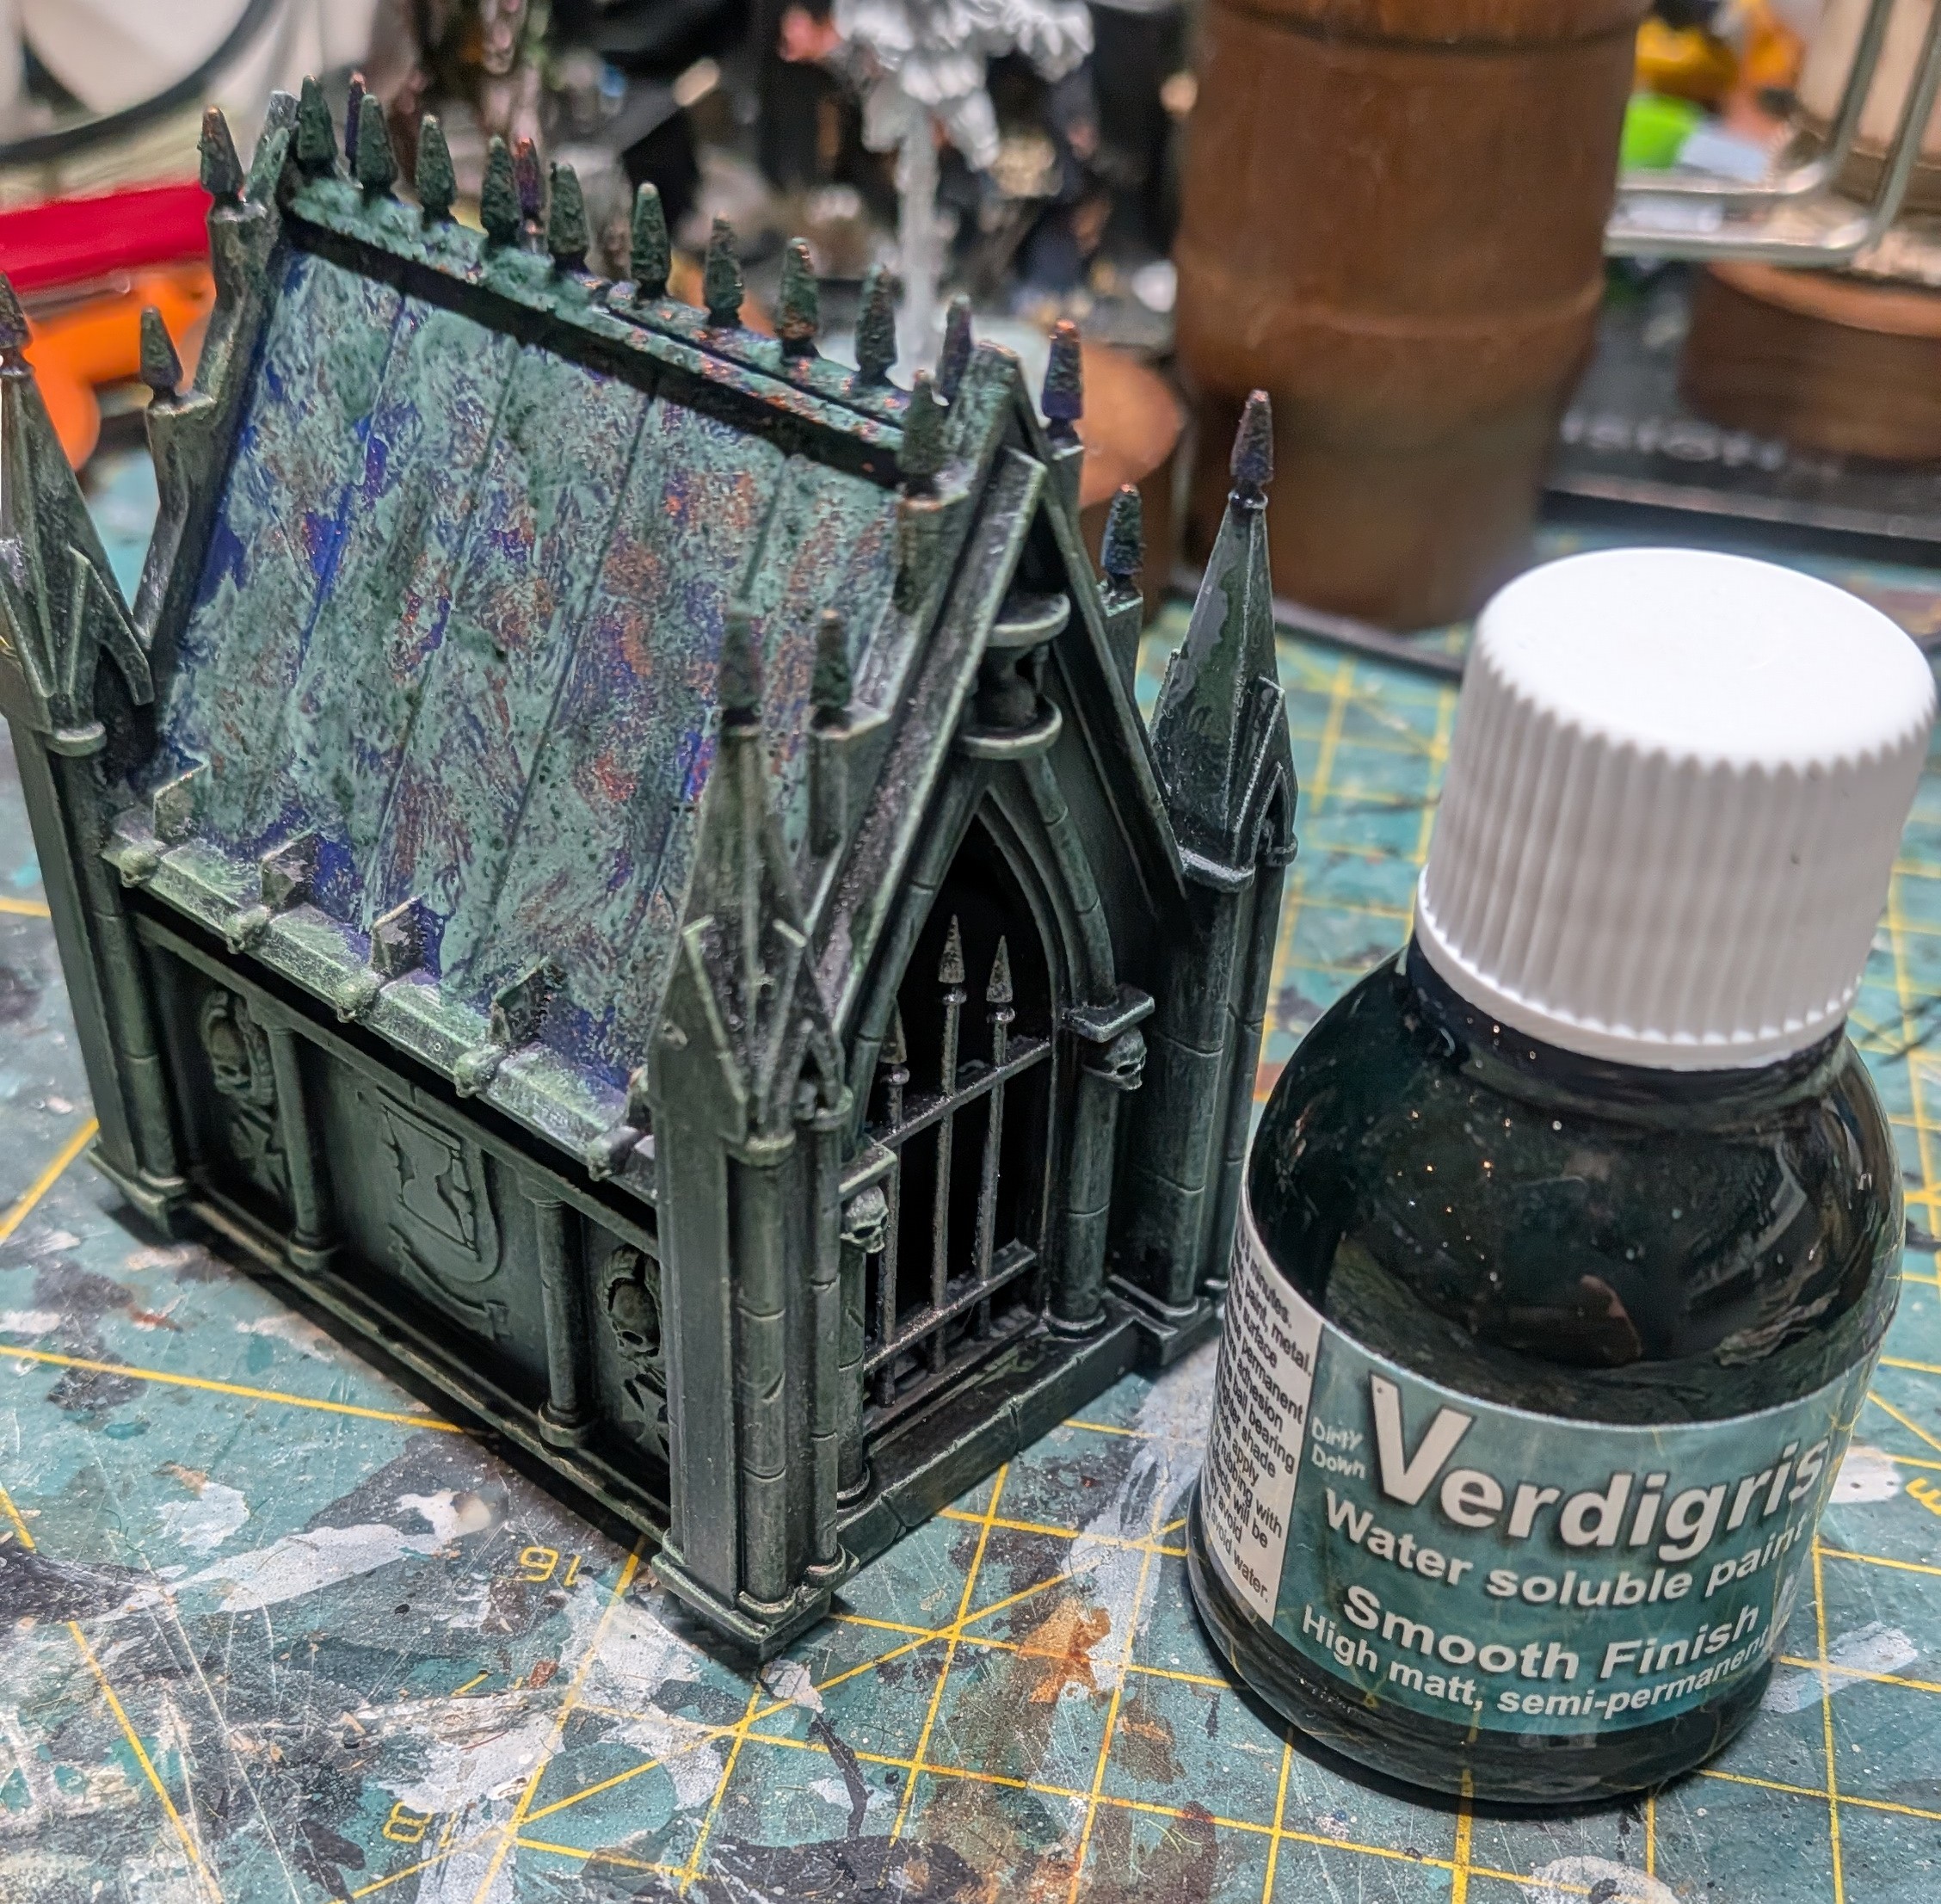 Verdigris effect on roof
I liked the look of the masonry as it reminds me of the predominantly slate building in Keswick. However it is a very similar colour to the verdigris on the roof.
I think I’m in the mood to tackle a second riser next.
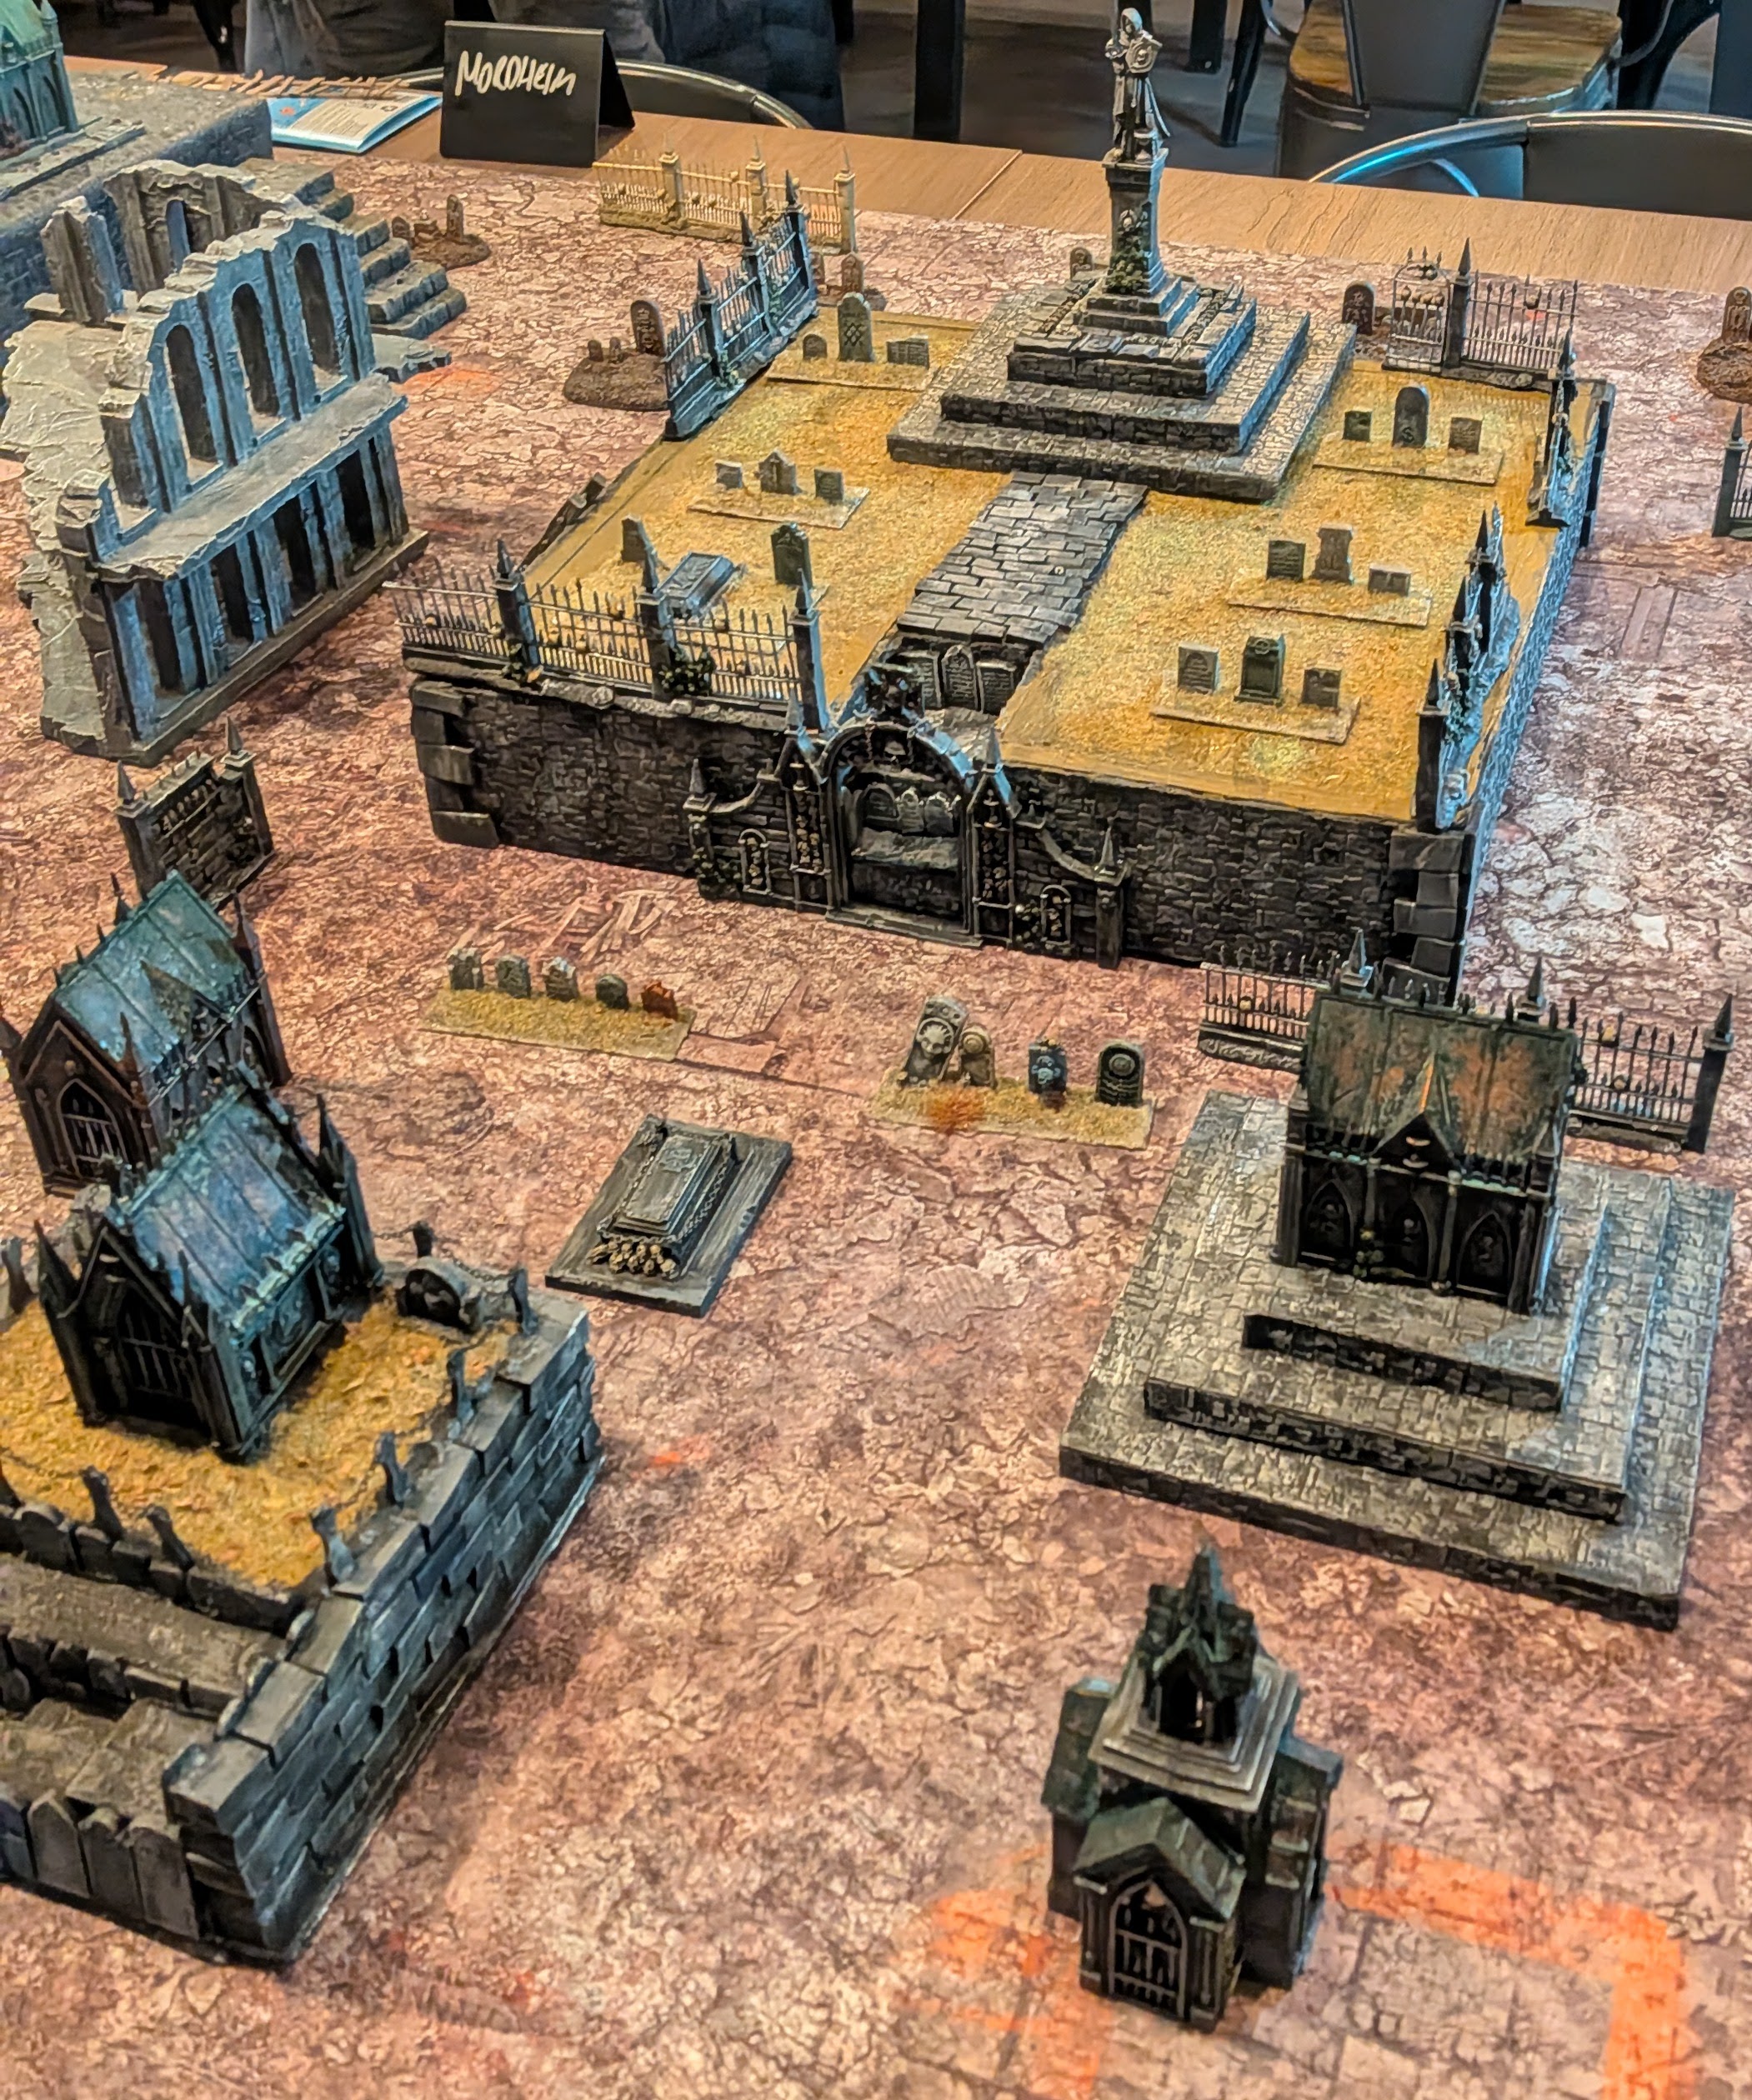
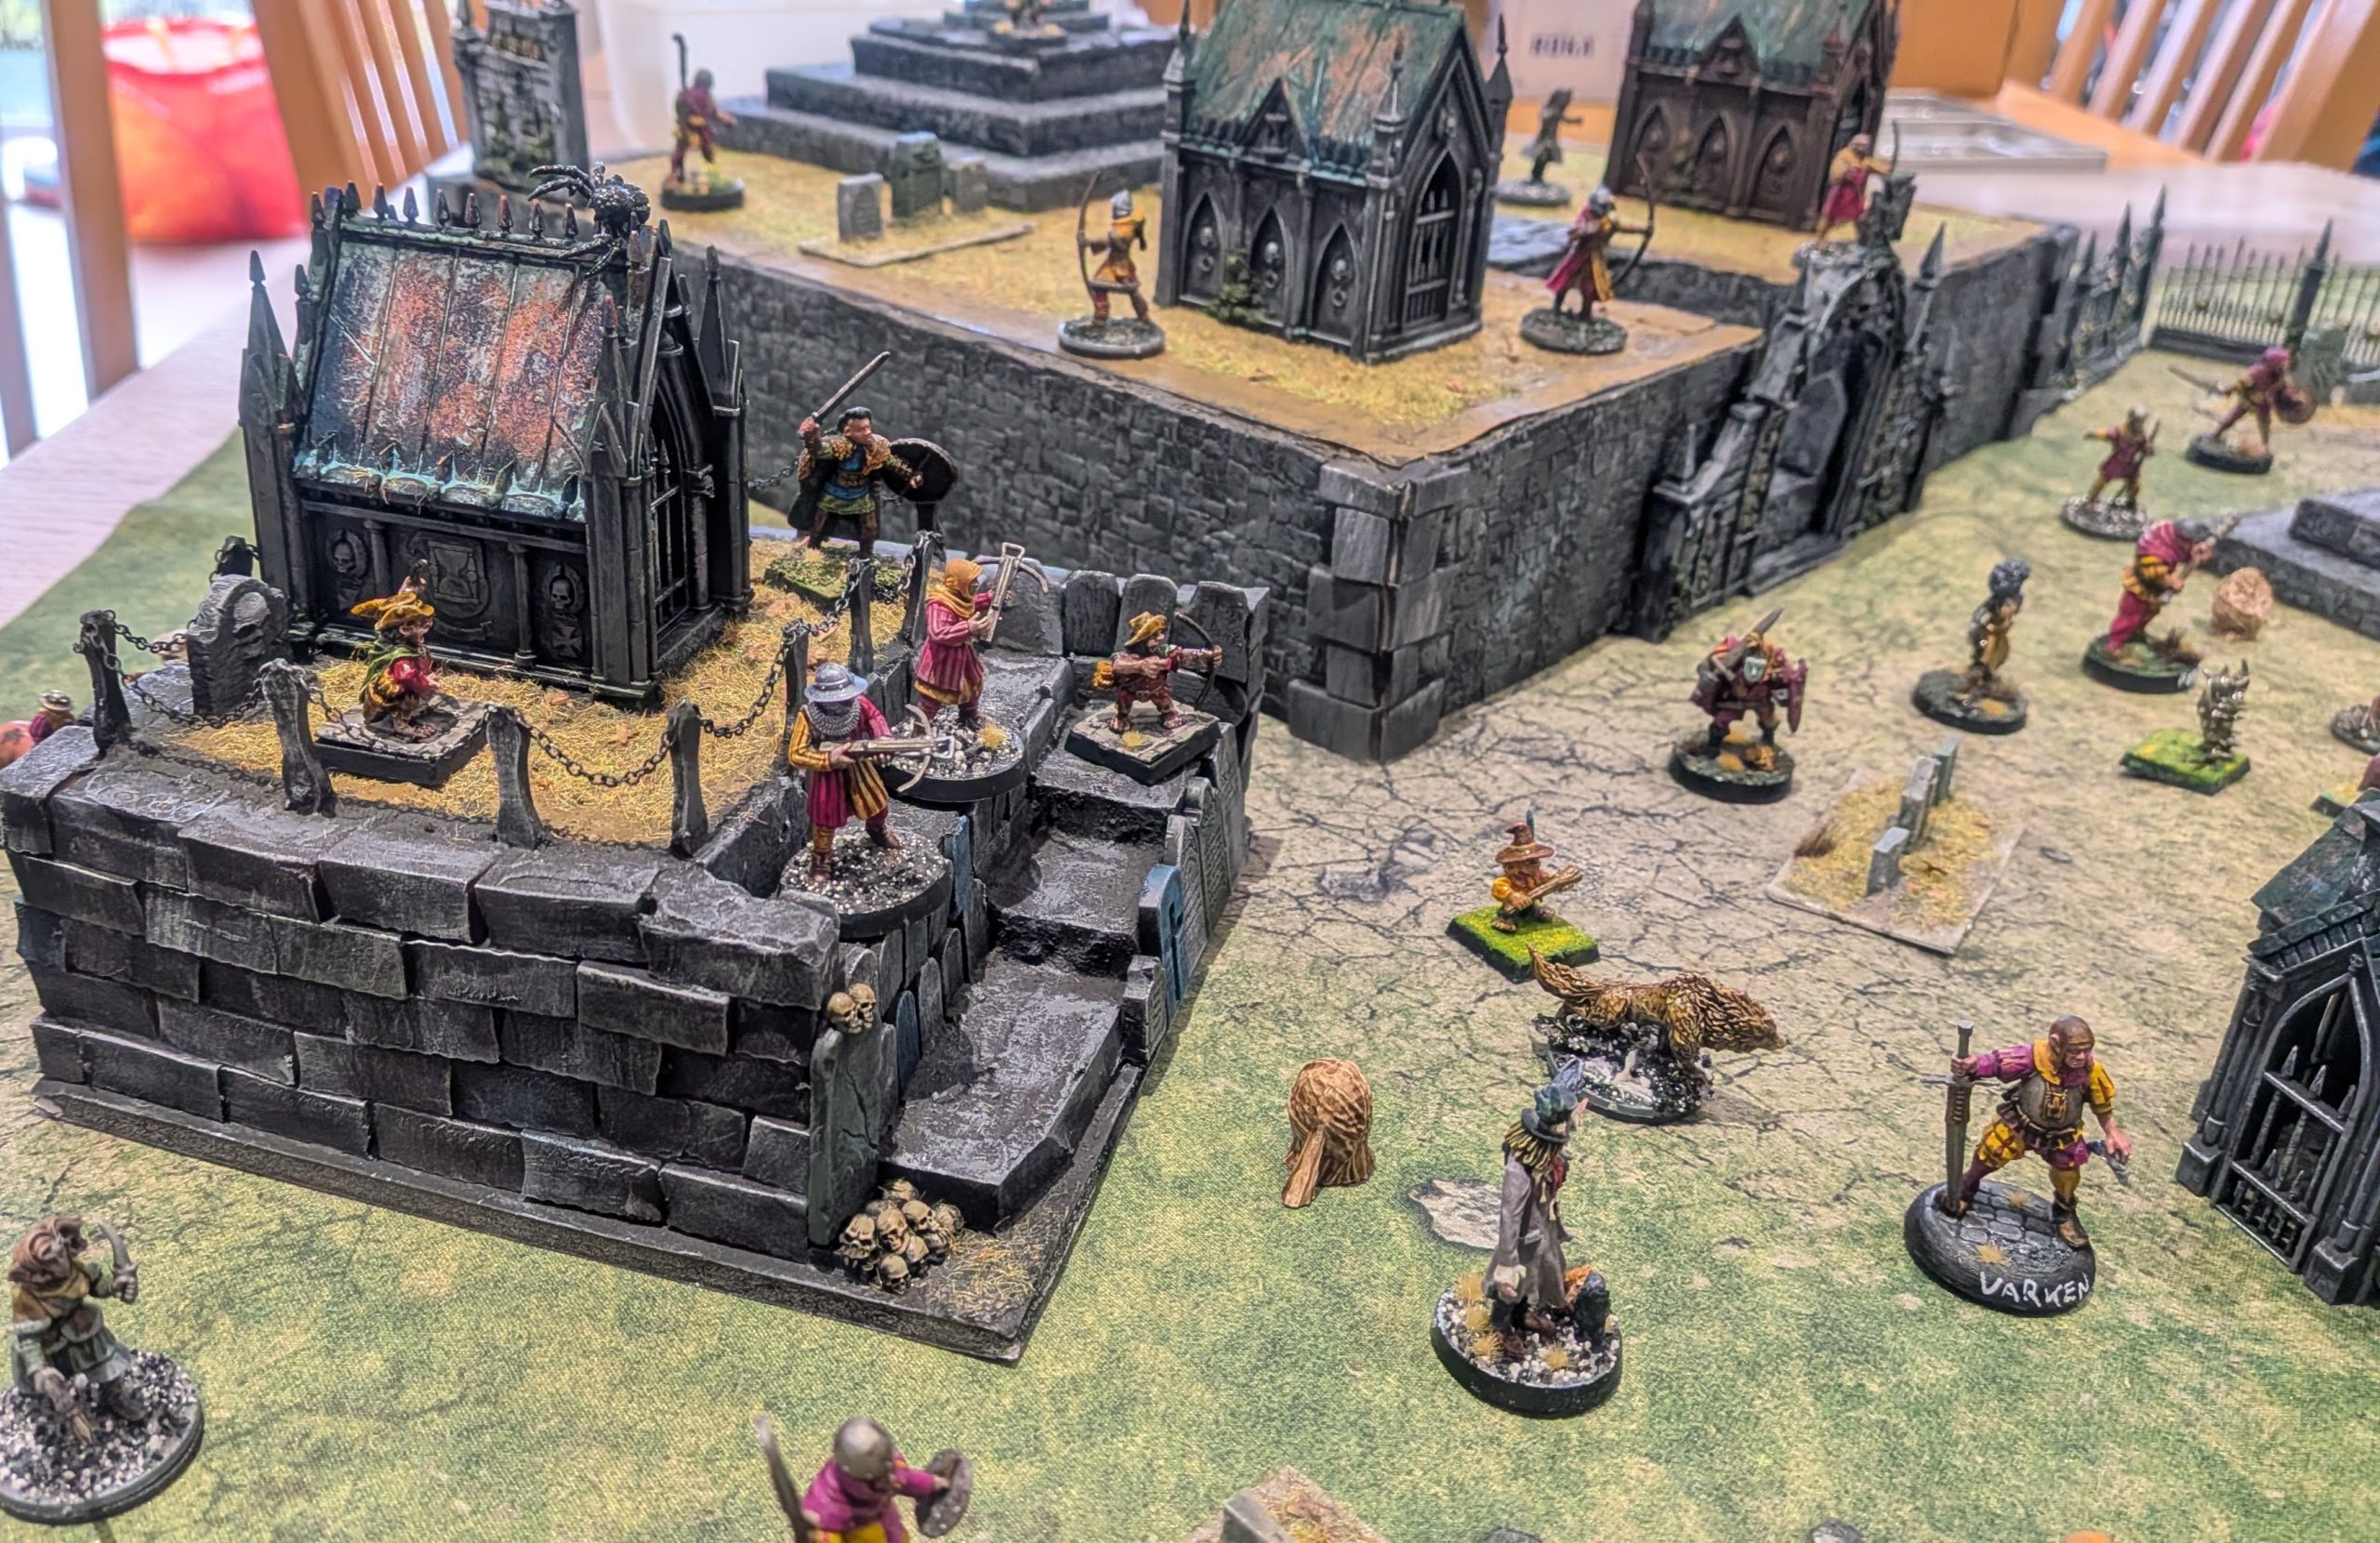
A battle report!
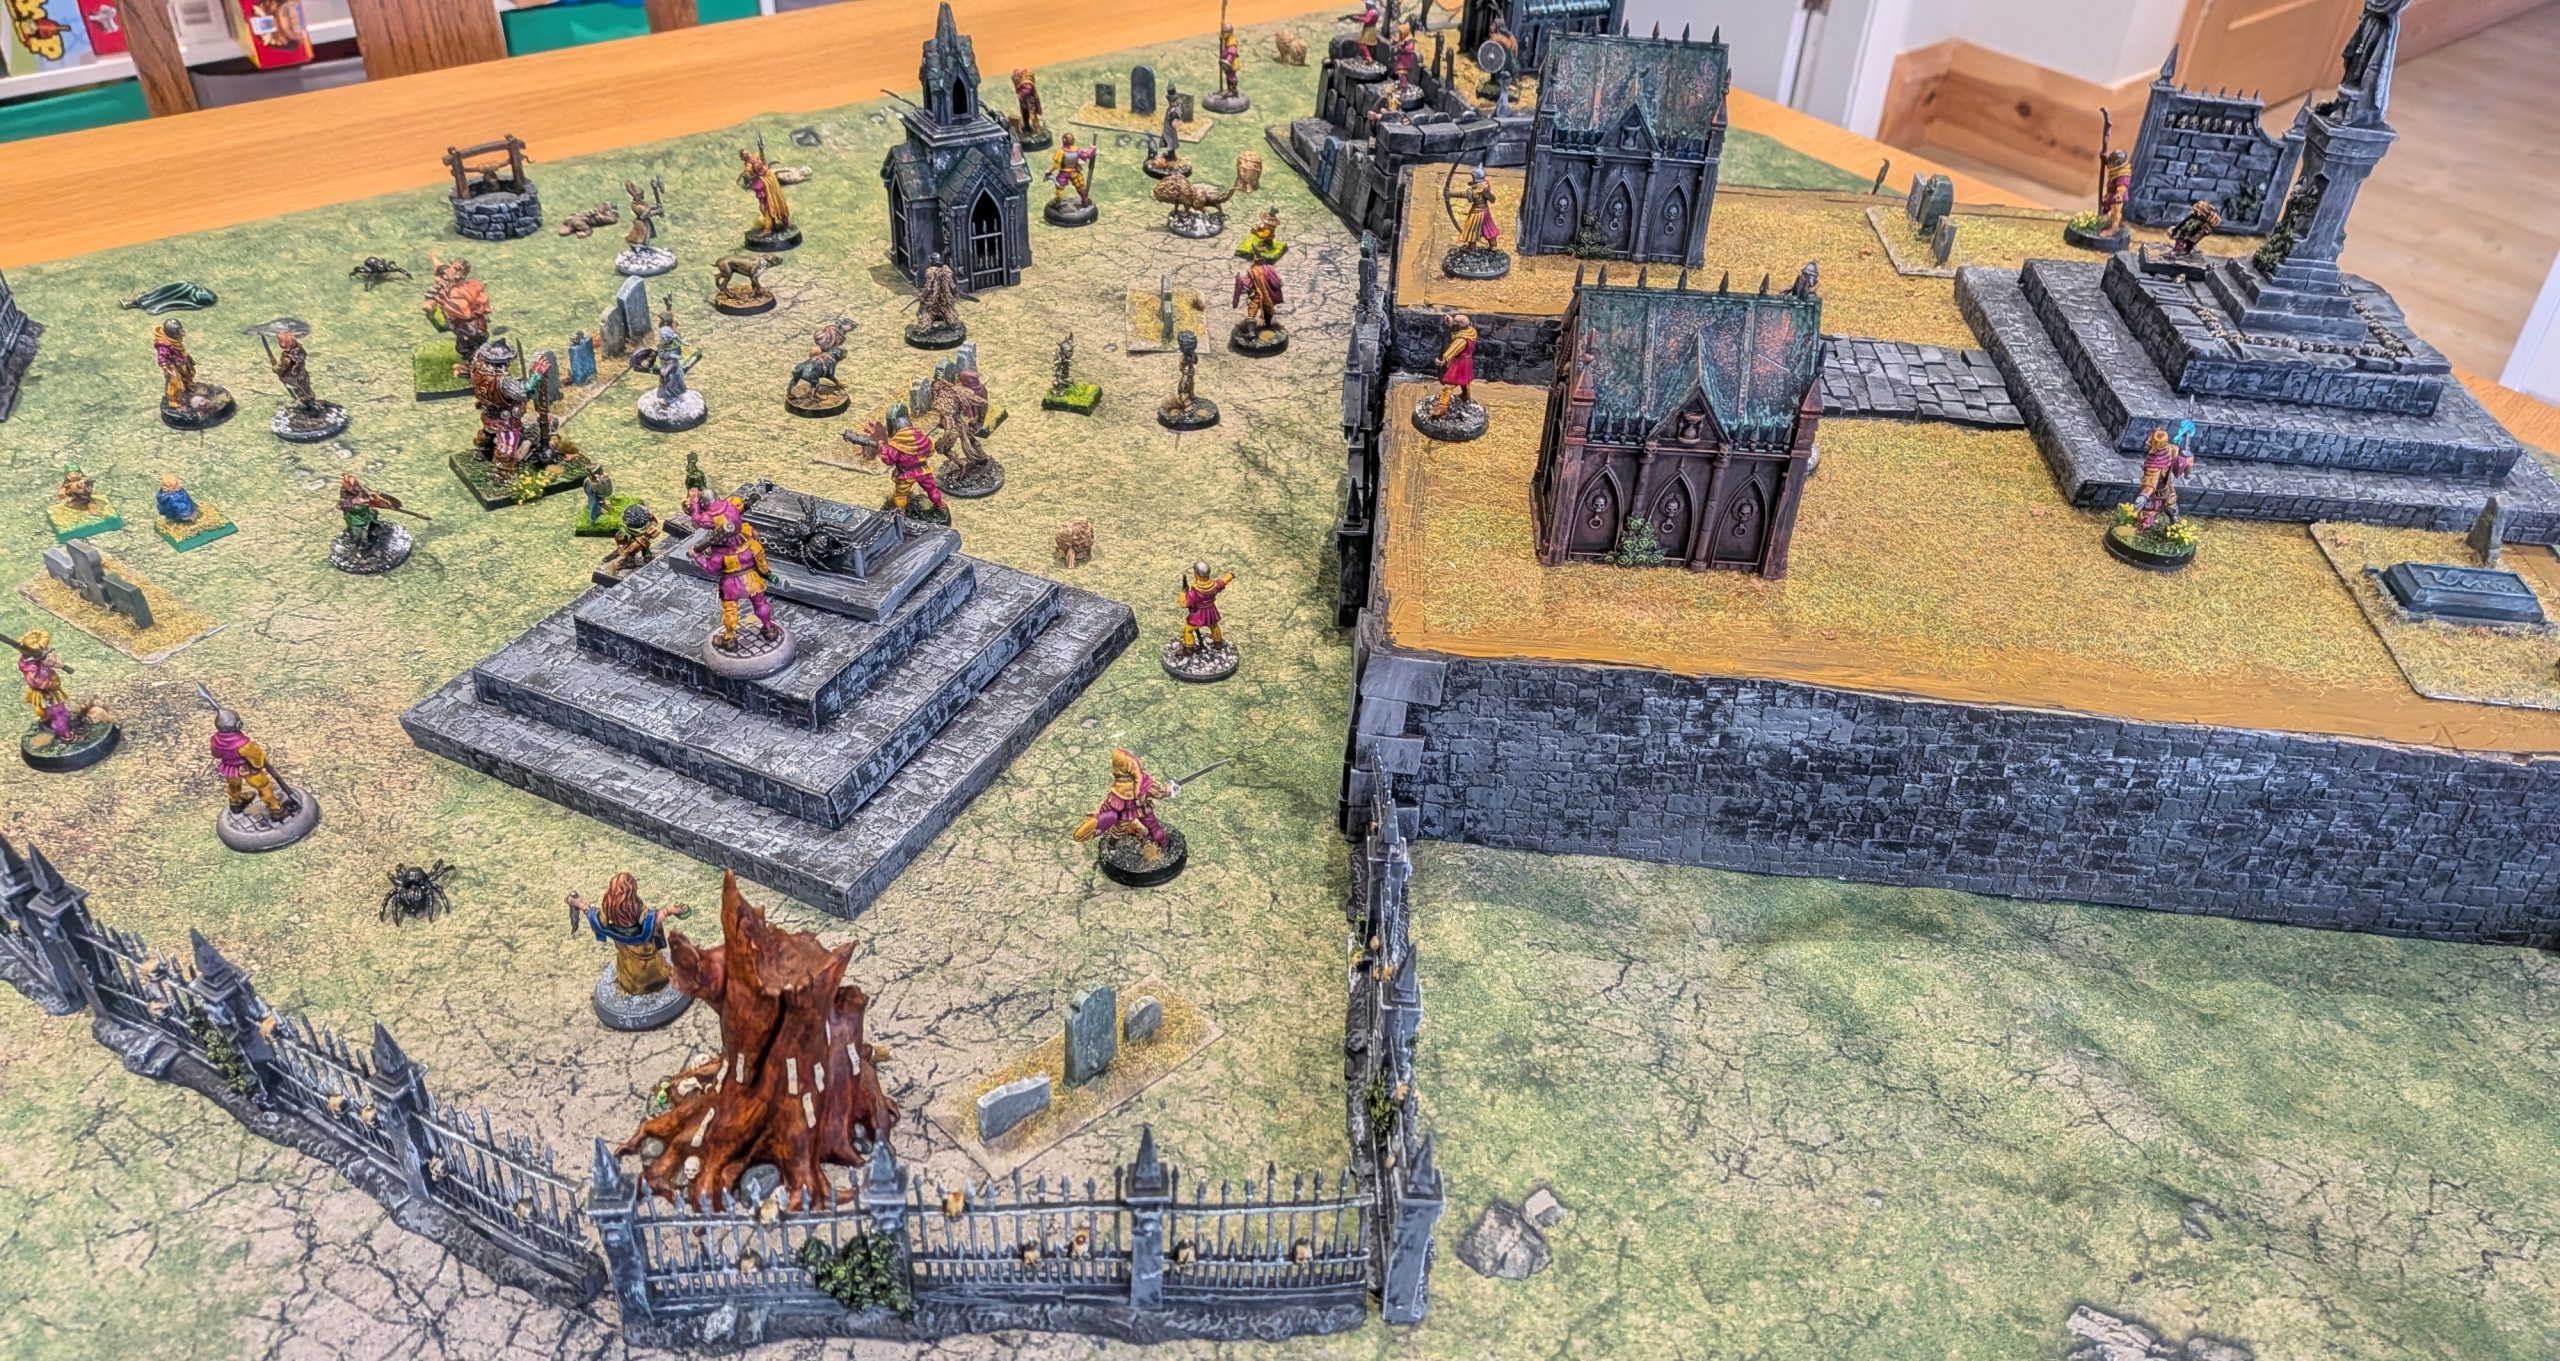
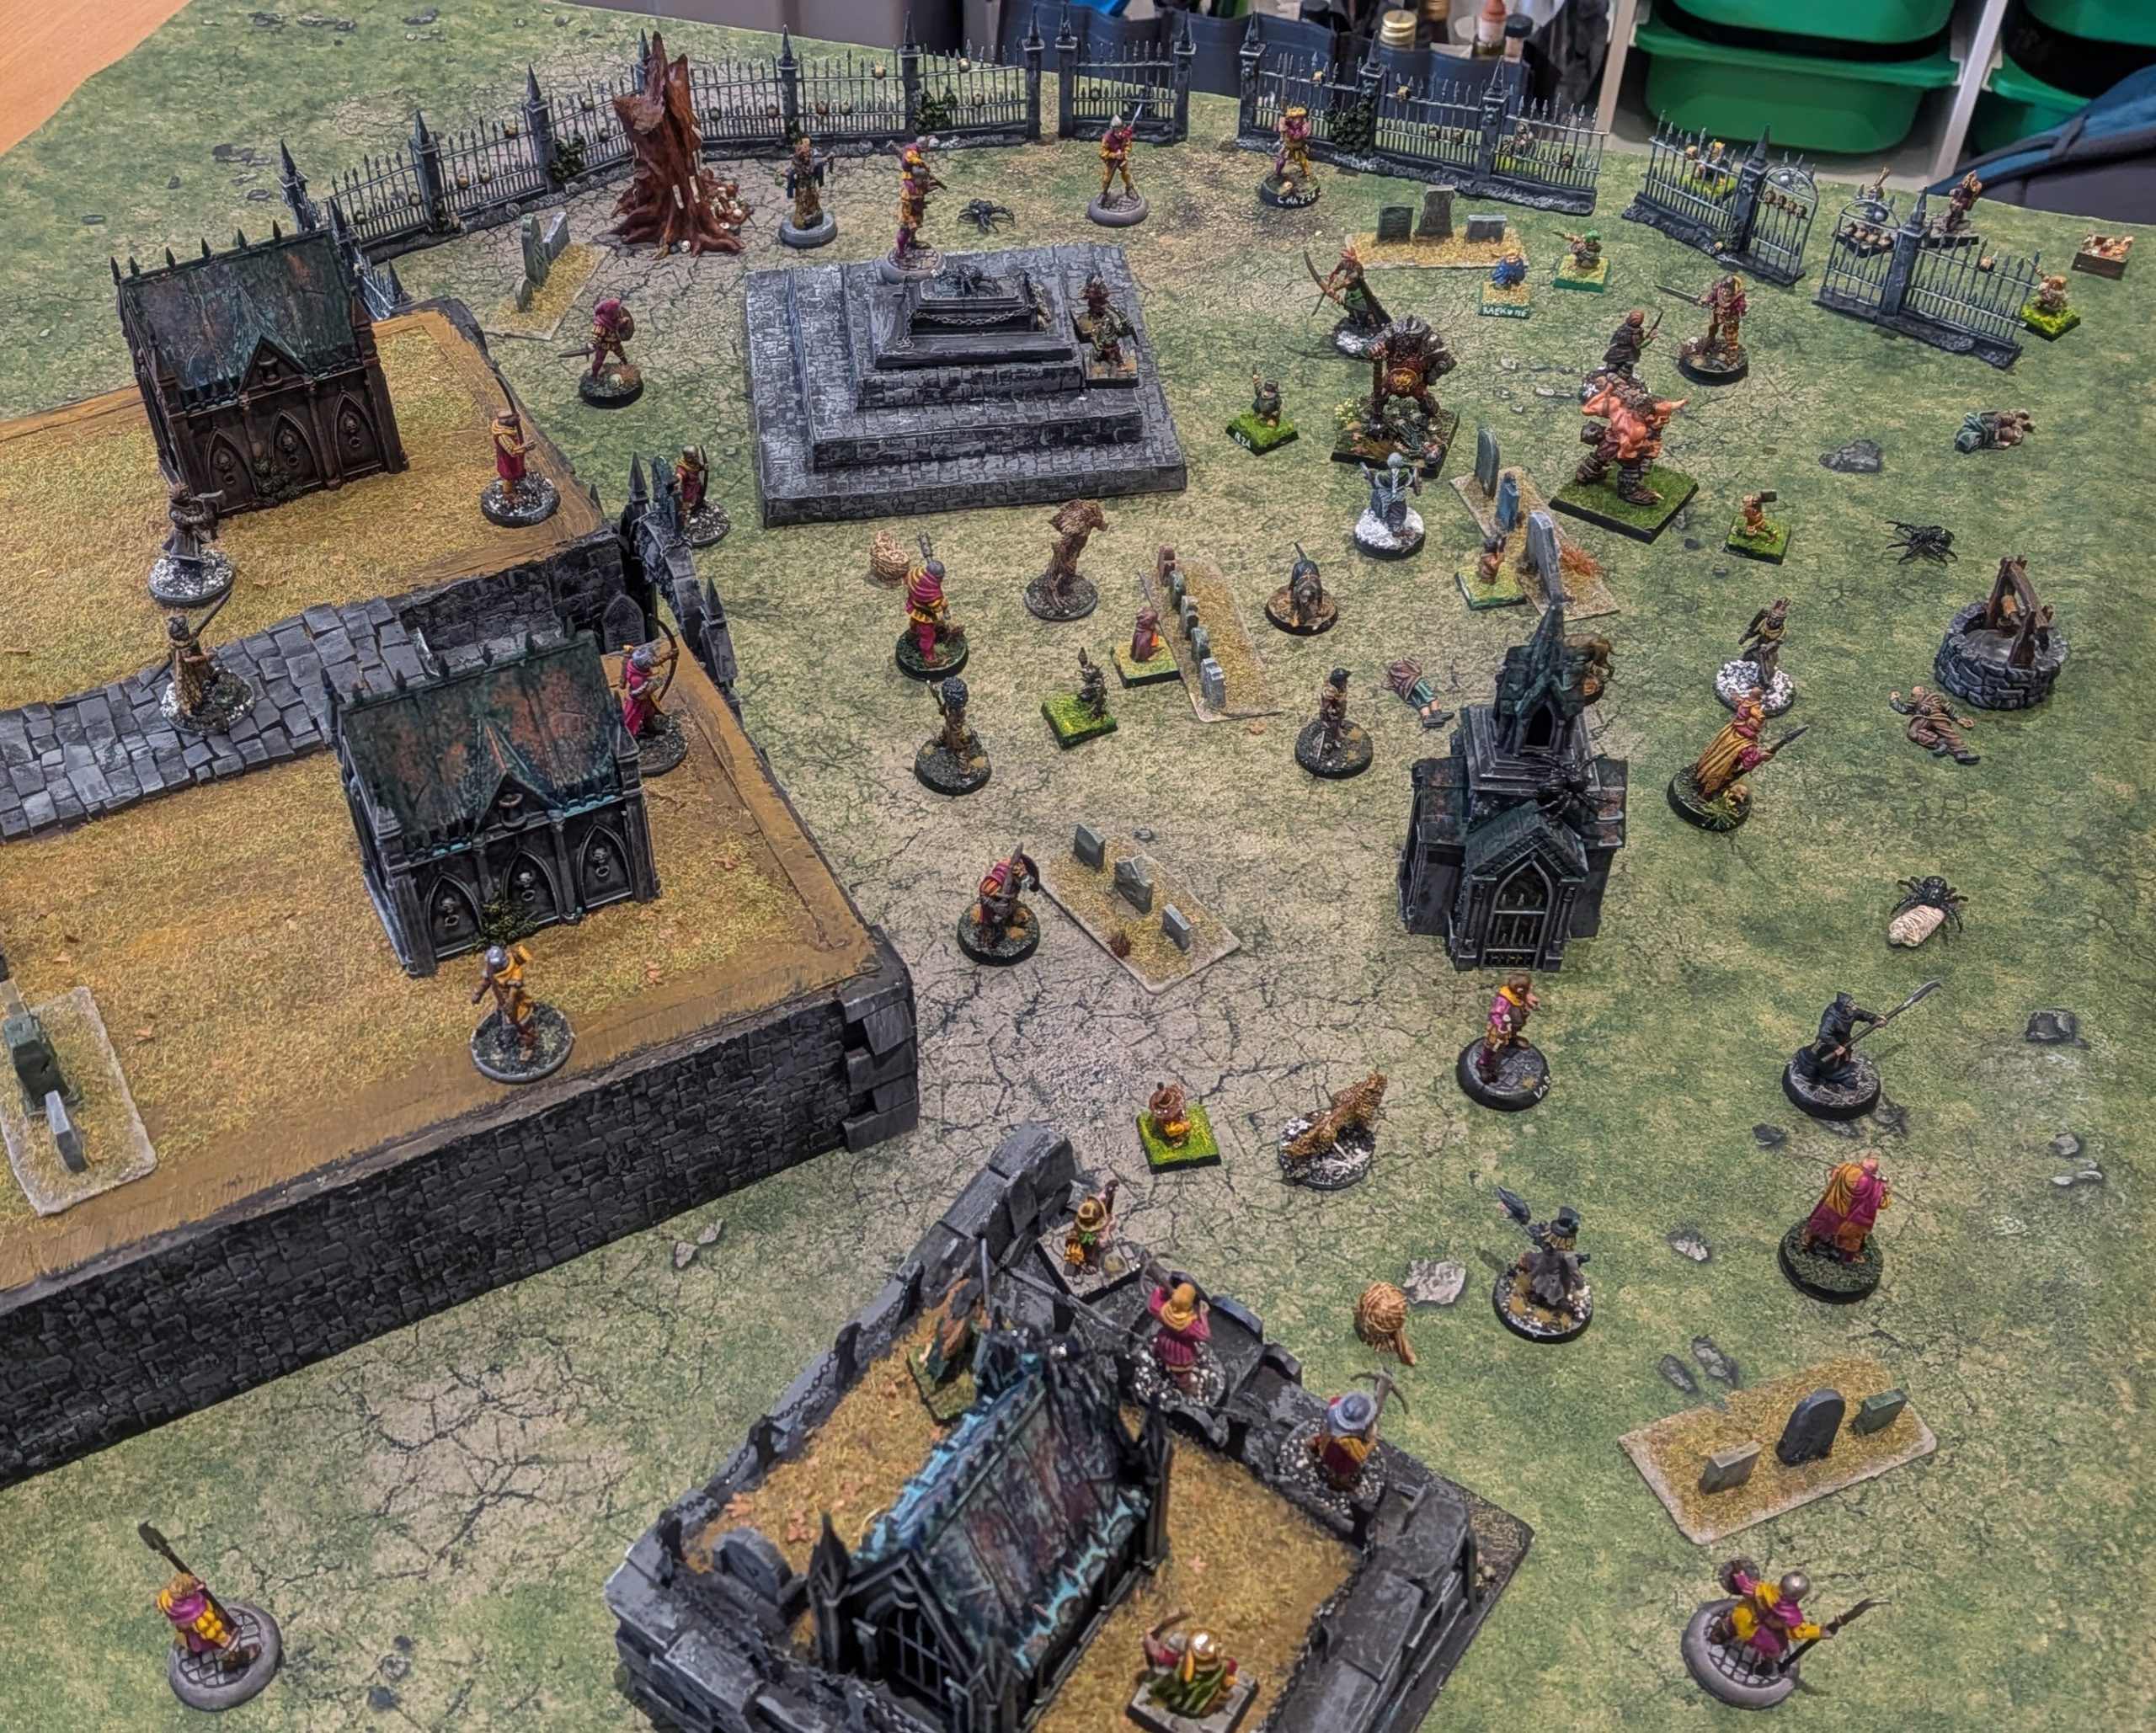
I packed up my Graveyard and headed down to Clubhouse Gaming to test it out with a game of Mordheim.
I added some extra terrain from the collection at the club, but in the end we didn’t use that side of the table.
We played Wyrdstone hunt with the contest between my Ostermarkers, who haven’t won a game in the campaign yet, against a maxed out band of Marienburgers ran by David from Northwing Miniatures
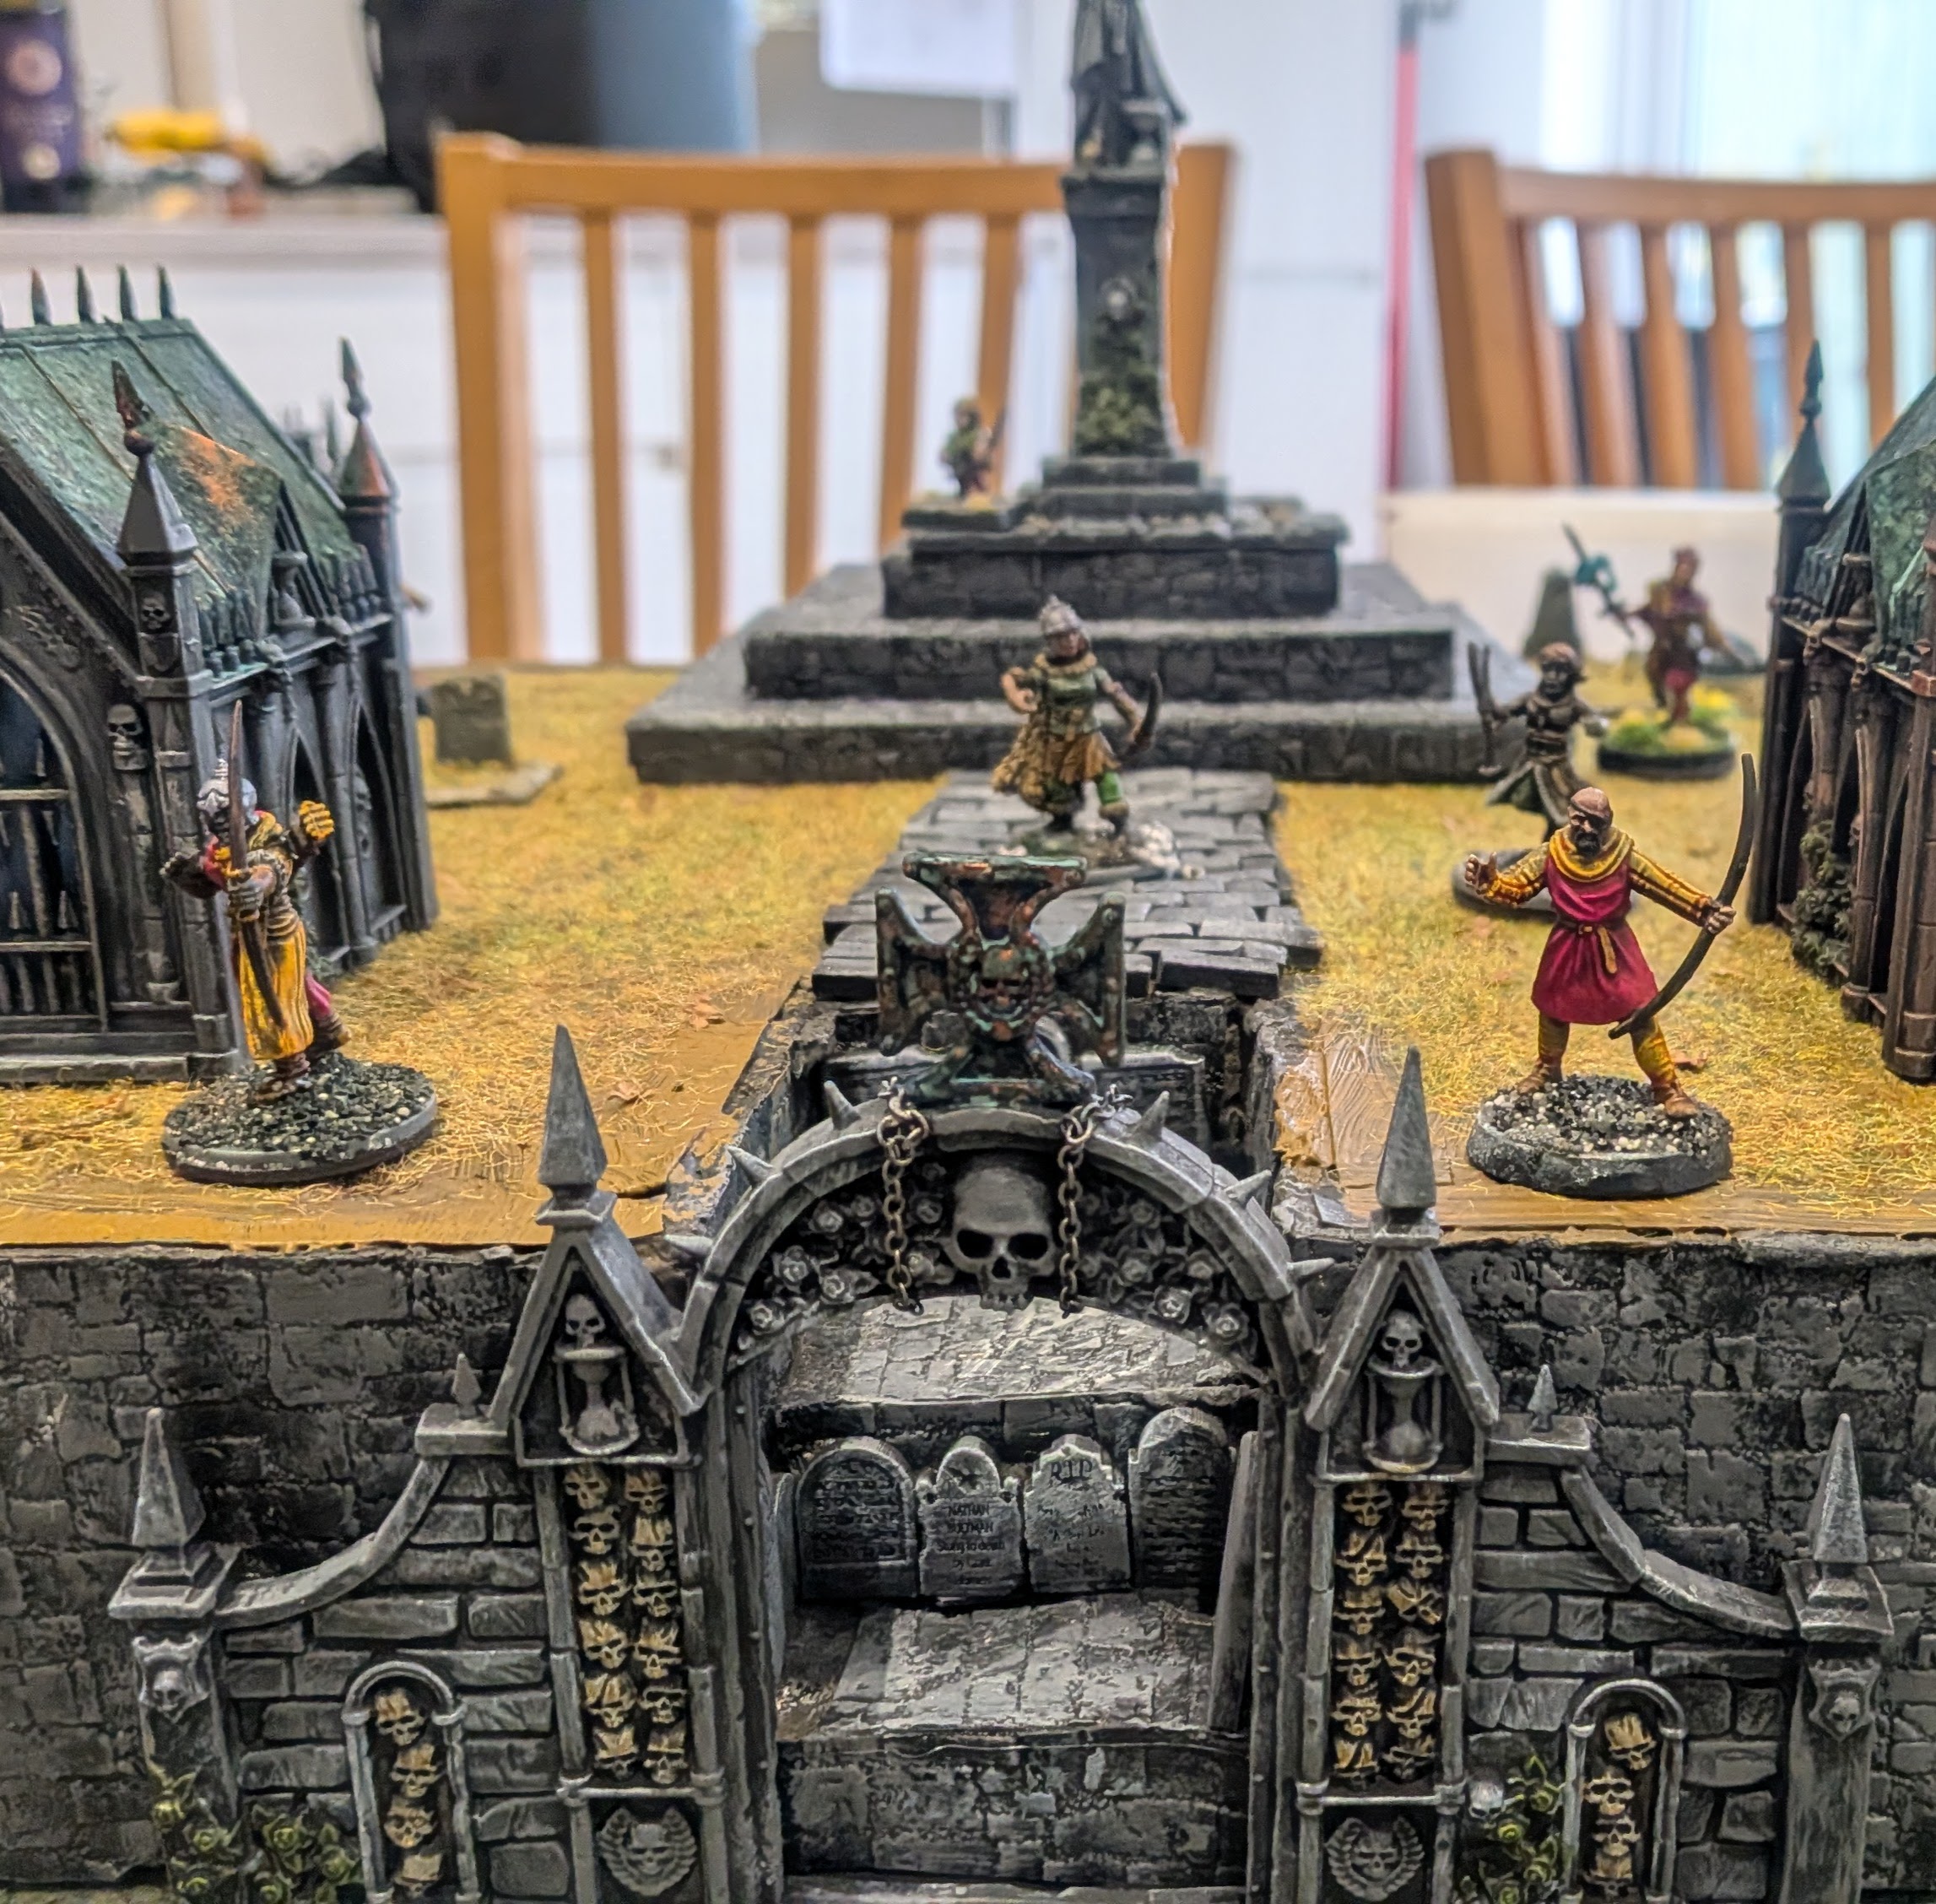
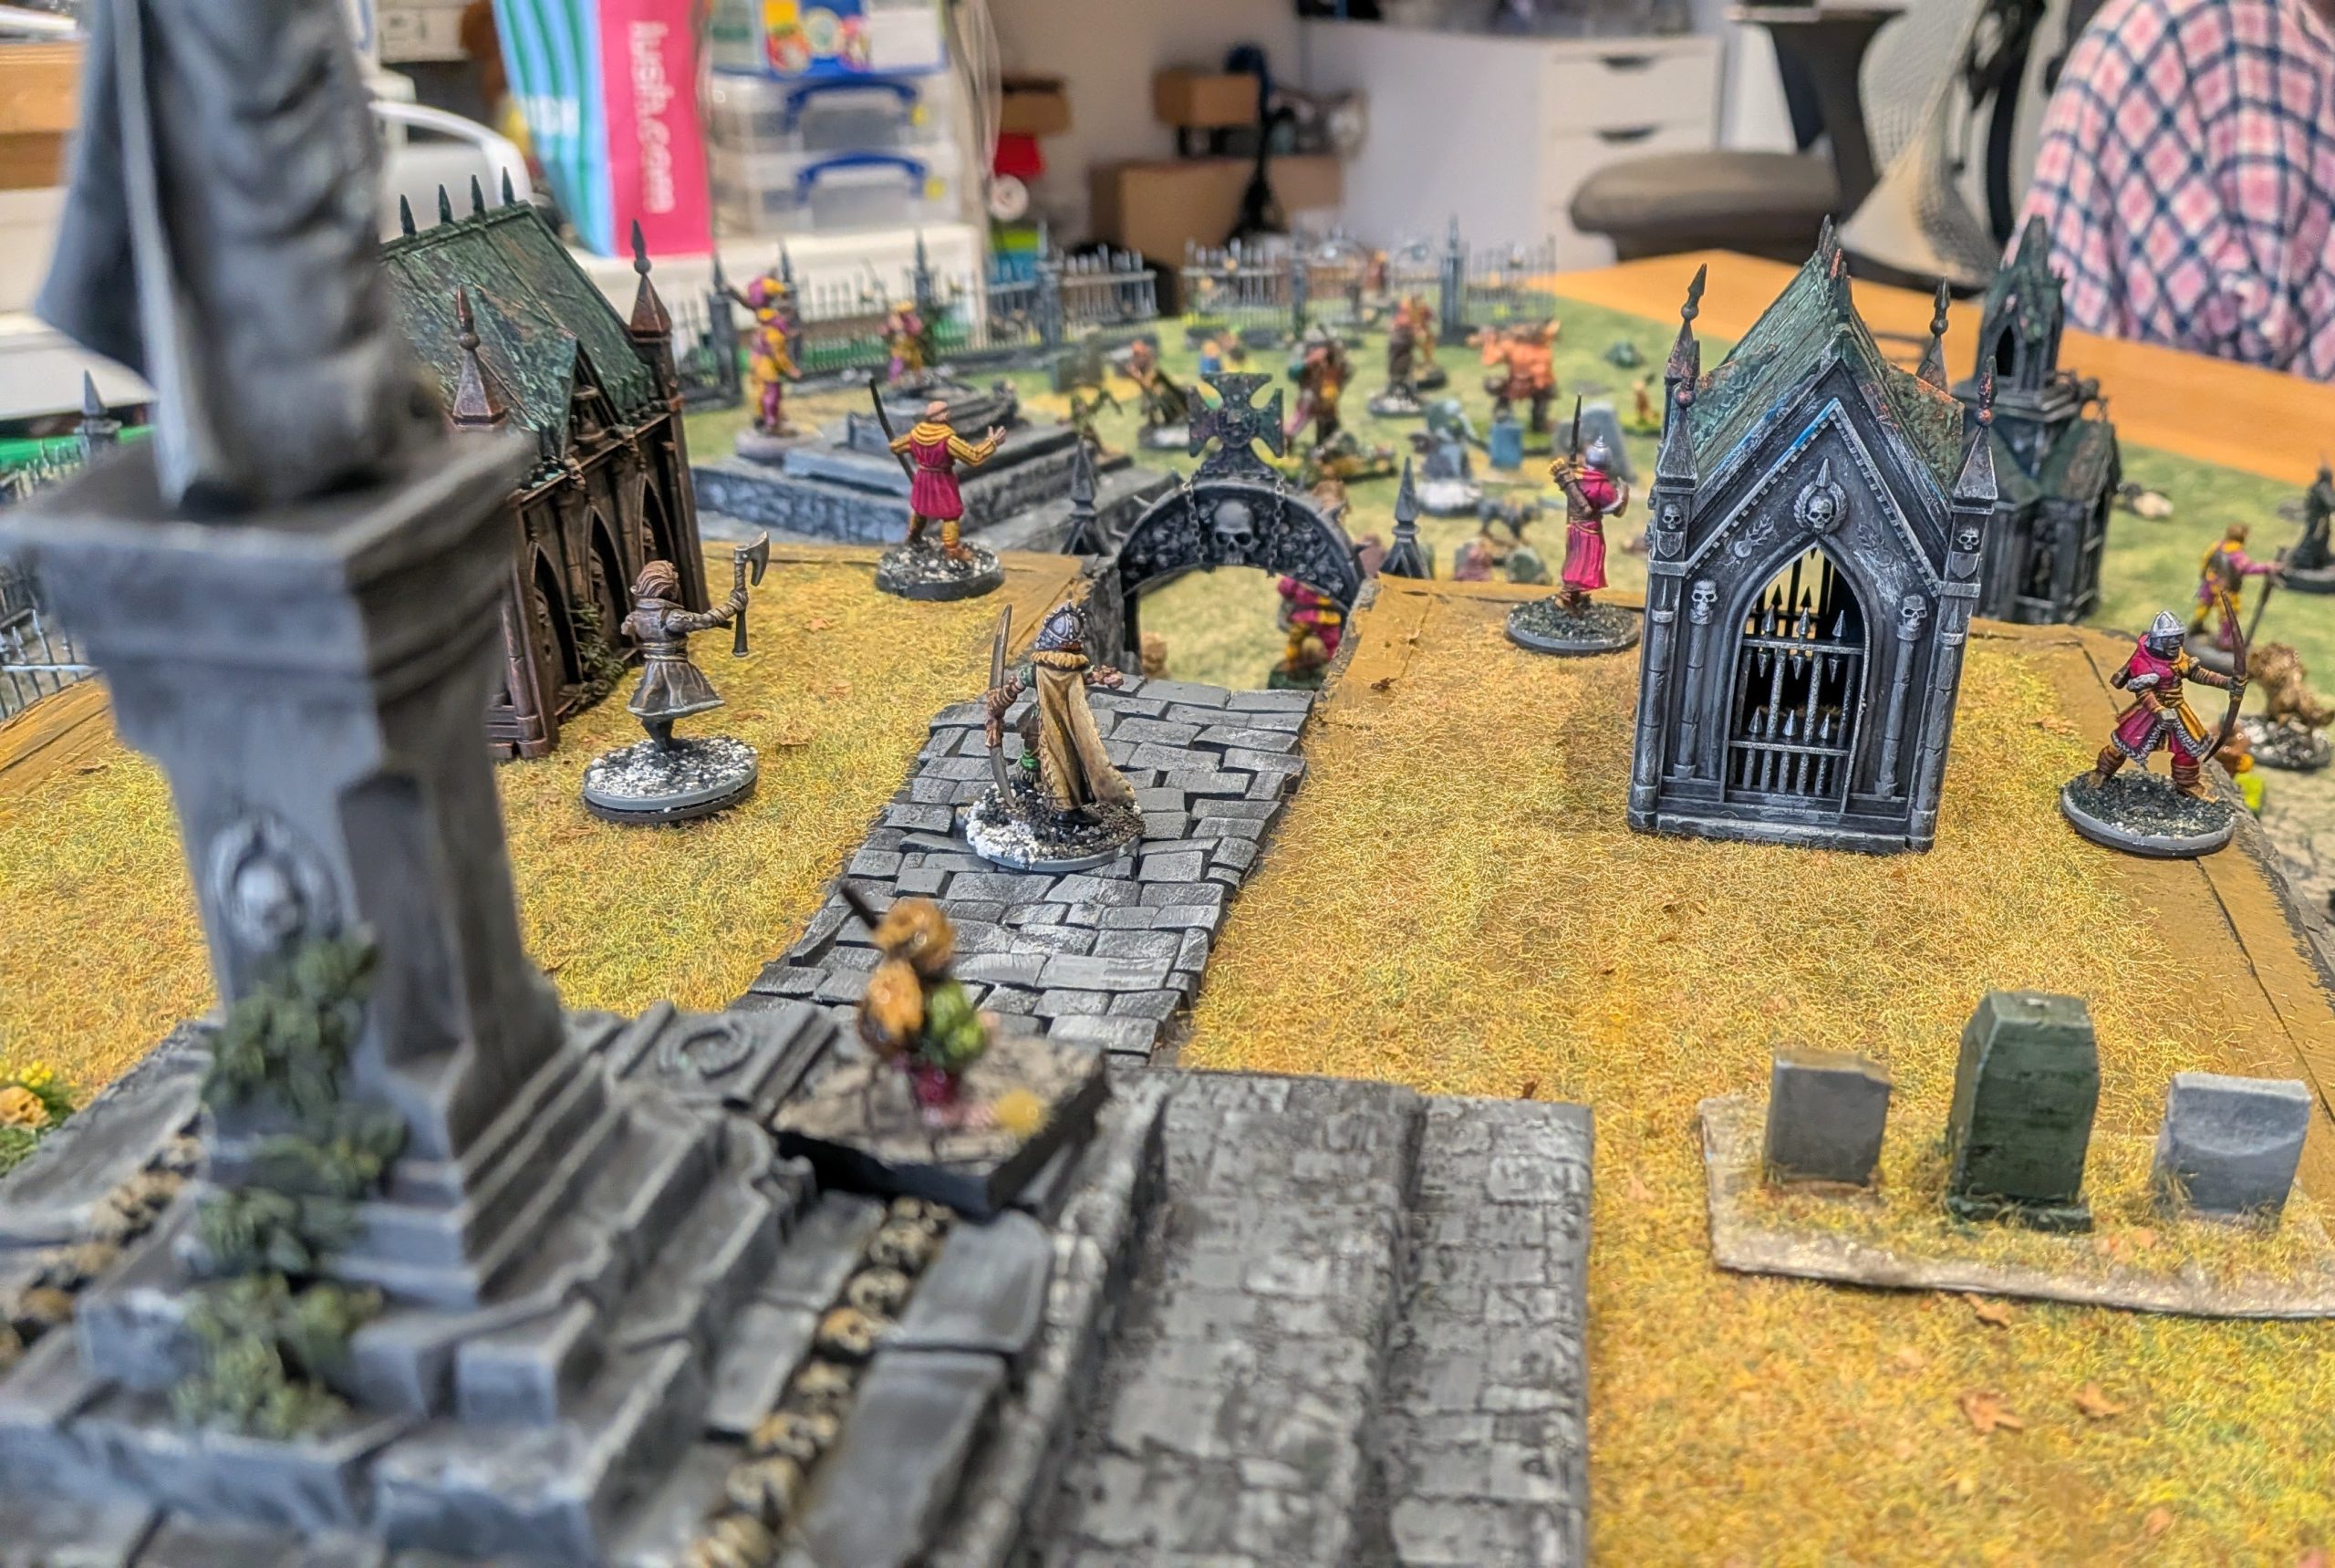
I split my band into three : two flanks and the middle. There were enough Marienburgers to walk in a line up the board. A few long range shots were traded, and a piece of wyrdstone picked up for each side before contact was made.
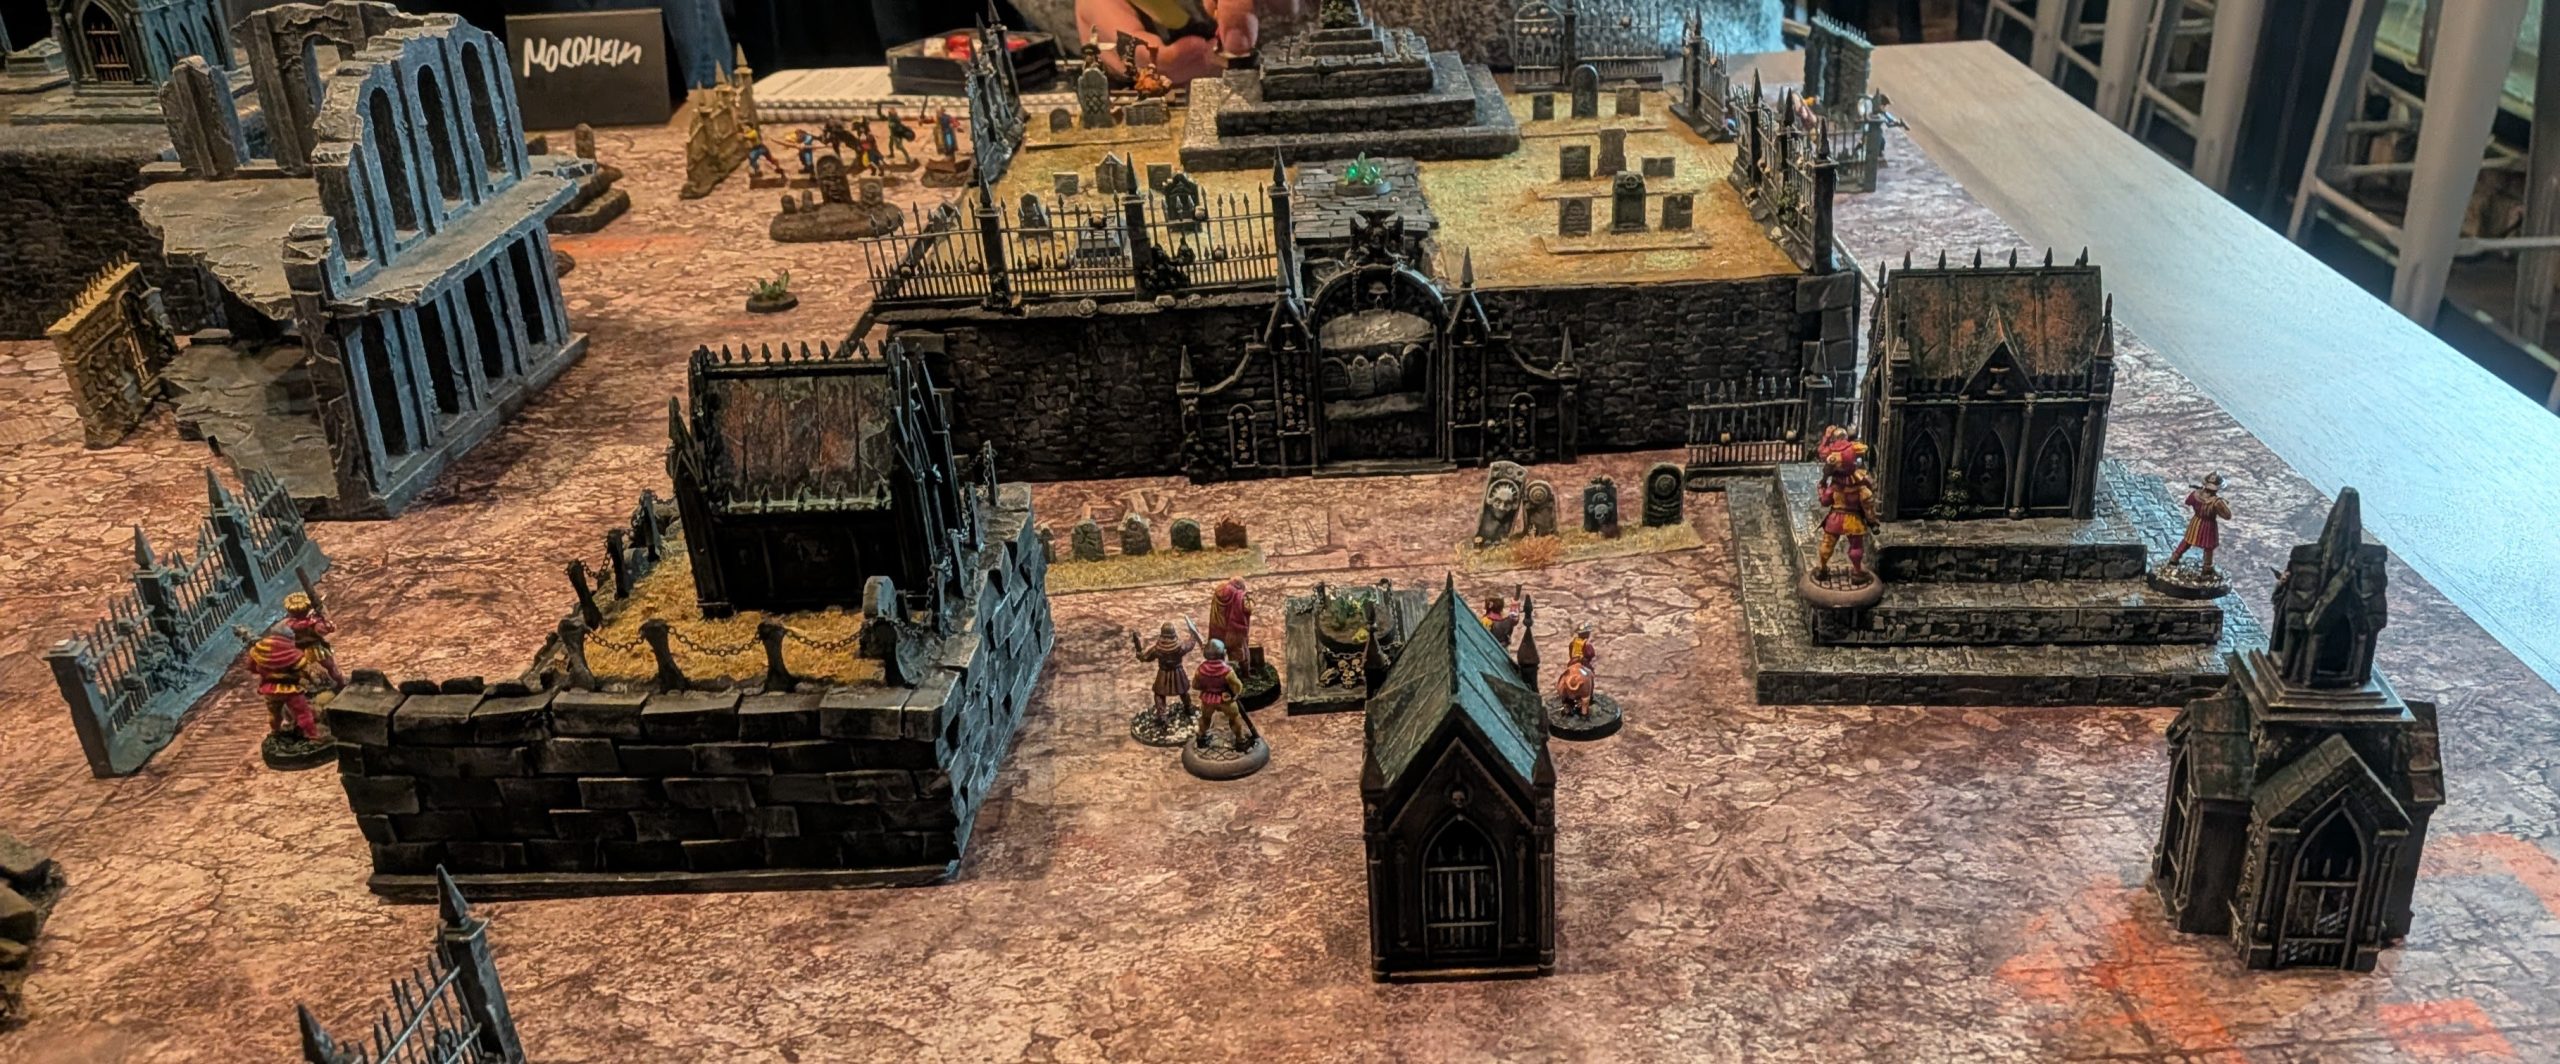
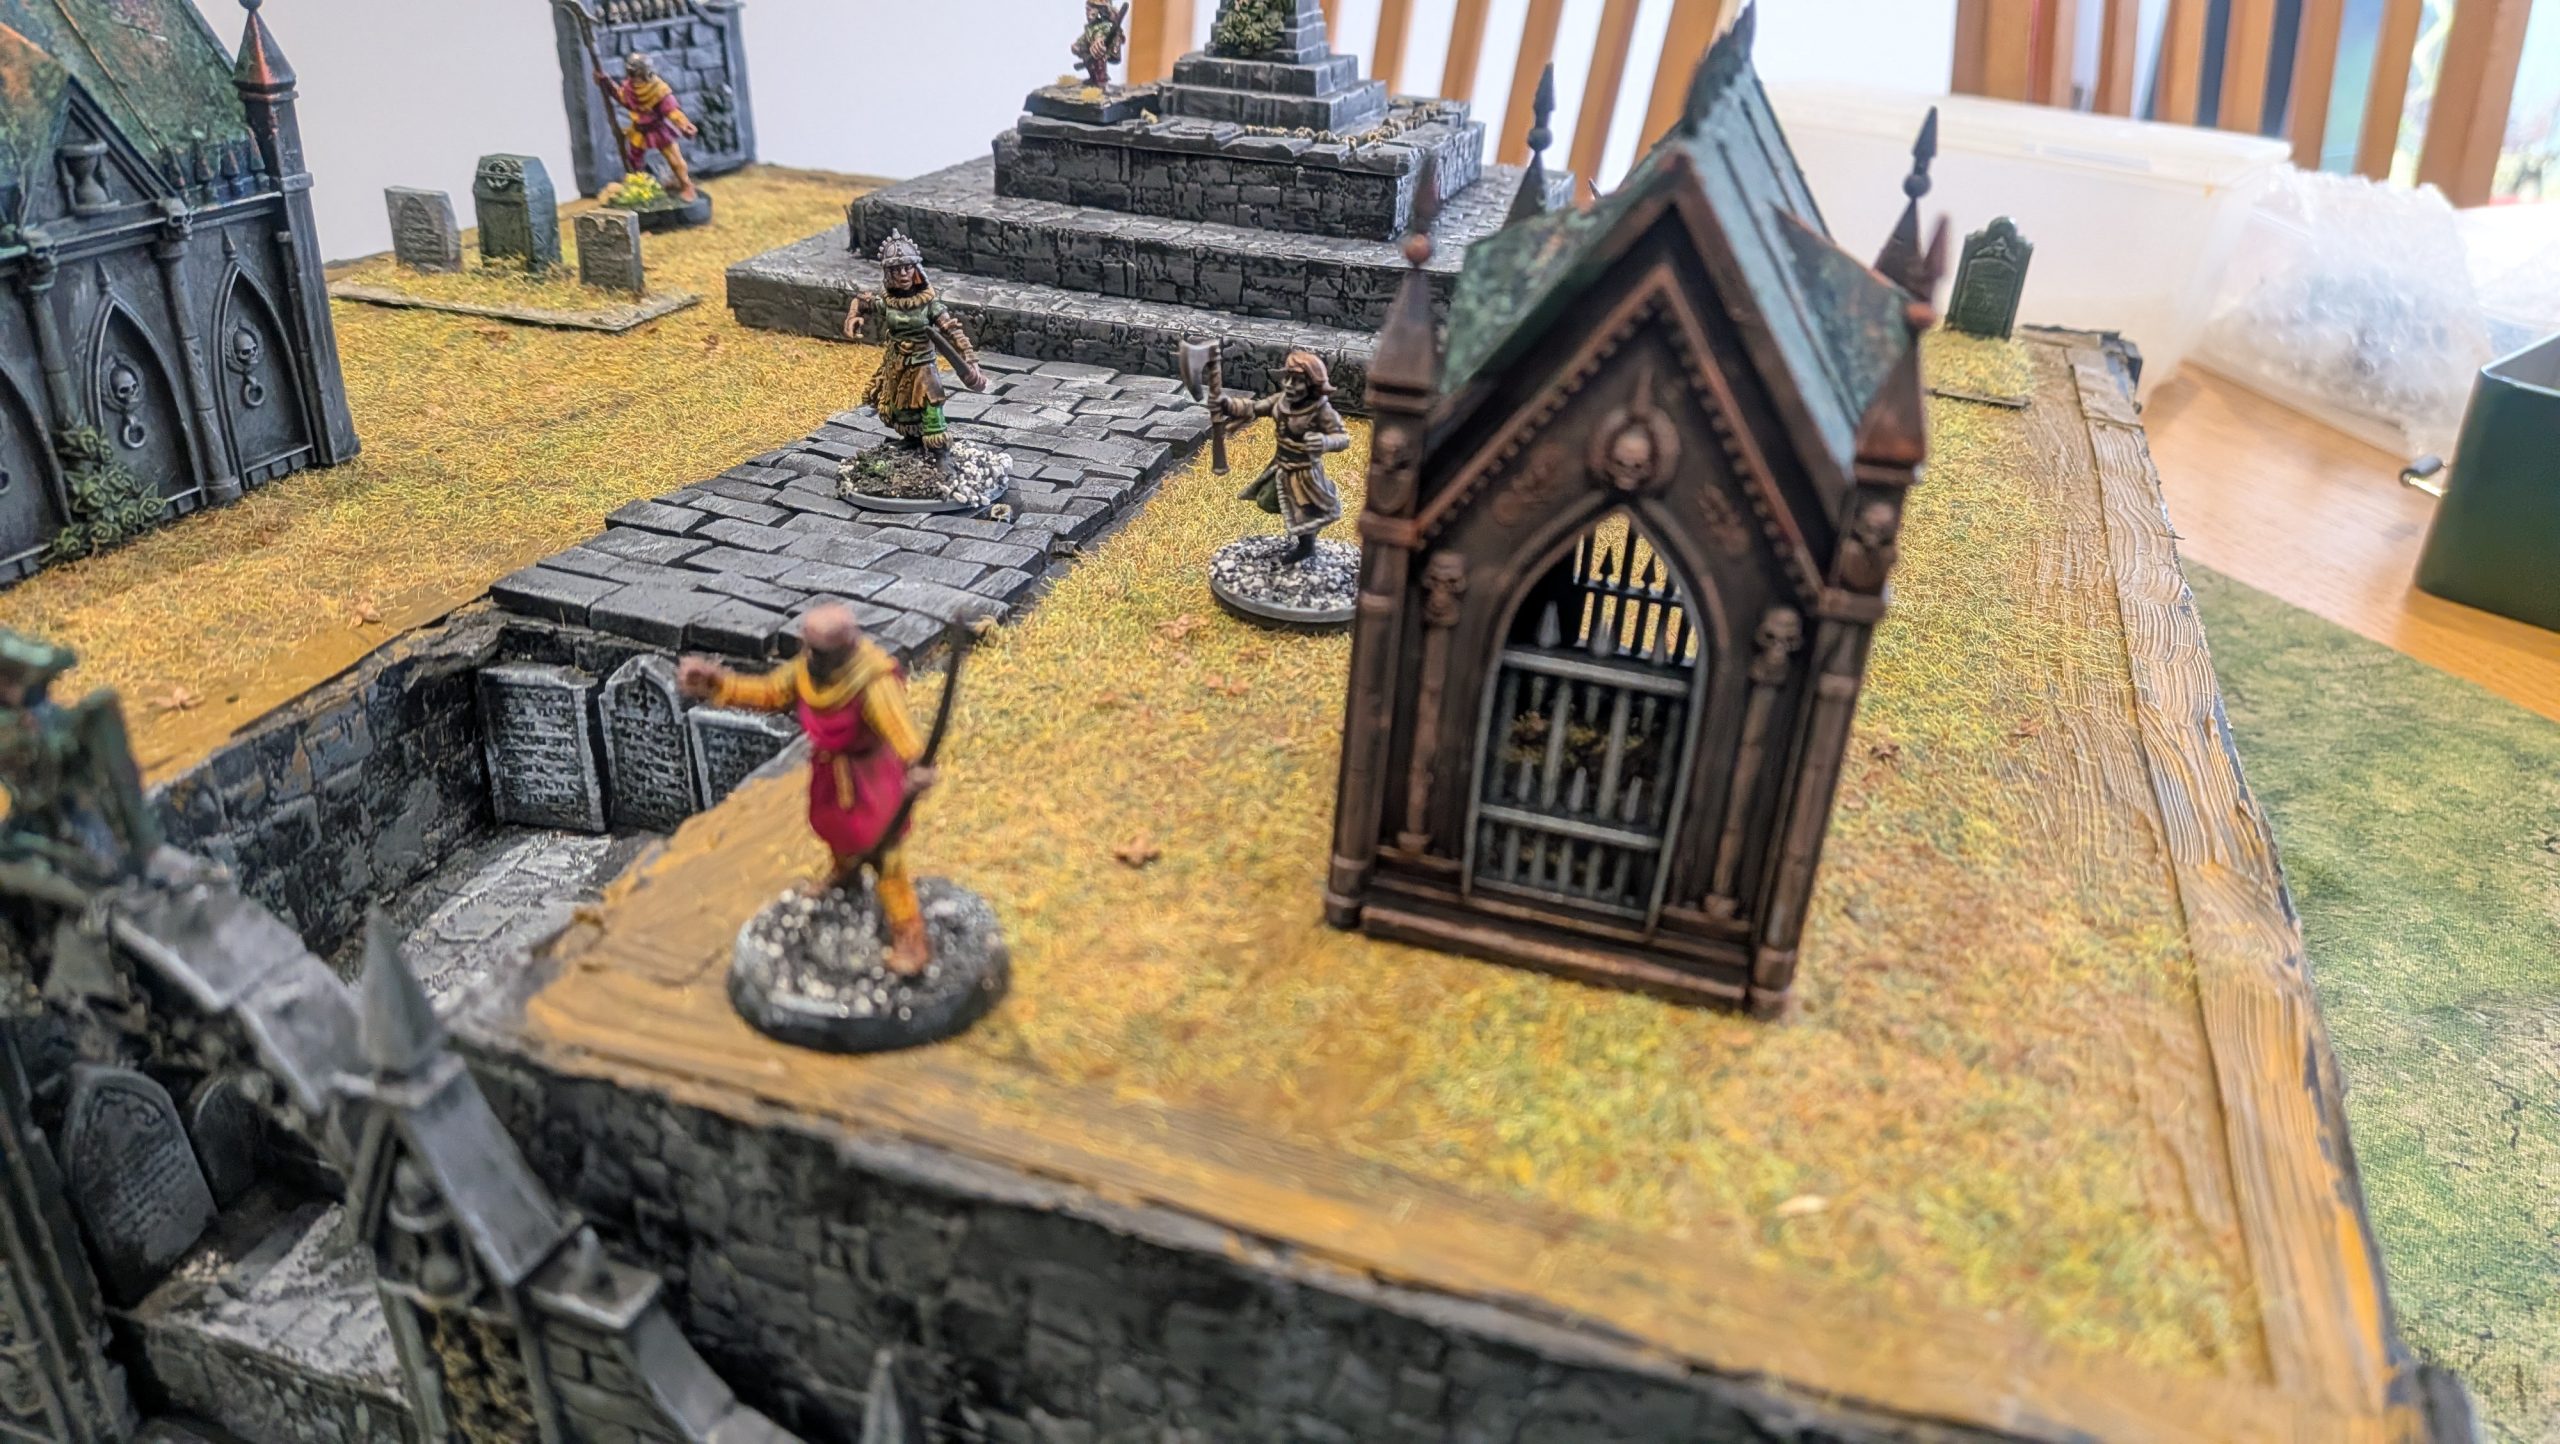
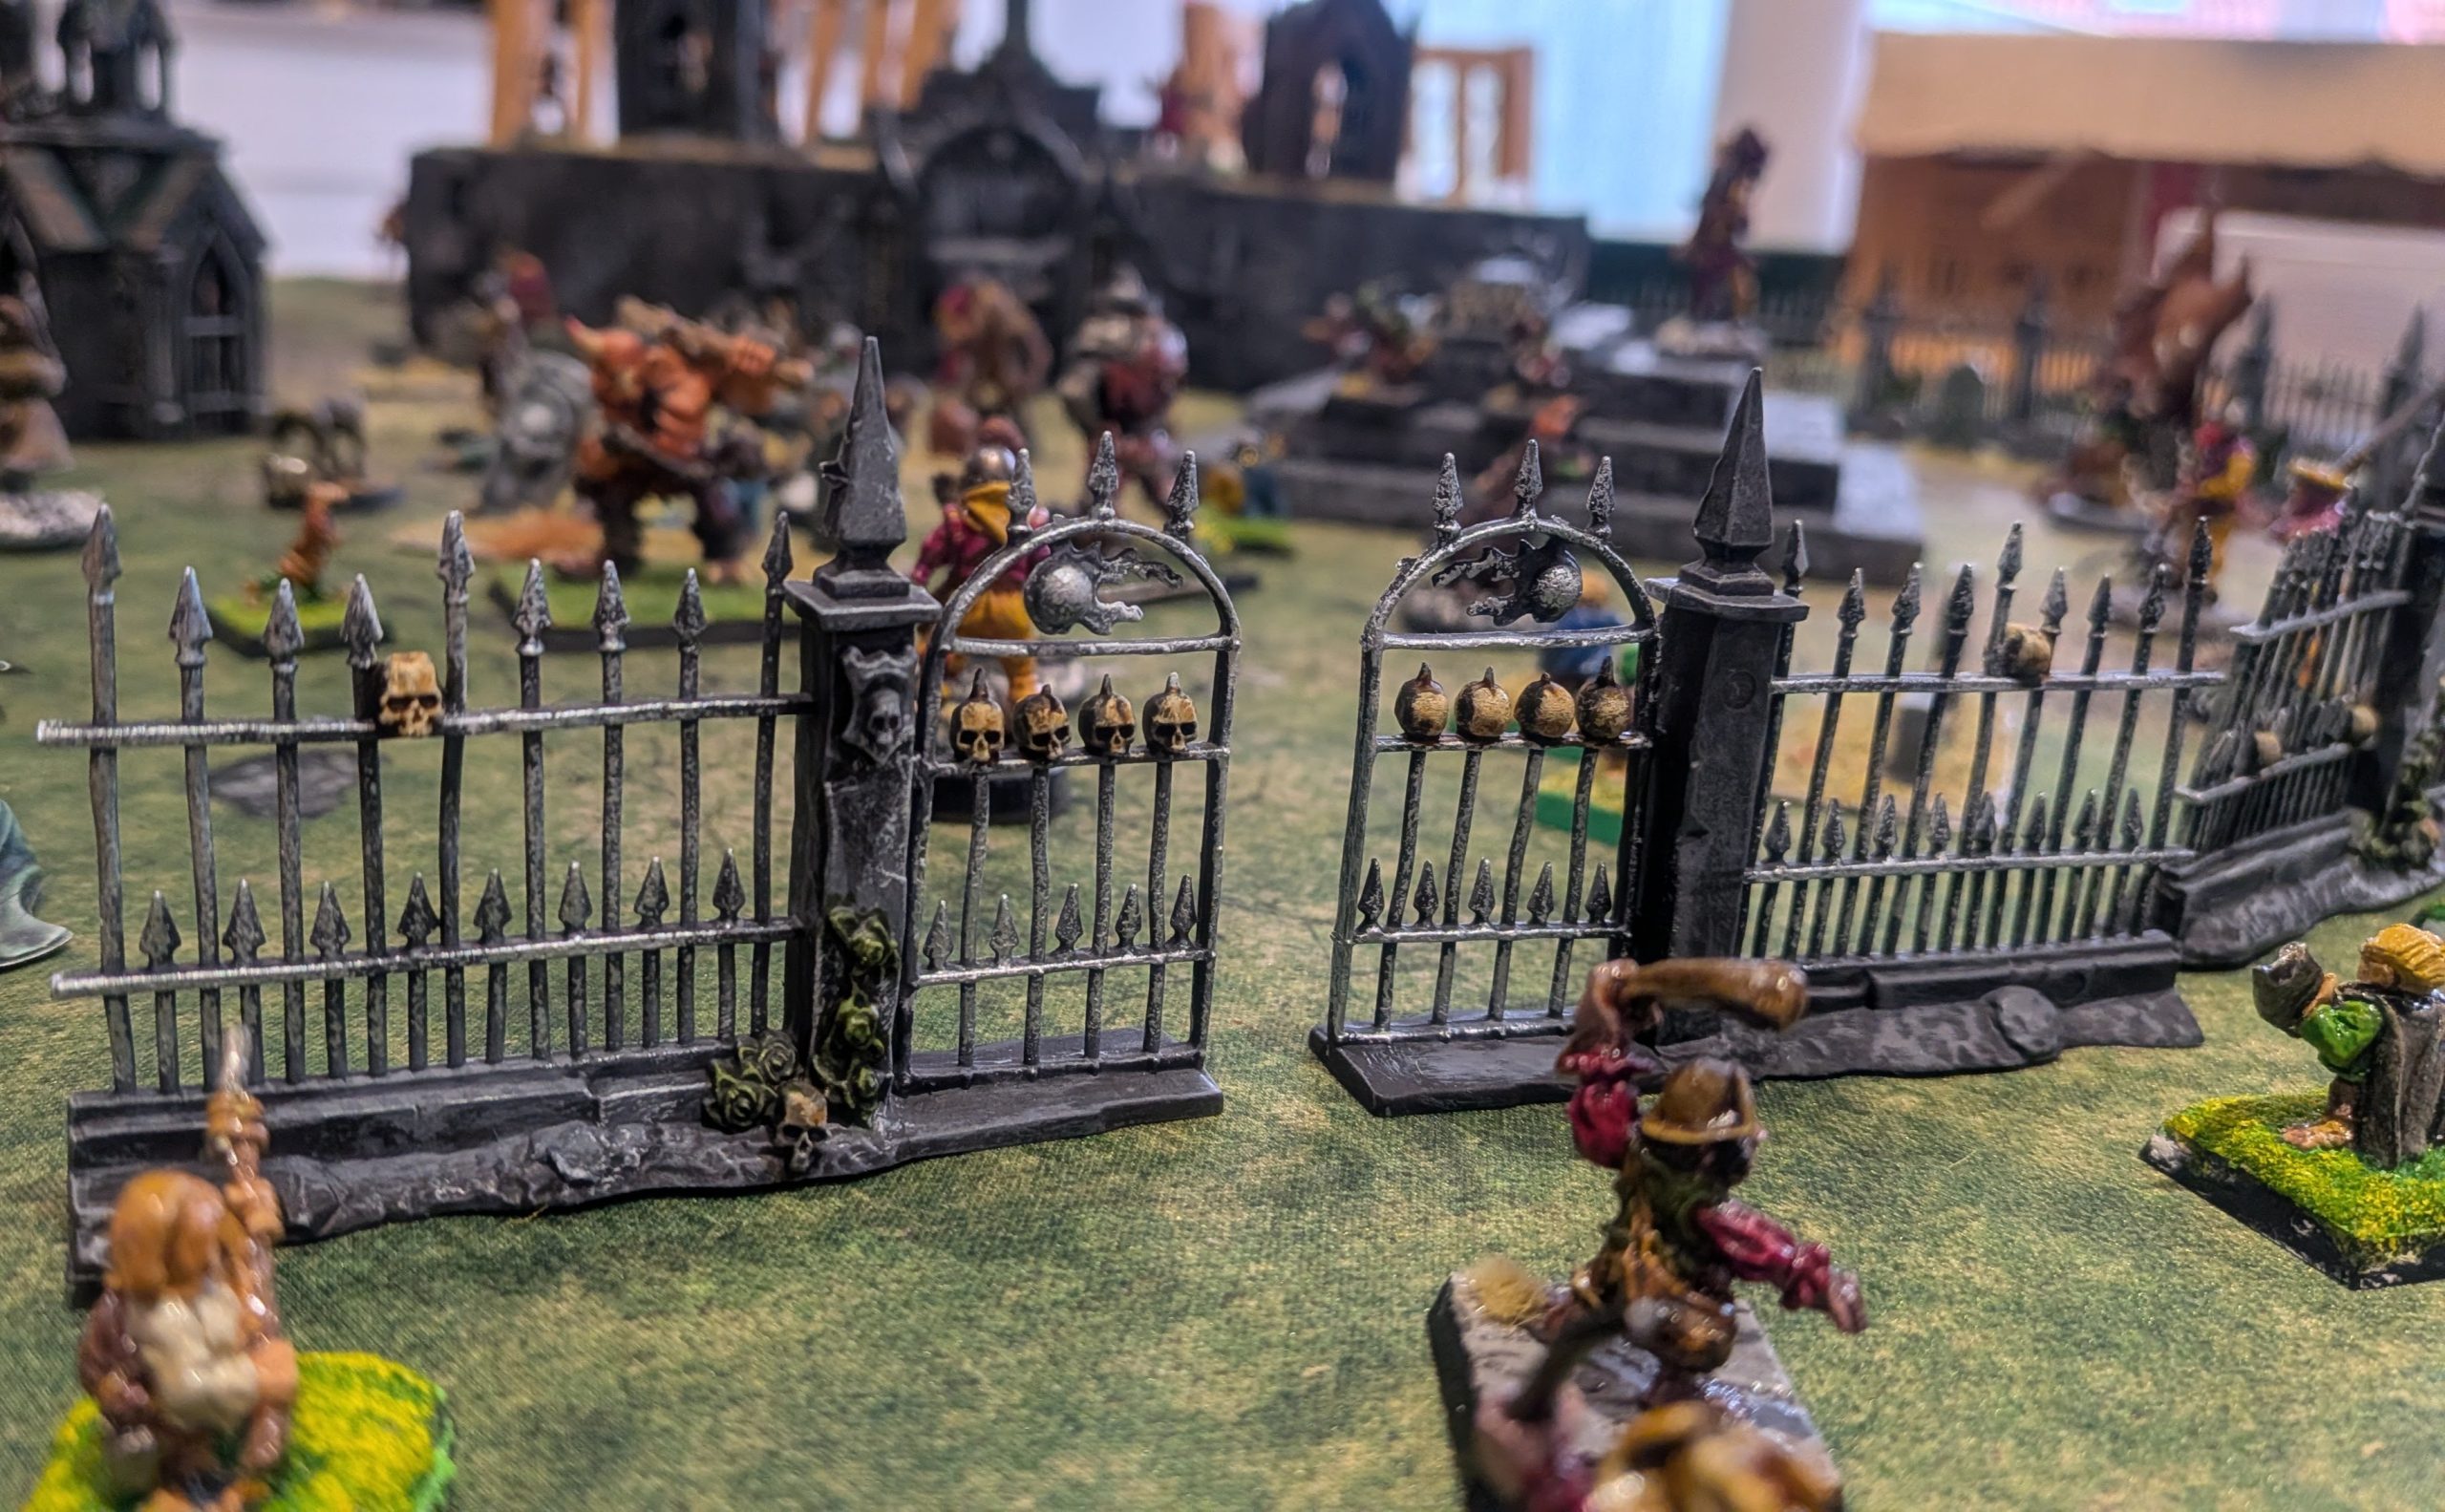
The initial clashes in the gateway of the raised graveyard were surprisingly even, but then the meat grinder effect of being surrounded on 3 sides took it’s toll and the captain and the newest recruit were both taken out. On the right flank the marksmen had some success, killing one on pinning down another of the enemy. The left flank more or less folded on contact.
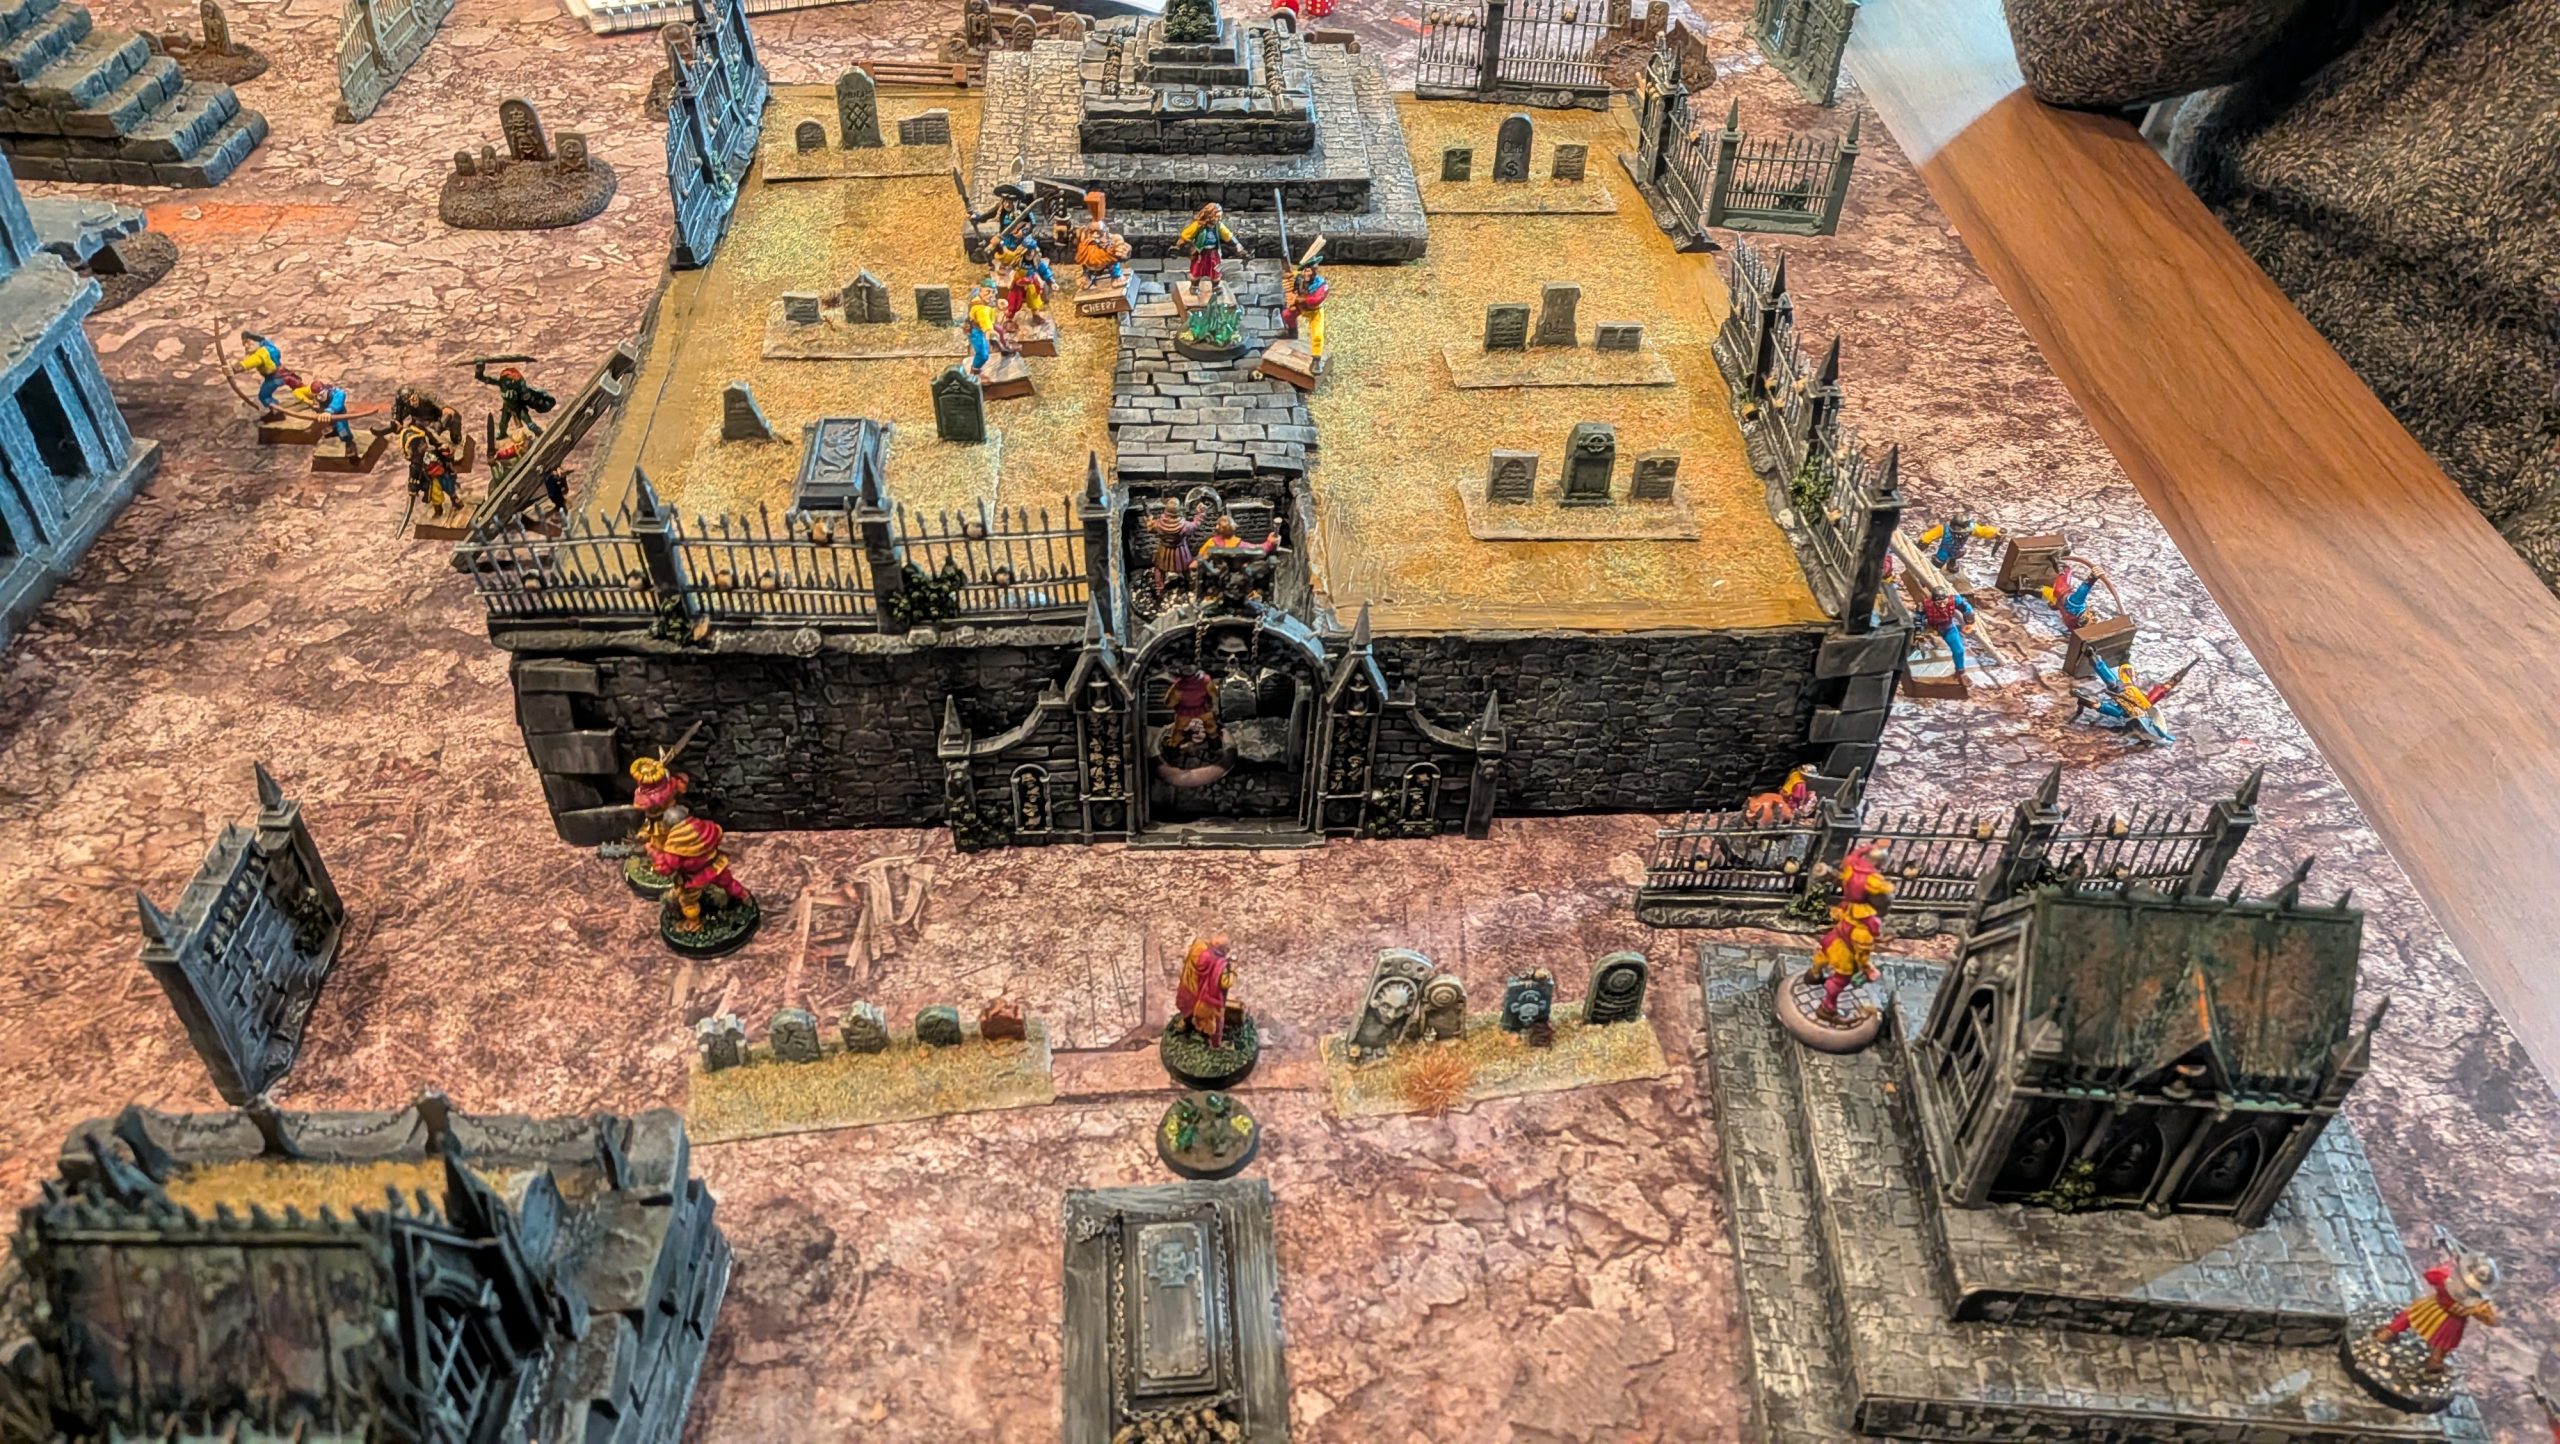
In the aftergame my captain lost an eye, my newest recruit, who had been taken out fighting shoulder to shoulder with the captain, rolled ‘lads got talent’. The only fatality was a warrior with a bunch of experience, the last of his group. I sold all the wyrdstone that I found, getting enough gold for 2 new warriors with maces and to buy a better weapon for my new hero.
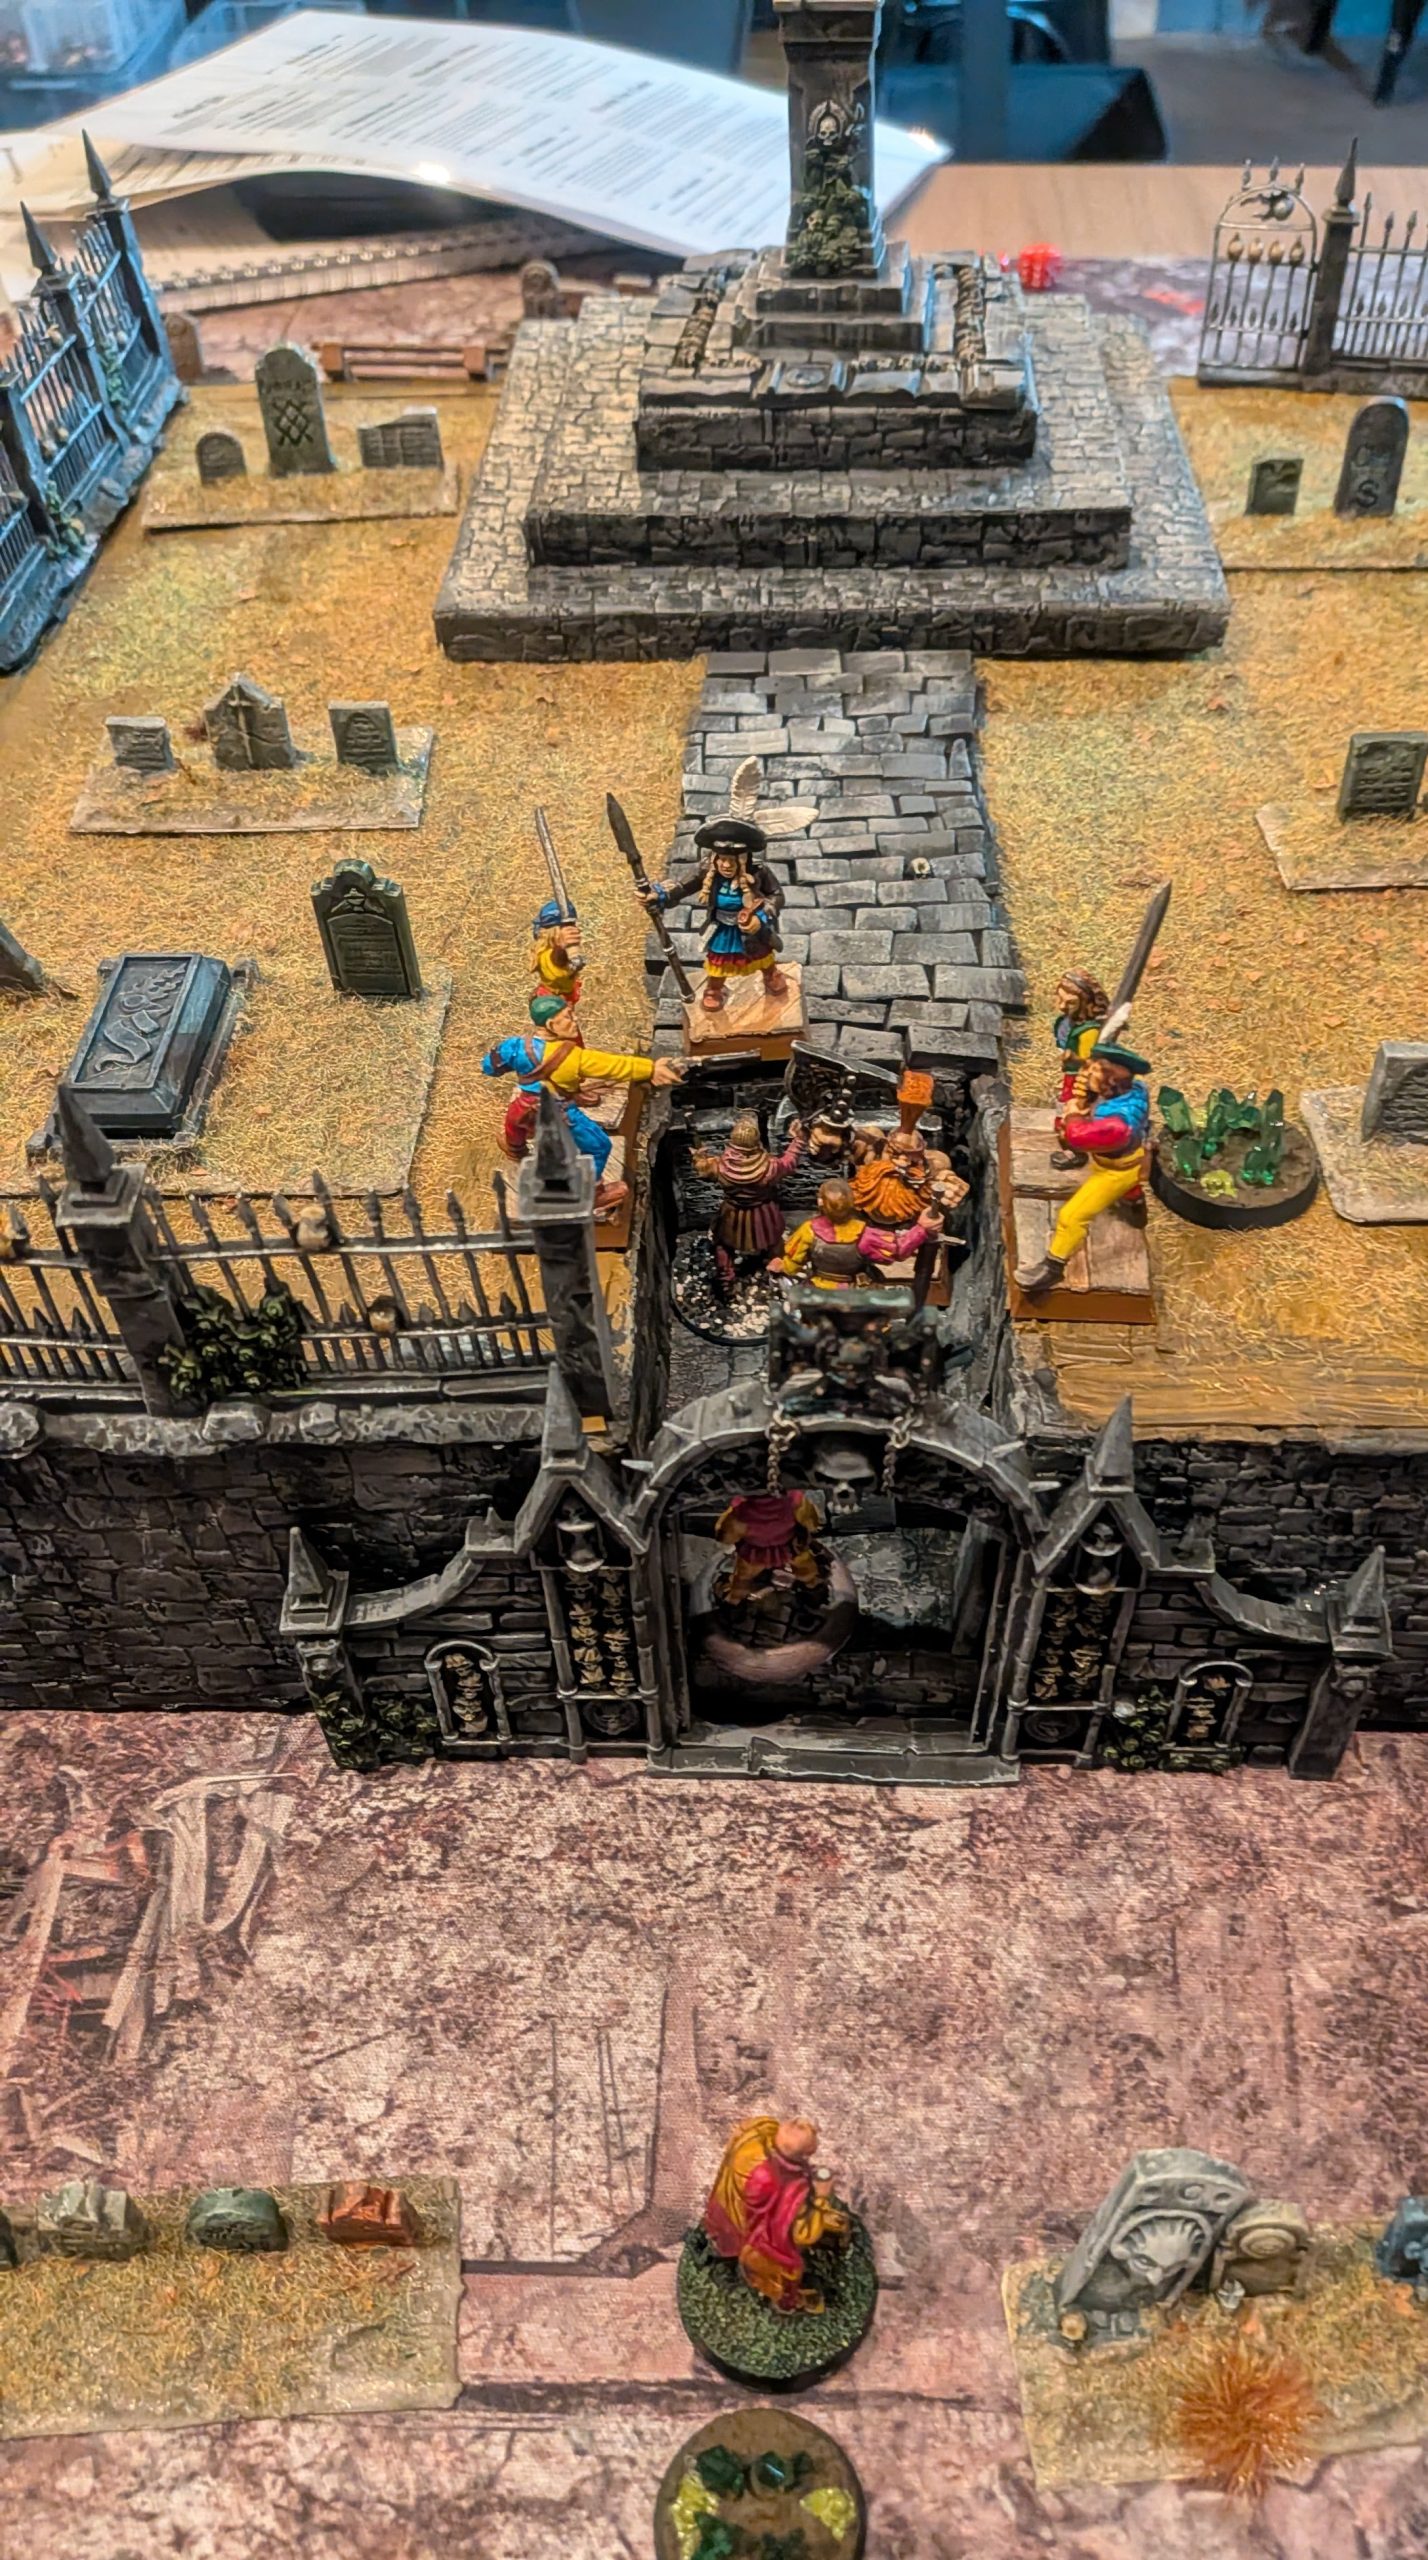
Painted and staged
I’ve built up enough to paint now. First a Halfords black rattle can primer, then 2 dry brushings of hobby shop acrylic : grey then lighter grey. I used the watered down speed paints to pick out the skulls tiny headbones and to vary the colours of the buildings and the larger bricks.
The copper roofs were then painted in Monument Hobbies transparent blue, I sponged on some 40 year old copper acrylic, then applied Dirty Down verdegris. That’s useful as it reactivates with water, so if there’s too much coverage once it’s dry you can easily remove some.
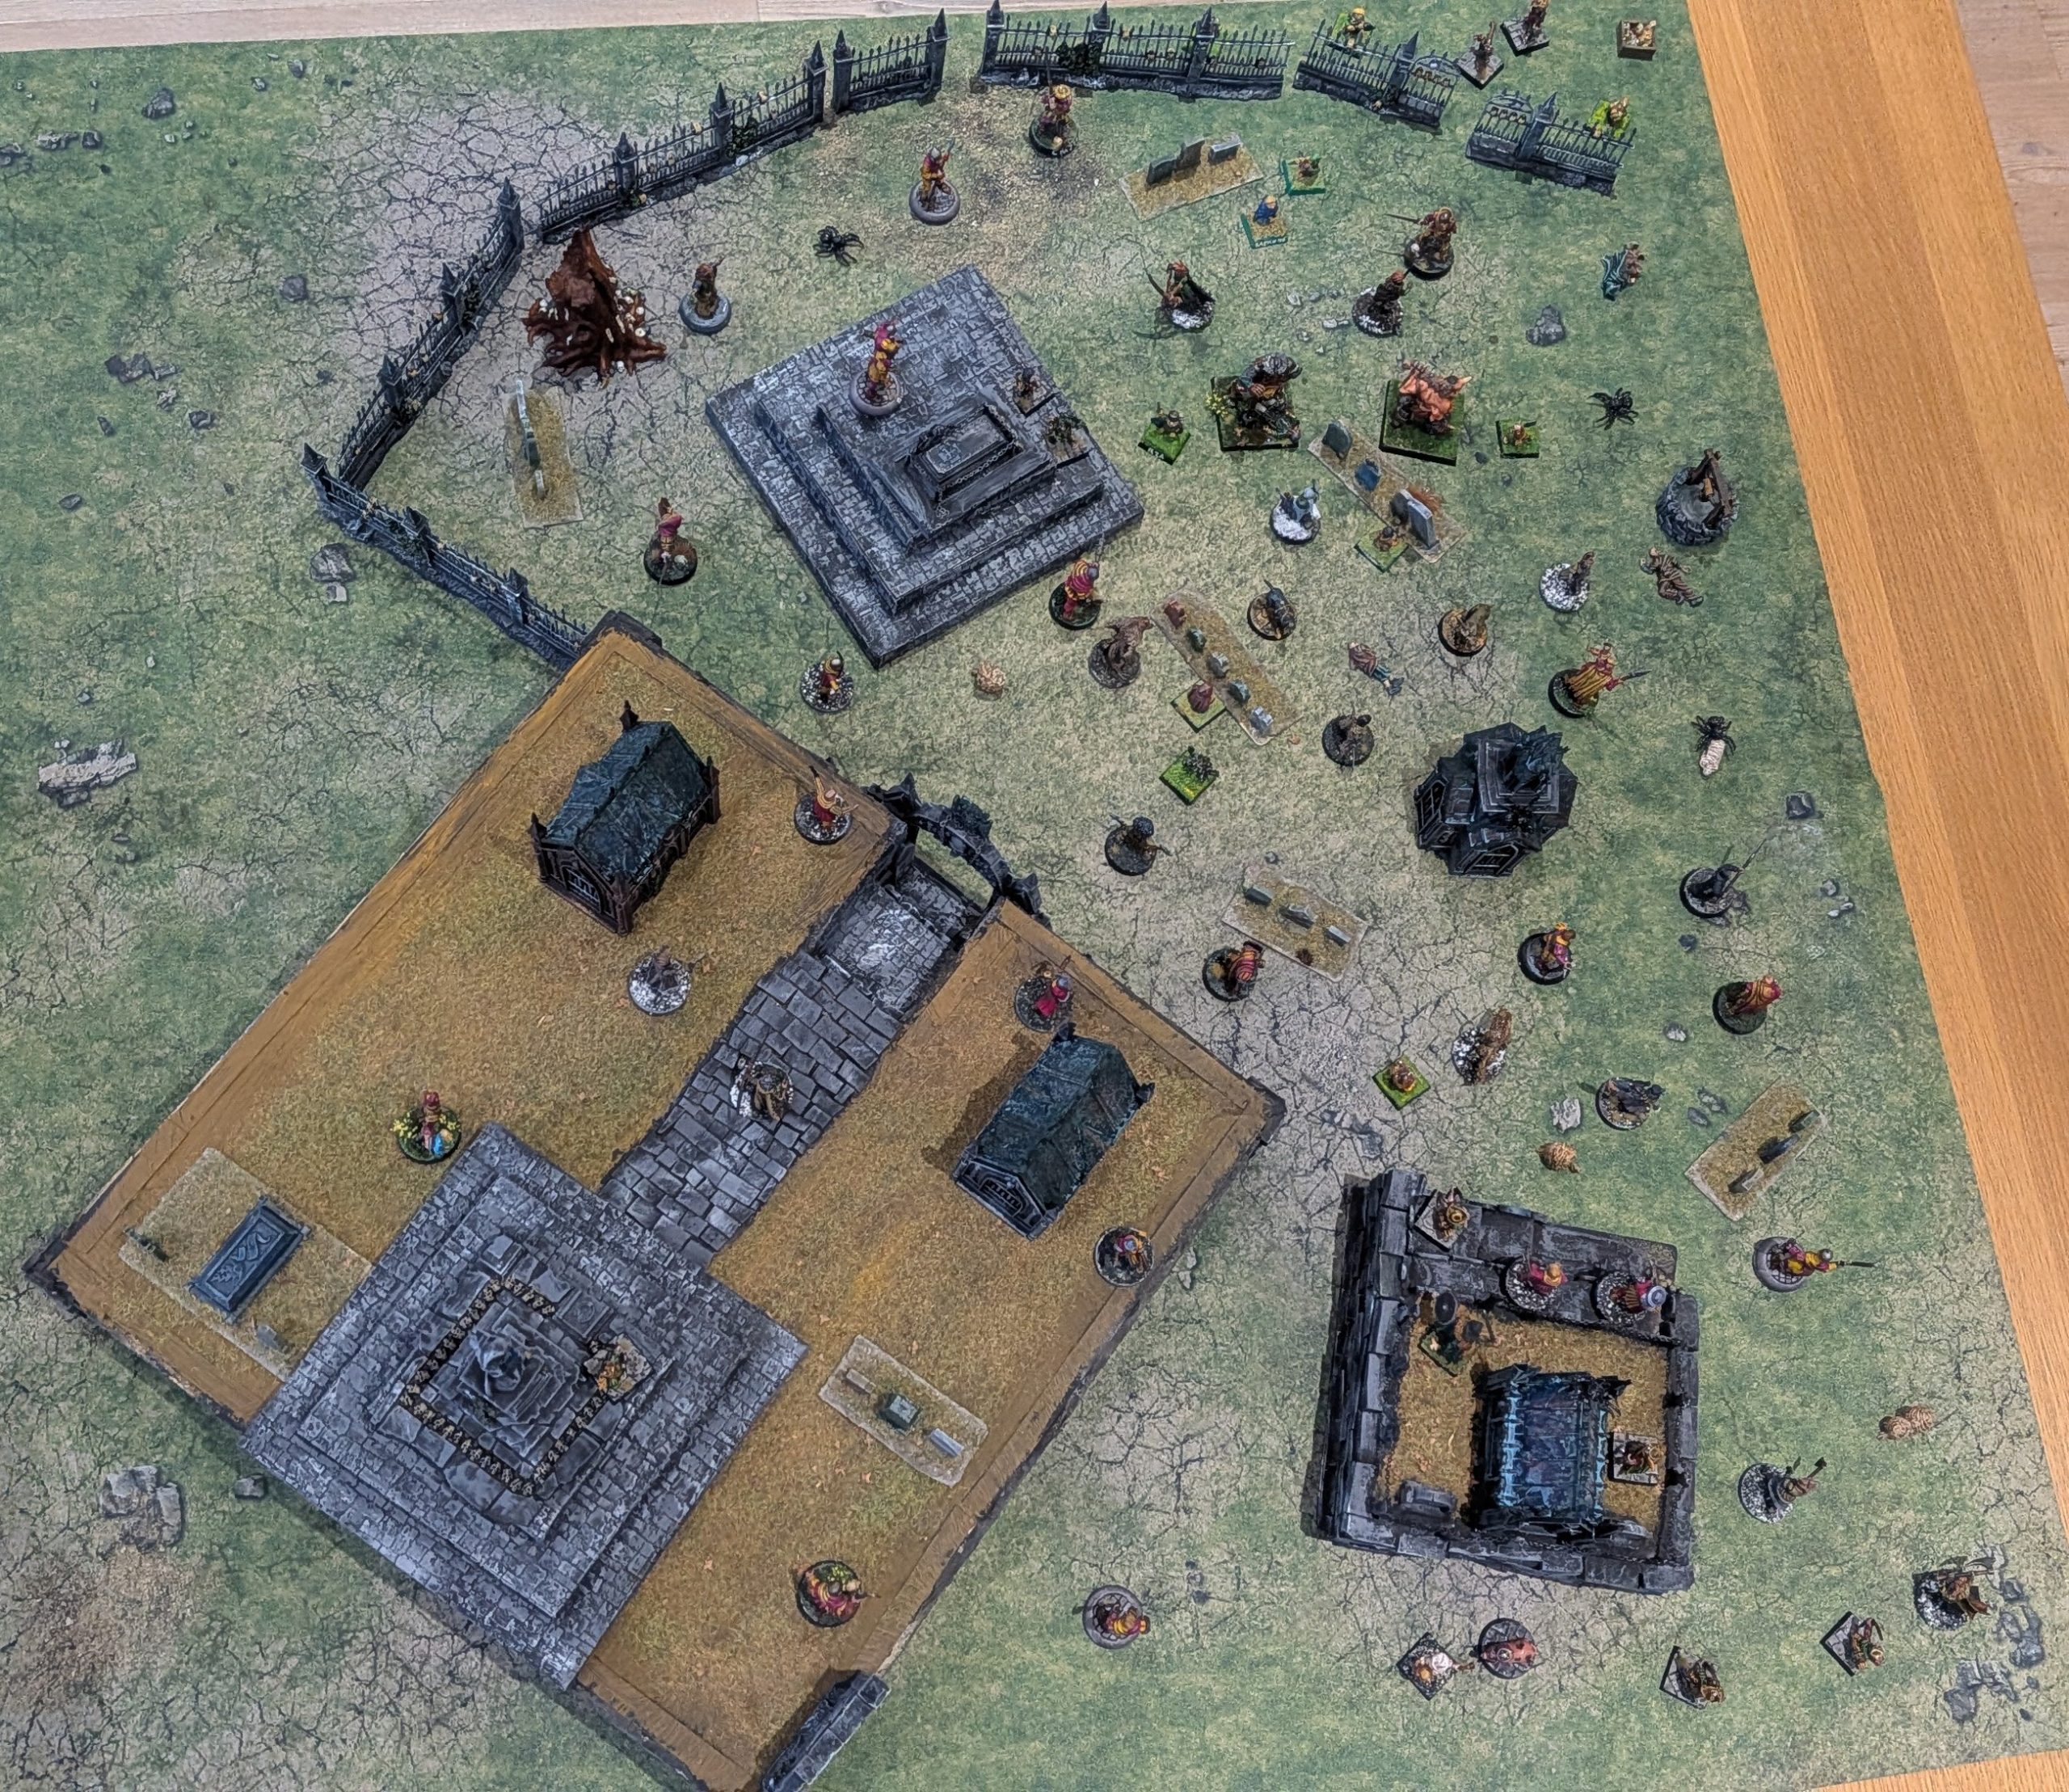
Unfortunately I was too in the moment to take any WIP shots, so here’s what it looks like complete. And, in lieu of a battle report, my daughter helped set up a few warbands to make it look populated.
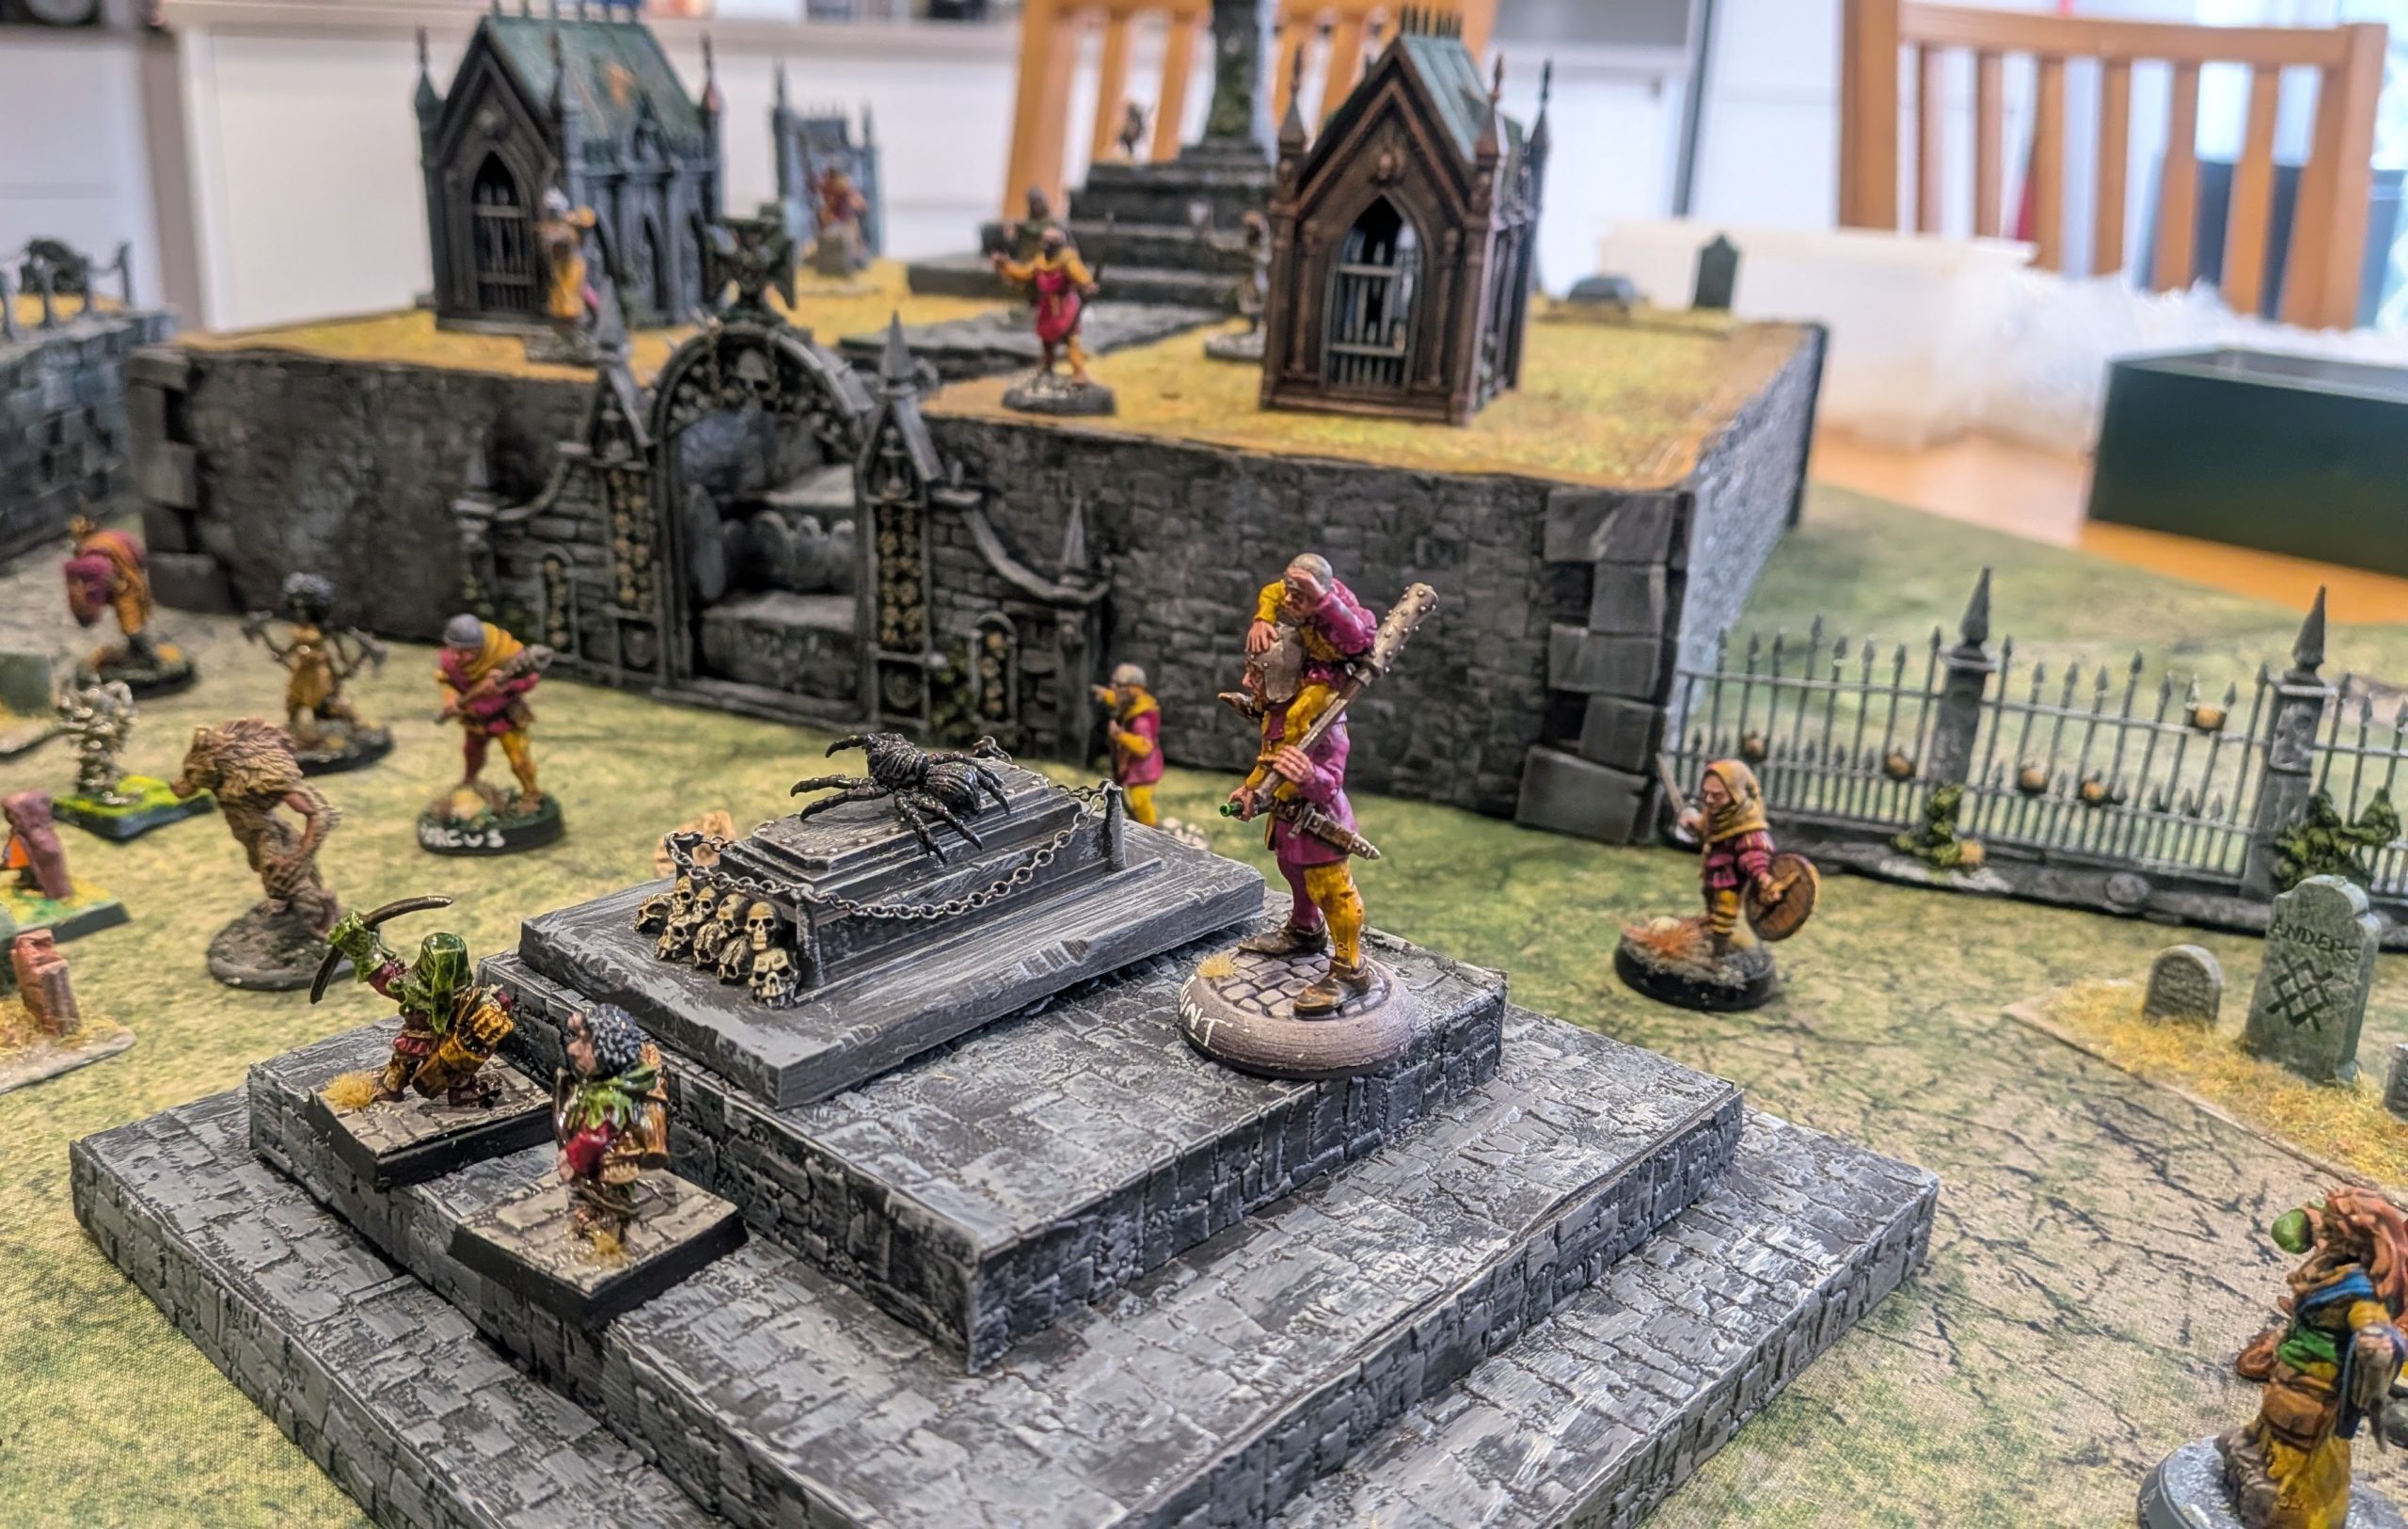

I won’t close the project as I intent to build another riser or two, and paint the rest of the Sigmarite Mausoleum set. There will even be a battle report.
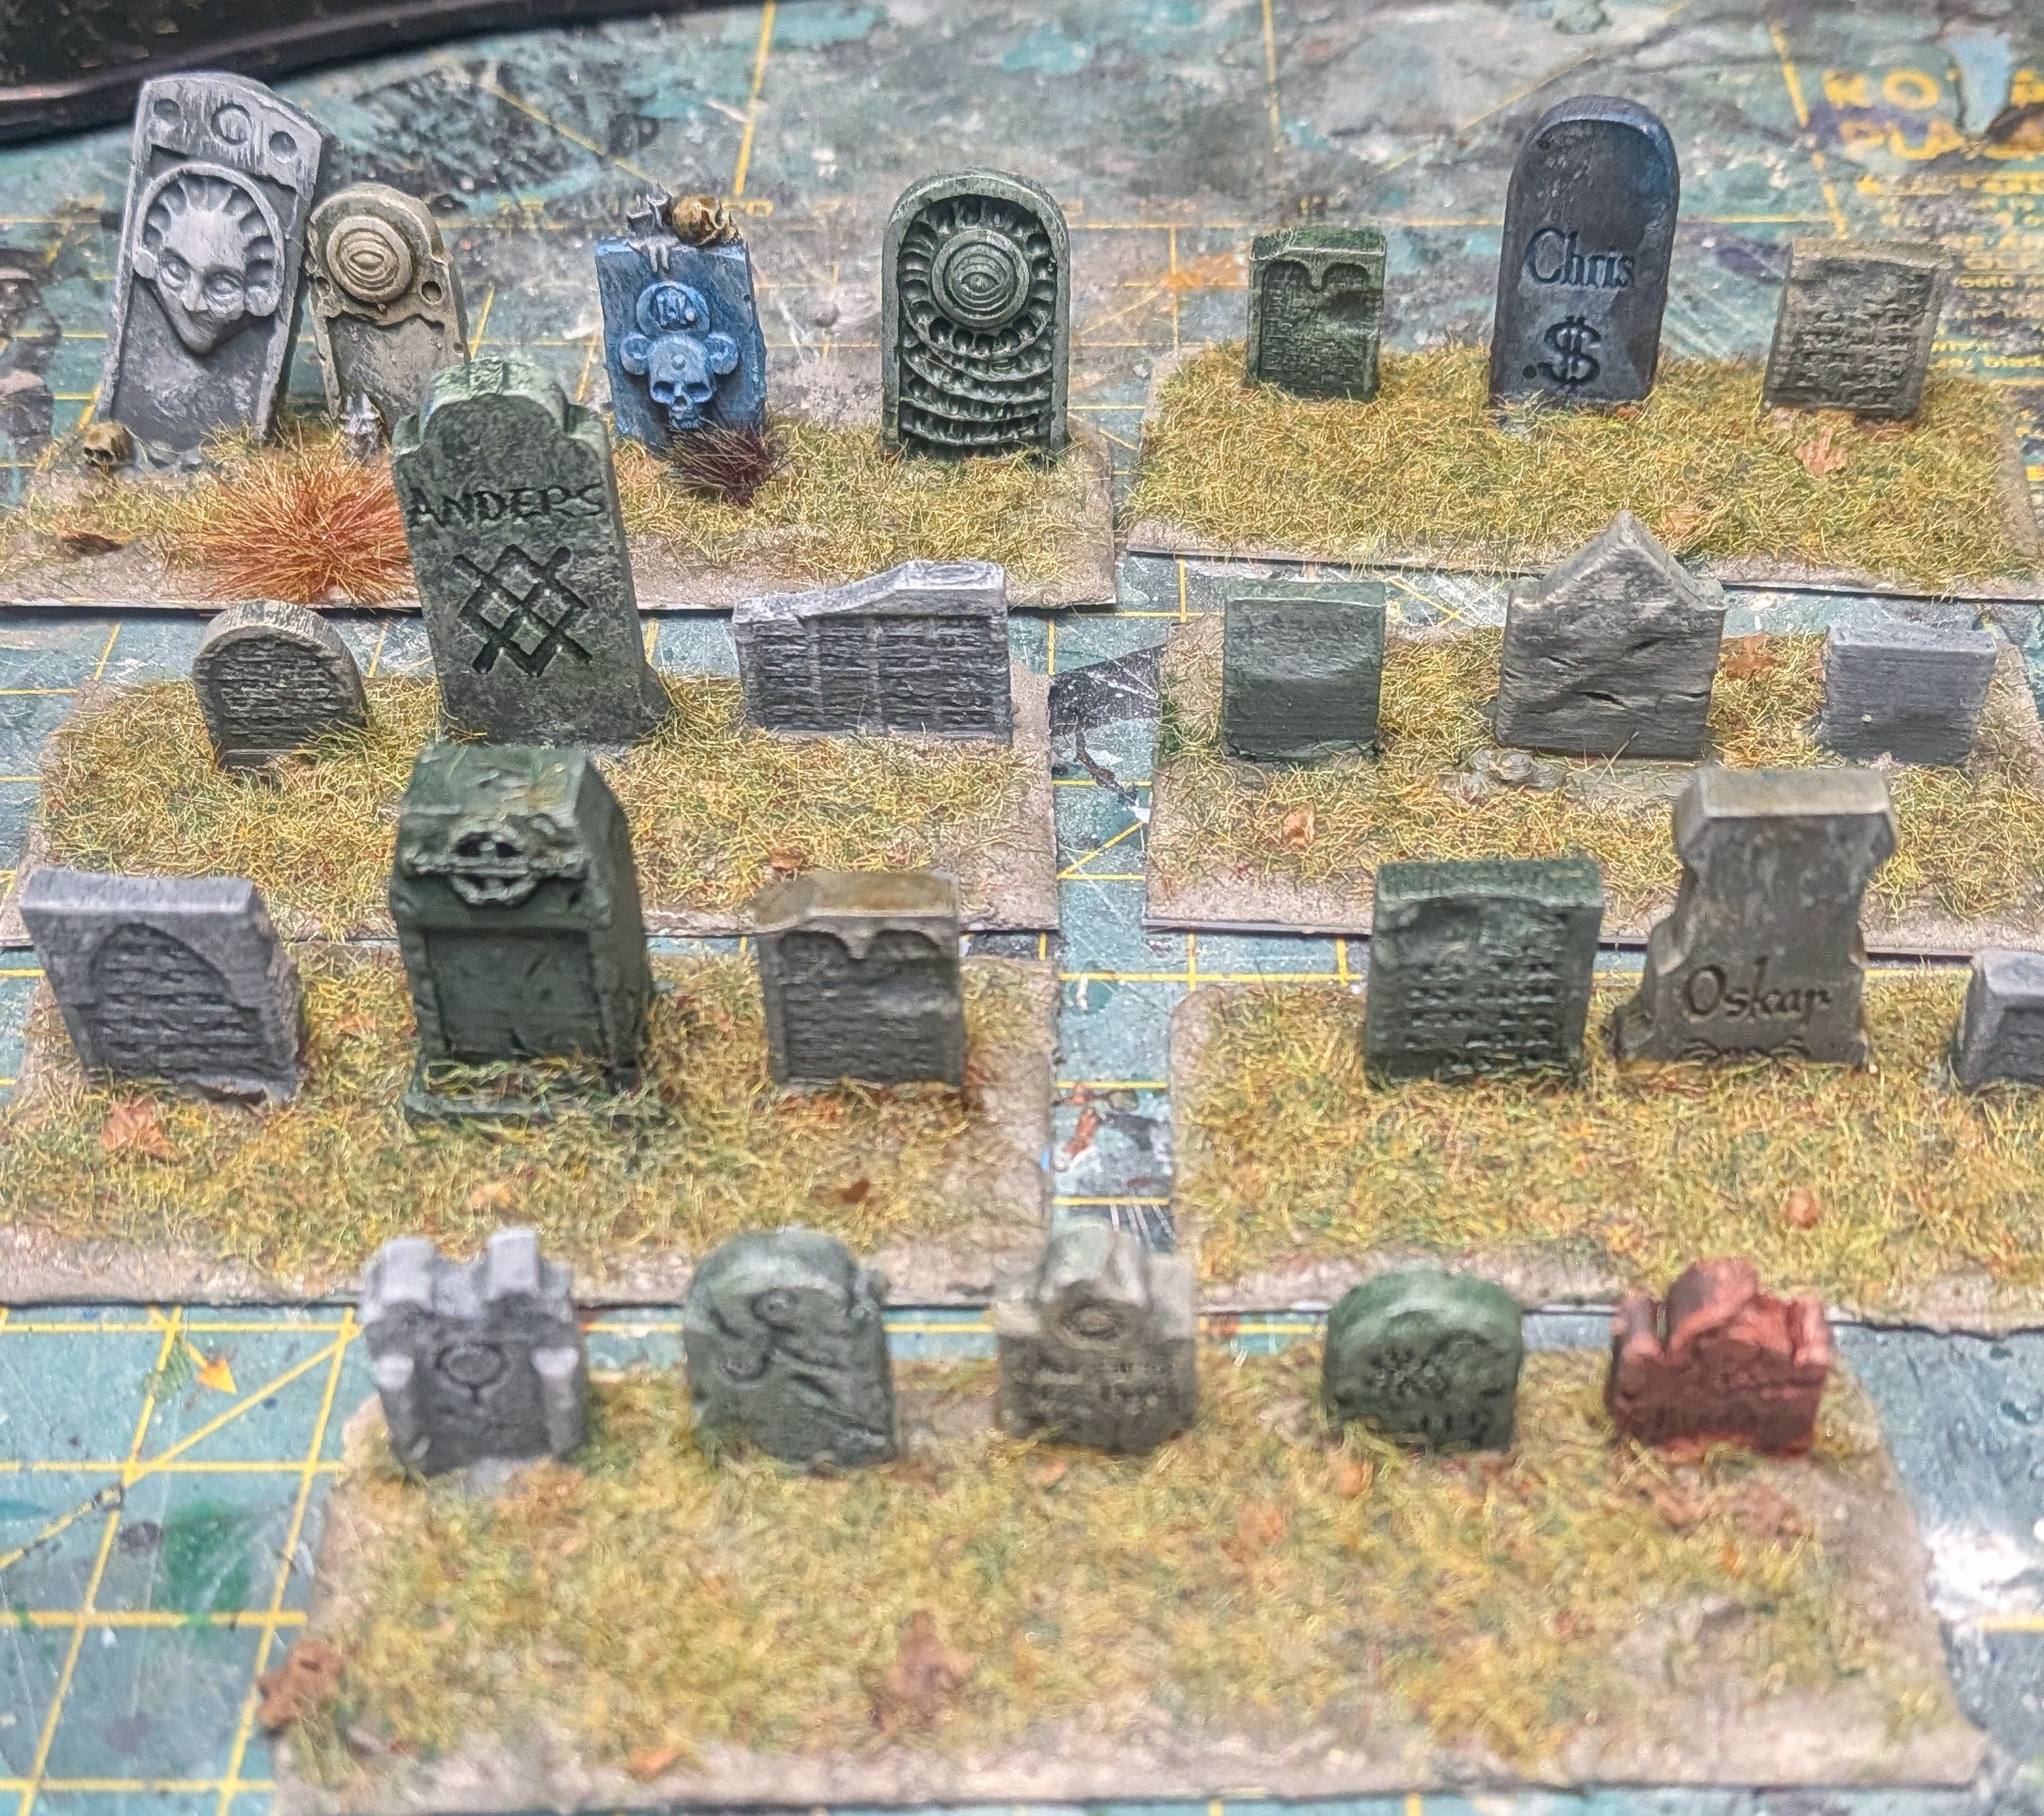
Tiny Headstones
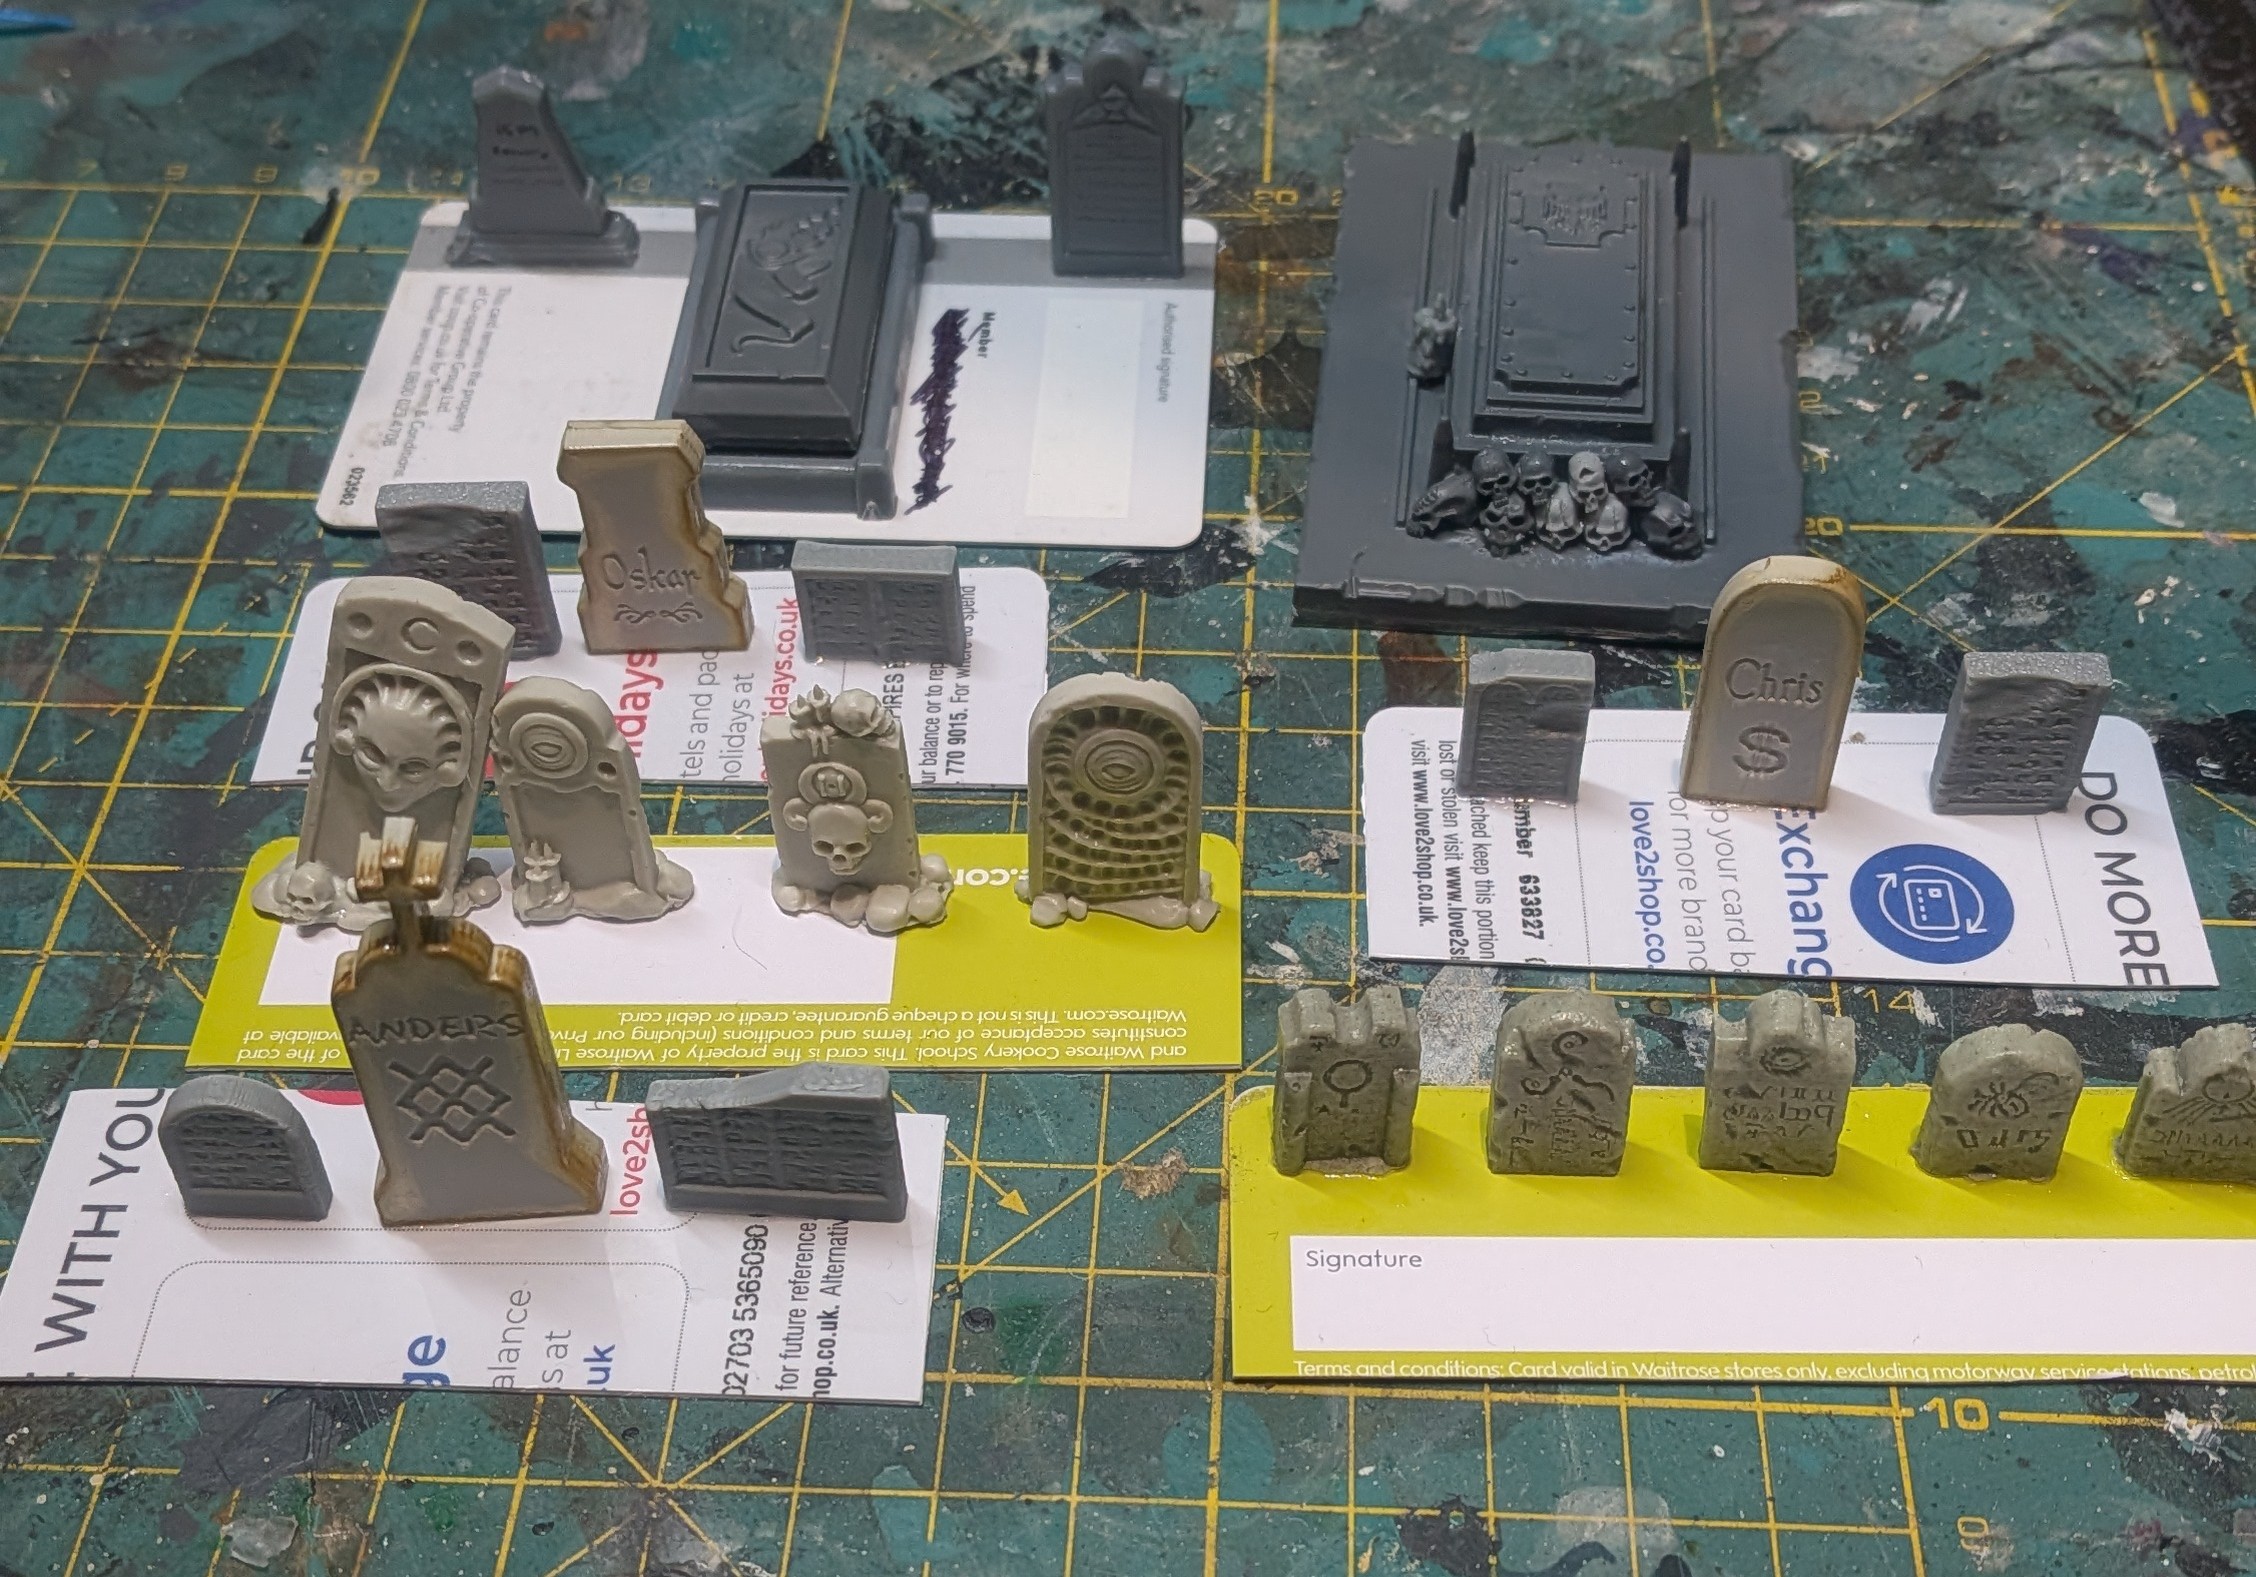
Time to create some cemetery appropriate scatter terrain: a bunch of head stones.
I started by cutting up some old loyalty cards into appropriate lengths and super gluing the head stones onto them. I decided to keep a couple of the manufacturers in their own rows (Fenris and Rotten Factory) as they definitely have their own style. I’m not convinced they would mix well together.
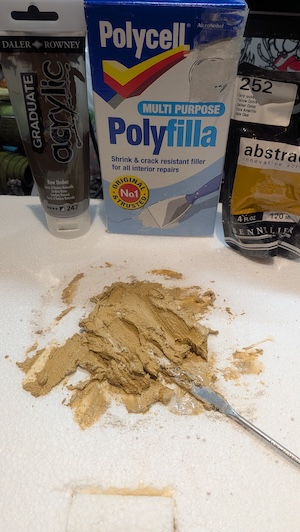
Next I added some polyfilla and paint mix to build up texture on the base. This broke off as soon as it was dry, I suppose the plastic base was too flexible. I cleaned that off, and tried again adding PVA glue to the mix. That seems to have worked better, but it’s not perfect.
I also primed the head stones, and dry brushed them with a lighter grey. A couple I picked out in a thinned down speed paint wash.
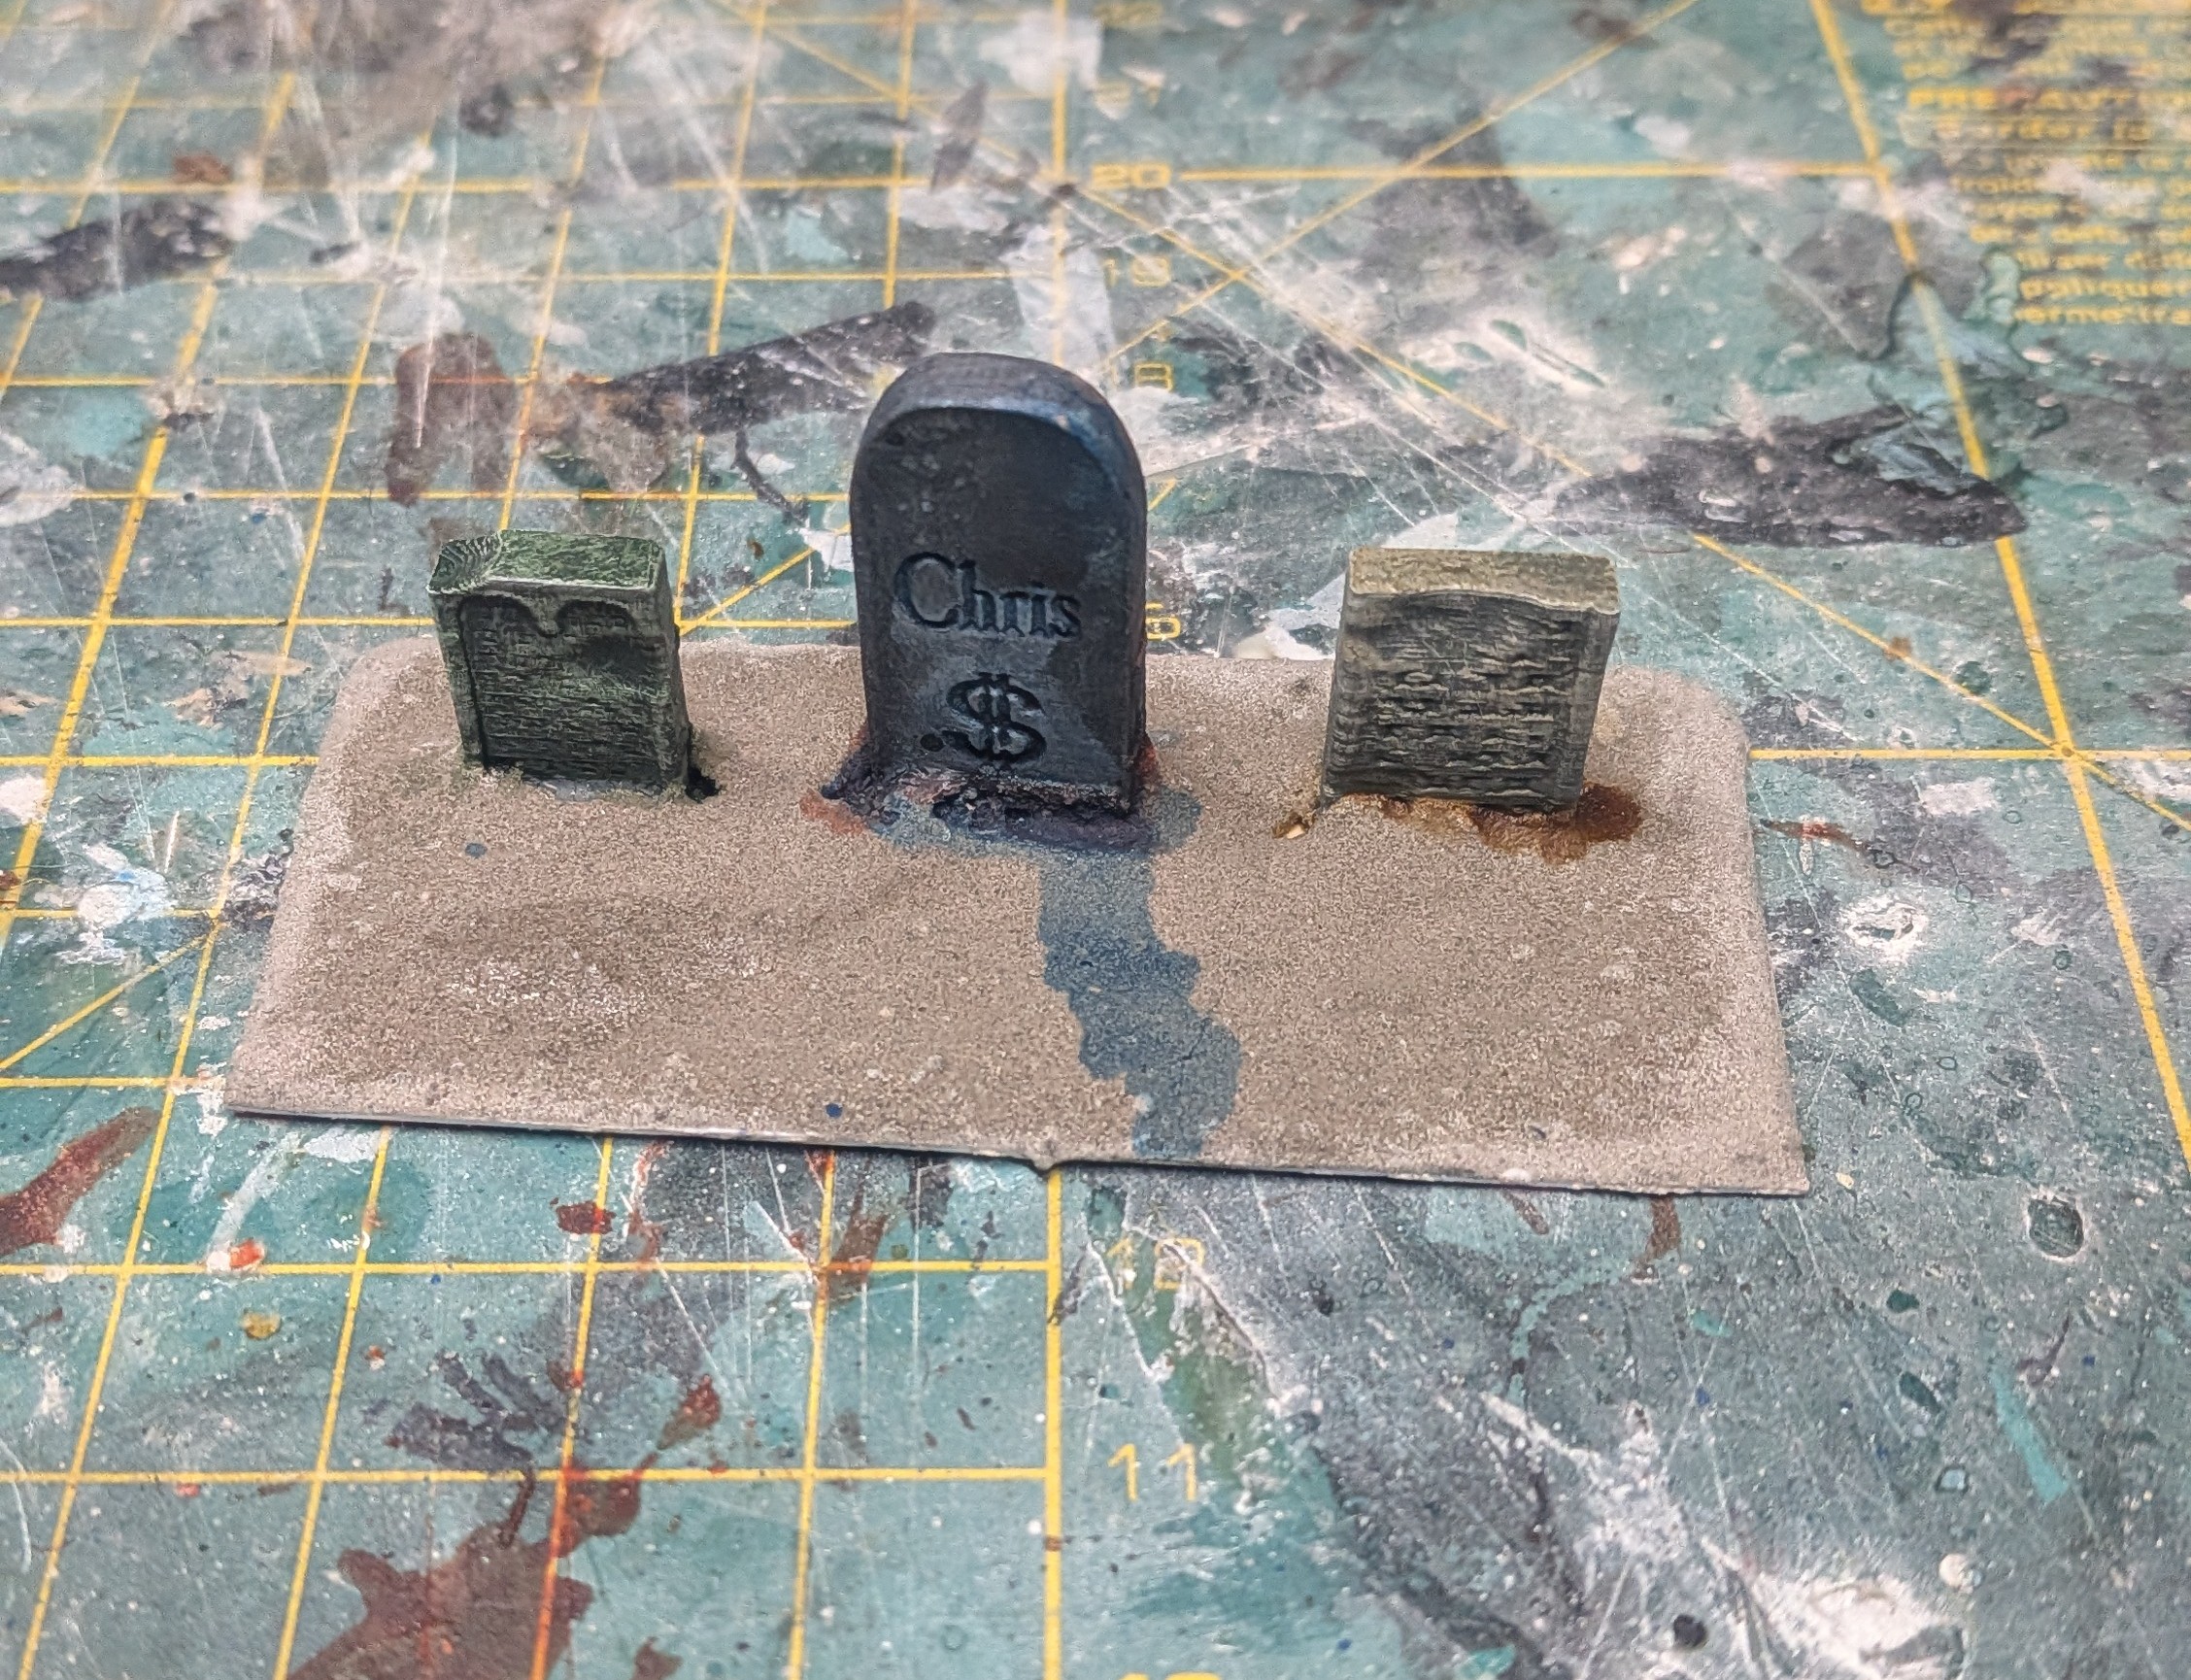
Next some PVA, static grass (a mix of Jarvis 2mm summer and autumn) some birch seeds for leaves was piled on.
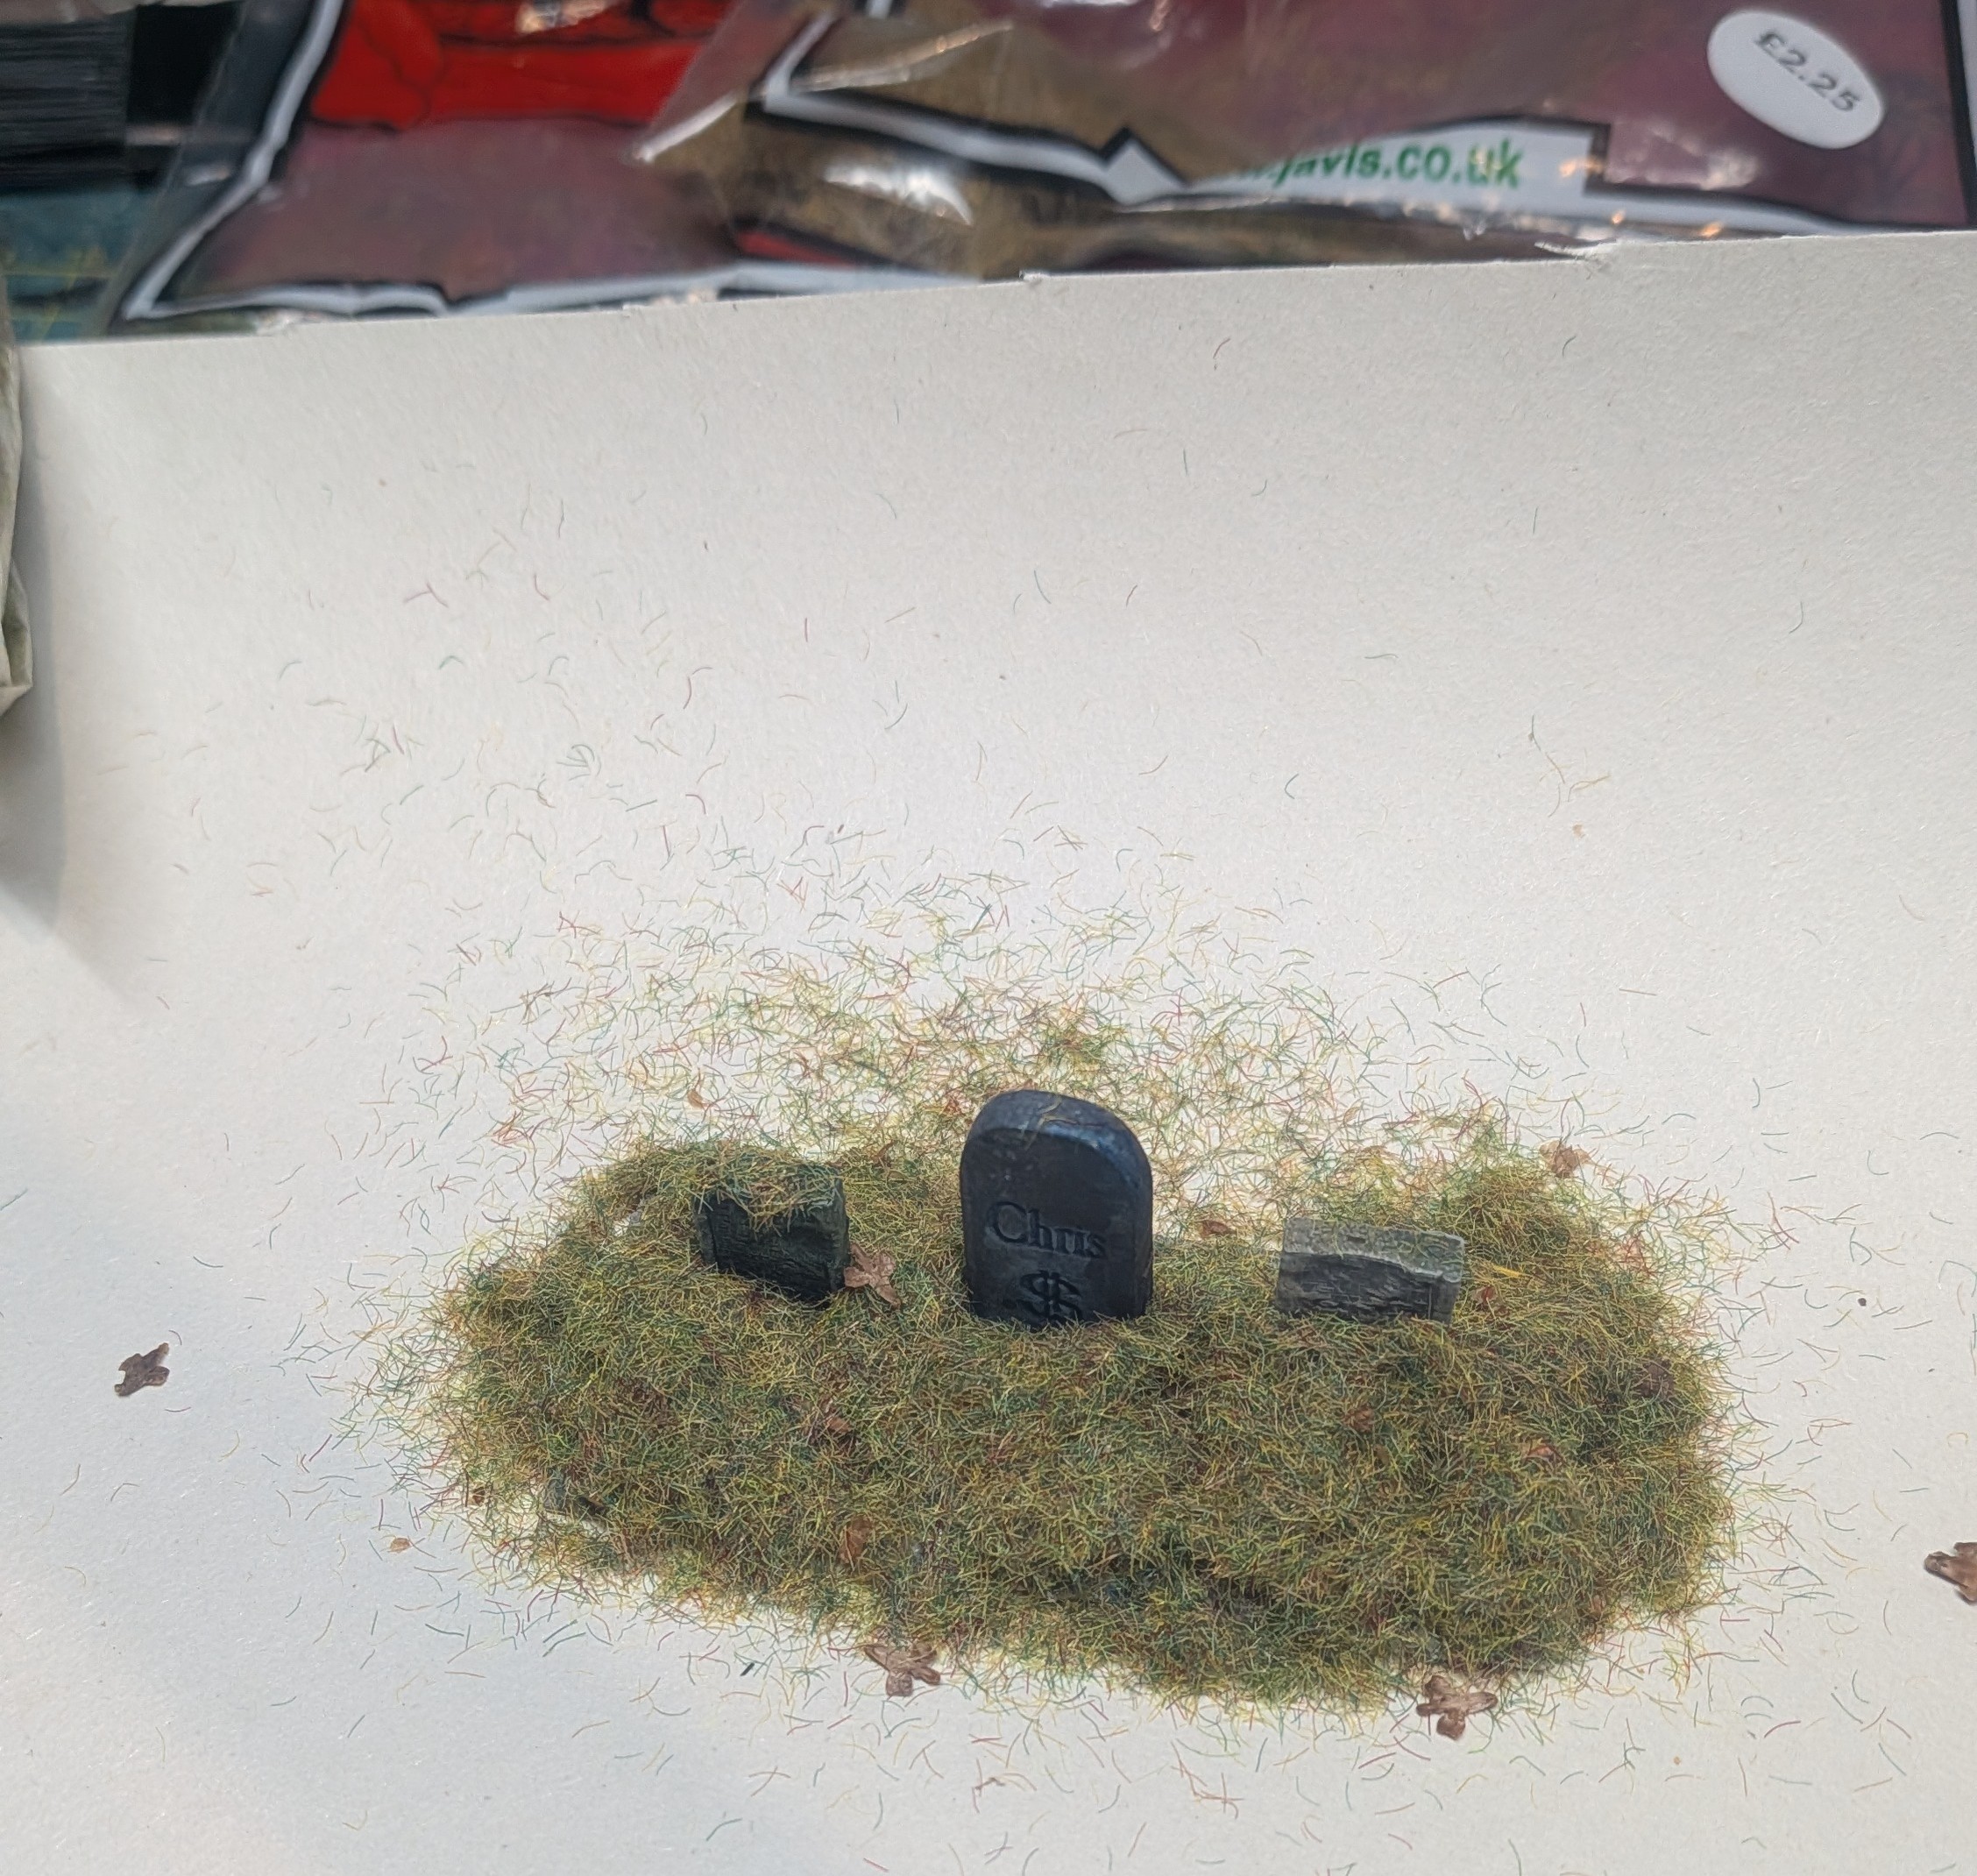
All done.
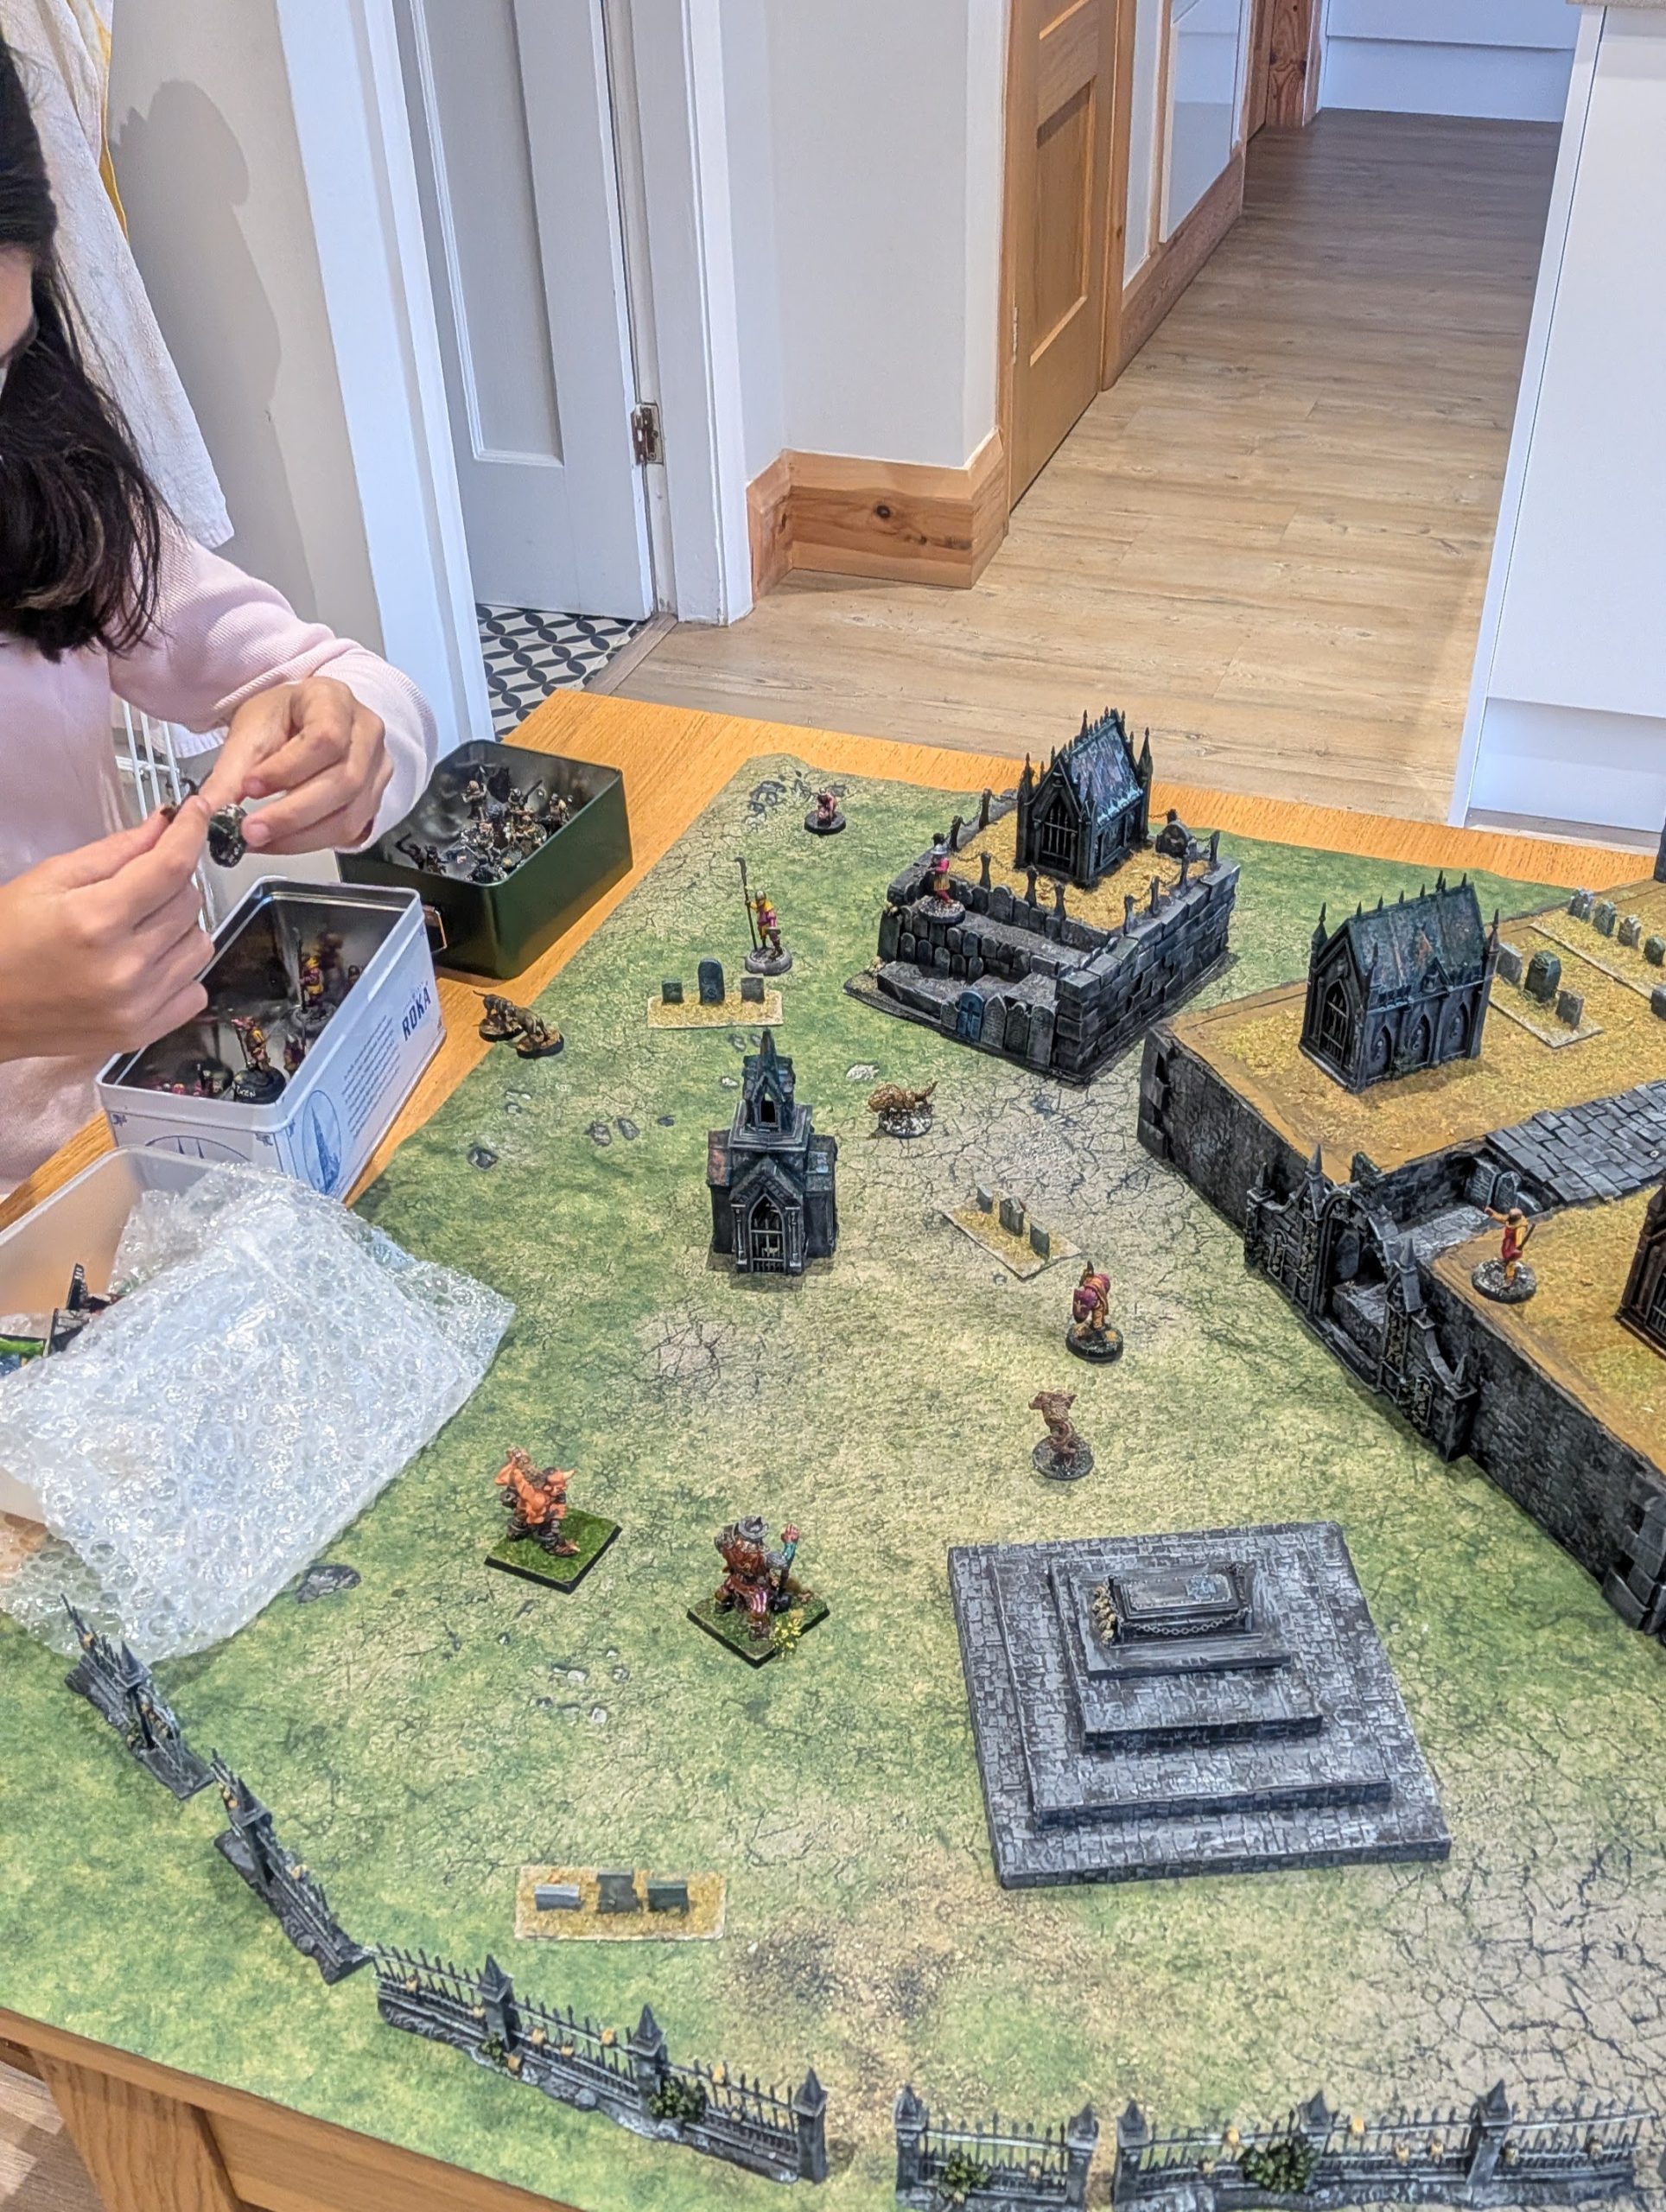
Rising the dead
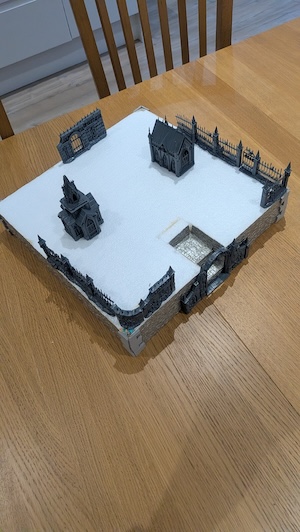
When we play Mordheim at the club, it’s essential to have a number of the ruined buildings raised up on risers. So I’m going to make a number of risers for the graveyard too. The plan is for 2 bigger risers (as I have two squares of polystyrene packaging) and a number of smaller ‘ziggurats’ made from foam core.
I won’t attach the various statues, mausoleums and gravestones to these for a couple of reasons. Primarily, it’ll help with storage (the bits projecting from the surface of the riser will likely get damaged or broken off) but also it will aid with modularity.
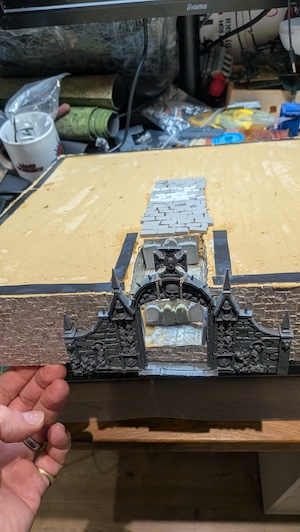
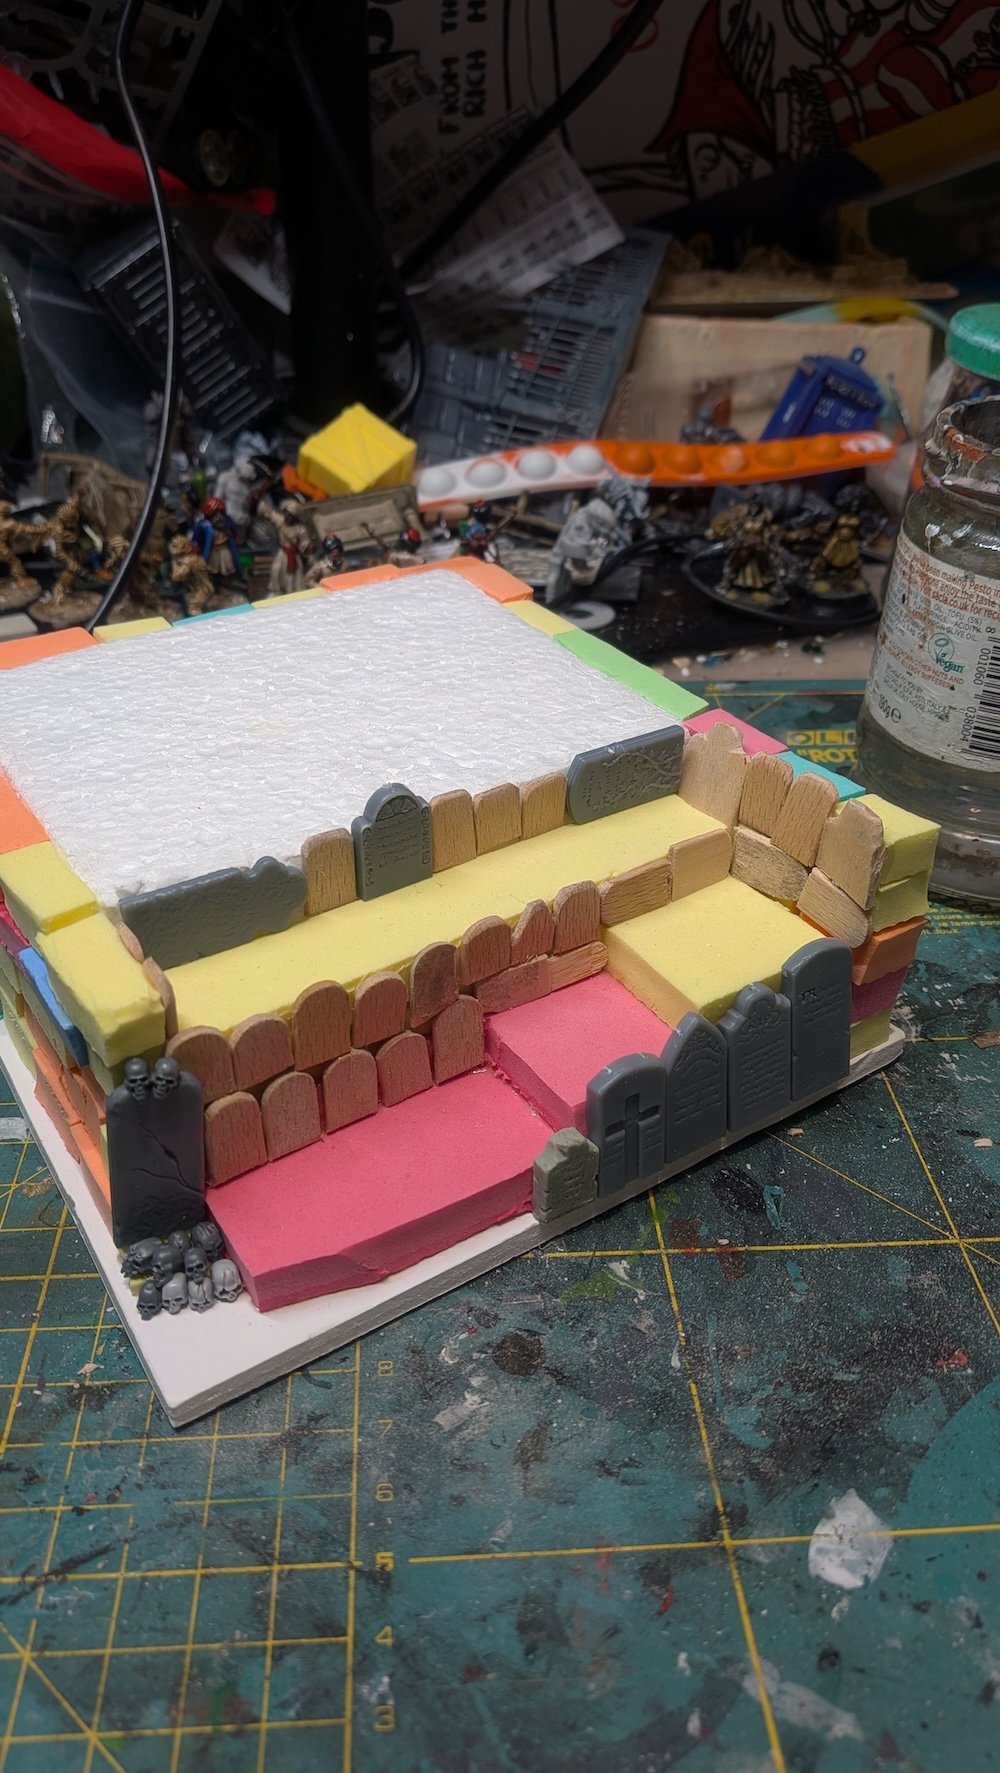
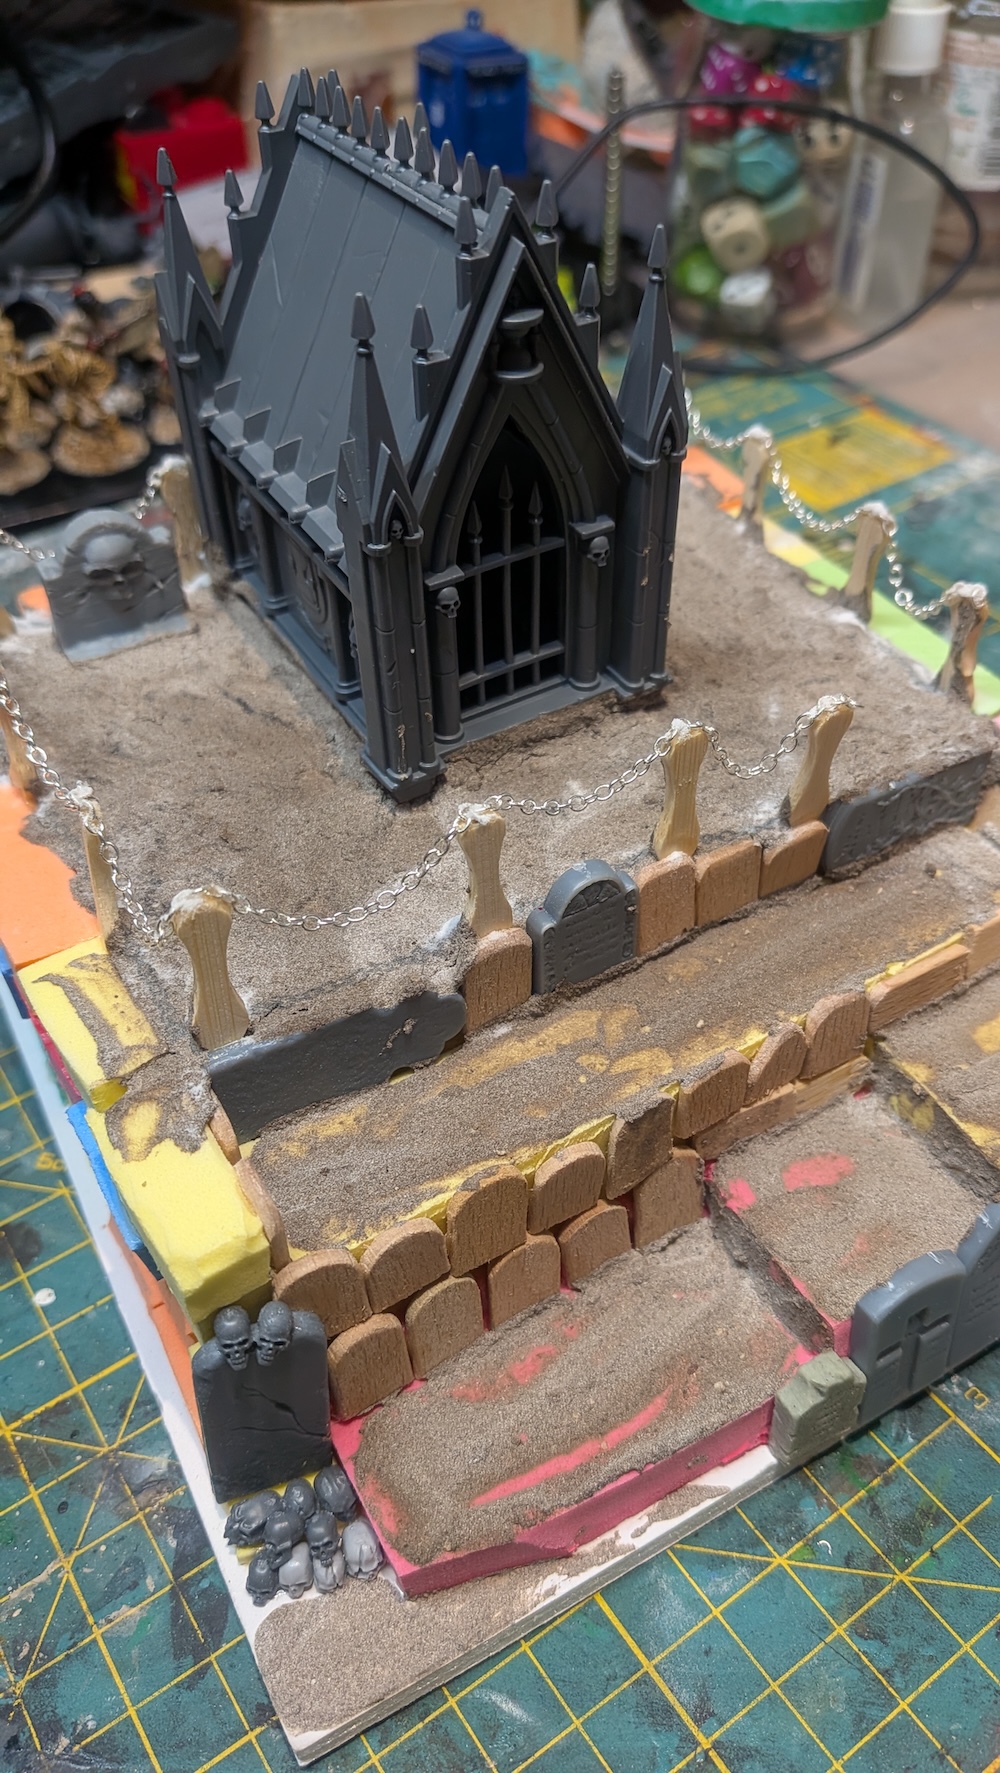
I decided to make the stairs to the first bigger riser fixed and cut out a section from the centre of one edge. I flipped the piece that I removed and glued it back into the space, to form the basis of the stairs.
The next step was to add some stone texture to the sides. Frankly I haven’t the patience to cut out and glue hundreds of bricks from eva foam, so I used lengths of textured wallpaper. I did resort to some thin eva foam (some more recycled elephant masks) for the corner stones to disguise the gaps left where strips of paper met.
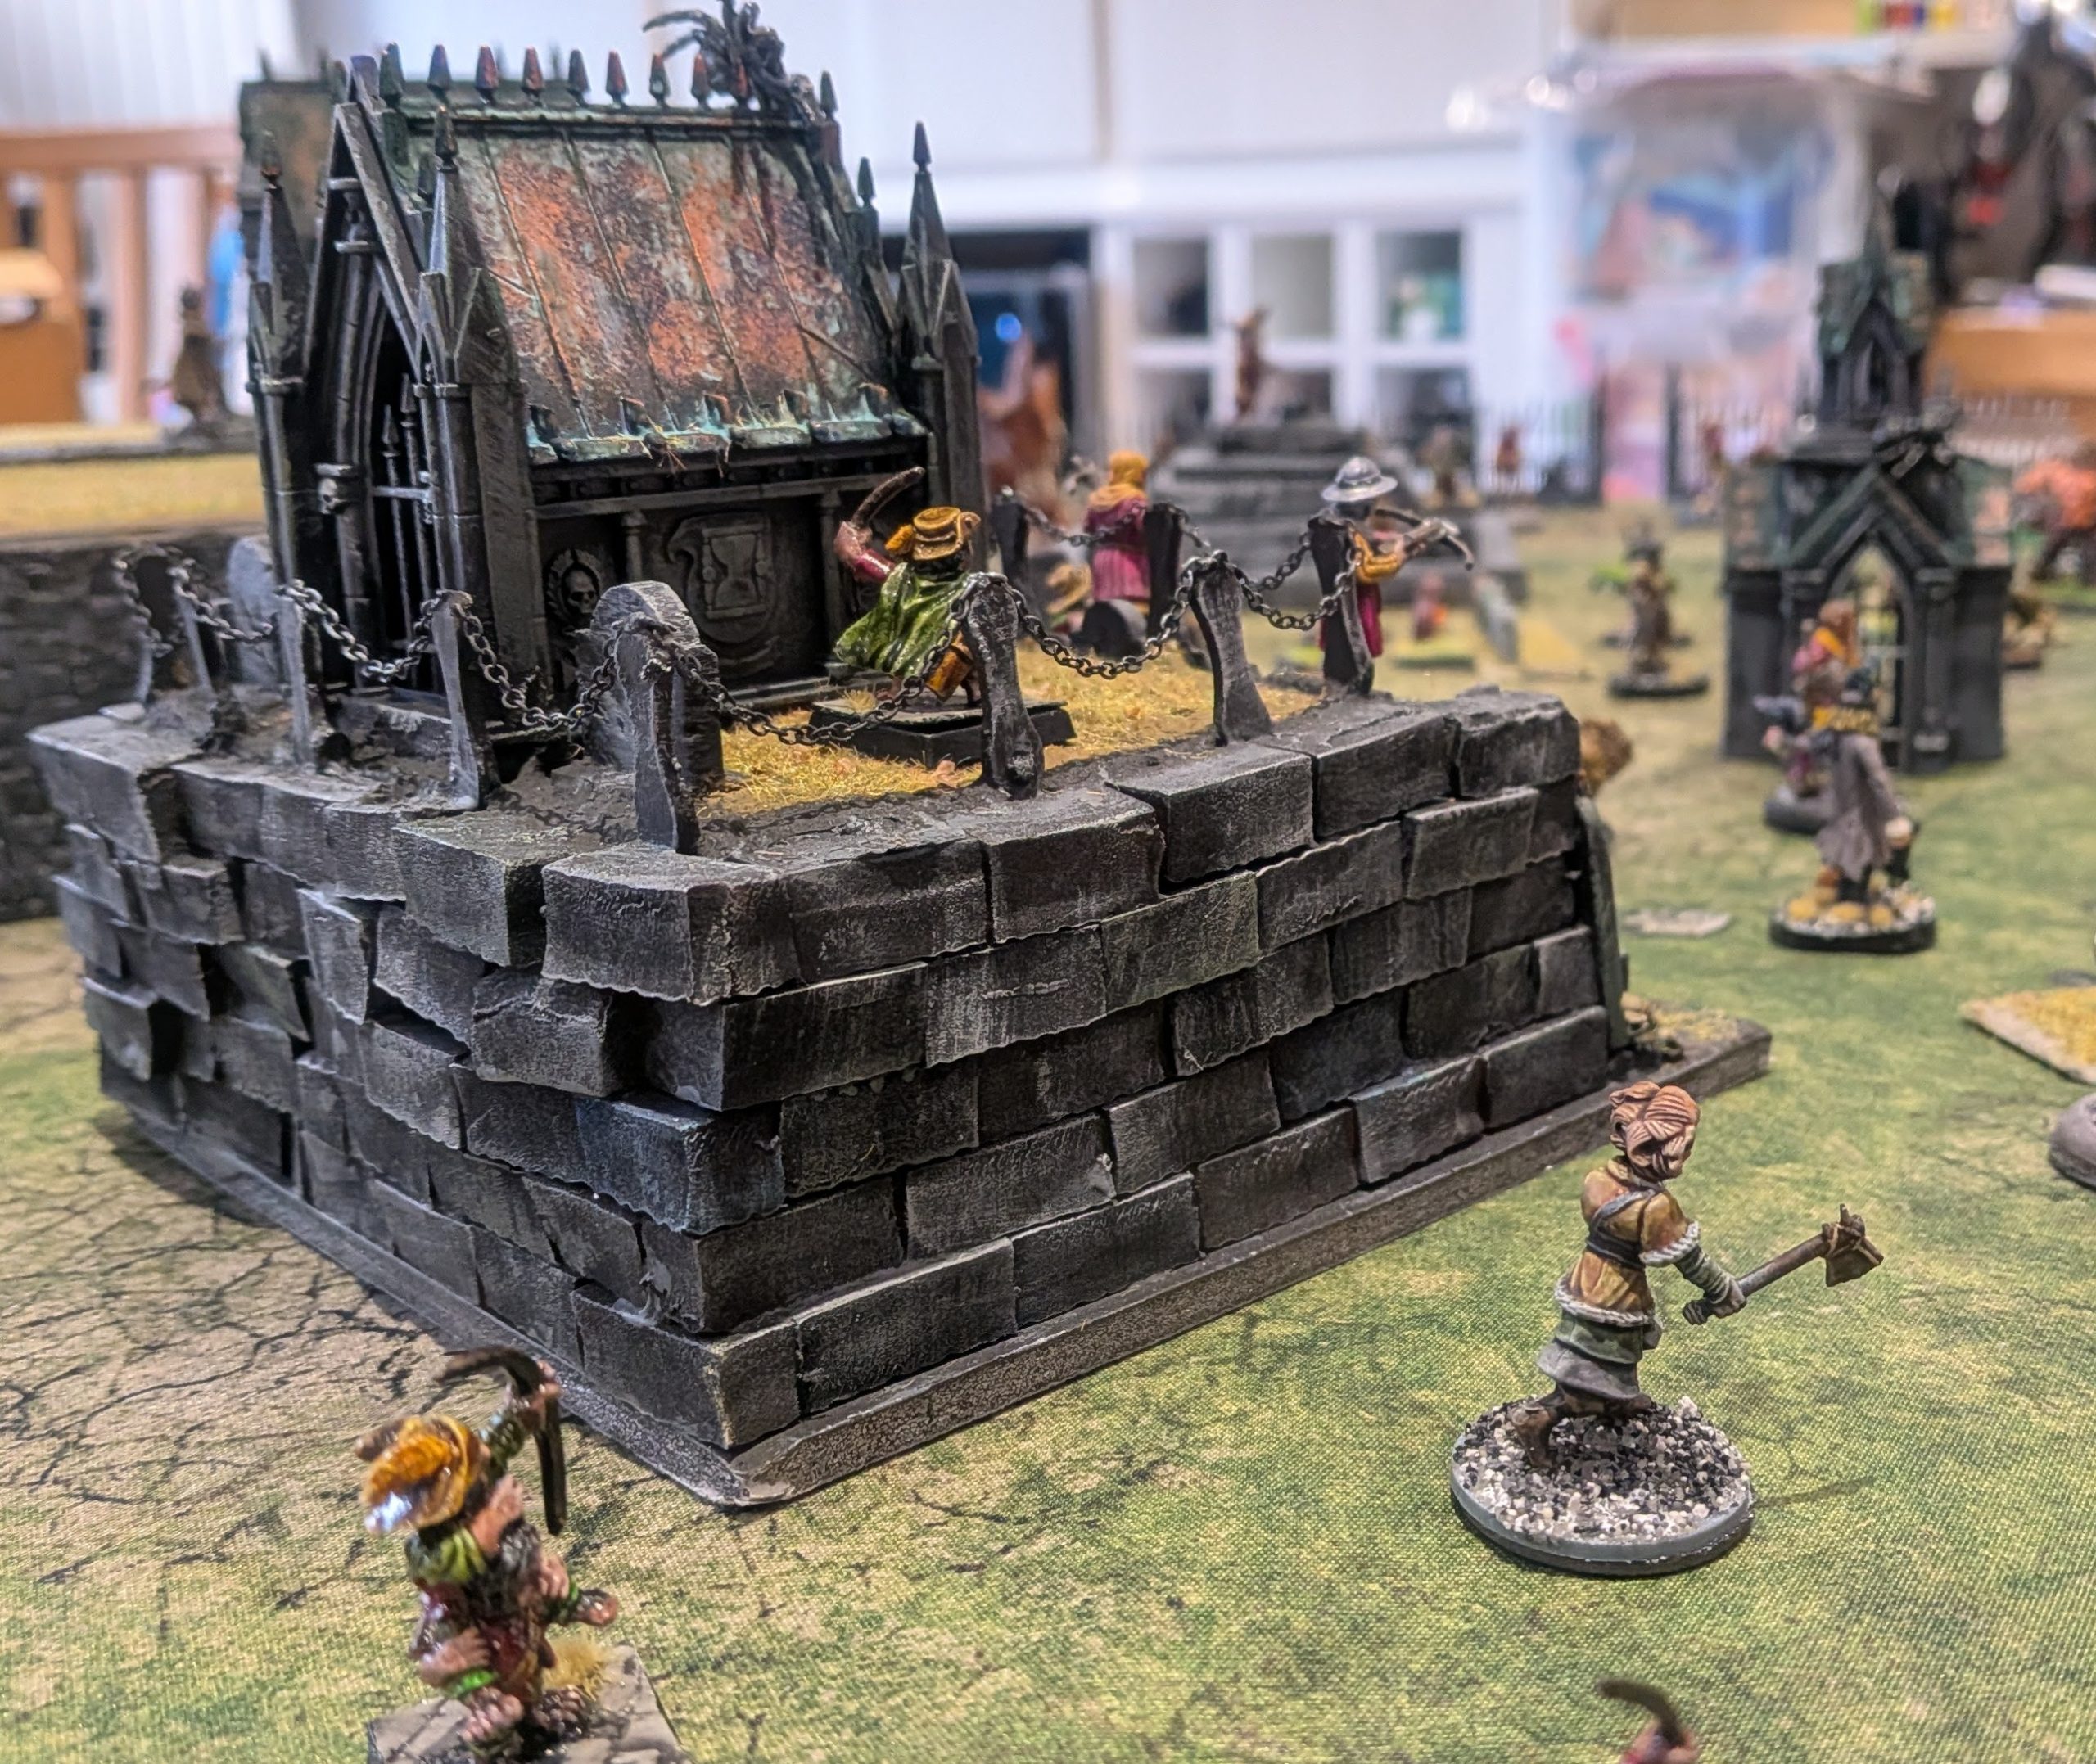
I decided the entrance to the steps needed to be decorated, and found that I’d fluked cutting a gap that matched the space for the gateway section of the GW kit. I hot glued this into place. It comes with a cross over the archway, which is the kind of thing that may get knocked off, so I wrapped a length of chain around the base a couple of times and super glued that into place in an attempt to add some strength. I delimited the steps themselves with more gravestones.
At this stage I dry fitted a few fence sections and mausoleums to see what everything looked like : pretty good. Although I noted they would easily get knocked off.
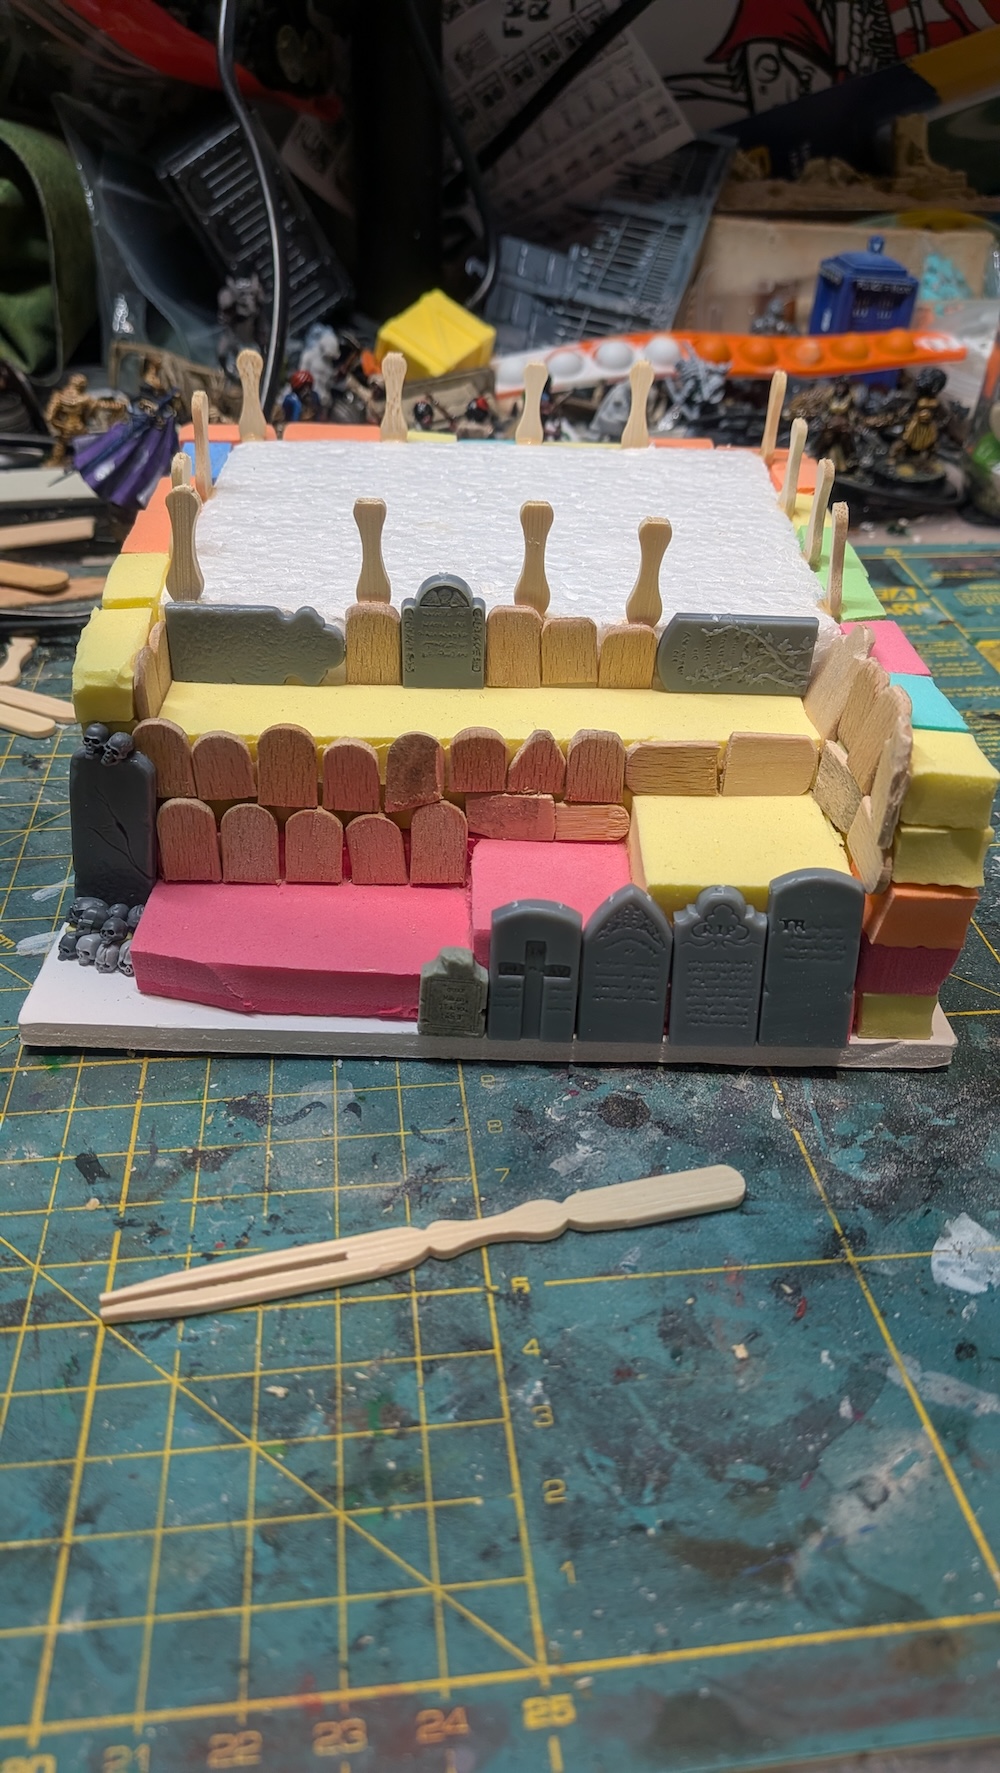
The surface of the riser needed some texture now, so I used powdered polyfilla and craft store acrylic mixed directly on the riser, then spread out. I then decided that I somehow needed to magnetise the fences, as they would easily fall off the riser. I experimented with hot gluing pins along every edge, but that was pretty hopeless. I picked that off and went for some magnetic sheet cut into strips. It’s the kind of stuff you’re meant to print photos onto to stick on fridges (I imagine) and not very strong. I bought it in error, to use for magnetising my bases and it’s been hanging around for a year or two. I’m not convinced it will work here, but let’s see.
I also added more thin eva foam (more party bag masks) cut up and glued with PVA to make a path at the top of the stairs.
The ziggurats are three steps high. Each layer is made up of two sheets of foam board glued together, and slightly smaller than the last. I didn’t really plan the sizes, just played around with what seemed right and would give a step wide enough for a figure to stand on. Each of the layers has a textured wallpaper covering.
Finding my feet
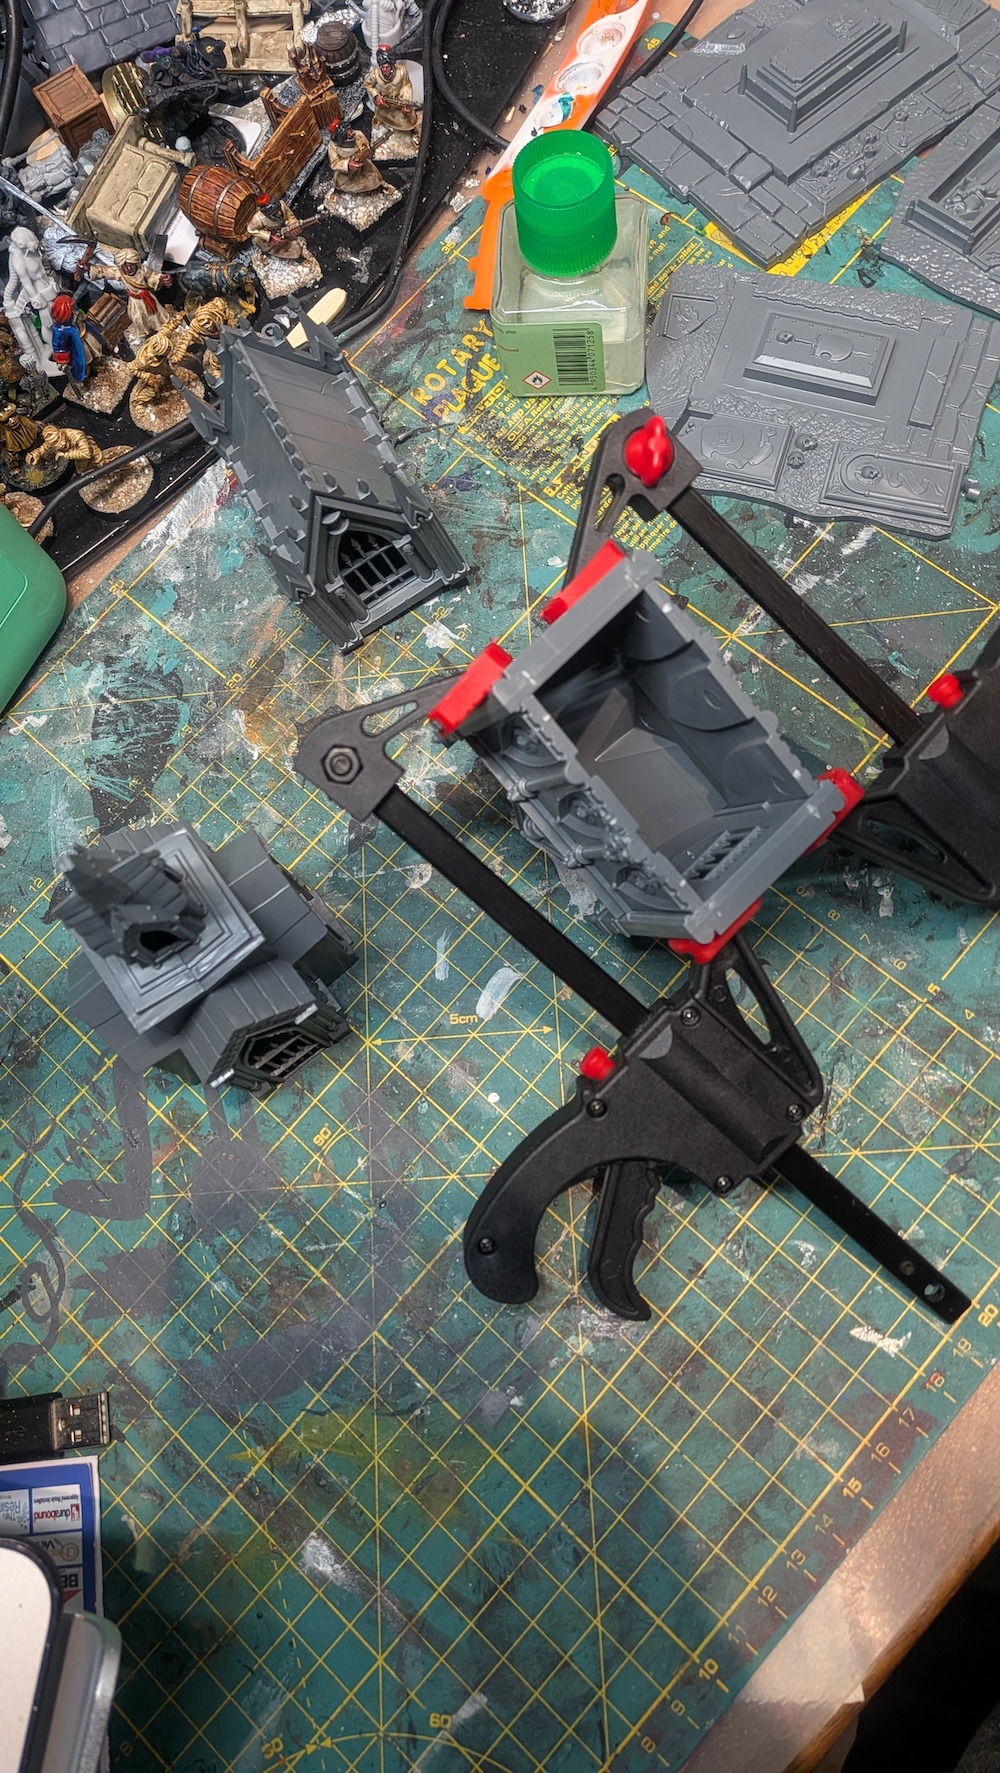
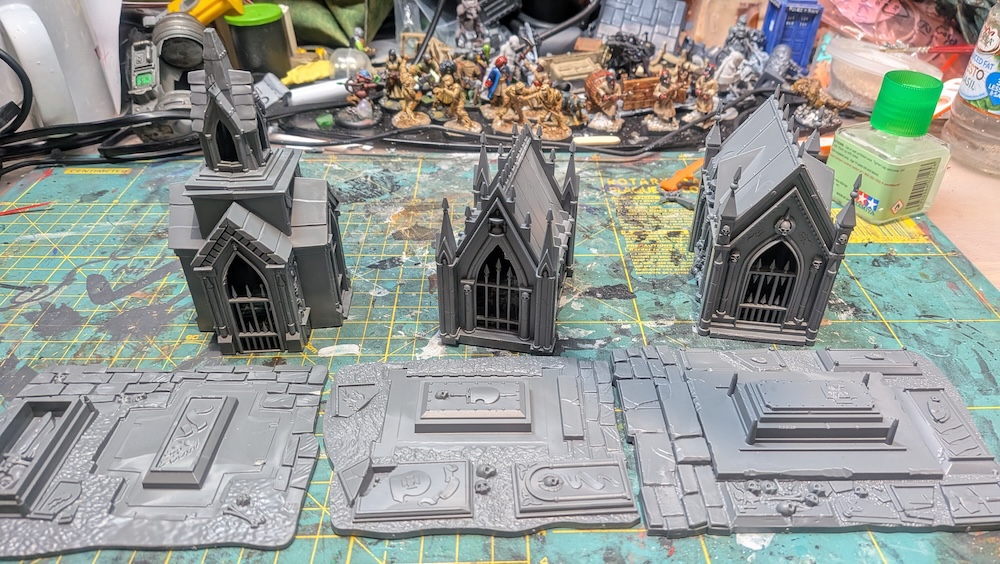
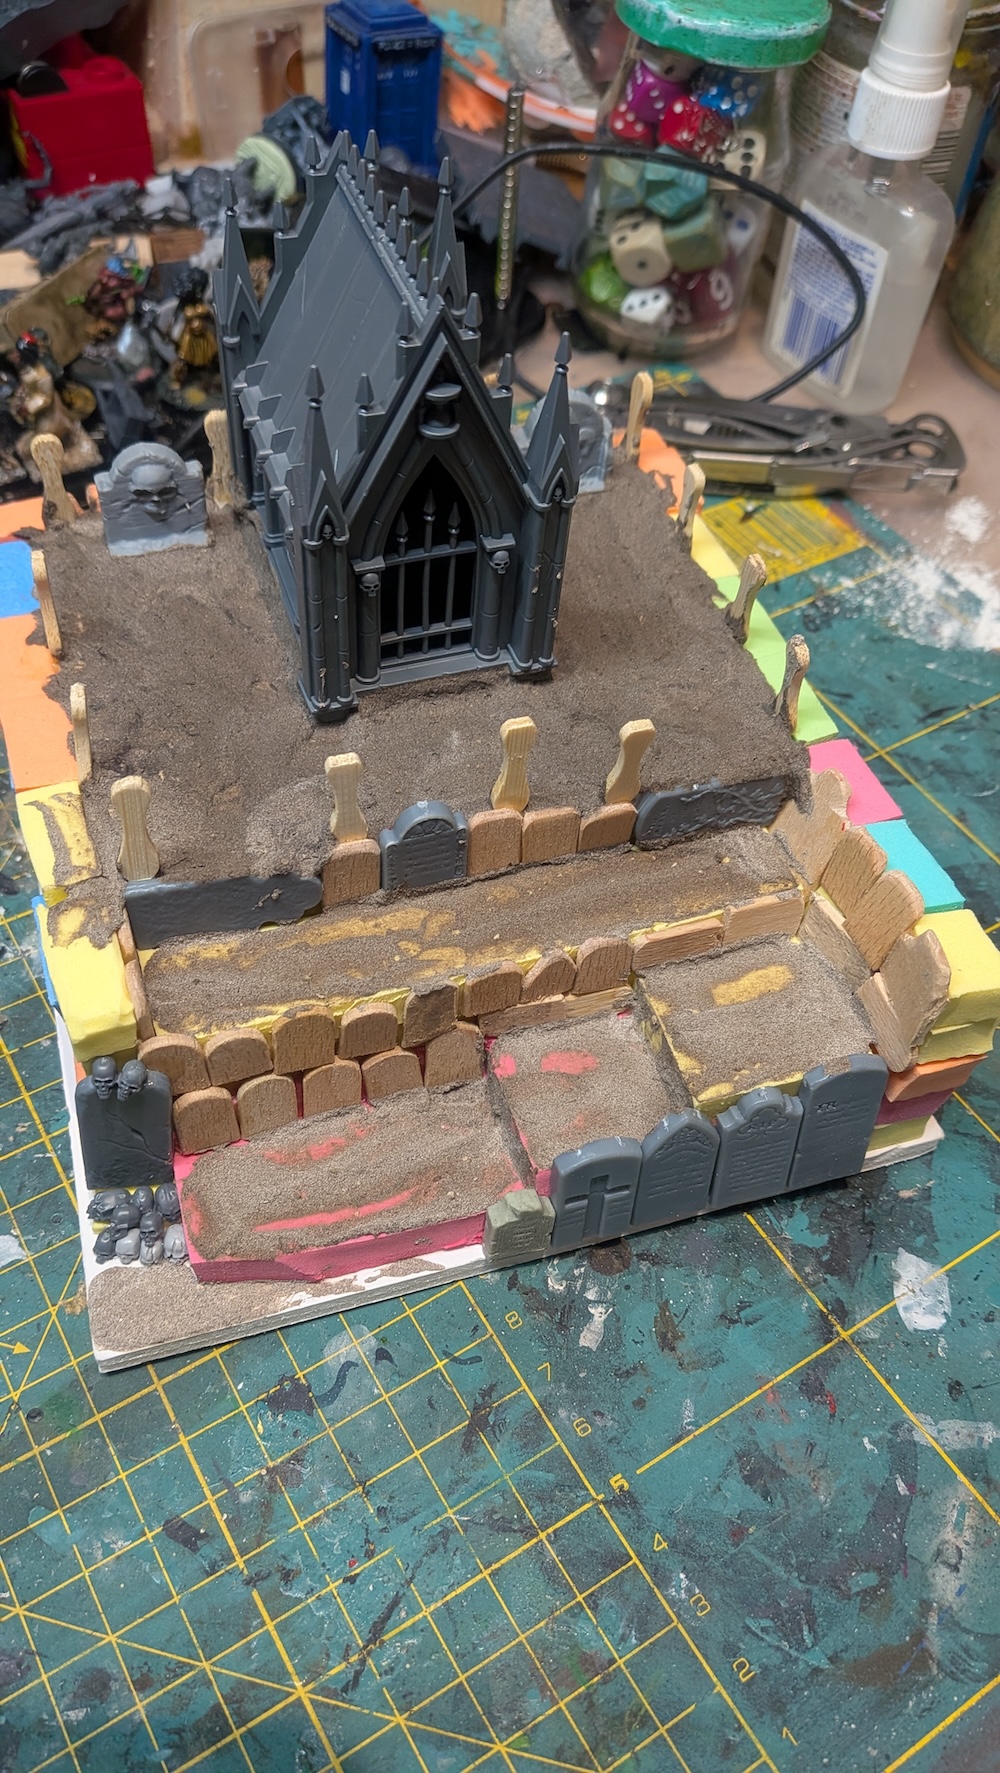
I started by building some of the buildings in the Sigmarite Mausoleum set. As far as I can tell they come in 3 designs, so I build one of each. I decided not to use the bottom of each as they contain useful looking tomb stones that I could harvest for use elsewhere.
So, as there was no foundations for the buildings, I used plastic cement rather than superglue, to give me time to adjust the joints. I also had to break out the clamps to hold the parts in place while the cement dried.
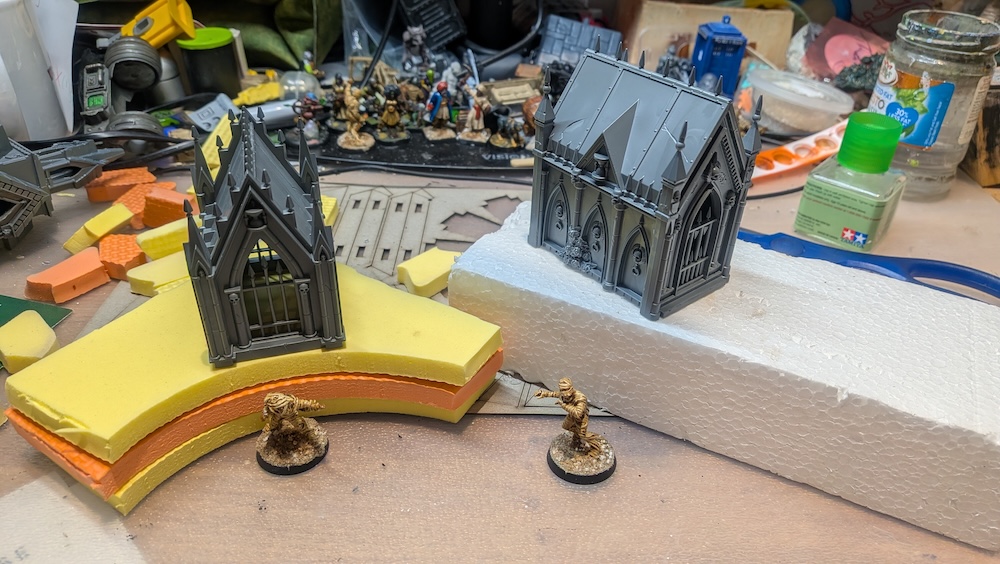
With that done, I needed to decide how to create the elevation I wanted. Two options sprung to mind: expanded polystyrene or a layering of my kids old EVA faom play mats.
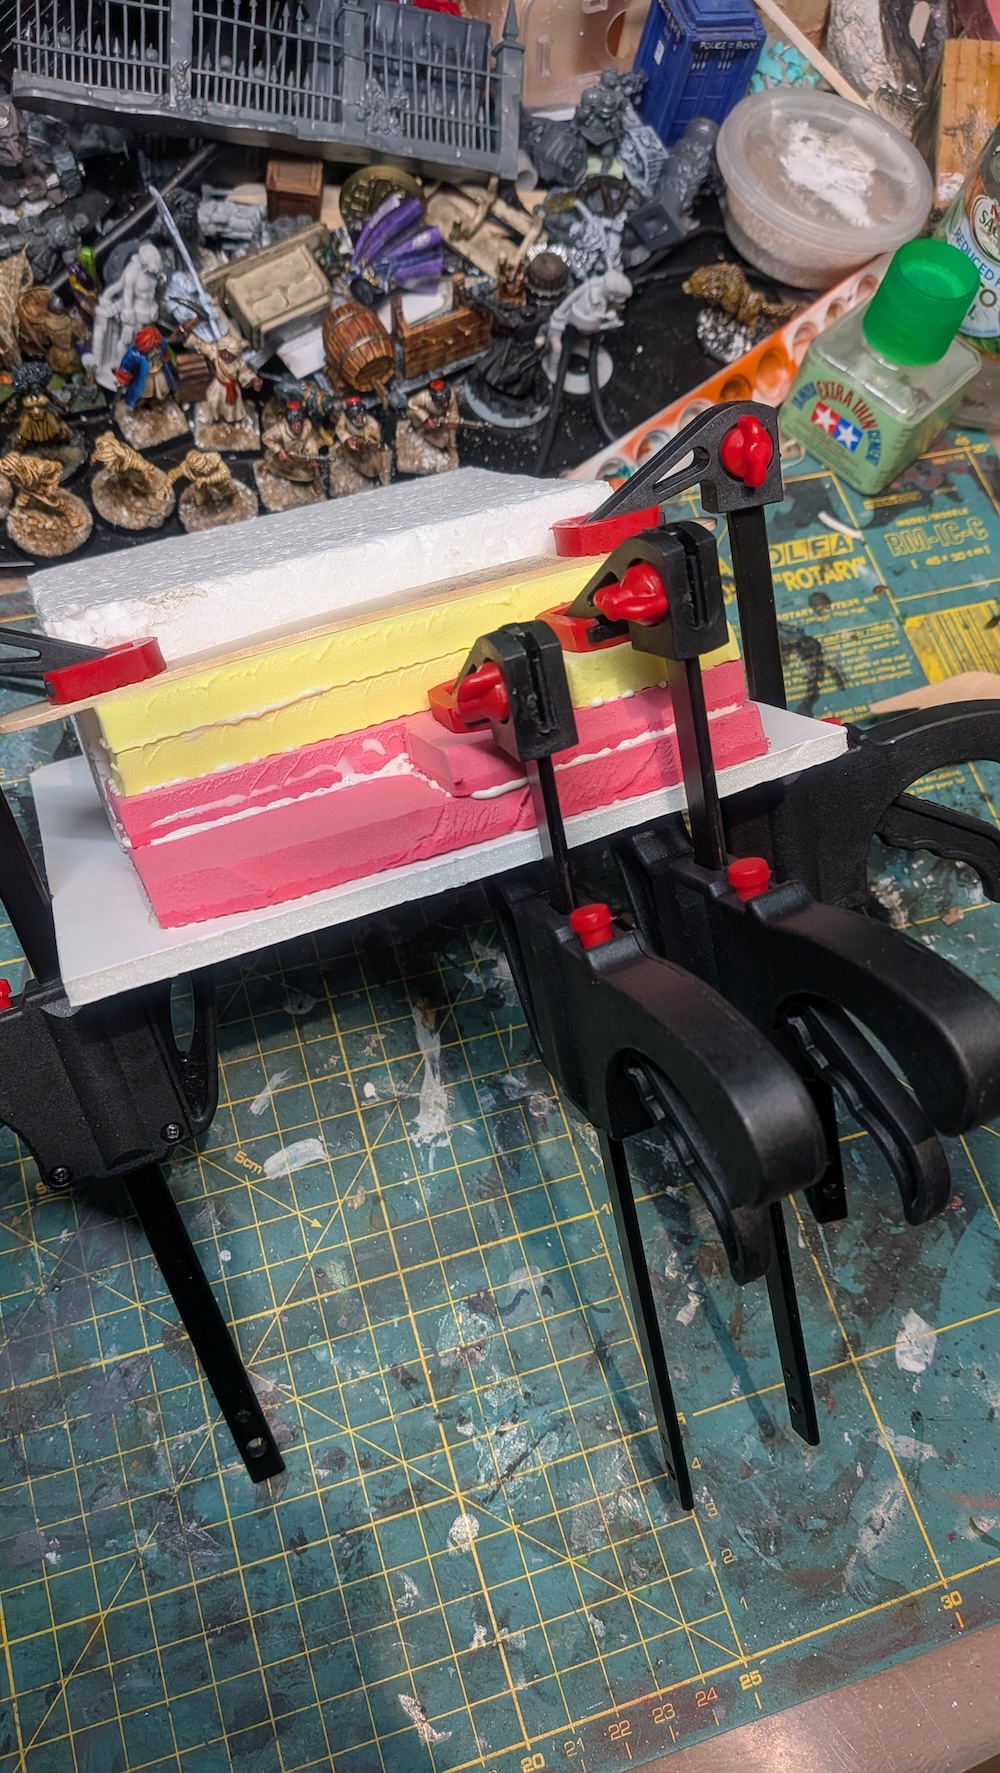
I went for a combined approach: polystyrene for the bulk of it, and EVA foam for the steps up, glued together with PVA.

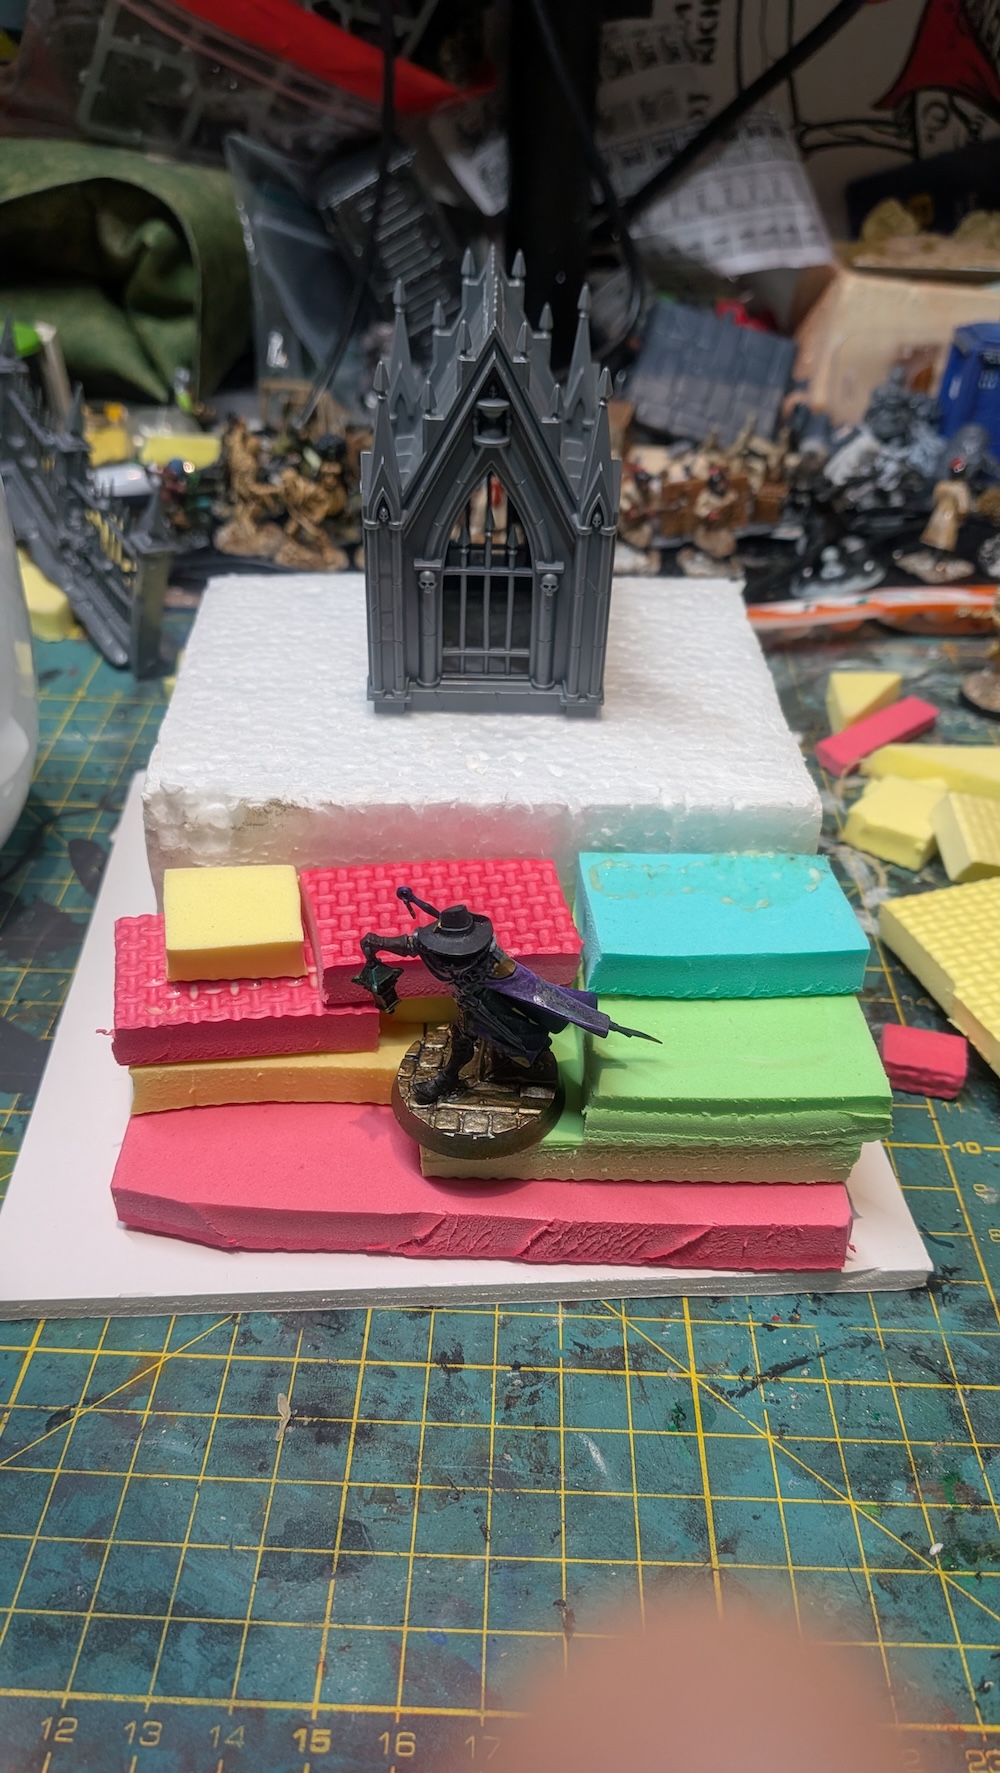
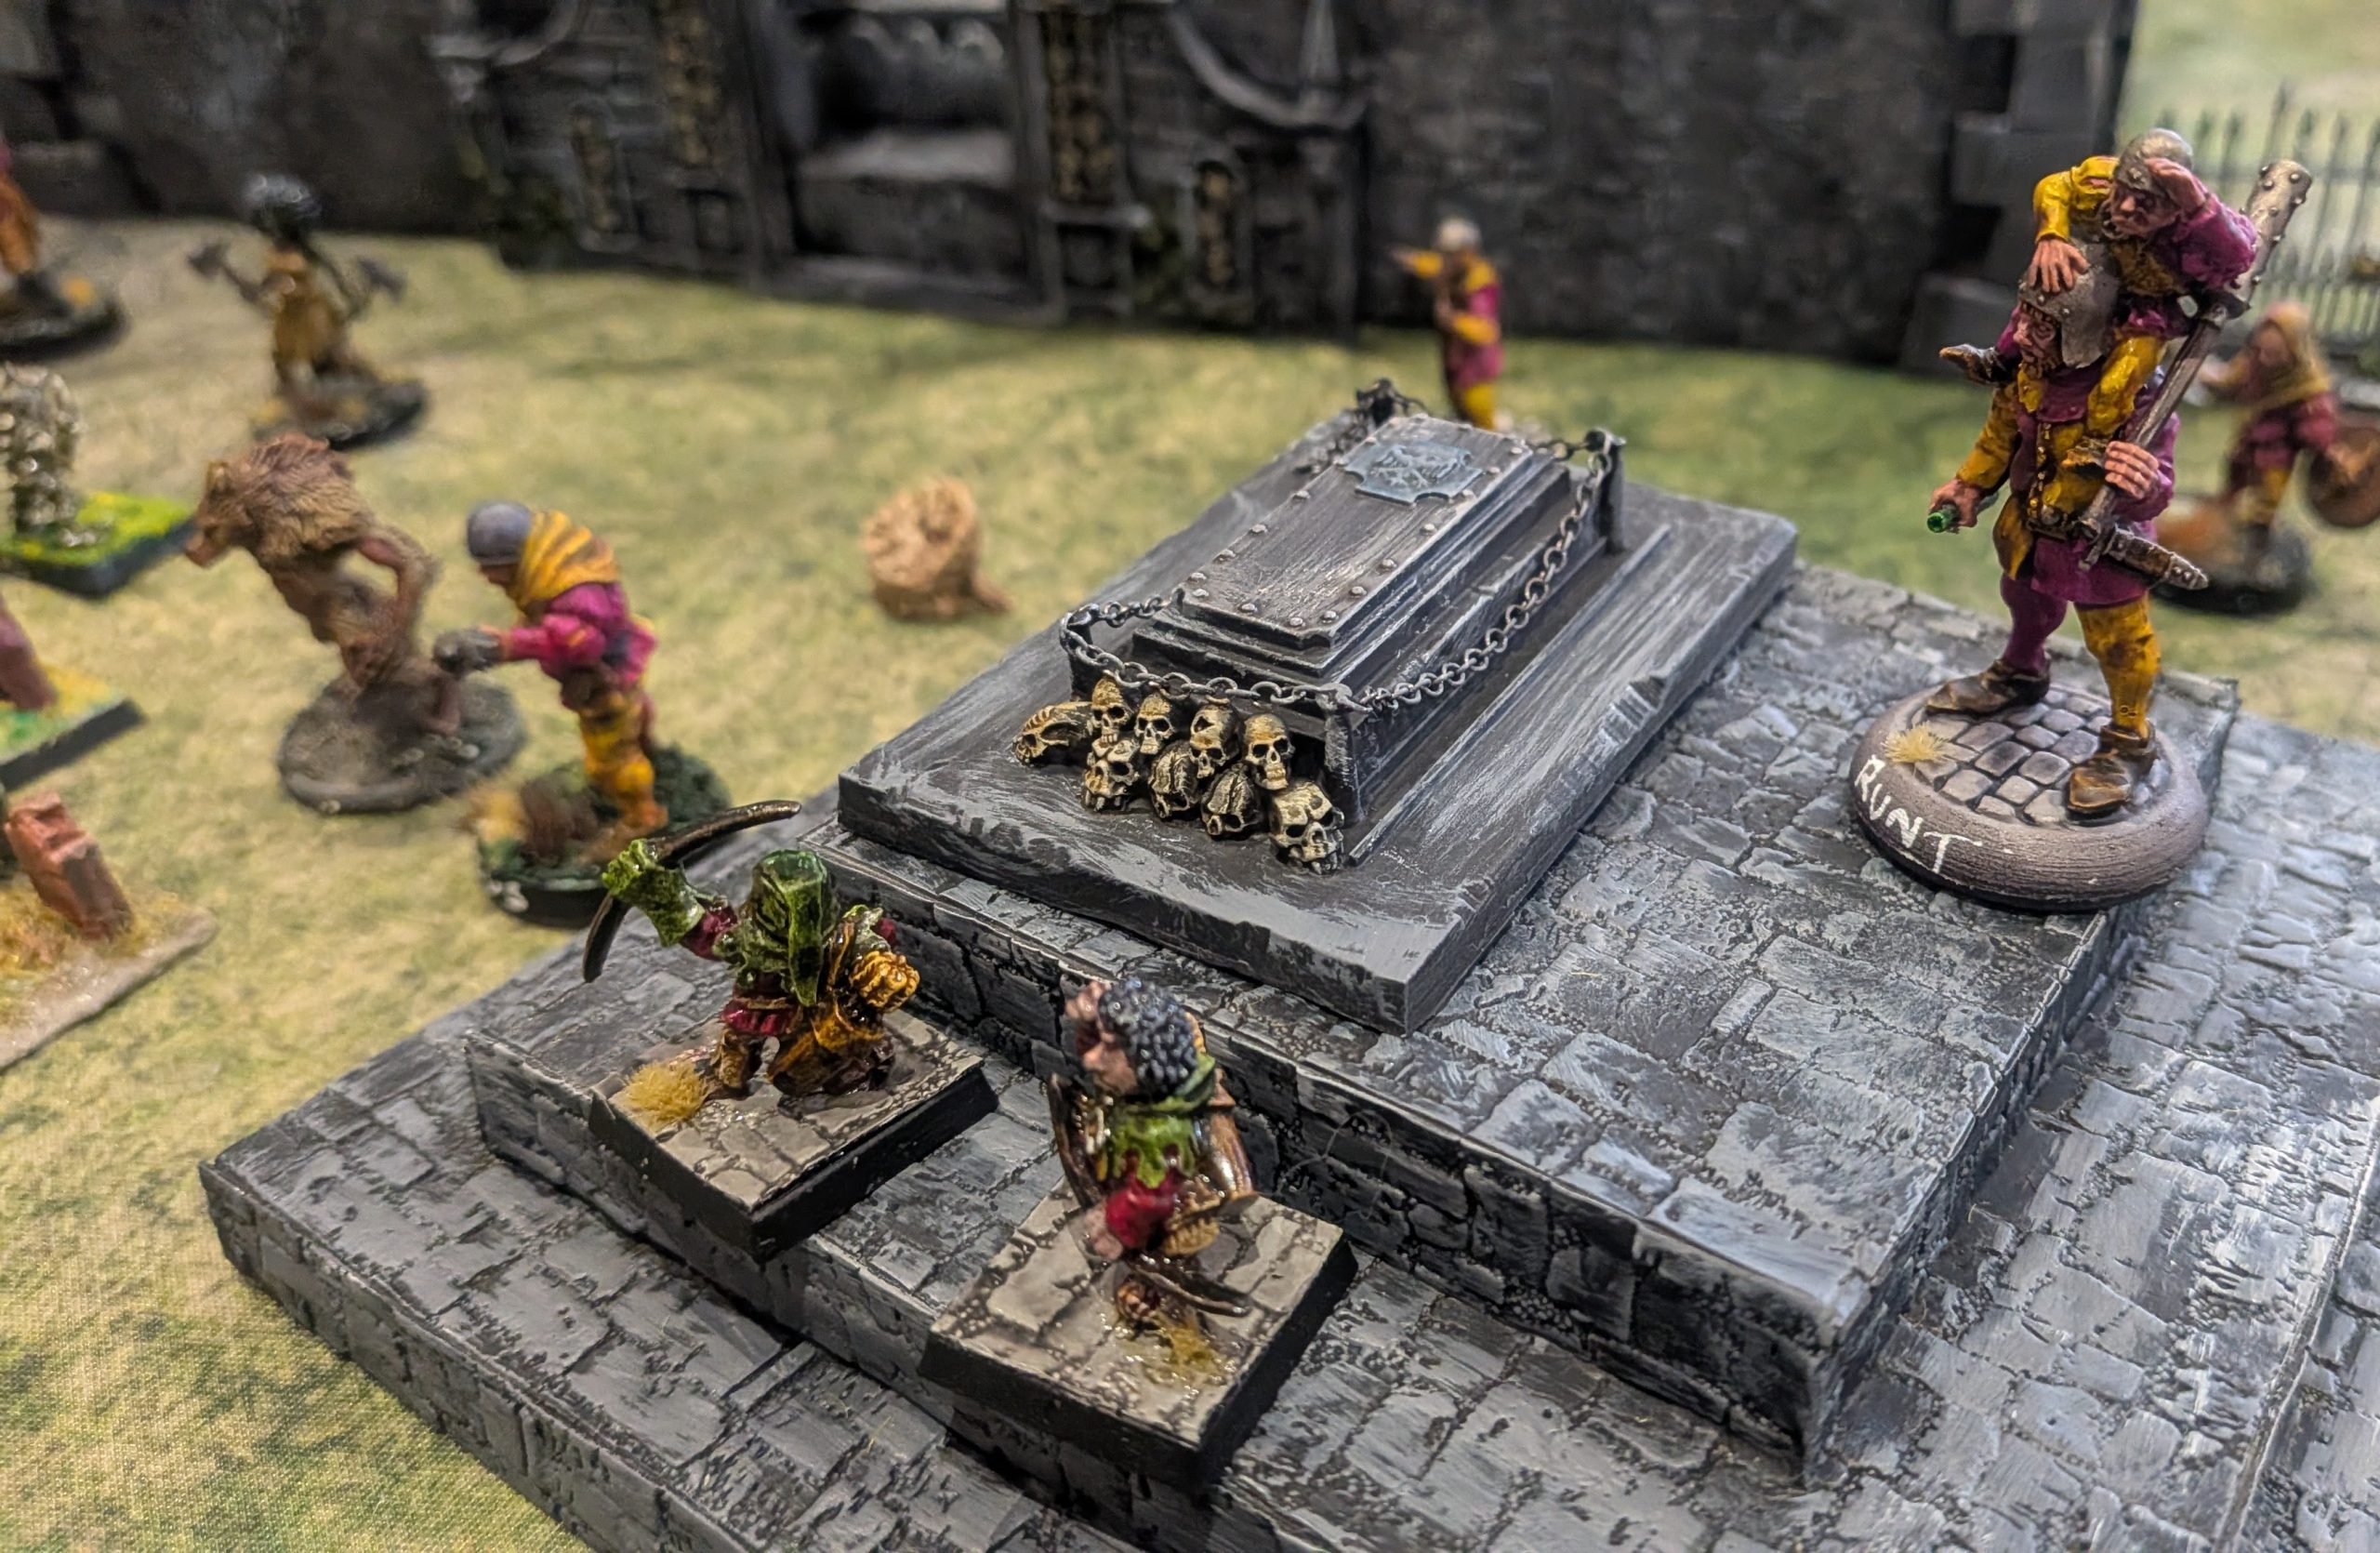
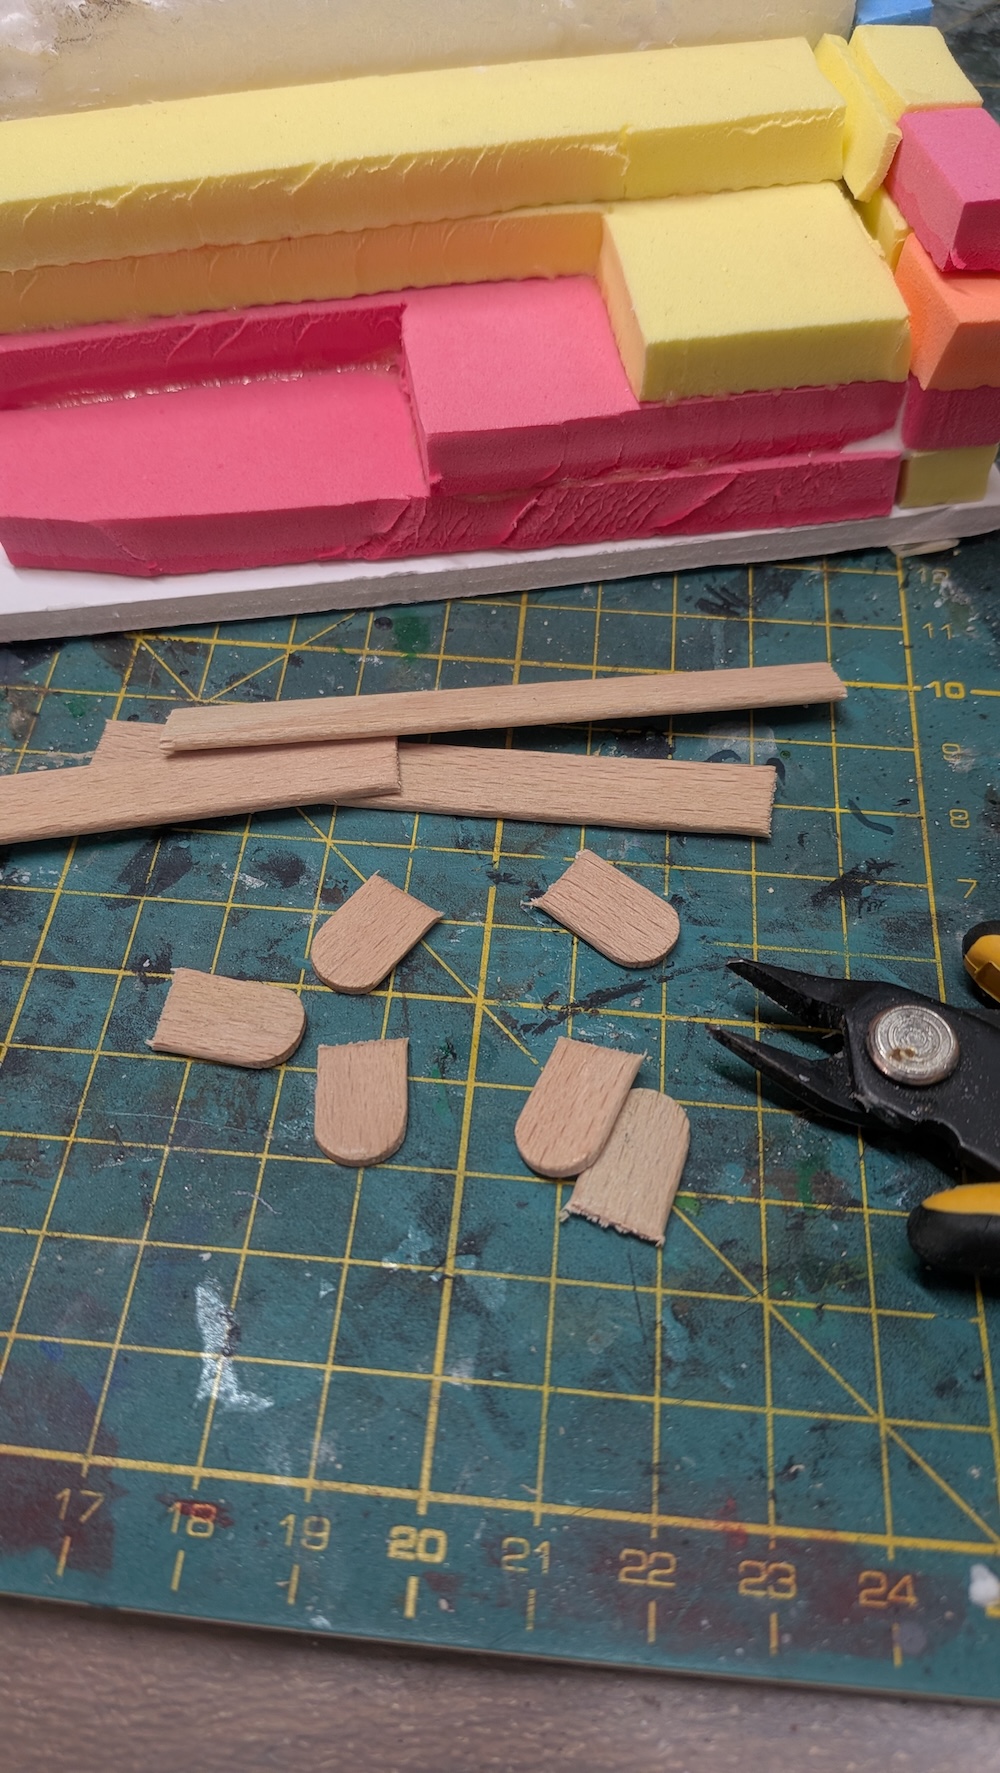
I surrounded the raised area with EVA bricks, then disguised the joins of the stairs with gravestones, most made from ice pop sticks, but also some Renedra plastics.
I glued the chosen mausoleum in the centre back of the raised area, with a couple of gravestones on each side. I like to think these were for the poorer members of the family, or perhaps faithful retainers.
I made a rail out of fancy bamboo cocktail sticks and chain (you don’t want to fall off a height when you’re visiting your ancestors) and added a texture slurry of polyfilla, pva glue and craft paint.
Inspiration
As I mentioned in the ‘About …’ I’m standing on the shoulders of giants in the form of excellent projects from admiralfb and Demonsub , I’d recommend that you look at them immediately if you’re not familiar with them.
There’s also been a couple of inspirations outside the community that I have to acknowledge.
First of all there’s this reddit post from a user called Ultraviolet52, and the current work of herr.poom
What I’m picking up on here is, of course, using the ubiquitous Sigmarite Mausoleum set with the addition of other terrain, sometimes MDF, sometimes 3D prints. There’s additional scatter such as gravestones, statues and so on. Perhaps the major thing to take away is elevation. Graveyards can be very flat areas, but I intend to add some appropriately themed risers.
I’ver got all of those, gathered over a number of years, in cupboards and drawers around the house. It’s time to see what I can conjure up.


