![How To Paint Moonstone’s Nanny | Goblin King Games [7 Days Early Access]](https://images.beastsofwar.com/2024/12/3CU-Gobin-King-Games-Moonstone-Shades-Nanny-coverimage-225-127.jpg)


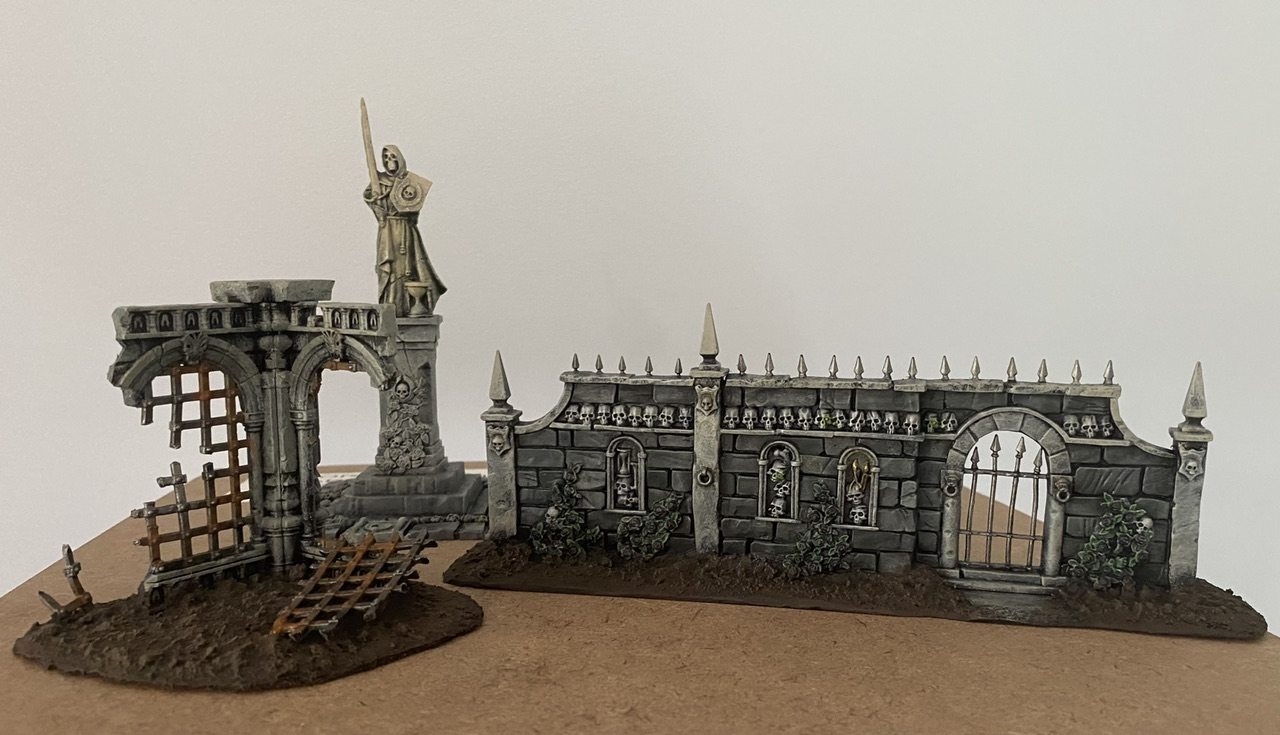
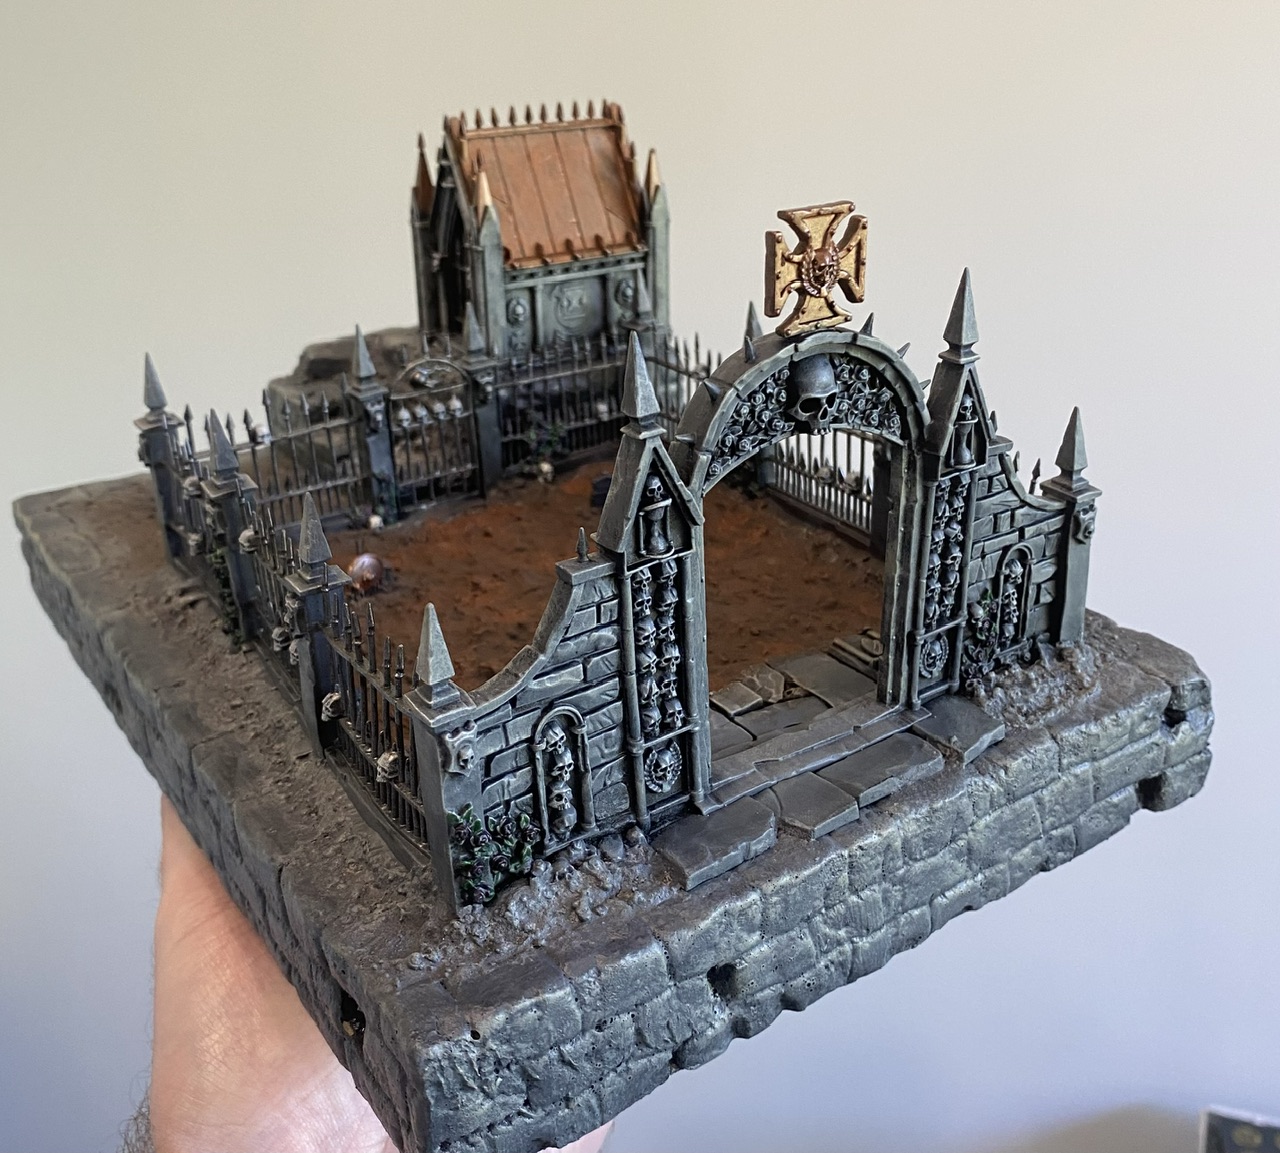
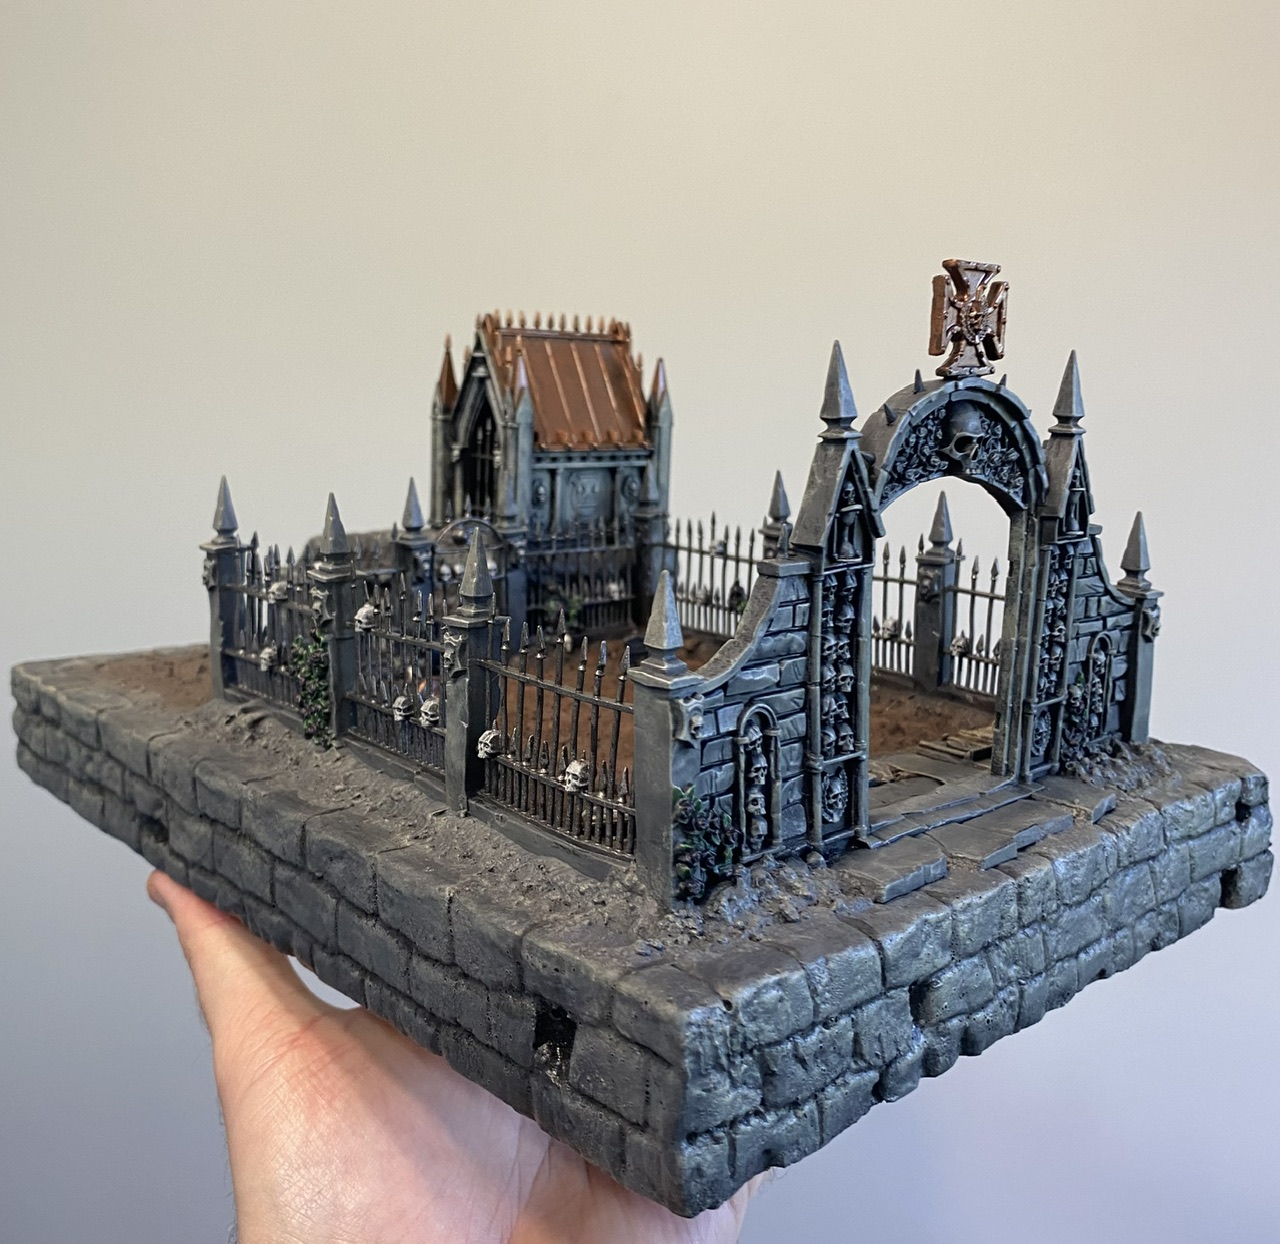
Mordhiem graveyard


Recommendations: 181
About the Project
Building a playable skirmish graveyard with multiple levels ideal for mordhiem
Related Genre: Fantasy
Related Contest: TerrainFest 2023
This Project is Completed
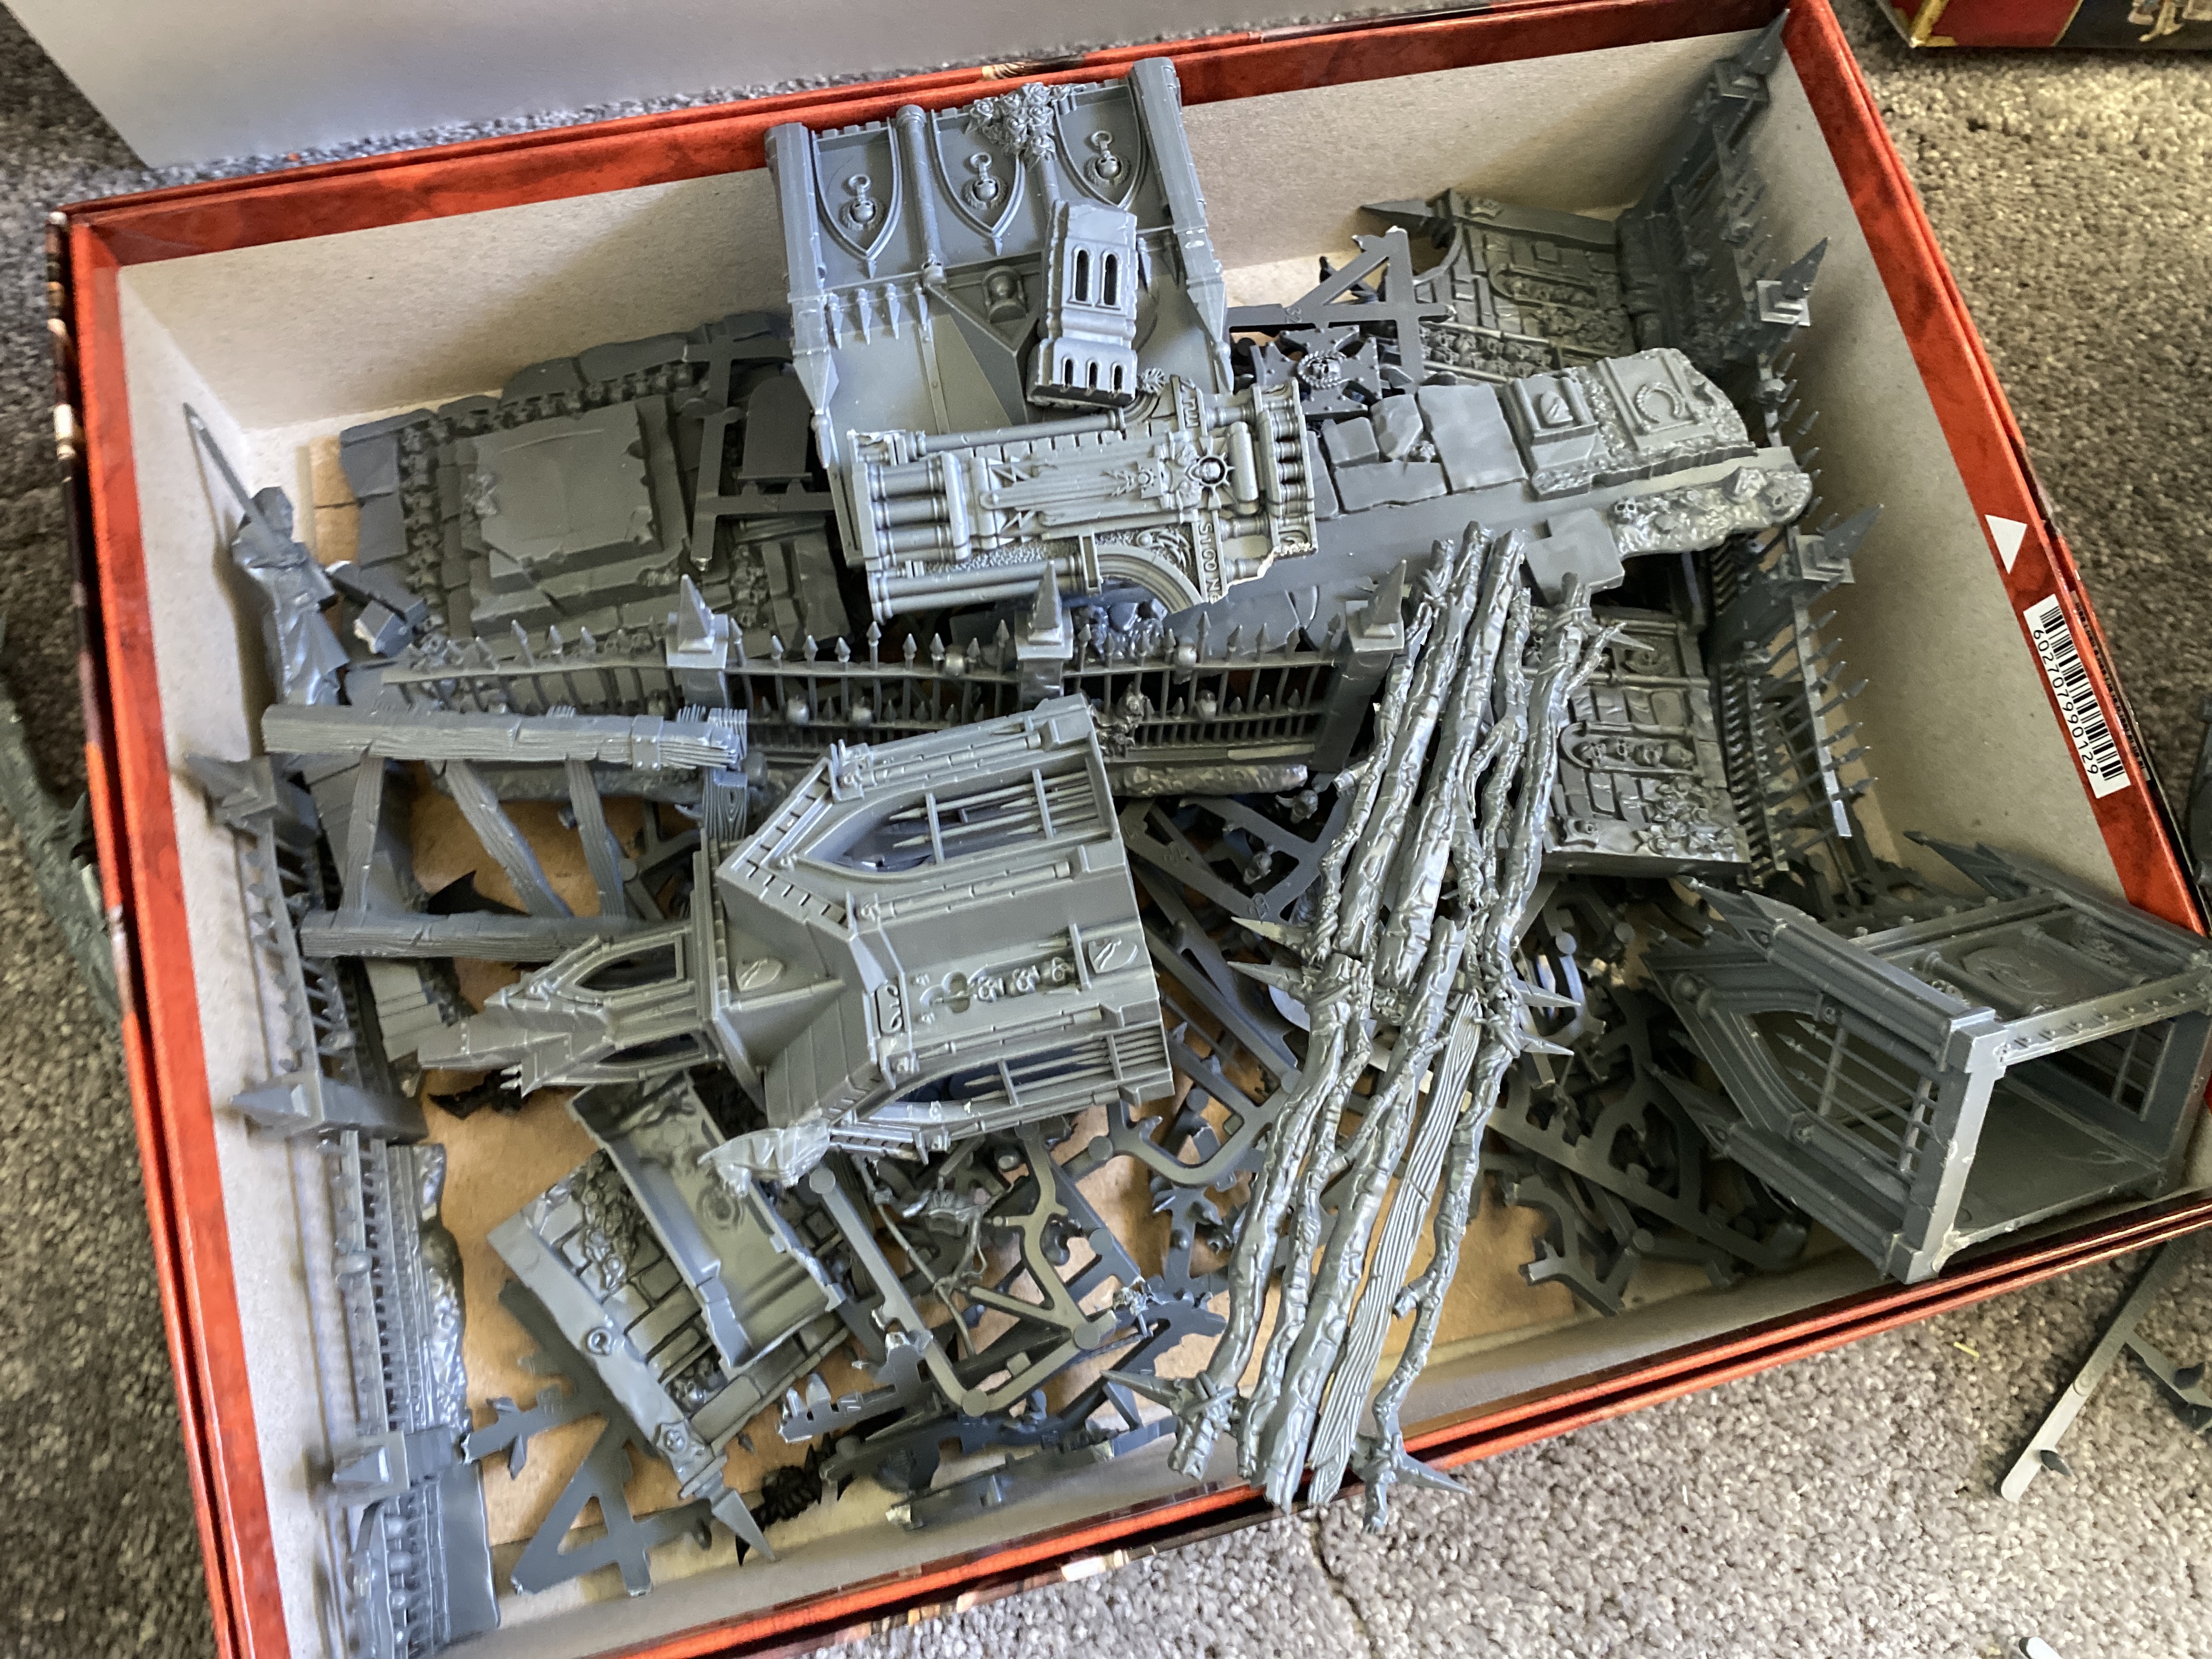
Taking stock
I’ve been getting back into mordhiem and other grimdark skirmishes and the most important thing (other than making overly characterful modes) is having an evocative location to play in.
Going through my bits box I have found a half built garden of morr… and I have some foam… and some other bits and pieces… so the dream is to turn all of that into some decent, playable terrain. It needs to be multi level, space for moving models onto it and around it and be somewhat modular.
Now let’s see if my skills match these ambitions…
Step zero: thinkin hat time
So I have some graveyard stuff, which traditionally are quite flat topographical features. Making it as is can be quite atmospheric but not super interesting to play in. I like the multiple levels and verticality of mordhiem so how can I turn a flat feature into a tall one?
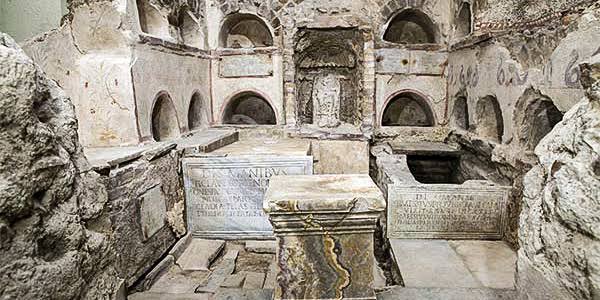
Reading some Bretonnian fluff on mousillon they talk about not being able to bury their unquiet dead due to the marshy ground so they build their tombs upwards creating necropolises instead.
I think this could work… time to break out the foam.
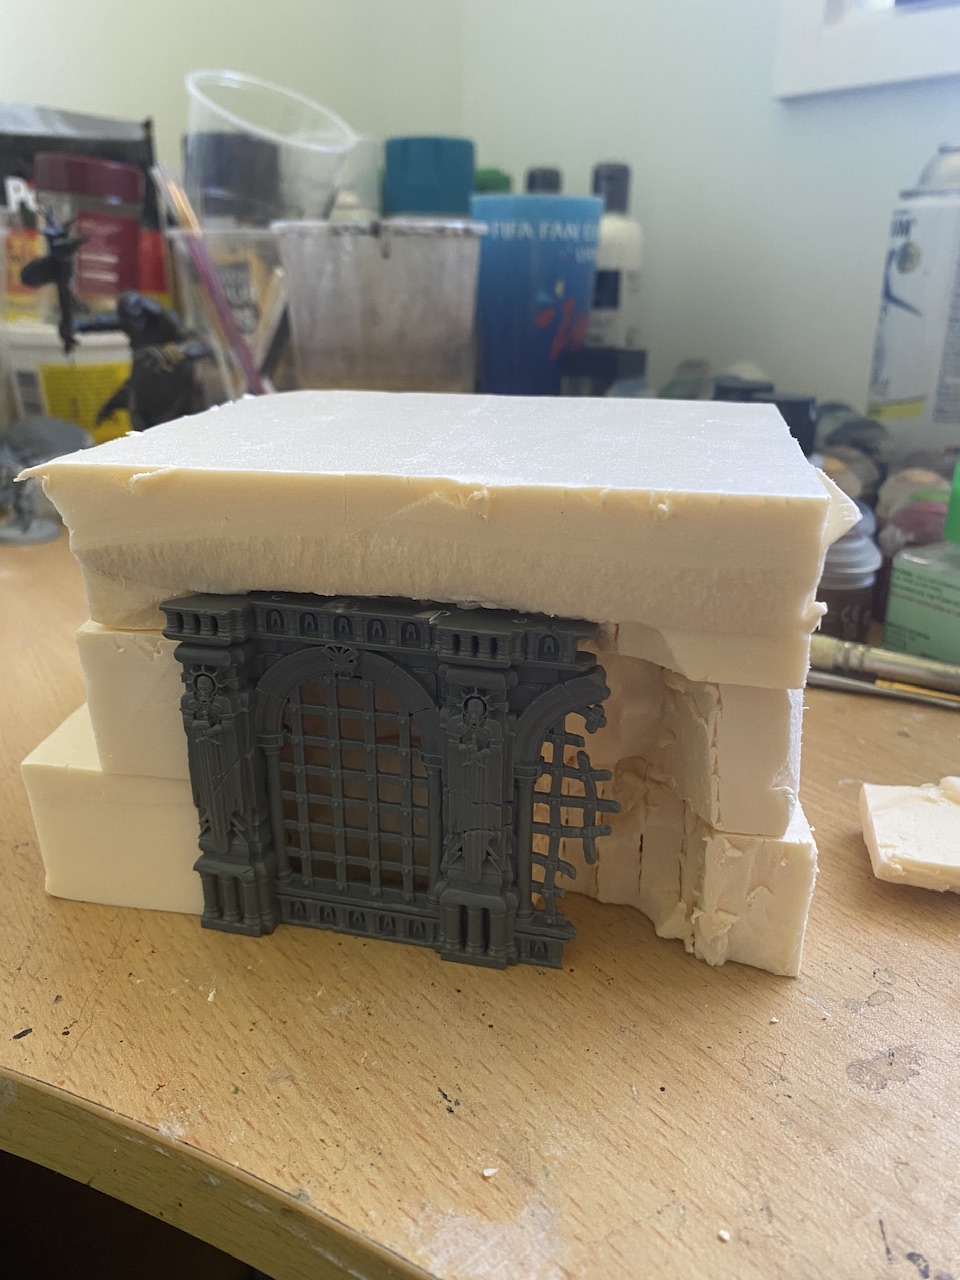
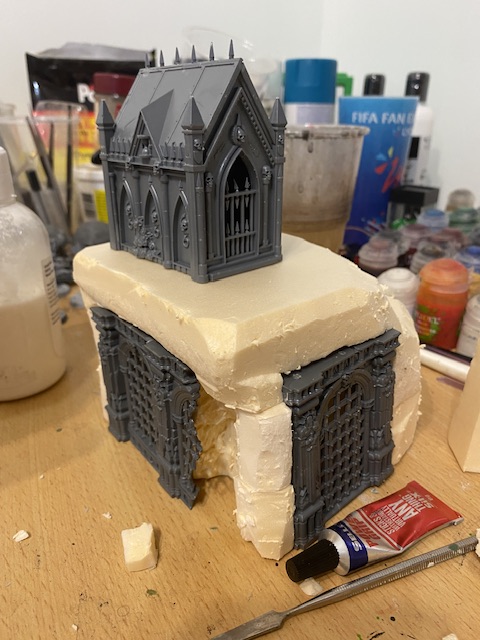
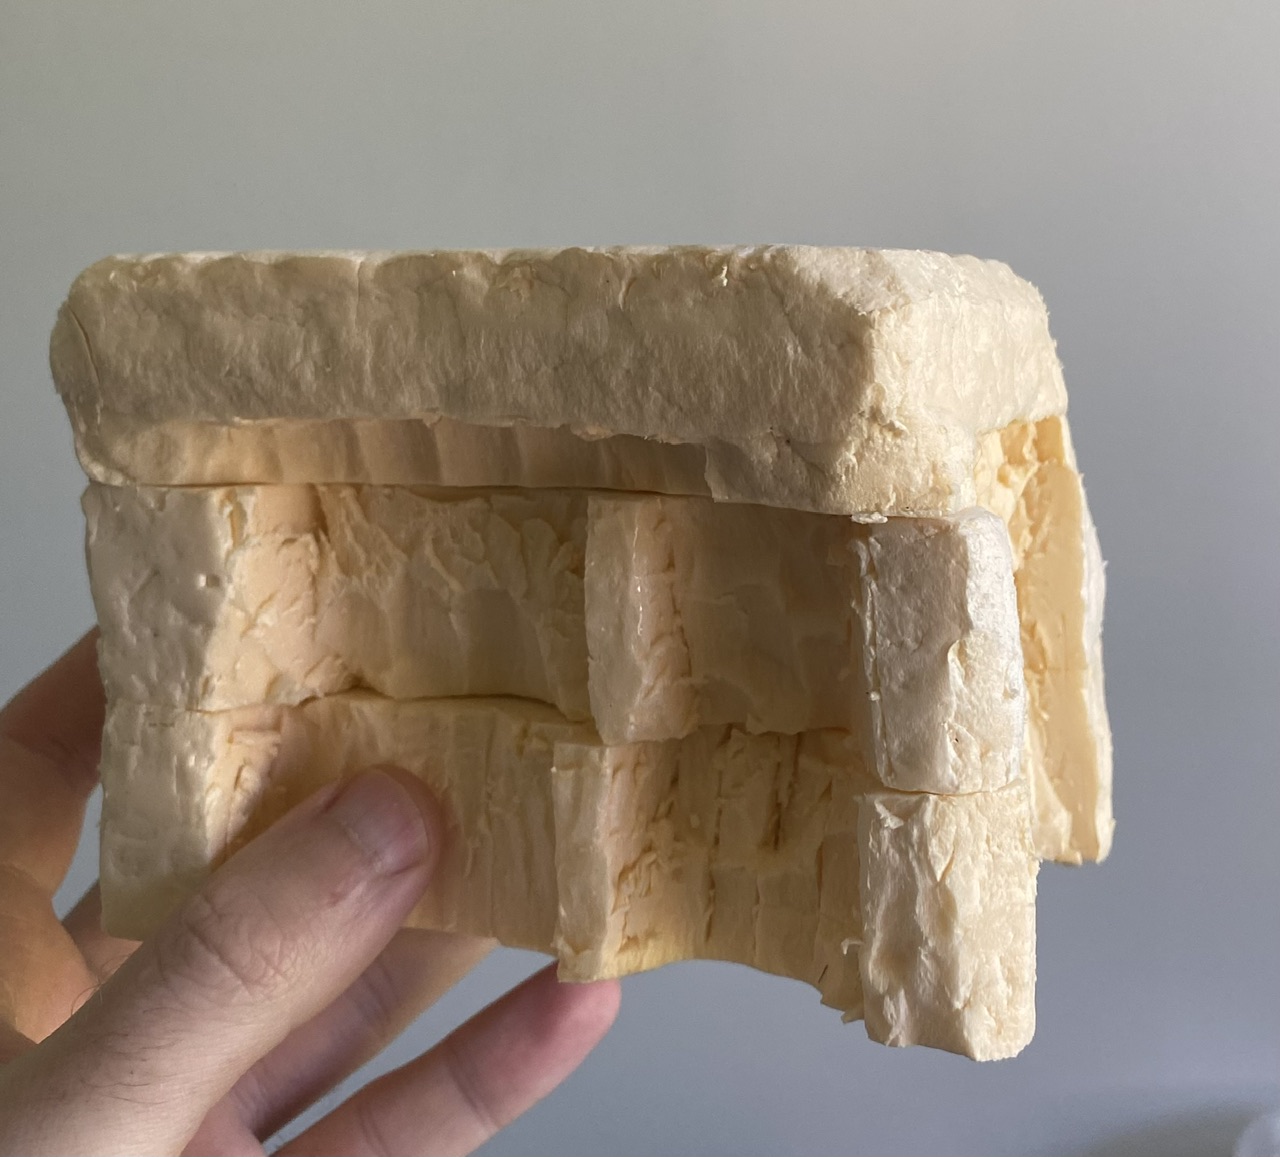
Step one: foaming up
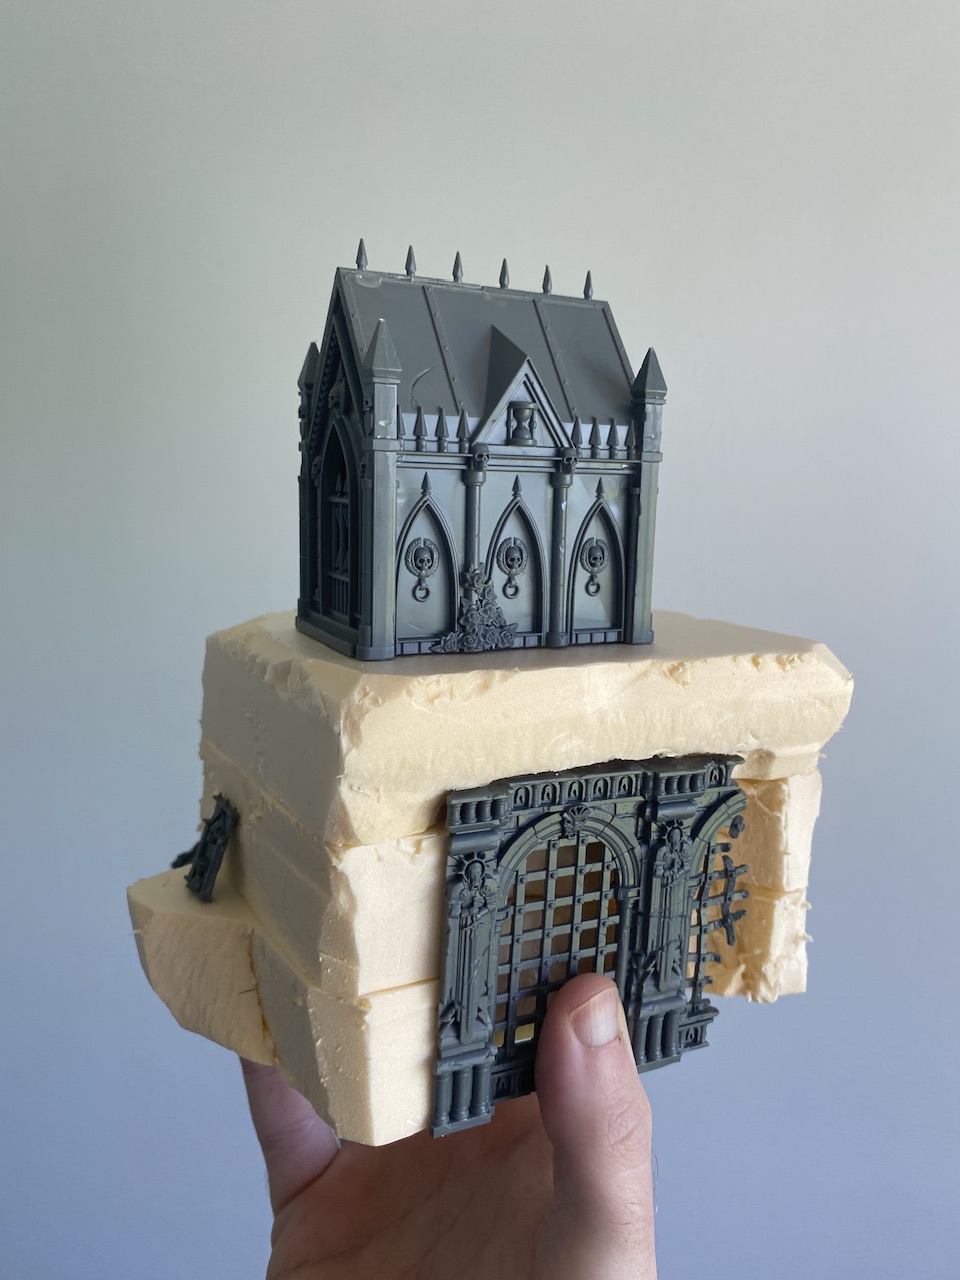
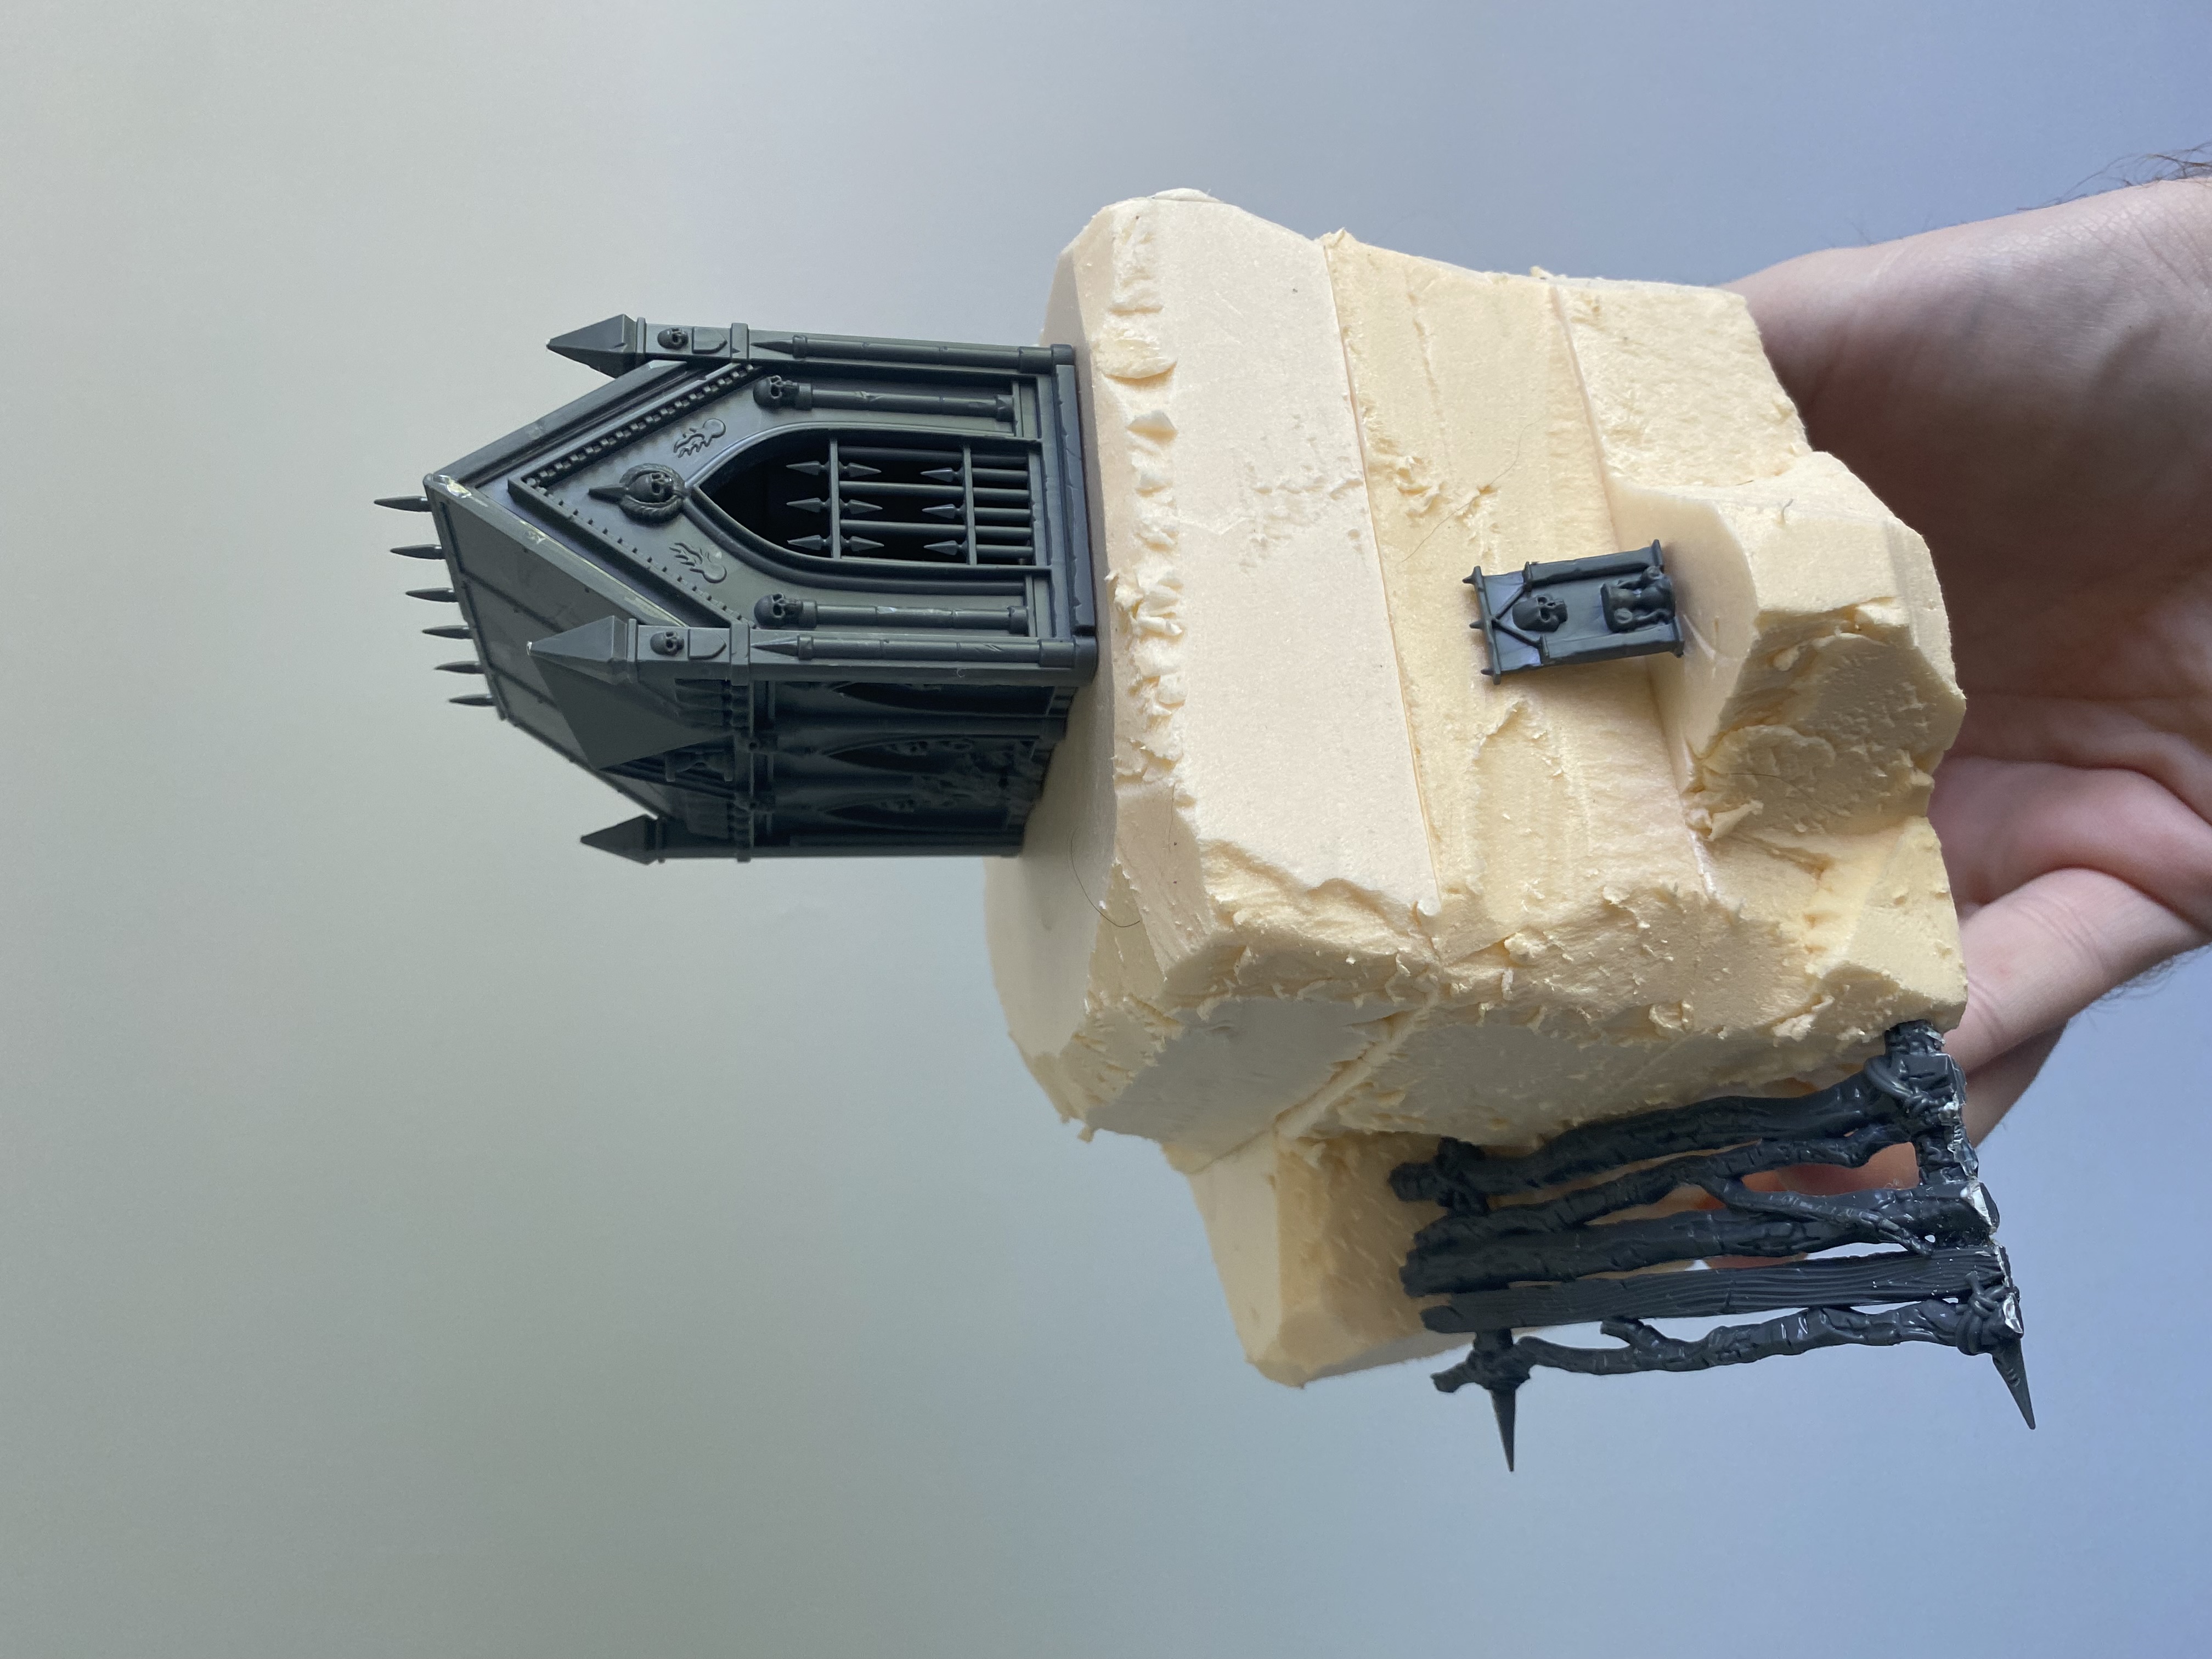
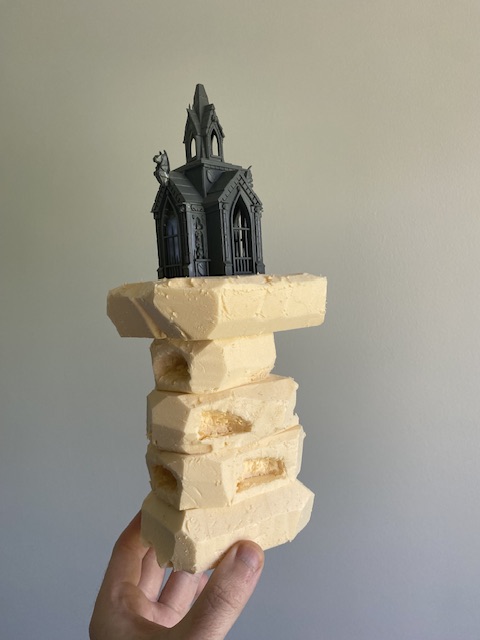
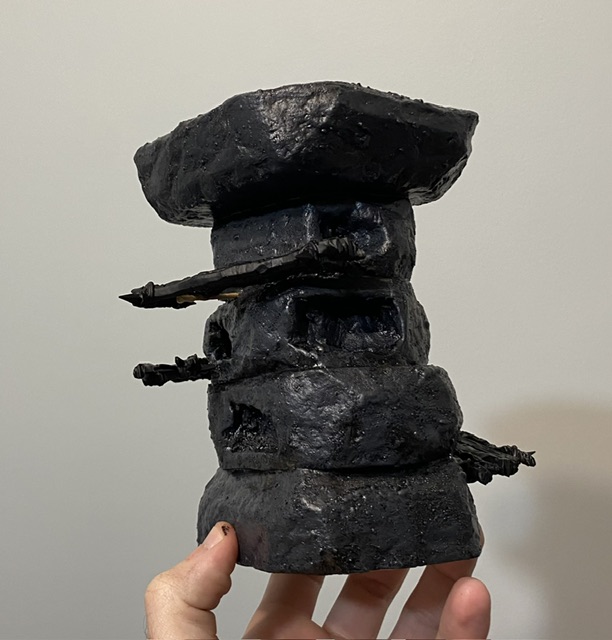
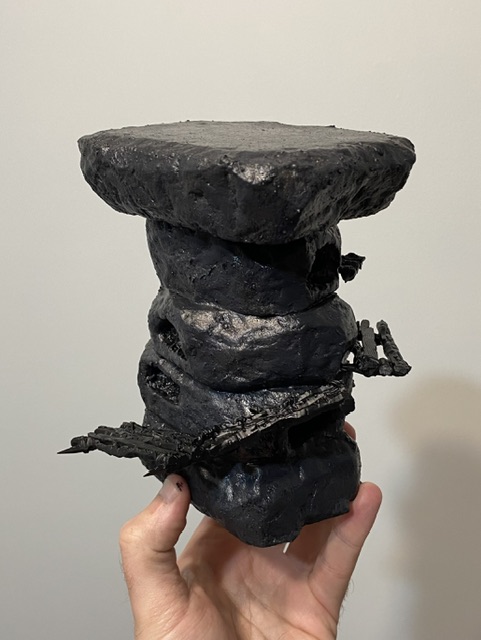
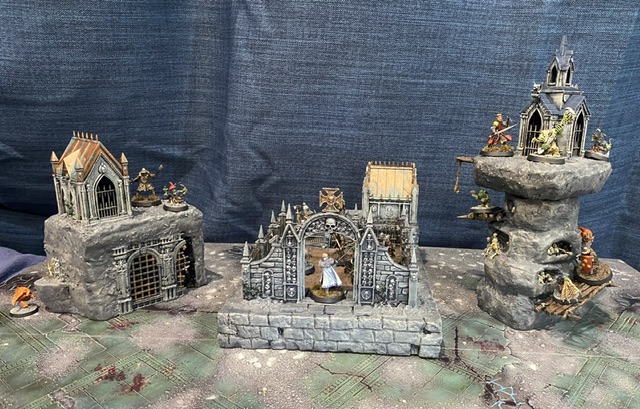
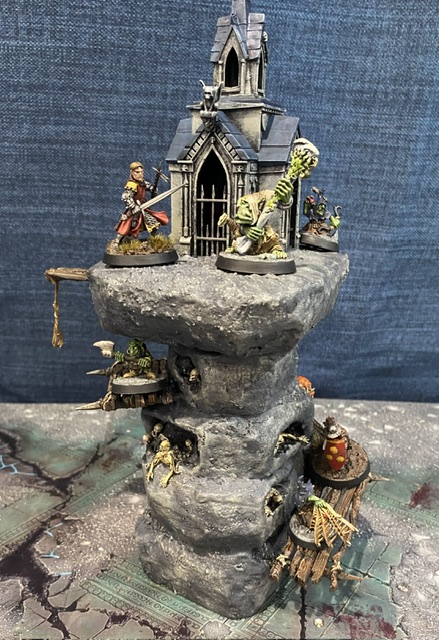
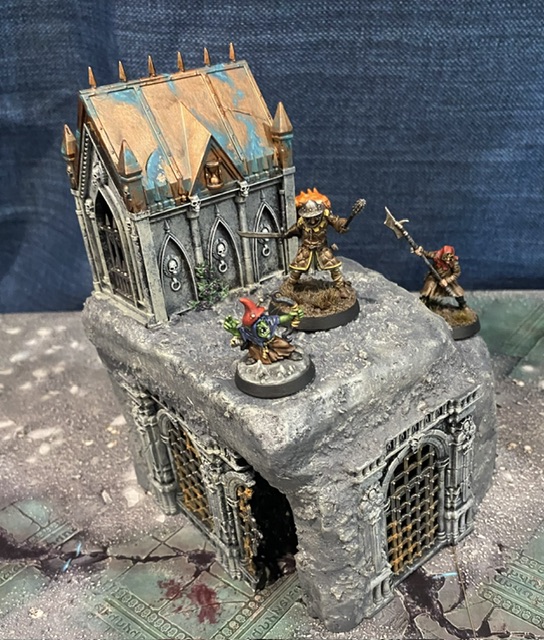
So looking over what I had I have decided on 3 main pieces. Building them separately should give me some modularity in play. Each is also a different height (1 sheet, 3 sheets and 5 sheets of foam) to enjoy that verticality.
After cutting the foam out, I began the process of rough shaping each piece and making sure the plastic components fit. Then I grabbed some minis and made sure they fit the various levels as I want these to be playable not just obstacles on the table.
Once I was happy with the rough shapes I roughly shaped them with my hobby knife before gluing them together.
Now that’s done it’s a matter of letting the glue dry… and trying to be patient while it does.

Step 2: texture and sealing
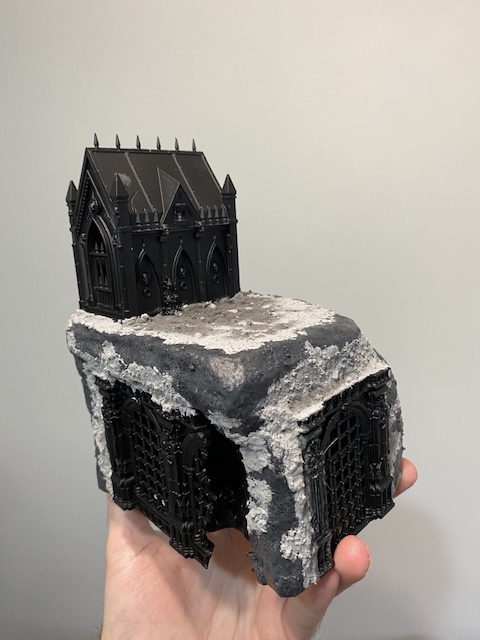
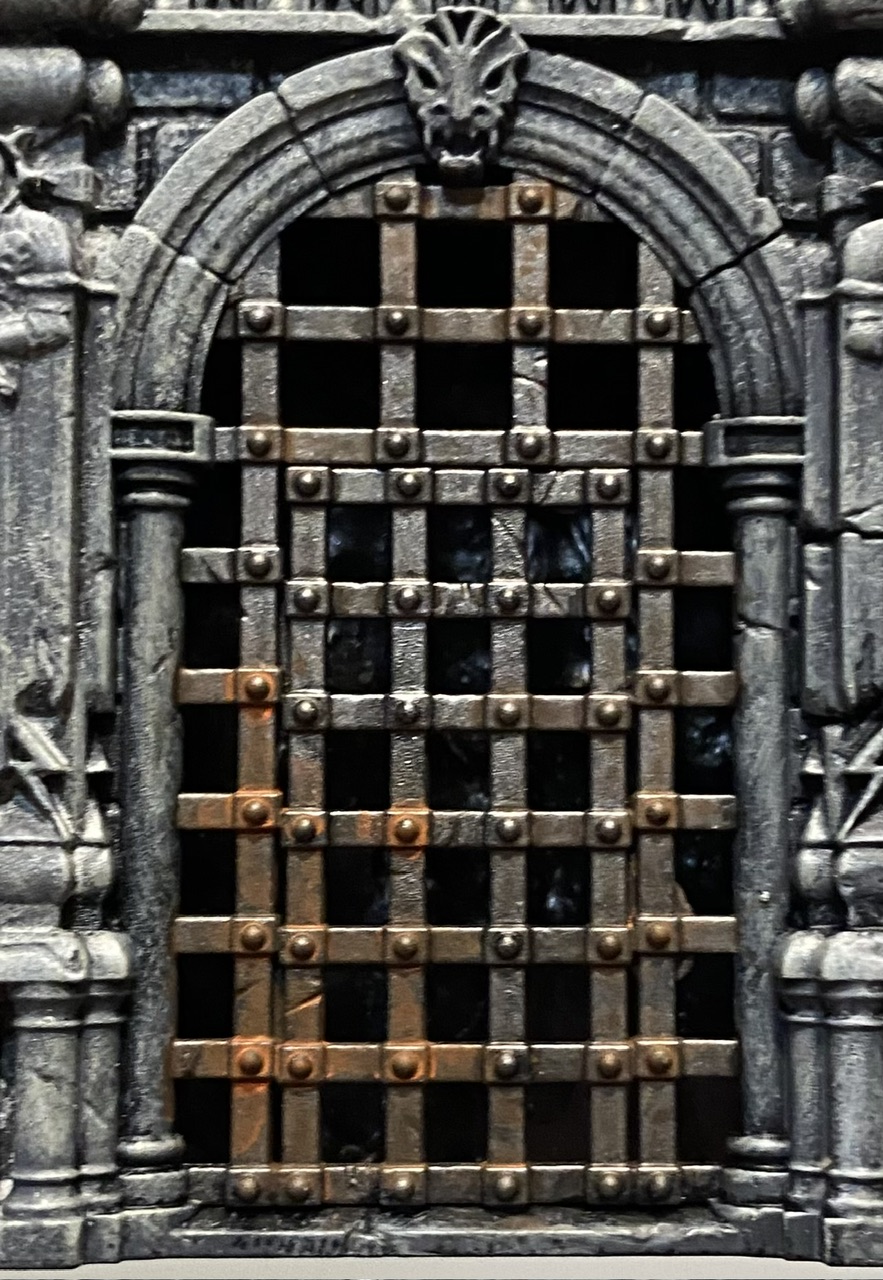
Now that the glue has set I add rough stone textures by pressing a rock from the garden into the foam. For smaller projects I use a ball of aluminium foil instead, but on jobs this scale bigger is better. It’s better to go more aggressive on this step as sealing will fill in some details. Judiciously adding more textures can help obscure any unsightly seams between the layers of foam too. The brick work is just drawn on with a pen.
Once everything is done and textured, I like to seal the foam to protect it from any aggressive paints and glues going forward. Usually I use a mix of PVA glue, paint and water this gives decent protection but isn’t great over repeated use. So this time I went for a mix of modge podge, paint and water. Modge podge is a mix of pva and acrylic gloss medium so hopefully will be a little hardier going forward. I’ve given it 2 coats, so now it’s time to let it dry completely.

Step 3: big details and base coats
Now that we’ve protected the foam with a solid couple coats it’s time to put it all together..
Usually I only paint things once these big pieces have been glued into place, however with the see through pieces I needed to base coat first. For painting big details like terrain I favour stippling using a big flat brush. Currently I’m using a sign painters brush which has some quite coarse bristles. This speeds up the process while adding more texture to the terrain.
Base coats done it’s time to glue the big details in place. Since everything worked when we dry fitted it, it’s a simple job.
The big consideration here is what glue to use. Even sealed foam can melt to more caustic glues, especially if you pierce that protective film. My preference is for construction adhesive (liquid nails is what I had to hand) as it holds well and only takes around 15 mins to dry. PVA can work but since it’s air drying it struggles in tight spaces. Hot glue can also work but I find it a pain to work with and I don’t think it holds that well compared to the other adhesives.
Now they’re altogether it’s back to the waiting game as paint and glue dries…
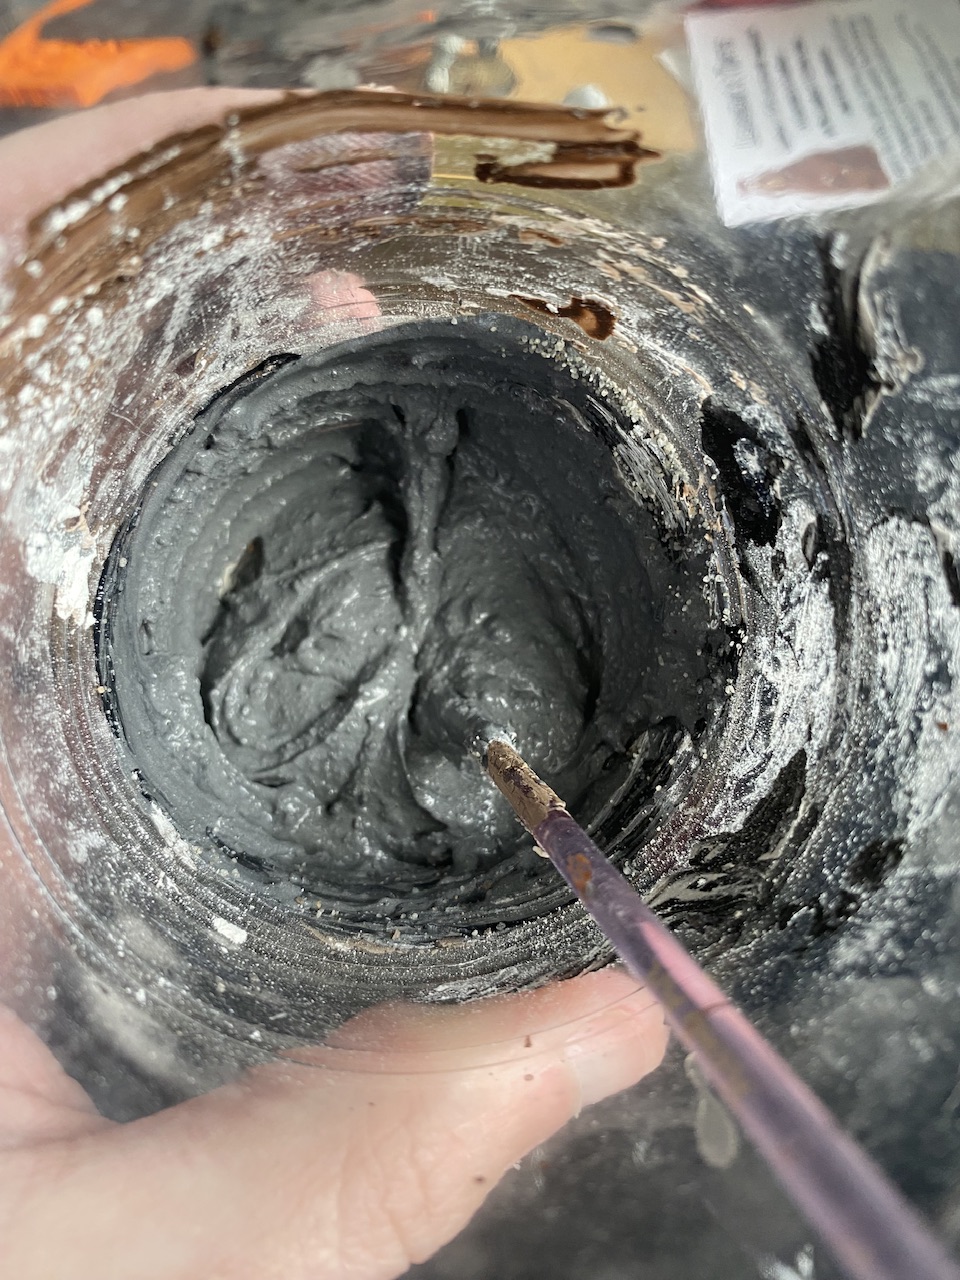
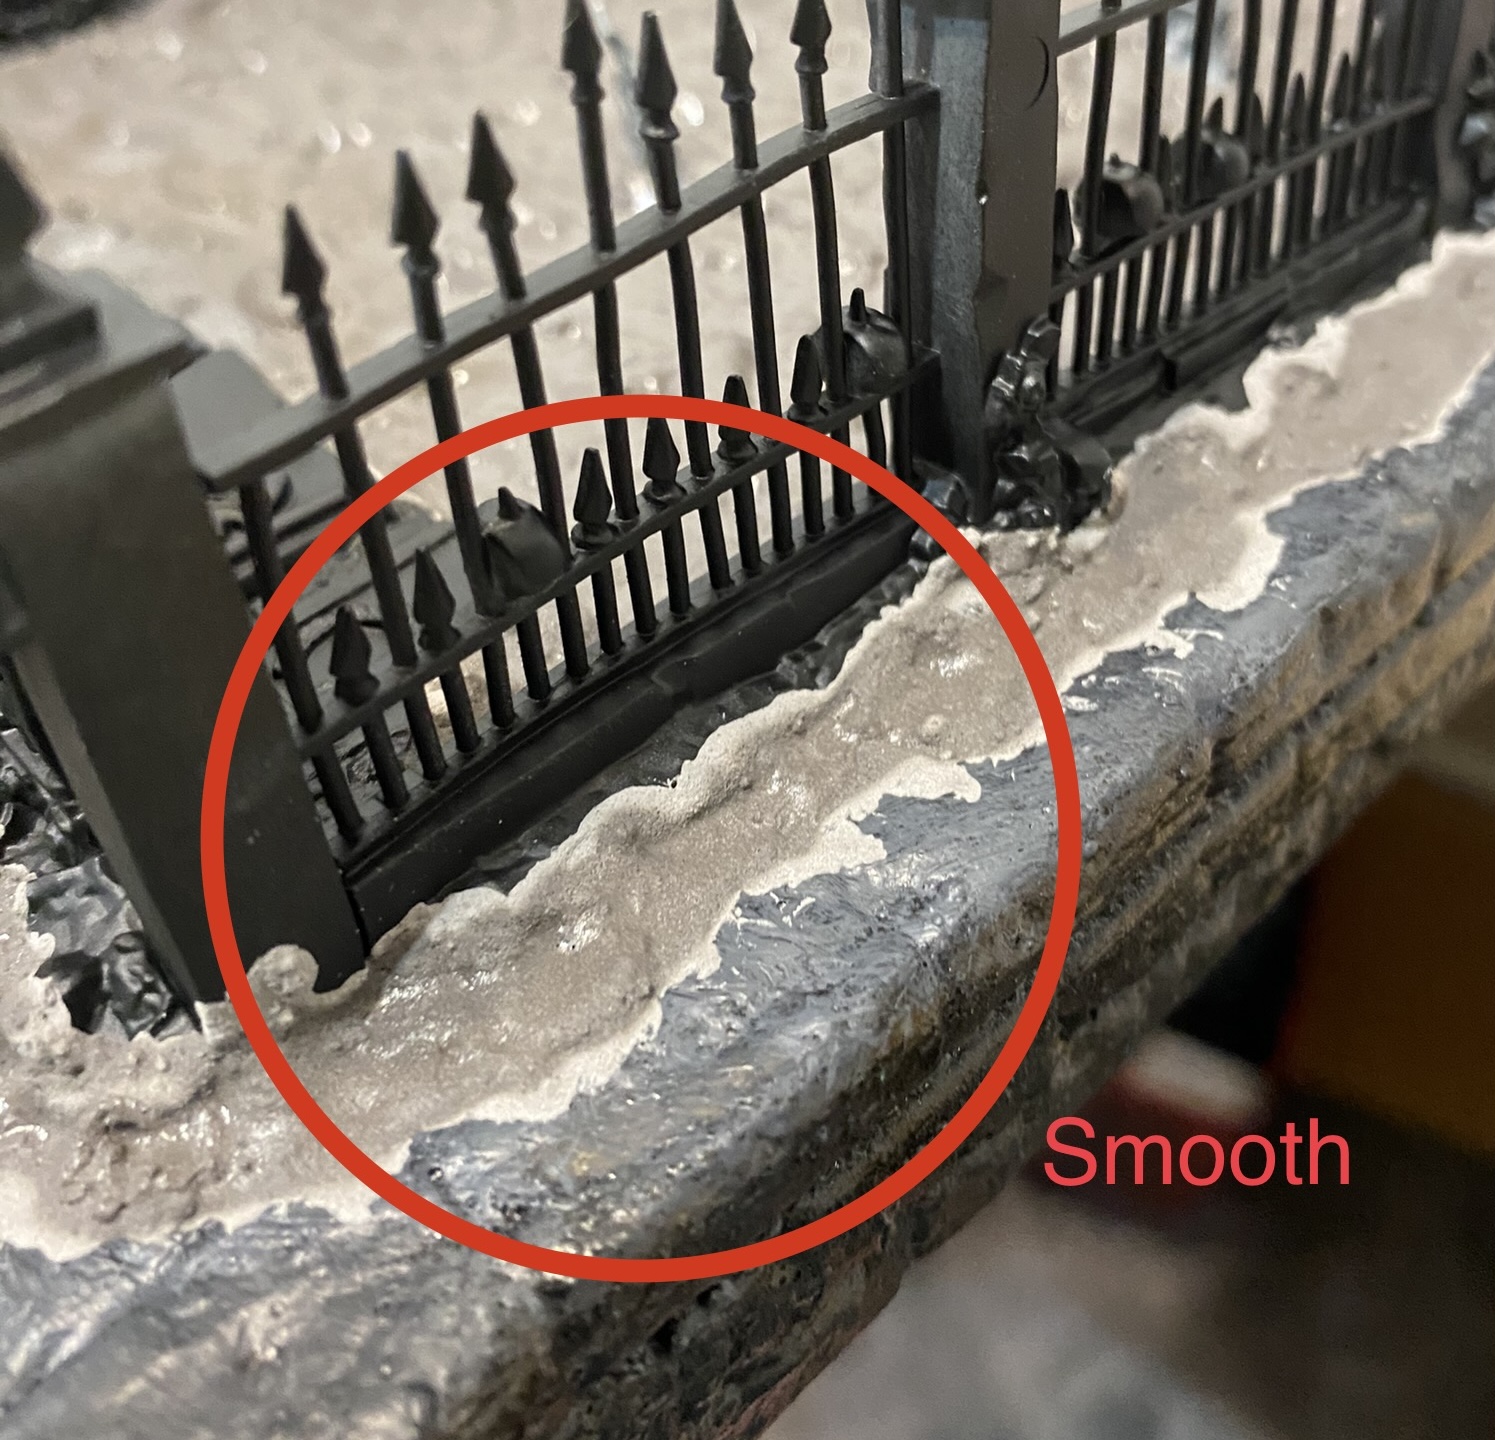
Step 4: filler
Now that the we’re all assembled it’s almost time to paint, there’s just one final step: filler
I use filler to cover anything I don’t want people to see. It covers the layers of foam where my cuts weren’t precise enough to hide them. It blends the plastic elements into the foam, hiding the gaps and adds another layer of texture.
My filler is a mix of 3 things: polymer gap filler (usually used to fill small gaps in DYI), craft paint and sand. The filler gives it body, the paint helps hide any damage and saves time later, and the sand gives it a more natural ground texture. Just remember it’ll dry lighter than it is when wet.
I apply this wherever it’s needed using a cheap trashed brush. Everything is also water soluble so can be cleaned if needed with just water.
It’s best to apply it in thinner layers where possible. Filler has a habit to crack when applied too thick as it fully dries (can be up to a couple of days depending).
When applying it just focus on getting it where you want it. You can come back to it in 15-30 mins and re-texture it as needed. Using you brush and lightly tapping it will give it a nice texture if it looks too smooth as it has settled.

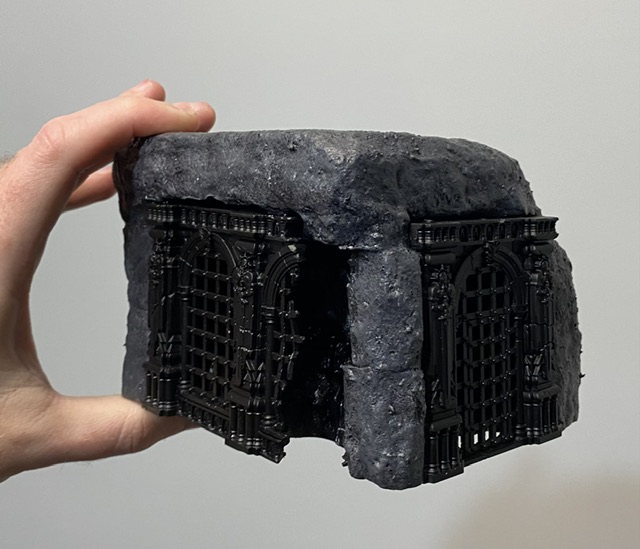
Step 5: painting
Now it’s time to start bringing it all together. When painting, especially terrain, the secret is to always use the biggest brush you can get away with.
Technique wise I fall back to stipling and drybrushing for pretty much everything. Stipling quickly adds colours to flat areas while adding texture and natural variations in tone. Drybrushing quickly catches textures and helps define details. With these two techniques I have painted 90% of everything.
With the next stage being some all over washes it doesn’t hurt to go brighter than you would expect. The wash will knock it down and bring everything together.
With that done I pick out a few key details to add a touch of colour and pop to each piece. In this case it was a bronze tone to the roofs of the crypts and some flowers. In the next step I will add some weathering effects to these to help break up the shine and bring them into the theme of the build.
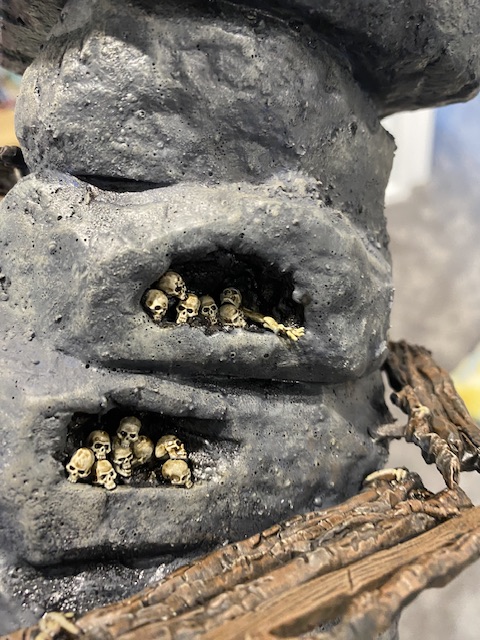
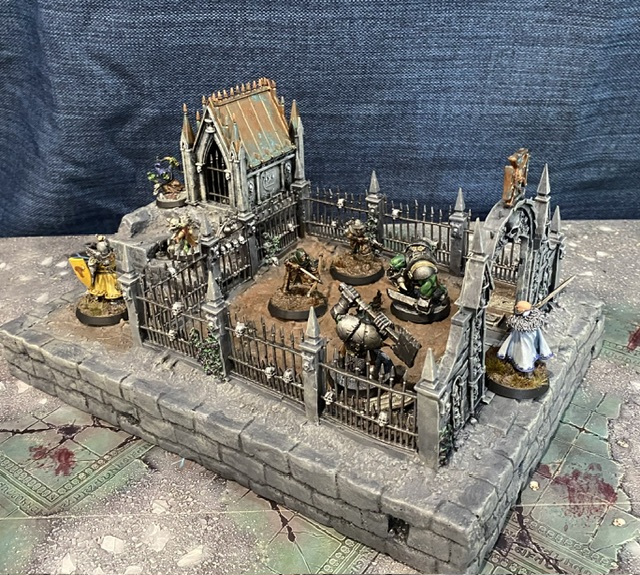
The final step here is to add the smaller details and set dressing. These details can make the terrain feel lived in and help reinforce scale. For mordhiem it’s mostly skulls…
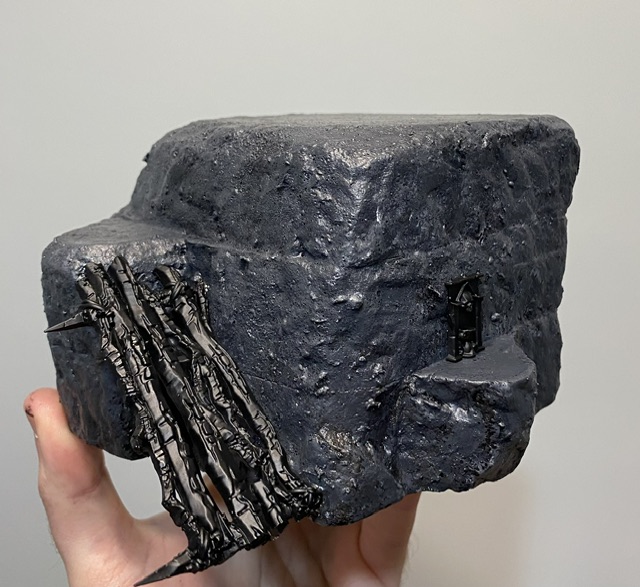
Step six: washes
Washes are magic, they bring your project together. For mine I prefer using oil washes made by thinning oil paints to a wash consistency with paint thinner. It takes a while to dry and will test how well you’ve sealed your foam, but nothing is faster and easier to apply. The lower surface tension helps it seek the depths of any detail, doing your work for you. It can also be removed with a sponge and a touch more thinner (just be careful not to remove the paint below too).
I used a black was to pick out any details on my rock faces that I felt needed more definition or needed an outline between different elements. I then added a small amount of brown to the black wash to make a dark dirty wash. This I used on the wood elements, the mud of the graveyard and anywhere I wanted to dirty things up.
After letting it sit for 15 mins I lightly wiped the upper most areas gently with a sponge to rehighlight some areas that had gotten too dark.
The final step was to pin wash the brickwork texture. I find it faster to just be a little more careful here rather than slathering everything then having to clean it up afterwards.
Now that all the hard work is done we’re just left with the finishing details…
Step se7en: what’s in the box… skulls…
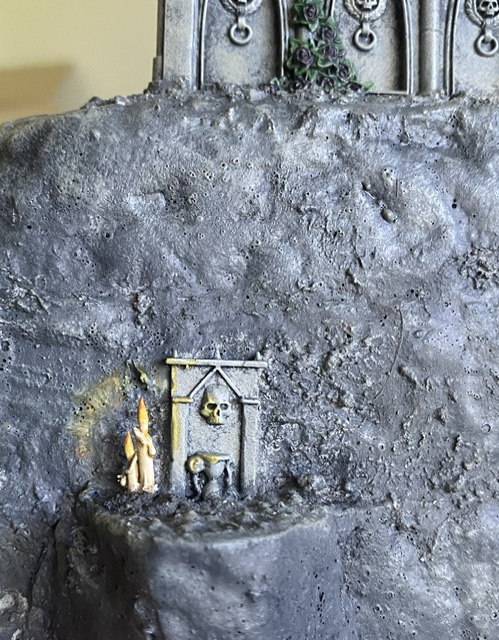
With everything washed and painted we could end here and have perfectly usable terrain, however if you add some more details it can help create interesting little vignettes that can capture peoples attention and set the mood.
Mordhiem is famous for its mood. It is peak grim dark, supported by the amazing art scattered throughout its books. These tiny details can do the same for our terrain.
Adding some candles fits in with the theme nicely. Painting the OSL from the candles so brightly helps reinforce the grim darkness of the rest of the piece.
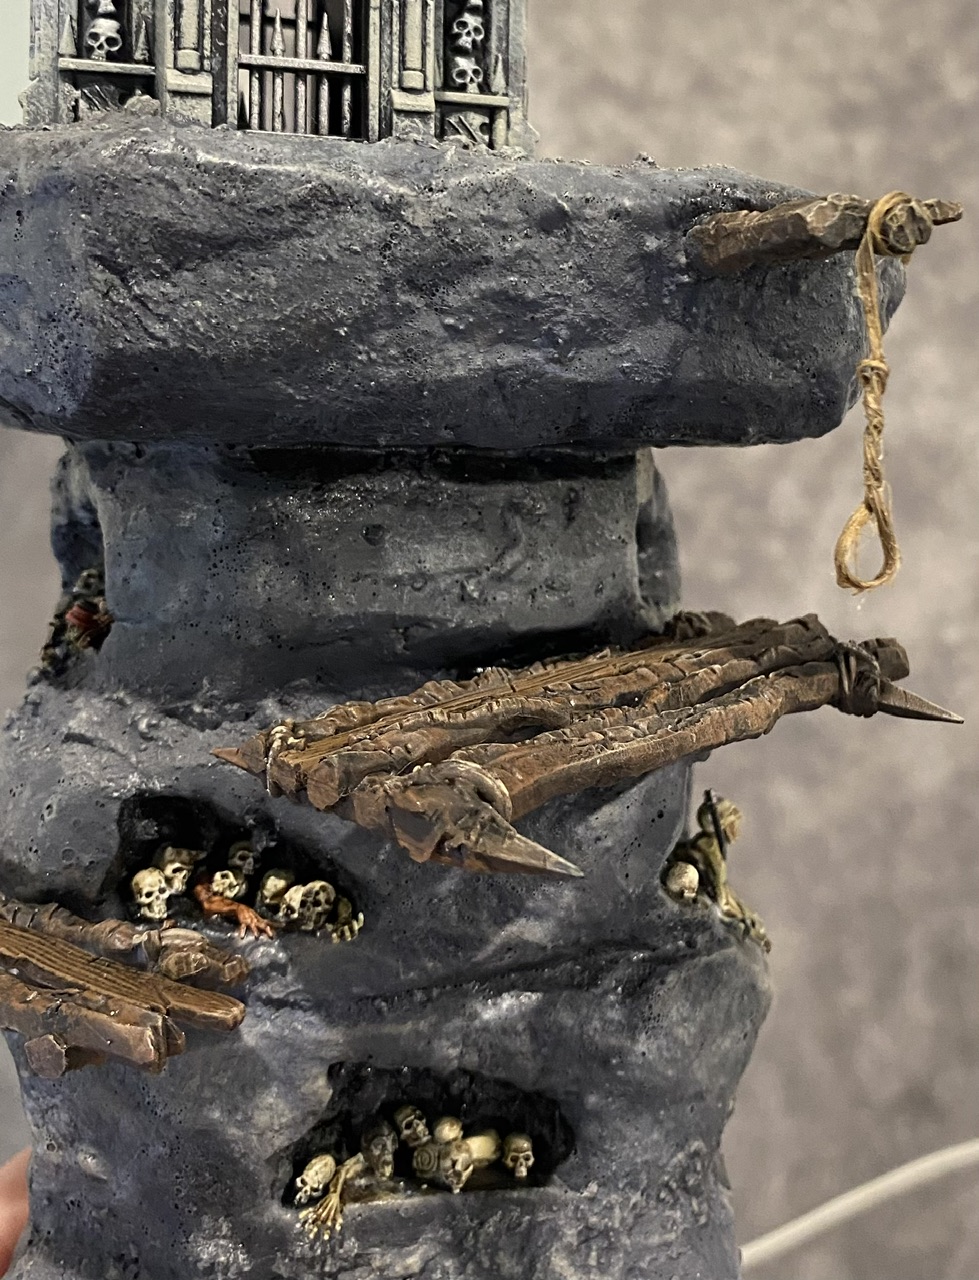
Adding skulls everywhere helps remind the player that they’re in a graveyard. Adding some spare zombie bits helps it feel extra creepy, reminding the players that in this world the unquiet dead are a real possibility.
And there’s always something creepy about a noose (though this one also helps playability by giving players something they can use to climb up with).
Step eight: Whether or not to apply weathering
Nothing says grimdark like weathering (apart from skulls). While just leaving things with the dark brown wash would be ok adding some extra weathering we can really kick it up a notch.
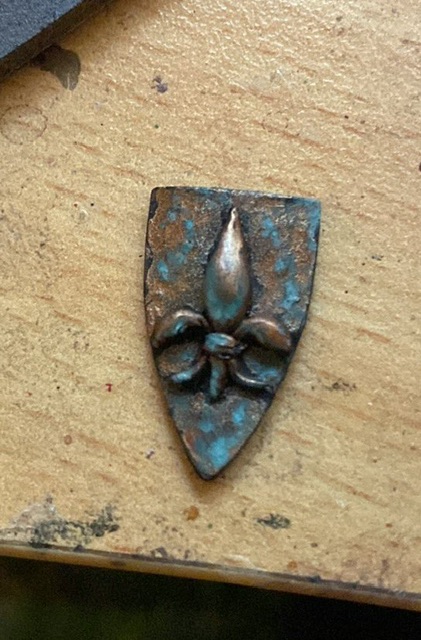
Adding rust and verdigris are some ways to add to that grim feeling while adding some more pops of colour. Rust being orange and verdigris being teal give a unique opportunity to add some colour and keep things grim.
While there are a millions magic products to add these effects I’m cheap so I use regular acrylic paints.
For rust I start with a red-brown. I water this down to basically a wash consistency. Then I dab this onto the metallics in a random pattern. If you put too much on just clean your brush and wick away the excess. I might do two or three goes with the brown, some areas will get multiple coats, some only one. This gives a natural variety that you are after. The watery consistency gives a nice tea staining effect that I think suits rust.
I then grab my fluorescent orange and water it down too. This colour is naturally very translucent so layers over the brown nicely. This I dab onto the centres of the stronger brown splotches. Again you will need multiple layers, but this time I focus on the centres of the previous splotches to create a gradient with the brightest orange in the middle.
Don’t worry if you go over board, you can always go over the orange with more brown or even back to the base coat silver to knock it back.
With verdigris I use the same process but instead of brown and orange I use a blue-green and a bright blue.
The final bit of weathering I like to do is add moss. This is a great way to break up more natural stone pieces and adding a new texture and a pop of colour. To make my moss I use foam flocking torn up into very small pieces (1-2mm across). These I soak in a mix of PVA glue and dirty green wash/ink. You can add a little water to thin the mix and help the foam soak it up. Then you can paint this onto your terrain where you want to. The PVA glue will not only help keep your moss where you want it but will also harden the foam helping protect it. Be careful when applying it as the green colouring will stain what you put it on, even if you move the foam later.
Moss helps make your terrain feel dank and unpleasant. It, along with the oxidation effects, makes your terrain and the world you populate with it, as if it is decaying and rotten.

Step nine: playing time
So now it’s altogether it’s time to play with it.
With these 3 pieces and little scatter I can set up a little graveyard to play mordhiem or other skirmish games in. With another big piece or two I could fit out a spooky graveyard board… now that gets me thinking…
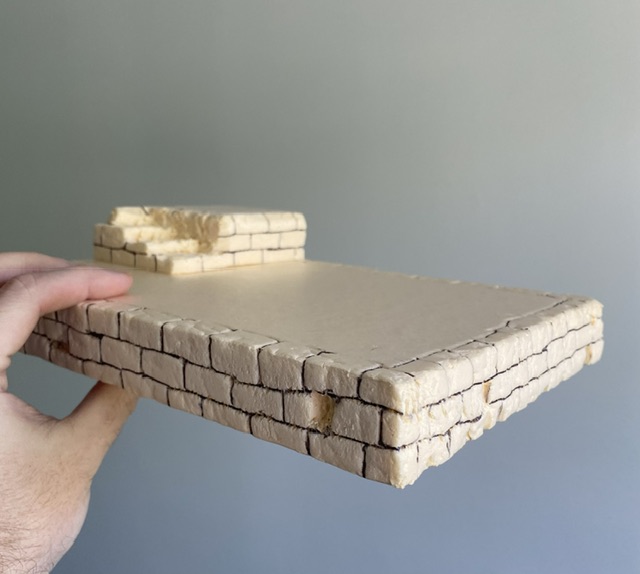
Epilogue: scatter pieces
So with a couple of pieces of left overs from the kits used I’ve put together some scatter terrain.
By using all the same techniques it took only an hour or so.