![NO Weekender Or Cult Of Games XLBS This Weekend [Updated]](https://images.beastsofwar.com/2026/03/No_Weekender_and_XLBS_this_Weekend-225-127.jpg)


Portable Desert


Recommendations: 111
About the Project
For my brother's Christmas present, I'm creating a desert terrain with four modular tiles for small Gaslands games, which can be transported in a homemade wooden case so he can play wherever he wants.
Related Game: Gaslands
Related Genre: Post-Apocalyptic
Related Contest: TerrainFest 2025
This Project is Active
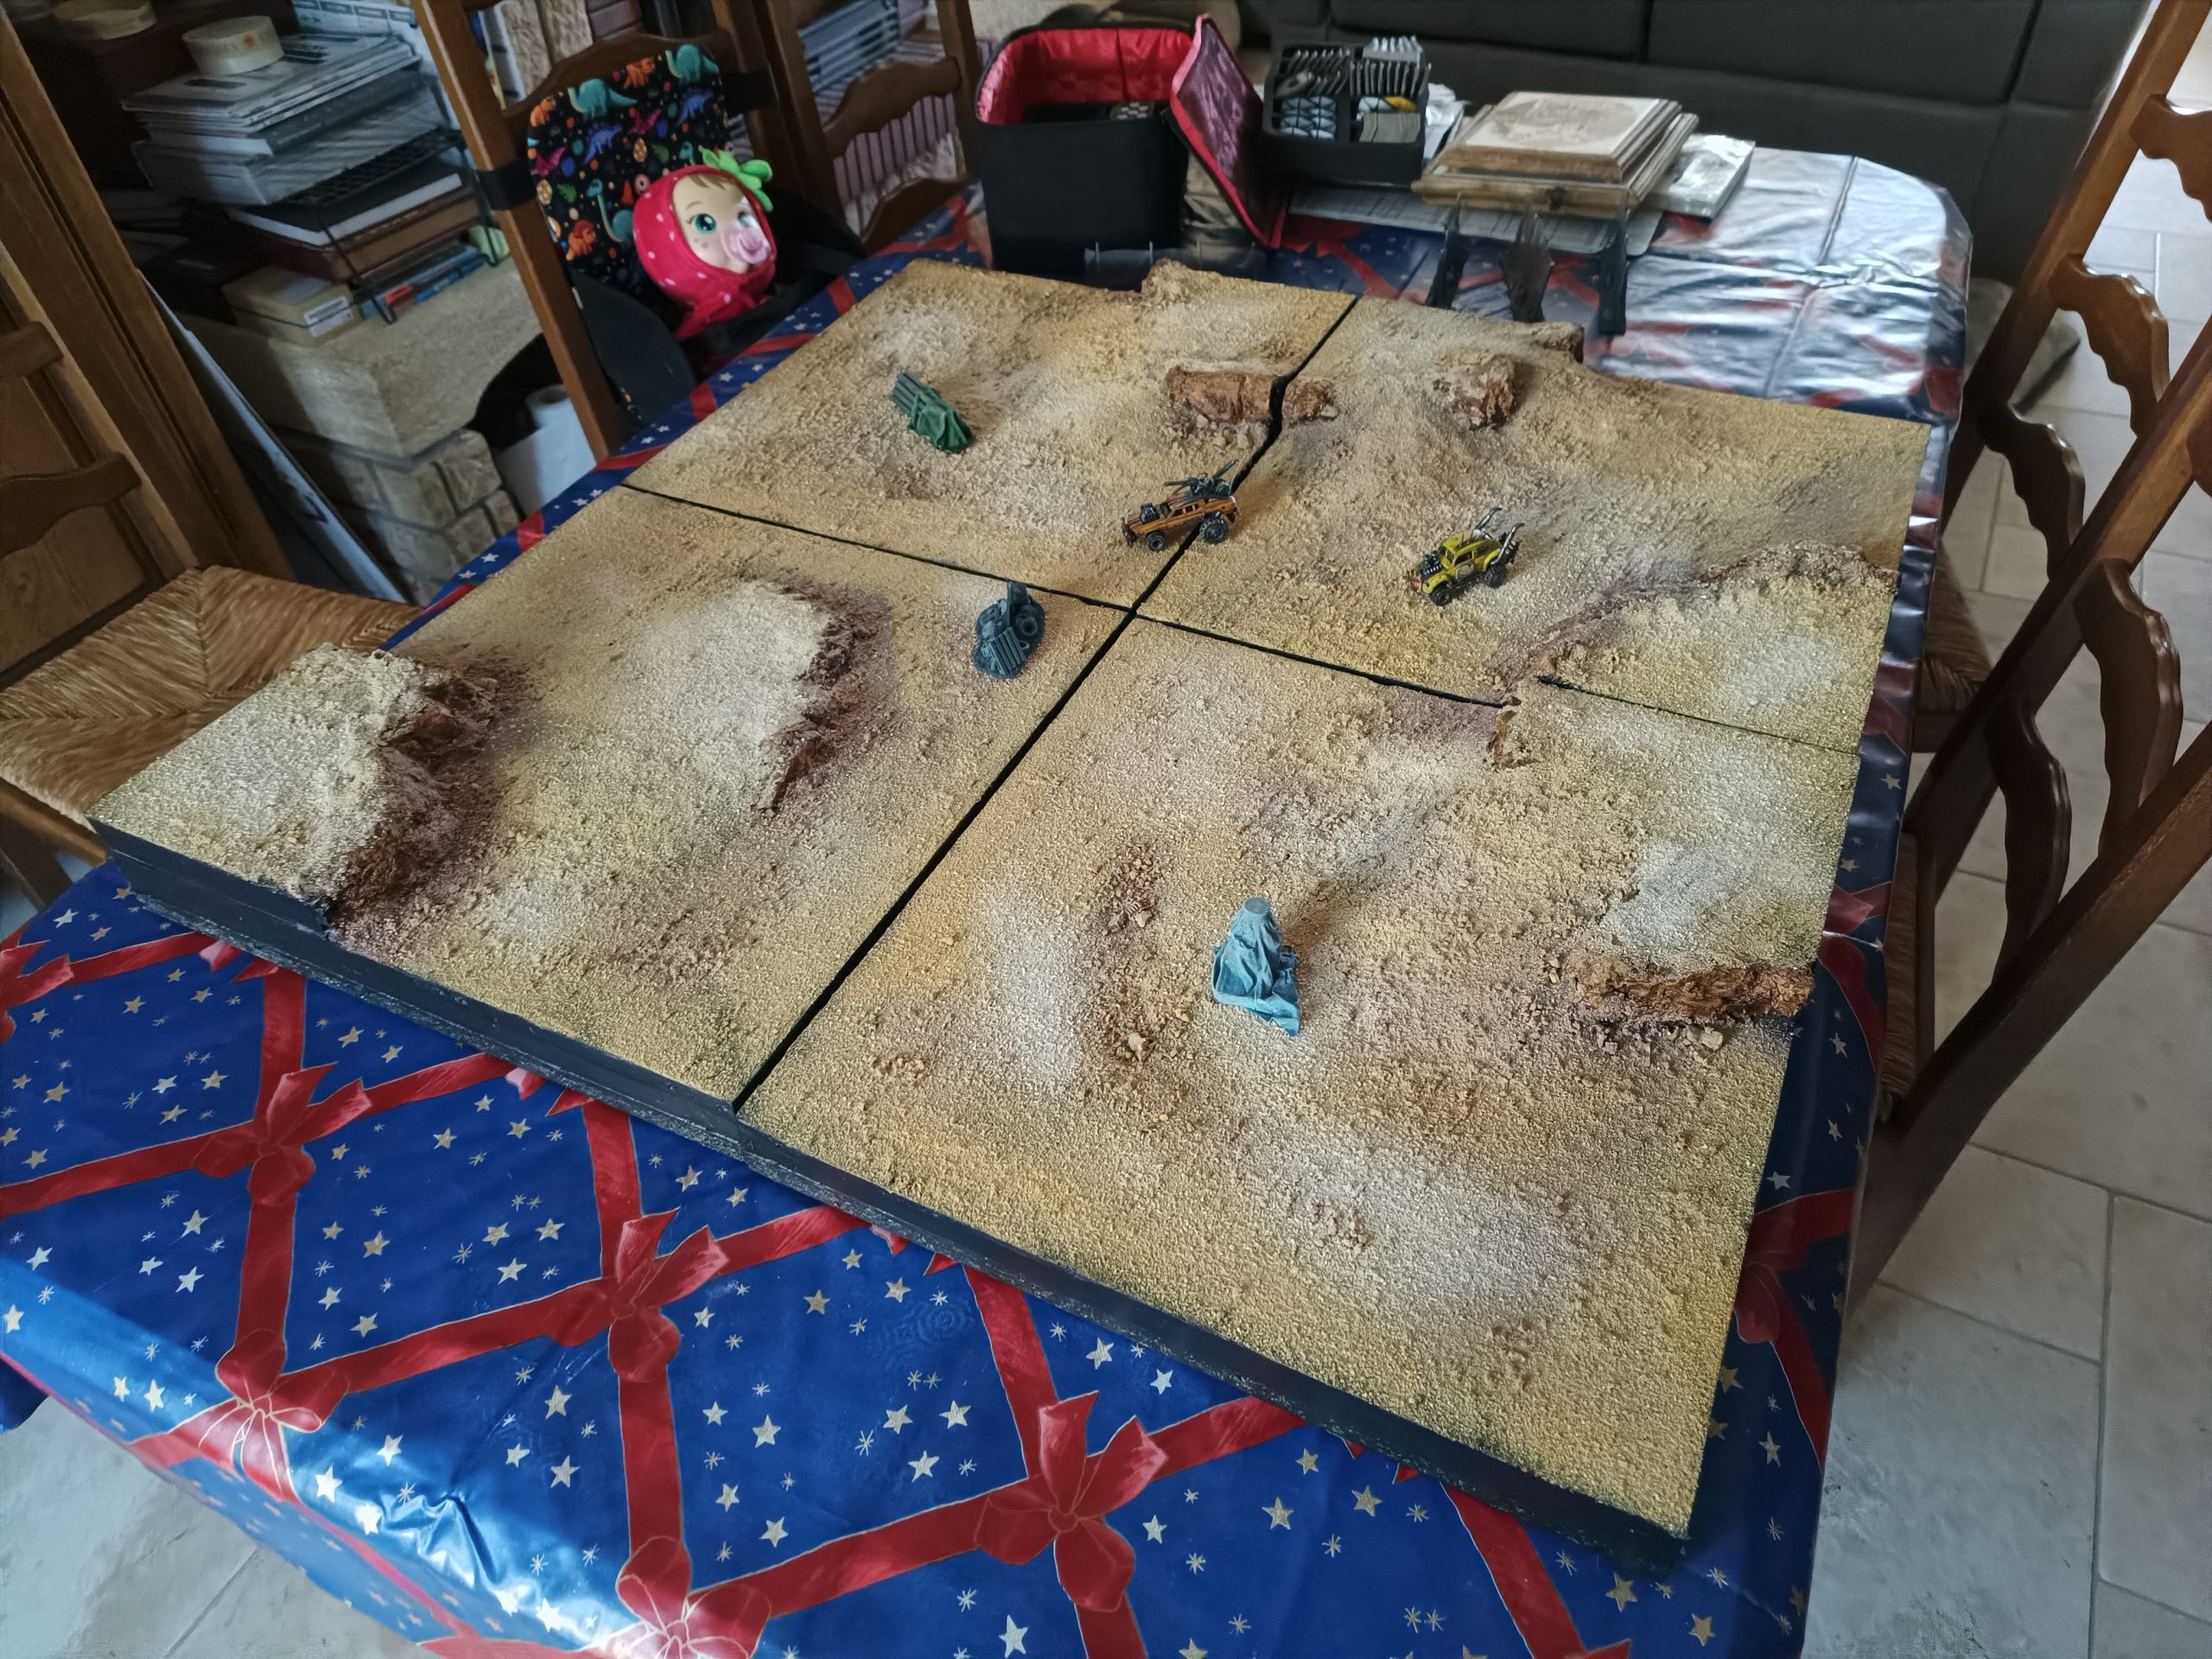
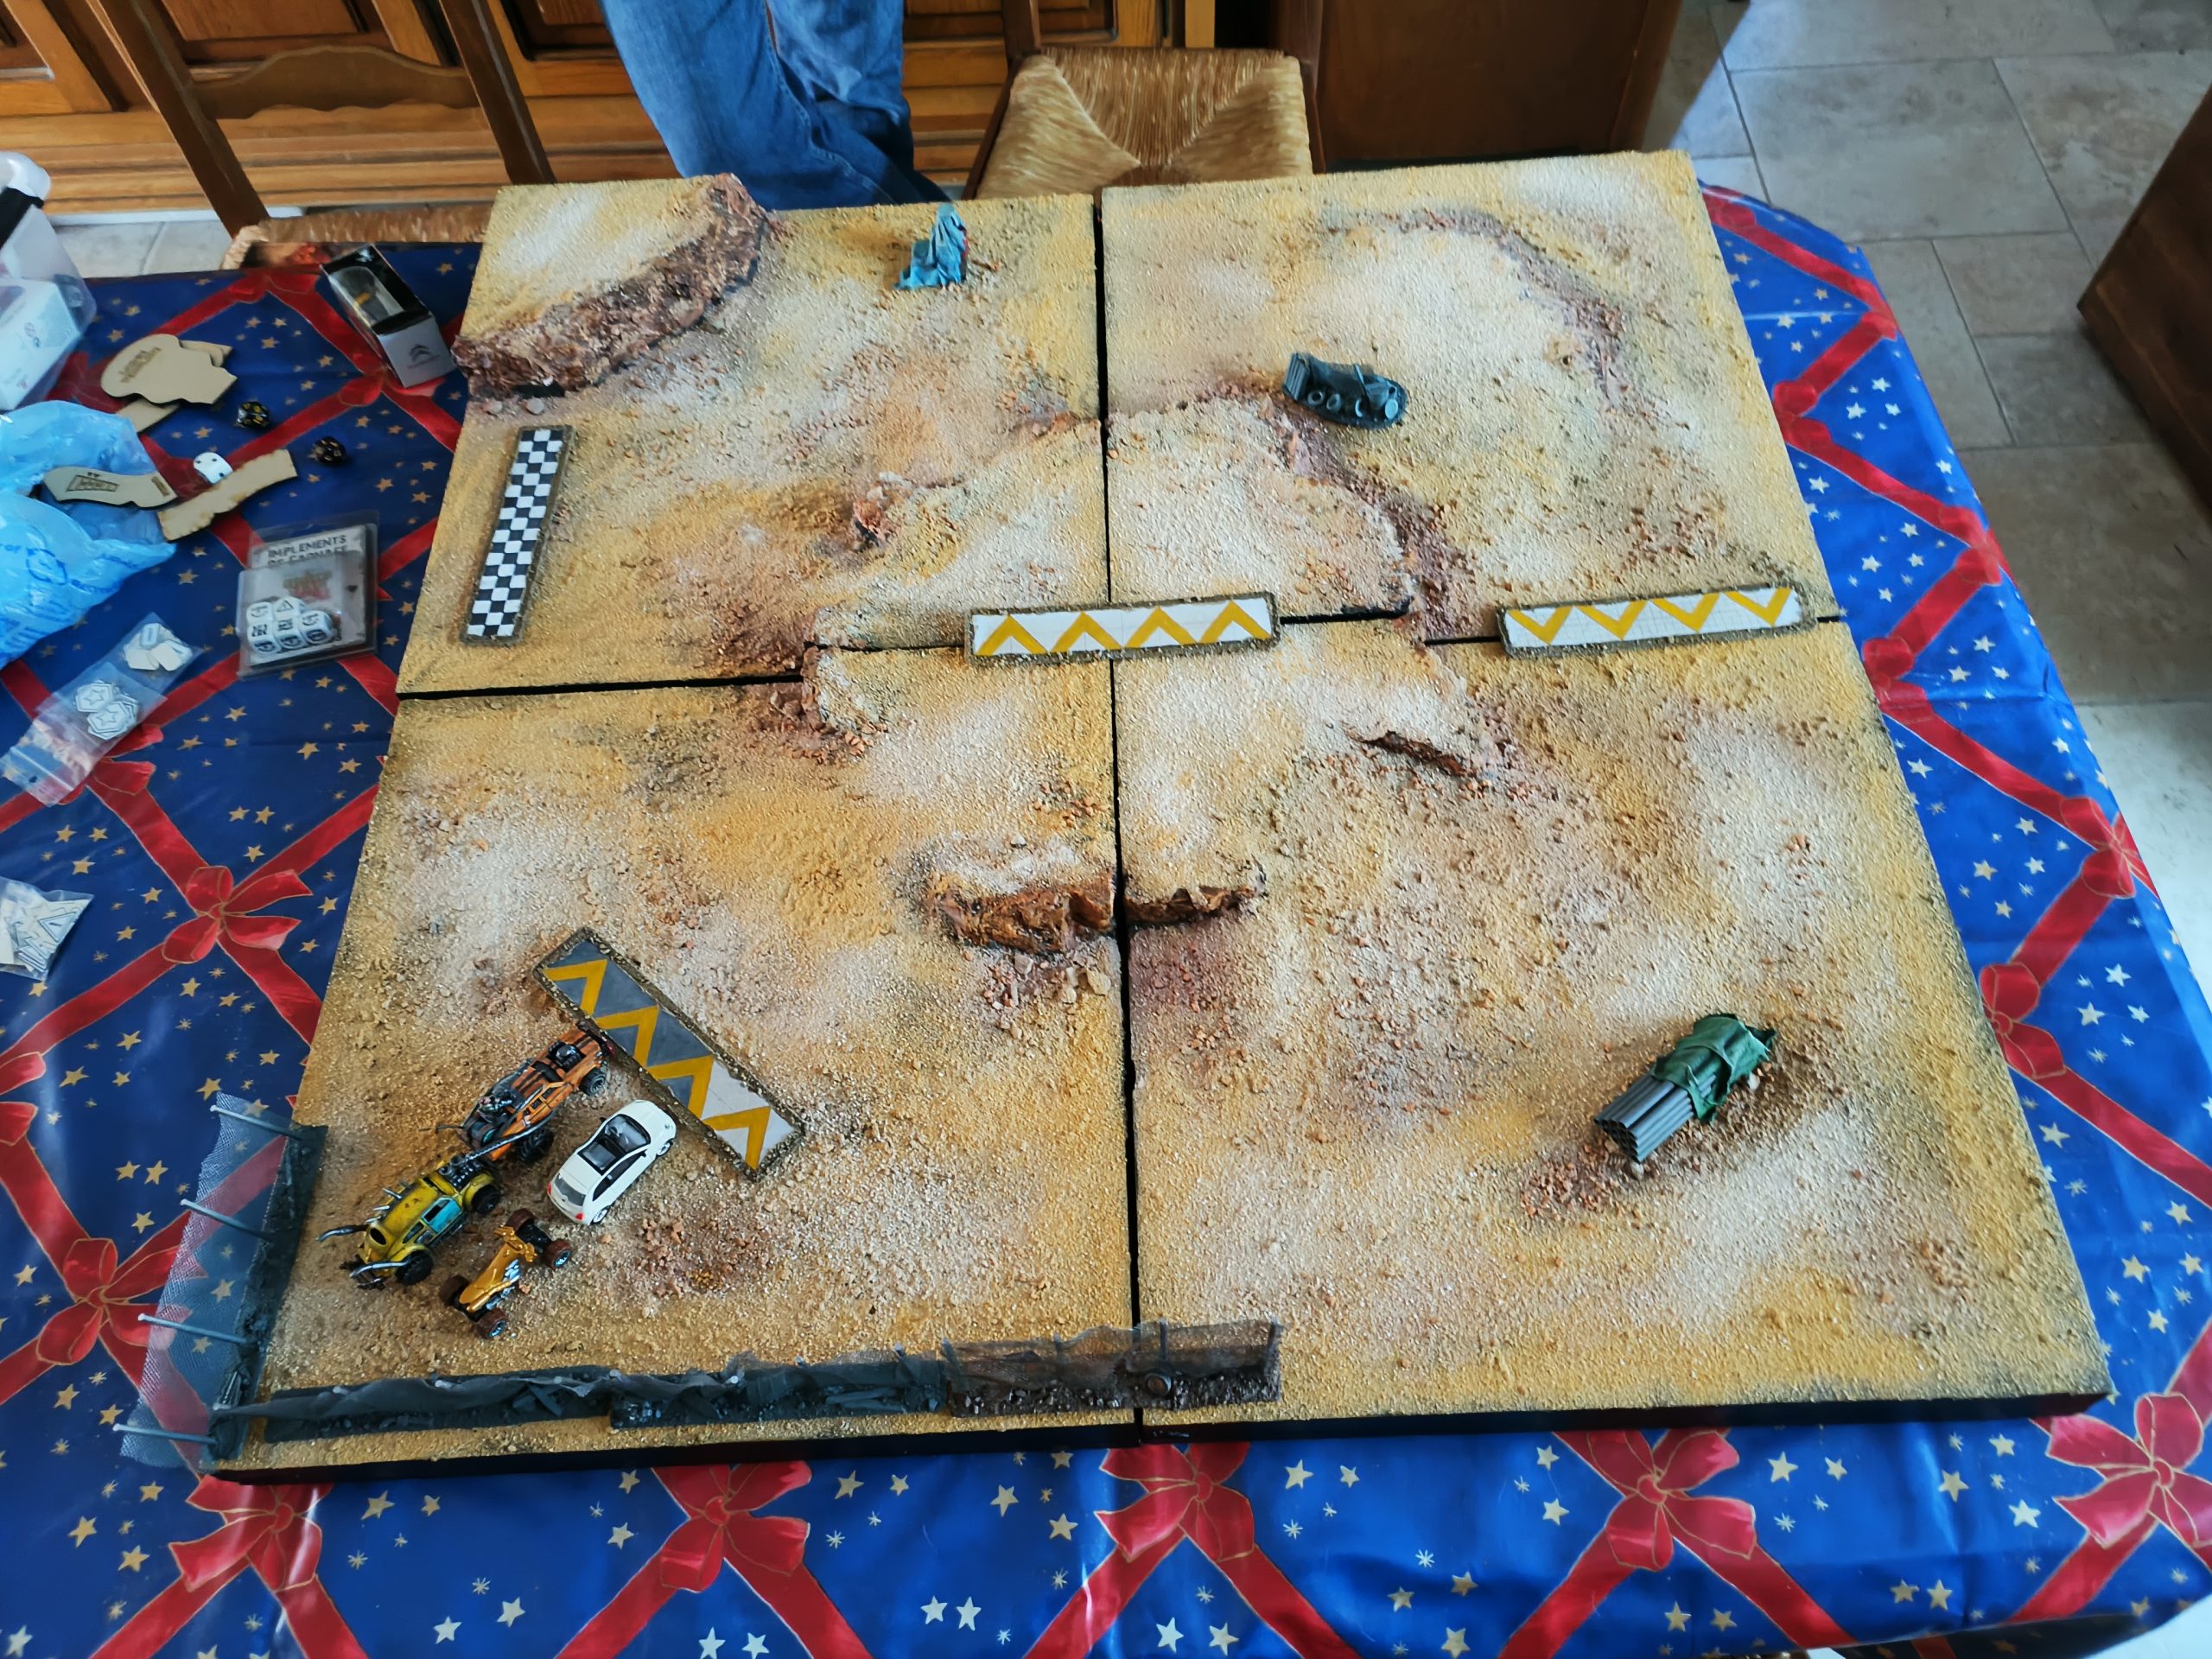
At the heart of the action
We were finally able to play a few games on this new field, with some custom scenery:
It was a real pleasure to work on this project, despite all the difficulties we encountered. And what a pleasure it is to be able to play on it! It’s a childhood dream come true!
Thank you for following this project, I hope you enjoyed it too. 🙂
The finishing touches
All that remains is the finishing touches: the handles, corner protectors, protective foam in case the tiles come loose and slide forward.
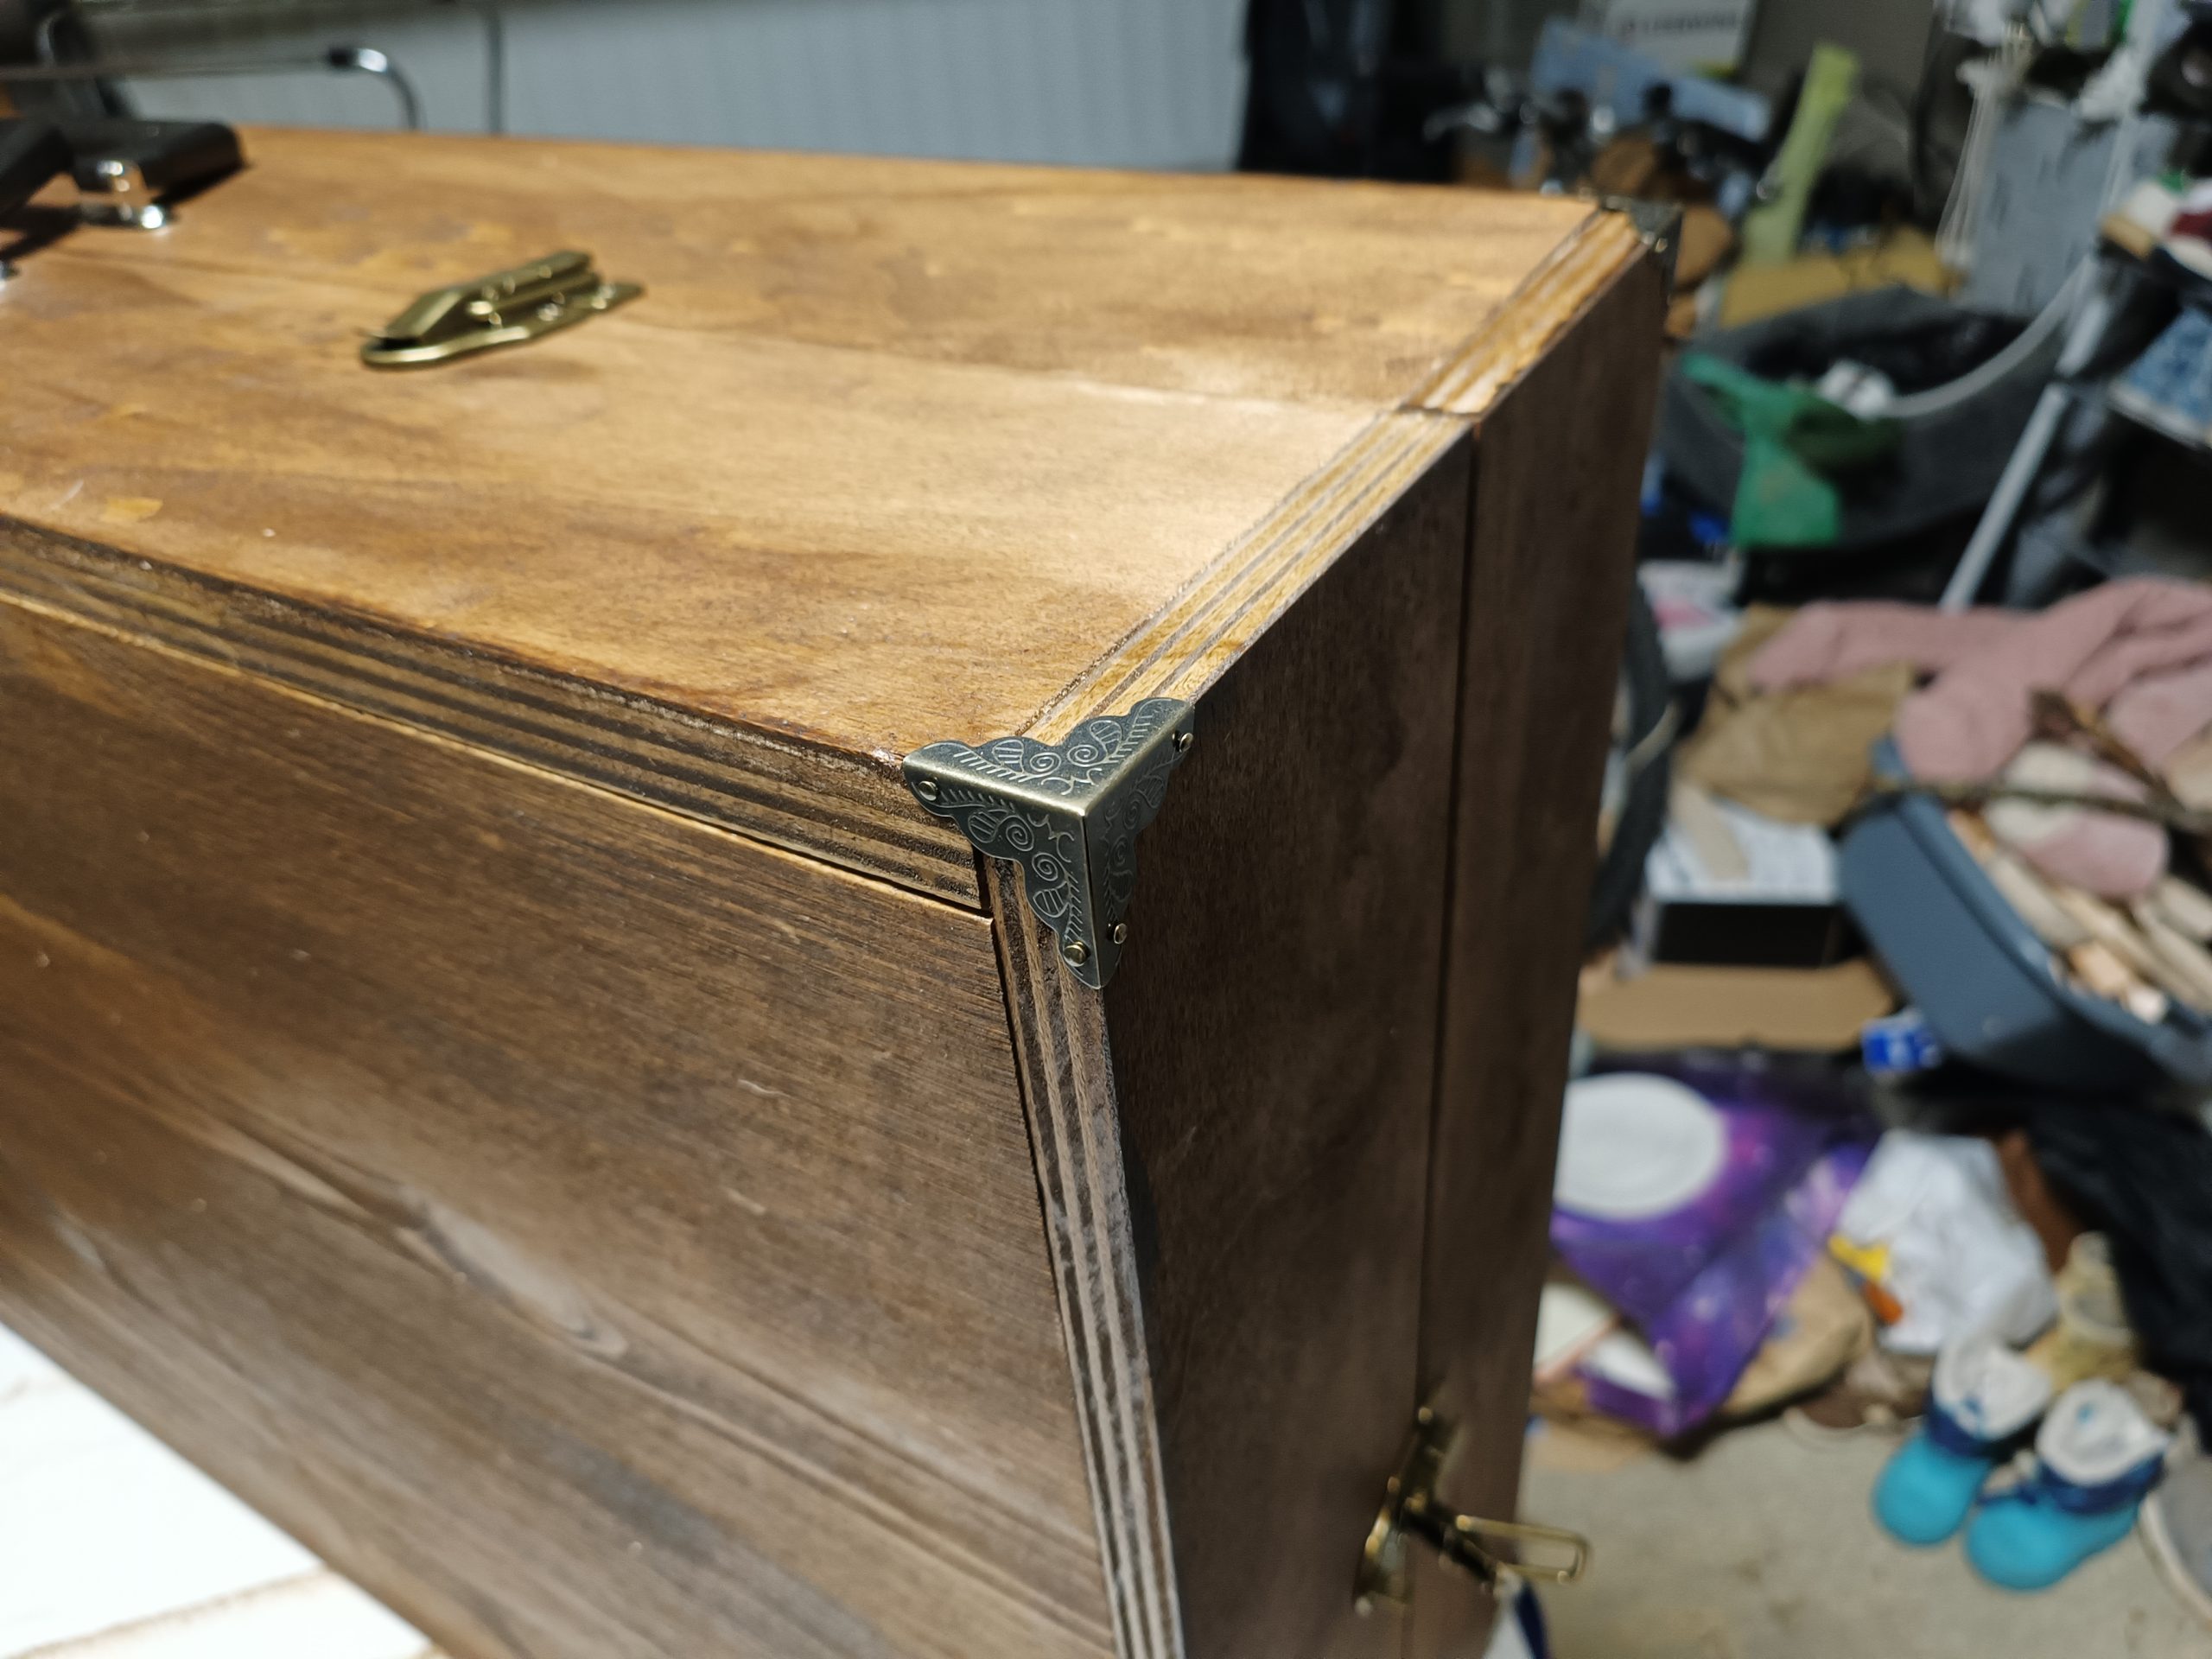
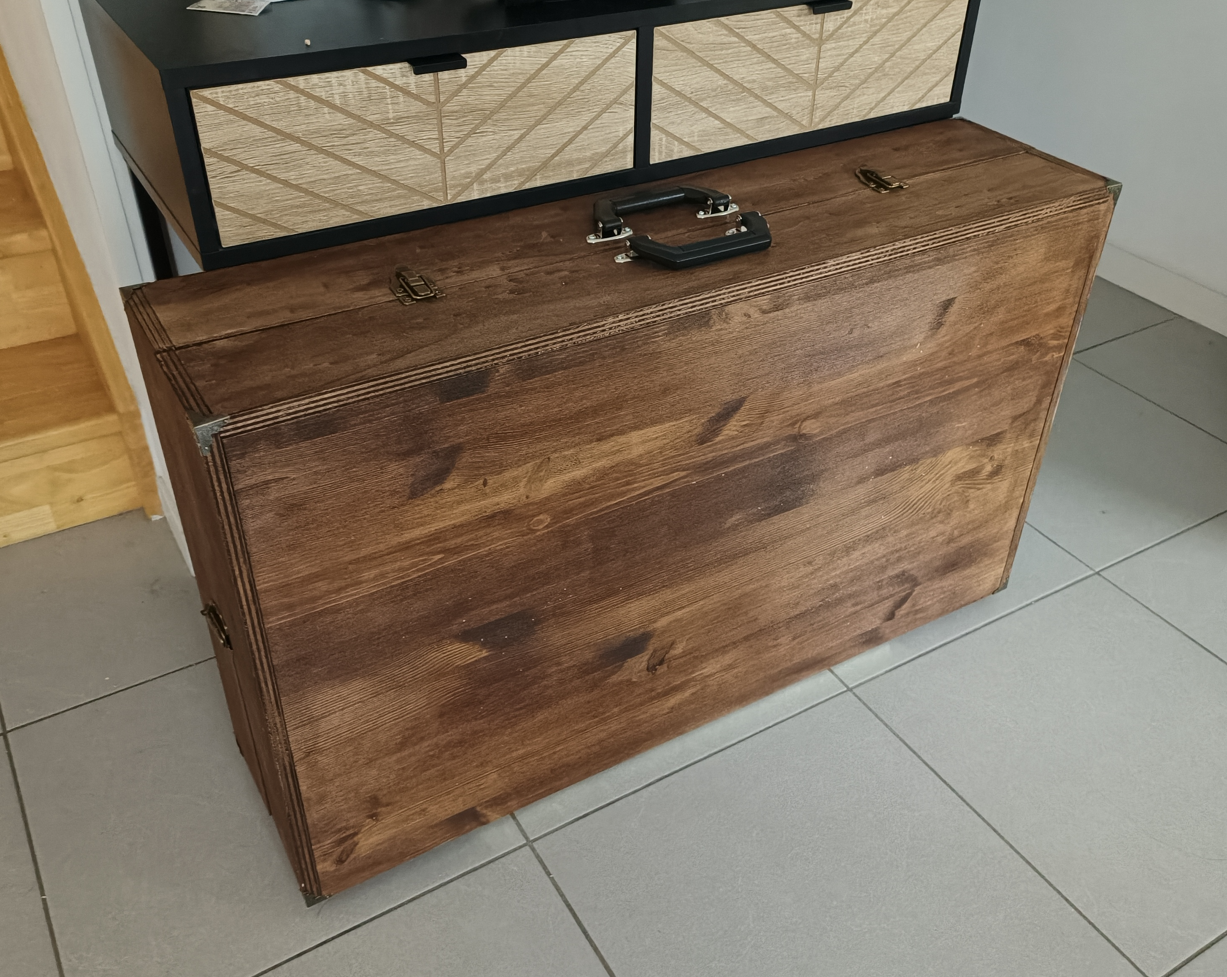
I really like the result, even though the case is very large and a little too heavy when full…
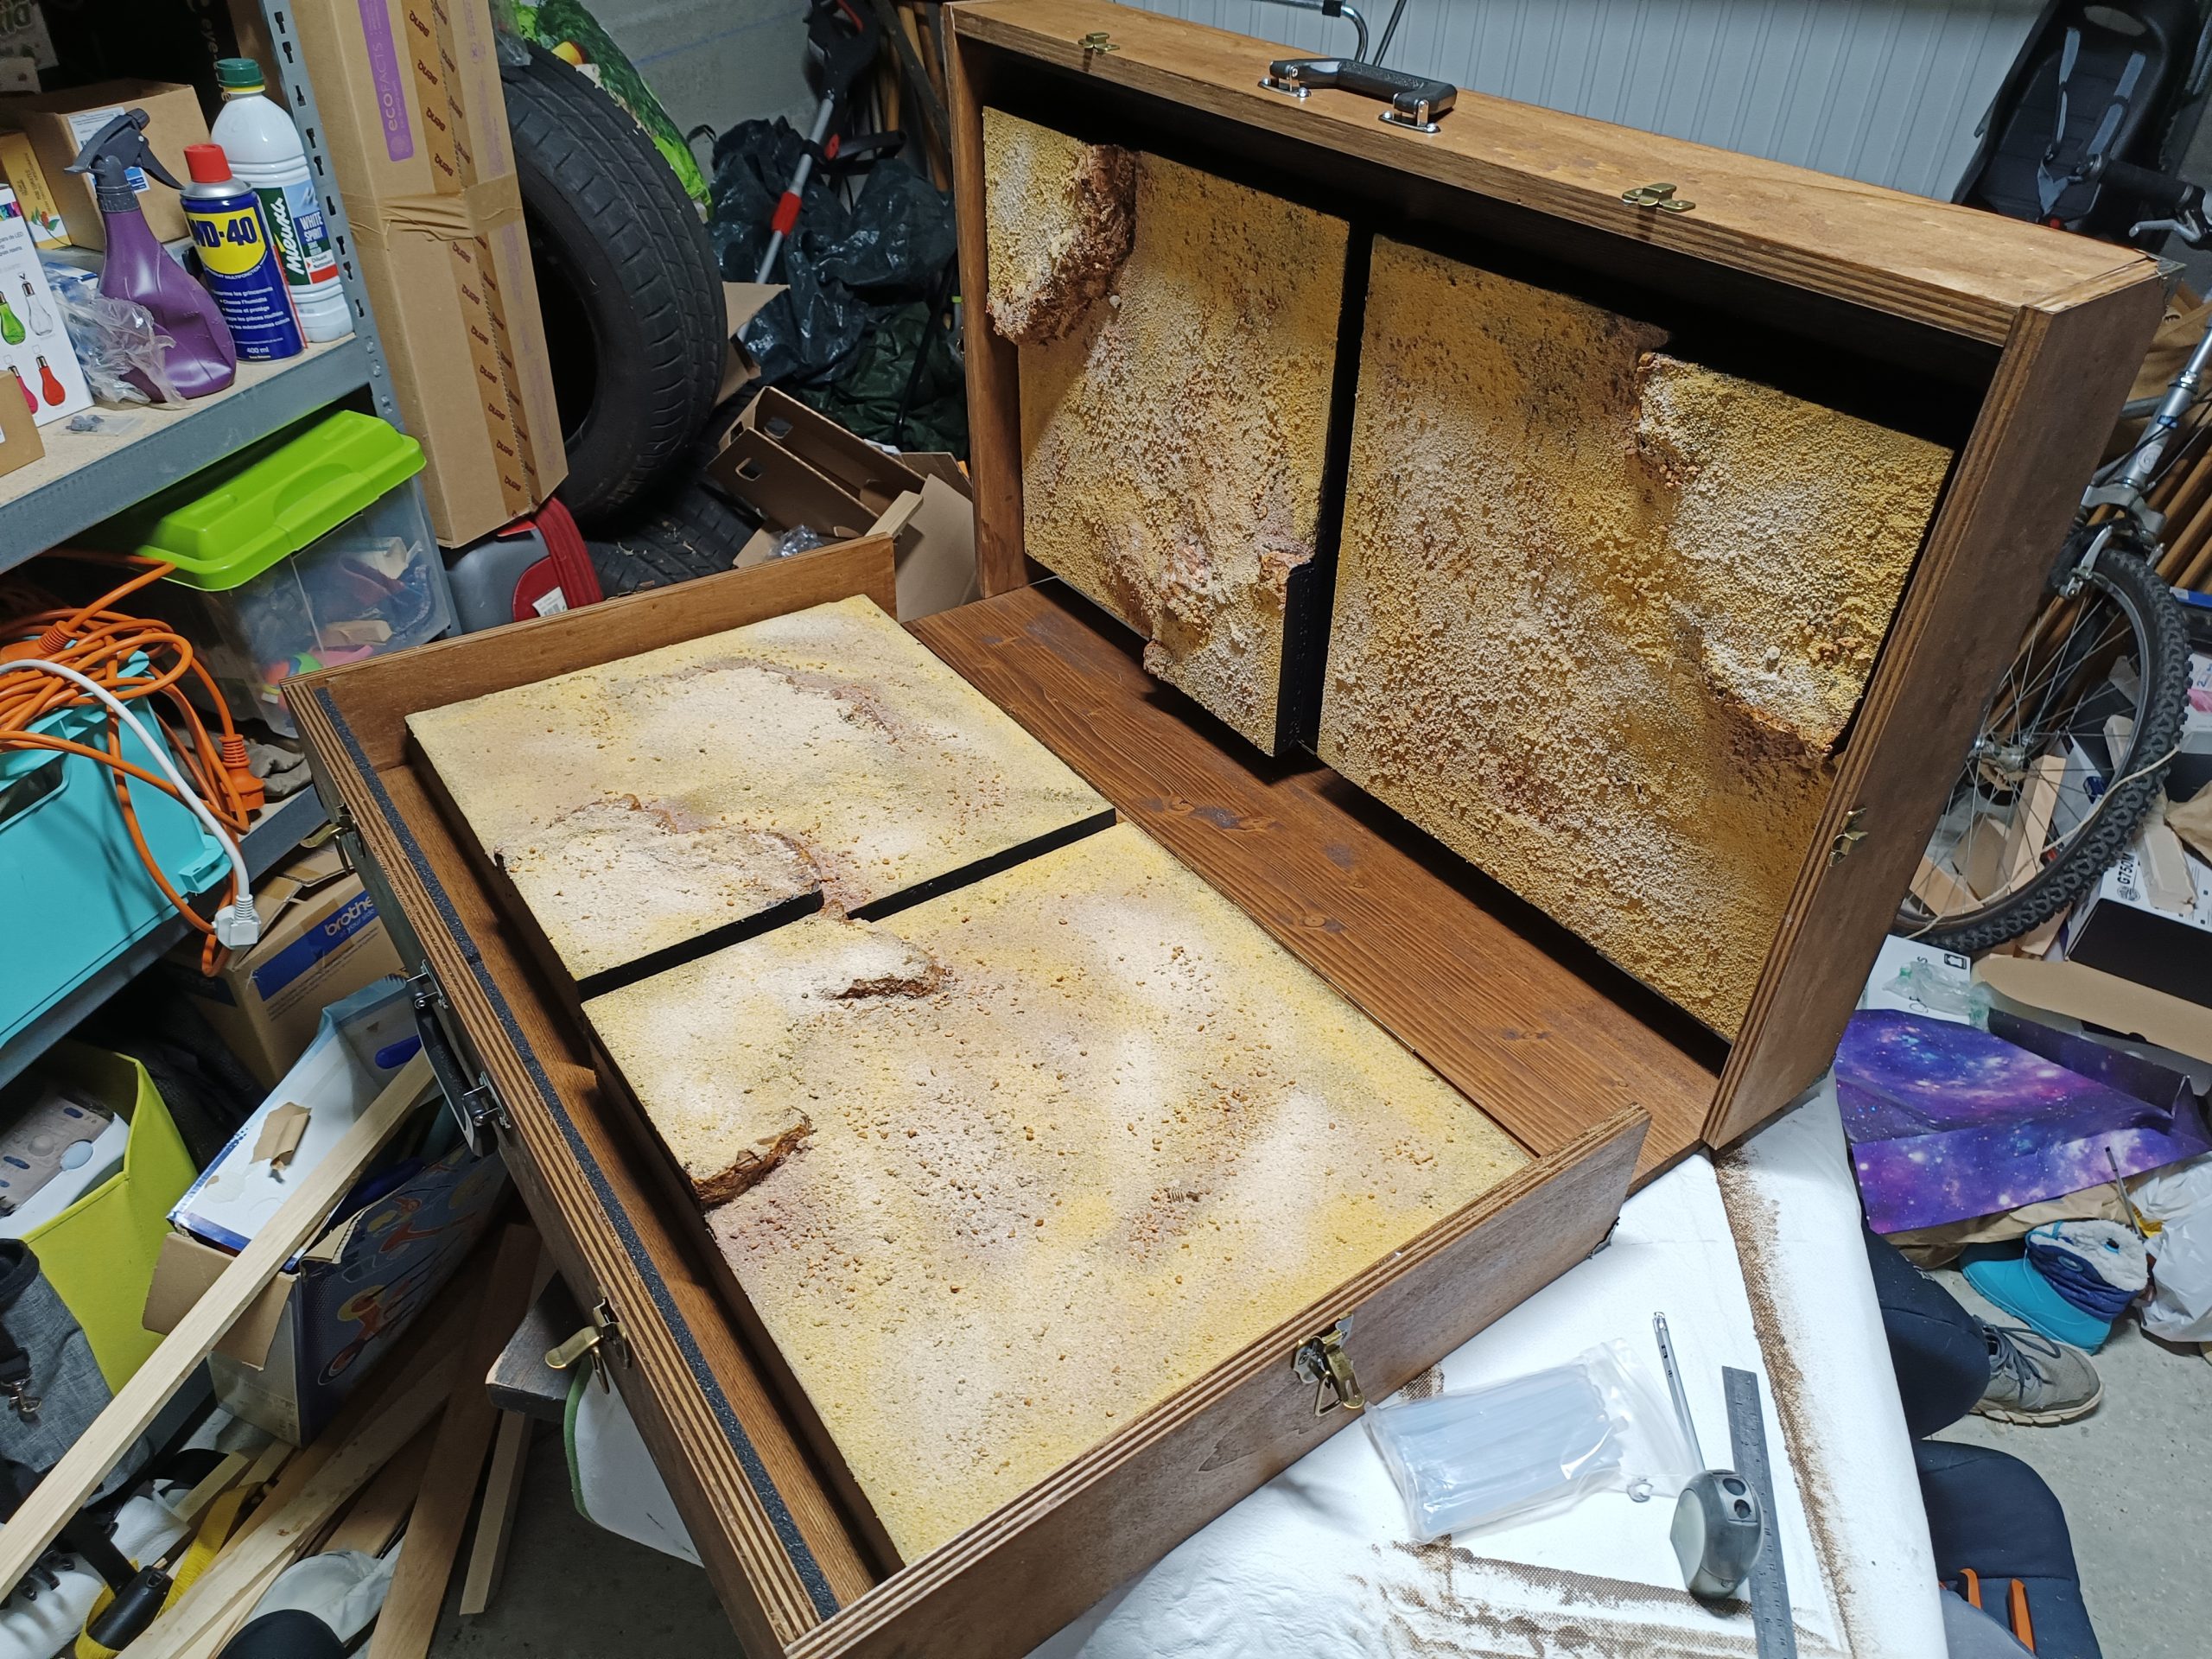
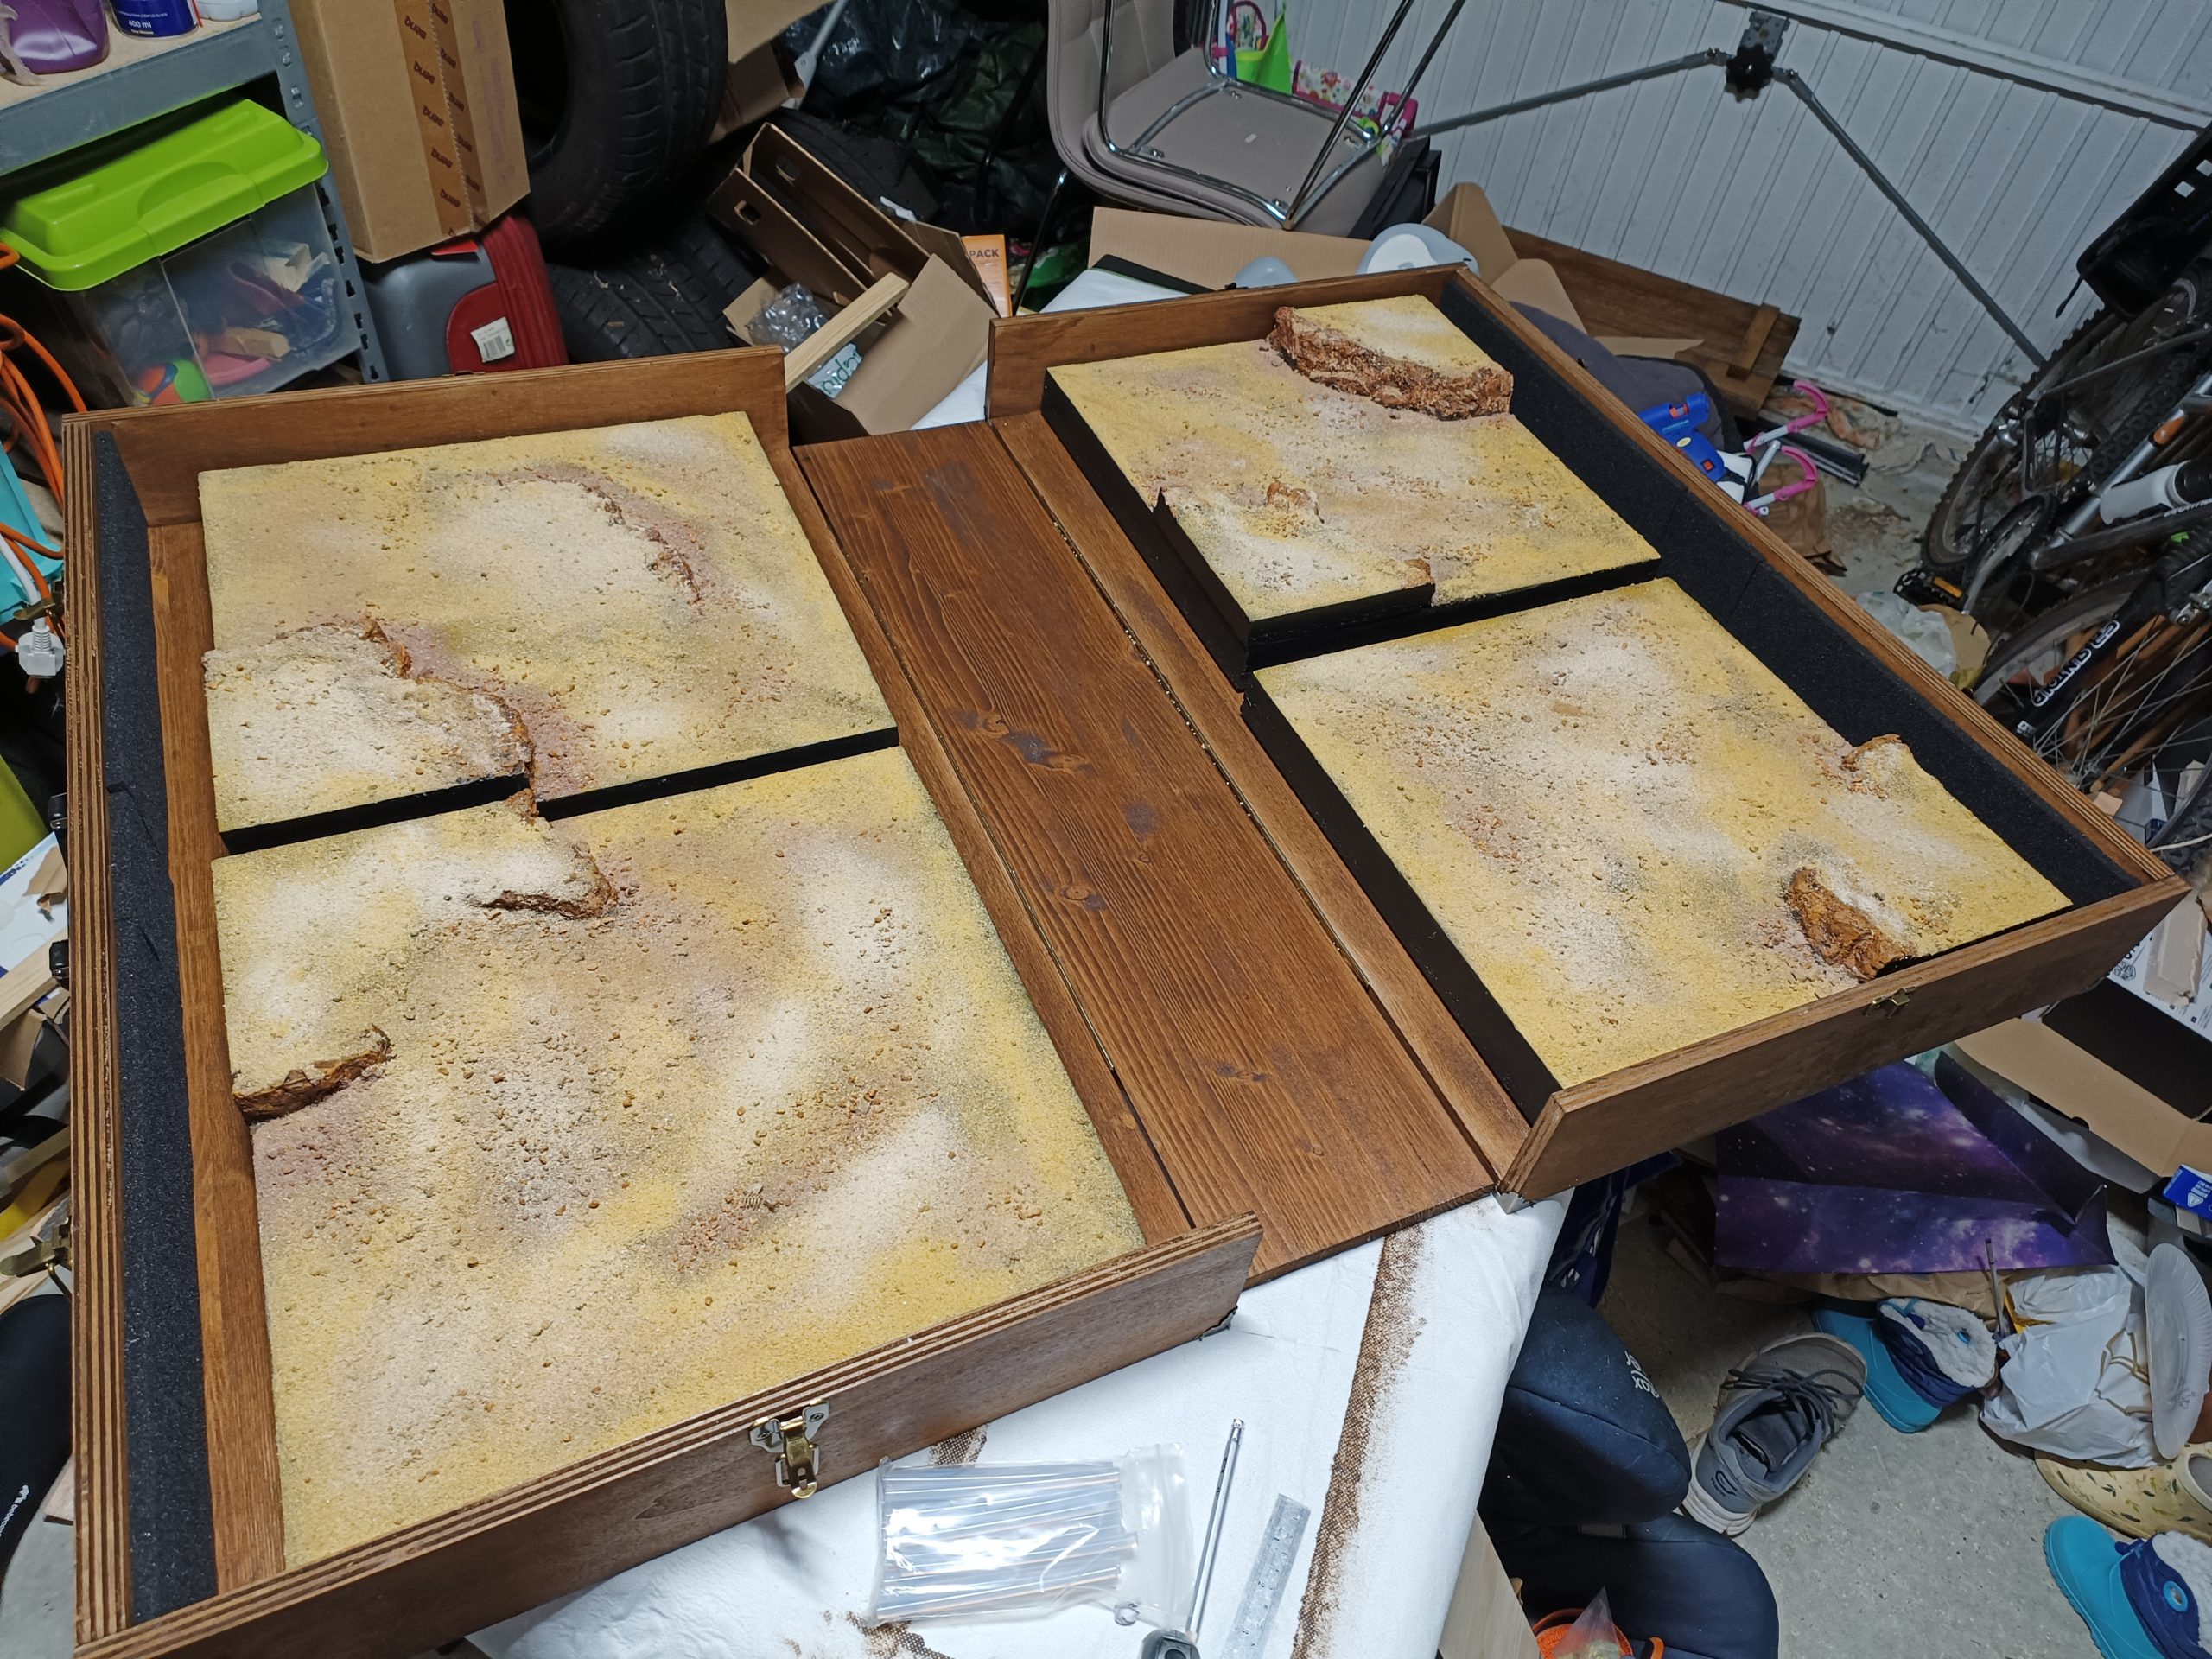
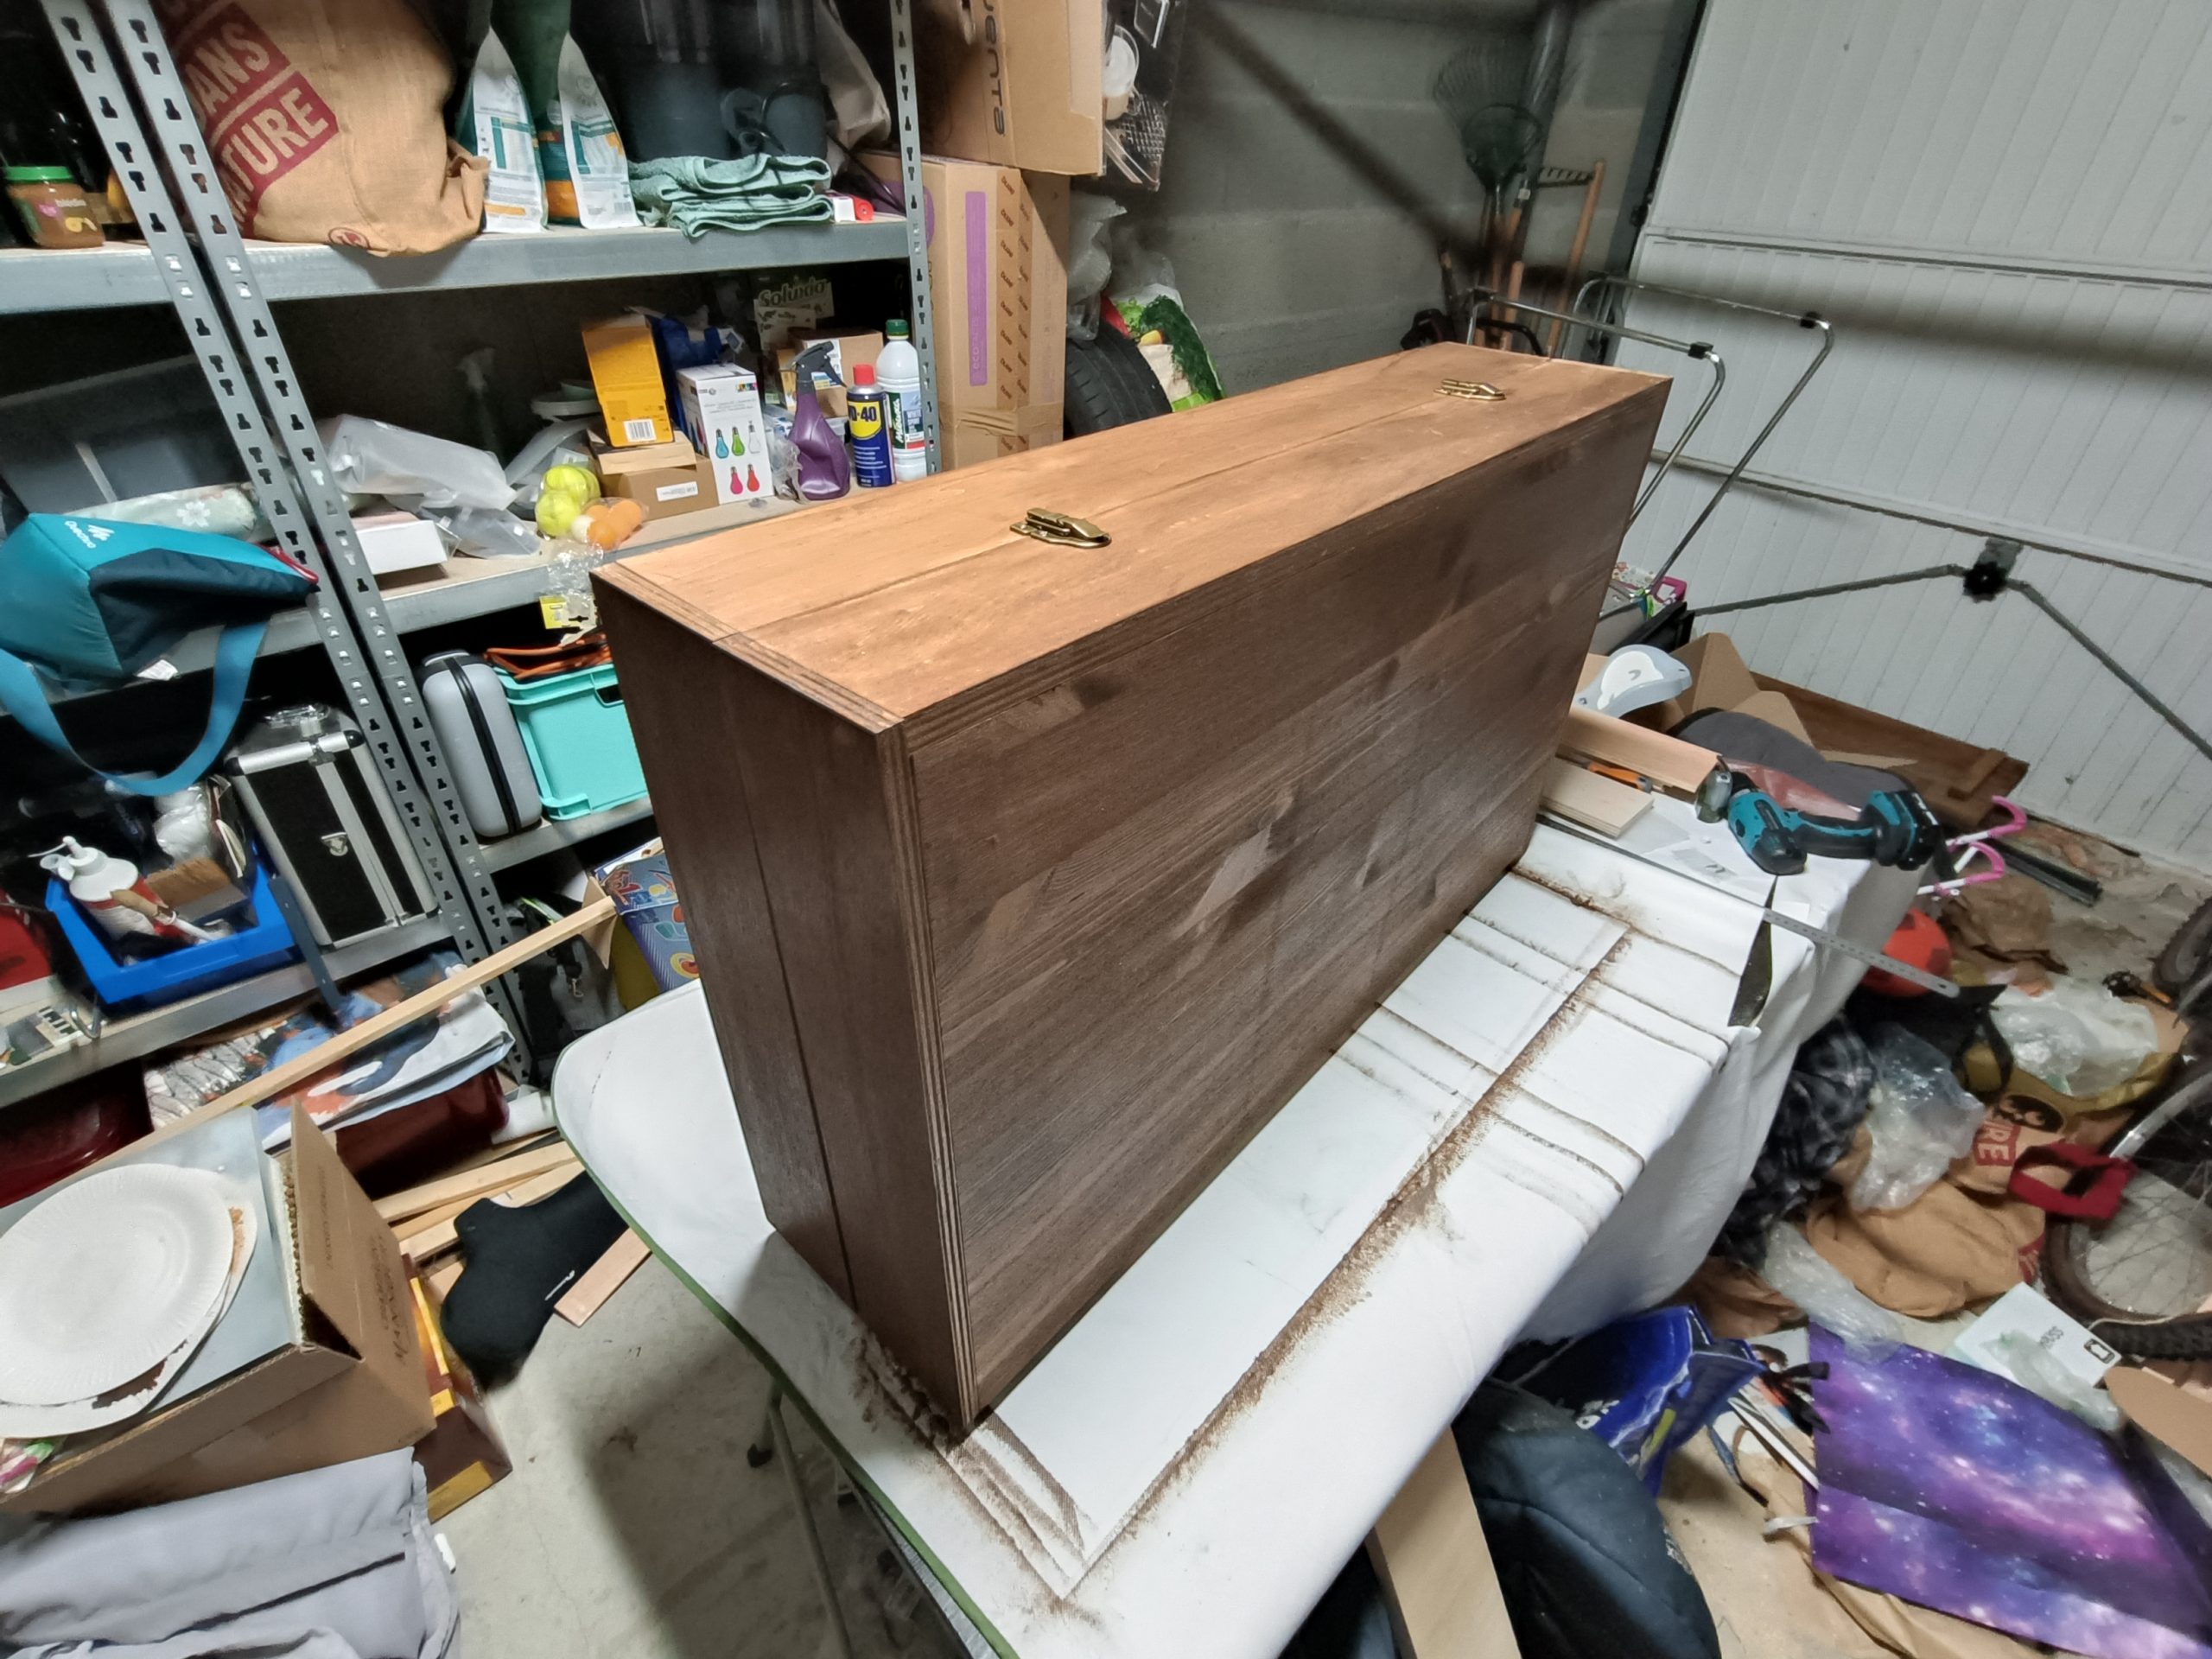
How to box ?
After taking numerous measurements and running 3D simulations to determine how the box would open and whether the measurements were correct, and despite doubts about the final shape of the box, it was time to get started. I started working on two boards long enough to hold two tiles each, connected by a central board to create a flat surface that could be used as a game table if needed. I left a little space to add decorations, models, vehicles, and any other elements useful for the game.
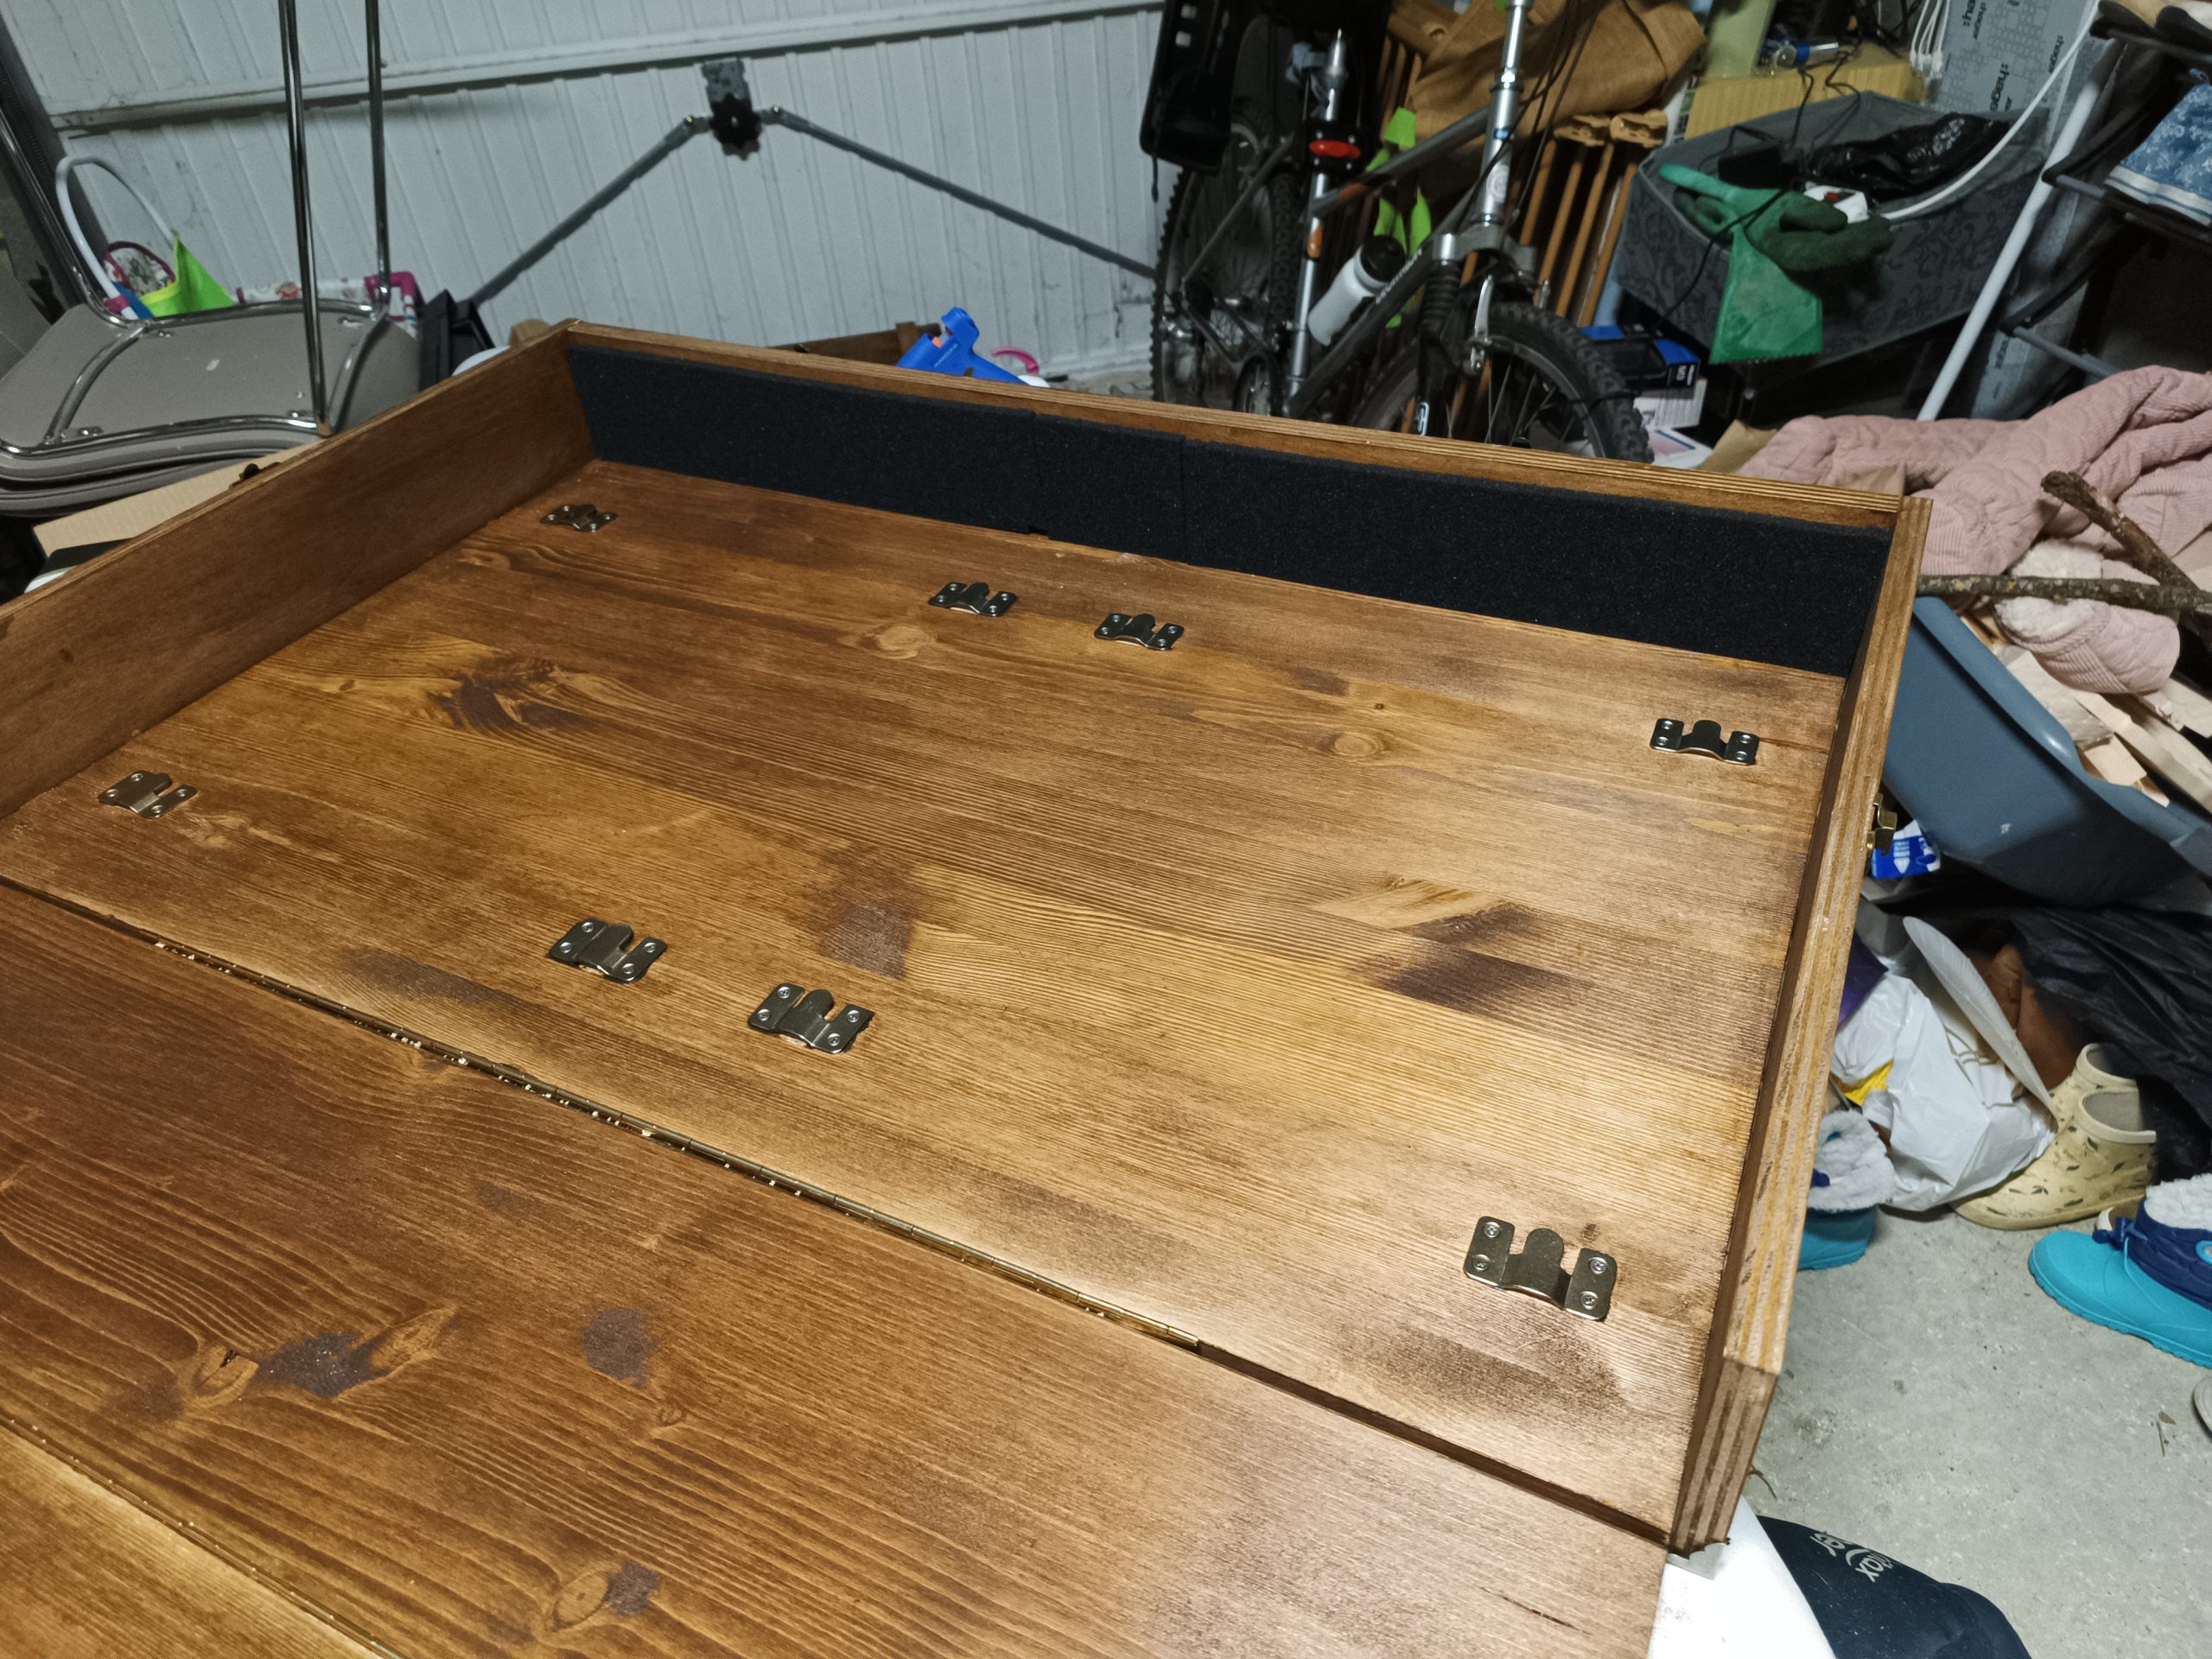
Next came the question of how to attach the tiles to the boards… I had in mind to use magnets, which would allow the tiles to be attached in any direction, but in the end, the models I found were either too powerful, too fragile, or too expensive. So I turned to simple fasteners, as can be seen in the following image.
During this period of research, the boards I had previously purchased decided to warp, so it took a lot of effort and a week per board to straighten them out…
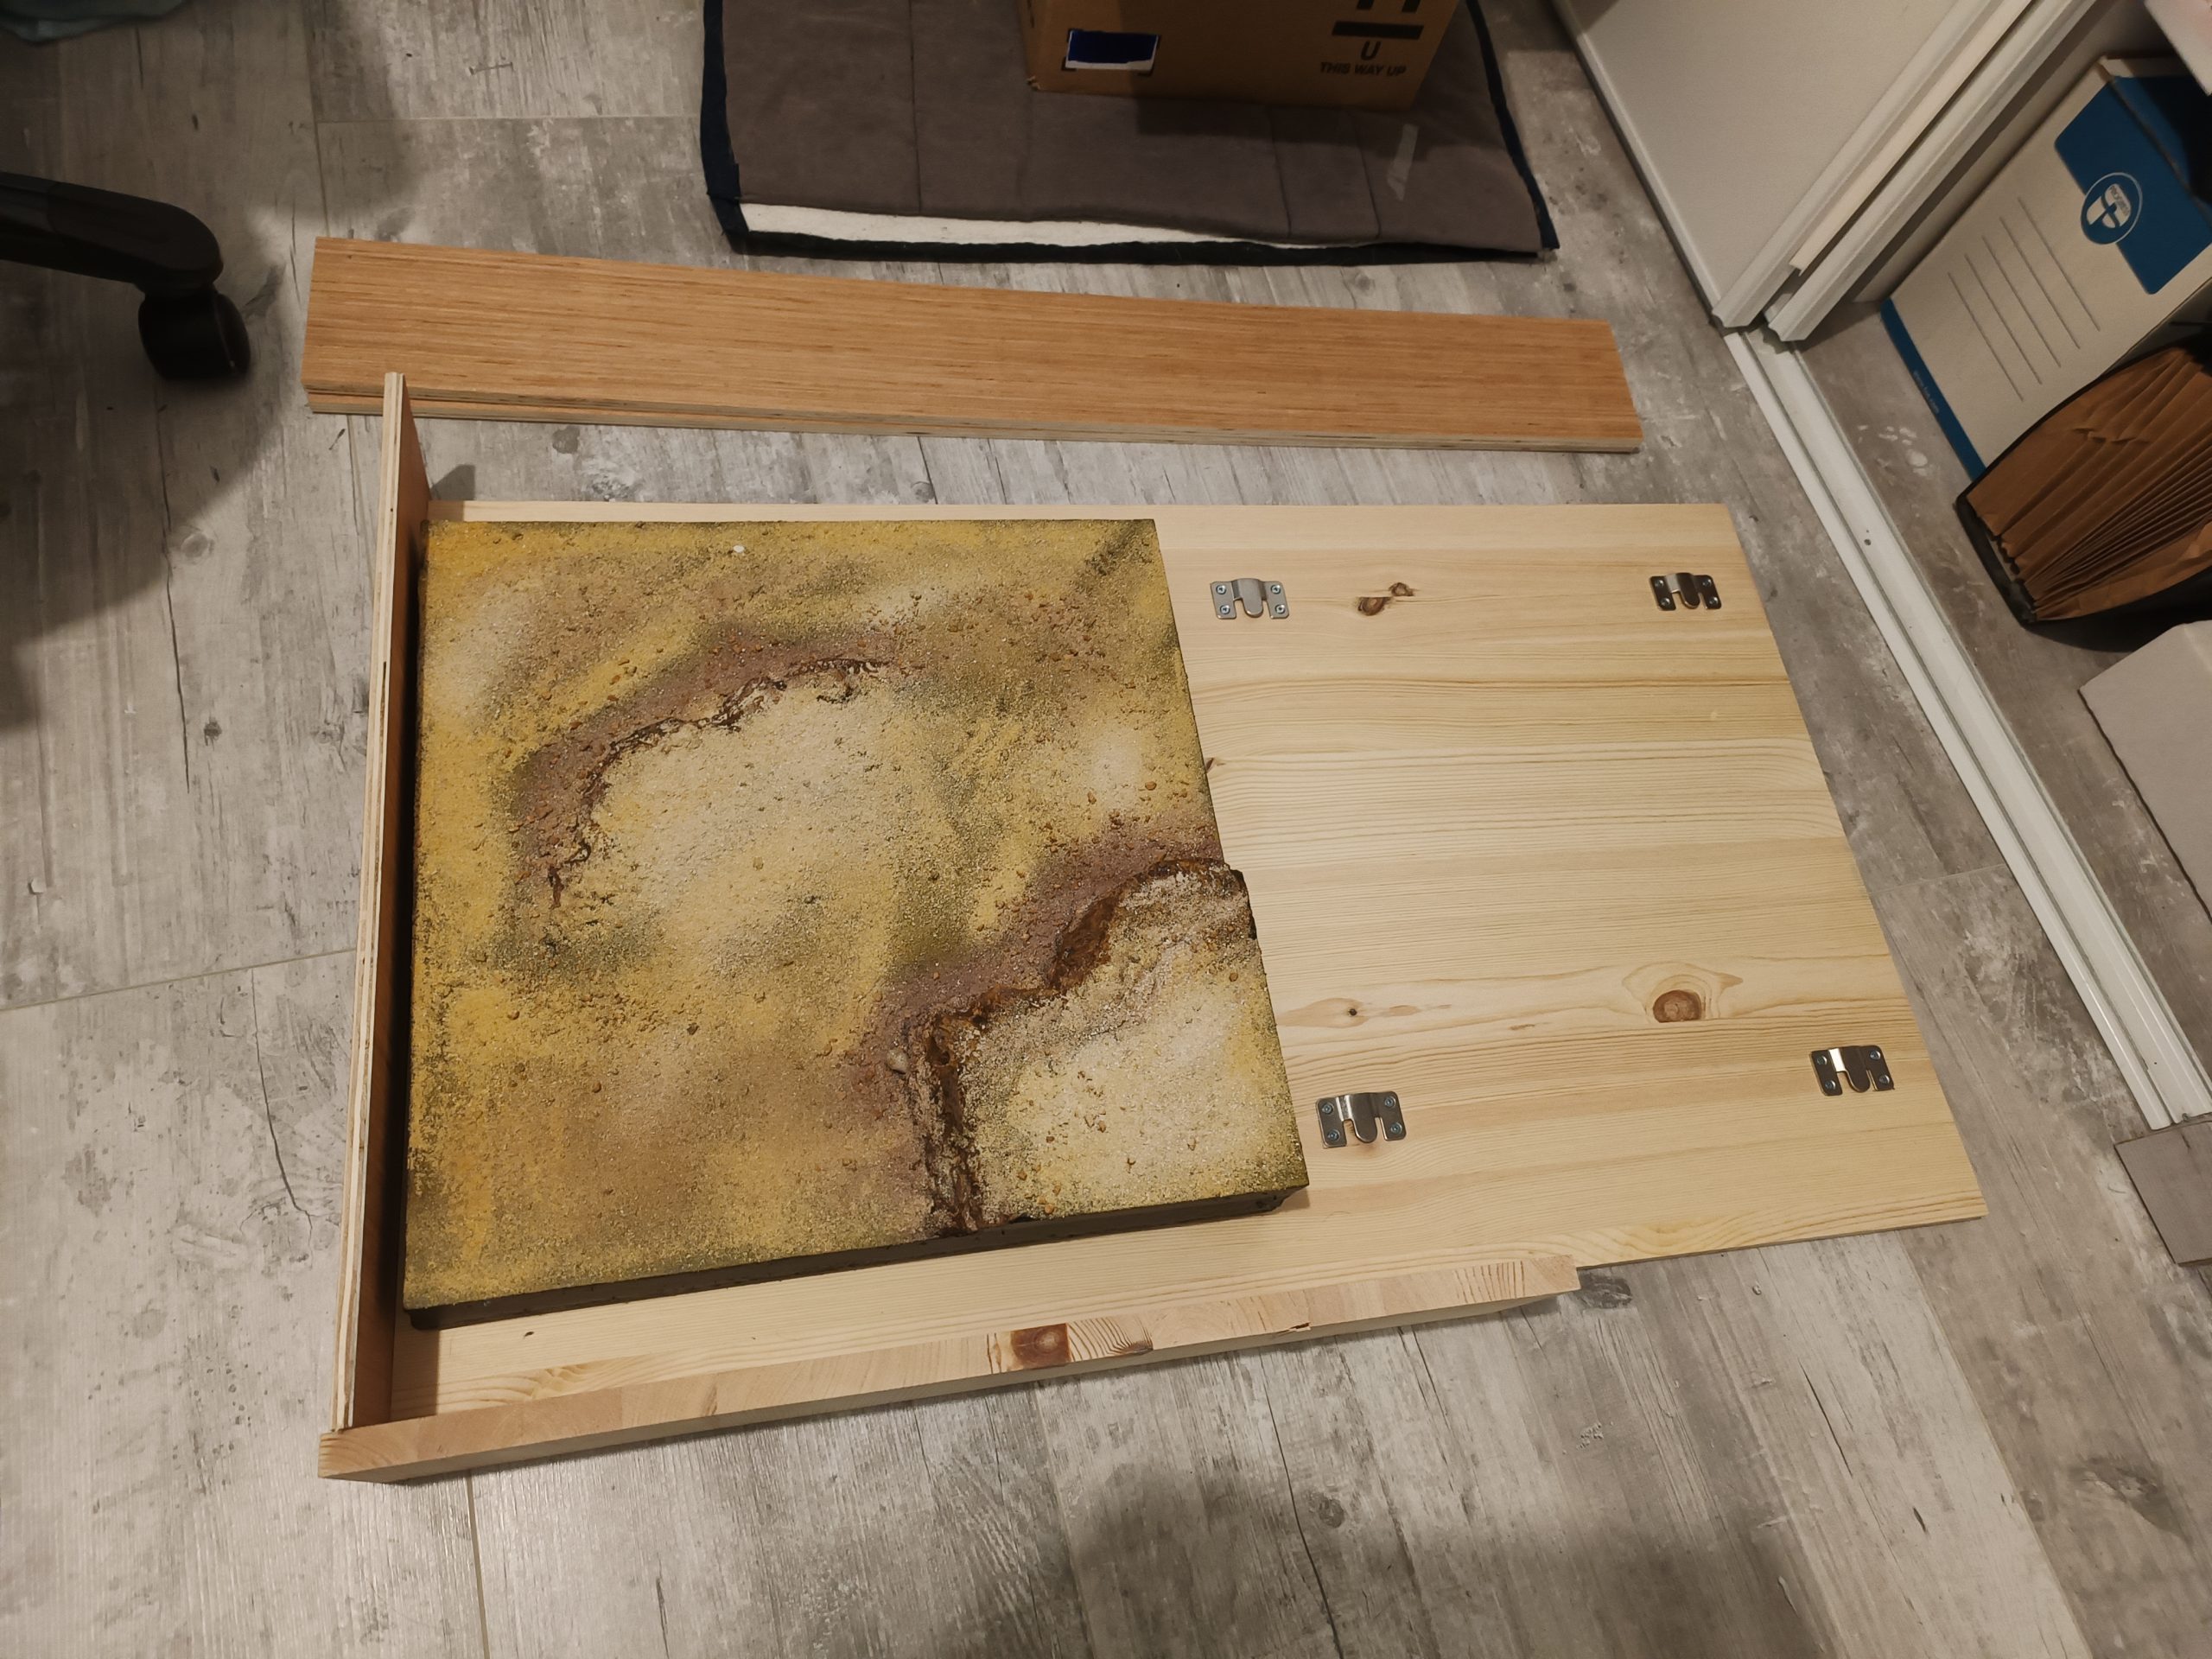
The hooks were attached to the edges of the case to provide as much space as possible for measurements. Ultimately, this means that the tiles have to be stored and laid in a certain rotation, but I made sure to minimize overlap between the hills.
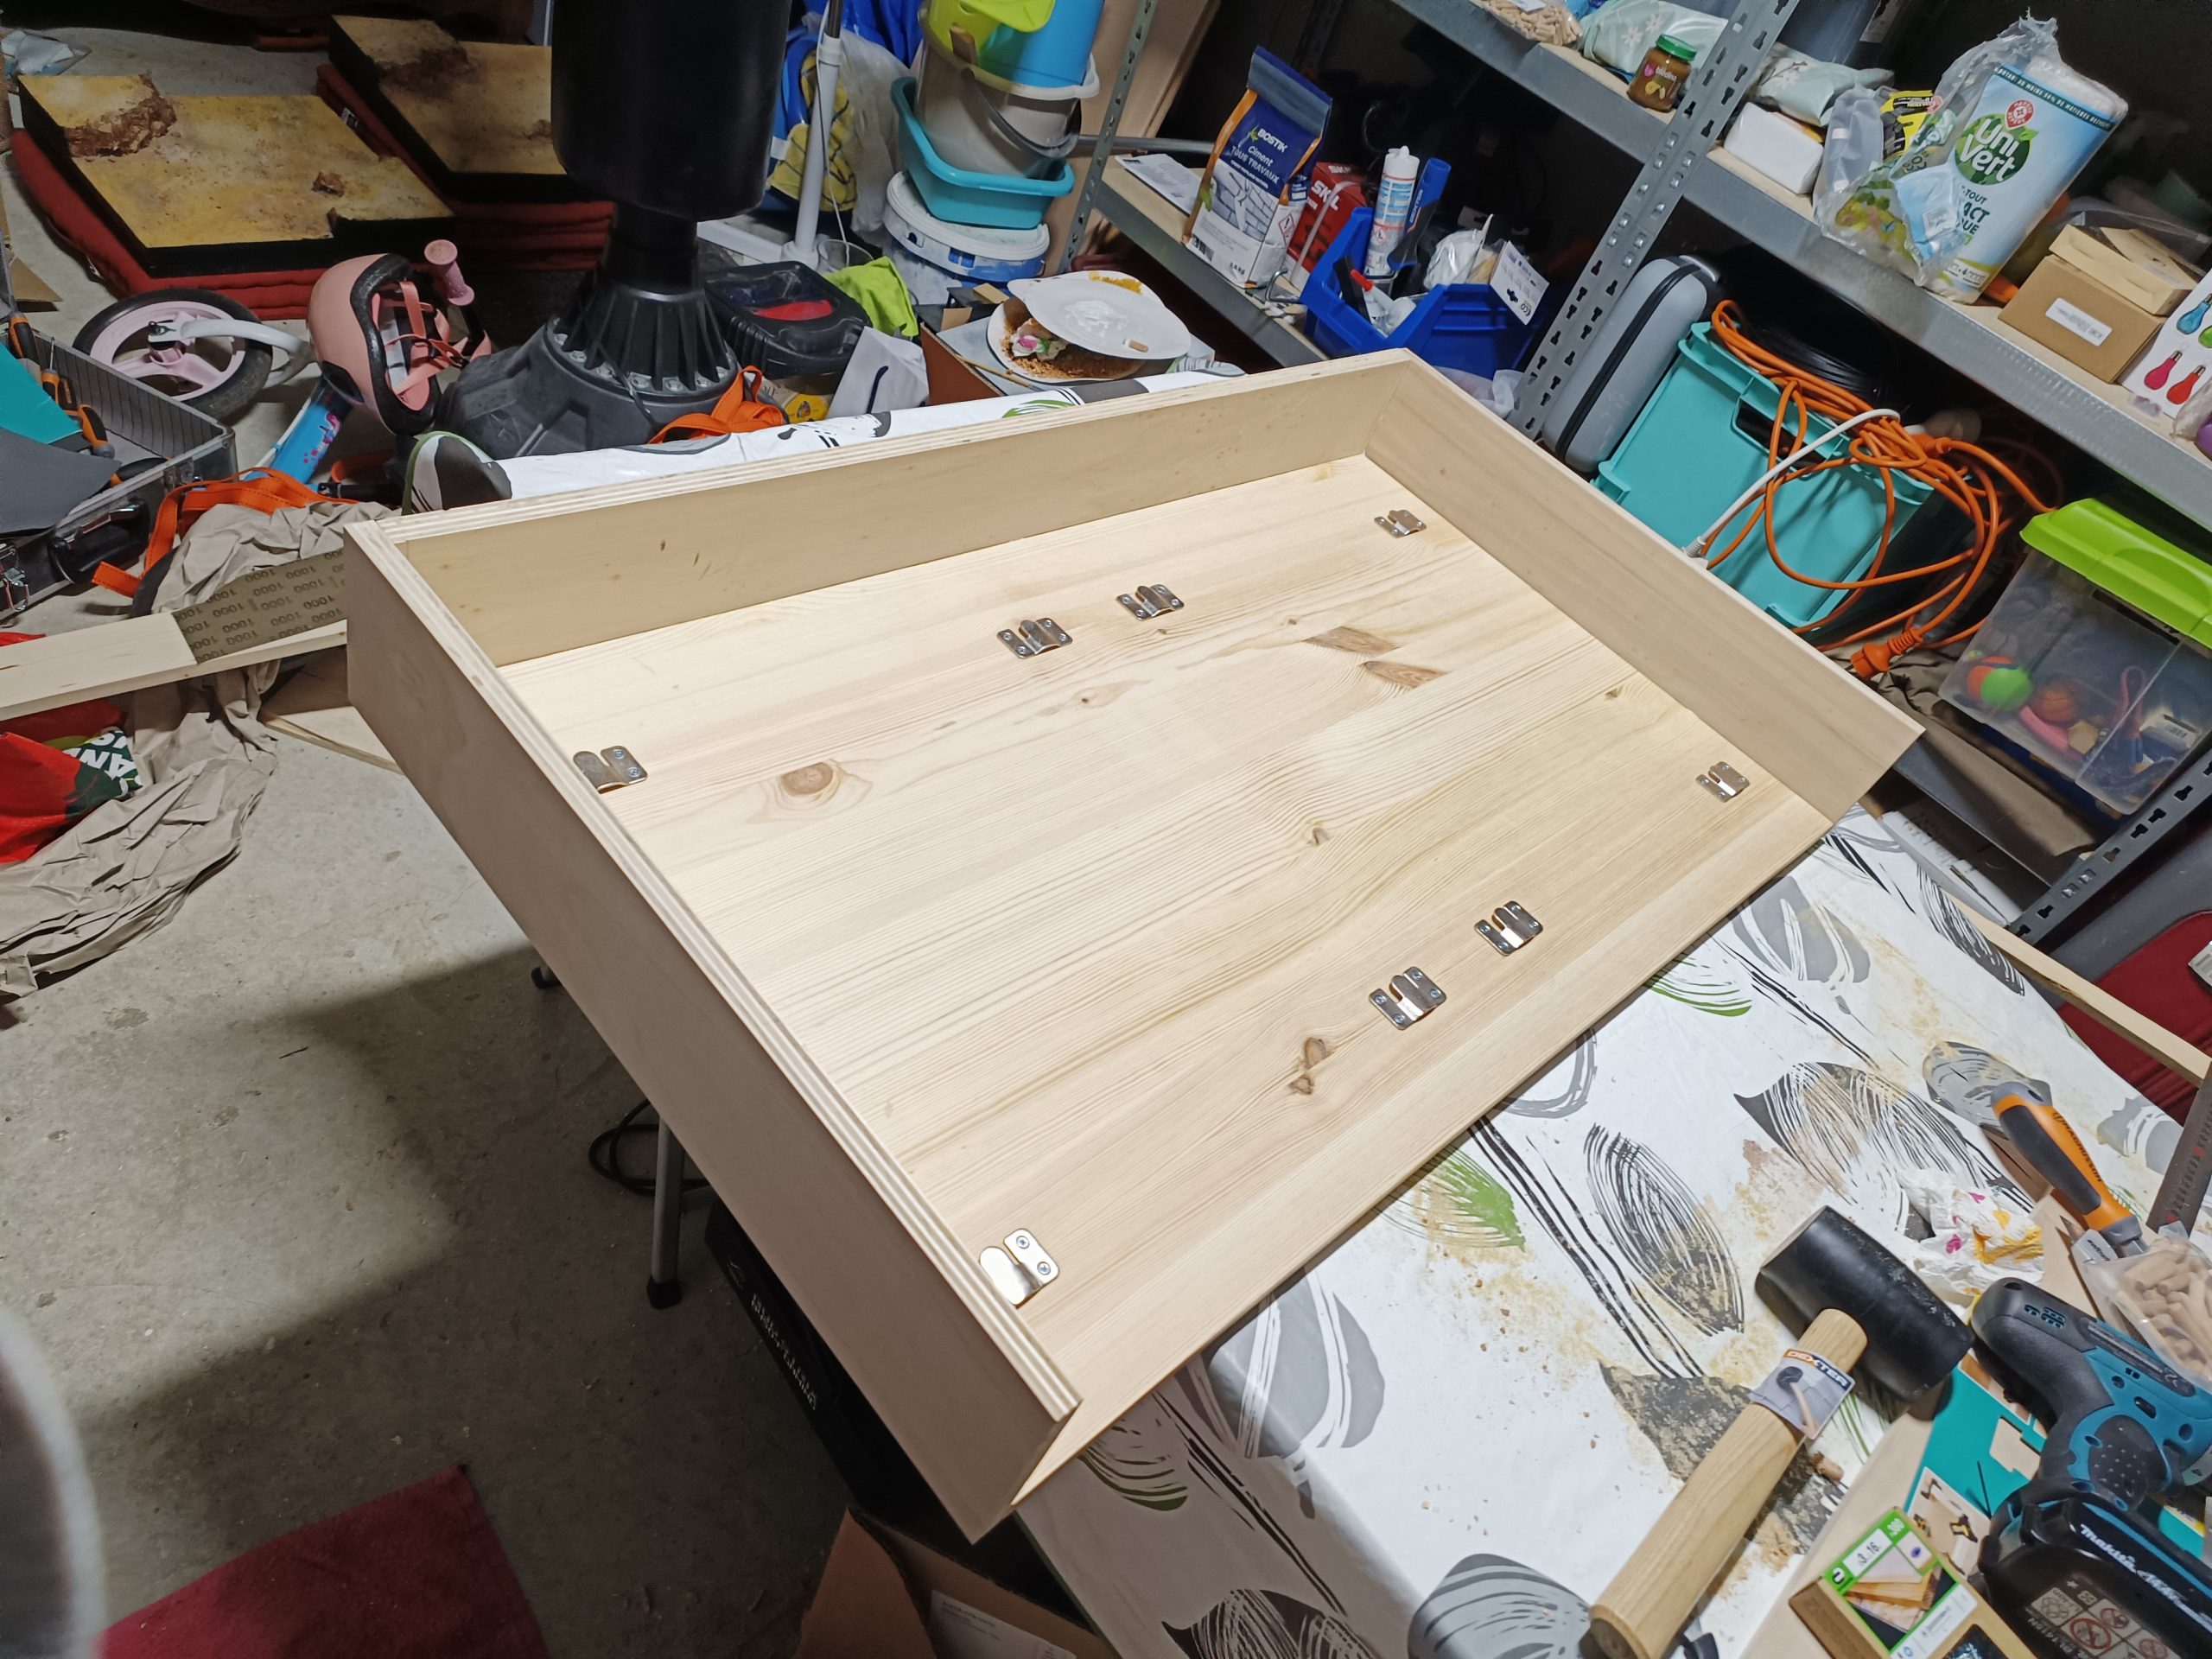
The sides of the blocks were then fixed invisibly, using simple dowels. The top, which supports the handles—and therefore the entire weight of the suitcase—is made of 18mm thick plywood. The sides, which are less demanding in terms of strength, are 15mm thick.
Once the two blocks assembled, the three elements of the box (the two blocks and the central board) were then stained and fixed together using two piano hinges and four suitcase fasteners.

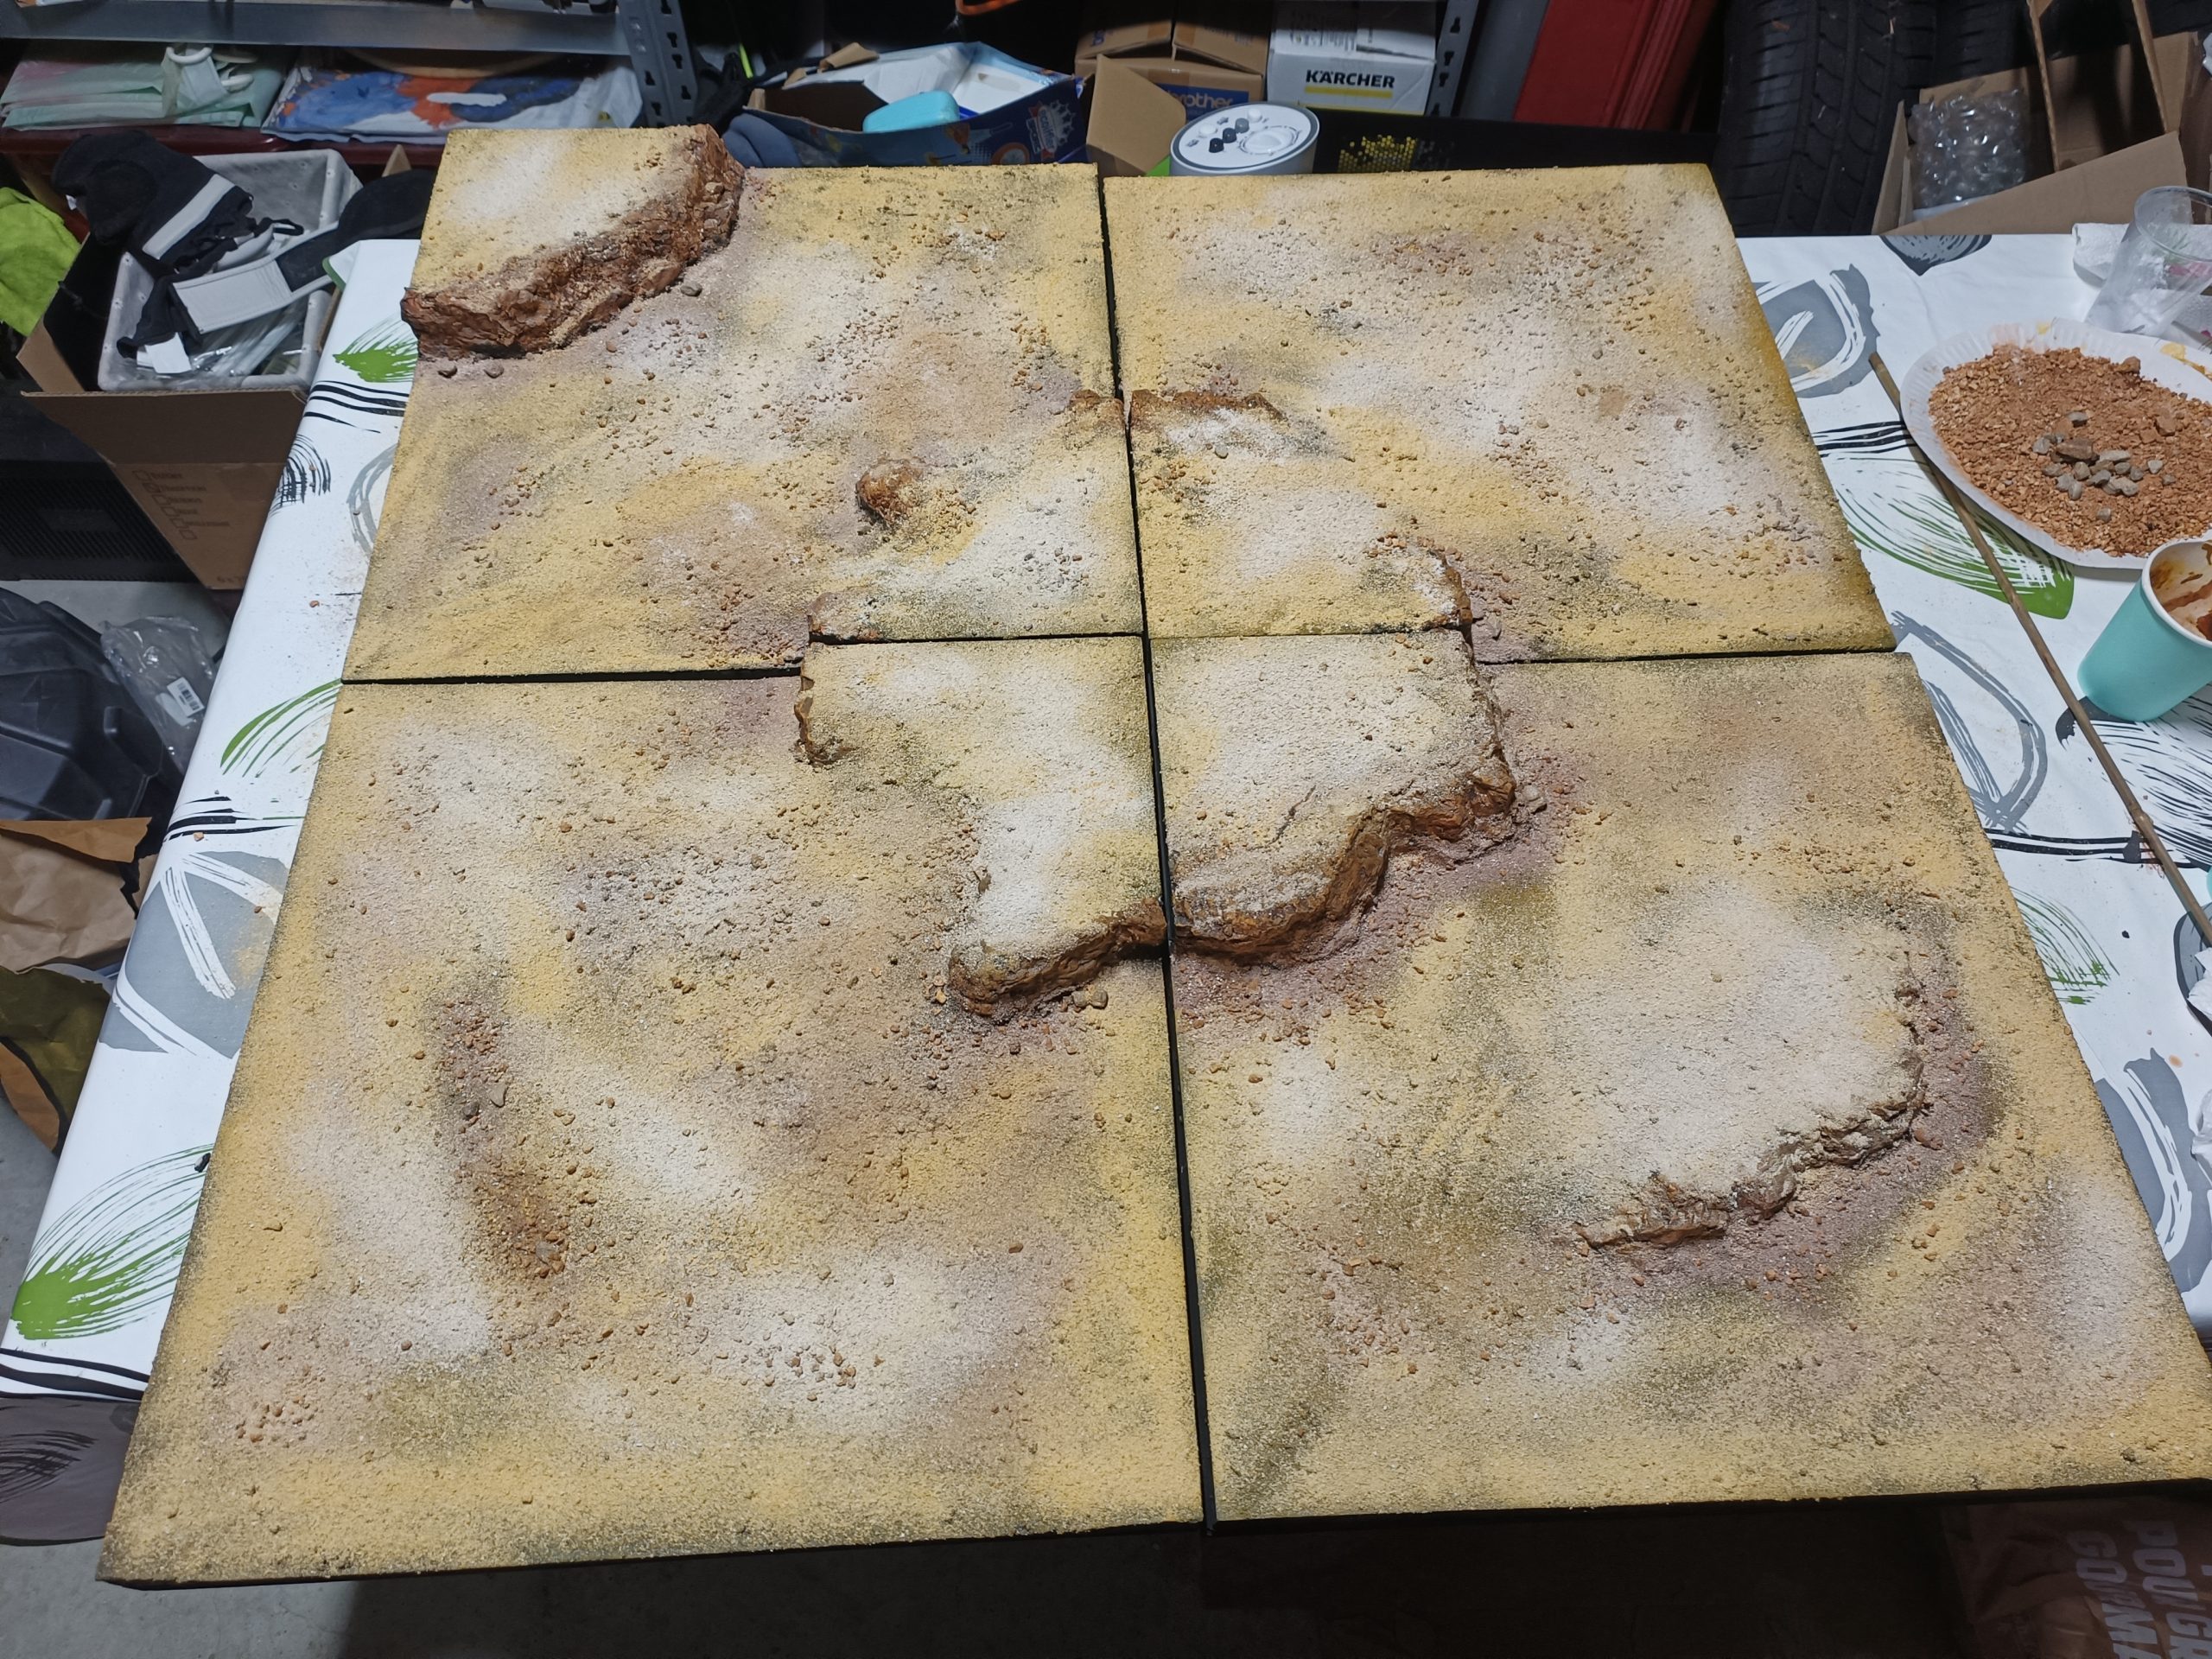
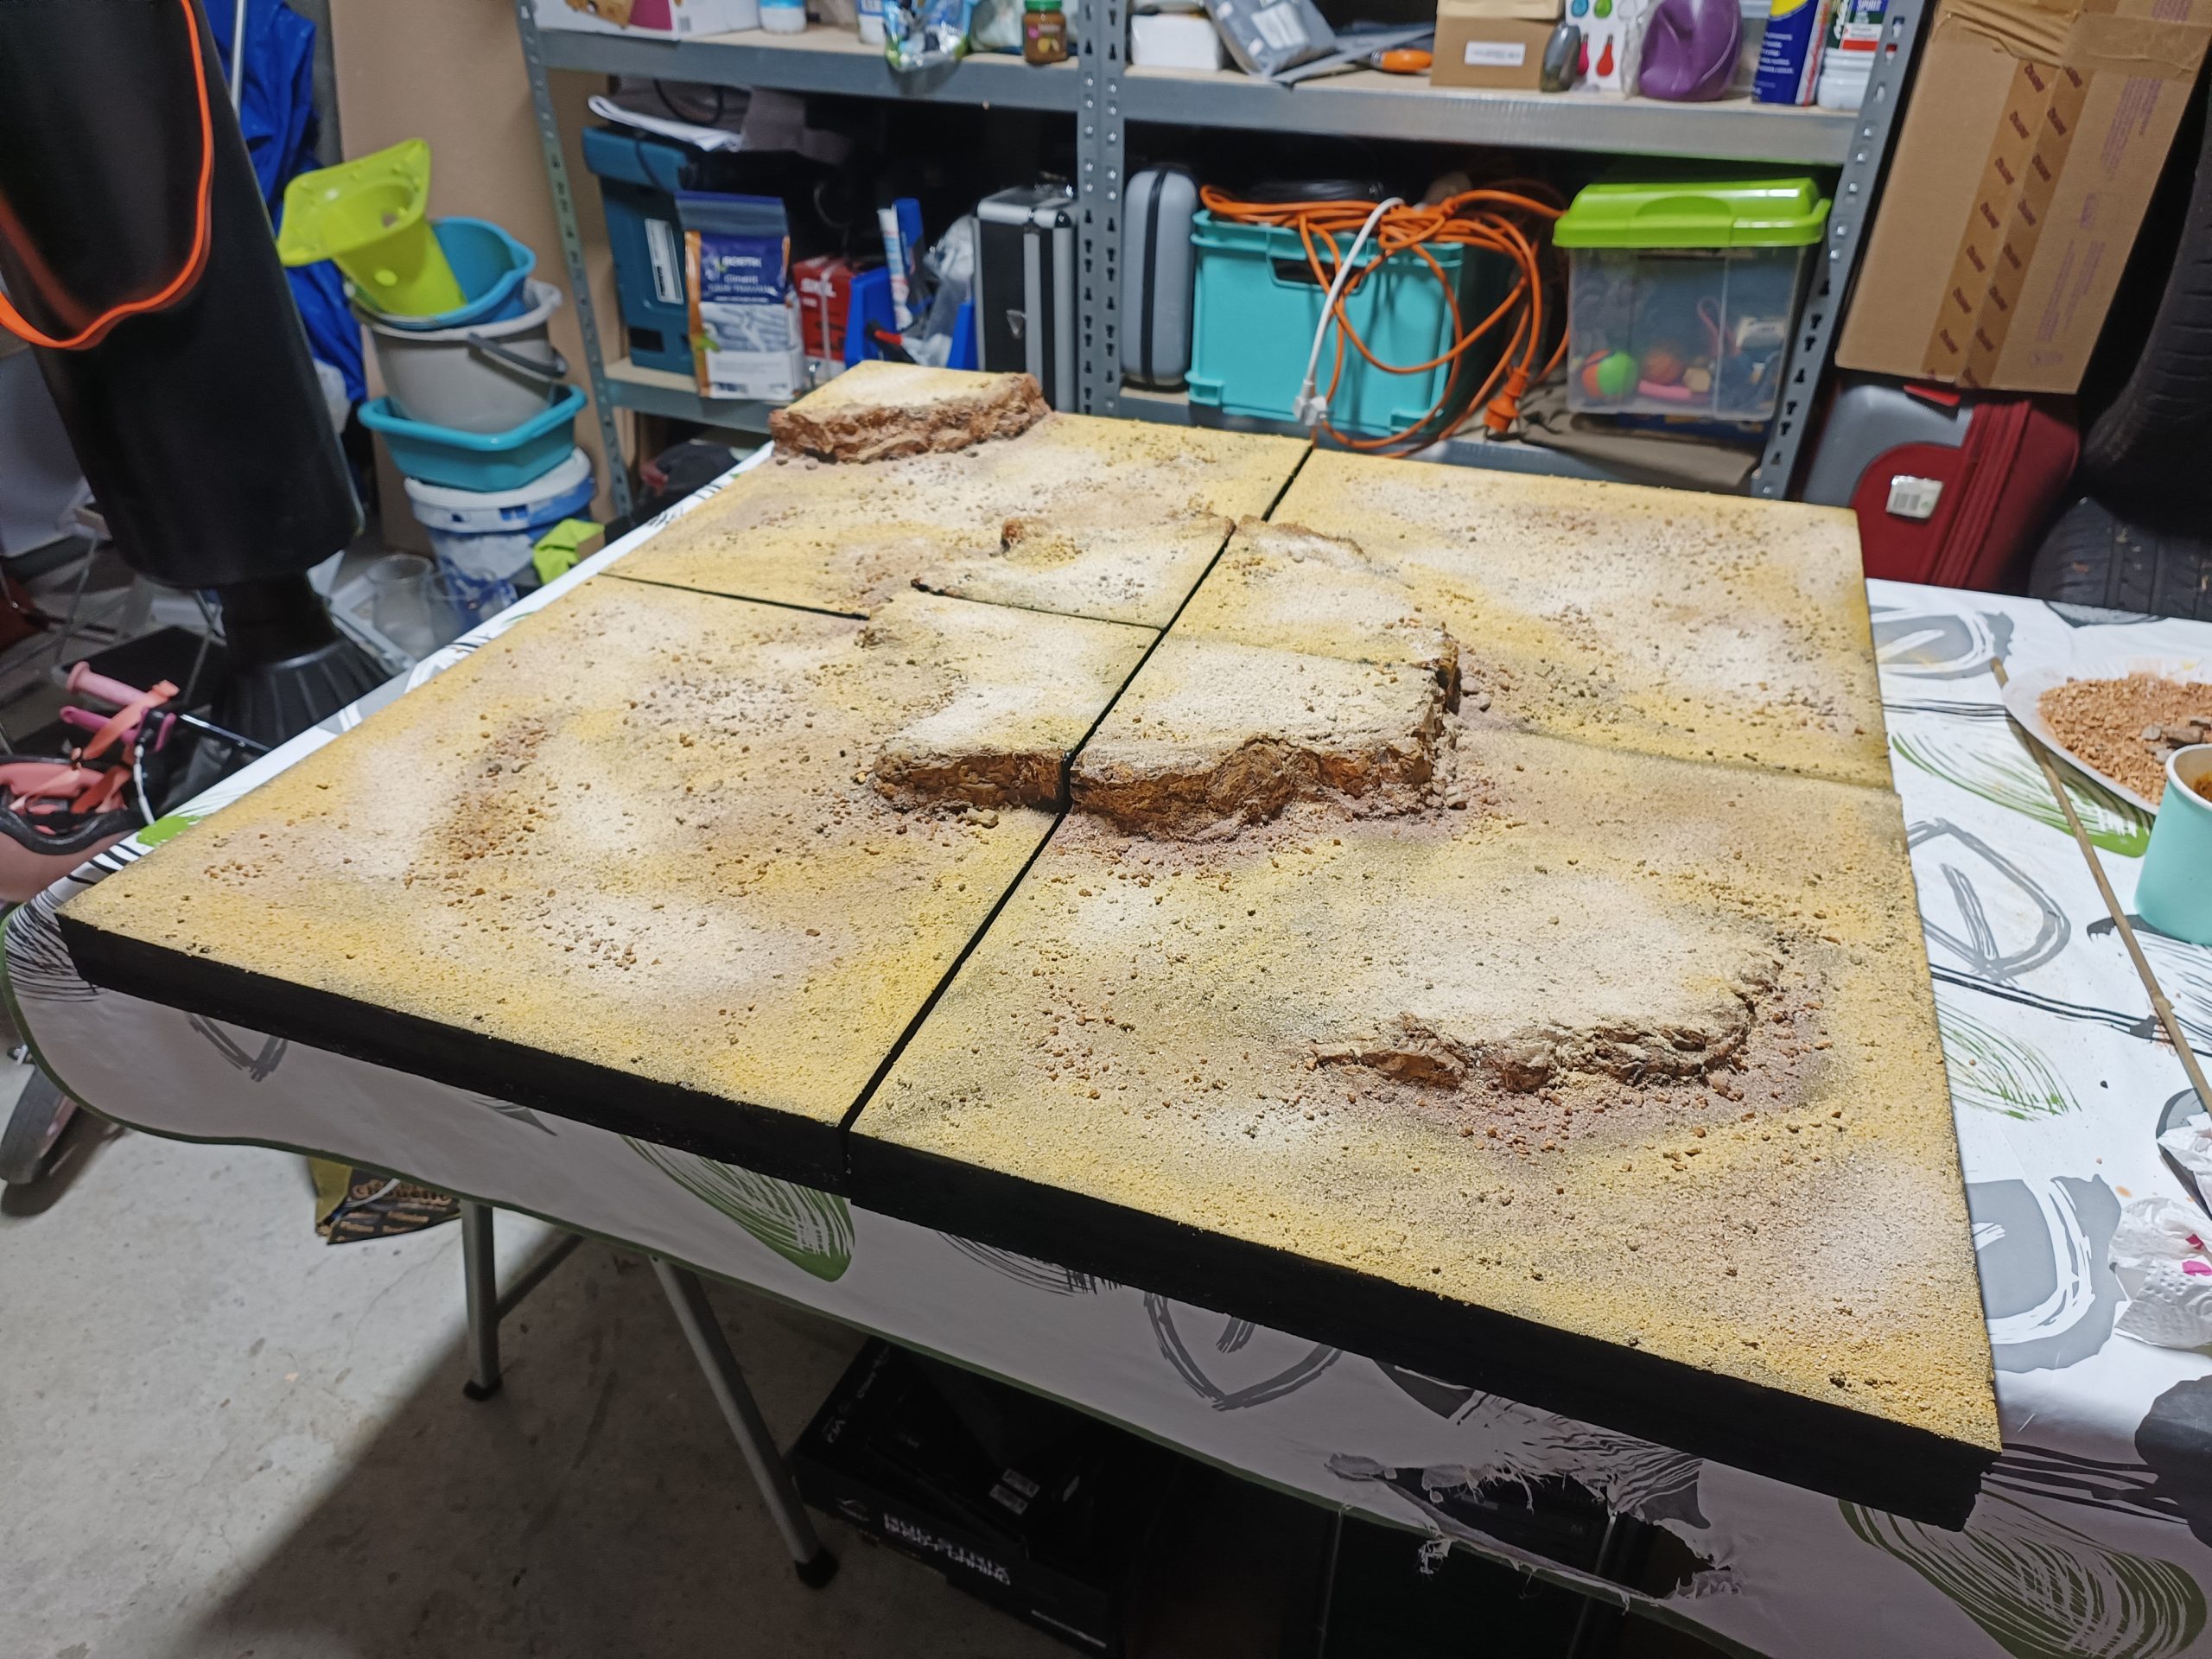
Sand everywhere
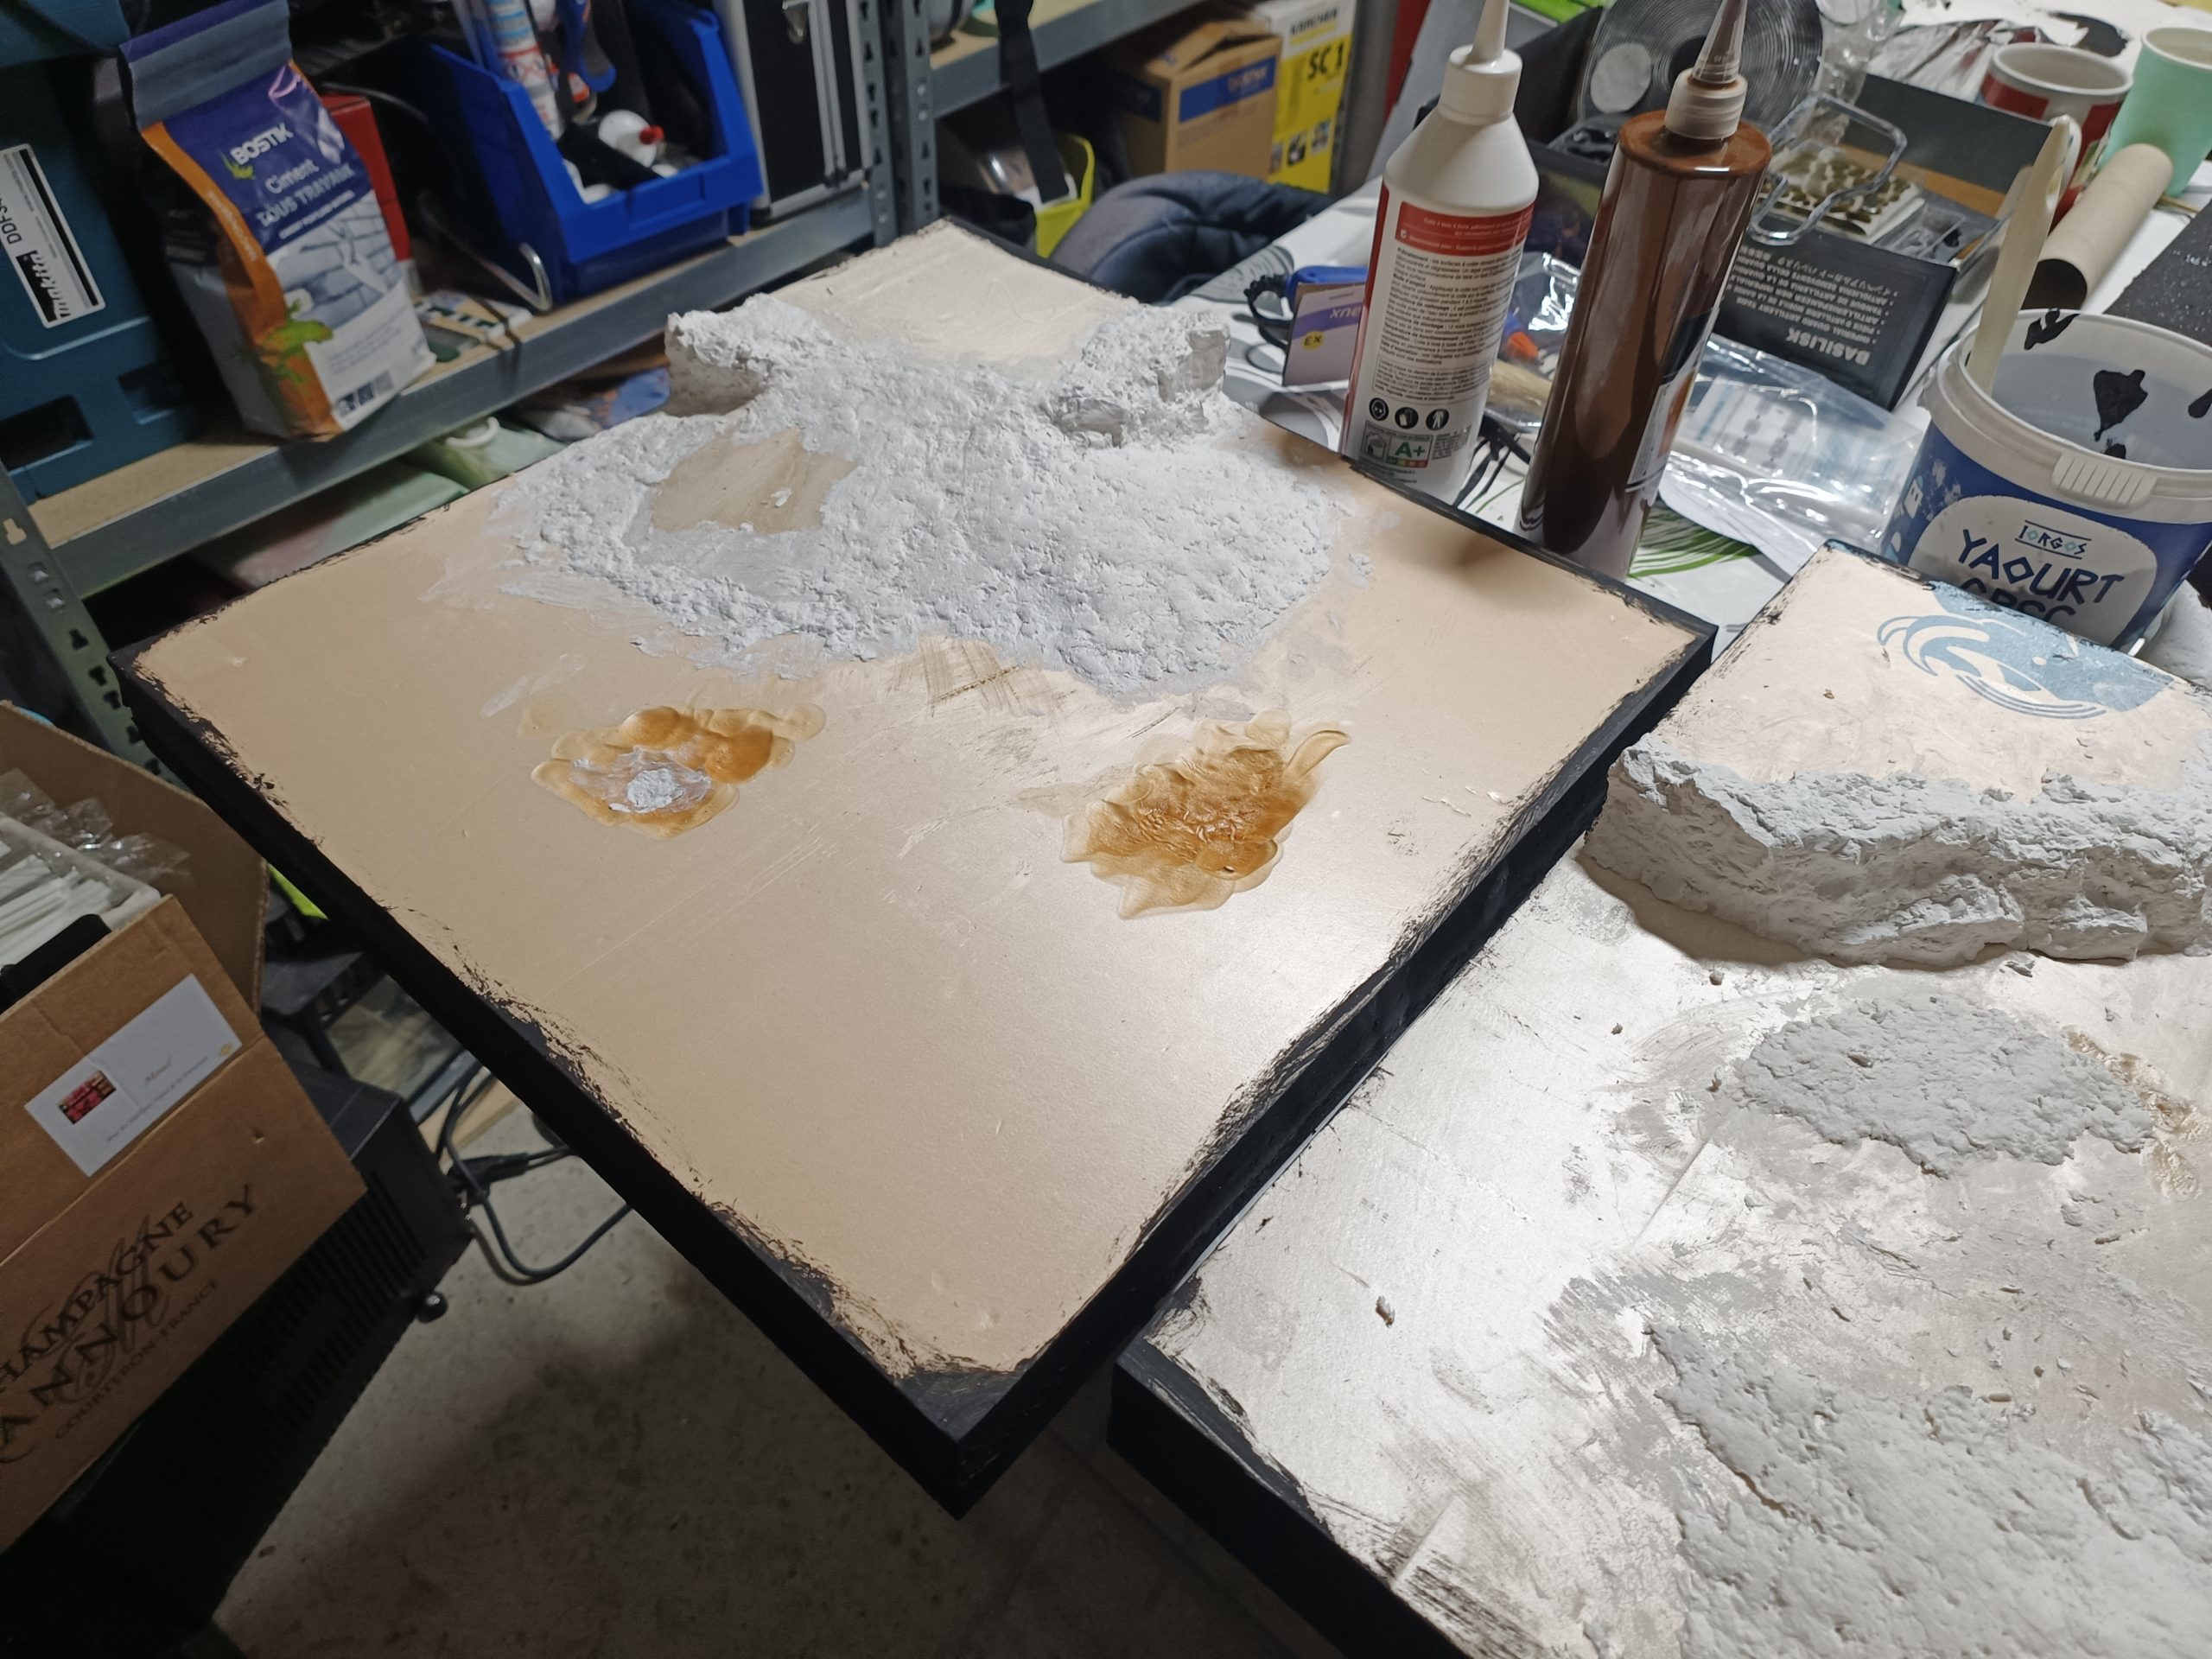
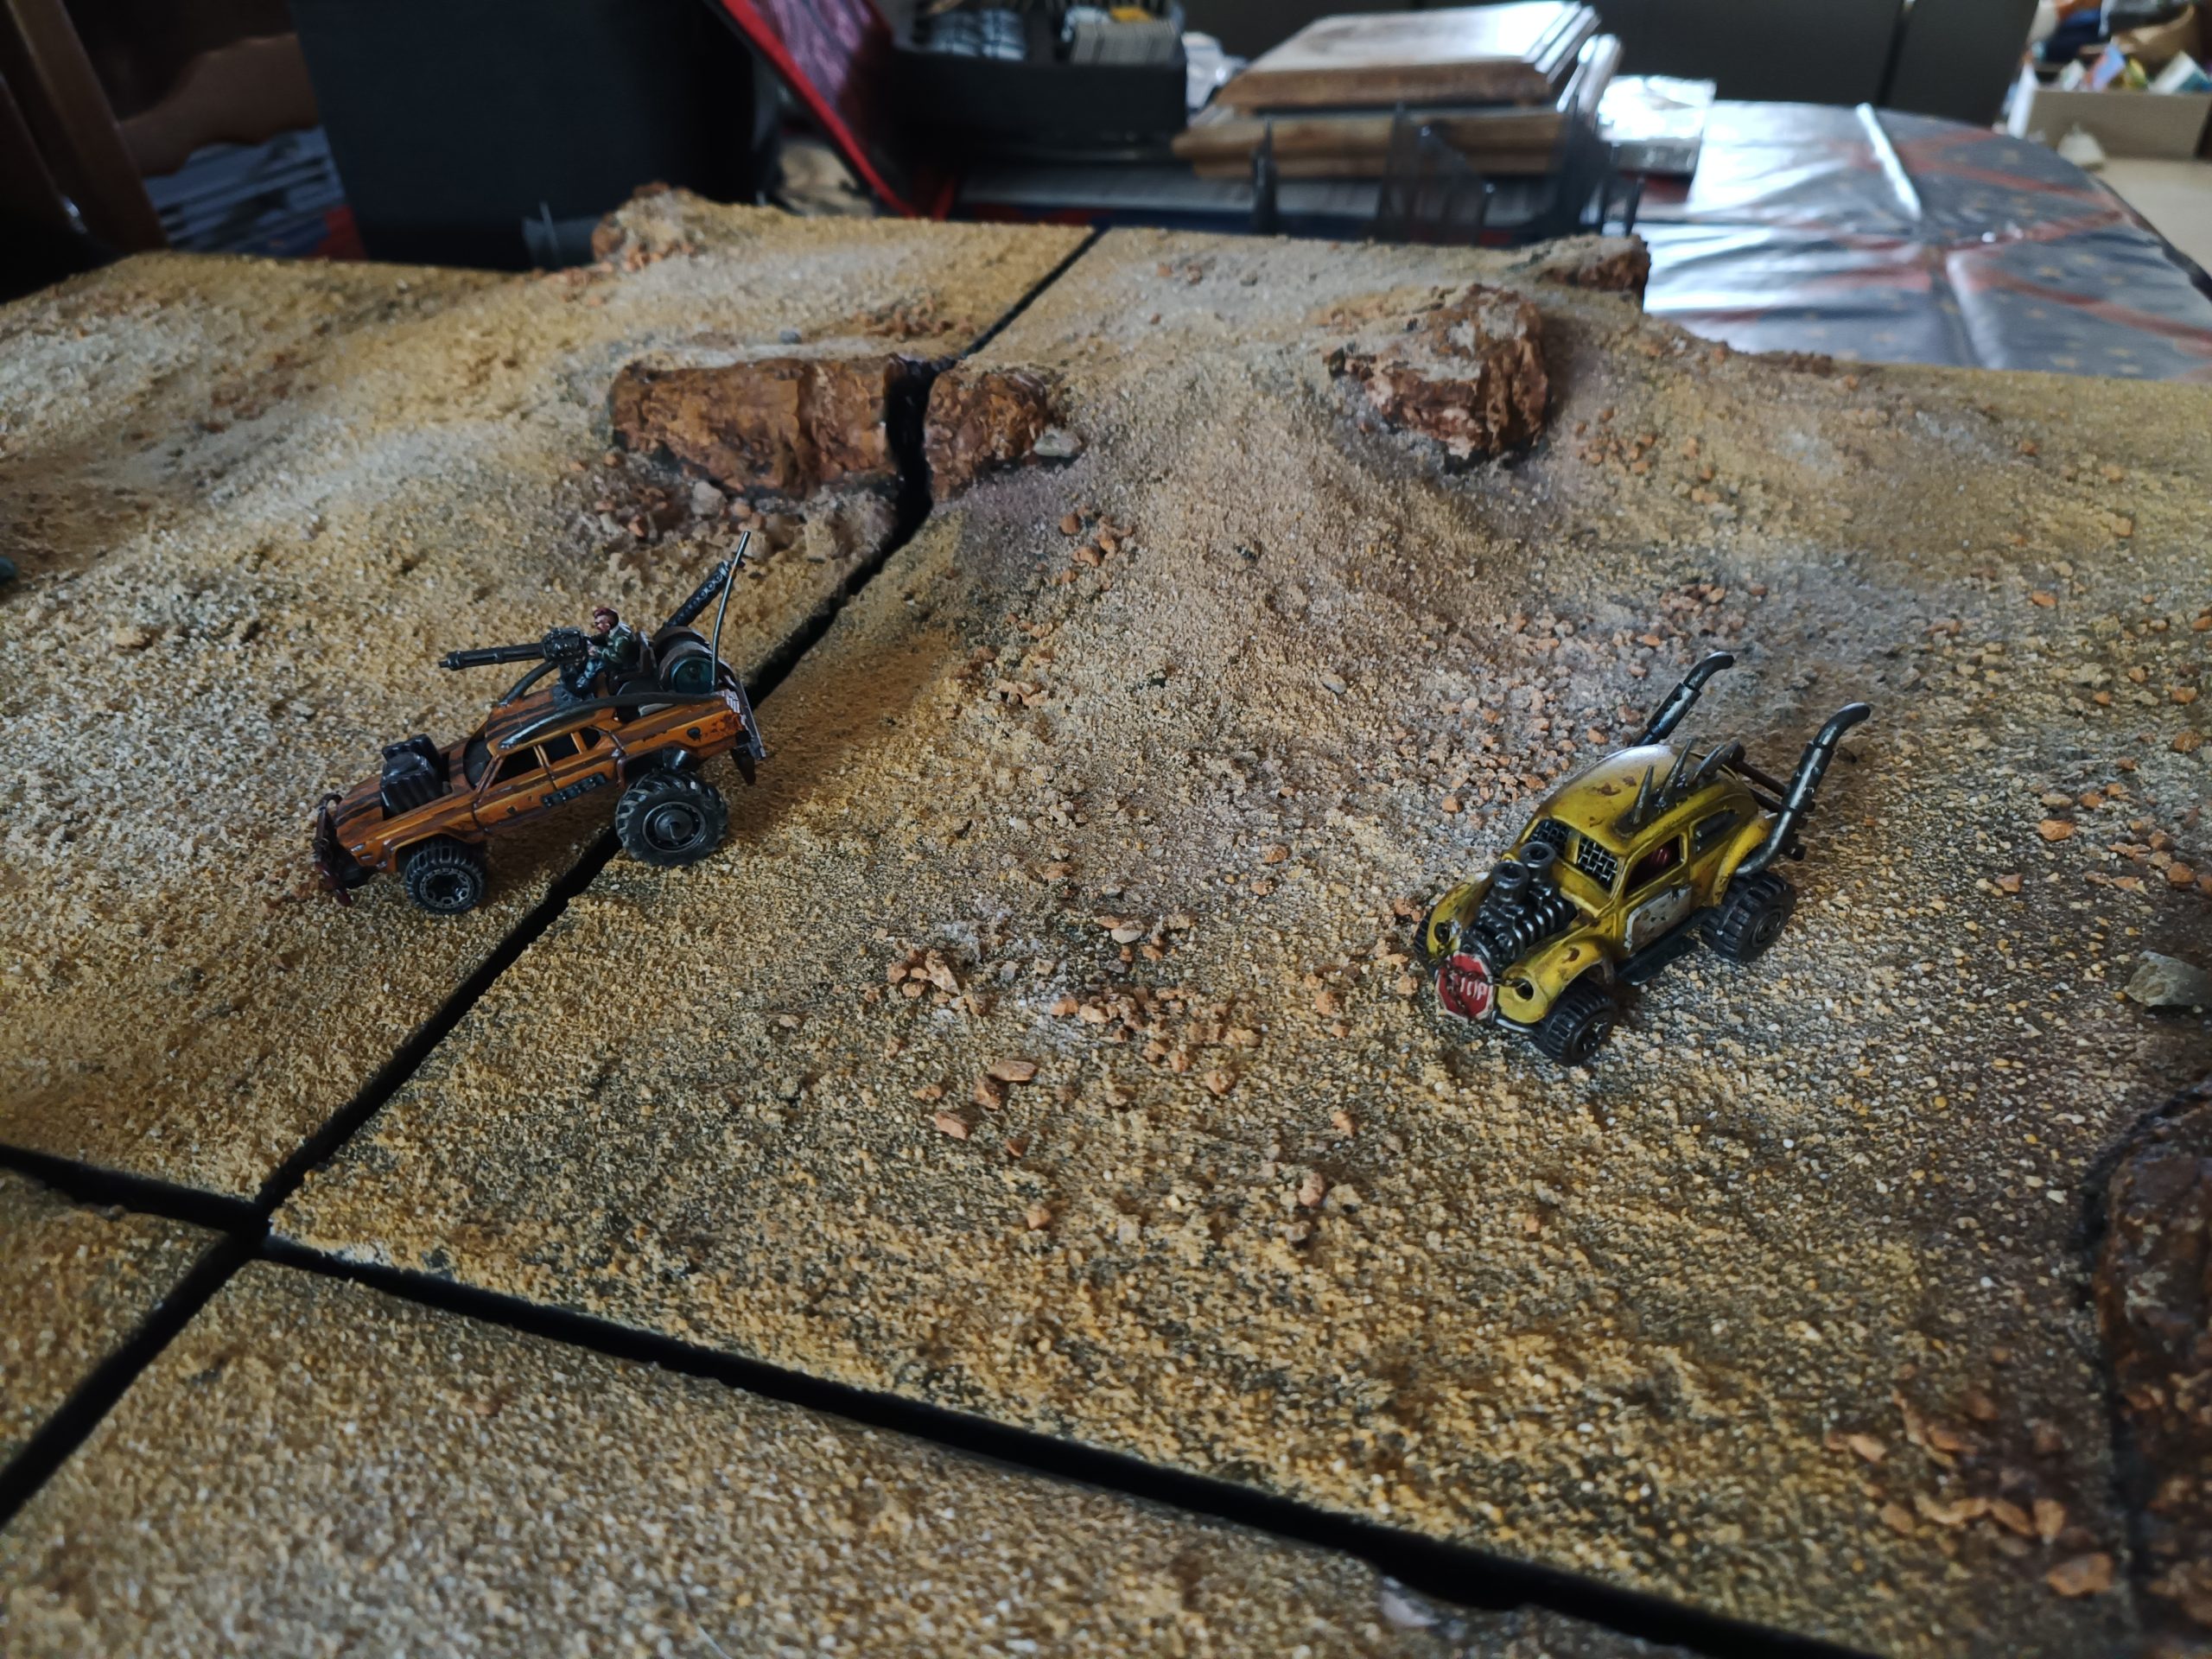
Now that the tiles have received their first coat of paint, it’s time to make them as realistic as possible.
To do this, I start by working on the surface with different layers of paint representing the earth and mud that you might find under the sand. I also took the opportunity to do some dry brushing with yellow ochre to get an idea of the overall shade of sand I wanted for this project.
It was during this stage that I realized I had made a mistake when applying the undercoat to my tiles: I should have sifted the sand to remove the larger grains. Because every time I dry brushed, my brush pulled out some of the larger grains, taking some of the paint with them and leaving the polystyrene exposed. I had to reapply several undercoats to fill in these spots.
Then came the most interesting part of the project: texturing!
It took me a long time to decide on the approach and colors to use to achieve a realistic and natural look on such large surfaces.
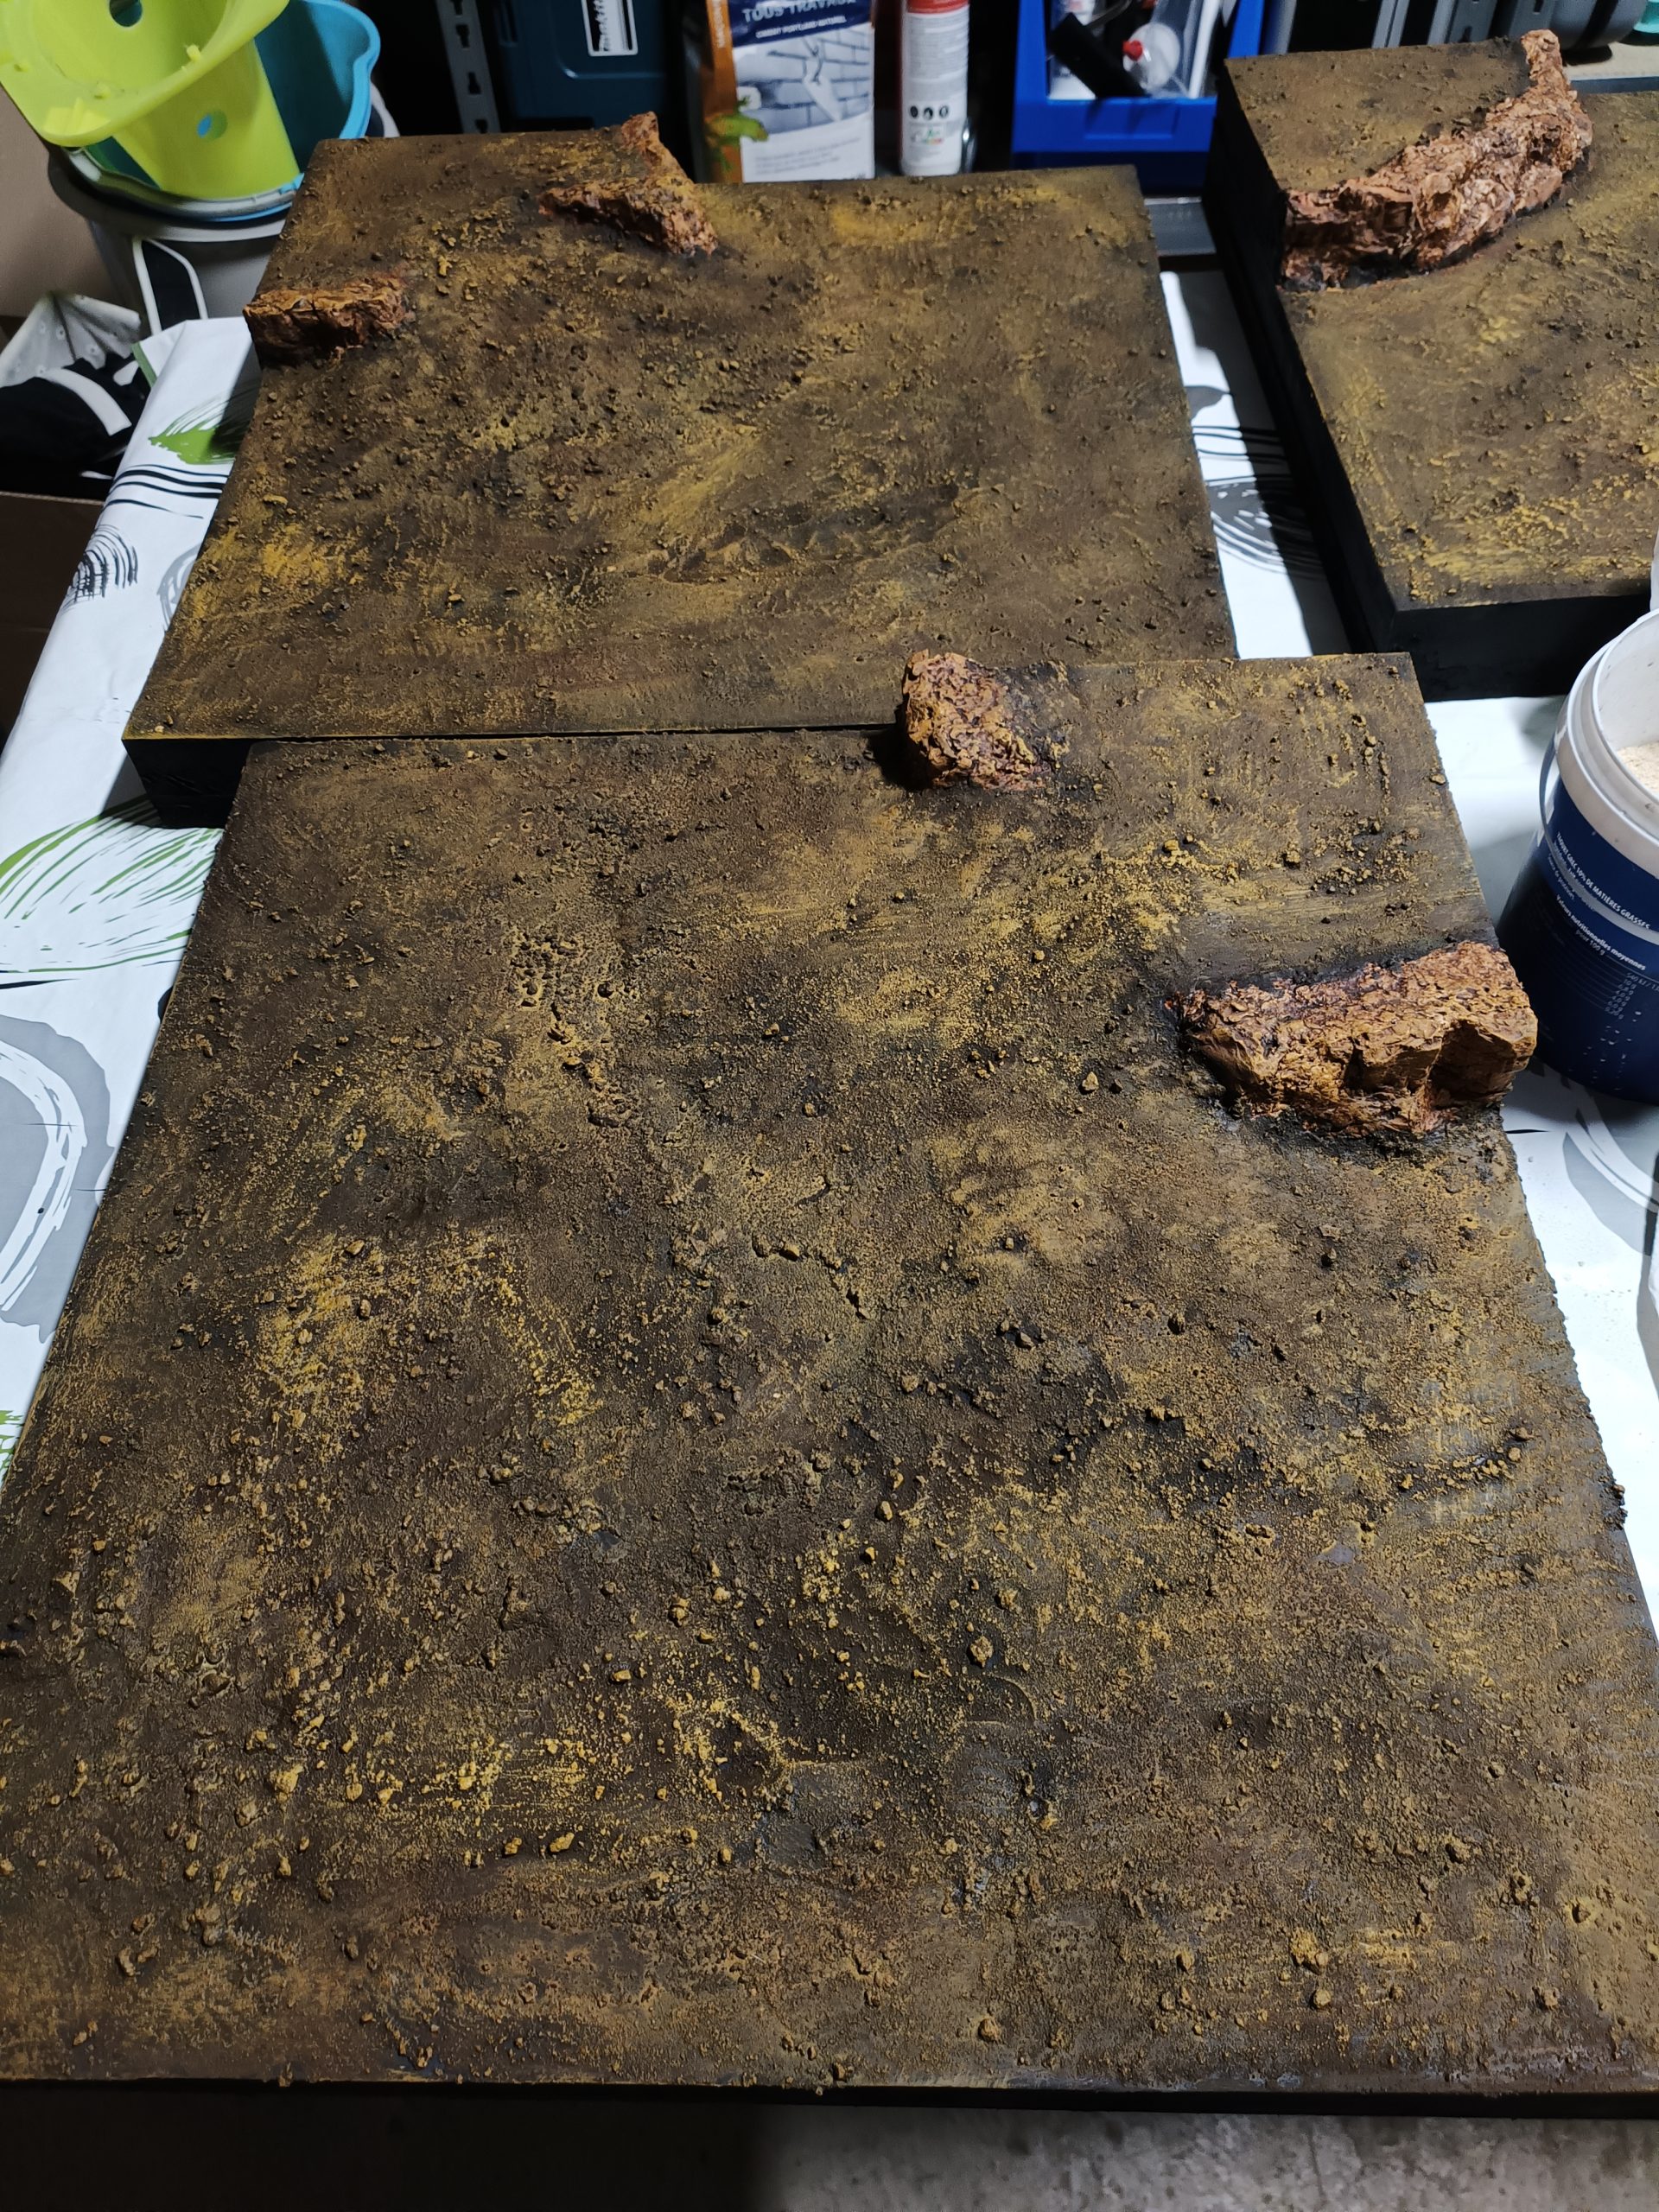
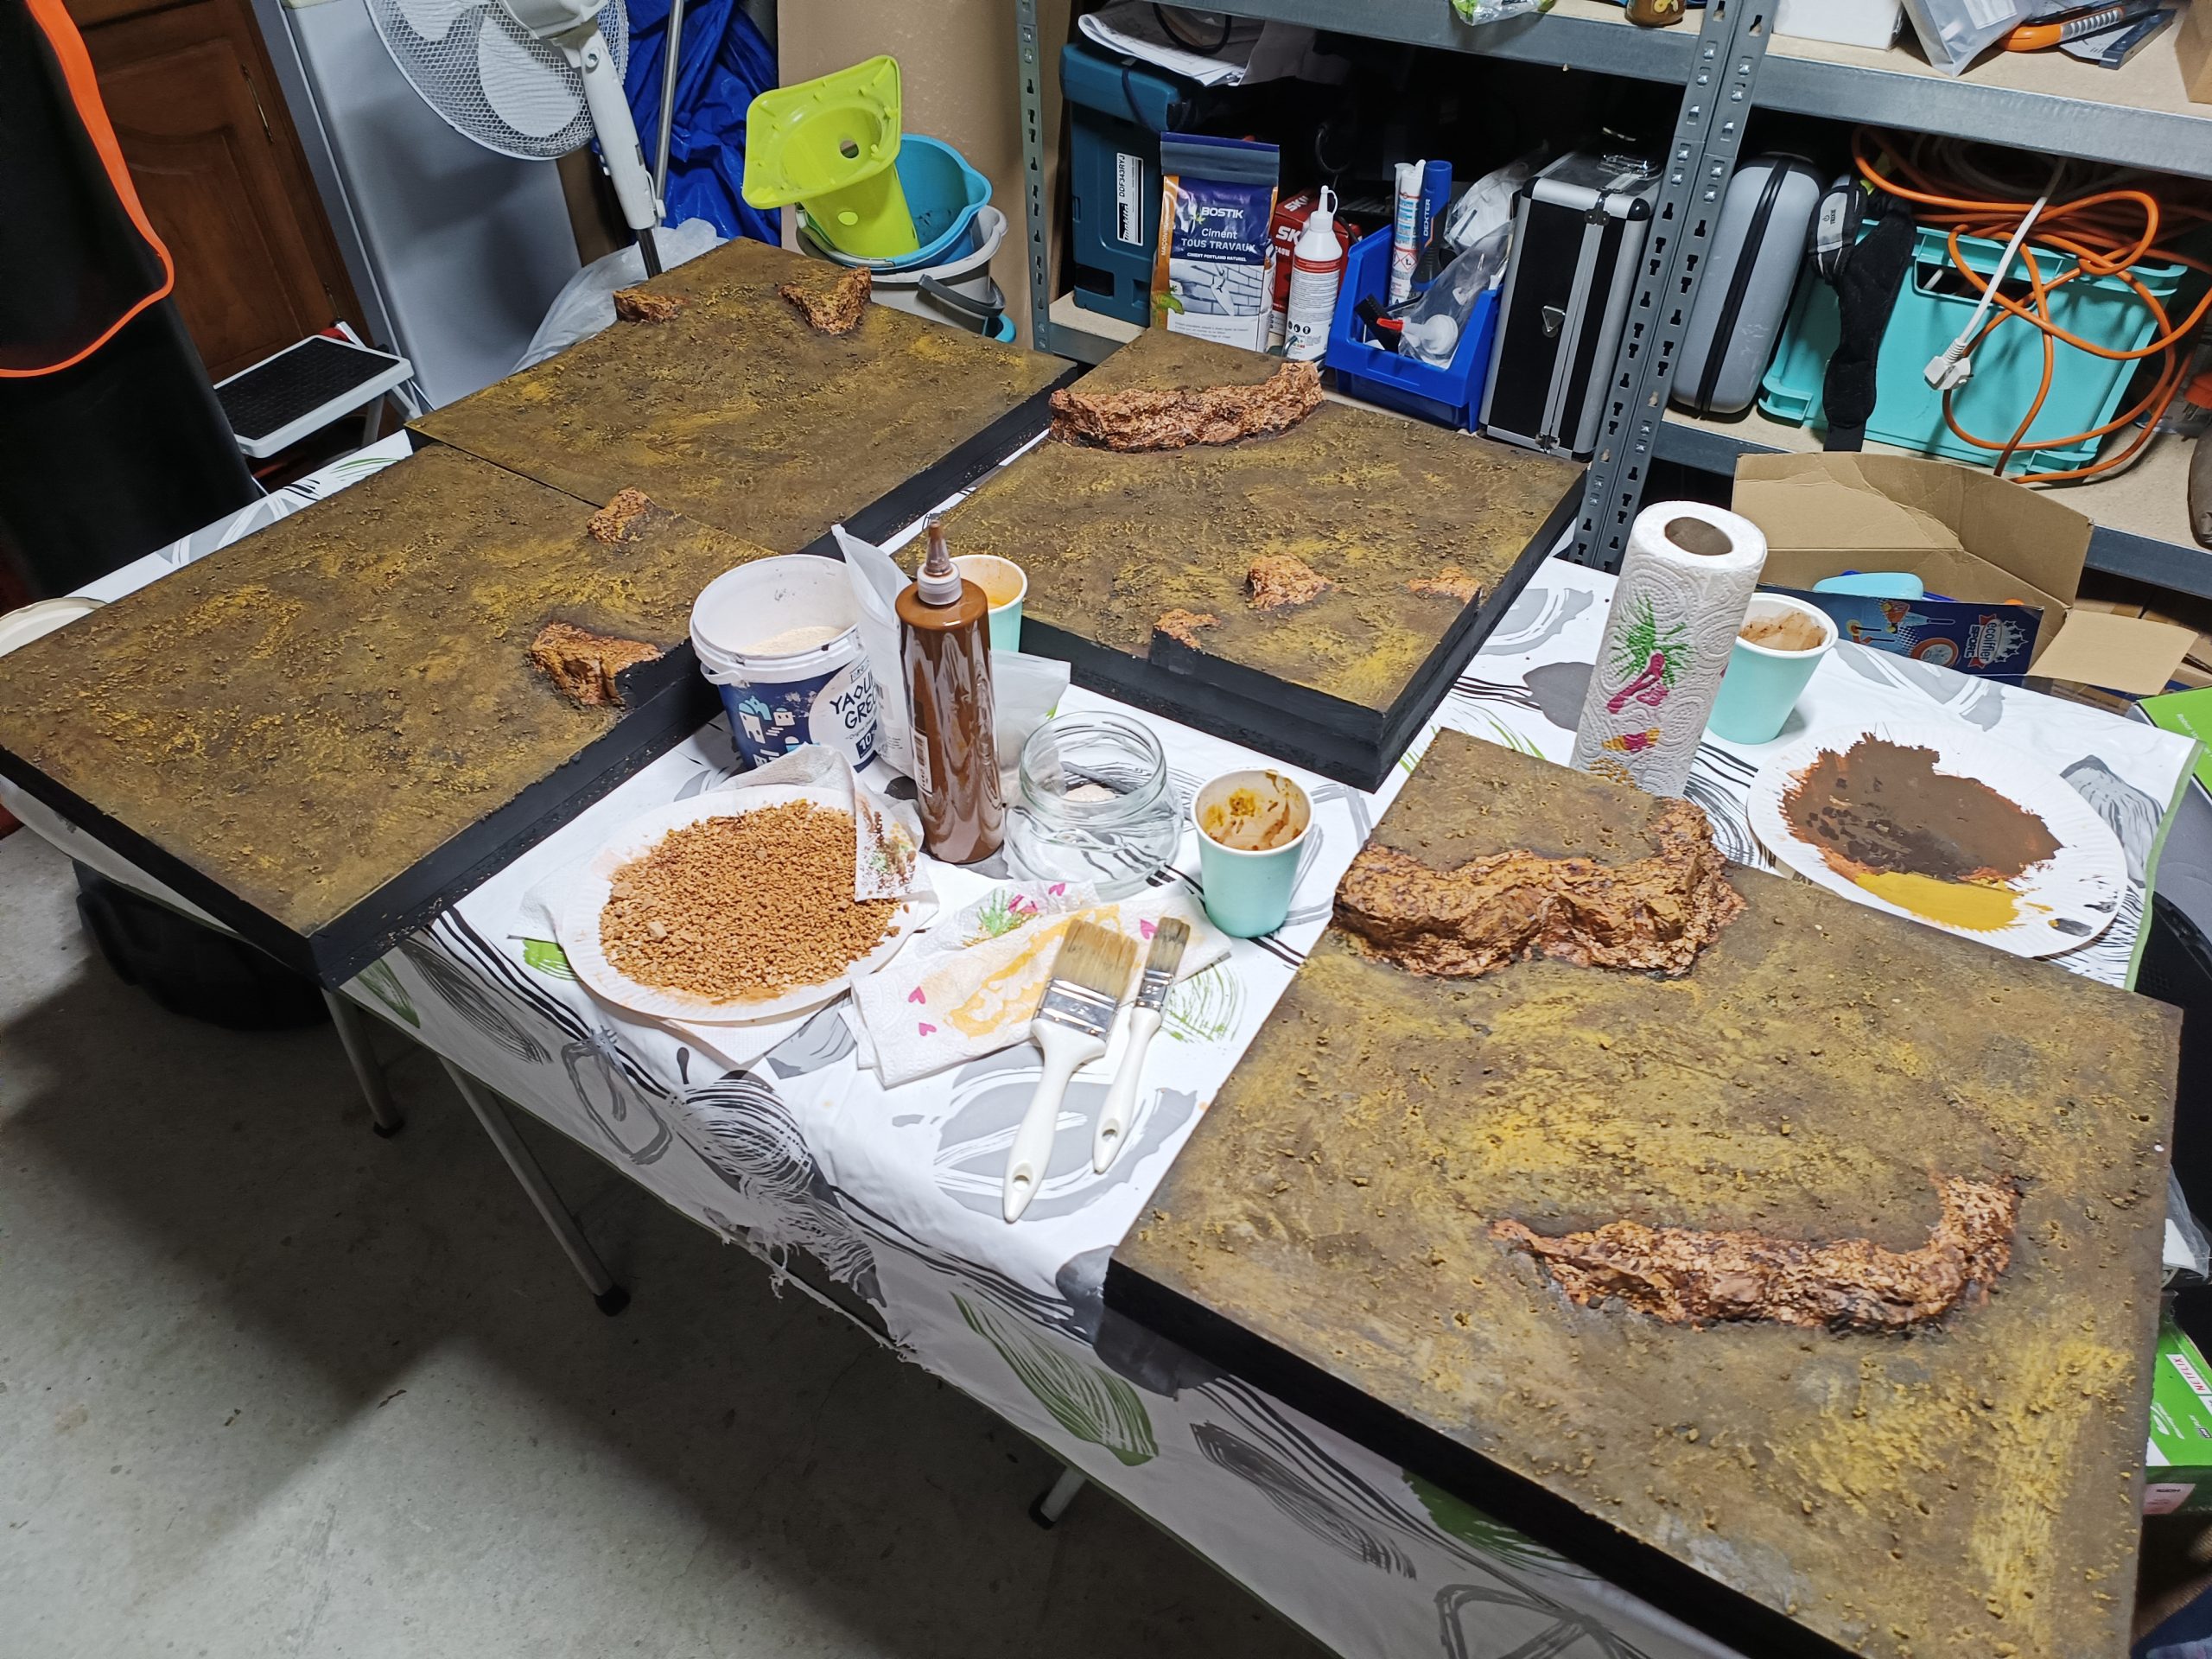
So I decided to use several layers of colored sand. I chose to start with Zen garden sand, which I sifted. This sand is very fine and very light in color, close to white, which was ideal for tinting it with different pigments.
I then applied the different layers of colored sand, starting with a medium shade, such as yellow ochre sand. I then applied darker sand in the hollows and redder sand at the foot of the cliffs. Finally, I lightened the whole thing with a lighter yellow sand, adding touches of pure Zen sand to the most pronounced reliefs.
A few pebbles dyed the same color as the cliffs were placed in “strategic” locations on the terrain, i.e., near the cliffs and in the hollows of the terrain.
The tiles are done, all that’s left is the box… and that’s clearly not the easiest part of the project!
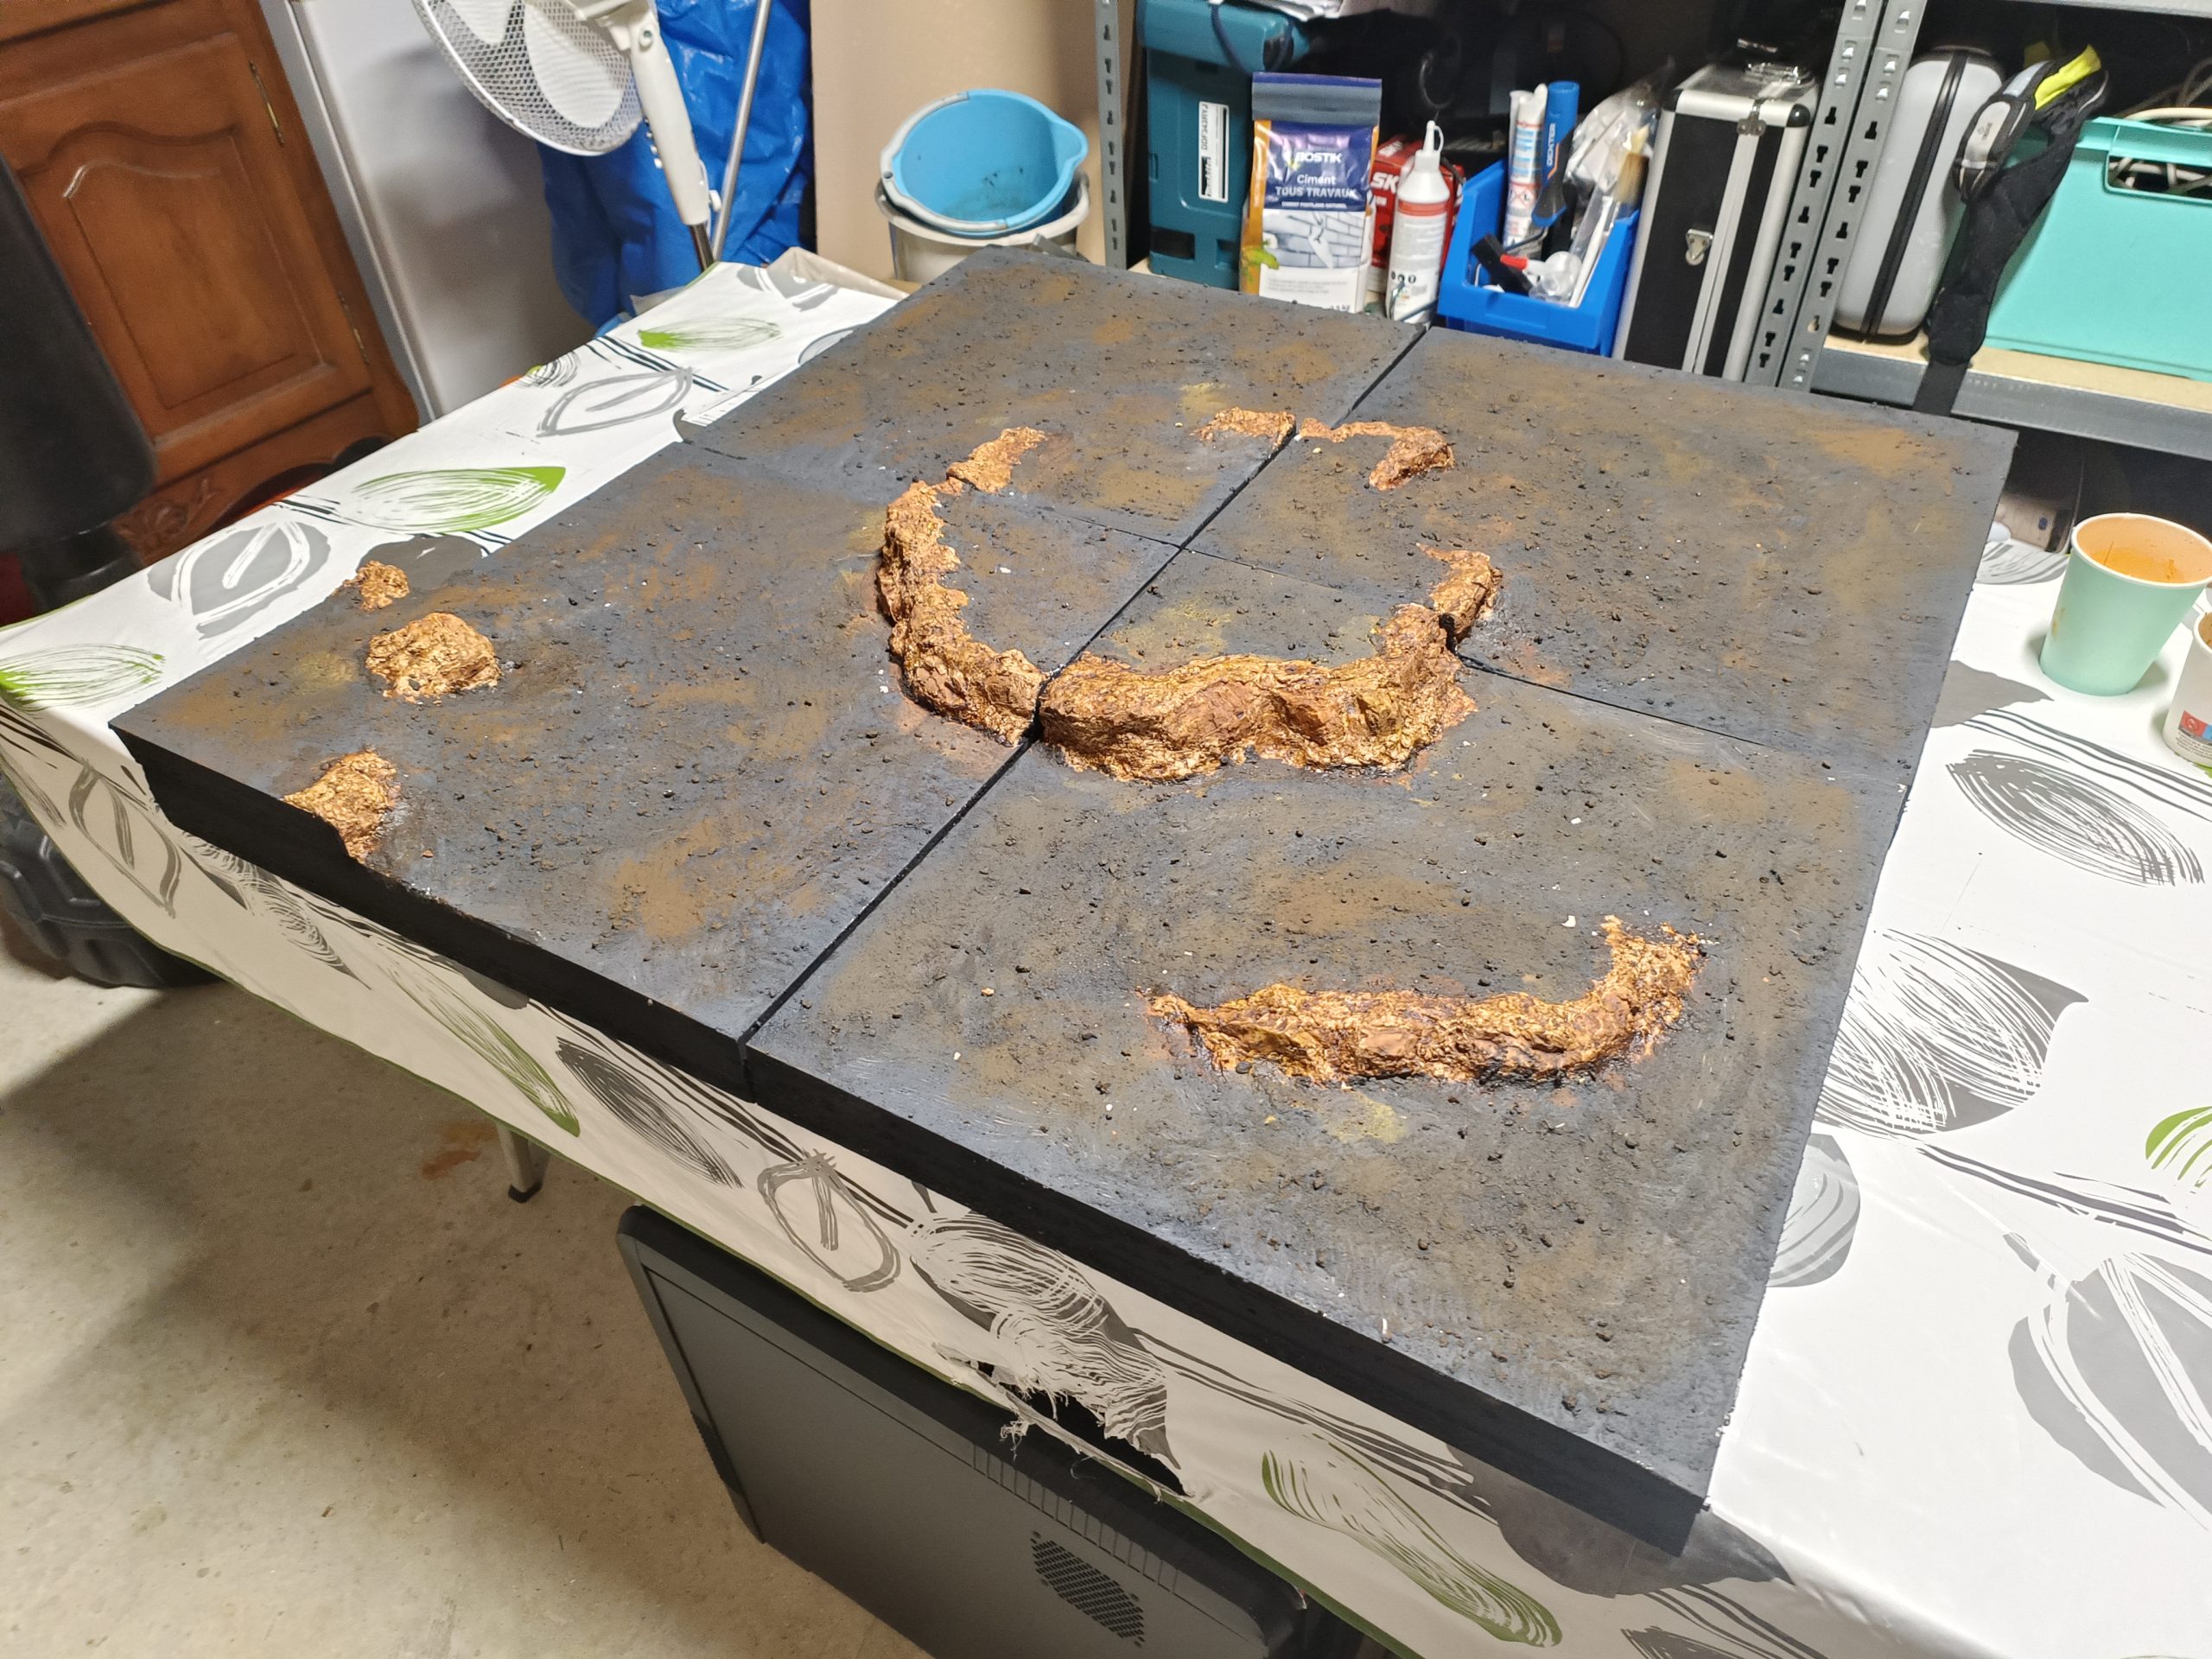
What the Hill !
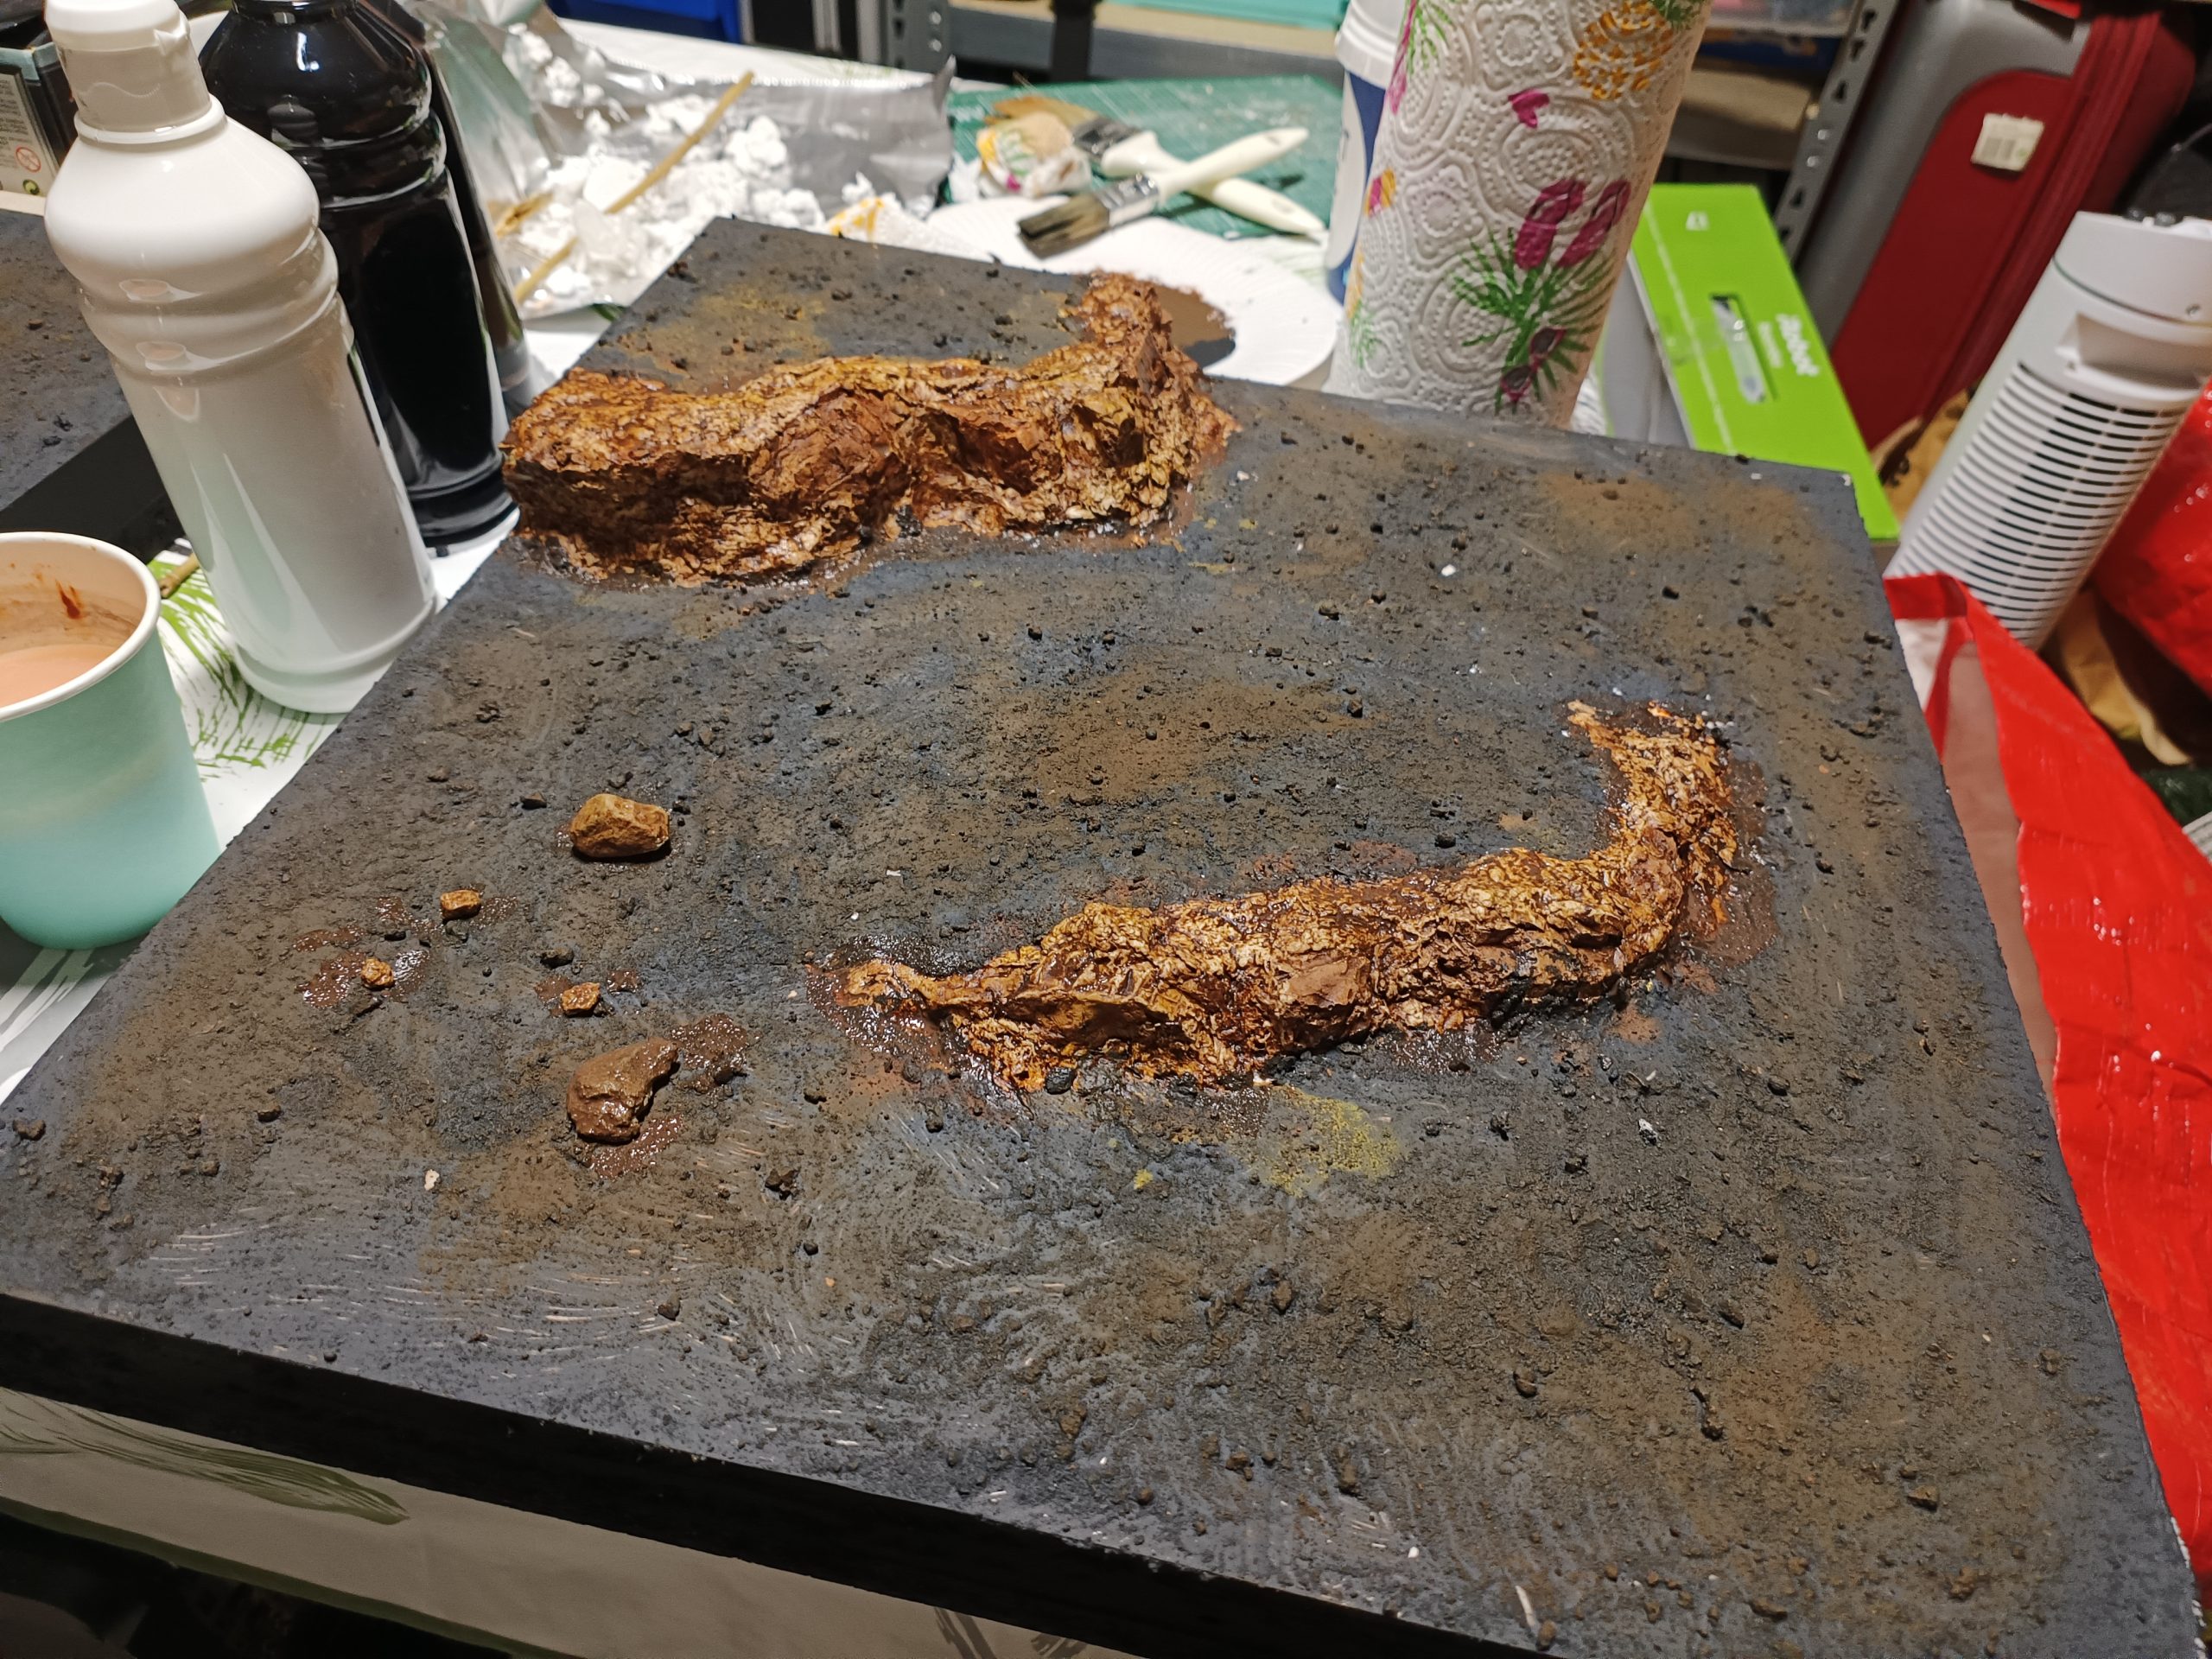
Now that the hills have been made, it’s time to make it all look more desert-like!
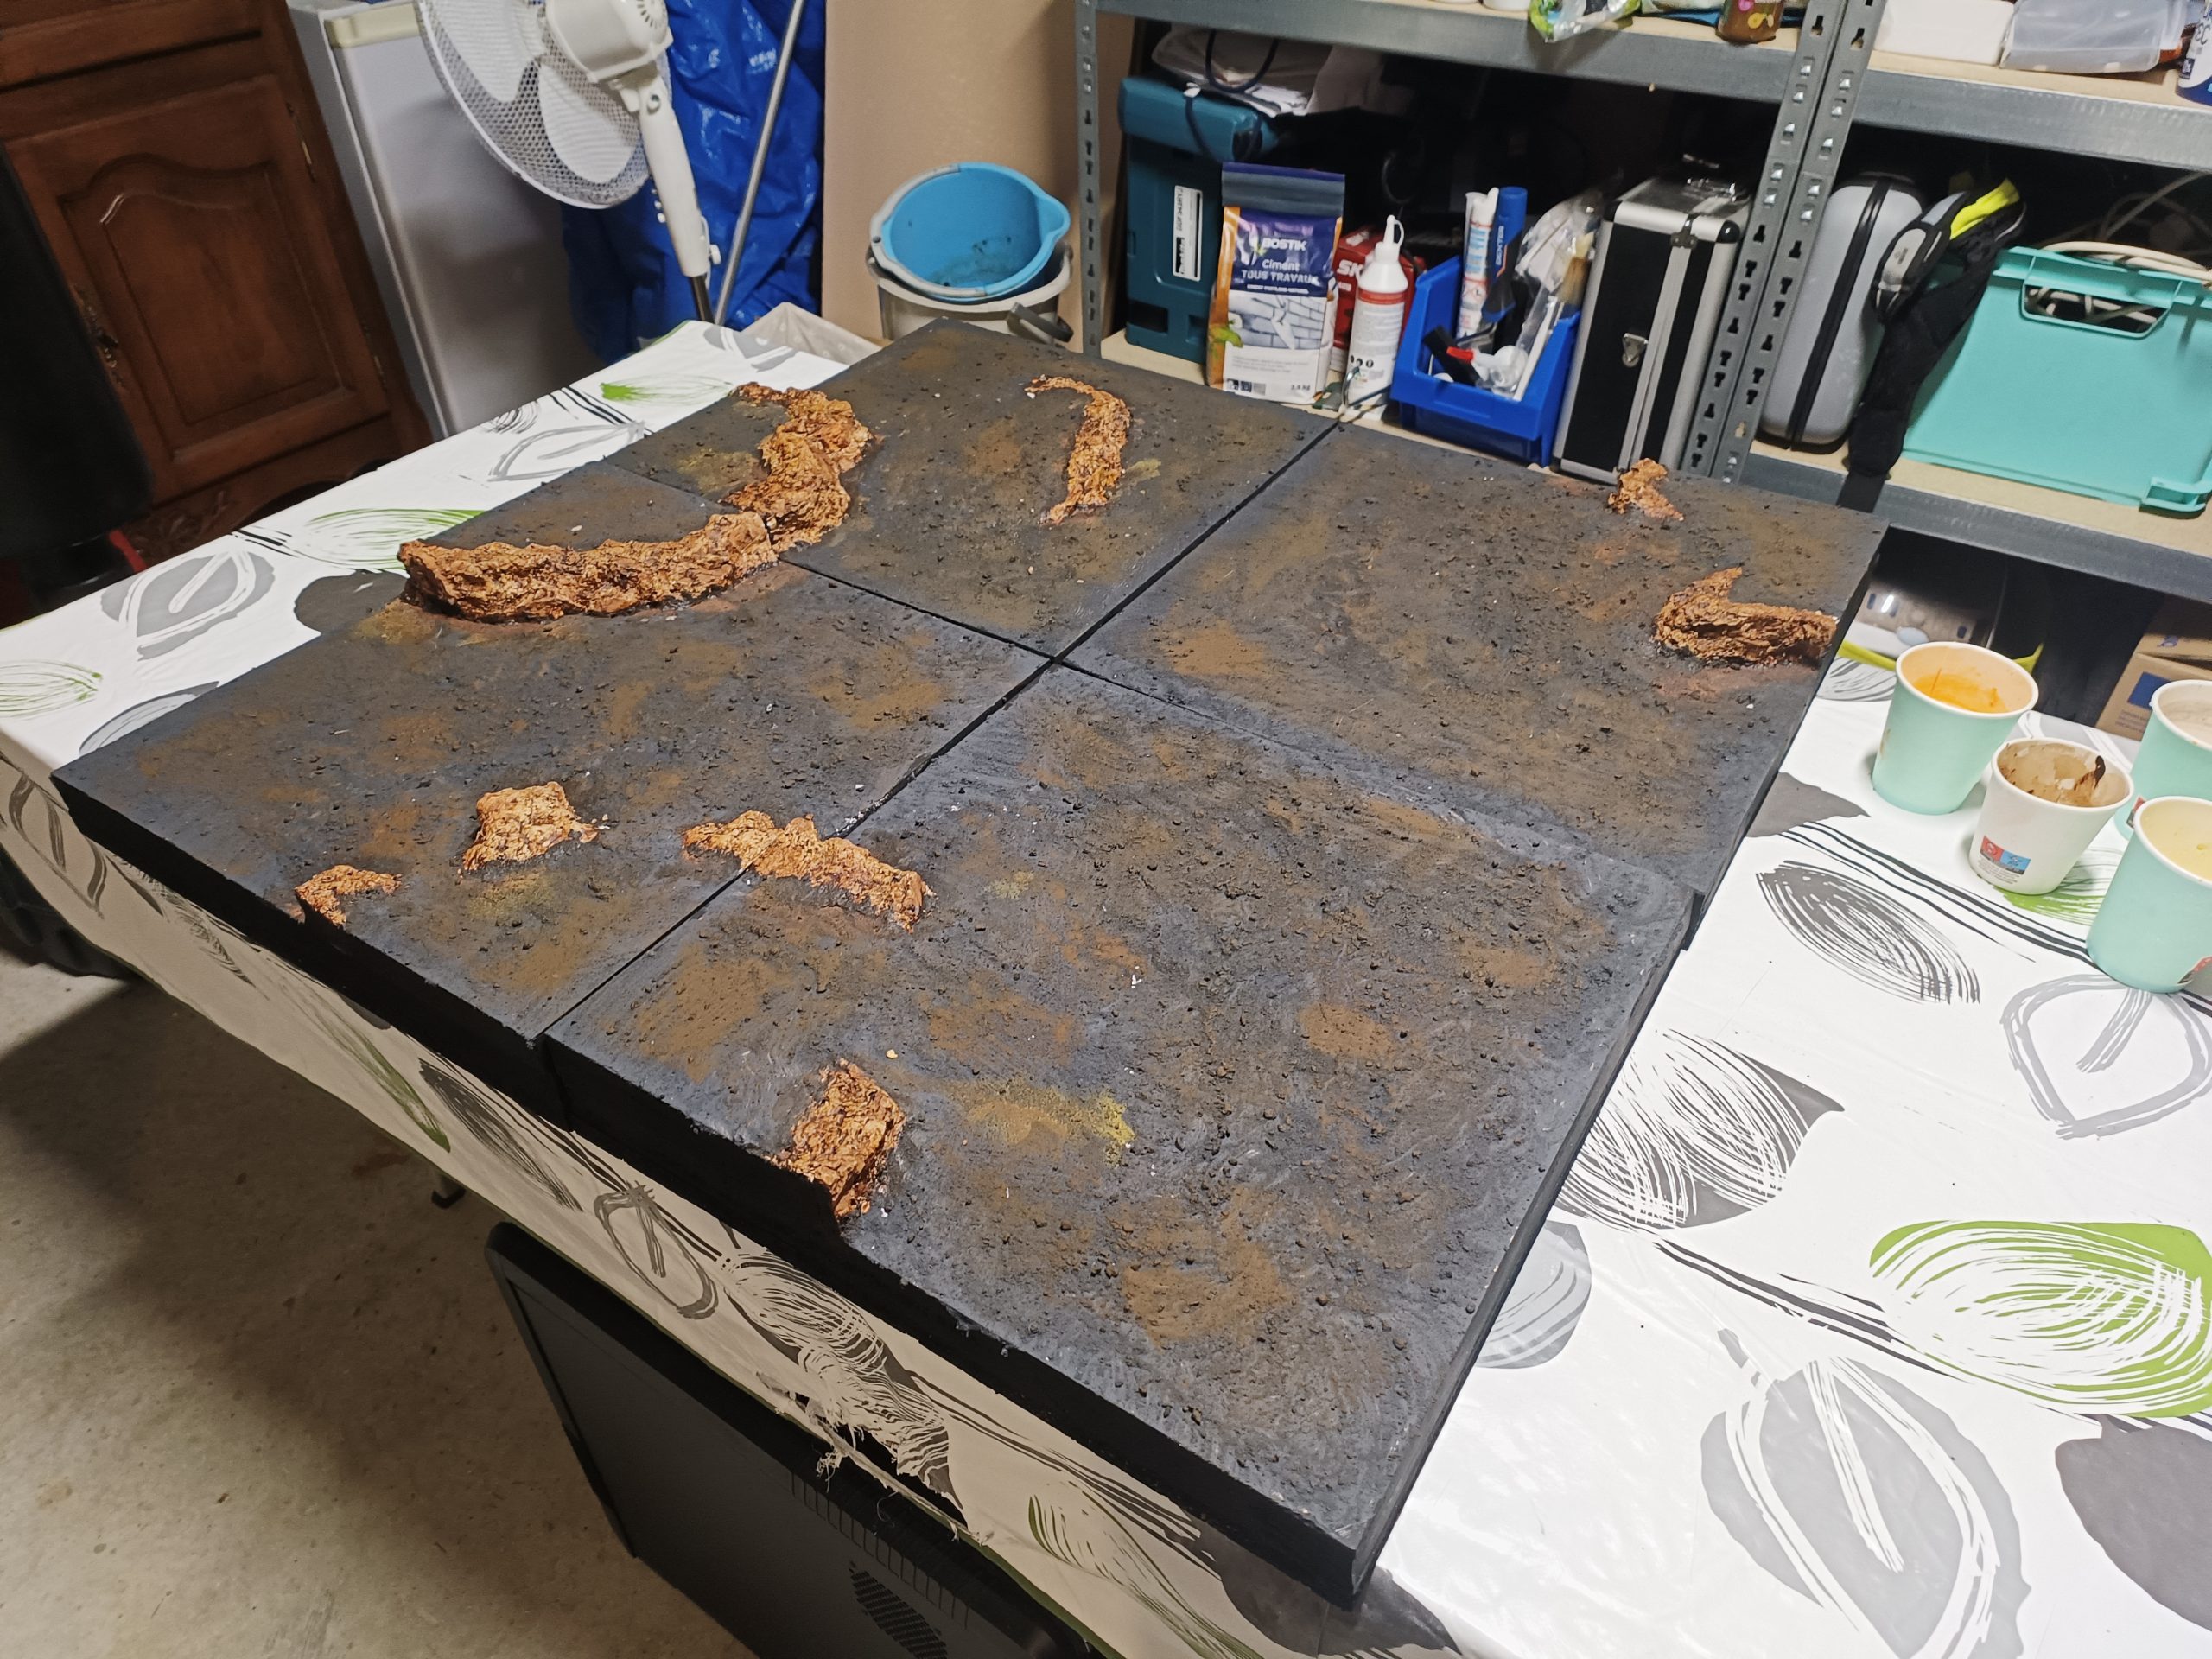
To do this, I started by applying a kind of homemade undercoat made from a mixture of PVA glue, sand, and paint, which I applied to all surfaces, avoiding the cliffs as much as possible.
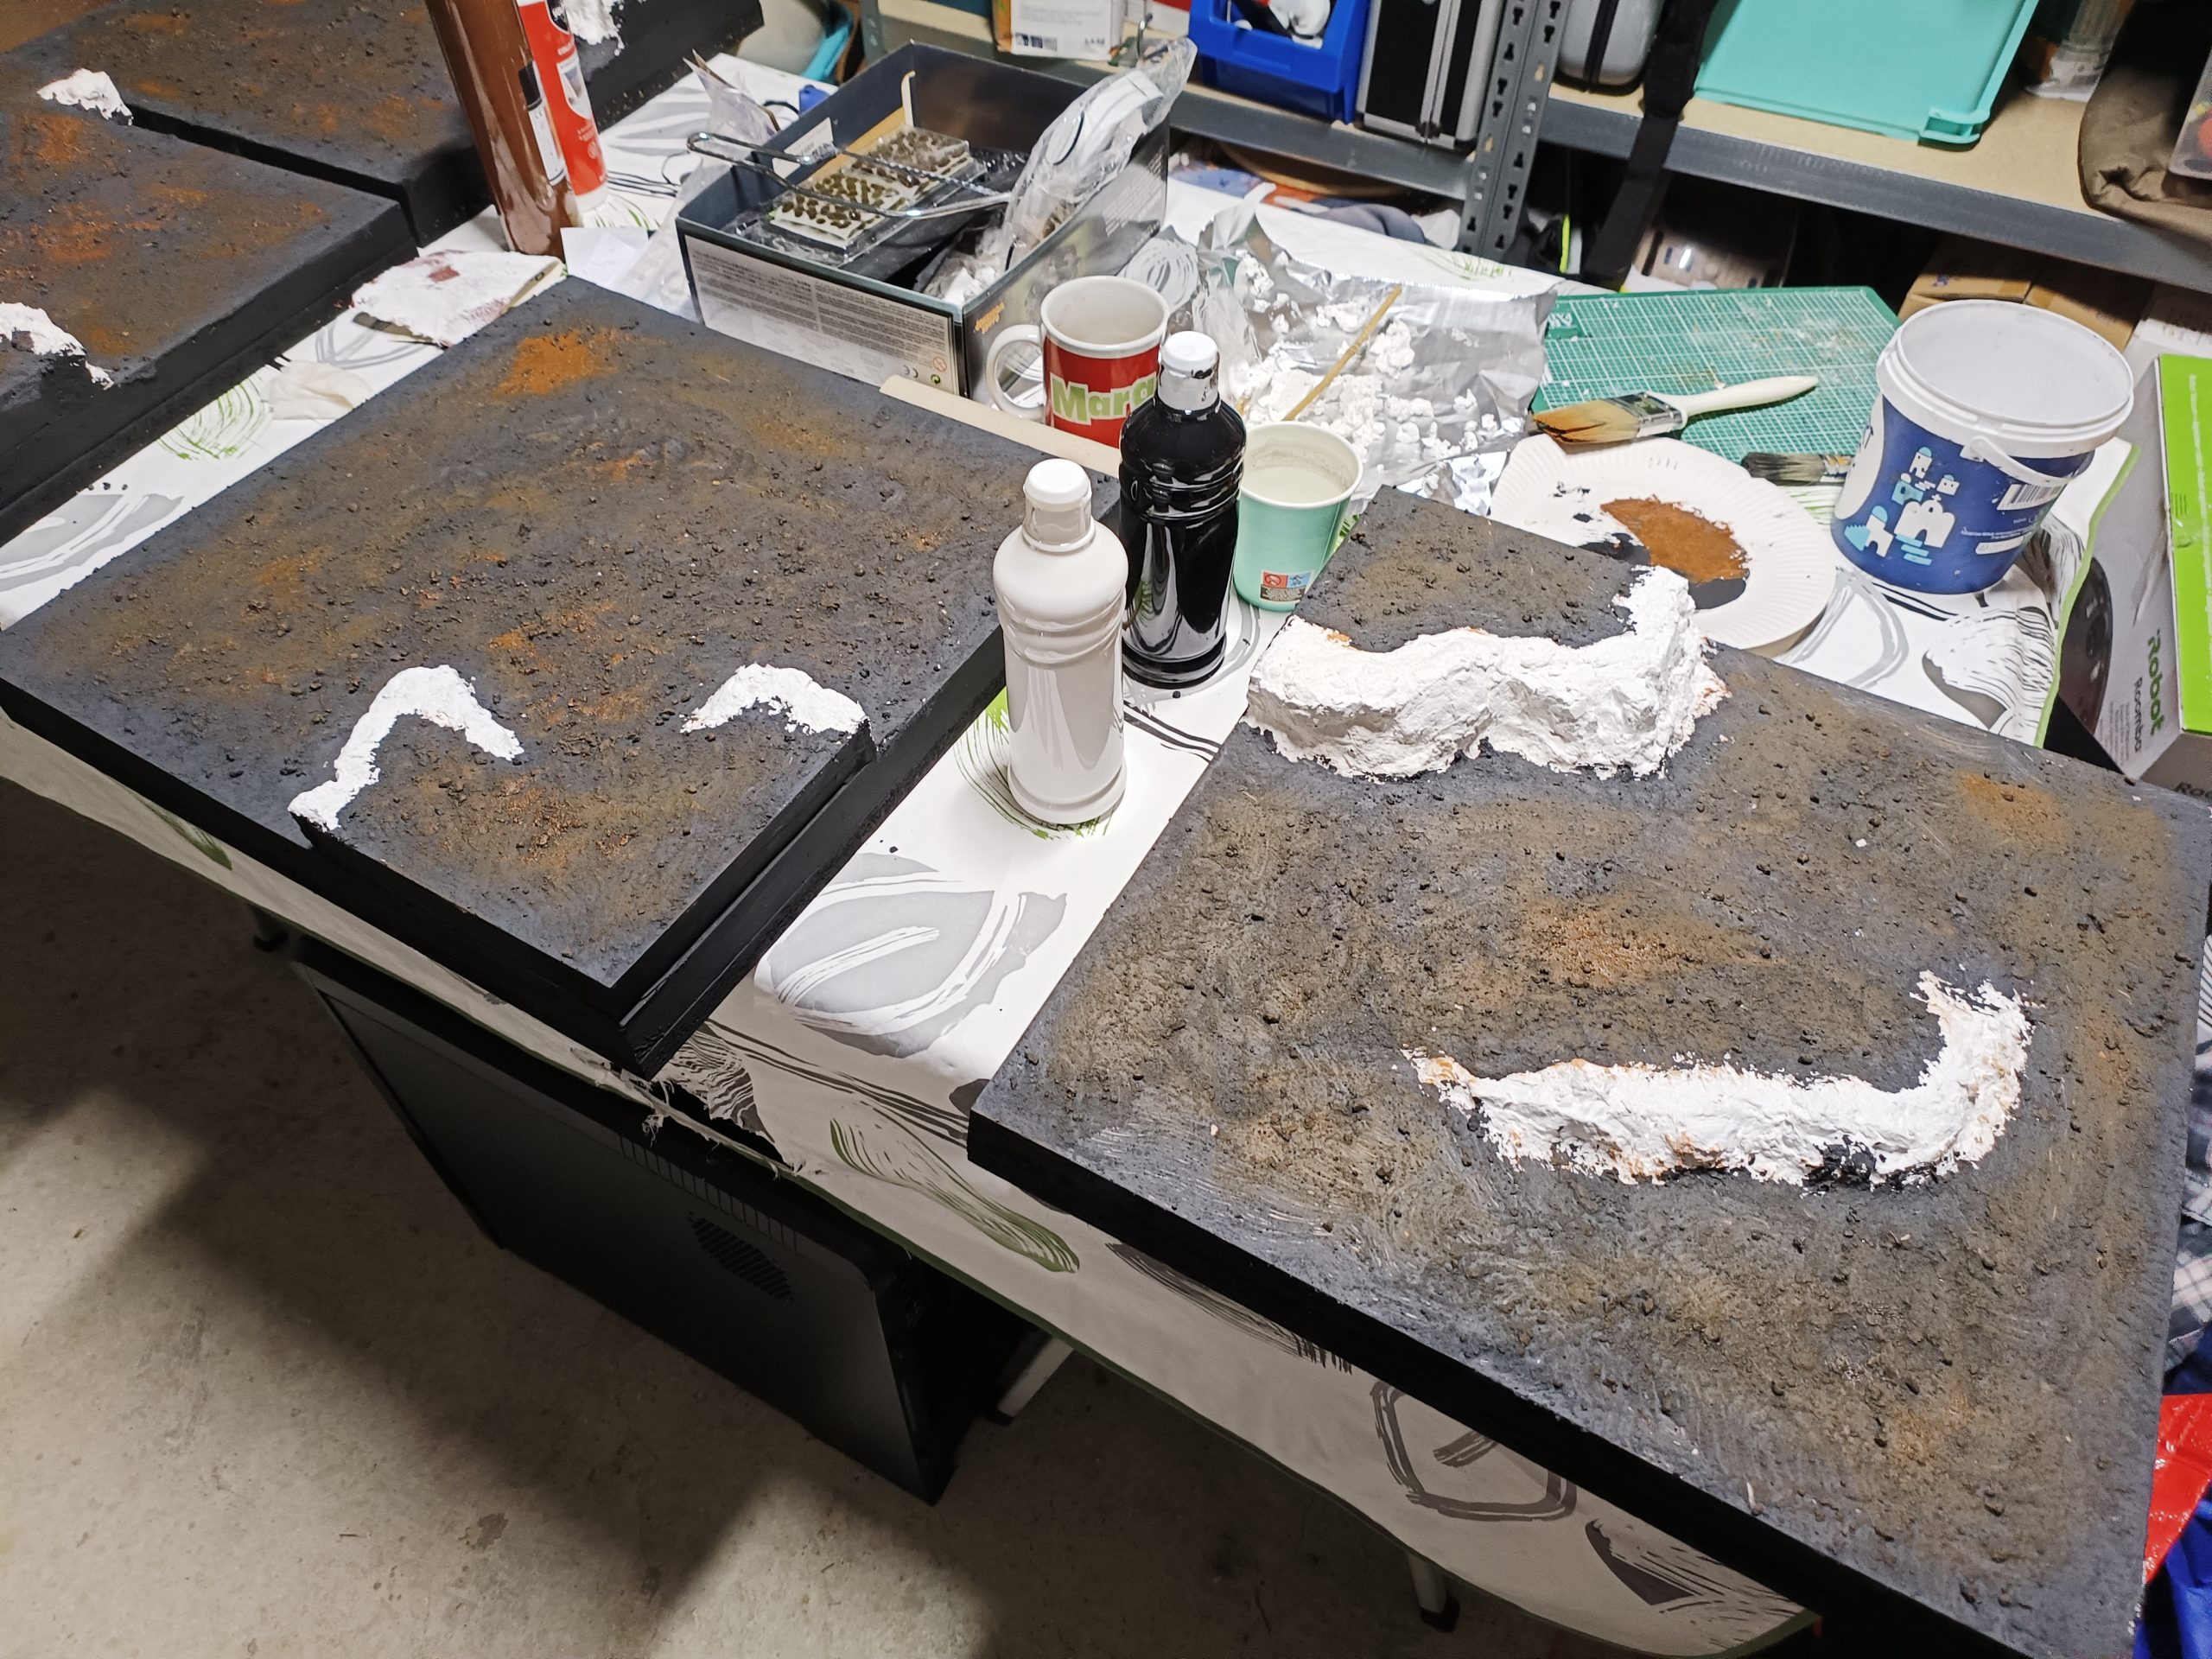
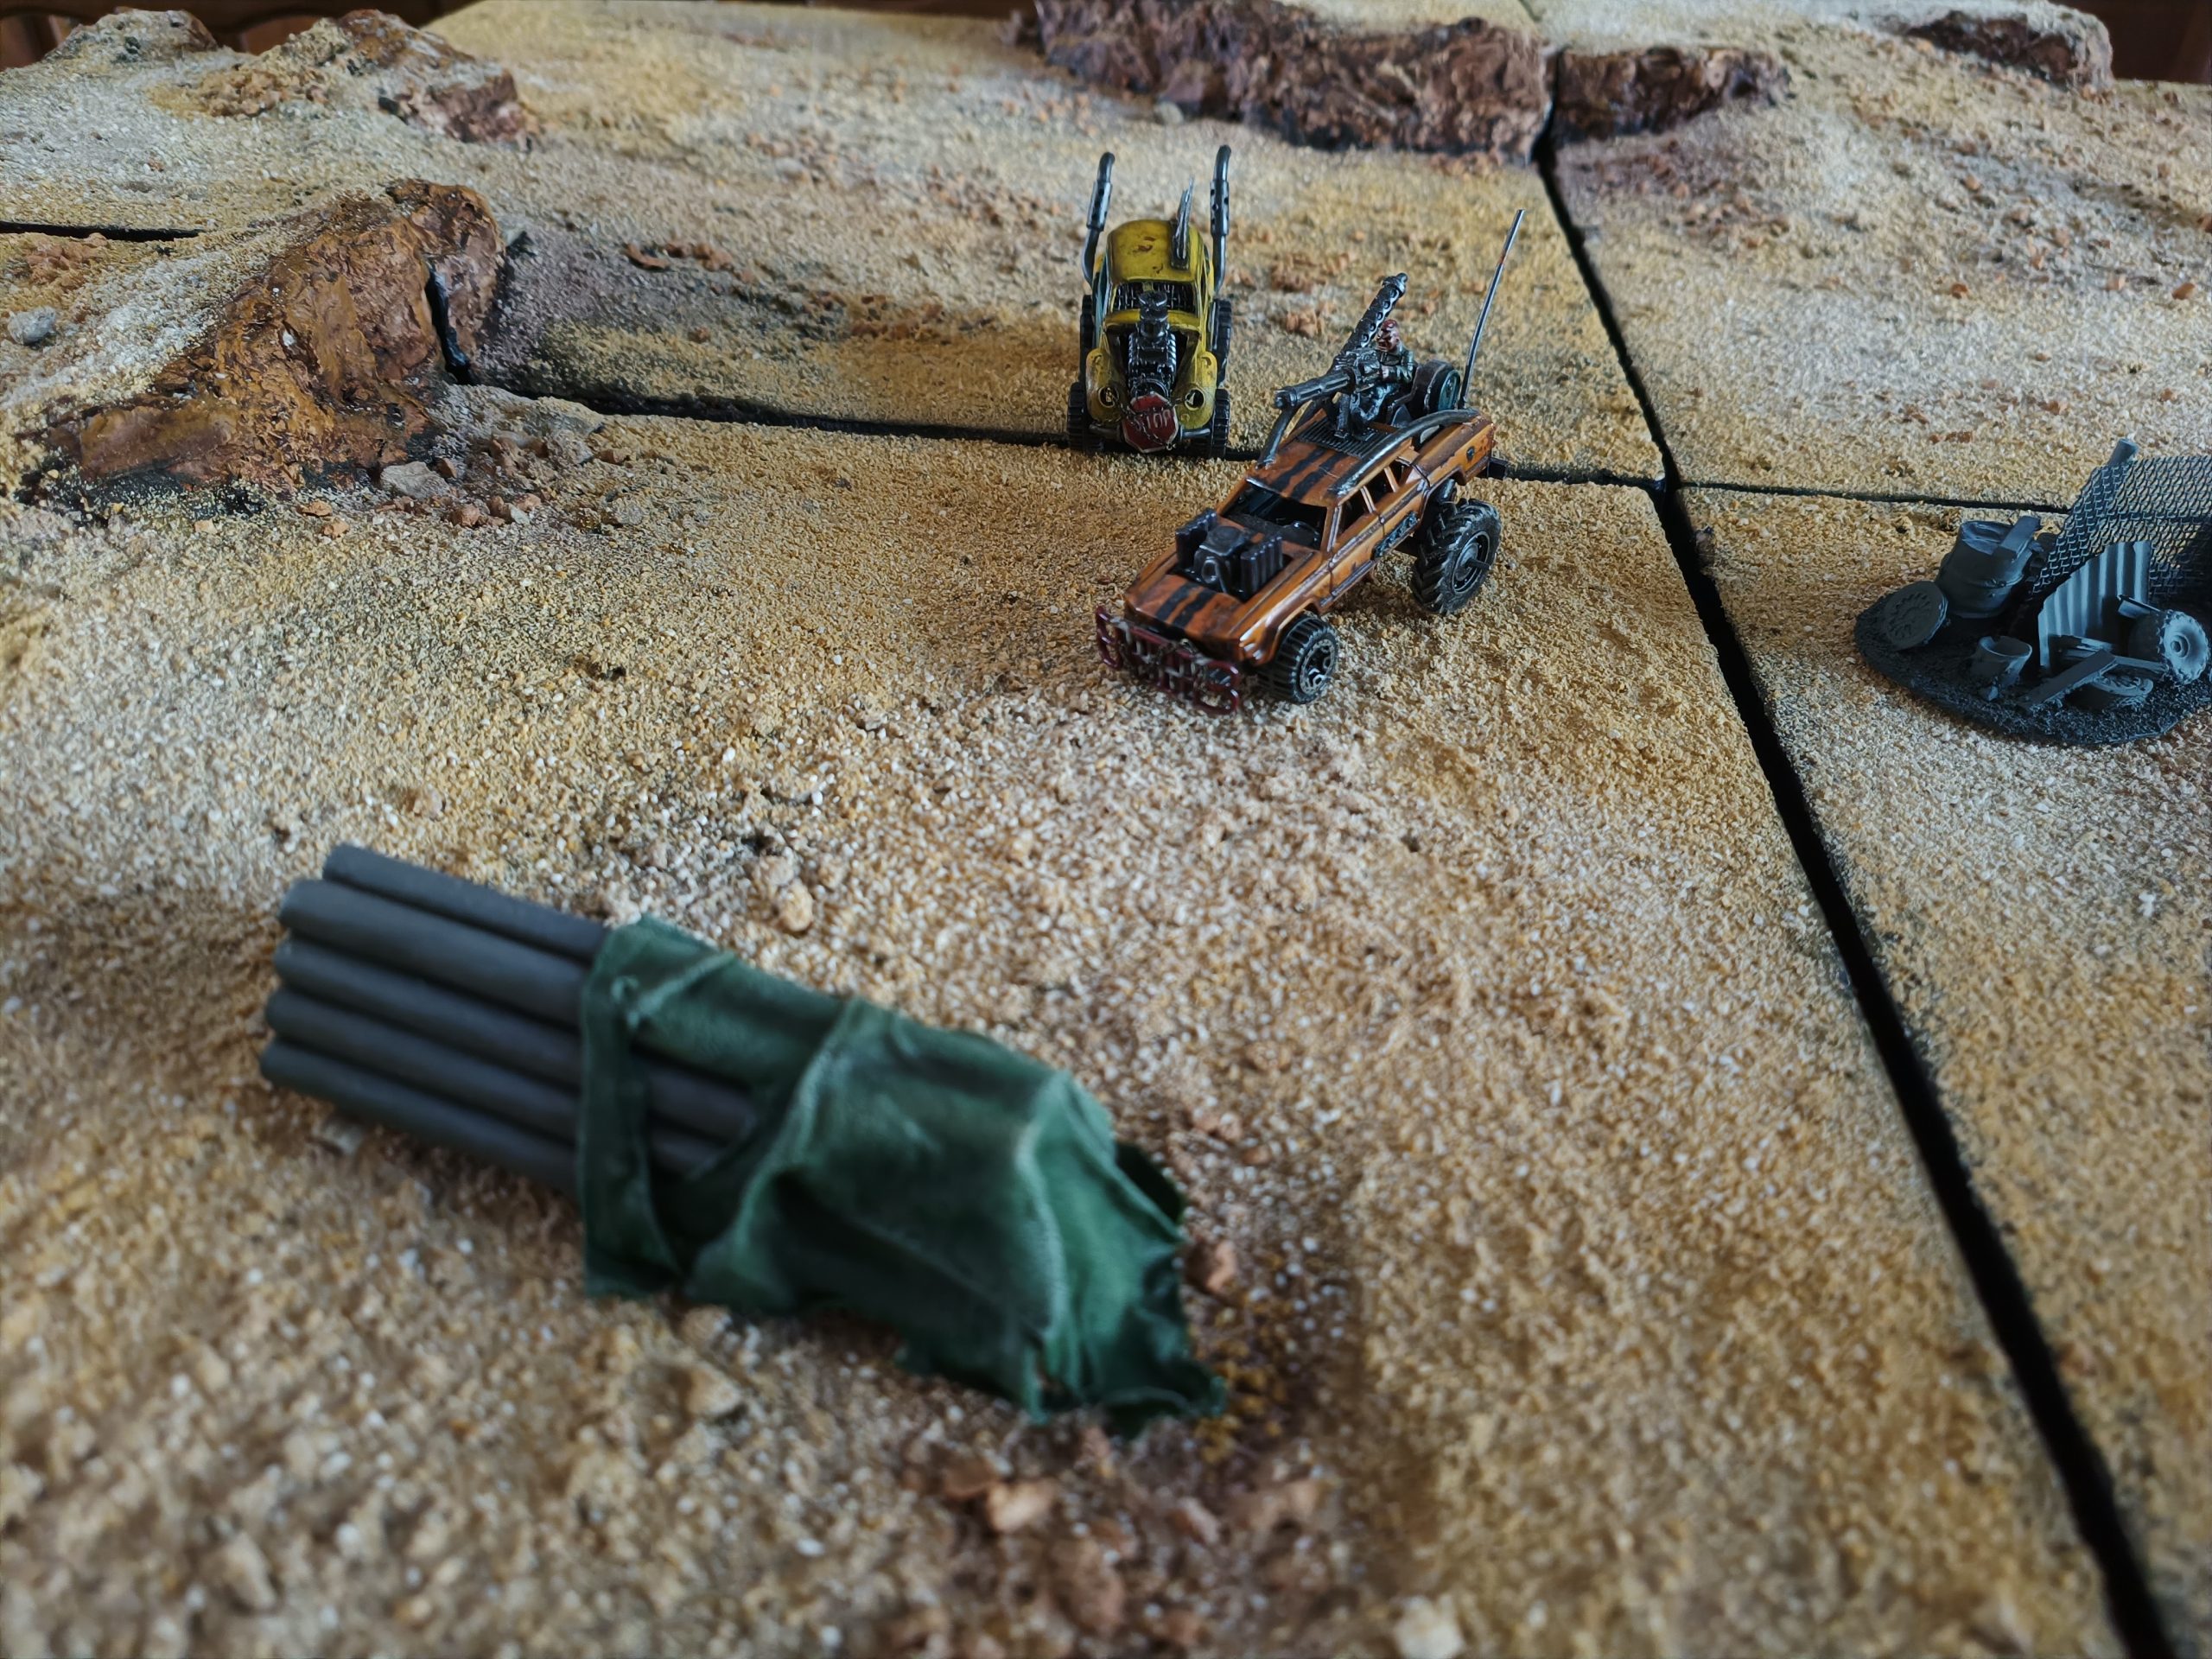
Once everything was completely dry, I tackled the cliffs. I used the leopard painting technique, which is often used in model making. This technique involves applying several layers of very diluted, fairly bright colors, then covering them with a more uniform layer. I find the result very satisfying, quite realistic with a lot of contrast and variation.
This is where I got to have a little fun with the modularity of my tiles! 😀
My only regret is this tile with two hills. The idea seemed good at first—having the choice between a piece of hill with a ramp and a piece of hill that is inaccessible—but in the end, it limits the overall modularity between the tiles and reduces the space available for vehicles to pass through
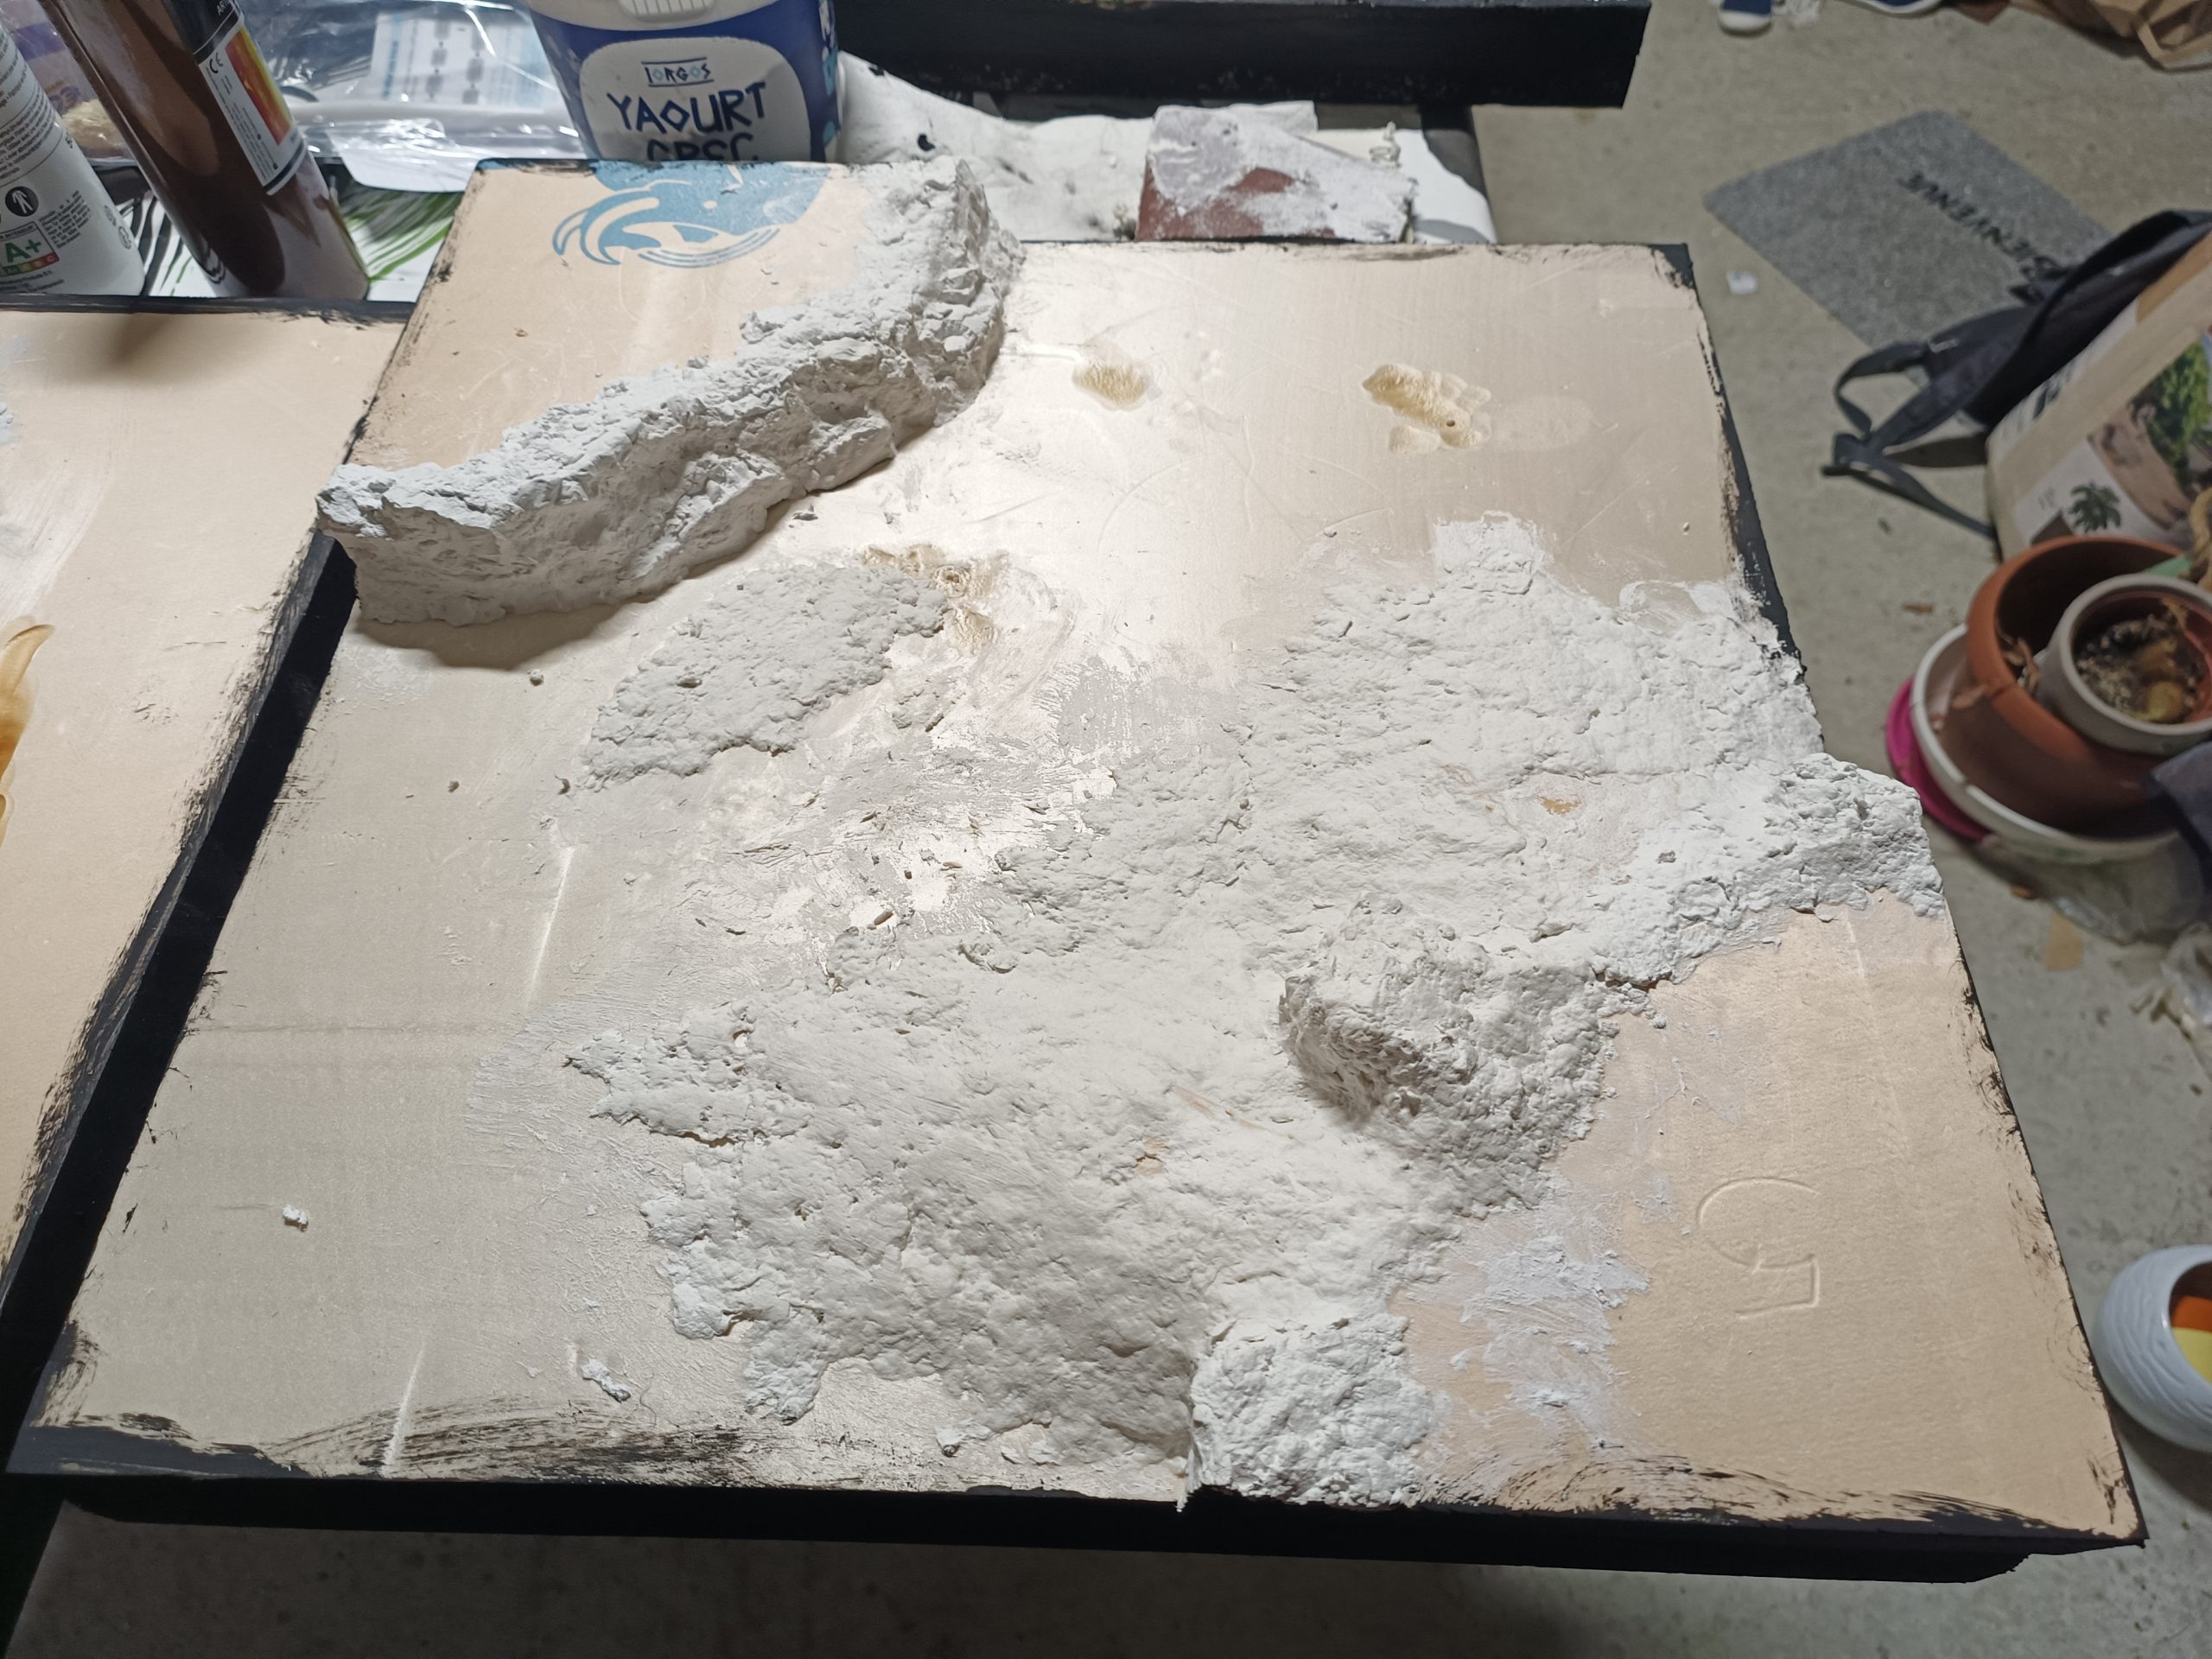
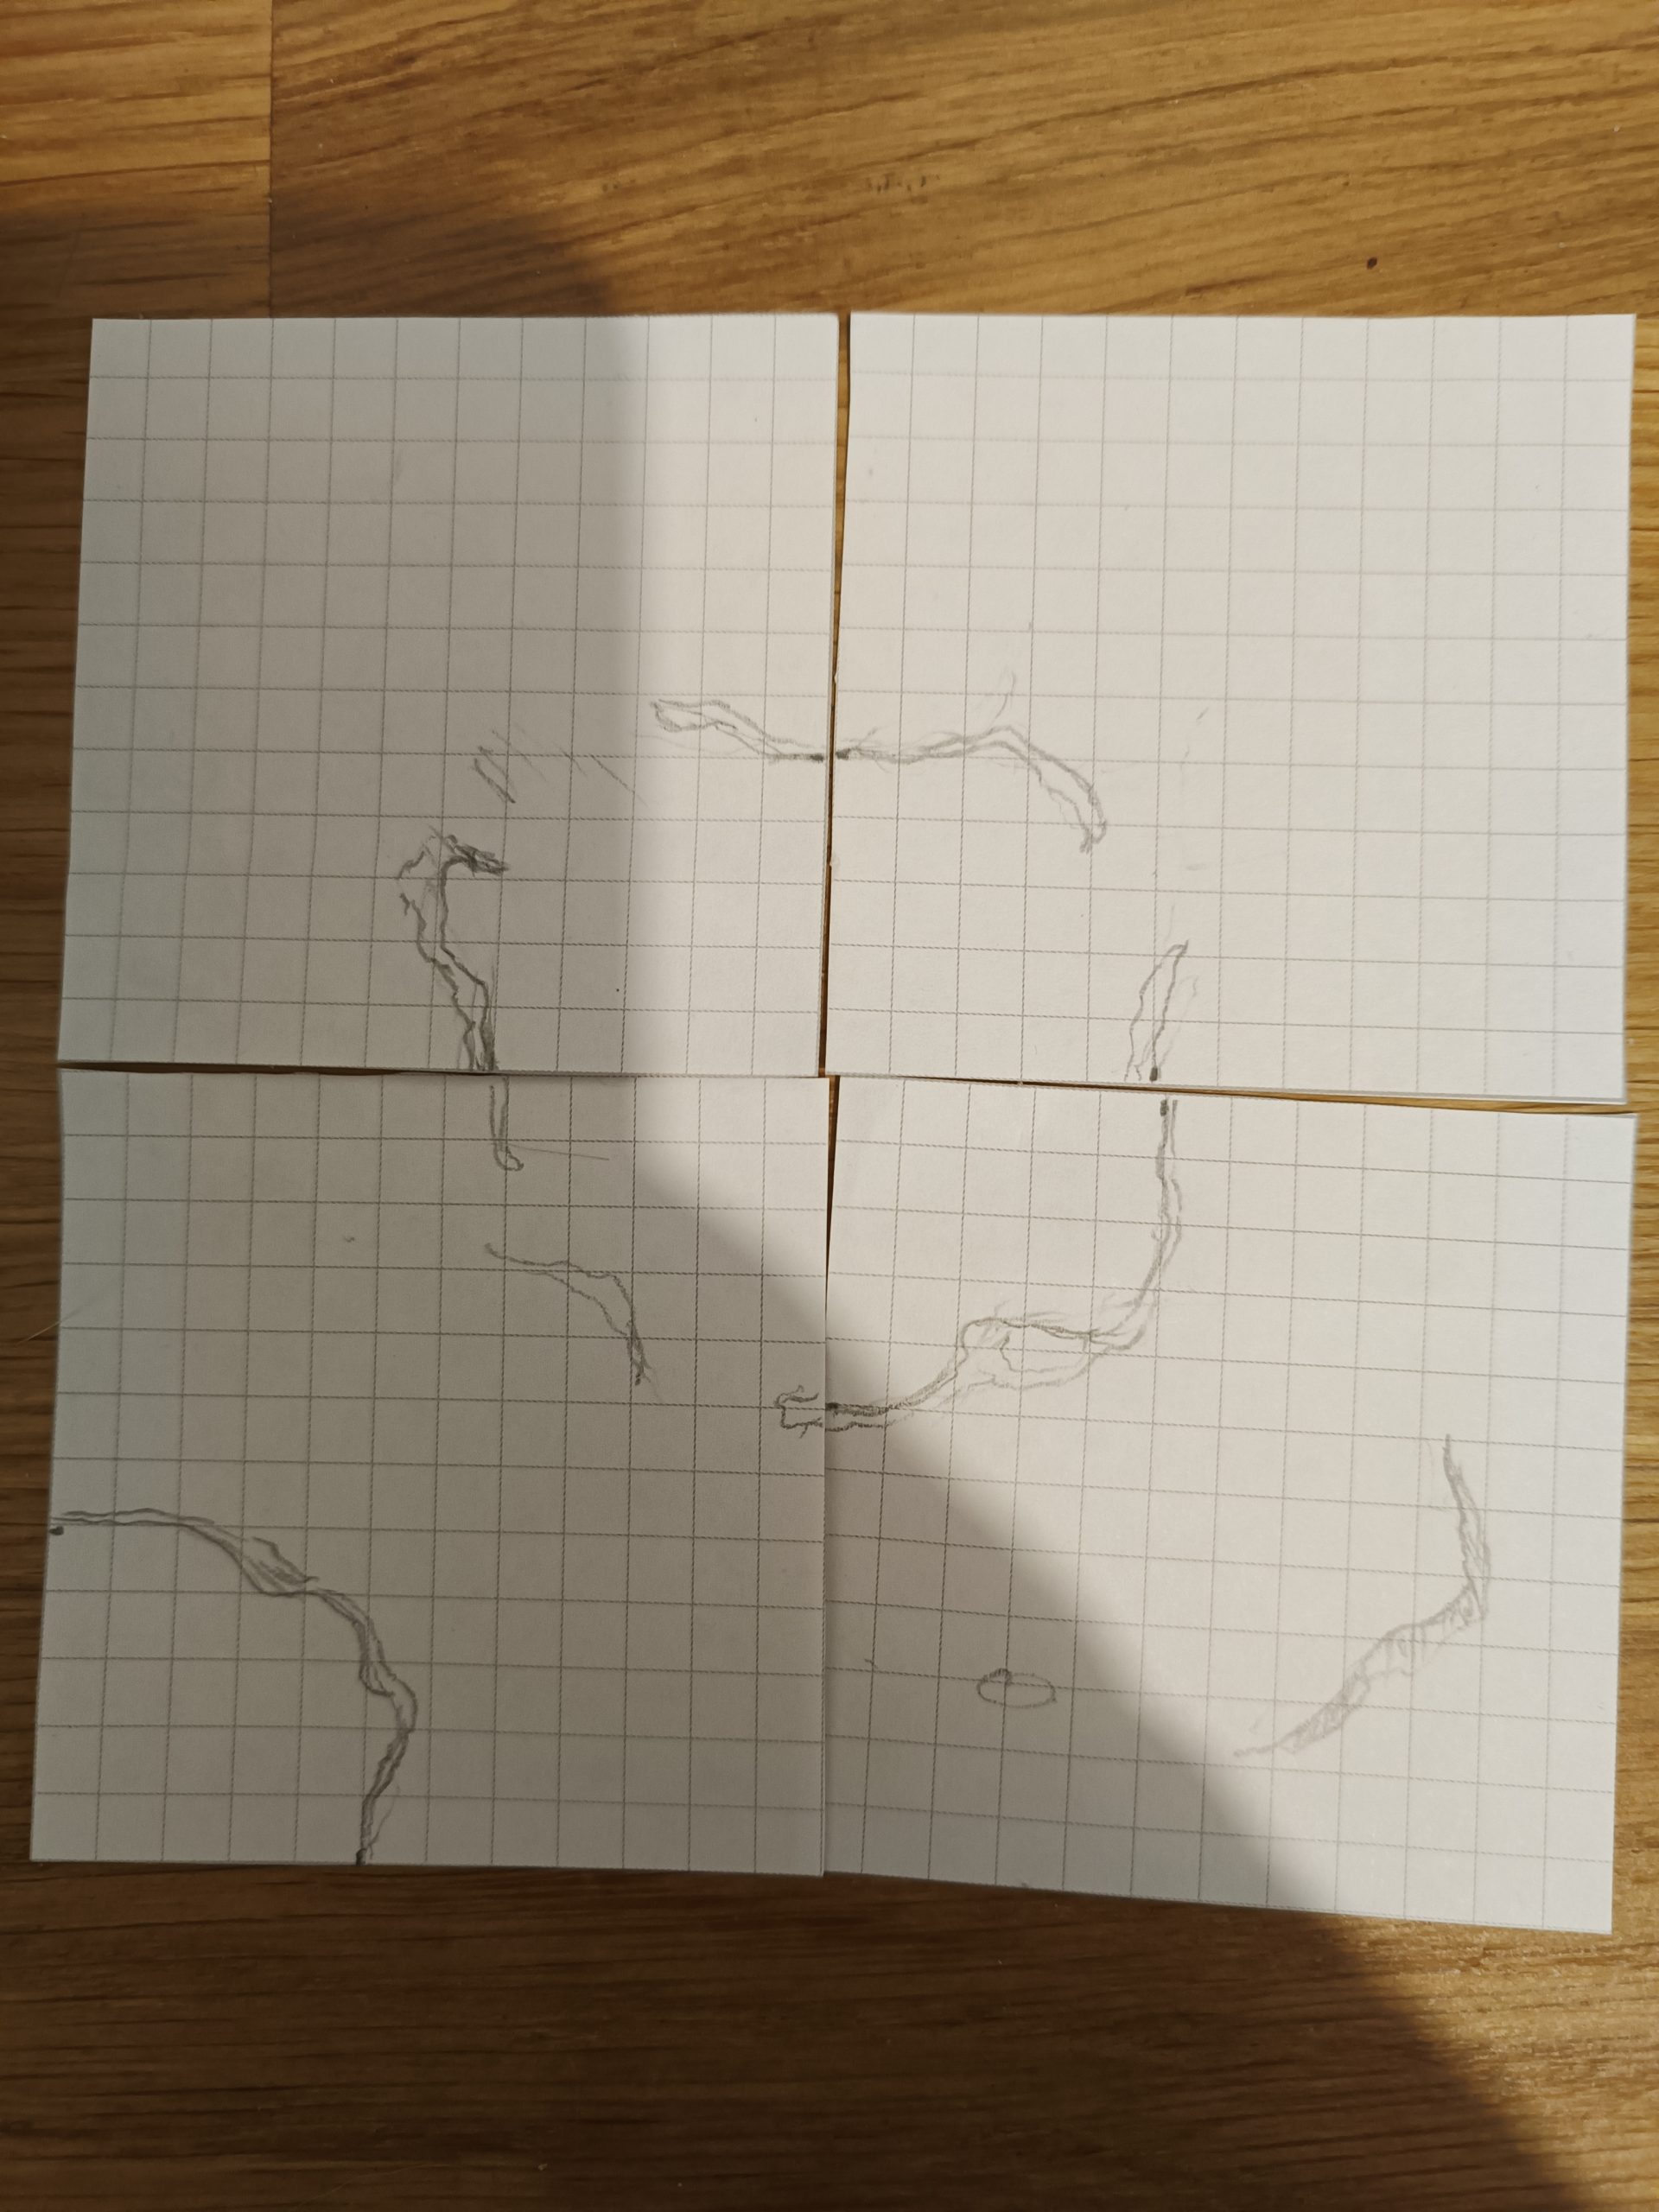
First Creating the tiles
The first thing to do was to determine what the terrain would look like. I knew I wanted to make sand tiles to match the idea we had for the game. I wanted everything to be modular, with hills that vehicles could climb up. So I started by drawing on small squares of graph paper to get an idea of the potential dimensions of the hills and see how I could make the terrain as modular as possible.
I then gathered all the materials I needed to make the tiles. The tiles are 45 cm square. They are made of an 18 mm thick wooden board, then a layer of polystyrene about 30 mm thick.
I cut and glued the polystyrene with PVA glue to create the main shapes of the hills.
By following several tutorials, notably those by Zorpazop on his Geonosis terrain, and Eric’s Hobby Workshop on desert terrain, I was able to learn different techniques for creating realistic scenery.
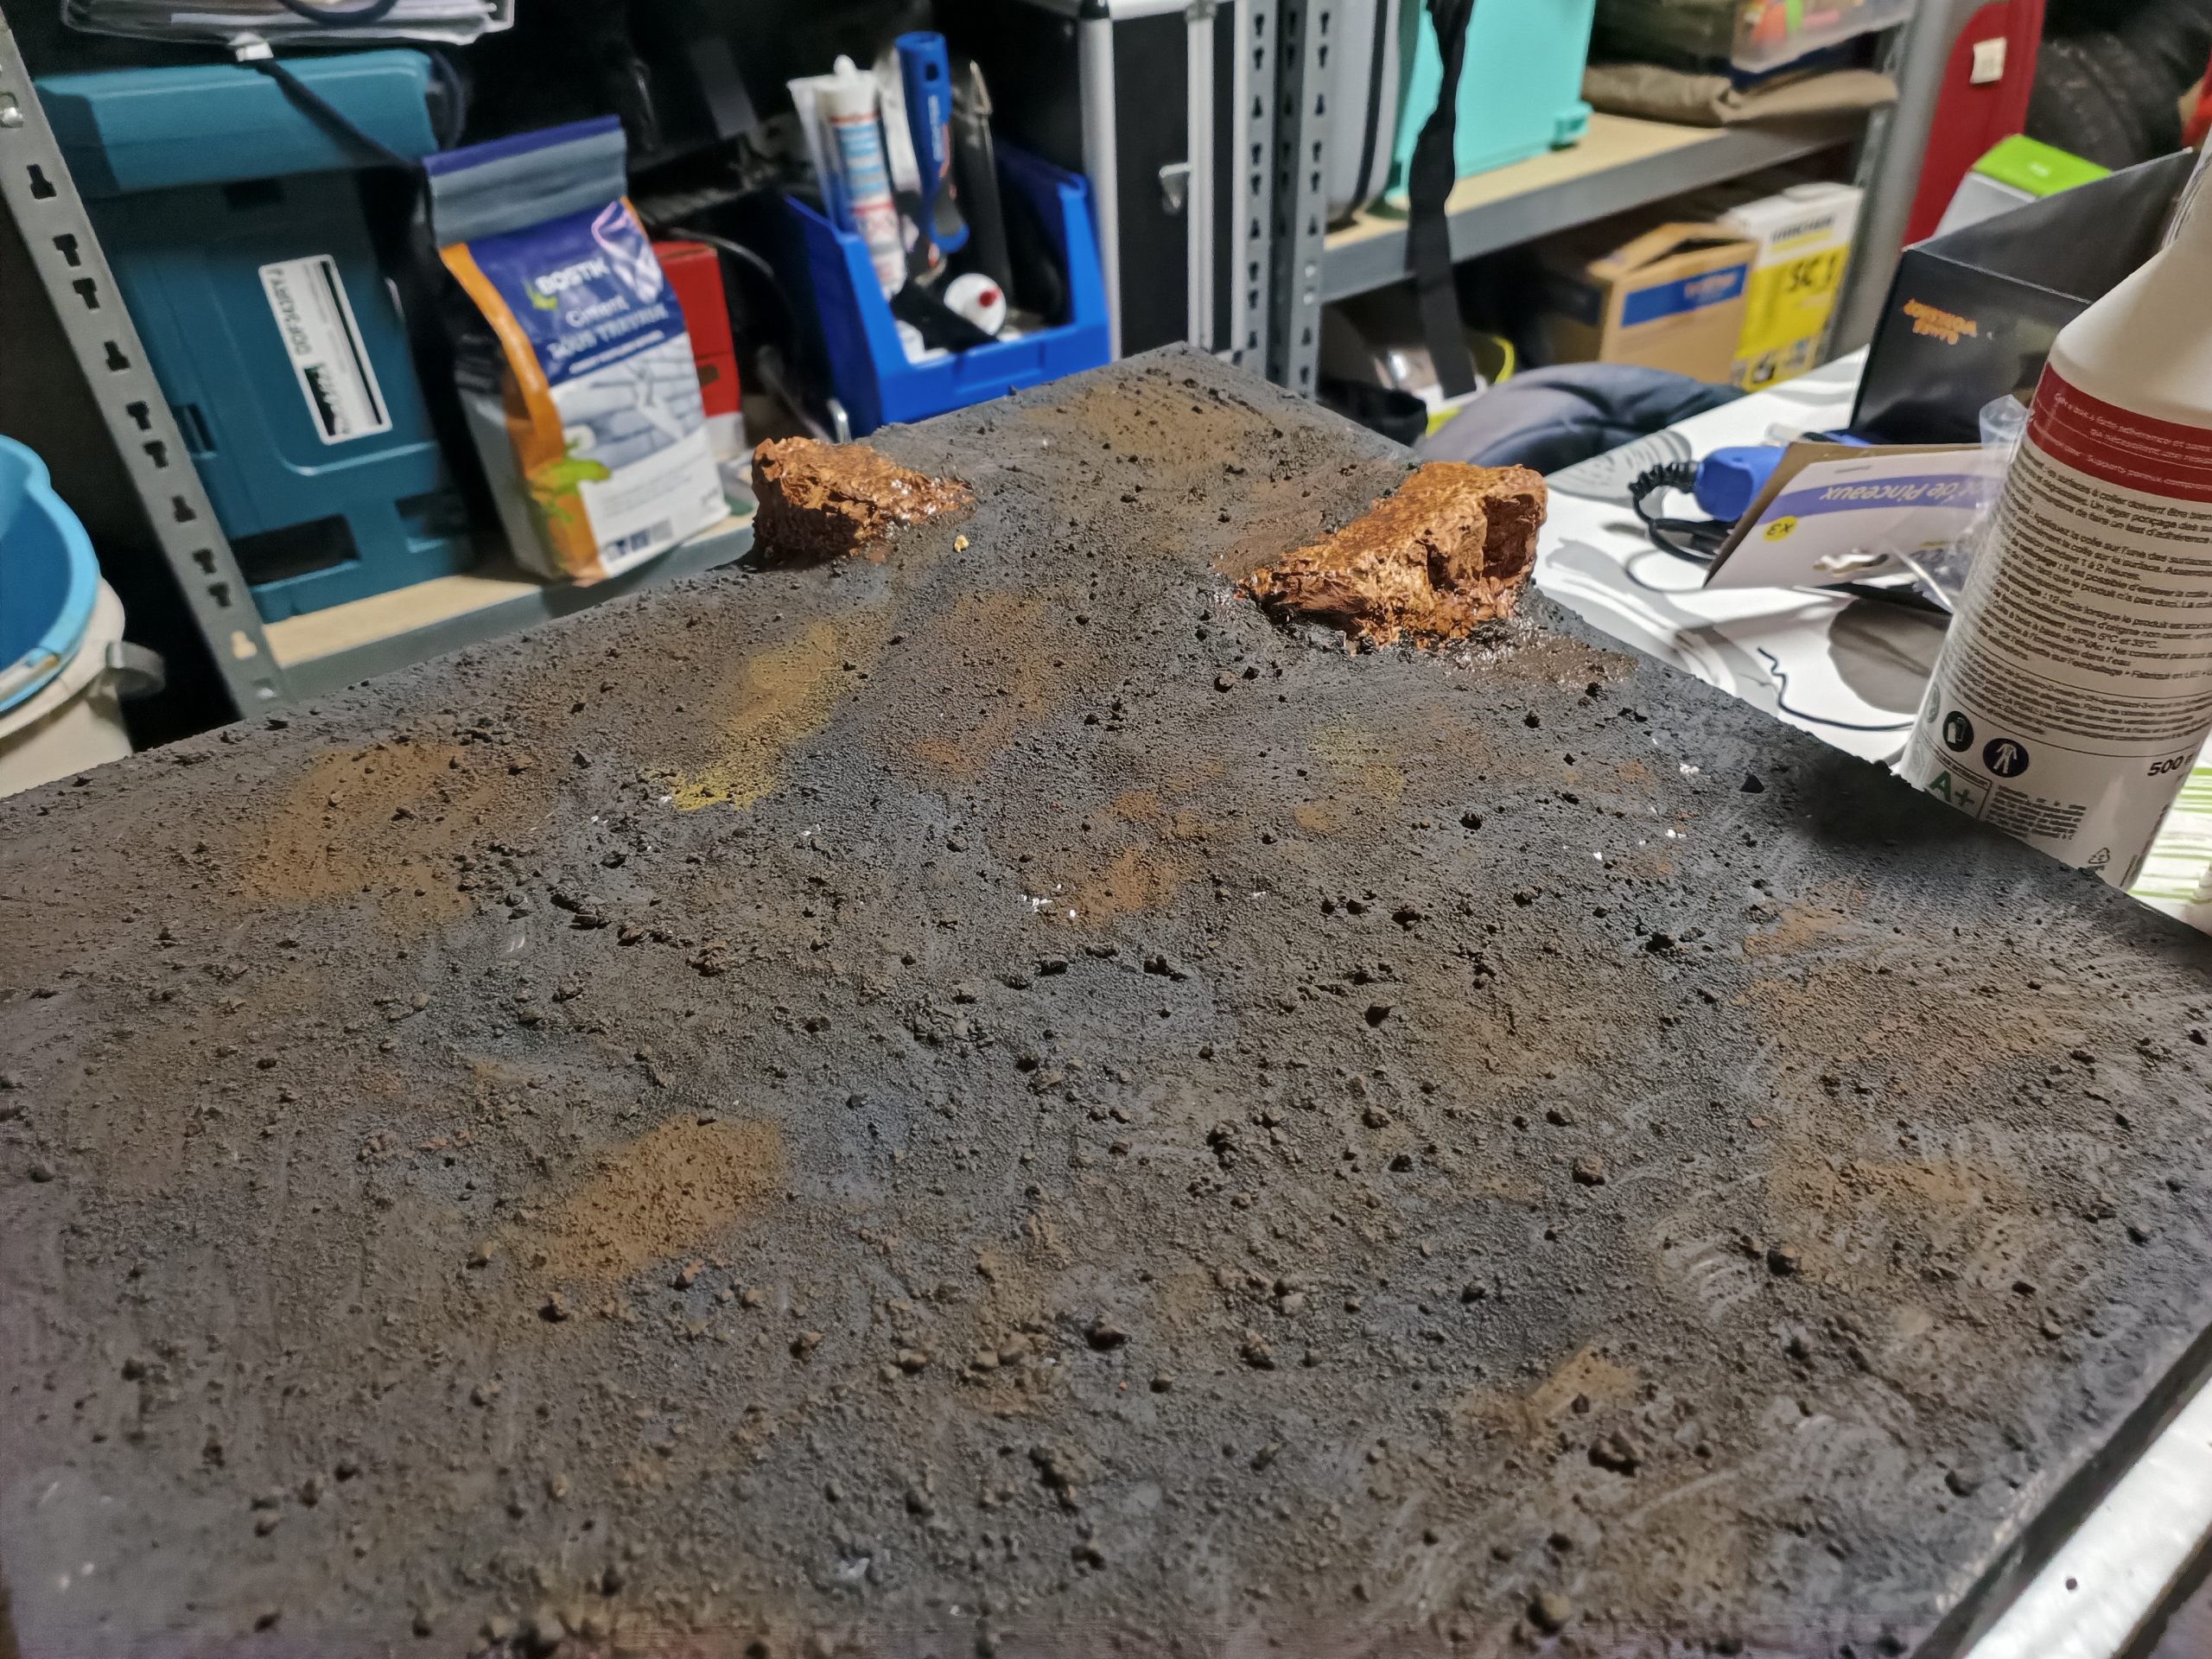
Following Zorpazorp’s advice, I molded rock faces to apply to the cliff sides. I was then able to add polystyrene scraps to make ramps for the vehicles to drive on.
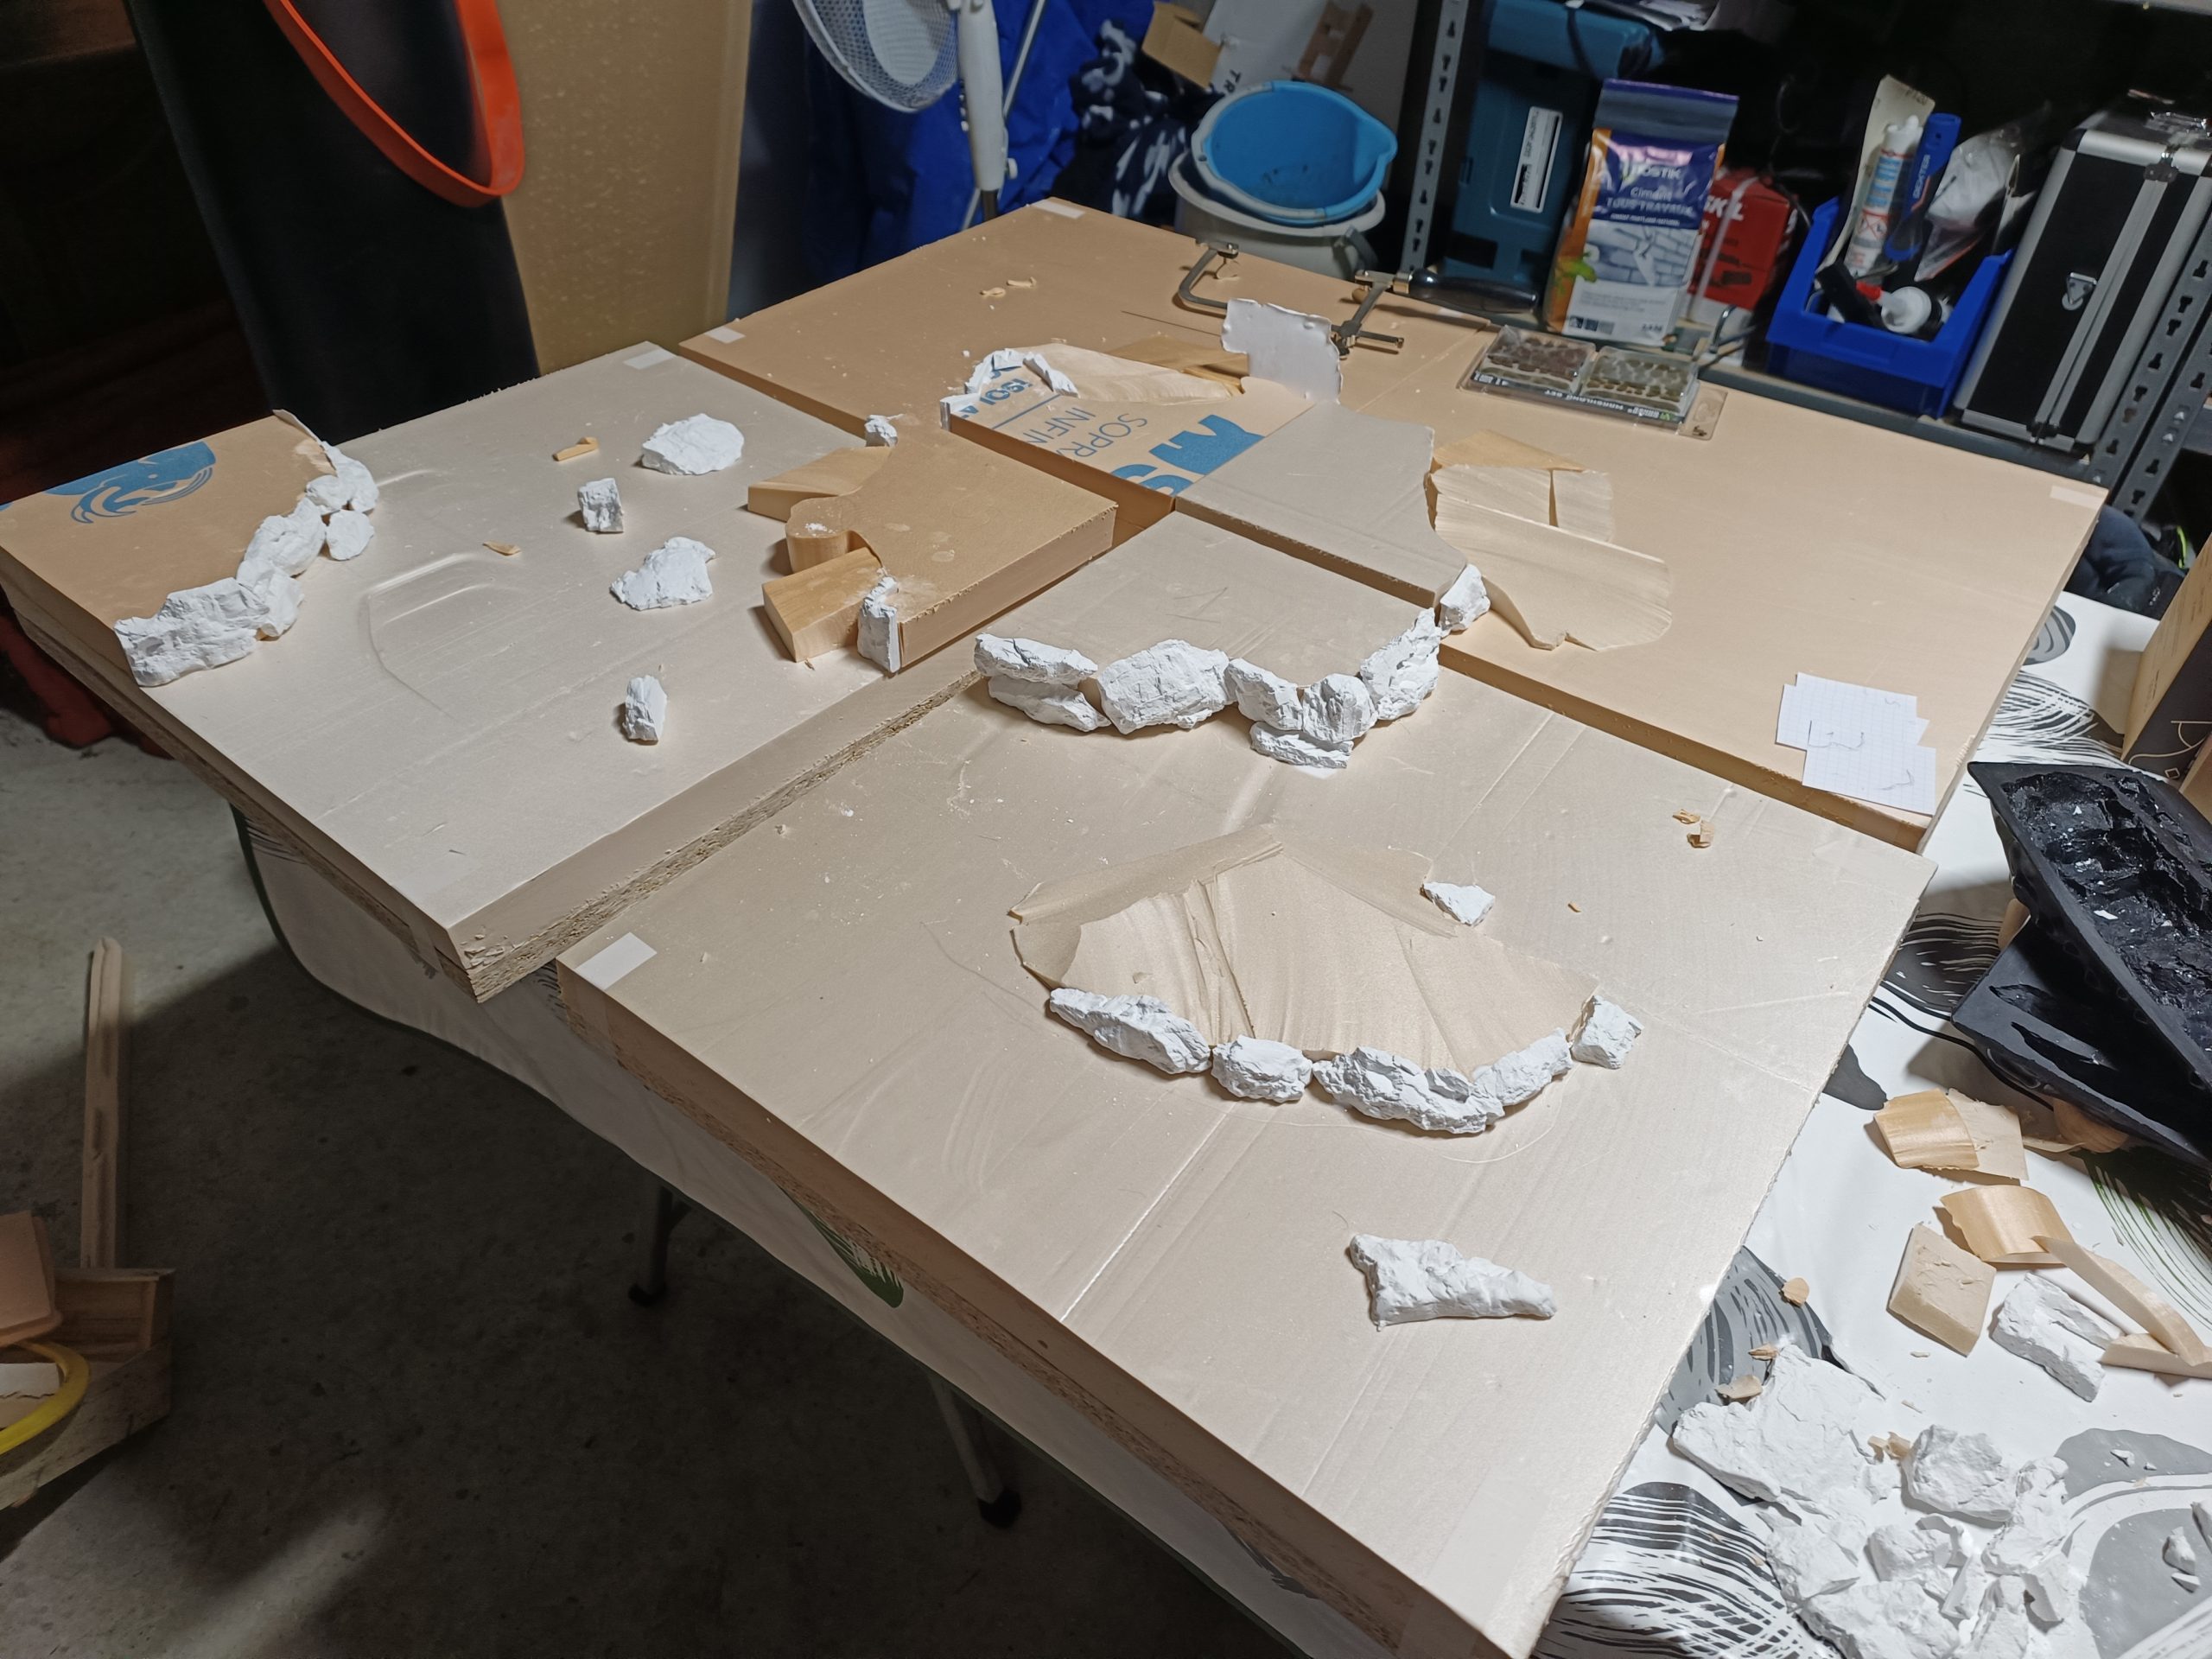
I also took advantage of the thickness of the polystyrene to melt it in certain places, creating real cracks in the terrain, which will make it less flat once textured.
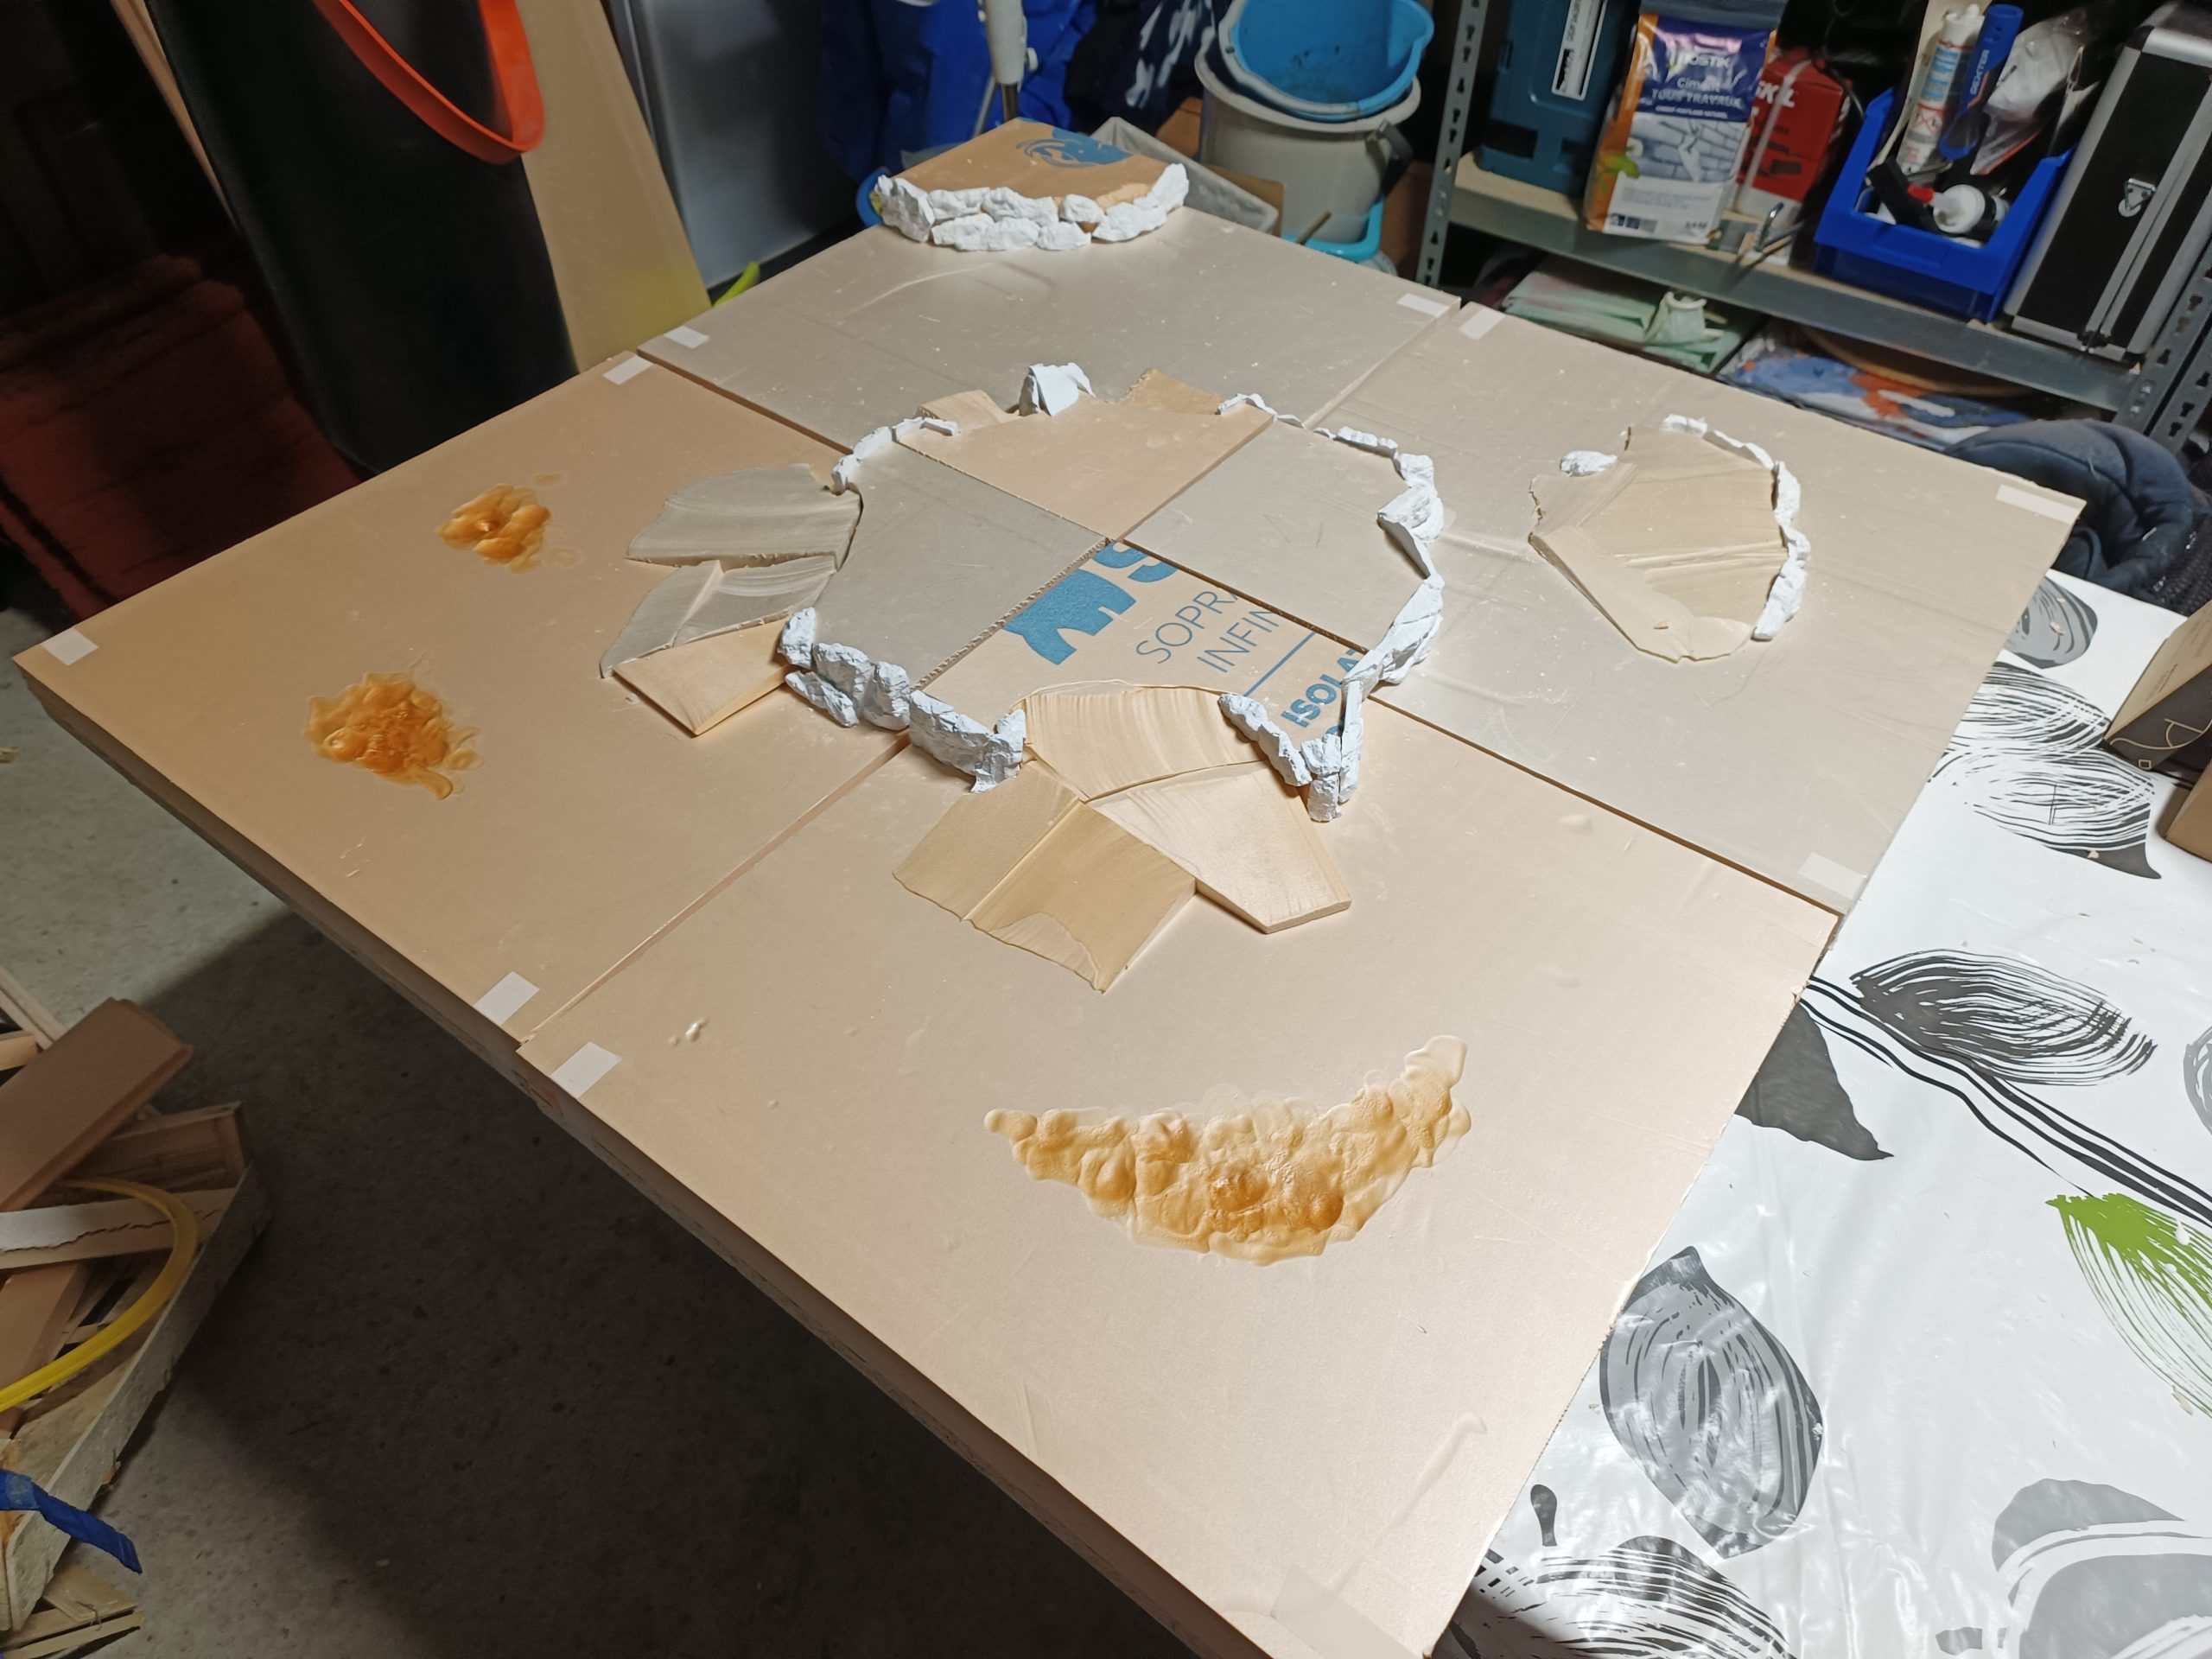
Still following Zorpazorp’s advice, I apply a layer of modeling compound over the entire hillside to fill in any remaining holes and refine the slopes in a very natural way. The project begins to take shape at the end of this stage! Modeling compound is an incredible tool for working on rocky surfaces and soil. Its papier-mâché-like appearance and relatively long drying time allow you to work on your scenery thoroughly. Once dry, you can even sculpt it a little more and sand it down.