


Let Slip A Dog Of War


Magnets, Drill bit things n stinky epoxy
Guns are done……..ish. I haven’t done the magents and joints that will actually fix the gun arms to the shoulders yet as that wont be done till much later for posing reasons. but got the guns put together to this point. The Plasma blastgun just really needed the plasma cannisters at the back stuck in/on but the turbo laser needed the barrels attached to the cannon body. Long pins, 2 part expoxy and a trigger clamp to the fore.

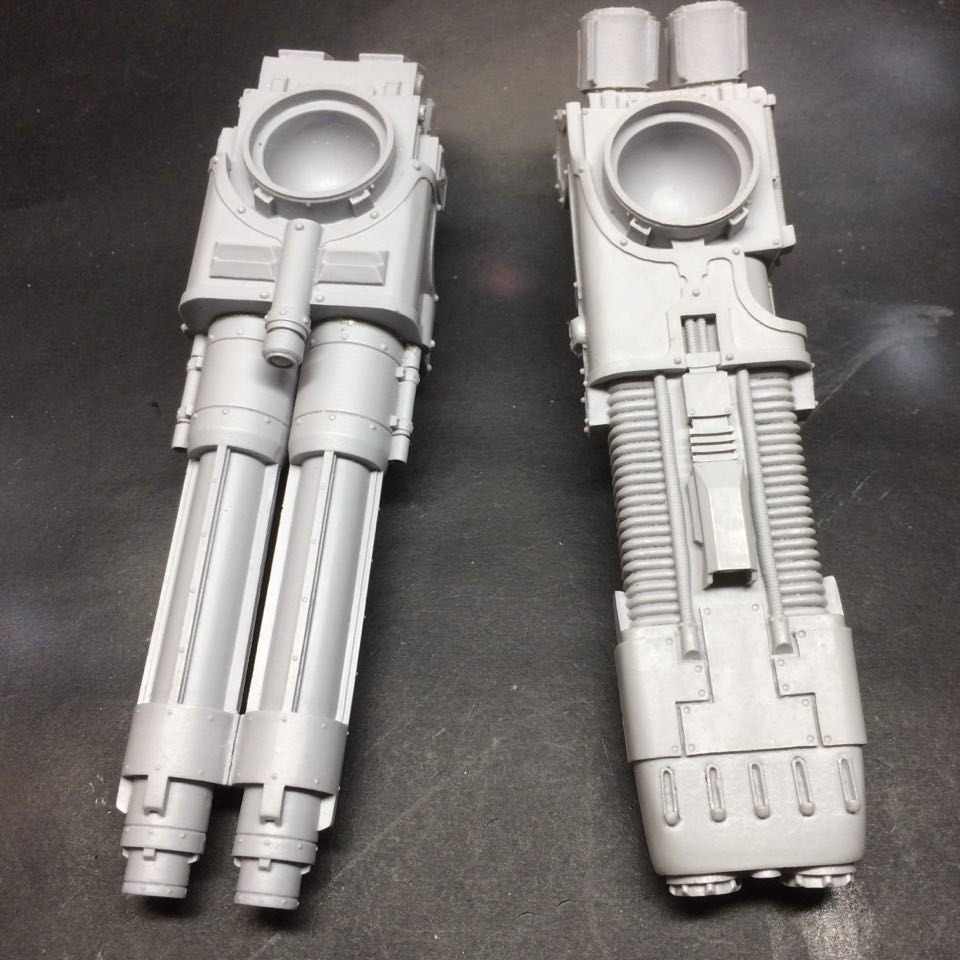 These things are a lot bigger than I had anticipated and this is just a scout titan. o.O
While getting the carapace/body prepped and ready for assembly and considering what sub-assemblies to paint it in there is a magnet job that needs done early on. The waist and hip join.
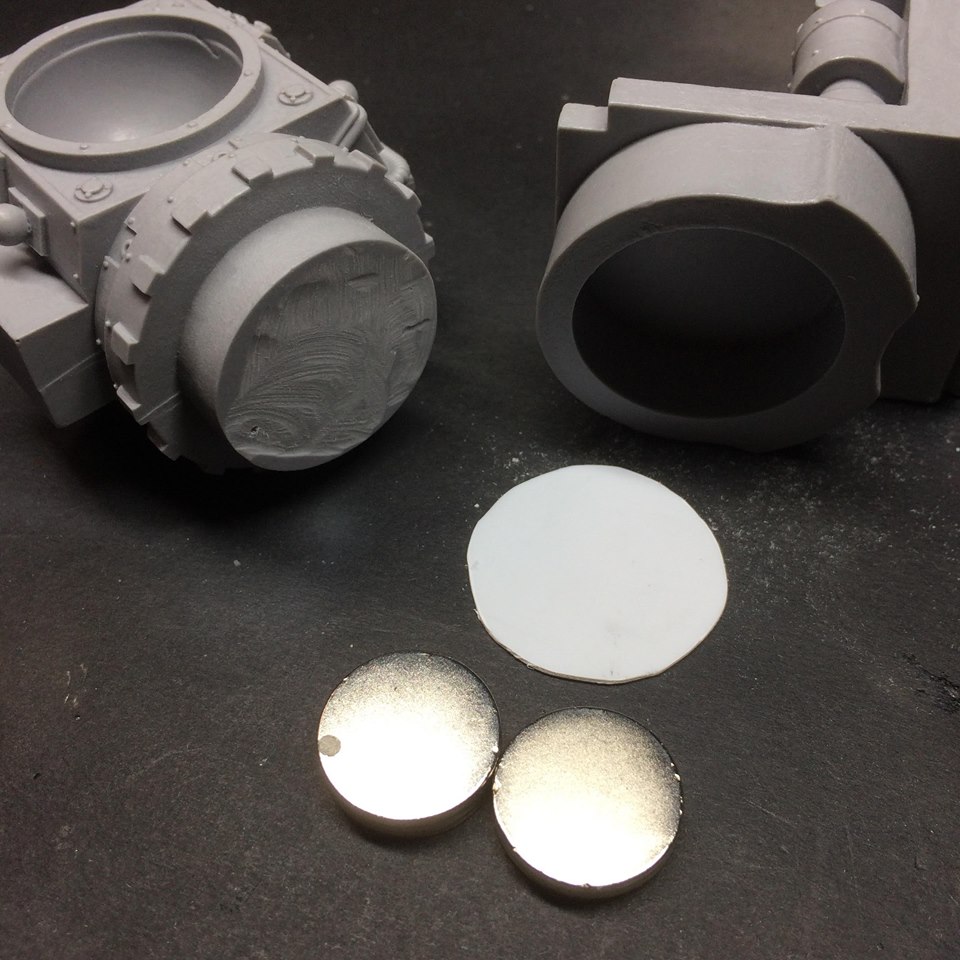 This comes in two pieces - the piece on the right forms part of the main body construction and the piece on the left house the ball joints for the legs. You can see how they lock in together.
 The magnets for this need done now before the waist recieving socket piece gets built into the upper body pieces.
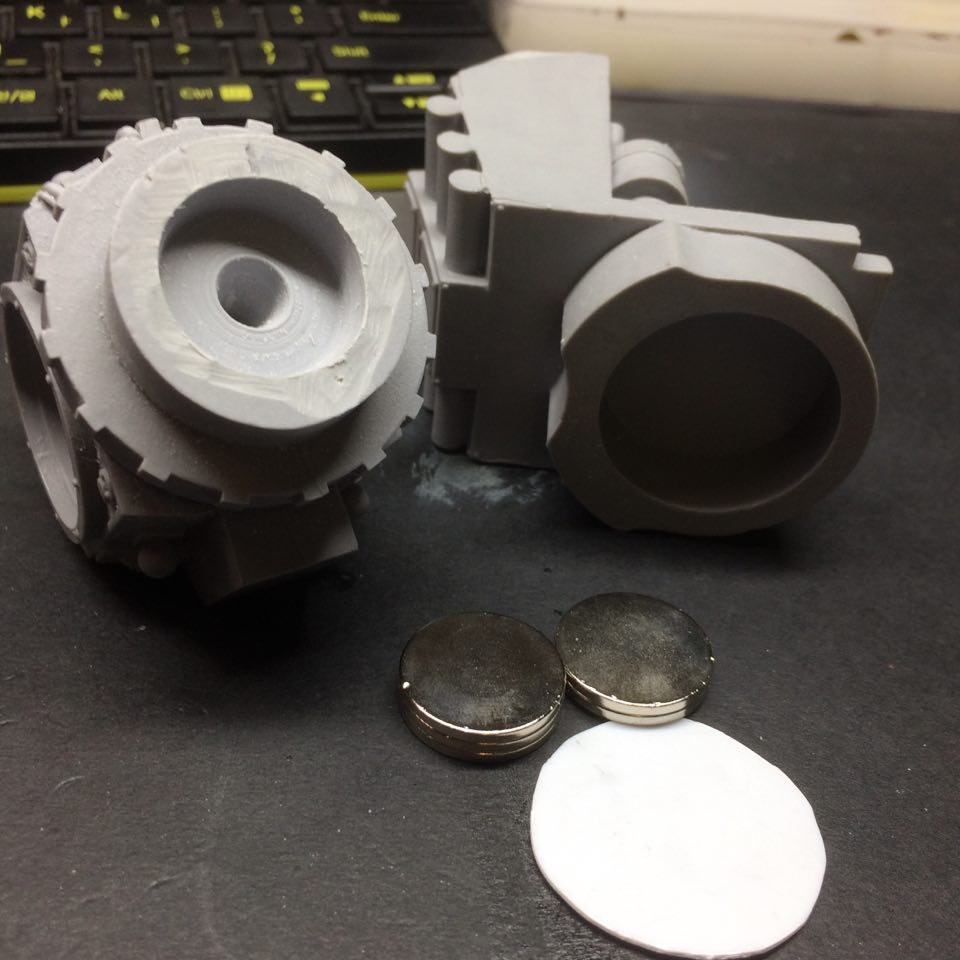
So we’re are going with a stack of 20mm disc magnets. 4 in the hip section and 2 in the waist. I can drill deeply into the hip part as its really thick but not so much into the waist.
 Using a 20mm spade bit I drilled down into the hip piece (Wear a bloody mask and have a dustbuster on hand - this is resin and is a big no bueno for the ol' laughing sacs)
 The circular piece of plasticard will seperate the magnets in the two sections. Reason for this is if magnets smack against each other too harshly when joining they can shatter. And as I am using 6 very strong magnets that is a possibilty when linking the two sections. A plasticard divider lessens that danger of happening.
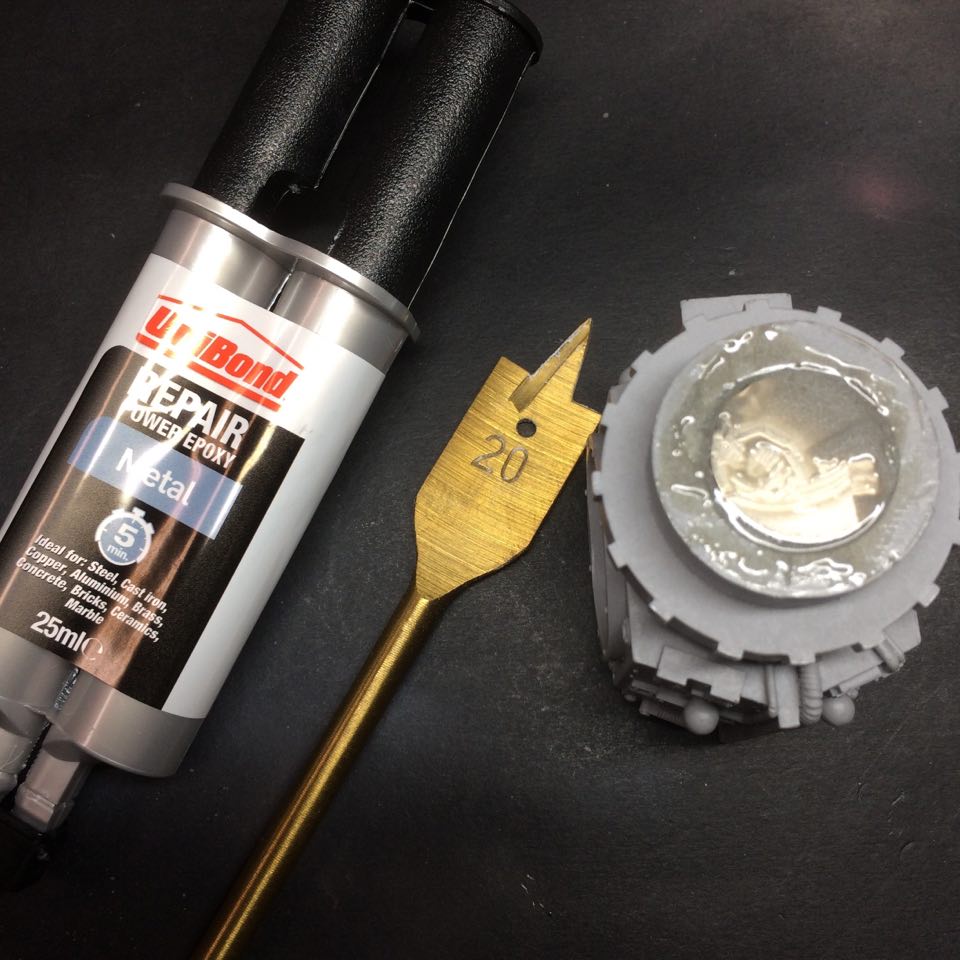
I used a two part epoxy. strongest i could find. Now, usually I would use nothing less than JB Weld, however finding JB Weld over here in Ireland is not the easiest thing and I couldnt be arsed ordering it off the internet and waiting. This Unibond stuff should do the trick but if you have access to or can easily get JB Weld – go for that everytime when asssembling large heavy resin builds.
So – hip magnets are set in and epoxied both to each other and into the drilled chamber and now we just need to wait 20 hours for the epoxy to fully cure and then I can position and glue the two waist magnets in.
I promise the next bits to come are much more exciting!!!!!


Leave a Reply