


![How To Paint Moonstone’s Nanny | Goblin King Games [7 Days Early Access]](https://images.beastsofwar.com/2024/12/3CU-Gobin-King-Games-Moonstone-Shades-Nanny-coverimage-225-127.jpg)


Painting the KD:M Pinup Architect


Flesh Tones

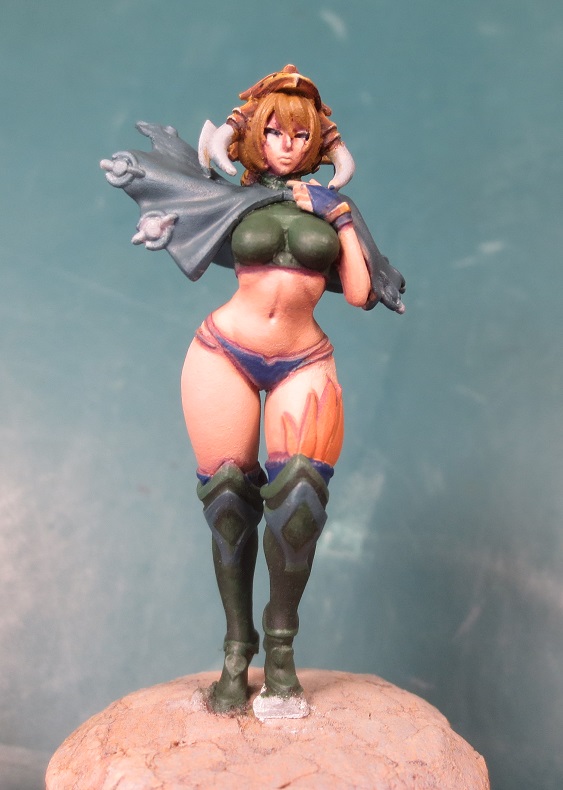
I usually paint flesh tones first, often because it lays in areas that would be harder to reach later (such as under the cape on this miniature). The above skin was achieved using the Reaper paints, basecoated with the midtone Tanned Highlight and blended up and down from there.
Again, just personal preference, but I blend down into the shadows, then up into highlights.
Step One: Lay down vague shadow areas using Tanned Flesh (the difference won’t be too visible yet)
Step Two: Over a smaller area within the Tanned Flesh, add some Tanned Shadow.
Step Three: The final shadows are created using a mix of Tanned Shadow and Royal Purple. You can see on the left leg, near the feathers, where the transition was a little too harsh (this gets blended out eventually).
The purple does a few things: First, it creates depth to the shadows that wouldn’t be there otherwise. Second, it helps strengthen the demarcation between flesh and clothes (which is how that line above the boot got there). Third, it’s a secondary colour, which will contrast and combine pleasingly with the other secondary colours on this mini (green, orange).
Highlights are created using a similar process, with Fair Skin, Fair Highlight, and finally a 70/30 mix of Fair Highlight and Polished Bone on the nose and cheeks.
To really make the skin pop, I went back over the shadow portions and added some Rosy Shadow and Rosy Skin. It’s difficult to describe the method I use to do this, as it’s neither a glaze nor a wetblend, but something in between.
Step One: Using a mix of Tanned Highlight (the basecoat colour) and Rosy Skin, glaze/wetblend between the basecoat and the previous Step One. In the end I needed to mix in a little Tanned Flesh to make the transition seamless.
Step Two: Using a mix of Tanned Flesh and Rosy Shadow, glaze/wetblend between the areas created during the previous Steps One and Two. Again, I needed to mix in a little Tanned Shadow.
It should be noted this can (and I think I usually do) be done before adding the highlights. Sometimes I decide to shift the shadow regions around, which is easier to do when not having to paint over highlights.
(The hand hasn’t been painted. I leave those until last, just because they’re so fiddly and in close proximity to weapon handles, rings, clothes, etc.)


Leave a Reply