


![How To Paint Moonstone’s Nanny | Goblin King Games [7 Days Early Access]](https://images.beastsofwar.com/2024/12/3CU-Gobin-King-Games-Moonstone-Shades-Nanny-coverimage-225-127.jpg)


From Intimacy Male to Crystal Skin


Constructing Crystal Formations, Part Two (and Three)
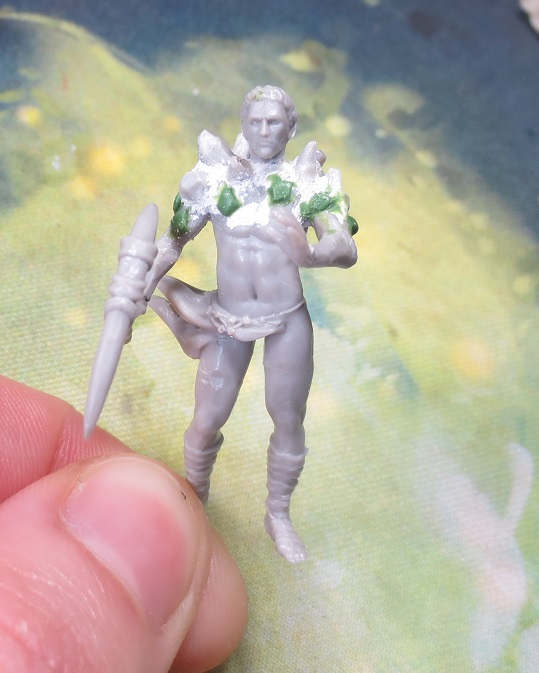
Between the last step and this one, I used Milliput to fill gaps between the different sprue formations and the main body of the miniature. This created a much more bulked-out silhouette.
After the Milliput cured, I went back in and started making smaller, flatter formations. This involved sticking small lumps of Greenstuff to the mini, then sealing it off one edge at a time with the dull edge of a utility knife. As a final step, I used the flat of the knife to compress the top.
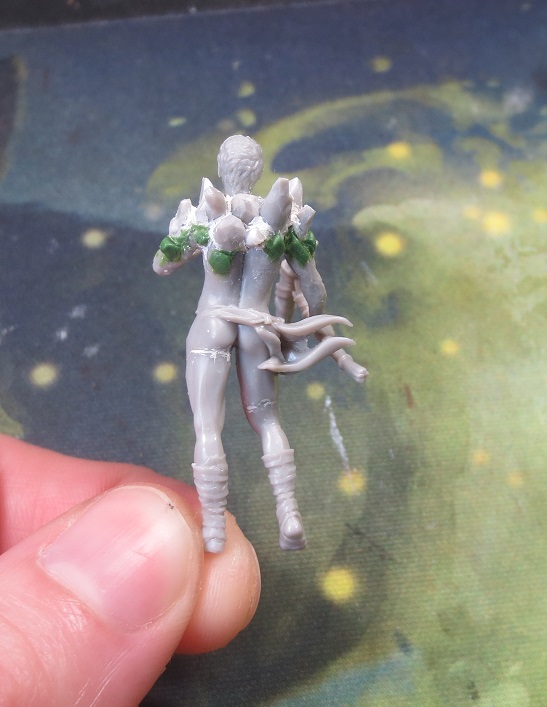
The idea behind this step is to taper the crystalline portions down into a more human shape, generally following the same lines as body hair.
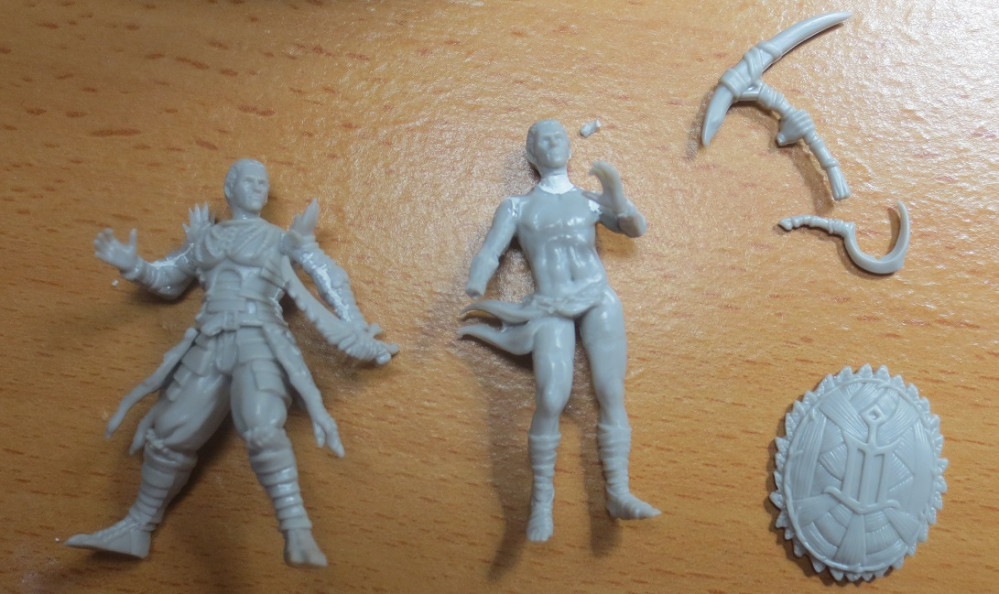
The hand holding the pickaxe was attached only after all the Greenstuff had been applied and cured. Not only would it have got in the way of the utility knife used to ‘sculpt’ the formations, but it would have been too easy to break, especially as I carved away the leather bracers that would have provided extra surface area for the plastic cement to bond with.
Either I lost the pictures of the third step or never took them. As the final stage of creating a crystalline survivor, I applied thin layers of slightly watered-down PVA glue to the miniature’s back, chest, and arms (again, trying to follow the same lines that body hair would in those regions). I sprinkled dirt onto these areas, waited for the glue to dry, and sealed the miniature with varnish.
Originally I applied dirt onto the miniature’s legs as well, but because I chose not to make structures there with sprue or Greenstuff, the single texture looked extremely out of place. I wiped off the dirt before any glue could dry.


Leave a Reply