


![How To Paint Moonstone’s Nanny | Goblin King Games [7 Days Early Access]](https://images.beastsofwar.com/2024/12/3CU-Gobin-King-Games-Moonstone-Shades-Nanny-coverimage-225-127.jpg)


Infinity Terrain


Drawing got dull
So in the past couple of days I couldn’t keep drawing. I enjoy it but I prefer building and painting and I was starting to get a mental block of how things should work or look and the overall feel of the model.
So I decided to start to build it since the first floor was done apart from add on parts.
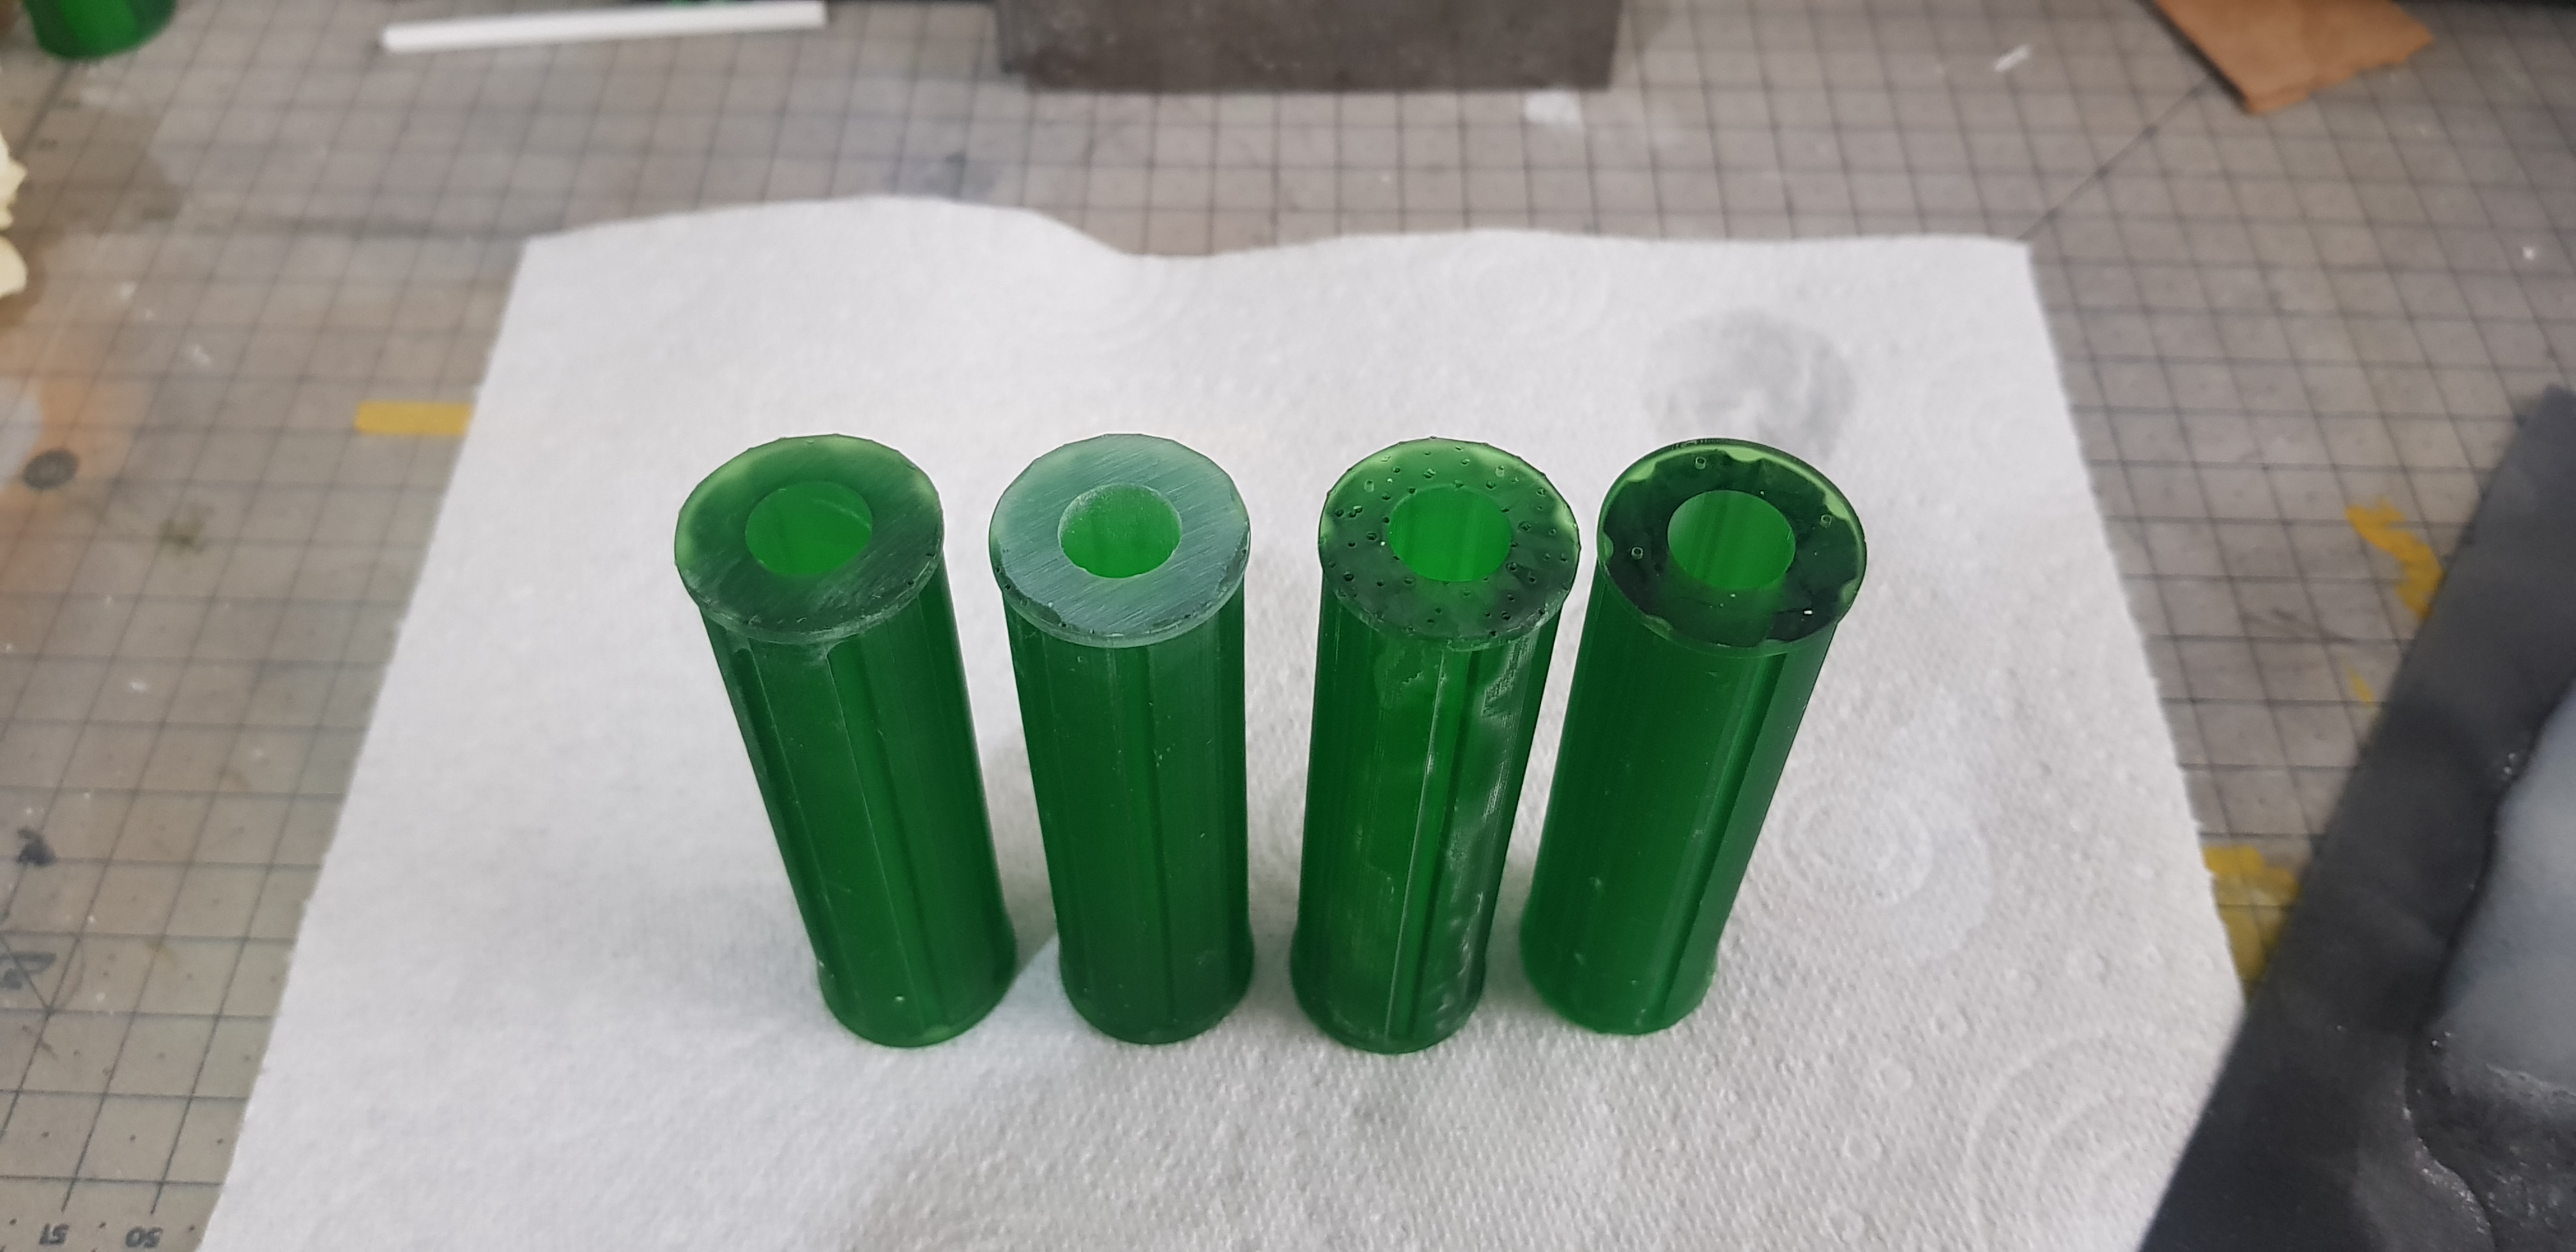
I started to use green clear resin as it’s much faster then the grey. I still have not done the test model on my 3d printer. but the green resin came with it. Spoiler alert I much prefer it to the grey.
I started on the columns I have two types one with a gear inside it and one without. I started with the one with the gear and had my first major print failure. I Went to bed and didn’t top up the resin. Stupid mistake probably a £4 mistake. Not the worst £4 I have wasted but now I have some bits or my bits box. It takes around 7 hours for 4 columns to print this was done overnight so didn’t mater much about the wasted time.
After the prints come out the are covered in goo I split them up while covered in uncured resin place them in a jar of alcohol and put them into my ultrasonic cleaner.
After they come out they are not tacky they are kind of like a hard gum but easily scratched. I remove the supports which on the bottom surface most of the detail is gone and it sort of balloons I then sand this to flat with wet and dry and keep the dust down then do this more until flat enough. The parts closest to the fep the film at the bottom have great detail.
I also went onto laser cutting the base and printed and placed the hazard stripes into the board.
This was done with superglue and then going in with Vallejo plastic putty. I also filled in unwanted lines on the board and glued it together with PVA.
At this stage I also laser cut the lifting platforms and started to print the components to the robot arms.

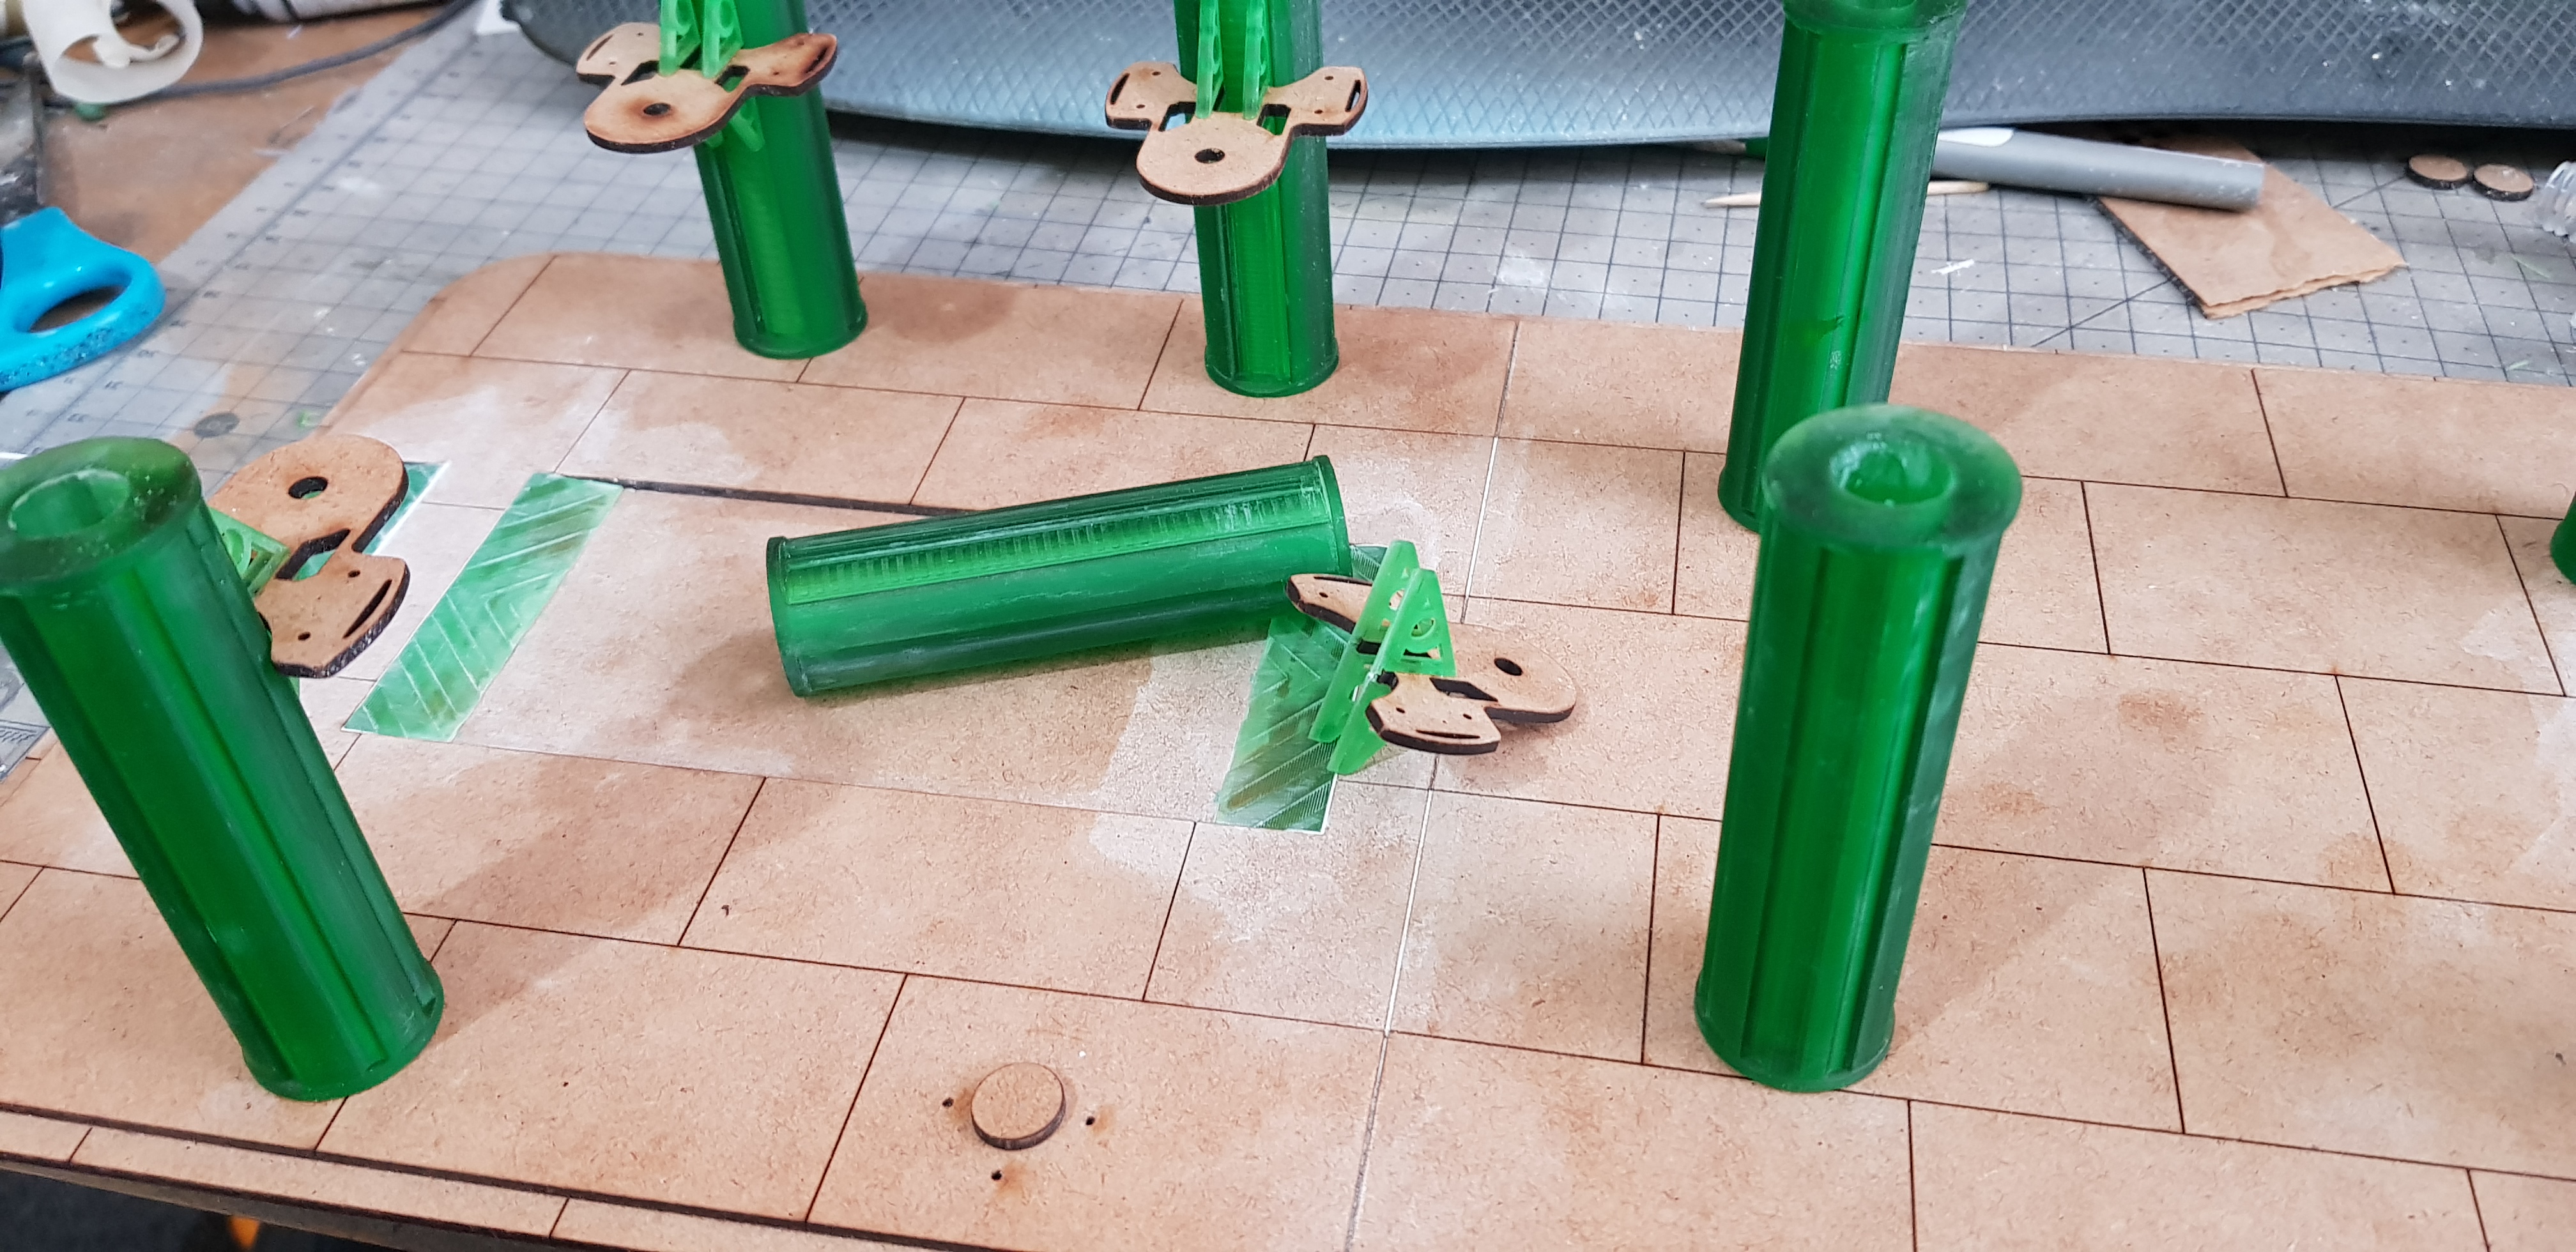
The robot arms turned out to be a pain but that was a learning pain of using a 3d printer. I know the tolerance of 3d prints is make things 0.2mm bigger but when you also include the end of the bed this can be more and the orientation of the print matters as well and I cant calculate for this built it is consistent but it may take a bigger brain than mine to work this out.
Parts, resin to resin do not line up as they should but 3d print to laser cut do. I think this is because when the laser cut objects which are crazy accurate it is a 0.02 deviation that I can account for but 3d print to 3d print may be 2x 0.2mm accuracy difference which is. regardless I just make it work in the great old modelling style.
Each robot arm has 16 components and 6 axis of movement making them very posable and complex. I made 4 of them and they do work and roll up and down the column with the rack and pinion and the guide rails. This was a tight fit band stayed in place but now with lots of play are a bit loose. they do need cleared more and then fixed in place but they seem to work well.
Don’t know how I am going to paint these but I know it’s going to be basic.
I also base coated the base board in Poundland spray paint black this showed where I filled and where I didn’t which isn’t a great look.
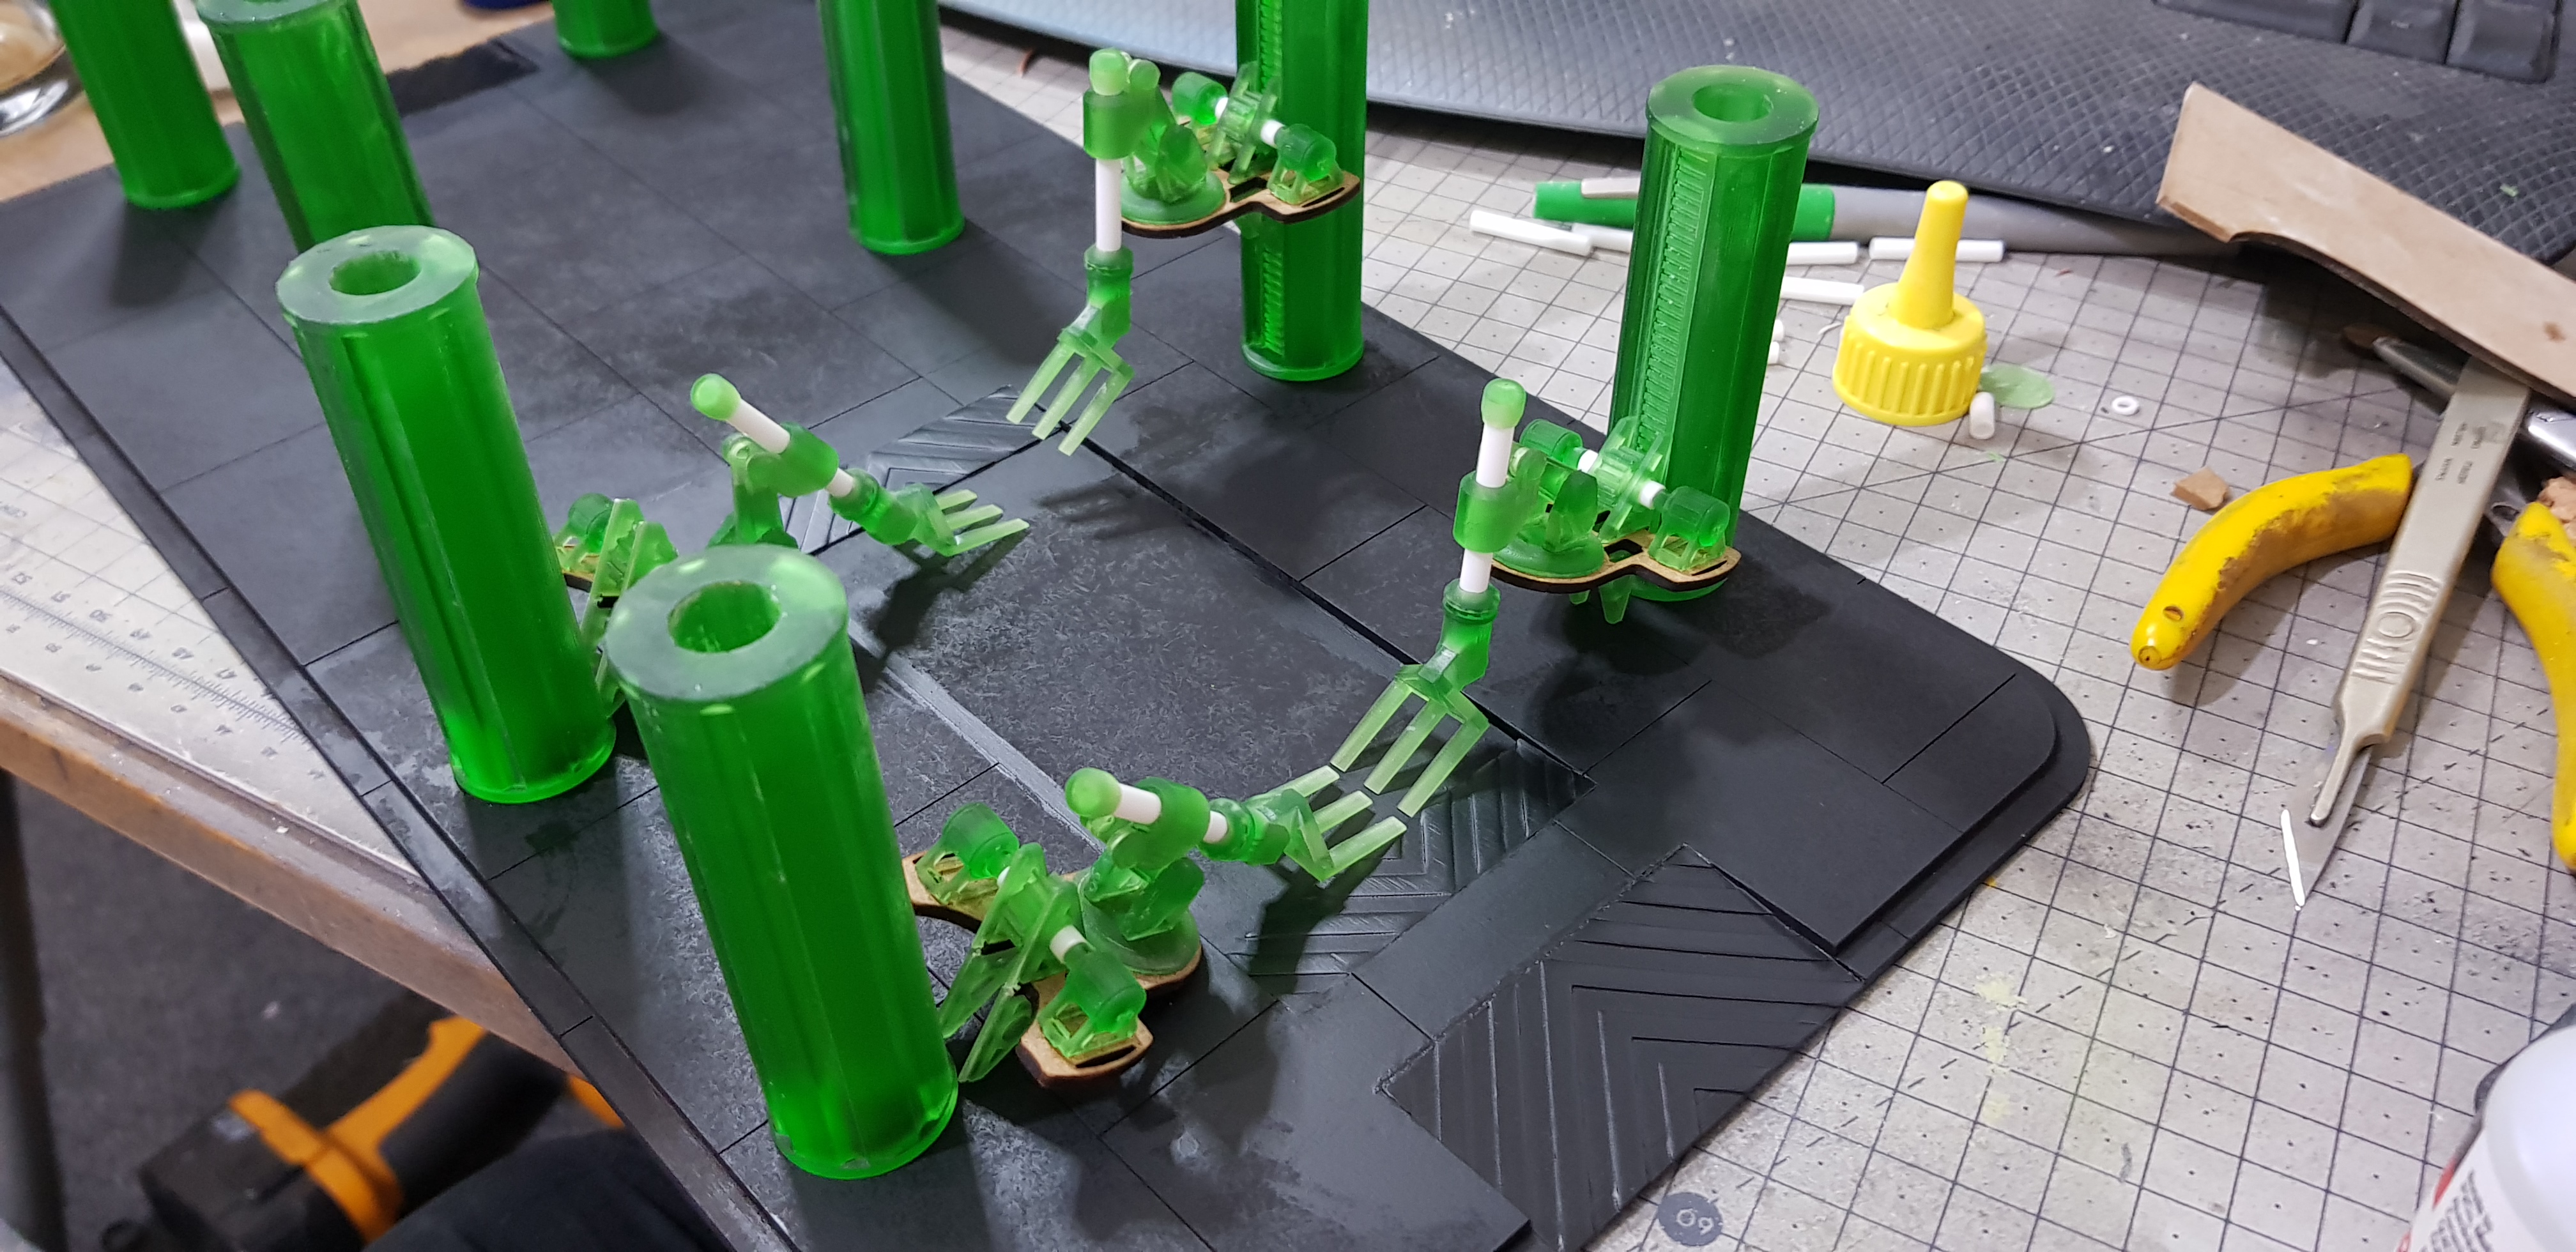 All current printed and laser cut components together for the first time.
 I couldn’t let the finish on the base stop bothering me. I sprayed over a gloss coat (again Poundland) this made it look great but then when I went over again this came through again.
I carried on regardless and airbrushed a light dusting of black then grey then some blue and silver and some green and bone. All Vallejo primers. this looked good to me as a base concreate I will do more to this finish later.
I then masked off the ramps and sprayed white primer down went in with orange at the top and bottom then went in with yellow and then a stripe of white across the middle.
After this as this was 3D I went in and hand painted the stripes in black.
I need to put some text and details onto this like a robot working area warning on the ground.
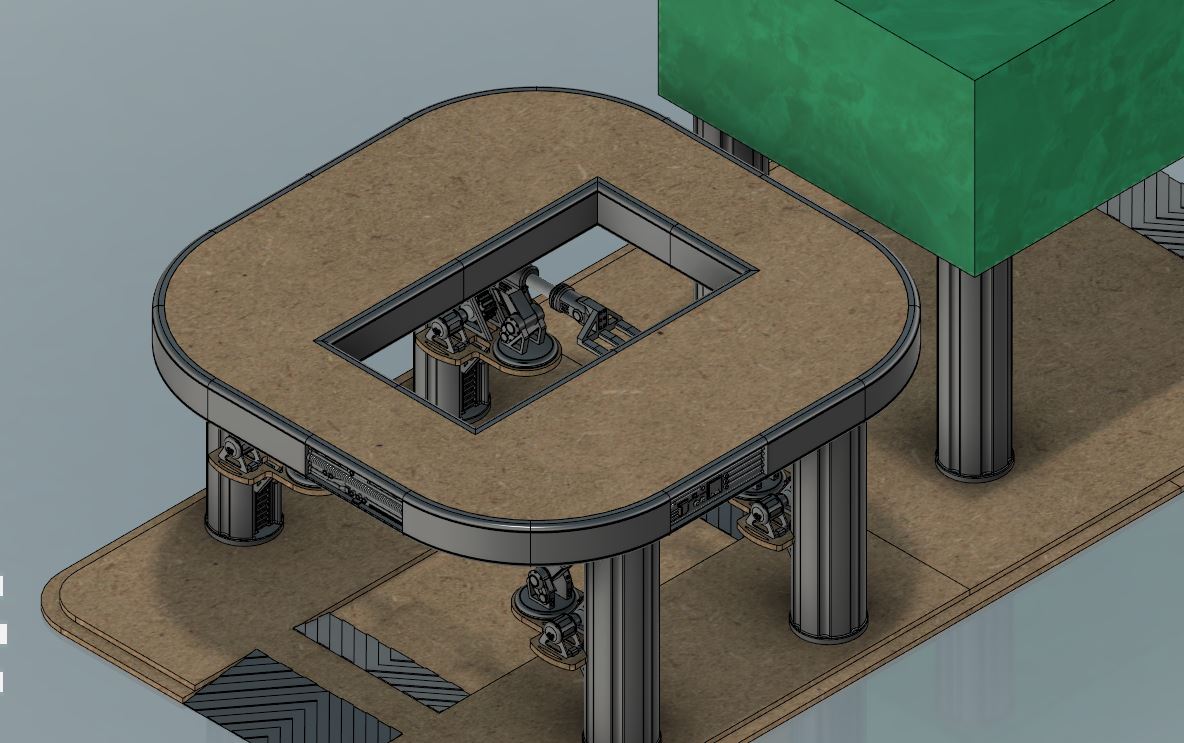
This will also have a lot of clutter placed on it creates and pipe coils and spare parts. and a autonomous vehicle getting a container placed onto it by the robotic arm. Should provide a lot of cover through it . there is also a staircase to go in for the other building but I have not designed that yet.
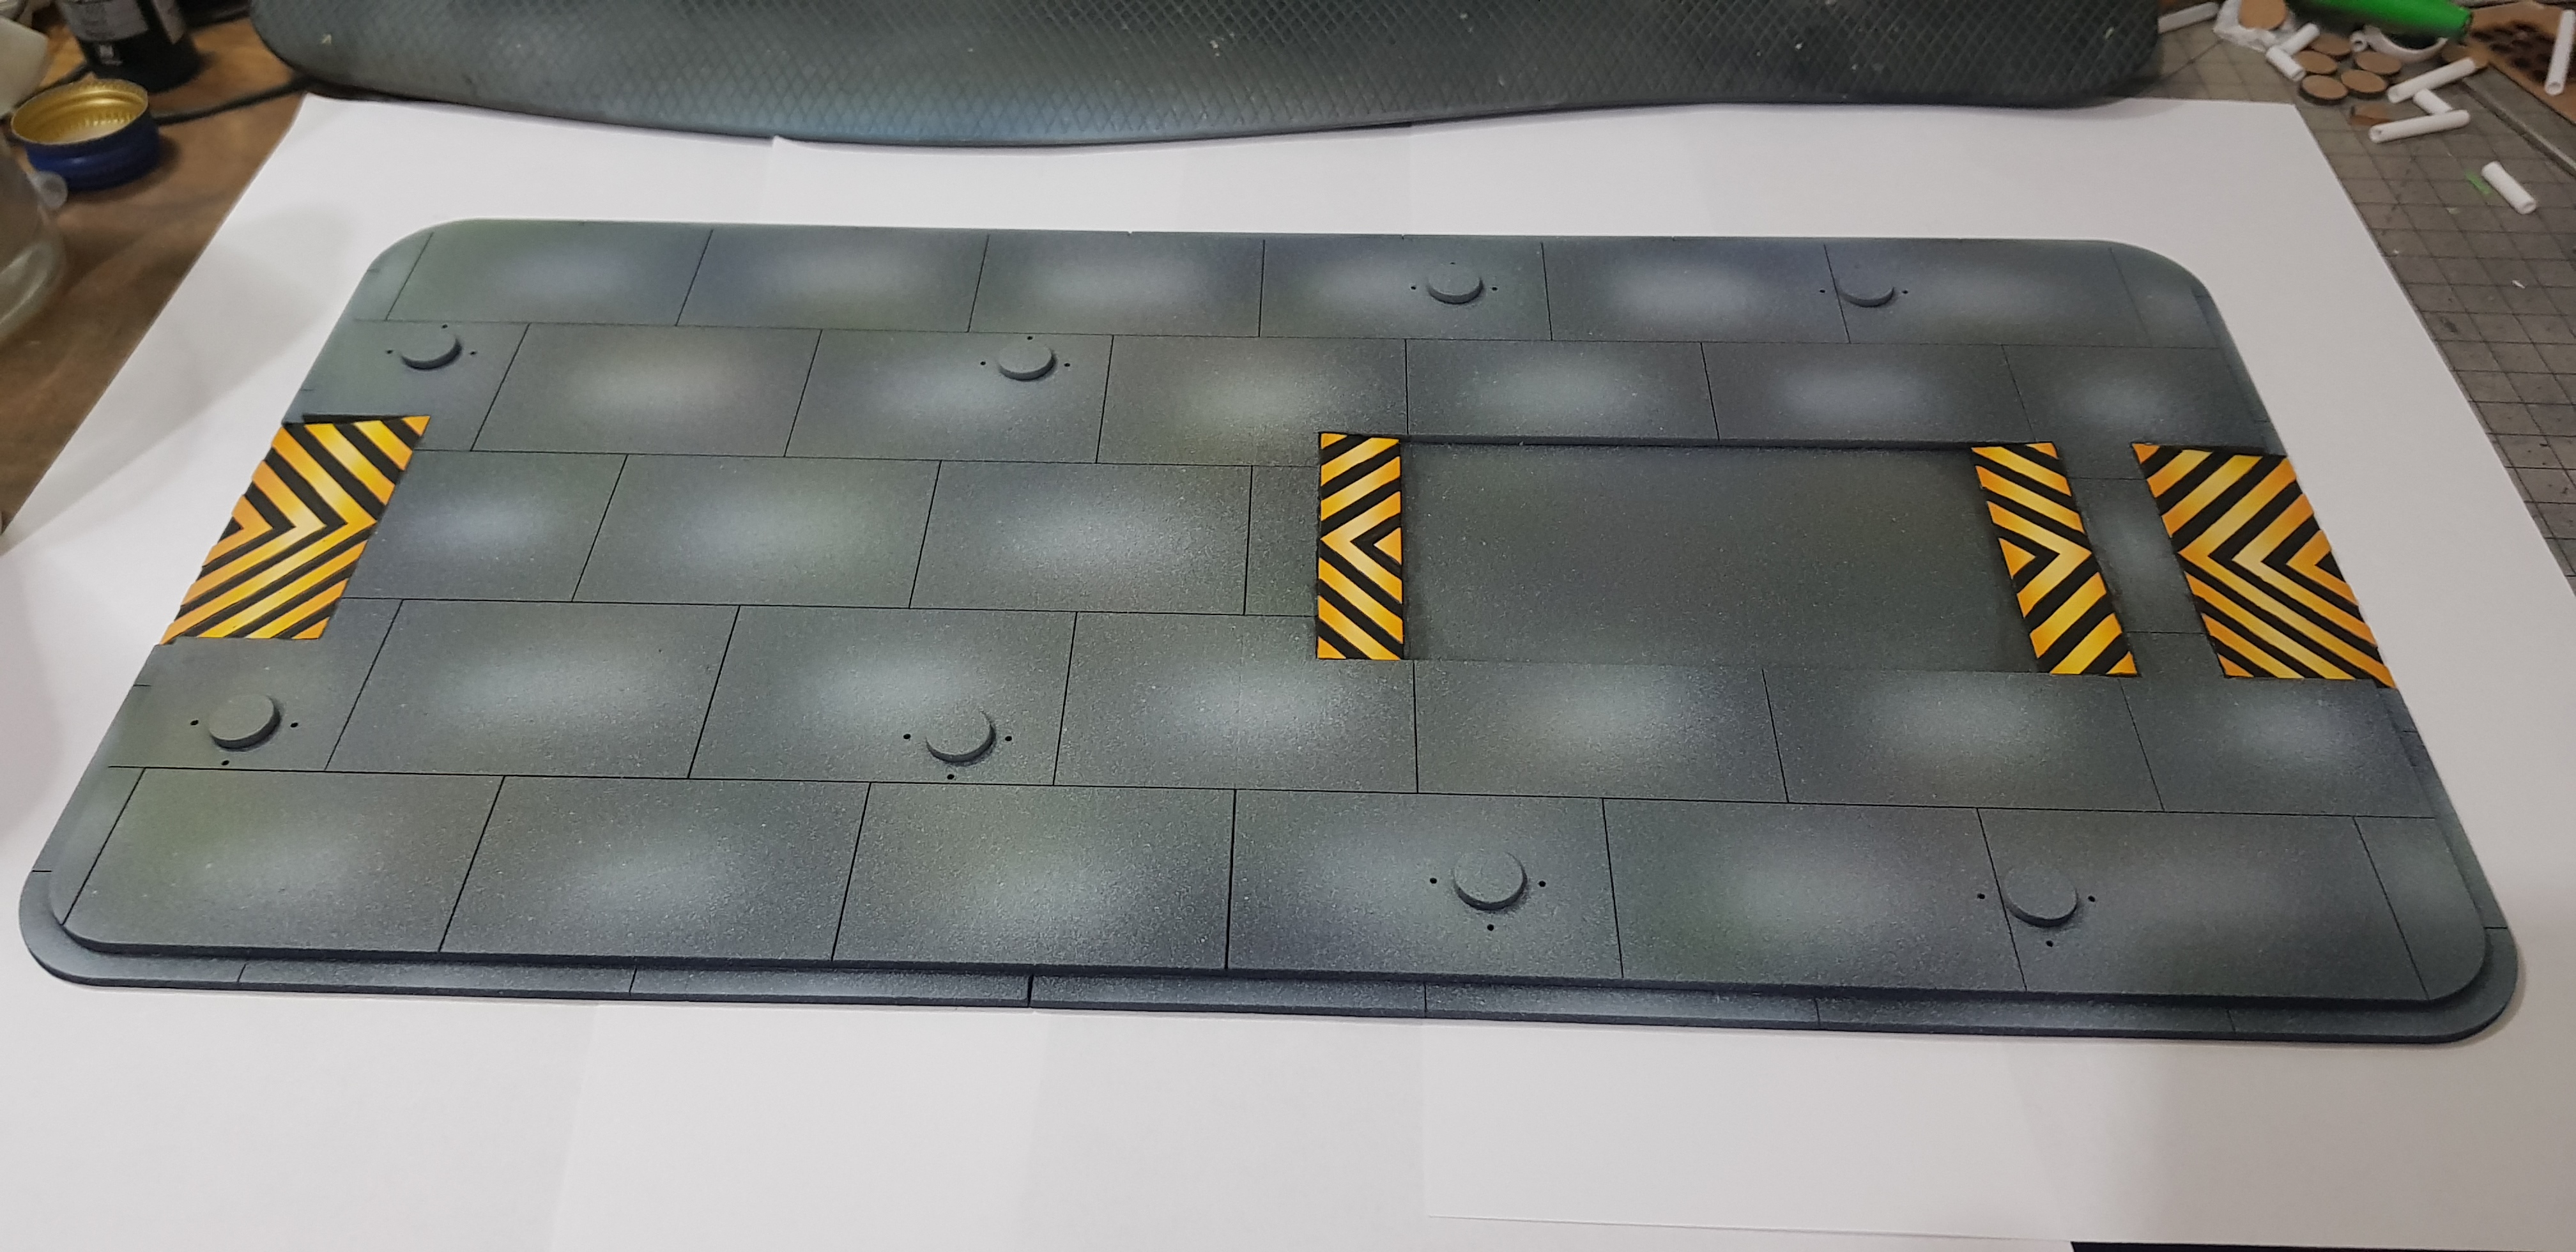 Building base in it's current state.
 I still have my drawing open and am working on the landing pad at the moment. This is supposed to look a little on the used side but not total disrepair. This is one of the first buildings on the site and part from flat materials all comments will fit into a container.
Some panels are missing and there will be hanging cables in places. plugged into ports on the exposed side panels. The big green building is the control/coms tower which I have not finished the design and this will also somehow link to the landing pad. I am liking linking MDF laser cut to 3d printed parts. I am learning a lot and may have to go add tolerances to all parts or I may just cut and sand them.
 Current drawing
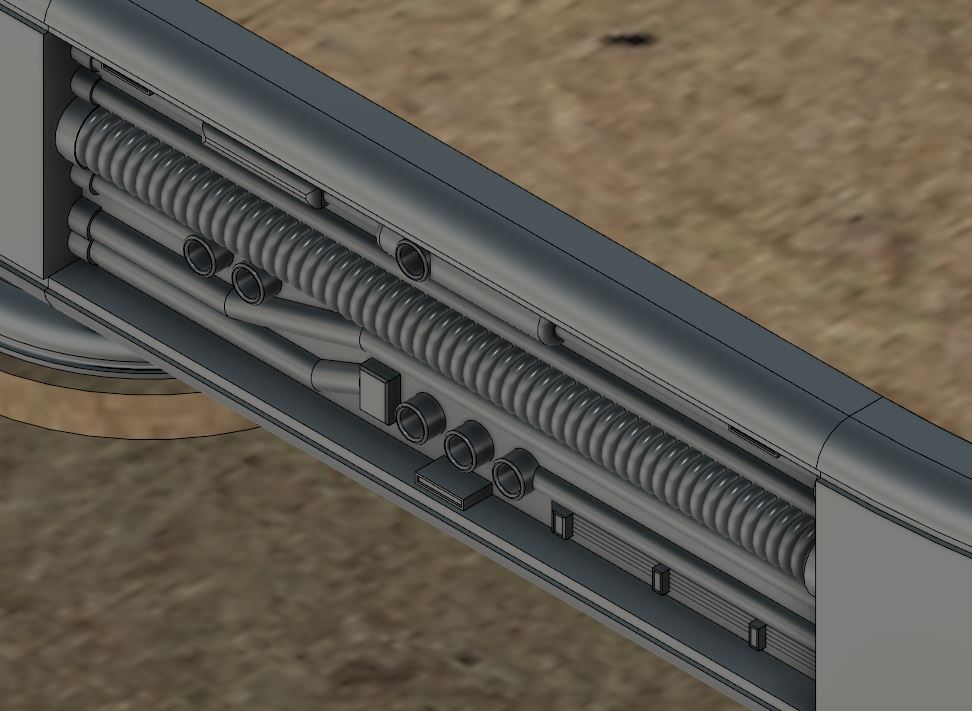 Side detail
So that’s me so far. Still got a lot to do. A frankly daunting part. I am still excited to get a landing pad that I think would work in real life with an actual reason to be on a platform.
More to come. Hopefully soon.
Next more painting, assembly and drawing. Keep making awesome projects, I place more likes than comments due to time but I still love seeing everyone’s work! Glad I am not the only crazy one.


Leave a Reply