


![How To Paint Moonstone’s Nanny | Goblin King Games [7 Days Early Access]](https://images.beastsofwar.com/2024/12/3CU-Gobin-King-Games-Moonstone-Shades-Nanny-coverimage-225-127.jpg)


Infinity Terrain


The next stage & math... Lots of math
Over the weekend I started to draw, designing the com tower that would fit onto the 4 pre done pillars. I am at the stage where I am going to stop drawing and start making again. I am home sick at the moment but my head is clear enough to finish the drawings that I need.
The design has taken a number of twists along the way.
I had to think about the roots of this project and what I wanted to achieve. Not only the end result I wanted to experiment with better ways to use the tools I have and develop or discover techniques. I have used a lot of old tricks but everything 3D printed here is pretty new to me and merging laser cut MDF and card into the mix is also a new combination to me. I still have not pushed the limits of the laser cutter or the 3D printer.
Time to start pushing those boundaries.
I started with the staircase. I looked at industrial staircases and existing 28mm ones . These were rather basic but easily achievable. Not exactly pushing the design or boundaries. I wanted to break up symmetry of the second section as the first is very symmetrical, this should add visual interest in the object but in doing so I had some more room to play with.
I decided to scrap the boxy staircase and put something I have not seen done in 28mm before. A modern / industrial spiral staircase. I have been told by lots of people 15 – 20 years ago that this was one of the most complex objects to make and for it to be correct at any scale (including 1:1)… what do they know.
I started drawing and yes it makes your head hurt. Even with modern software to design in 3D, Making the shapes and have it work so you don’t have to crawl up the stairs is a challenge.
I ended up with a 28 degree section for the tread. Each raiser should be 3 point something mm high, I rounded down to 3 to make my head hurt less. To draw you need to make all the steps and move them 28 degrees around the axis which in my case is a part of an old GW paintbrush. I ended up with 31 steps at 2mm each and 30 1mm spacers.
Even reading the above hurt my head. So I had my staircase. Great… or not. Still too simple. So I decided to make a tread for each step but I wanted to keep the industrial look. Great easy just laser cut some plastic mesh… not so fast. The type of plastic the mesh I was thinking of, will laser cut but it will also likely produce toxic fumes. No thanks. I have ordered some fibreglass mesh which should be much thinner and not produce fumes I cant deal with (still not going to huff it).
Still not enough. what if my little people fall over and die before they get to the top. People will most likely be ARO’ing anyone who runs up the stairs. So I needed a safety rail of course. So I put balusters on each of the steps these will be paperclips.
That left me with a sore head. I still don’t know how I am going to print the handrail but even drawing it wasn’t pleasant but I did find an easy way after about an hour which was draw 3D curves connecting each of the balusters making the sketch into a pipe and then cutting out the holes that the balusters could fit into.
I then extended and cut the hole in the base to provide a lining.
To the left I will be placing a movable looking bridge over to the landing pad. and the basic shape of the building was set I wanted the edges curved and will be doing this on the laser cutter. but will finish the design later. There will be two ladders going from the first to the second floor.
That left the right section. I was still worries about my models safety. I will be placing boxes etc up there to provide actual cover for models but what if that stuff was not there. I know I needed another handrail. Thankfully this one was much faster.
Congratulations if you just read the ramblings above I am aware that this is quite long here is far too few pictures to balance the text.
 The entire drawing as it stands. new colours added to represent actual materials used.
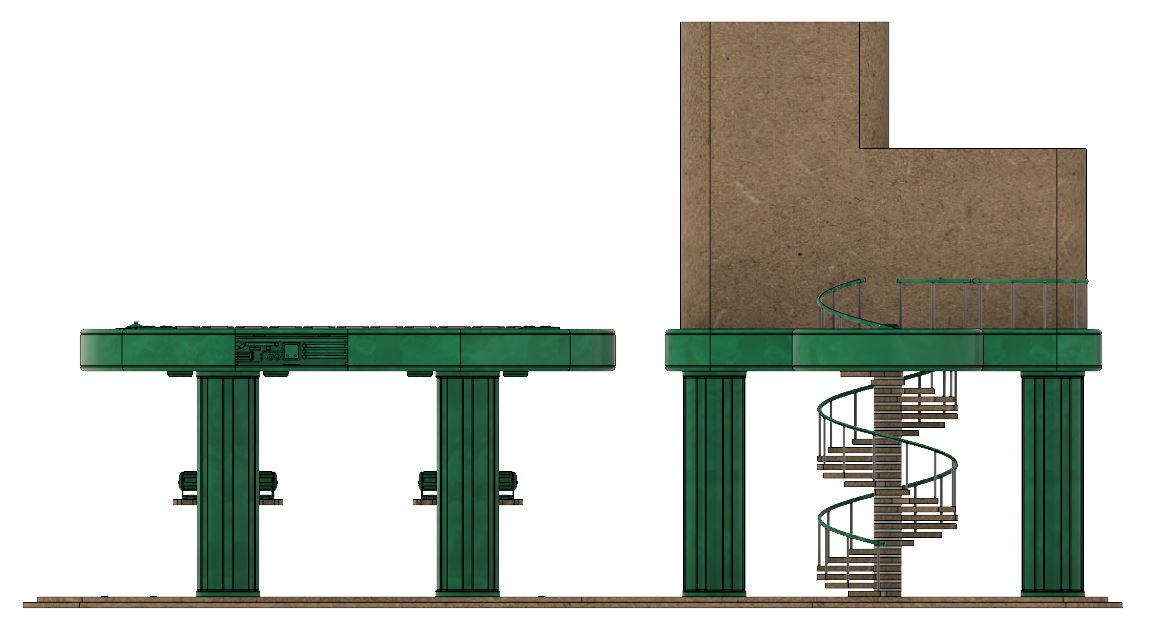 Side view showing the helix that is the stairs.
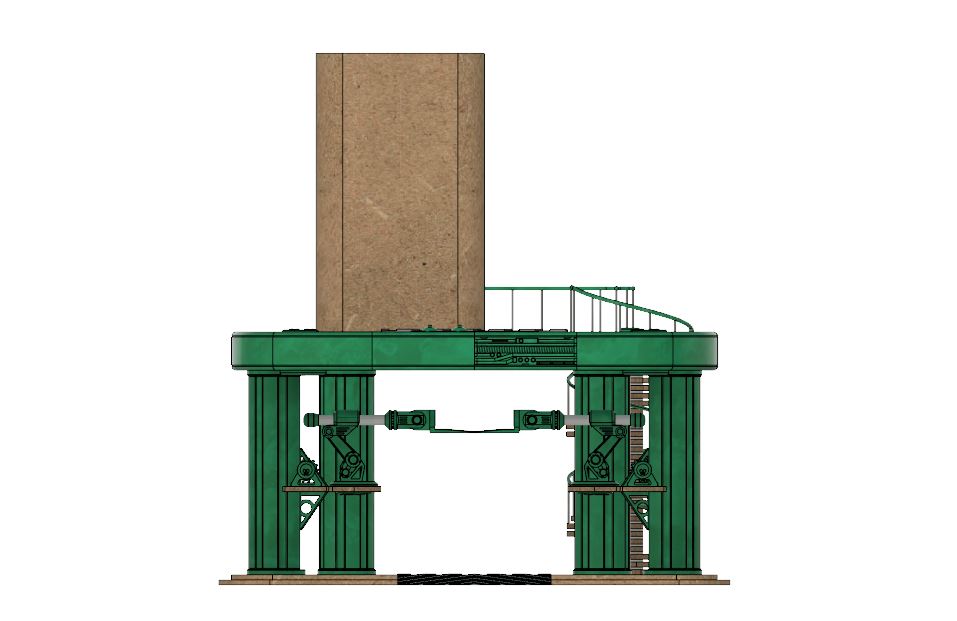 Front view showing the break in symmetry.
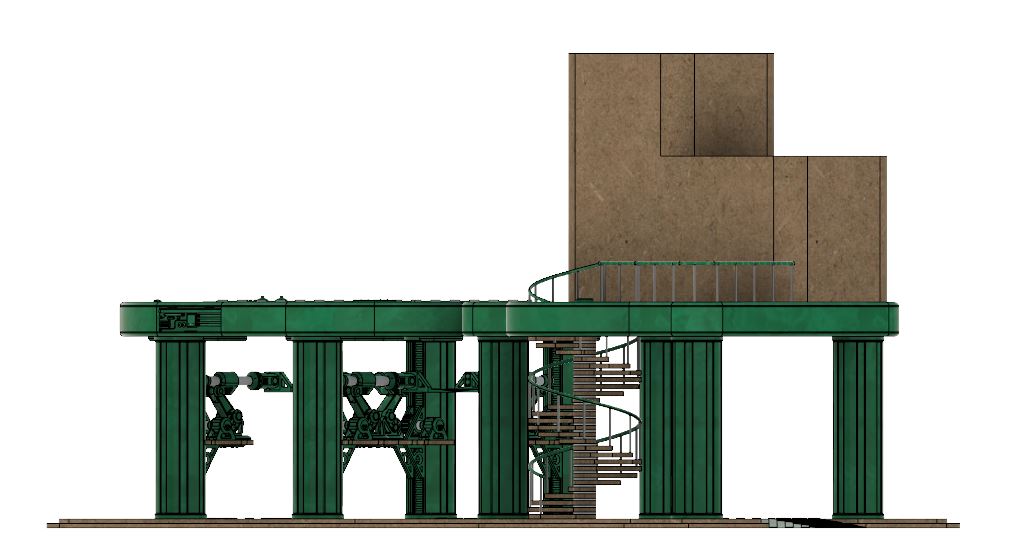 corner view showing the intrest point when not viewed from the front. I hope this draws the viewer in.
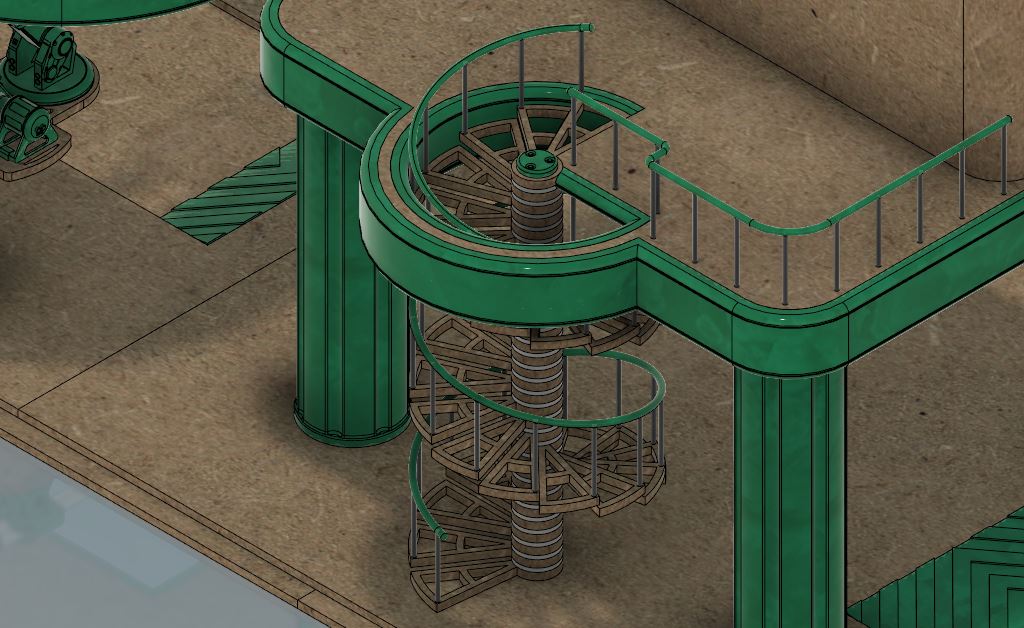 Zoomed in on the staircase
So that’s the design so far. I hope to get some time this weekend to start to build this. I don’t think I will finish it to the same level as the other parts until the building is done. I am going to build it though.
I see lots of swearing in my future.
More to come.


Leave a Reply