


![How To Paint Moonstone’s Nanny | Goblin King Games [7 Days Early Access]](https://images.beastsofwar.com/2024/12/3CU-Gobin-King-Games-Moonstone-Shades-Nanny-coverimage-225-127.jpg)


From zero to hero, a terrain journey


Cobblestone roads
An homage to the "hell of the north"
 Maybe a bit narrow but I did make it to measure for my Stoatbart cart and I wanted to squeeze three sections out of my A5 piece of plasticard
I made some cobbled roads to use with the Stoatbart Haulage scenario for Burrows and Badgers. I went down the hard route for making my cobblestones because I wanted to recreate the inconsistent nature of the modern pave as ridden by professional cyclists in the spring, culminating in the infamous Paris-Roubaix.
I rode the route myself a couple of years ago and it’s hard to describe just how rough the cobbles really are, so they were a natural inspiration for my little model roads!
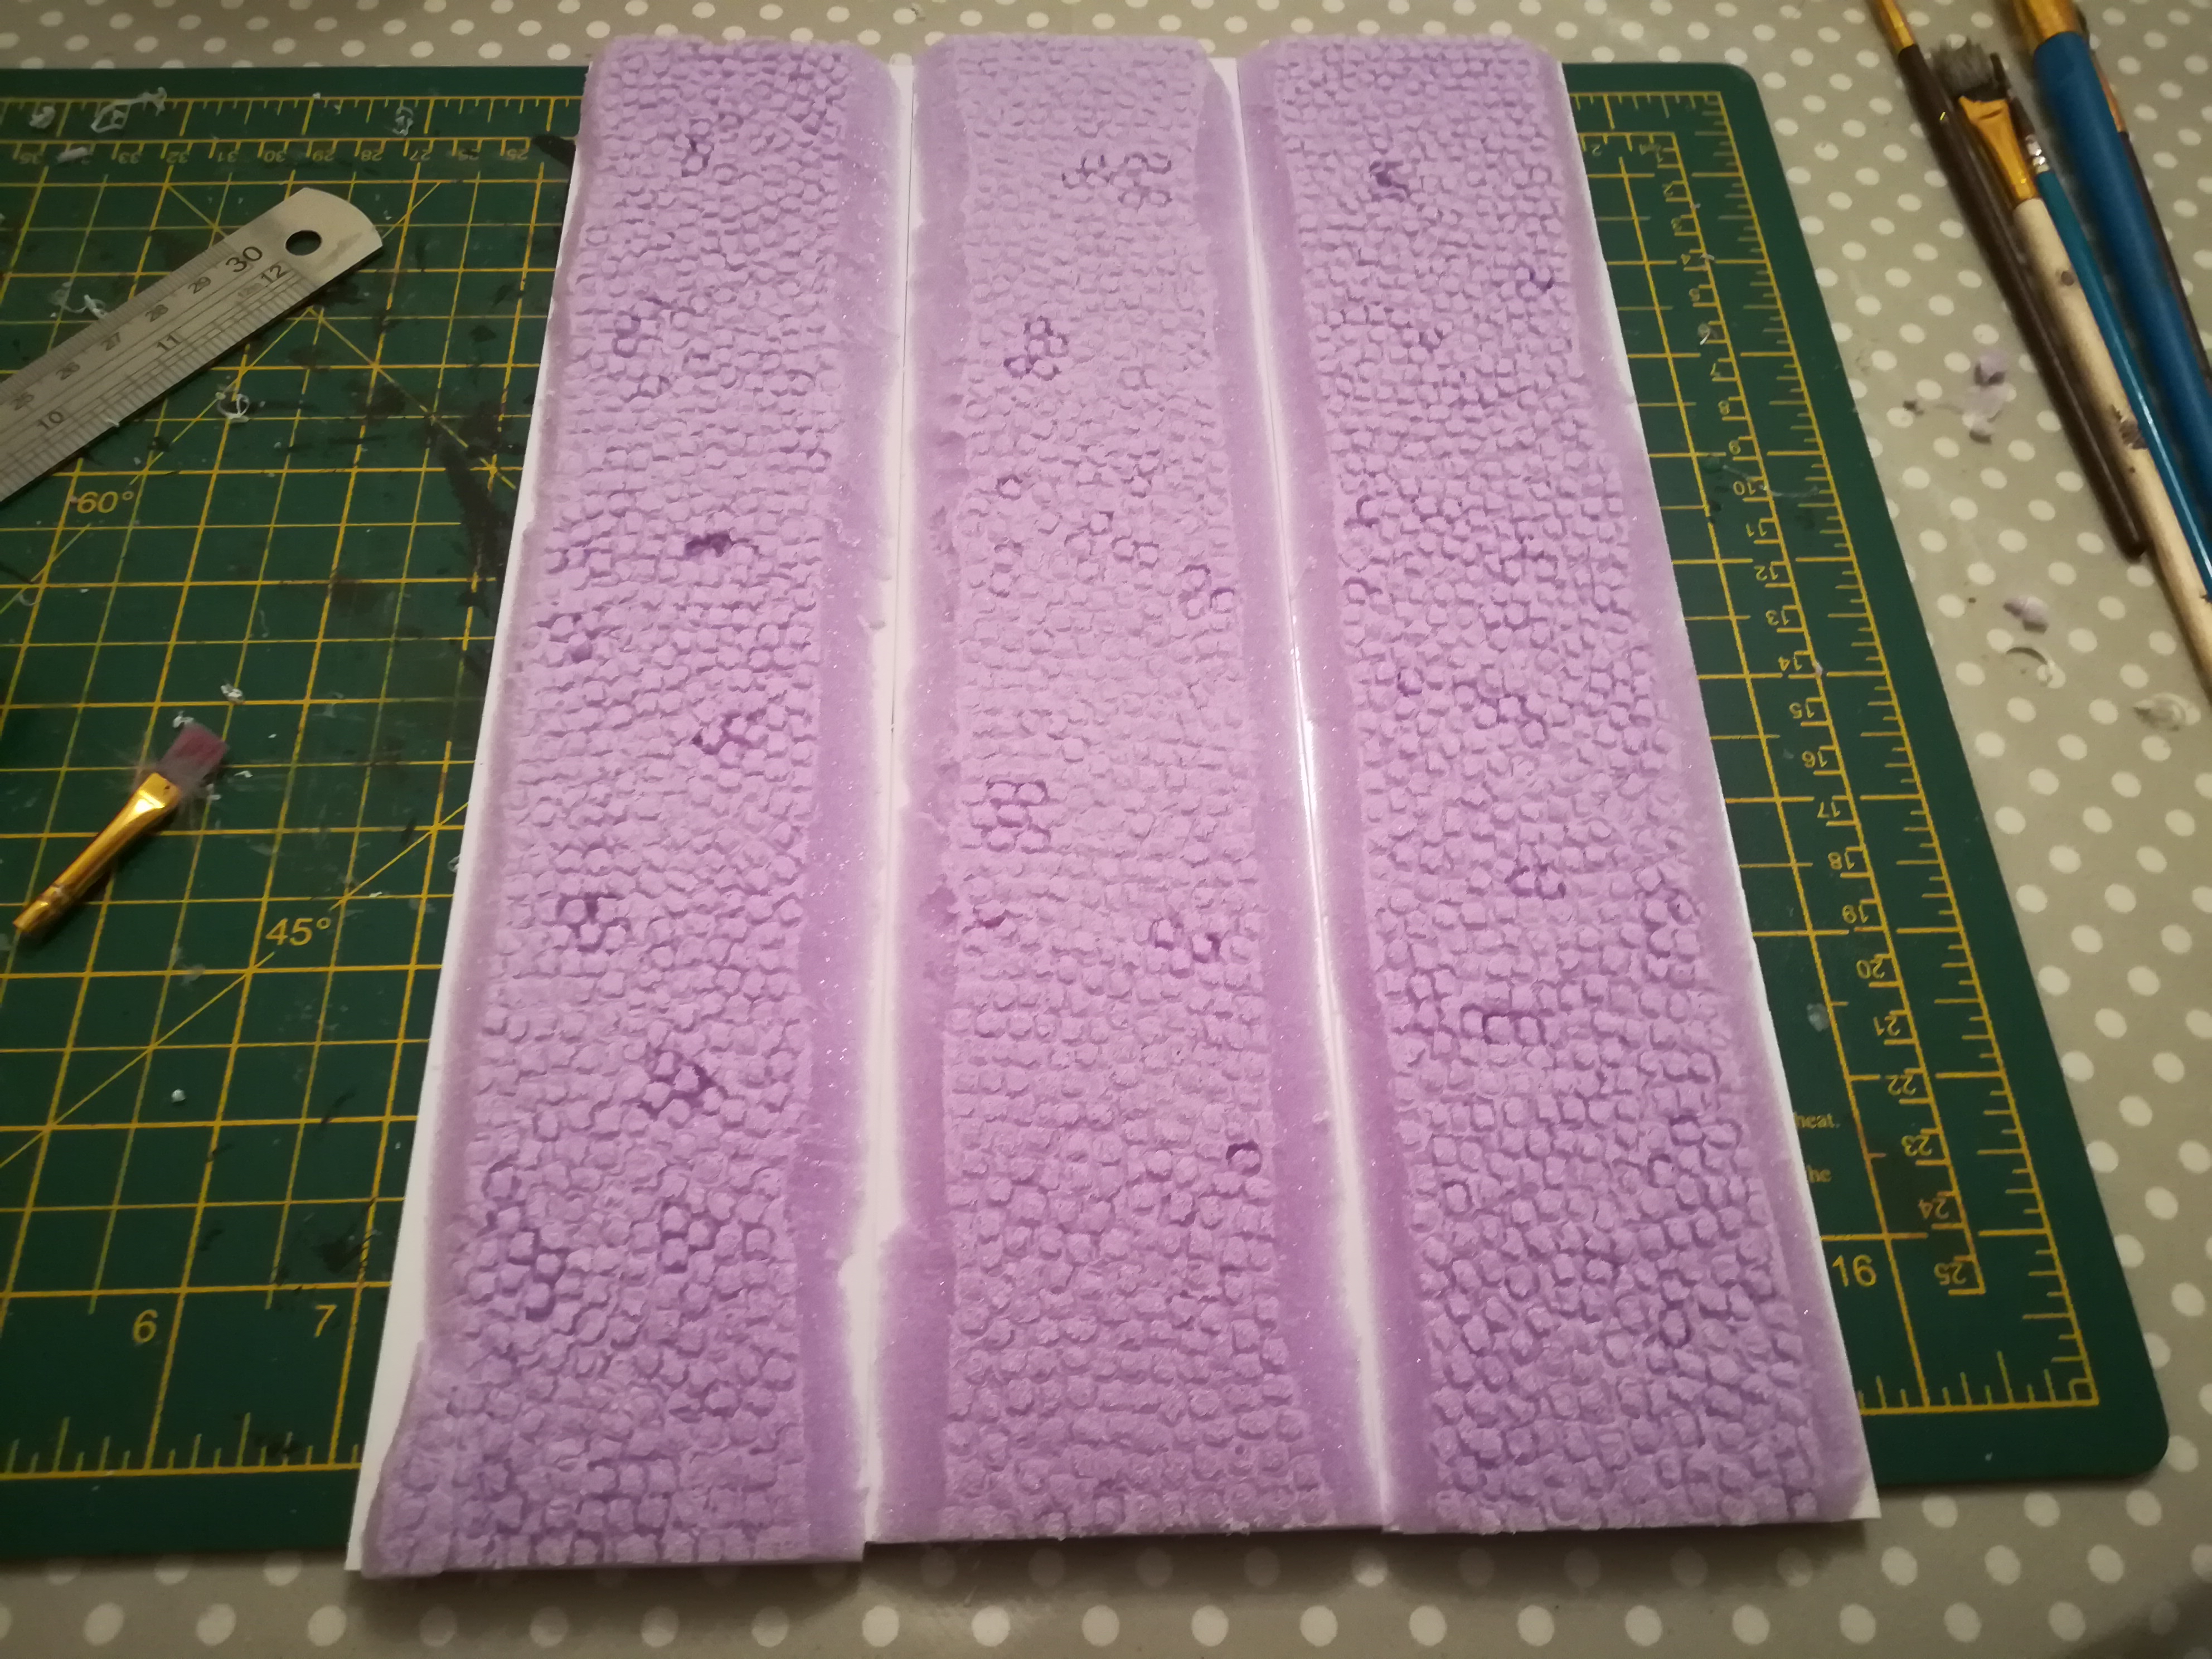
The pieces are based from a single piece of A5(ish!) plasticard, which worked out to be three ~300mm x 70mm sections. I cut a slightly oversized bit of foam and stuck the three pieces of plasticard to it next to each other with room to cut them away. I put a bunch of weight on them to get a solid bond (last thing I need is the road surface coming away from the base!)
Once dry (actually about a week later) I got around to trimming them to the size of the base and after a bit of measuring I knew I needed my road surface to be 50mm minimum. Armed with this I bevelled the edges of hte foam down to the base and used filler to give a bit of shape to the verges and hide any crimes from cutting.
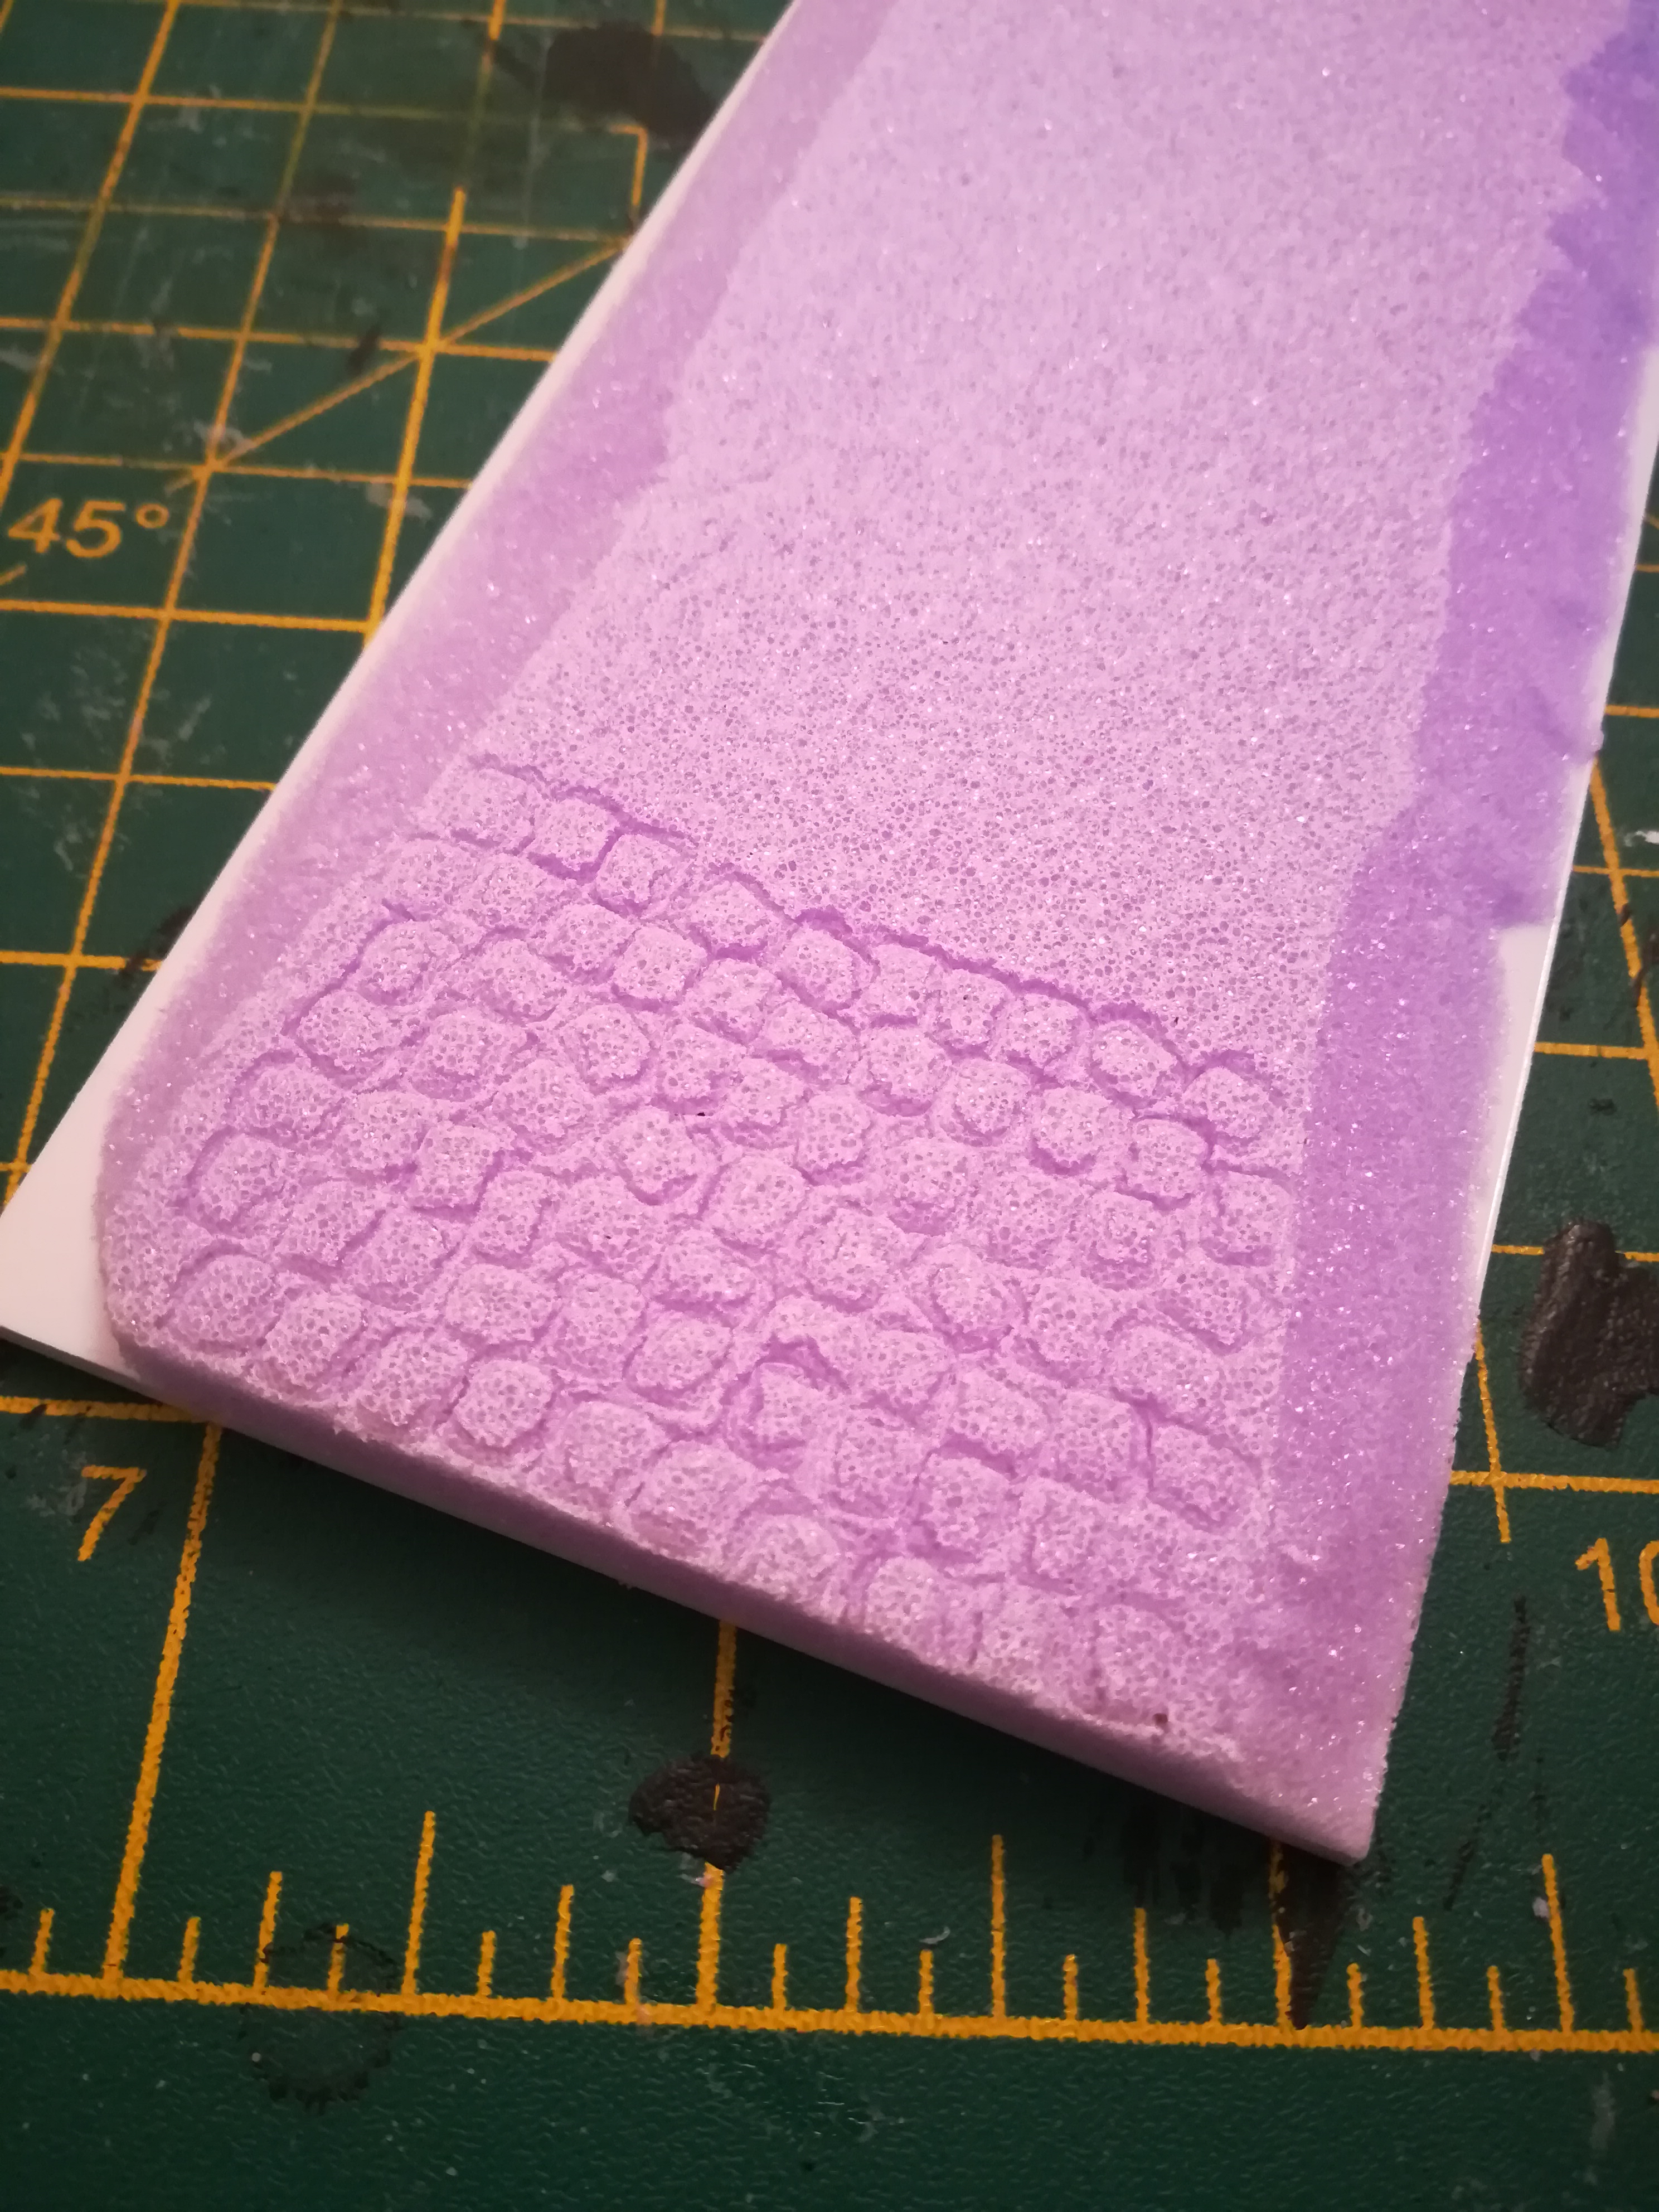
To create the cobbles themselves I used Mel the Terrain Tutor’s method of using a ferrule from a broken paintbrush bent into a rough square shape to engrave each cobblestone by pressing into the foam surface.
It took ages and I got cramp but I did insist on doing three feet of it in one sitting.
One of the benefits of this method was being able to do deeper impressions on some sections to represent loose or damaged cobbles, I dug some of them out completely to leave gaps in the road surface.
Once the engraving was done and all the filler was cured I added sand and grit to the verges and eventually primed the pieces with mod podge and black.
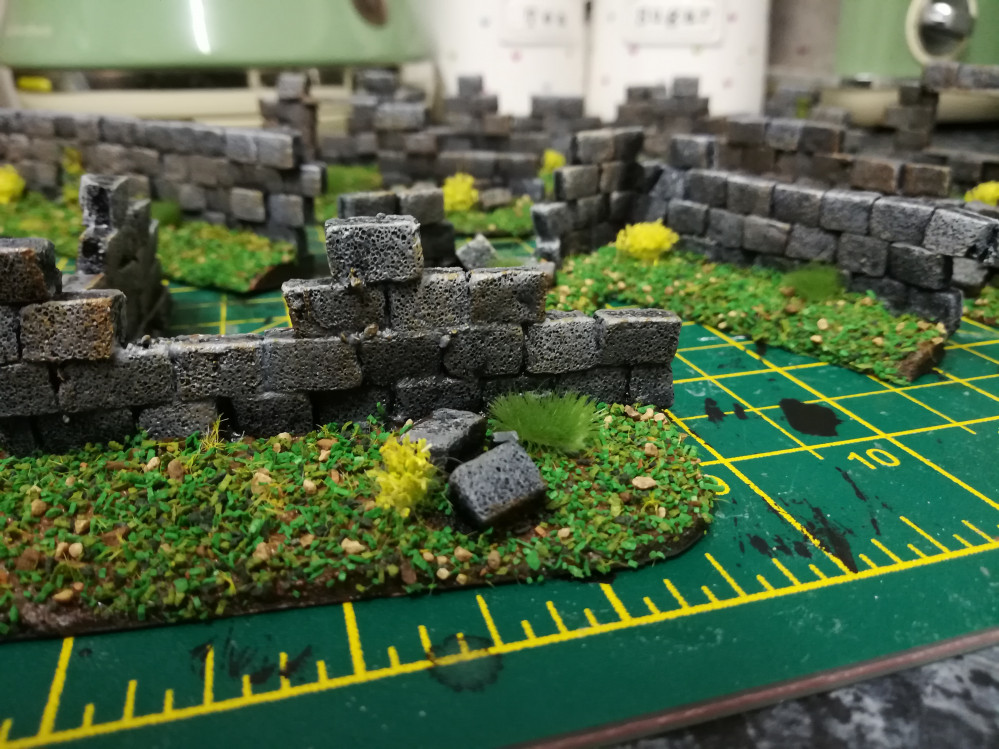
I accidentally didn’t take any intermediate photos of the priming and painting steps, but it follows a very similar approach to my ruins although this time since the cobbles are set into the ground any mortar is long covered by grasses and mud so after a base of mod podge and black I coated it in a generous layer of brown, then drybrushed the actual cobbles back to grey.
The grey had a very glossy finish to it which I was pretty disappointed with, but now I’ve gone back out to measure them for this entry it turns out I just didn’t leave the paint to dry fully!
I think to really finish the piece I’m going to give the cobbles another very light tan drybrush and possibly apply a bit of wash to break up the colour a little bit. The aim here being to evoke newer repaired sections of road.
![The fearesome cobbles of Trouee d'Arenberg, credit: bram_souffreau [CC BY-SA 2.0 (https://creativecommons.org/licenses/by-sa/2.0)]](https://images.beastsofwar.com/2019/05/23186435-Paris-Roubaix_Trouee_dArenberg.jpg) The fearesome cobbles of Trouee d'Arenberg, credit: bram_souffreau [CC BY-SA 2.0 (https://creativecommons.org/licenses/by-sa/2.0)]
The fearesome cobbles of Trouee d'Arenberg, credit: bram_souffreau [CC BY-SA 2.0 (https://creativecommons.org/licenses/by-sa/2.0)]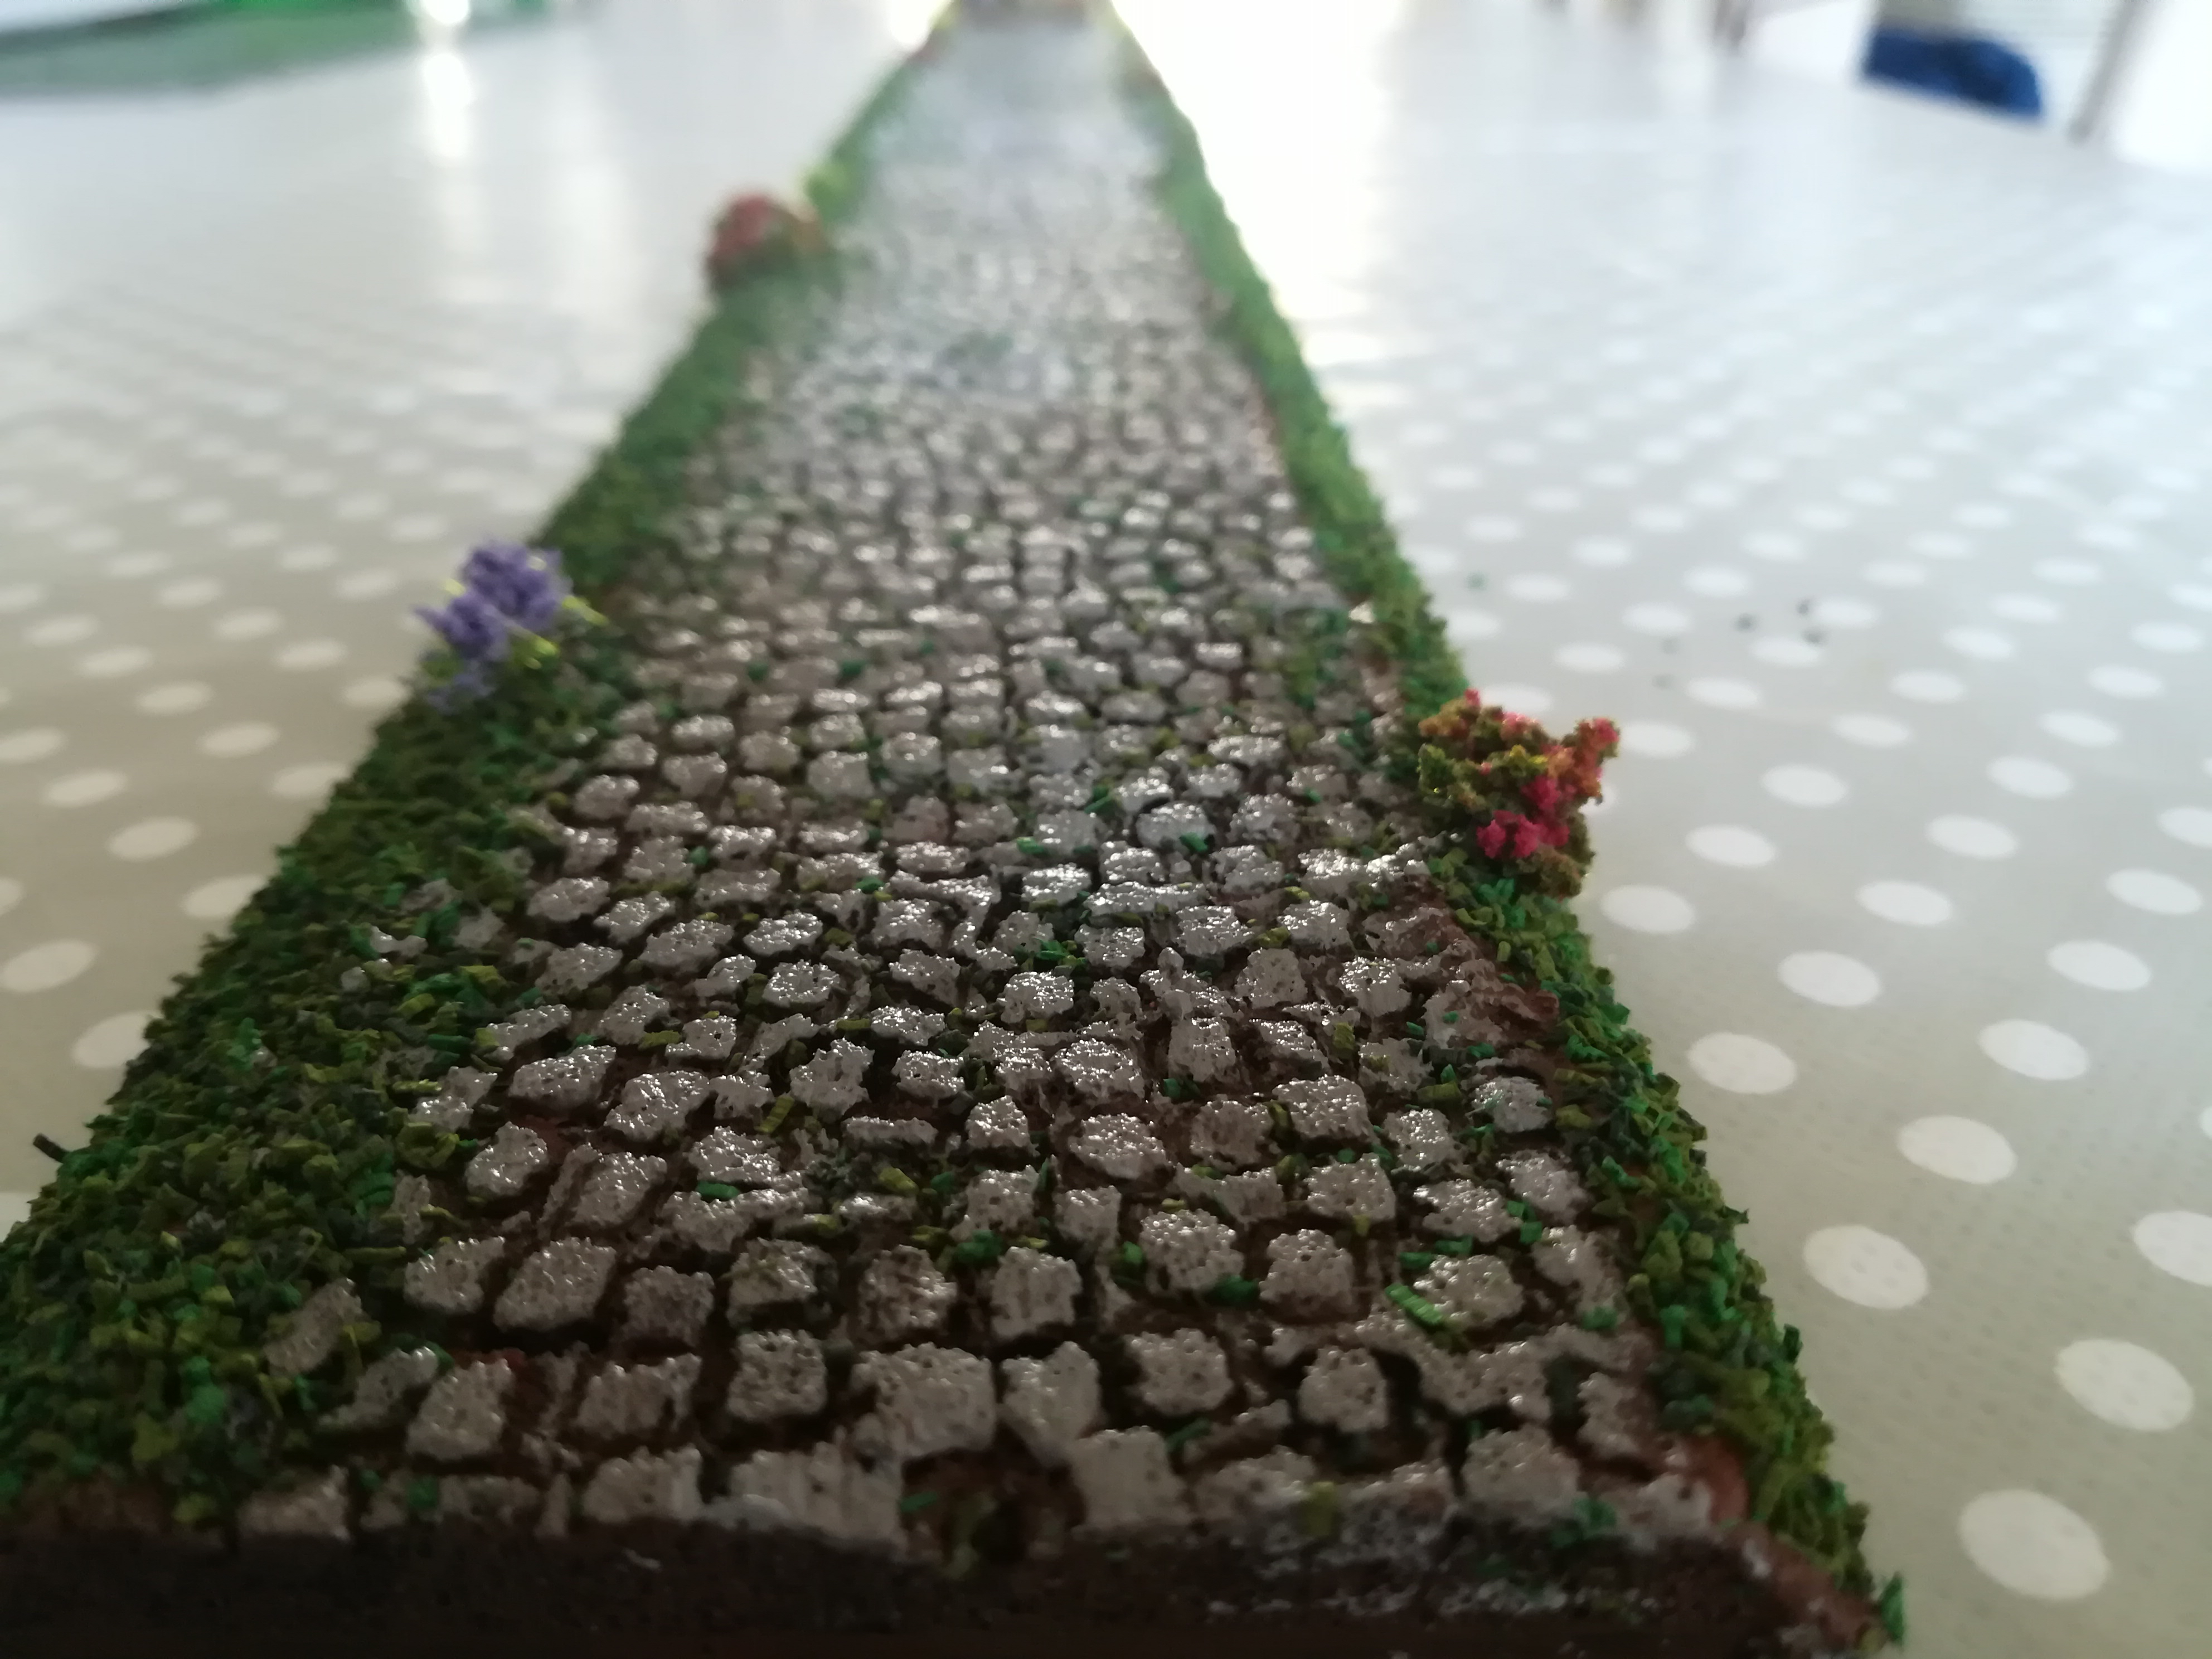 Not too bad a facsimile


theyre excellant, you need some bends etc, I assume the plasticard backing is for reinforcing purposes?
I’m definitely going to make some more, there was very little waste material for these straights. There are a surprising amount of 90° bends in the real roads so I’ll emulate those if I can. The plasticard was really easy to work with, just score it about a mm or so deep and it’ll snap predictably along the score line. Well see how corner pieces come out! For now though two sections will span my 2×4 board for the stoatbart scenario nicely, I think they’ll be a few mm off at most. I was following Mel’s tutorial where he is… Read more »