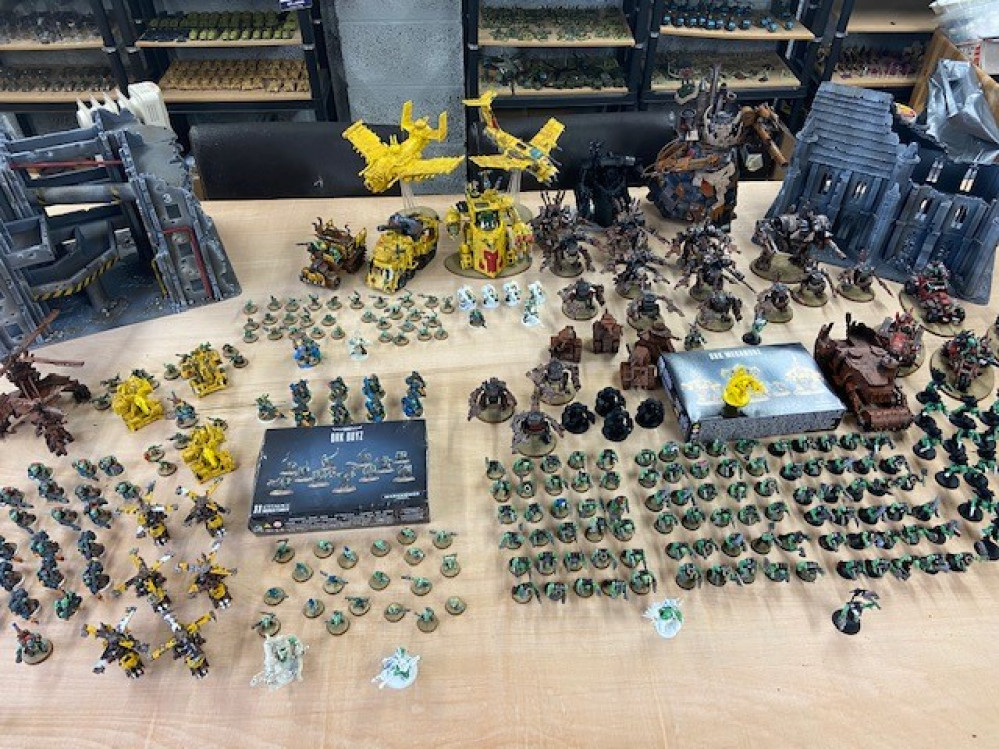
40K Ork Apocalypse army / Spring clean challenge / how i'm beating the boredom of the Covid 19 lock down...
30 Boys in 3 hours? And get table top results? You be the judge...
One of the final units for my Ork army is a big mob of 30 Shoota boys. Having previously speed painted 90 boys and 50 grots already, I was keen to try and get as many models painted as quickly as possible. 30 Boys in 3 hours would mean just 5 minutes per boy in total…. This was going to take some doing*
*In my all honesty, I do not include drying time for paint or glue, nor is it 3 hours in one sitting, this was achieved over 4-5 days when I had free time here and there. Also remember im going for table top ready models, not awards.
First step was to remove all the parts I would need from the sprues. I had decided to use aerosol paints to speed up the process and that would mean painting things separately, I also glued all the legs to the bases so I could base coat those at the same time.
Time taken: 35 Minutes so far
Second step was to lay all the individual pieces out for spraying. I used Halfords white primer for everything, then Rover brown on the legs and Fiat Broom Yellow (same as the planes, Morkanaut etc) on the torsos.
Time taken: 10 Minutes, 45 so far
Third step was to “dip” the flesh colored parts of the models. I used a tub of GW Biel tan green and literally, dipped the arms and heads into it. When it drys, it gives a perfect quick and easy Ork flesh tone. This took quite a while but I had used this technique on over a hundred models previously so I’ve got the hang of it.
Time taken: 30 Minutes, 1 Hour 15 so far.
Fourth step was what I call the top layers. This involves painting the guns silver (lead belcher), the torsos with silver (more LB) and brown (Mournfang brown) & detail on the faces (Usabti bone for the teeth, Evil Sunz red on the eyes & retributer armour gold on the ear rings). This took quite a while but it was the single biggest part of the whole process.
It took a little longer then expected because the Rover brown I had used on the legs came up very glossy. It took me two coats of yellow to do the loin cloths on some of the models, and then the legs all needed a coat of Agrax Earthshade to dull them down and add definition.
Time taken: 1 hHour, 2 Hour 15 so far.
We’re in the end game now! The torsos were dulled down with a liveral coating of Agrax Earthshade, and the guns were coated with Nuln oil. After that, it was just a case of removing the final parts from the sprues.
Time taken: 20 Minutes, 2 Hour 35 so far.
After that, it was just a case of gluing the bits together. This took a bit longer as I did not want to repeat the mistakes I had made with my previous models.
On the previous 90, I had glued the arms, heads etc straight onto the torsos and then the legs. This had proven to be a bad idea as what I had effectively done is glue paint to paint. This meant that the models broke at absolutely nothing as the glue had nothing to key or bond to. This time around, I sanded down some of the paint in the areas that the glue would need (and be hidden from the eye) so as to reveal some of the plastic underneath, and to give me a rough surface for the glue to bond too.
This took a long time and put me over my 3 hour budget but I believe it will pay off in the end.
Time taken: 40 Minutes, 3 Hour 15 so far.
Lastly it was just time to glue the completed torsos to the legs, the bases having already been done back in stage 4.
Total time taken, 3 Hours and 35 Minutes.
So, are they worthy of an award? No. Do they pass the 4ft test on the battlefield, I think so. And remember these are just basic boys. They deploy, they move (if I go first) and then they get killed. No point spending an hour per model when 5 minutes will do.


![How To Paint Moonstone’s Nanny | Goblin King Games [7 Days Early Access]](https://images.beastsofwar.com/2024/12/3CU-Gobin-King-Games-Moonstone-Shades-Nanny-coverimage-225-127.jpg)


2022-10-25 Your project has been visited by the unofficial Hobby Hangout. Huzza!