


Cyberpunk city mdf buildings


Using filler and stencils to make brick patterns
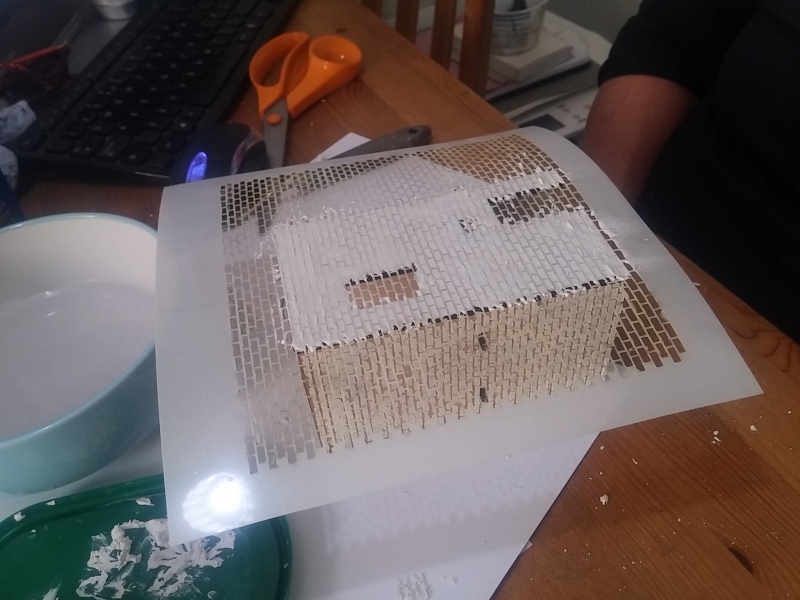
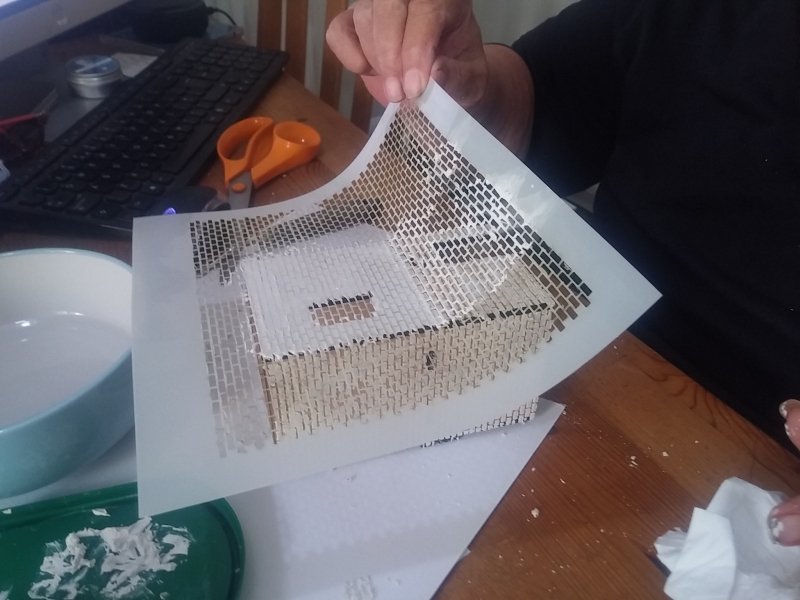
After leaving the filler just long enough to start to firm up, slowly and carefully peel the stencil off in a rolling motion. Most of the bricks should retain a sharp outline – but the occasional one may get stuck or pulled out of shape (especially if the filler is still a little wet or “loose” in places) – but this is ok; in fact, this only adds to the randomness of the pattern and adds to the realism.
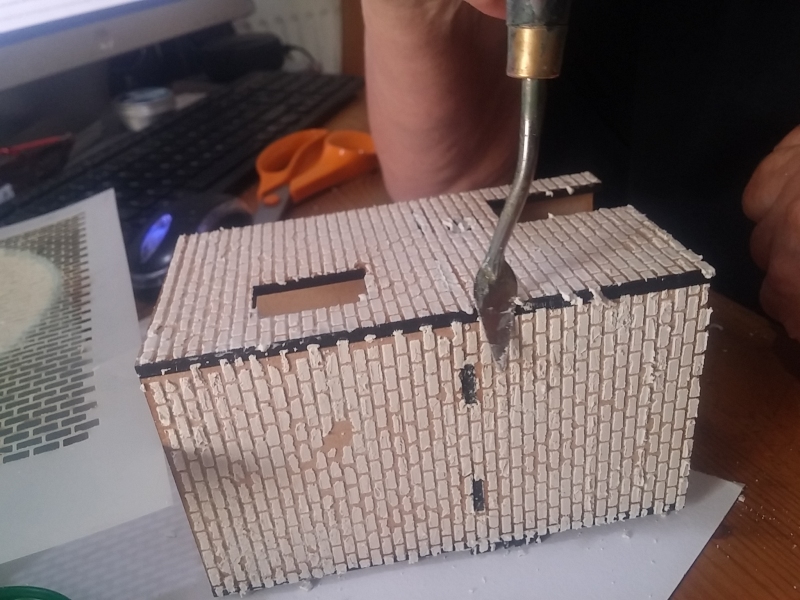
Give the filler about an hour or so to reach a decent hardness, then apply to other sides of the building. Clean up any “ragged edges” before it sets too firm.
Next, once all the filler has gone off, paint all the brickwork with a pale brown/ivory colour; this will form the basis of the mortar between the bricks. We used cheap craft acrylics to paint the terrain (because otherwise it would get very expensive, using multiple 12ml pots of zandri dust!). One some buildings the mortar was more ivory/beige, on others, more brown – paint was applied deliberately “patchy” to create an uneven look.

A deep red-maroon colour was then sponged onto the brickwork, being very careful to use only very light stokes – too heavy and the red paint gets onto the mortar between the bricks. S0 – just as Sir Duncan might say – multiple thin coats are better than one thick one.
The end result is an irregular brickwork with the occasional mis-shapen brick and crumbling/missing pieces every now and again – a much more realistic-looking brickwork pattern than my dumb idea of either using a flat sticker, or trying to stick hundreds of little laser-cut shapes as a cladding!


Leave a Reply