Cyberpunk city mdf buildings


Recommendations: 156
About the Project
Having created a cool app-based game and successfully played a couple of rounds with family across the continent (well, me in the UK and my son-in-law in Italy) and having spend many many hours painting my cyberpunk/Unit9 minis, I figured it was only fair to put a bit of effort into the terrain.
Related Genre: Cyberpunk
This Project is Active
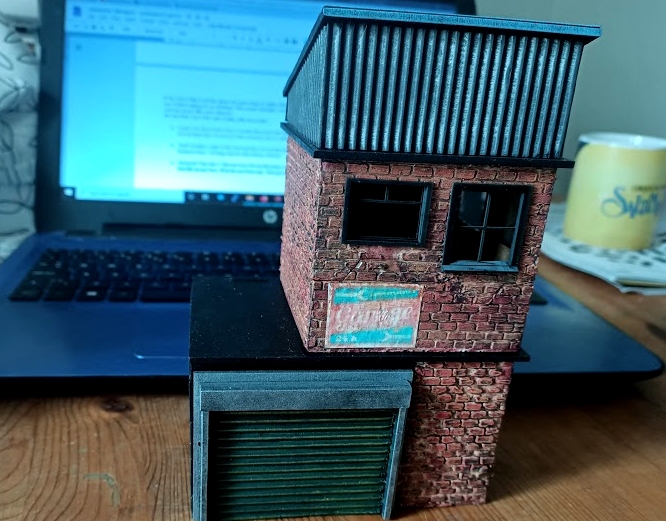
A quick wash and a drybrush and call it done
We debated about using a wash before drybrushing the buildings. I wasn’t sure. I thought it’d make the motar too dark and it’d look better kept as a bright ivory colour. Mrs Blinky said we could always made some more if this didn’t turn out right.
As ever, it turns out she was right. A wash with some Agrax Earthshade and a drybrush of bright orange, and they turned out really nice!
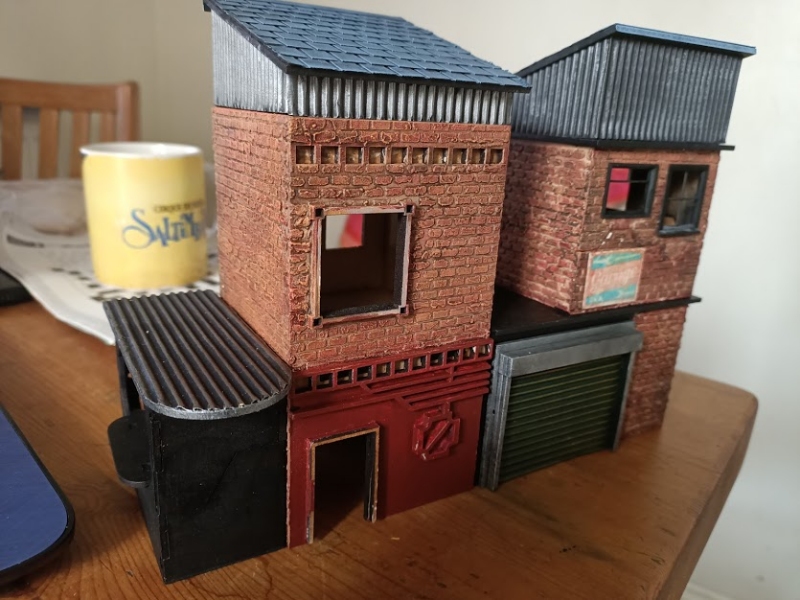
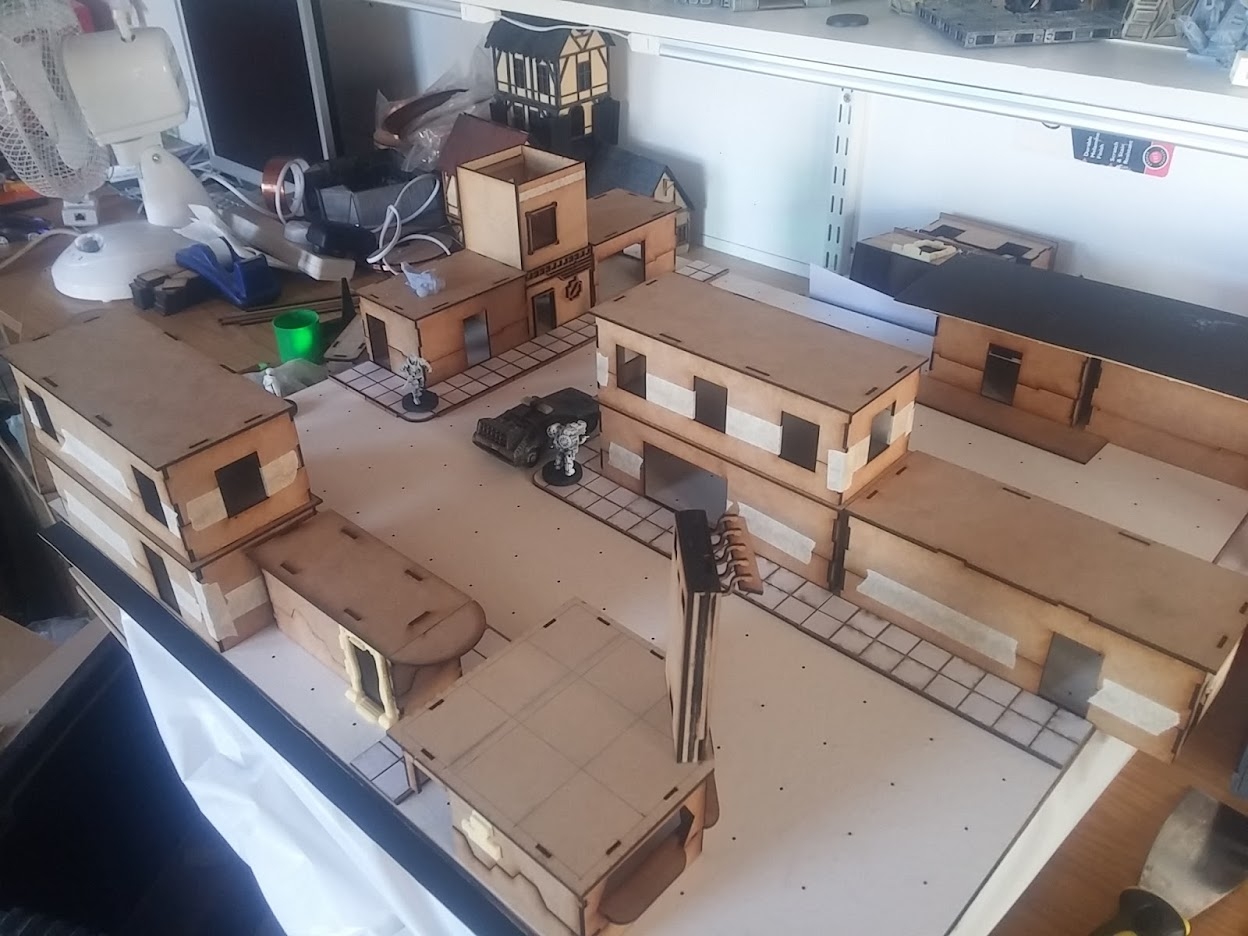
We’ve got about four building finished to date – still not quite enough for a full city, but enough to see how they are going to look when placed together.
Now to make some pavements and tie the whole lot together!
Using filler and stencils to make brick patterns
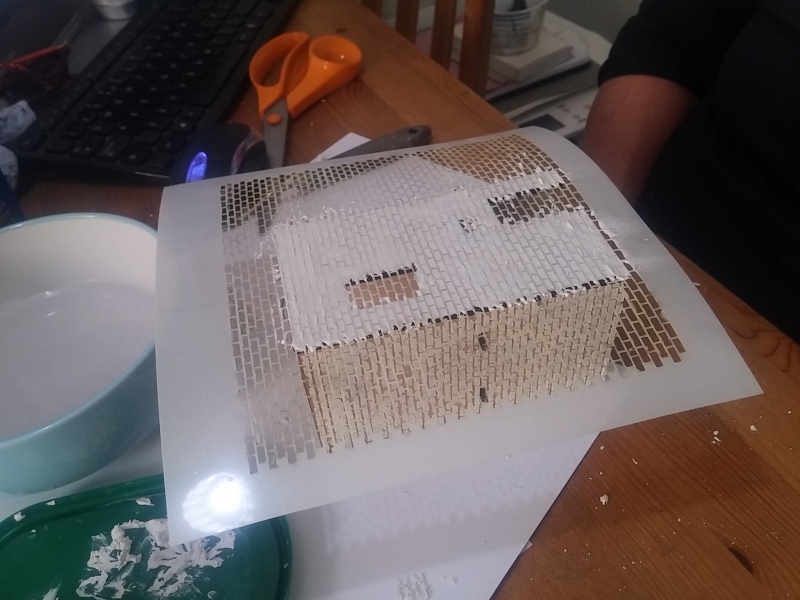
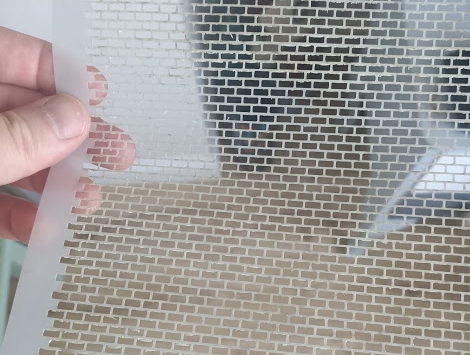
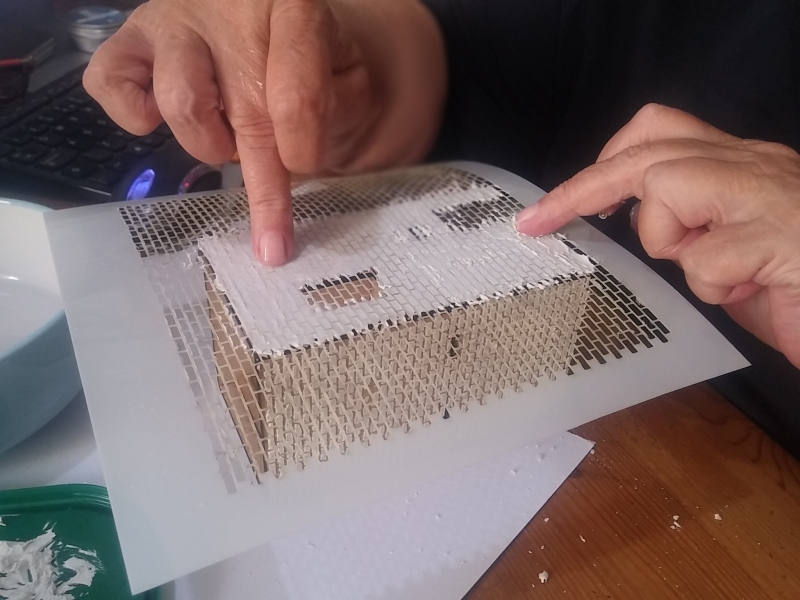
After leaving the filler just long enough to start to firm up, slowly and carefully peel the stencil off in a rolling motion. Most of the bricks should retain a sharp outline – but the occasional one may get stuck or pulled out of shape (especially if the filler is still a little wet or “loose” in places) – but this is ok; in fact, this only adds to the randomness of the pattern and adds to the realism.
Give the filler about an hour or so to reach a decent hardness, then apply to other sides of the building. Clean up any “ragged edges” before it sets too firm.
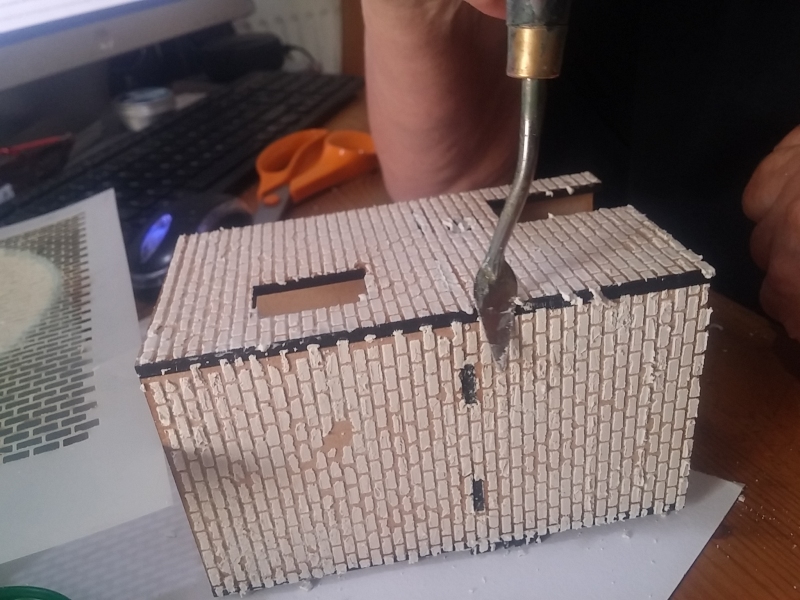
Next, once all the filler has gone off, paint all the brickwork with a pale brown/ivory colour; this will form the basis of the mortar between the bricks. We used cheap craft acrylics to paint the terrain (because otherwise it would get very expensive, using multiple 12ml pots of zandri dust!). One some buildings the mortar was more ivory/beige, on others, more brown – paint was applied deliberately “patchy” to create an uneven look.

A deep red-maroon colour was then sponged onto the brickwork, being very careful to use only very light stokes – too heavy and the red paint gets onto the mortar between the bricks. S0 – just as Sir Duncan might say – multiple thin coats are better than one thick one.
The end result is an irregular brickwork with the occasional mis-shapen brick and crumbling/missing pieces every now and again – a much more realistic-looking brickwork pattern than my dumb idea of either using a flat sticker, or trying to stick hundreds of little laser-cut shapes as a cladding!
Mrs Blinky to the rescue
While I was initially encouraged by my laser cut buildings – especially when placing quite a few of them on the board – and they were starting to resemble a city block.
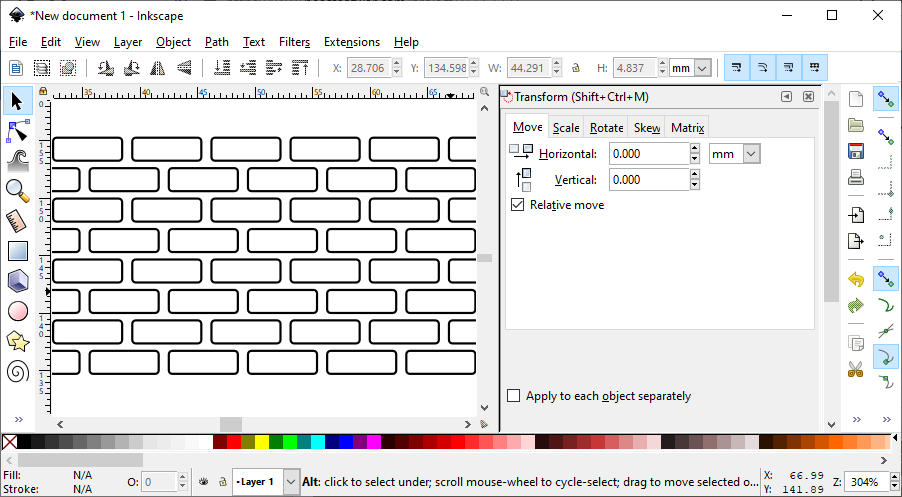
But there was just something bugging me about them. Try as I might, they still just looked like laser-cut boxes, not miniature buildings. So Mrs Blinky stepped up to the plate. She asked me to show her how to use the laser cutter. I explained the difference between cutting and etching and when best to use each. She had a crash course in Inkscape then locked me out of the workshop while she tried out a few ideas (and spent a lot of time turning the air blue!)
Stupidly, I told her that I thought she was crazy, trying to laser cut hundreds (if not thousands) of little tiny bricks in order to stick them onto the sides of the buildings. Plus, of course, the thickness of the laser (it’s focussed to about 0.1mm but even then, there’s a noticeable gap around the top surface of cutouts) would mean the bricks would be almost impossible to work with!
I was suitably chastised and called an idiot and told to bugger off.
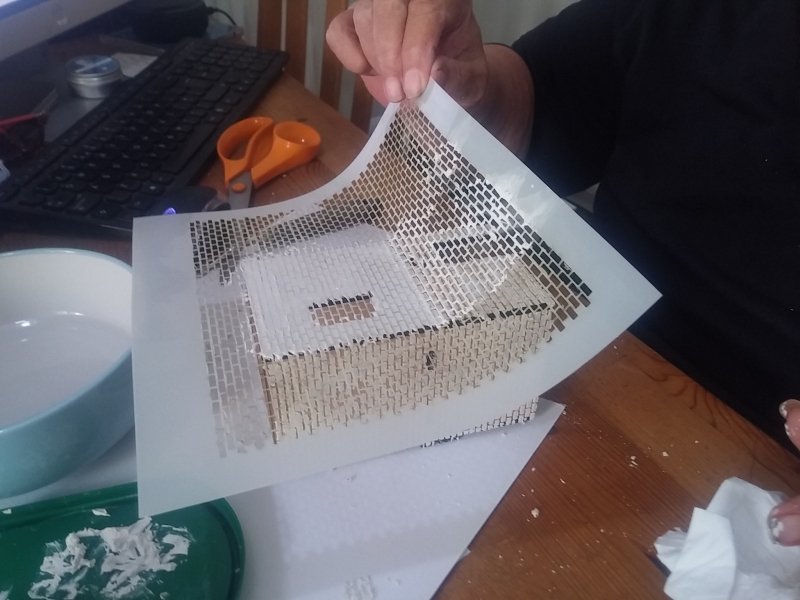
It turns out Mrs Blinky wasn’t trying to cut out the brick shapes in order to stick them on – she was etching the brick shapes out of a sheet of mylar to make a stencil.
(side note – laser cutting mylar stinks. Even worse than pasta. No matter how funny you think it’s going to be to make your own shaped pasta, or etch your own designs onto lasagne sheets – just don’t: it stinks. Really, really stinks. And the stink will linger for days. Mylar smells worse than even this.)
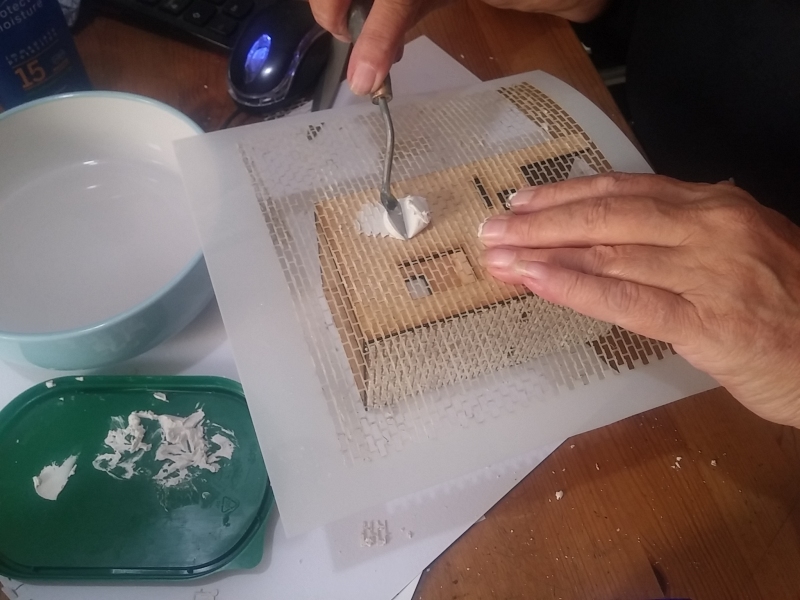
It begins with some ready-mix household filler being smudged all over the stencil. Then smooth it all out with a wet finger.
Leave to dry for about ten minutes or so, just so the filler starts to “firm up” a bit (and can hold it’s shape on it’s own). All the while, smoothing any bumps or voids that might form as it is drying….
Laser cutting mdf buildings is far quicker than decorating them
While we set about our prospective tasks, it soon became apparent that my job of laser cutting bits of mdf was far less demanding than finding/making artwork to go onto the buildings, rescaling it, aligning it with the cut marks etc.
It didn’t take long for me to have an entire 2′ x 2′ board of city buildings (and pavements) cut, glued and assembled.
While I thought we were making great progress, Mrs Blinky wasn’t happy.
Even with the cool sci-fi stickers on, the buildings still looked too “regular” and “untextured” (not my words, but they stung when I heard them). It was decided (I had no say in the decision) that someone else needed to take control of the laser cutter and come up with something very different….
Sure, they look like little wooden boxes - that's what they are!
When you glue five pieces of flat mdf into a box shape, it doesn’t matter how much you try to convince yourself it’s a generic building shape, it still just looks like a wooden box.
I didn’t really fancy spending hours and hours on each building, lining with those ridiculously small foam bricks, to make it look less like an mdf-wooden-box. So came up with (what seemed like, at the time) a brilliant idea.
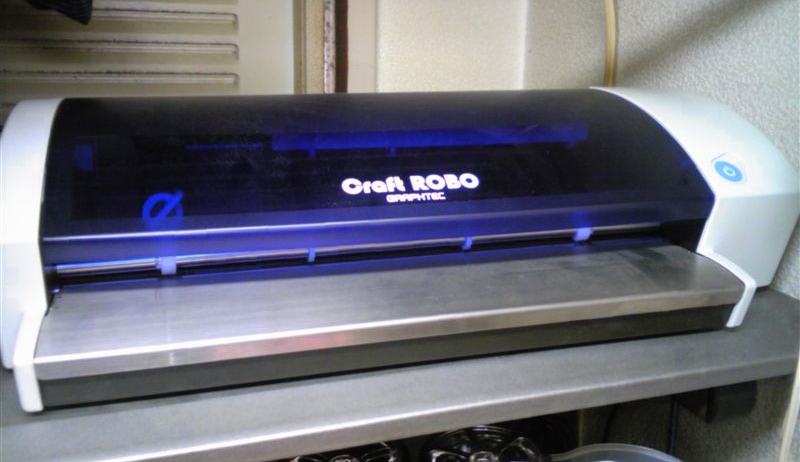
Many, many years ago – when they very first came to the UK educational market – Mrs Blinky (a local authority SENCO at the time) bought a Graphtec Craft Robo. It’s basically a little desktop vinyl cutter. Originally for cutting paper and vinyl, later versions were “beefed up” to cut thin card and targetted at the crafter’s market.
Ours is a very early version and struggles to cut anything even as “thick” as photo paper. But it does brilliantly at cutting out shapes from self-adhesive sticker paper.
After a lot of wrangling with Windows 10 (we were running Windows XP back when we first got the CraftRobo) I eventually got it running as a fake usb-printer. Mrs Blinky dredged the darkest recesses of her memory to puzzle out how it worked, and made some rather spanky stickers for my sci-fi buildings.
She used the same .dxf files as I’d sent to the laser cutter to create the cutting outline for the stickers. Amazingly it worked first time (if you’ve ever worked with CNC machines and know all about backlash, belts slackening and scaling issues between software, you’ll understand what a relief this was!)
The end result was so good, and the cuts so close that – in the real world at least, not through the lens of a 12MP digital camera – it’s not easy to see where the join is…

We might just have a quick and easy way to make our wooden boxes look like sci-fi buildings after all…..
Laser cutting mdf
My app-based electronic game idea uses a 1.5″ grid, which means most pre-existing terrain works well with it (since most terrain uses a 1″ grid system). Since most pre-existing terrain doesn’t actually have a hard-printed grid on it, placing 3 x one-inch pieces to fill 2 x 1.5″ squares is really easy.
All that said, I couldn’t really find anything I wanted to use for a cyberpunk *city* map – plenty of Infinity type space-ship interiors and hi-tech industrial sector table-fillers, but very little in actual city buildings (preferably with playable interiors).
So I set about making some myself.
I’ve owned an HPC LS3020 laser cutter for about ten years, and used it to create loads of prototype gadgets and products over the years (including miniature playable guitars that Mattel paid $10k for a 90-day option on, which more than covered the initial £2k outlay back in 2010).
Since getting an FDM 3d printer last year, and having a resin printer in January, the poor old laser cutter has been playing gooseberry, sitting rather forlorn and unloved in the corner of the workshop. I decided it was time to put it to use!
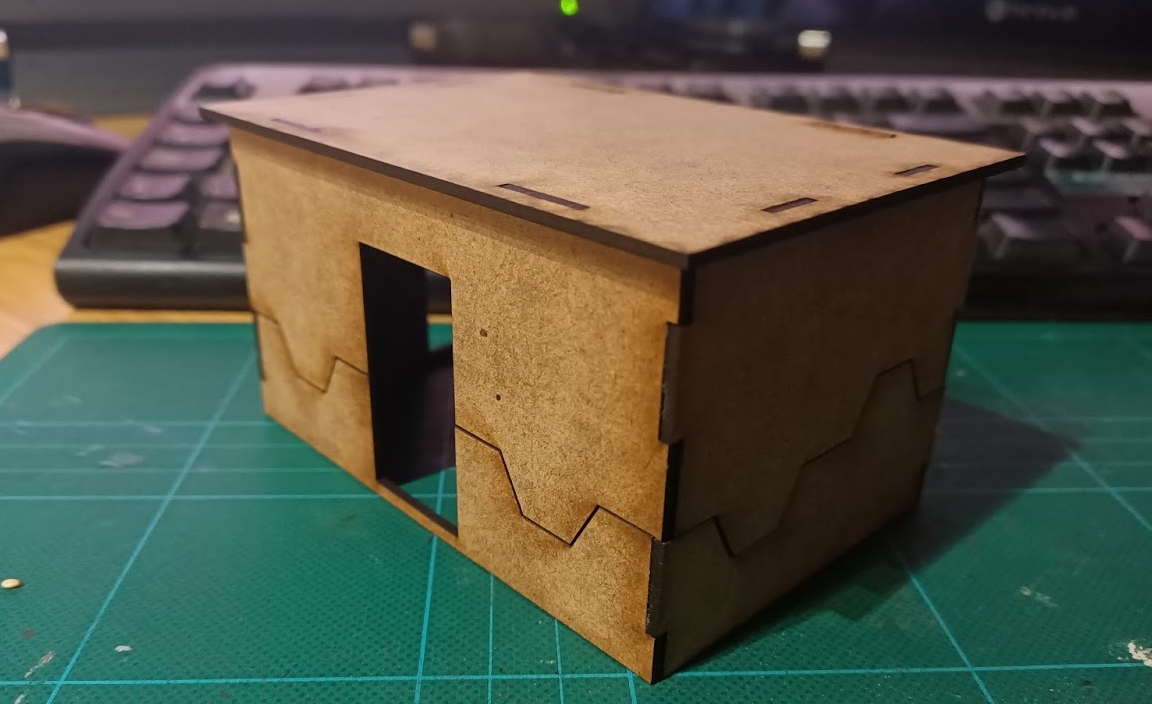
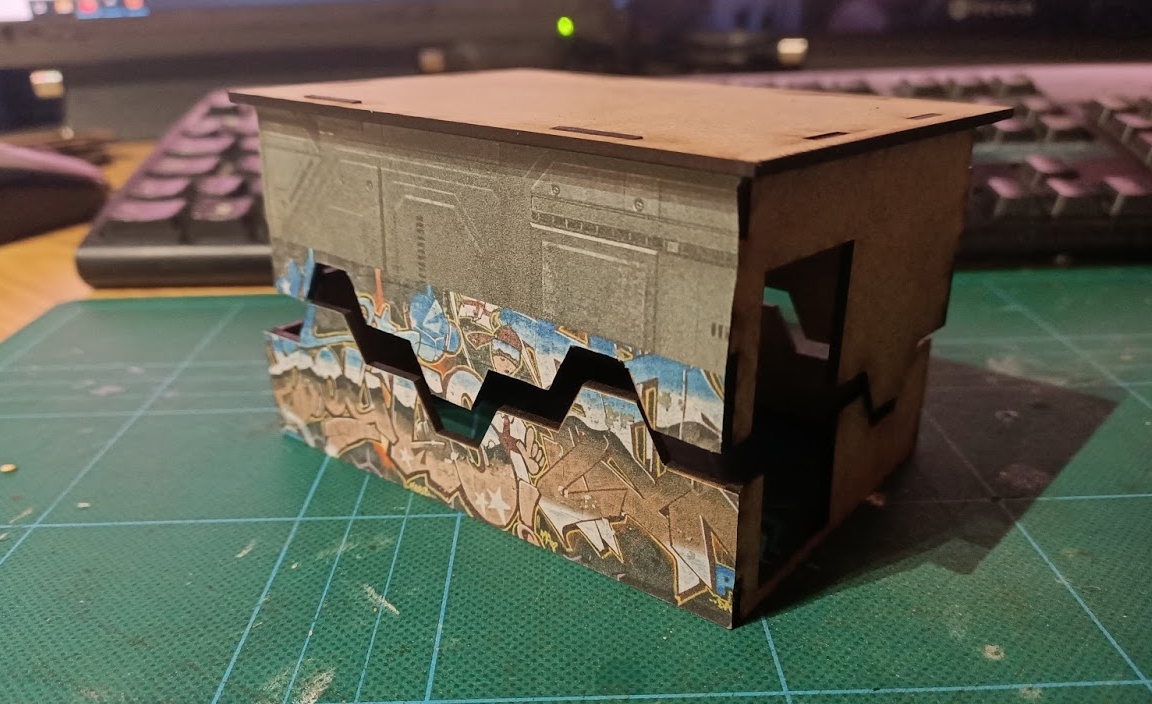
I actually prefer working in 2d, and rather enjoyed designing some 3×2 based buildings (4.5″ x 3″ footprint). I wanted them to split across the middle, so that the interiors could be playable (hey, who wants to always walk around buildings in a city, when you can go into, and through them?)
My first designs just had a simple horizontal split, but in use, it was all too easy to knock the tops off the buildings as you moved your minis around the tiny cityscape.
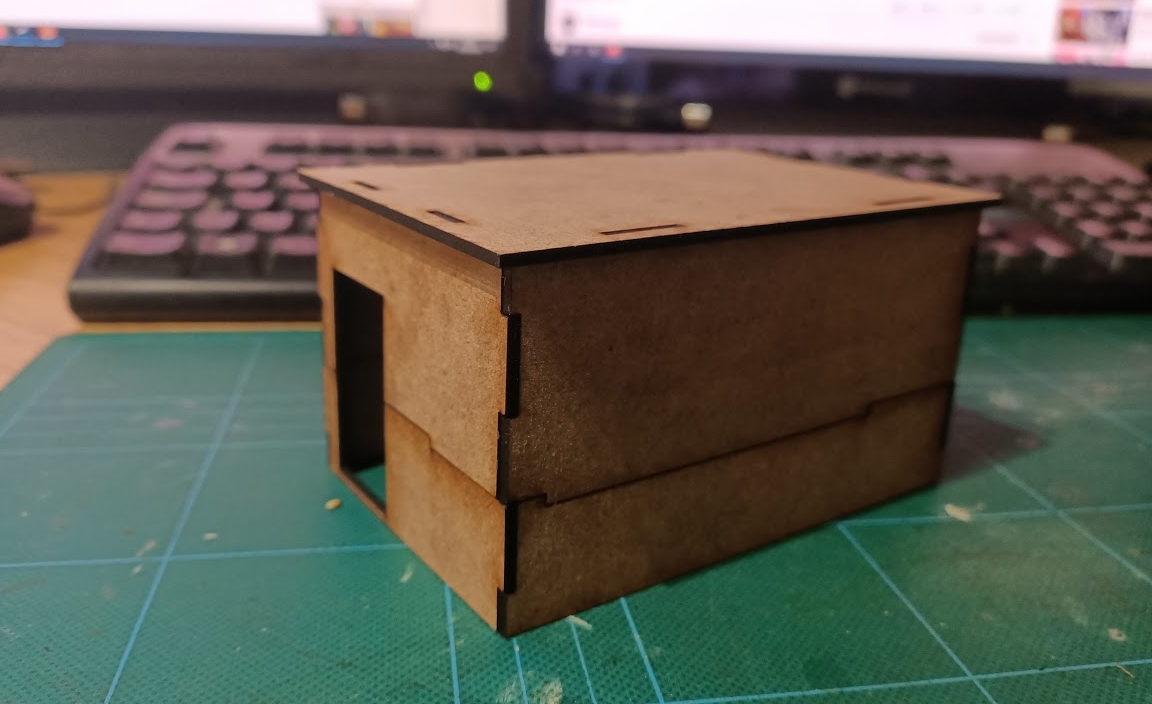
Even with a small step in the split (to aid lining up the two halves) lifting off the “lids” and replacing them during gameplay was often awkward.
So I came up with a sci-fi friendly hex-based split pattern. It was, admittedly, a risk at first, and a pain to get everything to line up properly, but the end result looked quite satisfying.
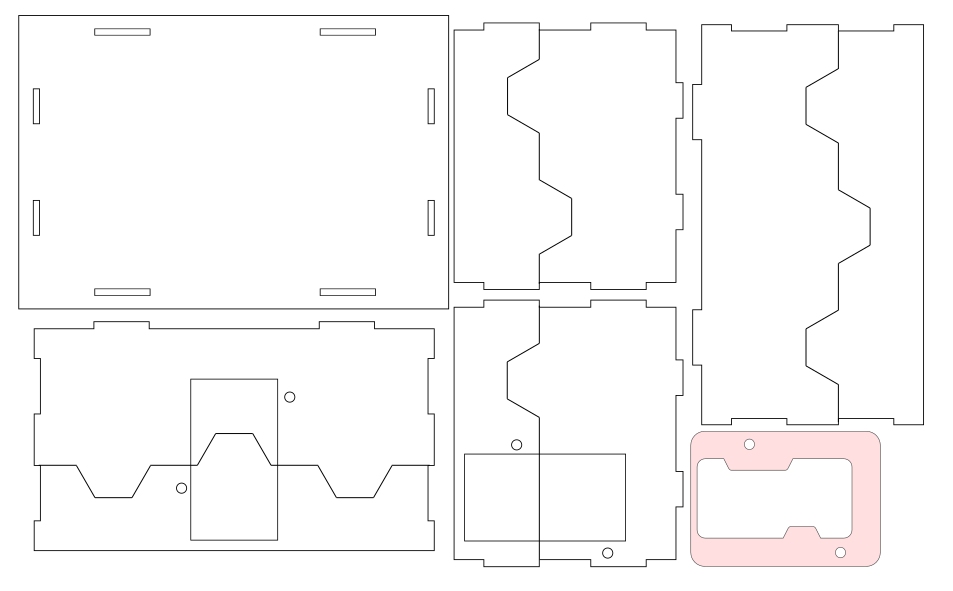
The resulting hex-based split not only looked sci-fi cool (this is for a sci-fi city after all) but worked really well too.
When simply dropping the top half of a building onto the base, the hex-patterns help drag the walls into place; when all four walls are trying to pull the “lid” part into place, the end result is a top section that always just falls into the perfect position (every time!)