


![How To Paint Moonstone’s Nanny | Goblin King Games [7 Days Early Access]](https://images.beastsofwar.com/2024/12/3CU-Gobin-King-Games-Moonstone-Shades-Nanny-coverimage-225-127.jpg)


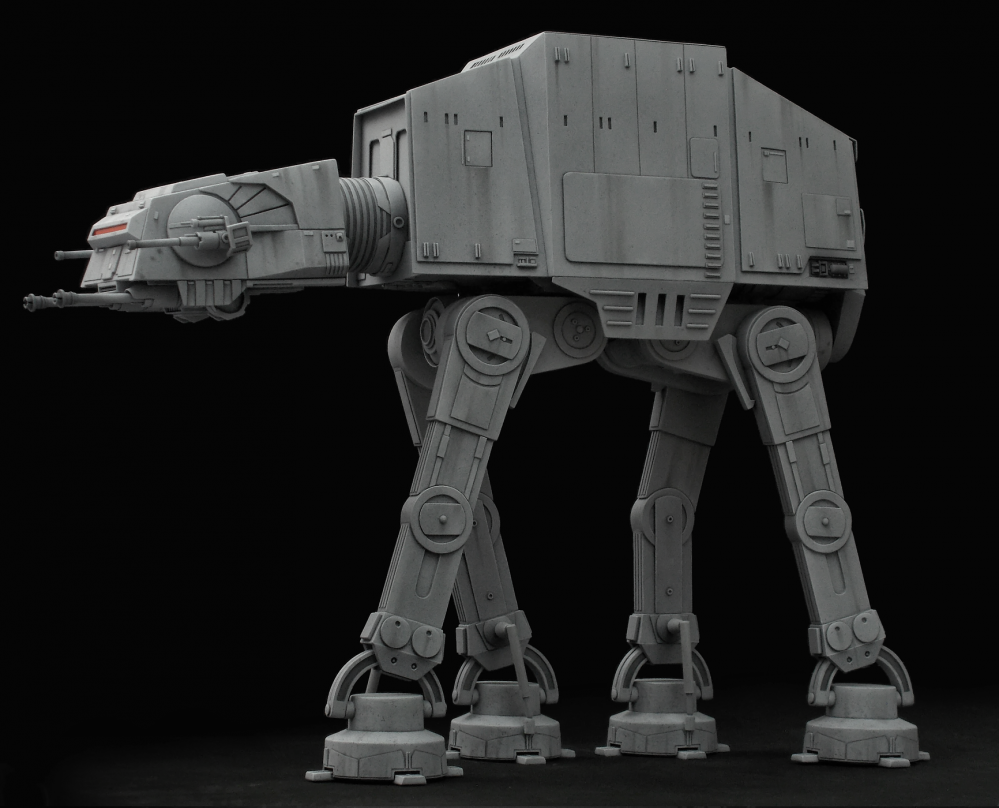
Spring Cleaning - with an AT-AT!


Playing Star Wars Legion - finally!
My Star Wars Legion miniatures are learning to fight.
Last night I visited my long-time buddy Michael, and we played our first game of Star Wars Legion. Skirmish with 500 points each on a 3’x3′ Skirmish Battlemat. Conditions: Clear. Standard Deployment. Objective: Breakthrough. Michael fielded Clone Troopers with 7 activations: Captain Rex, 1x Clone Commander, 2x Phase 1 Clone Troopers, 2x Phase 2 Clone Troopers (once with Medic), 1x ARC Troopers Strike Team with Heavy. I fielded Rebels with 6 activations: Leia Organa with Vigilance, Sabine Wren with Personal Combat Shield and Darksaber, 2x Rebel Troopers, 1x Mandalorian Resistance with Offensive Push, 1x Mandalorian Resistance Clan Wren with Offensive Push.
In the centre of the left half of the battlefield stood an imperial turbolaser tower, to the right of it towards the centre were two barricades on each side.
Michael was the blue player and started setting up the first unit. He also finished the alternating deployment of units, as he had one more unit than me. He placed his clones on the open side to the right of the turbolaser tower, my rebels rather stay on the left side behind the tower.
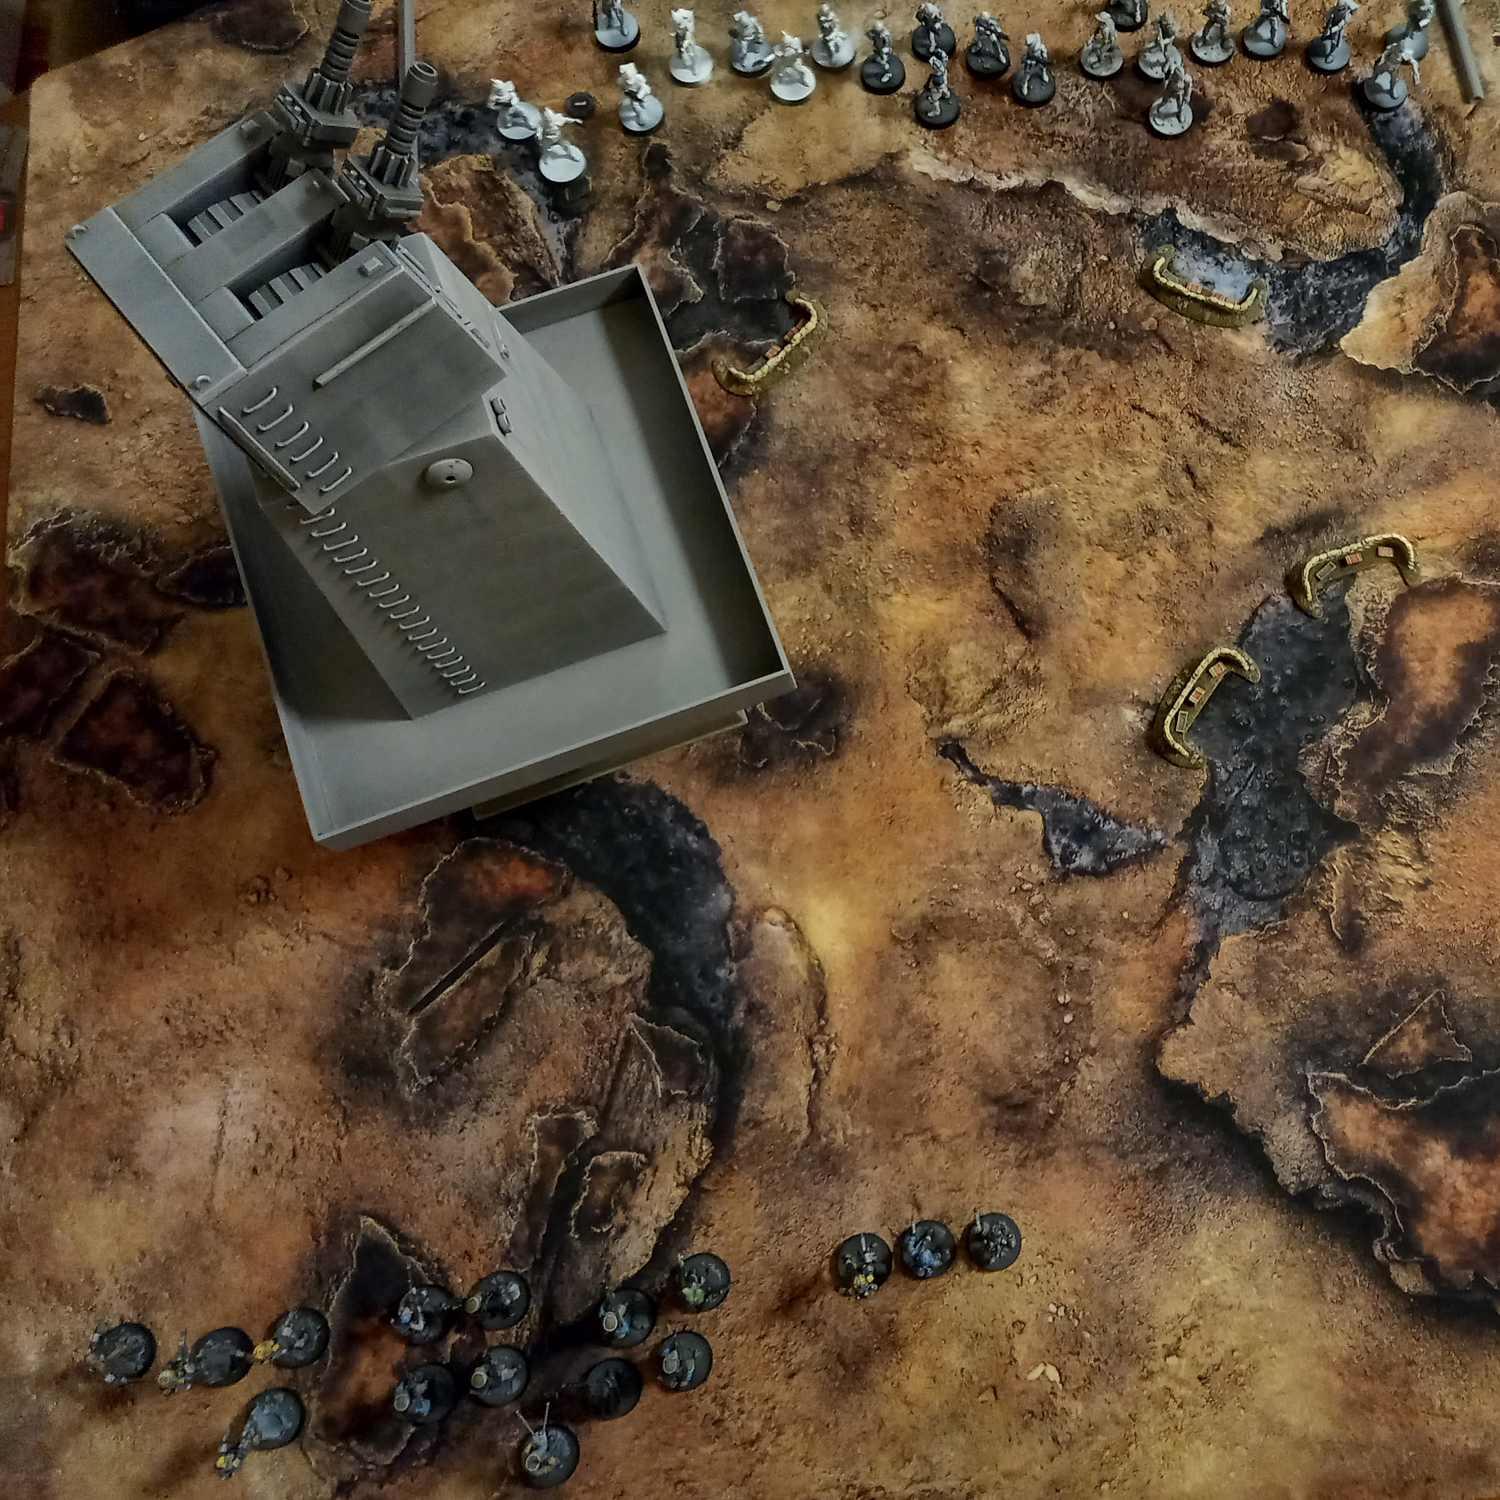
We started the game and our goal was mainly to become familiar with the game mechanics and the special rules of our troops, as well as to gain first impressions regarding terrain, moves, combinations, etc. The game was therefore followed by a joint analysis – more on that later. I can say one thing in advance: The game went pretty smoothly for the fact that we at least had an idea of what to look for in many aspects, but also looked up some details again.
I played Leia’s command card No Time For Sorrows in the first round and let Sabine and Clan Wren make a free speed 1 move towards the tower in the order phase. The Rebel Troopers as well as Leia, who always distributed dodge tokens nicely, advanced out of sight of the clones behind the tower, while all Mandos including Sabine moved to the balcony of the tower at height 1 thanks to their jetpacks. The Mandalorian Resistance came under heavy fire from the cautiously advancing clones, but thanks to hard cover, their red defence dice and their defence surge, they only lost one warrior, but also gained some supression.

In the next round, the battered Mandalorian Resistance unit left the balcony to take cover behind the tower and make way for Clan Wren. Clan Wren managed to take some Phase 2 Clone Troopers out of the fray. Sabine joined her family and, using Gunslinger, gave both Rex and another unit of clones a wound each. At the corner of the tower on their side, the ARC Troopers moved into position and on standby.
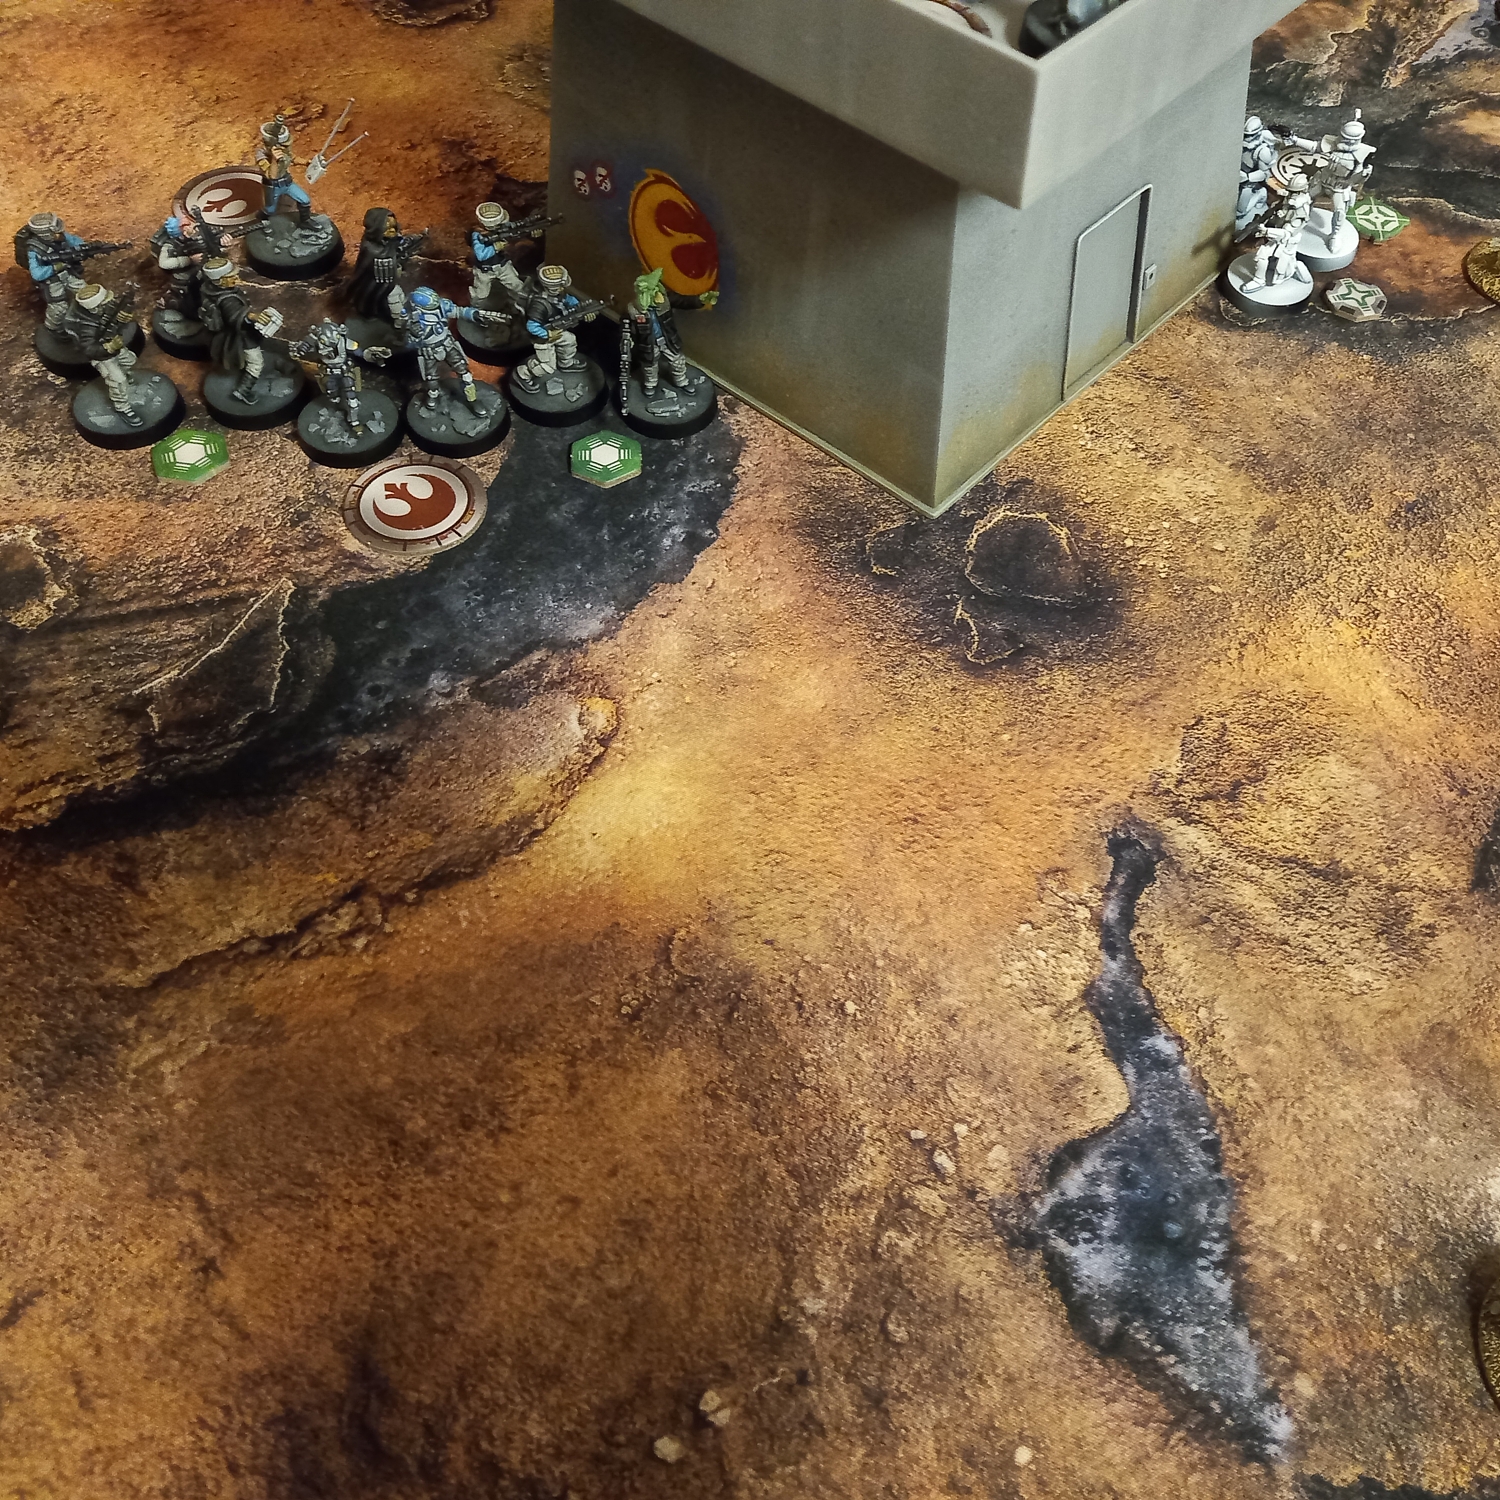
Since I wanted to take a few shots with the Rebel Troopers, but there was no cover in range, one of the two units ventured into the open and ate the standby attack of the ARC Troopers – two losses, two for the team. Glad they got their dodge token back thanks to Nimble. They fired back but missed. The second unit of Rebel Troopers now also came into the open and fired, but failed to wound even a single clone. Yikes!
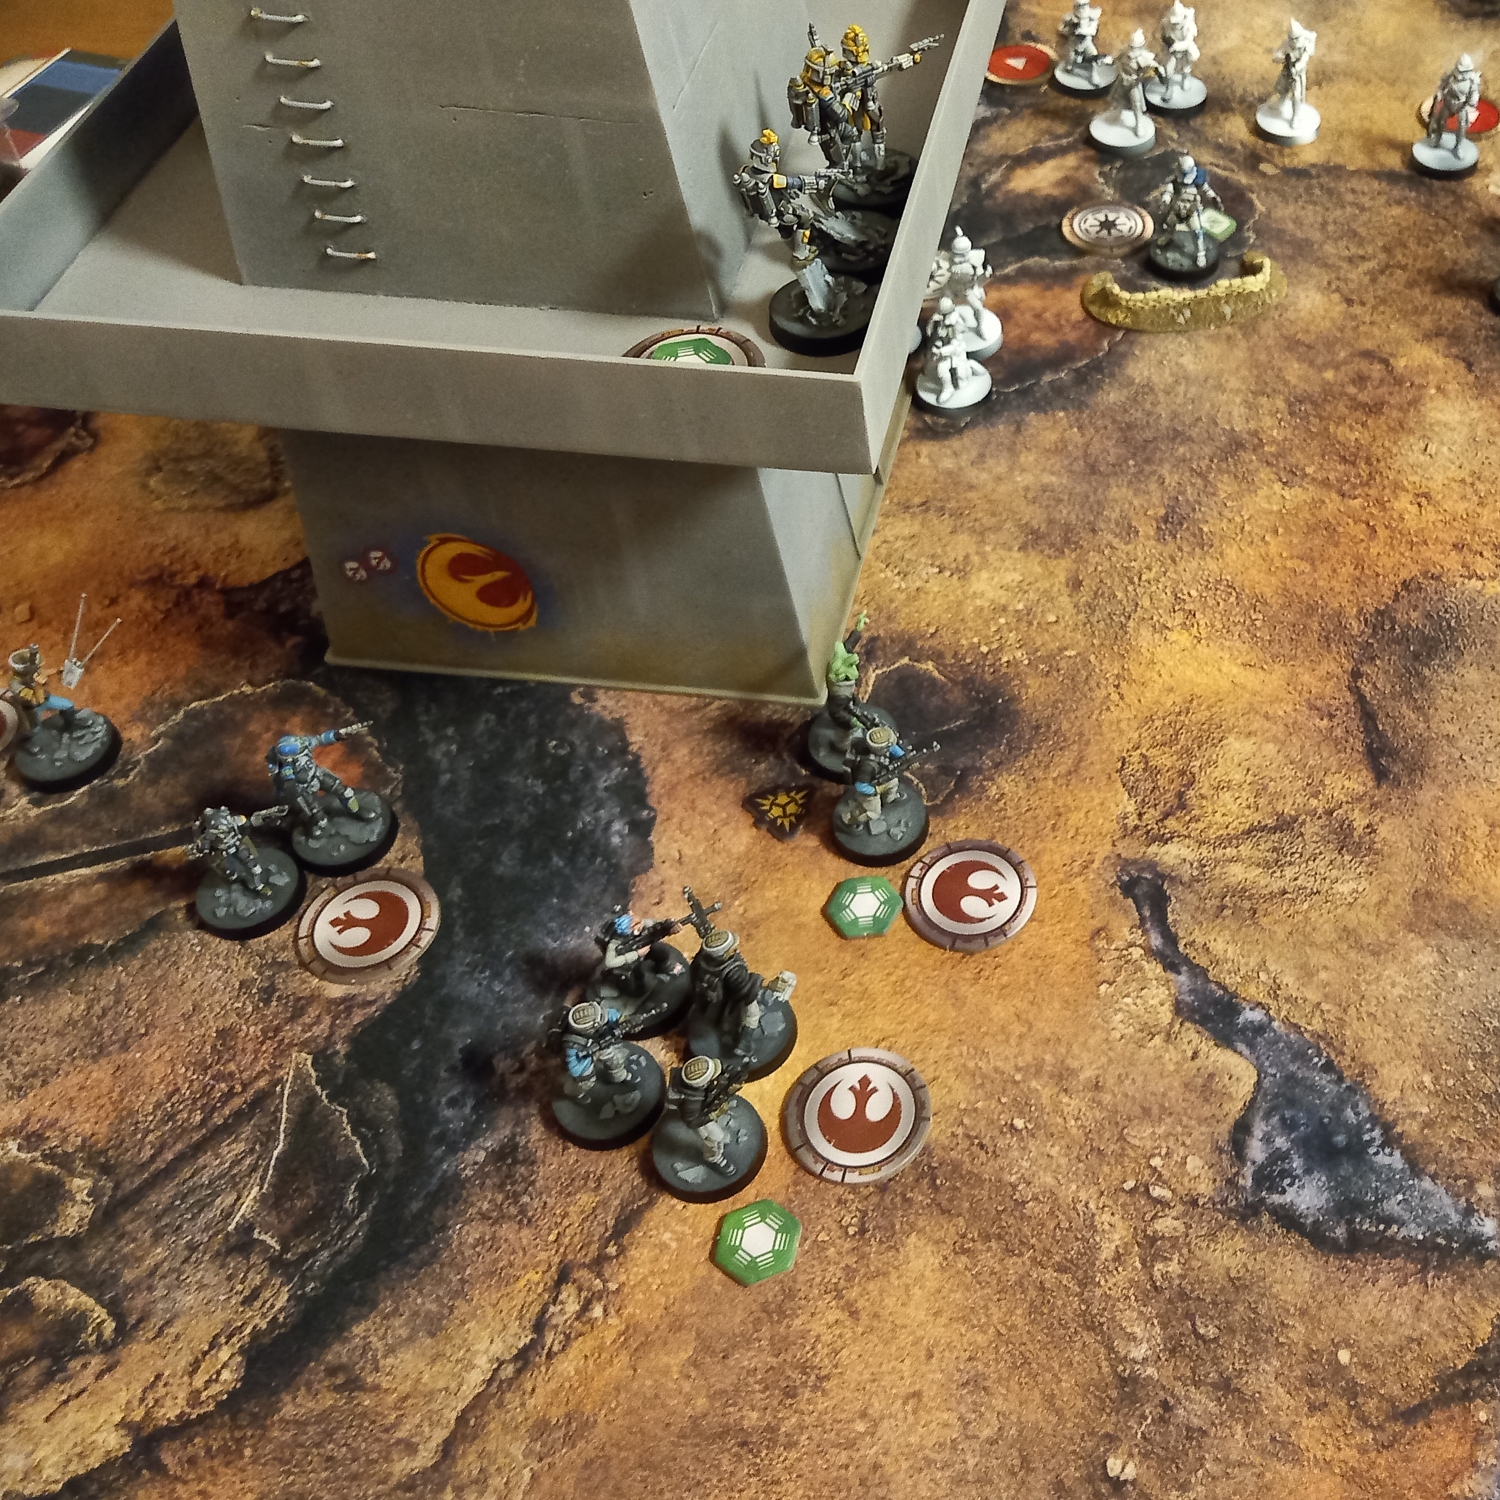
In the third round, Clan Wren on the balcony and the clones below continued to fire heavily at each other, resulting in the loss of two more clones. Clan Wren continued to remain unwounded thanks to hard cover and their good defence. Red defence dice combined with defence surges AND hard cover is fierce! On the other side of the tower, Sabine kept firing and then went out of sight to prepare a surprise….

Round three started with me playing Sabine’s command card Explosions and getting priority again. With the first move, Sabine jumped off the balcony and used her second action to place two thermal detonators at range 1 so that their blast radius reached Rex, the Clone Commander, the Arc Troopers and two units of Clone Troopers respectively. After she performed her free speed 1 move after arming the detonators, I detonated the explosives. In doing so, I rolled so well (there are one white and one red attack die per detonator for each unit in range 1) and Michael rolled so poorly with his red defence dice that it took Rex, who still had four health, out of the fray, massively decimating the ARC as well as Clone Troopers. After the initial shock, Michael then abandoned the game, and we quickly realised that we’d just experienced a really glaring statistical outlier here (I rolled either a hit or a crit on every white attack die for the detonators except one, and Michael rolled a bunch of blanks on his red defence dice – four out of four on Rex alone!). I felt really sorry, but after two or three minutes we could laugh about it.
Impressions and analysis:
- The game is definitely fun, even if it was a bit bumpy at the beginning due to a lack of routine, from the middle of round two things were already running much more smoothly.
- The clones have a very good order control, which you can make much more out of. Their token sharing makes them quite flexible, and their fire support is awesome – in a positive sense.
- Badass in a negative sense is hard cover for troopers with red defence dice, and especially those that also have defence surges. Here you really have to find the balance with the terrain. The Turbolaser Tower is crass in that with the balcony it basically provides up to four barricades worth of cover for troops that get there quickly. And that’s the crux: clones would have just as blatant defence there as the Mandos, but can’t get there nearly as quickly or easily. On the other hand, the Mandos only shoot from there at range 2, the clones at 3. We have therefore decided for the future to continue using the tower – if only because it is too cool a terrain piece – but to place it rather centrally between the deployment zones near one of the two remaining edges of the battlefield. That way it still offers possibilities, but you can only control a maximum of one half of the battlefield from it.
- Michael should definitely add upgrades like Offensive Push to the clones – anything that adds to their fire support. Recon Intel, especially with Rex, also gives them the opportunity to occupy positions in cover during the deployment phase.
- Rebel Troopers not only urgently need dodge tokens, but ideally also hard cover, otherwise they melt away far too quickly.
- Mandos and Sabine are fun! 😀
- I’m already looking forward to the next, certainly more tactical game. I’ve even thought of a cool two-round game move with Sabine. More about that soon, I hope.


Leave a Reply