


![How To Paint Moonstone’s Nanny | Goblin King Games [7 Days Early Access]](https://images.beastsofwar.com/2024/12/3CU-Gobin-King-Games-Moonstone-Shades-Nanny-coverimage-225-127.jpg)


Soap Dodger's Kings of War.


Painting every model for four hours - First Contact
The title was my original plan.
40 models for one unit are a full infinity faction… I have done Code one forces which have less and they take about 2 months of work.
Meaning I don’t have time left in my life for that. I turned to an old enemy of batch painting.
I dislike Batch painting as it takes the fun out of life and eats my soul. But I was committed now. Needs must.
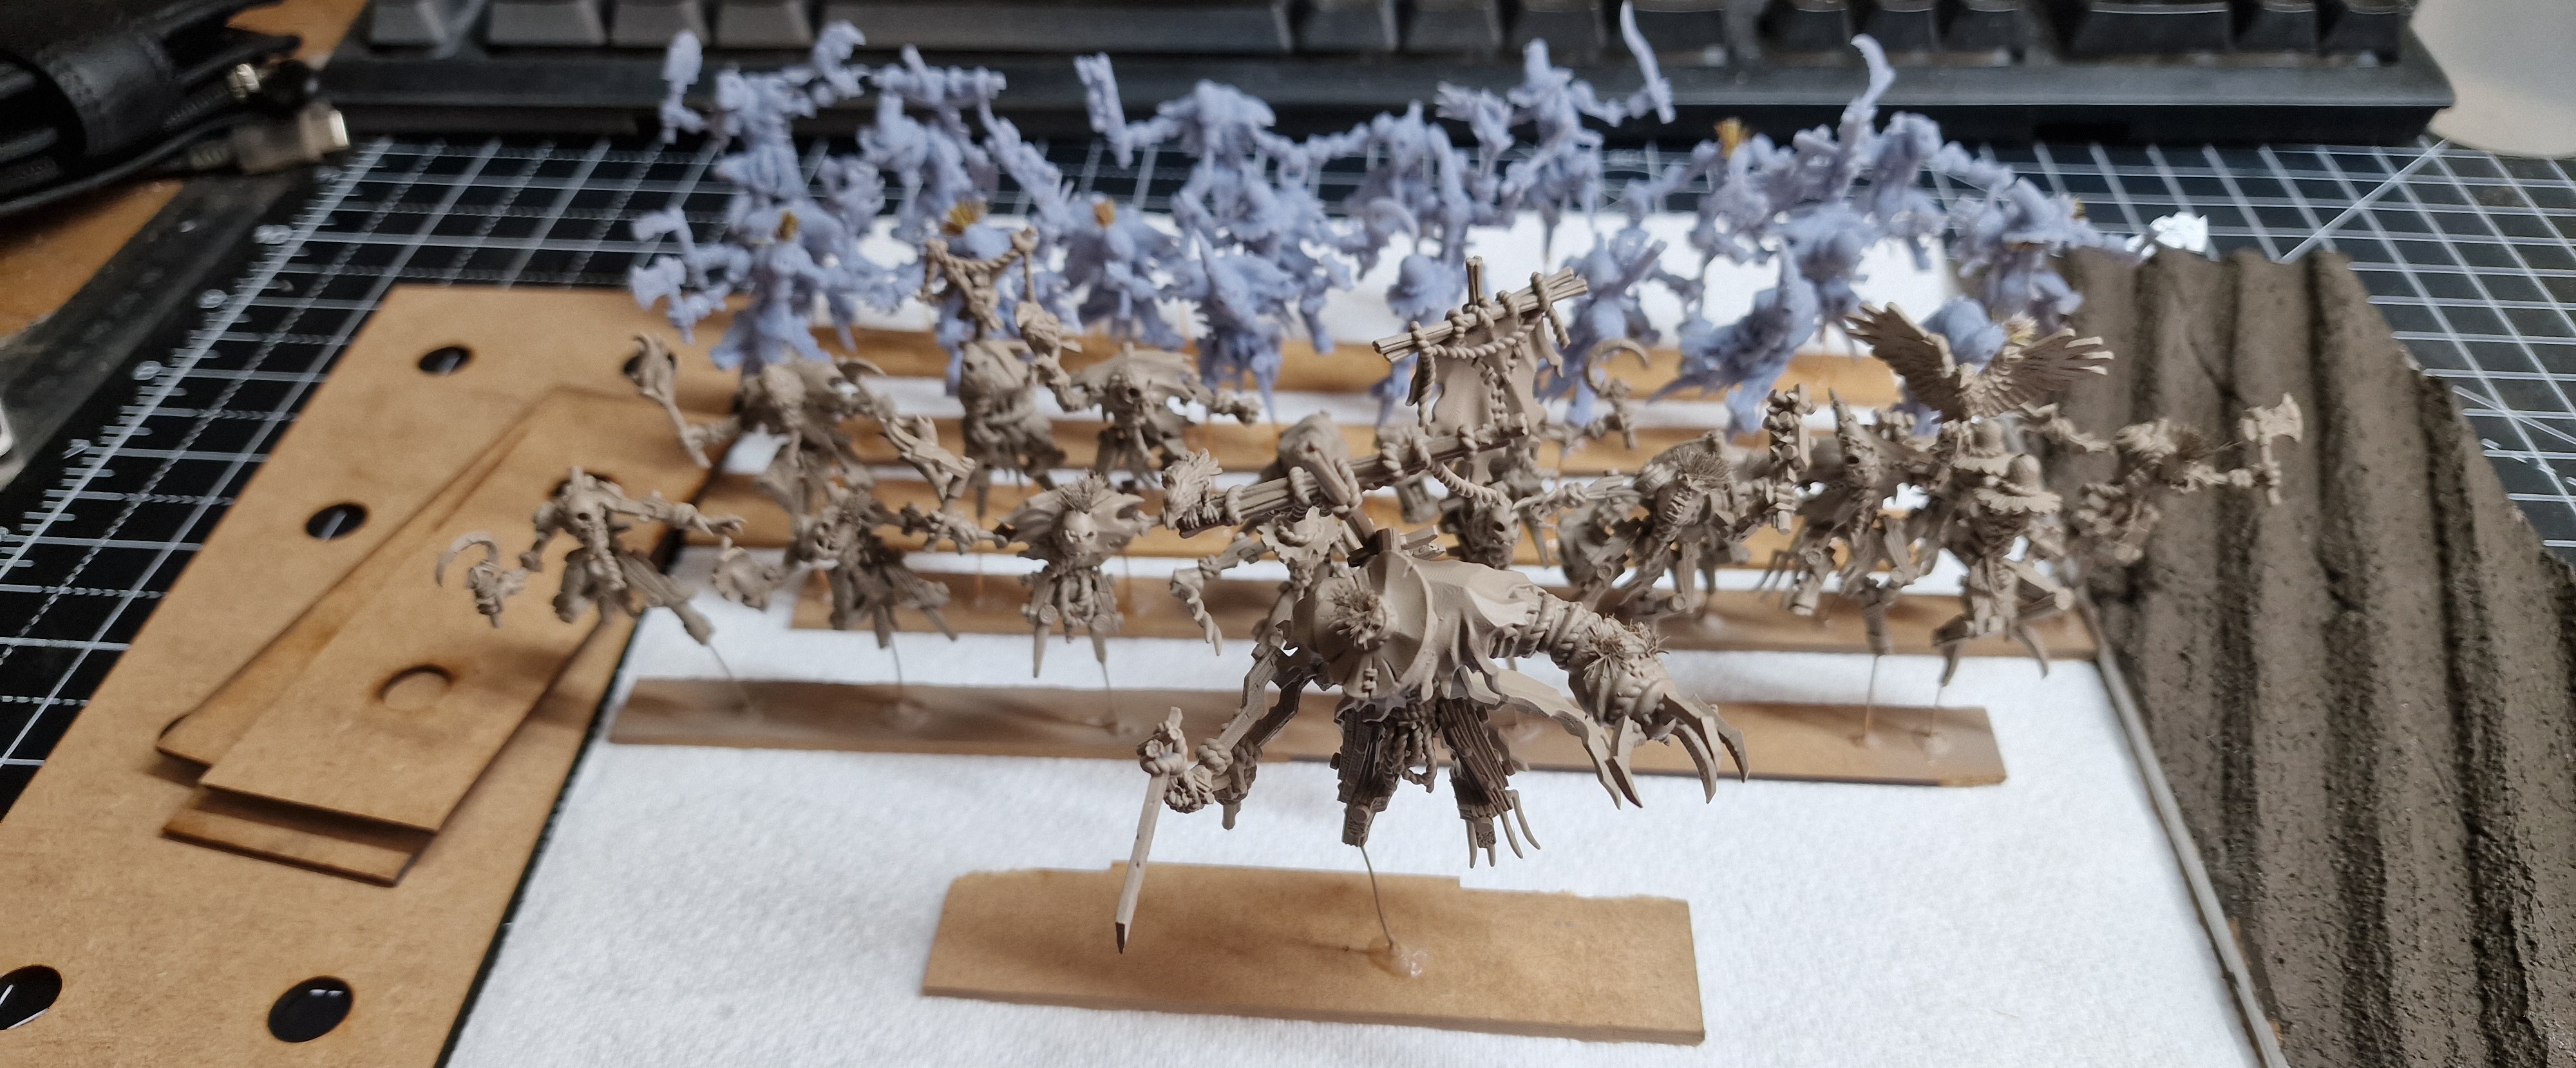
I used bronze wire to mount all the models and base coat them in a grey brown. This was my first time using bronze wire for this. All I will say is when you go bronze you will never go back.
I also replaced 3d printed Chips (meant to be straw) with tufts. I removed these digitally after the first prints.
I done multiple sporadic passes picking out limbs in slightly different browns (should have bothered), dry brushed in a slightly lighter grey brown (very soft) then used a grey was on all of the models. this set the basecoat of all the wood.
I then painted all non-wood areas black for a base and contrast.

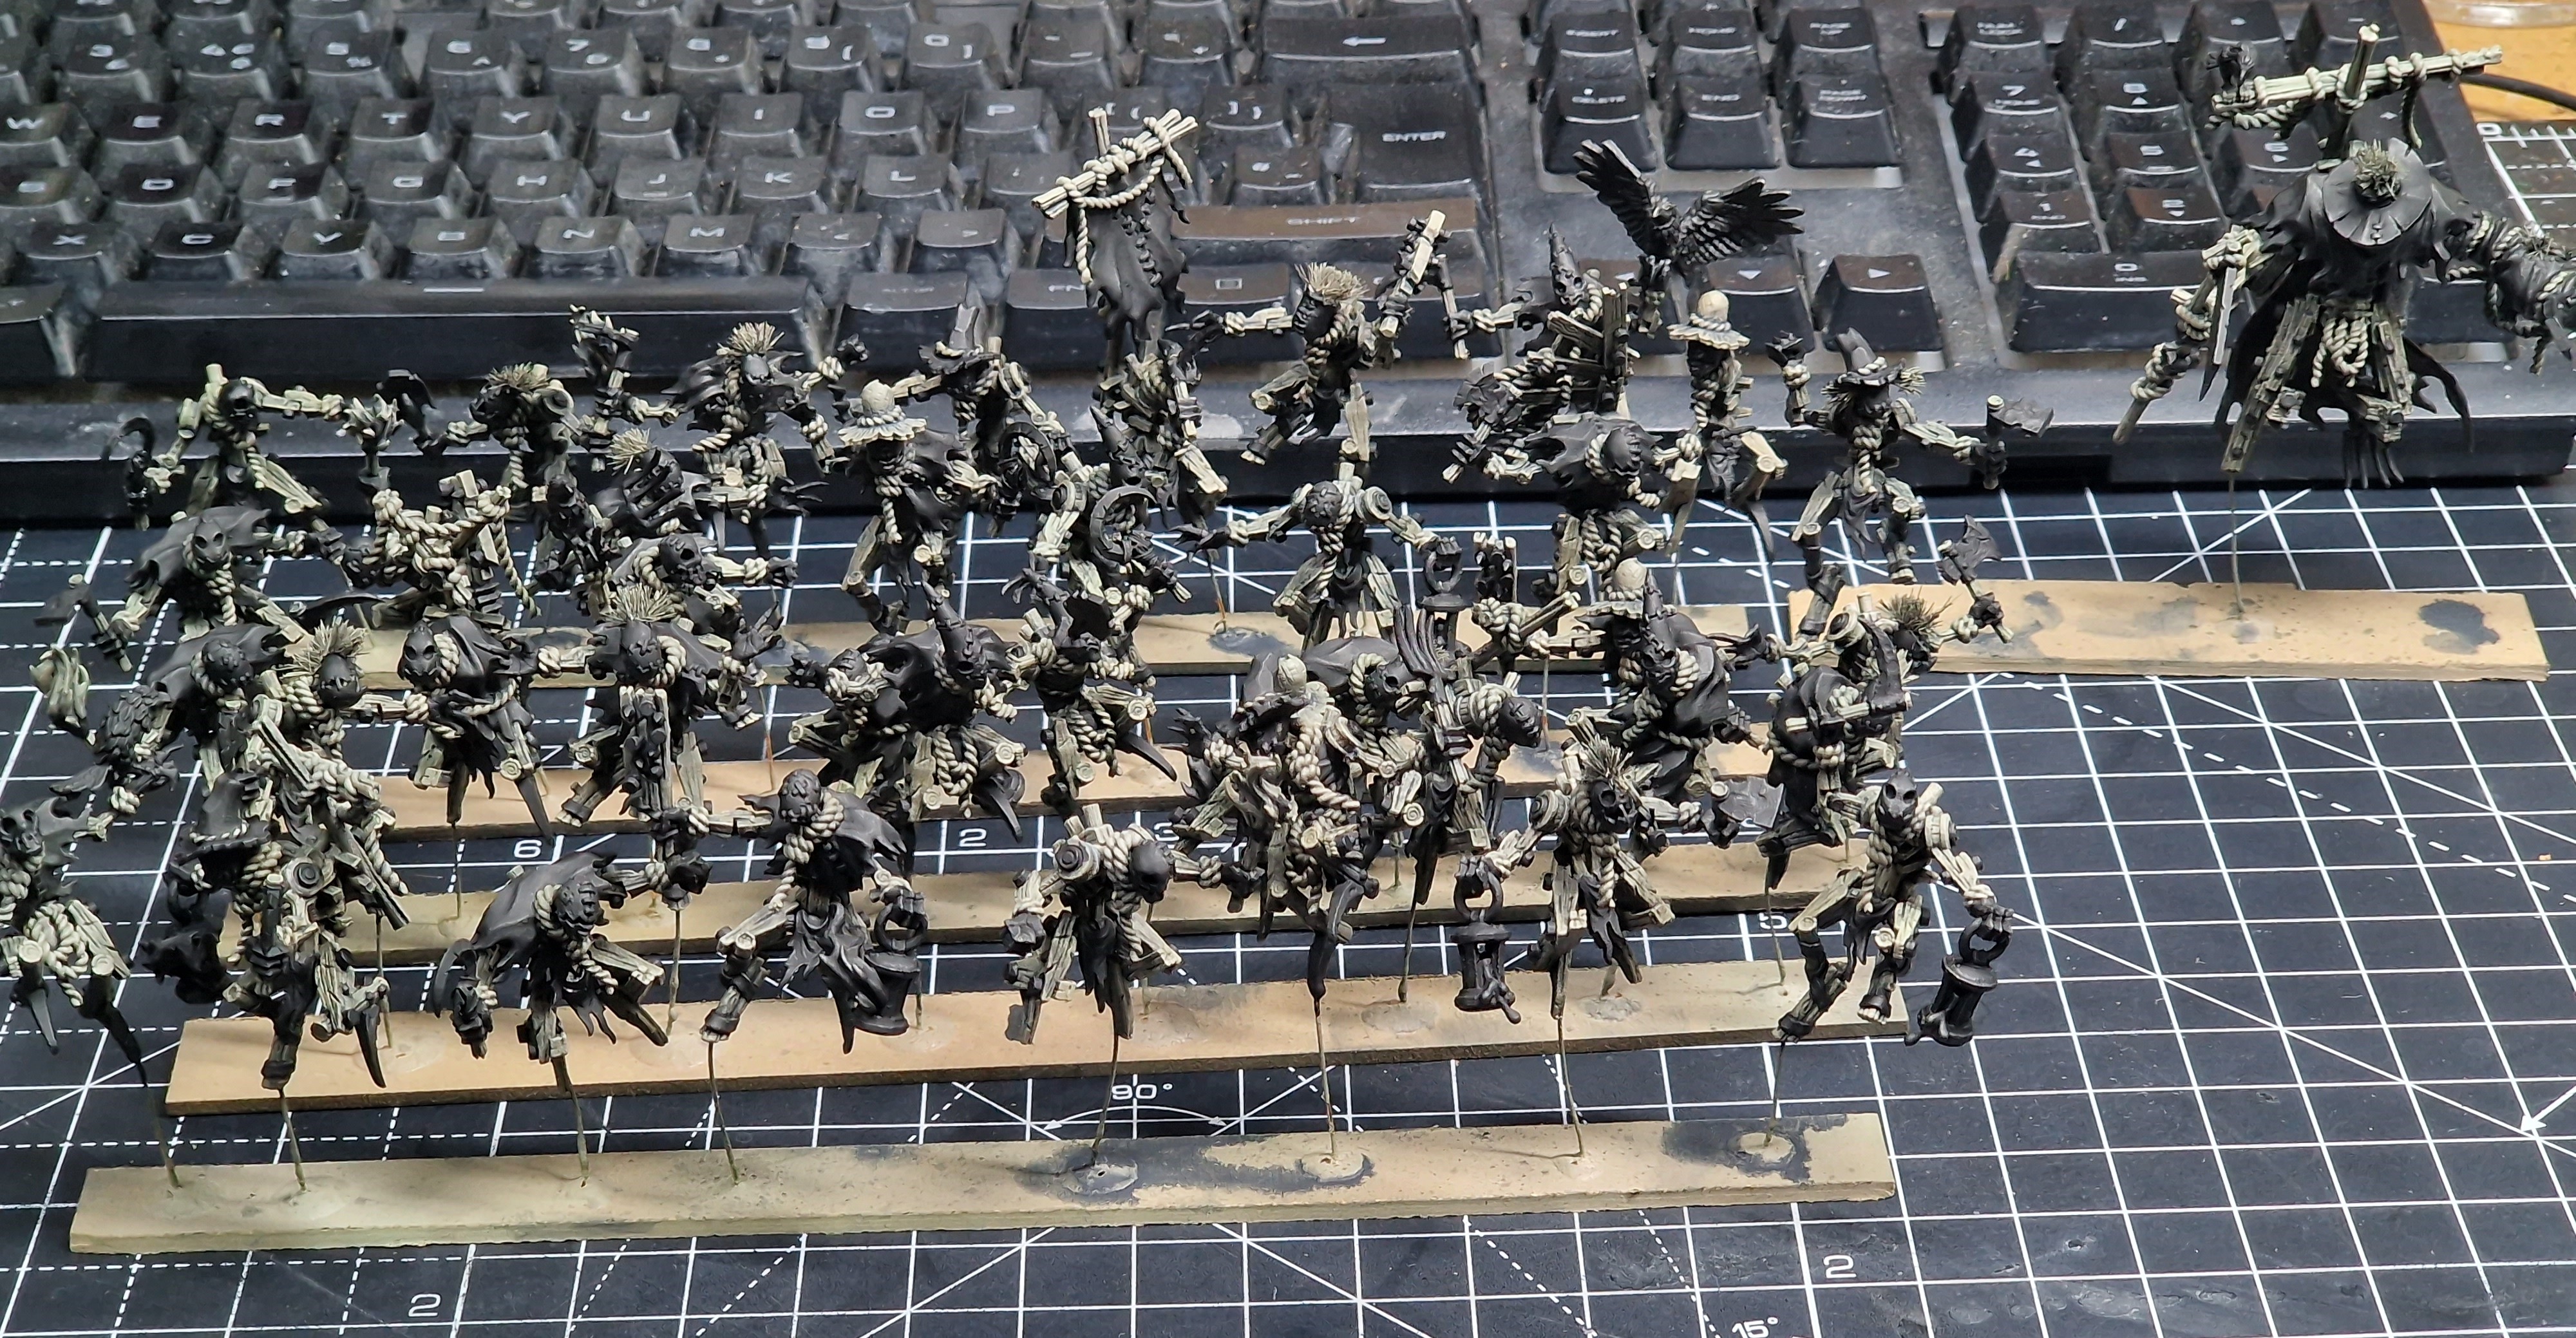
I will spare you further picture dumps form each stage as it was at this point, I lost the will to live.
I can point out the stages though as I think I will need another one of these units at least.
- I stippled the cloth in black red
- I then done a first stippled highlight of this mixed with red leather,
- I then done a second stippled highlight of red leather mixed with orange brown
- I done a third edge highlight of orange brown.
- I then touched up the wood
And properly lost the will to live again.
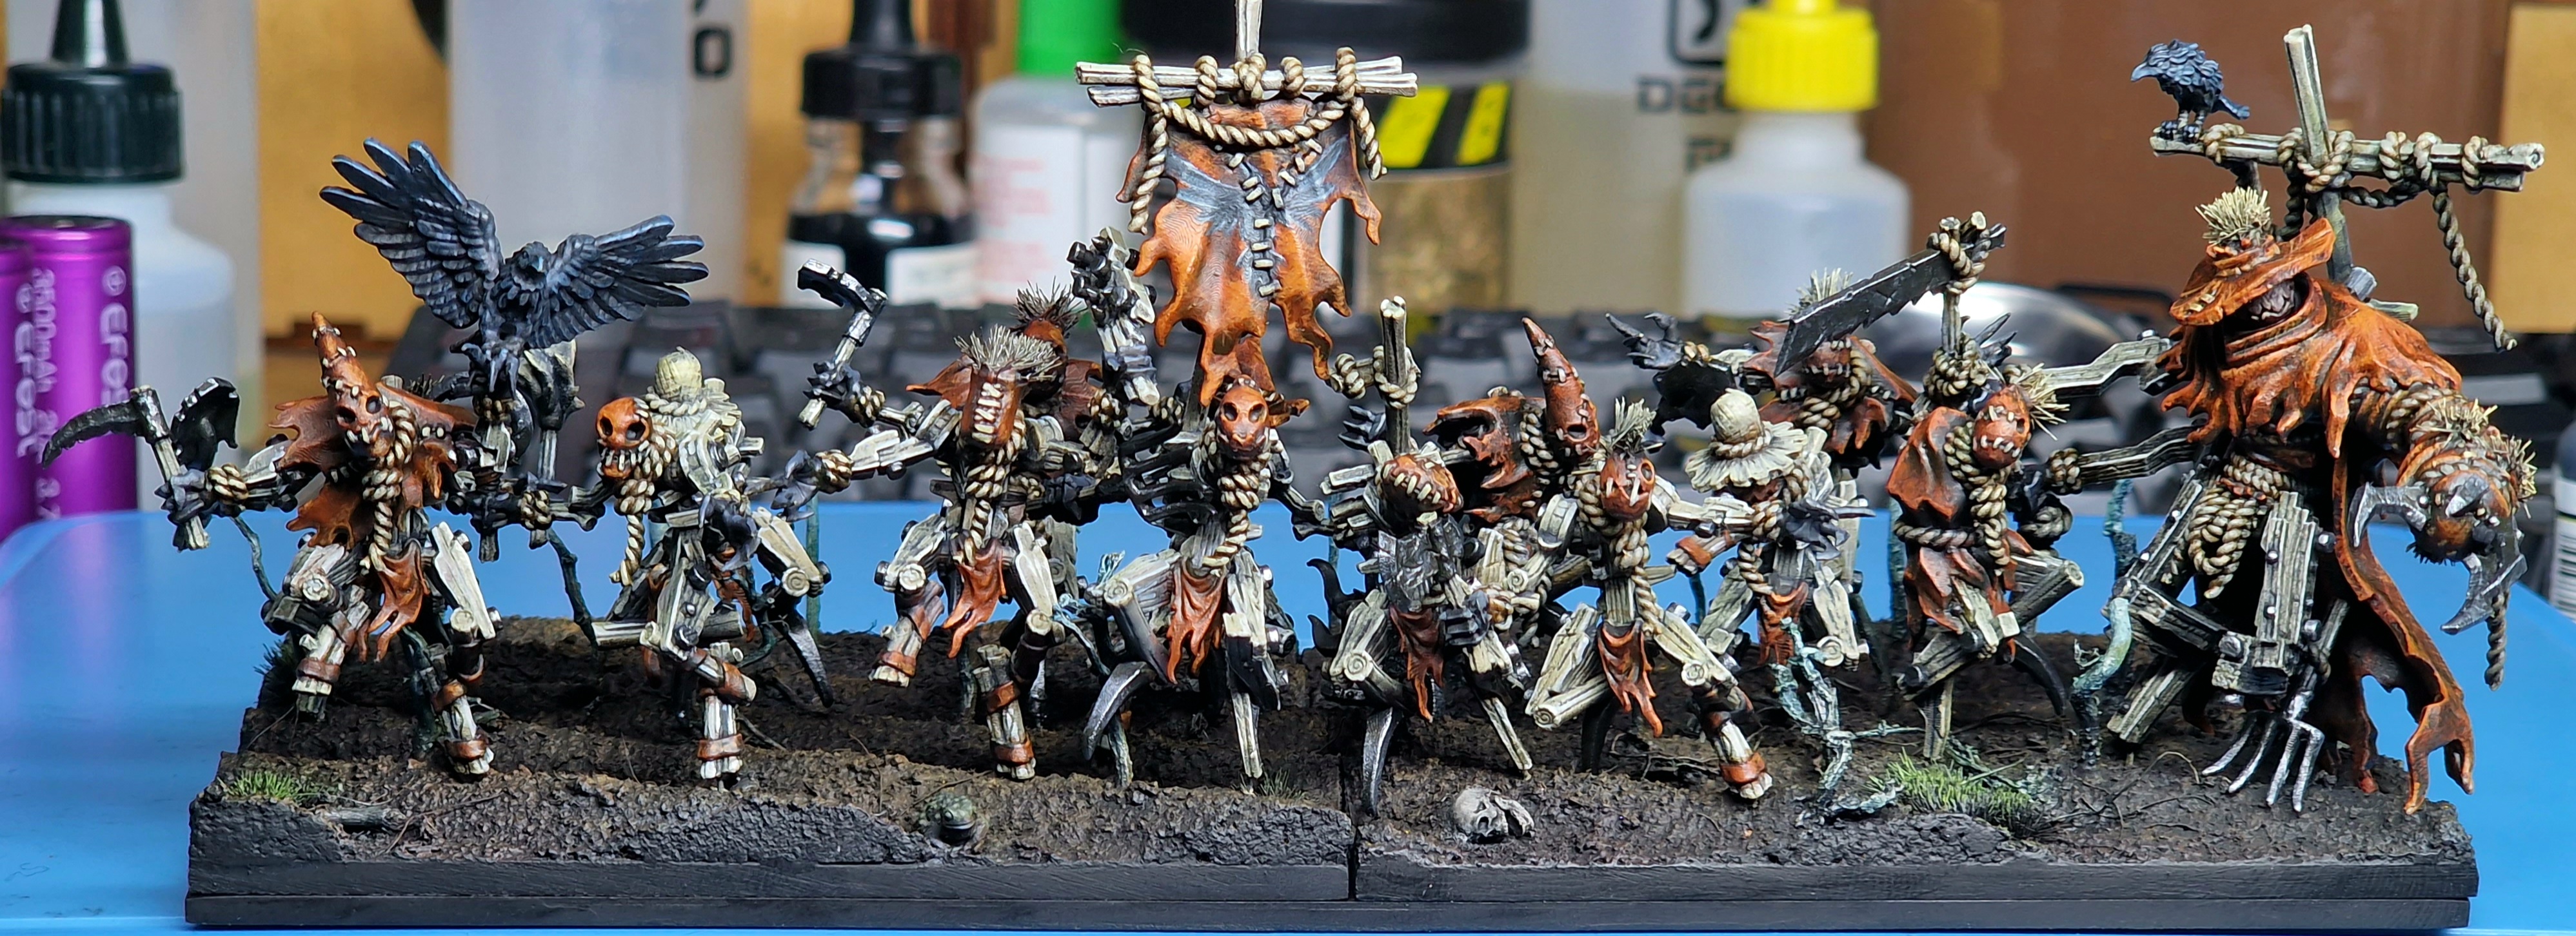
I then took one strip at a time and:
- edge highlighted all the wood in desk tan mixed with grey, brown.
- then picked out points on the wood with straight deck tan.
- base coated all the rope and each stich the wood colour and then washed with smoke paint.
- first highlight of beige and then adding in some yellow for the final highlight.
- Added more yellow off the pallet and done the straw hats and tufts.
- Stippled a black metallic paint on the meta-areas.
- Stippled a lighter mediatic paint on the metal,
- washed this with smoke paint and edge highlighted with the lighter metal. This was done for every nail head and rivet.
- Painted the birds with a blue black and added deck tan to highlight.
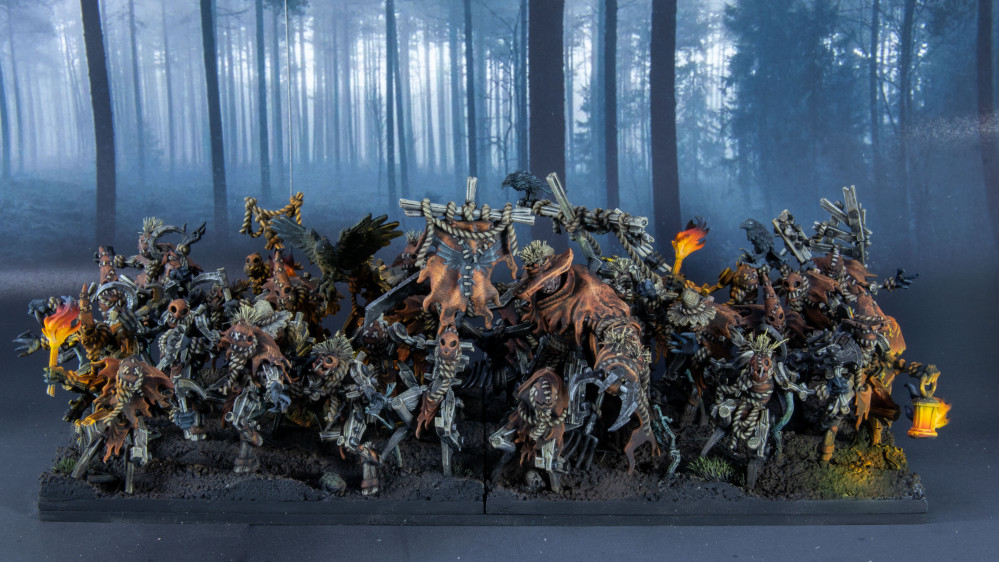
I then stopped here and done this for all 40 models. (Only ended up using 36 fml)
I did add some details like a raven freehand which seemed to fit as a banner. shame there is stitching right through it. I should have made this pop more but when I tried that it looked so out of place, I painted it darker again.
 Got everything to this stage.
 I needed to do some last highlights and a couple of details that I needed to do OSL on. The light would hit the models behind and in front of the models so there was no point doing that at this stage. I needed all the models to get done.
I stopped taking pictures at this point of my progress.
Again, I will outline what I done to get to the final pictures coming up in my last for a while post next. (More for me than you)
- I painted the candles with colours that were on the pallet and just needed white (which wasn’t on my pallet at the end for last highlights.
- I used the airbrush to white ink the flames
- Then a full coat of the lightest game air yellow all over.
- then a more orange yellow missing the root of the flame.
- then an actual orange fire for the flames.
- Used a darker orange for the top half of the flames
- used a red for the tips.
- Went back to the darker orange for the start of the OSL.
- Then went in with a brush for the highlights with yellow and white and orange putting it where it felt right.
- finished the tops of the flames with black airbrush then grey for the tips
- Final brush was sections of the base of the flames in white.
I then went done positioned the models where they were going to stay and finished the OSL on adjacent models the light would hit.
A final spot highlight with sand yellow mixed with orange grown and a few more deck tan highlights.
I also added OSL to the base missing out the middle which would be in shadow due to the lantern but missing the torches off this step completely due to them being held higher.
And that’s how to do this in 238234232 easy steps. Stay tuned for the end results. (Which come to think of it, you seen on the way in…


Leave a Reply