


The Final Push - Lawnor approaches 100% painted


14 MTG: Mantic's Terrain Crate Walls via Gerry Can, & Starting a Beholder
Models remaining:
Batch: 0, Normal: 7, Luxury: 7, Modular: 0, Bits Box: 3, Terrain sets: 9, To Ship: 80+
While working on the previous project I was also able to prime and base coat the main stone on these walls. Across the last week I found time to paint the wood to completion, then base colour the ground and the slate pointy bits on the top so everything was thoroughly dry before Friday night. The goal was to try out the method Gerry uses on his Fogou (Fogou!) buildings, as shown in this Gerry Can. I don’t have all the same paints and pigments he does, so I improvised with that I had and what I could get cheaply and easily. If it didn’t work out, I could always rebase, drybrush, and wash with Nuln Oil and all would be well.
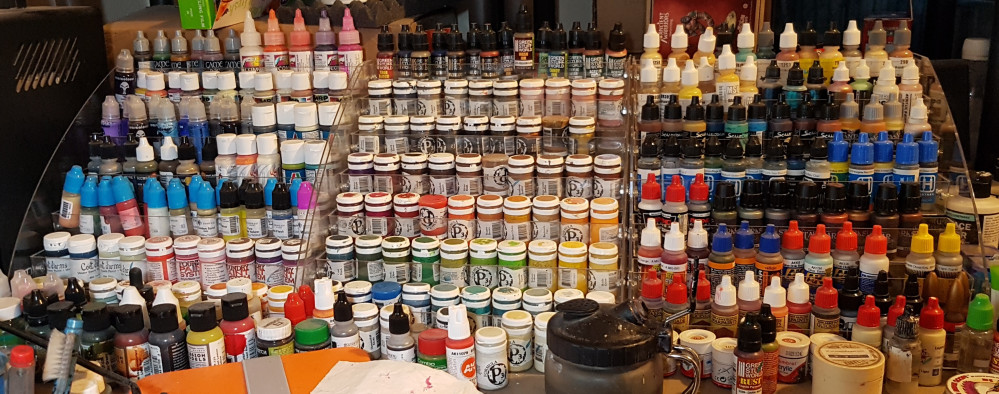
Here’s what paints I used:
Main Basecoat – VMC London Grey
Slate Basecoat – VMC Bassalt Grey
Load large drybrush with following pigments one at a time and tap it when over stone to drop off lots of powder. Can dab/rub it in patches to make it heavier. Don’t do much this way.
Vallejo pigment Brown iron oxide
Wilder Gunpowder Line Old Grease
Tescos Go! Create green chalk scraped in to a powder
Mix up AP Strong Tone Wash with enough water to make it flow better. Apply everywhere with large brush by dabbing. “Blob it on”.
Mix up:
White Chalk + Isopropanol
Vallejo Green Earth + Isopropanol (Verde )
Yellow Chalk + Broken Toad Grimy Dirt + Isopropanol + white
and flick on with toothbrush while Strong Tone is still very wet, applied top down from above as moss favours the sun.
There are some definite changes from the video here, and not everything worked. Firstly, I used a makeup brush to apply the Strong Tone, and it didn’t behave the same. I often thought there wasn’t enough paint, or it wasn’t going where I needed it and applied more, but ended up with the piece flooded. The Toothbrush stage didn’t seem to work for me. My solutions seemed to have more colour to them than Gerry’s did (It’s hard to tell, given Gerry’s pots were coloured, but they looked largely clear), but I’m not noticing anything on my m models. Perhaps my IPA isn’t right? It is 2nd hand reclaimed lab IPA “Borrowed” to make car screen wash, so why knows if it is up to snuff? I sprayed bits of each colour on the the side of the cardboard box i was using to contain the mess, and the white did leave marks, but none of the other colours did. This means using chalk wasn’t the issue.
No matter how messy Gerry made out this stage is, it was worse. By the time I thought about putting on a glove it was too late and I just carried on. My fingers had brown marks on for days. It also looked UGLY, and nothing like it should. Strong Tone is very brown, unlike the Dark Tone’s blackness, and it really didn’t look right over the grey stone. I went to bed convinced I was going to have to start again with primer.
The next morning, everything was dry enough to work with and actually looked a lot better. The wash had pooled in a crevice along the bottom of each wall, and was still wet enough to stain my fingers, but I cold carry on painting with minimal care. I did no drybrushing, picked out the green plants, and applied a pigment mix over the muddy parts. By evening it was dry enough to varnish (Lets call it 22ish hours for the heavy handed but diluted Strong Tone to dry fully).
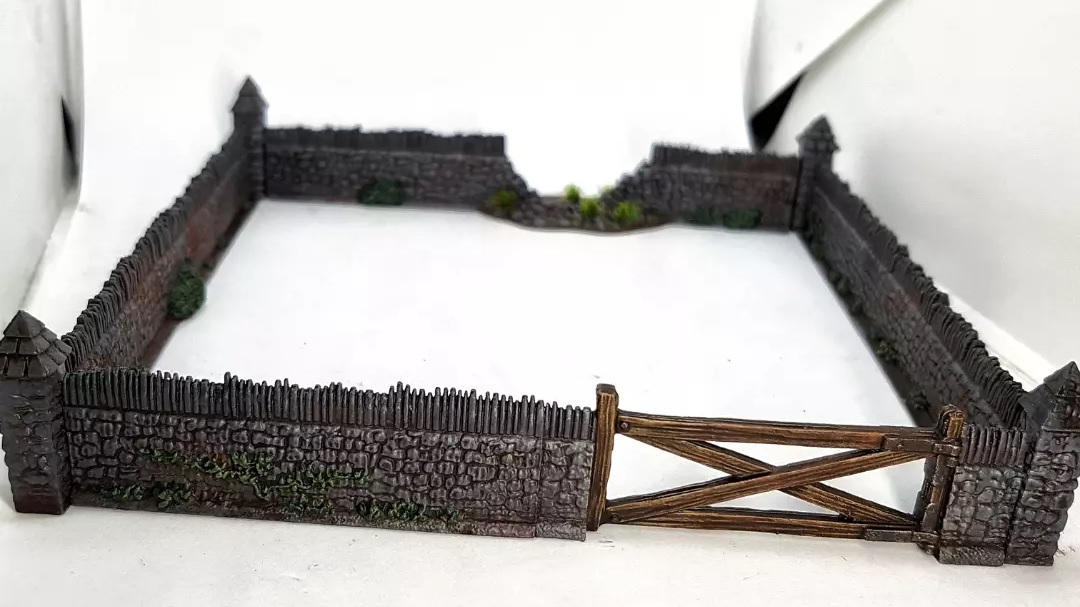 Mantic's Terrain Crate Walls
Considering how fugly these looked when the wash was wet, I’m really quite happy with how they turned out. It’s not what I was heading for, but I wasn’t going to get that with these colours anyway. I don’t know why the toothbrush stage didn’t work, even on the side of a box. Next time, I’d use a paint brush to apply the wash so I can apply less in a more controlled and targeted manner. perhaps that’ll help the spray to settle? I might also experiment with the toothbrush mix in advance and see if I can get some splatter on to some card before committing to the model.
I’d definitely do this again. Maybe Gerry wants to chip in with some advice or corrections to what I did? I’m curious if anyone has tried this on MDF terrain. I’m assuming it doesn’t work the same.
I have 3 of their horse and carts to paint up too. They are really bent and deformed and I hear they don’t straighten up too well. I’m hoping that pinning them to a base will help keep the wheels round. I’d be curious to hear what materials people have found around the house to make such bases before. I have the back panel from an old wardrobe saved, but I fear it’s not the best material. The edges seem likely to wear down over time.
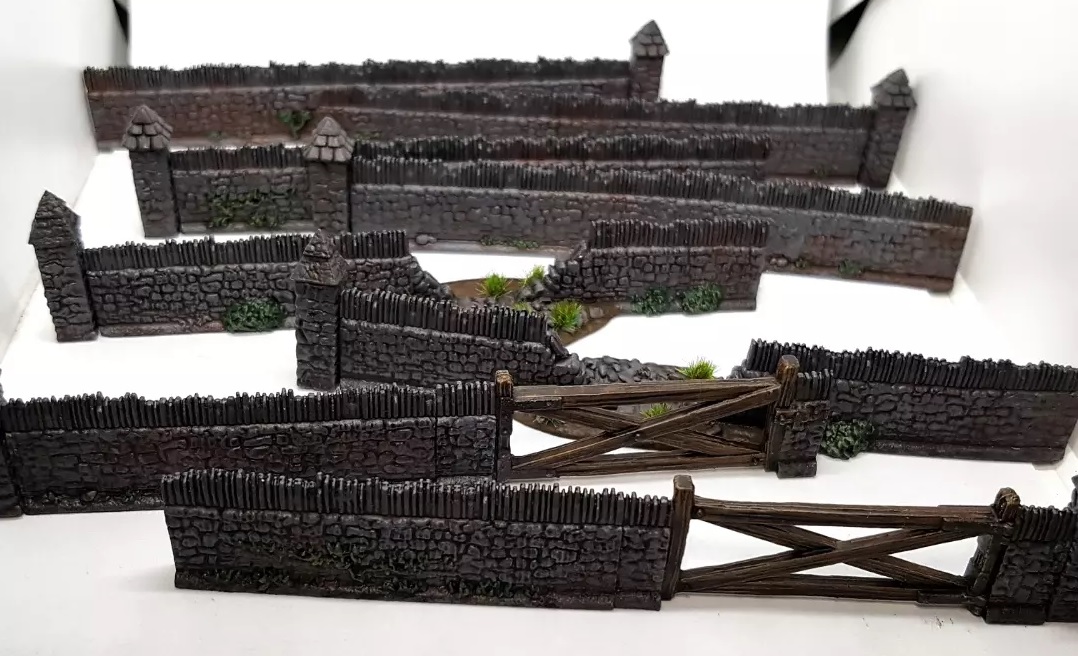 Mantic's Terrain Crate Walls
Hmm. Those pics really are not showing the full range of colours on these walls. I guess the angle isn’t the best? I’ll have to take a new picture tonight and update this post later so you can see the rust tones etc. Check back tomorrow, folks.
 Updated pic from next day showing the details better. Might be a little too much light now?
Still no sign of an email saying my Kickstarters are being dispatched to me, although I’m mostly sure at least one of them is in the country right now. No more excuses to avoid starting a bigger, intimidating project: Artisan Guild’s Xantaras The Eye Tyrant. He’s been primed and staring (hah!) at me from my desk for months. Eye’ve been excited to get to him, but also a little scared. Eye’ve definitely been putting him off. Eye know eye want to go purple on this guy, but eye’ve never really been sure which purple. Eye wanted to avoid going with my usual strong purples as that feels too cartoony. Eye (that’s the last, I swear) pulled out all 25 purples I own and stared at them for a while, and eventually decided to use the Vallejo Nocturna Malefic Flesh box‘s Purple Flesh scheme as my starting point, but use their shadow colour as my mid tone.
I had the airbrush out already so I got to work. I built up a good base colour, and then used the airbrush to shade down, spraying from below. The next morning I built up some highlights with careful, gentle, targeted spraying from above.
Here’s the paint I’ve used so far. This is not the extent of my shading and highlighting. There will be brushwork to come later.
Base: VMC 74.011 Purple Shadow
Shade 1: Purple Shadow mixed with Reaper 09023 Imperial Purple 1:5
Shade 2: Almost pure Imperial Purple
High 1: Purple Shadow mixed 50/50 with VMC 74.012 Malefic Flesh
High 2: As High 1, but with more Malefic Flesh
I have since started reclaiming the underbelly with VMC Deck Tan. This is a delicate and time consuming job. I really should not have glued the eye stalks on.
I also got a couple of games of Gloomhaven JoTl in while waiting for things to dry over the weekend. I’m now 10 games in, and have 2 level 4 character. Maybe next weekend I can hit level 5 and unlock those new minis I just painted?
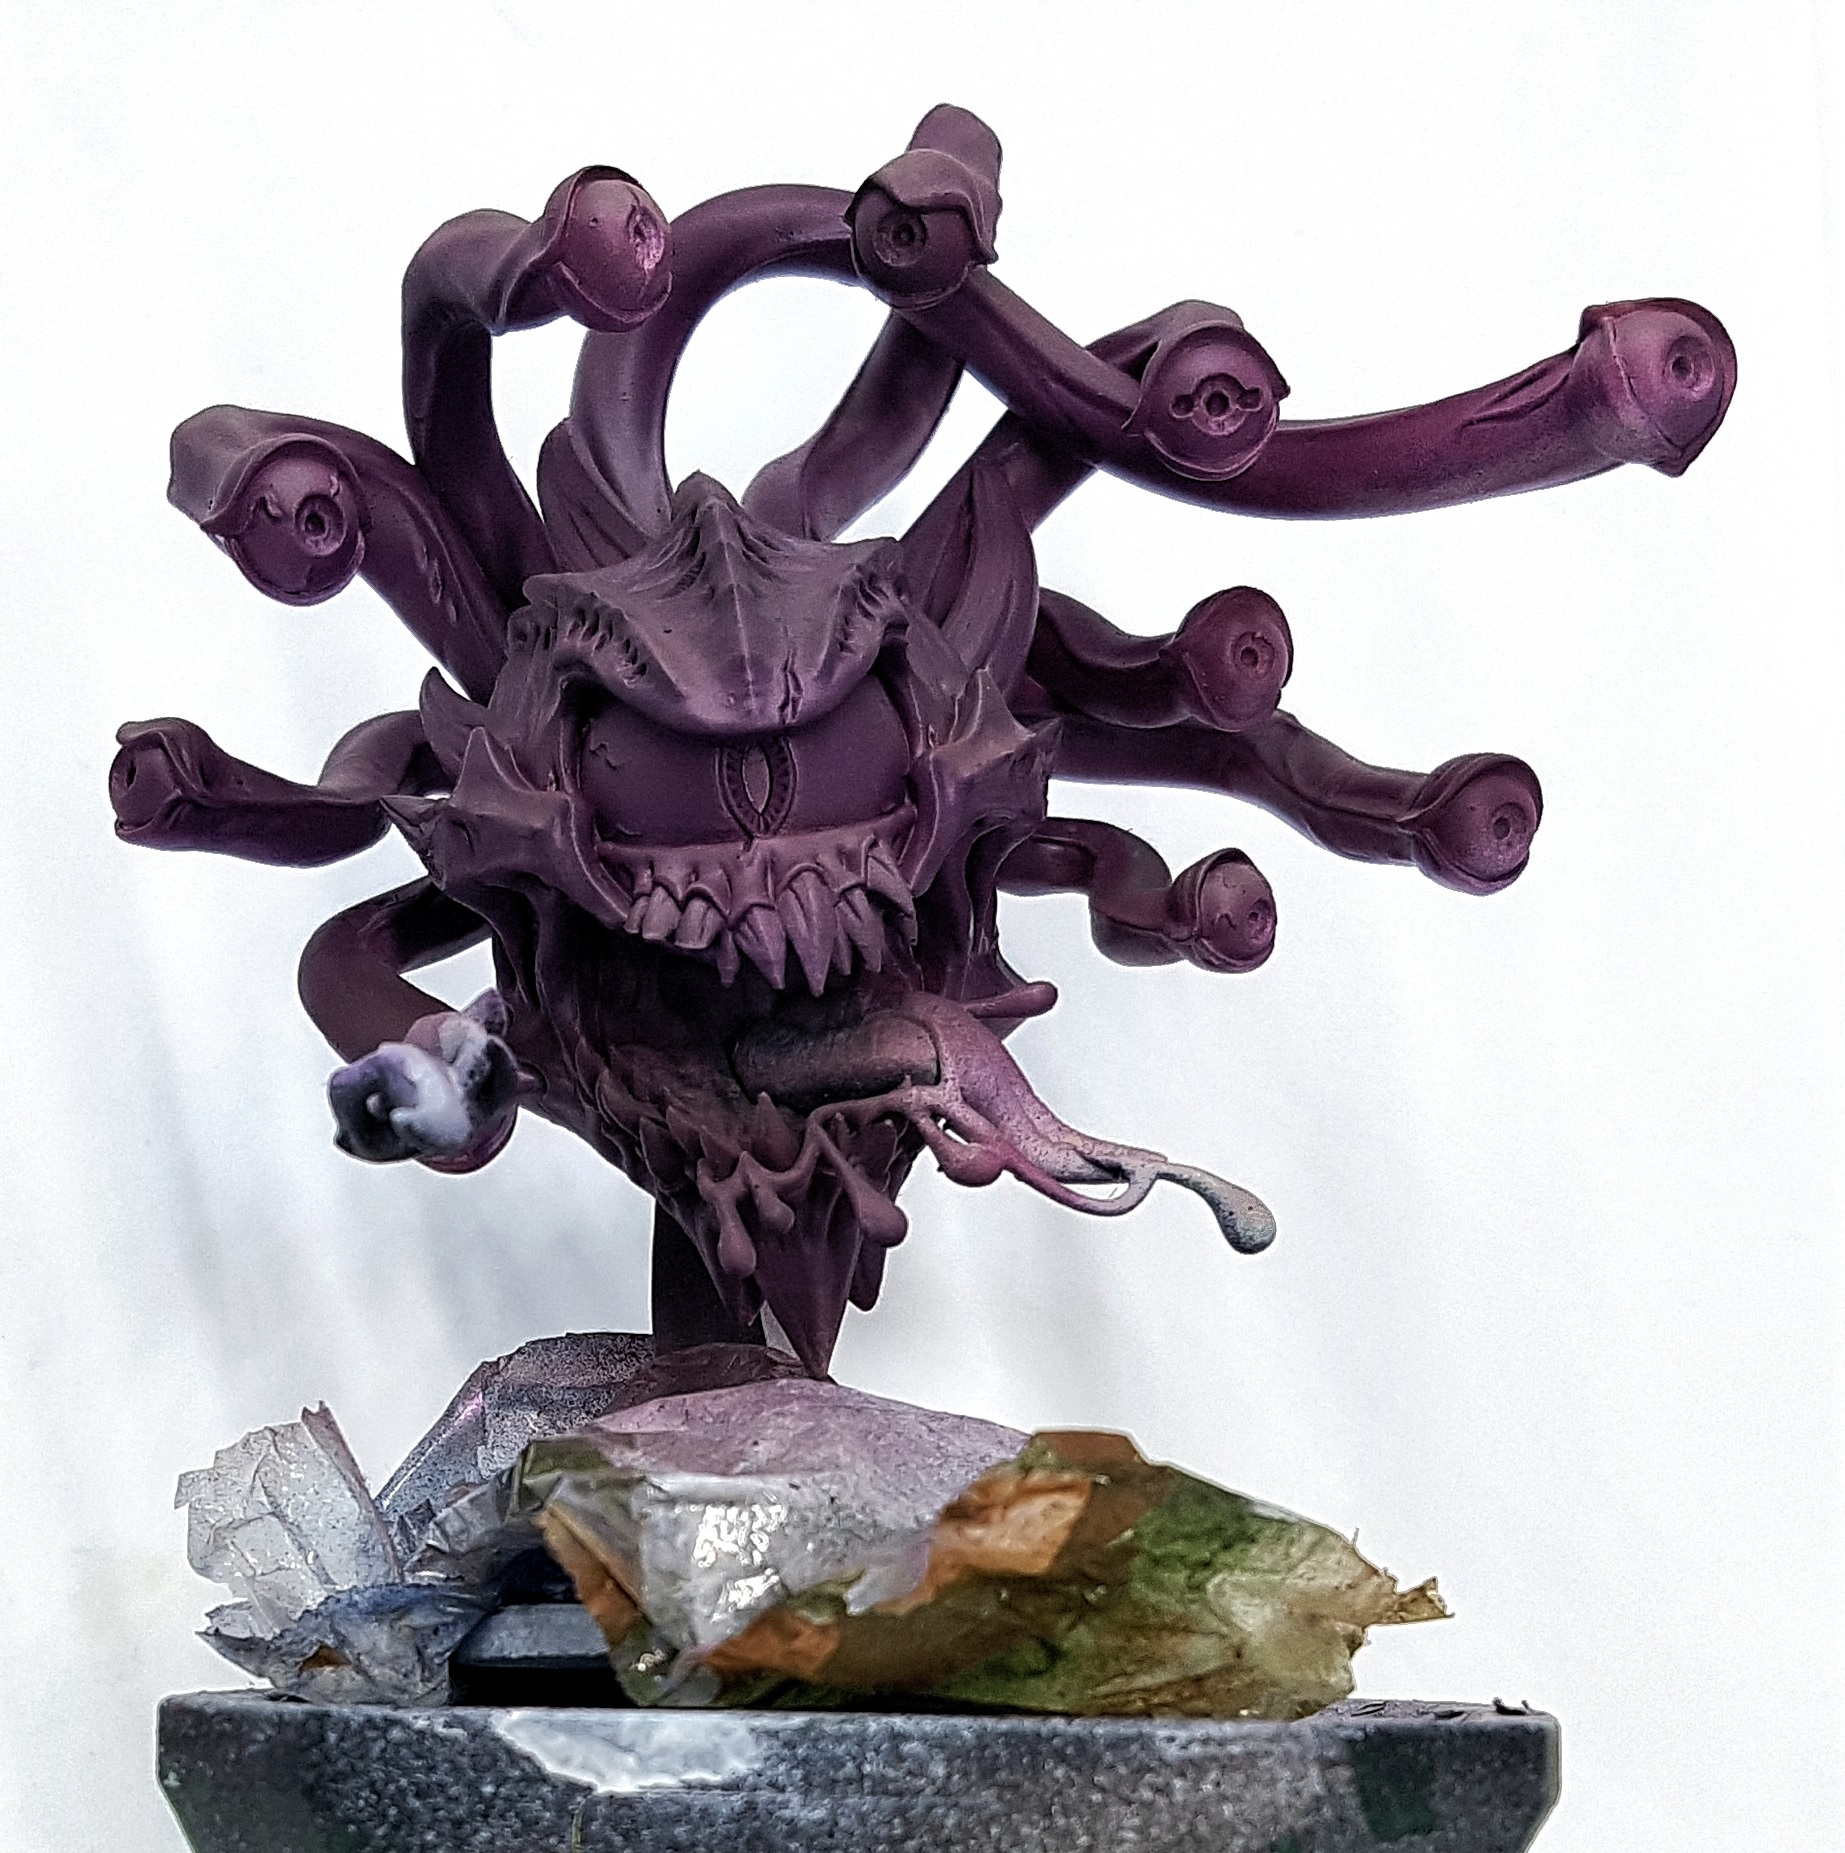 Artisan Guild's Xantaras The Eye Tyrant
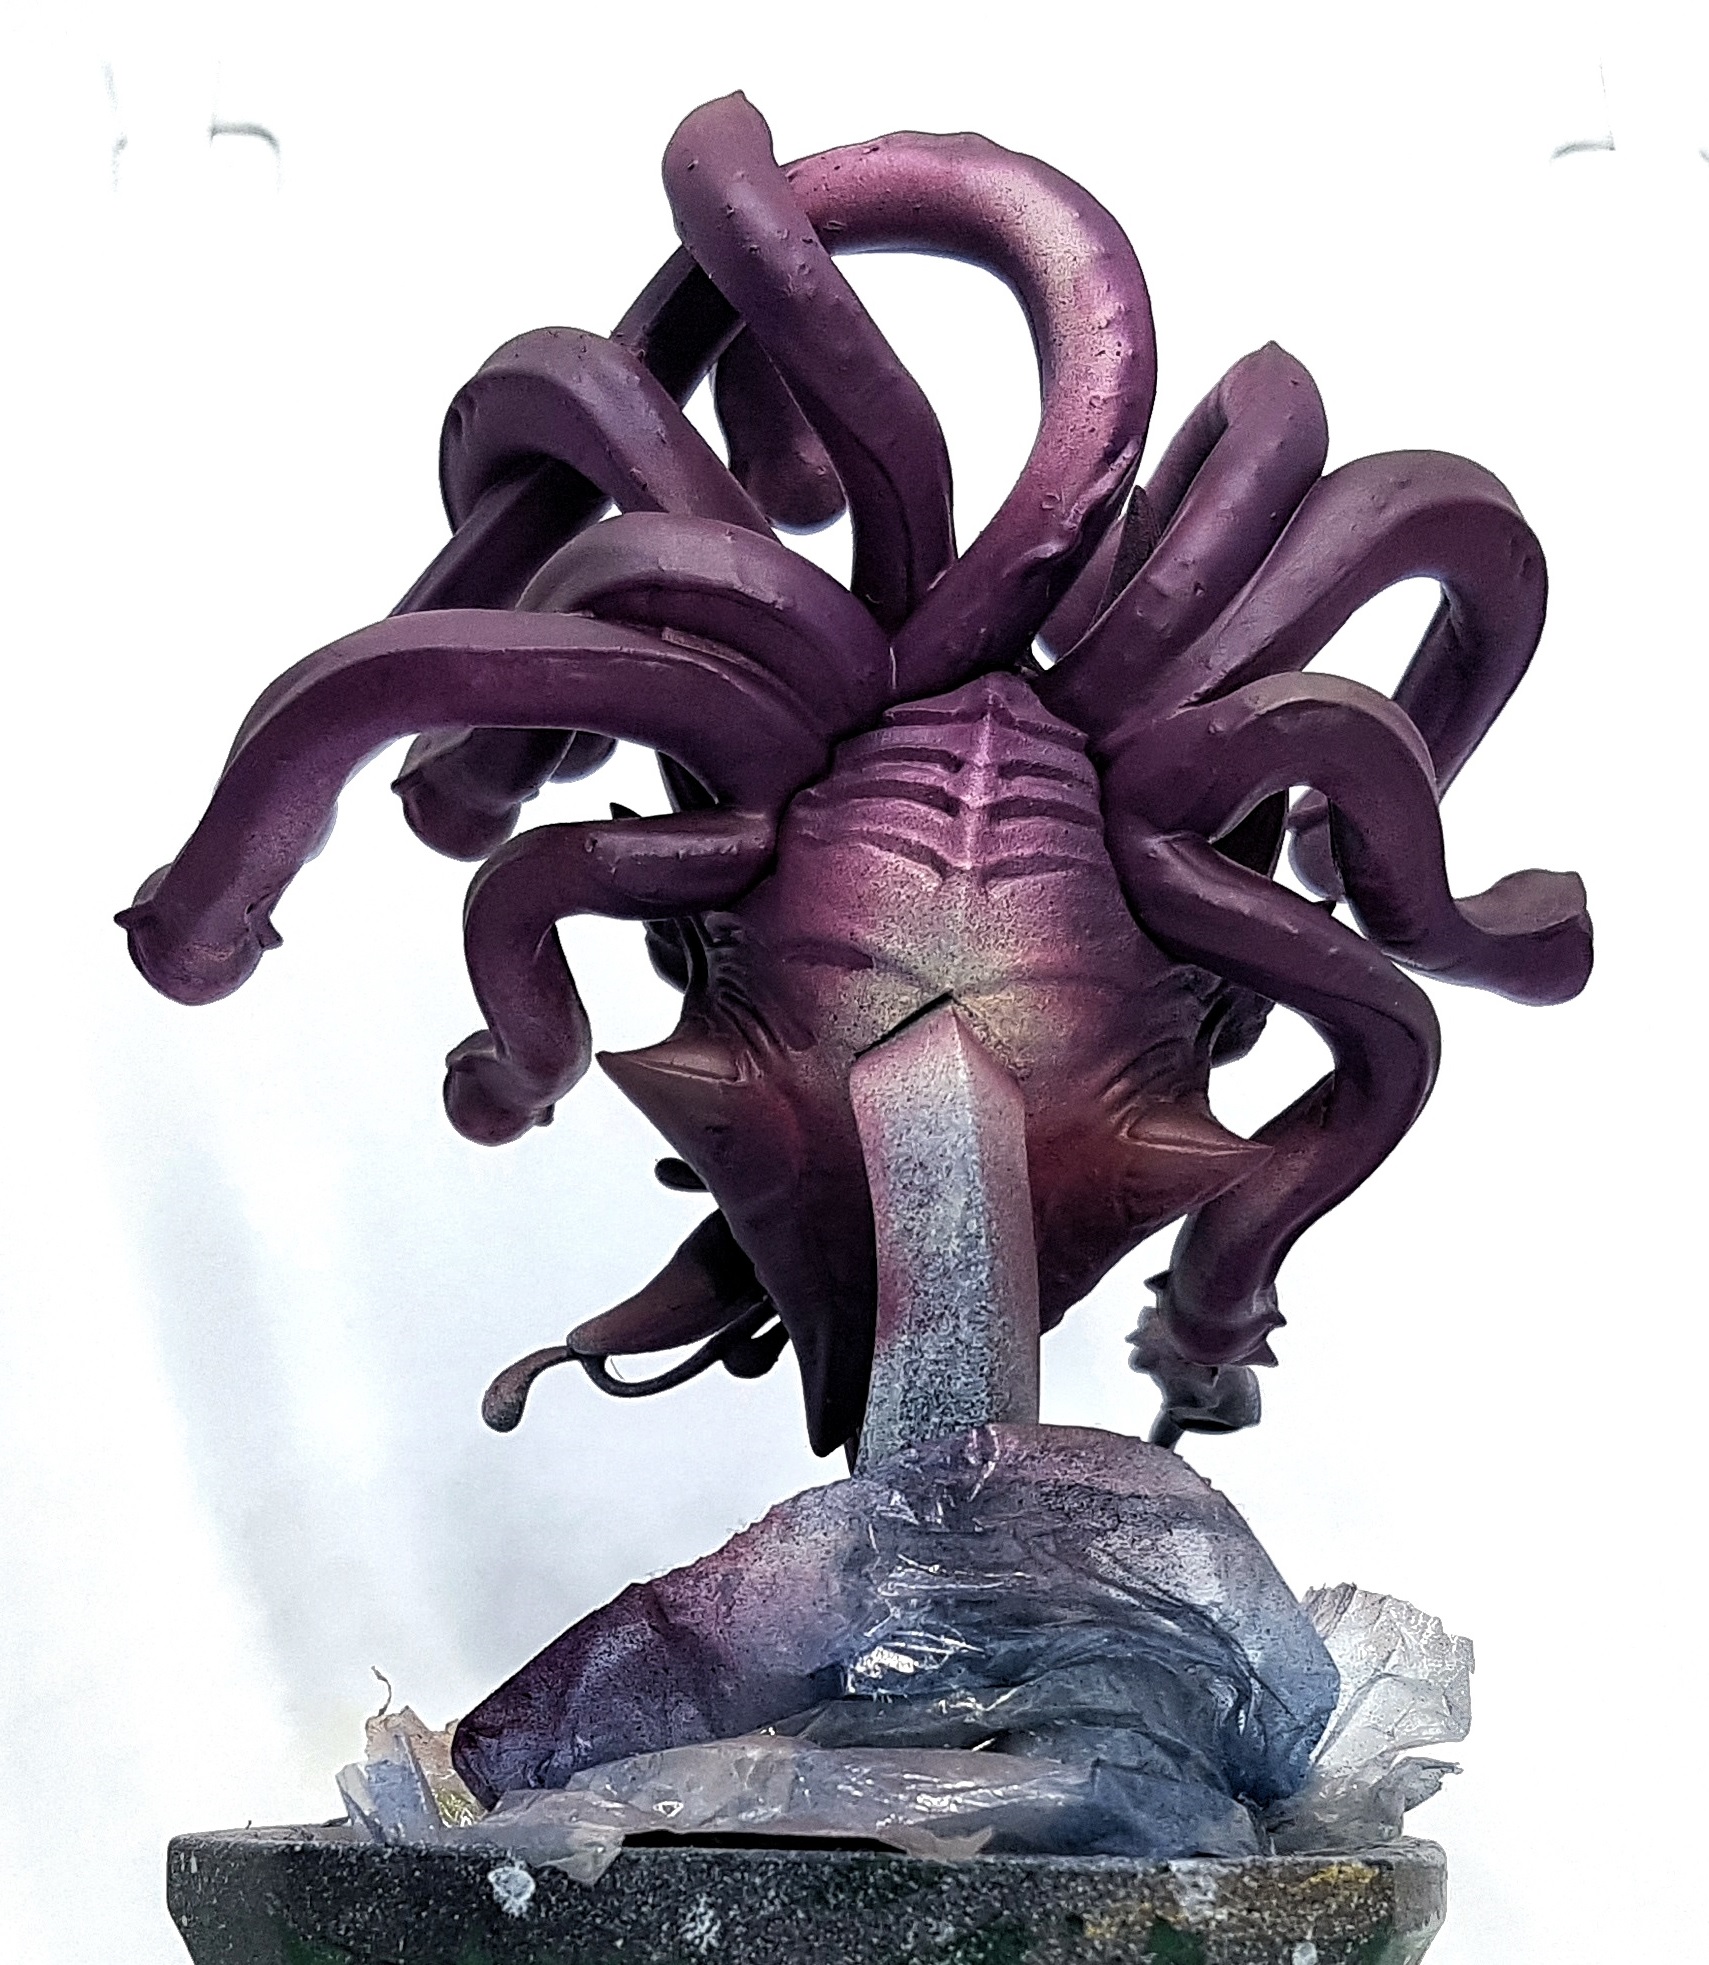 Artisan Guild's Xantaras The Eye Tyrant


Leave a Reply