Redvers and Son Get Into Bushido
Battle Report No.6
We played this game before Christmas but it has taken me this long to summon up the courage to tackle the project system to upload it! This was a quick game, so I’ll keep the report brief (at least for me!) but hopefully this will keep the usual suspects who like these battle reports happy.
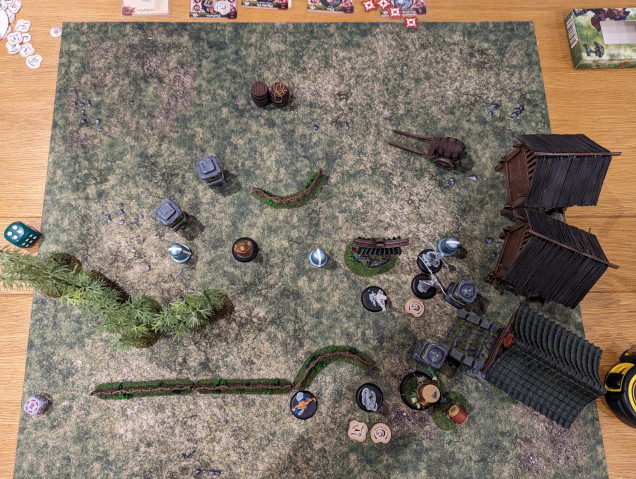
Firstly, the mission. Having played a few games now, I definitely see that the game is designed for scenario play. Some factions and builds are not meant for a straight up fight and can win a scenario without killing a single enemy model. With this in mind, we opted for the simple 3 idol scenario with a game length of 6 turns. Scoring takes place at the end of turn 4, turn 5 and turn 6 with the side with the most scenario points gaining 1VP at the end of each of the listed turns. You gain one scenario point for each ‘friendly’ idol. Idols start the game neutral and can be turned friendly if a model in BtB spends an activation to interact with it. The idols are deployed along the centre line at 6” intervals.
My son opted for his Temple of RoKan and wanted to use his new models he picked up early December. His force was,
Master Po – This is a master monk who despite looking like a fat bloke who like a cuddle, is a combat monster. Hard to hit but he hits back twice as hard
The Grey Pilgrim – A ronin who is handy in combat but comes with a very useful lightening bolt ranged attack that can be buffed with Ki to make a second attack within 3” of the first target
Riku – a monk who has an affinity with water and includes a Tsunami Ki ability that effectively washes everyone backward across the board – useful for moving enemy models off of the objectives
Tsutsumi – a monk who has a sonic blast ranged attack that leaves targets prone (and therefore vulnerable to combat monks!)
He also took a Gorinto terrain piece to generate an extra Ki point per turn
I ditched my Cult of Yurei and opted for the Kiyozumi family that we got in the original start set that we picked up. Just for something a bit different. This allowed be to play the Kiyozumi Theme list giving me the bonus of turning one objective friendly from the start (I picked the middle objective) and during one turn, I get to win all tie breaks. Useful! In my list was,
Kiyozumi Kicho – Handy in combat and has some sneaky Ki feats
Kenmeina – an Ashigaru who can handle herself in combat and has some durability with her armour
Kiyozumi Sadaka – a Samurai and I’ve equipped with a card providing some defence against opposing Ki attacks
Kiyozumi Haiboku – a Samurai with a bow for handy long ranged attacks
Kiyozumi Hinadori – a healer who I’ve also given a golden sword in case she gets into combat
Turn 1
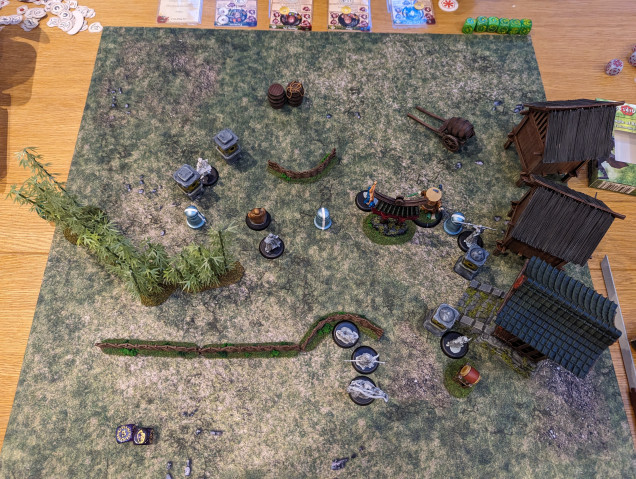
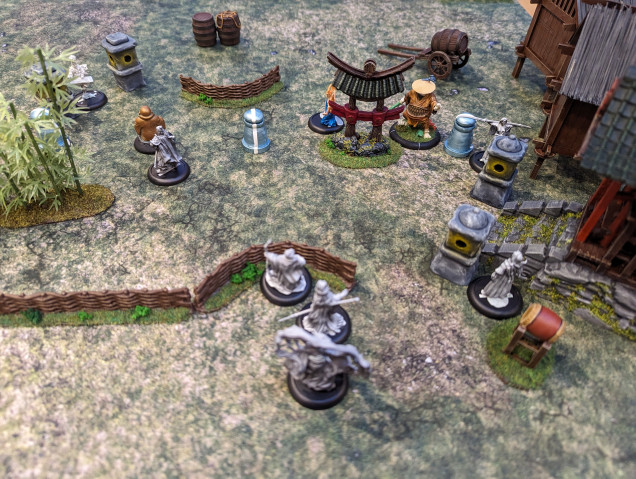
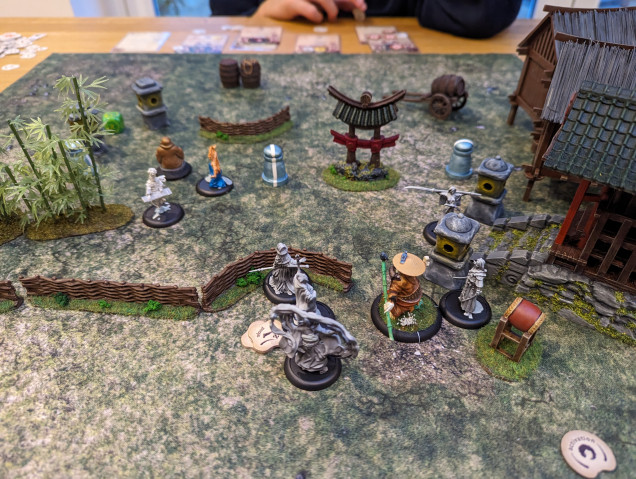
I moved my models up behind the fence to get a bit of protection and use some of my ranged attacks to soften the enemy up. My son was aggressive and ran forward to the idols, really wanting to get into position to get into combat. I was able to get Sadaka to use her ranged Ki ability to drain the Grey Pilgrim of some Ki which will limit here ability to launch lightening bolts
Turn 2
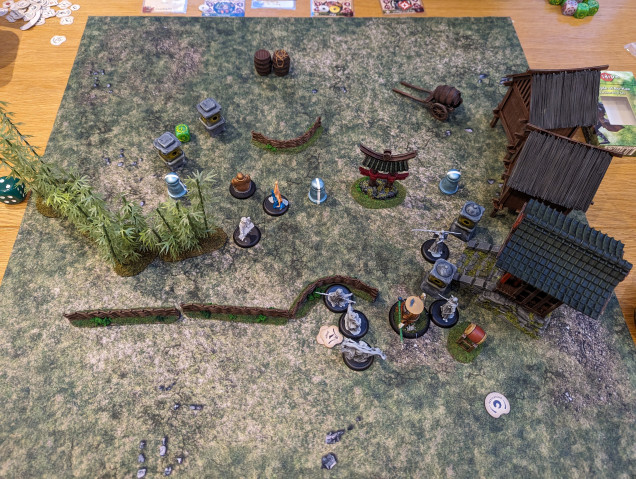
My son kicked off turn two by activating the Grey Pilgrim. The pilgrim used her Ki feat of Rajins Rage which allows any successful lightening bolt hit to leap to any model within 3” for a second attack. She proceeded to zap Kicho for a point of damage and then managed another point against Sadaka. I got off lightly on that attack as it could have been a lot worse!
Haiboku used his Dai Kyu long bow against the Grey Pilgrim as retribution for her lightening attack. This went very well, and he was able to skewer her for 4 points of damage. I was feeling pleased with this….
Riku, the water monk, charged into Kenmeira. During the rolling of the melee dice pool, I managed to roll all 1s. My son, who has an uncanny ability to roll good dice, rolled very highly resulting in a massive success level in attack. He managed 8 damage, which is a huge amount in one turn, especially given that Kenmeira has armour that reduces the damage roll. Kenmeira is not able to withstand such an attack, and dies.
Master Po then gets in on the action and attacks Sadaka. Fortunately, Haiboku is close by and activates his Bodyguard ability, switching places with Sadaka. Having fought Po before and knowing how good he is in combat, I went full defensive and used Haiboku’s push defence ability. This works, as Po’s attacks fail to get through and Haiboku can then push Po back 1” out of BtB and combat. A lucky escape!
Looking to overload Po, I get Kicho to attack him and she is able to land 1 damage, but this is annoyingly cancelled by Po’s tough ability, so the combat ends without damage.
My son, looking to take out Kicho, uses The Grey Pilgrim’s Lightening Bolt attack against Kicho. But, as she is in BtB with Po, he has to roll off to see if he hits Po. Amusingly for me, he does, and Po gets zapped for 1 damage. I laughed, my son didn’t.
With Po exhausted (out of activations), I got Kicho to press the attack. Being exhausted automatically removes a dice from your melee pool, so this makes an attack on the mighty Po slightly easier. You allocate your melee dice pool secretly and also select any available special attacks/defences secretly as well. My son put all of his dice into defence and opted for the Counter Strike Defence special defence. In this case, if Po’s defence dice pool beats Kicho’s attack pool by 2 or greater, then Po gets to make a damage roll. And this is exactly what happens and Kicho takes a point of damage.
Turn 3
My son gets the initiative and wastes no time in activating Po who is still locked in combat against Kicho. Kicho is grossly out matched and despite me putting all of my dice into defence, Po used his Crushing Wave Strike Ki feat (which means I must remove my highest defence dice), it wasn’t enough. Po was able to deliver a blow that killed Kicho.
With two models removed from my faction and I’m nowhere near any of the objectives, I’m in deep trouble. I try to strike back with Haiboku’s long bow but manage to miss everything. Riku then uses his tsunami Ki feat, which requires all enemy models to take tests to avoid being pushed backward 8” (or up against any immovable terrain). I fail most of the tests and my warband is now scattered and further away from the objectives.
The Grey Pilgrim is now able to get into combat with Sadaka and does so. Sadaka does her best but takes 2 wounds. My attacks are just not getting through and causing damage.
Po continues his rampage and moves into combat with Haiboku. Haiboku rolls a lot of defence dice but is not enough to avoid taking another point of damage.
Finally Tsutsumi gets into the action and attacks Hinadori in the rear which gives him a lot of bonus dice to his attack. It’s too much for Hinadori who takes a massive 8 damage, which would be enough to kill off most of the models in the game and Hinadori is no exception.
Turn 4
This is a scoring turn (at the end) and despite losing over half of my warband, I’m actually still in the lead! But in reality, it is all over quickly as the Grey Pilgrim quickly despatches Sadaka and Po takes out Haiboku. Overall, it’s a very one sided game and my warband is completely crushed.
Conclusion
My son was very aggressive and Master Po is certainly worth his points value, providing a lot of consistent melee output. I was overwhelmed from the start and never got into the fight.
Interestingly, had we been playing a tournament game, tabling your opponent doesn’t automatically give you a win. The game automatically stops when an opponent is completely defeated and as this happened in during turn 4, there was never a scoring event and the game would therefore have finished in a draw. Had I survived to the 5th turn and still had the one objective scoring for me, I would have taken a victory point at the end of the 4th turn and then won the game. There will be many out there that would disagree with this, as tabling your opponent surely means that you win, but this does create an interesting dynamic to the game. Even in list building, you need to think about which of your models will handle the scenario objectives and which will be providing another role.


![How To Paint Moonstone’s Nanny | Goblin King Games [7 Days Early Access]](https://images.beastsofwar.com/2024/12/3CU-Gobin-King-Games-Moonstone-Shades-Nanny-coverimage-225-127.jpg)







Leave a Reply