
Badgering a Normie
Am I even doing hobby if I don't post in on OTT?
I’ve been a bit quiet on here the last couple of weeks so let’s catch up on my hobby shall we?
A few weeks ago I strained a ligament in my knee so we pushed the game… unfortunately we’ve still not managed to find a day that suits both of us yet. Living in Edinburgh during the Festival is a tricky time for generic friendly hang outs but I’ve been using the time to add to my terrain.
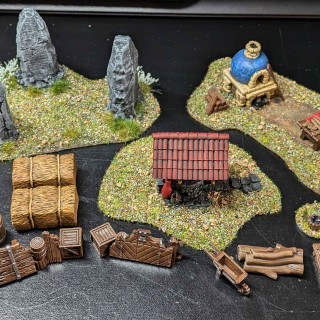
In the stash I had some tree kits from Woodland Scenics and a lot of Mantic Terrain Crate plastic bits that have never been out of their plastic bag prisons. I grabbed some fences, hedges, boxes and barrels for now.
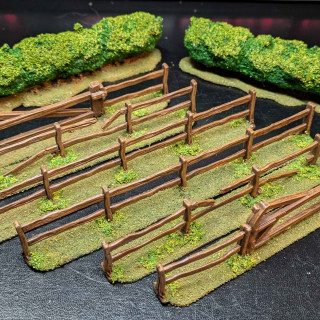
- A quick job while I was watching Jurassic Park was to mount the fencing on tongue depressors and adding some AK Interactive texture paste.
- I had one day free at the weekend to paint them between household chores. First was a spray prime with TTCombat Laser Burn Brown. Then out came the cheap acrylic paints from Hobbycraft that are kept for painting terrain. A mixture of browns, greens and other earthy hues were used – you know the kind of things, don’t make me list them. Most of the work was just dry brushing.
- The hedges got a layer of flock to give them a bit more texture
- I knew that one of the things I was going to do was tie everything in with flock. I hate the mat that I’m using so nothing was going to be matched to that – at some point I’ll replace it completely. After soaking with IPA and watered down, everything was set and good for play.
- Trees are boring but a necessity on a table.
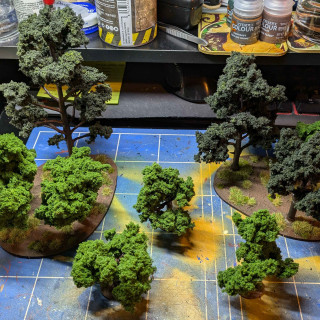
- Following the instructions in the kits (one of which was metal – news to me!), I bent the armatures to shape and gave them all a spray prime with black as I was running low on the brown.
- Dusting with the remains of the brown can, the armatures were ready for a bit of dry brushing. I’m not aiming for the most realistic trees you’ve ever seen, just what your eyes expect to see.
- Once I got some more browns on there, I went over all the limbs with my very old (yeah, should have thought about that before starting this project) Hobb-E-tac. Not going to lie, I was dubious that it would work but eventually it “dried”.
- The metal kit came with some of the Woodland Scenics pull apart fibre which I’ve not used before.
- The plastic trees had their usual big bag of clump flock to get dipped in.
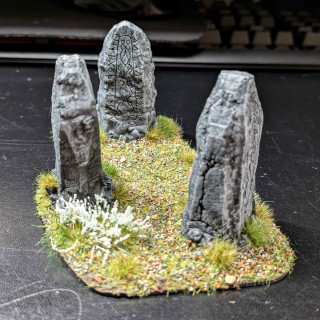
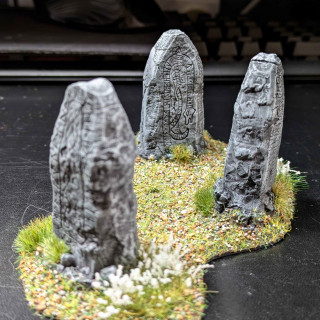
- I also printed out the standing stones and treasure piles that they have in their 3d Vault this month.
- These got a black prime then the stones were drybrushed up with three shades of grey. Put on another pond base, texture paint and then a layer of a new Javis scatter mix I’ve picked up and really like the look of
- The treasure piles aren’t really for B&B so much as just to be generic objective tokens. They just got base coats and a wash
At this point I was doing pretty well and seem to have hit upon a tactic that is working. I don’t normally enjoy painted terrain elements but if I just keep it simple and work on one at a time, they get done pretty fast.
Claymore was this weekend and I got two more little terrain bits and managed to bash through them in a couple of hours each Saturday and Sunday. They are 3d printed but the quality is excellent and I’m really happy with how they turned out.
I’m thinking about changing all the ground cover to the new Javis stuff (Battlezone Field Scatter apparently) but I want to get on with finishing up other things first.


![How To Paint Moonstone’s Nanny | Goblin King Games [7 Days Early Access]](https://images.beastsofwar.com/2024/12/3CU-Gobin-King-Games-Moonstone-Shades-Nanny-coverimage-225-127.jpg)




you’re doing way more hobby than I do XD
That’s the metric I use to measure my success, how did you know?