![How To Paint Moonstone’s Nanny | Goblin King Games [7 Days Early Access]](https://images.beastsofwar.com/2024/12/3CU-Gobin-King-Games-Moonstone-Shades-Nanny-coverimage-225-127.jpg)


75th Anniversary of Battle of Monte Cassino and Northern Italy (Terrain Build)


Recommendations: 440
About the Project
Firstly, I’m aware that the 75th Anniversary for the first Battle of Monte Cassino is 12th January 2019 however, this project is about preparing for some of the games that I’m thinking about running. I’m a slow painter, so I need plenty of time to prepare! In this project, I will look at building the terrain that I will need for the battles. I have another project looking at the forces that I need to build and paint to better re-create those involved.
Related Game: Flames of War: The World War II Miniatures Game
Related Genre: Historical
This Project is Active
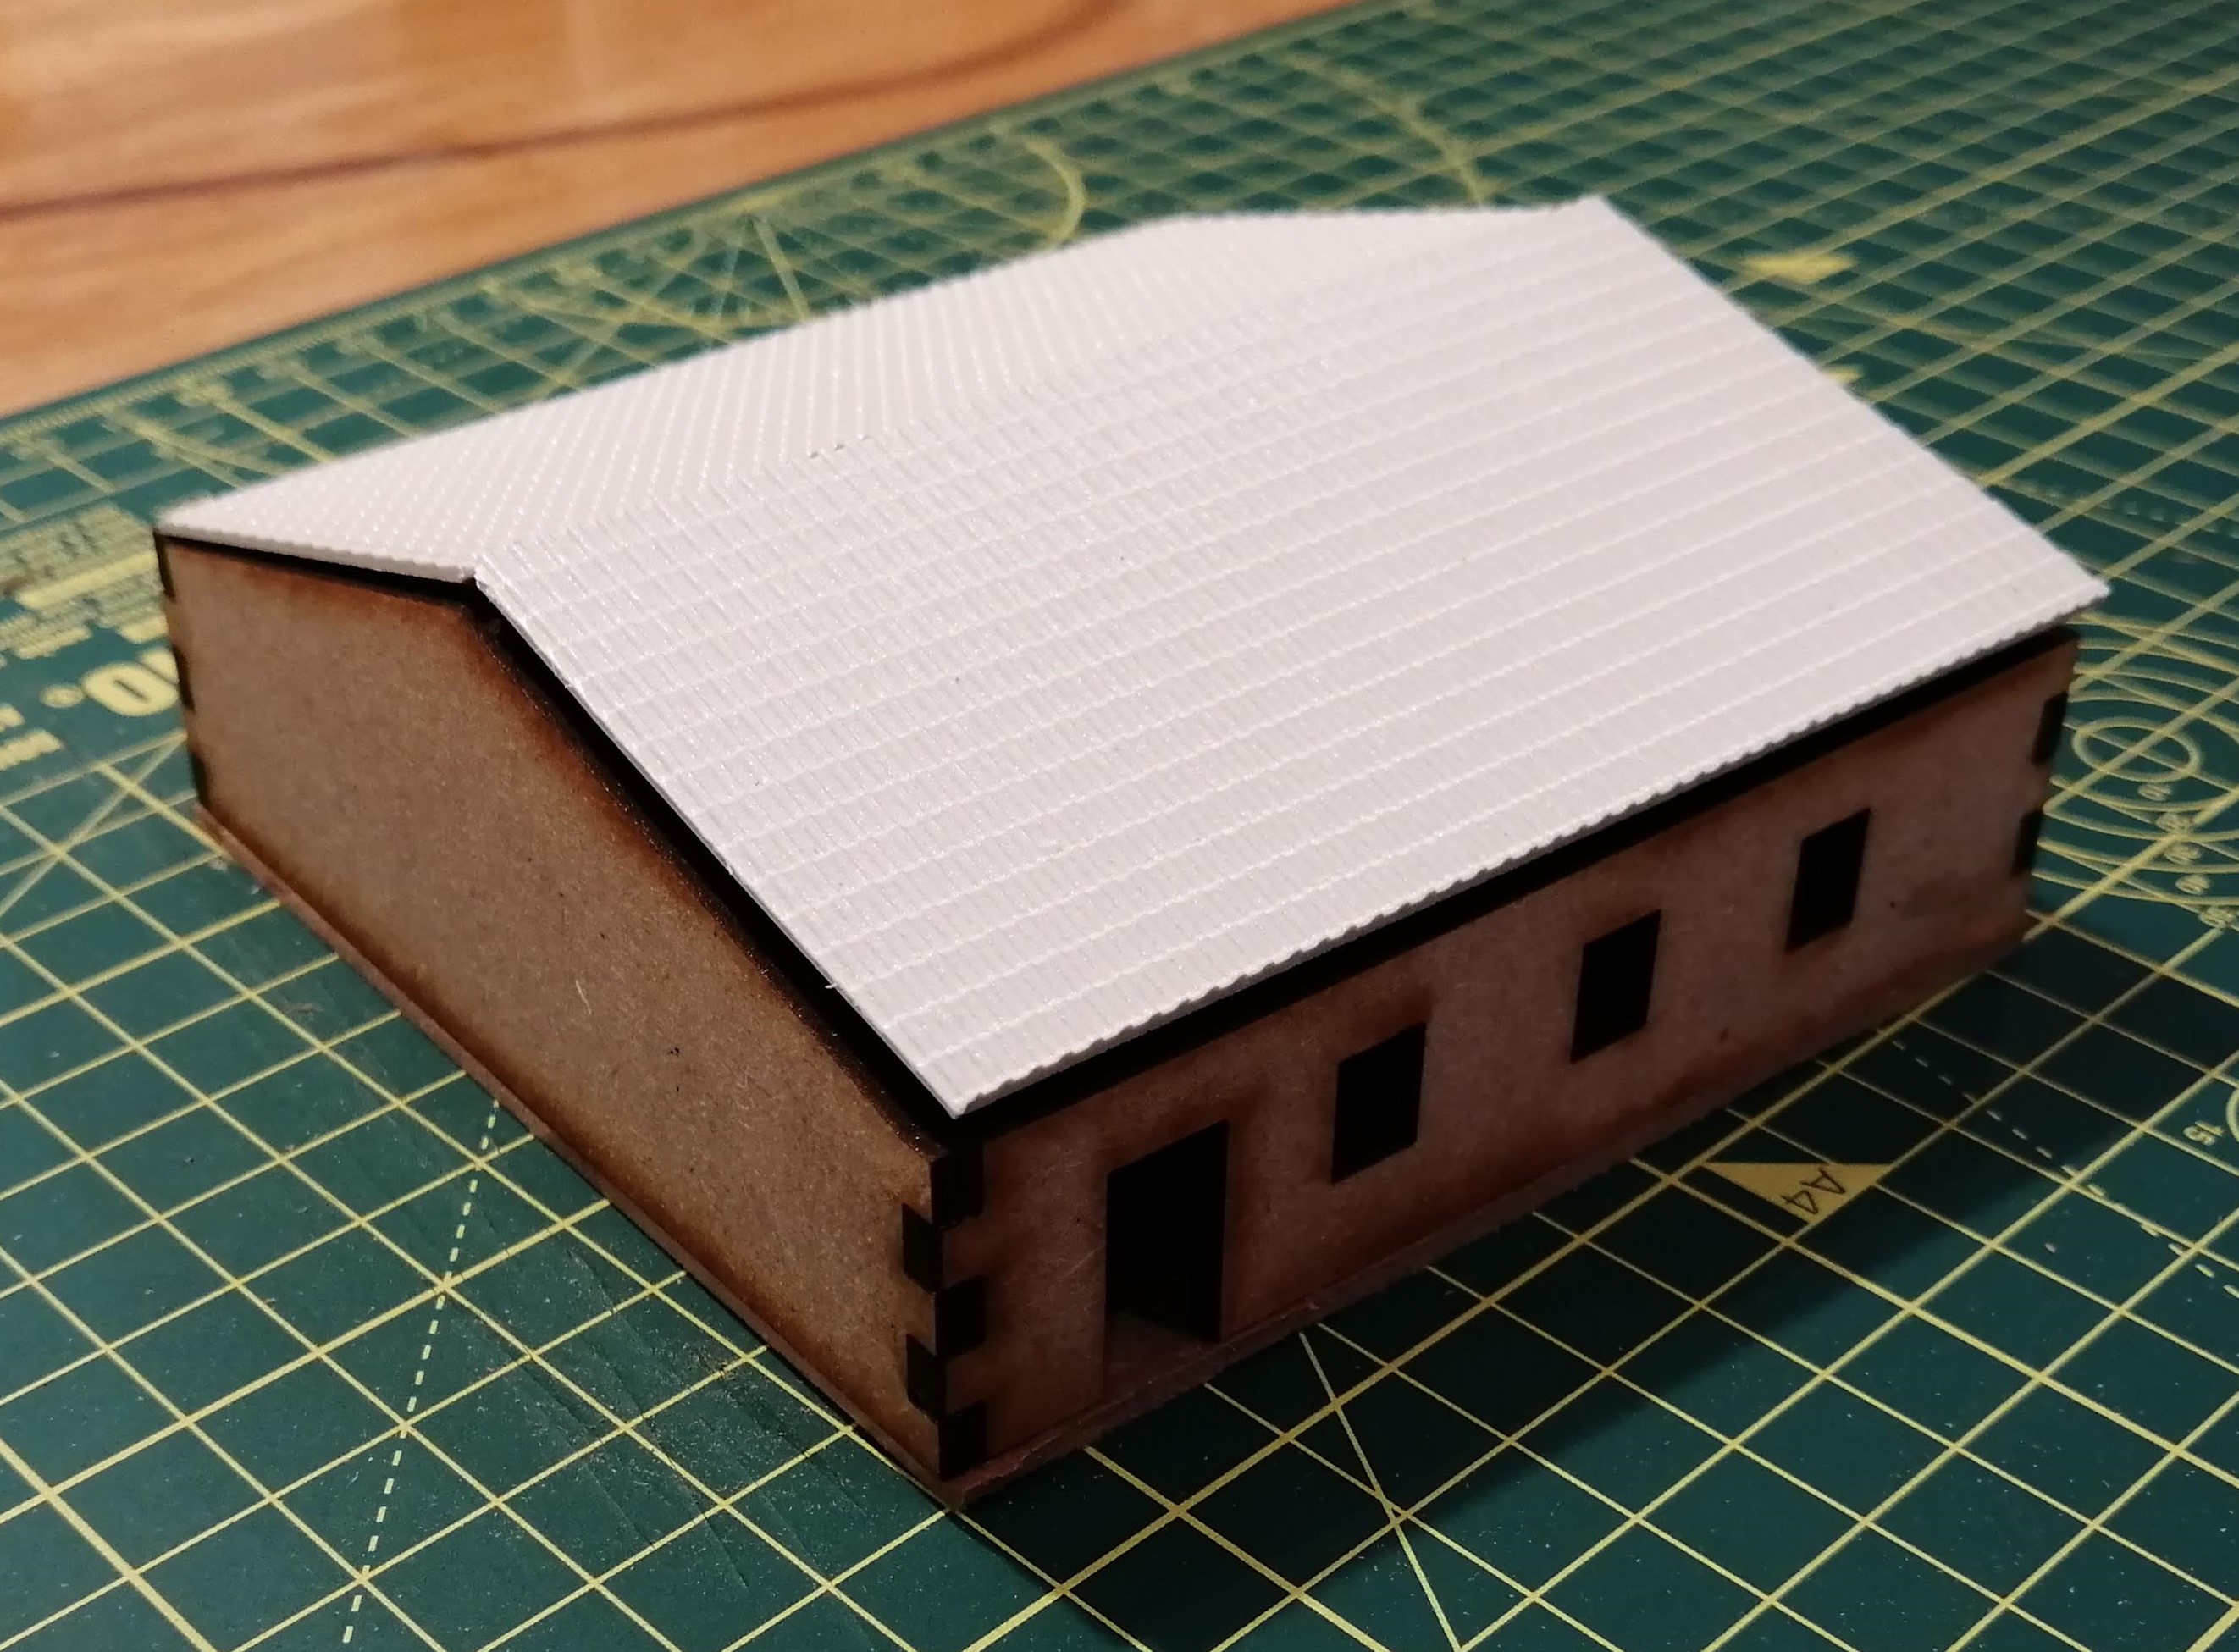
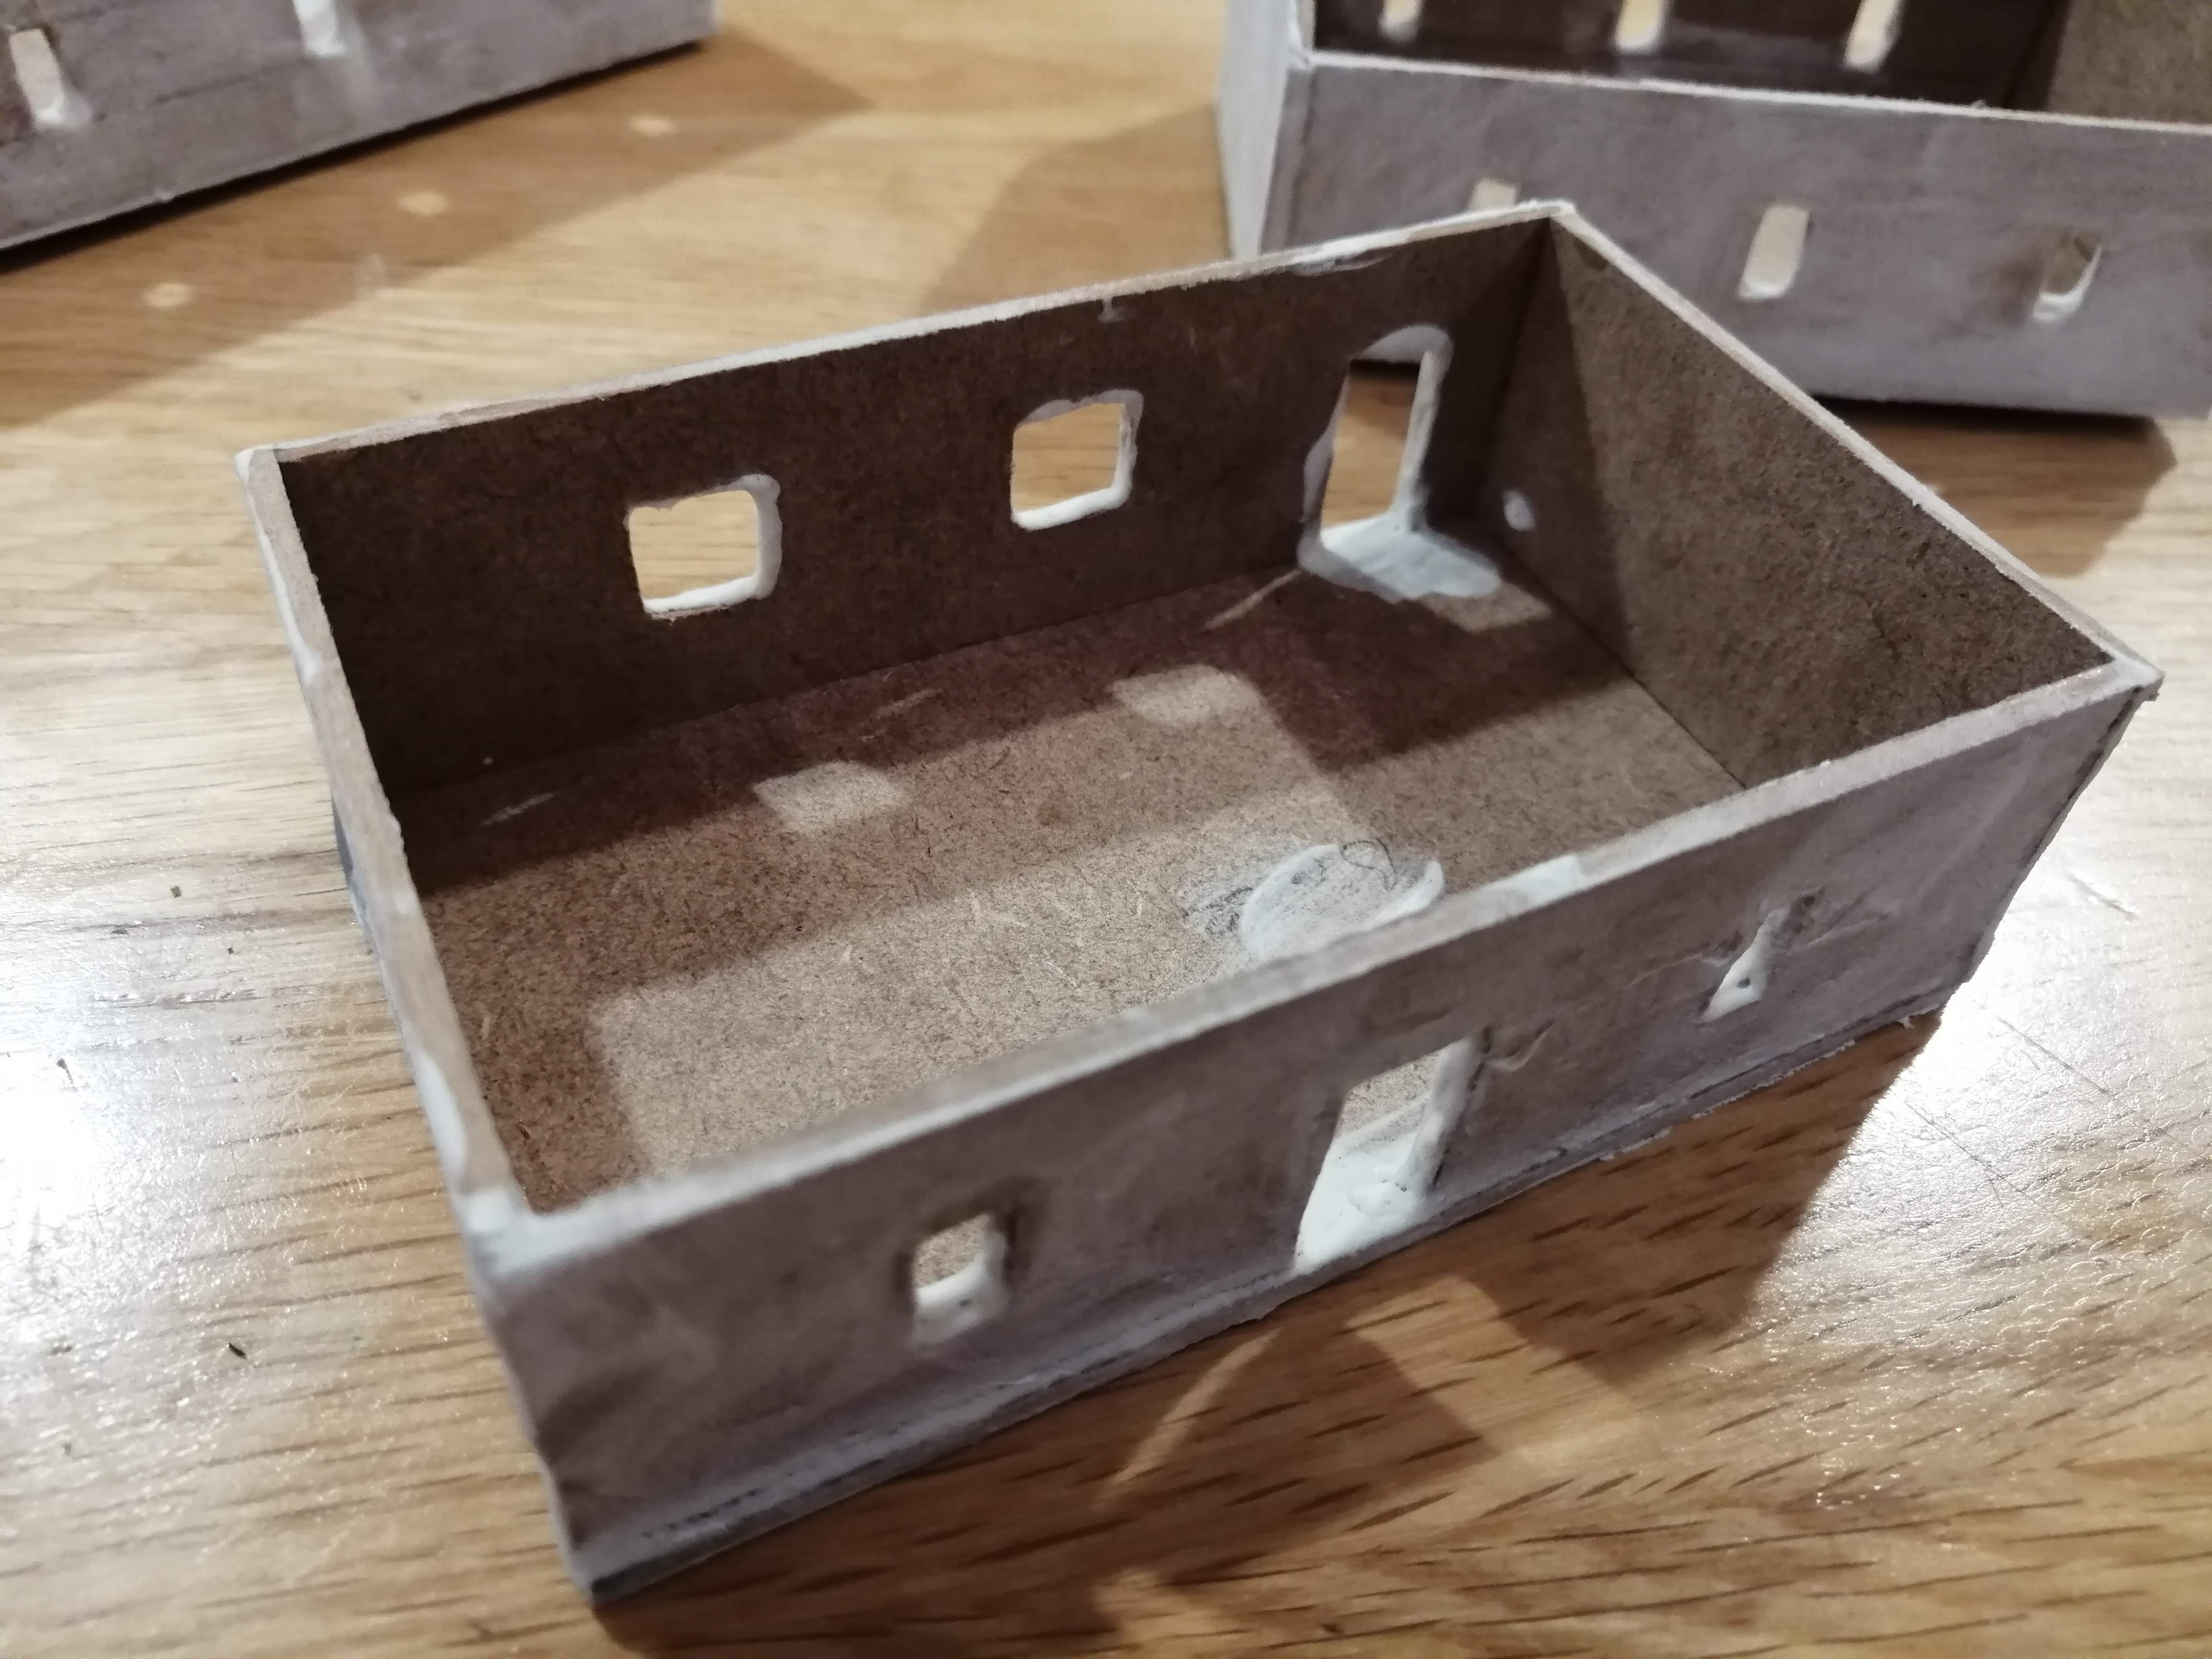
Italian Houses - Building the test house
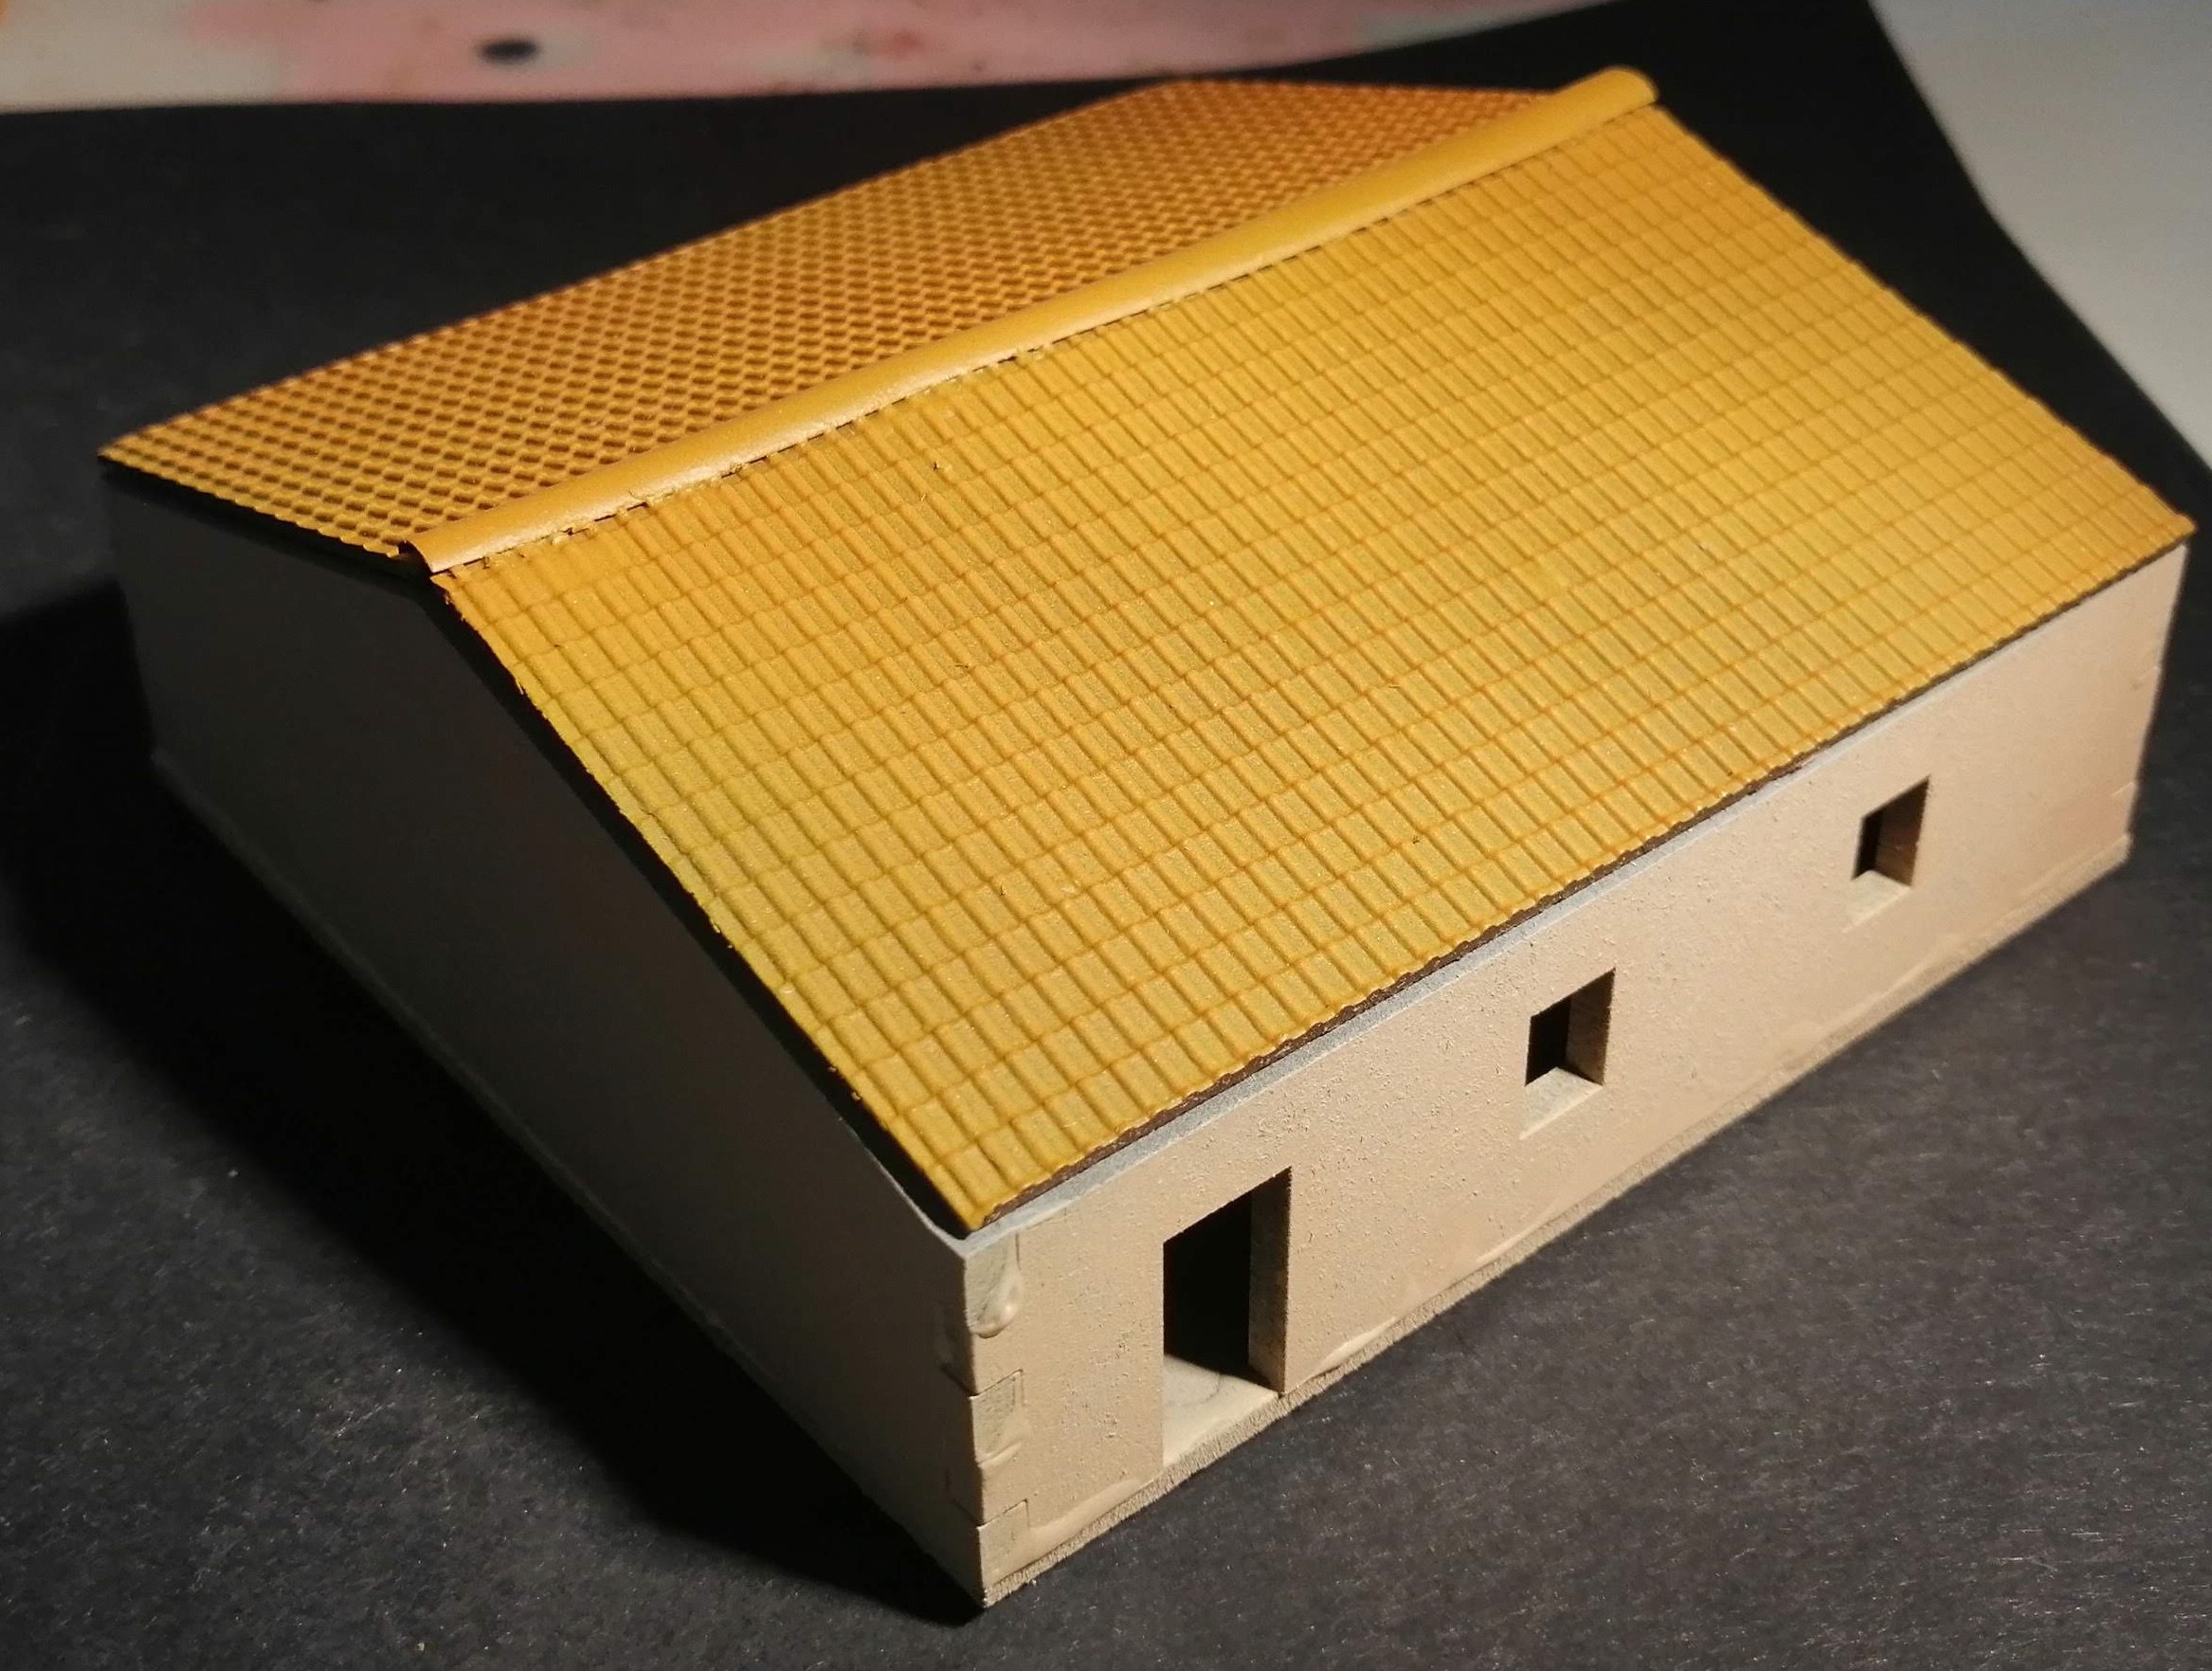
So I’ve been away on business this week and returned to find a little package for me from Razorlab. My vector line diagram in the last update has been converted into something tangible.
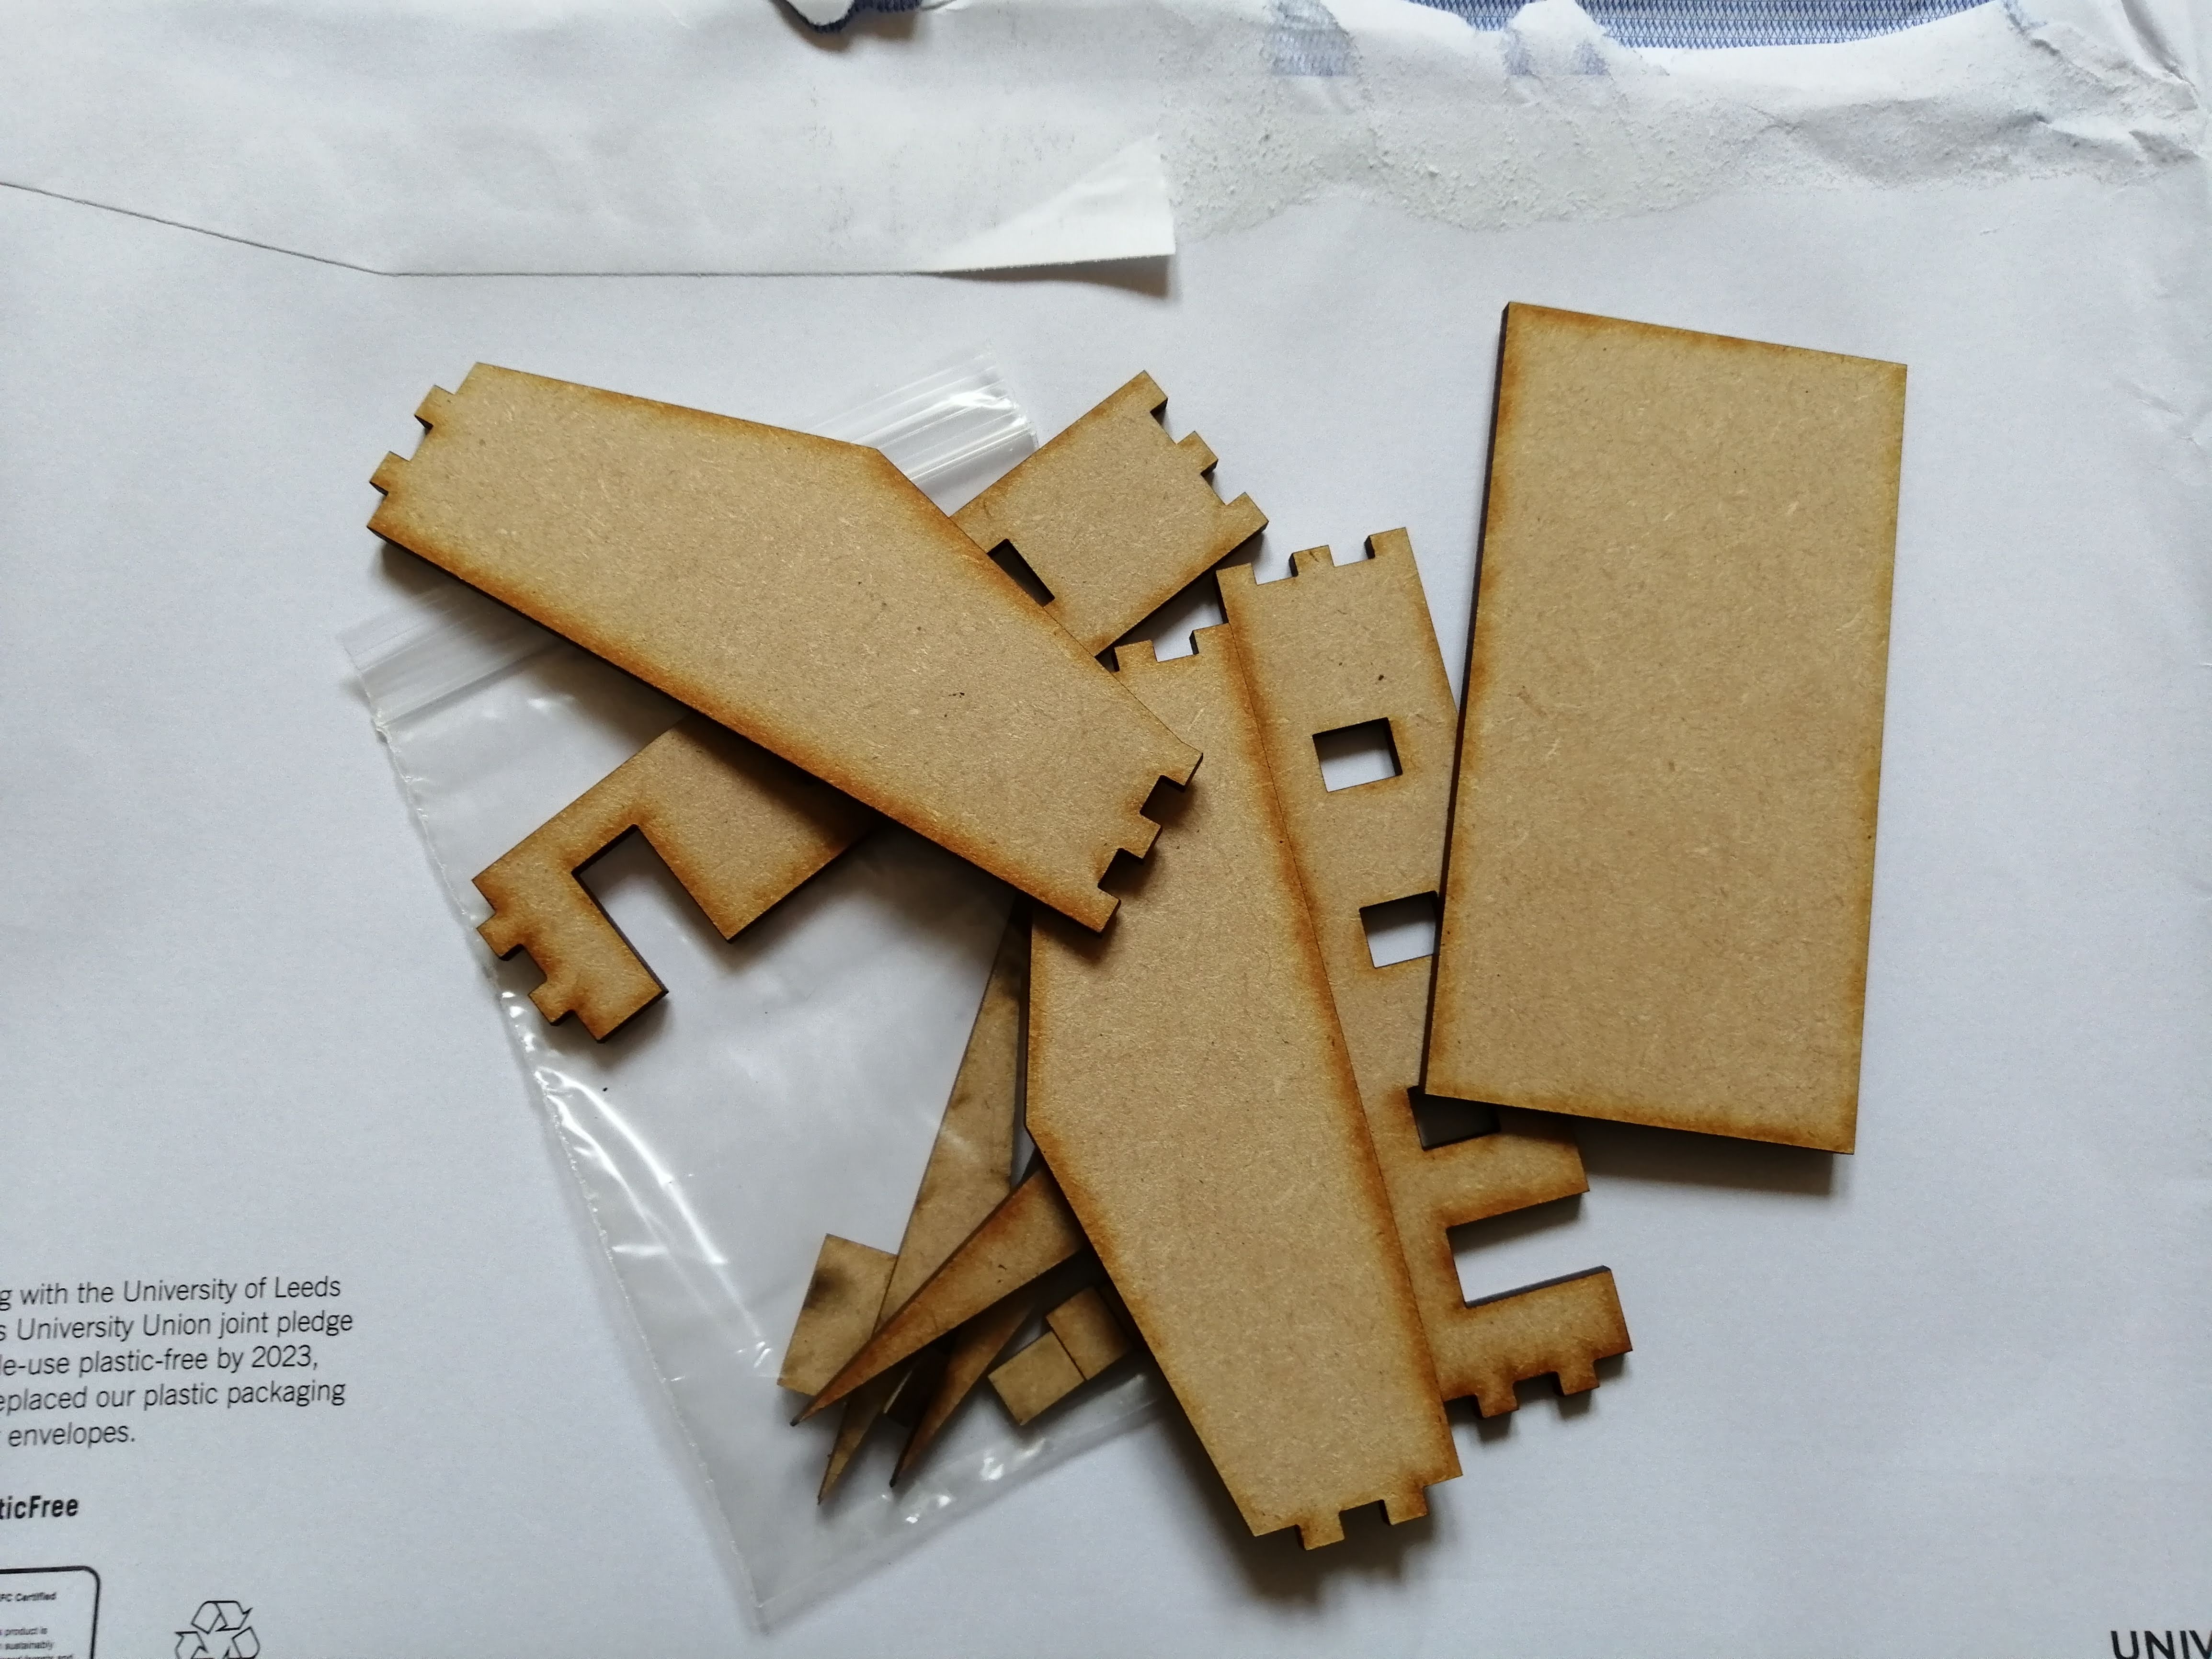 All the bits from Razorlab
As I ordered the smallest mdf base material, there wasn’t enough space for two roof panels (just the one) or a base, so I had to cut these myself. However, once done, the pieces went together very smoothly and easily – no sanding or additional work beyond a bit of PVA. So I’m very pleased with how that worked out.
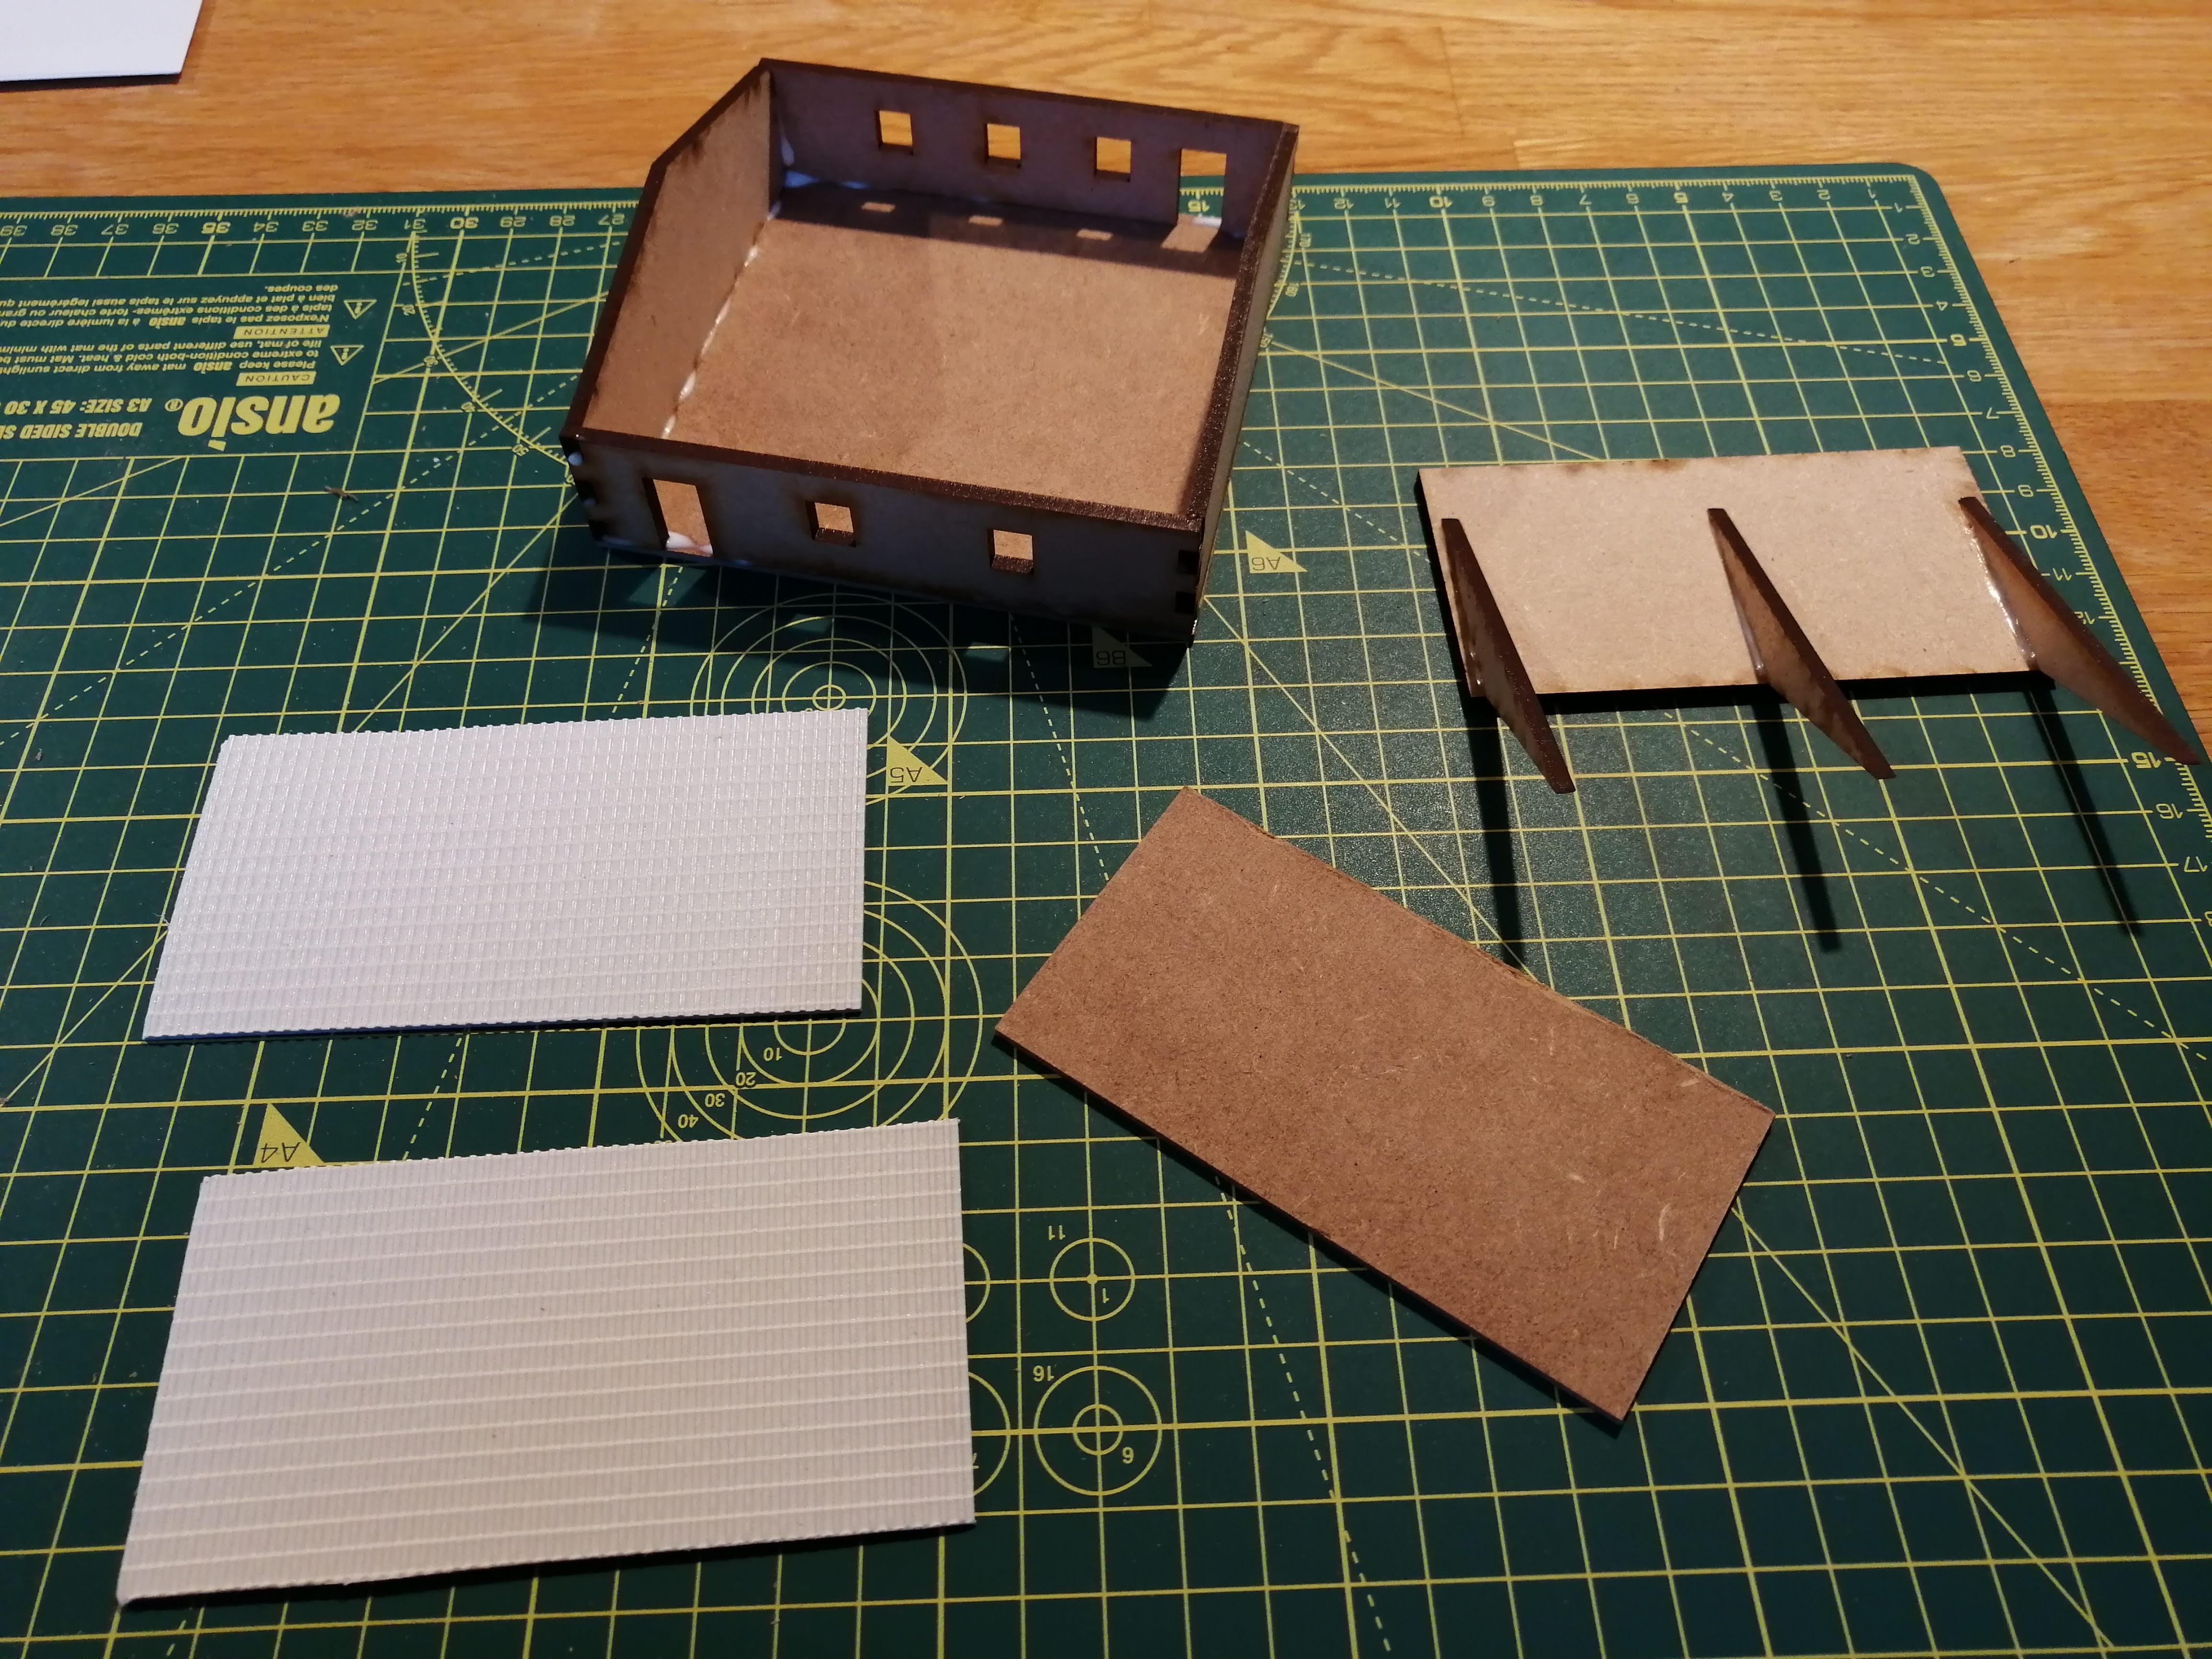

I’ve cut and glued the plastic roof panels onto the mdf roof base. One thing that I didn’t think about was the 3mm thickness of the roof and my trigonometry. The thickness means the roof doesn’t sit quite flush with the building and will need a little shaved off. Not a disaster but something to take into account in future designs.
For the paint, I’m going to try a hull red base for the roof and then layer on some fiery orange followed by elf flesh. For the walls, I think I’ll try elf flesh mixed with some off white to brighten it up. All paints from Vallejo and I’ll apply through the air brush. Before hand, I’ve given everything a grey primer.
I’ve also painted up my hand cut test house as well to try out some techniques and to also see how the pva/filla mix works out.
As an experiment, I’ve also lightly sprayed on some green around the bottom of the buildings to give the impression of moss/mold.


Now for the doors and windows. For the shutters, I’ve just cut out green card and glued these in place. For the doors, the cut outs from the frames were included and I just cut out card to glue over the top and then glued the door back into place. In hind sight, I could have just not cut anything out and glued a card door on the top but at least I have the option of having the door open now!
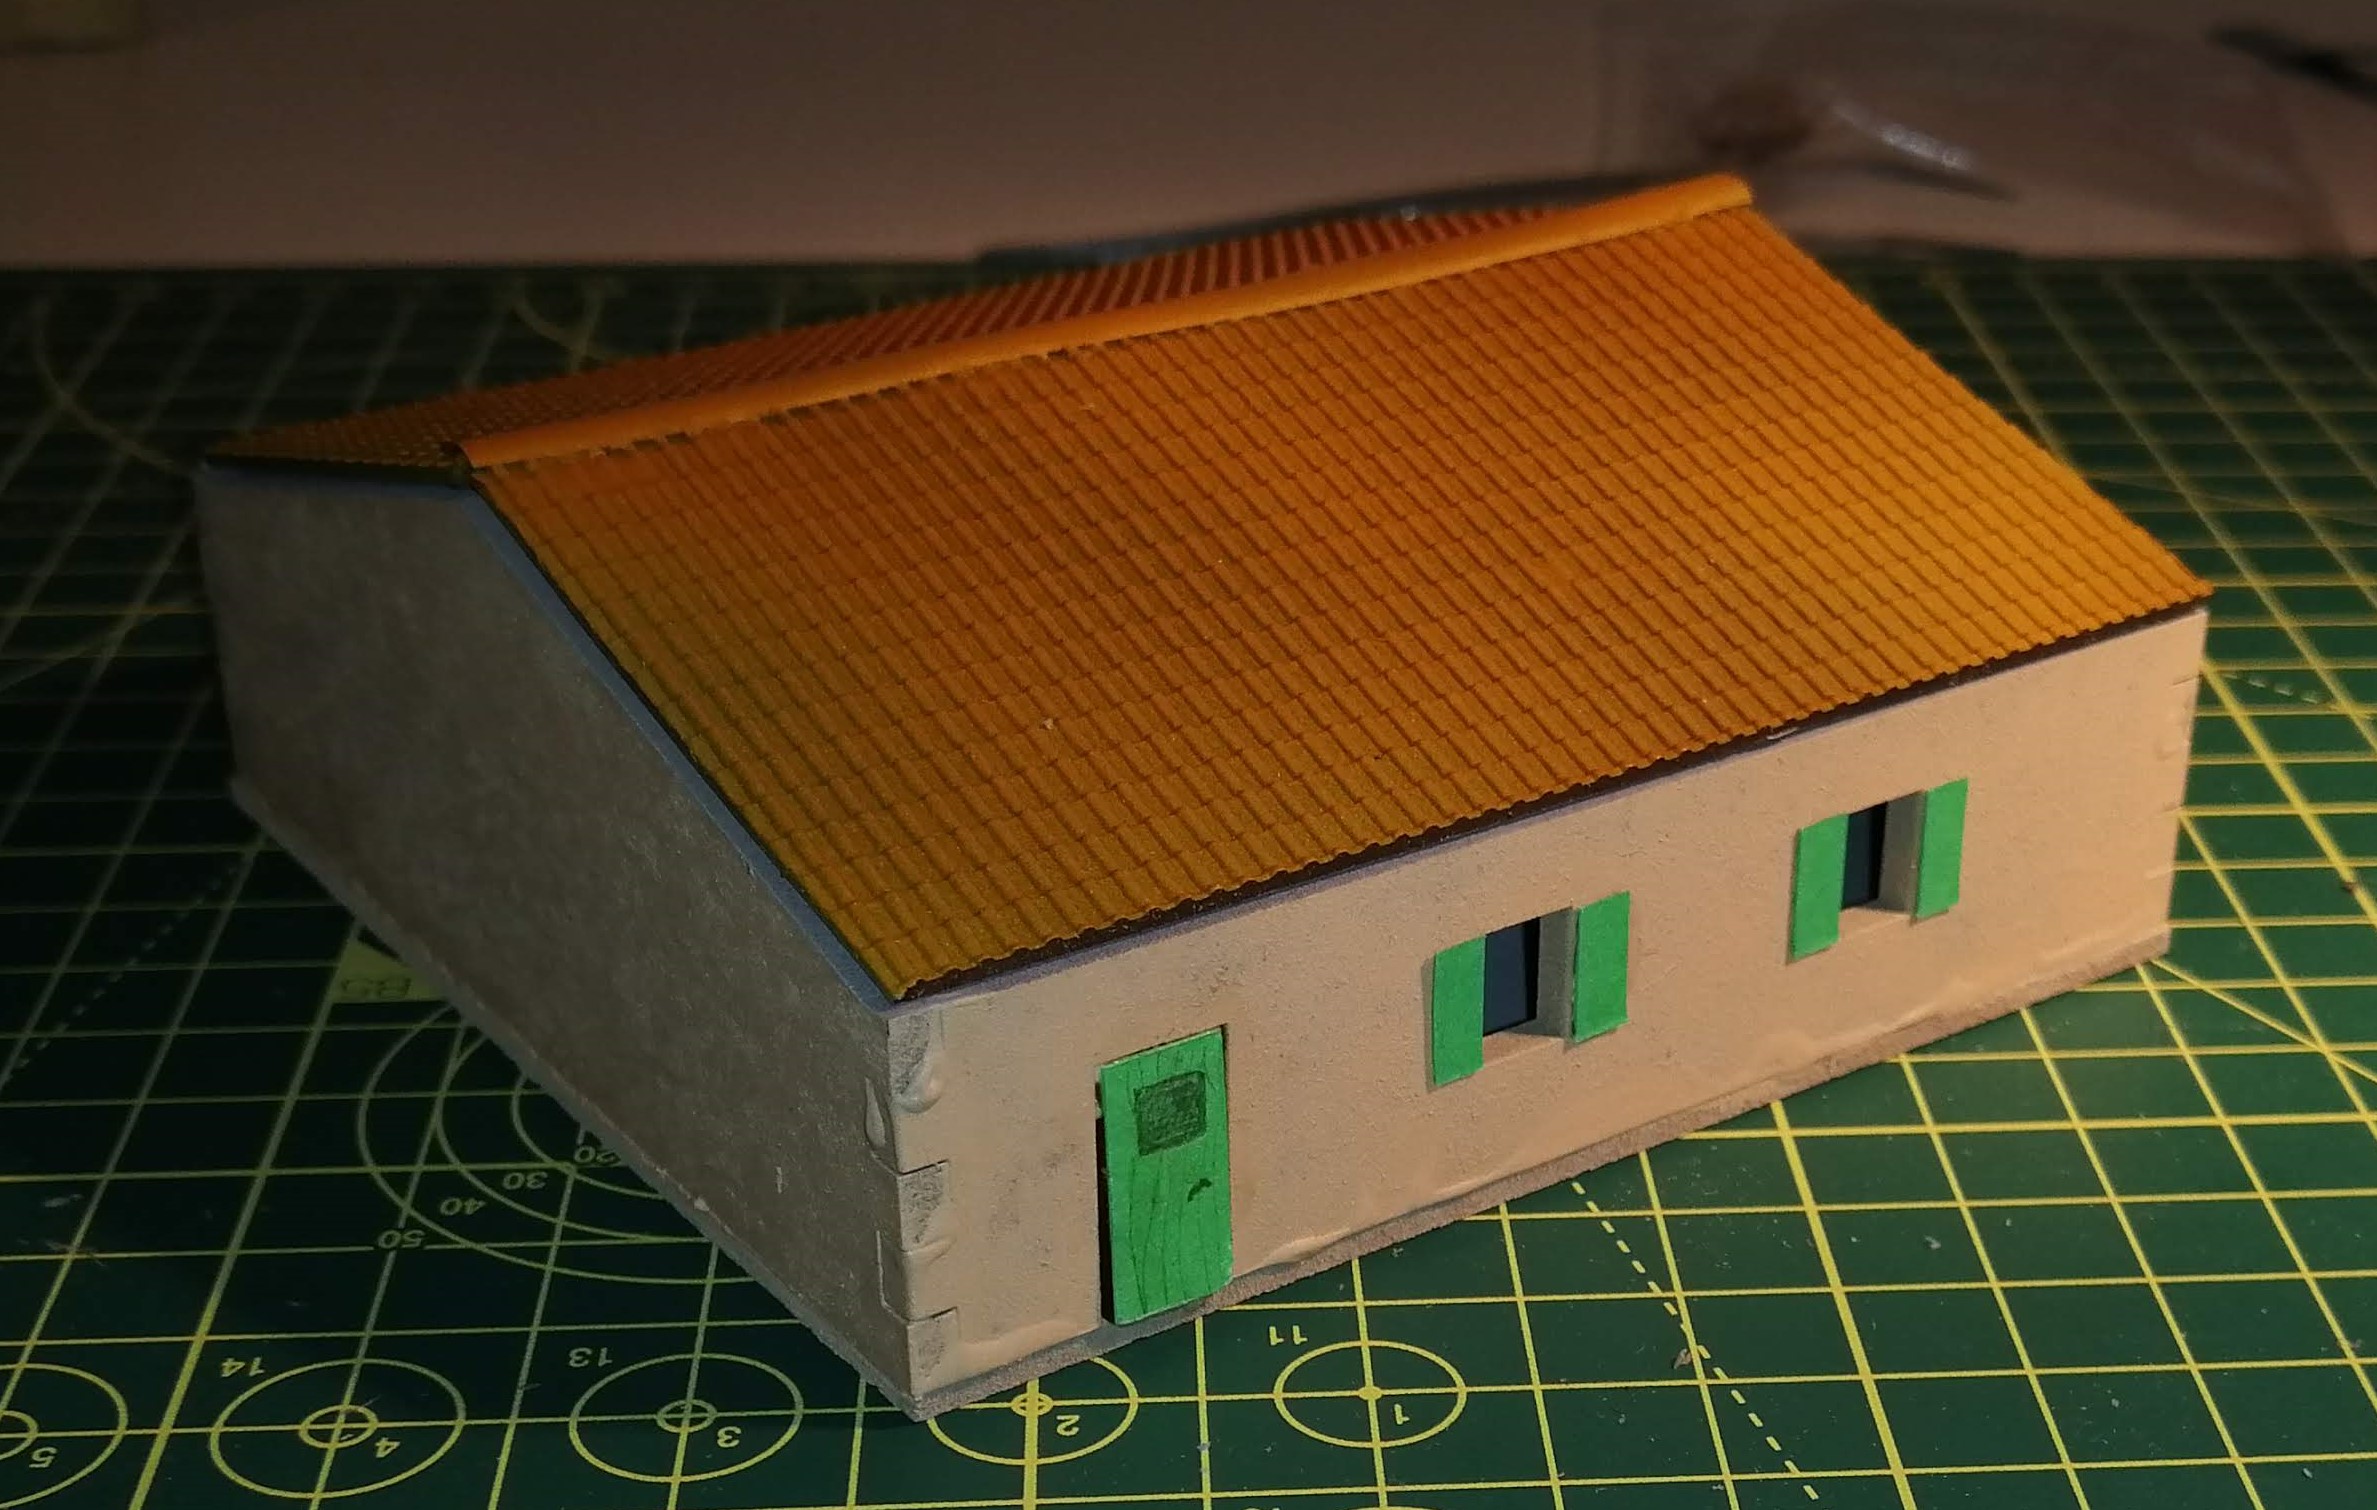
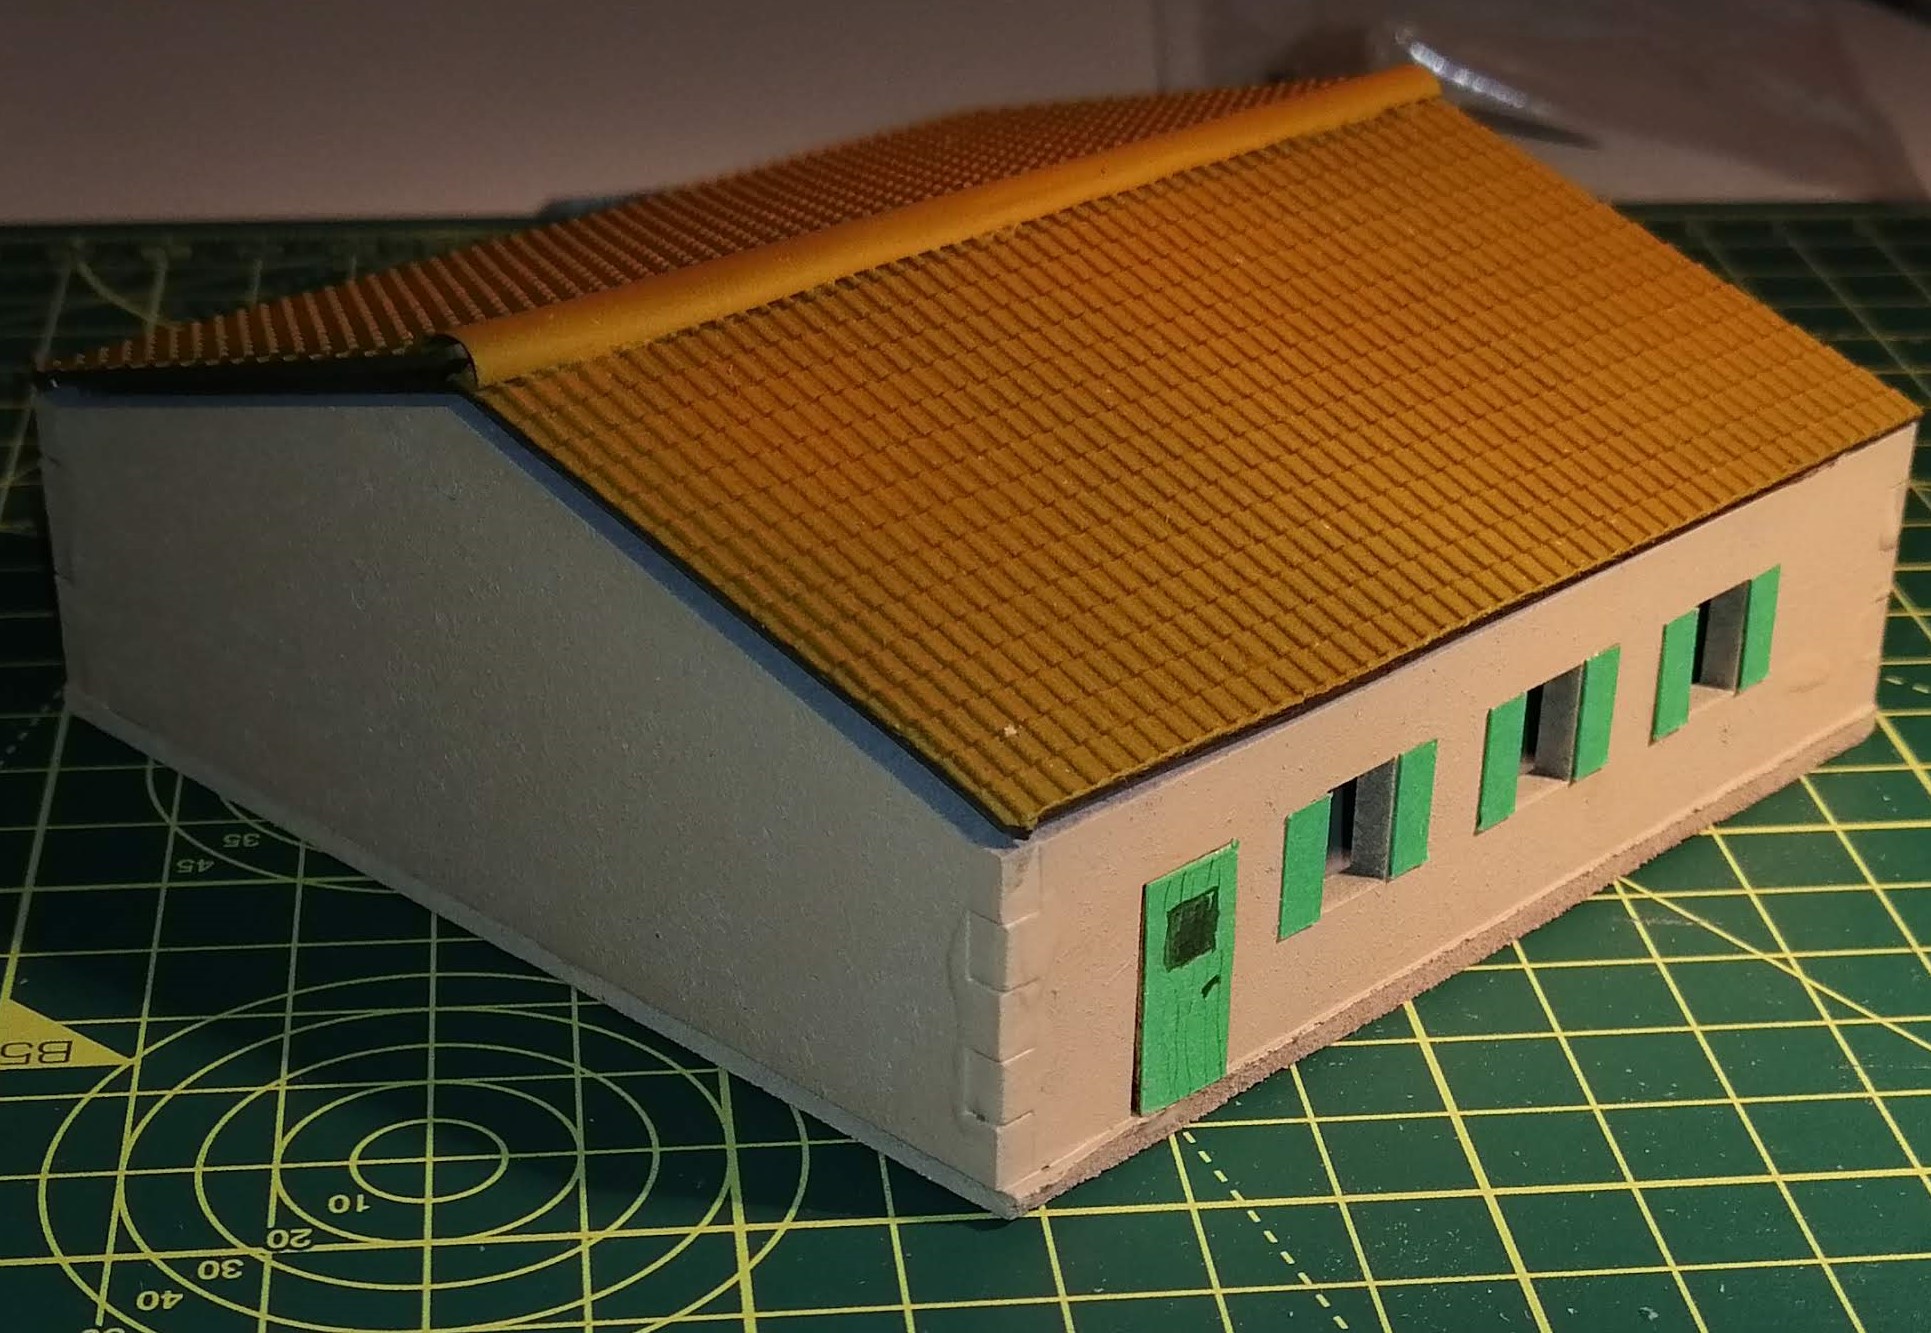

So overall, given the limited amount of effort involved, I’m quite pleased with the results from Razorlab. I like the pva/filla coating I gave to the hand cut building, so I’ll take this approach with my next builds.
I now need to make some more to build a small hamlet. One small problem is the lack of uniformity in the buildings in a Tuscan town, so no designing just one building and replicating a lot of times. I’m going to need a lot of different designs to get the look right. I’ll also need a small church with tower as well as a separate bell tower as well.
Time to crack open the vector line software again and start designing.
Italian Houses - Vector Line Drawings
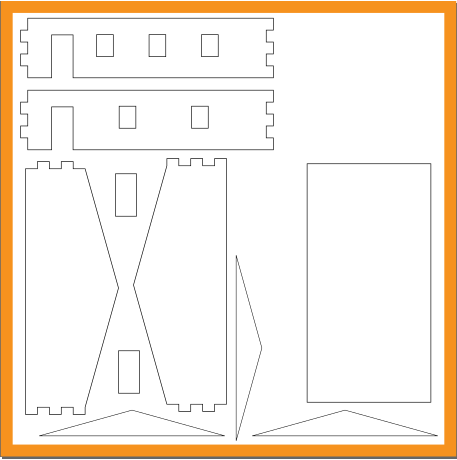
So as a test, I’ve designed an single storey ‘farm house’ to test whether I’ve got my principles right and that it will all go together correctly. This should create a 10cm by 10cm building and I’ve opted for the smallest mdf board to keep the costs down. As a consequence, I can’t cut a base and I can only create one roof panel (the rectangle on the right) but I’m confident enough that I can cut some mdf with a knife to manage this without making things too wonky.
Once again, getting the lengths and angles for the roof panel and roof trusses required some trigonometry so hopefully I’ve got my sums right.
I’ve used a free tool called Inkscape to draw the plans. This involved a lot of positioning the ‘points’ accurately on the x and y scale to ensure that the measurements are spot on.
Hopefully I should get the results back in a week or so to find out how well this has worked.
 Vector line diagram that the laser cutter will use
Italian Houses
When I think about Italy, I see Tuscan hill villages (and Chianti, cheese, good food but that’s another story). Now while the whole of Italy isn’t covered with Tuscan hill villages (just Tuscany has Tuscan hill villages 🙂 ) I think building one will certainly set off the battles that were fought later in 1944 and 1945, once Cassino had been taken. Something like the picture below sums up what I’m aiming for, although probably more of a small hamlet rather than a town.
 A typical Tuscan hill village yesterday
Bizarrely, I can’t find any good 1:100 scale model Italian buildings. There’s some OK Spanish peninsula options that look similar, but nothing that really works. So I’m going to have to make my own.
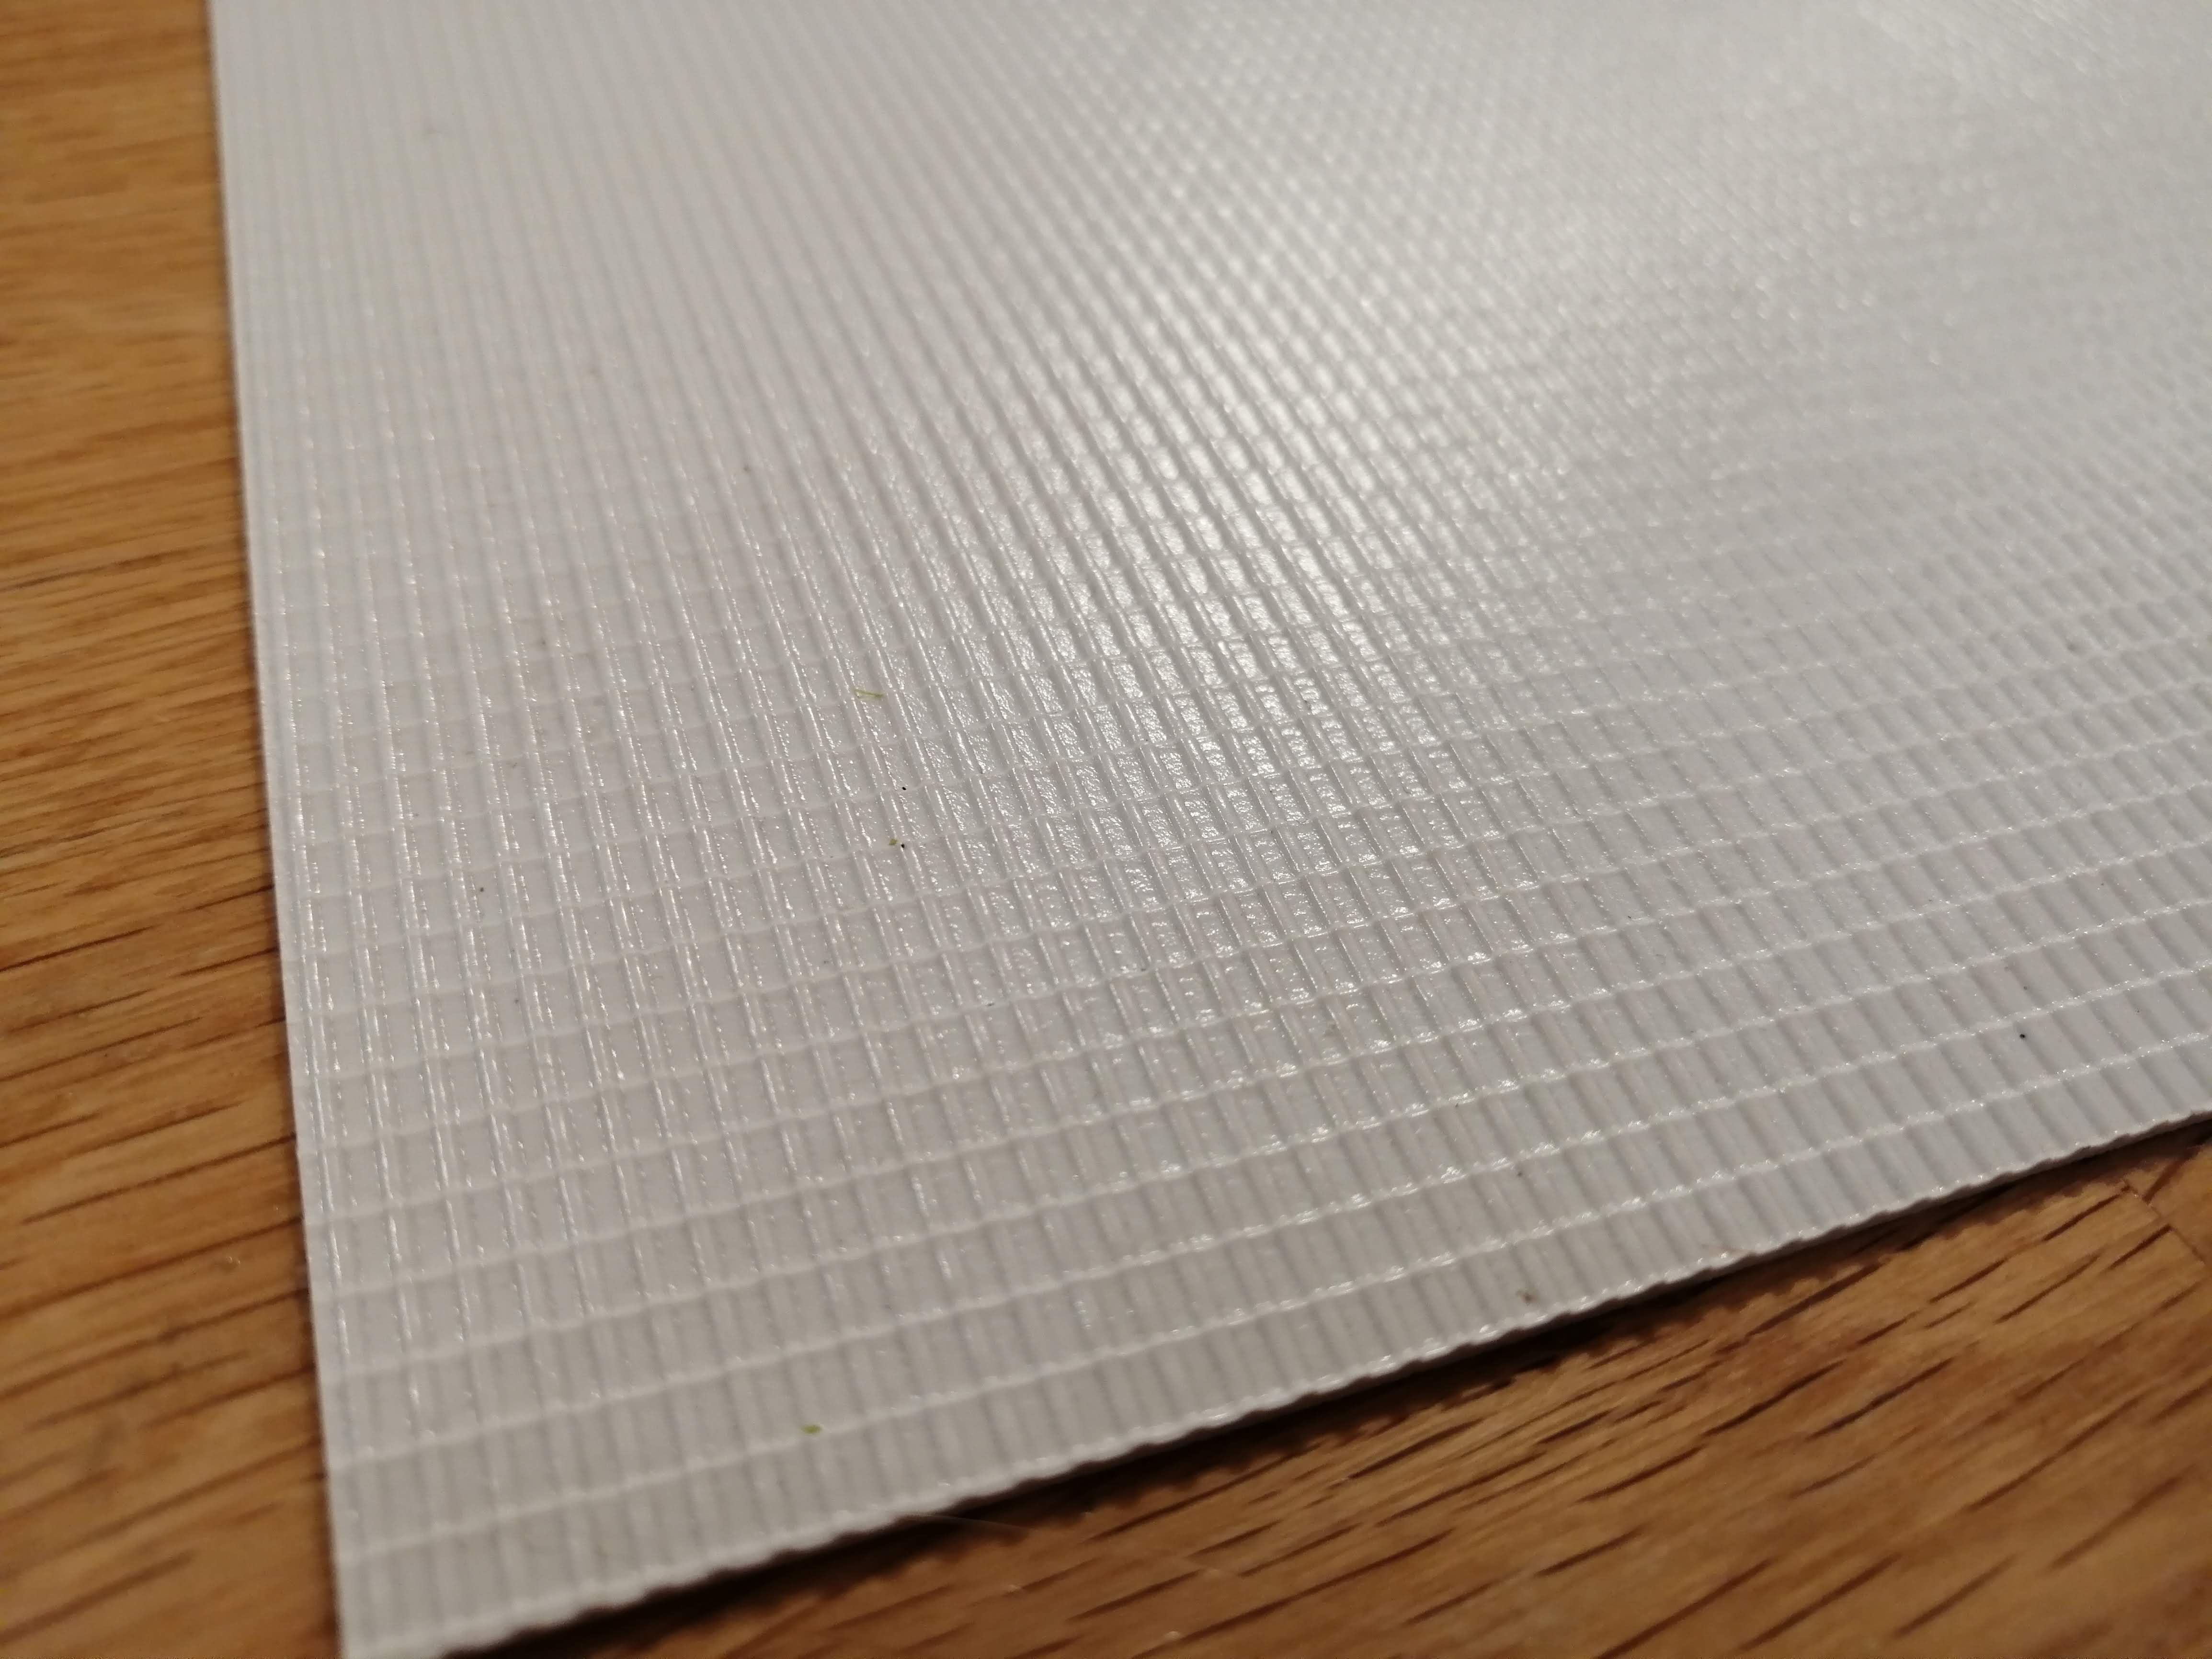
I considered card models but it just doesn’t have the durability so I’ve opted for mdf. I’ve also found some sheets of the below on ebay which is 1:100 scale and looks exactly like the very distinctive roof tiles used in Italy.
 Sheets of roof tiles
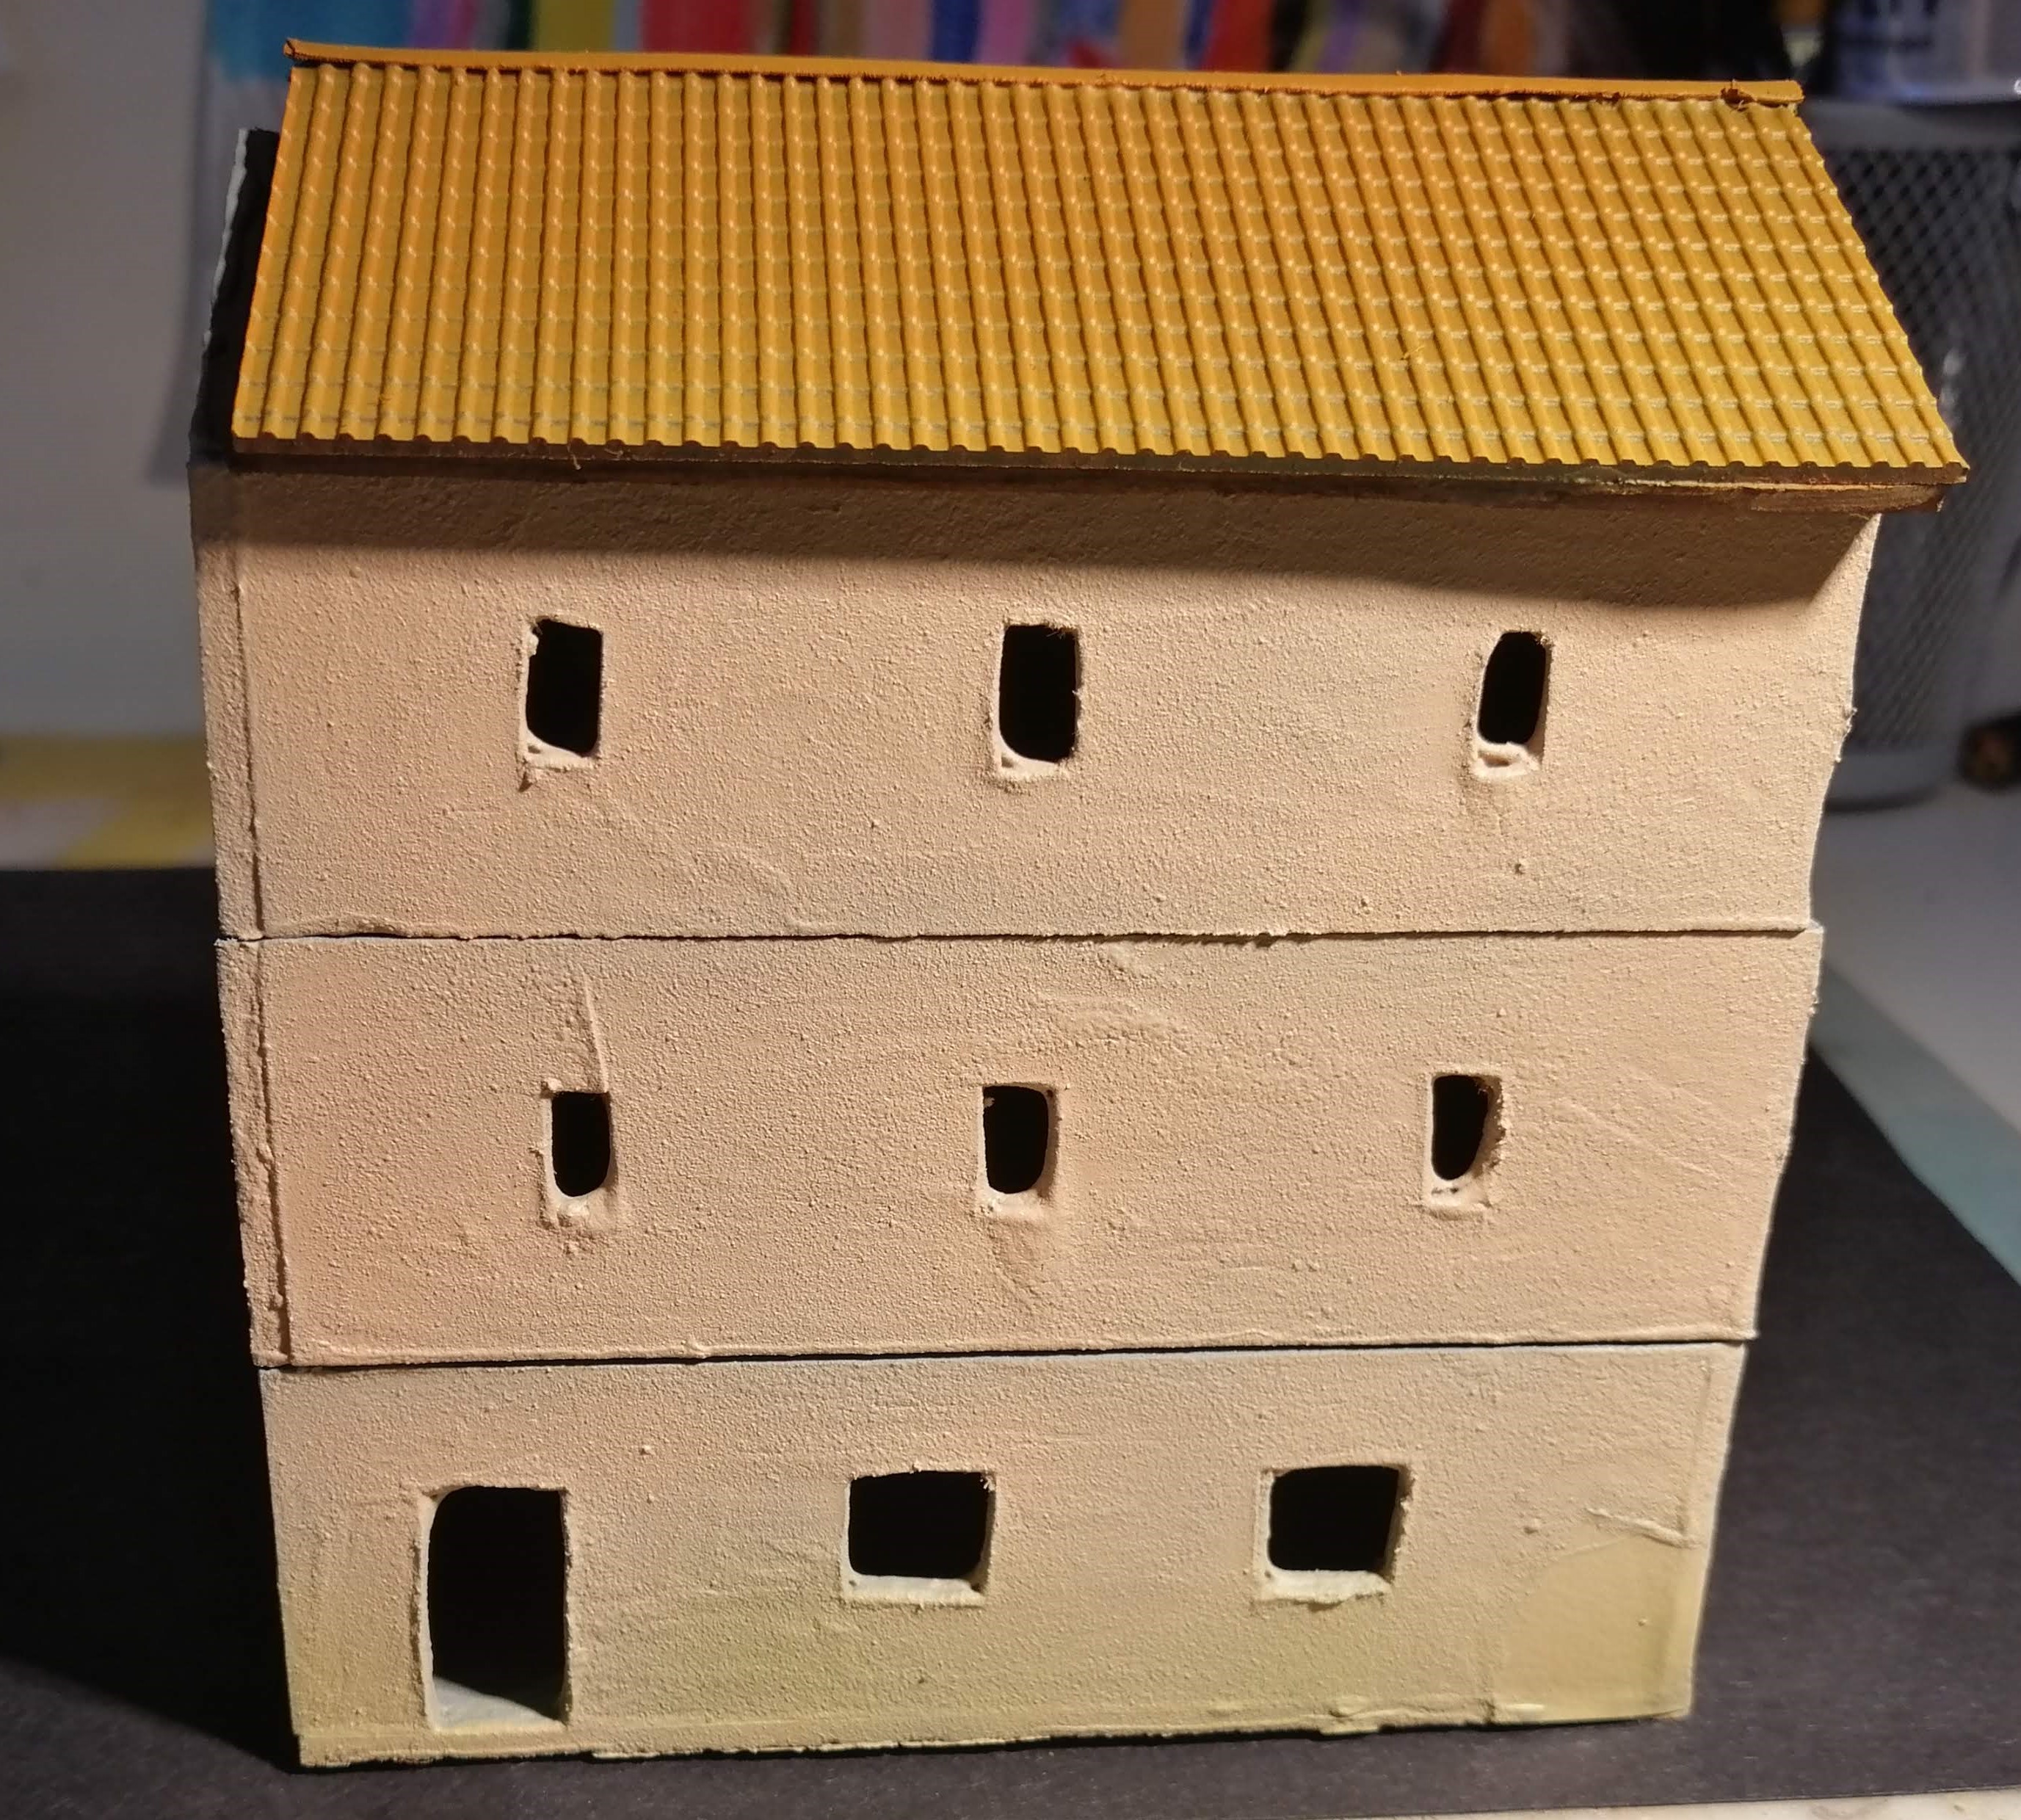
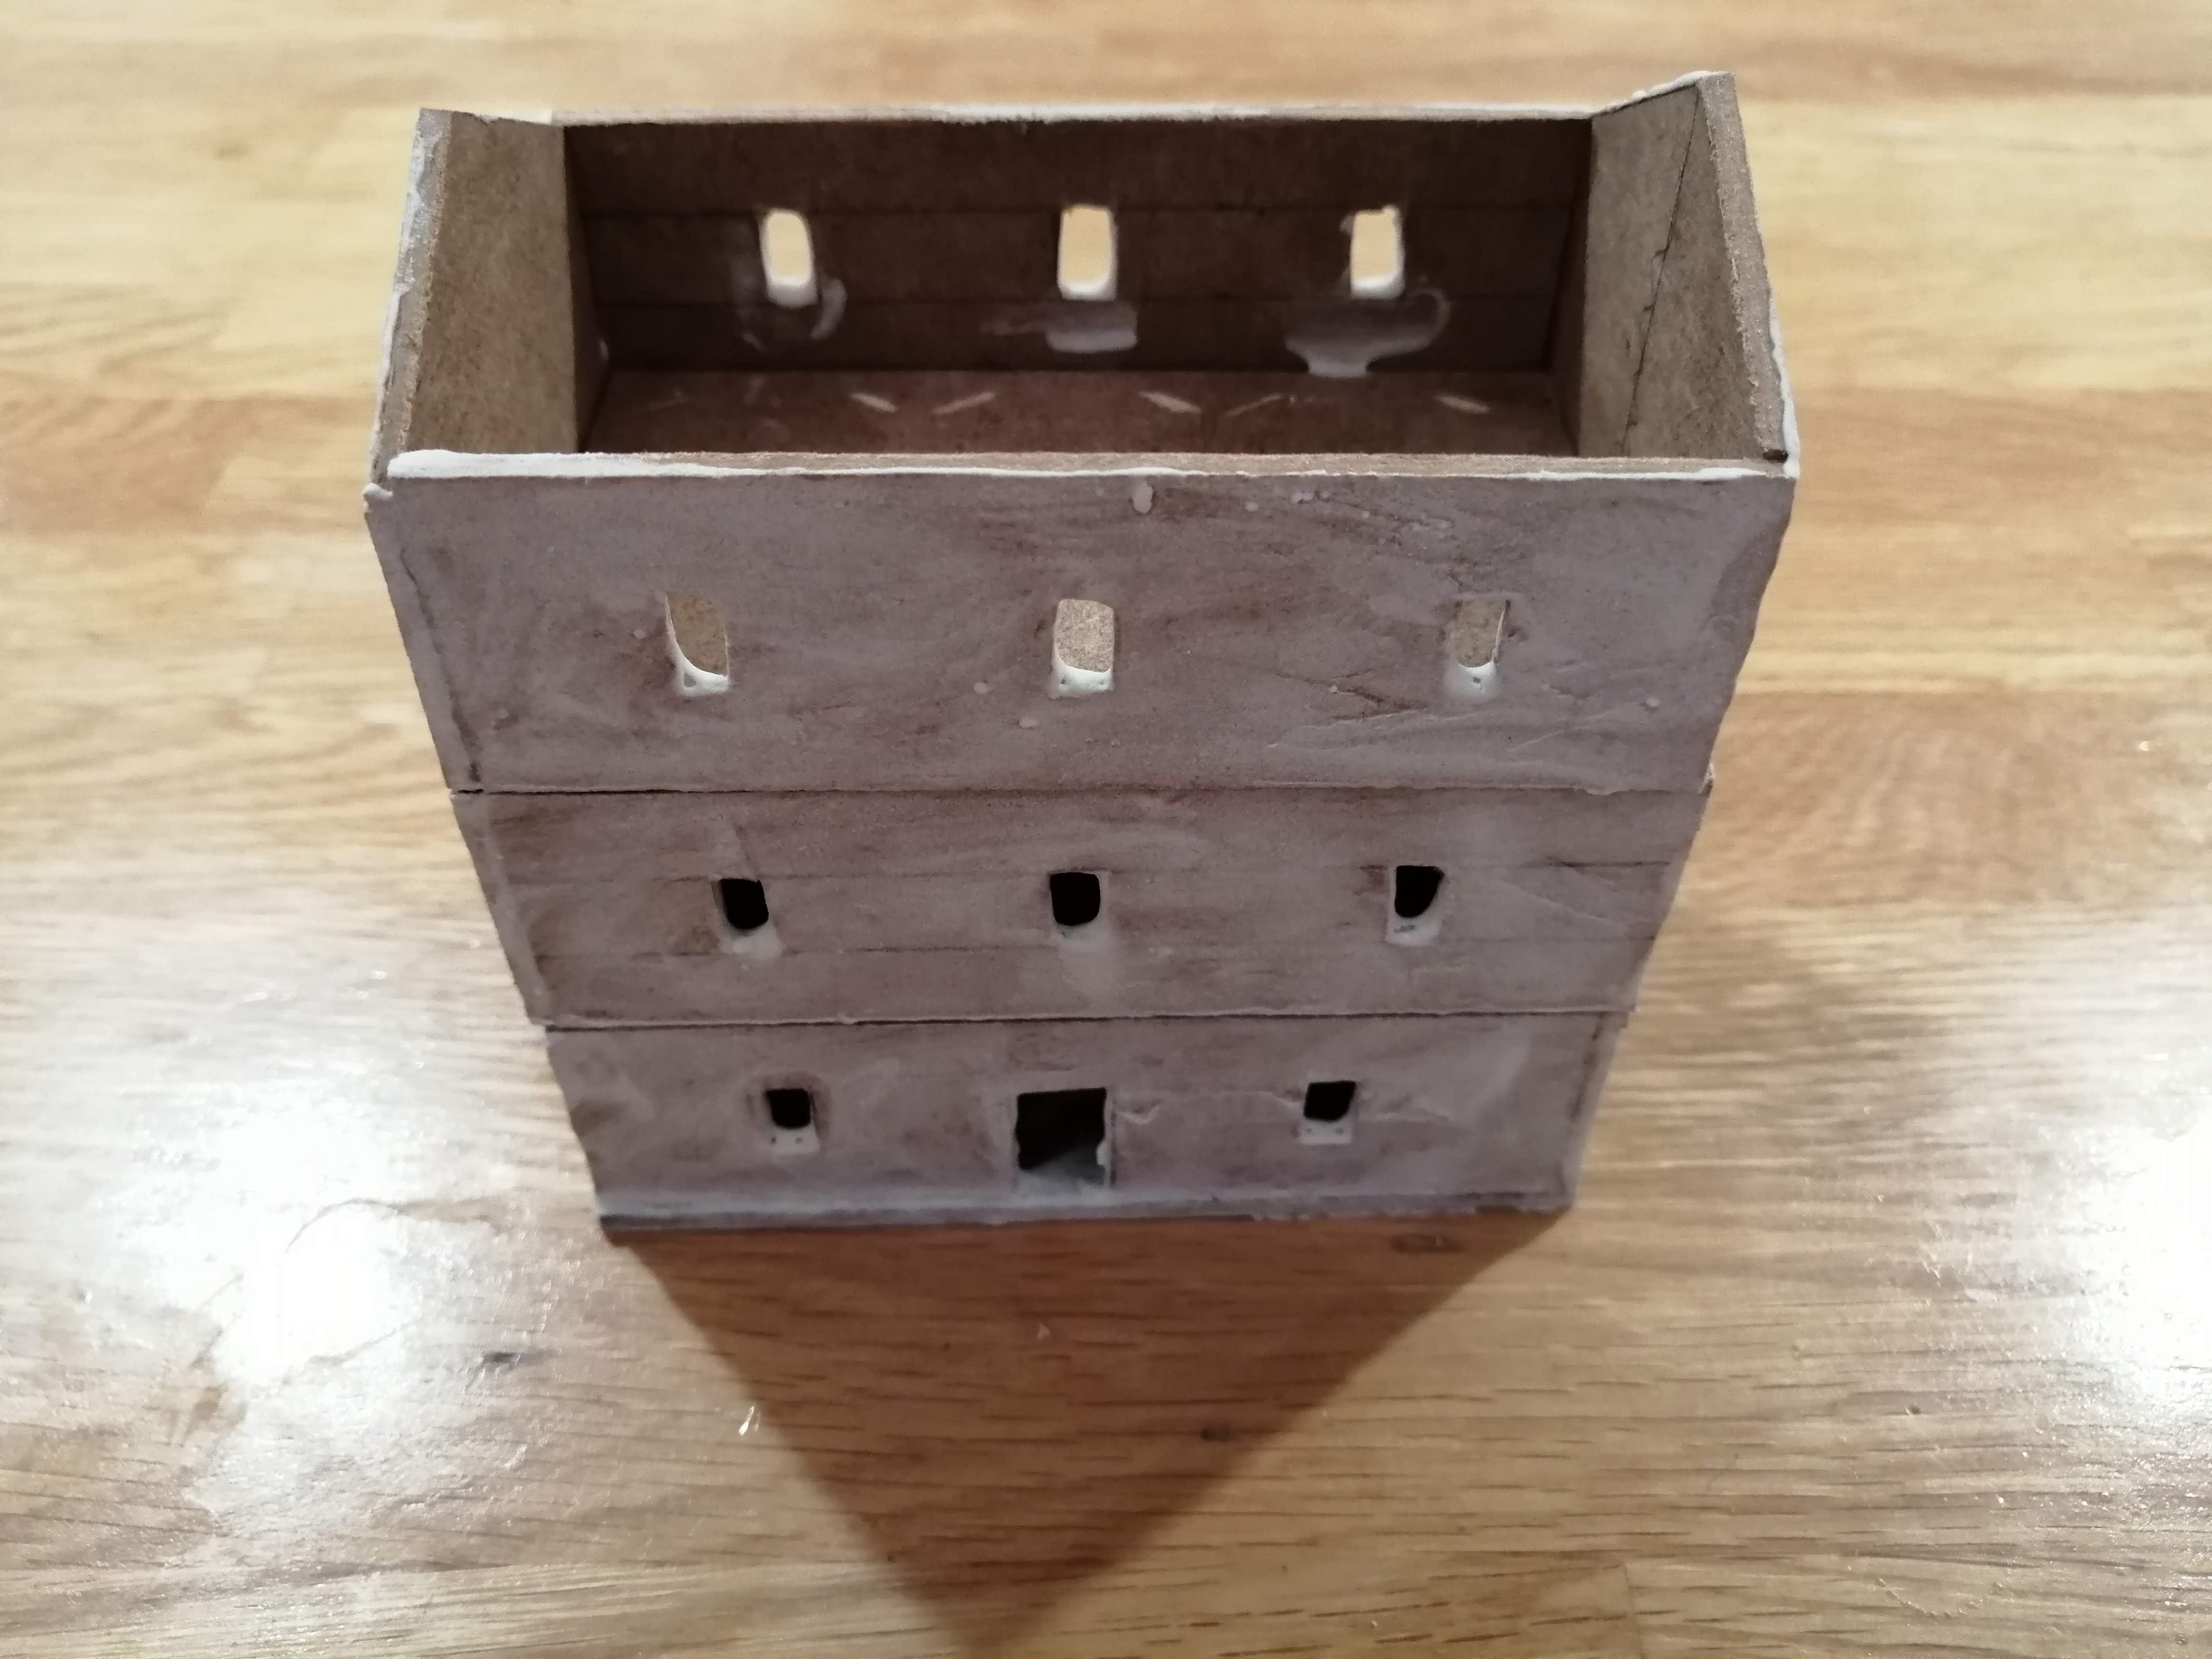
Armed with just a trusty metal ruler, a pencil and a sharp knife, I drew out the panels on some 3mm mdf and cut them out. This took a little time but in the end, I had a three story building which I was able to glue together with PVA.
As an experiment, to get the texture of the render used in Italy, I mixed up pva with polyfilla. This will hopefully have the advantage of sealing the mdf together while also creating the render. You can see the three floors below.

Now the roof was tricky. I had to get a calculator out and go back to my trigonometry to work out the angles and lengths for the roof. I even had to use the mnemonic Silly Old Hitler Couldn’t Advance His Troops Over Asia (a little apt, given the project).
I got the mathematics right but cutting 3mm mdf with enough precision just wouldn’t work.
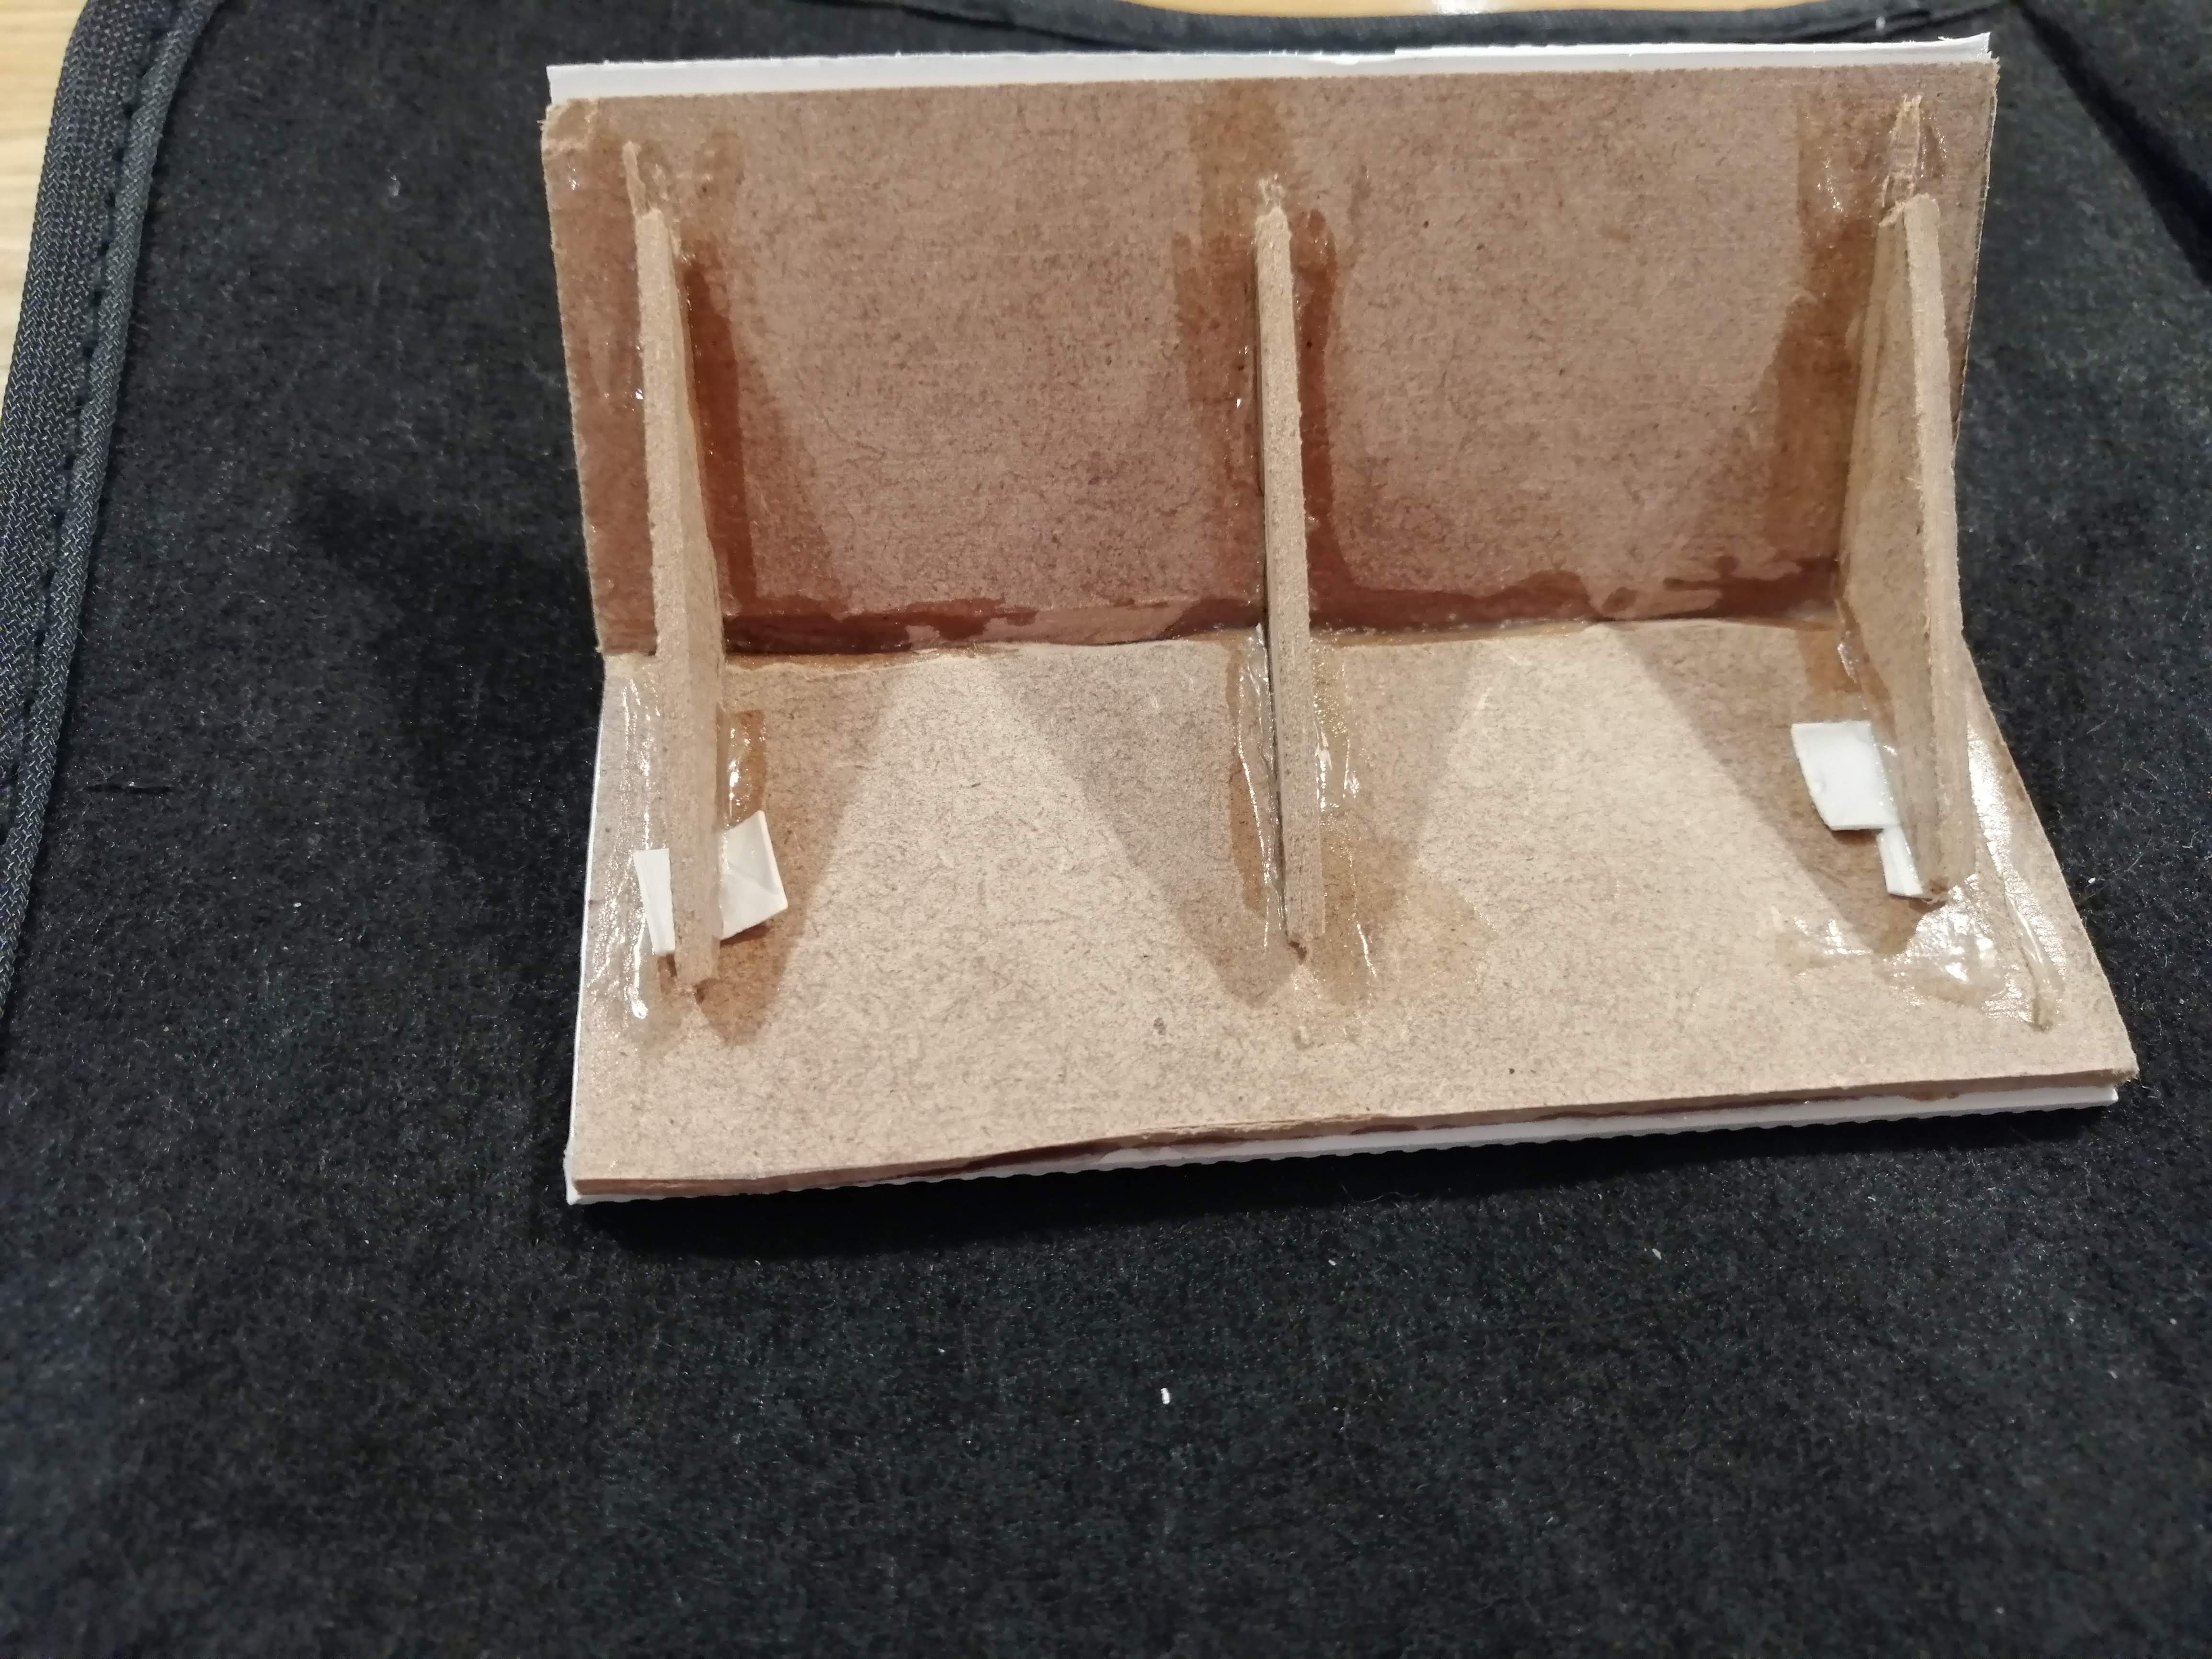 Roof with supports
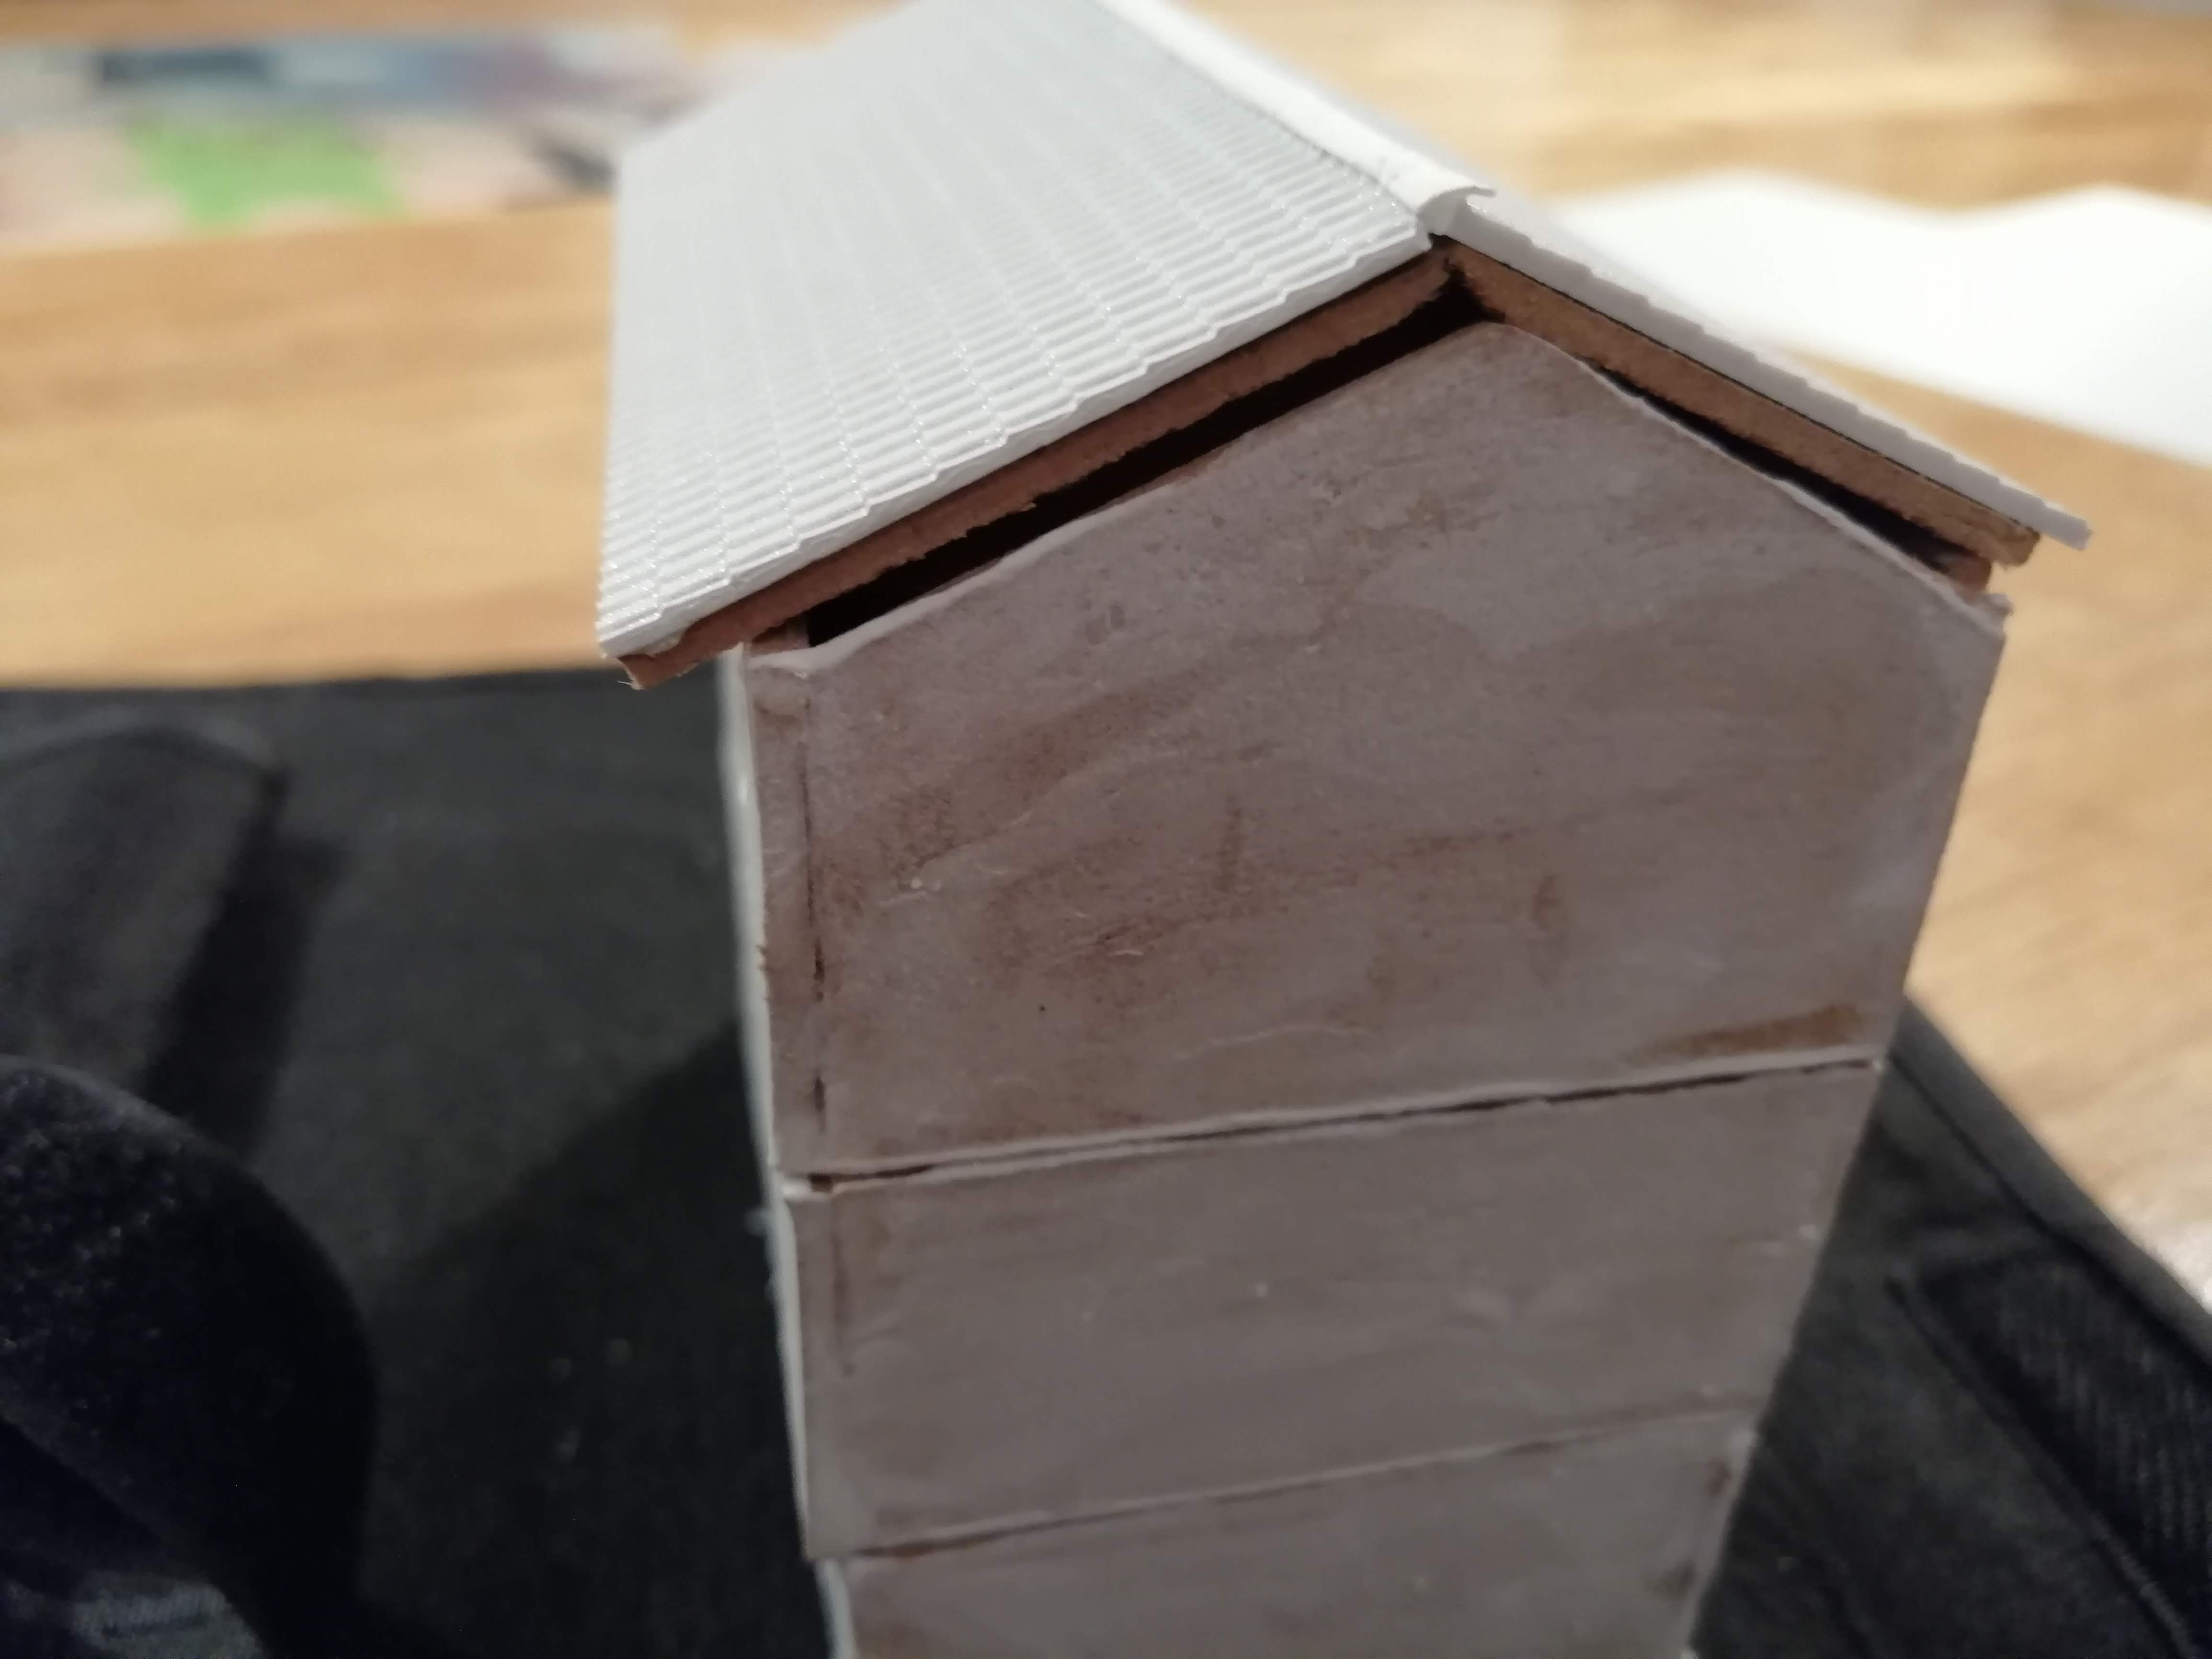 Wonky roof
While the plastic sheet tiles look good and I think the render has worked, the whole wonky look and the fact that the roof doesn’t fit is irritating. I’m also never going to have the time to design and cut out enough buildings to populate a village. So I need to find another way.
I then found this site:
http://www.razorlab.co.uk/
And I think that this could be my answer. They take vector line diagrams and use these to laser cut your chosen material – and 3mm mdf is just one such material. So I’m going to design the building and see whether I can get this right before launching head first into it.
Monte Cassino - Completed
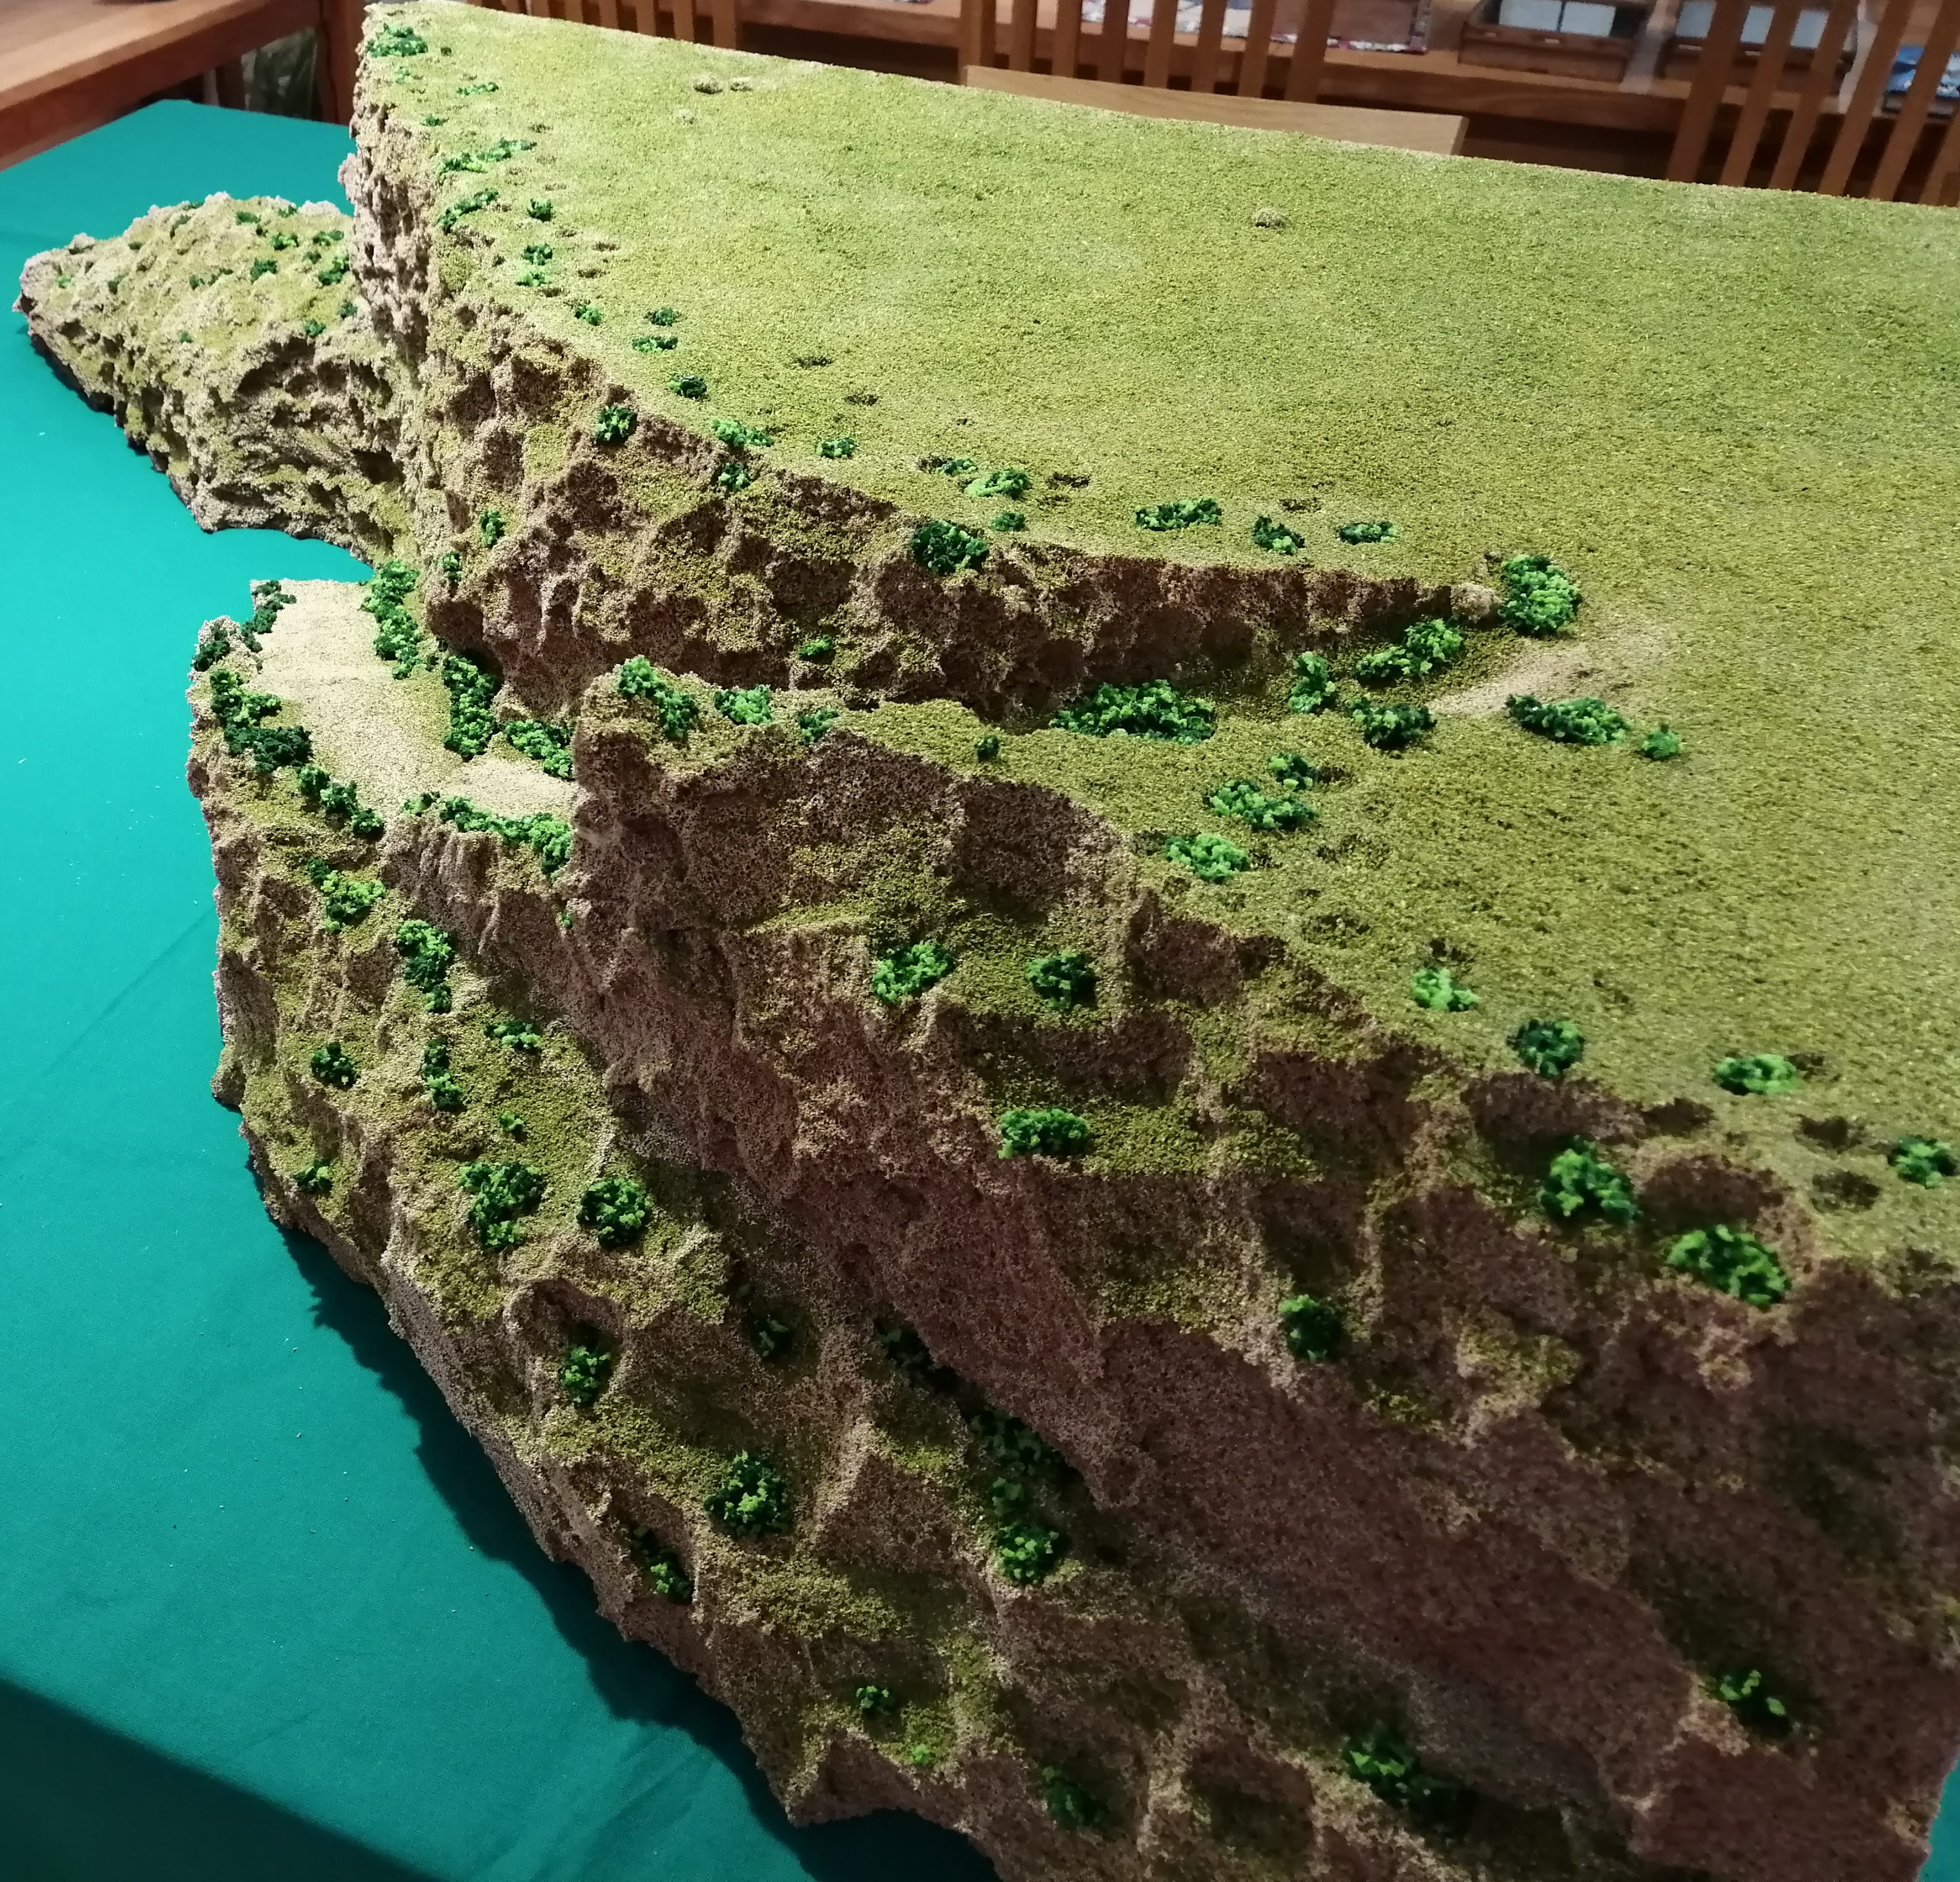
The pva glued clump foliage is now all dry and for the sake of speed, I think that this terrain is now complete. It’s certainly ‘table ready’.
 Entire hill from the front
 looking up the road
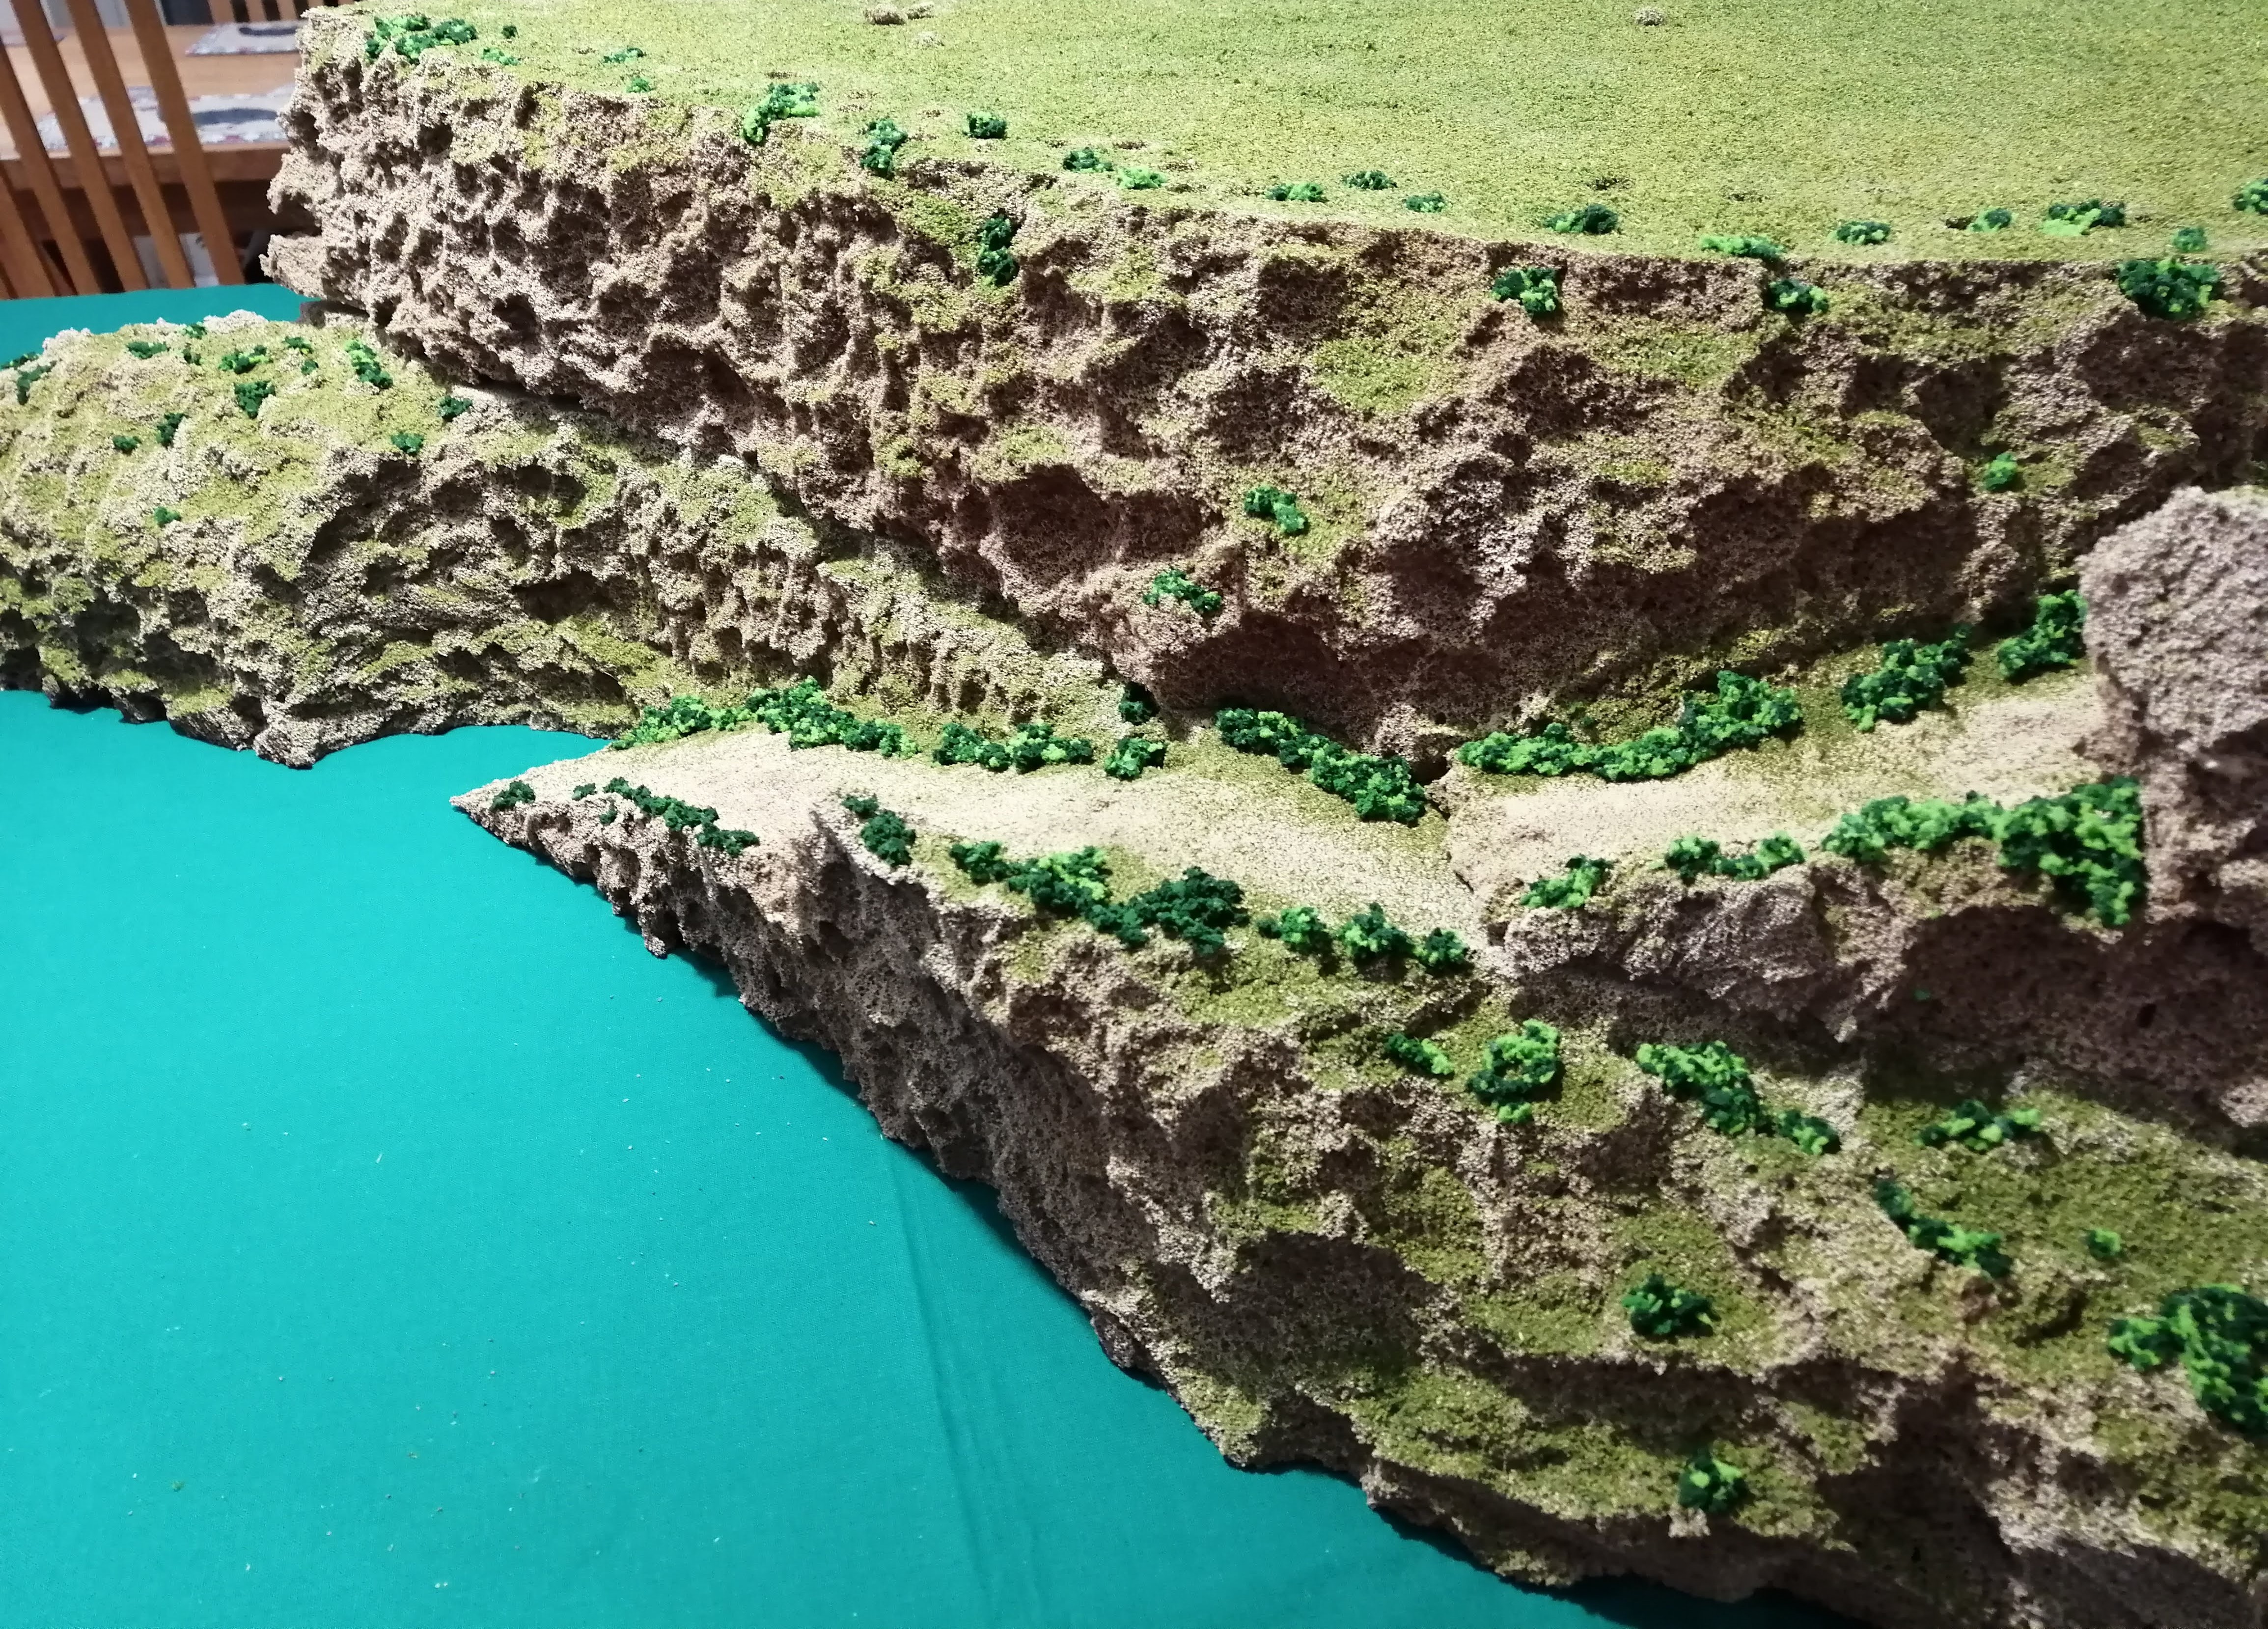
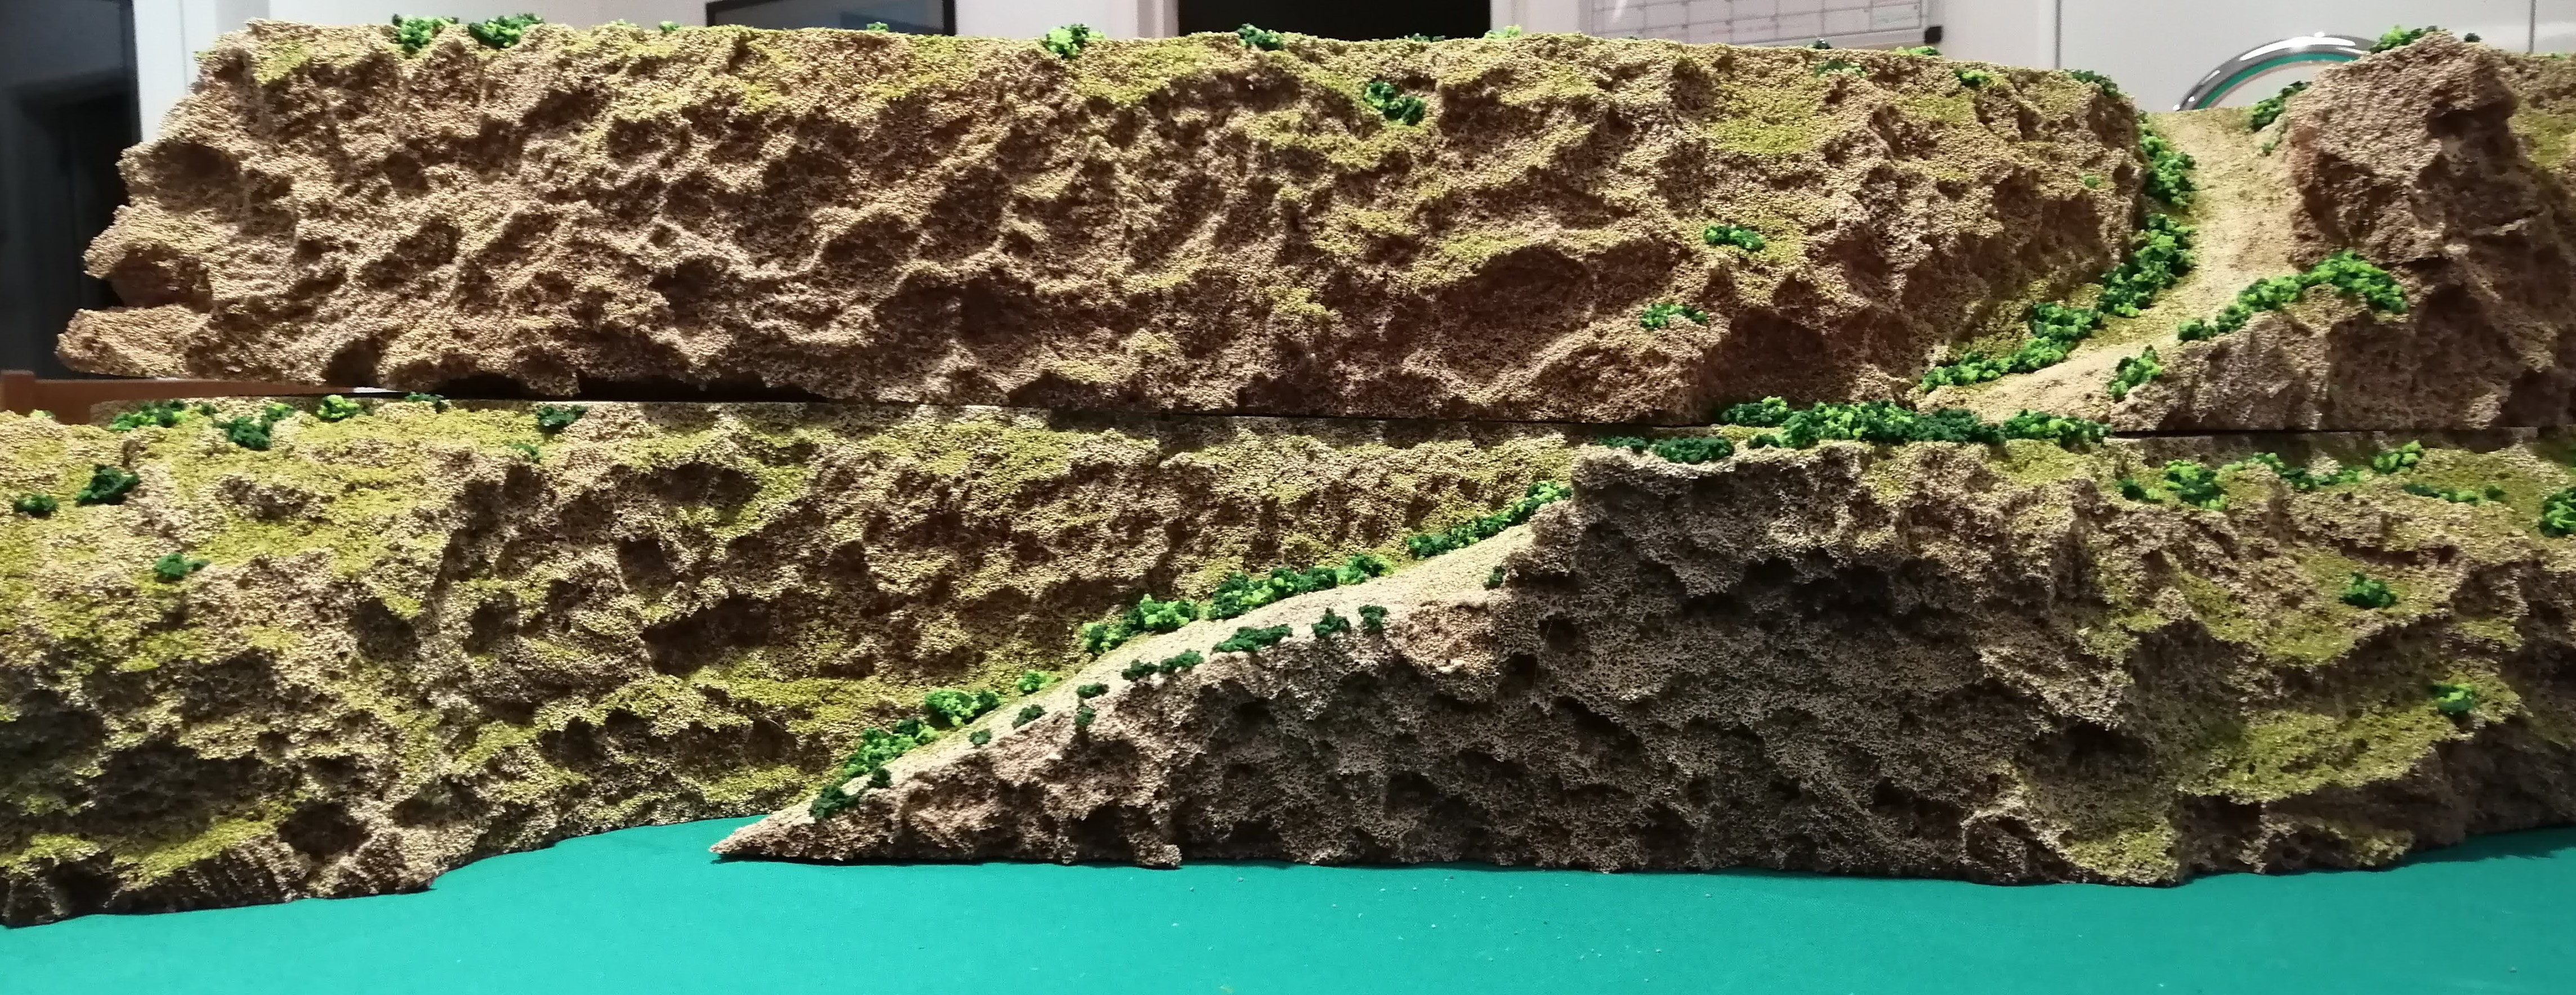 A shot from the bottom of the hill (you can see where the two bits of foam meet on the left side but don't tell anyone!)
Monte Cassino - Flocking
With the sand/paint/PVA mixture dry, it needs some depth. I mixed up a thin, dark brown wash and applied this over the road. Once dry, I added a second wash but this time in two thin lines to create the impression of tyre tracks.
 The road with wash applied
Time to start flocking. In the interests of speed and simplicity, I mixed up three different flocks and applied PVA liberally over the tops of the hills, along the sides of the road and the upper cliff faces. Monte Cassino had a fair coverage of flora and the flocking should represent this.
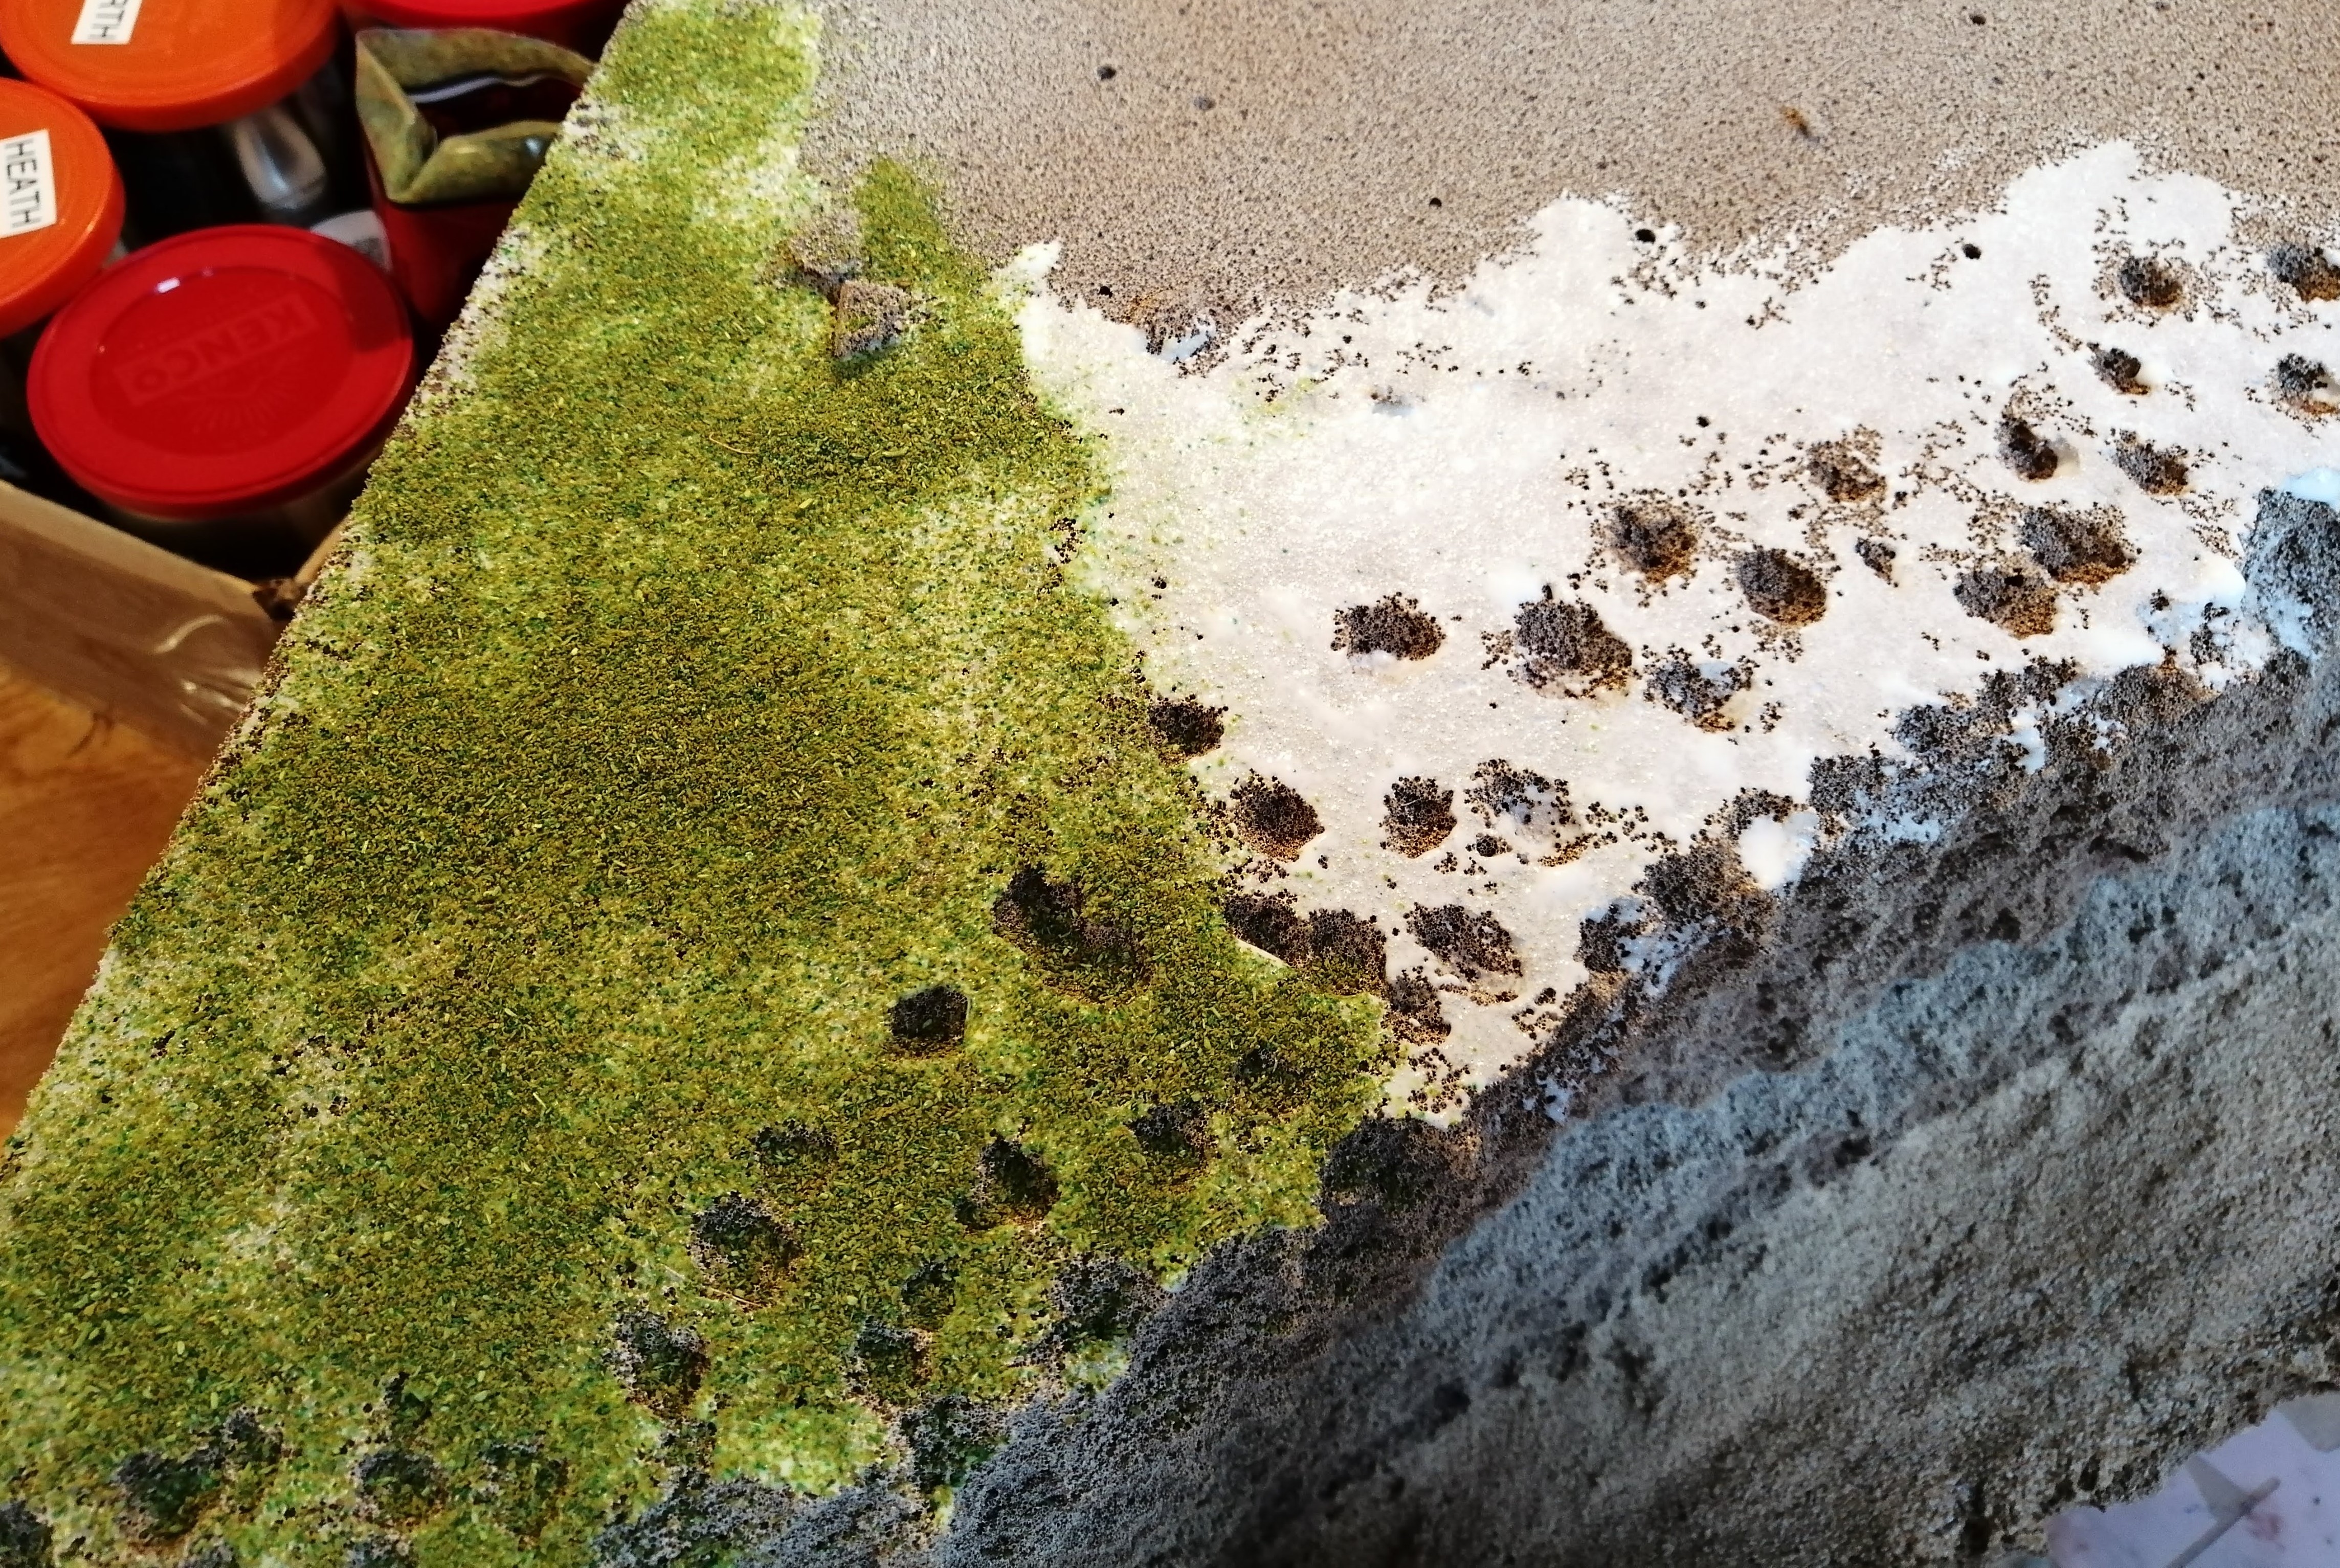 Applying the flocking
Once dry, I sprayed a very watered down PVA mixture. I had to do this several times to ensure a good coverage. This helps the flock stick and stop it dropping off all over your gaming table and models.
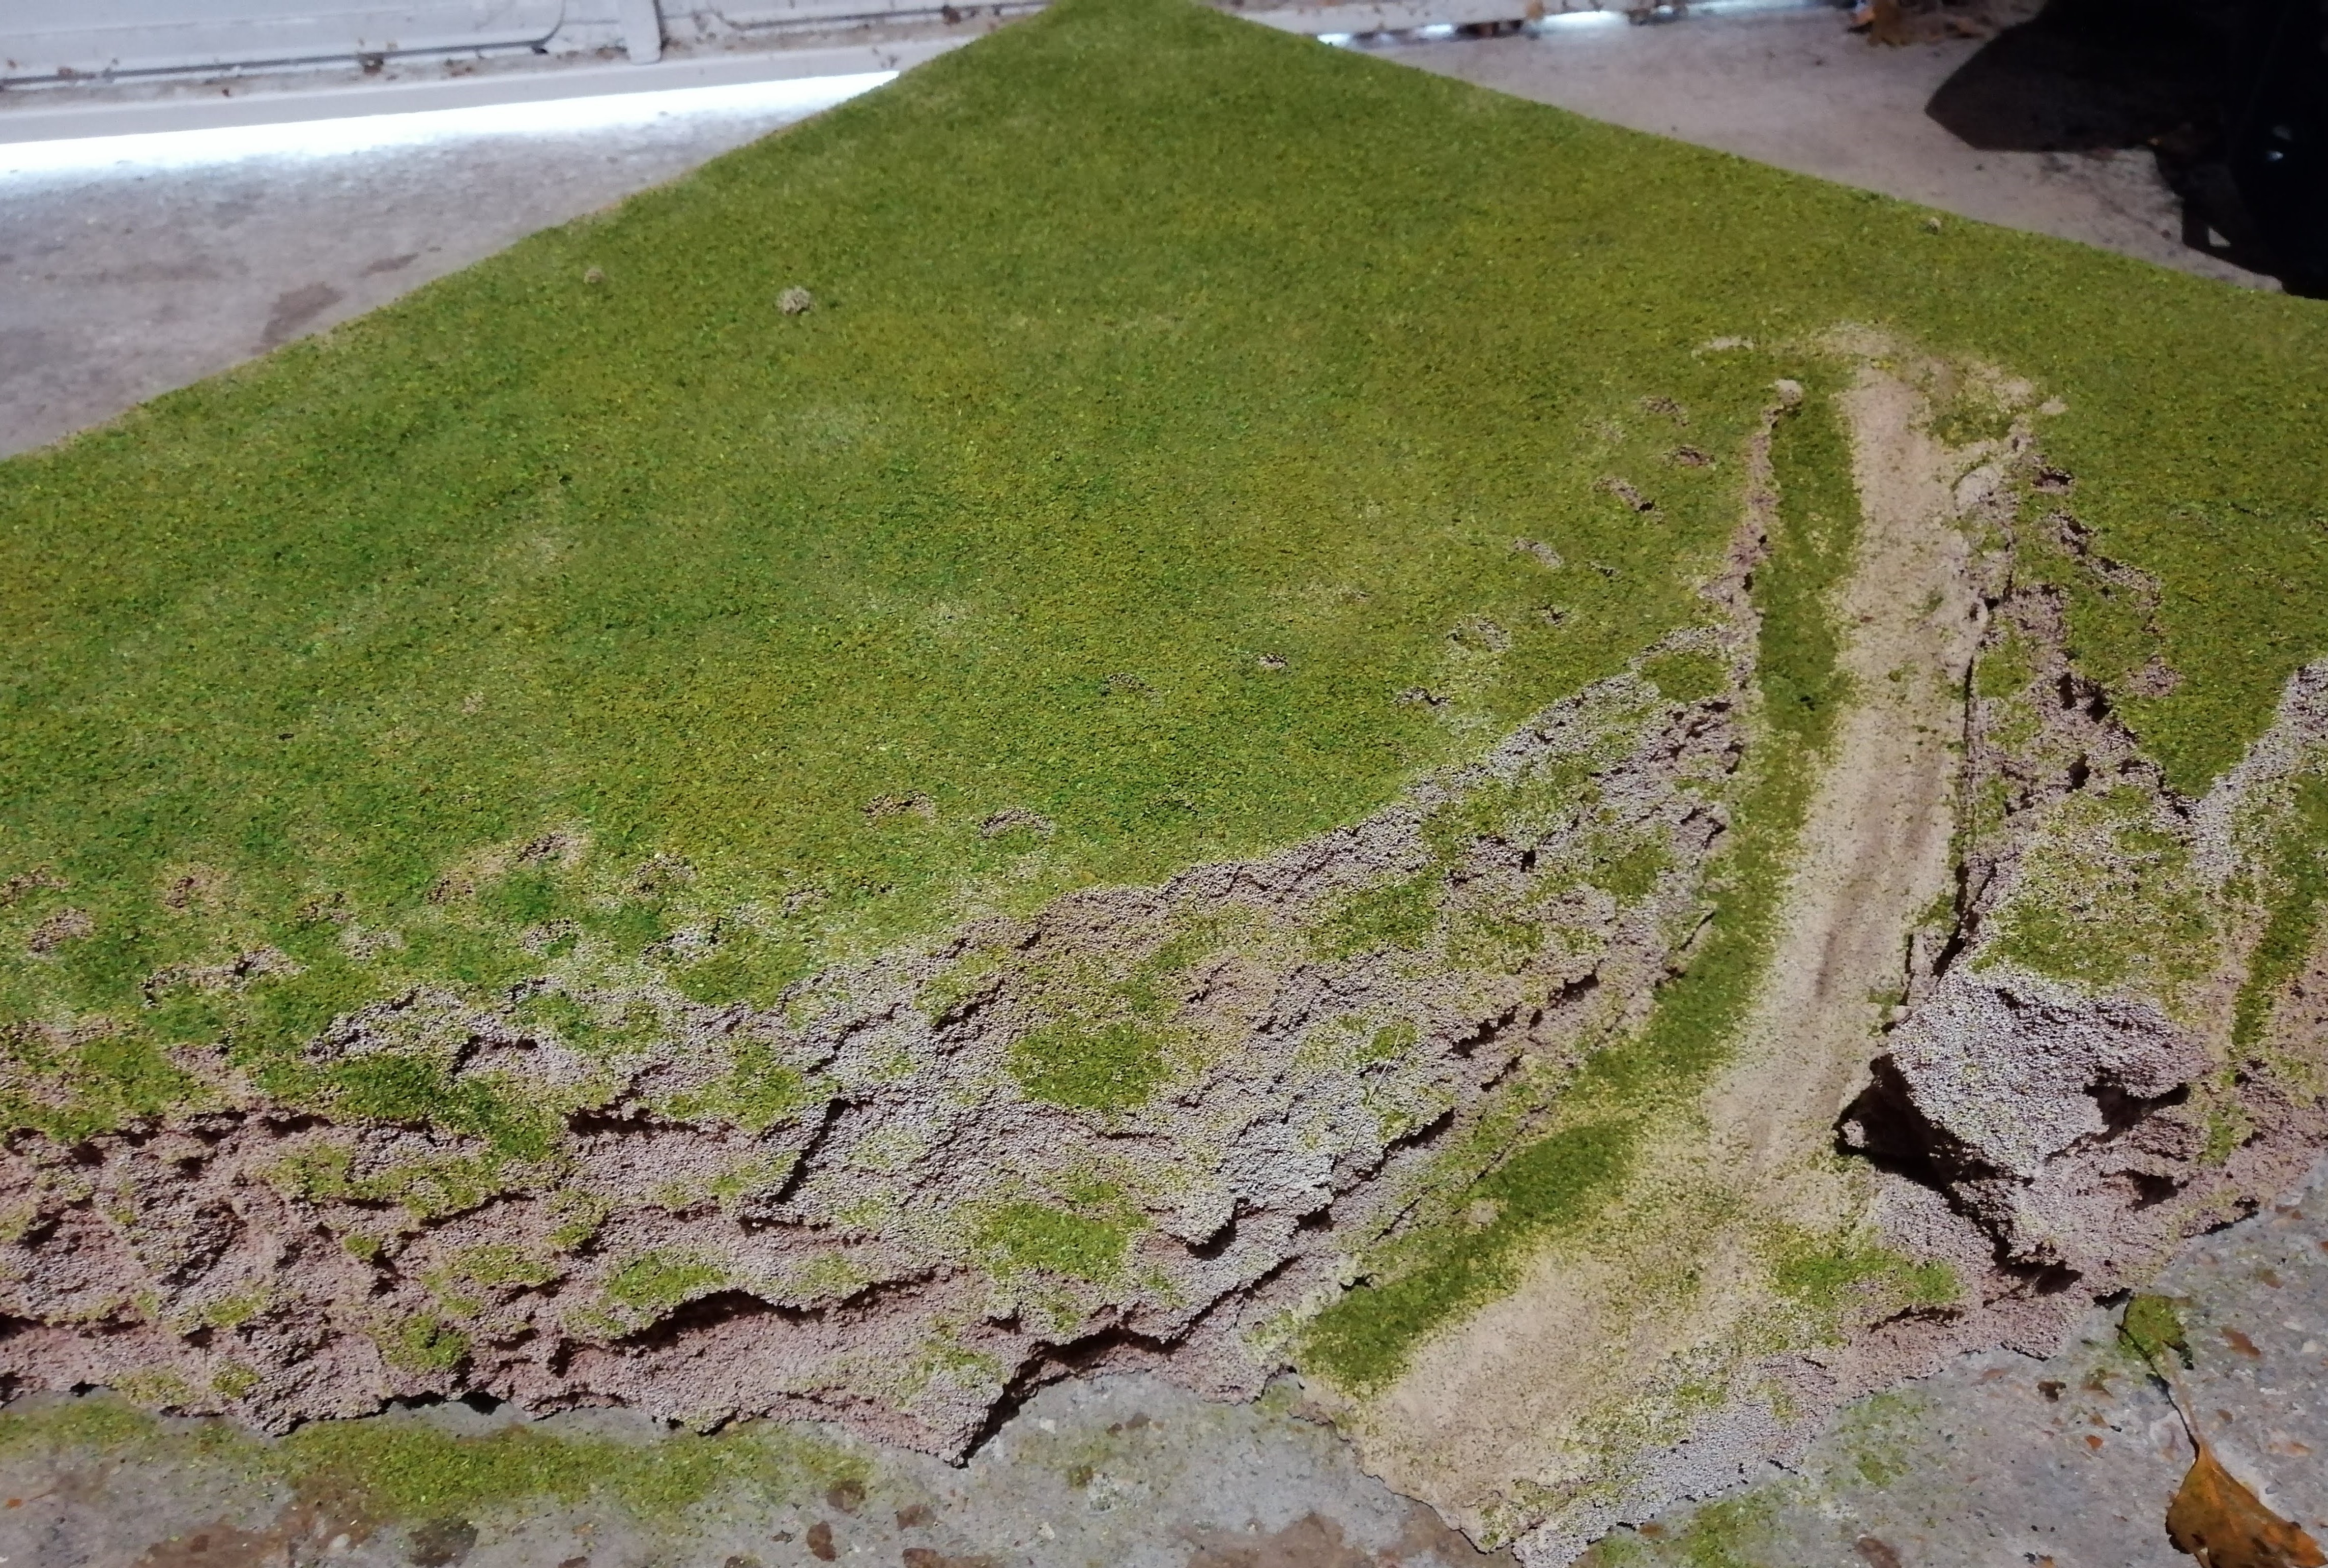 The top of Monte Cassino on my garage floor, all flocked
 The upper sides of the cliff face
To add bushes and more flora, I mixed up a 50:50 water/PVA mix and dumped different coloured clump foliage in. Once soaked through, I applied this across the terrain. I also applied this along the join area to try to conceal the fact that the finished terrain is two pieces of foam.
The down side of this soaking is that it takes some time to dry but at least dries hard.
 Applying the foliage where required
 Applying along the steep sides
Monte Cassino - Roads and highlights
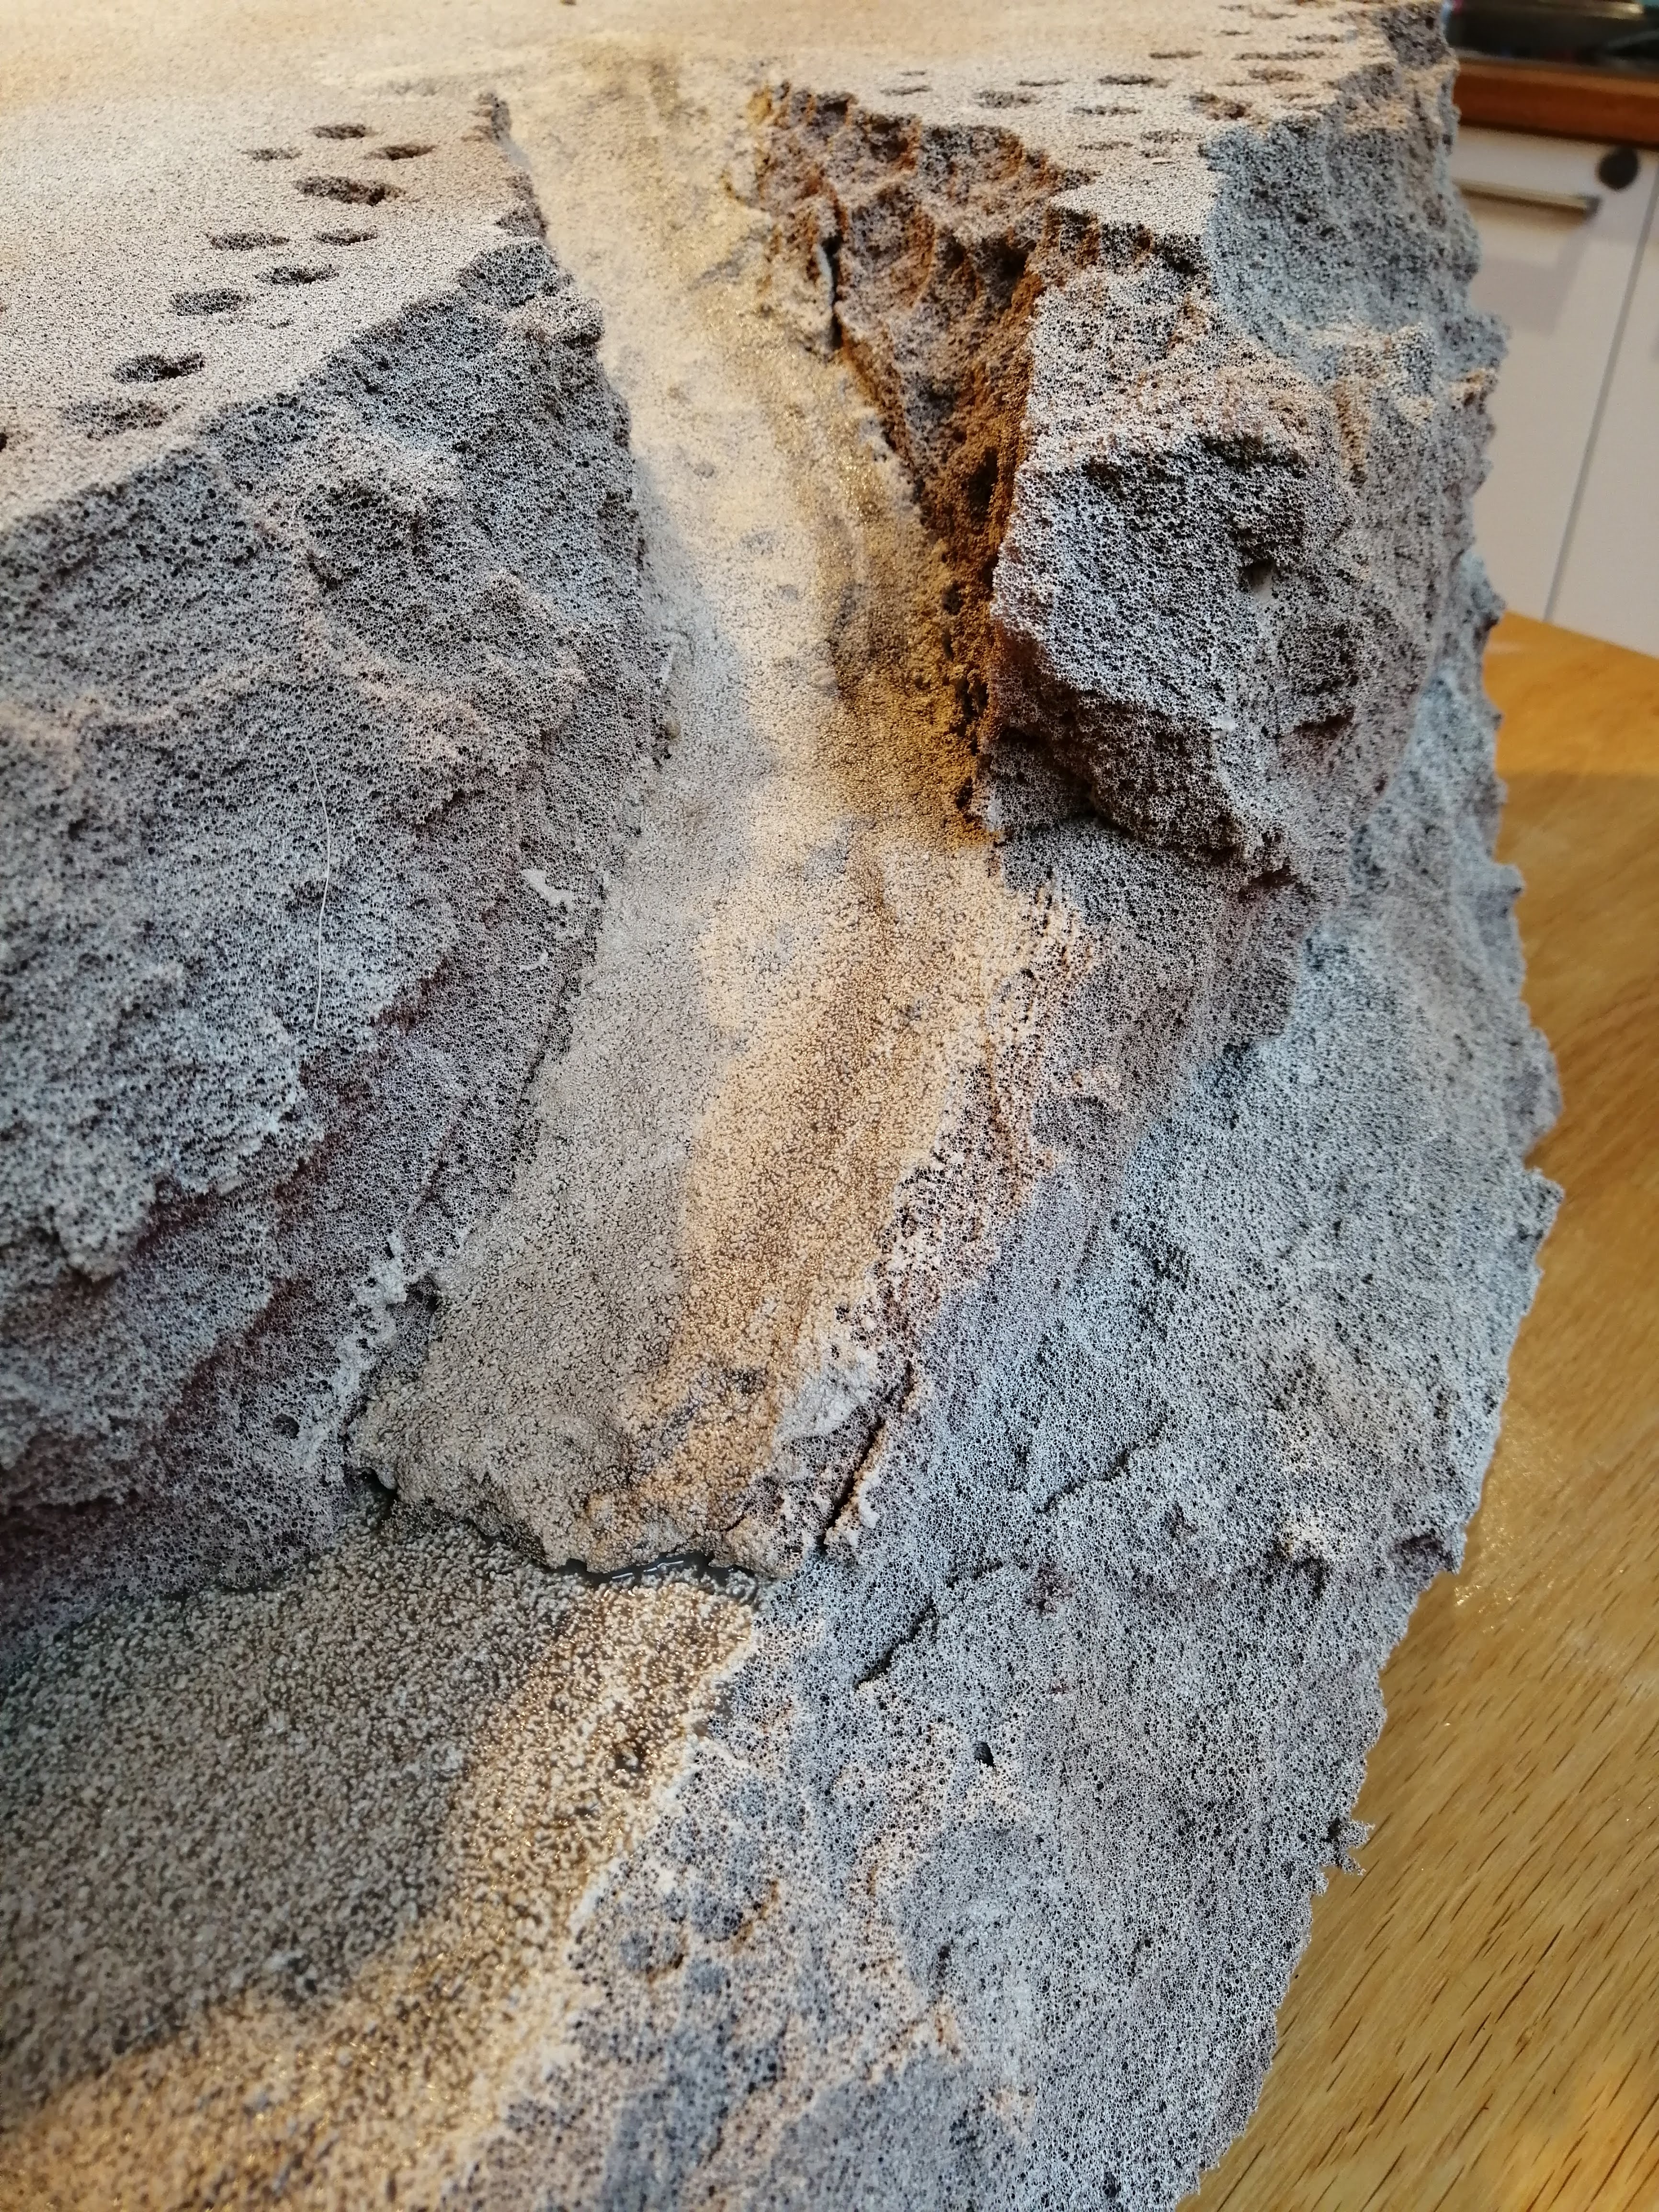
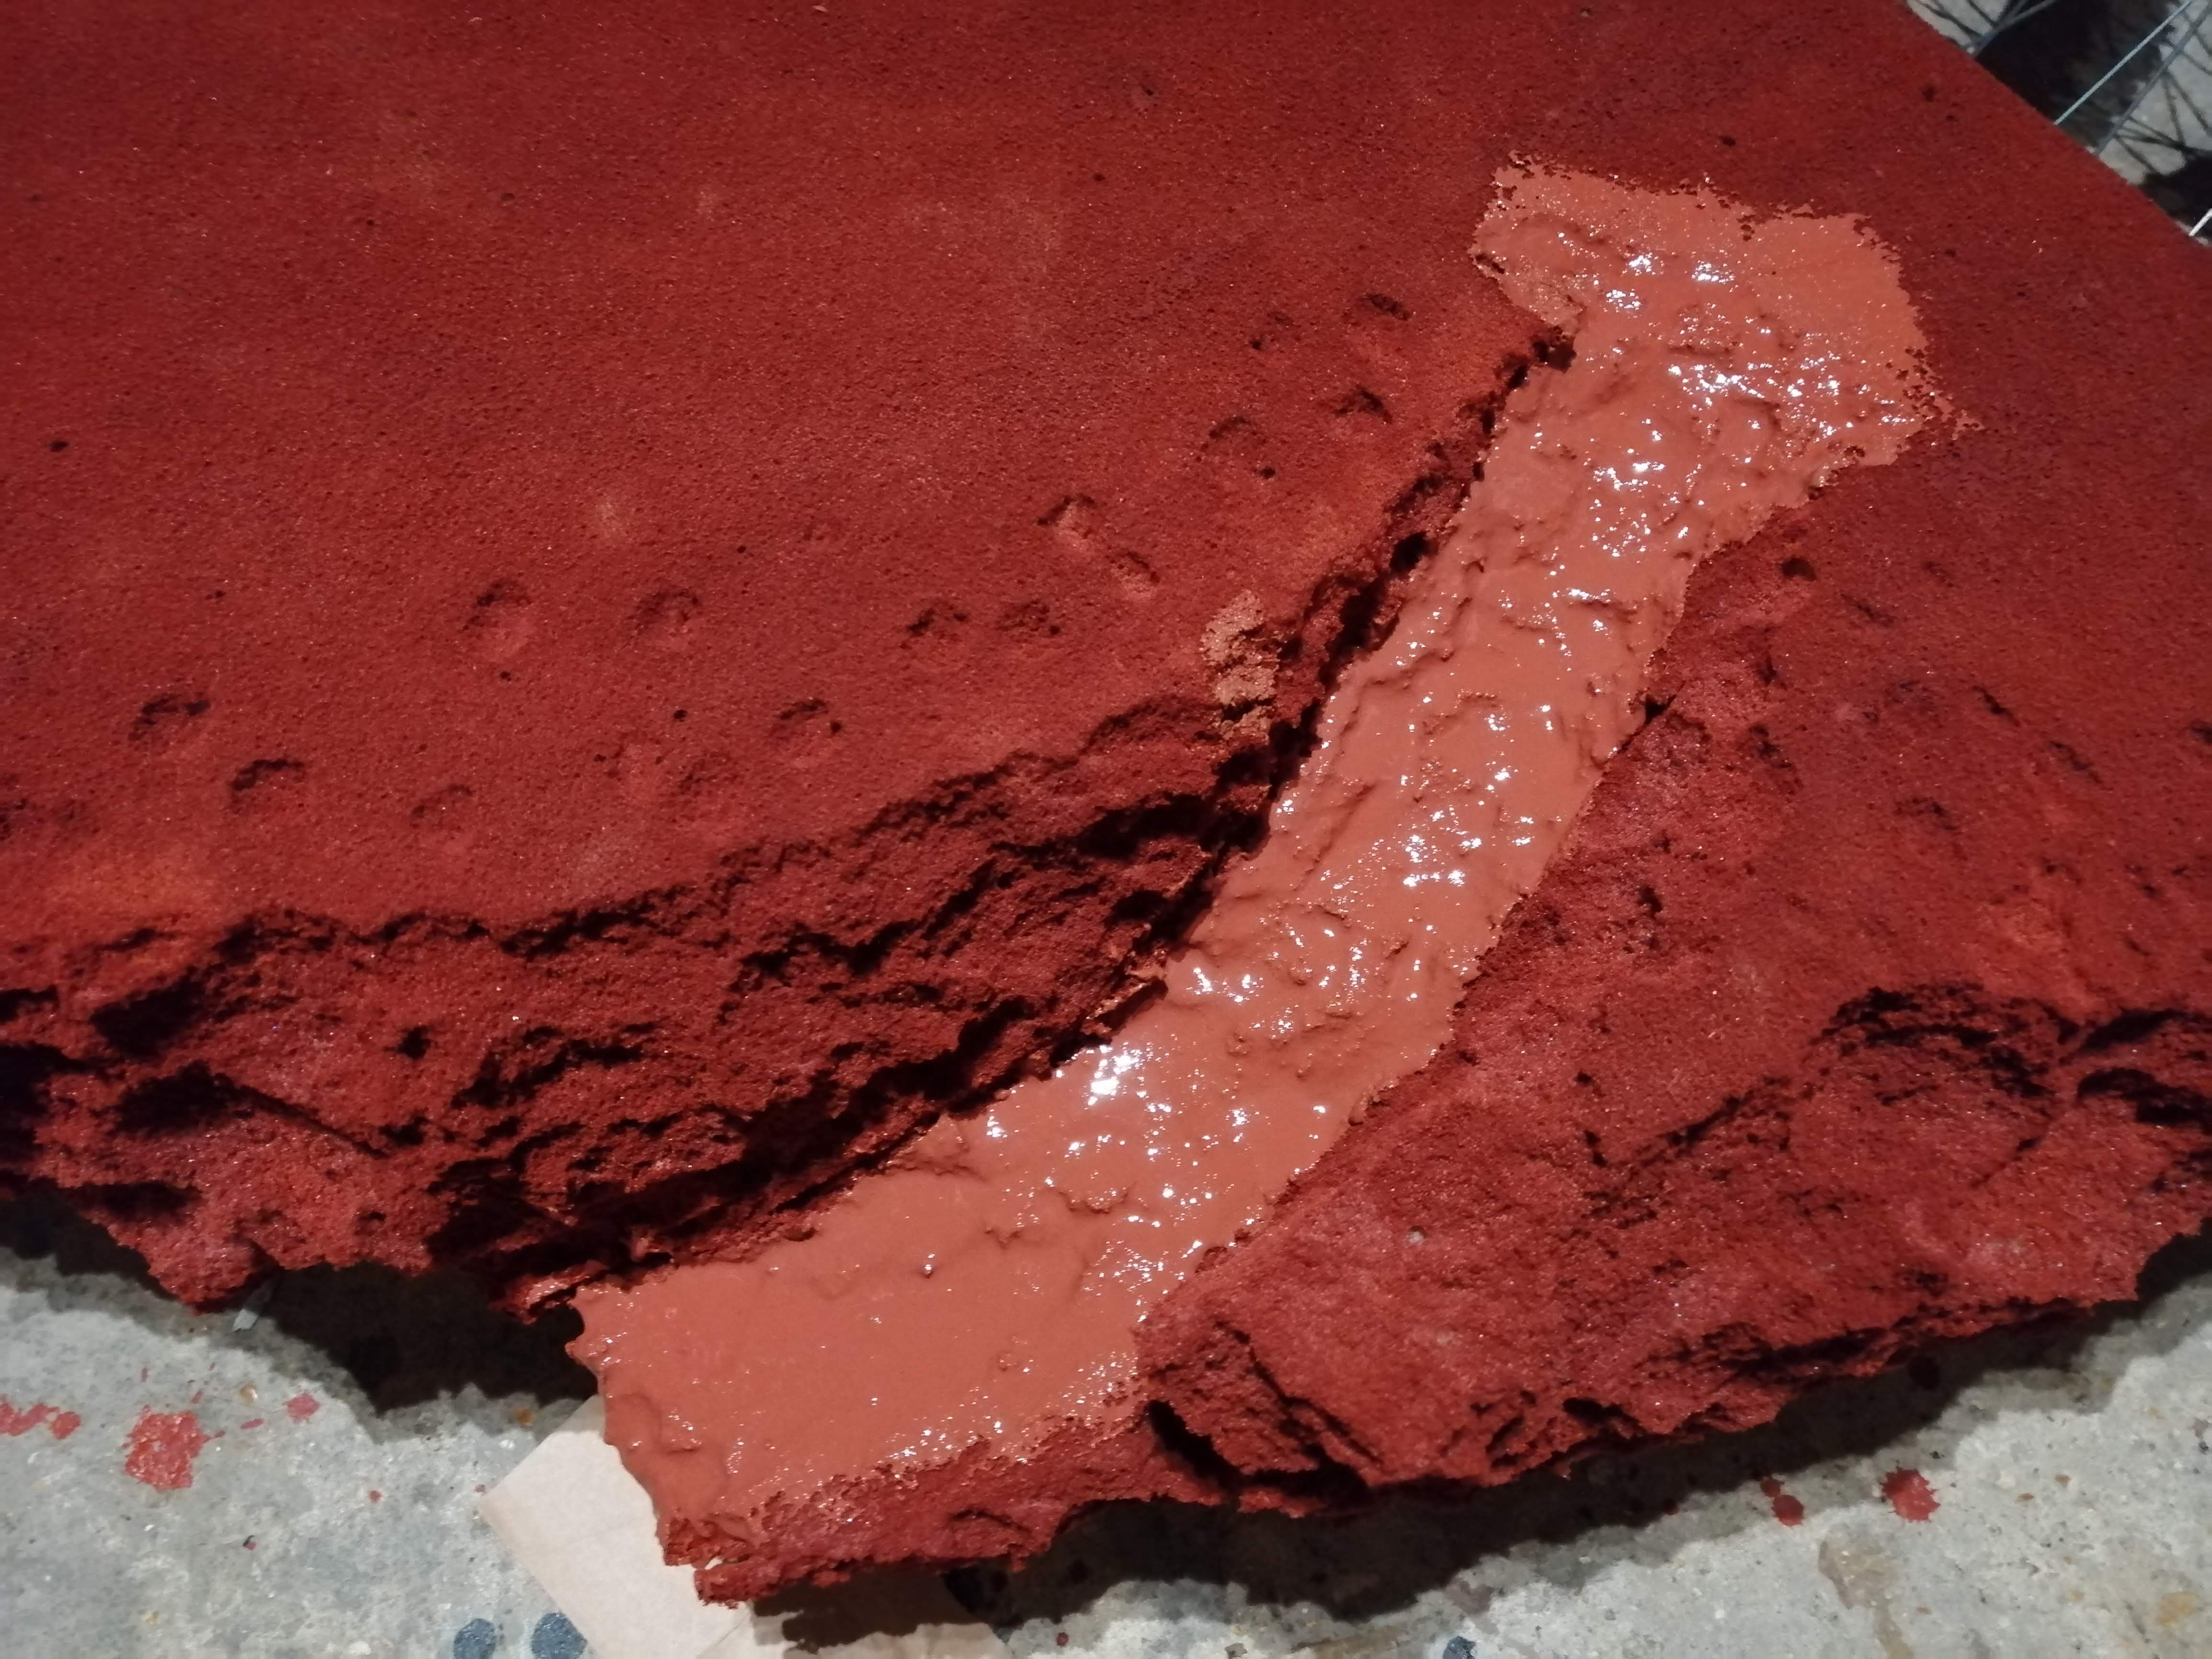
I managed to get a small amount of hobby done over the Christmas holidays. I wanted to get the dirt road in place up the side of Monte Cassino and felt the best way to do this was was to mix up some sand with PVA glue. The sand should be the right scale to be ‘pebble’ size and look a little more like a dirt road. I needed to colour it as well and so mixed in plenty of the brown paint used for colouring the rest of the foam.
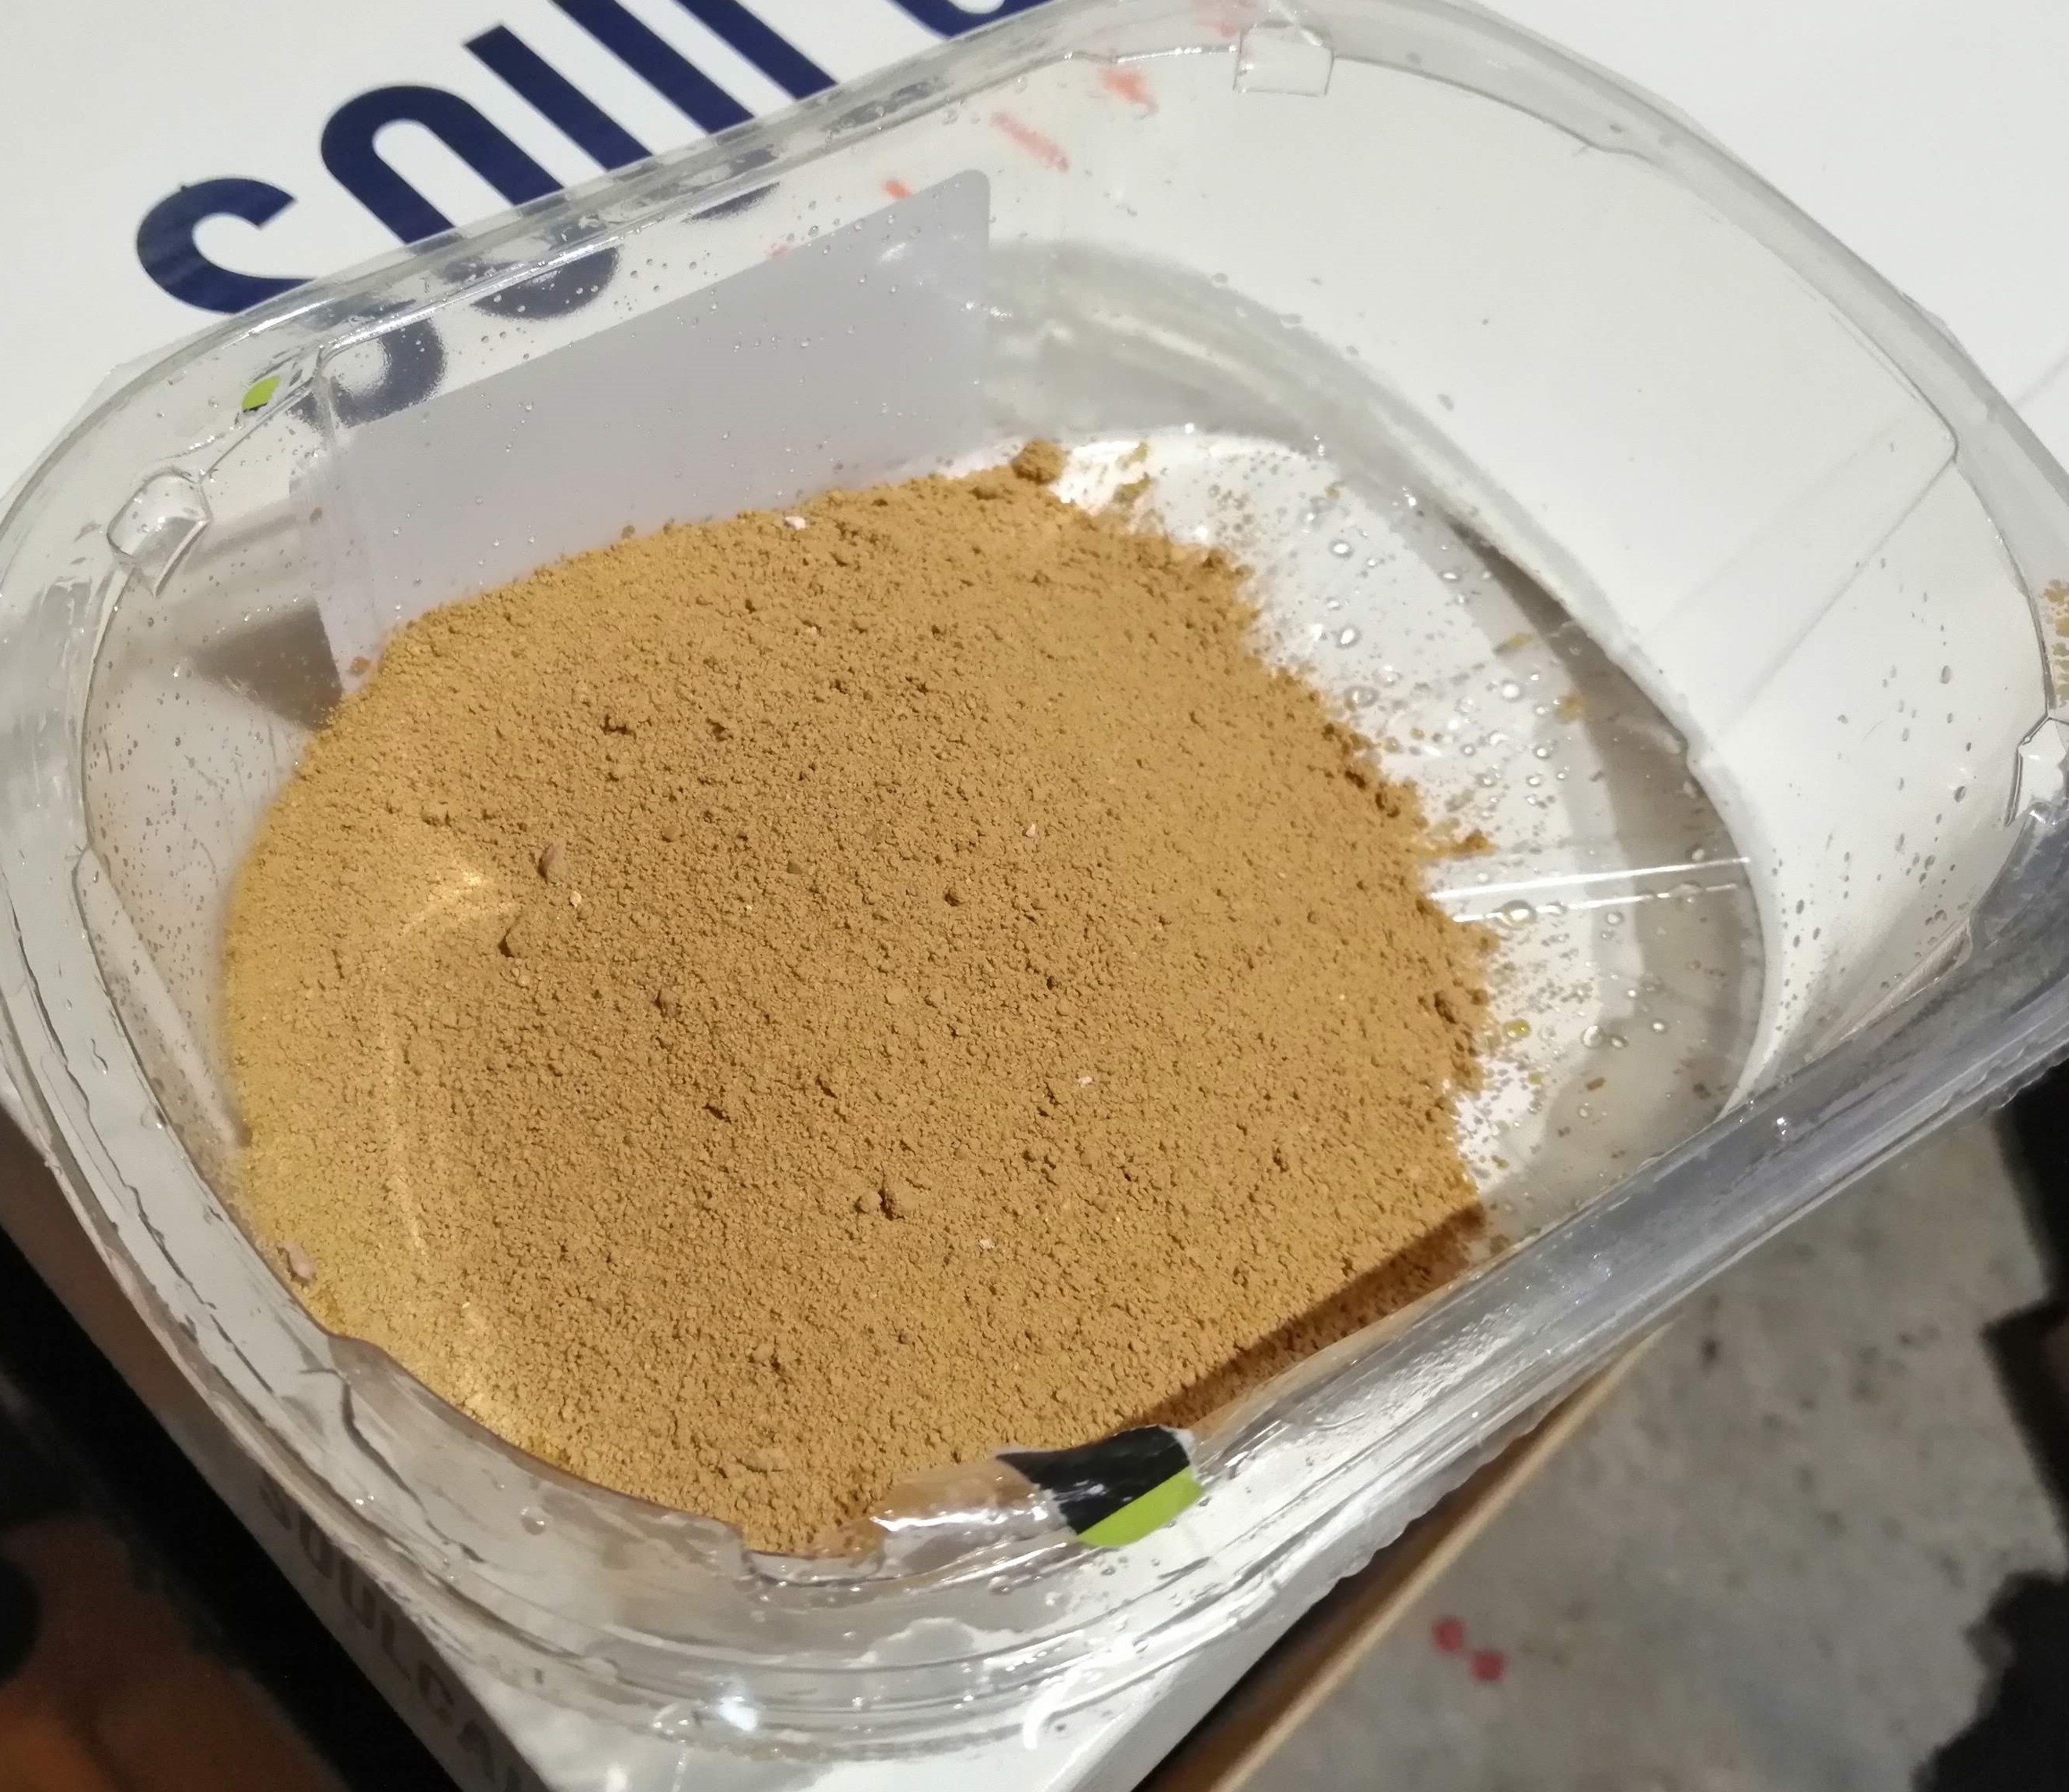
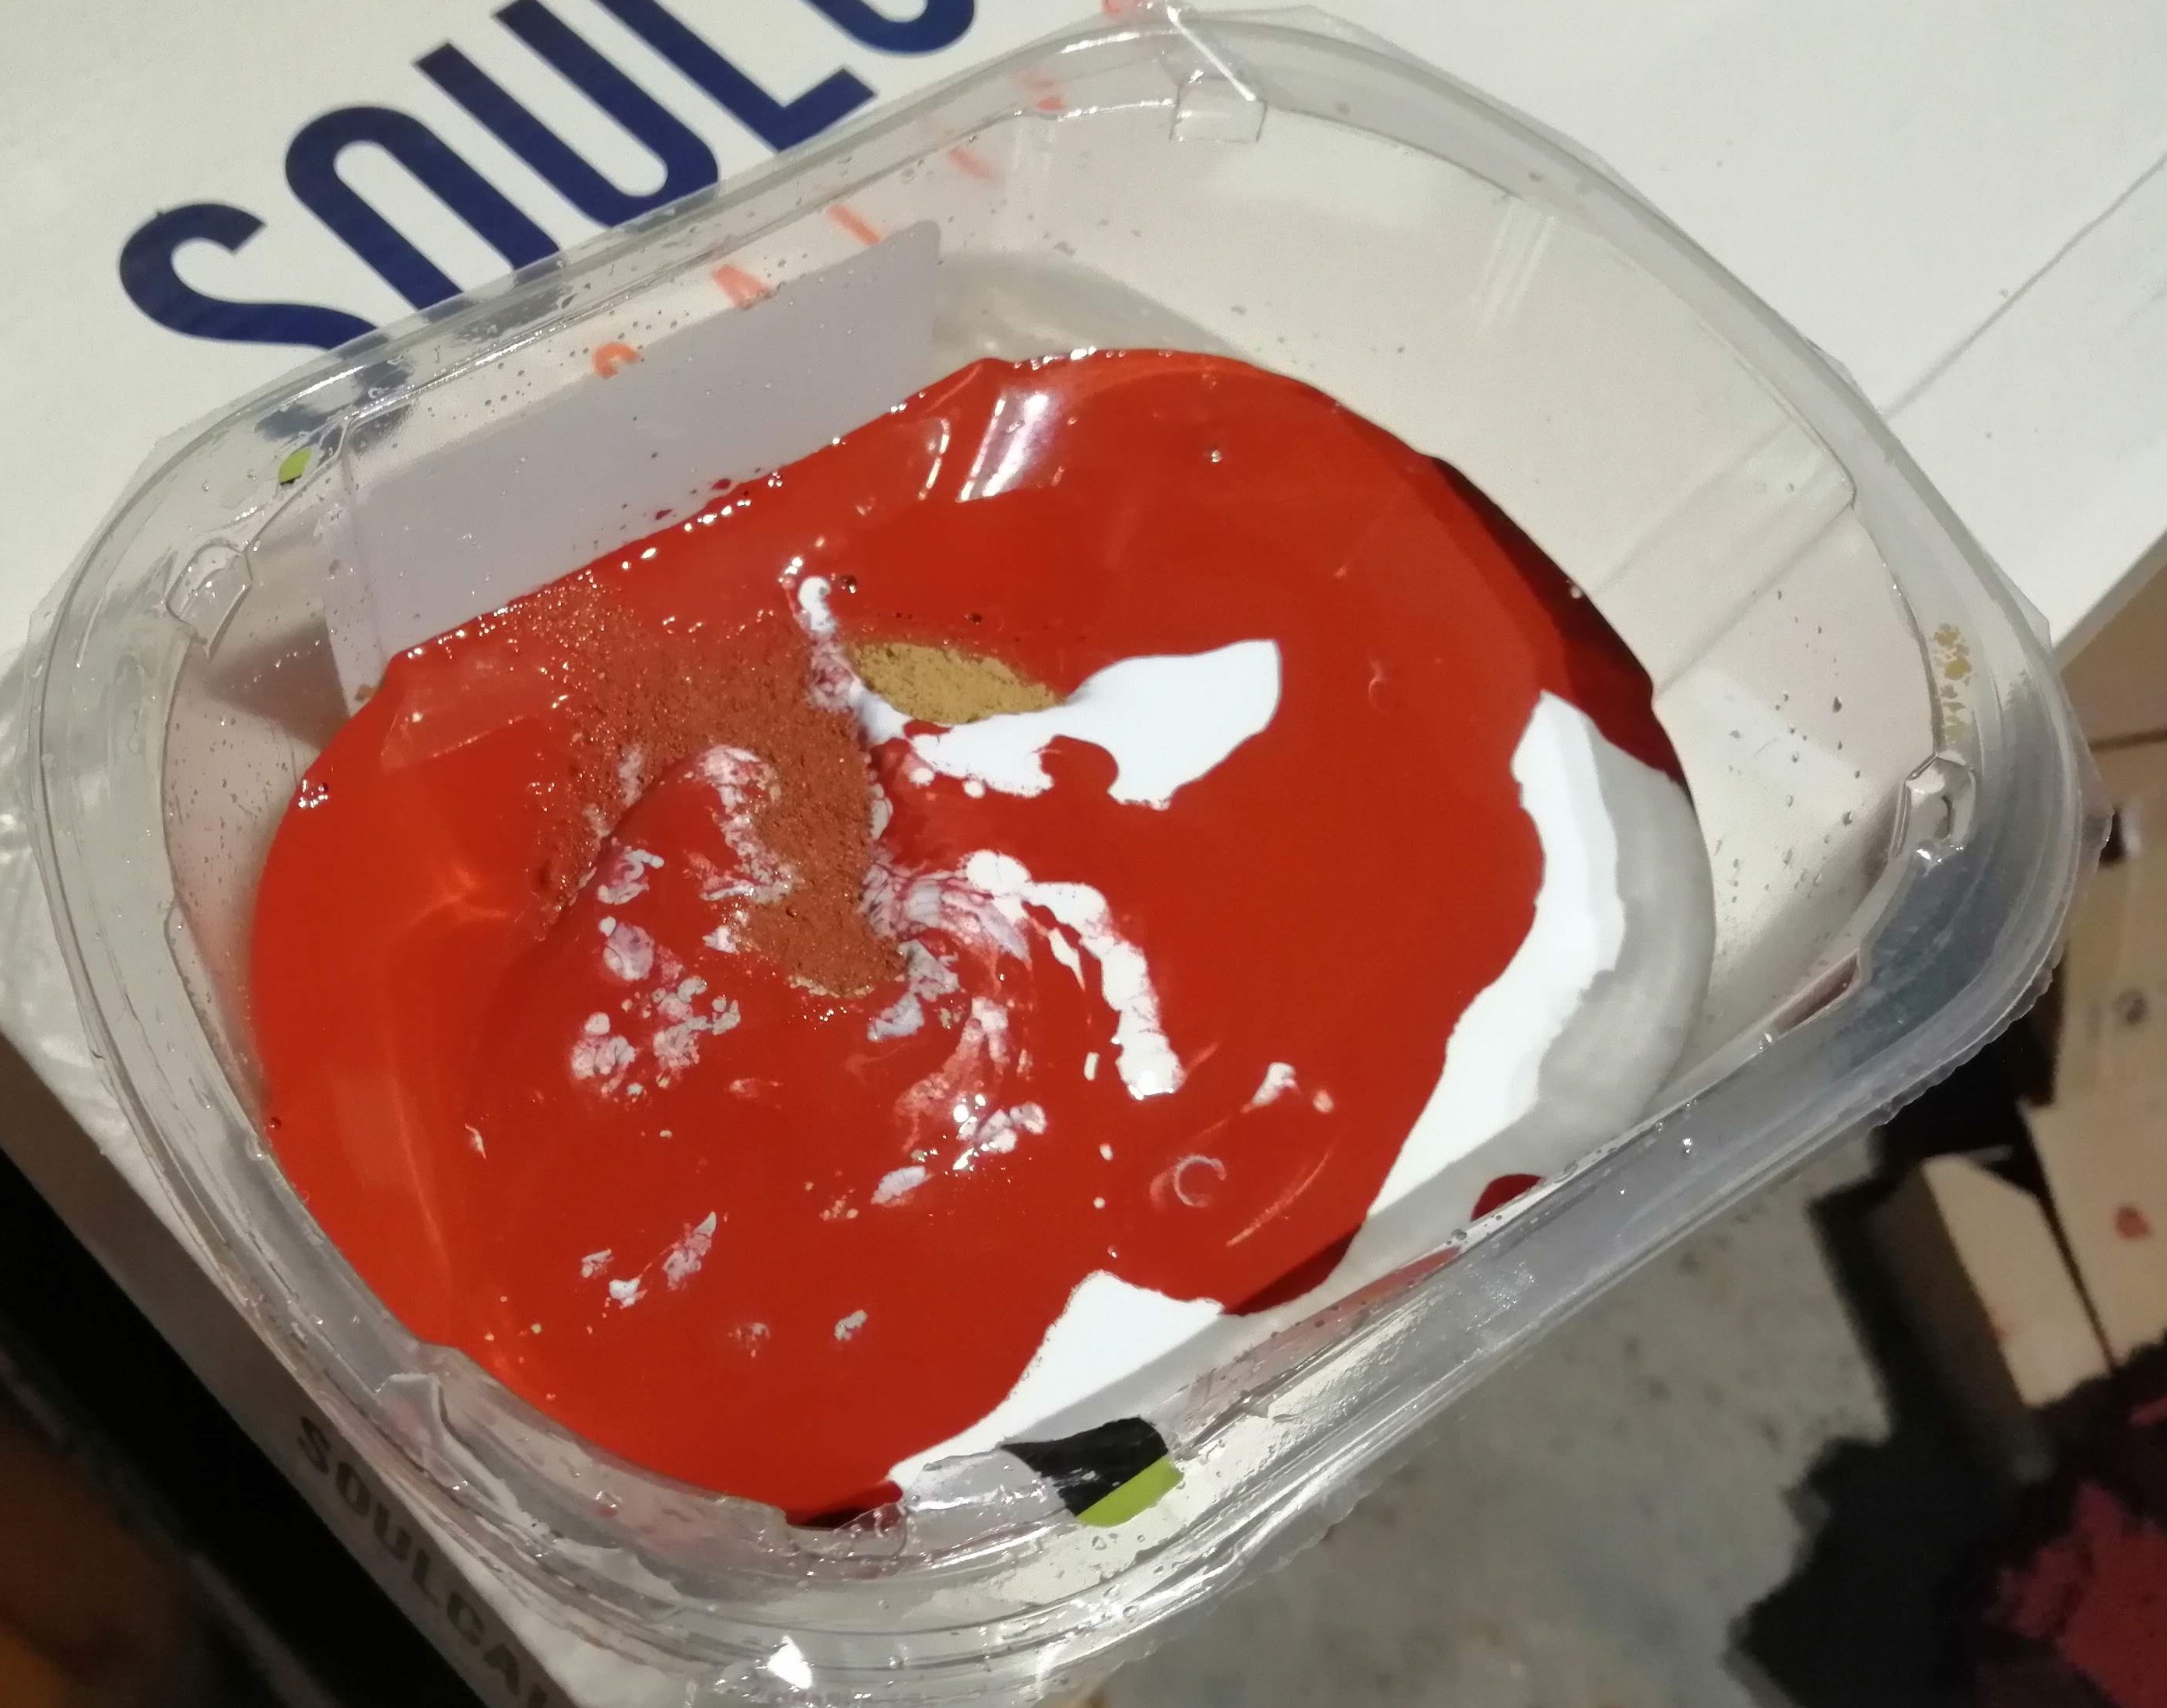
This mixture was then applied in a couple of layers to the area designed to be a road. This took several days to dry properly.
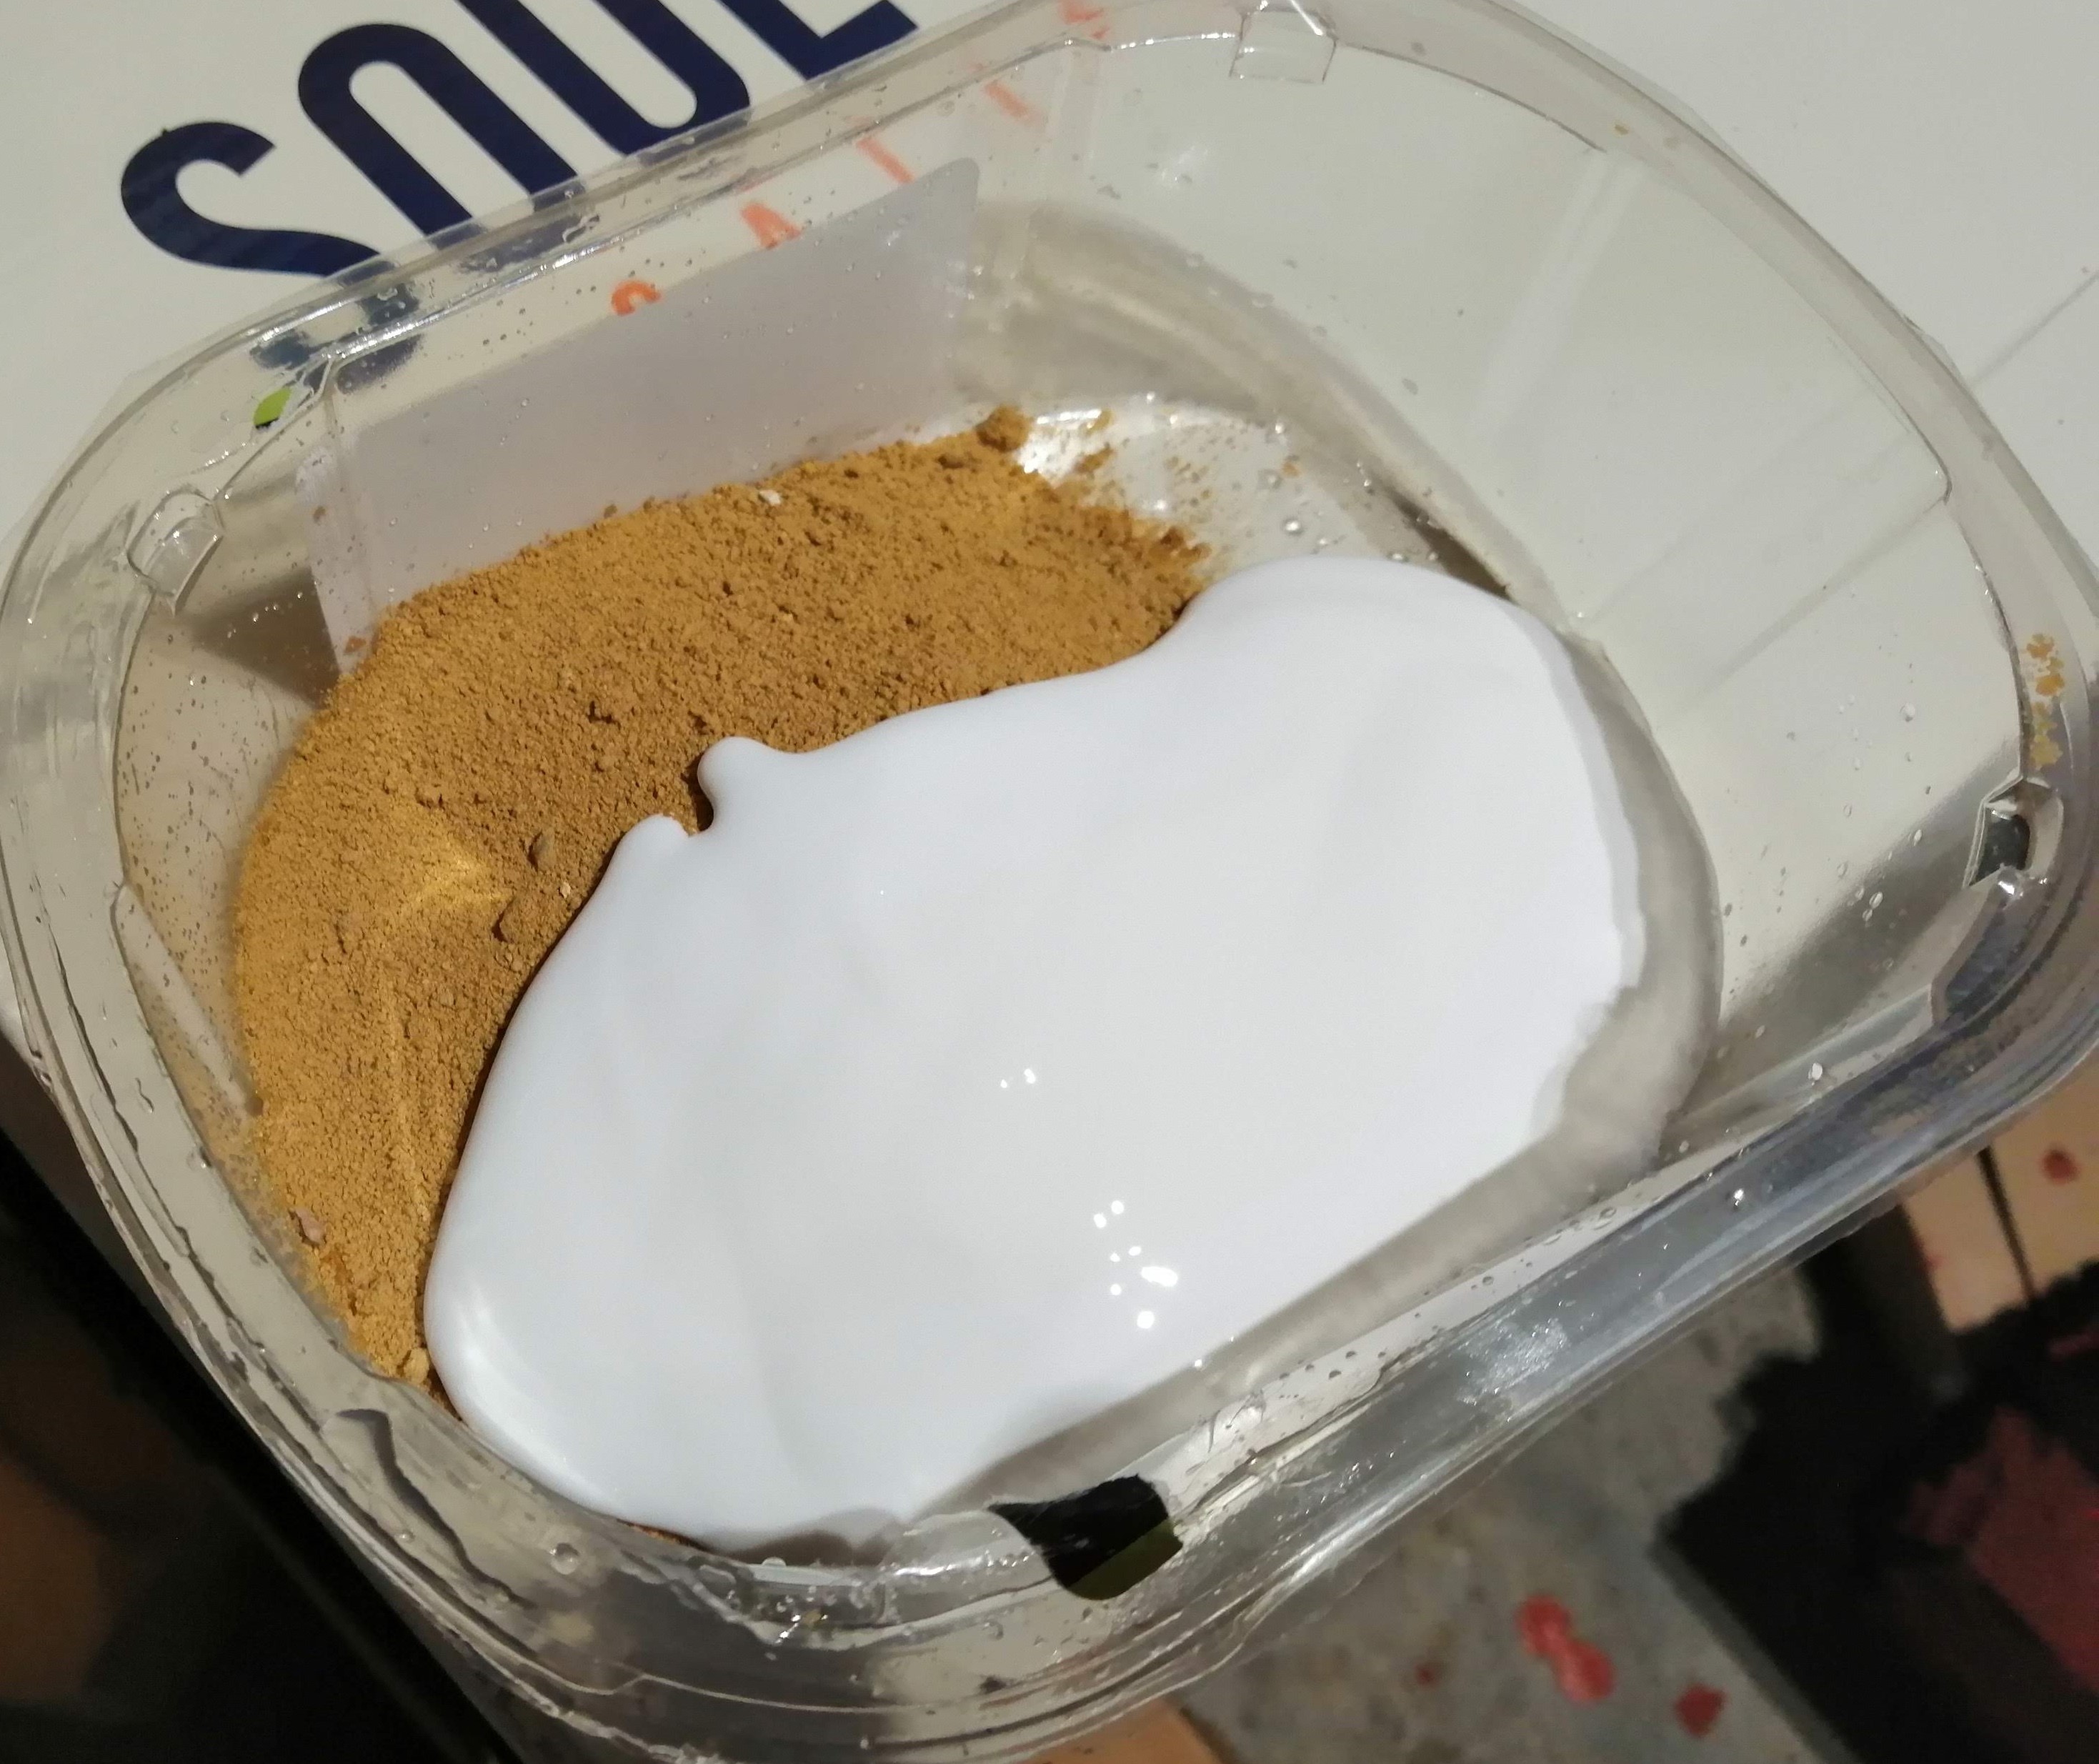
To provide the highlight, I found some cheap spray acrylics online and ordered these in. The rocks around Cassino are very light in colour so a light brown and bone white looked the best bet for getting the highlight right.
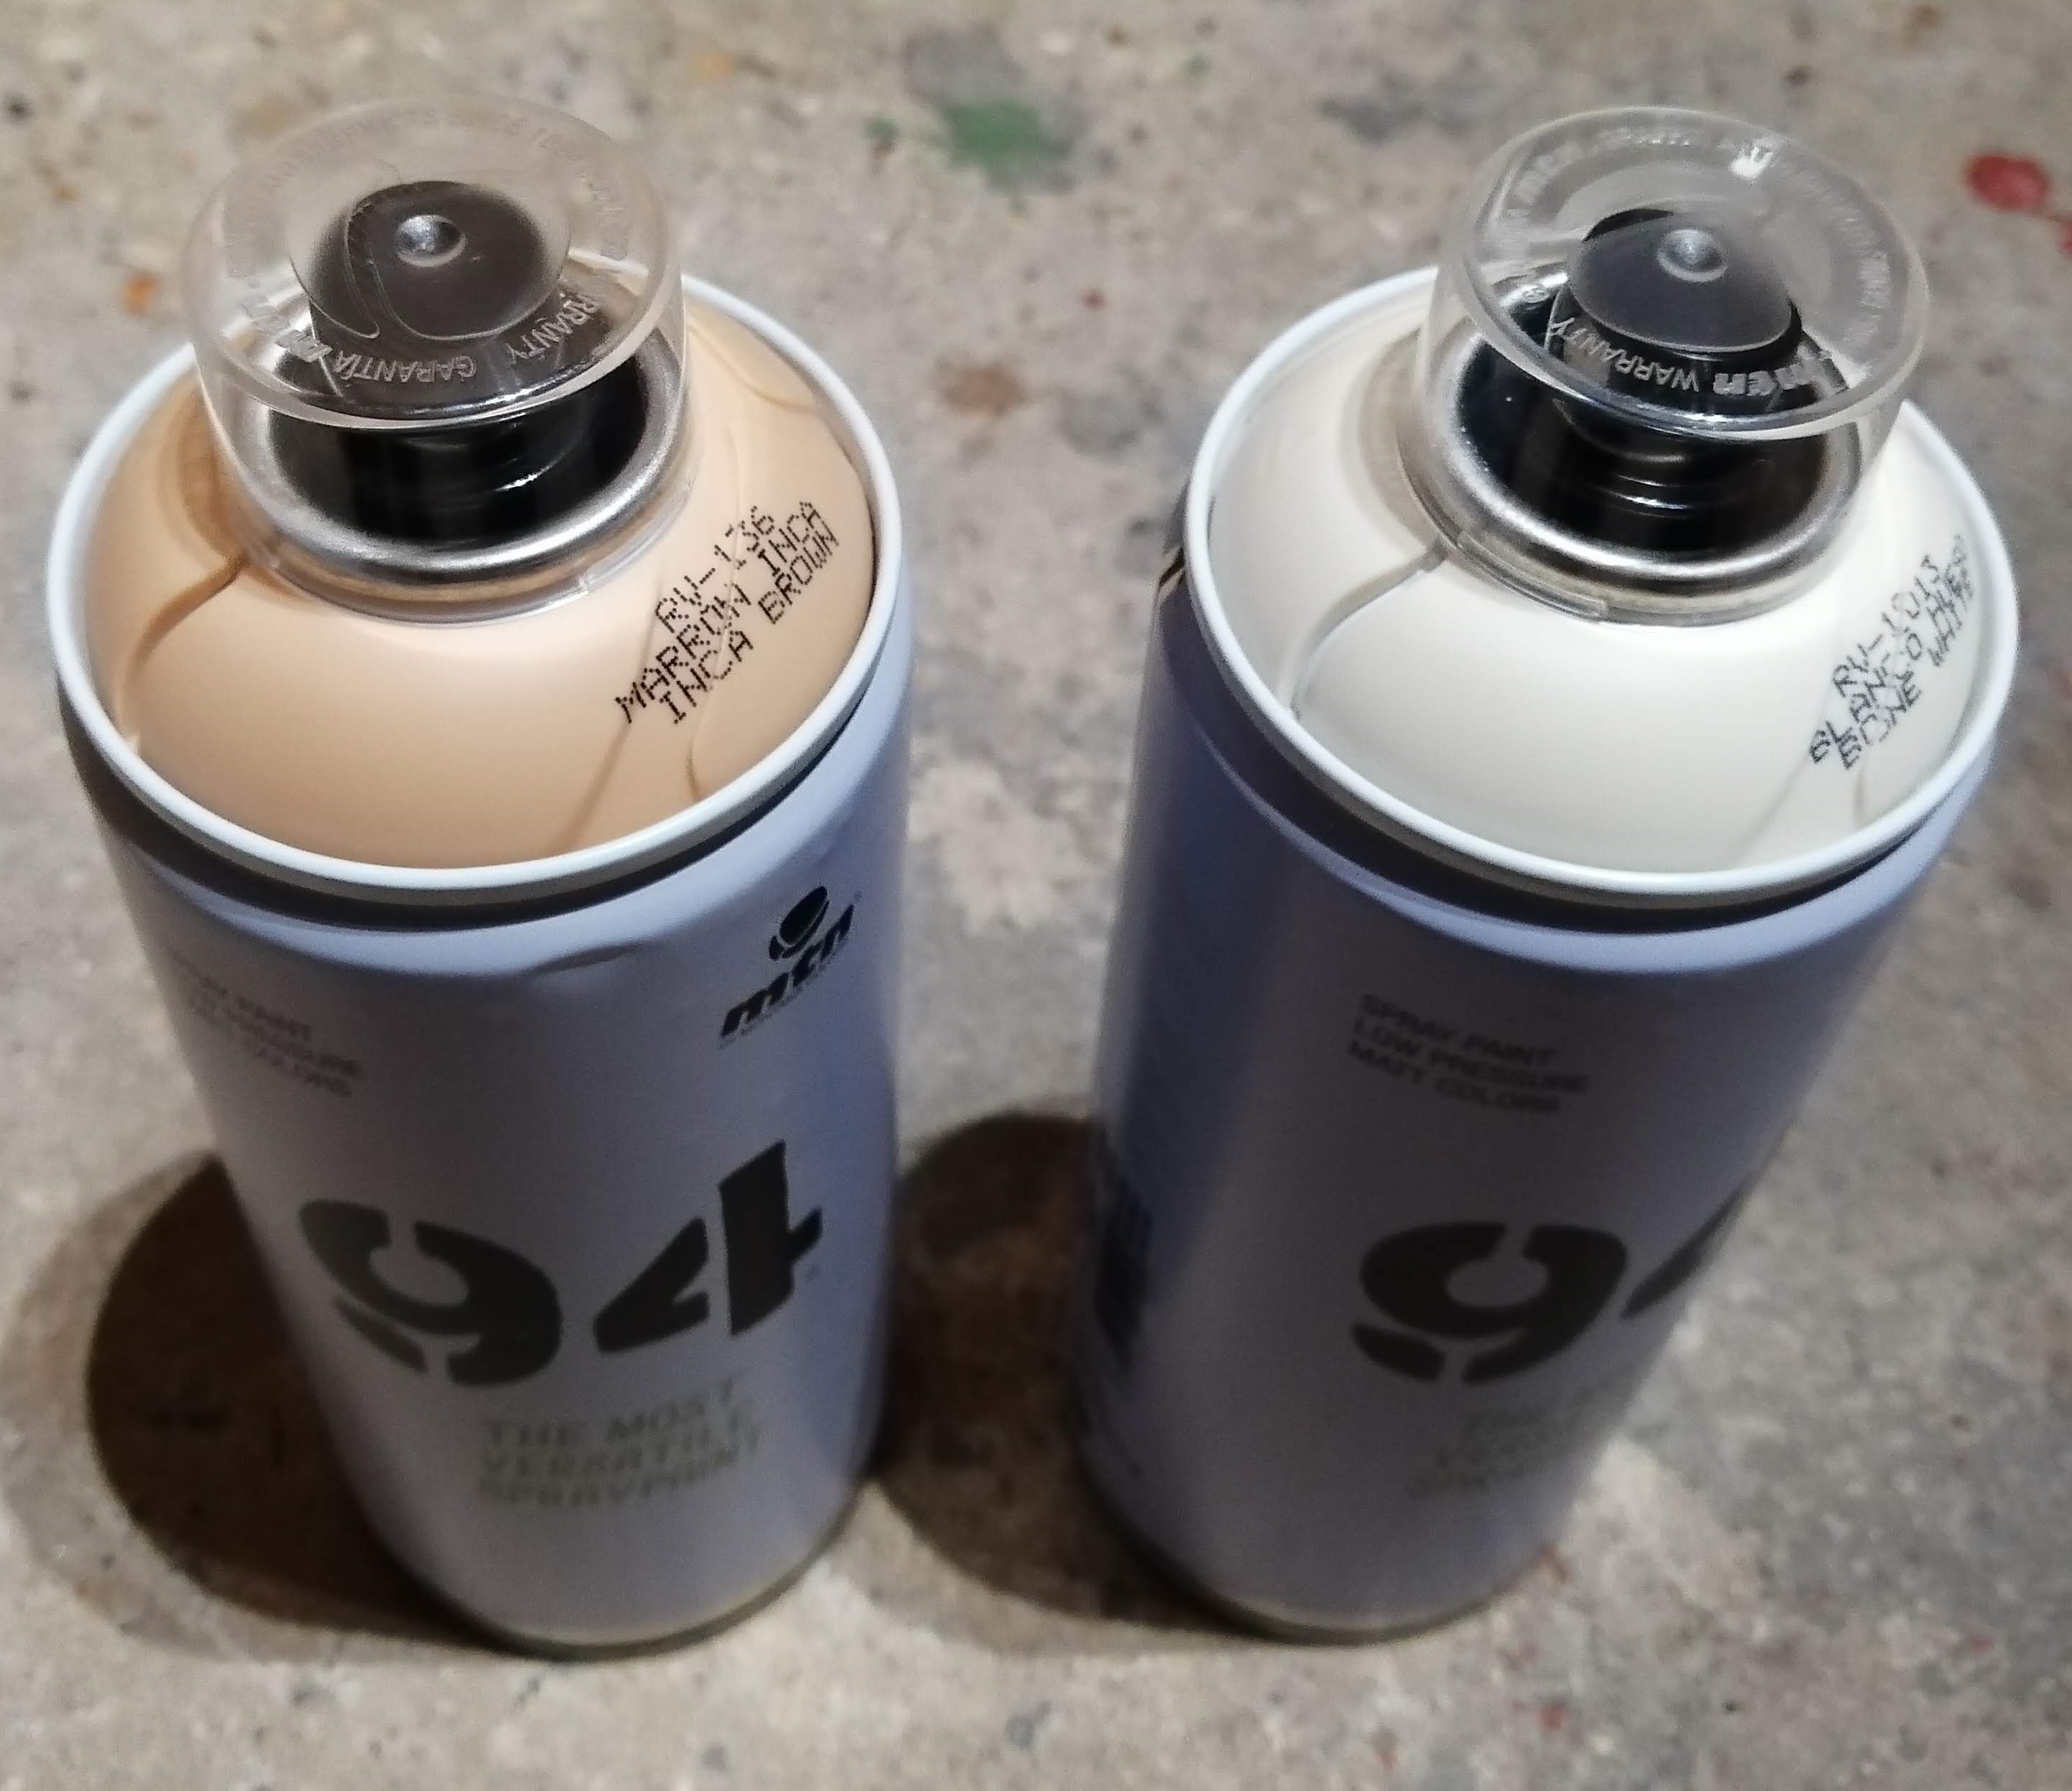
The mid brown colour was applied fairly close to the foam and at a low angle from the horizontal. Once dry, I applied the bone white sparingly from a higher angle to catch the top edges. I followed this up with hitting odd patches across with mixes of the two colours to try and vary the tone.
Next job will be to start flocking the hill and applying some wash to the road.
Monte Cassino - Plucking Hell
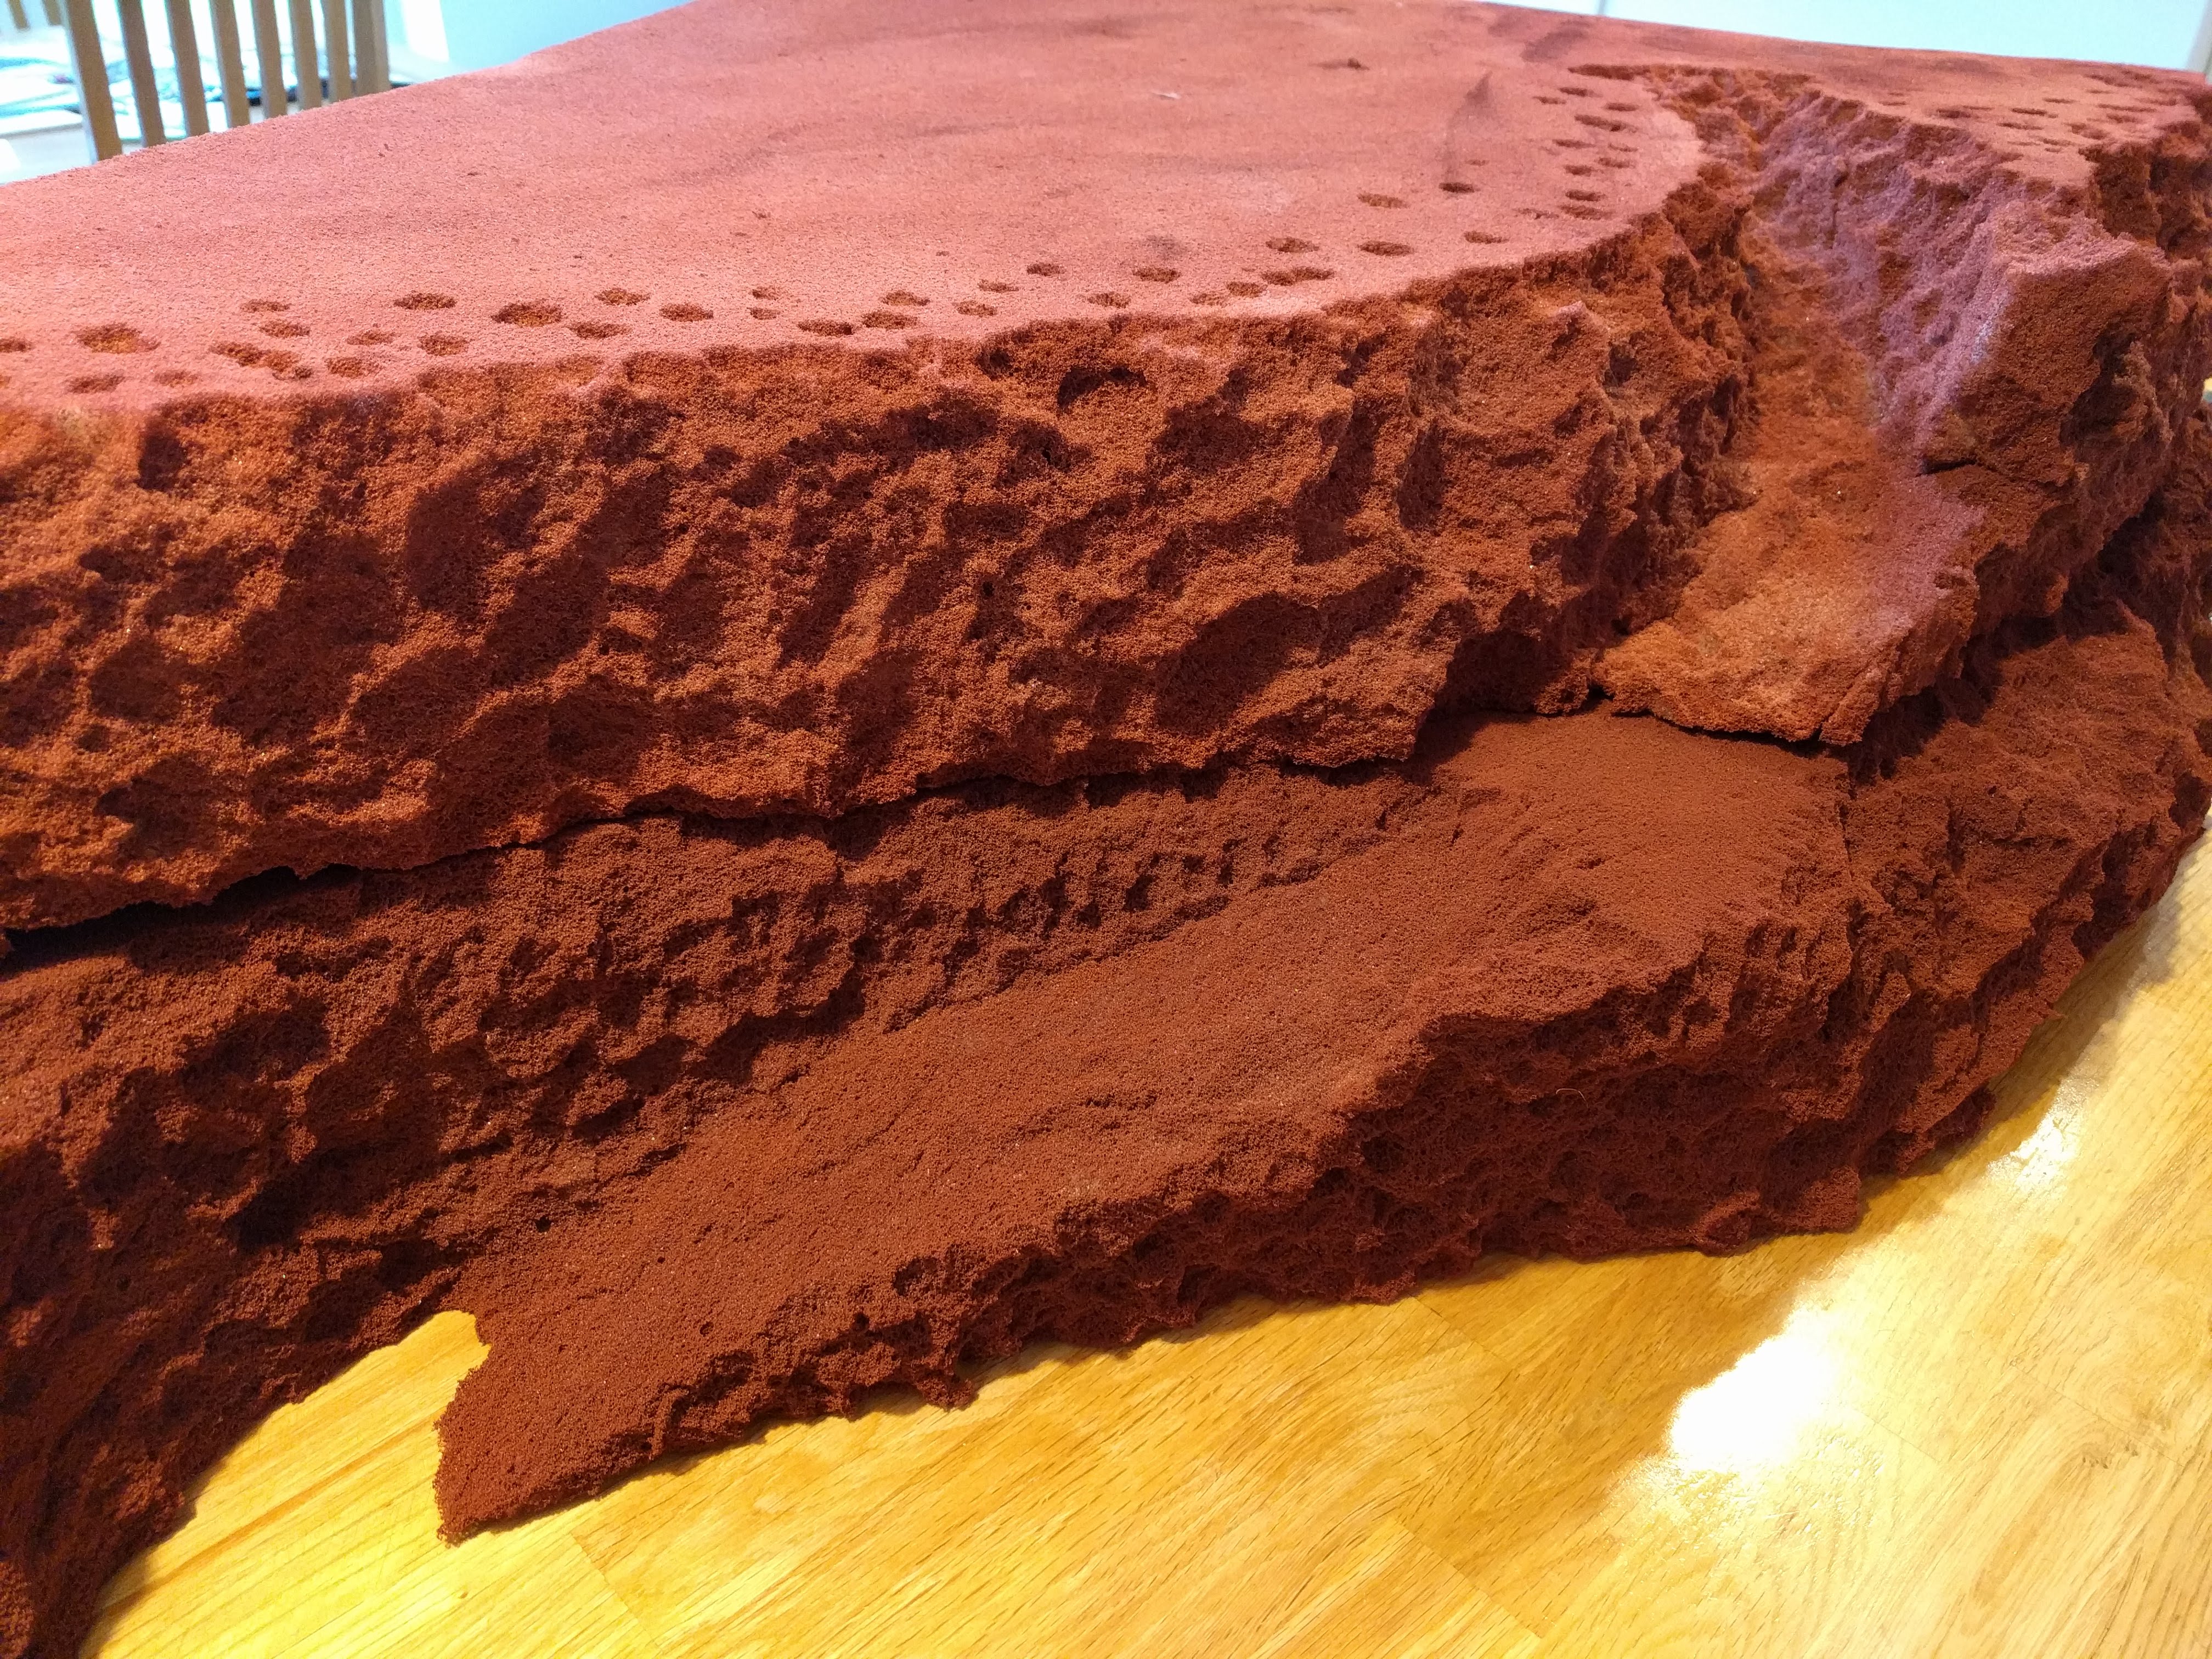
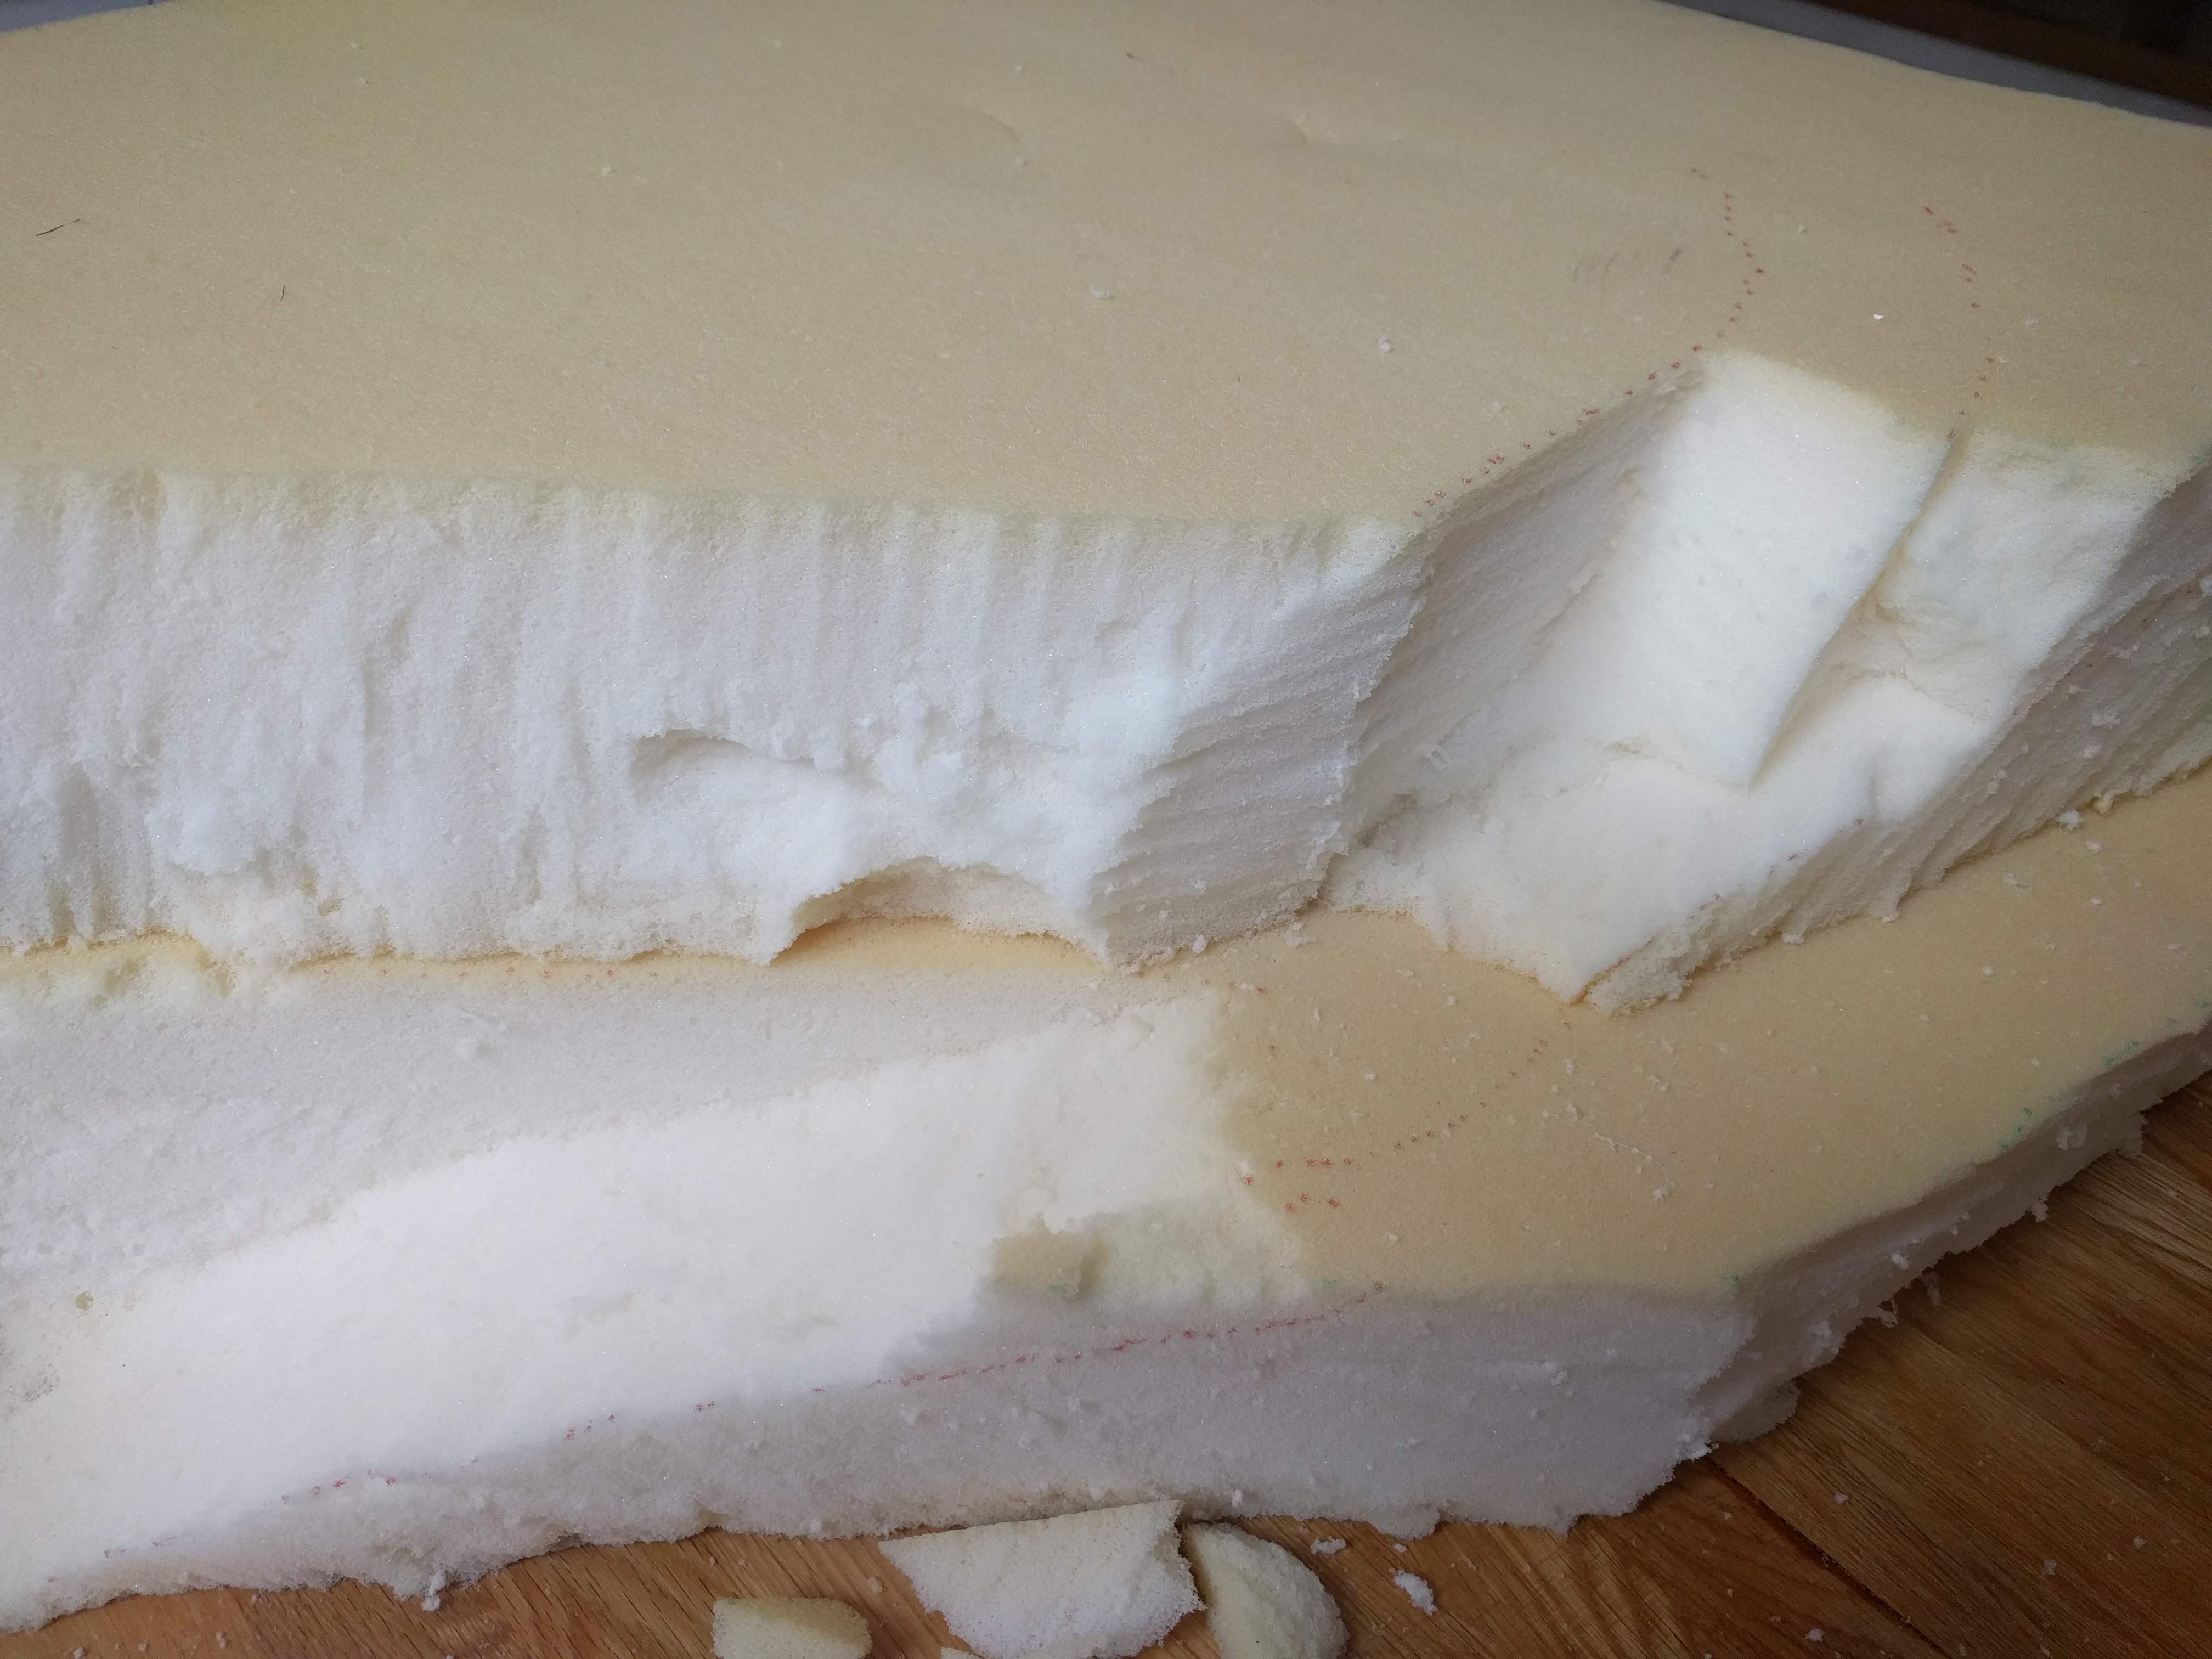
Managed to get some time to work on the terrain for this project. Having shaped the foam in the last update, it was time to pluck it to create a cliff face. I want something imposing and shear as while the scale will be wrong, it needs to look like it dominates the battle field.
The plucking took ages and my fingers were sore after doing it. I’m happy with the general shape but I think it might need some more work.


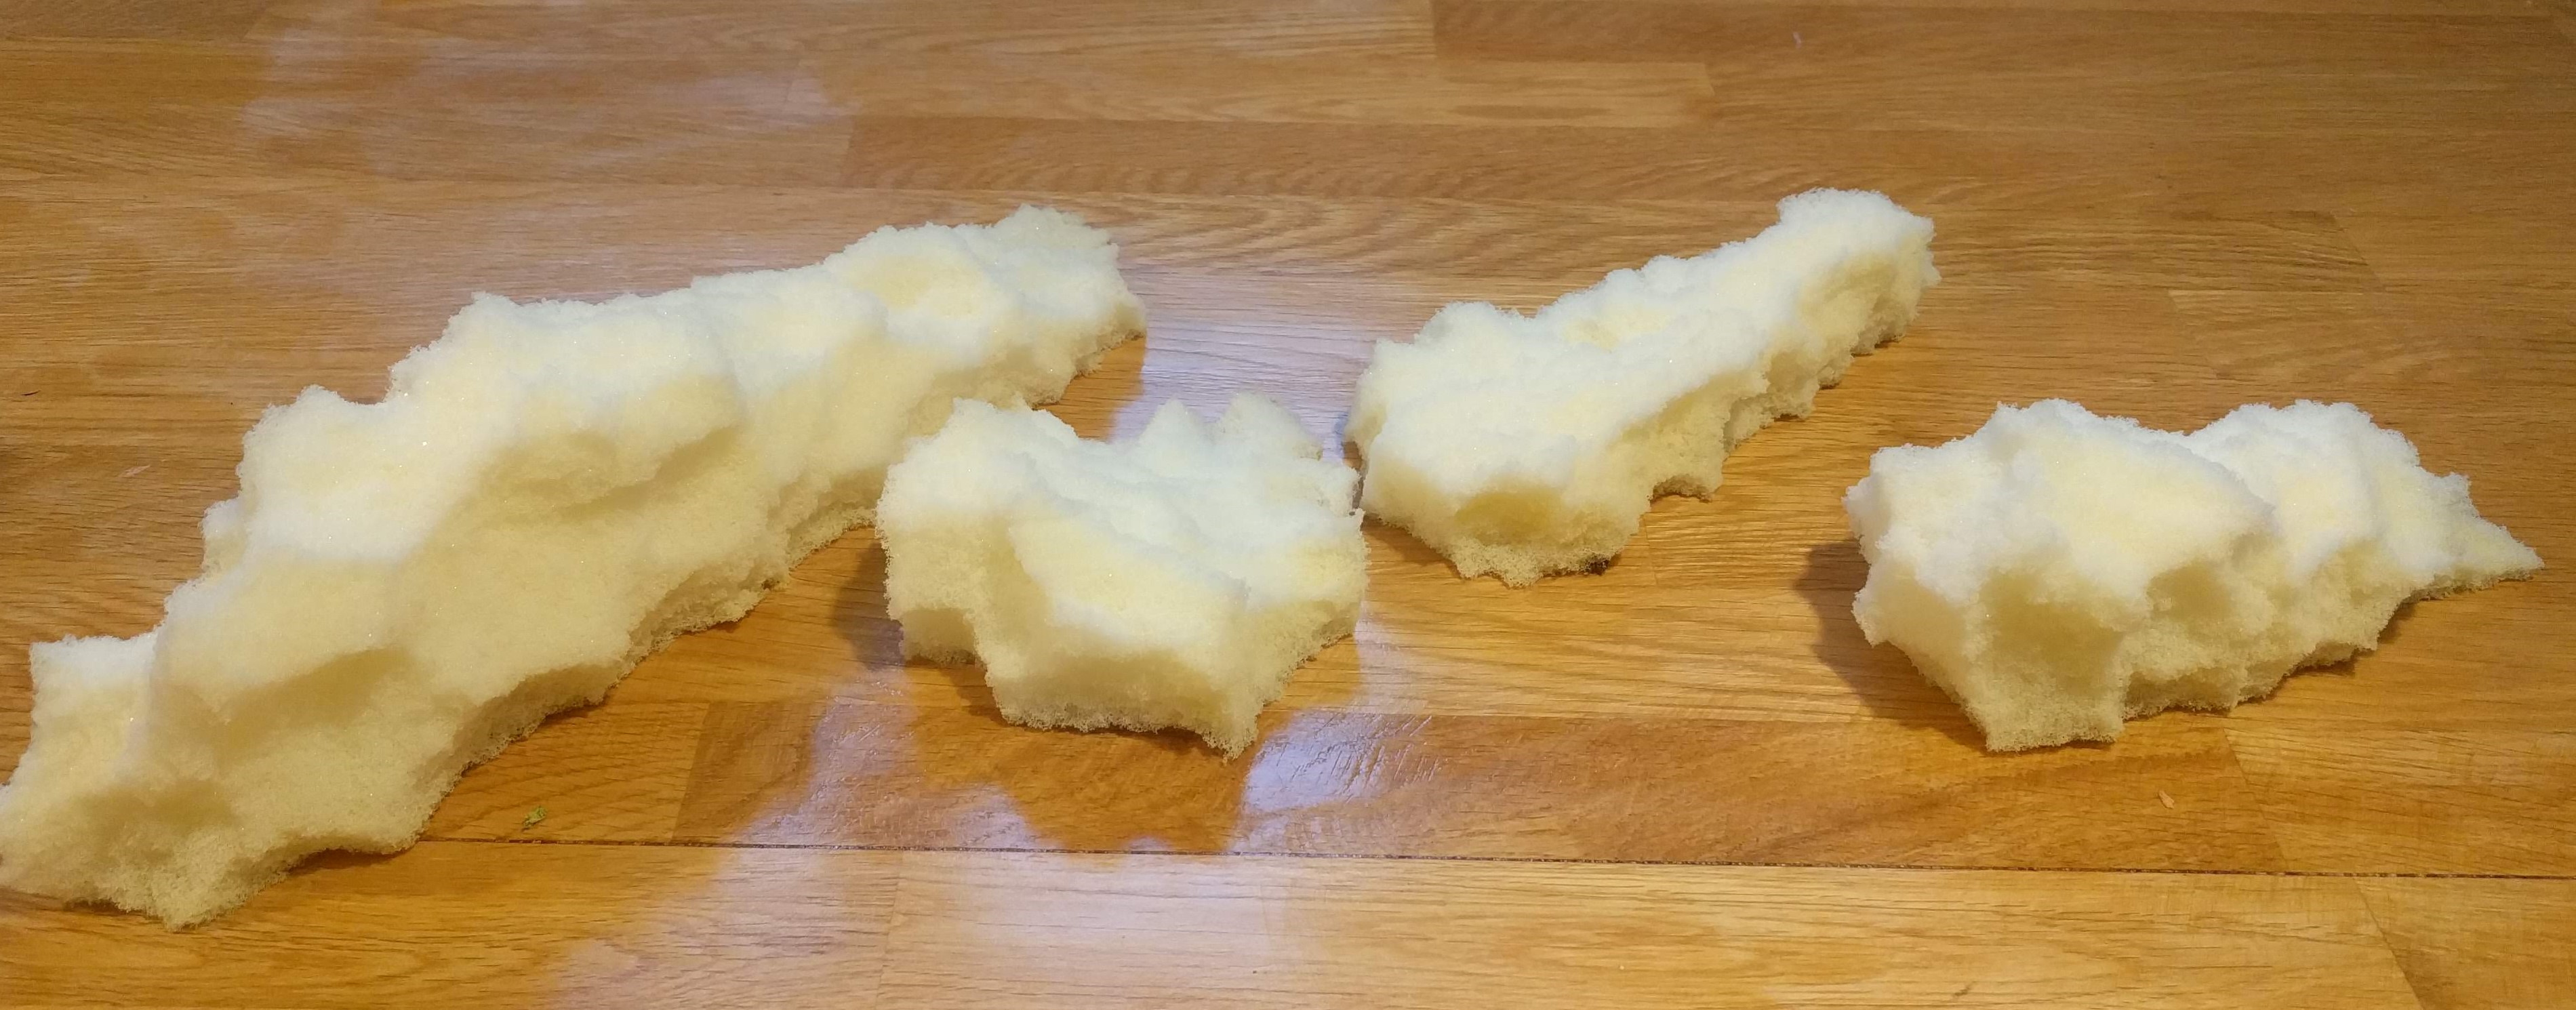 I even had foam left over to create some additional rocks for other terrain pieces :-)
I then needed to colour the foam. The rock around Cassino is quite light, almost a bone colour however I need a dark shade initially to soak into the foam so that none of the foam shows through. I’ve again ordered some cheap dark brown acrylic paint from Amazon and watered it down a little. This was then liberally applied to the foam and ‘pushed’ into it by a very old paint brush.
It took a few coats to cover the foam up and some time to dry but it now looks a lot less like some foam from a sofa!
 The 'undercoated' Monte Cassino
Monte Cassino - Starting the Hill
The town of Cassino is dominated by the large hill and monastery overlooking it. At 520m high, scale wise I’m not going to be able to recreate this on the tabletop however having some form of representation seems appropriate.
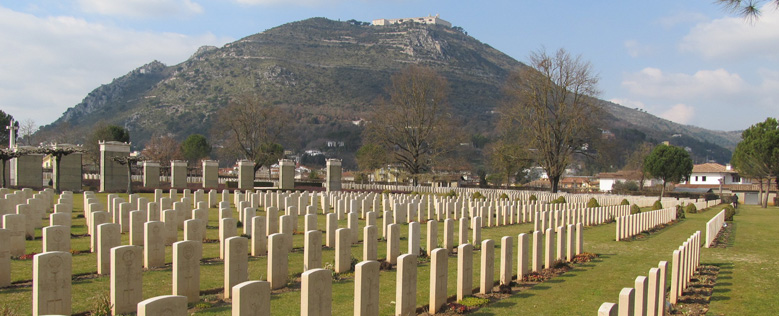 Monte Cassino with the rebuilt monastery
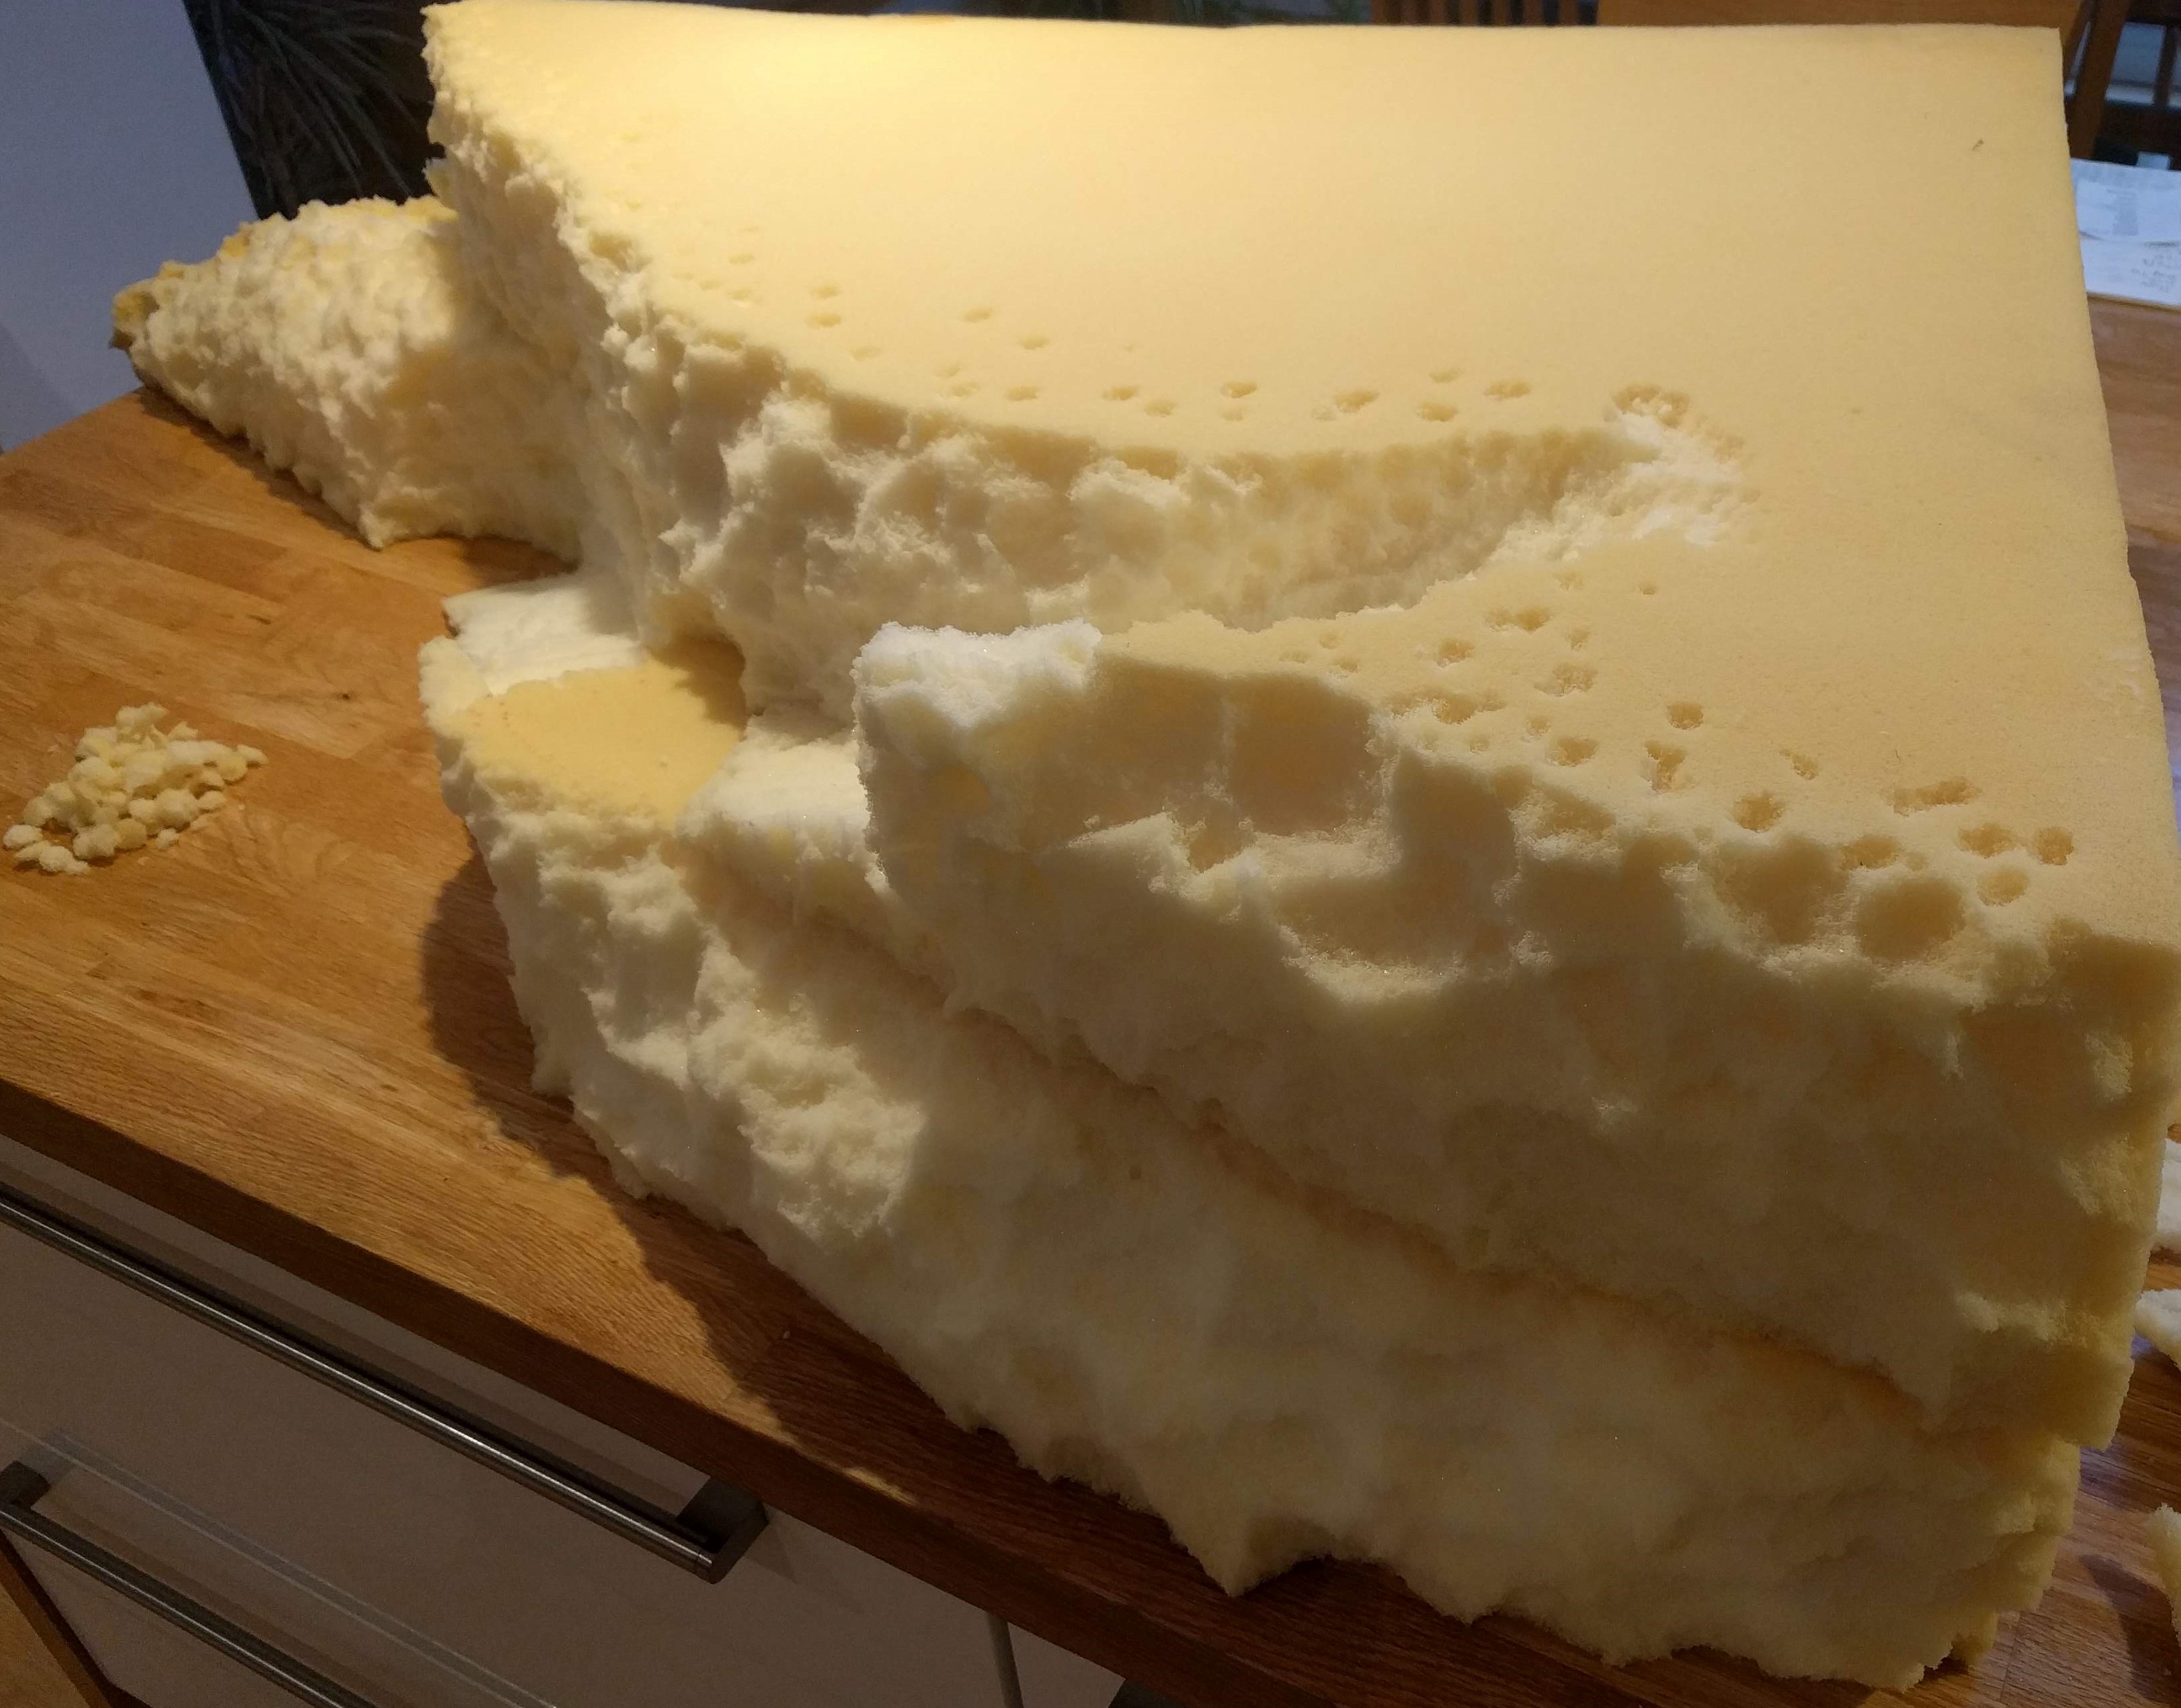
I’m going to take the same approach to hill building as described here on BoW using foam. Fortunately, I salvaged some foam from an old sofa that was heading to the rubbish tip, so the cost of this will be nothing!
I plan to cut the foam in two and use it as a corner piece to the table. I’ve marked on the cut for the base piece and will then shape the top bit accordingly.
 The large piece of old foam, ready for conversion
 Marking the outline of the base piece
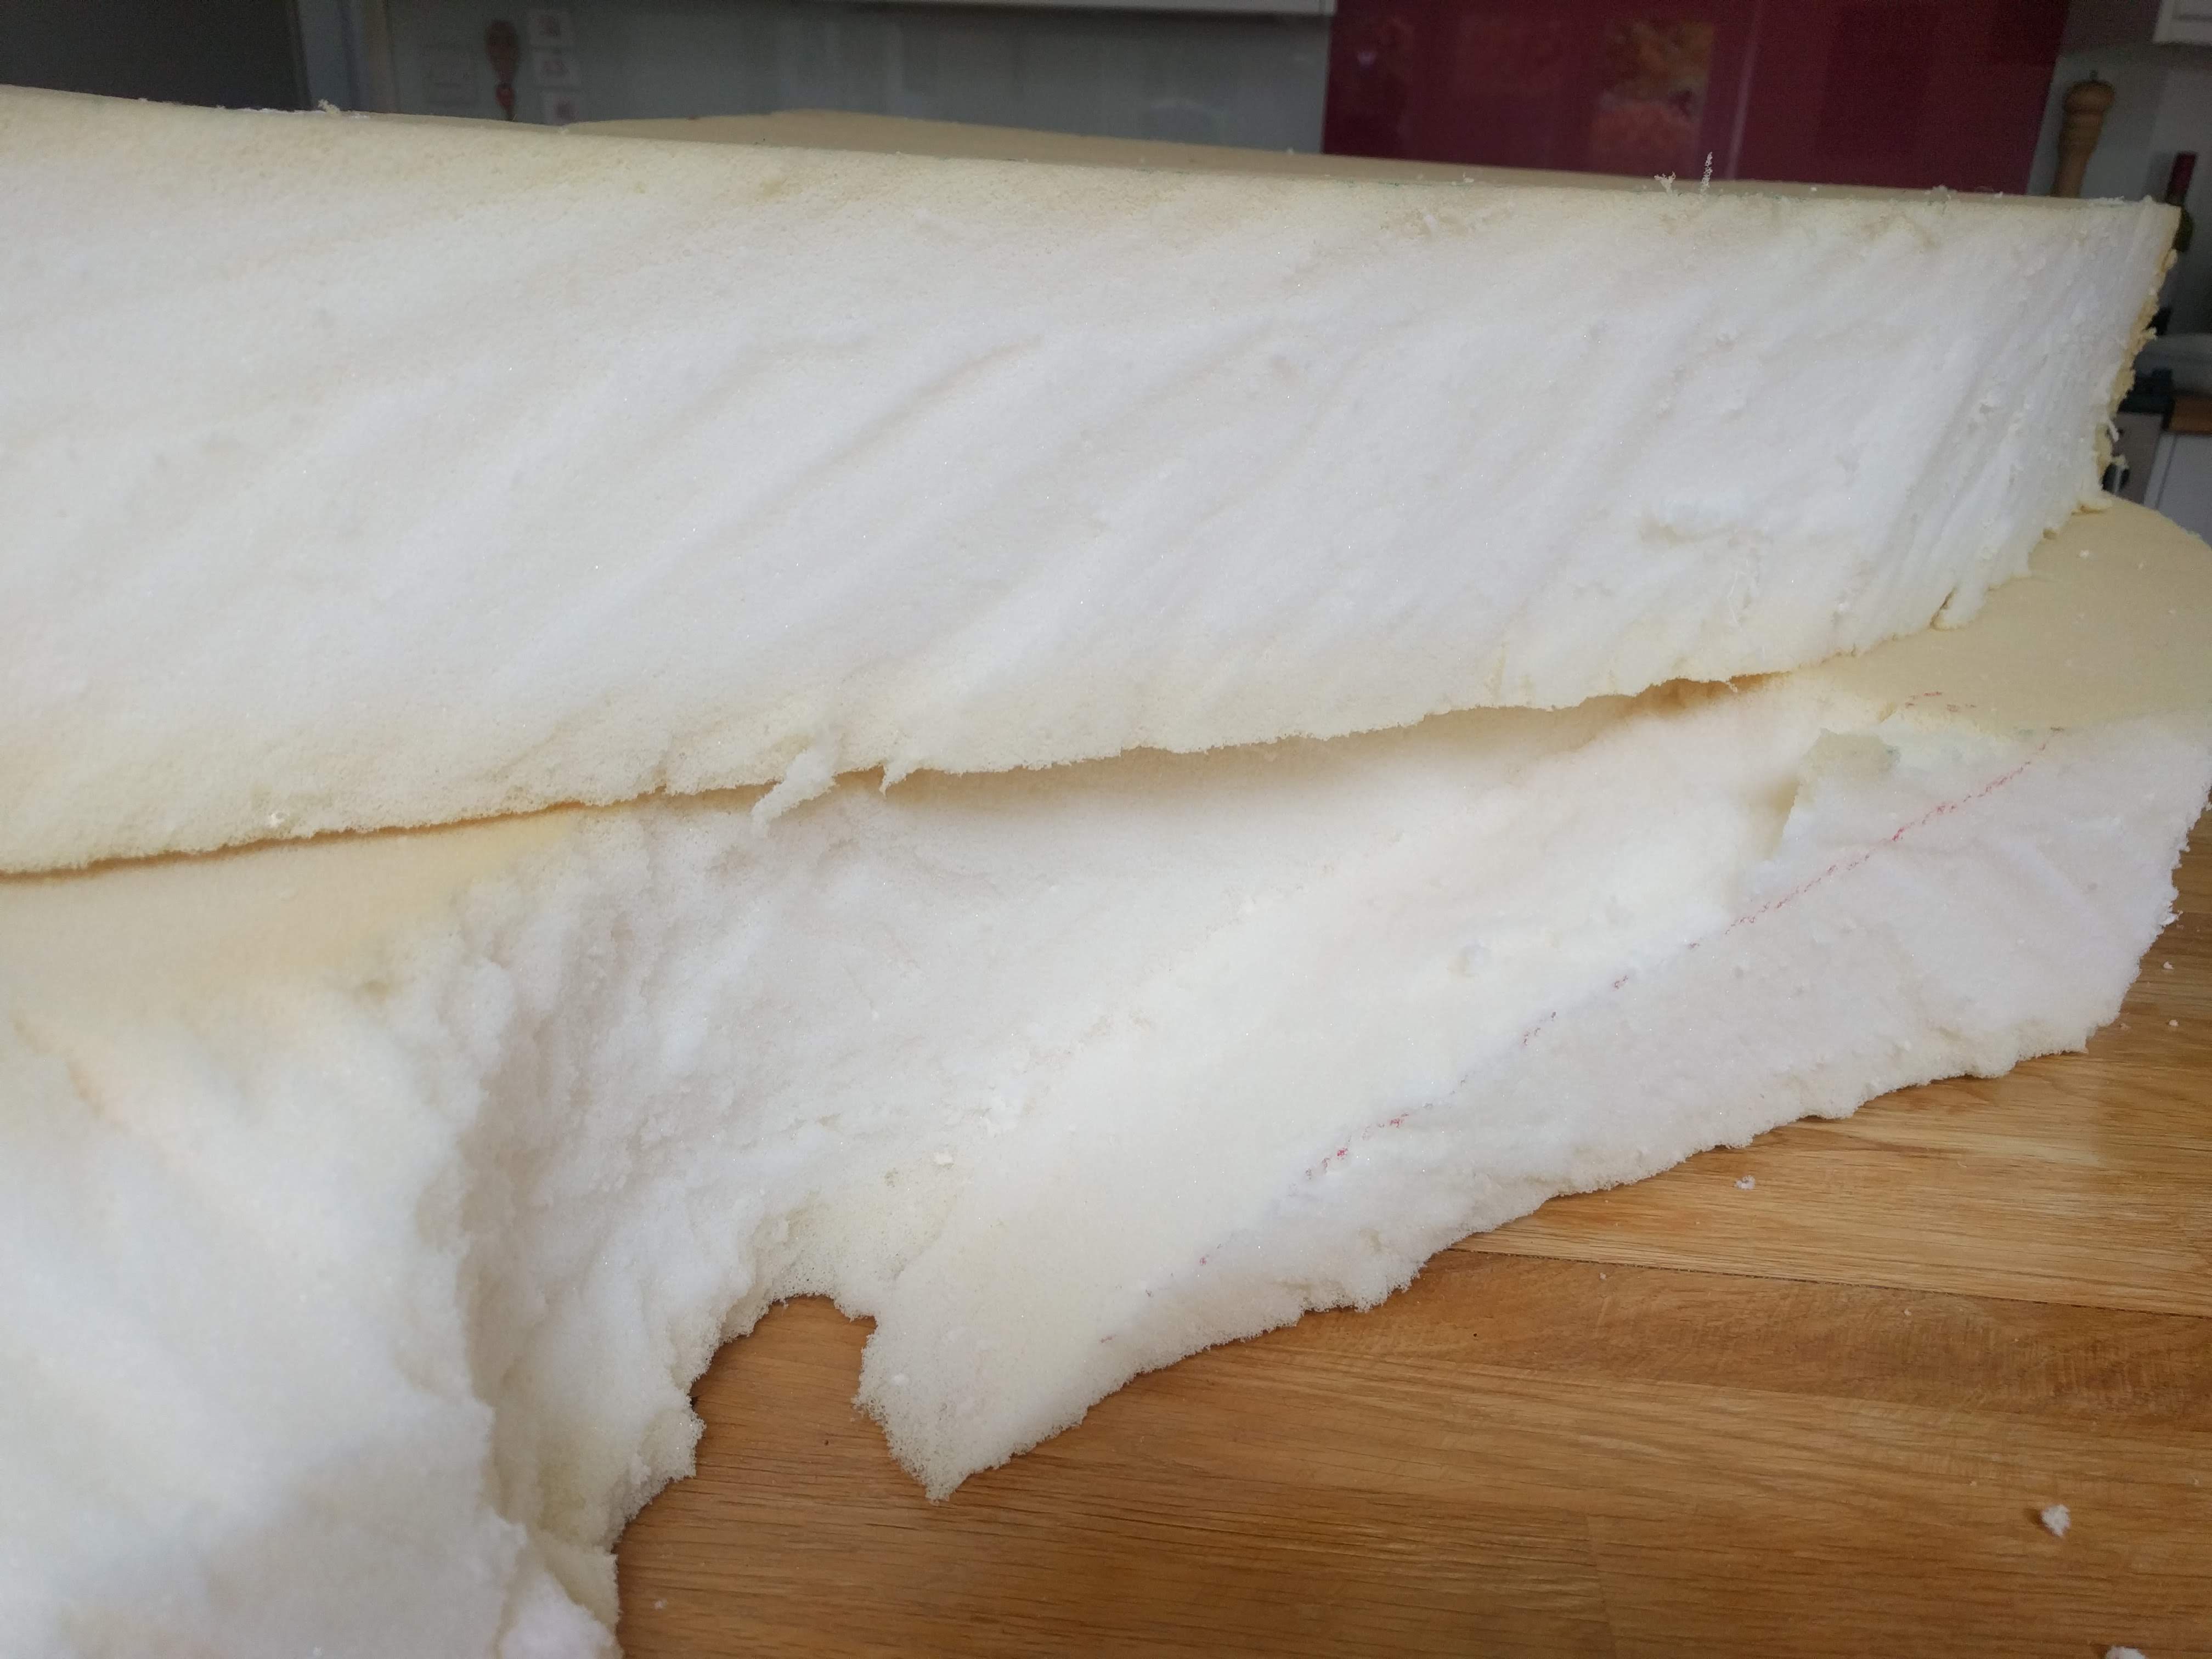
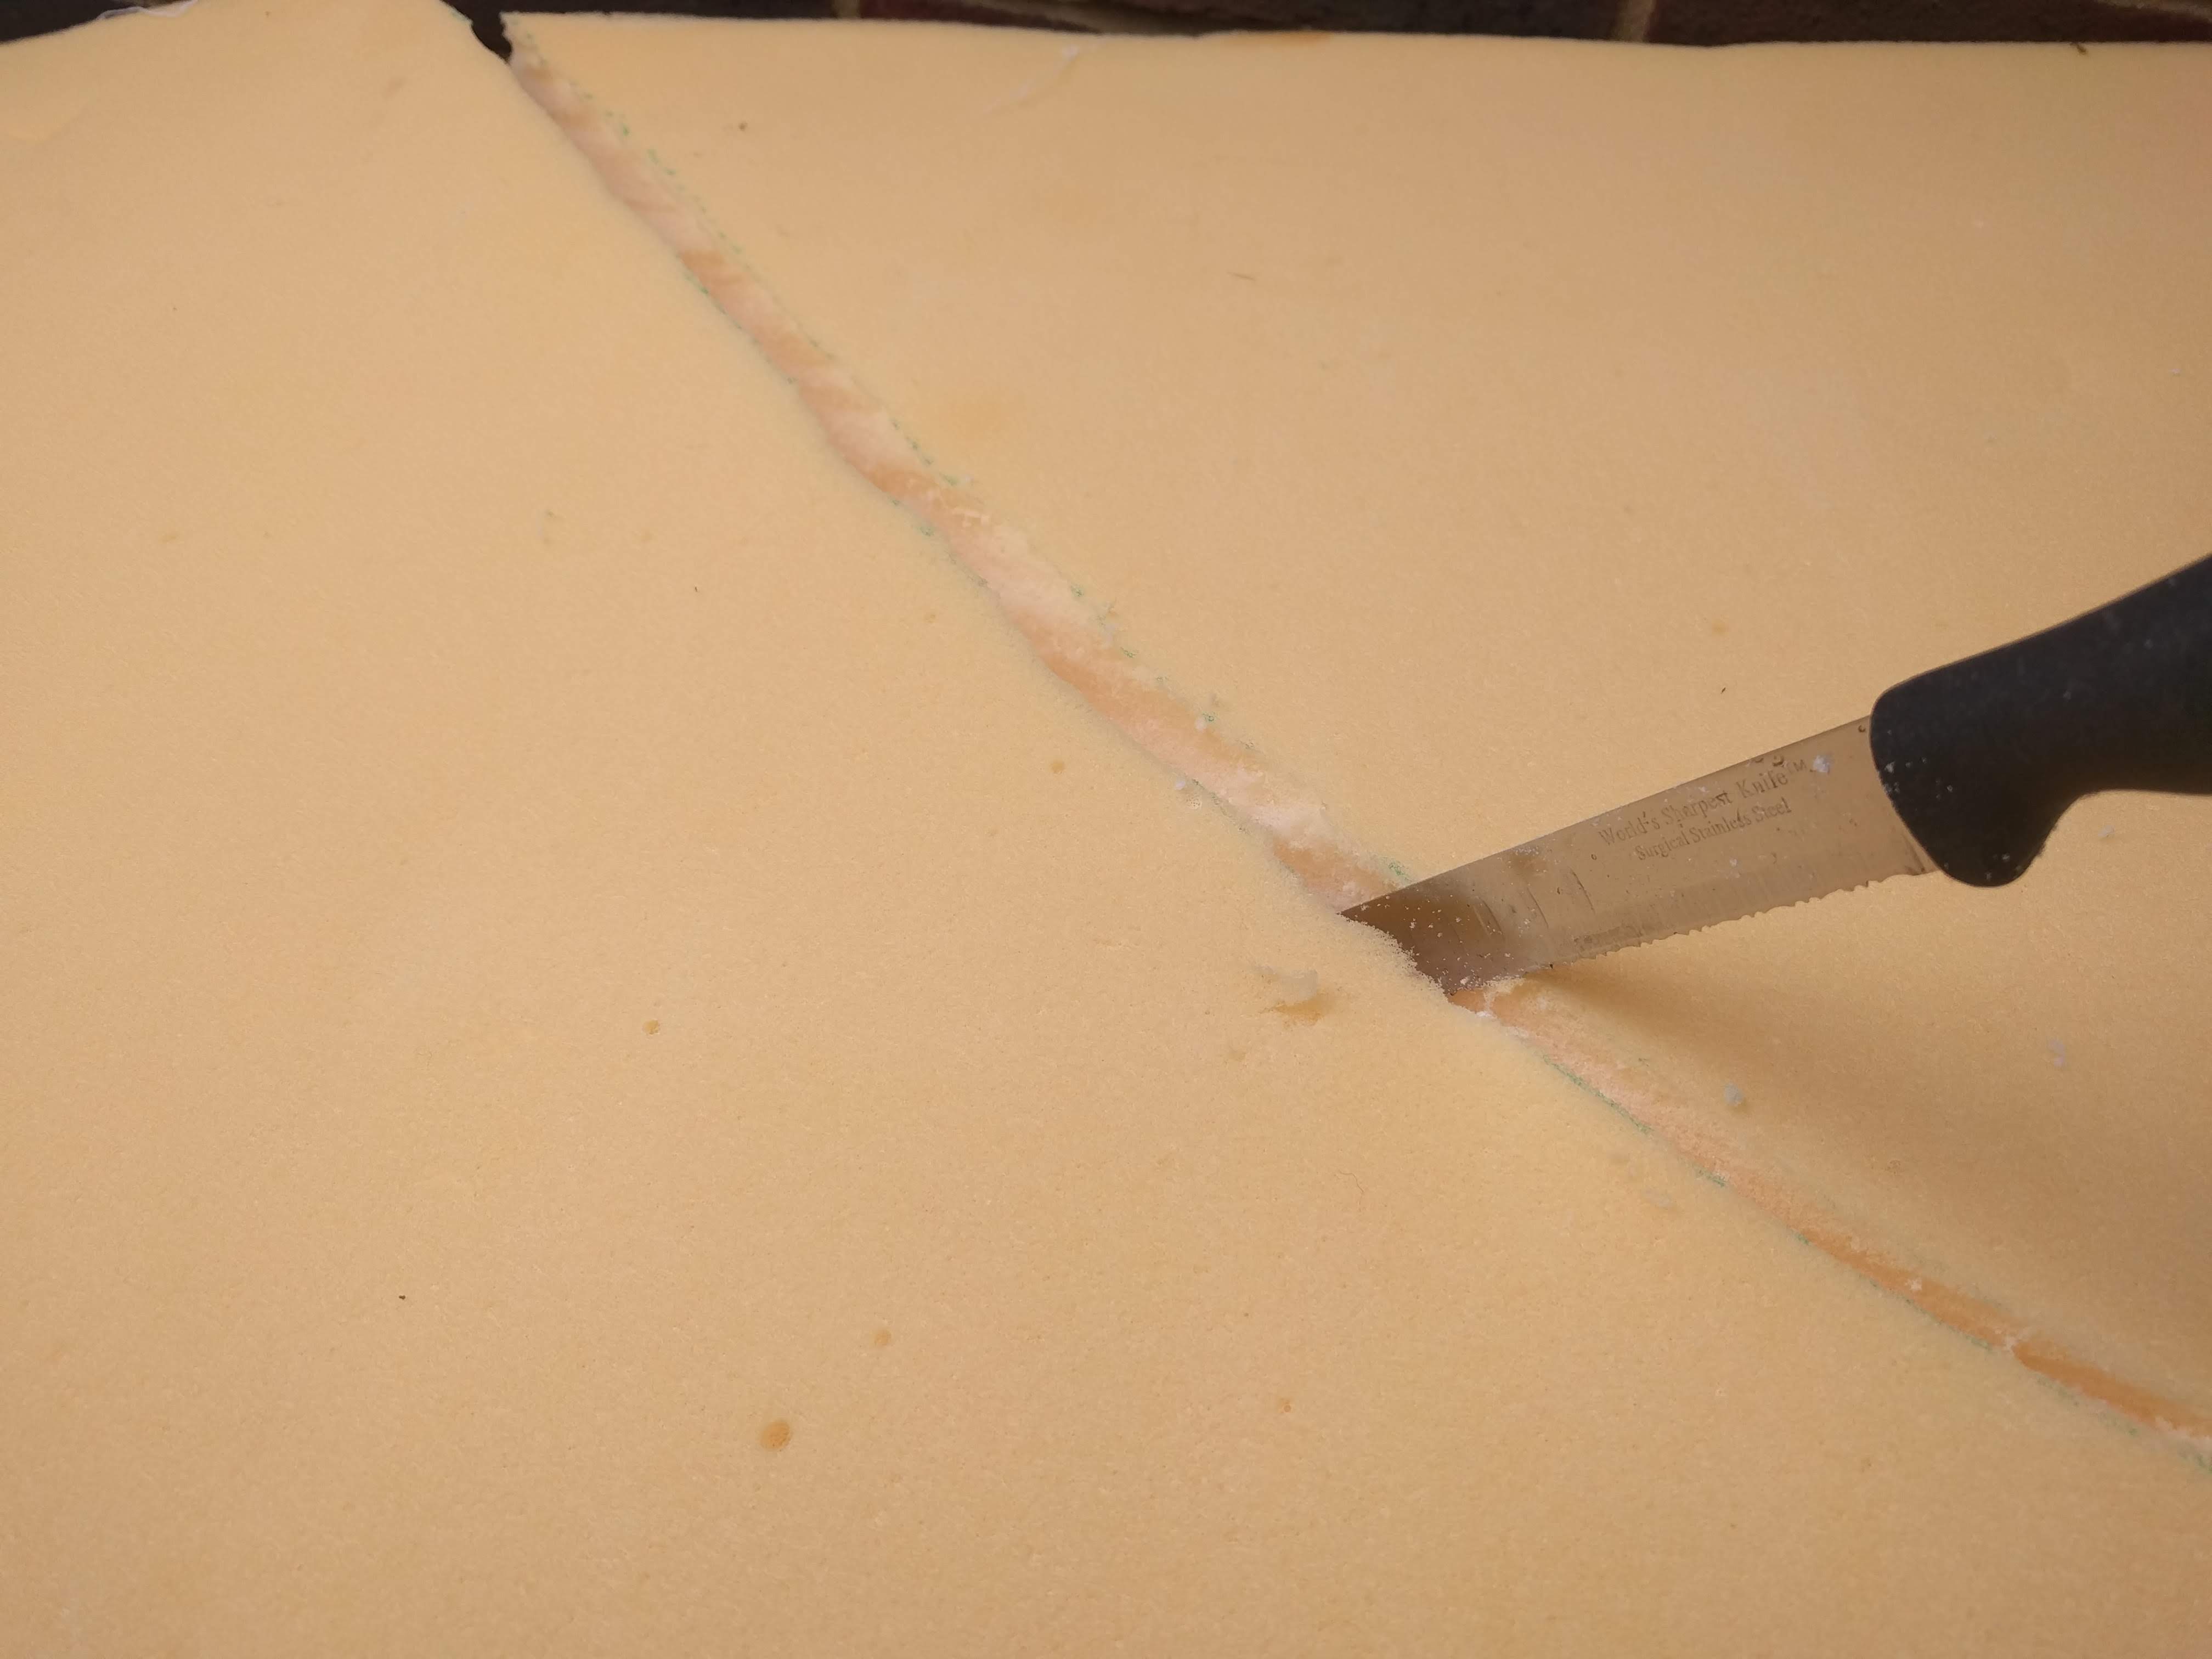 I found a serrated kitchen knife easiest for cutting
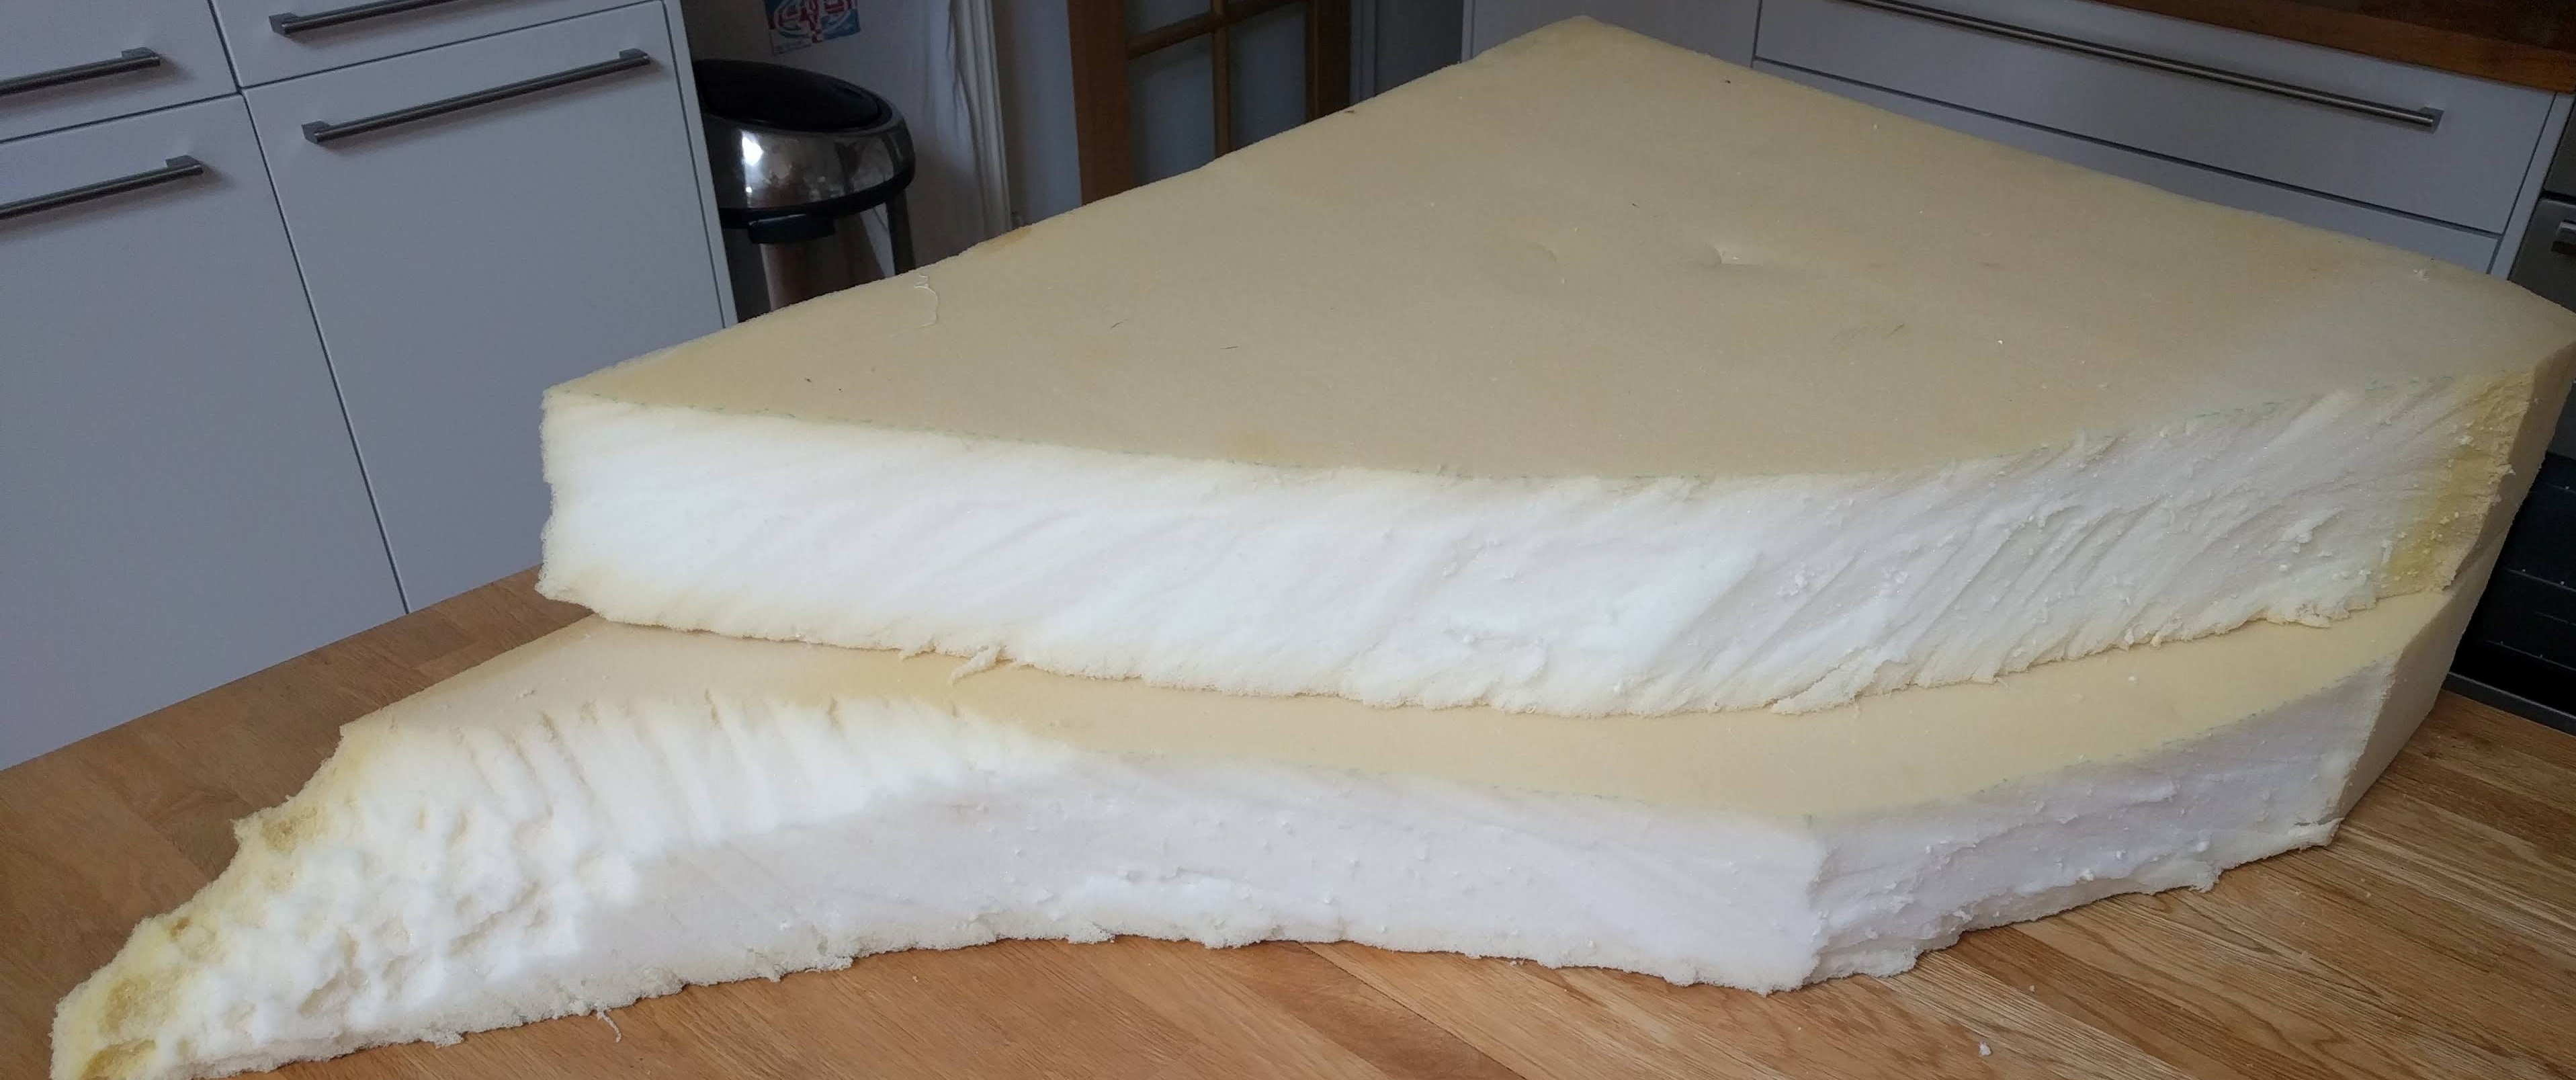 After shaping the top piece a little, I'm left with the above
I need to provide access to the top of the hill, so will build in a road up the side. This will need to be carefully cut into the foam.
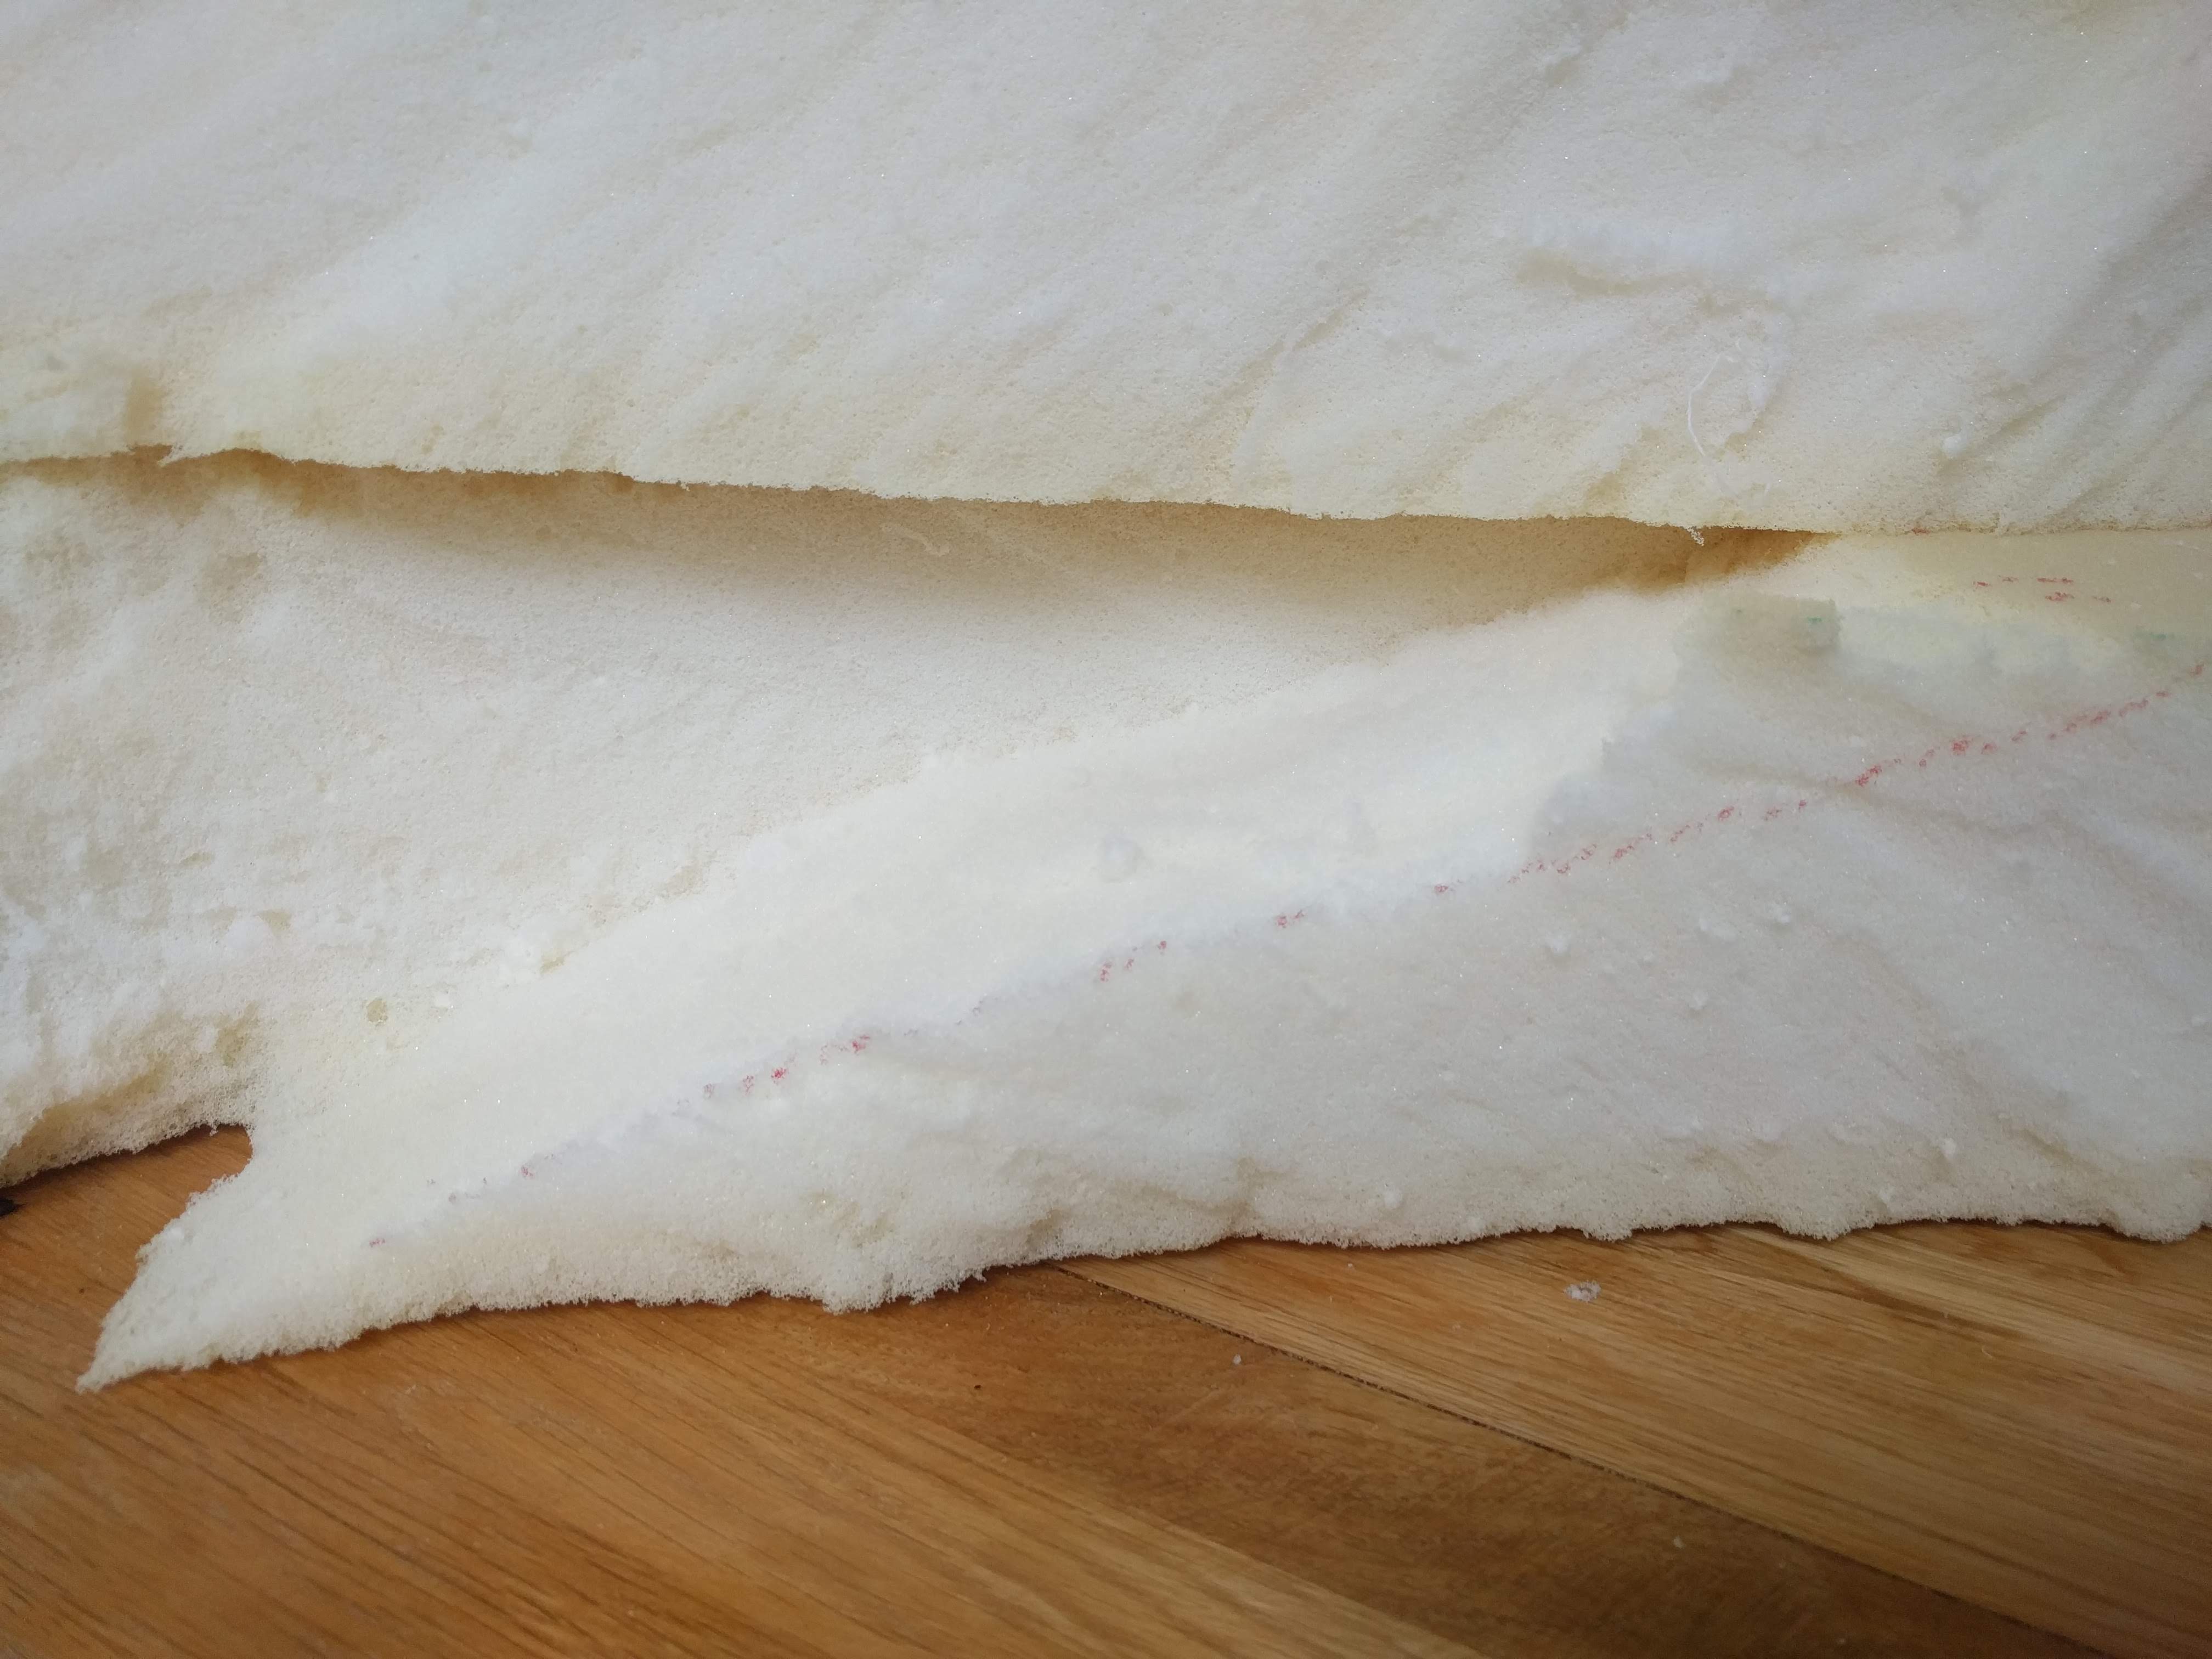
Next step will be to pluck out the hill side and remove the cutting marks.
Trenches - Finished
I’ve now completed the trenches!
Following the base paint step, I gave the wood and sandbags a brush on dip layer to give some shade and to protect the paint. Once dry, I gave the whole thing a dry brush of wych flesh.
I gently brushed some black pigment powder into the craters to create a burnt, blast effect and then started flocking. I’ve used three separate flocks and clump foliage for the bases. Once this was applied, I sprayed the whole thing with watered down PVA to seal it in and then brushed on a matt varnish to the wood and sand bags to remove any shine form the glue. All done!
 One of the trench line with a crater
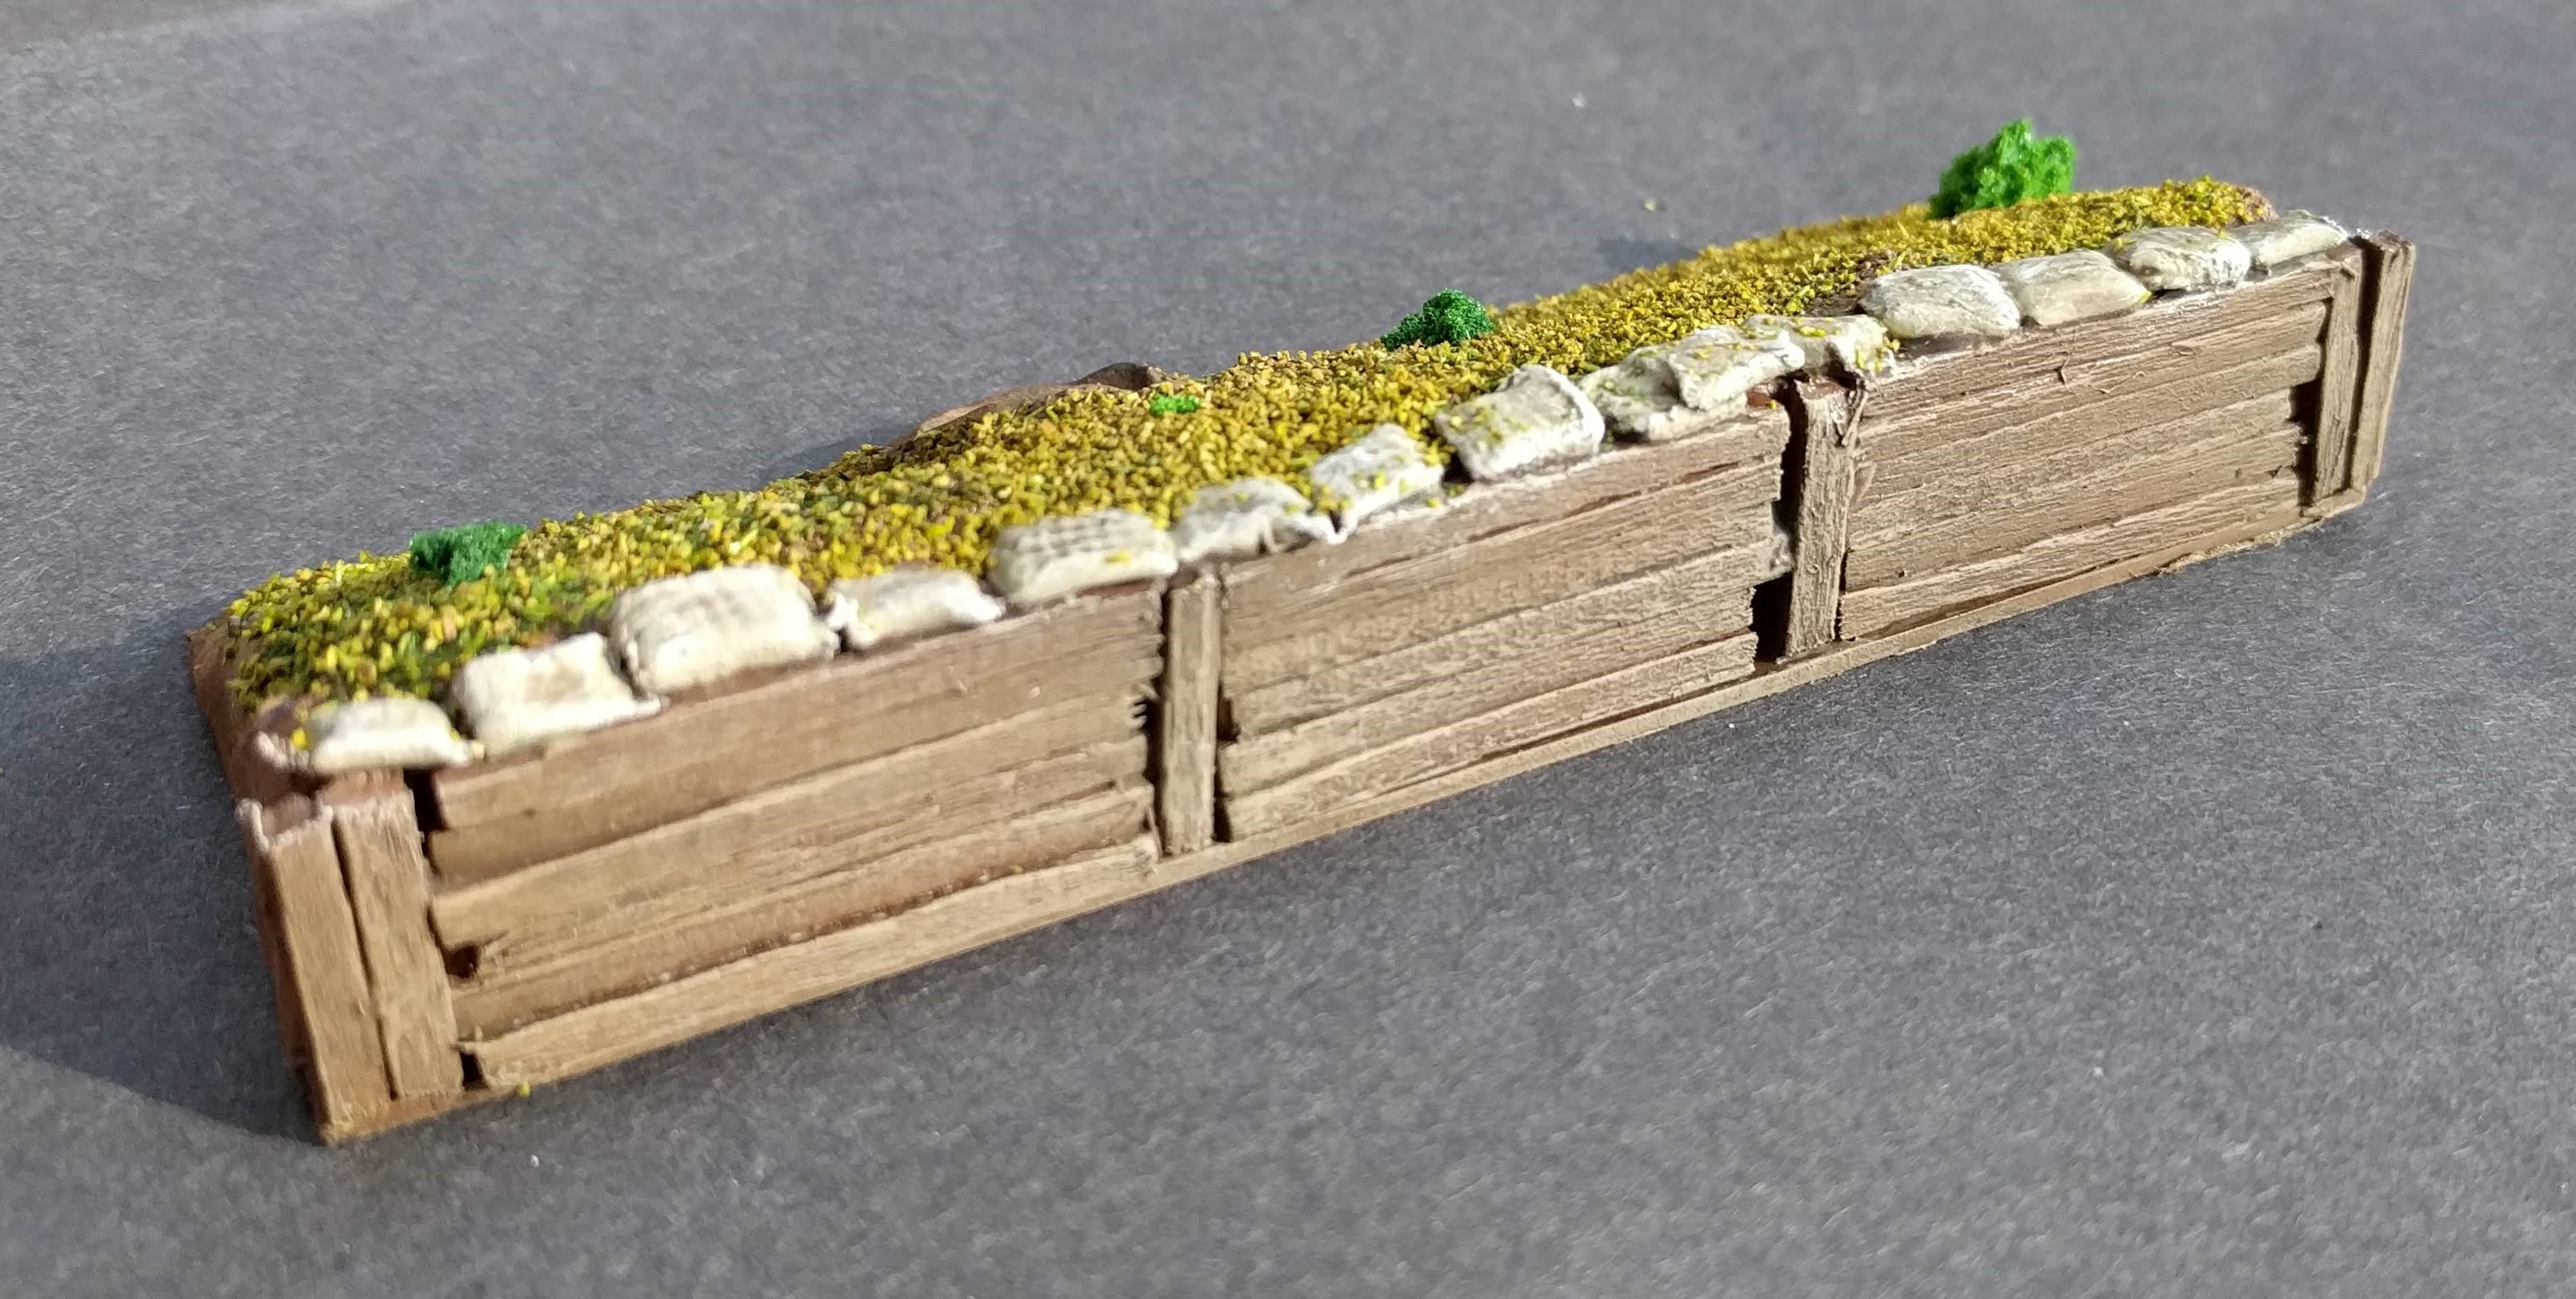 The reverse side with the wooden retaining walls
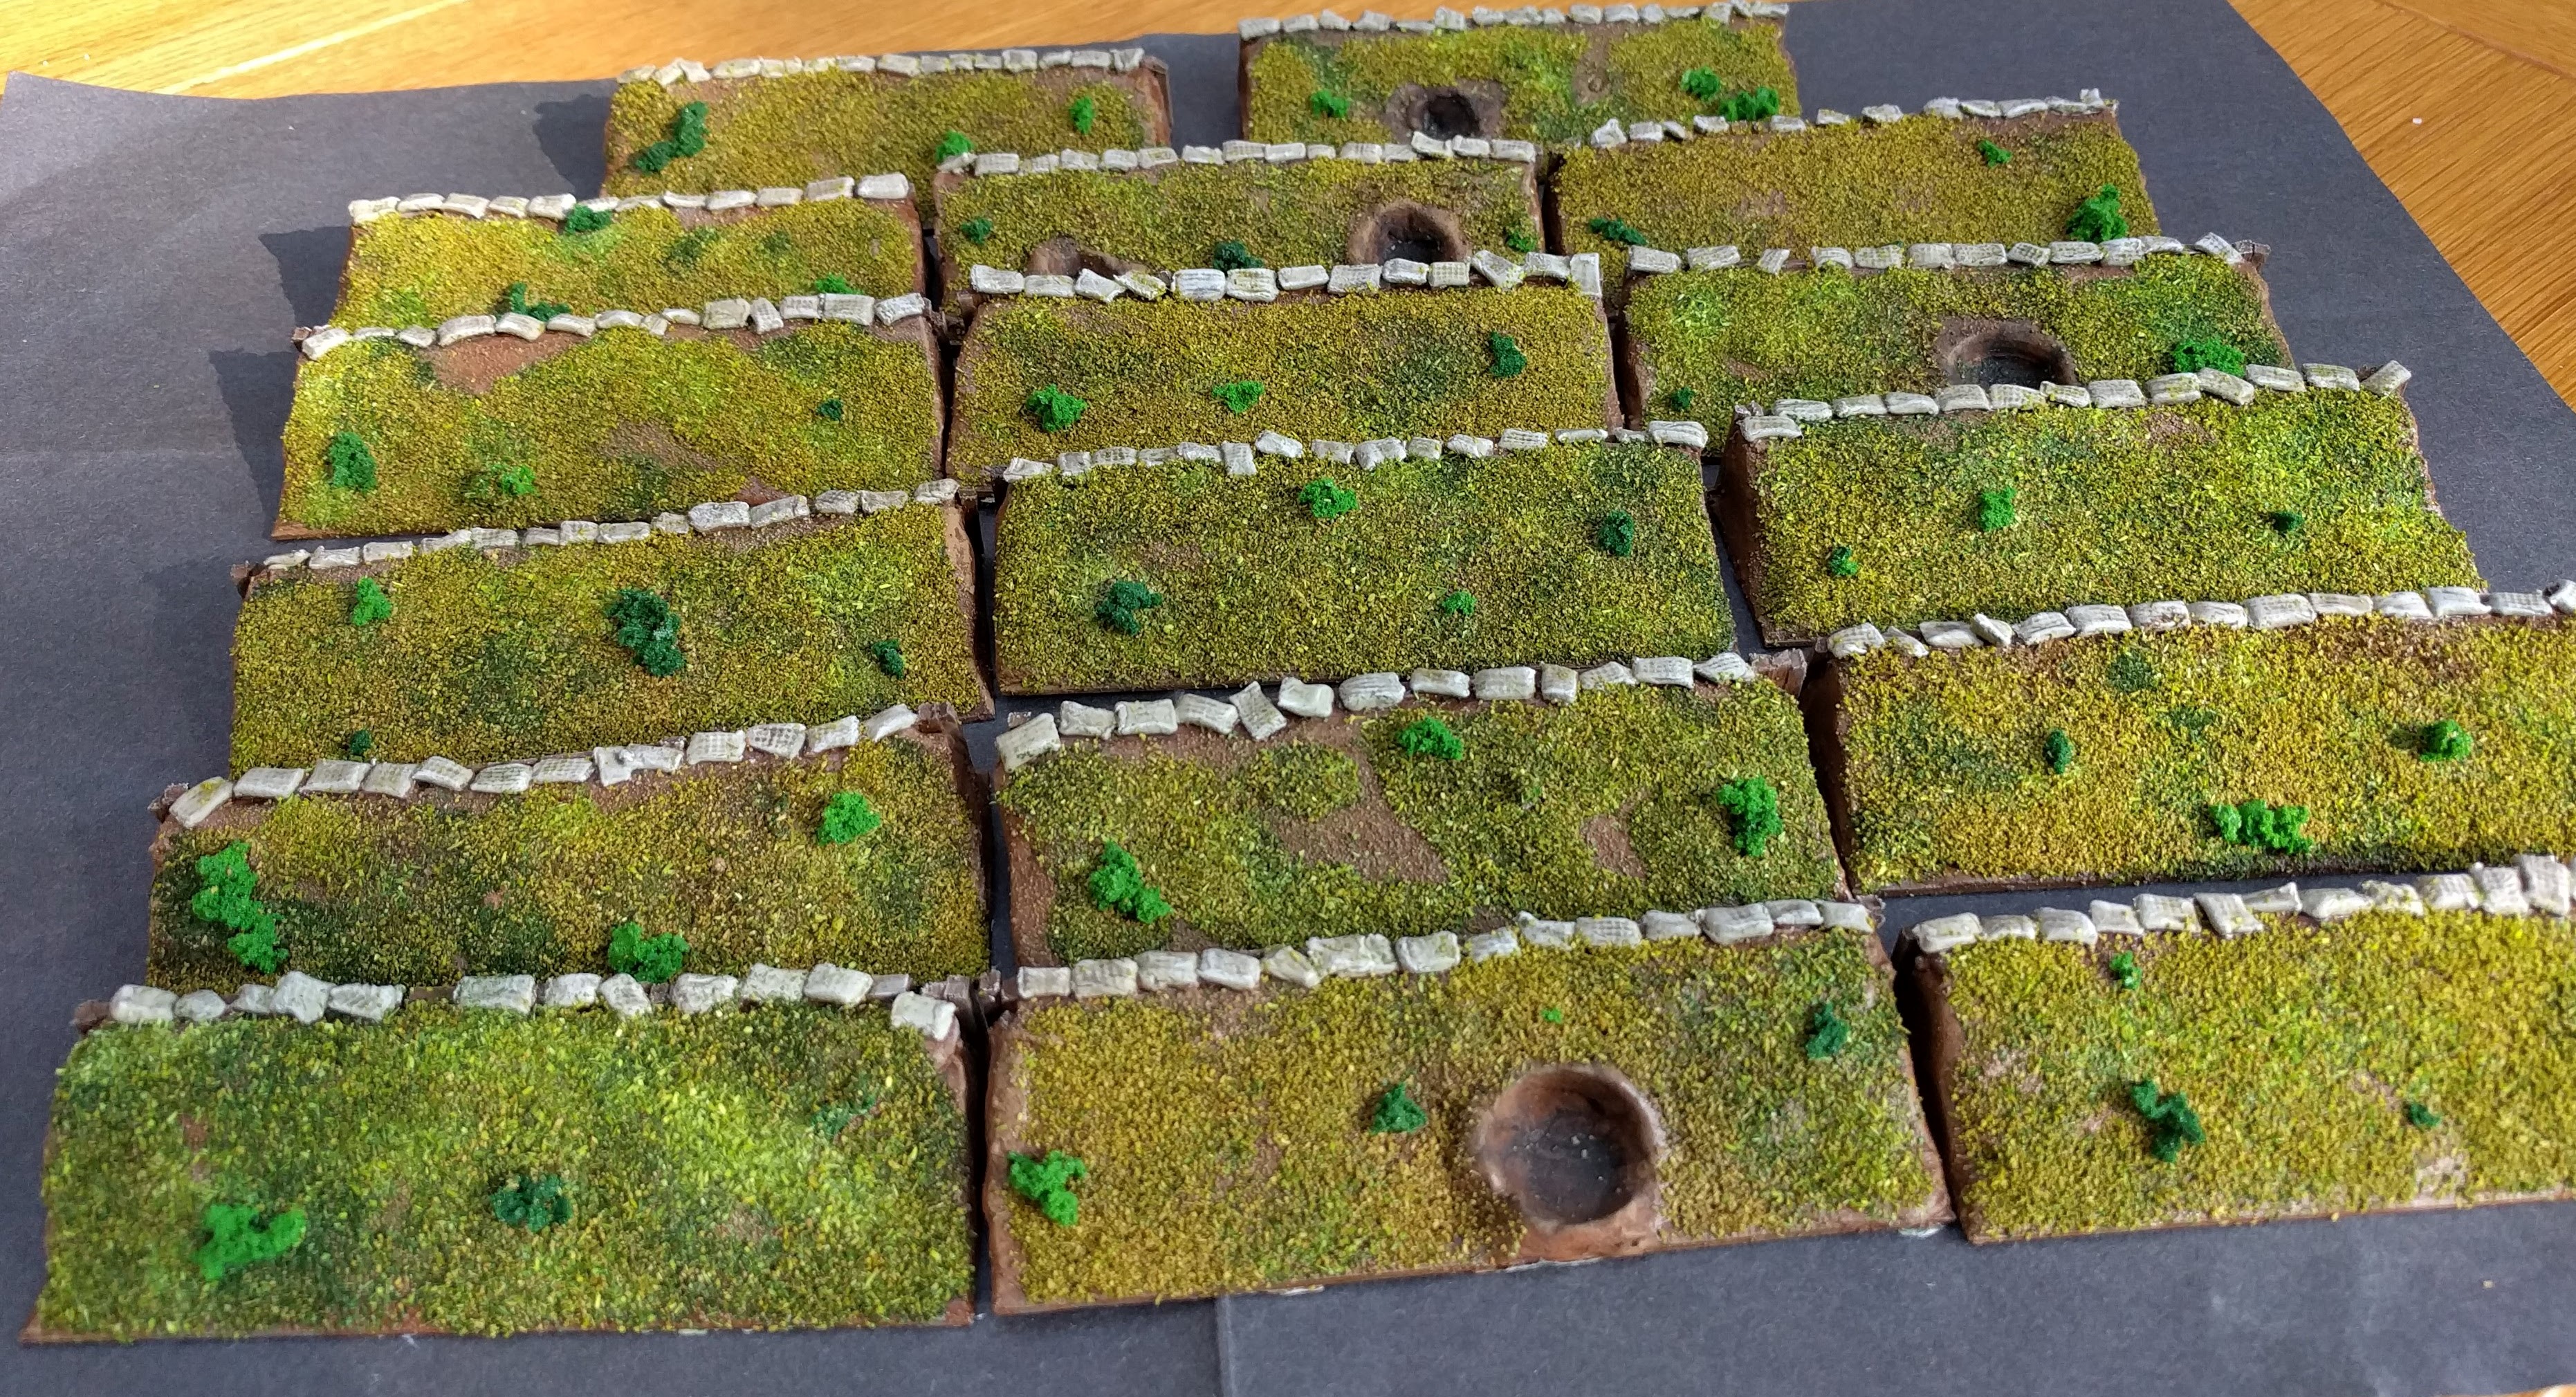 All of the completed pieces - 17 in total or 68" in game terms
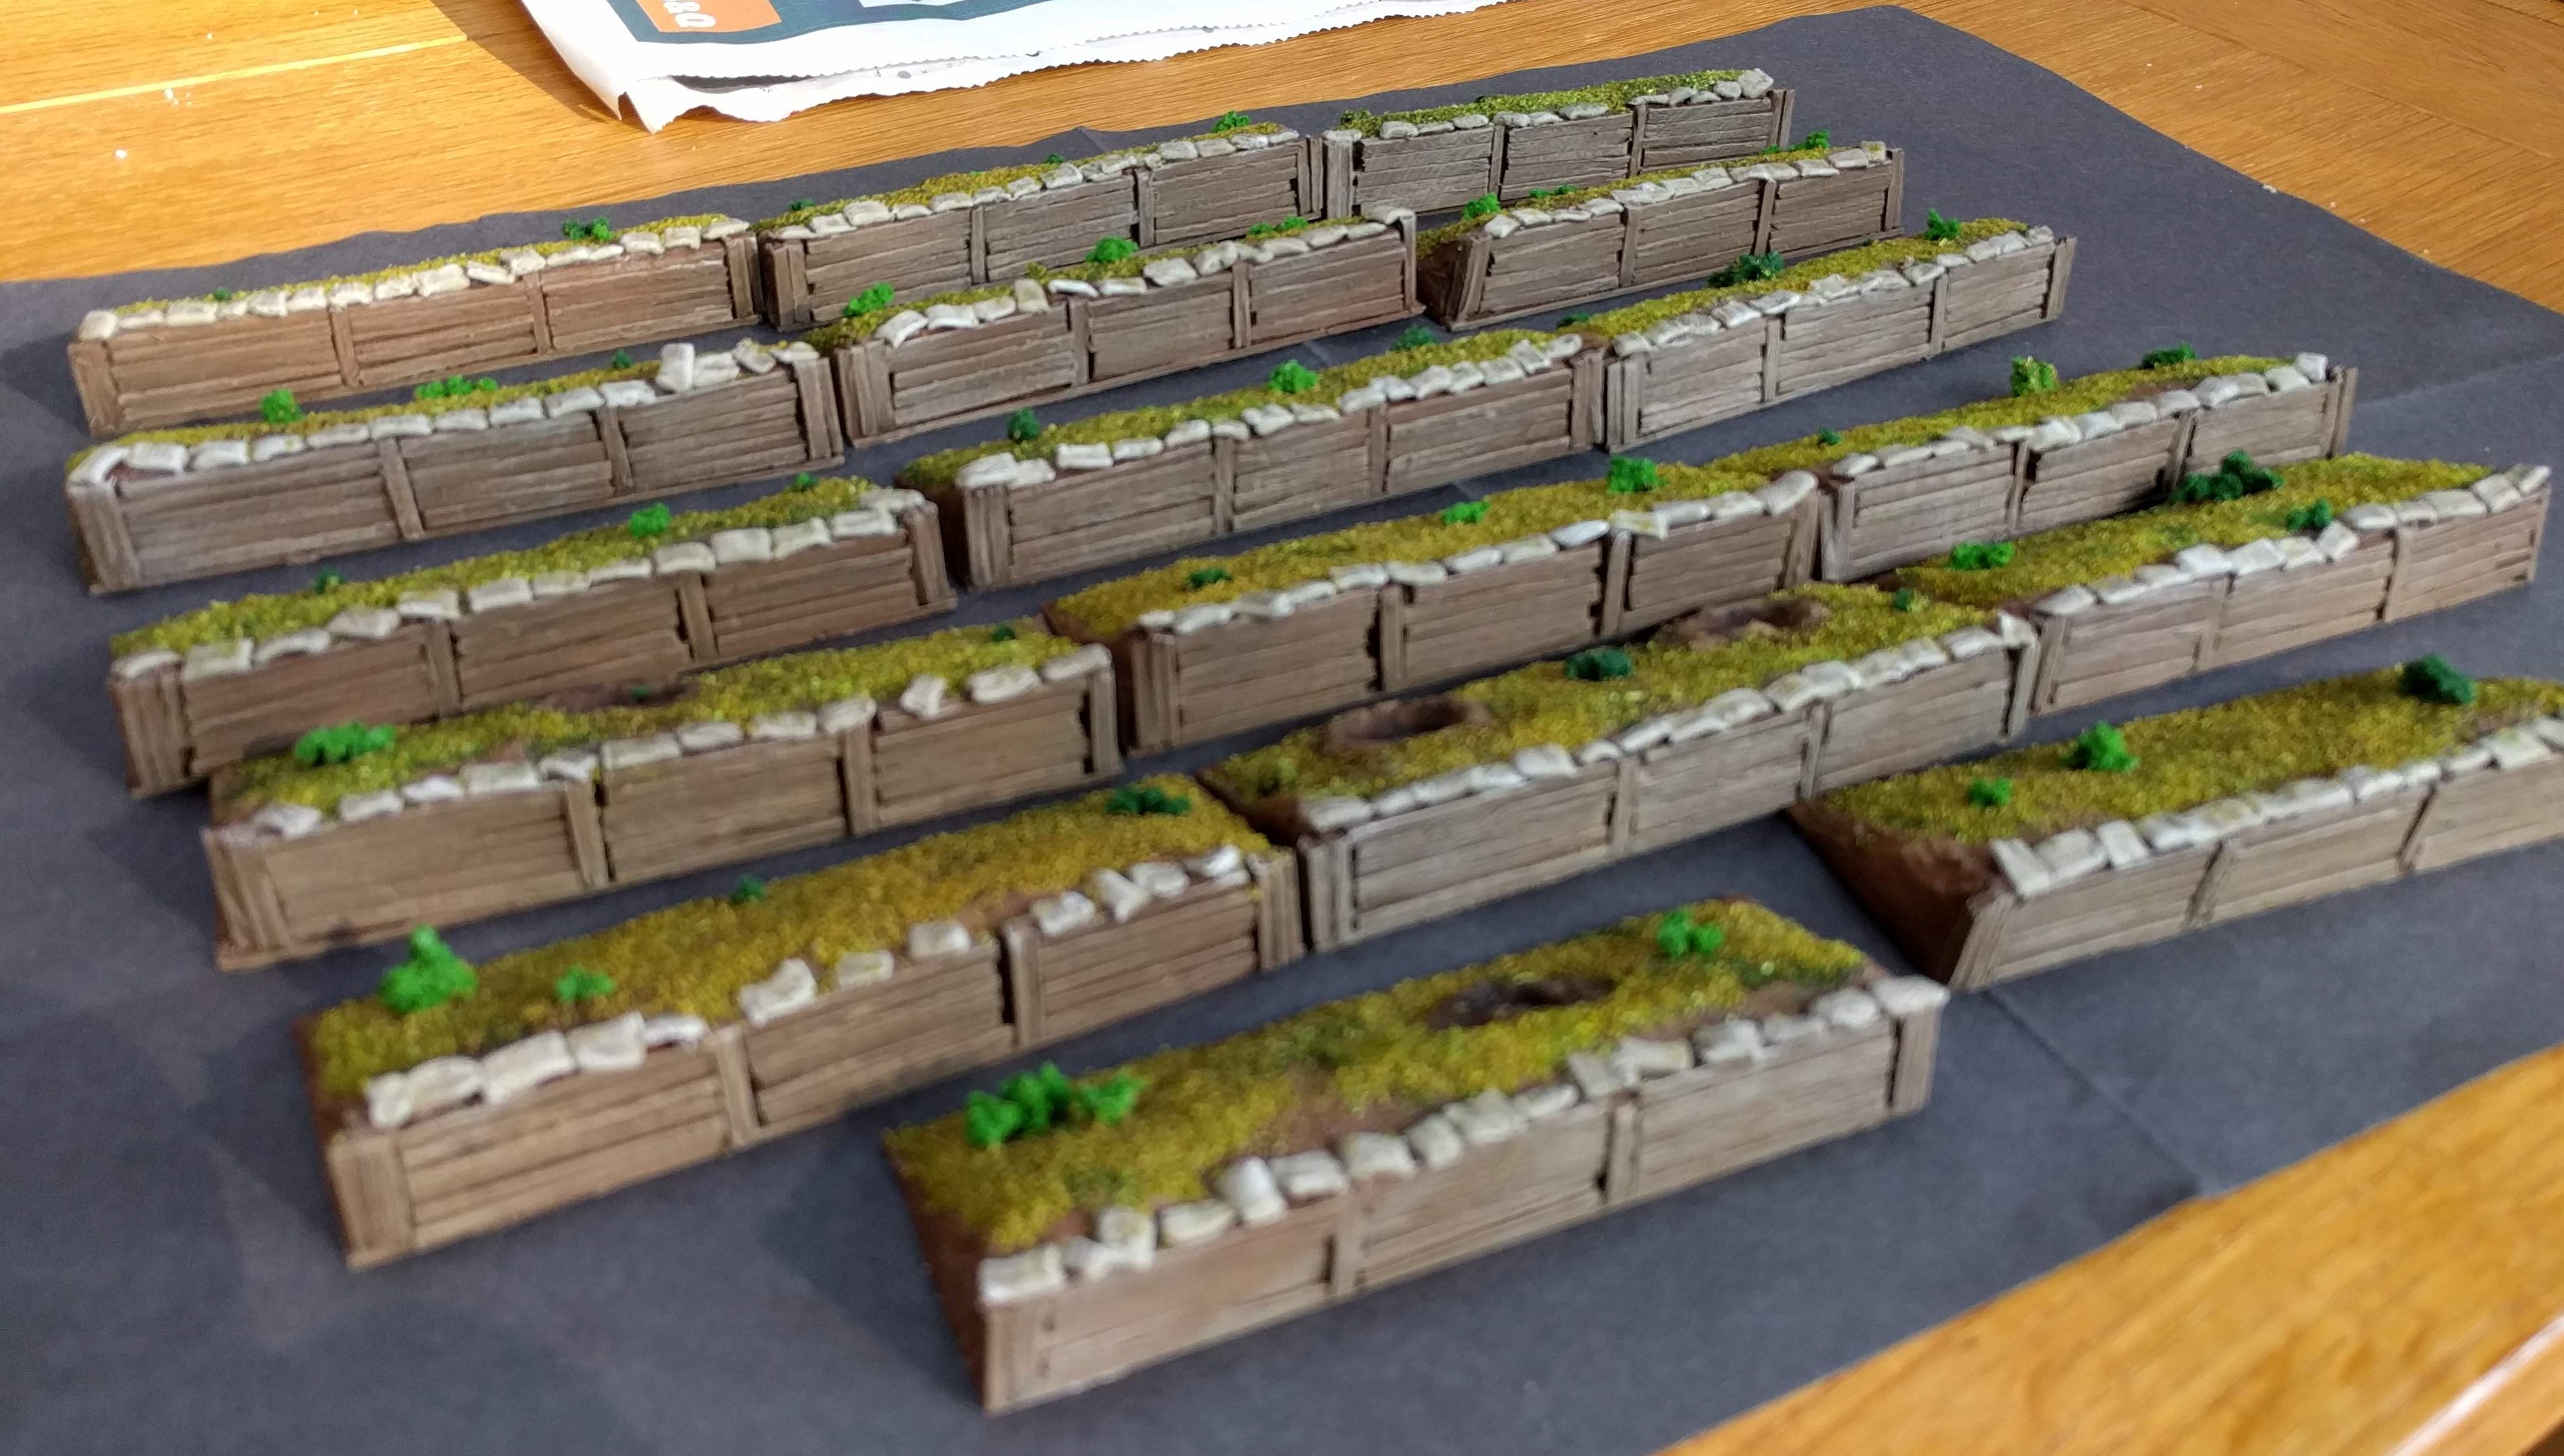
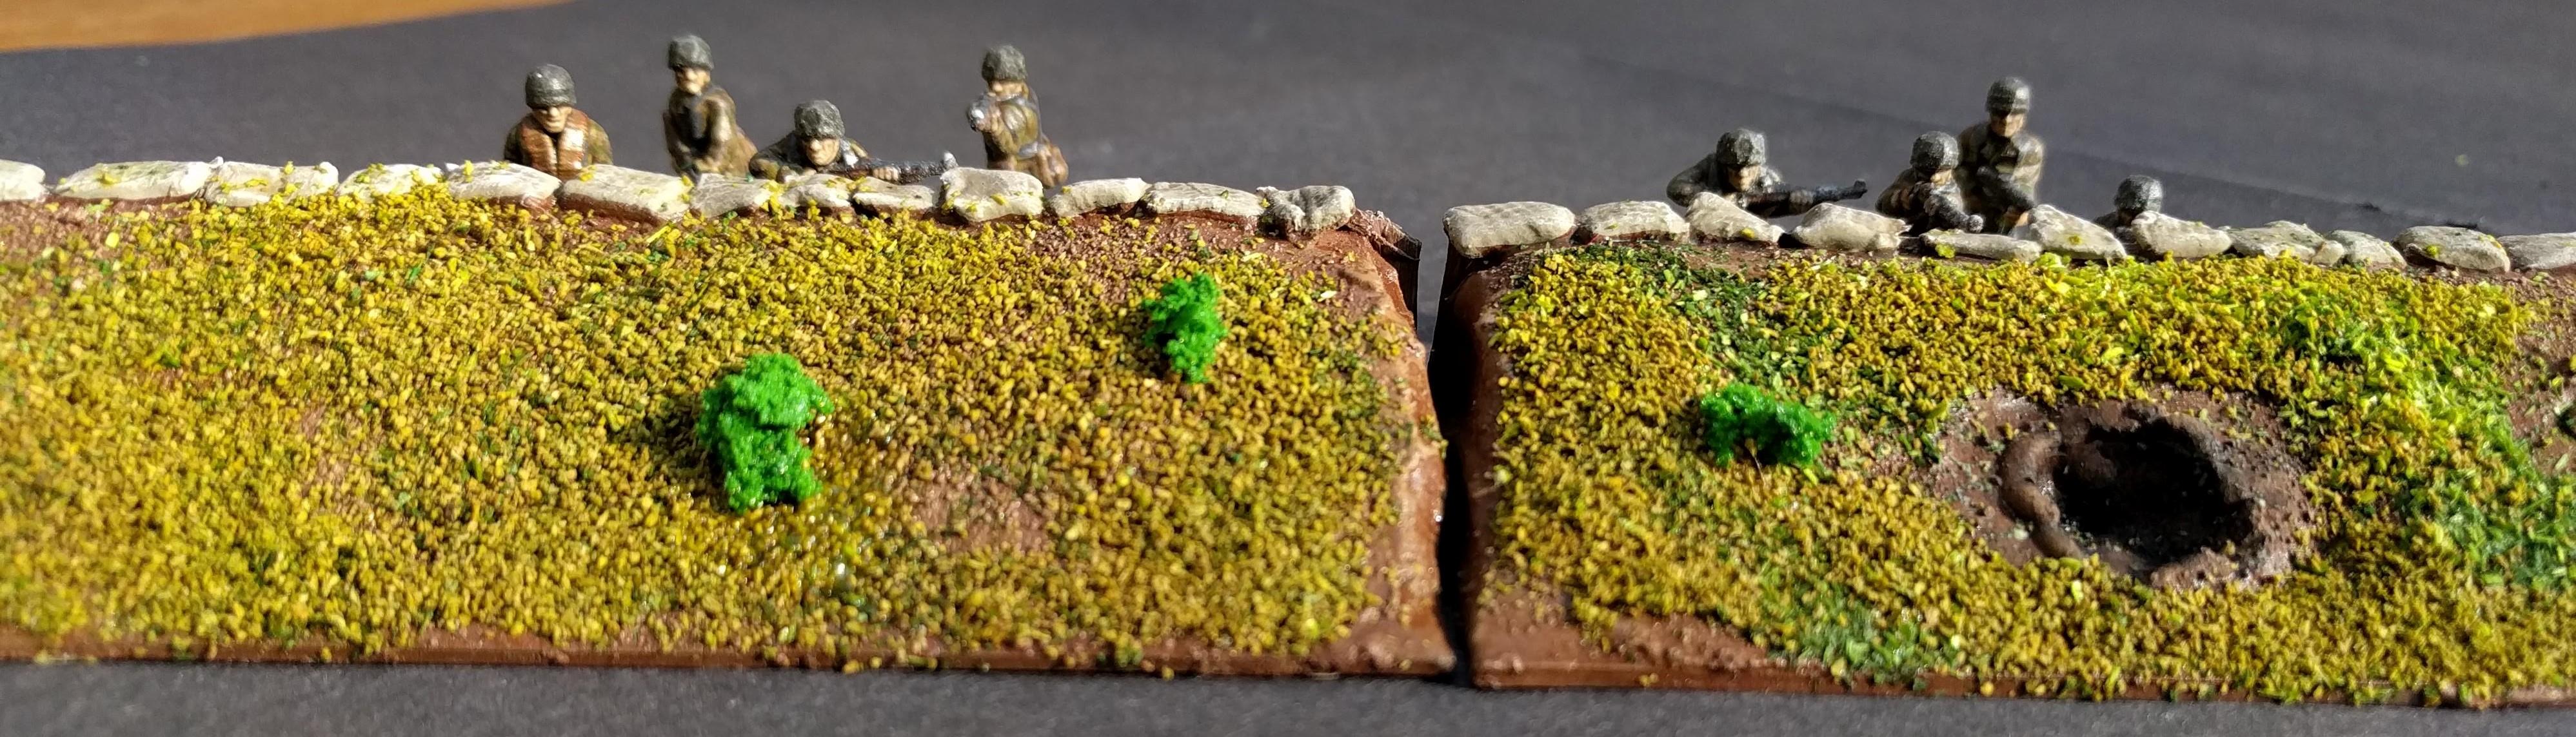 And for scale, with some German defenders
Trenches - First paint
Now time to get some paint down on the trenches. Given the mix of materials, I’ve decided to apply a grey primer first to everything. Once dry, I opted for a watered down dark brown. I’ve applied this to the whole model, including sand bags and wooden retaining wall.
 The grey primer is still just a little visible, which I quite like for this banking
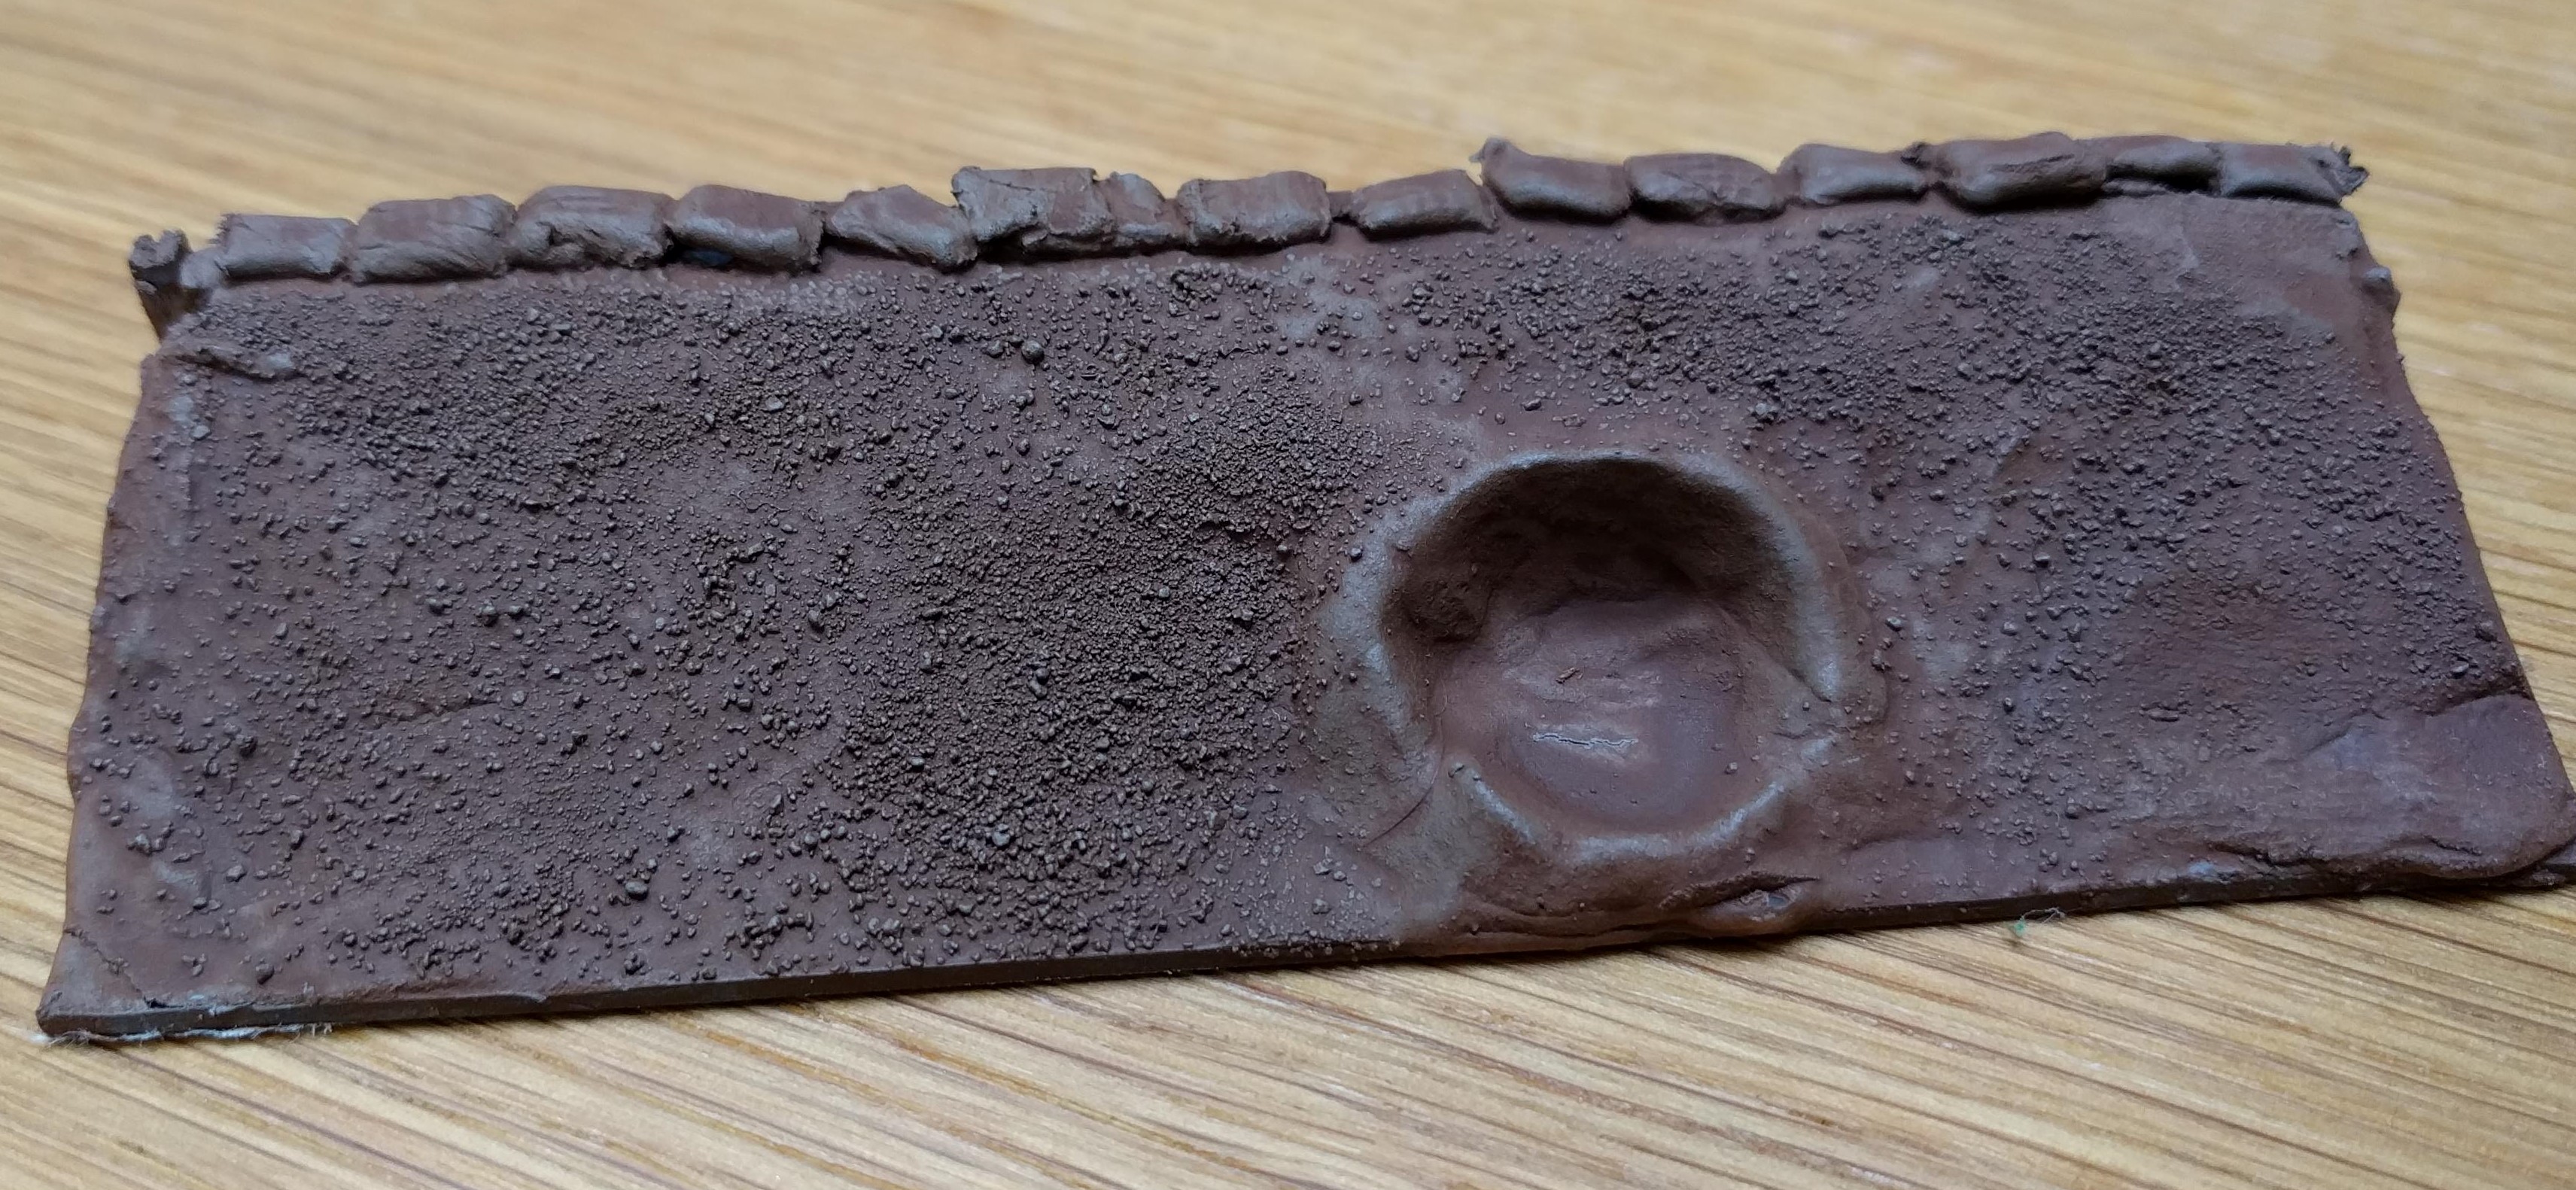
It took a couple of coats to get a good cover of the brown. Next I applied a dry brush of stone grey. I wanted to just pick out the highest parts of the banking. I also found that this colour worked well on the wood as well.
 Just a light dry brush
 I've given the wood a slightly heavier dry brush
I really want the sandbags to stand out, so I’ve decided to paint them a colour lighter than they probably would have been – perhaps the Italian sun has bleached them? Stone grey was to hand and seemed suitable
I’ve also noticed that the lighting between the photo below and those above is different. It is the same, honest!
 Sandbags now painted up
I won’t take the earth any further than this. I plan to flock a lot of it, so most of it will be covered.
I need to apply a wash to the sandbags and wooden retaining wall which will probably be a brushed on dip. This will hopefully have the added effect of securing them to the model and protecting them.
Trenches - Sandbagging
I thought I would add some more detail and contrast to the trenches by lining the top of the wooden retaining walls with sandbags. This was somewhat inspired by the Bolt Action boot camp and I’ve used a similar method.
Having done a tiny bit of research, roughly a sandbag in 15mm scale should be around 4mm wide and about 6 to 8mm long. This is obviously quite small and tricky to get right but if I can get close, I think it will be good enough.
I’m going to use Das modelling clay and roll out long sausages to about a diameter of 2mm. I then gently squash these between two kitchen chopping boards. This has the benefit of adding some texture to the sandbags as well!
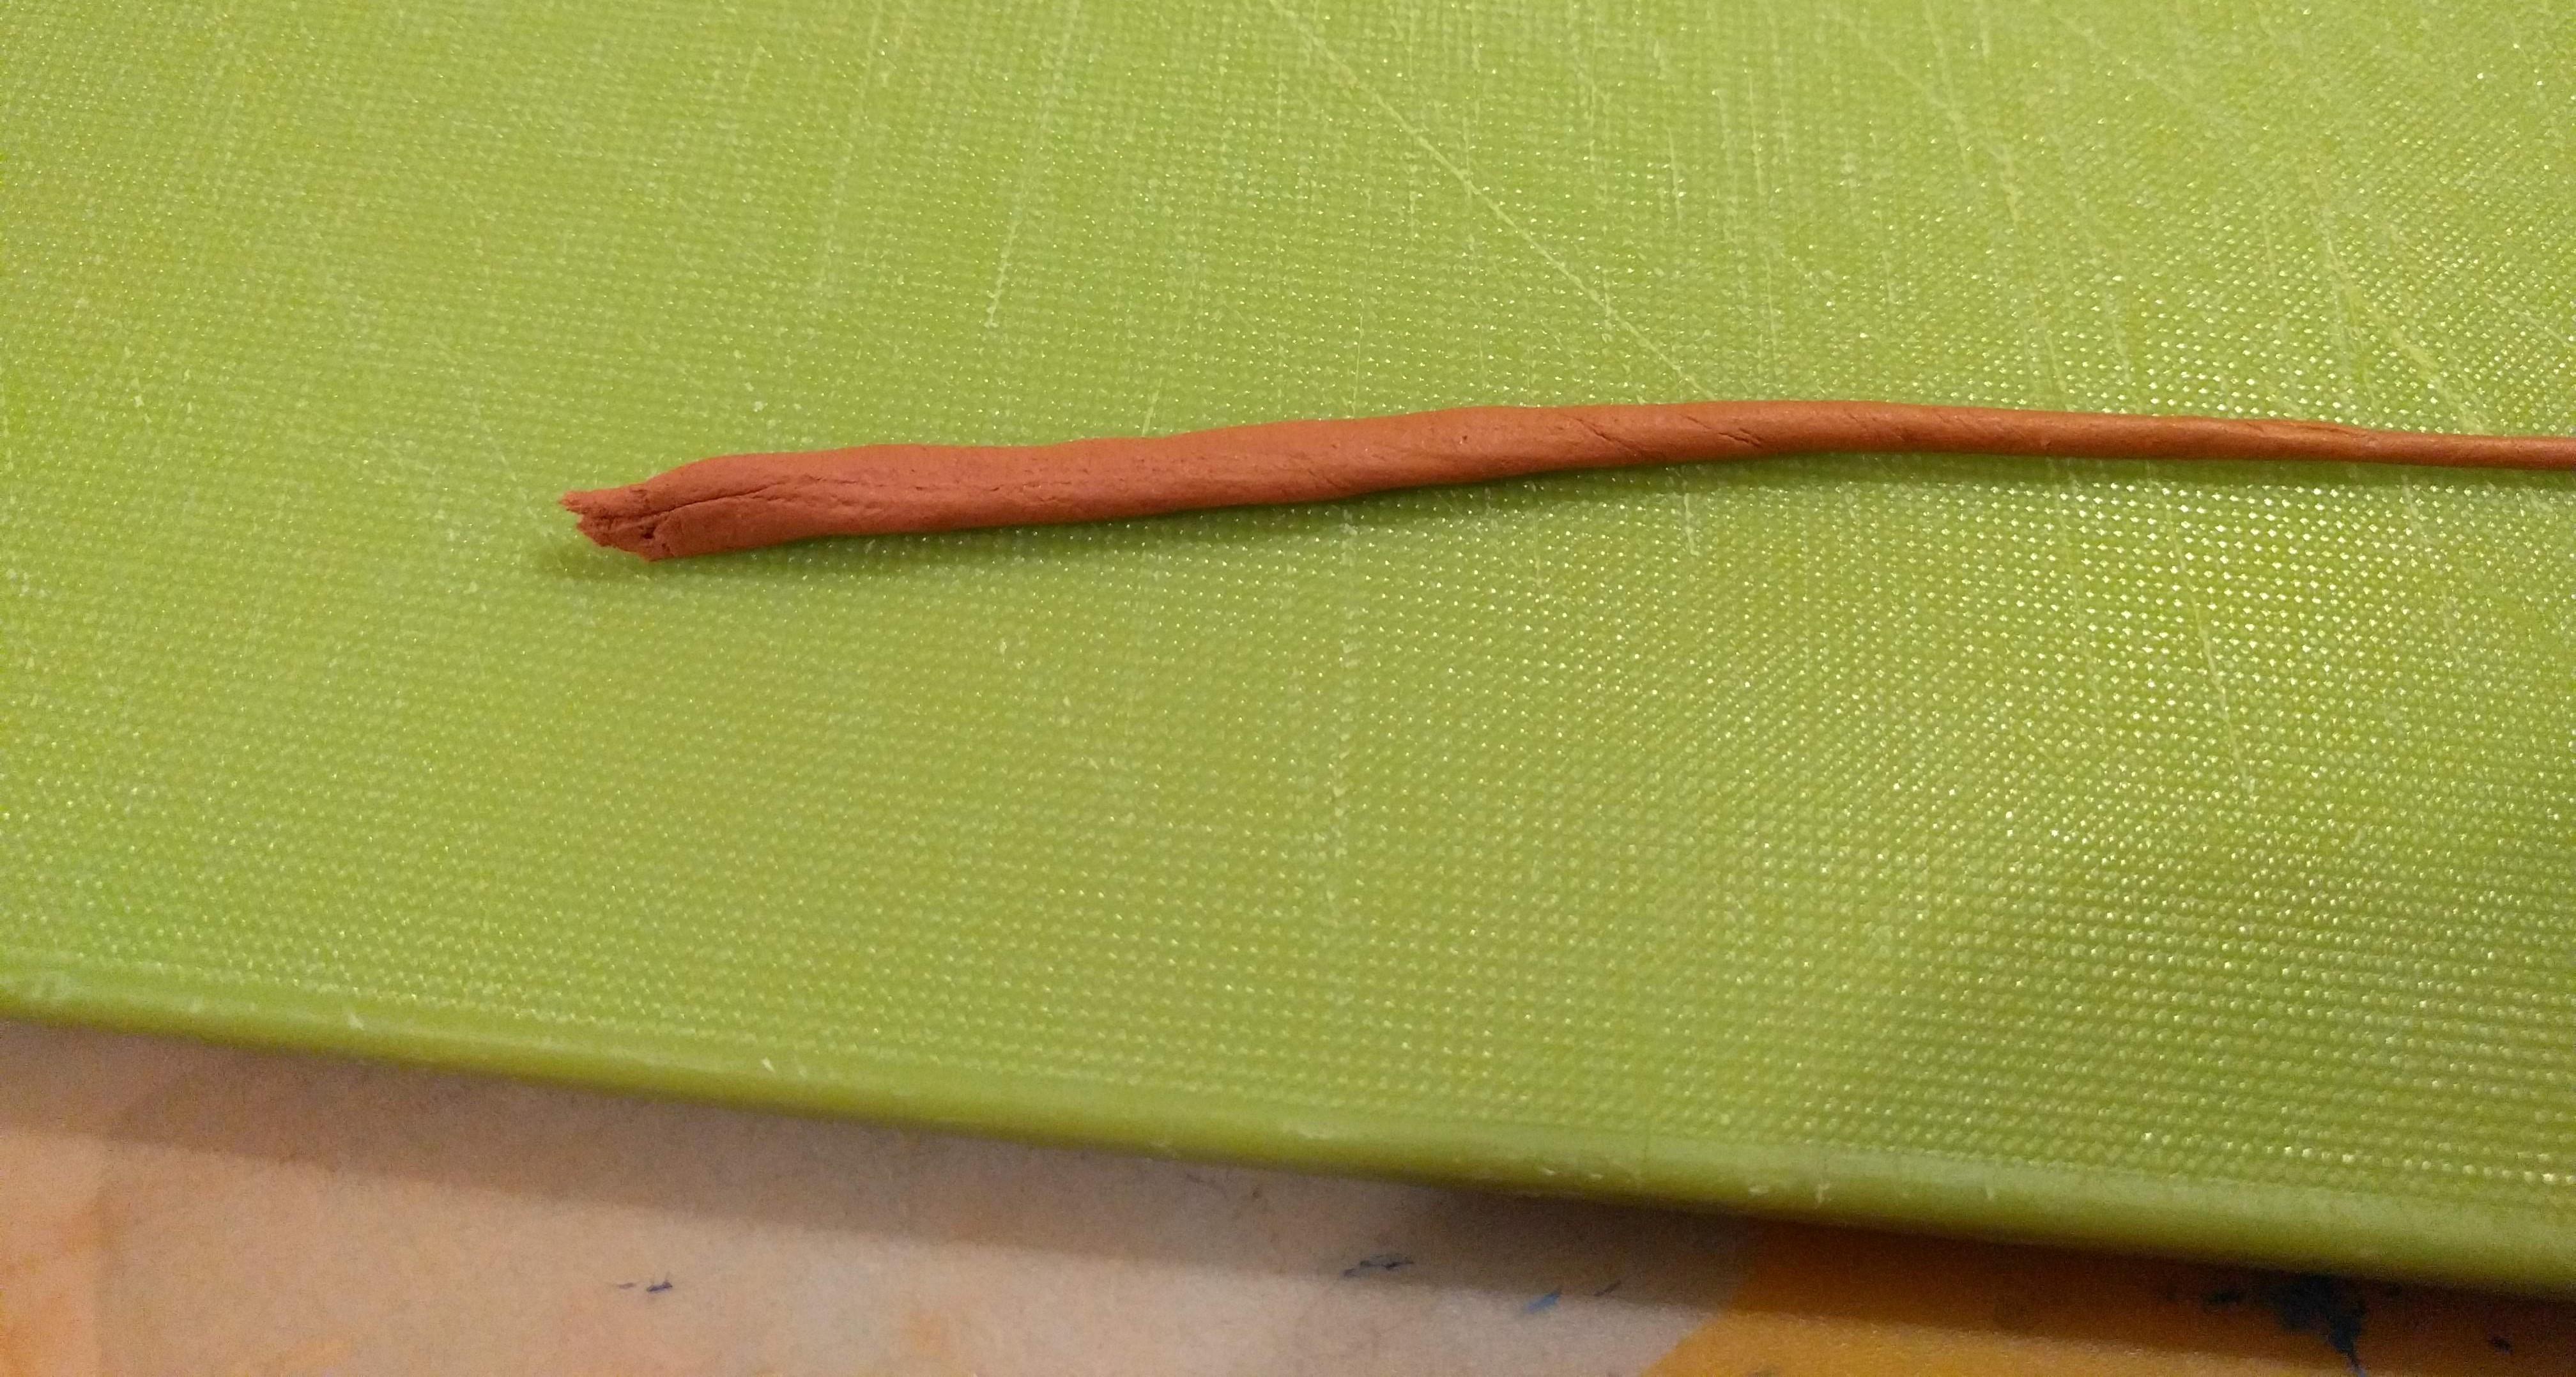 Rolling the clay sausage on the chopping board
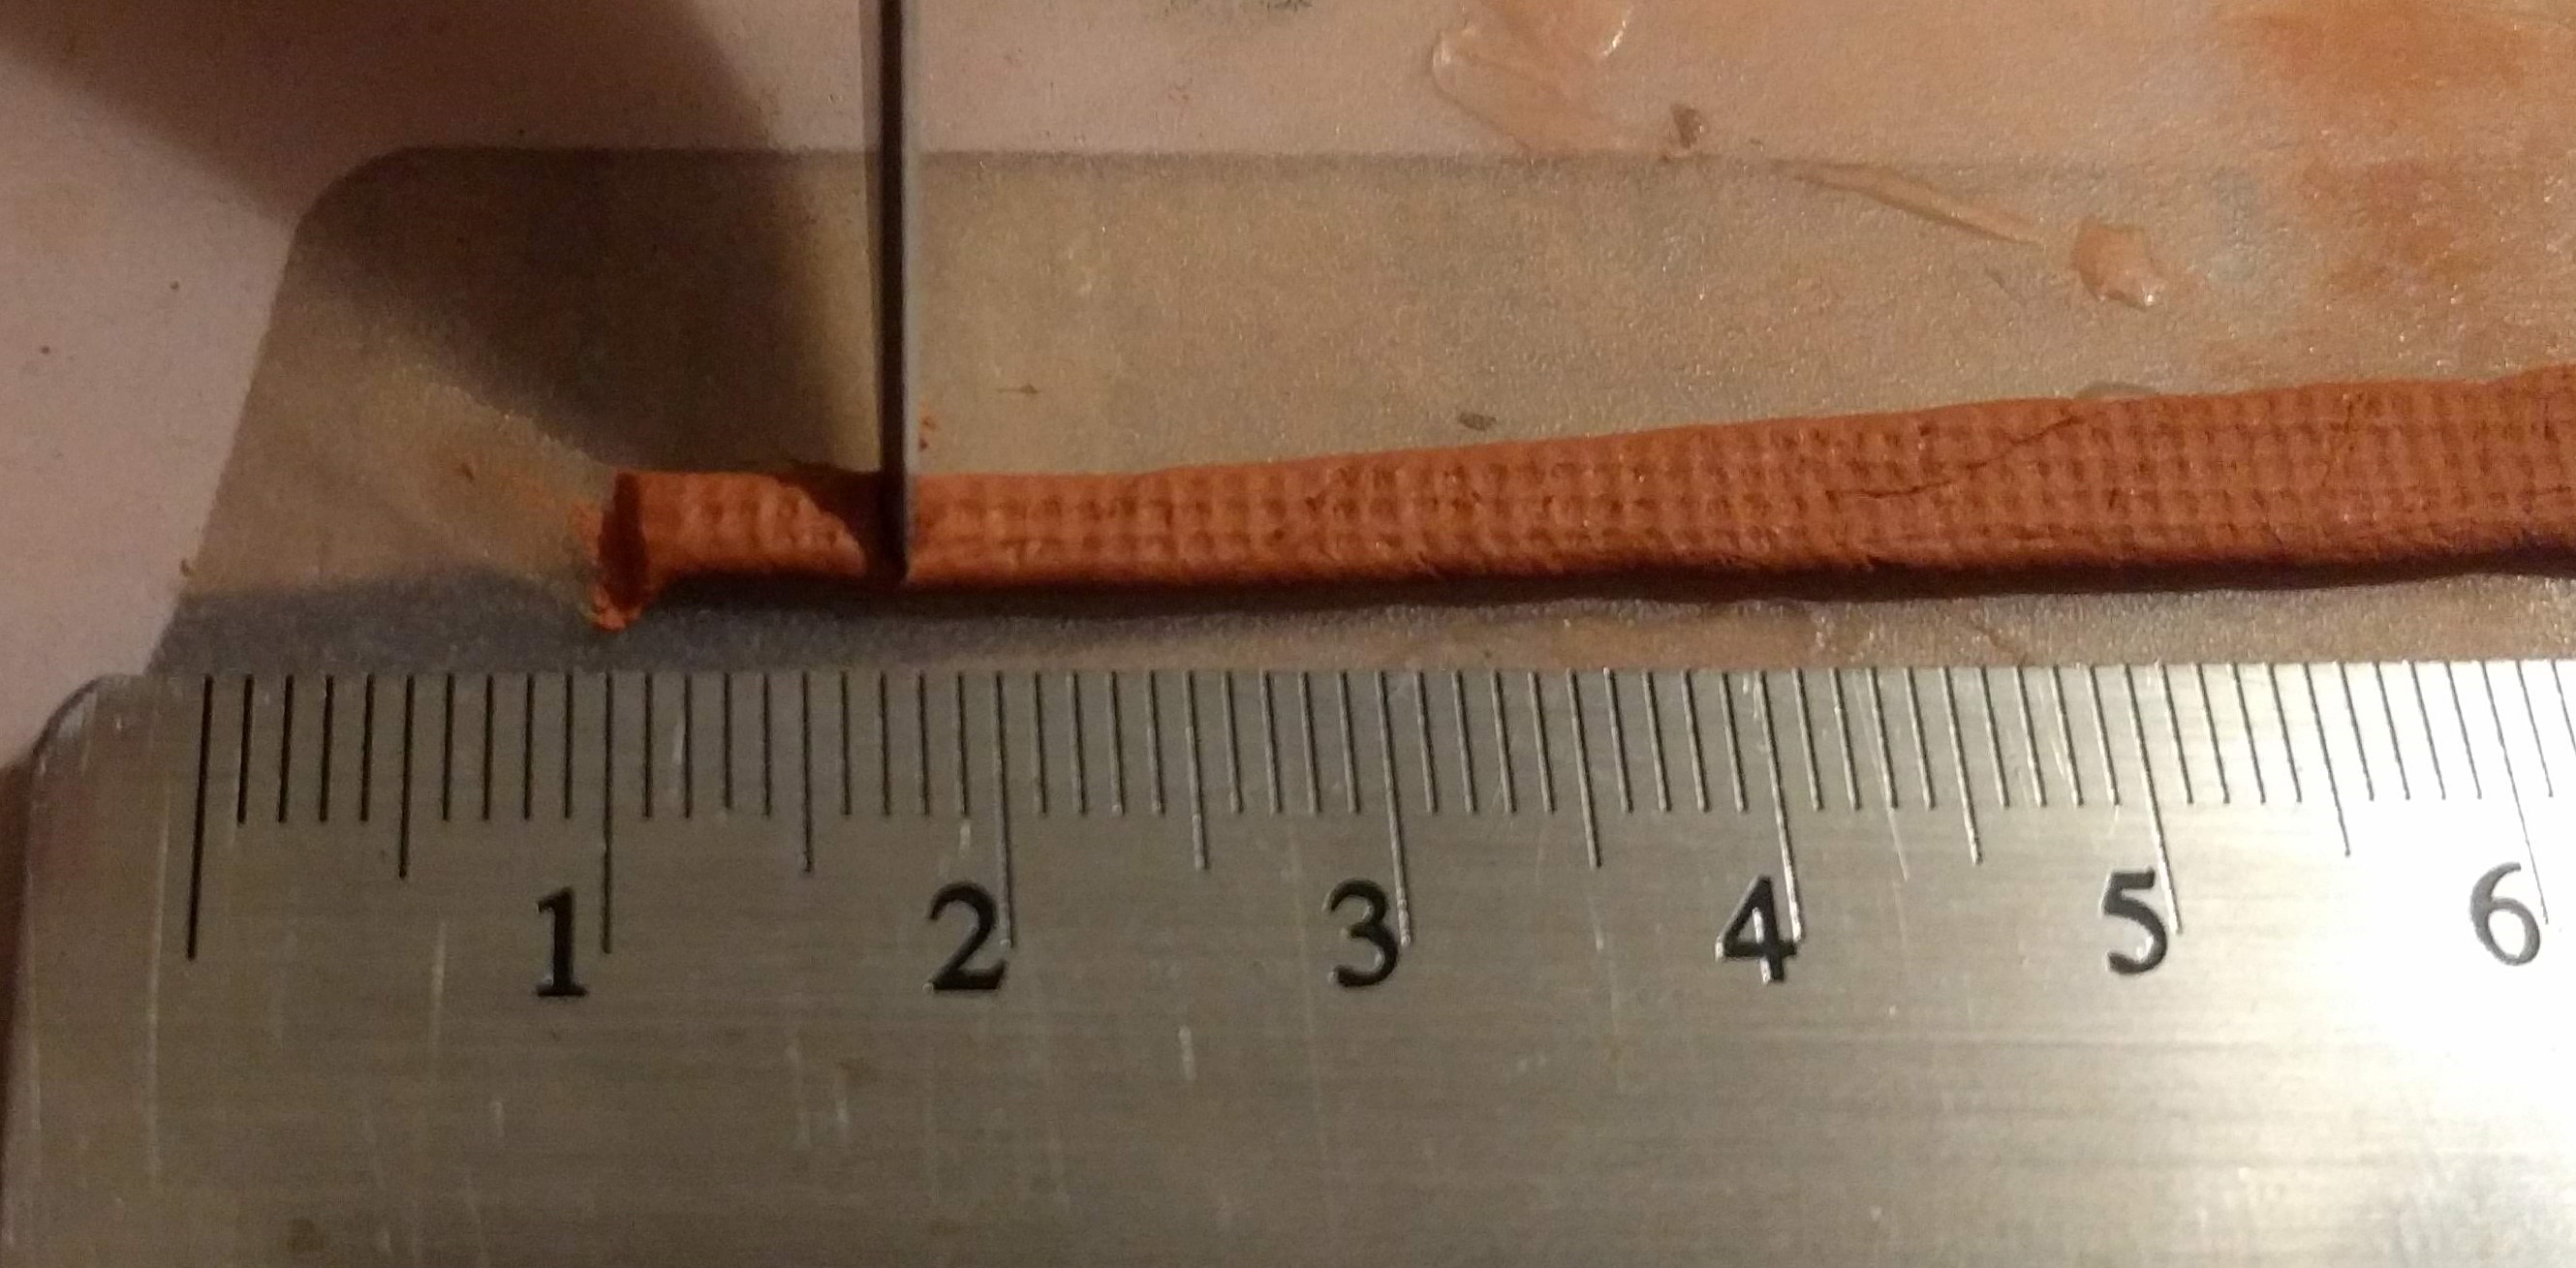
Once squashed, using a ruler and a sharp modelling knife, I’ve cut the sausage into 6mm lengths. I’ve then left these to dry.
I tried creating some variation by stacking a few sandbags or arranging them together in different ways while still wet. If I’m honest though, this was very fiddly and I lost patience quite quickly!
 Chopping the sand bags up
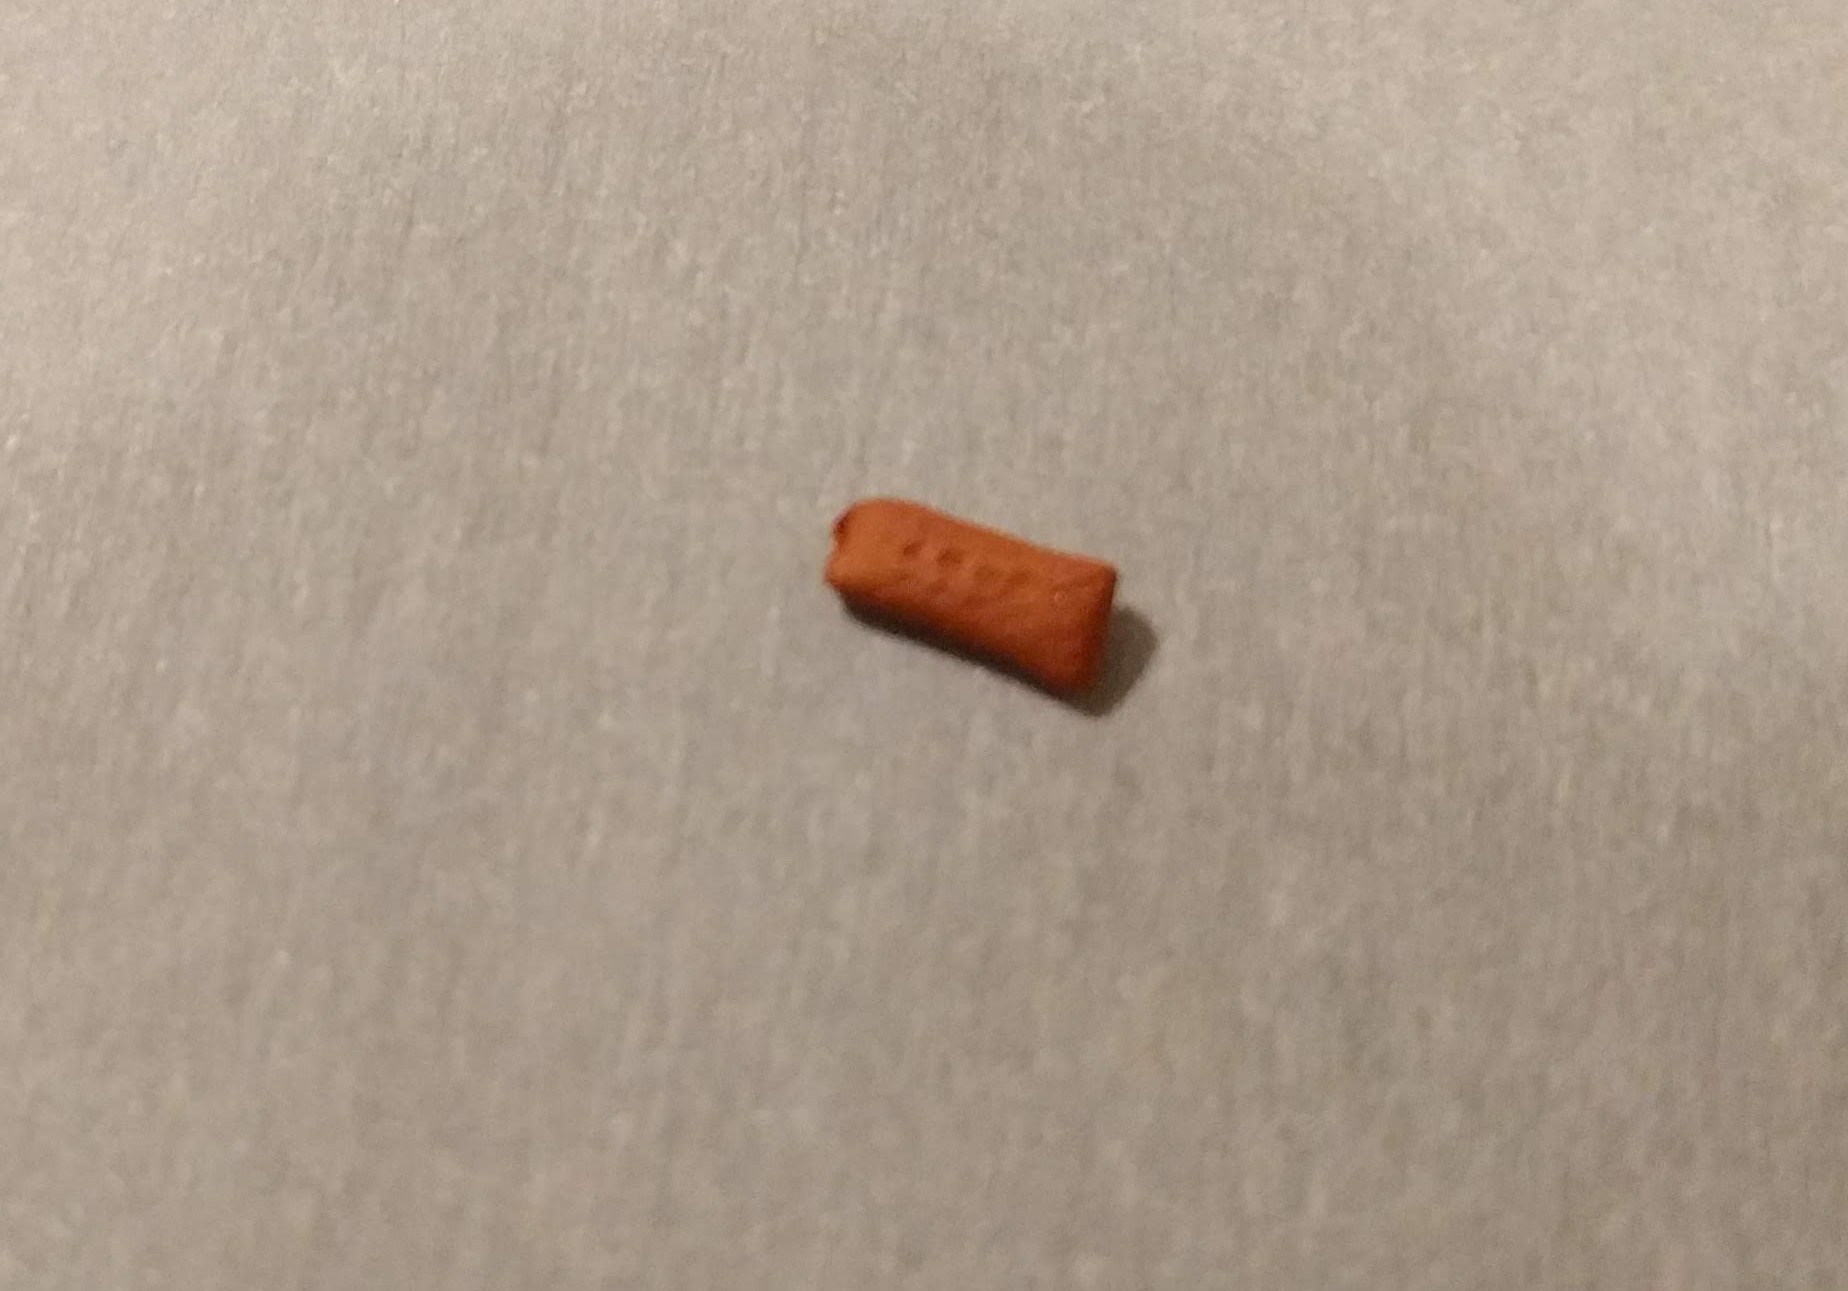 A completed sandbag, ready for drying - note the texture from the chopping board
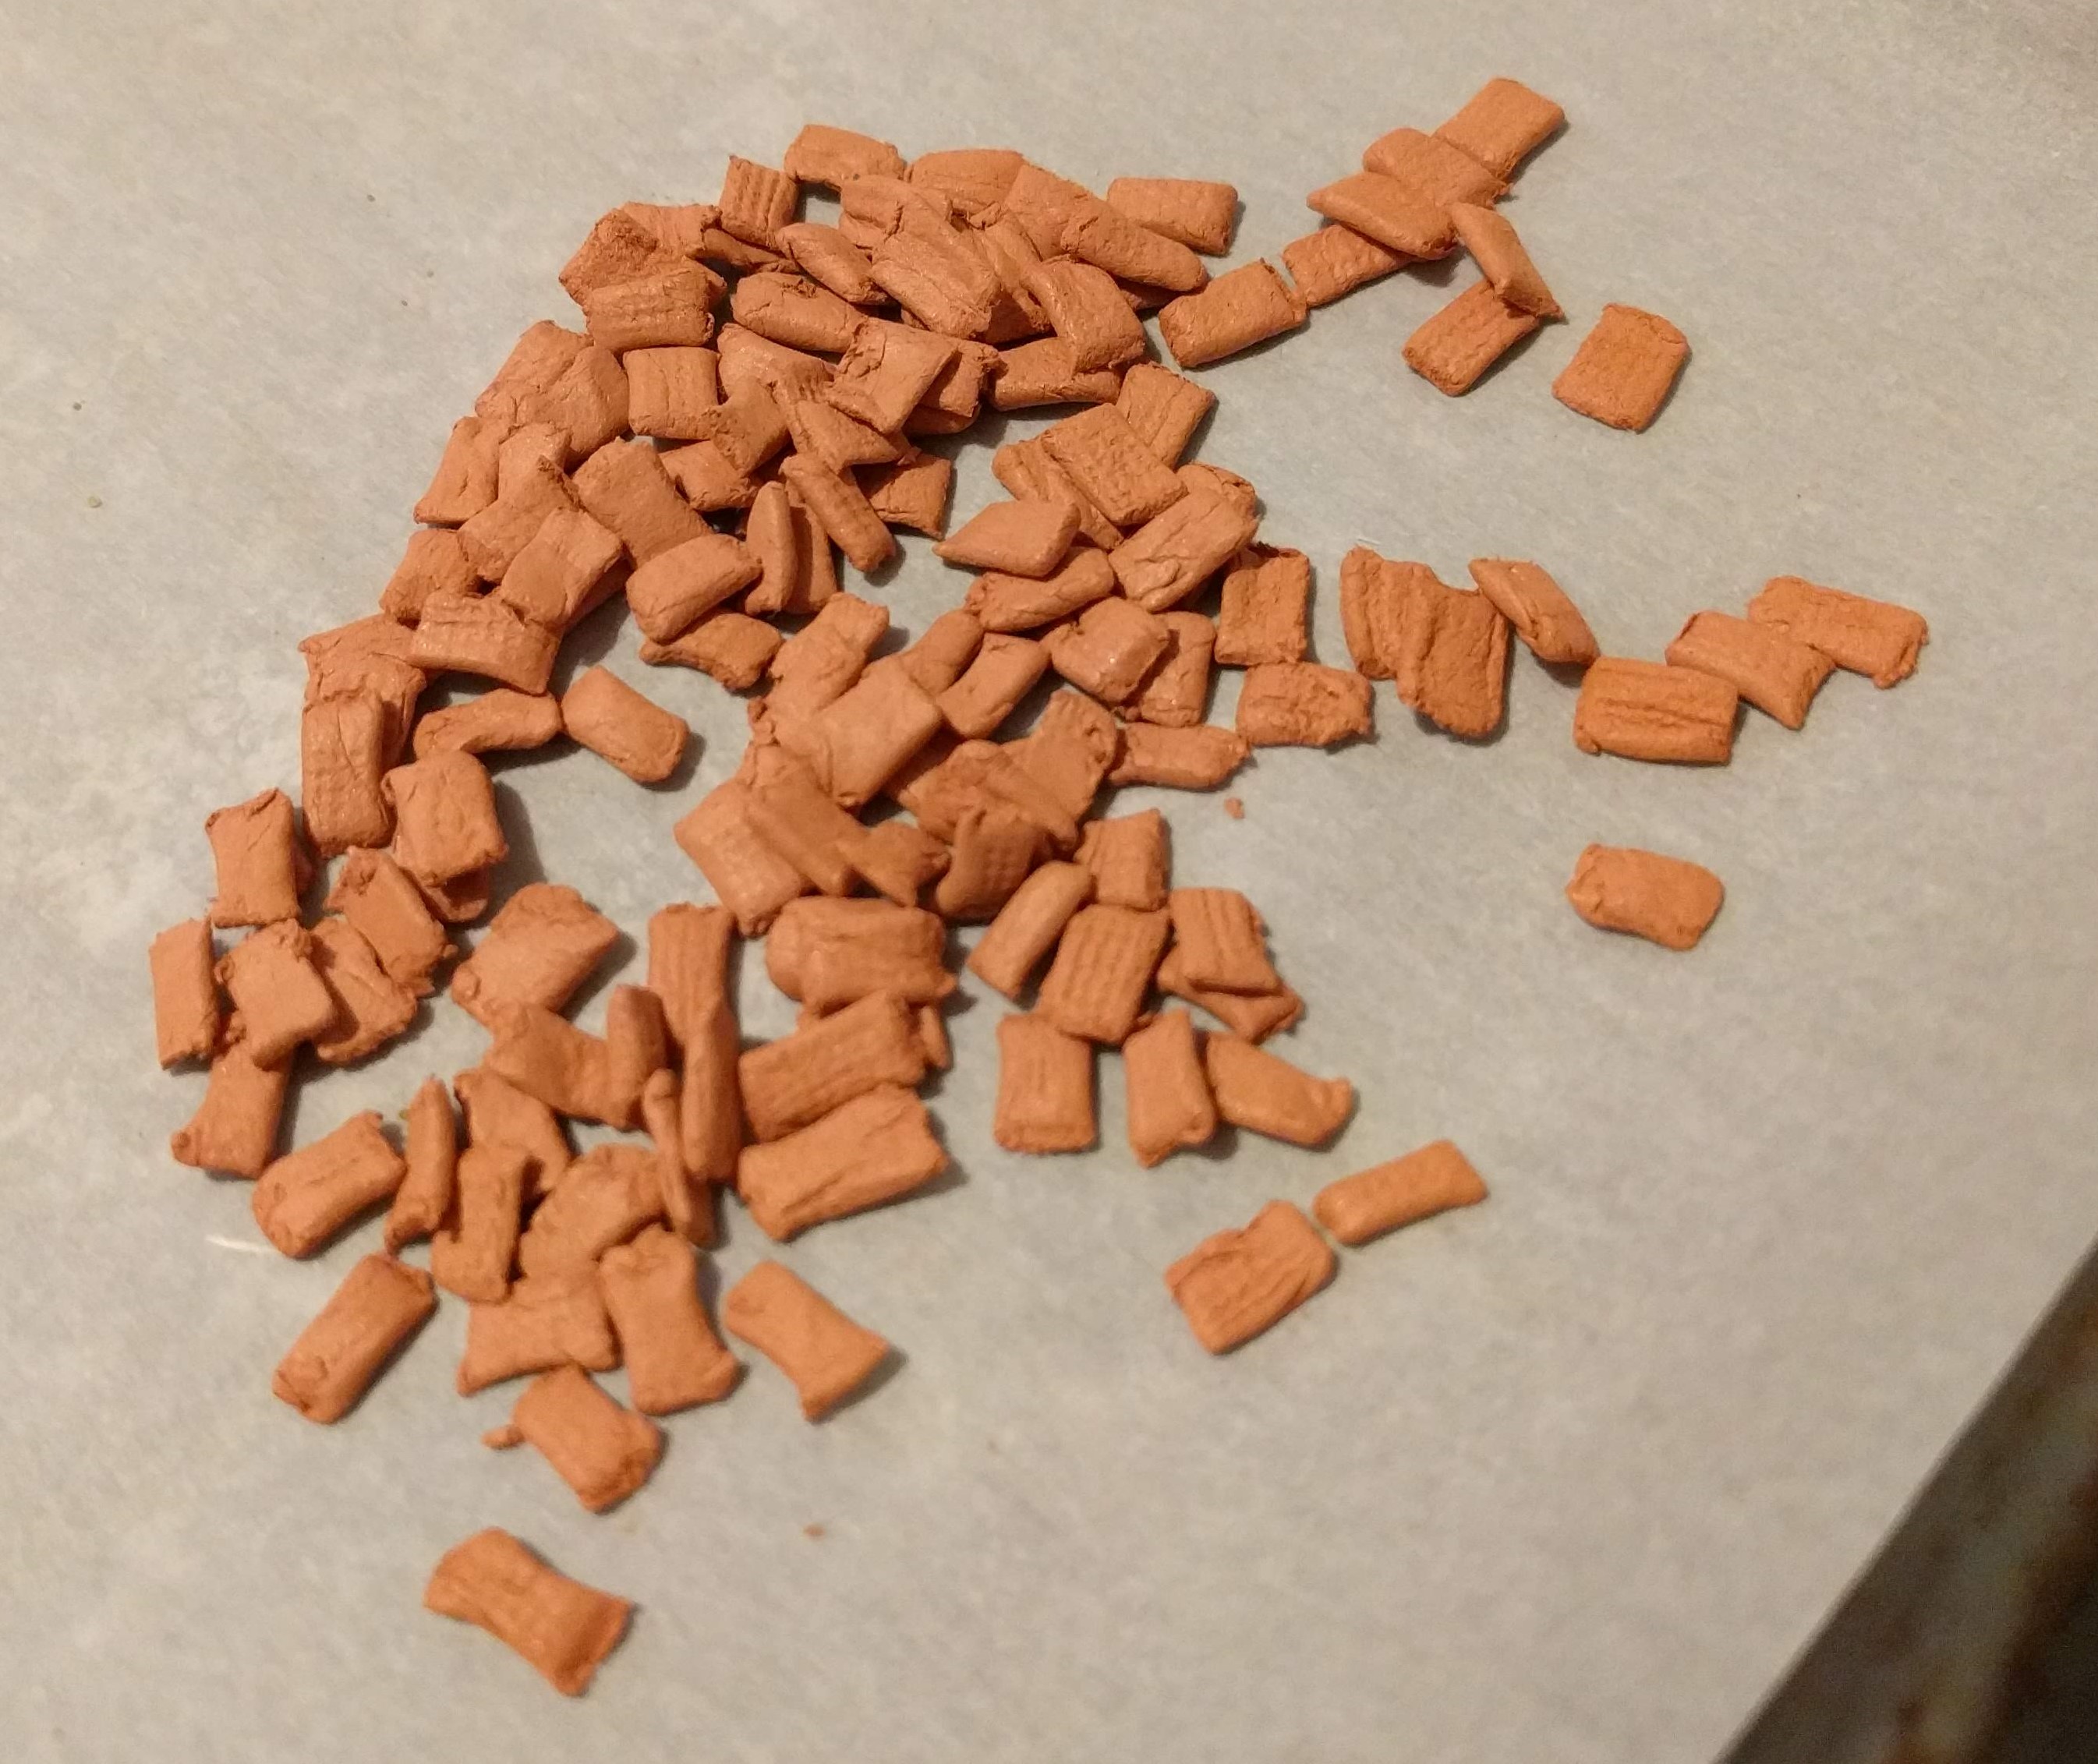 Once dry, they are ready for attaching to the trenches
Left overnight to dry, I attached the sandbags along the top of the trenches using a lot of super glue. Once this was all dry, I then sprayed the whole piece with watered down PVA. This was partly to give the sand bags some more adhesion but also to fix down the sand that I had applied to the Polyfilla in the previous entry on this project. Once dry, this will be ready for priming and painting.
 With the sand bags attached
Trenches - Retaining Walls
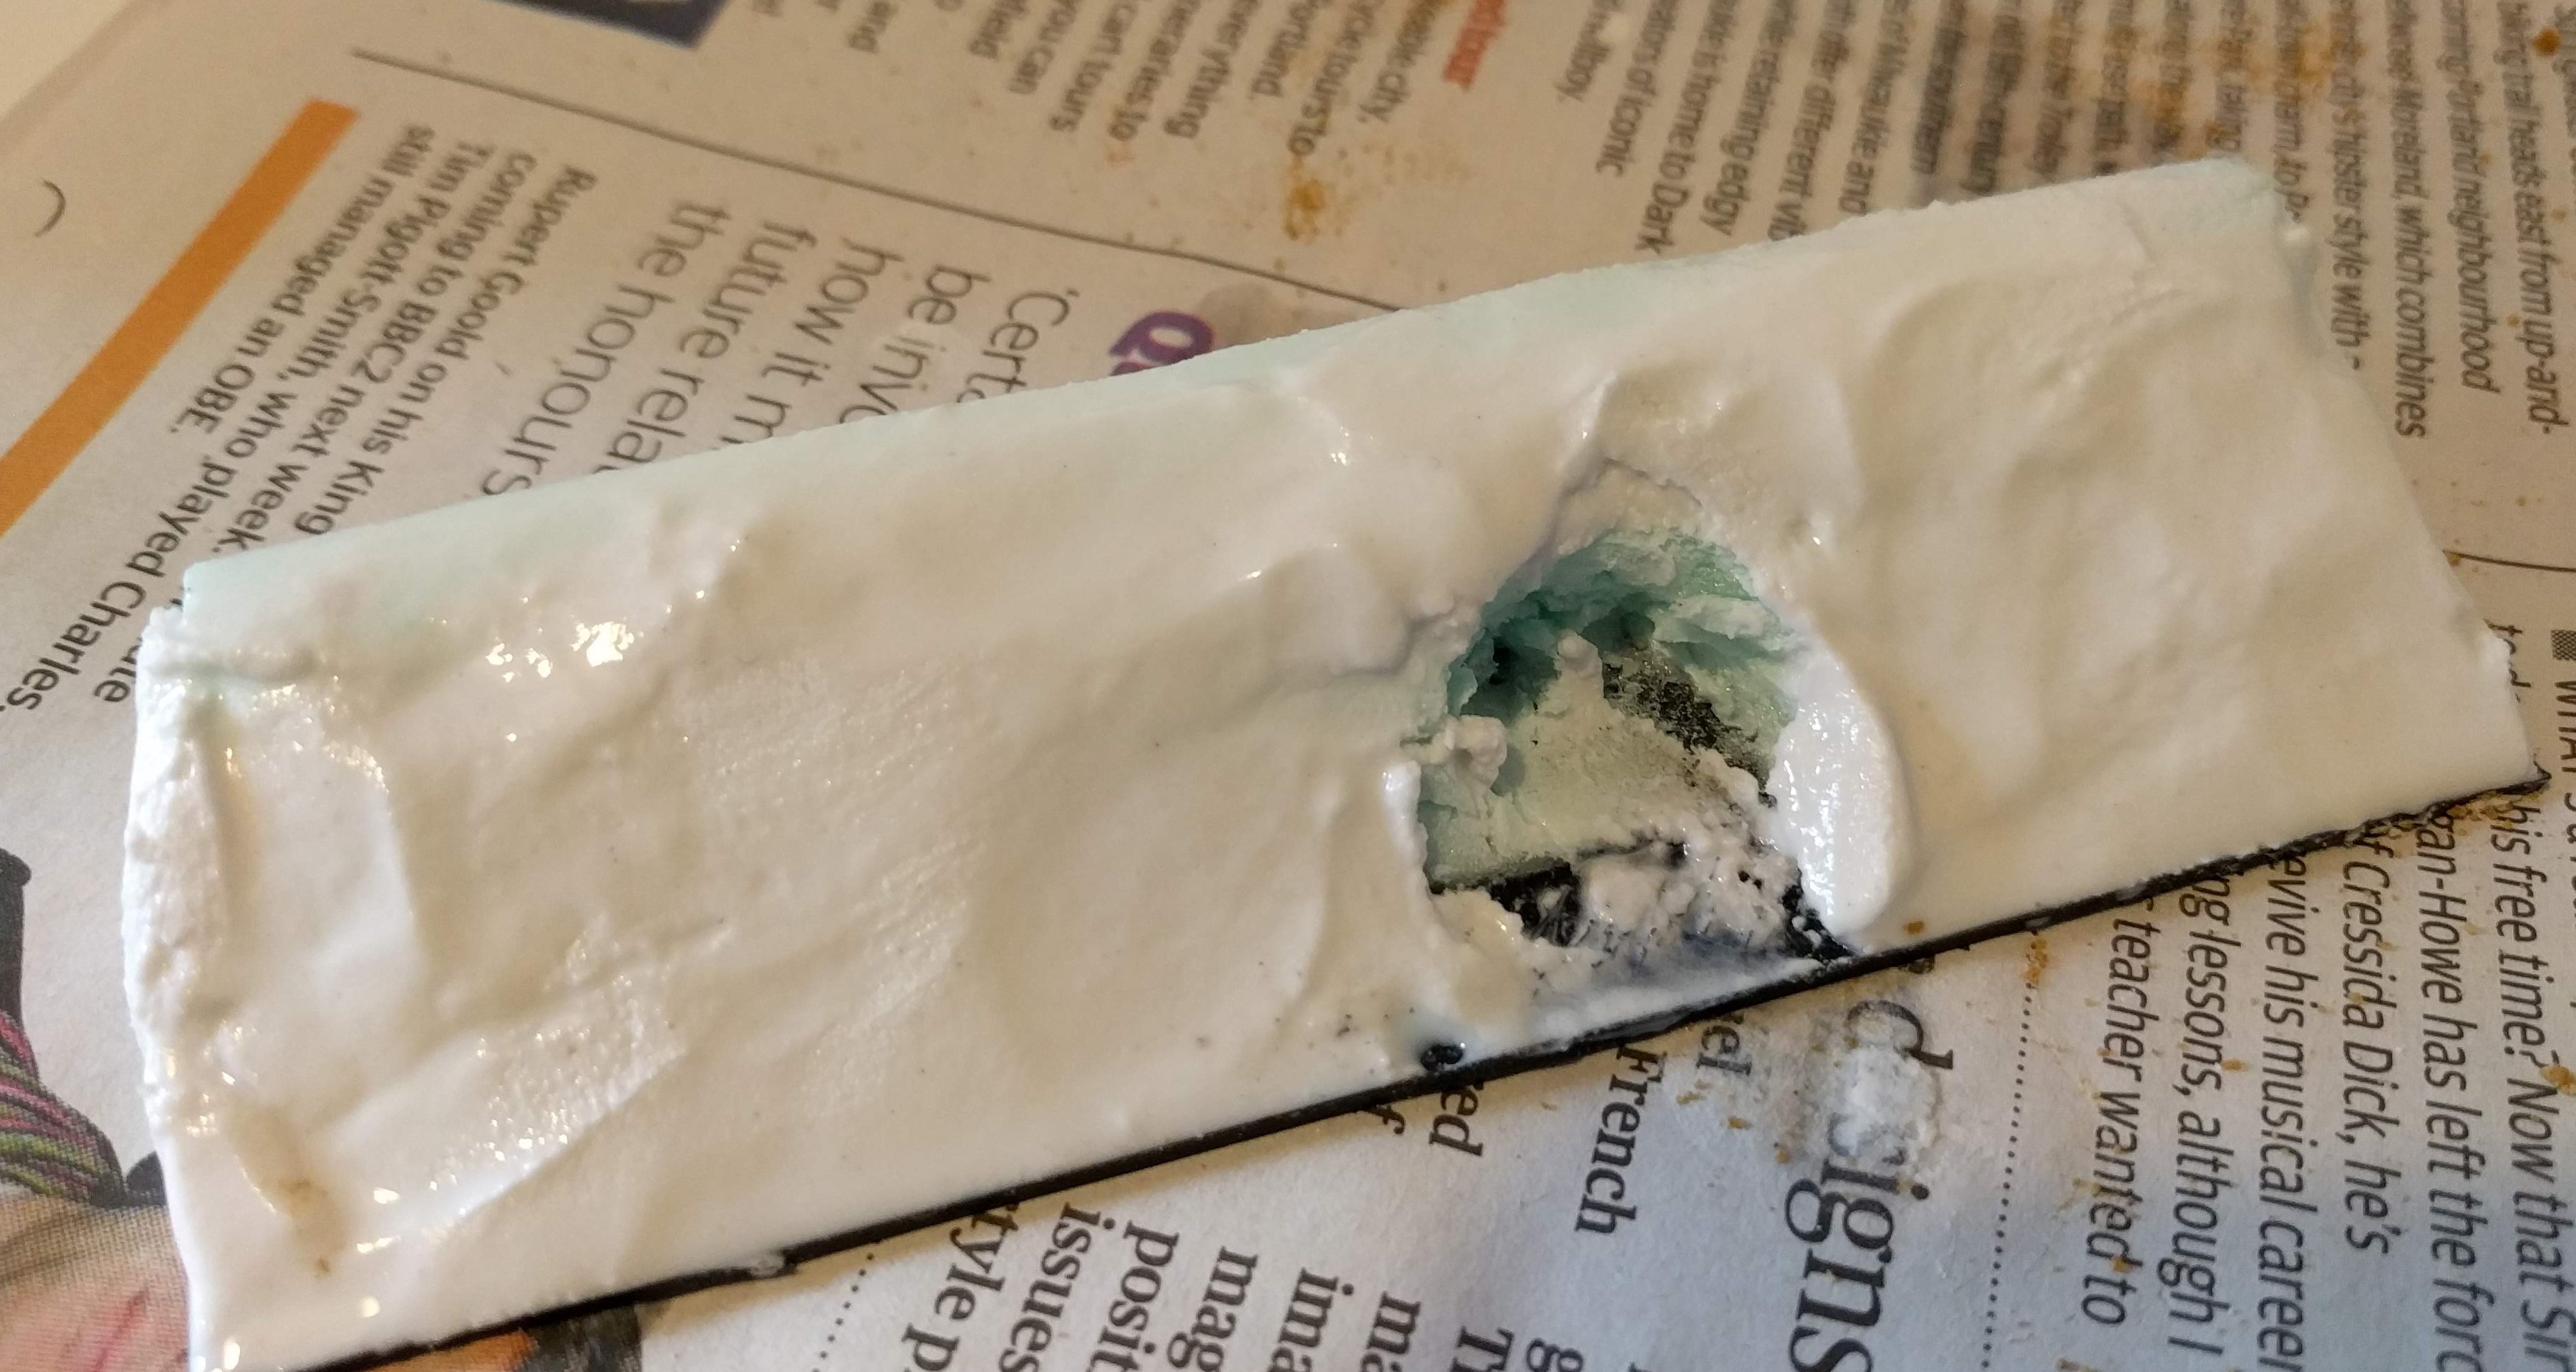
Now that the polyfilla is dry, I want to build a more realistic ‘inside’ of the trench. I’m assuming that the earth needs some sort of retaining wall and that the easiest solution would be wooden planks.
To start with, I’ve sanded the vertical face of the trench as flat as possible. I only applied a thin polyfilla layer here just to cover any cracks/holes and to provide a solid surface for the glue to adhere to.
 Example of the sanded, flat surface
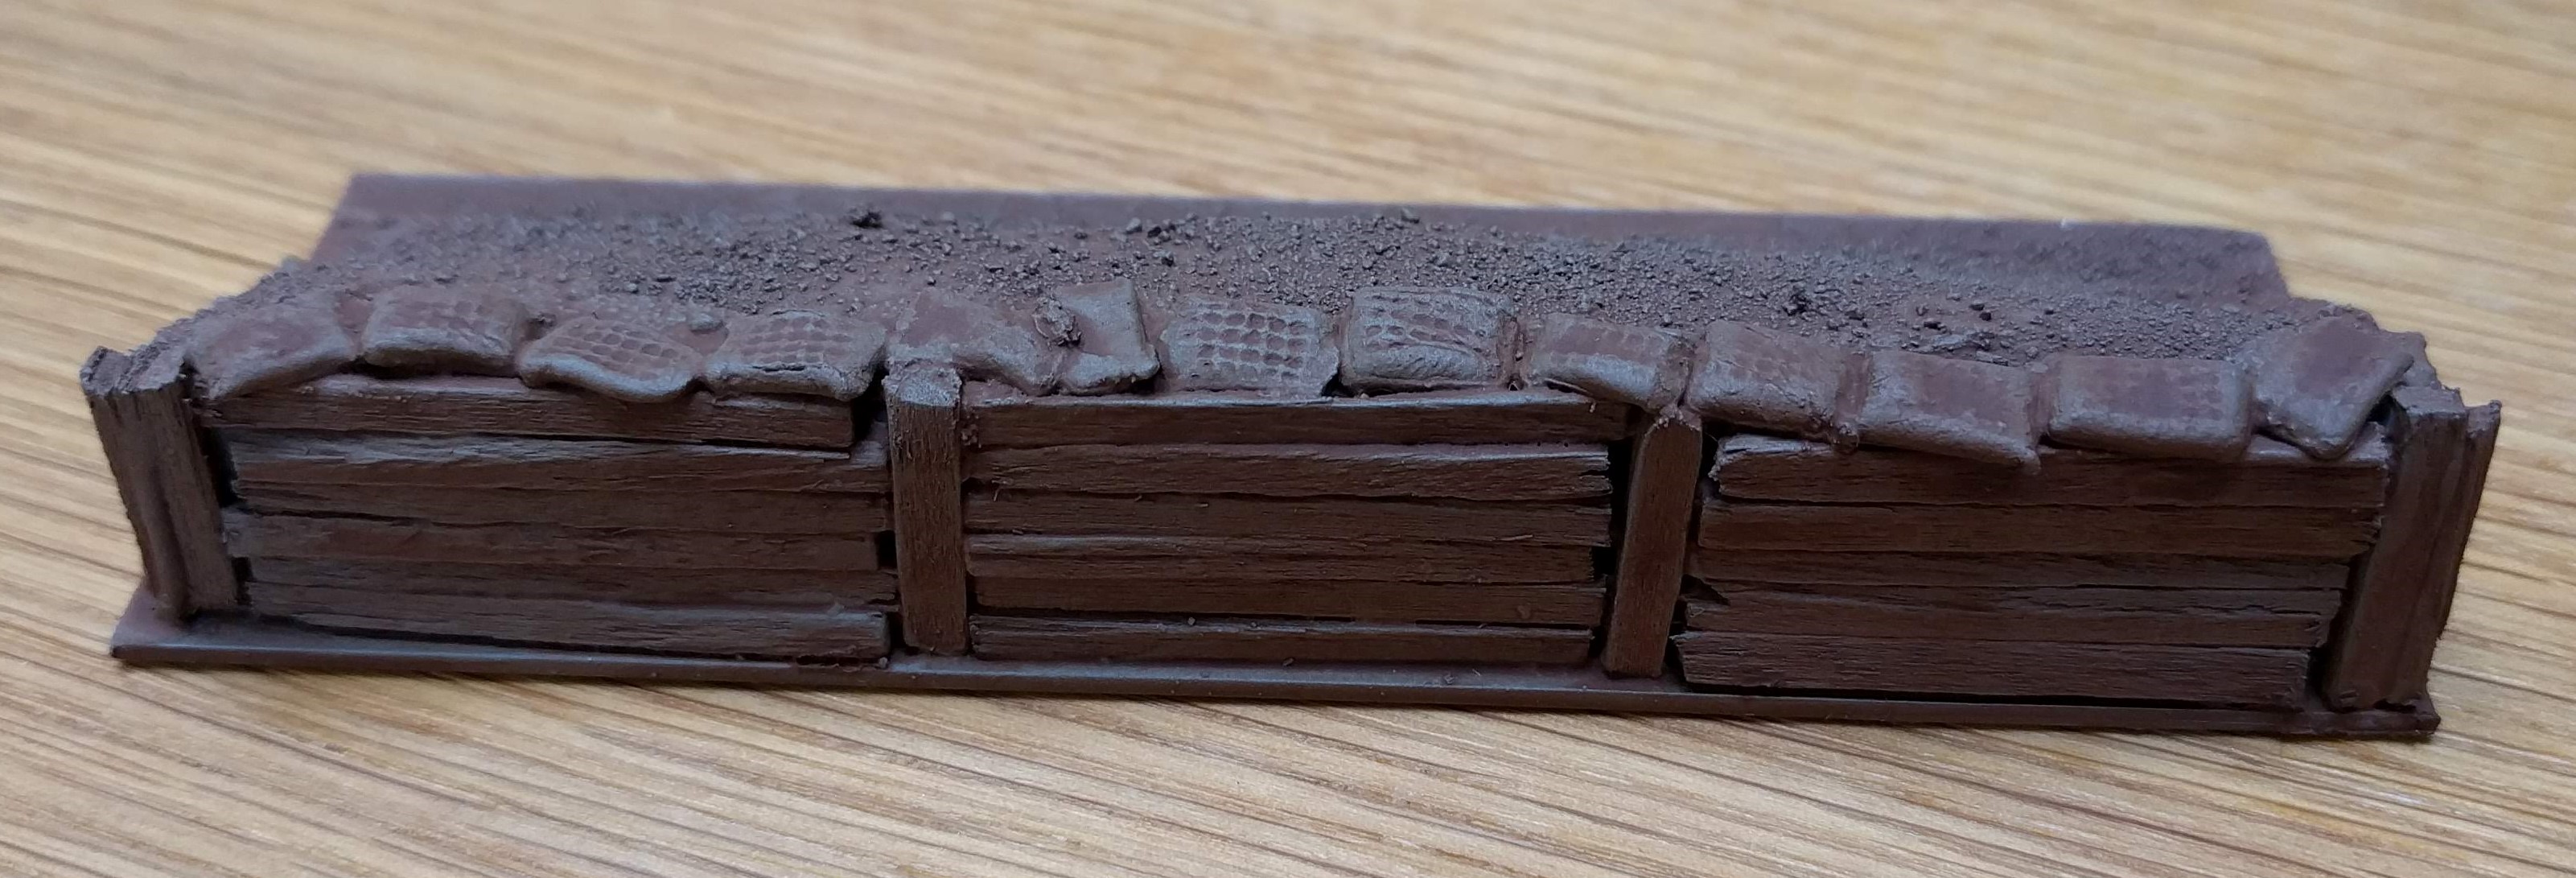
 Matchsticks seem the obvious option for creating a simple, cheap but effective wooden retaining wall. I’ve started by cutting the uprights. These are the height of the trench and I’ve placed one upright roughly every inch along. I’ve glued these down with super glue to ensure a good fix.


As the uprights aren’t religiously 1″ apart, I need to cut the cross beams to size for each section. I found doing this first the best option. I’ve then filled the gaps where the cross beams will go with plenty of PVA.

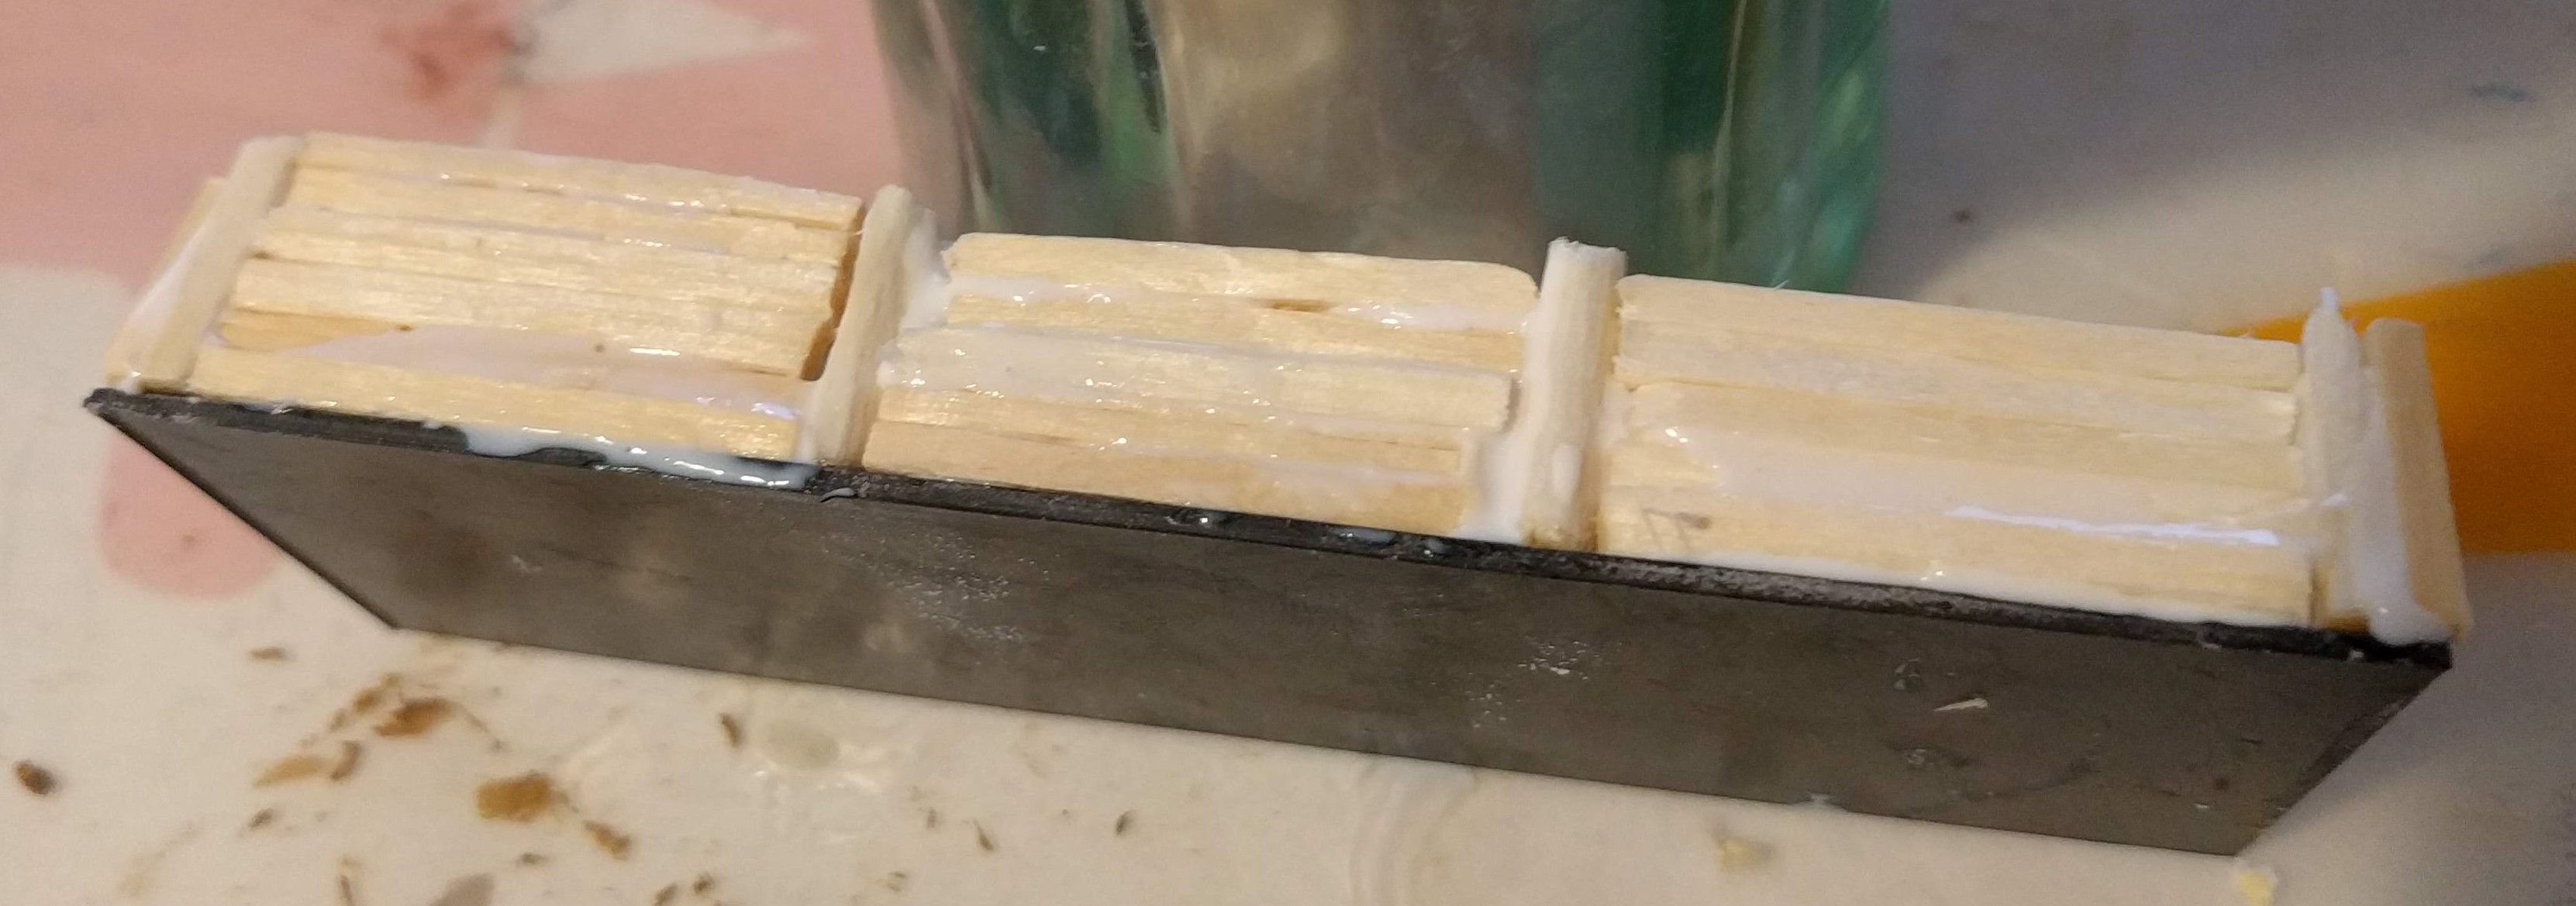 All the wood glued in place
It took a while to complete all of the trench sections but I think it will look worthwhile once all painted up. I think I will take it a step further and add some sandbags along the top. This will add to the overall look as well as hide the join between the matchsticks and the rest of the trench banking.
 Some of the completed trench sections (I'll clip the longer uprights off later)
Trenches - Applying the basing material
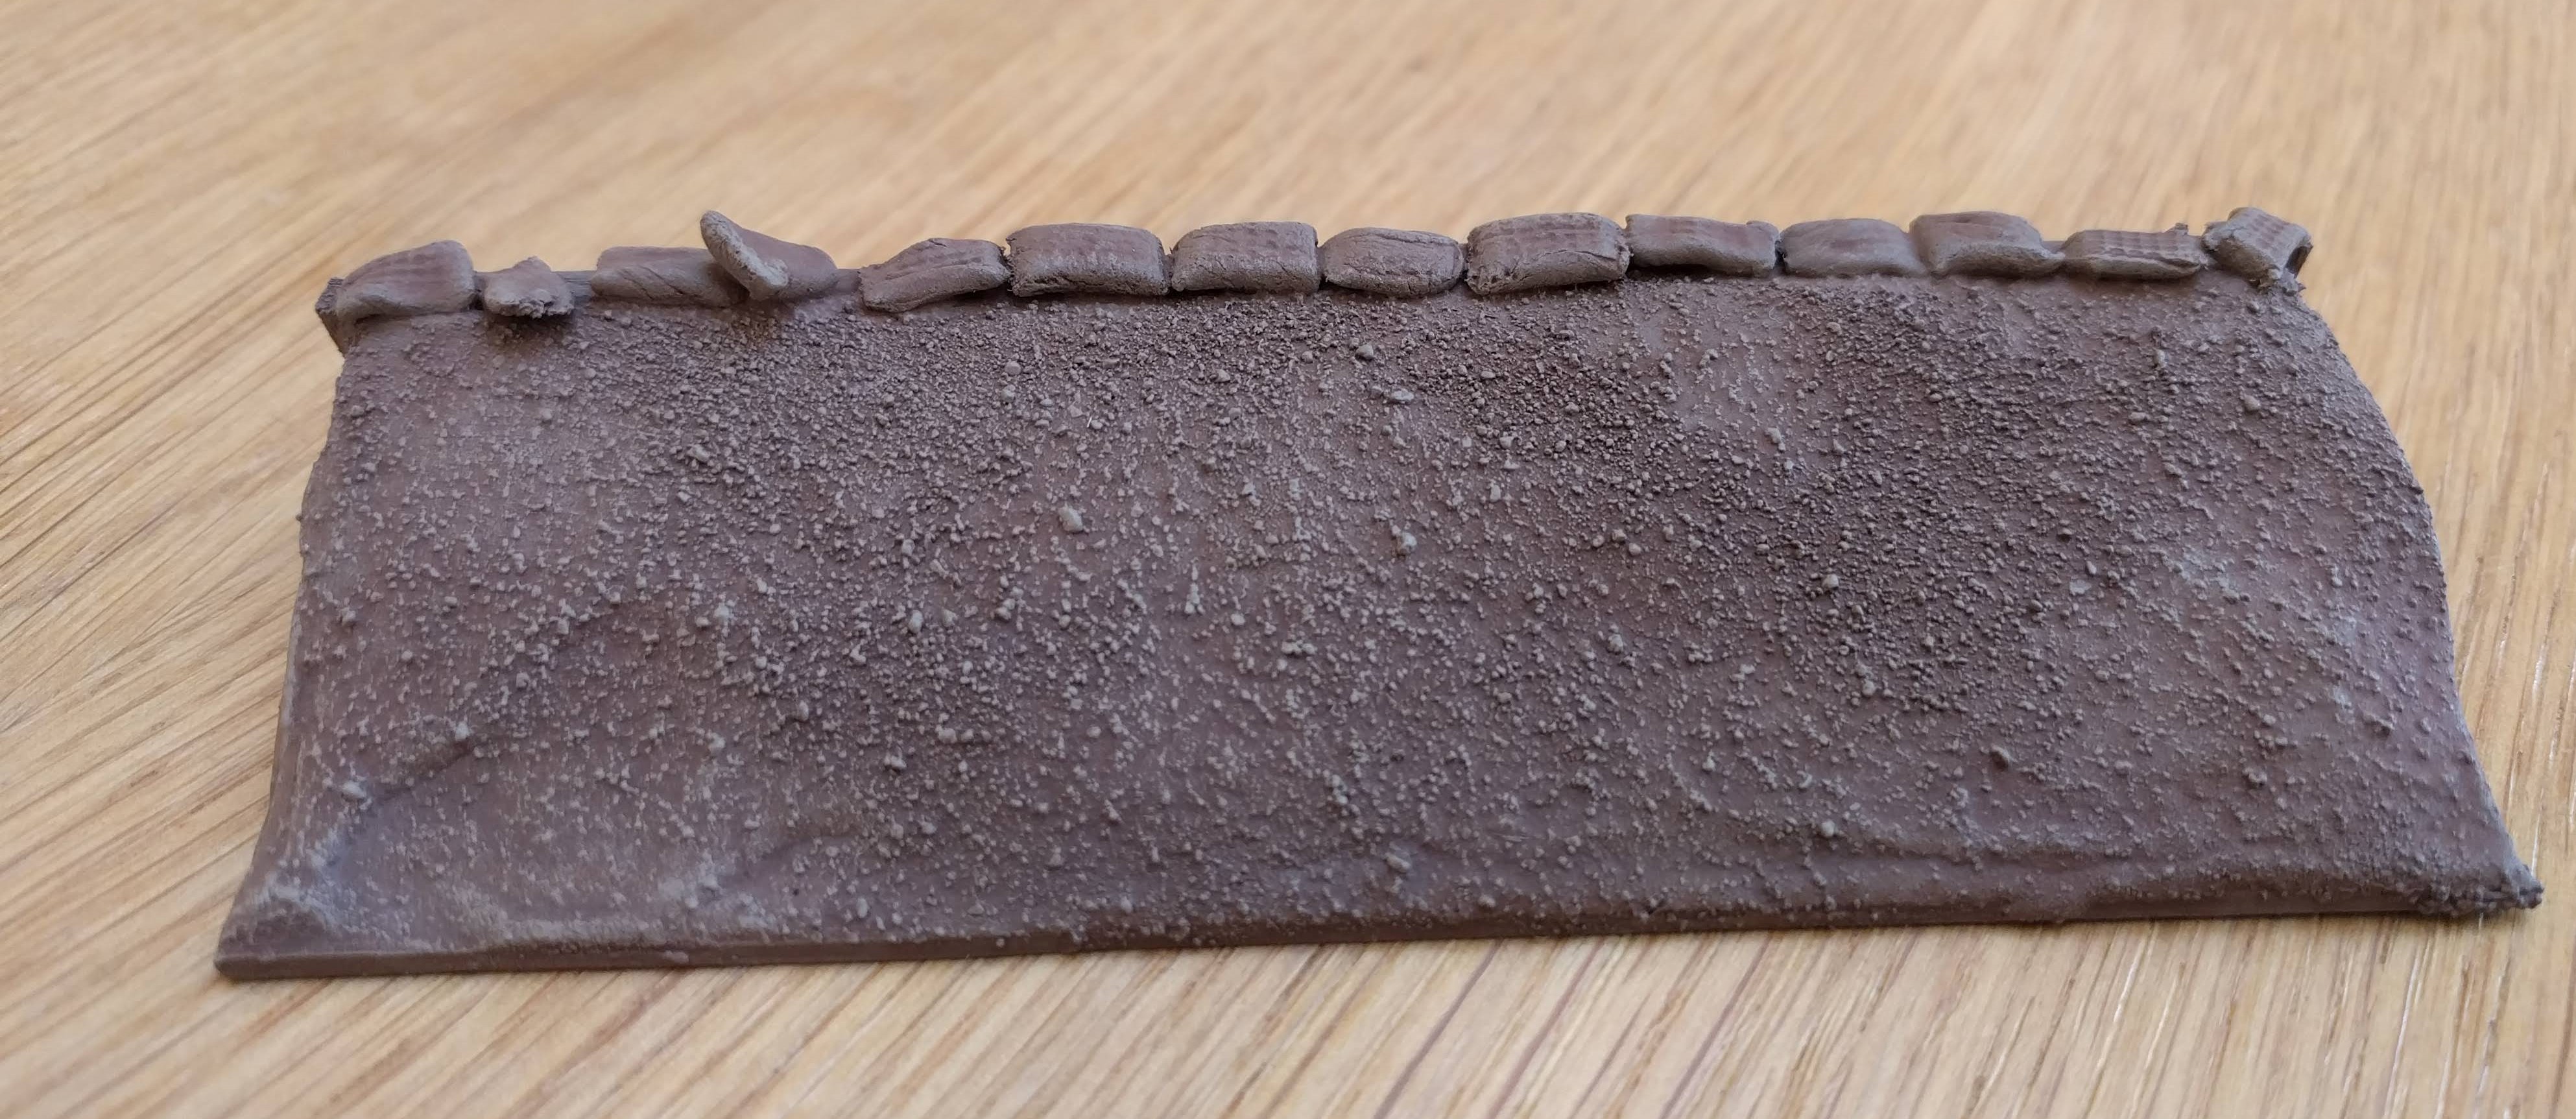
Managed to get some more hobby time over the weekend so worked some more on the trenches. I’ve now applied the basing material and did so using polyfilla.
I’ve started by applying a liberal amount over the sloped area of foam to create a bank. From there, I’ve used my trusty index finger with water to smooth down the polyfilla and then sprinkled sand over the top for texture.
I’ve tried to keep the ends of the trenches square so that they will butt up next to each other neatly when on the table.
 Liberal polyfilla
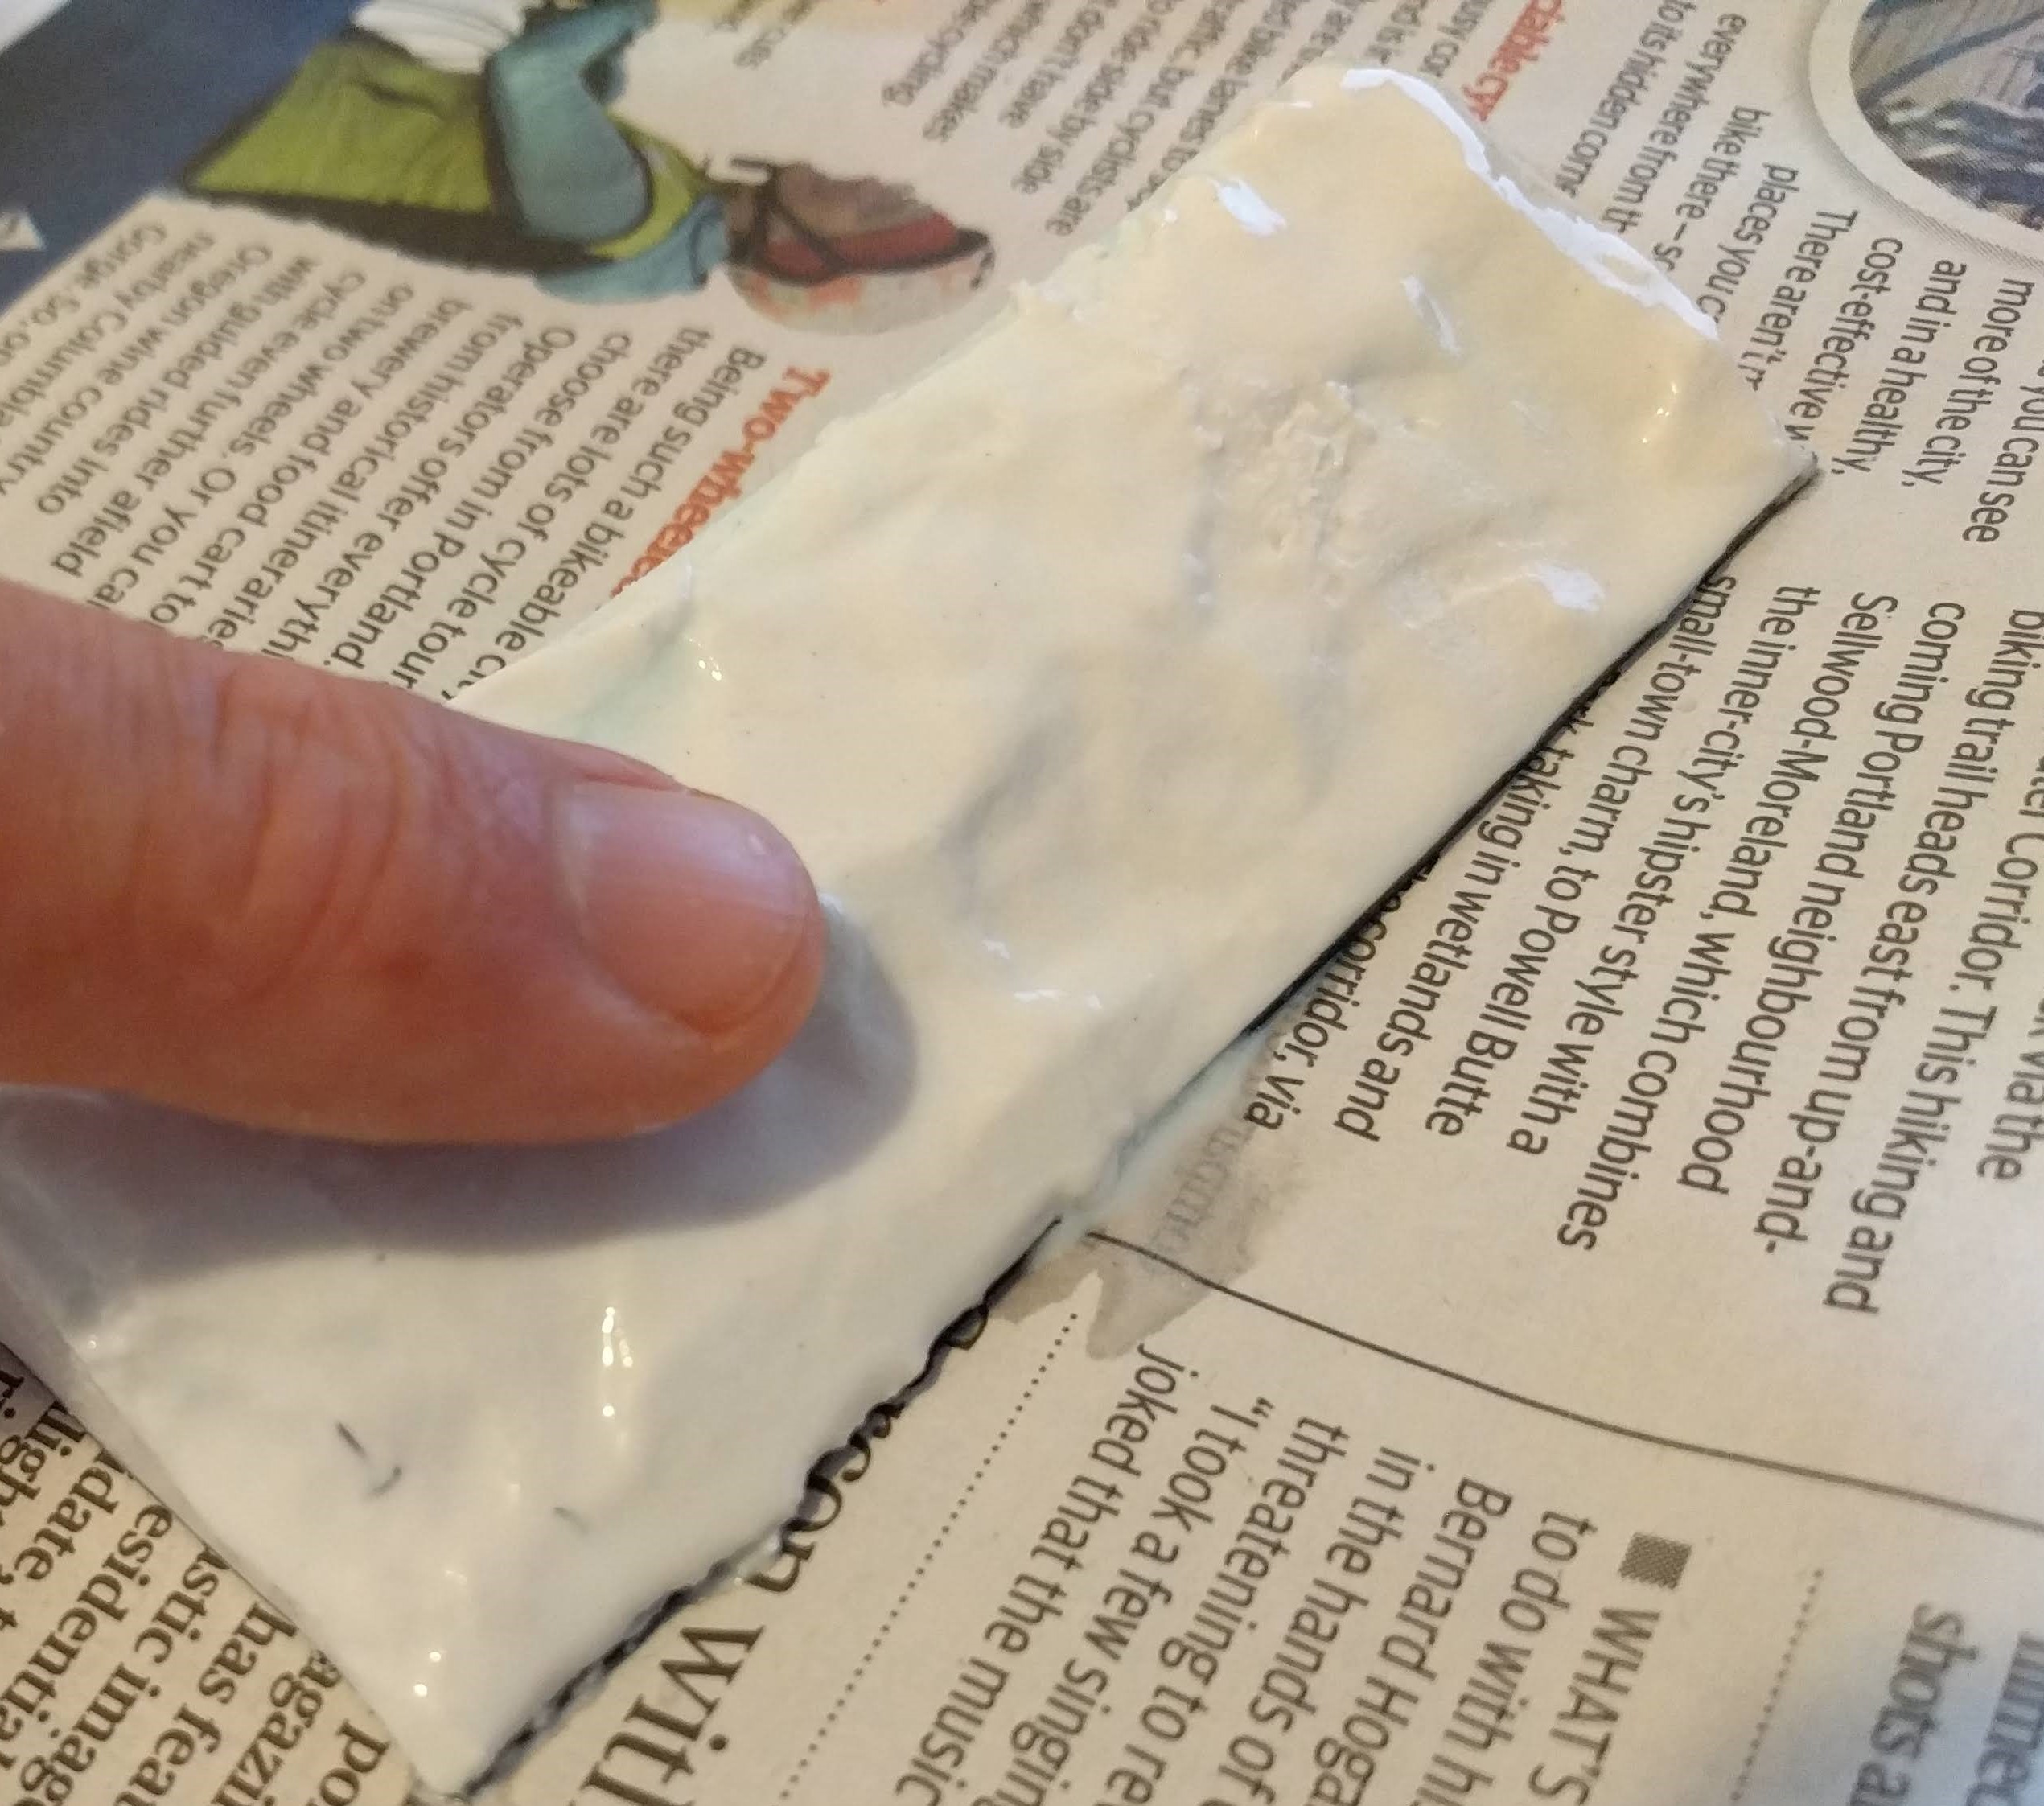 My trusty finger at work
 Sanded and with squared off ends (or as square as you can make wet polyfilla)
To make the craters, I applied a small amount of poyfilla into the hole that was cut in the foam during the last stage – just enough to cover the foam.
Taking small amounts of filla, I rolled these into sausages using my hand. I found that rolling them out on newspaper helps remove the moisture from them and keeps them together.
Arrange the sausage around the hole (oo-er) and using your trusty finger wet with water, soften the sausage into a crater edge shape. Once done, I’ve sanded except in the crater as I’ve assumed that whatever created the crater probably blew most of the debris out.
 Everything covered except the crater
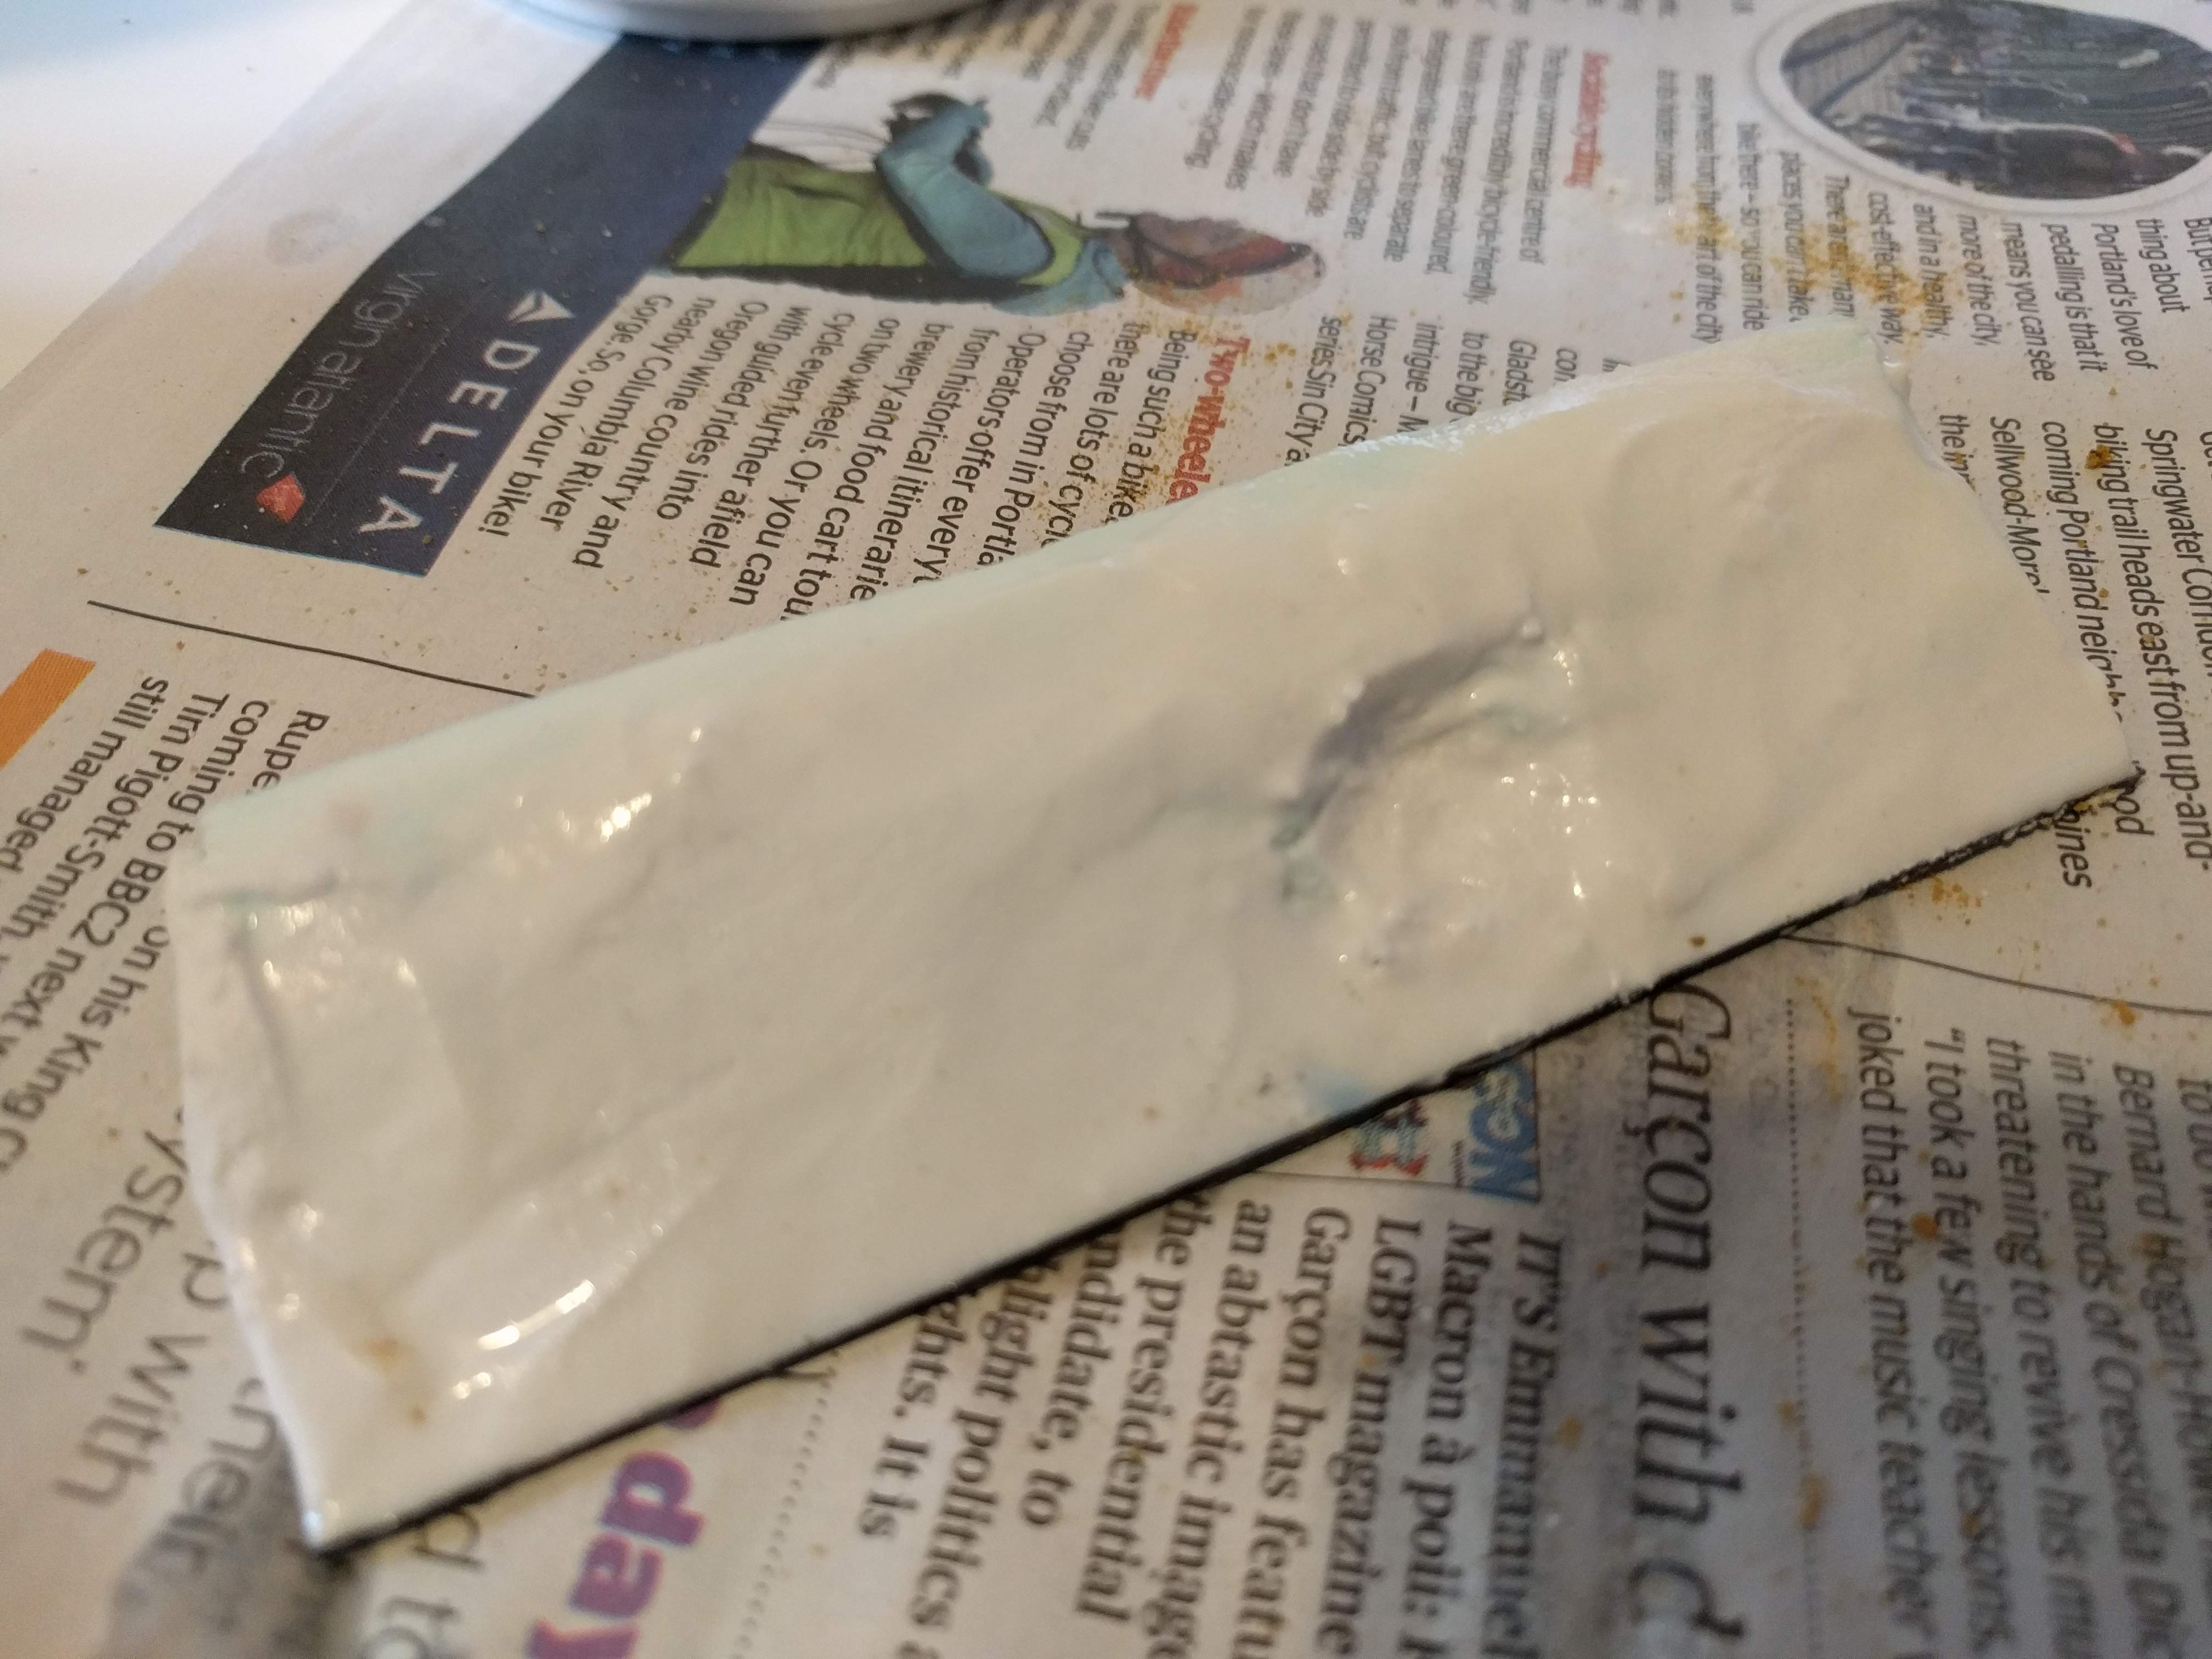 Crater lightly filled with filla
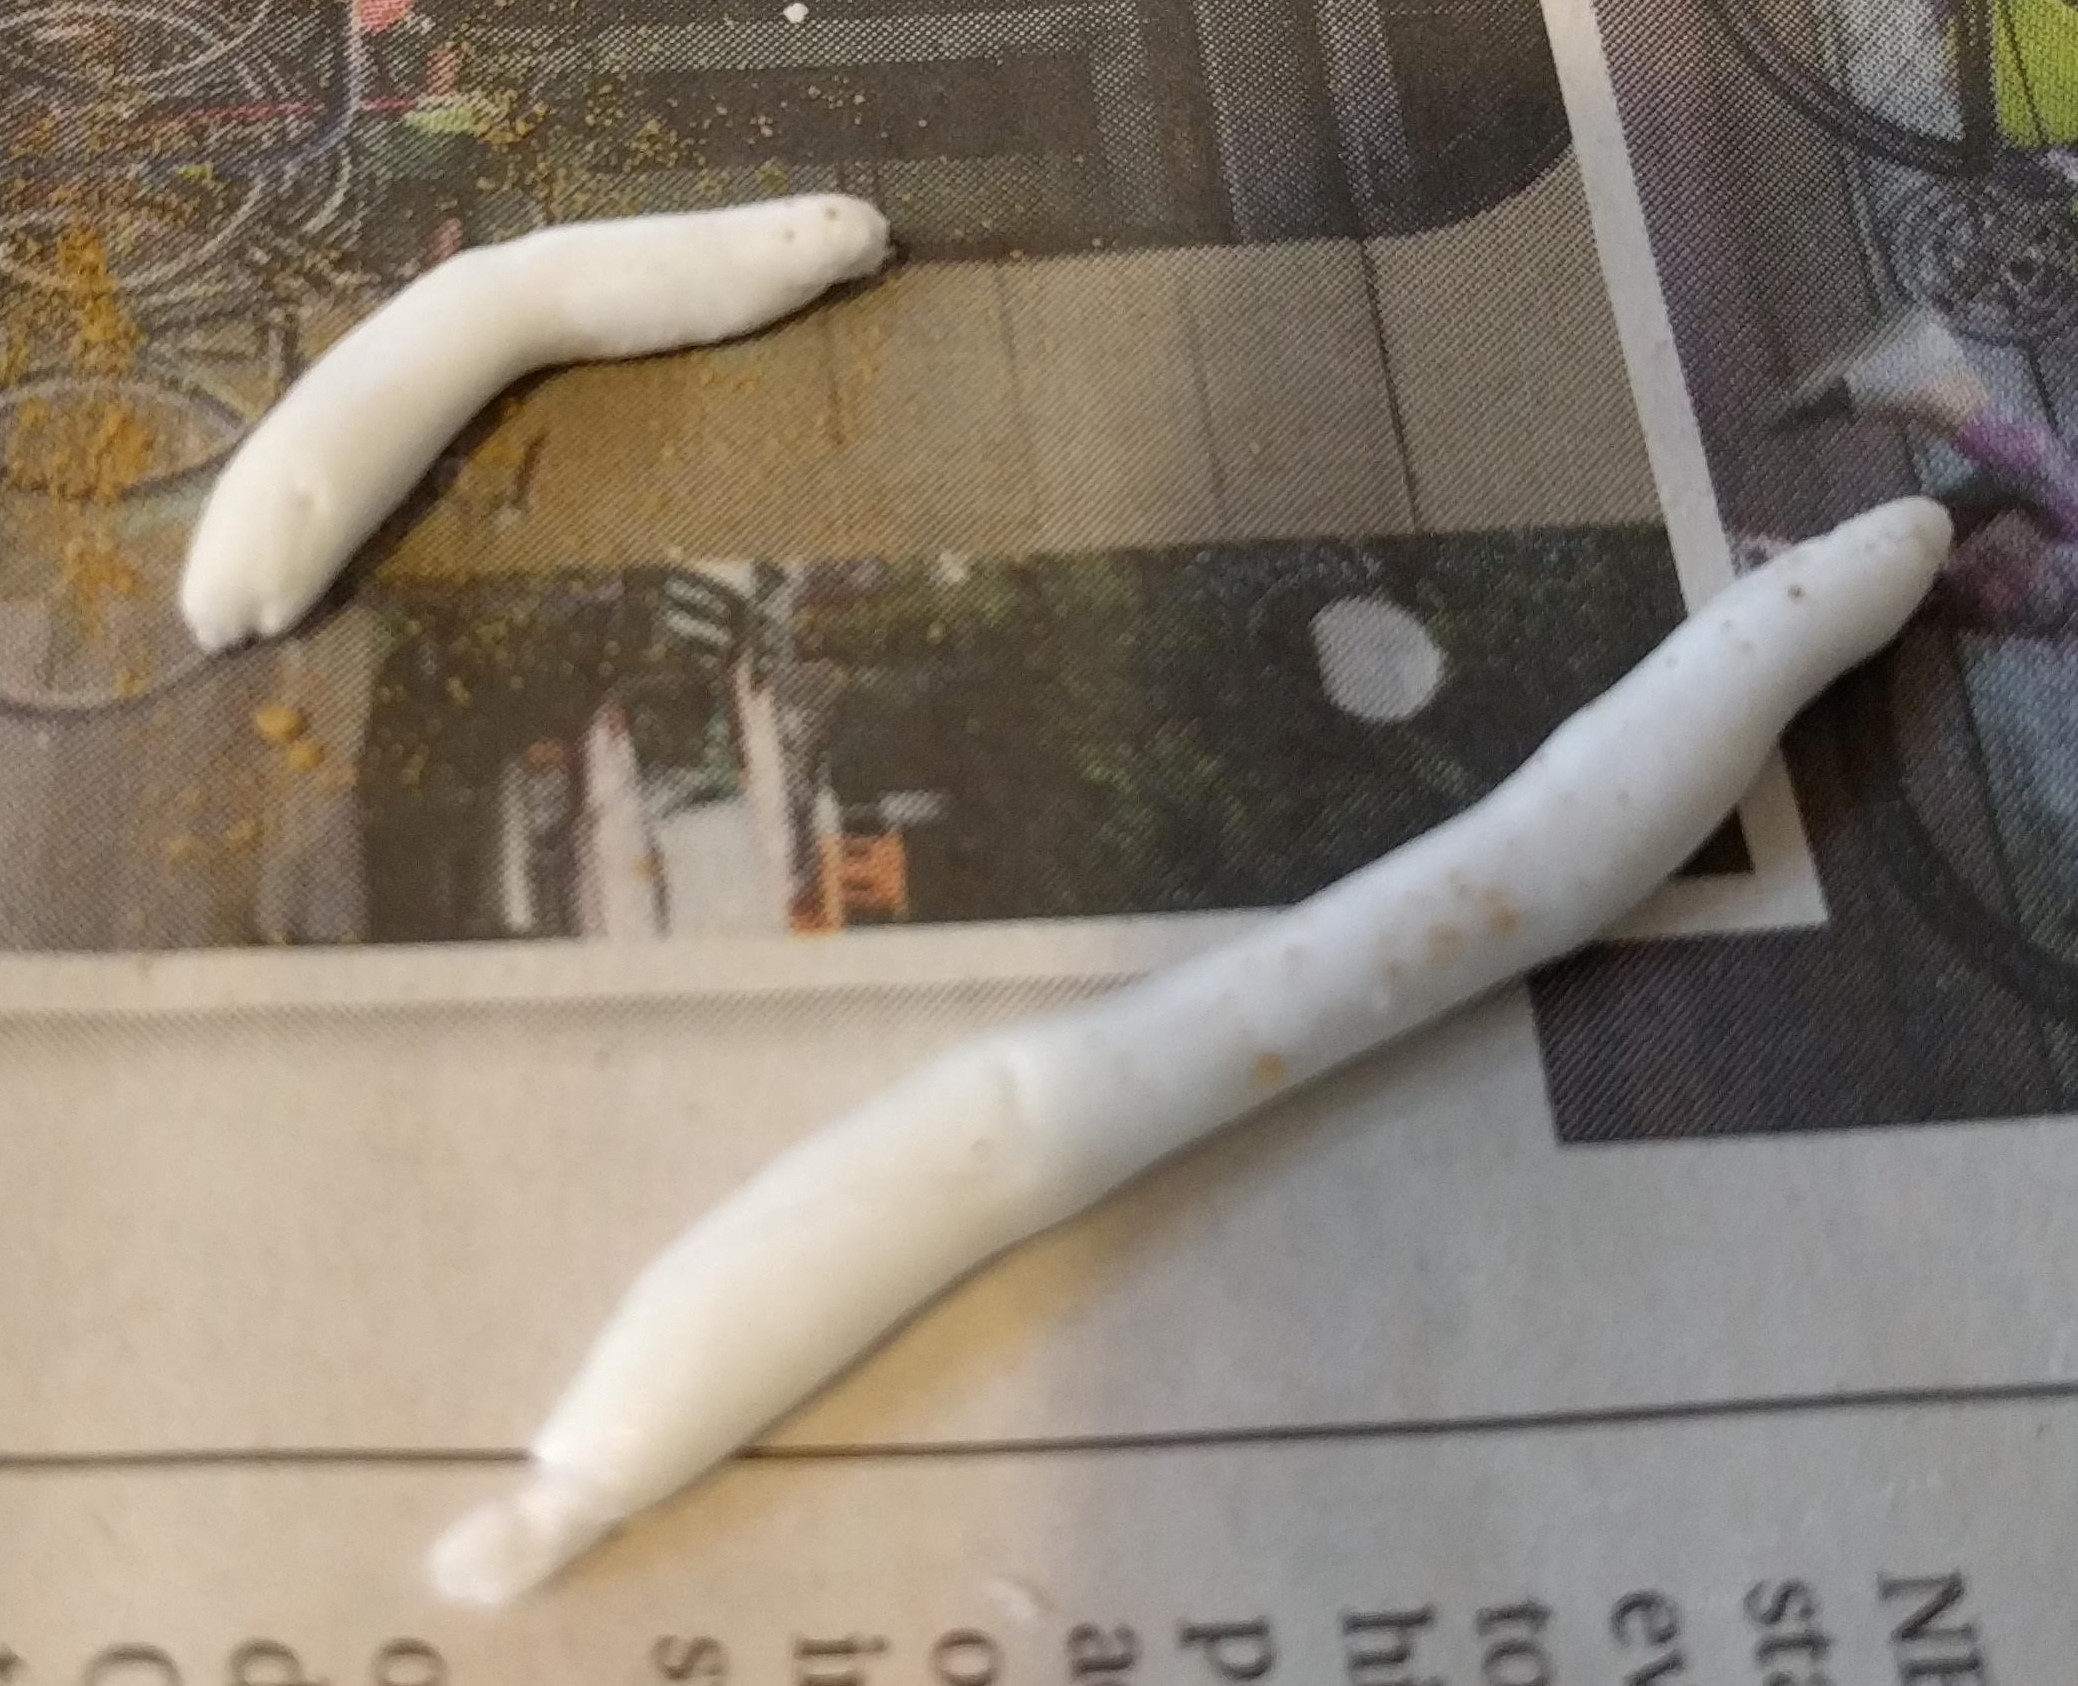 Making sausages
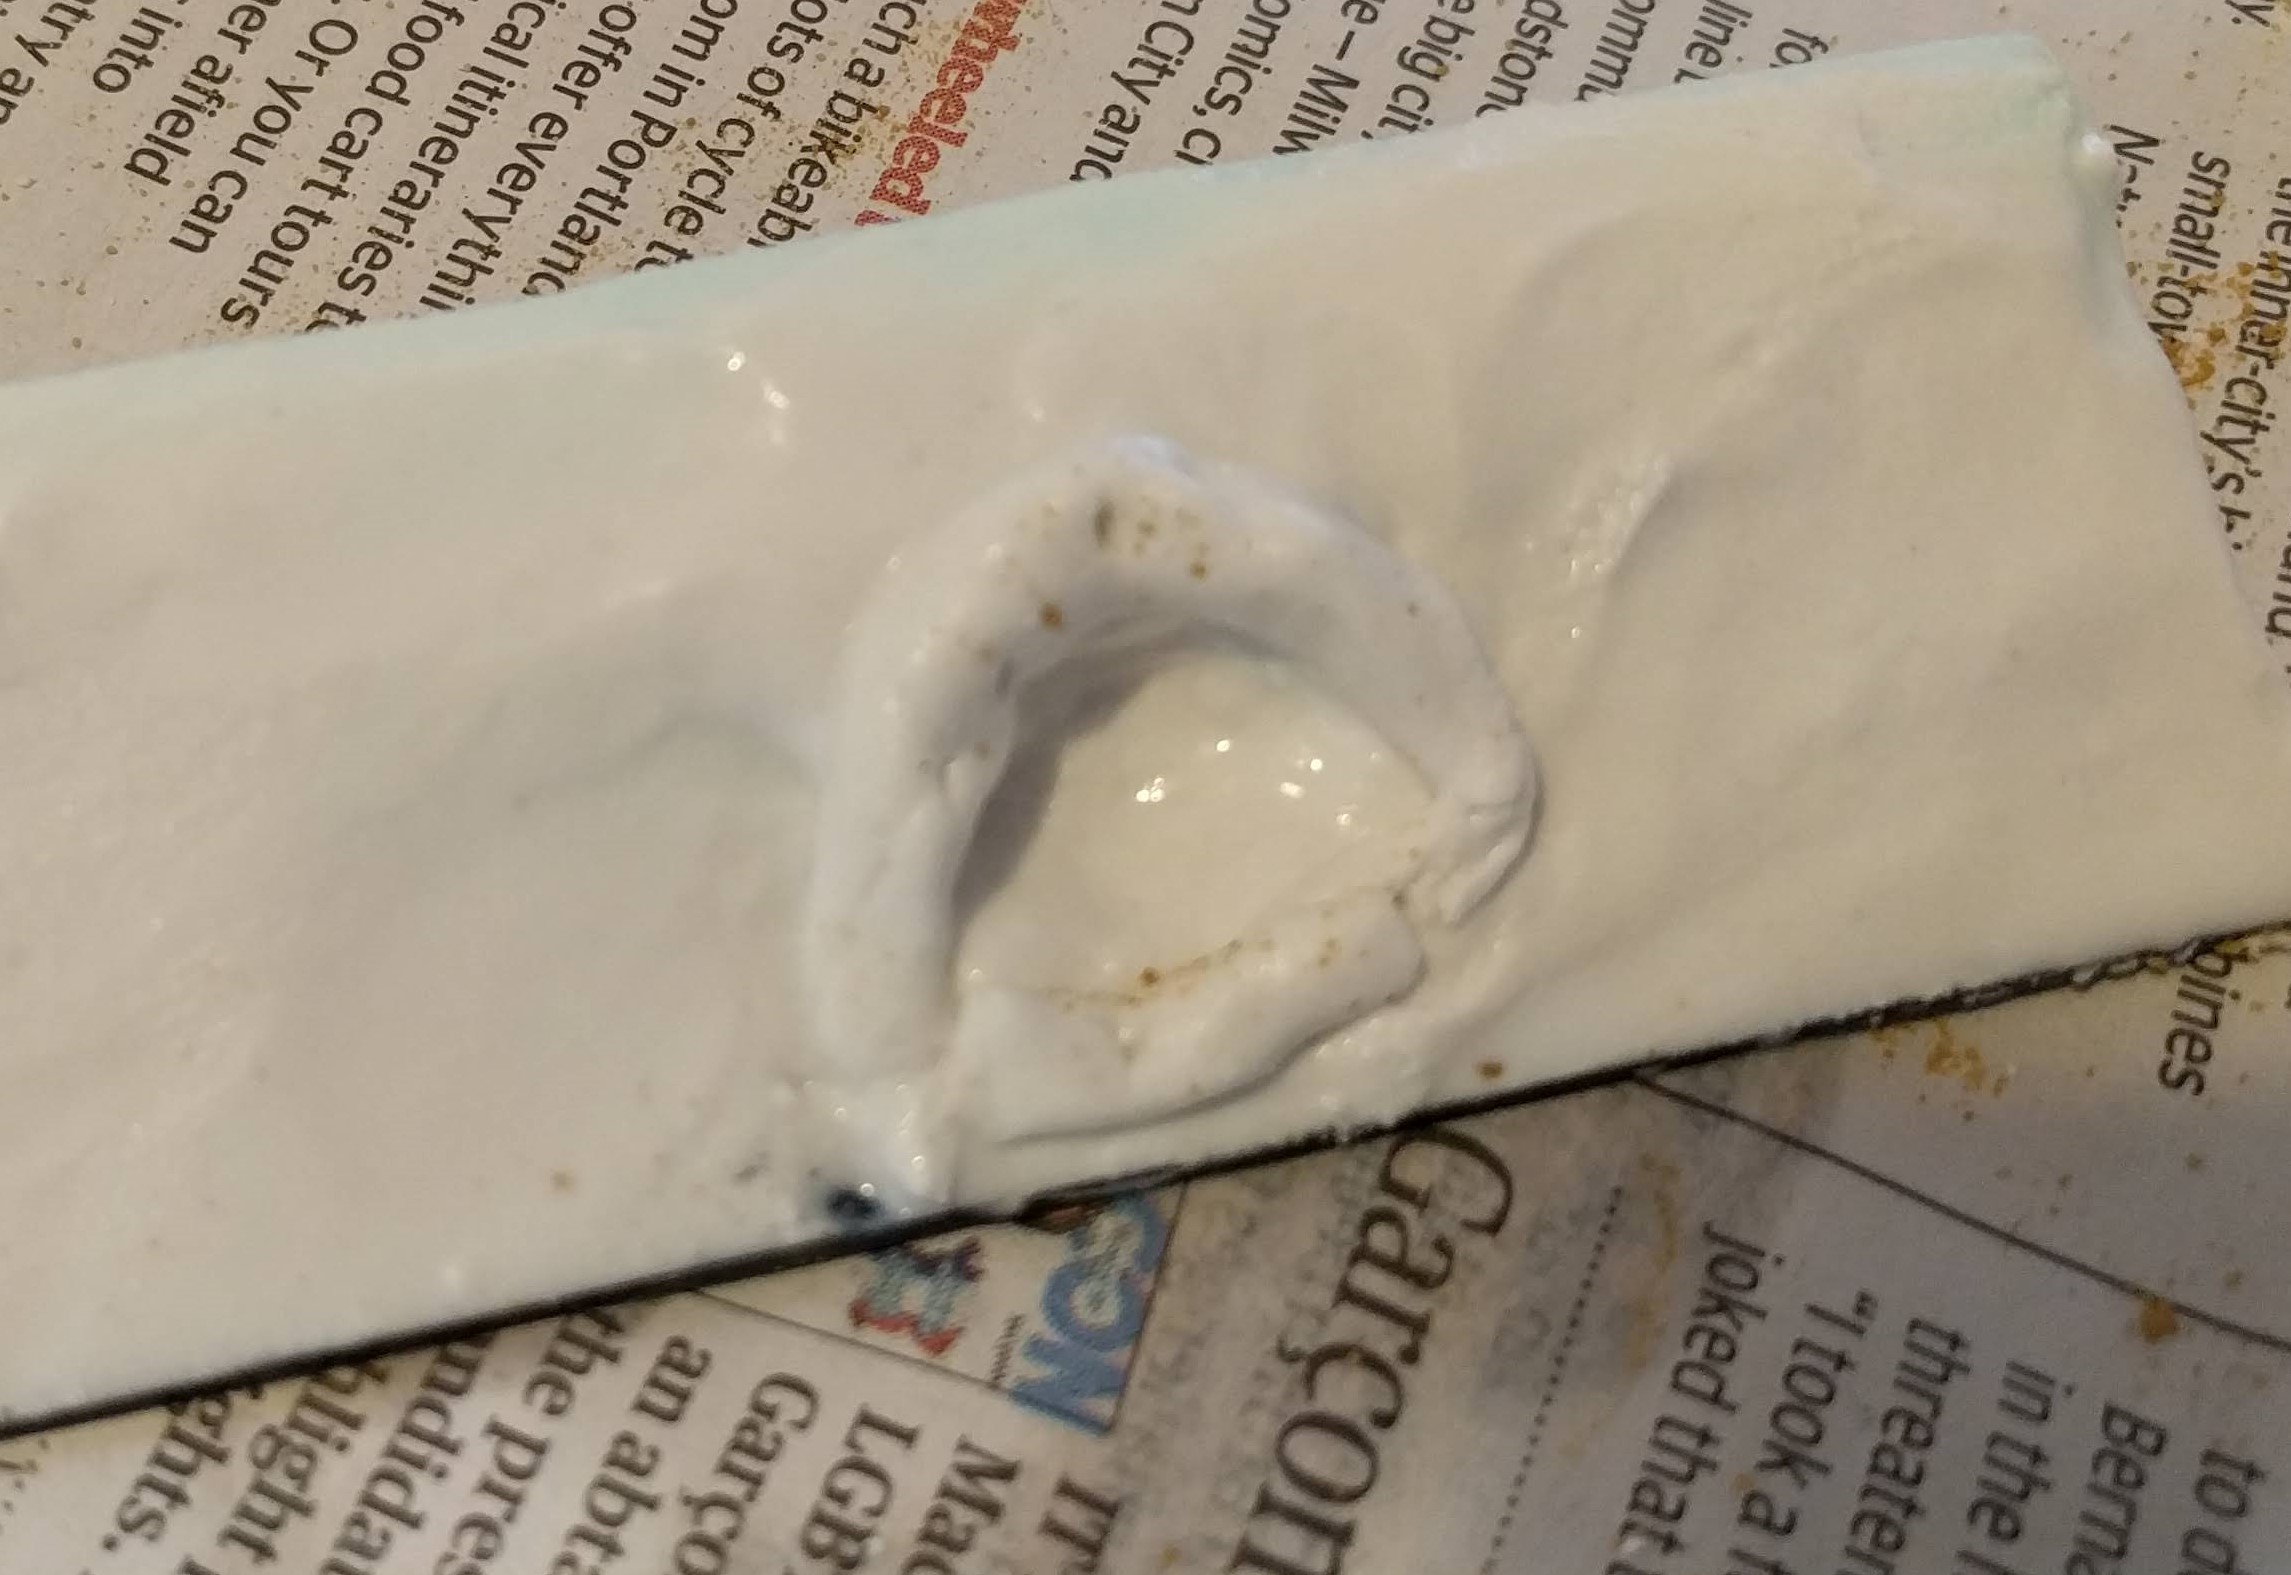 Sausage applied to hole (oo-er)
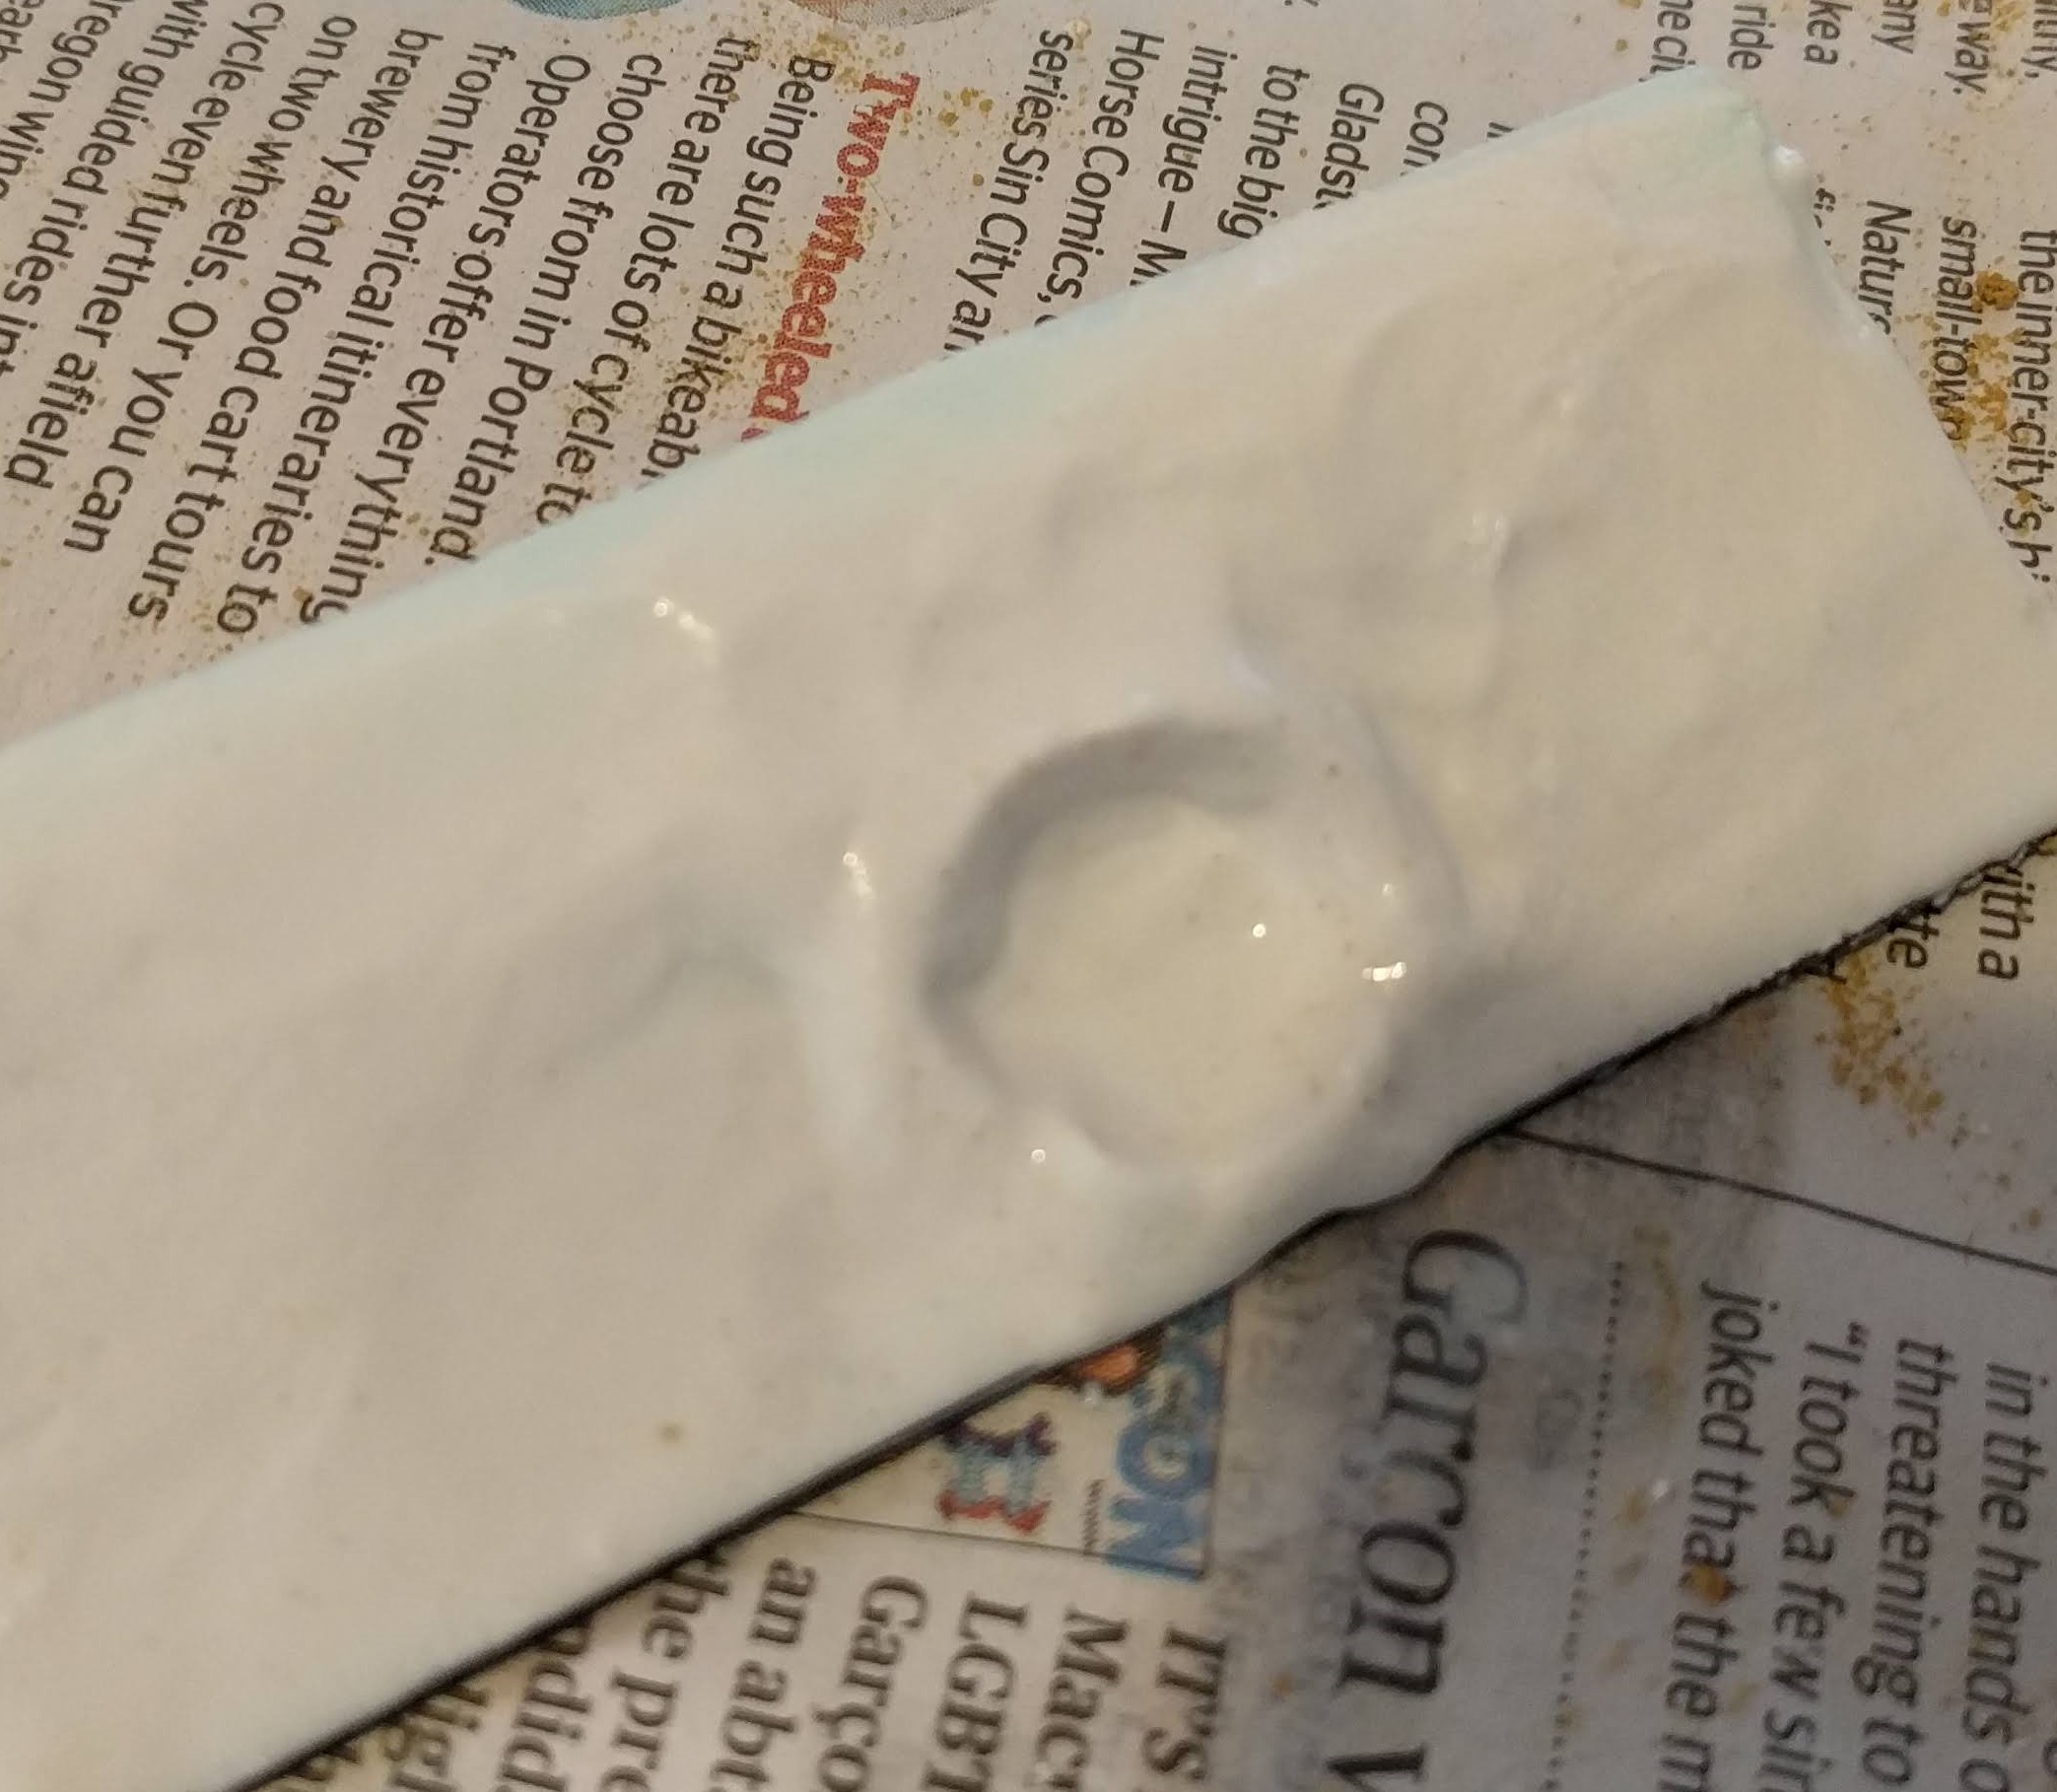 Smoothed down into a more 'natural' shape
 All sanded up and ready to dry
I’ve applied a very thin layer of polyfilla to the back of the trench. This I sanded down once it was dry to create a vertical and smooth surface. I plan to add wooden supports to this to create the ‘behind the trench’ look.
Trenches - Building the sub-structure
The German defenders in Italy were very well dug in and had created a series of defensive lines across the country. Because of this, I’m going to need some trenches to represent the dug in nature of the defenders. Unlike the BoW crew with their Bolt Action desert trench table, I can’t glue foam to a wooden base. My trenches will be placed on the table as ‘terrain’.
I’ve started with 3mm foam underfloor heating insulation. I’ve used this to craft hills and other objects as it is very easy to work with. I’m going to build the trenches in 4″ strips and have cut three 4″ lengths of foam, each of narrower width. I’ve then proceeded to glue these together using PVA and held in place with a cocktail stick. I’ve made sure that each strip starts flush with one long edge – this will make the inside of the trench wall.
I’m going to need a fair amount of this, so I made quite a few.
Once the PVA has dried, I mounted each piece of foam onto a plasticard base. I’ve made sure that the plasticard is slightly wider and longer than the foam base. This will give the basing material something to stick to.
The strips of foam create a stepped effect which won’t be ideal for the polyfilla cover so I then went across them with a sharp knife to lessen the stepping.
Finally (in the last picture below) I have scored the plasticard to give the polyfilla something to stick to.

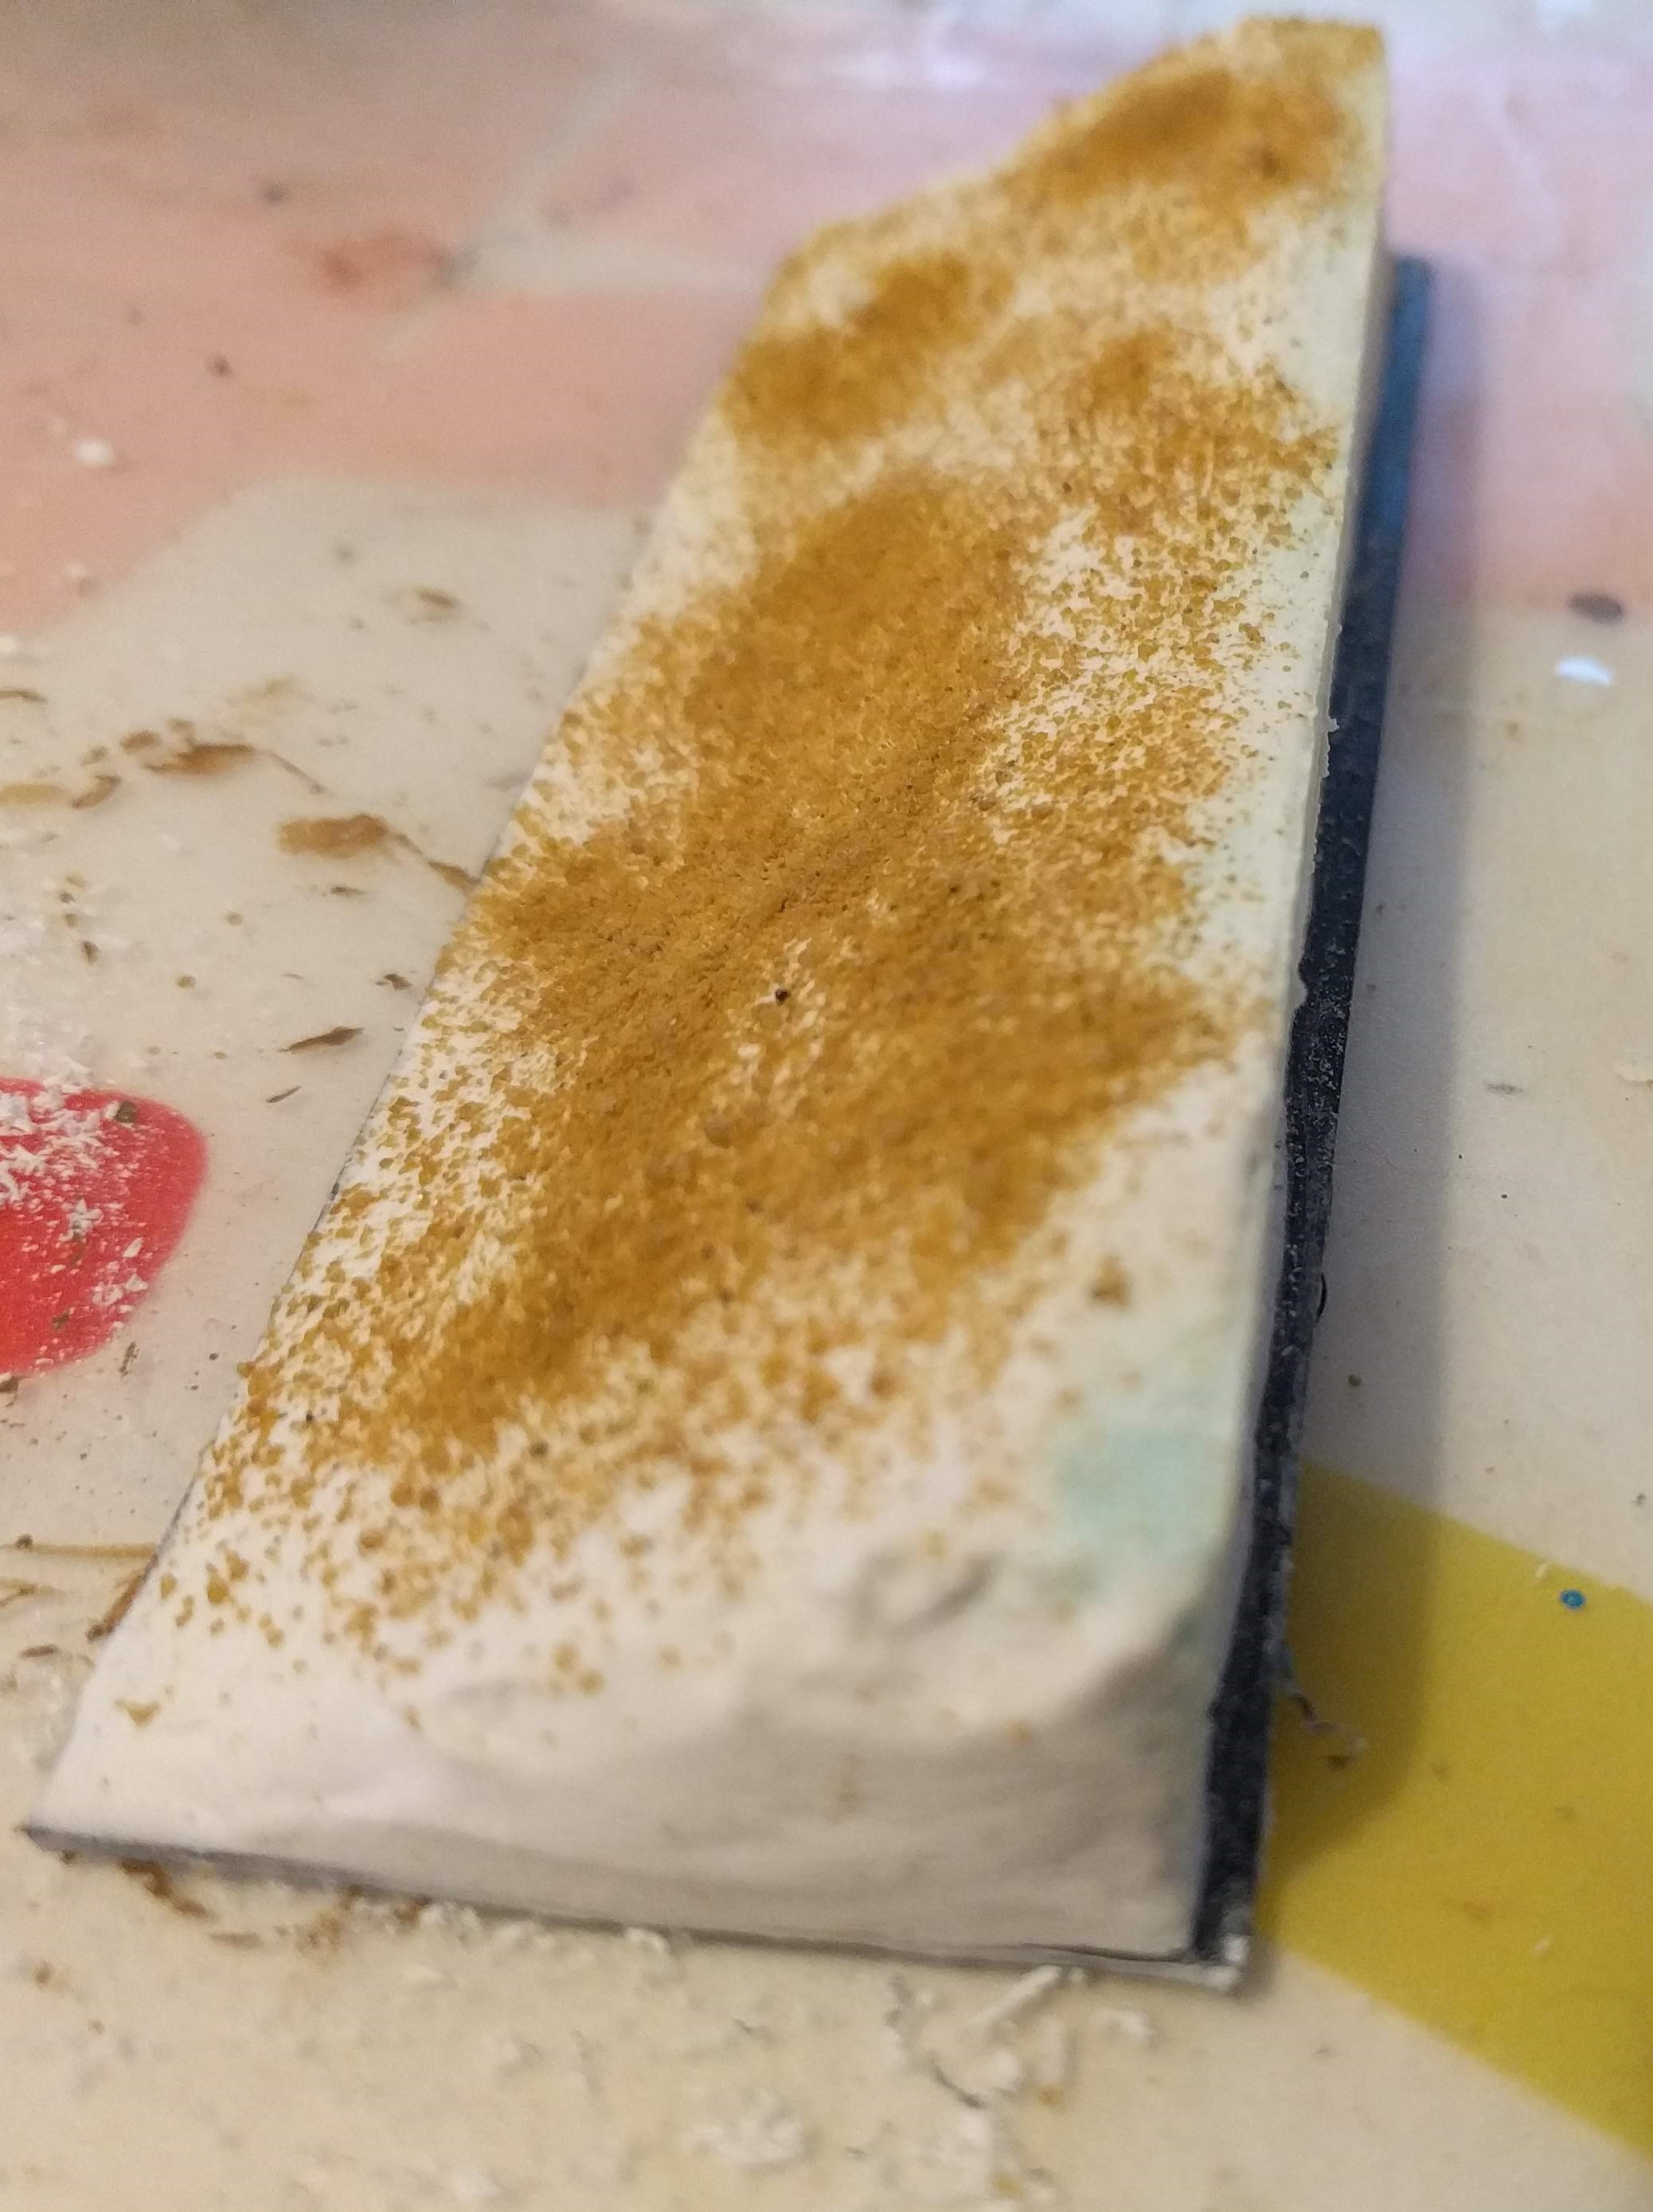
I also want to break up the uniform look so will create some craters in the front of the trench line. To do this, I’ve started by cutting out circular areas of the foam.
 The start of a crater
The next job will be to apply the polyfilla top. This will provide some weight, definition and hold the whole thing together.
Defensive Obstacles - Finishing them off
Time for an update.
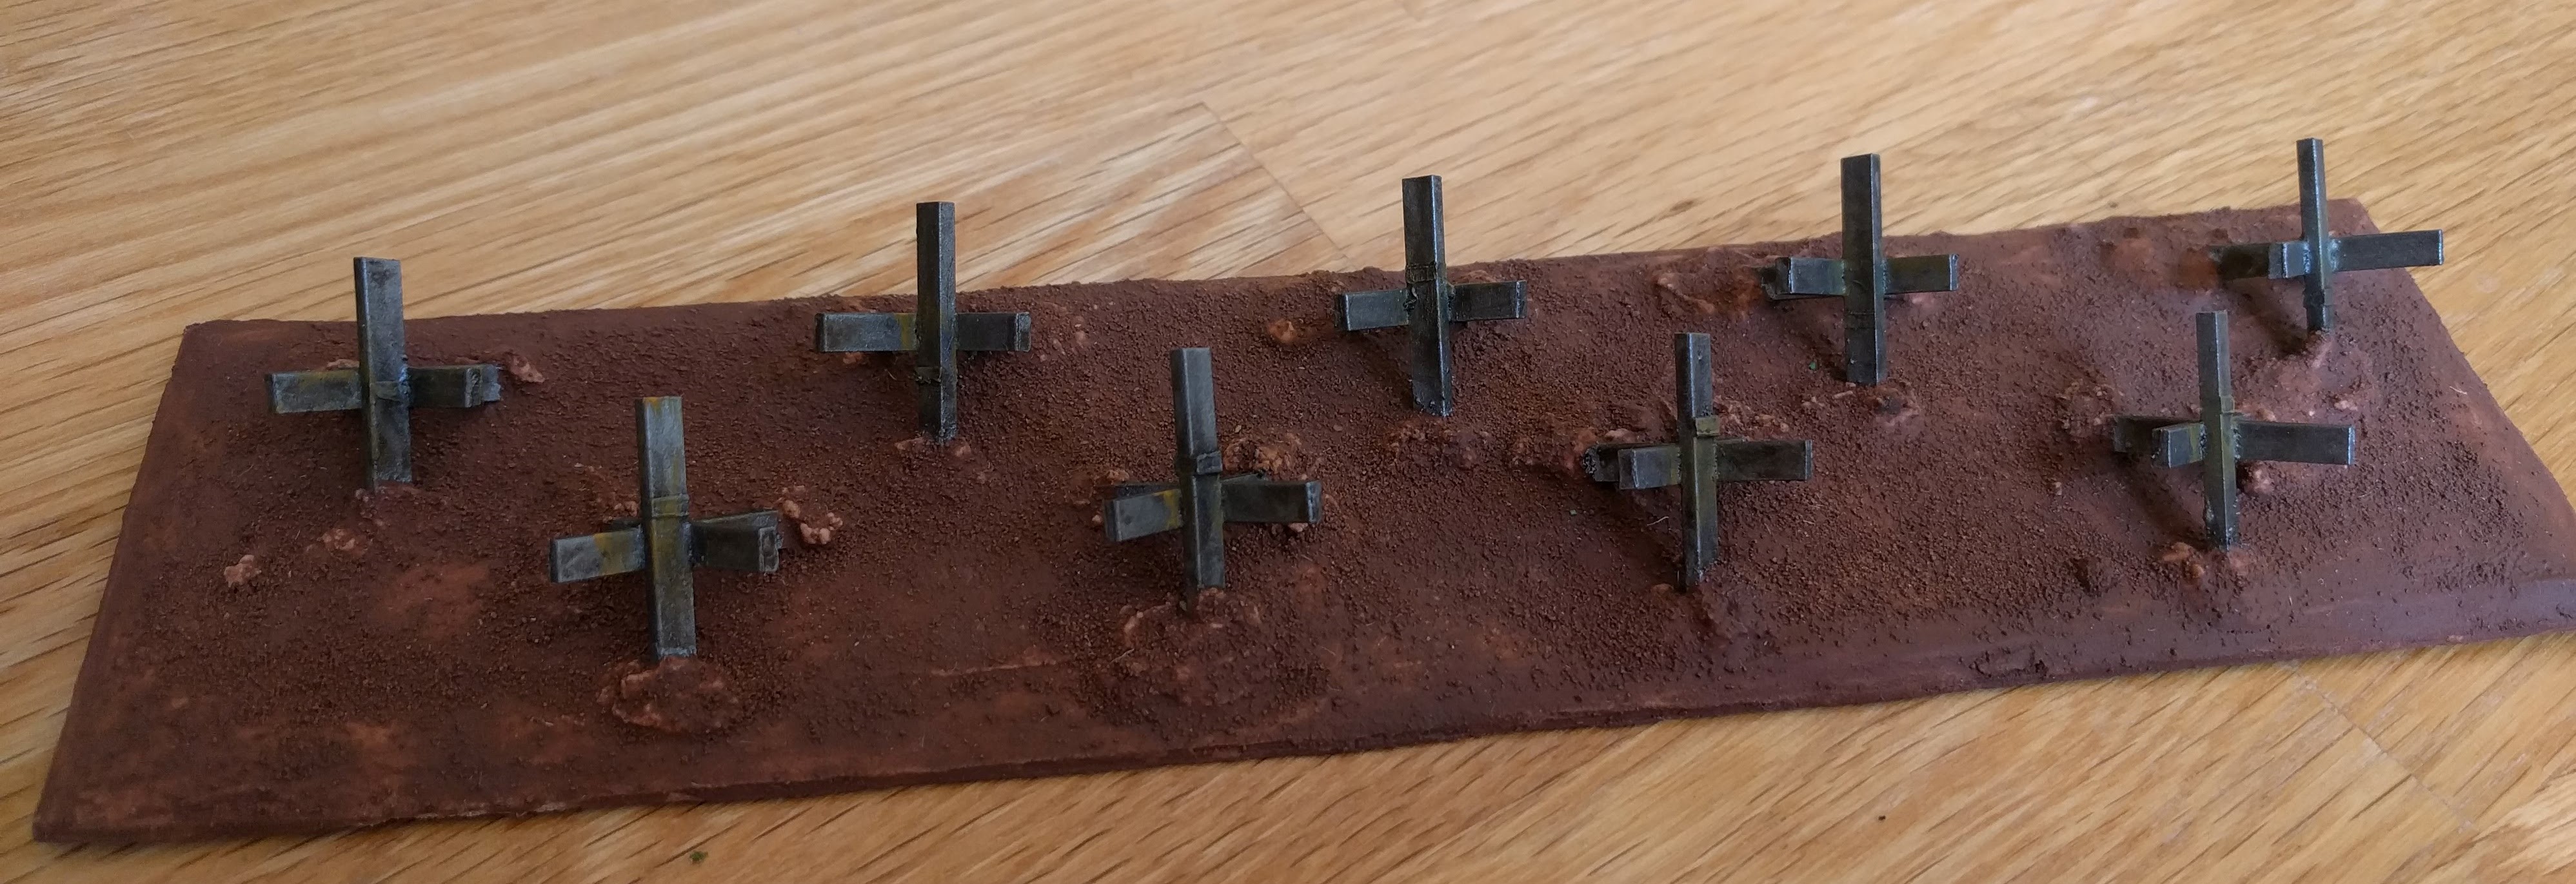
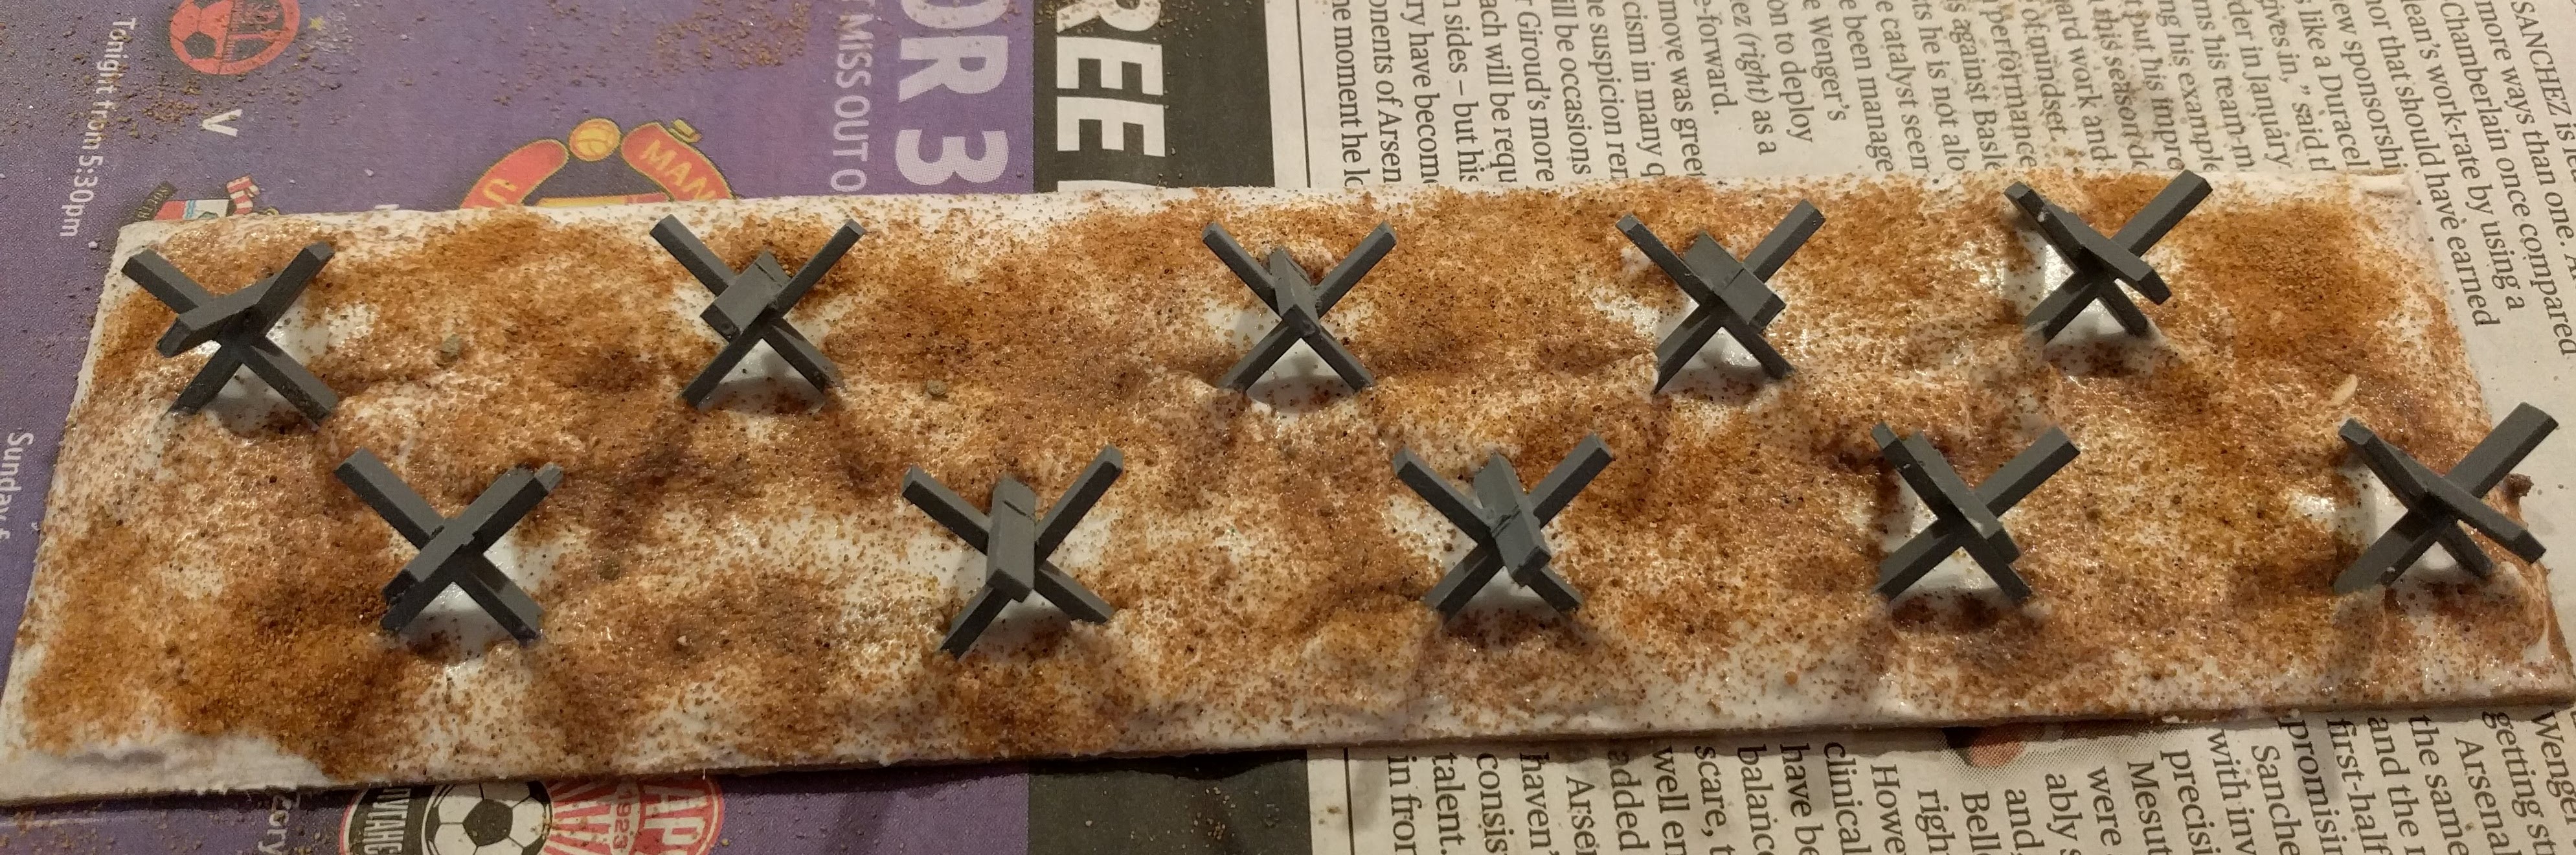
Once the paint from the previous step had dried I flocked up the bases. I mixed up a 50:50 water to PVA mix and painted this onto the bases where I wanted the flock to stick. I then applied three separate flocks, a brown, light and a dark green. This was then left to dry.
Once the flock had dried, I soaked some clump foliage in pva/water and stuck this to the base to represent bushes. Once this was all dry, I have sprayed the whole base with a 4:1 water to PVA mix to seal everything down.
For the minefields, I’ve just flocked the base and left it as is. This is after all just area terrain and I think that fenced areas and signs will impede the models should the choose to enter the minefield.
I’ve left patches of the barbed wire and tank trap ground bare to make it look as if the defences are newly laid.
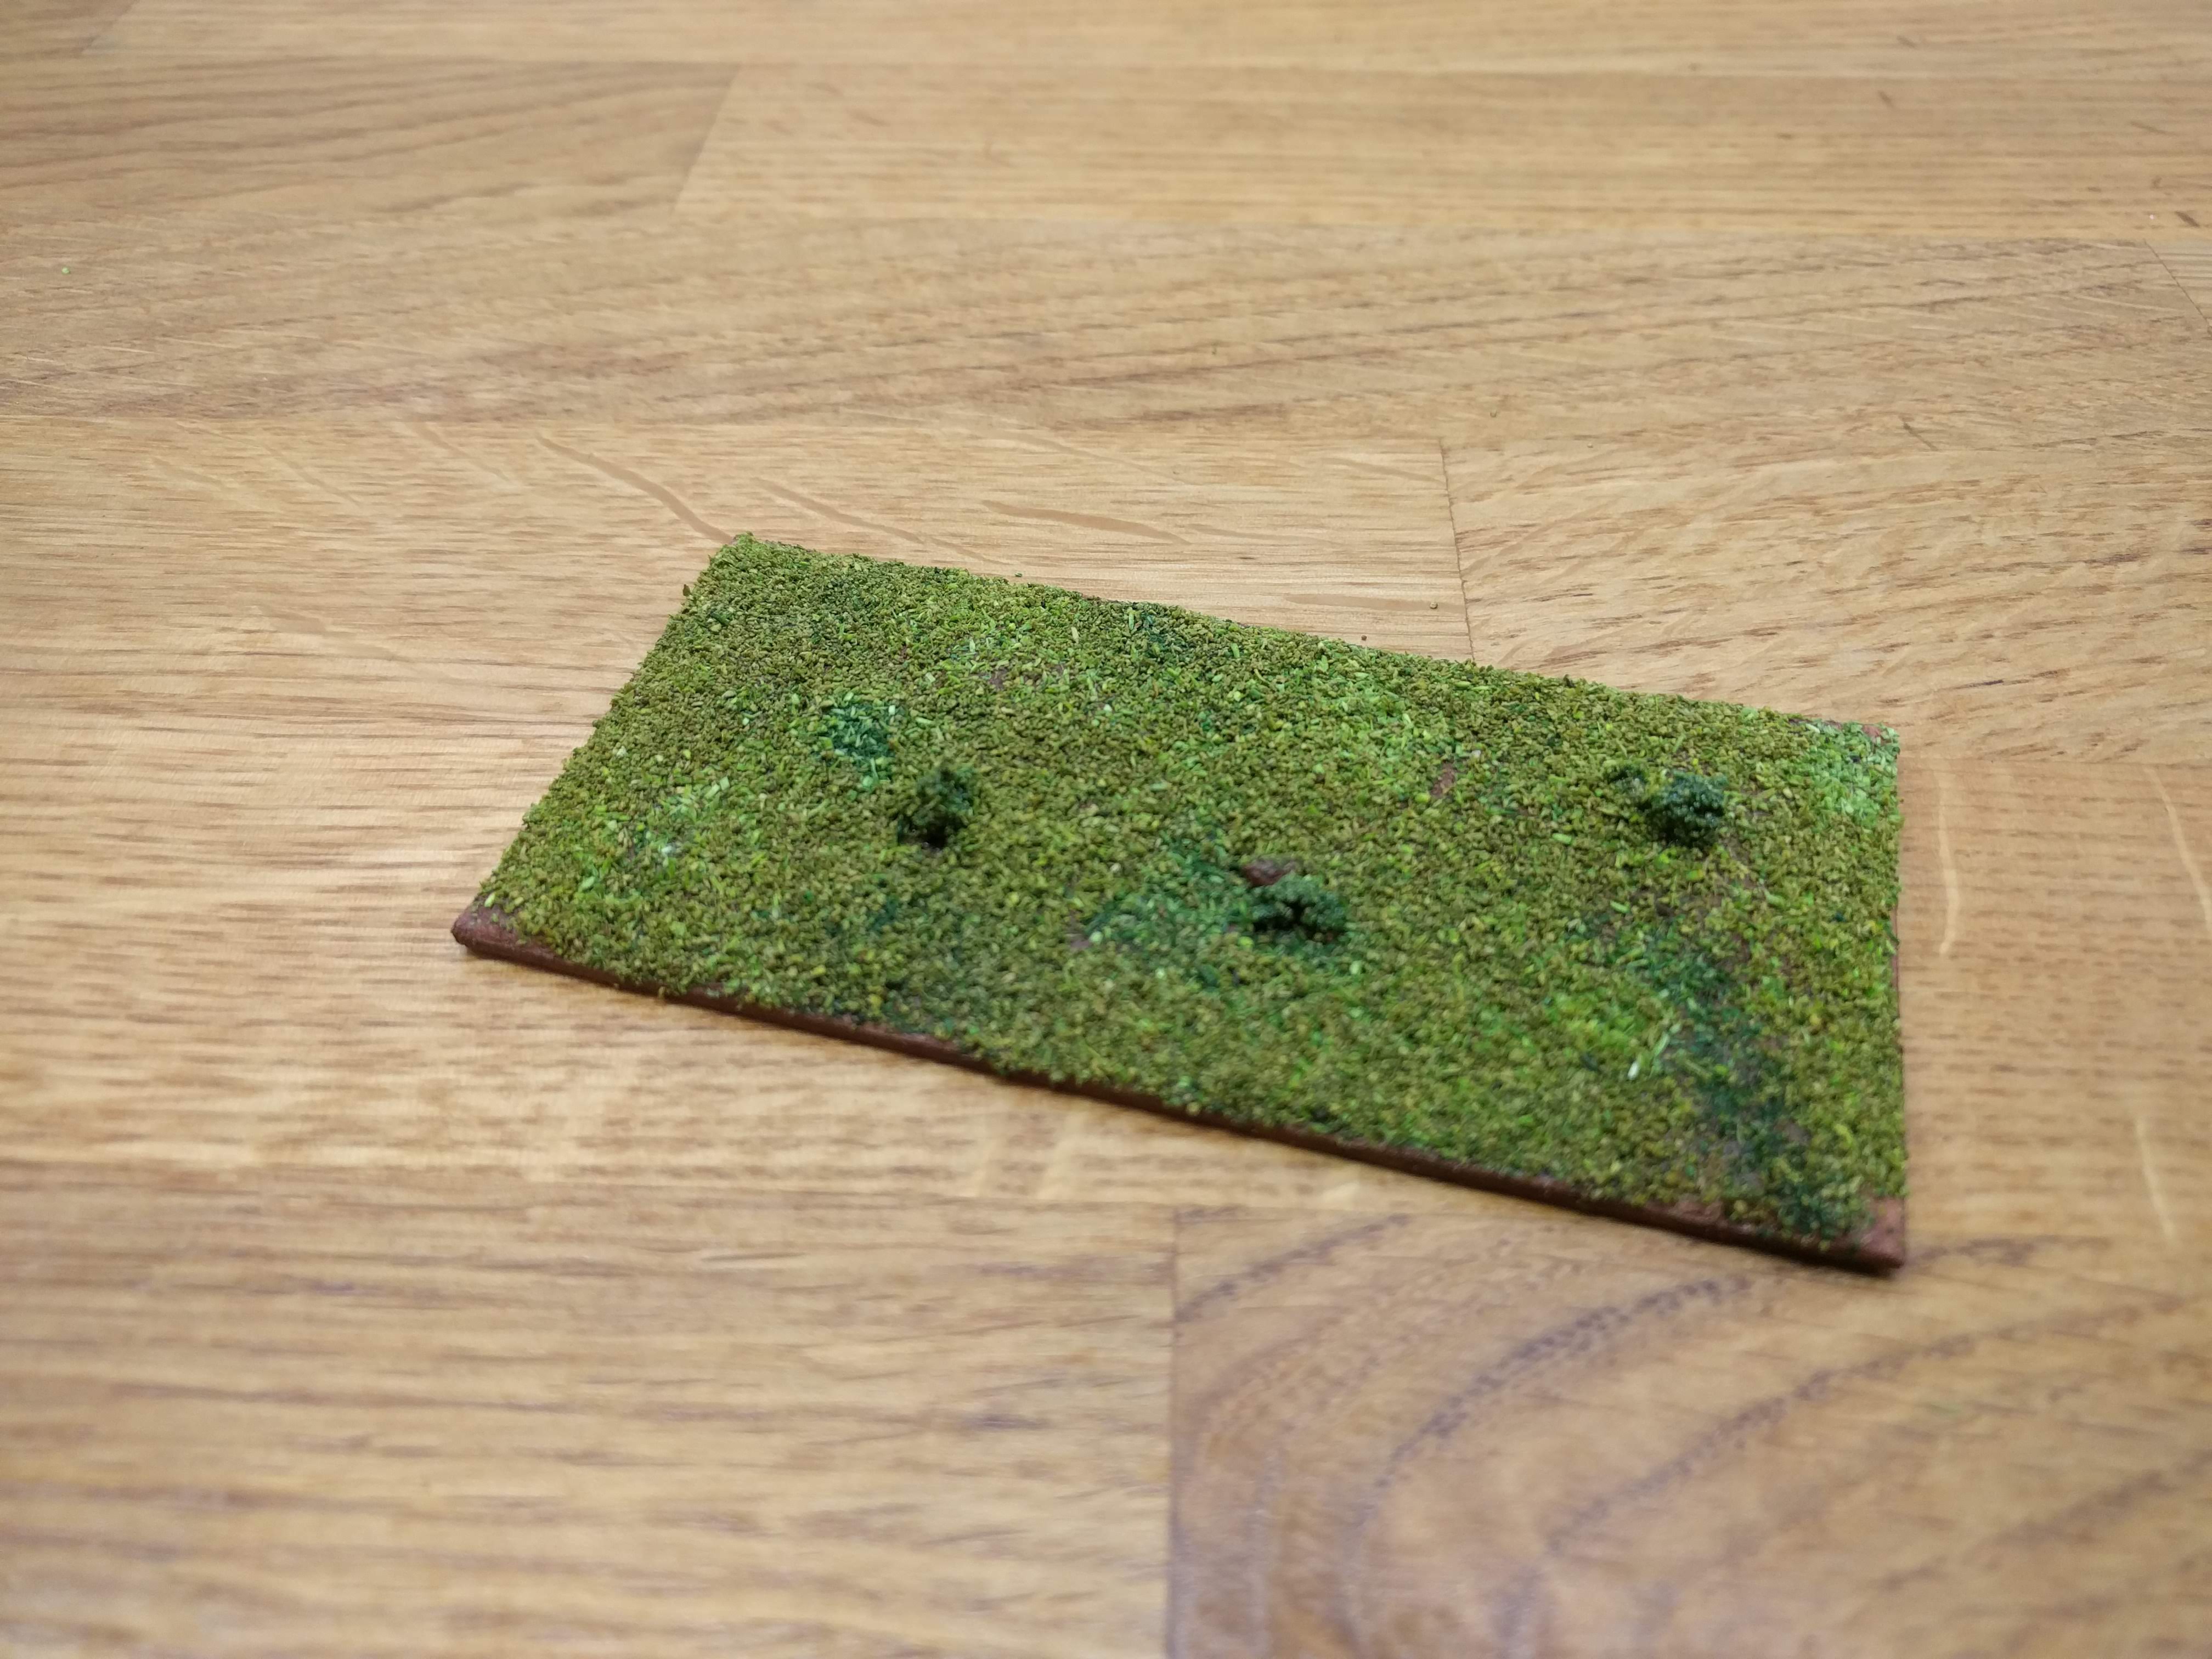 A not very interesting or exciting minefield (but it will blow you up if you enter it)
 Tank Traps
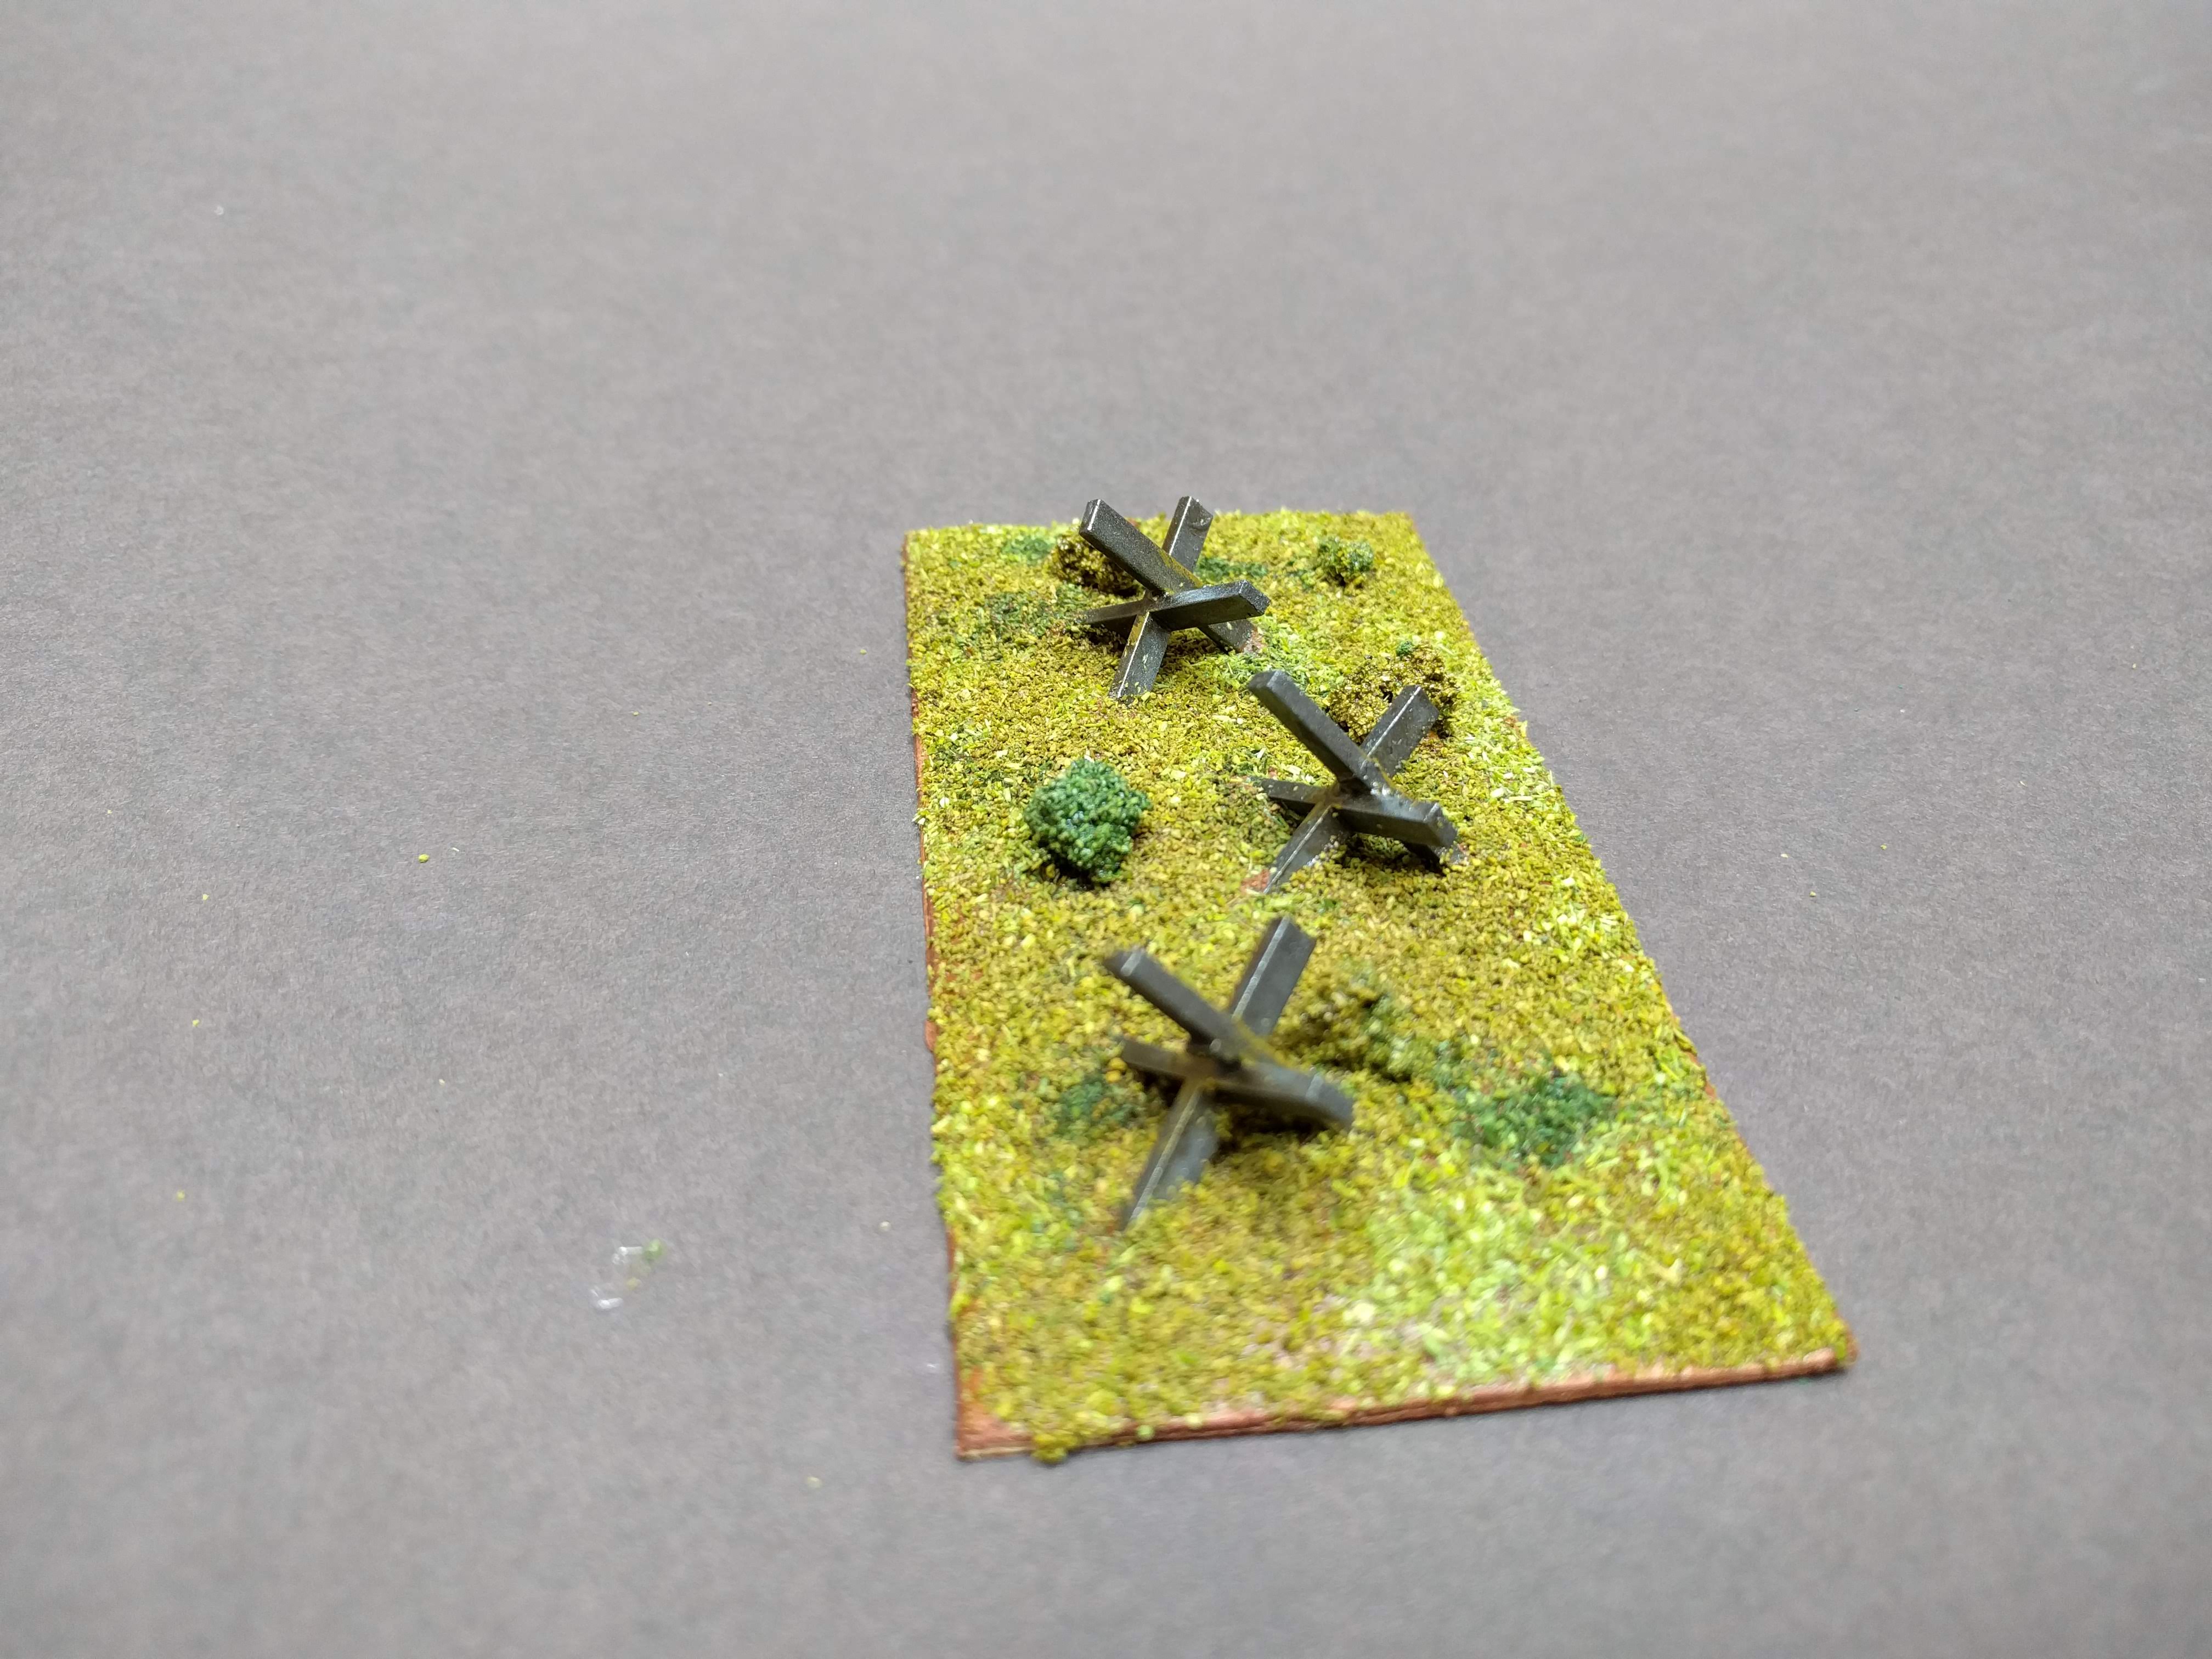


 Barbed wire
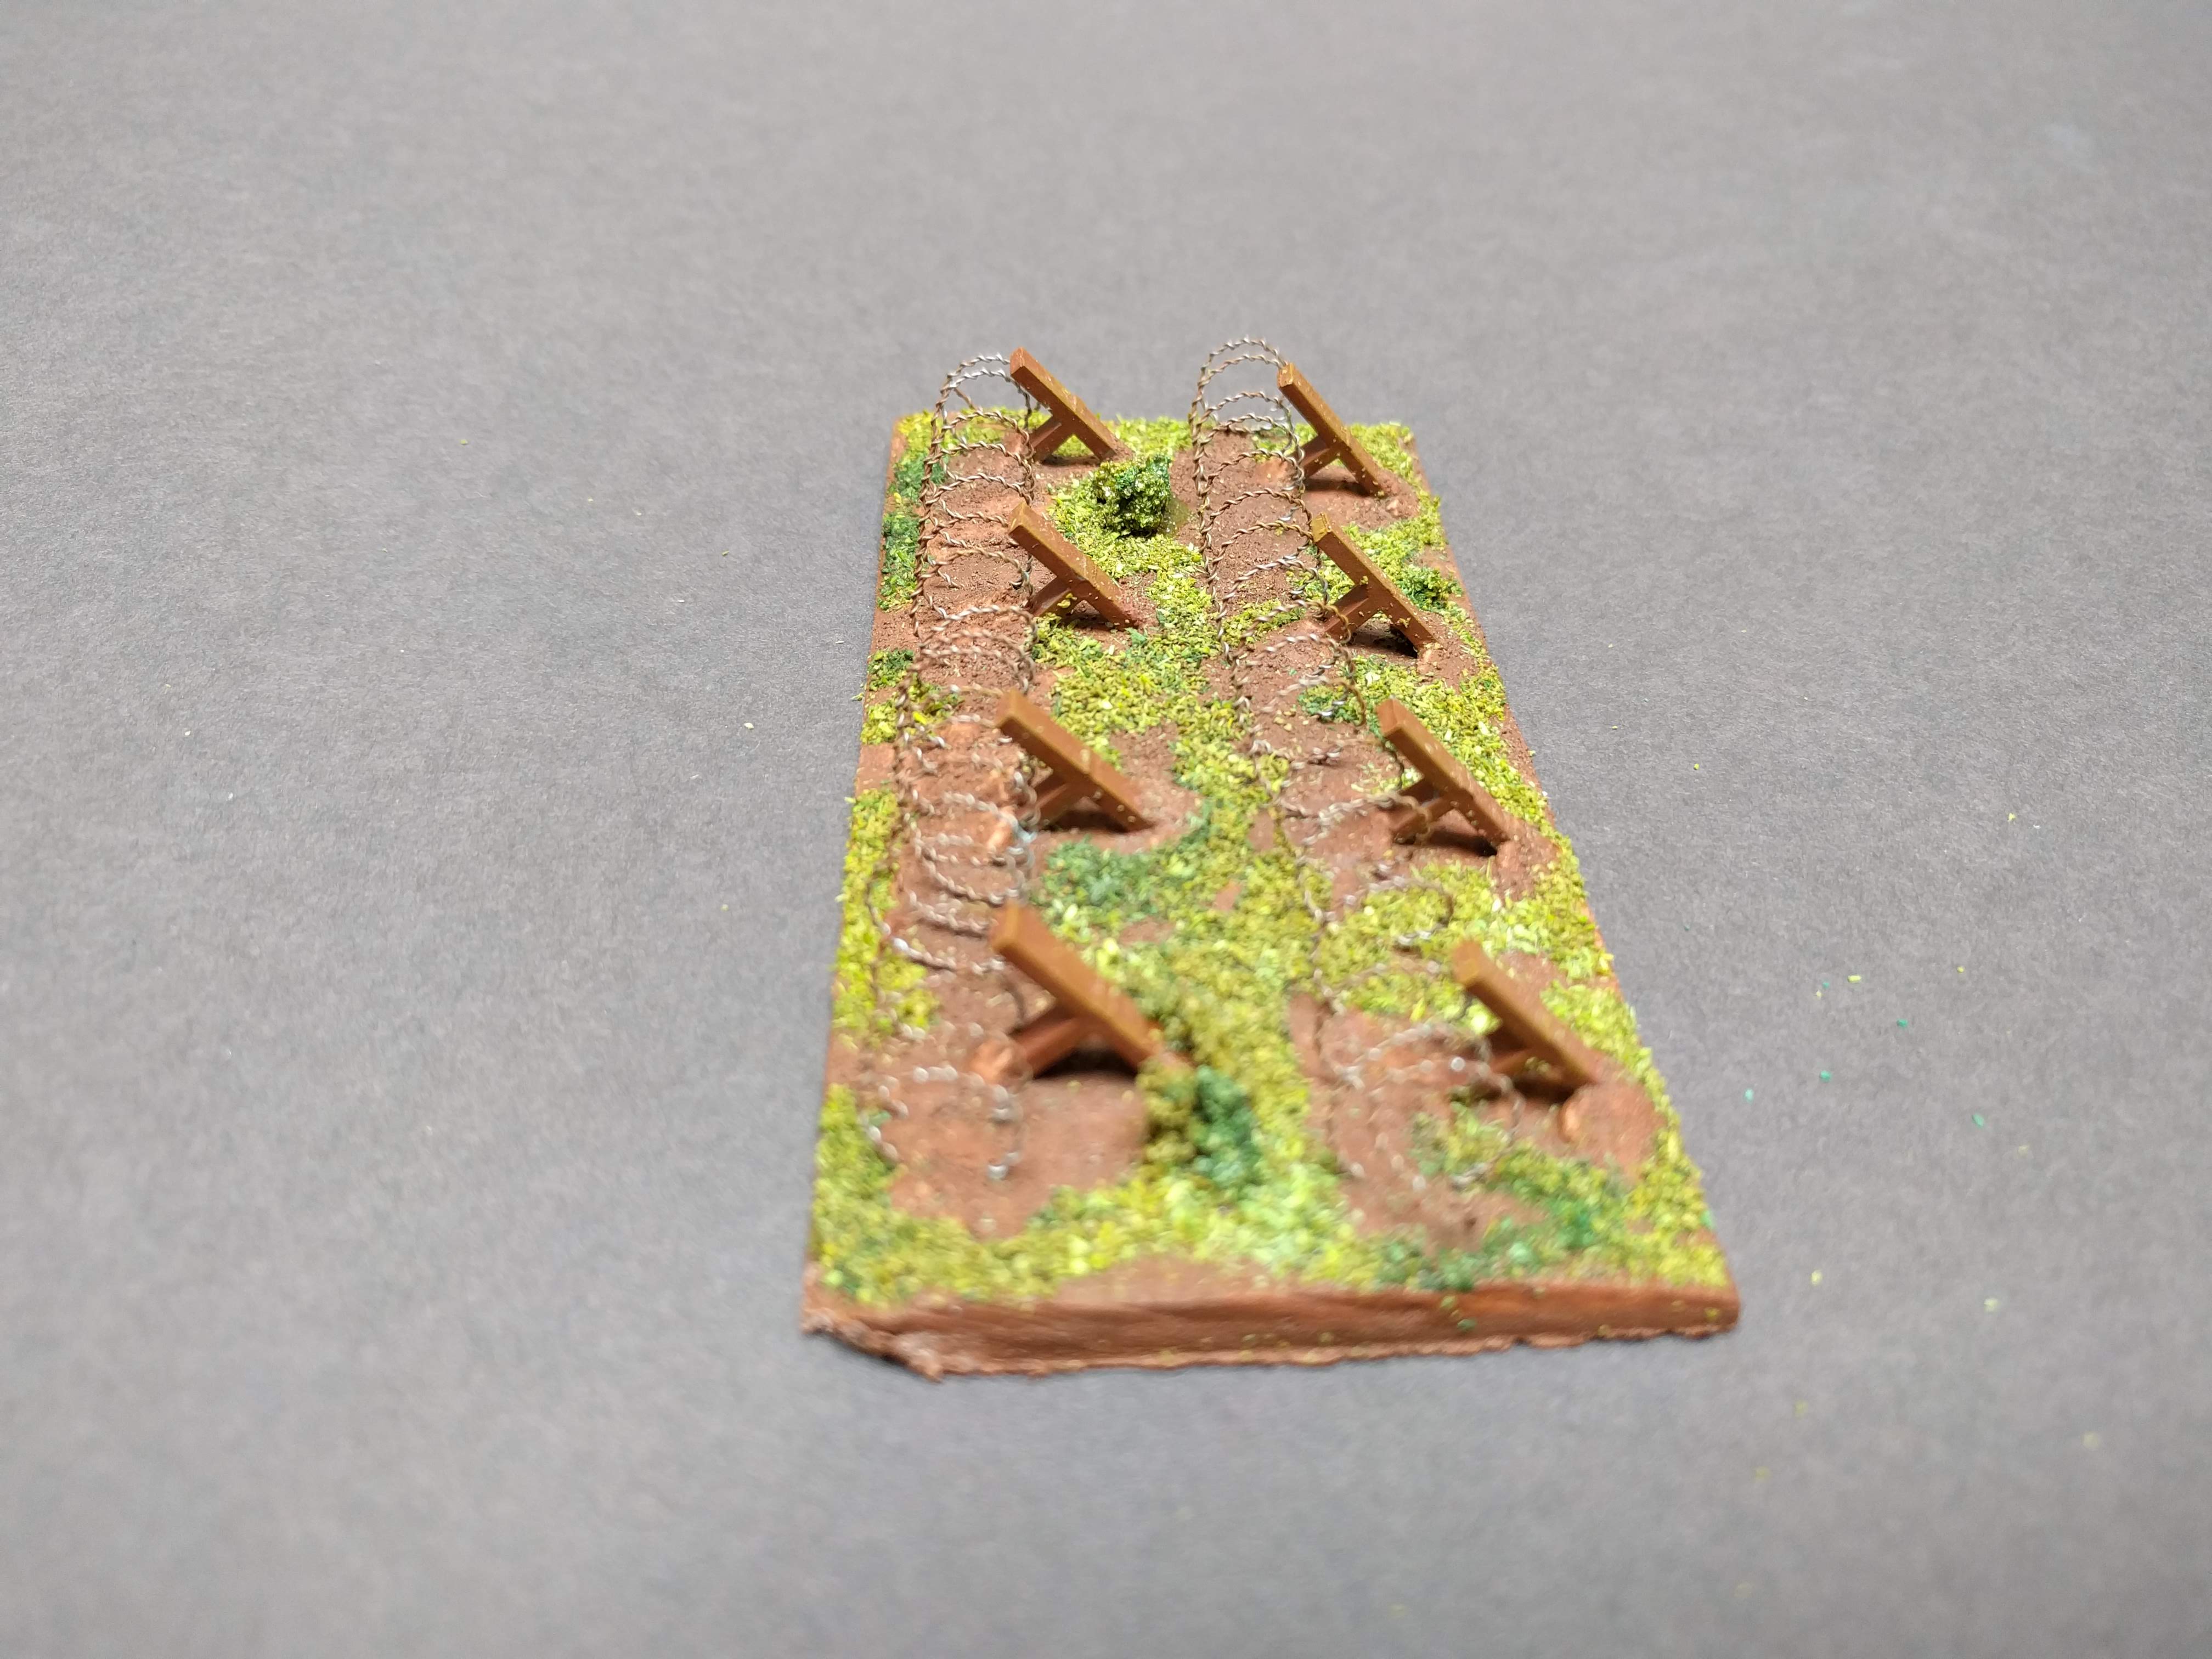

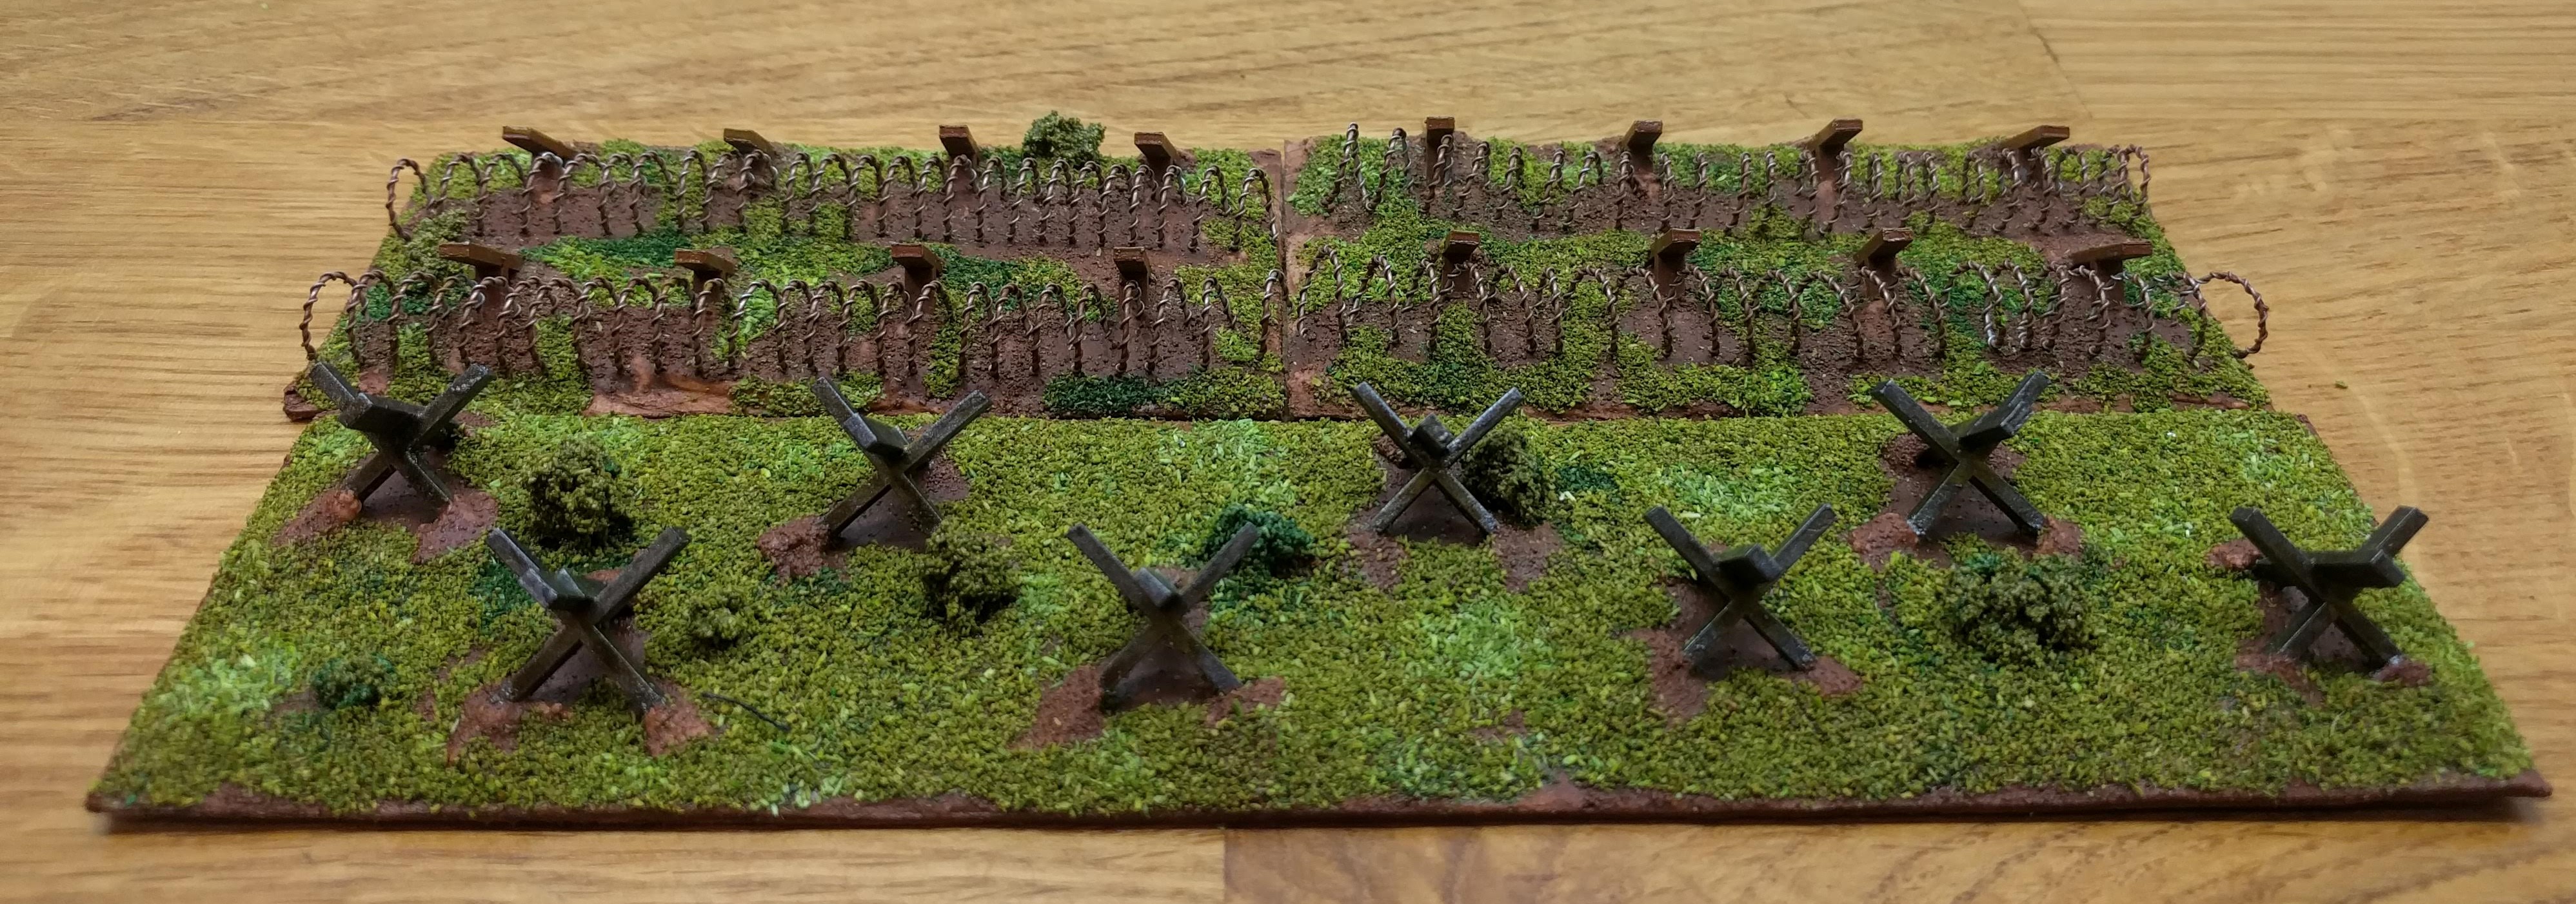 The combined defences
Defensive Obstacles - Getting the colour down
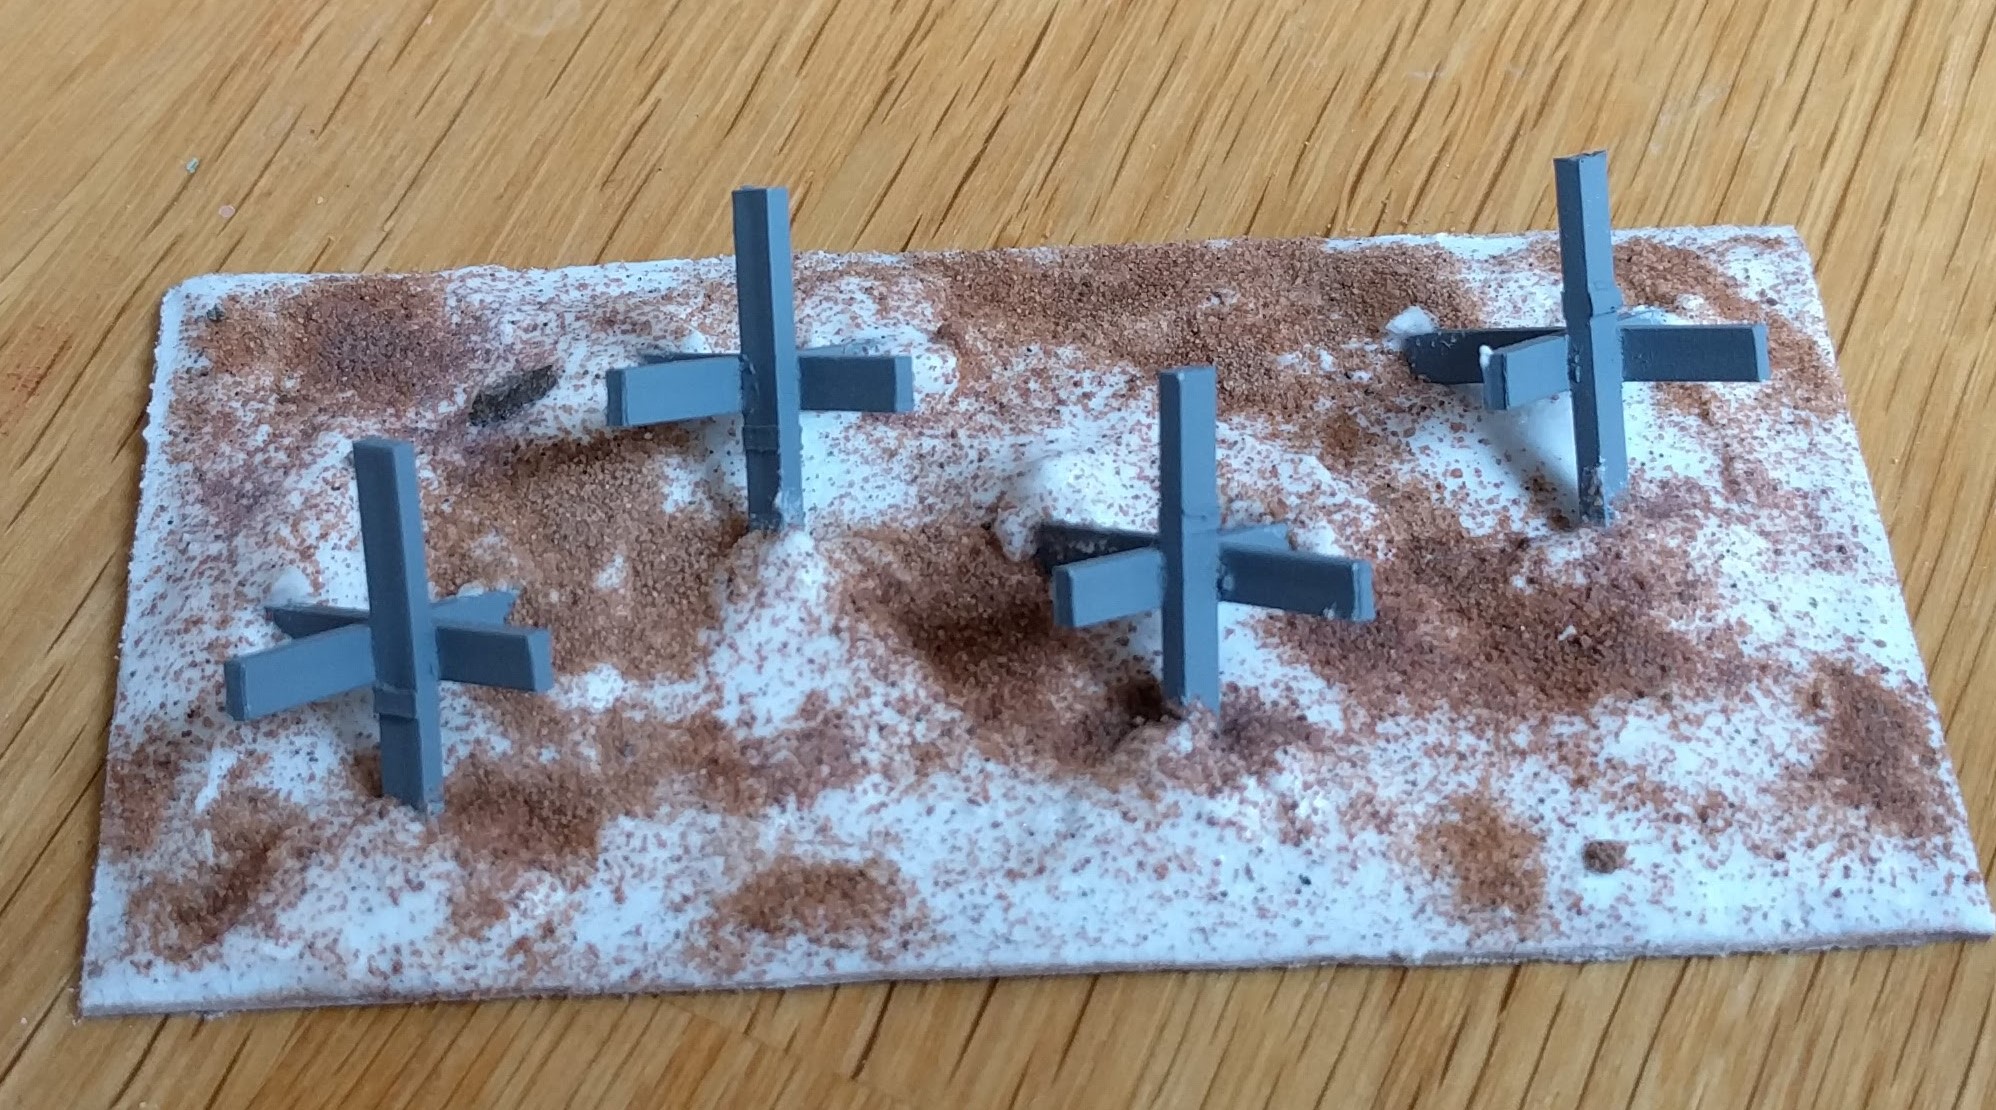
It’s been busy recently in the Redvers’ household but I’ve had some time to advance this project. The filla took 24 hours to dry properly and securely hold the tank traps and barbed wire in place. For the ground, I took my cheap, dark brown paint and mixed in some PVA glue, mainly to hold the sand in place. I applied this liberally over the filla.
Once the first coat was dry, I mixed up a darker brown wash and applied this, allowing it to run and pool. I also applied the wash to the tank traps to give them a dirty look and also to the barbed wire to dull down the shine and provide a ‘rusty’ look.
 Tank traps with the wash going down - I've deliberately used a lot of wash here
 Barbed wire with the wash applied
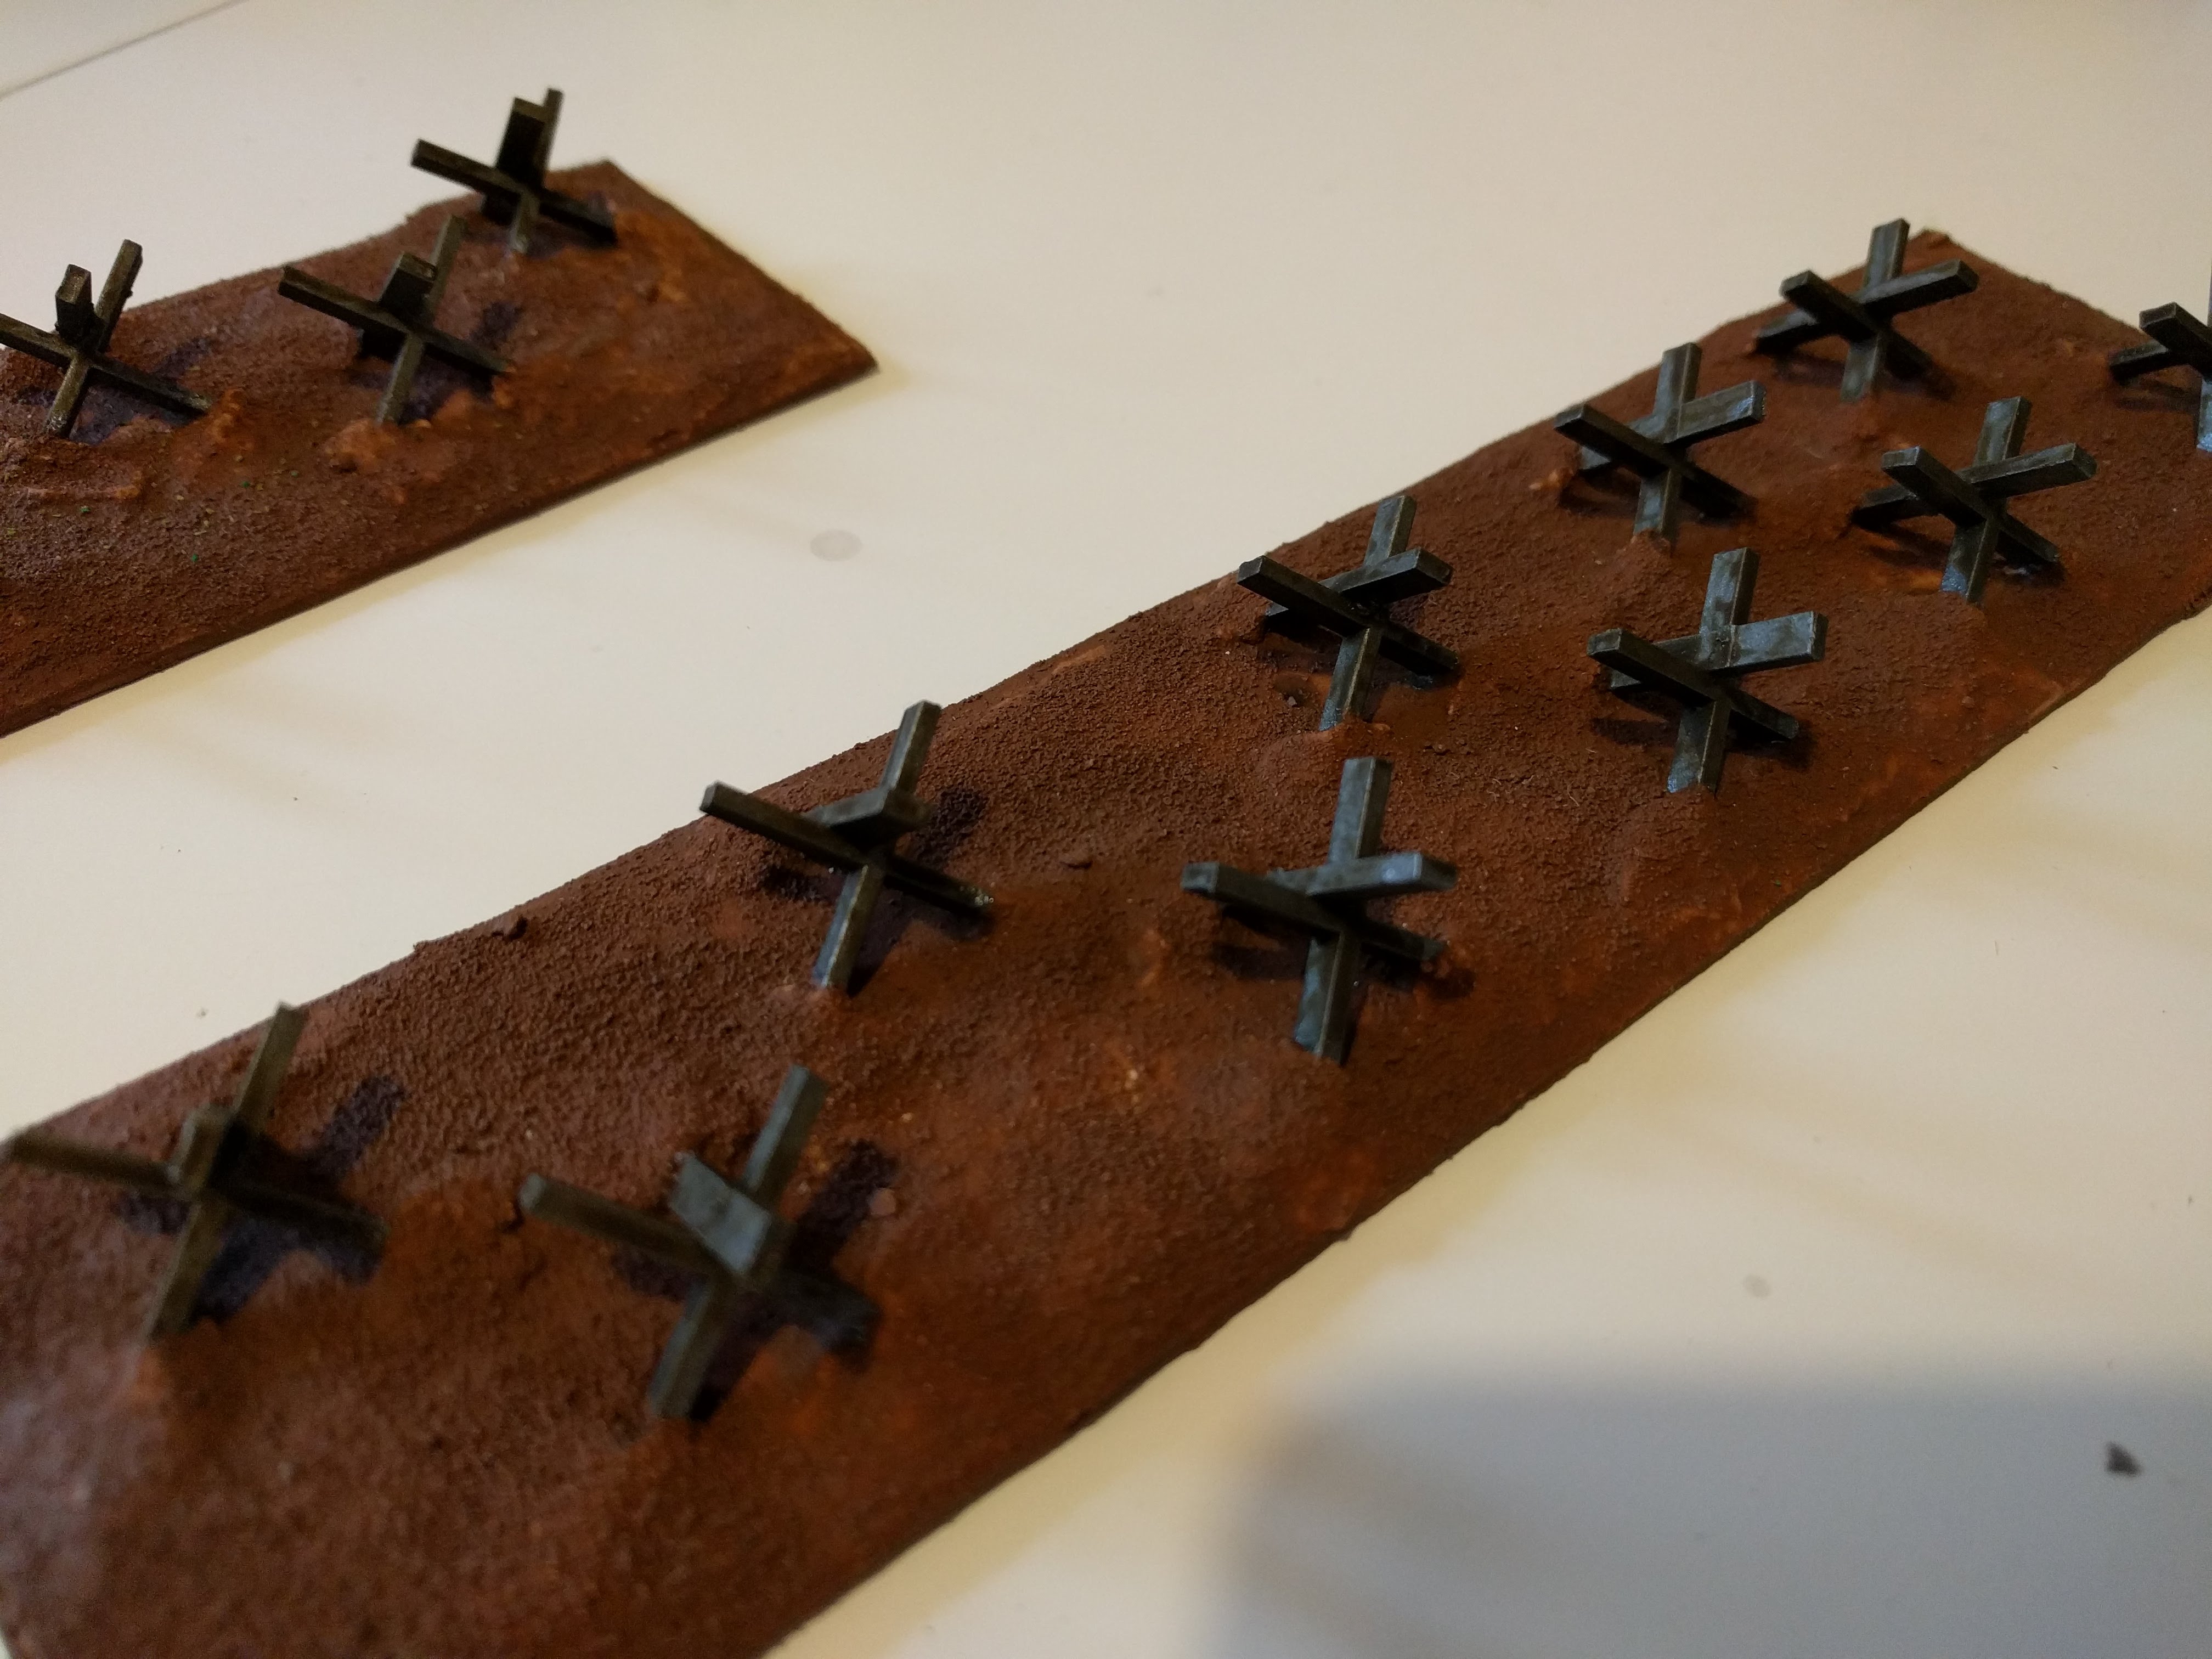


 Barbed wire fully dried
The above pictures also show the results once dry. You’ll note the lighter areas where the filla is still somewhat visible. I’m ok with this as these raised areas would naturally be lighter so I’m going to leave these as is.
Next step is to flock these up and they should be finished.
Defensive Obstacles - Applying the basing material
I like using filler (spakling paste) for my basing. It’s creates a decent texture and can hold things down if attached while wet which effectively places those items ‘in to the terrain’ rather than ‘on top of the terrain’.
I start by scoring the MDF base with a knife to help create a rough surface area for the filler to adhere to. It’s then a simple case of applying the filler. I use my finger and some water to smooth it out and create undulations so it looks more natural.
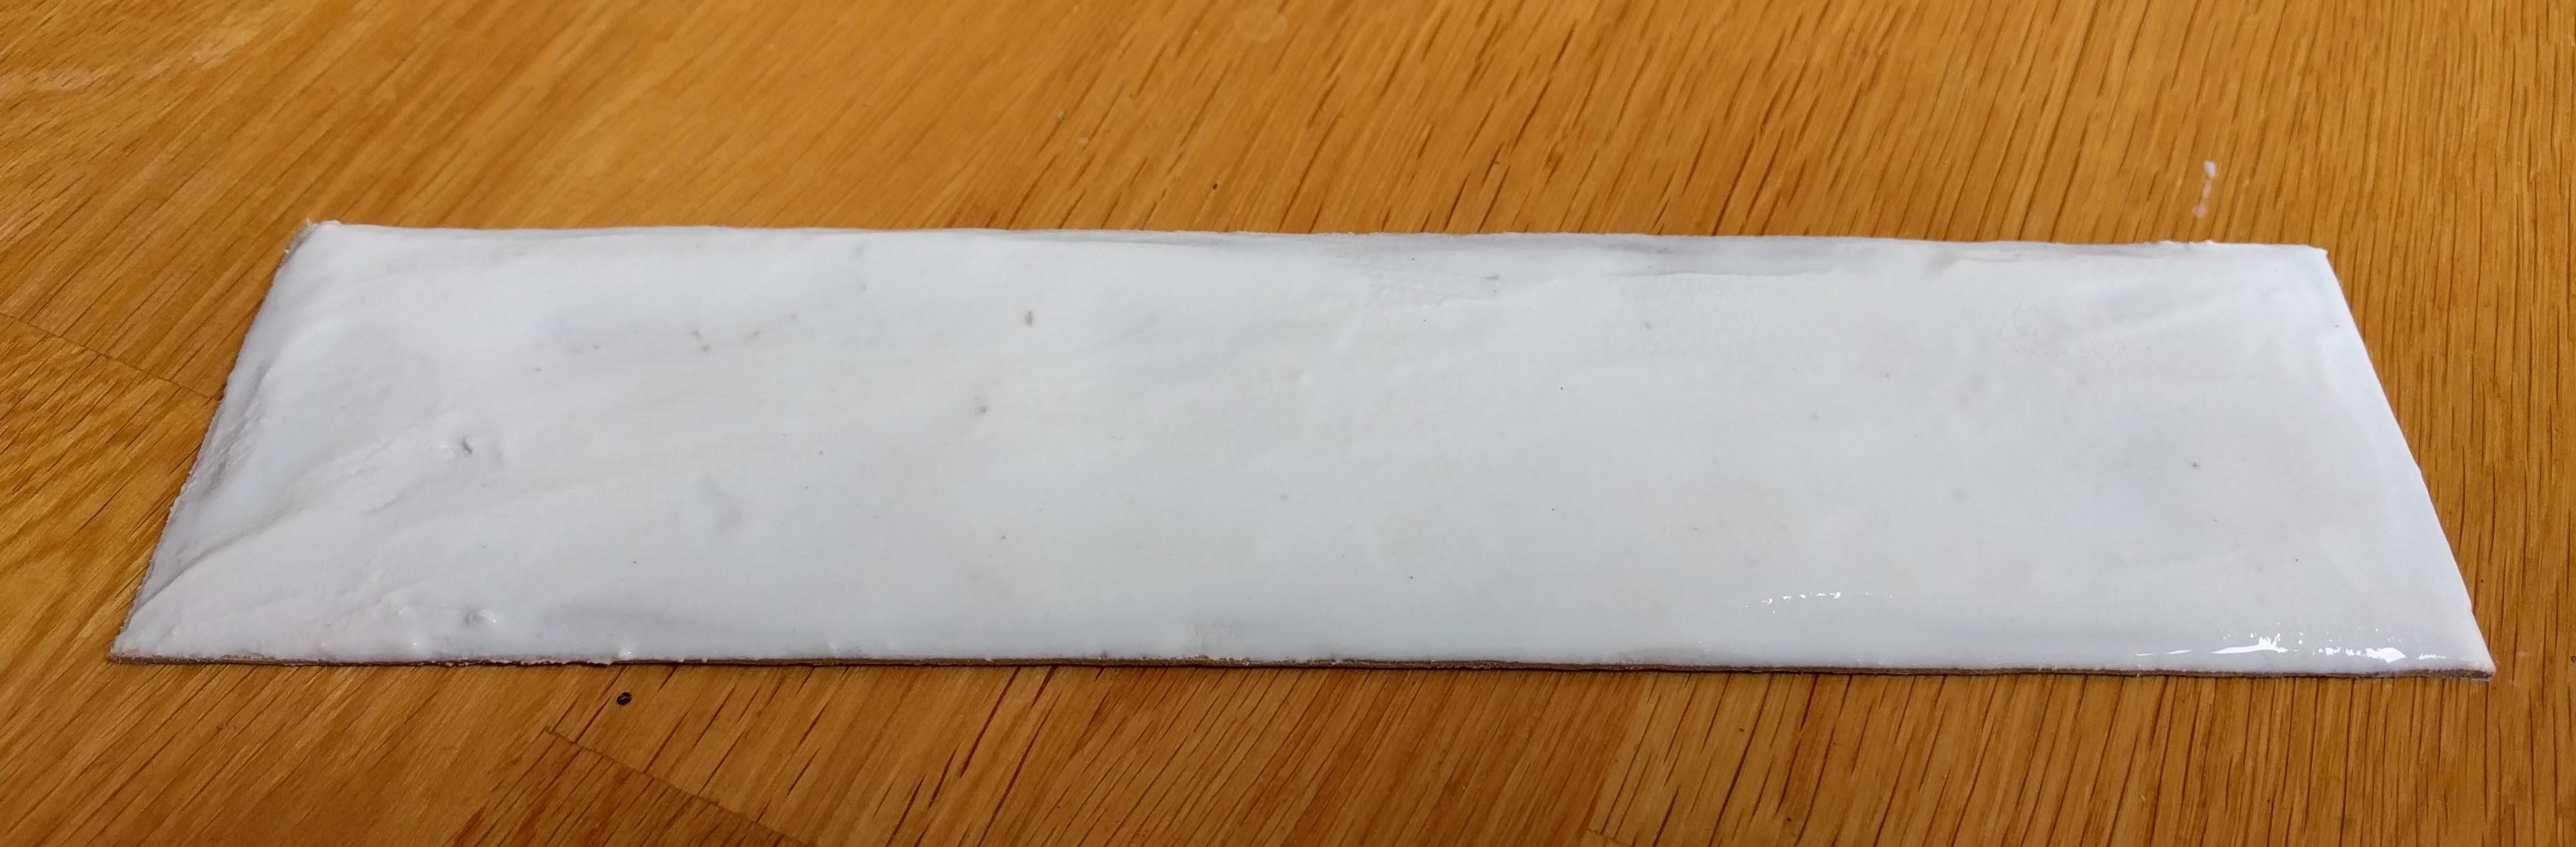 An MDF base covered with filler that has been smoothed with some water
For the mine fields, I will simply sprinkle over some sand and small stones/cork chippings to create some texture and leave to dry.
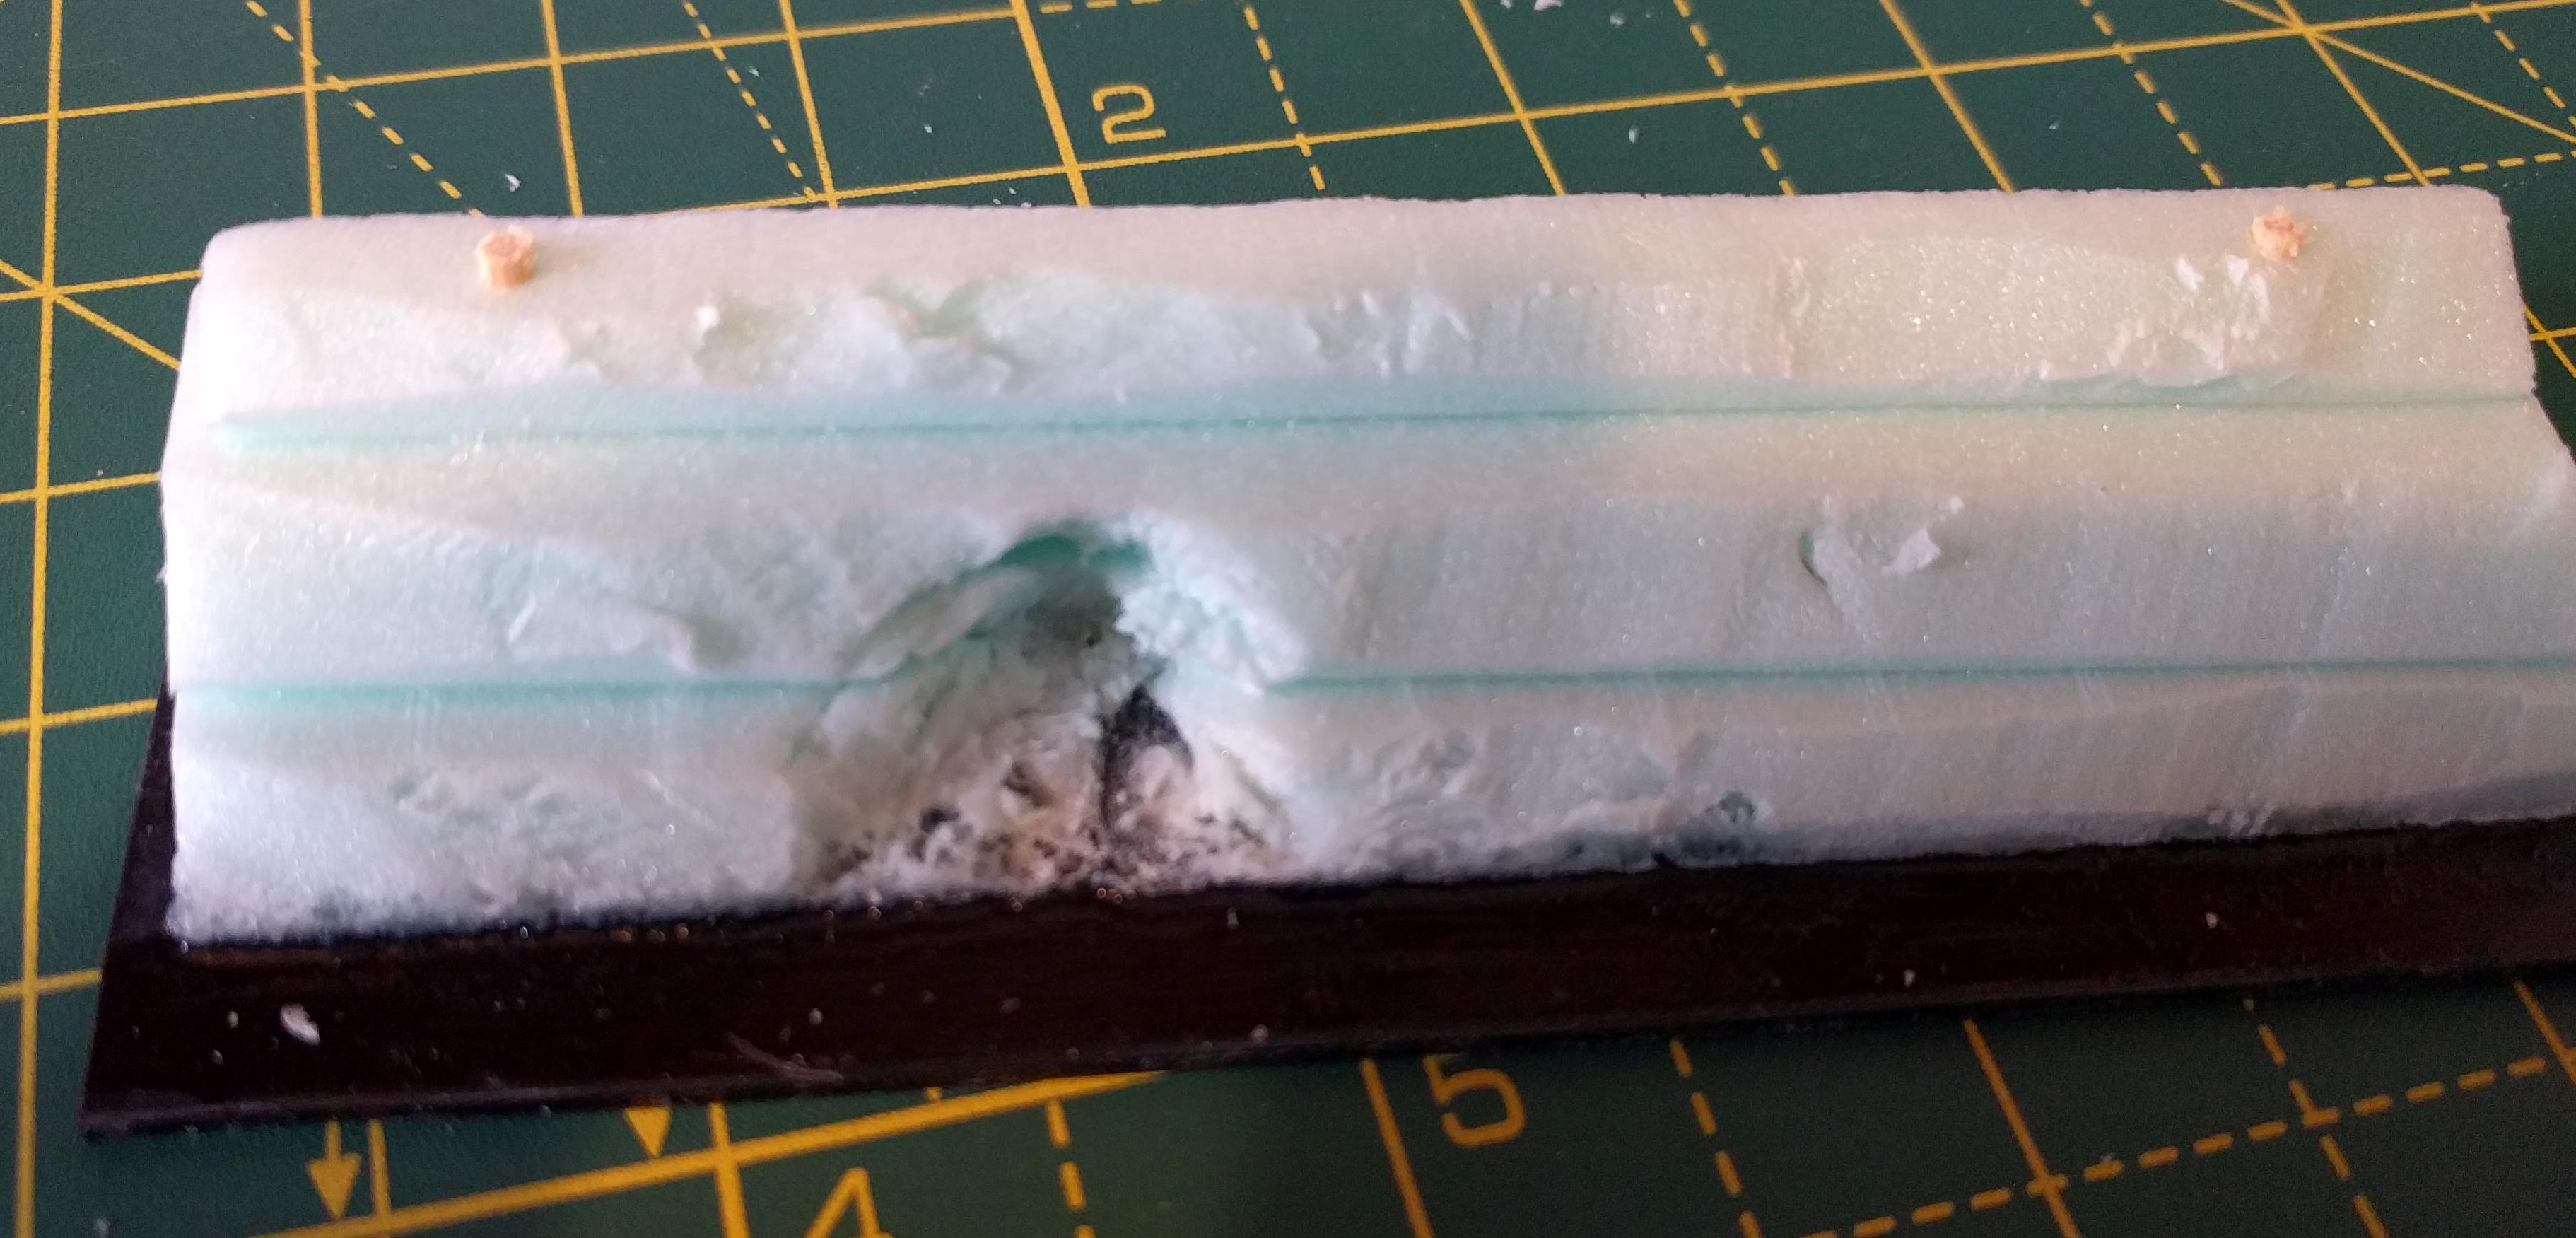
For the tank traps and barbed wire, I pushed the primed tile spacers into the filler and applied a small blob of filler around the base of each ‘post’ to create the impression of these posts being fixed into the ground. Again, some water and my finger smoothed these blobs out to make them look more ‘natural’.
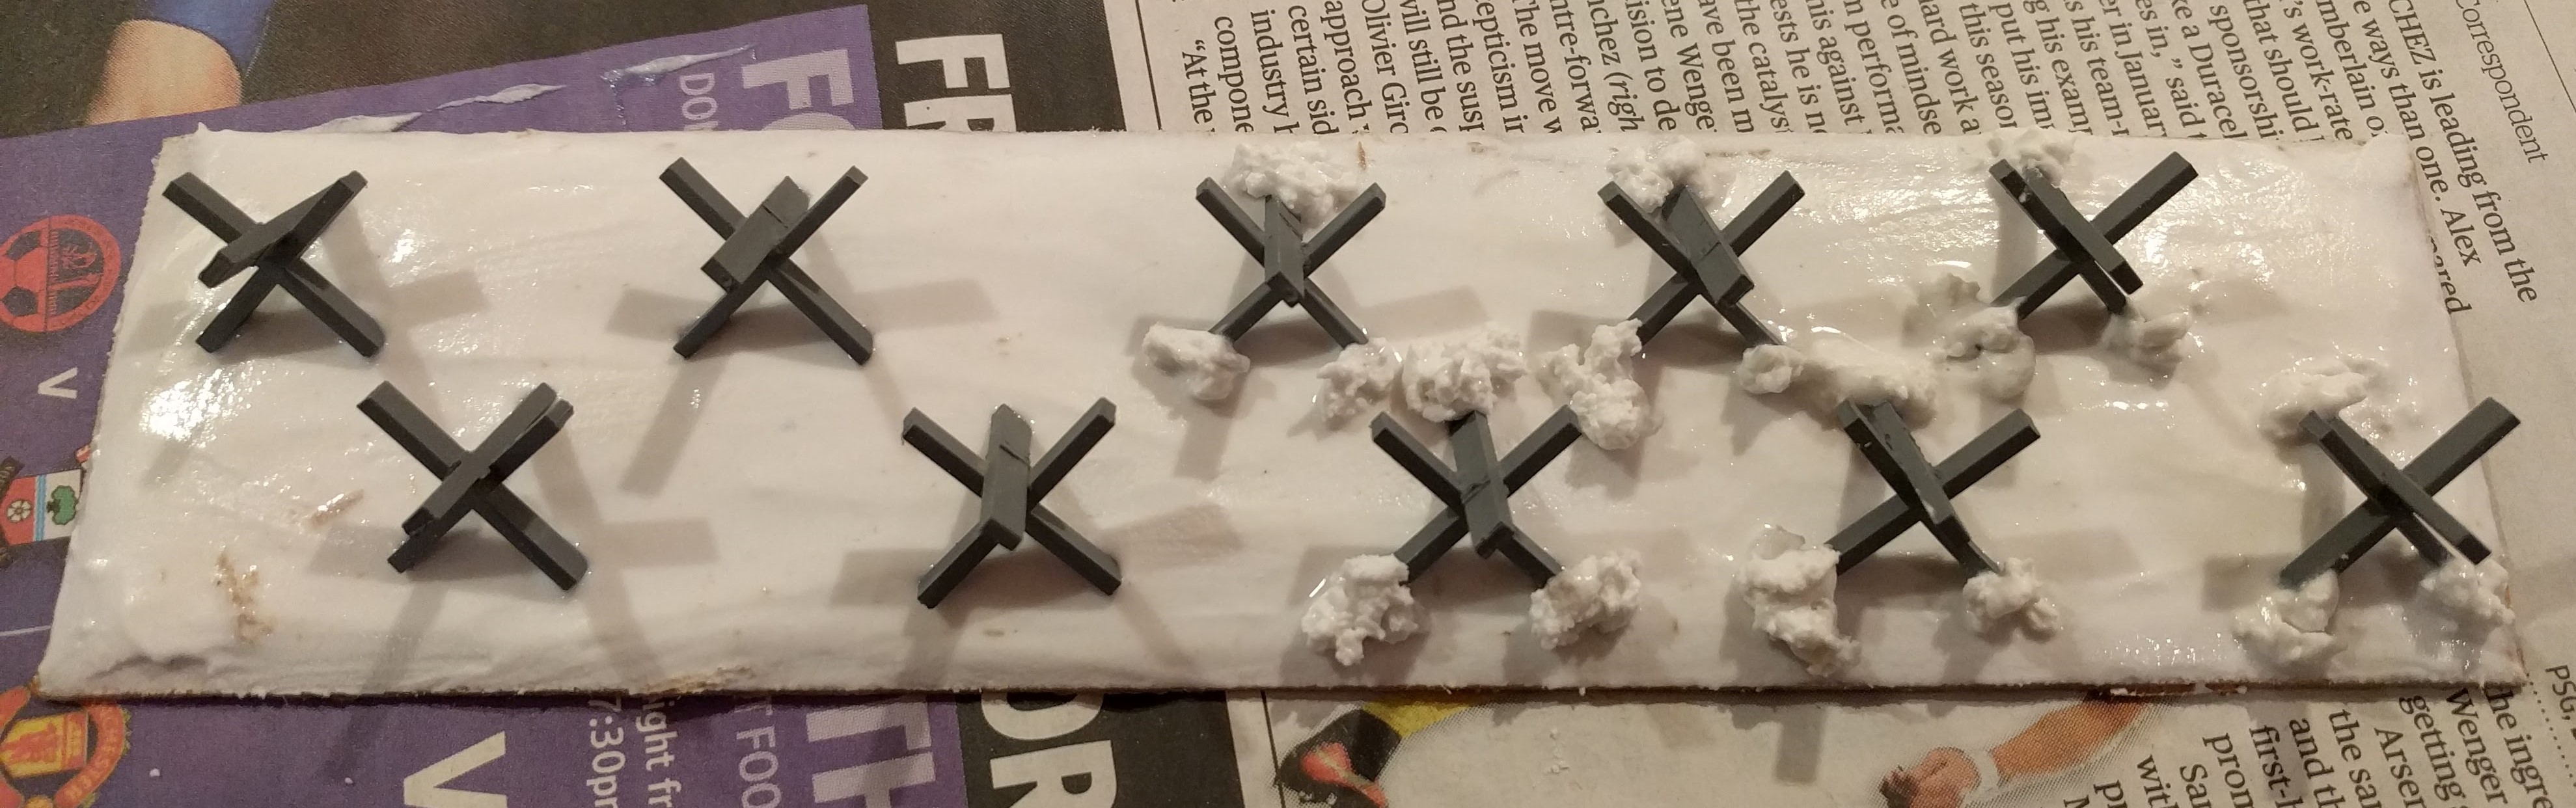 The tank traps with the pre-smoothed blobs of filler around each post
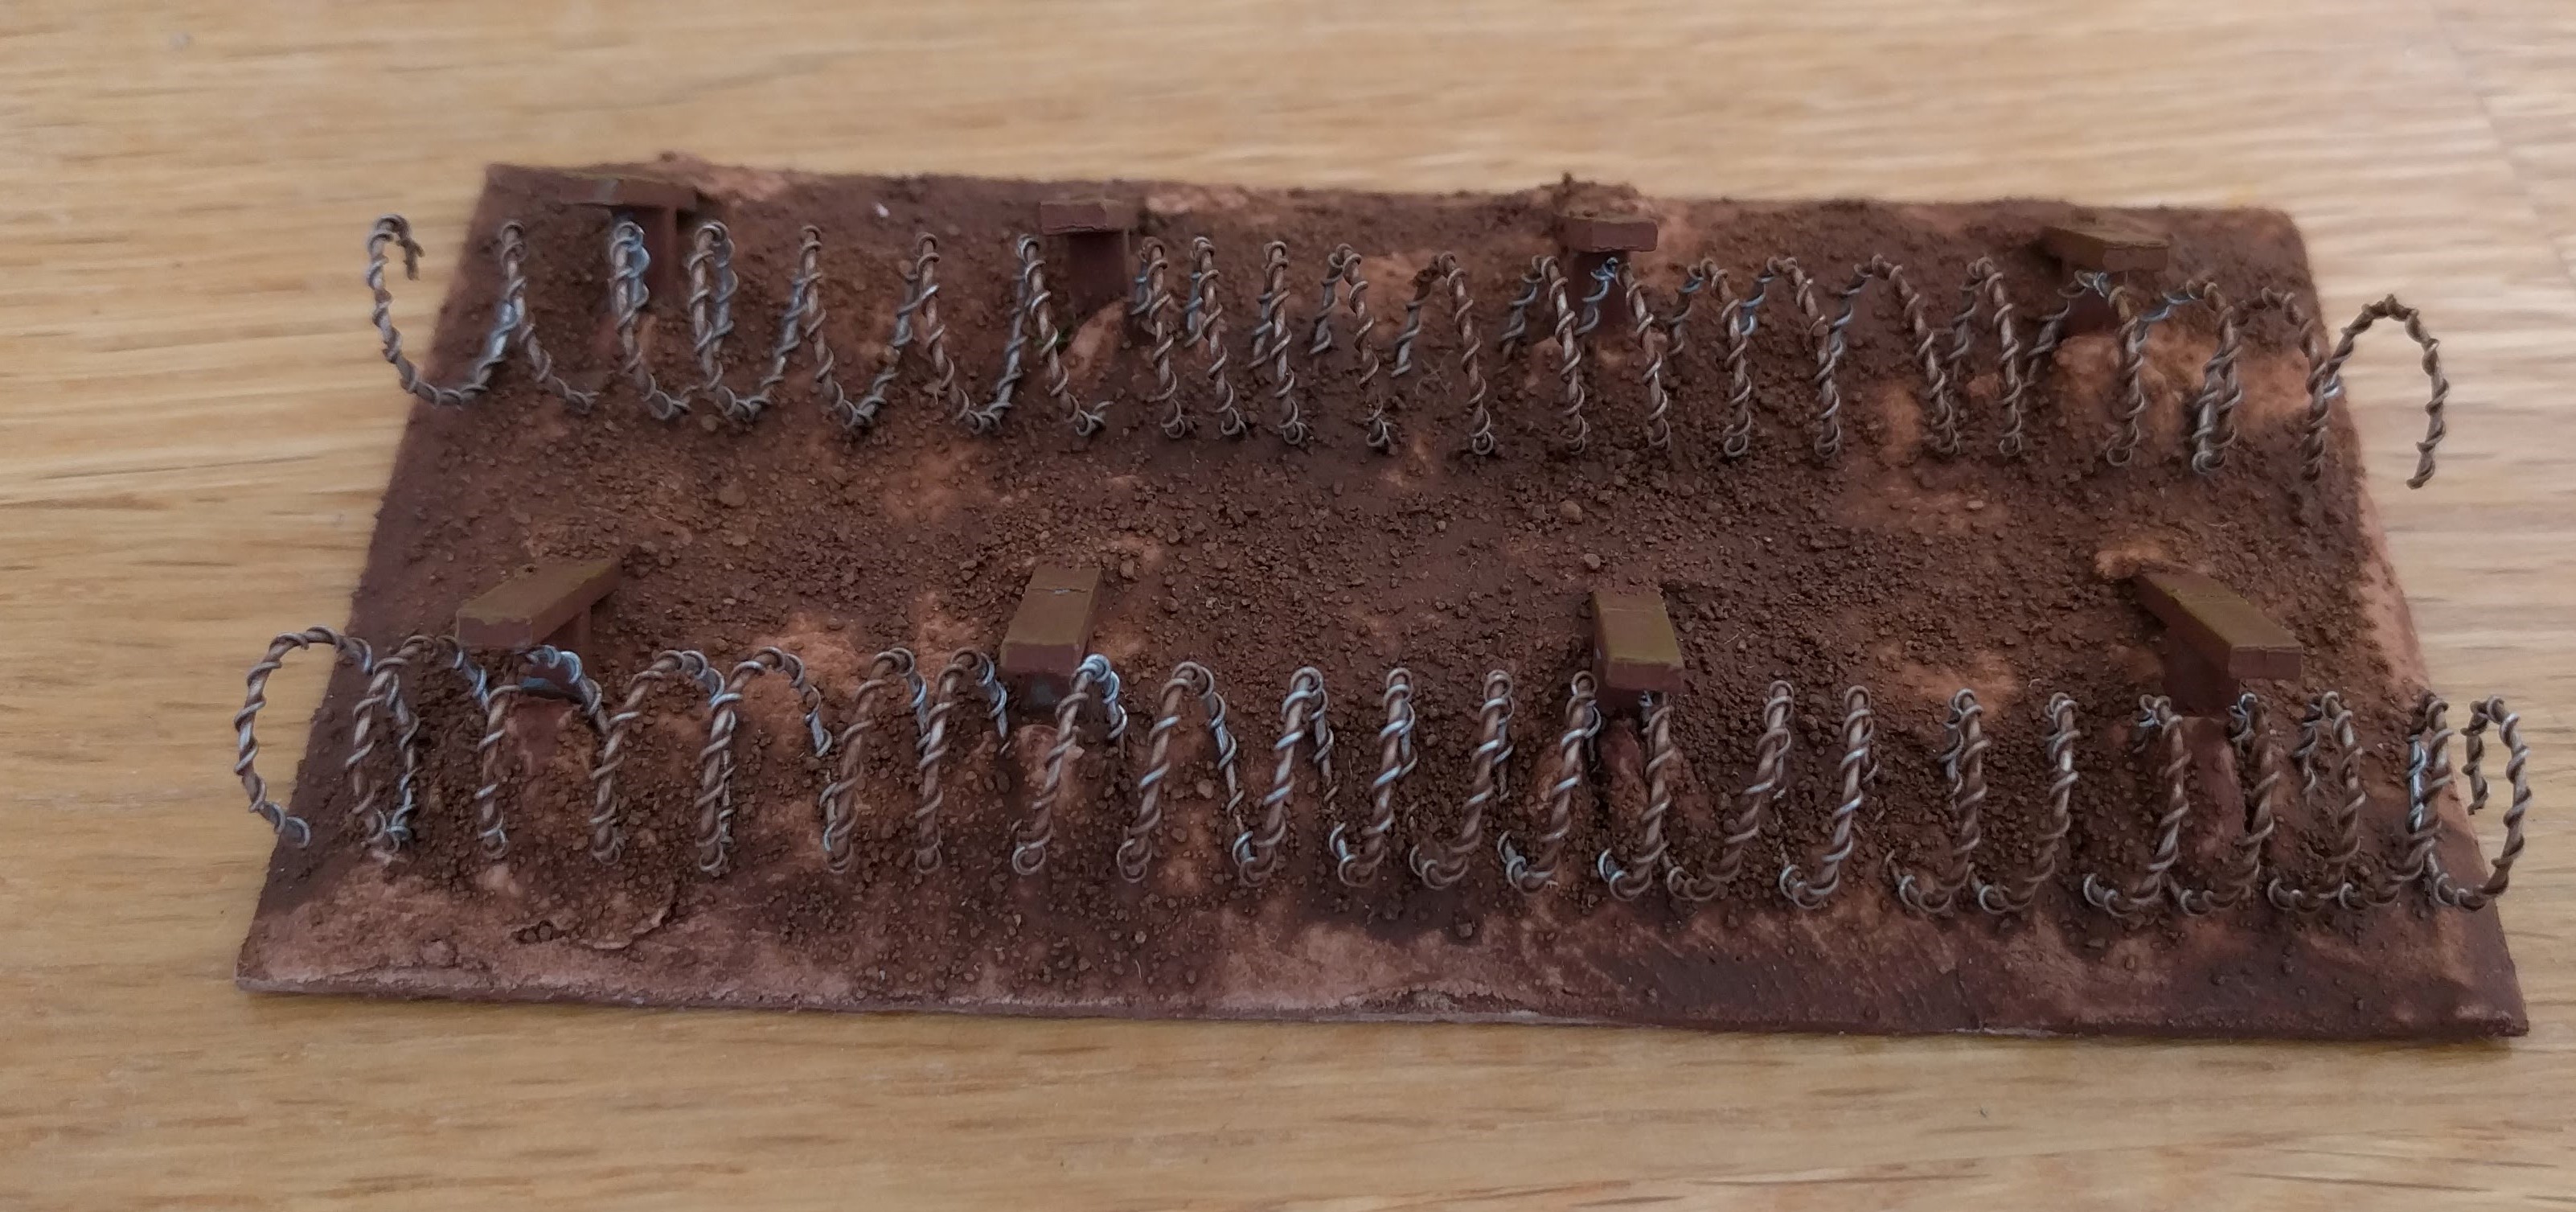
Same approach for the barbed wire posts. Once the posts were attached, I gently pushed the coils of barbed wire into the filler along the line of the posts. Not to far, just enough to hold them in place.
 Attaching the barbed wire
Finally, I applied sand over the base to create texture and left it all to dry. I generally leave this 24 hours to make sure it has fully dried. You also need to be careful of warping, particularly with the longer stretches (which is why a 4″ length of base is better than the 8″ base). I’ve noticed a few of mine warping so carefully hold the ends down with some weights to avoid this.

Defensive Obstacles - Barbed Wire
I thought about making my own barbed wire but then found that it’s very cheap from a number of sources, so that seemed the easiest option.
The width of a standard pencil seems close enough for the diameter of a coil of barbed wire, so I’ve wrapped the wire around this to shape it. I’ve created 4″ lengths which I will fix to the bases when I apply the basing material.
Having done this for all of the bases going to take the barbed wire, I had a nice blister developing on the end of my index finger. Does this count as a hobby related injury?
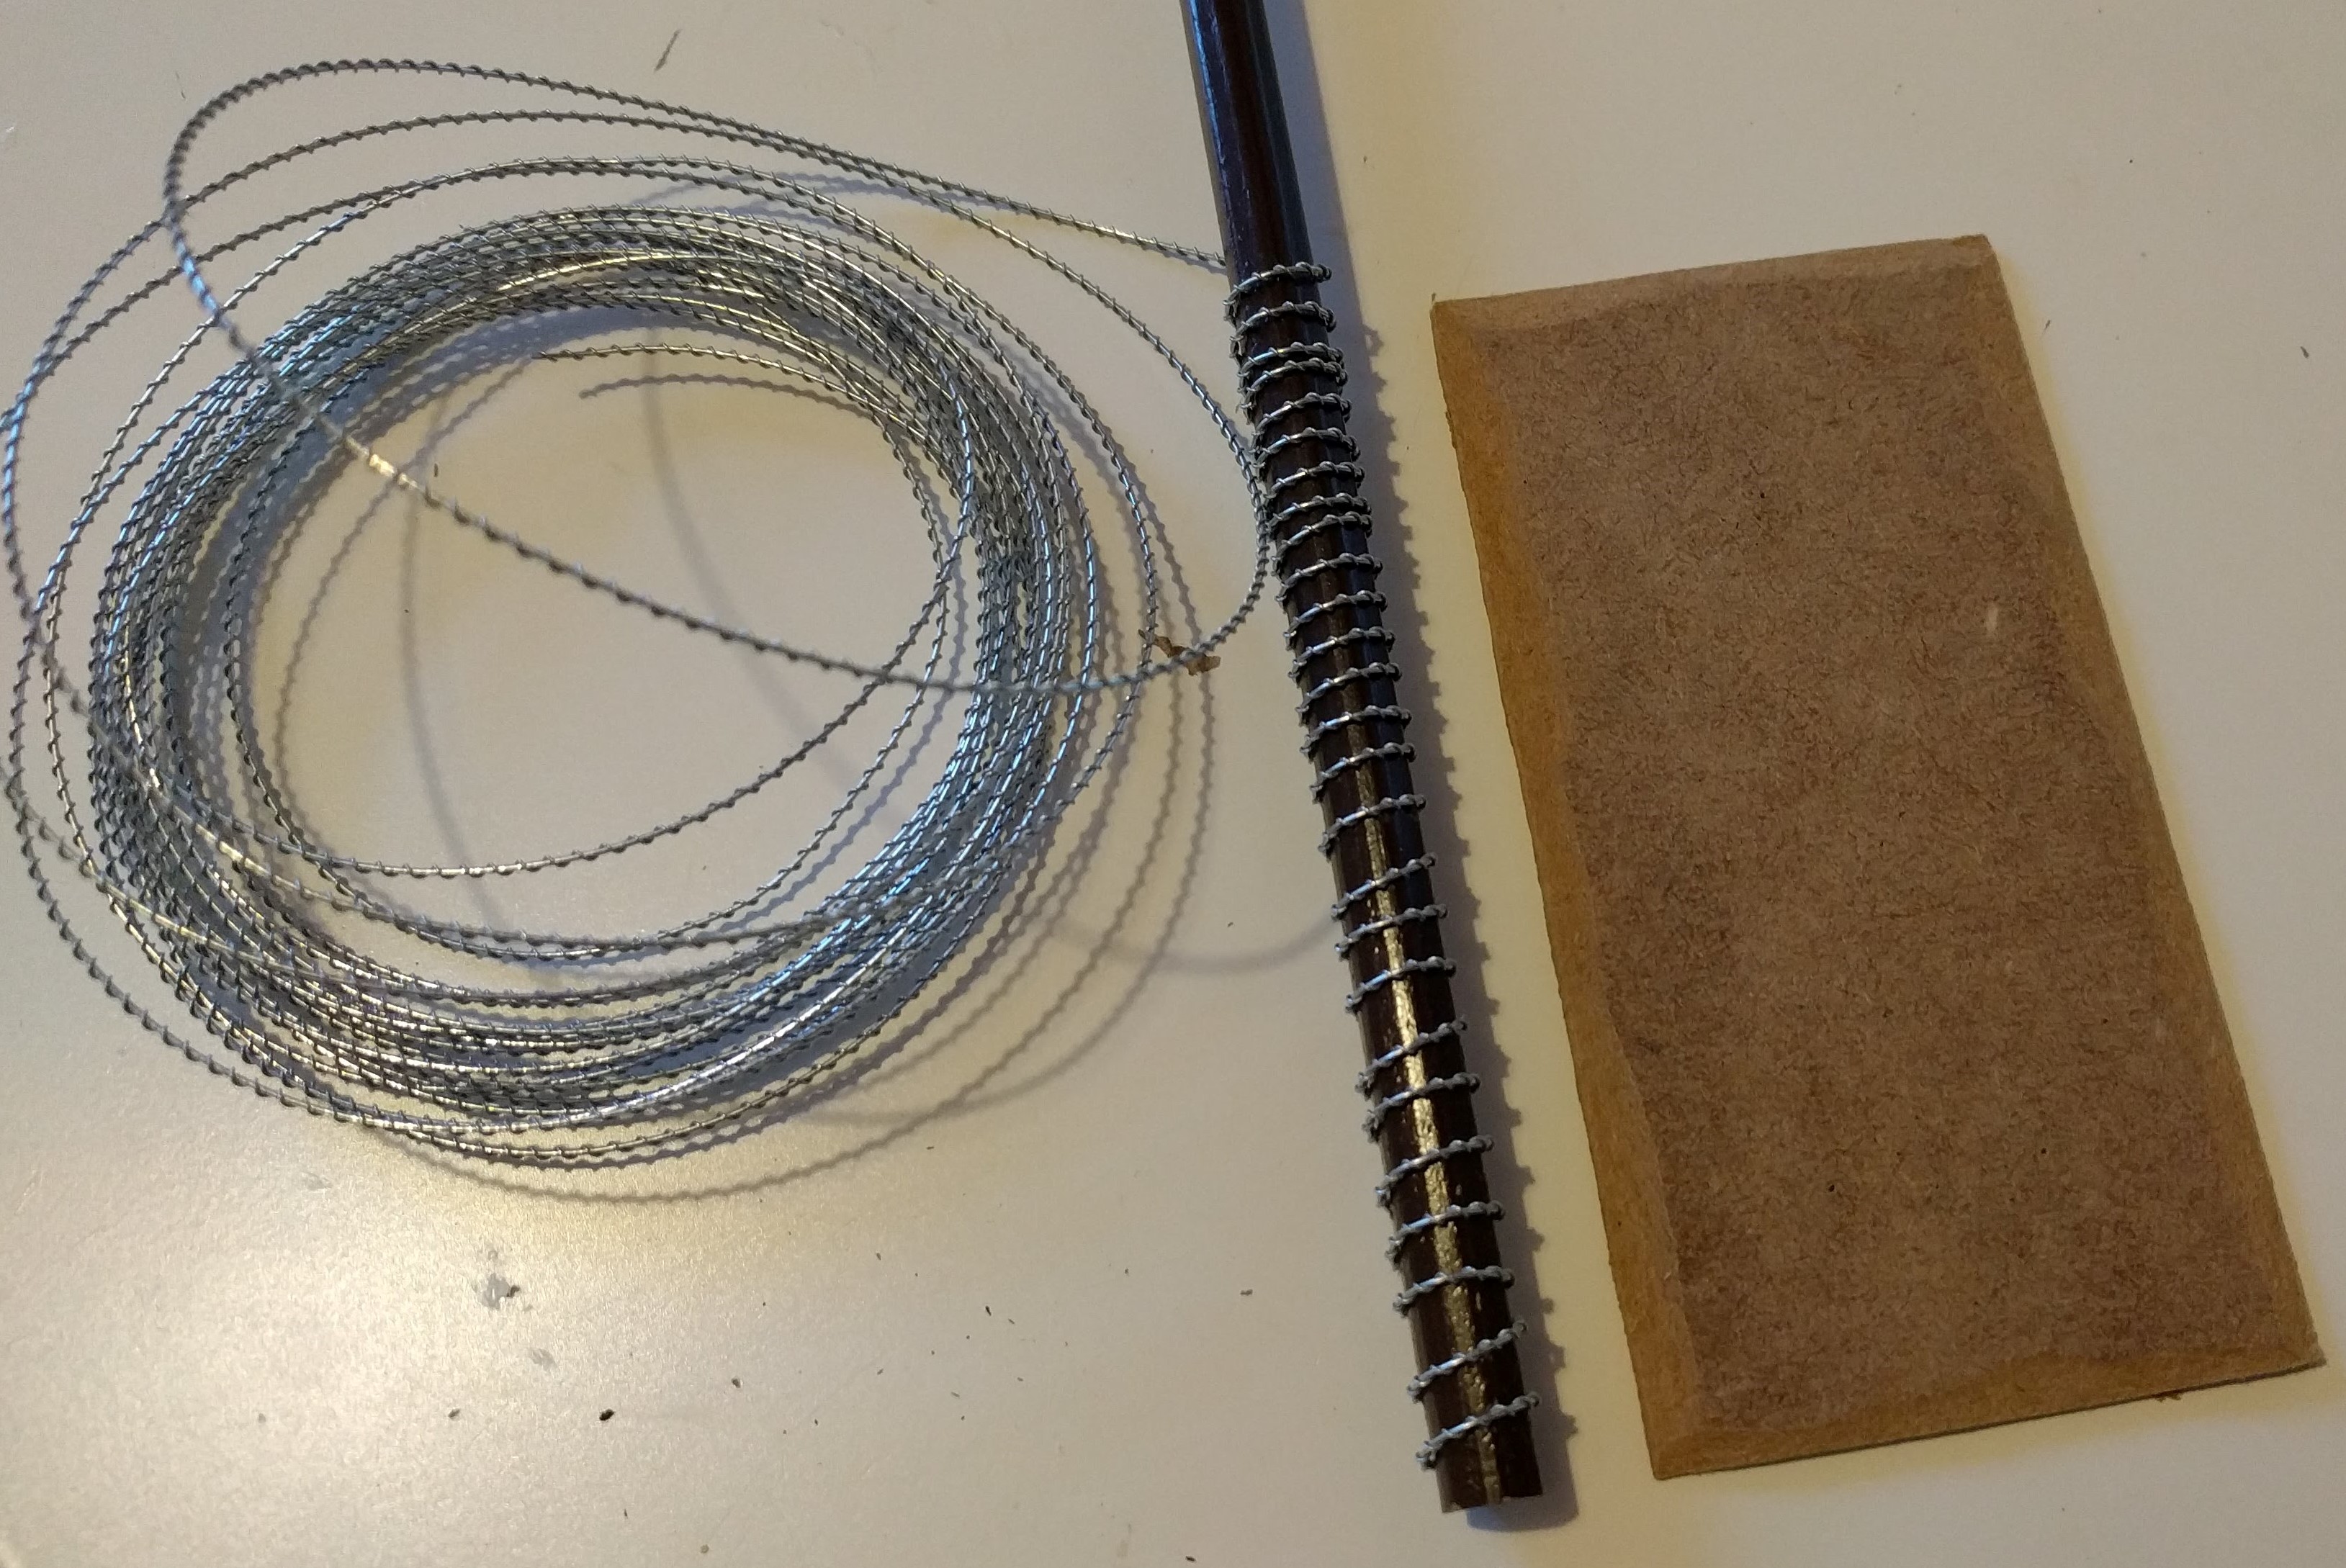 One of the lengths of coiled barbed wire
Defensive Obstacles
The battle for Italy was a series of assaults on heavily defended positions. With the bunkers and machine gun nests complete, I’m going to need plenty of obstacles to slow the attackers down. So I need to make minefields, tank traps and barbed wire entanglements.
I’m going to use the same approach for all of these to keep things simple. And for the minefield, I’m just going to create an area terrain, no signs with skulls on or ‘obvious’ mines buried in the ground.
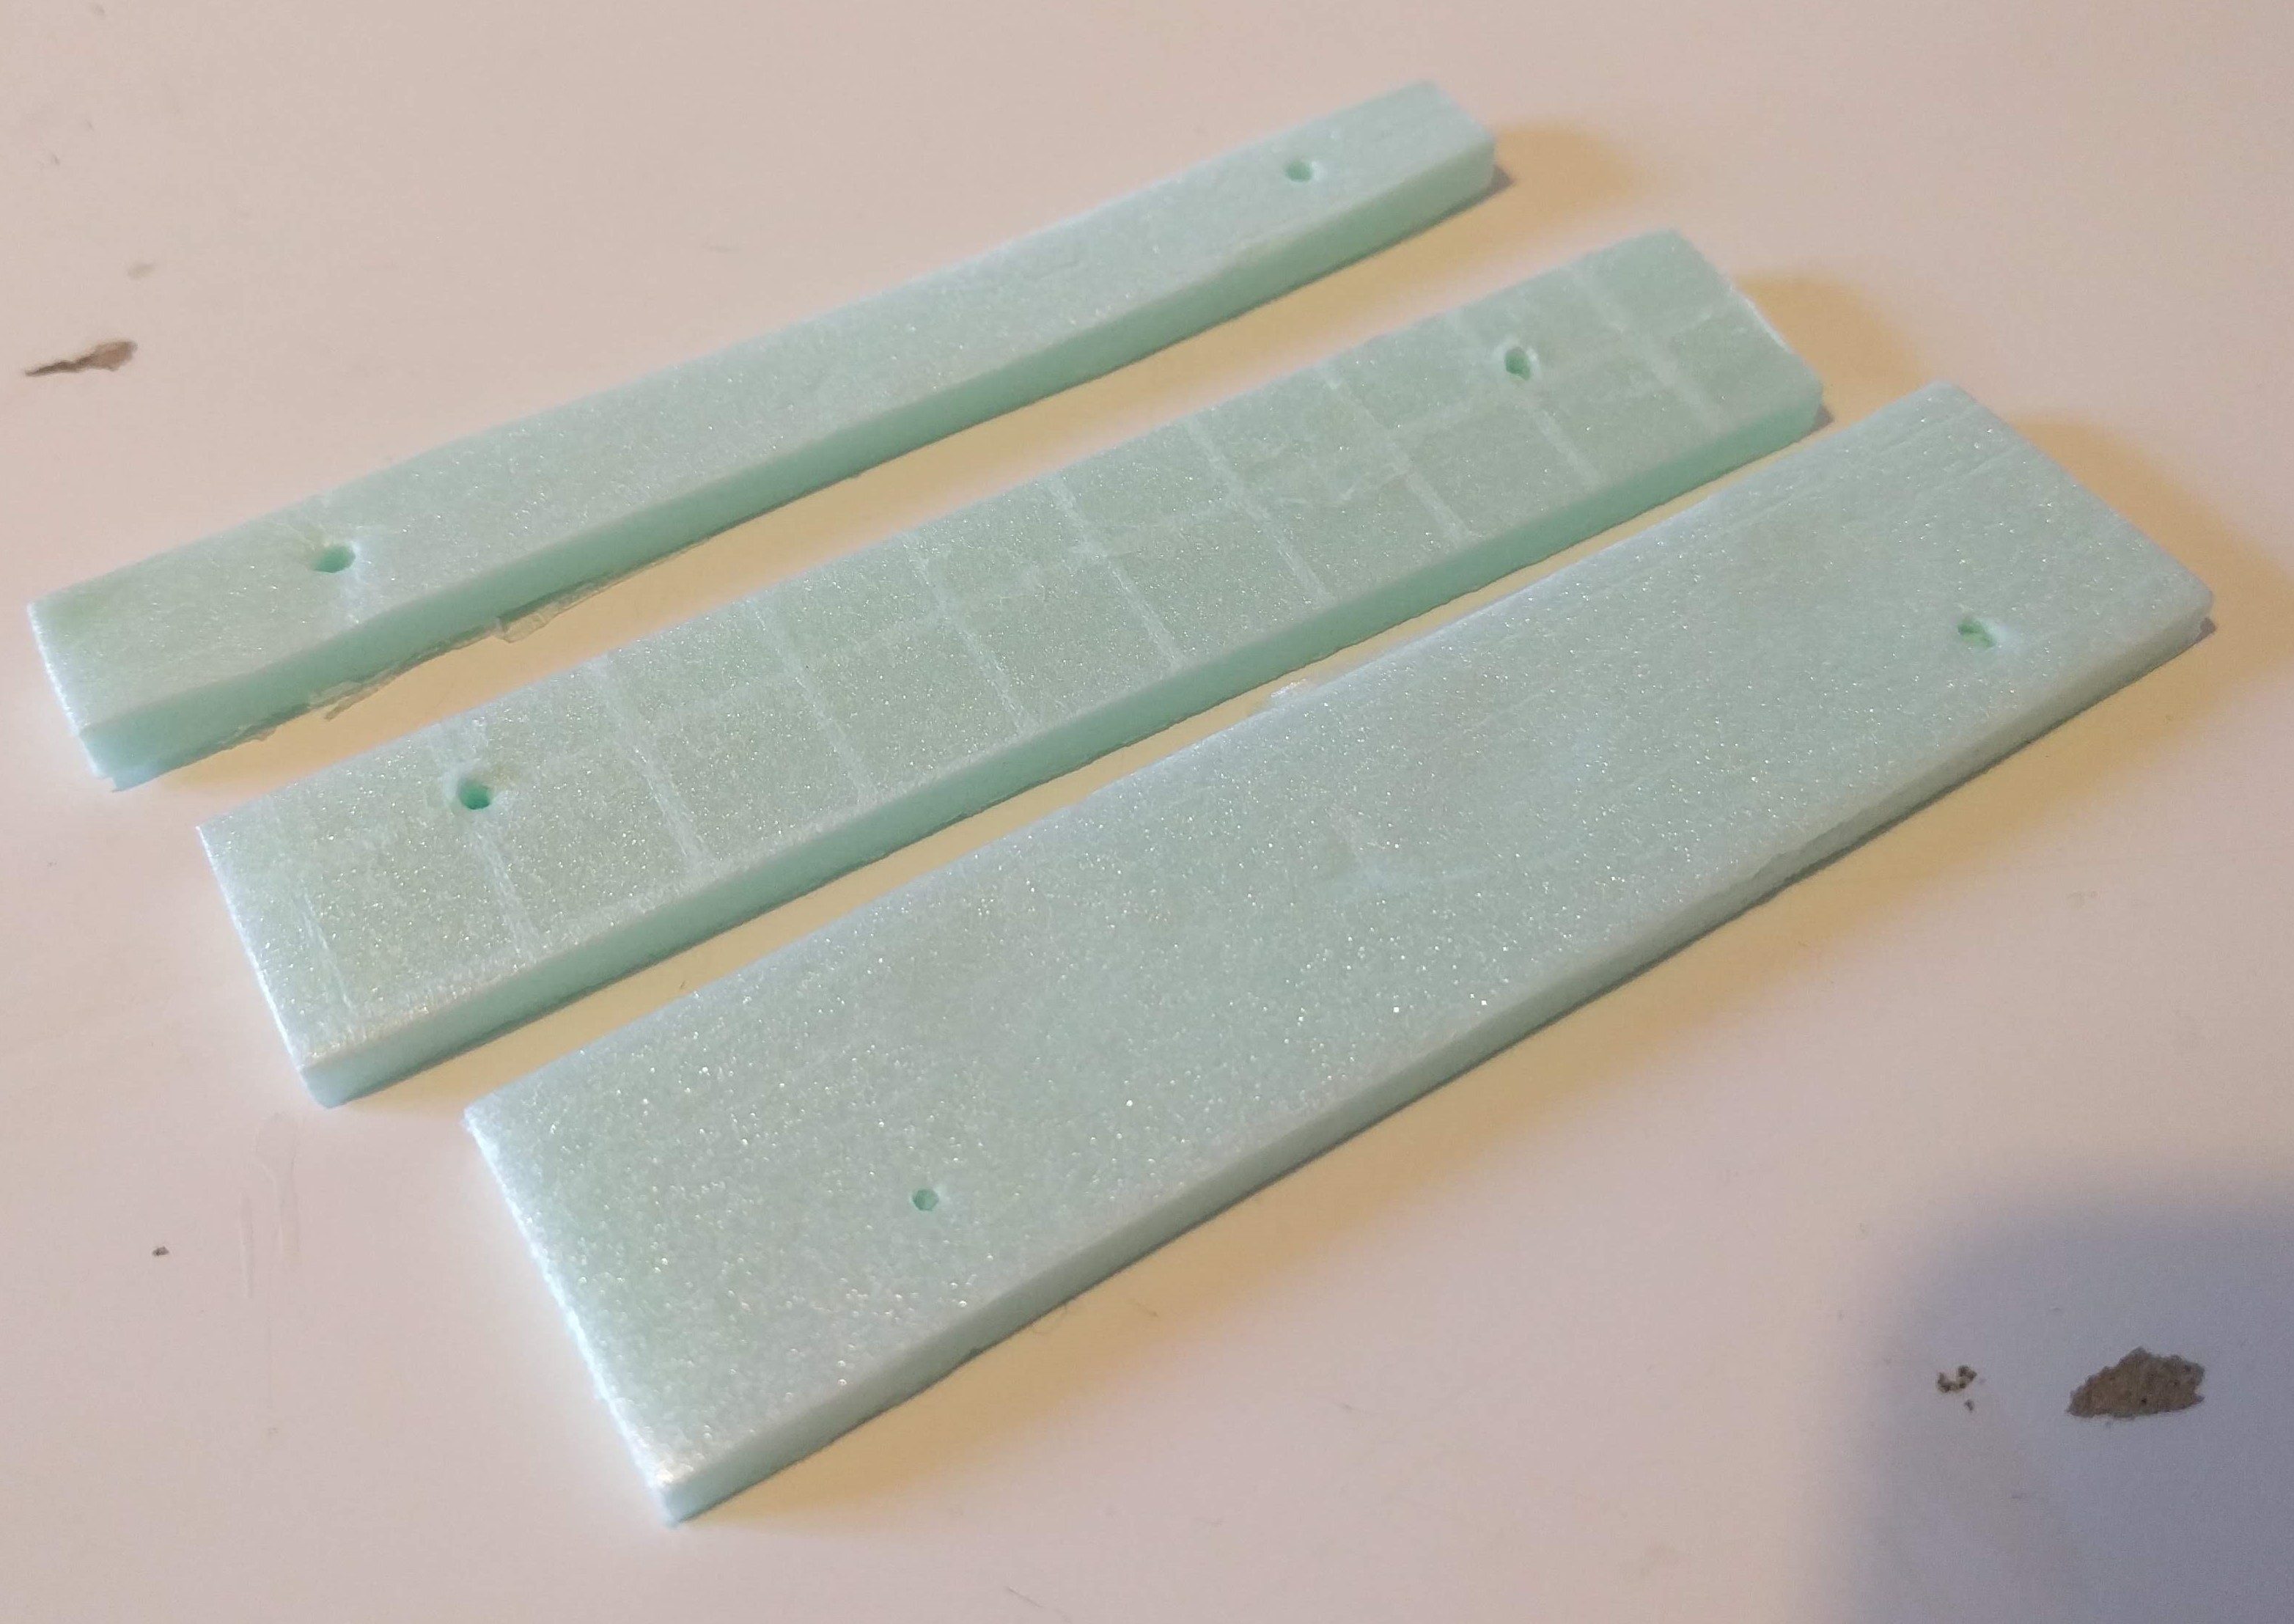
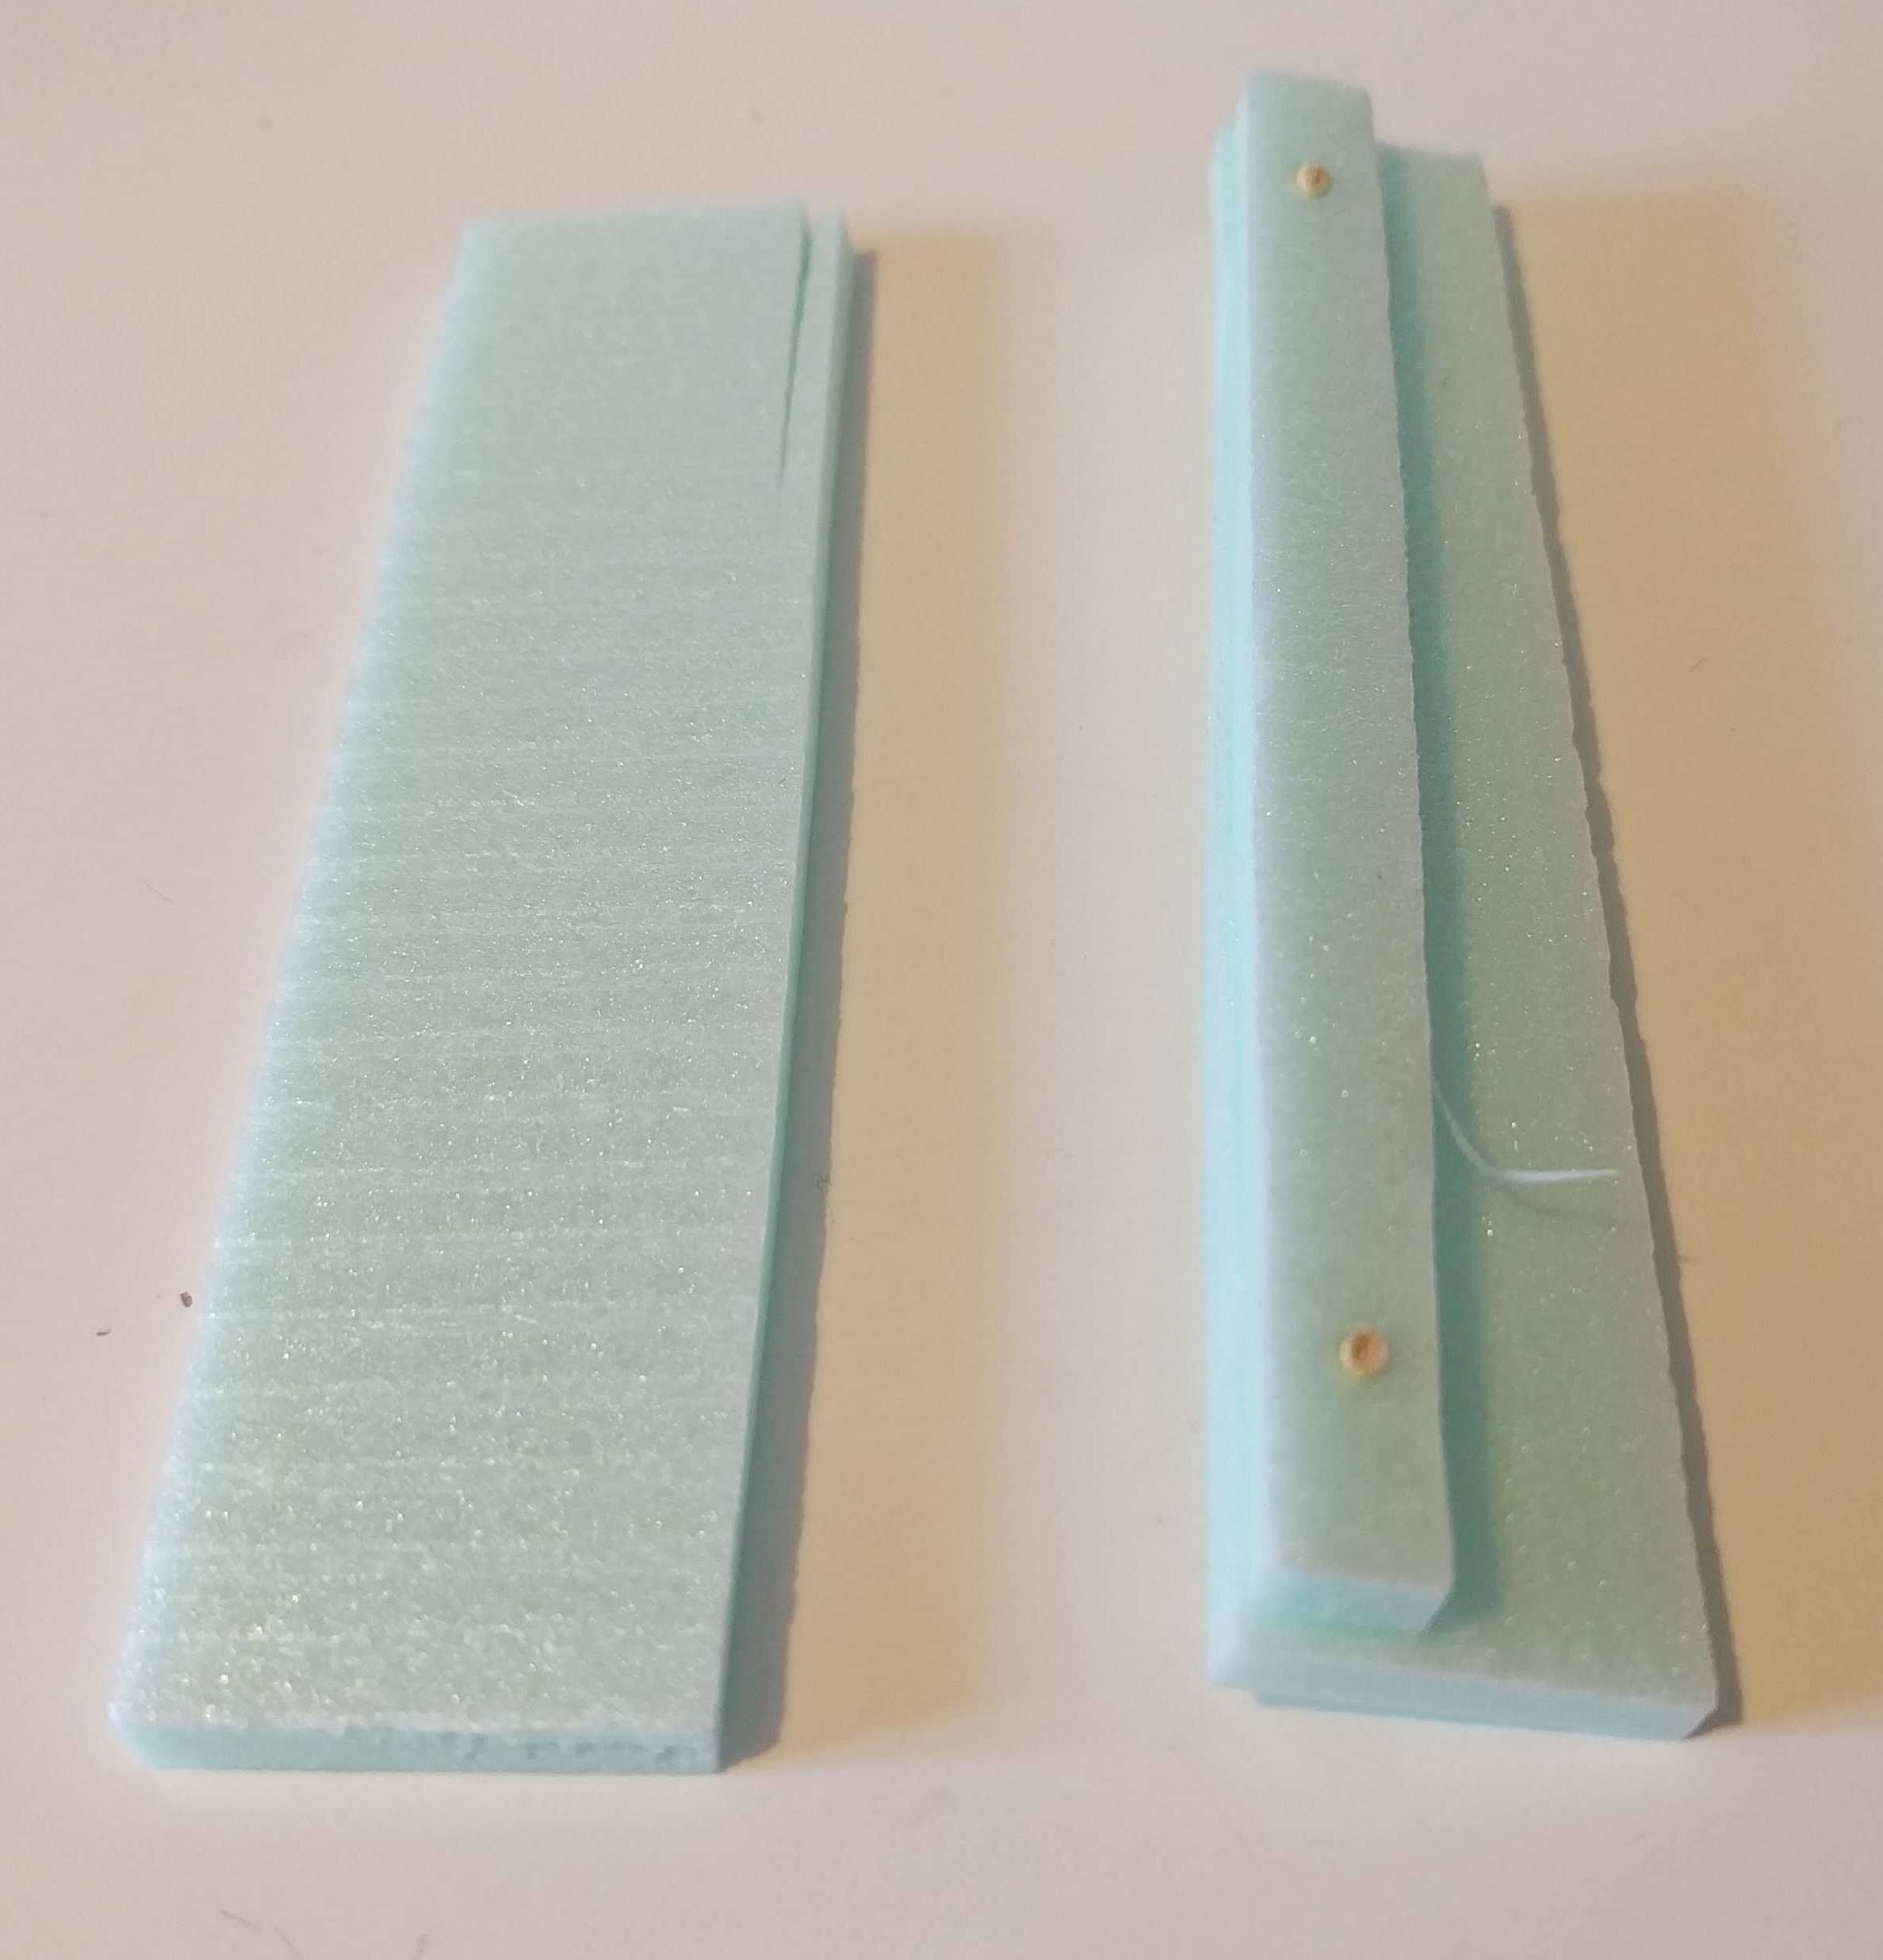
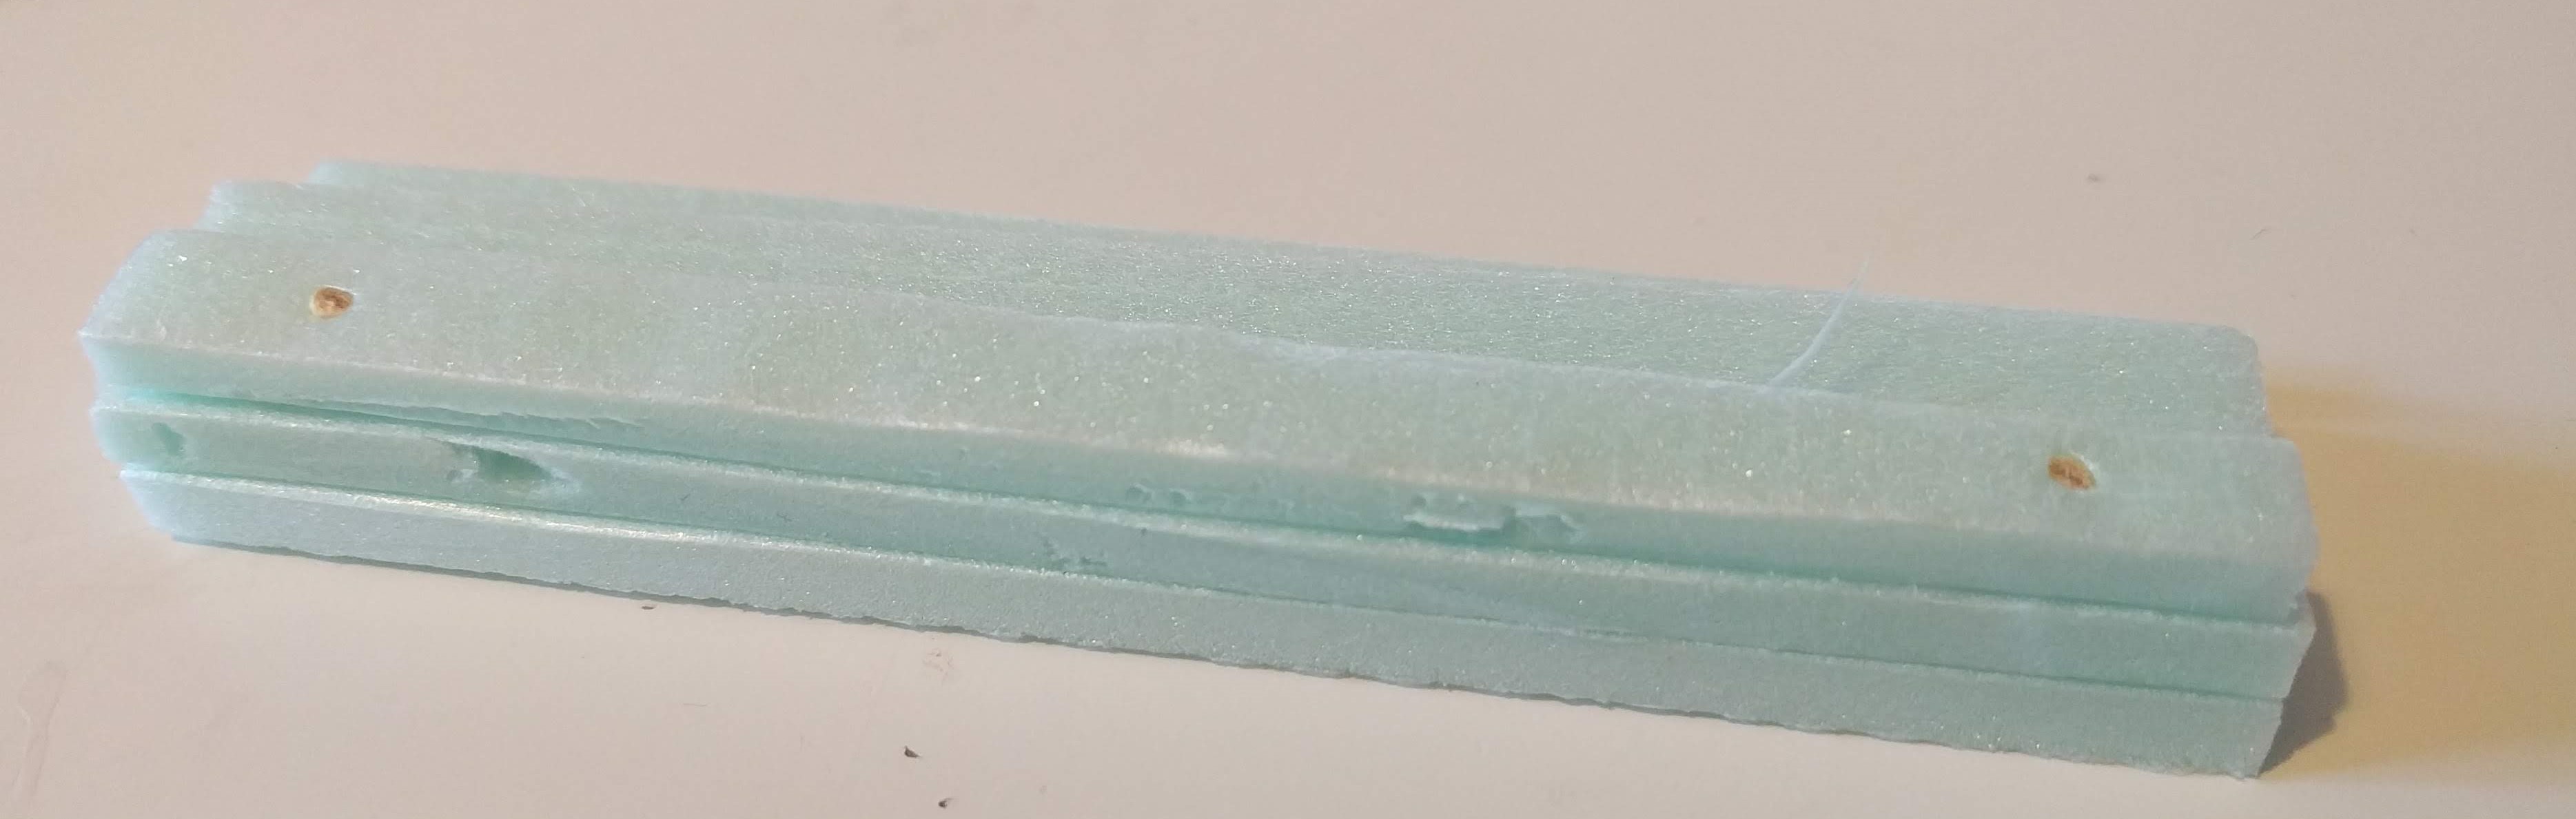
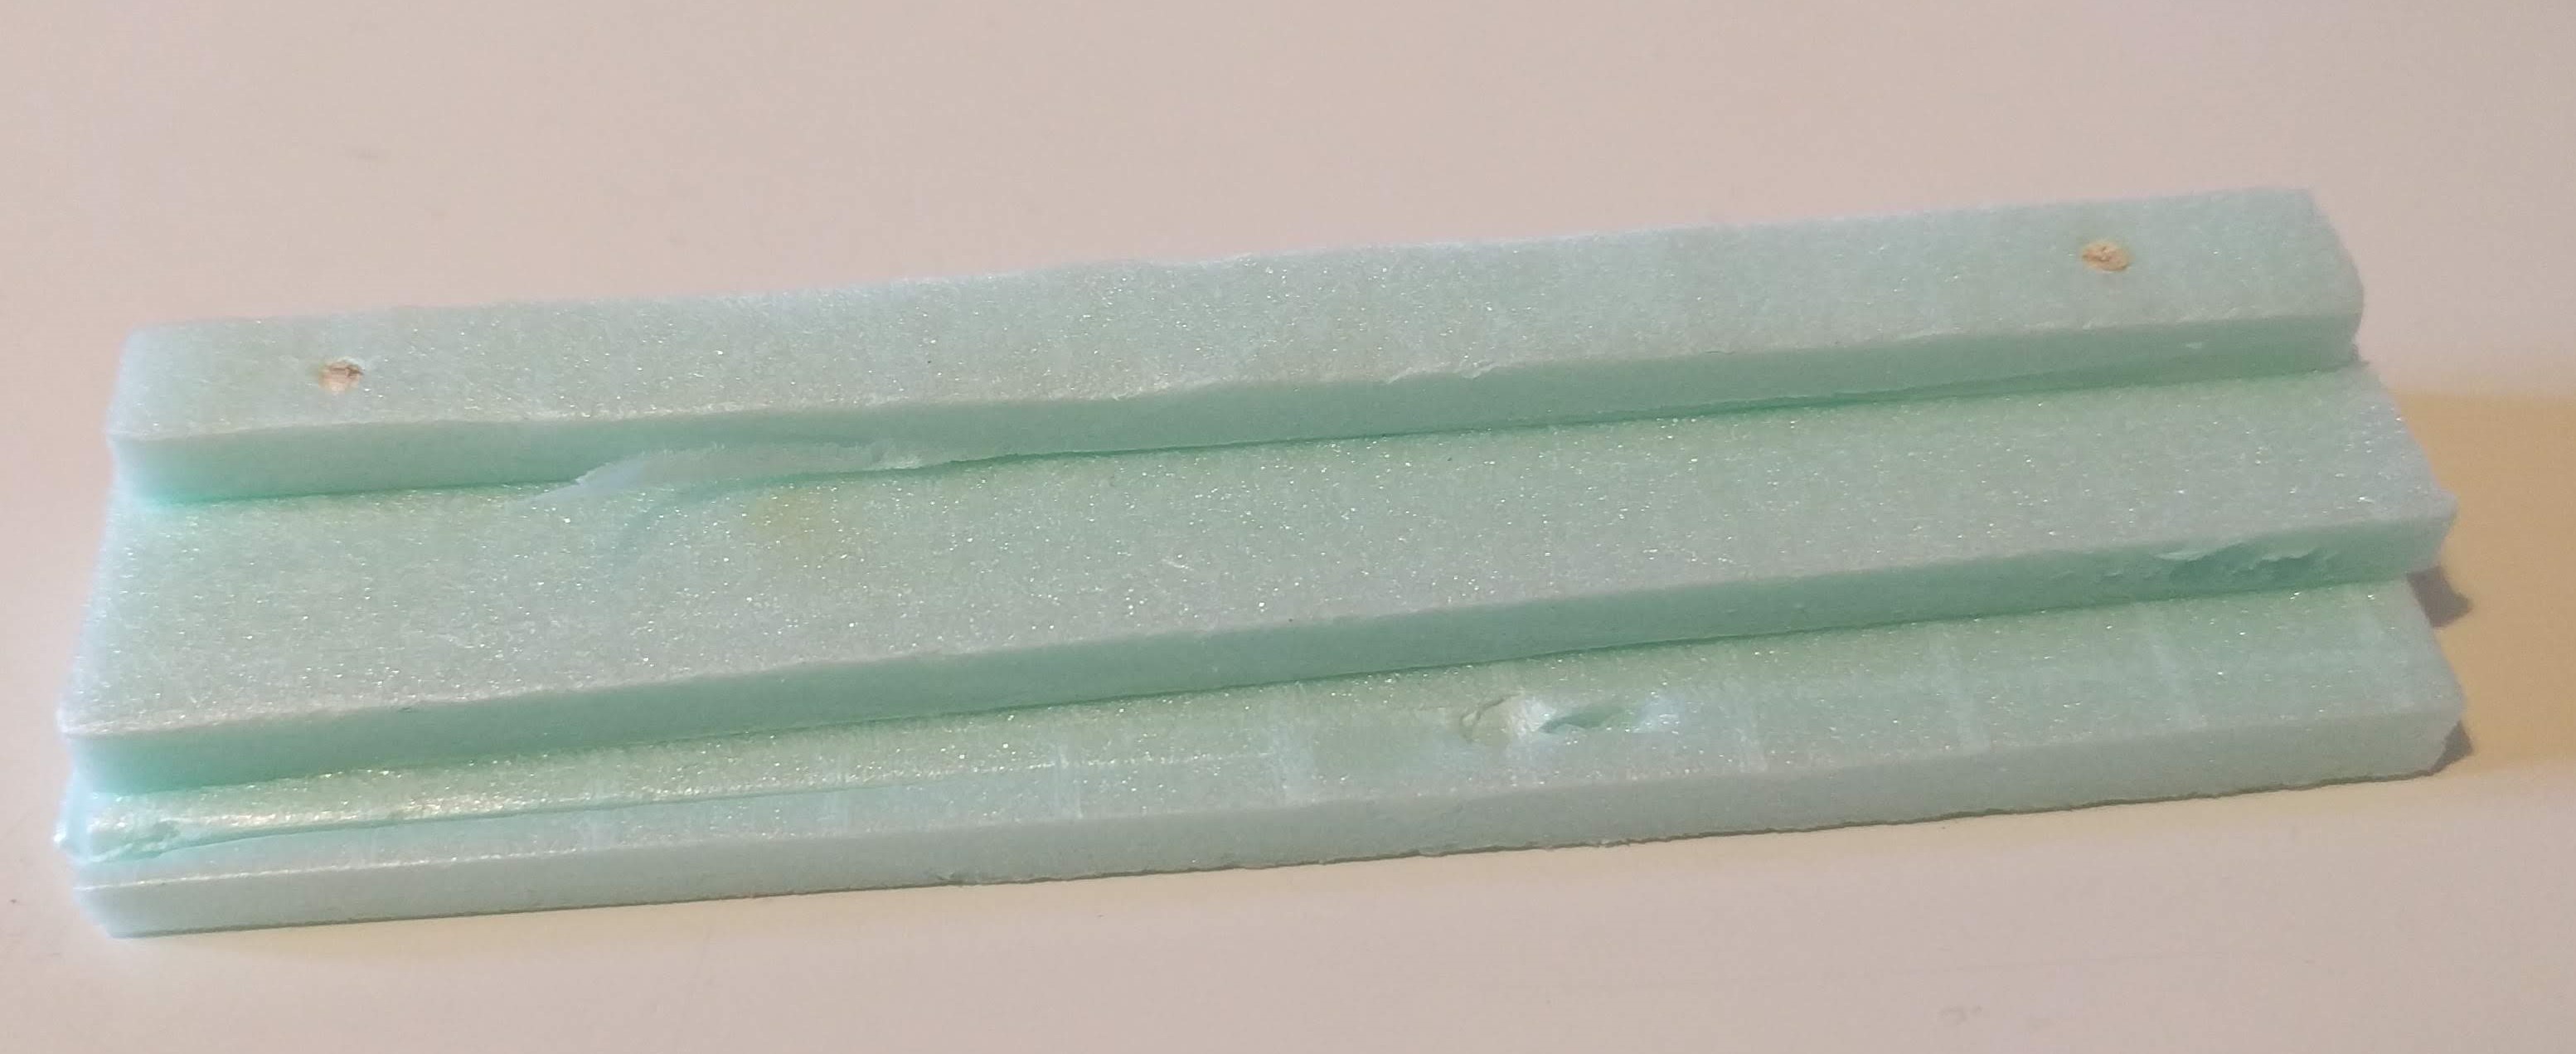
In Flames of War, these area obstacles are usually 2″ by 8″. I will start with some 3mm MDF and cut some bases to the above dimensions. I will also cut a few to 2″ by 4″ so that they can fit around other terrain. I’ve chamfered the edges so that it will eventually blend in with the table.

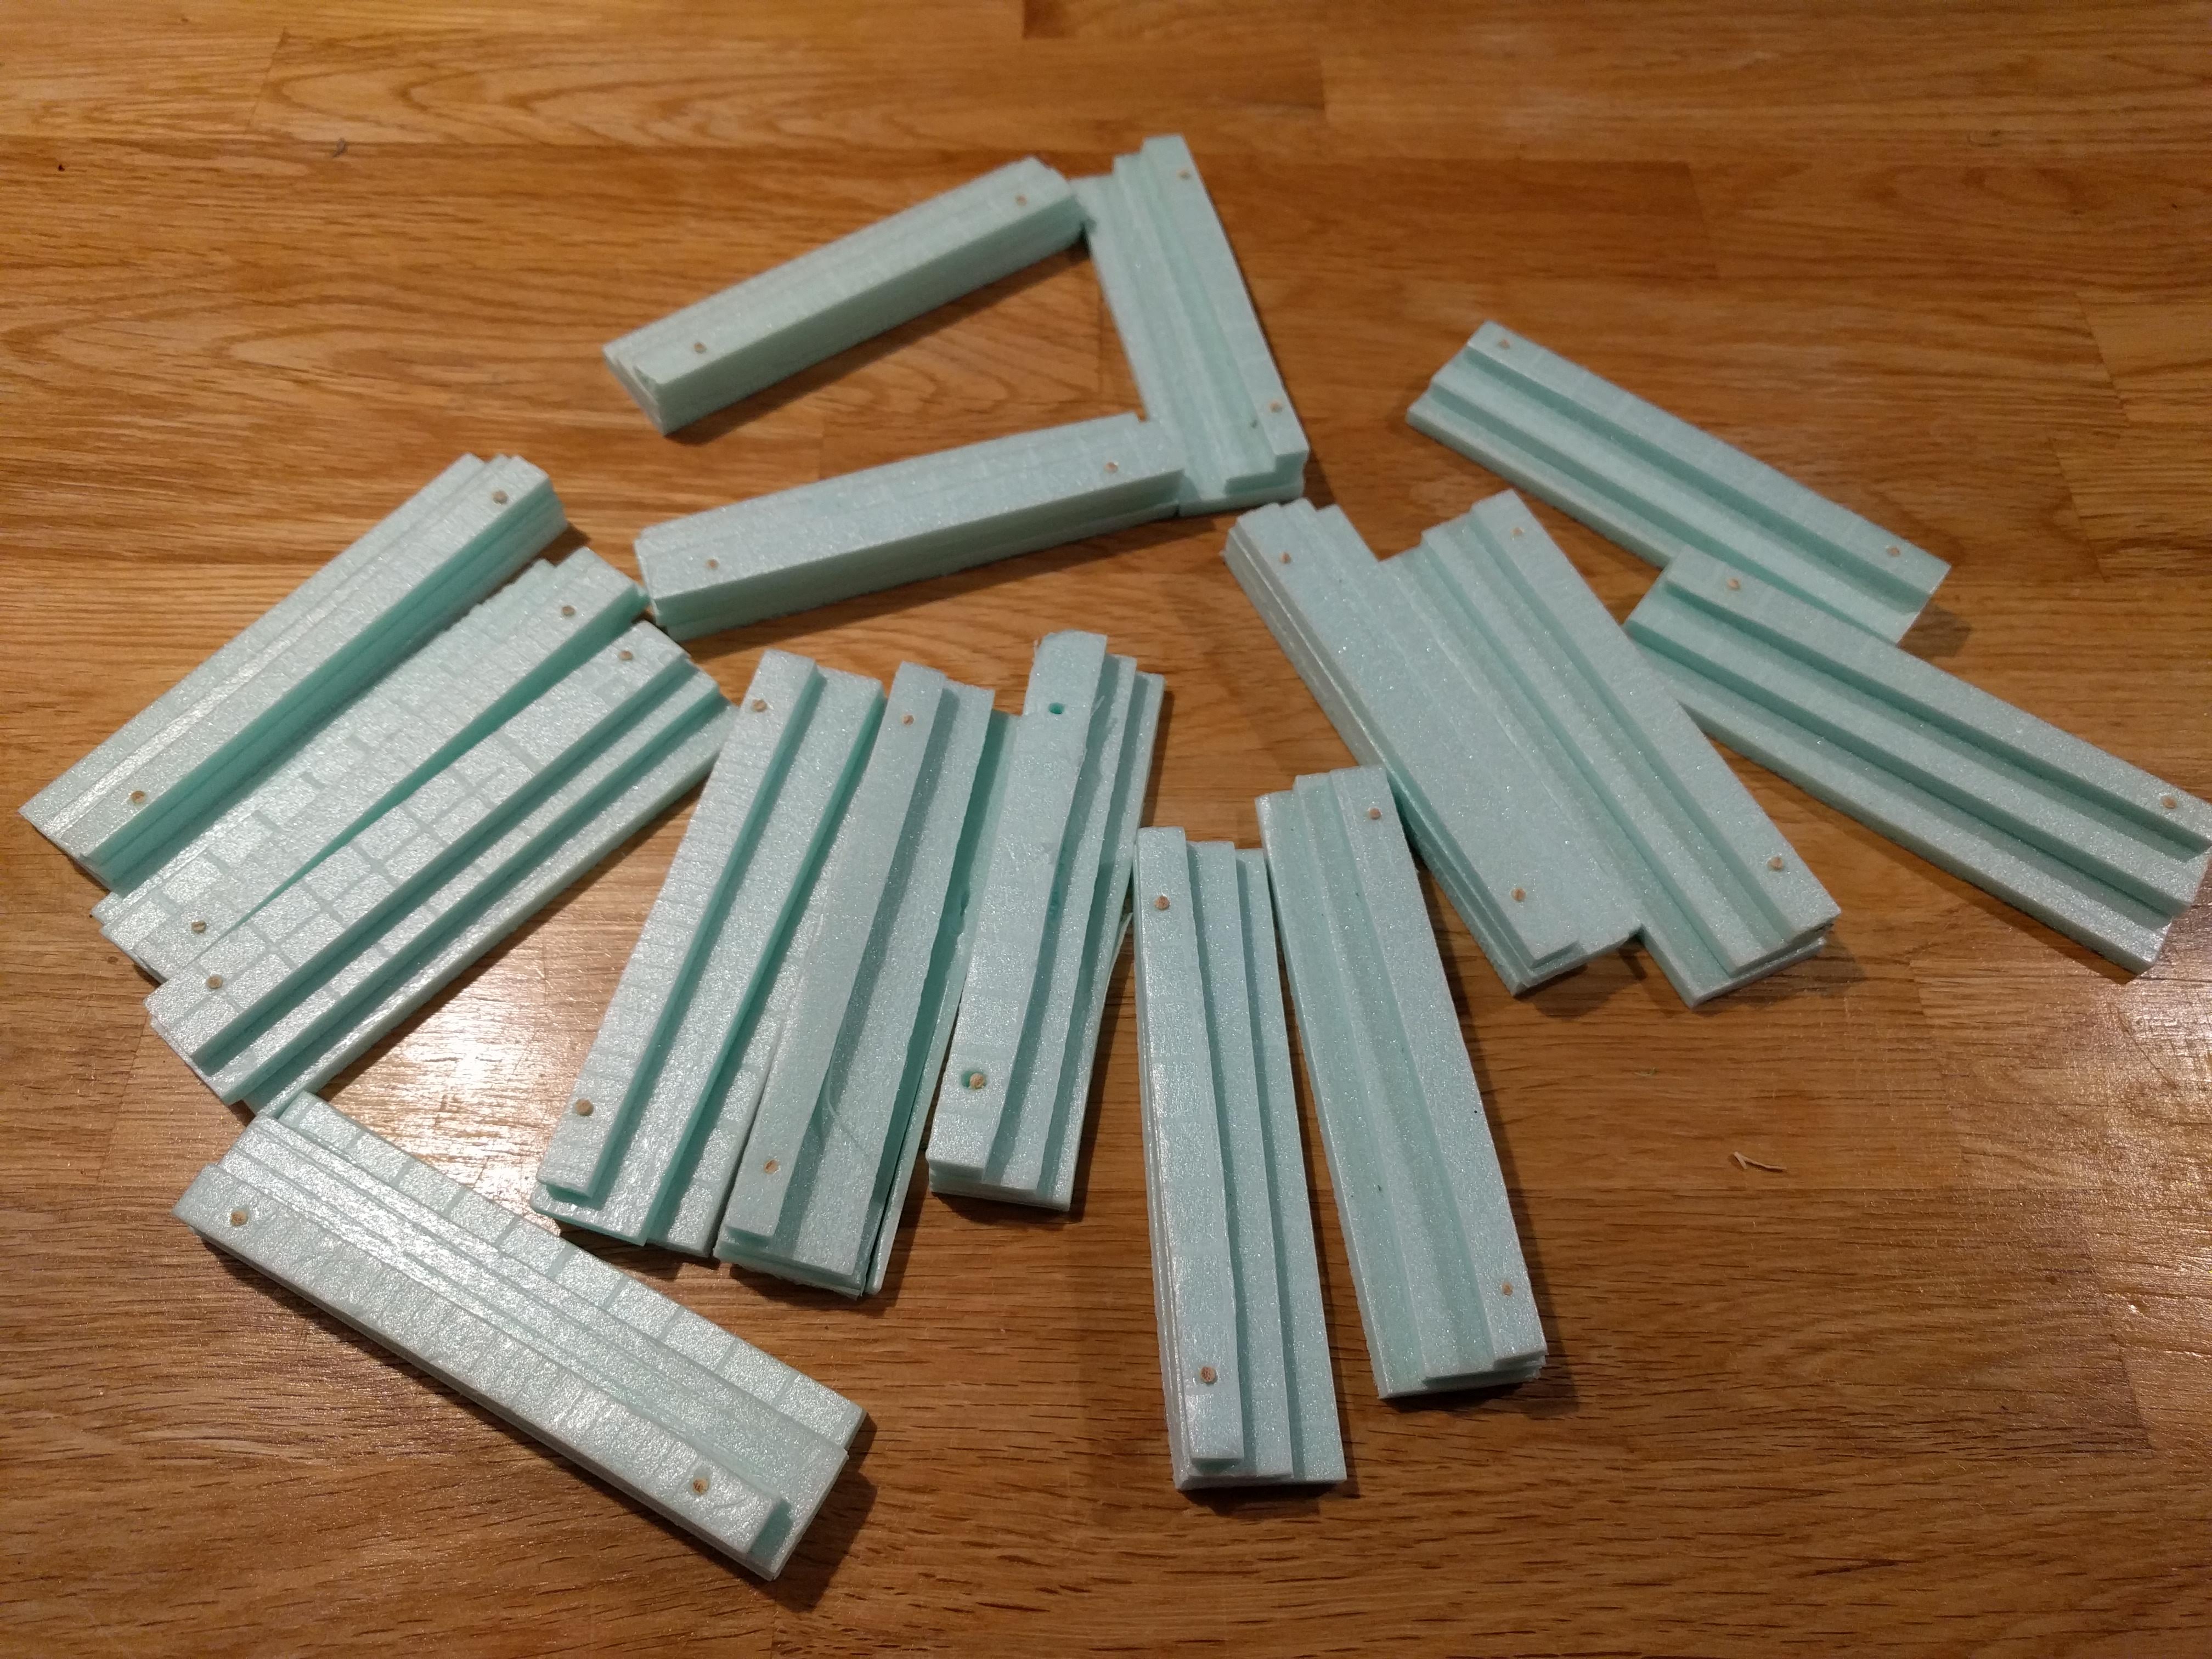
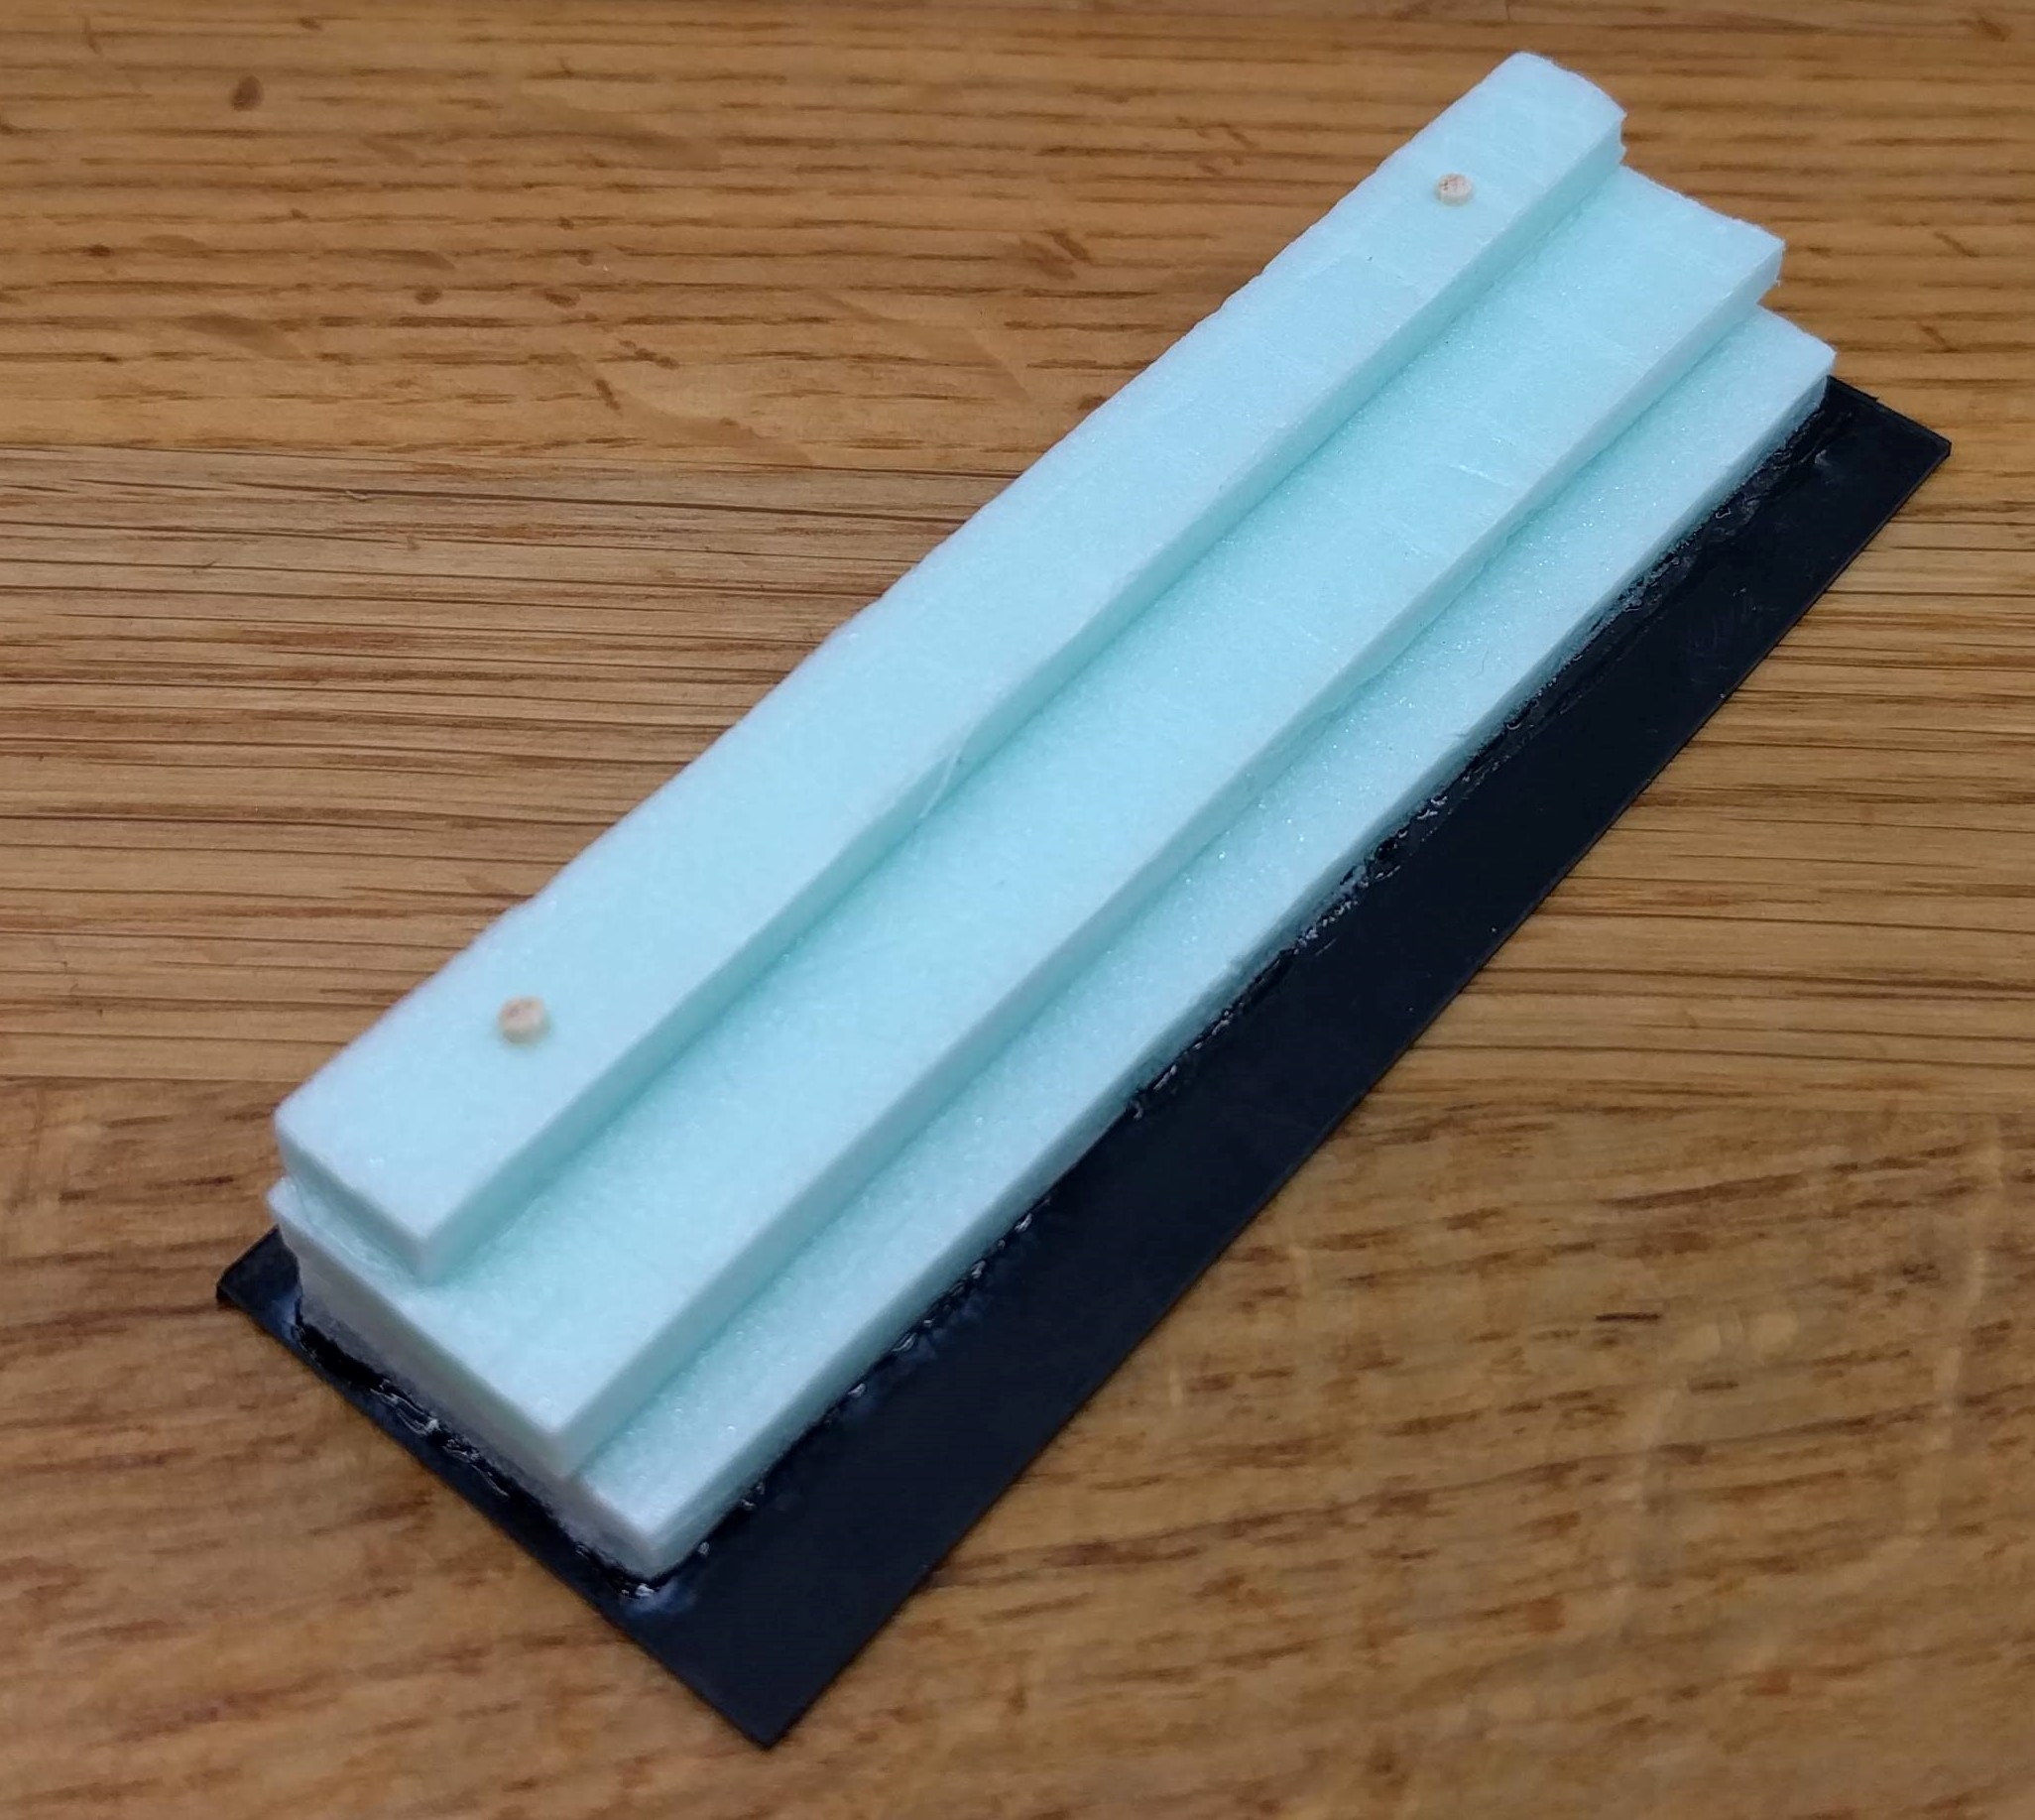
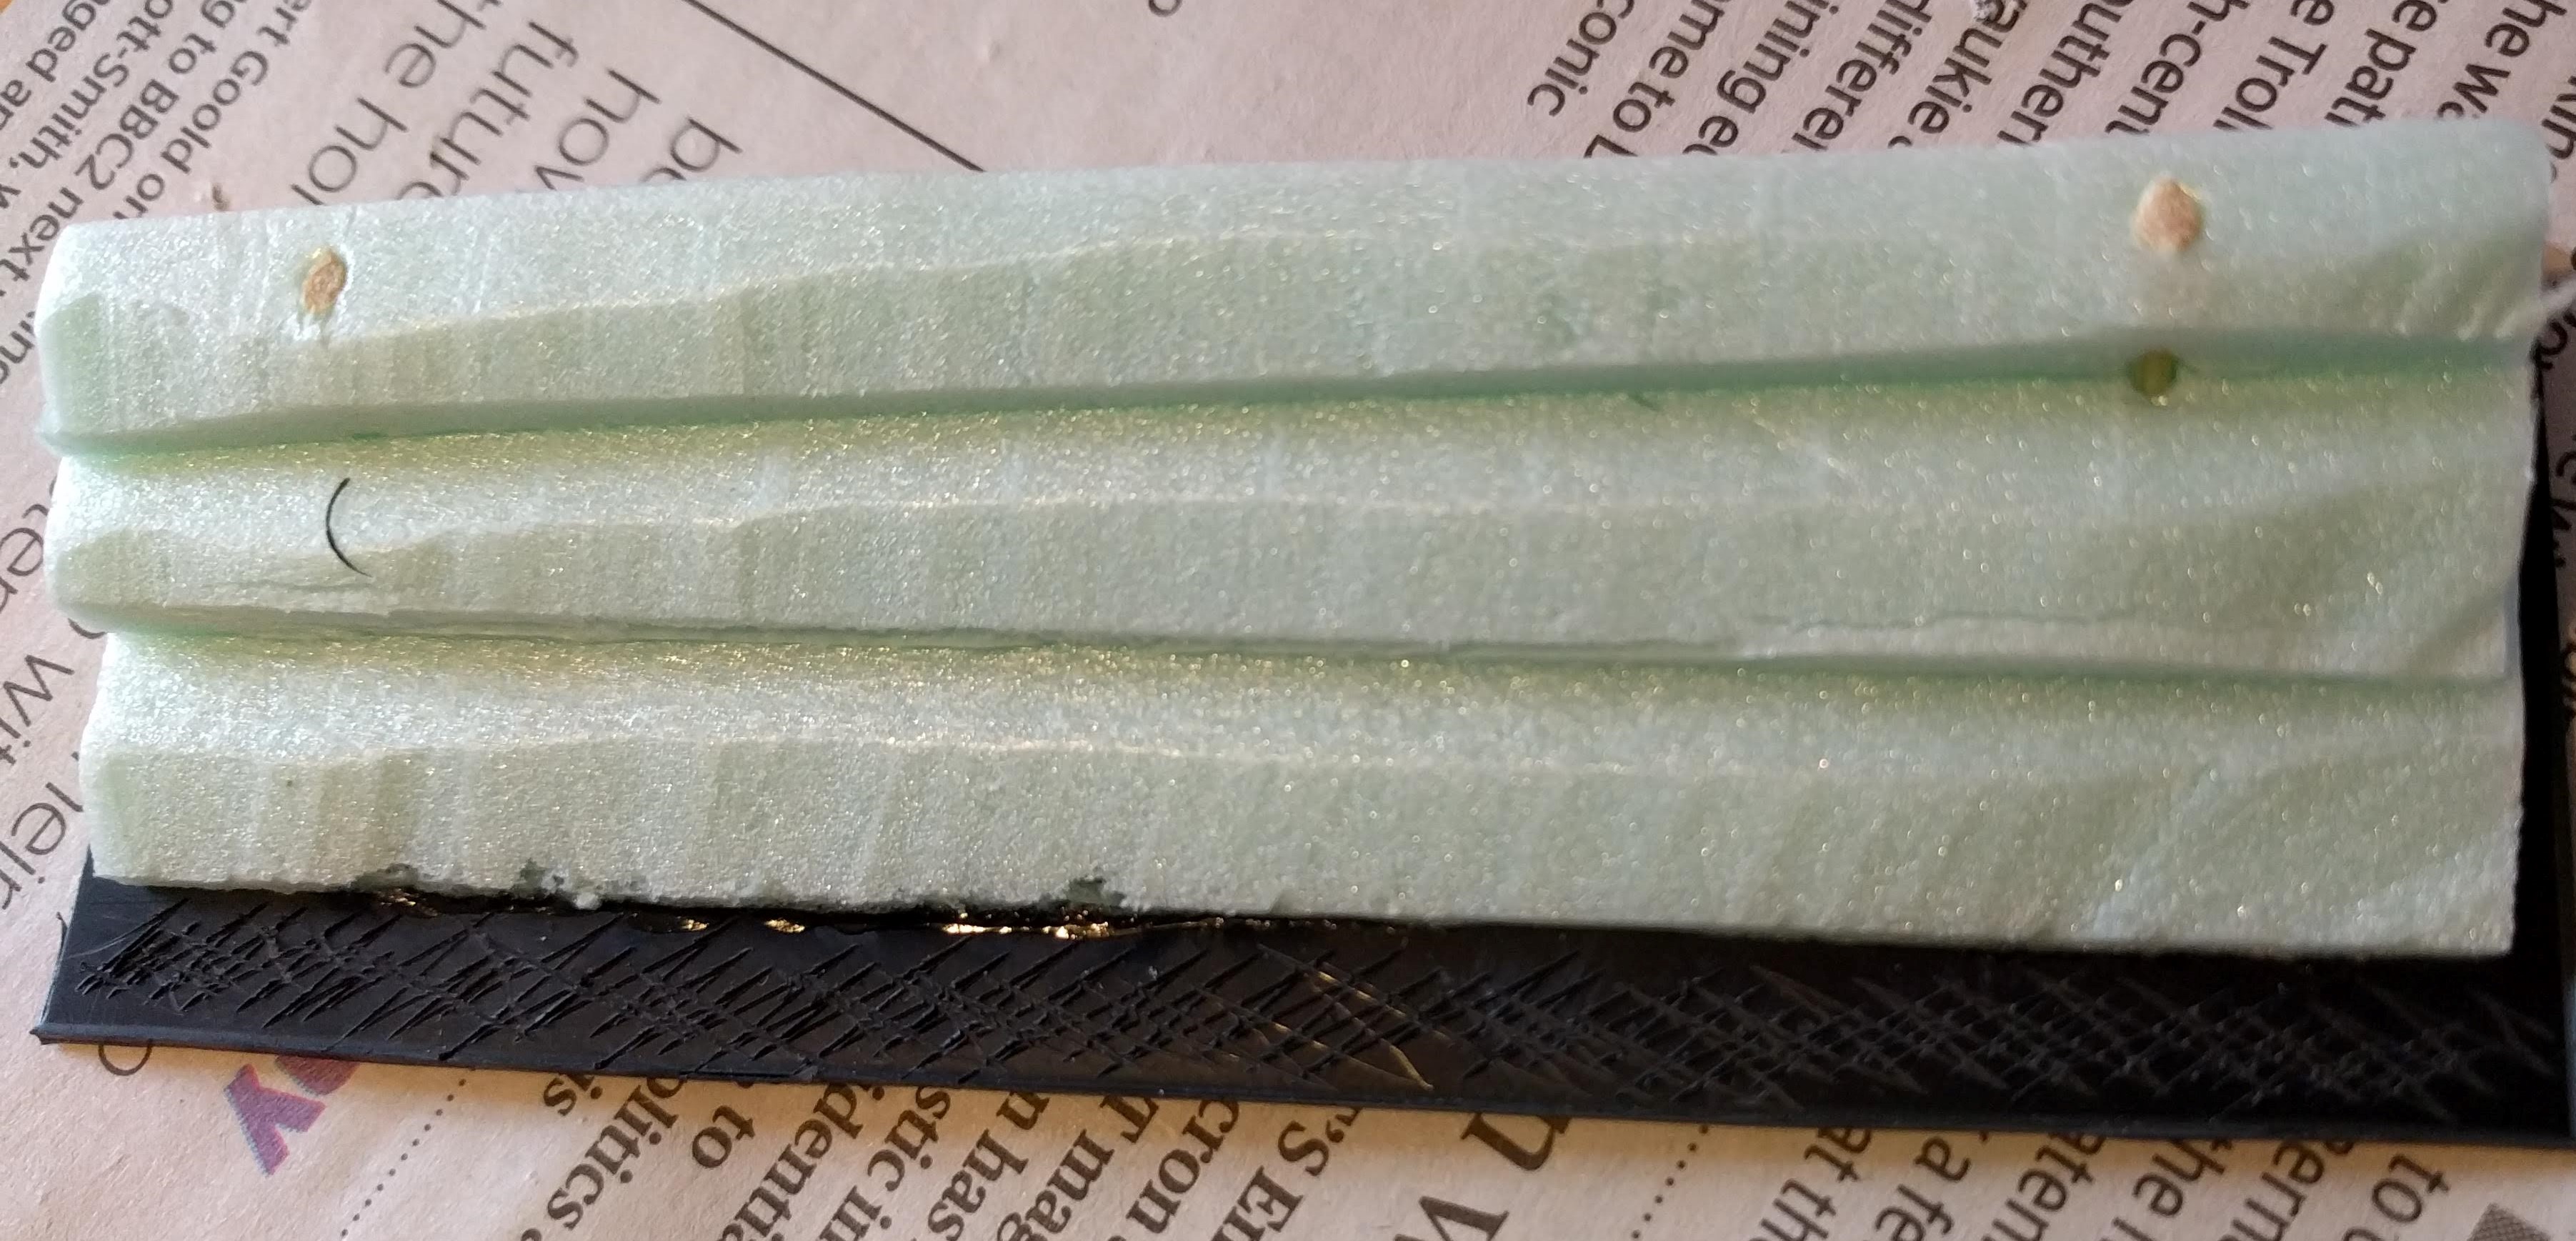
The tank traps and the supports for the barbed wire will be made out of tile spacers. I bought a bag of 200 of the smallest spacers I could find from my local tiling shop for a couple of quid. These are 2mm in width (ideal) but have a bit more depth to them than I would like.
In the picture below, you can see on the left an original spacer. I’ve then trimmed the ends off so that they are about 6mm in length. The one in the middle will be used for the tank trap and the one on the right will be used for the barbed wire.
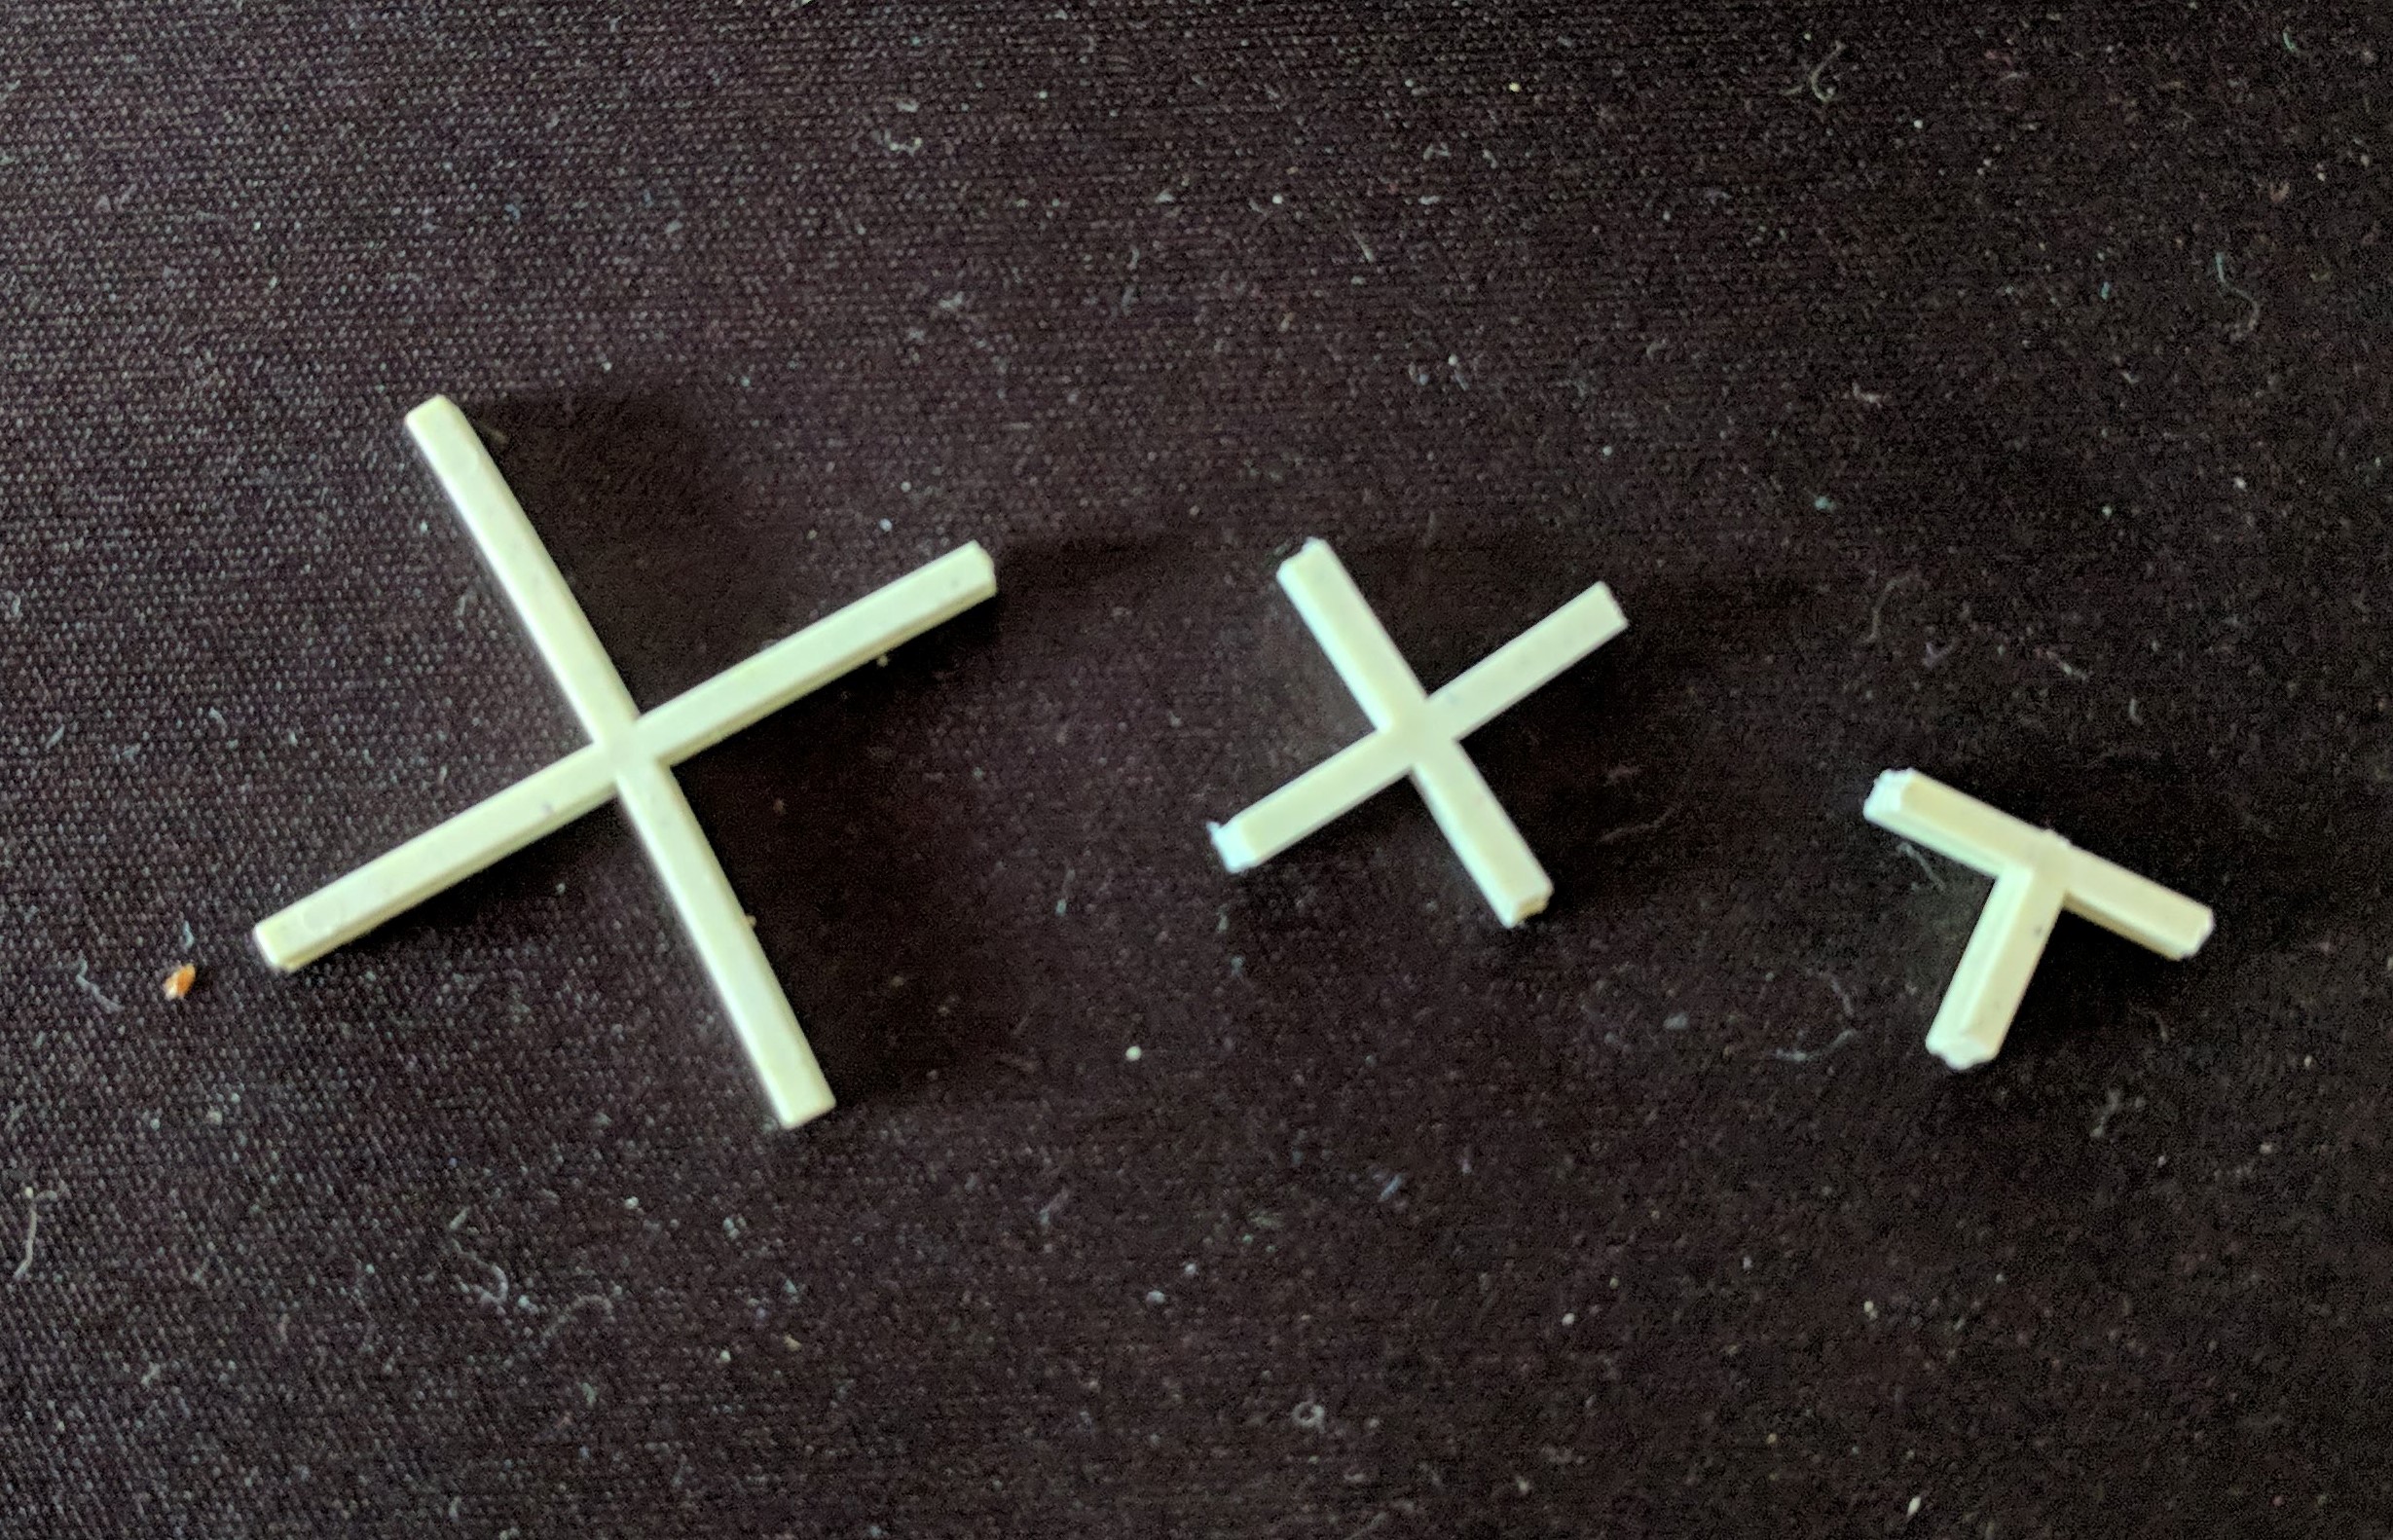 The tile spacers. In the middle and right, cut to the correct size.
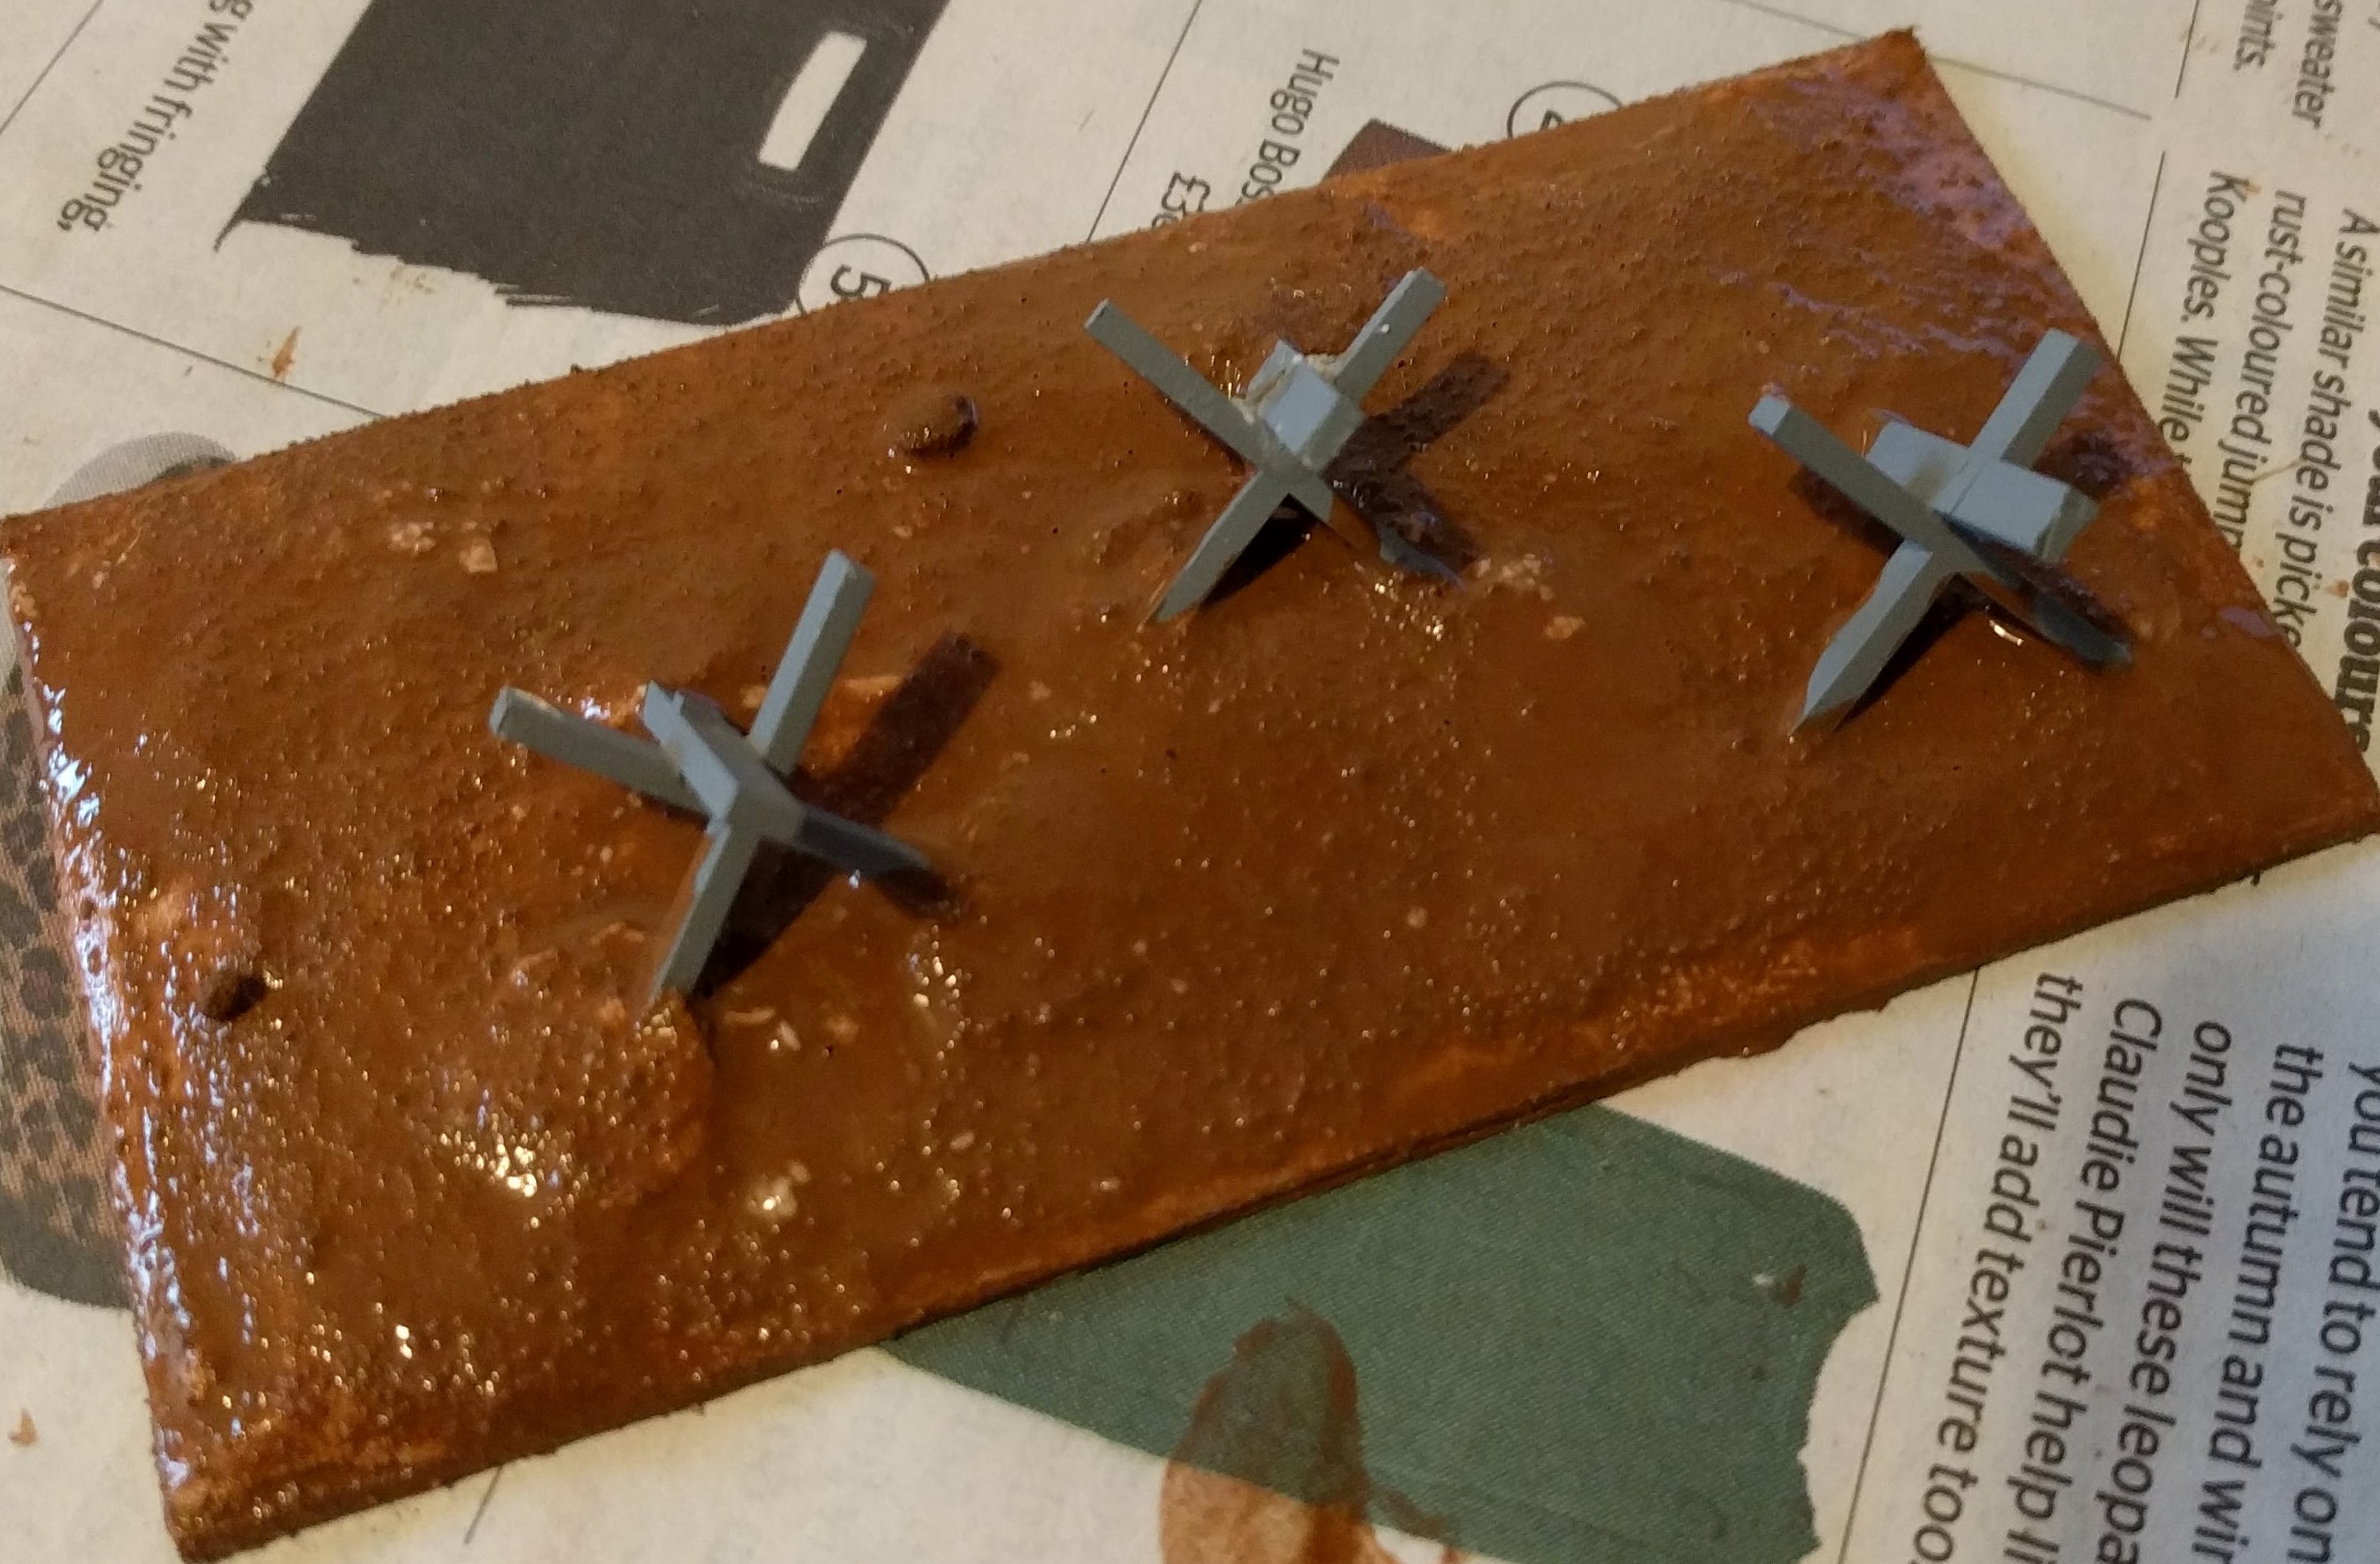
The tank traps need two spacers glued together to create a cross shape. Everything was then primed with my cheap, trusty Halfords grey primer.
These are now ready to be added to the base.
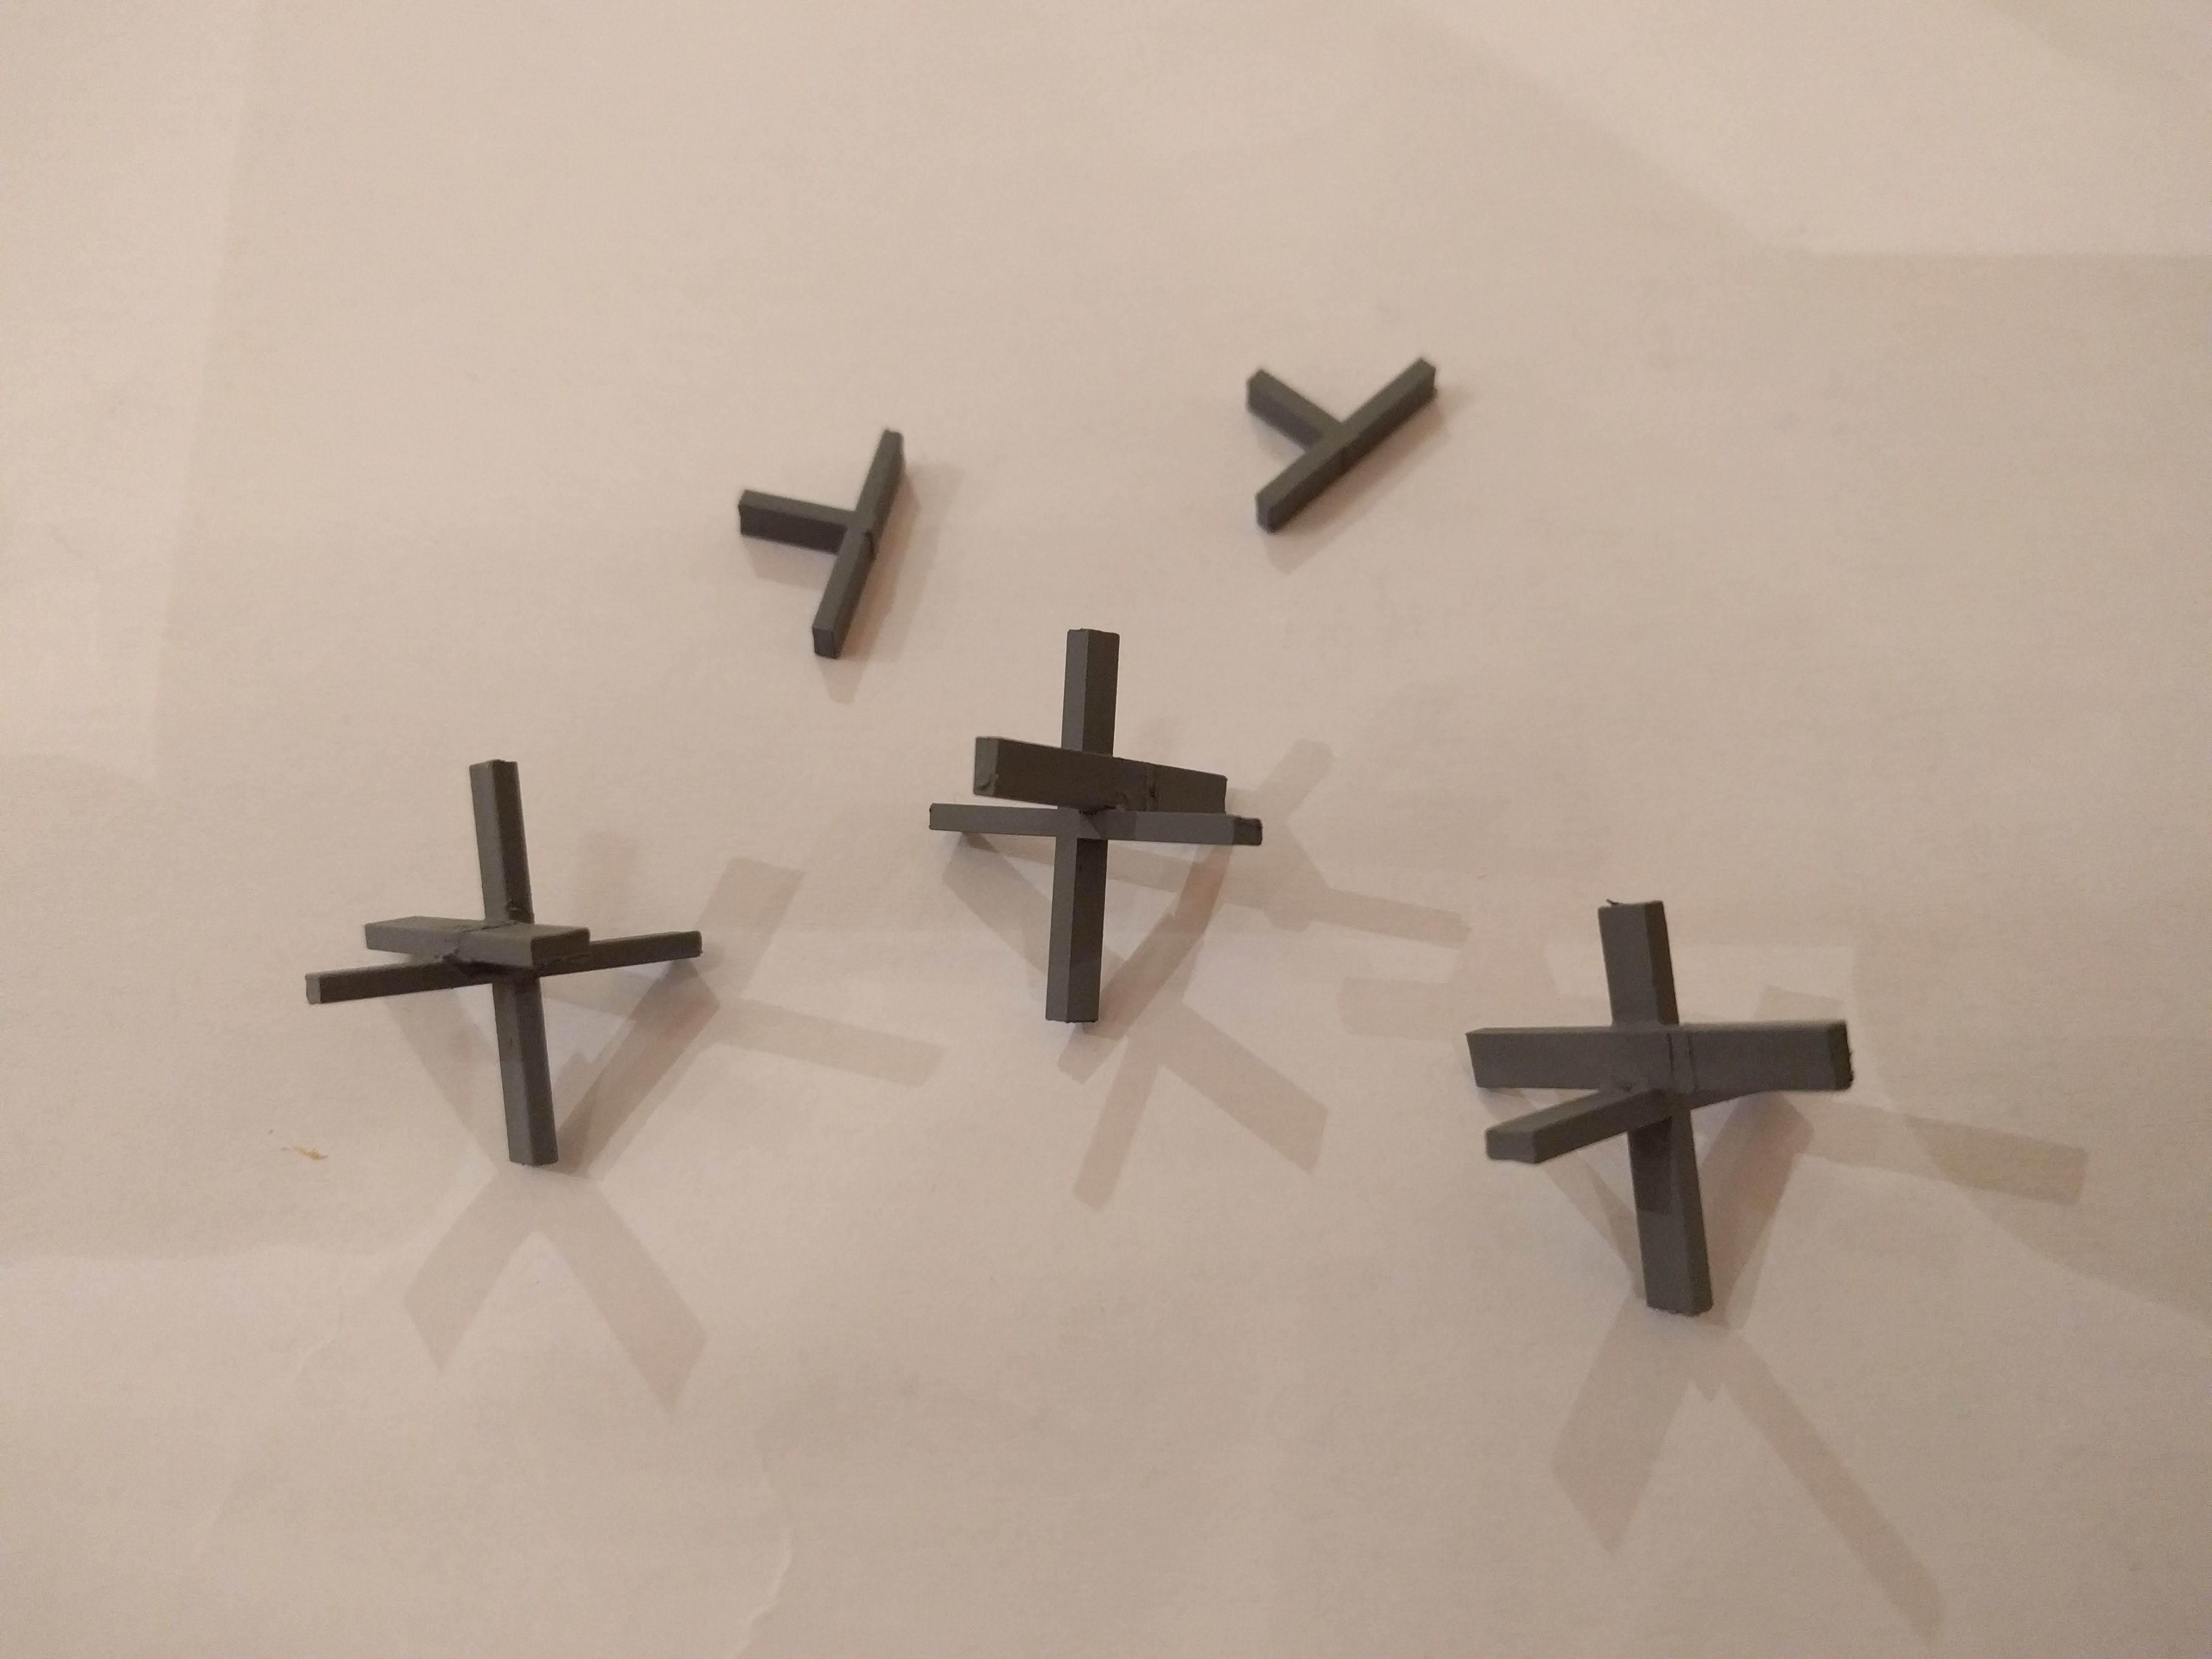 Primed and ready to go.
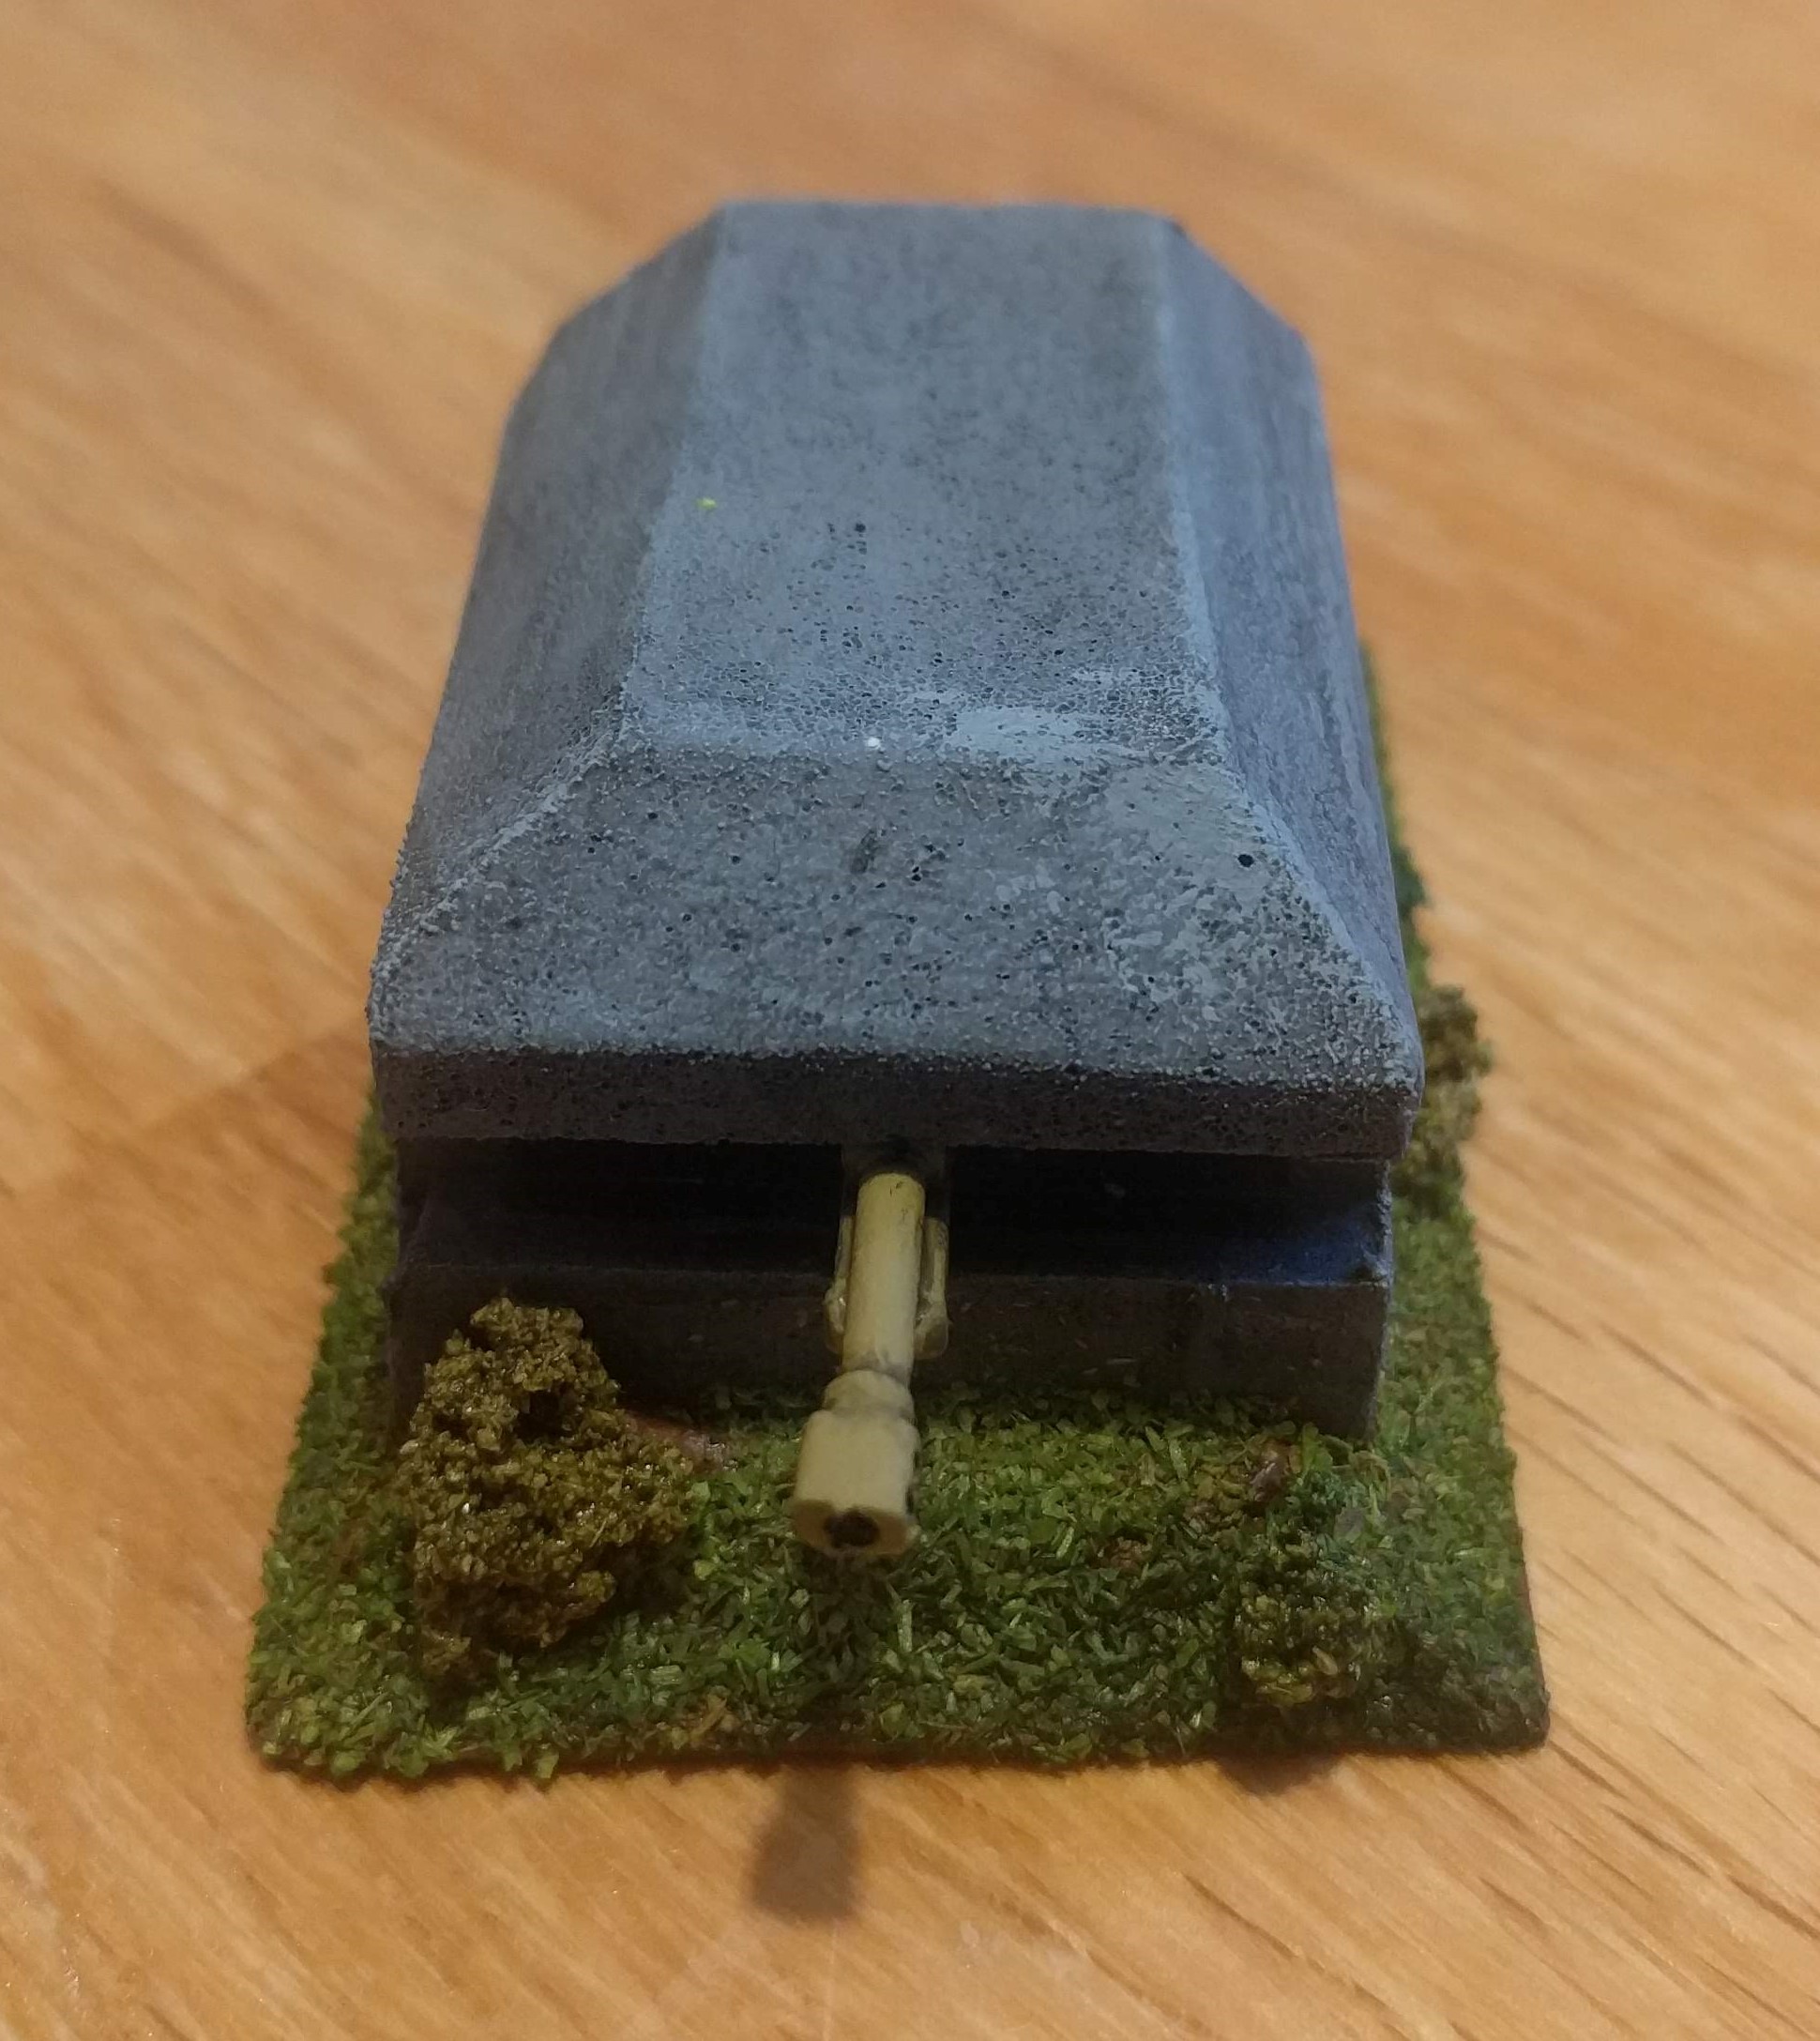
Bunker and Nest update
I sealed the flock of the bunkers and the nests with watered down PVA. Once dry, this left a slight sheen over some of the model that I didn’t like so I have decided to give both the bunkers and the nests a matt varnish.